Practical Chemistry of Aliphatic Compounds (4022132-3 ...
79
Kingdom of Saudi Arabia Ministry of higher Education Umm Al- Qura University College of Applied Science Department of Chemistry Practical Chemistry of Aliphatic Compounds (4022132-3) Department of Chemistry 1441
-
Upload
khangminh22 -
Category
Documents
-
view
1 -
download
0
Transcript of Practical Chemistry of Aliphatic Compounds (4022132-3 ...

Kingdom of Saudi Arabia
Ministry of higher Education
Umm Al- Qura University
College of Applied Science
Department of Chemistry
Practical Chemistry of Aliphatic Compounds (4022132-3)
Department of Chemistry
1441

2
Contents
Lab Safety 3
Introduction 3
Crystallization 12
Distillation 19
Melting point determination 25
Extraction and separation technique 27
Chromatography: Thin layer and Column Chromatography 29
Identifications and reactions of Alcohols 43
Identifications and reactions of Aldehydes and Ketones 46
Identifications and reactions of Carboxylic acids and acid salts 56
Identifications and reactions of Amines 63
Identifications of Carbohydrates 67
Schemes for aliphatic organic compounds 75

3
Lab Safety
The responsibility for lab safety rests with each student in the laboratory. You
must use common sense and work carefully to avoid chemical spills, broken
glassware, and fires. This ensures not only your own safety, but that of your lab
mates. Know the hazards of each chemical you use so that you will know what level
of caution to use when handling it. If you do this, you will not be exposed to a
harmful amount of any chemical during your year in organic chemistry lab.
General Guide for Handling Chemicals in the Laboratory
One of our goals is to teach each student how to safely handle organic
chemicals. Not only is this necessary for you to have a safe experience in organic
lab, it is useful knowledge for almost any job you have after college, as well as for
handling cleaning solvents and other chemicals in your home.
Flammable Chemicals
The method for proper handling of these flammable chemicals (such as diethyl
ether, acetone, hexanes, ethanol, methanol) depends on their flammability rating, as
given by a number 4-0 in the red area of a NFPA/HMIG label. The NFPA/HMIG
rating for diethyl ether is "4" while acetone, methanol, ethanol, and hexanes are "3".
Ether is extremely flammable and any spark or simply heat can ignite it.
In case of fire:
If your clothing catches fire, immediately drop to the floor and roll to smother
the flames and call for help.
If a compound or solvent catches on fire, if you can, quickly cover the flames
with a piece of glassware

4
If it is feasible, use a fire extinguisher to put the fire out.
Do not put water on an organic chemical fire because it will only spread the
fire.
If the fire is large, do not take chances: evacuate the lab and the building
immediately and tell your TA or the Coordinator what has happened.
If no one in authority is available, pull the fire alarm in the hallway and call
911 from a safe phone.
If the fire alarm sounds for any reason, leave the room immediately and exit the
building.The types and use of fire extinguishers is covered in a separate orgchem
web page: Fire Extinguishers.
Volatile Chemicals
. Volatile chemicals (such as hexanes, acetone, methylene chloride, diethyl
ether)are ones that evaporate very easily. Diethyl ether and methylene chloride are
the most volatile of the chemicals that you will use in the organic chem teaching
labs. If they are accidentally inhaled, they can cause irritation of the respiratory tract.
In large concentrations, symptoms such as intoxication, drowsiness, nausea, or
central nervous system depression may occur. Note that diethyl ether presents a
special problem because it is not only volatile, it is also extremely flammable.
Work in your student hood whenever possible, especially when you are
handling volatile chemicals. If you need to carry volatile chemicals through the lab,
carry them in a covered container. Everyone in the lab must work together to reduce
the amount of volatile chemicals released into the lab room!

5
A student hood. (Note the flaps on the front face). The main hood. (Note that it is nearly closed).
If you inhale vapors:
Leave the area immediately - at least into the hallway. Tell your TA or the
Coordinator; they will take you outside into the fresh air, and if necessary provide
first aid or take you to get medical attention.
Contact Hazards
The health hazard of a chemical (such as methanol, ethanol, hexanes, acetone,
methylene chloride, diethyl ether) is designated by a number 4-0 in the blue area of
a NFPA/HMIG label. None of the chemicals you will use has a "4" rating; most are
1 or 2. If you had a one-time overexposure to the above chemicals, you might suffer
a minor or a serious injury. If you protect yourself by wearing proper protective
equipment (gloves, lab coat, goggles, and closed-toed shoes), and if you are careful
not to spill chemicals, you are not likely to come into contact with these chemicals.
In the past, chemicals have been spilled by students and left where they were in the
lab, especially by the balances.
If you spill a contact hazard on yourself:
Immediately rinse the affected area with lots of water. Use soap if you wish,
but never try to "treat" the spill with another solvent or chemical unless directed to

6
do so by your TA. If the affected area remains more than slightly red after the rinsing
period, seek medical attention.
Corrosives
Strong acids (hydrochloric acid, sulfuric acid, phosphoric acid, nitric acid) and bases
(as sodium hydroxide)are used frequently in the organic chemistry teaching labs. If spilled
on your skin, they cause a chemical burn. They are very harmful to your eyes. If you breath
in a big whiff of vapors, you will feel a burning in your nasal and respiratory passages.
Handle corrosives with great care so as not to spill them or inhale their vapors.
Always wear protective gear. The heavier style of Playtex gloves are recommended
for use when handling corrosives.
If you spill a corrosive on yourself:
Immediately rinse the affected area with lots of water. Use soap if you wish,
but never try to "treat" the spill with another solvent or chemical unless directed to
do so by your TA. If the affected area remains more thanslightly red after the rinsing
period, seek medical attention.
Glassware Safety
Use common sense when handling glassware. Keep glassware away from the
edge of the benchtop. Always clamp your reaction flask and the suction flask
securely to a ring stand to prevent them from falling over. Check each piece of
glassware for hairline or star cracks before using it. When doing a distillation, clamp
each piece of glassware securely. If you do break a piece of glassware, do not leave
it in the sink or on the benchtop because someone may inadvertently get cut.
If you cut or burn yourself:
If you cut yourself, wash the wound immediately with large amounts of cool
water. If it is your neighbor who has been hurt, be prepared to help them if they are

7
unable to help themselves. Thermal burns are treated by covering the affected area
with cool water or ice. After a while, you can apply a pain-relieving cream. If the
burn looks like it is more than just a reddening of the skin, seek medical attention.
Equipment and Electrical Safety
Use electrical equipment (heating mantles, variances, stir motors, hot plates)
properly to prevent electrical shock. Check the cord or plug to make sure that it is
not damaged or frayed; if it is, tell your TA. Always disconnect the plug from the
socket by pulling firmly on the plug: Do not yank it out by the cord! Keep water
away from all electrical equipment.
Fire Extinguishers
If there is a fire in the lab room, you might need to use a fire extinguisher.
Remember, it is more important to get to safety than it is to put the fire out. If you
do decide that it is feasible, you must know where they are, what types they are, and
how to use them. There are two fire extinguishers in each lab: one at the front of the
lab near the blackboard, and at the back near the main hood.
Each of these fire extinguishers is safe for use on chemical fires, since the
only fire extinguishers in the labs are "Dry Chemical" (the two on the left in the
picture below) or "CO2" (the one on the right). CO2 extinguishers can be identified

8
by their large nozzles. In almost all cases, the best choice is a CO2 extinguisher, since
it does not leave a residue on the equipment when the fire is out. But do not hesitate:
grab the closest fire extinguisher in an emergency. Never use a water fire
extinguisher in the organic chemistry labs (there is one in the hallway for fireman
use only).
Reaction Glassware
Round-bottom flask Y-adaptor Vacuum adaptor Condenser
Thermometer adaptor Claisen adaptor
Bench Glassware

9
Bench Equipment
Versatile clamp
3-pronged clamp Ring clamp
Spatula
Scoopula
Forceps
Keck clip
Stir bar
Heating mantle
Stir motor
Variac
Stirring Hotplate
Ring stand
Tubing
List of common equipment in student’s locker
- Beaker, 50,100, 250, 400, 600 mL
Beaker
Erlenmeyer flask
Side-arm flask
Buchner funnels
Thermometer
Stemmed funnels
Separatory funnel
Watch glass
Stir rod
Vial
Graduated cylinder Pasteur Pipet

10
- Clamp, test tube
- Cylinder, graduated by 0.1, 10, 100 mL
- Dropper, medicine with rubber bulb
- Evaporating dish - Flask, Erlenmeyer, 125, 250, 500 mL
- File, triangular
- Forceps
- Funnel, short stem
- Gauze, wire
- Spatula, stainless steel
- Sponge
- Striker (or box of matches)
- Test tubes, approximately 15 150 mm
- Test tube brush
- Thermometer, 150°C
- Tongs, crucible
- Wash bottle, plastic
- Watch glass.
- Filter paper.
Purification and separation of organic compounds
Organic compounds, whether solids, liquids or gaseous, when are separated from a
natural source or organic reactions are seldom pure. They may be contaminated with
other compounds, which are formed as a byproduct, owing to a side reaction. These
organic compounds have to be purified before using them in other chemical reaction.
Various methods used for the purification of organic compounds are based on the

11
nature of the compound and the impurity present in it. These methods are listed
below:-
1- Recrystallization.
2- Sublimation.
3- Extraction.
4- Distillation.
a) Simple distillation.
b) Fractional distillation.
c) Vacuum distillation.
d) Steam distillation.
5- Chromatographic Methods.
The method employed depends upon the nature of the material to be separated
and purified.
Purification may often be successfully accomplished by re-crystallization or
sublimation for solids; extraction for solid dissolved in liquid or mixture of liquids;
fractional distillation under atmospheric or reduced pressure for liquids or low
melting solids; molecular distillation for high-boiling liquids. In those cases where
the use of these traditional methods does not yield product of adequate purity, resort
must be made to preparative chromatographic procedures
Crystallization
Crystallization is a technique which chemists use to purify solid compounds.
It is one of the fundamental procedures each chemist must master to become
proficient in the laboratory. Crystallization is based on the principles of solubility:
compounds (solutes) tend to be more soluble in hot liquids (solvents) than they are
in cold liquids. If a saturated hot solution is allowed to cool, the solute is no longer

12
soluble in the solvent and forms crystals of pure compound. Impurities are excluded
from the growing crystals and the pure solid crystals can be separated from the
dissolved impurities by filtration. This simplified scientific description of
crystallization does not give a realistic picture of how the process is accomplished
in the laboratory.
What Happens During a Crystallization?
To crystallize an impure, solid compound, add just enough hot solvent to it to
completely dissolve it. The flask then contains a hot solution, in which solute
molecules - both the desired compound and impurities - move freely among the hot
solvent molecules. As the solution cools, the solvent can no longer hold all of the
solute molecules, and they begin to leave the solution and form solid crystals. The
chilled solution is then filtered to isolate the pure crystals and the crystals are rinsed
with chilled solvent. This first series of diagrams shows what happens if you let a
crystallization proceed slowly: first by setting the flask at room temperature
undisturbed until crystals form, and then carefully on ice. The red bar to the right of
each image is a thermometer, to indicate the temperature. The yellow triangles are
an impurity in the hot solution of orange hexagons. If the solution is allowed to cool
slowly, the impurities may attach briefly to the growing crystal lattice, but they soon
leave as a compound with a more suitable geometry comes in to take their place.
Suitable hexagons stay more readily in the growing lattice, and eventually pure
crystals of orange hexagons are formed.

13
1 2 3 4 5 6
This second series of diagrams shows what happens if you cool the solution too quickly. The
yellow triangle impurities are trapped inside the crystals being formed by the orange hexagons,
thus, the crystals isolated are impure. Note that slow crystallization gives larger crystals than fast
crystallization. Small crystals have a large surface area to volume ratio and impurities are located
on the surface of the crystals as well as trapped inside the matrix.
1 2 3 4
How To Do a Crystallization
14
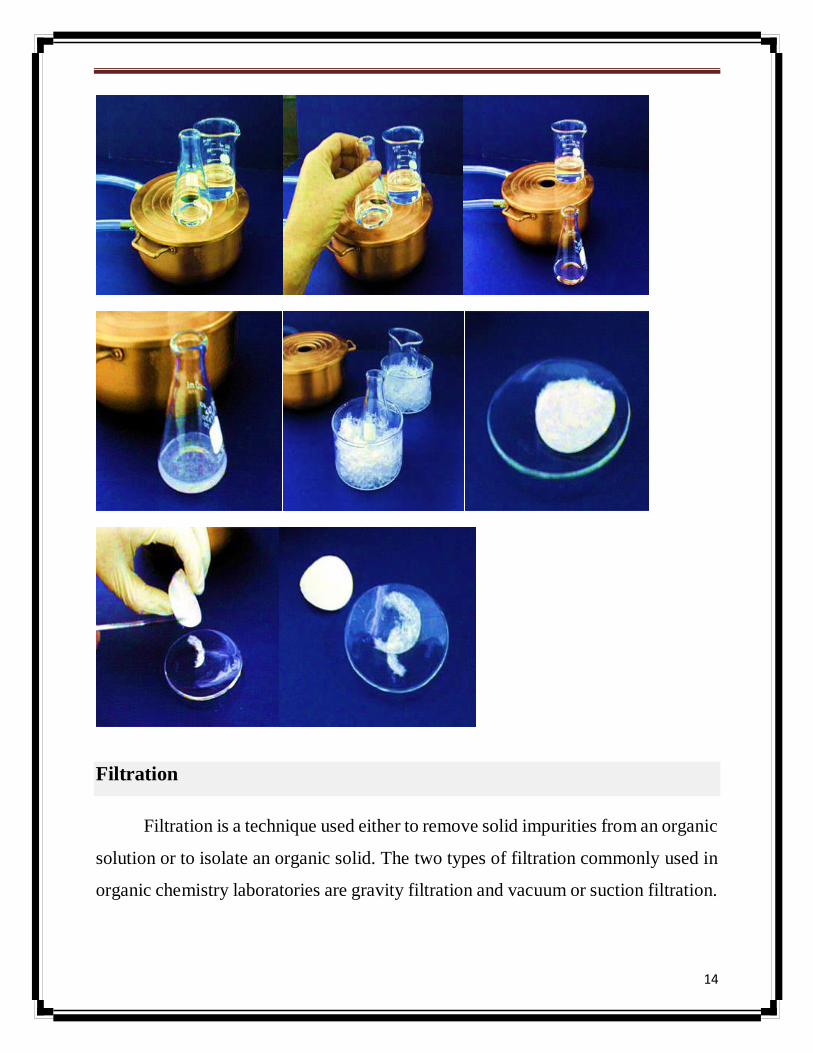
Filtration
Filtration is a technique used either to remove solid impurities from an organic
solution or to isolate an organic solid. The two types of filtration commonly used in
organic chemistry laboratories are gravity filtration and vacuum or suction filtration.

15
Gravity Filtration
Vacuum Filtration
Vacuum filtration is used primarily to collect a desired solid, for instance, the
collection of crystals in a recrystallization procedure. Vacuum filtration uses a
Buchner funnel and a side-arm flask.

16

17
It is often necessary to remove solvent from a solution to recover either a solid
or a high-boiling liquid. There are several ways to do this.
Sublimation
Sublimation is the transition of a substance directly from the solid to the gas
phase without passing through an intermediate liquid phase. Sublimation is an
endothermicphase transition that occurs at temperatures and pressures below a
substance's triple point in its phase diagram. The reverse process of sublimation is
desublimation, or deposition.
Sublimation (phase transition)
Dark green crystals of nickelocene, freshly sublimed on a cold finger
Distillation
Simple distillation can be used to remove solvent. Distillation works well if
the solution is composed of a solid and a low-boiling solvent, or if the solution is
composed of a high-boiling liquid and a low-boiling solvent (with boiling point
differences greater than 100°). Advantages of distillation are that the solvent can be
collected and recycled and that no vapors are released into the atmosphere.
18
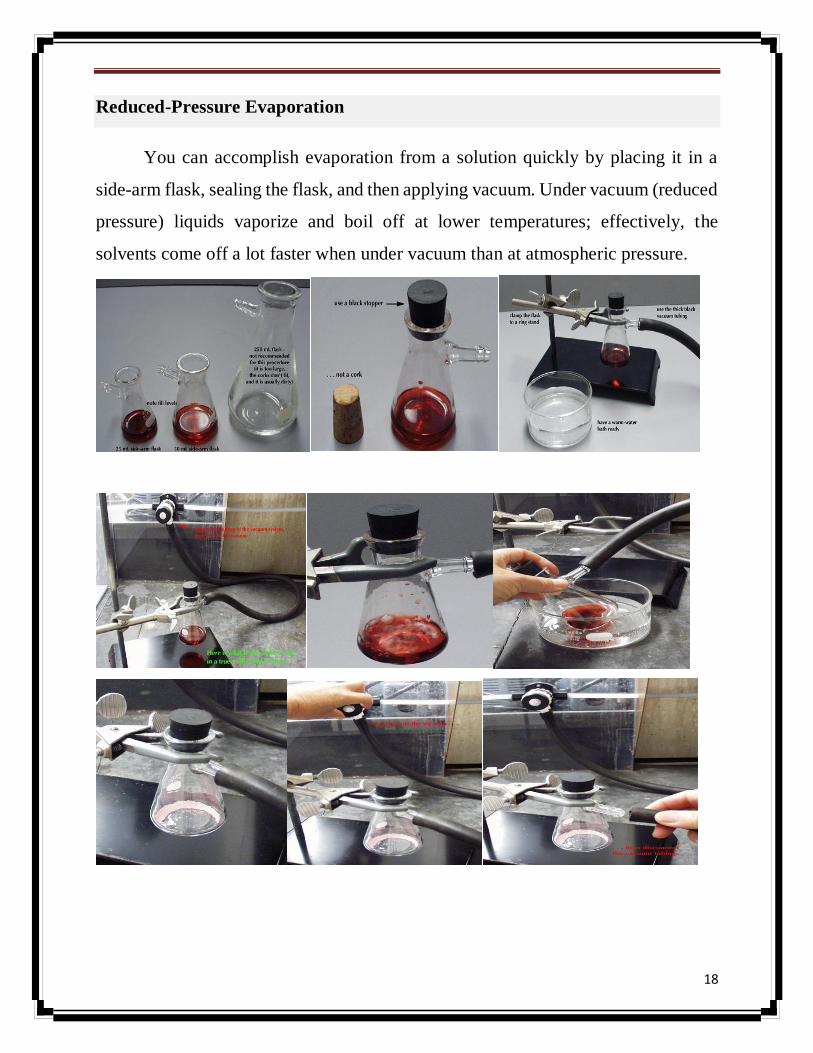
Reduced-Pressure Evaporation
You can accomplish evaporation from a solution quickly by placing it in a
side-arm flask, sealing the flask, and then applying vacuum. Under vacuum (reduced
pressure) liquids vaporize and boil off at lower temperatures; effectively, the
solvents come off a lot faster when under vacuum than at atmospheric pressure.

19
Rotary Evaporators
Rotary evaporators, or rotovaps, are standard equipment in most organic
chemistry research labs. These evaporators are designed to remove solvent rapidly
from solutions.

20
Distillation for Boiling Point Determination
The boiling point of a compound is one of the physical properties used to
identify it. Distillation is used to purify a compound by separating it from a non-
volatile or less-volatile material. When different compounds in a mixture have
different boiling points, they separate into individual components when the mixture
is carefully distilled.
The boiling point is the temperature at which the vapor pressure of the liquid
phase of a compound equals the external pressure acting on the surface of the liquid.
The external pressure is usually the atmospheric pressure. For instance, consider a
liquid heated in an open flask. Different compounds boil at different temperatures
because each has a different, characteristic vapor pressure: compounds with higher
vapor pressures will boil at lower temperatures. Boiling points are usually measured
by recording the boiling point (or boiling range) on a thermometer while performing
a distillation. This method is used whenever there is enough of the compound to
perform a distillation.
Simple Distillation
Simple distillations are used frequently in the organic chemistry teaching labs. They
are useful in the following circumstances:

21
The liquid is relatively pure to begin with (e.g., no more than 10% liquid
contaminants)
The liquid has a non-volatile component, for example, a solid contaminant
The liquid is contaminated by a liquid with a boiling point that differs by at
least 70°C
What is simple distillation?
The setup for a simple distillation is shown in Figure 1. A simple distillation
apparatus consists of a boiling flask (round-bottom flask) attached to an adapter
holding a thermometer (to determine the boiling temperature of the liquid). The
adapter connects to a condenser into which cold water is constantly passed through.
The condenser leads into a collection flask for the purified liquid.
Figure 1. Simple distillation.
Fractional Distillations
Mixtures of liquids whose boiling points are similar (separated by less than
70°C) cannot be separated by a single simple distillation. In these situations, a
fractional distillation is used. You can see photos of a fractional distillation set-up
here.

22
What is fractional distillation?
Fractional distillation is essentially the same as simple distillation except that
a fractionating column is placed between the boiling flask and the condenser. The
fractionating column is usually filled with glass or plastic beads. These beads
improve the separation between the liquids being distilled. The reason that fractional
distillation gives better separation between the liquids is because the glass beads in
the fractionating column provide "theoretical plates" on which the refluxing liquid
can condense, re-evaporate, and condense again, essentially distilling the compound
over and over.
Figure 2. Fractional distillation.
Vacuum Distillations
Vacuum distillation is distillation at a reduced pressure. Since the boiling
point of a compound is lower at a lower external pressure, the compound will not
have to be heated to as high a temperature in order for it to boil. Vacuum distillation
is used to distill compounds that have a high boiling point or any compound which
might undergo decomposition on heating at atmospheric pressure. The vacuum is
provided either by a water aspirator or by a mechanical pump. You can see photos

23
of a fractional distillation set-up here. Always check for star cracks in the flasks
before beginning a vacuum distillation.
Distillation Guide
What's distillation used for?
Distillation is a laboratory technique used for separating and purifying liquids.
How does distillation work?
To separate two or more liquids by distillation, you first heat them in a flask.
The more volatile liquid (the liquid with the lower boiling point) will typically
evaporate first and the vapor will pass into a condensing column, where it can revert
into a liquid (condense) on the cool glass where it trickles into a collection flask.
Heating further will cause the less volatile liquids to evaporate and distill at higher
temperatures. The two main kinds of distillation are simple distillation and fractional
distillation, and both are used widely.
So, simple or fractional?
The choice of whether to use fractional distillation or simple distillation
depends on the two liquids being separated. Typically, using simple distillation is
preferable because the apparatus is, well, simpler, and a simple distillation typically
goes faster than a fractional distillation (and requires less energy). On the other hand,
fractional distillation gives better separation between the liquids. The choice of
whether to use simple or fractional distillation, then, depends usually on the
difference in boiling temperatures between the two liquids. If there is a large
difference in the boiling points (>70oC)between the two liquids then simple
distillation is probably the best option. On the other hand, if there is only a small
temperature difference between the two liquids a fractional distillation is the
preferable option.

24
Simple distillation Fractional distillation
Advantages
simpler setup than fractional
faster distillation times
consumes less energy than
fractional distillation
much better separation
between liquids than
simple distillation
can more readily purify
complex mixtures than
simple distillation
Disadvantages
requires the liquids to have large
boiling point differences (>70oC)
gives poorer separation than
fractional distillation
only works well with relatively
pure liquids
more complicated setup
than simple distillation
takes longer for liquids
to distill
consumes more energy
than simple distillation
Best used for:
separating relatively pure liquids with
large boiling differences or liquids with
solid impurities
Separating complex mixtures of
liquids with smaller boiling
point separations.
Melting Point Determination
An organic compound's melting point is one of several physical properties by
which it is identified. A physical property is a property that is intrinsic to a compound
when it is pure. Since melting points are relatively easy and inexpensive to
determine, they are handy identification tools to the organic chemist. If you want to
use the melting point to identify a solid compound which you have isolated in the
lab, you will need to compare its melting point with that of the true compound. If the
compounds are sold slightly impure, the melting point range will reflect this fact.
The melting point listed in the CRC, Merck Index, or on the MSDS is the melting
point of the pure compound. While theoretically these should be constant from
source to source, in reality the reported melting points sometimes vary. Therefore,
always reference the source of the physical data which you write in your lab report.

25
Descriptions and Use of Melting Point Apparatus
Three types of melting point apparatus are available in the Organic Chemistry
teaching labs, the Fisher-Johns, the Mel-Temp, and the DigiMelt. Explanations
(including pictures) of how to take a melting point on each type of apparatus are
linked on this website.
Melting Point Apparatus
The picture below shows a melting point apparatus as an example. This type
of melting point apparatus uses small round, glass coverslips.

26
Technique for Taking a Melting Point
The rate of temperature increase in the vicinity of the melting point must be small,
about 2 degrees C per min. This insures that the temperature of the hot plate,
thermometer, and sample will be in thermal equilibrium. Increase the temperature
rapidly at first and then slowly as the melting point is approached in the following
manner:
Extraction
Liquid-liquid extractions using a separating funnel are essentially the only
kind of extraction performed in the organic teaching labs. Liquid-liquid means that
two liquids are used in the extraction procedure. The liquids must be immiscible:
this means that they will form two layers when added together, like oil and water.
Some compounds are more soluble in the organic layer (the "oil") and some
compounds are more soluble in the aqueous layer (the "water").

27
In a particular experiment in simple extraction or in chemically active
extraction, you will be able to figure out which layer, aqueous or organic, will
contain the compound you want to isolate. (Please read the theory section in the
Handbook for Organic Chemistry Lab.) You will also need to know which layer will
be on top in the separating funnel. This is determined by the density of the two
solvents. Densities are listed in various sources of scientific data, as referenced on
the Chemical Information page on this site.
How to do an Extraction

28
Chromatography
Column Chromatography
In column chromatography, the stationary phase, a solid adsorbent, is placed
in a vertical glass (usually) column. The mobile phase, a liquid, is added to the top
and flows down through the column by either gravity or external pressure. Column
chromatography is generally used as a purification technique: it isolates desired
compounds from a mixture. The mixture to be analyzed by column chromatrography
is placed inside the top of the column. The liquid solvent (the eluent) is passed
through the column by gravity or by the application of air pressure.
Column chromatography is separated into two categories, depending on how
the solvent flows down the column. If the solvent is allowed to flow down the
column by gravity, or percolation, it is called gravity column chromatography. If

29
the solvent is forced down the column by positive air pressure, it is called flash
chromatography, a "state of the art" method currently used in organic chemistry
research laboratories.
Silica gel (SiO2) and alumina (Al2O3) are two adsorbents commonly used by
the organic chemist for column chromatography. An example of each of these
adsorbents is shown below.
Alumina is used more frequently in column chromatography than it is in TLC.
Alumina is quite sensitive to the amount of water which is bound to it: the higher its
water content, the less polar sites it has to bind organic compounds, and thus the less
"sticky" it is. This stickiness or activity is designated as I, II, or III, with I being the
most active. Alumina is usually purchased as activity I and deactivated with water
before use according to specific procedures. Alumina comes in three forms: acidic,
neutral, and basic. The neutral form of activity II or III, 150 mesh, is most commonly
employed.

30
The Solvent
The polarity of the solvent which is passed through the column affects the
relative rates at which compounds move through the column. Polar solvents can
more effectively compete with the polar molecules of a mixture for the polar sites
on the adsorbent surface and will also better solvate the polar constituents. If a
solvent is too polar, movement becomes too rapid, and little or no separation of the
components of a mixture will result. If a solvent is not polar enough, no compounds
will elute from the column. Proper choice of an eluting solvent is thus crucial to the
successful application of column chromatography as a separation technique. Thin-
Layer Chromatography (TLC) is generally used to determine the system for a
column chromatography separation.
Often a series of increasingly polar solvent systems are used to elute a column.
A less-polar solvent is first used to elute a less-polar compound. Once the less-polar
compound is off the column, a more-polar solvent is added to the column to elute
the more-polar compound.
Analysis of Column Eluents
If the compounds separated in a column chromatography procedure are
colored, the progress of the separation can simply be monitored visually. More
commonly, the compounds to be isolated from column chromatography are
colorless. In this case, small fractions of the eluent are collected sequentially in
labeled tubes and the composition of each fraction is analyzed by TLC. (Other
methods of analysis are available; this is the most common method and the one used
in the organic chemistry teaching labs.)

31
Thin Layer Chromatography (TLC)
TLC is a simple, quick, and inexpensive procedure that gives the chemist a
quick answer as to how many components are in a mixture. TLC is also used to
support the identity of a compound in a mixture when the Rf of a compound is
compared with the Rf of a known compound (preferably both run on the same TLC
plate).A TLC plate is a sheet of glass, metal, or plastic, which is coated with a thin
layer of a solid adsorbent (usually silica or alumina). A small amount of the mixture
to be analyzed is spotted near the bottom of this plate.
How To Run a TLC Plate

32
Step 1: Prepare the developing container
The developing container for TLC can be a specially designed chamber, a jar
with a lid, or a beaker with a watch glass on the top (the latter is used in the undergrad
labs at CU). Pour solvent into the chamber to a depth of just less than 0.5 cm. To aid
in the saturation of the TLC chamber with solvent vapors, you can line part of the
inside of the beaker with filter paper. Cover the beaker with a watch glass, swirl it
gently, and allow it to stand while you prepare your TLC plate.
Step 2: Prepare the TLC plate
TLC plates used in the organic chem teaching labs are purchased as 5 cm x
20 cm sheets. Each large sheet is cut horizontally into plates which are 5 cm tall by
various widths; the more samples you plan to run on a plate, the wider it needs to be.
Shown in the photo to the left is a box of TLC plates, a large un-cut TLC sheet, and
a small TLC plate which has been cut to a convenient size. Handle the plates
carefully so that you do not disturb the coating of adsorbent or get them dirty.
Measure 0.5 cm from the bottom of the plate. Using a pencil, draw a line across the
plate at the 0.5 cm mark. This is the origin: the line on which you will spot the plate.
Take care not to press so hard with the pencil that you disturb the adsorbent. Under
the line, mark lightly the name of the samples you will spot on the plate, or mark
numbers for time points. Leave enough space between the samples so that they do
not run together; about 4 samples on a 5 cm wide plate is advised.

33
Step 3: Spot the TLC plate
If the sample is not already in solution, dissolve about 1 mg in 1 mL of a volatile
solvent such as hexanes, ethyl acetate, or methylene chloride. As a rule of thumb, a
concentration of 1% usually works well for TLC analysis. If the sample is too
concentrated, it will run as a smear or streak (see troubleshooting section below); if
it is not concentrated enough, you will see nothing on the plate. Sometimes you will
need to use trial and error to get well-sized, easy to read spots. Obtain a
microcapillary. In the organic teaching labs, we use 10µL microcaps - they are easier
to handle than the smaller ones used in research labs. Dip the microcap into the
solution and then gently touch the end of it onto the proper location on the TLC
plate.
Step 4: Develop the plate
Place the prepared TLC plate in the developing beaker, cover the beaker with
the watch glass, and leave it undisturbed on your bench top. The solvent will rise up
the TLC plate by capillary action. Make sure the solvent does not cover the spot.
Allow the plate to develop until the solvent is about half a centimeter below the top
of the plate. Remove the plate from the beaker and immediately mark the solvent
front with a pencil. Allow the plate to dry.
Step 5: Visualize the spots
If there are any colored spots, circle them lightly with a pencil. Most samples
are not colored and need to be visualized with a UV lamp. Hold a UV lamp over the
plate and circle any spots you see. Beware! UV light is damaging both to your eyes
and to your skin! Make sure you are wearing your goggles and do not look directly
into the lamp. Protect your skin by wearing gloves. If the TLC plate runs samples
which are too concentrated, the spots will be streaked and/or run together. If this
happens, you will have to start over with a more dilute sample to spot and run on a
TLC plate. Here's what overloaded plates look like compared to well-spotted plates.
34
TLC Solvents Choice
When you need to determine the best solvent or mixture of solvents (a "solvent
system") to develop a TLC plate or chromatography column loaded with an
unknown mixture, vary the polarity of the solvent in several trial runs: a process of
trial and error. Carefully observe and record the results of the chromatography in
each solvent system. You will find that as you increase the polarity of the solvent
system, all the components of the mixture move faster (and vice versa with lowering
the polarity). The ideal solvent system is simply the system that gives the best
separation. TLC elution patterns usually carry over to column chromatography
elution patterns.
Since TLC is a much faster procedure than column chromatography, TLC is
often used to determine the best solvent system for column chromatography. For
instance, in determining the solvent system for a flash chromatography procedure,
the ideal system is the one that moves the desired component of the mixture to a
TLC Rf of 0.25-0.35 and will separate this component from its nearest neighbor by
difference in TLC Rf values of at least 0.20. Therefore, a mixture is analyzed by TLC
to determine the ideal solvent(s) for a flash chromatography procedure.
Beginners often do not know where to start: What solvents should they pull
off the shelf to use to elute a TLC plate? Because of toxicity, cost, and flammability
concerns, the common solvents are hexanes (or petroleum ethers/ligroin) and ethyl
acetate (an ester). Diethyl ether can be used, but it is very flammable and volatile.
Alcohols (methanol, ethanol) can be used. Acetic acid (a carboxylic acid) can be
used, usually as a small percentage component of the system, since it is corrosive,
non-volatile, very polar, and has irritating vapors. Acetone (a ketone) can be used.
Methylene chloride or and chloroform (halogenated hydrocarbons) are good
solvents, but are toxic and should be avoided whenever possible. If two solvents are

35
equal in performance and toxicity, the more volatile solvent is preferred in
chromatography because it will be easier to remove from the desired compound after
isolation from a column chromatography procedure. Ask the lab instructor what
solvents are available and advisable. Then, mix a non-polar solvent (hexanes, a
mixture of 6-carbon alkanes) with a polar solvent (ethyl acetate or acetone) in
varying percent combinations to make solvent systems of greater and lesser polarity.
The charts below should help you in your solvent selection. You can also download
this pdf chart of elution order.
Interactions between the compound and the adsorbent
The strength with which an organic compound binds to an adsorbent depends on the
strength of the following types of interactions: ion-dipole, dipole-dipole, hydrogen
bonding, dipole induced dipole, and van der Waals forces. With silica gel, the
dominant interactive forces between the adsorbent and the materials to be separated
are of the dipole-dipole type. Highly polar molecules interact fairly strongly with the
polar SiOH groups at the surface of these adsorbents, and will tend to stick or adsorb
onto the fine particles of the adsorbent while weakly polar molecules are held less
tightly. Weakly polar molecules generally tend to move through the adsorbent more

36
rapidly than the polar species. Roughly, the compounds follow the elution order
given above.
The Rf value
The retention factor, or Rf, is defined as the distance traveled by the compound
divided by the distance traveled by the solvent.
For example, if a compound travels 2.1 cm and the solvent front travels 2.8 cm, the
Rf is 0.75:
The Rf for a compound is a constant from one experiment to the next only if the
chromatography conditions below are also constant:
solvent system
adsorbent
thickness of the adsorbent
amount of material spotted
temperature
Since these factors are difficult to keep constant from experiment to experiment,
relative Rf values are generally considered. "Relative Rf" means that the values are

37
reported relative to a standard, or it means that you compare the Rf values of
compounds run on the same plate at the same time.
The larger an Rf of a compound, the larger the distance it travels on the TLC
plate. When comparing two different compounds run under identical
chromatography conditions, the compound with the larger Rf is less polar because it
interacts less strongly with the polar adsorbent on the TLC plate. Conversely, if you
know the structures of the compounds in a mixture, you can predict that a compound
of low polarity will have a larger Rf value than a polar compound run on the same
plate.
Troubleshooting TLC
All of the above (including the procedure page) might sound like TLC is quite an
easy procedure. As with any technique, with practice you get better. Examples of
common problems encountered in TLC:
The compound runs as a streak rather than a spot: The sample was
overloaded. Run the TLC again after diluting your sample. Or, your sample
might just contain many components, creating many spots which run together
and appear as a streak. Perhaps, the experiment did not go as well as expected.
The sample runs as a smear or a upward crescent: Compounds which
possess strongly acidic or basic groups (amines or carboxylic acids)
sometimes show up on a TLC plate with this behavior. Add a few drops of
ammonium hydroxide (amines) or acetic acid (carboxylic acids) to the eluting
solvent to obtain clearer plates.
The sample runs as a downward crescent: Likely, the adsorbent was
disturbed during the spotting, causing the crescent shape.
38
The plate solvent front runs crookedly: Either the adsorbent has flaked off
the sides of the plate or the sides of the plate are touching the sides of the
container (or the paper used to saturate the container) as the plate develops.
Crooked plates make it harder to measure Rf values accurately.
Many random spots are seen on the plate: Make sure that you do not
accidentally drop any organic compound on the plate. If get a TLC plate and
leave it laying on your workbench as you do the experiment, you might drop
or splash an organic compound on the plate.
You see a blur of blue spots on the plate as it develops: Perhaps you used
an ink pen instead of a pencil to mark the origin.
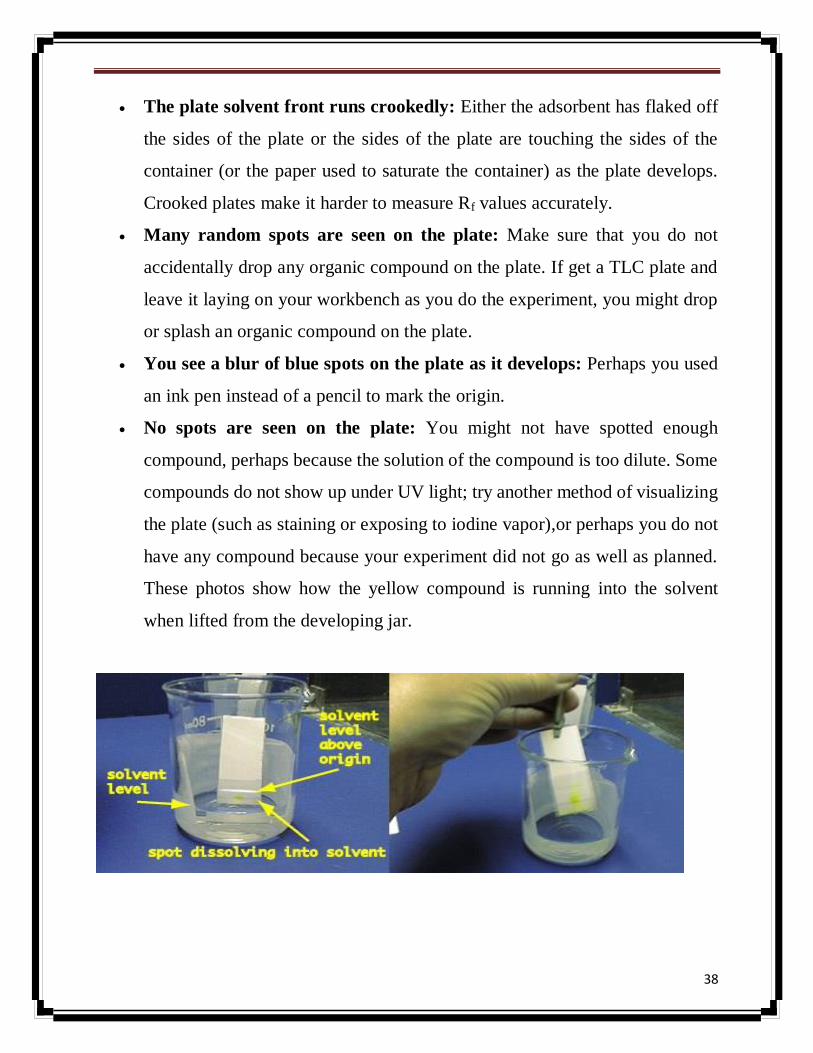
No spots are seen on the plate: You might not have spotted enough
compound, perhaps because the solution of the compound is too dilute. Some
compounds do not show up under UV light; try another method of visualizing
the plate (such as staining or exposing to iodine vapor),or perhaps you do not
have any compound because your experiment did not go as well as planned.
These photos show how the yellow compound is running into the solvent
when lifted from the developing jar.

39
Strategy for identifying an unknown
The following steps should be taken to identify an unknown compound:
1. Perform a solubility classification test to determine the possible functional
group classes to which the unknown may belong.
2. Narrow the choices of possible functional groups to one group by performing
appropriate functional group tests.
3. Make one or more derivatives to finally determine the exact identity of the
unknown.
The above approach should lead to a successful identification of an unknown about
80 % of the time. In other cases, the unknown may pose difficulties that would
require imagination and careful analysis of the data to be successful in its
identification.
FUNCTIONAL GROUP ANALYSIS:
Below are listed 24 chemical tests that could be used to help identify an unknown.
The tests are listed in numerical/alphabetical order.
1. Introduction to qualitative tests
2. 2,4-Dinitrophenylhydrazine (for aldehydes and ketones)
3. Acetyl chloride (for acidic hydrogen compounds such as alcohols)
4. Basic hydrolysis (for amides, esters and nitriles)
5. Beilstein test (for halogenated compounds)
6. Benedict test (for aldehydes and reducing sugars)
7. Bromine in carbon tetrachloride (for alkenes and alkynes)
8. Ceric nitrate (for alcohols and phenols)
9. Chromic acid (for aldehydes, primary and secondary alcohols)
10. Combustion test (for flammable or combustible compounds)

40
11. Ferric chloride (for phenols)
12. Ferric hydroxamate (for esters, acid chlorides and acid anhydrides)
13. Ferrous hydroxide (for nitro compounds)
14. Hinsberg test (to distinguish primary, secondary and tertiary amines)
15. Hydroxylamine hydrochloride (for aldehydes and ketones)
16. Iodoform test (for methyl carbonyl compounds)
17. Lucas test (to distinguish primary, secondary and tertiary alcohols of six
carbons or less)
18. Nitrous acid (to distinguish primary, secondary and tertiary amines)
19. pH in ethanol/water (to distinguish low molecular weight acidic or basic
compounds)
20. Potassium permanganate (for compounds that can be oxidized)
21. Silver nitrate in ethanol (for Sn1 reactions of alkyl halides)
22. Sodium fusion (for compounds containing halogen, nitrogen or sulfur)
23. Sodium iodide in acetone (for Sn2 reactions of alkyl chlorides or bromides)
24. Solubility classification (for general classification or organic compounds)
25. Tollens test (for aldehydes and reducing sugars)
Procedure for Determining Solubility of Organic Compounds
1) Water Solubility
Place approximately 0.1 g or 0.2 mL (2-3 drops) of compound in a small test
tube, and add about 1 mL of water in small portions. Shake test tube vigorously after
the addition of each portion of solvent. Check the pH of the water to determine if
your unknown is partially or completely soluble in water and whether your
compound has changed the pH of the water.
Litmus turns red: water soluble acidic compound
Litmus turns blue: water soluble basic compound

41
Litmus neutral: water soluble general compound or insoluble compound
2) 5% NaOH Solubility
Place approximately 0.1 g or 0.2 mL (2-3 drops) of compound in a small test
tube, and add about 1 mL of NaOH solution in small portions. Shake test tube
vigorously after the addition of each portion of solvent. If soluble, then your
unknown is behaving as an organic acid. The most common organic acids are
carboxylic acids and phenols. Carboxylic acids are usually considered stronger acids
than phenols, but both of these acids will react with NaOH (a strong base).
3) 5% NaHCO3 Solubility
Place approximately 0.1 g or 0.2 mL (2-3 drops) of compound in a small test
tube, and add about 1 mL of NaHCO3 solution in small portions. Shake test tube
vigorously after the addition of each portion of solvent. If soluble, then it is a strong
organic acid. If not, then it is a weak organic acid, if it dissolves in NaOH. The most
common weak organic acid are phenols. Typically, only a carboxylic acid will react
with NaHCO3
4) 5% HCl Solubility
Place approximately 0.1 g or 0.2 mL (2-3 drops) of compound in a small test
tube, and add about 1 mL of HCl solution in small portions. Shake test tube
vigorously after the addition of each portion of solvent. If HCl soluble, then it is an
organic base. Amines are the most common organic base.
If insoluble in all solutions, then your unknown is not an acidic or basic organic
compound.

42
43
Identifications and reactions of Alcohols
1- Methyl alcohol
CH3OH
Physical properties:
Colorless liquid, M.F is CH4O, boiling at 65 °C, miscible with water and toxic
material as it causes blindness before death.
Reactions of Methanol
1- Ester formation
In dry test tube put 1 ml of methyl alcohol then add o.5 ml of conc. H2SO4 and
o.5 gm. of salicylic acid or its derivatives. Heat the mixture for 3mintsin water bath,
then cool and pour the contents in a beaker containing about 30 ml of sodium
carbonate solution. Note the characteristic odor of methyl salicylate.
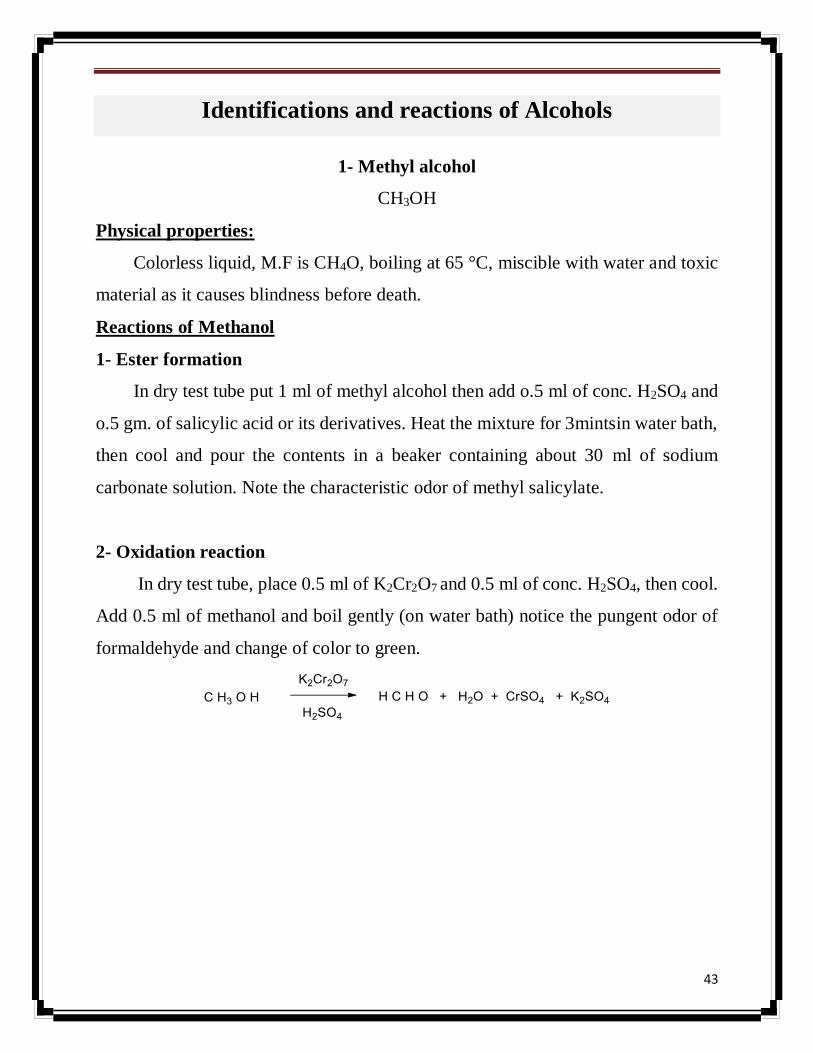
2- Oxidation reaction
In dry test tube, place 0.5 ml of K2Cr2O7 and 0.5 ml of conc. H2SO4, then cool.
Add 0.5 ml of methanol and boil gently (on water bath) notice the pungent odor of
formaldehyde and change of color to green.

44
2- Ethyl alcohol
CH3CH2OH
Physical properties:
Colorless liquid, miscible with water, M. F is C2H6O, b. p 78 °C.
Reaction s of ethanol
1- Oxidation reaction
Place 1 ml of K2Cr2O7 and 0.5 ml of conc. H2SO4, then cool. Add 0.5 ml of
ethanol and boil gently (on water bath) notes the odor of acetaldehyde and change
the color solution to green.
2- Ester formation
Place 1 ml of ethanol in dry test tube, then add 0.5 ml of conc. H2SO4 and 1 ml
of acetic acid. Heat the mixture gently for 3 mints in water bath, cool and pour the
tube into baker containing sodium carbonate solution. Not the characteristic odor of
ester.
3- Iodoform test
Add 4 ml of iodine solution to 1 ml of ethyl alcohol then add NaOH solution
drop wise until the color of solution becomes straw yellow. Heat the solution in
water bath for 5 mints then leaves it to cool gradually, a yellow ppt. of iodoform is
appearing.

45
EXPERIMENT No.
Identifications and reactions of aldehydes.
Data and Results
Name:
Sec.No.
Date:
Physical properties
Solubility: ……………………
Color: …………………………
Shape: ………………………
Chemical properties
Res. Obs. Exp.
Unknown is:

46
Identifications and reactions of Aldehydes and ketones.
Purpose:
To identify aldehydes and ketones by using properties and reactions.
Discussion
Aldehydes and ketones share the carbonyl functional group which features carbon
doubly bonded to oxygen. In the case of ketones there are two carbon atoms bonded
to the carbonyl carbon and no hydrogen. In the case of aldehydes there is at least one
hydrogen atom bonded to the carbonyl carbon, the other attachment maybe a carbon
or hydrogen. In all cases the carbon(s) that are attached to the carbonyl group may
be aliphatic (not part of an aromatic ring) or aromatic (part of an aromatic ring).
Since they share the carbonyl group, aldehydes and ketones share much of their
chemistry, but they are different enough to be considered different classes of
compounds.
General tests for Aldehydes and Ketones
2, 4-Dinitrophenyl hydrazine test
2,4-Dinitrophenylhydrazine can be used to qualitatively detect the carbonyl
group functionality of an aldehydeor ketone functional group. A positive test is
signaled by a yellow/red precipitate, known as adinitrophenylhydrazone.

47
This reaction can be described as a condensation reaction, with two molecules
joining together with loss of water. It is also called addition-elimination reaction:
nucleophilic addition of –NH2 group to C=O carbonyl group, followed by removal
of H2O molecule.
Procedure
Add a solution of 1 or 2 drops or 30 mg of unknown in 2 mL of 95% ethanol
to 3 mL of 2,4-dinitrophenylhydrazine reagent. Shake vigorously, and, if no
precipitate forms immediately, allow the solution to stand for 15 minutes.
The 2,4-dinitrophenylhydrazine reagent will already be prepared for you.
Positive test
Formation of a precipitate is a positive test.
Complications
Some ketones give oils, which will not solidify.
Some allylic alcohols are oxidized by the reagent to aldehydes and give a
positive test.
Some alcohols, if not purified, may contain aldehyde or ketone impurities.
To differentiate between aldehydes and ketones
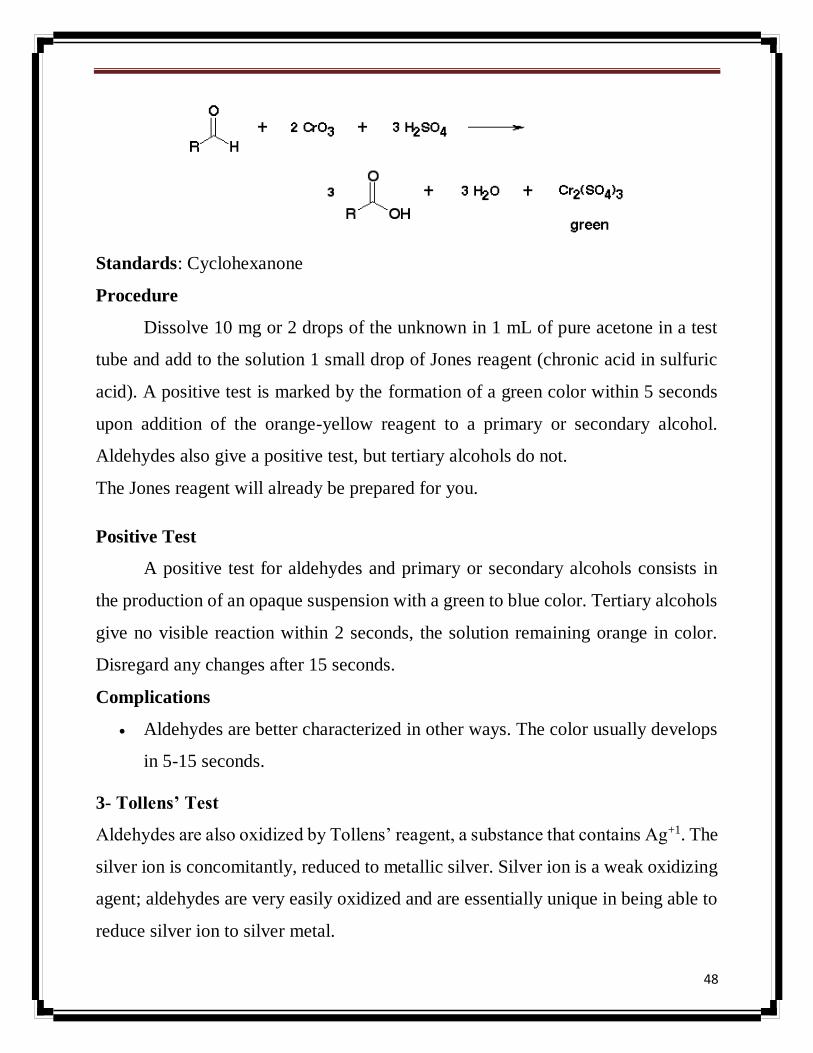
1-Chromic Acid Test
Regardless of which mechanism actually operates, these reactions are usually
referred to as nucleophilic additions. Aldehydes are oxidized by chromic acid,
ketones are not. When an aldehyde is oxidized by orange brown chromic acid the
chromic acid is reduced to Cr3+, which is green. Consequently, chromic acid can
distinguish between aldehydes and ketones. It is also true those other functional
groups; primary and secondary alcohols for example, can be oxidized by chromic
acid, causing the formation of a green color.
48
Standards: Cyclohexanone
Procedure
Dissolve 10 mg or 2 drops of the unknown in 1 mL of pure acetone in a test
tube and add to the solution 1 small drop of Jones reagent (chronic acid in sulfuric
acid). A positive test is marked by the formation of a green color within 5 seconds
upon addition of the orange-yellow reagent to a primary or secondary alcohol.
Aldehydes also give a positive test, but tertiary alcohols do not.
The Jones reagent will already be prepared for you.
Positive Test
A positive test for aldehydes and primary or secondary alcohols consists in
the production of an opaque suspension with a green to blue color. Tertiary alcohols
give no visible reaction within 2 seconds, the solution remaining orange in color.
Disregard any changes after 15 seconds.
Complications
Aldehydes are better characterized in other ways. The color usually develops
in 5-15 seconds.
3- Tollens’ Test
Aldehydes are also oxidized by Tollens’ reagent, a substance that contains Ag+1. The
silver ion is concomitantly, reduced to metallic silver. Silver ion is a weak oxidizing
agent; aldehydes are very easily oxidized and are essentially unique in being able to
reduce silver ion to silver metal.

49
4-Iodoform Test for Methyl Ketones
Standard: Acetone
Procedure
If the substance to be tested is water soluble, dissolve 4 drops of a liquid or an
estimated 50 mg of a solid in 2 mL of water in a large test tube. Add 2 mL of 3 M
sodium hydroxide and then slowly add 3 mL of the iodine solution. Stopper the test
tube and shake vigorously. A positive test will result in the brown color of the
reagent disappearing and the yellow iodoform solid precipitating out of solution. If
the substance to be tested is insoluble in water, dissolve it in 2 mL of 1,2-
dimethoxyethane, proceed as above, and at the end dilute with 10 mL of water.
Positive Test
Formation of solid iodoform (yellow) is a positive test. (Iodoform can be
recognized by its odor and yellow color and, more securely, from the melting point
119o-123oC).
Complications
Test will not be positive if the R group is a di-ortho substituted aryl group

50
Aldehydes
1-Formaldehyde
HCHO
Physical properties:
Colorless liquid, with characteristic pungent odor.
Reactions of formaldehyde
1- Schiff s reagent test. Add 2 ml of Schiff s reagent to 2 ml cold aldehyde
solution shake vigorously and allow standing for two minutes – a deep – violet
color indicates the presence of aldehydic group.
2- In dry test tube put 2 ml of formaldehyde with few crystals of resorcinol then
add 2 ml conc. H2SO4 carefully from the side of the tube. The red ring formed
and white ppt. in aqueous layer turns to violet red.
3- It is reduces solution Fehling s reagent.
Add 1ml of formaldehyde solution to Fehling ssolution (1ml of Fehling A
+1ml of Fehling B) and heating the solution notice the blue color convert to red color
4- Add 2 ml of formaldehyde + 1% phenyl hydrazine + few drops of sodium
nitro prusside solution in excess of NaOH. Blue color will appear then turns
to green then red then brown.
5- Add diluted formaldehyde solution + 1% phenyl + 5% 2 ml pot.ferricyanide
+conc. HCl it gives a rose red color.
6- It gives 2, 4-dinitrophenyl hydrazine m.p 166 °C.
2-Acetaldehyde

51
CH3CHO
Physical properties:
Colorless liquid Pungent, fruity odor, b.p 20 °C; miscible with water, alcohol and
ether, M.F is C2H4O.
Reactions of acetaldehyde
1- Give violet color with Schiff s reagent.
2- 2 ml of acetaldehyde with 2 ml aqueous sodium nitroprusside and 5 drops of
NaOH gives a deep win red color.
3- Responds to iodoform test
4- Boiling of 2 ml of solution with 2 ml 20% KOH give yellow ppt.
5- It is reduces Fehling s solution and Tollen s reagents.
6- Formed white crystals by reaction with sodium bisulphate.
7- It is give 2,4- dinitrophenyl hydrazone, m.p 168 °C.
EXPERIMENT No.

52
Identifications and reactions of aldehydes.
Data and Results
Name:
Sec.No.
Date:
Physical properties
Solubility: ……………………..
Color: …………………….
Shape: …………………………
Chemical properties
Result observation Experiment
Unknown is:
KETONES

53
Acetone
Physical properties:
Molecular formula (M.F.) is C3H6O, Colorless liquid with characteristic
pleasant smell, miscible with water, alcohol, and ether.
Reactions of acetone
1- Colors test.
- Add 1 ml of acetone to 1 ml of sodium nitroprusside with 0.5 ml of NaOH and
notice appearance red color
- Add 1 ml of acetone to 1 ml of sodium nitroprusside with 0.5 ml of pyridine and
notice appearance blue color
- Add 0.5 gm of m-dinitrobenzene to 1 ml of acetone with 0.5 ml of NaOH and
notice appearance red color
- Add 0.5 ml of Schiff s reagent to 0.5 ml of acetone and notice do not appearance
violet color
2- Iodoform test.On addition of 3-4 drops of iodine solution and then NaOH
solution drop by drop to the substance and warming the brown color of iodine
disappear and a yellow ppt. is formed.
3- Ding`s test. Add 2 ml of acetone to 2 ml of acid solution of mercury sulphate
and heating on water produce heavy white precipitate.
4- To 2 ml of standard sodium bisulphite add few drops of acetone. White
crystals are formed.

54
5- Oxidation test. Add 1 ml of acetone to 2 ml of solution of KMnO4 and heating
lead to disappear of violet color of permanganate
6- 2,4- Dinitrophenylhydrazine test.
Add 1 ml of acetone to 3 ml of alcoholic solution of 2,4-dinitrophenyl-
hydrazine and heating the mixture in water bath and notice formation yellow
precipitate
EXPERIMENT No.
Identifications and reactions of ketones.

55
Data and Results
Name:
Sec.No.
Date:
Physical properties
Solubility: ……………………..
Color: …………………….
Shape: …………………………
Chemical properties
Result observation Experiment
Unknown is:
Identifications and reactions of carboxylic acids and acid salts

56
Purpose:
To study properties and reactions of carboxylic acids and esters
Discussion
The functional group of a carboxylic acid is a carboxyl group. The general formula
for an aliphatic carboxylic acid is RCOOH and for an aromatic carboxylic acid is
ArCOOH. Carboxylic acids have significantly higher boiling points than other types
of organic compounds of comparable molecular weight. They are polar compounds
and form very strong intermolecular hydrogen bonds. Carboxylic acids are more
soluble in water than alcohols, ethers, aldehydes, and ketones of comparable
molecular weight. They form hydrogen bonds with water molecules through both
their C=O and OH groups. They are dissolving in Na2CO3 with evaluation of CO2;
they are also dissolving in NaOH. Carboxylic acids are divided into two categories,
aliphatic and aromatic carboxylic acids.
To use carboxylic acids neutral solution (must be prepared).
To the solid, add aqueous solution of ammonia (excess). Boil the solution until all
ammonia odor evolved. Cool.
RCOOH +NH4OH RCOONH4 +NH3
Tests for Carboxylic Acids
Acidity test
Procedure

57
A few drops or a few crystals of the unknown sample are dissolved in 1mL of
methanol and slowly added to 1 mL of a saturated solution of sodium bicarbonate.
Positive Test
Evolution of a carbon dioxide gas is a positive test for the presence of the
carboxylic acid and certain phenols listed in the Complications section.
Complications
Negatively substituted phenols such as nitrophenols, aldehydrophenols, and
polyhalophenols are sufficiently acidic to dissolve in 5% sodium bicarbonate.
1- Formic acid
HCOOH
Physical properties:
It is colorless liquid, miscible with water, alcohol and ether, boiling point 100 °C.
Reactions of formic acid
1- It is reduces Fehling s solution and Tollen s reagent.
2- It is decolorized KMnO4
3- With FeCl3: n. solution of acid gives red color which converted to brown by
boiling.
4- Ester formation: to 1 ml of acid add 1 ml of ethyl alcohol and 1 ml of conc.
H2SO4 in attest tube, heat in water bath, and then pour to Na2CO3 solution .the
characteristic odor of ethyl format is evolved.
HCOOH + C2H5OH HCOOC2H5 + H2O
2-Acetic acid
CH3COOH

58
Physical properties:
It is colorless viscous liquid, miscible with water, alcohol and ether, b.p 122 °C.
Reactions of acetic acid
1- It does not reduce Fehling s solution and Tollen s reagent.
2- With FeCl3: n. solution of acid gives red color which converted to brown by
boiling.
3- Ester formation: to 1 ml of acid add 1 ml of ethyl alcohol and 1 ml of conc.
H2SO4 in attest tube, heat in water bath, and then pour to Na2CO3 solution .the
characteristic odor of ethyl acetate was evolved.
CH3COOH + C2H5OH CH3COOC2H5 + H2O
3-Oxalic acid
Physical properties:
It is colorless crystalline solid m.p. 100 °C. It is readily soluble in water and alcohol.
Reactions of oxalic acid
1- Flaming test. When the acid or its salt is heated on a piece ofporcelain it is
decomposed with little or no charring.
2- When the acid is heated with conc. H2SO4 it is decomposed into CO and CO2
with no charring.
3- n. Solution + CaCl2: A white ppt. of Ca oxalate is separatedimmediately on
cold which is soluble in mineral acids.
4- n. Solution + AgNO3: gives white ppt. of Ag oxalate.

59
5- When heated a few drops of dil. KMnO4 sol .and the acidified sol. Of oxalate
the color is discharged.
4-Tartaric acid
Physical properties:
It is colorless crystalline solid, m.p. 167°C and readily soluble in cold water and
alcohol.
Reactions of tartaric acid
1- It gives Acidity test +ve.
2- With conc. H2SO4: when the solid is heated with conc. H2SO4 charring is
occur with the evaluation of odor of burnet sugar.
3- n. Solution + CaCl2: it gives white ppt. after shaking from calcium tartrate,
which is soluble in mineral acids.
4- n. Solution + AgNO3: it gives Ag mirror after heating in w.b.
5- KMnO4 + n. solution: by heating in presence of dil. H2SO4 a de colorization
of color is occurring.
5- Citric acid

60
Physical properties:
It is colorless crystalline solid, m.p 100 °C, soluble in cold water
Reactions of citric acid
1- Heating the solid with conc. H2SO4 gives yellow color.
2- It gives Acidity test +ve.
3- With CaCl2 solution: it gives white ppt. after boiling
4- Deng s test: I ml of HgSO4solution is added to 5 ml of neutral solution. Then
heat to boiling and then add 1-2 drops of 2 % KMnO4 where de colorization
occurs and a heavy whit ppt appear.
Identifications and reactions of acid salts
A) Ammonium salts: RCOONH4
All colorless solids, soluble in cold water, giving the neutral solution of the
corresponding acid.
General reactions:-
1- They give off ammonia when treated with aqueous NaOH sol. in the cold
(distinction from amides, imides)
2- Ammonia is liberated when the solid salt is mixed with solid Na2CO3,
moistened with one drop of water and grind between the fingers.
3- Aqueous solution (neutral solution of the corresponding acid) gives with
FeCl3 or CaCl2 the characteristic reactions of the corresponding acid.
4- Identify the carboxylic acid by the test given before.
B) Metallic Salts
They are solid of acid (metallic salt) have the general formula RCOOM
61
1- Effect of the heat:
2- Nitration -ve aliphatic salt
3- Effect FeCl3
Soln. + FeCl3 Buff Succinate
4- Effect of CaCl2
Soln. + CaCl2 White ppt. (at once) Oxalate
White (after shaking) Tartarate
White (after heating) Citrate
Then carry out the confirmatory test for each salt of acid
EXPERIMENT NO.
Identifications and reactions of carboxylic acids and acid salts
Data and Results
Name:

62
Sec.No.
Date:
Physical properties
Solubility: ……………………
Color: …………………………
Shape: ………………………
Chemical properties
Res. Obs. Exp.
Unknown is
Identifications of amines
Purpose:

63
To study properties and reactions of amines
Discussion
Amines are derivatives of ammonia, they are considered as important type of
organic base found in nature. Consider as if substituted ammonia: RNH2, R2NH, and
R3N. R can be either aliphatic or aromatic. Amines form hydrogen bonds but not as
strongly as alcohols. Nitrogen is less electronegative than oxygen. Tertiary amines
cannot hydrogen bond to each other. Amines have boiling points between alkanes
and alcohols. Tertiary amines boil lower than 10 or 20 of similar molecular weight.
All amines can form hydrogen bonds with water. Amines up to 6 carbons long are
water soluble due to this hydrogen bonding. Water solubility decreases as the length
of the hydrocarbon portion of the molecule increases. Amines are classified by the
number of carbons directly bonded to the nitrogen atom: A primary amine has one
(RNH2 = 1o); A secondary amine has two (R2NH = 2o); A tertiary amine has three
(R3N = 3o)
Urea
64
Physical properties:
Colorless crystalline solid, soluble in water and alcohols; melting point 132oC.
Reactions of Urea
1- Solubility:
Confirm that urea is very solution in water and dissolves in hot methyl, ethyl
and amyl alcohol, but is almost insoluble in ether.
2- Sodium hydroxide solution:
Dissolve 0.2 gm of urea in 5 ml of dilute NaOH solution and warm. Observe
that ammonia is evolved.
CO(NH2)2 + NaOH -------→ Na2CO3 + 2 NH3
3- Sodium hypobromite (or hypochlorite) solution:
Dissolve 0.5 gm of urea in 3 ml of water and add 5 – 10 ml of dilute sodium
hypochlorite or hypobromite solution. Nitrogen is evolved.
CO(NH2)2 + 3NaOBr + 2 NaOH --→ N2 + 3H2O + Na2CO3 + 3NaBr
4- Nitrous acid:
Dissolve 0.2 gm of urea in 2-3 ml of dilute HCI and add 3 ml of dilute (about
5 % NaNO2 solution. effervescence occurs, and nitrogen and carbon dioxide
are evolved.
CO(NH2)2 + 2HNO2 -------------→ CO2 + 2N2 + 3H2O
5- Amines with Nitrous Acid
In fact, nitrous acid is a useful reagent to determine whether a particular amine
is primary, secondary, or tertiary. With primary amines nitrous acid results
in evolution of nitrogen gas; With secondary amines insoluble yellow liquids
or solid NN-nitroso compounds, R2N−N=O, separate; Tertiary amines
dissolve react with nitrous acid solutions without evolution of nitrogen,
usually to give complex products:

65
- Dissolve (0.2g) urea in Conc. HCl (2 ml) and water (2 ml) in a boiling tube.
- Cool the solution in an ice bath to 0-5 oC.
- To this added a cooled (5 oC) solution of sodium nitrite (0.2g in 2-3 ml
water) dropwise and mix well.
- Notice effervescence of nitrogen appears, which indicates presence
of urea.
EXPERIMENT NO.
Identifications and reactions of amines.
Data and Results
Name:
Sec.No.

66
Date:
Physical properties
Solubility: ……………………
Color: …………………………
Shape: ………………………
Chemical properties
Res. Obs. Exp.
Unknown is
Identification of Carbohydrates
Carbohydrates consist of simple sugars (e.g. glucose, fructose and sucrose) and
complex carbohydrates (large molecules called polymers made of hundreds of

67
simple sugars). There are a large number of carbohydrates in living organisms,
varying from small sugar molecules such as the simple sugar glucose, which
provides all cells with the fuel needed to do cell work, to polymers such as cellulose (structural
molecules of plants) and glycogen (a storage carbohydrate in animals). Because there
are so many different types of carbohydrates, one chemical test cannot
identify all of them. Different chemical reagents, or testing agents, are used
to test for simple sugars and carbohydrate polymers. A reducing sugar is a type of sugar
that can cause a specific chemical reaction, called a reduction. A reduction is a very
common type of chemical reaction where a substance "gains an electron".
Reducing sugars can cause certain types of molecules to get reduced (gain
an electron). Not all sugars have the chemical structure to be reducing sugars. A
reduction is always coupled to a chemical reaction calle d an oxidation,
where a substance loses an electron. Reducing sugars lose electrons when
they cause a reduction of some other chemical. Oxidation-reduction, or Redox,
reactions are very important in the energy transfer chemical reactions of living organisms.
A Benedict’s test can be used to identify reducing sugars. The Benedict’s solution
(a chemical reagent) contains a blue soluble form of copper ions (Cu++) that can
undergo a reduction (that is the copper ions gain electrons) when heated in the
presence of a reducing sugar. When the blue copper ions are reduced, they change
from the soluble blue color to reddish color copper ions (Cu+) that are insoluble.
The color of the test solution changes from blue ---> green ---> orange ---> red-brown or
rust color as more reduced copper ions are formed. You will use the Benedict's solution to test
for the presence of reducing sugar in various substances
The Molisch Test
Shows positive test for:All carbohydrates. Monosaccharides give a rapid positive
test. Disaccharides and polysaccharides react slower.
Reactions:

68
The test reagent dehydrates pentoses to form furfural (top reaction) and
dehydrates hexoses to form 5-hydroxymethyl furfural (bottom reaction). The
furfurals further react with -naphthol present in the test reagent to produce
a purple product (reaction not shown).
How to perform the test:
Two ml of a sample solution is placed in a test tube. Two drops of the Molisch
reagent (a solution of -napthol in 95% ethanol) is added. The solution is then
poured slowly into a tube containing two ml of concentrated sulfuric acid so that two
layers form. The formation of a purple product at the interface of the two layers.
A negative test (left) and a positive test (right)
1) Barfoed's Test
Shows positive test for:Reducing monosaccharides
Reactions:

69
Reducing monosaccharides are oxidized by the copper ion in solution to form
a carboxylic acid and a reddish precipitate of copper (I) oxide within three minutes.
Reducing disaccharides undergo the same reaction, but do so at a slower rate.
How to perform the test:
One ml of a sample solution is placed in a test tube. Three ml of Barfoed's
reagent (a solution of cupric acetate and acetic acid) is added. The solution is then
heated in a boiling water bath for three minutes.
A positive test is indicated by:The formation of a reddish precipitate within three
minutes.
a negative test (left) and a positive test (right)
2) Fehling's Solution
Procedure
To a solution or suspension of 0.2 g of unknown in 5 mL of water, add 5 mL of
Fehling's solution and heat the mixture to boiling. Cool the solution. Fehling's

70
solution: Dissolve 17.32 g of hydrated copper sulfate in 200 mL of water and dilute
to 250 mL. Dissolve 86.5 g of sodium potassium tartrate and 35 g of sodium
hydroxide in 100 mL of water and dilute to 250 mL. Mix 2.5 mL of each solution
immediately prior to use.
Positive Test: Precipitation of copper (II) oxide as a red, yellow, or yellowish-green
solid is a positive test.
3) Benedict's Solution
Procedure
To a solution or suspension of 0.2 g of unknown in 5 mL of water, add 5 mL
of Benedict's solution. If no precipitate is formed, heat the mixture to boiling and
cool. Benedict's solution: A solution of 17.3 g of sodium citrate and 10.0 g of
anhydrous sodium carbonate in 80.0 mL of water is heated until the salts are
dissolved. Additional water is added to bring the volume up to 85.0 mL. A solution
of 1.73 g of hydrated copper sulfate in 10.0 mL of water is poured slowly with
stirring into the solution of the citrate and the carbonate. Add water to make a final
volume of 100 mL.
Positive Test: Precipitation of copper (II) oxide as a red, yellow, or yellowish-
green solid is a positive test.
4) Osazone Test:
This test is used to differentiate the maltose and lactose
Principle:

71
An organic compound phenylhydrazine reacts with carbonyl carbon of sugar
to form the osazones. These osazone crystals have yellow colour characteristics
shapes and melting point,time of formation and solubility. The characterstics
features of osazone are given in thefollowing table: -
Time of formation
(Minutes)
Solubility in
boiling water Crystalline structure
Fructosazone 2 Insoluble Needle shape
Glucosazone 5 Insoluble Needle shape
Galactosazone 20 Insoluble Thorny ball shape
Maltosazone 30-45 Soluble Sunflower/Star shape
Lactosazone 30-45 Soluble Cotton ball/Powder puff shape
Procedure:
Dissolve of 0.2g of carbohydrate, 0.4g of phenyl hydrazine hydrochloride and
0.6g of sodium acetate in 4 ml of water and dip the tube in a beaker containing
boiling water and leave it as such for 20 minutes then place it aside to cool slowly.
The ozazone separates as a yellow crystalline precipitate.
Observations and inference:
Lactose is soluble in hot water and will only separate on cooling of the
solution and forms powder puff shape crystals,

72
Galactose, and Maltose are soluble in hot water and will only separate on
cooling of the solution and forms sunflower shaped or star shaped crystals,
Glucose and fructose are insoluble in hot water and separates readily from the
solution before cooling and forms needle shaped crystals.
Yellow on heating Yellow after coolingYellow after cooling
(Needle shape) (Powder puff shape)(Cotton ball)
EXPERIMENT NO.
Identifications and reactions of Carbohydrates
Data and Results
Name:
Sec.No.
Date:
Physical properties
Solubility: ……………………
Color: …………………………
Shape: ………………………
Chemical properties
Res. Obs. Exp.

73
Unknown is:
Scheme for organic aliphatic compounds
Liquid organic aliphatic compounds:
1- Alcohols
Methanol – Ethanol – Glycerol
2- Aldehydes
Formaldehyde – Acetaldehyde – Benzaldehyde
3- Ketones
Acetone
4- Acids
Formic acid – Acetic acid

74
Scheme for liquid organic compounds
Step 1: 1 ml of unknown + drops of Schiff`s base
Step 2: 1 ml of unknown + 3 ml of Iodine and heated for 3 min.
then cool and add NaOH gradually by continuous shaking (Iodoform)
-Ve
Unknown is acetone, glycerol, methanol,
ethanol, formic acid or acetic acid
Go to step 3
Violet or rose color.
Unknown is formaldehyde or
acetaldehyde
Go to step 2
-ve
Unknown is formaldehyde Yellow ppt after cooling
Unknown is acetaldehyde

75
Step 3: (Acidity)
1 ml of unknown + 1 ml of Na2CO3 solution
Step 4: (Borax Test).
2 ml of borax solution + drops of Ph.Ph + 1 ml of unknown
Step 5:
Iodoform Test
Step 6: Esterification Test
Step 7: Effect of KMnO4
CO2 evolves with effervescence
Unknown is formic acid or acetic acid
Go to step 7
-Ve
Unknown is acetone, glycerol, methanol, ethanol
Go to step 4
-ve
Unknown is acetone, methanol, ethanol
Go to step 5
Pink color disappears on cold.
Unknown is Glycerol
-ve
Unknown is methanol
Yellow ppt
Unknown is ethanol or acetone
Go to step 6
-ve
Unknown is acetone
Specific odor with effervescence
Unknown is ethanol

76
Solid aliphatic organic compounds:
1- Acids
Salicylic acid - Oxalic acid - Tartaric acid - Citric acid
2- Sodium salt for acid
Sodium acetate – Sodium format –Sodium oxalate – Sodium tartarate – Sodium
citrate
3- Ammonium salts for acids
Ammonium acetate – Ammonium format –Ammonium oxalate – Ammonium
tartarate – Ammonium citrate
4- Amines
Urea
5- Carbohydrates
Glycose – Fructose – Maltose – Sucrose – Starch
Color of KMnO4 will not disappear
Unknown is Acetic acid Color of KMnO4 disappear
Unknown is Formic acid

77
Scheme for solid aliphatic organic compounds
Step 1: 0.25 g of unknown + 1 ml of NaOH
Step 2: 1 ml of neutral solution of unknown +
drops of FeCl3
-Ve Unknown is ammonium
oxalate, tatarate, citrate or urea
Go to step 3
Red color change to brown ppt with heating
Unknown is ammonium format or ammonium
acetate
Go to step 4
Odor of ammonia
Unknown is ammonium salt or urea
Go to step 2
No odor of ammonia
Unknown is sodium salts, acids, or
carbohydrates
Go to step 5

78
Step 3: 1 ml of neutral solution of unknown + 1 ml of CaCl2
Step 4: Effect of
KMnO4
Step 5: (Acidity test) 0.25 g of unknown + 1 ml of Na2CO3
Step 6: (Molisch`s Test)
Step 7: 1 ml of neutral solution of salt + drops of FeCl3
White ppt after
boiling, unknown is
ammonium citrate
White ppt on
cold, unknown is
ammonium
oxalate
White ppt after scratching
the inner wall of the tube,
unknown is ammonium
tartarate
No evolution
Unknown is sodium salts or carbohydrates
Go to step 6
CO2 evolves with effervescence
Unknown is carboxylic acids
Go to step 10
-Ve.
unknown is
urea
-Ve
Unknown is sodium salts
Go to step 7
+Ve
Unknown is carbohydrates
The color will not disappear
Unknown is ammonium acetate The color will disappear
Unknown is ammonium format

79
Step 8: 1 ml of neutral solution of salt + 1 ml of
CaCl2
Step 9: Effect of KMnO4
Step 10: 1
ml of neutral
solution of acid + 1 ml of CaCl2
-Ve Unknown is sodium oxalate or
tatarate or citrate
Go to step 8
White ppt after
boiling, unknown is
sodium citrate
Red color change to brown ppt with heating
Unknown is sodium format or sodium acetate
Go to step 9
White ppt on cold, unknown
is sodium oxalate
White ppt after scratching the
inner wall of the tube, unknown
is sodium tartarate
White ppt on cold,
unknown is oxalic acid
The color will not disappear
Unknown is sodium acetate The color will disappear
Unknown is sodium format
White ppt after
boiling, unknown is
citric acid
White ppt after scratching the
inner wall of the tube, unknown
is tartaric acid