PIC24F Family Reference Manual, Sect. 6 Oscillator
26
© 2006 Microchip Technology Inc. Advance Information DS39700A-page 6-1 Oscillator 6 Section 6. Oscillator HIGHLIGHTS This section of the manual contains the following major topics: 6.1 Introduction .................................................................................................................... 6-2 6.2 CPU Clocking Scheme .................................................................................................. 6-3 6.3 Oscillator Configuration.................................................................................................. 6-3 6.4 Control Registers ........................................................................................................... 6-5 6.5 Primary Oscillator (POSC) ........................................................................................... 6-10 6.6 Phase Locked Loop (PLL) ........................................................................................... 6-14 6.7 Low-Power Secondary Oscillator (SOSC) ................................................................... 6-15 6.8 Internal Fast RC Oscillator (FRC) ................................................................................ 6-16 6.9 Internal Low-Power RC Oscillator (LPRC) ................................................................... 6-16 6.10 Fail-Safe Clock Monitor (FSCM) .................................................................................. 6-17 6.11 Clock Switching Operation ........................................................................................... 6-18 6.12 Two-Speed Start-up ..................................................................................................... 6-21 6.13 AC Electrical Specifications ......................................................................................... 6-22 6.14 Design Tips .................................................................................................................. 6-23 6.16 Related Application Notes............................................................................................ 6-25 6.17 Revision History ........................................................................................................... 6-26
-
Upload
khangminh22 -
Category
Documents
-
view
0 -
download
0
Transcript of PIC24F Family Reference Manual, Sect. 6 Oscillator

Oscillato
r
6
Section 6. Oscillator
HIGHLIGHTSThis section of the manual contains the following major topics:
6.1 Introduction .................................................................................................................... 6-26.2 CPU Clocking Scheme .................................................................................................. 6-36.3 Oscillator Configuration.................................................................................................. 6-3
6.4 Control Registers ........................................................................................................... 6-56.5 Primary Oscillator (POSC) ........................................................................................... 6-106.6 Phase Locked Loop (PLL) ........................................................................................... 6-14
6.7 Low-Power Secondary Oscillator (SOSC) ................................................................... 6-156.8 Internal Fast RC Oscillator (FRC) ................................................................................ 6-166.9 Internal Low-Power RC Oscillator (LPRC)................................................................... 6-16
6.10 Fail-Safe Clock Monitor (FSCM) .................................................................................. 6-176.11 Clock Switching Operation........................................................................................... 6-186.12 Two-Speed Start-up ..................................................................................................... 6-21
6.13 AC Electrical Specifications ......................................................................................... 6-226.14 Design Tips .................................................................................................................. 6-236.16 Related Application Notes............................................................................................ 6-25
6.17 Revision History ........................................................................................................... 6-26
© 2006 Microchip Technology Inc. Advance Information DS39700A-page 6-1

PIC24F Family Reference Manual
6.1 INTRODUCTION
This section describes the PIC24F oscillator system and its operation. The PIC24F oscillatorsystem has the following modules and features:
• A total of four external and internal oscillator options as clock sources, providing 11 different clock modes
• On-chip 4x PLL to boost internal operating frequency on select internal and external oscillator sources
• Software-controllable switching between various clock sources
• Software-controllable postscaler for selective clocking of CPU for system power savings• A Fail-Safe Clock Monitor (FSCM) that detects clock failure and permits safe application
recovery or shutdown
A simplified diagram of the oscillator system is shown in Figure 6-1.
Figure 6-1: PIC24F Family Clock Diagram
PIC24F Family
4 x PLL
Secondary Oscillator
SOSCEN
SOSCO
SOSCI
Timer1, RTCC
OSC1
OSC2
Primary Oscillator
XTPLL, HSPLL,
XT, HS, EC
CPU
Peripherals
Pos
tsca
ler
CLKDIV<10:8>
WDT, PWRT
8 MHz
FRC
31 kHz (Nominal)
FRCOscillator
LPRCOscillator
SOSC
LPRCP
osts
cale
r
Clock Control Logic
Fail-SafeClock
Monitor
CLKDIV<14:12>
FRCDIV
ECPLL, FRCPLL
OSCTUN<5:0>
8 MHz4 MHz
CLKO
(Nominal)
DS39700A-page 6-2 Advance Information © 2006 Microchip Technology Inc.

Section 6. OscillatorO
scillator
6
6.2 CPU CLOCKING SCHEMEThe system clock source can be provided by one of four sources:
• Primary Oscillator (POSC) on the OSC1 and OSC2 pins• Secondary Oscillator (SOSC) on the SOSCI and SOSCO pins• Internal Fast RC Oscillator (FRC)
• Internal Low-Power RC Oscillator (LPRC)
The Primary Oscillator and FRC sources have the option of using the internal 4x PLL. Thefrequency of the FRC clock source can optionally be reduced by the programmable clock divider.The selected clock source generates the processor and peripheral clock sources.
The processor clock source is divided by two to produce the internal instruction cycle clock, FCY.In this document, the instruction cycle clock is also denoted by FOSC/2. The timing diagram inFigure 6-2 shows the relationship between the processor clock source and instruction execution.The internal instruction cycle clock, FOSC/2, can be provided on the OSC2 I/O pin for someoperating modes of the Primary Oscillator.
Figure 6-2: Clock/Instruction Cycle Timing
6.3 OSCILLATOR CONFIGURATION
The oscillator source (and operating mode) that is used at a device Power-on Reset event isselected using Configuration bit settings. The oscillator Configuration bit settings are in theConfiguration registers located in the program memory (refer to the specific product data sheet forfurther details). The Primary Oscillator Configuration bits, POSCMD1:POSCMD0(Configuration Word 2<1:0>), and oscillator Configuration bits, FNOSC2:FNOSC0(Configuration Word 2<10:8>), select the oscillator source that is used at a Power-on Reset. TheFRC oscillator with Postscaler (FRCDIV) is the default (unprogrammed) selection. The SecondaryOscillator, or one of the internal oscillators, may be chosen by programming these bit locations.
The Configuration bits allow users to choose between 11 different clock modes, shown inTable 6-1.
FOSC
PC
FCY
PC PC + 2 PC + 4
Fetch INST (PC)Execute INST (PC – 2) Fetch INST (PC + 2)
Execute INST (PC) Fetch INST (PC + 4)Execute INST (PC + 2)
TCY
© 2006 Microchip Technology Inc. Advance Information DS39700A-page 6-3

PIC24F Family Reference Manual
Table 6-1: Configuration Bit Values for Clock Selection
6.3.1 Clock Switching Mode Configuration Bits
The FCKSM Configuration bits (Configuration Word 2<7:6>) are used to jointly configure deviceclock switching and the Fail-Safe Clock Monitor (FSCM). Clock switching is enabled only whenFCKSM1 is programmed (‘0’). The FSCM is enabled only when FCKSM1:FCKSM0 are bothprogrammed (‘00’).
6.3.2 OSC1 and OSC2 Pin Functions in Non-Crystal Modes
When the Primary Oscillator on OSC1 and OSC2 is not configured as the clock source(POSCMD1:POSCMD0 = 11), the OSC1 pin is automatically reconfigured as a digital I/O. In thisconfiguration, as well as when the Primary Oscillator is configured for EC mode(POSCMD1:POSCMD0 = 00), the OSC2 pin can also be configured as a digital I/O byprogramming the OSCIOFCN Configuration bit (Configuration Word 2<5>).
When OSCIOFCN is unprogrammed (‘1’), a FOSC/2 clock output is available on OSC2 for testingor synchronization purposes. With OSCIOFCN programmed (‘0’), the OSC2 pin becomes ageneral purpose I/O pin. In both of these configurations, the feedback device between OSC1 andOSC2 is turned off to save current.
Oscillator ModeOscillator
SourcePOSCMD1:POSCMD0
FNOSC2:FNOSC0
Note
Fast RC Oscillator with Postscaler (FRCDIV)
Internal xx 111 1, 2
(Reserved) Internal xx 110 1
Low-Power RC Oscillator (LPRC)
Internal xx 101 1
Secondary (Timer1) Oscillator (SOSC)
Secondary xx 100 1
Primary Oscillator (HS) with PLL Module (HSPLL)
Primary 10 011
Primary Oscillator (XT) with PLL Module (XTPLL)
Primary 01 011
Primary Oscillator (EC) with PLL Module (ECPLL)
Primary 00 011
Primary Oscillator (HS) Primary 10 010
Primary Oscillator (XT) Primary 01 010
Primary Oscillator (EC) Primary 00 010
Fast RC Oscillator with PLL Module (FRCPLL)
Internal xx 001 1
Fast RC Oscillator (FRC) Internal xx 000 1
Note 1: OSC2 pin function is determined by the OSCIOFCN Configuration bit.2: Default oscillator mode for an unprogrammed (erased) device.
DS39700A-page 6-4 Advance Information © 2006 Microchip Technology Inc.
Section 6. OscillatorO
scillator
6
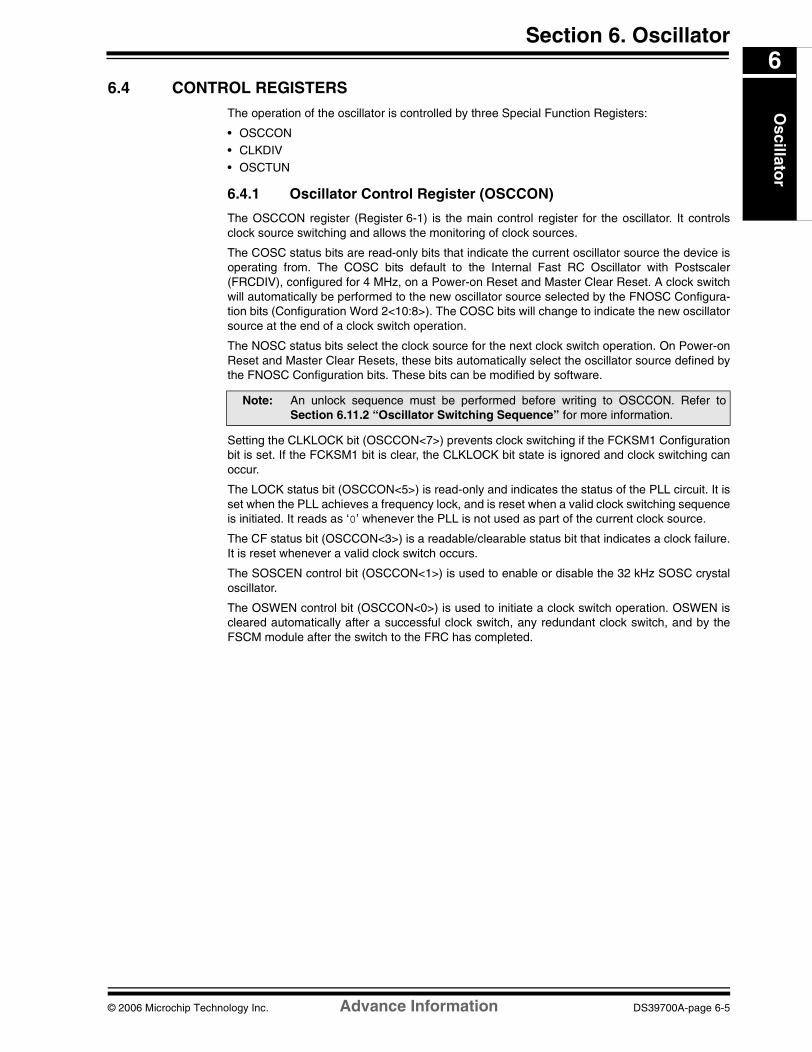
6.4 CONTROL REGISTERSThe operation of the oscillator is controlled by three Special Function Registers:
• OSCCON• CLKDIV• OSCTUN
6.4.1 Oscillator Control Register (OSCCON)
The OSCCON register (Register 6-1) is the main control register for the oscillator. It controlsclock source switching and allows the monitoring of clock sources.
The COSC status bits are read-only bits that indicate the current oscillator source the device isoperating from. The COSC bits default to the Internal Fast RC Oscillator with Postscaler(FRCDIV), configured for 4 MHz, on a Power-on Reset and Master Clear Reset. A clock switchwill automatically be performed to the new oscillator source selected by the FNOSC Configura-tion bits (Configuration Word 2<10:8>). The COSC bits will change to indicate the new oscillatorsource at the end of a clock switch operation.
The NOSC status bits select the clock source for the next clock switch operation. On Power-onReset and Master Clear Resets, these bits automatically select the oscillator source defined bythe FNOSC Configuration bits. These bits can be modified by software.
Setting the CLKLOCK bit (OSCCON<7>) prevents clock switching if the FCKSM1 Configurationbit is set. If the FCKSM1 bit is clear, the CLKLOCK bit state is ignored and clock switching canoccur.
The LOCK status bit (OSCCON<5>) is read-only and indicates the status of the PLL circuit. It isset when the PLL achieves a frequency lock, and is reset when a valid clock switching sequenceis initiated. It reads as ‘0’ whenever the PLL is not used as part of the current clock source.
The CF status bit (OSCCON<3>) is a readable/clearable status bit that indicates a clock failure.It is reset whenever a valid clock switch occurs.
The SOSCEN control bit (OSCCON<1>) is used to enable or disable the 32 kHz SOSC crystaloscillator.
The OSWEN control bit (OSCCON<0>) is used to initiate a clock switch operation. OSWEN iscleared automatically after a successful clock switch, any redundant clock switch, and by theFSCM module after the switch to the FRC has completed.
Note: An unlock sequence must be performed before writing to OSCCON. Refer toSection 6.11.2 “Oscillator Switching Sequence” for more information.
© 2006 Microchip Technology Inc. Advance Information DS39700A-page 6-5

PIC24F Family Reference Manual
Register 6-1: OSCCON: Oscillator Control Register
U-0 R-0 R-0 R-0 U-0 R/W-x(1) R/W-x(1) R/W-x(1)
— COSC2 COSC1 COSC0 — NOSC2 NOSC1 NOSC0
bit 15 bit 8
R/SO-0 U-0 R-0(2) U-0 R/CO-0 U-0 R/W-0 R/W-0
CLKLOCK — LOCK — CF — SOSCEN OSWEN
bit 7 bit 0
Legend: U = Unimplemented bit, read as ‘0’
R = Readable bit W = Writable bit CO = Clearable Only bit SO = Settable Only bit
- n = Value at all Resets ‘1’ = Bit is set ‘0’ = Bit is cleared x = Bit is unknown
bit 15 Unimplemented: Read as ‘0’
bit 14-12 COSC2:COSC0: Current Oscillator Selection bits111 = Fast RC Oscillator with Postscaler (FRCDIV)110 = Reserved101 = Low-Power RC Oscillator (LPRC)100 = Secondary Oscillator (SOSC)011 = Primary Oscillator with PLL module (XTPLL, HSPLL or ECPLL)010 = Primary Oscillator (XT, HS or EC)001 = Fast RC Oscillator with PLL module via Postscaler (FRCPLL)(3)
000 = Fast RC Oscillator (FRC)
bit 11 Unimplemented: Read as ‘0’
bit 10-8 NOSC2:NOSC0: New Oscillator Selection bits
111 = Fast RC Oscillator with Postscaler (FRCDIV)110 = Reserved101 = Low-Power RC Oscillator (LPRC)100 = Secondary Oscillator (SOSC)011 = Primary Oscillator with PLL module (XTPLL, HSPLL or ECPLL)010 = Primary Oscillator (XT, HS or EC)001 = Fast RC Oscillator with PLL module via Postscaler (FRCPLL)(3)
000 = Fast RC Oscillator (FRC)
bit 7 CLKLOCK: Clock Selection Lock Enable bit If FSCM is enabled (FCKSM1 = 1):1 = Clock and PLL selections are locked.0 = Clock and PLL selections are not locked and may be modified by setting the OSWEN bitIf FSCM is disabled (FCKSM1 = 0):Clock and PLL selections are never locked and may be modified by setting the OSWEN bit.
bit 6 Unimplemented: Read as ‘0’
bit 5 LOCK: PLL Lock Status bit 1 = PLL module is in lock or PLL module start-up timer is satisfied0 = PLL module is out of lock, PLL start-up timer is running or PLL is disabled
bit 4 Unimplemented: Read as ‘0’
bit 3 CF: Clock Fail Detect bit
1 = FSCM has detected a clock failure0 = No clock failure has been detected
bit 2 Unimplemented: Read as ‘0’
Note 1: Reset values for these bits are determined by the FNOSC Configuration bits.2: Also resets to ‘0’ during any valid clock switch, or whenever a non-PLL clock mode is selected.3: Available only with 4 MHz and 8 MHz FRC postscaler options.
DS39700A-page 6-6 Advance Information © 2006 Microchip Technology Inc.

Section 6. OscillatorO
scillator
6
6.4.2 Clock Divider Register (CLKDIV)
The Clock Divider register (Register 6-2) controls the features associated with Doze mode, aswell as the postscaler for the FRC oscillator.
The ROI bit (CLKDIV<15>) allows an interrupt to exit Doze mode and automatically selects a1:1 ratio for the processor and peripheral clocks. The DOZEN bit (CLKDIV<11>) is cleared afterthe exit from Doze mode. Clearing the ROI bit prevents interrupts from affecting Doze mode.
The DOZE bits (CLKDIV<14:12>) select the ratio of processor clocks to peripheral clocks. Therange is software selectable between 1:1 to 1:128. Master Clear and Power-on Resets default tothe 1:1 ratio. This feature allows the CPU to consume less power without disrupting theperipheral’s operations.
Setting the DOZEN bit places the device into Doze mode and engages the processor clockpostscaler. This bit is cleared when the ROI bit is set and an interrupt occurs.
The RCDIV bits (CLKDIV<10:8>) select the postscaler option for the FRC oscillator output, allowingusers to choose a lower clock frequency than the nominal 8 MHz. This option is described in moredetail in Section 6.8.2 “FRC Postscaler Mode (FRCDIV)” and Section 6.8.3 “FRC Oscillatorwith PLL Mode (FRCPLL)”.
bit 1 SOSCEN: 32 kHz Secondary Oscillator (SOSC) Enable bit
1 = Enable Secondary Oscillator0 = Disable Secondary Oscillator
bit 0 OSWEN: Oscillator Switch Enable bit1 = Initiate an oscillator switch to selection specified by NOSC2:NOSC0 bits0 = Oscillator switch is complete
Register 6-1: OSCCON: Oscillator Control Register (Continued)
Note 1: Reset values for these bits are determined by the FNOSC Configuration bits.2: Also resets to ‘0’ during any valid clock switch, or whenever a non-PLL clock mode is selected.3: Available only with 4 MHz and 8 MHz FRC postscaler options.
© 2006 Microchip Technology Inc. Advance Information DS39700A-page 6-7

PIC24F Family Reference Manual
Register 6-2: CLKDIV: Clock Divider Register
R/W-0 R/W-0 R/W-0 R/W-0 R/W-0 R/W-0 R/W-0 R/W-1
ROI DOZE2 DOZE1 DOZE0 DOZEN(1) RCDIV2 RCDIV1 RCDIV0
bit 15 bit 8
U-0 U-0 U-0 U-0 U-0 U-0 U-0 U-0
— — — — — — — —
bit 7 bit 0
Legend:
R = Readable bit W = Writable bit U = Unimplemented bit, read as ‘0’
-n = Value at all Resets ‘1’ = Bit is set ‘0’ = Bit is cleared x = Bit is unknown
bit 15 ROI: Recover on Interrupt bit1 = Interrupts clear the DOZEN bit and reset the CPU/peripheral clock ratio to 1:10 = Interrupts have no effect on the DOZEN bit
bit 14-12 DOZE2:DOZE0: CPU:Peripheral Clock Ratio Select bits 111 = 1:128110 = 1:64101 = 1:32100 = 1:16011 = 1:8010 = 1:4001 = 1:2000 = 1:1
bit 11 DOZEN: DOZE Enable bit(1)
1 = DOZE2:DOZE0 bits specify the CPU peripheral clock ratio0 = Processor clock/peripheral clock ratio set to 1:1
bit 10-8 RCDIV2:RCDIV0: FRC Postscaler Select bits111 = 31.25 kHz (divide-by-256)110 = 125 kHz (divide-by-64)101 = 250 kHz (divide-by-32)100 = 500 kHz (divide-by-16)011 = 1 MHz (divide-by-8)010 = 2 MHz (divide-by-4)001 = 4 MHz (divide-by-2)000 = 8 MHz (direct FRC output)
bit 7-0 Unimplemented: Read as ‘0’
Note 1: This bit is automatically cleared when the ROI bit is set and an interrupt occurs.
DS39700A-page 6-8 Advance Information © 2006 Microchip Technology Inc.

Section 6. OscillatorO
scillator
6
6.4.3 Oscillator Trim Register (OSCTUN)The FRC Oscillator Tuning register (Register 6-3) allows the user to fine tune the FRC oscillatorover a range of approximately ±12%. Each bit increment or decrement changes the factorycalibrated frequency of the FRC oscillator by a fixed amount.
Register 6-3: OSCTUN: FRC Oscillator Tuning Register
U-0 U-0 U-0 U-0 U-0 U-0 U-0 U-0
— — — — — — — —
bit 15 bit 8
U-0 U-0 R/W-0 R/W-0 R/W-0 R/W-0 R/W-0 R/W-0
— — TUN5 TUN4 TUN3 TUN2 TUN1 TUN0
bit 7 bit 0
Legend:
R = Readable bit W = Writable bit U = Unimplemented bit, read as ‘0’
-n = Value at all Resets ‘1’ = Bit is set ‘0’ = Bit is cleared x = Bit is unknown
bit 15-6 Unimplemented: Read as ‘0’
bit 5-0 TUN5:TUN0: FRC Oscillator Tuning bits
011111 = Maximum frequency deviation011110 = • • • 000001 = 000000 = Center frequency, oscillator is running at factory calibrated frequency111111 = • • • 100001 = 100000 = Minimum frequency deviation
© 2006 Microchip Technology Inc. Advance Information DS39700A-page 6-9

PIC24F Family Reference Manual
6.5 PRIMARY OSCILLATOR (POSC)
The Primary Oscillator is available on the OSC1 and OSC2 pins of the PIC24F family. In general,the Primary Oscillator can be configured for an external clock input or an external crystal. Furtherdetails of the Primary Oscillator operating modes are described in subsequent sections. ThePrimary Oscillator has 6 operating modes, summarized in Table 6-2.
Table 6-2: Primary Oscillator Operating Modes
The POSCMD and FNOSC Configuration bits (Configuration Word 2<1:0> and <10:8>, respec-tively) select the operating mode of the Primary Oscillator. The POSCMD1:POSCMD0 bits selectthe particular submode to be used (XT, HS or EC), while the FNOSC2:FNOSC0 bits determineif the oscillator will be used by itself or with the internal PLL. The PIC24F operates from thePrimary Oscillator whenever the COSC bits (OSCCON<14:12>) are set to ‘010’ or ‘011’.
Refer to the Electrical Characteristics section in the specific device data sheet for furtherinformation regarding frequency range for each crystal mode.
Figure 6-3: Crystal or Ceramic Resonator Operation (XT or HS Oscillator Mode)
Oscillator Mode
DescriptionOSC2 PinFunction
EC External clock input (0-32 MHz) FOSC/2
ECPLL External clock input (4-8 MHz), PLL enabled FOSC/2
HS 10 MHz-32 MHz crystal (Note 1)
HSPLL 4 MHz-8 MHz crystal, PLL enabled (Note 1)
XT 3.5 MHz-10 MHz crystal (Note 1)
XTPLL 3.5 MHz-8 MHz crystal, PLL enabled (Note 1)
Note 1: External crystal connected to OSC1 and OSC2 in these modes.
C1(3)
C2(3)
XTAL
OSC2
RS(1)
OSC1
RF(2) Sleep
To Internal Logic
PIC24F
Note 1: A series resistor, Rs, may be required for AT strip cut crystals.2: The internal feedback resistor, RF, is typically in the range of 2 to 10 MΩ.3: See Section 6.5.2.4 “Determining the Best Values for Oscillator Components”.
DS39700A-page 6-10 Advance Information © 2006 Microchip Technology Inc.

Section 6. OscillatorO
scillator
6
6.5.1 Selecting a Primary Oscillator ModeThe main difference between the XT and HS modes is the gain of the internal inverter of the oscil-lator circuit, which allows the different frequency ranges. The XT mode is a medium power,medium frequency mode. HS mode provides the highest oscillator frequencies with a crystal.OSC2 provides crystal feedback in both HS and XT Oscillator modes.
The EC and HS modes that use the PLL circuit provide the highest device operating frequencies.The oscillator circuit will consume the most current in these modes because the PLL is enabledto multiply the frequency of the oscillator by 4.
In general, users should select the oscillator option with the lowest possible gain that still meetstheir specifications. This will result in lower dynamic currents (IDD). The frequency range of eachoscillator mode is the recommended frequency cutoff, but the selection of a different gain modeis acceptable as long as a thorough validation is performed (voltage, temperature andcomponent variations, such as resistor, capacitor and internal oscillator circuitry).
The oscillator feedback circuit is disabled in all EC modes. The OSC1 pin is a high-impedanceinput and can be driven by a CMOS driver.
If the Primary Oscillator is configured for an external clock input, the OSC2 pin is not required tosupport the oscillator function. For these modes, the OSC2 pin can be used as an additionaldevice I/O pin or a clock output pin. When the OSC2 pin is used as a clock output pin, the outputfrequency is FOSC/2.
6.5.2 Crystal Oscillators and Ceramic Resonators
In XT and HS modes, a crystal or ceramic resonator is connected to the OSC1 and OSC2 pins toestablish oscillation (Figure 6-3). The PIC24F oscillator design requires the use of a parallel cut crys-tal. Using a series cut crystal may give a frequency out of the crystal manufacturer’s specifications.
6.5.2.1 OSCILLATOR/RESONATOR START-UP
As the device voltage increases from VSS, the oscillator will start its oscillations. The timerequired for the oscillator to start oscillating depends on many factors, including:
• Crystal/resonator frequency
• Capacitor values used• Series resistor, if used, and its value and type• Device VDD rise time
• System temperature• Oscillator mode selection of device (selects the gain of the internal oscillator inverter)• Crystal quality
• Oscillator circuit layout• System noise
The course of a typical crystal or resonator start-up is shown in Figure 6-4. Notice that the timeto achieve stable oscillation is not instantaneous.
Figure 6-4: Example Oscillator/Resonator Start-up Characteristics
Voltage
Crystal Start-up Time
Time
Device VDD
Maximum VDD of System
0V
VIL
VIH
© 2006 Microchip Technology Inc. Advance Information DS39700A-page 6-11

PIC24F Family Reference Manual
6.5.2.1.1 Primary Oscillator Start-up from Sleep Mode
The most difficult time for the oscillator to start-up is when waking up from Sleep mode. This isbecause the load capacitors have both partially charged to some quiescent value and phasedifferential at wake-up is minimal. Thus, more time is required to achieve stable oscillation.Remember also that low voltage, high temperatures and the lower frequency clock modes alsoimpose limitations on loop gain, which in turn, affects start-up.
Each of the following factors increases the start-up time:
• Low-frequency design (with a Low Gain Clock mode)• Quiet environment (such as a battery operated device)
• Operating in a shielded box (away from the noisy RF area)• Low voltage• High temperature
• Wake-up from Sleep mode
Circuit noise, on the other hand, may actually help to “kick start” the oscillator and help to lowerthe oscillator start-up time.
6.5.2.2 OSCILLATOR START-UP TIMER
In order to ensure that a crystal oscillator (or ceramic resonator) has started and stabilized, anOscillator Start-up Timer (OST) is provided. The OST is a simple 10-bit counter that counts1024 TOSC cycles before releasing the oscillator clock to the rest of the system. This time-outperiod is designated as TOST. The amplitude of the oscillator signal must reach the VIL and VIH
thresholds for the oscillator pins before the OST can begin to count cycles.
The TOST interval is required every time the oscillator has to restart (i.e., on POR, BOR andwake-up from Sleep mode). The Oscillator Start-up Timer is applied to the XT and HS modes forthe Primary Oscillator, as well as the Secondary Oscillator, SOSC (see Section 6.7 “Low-PowerSecondary Oscillator (SOSC)”).
6.5.2.3 TUNING THE OSCILLATOR CIRCUIT
Since Microchip devices have wide operating ranges (frequency, voltage and temperature;depending on the part and version ordered) and external components (crystals, capacitors, etc.)of varying quality and manufacture, validation of operation needs to be performed to ensure thatthe component selection will comply with the requirements of the application. There are manyfactors that go into the selection and arrangement of these external components. Depending onthe application, these may include any of the following:
• Amplifier gain• Desired frequency• Resonant frequency(s) of the crystal
• Temperature of operation• Supply voltage range• Start-up time
• Stability• Crystal life• Power consumption
• Simplification of the circuit• Use of standard components• Component count
DS39700A-page 6-12 Advance Information © 2006 Microchip Technology Inc.

Section 6. OscillatorO
scillator
6
6.5.2.4 DETERMINING THE BEST VALUES FOR OSCILLATOR COMPONENTSThe best method for selecting components is to apply a little knowledge and a lot of trialmeasurement and testing. Crystals are usually selected by their parallel resonant frequency only;however, other parameters may be important to your design, such as temperature or frequencytolerance. Microchip application note AN588, “PICmicro® Microcontroller Oscillator DesignGuide” is an excellent reference to learn more about crystal operation and ordering information.
The PIC24F internal oscillator circuit is a parallel oscillator circuit which requires that a parallelresonant crystal be selected. The load capacitance is usually specified in the 22 pF to 33 pFrange. The crystal will oscillate closest to the desired frequency with a load capacitance in thisrange. It may be necessary to alter these values, as described later, in order to achieve otherbenefits.
The clock mode is primarily chosen based on the desired frequency of the crystal oscillator. Themain difference between the XT and HS Oscillator modes is the gain of the internal inverter ofthe oscillator circuit which allows the different frequency ranges. In general, use the oscillatoroption with the lowest possible gain that still meets specifications. This will result in lowerdynamic currents (IDD). The frequency range of each oscillator mode is the recommendedfrequency cutoff, but the selection of a different gain mode is acceptable as long as a thoroughvalidation is performed (voltage, temperature and component variations, such as resistor, capac-itor and internal oscillator circuitry). C1 and C2 should also be initially selected based on the loadcapacitance, as suggested by the crystal manufacturer, and the tables supplied in the device datasheet. The values given in the device data sheet can only be used as a starting point since thecrystal manufacturer, supply voltage and other factors already mentioned may cause your circuitto differ from the one used in the factory characterization process.
Ideally, the capacitance is chosen so that it will oscillate at the highest temperature and the lowestVDD that the circuit will be expected to perform under. High temperature and low VDD both havea limiting effect on the loop gain, such that if the circuit functions at these extremes, the designercan be more assured of proper operation at other temperatures and supply voltage combina-tions. The output sine wave should not be clipped in the highest gain environment (highest VDD
and lowest temperature) and the sine output amplitude should be large enough in the lowest gainenvironment (lowest VDD and highest temperature) to cover the logic input requirements of theclock as listed in the device data sheet. OSC1 may have specified VIL and VIH Levels (refer tothe specific product data sheet for more information).
A method for improving start-up is to use a value of C2 greater than C1. This causes a greaterphase shift across the crystal at power-up which speeds oscillator start-up. Besides loading thecrystal for proper frequency response, these capacitors can have the effect of lowering loop gainif their value is increased. C2 can be selected to affect the overall gain of the circuit. A higher C2can lower the gain if the crystal is being overdriven (also, see discussion on Rs). Capacitancevalues that are too high can store and dump too much current through the crystal, so C1 and C2should not become excessively large. Unfortunately, measuring the wattage through a crystal isdifficult, but if you do not stray too far from the suggested values you should not have to beconcerned with this.
A series resistor, Rs, is added to the circuit if, after all other external components are selected tosatisfaction, the crystal is still being overdriven. This can be determined by looking at the OSC2pin, which is the driven pin, with an oscilloscope. Connecting the probe to the OSC1 pin will loadthe pin too much and negatively affect performance. Remember that a scope probe adds its owncapacitance to the circuit, so this may have to be accounted for in your design (i.e., if the circuitworked best with a C2 of 22 pF and the scope probe was 10 pF, a 33 pF capacitor may actuallybe called for). The output signal should not be clipping or flattened. Overdriving the crystal canalso lead to the circuit jumping to a higher harmonic level, or even, crystal damage.
The OSC2 signal should be a clean sine wave that easily spans the input minimum and maximumof the clock input pin. An easy way to set this is to again test the circuit at the minimum temper-ature and maximum VDD that the design will be expected to perform in, then look at the output.This should be the maximum amplitude of the clock output. If there is clipping, or the sine waveis distorted near VDD and VSS, increasing load capacitors may cause too much current to flowthrough the crystal or push the value too far from the manufacturer’s load specification. To adjustthe crystal current, add a trimmer potentiometer between the crystal inverter output pin and C2and adjust it until the sine wave is clean. The crystal will experience the highest drive currents atthe low temperature and high VDD extremes.
© 2006 Microchip Technology Inc. Advance Information DS39700A-page 6-13

PIC24F Family Reference Manual
The trimmer potentiometer should be adjusted at these limits to prevent overdriving. A seriesresistor, Rs, of the closest standard value can now be inserted in place of the trimmer. If Rs istoo high, perhaps more than 20 kΩ, the input will be too isolated from the output, making the clockmore susceptible to noise. If you find a value this high is needed to prevent overdriving thecrystal, try increasing C2 to compensate or changing the oscillator operating mode. Try to get acombination where Rs is around 10 kΩ or less and load capacitance is not too far from themanufacturer’s specification.
6.5.3 External Clock Input
In EC mode, the OSC1 pin is in a high-impedance state and can be driven by CMOS drivers. TheOSC2 pin can be configured as either an I/O or the clock output (FOSC/2) by selecting theOSCIOFCN bit (Configuration Word 2<5>). With OSCIOFCN set (Figure 6-5), the clock output isavailable for testing or synchronization purposes. With the OSCIOFCN clear (Figure 6-6), theOSC2 pin becomes a general purpose I/O pin. The feedback device between OSC1 and OSC2is turned off to save current.
Figure 6-5: External Clock Input Operation (OSCIOFCN = 1)
Figure 6-6: External Clock Input Operation (OSCIOFCN = 0)
6.6 PHASE LOCKED LOOP (PLL)
The PLL provides a fixed 4x multiplier which can be used with XT, HS and EC Primary Oscillatorsand the Internal Fast RC Oscillator (FRC). Whenever the clock source of the PLL is changed, thePLL ready timer must be reset to allow the PLL to synchronize to the new clock source. After theready timer has counted the required time, the PLL output is ready for use.
6.6.1 PLL Lock Status
The LOCK bit (OSCCON<5>) is a read-only status bit that indicates the lock status of the PLL. Itis automatically set after the typical time delay for the PLL to achieve lock, also designated asTLOCK. If the PLL does not stabilize properly during start-up, LOCK may not reflect the actualstatus of PLL lock, nor does it detect when the PLL loses lock during normal operation.
The LOCK bit is cleared at a Power-on Reset and on clock switches when the PLL is selectedas a destination clock source. It remains clear when any clock source not using the PLL isselected.
Refer to the Electrical Characteristics section in the specific device data sheet for furtherinformation on the PLL lock interval.
OSC1
OSC2FOSC/2
Clock fromExt. System
PIC24F
OSC1
I/O (OSC2)I/O
Clock fromExt. System
PIC24F
DS39700A-page 6-14 Advance Information © 2006 Microchip Technology Inc.

Section 6. OscillatorO
scillator
6
6.7 LOW-POWER SECONDARY OSCILLATOR (SOSC)The low-power or Secondary Oscillator (SOSC) is designed specifically for low-power operationwith a 32.768 kHz crystal. The oscillator is located on the SOSCO and SOSCI device pins andserves as a secondary crystal clock source for low-power operation. It can also drive Timer1 orthe Real-Time Clock/Calendar module for Real-Time Clock applications.
6.7.1 Enabling the Secondary Oscillator
The operation of SOSC is selected by the FNOSC Configuration bits and is further controlled bythe SOSCEN bit (OSCCON<1>). Setting SOSCEN enables the oscillator; the SOSCO andSOSCI pins are controlled by the oscillator and cannot be used for port I/O or other functions.
6.7.2 Secondary Oscillator Continuous Operation
The SOSC is always enabled when SOSCEN is set. Leaving the oscillator running at all times allowsa fast switch to the 32 kHz system clock for lower power operation. Returning to the faster mainoscillator will still require an oscillator start-up time if it is a crystal type source (see Section 6.5.2.2“Oscillator Start-up Timer”).
In addition, the oscillator will need to remain running at all times for Real-Time Clock application usingTimer1 or the RTCC module. Refer to Section 14. “Timers” and Section 29. “Real-Time Clockand Calendar (RTCC)” for further details.
6.7.3 Secondary Oscillator Intermittent Operation
When SOSCEN is cleared, the oscillator will only operate when it is selected as the currentdevice clock source (COSC2:COSC0 = 100). It will be disabled automatically if it is the currentdevice clock source and the device enters Sleep mode.
Note: An unlock sequence is required before a write to OSCCON can occur. Refer toSection 6.11.2 “Oscillator Switching Sequence” for more information.
© 2006 Microchip Technology Inc. Advance Information DS39700A-page 6-15
PIC24F Family Reference Manual
6.8 INTERNAL FAST RC OSCILLATOR (FRC)
The FRC oscillator is a fast (8 MHz nominal), internal RC oscillator. This oscillator is intended toprovide reasonable device operating speeds without the use of an external crystal or ceramicresonator. The PIC24F operates from the FRC oscillator whenever the COSC bits are ‘111’,‘001’ or ‘000’.
6.8.1 Enabling the FRC Oscillator
Since it serves as the reference clock during device initialization, the FRC oscillator is alwaysenabled at a Power-on Reset. After the device is configured and PWRT expires, FRC remainsactive only if it is selected as the device clock source.
6.8.2 FRC Postscaler Mode (FRCDIV)
Users are not limited to the nominal 8 MHz FRC output if they wish to use the fast internaloscillator as a clock source. An additional FRC mode, FRCDIV, implements a selectablepostscaler that allows the choice of a lower clock frequency from 7 different options, plus thedirect 8 MHz output. The postscaler is configured using the RCDIV2:RCDIV0 bits(CLKDIV<10:8>). Assuming a nominal 8 MHz output, available lower frequency options rangefrom 4 MHz (divide-by-2) to 31 kHz (divide-by-256). The range of frequencies allows users theability to save power at any time in an application by simply changing the RCDIV bits.
The FRCDIV mode is selected whenever the COSC bits are ‘111’.
6.8.3 FRC Oscillator with PLL Mode (FRCPLL)
The output of the FRC postscaler block may also be combined with the 4x PLL to produce anominal system clock of either 16 MHz or 32 MHz. Although somewhat less precise in frequencythan using the Primary Oscillator with a crystal or resonator, it still allows high-speed operationof the device without the use of external oscillator components.
The FRCPLL mode is selected whenever the COSC bits are ‘001’. In addition, this mode only func-tions when the direct or divide-by-2 FRC postscaler options are selected (RCDIV2:RCDIV0 = 000or 001).
6.9 INTERNAL LOW-POWER RC OSCILLATOR (LPRC)
The LPRC oscillator is separate from the FRC and oscillates at a nominal frequency of 31 kHz.LPRC is the clock source for the Power-up Timer (PWRT), WDT and FSCM circuits. It may alsobe used to provide a low-frequency clock source option for the device in those applications wherepower consumption is critical, and timing accuracy is not required.
6.9.1 Enabling the LPRC Oscillator
Since it serves the PWRT clock source, the LPRC oscillator is enabled at Power-on Resetswhenever the on-board voltage regulator is disabled. After the PWRT expires, the LPRCoscillator will remain on if any one of the following is true:
• The Fail-Safe Clock Monitor is enabled.
• The WDT is enabled.• The LPRC oscillator is selected as the system clock (COSC2:COSC0 = 100).
If none of the above is true, the LPRC will shut off after the PWRT expires.
DS39700A-page 6-16 Advance Information © 2006 Microchip Technology Inc.
Section 6. OscillatorO
scillator
6
6.10 FAIL-SAFE CLOCK MONITOR (FSCM)The Fail-Safe Clock Monitor (FSCM) allows the device to continue to operate even in the eventof an oscillator failure. The FSCM function is enabled by programming the FCKSM (Clock Switchand Monitor) bits in the Configuration Word 2. FSCM is only enabled when both bits are pro-grammed (‘00’). When FSCM is enabled, the LPRC internal oscillator will run at all times (exceptduring Sleep mode).
In the event of an oscillator failure, the FSCM will generate a clock failure trap and will switch thesystem clock to the FRC oscillator. The user will then have the option to either attempt to restartthe oscillator or execute a controlled shutdown. FSCM will monitor the system clock sourceregardless of its source or oscillator mode. This includes the Primary Oscillator for all oscillatormodes and the Secondary Oscillator, SOSC, when configured as the system clock.
The FSCM module takes the following actions when switching to the FRC oscillator:
1. The COSC bits are loaded with ‘000’.2. The CF status bit is set to indicate the clock failure.
3. The OSWEN control bit is cleared to cancel any pending clock switches.
6.10.1 FSCM Delay
On a POR, BOR or wake from Sleep mode event, a nominal delay (TFSCM) may be insertedbefore the FSCM begins to monitor the system clock source. The purpose of the FSCM delay isto provide time for the oscillator and/or PLL to stabilize when the Power-up Timer (PWRT) is notutilized. The FSCM delay will be generated after the internal System Reset signal, SYSRST, hasbeen released. Refer to Section 7. “Reset” for FSCM delay timing information.
The TFSCM interval is applied whenever the FSCM is enabled and the EC, HS or SOSC Oscillatormodes are selected as the system clock.
6.10.2 FSCM and Slow Oscillator Start-up
If the chosen device oscillator has a slow start-up time coming out of POR, BOR or Sleep mode,it is possible that the FSCM delay will expire before the oscillator has started. In this case, theFSCM will initiate a clock failure trap. As this happens, the COSC bits are loaded with the FRCoscillator selection. This will effectively shut off the original oscillator that was trying to start. Theuser can detect this situation and initiate a clock switch back to the desired oscillator in the TrapService Routine.
6.10.3 FSCM and WDT
The FSCM and the WDT both use the LPRC oscillator as their time base. In the event of a clockfailure, the WDT is unaffected and continues to run on the LPRC.
Note: For more information about the oscillator failure trap, refer to Section 8. “Interrupts”.
Note: Please refer to the Electrical Characteristics section of the specific device datasheet for TFSCM specification values.
© 2006 Microchip Technology Inc. Advance Information DS39700A-page 6-17

PIC24F Family Reference Manual
6.11 CLOCK SWITCHING OPERATION
With few limitations, applications are free to switch between any of the four clock sources(Primary, SOSC, FRC and LPRC) under software control and at any time. To limit the possibleside effects that could result from this flexibility, PIC24F devices have a safeguard lock built intothe switch process.
6.11.1 Enabling Clock Switching
To enable clock switching, the FCKSM1 Configuration bit must be programmed to ‘0’. (Refer tothe specific device data sheet for further details.) If the FCKSM1 Configuration bit is unpro-grammed (‘1’), the clock switching function and Fail-Safe Clock Monitor function are disabled.This is the default setting.
The NOSC control bits (OSCCON<10:8>) do not control the clock selection when clock switchingis disabled. However, the COSC bits (OSCCON<14:12>) will reflect the clock source selected bythe FNOSC Configuration bits.
The OSWEN control bit (OSCCON<0>) has no effect when clock switching is disabled. It is heldat ‘0’ at all times.
6.11.2 Oscillator Switching Sequence
At a minimum, performing a clock switch requires this basic sequence:
1. If desired, read the COSC bits (OSCCON<14:12>) to determine the current oscillatorsource.
2. Perform the unlock sequence to allow a write to the OSCCON register high byte.3. Write the appropriate value to the NOSC control bits (OSCCON<10:8>) for the new
oscillator source.4. Perform the unlock sequence to allow a write to the OSCCON register low byte.5. Set the OSWEN bit to initiate the oscillator switch.
Once the basic sequence is completed, the system clock hardware responds automatically asfollows:
1. The clock switching hardware compares the COSC status bits with the new value of theNOSC control bits. If they are the same, then the clock switch is a redundant operation.In this case, the OSWEN bit is cleared automatically and the clock switch is aborted.
2. If a valid clock switch has been initiated, the LOCK (OSCCON<5>) and the CF(OSCCON<3>) status bits are cleared.
3. The new oscillator is turned on by the hardware if it is not currently running. If a crystaloscillator must be turned on, the hardware will wait until the OST expires. If the newsource is using the PLL, then the hardware waits until a PLL lock is detected (LOCK = 1).
4. The hardware waits for the new clock source to stabilize and then performs the clockswitch.
5. The hardware clears the OSWEN bit to indicate a successful clock transition. In addition,the NOSC bit values are transferred to the COSC status bits.
6. The old clock source is turned off at this time, with the exception of LPRC (if WDT orFSCM are enabled) or SOSC (if SOSCEN remains set).
The timing of the transition between clock sources in shown in Figure 6-7.
Note: Primary Oscillator mode has three different submodes (XT, HS and EC) which aredetermined by the POSCMD Configuration bits. While an application can switch toand from Primary Oscillator mode in software, it cannot switch between the differentprimary submodes without reprogramming the device.
Note: The processor will continue to execute code throughout the clock switchingsequence. Timing-sensitive code should not be executed during this time.
DS39700A-page 6-18 Advance Information © 2006 Microchip Technology Inc.

Section 6. OscillatorO
scillator
6
Figure 6-7: Clock Transition Timing DiagramA recommended code sequence for a clock switch includes the following:
1. Disable interrupts during the OSCCON register unlock and write sequence.
2. Execute the unlock sequence for the OSCCON high byte by writing 78h and 9Ah toOSCCON<15:8> in two back-to-back instructions.
3. Write new oscillator source to NOSC control bits in the instruction immediately followingthe unlock sequence.
4. Execute the unlock sequence for the OSCCON low byte by writing 46h and 57h toOSCCON<7:0> in two back-to-back instructions.
5. Set the OSWEN bit in the instruction immediately following the unlock sequence.6. Continue to execute code that is not clock-sensitive (optional).7. Invoke an appropriate amount of software delay (cycle counting) to allow the selected
oscillator and/or PLL to start and stabilize.8. Check to see if OSWEN is ‘0’. If it is, the switch was successful.
The core sequence for unlocking the OSCCON register and initiating a clock switch is shown inExample 6-1.
Example 6-1: Basic Code Sequence for Clock Switching
Old Clock Source
New Clock Source
System Clock
Both Oscillators Active
OSWEN bit
New SourceEnabled
New SourceStable
Old SourceDisabled
Note: The system clock can be any selected source (Primary, Secondary, FRC or LPRC).
;Place the new oscillator selection in W0;OSCCONH (high byte) Unlock SequenceMOV #OSCCONH,w1MOV #0x78, w2MOV #0x9A, w3MOV.b w2, [w1]MOV.b w3, [w1];Set new oscillator selectionMOV.b WREG, OSCCONH;OSCCONL (low byte) unlock sequenceMOV #OSCCONL,w1MOV.b #0x01, w0MOV #0x46, w2MOV #0x57, w3MOV.b w2, [w1]MOV.b w3, [w1];Start oscillator switch operationMOV.b w0, [w1]
© 2006 Microchip Technology Inc. Advance Information DS39700A-page 6-19

PIC24F Family Reference Manual
6.11.2.1 CLOCK SWITCHING CONSIDERATIONS
When incorporating clock switching into an application, users should keep certain things in mindwhen designing their code.
• The OSCCON unlock sequence is extremely timing critical; the OSCCON register byte is only writable for one instruction cycle following the sequence. Some high-level languages, such as C, may not preserve the timing-sensitive sequence of instructions when compiled. When clock switching is required for an application written in a high-level language, it is best to create the routine in assembler and link it to the application, calling it as a function when it is required.
• If the destination clock source is a crystal oscillator, the clock switch time will be dominated by the oscillator start-up time.
• If the new clock source does not start, or is not present, the clock switching hardware will wait indefinitely for the new clock source. The user can detect this situation because the OSWEN bit remains set indefinitely.
• If the new clock source uses the PLL, a clock switch will not occur until lock has been achieved. The user can detect a loss of PLL lock because the LOCK bit will be cleared and the OSWEN bit is set.
• Switching to a low-frequency clock source, such as the Secondary Oscillator, will result in very slow device operation.
6.11.3 Aborting a Clock Switch
In the event the clock switch did not complete, the clock switch logic can be reset by clearing theOSWEN bit. This will abandon the clock switch process, stop and reset the OST (if applicable)and stop the PLL (if applicable). Typical assembly code for aborting a clock switch is shown inExample 6-2.
A clock switch procedure can be aborted at any time. A clock switch that is already in progresscan also be aborted by performing a second clock switch.
Example 6-2: Aborting a Clock Switch
6.11.4 Entering Sleep Mode During a Clock Switch
If the device enters Sleep mode during a clock switch operation, the clock switch operation isaborted. The processor keeps the old clock selection and the OSWEN bit is cleared. The PWRSAVinstruction is then executed normally.
Note: The application should not attempt to switch to a clock with a frequency lower than100 kHz when the Fail-Safe Clock Monitor is enabled. Clock switching in theseinstances may generate a false oscillator fail trap and result in a switch to theInternal Fast RC oscillator.
MOV #OSCCON,W1 ; pointer to OSCCONMOV.b #0x46,W2 ; first unlock codeMOV.b #0x57,W3 ; second unlock codeMOV.b W2, [W1] ; write first unlock codeMOV.b W3, [W1] ; write second unlock codeBCLR OSCCON,#OSWEN ; ABORT the switch
DS39700A-page 6-20 Advance Information © 2006 Microchip Technology Inc.

Section 6. OscillatorO
scillator
6
6.12 TWO-SPEED START-UPTwo-Speed Start-up is an automatic clock switching feature that is independent of the manuallycontrolled clock switching previously described. It helps to minimize the latency period, fromoscillator start-up to code execution, by allowing the microcontroller to use the FRC oscillator asa clock source until the primary clock source is available. This feature is controlled by the IESOConfiguration bit (Configuration Word 2<15>) and operates independently of the state of theFCKSM Configuration bits.
Two-Speed Start-up is particularly useful when an external oscillator is selected by the FNOSCConfiguration bits and a crystal-based oscillator (either a Primary or Secondary Oscillator) mayhave a longer start-up time. As an internal RC oscillator, the FRC clock source is available almostimmediately following POR or device wake-up.
With Two-Speed Start-up, the device starts executing code on POR in its default oscillator con-figuration (FRC). It continues to operate in this mode until the external oscillator source specifiedby the FNOSC Configuration bits becomes stable; at which time, it automatically switches to thatsource.
Two-Speed Start-up is used on wake-up from the Power-Saving Sleep mode. The device usesthe FRC clock source until the selected primary clock is ready. It is not used in Idle mode, as thedevice will be clocked by the currently selected clock source until the primary clock sourcebecomes available.
6.12.1 Special Considerations for Using Two-Speed Start-up
While using the FRC oscillator in Two-Speed Start-up, the device still obeys the normal commandsequences for entering Power-Saving modes, including serial PWRSAV instructions. In practice,this means that user code can change the NOSC2:NOSC0 bit settings or issue PWRSAV #SLEEPinstructions before the OST times out. This would allow an application to briefly wake-up, performroutine “housekeeping” tasks and return to Sleep before the device starts to operate from theexternal oscillator.
User code can also check which clock source is currently providing the device clocking by check-ing the status of the COSC2:COSC0 bits against the NOSC2:NOSC0 bits. If these two sets ofbits match, the clock switch has been completed successfully and the device is running from theintended clock source; the Primary Oscillator is providing the clock. Otherwise, FRC is providingthe clock during wake-up from Reset or Sleep mode.
© 2006 Microchip Technology Inc. Advance Information DS39700A-page 6-21

PIC24F Family Reference Manual
6.13 AC ELECTRICAL SPECIFICATIONS
Figure 6-8: External Clock Timing
OSC1
CLKO
Q4 Q1 Q2 Q3 Q4 Q1
OS20
OS25OS30 OS30
OS40 OS41
OS31OS31
Q1 Q2 Q3 Q4 Q2 Q3
Table 6-3: External Clock Timing Requirements
AC CHARACTERISTICSStandard Operating Conditions: 2.0V to 3.6V (unless otherwise stated)Operating temperature -40°C ≤ TA ≤ +85°C for Industrial
ParamNo.
Sym Characteristic Min Typ(1) Max Units Conditions
OS20 TOSC TOSC = 1/FOSC — — — —
OS25 TCY Instruction Cycle Time(2) 62.5 — DC ns
OS30 TosL,TosH
External Clock in (OSC1)High or Low Time
0.45 x TOSC — — ns EC
OS31 TosR,TosF
External Clock in (OSC1)Rise or Fall Time
— — 20 ns EC
OS40 TckR CLKO Rise Time(3) — 6 10 ns
OS41 TckF CLKO Fall Time(3) — 6 10 ns
Note 1: Data in “Typ” column is at 3.3V, 25°C unless otherwise stated. Parameters are for design guidance only and are not tested.
2: Instruction cycle period (TCY) equals two times the input oscillator time base period. All specified values are based on characterization data for that particular oscillator type under standard operating conditions with the device executing code. Exceeding these specified limits may result in an unstable oscillator operation and/or higher than expected current consumption. All devices are tested to operate at “Min.” values with an external clock applied to the OSC1/CLKI pin. When an external clock input is used, the “Max.” cycle time limit is “DC” (no clock) for all devices.
3: Measurements are taken in EC mode. The CLKO signal is measured on the OSC2 pin. CLKO is low for the Q1-Q2 period (1/2 TCY) and high for the Q3-Q4 period (1/2 TCY).
DS39700A-page 6-22 Advance Information © 2006 Microchip Technology Inc.

Section 6. OscillatorO
scillator
6
6.14 DESIGN TIPSQuestion 1: When looking at the OSC2 pin after power-up with an oscilloscope, there isno clock. What can cause this?
Answer: There are several possible causes:
1. Entering Sleep mode with no source for wake-up (such as WDT, MCLR or an interrupt).Verify that the code does not put the device to Sleep without providing for wake-up. If it ispossible, try waking it up with a low pulse on MCLR. Powering up with MCLR held low willalso give the crystal oscillator more time to start-up, but the Program Counter will notadvance until the MCLR pin is high.
2. The wrong clock mode is selected for the desired frequency. For a blank device, thedefault oscillator is FRCDIV. Most parts come with the clock selected in the Default modewhich will not start oscillation with a crystal or resonator. Verify that the clock mode hasbeen programmed correctly.
3. The proper power-up sequence has not been followed. If a CMOS part is powered throughan I/O pin prior to power-up, bad things can happen (latch-up, improper start-up, etc.). Itis also possible for brown-out conditions, noisy power lines at start-up and slow VDD risetimes to cause problems. Try powering up the device with nothing connected to the I/O,and power-up with a known, good, fast rise power supply. Refer to the power-up informa-tion in the specific device data sheet for considerations on brown-out and power-upsequences.
4. The C1 and C2 capacitors attached to the crystal have not been connected properly orare not the correct values. Make sure all connections are correct. The device data sheetvalues for these components will usually get the oscillator running; however, they justmight not be the optimal values for your design.
Question 2: Why does my device run at a frequency much higher than the resonantfrequency of the crystal?
Answer: The gain is too high for this oscillator circuit. Refer to Section 6.5.2.4 “Determiningthe Best Values for Oscillator Components” to aid in the selection of C2 (may need to behigher), Rs (may be needed) and clock mode (wrong mode may be selected). This is especiallypossible for low-frequency crystals, like the common 32.768 kHz.
Question 3: The design runs fine, but the frequency is slightly off. What can be done toadjust this?
Answer: Changing the value of C1 has some effect on the oscillator frequency. If a series reso-nant crystal is used, it will resonate at a different frequency than a parallel resonant crystal of thesame frequency call-out. Ensure that you are using a parallel resonant crystal.
Question 4: What would cause my application to work fine, but then suddenly quit orlose time?
Answer: Other than the obvious software checks that should be done to investigate losing time,it is possible that the amplitude of the oscillator output is not high enough to reliably trigger theoscillator input. Also, look at the C1 and C2 values and ensure that the device Configuration bitsare correct for the desired oscillator mode.
Question 5: If I put an oscilloscope probe on an oscillator pin, I don’t see what I expect.Why?
Answer: Remember that an oscilloscope probe has capacitance. Connecting the probe to theoscillator circuitry will modify the oscillator characteristics. Consider using a low capacitance(active) probe.
© 2006 Microchip Technology Inc. Advance Information DS39700A-page 6-23

PIC24F Family Reference Manual
6.15
RE
GIS
TE
R M
AP
SA
sum
mar
y of
the
regi
ster
s as
soci
ated
with
the
PIC
24F
Osc
illat
or m
odul
e is
pro
vide
d in
Tab
le6-
4.
Tab
le 6
-4:
Osc
illat
or
Reg
iste
r M
ap
File
Nam
eB
it 1
5B
it 1
4B
it 1
3B
it 1
2B
it 1
1B
it 1
0B
it 9
Bit
8B
it 7
Bit
6B
it 5
Bit
4B
it 3
Bit
2B
it 1
Bit
0A
ll R
eset
s
OS
CC
ON
—C
OS
C2
CO
SC
1C
OS
C0
—N
OS
C2
NO
SC
1N
OS
C0
CLK
LOC
K—
LOC
K—
CF
—S
OS
CE
NO
SW
EN
xxxx
(1)
CLK
DIV
RO
ID
OZE
2D
OZ
E1
DO
ZE0
DO
ZEN
RC
DIV
2R
CD
IV1
RC
DIV
0—
——
——
——
—0300
OS
CTU
N—
——
——
——
——
—TU
N<5
:0>
0000
Leg
end
:x
= u
nkno
wn
valu
e on
Res
et, —
= u
nim
plem
ente
d, r
ead
as ‘0
’. R
eset
val
ues
are
show
n in
hex
adec
imal
.N
ote
1:O
SC
CO
N r
egis
ter
Res
et v
alue
s de
pend
ent o
n th
e F
OS
C C
onfig
urat
ion
bits
and
by
type
of R
eset
.
DS39700A-page 6-24 Advance Information © 2006 Microchip Technology Inc.

Section 6. OscillatorO
scillator
6
6.16 RELATED APPLICATION NOTESThis section lists application notes that are related to this section of the manual. Theseapplication notes may not be written specifically for the PIC24F device family, but the conceptsare pertinent and could be used with modification and possible limitations. The currentapplication notes related to the Oscillator module are:
Title Application Note #
Crystal Oscillator Basics and Crystal Selection for rfPIC® and PICmicro® Devices AN826
Basic PICmicro® Oscillator Design AN849
Practical PICmicro® Oscillator Analysis and Design AN943
Making Your Oscillator Work AN949
Note: Please visit the Microchip web site (www.microchip.com) for additional applicationnotes and code examples for the PIC24F family of devices.
© 2006 Microchip Technology Inc. Advance Information DS39700A-page 6-25

PIC24F Family Reference Manual
6.17 REVISION HISTORY
Revision A (September 2006)This is the initial released revision of this document.
DS39700A-page 6-26 Advance Information © 2006 Microchip Technology Inc.