Oracle® Retail Merchandising System - Oracle Help Center
105
Oracle ® Retail Merchandising System Installation Guide Release 13.0 April 2008
-
Upload
khangminh22 -
Category
Documents
-
view
0 -
download
0
Transcript of Oracle® Retail Merchandising System - Oracle Help Center

Oracle® Retail Merchandising System
Installation Guide Release 13.0
April 2008

Oracle® Retail Merchandising System Installation Guide, Release 13.0
Copyright © 2008, Oracle. All rights reserved.
Primary Author: Paul Kehler
The Programs (which include both the software and documentation) contain proprietary information; they are provided under a license agreement containing restrictions on use and disclosure and are also protected by copyright, patent, and other intellectual and industrial property laws. Reverse engineering, disassembly, or decompilation of the Programs, except to the extent required to obtain interoperability with other independently created software or as specified by law, is prohibited.
The information contained in this document is subject to change without notice. If you find any problems in the documentation, please report them to us in writing. This document is not warranted to be error-free. Except as may be expressly permitted in your license agreement for these Programs, no part of these Programs may be reproduced or transmitted in any form or by any means, electronic or mechanical, for any purpose.
If the Programs are delivered to the United States Government or anyone licensing or using the Programs on behalf of the United States Government, the following notice is applicable:
U.S. GOVERNMENT RIGHTS Programs, software, databases, and related documentation and technical data delivered to U.S. Government customers are "commercial computer software" or "commercial technical data" pursuant to the applicable Federal Acquisition Regulation and agency-specific supplemental regulations. As such, use, duplication, disclosure, modification, and adaptation of the Programs, including documentation and technical data, shall be subject to the licensing restrictions set forth in the applicable Oracle license agreement, and, to the extent applicable, the additional rights set forth in FAR 52.227-19, Commercial Computer Software—Restricted Rights (June 1987). Oracle Corporation, 500 Oracle Parkway, Redwood City, CA 94065
The Programs are not intended for use in any nuclear, aviation, mass transit, medical, or other inherently dangerous applications. It shall be the licensee's responsibility to take all appropriate fail-safe, backup, redundancy and other measures to ensure the safe use of such applications if the Programs are used for such purposes, and we disclaim liability for any damages caused by such use of the Programs.
Oracle, JD Edwards, PeopleSoft, and Siebel are registered trademarks of Oracle Corporation and/or its affiliates. Other names may be trademarks of their respective owners.
The Programs may provide links to Web sites and access to content, products, and services from third parties. Oracle is not responsible for the availability of, or any content provided on, third-party Web sites. You bear all risks associated with the use of such content. If you choose to purchase any products or services from a third party, the relationship is directly between you and the third party. Oracle is not responsible for: (a) the quality of third-party products or services; or (b) fulfilling any of the terms of the agreement with the third party, including delivery of products or services and warranty obligations related to purchased products or services. Oracle is not responsible for any loss or damage of any sort that you may incur from dealing with any third party.
Value-Added Reseller (VAR) Language (i) the software component known as ACUMATE developed and licensed by Lucent Technologies Inc. of Murray Hill, New Jersey, to Oracle and imbedded in the Oracle Retail Predictive Application Server – Enterprise Engine, Oracle Retail Category Management, Oracle Retail Item Planning, Oracle Retail Merchandise Financial Planning, Oracle Retail Advanced Inventory Planning and Oracle Retail Demand Forecasting applications.
(ii) the MicroStrategy Components developed and licensed by MicroStrategy Services Corporation (MicroStrategy) of McLean, Virginia to Oracle and imbedded in the MicroStrategy for Oracle Retail Data Warehouse and MicroStrategy for Oracle Retail Planning & Optimization applications.
(iii) the SeeBeyond component developed and licensed by Sun MicroSystems, Inc. (Sun) of Santa Clara, California, to Oracle and imbedded in the Oracle Retail Integration Bus application.
(iv) the Wavelink component developed and licensed by Wavelink Corporation (Wavelink) of Kirkland, Washington, to Oracle and imbedded in Oracle Retail Store Inventory Management.
(v) the software component known as Crystal Enterprise Professional and/or Crystal Reports Professional licensed by Business Objects Software Limited (“Business Objects”) and imbedded in Oracle Retail Store Inventory Management.
(vi) the software component known as Access Via™ licensed by Access Via of Seattle, Washington, and imbedded in Oracle Retail Signs and Oracle Retail Labels and Tags.
(vii) the software component known as Adobe Flex™ licensed by Adobe Systems Incorporated of San Jose, California, and imbedded in Oracle Retail Promotion Planning & Optimization application.
(viii) the software component known as Style Report™ developed and licensed by InetSoft Technology Corp. of Piscataway, New Jersey, to Oracle and imbedded in the Oracle Retail Value Chain Collaboration application.
(ix) the software component known as WebLogic™ developed and licensed by BEA Systems, Inc. of San Jose, California, to Oracle and imbedded in the Oracle Retail Value Chain Collaboration application.
(x) the software component known as DataBeacon™ developed and licensed by Cognos Incorporated of Ottawa, Ontario, Canada, to Oracle and imbedded in the Oracle Retail Value Chain Collaboration application.


v
Contents Preface .............................................................................................................................. ix
Audience ................................................................................................................................ ix Related Documents............................................................................................................... ix Review Patch Documentation ............................................................................................. ix Oracle Retail Documentation on the Oracle Technology Network................................ ix Customer Support...................................................................................................................x Conventions.............................................................................................................................x
1 Preinstallation Tasks................................................................................................... 1 Implementation Capacity Planning......................................................................................1 Check Database Server Requirements .................................................................................2 Verify Single Sign-On.............................................................................................................2 Check Application Server Requirements.............................................................................3 Check Web Browser and Client Requirements...................................................................3 Create a UNIX user account to install the software ...........................................................3 Create Staging Directory for RMS Database Schema Files................................................3 Create Staging Directory for RMS Batch Files ....................................................................4 Create Staging Directory for RMS Application Server Files .............................................4
2 Database Installation Tasks........................................................................................ 5 Establish Database Partitioning Strategy.............................................................................5
Step 1: Modify partition_attributes.cfg ........................................................................6 Step 2: Modify Data Definition Files ............................................................................7 Step 3: Generate DDL for Tables – Run partition.ksh................................................7
Create the RMS Database.......................................................................................................8 Create the Database as Follows:.....................................................................................8 Create the Tablespaces: ...................................................................................................9 Create the Schema Owner ..............................................................................................9
Review RIB CLOB Settings ..................................................................................................10 Run the RMS Database Schema Installer...........................................................................10
Values to Remember for the Batch and Application Installers................................11 Resolving Errors Encountered During Database Schema Installation ...................11
Set Up Additional RMS Users .............................................................................................11 3 Batch Installation Tasks............................................................................................ 13
Resolving Errors Encountered During Batch Installation ...............................................14 RETL for RDW.......................................................................................................................14
4 Application Server Installation Tasks...................................................................... 15 Prepare Application Server for RMS..................................................................................15 Run the RMS Application Installer.....................................................................................15 Resolving Errors Encountered During Application Installation....................................17 Clustered Installations – Post-Installation Steps...............................................................17

vi
Oracle Configuration Manager ...........................................................................................18 RMS Reports Installed by the Application Installer.........................................................18 Test the RMS Application ....................................................................................................18
5 RMS Reports .............................................................................................................. 19 A Appendix: Oracle 10g Database Creation Scripts.................................................. 21 B Appendix: Configure Listener for External Procedures ........................................ 25 C Appendix: Tablespace Creation Scripts.................................................................. 27 D Appendix: RMS User Creation Script ...................................................................... 29 E Appendix: RMS RETL instructions .......................................................................... 30
Configuration ........................................................................................................................30 RETL ................................................................................................................................30 RETL user and permissions..........................................................................................30
F Appendix: Oracle Trade Management 13 System Expectations........................... 31 Install Scripts .........................................................................................................................31
Elc_comp_post_htsupld.sql..........................................................................................31 HTS Upload / Mass Update................................................................................................33
Calculation of Merchandise Processing Fee...............................................................34 Unit of Measure Conversions.......................................................................................34 Customs Entry Ref. Status ............................................................................................34 Customs Entry Totals ....................................................................................................35
G Appendix: RMS-RIB Custom Post- Processing...................................................... 37 H Appendix: RMS Database Schema Installer Screens ............................................ 39 I Appendix: RMS Batch Installer Screens ................................................................. 61 J Appendix: RMS Application Installer Screens........................................................ 65 K Appendix: Installer Silent Mode ............................................................................... 73
Repeating an Installation Attempt......................................................................................73 L Appendix: URL Reference ........................................................................................ 75
JDBC URL for a Database ....................................................................................................75 LDAP Derver URL................................................................................................................75 JNDI Provider URL for an Application .............................................................................75
M Appendix: Common Installation Errors.................................................................. 77 Database Installer Hangs on Startup..................................................................................77 Unreadable Buttons in the Installer....................................................................................77 “Could not create system preferences directory” Warning ............................................77 “Couldn't find X Input Context” Warnings ......................................................................77 Unresponsive Country and Currency Drop-Downs........................................................78 ConcurrentModificationException in Installer GUI.........................................................78 FRM-30064: Unable to parse statement select while compiling fm_ituda.fmb ............79 ORA-04031 (unable to allocate memory) error during database schema installation.79 X Error of failed request: BadWindow (invalid Window parameter) ..........................79

vii
N Appendix: Manual Application Installation ............................................................ 81 Set Environment Variables ..................................................................................................81 RMS Toolset Installation ......................................................................................................82 RMS Forms Installation........................................................................................................83 Configure Oracle Application Server 10g for RMS ..........................................................84
O Appendix: Application Deployment Method ........................................................... 89 P Appendix: Manual Batch Installation...................................................................... 91
Set Environment Variables ..................................................................................................91 Configure Make File .............................................................................................................91 Create Batch Libraries in Database.....................................................................................91 Re-Validate RMS Database Objects ....................................................................................92 Compile Batch Libraries.......................................................................................................92 Compile Batch Source Code ................................................................................................92
Q Appendix: Single Sign-On Resource Access Descriptors ................................... 93 R Appendix: Installation Order .................................................................................... 95


ix
Preface Oracle Retail Installation Guides contain the requirements and procedures that are necessary for the retailer to install Oracle Retail products.
Audience This Installation Guide is written for the following audiences: Database administrators (DBA) System analysts and designers Integrators and implementation staff
Related Documents You can find more information about this product in these resources: Oracle Retail Merchandising System Release Notes Oracle Retail Merchandising System Data Model Oracle Retail Merchandising System Online Help Oracle Retail Merchandising System User Guide Oracle Retail Merchandising System Operations Guide (volumes 1, 2, and 3) Oracle Retail Sales Audit User Guide Oracle Retail Trade Management User Guide Oracle Retail Merchandising Batch Schedule Oracle Retail Merchandising Data Conversion Operations Guide Oracle Retail Merchandising Implementation Guide
Review Patch Documentation For a base release (".0" release, such as 13.0), Oracle Retail strongly recommends that you read all patch documentation before you begin installation procedures. Patch documentation can contain critical information related to the base release, based on new information and code changes that have been made since the base release.
Oracle Retail Documentation on the Oracle Technology Network In addition to being packaged with each product release (on the base or patch level), all Oracle Retail documentation is available on the following Web site: http://www.oracle.com/technology/documentation/oracle_retail.html Documentation should be available on this Web site within a month after a product release. Note that documentation is always available with the packaged code on the release date.

x
Customer Support https://metalink.oracle.com When contacting Customer Support, please provide the following: Product version and program/module name Functional and technical description of the problem (include business impact) Detailed step-by-step instructions to re-create Exact error message received Screen shots of each step you take
Conventions Navigate: This is a navigate statement. It tells you how to get to the start of the procedure and ends with a screen shot of the starting point and the statement “the Window Name window opens.”
Note: This is a note. It is used to call out information that is important, but not necessarily part of the procedure.
This is a code sample It is used to display examples of code A hyperlink appears like this.

Installation Guide 1
1 Preinstallation Tasks
Implementation Capacity Planning There is significant complexity involved in the deployment of Oracle Retail applications, and capacity planning is site specific. Oracle Retail strongly suggests that before installation or implementation you engage your integrator (such as the Oracle Retail Consulting team) and hardware vendor to request a disk sizing and capacity planning effort. Sizing estimates are based on a number of factors, including the following: Workload and peak concurrent users and batch transactions Hardware configuration and parameters Data sparcity Application features utilized Length of time history is retained
Additional considerations during this process include your high availability needs as well as your backup and recovery methods.

Check Database Server Requirements
2 Oracle Retail Merchandising System
Check Database Server Requirements General Requirements for a database server running RMS include:
Supported on: Versions Supported:
Database Server OS UNIX based OS certified with Oracle RDBMS 10g Enterprise Edition (Oracle Enterprise Linux 4 Patch 5)
Database Server UNIX based OS certified with Oracle RDBMS 10g Enterprise Edition (Oracle Enterprise Linux 4 Patch 5) Oracle RDBMS 10g Release 2 Enterprise Edition (minimum 10.2.0.3 patchset required) with the following patches and components: Patches: 5397953 (ORA-07445: [KKPAPITGETALL()+2152]
[SIGSEGV] [ADDRESS NOT MAPPED TO OBJECT] [0X34)
5648872 (SCHEDULER ORA-07445 [OPIDSA()+321] WHEN SETTING UP CHAIN TEST)
5921386 (WRONG RESULT WITH MERGE JOINT OUTER IN THE EXECUTION PLAN)
RAC Only 5721821 (ORA-7445[KGLOBCL] OCCURED AND
INSTANCE WENT DOWN) Components: Oracle Database 10g Oracle Partitioning Oracle Net Services Oracle Call Interface (OCI) Oracle Programmer Oracle XML Development Kit
ANSI compliant C compiler (certified with OS and database version) Perl compiler 5.0 or later x-Windows interface
Verify Single Sign-On If a Single Sign-On is to be used, verify the Oracle Infrastructure Server 10g version 10.1.2.2 server has been installed. Verify the Mid-Tier server hosting Oracle Forms is registered with the Infrastructure Oracle Internet Directory.

Check Application Server Requirements
Installation Guide 3
Check Application Server Requirements General requirements for an application server capable of running RMS include:
Supported on: Versions Supported:
Application Server OS UNIX based OS certified with Oracle Application Server 10g version 10.1.2.2 (Oracle Enterprise Linux 4 Patch 5)
Application Server Oracle Application Server Forms and Reports 10g version 10.1.2.2 Patches: 5861907 (IAS 10.1.2.2 PATCHSET UPDATES
ORACLEHOMEPROPERTIES.XML WITH WRONG ARU_ID & ARU_I)
5632264 (NEED UPDATED TIMEZONE FILES (VERSION 4) FOR MORE DST RULE CHANGES)
Check Web Browser and Client Requirements General requirements for client running RMS include:
Requirement Version
Operating system Windows 2000 or XP
Display resolution 1024x768
Processor Pentium processor (minimum 450 MHz)
Memory minimum of 256 MB RAM
Sun JRE Plug-in 1.4.1+
Microsoft Internet Explorer version 5.5, 6.0 and higher
Create a UNIX user account to install the software The following user should be created on both the application and database servers. 1. Create a UNIX group named “dev”. 2. Create UNIX user named “oretail” and assign it to the “dev” group. This user will
install the RMS software.
Create Staging Directory for RMS Database Schema Files 1. Log into the database server as oretail. 2. Create a staging directory for the RMS database schema installation software. There
should be a minimum of 180 MB disk space available in this location. 3. Copy the rms13dbschema.zip file from the RMS 13.0 release to the staging directory.
This is referred to as INSTALL_DIR when installing database software. 4. Change directories to INSTALL_DIR and extract the rms13dbschema.zip file. This
creates an rms/dbschema subdirectory under INSTALL_DIR.

Create Staging Directory for RMS Batch Files
4 Oracle Retail Merchandising System
Create Staging Directory for RMS Batch Files 1. Log into the database server as oretail. 2. Create a staging directory for the RMS batch installation software or use the same
staging directory as created in the database schema step above. There should be a minimum of 30 MB disk space available in this location.
3. Copy the rms13batch.zip file from the RMS 13.0 release to the staging directory. This is referred to as INSTALL_DIR when installing the RMS batch software.
4. Change directories to INSTALL_DIR and extract the rms13batch.zip file. This creates an rms/batch subdirectory under INSTALL_DIR.
Create Staging Directory for RMS Application Server Files 1. Log into the application server as the oretail user. 2. Create a staging directory for the RMS application installation software. There
should be a minimum of 500 MB disk space available in this location. 3. Copy the file rms13appserver.zip from the RMS 13.0 release to staging directory.
This will be referred to as INSTALL_DIR when installing application software. 4. Change directories to INSTALL_DIR and extract the file rms13appserver.zip. This
will create an rms/application subdirectory under INSTALL_DIR.

Installation Guide 5
2 Database Installation Tasks
Establish Database Partitioning Strategy Partitioning is mandatory for specific tables. Please review this section in it’s entirety before proceeding with the installation. Sample Partitioning The RMS 13.0 database schema installer runs the partitioning script (partition.ksh) automatically using a sample partitioning strategy if you do not run the partition script yourself. This is acceptable for development or demo installations and allows for a simpler installation. However, the resulting partitioning strategy is NOT suitable for production environments. It is highly recommended that the Production Partitioning section below be followed rather than allowing the installer to implement the sample strategy. The installer can be used to install the RMS database schema regardless of the choice made here. Production Partitioning Requirements for mandatory and optional partitioning are defined in the Microsoft Excel spreadsheet located in INSTALL_DIR/ddl/part/RMS_partition_definition.xls. Since partitioning strategies are complex, this step should be implemented by an experienced individual who has a thorough understanding of partitioning principles and the data to be partitioned. Use the Microsoft Excel spreadsheet to determine an appropriate partitioning strategy (INSTALL_DIR/ddl/part/RMS_partition_definition.xls). The “Partition Method” column indicates the recommended partitioning option(s) for each table. Refer to the information in this file to modify the DDL for partitioned tables. This can be done by manually changing the file INSTALL_DIR/ddl/rms_part.tab or by implementing the process defined below. This file will be used later in the installation process.
Note: Refer to Oracle10g Database Concepts Release 2 Chapter 18 “Partition Tables and Indexes” for further details regarding partitioning concepts.
Hash partitions: To calculate the number of hash partitions and sub-partitions, enter values for the three parameters highlighted in yellow at the top of the RMS worksheet. Altering these values updates the “Number of Partitions” column for HASH partitioned/sub-partitioned tables. The values in these columns indicate the number of hash partitions/sub-partitions to create. Partition Factor: This value is used to adjust the number of hash partitions. It is based on the number of active items per location and transactions per location/day. If the number of items/location and/or transactions/store/day is low, the value of partition factor should be high. This calculates fewer hash partitions. The typical factor value ranges from two to four and in special cases, it can be ten or more.
Note: Changing the items/location and transactions/store/day fields on the worksheet does not automatically impact the factor value. They are used as a point of reference only.

Establish Database Partitioning Strategy
6 Oracle Retail Merchandising System
Sub-Partition Factor: This value is used to adjust the number of hash sub-partitions. The partition strategy for historical information determines the value of this number. If the number of range partitions is high, the value of sub-partition factor should be high to control the number of sub-partitions. Typically, this value will be 2. Locations: The total number of active stores and warehouses. Range partitions: Determine the purging strategy for all of the tables that are RANGE partitioned. Each partition should have a range of multiple key values. For example, if the strategy were to have data available for one year and to purge it every three months, five partitions would be created. In this case, four 3-month partitions and a “max value” partition to contain all data greater than the defined ranges would result. Refer to the “Comments” column and update the value in the “Number of Partitions” column. The value in this column indicates the number of range partitions to create. List partitions: The DAILY_ITEM_FORECAST and ITEM_FORECAST must be LIST partitioned. If number of partition keys is relatively static, change the value in the “Partition Method” column to LIST where allowed. This method ensures that each partition key has a separate partition and that none are empty. The “Number of Partitions” column is automatically updated with the proper number of locations in the event the partition method is changed. The value in this column indicates the number of list partitions to create.
Step 1: Modify partition_attributes.cfg Modify INSTALL_DIR/ddl/part/partition_attributes.cfg based on the partitioning strategy defined in RMS_partition_definition.xls. Changes to this file should be made only as indicated. partition_attributes.cfg file: (file is comma-delimited) Sample Entry: ITEM_LOC_HIST,EOW_DATE,RANGE,item_loc_hist.eow_date.date,64,LOC,HASH,item_loc_hist.loc.number,64,RETEK_DATA
Field 1: Table Name - Do not modify Field 2: Partition Key - Do not modify Field 3: Partition Method - Modify based on value in “Partition Method” column in RMS_partition_definition.xls - Valid values are RANGE, LIST, or HASH (case sensitive) Field 4: Partition Data Definition Filename - Do not modify - This field is ignored if Partition Method is not RANGE or LIST Field 5: Partition Hash Count – Modify based on value in “Hash Partitions Calculated” column in RMS_partition_definition.xls. This field is ignored if Partition Method is not HASH Field 6: Sub-Partition Key - Do not modify Field 7: Sub-Partition Method - Modify based on value in “Sub-partition Method” column in RMS_partition_definition.xls - Valid values are LIST or HASH (case sensitive) Field 8: Sub-Partition Data Definition Filename - Do not modify - This field is ignored if Sub-Partition Method is not RANGE or LIST Field 9: Sub-Partition Hash Count - Modify based on value in “Hash Sub-partitions Calculated” column in RMS_partition_definition.xls. This field is ignored if Sub-Partition Method is not HASH Field 10: Tablespace Name - Optional. Default is RETEK_DATA

Establish Database Partitioning Strategy
Installation Guide 7
Step 2: Modify Data Definition Files Tables partitioned or sub-partitioned by RANGE or LIST have a corresponding data definition file in the INSTALL_DIR/ddl/part/data_def directory and should not be removed or renamed. These files are used to define the data boundaries for each partition. Values must be entered in each file based on the data type of the “Partition Key” column in RMS_partition_definition.xls. Refer to the “Comments” column in this file for additional information. The value in the “Number of Partitions” column indicates the number of entries to place in the data definition file. The format of a data definition file name is <table name>.<partition key column>.<partition key data type>, e.g., item_loc_hist.eow_date.date. When placing data into these files, enter one data partition value per line. When entering varchar2 values in a data definition file, do not use quotation marks. When defining date values, use the DDMMYYYY format. sampletable.action_date.date:
01012004 01012005
sampletable.state.varchar2: Minnesota Iowa
sampletable.location.number: 1000 2000
When using RANGE partitioning, the data definition files will use the “value less than” concept. For example, in sampletable.action_date.date above, the first partition contains all data less than 01012004. The second partition contains all data greater than or equal to 01012004 and less than 01012005. A third “MAXVALUE” partition is automatically created for all data greater than or equal to 01012005. When using LIST partitioning, the data definition files use the “value equal to” concept. For example, in sampletable.state.varchar2 above, the first partition will contain all data equal to Minnesota. The second partition will contain all data equal to Iowa.
Step 3: Generate DDL for Tables – Run partition.ksh Execute INSTALL_DIR/ddl/part/partition.ksh at the UNIX command prompt. This script reads configuration information from the partition_attributes.cfg file and generates the partitioned DDL file INSTALL_DIR/ddl/rms_part.tab. This file is used later during the installation process.
Sample output from partition.ksh: <INSTALL_DIR>/ddl/part > ./partition.ksh ######################################################################## # partition.ksh: # This script will read the partition_attributes.cfg file and any referenced # data definition files and generate partitioned DDL. ######################################################################## # The non-partitioned DDL file is ../rms.tab. # The partitioned DDL file that will be generated is ../rms_part.tab. ######################################################################## Checking partition_attributes.cfg for errors Generating Partitioned DDL for DAILY_DATA Generating Partitioned DDL for DAILY_ITEM_FORECAST Generating Partitioned DDL for DAILY_SALES_DISCOUNT …

Create the RMS Database
8 Oracle Retail Merchandising System
partition.ksh has generated the DDL for partitioned tables in the ../rms_part.tab file. Completed successfully
Create the RMS Database It is assumed that Oracle 10g release 2, with appropriate patches, has already been installed. If not, refer to “Check Database Server Requirements” in Chapter 1, “Pre-Installation Tasks” before proceeding. Additionally, INSTALL_DIR in this section refers to the directory created in “Create Staging Directory for RMS Database Files”, Chapter 1. Please review the “Establish Partitioning Strategy” section before continuing. If a database has already been created, it is necessary to review the contents of this section to determine if all database components have been installed and configured properly. Also refer to Appendices A, B, C, D, and E.
Create the Database as Follows: 1. Login to UNIX as the oracle user; typically the user that owns the Oracle RDBMS
software. 2. Create the Oracle recommended OFA directory structure for the database
(datafile directories, adump, bdump, cdump, arch, create, exp, pfile, udump, utl_file_dir)
3. Place an entry in the oratab file for the database and execute oraenv to set the ORACLE_SID and ORACLE_HOME environment variables.
4. Copy INSTALL_DIR/create_db/init.ora to the $ORACLE_HOME/pfile directory and rename it to init${ORACLE_SID}.ora. Modify the parameters according to guidelines specified in this file.
5. Create a symbolic link from $ORACLE_HOME/pfile/init${ORACLE_SID}.ora to $ORACLE_HOME/dbs/init${ORACLE_SID}.ora.
6. Modify the INSTALL_DIR/create_db/crdb1.sql file. Refer to comments in this file regarding modifications that need to be made.
7. Login to SQL*Plus as SYSDBA and execute INSTALL_DIR/create_db/crdb1.sql. Review crdb1.log for errors and correct as needed.
8. Login to SQL*Plus as SYSDBA and execute INSTALL_DIR/create_db/crdb2.sql. Review crdb2.log for errors and correct as needed.
9. Login to SQL*Plus as SYSDBA and execute INSTALL_DIR/create_db/crdb3.sql. Review JServer.log, context.log and xdb_protocol.log for errors and correct as needed.
10. Configure the listener. The RMS application uses external procedure calls. Therefore, the listener.ora and tnsnames.ora files must be configured properly. Refer to Appendix B.

Create the RMS Database
Installation Guide 9
Create the Tablespaces: Modify INSTALL_DIR/create_db/create_rms_tablespaces.sql. Refer to Appendix C and the section below. Once this script has been modified, execute it in SQL*Plus as sys. Review create_rms_tablespaces.log for errors and correct as needed.
Note: The partitioning strategy determines the size of RMS tablespaces. Be aware that increasing the number of partitions may necessitate an increase in the size of the required tablespaces. It is important to be accurate when sizing tablespaces prior to the installation of RMS. Failure to do so results in “insufficient space” errors which require a complete re-install of RMS.
The INSTALL_DIR/create_db/create_rms_tablespaces.sql script contains the DDL for creating the required tablespaces which can extend up to the following sizes:
TABLESPACE_NAME SIZE
RETEK_INDEX 12G
RETEK_DATA 6G
LOB_DATA 2G
These sizes are sufficient if the initial values in the INSTALL_DIR/ddl/part/RMS_partition_definition.xls spreadsheet are used without modifications. Although using the initial values is not recommended for a production environment, it is possible to use them for the purpose of creating a small test environment. For additional assistance with production database sizing, contact Oracle Retail Services.
Create the Schema Owner Create an Oracle schema that will own the RMS application. Refer to Appendix D and the section below.
Note: The RMS schema owner must be created prior to running the RMS database schema installer. The installer will validate this user before proceeding with installation.
1. Change directories to INSTALL_DIR/utility 2. The create_user script relies on an empty role, developer, being created. Log into
sqlplus as sysdba and run the following command to create that role. SQL> create role developer;
3. Enter the following command to create the schema owner. SQL> @create_user.sql
The following prompts will occur: Schema Owner – the Oracle user that will own all RMS objects. Referred to in
this install guide as RMS13DEV Password – the password for RMS13DEV Temp Tablespace – the temporary tablespace for RMS13DEV
4. Check the log file create_user.log for any errors. This log file should be removed to prevent the password from being compromised.

Review RIB CLOB Settings
10 Oracle Retail Merchandising System
Review RIB CLOB Settings The RMS database schema installer runs the RIB objects into the RMS schema. There are some RIB settings passed to the RIB CLOB (Character Large Object) scripts that you can configure ahead of time. Review the rms_rib_install.properties file for the settings passed to the RIB CLOB scripts by the RMS installer. For more information on the RIB objects see the RIB documentation.
Run the RMS Database Schema Installer Note: Appendix H contains details on every screen and field in the database schema installer.
1. Change directories to INSTALL_DIR/rms/dbschema. 2. Source the oraenv script to set up the Oracle environment variables
(ORACLE_HOME, ORACLE_SID, PATH, etc)
Example: prompt$ . oraenv ORACLE_SID = [] ? mydb prompt$
Verify the ORACLE_HOME and ORACLE_SID variables after running this script.
Example: prompt$ echo $ORACLE_HOME /u00/oracle/product/mydbversion prompt$ echo $ORACLE_SID mydb
3. Set and export the following environment variables. These variables are needed in addition to the environment variables set by the oraenv script above.
Variable Description Example
NLS_LANG Locale setting for Oracle database client
NLS_LANG=AMERICAN_AMERICA.UTF8 export NLS_LANG
DISPLAY Address and port of X server on desktop system of user running install. Optional for dbschema installer
DISPLAY=<IP address>:0 export DISPLAY
4. If you are going to run the installer in GUI mode using an X server, you need to have the XTEST extension enabled. This setting is not always enabled by default in your X server. See Appendix M: Common Installation Errors for more details.
5. Run the install.sh script to start the installer.
Note: Below are the usage details for install.sh. The typical usage for GUI mode is no arguments.
install.sh [text | silent]
Depending on system resources, a typical installation takes anywhere from 30 minutes to two hours.
For the initial RMS 13.0 installation select the “Full” option on the “Full Install or Patch Option” screen. RMS 13.0.x patches released after RMS 13.0 will utilize the Patch option.

Set Up Additional RMS Users
Installation Guide 11
6. After the installer is complete, you can check its log file: rms-install-dbschema.<timestamp>.log. A .dbhistory file is created with a listing of all of the sql scripts that were run by the installer. A .dberrors file is created if any errors are encountered.
7. The installer leaves behind the ant.install.properties file for future reference and repeat installations. This file contains all inputs you provided, including passwords. As a security precaution, make sure that the file has restrictive permissions.
Example: chmod 600 ant.install.properties
Values to Remember for the Batch and Application Installers After it has completed the schema installation, the installer prints some database settings that you need for the batch and application installers. These settings are also written to the end of the installer log file (rms-install-dbschema.<time>.log). Record these settings for use during the batch and application installations.
Resolving Errors Encountered During Database Schema Installation If the database schema installer encounters any errors, it halts execution immediately and prints to the screen which SQL script it was running when the error occurred. It also writes the path to this script to the .dberrors file. When this happens, you must run that particular script using sqlplus. After you are able to complete execution of the script, delete the .dberrors file and run the installer again. You can run the installer in silent mode so that you don’t have to go through the installer screens again. See Appendix K of this document for instructions on silent mode. See Appendix M of this document for a list of common installation errors. Subsequent executions of the installer skip the SQL scripts which have already been executed in previous installer runs. This is possible because the installer maintains a .dbhistory file with a listing of the SQL scripts that have been run. If you have dropped the RMS schema and want to start with a clean install, you can delete the .dbhistory file so that the installer runs through all of the scripts again. It is recommended that you allow the installer to skip the files that it has already run.
Set Up Additional RMS Users 1. Additional users to the RMS application can be set up by executing the standard SQL
“create user” command. Once these users have been created, execute the following to grant proper privileges for these users. grant create session, create table, create procedure,create view, delete any table, insert any table, select any table, update any table, select any sequence, execute any procedure, create any procedure, drop any procedure, execute any procedure, create any table, drop any table to <userid>;
grant developer to <userid>;
Note: Evaluate the use of multiple roles and assign appropriately to users, based on user responsibilities.
2. After users are set up, create synonyms to the owner schema for all tables, views, sequences, functions, procedures, packages and types that the user has access to.

Set Up Additional RMS Users
12 Oracle Retail Merchandising System
3. Run the following scripts as the new user to give new users security privileges. SQL> @englishUser.sql SQL> @superUser.sql
These scripts can be found in the RMS database schema installer package under rms/dbschema/dbscripts_rms/utility.

Installation Guide 13
3 Batch Installation Tasks
Note: Appendix I contains details on every screen and field in the batch installer.
1. Change directories to INSTALL_DIR/rms/batch. This directory was created when the rms13batch.zip file was expanded under INSTALL_DIR.
2. Source the oraenv script to set up the Oracle environment variables (ORACLE_HOME, ORACLE_SID, PATH, etc)
Example: prompt$ . oraenv ORACLE_SID = [] ? mydb prompt$
Verify the ORACLE_HOME and ORACLE_SID variables after running this script.
Example: prompt$ echo $ORACLE_HOME /u00/oracle/product/mydbversion prompt$ echo $ORACLE_SID mydb
3. Set and export the following environment variables. These variables are needed in
addition to the environment variables set by the oraenv script above.
Variable Description Example
DISPLAY Address and port of X server on desktop system of user running install. Optional for batch installer
DISPLAY=<IP address>:0 export DISPLAY
4. If you are going to run the installer in GUI mode using an X server, you need to have the XTEST extension enabled. This setting is not always enabled by default in your X server. See Appendix M: Common Installation Errors for more details.
5. Run the install.sh script to start the installer.
Note: Below are the usage details for install.sh. The typical usage for GUI mode is no arguments.
install.sh [text | silent]
Depending on system resources, a typical RMS batch installation takes anywhere from 20 to 60 minutes..
6. After the installer is complete, you can check its log file: rms-install-batch.<timestamp>.log.

Resolving Errors Encountered During Batch Installation
14 Oracle Retail Merchandising System
7. The installer leaves behind the ant.install.properties file for future reference and repeat installations. This file contains all inputs you provided, including passwords. As a security precaution, make sure that the file has restrictive permissions.
Example: chmod 600 ant.install.properties
Resolving Errors Encountered During Batch Installation The RMS batch installer is a full install that starts from the beginning each time it is run. If you encounter errors in your environment, after resolving the issue you can safely run the batch installer again to attempt another installation.
RETL for RDW The RMS batch installer installs the RETLforRDW files under $MMHOME/rfx. See Appendix E of this document for more information about RETL for RDW.

Installation Guide 15
4 Application Server Installation Tasks
It is assumed that Oracle Application Server 10g version 10.1.2.2 (OAS) has already been installed. If not, refer to “Check Application Server Requirements” in Chapter 1, “Preinstallation Tasks” before proceeding. Additionally, INSTALL_DIR in this section refers to the directory created in “Create Staging Directory for RMS Application Files” in Chapter 1. In order to use Forms Builder 10g for manual compilation of RMS 13 forms modules, Oracle Developer Suite 10g Release 2 (10.1.2.2) must be used. Please refer to the Oracle Developer Suite 10g Release 2 documentation for the steps to manually compile objects.
Note: It is necessary to have $ORACLE_HOME/network/admin/tnsnames.ora file configured in this OAS installation. Forms will use this information for connectivity. Refer to Appendix B for an example setup of the tnsnames.ora file.
Prepare Application Server for RMS Note: ORACLE_HOME is the location where Oracle Application Server 10g (10.1.2.2) has been installed
1. The T2kMotif.rgb file that is sent out with Oracle Application Server 10g (10.1.2.0.2) must be modified. It is located at the following location:
$ORACLE_HOME/guicommon/tk/admin Make a copy of the file ORACLE_HOME/guicommon/tk/admin/Tk2Motif.rgb, and name it Tk2Motif.rgb_ORIG (for example). Modify the file Tk2Motif.rgb file so that it contains the following line:
Tk2Motif*fontMapCs: iso8859-2=UTF8
Run the RMS Application Installer Note: Appendix J contains details on every screen and field in the application installer.
1. Logon to your application server as the oretail user 2. Change directories to INSTALL_DIR/rms/application. This directory was created
when the rms13application.zip file was expanded under INSTALL_DIR.
Run the RMS Application Installer
16 Oracle Retail Merchandising System
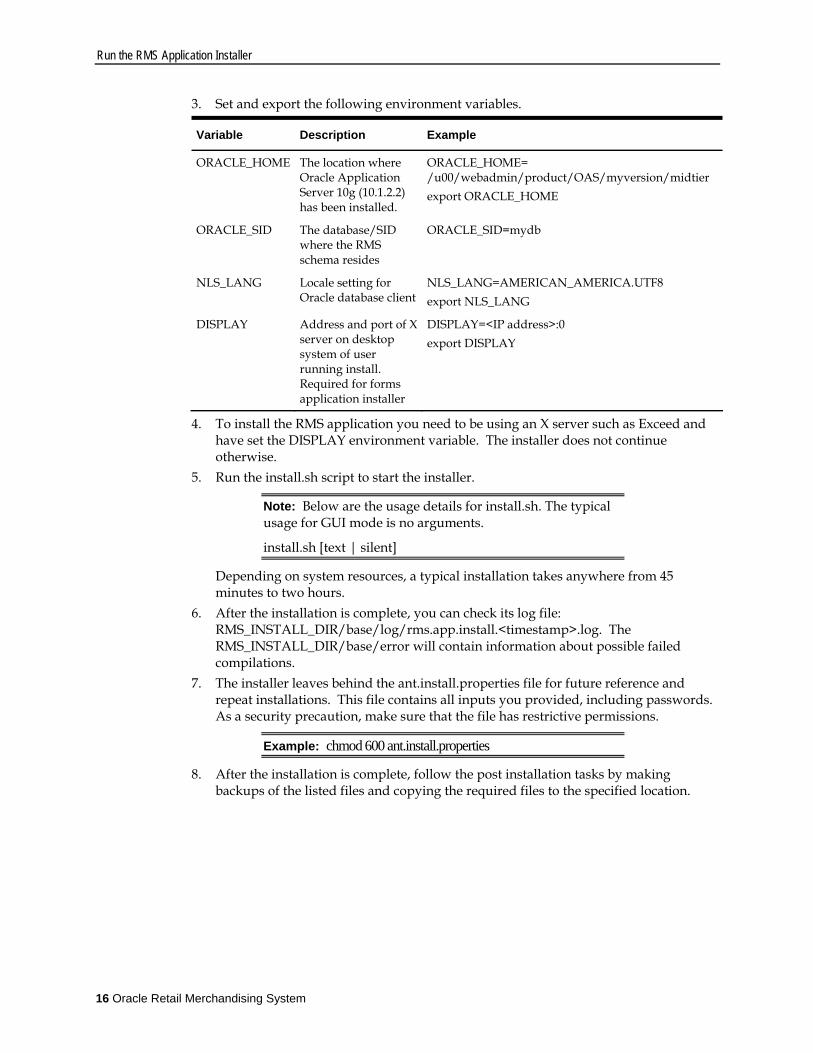
3. Set and export the following environment variables.
Variable Description Example
ORACLE_HOME The location where Oracle Application Server 10g (10.1.2.2) has been installed.
ORACLE_HOME= /u00/webadmin/product/OAS/myversion/midtier export ORACLE_HOME
ORACLE_SID The database/SID where the RMS schema resides
ORACLE_SID=mydb
NLS_LANG Locale setting for Oracle database client
NLS_LANG=AMERICAN_AMERICA.UTF8 export NLS_LANG
DISPLAY Address and port of X server on desktop system of user running install. Required for forms application installer
DISPLAY=<IP address>:0 export DISPLAY
4. To install the RMS application you need to be using an X server such as Exceed and have set the DISPLAY environment variable. The installer does not continue otherwise.
5. Run the install.sh script to start the installer.
Note: Below are the usage details for install.sh. The typical usage for GUI mode is no arguments.
install.sh [text | silent]
Depending on system resources, a typical installation takes anywhere from 45 minutes to two hours.
6. After the installation is complete, you can check its log file: RMS_INSTALL_DIR/base/log/rms.app.install.<timestamp>.log. The RMS_INSTALL_DIR/base/error will contain information about possible failed compilations.
7. The installer leaves behind the ant.install.properties file for future reference and repeat installations. This file contains all inputs you provided, including passwords. As a security precaution, make sure that the file has restrictive permissions.
Example: chmod 600 ant.install.properties
8. After the installation is complete, follow the post installation tasks by making backups of the listed files and copying the required files to the specified location.

Resolving Errors Encountered During Application Installation
Installation Guide 17
Example: ########################################################################### ## Oracle Application Server Configuration Tasks ## ########################################################################### Contact your Oracle administrator and have them make backups of the following files: /u00/webadmin/product/10.1.2.0.2_FULL/midtier/Apache/Apache/conf/httpd.conf /u00/webadmin/product/10.1.2.0.2_FULL/midtier/forms/java/oracle/forms/registry/Registry.dat /u00/webadmin/product/10.1.2.0.2_FULL/midtier/forms/server/formsweb.cfg /u00/webadmin/product/10.1.2.0.2_FULL/midtier/forms/admin/resource/US/fmrweb.res /u00/webadmin/product/10.1.2.0.2_FULL/midtier/forms/admin/resource/US/fmrweb.res_utf8.res Have the Oracle administrator copy everything in /projects/rmsse/con/installs/app/post to /u00/webadmin/product/10.1.2.0.2_FULL/midtier to update the files, and then restart the application server for the changes to take effect. example: cp -R * /u00/webadmin/product/10.1.2.0.2_FULL/midtier
Resolving Errors Encountered During Application Installation In the event a form or menu does not compile, go to <INSTALL_LOCATION>/base/error and see which objects didn’t compile. To try and manually recompile the object run <INSTALL_LOCATION>/base/forms.profile and run the following command: # frmcmp.sh userid=$UP module_type=form module=FORM_OR_MENU
You can also safely rerun the installer to see if the form compiles.
Clustered Installations – Post-Installation Steps If you are installing the RMS application to a clustered Oracle Application Server environment, there are some extra steps you need to take to complete the installation. In these instructions, the application server node whose ORACLE_HOME you used for the RMS application installer is referred to as the master node. All other nodes are referred to as the remote nodes. 1. To complete the RMS forms application install, the installer provided new versions of
formsweb.cfg and the newly-created env file(s) for the new RMS installation. The env files should be copied from the master node to the remote node(s). The entries added to formsweb.cfg for these new environments should be copied from the master node to the remote node(s).
Note: Do not copy the entire formsweb.cfg file from one node to another. Only copy the RMS entries appended to this file by the installer. There is node-specific information in this file that is different between ORACLE_HOME installations.

Oracle Configuration Manager
18 Oracle Retail Merchandising System
Oracle Configuration Manager The first OCM collector distribution that will be aware of the Oracle Retail applications is in development. This version of OCM is scheduled to be posted for download but is not yet available. Oracle Retail recommends that retailers download OCM 10.3.0 from ARU and use the "emCCR update_components" command to upgrade installed OCM collectors. See the OCM Installation and Administration Guide for further instructions. The Retail OCM Installer released with Oracle Retail 13.0 applications will install OCM 10.2.7. If the collector remains at version 10.2.7 and is installed in connected mode, an automatic update to version 10.3.0 is expected to occur later this year, the time at which 10.3.0 becomes a mandatory upgrade. For more information, see the following:
Metalink Note: 559539.1 The Oracle Configuration Manager Installer Guide describes the procedures and interface of the Oracle Retail Oracle Configuration Manager Installer that a retailer runs near the completion of its installation process.
RMS Reports Installed by the Application Installer The application installer installs RMS report files to $MMHOME/base/reports. These files should be installed into BI Publisher as documented in the RMS Reports chapter of this document.
Test the RMS Application Oracle Retail provides test cases that allow you to smoke test your installation. Refer to the Oracle Retail Merchandising Installation Test Cases document; Metalink Note 559560.1.

Installation Guide 19
5 RMS Reports
Verify that Oracle BI Publisher has been set up correctly; refer to the RMS Operations Guide Volume 3. 1. Click on the Admin tab and then click Report Repository under System Maintenance.
The Path variable should be set as part of the BI Publisher install, REPORTS_DIR. 2. In the default.env file, not this file may be renamed rms13.env, located here
ORACLE_HOME/forms/server/ add the following values: ORACLE_RMS_REPORTS_HOST=http://<server>:<port>:<context root for
reports> ORACLE_RMS_REPORTS_SERVER=<context root for reports> ORACLE_RMS_RWSERVER=/<view userid>/
3. Go to the REPORTS_DIR and create a folder with the same name as ORACLE_RMS_RWSERVER.
4. Copy the files and directories from INSTALL_DIR/rms/application/rms13/reports/* to folder created in step 3.


Installation Guide 21
A Appendix: Oracle 10g Database Creation Scripts
############################################################################### # Oracle 10.2.0.x Parameter file # # NOTES: Before using this script: # 1. Change <datafile_path>, <admin_path>, <utl_file_path>, and <hostname> # values as appropriate. # 2. Replace the word SID with the database name. # 3. Size parameters as necessary for development, test, and production environments. # ------------------------------------------------------------------------ # MAINTENANCE LOG # # Date By Parameter Old/New Notes # +------+ +---------+ +-----------------+ +-------------+ +-------------+ # 02/20/06 Oracle NA NA creation # ############################################################################### # ------------------------------------------------------------------------------- # The following SGA parameters are CRITICAL to the performance of the # database. The following settings are based on 1GB of allotted memory. # The SGA is composed of: # db_cache_size, log_buffer,java_pool_size, large_pool_size, shared_pool_size # ------------------------------------------------------------------------------- db_cache_size = 256M java_pool_size = 150M # 150M for initial db creation log_buffer = 10485760 shared_pool_size = 350M # 350M for initial db creation shared_pool_reserved_size = 35M # 10% of shared_pool_size # -------------------------------------------------------------------------------- # The following parameters do not affect SGA size; # -------------------------------------------------------------------------------- audit_file_dest = <admin_path>/adump background_dump_dest = <admin_path>/bdump compatible = 10.2.0 control_files = (<datafile_path>/control01.ctl ,<datafile_path>/control02.ctl) core_dump_dest = <admin_path>/cdump db_block_size = 8192 # Default is 2k; adjust before db creation, cannot change after db is created db_file_multiblock_read_count = 16 # Platform specific (max io size)/(block size) db_name = SID job_queue_processes = 5 # Oracle Retail required; number of cpu's + 1 local_listener = "(ADDRESS=(PROTOCOL=TCP)(HOST=<hostname>)(PORT=1521))" nls_calendar = GREGORIAN nls_date_format = DD-MON-RR # Oracle Retail required; if RDW database see later entry for proper format nls_language = AMERICAN # Default nls_numeric_characters = ".," # Should be explicitly set to ensure all users/batch get the same results nls_sort = BINARY # Should be explicitly set to ensure all sessions get the same order

Appendix: Oracle 10g Database Creation Scripts
22 Oracle Retail Merchandising System
nls_territory = AMERICA # Default open_cursors = 900 # Oracle Retail required (minimum=900); default is 50 optimizer_features_enable = 10.2.0.1 optimizer_mode = CHOOSE # Oracle Retail required pga_aggregate_target = 100M plsql_optimize_level = 2 # 10g change; use this setting to optimize plsql performance plsql_debug = false # 10g change; use this setting to optimize plsql peformance processes = 500 # Max number of OS processes that can connect to the db query_rewrite_enabled = TRUE # Oracle Retail required for function-based indexes session_cached_cursors = 900 # Oracle Retail required; 10g uses to cache sql cursors in pl/sql undo_management = AUTO undo_retention = 1800 # Currently set for 30 minutes; set to avg length of transactions in sec undo_tablespace = undo_ts user_dump_dest = <admin_path>/udump utl_file_dir = <utl_file_path> workarea_size_policy = auto # Should be set to auto when pga_aggregate_target is set # *** Set these parameters for Oracle Retail Data Warehouse (RDW) database *** #nls_date_format = DD-MON-RRRR # Required by MicroStrategy #query_rewrite_integrity = TRUSTED #star_transformation_enabled = TRUE #utl_file_dir = <Windows_utl_file_path>, <UNIX_util_file_path> # *** Archive Logging, set if needed *** #log_archive_dest_1 = 'location=<admin_path>/arch/' #log_archive_format = SIDarch_%r_%s_%t.log #log_archive_max_processes = 1 # Default:1 #log_archive_min_succeed_dest = 1 # Default:1 #log_buffer = 262144 # Set to (512K or 128K)*CPUs #log_checkpoint_interval = 51200 # Default:0 - unlimited #log_checkpoint_timeout = 7200 # Default:1800 seconds ------------------------------------------------------------------------------------- Script: crdb1.sql --- Execute as: sysdba --- Note: Before running this script: --- Modify <datafile_path> values. --- Modify SID values. --- Adjust sizes for redo logs, datafiles and tempfile ---------------------------------------------------------------------------------- spool crdb1.log STARTUP NOMOUNT pfile=${ORACLE_HOME}/dbs/initSID.ora CREATE DATABASE "SID" MAXDATAFILES 1000 CHARACTER SET UTF8 DATAFILE '<datafile_path>/system01.dbf' SIZE 500M AUTOEXTEND ON NEXT 100M MAXSIZE 2000M LOGFILE GROUP 1 ('<datafile_path>/redo1a.log') SIZE 1000M, GROUP 2 ('<datafile_path>/redo2a.log') SIZE 1000M, GROUP 3 ('<datafile_path>/redo3a.log') SIZE 1000M

Appendix: Oracle 10g Database Creation Scripts
Installation Guide 23
DEFAULT TEMPORARY TABLESPACE temp TEMPFILE '<datafile_path>/temp01.dbf' SIZE 5000M EXTENT MANAGEMENT LOCAL UNIFORM SIZE 1M UNDO TABLESPACE undo_ts DATAFILE '<datafile_path>/undo_ts01.dbf' SIZE 5000M SYSAUX DATAFILE '<datafile_path>/sysaux01.dbf' SIZE 500M AUTOEXTEND ON NEXT 100M MAXSIZE 2000M ; exit spool off ------------------------------------------------------------------------------------- --- Script: crdb2.sql --- Execute as: sysdba in 10.1.0.2 databases or higher --- Note: This script installs the data dictionary views in addition to --- granting necessary privileges to public. ------------------------------------------------------------------------------------- spool crdb2.log REM # install data dictionary views: PROMPT Running catalog.sql @$ORACLE_HOME/rdbms/admin/catalog.sql; PROMPT Running catblock.sql @$ORACLE_HOME/rdbms/admin/catblock.sql; PROMPT Running catproc.sql @$ORACLE_HOME/rdbms/admin/catproc.sql; PROMPT Running catoctk.sql @$ORACLE_HOME/rdbms/admin/catoctk.sql; PROMPT Running catrep.sql @$ORACLE_HOME/rdbms/admin/catrep.sql; PROMPT Running owminst.plb @$ORACLE_HOME/rdbms/admin/owminst.plb; REM * These privs needed for users to run proper grant code when creating users. grant select on dba_jobs to public with grant option; grant select on dba_roles to public with grant option; grant select on dba_role_privs to public with grant option; grant execute on dbms_rls to public with grant option; grant execute on dbms_alert to public; grant select_catalog_role to public; grant execute_catalog_role to public; grant execute on dbms_lock to public; grant execute on dbms_rls to public; grant execute on dbms_crypto to public; grant select on dba_sys_privs to public with grant option; REM * query rewrite privilege needed to create function-based indexes grant query rewrite to public; REM * dbms_system is needed for tracing grant execute on sys.dbms_system to public; PROMPT Creating PLAN table owned by SYSTEM @$ORACLE_HOME/rdbms/admin/utlxplan.sql PROMPT Creating public synonyn for the plan table create public synonym PLAN_TABLE for SYSTEM.PLAN_TABLE; connect SYSTEM/manager @$ORACLE_HOME/sqlplus/admin/pupbld.sql; @$ORACLE_HOME/sqlplus/admin/help/hlpbld.sql helpus.sql;
Appendix: Oracle 10g Database Creation Scripts
24 Oracle Retail Merchandising System
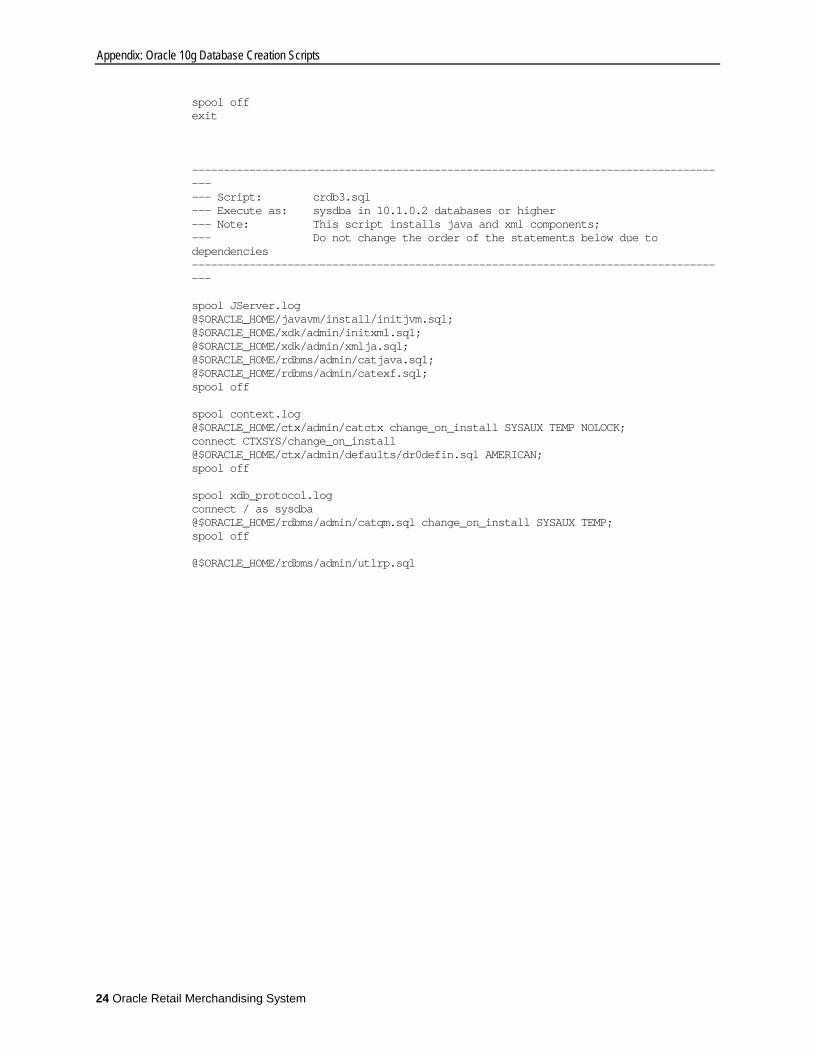
spool off exit ------------------------------------------------------------------------------------- --- Script: crdb3.sql --- Execute as: sysdba in 10.1.0.2 databases or higher --- Note: This script installs java and xml components; --- Do not change the order of the statements below due to dependencies ------------------------------------------------------------------------------------- spool JServer.log @$ORACLE_HOME/javavm/install/initjvm.sql; @$ORACLE_HOME/xdk/admin/initxml.sql; @$ORACLE_HOME/xdk/admin/xmlja.sql; @$ORACLE_HOME/rdbms/admin/catjava.sql; @$ORACLE_HOME/rdbms/admin/catexf.sql; spool off spool context.log @$ORACLE_HOME/ctx/admin/catctx change_on_install SYSAUX TEMP NOLOCK; connect CTXSYS/change_on_install @$ORACLE_HOME/ctx/admin/defaults/dr0defin.sql AMERICAN; spool off spool xdb_protocol.log connect / as sysdba @$ORACLE_HOME/rdbms/admin/catqm.sql change_on_install SYSAUX TEMP; spool off @$ORACLE_HOME/rdbms/admin/utlrp.sql

Installation Guide 25
B Appendix: Configure Listener for External
Procedures Note: This example illustrates the listener configuration required for external procedures. It does not include environment specific settings that may be needed. Consult Oracle Net Services guides for additional information.
################################################################# # File: listener.ora # Desc: Oracle Net8 listener file. # Notes: Modify <hostname> ################################################################# LISTENER = (DESCRIPTION_LIST = (DESCRIPTION = (PROTOCOL_STACK = (PRESENTATION = TTC) (SESSION = NS)) (ADDRESS = (PROTOCOL = tcp) (HOST = <hostname>) (PORT = 1521)) (ADDRESS = (PROTOCOL = IPC) (KEY = extproc_key)) ) ) SID_LIST_LISTENER = (SID_LIST = (SID_DESC = (PROGRAM = extproc) (SID_NAME = extproc_agent) (ENVS='EXTPROC_DLLS=ANY') ) )

Appendix: Configure Listener for External Procedures
26 Oracle Retail Merchandising System
Note: This example illustrates the configuration of net services names required for external procedures. It does not include environment specific settings that may be needed. Consult Oracle Net Services guides for additional information
################################################################# # File: tnsnames.ora # Desc: Net Services configuration file. # Note: Change these values: <service_name>, <oracle_sid>, <hostname>, # <global_name> ################################################################# EXTPROC_CONNECTION_DATA = (DESCRIPTION = (ADDRESS_LIST = (ADDRESS = (PROTOCOL = IPC)(Key = extproc_key))) (CONNECT_DATA = (SID = extproc_agent))) EXTPROC_CONNECTION_DATA.world = (DESCRIPTION = (ADDRESS_LIST = (ADDRESS = (PROTOCOL = IPC)(Key = extproc_key))) (CONNECT_DATA = (SID = extproc_agent))) <service_name> = (DESCRIPTION = (ADDRESS_LIST = (ADDRESS = (PROTOCOL = tcp)(host = <hostname>)(Port = 1521))) (CONNECT_DATA = (SID = <oracle_sid>) (GLOBAL_NAME = <global_name>))) <service_name>.world = (DESCRIPTION = (ADDRESS_LIST = (ADDRESS = (PROTOCOL = tcp)(host = <hostname>)(Port = 1521))) (CONNECT_DATA = (SID = <oracle_sid>) (GLOBAL_NAME = <global_name>))) Example: EXTPROC_CONNECTION_DATA = (DESCRIPTION = (ADDRESS_LIST = (ADDRESS = (PROTOCOL = IPC)(Key = extproc_key))) (CONNECT_DATA = (SID = extproc_agent))) EXTPROC_CONNECTION_DATA.world = (DESCRIPTION = (ADDRESS_LIST = (ADDRESS = (PROTOCOL = IPC)(Key = extproc_key))) (CONNECT_DATA = (SID = extproc_agent))) prod_db1 = (DESCRIPTION = (ADDRESS_LIST = (ADDRESS = (PROTOCOL = tcp)(host = server_01)(Port = 1521))) (CONNECT_DATA = (SID = prod_db1) (GLOBAL_NAME = prod_db1.world))) prod_db1.world = (DESCRIPTION = (ADDRESS_LIST = (ADDRESS = (PROTOCOL = tcp)(host = server_01)(Port = 1521))) (CONNECT_DATA = (SID = prod_db1) (GLOBAL_NAME = prod_db1.world)))

Installation Guide 27
C Appendix: Tablespace Creation Scripts -------------------------------------------------------------------------- Script: create_rms_tablespaces.sql --- Execute as: sysdba --- Note: Before running this script: --- Modify <datafile_path> values. --- Modify datafile storage parameters and sizes based -- on partitioning strategy. ----------------------------------------------------------------------- spool create_rms_tablespaces.log CREATE TABLESPACE RETEK_INDEX DATAFILE '<datafile_path>/retek_index01.dbf' SIZE 500M AUTOEXTEND ON NEXT 500M MAXSIZE 2000M EXTENT MANAGEMENT LOCAL SEGMENT SPACE MANAGEMENT MANUAL ; CREATE TABLESPACE RETEK_DATA DATAFILE '<datafile_path>/retek_data01.dbf' SIZE 500M AUTOEXTEND ON NEXT 500M MAXSIZE 2000M EXTENT MANAGEMENT LOCAL SEGMENT SPACE MANAGEMENT MANUAL ; CREATE TABLESPACE LOB_DATA DATAFILE '<datafile_path>/lob_data01.dbf' SIZE 50M AUTOEXTEND ON NEXT 100M MAXSIZE 2000M EXTENT MANAGEMENT LOCAL SEGMENT SPACE MANAGEMENT MANUAL ; ALTER TABLESPACE RETEK_INDEX ADD DATAFILE '<datafile_path>/retek_index02.dbf' SIZE 500M AUTOEXTEND ON NEXT 500M MAXSIZE 2000M ; ALTER TABLESPACE RETEK_INDEX ADD DATAFILE '<datafile_path>/retek_index03.dbf' SIZE 500M AUTOEXTEND ON NEXT 500M MAXSIZE 2000M ; ALTER TABLESPACE RETEK_INDEX ADD DATAFILE '<datafile_path>/retek_index04.dbf' SIZE 500M AUTOEXTEND ON NEXT 500M MAXSIZE 2000M ; ALTER TABLESPACE RETEK_INDEX ADD DATAFILE '<datafile_path>/retek_index05.dbf' SIZE 500M AUTOEXTEND ON NEXT 500M MAXSIZE 2000M ; ALTER TABLESPACE RETEK_INDEX ADD DATAFILE '<datafile_path>/retek_index06.dbf' SIZE 500M AUTOEXTEND ON NEXT 500M MAXSIZE 2000M ; ALTER TABLESPACE RETEK_DATA ADD DATAFILE '<datafile_path>/retek_data02.dbf' SIZE 500M AUTOEXTEND ON NEXT 500M MAXSIZE 2000M ;

Appendix: Tablespace Creation Scripts
28 Oracle Retail Merchandising System
ALTER TABLESPACE RETEK_DATA ADD DATAFILE '<datafile_path>/retek_data03.dbf' SIZE 500M AUTOEXTEND ON NEXT 500M MAXSIZE 2000M ; spool off exit

Installation Guide 29
D Appendix: RMS User Creation Script
Run the following commands as the sysdba user. Replace “schema_owner” with an appropriate account name. The empty role developer must be created before running the following commands. spool create_user.log create user &schema_owner identified by &password default tablespace RETEK_DATA temporary tablespace &temptblsp quota unlimited on RETEK_DATA quota unlimited on RETEK_INDEX quota unlimited on LOB_DATA / grant developer, select_catalog_role, alter session, analyze any, create any synonym, create any type, create database link, create library, create procedure, create public database link, create public synonym, create sequence, create session, create synonym, create table, create trigger, create view, drop any synonym, execute any procedure, execute any type, select any sequence, select any table, select any dictionary, query rewrite, create materialized view, create any context to &schema_owner / grant select on sys.dba_role_privs to &schema_owner / grant select on sys.dba_jobs to &schema_owner / grant select on sys.dba_roles to &schema_owner / spool off exit;

Installation Guide 30
E Appendix: RMS RETL instructions
This Appendix summarizes the RETL program features utilized in the RMS Extractions (RMS ETL). More information about the RETL tool is available in the latest RETL Programmer’s Guide. More information about RMS ETL is available in the RMS ETL operations guide.
Configuration RETL
Before trying to configure and run RMS ETL, install RETL version 10.3 or later which is required to run RMS ETL. Run the “verify_retl” script (included as part of the RETL installation) to ensure that RETL is working properly before proceeding.
RETL user and permissions RMS ETL should be installed and run as the RETL user. Additionally, the permissions should be set up as per the RETL Programmer’s Guide. RMS ETL reads data, creates, deletes and updates tables. (This is to ensure that weekly sales data is not pulled multiple times on subsequent extractions.) If these permissions are not set up properly, extractions will fail.
Environment variables In addition to the RETL environment variables (please see the Programmer’s Guide for version of RETL), you need to set MMHOME to the base directory for RMS ETL. This is the top level directory that selected during the installation process. So in .kshrc you should add a line like the following: export MMHOME=<base directory for RMS ETL>
rmse_config.env There are a couple variables that will need to change depending upon local settings: export DBNAME=int9i export RMS_OWNER=RMS13DEV export BA_OWNER=rmsint1012
Also, you will need to set the environment variable PASSWORD in either the rmse_config.env, .kshrc or some other location that can be included via one of those two means. For example, adding this line to the rmse_config.env will cause the password “bogus” to be used to log into the database: export PASSWORD=pass1

Installation Guide 31
F Appendix: Oracle Trade Management 13
System Expectations Install Scripts Elc_comp_post_htsupld.sql
This script is for the RTM product only. This needs to be applied only after all static install scripts have been run, oga, tariff_treatment, quota_category, country_tariff_treatment and hts_headings scripts have all been run followed by running the htsupld.pc program. The last step is running this script. This script will insert the Expense and Assessment Cost Components. This script needs to be run once for each country of import that the client is using.
Note: This script is expecting two parameters to be passed in (the user will be prompted for the parameters). The first parameter is country ID, this is the Import Country. The second parameter is Currency Code, this is the code of the currency that corresponds to the entered Import Country. Most likely this script will be run using the Base Country and the Primary Currency as defined in the System Variables form.
The inserted components include: MPFXX (Merchandise Processing Fee XX) – This component is used to store
Merchandise Processing Fee. In place of the ‘XX’ is the country code that is passed into the script. So if the Country is ‘US’, then there is one component created, ‘MPFUS’, with a description of ‘Merchandise Processing Fee US’. This leaves the client with the ability to create additional MPF components for each of the countries that they intend to import into. This component is inserted with a Component Rate of 100 percent. This rate should be modified to be the appropriate rate for the Import Country. This component is also set up as an ‘Always Default’ which means that it is defaulted to every Item/HTS combination.
HMFXX (Harbor Maintenance Fee XX) – This component is used to store Harbor Maintenance Fee. In place of the ‘XX’ will be the country code that is passed into the script. So if the Country is ‘US’, then there is one component created, ‘HMFUS’, with a description of ‘Harbor Maintenance Fee US’. This leaves the client with the ability to create additional HMF components for each of the countries that they intend to import into. This component is inserted with a Component Rate of 100 percent. This rate should be modified to be the appropriate rate for the Import Country.
TDTYXX (Total Duty XX) – This component is used to store the total of the duty for each Item/HTS or Order/Item/HTS combination. It totals all duties, taxes, and fees within the Ordering dialog. This total is added together with the Total Expense and the Item’s Cost to come up with the Total Estimated Landed Cost of the Item or Order/Item combination. This component should not be modified.

Appendix: Oracle Trade Management 13 System Expectations
32 Oracle Retail Merchandising System
VFDXX (Value For Duty XX) – This Computation Value Base (CVB) is used to store the value that duty should be calculated from. In place of the ‘XX’ is the country code that is passed into the script. So if the Country is ‘US’, then there is one CVB created, ‘VFDUS’, with a description of ‘Value for Duty US’. This leaves the client with the ability to create additional VFD CVBs for each of the countries that they intend to import into. Upon insert here, this CVB will only have one detail, which is ‘ORDCST’ (Order Cost). If the client needs additional expenses (we are making the assumption that only ‘Expense’ components will make up ‘Value for Duty’) to be used in the Value For Duty, they need to be added to VFDXX through SQL Plus. All automatically inserted Assessment components with a Calculation Basis of ‘Value’ will have ‘VFDXX’ as their CVB.
VFDXXXX (XX% of Value For Duty XX) – This component is used to store a percent of the CVB, Value For Duty. This is used in the case when you have an Item that is classified with multiple HTS codes. For example, a button-down shirt may have one HTS code for the cotton material that is 75 percent of the cost, and a second HTS code for the buttons that make up the other 25 percent. The duty components associated with the first HTS code would be need to be calculated from 75 percent of the entire Value for Duty. To accomplish this, the associated components would use ‘VFD75XX’ as their CVB instead of ‘VFDXX’. The detail component would be ‘VFD75XX’ and would have a Component Rate of 75 and a CVB of ‘VFDXX’, therefore, the component ‘VFD75XX’ would be 75% of the Value for Duty. More generically speaking, ‘VFDXXXX’ will be the only detail in an inserted CVB called ‘VFDXXXX’, where the first ‘XX’ is replaced with the percentage. In place of the second ‘XX’ will be the country code that is passed into the script. So if the Country is ‘US’, then there will be one component created, ‘VFD25US’, with a description of ‘25% of Value for Duty US’. This leaves the client with the ability to create additional VFD components for each of the countries that they intend to import into. The script will insert ‘VFD25XX’, ‘VFD50XX’, and ‘VFD75XX’, these are meant to be used as a guide if the client needs additional components with different percentages. These components should not be modified.
DTYXXXX (DTYXXXX) – These components are used to calculate duty for each HTS code. In place of the first ‘XX’ is the HTS code’s Duty Component Code concatenated with an ‘A’, ‘B’, or ‘C’ as needed for duty calculation. In place of the second ‘XX’ is the country code that is passed into the script. So if the Country is ‘US’, then there is one component created, ‘DTYXXUS’, with a description of ‘DTYXXUS’. This leaves the client with the ability to create additional components for each of the countries that they intend to import into. The Import Country for these components is the country code of the Base Country that is defined on the System Options table. This component is inserted with a Component Rate of 100 percent. This rate is overwritten with the appropriate Tariff Treatment rate upon calculation within the Item and Ordering dialogs. These components should not be modified.
DUTYXX(DUTYXX) – This component is used as a sub-total. In place of the ‘XX’ is the country code that is passed into the script. So if the Country is ‘US’, then there is one component created, ‘DUTYUS’, with a description of ‘DUTYUS’. This leaves the client with the ability to create additional components for each of the countries that they intend to import into. It contains the sum of all ‘DTYXXXX’ components each HTS code. This component has a CVB called ‘DUTYXX’ that contains every ‘DTYXXXX’ component as its details. This component should not be modified.

Appendix: Oracle Trade Management 13 System Expectations
Installation Guide 33
XXXXXXX (XXXXXXX) – Fees and Taxes are created using a concatenation of information. The Component ID consists of the Fee or Tax Class Code concatenated with the Fee or Tax Component Code, and an ‘A’ or ‘B’ as needed for calculation, and then the import country. For example, there is an existing Fee Class Code (also referred to as Fee Type) which is ‘053’, its Fee Component Code is ‘1’, and importing into the US, so there is a component created that has an ID of ‘0531AUS’. The descriptions are the same as the Component ID and can/should be modified to be clearer. Other than the description, these components should not be modified.
ADXX (Anti-Dumping XX) – This component contains the Anti-Dumping charge for each Item/HTS code. In place of the ‘XX’ is the country code that is passed into the script. So if the Country is ‘US’, then there is one component created, ‘ADUS’, with a description of ‘Anti-Dumping US’. This leaves the client with the ability to create additional components for each of the countries that they intend to import into. This component should not be modified.
CVDXX (Countervailing Duty XX) – This component contains the Countervailing Duty charge for each Item/HTS code. In place of the ‘XX’ will be the country code that is passed into the script. So if the Country is ‘US’, then there is one component created, ‘CVDUS’, with a description of ‘Countervailing Duty US’. This component should not be modified.
HTS Upload / Mass Update There are several install scripts that must be run prior to HTS Upload to populate the following tables. These are one-time installs upon implementation of the product and must be maintained by the client: ELC_COMP QUOTA_CATEGORY (via the quota_category.sql script) OGA (via the oga.sql script) COUNTRY_TARIFF_TREATMENT (via the country_tariff_treatment.sql script) HTS_CHAPTER (via the hts_headings.sql script) TARIFF_TREATMENT (via the tariff_treatment.sql script)
After the initial load of the HTS data from executing the HTS Upload program. One additional install script must be run to populate the following tables with additional information: ELC_COMP, CVB_HEAD, CVB_DETAIL (via the elc_comp_post_htsupld.sql script)
The initial load of HTS information using a Customs provided tape and subsequent execution of the HTS Upload program will populate and update the following tables: HTS HTS_TARIFF_TREATMENT HTS_OGA HTS_FEE HTS_TAX HTS_TT_EXCLUSIONS

Appendix: Oracle Trade Management 13 System Expectations
34 Oracle Retail Merchandising System
The following tables need to be populated by the client, but will be updated via the HTS Upload program: HTS_AD HTS_CVD HTS_REFERENCE
The following tables need to be populated and maintained by the client: HTS_CHAPTER_RESTRAINTS
Calculation of Merchandise Processing Fee This particular cost component is the only Cost Component that is calculated with a Min/Max Range for each Customs Entry. This range is defined on the MPF_MIN_MAX table (note: this table does not have a corresponding form and needs to be populated by the client via SQL Plus. In order to process MPF the MPF_MIN_MAX table must be populated for the import country or else the calculation function errors out during processing.). If a client does not use Merchandise Processing Fee, but has a similar component, they can use the MPF_MIN_MAX table and the MPFXX component to accomplish the same result. They simply need to change the Component Description and Rate. Within the Customs Entry dialog, MPFXX is defaulted in along with all other assessments that are associated with each Order/Item combination. Once associated with the Entry, MPF is recalculated and checked to see if the value falls within the Min/Max Range. If not, the value is modified to be within the range and then allocated across all of the items on the Entry. Because this value is being calculated by the system, the user is not allowed to modify the rate or value of any MPF components within the Customs Entry dialog.
Unit of Measure Conversions The internal process that calculates and distributes MPF charges on-line requires Unit of Measure (UOM) conversions in multiple instances. If a particular UOM conversion is missing the processing stops and a message will be displayed indicating that there is insufficient UOM information to continue. If this should occur, you must exit the dialog that generated the error add the missing conversion information and re-enter the dialog for the MPF charges to be processed.
Customs Entry Ref. Status There are 4 possible CE Ref. Statuses for each Customs Entry. They are ‘Worksheet’, ‘Send’, ‘Downloaded’, and ‘Confirmed’. In general when an Entry is created it is in ‘Worksheet’ status. Once all of the necessary information has been added, the user is set the Status to ‘Send’, indicating that the Entry is ready to be sent to the Broker. That night in the nightly batch run, the Entry is downloaded to the Broker (cednld.pc). Once the download process is complete, the Status is automatically set to ‘Downloaded’; a user can never set the Status to this value manually. At that point once the user receives confirmation from the Broker, makes any necessary changes, and is sure that the information is correct, they can set the CE Ref. Status to ‘Confirmed’. From that point on the Status cannot be changed, however most of the fields on the CE Header form remain editable. All information on the CE Shipment form is view only. Also, all information on the CE Order/Item form is view only except for the Cleared Quantity, Cleared Quantity UOM, Apply button, and Comments fields. And finally all information in the CE Charges form will be view only as well.

Appendix: Oracle Trade Management 13 System Expectations
Installation Guide 35
Since some clients may prefer not to download their Entries to a Broker, the user will have the ability to set the CE Ref. Status from ‘Worksheet’ directly to ‘Confirmed’.
Customs Entry Totals Total Duty contains the sum of the duty charges (any component beginning with
‘DTY’) for each item times the associated item’s Manifest Item quantity, summed together for all items on the entry.
Total Taxes contains the sum of the tax charges (any component beginning with a tax type (see attached document for a description of taxes)) for each item times the associated item’s Manifest Item quantity, summed together for all items on the entry.
Total Other contains the sum of all other charges (including fees) for each item times the associated item’s Manifest Item quantity, summed together for all items on the entry.
Total VFD contains the Value for Duty (which can be made up of order cost plus other dutiable expenses such as selling commission, royalties, etc.) times the associated item’s Manifest Item quantity, summed together for all items on the entry.
Total Est. Assessments contains the sum of the estimated duty/fees/taxes for each item, calculated from the Purchase Order/Item HTS Assessments, times the associated item’s Manifest Item quantity, summed together for all items on the entry.
Total Act. Assessments contains the sum of the Total Duty, Total Taxes, and Total Other values.


Installation Guide 37
G Appendix: RMS-RIB Custom Post-
Processing The following are instructions for installing RMS – RIB Custom Post Processing. This should be completed after the RIB has been installed. Un-tar the tarfile into the RIB INSTALL subdirectory. This creates a RIBCustPostProcXXXX subdirectory. Copy the jar file desired from this subdirectory (there are currently 2 custom
postprocessing jar files) into both of the subdirectories. – $EHOME/client/classes – $EHOME/server/registry/repository/<RIB SCHEMA>/runtime/classes
Rename the jar file to custom-postprocess-impl.jar


Installation Guide 39
H Appendix: RMS Database Schema Installer
Screens You need the following details about your environment for the installer to successfully create the RMS database schema. Depending on the options you select, you may not see some screens or fields.
Screen: Full Install or Patch Option
Fields on this Screen:
Field Title Full or Patch
Field Description
The installer can create the full baseline schema or apply a patch. For the RMS 13.0 release, select Full. If installing a patch released after 13.0, select Patch and the installer will prompt for the location of the patch files on the next screen.
Example Full
Notes

Appendix: RMS Database Schema Installer Screens
40 Oracle Retail Merchandising System
Screen: Apply an RMS DB Patch
Fields on this Screen:
Field Title Patch Directory
Field Description
This page appears if the Patch option is selected on the previous screen. Provide the directory path to the downloaded patch you want to install. The installer will run only the patch you provide. Note: The directory you choose must contain a dbstart.sql file.
Example /my/rms/patch/dir
Notes

Appendix: RMS Database Schema Installer Screens
Installation Guide 41
Screen: DataSourceDetails
Fields on this Screen:
Field Title RMS Schema Owner
Field Description
Provide the RMS database user here. The installer will log into the database as this user to create the RMS schema. This user must already exist in the database when the RMS database schema installer is run.
Example RMS
Notes
Field Title RMS Schema Password
Field Description
Database password for the RMS Schema Owner.
Notes
Field Title RMS Oracle SID
Field Description
Oracle system identifier for the database where RMS will be installed
Example rmsdb
Notes
The database settings provided are validated by the installer when you advance to the next screen.

Appendix: RMS Database Schema Installer Screens
42 Oracle Retail Merchandising System
Screen: Primary Country
Fields on this Screen:
Field Title Primary Country
Field Description
Choose your primary country from the list provided.
Example US
Notes

Appendix: RMS Database Schema Installer Screens
Installation Guide 43
Screen: Primary Currency
Fields on this Screen:
Field Title Primary Currency
Field Description
Choose your primary currency from the list provided.
Example USD
Notes

Appendix: RMS Database Schema Installer Screens
44 Oracle Retail Merchandising System
Screen: Primary Language
Fields on this Screen:
Field Title Primary Language
Field Description
Choose your primary language from the list provided. You will have an opportunity to select a secondary language on another screen.
Example en
Notes

Appendix: RMS Database Schema Installer Screens
Installation Guide 45
Screen: Secondary Language
Fields on this Screen:
Field Title Secondary Language
Field Description
This screen only appears if English is selected as the primary language. Choose your secondary language from the list provided. Among the individual language choices are the (NONE) and (ALL) selections, which will use no secondary language or all secondary languages, respectively.
Example none
Notes

Appendix: RMS Database Schema Installer Screens
46 Oracle Retail Merchandising System
Screen: Value-Added Tax (VAT)
Fields on this Screen:
Field Title Enable VAT?
Field Description
Select Yes if you will use VAT.
Example No
Notes

Appendix: RMS Database Schema Installer Screens
Installation Guide 47
Screen: Class Level Value-Added Tax
Fields on this Screen:
Field Title Enable Class-Level VAT?
Field Description
You said yes to the VAT setting. Select Yes in this field to allow tax rates to be maintained at the class level. Select No to restrict tax rates.
Example No
Notes

Appendix: RMS Database Schema Installer Screens
48 Oracle Retail Merchandising System
Screen: Multi-Channel Retailing
Fields on this Screen:
Field Title Enable Multi-Channel setting?
Field Description
If you are operating multiple sales channels or think you might do so in the future, select Yes for this setting.
Example Yes
Notes

Appendix: RMS Database Schema Installer Screens
Installation Guide 49
Screen: Bracket Costing
Fields on this Screen:
Field Title Enable Bracket Costing?
Field Description
Select Yes if you allow vendors to use a bracketed costing structure.
Example Yes
Notes

Appendix: RMS Database Schema Installer Screens
50 Oracle Retail Merchandising System
Screen: Wholesale
Fields on this Screen:
Field Title Enable Wholesale?
Field Description
TODO
Example Yes
Notes

Appendix: RMS Database Schema Installer Screens
Installation Guide 51
Screen: Multiple Sets of Books
Fields on this Screen:
Field Title Enable Multiple Sets of Books?
Field Description
TODO
Example Yes
Notes

Appendix: RMS Database Schema Installer Screens
52 Oracle Retail Merchandising System
Screen: Supplier Sites
Fields on this Screen:
Field Title Enable Supplier Sites?
Field Description
TODO
Example Yes
Notes

Appendix: RMS Database Schema Installer Screens
Installation Guide 53
Screen: Freight Terms Loading
Fields on this Screen:
Field Title Load this data
Field Description
Freight terms data is provided with the RMS release. Select this option to insert it into the schema. If data will be pulled from another system such as EBS financials then do not select this option.
Notes

Appendix: RMS Database Schema Installer Screens
54 Oracle Retail Merchandising System
Screen: Calendar Type
Fields on this Screen:
Field Title Calendar Type
Field Description
TODO
Example 454 Calendar
Notes
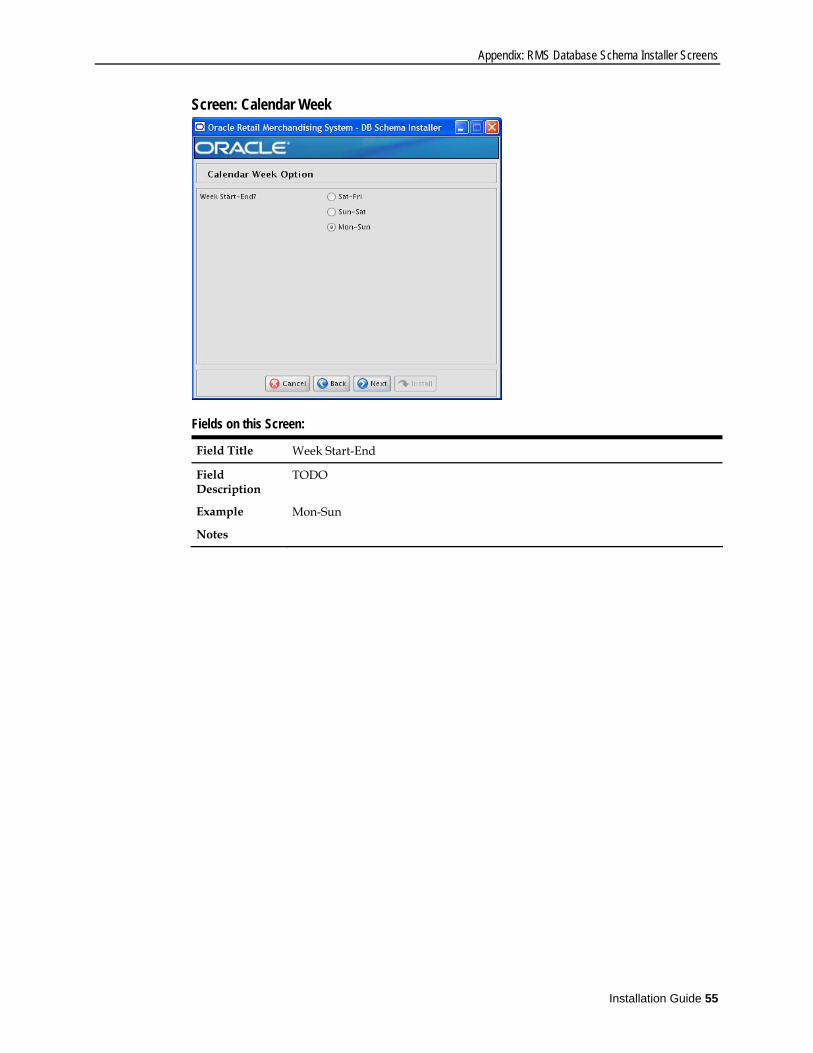
Appendix: RMS Database Schema Installer Screens
Installation Guide 55
Screen: Calendar Week
Fields on this Screen:
Field Title Week Start-End
Field Description
TODO
Example Mon-Sun
Notes

Appendix: RMS Database Schema Installer Screens
56 Oracle Retail Merchandising System
Screen: Calendar VDate
Fields on this Screen:
Field Title VDate
Field Description
TODO
Example 01-MAR-2001
Notes

Appendix: RMS Database Schema Installer Screens
Installation Guide 57
Screen: Data to Load
Fields on this Screen:
Field Title Insert demo data
Field Description
Indicate whether or not the demo data scripts should be run for RMS.
Notes

Appendix: RMS Database Schema Installer Screens
58 Oracle Retail Merchandising System
Screen: Demo Data – Number of Items
Fields on this Screen:
Field Title Number of demo items
Field Description
If you chose to insert demo data, this setting will determine how many demo items to create.
Example 5
Notes

Appendix: RMS Database Schema Installer Screens
Installation Guide 59
Screen: Transaction Level
Fields on this Screen:
Field Title Transaction Level
Field Description
If you chose to insert demo items on the previous screen, you are asked to provide a transaction level value for these items.
Example 1
Notes

Appendix: RMS Database Schema Installer Screens
60 Oracle Retail Merchandising System
Screen: Summary
Fields on this Screen: All of the fields on this summary screen are read-only. In GUI mode of the installer, this screen will provide the opportunity to review inputs and go back to previous screens to correct them if necessary.

Installation Guide 61
I Appendix: RMS Batch Installer Screens
You need the following details about your environment for the installer to successfully compile and install the RMS batch programs. Depending on the options you select, you may not see some screens or fields.
Screen: Welcome
There are no fields on this screen. The Welcome screen contains information about the RMS Batch Installer and prerequisites.

Appendix: RMS Batch Installer Screens
62 Oracle Retail Merchandising System
Screen: DataSourceDetails
Fields on this Screen:
Field Title RMS Schema Owner
Field Description
Provide the RMS database user here. The installer will log into the database as this user to create RMS library objects and query for data to generate batch source files. This user must already exist in the database and have the RMS tables installed.
Example RMS
Notes
Field Title RMS Schema Password
Field Description
Database password for the RMS Schema Owner.
Notes
Field Title RMS Oracle SID
Field Description
Oracle system identifier for the database where RMS will be installed
Example rmsdb
Notes

Appendix: RMS Batch Installer Screens
Installation Guide 63
Screen: Batch Installation Directory
Fields on this Screen:
Field Title Batch Installation Directory
Field Description
Location where the installer will install the batch source and then compile it. This will be the permanent location for the RMS batch programs.
Example /u00/oracle/rmsbatch
Notes

Appendix: RMS Batch Installer Screens
64 Oracle Retail Merchandising System
Screen: Summary
Fields on this Screen: All of the fields on this summary screen are read-only. In GUI mode of the installer, this screen will provide the opportunity to review inputs and go back to previous screens to correct them if necessary. Once you advance forward from this screen, the installer will connect to the database and validate that the RMS user exists before beginning installation.

Installation Guide 65
J Appendix: RMS Application Installer
Screens Screen: Welcome
There are no fields on this screen. The Welcome screen contains information about the RMS Application Installer and prerequisites.

Appendix: RMS Application Installer Screens
66 Oracle Retail Merchandising System
Screen: Data Source Details
Fields on this Screen:
Field Title RMS Schema Owner
Field Description
This is the same username that was used during the RMS Database Schema Installer.
Example RMS
Notes
Field Title RMS Schema Password
Field Description
This is the same password that was used during the RMS Database Schema Installer.
Notes
Field Title RMS Oracle SID
Field Description
This is the same Oracle SID that was used during the RMS Database Schema Installer.
Example Rmsdb
Notes

Appendix: RMS Application Installer Screens
Installation Guide 67
Screen: Application Installation Directory
Fields on this Screen:
Field Title Application Installation Directory
Field Description
The location where the RMS Application (toolset, forms and reports) will be installed. The RMS $MMHOME path will be a subdirectory of this directory, named “base”.
Example /u01/oracle/retail
Notes

Appendix: RMS Application Installer Screens
68 Oracle Retail Merchandising System
Screen: Installation Name
Fields on this Screen:
Field Title Installation Name
Field Description
This value will be used in conjunction the Oracle Configuration Manager (OCM). It will give the installation a unique name so the OCM can identify different installations of RMS in the same Oracle Application Server instance.
Example rms13inst
Notes

Appendix: RMS Application Installer Screens
Installation Guide 69
Screen: Application Deployment Method
Fields on this Screen:
Field Title Which Environment Deployment Method would you like to use
Field Description
Select the Application Deployment Method you would like. Reference Appendix O for more information.
Example Base
Notes

Appendix: RMS Application Installer Screens
70 Oracle Retail Merchandising System
Screen: Install OCM
Fields on this Screen:
Field Title Install OCM
Field Description
Install OCM checkbox. This field will give you the option to install or not install OCM. The default option is checked. It is highly recommended you install OCM if you meet the requirements.
Example Checked/True
Notes

Appendix: RMS Application Installer Screens
Installation Guide 71
Screen: Summary
Fields on this Screen: All of the fields on this summary screen are read-only. In GUI mode of the installer, this screen will provide the opportunity to review inputs and go back to previous screens to correct them if necessary. Once you advance forward from this screen, the installer will connect to the database and validate that the RMS user exists before beginning installation.


Installation Guide 73
K Appendix: Installer Silent Mode
Repeating an Installation Attempt In addition to the GUI and text interfaces of the RMS installer, there is a silent mode that can be run. This mode is useful if you wish to run a repeat installation without retyping the settings you provided in the previous installation. It is also useful if you encounter errors in the middle of an installation and wish to continue. The installer runs in two distinct phases. The first phase involves gathering settings from the user. At the end of the first phase, a properties file named ant.install.properties is created with the settings that were provided. Then the second phase begins, where this properties file is used to provide your settings for the installation. To skip the first phase and re-use the ant.install.properties file from a previous run, follow these instructions: 1. Edit the ant.install.properties file and correct any invalid settings that may have
caused the installer to fail in its previous run. 2. Look for duplicate properties in the ant.install.properties file. Some properties are set
on multiple pages to ensure default values when a page is only displayed under certain conditions. For example, if there are two instances of input.property.name, remove all but the last one.
3. Run the installer again with the silent argument.
Example: install.sh silent


Installation Guide 75
L Appendix: URL Reference
JDBC URL for a Database Used by the Java application and by the installer to connect to the database. Thick Client Syntax: jdbc:oracle:oci:@<sid> <sid>: system identifier for the database
Example: jdbc:oracle:oci:@mysid
Thin Client Syntax: jdbc:oracle:thin:@<host>:<port>:<sid> <host>: hostname of the database server <port>: database listener port <sid>: system identifier for the database
Example: jdbc:oracle:thin:@myhost:1521:mysid
LDAP Derver URL Used by the Java application to connect to the LDAP directory. Syntax: ldap://<host>:<port> <host>: hostname of the directory server <port>: LDAP server port
Example: ldap://myhost:389
JNDI Provider URL for an Application Used by the application client to access the application running in the server. Also used by other applications for server-to-server calls. OracleAS : Syntax: opmn:ormi://<host>:<port>:<instance>/<app> <host>: hostname of the OracleAS environment <port>: OPMN request port of the OracleAS environment. This can be found in the <ORACLE_HOME>/opmn/conf/opmn.xml file. <instance>: Name of the OC4J instance running the application <app>: Deployment name for the application.
Example: opmn:ormi://myhost:6003:rsm-oc4j-instance/rsm13
Note: The JNDI provider URL can have a different format depending on your cluster topology. Consult the Oracle Application Server documentation for further details.

Appendix: URL Reference
76 Oracle Retail Merchandising System
WebSphere: Syntax: iiop://<host>:<port> <host>: hostname of the WebSphere environment <port>: BOOTSTRAP port of the WebSphere server that is running the application. Example: iiop://myhost:2809

Installation Guide 77
M Appendix: Common Installation Errors
This section provides some common errors encountered during installation of RMS.
Database Installer Hangs on Startup Symptom: When the database schema installer is run, the following is written to the console and the installer hangs indefinitely: Running pre-install checks Running tnsping to get listener port
Solution: The installer startup script is waiting for control to return from the tnsping command, but tnsping is hanging. Type Control+C to cancel the installer, and investigate and solve the problem that is causing the tnsping <sid> command to hang. This can be caused by duplicate database listeners running.
Unreadable Buttons in the Installer If you are unable to read the text within the installer buttons, it probably means that your JAVA_HOME is pointed to a pre-1.4.2 JRE or JDK. Set JAVA_HOME to a Java runtime environment of version 1.4.2 or later and run the installer again.
“Could not create system preferences directory” Warning Symptom: The following text appears in the installer Errors tab: May 22, 2006 11:16:39 AM java.util.prefs.FileSystemPreferences$3 run WARNING: Could not create system preferences directory. System preferences are unusable. May 22, 2006 11:17:09 AM java.util.prefs.FileSystemPreferences checkLockFile0ErrorCode WARNING: Could not lock System prefs. Unix error code -264946424.
Solution: This is related to Java bug 4838770. The /etc/.java/.systemPrefs directory may not have been created on your system. See http://bugs.sun.com for details. This is an issue with your installation of Java and does not affect the Oracle Retail product installation.
“Couldn't find X Input Context” Warnings Symptom: The following text appears in the console window during execution of the installer in GUI mode: Couldn't find X Input Context
Solution: This message is harmless and can be ignored.

Appendix: Common Installation Errors
78 Oracle Retail Merchandising System
Unresponsive Country and Currency Drop-Downs Symptom: In GUI mode, when you click on the drop-down list selection for the primary country or currency, the list does not appear, and this message appears in the console window: XTEST extension not installed on this X server: Error 0
Solution: To run the RMS installer in GUI mode you must have the XTEST extension enabled in your X server. Enabling XTEST in Exceed: 1. Open Xconfig to edit Exceed configuration 2. Go to the X Server Protocol settings 3. Click on the Extensions tab 4. Make sure that the XTEST extension is selected:
5. Restart the X Server and re-run the RMS installer.
ConcurrentModificationException in Installer GUI Symptom: In GUI mode, the errors tab shows the following error: java.util.ConcurrentModificationException at java.util.AbstractList$Itr.checkForComodification(AbstractList.java:448) at java.util.AbstractList$Itr.next(AbstractList.java:419) … etc
Solution: You can ignore this error. It is related to third-party Java Swing code for rendering of the installer GUI and does not affect the retail product installation.

Appendix: Common Installation Errors
Installation Guide 79
FRM-30064: Unable to parse statement select while compiling fm_ituda.fmb
Symptom: When running the application installer you get the following error: FRM-30064: Unable to parse statement select vu.uda_desc, vu.uda_id from v_uda vu where get_primary_lang = get_user_lang and vu.display_type = 'LV' union all select nvl(t.translated_value, vu.uda_desc), vu.uda_id from tl_shadow t, v_uda vu where get_primary_lang != get_user_lang and upper(vu.uda_desc) = t.key(+) and get_user_lang = t.lang(+) and vu.display_type = 'LV' order by 1. ORA-28112: failed to execute policy function Record Group RG_UDA_LOV Form: FM_ITUDALST FRM-30085: Unable to adjust form for output. Form not created
Solution: Disable the database filter policies by running drop_filter_policy.sql, run the application installer again and then run add_filter_policy.sql. Both files can be located with the database installer.
ORA-04031 (unable to allocate memory) error during database schema installation
Symptom: When running the database schema installer you get the following error one or more times: [ora:sqlplus] alter package [ora:sqlplus] * [ora:sqlplus] ERROR at line 1: [ora:sqlplus] ORA-04031: unable to allocate 92120 bytes of shared memory ("shared [ora:sqlplus] pool","unknown object","PL/SQL MPCODE","BAMIMA: Bam Buffer")
Solution: There was not enough available memory in the shared pool on the database at the time of compilation. There are several choices to get past this error: Log into the database and attempt to recompile invalid objects in the database
schema. Subsequent attempts to compile the same object(s) can be successful. Have a DBA increase the shared pool size on the database and re-run the installer
from scratch on a new schema user.
X Error of failed request: BadWindow (invalid Window parameter) Symptom: When compiling forms during the application installation you receive this error one or more times: X Error of failed request: BadWindow (invalid Window parameter) Major opcode of failed request: 18 (X_ChangeProperty) Resource id in failed request: 0x1800002 Serial number of failed request: 432 Current serial number in output stream: 437

Appendix: Common Installation Errors
80 Oracle Retail Merchandising System
Solution: This error occurs when there are too many requests made to the X server. If this error occurs manually recompile the form. Example: frmpcmp.sh userid=$UP module_type=form module=FORM_OR_MENU

Installation Guide 81
N Appendix: Manual Application Installation
It is strongly recommend that you use the installer to install the RMS Application. Below are the instructions to manually install the application portion of RMS. It is assumed that Oracle Application Server 10g version 10.1.2.2 (OAS) has already been installed. If not, refer to “Check Application Server Requirements” in Chapter 1, “Preinstallation Tasks” before proceeding. Additionally, INSTALL_DIR in this section refers to the directory created in “Create Staging Directory for RMS Application Files” in Chapter 1. In order to use Forms Builder 10g for manual compilation of RMS 13 forms modules, Oracle Developer Suite 10g Release 2 (10.1.2.2) must be used. Please refer to the Oracle Developer Suite 10g Release 2 documentation for the steps to manually compile objects.
Note: It is necessary to have $ORACLE_HOME/network/admin/tnsnames.ora file configured in this OAS installation. Forms/reports will use this information for connectivity. Refer to Appendix B for an example setup of the tnsnames.ora file.
Set Environment Variables Note: ORACLE_HOME is the location where Oracle Application Server 10g (10.1.2.2) has been installed
1. The T2kMotif.rgb file that is sent out with Oracle Application Server 10g (10.1.2.2) must be modified. It located at the following location:
$ORACLE_HOME/guicommon/tk/admin Make a copy of the file ORACLE_HOME/guicommon/tk/admin/Tk2Motif.rgb, and name it Tk2Motif.rgb_ORIG (for example). Modify the file Tk2Motif.rgb file so that it contains the following line:
Tk2Motif*fontMapCs: iso8859-2=UTF8
2. The Logon to the application server as the oretail user, 3. Set the DISPLAY variable to the IP address plus “:0.0” (ie: 10.1.1.1:0.0) of the
application server. 4. Set the following variables:
Note: ORACLE_HOME is the location where Oracle Application Server 10g (10.1.2.0.2) has been installed
All OS Platforms PATH=$ORACLE_HOME/bin:$ORACLE_HOME/opmn/bin:$ORACLE_HOM
E/dcm/bin:INSTALL_DIR/forms10gr2_scripts:$PATH CLASSPATH=$ORACLE_HOME/jlib/importer:
$ORACLE_HOME/jlib/debugger.jar:$ORACLE_HOME/jlib/utj.jar:$ORACLE_HOME/jlib/ewt3.jar:$ORACLE_HOME/jlib/share.jar:$ORACLE_HOME/jlib/dfc.jar:$ORACLE_HOME/jlib/help4.jar:$ORACLE_HOME/jlib/oracle_ice.jar:$ORACLE_HOME/jlib/jewt4.jar

Appendix: Manual Application Installation
82 Oracle Retail Merchandising System
FORMS_BUILDER_CLASSPATH=$CLASSPATH FORMS_PATH=INSTALL_DIR/toolset/bin:INSTALL_DIR/rms/forms/bin:$O
RACLE_HOME/forms REPORTS_PATH=INSTALL_DIR/rms/reports/bin:$ORACLE_HOME/forms TK_UNKNOWN==$ORACLE_HOME/guicommon/tk/admin UP=<RMS schema owner>/<RMS schema password>@<RMS database>
Note: Verify that TNS is set up correctly by using the UP variable to successfully log into the RMS 13 schema.
Example: /u00/oracle> sqlplus $UP
RMS Toolset Installation 1. Copy all libraries (.pll files) in the INSTALL_DIR/toolset/src directory to the
INSTALL_DIR/toolset/bin directory. 2. Change directories to INSTALL_DIR/toolset/bin. 3. Run f10gr2plsqlconv_pll_stand45 to automatically attach the Forms 10g library
rp2rro.pll to stand45.pll. This library must be attached to stand45.pll in order to run RMS reports.
4. Remove the newly created stand45.pld should it be created from running f10gr2plsqlconv_pll_stand45.
5. Run pll2plx10gr2_toolset to compile all Toolset .pll’s.
Note: If the pll2plx10gr2_toolset script is not used and the libraries are compiled individually, then they must be compiled in the following order (which is noted in the pll2plx10gr2_toolset script):
messge45.pll ariiflib.pll stand45.pll calend45.pll find45.pll item45.pll tools45.pll mblock45.pll mview45.pll nav45.pll work45.pll itnumtype.pll hierfilter.pll rmslib.pll
6. Check to make sure that each .pll file has a corresponding .plx (to ensure that all .pll’s compiled successfully).
7. Remove all newly created .plx files. 8. Copy all forms (*.fmb files) in the INSTALL_DIR/toolset/src directory to the
INSTALL_DIR/toolset/bin directory.

Appendix: Manual Application Installation
Installation Guide 83
9. Run fmb2fmx10gr2_fm (in INSTALL_DIR/toolset/bin) to compile the Toolset reference forms.
10. Remove all newly created fm_*.fmx files (reference forms should not have executable files).
11. Run fmb2fmx10gr2 (in INSTALL_DIR/toolset/bin) to generate Toolset runtime forms – .fmx’s.
12. Check to make sure that each non-reference form (.fmb file) has a corresponding .fmx file.
Note: Disregard fm_*.fmx files should they be created. These files should be removed. They should NOT exist in the INSTALL_DIR/toolset/bin directory.
13. Remove all non-reference form forms from INSTALL_DIR/toolset/bin; the following syntax leaves all reference forms (fm_*.fmb) in the bin directory, while removing all other forms:
> for PROG in `ls *.fmb | grep -v fm_` > do PROGNAME=`echo $PROG` > rm $PROGNAME > done
14. Copy all menus (*.mmb files) in the INSTALL_DIR/toolset/src directory to the INSTALL_DIR/toolset/bin directory.
15. Run mmb2mmx10gr2 (in INSTALL_DIR/toolset/bin) to generate Toolset runtime menus – .mmx’s.
16. Check to make sure that each .mmb file has a corresponding .mmx file.
Note: .err files may be created by the compilation scripts above. These files are logs of the compilation process and can be removed.
17. Remove all .mmb files from INSTALL_DIR/toolset/bin.
RMS Forms Installation 1. Copy all libraries (.pll files) in the INSTALL_DIR/rms/forms/src directory to the
directories to the INSTALL_DIR/rms/forms/bin directory. 2. Change directories to INSTALL_DIR/rms/forms/bin. 3. Run pll2plx10gr2_forms to compile all RMS .pll’s. 4. Check to make sure that each .pll file has a corresponding .plx (to ensure that all
.pll’s compiled successfully). Remove all newly created .plx files. 5. Copy all forms (*.fmb files) in the INSTALL_DIR/rms/forms/src directory to the
INSTALL_DIR/rms/forms/bin directory. 6. Run fmb2fmx10gr2_fm (in INSTALL_DIR/rms/forms/bin) to compile the RMS
reference forms. 7. Remove all newly created fm_*.fmx files (reference forms should not have executable
files). 8. Run fmb2fmx10gr2 (in INSTALL_DIR/rms/forms/bin) to generate RMS runtime
forms – .fmx’s. 9. Check to make sure that each non-reference form .fmb file has a corresponding .fmx
file.

Appendix: Manual Application Installation
84 Oracle Retail Merchandising System
Note: Disregard fm_*.fmx files should they be created. These files should be removed. They should NOT exist in the INSTALL_DIR/rms/forms/bin directory.
10. Remove all non-reference form forms from INSTALL_DIR/rms/forms/bin; the following syntax leaves all reference forms (fm_*.fmb) in the bin directory, while removing all other forms:
> for PROG in `ls *.fmb | grep -v fm_` > do PROGNAME=`echo $PROG` > rm $PROGNAME > done
11. Copy all menus (*.mmb files) in the INSTALL_DIR/rms/forms/src directory to the INSTALL_DIR/rms/forms/bin directory.
12. Run mmb2mmx10gr2 (in INSTALL_DIR/rms/forms/bin) to generate RMS runtime menus – .mmx’s.
13. Check to make sure that each .mmb file has a corresponding .mmx file. 14. Remove all .mmb files from INSTALL_DIR/rms/forms/bin.
Note: .err files may be created by the compilation scripts above. These files are logs of the compilation process and can be removed.
Configure Oracle Application Server 10g for RMS Note: The proper Oracle Application Server 10g (10.1.2.2) components must be started in order to run Oracle Forms applications.
Note: ORACLE_HOME refers to the location where Oracle Application Server 10g (10.1.2.2) Forms and Reports Services is installed.
Note: Prior to modifying Oracle Application Server 10g (10.1.2.2) Forms and Reports Services files, a backup of original files should be made.
1. Make a copy of the file ORACLE_HOME/forms/server/default.env, and name it rms.env (for example).
2. Modify the new file rms.env by appending the location of the RMS toolset and forms modules to the FORMS_PATH variable setting, and by adding the NLS_DATE_FORMAT and NLS_LANG variables to the end of this file. Additionally, the variable FORMS_REJECT_GO_DISABLED_ITEM=FALSE must also be added to rms.env due to changes between Oracle Forms 6i and Oracle Forms 10g.
Example: FORMS_PATH=/u00/rms/toolset/bin:/u00/rms/forms/bin:/u00/oracle/AS10GR2/forms NLS_DATE_FORMAT=DD-MON-RR
NLS_LANG=AMERICAN_AMERICA.UTF8 FORMS_REJECT_GO_DISABLED_ITEM=FALSE

Appendix: Manual Application Installation
Installation Guide 85
3. Make an entry in the file ORACLE_HOME/network/admin/tnsnames.ora for the Oracle 10g database that was created in Chapter2 (where the RMS 13 schema resides). Appendix C contains a sample tnsnames.ora file entry for an Oracle 10g database; refer to the sample or following example for a proper entry in file ORACLE_HOME/network/admin/tnsnames.ora.
4. Log into sqlplus as the RMS 13 schema owner (RMS13DEV) and update the lang table so that WEBHELP_SERVER, REPORTS_SERVER, WEBREPORTS_SERVER, and APP_SERVER are correct: WEBHELP_SERVER is the url http://<server>:<port> where <server> is the
name or IP address of the server where Oracle AS 10g is installed and <port> is the “Listen” value in ORACLE_HOME/Apache/Apache/conf/httpd.conf
REPORTS_SERVER is the value of the reports server created in step 3 above WEBREPORTS_SERVER is reports/rwservlet APP_SERVER is the url http://<server>:<port>/ where <server> is the name or
IP address of the server where Oracle AS 10g is installed and <port> is the “Listen” value in ORACLE_HOME/Apache/Apache/conf httpd.conf
Example: SQL> update lang set WEBHELP_SERVER=’http://server:7778’ where lang=1; SQL> update lang set REPORTS_SERVER=REP_<SERVER_NAME> where lang=1; SQL> update lang set WEBREPORTS_SERVER=’reports/rwservlet’ where lang=1’; SQL> update lang set APP_SERVER=’http://server:7778/’ where lang=1;
5. Modify the file formsweb.cfg located at ORACLE_HOME/forms/server. Create the RMS environment section at the end of this file. Brackets ([ ] in the example below) distinguish a separate environment in this file. Variables to be set in the RMS environment section of formsweb.cfg are: envfile (from step 2 above); width, height, and separateFrame applet parameters; and starting form for the RMS application.
Example: [rms]
envfile=rms.env width=850 height=585 separateFrame=true form=rtkstrt.fmx
If Oracle Single Sign-On is to be used with RMS, then set ssoMode to true. If Resource Access Descriptors are allowed to be dynamically created, then set
ssoDynamicResourceCreate to true.

Appendix: Manual Application Installation
86 Oracle Retail Merchandising System
Example: [rms]
envfile=rms.env width=850 height=585 separateFrame=true form=rtkstrt.fmx ssoMode=true ssoDynamicResourceCreate=true
Additional modifications are needed to ensure that RMS utilizes the Sun JRE plug-in installed on the client. Comment out the following lines in formsweb.cfg at the beginning of this file: baseHTMLjinitiator=basejini.htm baseHTMLjpi=basejpi.htm
Example: ## baseHTMLjinitiator=basejini.htm ## baseHTMLjpi=basejpi.htm Add the following lines after the “Single Sign-On OID configuration parameter” section of formsweb.cfg . This will direct clients to use the latest version of the Sun Java Plug-in installed on their machine when accessing RMS. No update is needed if you are using a different minor version of the Java plug-in. ###############################################################
## added for Java 1.4.1+
## Use this classid to allow users to use any 1.4.X plugin
jinit_classid=clsid:8AD9C840-044E-11D1-B3E9-00805F499D93
jinit_mimetype=application/x-java-applet;jpi-version=1.4.1_03
legacy_lifecycle=true
## end Java plug-in additions
###############################################################
6. Modify the file ORACLE_HOME/forms/java/oracle/forms/registry/Registry.dat by setting default.icons.iconpath to /web_gif/.
Example: default.icons.iconpath=/web_gif/
7. If NLS_LANG is NOT set in the ORACLE_HOME/forms/server/rms.env then copy the RMS keyboard-mapping file
INSTALL_DIR/sample_files/fmrweb.res to ORACLE_HOME/forms/admin/resource/US
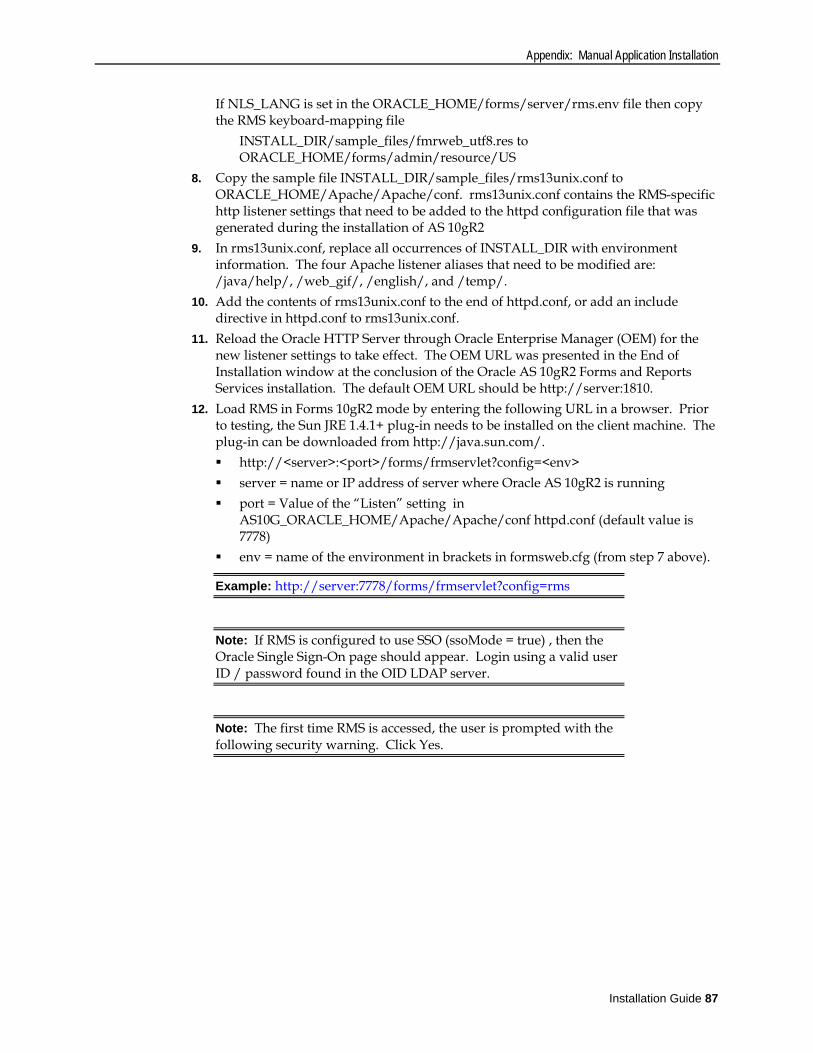
Appendix: Manual Application Installation
Installation Guide 87
If NLS_LANG is set in the ORACLE_HOME/forms/server/rms.env file then copy the RMS keyboard-mapping file
INSTALL_DIR/sample_files/fmrweb_utf8.res to ORACLE_HOME/forms/admin/resource/US
8. Copy the sample file INSTALL_DIR/sample_files/rms13unix.conf to ORACLE_HOME/Apache/Apache/conf. rms13unix.conf contains the RMS-specific http listener settings that need to be added to the httpd configuration file that was generated during the installation of AS 10gR2
9. In rms13unix.conf, replace all occurrences of INSTALL_DIR with environment information. The four Apache listener aliases that need to be modified are: /java/help/, /web_gif/, /english/, and /temp/.
10. Add the contents of rms13unix.conf to the end of httpd.conf, or add an include directive in httpd.conf to rms13unix.conf.
11. Reload the Oracle HTTP Server through Oracle Enterprise Manager (OEM) for the new listener settings to take effect. The OEM URL was presented in the End of Installation window at the conclusion of the Oracle AS 10gR2 Forms and Reports Services installation. The default OEM URL should be http://server:1810.
12. Load RMS in Forms 10gR2 mode by entering the following URL in a browser. Prior to testing, the Sun JRE 1.4.1+ plug-in needs to be installed on the client machine. The plug-in can be downloaded from http://java.sun.com/. http://<server>:<port>/forms/frmservlet?config=<env> server = name or IP address of server where Oracle AS 10gR2 is running port = Value of the “Listen” setting in
AS10G_ORACLE_HOME/Apache/Apache/conf httpd.conf (default value is 7778)
env = name of the environment in brackets in formsweb.cfg (from step 7 above).
Example: http://server:7778/forms/frmservlet?config=rms
Note: If RMS is configured to use SSO (ssoMode = true) , then the Oracle Single Sign-On page should appear. Login using a valid user ID / password found in the OID LDAP server.
Note: The first time RMS is accessed, the user is prompted with the following security warning. Click Yes.

Appendix: Manual Application Installation
88 Oracle Retail Merchandising System
If Single Sign-On is not used, or if a Resource Access Descriptor has not been set up for RMS for this user and ssoDynamicResourceCreate is true, then the RMS logon form appears. Enter the appropriateUsername/Password@Connect String information in the corresponding fields:
Username = RMS Schema Owner or additional Oracle user created Password = Username password Connect String = Oracle database created in Ch. 1
Example: Username: RMS13DEV Password: retek Connect String: prod_db1
13. On the RMS logon form, enter the appropriateUsername/Password@Connect String information in the corresponding fields: Username = RMS Schema Owner or additional Oracle user created Password = Username password Connect String = Oracle database created in Ch. 1
Example: Username: RMS13DEV Password: retek Connect String: prod_db1

Installation Guide 89
O Appendix: Application Deployment Method
The RMS installer provides the option to configure multiple application deployment methods. This is a setup where there is still a single primary RMS installation, but there are additional levels where customization can occur. This means multiple URLs configured in formsweb.cfg with cascading FORMS_PATH values. The installer provides three choices for cascading environment configuration: Base: A standard RMS base installation with one application installation folder, and
one URL. Production: Base plus two additional forms directories for PRD and EMG and an
additional URL for EMG. Development: Production plus two additional forms directories for UAT and DEV
and two additional URLs for UAT and DEV.
The above diagrams show how the application deployment method environment configurations are set up in the forms installation. The installer creates the set of URLs, and empty directories for the other environments. All forms installed by this installer are placed in the “Base” environment. We are simply laying down the structure for customizations and fixes that the user can make after installation is complete.


Installation Guide 91
P Appendix: Manual Batch Installation
It is strongly recommend that you use the installer to install the RMS Application. Below are the instructions to manually install the batch portion of RMS.
Note: Warning messages may appear during the compilation of the batch. These warnings can be ignored if the batch executables are successfully generated.
Set Environment Variables 1. As the oretail user, change directories to INSTALL_DIR/rms 2. Set the following variables:
Note:
INSTALL_DIR is the location where RMS 13 will be installed.
Make sure the path for make, makedepend, and the compiler are in $PATH environment variable.
MMHOME=INSTALL_DIR/rms MMUSER=RMS Schema Owner PASSWORD=RMS Schema Owner Password ORACLE_HOME=Location of Oracle install ORACLE_SID=The Oracle Sid for the RMS database
Configure Make File 1. As the oretail user, change directories to INSTALL_DIR/rms/oracle/lib/src 2. Several platform specific make files have been shipped with this release. Copy and
rename the appropriate platform-specific make file to platform.mk Example: #cp platform_oel_64bit.mk platform.mk
3. Run the oramake script from INSTALL_DIR/rms/oracle/lib/src directory. This uses the server’s configurations to create a file called oracle.mk and copy an Oracle supplied make file (demo_rdbms.mk) to the lib/src directory.
Create Batch Libraries in Database 1. Change directories to INSTALL_DIR/db_objects. 2. Log into SQL*Plus as RMS13DEV and run the following scripts:
SQL> @createordlib.sql SQL> @dealinclib.sql SQL> @dealordlib.sql SQL> @scllib.sql
3. Exit SQL*Plus.

Appendix: Manual Batch Installation
92 Oracle Retail Merchandising System
Re-Validate RMS Database Objects 1. As the oretail user, change directories to INSTALL_DIR/utility 2. Log into SQL*Plus as RMS13DEV and run the following command.
This script may need to be run more than once. SQL> @inv_obj_comp.sql
Compile Batch Libraries 1. As the oretail user, change directories to INSTALL_DIR/rms/oracle/lib/src 2. To make library dependencies run this command. make –f retek.mk depend 2>&1 | tee libdpnd.log
Check the libdpnd.log file for errors 3. To make batch libraries make –f retek.mk retek rms resa 2>&1 | tee libretek.log
Check the libretek.log file for errors 4. To install batch libraries
make –f retek.mk install
The batch libraries should now be in INSTALL_DIR/rms/oracle/lib/bin
Compile Batch Source Code 1. As the oretail user, change directories to INSTALL_DIR/rms/oracle/proc/src 2. To make dependencies run the following command:
make –f mts.mk rms-depend recs-depend rtm-depend resa-depend 2>&1 | tee srcdpnd.log
Check the srcdpnd.log file for errors 3. To make batch programs run the following commands in the order stated.
make –f rms.mk PRODUCT_PROCFLAGS=dynamic=ansi ditinsrt make –f mts.mk rms-ALL recs-ALL resa-ALL rtm-ALL 2>&1 | tee srcall.log
Check the srcall.log file for errors 4. To install batch programs
make –f mts.mk rms-install recs-install resa-install rtm-install
The batch programs should now be in INSTALL_DIR/rms/oracle/proc/bin

Installation Guide 93
Q Appendix: Single Sign-On Resource Access
Descriptors Oracle Forms applications such as RMS use database connections for authentication and authorization purposes. Oracle Single Sign-On, however, uses the Oracle Internet Directory (OID) user ID and password for this purpose. The Forms framework maps OID user IDs to database connections via information stored in Resource Access Descriptors (RADs). A user will have one RAD for each application accessed. RADs may be created by an administrator or by an LDIF script. Depending on the Oracle Internet Directory and/or the formsweb.cfg configuration, RADs may also be created by the user. A user is prompted for the database connection information whenever formsweb.cfg file specifies ssoMode = true and createDynamicResources = true for an application and no valid RAD exists. RADs may become invalid when passwords have expired or have been changed. RADs may be created by administrators or users via the Delegated Administration Services application. Note: users can create new RADs only if one or more RADs already exist. RADs may be created and via LDIF scripts as well. Documentation on this may be found in the Metalink document number 244526.1.


Installation Guide 95
R Appendix: Installation Order
This section provides a guideline as to the order in which the Oracle Retail applications should be installed. If a retailer has chosen to use some, but not all, of the applications the order is still valid less the applications not being installed. 1. Oracle Retail Merchandising System (RMS), Oracle Retail Trade Management (RTM),
Oracle Retail Sales Audit (ReSA) 2. Oracle Retail Service Layer (RSL) 3. Oracle Retail Extract, Transform, Load (RETL) 4. Oracle Retail Active Retail Intelligence (ARI) 5. Oracle Retail Warehouse Management System (RWMS) 6. Oracle Retail Allocation 7. Oracle Retail Invoice Matching (ReIM) 8. Oracle Retail Price Management (RPM)
Note: During installation of RPM, you are asked for the RIBforRPM provider URL. Since RIB is installed after RPM, make a note of the URL you enter. If you need to change the RIBforRPM provider URL after you install RIB, you can do so by editing the jndi_provider.xml file.
9. Oracle Retail Central Office (ORCO) 10. Oracle Retail Back Office (ORBO) 11. Oracle Retail Store Inventory Management (SIM)
Note: During installation of SIM, you are asked for the AIP provider URL. Since AIP is installed after SIM, make a note of the URL you enter. If you need to change the AIP provider URL after you install AIP, you can do so by editing the jndi_providers_ribclient.xml file.
12. Oracle Retail Integration Bus (RIB) 13. Oracle Retail Point-of-Service (ORPOS) 14. Oracle Retail Analytics Applications 15. Oracle Retail Advanced Inventory Planning (AIP) 16. Oracle Retail Predictive Application Server (RPAS) 17. Oracle Retail Data Warehouse (RDW) 18. Oracle Retail Workspace (ORW)