Natural and Agricultural Sciences - University of the Free State
Upload
khangminh22Category
view
2download
0
1
Natural Sciences
TOPIC 1 UNIT 1 – PLANTS AND ANIMALS ON EARTH INTRODUCTION
1. Read through the introduction pages in the Learner’s Book LIVING AND NON-LIVING THINGS LIVING THINGS
2. Read What's science all about? p10-11 3. Read Geography Encyclopedia p108-109 4. Discuss
a. Teacher's Note: the emphasis must not be on memorising facts or definitions but on activities that use process skills such as observing differences, sorting and classifying, describing and drawing. As a teacher you need to build the language needed for talking about concepts. Even if the learners use the correct word , the meanings of that word may be different for each of them. It is especially important to introduce the formal scientific terms of the seven life processes correctly and to explain each process and word-meaning accurately.
b. What does it mean to be alive? c. What is a non-living thing? What does it mean to be non-living? Discuss the difference in
terminology between something that is non-living and something that is dead. d. A river seems to move, so is a river living? e. Are the plants that I eat from a garden living or non-living? f. How can I tell if the bean seeds from a garden are living or non-living? g. A chicken egg seems to be non-living, but then it can hatch into a chicken. Is the egg living or
non-living? h. Are all living things animals? What do plants and animals need to stay alive? (Water, food, air
etc.)
5. Read What's science all about? p16-17 6. Notebook Entry
Make a mind-map display with these words: moving, reproducing, sensing, feeding, breathing, excreting and growth. In the center of the mind-map write: The Seven Life Processes. As examples of each of these processes are studied in the class let the learners add illustrations or interesting facts and build the mind-map as you work through the section.
7. Discuss Living things
a. There are many different kinds of living things. It is easy to see when some things are living or non-living. It is a bit trickier to decide with other things if they are living or not!
b. Ask the learners to name the living things around you and at home. c. It is not always easy to say if something is living or non-living. Many times things that look as if
they are non-living can become alive again. Other things like a river or soil, are non-living but people say that the "soil is alive" or talk of the "living waters". This is because there are so many living things that live in the soil or the water. This can be a bit confusing, don't you think? Look carefully at the living things in the photos. Can you see what is the same in ALL of them? Something that they maybe all DO?
d. Which seven things have all living things in common?

2
8. Discuss Characteristics of living plants and animals a. Although living things look different, they all carry out seven similar processes (all living things
have these things in common). We call these the seven life processes. M = Moving R = Reproducing S = Sensing B= Breathing F = Feeding E = Excreting G = Growth This spells? MRS B. Feg
i. MOVING: All living plants and animals move
• Humans and animals use their bodies to move from one place to another. • Some plants turn towards light or water. Roots mostly grow downwards. Many
stems grow upwards. • VIDS: Plants
- how time flies and sunflowers catch the sun.mp4
ii. REPRODUCING: All living things make offspring ( babies or seeds) • Humans and animals have babies • Some new plants can grow from seeds • Other plants grow from cuttings or shoots
iii. SENSING: All living things respond to any chan ge that they sense
• When you are feeling cold, you will put on a jersey or jacket • When it becomes winter some animals hibernate • In autumn the leaves on some trees change colour • You can use an umbrella to protect you from the rain or from the harsh sun on
a hot day • Reptiles like to lie and bask in the sun on cold winter's days
iv. BREATHING: All living things BREATHE gases in a nd out
• Humans and animals use the gas, oxygen from the air that they breathe in. They release (give off) the gas carbon dioxide when they breathe out
• Plants take in the gas carbon dioxide into their leaves. They use it to make food. They then release oxygen for animals and humans to use
v. FEEDING: All living animals and plants need food
• Food gives all living things the energy they need • Green plants can make their own food for energy in their leaves and stems • Humans and animals eat plants to get energy • VIDS: Plants
- I Can’t Wait To Hibernate by Brent Holmes.mp4
vi. EXCRETING: All living animals and plants have t o get rid of waste products • Humans and animals have to get rid of waste products from their bodies. • There are special organs in the body which help to get rid of waste, such as the
lungs, kidneys and skin. Your kidneys take the waste out of your blood and produce urine. Also, when you sweat you are actually excreting waste from your skin!
• Plants get rid of waste water through the process of transpiration. • VIDS: Plants
- Time Lapse of plant growing.mp4
3
vii. GROWTH: All living things grow • Human and animal babies grow into adults. • Seedlings grow into plants.
All seven of the life processes must happen for something to be living. If something does not carry out all seven life processes then that thing is non-living. For example, if you think of a river, you may think it moves and grows, but a river does not sense or feed or excrete or breathe or reproduce so it is non-living!
9. Notebook Entry
a. What is living and what is non-living? i. Divide your page in half, lengthwise ii. Title the two columns: Living things, Non-living things iii. Look through the photos and decide whether you think they are living or non-living. iv. Use the checklist to see how right you were. v. Paste the pictures in their appropriate column
b. The seven life processes
i. Construct a mindmap with the labels and add descriptions as we go along
c. VIDS: Plants i. 7 life processes
d. Teacher's Note
i. An airplane takes in fuel (feeding), gives out exhaust gases (excreting) and use air for combustion (breathing). You should accept either a tick or a cross for these three processes.
ii. The chicken egg can be revived later if it has been fertilized and so is a living thing.
10. Read What's science all about? p24-25 (Plant and animal cells) 11. Activity
a. Learners mime (act without using words) the life processes.
12. Discuss a. How do the movement of plants and animals differ? Expected answers: Movement - animals
can move from one place to another, while plants grow in the same place but can move towards the light or to/away from gravity.
b. How many ways do you know of that plants can grow new plants? Expected answers: seeds,
cuttings, perhaps a few might know of shoots, underground rhizomes (?) or spores?
c. Are the vegetables you eat living or non-living? How do you determine this? Expected answers: A good way to explain this is to ask if they could plant the cooked vegetable and if new plants will grow from it. If they cannot then the item is no longer living.
d. Some things seem to be non-living for a very long time. They wait until they sense the right
conditions to revive again. This means that they have to wait for something special to happen before they can revive and show the characteristics of living things. We say they need the right conditions to revive and show the seven life processes. Look at pictures of coral and sunflower seeds that seem to be non-living!
e. Fertilized eggs need to be kept warm or they will not hatch. This is why a mother bird will start
sitting on her eggs to keep them warm when she has laid all of them.
f. Yeast can cause bread dough or cake batter to raise. Yeast needs warmth to come alive and start raising the bread. Some people buy dry yeast for their baking. It also needs heat to start

4
working (and sugar). That is why you will see bakers place their dough in a warm place (near the stove for example) to get it to rise.
13. Discuss
a. Can you explain why a bird needs to sit on her eggs? She needs to keep the eggs warm in order to hatch them.
b. In farms, the farmers often do not let the mother chickens sit on their eggs. Instead they put the
eggs in something called an incubator. What does the incubator provide to the eggs? Warmth.
c. A snake normally lays her eggs in a 'nest'. Why does she not have to lie on top of them to hatch them? The heat of the sun provides the warmth to hatch the eggs.
d. In what season can you normally find little tadpoles or silkworms, and why? Silkworms are
typically available in Spring and early summer, and tadpoles can generally be found in pools and ponds from Spring to Autumn. The eggs need warmth to hatch. The adult animals lay their eggs in these seasons because the warmth of the sun will hatch the eggs.
14. ACTIVITY: Germinating a seed
a. Discuss i. why plants are important. Possible answers can be: For food, to provide oxygen, to
protect the soil (plant on dunes), plants are beautiful etc. ii. Do we need to make more plants? Why? How?
b. Materials (what you need):
i. bean seeds / coriander seeds / lentils ii. cotton wool iii. plastic lids (from empty peanut butter jars for example)
c. Teacher's Note
Bean seeds are the most common to get hold of, but sometimes take a bit long to grow. Lentils or coriander seeds can sometimes grow quicker. Perhaps try a mixture of the seeds.
d. Discuss
Before you water your seeds, describe how your seeds look and feel. Learners should refer to the hard & dry texture of the seeds and that it looks non-living.
e. Instructions i. Place two layers of cotton wool in the plastic lid. ii. Place a few of your seeds between the two layers of cotton wool. iii. Drizzle water over the seeds. You need to water the cotton wool enough to wet it but
NOT TO DROWN THE SEED! There should be NO WATER running over the sides of the lid or your seed will drown.
iv. Place your seeds in a warm place near a window. v. Water your seeds whenever you feel the cotton wool is almost dry. Be careful not to
drown your seeds! vi. Set aside at least five minutes per day to monitor seeds. vii. Guide the learners on how to keep a diary. Learners have to write the date and record
their observations under headings as: what is different today (root appeared), measured root length, etc.
viii. Revise / reinforce that drawings and labeling must be done scientifically. ix. Assist the learners to make the following drawings:
• the bean and the first root • the bean, root and first leave • its first root, a stem and its first leaf • bean plant after 2 weeks

5
f. Discuss i. Draw your seeds between the cotton wool on the first day (or use Life Cycle of bean
plant.pdf or Life cycle of sunflower.pdf in plants directory). ii. Keep watching your seeds every day. How long did it take them to germinate? And
what do your seeds look and feel like now? Learners should refer to the outer layer of the seeds getting soft and moist and say that there is something growing out of the seeds.
iii. What do you think made your seeds revive? The water that was poured over the cotton wool kept the seeds moist (as if it was lying in moist ground). Some might also remember that they put the seeds near the window so the heat from the sun might have also helped the seeds to sprout. This is discussed extensively in a later section so do not spend too much time on it.
15. ACTIVITY: Getting yeast to grow!
a. Materials (what you need): i. packet of dry yeast ii. sugar iii. warm water iv. an empty yogurt tub
b. Instructions:
i. Place a teaspoon of sugar and a teaspoon of dry yeast in your yogurt tub. Mix with your spoon.
ii. Add 3 teaspoons of warm water iii. Stir your sugar and yeast mixture in the warm water to make sure it is well mixed iv. Watch to see what will happen!
c. Discuss
i. How does your yeast look and feel like before you mix it with the sugar and water? The yeast feels like small round balls / grainy / dry / grey /non-living.
ii. When you add the sugar to the yeast, does anything change in the yeast? Not really - it stays the same.
iii. What happened to the yeast and sugar mixture when you added the warm water? It starts to bubble and smells 'strange'. The mixture bubbles up into the tub. There is a feint fizzy noise.
iv. How did the yeast revive? The yeast needed the warm water and the sugar to revive from a dormant state.
d. Further experimentation
Encourage learners to experiment with the yeast and see if the same results are achieved if the sugar is left out, or very little or large quantities is included; also to experiment with the temperature of the water to see if this effects the outcome.
NON-LIVING THINGS 1. Discuss:
a. Non-living things are different from living things because they do not perform all of the seven life processes. Let's look at an example.
b. Look at a picture of a car. Do you think it is living or non-living? c. Let's look which of the seven life processes the car carries out (Remember if there is even one
life process that something cannot do then it is not living!) i. How many life processes does a car have? It does four of the life processes. ii. Is it living or non-living? 4 of the 7 so it is non-living.
2. Discuss: Changing from living to non-living
a. Living things can become non-living when they die. Look at the wood that your desk is made of. i. Where did the wood come from? ii. What was once living?

6
iii. Look around you in the room. Are there other things that were once living and that are now non-living or dead?
b. Go for a walk outside, or page through newspapers and magazines, and collect (each his
own) 10 objects (or suggest to look for living as well as non-living objects – living, once lived, seems to be non-living but can be revived & never lived).
c. Discuss whether the objects are living or non-living objects
3. Notebook Entry
a. Divide your page in quarters b. Label the sections with the following headings:
i. Living ii. Once lived iii. Seems to be non-living but can be revived iv. Never lived
c. Paste your objects, or parts of it, in their appropriate block on the page d. Label your objects
4. Discuss: a. Can you now distinguish between living and non-living things? b. How do you know when things are living and when they are not? Things are living when they
display all 7 life processes and they are non-living when they do not (except for seeds, eggs and yeast which can be revived again).
c. Now you know that we can group almost everything in the world into two groups: living and non-
living things. If something cannot carry out all the seven life processes then it is non-living. Some things were never living, like water and oxygen. Other things can be non-living now but were living before, like wood, fossils or oil
5. Oral Narration
a. Explain how we distinguish between living and non-living things.
6. Revision: Read the following story and then answer the questions that follow.
The Strelitzias When the world was made the Strelitzia birds were among the finest! Their bright orange feathers and dark purple wings decorated the sky and all creation admired their beauty. They would fly for hours high in the sky and only came down to feed at the river bed and to tell the other animals of the wonderful things they had seen. (Show strelitzias) Their nests were in the highest cli s and they almost never sat in trees or walked on the ground among the other animals! However as time went by the Strelitzia birds became more and more proud and arrogant. They started to look down on the other animals and started teasing them endlessly, telling the tall gira e that her neck could never dream of the cool breezes they have felt, or laughing at the tortoise who had to always stagger through the dust over rocks and sand. They laughed at the crocodile who had to stay in the water and at the monkeys for being stuck in trees all their lives! One day the Maker came to visit the animals and instead of the beautiful, joyous creation there was only sadness and tears. One by one the animals told of the Strelitzia birds' teasing and taunting till the Maker became very angry at these proud birds. The Maker snatched them one by one from the sky and stuck each one's strong, slender legs deep into the soil. Their graceful long toes became roots and their

7
feathers and wings turned to dull green leaves. Only their crowning feathers of orange and purple remained as a reminder of their beauty. If you find a Strelitzia flower today, look carefully and you will see how they are always reaching for the sky, trying to free their feet from the soil and fly once more!
a. Name 5 non-living things mentioned in the story. Any 5 of wind, cliff, rock, soil, dirt, dust, breeze, river bed, etc
b. Name all the things from the story that use oxygen. Strelitzia, giraffe, tortoise, crocodile, monkey, trees, plants
c. What life process in living things uses oxygen? Breathing d. Give an example from the story of:
i. moving: glide, stagger, fly , walk, snatch, stick ii. sensing: joyous, sadness, tears iii. feeding: roots, leaves, water hole, trees iv. growth: dull grey leaves
e. The Strelitzia birds had nests high up on the cliffs. Why do you think birds like them like to build their nests high up on the cliffs? To protect their eggs and young
f. What life process do we associate with the eggs in the nest? Reproduction
7. Notebook Entries a. e-Classroom-Living-and-non-living-things.pdf b. Vocabulary (cut & paste)
i. Adapt - To change because of new conditions ii. Cells - Tiny parts of living things that carry everything needed for life iii. Change – To become different iv. Develop – To grow or expand v. Energy – The ability to do work or to make a change vi. Living – Alive now or once was alive vii. Reproduce - To make another living thing of the same kind viii. Respond - To react to something that happens ix. Alive – Living right now x. Nurse log - A fallen, dead tree that provides a home and food for other living things xi. Characteristic - Any feature that helps identify something xii. Dead – No longer alive xiii. Environment - All of the conditions that affect a living thing xiv. Hair - Thin strands that grow from the skin of a person or animal xv. Grow – To get bigger xvi. Nail - A thin, hard covering at the tip of a finger or toe xvii. Skin - The body covering of a person or animal
8
HABITAT Introduction
1. Discuss: What is a habitat? A natural home of a plant or an animal. 2. Notebook Entries
a. What is it called? i. Habitat in water Aquatic habitat ii. Habitat on land Terrestrial habitat
3. Discuss:
a. What do you think it means when we say that there is interdependence between plants, animals and their habitats? Living things do not live on their own in a habitat, but rely on other living organisms and non-living things in their habitat to survive.
4. Read & Discuss p1 LB
DIFFERENT HABITATS Habitats of animals and plants
1. Discuss a. Why do you only find certain plants or animals in certain parts of the world? b. What different kinds of habitats do you get? c. How do plants and animals choose where to live? d. Why do we have the galjoen, blue crane and springbok as our national animals? e. Why are Proteas and the Real Yellow wood tree our national plants?
2. Discuss what is a habitat? Animals tend to live naturally in specific areas. Different kinds of plants grow naturally in different areas too. Plants and animals will choose where they live mostly because of the water, food and climate of a specific area. The physical environment also plays a part in an organism's choice of habitat, for example, plants prefer certain types of soil in a habitat to grow in. You can easily see if a plant does not like to grow in a specific area - it will stay small and have few leaves. If a plant is in an area that it likes it will grow big and strong and have lots of leaves.
The place that a plant or animal lives in is called a habitat. A habitat is the physical area where the animal or plant lives. An organism's natural habitat has everything it needs to live.
3. Different habitats There are many kinds of habitats that plants and animals like to live in.
a. Some plants and animals choose to live in the hot, dry desert. These plants and animals do not
need as much water as other types of plants. b. Some animals and plants live in a forest or cave habitat because they prefer cooler, shady
areas. c. In South Africa there are many forest areas.
There used to be many wild elephants that lived in the Knysna forest in the in the Western Cape. But today there are hardly any left as lots were killed by humans. Their forest habitat has also decreased in size due to humans moving in so the numbers of the elephants have decreased. Other plants and animals choose to live along the shoreline where the water meets the land. This is because they prefer a wet environment, but they are also able to live on land.
d. Animals that live along the shoreline need to have strong bodies and protection against the waves.
e. This is why many animals have shells to cover their bodies.

9
f. Identify three animals that live at the shoreline and have shells or hard armour covering their body. If you have not been to the shoreline, choose another habitat close to your house and identify three animals from that habitat. crabs, crayfish, prawns, muscles, periwinkles, sea snails, sea stars, etc.
g. Water plants like to grow in or very near to rivers, lagoons or wetlands. h. Some animals chose to always be in the water and others are only some times in the water. i. Name two animals that are always in the water and two animals that are only some time in
water. j. There are even animals and plants that live in the very cold regions near the arctic poles or in
very high mountains. Marion island is an island towards the South Pole and near South Africa. Scientists study animals that live on the island to learn more about these animals and how they adapt to their habitats.
4. ACTIVITY: Discovering Habitats
In this activity you are going to find a habitat in and around our house, and draw and describe the habitat.
a. MATERIALS:
i. scrap paper ii. pencil iii. clipboard or something hard to press one when you draw iv. paper sheets to make final drawings v. coloured pencils or crayons
b. INSTRUCTIONS:
i. Find a habitat where you think different plants and animals will live. ii. Carefully look at your habitat WITHOUT moving anything or changing anything in your
habitat. Can you see any animals in your habitat? iii. Ask one person to turn over large rocks one at a time so you can see what is under the
rock. Many bugs and spiders live under the rocks. iv. Also look under the bushes or shrubs for animals that might be hiding from you! v. Make a drawing of the habitat you observe on scrap paper. vi. This is your rough drawing. You will redraw your habitat on neat paper later. vii. Add in ONLY the plants and little animals that you can see in your habitat. viii. Carefully study the colours of the different plants in your habitat. ix. Once your whole group has finished their drawings, return to your class. x. Redraw your habitat on new clean paper. Use colour pencils or other colouring in
materials to add colour and detail to your drawing. xi. Give your drawing a heading and add in labels to name the different plants and animals
that you recognised.
5. Discuss a. Explain where the habitat was that you studied b. What kind of habitat did you study? Use some words to describe the habitat that you studied,
such as shady, sandy, wet. c. Name the different animals that you could see in your habitat. d. Were there any plants that you recognised in the habitat? Name these plants. e. If it started raining very heavily, how would the plants and animals in your habitat be affected? f. How do you think your plants and animals are affected in winter? Will they be able to survive the
cold conditions? Explain why you say so. g. Is there any damage from people in your habitat? If so, how do you think you could prevent this
damage?
6. Discuss: Why do animals need a habitat? Animals and plants need food, water and shelter in their habitat. Animals also need a safe place to have their young (babies) and to hide from predators and escape from other danger. Let's look at some more of the reasons why animals need a habitat.

10
7. Discuss: Camouflage in a habitat Some animals rely on their habitat to escape danger or to hide from the food they are trying to catch! To help them do this, they blend in with their surroundings. This is called camouflage. Animals use camouflage for two reasons: Animals use it to hide from predators . In other words, their camouflage helps them to hide from other animals that eat them. Animals use it to hide from their prey . In other words, when they are hunting it helps them to sneak up on other animals without being seen. Animals are camouflaged in different ways. Let's look at some animals and the way they use their habitats to escape danger!
Some animals are really good at blending into their habitats. Look at the pictures below on p89-90 of animals and their camouflage. Identify how the animal uses its camouflage to blend into its surroundings. Why do you think these animals need to blend into their habitat - is it to escape danger, such as a predator, or is it to hide from prey?
8. Discuss: Habitats of indigenous animals in South Africa
South Africa is very well-known for its Big 5. Many tourists visit our country to see these animals. But how do they know where to find these African wild animals?
9. ACTIVITY: Understanding the habitats of indigenous South African animals
a. MATERIALS: i. A piece of A2 cardboard ii. A piece of A4 paper iii. Information about the Big 5 iv. Pictures of the Big 5 (from old magazines, newspaper cuttings, photocopied images) v. Coloured pens and pencils vi. Scissors vii. Glue
b. INSTRUCTIONS:
i. You are going to make a poster about the Big 5 and where to find each animal so that tourists will know when they come to South Africa!
ii. Find information and pictures about the animals - this must include what the animal eats, where it lives, how it reproduces
iii. Plan the poster you are going to make about where to find each of the Big 5 animals on the A4 paper
iv. Once you have finished your plan, use the bigger sheet of paper to make your real poster. (Remember to give your poster a heading)
v. Write down what you will tell a tourist about where to find the Big 5 animals in their natural habitat.
10. Discuss: South Africa’s National Symbols
a. South Africa has five animals and plants as our national symbols b. National symbols are used to identify a country c. These are animals and plants that live in habitats found in our country or our seas
i. Blue crane ii. Springbok iii. Galjoen iv. King Protea v. Yellow Wood tree
11. ACTIVITY: Research project on South Africa's National Symbols
a. MATERIALS: i. books and reading material of South Africa's national animals and plants ii. scrap paper for making notes iii. pencils for colouring and writing iv. cardboard to make a poster

11
b. INSTRUCTIONS: i. Find out as much as you can by reading in books or asking a family member about the
plants and animals that are South Africa's National Symbols ii. Choose two of the animals and two of the plants iii. Explain why they were chosen as National Symbols iv. Describe each one's habitat v. Explain why these animals and plants can survive in their habitats - how specifically are
they suited to live there? vi. Identify ways that we can protect and look after these animals and plants vii. Present your research as a poster
12. Discuss
a. How does a little weaverbird or a swallow build such a complicated nest? I do not think I could even do it!
b. What different kinds of animal structures do you get? c. How do I build an animal shelter?
13. Discuss: Natural and man-made shelters
a. Natural shelters Remember earlier you dealt with living and non-living things. Living things need some shelter to protect them from harsh weather conditions. Some animals live in natural habitats for their homes. Other animals build their own homes. Some animals even live in other animal's homes. A natural shelter is a home that the animal has made for itself. Animals live in different kinds of homes like:
i. holes in the ground ii. caves iii. nests iv. trees
Look at the following picture of a few places where animals live.
Some shelters that animals build and the materials they use.
12
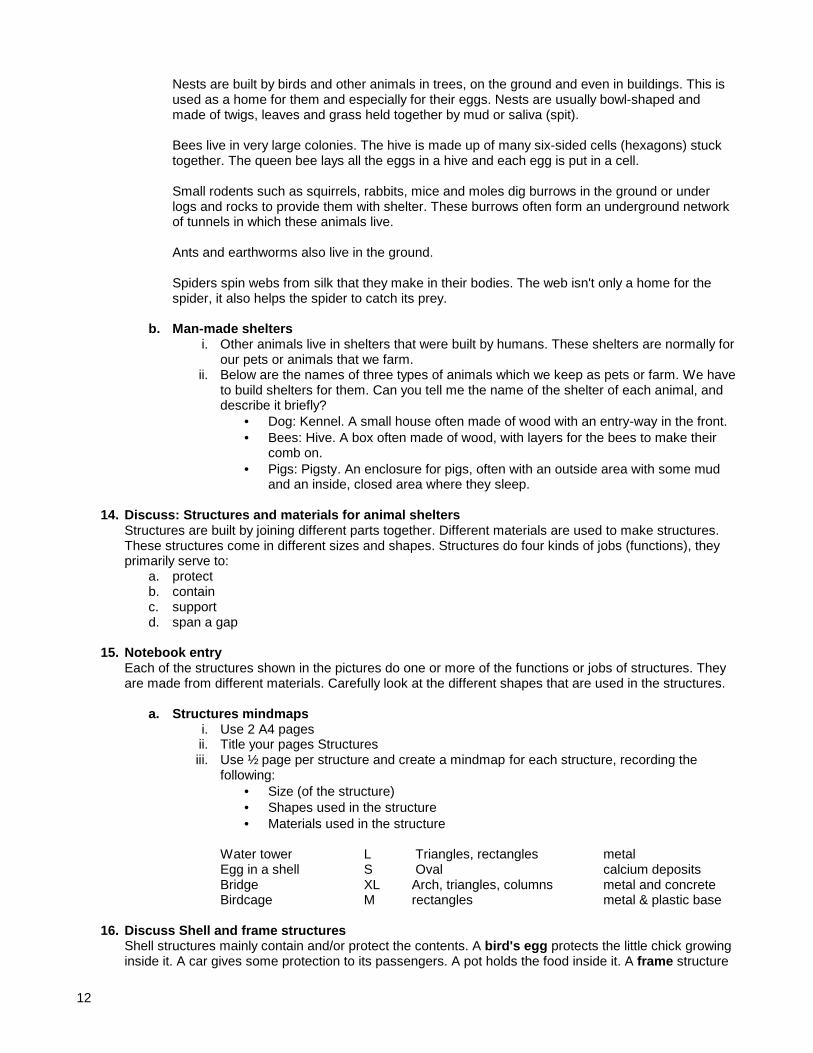
Nests are built by birds and other animals in trees, on the ground and even in buildings. This is used as a home for them and especially for their eggs. Nests are usually bowl-shaped and made of twigs, leaves and grass held together by mud or saliva (spit).
Bees live in very large colonies. The hive is made up of many six-sided cells (hexagons) stuck together. The queen bee lays all the eggs in a hive and each egg is put in a cell. Small rodents such as squirrels, rabbits, mice and moles dig burrows in the ground or under logs and rocks to provide them with shelter. These burrows often form an underground network of tunnels in which these animals live. Ants and earthworms also live in the ground.
Spiders spin webs from silk that they make in their bodies. The web isn't only a home for the spider, it also helps the spider to catch its prey.
b. Man-made shelters
i. Other animals live in shelters that were built by humans. These shelters are normally for our pets or animals that we farm.
ii. Below are the names of three types of animals which we keep as pets or farm. We have to build shelters for them. Can you tell me the name of the shelter of each animal, and describe it briefly?
• Dog: Kennel. A small house often made of wood with an entry-way in the front. • Bees: Hive. A box often made of wood, with layers for the bees to make their
comb on. • Pigs: Pigsty. An enclosure for pigs, often with an outside area with some mud
and an inside, closed area where they sleep.
14. Discuss: Structures and materials for animal sh elters Structures are built by joining different parts together. Different materials are used to make structures. These structures come in different sizes and shapes. Structures do four kinds of jobs (functions), they primarily serve to:
a. protect b. contain c. support d. span a gap
15. Notebook entry
Each of the structures shown in the pictures do one or more of the functions or jobs of structures. They are made from different materials. Carefully look at the different shapes that are used in the structures.
a. Structures mindmaps i. Use 2 A4 pages ii. Title your pages Structures iii. Use ½ page per structure and create a mindmap for each structure, recording the
following: • Size (of the structure) • Shapes used in the structure • Materials used in the structure
Water tower L Triangles, rectangles metal Egg in a shell S Oval calcium deposits Bridge XL Arch, triangles, columns metal and concrete Birdcage M rectangles metal & plastic base
16. Discuss Shell and frame structures
Shell structures mainly contain and/or protect the contents. A bird's egg protects the little chick growing inside it. A car gives some protection to its passengers. A pot holds the food inside it. A frame structure
13
gives support . There is a frame structure inside your body! Your skeleton supports your body! Your knees and elbows are places where the bones join. A frame structure must carry a load in the right places without it collapsing or falling over. Frames are made of members and joins. The members are the long parts and the joins are where the long parts come together. Sometimes longer tubes can be joined to make triangles. The tubes are called the members. Where the tubes come together that is called the join.
a. List three types of structures. b. What is the difference between shell and frame structures? c. What kinds of functions do shell and frame structures serve?
17. Practical Activity - Designing an animal shelte r
Learners need to research, design, and draw a shelter for an animal.
a. Teacher’s Note: We are not doing the whole process (ie. making and evaluating). Later on in the year in the other strands they will be taking the Technology Process further and actually making their products. So, for each Technology project you are building up their skills and reinforcing the process and the steps to follow.
The educational value in Technology lies in the investigating, thinking and designing that children must do. Technology aims to make children capable; capability means the children's ability to turn thinking into doing and completing . When they learn new science knowledge, the learning has a purpose: they must use that knowledge in producing good designs. When they have made a product, they should be able to explain to you all the reasons why they designed it like that (even if they could not make it in the way they wanted to).
b. The Technology Process
When we design and make products and structures we use a special way to do this. It is called the Technology Process. The Technology Process helps you to design and make products. We use the Technology Process to investigate a specific problem. We then use this information to design and make something to help us solve this problem. While we work on the design and make the product, we constantly evaluate it to see if it is working and if it does what we meant for it to do. We also talk to our friends or the other people working with us to tell what we plan to do and to explain how we want to design or make the product. Many people use the technology process every day. If you want to design and make something to solve a problem, you can also use it! The Technology Process has 5 steps:
i. Investigate ii. Design iii. Make iv. Evaluate v. Communicate
Whenever we do a Technology project in Natural Sciences and Technology, we will be following these steps! Let's use the Technology Process to help some birds in your area! Remember you need to start by first identifying the problem and then you can start to design and make a solution!

14
c. ACTIVITY: Design and make a shelter for wild birds Many of the trees in your town have been chopped down to make space for homes and other buildings. The birds that used to make their nests in the trees now have nowhere to safely lay their eggs! There are many more rats, mice and other pests in the city because their are fewer and fewer birds to catch them! This is because many birds left to find safe places to build their nests and raise their chicks. Some of the birds that stayed behind tried to make nests on rooftops but the people did not like the mess they made on their buildings and destroyed the nests. Other birds tried to build their nests on tall radio and television towers. But then the people could not get their televisions or radios to work properly so they also broke their nests and shoo'ed the birds away. The people are complaining about all the pests that are in the city and the birds want to come back but do not have a safe place to build nests - they need your help! In the previous section we learnt about animal homes. We need to help these birds by making homes or places for them to roost and also making it look good to the people. ** Hand out the design form DESIGN BRIEF: A Design Brief is a short description of what you plan to do. An example of a Design Brief for this project could be "Design and make an animal shelter that can be used by wild birds." INVESTIGATE: The next step in the Design Process is to investigate and do some research about the shelter that you are going to make. We have actually already done this in the activities in this chapter when we looked at different man-made animal shelters. So let's get on to designing! DESIGN: We now need to design the animal shelter. Let’s discuss the following questions which will help guide your design and make you think about what your bird shelter should look like.
i. What is the purpose of the bird shelter? ii. What shape and size will the shelter be? iii. How will the birds get inside? iv. What are the best materials to make the shelter from? v. Will there be a place to provide the birds with food and water?
When we design something there are some things that the product or structure you are making need to do or some things that it cannot do. We call these specifications (what it must do) and constraints (what it cannot do). We need to show the specifications or things that your product must do or have before we start to design or make it. You have to make a list of all the specifications otherwise you might not make your product in the proper way. When we list specifications and constraints, we answer certain questions. You answered some of these questions above.
Specifications • Purpose of bird shelter: • Size of bird shelter: • Materials used to make bird shelter:
Constraints Some constraints for your bird shelter could be: • The materials used must be able to withstand the weather outside, such as wind and rain.

15
Teacher's Note Encourage learners to use recycled materials. An easy design is to make the bird shelter from a recycled 2 litre plastic juice bottle. They can push string through a hole in the lid and screw the lid onto the bottle to hang the bottle in the tree.
Then they make holes in the sides to let a dowel sticks through for the birds to perch on. They also cut open a smallish flap to let birds leaving space at the bottom of the bottle for the bird to make a nest in. The flap should therefore be at least 15cm from the bottom. They can paint the bottles to blend into a tree habitat to hide the bottle from predators.
DRAWING THE DESIGN FOR THE BIRD SHELTER In this step you draw what you want your bird shelter to look like.
You might need to make many drawings until you decide which design you want to use. It is a good idea to use scrap paper for this. Label the different parts of your design and say what material each part is made of.
Teacher's Note Make it clear to learners that the drawing may be different from the actual product that you make in the end due to certain reasons, such as a material not working as well as was planned, or you get a better idea for something. This being the first opportunity for learners to design and make, they will chop and change a lot of things and learn in the process. So they should not be penalised for changing, as this is part of the process. Perhaps use scrap paper for them to experiment on and draw many different designs. When they have a design they are happy with, they can draw it.
EVALUATE: Once you have a design drawing that you are happy with, you would then proceed to make the shelter. **We are not going to do this now. Later in the year you will get a chance to make some of the designs that you do (We could still do this…). For now, let's evaluate the design that you did. This means you must decide whether your product will be able to solve the problem you identified at the beginning. To do this you go back to the problem and ask the following questions: • Has my design solved the problem and how? • Did I stick to the specifications and constraints? (Ask this question of all your specifications
separately.) • If you changed some of the specifications, such as the size or materials, why did you do
so? • Is there any way you think you could improve your design?
18. Discuss what we’ve learned a. Natural structures are made by animals, like nests and shells. b. Human made structures are made by people. c. There are different kinds of structures, like frame and shell structures. d. Structures can have different shapes and sizes. e. Structures can be made from different materials. f. Humans can make shelters for animals, especially pets and birds.
19. Notebook Entry
a. Animal shelters
20. Discuss: a. Why do rabbits, pigeons and tuna fish have different habitats and shelters? There are many
reasons. The first is that it depends on what the animal is adapted to live in. Fish need to live in
16
water and so cannot live anywhere else. The water is already there and so the fish does not have to make a shelter. Rabbits need to make shelters often to raise their young, sleep at night and hide from predators. They have to dig holes in the ground and these are not naturally occurring. Pigeons often sleep in trees which are naturally occurring, but they need a shelter when they lay eggs and have chicks so they have to make nests.
b. Do you think it is fair to keep a pet rabbit in a cage where it cannot burrow? Give a reason for
your answer.
21. Read & Discuss p2-3 LB 22. Infosearch: Usborne First Encyclopedia of Our World p30-50
23. Read & Discuss The Usborne Science Encyclopedia p290
24. Notebook Entries
a. Vocabulary words i. Habitat – The natural home of a plant or an animal ii. Biodiversity – The variety of all the plants and animals on the Earth iii. Indigenous – Plants and animals that have always lived in a certain area iv. Shelter – A place that gives protection from bad weather and danger
25. Read & Discuss p4-5 LB

17
PLANT AND ANIMAL ADAPTATIONS 1. Discuss
b. The habitat of an organism determines the features of an organism. Organisms are classified into different groups according to their structural differences.
2. Read What’s Science all about p84 3. Discuss Animal Adaptations
Animals come in all different shapes, sizes and colours. These differences make each species or individual member of a species specially adapted for success in a different habitat or place within the habitat.
To help students understand the great diversity of life forms found in nature, generate a list of species with the colours and shapes listed below. Ask students to come up with as many species as possible. Some examples are listed. Ask the learners why they think the animals have these adaptations try to draw a link to habitat.
Black (penguins, black wildebeest) Grey (elephant) Green (plants, grasshoppers) Spotted (cheetah, leopard, giraffe) Striped (tiger, zebra) Wings (birds) Fur (mammals) Gills (fish) Short tail (hyena, wild dog) Long tail (cheetah, lion) Short legs (warthog) Long legs (giraffe, antelope) No legs (snakes, whales)
What is an adaptation? Animals are designed to survive in particular habitats. Just as we might try to guess where people of different cultures are from by observing the way they dress, talk and behave, we can tell a lot about an animal's habitat by observing its behaviours and appearance.
An adaptation is a physical or behavioural characteristic that helps an animal survive in its habitat. Those best adapted to the conditions in which they live are more likely to survive and reproduce. For example, take a cheetah with solid black spots. The spots help to hide them in the shade of bushes and trees, making it harder for other predators, which are a threat to the survival of the cheetah, to see them.
Let’s explore the special body parts and adaptations cheetahs have that allow them to run so fast.
** Using supplies listed below and the adaptation fact sheets and diagrams, discuss with the students the various adaptations of the cheetah. Next to each of the supplies listed is the body part and adaptation it represents. Go through items one by one and explain why each is an important piece to include in the cheetah. You may want to put up a picture of the cheetah to help students visualise each part.

18
SUPPLIES BODY PART ADAPTATION Paper aeroplane Long thin body Aerodynamic build Running shoe / takkie Semi-retractable claws Traction for running Long, medium, short sticks Legs Long legs for bigger stride Piece of wire Flexible spine Increased stride length Picture of cheetah Body / skeleton Thin and light Long piece of string Tail Maintains balance Paper heart Strong, enlarged heart For oxygen supply Binoculars (two toilet rolls tied together can substitute)
Eyes Vision of 5 km
Sunglasses Tear marks on eyes Protect eyes from sun’s glare
Paper aeroplane Throw it into the air and watch it fly. The cheetah has a long thin body to create less resistance to wind while running, just as a paper aeroplane flies easily through the air. Now crumple the paper and throw it; it will not fly like the aeroplane. Animals that move quickly through the air like birds or through the water like fish are streamlined. Cheetahs' long, thin bodies help them to run so fast.
Running shoe What is this? Shoe What type of shoe? Running shoe / takkie / sneaker When do we wear these shoes? Running / sport / exercise Why do we wear these shoes for these activities and not other shoes? Rough sole with grooves can slip easily with a smooth sole. The rough sole provides better grip decreasing the chances of slipping and falling.
Do you think it will aid a cheetah to have such an adaptation providing grip? A cheetah's paw has two adaptations to grip the non-retractable claws, which can dig into the ground and the grooves on the pads which work similar to the treads on a car tyre.
Sticks Ask students which sticks they would use for a cheetah's legs. Long legs increase the stride of a cheetah allowing it to cover a greater distance in less time.
Wire Bend and straighten the wire to show how flexible it is. This represents the cheetah's spine. The cheetah has a very flexible spine, which allows the body to stretch out in a run. Together with the long legs, this gives the cheetah a stride of 8m (pace out 8m).
Picture of a Cheetah Is the cheetah thin or fat? Cheetahs have light bones and do not carry a lot of muscles. The bigger and heavier you are the slower you are.
String The cheetah's tail acts like a rudder helping the cheetah turn while running and maintain balance. The cheetah uses its tail like we use the handlebars on a bicycle to steer.
Heart What is the function of your heart? Pump blood with oxygen to your muscles to that they can work When you are running and active, would you need more to keep muscles working? Yes Why do you get tired when active? Not enough oxygen getting to the muscles. Do you think it will take a lot of oxygen to run at 120km/h? Yes Therefore the cheetah has an enlarged heart to help it run that fast.
Binoculars If you are a buck are you going to live near to a cheetah or as far away as possible? Far away What do we use to see things that are far away from us? Binoculars
19
Do you think that it would be an advantage to a cheetah to be able to see far? Yes, will be able to see where food is / other predators are? Cheetahs' eyes work like a pair of binoculars allowing the cheetah to see very far 5 km. Using a landmark 5 km from the school that the learners all recognise to explain to them just how far 5km is. Cheetahs will be able to see a bird at that distance.
Sunglasses Due to its speed a cheetah has to hunt by day in order to clearly see where it is going. At its active times, early morning / late afternoon the sun is low on the horizon often resulting in the cheetah looking directly into the sun. When you look into the sun can you see clearly? Do you think this would be good for the cheetah while hunting and running fast? What do we use to protect our eyes from the sun? Sunglasses. What do you think are the cheetah's sunglasses? Tear marks
The colour black absorbs light so attracts the glare of the sun to below the eyes not directly into the eyes.
Using both of the following activities, you can assess the learners understanding of the lesson as well as their ability to access information from a variety of sources.
Adaptations of a Cheetah for Speed: The cheetah is the fastest animal on land, with a maximum speed of 110 - 120 km per hour. Running is the cheetah's main form of defence, its speed allows it to hunt and escape from danger. The cheetah has many adaptations, which help it to run so fast. The cheetah has a very light skeleton and does not have a lot of muscles, allowing it to run fast as the heavier you are the slower you are. The cheetah's body is thin and streamlined. The leg bones are longer than other cats and cheetahs run on the tips of their toes giving them a bigger step. The cheetah's spine also can bend a lot more than other cats; this also allows them to increase the size of their steps by stretching their body out. Their hip bones can turn where they are attached to the rest of the skeleton, this allows them to stretch their hind legs out further. All these adaptations give the cheetah a stride of 8 meters while running at full speed. The cheetah's long, narrow tail helps him to keep his balance and steer around corners. The feet give them better grip on the ground to stop the cheetah from slipping while it is running. This grip is provided by grooves on the cushions of the feet as well as the claws which cannot be pulled into the paw completely (we say that they are semi-retractable). It takes a lot of energy for the cheetah to run that fast. It is the oxygen in our blood that provides that energy. The cheetah has a very big heart and lungs to make sure that they get enough oxygen to their muscles while running to keep up their energy.
4. Read What's science all about? p84
5. Notebook Entry
a. Built for speed (Cut & paste) b. Adaptations of the cheetah (Cut & paste)

20
6. Practical Activity
a. Find different leaves, flowers and fruits. Understand that the leaves, flowers and fruit of different plants are different because they live in different habitats.
7. Discuss Classification
a. Classification takes place because of different features in living organisms. The features of an organism are determined by their particular habitat. These features enable an organism to survive in its environment.

21
STRUCTURES OF PLANTS
1. Discuss: a flowering plant a. Examine a plant (or a clear poster) showing the basic structures of flowering plants. b. Ask him to identify different parts of the plant. c. What are the possible function(s) of each part? d. Why do plants need water? e. Which part of the plant can take up water? f. Give another word for "take up". Absorb. g. Which part of the plant connects the roots to the rest of the plant?
2. Read & Discuss Usborne Internet-Linked First Encyclopedia of Science p20-21 3. Discuss
a. All plants have different parts that we call structures. In most plants you can identify the following structures: (see What's science all about? p61)
i. roots ii. stems iii. leaves iv. flowers
b. Let's take a look at the different plant structu res.
i. Roots • Plant's roots are normally found underground. Roots have very important
functions (jobs): • Roots anchor the plant in the ground. • Roots absorb water and nutrients from the soil, which are then transported to
the rest of the plant. • Some plants store the food they make in their roots, like potatoes or carrots.
ii. Stems
• Stems connect the roots to the rest of the plant. The stem has important functions:
• The stem supports the leaves, flowers and fruit (the stem holds these parts upright).
• The stem carries nutrients and water from the roots to the other parts of the plant.
• Some plants store the food they produce in their stems (like sugar cane or asparagus)
iii. Leaves
• Although many plants' leaves are green, leaves can have many other colours. Some leaves change colour during autumn. Leaves have very important functions.
• The leaves absorb the sunlight and use it to make food for the plant. This process is known as photosynthesis.
• Some plants use their leaves to store water (cactus) or food (like spinach or lettuce).
• Leaves have small openings (called stoma) underneath that allows the plant to pass out extra water as part of the process of transpiration.
• Most leaves have veins that are like tiny pipes that carry water and nutrients from the roots. The veins also carry the food the leaf makes to the rest of the plant.
iv. Flowers
• Many plants have flowers. The flowers are very important to the plant. • The flowers make pollen to make seeds that will grow new plants.
22
• The flowers attract birds and insects to spread their pollen and get pollen from other flowers.
• The flowers make fruit and seeds. • There are different kinds of flowers.
v. Seeds • Many plants make seeds and store their seeds in different ways. • In their fruit like in peaches or oranges. • In pods like in beans and peas. • On a cob like a mielie or on an ear like wheat. • Plants grow their seeds from the plant's flower, like a dandelion or the acorns
on an oak tree. • Seeds are very important to plants because new plants can grow from seeds.
4. Read I Wonder Why trees have leaves p4-5; 8-9; 18-19 5. VIDS: Plants
a. Narrated Video A Plant Story (Low) b. Where does fruit come from (Low)
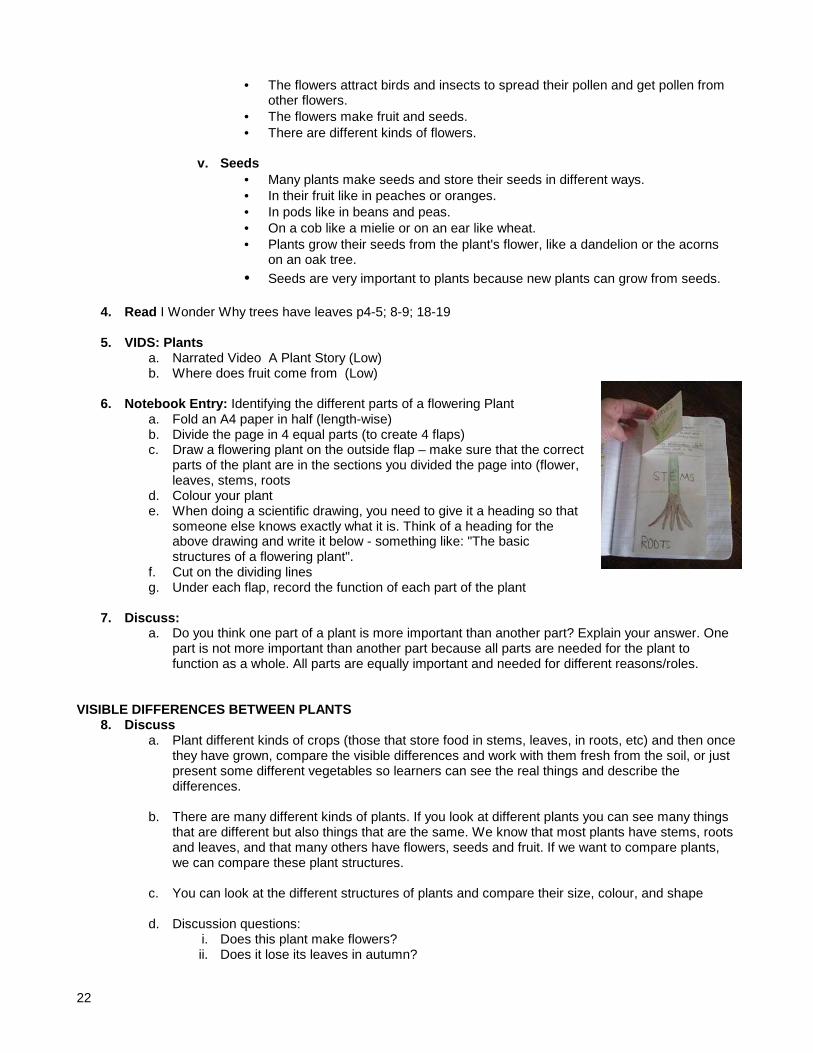
6. Notebook Entry: Identifying the different parts of a flowering Plant
a. Fold an A4 paper in half (length-wise) b. Divide the page in 4 equal parts (to create 4 flaps) c. Draw a flowering plant on the outside flap – make sure that the correct
parts of the plant are in the sections you divided the page into (flower, leaves, stems, roots
d. Colour your plant e. When doing a scientific drawing, you need to give it a heading so that
someone else knows exactly what it is. Think of a heading for the above drawing and write it below - something like: "The basic structures of a flowering plant".
f. Cut on the dividing lines g. Under each flap, record the function of each part of the plant
7. Discuss:
a. Do you think one part of a plant is more important than another part? Explain your answer. One part is not more important than another part because all parts are needed for the plant to function as a whole. All parts are equally important and needed for different reasons/roles.
VISIBLE DIFFERENCES BETWEEN PLANTS
8. Discuss a. Plant different kinds of crops (those that store food in stems, leaves, in roots, etc) and then once
they have grown, compare the visible differences and work with them fresh from the soil, or just present some different vegetables so learners can see the real things and describe the differences.
b. There are many different kinds of plants. If you look at different plants you can see many things
that are different but also things that are the same. We know that most plants have stems, roots and leaves, and that many others have flowers, seeds and fruit. If we want to compare plants, we can compare these plant structures.
c. You can look at the different structures of plants and compare their size, colour, and shape
d. Discussion questions:
i. Does this plant make flowers? ii. Does it lose its leaves in autumn?

23
iii. Can animals eat the plant or parts of the plant? iv. Can humans eat the plant? v. Perhaps you can think of other important questions that you could ask?
e. People have studied plants for thousands of years. Can you think of reasons why people need
to study plants? f. What uses do people have for plants?
People need to find which plants are good to eat and which plants can be used to cure which diseases; some plants are good for making baskets or clothes, while others can be used to construct shelters and homes; plants can also be used to write on (papyrus and trees that make paper)or to make string etc. There are many more uses.
g. People that study plants, like you are doing, start by looking at the plants and comparing what they see. They later move onto more complicated things to compare. We are going to compare different plants using our eyes as our guides.
Look at photos of the banana palm and the basil plant. How many differences can you see between these two plants?
h. When we compare plants, it is sometimes easier to use the different plant structures to compare
the plants. We can look at the stem for example in the banana palm and the basil plant and compare this. The basil plant has a thin green stem while the banana palm has a thick brown woody bark covering it's very thick trunk.
i. Look at photos of water lilies and reeds. Both grow near or in water but they look
completely different!
9. Notebook entry: Comparing plants a. When people compare different things using a set of items (like the plant structures we are
using), they often use a table to write down their ideas. b. Complete a table (computer project) - Write differences and similarities between the plant
structures of the water lilies and the reeds
Water lilies Reeds Stems Roots Leaves Flowers and/or seeds
10. Discuss
a. If you look at a plant and cannot see seeds, can you say that that plant falls into the group that does not make seeds? Why not? NO - Just because you cannot see seeds does not mean the plant does not produce seeds sometime in its lifetime. Some plants only flower once in 10 - 15 years and then only produce seeds at this time. Teachers to emphasize that just because at a specific time a plant does not have flowers or seeds, learners should not assume that the plant does not produce these.
b. Did you notice that it was slightly easier to compare plants if you know the different plant
structures?
11. Practical task a. Collect leaf samples from different plants.
i. Tell learners to be respectful of plants. They need to be careful not to ruin the plant when they cut the leaf of. Use a pair of scissors or cutters.
ii. Learners must also take care of themselves. Some plants are POISONOUS. Safety rules are:
• Don't eat parts of unknown plants.

24
• Don't rub your eyes while handling plants. • Wash your hands after handling plants.
b. Make leaf rubbings: i. Take one leaf and put it on a flat hard surface. ii. Make sure the veins are facing up, that means the leaf must be upside-down. iii. Place the white paper over the leaf. iv. Use the crayon on its side to gently colour on the paper over the leaf to trace the leaf. v. Give your page a heading that describes what you did. vi. After you have made at least 4 different leaf rubbings, carefully study your different
leaves. Describe the differences you noticed in the different leaves you used. 12. Read The Usborne Science Encyclopedia p258-259 13. Discuss
a. Can you see if different leaves have similar shapes? b. Can you see if different leaves have similar edges?
14. Notebook Entry
a. Different shapes and different edges i. Draw the different shapes leaves and the different edges leaves that you could see.
15. Discuss
a. Let him name edible leaves for example: lettuce, spinach, parsley, cabbage, coriander etc. b. Explain key words as: smooth or serrated edge, large or small, hairy or smooth, thin or thick,
etc.
25
STRUCTURE OF ANIMALS 1. Discuss
All living things can be grouped into two groups - plants and animals. Plants can be compared using the different plant structures to group them into different groups. We can use a similar method to compare animals. In this section we are going to learn how to identify different animal structures. Then we will use these animal structures to compare some animals you might already know.
2. Practical Activity
a. Think of different animals. Mime the animal so that I can guess which animal you are. 3. Discuss
a. Humans are also animals since all living things are either plants or animals. b. If I say that you live in a pigsty, does it mean that you are a pig? c. If I say someone eats like a dog, does it mean I’m calling him a dog? d. Revise the concept basic structure (how it is built up). Let him name the basic structure of
plants.
4. Notebook Entry: Comparing Animals a. Carefully study the photo of a dog and a jellyfish.
i. What differences and similarities to can you see? ii. Write the differences and similarities in the table. (Can be done on PC)
Differences Similarities
5. Discuss a. What do you think the basic structure of animals is? (Refer back to the jellyfish and the dog.
Discuss the body of different animals starting with yourself and then use the jellyfish and the dog as examples.
b. Add other types of animals to reinforce the point that different animals' bodies are covered in
different ways. c. Just like plants, animals also have basic structures. The basic structures of an animal are:
i. head ii. tail iii. body iv. limbs v. sense organs
d. Let's take a look at the different animal struct ures.
i. Head Even the smallest animal has a part where its brain is. In most animals the head has:
• A brain - no matter how small. • Sensory organs like the eyes and ears. • Feeding structures - the mouth and jaws.
ii. Tail Most animals have a tail at the back end of their body (have you ever wondered where a starfish or octopus' tail is?) A tail is often pointed but can have many other shapes as well.

26
Look at the different tails of all the animals in the illustration - can you find similarities between the tails? Some tails are long, some are short, some are bushy and covered in fur, others are covered in scales, some are very colourful and others are just one colour.
• Tails do different jobs for animals. What does the whale in the picture use its tail for? To swim.
• Both the chameleon and the squirrel have tails and live mostly in trees and bushes. But their movements are very different!
• A chameleon moves slowly while a squirrel jumps from branch to branch and climbs up and down the tree trunks. What does each of these animals use their tails for? The chameleon uses its tail to cling onto branches and balance. The squirrel mostly uses its tail for balance and to be agile when jumping from branch to branch.
• The male peacock has a very brightly coloured tail. Why do you think this is so? He attracts a mate with his tail by lifting it up and displaying it.
Tails help an animal to: • move and swing in trees - monkeys for example • balance - kangaroos use their tails to balance while they jump for example • kill their prey - crocodiles use their tails to spin them around and around when
they need to drown their prey; scorpions often have poison in their tails • pat down the earth - beavers use their powerful tails to pat ground down hard
and solid • swim - almost all fish use their tails to swim • steer their movement - fish, whales, dolphin, sharks and many others use their
tail as a sort of rudder to steer them in a certain direction. Birds' tails are very important rudders too
• attract a mate - a peacock is a perfect example! • keep it warm - a little squirrel or fox wraps its tail around it like a blanket to keep
warm. • get rid of flies - a cow or horse can swish their tail to get rid of flies • warn others of possible dangers - some deer flash the white underside of their
tails to other deer to warn them of possible danger • communicate - dogs show their emotion in their tails. If they are happy to see
you they wag their tails • protect - an armadillo has an armoured tail to protect itself

27
• distract predators - if a lizard is attacked it will drop its tail and get away while the predator goes after the wriggling tail
As you probably realised animals' tails are very important to them!
iii. Body
Collect different toy animals with as realistic body coverings as possible in a black bag. Let him feel what’s inside the bag. Discuss what he felt.
Different animals need to cover their bodies in different ways.
• Can you think of at least 5 different kinds of body coverings that animals use? • Just like animals, people use specific body coverings for special reasons. Let's
think about reasons why people cover their bodies, then we'll see how this compares to animals.
• Where or when would people wear it?
- Thick jacket, scarf and gloves - Bright thin dress with thin straps over the shoulders - A black suit with black pants and bow tie - Grey skirt and white short sleeve blouse, black shoes and white socks - A costume
• People wear different kinds of clothes in different environments. If they are cold people will wear warm clothes, and if they are hot most people will wear much fewer and thinner clothes.
• Animals also have different body coverings, which most cannot change when
the weather change. - Why do you think a bird is covered in feathers and not scales? - Why does a whale have a smooth thick skin but an octopus has a slimy
slippery skin? - Why is it that a cat has a soft furry skin but a crocodile's body is
covered in hard bone-like scales?
• Animals need to cover their bodies in special ways for a few reasons: - Body coverings need to protect the animals organs, bones and
muscles from their environment, UV rays, bumps and scratches, and from germs and bacteria that might cause infection. A warm furry body protects a polo bear in the arctic just like a scaly body protects an armadillo and crocodile.
- They need to blend into their environment to either hide from predators or camouflage themselves to stop prey from seeing them (for example lions)
- Males often use their body covering to attract female attention. A peacock boasting with his beautiful tail feathers or a lion with his mane is meant to attract females.
• Look at pictures of the following animals (respectively)
- Snail - Impala - Tortoise - Chimpanzee - Earthworm - Goldfish - Penguin - Whale

28
- Seal - Think about where the animal lives. - What does each animal's body covering do for it? - Where does this animal live?
iv. Limbs Most animals use their limbs to move with. Animals can walk, run, climb or swim using their limbs. Some animals like chimpanzees and squirrels can use their front or upper limbs to handle objects. Can you name some limbs that animals can have? Animals can have wings, webbed feet, tentacles, fins, legs, arms, flippers and long slithery bodies with no limbs, such as the earthworm.
He needs to mime an animal's movement for you to guess what it is.
v. Senses
• Animals can sense much more than humans can. Dogs for example can sense things and help humans with this. Sniffer dogs help to find people who are trapped under building rubble, mudslides or snow and tell the rescue workers where the victims are. These dogs also smell drugs or bombs and alert the police.
• Eagles, buzzards, hawks and other birds of prey have extremely sharp eyes as they have to see a small rodents from very far away.
• Elephants, cats and dogs can hear sounds that human ears cannot hear. • Bats, dolphins and some whales use a special sense called eco-location. They
send out special sound waves and can find prey or objects from quite far away. • Butterflies, bees and earthworms have another special sense called
chemoreceptors – they taste through their skin or feet. • Animals such as ants, cockroaches or crayfish have special sense receptors
that can sense something moving from very far away.
16. Notebook Entry a. On an A4 page, draw an animal of your choice (big). b. Use your scientific labeling skills to label each animal using the five body structures of animals,
and write what that body part is used for.
17. Discuss a. Think back to the seven life processes and why we can say that an animal is alive. Look at the
basic structure of an animal, at their head, limbs, body, tail and senses. How does the basic structure of animals help them carry out the seven life processes?
i. Movement - limbs & tail ii. Reproducing – body iii. Sensing - sense organs iv. Breathing – body v. Feeding - limbs (catch food, hold food, break it open), head & sense organs vi. Excreting – body vii. Growth - body, limbs, tail, head, etc.
The relationship between the structure of an animal and the seven life processes may not always be clear with some animals, but with most animals it is. For the above question, encourage learners to think of an easy animal such as a dog.
b. Animals all look very different. Some have long legs and others have short stubby claws, some have big eyes and others have thousands of tiny eyes together in one big eye. They come in all shapes and sizes!
29
18. Notebook Entry: a. Small, medium, large or extra large?!
When going shopping, have you seen that shops use the words, SMALL, MEDIUM, LARGE and Xtra-LARGE when they compare things like pizzas, eggs or clothes for example? Sometimes people just write S, M, L and XL to show the size. Let's use these letters to compare the basic body parts of animals (look on PC) Write S, M, L or XL to describe the size of the body part of the animal.
19. Discuss
a. All plants have a basic structure of roots, stems and leaves. b. Flowering plants also have flowers, fruit and seeds. c. We can see how plants are different. We compare the size, shape and colour of roots, stems,
leaves, flowers, fruits and seeds. d. All animals have a basic structure: head, tail, body, limbs and sense organs. e. Animals have different body coverings, shapes and sizes and sense organs. f. We can compare the different things that we see in animals.
30
WHAT PLANTS NEED TO GROW 1. Discuss
a. How can I grow my own plants? b. If I plant seeds, what must I do to make sure that they grow? c. What does a plant actually need to stay alive and grow?
2. Read about Conditions for growth a. What do plants need to grow?
Do you remember learning about living and non-living things? We said that almost all things on earth are either living or non-living. The plants and animals that are living need to carry out the seven life processes - do you still remember what they are? Plants make all the food that all the animals on Earth need to stay alive. If all the plants were to suddenly vanish, life on Earth would not be possible. We need to take care of the plants on our planet. In this section we are going to learn specifically what makes plants grow and keeps them alive. We will also look at growing new plants and how you can make sure that as many of your seeds as possible grow into healthy plants.
3. Discuss what plants need to grow
a. In the activity when you planted a bean seed, how did your bean grow - did it die or did it stay alive? Discuss what you think your bean plant will need to stay alive and continue growing.
b. Plants need sunlight, water and air to grow.
i. Sunlight • Green plants use sunlight, water and carbon dioxide gas to make food • The plant can use some of this food to grow and develop • It stores the rest of the food for animals to eat • When animals and humans eat plants they get energy from the plant.
ii. Air
• Just like animals and people, plants also need air to live and grow • Plants use carbon dioxide to make food so that they can grow
iii. Water • Plants need water to grow and to make food. Some plants need more water
than others. The amount of water a plant needs depends on the type of plant. If the plant does not get the amount of water it needs it will die. Some plants are able to grow in very dry areas, such as cacti in the desert. These plants have adapted (changed) over many, many years to be able to survive in these conditions. The roots of the plant absorb water from the soil. This water carries nutrients from the soil to all the parts of the plant.
When raindrops collect on the leaves of a plant, they fall down to the soil and soak into the soil. The roots will then absorb the water for the plant. Remember, a plant needs water, sunlight and carbon dioxide to make food.
iv. Soil
• Most plants grow well if they are planted in soil • Plants are anchored in the soil by their roots • Their roots absorb the dissolved nutrients from the soil • To make sure plants get enough of these mineral nutrients we often add some
fertiliser or compost to the soil. We say that soil that has a lot of nutrients is rich and soil that does not have many nutrients is poor.

31
4. Discuss: Growing new plants a. Do you remember that one of the life processes is reproduction? How do plants make new
plants? i. Plants can generally be grown from seeds or cuttings. ii. Seeds grow from flowers and are fertilized with pollen from another flower. Fertilized
seeds can then germinate to start growing into a new plant. iii. A cutting is made when a piece of a plant (usually the stem) is cut off and planted in
new soil to start growing roots and form a new plant. iv. Plants can also grow from shoots that are little roots that shoot out of special places in
the stem of the plant and start to grow into a new plant. b. What seeds need to germinate
i. You have learnt that seeds are important to grow new plants. A plant needs to germinate from the seed to start growing. This means that the seed has to develop into a new plant and grow all the necessary plant parts.
ii. Previously we germinated a seed and saw that although it seemed to be non-living, it can be revived. Have you ever wondered what seeds need to germinate and grow into new plants? Let's find out by doing a scientific investigation!
5. Discuss a science investigation
Emphasize the need for a proper science investigation to answer a question. a. INVESTIGATION: What does a seed need to germinate?
i. We will investigate different questions. ii. Can a bean germinate in a dark place? iii. ** Everything Kids Science Experiments Do seeds need light to grow? P6-7 iv. Can a bean germinate in a very cold place? v. Can a bean germinate without water?
b. AIM:
An aim in a science investigation is where we state what the purpose (aim) of the investigation is. What do you want to find out by doing this investigation? For example: To find out whether a seed needs light to germinate and grow", or "To find out whether a seed needs warmth to germinate and grow".
c. PREDICTION:
A prediction is when you predict (make a guess) what the result of your investigation will be. But it is not just any guess! You must think about what you think will happen in your investigation. What do you think will happen to your seed and how will it change?
d. APPARATUS (Equipment you will need):
i. bean seeds ii. a couple of shallow containers, such as a saucer or the lid of a large jar or yoghurt tub iii. cotton wool (if no cotton wool is available, use strips of newspaper instead) iv. a dark cupboard v. a fridge vi. a ruler
e. METHOD (what you must do):
Depending on what you are investigating.
Teacher’s Note: The control beans should germinate and grow the best and you can then use these plants to monitor further. Once they have germinated, show learners how to measure the lengths of the stems using a ruler. Possibly measure 3 stems and then calculate an average.
32
Record these results on the board and then use them to draw a table and then a graph in the learners book. Get the learners to make a drawing of the first beans that germinated, and again when a leaf appears.
i. Wrap your bean in cotton wool (or newspaper if you do not have cotton wool) ii. Place it in the shallow container (saucer or lid). iii. Wet the cotton wool (be careful not to flood it!) iv. Place the container with the wet cotton wool and bean in a sunny spot ** OR WHERE
ELSE YOU WANT TO INVESTIGATE v. Water your cotton wool DAILY and make sure that it stays damp ** vi. Regularly check your bean's progress
f. RESULTS AND OBSERVATIONS (What you observe and f ound out):
i. Keep a diary during the next few weeks to write down what you see happening. This is called recording your observations
ii. Once the seeds germinate, measure the length of the stems each day and record your
results.
iii. We are now going to draw a graph! Graphs are another way of presenting (showing) our results. They are often used by scientists to show their results. Drawing graphs is a very important skill! We will use the results from the table above to draw a graph. There are also many different types of graphs, but we will draw a line graph.
• First draw the axes - one is called the horizontal axis and the other is called the vertical axis
• Next decide what will go on each axis. The horizontal axis is where the independent variable is plotted. The date or day number will go along the horizontal axis. The dependent variable goes on the vertical axis. the height grown by the plants (stem length) is dependent on the day, so this goes on the vertical axis.
• Label the axes. • Next decide on a scale for each - perhaps only record a measurement every
two days if your seeds took a long time to grow. • Next plot each point using the "pairs" from the table .In other words for Day 1,
the height should be zero so plot a point for this first. Show learners how to first read on one axis, then the other, and where these two cross, you make the point.
• You can then draw a line between the points to link them up. • Give the graph a heading • A possible graph is given below to give an idea
g. CONCLUSION (What we have learnt):
i. When we do a science investigation, we always have to write a conclusion at the end. This summarizes what we have learnt from the results of our experiment. From this science investigation, write a conclusion where you state what you have learnt. Seeds need water and warmth to germinate (this should be the main conclusion from learners). Evaluate any other conclusions that they might have made depending on the experiment.
6. Independent Activity: Do your own investigation (follow the procedure)
a. INVESTIGATION: How the amount of water influences the growth of a plant b. AIM (What you want to find out):
i. What do you want to find out by doing this investigation?
c. PREDICTION (What you think will happen): i. Can you already guess what will happen in your investigation? ii. Write a prediction of what you think will happen

33
d. APARATUS (Equipment you will need): i. Three of the bean plants that germinated in the previous investigation ii. Three containers of exactly the same size iii. Soil
e. METHOD (What you must do):
i. Fill the three containers with exactly the same amount of soil. ii. Plant the three seedlings in the three containers. iii. Place the three containers next to each other in a spot that gets enough sunlight during
the day iv. Label the three containers as follows:
1. No water 2. Little water 3. Plenty of water
v. 5. Water the plants according to the labels. vi. Measure the three plants on the same day every week. vii. Recording your findings in the table. That means you need to write the lengths of each
plant in the correct block on the table below.
f. RESULTS (What happened?): i. Reacord your results ii. Use the space provided below to draw a bar graph of your findings. iii. Fill in the scale for the vertical axis iv. Draw in the bars for each plant for the final height it grew after week 5
g. CONCLUSION (What we learnt):
i. What differences could you see between the three plants after the 5 weeks? Why do you think the plants differed so much after 5 weeks?

34
TOPIC 1 UNIT 2 – INTERDEPENDANCE
1. Discuss a. Are plants living or non-living things? Although they do not move from one place to another like
animals do, they are also living things with organs. b. Explain: these living things do not live on their own in a habitat, but rely on other living
organisms and non-living things in their habitat to survive.
2. Read & Discuss p6-9 LB
3. Notebook Entries a. Find pictures that illustrate how living things and non-living things depend on each other.
Divide the pictures into different habitats (e.g. terrestrial habitats vs aquatic habitats) i. Discuss differences in structural adaptations in different terrestrial habitats (e.g. deserts,
grasslands, forests) b. Vocabulary words (he writes the word on the outside of the flap)
i. Interdependence – Two or more things that depend on each other ii. Host – A plant that provides food, water and shelter for another plant iii. Disperse – To move away from each other iv. Resources – non-living things that animals and plants need in their habitats to survive
(like air, water, soil) 4. Read & Discuss p8-9 LB (Up to Activity 6)
35
TOPIC 1 UNIT 3 – ANIMAL TYPES (Animal Classificatio n) 1. Read & Discuss p10-11 LB 2. Notebook Entries (he must search for and write the answer inside the flaps)
a. Animals with exoskeletons are called… Invertebrates b. What is an exoskeleton made of? Plates joined together to make a hard shell c. An exoskeleton is thick and hard… where the body must bend, e.g. the leg joints d. Exoskeletons (advantages vs disadvantages) p10
3. Read & Discuss p11-12 LB 4. Notebook Entries
a. Facts about endoskeletons i. Let him read the text and highlight the facts in different colours ii. He must then paste the facts inside the minitbook
b. Where is cartilage found? At the joints c. Animals with endoskeletons are called…
d. Vocabulary words
i. Exoskeleton – Shell or hard covering on the outside of animals ii. Invertebrate – An animal that does not have a backbone made of bone iii. Moult – To shed the outer covering to grow a new, bigger one iv. Endoskeleton – Skeleton found inside an animal’s body v. Vertebrate – An animal with a bony backbone vi. Vertebrae – Small bones in a backbone vii. Cartilage – Flexible, tough substance that cushions bones at the joints
5. Read & Discuss p13 LB 6. Read & Discuss p2-5 Exploring Creation with Zoology 1 (Classification, Latin, Binomial Nomenclature,
Try This!) 7. Read What's science all about? p18-21
8. Notebook Entries
a. Scientists who study animals are called… Zoologists b. What is taxonomy? When living things are grouped and named. c. Classifying Living things.pdf (Cut & paste) d. 4 Invertebrate classes.pdf (Cut & paste) e. 5 Vertebrate classes.pdf (Cut & paste) f. What is Binomial Nomenclature? (Cut & paste)The two-named Latin system that scientists use to
write scientific names of animals, which refers to the animal’s genus and species. g. Sort them yourself
i. Divide an A4 page in half lengthwise ii. Label the columns Vertebrates and Invertebrates iii. Find and paste pictures under the appropriate columns
TOPIC REVISION p14 LB Basic Target Worksheet Topic 1 p1 Advanced Target Worksheet Topic 1 p2

36
TOPIC 2 - ANIMAL SKELETONS
1. Needed Resources: a. Pictures and examples of animal skeletons/bones b. Examples of creatures with exoskeletons c. Clean bones, x-rays
2. Discuss:
a. Why are humans animals? b. Name three things that all the skeletons in the introductory picture have in common c. What type of skeleton do humans have? Endoskeleton d. How many bones are in the human skeleton? 206 e. Are bones living or dead? Living f. Can bones heal? Yes g. What are the two main functions of your skeleton ? Protects vital organs and provides
muscle levers so your body can move h. Where is the smallest bone in the human body? In the ear
3. Read & Discuss p16-19 LB 4. Activity
a. Make a pasta skeleton p9 TG
5. Read & Discuss Usborne Science Encyclopedia p346 6. Read Usborne Illustrated Dictionary of Science p278-279
7. Notebook Entries
a. Parts of a human skeleton
8. Read & Discuss How your body works Issue 1 p1
9. Notebook Entries a. Busy Bones
i. Write what bones do for the body Protect the body’s vital organs, make blood cells, store nutrients
10. Read & Discuss How your body works Issue 1 p2-3
11. Notebook Entries
a. Where are they found?
12. Read & Discuss How your body works Issue 1 p4-5
13. Infosearch Usborne Science Encyclopedia p347
14. Usborne Illustrated Dictionary of Science p280-281

37
15. Notebook Entries a. What goes on inside a bone?
16. Read & Discuss How your body works Issue 1 p6-7 & Issue 3 p28-29 17. Infosearch Usborne Science Encyclopedia p347
18. Notebook Entries
a. Different types of joints (Cut & paste) b. How many joints are in the human body? 360 c. Joints and their functions (Cut & paste)
19. Read & Discuss How your body works Issue 1 p8-9, 12 20. Notebook Entries
a. What animal has the biggest bones? The blue whale. b. Vocabulary Words (Mix & match)
i. Muscles – Masses of tough, elastic tissue that pull our bones when we move ii. Tendons – Tough cords that attach muscles to bones iii. Ligaments – Bands that connect bone to bone and strengthens the joint iv. Adaptation – Changes in a body over time to suit the environment v. Synovial fluid – The fluid that fills the membrane and allows bones to slide easily
21. Read & Discuss How your body works Issue 2 p13 22. Notebook Entries
a. Why are bones like a medieval suit of armour?
23. Read & Discuss How your body works Issue 2 p14-15 24. Notebook Entries
a. Bones in the trunk (Cut & Paste)
25. Read & Discuss How your body works Issue 2 p16-17, 22-23 26. Notebook Entries
a. Vertebrae and discs
27. Read & Discuss How your body works Issue 3 p26-27 28. Notebook Entries
a. How many bones are in your hands and feet? 106 b. Arm bones.pdf c. Foot bones flap.pdf
29. Read & Discuss How your body works Issue 3 p32-33 30. Notebook Entries
a. How our bones heal (copy p33 diagrams, paste title on front page) b. Vocabulary words: (Mix & match)
i. Joint – The place where two or more bones meet ii. Frame structures – Framework of struts that are joined in triangular shapes iii. Vital organs – Organs in the body that are absolutely necessary for life iv. Limb – Leg, arm or tail v. Trunk – The body of an animal excluding the head or the limbs vi. Shoulder girdle – Set of bones where front limbs attach vii. Hip girdle – Part of the skeleton made up of hip bones that support the hindlimbs viii. Characteristic – Something to help identify or tell things apart
38
31. Discuss a. Why is calcium important in your diet? b. Which food should we eat more of if we do not ha ve enough calcium in our bones? E.g.
cheese, fish, whole grains c. What is the disease called when there is not eno ugh calcium in the bones? Osteoporosis d. Are women or men more likely to get the disease? At what age do people get this
disease? Women over 50 years old e. Apart from the correct foods containing calcium what else can we do to keep our bones
strong and healthy? Exercise, especially weight-bearing exercise. Take in Vitamin D which is important for increasing calcium absorption. Avoid smoking and drinking alcohol.
32. Read & Discuss p20-21 LB
a. Also read How your body works Issue 3 p36 33. Notebook Entry
a. What happens when calcium is removed from bones?
34. ONLINE: (Drag & Drop bones on skeleton) a. http://www.bbc.co.uk/science/humanbody/body/interactives/3djigsaw_02/index.shtml?skeleton
35. VIDS: Skeletons a. Skeleton puppet dancing and singing b. The Skeleton Dance from Super Simple Songs c. Human Skeleton 3D Animation d. THE SKELETAL SYSTEM
36. VIDS: Movies/Once upon a time/life a. Life - The bones and the skeleton (1 of 3) b. Life - The bones and the skeleton (2 of 3) c. Life - The bones and the skeleton (3 of 3) d. Life - The bone marrow (1 of 3) e. Life - The bone marrow (2 of 3) f. Life - The bone marrow (3 of 3)

39
TOPIC 2 UNIT 2 – MOVEMENT
1. Discuss: a. How do you think your body moves? b. Can bones bend? No, but we do have a whole range of movement in our bodies due to joints.
We have different kinds of joints that allow for different kinds of movement. Joints have a thin lining or membrane filled with a fluid (synovial fluid) that allows bones to slide easily.
c. Experiment with your joint movements, particularly your shoulders, hips, knees and elbows. Compare the range of movement between the different joints.
d. *Draw his attention to a hinge on the classroom door and the movement that it allows. e. Predict / compare / discuss movement in vertebrates other than humans. f. Connect animal skeletons to their habitat, lifestyle ad method of movement
2. Read & Discuss p22-23 LB a. No movement can take place without the muscles pulling on the bones. b. Tendons attach the muscles to the bones
3. Read How your body works Issue 4 p37-45, 48 4. Read How your body works Issue 5 p62 5. Read What’s Science all about? p39
6. InfoSearch:
a. The Usborne Science encyclopedia p348-349 b. Usborne Illustrated Dictionary of Science p282-283
7. Notebook Entries
a. Copy the different shapes of muscles i. Title a page – Types of Muscles ii. Copy last page #2 How your body works iii. Write descriptions and where it is found in the body
8. MOVIE: Muscular system
a. http://kidshealth.org/kid/closet/movies/MSmovie.html?tracking=59983_G b. Then do the quiz (click on the link at the bottom)
9. ONLINE: (Drag & Drop at correct place) a. http://www.bbc.co.uk/science/humanbody/body/interactives/3djigsaw_02/index.shtml?muscles
10. Activity a. Build a pair of muscles How your body works Issue 4 p46-47
11. VIDS: Movies/Once upon a time/life a. Life - The muscles and the fat (1 of 3) b. Life - The muscles and the fat (2 of 3) c. Life - The muscles and the fat (3 of 3)
12. Read & Discuss p24-25 LB 13. Read & Discuss What’s Science all about? p54 (Skeletons and movement of other animals)
14. Notebook Entries
a. Complete the Notebook page on amphibians. Use the following prompts (answer the questions in full sentences) to write what you know about amphibians:
i. Amphibians move in different ways: They can walk, run, hop, jump, swim, burrow, glide
ii. Name an example of an amphibian. A frog is an example of an amphibian.

40
iii. Why is a frog called an amphibian? Frogs are amphibians, because they live on land but breed in water.
iv. How many limbs does a frog have? Frogs have four limbs. v. Why are a frog’s back legs bigger and stronger t han the front legs? Frogs use
their hind legs to jump, that’s why it is bigger and stronger than the front legs. vi. How are amphibian skeletons similar to skeleton s of other vertebrates?
Amphibian skeletons are similar to skeletons of other vertebrates, because both skeletons are made from bone; the bones are different shapes and sizes; muscles attach to the bones; bones protect internal organs; the skeleton gives the body shape.
15. VIDS: http://video.nationalgeographic.com/video/kids/animals-pets-kids/amphibians-kids/
TOPIC REVISION p26 LB Basic Target Worksheet Topic 2 p3

41
TOPIC 3 - STRUCTURES STRENGTHENING MATERIALS WAYS TO STRENGTHEN MATERIALS There are different ways to strengthen materials to make a stronger structure. We can do this by changing the shape of the material. You may think that the shape may not make that much of a difference, but let's have a look.
1. Which shape is stronger?
a. ACTIVITY: Explore different ways to strengthen paper b. MATERIALS:
i. Up to 5 sheets of A4 paper ii. Pieces of sticky tape iii. A number of identical or similar size books
c. INSTRUCTIONS:
i. Investigate different ways of using your paper sheets to balance a book. Look at the pictures below for some ideas. Use a piece of sticky tape if you need it.
d. VID: Online - Different shapes for structures - goo.gl/Q9XLd e. How many different ways can you find of balancing a book more than 10 cm above the desk or
floor, using only 1 sheet of A4 paper?
f. Discuss: i. Could you balance a book on just a single flat piece of paper? No ii. Which shape of piece of paper is the strongest? Why do you think so? The investigation
should show that the strongest shape that the paper can be folded or rolled into to support a weight would be a round tube.
iii. What did we learn from doing this activity? iv. Materials can be made stronger by changing their shape. An example is rolling the
paper into pillars. Pillars can be circular, triangular or square. Which one do you think is the strongest?
2. Which pillar is the strongest?
Tom has a pile of books next to his bed at home. He wants to make a stand for these books so that his room looks a bit neater. He thought about making a stand using materials he can easily get hold of, such as paper. His idea is to make 4 pillars and then place a cardboard sheet on top on which to place his books. But, Tom does not know which type of pillar would be the strongest - triangular, circular, or square. Let's help Tom and do an investigation to find out which shape of pillar is the strongest for him to make a book stand.
Teacher’s Note: In the experimental design stage, encourage learners to ask questions such as "How will we know it is strong?", "What should we do to check it is strong?", etc. This will help learners to see that by placing

42
books on top with increasing weight, you can test how strong the pillars are. Do not give them these answers outright, rather ask them the questions first and encourage them to think.
a. INVESTIGATION: Which pillar is the strongest? b. AIM (what you want to find out):
Write down what you think the aim is for the experiment. To investigate which type of pillar is the strongest: a triangular, circular, or square.
c. APPARATUS:
i. 4 sheets of A4 paper ii. scissors iii. sticky tape iv. a piece of cardboard to form a platform as the lid of a box v. a number of the same type and size of books
d. METHOD:
i. Look at the image below to see how to make the different shaped pillars
Triangular, round and square paper pillars.
ii. Make 4 of the same pillars out of the 4 sheets of paper (one sheet per pillar) iii. You can use sticky tape if needed (use the same amount on all structures) iv. Put a platform of cardboard on the folded pillars as in the picture below.
A platform for the books using 4 circular paper pillars
v. Now test the structures vi. Add books (one-by-one) onto the platform. Use the same books for each structure and
place the books on in the same order each time. vii. Record the number of books that each structure can hold before collapsing on the table
below.

43
Groups Number of books Circular pillars Triangular pillars Square pillars
viii. Now draw a bar graph of your results. A bar graph is used to represent your results in a
different way.
Teacher's Note On x-axis: three types of support. Circular, triangular and square On y-axis: number of books Heading: The graph shows the number of books supported by pillars of different shapes
e. CONCLUSION: i. What is your conclusion from this experiment? Which shape of pillar is the strongest?
f. Discuss: i. Which shape pillar would you tell Tom to use for his book stand? Dependent on
experiment. It should however be the round pillar.
3. Tubing and folding a. Discuss:
Materials are strengthened by shaping them into a tube (tubing). Tubing is often used to make frames and for supporting weight. The tube can be in a number of shapes, as we saw in the investigation. It can be circular, square, triangular or even in a U-shape.
When exploring different ways to strengthen paper you discovered folding the paper also helped to strengthen it. Corrugated cardboard and bubble wrap plastic are examples of strengthened folded materials. Corrugated iron is another example of how folding makes a material stronger. Look at the picture below of a sheet of corrugated iron and a flat sheet. Corrugated iron is much stronger which is why it is used for the roofs of some houses.
b. ACTIVITY:
i. Investigate the uses of different materials in different buildings and structures ii. Look particularly for materials which have been tubed or folded, and for the use of struts
and braces
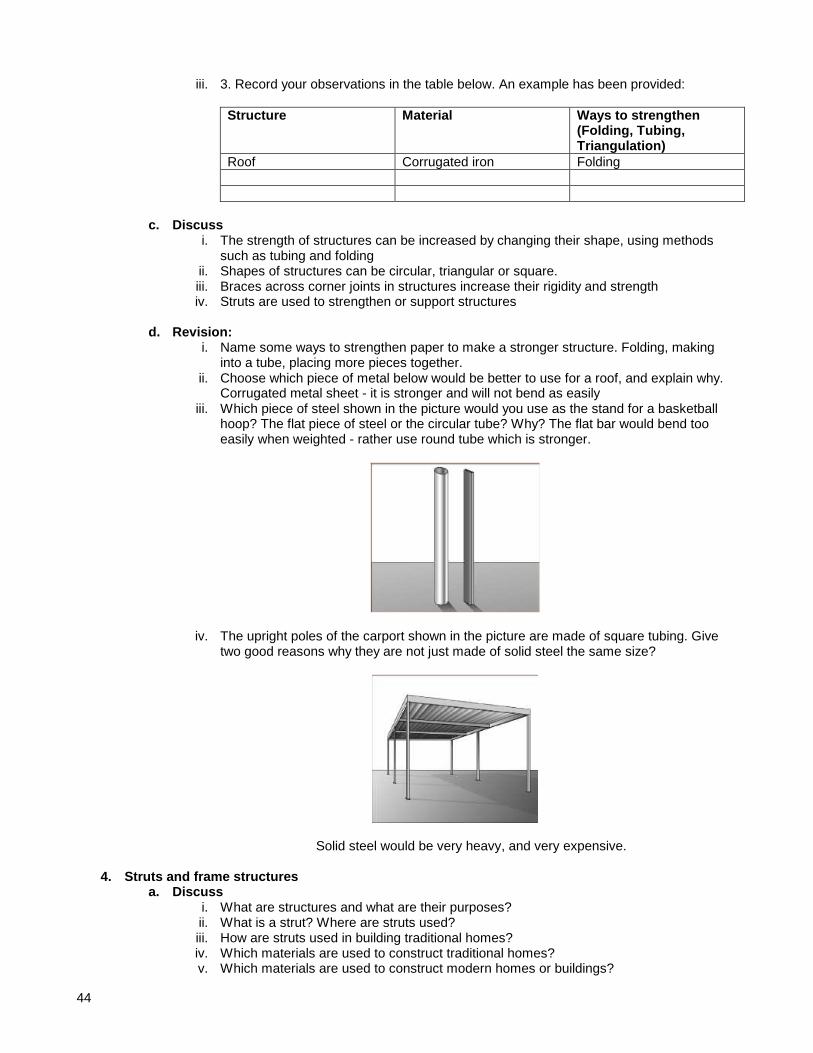
44
iii. 3. Record your observations in the table below. An example has been provided:
Structure Material Ways to strengthen (Folding, Tubing, Triangulation)
Roof Corrugated iron Folding
c. Discuss
i. The strength of structures can be increased by changing their shape, using methods such as tubing and folding
ii. Shapes of structures can be circular, triangular or square. iii. Braces across corner joints in structures increase their rigidity and strength iv. Struts are used to strengthen or support structures
d. Revision:
i. Name some ways to strengthen paper to make a stronger structure. Folding, making into a tube, placing more pieces together.
ii. Choose which piece of metal below would be better to use for a roof, and explain why. Corrugated metal sheet - it is stronger and will not bend as easily
iii. Which piece of steel shown in the picture would you use as the stand for a basketball hoop? The flat piece of steel or the circular tube? Why? The flat bar would bend too easily when weighted - rather use round tube which is stronger.
iv. The upright poles of the carport shown in the picture are made of square tubing. Give two good reasons why they are not just made of solid steel the same size?
Solid steel would be very heavy, and very expensive. 4. Struts and frame structures
a. Discuss i. What are structures and what are their purposes? ii. What is a strut? Where are struts used? iii. How are struts used in building traditional homes? iv. Which materials are used to construct traditional homes? v. Which materials are used to construct modern homes or buildings?

45
vi. Where do we find struts in the human body?
In the previous lessons we saw how to strengthen a material to build a strong structure, such as folding and creating tubes. Now we want to look at how we can strengthen a structure. A structure is something that is arranged in a specific way and consists of different parts. A jungle gym is an example of a structure. It has many different parts such as beams, ropes, and bars.
A structure is made of different parts. The way we put these parts together can make a structure strong or weak. Let's have a look at ways to join parts together.
Teacher's Note The following activity is an investigation which will lead into the subsequent content. This activity will introduce what struts are. Make sure that the learners experience a triangle as a strong structure and a square as a weak structure.
The cardboard strips can be made from cardboard boxes such as paper boxes and kept for future years. This can also be done with straws and pins, or with toothpicks and jelly-tots, or with uncooked spaghetti sticks and marshmallows.
b. ACTIVITY: Exploring ways to make a strong structure c. MATERIALS:
i. 7 cardboard strips, all the same length ii. 10 - 12 paper fasteners - e.g. split pins iii. A hole punch
d. INSTRUCTIONS:
i. You are going to make different structures using the pieces of cardboard ii. Make holes at both ends of each strip. iii. Join the strips into a square and a triangle. Use the paper fasteners (split pins) to join
the strips together at the corners. iv. Now test each of the shapes by pressing two corners together as in the picture below
(don't force them). Watch what happens. Which shape is easy to "squash"? v. Cut a longer strip of cardboard which will reach from one corner of the square to the
opposite corner, punch holes in it in the correct places, and add it onto the square. vi. Now press two corners together and see what happens.
e. Discuss: i. Which shape lost its shape (collapsed) when you pressed on the corner? Square ii. How can we strengthen the shape that collapsed? Use one strip to brace diagonally
opposite corners iii. How many shapes are formed when the shape is strengthened with the extra piece of
card? 2 shapes iv. What is the name of this shape? Triangle v. Which shape do you think is the strongest? Triangle
We saw in the last activity that you can make a shape stronger be putting an extra piece in. For

46
example, the square was much stronger after you placed an extra piece of card diagonally from one corner to the opposite. This extra diagonal piece is called a strut. The other pieces are also called struts and together they all make up a strong, stable frame.
The frame is the structure which supports the other parts. The struts strengthen the frame structure when joined in particular, stable shapes. A frame is a rigid support structure that gives shape and forms support for its parts. The word rigid means stiff, not bending or changing shape. Every building, vehicle, and piece of furniture has a frame structure.
f. QUESTIONS
i. There are five struts making up this frame. Label all 5.
ii. Did you know humans also have a frame structure? Can you guess?! It is our skeleton! Our skeleton consists of bones which make up the frame to support all our muscles and organs. Look at the picture below of the rib cage. It is a perfect example of a frame structure. The frame structure of the rib cage protects all the organs inside, such as the heart and lungs.
iii. A strut is a part of structure that will support or hold another strut in place. It can be a rod or a bar. A strut is designed to withstand compression. The picture below shows how wooden struts are used to prevent the fence from collapsing.
iv. Study the picture of the struts in the fence. What properties do you think the struts need
to have to do its job? For example can the strut be made of something soft? Can the struts be flexible? No, it cannot be made of something soft. The strut must be strong and hard to support the force from the fence. No, the strut must be sti_ and not flexible as it must not bend.

47
The strut in this fence must be strong and solid to give the fence stability.
g. Discuss:
A tie is a connector that is designed to withstand tension for example a nut and bolt.
A guy is designed to withstand tension. A guy can be a rope, chain or a single wire. For example, when you put up a tent you use guy ropes to hold down the tent.
Corners of rectangles are often weak points in structures, where the structure can bend and collapse like the square in the investigation you did in the previous unit. Triangles are strong shapes, which do not collapse easily. By putting another support (called a brace) across a rectangle's corner to make a triangle, the corner is made much stronger.
We are mostly going to look at the parts of frame structures used in building something.
Teacher's Note The following pages of pictures do not contain many exercises. But, the main objective is to expose the learners to different structures with have been strengthened using struts. Makes sure to go through each picture and identify the struts. Ask learners to point out the struts in the pictures and explain why they think the frame structures need to be strong and rigid.
When builders need to work high above the ground, they often use a frame called scaffolding. If this didn't have any braces across it which make triangles, it could easily collapse.
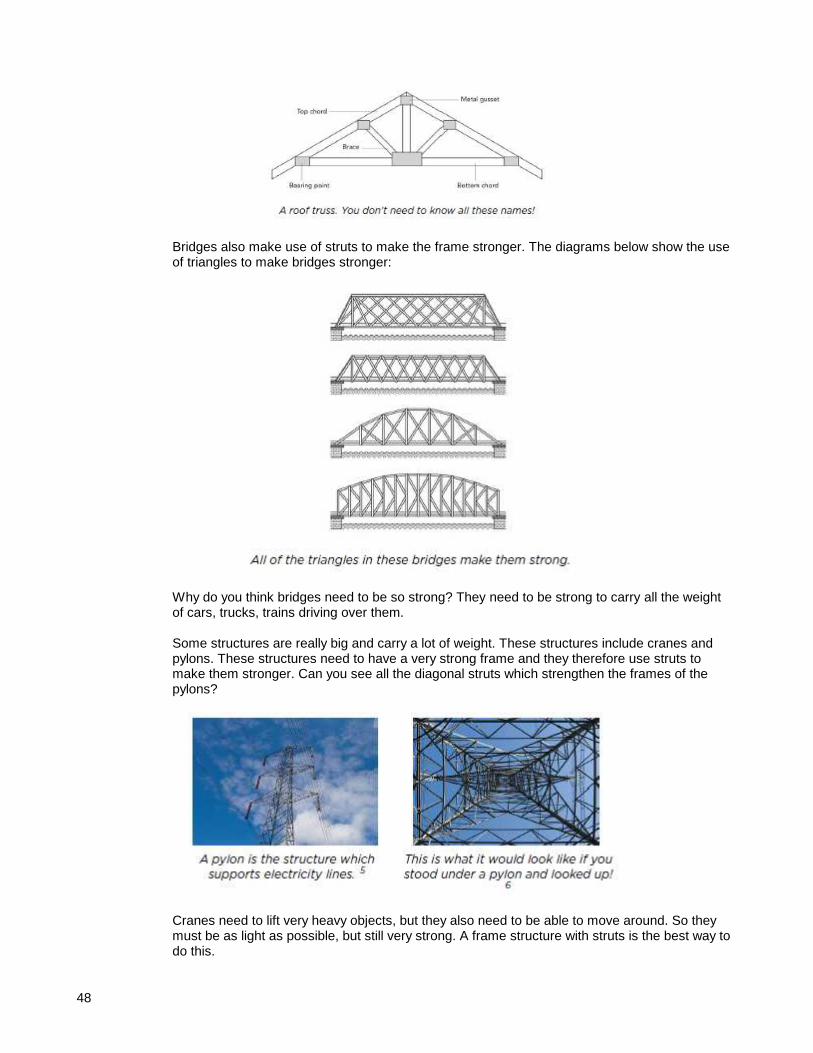
48
Bridges also make use of struts to make the frame stronger. The diagrams below show the use of triangles to make bridges stronger:
Why do you think bridges need to be so strong? They need to be strong to carry all the weight of cars, trucks, trains driving over them.
Some structures are really big and carry a lot of weight. These structures include cranes and pylons. These structures need to have a very strong frame and they therefore use struts to make them stronger. Can you see all the diagonal struts which strengthen the frames of the pylons?
Cranes need to lift very heavy objects, but they also need to be able to move around. So they must be as light as possible, but still very strong. A frame structure with struts is the best way to do this.
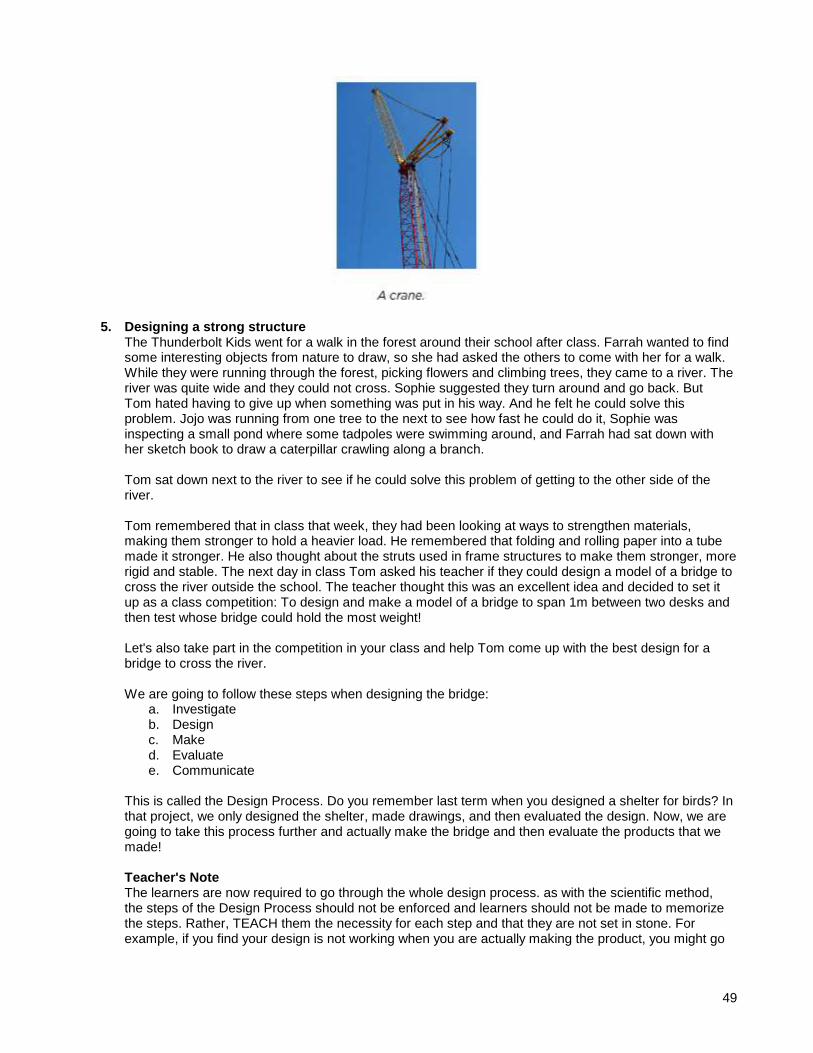
49
5. Designing a strong structure The Thunderbolt Kids went for a walk in the forest around their school after class. Farrah wanted to find some interesting objects from nature to draw, so she had asked the others to come with her for a walk. While they were running through the forest, picking flowers and climbing trees, they came to a river. The river was quite wide and they could not cross. Sophie suggested they turn around and go back. But Tom hated having to give up when something was put in his way. And he felt he could solve this problem. Jojo was running from one tree to the next to see how fast he could do it, Sophie was inspecting a small pond where some tadpoles were swimming around, and Farrah had sat down with her sketch book to draw a caterpillar crawling along a branch.
Tom sat down next to the river to see if he could solve this problem of getting to the other side of the river.
Tom remembered that in class that week, they had been looking at ways to strengthen materials, making them stronger to hold a heavier load. He remembered that folding and rolling paper into a tube made it stronger. He also thought about the struts used in frame structures to make them stronger, more rigid and stable. The next day in class Tom asked his teacher if they could design a model of a bridge to cross the river outside the school. The teacher thought this was an excellent idea and decided to set it up as a class competition: To design and make a model of a bridge to span 1m between two desks and then test whose bridge could hold the most weight!
Let's also take part in the competition in your class and help Tom come up with the best design for a bridge to cross the river.
We are going to follow these steps when designing the bridge:
a. Investigate b. Design c. Make d. Evaluate e. Communicate
This is called the Design Process. Do you remember last term when you designed a shelter for birds? In that project, we only designed the shelter, made drawings, and then evaluated the design. Now, we are going to take this process further and actually make the bridge and then evaluate the products that we made!
Teacher's Note The learners are now required to go through the whole design process. as with the scientific method, the steps of the Design Process should not be enforced and learners should not be made to memorize the steps. Rather, TEACH them the necessity for each step and that they are not set in stone. For example, if you find your design is not working when you are actually making the product, you might go
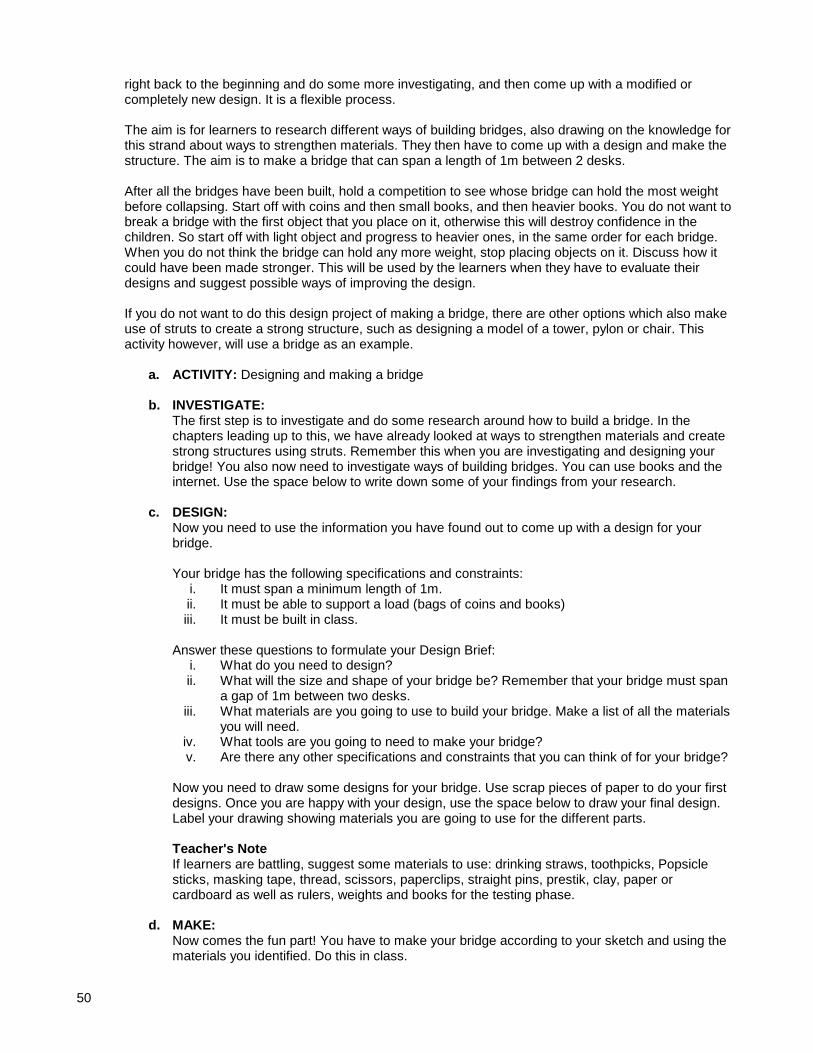
50
right back to the beginning and do some more investigating, and then come up with a modified or completely new design. It is a flexible process.
The aim is for learners to research different ways of building bridges, also drawing on the knowledge for this strand about ways to strengthen materials. They then have to come up with a design and make the structure. The aim is to make a bridge that can span a length of 1m between 2 desks.
After all the bridges have been built, hold a competition to see whose bridge can hold the most weight before collapsing. Start off with coins and then small books, and then heavier books. You do not want to break a bridge with the first object that you place on it, otherwise this will destroy confidence in the children. So start off with light object and progress to heavier ones, in the same order for each bridge. When you do not think the bridge can hold any more weight, stop placing objects on it. Discuss how it could have been made stronger. This will be used by the learners when they have to evaluate their designs and suggest possible ways of improving the design.
If you do not want to do this design project of making a bridge, there are other options which also make use of struts to create a strong structure, such as designing a model of a tower, pylon or chair. This activity however, will use a bridge as an example.
a. ACTIVITY: Designing and making a bridge b. INVESTIGATE:
The first step is to investigate and do some research around how to build a bridge. In the chapters leading up to this, we have already looked at ways to strengthen materials and create strong structures using struts. Remember this when you are investigating and designing your bridge! You also now need to investigate ways of building bridges. You can use books and the internet. Use the space below to write down some of your findings from your research.
c. DESIGN:
Now you need to use the information you have found out to come up with a design for your bridge.
Your bridge has the following specifications and constraints:
i. It must span a minimum length of 1m. ii. It must be able to support a load (bags of coins and books) iii. It must be built in class.
Answer these questions to formulate your Design Brief:
i. What do you need to design? ii. What will the size and shape of your bridge be? Remember that your bridge must span
a gap of 1m between two desks. iii. What materials are you going to use to build your bridge. Make a list of all the materials
you will need. iv. What tools are you going to need to make your bridge? v. Are there any other specifications and constraints that you can think of for your bridge?
Now you need to draw some designs for your bridge. Use scrap pieces of paper to do your first designs. Once you are happy with your design, use the space below to draw your final design. Label your drawing showing materials you are going to use for the different parts.
Teacher's Note If learners are battling, suggest some materials to use: drinking straws, toothpicks, Popsicle sticks, masking tape, thread, scissors, paperclips, straight pins, prestik, clay, paper or cardboard as well as rulers, weights and books for the testing phase.
d. MAKE:
Now comes the fun part! You have to make your bridge according to your sketch and using the materials you identified. Do this in class.
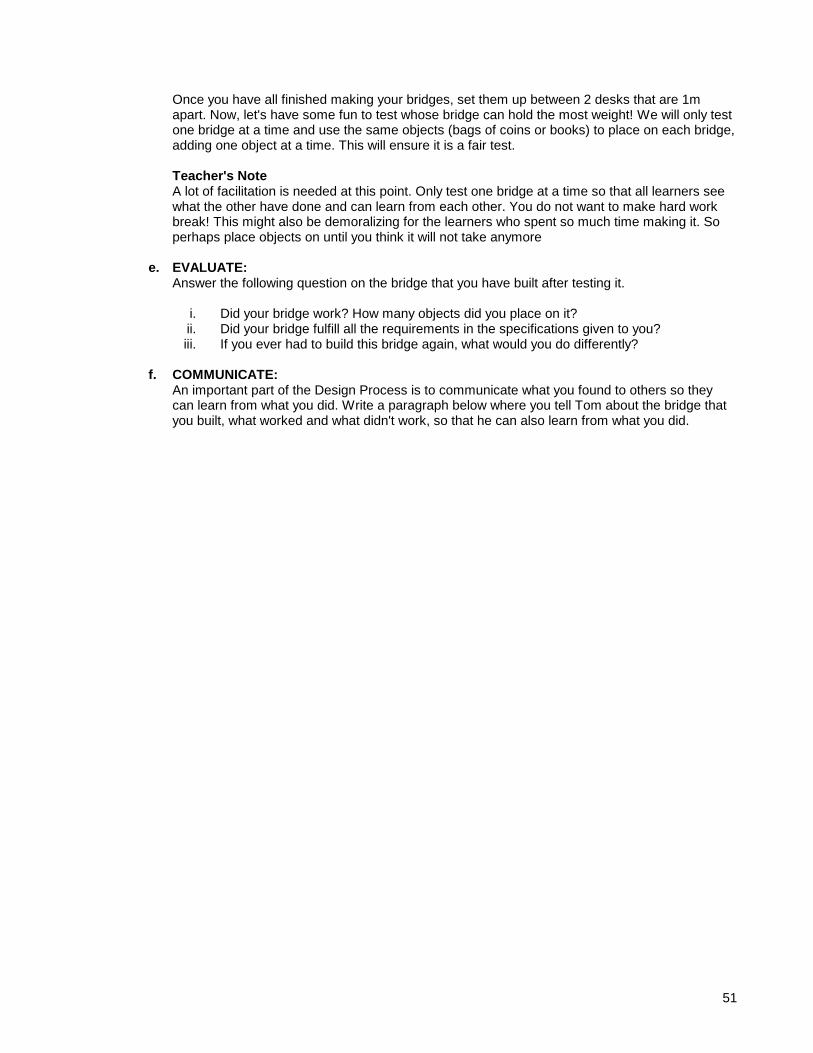
51
Once you have all finished making your bridges, set them up between 2 desks that are 1m apart. Now, let's have some fun to test whose bridge can hold the most weight! We will only test one bridge at a time and use the same objects (bags of coins or books) to place on each bridge, adding one object at a time. This will ensure it is a fair test.
Teacher's Note A lot of facilitation is needed at this point. Only test one bridge at a time so that all learners see what the other have done and can learn from each other. You do not want to make hard work break! This might also be demoralizing for the learners who spent so much time making it. So perhaps place objects on until you think it will not take anymore
e. EVALUATE:
Answer the following question on the bridge that you have built after testing it.
i. Did your bridge work? How many objects did you place on it? ii. Did your bridge fulfill all the requirements in the specifications given to you? iii. If you ever had to build this bridge again, what would you do differently?
f. COMMUNICATE:
An important part of the Design Process is to communicate what you found to others so they can learn from what you did. Write a paragraph below where you tell Tom about the bridge that you built, what worked and what didn't work, so that he can also learn from what you did.
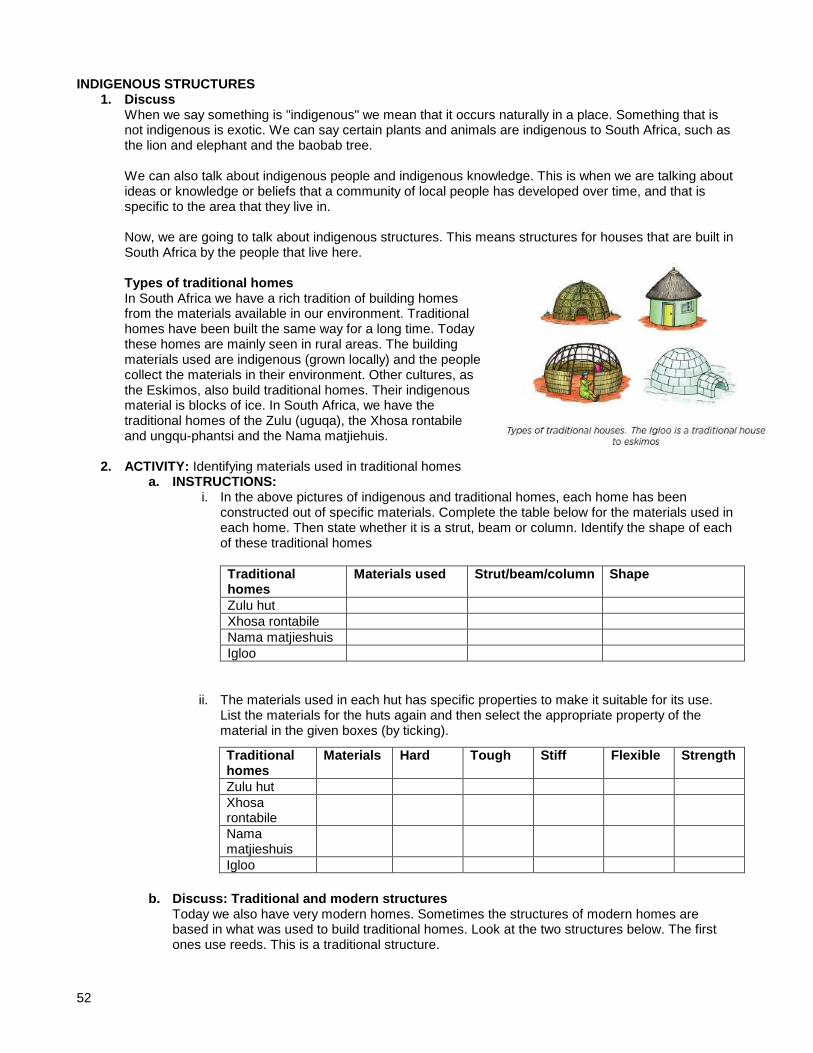
52
INDIGENOUS STRUCTURES 1. Discuss
When we say something is "indigenous" we mean that it occurs naturally in a place. Something that is not indigenous is exotic. We can say certain plants and animals are indigenous to South Africa, such as the lion and elephant and the baobab tree.
We can also talk about indigenous people and indigenous knowledge. This is when we are talking about ideas or knowledge or beliefs that a community of local people has developed over time, and that is specific to the area that they live in.
Now, we are going to talk about indigenous structures. This means structures for houses that are built in South Africa by the people that live here.
Types of traditional homes In South Africa we have a rich tradition of building homes from the materials available in our environment. Traditional homes have been built the same way for a long time. Today these homes are mainly seen in rural areas. The building materials used are indigenous (grown locally) and the people collect the materials in their environment. Other cultures, as the Eskimos, also build traditional homes. Their indigenous material is blocks of ice. In South Africa, we have the traditional homes of the Zulu (uguqa), the Xhosa rontabile and ungqu-phantsi and the Nama matjiehuis.
2. ACTIVITY: Identifying materials used in traditional homes
a. INSTRUCTIONS: i. In the above pictures of indigenous and traditional homes, each home has been
constructed out of specific materials. Complete the table below for the materials used in each home. Then state whether it is a strut, beam or column. Identify the shape of each of these traditional homes
Traditional homes
Materials used Strut/beam/column Shape
Zulu hut Xhosa rontabile Nama matjieshuis Igloo
ii. The materials used in each hut has specific properties to make it suitable for its use. List the materials for the huts again and then select the appropriate property of the material in the given boxes (by ticking).
b. Discuss: Traditional and modern structures Today we also have very modern homes. Sometimes the structures of modern homes are based in what was used to build traditional homes. Look at the two structures below. The first ones use reeds. This is a traditional structure.
Traditional homes
Materials Hard Tough Stiff Flexible Strength
Zulu hut Xhosa rontabile
Nama matjieshuis
Igloo

53
In the second picture, you can see the roof trusses for a modern home. Can you see the similarities between the two? For example, the shape and how the structures are made stronger with struts. There are also some differences. For example, in the traditional house, the reeds and branches are tied together with rope. But in the modern house, the roof trusses are strengthened with gussets.
c. Discuss: Comparing modern and traditional structures and materials i. Study the above frameworks and the two pictures of the houses. ii. Discuss and compare the roofs of the traditional and modern house. Where are the
differences? Are there similarities? iii. Discuss and compare the similarities and differences between traditional and modern
structures and materials. iv. Discuss the advantages and disadvantages of the modern structure. v. Discuss the advantages and disadvantages of a traditional structure. vi. Frame structures can be made stronger by using struts vii. A strut is a solid bar joined into a structure to make it more stable viii. Struts are used in roof trusses, bridges, cranes and pylons ix. Skeletons are frame structures made of a system of struts x. The bones are the struts xi. An indigenous structure is a structure used in a traditional home xii. Indigenous materials come from living plants in the environment xiii. Traditional homes of the Xhosa, Nama and Zulu make use of a framework of struts
d. Discuss:
i. Give four examples of structures which make use of struts to strengthen the framework. Bridge, pylon, crane, scaffolding, roof trusses
ii. Why do you think the human rib cage can be considered a frame structure? This is because it is a frame of ribs, which are like struts, and they protect the internal organs.
iii. Draw a brace or braces onto the wooden frame below to make it a much stronger structure.

54
Either 4 small corner brace, or 1 or 2 cross-braces from corner to corner.
iv. Give 3 examples of traditional homes in South Africa. Zulu hut, Xhosa rontabile and
ungqu-phantsi and Nama matjiehuis. v. What are some of the indigenous materials that traditional homes are made out of?
Reeds, branches, straw, rope

55
TOPIC 3 UNIT 1 – FRAME AND SHELL STRUCTURES
1. Read & Discuss p28-31 LB 2. VIDS: Skeleton
a. ROYLCO R60558 Newspaper Skeleton
3. Practical Activity: Make struts for a frame structure p32LB a. Needed items:
i. dowel sticks (30cm x 10mm) ii. metal paper fasteners iii. paper
4. Practical Activity: Make a model of a vertebrate skeleton
a. Notebook Entry: Information about my chosen vertebrate (PC Research Project) i. About the vertebrate’s habitat, diet and skeleton ii. Include information about the structure and function of the animal’s skeleton iii. Include an A4 drawing of your vertebrate skeleton iv. Start building your skeleton (p34-35 LB)
5. Notebook Entries:
a. Vocabulary words: i. Struts – Strong structures that can support a lot of weight ii. Shell structure – A structure that has a strong layer on the outside that holds itself up
b. Make a poster or do a presentation about five famous frame and shell structures in the world. Spend time discussing what makes these structures a frame or shell structure.
TOPIC REVISION p36 LB Basic Target Worksheet Topic 3 p4 Advanced Target Worksheet Topic 3 p5 Term 1 Practice Test p95 TG
56
TOPIC 4 UNIT 1 – FOOD AND FEEDING
1. Read Introduction p37 LB 2. Read & Discuss p38-39 LB
3. VIDS: Animation of Photosynthesis
a. http://www.sites.ext.vt.edu/virtualforest//modules/photo.html b. http://www.biology.ualberta.ca/facilities/multimedia/uploads/alberta/Photo.html
4. Notebook Entries
a. Draw a picture to show how plants make food (p39 LB)
5. Read & Discuss p40-41 LB 6. Notebook Entries
a. Animals and what they eat (The space at the bottom will be filled in Unit 2)
7. Discuss how to differentiate between carnivores, omnivores and herbivores. a. Carnivores have got long sharp canine teeth next to the front teeth, and sharp back teeth
(molars) to tear meat. They have eyes in front to spot prey and have claws to hold prey and fight.
b. Omnivores have got all kinds of teeth. They have eyes in front and have hands or claws for grabbing food.
c. Herbivores have blunt or flat teeth. They have eyes on the sides of their heads to see predators and have hooves for running away.
8. Practical activity:
a. To demonstrate that plants make and store foods such as starch, you can carry out a starch test by putting a few drops of iodine solution on a piece of potato. The iodine will change from a brown to a blue-black colour, which is the positive reaction for the presence of starch.

57
TOPIC 4 UNIT 2 – HOW A FOOD CHAIN WORKS
1. Discuss: a. How do plants and animals get their food, and why do they need food?
2. Read & Discuss p42-43 LB (to end of Activity 4) 3. Read What’s Science all about? p88-89
4. Notebook Entries:
a. Super-Science-Food-Chain.pdf
5. Read & Discuss p43
6. Infosearch: The Usborne Science encyclopedia p332
7. Notebook Entries a. Food Chain Frenzy.pdf (variety of minitbooks)
8. VIDS: Food Chain
a. Food Chain - educational song b. Food Chains
9. Activity: Write a Food Chain poem a. The heading of your poem must describe or label the type of habitat in which the food chain is
located. b. The body must explain the flow of energy in the food chain c. The ending must repeat the heading and your name d. Use a thesaurus to get ideas for different verbs instead of only using "EAT". e. Here is an example of a food chain poem written by Farrah:
The Savannah
There are the lion cubs that were fed by the graceful lioness
that caught the zebra that munched the grass
that grows on the savannah where Farrah lives! TOPIC REVISION p46 LB Basic Target Worksheet Topic 4 p6

58
TOPIC 5 UNIT 1 – GROWTH AND DEVELOPMENT
1. Read Introduction p47 LB 2. Discuss:
a. Why do you think the word cycle is used in the term life cycle? b. How does an apple or orange tree start its life? (Hold up an apple or orange). What is the first
stage in the life of an apple tree? (Cut open the apple to expose the seeds)
3. Read & Discuss p48-49 LB 4. Infosearch: The Usborne Science encyclopedia p328 (Life cycle of animals)
5. Notebook Entries:
a. Life cycle of a flowering plant.pdf (Draw different life stages) b. foodweb_wordsearch.doc c. Vocabulary mix & match
i. Substance – Any type of solid, liquid or gas ii. Nutrients – Substances that help living things grow iii. Herbivores – Animals that only eat plants iv. Carnivores – Animals that only eat meat or other animals v. Omnivores – Animals that eat plants and meat vi. Producers – Plants that produce or make their own food vii. Food chain – The order in which animals eat plants and other animals to get energy viii. Life cycle – Stages through which a living thing passes during its lifetime ix. Pollination – When pollen from the male parts of a flower reaches the female parts of
the flower x. Germinate – Begin to sprout or grow into a seedling xi. Fertilisation – When male cells in pollen join eggs in the female parts of a flower to form
seeds xii. Reproduce – When plants and animals produce offspring xiii. Extinct – When all the individuals of a type of plant or animal die and no more are left xiv. Internal ferilisation – Joining of male cells and female egg inside the body xv. External fertilization – Joining of male cells and female egg outside the body xvi. Sequence – The order in which something happens xvii. Scavengers – Animals that eat off dead animals and plants xviii. Decomposers eat and break up the dead animals and put the chemicals from their
bodies (carbon, phosphorus and nitrogen) back into the soil to feed the plants.
6. Read & Discuss p50-51 LB 7. Needed items:
a. Flower (preferably a petunia or lily) b. Straight pins c. Magnifying glass d. ** Think about parsing the flower, then labeling it
8. Notebook Entries a. Parts of a flower (Cut & Paste)
9. Read & Discuss p51-53 LB 10. Notebook Entries
a. Life cycle of a cat (Cut & Paste) b. Vocabulary Words (he writes the word on the outside flap)
i. Embryo – A fertilized egg ii. Fertilisation – when sperm and egg join together to form a new life
59
11. Read & Discuss p56-57 LB (Use the Notebook Entry instead of Activity 5) 12. Notebook Entries
a. pumpkin-life-cycle.pdf (Cut & Paste) i. Under each picture, label each stage (Use the stages: vine, seeds, flower, green
pumpkin, seedling, ripe pumpkin – see Learner’s Book) ii. Paste a letter sticker from A-F on each of the pictures iii. Write a sentence to describe what happens at each stage in the life cycle of a pumpkin
(label sentences accordingly (A-F)) b. Activity 1 #2 LB p56 Draw the life-cycle of a plant c. Part 2 LB p57 Draw the life-cycle of a chicken
13. VIDS: Life Cycle
a. Time lapse radish seeds sprouting, top and roots growing b. Frog life cycle animation c. Animal Life Cycles
TOPIC REVISION p58 LB PRACTICE TEST P59-60 LB Basic Target Worksheet Topic 5 p7-8 Advanced Target Worksheet Topic 5 p9 TERM EXAM p97 TG

60
TOPIC 6 MATTER & MATERIALS
1. Discuss: a. What are solids, liquids and gases? b. How can water be a solid, a liquid and a gas? c. Why does my ice cream melt in the sun? d. Why does water start bubbling in the kettle when it gets hot? e. What change of state takes place when a substance melts? f. What change of state takes place when a substance evaporates?
Everything around us is made up of matter. All solids, liquids and gases in the universe are matter. Matter takes up space and has mass, this means we can weigh matter. When we use one kind of matter to make something such as a wooden or plastic chair we say the material used was wood or plastic.
2. Read What’s Science all about p108 3. Discuss Solids, liquids and gases
a. Explain that everything around us is built up of matter. When we use matter to make something we usually call it a material. Introduce this section with a practical demonstration. Use examples of materials and substances to sort matter as solids, liquids and gases.
i. You will need the following materials : wood, stone, plastic, a glass of water, another different shaped container to pour the water in, juice, tea, air (in a two of three different shaped balloon or tyres), cooking oil, cooking gas, a boiling kettle etc.
b. Explain what they have to do in the activity: "Exploring the properties of solids".
They must do the activity and write down their findings. Assist them to draw a concept map.
c. Materials are all around us. Some materials are solids, some are liquids and some are gases. A material will always be one of these three things. But what exactly are solids, liquids and gases?! Let's investigate the properties of solids, liquids and gases!
4. Discuss: When is a material a solid? The word "property" has different meanings. We say this house is the property of Mr Mabusa, he is the owner of the house. When we use the word "property" in Science we look at what makes that kind of matter special; how does it behave differently from other kinds of matter. For example when you shift a chair to another place, it will still have the same shape. This is because the chair is solid. So we can say that all solids keep their shape. We say that keeping its shape is a property of a solid. Let's look at some of the properties of solids.
5. Read What’s Science all about p112
6. ACTIVITY: Exploring the properties of solids
a. MATERIALS (What you will need): i. a stone ii. cloth iii. paper iv. a table or chair v. pen or any solids around you
b. INSTRUCTIONS (What you have to do):
Use the questions below to investigate each solid. i. Does it feel hard or soft? ii. Does it make a sound when you knock on it? iii. Does it break easily? Can it break? iv. Can you put your finger through it? v. Is your hand dry or wet after handling the object?

61
vi. Does it change its shape when you put it in something else? vii. How will you describe the shape, is it fixed, does it remain the same?
Use the table to fill in some of your answers about each of the objects.
7. Discuss:
a. Which properties were the same (common) for all the solids you investigated? Fixed shape, dry, hard
b. List some other solid objects in your classroom. Give at least 5 examples. Table, door, ruler,
pencil, rubber, desk, etc c. So, we have learned that a substance in a solid form will have a fixed shape and takes up a
definite space. Let's now look at liquids.
8. Discuss: What is a liquid? There are liquids all around you and you use them in your everyday lives. Some examples are water, paraffin, baby oil, fruit juice, petrol, methylated spirits. What are the common properties of liquids? When a scientist wants to know more about something they set up questions and then they try to answer the questions by doing the experiments.
9. Teacher’s note: How to present the lesson: Pour about 2 tablespoons of the suggested liquid in a container. Discuss the safety rules and warn the learners NEVER to taste an unknown liquid - methylated spirits and paraffin is poisonous. Go through the concept maps of the groups in a class discussion to make sure that everyone knows how to draw a concept map.
10. ACTIVITY: Exploring the properties of liquids
a. MATERIALS (What you will need): i. Water ii. Paraffin iii. Baby oil iv. Fruit juice v. Mentholated spirits vi. 5 small pieces of cloth vii. 5 containers for each of the 5 liquids viii. 5 other clean and empty containers, such as a glass, cool drink bottle or tin ix. 5 saucers
b. INSTRUCTIONS (What you have to do):
i. Answer these questions while you are studying your liquid.
ii. Write your answers in the table that follows.
iii. DO NOT TASTE THE LIQUID! • How does it smell? • Can you put your finger through it? • Is your hand dry or wet feeling the liquid? • Can you soak the liquid up with a cloth?
iv. Put a small amount of the liquid in the saucer and leave it for a while in a warm place.
• Was it easy to pour the liquid from one container to another? • Can the liquid flow or spread out on a saucer? • How will you describe the shape of the liquid, is it fixed does it take the shape
of the container?

62
• Did the amount of the different liquids remain the same after leaving them in a warm place?
v. WASH YOUR HANDS AFTER HANDLING THE LIQUID
11. Discuss:
a. Write down the safety rules for this investigation. Why are these safety rules taken? Don't taste any unknown liquid, wash your hands after handling unknown liquid they can be poisonous.
b. Write down those properties that were the same (common) for all the liquids investigated.
Liquids: flow and can be poured, shape is not fixed they take the shape of the container.
c. After doing this activity where we investigated the properties of liquids, we can say that a liquid: i. can flow, ii. it has no fixed shape, iii. and it takes the shape of the container that it is in.
This is different to a solid. Remember a solid has a fixed shape and you cannot pour a solid!
12. Discuss: What is a gas?
Do you remember when we spoke about breathing as one of the seven life processes of living things? When we breathe, we are taking in and giving out gases. But we cannot see the gas! Gases are a bit more difficult to understand as we usually cannot see gases. We can see places where gases are used and the containers that a gas is kept in. Do you know any gases? What about the gas used in stove to cook food? Have you seen the gas coming out of the exhaust of a motorcar? In hospitals there are cylinders filled with oxygen gas for patients with breathing problems. The air you breathe in has oxygen gas. The air you breathe out has more carbon dioxide gas. Look at the following pictures of where a gas is being used.
13. ACTIVITY: Learning about gases from pictures a. INSTRUCTIONS:
i. Study the pictures below. Each of the pictures shows a different property of a gas.

63
ii. The properties are listed in the first column of the activity below. Decide which picture is showing the property and give it a tick. Make a tick under the right picture for each property.
14. VIDS: Materials
a. Junior Chemistry Gases 1 (Low)
15. Comparing solids, liquids and gases The states of matter are solids, liquids and gases. We have carefully investigated these three states of matter.
Here is a summary:
16. Online Game: goo.gl/9PcF6 17. VID: Materials
a. Solid Liquid Gas - They Might Be Giants - official video
64
CHANGE OF STATE 1. Discuss: States of matter
Remember that we spoke about the states of matter? These were solids, liquids and gases. A substance can change from one state to another. For example a solid can change into a liquid. For example water can be a liquid in your glass or in the freezer water is ice. Ice is a solid. But what makes these substances change from one state to another?
2. Discuss: What causes a change of state? We know that matter can be in the solid, liquid or gas state. Let's use water as an example.
a. If you place tap water into an ice tray and put this in the freezer, what will happen to the water? It freezes
b. If you now take ice cubes and place them in the sun, what happens to the ice cubes? They melt.
The difference between the freezer and the sun outside is that one is hot and the other is cold. So if we place the water in a place that is cold enough, it freezes. If we place the ice cubes in a hot place, they melt. This is because the state of matter can be changed from one to another by adding or removing heat. Let's read a story to try to understand this a bit more.
The Story of Mashadu
Mashadu is a boy in Grade 1 at a Primary School in a small village which gets very hot in summer. He loves to play soccer. After school he often goes over to The Thunderbolt School of Learning to play with the Thunderbolt Kids. They really like having Mashadu to play with them even though he is a few years younger, because he is very talented and also fun and caring. Mashadu especially likes Jojo and they play well together as a team. One day after school, Mashadu thought he would do something nice for his friends, the Thunderbolt Kids and surprise them with ice lollies for when they were finished playing. Mashadu bought 5 ice lollies, one for himself and one for each of the Thunderbolt Kids. He put the ice lollies in a bowl and placed some ice blocks around them to keep them cool. Mashadu then ran off to join the others playing soccer.
After the game, Mashadu ran back to the bowl to get the ice lollies. But he got such a shock when he got there. They were all gone! He was so upset and started to cry. The Thunderbolt Kids saw that Mashadu was upset and ran over to see what was wrong. "Hey Mashadu, what's wrong?! Did you hurt yourself while playing?" Jojo asked. "No, I didn't. I bought some ice lollies for all of you as a surprise and when I came back now to get them they were all gone! I think someone stole and ate them and just left the sticks! Look!" Mashadu cried out.
"Oh no, don't cry Mashadu! It's not your fault, and no one stole them or ate them either," Farrah said while rubbing Mashadu on the back. "Yes, Mashadu, actually we learned in class today about what happened to your ice lollies," said Sophie, "and I can explain it to you too. Do you see that your bowl is actually not empty? There is a liquid in it. And it also has a red colour, which was the colour of your ice lollies." "Yes, I see that," answered Mashadu, "but then how did that happen?"

65
Tom then answered, "Your ice lollies melted from the heat from the air around us. Even if the sun was not so hot, they would have melted! For something to stay frozen it needs to be at a very cold temperature, like in a freezer." "Yes, melting is when heat causes the solid ice lollies to change into a liquid," Sophie replied, "So no one stole the ice lollies, they just melted." "Oh ok, I see," said Mashadu, "I must be really silly not to know that!" "No not at all Mashadu! We only learned about it today in class and we are in Grade 4!" laughed Farrah.
"I know what we should do!" shouted Jojo, "Let's go to the Tuckshop right now. I have some extra change and we can buy some more frozen ice lollies!" They all really liked this idea, especially Mashadu who was now laughing. So they all went, The Thunderbolt Kids and Mashadu, and bought some more ice lollies and sat under the tree to eat them.
So what have we learned from Mashadu's experience with the ice lollies? The ice lollies were frozen and cold. When they were placed in the sun, they started to warm up. This heat caused a state change to take place. The ice changed to a liquid. This is called melting. When Mashadu and the Thunderbolt Kids went to get new ice lollies from the Tuckshop, these ice lollies were frozen, but they were made from a liquid. The liquid was poured into the shape of an ice lolly and then they were cooled as heat was removed and they froze. When a liquid changes to a solid, this is called solidifying.
In the ocean, icebergs and floating ice are water that has frozen as it is so cold.
Now that we have read about Mashadu and his experience of changes of state, let's do some practical demonstrations to learn more.
3. ACTIVITY: Heating and cooling to cause a change of state a. Teacher's Note
You need to explain both processes that are taking place. Firstly, heat is added to the water and it boils, changing from a liquid to a gas. When the gas hits the mirror, which is cold, it cools down and condenses to form a liquid again on the mirror. This also shows that changes of state are reversible. Later on, refer back to this activity when dealing with reversible state changes.
b. MATERIALS (What you will need) i. Kettle ii. liquid water iii. glass or mirror iv. gloves or towel
c. INSTRUCTIONS (What you have to do):
i. Boil the water in the kettle. ii. Put a glass or mirror 30 cm above the boiling kettle (you need to wear gloves made of
thick material or use a towel to avoid burning your skin)
4. Discuss: a. What was the change of state when the water boiled and became steam? Water to gas b. You cannot actually see the steam. The steam is extremely hot and quickly cools and forms tiny
droplets in the air. When the steam changes into tiny water droplets, what is this called? Condensation.

66
c. Evaporation takes place when heat is added to the liquid. It means the water changes from the liquid to the gas state.
d. The steam that comes out of the kettle is extremely hot and you cannot see it. The steam
quickly cools and forms tiny droplets in the air. These tiny droplets are visible and form the "cloud" that you see. When these tiny droplets hit the mirror they cool more and form the bigger droplets which you see forming on the mirror.
We say the steam condensed to form water. The change of state is from the gas state to the liquid state. Condensation takes place when heat is removed. When you leave a glass filled with cold water on the table, small droplets form on the outside. This is because there is water vapour in the air which cools down when it is near the cold glass. The water vapour in the air around the glass condenses as it changes from a gas to a liquid and forms the tiny droplets you can see.
e. We now know that substances react to temperature changes around them. But where do we
use what we learned in everyday life? Let us look at how milk reacts to low temperature. Ice cream is frozen milk and cream.
5. VID: Materials
a. How ice cream is made (Low) b. Home Made Ice Cream (made in a blender!) – RECIPE
6. ACTIVITY: Let's make ice cream! a. MATERIALS (what you will need):
i. an electric blender ii. 2 litre container with lid iii. 3 ripe bananas iv. 2 cups fresh cream v. 2 cups of milk vi. 1 teaspoon of vanilla essence vii. 12 cups of sugar
b. INSTRUCTIONS:
i. Cut up the 3 bananas into pieces ii. Put the bananas into the electric beater iii. Pour the fresh cream and the milk into the blender iv. Add the vanilla essence v. Add the sugar vi. You can add any other flavours you may want into the ice cream, such as chocolate
pieces or strawberries vii. Plug the blender in and turn it on. Don't forget to put the lid on! viii. Blend for about 1 minute ix. Pour the mixture into a 2 litre container x. Place the lid on the container xi. Place the container in the freezer for the night xii. Enjoy your ice cream the next day!
7. Discuss:
a. The ingredients were in different states (solid or liquid) before and after making the ice cream. Use the table to record which state each ingredient was in before and after making the ice cream.
b. What do we call the process for when a liquid changes to a solid? Solidifying. c. Which ingredients changed state during the process? Cream, milk and vanilla essence
8. ACTIVITY: Melting and solidifying substances
a. MATERIALS (What each group will need): i. butter, fat or margarine

67
ii. chocolate or wax iii. ice blocks or ice cream iv. 3 containers which will not melt (they can be empty tins) v. 6 wooden pegs vi. a candle vii. matches
b. INSTRUCTIONS (What you have to do):
i. Plan how you are going to melt and solidify the substances ii. Look at the diagram below which shows how you can do this
iii. Be careful not to burn yourself when working with the candle! iv. Discuss the safety rules that you are going to apply v. Test each different substance that you have by placing it in the tin and holding it over
the candle vi. Then remove the tin from the candle and leave it on the side to cool vii. Observe what happens to each substance and write down your observations in the
table below.
c. Discuss: i. What happened when the solids were heated by the candle? They melted ii. What happened to the substances when they cooled down again? They solidified. iii. Did the ice cream solidify again or did it remain a liquid? No, ice cream should not have
solidified again if it was not placed back in the freezer. iv. Why does the ice cream need to be at a colder temperature than the butter or chocolate
in order to solidify? Because it has a different freezing temperature.
9. Discuss We have seen that solids that have melted can be solidified again. So the process can be reversed or turned around again by adding or removing heat.
Here is a summary of the different state changes:
** Freezing is actually only a type of solidification and requires specific conditions, zero degrees Celsius.
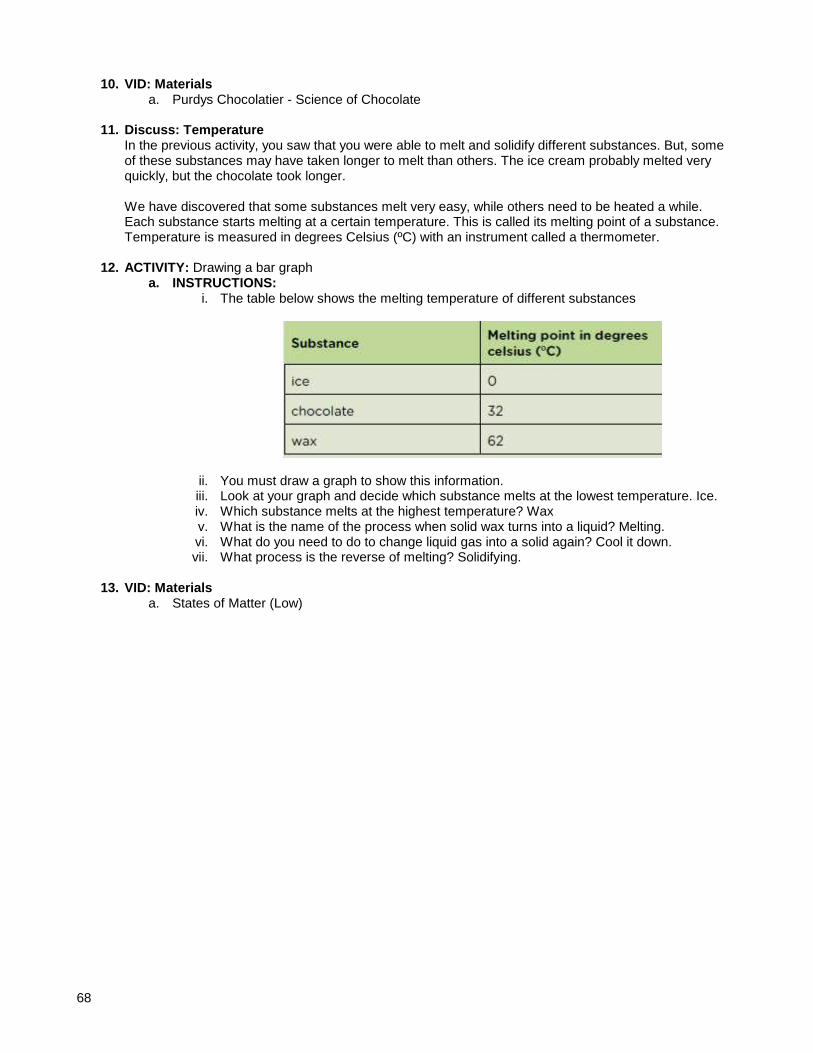
68
10. VID: Materials a. Purdys Chocolatier - Science of Chocolate
11. Discuss: Temperature
In the previous activity, you saw that you were able to melt and solidify different substances. But, some of these substances may have taken longer to melt than others. The ice cream probably melted very quickly, but the chocolate took longer.
We have discovered that some substances melt very easy, while others need to be heated a while. Each substance starts melting at a certain temperature. This is called its melting point of a substance. Temperature is measured in degrees Celsius (ºC) with an instrument called a thermometer.
12. ACTIVITY: Drawing a bar graph a. INSTRUCTIONS:
i. The table below shows the melting temperature of different substances
ii. You must draw a graph to show this information. iii. Look at your graph and decide which substance melts at the lowest temperature. Ice. iv. Which substance melts at the highest temperature? Wax v. What is the name of the process when solid wax turns into a liquid? Melting. vi. What do you need to do to change liquid gas into a solid again? Cool it down. vii. What process is the reverse of melting? Solidifying.
13. VID: Materials
a. States of Matter (Low)

69
THE WATER CYCLE 1. Discuss:
People say the Earth is the blue planet, because much of its surface is covered in water and the land forms a small part. Did you know that the amount of water on Earth now is about the same as when the dinosaurs lived on our planet. How is that possible? The answer is that invisible water vapour in the air cools and condenses to form drops of water. The reverse process takes place when water evaporates. When the water evaporates, it cannot be seen anymore as it has become a gas called water vapour. This process of water always changing from a liquid to a gas and back again is an ongoing process. It is called the water cycle and this is why the amount of water on Earth stays the same. In a cycle, a set of events (things that happen) keep on repeating in the same order.
2. Discuss: What is the water cycle? The water cycle refers to how water changes from one state to another in a cycle. It takes place in our whole world.
Look at the diagram in Usborne Illustrated Dictionary of Science p206
Let's look at the stages in the water cycle:
a. The Sun's heat causes water to evaporate from the seas, streams, rivers and lakes. b. The water vapour rises into the air. c. Higher up where the air is cooler, water vapour condenses into millions of water droplets which
form cloud d. When the water droplets in the clouds get bigger, some of the water falls as rain. The science
word for this process is precipitation e. In other clouds which become really cold, the water vapour freezes and forms snow. The snow
falls down to the ground and melts. f. Some runoff water that falls to the ground flows down the rivers to the seas g. And this water will evaporate again forming part of the water cycle.
Look at the image again which shows the water cycle. Use the picture to explain the water cycle and see if you understand all the processes. Let's make a model to help explain the water cycle. Models are very important in science as they help to show an important process or concept in real life. A model is something we build to represent or explain what happens in real life.
Teacher's Note Explain to the learners that different parts of the model will represent actual things in real life. For example, the water in the bottom of the bottle will represent the ocean. At the end of the activity the learners will need to answer what each part of the model represents so make sure to give hints and suggestions as you are making the model. It would be best to do this as a group activity. Make sure that it is a hot day and that you leave the bottles in the sun for long enough that there is evaporation and condensation in the bottle. An idea is to leave the bottle outside whilst carrying on with the rest of the lesson.
3. ACTIVITY: Making a model of a water cycle
a. MATERIALS (What you will need): i. a big plastic bottle (for example a 2 litre coke bottle) ii. water iii. a brick
b. INSTRUCTIONS (What you have to do):
i. Put about a cup of water in a big plastic bottle and put the lid back on ii. Rest the upper part of the bottle on a brick as shown in the diagram iii. Leave the bottle in the sun for about 20 minutes iv. Observe what happens and write down your observations.

70
4. Discuss: a. Which part of the model is like the sea? The water in the bottom b. Which part is like rain falling? The water condensing on the side of the bottle c. Which part is like the river flowing back to the sea? The droplets running back down to the water
along the side of the bottle d. What do we call the process where water turns into a water vapour (a gas)? Evaporation e. Can you see how the water in the bottle is going through a cycle?
5. Revision
a. Matter is everything around us b. Materials are matter used to make something c. Solids are matter that has a fixed shape d. Liquids are matter that runs or flows, can be poured, takes the shape of the container e. Gases are mostly invisible, takes the shape of the container and spreads out / flows in space f. A change of state is brought about by heating and cooling matter g. Adding heat to matter causes solids to change to liquids and liquids to change to gases h. Removing heat from matter causes gases to change to liquids and liquids to change to solids i. Water evaporates, condenses, freezes and melts in the water cycle j. List the three states of matter Solid, liquid, gas k. Describe what happens to solid ice when it is heated. The temperature rises causing the solid to
melt. l. What will happen to the water in a saucer if we leave it in the sun for four hour on a very hot
days? It will evaporate. m. Explain why water droplets form on the outside of a cold cool drink can? The water vapour in
the air touches the side of the cold cool drink and also cools down. This causes it to condense on the side of the can and form water droplets.
n. A block of ice, a brick, and a marshmallow are left in the sun next to each other on a hot day. Discuss what changes you would observe in the objects after three hours. The block of ice will melt and become a liquid very quickly. The brick will warm up but will not melt. The marshmellow will probably begin to melt, but not as quickly as the ice.
o. What is the reverse of freezing? Melting p. Do you think ice or chocolate will melt quicker if they are both left outside in the sun on a hot
day? Ice

71
SOLID MATERIALS 1. Discuss
a. What kinds of materials are solid objects made from? b. What is the difference between raw and manufactured materials? c. Where do raw materials come from? d. Is sand really made from glass? e. In the previous lessons, we looked at materials all around us and how they can be either a solid,
a liquid or a gas. Now we are going to look more closely at solid materials.
2. Discuss: Solid materials all around us Almost everything around us is made of materials. The shoes you wear, the pen you write with, the glass you drink out of, cellphones, a soccer ball, all your toys, the chair you sit on are all made of materials.
3. ACTIVITY: Investigating materials that objects are made from a. INSTRUCTIONS:
i. Study the object above and answer the questions that follow. ii. What is this object called and what is it used for? A pencil bag is used for keeping your
stationery in. iii. What material is the object made of? Fabric iv. Do you think this is a good material for this object? Give a reason for your answer. v. Can you suggest another type of material that can be used to make this object? Do you
think this material will work better? Give a reason for your answer. vi. The object has a zip. What is the function of the zip? To open and close the bag vii. What material is the zip made from? Do you think this is a good choice of material?
Give a reason for your answer. The zip is made of metal. It is a good choice of material as metal is strong and will not break when you are constantly opening and closing the zip. Assess what the learners says and if they provide any other reasons.
4. Discuss: Raw and manufactured materials
Every day we use different products made from different materials. The chair you are sitting on is made of a material called wood or plastic. Wood is from a tree. Wood comes from a natural resource. It can be used as a raw material by humans to make furniture.
5. Discuss: What does raw and manufactured mean? Where have you heard the word "raw" before? Perhaps it was when someone was talking about your food and they said the meat or vegetables were still raw as they had not been cooked yet. When we talk about raw food, it means the food has not been processed by cooking. When we process something we do something to it to turn it into something else with different properties. We can also talk about raw materials. This is when the material is in its natural state. It has not been processed yet. We find raw materials in the environment around us, such as the trees in a forest, or coal and oil underground. But, when this raw material has been processed, meaning humans have changed it, then we call it a manufactured material. Examples of a raw materials are wood and plant fibre. Once wood and fibre have been processed, humans make it into paper. Paper is a manufactured material. Sheep are farmed for their wool. Wool is a raw material, but it is processed to make a manufactured material. What things are made from wool? Fabric, jerseys, scarves, socks, beanies, gloves, etc

72
Raw materials in our environment are used to make other materials which are very useful. Let's look at some. Examples of raw materials used to make other materi als
• Animal skin is a raw material and is processed into leather to make shoes, handbags and belts • Animal wool is used to make clothes, such as jerseys and scarves • Sand is a natural, raw material. Sand is heated to extremely high temperatures and melted to
make glass • Clay is moulded and burned to make ceramics, such as teacups, teapots and vases • Coal and oil are used to make plastics, paints and fabrics • Wood and plant fibres are used to make paper
Look at the pictures in the following activity which show the raw material and the manufactured material that is made from each. Raw and manufactured materials have different properties.
6. ACTIVITY: Describing the properties of raw and manufactured materials
Teacher's Note Teacher note: Photos are provided but it would be best if you could bring some of the actual materials into class, such as wet clay and a fired pot.
a. INSTRUCTIONS: i. Below are some of pictures of the raw material and the manufactured product that is
made from the raw material. Study these pictures and compare the properties of the raw material and then the manufactured material after it has been processed.
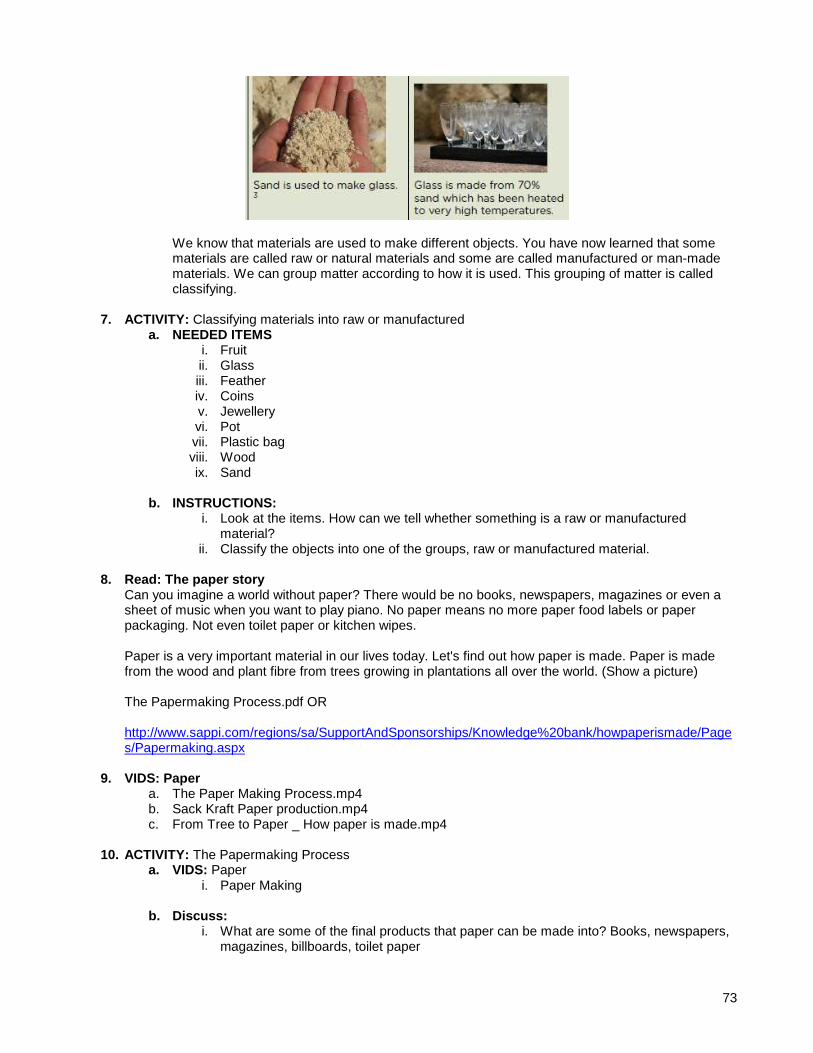
73
We know that materials are used to make different objects. You have now learned that some materials are called raw or natural materials and some are called manufactured or man-made materials. We can group matter according to how it is used. This grouping of matter is called classifying.
7. ACTIVITY: Classifying materials into raw or manufactured a. NEEDED ITEMS
i. Fruit ii. Glass iii. Feather iv. Coins v. Jewellery vi. Pot vii. Plastic bag viii. Wood ix. Sand
b. INSTRUCTIONS:
i. Look at the items. How can we tell whether something is a raw or manufactured material?
ii. Classify the objects into one of the groups, raw or manufactured material.
8. Read: The paper story Can you imagine a world without paper? There would be no books, newspapers, magazines or even a sheet of music when you want to play piano. No paper means no more paper food labels or paper packaging. Not even toilet paper or kitchen wipes.
Paper is a very important material in our lives today. Let's find out how paper is made. Paper is made from the wood and plant fibre from trees growing in plantations all over the world. (Show a picture)
The Papermaking Process.pdf OR http://www.sappi.com/regions/sa/SupportAndSponsorships/Knowledge%20bank/howpaperismade/Pages/Papermaking.aspx
9. VIDS: Paper
a. The Paper Making Process.mp4 b. Sack Kraft Paper production.mp4 c. From Tree to Paper _ How paper is made.mp4
10. ACTIVITY: The Papermaking Process
a. VIDS: Paper i. Paper Making
b. Discuss:
i. What are some of the final products that paper can be made into? Books, newspapers, magazines, billboards, toilet paper

74
ii. What species of trees are mostly used to make paper? Eucalyptus (gum trees) and Pine trees
iii. What is pulp made of? Plant fibre and water iv. What does "debarked" mean? It means the bark is removed from the logs. v. What is a landfill site? It is where the rubbish is dumped in big areas.
c. Notebook Entry: Arrange the processes in the process of papermaking in the correct way.
Wood is harvested from trees growing in a plantation Wood logs are transported by trucks Chips go into the pulp mill Pulp flows to the paper mill Pulp is washed, bleached and cleaned and dried The pressed and dried pulp is rolled or cut into sheets as paper Paper is transported to buyers who make other paper products
d. Discuss:
i. Do you think many people work in the papermaking industry? Explain your answer. Many people are employed. There are job opportunities for workers in the forests at the paper mills to transporting products etc.
ii. Do you think the papermaking process is a long or a short process. Give a reason for
your answer. It is a long process as there are many steps involved which all take time, especially the growing of the plantations as the trees take several years to grow to the right height.
iii. Name 2 of the major papermaking companies in South Africa that you know of. Sappi
and Mondi
iv. We mentioned recycling as a part of the papermaking process. Recycling is a very important process as it allows us to reduce our waste and use things over again. Not only paper can be recycled. You can also recycle glass, tin and plastic.
v. Why do you think we need to recycle paper? Energy is saved to make new paper
products when using recycled paper. Reduce the waste at the landfill sites which have a big environmental impact and destroy natural habitats.

75
PROPERTIES OF MATERIALS 1. Discuss
Raw and manufactured materials have specific properties. We already looked at some of the properties of raw and manufactured materials by describing them. The properties of a material help determine how it is used. For example, plastic is waterproof so some rain jackets are made of plastic to keep the rain off and keep you dry. A rain jacket made from wool or fibre would not be waterproof and you would be soaked! This is because the wool is an absorbent material (it absorbs water).
2. Discuss: Hard or soft?
A material is described as hard when you cannot scratch it, you cannot cut it and you cannot dent it. Hardness measures how diffcult or easy it is to change the shape of the material, either by denting, cutting or scratching it. A diamond is an example of a hard material as diamond cannot be scratched by other objects. In fact, diamond is so hard it is used on drill bits to drill through rocks and many other materials.
The opposite of hard is soft! Think of wet, raw clay. The clay is soft and can therefore be moulded into a new shape.
3. ACTIVITY: Exploring the hardness of materials a. MATERIALS:
i. a sharp steel nail ii. a wax candle iii. a metal coin iv. a plastic spoon or wooden pencil
b. INSTRUCTIONS:
i. First make a prediction about whether you think you can scratch or dent the object. Fill your predictions in the table.
ii. Scrape the point of the steel nail across the surface of the wax, the metal and the plastic.
iii. Fill in your observations in the table. iv. Try to indent (make a hollow in) each of the objects by pushing the point of the steel nail
into each of the objects v. Fill in your observations in the table below.
c. Discuss:
i. Which of the three materials is the hardest? Metal coin ii. Which of the three materials is the softest? Wax candle
4. Discuss: Tough or fragile?
A material is tough if it is hard to break. Kevlar is used to make bullet proof vests. This material will not let bullets go through. If you hit a metal coin with a hammer, there will be no or little damage. If you hit a piece of chalk with a hammer it will break into pieces. The metal coin is tough compared to the chalk. The chalk is very fragile.
Toughness measures how much energy is needed to break a material. We will test some everyday materials to decide which material is the toughest.
5. Activity: Complete a Science investigation sheet
a. INVESTIGATION: How tough are some materials? b. AIM: To investigate how tough different materials are.

76
c. APPARATUS: i. 1 container with a wide round opening (eg. large jam tin, yoghurt container) ii. 1 square sheet (20 cm by 20 cm) of each of the following materials:– newspaper
• photocopy paper • tin foil • wax paper • plastic wrap • 2 thick elastic bands to fit around the container • a meter stick or tape measure • a metal teaspoon
d. METHOD:
i. Choose a material to test ii. Place the material over the top of the container and hold the material
in place using the elastic band. Make sure that the material is flat and secure.
iii. Hold the covered container next to the meter stick. iv. Hold the teaspoon by the handle 10 cm above the top of the
container. v. Drop the teaspoon straight down onto the material vi. Record your observations in the table below (Did the material dent,
tear?) vii. If the material did not break repeat the experiment by dropping the
teaspoon from 20 cm above the material. Record your observations. viii. Keep increasing the height from which you drop the teaspoon by 10
cm until the material breaks ix. Remove the broken material and replace with a different material x. Repeat the experiment.
e. RESULTS AND OBSERVATIONS:
i. Record your measurements and observation in the table:
f. CONCLUSION (What you learnt): The energy of the teaspoon when it hits the material depends on the height from which you dropped the teaspoon. The greater the height the greater the energy. The toughest material only broke with the teaspoon with the greatest energy.
i. Which material broke first and which material broke last? ii. Which material needed the least amount of energy to break? iii. Which material took in (absorbed) the most energy before breaking? iv. Which material was the toughest?
6. Discuss: Stiff or flexible?
Stiffness and flexibility are ways of describing how an object behaves when a force is applied to it. A stiff material will not bend when you apply a force (push on it). But a flexible material will bend. When builders choose materials for building structures, sometimes they need flexible materials and other times they need stiff materials.
a. Discuss the table with your ideas of stiff or flexible materials and where they could be used.
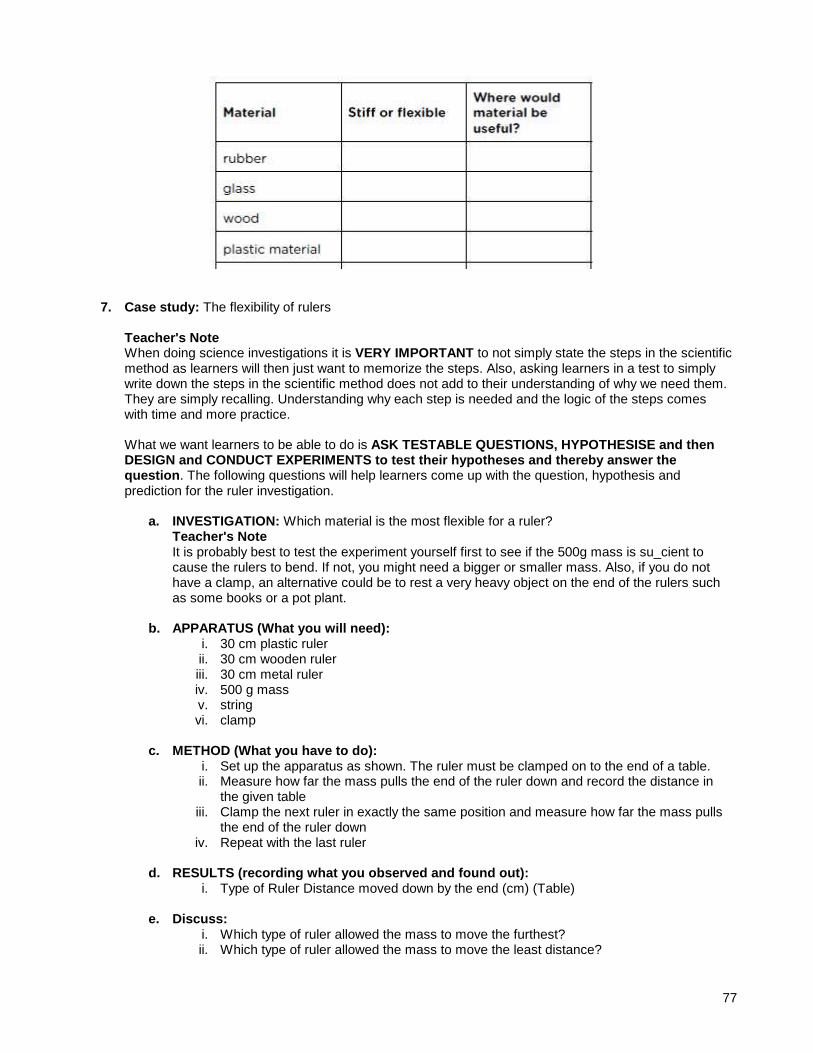
77
7. Case study: The flexibility of rulers
Teacher's Note When doing science investigations it is VERY IMPORTANT to not simply state the steps in the scientific method as learners will then just want to memorize the steps. Also, asking learners in a test to simply write down the steps in the scientific method does not add to their understanding of why we need them. They are simply recalling. Understanding why each step is needed and the logic of the steps comes with time and more practice. What we want learners to be able to do is ASK TESTABLE QUESTIONS, HYPOTHESISE and then DESIGN and CONDUCT EXPERIMENTS to test their hypoth eses and thereby answer the question . The following questions will help learners come up with the question, hypothesis and prediction for the ruler investigation.
a. INVESTIGATION: Which material is the most flexible for a ruler? Teacher's Note It is probably best to test the experiment yourself first to see if the 500g mass is su_cient to cause the rulers to bend. If not, you might need a bigger or smaller mass. Also, if you do not have a clamp, an alternative could be to rest a very heavy object on the end of the rulers such as some books or a pot plant.
b. APPARATUS (What you will need):
i. 30 cm plastic ruler ii. 30 cm wooden ruler iii. 30 cm metal ruler iv. 500 g mass v. string vi. clamp
c. METHOD (What you have to do):
i. Set up the apparatus as shown. The ruler must be clamped on to the end of a table. ii. Measure how far the mass pulls the end of the ruler down and record the distance in
the given table iii. Clamp the next ruler in exactly the same position and measure how far the mass pulls
the end of the ruler down iv. Repeat with the last ruler
d. RESULTS (recording what you observed and found o ut):
i. Type of Ruler Distance moved down by the end (cm) (Table) e. Discuss:
i. Which type of ruler allowed the mass to move the furthest? ii. Which type of ruler allowed the mass to move the least distance?

78
iii. If the mass is able to move down, then it means the ruler has to bend. We have said that the measure of how much something can bend is its flexibility. Which ruler do you think is the most flexible and why?
f. CONCLUSION (what you learned from the results):
i. What did you learn from this investigation? Provide an answer to your original question.
8. Case study II: The flexibility of rulers a. INVESTIGATION: Investigating the flexibility of a ruler b. APPARATUS (What you will need):
i. 30 cm flexible ruler ii. clamp iii. string iv. any ruler v. six (6) 100 g mass pieces vi. graph paper
c. METHOD (What we have to do):
i. Use the most flexible ruler and set up the apparatus as in the previous experiment. ii. Hang a 100 g mass piece on the end of the ruler. Use any other ruler to measure how
far the end drops down. Record the distance dropped from the start in the table. iii. Add another 100 g mass piece and the procedures and record the total distance the
end drops down. iv. Repeat step 3 until 600 g are hanging from the end of the ruler.
d. RESULTS (what you observed):
Use the results from your table to plot points on graph paper. We decided to change the mass hanging to the end of the ruler. With each mass the distance dropped changed. When plotting a graph the quantity we chose to change, in this experiment the mass, is plotted on the x-axis.
i. Draw the x-axis, label it and choose the scale. ii. Draw the y-axis, label it and choose the scale. iii. Give your graph a heading. iv. Draw a line graph using your plotted points to guide you.
e. CONCLUSION (what you learned):
i. Which mass piece made the ruler bend the most? The heaviest ii. Which mass piece made the ruler bend the least? The lightest iii. What can you conclude about the distance the ruler moves (bends) and the mass that
is hung from the end? The heavier the mass the more the ruler will bend.
9. Extension: Strength in tension Some situations require that materials be strong in compression (be able to withstand pushing forces) and other situations where materials need to be strong in tension (be able to withstand pulling forces).
The vertical (upright) steel poles of the water tower that are supporting a great weight have to be strong in compression in order to hold up the weight of the water tank. The rope supporting the bungee jumper needs to be strong in tension to ensure that the rope does not break and that the jumper survives his experience.
10. ACTIVITY: Identifying materials that are strong in tension
a. INSTRUCTIONS: i. In each of the following scenes, identify the material that is strong in tension (pulling
forces)
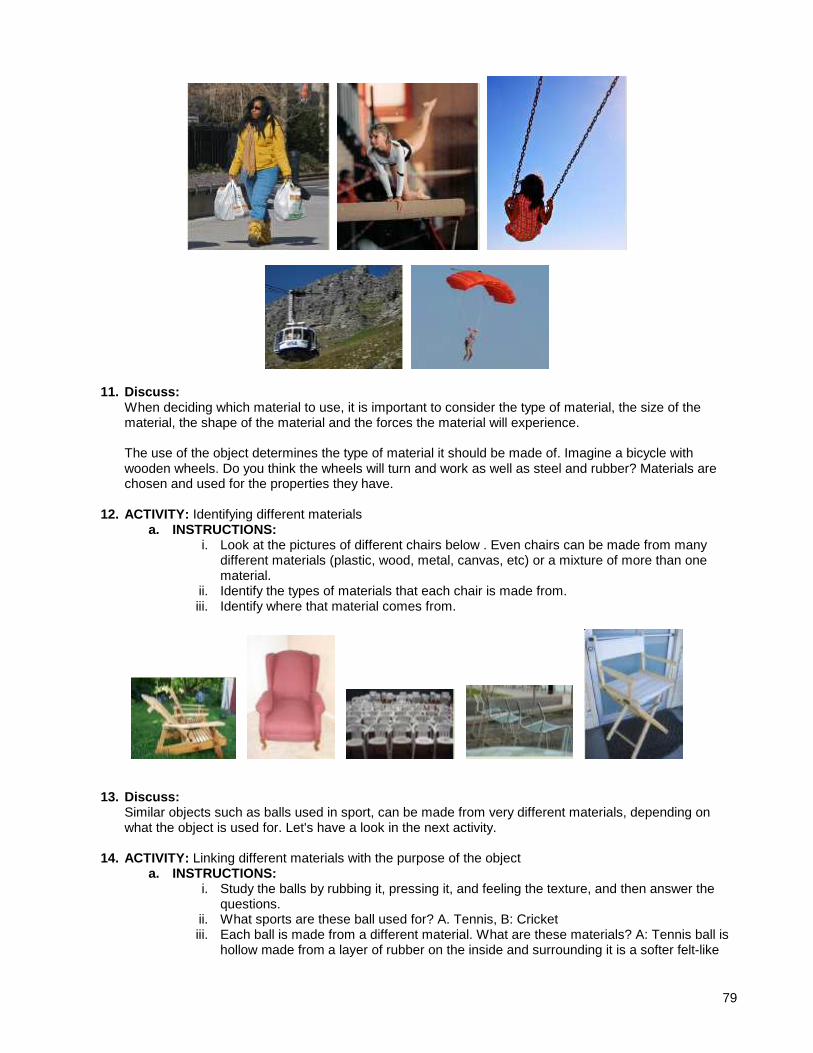
79
11. Discuss: When deciding which material to use, it is important to consider the type of material, the size of the material, the shape of the material and the forces the material will experience.
The use of the object determines the type of material it should be made of. Imagine a bicycle with wooden wheels. Do you think the wheels will turn and work as well as steel and rubber? Materials are chosen and used for the properties they have.
12. ACTIVITY: Identifying different materials
a. INSTRUCTIONS: i. Look at the pictures of different chairs below . Even chairs can be made from many
different materials (plastic, wood, metal, canvas, etc) or a mixture of more than one material.
ii. Identify the types of materials that each chair is made from. iii. Identify where that material comes from.
13. Discuss: Similar objects such as balls used in sport, can be made from very different materials, depending on what the object is used for. Let's have a look in the next activity.
14. ACTIVITY: Linking different materials with the purpose of the object
a. INSTRUCTIONS: i. Study the balls by rubbing it, pressing it, and feeling the texture, and then answer the
questions. ii. What sports are these ball used for? A. Tennis, B: Cricket iii. Each ball is made from a different material. What are these materials? A: Tennis ball is
hollow made from a layer of rubber on the inside and surrounding it is a softer felt-like

80
material. B: The cricket ball has a solid cork centre surrounded by hard leather and stitched with string.
iv. Observe and then describe the properties of the material which is used in each ball. Tennis ball - soft, "furry"/rough, can dent it (the rubber is flexible), light. Cricket ball - hard, heavier, smooth, shiny.
v. Why do you think the material was chosen for each ball? The tennis ball needs to be soft and to be able to bounce as it is hit across the tennis court. So the materials help it to do this. The red cricket ball is harder. The leather is smooth and hard and helps the ball to go fast and be hit far.
15. Revision
a. Raw materials are those which have not been processed and they come directly from natural products.
b. Manufactured materials have been made from raw materials c. Raw and manufactured materials have specific properties d. If a material is hard, it is strong and tough to scratch or break e. If a material is stiff, it is firm and does not bend easily. Stiff is the opposite to flexible. f. Other properties to describe materials are: strong, weak, light, heavy, waterproof and absorbent
81
TOPIC 6 – METALS AND NON_METALS
1. Read & Discuss p61 LB a. How would you know if a material is a metal? Name some properties b. Would you say that all metals are hard? Yes, some are just harder than others. A sheet of lead
2mm thick can easily be bent by hand. Pure gold is soft compared to other metals. c. The lead in your pencil is not metal lead, but graphite (carbon)
2. Discuss:
Metals and non-metals are two different classes of materials. Each class has its own unique properties. Properties are those things that are special about an object or a material. We can use the properties of a material to describe what it is like. For example, we could say that a property of gases is that they can be compressed. When we want to make a new product (a building or a tool or any kind of object) we first have to decide what the purpose of that product will be. Perhaps we want to make a tool for digging in the garden, or a kennel (dog house) for our new puppy. The purpose of the product will help us decide which would be the best material with which to make the object. What would be the best material for a digging tool? Surely we would need a tool that is strong and durable; with a sharp edge that will allow us to cut through the soil when we dig into it.
3. Discuss: a. What material would allow us to make a doghouse that is cool in summer and warm in winter? b. What material would you choose to make a spade for digging in the garden?
4. Notebook Entries a. Vocabulary Words:
i. Lustre/lustrous: The "shine" we see when light reflects off the surface of a metallic object such as a key or a coin.
ii. Ore – A type of rock that contains minerals and metals iii. Properties – Qualities or characteristics of matter and materials iv. Malleable – Able to be beaten or hammered into shapes without breaking v. Ductile - able to be drawn into wires vi. Rust – the reddish-brown layer formed when iron combines with air and water vii. Conducts – Carries heat or electricity viii. Alloy – Two or more metals mixed together, or a metal mixed with non-metal ix. Plated – a metal coated by another metal
5. Read & Discuss p62-63 LB (properties of metals)
a. While looking at figures 2-6, discuss the properties of metals (hardness, strength, shininess, malleability, ductility, melting at high temperatures)
6. Read & Discuss
a. Usborne Science Encyclopedia p42-43 b. What’s science all about? p112, 126-127, 160
7. Discuss properties of everyday objects (must physically touch to create association) Copper wire, coins, nails, screws, cooking pots, knives, forks, spoons, steel wool, cooldrink can, chalk, coal, wood, glass jar, pile of sand, stones
a. Feel the hardness b. See how it shines when scratched c. Will not break if dropped
8. Read & Discuss p64 LB (Mixtures of metals & coating metals) 9. Read
a. Usborne Science Encyclopedia p34-39 b. What’s Science all about? p161

82
10. Notebook Entries a. What are alloys?
i. On the line, write: Mixtures of metals ii. Complete the circles: what and what makes what alloy?
b. Why are alloys used? Because they combine the properties of different metals c. Converting iron to steel (Cut & paste description and picture together)
11. Online Edu: a. http://nobelprize.org/educational/physics/steel/ b. http://resources.schoolscience.co.uk/CDA/14-16/chemistry/copch0pg1.html c. http://www.bbc.co.uk/schools/gcsebitesize/science/aqa_pre_2011/rocks/metalsact.shtml
12. Read & Discuss p65 LB (Ways to make dull metals shiny) a. NEEDED:
i. 4x 5c coins (and a selection of metal and non-metal objects, and pieces of different kinds of metal)
ii. Soft cloth iii. Cleaning materials
• One cleaning material needs to be prepared as follows: Mix 1tbsp flour with ½ tsp salt. Add a little vinegar to make a firm paste.
• Soapy water • Vinegar • Cream cleaner (or pine gel)
13. Discuss
a. Discuss the need for having a plan when tackling a project, rather than having a haphazard approach. (Some scientific discoveries have been the result of an accidental event, but many more discoveries have been the result of methodical research).
b. Discuss each stage of the investigation process in detail, explaining and reinforcing the keywords. (Read & Discuss p66-67)
i. Compare the bounce of a soccer ball against the bounce of a tennis ball c. See p30 TG Skills focus for explanation of steps
14. Read Usborne Science Encyclopedia p30-33
83
TOPIC 6 – UNIT 2 PROPERTIES OF NON-METALS 1. Practical Task:
a. Hit a small piece of pottery with a hammer, showing it is brittle. Hit a piece of metal with the same force (**protect your eyes…)
b. Put a kitchen knife into hot water for a few minutes. Take it out and leave it for about a minute and let the learners feel the difference in temperature between the handle and the blade.
c. Emphasize that non-metals may conduct some heat, but they are poor conductors compared to metals.
2. Read & Discuss p68-69 LB 3. Read
a. Usborne Science Encyclopedia p100-101 b. What’s Science all about? p164
4. VIDS: Polymers
a. Polymers.mpg
5. Online: a. Synthetic fibres
i. http://www.bbc.co.uk/schools/gcsebitesize/design/textiles/fibresrev3.shtml b. How super-strong polymer material Kevlar® was invented by accident
i. http://www.nbclearn.com/portal/site/learn/chemistry-now/bulletproof-chemistry-kevlar
6. Activity a. Make glittery slime and create a model of one of your body's important self-defense systems
(Lapbook_Notebook Resources/Polymers/glitterslime.pdf)
7. Notebook Entries a. What are polymers? Plastics, rubber and fabrics b. What are ceramics? Objects made from clay or sand c. Activity 5 p69 LB
i. Divide an A4 page in half ii. Label the columns: Metal, Non-metal iii. Find pictures and paste in the appropriate column
8. Practical Activity – Demonstrate how metals conduct heat better than non-metals (plastic)
a. P32 TG Extension
FORMAL ASSESSMENT: Practical Task p70-71 LB Topic Revision p72LB Basic Target Worksheet Topic 6 p11

84
TOPIC 7 UNIT 1 – OTHER PROPERTIES OF METALS
1. Read & Discuss p73 LB a. Not all metals are magnetic. Some are magnetic but that does not make them a magnet. A
magnet attracts a magnetic material (like a metal paper clip) but a magnetic material (another paper clip) does not attract another magnetic material.
2. Read What’s Science all about? p256 3. Discuss:
a. Review properties of metals b. One property not yet mentioned, is magnetism
4. NEEDED: a. Magnetic & non-magnetic materials (coins, nails, drawing pins, paper clips, safety pins, copper
wire, scissors, spoon, iron failings, brass screws) b. Magnets c. Pot with metal handles d. Candle e. Websites on magnetism
i. http://www.explainthatstuff.com/magnetism.html
5. VIDS: Magnet 6. Read & Discuss p74-77LB
7. Notebook Entries
a. Vocabulary words – Metals picture dictionary i. Magnetic ii. Attracted iii. Tarnish iv. Corrode
8. Read & Discuss Usborne Science encyclopedia p40-41 9. Read: How copper has kept the Statue of Liberty beautiful.
Through one hundred years of biting sea winds, driving rains and beating sun, the copper skin of the Statue of Liberty not only has grown more beautiful but also has remained virtually intact. While a glance at the Statue's rich, green patina provides proof of copper's enduring good looks, closer analysis shows that weathering and oxidation of the copper skin has amounted to just .005 of an inch in a century. For this reason, the copper skin was one of the few major elements of the Statue that did not need to be significantly rebuilt or completely replaced when the Statue was renovated for its centennial. The only copper part of the Statue that required renovation was the torch section, which was rebuilt with new copper and patinated before installation to match the rich, green color of the existing copper - testimony to copper's unique ability to grow more attractive over the years.
Copper played a key role in the restoration of the Statue inside, as well as outside. High-alloy copper saddles and rivets now secure the copper skin to the skeleton underneath. The copper fastenings ensure structural integrity and, as part of the total materials system, guard against any galvanic reaction problems.
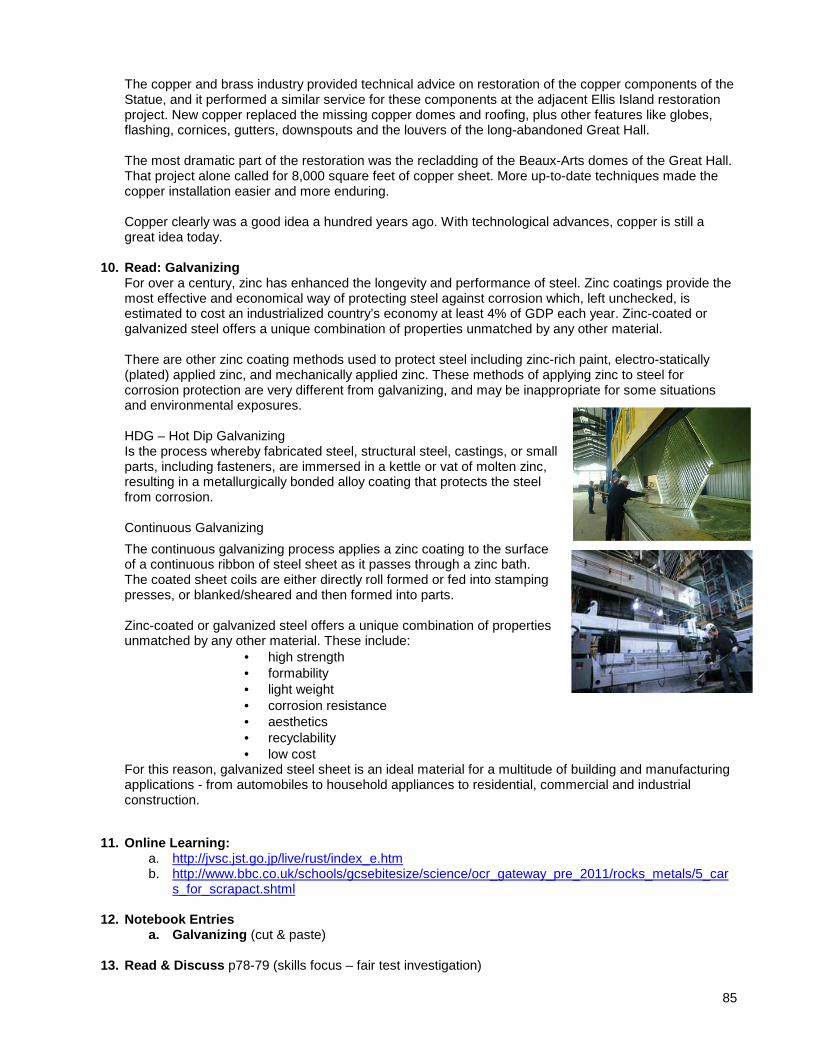
85
The copper and brass industry provided technical advice on restoration of the copper components of the Statue, and it performed a similar service for these components at the adjacent Ellis Island restoration project. New copper replaced the missing copper domes and roofing, plus other features like globes, flashing, cornices, gutters, downspouts and the louvers of the long-abandoned Great Hall. The most dramatic part of the restoration was the recladding of the Beaux-Arts domes of the Great Hall. That project alone called for 8,000 square feet of copper sheet. More up-to-date techniques made the copper installation easier and more enduring. Copper clearly was a good idea a hundred years ago. With technological advances, copper is still a great idea today.
10. Read: Galvanizing For over a century, zinc has enhanced the longevity and performance of steel. Zinc coatings provide the most effective and economical way of protecting steel against corrosion which, left unchecked, is estimated to cost an industrialized country’s economy at least 4% of GDP each year. Zinc-coated or galvanized steel offers a unique combination of properties unmatched by any other material. There are other zinc coating methods used to protect steel including zinc-rich paint, electro-statically (plated) applied zinc, and mechanically applied zinc. These methods of applying zinc to steel for corrosion protection are very different from galvanizing, and may be inappropriate for some situations and environmental exposures. HDG – Hot Dip Galvanizing Is the process whereby fabricated steel, structural steel, castings, or small parts, including fasteners, are immersed in a kettle or vat of molten zinc, resulting in a metallurgically bonded alloy coating that protects the steel from corrosion. Continuous Galvanizing
The continuous galvanizing process applies a zinc coating to the surface of a continuous ribbon of steel sheet as it passes through a zinc bath. The coated sheet coils are either directly roll formed or fed into stamping presses, or blanked/sheared and then formed into parts. Zinc-coated or galvanized steel offers a unique combination of properties
unmatched by any other material. These include: • high strength • formability • light weight • corrosion resistance • aesthetics • recyclability • low cost
For this reason, galvanized steel sheet is an ideal material for a multitude of building and manufacturing applications - from automobiles to household appliances to residential, commercial and industrial construction.
11. Online Learning:
a. http://jvsc.jst.go.jp/live/rust/index_e.htm b. http://www.bbc.co.uk/schools/gcsebitesize/science/ocr_gateway_pre_2011/rocks_metals/5_car
s_for_scrapact.shtml
12. Notebook Entries a. Galvanizing (cut & paste)
13. Read & Discuss p78-79 (skills focus – fair test investigation)

86
TOPIC 7 UNIT 2 – USES OF METALS
1. Read & Discuss p80-83LB (Uses of metals)
2. Read Usborne Science Encyclopedia p44-45
3. Online VID: a. http://www.recyclenow.com/how_is_it_recycled/cans.html
4. Notebook Entries:
a. Activity 8 p82 LB - Replacing metal objects with non-metal objects OR b. Activity 9 p83 LB - Research Project about the uses of metals in transport (PC Project) c. Vocabulary words – Metals picture dictionary
i. Structure ii. Ornamental iii. Recycle
TOPIC REVISION p84 LB Basic Target Worksheet Topic 7 p12-13

87
TOPIC 8 – PROCESSING MATERIALS – COMBINING MATERIAL S
1. Read & Discuss p85 LB (Introduction) a. Needed:
i. Mould for plaster of Paris ii. Ingredients for cake
2. Practical Activity: Bake a cake
3. Read & Discuss p86-87 LB (Combining materials, mixing & setting)
4. Notebook Entries:
b. Vocabulary words: (Mix & Match) i. Combine – to mix or join together ii. Ingredients – The list of raw materials that are selected to go into the mixture iii. Process – change in different ways to get new materials or products with new
properties iv. Products – Something new and useful coming out of a process v. Mixture – Something that is made by mixing things together vi. Cement – A product made from clay and limestone that becomes hard when mixed with
water vii. Concrete – A mixture of sand, gravel, cement and water viii. Reinforced – Strengthened with additional material ix. Plaster of Paris – A white powder that quickly becomes a hard solid when mixed with
water x. Paste – A thick mixture of a solid and a liquid xi. Dissolve – Mixes completely with water xii. Rural – Far from big, modern cities where people live off what is available in nature
5. Practical Activity – Make glue from flour and wa ter
a. p88 LB b. NEEDED:
i. flour, water, picture, newspaper
6. Read & Discuss p89LB (Mixing & cooking) 7. Notebook Entry
a. Activity 3 #1 p89 LB 8. Practical Activity – Making porridge
a. NEEDED: i. Maize meal; salt, teaspoon, water
9. Read & Discuss p90 LB (Mixing, and cooling) 10. Practical Activity – Making jelly
a. NEEDED: i. Packet of jelly
11. Read & Discuss p91 LB (Mixing, drying and firing) 12. ACTIVITY: Making Bricks
a. NEEDED: i. Plaster or Paris ii. Old Ice cube tray that can be used as a mold for the bricks and thrown away later, or
reused for the same purpose next year. iii. A permanent marker iv. Water

88
v. Sand (beach sand or builder's sand would work well) vi. Ice cream sticks or plastic tea spoons for mixing and scooping vii. 2 empty 1 liter yoghurt tubs: one for measuring and one for mixing
b. INSTRUCTIONS:
i. Look at all the starting materials and feel them with your fingers.
ii. Discuss their properties (What does it look like? What does it feel like?)
iii. Making sand bricks: • Mix some of the sand with water to make some stiff mud. Fill three or four of the
hollows in the ice cube tray with the mud. • When these bricks are dry, they will be sand bricks. • Do you think they will be strong and durable?
iv. Making 'concrete' bricks:
Teacher's Note Plaster of Paris sets quickly and gives off a considerable amount of heat in the process. Ensure that learners take note of the observation that the mixture becomes warm when it sets. Help them to formulate their ideas around this by asking questions like: "Why does the mixture get warm?" and "When do things get warm?" You want them to realise that things feel warm when they release energy/heat. When mixing, the plaster of Paris and sand need to be in a 1:2 ratio.
• Pour all the plaster of Paris powder into the measuring tub. • Measure the amount of powder in the tub by making a mark on the outside of
the tub with a pen. • Pour the plaster of Paris into the mixing tub. • Pour sand into the measuring tub, up to the mark that you made. • Add the sand to the plaster of Paris in the mixing tub. • Repeat steps 3 and 4 once more. • Pour water into the measuring tub, up to the mark that you made in step 1. • Add the water to the sand and plaster of Paris and mix well with the stick. Now you have made wet 'concrete'. You will have to work fast because it will set quickly. • Scoop the wet 'concrete' into the empty hollows of the ice tray. Fill them all to
the same height so that your finished bricks all have the same size. Make the top surface of each brick flat so that they will be easy to stack later.
• When these bricks are dry, they will be 'concrete' bricks. • Do you think they will be strong and durable? • Wash your hands very thoroughly.
• Leave all the bricks overnight to set. When the bricks have set they can be
removed from the tray and placed in a sunny spot to dry out for a few days.
• When the bricks are dry you can use them to build something interesting.
• Examine both types of bricks and write your observations in the table below.
13. Discuss: a. What materials did you start with? Sand, plaster of Paris and water. b. How did the 'concrete' mixture feel after you mixed it? Did it get warmer or colder? The mixture
felt warmer. Encourage learners to think in terms of the concept of temperature: "That means the temperature was higher (increased)".

89
c. Where do you think the heat came from? Learners might say: "From the starting materials".
Teacher note: This is an opportunity to get learners to realize that when materials are mixed, they sometimes change . You could then ask: "Did the starting materials feel warm?" to which learners should respond: "No." Then: "When did it start to feel warm?" .. "When the materials were mixed." "What do you think happened when the materials were mixed that caused them to get warm?" Some learners may now begin to use words like "react" or "reaction". You could then bring in that energy is released by the starting materials reacting with each other. We observe this energy by the heat/warmth that we feel.
d. Do you think that sand and water alone would be good material for making bricks? Say why (or
why not). If the sand bricks were weak and easily crushed learners may respond: Sand and water is not a good material because the bricks will not be strong enough.
e. Did adding plaster of Paris to the sand make the bricks better? In what way? Teacher note:
Here it is important to convey the idea that the plaster of Paris acts as binder to hold the sand grains together. The sand and plaster of Paris bricks should turn out stronger than the bricks made of sand alone, and therefore learners may respond: The bricks made of sand and plaster of Paris were stronger than the sand bricks.
f. Can you think of other materials that we could add to the mixture of sand and plaster of Paris to
make the bricks even stronger and tougher? Here you could allow the learners to use their imaginations: Some materials that may be mentioned are: cement, stones, rocks, etc. This question is an ideal opener for introducing the concept of reinforcement. You could use the meaning of the word "force" to conjure up notions of "strength" and making things "stronger".
Real bricks are actually made by firing the bricks in a special oven called a kiln to bake them and make them hard. A potter is someone who makes objects such as pots out of wet clay. Once they have dried and then been fired the clay becomes hard. We have learnt that sometimes we can make materials stronger if we add other materials to them. When we make materials stronger by adding other materials, we say we are reinforcing it. In the activity you have just completed the bricks made of 'concrete' (sand and plaster of Paris mixture) were stronger than the bricks made of sand only. The plaster of Paris acted as binder to glue the sand grains together. In the next activity we will be looking at pictures showing examples of how concrete can be reinforced. There will be some questions to help you think about each process.
14. Discuss: Reinforcing concrete a. INSTRUCTIONS:
i. Look at a picture of a piece of concrete wall. The concrete looks as if there are pebbles (small stones) embedded in it.
ii. Can you see that there are things embedded in the concrete? What do you think they are?
iii. How did the stones get inside the concrete? The stones were mixed into the concrete when it was still wet.
iv. Why do you think the concrete was mixed with stones? (Hint: Is stone a strong material?) The stones were mixed into the concrete to make it stronger. (Here you may want to encourage the use of the word "reinforce".)
v. What is the process called when we make a material stronger by mixing it with another material? Reinforcing.
vi. Look at a picture that shows how a floor is being prepared for reinforcement with steel bars.
vii. Why do you think the concrete needs to be reinforced with steel bars? (Hint: In a garage, why would the floor need to be extra strong?) The floor needs to be strong because the garage may be used to store a car or a truck or heavy equipment.

90
viii. Look at a picture showing a new building that is being constructed.
15. Notebook Entry a. Comparing bricks (table) b. Activity 5 p91 LB (Writing assignment)
16. Read & Discuss p92-93 LB 17. Practical Activity:
a. Mould something out of plaster of Paris and paint
TOPIC REVISION p94 LB Basic Target Worksheet Topic 8 p14-15 Advanced Target Worksheet Topic 8 p16-17

91
TOPIC 9 – PROCESSED MATERIALS UNIT 1 – PROPERTIES AND USES OF PROCESSED MATERIALS
1. Read & Discuss p96-101 LB
2. Notebook Entries a. Processed materials
i. Turn an A4 page sideways. ii. Write the title Processed materials on the top of your page. iii. Paste at least 2 pictures (from a magazine) of the different processed materials, and
label the type of processed materials as well as the items b. Special properties of some processed materials (Activity 3 p101)
i. Complete the table ii. Needed items: (p101 LB)
c. Raw or processed (cut & paste)
i. Divide an A4 page in 3 lengthwise ii. Title the columns: Raw, Processed, Origin iii. Discuss each material and decide how to classify it. Is it a raw material or a processed
material? Does it come from plants, animals or the ground?
d. Vocabulary Words i. Processed materials – Materials that have been processed in some way ii. Fire-resistant - A material that is not easily damaged by fire iii. Durable – Something that will last for a long time iv. Waterproof – Will not let water pass through v. Fabric – Material made from yarn or fibres by weaving or knitting vi. Heat-resistant – A material that is not easily damaged by heat vii. Absorbent – Able to take in or soak up liquids easily viii. Texture – The way a surface or material feels when you touch it ix. Paint – A liquid used to give colour or texture or protect surfaces and objects x. Pigment – A dry, coloured powder that is mixed with oil or water to make paint
e. Properties of processed materials
i. He has to write some properties under the flaps (answers in LB)
3. Project a. Follow the instructions in the Learner’s Book p102-103 b. Complete all the tasks in writing (keep all your notes and rough work – it must be submitted with
your written script or poster) c. Assessment p48 TG (Assessment tool for script or poster)

92
UNIT 2 – TRADITIONAL PROCESSING
1. Read p104-105 LB (Not the Activity)
2. Read & Discuss People have been processing materials from the earliest times. In the old days only natural materials were available and people found many clever ways to make these materials more useful.
The first people who lived in our land had ways to harden wood and bone for making tools and hunting weapons. They also had ways of reinforcing the mud used for making traditional huts. They knew which materials made the best clothes and blankets, and which grass made the softest beds. They also knew exactly which reeds would make the best mats to cover their walls, and how to build the best houses for their climate and their lifestyle. Some of these traditional ways of processing materials are still used today. In this section we will learn more about them.
Before South Africa was a country, several interesting groups of people lived in our land. The Khoikhoi people were one of the first nations to live in Southern Africa and many modern day South-Africans are descendants of the Khoikhoi. The Khoikhoi were pastoral people who kept goats, but also hunted animals for their meat and skins.
The following story tells us about the young Khoikhoi hunter, Heitsi, who prepares to go on an expedition to hunt a springbok.
Read the story carefully, and look out for clues about the ways in which Heitsi's people used and processed materials. When you have read the story, answer the questions that follow.
Heitsi prepares for the hunt Heitsi is getting his hunting kit ready for the hunt. He is not a man yet, but already a good hunter. When he was born 11 summers ago, his mother named him after Heitsi-eibib, who was a mythical hunter, sorcerer and warrior in the stories of his people. His father and his uncles have taught him how to use the bow and arrow and the 'kierie' (or throwing stick) that are the traditional hunting weapons of the Khoikhoi. Heitsi is very excited about the hunt. Today he is hoping to kill a springbok, because he wants to cut a head dress for himself from the skin of the springbok. He can already imagine how envious his friends will be when he wears it proudly around his head.
He will give the rest of the springbok skin to his mother to turn into a blanket ( karos) or a piece of clothing for his new baby sister. His mother will scrape the skin with a sharp stone or metal blade to remove the hair and rub it with animal fat for a long time to make it soft. Heitsi slings the quiver in which he keeps his arrows over his shoulder. The quiver is made from tree bark. It is a good quiver, but he really wants one made of animal skin like the one his father carries. The arrows inside the quiver have wooden shafts and sharp tips made of metal. His younger cousins have arrows with tips made of hardwood. In the old days all the arrow tips were made of wood or bone, but Heitsi's people have been making contact with other peoples who have introduced them to metal. He also keeps some tinder in his quiver. Tinder is the name for the soft, dry plant materials his people use when starting a fire. Another item he keeps in the quiver is a hollow reed that can be used like a straw to suck up water that has collected on the leaves of plants. He knows that he has to handle the arrow tips very carefully because they are very sharp. He keeps them sharp by rubbing them on a special stone. Another reason why Heitsi handles the arrows very carefully is because their tips have been covered with a layer of poison. His cousins sometimes use the sap from poisonous plants to treat their arrow tips, but he prefers to use snake poison because it is more potent. He picks up his bow, and admires it for a moment. He made it himself from the flexible wood of a wild olive tree. The bow string is made from the gut of a small wild cat that he hunted last summer. His uncle's bow has a string made of twisted palm leaves, and it makes a beautiful sound when Uncle holds
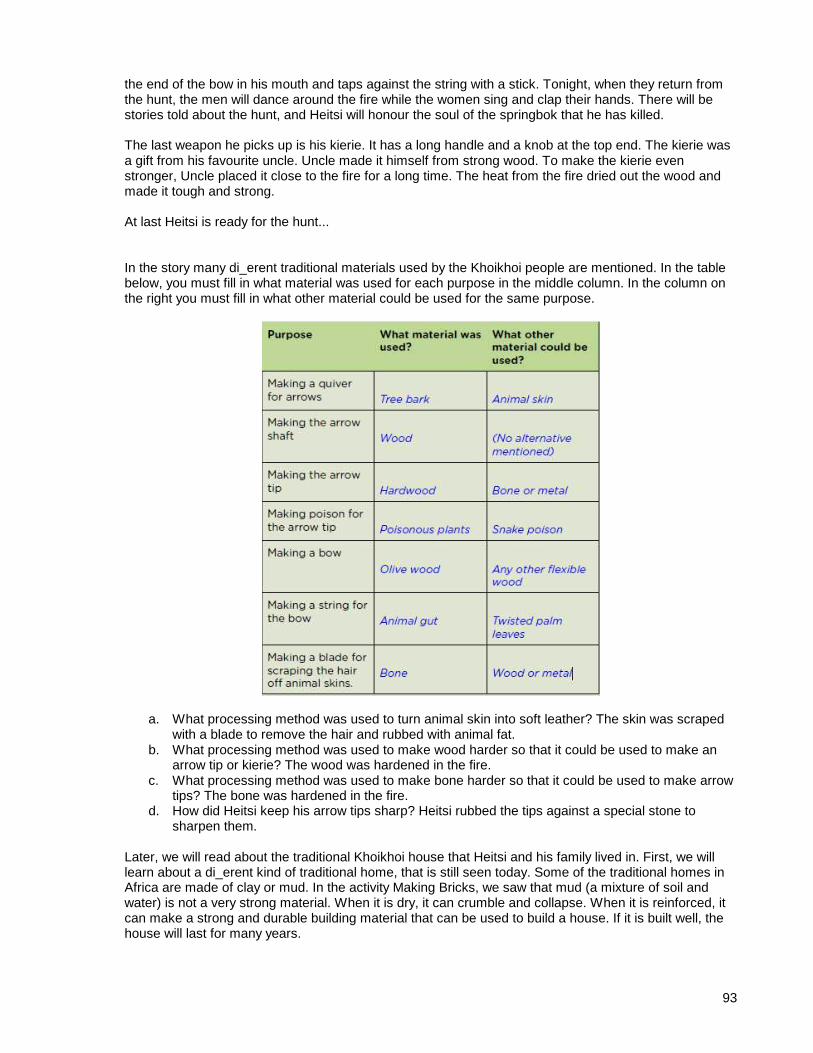
93
the end of the bow in his mouth and taps against the string with a stick. Tonight, when they return from the hunt, the men will dance around the fire while the women sing and clap their hands. There will be stories told about the hunt, and Heitsi will honour the soul of the springbok that he has killed. The last weapon he picks up is his kierie. It has a long handle and a knob at the top end. The kierie was a gift from his favourite uncle. Uncle made it himself from strong wood. To make the kierie even stronger, Uncle placed it close to the fire for a long time. The heat from the fire dried out the wood and made it tough and strong. At last Heitsi is ready for the hunt...
In the story many di_erent traditional materials used by the Khoikhoi people are mentioned. In the table below, you must fill in what material was used for each purpose in the middle column. In the column on the right you must fill in what other material could be used for the same purpose.
a. What processing method was used to turn animal skin into soft leather? The skin was scraped
with a blade to remove the hair and rubbed with animal fat. b. What processing method was used to make wood harder so that it could be used to make an
arrow tip or kierie? The wood was hardened in the fire. c. What processing method was used to make bone harder so that it could be used to make arrow
tips? The bone was hardened in the fire. d. How did Heitsi keep his arrow tips sharp? Heitsi rubbed the tips against a special stone to
sharpen them.
Later, we will read about the traditional Khoikhoi house that Heitsi and his family lived in. First, we will learn about a di_erent kind of traditional home, that is still seen today. Some of the traditional homes in Africa are made of clay or mud. In the activity Making Bricks, we saw that mud (a mixture of soil and water) is not a very strong material. When it is dry, it can crumble and collapse. When it is reinforced, it can make a strong and durable building material that can be used to build a house. If it is built well, the house will last for many years.

94
3. ACTIVITY: Making a mud house stronger In this activity we are going to look at some videos and pictures for ideas on how to process mud into a strong and durable building material. If you are not able to watch the videos, then look at the pictures. Many of these traditional building methods have become very popular amongst modern-day people who want to live in a sustainable way.
4. VIDS: Traditional Processing
a. How to Make a Mud Hut.mp4
5. Discuss: a. What material is the house in the video and in the pictures made of? Mud, sticks and cement b. The man in the video used two methods to strengthen the walls of his house. What are they? Or
else, look at the second picture above of a close up photo of a wall to see how they strengthened the wall. He added cement to the mud, and he used sticks to build a framework for the house.
6. VIDS: Traditional Processing
a. How to build a mud house.mp4
7. Discuss: a. What materials are recommended to reinforce the mud? Dry grass and stones. b. Why do you think the wall should be built thicker at the bottom than at the top? The wall will be
more stable when it is built thicker at the bottom. It will not fall over easily. c. Write a step-wise procedure for building a mud shelter. For example the steps could include to
first put sticks into the ground to mark out where the walls of the house would be, then to collect or make the mud, and to add grass and stones to reinforce it. Then pack the mud up against the sticks as the you boy is doing in the first picture. Then to leave the mud to dry.
8. Discuss:
The mixture of clay and straw the man is using to build the wall is sometimes called cob. Another way of building a cob wall is to use bricks made of cob.
9. VIDS: Traditional Processing
a. Cob Building Demonstration.mp4
10. Discuss: a. What material has the woman added to the mud to reinforce the bricks? Straw, grass b. What is this mixture called? Cob c. Would it be possible to add the straw or grass after the bricks have been made? When should
the straw be added to the clay? No, the straw should be added before the clay hardens into bricks.
11. VIDS: Traditional Processing
a. Mud Bricks.mp4
12. Discuss: a. Do the bricks contain straw or stones? In the video, they contain only clay/mud. In the pictures
above they do contain straw and grass. b. How does the man get all the bricks to look the same? He fills a box (mold) with the clay, then
tips the wet clay out of the mold before it is dry. c. After making the bricks they are stacked in a large pile and then a fire is made underneath the
pile. What do you think is the purpose of this procedure? The bricks are baked (fired) to make them hard.
d. Make a list of all the di_erent ways in which mud or clay can be made stronger when we want to use it to build a house.
i. The mud can be mixed with straw or stones. ii. The mud can be mixed with cement. iii. The mud can be packed inside a framework of sticks.

95
iv. The mud walls can be built thicker at the bottom. v. The mud can be shaped into bricks and then fired.
13. Discuss:
You may remember from the story Heitsi prepares for the hunt, that Heitsi belongs to the Khoikhoi people from the days before South Africa was a country. In those days there were no borders, no provinces, no towns or cities, and no roads. No-one 'owned' land; the land belonged to everyone who lived on it. Imagine that! Like all the early people, the Khoikhoi had to make everything they needed, because remember, there were no shops then! They had to use whatever materials were freely available. The Khoikhoi people were nomads. That means they did not live in one place for long. They moved their homes and their belonging every few months, when the seasons changed. This way they could always be close to good grazing. Fresh green grass and trees meant there would be leaf-eating animals around to hunt. It also meant there would be good food around for themselves, and for their goats to eat.
Read the story carefully for clues on which materials were used to make a traditional Khoikhoi house.
Heitsi moves house Heitsi's clan is on the move again. A few days ago, the clan packed up all their belongings and started their long trek to the place that will be their home for the summer months. The place where they lived had become dry and dusty and it was becoming more and more di_cult to find good things to eat. They took apart their hut, which they will rebuild when they reach their destination. During the long walk, everyone has to help carry. Heitsi is carrying his own sleeping mat and karos, and his hunting weapons. He also has to keep an eye on the goats in case they wander too far from the clan. After many days of walking, they come to the right place. Now they can rebuild their house. The framework of the house must be strong so that the house will stand firm. Heitsi's mother and aunties have found some young trees nearby and are cutting long, thin branches that will be perfect for making a frame for the house. Once they have cut the branches, they strip o_ the leaves.
The men bend the flexible branches into crescent (half-moon) shapes and tie them together with flexible strips of tree bark. This is how they build a dome-shaped framework for the house. Can you see the framework of tree branches? Can you see what the house is made of?
Once the framework is built, it is ready to be covered with reed mats. For this reason the house is called a matjieshuis (mat-house).
Heitsi's mother and aunties made the mats by threading reeds together with string that she made from the long thin leaves of palm trees.
The whole family has to help with the floor of the house. They bring clay from a nearby river and Heitsi's mother makes the floor by stomping down the wet clay with her feet. Once the clay has dried, the floor

96
will be smeared with animal manure. This is not as bad as it sounds - the manure seals the clay to prevent it from becoming sandy and dusty. A fire-hole will be dug in the middle of the floor, with sleeping hollows (about 15 cm deep) around it. Soft plant material will be placed in the sleeping hollows, and this will be covered with mats and karosses to make comfortable beds for Heitsi and his family. Heitsi loves his portable home. It is the perfect shelter. In hot, dry weather, the openings between the reeds allow air to circulate inside the house to keep it cool. It also lets in light. He knows that when the rains come and the reed mats get wet, the reeds will absorb water and swell out. Then they will seal tight and protect the inside of the house against leaks. During the cold months, the inside of the house will also be lined with animal skins to make it extra warm and comfortable.
In the story we learnt how many di_erent traditional materials were used by the Khoikhoi when they built their portable homes. Make a list of all the materials you can find in the story, and say how they were used. Use the table below for your list.
a. What does it mean when we say Heitsi's house is portable? A portable house is a house that can be broken down, moved and built again in another place.
b. Write a paragraph to describe the materials and methods used by Heitsi's family to keep their
home warm and dry during winter. The family made warm beds out of plant material and covered them with mats and karosses. They made the beds around the fire, so everyone could sleep close to the fire. They built their house of reeds that would swell out in the rainy weather, to keep the inside of the house dry. They covered the house in animal skins for extra warmth.

97
c. How does Heitsi's mother strengthen the floor of the matjieshuis? Heitsi's mother makes the floor from clay, which will be hard when it is dry. Then she covers the clay with animal dung that will form a seal on top of the clay. This prevents the clay surface from breaking up into dust.
d. Look at all the pictures of modern "houses" (A brick house, a caravan and a tent). Which one is
the most like Heitsi's house? Why do you say so? The tent is most like Heitsi's house because it can be broken down quickly and it is light enough to carry to a new location.
e. Draw a picture of the floor plan of Heitsi's house.
f. If you have time in class, build a model of Heitsi's house, using any suitable building materials.
We saw that Hetsie's family uses grass to make the reed mats for their matjieshuis. In Africa, many people make objects by using plant products, called plant fibres. The people weave and stitch the plant fibres together to make different objects, such as reed mats, baskets, or even thatch to make a roof for a house. This is also a type of traditional processing.
Look at the picture of a matjieshuis. It is an old one and it was made differently to the one Hetsie's family made as this one does not use reed mats, but rather bushes that have been tied onto the frame. Which method do you think is better and why?
14. Read & Discuss p106-107 LB 15. Discuss:
a. Natural materials come from plants, animals or the Earth b. Raw materials are materials that have not been processed. c. Processed materials are raw materials that have been changed or refined by humans. d. Humans have been processing materials from the earliest times e. In Africa, people have processed materials for hundreds of years, for example to make clay pots
and woven products f. What are raw materials? Raw materials are materials that have not been processed. g. What are natural materials? Natural materials come from plants, animals or the Earth h. What are processed materials? Processed materials are raw materials that have been changed
or refined by humans. i. Which processing method did the Khoikhoi people use to make wood and bone hard and
strong? They used fire to dry the wood and bone slowly without burning it. This process is called fire-hardening.
j. Where did the Khoikhoi people find the material that they used to make their homes? All the materials were found in nature.
k. How can sand and clay be made stronger if we want to use it to build a house? Sand and clay can be made stronger by adding a binder like cement, and/or by adding reinforcing material like straw, pebbles or even steel reinforcements.Learners should say that the matjieshuis made by Hetsie's family is better as the woven reeds are stronger and hold together more firmly than the bushes which are just tied on to the frame.
l. How is this woman using a woven product? Think if you, or anyone in your family, uses any woven products in your daily life and write them down too.
16. Read & Discuss p106-107 LB 17. Notebook Entries
a. Vocabulary words (Cut & paste) i. Coil – To roll material into a spiral shape ii. Weave – The process of making something by crossing strips or threads under and
over each other iii. Stitch – Using thread to sew or join two materials together iv. Plait – To twist three strands over and under each other to form one thicker strand

98
18. Activity: Make a clay pot a. p105 LB
TOPIC REVISION p108 LB Basic Target Worksheet Topic 9 p18-19 Advanced Target Worksheet Topic 9 p20-21 TERM 2 PRACTICE EXAM p109-110 LB
99
TOPIC 10 - STORED ENERGY IN FUELS UNIT 1 – FUELS
1. Discuss: a. What do you understand by the term fuel?
2. Read Usborne Science Encyclopedia p106-107 3. Read and Discuss p111-112 LB 4. Discuss:
There are a few different definitions for fuel. There are three main categories that you can use to investigate fuels. Some fuels can be burnt to create heat and light. W ood is often collected and burnt to give us heat and light. On a cold evening it is wonderful to sit around a fire to tell stories and warm yourself with friends. Wood comes from plants, especially trees. When plants are growing, they use the light energy from the sun as well as carbon dioxide and water to grow. Plants take the energy and store it in their leaves, roots and all parts of the plant. Wood also contains this energy stored by plants. Burning wood allows us to change this stored energy into light and heat which is useful to us.
5. VID: Energy
a. Formation of Fossil Fuels.mp4 6. Read & Discuss p113 LB
Coal is a type of fossil fuel that is also burnt to provide us with heat that we can use. The heat from coal can be used to cook our food and warm our houses. Fossil fuels like coal were made from prehistoric plants. The plants got their energy from the Sun and stored it in their bodies. Millions of years ago, a lot of the Earth was covered by water. The plants that died sank to the bottom of the water. Over millions of years, the layers of plants were covered by layers of sand and pushed down by the weight of the sand. The plant material was buried deeper and deeper under the ground where it is much hotter than on the surface of the Earth. Over millions of years, the plant remains are changed into fossil fuels. Fossil fuels get their name "fossil" because they are made from plants and animals that were alive a long, long time ago. Other types of fossil fuels are natural gas and oil. Scientists have realized that tiny sea organisms, also died, sank to the bottom of the ocean and were buried under the sand. Over millions of years, many layers of dead sea animals got buried like this. Over millions of years, the dead sea animals changed into oil and natural gas Wax in a candle is burnt to provide light. There is stored energy in the wax and burning it, allows us to change the stored energy into light.
Paraffin is also a fuel that contains stored energy. Paraffin is burnt in paraffin lamps and paraffin stoves to provide us with useful energy in the form of light and heat.
7. Discuss Activity 2 p114 LB 8. Read & Discuss: Food is fuel for the body
In order to live, people and animals need energy. We get our energy from the food that we eat. Do you remember learning about food chains in the beginning of the year in Life and Living?
9. Notebook Entry a. Food Chain
i. Choose one of the foods that you will eat for lunch today and draw a food chain including this food and ending with you. Any food chain starting with the Sun and ending with a person (the learner). Perhaps it is a piece of fruit, then it will just be a 3 link food chain. If it is a meat product, then it would be a four link food chain.
100
Teacher Note: Remind learners about food chains and how the direction of the arrows shows the transfer of energy from the Sun and then from one organism to the next.
10. Discuss: Food contains stored energy that our bodies can change into useful energy that we need when we run, jump, breathe, learn and everything else that we do.
The energy value of food is often shown on the packaging of foods that we buy. The energy of food is measured either in calories (Cal) or in joules (J). A snack such as a packet of chips gives you thousands of joules of energy. So we rather talk about kilojoules of energy when talking about the energy in food.
Teacher's Note Spend a moment going over the link between units of measurements and the use of "kilo" as this is often a huge problem with learners in the higher grades. For example, write some of these on the board, 1000 grams (g) = 1 kilogram (kg), 1000 meters (m) = 1 kilometer (km), and then write 1000 joules (j) = ….. and ask learners for the answer.
Have a look at a mealie meal packet. The side of the packet contains a lot of information about what the mealie meal contains. The very top line tells us that 100 g of mealie meal will supply your body with 1368 kJ of energy.
The energy value of a food tells us how much energy that food is worth to our bodies as fuel. An average adult man needs about 2500 kcal or 10 000 kJ per day. Children and adults that are not very active need less energy. People that are very active need more energy. These numbers are just to give us an idea of the amount of energy your body needs as fuel everyday.
It is important to eat a balanced diet. In the next activity we are going to look at how much energy different food gives us. Next year in Grade 6 we will learn a lot more about nutrition and what you should eat to be healthy!
11. ACTIVITY: Energy from food
a. MATERIALS: i. various packaging for foods collected
b. INSTRUCTIONS: i. Look carefully at the energy information given on the packets and use this information
to complete the table (We’ll be doing it orally). ii. It is important to record the number and the unit in your table iii.
c. Discuss:
i. Which food item contains the most amount of energy per 100g? ii. Which food item contains the least amount of energy per 100g?
12. Discuss: Some fuels are energy sources for engines and power stations
Fuels can also be used to give us other forms of useful energy. Petrol or diesel is used in cars and trucks to make them go. The stored energy in the fuel is changed into movement energy of the car or truck. Petrol and diesel are made from fossil fuels. Can you see that even energy for cars and generating electricity comes from the Sun?
13. Discuss:
Coal is not only burnt in our homes for cooking and keeping us warm. It is also burnt in large quantities to make electricity. A power station is a large factory where the coal is burnt in large amounts to produce electricity. (Have a look online at pics of a power station) We can also do an investigation to find out how much energy is stored in fuels.
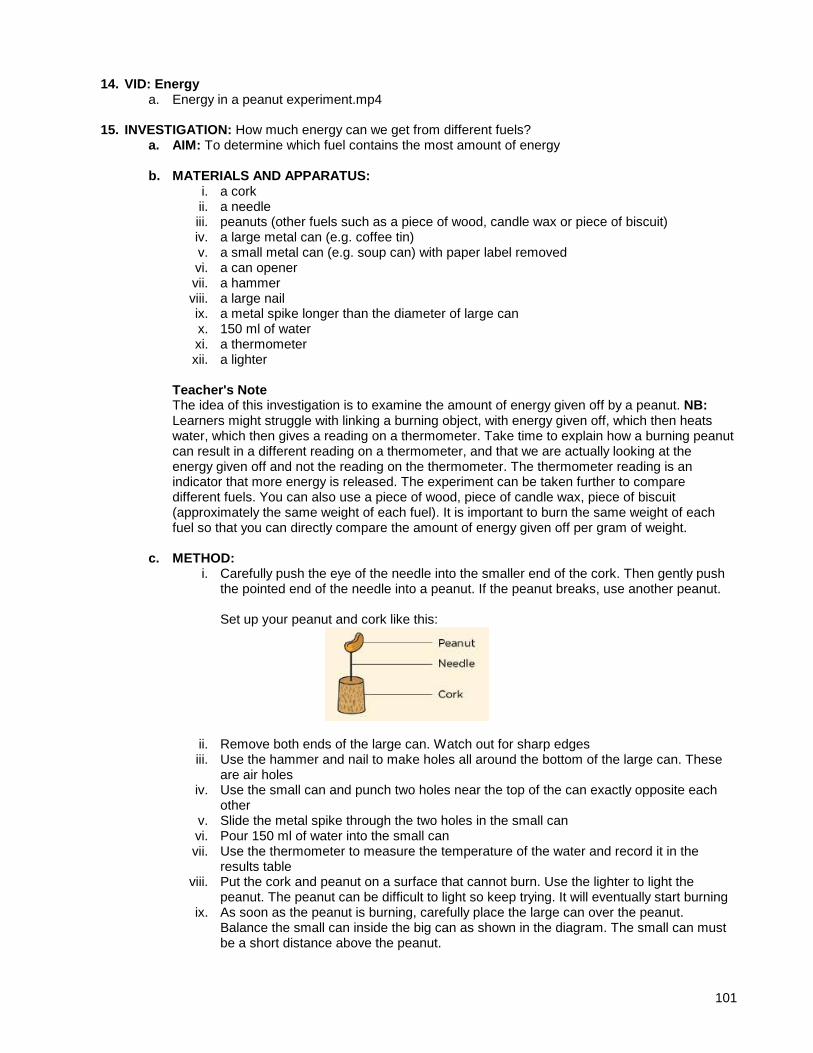
101
14. VID: Energy a. Energy in a peanut experiment.mp4
15. INVESTIGATION: How much energy can we get from different fuels? a. AIM: To determine which fuel contains the most amount of energy b. MATERIALS AND APPARATUS:
i. a cork ii. a needle iii. peanuts (other fuels such as a piece of wood, candle wax or piece of biscuit) iv. a large metal can (e.g. coffee tin) v. a small metal can (e.g. soup can) with paper label removed vi. a can opener vii. a hammer viii. a large nail ix. a metal spike longer than the diameter of large can x. 150 ml of water xi. a thermometer xii. a lighter
Teacher's Note The idea of this investigation is to examine the amount of energy given off by a peanut. NB: Learners might struggle with linking a burning object, with energy given off, which then heats water, which then gives a reading on a thermometer. Take time to explain how a burning peanut can result in a different reading on a thermometer, and that we are actually looking at the energy given off and not the reading on the thermometer. The thermometer reading is an indicator that more energy is released. The experiment can be taken further to compare different fuels. You can also use a piece of wood, piece of candle wax, piece of biscuit (approximately the same weight of each fuel). It is important to burn the same weight of each fuel so that you can directly compare the amount of energy given off per gram of weight.
c. METHOD:
i. Carefully push the eye of the needle into the smaller end of the cork. Then gently push the pointed end of the needle into a peanut. If the peanut breaks, use another peanut.
Set up your peanut and cork like this:
ii. Remove both ends of the large can. Watch out for sharp edges iii. Use the hammer and nail to make holes all around the bottom of the large can. These
are air holes iv. Use the small can and punch two holes near the top of the can exactly opposite each
other v. Slide the metal spike through the two holes in the small can vi. Pour 150 ml of water into the small can vii. Use the thermometer to measure the temperature of the water and record it in the
results table viii. Put the cork and peanut on a surface that cannot burn. Use the lighter to light the
peanut. The peanut can be difficult to light so keep trying. It will eventually start burning ix. As soon as the peanut is burning, carefully place the large can over the peanut.
Balance the small can inside the big can as shown in the diagram. The small can must be a short distance above the peanut.

102
x. Let the peanut heat the small can with the water until the peanut stops burning. Stir the water and measure the temperature of the water and record it in the results table.
xi. Repeat the experiment with two different fuels. Your teacher will decide which fuels to test. Fill in the results table for the other fuels tested. Remember to use quantities of the other fuels which are similar in size to the peanut and to always start with a cold can of water.
d. CONCLUSION:
i. Write a conclusion for your investigation. The energy stored in the peanut was changed into heat energy which we used to warm the water.
e. DISCUSS:
i. If the peanut had stored a greater amount of energy would the final temperature of the water be greater or smaller?
ii. Which substance contained the most amount of energy? iii. Also ensure the learners understand that to make a fair comparison about the amount
of stored energy in each substance, that you would have had to have the same mass of fuel for each experiment. In addition, you could use a metal bottle top and fill with paraffin or other liquid fuel to compare stored energy.
iv. Which fuel contained the most amount of energy and how did you determine this? The fuel containing the most amount of energy would have burnt for the longest and therefore caused the greatest change in the temperature of the water.
v. Where did the energy in the peanut originally come from? The energy comes from the Sun.
vi. Discuss what happened to the energy stored in the nut, or other fuels you used. As the nut was set on fire, the stored energy was released as heat and light
vii. What was the input energy needed to make the peanut (and other fuels) burn? Heat energy
viii. What was the output energy obtained from the fuel? Heat and light energy ix. Discuss how you could compare the amount of energy stored in peanuts to the amount
of energy stored in a cashew nut. The experiment (peanut or cashew nut) that produces the biggest increase in temperature has used the fuel with the most stored energy.
Repeat the experiment with a peanut and then a cashew nut of the same mass. Learners can go into the details of how to set up and perform the experiment. Unless they have done it, they won't be able to predict which one has the most stored energy, but the following conclusion could be made. In order to light the fuel, you had to put in a small amount of energy. The fuel however gave out a lot more energy than what was put in. The difference between the energy you put in and the energy the fuel gave out is how much energy was stored in the fuel. The OUTPUT ENERGY obtained from a fuel is GREATER THAN the INPUT ENERGY needed to make the fuel burn.
16. Read & Discuss p114-117 LB

103
UNIT 2 – BURNING FUELS
1. Discuss We have learnt that burning fuels provides us with energy that we can use. What does a fuel need to be able to burn? Burning fuel requires some energy to start burning. Fuel needs oxygen to burn. Fuel usually gets oxygen from the air around it. There are other gases present in air as well, but they do not burn. The following pie chart illustrates how much of each type of gas is found in the air around us.
When something burns we say it is combusting. So, another word
for burning is combustion.
2. VID: Fuel a. The Science of Fireworks at the Franklin Institute.mp4
3. Read p118-119 LB 4. Practical Task: p120-123 LB
a. NEEDED: i. 3 candles ii. 1x large glass bottle iii. 1x smaller glass bottle iv. 1x box of matches
5. Discuss
a. When lighting a candle, identify the heat source that provides the starting energy and the fuel supply. heat source is lit match, fuel is the wax
b. Why did the candle go out once you put the glass jar over the candle? The candle used up all the oxygen in the air. Burning cannot happen without oxygen so the candle went out.
c. Why do you think there is a difference in the time taken for the candle to go out? The small jar has less air and hence less oxygen than the bigger jars. The smaller the amount of oxygen, the quicker it gets used up and the quicker the candle goes out.
d. A candle that is allowed to burn freely in air will eventually burn down and go out. Why does the candle stop burning in this situation? The fuel has run out
6. VID: Fuel
a. Combustion in Pure Oxygen.mp4
7. Notebook Entries a. Vocabulary words
i. Extinguish – to put something out ii. Firefighters – People who are trained to help put out uncontrolled fires iii. Combustion – another word for burning

104
UNIT 3 – SAFETY WITH FIRE
1. Read & Discuss p124-125 LB a. Why are the following situations dangerous?
2. Discuss (Revision): a. List three types of fuel that you use in your community. food, coal, any fuel that the learners
have experienced b. What is needed for combustion to take place? heat, fuel and oxygen c. Your dad is cooking with hot oil on the stove. The oil catches fire. Suggest a way to put out the
fire and explain why it will work. Put the lid on the pot. This will cut o_ the oxygen needed to burn and the fire will go out. Do not use water to put out an oil fire.
3. Task:
a. An enthusiastic Science learner decides to perform an experiment to find out how long different quantities of firelighters will last. Each firelighter was cut into equal size blocks. The experiment was performed under adult supervision, and the following results were obtained:
Number of firelighters Time of burn (min)
2 6,0 4 11,5 6 18,6 8 23,8 12 37,0 16 48,0
b. Plot a graph of number of firelighters on the horizontal (x) axis and the time of burn on the
vertical (y) axis. c. Draw a line of best fit on your graph. d. Teacher's Note
Line must NOT join the points. Must be a line drawn with a ruler that is as close to the data points as possible. There should be as many data points above the line as below.
e. Describe the relationship between the time of burn and the number of firelighters. The greater
the number of firelighters, the greater the burn time
f. Use your graph to find out how long ten firelighters would burn for. 30 min

105
4. Your mom leaves the iron on and it is next to a window with a curtain blowing in the wind. Explain to her why this is dangerous and what she should rather do. The curtain could blow against the hot iron and catch fire and burn the house down. The wind blowing in from the window would also help to spread the fire. She should rather turn the iron off when not using it and close the window so the curtain does not blow against the iron.
TOPIC REVISION p126 LB Basic Target Worksheet Topic 10 p22 Advanced Target Worksheet Topic 10 p23

106
TOPIC 11 ENERGY AND ELECTRICITY UNIT 1 – CELLS AND BATTERIES
1. Read p127 LB 2. Discuss: Cells and batteries
Batteries come in all shapes and sizes. Batteries are needed for many different purposes. Most torches, radios, calculators, cell phones, some toys and even cars, pacemakers and hearing aids need a battery to work.
Batteries are useful as they store chemical energy. When the battery is connected in an electrical appliance and it is turned on, the stored energy in the battery is changed into electrical energy which is used to make the appliance work.
a. What problems would we encounter in the world if everything had to get energy from wires and
cables? Cars would not be able to start with a simple turn of a key; it would create a mess and it would be a safety hazard if wires had to be strung everywhere.
b. What do you know about batteries? c. Do you think batteries store electrical energy? No. A battery contains chemicals that react when
the positive and negative terminals are connected to a circuit. In other words, batteries store chemical energy, which is converted into electrical energy when connected to a circuit.
Two or more cells connected end to end are called a battery. One cell stores a small amount of energy. If we need to store a lot of energy we use a battery. A car needs energy to start its engine. One cell does not have enough stored energy. A car battery is actually six cells that are connected end to end inside the battery case. There is six times more energy stored in the battery than in a single cell. This gives the car enough energy to start the engine.
3. Read Usborne Science Encyclopedia p231 4. Read & Discuss p128-129 LB
5. Read & Discuss p130 LB
6. Activity: Make your own battery (What’s science all about p251)
a. Needed: i. ½ cup salt ii. 1 cup vinegar iii. 11 copper coins iv. 10 circles coffee filter paper (same size as coins) v. 10 circles foil (same size as coins) vi. 2 copper wires vii. LED
7. Activity 4 p131 LB (Make an electrical circuit)
a. Needed: i. 1 torch battery ii. two connecting wires iii. bulb
8. Online http://phet.colorado.edu/en/simulation/circuit-construction-kit-dc ** Not a necessity

107
9. Notebook Entry: a. Timeline entry:
i. First ever battery (by Alessandro Volta in 1800)
10. VIDS: Batteries a. Voltaic pilecell Leclanché cell (zinc-carbon battery) - How it works!.mp4

108
UNIT 2 – MAINS ELECTRICITY
1. Discuss: a. electrical systems in and around the house (most appliances are made of several components
working together) b. How do they work and where does the energy come from? c. A battery has stored energy which can be changed into electrical energy. But our homes,
schools, shops and factories cannot run on batteries. Electricity does a lot of work for us and is used many times every day. The main source of electrical energy is from power stations. We call this "mains electricity".
2. Investigate the main ways electricity is produced in South Africa. What is the effect of these ways of
generating electricity? What can each person do to minimize these effects? By far, the majority of electricity in SA is generated by burning coal. Coal is a non-renewable resource that gives off significant pollution when burned. These effects can be minised through the efficient use of electricity and by generating electricity through renewable means. Lights, for example can work off a battery system that is charged by solar panels.
3. VIDS: Electricity
a. Energy 101 Electricity Generation.mp4 b. How do you make electricity from coal.mp4 c. How a coal power station works.mp4 d. http://www.srpnet.com/education/tour/ (virtual tour) e. The story of electricity
4. Read & Discuss p135-137LB (I know… I know… be patient, we’ll get to p132-135) 5. Notebook Entry
a. Power Stations i. He must write on the inside of the flap what is used to generate electricity (source) in
each of these plants Hydro-electric (water), geo-thermal (steam), and nuclear power stations (nuclear).
b. Activity 9 p136 (Draw a diagram of a coal-burning power station) 6. Online learning:
a. Find out how a wind farm and coal-fired power station work. See how these both affect the environment in different ways http://www.eon-uk.com/EnergyExperience/164.htm
b. Build your own power station http://www.eon-uk.com/EnergyExperience/708.htm c. Walk through a hydro-electric power plant http://fwee.org/nw-hydro-tours/walk-through-a-
hydroelectric-project/
7. VIDS: Power plants a. Atomic Power at Shippingport (Part I) b. Atomic Power at Shippingport (Part II) c. A is for Atom - 1953 Atomic Energy (14:39)
8. Read: Koeberg Nuclear power station South Africa a. http://en.wikipedia.org/wiki/Koeberg_Nuclear_Power_Station
9. Read Usborne Science Encyclopedia p108-109 10. Notebook Entry: (Picture dictionary – let him draw the whole block full, the symbol for joules and watts
used on diagrams) a. Nuclear energy (See http://kids.britannica.com/comptons/art-124596/Technicians-wear-
radiation-resistant-clothing-to-protect-themselves-while-handling) b. Energy is measured in… Joules (J) c. Power is measured in… Watts (W) - is the energy used in a certain time measured in Watts
(1W = 1J/s)
109
d. Electric pressure is measured in… Volts (V) (http://www.fplsafetyworld.com/?ver=kkblue&utilid=fplforkids&id=16184)
11. VID: Energy
a. Renewable vs NonRenewable Energy Sources.mp4 (04:17)
12. Read & Discuss p132-133 LB The national grid is a large electrical circuit like the one you built in the previous lesson. It brings electricity to people’s homes in the same way as the circuit gave electricity to the light bulb.
13. Discuss:
Electrical energy on its own is not very useful. We need electrical appliances to convert the electrical energy to other useful forms of energy such as head, light and sound. Name several appliances that convert electrical energy to each of these forms:
a. Heat Stoves, kettles, geysers, heaters, electric blankets b. Light light bulbs, cellphones, LEDs c. Sound radios, TVs, public address systems
14. Discuss: How electricity gets to our appliances a. Read & Discuss: p134-135 LB
15. Online: http://www.switchedonkids.org.uk/what-is-electricity (generating electricity)
16. Notebook Entry:
a. Vocabulary words: i. Electrochemical cell – Changes the energy in chemicals into electricity ii. Battery – A source of stored energy that is made of one or more cells iii. Switch – Controls the electricity in an electric circuit iv. Electrical Circuit – A system that provides a path for the transfer of electricity v. Generator – a machine that produces electricity vi. Insulators – Substances that build up an electric charge rather than passing it on vii. Conductors – Substances that allow electric charge to flow through viii. Electric current – The flow of electric charge through a conductor
17. Read
a. Usborne Science encyclopedia p228-229 (Explains atoms & charge) b. What’s Science all about? p247-251
18. Oral Narration
a. Explain the difference between static electricity and current electricity b. Explain the difference between AC and DC current (you can also check out
http://www.pbs.org/wgbh/amex/edison/sfeature/acdc.html)
19. VID: Online a. http://video.nationalgeographic.com/video/kids/forces-of-nature-kids/lightning-101-kids/
20. Read & Discuss p138-139LB (Safety with electricity) 21. Notebook Entry:
a. Why does electricity shock people? (p17 electricity.pdf) b. Timeline Entry: Thomas Edison supplies people with electricity
22. Activity:
a. Make a Poster (Activity 12 p139 LB)
TOPIC REVISION p140 LB Basic Target Worksheet Topic 11 p24 Advanced Target Worksheet Topic 11 p25

110
TOPIC 12 – ENERGY AND MOVEMENT
1. Discuss: We often confuse the word elastic with rubber band. A rubber band is elastic because it has the property of elasticity (returns quickly to its original shape after being stretched). Other materials that are elastic include our skin. Can you think of others?
2. Discuss:
a. What is needed to make machines work? Energy (This may lead to a discussion on energy, where it comes from and how it can be stored. Energy transfer is an important concept).
b. Energy is never used up, but is converted from one form to another.
3. Read & Discuss p141-142 LB 4. Discuss
When we stretch an elastic band, we store energy in it. This is because when the band is stretched it can do work when you release it. We are going to look at some other ways of using stretched elastic bands to do work and produce movement.
5. ACTIVITY: Making your own catapult
a. MATERIALS: i. 10 ice lolly sticks or craft sticks ii. 4 to 6 rubber bands iii. 1 plastic spoon iv. Bag of marshmallows
b. INSTRUCTIONS:
i. Place 8 of the sticks together and tie a rubber band tightly around one end ii. Tie another elastic band around the other end so that the sticks are bound tightly iii. Tie a rubber band around the remaining 2 sticks, close to the one end iv. Insert the bundle of 8 sticks bound together through the 2 stick bundle v. Tie another rubber band in a cross so that the two bundles are held in place vi. Use a rubber band to secure the plastic spoon on the end. You now have a simple
catapult. vii. Use the marshmallows and shoot these by placing one on the spoon, pulling down and
then releasing it. viii. Have a competition to see who can shoot marshmallows the furthest and the most
accurately – can you hit a target?!
6. Discuss: a. How are you able to shoot a marshmallow closer or further away? Pulling the spoon down
further will make the marshmallow shoot further. b. When the marshmallow goes as far as possible, how much did the elastic band stretch
compared to when the marshmallow did not go far? The greater the stretch of the elastic band, the further the marshmallow went.
c. Where did the movement energy of the marshmallow come from? Stored energy in stretched elastic.

111
We saw in this activity that if you stretch an elastic band, you can produce movement. The stored energy in the band when it is stretched has the potential to do work. We call the stored energy in the elastic band potential energy because it has the potential to do something for us later. But what does the word potential mean? Look up a definition for potential in your dictionary. Having the capacity to do or develop into something in the future. Synonyms are possibility/feasible. A stretched elastic band can also produce movement and do work in the future when it is released.
7. Read & Discuss p143-147 LB
a. We have been looking at elastic bands and how they can be stretched or twisted to store energy to do work (to produce movement). Springs can also be compressed or stretched to store energy.
8. VID: Energy
a. Slinky Drop Extended (Low)
9. Discuss: A slinky is a metal coiled spring. When you stretch a slinky spring it stores energy. When the spring is released, the stored energy is changed into movement energy as it springs back into place. Springs can also be compressed to do work. To compress something means that you squash it.
A pogo stick works using a compressed spring.
10. Oral Narration:
a. Use your knowledge of springs to explain how a pogo stick works. Your answer must include the words compress, stored energy and movement. When a child jumps on a pogo stick he compresses the spring (squashes it). The spring then has stored energy and releases back up and pushes the child up again. The stored energy from the compression is released and turned into a movement.
11. Activity: Make a bird-in-the-cage spinner p147 LB
a. NEEDED: i. 2x elastics ii. cardboard iii. hole punch
TOPIC REVISION p148 LB Basic Target Worksheet Topic 12 p26 Advanced Target Worksheet Topic 12 p27

112
TOPIC 13 – SYSTEMS FOR MOVING THINGS
1. Discuss: Have you ever looked underneath a car? It looks very complicated and there are all sorts of pieces and parts, each with their own job to do. We are going to focus on two of the main parts in a vehicle which allow it to move.
2. Read & Discuss p149-155 LB 3. Activity: Experiment with wheels and axles p155 LB
a. NEEDED: i. Waste materials like bottle tops, round tins, or cardboard circles, straws or dowel sticks
4. Activity: Make and evaluate wheels and axles p156 LB
a. NEEDED: i. Bottle tops, round cooldrink tins or cardboard circles for wheels ii. 4 sosatie sticks, dowel sticks or straws iii. thick cardboard iv. glue gun v. sellotape
b. Also experiment with different types of materials for a roadway to see if it makes a difference to
the speed and distance the buggies travel (sandpaper, tissue paper, plastic)
5. Read The story of inventions p8-9 (Reference Ancient World p8) 6. Notebook Entry:
a. Vocabulary words i. System – Two or more parts that work together to carry out a function ii. Mechanism – Parts of a machine that do specific jobs to make the machine work iii. Axle – A rod attached to a wheel iv. Fulcrum – Centre point v. Turning Axle – A system in which the axle turns together with the wheels
b. Timeline Entry i. John Boyd Dunlop
TOPIC REVISION p158 Term 3 Practice Test p159-160 Basic Target Worksheet Topic 13 p28 Advanced Target Worksheet Topic 13 p29 TERM 3 Test p99 TG
113
TOPIC 14 – PLANET EARTH
1. Read & Discuss p161-165 LB 2. Notebook entries
a. Vocabulary words: (Cut & paste) i. Orbit – The path of one object in space around another, such as the path of the Earth
around the Sun ii. Revolution – The movement of an object in space around another object, such as the
movement of the Earth around the Sun iii. Axis – An imaginary line passing through the center of an object iv. Rotation – The movement of an object around itself, such as the movement of the Earth
around its own axis b. (Activities in LB include notebook entries)
3. The Sun a. Educational song b. The Sun is hot.mp3 (lapbook_resources/planets/sun)
4. VIDS: Planets/Sun
a. Eclipses (Low) b. NASA Magnificent Eruption in Full HD (Low)
TOPIC REVISION p166 Basic Target Worksheet Topic 14 p30 Advanced Target Worksheet Topic 14 p31

114
TOPIC 15 – THE SURFACE OF THE EARTH
1. Read & Discuss p167 LB a. What would you find if you could dig a very deep hole? b. Where does soil come from? c. If you were going to buy a farm, what kind of soil would you look
for? d. What is on the surface of the Earth? Name all the features (parts)
you can think of. Answers may include Land, sea, forests, rivers, deserts, air, clouds. Learners may correctly include animals and people though they cannot see them in the picture.
e. What do you think is under the surface? Answers may include soil, rocks, mines, bones, roots, drainpipes, and many more. Encourage them to think of as many ideas as they can.
2. ACTIVITY: What will you find if you dig a hole, as deep as it can go?
Look at the picture of a digging machine and imagine you are driving it. a. What is under the floor of this schoolroom? This question is for discussion. b. Imagine that you use the machine to dig as deep as you want. You drive it down into the Earth.
What do you find as you go down? Let the learners discuss this before they write. If they cannot write, let them draw pictures of what they think they will find under the Earth.
c. Do a drawing of yourself, the digging machine and the hole. In your drawing, show (a) the Earth (b) the digging machine with you inside (c) the hole (d) what you find at the deepest part of the hole. Give the learners enough time to think while they do their drawings. Look at the learners' drawings but do not correct them. If you give them the right answer, you will stop them thinking about the problem. Correctness does not matter at this stage: we are raising their curiosity by asking the question "what is deep down under our feet?" If they are thinking about that question, then the next section will make more sense to them.
3. Discuss: So what do we find as we dig deeper?
When we begin to dig, we first dig though topsoil. Good topsoil is usually a dark colour.

115
Topsoil is very important for life. As you can see in the picture, plants and animals depend on topsoil. If we dig deeper, we find subsoil. This layer is often sandy and orange in colour. When we dig deeper, we come to rock. This layer of rock underneath the soil is called bedrock.
When we dig through the rock, a few hundred metres deep, we may find different layers of rock. We may even find water in cracks in the rock in some places. We may find coal in a few places. Deeper down, about a kilometre deep, we may find oil and gas.
Still deeper, we will find very hard rock and the rock will feel hot to touch. In Gauteng and the Free State, in a very few places, we will find rock that has gold in it.
4. Read & Discuss p168 LB (Only The surface of the Earth is made of rock and soil) 5. Discuss: The surface of the Earth is the crust
People have not really gone very deep into the Earth. We are in rock that is called the crust of the Earth. The crust is the outer layer of the Earth's surface. The crust consists of rock and soil. The crust is about 70 km thick, so we have not gone very far yet. Humans have only gone 5 kilometres deep, and the hole is so small that you cannot see it in the crust.
a. If you dig a hole in the beach sand what will you find if you dig very deep? Rocks, if you dig deep. Children who have dug holes in sand will also tell you that sea water flows through the sand and flows into the hole.
b. If you went down under the seawater, what would you find down there? Sand near the beach, but further out to sea you find fine mud and under it you find rock. It must be such an interesting world in the depths of the oceans. I wonder what it is like?!
The sea is very deep if you go far from the beach. The sea may be kilometres deep. The deepest part of the sea is called the Marianas Trench. It is near the Marianas Islands, south of Japan. You can find this place on a map. The deepest part of the oceans is here. It is a trench (like a valley with steep sides) that is 11 kilometres deep. The Sun's light cannot reach down to the bottom and it is pitch-dark. The water presses down with a pressure that is like the weight of three buses pressing on your thumbnail! Three scientists have gone down there in small submarines, and taken pictures and collected rocks. The submarines had bright lights, and the scientists were amazed when they saw animals that live down there. (You can go Google some pics)
They also found rocks. So the crust rock lies under the oceans as well as under our feet. The crust is a layer of rock all around the Earth, like the shell of a hard-boiled egg. The mantle and the core lie even deeper under the c rust. If we go deeper than the crust, we go into rock called the mantle . The mantle is the layer that lies underneath the crust. Mantle rock is much hotter than the rock that is found in the crust. The rocks are so hot that they are soft in some places, like toothpaste. If there is a weak spot in the crust, the hot rock pushes upwards and it might burst out. This is how volcanoes happen. The mantle is 2 900 km thick, so we still have a long way to go down. **Model the way in which the crust extends under the ocean simply by using a saucer or a soup plate with a broad rim. Tell the learners that the surface of the saucer or plate represents the crust. Fill the deepest part of the saucer or plate with water and show them that the crust is underneath the water. Increase and decrease the water level in the saucer or plate to show them that the crust is always there, and that some of it is under water, and some is on dry land.
6. Discuss: Thinking about the layers of the Earth. a. What is the diameter of the Earth? Think of the Earth as a circle; then the diameter means the
distance across the middle of the Earth. The diameter is 12 900 km. b. If the digging machine went as far as it can go, what is the last layer of the Earth that it would
dig through? It will dig through the crust, but from underneath and then it will come out into the air.

116
c. Which is the best model of the Earth - a loaf of bread, an apple or an avocado? Look at the three pictures below. Which of those is most like the Earth? Explain your answer. Remember that the Earth has a hard crust , a hot sticky mantle and a hot core .
The bread has a crust, but no core. The apple has a peel or skin and a core, but the core is not one solid thing. The avocado has a tough skin or peel, and a solid core, so it is quite a good model of the Earth.
d. Although the model you chose is most like the Earth, it is not exactly the same. In what way is
this model not like the Earth? For example, the avocado pip is not hot, but the core of the earth is very hot.
7. VID: Rocks
a. Rocks Types - Igneous ,Sedimentary, Metamorphic for kids.mp3
8. Read & Discuss p168-169 LB 9. ACTIVITY: So what is under our feet?
a. INSTRUCTIONS: i. In the first activity at the beginning of this Chapter you drew pictures of yourself digging
a hole into the Earth. You had to imagine you were making the hole as deep as a hole can be.
ii. Perhaps you feel your picture is correct, or perhaps you want to change your idea about the Earth.
iii. Look at those pictures now, and do the activity again.
10. Notebook Entry: a. Activity 2 p169 LB
117
TOPIC 15 UNIT 2 - SOIL COMES FROM ROCK 1. Activity: Soil comes from rocks
Rocks do not last forever! They may seem very hard and indestructible, but let's have a look!
Can hard things like rock and stone wear away?
Stones are hard. People say that a thing that is made of stone will last for ever. But is this true?
a. MATERIALS: i. two stones (pieces of rocks) ii. a sheet of paper.
b. INSTRUCTIONS
i. Find a cement step that everyone walks on. ii. Sweep the step clean and then look carefully at the step. iii. Can you see where people put their feet? What has happened there? iv. Find a piece of cement under an outside tap. Look carefully at the cement, where the
water falls on it. You might see that the cement is rougher just where the water hits it. The cement has lost little pieces.
v. Find out how long the cement has been there. How many years did it take to wear away the cement? The learners have to find out when the school was built.
vi. Find another object that is being worn away. Tell about what you have found. The learners could report that they found a Door edge; corner of building; pencil point; piece of board chalk; bottom of spoon; sole of shoe.
vii. What do you think is wearing away the object? Many shoes wear away the step, or many shoulders that rub against the object. Or paper that the pencil rubs on wears away the pencil.
viii. When a small bit breaks off the object, where do you think it goes? Learners may not have the idea that small bits break off. Find out whether they really think this.
ix. Are the small bits still lying somewhere, do you think? If they do think of small pieces breaking off, learners may believe the pieces no longer exist. Here we are dealing with conservation of matter, which is a mental operation the learners must develop. Rubbing rocks together to make sand.
x. Now rub the two rocks together for three minutes. Let all the little pieces fall onto the paper. Make a pile of the pieces and look carefully at them. They look like a pile of sand. You are changing the two rocks into sand!
2. Discuss:
In nature, rocks turn into sand. But how does it happen?
Big rocks break up into smaller rocks
We know that we can break big stones into small stones. But when we see small stones lying on the ground, it is hard to think how they were broken up.
In nature, rocks break up in many ways. We will look at just three of those ways.
a. Bigger rocks break up into smaller rocks Over time, rocks can get cracks in the surface. Water gets into the cracks and causes the cracks to get bigger. Pieces of rock then break off when the cracks get bigger. Smaller and smaller pieces of rock form as the rocks break up more and more.
b. Water breaks up the surface of rocks In the soil, we can find a little water. The roots of plants can change this water so that the water becomes an acid. Vinegar has acid in it, and that is why vinegar tastes so sour. Acid can work on stones to break them up. The acid water breaks the surface of the stone and then the stone can break more easily.
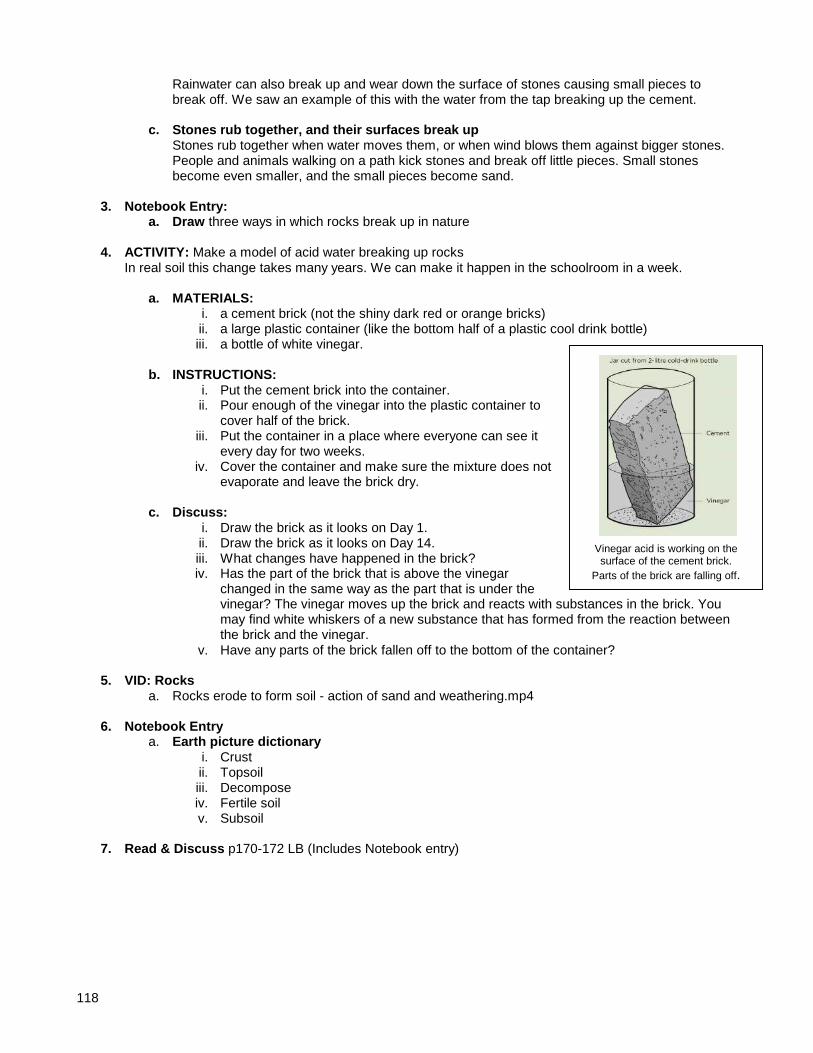
118
Rainwater can also break up and wear down the surface of stones causing small pieces to break off. We saw an example of this with the water from the tap breaking up the cement.
c. Stones rub together, and their surfaces break up
Stones rub together when water moves them, or when wind blows them against bigger stones. People and animals walking on a path kick stones and break off little pieces. Small stones become even smaller, and the small pieces become sand.
3. Notebook Entry:
a. Draw three ways in which rocks break up in nature
4. ACTIVITY: Make a model of acid water breaking up rocks In real soil this change takes many years. We can make it happen in the schoolroom in a week.
a. MATERIALS: i. a cement brick (not the shiny dark red or orange bricks) ii. a large plastic container (like the bottom half of a plastic cool drink bottle) iii. a bottle of white vinegar.
b. INSTRUCTIONS:
i. Put the cement brick into the container. ii. Pour enough of the vinegar into the plastic container to
cover half of the brick. iii. Put the container in a place where everyone can see it
every day for two weeks. iv. Cover the container and make sure the mixture does not
evaporate and leave the brick dry.
c. Discuss: i. Draw the brick as it looks on Day 1. ii. Draw the brick as it looks on Day 14. iii. What changes have happened in the brick? iv. Has the part of the brick that is above the vinegar
changed in the same way as the part that is under the vinegar? The vinegar moves up the brick and reacts with substances in the brick. You may find white whiskers of a new substance that has formed from the reaction between the brick and the vinegar.
v. Have any parts of the brick fallen off to the bottom of the container?
5. VID: Rocks a. Rocks erode to form soil - action of sand and weathering.mp4
6. Notebook Entry
a. Earth picture dictionary i. Crust ii. Topsoil iii. Decompose iv. Fertile soil v. Subsoil
7. Read & Discuss p170-172 LB (Includes Notebook entry)
Vinegar acid is working on the surface of the cement brick.
Parts of the brick are falling off.

119
TOPIC 15 UNIT 3 – SOIL TYPES
1. Discuss: Making soil Rocks break down and slowly change into sand. This change needs thousands of years to take place because soil, wind and water do it very slowly. But sand is not soil. More changes must happen to sand before it is soil.
2. ACTIVITY: Look at different kinds of soil a. MATERIALS:
i. a tin-can half full of moist topsoil (moist means it is not dry) ii. a hand lens or some other kind of magnifier iii. a sheet of white paper iv. toothpicks, matches or pieces of dried grass that you use for moving the little pieces of
soil.
b. INSTRUCTIONS i. Smell the soil in the tin. Does it have a smell? ii. Put a teaspoonful of the topsoil on the white paper and spread it out. iii. Use your stick to move the small bits of soil that you find there. Look at the soil with the
magnifier. Make piles of bits that look the same.
Look closely at the soil. What pieces do you find there?
• One pile will be rock grains. You will find very small pieces of rock and some pieces that are not so small. There will also be some grains that are almost too small to see.
• Another pile will be small bits of plants. You will find very small pieces of sticks, leaves and roots.
• Another pile will be small bits of animals. You will find very small pieces of beetle shell, or legs, or wings of flies.
• You may even find a small live animal! If you do find one, do a drawing of it on your paper and then let it go on the soil outside.
3. Discuss:
a. What colour is your soil? Use words like "dark brown", "grey" "orange" or "yellow". b. Complete the sentence: Soil has sand but it also has ... Rock particles, organic matter such as
pieces of plants and dead animals, etc. c. Draw some of the grains of rock (sand) that you find. Draw any small bits of plants or bits of
dead animals that you see in the soil. Draw any small living animals that you find in the soil. Then let them go, outside.
4. ACTIVITY: Begin to make soil
We can make soil in a few weeks, but only a small amount of soil.

120
Teacher's Note The class should begin this activity on the first day of the 4th term, because it needs about 3 weeks to be complete. In this activity you begin the slow process of making soil. Your class perhaps started your compost column in the first week of the term.
a. MATERIALS: i. 3 big cool drink bottles like the ones in the picture ii. an old stocking iii. a strong rubber band iv. felt-tip pens that will write on plastic v. a big needle vi. a pair of scissors vii. scraps of vegetables and fruit, leftover porridge, cut grass, enough to fill a big bottle to
the top viii. a cup of water
Cut and join the 3 the cool drink bottles like this.
b. INSTRUCTIONS:
i. You need the plastic bottles that you see in the picture. Cut them as you see and join them together as in the picture.
ii. Cut a piece of stocking to fit over the neck of the bottle that is upside down. The stocking will stop the vegetable peels falling through the hole, but it will let water go through.
iii. Add the vegetable peels, old bread, and leaves. iv. Now slowly pour in the cup of water. Let the water go down through the stocking, into
the bottom container. v. Now use the needle to make air holes in the top bottle, as you see in the picture. vi. Mark the height of the compost column on the plastic. Write the date next to the mark. vii. Each Friday, mark the height of the compost column again, and write the date on the
bottle. viii. Then take out the bottom container with the water in it, and pour the water into a tin. ix. Then use the tin to pour all the water slowly back into the compost. This will stop the
compost from drying out. x. Begin a logbook. A logbook is a book in which you write down what happens on a day.
In the beginning, you might think the compost looks ugly, and is just a lot of rotting food and leaves. It might have a smell. But as the weeks go by, you will see changes in the colour and the size of the small pieces. You will also see some things begin to grow in the compost. The smell will change. You may also see insects appear from the compost.
5. Discuss:
a. Did you notice any changes in the compost? Did you see anything begin to grow in the compost? Dependent on activity – possibly fungi.

121
b. What happens to the colour of the water that you pour back in every week? It should get darker and more "muddy" in colour.
c. What do you think is in the water? Possibly fine bits of broken down organic material from the plants and other matter.
d. Why must you use the same water each week and not take fresh water? This is so that you do not lose the nutrients from that water, because if you use fresh water, then you are washing out and losing the fine bits that have been broken up and beginning to form in the compost.
e. Why does the compost column become lower as the days go by? As the days go by, the organic matter is broken down into smaller particles which can pack closer together and take up less space. So the compost column decreases in height.
f. Where do you think the insects come from? Possibly from eggs/larvae that were present on the organic matter before putting it into the compost column.
The grey hairy things that you see growing in the vegetable peels are fungi, and they help to break down the peels. There are many kinds of fungi and they have different colours. When you see insects in the compost column, they may be fruit lies that can get in through the air holes but they may also be hatching from eggs that insects laid in the peels and leaves before you put them into the plastic bottles. Do you remember in the first term when we did Life and living, we observed the life cycle of fruit flies? After about 4 weeks, your compost will be a dark colour and the big pieces will have broken down into small pieces. You can pour out the compost and mix an equal amount of sand with the compost. Now you have made a little soil. Teacher's Note Real soil is more complex than this mixture, and the living things in the soil make substances that bind the grains of sand together, or break down the grains into smaller pieces. But for Grade 5, it is enough to help the learners understand that soil is not just sand.
6. Discuss: Microorganisms in the soil Start off with a discussion about them and ask learners whether they think microorganisms are living or not.
When you looked at soil, you found sand grains, small bits of plants and small bits of animals. But there was another group of things you could not see, because they are too small. They are microorganisms. They are alive and they are busy in soil, changing dead plant and animal material into substances that plants can use and absorb through their roots. If we work hard, we can make a small amount of good topsoil in a term. But a farmer needs good topsoil all over the farm. Nature works all over the Earth but it works very slowly. Nature needs about 1 000 years to make topsoil just 10 cm deep. If rain washes away the topsoil the farmer cannot grow good crops on that land. Even if the farmer stops the erosion, it will be about 1 000 years before nature can make new topsoil to replace the soil that has gone.
If there is too little top-soil, then there will be too few plants for animals to eat. So all animals depend on the top-soil, even animals like lions that only eat meat.
a. We can say that lions depend on top-soil for their food, although they do not eat top-soil. Why
do lions depend on the top-soil for their food? Explain your answer. Hint: Think back to what you learned in the first term in Life and Living about food chains. Lions eat other animals, such as impala, zebra, giraffe, etc. these animals are herbivores which eat grass and other plants. The plants that these animals eat need topsoil to grow in. So the lions are indirectly dependent on topsoil by their feeding relationships.
7. Discuss: Soil types
Have you ever noticed how many different colours of soil and textures of soil there are? Even if you are just walking around in the yard, you may come across many different types of soil. This is because there
122
are different particles which make up soil. These particles can vary in amounts and therefore make up different types of soils.
Some particles are bigger, others are smaller and some are in between. A soil sample normally has a lot of particles either bigger, smaller or in between and a smaller portion of the other sizes.
8. Discuss: Soil particles - Sand, silt and clay
There are 3 main types of particles which make up soil:
a. Clay b. Silt c. Sand
If the soil was formed from a very hard rock, then it has bigger particles, if it was formed from a soft rock then the particles will be smaller.
9. Activity: INVESTIGATION: Different amounts of sand, silt and clay a. AIM:
i. To find out how much sand, silt and clay there is in soil from two different places.
b. PREDICTION (what you think you will find out): The soil from _____________ will have more ______________, and the soil from __________ will have more ____________ .
c. MATERIALS AND APPARATUS: i. soil from two di_erent places, such as near the top of a slope/hill, and near the bottom.
Or take soil from under a tree and other soil in an area with wild grass. The soils should look different.
ii. sheets of newspaper to keep the desks clean iii. two large see-through jars the same size
d. INSTRUCTIONS:
i. Collect two tins of soil from places you choose. These are samples of each kind of soil (a sample is a little bit to study).
ii. Feel the two samples in your hand. How do they feel different? Do they smell different? Ask for oral answers, no written answers.
iii. Spread a teaspoonful on the white paper and look at each – in what ways do they look different?
iv. Then put your soil samples into the glass jars. Pour in water to make the jar almost full, cover the top and shake each jar to mix the soil and water.
v. Now leave the two jars to stand until tomorrow. The water must not move. vi. In the morning you will see something like in the picture below. In each jar, the water
has let the large grains settle at the bottom, the very small grains are on top, and the clay grains are so small they are still mixed with the water. You may see some plant parts floating on the water.
vii. Your two jars will show different layers. In one jar, you might see a lot of sand, and in the other jar you might see less sand.

123
You will have two jars like this. The parts of your soil settle in layers.
e. OBSERVATIONS:
i. Draw the two jars showing the layers in your two sand samples. ii. Give your drawings labels and a heading. iii. How could you do this investigation better?
f. CONCLUSION (what you learnt):
i. The diference between our two soil samples is that ...
You will see that your soil has some grains that are grains of sand, some grains that are smaller and some that are so small you can't see them.
• Sand, which you know how it feels between your fingers. • Silt has much smaller grains but you can still feel that the silt is a bit rough. • Clay has such small grains that when you rub it between your fingers it feels like paint. In fact
you can paint with it. When clay dries, it becomes hard.
10. Discuss: a. Can you make pots with sand? b. What kind of soil is good for making pots?
11. Read & Discuss p173-174 LB
12. Discuss
a. Why do you think plants do not grow well in sandy soil? Sandy soil does not have any nutrients. It is easily blown away so plants can not form roots or roots become exposed. Sandy soil does not retain water
b. Do you think plants will be able to grow in clay? No, not if the soil only consists of clay.. This is because the clay can become waterlogged and it could pack too tightly around the roots.
c. What are the differences between loam and sand soil? Name three things that you find in loam but you do not find in sand. Plant material, animal material, living organisms (microorganisms).
13. Activities:
a. Activity 4 & 5 p174-175 LB
14. Notebook Entries a. Compare three soil types (LB p174 – Complete Table) b. Earth picture dictionary:
i. Microscope ii. Coarse grain iii. Fine grains iv. Soil grains v. Humus vi. Eroded soil

124
15. Online Learning: Soil types: goo.gl/QMnsG 16. Read & Discuss p176-179 LB (Not Activity 6 p177 yet)
17. Discuss:
Each soil type also has air and water in it, and sometimes the remains of dead organisms and very small living organisms.
How do some plants live when no rain falls? We do know that many plants can live through the dry season, even though no rain falls for eight months. How do they do it?
a. ACTIVITY: Soil holds water
i. MATERIALS: • a spade • a large sheet of clear plastic • a few bricks
ii. INSTRUCTIONS: • Look at the picture below • Dig a hole in the soil outside, like this • Cover the hole with a sheet of clear plastic and hold it down with some bricks. • After a short time, you see drops of water on the plastic.
Dig a hole in the soil, and cover it with a clear plastic sheet.
b. Discuss: i. Are the drops on the top or the bottom of the plastic? On the bottom, nearest the soil ii. Where is the water coming from? From the soil iii. How did the water get into the soil? From the rain. iv. Some plants can live even when no rain falls. How do they live? Their roots can absorb
water in the soil. some plants have roots that do this very well, so they can live in dry places.
18. Discuss:
Farmers know that soils are not all the same. They know that some soils hold water well, and other soils do not hold water well. An easy way to see how well soil holds water is to pour some water into soil and let it run through into a bottle. Look at the first picture below. These two bottles are the same size. In the next picture, the water is poured into the jar with the soil in it. Look at the last picture - has all the water run through the soil?
Put the soil in a funnel, like this. Use two jars the same size.
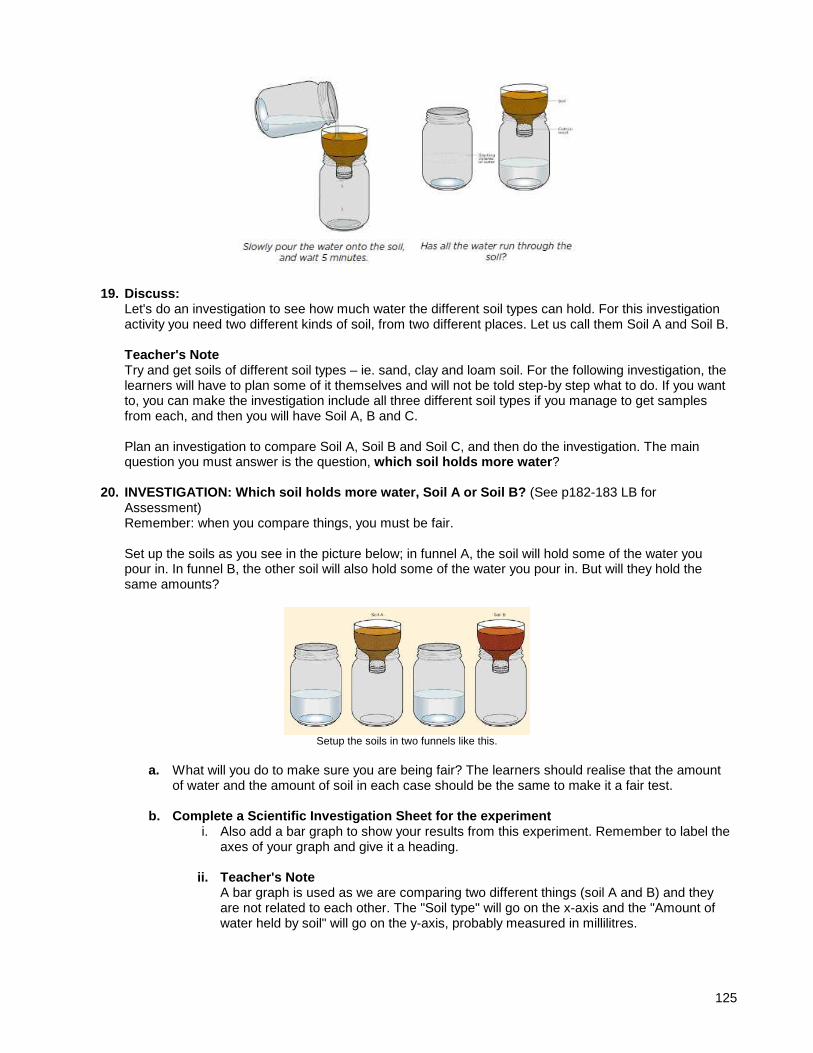
125
19. Discuss: Let's do an investigation to see how much water the different soil types can hold. For this investigation activity you need two different kinds of soil, from two different places. Let us call them Soil A and Soil B. Teacher's Note Try and get soils of different soil types – ie. sand, clay and loam soil. For the following investigation, the learners will have to plan some of it themselves and will not be told step-by step what to do. If you want to, you can make the investigation include all three different soil types if you manage to get samples from each, and then you will have Soil A, B and C. Plan an investigation to compare Soil A, Soil B and Soil C, and then do the investigation. The main question you must answer is the question, which soil holds more water ?
20. INVESTIGATION: Which soil holds more water, Soi l A or Soil B? (See p182-183 LB for Assessment) Remember: when you compare things, you must be fair. Set up the soils as you see in the picture below; in funnel A, the soil will hold some of the water you pour in. In funnel B, the other soil will also hold some of the water you pour in. But will they hold the same amounts?
Setup the soils in two funnels like this.
a. What will you do to make sure you are being fair? The learners should realise that the amount
of water and the amount of soil in each case should be the same to make it a fair test.
b. Complete a Scientific Investigation Sheet for th e experiment i. Also add a bar graph to show your results from this experiment. Remember to label the
axes of your graph and give it a heading.
ii. Teacher's Note A bar graph is used as we are comparing two different things (soil A and B) and they are not related to each other. The "Soil type" will go on the x-axis and the "Amount of water held by soil" will go on the y-axis, probably measured in millilitres.

126
iii. CONCLUSION (What you learnt): Write a sentence where you give a conclusion about what you learnt from this investigation. See if you can identify what types of Soil A and B were. For example, I learned that the soil from the bottom of the hill holds more water than the soil from the top of the hill. Also ask learners to identify what type of soil they think Soil A and B.
21. Discuss:
Sandy soil does not hold much water. Clay soil holds too much water. Clay holds water because it has very small grains. The grains fit together tightly. Loam soil has a mixture of sand and clay, along with composted plant and animal substances. So, loam soil holds water well, but does not become waterlogged like clay soil.
a. Why does sand let the water run through quickly? You are asking the children to make a hypothesis based on the information about the size of the grains. Sand grains are much larger than clay grains, and so they don't fit together so tightly and so there is more space for the water to run through.
22. Discuss: Which soil type do plants grow best in ? (See p184-185 LB for Assessment)
Now that we have looked at how different soil types hold different amounts of water, let's compare how well plants grow in the different soil types. In Life and Living, you might have grown seedlings before, but let's try again and this time focus on the type of soil.
a. INVESTIGATION: Compare how well plants grow in different kinds of soil b. AIM (What you want to find out):
c. PREDICTION/HYPOTHESIS (What you think will happe n):
d. MATERIALS AND APPARATUS:
i. 3 large jam tins ii. packet of radish seeds iii. some sand, enough to fill one tin iv. some loam soil, enough to fill a tin. You can find loam soil in a vegetable garden v. some clay soil, enough to fill the last tin (if you have access to clay soil) vi. a ruler vii. a measuring cup viii. a table spoon
Teacher's Note We use radish seeds because they germinate very quickly. Also, they are so small that they soon need substances from the soil to continue growing. In the tin with sand, they will not get those substances and they will soon begin to die. In the loam soil, your learners may get several good radishes. A radish is a root vegetable that has a sharp hot taste. If you cannot find clay soil, then just do the investigation using sand and loam soil which are easier to obtain.
e. METHOD:
i. Make five small holes in the bottom of each tin, so that water can drain out if there is too much water in the tin.
ii. Fill one tin with sand, one tin with the loam soil, and the last tin with clay soil. iii. Plant 10 radish seeds in each tin. Cover the seeds by sprinkling a little of the sand or
soil over them. iv. Pour a cup of water into each tin. Remember to keep the amount of water constant to
make it a fair test. v. Now let the seeds begin to grow, perhaps on the windowsill in the classroom to make
sure that they have a light source. vi. Each day, give each tin a tablespoon of water. vii. Observe the radish seeds growing for a week, and compare them.

127
viii. Measure the height of the radish plants growing in each type of soil. Calculate the average seedling height for each soil type.
ix. Record your results in a table.
Teacher's Note To calculate the average height, learners must measure the height of each seedling for a soil type, add all the heights together and the divide by the number of seedlings that have grown for that soil type. They must do this for each soil type.
f. RESULTS AND OBSERVATIONS: i. Draw a table to record your results from measuring the height of the seedlings each
day. Give your table a heading.
Date Loam soil (mm) Sandy soil (mm) Clay soil (mm)
ii. Now draw graphs to compare your results. A table is one way of presenting results, but a graph gives a visual representation which is sometimes easier to quickly understand and compare the results from an experiment.
First draw a line graph to show the change in average height of the seedlings grown in loam soil over time. Teacher's Note A line graph is used as we are showing the change over time of one thing. The input, independent variable is the day and this goes on the x-axis. The output, dependent variable is the average height grown and this goes on the y-axis.
iii. Next, draw a bar graph to compare the average height of the seedlings on the last day of your investigation for each soil type used.
Teacher's Note As with the previous bar graph, a bar graph must be drawn as there are 3 different things being tested which are not related to each other (the di_erent soil types). Soil type goes on the x-axis and Height grown goes on the y-axis, in centimetres or millimetres.
iv. How could you do this investigation better?
g. CONCLUSION:
Write a conclusion for this investigation. Remember, in a conclusion you must answer the question which you set out to investigate at the start.
23. Notebook Entries
a. Activity 6 p177 LB
24. Infosearch: Geography Encyclopedia p28-29 25. Read & Discuss Geography Encyclopedia p30-31 (Protecting soil)
26. Notebook entry:
a. Things that damage soil i. Use half of an A4 page. ii. Draw a mindmap with the title Things that damage soil in the middle. iii. Extend 3 arms, draw a small frame (big enough to draw in) attached to each arm

128
iv. Draw the different things (pollution, farming, cutting down trees) in each frame v. Title the pictures
27. Oral Narration
a. Explain the soil cycle (Geography Encyclopedia p30) b. Explain what is crop rotation c. Explain what is soil erosion (Geography Encyclopedia p31)
28. Read & Discuss Geography Encyclopedia p34-35 (Erosion) 29. Oral Narration
a. Explain how erosion takes place
30. VIDS: Rocks a. Rocks erode to form soil - action of sand and weathering.mp4
31. VIDS: Online:
a. http://forces.si.edu/soils/video/soil_savvy.html b. http://www.classzone.com/books/earth_science/terc/content/visualizations/es1205/es1205page
01.cfm?chapter_no=12 c. http://www.oum.ox.ac.uk/thezone/rocks/index.htm (Rock cycle) d. http://www.nps.gov/webrangers/activities/rockpark/?id=22 (Erosion landscapes)
TOPIC REVISION p186 LB Basic Target Worksheet Topic 15 p32 Advanced Target Worksheet Topic 15 p33

129
TOPIC 16 UNIT 1 – SEDIMENTARY ROCK
1. Discuss a. Why does the Earth have mountains and valleys? b. Have mountains always looked like they look now? c. Why can you sometimes see "layers" in rock which are different colours? How did these layers
form?
We’re only studying sedimentary rock in this unit, but it does leave one wondering what other types of rock there are. The main other type of rock is igneous rock. That is rock that has been hot and molten, and pushed up from deep in the mantle. Mostly it hardens under the ground and we see it only millions of years later when erosion has removed the ground over it. Sometimes it breaks through the crust as molten lava, and we have a volcano. The top of the Drakensberg is the remains of a huge outpouring of lava long ago. Nature is always breaking down rock and eroding it, so mountains are always changing. They change so slowly that we cannot notice it in a person's lifetime, but the changes are happening all the time. We saw in Chapter 2 that the surface of the Earth is made up of rocks and soil. There are different soil types, but did you know that there are also different types of rock? We classify rocks depending on how they were formed.
2. Read & Discuss p188-191 LB
a. Practical Activity p191 LB i. Needed:
• Large jar with a screw-top lid • 500ml plastic tub • water
3. Discuss: Different kinds of sedimentary rock and their uses
There are many kinds of sedimentary rock. Here are three kinds:
a. Sandstone is made from grains of sand that are cemented together. Sandstone has been a popular building material since ancient times, especially in houses and cathedrals around the world. This is because it is quite soft and easy to carve. Houses in Lesotho and the Free State were built from sandstone blocks. Sandstone comes in many different colours and so it is often used decoratively, such as in decorative stones, in fireplaces, in decorative columns and pillars in buildings and cathedrals and to make statues and fountains. Since sandstone is easy to carve, but does not weather, it is often used as paving stones and to make walkways.
b. Shale is made from grains of clay that are cemented together. Shale is quite soft and you can
use it to write with, like a piece of chalk. Shale is also used in buildings, especially as a raw material to make bricks. Shale also splits very easily into thin sheets and is therefore used as as tiles for floors and roofs. Shale is used for floors in some houses in South Africa. Cement is also made from shale. The shale is crushed to a powder and heated in a kiln (a kind of stove). Black shale rock is also a very important source of oil and natural gas all over the world.
c. Limestone is made of layers of shells of sea-animals that died and sank to the bottom of the
sea. Other kinds of limestone are made from sea-water evaporating. Limestone is a very common sedimentary rock and it has many uses, mostly as building materials. Limestone is cut into blocks and used in buildings. Look at these pictures below of different buildings made from limestone.
Limestone is crushed and used to make cement. Limestone is often used in sculptures as it can be carved easily. Glass is made from molten sand, and limestone is mixed with the sand to make the glass stronger. Farmers use limestone to improve their soil, if the soil is too acidic. Limestone is even used in some medicines and cosmetics and as a white pigment in toothpaste, paints and plastics!

130
4. Notebook Entries a. Different types of sedimentary rock in buildings (Cut & Paste – fold in half and paste the title
on the outside b. Earth picture dictionary:
i. Sedimentary rock ii. Deposit iii. Sediments iv. Compact v. Shale vi. Sandstone vii. Limestone
TOPIC REVISION p196 LB Basic Target Worksheet Topic 16 p34 Advanced Target Worksheet Topic 16 p35

131
TOPIC 17 – FOSSILS Will be done in History… Review it TOPIC REVISION p210 Term 4 Practice Exam p211-213 Basic Target Worksheet Topic 17 p36 Advanced Target Worksheet Topic 17 p37 FORMAL EXAM p103 TG
Copyright © 2022 FDOKUMEN