Microsoft Dynamics CRM 4 for Dummies - WordPress.com
434
-
Upload
khangminh22 -
Category
Documents
-
view
1 -
download
0
Transcript of Microsoft Dynamics CRM 4 for Dummies - WordPress.com


by Joel Scott, David Lee, and Scott Weiss
MicrosoftDynamics™ CRM 4
FOR
DUMmIES‰
01_343258-ffirs.qxp 6/4/08 12:09 AM Page iii

MicrosoftDynamics™ CRM 4
FOR
DUMmIES‰
01_343258-ffirs.qxp 6/4/08 12:09 AM Page i

01_343258-ffirs.qxp 6/4/08 12:09 AM Page ii
by Joel Scott, David Lee, and Scott Weiss
MicrosoftDynamics™ CRM 4
FOR
DUMmIES‰
01_343258-ffirs.qxp 6/4/08 12:09 AM Page iii

Microsoft Dynamics™ CRM 4 For Dummies®
Published byWiley Publishing, Inc.111 River StreetHoboken, NJ 07030-5774
www.wiley.com
Copyright © 2008 by Wiley Publishing, Inc., Indianapolis, Indiana
Published by Wiley Publishing, Inc., Indianapolis, Indiana
Published simultaneously in Canada
No part of this publication may be reproduced, stored in a retrieval system or transmitted in any form or byany means, electronic, mechanical, photocopying, recording, scanning or otherwise, except as permittedunder Sections 107 or 108 of the 1976 United States Copyright Act, without either the prior written permis-sion of the Publisher, or authorization through payment of the appropriate per-copy fee to the CopyrightClearance Center, 222 Rosewood Drive, Danvers, MA 01923, (978) 750-8400, fax (978) 646-8600. Requests tothe Publisher for permission should be addressed to the Legal Department, Wiley Publishing, Inc., 10475Crosspoint Blvd., Indianapolis, IN 46256, (317) 572-3447, fax (317) 572-4355, or online at http://www.wiley.com/go/permissions.
Trademarks: Wiley, the Wiley Publishing logo, For Dummies, the Dummies Man logo, A Reference for theRest of Us!, The Dummies Way, Dummies Daily, The Fun and Easy Way, Dummies.com, and related tradedress are trademarks or registered trademarks of John Wiley & Sons, Inc., and/or its affiliates in the UnitedStates and other countries, and may not be used without written permission. Microsoft Dynamics is atrademark of Microsoft Corporation in the United States and/or other countries. All other trademarks arethe property of their respective owners. Wiley Publishing, Inc., is not associated with any product orvendor mentioned in this book.
LIMIT OF LIABILITY/DISCLAIMER OF WARRANTY: THE PUBLISHER AND THE AUTHOR MAKE NO REP-RESENTATIONS OR WARRANTIES WITH RESPECT TO THE ACCURACY OR COMPLETENESS OF THECONTENTS OF THIS WORK AND SPECIFICALLY DISCLAIM ALL WARRANTIES, INCLUDING WITHOUTLIMITATION WARRANTIES OF FITNESS FOR A PARTICULAR PURPOSE. NO WARRANTY MAY BE CRE-ATED OR EXTENDED BY SALES OR PROMOTIONAL MATERIALS. THE ADVICE AND STRATEGIES CON-TAINED HEREIN MAY NOT BE SUITABLE FOR EVERY SITUATION. THIS WORK IS SOLD WITH THEUNDERSTANDING THAT THE PUBLISHER IS NOT ENGAGED IN RENDERING LEGAL, ACCOUNTING, OROTHER PROFESSIONAL SERVICES. IF PROFESSIONAL ASSISTANCE IS REQUIRED, THE SERVICES OF ACOMPETENT PROFESSIONAL PERSON SHOULD BE SOUGHT. NEITHER THE PUBLISHER NOR THEAUTHOR SHALL BE LIABLE FOR DAMAGES ARISING HEREFROM. THE FACT THAT AN ORGANIZATIONOR WEBSITE IS REFERRED TO IN THIS WORK AS A CITATION AND/OR A POTENTIAL SOURCE OF FUR-THER INFORMATION DOES NOT MEAN THAT THE AUTHOR OR THE PUBLISHER ENDORSES THEINFORMATION THE ORGANIZATION OR WEBSITE MAY PROVIDE OR RECOMMENDATIONS IT MAYMAKE. FURTHER, READERS SHOULD BE AWARE THAT INTERNET WEBSITES LISTED IN THIS WORKMAY HAVE CHANGED OR DISAPPEARED BETWEEN WHEN THIS WORK WAS WRITTEN AND WHEN ITIS READ.
For general information on our other products and services, please contact our Customer CareDepartment within the U.S. at 800-762-2974, outside the U.S. at 317-572-3993, or fax 317-572-4002.
For technical support, please visit www.wiley.com/techsupport.
Wiley also publishes its books in a variety of electronic formats. Some content that appears in print maynot be available in electronic books.
Library of Congress Control Number: 2008929979
ISBN: 978-0-470-34325-8
Manufactured in the United States of America
10 9 8 7 6 5 4 3 2 1
01_343258-ffirs.qxp 6/4/08 12:09 AM Page iv

About the AuthorsJoel Scott is the president of the Computer Control Corporation, whichbegan focusing on CRM software in 1989. Since the early 1990s, ComputerControl has been an elite dealer of GoldMine software, winning many salesand business process awards. Mr. Scott has also written the entire series ofGoldMine For Dummies books.
With the release of Microsoft CRM 1, Computer Control Corporation madethe decision to expand its product line and expertise to Microsoft CRM aswell. Mr. Scott has been the lead author for the Microsoft CRM For Dummiesseries. This is now the third book in the series.
In 2007, the Computer Control Corporation merged with a friendly competi-tor, Core Solutions, Inc. Mr. Scott now handles GoldMine and Microsoft CRMsales and design work for Core Solutions, as well as focusing on client reten-tion consulting, writing, and speaking engagements. Mr. Scott can be reachedat [email protected].
David Lee is the Chairman of the Board of Trustees for the University ofNorthern Virginia, Vice Chair of the Board of Trustees of Myers University, onthe Board of Advisors to ECPI, and was also adjunct faculty for George MasonUniversity.
He founded Vertical Marketing, Inc., as a home-based business in 1985 andhas grown it to a force in the CRM industry, with offices in four cities world-wide. It has won numerous industry awards and certifications and has com-pleted more than 1,000 CRM projects using dozens of CRM applications.
Dr. Lee is a recognized speaker and thought leader in the customer relation-ship management (CRM) industry. He is a regular contributor to several CRMpublications and writes a CRM column for MSDynamicsWorld. He is certifiedin many of the primary mid-market CRM systems.
Before founding Vertical Marketing, Dr. Lee served as Marketing & SupportManager, Vice President of Marketing, Vice President of Sales, and Presidentin such organizations as Rand Teleprocessing, Barrister Microsystems, andMarket Wise Inc., and as an officer in the U.S. Army. He is also a karate blackbelt and a competition-level dancer.
Mr. Lee can be contacted at [email protected].
01_343258-ffirs.qxp 6/4/08 12:09 AM Page v

Scott Weiss is president and CEO of Core Solutions, Inc., a CRM consultingfirm specializing in Microsoft CRM, SalesLogix, and GoldMine. He is a graduateof Rutgers University and earned a MBA from Boston University. With over 20years marketing and sales expertise, Mr. Weiss is authoring his first ForDummies book.
Mr. Weiss founded Core Solutions in 2000. With offices in Newton, Massachusetts,and Rocky Hill, Connecticut, Core Solutions has provided CRM solutions tohundreds of clients. Mr. Weiss hosted a weekly radio show “Winning Business”from 2005–2006. He has guest lectured to graduate business students on entrepreneurship.
Prior to founding Core Solutions, Mr. Weiss spent several years in sales andmarketing management in the medical diagnostics industry. He lectured oninternational marketing for the Massachusetts Port Authority.
Mr. Weiss can be reached at [email protected].
Authors’ AcknowledgmentsJoel Scott: No one writes a book alone. Perhaps it’s possible for a work offiction. I plan to find that out shortly. But even then, a collection of editorsand technicians all have some say in the appearance of the work. Bob Woernerand Chris Morris, our editors at Wiley, have consistently been there for usworking hard and responding quickly.
I also need to thank my co-authors, Dave Lee and Scott Weiss. Our earlybrainstorming sessions about this book and continuing communicationsmade this writing easier.
I also want to thank everyone at home for taking up the slack while I was sooften sitting in my room moaning and groaning over words I had written andrewritten so many times.
David Lee: I would like to thank two of my senior engineers, BenjaminMwendwa and Patrick Pawlowski, for their help and support in this effort.They spent many hours reviewing and checking the facts, capturing picturesof the screens, and doing technical reviews. Without their help I could nothave written this book and still run my company, Vertical Marketing.
01_343258-ffirs.qxp 6/4/08 12:09 AM Page vi

I also need to thank my friend, partner, competitor, and co-author, Joel Scott.He risked a friendship spanning more than a decade by asking me to co-author our first Microsoft CRM For Dummies book. Now, after our secondround of late nights and deadlines, I still like the guy.
I could not leave out Scott Weiss, the newest member of our little team of co-authors. By taking on one third of the chapters, he cut my workload by 50percent.
Finally, I would like to thank you, the reader, for your interest in MicrosoftCRM. CRM is my passion (I am a pretty dull guy), and it is people like youwho allow me to do the work that I love.
Scott Weiss: First and foremost I want to thank my wife, Rachel, and my threechildren, Zach, Ethan, and Stephanie, for their support and understanding duringthe writing process. Without them, I never would have completed my work.
I’d also like to thank Umang Vasa of Microsoft, who has been a valuable resourcethroughout this process. I’d also like to thank the entire Wiley team and, inparticular, Chris Morris, senior project editor; Heidi Unger, copy editor; andBob Woerner, senior acquisitions editor, for their expertise and easygoingstyle. I’d also like to thank our technical editor, John Straumann, for his helpand insights.
Lastly, thank you to Joel Scott and David Lee for adding me to the team ofauthors. Their guidance and patience were and are very much appreciated.
01_343258-ffirs.qxp 6/4/08 12:09 AM Page vii

Publisher’s AcknowledgmentsWe’re proud of this book; please send us your comments through our online registration formlocated at www.dummies.com/register/.
Some of the people who helped bring this book to market include the following:
Acquisitions, Editorial
Sr. Project Editor: Christopher Morris
(Previous Edition: Susan Pink)
Sr. Acquisitions Editor: Bob Woerner
Copy Editor: Heidi Unger
Technical Editor: John Straumann
Editorial Manager: Kevin Kirschner
Editorial Assistant: Amanda Foxworth
Sr. Editorial Assistant: Cherie Case
Cartoons: Rich Tennant(www.the5thwave.com)
Composition Services
Project Coordinator: Katie Key
Layout and Graphics: Carl Byers, Reuben W. Davis, Melissa K. Jester,Stephanie D. Jumper, Christine Williams
Proofreaders: Broccoli Information Management, Caitie Kelly, Jessica Kramer
Indexer: Lynnzee Elze
Publishing and Editorial for Technology Dummies
Richard Swadley, Vice President and Executive Group Publisher
Andy Cummings, Vice President and Publisher
Mary Bednarek, Executive Acquisitions Director
Mary C. Corder, Editorial Director
Publishing for Consumer Dummies
Diane Graves Steele, Vice President and Publisher
Joyce Pepple, Acquisitions Director
Composition Services
Gerry Fahey, Vice President of Production Services
Debbie Stailey, Director of Composition Services
01_343258-ffirs.qxp 6/4/08 12:09 AM Page viii

Contents at a GlanceIntroduction .................................................................1
Part I: Microsoft CRM Basics.........................................7Chapter 1: Taking a First Look at Microsoft CRM 4........................................................9Chapter 2: Using the Outlook Client — Or Not.............................................................21Chapter 3: Navigating the Microsoft CRM System .......................................................29
Part II: Setting Things Up ...........................................45Chapter 4: Personalizing Your System...........................................................................47Chapter 5: Managing Territories.....................................................................................63Chapter 6: Managing Business Units and Teams..........................................................69Chapter 7: Using the Product Catalog ...........................................................................75Chapter 8: Understanding Security and Access Rights ...............................................89Chapter 9: Implementing Business Rules and Workflow...........................................101Chapter 10: Creating and Running Reports ................................................................117
Part III: Managing Sales ...........................................135Chapter 11: Setting Sales Quotas and Dealing with Forecasts .................................137Chapter 12: Handling Leads and Opportunities .........................................................149Chapter 13: Working with Accounts and Contacts ....................................................165Chapter 14: Creating and Managing Activities............................................................179Chapter 15: Using Notes and Attachments .................................................................191Chapter 16: Generating Quotes, Orders, and Invoices ..............................................197Chapter 17: Setting Up Sales Literature and Dealing with Competitors..................207Chapter 18: Implementing Sales Processes.................................................................215
Part IV: Making the Most of Marketing ......................221Chapter 19: Targeting Accounts and Contacts ...........................................................223Chapter 20: Managing Campaigns ................................................................................243Chapter 21: Integrating Your Web Site.........................................................................267
Part V: Taking Care of Your Customers .......................275Chapter 22: Working with Cases...................................................................................277Chapter 23: Managing Your Subjects ...........................................................................295Chapter 24: Creating and Using the Knowledge Base................................................311
02_343258-ftoc.qxp 6/4/08 12:09 AM Page ix

Chapter 25: Managing Queues ......................................................................................323Chapter 26: Working with Contracts............................................................................333
Part VI: The Part of Tens ...........................................347Chapter 27: The Top 10 (or So) Add-on Products for Microsoft CRM 4..................349Chapter 28: Ten Ways to Get Help................................................................................355Appendix A: Converting to Microsoft CRM.................................................................365Appendix B: Managing Your Data.................................................................................373
Index .......................................................................389
02_343258-ftoc.qxp 6/4/08 12:09 AM Page x

Table of ContentsIntroduction..................................................................1
How CRM Fits in the Market ...........................................................................1How to Use This Book .....................................................................................2Foolish Assumptions .......................................................................................2How This Book Is Organized...........................................................................3
Part I: Microsoft CRM Basics.................................................................3Part II: Setting Things Up.......................................................................3Part III: Managing Sales..........................................................................3Part IV: Making the Most of Marketing ................................................4Part V: Taking Care of Your Customers ...............................................4Part VI: The Part of Tens .......................................................................4
Icons Used in This Book..................................................................................5Where to Go from Here....................................................................................5
Part I: Microsoft CRM Basics .........................................7
Chapter 1: Taking a First Look at Microsoft CRM 4 . . . . . . . . . . . . . . . . .9Tracking Your Contacts.................................................................................10Communicating with the Outside World.....................................................10Integrating with Accounting .........................................................................11
Why integrate?......................................................................................11Other accounting systems ..................................................................12
Setting Up Business Processes.....................................................................12Coordinating Microsoft CRM with Your Success Plan...............................13
Defining your goals ..............................................................................14Implementing a pilot program ............................................................15
Live versus On-Premise.................................................................................15Security..................................................................................................16Access ....................................................................................................16Total cost of ownership.......................................................................17
Being Mobile ...................................................................................................18Server Editions ...............................................................................................18
Workgroup.............................................................................................18Professional...........................................................................................19Enterprise..............................................................................................19Migrating from one version to another .............................................19
Using Microsoft CRM Successfully...............................................................20
02_343258-ftoc.qxp 6/4/08 12:09 AM Page xi

Chapter 2: Using the Outlook Client — Or Not . . . . . . . . . . . . . . . . . . . .21The Microsoft CRM Online Outlook Client .................................................22The Microsoft CRM Offline Outlook Client .................................................25The Microsoft CRM Web Client ....................................................................26What’s New in Microsoft CRM 4 Outlook Client.........................................26
Chapter 3: Navigating the Microsoft CRM System . . . . . . . . . . . . . . . .29Whirlwind Tour of the Screen.......................................................................29
Navigation pane....................................................................................30Status bar ..............................................................................................31Window..................................................................................................31
First Things First — Signing On....................................................................33The Workplace Is Your Starting Point..........................................................34
Navigating at the application level.....................................................34Navigating at the record level.............................................................35Your first navigation lessons...............................................................36
Filtering and Searching for Records ............................................................38Filtering records ...................................................................................39Searching with the magnifying glass icon .........................................40Searching with the Form Assistant ....................................................40Searching with the Advanced Find feature .......................................41
Using the Resource Center ...........................................................................44
Part II: Setting Things Up ............................................45
Chapter 4: Personalizing Your System . . . . . . . . . . . . . . . . . . . . . . . . . . .47Tailoring the System to Suit Your Needs.....................................................47
General tab: Customizing a variety of user preferences .................48Workplace tab: Simplifying your navigation pane............................51Activities tab: Displaying appointments and
setting your work hours ..................................................................52Formats tab: Adapting CRM to your part of the world....................53E-mail Templates tab: Speed the process of handling e-mails........54E-mail tab: Routing your CRM messages...........................................55Privacy tab: Indicating when to report errors to Microsoft............56Language tab: Choosing the language you see onscreen................57
Establishing Your User Profile......................................................................57Providing general information about yourself .................................59Joining teams to share records ..........................................................60Viewing security roles..........................................................................60Announcing which hours you’ll be working .....................................60Monitoring workflows..........................................................................61
Microsoft Dynamics CRM 4 For Dummies xii
02_343258-ftoc.qxp 6/4/08 12:09 AM Page xii

Chapter 5: Managing Territories . . . . . . . . . . . . . . . . . . . . . . . . . . . . . . . .63Setting Up Sales Territories ..........................................................................64Managing Territories .....................................................................................67
Chapter 6: Managing Business Units and Teams . . . . . . . . . . . . . . . . .69Managing Business Units ..............................................................................69Managing Teams.............................................................................................71
Creating teams......................................................................................72Assigning users to teams.....................................................................73
Chapter 7: Using the Product Catalog . . . . . . . . . . . . . . . . . . . . . . . . . . .75Overview of the Product Catalog.................................................................75Getting to the Product Catalog Window......................................................76Creating a Discount List ................................................................................77Creating a Unit Group ....................................................................................80Creating a Price List.......................................................................................82Adding Products.............................................................................................85
Chapter 8: Understanding Security and Access Rights . . . . . . . . . . . .89Security Overview..........................................................................................90Setting Restrictions with User Privileges....................................................91Further Defining Permissions with Access Levels.....................................91Looking at Predefined Roles .........................................................................92Assigning Roles ..............................................................................................94Sharing Information with Others on Your Team ........................................95
Defining a team .....................................................................................95Sharing and assigning ..........................................................................95Unsharing ..............................................................................................95
Sharing and Not Sharing Data.......................................................................96Sharing records.....................................................................................96Sharing multiple records .....................................................................98Unsharing records................................................................................98Assigning records.................................................................................99Streamlining the assignment of permissions..................................100
Chapter 9: Implementing Business Rules and Workflow . . . . . . . . .101Workflow Components ................................................................................102Limitations of Workflow ..............................................................................102Creating Workflow Rules .............................................................................103
Testing a new rule ..............................................................................108Creating On-Demand (manual) rules ...............................................109Creating follow-up rules ....................................................................110Testing a manual rule.........................................................................112
Monitoring Your Workflow..........................................................................112
xiiiTable of Contents
02_343258-ftoc.qxp 6/4/08 12:09 AM Page xiii

Microsoft Dynamics CRM 4 For Dummies xivWorkflow Glossary .......................................................................................114
Events ..................................................................................................114Conditions ...........................................................................................114Actions.................................................................................................115To workflow infinity and beyond......................................................116
Chapter 10: Creating and Running Reports . . . . . . . . . . . . . . . . . . . . . .117Adding Report Categories...........................................................................117Navigating the Report Area.........................................................................118Using Viewing Options ................................................................................123Exporting and Printing Your Report ..........................................................124Accessing the Report Wizard .....................................................................125Report Settings.............................................................................................129Editing Reports.............................................................................................131Creating Excel Reports ................................................................................132
Part III: Managing Sales............................................135
Chapter 11: Setting Sales Quotas and Dealing with Forecasts . . . .137How a Manager Sets Up Quotas .................................................................137
Fiscal year settings.............................................................................138Setting up a salesperson’s quota......................................................139
Entering Sales Forecasts .............................................................................141Updating Your Forecasts .............................................................................144Examining the Forecasts .............................................................................145
Printing a report .................................................................................145Using Excel to examine forecast data ..............................................146
Chapter 12: Handling Leads and Opportunities . . . . . . . . . . . . . . . . . .149Processing Leads from Suspects................................................................150
Getting to the Leads window ............................................................150Creating a lead manually ...................................................................150Modifying a lead .................................................................................152Giving up on a lead.............................................................................153Resurrecting a lead ............................................................................154
Turning a Lead into an Opportunity..........................................................155Handling Opportunities...............................................................................156
Creating and modifying opportunities.............................................156Assigning and sharing opportunities...............................................159Relating opportunities to activities or other records....................161Managing stages and relationships..................................................162Closing, reopening, and deleting opportunities .............................162
Chapter 13: Working with Accounts and Contacts . . . . . . . . . . . . . . .165Adding and Editing Contacts ......................................................................166
02_343258-ftoc.qxp 6/4/08 12:09 AM Page xiv

Adding and Editing Accounts and Subaccounts ......................................166Exploring account records and their four sections .......................167Setting up subaccounts .....................................................................171
Finding and Viewing Account Information................................................172Finding an account by name .............................................................172Using Advanced Find to perform a more sophisticated search...173
Assigning and Sharing Accounts................................................................175Assigning accounts to users .............................................................175Sharing accounts ................................................................................176
Chapter 14: Creating and Managing Activities . . . . . . . . . . . . . . . . . .179No Outlook Here...........................................................................................180Viewing Your Calendar ................................................................................181Viewing Your Activities ...............................................................................182Creating an Appointment for Yourself from the Activities Screen.........184Scheduling for Other People.......................................................................186Assigning an Activity to Someone..............................................................186Completing an Activity ................................................................................188
Chapter 15: Using Notes and Attachments . . . . . . . . . . . . . . . . . . . . . .191Creating Notes ..............................................................................................191Creating Attachments..................................................................................193Deleting a Note or an Attachment..............................................................195
Chapter 16: Generating Quotes, Orders, and Invoices . . . . . . . . . . . .197Creating and Activating Quotes .................................................................198
Creating a quote .................................................................................198Activating a quote ..............................................................................202
Associating Opportunities and Quotes .....................................................203Printing a Quote ...........................................................................................203Converting a Quote to an Order.................................................................204Generating Invoices from Orders...............................................................205
Chapter 17: Setting Up Sales Literature and Dealing with Competitors . . . . . . . . . . . . . . . . . . . . . . . . . . . . . . . . . . . .207
Adding Literature .........................................................................................207Modifying Literature ....................................................................................211Relating Literature to Competitors............................................................212Adding and Tracking Competitors.............................................................213
Chapter 18: Implementing Sales Processes . . . . . . . . . . . . . . . . . . . . .215The General Principles ................................................................................216
Alerts....................................................................................................216Escalation ............................................................................................217Feedback and analysis.......................................................................218
Planning Your Sales Stages .........................................................................218
xvTable of Contents
02_343258-ftoc.qxp 6/4/08 12:09 AM Page xv

Microsoft Dynamics CRM 4 For Dummies xviPart IV: Making the Most of Marketing.......................221
Chapter 19: Targeting Accounts and Contacts . . . . . . . . . . . . . . . . . . .223Targeting the Right People..........................................................................224Developing and Saving Marketing Lists ....................................................227
Creating marketing lists.....................................................................228Adding members to the marketing list ............................................229Populating a marketing list using Advanced Find..........................233
Editing a Marketing List...............................................................................235Removing Records from a Marketing List.................................................236Merging Mail from Marketing Lists ............................................................239
Chapter 20: Managing Campaigns . . . . . . . . . . . . . . . . . . . . . . . . . . . . .243Developing Your Campaign.........................................................................244Creating Campaigns .....................................................................................245Planning Tasks..............................................................................................248Defining Campaign Activities......................................................................250Distributing Campaign Activities ...............................................................255Recording Campaign Responses................................................................260Relating Campaigns to Each Other ............................................................262Working with Quick Campaigns .................................................................263
Chapter 21: Integrating Your Web Site . . . . . . . . . . . . . . . . . . . . . . . . .267Sending E-Mail to a Queue ..........................................................................267Creating Records with Programming.........................................................271Creating a Web Portal ..................................................................................271
Part V: Taking Care of Your Customers ........................275
Chapter 22: Working with Cases . . . . . . . . . . . . . . . . . . . . . . . . . . . . . .277Case Management Overview ......................................................................278Working in the Cases Window ....................................................................279Creating Cases ..............................................................................................281
Filling in the General tab ...................................................................282Filling in the Notes and Article tab ..................................................285
Assigning and Accepting Cases..................................................................288Tending to Cases ..........................................................................................291
Resolving a case .................................................................................292Reactivating a case.............................................................................294
Chapter 23: Managing Your Subjects . . . . . . . . . . . . . . . . . . . . . . . . . . .295Tips for Defining Your Subjects..................................................................296Accessing the Subjects Window.................................................................297Adding a Subject ..........................................................................................298Editing a Subject...........................................................................................300
02_343258-ftoc.qxp 6/4/08 12:09 AM Page xvi

xviiTable of Contents
Removing a Subject......................................................................................301Relating Subjects to Other Entities............................................................301
Relating subjects to cases .................................................................302Putting the case link to work ............................................................303Relating a subject to a knowledge base article ..............................305Putting the article link to work.........................................................308Relating a subject to the product catalog .......................................308Relating a subject to sales literature ...............................................310
Chapter 24: Creating and Using the Knowledge Base . . . . . . . . . . . .311Organizing Information for Your Knowledge Base...................................311Creating Article Templates .........................................................................312Creating a Knowledge Base Article............................................................314
Submitting a draft article...................................................................317Approving an article ..........................................................................318
Searching the Knowledge Base ..................................................................320
Chapter 25: Managing Queues . . . . . . . . . . . . . . . . . . . . . . . . . . . . . . . .323Queue Overview...........................................................................................324Looking at Personal and Public Queues....................................................325Creating a Queue..........................................................................................326Working with Cases and Activities Assigned to Queues .........................328
Assigning an activity to a queue.......................................................329Accepting Queue Assignments...................................................................331
Chapter 26: Working with Contracts . . . . . . . . . . . . . . . . . . . . . . . . . . .333Creating a Contract Template.....................................................................334Understanding Contract Status..................................................................336Creating a Contract ......................................................................................337Adding Contract Lines to a New Contract ................................................341Renewing a Contract....................................................................................344Creating a Case and Linking It to a Contract ............................................344
Part VI: The Part of Tens............................................347
Chapter 27: The Top 10 (Or So) Add-on Products for Microsoft CRM 4 . . . . . . . . . . . . . . . . . . . . . . . . . . . . . . . . . . . . . . . . .349
Checking Spelling with Google Toolbar.....................................................350Automating Processes and Generating Alerts..........................................351Increasing Your Productivity with c360 ....................................................352Increasing Your Productivity with Axonom’s Powertrak ........................353Migrating and Manipulating Your Data......................................................353Accessing Instant Advice, Tips, and Tricks ..............................................354Displaying Data in Graphical Formats.......................................................354Upgrading Your Service Area......................................................................354
02_343258-ftoc.qxp 6/4/08 12:09 AM Page xvii

Microsoft Dynamics CRM 4 For Dummies xviiiChapter 28: Ten Ways to Get Help . . . . . . . . . . . . . . . . . . . . . . . . . . . . . .355
Using Microsoft CRM’s Built-in Help..........................................................356Reading the Blog ..........................................................................................357Accessing the Resource Center..................................................................357Getting the Straight Story from Newsgroups or Forums ........................358Finding an Expert .........................................................................................361Using Technical Sites for Developers ........................................................362Investing in Training ....................................................................................362Selecting Microsoft Packaged Service and Support ................................363Getting in Touch with Us.............................................................................364Accessing General CRM Resources Online ...............................................364
Appendix A: Converting to Microsoft CRM . . . . . . . . . . . . . . . . . . . . . .365Developing a Process for the Conversion.................................................366Evaluating the Current System...................................................................366Defining Expectations..................................................................................367A Word on Reports.......................................................................................368Designing the System...................................................................................369Implementing the Design ............................................................................370Testing the System.......................................................................................370Cleaning the Data .........................................................................................370Migrating the Data........................................................................................371Training the Staff ..........................................................................................372
Appendix B: Managing Your Data . . . . . . . . . . . . . . . . . . . . . . . . . . . . .373Tips for Creating Duplicate Detection Rules ............................................373To Dot or Not to Dot, That Is the Question...............................................374Defining Duplicate Detection Rules ...........................................................375Creating a Duplicate Detection Rule..........................................................376Editing a Duplicate Detection Rule ............................................................378Putting the Rule to Work .............................................................................379Importing and Exporting.............................................................................380
Creating data maps ............................................................................381Editing data maps...............................................................................384Importing records ..............................................................................384Exporting and re-importing data ......................................................386
Index........................................................................389
02_343258-ftoc.qxp 6/4/08 12:09 AM Page xviii

Introduction
This book is about Microsoft Dynamics CRM version 4, which we refer toas simply Microsoft CRM or just CRM. We assume that Microsoft CRM
just showed up on your desktop computer or notebook. Chances are, youalready have some experience with one or more of the popular predecessorsto CRM — ACT, GoldMine, SalesLogix, or an earlier release of Microsoft CRM.Maybe you thought your Outlook was actually a CRM system. (It isn’t.) Ormaybe you’ve never had any kind of CRM system — and never wanted oneeither. In any event, now you have to get yourself up and running with this newsoftware. If you relate to any of this, Microsoft CRM 4 For Dummies is for you.
If you’re a technical type looking for help with installation, integration, orserious customization, you’ll need more than just this book. You’ll need sometechnical references, an experienced dealer, and some time.
If nothing else, Microsoft CRM is an organizational tool. Whether you’re insales, marketing, customer service, or management, this software will pro-vide a significant return on your investment — whether that investment ismoney or time. Beyond that, if you’ve fallen in love with Microsoft Outlookand refuse to relinquish it, relax. Not only can you still use Outlook, it’s one ofthe primary means by which you’ll communicate with Microsoft CRM.
How CRM Fits in the MarketMicrosoft came to the CRM market seemingly a little late but with a systembuilt on a platform called .NET. With CRM, you work in networked mode or inoffline mode. Networked mode doesn’t require a direct connection to youroffice file server. In fact, with .NET technology, networked actually means connected to the server through the Internet. Offline mode also takes greatadvantage of the Internet but enables you to work while disconnected byusing a tool that Outlook users will find familiar.
And, now, Microsoft has an answer for all those users clamoring for a hostedversion of its software. With the release of version 4, Microsoft is also offeringCRM Live — a hosted version of essentially the same software you can pur-chase and install on your own servers.
03_343258-intro.qxp 6/4/08 12:10 AM Page 1

If you have an IT department that’s comfortable with the care and feeding ofservers and have Internet connectivity with good firewalls and security, youshould consider installing and using CRM. Otherwise, you can have CRMhosted. The third-party hosting company or Microsoft maintains the equip-ment and software in return for a monthly check.
How to Use This BookMicrosoft CRM is divided into six major sections: Workplace, Sales, Marketing,Service, Settings, and the new Resource Center. This book loosely followsthese themes. We describe navigating the workplace and CRM in general inChapter 3. In Part II, you find out all about setting up the system. Then wejump into sales topics, a little marketing, and some customer service.
You should be able to comfortably read the book from start to finish, but forthose of you so caffeinated you can’t sit still that long (don’t laugh; you knowwho you are), each chapter can stand on its own as reference material. Eitherway, you have a comprehensive guide to Microsoft CRM.
You’ll get the most benefit from this book by sitting in front of your computerwith CRM on the screen. It’s easy to convince yourself that you’ve got it byjust reading, but there’s no substitute for trying the steps yourself. Experi-menting with sample data is sometimes just the ticket to an epiphany.
Foolish AssumptionsWe assume you have some basic computer and Windows skills. If you aren’tcomfortable with Windows, you need to get yourself up to speed in this area.Find a local class or seminar, or get one of the For Dummies books on Windows.Regarding CRM, however, we assume you just returned from a long missionto Mars and need to start using CRM tomorrow.
We also assume you have a basic understanding of database concepts. Ifyou’re comfortable with fields, records, files, folders, and how they relate toeach other, you’ll be fine. If you’re familiar with attributes, entities, instances,and objects, even better. If this is already sounding bad, you can seek help atmost community colleges or local computer training facilities.
If you’re going to be your own CRM administrator (backing up files andassigning usernames, passwords, and access rights), you need to understand
2 Microsoft Dynamics CRM 4 For Dummies
03_343258-intro.qxp 6/4/08 12:10 AM Page 2

records, files, folders, security, operating systems, and networks. If you justwant to be a good day-to-day user of CRM, make sure that you understandwhat a file is and how to locate one using Explorer.
How This Book Is OrganizedSome people just have a knack for organization. Our office manager is highlyorganized, although her desk looks like a tornado swept through it. However,she assures us that she knows exactly where everything should be. (And wetake no responsibility for her actions if you touch anything.) Anyway, wedigress. Organization — without it, this book would be a jumbled mess. Tocure that, we’ve organized the book into six parts, each with at least threechapters. Again, you can read the book from cover to cover (who has thatkind of time?), or you can refer to it section by section. Each part (and chap-ter) can definitely stand on its own, but we recommend that you at least skimthrough the basics and the table of contents before getting started.
Part I: Microsoft CRM BasicsJust the facts! Part I gives you an overview of what Microsoft CRM is all about and provides a tour of the main windows. We also show you how touse Microsoft CRM offline.
Part II: Setting Things UpIn Part II, we begin with a discussion of how to personalize your workplaceand the software. The workplace is command central in Microsoft CRM. Fromthe workplace, you can access the day-to-day stuff, such as your calendar,assigned activities, and service scheduling. You can also set up businessunits, security, sales processes, and business rules. Setting up workflow andreports are the topics of Chapters 9 and 10 respectively.
Part III: Managing SalesIn Part III, we explain how to create accounts and contacts in your databaseand how to locate existing records. We also show you how to create andmanage activities as well as leads, opportunities, and territories. You find
3Introduction
03_343258-intro.qxp 6/4/08 12:10 AM Page 3

how-to information on notes and attachments. Then we get into the nitty-gritty and discuss some of the more complex functions of Microsoft CRM,such as quotes, orders, and invoices (some of which benefit from integrationwith an accounting system). In addition, we talk about sales literature andhow to track competitors.
Part IV: Making the Most of MarketingMicrosoft CRM 4 explodes with all kinds of capability in the marketing arena.Combining the new Advanced Find function with quick campaigns and asophisticated campaign management system, Microsoft CRM enables you todo more than just send out e-mails and letters. You’ll be able to follow theprogress of the campaign, create and delegate tasks, keep track of actualcosts compared to the campaign budget, and easily catalog and maintain theresponses.
Part V: Taking Care of Your CustomersCustomer service is a big issue, no matter how big your company. In thispart, we show you how to track and manage customer service issues usingcases and the special Service Calendar. We talk about workflow and yourbusiness processes and how Microsoft CRM can easily handle incoming ser-vice calls and e-mail and their responses using queues. We discuss contractsand tiered levels of customer service and how to organize this division tohandle service issues efficiently and quickly.
Part VI: The Part of TensAs new as Microsoft CRM is, third-party developers have brought many com-plementary products to the market. We discuss the best and most usefulwe’ve found. And, just in case you still need assistance, we also discuss tenways to get help.
Additionally, two appendixes at the end of the book assist you with convert-ing to Microsoft CXRM 4 and with managing your data.
4 Microsoft Dynamics CRM 4 For Dummies
03_343258-intro.qxp 6/4/08 12:10 AM Page 4

Icons Used in This BookYou don’t want to skip the helpful reminders noted by this icon.
This icon lets you know that some particularly geeky, technical information iscoming up. You can look past this if you want.
This icon points you to a trick that will save you time and effort.
Look to this icon to find out what to avoid if you don’t want your database toblow up or cause you other types of anguish.
Where to Go from HereIf you’re a first-time user, we suggest you begin with Chapters 1–3 to get asolid introduction to the basics of living with Microsoft CRM. Then check out Part III, IV, or V, depending on whether you’re in sales, marketing, or cus-tomer service, respectively. If you’re charged with setting up CRM for yourcompany, you would do well to read Part I and then Part II. If you have ques-tions or comments and want to contact us directly, please send us an e-mailat [email protected].
5Introduction
03_343258-intro.qxp 6/4/08 12:10 AM Page 5

6 Microsoft Dynamics CRM 4 For Dummies
03_343258-intro.qxp 6/4/08 12:10 AM Page 6

Part IMicrosoft CRM
Basics
04_343258-pp01.qxp 6/4/08 12:10 AM Page 7

In this part . . .
Microsoft Dynamics CRM 4 is technically an updateto version 3, but it’s really a quantum leap beyond
what first came out almost three years ago. In addition tosmoothing out a few rough edges, Microsoft has added aLive — which, to most of us, means hosted — version of CRM. There are also three levels of server software,appropriate for small, mid-level, and enterprise-type organizations.
Microsoft CRM integrates with Outlook and the Web and is now much easier to use. If you’re one of the 92 millionOutlook users, Microsoft CRM is the comfortable, organi-zational upgrade you’re looking for.
In this first part, you find a general discussion of the fea-tures and benefits of Microsoft CRM and how best to navi-gate through the screens, even if you’re navigationallychallenged. You can even set up internal announcements;this is discussed in Chapter 3.
04_343258-pp01.qxp 6/4/08 12:10 AM Page 8

Chapter 1
Taking a First Look at Microsoft CRM 4
In This Chapter� Keeping track of contacts
� Integrating CRM with an accounting system
� Exploring the differences between Live and On-Premise
� Being mobile
� Using Standard, Professional, and Enterprise
� Migrating from one version to another
� Figuring out whether CRM is for you
� Following a plan for a successful implementation
Personal information managers (PIM) and contact management systems(CMS) were introduced in the mid-1980s. Both PIM and CMS enabled
you to organize the names, addresses, and phone numbers for all of yourbusiness contacts. PIMs were superseded by sales force automation (SFA)systems in the late 1980s. Products such as ACT and GoldMine initially com-bined scheduling functions with contact management. By the mid-1990s,these systems evolved into simple customer relationship management (CRM)systems, attempting to involve not just salespeople but also customer ser-vice and management.
Microsoft Dynamics CRM 4 (that’s the official name) is the next generation ofCRM systems. Microsoft CRM is based on .NET (pronounced dot-net) technol-ogy, pioneered by Microsoft. Not only does Microsoft CRM have functionalityfor sales, customer service, and now marketing, it takes great advantage ofthe Internet, or more specifically, Web services. This Web service focus iswhat defines the .NET strategy. In a nutshell, Web services enable applica-tions to be easily integrated, rapidly configured to meet your business needs,and extended to both internal and external users.
05_343258-ch01.qxp 6/4/08 12:10 AM Page 9

Tracking Your ContactsMicrosoft CRM has a record type or entity called a contact. A contact, in thissense, is a person. It’s a concept taken from Microsoft Outlook. In fact, con-tact records from Outlook are directly transferable into contact records inMicrosoft CRM.
Microsoft CRM calls company records accounts. Companies (accounts) andthe people who work at each of them (contacts) can be related to oneanother within the system.
A contact is a person and an account is a company. A customer is either aperson or a company.
We often hear company executives say that their most important corporateasset is their database of prospects and clients. We couldn’t agree more.Neglecting, for the moment, all the powerful tools within CRM, the most basicthing is what pays off the quickest. And that quick payoff results from havingone central, organized, accessible, repository for all the information relatingto your customers and prospects. Even if you never create any workflowrules, never connect the system to a Web site, or never automate your quota-tion system, you’ll be miles ahead just by organizing your data into onecoherent database.
You want to store other kinds of information in Microsoft CRM, too. The systemis going to be your universal reference tool — your Rolodex, your personneldirectory, and your Yellow Pages all in one place. You also want to have recordsfor vendors, employees, and competitors.
In addition, Microsoft CRM holds important information that will help youmanage and make better-informed decisions about your business. That infor-mation includes opportunities to track your sales cycles, cases to track cus-tomer service issues, and campaigns to track the results of your marketingcampaigns.
Communicating with the Outside WorldFar and away, the primary reason that companies lose accounts is that thecustomer thinks no one is paying attention. Microsoft CRM gives you thetools to counteract this perception, which, with regard to your firm, is cer-tainly a wrong one. Right?
10 Part I: Microsoft CRM Basics
05_343258-ch01.qxp 6/4/08 12:10 AM Page 10

A handful of ways exist to communicate with customers, and CRM handlesmost of them:
� Scheduling calls and appointments: Of course, you’ll schedule all ofyour calls and appointments using CRM through Outlook.
� Faxing: This is built into Microsoft CRM Small Business Edition.
� E-mailing: Outlook is the champion of all e-mail systems. It’s practicallythe de facto standard. Whether you’re operating in online or offlinemode, you have the ability to integrate your e-mail with the CRM system.This includes the ability to create e-mail templates and e-mail mergedocuments to rapidly communicate with your customers.
� Printing: You can merge and print letters as long as you have MicrosoftWord (which, as part of the Microsoft family of products, is well-integratedwith CRM).
Integrating with AccountingIn the early years of CRM systems, many companies were reluctant to allowtheir salespeople access to accounting information. Fortunately, the pendu-lum has swung back, with the best thinkers realizing that it’s helpful for sales-people to have more knowledge, not less. Microsoft has developed links to aline of applications it owns called Dynamics (of which Microsoft DynamicsCRM is a part). These links include the ability to share customer, product,invoice, and billing information.
Links to other accounting packages, such as those from Intuit and Sage SAP,are provided by third-party developers.
Why integrate?Surely no sales manager wants his or her people spending their time trying toclose another deal with an existing customer when that customer hasn’t paidfor the previous six orders stretching over the last eight months. Nor would adiscerning sales manager want a salesperson quoting a deal that would putcustomers over their existing credit limit without taking the credit situationinto account. By integrating Microsoft CRM with your accounting system,your users and sales managers have the information they need to avoid thesesituations.
11Chapter 1: Taking a First Look at Microsoft CRM 4
05_343258-ch01.qxp 6/4/08 12:10 AM Page 11

Conversely, before a credit manager calls an existing client in an effort to col-lect a past-due payment, it may be important for the manager to understandthat the sales department is on the verge of closing a megadeal with that verysame client. Although the credit department would certainly want to collectthat money, understanding the current sales situation may affect how thecredit manager’s conversation is conducted.
Other accounting systemsMost competitors claim to have integration with one or more accounting pack-ages. Most of the time, a third party does this integration, and that situationhas some major disadvantages. If you’re relying on three separate companies —your CRM vendor, your accounting vendor, and a third-party developer — tocoordinate your front-office and back-office operations, you could be in trouble.
One of the ongoing problems occurs when your CRM vendor or your account-ing vendor upgrades. That upgrade immediately requires an upgrade to atleast one of the other packages. Microsoft has gone a long way toward solvingthis dilemma because it controls both ends and the middle. Look for integra-tion that is much better coordinated than what has been available in the past.
Setting Up Business ProcessesOne of the most powerful features in Microsoft CRM is workflow rules. Theserules provide a way to automate many routine functions in your organization,such as following up with standard letters after an appointment or alertingmembers of your team to account-related deadlines.
If you prefer to have Microsoft CRM work for you, rather than you work for it,you should consider implementing workflow rules after you get past the ini-tial effort of organizing all your data.
Every business has processes. Sometimes they aren’t well documented, sothey aren’t obvious. An example of a process is how your company handlesleads from prospective customers.
While designing and customizing your soon-to-be CRM system, you shouldalso analyze (and improve) all of your processes.
Good process development has several basic principles:
� Assigning tasks: The first principle is properly assigning responsibility.Each task that needs to be accomplished should have one primaryperson assigned to it, not a team of people.
12 Part I: Microsoft CRM Basics
05_343258-ch01.qxp 6/4/08 12:10 AM Page 12

� Feedback: Every step of every task should be confirmed. Amazon.comhas this procedure down pat. If you aren’t sure about proper feedback,order a book from Amazon. Almost any For Dummies book will do. Whenyou place the order, you get an order confirmation. When the book isshipped, you get a shipping confirmation. And you may very well getsome after-the-fact follow-up. (All in an effort, of course, to sell you morebooks). Their process is well done, and you may want to pattern yourprocesses after theirs.
� Escalation: Just because a phone call is assigned, don’t assume that itwill be completed. Plan your processes under the assumption that, evenwith the best of intentions, things fall through the cracks. Give eachteam member a reasonable amount of time to accomplish a task. If thetask isn’t completed, make sure that the next person on your organiza-tion chart is notified. Continue escalating and notifying until somethingis done about the situation.
� Reporting and measuring: It isn’t a real process unless you can measureit and then improve it. Design into each process an appropriate reportthat allows the necessary analysis that leads to continual improvement.A good way to begin designing a process is to mock up the reports first.These reports help determine what data is necessary for proper tracking.
With workflow rules, you can program the business process you design.Workflow rules can access any of the data files in Microsoft CRM and createactivities for your users or send out correspondence through fax or e-mail.These rules can notify you of overdue activities and can escalate importantissues.
Implementing business processes within the scope of workflow rules is theheart and mind of a good CRM system and is also probably the most under-utilized area of CRM. Too often, companies relax after their data is properlyimported and their users have received a little training. Properly imple-mented workflow rules will pay you back for your investment many timesover. Do not neglect this powerful feature!
Coordinating Microsoft CRM with Your Success Plan
A disappointing number of CRM projects don’t live up to their expectations.The first issue to consider is the one of expectations. The second issueinvolves planning.
If all your expectations are built on what you heard from your salesperson orwhat you read in the promotional materials, you may be in for an unpleasantsurprise. And, of course, the old axiom applies: If you fail to plan, you plan to
13Chapter 1: Taking a First Look at Microsoft CRM 4
05_343258-ch01.qxp 6/4/08 12:10 AM Page 13

fail. Microsoft has released a comprehensive CRM planning guide. It’s availableon their Web site at www.microsoft.com/downloads/thankyou.aspx?familyId=1ceb5e01-de9f-48c0-8ce2-51633ebf4714&displayLang=en,or at www.consultcore.com/dummies.htm
Defining your goalsYou may be tempted to wing it. Maybe someone promised the sales staff thata system would be in place before the next annual sales meeting, and thatwas 11 months ago. If you’re thinking you have a month to buy the softwareand get it implemented, forget about it. You should do your project in bite-sized chunks, with measurable goals at each step.
The first step in a project with the complexity of a Microsoft CRM implemen-tation is to do a needs analysis. Most of the more sophisticated dealers dothis for you, although you should expect to pay for it. Some dealers offer afree needs analysis. Remember, you always get what you pay for.
A true needs analysis involves interviewing representatives from eachdepartment that will be using the system. It involves collecting a consider-able amount of information on what is being done at your company todayand how you want that to change. It involves determining what software maymeet your requirements and doesn’t presume that it’s necessarily MicrosoftCRM or any other system. A needs analysis includes detailed pricing, sched-ules, and the assignment of responsibilities.
We think a good needs analysis (or at least a detailed, written plan) is anessential ingredient to a successful implementation.
14 Part I: Microsoft CRM Basics
Making Microsoft CRM part of your client-retention program
Out of the box, Microsoft CRM comes preparedto assist you with closing business with newcustomers. It has records for leads that areexpected to grow into opportunities. It has fieldsin the account and contact records that aremeant to assist you in organizing your efforts tomake a deal.
With a little forethought and customizing, youcan use Microsoft CRM to ensure that you keepthe customers you already have. CRM vendorshave put little emphasis on customer retention,but it is relatively simple and will provide thatreturn on your investment that everyone looksforward to generating.
05_343258-ch01.qxp 6/4/08 12:10 AM Page 14

Microsoft provides some documents that you can refer to if you decide to goit alone. Look in the Planning Guide for basic planning documents to makesure you get the most out of your system. The Planning Guide can be down-loaded for free from www.consultcore.com/dummies.htm
Implementing a pilot programEveryone is conservative by nature when thinking about spending money. Soa pilot program is often a useful way to make sure the project will be success-ful. Typically, a pilot program involves a select group of users, not the entirecompany. If you’re going to go this route, make it a representative sample, not just the brightest or most enthusiastic people and not just people in onesmall department.
Many projects never get beyond the pilot stage because a hundred or a thousand steps are needed to implement any project like this successfully.Invariably, as the pilot project struggles to the finish line, you find two orthree nagging items that have not been conquered. And these unresolveditems are what everyone is suddenly focused on. In some people’s minds,these unfinished items remain a good reason to declare failure or to refuse tomove on to the full rollout.
Before beginning the pilot, you must define what determines success. Writethese conditions down and make them known to all. If they’re met, trigger fullrollout automatically.
Live versus On-PremiseProbably the most significant development in version 4 is the appearance ofthe Live version of Microsoft CRM. Live actually just means hosted or is some-times also referred to as software as a service (or SaaS). All of this terminol-ogy comes down to one thing: with Live, you don’t buy it, you rent it. TheOn-Premise version is the more traditional, “you buy it, you install it, youown it” variety.
With Microsoft CRM Live, you don’t own the software. Instead, you temporar-ily (as long as you keep paying) own the right to use the software on someoneelse’s server, either a third-party hosting company’s server or Microsoft’s itself.
Everything seems to come full circle. In the beginning of the computer era,software ran on big, mainframe servers, and we all shared time on them. Then,
15Chapter 1: Taking a First Look at Microsoft CRM 4
05_343258-ch01.qxp 6/4/08 12:10 AM Page 15

in the early ’80s, the IBM PC revolutionized how we all computed. Suddenly, wewere all one-on-one with our own computers. And that gave most of us a feel-ing of control over what we were doing. There was no longer any pleading witha computer operator to please, please load the tape that has the data we need.
Operating systems and software became so complicated by the late ’90s thatthere was a movement toward leaving the management of servers and soft-ware to hosting companies. In the CRM field, this movement was lead bySalesforce.com, the pioneer in hosted CRM. Microsoft’s response to the grow-ing enthusiasm for hosted systems is CRM Live. The landscape is a bit morecrowded now, however, with entries from Entellium and from Kyliptix.
There are several concerns among people considering whether to adopt ahosted version or an On-Premise version, including:
� Security
� Access
� Total cost of ownership
These are discussed in greater detail in the next few sections.
SecurityMany people had an initial unease about having some unknown person or entitymanaging their most critical data — namely, their customer lists. This authorwas among those with that skepticism. But we need to look at the reality.
Most organizations, especially smaller ones, don’t have the sophisticatedkind of data centers that hosting companies possess. Good hosting compa-nies do daily backups, have server redundancy, have multiple hosting sites incase of natural disaster, and have disaster recovery plans. The good onesalways keep their operating systems current and update the application soft-ware you’re using with the most current patches.
If your organization doesn’t have the resources to do all of this, your skepti-cism should be tempered by the realization that your data is probably moresecure with a professional hosting company than it is being managed by theboss’s brother-in-law who comes in one evening a week.
AccessAnother issue with hosted systems is actually getting to the data. If you don’thave Internet access you can’t log into the system. Yes, there is an offline
16 Part I: Microsoft CRM Basics
05_343258-ch01.qxp 6/4/08 12:10 AM Page 16

version of CRM, which is discussed below. However, many people believe it’scritical for them to work with their data even when no Internet is available.Let’s be honest with ourselves here. There are very few places most of us gowithout access to the Internet. Okay, airplanes, at least so far, although sev-eral major airlines have recently announced plans to provide in-flight Internetaccess.
Typically, whether you’re at home, in a hotel room, at a customer site, or atthe local coffee shop or burger joint, some kind of Internet access is almostalways available. This argument about needing consistent access is becomingless and less tenable.
Total cost of ownershipHow do the costs between owning and renting compare? Typically, CRM sys-tems, and software in general, has a life expectancy of three to seven years.How long you use a particular piece of software has a profound effect on itscost of ownership and how well renting compares to buying.
In general, if you’re going to use the software for only a short time (24-36months or less) renting is almost always the more cost-effective approach.However, there are many factors. We have designed a spreadsheet you canuse to analyze your situation. The spreadsheet allows you to enter your ownnumbers and then displays a graphic illustrating the five-year comparativecosts of hosted vs On-Premise software. You can download the spreadsheetfor your own use at www.consultcore.com/dummies.htm. Figure 1-1 illus-trates a typical scenario. In the figure, we used $59 per month per user as thehosted cost and a little over $1,000 per license for the purchase option.
Months
Hosted
TCO Comparison between On-Premise,and Hosted Systems
On-Premise
0
50,000
100,000
150,000
1 8 15 22 29 36 43 50 57
Dol
lars
Figure 1-1:The total
cost for a25-userhostedsystem
versus thatsame
system On-Premise.
17Chapter 1: Taking a First Look at Microsoft CRM 4
05_343258-ch01.qxp 6/4/08 12:10 AM Page 17

Being MobileSo, what do you do when you’re on an airplane from New York toJohannesburg for 16 hours without Internet access? Well, we suggest youread a book or watch a movie, but if you really need to be productive, youcan be. Microsoft CRM provides offline access to your CRM data.
You can select the data you need to take with you on the road and downloadit to your laptop via Outlook. While disconnected, you can review and updatedata related to your accounts. When your feet are back on the ground andyou have Internet access, you can synchronize your data with the MicrosoftCRM server.
Microsoft CRM Mobile — as of this writing (spring 2008) the CRM Mobilefunctionality that allowed you access via various handheld devices, such asBlackBerries and Treos, hasn’t yet been released for version 4. If you want tooperate remotely with a handheld device, keep your eye out for Microsoft’srelease, which is imminent, or you can search out a third-party product.
Server EditionsEvery server running Microsoft CRM 4 requires a server license. Three levelsof licenses are available:
� Workgroup
� Professional
� Enterprise
These are discussed more fully in the next few sections. There ought to be a convenient and cost-effective path to upgrade from one level to the next.There doesn’t seem to be, so your initial purchase decision needs to be wellconsidered.
WorkgroupThe Workgroup Server license is intended for the smallest organizations. Youget five user licenses, and that’s it. You can’t expanded it beyond five. This isa competitive and cost-effective approach if you’re certain you won’t evergrow beyond this number. If you do outgrow the Workgroup Server license,you’ll need to buy either a Professional or an Enterprise license.
18 Part I: Microsoft CRM Basics
05_343258-ch01.qxp 6/4/08 12:10 AM Page 18

Workgroup Server runs on Windows Server 2003 and Windows Small BusinessServer 2003.
ProfessionalIf you “go Professional,” you’re limited only by the number of user licensesyou purchase — and you can always buy more as you grow. The Professionallicense supports single tenancy, which means you can install only one copy ofthe software on one server. Although that may sound like the right ticket, theEnterprise license provides a lot more flexibility and power.
Professional runs on Windows Server 2003 and Windows Small BusinessServer 2003.
EnterpriseThe whole “multi” family comes into play when you own the Enterprise Serverlicense. This applies to multi-tenancy, multi-currency, and multi-language.Even if you have no intention of being a hosting center for other companies,you can have a complete test bed with the Enterprise license. That meansyou could have a development version, a test version, and a production ofCRM. That’s a good thing!
If you operate in several countries, you can take advantage of multiple cur-rencies and multiple languages. John in New York can work in English andenter forecasts in dollars while Miguel in Buenos Aires can work in Spanishand enter his forecasts in pesos.
Migrating from one version to anotherAs of this writing, Microsoft just doesn’t have a good plan for migrating fromone version to another. For example, if you outgrow the Professional Serverand now want the Enterprise Server, you need to buy and install EnterpriseServer without any credit for the fact that you already own most of it. So, youand your CRM analyst need to do the best possible job of planning for futuregrowth.
We haven’t seen a good migration plan from the Live version to On-Premiseeither. All in due time, probably. We almost always recommend the EnterpriseServer. You won’t be likely to outgrow that one!
19Chapter 1: Taking a First Look at Microsoft CRM 4
05_343258-ch01.qxp 6/4/08 12:10 AM Page 19

Using Microsoft CRM SuccessfullyThe difference between a successful implementation and a flop is often theinvestment of a little more time, thought, money, and commitment. MicrosoftCRM won’t let you down as long as you do the following:
� Have a needs analysis completed by a competent dealer. Spend themoney. It’s well worth it.
� Make sure that every user finds an advantage to using the system.Otherwise, you won’t get good acceptance or consistent use, which willinevitably lead to the collapse of the system. You have to sell your teamon it. Solicit ideas from team members. Have each of them invest in theeffort.
� Plan your technology infrastructure. Microsoft CRM demands a seriesof servers (or at least a Small Business server) and good network con-nectivity. You may need to update your operating systems and installSQL and Exchange servers.
� Organize your existing data. You probably have your data in moreplaces and formats than you realize. Take a survey of all your users soyou know the location of all the data. Plan to eliminate unnecessaryrecords and collect as much missing information as possible.
� Install your Microsoft CRM software and customize it with regard toany additional fields and reports you need.
� Set up your organizational structure with business units, roles, andteams.
� Import all the data and train your users almost simultaneously. Assoon as training is complete, you want your users to have immediateaccess to their own data so they can start using it before they forgetwhat they learned in class.
� Don’t take your eyes off of your data. As soon as you turn your back on the data, it will turn into garbage. Put someone in charge of dataintegrity.
� Plan to continually improve the system. The system will never be fin-ished and will never be perfect. It’s a process that evolves and changesas your organization changes. Don’t lose sight of where you came from.
20 Part I: Microsoft CRM Basics
05_343258-ch01.qxp 6/4/08 12:10 AM Page 20

Chapter 2
Using the Outlook Client — Or NotIn This Chapter� The Microsoft CRM Online Outlook Client
� The Microsoft CRM Offline Outlook Client
� The Microsoft CRM Web Client
� What’s New in the Microsoft CRM4.0 Outlook Client
Microsoft CRM is all about choices. It is very empowering, but it canalso get confusing. It can be used in two ways: through the Web or
through Outlook (offline or online).
In this chapter, we look at the various ways to access Microsoft CRM.Microsoft calls these clients. The three clients in which you can accessMicrosoft CRM are:
� The online Outlook client: Access MS CRM within Outlook. The CRMdata is read over the internet on the corporate server.
� The offline Outlook client: Access MS CRM within Outlook without anInternet connection. When you are back online, you will automaticallysynchronize with the corporate server.
� The Web client: Access MS CRM with Internet Explorer 6.0 and higher.
We use the Microsoft CRM Web client in the figures throughout this book.Except as described in this chapter, the other clients look and feel about thesame. Most people use either the Outlook clients or the Web client, but youdon’t really have to make a permanent choice: You can log into one in thissession and into another in your next session.
In Microsoft CRM 3, the functionality of the Outlook client was significantly lessthan that of the Web client. In version 4, that gap has narrowed considerably.
06_343258-ch02.qxp 6/4/08 12:11 AM Page 21

The Microsoft CRM Online Outlook ClientThe Outlook client requires that you have software on your computer. This is the first difference between the Outlook client and the Web client, whichrequires no Microsoft Outlook 2003 / 2007, and Internet Explorer 6.0 sp1 orhigher software on your computer. The significance is that when you haveany client software on your computer, you need to do a small amount ofmaintenance. You’ll need to be sure that you’re on the same version of thesoftware as that of your server. Microsoft Outlook 2003 / 2007 is part of theMicrosoft Office suite and is purchased independently from CRM. MS CRMcomes with integration software that enables MS Outlook to communicatewith it. Before installing MS CRM Outlook software, the client must haveOutlook and Internet Explorer 6.0 sp1 or higher installed.
The “online” part means that you’re using Outlook online. (That is, you musthave Internet access.) When you interact with Microsoft CRM using theonline Outlook client, you’re updating the main database directly.
One of the differences between the Outlook client and the Web client is thatthe Outlook client offers you the option of simultaneously updating yourOutlook data when you update your CRM data.
When you open Outlook with CRM installed, you see some new items on theOutlook toolbar (Figure 2-1), in the Shortcuts pane (Figure 2-2), and in theCRM folder (Figure 2-3). As you click on these new tools, you’ll see that theassociated Microsoft CRM objects appear in the main Outlook screen. TheseMicrosoft CRM objects look and work like their counterparts in the Webclient and in the offline Outlook client.
The CRM Outlook software is a single application that works in two differentmodes: Online and Offline. Offline simply means you are caching your datalocally because you have no internet connection. When you do have a con-nection, you will be automatically synchronized with the server. An option togo Online/Offline is an option in the toolbar.
The Microsoft CRM toolbar is a set of six horizontal icon/text combinationsthat appear below Outlook’s normal menu and e-mail options toolbar. This
Figure 2-1:The
MicrosoftCRM
toolbar.
22 Part I: Microsoft CRM Basics
06_343258-ch02.qxp 6/4/08 12:11 AM Page 22

custom toolbar lets you create record types and activities that coexist inMicrosoft CRM and in Outlook. It includes the following tools:
� CRM: This screen shows you which version of CRM you are on.
� New Activity: Lets you schedule an appointment that appears in bothMicrosoft CRM and in Outlook. You can link the appointment to anaccount, contact, or opportunity in Microsoft CRM.
� New Record: Lets you add a new contact record, which appears in bothMicrosoft CRM and in Outlook.
� Track in CRM: Lets you convert selected e-mail messages into MicrosoftCRM activities. In this way, you can store and view the e-mail messageson the Activities tab associated with a specific account, contact, oropportunity.
� Set Regarding: Let’s you set a parent record, in CRM, for the new activ-ity created.
� Advanced Find: Let’s you search on multiple fields to find records.
The CRM Outlook Shortcuts contains six folders: Marketing, Resource Center,Sales, Service, Settings, and Workplace. (See Figure 2-2.)
� Marketing: This folder allows you to create and manage leads, cam-paigns, and sales literature.
� Resource Center: This folder contains information for the new user,including best practices and training material.
� Sales: This folder allows you to create and manage accounts, contacts,leads, and opportunities.
� Service: This folder allows you to create and manage cases and con-tracts. This is also where the knowledge base is configured.
� Settings: This folder contains administrative tasks. Here you can manageannouncements, set up users and security, configure e-mail options andrules, and configure your system settings.
� Workplace: This folder allows you to create and manage your calendar,personal work items, and knowledge base, and it reports all in one area.You can also work with your accounts and contacts in this area.
Figure 2-2:The Outlook
Shortcutspane.
23Chapter 2: Using the Outlook Client — Or Not
06_343258-ch02.qxp 6/4/08 12:11 AM Page 23

The CRM menu offers the following options (see Figure 2-3):
� New Activity: Lets you schedule an appointment that appears in bothMicrosoft CRM and in Outlook. You can link the appointment to anaccount, contact, or opportunity in Microsoft CRM.
� New Record: Lets you add a new contact record that appears in bothMicrosoft CRM and in Outlook.
� Go To: An option that allows you to select one of the six shortcuts:Marketing, Resource Center, Sales, Service, Settings, and Workplace.
� Advanced Find: Lets you search in multiple fields to find records.
� Synchronize with CRM: This option synchronizes your local data withMicrosoft Outlook.
� Go Online / Offline: Allows you to take your CRM data locally (GoOffline) so that you have full access to CRM functionality when discon-nected from the internet. Go Online synchronizes your local data withthe server database and then continues to use the server database until you go offline. This option is extremely handy if you are on theroad often.
� Import Data: Allows you to import records into CRM from an externalfile.
� Duplicate Detection: Allows you to define rules that constitute duplicaterecords and define how to merge them together.
� Options: Allows you to set your personal settings, such as defaultrecords per page, which items to synchronize (contacts, appointments,and so on), configure your Workplace, set formats (currency, time dis-play, date display, and so on), and your base language.
� Modify Local Data Groups: Allows you to create groups of records,based on field values, to synchronize with Outlook.
� Change Organization: This option allows you to uninstall Outlook CRMsoftware or re-configure it to point to a different server database. (Forexample, if you have the software installed but move to a different company.)
� Disable Toolbar: Because most of the options listed here are accessiblevia the shortcuts or CRM Toolbar, you may wish to simply disable thistoolbar.
� Check For Updates: This option checks the Microsoft Web site for anyupdates to the software.
24 Part I: Microsoft CRM Basics
06_343258-ch02.qxp 6/4/08 12:11 AM Page 24
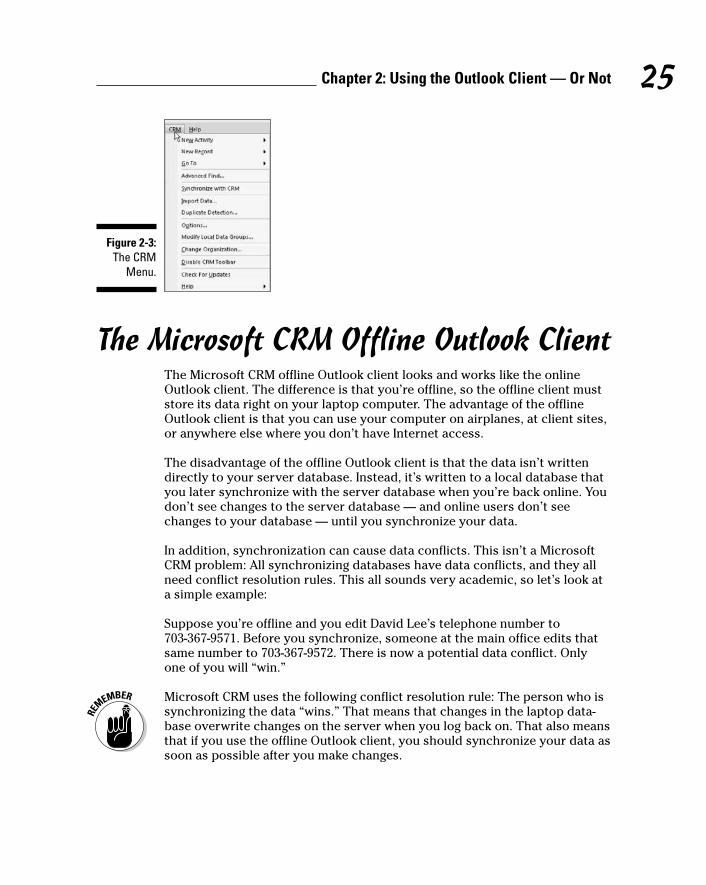
The Microsoft CRM Offline Outlook ClientThe Microsoft CRM offline Outlook client looks and works like the onlineOutlook client. The difference is that you’re offline, so the offline client muststore its data right on your laptop computer. The advantage of the offlineOutlook client is that you can use your computer on airplanes, at client sites,or anywhere else where you don’t have Internet access.
The disadvantage of the offline Outlook client is that the data isn’t writtendirectly to your server database. Instead, it’s written to a local database thatyou later synchronize with the server database when you’re back online. Youdon’t see changes to the server database — and online users don’t seechanges to your database — until you synchronize your data.
In addition, synchronization can cause data conflicts. This isn’t a MicrosoftCRM problem: All synchronizing databases have data conflicts, and they allneed conflict resolution rules. This all sounds very academic, so let’s look ata simple example:
Suppose you’re offline and you edit David Lee’s telephone number to703-367-9571. Before you synchronize, someone at the main office edits thatsame number to 703-367-9572. There is now a potential data conflict. Onlyone of you will “win.”
Microsoft CRM uses the following conflict resolution rule: The person who issynchronizing the data “wins.” That means that changes in the laptop data-base overwrite changes on the server when you log back on. That also meansthat if you use the offline Outlook client, you should synchronize your data assoon as possible after you make changes.
Figure 2-3:The CRM
Menu.
25Chapter 2: Using the Outlook Client — Or Not
06_343258-ch02.qxp 6/4/08 12:11 AM Page 25

When you sync from the server to your laptop, there should be no data con-flicts because you presumably haven’t made any changes in your offlineclient since the last time you went online.
Note that Microsoft CRM 4 has a new diagnostic tool that identifies recordsthat cause problems with synchronization. See the section, “What’s New inMicrosoft CRM 4.0 Outlook Client,” later in this chapter, for details.
As noted in the Online Outlook Client section, you launch the synchroniza-tion from the Microsoft CRM toolbar. Select the Go Offline option (assumingthat you’re online at the time). This lets you synchronize your current CRMdata with your local computer or, if you’re offline and are going online, sendall changed data from your local computer to the CRM server (Go Online).
The Microsoft CRM Web ClientThe Web client is the access method used in the examples throughout thisbook, so we don’t go into much detail here.
With Web access, you don’t need any software on your computer. You canactually access your system from the lobby or business center computer in a hotel.
You must do all setup and configuration tasks through the Web client.However, as we mentioned earlier, you can use any of the clients during anysession. You don’t need to make a permanent selection of which client to use.
What’s New in Microsoft CRM 4 Outlook Client
Microsoft CRM 4 improves on version 3 by adding a number of new enhance-ments and features. These improvements, guided by customer evaluation,are focused on end-user benefits, support for global organizations (in theform of multi-language packs and currencies), and increased application scal-ability (running multiple instances of CRM 4 on the same physical machine).
Because you will not likely be working with CRM 4 in the back-end, the follow-ing enhancements are focused on regular usage of CRM.
26 Part I: Microsoft CRM Basics
06_343258-ch02.qxp 6/4/08 12:11 AM Page 26

� The Diagnostic Tool: This is a standard part of the Outlook client. In Windows, navigate to Start➪All Programs➪Microsoft Dynamics CRM 4.0➪Diagnostics, to invoke the tool.
The Diagnostic Tool can identify records that cause problems with syn-chronization, and it can identify and resolve CRM add-ins that have beendisabled. It can analyze your log files and report to your support desk sothat your support people can provide you with better support. It cancheck for updates and disable your system if you don’t have a manda-tory update installed.
� User interface enhancements: These enhancements include the following:
• Promote up to 20 contact or appointment records at a time fromOutlook to Microsoft CRM. This saves time by allowing the end-user to highlight 20 contacts in Outlook and click on a singlebutton to send them to MS CRM.
• Synchronize tasks (available in version 3) as well as telephonecalls, letters, and faxes (all new in version 4).
• Set the Regarding feature for e-mail messages. (This links thee-mail from Outlook to the parent account in MS CRM.)
You do this by clicking Track in CRM on the toolbar. After savingthe record, click View in CRM. If you’re using Outlook 2003, clickRegarding. If you’re using Outlook 2007, click Set Parent or SetRegarding. Then click Save and Close.
• In Microsoft CRM 4, you can enter data into Outlook or into theCRM windows, which means that you can now enter data into acustom CRM data field.
• Auto Resolution for lookup fields: When you’re searching for avalue, you can get a list of all records meeting your search criteria.
• Converting activities: Convert an activity to an opportunity (avail-able in 3.0) or to a lead, an opportunity, or a case. On the Actionstoolbar, click Convert Activity and then select from the options.
• Mail merge: In version 3, mail merge worked only from the Outlookclient. In 4, it works from the Web client as well.
� Reporting services enhancements: These enhancements include the following:
• Report Wizard: This allows you to create reports using an easy tofollow graphical display on demand. (In version 3, it was not possi-ble to create reports within CRM.) This Report wizard allows you
27Chapter 2: Using the Outlook Client — Or Not
06_343258-ch02.qxp 6/4/08 12:11 AM Page 27

to group data; summarize data (totals and subtotals); present datain tables, graphs, and charts; and print without exporting to Excel.
• Export to Excel: This was available in version 3. The new featuresinclude exporting data from related entities and editing queriesafter you create your spreadsheet.
� Offline synchronization improvements: These improvements includethe following:
• Background synchronization: Instead of clicking Go Offline and waiting while synchronization runs, you can synchronize continu-ously in the background. (Note that this puts an extra load on yourserver.)
You can set this by doing the following: From the Outlook client onthe CRM menu, click Options, then click the Synchronization tab,and select Synchronize Local Data Every X Minutes. It defaults toevery 15 minutes. The smaller you make the time interval, thegreater the extra load on your server.
• Changes to default synchronization settings: These are intended toreduce the load on the server. You can still change the settings ifyou like.
• Contacts aren’t synchronized: These include only your Outlookclients, not all of the contacts in Microsoft CRM.
• Only records owned by the user are synchronized.
• Address book synchronizes every 24 hours: You can change this byclicking Set Personal Options and then Synchronization. From theresulting screen you can change all of your sync settings.
28 Part I: Microsoft CRM Basics
06_343258-ch02.qxp 6/4/08 12:11 AM Page 28

Chapter 3
Navigating the MicrosoftCRM System
In This Chapter� Touring the screen
� Logging on
� Getting around in CRM
� Filtering records
� Finding records
� Using the Resource Center
In this chapter, we explain the main features of the most commonly usedscreens — like the workplace — and provide you with the skills to get from
one screen to another without getting lost. The workplace, by the way, is thecentral repository for everything that you have going on in your life as far asCRM knows.
Whirlwind Tour of the ScreenThe workplace is the first thing you see when you start Microsoft CRM, so that’swhere we begin our discussion of what’s what on the screen. Figure 3-1 showsa typical workplace screen.
Many elements in CRM are context sensitive, which means that what they con-tain differs depending on what part of the program you’re viewing, what accessrights you have, or both. In addition, you can change your personal settings (aswe describe in Chapter 4). Those personal settings may further influence whatyou see on each screen. And, one more caveat: Microsoft CRM is highly cus-tomizable. If someone in your organization or your CRM dealer has alreadycustomized your system, your screens may not be exactly the same as thosethat came out of the box. (For this book, we used all out-of-the-box screens.)
07_343258-ch03.qxp 6/4/08 12:11 AM Page 29

30 Part I: Microsoft CRM Basics
If you’ve used Microsoft products before, you’ll find that some of theseelements are familiar.
Navigation paneThe navigation pane is the column on the left side of the screen. As men-tioned, many screen elements are context sensitive, but no area is more sothan the navigation pane. The navigation pane is split into two majorareas.Which button you click at the bottom — Workplace, Sales, Marketing,Service, Settings, and Resource Center — determines what you see at the top.Click Sales, for example, and you might see a screen like the one in Figure 3-2.
No matter which module you’re working in, the navigation pane is alwaysavailable, and you can use it to get back to the workplace at any time. Forthose people just getting started with a CRM application or those comingfrom a simpler system, it’s easy to get lost in what may seem to be a myriadof similar screens. The Workplace button in the navigation pane is alwaysthere for you, like a trail of bread crumbs leading you home.
Toolbar
Navigation pane
Menu bar Window
Navigation buttons
Figure 3-1:A typical
workplacewith the
navigationpane on theleft and the
Activitieswindow on
the right.
07_343258-ch03.qxp 6/4/08 12:11 AM Page 30

If you’re suddenly lost while entering information, remember that MicrosoftCRM doesn’t automatically save data for you. So click the Save button (thedisk icon) on the toolbar before returning to the workplace.
Status barAt the very bottom of the screen is the status bar with several indicators.The Done indicator tells you that CRM has finished retrieving the informationyou requested. If CRM hasn’t finished, you see an indication of what’s cur-rently loading. If you see a pop-up icon in the status bar, hover your mouseover it, and it will tell you whether pop-ups are blocked. The final indicatorshows your current Internet security properties. The possibilities areInternet, Local Intranet, Trusted Sites, and Restricted Sites.
WindowThe largest part of the screen is what we simply call the window (labeled inFigure 3-1). What you see here depends first on which navigation buttonyou’ve clicked (Workplace, Sales, Marketing, Service, Settings, or Resource
Figure 3-2:Clicking the
Sales buttondisplays alist of your
currentleads.
31Chapter 3: Navigating the Microsoft CRM System
07_343258-ch03.qxp 6/4/08 12:11 AM Page 31

Center) and second on what you’ve clicked in the upper part of the naviga-tion pane. For example, in Figure 3-3, we’ve clicked Workplace and thenAccounts (under Customers).
At the top of the window is the name of the area you’re currently working in.Directly below the title of the window, you see the Look For field and its Findbutton, as well as the View menu. You use these elements to filter records. Wetalk more about filtering records later in this chapter in the “Filtering andSearching for Records” section.
Next up is a row of toolbar buttons, such as the New button and a printericon. The toolbar in Figure 3-3 also shows two buttons with drop-downmenus, Create Quick Campaign and More Actions. Click the down-pointingarrow, and a list of options appears. Quick Campaigns are part of marketingand are discussed in Chapters 19 and 20.
Window’s toolbar
WindowClick to preview record.
Window’s title Column headings
Record
Figure 3-3:The
Accountswindow.
32 Part I: Microsoft CRM Basics
07_343258-ch03.qxp 6/4/08 12:11 AM Page 32

Records are displayed in the main display area of the window. You can viewany record that appears here by simply double-clicking it. To preview addi-tional details about a record displayed in the window, click the arrow to theleft of the record name. A small window, called the preview, appears in thelower part of the screen with more fields than CRM shows in the listing in themain window. However, you can’t edit a record in the preview window.
At the top of the record list, you see the column headers. Click a columnheader to sort the records into ascending or descending order. To change thesort order for a particular column, click the column header again.
To select one record for some type of action, such as sending an e-mail, high-light the record. You can select all the records on a page by clicking the topcheck box (the one that is a column header).
Selecting all the records in the manner just described selects only thoserecords displayed in that particular window, one screen at a time.
Many windows, particularly those with a list view such as the Accountswindow, have a refresh button just to the right of the column headers. Ifyou’ve modified a record but there’s no evidence of that change in thewindow, click the refresh button.
Several elements appear at the bottom of the window. The first is the scrollbar. Next, you see a row indicating how may records appear in the windowand how many of those records are selected. The current page number is onthe far right. When a list has more than one page, the arrows surrounding thepage number are no longer dimmed, and you can use them to move from onepage to another.
The final element (in the list view) is the CRM alphabet bar. Click a letter inthe alphabet bar, and you see only records beginning with that letter. This isa quick way to sort and find records.
First Things First — Signing OnNow that we’ve described some of the basic screen terminology, it’s time totalk about navigating through the CRM system. But before you can navigateto and through Microsoft CRM, you have to sign on. Although that soundslike a simple thing, you might encounter a gotcha or two.
Microsoft CRM doesn’t require a separate login for the program, like other CRMsystems you may have used. It’s integrated with Microsoft Active Directory,which means that it gets your login information from your computer. However,
33Chapter 3: Navigating the Microsoft CRM System
07_343258-ch03.qxp 6/4/08 12:11 AM Page 33

before you can access CRM, your administrator must set you up in thesystem with at least one security role. Your role in the organization and youraccess rights determine, to a large part, what sections of the system you canget to and what you can do when you’re there. For more on roles and accessrights, see Chapter 8.
If your browser has a pop-up blocker enabled, this may prevent you from evengetting into Microsoft CRM. From the Internet Explorer main toolbar, go toTools➪Pop-up Blocker➪Turn Off Pop-up Blocker. However, this may not beenough if you have other pop-up blockers enabled. For example, if you useYahoo!, it has its own pop-up blocker (on its main toolbar) that you must alsodisable. You may also need to add the MSCRM URL as a trusted site in yourbrowser.
The Workplace Is Your Starting PointThe mysteries of Internet connectivity and pop-up blockersare one thing toconquer. The next is actually getting CRM to appear on your screen. Thereare two common ways to access CRM – either directly via Outlook or via yourweb browser. I have the URL for my CRM system as one of my favorites in mybrowser. After you enter your username and password and click OK, CRMautomatically brings you to your workplace. Ta da!
If you’re working directly on your LAN, you might not get prompted for ausername or password because your IT dept may have automated this stepfor you.
The workplace isn’t only the first place you see after signing on, it’s the placeyou should always go back to if you find yourself adrift in a sea of screens.Just click the Workplace button in the bottom portion of the navigation paneto go back to the workplace.
The CRM program contains six modules: Workplace, Sales, Marketing,Service, Settings, and Resource Center. The three application modules —Sales, Marketing, and Service — can contain many individual records, such asan account (a company your business works with), a contact (an individualyour business works with), or a case (a record relating to a service issue). Inthis section, we discuss how to get to the application modules and, fromthere, how to get to individual records.
Navigating at the application levelYou can navigate to the three application modules from the workplace in twoways: the navigation pane or the Go To menu (on the menu bar). Our choice is
34 Part I: Microsoft CRM Basics
07_343258-ch03.qxp 6/4/08 12:11 AM Page 34
Haghighat Sabet
Highlight
Haghighat Sabet
Highlight
Haghighat Sabet
Highlight
Haghighat Sabet
Highlight

to use the navigation pane, which contains buttons for all six modules (including the workplace). If you instead choose the Go To menu, you are presented with a drop-down list of the same six choices available in the navigation pane.
The Settings module is one you’ll visit infrequently, when you want to changea personal setting on your system. That leaves the three application modules:Sales, Marketing, and Service, plus the Resource Center. Depending on yourrole in your organization, you’ll probably spend most of your day in just oneof these modules.
At the application level, the windows you see are similar to those of the work-place, but they do have a few differences. Figure 3-4 shows a sampleSales/Opportunities list view.
Navigating at the record levelFrom the application level, you can drill down to the record level, where themeat of your data actually lives. To access the record level, you simplydouble-click a record in the particular window’s listing. Figure 3-5 shows atypical contact record. The record level shows detailed information abouteach subarea (Contacts, Leads, Opportunities, Accounts, and the like).
Figure 3-4:Everyone I
should be intouch with
all the time.
35Chapter 3: Navigating the Microsoft CRM System
07_343258-ch03.qxp 6/4/08 12:11 AM Page 35

Your first navigation lessonsNavigating through the Activities window is typical of more general naviga-tion through CRM. You almost always need to create and edit appointments(which are a type of activity), so we use appointments as an example here.You can create (also called schedule) an activity in many ways, but the fastestand easiest way is to use the workplace:
1. At the bottom of the navigation pane, click the Workplace button.
2. At the top of the navigation pane, click Activities.
The Activities window appears.
3. On the Activities window’s toolbar, click the New button.
The New Activity dialog box appears.
4. Double-click the icon for the activity you want to create.
You’re creating an appointment, so you double-click Appointment. Awindow appears for entering the relevant information, as shown inFigure 3-6.
5. Enter text in all the necessary fields.
For an appointment, enter the subject (why you’re making the appointment),the account or contact with whom you’re scheduling the appointment, andall scheduling information. For more detailed information on how to fillout these fields, skip ahead to Chapter 14.
Figure 3-5:A typicalcontactrecord.
36 Part I: Microsoft CRM Basics
07_343258-ch03.qxp 6/4/08 12:11 AM Page 36

6. CRM doesn’t save anything until you tell it to, so click the Save andClose button (below the menu bar).
You return to the workplace.
Now that you’ve created an appointment, you can practice changing one.This should be even easier. We’ll start from the Activities window:
1. In the Activities window, find and then click the activity you want to edit.
The activity opens, enabling you to review and change it. If you werechanging an appointment, you’d see a screen similar to Figure 3-6.
2. To change a field, highlight it and make your edits.
For example, you might want to change the scheduled time for anappointment.
3. Before leaving the window, make sure you click the Save and Closebutton.
You return to the workplace.
Now that you’ve worked on creating, viewing, and editing an appointment,take a moment to check out another area of CRM: announcements. From theworkplace, click Announcements (under My Work) in the upper part of thenavigation pane. In the Announcements window, members of your team canpost messages to everyone about company-wide events or issues. For example,you might use an announcement to send reminders about an upcoming pricechange or a revised holiday schedule.
Figure 3-6:Schedulingan appoint-
ment.
37Chapter 3: Navigating the Microsoft CRM System
07_343258-ch03.qxp 6/4/08 12:11 AM Page 37

Figure 3-7 shows some typical announcement postings. Clicking the link inthe Announcements window brings you directly to that posting. The postingcan include a link to a Web site containing additional information, if the personposting the announcement decides to include it.
If an announcement is too long, or if several active announcements are dis-played, a scroll bar appears at the right side of the window so you can reviewall the posted material.
Filtering and Searching for RecordsSince the dawn of mankind, humans have organized things. Of course, if youorganize things, you have to filter and search through them at some point. Itcould be argued that you have to filter and search before you can organize,but that’s sort of like trying to determine which came first, the chicken or theegg. Well, Microsoft CRM doesn’t answer that question, but the program doesoffer you an advanced, user-intuitive filter and search capability.
Figure 3-7:A typicalcompany
announce-ment
window.
38 Part I: Microsoft CRM Basics
07_343258-ch03.qxp 6/4/08 12:11 AM Page 38

Filtering recordsNow how is filtering different from searching? Basically, a filter is a type of search,in that you give the program search criteria and the filter function hunts down allthe records that meet your search definition. You can apply this filtering to a listof contacts or leads (people you’d like to sell your product to), to documents inthe knowledge base (a database of documents), to service activities (customerissues), and more. You can use the function to find one record or a thousandrecords.
In almost every workspace in Microsoft CRM, you’ll see a Search for Recordsfield below the window’s title and a View field to the right, as shown in Figure 3-8.
You use the Search for Records field to enter information free form. If you’relooking for an article on brakes, for example, you can type brakes in theSearch for Records field. If you’re looking for the guy who just called you atthe help desk (and got cut off) but all you remember is his first name, Rico,you can type that first name in the Search for Records field. You might alsonotice a magnifying glass icon at the right side of the Search for Records field.Keep reading because we tell you how to use that icon in the next section.
Right next to the Search for Records field is the View field. Basically, this tellsthe program where to search for and what to search while hunting for thetext you entered in the Search for Records field.
Here’s where the filter function shows its teeth. The options you find in theView field drop-down box depend on what section of Microsoft CRM you’reworking in. For example, if you’re in Workplace, under Contacts, the optionsare geared towards contacts, such as Active Contacts, My Active Contacts,and Inactive Contacts. If you’re in Marketing, in the Campaigns workspace,you get options such as My Campaigns and Launched Campaigns.
Figure 3-8:If you Viewthis figure,you’ll see
what you’reLooking For.
39Chapter 3: Navigating the Microsoft CRM System
07_343258-ch03.qxp 6/4/08 12:11 AM Page 39

Searching with the magnifying glass iconThroughout Microsoft CRM, you’ll find a magnifying-glass icon to the right ofmany fields. Whenever you see the magnifying glass, there’s a Look Up Recordsdialog box waiting for you. Using this look-up feature, you can search almostanything.
Just click the magnifying glass. Like the filter function, the options you see inthe Look Up dialog box depend on the field the icon is next to. Figure 3-9 isthe one you’ll see most often because it lends itself to most searches per-formed in Microsoft CRM. The drop-down list offered in the Type field canhave as few as two options to search in (say, Accounts and Contacts) or asmany as eleven, depending on the type of record you’re looking for.
Searching with the Form AssistantThe Form Assistant is basically a wizard guiding you through the entry offields on forms. You can access and complete every field with a magnifyingglass using the Form Assistant, which is a window that appears on the rightside of virtually every form There is a skinny panel on the right side of the formwhich you expand to access the Form Assistant, or you use CTRL-SHIFT-F. SeeFigure 3-10.
Figure 3-9:The mostcommon
Type dialogwindow.This one
comes fromthe Activityscheduling
window.
40 Part I: Microsoft CRM Basics
07_343258-ch03.qxp 6/4/08 12:11 AM Page 40

Keep in mind that what the Form Assistant shows depends on the field youwant to complete.
Searching with the Advanced Find featureAlmost all CRM software programs have some sort of advanced search fea-ture, but they rarely measure up to the workhorse built into Microsoft CRM.You can search for almost anything, from addresses to queues to roles toviews. The other cool thing is that you can access Advanced Find throughoutthe program (in the main menu bar).
In this section, we look at using the Advanced Find feature locate selectedaccounts. In this example, we search for accounts in NY or in NJ. (You canfind even more ways to use Advanced Find in Chapter 16.) Follow these steps:
1. Click the Advanced Find button on the main menu bar, or chooseTools➪Advanced Find on the menu bar.
Your location in the program doesn’t matter. You can access AdvancedFind from Marketing, Sales, Service, the Resource Center — even Settings.The Advanced Find dialog box appears, as shown in Figure 3-11, so youcan define the values of your search.
2. Click the drop-down arrow to the right of the Look For field to selectthe area or item you want to search.
The list has 49 items (or more if you have customized field views).Browse through them to see the available options. The options in theUse Saved View field depend on the category you select in the Look Forfield. Experiment by selecting various options in the Look For field andthen seeing your options in the Use Saved View field.
Figure 3-10:Your friendly
neighbor-hood FormAssistant.
41Chapter 3: Navigating the Microsoft CRM System
07_343258-ch03.qxp 6/4/08 12:11 AM Page 41
Haghighat Sabet
Highlight

3. (Optional) Click the drop-down arrow to the right of the Use SavedView field to select the area or item you want to search.
If you don’t see any saved searches that suit your needs, skip that fieldand continue on with the next step.
4. Choose your search criteria.
a. Move your cursor to the word Select below the window’s toolbar inthe Advanced Find window.
A field appears with a drop-down menu.
b. Click the field to open the drop-down box.
c. Select a field from the drop-down menu.
For example, if you select the State/Province field, this tellsMicrosoft CRM the search you’re about to conduct looks first inthe State/Province field.
Note that after you make the State/Province selection, the word Equalsappears next to it. To the right of Equals is the phrase Enter Value. Theoptions in this third lookup file depend on the choices made earlier.
5. Choose the modifier.
a. Hover your cursor over the word Equals to display the field.
This should default to Equals, but always check before continuing.We want Equals in this case, but you can also choose from DoesNot Equal, Contains, Does Not Contain, and so on.
b. Click in the field to open the drop-down box and select the option youneed.
6. Enter the value for your search.
a. Move your cursor over the words Enter Value and click in the fieldthat appears.
Figure 3-11:With
AdvancedFind, your
searchoptions are
almostlimitless.
42 Part I: Microsoft CRM Basics
07_343258-ch03.qxp 6/4/08 12:11 AM Page 42

Again, these options depend on choices made in the previoussteps.
b. To follow along with the example, enter NY in the field.
By using the Group function you can select multiple values. In theexample shown in Figure 3-12, we search for Accounts in either NYor in NJ. These must be grouped with the “Or” function because noAccount can possibly be in both States. Whether you are connect-ing values with ANDs or ORs, you have to specifically add a stepeach time.
7. Click Save.
A window pops up, asking for a title of your search.
8. Enter a name for your search and click OK.
This convenient feature saves your search for future use.
Click the arrow by the Use Saved View field to see all saved searches.Searches in System Views are available to everyone. Those in My Views(including the one you just saved) are available to you.
9. In the Advanced Find window, click Find (in the lower-right corner) toactivate the search.
A new window appears showing you a list of all accounts meeting yoursearch criteria, as shown in Figure 3-12.
Figure 3-12:Another
successfulsearch
usingAdvanced
Find!
43Chapter 3: Navigating the Microsoft CRM System
07_343258-ch03.qxp 6/4/08 12:11 AM Page 43

Don’t see what you want? Or worse, your search results returned a gazillionmore hits than you thought it would? You can always click Back to Query toreturn to your search criteria for further definition.
Using the Resource CenterThe Resource Center is a new goodie in version 4. The link to it is promi-nently displayed at the bottom of the navigation pane. A typical ResourceCenter window is shown in Figure 3-13.
Within the Resource Center, you find links to all sorts of help, white papers,and community forums. You have access to a variety of problem-solving con-tent, including current blog posts, newsgroup answers, and articles. You canfind more detailed information on the Resource Center in Chapter 28.
Figure 3-13:A typical
ResourceCenter
display.
44 Part I: Microsoft CRM Basics
07_343258-ch03.qxp 6/4/08 12:11 AM Page 44

Part IISetting Things Up
08_343258-pp02.qxp 6/4/08 12:12 AM Page 45

In this part . . .
In Part II, you discover how to make the software fit youand your organization. You read about personalizing
the system around your work habits and schedule. Youfind out about security and access rights, territories,roles, and business units.
If your organization is divided into departments (that is,business units), you find out how to emulate that struc-ture in CRM. We discuss territories, which are usually theprovince of the sales manager, in this part as well.
If you’re going to do quotes in CRM, setting up a productcatalog is almost a necessity; you find that information inthis part also.
Because workflow is a key component to automating thesystem around your company’s business processes,Chapter 9 discusses designing and then implementingworkflow.
With Microsoft CRM, you can use built-in reports or createyour own. In Chapter 10, you find out how to run thosereports and how to develop template documents.
08_343258-pp02.qxp 6/4/08 12:12 AM Page 46

Chapter 4
Personalizing Your SystemIn This Chapter� Accessing your personal settings
� Choosing your default start page, currency, and time zone
� Setting up your workplace screen and choosing e-mail and language preferences
� Understanding your user profile options
� Establishing roles, teams, and office hours
One of the first things you should do is set your personal options to con-trol the way Microsoft CRM displays information. You can use these per-
sonal settings to streamline the system so it best suits your function in theorganization and your style. For example, you can determine which windowappears when you start Microsoft CRM each day. If your role is strictly in cus-tomer service, you might want the system to go directly to the list of your cases.
In this chapter, we discuss the choices you have and how to set them. It’sunlikely that you’ll need to change every option, but it’s good to know what’savailable.
Customization is important, and the process shouldn’t take long. A littleattention to customization now will enable you to work more efficiently asyou become familiar with the system.
Tailoring the System to Suit Your NeedsYou can streamline your use of CRM by setting your regular workday hours,how you want your scheduled activities to appear, the starting point for thesystem each morning, and many other options. Options like these are calledyour personal settings. Basically, you’re telling Microsoft CRM how you like tooperate.
09_343258-ch04.qxp 6/4/08 12:12 AM Page 47

To access your personal settings from the Web Client, follow these two steps:
1. At the bottom of the navigation pane, click the Workplace button.
An option to Personalize Workplace appears in blue just above theWorkplace button.
2. Click the Personalize Workplace option.
The Set Personal Options window appears, with the Workplace tab dis-played by default, as shown in Figure 4-1.
CRM provides you with eight tabs, each of which affects various default set-tings and how information is displayed. Most of these settings do not affectanyone other than you, so you should set them to please yourself. All dates inMSCRM are converted to Universal Time when entered into the database;make sure your time zone is set correctly if you share data with other usersin different time zones.
In the sections that follow, we cover adjusting the options on these tabs. Afteryou make changes on any of them, make sure to click OK to save your changes.To see the results of any changes you make, log out and then back in.
General tab: Customizing a variety of user preferencesClick the General tab (called Miscellaneous in prior versions of Microsoft CRM)contains settings for what you want the system to display upon startup, how
Figure 4-1:The Set
PersonalOptions
window,showing the
Workplacetab.
48 Part II: Setting Things Up
09_343258-ch04.qxp 6/4/08 12:12 AM Page 48

many records you want to see at one time, how you want the Find function towork, which time zone you work in, which currency you use, and whether you’dlike to display CRM in high contrast. The General tab is shown in Figure 4-2.
The first group of options on the General tab pertains to your default startpage. The Default Pane drop-down list offers you these six choices:
� Workplace: This folder allows you to create and manage your calendar,personal work items, knowledge base, and reports all in one area. Youcan also work with your accounts and contacts in this area.
� Sales: This folder allows you to create and manage accounts, contacts,leads, and opportunities.
� Marketing: This folder allows you to create and manage leads, cam-paigns, and sales literature.
� Service: This folder allows you to create and manage cases and con-tracts. This is also where the knowledge base is configured.
� Settings: This folder contains administrative tasks. Here you can manageannouncements, setup users and security, configure e-mail options andrules, and configure your system settings. You can probably eliminatethis option as a reasonable choice. Selecting Settings means that everymorning when you sign on, CRM automatically starts up by allowing youto change your Settings. This isn’t something you’re likely to do regu-larly. In fact, you’ll probably set it and forget it.
� Resource Center: This folder contains information to the new userincluding best practices and training material.
Figure 4-2:You can tellthe system
how youwant to
operate,rather than
have it be in charge
of you.
49Chapter 4: Personalizing Your System
09_343258-ch04.qxp 6/4/08 12:12 AM Page 49

Note that the selections you see in the Default Tab option change dependingon your selection in the Default Pane option. For example, if you selectSettings as your default pane, you will see options for administrative taskssuch as user security, announcements and email rules. If you select Serviceas your default pane, options for cases, contracts, and knowledge baseappear as selections in the default tab.
If your job function is primarily in sales, marketing, or customer service, itmight seem logical to select one of those choices as a starting point for yourday. This might work for you. However, we prefer to come in each morningand see what’s on our agenda. This is best accomplished by setting theDefault Pane option to Workplace and the Default Tab option to Activities orto Calendar.
To set your default start screen, follow these steps:
1. Set the Default Pane option as desired.
To do so, click the down arrow to the right of the field and then make aselection. The options in the Default Tab option will change, but youwon’t be able to see that until you position your mouse in that field.
2. Set the Default Tab option as desired.
3. Click the OK button (at the bottom of the window).
Your new options are saved, but you won’t see the effect of this until thenext time you log into CRM.
Now on to the next option on the General tab — Records Per Page. Dependingon the size and resolution of the screen you’re using, you may want to changethe number of records that appear in each list. The smaller your screen orthe lower your resolution, the fewer lines you may want displayed at any onetime. On the other hand, if you have a large number of records and prefer justscrolling up and down, set the number of records shown to a large number,perhaps 100 or more. The default is 50 records per page; we usually set oursa little higher.
Advanced Find Mode allows you to create more complex searches and savesearch criteria for future use. You can take best advantage of this feature byselecting the Detailed option. If you select the Simple mode instead, you canuse predefined searches but cannot create new ones yourself. Even if youhave no intention of creating Advanced Find searches right now, don’t limityourself by selecting Simple.
The Time Zone drop-down list contains time zones from all over the world.Choose yours. The goal of setting your time zone is to coordinate your activi-ties with other members of your team who may be dispersed throughout theworld. This assists in coordinating conference calls among team members.
50 Part II: Setting Things Up
09_343258-ch04.qxp 6/4/08 12:12 AM Page 50

For example, suppose you are in New York and set up a conference call with ateam member in Sydney, Australia. If you schedule your call for 4 p.m. Monday,the call shows up on your Australian counterpart’s activity list for 8 a.m.Tuesday (her time) — if she’s selected her correct time zone as well, that is.
The Currency box allows you to select the currency you’ll use when workingwith Quotes, Invoices, Orders, and Opportunities.
The Enable High Contrast option improves the display of buttons and iconsin your system. Select this option if you have it selected in your operatingsystem or Web browser (such as Internet Explorer). (Selecting this option will automatically reload your page.)
Workplace tab: Simplifying your navigation paneYou use the Workplace tab in the Set Personal Options window (refer toFigure 4-1) to define your role in your organization and to tailor the work-place. (As you may recall, a workplace is a page that allows you to create and manage your calendar, personal work items, knowledge base, reports,accounts, and contacts all in one area to show any combination of sales, mar-keting, service, and scheduling information.) When you select the Marketingoption, for example, marketing lists, campaigns, and quick campaigns becomeavailable to you in the navigation pane. This list of options may look differentdepending on how your system administrator or implementation partnerdefined the options when setting CRM up.
Simply click to add the check mark from each of the four options in turn. Asyou do so, more areas are displayed in the Preview panel on the left of thecheck boxes you are clicking on. When all four workplace areas are turnedon, the maximum areas are available.
We recommend that you select just the one or two roles you usually play inyour organization. Selecting more won’t damage anything but will clutter thescreen with functions you don’t need. Our advice? If you’re in sales, selectSales or Sales plus Marketing. If you’re in customer service, select Service orService plus Scheduling. If you’re in Marketing, don’t clutter up your work-place with Service schedules but do select the other three. Remember thatthe workplace simply consolidates information from different areas as men-tioned earlier. If, for example, you selected only Sales to be displayed in yourworkplace but later needed access to Service information, you can simplyclick on the Service short-cut in the left navigation pane. (For more on this,please refer to Chapter 3.)
51Chapter 4: Personalizing Your System
09_343258-ch04.qxp 6/4/08 12:12 AM Page 51

Activities tab: Displaying appointmentsand setting your work hoursActivities is the third tab in the Set Personal Options window. This is whereyou to specify your default calendar view and the hours that you’re typicallyin the office, as shown in Figure 4-3.
A good choice for the Default Calendar view is Weekly, which is shown inFigure 4-4. The calendar view, whether daily, weekly, or monthly, displaysonly appointments and none of the other activities, such as scheduled phonecalls or tasks. If you want to use any of the calendar views and you want arealistic picture of what’s on your schedule, make everything an appoint-ment. Please note that these options affect what you see in the graphical cal-endar (calendar view). We think a better option is to use the Activities view,which shows all types of scheduled activities including appointments andphone calls. (Please refer to Chapter 2 for more on using Outlook Client andsynchronizing MS Outlook with CRM.)
Figure 4-3:The
Activitiesoptions.
52 Part II: Setting Things Up
09_343258-ch04.qxp 6/4/08 12:12 AM Page 52

The second set of options (Set Your Default Work Hours) enables you to spec-ify your typical workday hours. Although a Start Time of 2 p.m. and an EndTime of 3 p.m. sounds appealing, you should set this more realistically as itaffects your calendar as well as scheduling. By default, your workplace calen-dar displays the hours you’ve selected as your regular work schedule. This isalso what everyone using the system sees as your official work hours. Enterthem wisely; other users of the system will schedule your calls, appointments,and so on, within that range of hours. If you (or others) happen to schedule anappointment outside those normal hours, it will still appear on your calendar.
Formats tab: Adapting CRM to your part of the worldThe Formats tab (see Figure 4-5) enables you to select from a pre-defined listthe manner in which CRM displays numbers, currency, time, and dates. Forexample, if you choose the English (United States) option from the CurrentFormat drop-down list, when you log into CRM you see numbers 123,456,789.00,currency with a dollar sign preceding it, time 8:30 AM, the short date in themm/dd/yyyy format, and the long date with the day of the week preceding theday, month, and year.
You can additionally extend the pre-defined list by clicking the Customizebutton and adjusting the options in the window that appears.
Figure 4-4:The weekly
calendarview.
53Chapter 4: Personalizing Your System
09_343258-ch04.qxp 6/4/08 12:12 AM Page 53

E-mail Templates tab: Speed the process of handling e-mailsThe E-mail Templates tab enables you to create and customize templates (pre-defined e-mails, e-mail body, subject, and so on) for almost every type of record(account, contact, opportunities, and so on) in the database, assuming yoursecurity level allows this. (We describe security and access rights in Chapter 8.)The ones you create in this section are available only to you. To create tem-plates for the entire organization, use the Settings tab of Microsoft CRM.
This important feature enables you to create a powerful array of standarddocuments that you can use, for example, as automatic responses (seeChapter 9 for more on working with workflows) to inquiries about your prod-ucts or services. This is a great way to expedite your response to salesinquiries. Unlike fine wine, leads never improve with age. From a list of tem-plates you create, you can choose any template and create a bulk e-mail, alsoknown as a direct e-mail or an e-mail blast. Bulk e-mail is a way to send multi-ple e-mails at one time easily and automatically. Some people associate thiswith spam. As long as you’re legitimately responding to someone’s inquiry orhave received permission to send electronic communications (also called opt-in mail), it is not spam and may be an effective way to handle many routinebusiness activities, including newsletters and special announcements.
It is probably to your professional advantage to include a way for your e-mailrecipients to opt out of receiving e-mail from you. For more information, readthe CAN-SPAM Act of 2003 at www.ftc.gov/bcp/conline/pubs/buspubs/canspam.shtm.
Figure 4-5:The Formats
options.
54 Part II: Setting Things Up
09_343258-ch04.qxp 6/4/08 12:12 AM Page 54

See Figure 4-6 for an example of e-mail template titles. From the E-mailTemplates tab, you can apply any of the templates to an email, or you cancreate new templates by clicking the New button and following the instruc-tions in Chapter 12.
E-mail tab: Routing your CRM messagesThe E-mail tab (see Figure 4-7) allows you to better control the onslaught ofincoming e-mail by letting you choose which type of e-mails are automaticallytracked in CRM. Your options are All Emails, Emails in Response to Those YouSent Out or All Emails from Your Accounts, Contacts, and Leads in Your CRMSystem. Microsoft has incorporated a token-based system into the systemwhich allows it to know if the e-mail should be copied to CRM or not.
From the Track drop-down list, if you select All E-mail Messages, all e-mailthat would normally go to your Outlook inbox goes also to Microsoft CRM4.0. If you select E-mail Messages in Response to CRM E-Mail, only those mes-sages sent in response to e-mails sent from Microsoft CRM are brought intoMicrosoft CRM automatically. If you select E-mail Messages from CRM Leads,Contacts, and Accounts, only e-mails from leads of customers are will besaved in CRM.
Each method has its strengths and weaknesses. As a general rule, if you usethe Outlook Client for Microsoft CRM, you should have Microsoft CRM auto-matically capture e-mails with the tokens. If you typically use InternetExplorer to access Microsoft CRM, select All E-mail.
Figure 4-6:Seasoning
your e-mailtemplates
to taste.
55Chapter 4: Personalizing Your System
09_343258-ch04.qxp 6/4/08 12:12 AM Page 55
Haghighat Sabet
Highlight

Privacy tab: Indicating when to report errors to MicrosoftUsers of Windows XP will immediately recognize the options presented here(see Figure 4-8). As with Windows, when MS CRM encounters an error, it cansend a detailed report to Microsoft. You can tell MS CRM to do so in threeways: automatically, only with your permission, or never send a report. Agood practice would be to have an administrator set this option up as mostend-users aren’t sure what to do when they see this prompt.
Figure 4-8:Handle
those errormessages.
Figure 4-7:Selectwhich
e-mails totrack.
56 Part II: Setting Things Up
09_343258-ch04.qxp 6/4/08 12:12 AM Page 56
Haghighat Sabet
Highlight

Language tab: Choosing the language you see onscreenThe last tab, Languages, allows you to select the language in which the maininterface and help files are presented. (See Figure 4-9.)
Establishing Your User ProfileSetting your user profile means telling the system (see the tip below) whoyou are and your role in the organization.
Your user profile coordinates you with your organization, so it’s critical thatyour profile is set up before you and the other users really start using thesystem. The settings can always be changed as you go along and as yourroles change.
Depending on the rights you have to the system, you may need to approachyour system administrator to change your user profile.
Even if you don’t have the rights to tinker with these settings, you shouldknow what options are available so you can at least provide input to thesystem administrator.
Your user profile enables you to record information about yourself and yourrelationship to your company, such as your title, the teams you work on,your roles in the organization, and the times you’re generally available. Your
Figure 4-9:Select your
language.
57Chapter 4: Personalizing Your System
09_343258-ch04.qxp 6/4/08 12:12 AM Page 57
Haghighat Sabet
Highlight
Haghighat Sabet
Highlight
Haghighat Sabet
Highlight
Haghighat Sabet
Highlight
Haghighat Sabet
Highlight

user profile settings enable you to participate in one or more team activities(a team is a group of users which work together on specific records) and tohave a specific role in those activities. (Please review Chapter 6, “ManagingBusiness Units and Teams,” for more information on teams and roles.)
Anyone can view anyone else’s user profile in both the web and outlookclients, but administrative rights may be required to make changes.
To navigate to the user profile area, follow these steps:
1. At the bottom of the navigation pane, click the Settings button.
A window with 10 choices appears.
2. Select Users.
The Users window appears.
3. Double-click the user (you) whose profile needs to be reviewed orchanged.
A window similar to the one in Figure 4-10 appears.
Figure 4-10:Your user
profileinformation.
58 Part II: Setting Things Up
09_343258-ch04.qxp 6/4/08 12:12 AM Page 58
Haghighat Sabet
Highlight
Haghighat Sabet
Highlight
Haghighat Sabet
Highlight
Haghighat Sabet
Highlight
Haghighat Sabet
Highlight
Haghighat Sabet
Highlight

Your user profile may be displayed as read-only if your security settings don’tallow you to edit it. If this is the case, your system administrator has to makeany necessary changes for you.
Your user profile contains seven categories, each of which is displayed in theupper part of the navigation pane. These seven categories are divided intotwo groups: Details and Service. The Details group applies to everyone; theService group applies specifically to customer service personnel. We discussService groups in detail in Chapter 22.
Under the Details group are the Information, Teams, Roles, Quotas, andWorkFlows categories. You should go through each category sequentially toview how your record is set up and determine whether any changes arerequired. Each of these categories defines a different aspect of your role inthe organization, as we discuss in the sections that follow.
Providing general information about yourselfWhen you click Information in the navigation pane, you see the User window,with two tabs: General and Addresses. (Refer to Figure 4-10.) The fieldslabeled in red are required; everything else is optional but recommended.Most of the fields on the General tab are self-explanatory, but these deserve furtherexplanation:
� Domain Logon Name: The server or entire set of resources running yourCRM system.
� Business Unit: The organization to which you directly report.
� Manager: Your manager’s name. (This field may be important if yoursystem is designed to automatically escalate issues from one level ofmanagement to another.)
� Territory: Particularly in sales, efforts are usually divided into regionsor territories. Each salesperson is usually associated with one territory.
The Addresses tab allows for two separate addresses. Everyone in your com-pany should use these the same way. We recommend that you use the officeaddress as the Mailing Address and your home address as the Other Address.It could just as well be the other way around, but everyone in your companyneeds to conform to the same method. This is because of the way they are
59Chapter 4: Personalizing Your System
09_343258-ch04.qxp 6/4/08 12:12 AM Page 59
Haghighat Sabet
Highlight
Haghighat Sabet
Highlight
Haghighat Sabet
Highlight
Haghighat Sabet
Highlight
Haghighat Sabet
Highlight
Haghighat Sabet
Highlight

stored in the database. Inconsistent entry makes it difficult for automatingcertain tasks such as mailings to employees.
Joining teams to share recordsYou use Teams, the next selection in the navigation pane, to group users whohave the same basic role or who might need to share records.
Each user can be assigned to one or more teams. For example, you may beinvolved in your company’s consulting efforts and also have some salesresponsibilities. By assigning yourself to both the consulting team and thesales team, you assure yourself of being included in correspondence andmeetings for those two groups. All the teams in a particular organization aredisplayed on the left. On the right are the teams to which the user isassigned.
Viewing security rolesRoles is the third selection in the navigation pane. Click the Roles option inthe navigation pane to display the Roles window. Highlight the specific roleyou want to see and then click Manage Roles from the window’s toolbar.
Microsoft CRM comes with a number of well-defined access rights, each asso-ciated with different roles that people perform in a company. For example,there’s a well-defined set of access rights for an individual salesperson and adifferent set for the manager of customer service. You should have at leastone role and could have several. These assignments are normally part of theinitial configuration of the system and are usually the responsibility of youradministrator.
Announcing which hours you’ll be workingThis is where each user’s standard schedule is housed. You establish the typ-ical work week and then add specific time off. If your organization runs morethan one shift, the Work Hours area is where you indicate which shift eachperson is working. You can use this area also to indicate you’re working or on vacation.
To view or edit your work hours, follow these steps:
60 Part II: Setting Things Up
09_343258-ch04.qxp 6/4/08 12:12 AM Page 60
Haghighat Sabet
Highlight
Haghighat Sabet
Highlight

1. At the bottom of the navigation pane, click the Settings button.
2. Select Users.
The Users window appears.
3. Select the user whose work hours you want to view by highlightingthat user and clicking Work Hours from the navigation pane.
The window shown in Figure 4-11 appears.
4. In the top-left area, click the Set Up button.
This button is the key to managing each user’s work hours. Threeoptions appear, enabling you to set a new weekly schedule, set a uniqueschedule for one day at a time, or schedule time off. Each option dis-plays a simple entry screen.
5. Choose an option, fill in the entry screen, and then click OK.
Monitoring workflowsThe final category under Details is Workflows. The Workflows screen allowsyou to monitor processes defined in your system. (These processes aresimply workflow jobs, such as automated follow-up calls for every new leads,which are scheduled, running, or completed in the system.) We discuss work-flows in detail in Chapter 9.
Figure 4-11:Sometimes
at work;sometimes
not.
61Chapter 4: Personalizing Your System
09_343258-ch04.qxp 6/4/08 12:12 AM Page 61
Haghighat Sabet
Highlight

62 Part II: Setting Things Up
09_343258-ch04.qxp 6/4/08 12:12 AM Page 62

Chapter 5
Managing TerritoriesIn This Chapter� Defining your territories
� Managing your territories
Territories, teams, and business units are three organizational conceptsthat are so closely linked that you need to understand all three before
deciding how to handle any one of them.
Territories are customer records managed and maintained by one or morepeople in an organization. A team is a group of users who work together onspecific records. As one can imagine, some records might contain sensitiveinformation and some may contain information that may be viewed by othersbut not edited. For example, Person A reports to a Manager A who reports toRegion Manager A. Region Manager A has full access to all his own records aswell as those accounts managed by his subordinates. The subordinates inturn cannot edit accounts that are outside their territories or managed directlyby a supervisor. A business unit, then, is where an administrator creates andmanages security settings that dictate who can access what information.
Typically, you establish territories to manage sales in bite-sized chunks. Youprobably want to develop a sales quota for your company in each territoryand then check forecasted sales and closed sales against the quotas you’veset. (We talk more about assigning quotas and forecasting sales in Chapter11.) You may also want to use territories as a way to ensure that customersare equitably distributed among salespeople. By using Microsoft CRM, youcan measure equitable distribution by geography, the number of customers,account revenue, or some combination of all three factors.
Territories come into play when assigning accounts and when reporting onthem. In this chapter, we explain how to set up territories, business units,and teams.
10_343258-ch05.qxp 6/4/08 12:13 AM Page 63
Haghighat Sabet
Highlight
Haghighat Sabet
Highlight
Haghighat Sabet
Highlight
Haghighat Sabet
Highlight
Haghighat Sabet
Highlight
Haghighat Sabet
Highlight
Haghighat Sabet
Highlight
Haghighat Sabet
Highlight

Setting Up Sales TerritoriesEvery account record has one field called Territory. After you define your territories, you assign the proper territory to each account record. You cando this by manually selecting a territory for each account record from a drop-down list that your database administrator sets up, or you can use workflowrules to automatically assign an account to a territory based on state,province, zip or postal code, or some combination of these.
Don’t use telephone area codes for territory definitions. Area codes changetoo often and, in the U.S., aren’t geographically consistent. On top of that,with many people using cell phones or Internet phones, it’s hard to relatephone numbers to geography.
Implementing workflow rules is a powerful way to have Microsoft CRM do atremendous amount of work for you. For example, an administrator cancreate a workflow rule that automatically attaches to every new record; therule checks the physical location of that account or contact and assigns it toa territory. Setting up such rules is appropriate for this or any kind of proce-dure that’s well defined and frequently repeated. See Chapter 9 for a discus-sion of workflow rules.
An administrator can assign each user to a single territory and designate theuser as either a territory user (a member of a team) or as the territory manager.
The task of setting up and managing territories is usually reserved for peoplewith administrative rights. If you don’t already have territories defined, this isa good time to do so. Follow these steps:
1. At the bottom of the navigation pane, click the Settings button. (If youare using Outlook Client, click on Settings under the MicrosoftDynamics CRM folder in Outlooks navigation pane.)
2. Click Business Management in the navigation pane.
The Settings window with its 11 options appears. The options are as follows:
• Fiscal Year Settings: This is where you configure your company’ssettings for its fiscal year and options on how they are displayed.
• Facilities/Equipment: This is where you manage people and theservices you provide for your clients. In example, you can sched-ule a technician to go onsite and fix a printer. The technician mayneed certain equipment for this job.
• Resource Groups: A resource group is simply a team of people whoprovide services for clients. This is where you would create andmanage them.
64 Part II: Setting Things Up
10_343258-ch05.qxp 6/4/08 12:13 AM Page 64
Haghighat Sabet
Highlight
Haghighat Sabet
Highlight

• Services: Services are jobs scheduled for a customer. Theseappear as calendar activities for the users who are scheduled toperform the tasks.
• Subjects: This is where you create and manage various areas onknowledge in a hierarchy. An example would be a company knowl-edge base.
• Relationship Roles: This is where you create and manage a corre-lation between the records in your system. For example, you maywish to create relationships between distributor and seller accounts.
• Business Closures: This is where you define the days in the yearthat the company will remain closed.
• Queues: These are scheduled activities that need attention or needto be closed.
• Sales Territories: This is where you create and manage territories.(Sales territories are discussed later in this chapter.)
• Sites: A site is a physical location of a business. This is where youwould manage, per site, services you provide.
• Currencies: Currencies help determine the price of products youtrack in your system. (Products are discussed in Chapter 7.) Theyare also used to determine the price for various transactions, suchas purchase orders.
3. Select Sales Territories.
The Sales Territories window shown in Figure 5-1 appears. This is a typi-cal view displaying the territories already in your system, presumablyput there by your system administrator or by a sales manager.
Figure 5-1:The
territories inyour system.
65Chapter 5: Managing Territories
10_343258-ch05.qxp 6/4/08 12:13 AM Page 65
Haghighat Sabet
Highlight
Haghighat Sabet
Highlight
Haghighat Sabet
Highlight

4. On the Sales Territories window’s toolbar, click the New button to adda new territory.
The Territory: New window opens.
5. Fill in the General tab as follows:
a. In the Territory Name field, enter a unique territory name.
b. To the right of the Manager field, select a territory manager for thatterritory from the drop-down list.
c. If your territory name isn’t self-explanatory, be sure to enter adescription.
For example, if the Territory Name is New England, you should listthe individual states in the Description field. See Figure 5-2.
6. At the top of the screen, click Save (the disk icon).
Note that the Members option in the navigation pane is available. Theusers assigned to a territory are called members of that territory. Afteryou set up a territory, you can add users to that territory.
7. Add a user (member) to the territory as follows:
a. In the navigation pane of the territory, click the Members button.
b. On the window’s toolbar, click the Add Members button.
Figure 5-2:Enter anddefine the
territory.
66 Part II: Setting Things Up
10_343258-ch05.qxp 6/4/08 12:13 AM Page 66

You see a list of available users in the Look Up Records window.Because an administrator can assign an individual user to only oneterritory, the available users display in Figure 5-3 shows only unas-signed users.
c. From the available users, select one or more users (that is, members)for a territory.
8. After you finish adding users to a territory, click the Save and Closebutton.
You return to the Sales Territories window.
Sometimes you may think that you need to assign someone to more than oneterritory. For example, if the Mid-Atlantic manager leaves, you may need tohave the New England manager temporarily take over both territories. Youdo this by defining a new territory that encompasses both the New Englandand the Mid-Atlantic regions.
Managing TerritoriesIf you plan to assign accounts to territories, you need to ensure that theTerritory field for every account is filled in. You can do this by establishingworkflow rules that automatically assign territories based on the City or State fields.
Figure 5-3:Display ofavailableusers forterritory
assignment.
67Chapter 5: Managing Territories
10_343258-ch05.qxp 6/4/08 12:13 AM Page 67
Haghighat Sabet
Highlight
Haghighat Sabet
Highlight

You can ensure that every account is assigned to a territory in these ways:
� Make the Territory field a Business-Recommended field. (CreatingBusiness Recommended fields is a system administrator function.) Thisdesignation turns the field label blue, indicating to the user that enteringdata in this field is important. The business recommended designationdoes not force the entry of data.
� Make the Territory field a Business-Required field. (This is also asystem administrator function.) With this designation, which turns thefield label red, no one can save the record unless the field is filled in.
� Send missing data alerts by using a third-party alert system, such asKnowledgeSync (which we discuss in Chapter 27). An alert system sendsa pop-up alarm or report to a user or manager when a new record issaved without critical data. Since KnowledgeSync is not part of MS CRMbut an add-on tool, we will not cover how to set it up.
After you do everything possible to make sure every account is assigned to aterritory, you’d think you’d be done with it. But, things change. Salespeopleleave or are reassigned. New salespeople appear. Territories are merged. Itisn’t enough to just assign a salesperson to a territory. You must be vigilantto ensure that the assignments still make sense.
When customers are assigned to a territory or reassigned, someone shouldnotify the account manager. In a perfect world, you would also notify the customers that they have a new account manager.
Although notifying account managers when you assign accounts to themseems obvious, the software has no built-in function to make this happenautomatically. If a salesperson already has several hundred accounts, he orshe may not notice for a long time when a half dozen new accounts are addedto the list.
Workflow rules (discussed in Chapter 9) are an effective way to provide thisnotification. Failing that, you can resort to the old-fashioned method of eithertelling the salesperson or printing a report of existing customers and high-lighting the new ones with a yellow marker.
The second notification needs to go to the client. Whenever an account man-ager changes, it’s critical to inform all affected customers. With the appropri-ate workflow rules, you can accomplish this by an e-mail, a fax, a templateletter, a scheduled phone call, or a visit.
68 Part II: Setting Things Up
10_343258-ch05.qxp 6/4/08 12:13 AM Page 68
Haghighat Sabet
Highlight
Haghighat Sabet
Highlight
Haghighat Sabet
Highlight
Haghighat Sabet
Highlight

Chapter 6
Managing Business Units and Teams
In This Chapter� Managing your business units
� Creating your teams
� Assigning users to teams
The combination of business units and teams allows extreme flexibility inorganizing your CRM implementation. At first it can be confusing: “Is mar-
keting a business unit or a team?” However, this chapter provides you with abetter understanding of how to use each organizational structure.
The essential difference between the two is that business units are hierar-chal, potentially consisting of parent and children business units, whileteams can cut across this hierarchy. As an example, let’s assume that youhave some standard business units: Sales, Marketing, Product Development,and Service. Let’s also assume that you are starting development of a newproduct: X. You might create a team, Product X, that includes members fromeach of the business units. In this manner, teams offer you greater flexibilitythan you could get by simply having business units.
In this chapter, you see how to create and configure both business units andteams.
Managing Business UnitsA business unit is analogous to a division or a profit center in a company. Butthe concept of business units in Microsoft CRM allows more flexibility thanthe simple concept of divisions in a company. Rather, business units are morelike organizational charts. They also play a large role in the security model ofMicrosoft CRM.
11_343258-ch06.qxp 6/4/08 12:13 AM Page 69
Haghighat Sabet
Highlight
Haghighat Sabet
Highlight
Haghighat Sabet
Highlight
Haghighat Sabet
Highlight

For example, suppose a software dealership has three main business units:software, hardware/networking, and professional services. One or more ofthese units might have subunits. Maybe the software business unit is furtherdivided into three brands of software. Each of those three is also a businessunit. The security division might be divided into the firewall, the spyware,and the antispam units.
To set up business units, follow these steps in either the Outlook or Web client:
1. At the bottom left of the navigation pane, click the Settings button.
2. Click Administration in the upper right of the navigation pane.
3. Click Business Units on the right.
The screen shown in Figure 6-1 appears.
4. On the Business Units window’s toolbar, click the New button.
The Business Unit: New window appears, as shown in Figure 6-2.
5. Give your new business unit a name and change the Parent Businessfield if necessary.
Notice that the default Organization business unit is automaticallyselected as the Parent Business. This top business unit is created whenyou install CRM and every new business unit must be a child of thatBusiness Unit or of some other Business Unit. You can select a differentParent Business Unit by clicking the lookup (magnifying glass icon).
Figure 6-1:Businessunits for a typical
company.
70 Part II: Setting Things Up
11_343258-ch06.qxp 6/4/08 12:13 AM Page 70

6. After filling in the relevant fields (by default Name is the onlyrequired field), click Save and Close.
Notice that The system returns to the Business Units window, where yousee your new business unit.
After you create a business unit and link it to its parent unit (and maybe evengive it some children), you can reorganize your business units at any time bychanging the parent business unit of your business units.
After you create your business units, you can assign teams of users to them.That’s the topic of the next section.
Managing TeamsYou might have a team of people who work together to service customers ina particular territory. Perhaps you have a separate team for each territory. Or you may have teams that are made up of users with similar skill sets. Forexample, you might have a sales team, a marketing team, and a technical sup-port team. In this case, you’d want to assign your teams to business units.
Unlike territory assignments, in which each user can be in only one territory,each user can be a member of many teams. In all likelihood, this will be the
Figure 6-2:Adding a new
BusinessUnit.
71Chapter 6: Managing Business Units and Teams
11_343258-ch06.qxp 6/4/08 12:13 AM Page 71
Haghighat Sabet
Highlight
Haghighat Sabet
Highlight
Haghighat Sabet
Highlight
Haghighat Sabet
Highlight

case, with a typical user being a member of, say, the sales team, the processbrainstorming team, and the summer-picnic planning team.
The concept of sharing is also important to teams. Although you can’t assignan account to a team, you can share an account with a team. In this section,we describe creating teams and assigning members to teams. See Chapter 8for more on Assigning and Sharing records.
Creating teamsAfter you create a business unit, you can create and assign teams to that unit.To create a team and assign it to a business unit, follow these steps usingeither the Web or Outlook client:
1. At the bottom of the navigation pane, click the Settings button.
2. Click Administration in the navigation pane.
3. Select Business Units.
4. Double-click the business unit to which you want to assign one ormore teams.
The Business Units window appears.
5. In the upper part of the navigation pane, select Teams.
6. On the window’s toolbar, click the New Team button.
The screen shown in Figure 6-3 appears.
Figure 6-3:Creating anew team
for anexisting
businessunit.
72 Part II: Setting Things Up
11_343258-ch06.qxp 6/4/08 12:13 AM Page 72
Haghighat Sabet
Highlight
Haghighat Sabet
Highlight
Haghighat Sabet
Highlight
Haghighat Sabet
Highlight

7. Fill in the Team Name field.
The business unit you selected in Step 4 is automatically filled in for you,although you can change this association by clicking the magnifyingglass to the right of the Business Unit field.
8. Click Save and Close.
The system returns to the listing for that particular business unit.
If you create a team without assigning it to a specific business unit, by defaultit’s assigned to the overall parent unit. After a team is assigned to any busi-ness unit, you can’t reassign it to another business unit. However, you candisable the team and start fresh with a new team.
Assigning users to teamsWhen you initially create a team, it has no members. But after the team is cre-ated, it’s easy to add or later remove members.
To add one or more members to a team, follow these steps:
1. Double-click the team you created.
2. At the top of the navigation pane, select Members.
3. On the window’s toolbar, click the Add Members button and thenclick the Find button.
The Look Up Records dialog box appears, as shown in Figure 6-4.
Figure 6-4:Add some
members toyour new
team.
73Chapter 6: Managing Business Units and Teams
11_343258-ch06.qxp 6/4/08 12:13 AM Page 73
Haghighat Sabet
Highlight
Haghighat Sabet
Highlight

4. In the left panel, double-click each member that you want to add toyour team.
5. When you’ve finished assembling the team, click OK at the bottom ofthe window.
The system returns to that team’s listing.
In this chapter, you’ve seen how to define and create territories, businessunits, and teams. You can assign each user to only one territory, but eachuser may be a member of several teams and business units. By assigningusers to teams, you can easily share and shift responsibilities between teams.
74 Part II: Setting Things Up
11_343258-ch06.qxp 6/4/08 12:13 AM Page 74
Haghighat Sabet
Highlight
Haghighat Sabet
Highlight
Haghighat Sabet
Highlight
Haghighat Sabet
Highlight

Chapter 7
Using the Product CatalogIn This Chapter� Understanding the product catalog
� Getting to the Product Catalog screen
� Setting up a discount list
� Creating unit groups
� Formulating your price lists
� Adding products to the catalog
Product catalogs, whether they’re paper or virtual, are a great invention.And product catalogs aren’t just for consumers! They also make excel-
lent reference tools for your sales and customer service staff.
With Microsoft CRM, your company can create a brawny, capable, all-inclusive computer-based product catalog. That way, you can quickly andeasily find all the items and services you sell (nix thumbing through pages).This chapter shows you how to set up this valuable resource.
Overview of the Product CatalogWithin a product catalog, you can create pricing schedules and assign them toyour customers as default schedules. This way, Bob’s Big Discount Warehousegets the wholesale pricing schedule, and the National Organization for Toastersgets nonprofit pricing. Using these assigned pricing schedules and the quotegeneration feature of Microsoft CRM (refer to Chapter 16), your salespeoplecan generate accurate quotes quickly. Quotes beget orders and orders begetinvoices and invoices beget bucks (most of the time).
You can create a number of pricing schedules, for any reason. These sched-ules can be as simple as retail, wholesale, and nonprofit pricing or as com-plex as seasonal pricing or tiered membership pricing. Chapter 16 detailshow to create and use the pricing schedule to your company’s advantage.
12_343258-ch07.qxp 6/4/08 12:13 AM Page 75
The product catalog can link to opportunities, competitors, and product liter-ature. In fact, the product catalog has its tentacles into virtually every aspectof the system.
If you’re integrating with one of Microsoft Dynamics’ back-office accountingsystems, you can set up the product catalog in the accounting system andlink to it rather than set up the catalog in Microsoft CRM. If you’re integratingwith an accounting system other than Dynamics, you can upload thatsystem’s product list directly into the CRM product catalog. When integratingwith these systems, any data from the accounting side normally overrideswhat you entered previously in the CRM product catalog.
If you use an accounting application other than one from the MicrosoftDynamics family, there are solutions for you, too. See Chapter 27 for someadd-ons that simplify this work.
It’s a good idea to read this entire chapter before you build your product cat-alog. This will give you an overview and allow you to do some planning.
When you’re ready to start building your product catalog, we recommendthat you use the order suggested by Microsoft, which we follow too:
� Discount lists
� Unit groups
� Price lists
� Products
To start your planning, categorize your products and services and organizeand simplify your pricing schedules. This is also a good time to check andupdate your inventory lists. Take out products you haven’t sold sincePresident Nixon was in office. And while you’re at it, update your pricing.Remember, the cost of living has increased considerably since you foundedthe company (36 cents for a gallon for gas, anyone?).
Getting to the Product Catalog WindowYou create a product catalog in the Product Catalog window of Microsoft CRM.You don’t have to venture out of this section while creating your catalog —although we recommend venturing out of your cubicle for a leg stretch oncein a while.
76 Part II: Setting Things Up
12_343258-ch07.qxp 6/4/08 12:13 AM Page 76
Haghighat Sabet
Highlight
Haghighat Sabet
Highlight
Haghighat Sabet
Highlight
Haghighat Sabet
Highlight

Now that you’ve stretched your legs and shared the latest rumor, it’s time toget to work. Start by going to the Product Catalog window, as follows:
1. At the bottom of the navigation pane, click Settings.
The Settings section expands in the top left with the Administration sec-tion highlighted.
2. Click the Product Catalog section in the upper left.
The four components of the product catalog appear in the ProductCatalog window.
As mentioned, we recommend that you create your product catalog in theorder that Microsoft indicates. So that’s what you do next.
Creating a Discount ListDiscount lists control how prices change based on the quantity of the productor service being purchased. You can set your discounts in two ways:
� By percentage
� By reduction according to a set dollar amount
For example, a seasonal sale in which you offer a 10 percent discount on allpurchases calls for a percent discount list. Offering $5 off for every touch-down the high school team makes during the weekend game is a set dollaramount discount.
To set up a discount list, you first need to get to the Product Catalog window,as explained in the preceding section. Then follow these steps:
1. In the Product Catalog window, click Discount Lists.
All existing discount lists are displayed, as shown in Figure 7-1.
2. On the Discount Lists window’s toolbar, click the New button.
The Create Discount List window appears.
3. In the Name field, enter a title for your new discount list.
We recommend a unique and self-explanatory title so that others will be able to identify the list. In our example, we entered Summer SpecialDiscount.
77Chapter 7: Using the Product Catalog
12_343258-ch07.qxp 6/4/08 12:13 AM Page 77
Haghighat Sabet
Highlight
Haghighat Sabet
Highlight
Haghighat Sabet
Highlight
Haghighat Sabet
Highlight

4. Choose the type of discount that you want to offer your customers.
The Percentage option is based on a percentage of the regular price. TheAmount option is based on a set dollar amount deducted from the regu-lar price. To follow along with our example, select Percentage.
5. Click OK.
The Information window for your new discount list appears. (The navi-gation pane has three options: Information, Discounts, and Workflows.The Information display is the default display.) Note the top of thewindow; whatever you named your discount list appears here.
At this point, you can continue with creating the discount list, or youcan exit the discount list by clicking Save and Close.
6. Enter some descriptive information for the discount list in the descrip-tion box.
For example, you can add a note about the limitations of the discount(such as limit 4).
7. In the navigation pane, select Discounts.
The Discount section of your discount list appears, as shown in Figure 7-2.This is where you begin entering the details for this discount.
8. Now to make your discounts, click the New Discount button on thetoolbar.
Figure 7-1:Start
buildingyour
discountslists here.
78 Part II: Setting Things Up
12_343258-ch07.qxp 6/4/08 12:13 AM Page 78

9. In the Discount: New window that appears, enter the following infor-mation for your discount:
a. The beginning and ending quantity: The program calls these BeginQuantity and End Quantity.
b. Your discount amount: If you chose Percentage in Step 4, this linesays Percentage. If you chose Amount in Step 5, this line saysAmount ($). When entering the amount, don’t enter the symbol (% or $).
10. Click the Save and Close button to return to your discount list.
11. To enter another line item, go back to Step 8.
You can enter as many line items as you want to establish the necessaryprice breaks for this discount list. For example, if you want to offer pricebreaks for quantity purchases, you might create a line item for a dis-count for 1–10 items purchased and another one to assign a price for11–20 items.
12. To save this list, click Save and Close in the Discount List window.
Make sure that you don’t overlap quantity ranges. For example, suppose yourfirst discount covers the first nine items sold, and you have a larger discountfor ten items and above. You enter 1–9 for the first discount and 10–99 for thesecond discount. But what if you sell time and break it down in 15-minuteincrements? The undefined quantity between 9 and 10 could be an issue. Wesuggest that you break down time increments into decimals when enteringquantities for time.
Figure 7-2:The
discountworkspace
of yourdiscount list.
79Chapter 7: Using the Product Catalog
12_343258-ch07.qxp 6/4/08 12:13 AM Page 79

Creating a Unit GroupA base unit is the smallest or most common means of tracking an item sold.Typical base units are pounds, gallons, hours, days, and tons.
A unit group defines how individual items are grouped into larger quantities.For example, suppose that you sell books individually, by the case, and bythe pallet. A unit group of books shows how a book relates to a case and acase to a pallet. Using this example, if you sell 2 cases of books, with 20 booksto a case, the system knows that you sold 40 books.
To create a unit group, follow these steps:
1. In the Product Catalog window, click Unit Groups.
If you need help finding the window, see the earlier section titled“Getting to the Product Catalog Window.” The screen shown in Figure 7-3 appears.
2. On the window’s toolbar, click the New button.
The Create Unit Group dialog box appears.
Figure 7-3:This is your
main UnitGroupsdisplay.
80 Part II: Setting Things Up
12_343258-ch07.qxp 6/4/08 12:13 AM Page 80

3. Enter the following information for your unit group:
a. Name: This is the name of your unit group. For our example, we’recalling this unit group Books.
b. Primary Unit: This is the smallest unit by which the product can besold. The primary unit is also known as the base unit. Enter Eachas the Primary Unit.
4. Click OK.
The Information window, which is the default display, appears.
5. At the top of the navigation pane on the left, click Units.
The Unit Group: Books window appears. (If you named your unit some-thing else, that name would appear instead of Books.) This is whereyou’ll add your units to your unit group.
6. Click Units on the left and then on the toolbar of your new UnitGroup, click New Unit.
The Unit: New window appears.
7. For each of the three units (book, case, and pallet in our example), dothe following:
a. Enter the name.
This is where you enter the name of each unit. To follow along withthe example, enter Book (the first time through), then Case, andthen Pallet.
b. Enter the quantity.
Again, to follow along with the example, enter a quantity of 1 forEach because this is our base unit. The Case quantity is 20, mean-ing that each case contains 20 base units. The Pallet quantity is 10,meaning that each pallet contains 10 cases.
c. Enter the base unit.
The base unit is the smallest increment of this new unit you’re cre-ating. Continuing with the example, you can see that Each has nobase unit (because it is the base unit and was determined in Step 3to be the Primary Unit). Case has a base unit of Each, and Pallethas a base unit of Case. Use the magnifying glass to browse for theunit you want to set as the base unit. All units, with the exceptionof the primary unit, must have a base unit.
d. Click the Save and Close button.
A quick note for those keeping score: The columns in the Unit Group work-space are listed in a different order than those in the Unit: New window.
81Chapter 7: Using the Product Catalog
12_343258-ch07.qxp 6/4/08 12:13 AM Page 81

8. Click the Save and Close button.
You’re returned to the unit group that you’re working on, as shown inFigure 7-4.
9. To save the unit group, click the Save and Close button again.
Creating a Price ListPrice lists are the backbone of all your opportunities and quotes. Your com-pany may have more than one price list, such as a retail price list and awholesale one. You could also have separate price lists for government andnonprofit customers. You can add a default price list to each contact oraccount, but you can override this when you create quotes and invoices. (SeeChapter 16.)
If your company uses an accounting system and wants to integrate it withMicrosoft CRM, keep in mind that the interface normally provides all of thisinformation and overwrites your price lists with the information from theaccounting system. With the integration provided to Microsoft CRM, much of this functionality is disabled because it is controlled by the accountingapplication.
Figure 7-4:We’ve
added unitsto the group.
82 Part II: Setting Things Up
12_343258-ch07.qxp 6/4/08 12:13 AM Page 82

Here’s how you create that price list:
1. In the Product Catalog window, click Price Lists.
The Price Lists window, similar to the one shown in Figure 7-5, appears.
2. On the window’s toolbar, click the New button.
The Price List: New window appears. The navigation pane displays threechoices: Information, Price List Items, and Workflows. Price List Itemsand Workflows aren’t available until you’ve saved the price list.
3. Enter a name for your price list.
Required fields are in red. The Name field is required, but the start andend date fields aren’t. In our example, we created the “It’s Too Cold!!”price list to offer special prices to match the dropping temperatures.However, winter lasts only so long, so we’ve set the price specials to endin February.
4. Click Save (the disk icon next to the Save and Close button).
Clicking Save allows you to continue with the next part of the process,adding price list items. However, if you aren’t ready to enter your pricelist items or need to get out of this window for some reason, just clickthe Save and Close button.
Figure 7-5:Manage
and createyour pricelists from
this screen.
83Chapter 7: Using the Product Catalog
12_343258-ch07.qxp 6/4/08 12:13 AM Page 83

5. In the navigation pane on the left, click Price List Items.
6. On the Price List Items toolbar, click the Add Price List Item button.
The Price List Item: New window appears, as shown in Figure 7-6.
7. Enter your price list information in the available fields.
Some fields must be filled in by using the magnifying glass to the right ofthe field. The magnifying glass opens a Look Up window. You can fill inother fields freehand or by using the drop-down boxes. As with otherscreens in Microsoft CRM, the fields in red are required.
a. Price List: This is filled in automatically by the program. However,you can change the price list by using the magnifying glass.
b. Product: Use the magnifying glass to find the product you want inthis price list. Microsoft thwarts the Minions of Chaos by allowingyour staff to enter only predefined choices from the product list.
c. Unit: Use the magnifying glass to make your selection. This fieldisn’t enabled until you select a product.
d. Discount List (optional): Use the magnifying glass to find the dis-count list you created earlier in the chapter and link it to yourprice list. By adding a discount list to work in tandem with theprice list item, your staff can create thorough pricing to quote yourcustomers. (See Chapter 16 for details on generating quotes.)
e. Quantity Selling Option: This is where you define the quantities inwhich you’ll sell your product. Choose No Control, Whole, orWhole and Fractional. This feature really comes in handy if you sellfractional services such as help desk or prorated time products.
Figure 7-6:Enter the
informationabout youritem here.
84 Part II: Setting Things Up
12_343258-ch07.qxp 6/4/08 12:13 AM Page 84

f. Pricing Method: Six options are available: Currency Amount;Percent of List; Percent Markup — Current Cost; Percent Margin —Current Cost; Percent Markup — Standard Cost; Percent Margin —Standard Cost.
g. Amount ($): Enter the dollar amount for the price list. The Amountoption is available only if you chose Currency Amount underPricing Method. Don’t include a dollar sign.
h. Percentage: Enter the percentage for the price list. Don’t includethe symbol (%).
i. Rounding Policy: Your rounding policy tells the system how toround percentage calculations to arrive at a specific price. Youroptions are None, Up, Down, and To Nearest. Rounding appliesonly when the pricing method is based on percentage. If youselected Currency Amount for the Pricing Method, this field isn’tavailable.
j. Rounding Option: This option works with the Rounding Amountfield. For example, select Ends In here and .00 in the RoundingAmount field if you want to round to the nearest dollar. SelectMultiple Of here and enter .05 in the Rounding Amount field toround to the nearest nickel. If you selected None for the RoundingPolicy or Currency Amount for the Pricing Method, this field isn’tavailable.
k. Rounding Amount: Fill in the amount on which you want to baseyour rounding, as described in the preceding entry. If you selectedNone for the Rounding Policy or Currency Amount for the PricingMethod, this field isn’t available.
8. Click Save and Close to save your price list items to your price list.
As mentioned, the fields in red are required. If you’ve missed one (due toexcessive caffeine intake or hunting down who burned the popcorn), theprogram will remind you.
By creating price lists, you build an easy-to-use system to generate pricequotes for your customers. Microsoft CRM uses the price lists, discount lists,and price list items to automatically calculate client costs, so your salespeo-ple can focus on selling and not math.
Adding ProductsYour products — without them, you wouldn’t have a business, right? Fromthe first entrepreneurial caveman, businesses are made because someonehas a product to sell. We use the term product as a general term to encom-pass products, services, the help desk — basically whatever you build yourbusiness around.
85Chapter 7: Using the Product Catalog
12_343258-ch07.qxp 6/4/08 12:13 AM Page 85
Haghighat Sabet
Highlight

Now, because the Minions of Chaos love mischief, Microsoft has taken asmart step in preventing them from running amok in your system: Onlysystem administrators are allowed to add new products. That means that ifSam the Salesman can’t find the entry for the Hop-n-Pop toaster, he won’t beable to add entries that could create confusion when you want a report orwhen other salespeople are looking for the Hop-n-Pop. Can you imagine if headded the product as hopnpop, Mary in the next cube added it as HnP, andthen Carey added it by the model number X900? How could you run a reporton how many of those have sold?
Another function of Microsoft CRM allows you to group products sold as akit. Take your Hop-n-Pop toaster, sell it with bagels and organic preserves,and you have the Bagel Buff Gift Basket. You can also create special kits tosimplify your sales and ordering processes or to get rid of some stuff that youdon’t want anymore — clearance, anyone?
You can also relate individual products to substitute products. This is ahandy function for your salespeople when Mrs. Reynolds wants a Hop-n-Poptoaster but you sold the last one two days ago. By relating this product to asubstitute, your salesperson can easily recommend the equivalentHotHopPop toaster.
If you’re a system administrator, follow these steps to add a new product toyour product list:
1. In the Product Catalog window, click Products.
A list of your active products appears, as shown in Figure 7-7.
2. On the Products window’s toolbar, click the New button.
The Product: New window appears with three tabs, as shown in Figure 7-8.
Figure 7-7:The active
productsscreen.
86 Part II: Setting Things Up
12_343258-ch07.qxp 6/4/08 12:13 AM Page 86

3. Fill in the General tab.
The General tab, which is the default tab, is where you enter most of theinformation for your product. You can fill in some fields freeform, othersusing the magnifying glass (thwarting those Minions of Chaos), and stillothers with the Form Assistant. For details on using the magnifying glassand the Form Assistant, see Chapter 2.
The following fields are mandatory:
a. ID: If your system is integrated with your accounting system, the IDis the item number used by the accounting system. Through thisfield, the accounting system updates (and overwrites) informationin each product record.
b. Name: This is descriptive text entered freehand. But it can also bepopulated by your accounting system if it’s integrated.
c. Unit Group: If your system isn’t integrated with accounting, select theunit group that includes the units by which this product will be sold.
d. Default Unit: This is the unit you would typically sell the productas. For example, if you sold the book, Toasting the Night Away, as asingle product, the default unit would be Each. If you were sellingnails, the default unit might be Box.
e. Default Price List: Earlier in the chapter, we discuss price lists. Thisfield relates an individual product to a default price list (wholesale,retail, dealer, government, and the like) you’ve set up. When sales-people go to make that quote, they’ll actually get the price listattached to the customer record. However, if no price list is attachedto the customer record, the system defaults to the price list indi-cated for the product itself. You can’t assign a default price list tothe product until you save the product (use the Save button ratherthan the Save and Close button) and associate the product with aprice list item. Until you do this, you see a warning message thatthe default price list isn’t set.
f. Decimals Supported: If you can’t divide your product (books, forexample) into fractional quantities, enter 0. If fractional quantitiesare possible, you can use up to five decimal places.
g. Currency: This field is used to compute prices for you products. Itis also used compute the costs of business transactions such assales orders.
The following fields are optional, but we find them helpful in building aproduct catalog and entering products:
a. Subject: This field allows you to group your products for reporting.
b. Product Type: The four default product types are Sales Inventory(usually physical goods); Miscellaneous Charges (fees, such as forrestocking); Services (such as consulting or annual maintenancefees); and Flat Fee (for example, handling or shipping charges).
87Chapter 7: Using the Product Catalog
12_343258-ch07.qxp 6/4/08 12:13 AM Page 87
Haghighat Sabet
Highlight
Haghighat Sabet
Highlight
Haghighat Sabet
Highlight
Haghighat Sabet
Highlight
Haghighat Sabet
Highlight
Haghighat Sabet
Highlight
Haghighat Sabet
Highlight

c. Quantity on Hand: The number of items in stock. This field is con-trolled by the back-office system if you have integrated it.
d. URL: The Web address related to this product. This is a handyplace to get up-to-date product information.
e. List Price, Standard Cost, and Current Cost: The price on a generatedquote is based on these fields.
4. On the Description tab, you can enter vendor and part number information.
Having the vendor and part information can be helpful, especially if yousell similar products with similar names. Entering information on thistab isn’t mandatory, but it does offer you another opportunity to identifyyour product.
5. The Notes tab is for freeform notes and information about your product.
Suppose that your product comes in other colors. Instead of making thesalesperson back up a few screens to see what colors you offer, you canlist the colors here, too.
6. After you enter all of your product information, click Save and Closeto return to your product catalog. (Refer to Figure 7-7.)
Remember the motto of computer users everywhere: save, Save, SAVE!
Ta-dah! Now you’ve entered your product into your product catalog! Giveyourself a pat on the back.
Figure 7-8:Enter your
newproduct
informationhere.
88 Part II: Setting Things Up
12_343258-ch07.qxp 6/4/08 12:13 AM Page 88
Haghighat Sabet
Highlight

Chapter 8
Understanding Security and Access Rights
In This Chapter� Understanding security
� Examining user privileges and access levels
� Determining and assigning roles
� Sharing and unsharing data
In this day and age, security is important. As technology advances, so dothe hackers, virus writers, and other malevolently minded folks. With
Microsoft CRM, you should be concerned with two types of security: physicalsecurity and internal security.
Physical security is a defense against everyone you don’t know and don’t wantto meet. These are the people who have nothing better to do than developand propagate viruses or, worse yet, spend their time hacking into your systemto either paralyze it or steal your stuff. This type of security is generally han-dled by firewalls, routers, and other types of hardware and software. Becausethe vast majority of CRM installations run only on your intranet, this type ofsecurity is beyond the scope of this book. For more information, see the MicrosoftImplementation Guide.You can download the Implementation Guide by going towww.microsoft.com/downloads and searching for “Microsoft Dynamics CRM4.0 Implementation Guide.” In fact, searching for just “Microsoft Dynamics CRM 4.0” will result in dozens of downloads regarding CRM including the latestsecurity patches.
You can keep up on the latest at the Microsoft CRM Community site at
http://community.dynamics.com/
Be sure to check this Web site regularly to ensure that you are fully up-to-date on any security issues specifically affecting Microsoft CRM.
13_343258-ch08.qxp 6/4/08 12:14 AM Page 89

90 Part II: Setting Things Up
The second type of security, internal security, is aimed at your own usuallywell-meaning team members. Some organizations, such as brokerage houses,deal with internal security by requiring the restriction of certain records,even from members of their own staff. In other organizations, salespeople’sopportunities need to be hidden from the other salespeople. In our company,we find it occasionally important to keep e-mails away from prying eyes.
CRM has quite a bit of built-in security. And your system administrator, perhapswith several people from your management team, will probably be charged withsetting up security and access rights within Microsoft CRM. In this chapter, youfind out about the types of security you should consider and how to regulateyour internal security.
No form of security is ever foolproof. Although Microsoft CRM provides asophisticated security system, this issue should remain a high priority.Security threats can come from anywhere: from your staff (innocent mistakesor not-so-innocent sabotage) and from outside hackers.
Remember, no system is foolproof (remember the Titanic?), but you candevelop an efficient compromise and make your system user-friendly andhacker-unfriendly.
And, don’t forget about the Minions of Chaos — always back up your data.
Security OverviewMicrosoft CRM’s security focuses on meeting the needs of most organizationsin two ways:
� Role-based security
� Object-based security
Role-based security in Microsoft CRM allows you to assign a role to a user,such as Sales Manager, that controls what the user can do and has access to.Your installation can also define its own roles to meet your requirements. Seethe upcoming section, “Looking at Predefined Roles” to have a look at thesecurity roles that exist out of the box Many of these will work as-is orrequire only slight tweaking.
Object-based security in Microsoft CRM focuses on what access the roles haveto primary and extended entities (such as leads, opportunities, contacts,accounts, and cases). So, in this way, you could possess the role of SalesManager and have access to change opportunities (an object) but only readcases (another object).
13_343258-ch08.qxp 6/4/08 12:14 AM Page 90

Essentially a user’s rights depend on what Role they are a member of and whatObject they are working with. Although a Sales Manger (Role) might have fullaccess to Leads (Object) they may only have limited access to Cases (Object).On the other hand, the opposite might be true for a CSR (Role). CSRs might havefull access to the Cases (Objects) but limited access, if any, to Leads (Object).
Setting Restrictions with User PrivilegesPrivileges are the most basic security options in Microsoft CRM and are gen-erally set up by your administrator. User privileges determine what a usercan and can’t do, such as creating records or deleting records. (We recom-mend that only a system administrator be allowed to delete records.)Altogether, a user can have eight basic privileges, as follows:
� Create: The ability to create new records.
� Read: The ability to read or view the record.
� Write: the ability to change the record.
� Delete: The ability to delete the record.
� Append: The ability to link the record to another record.
� Append To: The ability to link other records to this record.
� Assign: The ability to change the record owner or “Assign” to anotherowner.
� Share: Similar to assign but without changing the owner. If you share arecords with another user then they will have nearly the same rights asyou on that record depending on their roles.
Further Defining Permissions with Access Levels
The next step above privileges, access levels help determine which records theuser privileges should apply to. In other words, your privileges may include the ability to delete account records, but your access level determines exactlywhich records you are able to delete. Microsoft CRM defines four access levelsfrom user (least authority) to organization (most authority), as follows:
� User: You only have access to your records.
� Business Unit: You have access to all the records in your business unit.
91Chapter 8: Understanding Security and Access Rights
13_343258-ch08.qxp 6/4/08 12:14 AM Page 91

� Parent: You have access to all the records in your business unit and allsubordinate business units.
� Organization: You have access to all records in the entire organization.
Many organizations deal only with the User and Organization Access Levels.This depends mostly on corporate policy and culture. Some organizationsallow everyone access to everything and others have a more “your contactsand my contacts” mentality. The Business Unit and Parent access levels allowfor very complex access rights more suitable for very large organizationswith complex organizational structures.
You can learn more about setting up CRM to mimic your organizational struc-ture in Chapter 6.
Looking at Predefined RolesThe concept of roles marries privileges and access rights. Microsoft CRMcomes with 13 predefined roles that are typical of a midsized organization, asshown in Figure 8-1. Making use of these predefined roles saves a lot of timethat would otherwise be spent setting up specific access rights for each user.
If you’re going to make any changes to the default roles, we recommend thatyou use the functionality Microsoft provides, called Role Copy. Refer to theonline help on how to use this.
Online help is available in the upper-right corner of virtually every screen in CRM.
Figure 8-1:You get
thesestandard
roles out ofthe box, but
you can addmore.
92 Part II: Setting Things Up
13_343258-ch08.qxp 6/4/08 12:14 AM Page 92

In this section, we show you how to look at the roles that Microsoft CRMships with. Each of these roles has a complete set of predefined privilegesand access rights. The prototypical sales manager, for example, is given adefault set of privileges and access rights. To see the settings for any of thedefault roles, follow these steps:
1. In the lower left part of the navigation pane, click the Settings buttonand then click Administration sub-section in the upper left.
The Administration window appears on the right. (Remember that non-administrative users will not have access to the Settings area.)
2. Select Security Roles on the right.
The Security Roles window appears, listing all existing roles. (Refer toFigure 8-1.)
3. View a role by double clicking it in the list.
For instance, if you double click the Salesperson Role, the Role:Salesperson window appears.
4. Click the Core Records tab.
A screen similar to the one shown in Figure 8-2 appears. The CoreRecords tab contains all the toggle switches to turn access rights on oroff and is the central storehouse for role information.
Figure 8-2:The Sales-
person’srights
regardingCore
Records.
93Chapter 8: Understanding Security and Access Rights
13_343258-ch08.qxp 6/4/08 12:14 AM Page 93

5. Click each tab in turn to see all the objects that the role can access atvarious levels.
6. Click the Save and Close button to return to the Security Roleswindow.
If your business has specific business rules you need to enforce, you shouldseek help from your system administrator or implementation partner.
Assigning RolesAfter you have defined a role by either copying or editing and existing role,you need to assign it to the user. Every user in the system must have at leastone role to access the system.
A user can have more than one assigned role. For example, someone couldhave a role as a systems administrator and as a mailroom clerk. Not a verylikely combination but still possible. When a single user has multiple roleswith different privileges and access rights, the role with the less restrictiveprivileges takes precedence. So, even when your systems administrator isfunctioning as a mailroom clerk, he or she will have the maximum levels ofaccess rights.
If your organization is complex or you don’t understand Microsoft CRM’s con-cepts of roles, we suggest that you consult with an expert to help you in set-ting up your roles and assigning them to users. See Chapter 28 for moreinformation on when and where to go for help.
To add a role to a user of the system, just follow these simple steps:
1. At the bottom left of the navigation pane, click the Settings button andthen click Administration in the upper left.
The Settings window appears.
2. Select Users.
The Users window appears, listing all current users.
3. Double-click a username.
The User window appears.
4. In the navigation pane, click Roles.
5. At the top of the Roles window, click Manage Roles.
6. Select the roles you want this user to have and then click OK.
7. Click Save and Close.
94 Part II: Setting Things Up
13_343258-ch08.qxp 6/4/08 12:14 AM Page 94

Sharing Information with Others on Your Team
Microsoft CRM has powerful security and record-sharing tools. If keeping cer-tain records or data confidential is necessary for your company, that’s noproblem. Usually more critical than keeping data confidential, however, isyour ability to share information with other members of your team.
Defining a teamBefore you set up your CRM system, we suggest that you do a bit of homeworkand planning. So get your management staff together and order pizza, becauseyou have some brainstorming to do. You’ll want to figure out your businessunits (think divisions or remote offices) and then assign users to those units.
Typically, the users assigned to a particular business unit are also membersof a team. Each user in CRM can be a member of one or more teams. Theconcept of a team allows for a convenient sharing of records. (For more onteams, see Chapter 6.)
Sharing and assigningYou can easily share records and activities with members of your team, andyou should. Sharing a record is like asking your buddies to help you when youneed it. Rest assured: If you ask them, they’ll return the favor. By sharing anddistributing the workload, you, your team members, and your customers allbenefit. While you’re on vacation, team members who have access to yourdata while you’re away can still help your clients.
You can also assign records and tasks. Assigning is a little more like tellinganother user on the system to handle the assignment. (It’s more like delegat-ing than sharing.)
UnsharingWhatever you share you can unshare. If you turned over access to yourclients while you were on vacation, you can retake control upon your return.In most work environments, this is a far better solution than sending yourclients e-mails telling them you’ll be away for two weeks and they should justrelax until you get back. And it’s certainly a better approach than not lettingyour clients know that you’ll be away at all.
95Chapter 8: Understanding Security and Access Rights
13_343258-ch08.qxp 6/4/08 12:14 AM Page 95

Sharing and Not Sharing DataThe concept of sharing is also pertinent to security. Assuming you have shar-ing privileges, you can regulate who else in your organization has access toyour records. By sharing your records with another user or a team, you’regranting access to people who wouldn’t otherwise be able to view or modifythose records.
Sharing recordsGranting sharing privileges to someone who already has organizational rights(the highest level of access rights) really doesn’t accomplish anything.Similarly, if you try to deny sharing rights to someone with organizationalrights, nothing’s going to change. That’s like telling the boss he or she can’tlook over your shoulder.
Sharing is a good tool if, for example, you’re working on a deal in New Yorkand need to bring in a co-worker from Detroit. Under normal security, yourco-worker wouldn’t be able to view your records. By sharing, you can givehim or her access to the record to help work the deal.
You can share almost any kind of record, but here we use an account recordas an example. Follow these steps to share an account with one user or awhole team:
1. Navigate to the object you want to share using the navigation pane onthe left of the main CRM screen.
For this example click on Sales and then Accounts.
The Accounts list appears on the right.
2. Open a record by double-clicking it.
The General tab for the account appears.
3. On the menu bar (at the top of the screen), choose Actions➪Sharing.
The window shown in Figure 8-3 appears.
4. In the Common Tasks pane on the left, select Add User/Team.
The Look Up Records dialog box appears, as shown in Figure 8-4.
5. In the Look For field, select User or Team and then click the Findbutton which looks like a magnifying glass.
All available users or teams are displayed. Alternately, you could entersome text in the text box to the left of the Find button to narrow the results.
96 Part II: Setting Things Up
13_343258-ch08.qxp 6/4/08 12:14 AM Page 96

6. Double-click any user (or team) from the list in the left panel.
Another method is to highlight the user (or team) and click the right-facing arrow button. The user (or team) is transferred to the right panein anticipation of sharing the record with that user or team.
7. Click OK.
The window shown in Figure 8-5 appears.
Figure 8-4:Selecting
someone toshare with.
Figure 8-3:Setting up
one or morerecords for
sharing.
97Chapter 8: Understanding Security and Access Rights
13_343258-ch08.qxp 6/4/08 12:14 AM Page 97

8. Specify which permissions you’re allowing for this record.
To do so, select or deselect each of the check boxes that relate to therights you’re granting.
9. Click OK when you’re satisfied that you’ve shared enough rights.
The window for the record reappears, but now these other users have asmuch access to the record as you’ve granted them.
Sharing multiple recordsYou can share multiple records by Shift-clicking them or Ctrl-clicking themfrom the list and then clicking More Actions from the tool bar and selectingSharing. This brings you to the same screen as in Figure 8-3, and from therethe process is the same as sharing a single record.
Unsharing recordsIf you can share it, you can unshare it. For example, before going on vacation,you may want to share all your records with one of your peers. When youreturn, you probably want to unshare them and resume your usual tasks. Tounshare a record, follow these steps:
1. Navigate to the record you want to unshare.
2. On the menu bar (at the top of the screen), choose Actions➪Sharing.
Figure 8-5:Grantingsharing
permissions.
98 Part II: Setting Things Up
13_343258-ch08.qxp 6/4/08 12:14 AM Page 98

3. Click the Share check box to remove the check mark.
If you granted sharing rights to more than one user, you can eliminatemultiple users’ rights by clicking each of their Share check boxes on thisone screen.
4. Click OK.
The system returns to the General tab of the account record.
Assigning recordsIf you can share it, you can unshare it. For example, before going on vacation,you may want to share all your records with one of your peers. When youreturn, you probably want to unshare them and resume your usual tasks. Tounshare a record, follow these steps:
1. Navigate to the record you want to assign.
2. On the menu bar (at the top of the screen), choose Actions➪Assign.
You will see the Assign Account box pictured in Figure 8-6. (Assumingit’s an account that you are assigning.)
3. Select either Assign to me or Assign to other user.
If you are assigning to another user then use the provided lookup toselect the user.
4. Click OK.
The system returns to the General tab of the record and it is nowassigned to the new user.
Figure 8-6:Assigning
an account.
99Chapter 8: Understanding Security and Access Rights
13_343258-ch08.qxp 6/4/08 12:14 AM Page 99

Streamlining the assignment of permissionsIf you share with multiple people or multiple teams, you can end up having todeal with quite a few check boxes to manage in the Common Tasks panel,which you see at the left side of the screen after you choose Actions➪Sharing. Microsoft CRM provides three additional options in the CommonTasks panel to streamline your efforts:
� Toggle All Permissions of the Selected Items: After you’ve selected oneor more users using the check boxes to the left of their name, this optionacts like a toggle switch (it turns all permissions on and off) for for theselected users. This is an easy way to grant permissions across theboard for multiple users.
� Reset: This is like a do-over button. Selecting Reset brings you back tothe settings you had before the last time you clicked the OK button.
100 Part II: Setting Things Up
13_343258-ch08.qxp 6/4/08 12:14 AM Page 100

Chapter 9
Implementing Business Rules and Workflow
In This Chapter� Understanding what workflow can’t do
� Creating and testing workflow rules
� Monitoring workflow
� Understanding events, conditions, and actions that change workflow
Workflow. I know what you’re thinking. Workflow? What is that? Well, asone of the most powerful functions of Microsoft CRM, workflow is the
nearest thing you’ll find to a money machine.
The Workflow Management System takes your manual business rules (or pro-cedures) and turns them into an automated system. Without workflow, you’dhave a database with names, addresses, and a schedule, but the database byitself wouldn’t do anything. With workflow, Microsoft CRM becomes a systemthat farms your existing accounts for additional business, helps you hunt fornew accounts, and ensures that important tasks don’t slip through the cracks.Whooaa. That’s a pretty hefty statement, isn’t it? However, by providing youwith electronic business alerts — such as automatic calls for accounts orautomatic follow-up e-mails — Microsoft CRM can step beyond being yourcontact/account database and become an important part of your businessand corporate culture.
You probably have many business rules already in place, even if they aren’tset in writing and mentioned all the time. For example, do you return a phonecall to a client who asks you to call him back? That’s a business rule, and work-flow might automate that business rule by sending you an electronic remindermessage — again and again — until you actually make the call. Your businessrule has now become a workflow rule. I like to call this one “auto-nag.”
Now, before you start plugging in workflow rules, we recommend that youreview all your current business processes. This may take some time. Youshould consult with the CEO, his or her assistant, the sales department, themarketing department, you get the idea. This is also the best time to do
14_343258-ch09.qxp 6/4/08 12:14 AM Page 101

spring cleaning. Get rid of business rules that worked before the advent of theInternet, and update others or make new ones. Automating an ineffective pro-cedure is like building a faster Edsel. The speed is there, but it’s still an Edsel.
In this chapter, we touch on the general principles of implementing workflowrules and then provide you with an example of a typical rule. You also findthe background and basis to design and implement at least some simpleworkflow rules of your own. However, keep in mind that the creation of com-plex workflow rules is probably best left to professional Microsoft CRM con-sultants or dealers.
Workflow ComponentsLet’s start from the beginning. Workflow may sound complicated, but whenyou get the knack of it, it’s fairly simple. Workflow has two main modules:Manager and Monitor.
� Manager: Enables you to develop and use the workflow rules feature,which is nothing more than a system to automate the businessprocesses you already have and use.
� Monitor: Provides a display of the current status of each rule. You cansee exactly which processes are running and which ones may be waitingfor a triggering event.
Limitations of WorkflowAlthough Workflow is a powerful utility, it isn’t Super Program and does havesome limitations. For example:
� Workflow can monitor data and events within the Microsoft CRM data-base but not outside it, unless you write a custom .NET assembly. (Moreon .NET assembly in a moment.)
� A workflow rule can check for data in more than one object (accounts orcontact records) at one time, but it’s limited to a few entities. For exam-ple, a workflow rule can look through all of your accounts to notify youof any that are missing telephone numbers, but a single workflow rulecan’t check for accounts that are missing phone numbers and have opencases more than two weeks old.
� Workflow rules have difficulty checking for the absence of an event,meaning they can alert you to an open or uncompleted appointment butdon’t tell you about stuff that wasn’t scheduled but should have been.(It’s a software program, not a mind-meld machine.)
102 Part II: Setting Things Up
14_343258-ch09.qxp 6/4/08 12:14 AM Page 102

An important step in creating your workflows is to think through the flowitself carefully. What are the exceptions? What conditions should terminatethe process? For example, if someone buys something, workflow should starttreating the person as a new customer and not as a prospect.
Creating Workflow RulesFor creating your workflow rules, we recommend that you use members ofyour staff who work with the product on a daily basis, both on the adminis-trative side and the operations side. This way, you cover your businessprocesses from all angles.
Now, we do suggest letting your company’s system administrator be the onlyperson to implement workflow rules. The process of creating rules can scary,humorous, or just outright sad. (Just spend an hour or two watching C-SPAN!)We think the best way to approach the process is with a small team of indi-viduals from both the business side and the tech side. The business guys willsay “We need to make sure that the managers get notified of every accountthat’s not touched in 90 days.” Then the data or tech person will say “What’sa touch?” “What’s an account?” and “Who’s the manager?” This exchange canbe frustrating, but it is necessary. If you don’t go through it, then on Mondaymorning the CEO might receive a flood of e-mails indicating that hundreds ofrecords in the database, including vendors and competitors, have not had acompleted sale in the last 90 days.
One of the most common tasks your company may want to automate is theassignment of an account manager to a newly created account. We use thatas our example for creating a workflow rule:
1. Choose Settings and then Workflows in the navigation pane of CRMWeb client.
The Microsoft CRM Workflow Manager window appears, as shown inFigure 9-1.
2. Click New.
3. Enter a name for the workflow and select an entity type.
The Entity Type option is the type of record (account, contact, lead, andso on. See chapters 12 & 13) that your workflow rule focuses on. Clickthe down arrow to the right of the field to open the drop-down box andchoose the entity you want to work with. For this exercise, we choseAccount for Entity Type.
4. Select the New Blank workflow radio button and then click OK.
103Chapter 9: Implementing Business Rules and Workflow
14_343258-ch09.qxp 6/4/08 12:14 AM Page 103

5. Select the Record Is Created check box.
The Workflow form should appear as shown in Figure 9-2. Note that theEntity field is already filled in with your choice from the preceding step.For our example, we chose Start when: Record is created because wewant the creation of a new record to trigger this workflow rule.
The other options to automatically trigger a workflow are:
• Record status changes (run Workflow when the status field changes)
• Record is assigned (run Workflow when the Owner field changes)
• Record attributes change (run Workflow when the button to selectattributes has been clicked)
• Record is deleted (this one’s pretty obvious and a good one to useto audit deletions)
6. Click the Add Step drop-down list and then a list appears with the fol-lowing choices, as shown in Figure 9-3:
• Check Condition: This is basically an IF...THEN construct.
• Conditional Branch: This is an ELSE...THEN to be attached to theabove Check Condition.
• Default Action: This is an ELSE to be attached to a Check Condition.
• Wait Condition: This pauses workflow until the condition is met.
• Parallel Wait Branch: This indicates a separate pause to wait for acondition. This one is useful for creating timeouts or escalations
Figure 9-1:The
WorkflowManager.
104 Part II: Setting Things Up
14_343258-ch09.qxp 6/4/08 12:14 AM Page 104

in your workflow logic. For instance you might have a wait condi-tion waiting for a call to be made and Parallel Wait condition set to alert someone after certain amount of time that the call has notbeen made.
• Create Record: Creates a new CRM record of any entity type.
• Update Record: Updates a CRM Record.
• Assign Record: Reassigns a record to a different user.
• Send E-Mail: This one does your laundry — no, wait! It sends ane-mail!
• Start Child Workflow: Branches to a child workflow. A child workflowis a workflow that cannot be run on its own but only when calledfrom a parent workflow. If you have a given group of steps thatmany workflows will use then you may want to create a child work-flow of the steps and then just reference the child workflow fromthe other workflows.
• Change Status: Changes the status field of the record.
• Stop Workflow: Immediately stops the process of the workflow.
7. Select Check Condition.
Three lines of information are added to the Workflow details area at thebottom of the screen. The first line is a text box containing the wordsType a Step Description Here.
Figure 9-2:Create your
workflowrule anddon’t go
wild now!
105Chapter 9: Implementing Business Rules and Workflow
14_343258-ch09.qxp 6/4/08 12:14 AM Page 105

8. In that text box, enter the description of this step.
9. Highlight <condition> (click to configure) in the workspace.
The Specify Condition form appears as shown in Figure 9-4.
Figure 9-4:Check it out!
Figure 9-3:Everyone
needs aCheck
Conditionoption.
106 Part II: Setting Things Up
14_343258-ch09.qxp 6/4/08 12:14 AM Page 106

10. Hover your cursor over the word Select and a drop-down boxappears. Click the down arrow and select a table.
In this example, we’re working with the Account table, so select Account.
11. Hover your cursor over the word Select, which appeared to the rightof where you selected Account, and another drop-down appears. Clickthe down arrow and select a field.
Just about every field in the table selected in step 10 is available here.Select the field to which you’d like to apply the workflow rule. For exam-ple, if you want to assign only records in Massachusetts to your accountmanager, Ted, you’d choose the Address1: State/Province field.
12. Hover your cursor over the word Select next to the State field youselected, click the down arrow, and then select Equals.
The Contains, Begins With, and Ends With operators can produce sur-prising results if you don’t carefully consider what data these expres-sions might find. For example, if you search for records containing East,you also get records containing beast.
In our example, we’re testing for Accounts in Massachusetts, so weselect Equals.
13. Hover over the words Enter Value next to the Equals condition andenter MA in the text box that appears.
For example, if you selected State in Step 11, you could put the statehere in the Static Value field. If you wanted to compare two fields, youcould select another field by selecting a Dynamic Value from the formsassistant on the right.
Now your new Workflow condition should look similar to Figure 9-5.
Figure 9-5:CompleteWorkflowCondition.
107Chapter 9: Implementing Business Rules and Workflow
14_343258-ch09.qxp 6/4/08 12:14 AM Page 107

14. Click Save and Close.
You return to the main Workflow screen.
15. Back on the main Workflow creation screen Highlight Select this rowand click Add Step under the condition you just created.
The action you select tells the program what you want done when thecondition you set in Steps 8 through 11 is met. A list of actions and theirdescriptions is available in the “Workflow Glossary” at the end of thischapter.
16. Select Assign Record from the Add Step drop-down menu.
17. Enter the account manager name or click the find button next to thefield to search for a list of system users.
18. Click Save and Close.
19. To make the rule available, click Publish.
If you forget to do this, your perfectly good new rule will sit there for-ever, forlorn and lost.
20. Click Save and Close to return to the main workflow manager window.
Testing a new ruleThroughout this book, you can find reference to our office manager’s archnemeses, the Minions of Chaos (MoC). They love to sneak inside your data-base and wreak havoc. Remember this because they can make an appearanceat any moment, now that you’ve created your workflow rules.
Back to the workflow rules. They’re complete and ready to go, so you loadthem up and away you go, right? Negative, databoy.
Loading an untested workflow rule on your active database is an invitation tothe MoC, who want nothing more than to get in and show you any errors orglitches that are on your live system by bringing your system to a grindinghalt as that workflow rule runs amok on your data. Okay, this is dramatic, butwe must stress the importance of testing your workflow rules before youmake them live features of your Microsoft CRM.
The good news is that testing your workflow rule is easy. Here’s how:
1. Now that you’ve created your workflow rule, go ahead and startMicrosoft CRM.
108 Part II: Setting Things Up
14_343258-ch09.qxp 6/4/08 12:14 AM Page 108

2. Create a condition in your database that triggers the workflow rule.
For example, if you set your workflow rule to trigger on every newaccount created in the system, go ahead and create an account andremember to save, Save, SAVE and Close the record.
3. Reopen the record you just created so you can check for the intendedresult.
If the rule said to assign every new account to Bob, you’d check to seewhether Bob is listed as the owner.
If you don’t see the desired result, you either failed to activate your rule, oryou need to review the rule criteria and specifics to determine the cause ofthe problem. Always go back and check out how you built the workflow rulefirst before assuming there’s a bug in the program — because most computererrors are the result of operator error.
In large, mission critical environments there would most likely be a develop-ment or test system that mimics the live system in every way possible. Thesesystems allow you to test possible solutions without the danger of damagingyour production data.
Creating On-Demand (manual) rulesAn On-Demand rule is a rule that can only be invoked manually — not auto-matically (at least not directly). Essentially it is a Workflow that doesn’t haveany of the Start When: boxes checked and instead has the Available to Run:On Deman box checked. For those of you designing complex workflow rules,you can call manual rules by another rule. By calling, we mean that each ruleshould do one or two simple things and should then trigger, or call, anotherrule if more functionality is needed.
Speaking of calling, try to avoid creating a giant workflow-rule Godzilla.Instead of one massive process, it may be easier to put together a series ofsimple manual rules that call each other. You can also do what computer pro-grammers do (no, not change people’s passwords for fun): Create small mod-ules of code, or in this case, workflow rules that you can reuse for manydifferent applications.
Remember that you have to activate a workflow rule after you create it, asthe last step. On-Demand rules, just like all the other rules, must be activebefore you can invoke or call them.
109Chapter 9: Implementing Business Rules and Workflow
14_343258-ch09.qxp 6/4/08 12:14 AM Page 109

On-Demand Workflow rules are great if everyone remembers to invoke or trigger them. The key word here is remembers. In today’s offices, most peopleare so busy answering the phone, dealing with customer service issues, andmaking sales calls that things are bound to slip through the cracks. We sug-gest that you create a system with a master workflow rule that automaticallyattaches to every new record and begins a sequence of calling additionalrules as conditions in that record warrant.
Creating follow-up rulesAlmost every business does some sort of follow-up with its customers, andyours is probably no exception. You may want to send a thank-you e-mail fora recent purchase, or you may want to schedule calls to accounts that havehad no activity for 60 days. This is called a follow-up rule, and it’s usually amanual one. The steps are similar to creating a rule in the first place, so we’lljust touch on them here and make sure we point out the variations.
One of the most common tasks your company may want to automate is thescheduling of a call to a newly created account. We use that as our examplefor creating a follow-up rule. As mentioned earlier, the steps mostly mirrorthe ones you use to create a workflow rule.
To create a manual rule that schedules a follow-up activity for the owner ofan account, follow these steps:
1. Choose Settings and then Workflows in the navigation pane of CRMWeb client.
The Microsoft CRM Workflow Manager window appears, as shown inFigure 9-1.
2. Click New.
3. Enter a name for the workflow and select an entity type. For thisexample we will use the Account entity once again.
4. Select the New Blank workflow radio button and then click OK.
5. Click On Demand and uncheck Start when: Record is created.
This is a slight variation. In the list used to create a workflow rule, youselected the Record Is Created option instead.
6. Click the Add Step drop-down list and then select Check Condition.
7. Click in the box where it says Type a step description here and type adescription to describe this step of the workflow. Something such as“Where State = MA” should suffice.
8. Click <condition> (click to configure), which opens the SpecifyWorkflow Condition screen.
110 Part II: Setting Things Up
14_343258-ch09.qxp 6/4/08 12:14 AM Page 110

9. Hover your cursor over the word “Select” and a drop-down boxappears. Select Account from the box.
10. Hover your cursor over the word “Select” to the right of where youjust selected Account. Another drop-down box appears. SelectAddress1: State/Province.
11. Hover over the word Select that appeared to the right of the the lastselection you made and select Equals from the drop down box thatappears.
12. Hover over the word Select that appears to the right of the last selec-tion and enter MA in the text box that appears.
13. Click Save and Close.
14. Back at the main Workflow screen click on “Select this row and clickAdd Step” under the condition you just created.
15. Select Create Record from the Add Step drop-down menu.
16. Select Phone Call from the drop-down menu of the Record you’re creating and then click the Set Properties button to the right of thedrop down.
The Create Phone Call window appears, as shown in Figure 9-6. Here,you can specify what tasks the follow-up rule should perform when it iscalled, or triggered.
17. Enter a subject and a description for this new activity.
For example, in the Subject field, you might enter New Account orAssigning an Account Manager to a new Account.
Figure 9-6:This activity
can create atask, phone
call, fax, or letter.
111Chapter 9: Implementing Business Rules and Workflow
14_343258-ch09.qxp 6/4/08 12:14 AM Page 111

18. Enter a due date and a priority.
The due date isn’t so much an actual date but a length of time you wantthe system to wait before it sends the letter or fax or prompts you toperform the task or make the phone call. The priorities are low, normal,and high.
19. Click Save and Close.
You’re taken to the main window of the workflow you just created.Remember, rules do nothing unless you publish them.
20. To make the rule available, click Publish.
21. After it’s published, click Save and Close to return to the main work-flow manager window.
Testing a manual ruleRemember the Minions of Chaos mentioned earlier? They don’t discriminatebetween automatic rules and manual ones, so you’ll want to test these as well.
The steps for testing follow-up rules are different than those for testing auto-matic ones. Here’s how you do it:
1. Create a condition in Microsoft CRM that triggers the original rule.
A good example is the New Account workflow rule we just created.
2. In Microsoft CRM, use the navigation pane to find and highlight theaccount.
3. In the window’s toolbar, click Run Workflow.
The Workflow dialog box appears.
4. Select your workflow process from the list and then click OK.
The process begins to run invisibly.
5. Go to the workplace and click Activities in the upper part of the navi-gation pane.
You should see the follow-up activity listed there (if the activity wasassigned to you, anyway).
Monitoring Your WorkflowNow that you have all of those workflow rules processing merrily away, youwant to see them all on one screen, without having to go to every account or
112 Part II: Setting Things Up
14_343258-ch09.qxp 6/4/08 12:14 AM Page 112

contact to see whether a rule has been applied. You can do this through theWorkflow Monitor. Like Workflow Manager, Workflow Monitor is visible fromwithin the CRM Web client. It also keeps a log of processes that are currentlyactive and records which ones have already run.
There are two ways to view the Monitor:
� Click a record that the workflow applies to, then click Workflows inthe navigation pane to see the status of workflows on that record.
The Workflow Monitor window appears, as shown in Figure 9-7. In thisdisplay, you can see Workflow process attached to the selected recordand along with some brief information regarding each Workflow.
� In the navigation pane, click Settings and then click System jobs. TheSettings area is generally only accessible by end users so they willneed to use the first method.
You can sort the items by clicking the header for each column. You can alsoexport the log to an Excel spreadsheet by clicking the Excel icon.
The Workflow Monitor only shows workflow rules that have been triggered.Even though you may have additional rules activated, they remain invisibleto the Monitor when an event triggers them.
Figure 9-7:Success
at last!
113Chapter 9: Implementing Business Rules and Workflow
14_343258-ch09.qxp 6/4/08 12:14 AM Page 113

Workflow GlossaryThroughout this chapter, we tell you to select an event, or choose an action,or set a condition. Maybe you’re wondering what, exactly, constitutes anevent, action, or condition. Well, we list them all here, in a one-stop, look-seethat’s easy to find.
EventsIn Microsoft CRM, an event is the trigger condition that initiates a workflowrule. For example, you can set a workflow rule for Assign, and anything that isassigned has that workflow rule applied to it. Microsoft CRM has four events:
� Record is created: This trigger fires whenever a new record is createdfor the selected entity.
� Record status changes: CRM monitors whether records have changedstate from active to inactive or vice versa and this event is fired whenthis happens.
� Record is assigned: This event fires when a record is assigned (or reassigned).
� Record attributes change: This event fires when one of the selectedattributes (or fields) changes for the selected entity.
� Record is deleted: This trigger fires when an entity is deleted.
� On Demand: Only workflow rules marked On Demand can be invokedmanually. To perform this invocation, select Apply Rule from the Actionstab of the Workflow Manager window.
ConditionsEvery business process is triggered by some change in a condition. That con-dition might be a change in a data field, a due date being passed, or a recordbeing created. The various conditions of the Workflow Manager (visible inFigure 9-3) enables you to initiate an action based on a field or an activitythat has changed or an amount of time that has transpired.
The options for possible conditions are as follows:
� Check Object Conditions: This enables you to drill down to a specificfield in a record. For example, if the State field is New York, you can takean action to assign the New York sales rep to the account. Based on the
114 Part II: Setting Things Up
14_343258-ch09.qxp 6/4/08 12:14 AM Page 114

type of field (whether it’s a numeric, text, or a date field, for example),various operators are available.
� Check Activities: By checking activities, you can initiate actions basedon scheduled or completed activities.
� Else If: This enables you to nest additional condition statements sayingthat if the first condition is false, evaluate the second condition.
� Wait for Conditions: Workflow can wait for a specified amount of timeuntil the specified criteria becomes true before the rest of the rule iscompleted. This can be the cornerstone of an activity escalation plan.For example, if a lead is assigned to a sales rep, the system can beinstructed to wait for three days before checking to see whether a userhas created an appointment. If the system finds no evidence of anappointment, a message can be automatically sent to the sales rep orthe sales rep’s manager.
� Wait for Timer: This is similar to Wait for Conditions, but this conditioncan make sure that an assignment is handled within a specified timelimit. For example, you can monitor a high-priority tech support call thatmust be returned within an hour by using Wait for Timer.
ActionsActions are a series of operations performed after conditions have been eval-uated as true. You can enact nine activities:
� Create Activity: This schedules a task, phone call, fax, or appointment.
� Send E-Mail: This powerful utility enables CRM to send a confirminge-mail, on your behalf, to a customer who has just placed an order ornotify a sales rep when a lead is assigned to him or her.
� Create Note: CRM can automatically attach a note to a record. For exam-ple, CRM could create a note that places an account on hold when pay-ment becomes overdue.
� Update Record: You can use the Update Record action to modify individ-ual fields in records. Many fields in each record are not, by default, dis-played on the screen. You can use Update Record to modify visible aswell as invisible fields.
� Change Status: Different types of records are assigned different types ofstatus. The Change Status action enables the workflow system to changea record’s status automatically based on conditions being met.
� Assign Entity: Workflow can automatically assign cases to customer ser-vice reps based on a topic, or it can assign an account to a sales rep basedon a territory. For example, if a customer calls about a malfunctioning
115Chapter 9: Implementing Business Rules and Workflow
14_343258-ch09.qxp 6/4/08 12:14 AM Page 115

transporter, the case can be assigned to Molly, your most experiencedcustomer service rep.
� Post URL: This action sends a Web site address of another business to adata field. For example, when a new account is created, you can post theWeb site address in the Web Site field.
� Run child workflow: Basically, this is one process or rule callinganother one. By using this technique, you can program a large numberof simple workflow rules, with each rule potentially calling another rule.
� Stop: This brings your process to a halt.
� Call Assembly: This option contains any custom .NET assemblies thatyour administrator or implementation partner has registered withMicrosoft CRM. Refer to the SDK documentation to add your own assem-blies here. You can download the SDK from www.microsoft.com/downloads. Search for “CRM SDK”.
To workflow infinity and beyond . . . Microsoft CRM also allows you call a small piece of code called a .NET assem-bly that does some custom functions. For example, if you want Microsoft CRMto check the credit on one of your customers and update the customer recordwith the customer’s FICO score, you can write a small .NET assembly thatcalls another application to get that information and then updates MicrosoftCRM. Based on the returned score, Microsoft CRM can then finish processingthe rest of the rule you set up.
A third-party business alert system, KnowledgeSync, enables you to look atmultiple databases and multiple types of records. We describe KnowledgeSyncin Chapter 27. If you anticipate the need to build sophisticated rules andalerts, and you don’t want to write custom code, you may want this add-onprogram.
116 Part II: Setting Things Up
14_343258-ch09.qxp 6/4/08 12:14 AM Page 116

Chapter 10
Creating and Running ReportsIn This Chapter� Adding report categories
� Creating reports
� Editing reports
� Removing reports
� Running reports
� Using Excel as a report writer
Now that you’ve started to put data into Microsoft CRM, you’re ready toget that data out. An easy way to analyze data in Microsoft CRM is to
run a report. But what if one of the pre-installed reports isn’t what you’relooking for? In fact, experience tells us that it’s very unlikely that the prebuiltreports are going to be exactly what you want. So what now?
Prior to Microsoft CRM 4, custom report creation was left to people whocould author reports in SQL Reporting. Not an easy task for the average user.But don’t worry, because version 4 has a built-in Report Wizard. The ReportWizard is simple to use, especially if you’re familiar with using AdvancedFind. (See Chapter 3 for more on Advanced Find.)
The Report Wizard provides limited design features. Designing reports withthe Report Wizard allows for grouping and sub-grouping of data, columnselection, some data summary, and graphing. Reports with graphs can alsohave the additional capability of drilling down to the details that representthe graph.
Adding Report CategoriesIn Microsoft CRM, you can aggregate reports by category. Out of the box,there are four categories: Sales, Service, Administrative, and Marketing. Youcan add your own categories to the list as well. Although you can find reports
15_343258-ch10.qxp 6/4/08 12:15 AM Page 117

in more than one category, Microsoft has segregated the reports based onthe following:
� Sales reports: Collect all the activities associated with a sale, from thelead through the actual sale. These reports can also provide statisticalinformation about accounts, lead sources, competitors, and products.
� Service reports: Provide statistical information related to contracts,cases, and summaries of knowledge base articles. These reports providequick analyses of which products require the most support and whereyour service representatives are spending the most time.
� Administrative reports: Provide summary information about yourMicrosoft CRM users.
� Marketing reports: Describe accounts, campaigns, lead source effective-ness, and other areas of interest to the marketing department. Thereports provide summary and detail information across accounts, cam-paigns, and lead sources.
You can add your own report categories. To do so, follow these steps:
1. In the navigation pane, click Settings.
The Settings navigation options appear at the top of the navigation pane.
2. In the navigation pane, click the Administration icon.
The Administration options are now available on the right.
3. In the Administration pane on the right, click System Settings.
Settings are divided by tabs. Click the Reporting tab on the right.
4. Click Add on the right.
5. Create the new category.
For our scenario, we added a category called Stephanie’s Reports.
6. Click OK.
7. Click OK on the bottom.
Your new category appears in the report area.
Navigating the Report AreaPrior to designing our first report, let’s take a look at the report area ofMicrosoft Dynamics CRM. To access the report area, follow these steps:
118 Part II: Setting Things Up
15_343258-ch10.qxp 6/4/08 12:15 AM Page 118
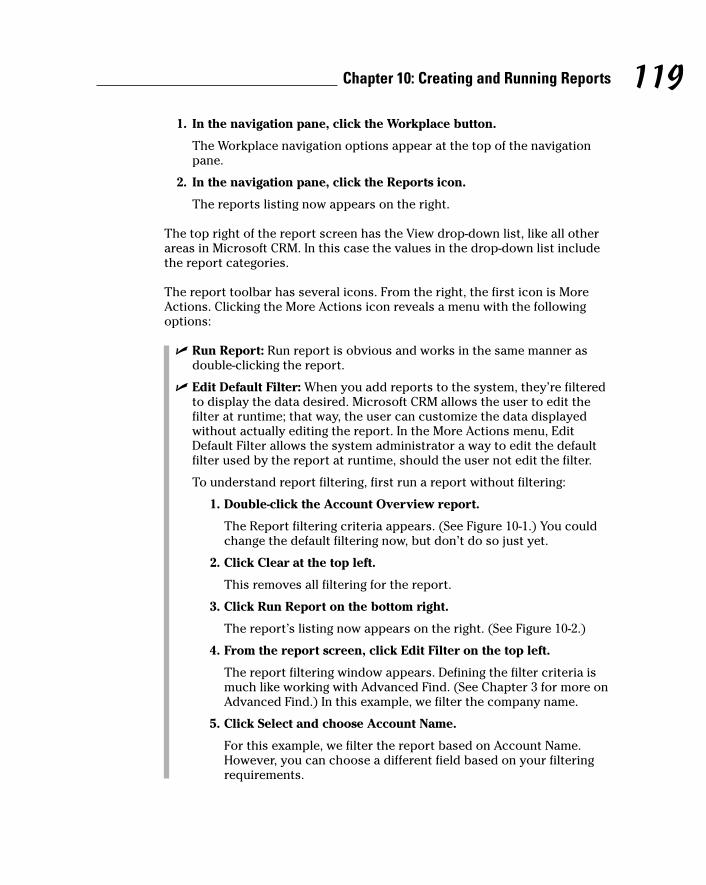
1. In the navigation pane, click the Workplace button.
The Workplace navigation options appear at the top of the navigationpane.
2. In the navigation pane, click the Reports icon.
The reports listing now appears on the right.
The top right of the report screen has the View drop-down list, like all otherareas in Microsoft CRM. In this case the values in the drop-down list includethe report categories.
The report toolbar has several icons. From the right, the first icon is MoreActions. Clicking the More Actions icon reveals a menu with the followingoptions:
� Run Report: Run report is obvious and works in the same manner asdouble-clicking the report.
� Edit Default Filter: When you add reports to the system, they’re filteredto display the data desired. Microsoft CRM allows the user to edit thefilter at runtime; that way, the user can customize the data displayedwithout actually editing the report. In the More Actions menu, EditDefault Filter allows the system administrator a way to edit the defaultfilter used by the report at runtime, should the user not edit the filter.
To understand report filtering, first run a report without filtering:
1. Double-click the Account Overview report.
The Report filtering criteria appears. (See Figure 10-1.) You couldchange the default filtering now, but don’t do so just yet.
2. Click Clear at the top left.
This removes all filtering for the report.
3. Click Run Report on the bottom right.
The report’s listing now appears on the right. (See Figure 10-2.)
4. From the report screen, click Edit Filter on the top left.
The report filtering window appears. Defining the filter criteria ismuch like working with Advanced Find. (See Chapter 3 for more onAdvanced Find.) In this example, we filter the company name.
5. Click Select and choose Account Name.
For this example, we filter the report based on Account Name.However, you can choose a different field based on your filteringrequirements.
119Chapter 10: Creating and Running Reports
15_343258-ch10.qxp 6/4/08 12:15 AM Page 119

Figure 10-2:The report
withoutfiltering.
Figure 10-1:The report
filteringscreen.
120 Part II: Setting Things Up
15_343258-ch10.qxp 6/4/08 12:15 AM Page 120

6. Make sure the operator shown is Equals.
If you need to change the operator from equals, simply click theword Equals.
Because you chose Equals, this value must match exactly the company name in the account area. Choose your operator care-fully. If you want to return all records in which the company namebegins with the letter A, you would choose Begins With and notEquals. To learn more about selecting the proper operator, seeChapter 3.
7. Place mouse over Enter Value and type a company name.
If necessary, you can add more sophisticated filtering prior to run-ning the report. To do so, click Select below your first criteria andrepeat steps 5–7.
8. Click Run Report on the bottom right.
Figure 10-3 shows a filtered report based on the Account Name.
Reports are also filtered based on user security. This happens regardlessof the filter criteria chosen. Therefore, users running reports will onlyhave access to records via the reports that they can access via the CRMinterface.
Figure 10-3:The filtered
report.
121Chapter 10: Creating and Running Reports
15_343258-ch10.qxp 6/4/08 12:15 AM Page 121

From the More Actions menu, the Edit Default filter allows the systemadministrator a way to edit the default filter used by the report at run-time, should the user not edit the filter. Follow the preceding steps forfiltering a report to edit the default filter (after you’ve chosen EditDefault Filter from the More Actions menu).
� Schedule Report: This is a wonderful way to create a report snapshot.Report snapshots are analogous to pictures in that they are frozen intime. When a snapshot is created, it preserves the report and data at thetime the snapshot was created. Rerunning a report snapshot, then,shows the same data every time. This is in contrast to running theactual report, which will dynamically update the report with the mostcurrent data.
Reports snapshots cannot be created unless the Microsoft CRMConnector for SQL Reporting Services is installed. If you try to create asnapshot and receive such an error message, speak with your MicrosoftCRM partner.
Microsoft CRM allows for eight snapshots per report. You can createsnapshots manually or via a schedule. To create a report snapshot,follow these steps:
1. On the Report area toolbar, select More Actions➪Schedule Report.
The Schedule Report Wizard runs.
2. Select either On Demand or On a Schedule.
Both are similar; however, On Demand has fewer options. In thislist, I choose On a Schedule.
3. Click Next.
The Select Frequency form opens. The schedule varies based onthe selection on the left.
4. Create a schedule for your report and click Next.
5. Depending on your selection in Step 4, pick start and/or end dates.
6. Click Next.
The Define Report Parameters form is displayed.
7. Fill in the appropriate parameters. If you don’t need to edit thedefault filter, click Next; otherwise, edit the default filter.
8. Review the snapshot criteria and click Create.
9. Click Finish.
� Sharing: Sharing is the last option in More Actions. Remember thatsnapshots contain data. They have the data that was available to theuser who created the snapshot. Sharing the report with a user who oth-erwise wouldn’t have access to sensitive data when running the reportmeans that user now has access to that data when viewing a snapshot.
122 Part II: Setting Things Up
15_343258-ch10.qxp 6/4/08 12:15 AM Page 122

The other report toolbar icons work like their brethren on other forms, andwe don’t cover them in this chapter.
Using Viewing OptionsAfter you’ve run the report, you may have noticed the viewing options justabove the report. Let’s take a look at all those options. (Depending on thereport you’re running, not all of the options that follow are displayed.)
� Group By: Group By options vary by report. Choose this to group report data.
� Page navigation: If your report has more than one page, you can movethrough them using these VCR-type controls. From left to right, the firstbutton (First Page) takes you to page one of the report. The next button(Previous Page) takes you back one page from the page currently dis-played. The third button (Next Page) takes you to the next page. The lastbutton (Last Page) takes you to the last page of the report. The displaybetween the second and third button tells you the page you’re on andthe total page count.
� Display size: Next to the navigation options is a box showing the size ofthe display. Click the arrow for the drop-down list to modify the size ofthe report.
� Find|Next: This field enables you to search for specific text in thereport. You can use * as a wildcard to search partial text. (For exam-ple, typing Mart* will find Martin.) Just fill in the Find field and clickFind. You’re taken to the first result. To move to the second result, click Next.
If the text you enter in the Find field appears in the report on a page pre-vious to the one you’re viewing on the screen, the search will come upempty. So, when conducting a search using the Find field, always jump tothe first page of the report before clicking Find.
You can drill down on summary reports (or graphs) to see the underly-ing detail. For example, if you open the Sales Pipeline report, you see asingle bar in the graph. Change the Group By to Sales User and clickView Report. You now have multiple bars representing your sales team.Click a bar and you’re presented with a table of data representing theselected bar. Move your mouse over any of the items in the left column(Opportunity). Your mouse turns into a hand. Click and drill all the waydown to the actual opportunity record.
123Chapter 10: Creating and Running Reports
15_343258-ch10.qxp 6/4/08 12:15 AM Page 123

Exporting and Printing Your ReportExporting report data is just what it sounds like — the movement of datafrom inside Microsoft CRM to outside Microsoft CRM. Let’s look at exportingyour spiffy report.
Printing is a form of exporting. To print your report, just click the littleprinter icon in the line above the report. You’ll get the basic Print dialogwindow, where you can make the usual selections.
For the most part, when we use the term export in this business, it describessending the data to another application. In Microsoft CRM’s case, the datadoesn’t export to just Microsoft products. You can create your report inHTML (good for display on your company Web site) or export it to an AdobeAcrobat file.
Follow these steps to export a report:
1. With the report on the screen in the Report Viewer window, click theExport drop-down list and select the application.
Your choices are HTML, Excel, Web Archive, Acrobat, TIFF, CSV (commadelimited), and XML.
2. Click the word Export.
You see a familiar screen, asking whether you want to open the file orsave it to disk. Your computer thinks you’re downloading a file from a Web site, so you’re asked whether you want to open it or save it. If you choose to open it, you have the option to save it from the reportwindow.
3. Decide whether to open or save the file and then click OK.
After a moment, your report opens in the format you selected.
When you select one of the export formats, the associated application opensand displays the report. Interestingly, no matter which selection you make,the report opens in a browser window. (Remember that Microsoft CRM isbrowser based.) So, for example, if you select Microsoft Excel as the exportformat, the report opens in essentially a browser version of Excel, and all ofExcel’s menus will be available.
Microsoft CRM 4 uses SQL Server 2005 Reporting Services as its primaryreporting tool. Should you desire to learn the Reporting Services design tool, you will need Microsoft Visual Studio. You can find a free version atwww.asp.net. We suggest you try the Report Wizard first, as it is mucheasier to learn. So read on.
124 Part II: Setting Things Up
15_343258-ch10.qxp 6/4/08 12:15 AM Page 124

Accessing the Report WizardBefore designing a report with the Report Wizard, we suggest you sketch yourdesign. After doing so, you’re ready to create a report with the Report Wizard.
If you read the “Navigating the Report Area” section earlier in the chapter,you now know your way around the report area in Microsoft CRM, and you’reready to create a new report.
What is our scenario for this report? The sales manager of Mega Corp,Stephanie, would like to create an opportunity pipeline report, grouping databy sales person or owner and sub-grouping by state and ordering by revenue.She has three sales people; Zach, Ethan, and Rachel. Let’s take a look at howStephanie would go about creating the report. Follow these steps:
1. In the navigation pane, click the Workplace button.
The Workplace navigation options appear at the top of the naviga-tion pane.
2. In the navigation pane, click the Reports icon.
The reports listing is now available on the right.
3. Click New to Create a new Report.
The Report: New dialog box opens. (See Figure 10-4.)
Figure 10-4:The Report:New dialog
box.
125Chapter 10: Creating and Running Reports
15_343258-ch10.qxp 6/4/08 12:15 AM Page 125

4. On the General tab, click the Report Wizard button.
The Report Wizard dialog box opens. (See Figure 10-5.)
5. Select the Start a New Report radio button and click Next.
The Report Properties dialog box opens.
6. Enter a report name and description.
7. Select a primary record type. (See Figure 10-6.)
In our case, the Primary Record type that we select is Opportunities.
Leave the Related Record Type field blank for this report. You could adda related record if your report displays fields from a related entity.
8. Click Next.
The Report Filtering Criteria dialog box opens.
9. Click Clear icon to reset the report filter.
You can now enter your own filtering criteria. Of course, you don’t haveto click Clear in this step. Leave the default filtering criteria when itmatches your desired filter criteria.
Report filtering criteria can be changed at run-time. See the section,“Navigating the Reports Area,” earlier in this chapter.
10. Click Next.
The Lay Out Fields dialog box opens.
Figure 10-5:The ReportWizard for
creatingcustomreports.
126 Part II: Setting Things Up
15_343258-ch10.qxp 6/4/08 12:15 AM Page 126

11. Click “Click here to add a grouping” to set the report’s highest levelgrouping (see Figure 10-7) and add a field to group by.
The Add Grouping dialog box opens. You can group your report in threelevels. For example, group first by date, then by sales rep, and lastly byproduct.
Figure 10-7:Grouping
the report.
Figure 10-6:Selectingthe entity to report
on. In ourexample,the entity
is Opportu-nities.
127Chapter 10: Creating and Running Reports
15_343258-ch10.qxp 6/4/08 12:15 AM Page 127

12. In the Add Grouping dialog box, leave Opportunities in the recordType drop-down list. Select Owner in the Column field, and leaveremainder of the fields as-is.
13. Click OK.
Back to the Lay Out Fields dialog box.
14. Click the “Click here to add a column” option.
The Add Column dialog box opens.
15. Select a Column for the report.
We’re adding only Opportunity fields, so make sure the Record Typefield says Opportunities. If you’d like to add fields from related entities,change the drop-down list to the desired entity. Select the field you’dlike to have in the left-most column (Stephanie chose Topic), and set thecolumn size. The largest column width is 300 pixels, and 25 pixels is thesmallest. Add more columns as desired.
16. Click OK.
17. Repeat Steps 15 and 16 to add additional columns.
18. Click Next.
The Format Report dialog box is displayed.
19. Select Table Only or Chart and Table.
For now, select Table Only. You can’t choose Chart and Table without anumber field that is summarized; we cover that in the next numberedstep list.
Summary choices relate to the type of number field.
20. Select Table only, click Next.
The Report Summary dialog box is displayed.
21. Click Next.
The Report Successfully Created dialog box opens.
22. Click Finish.
The report new/edit dialog box opens.
Before we alter the report settings, let’s return to step 19 above, the one inwhich we chose Table Only. If we’d like to include a chart, we would haveinstead chosen Chart and Table. However, that option may not have beenavailable to us. To access Chart and Table we need a field in the body of thereport summarized. Let’s back up to step 15 above and make the necessarychanges so we can select Chart and Table.
128 Part II: Setting Things Up
15_343258-ch10.qxp 6/4/08 12:15 AM Page 128

15a. Highlight an existing field and click Change Properties on the right.
The Edit Column Properties dialog box opens. Note, you MUST changethe properties of a number field and not a text field. Otherwise youwon’t be able to perform 16a below.
16a. Change the summary type to the option that best fits your data.
We chose Sum.
17a. Click OK.
The dialog box closes.
18a. Click Next.
The Chart and Table option is now available. Choose:
• Show table below chart on same page: This displays the table andthe chart on the same page.
• Show chart. To view data for a chart region, click the chartregion: This option lets you click on the chart and drill into thereport table for the details not displayed by the chart.
19a. Select a chart type. Click Next.
The Customize Chart Format dialog opens.
20a. Depending on your selections in step 15, you’ll be able to select whichfields are displayed as data slices and values. Decide if you want toshow data labels and legend and click Next.
The Report Summary dialog box opens.
21a. Click Next.
22a. Click Finish.
At this point we’ve created a new report using the report wizard. However,we’re not done yet. We need to set up where we want to display the report,the associated categories, and several other options. Then we need to runthe report to see if we’re happy with how it looks.
Report SettingsWhen we click Finish (step 22 above) the New/Edit Report dialog box opens.(See Figure 10-4.) We’re now ready to complete the remaining options on theform and run it.
129Chapter 10: Creating and Running Reports
15_343258-ch10.qxp 6/4/08 12:15 AM Page 129

The options on the General Tab are:
� Report Type: Report Wizard Report, Existing File, or Link to Web Page. Ifyou’ve followed the steps above and created a report using the ReportWizard, leave this alone. If you’re adding a Microsoft SQL ReportingService Report (SRS Report), then choose one of these options:
• From Existing File: An “existing file” is a report already uploaded toyour report server.
• Link to Web Report: This choice lets you link to other reports thathave not been uploaded to your Microsoft CRM report Web server.
� Name: The report name. You can rename your report here. If you arenaming a SRS report name, you’d be changing the display name inMicrosoft CRM and not the actual name.
� Description: Add any report description you deem appropriate.
� Parent Report: This pertains to sub-reports that are totally or partiallydisplayed in another report — the parent report. For our example, leavethis field blank.
� Categories: Select the categories under which your report can be found.To learn more about categories, see the section “Adding ReportCategories,” earlier in this chapter.
� Related Record Types: This controls the location (lists and forms) inwhich the report will be available. For example, to ensure that thisreport is available in the local opportunities list (the reports availablefrom the opportunity form), select Opportunities.
� Display In: Controls where reports are displayed, as follows:
• Forms for related record types: When a form is open, the report isaccessed via the report icon on the form toolbar.
• Lists for related record types: The report can be accessed from thelocal toolbar when viewing a list of data. To find the report list, clickon an entity from the navigation bar, such as Accounts. A reporticon is available on the toolbar above the list of records returned.
• Reports area. The Reports area is where we began this chapter.Access the reports area by clicking Workplace on the navigationbar, then Reports.
Now you’re ready to save the report and run it! Here’s all you need to do:
1. Complete the report as necessary.
We want our report to be run from the Reports area and from the list ofopportunities, so we completed the form as follows:
• Related Record Type: Opportunities.
• Display In: Lists for related record types and Reports area.
130 Part II: Setting Things Up
15_343258-ch10.qxp 6/4/08 12:15 AM Page 130

2. Click Save or Save and Close on the toolbar at the top of the form.
3. Click Run Report from the toolbar to view the report.
Your new report is displayed.
Editing ReportsYou can use the Report Wizard to edit reports created with the ReportWizard, but you can’t use the Report Wizard to edit reports created else-where. That means that you would have to use Microsoft SQL ReportingServices to edit any report created with Microsoft SQL Reporting Services.Such reports aren’t covered in this book.
Only users with the appropriate rights can add, edit, or delete reports.
After you’ve created a report with the report wizard, you may want to makesome changes to the report. To do so, follow these steps:
1. In the navigation pane, click the Workplace button.
The Workplace navigation options appear at the top of the naviga-tion pane.
2. In the navigation pane, click the Reports icon.
The reports listing is now available on the right.
3. Highlight the report to be edited and click Edit Report on the toolbarabove.
The Reports dialog box opens.
4. Click the Report Wizard button.
The Report Wizard appears.
5. Leave the default selections as they are and click Next.
6. Change the Report Name, Description, Primary Record, andSecondary Record Types and click Next.
7. Edit the report filter and click Next.
8. Click the group or column to change and click Change Properties.
You can change the Column Width field and Summary field (if it’s anumeric field).
9. To remove a column or group, click it and click Remove Group or Column. Similarly, to add a group or column, click Add Group orColumn.
10. Click Next.
131Chapter 10: Creating and Running Reports
15_343258-ch10.qxp 6/4/08 12:15 AM Page 131

11. Edit the layout and click Next.
12. Select the chart type (if your selection in Step 11 included a chart).
13. Customize chart type and click Next.
14. Click Next.
15. Click Finish.
The report now reflects your changes.
To remove a report from the report area, follow these steps:
1. Navigate to the report area.
2. Click the report you’d like to remove.
3. Click the black X on the report toolbar.
4. Confirm deletion.
Creating Excel ReportsThroughout the CRM system, you find the ever present Excel icon. Often inthis book, we refer to the fact that you can export data from Microsoft CRMto Excel and further manipulate that data. When you’ve created an Excelspreadsheet that you’d like to run often with refreshed CRM data, you can do so by saving your Excel file as a report.
Let’s say that Stephanie would like to create an Advance Find (refer toChapter 3 for more on Advanced Find) to show opportunities closing in thenext 30 days with estimated revenue greater than $50,000. She saves theAdvance Find, which is now visible in the Opportunity view.
Stephanie exports data to Excel and reformats the spreadsheet, and then shewould like to run the spreadsheet and have the data change dynamically. Todo this, she would follow these steps:
1. On the Navigation Bar, click Sales.
The sales-related icons appear at the top of the navigation bar.
2. Click Opportunities.
The Main Opportunity form opens to the right.
3. Click the Excel icon on the toolbar.
132 Part II: Setting Things Up
15_343258-ch10.qxp 6/4/08 12:15 AM Page 132
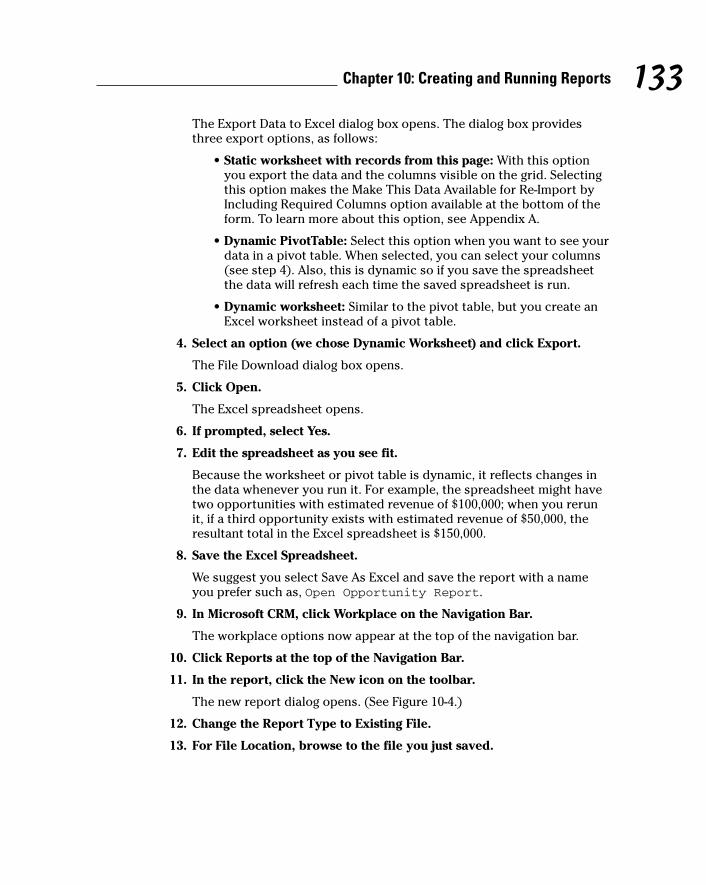
The Export Data to Excel dialog box opens. The dialog box providesthree export options, as follows:
• Static worksheet with records from this page: With this optionyou export the data and the columns visible on the grid. Selectingthis option makes the Make This Data Available for Re-Import byIncluding Required Columns option available at the bottom of theform. To learn more about this option, see Appendix A.
• Dynamic PivotTable: Select this option when you want to see yourdata in a pivot table. When selected, you can select your columns(see step 4). Also, this is dynamic so if you save the spreadsheetthe data will refresh each time the saved spreadsheet is run.
• Dynamic worksheet: Similar to the pivot table, but you create anExcel worksheet instead of a pivot table.
4. Select an option (we chose Dynamic Worksheet) and click Export.
The File Download dialog box opens.
5. Click Open.
The Excel spreadsheet opens.
6. If prompted, select Yes.
7. Edit the spreadsheet as you see fit.
Because the worksheet or pivot table is dynamic, it reflects changes inthe data whenever you run it. For example, the spreadsheet might havetwo opportunities with estimated revenue of $100,000; when you rerunit, if a third opportunity exists with estimated revenue of $50,000, theresultant total in the Excel spreadsheet is $150,000.
8. Save the Excel Spreadsheet.
We suggest you select Save As Excel and save the report with a nameyou prefer such as, Open Opportunity Report.
9. In Microsoft CRM, click Workplace on the Navigation Bar.
The workplace options now appear at the top of the navigation bar.
10. Click Reports at the top of the Navigation Bar.
11. In the report, click the New icon on the toolbar.
The new report dialog opens. (See Figure 10-4.)
12. Change the Report Type to Existing File.
13. For File Location, browse to the file you just saved.
133Chapter 10: Creating and Running Reports
15_343258-ch10.qxp 6/4/08 12:15 AM Page 133

14. Add categories.
For more information, see the section, “Report Settings,” earlier in thischapter.
15. Choose the Related Record Type.
In our example, we chose Opportunities.
16. In Display Area, select Lists for Related Records.
The spreadsheet now is available in the toolbar above the Opportu-nity grid.
The Related Record Types and Display In fields control the location in which your reports will be visible. The Categories field controls thecategories in which a report will be displayed in the main reports area(Workplace ➪Reports).
To share your report with others in your organization, complete steps 17and 18. Otherwise, skip to step 19.
17. Click the Administration Tab.
18. Select Organization in Viewable By.
19. Click the Save Icon or Save and Close.
134 Part II: Setting Things Up
15_343258-ch10.qxp 6/4/08 12:15 AM Page 134

Part IIIManaging Sales
16_343258-pp03.qxp 6/4/08 12:15 AM Page 135

In this part . . .
This part deals with the sales side of your organization.CRM has four types of customer records: leads,
opportunities, accounts, and contacts. This part explainsall four and shows you how to enter and manage them.
Organizing the sales team with quotas and forecasts is thestarting point and is detailed in Chapter 11.
We discuss leads and opportunities, which are near anddear to every salesperson, in Chapter 12. Chapter 13focuses on accounts and contacts.
Activities, which are tasks such as appointments and phonecalls, are associated with each of the four record types,and we discuss them in Chapter 14. Saving your notes andattachment documents is discussed in Chapter 15.
The quotes and orders and invoices that come from set-ting up your product list are all discussed in Chapter 16. Ifyou have any sales literature or any competitors, you findout how to handle both of these in Chapter 17. Salesprocesses, important in the design of your workflow, arediscussed in the last chapter of this part.
16_343258-pp03.qxp 6/4/08 12:15 AM Page 136

Chapter 11
Setting Sales Quotas and Dealingwith Forecasts
In This Chapter� Setting up quotas
� Forecasting sales
� Updating a forecast
� Examining forecasts
Toward the end of every year, our sales team sits down and develops aplan for the coming year. That plan includes the products we will sell,
who will sell those products, and a guideline for how much of each productour account managers will sell (we hope). That guideline translates into aquota in Microsoft CRM.
The quota not only helps us budget for the coming year but also gives us aseries of quarterly milestones. Failure to meet quotas or milestones causesmidterm reevaluations or sometimes something worse. Meeting or exceedingour goals is what keeps our company healthy and happy.
In this chapter, you find out how to set quotas for salespeople, how to logforecasted sales against those quotas, and how to adjust these forecasts andquotas as you go along.
How a Manager Sets Up QuotasQuotas relate to your company’s quarterly fiscal periods. Before you can setup a quota for anyone, Microsoft CRM needs to know your company’s fiscalperiods. Fiscal periods may be set only once, and the task should probablybe performed by someone with a title like CFO.
17_343258-ch11.qxp 6/4/08 12:15 AM Page 137
Haghighat Sabet
Highlight

Fiscal year settingsQuotas are usually related to the time period in which accountants measureprofits and losses — that is, the fiscal period. Accountants have devised avariety of fiscal years. They can be based on calendar years or can end onother seemingly random dates. A fiscal year can be divided semiannually orquarterly.
You can set the fiscal year options only once. You can’t change these settingsafter you set them.
To set a fiscal year, follow these steps:
1. Near the bottom of the navigation pane, click the Settings button andthen select Business Management.
Eleven customization topics appear.
2. In the Settings window, select Organization Settings.
The Business Management Settings window appears.
3. Select Fiscal Year Settings from the list.
The Fiscal Year Settings window appears as shown in Figure 11-1.
4. Enter the starting date for your fiscal year in the Start Date field andselect your intended interval for measuring revenue from the appro-priate drop-down menu.
The required Template field allows you to specify your fiscal periods.The rest of the fields in this window allow you to specify the namingconventions your company uses and to formatt the periods.
Figure 11-1:Creating
your fiscalyear
information.
138 Part III: Managing Sales
17_343258-ch11.qxp 6/4/08 12:15 AM Page 138
Haghighat Sabet
Highlight

You need to enter the fiscal year information carefully and correctlybecause you get only one shot at it. The system displays a warning mes-sage to this effect. You can’t enter sales quotas until you’ve entered thefiscal year settings. If you set up your fiscal year beginning at some futuredate — let’s say it’s December, and you are setting up your system forthe following year — you won’t be able to enter sales quotas until youreach that future date.
5. Click OK to save your entries.
Setting up a salesperson’s quotaAfter the fiscal year information is set, you need to establish quotas. Ofcourse, before you can enter quotas into the system, your management teammust develop a business plan and sales plan and coordinate the quotas withthat plan.
To set up the quota for a user (salesperson), follow these steps:
1. Near the bottom of the navigation pane, click the Settings button.
2. In the navigation pane, select Administration.
This selection brings you to a window with five topics as shown inFigure 11-2.
Figure 11-2:The majorfunctions
withinAdmin-
istration.
139Chapter 11: Setting Sales Quotas and Dealing with Forecasts
17_343258-ch11.qxp 6/4/08 12:15 AM Page 139
Haghighat Sabet
Highlight
Haghighat Sabet
Highlight

3. Select Users.
A list of all available users of the system appears.
4. Select one or more salespeople.
Although users is a more general term than salespeople, usually onlysalespeople have quotas. To select more than one salesperson, holddown the Ctrl key while clicking with the mouse. If a group of salespeo-ple has the same quota, you can set quotas for the group all at once.
5. From the menu bar (at the top of the screen), choose Actions➪ManageQuotas.
The Manage Quotas dialog box appears, as shown in Figure 11-3.
If you’ve selected more than one user, you may get a warning message. If this is the case, the new quota you’re about to enter will override anyexisting quota. If that isn’t your intention, you can cancel the operation;you return to the list of users (Step 3), where you can make anotherselection.
6. On the right side of the window, fill in each period’s quota.
These quotas will apply to every salesperson you selected in Step 4.However, nothing happens until you click the Apply button.
7. Click the Apply button at the bottom of the dialog box.
The quotas are saved. This is an important step. If you click OK withoutapplying your changes, nothing is saved.
Figure 11-3:Entering a sales-person’s
quota. In thisexample,
threesalespeople
wereselected,
each ofwhom willbe gettingthe same
quota.
140 Part III: Managing Sales
17_343258-ch11.qxp 6/4/08 12:15 AM Page 140

8. Click the OK button at the bottom of the dialog box.
You return to the Quota window.
9. If you want to enter a quota for another salesperson, repeat Steps 4through 8.
Entering Sales ForecastsAnyone who’s been in sales for more than a day has wrestled with sales fore-casting in some fashion. This wrestling match may have been with someformal system or may have been a manager demanding to know when thatbig deal is going to finally go down. Without reasonably accurate sales fore-casts, it’s difficult for management to steer the boat.
Forecasts in Microsoft CRM are part of the Opportunities section of the pro-gram (in the Sales module). The words forecast and opportunity are nearlysynonymous in this system.
To enter a new opportunity, follow these steps:
1. Near the bottom of the navigation pane, click the Sales button.
2. At the top of the navigation pane, select Opportunities.
The Opportunities window appears on the right, as shown in Figure 11-4.
Figure 11-4:The
opportuni-ties window
with somedata already
entered.
141Chapter 11: Setting Sales Quotas and Dealing with Forecasts
17_343258-ch11.qxp 6/4/08 12:15 AM Page 141
Haghighat Sabet
Highlight
Haghighat Sabet
Highlight

3. On the Opportunities window’s toolbar, click the New button.
The Opportunity: New window appears, as shown in Figure 11-5. On theGeneral tab, the Topic, Potential Customer, and Currency fields are allrequired fields.
4. In the Topic field, enter a general description of the product or ser-vice you’re selling.
For example, you might type Residential Swimming Pool Installation orClient Retention Consulting Engagement.
5. Fill in the Potential Customer field as follows:
a. Click the magnifying glass to the right of the Potential Customer fieldso you can link the opportunity.
Every opportunity should be linked to an account or to a contact.
b. In the Look For field, select Account or Contact.
To follow along with the example, select Account.
A customer can be either an account (a business) or a contact (aperson) and a forecast can relate to either entity.
c. Enter a portion of the potential customer’s name and then click Findto locate the specific account or contact to which you’re linking thisopportunity.
(We discuss the Find function in detail in Chapter 3.) The Look UpRecords dialog box appears, as shown in Figure 11-6.
d. In the Account Name field, select an account.
The General tab of the Opportunity: New window reappears.
Figure 11-5:Entering a
newopportunity.
142 Part III: Managing Sales
17_343258-ch11.qxp 6/4/08 12:15 AM Page 142

6. For the Revenue option, select User Provided.
If you’ve set up price lists, you may be able to have the system calculatethe price of your list of products and services. In this example, weassume that you don’t have price lists that apply, so you need to do amanual entry of the price.
7. In the Est. Revenue field, enter the estimated revenue from this opportunity.
8. Fill in the Est. Close date field using the calendar at the end of thefield.
9. In the Probability field, enter the probability of closing the deal.
If your company uses a sales process automated by workflow rules, thisfield may be auto-populated.
10. If you want, make a selection in the Rating drop-down list.
You can rate the deal Hot, Warm, or Cold, but the Probability fieldcovers this.
11. In the Description field, add any comments.
You might notice that a Notes tab is associated with this new opportunity.There’s no rule for using the Description field versus the Notes tab.However, for complex sales that take a long time to close or involve ateam of people, we use the Notes tab so each note is time stamped anddate stamped. For simpler and shorter deals, we use the Description field.
12. Click the Save and Close button.
You return to the Opportunities window.
Figure 11-6:The
accountsthat
correspondto yoursearch
criteria.
143Chapter 11: Setting Sales Quotas and Dealing with Forecasts
17_343258-ch11.qxp 6/4/08 12:15 AM Page 143

Updating Your ForecastsForecasts have a tendency to get stale quickly. We recommend that youreview and revise your forecasts at least once a week. These revisions needto focus not only on the estimated close date but also on every field that mayhave changed.
To update a forecast, follow these steps:
1. Near the bottom of the navigation pane, click the Sales button.
2. At the top of the navigation pane, select Opportunities.
The Opportunities window appears. If the opportunity you need toupdate doesn’t appear, check the View menu in the upper-right corner to make sure you’re looking at My Open Opportunities or OpenOpportunities.
3. Select the opportunity in question.
The detailed information for the opportunity appears, as shown inFigure 11-7.
4. Make your modifications.
Although much of the forecast is for your own benefit and is meant tokeep you on track, the forecast is also probably being reviewed by thesales management team. Reasonable and realistic estimates are alwaysbetter than pie-in-the-sky guesses.
Figure 11-7:It’s all in the
details.
144 Part III: Managing Sales
17_343258-ch11.qxp 6/4/08 12:15 AM Page 144

5. Click the Save and Close button.
The Opportunities window reappears. From here, you can review or editanother opportunity that needs attention.
Examining the ForecastsMicrosoft CRM has built-in reports that focus on opportunity management:opportunity reports and pipeline reports.
Opportunity reports are typically simple line reports with subtotals or totals.You can filter and sort them by territory, potential revenue, closing probabil-ity, salesperson, and many other fields.
Pipeline reports and charts generally involve a little math. If you are a salesmanager, you may want to see how much each salesperson is likely to closethis quarter. A pipeline report can show this to you, either in tabular orgraphic form, by multiplying the potential revenue by the probability.
Your dealer or a knowledgeable systems administrator can customize thesereports, as well as set up additional custom reports. However, that cus-tomization is outside the scope of this book.
Printing a reportTo select a report for printing or saving, follow these steps:
1. Near the bottom of the navigation pane, click the Sales button.
2. At the top of the navigation pane, select Opportunities.
The Opportunities window appears.
3. In the View drop-down list, select the opportunities you want toreport on.
For example, choose My Open Opportunities if you want to see onlyyour own deals, or choose Open Opportunities if you want a more com-pany-wide report (assuming you have the rights to see these).
4. On the window’s toolbar, click the Reports button.
The system displays a list of all available reports. Our copy of the soft-ware lists three reports: Competitor Win Loss and Lead SourceEffectiveness and Sales Pipeline.
5. Select a report from the drop-down list as shown in Figure 11-8.
145Chapter 11: Setting Sales Quotas and Dealing with Forecasts
17_343258-ch11.qxp 6/4/08 12:15 AM Page 145
Haghighat Sabet
Highlight

After the system processes all the data, the report appears on yourscreen.
6. Print or save the report.
Using Excel to examine forecast dataSales forecasting is one of the most critical aspects of the sales process atour company. It allows each salesperson to track his or her progress, and theinformation in the combined sales forecasts gives management a view ofcoming attractions. Most importantly, this same information allows workflowrules to ensure that no sale falls through the cracks.
You can export your forecast data directly to a local copy of Excel on yourcomputer. Then, if you have even a little facility with Excel, you can manipu-late the data and look at it in a tabular or in a graphical presentation. (If youneed help with Excel, get a copy of Excel 2007 For Dummies, by Greg Harvey[Wiley Publishing].)
To export your forecast data to Excel, follow these steps:
1. Near the bottom of the navigation pane, click the Sales button.
2. At the top of the navigation pane, select Opportunities.
The Opportunities window appears.
Figure 11-8:Selecting a
report —like the
SalesPipelineReport.
146 Part III: Managing Sales
17_343258-ch11.qxp 6/4/08 12:15 AM Page 146

3. In the View drop-down list, select the types of opportunities you wantin your Excel export.
4. On the window’s toolbar, click the Excel icon.
A screen appears with several worksheet choices.
5. For the simplest kind of export, select the first option and then clickExport.
CRM loads your data into a local copy of Excel. You can then calculatetotals, add columns with calculated values, or even create graphs.
6. For more sophisticated dynamic Excel tables, select the second orthird choices.
Dynamic worksheets automatically update their data as you change thedata in another application.
147Chapter 11: Setting Sales Quotas and Dealing with Forecasts
17_343258-ch11.qxp 6/4/08 12:15 AM Page 147

148 Part III: Managing Sales
17_343258-ch11.qxp 6/4/08 12:15 AM Page 148

Chapter 12
Handling Leads and OpportunitiesIn This Chapter� Creating and modifying leads
� Changing a lead to an opportunity
� Creating, assigning, and sharing opportunities
In CRM-speak, a suspect is a person or a company with whom you may dobusiness someday. In all likelihood, your suspect hasn’t yet heard of you.
A prospect is the next level up. Your prospect has heard of you and may haveeven expressed some interest in doing business with you. Microsoft CRMrefers to both suspects and prospects as leads.
An opportunity is a lead that has matured enough to deserve serious atten-tion. But before you can begin to turn leads into opportunities, you need toenter your lead data (such as contact information, the source of the lead, and what the prospect is interested in) into CRM.
Actually, you can promote a lead to an account record, a contact record, oran opportunity record, or to any combination of these three. The subtle ben-efit of promoting a lead to an opportunity is that you can forecast a sale asso-ciated with an opportunity. You can also link each opportunity to a price list,which helps determine the pricing in a quote.
You need to create an opportunity record before you close your opportunity(whether by winning or losing the deal). You create opportunity records man-ually by just typing them in, by importing them from outside files (such asExcel), or by converting them from leads. Importing data from Excel is dis-cussed in Appendix A.
Workflow rules enable almost complete automation of your selling process,moving opportunities from one sales stage to the next. Workflow is part of theprocess of handling opportunities and is discussed in some detail in Chapter 9.
In Chapter 16, we discuss what happens when you close an opportunity andturn it into the real deal. In this chapter, we talk about entering leads andmoving them through your sales process with the intention of turning theminto full-fledged opportunities.
18_343258-ch12.qxp 6/4/08 12:16 AM Page 149
Haghighat Sabet
Highlight

Processing Leads from SuspectsLeads may come to you from many sources. Some of the most commonsources are referrals from existing customers, mailing lists you’ve rented or purchased, inquiries from your Web site, and responses to marketing campaigns.
Leads get into CRM in essentially two ways. You can enter them manually oryou can import them, typically from an Excel file. If your CRM system is inte-grated with your Web site, you can automate the entry of leads from the Web.It’s likely, though, that you’ll want some expert help for that. Chapter 21 dealswith Web integration and Chapter 28 discusses when and how to accesssome expert help. You’re probably going to enter leads manually if you haveonly a few sporadic leads or if you don’t have them available in a convenientelectronic format. In this section, we discuss getting leads manually into yourCRM system and what to do with them after they’re there.
Getting to the Leads windowYou can access everything about leads and opportunities from the Salesmodule. And everything about leads starts at the Leads window, which isshown in Figure 12-1. To get to that window, click the Sales button near thebottom of the navigation pane. Then, at the top of the pane, select Leads.That’s it.
As you go through the standard Lead windows, you can see about 20 datafields. As with most data entry windows throughout CRM, many more fieldsthan that are available. Those fields have been hard-coded into the databasestructure but remain invisible unless your system design people make themavailable. In the case of lead records, for example, 95 fields are available,should you need to track more information about your leads. Your adminis-trator or dealer can add fields, if needed.
Creating a lead manuallyYour marketing department’s efforts are supposed to create leads. MicrosoftCRM thinks of a lead as a potential customer that may or may not haveexpressed interest in your company’s products. For example, the marketingdepartment might purchase a list of potential users. Or various types ofadvertising might generate inquiries. In any case, the resulting contact infor-mation has to get into the CRM database.
150 Part III: Managing Sales
18_343258-ch12.qxp 6/4/08 12:16 AM Page 150

Unless you have an electronic list or your CRM system is hooked to your Website, you’re probably going to be entering leads the old-fashioned way — bytyping. In this section, we discuss the easiest way to manually enter thosehard-won leads. Just follow these steps:
1. On the Leads window toolbar, click the New button.
The Lead: New window appears, as shown in Figure 12-2, with four tabs:General, Details, Administration, and Notes.
2. Fill in at least the required fields, which are highlighted with redasterisks.
If the General tab isn’t already selected, click it. For the Topic field, enterthe product or service that the prospect is interested in.
The Company Name field is a required field, so you must enter a com-pany name even if your lead is an individual. When we encounter thatsituation, we simply enter X as the default company name. If you havethe name of an individual or any other relevant contact information,enter that as well.
Although the E-Mail and Lead source fields aren’t system-required, theyshould be at least business-recommended fields (in blue). The e-mailaddress field is on the General tab, and the Lead source field is on theDetails tab. Make sure you enter as much information as you can in theGeneral, Details, and Administration tabs.
Figure 12-1:Your workwith leads
starts here.
151Chapter 12: Handling Leads and Opportunities
18_343258-ch12.qxp 6/4/08 12:16 AM Page 151
Haghighat Sabet
Highlight
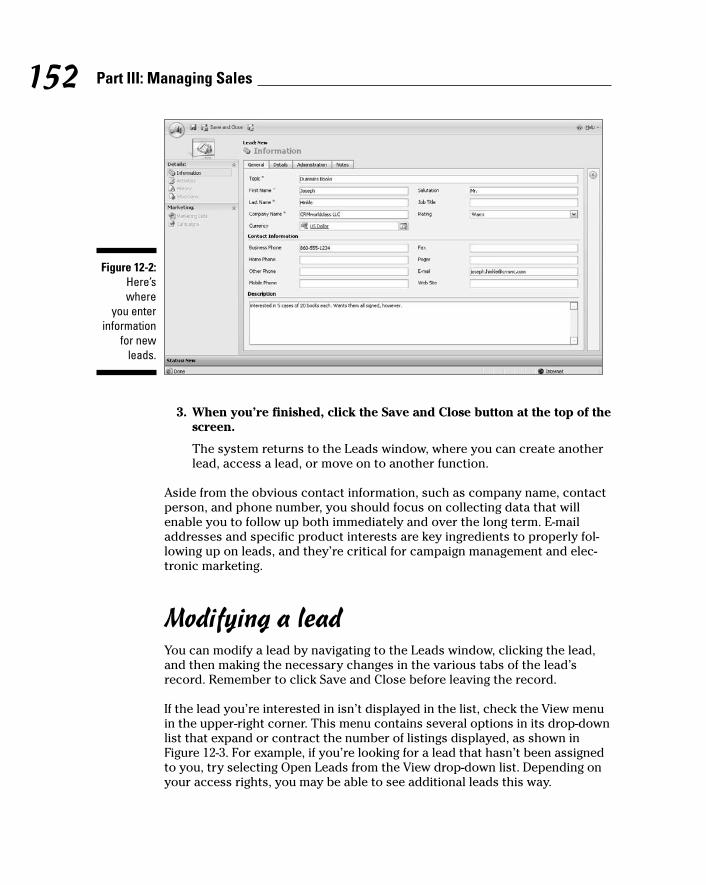
3. When you’re finished, click the Save and Close button at the top of thescreen.
The system returns to the Leads window, where you can create anotherlead, access a lead, or move on to another function.
Aside from the obvious contact information, such as company name, contactperson, and phone number, you should focus on collecting data that willenable you to follow up both immediately and over the long term. E-mailaddresses and specific product interests are key ingredients to properly fol-lowing up on leads, and they’re critical for campaign management and elec-tronic marketing.
Modifying a leadYou can modify a lead by navigating to the Leads window, clicking the lead,and then making the necessary changes in the various tabs of the lead’srecord. Remember to click Save and Close before leaving the record.
If the lead you’re interested in isn’t displayed in the list, check the View menuin the upper-right corner. This menu contains several options in its drop-downlist that expand or contract the number of listings displayed, as shown inFigure 12-3. For example, if you’re looking for a lead that hasn’t been assignedto you, try selecting Open Leads from the View drop-down list. Depending onyour access rights, you may be able to see additional leads this way.
Figure 12-2:Here’swhere
you enterinformation
for newleads.
152 Part III: Managing Sales
18_343258-ch12.qxp 6/4/08 12:16 AM Page 152

If you don’t find your lead in any view, it may have been converted to anaccount, a contact, or an opportunity. That’s good news, but it means youmay have to look under those other record types for your data. We discussaccounts and contacts in Chapter 13 and opportunities later in this chapter. Ifyour lead has been disqualified, which is just another way of saying, “forgetabout it,” refer to the upcoming “Resurrecting a lead” section.
Giving up on a leadWhen you’ve decided that you have no hope of generating anything worth-while from a lead, you can disqualify it. You do this as follows:
1. In the Leads window (refer to Figure 12-1), double-click the specificlead you intend to give up on.
The General tab for that lead appears.
2. Click the Convert Lead button near the top of the window.
The Convert Lead dialog box appears as shown in Figure 12-4.
3. To disqualify the lead, select the Disqualify option.
All the choices above the option become dimmed.
4. Select a reason for the disqualification from the Status drop-downmenu and then click OK.
The lead now shows up only in the Closed Leads view in the Leadswindow.
Figure 12-3:Expanding
the list ofleads.
153Chapter 12: Handling Leads and Opportunities
18_343258-ch12.qxp 6/4/08 12:16 AM Page 153
Haghighat Sabet
Highlight
Haghighat Sabet
Highlight

Deleting a lead is possible but not recommended. Deletions are permanent,and deleting a lead also deletes any attachments or notes associated with thelead. A far better approach is to disqualify the lead. That way, an audit trail(using that term loosely) remains if needed. And disqualifying allows you toresurrect the lead later if the situation changes.
Resurrecting a leadOccasionally you get lucky and a lead that you thought had died comes backto life. If you disqualified the lead, you can bring it back without re-enteringall the old information. If you didn’t heed our advice — see the precedingWarning — and instead deleted the lead, you’re out of luck.
To resurrect a lead, perform the following steps:
1. In the upper-right corner of the Leads window, change the View selec-tion to Closed Leads.
The lead you previously disqualified appears somewhere in the list.
2. In the list, select the lead in question by double-clicking it.
The record for that lead appears.
3. On the menu bar at the top of the screen, choose Actions➪ReactivateLead.
The Confirm Lead Activation dialog box appears.
Figure 12-4:Converting a
lead.
154 Part III: Managing Sales
18_343258-ch12.qxp 6/4/08 12:16 AM Page 154
Haghighat Sabet
Highlight
Haghighat Sabet
Highlight
Haghighat Sabet
Highlight
Haghighat Sabet
Highlight
Haghighat Sabet
Highlight
Haghighat Sabet
Highlight
Haghighat Sabet
Highlight

4. Click OK.
The original record appears. The data that had appeared dimmed whilethe lead was disqualified is again available for editing and general use.
5. Click the Save and Close button, and you’re back in business.
The record is updated and the window closes.
6. Review the list in the Leads window to make sure that your lead issuccessfully brought back to life. Make sure to change the Status to“Open Leads” or to “My Open Leads” to actually see your newly resur-rected lead.
Turning a Lead into an OpportunityYour goal is to turn all leads into opportunities. When you reach that goal, it’s time to turn your lead record into an opportunity record. Navigate to therecord for that lead and then click the Convert Lead button at the top of thescreen. The screen shown in Figure 12-5 appears.
The first three conversion choices in Figure 12-5 aren’t mutually exclusive. Ifyou initially created a lead without establishing any related accounts or con-tacts, you can do all three conversions in one smooth step now. We discussaccounts and contacts in Chapter 13.
Figure 12-5:Converting a
lead tosomething
better.
155Chapter 12: Handling Leads and Opportunities
18_343258-ch12.qxp 6/4/08 12:16 AM Page 155
Haghighat Sabet
Highlight

If this potential sale is directly related to a consumer (a person), select theContact option. If you’re trying to sell something to a company, choose theAccount option. If you’re dealing with a company, you can select the Contactin addition to selecting Account, in which case the system creates an accountand a related contact record.
An account is a company. A contact is a person. A customer might be either one.
The third option, Opportunity, converts your lead to an opportunity. If youalso elect to create an account record, that opportunity will be related to it. Ifyou don’t create an account but do create a contact, the opportunity will berelated to the contact. If you have the system create both an account and acontact, the opportunity (and the contact) relates to the account.
An opportunity is always associated with a customer! That’s why theCustomer field is a required field.
Handling OpportunitiesA fine line exists between a lead and an opportunity. Generally, you’vecrossed the line when you’re able to forecast a sale with associated revenue,a potential close date, and a probability for the sale happening. When thoseconditions are met, you graduate a lead to an opportunity, although yourorganization may define the transition differently. If you’ve already written aquotation, you’re definitely over the line.
Creating and modifying opportunitiesWe cover converting a lead to an opportunity in the preceding section. You can also skip entering the lead record entirely and go directly to anopportunity record. We like to do this when an existing client calls and asksfor something — even if we aren’t ready to forecast a sale yet.
To create a new opportunity, follow these steps:
1. Near the bottom of the navigation pane, click the Sales button. Then,near the top of the pane, select Opportunities.
The Opportunities window appears, as shown in Figure 12-6.
2. On the Opportunities window’s toolbar, click the New button.
The Opportunity: New window appears, as shown in Figure 12-7.
156 Part III: Managing Sales
18_343258-ch12.qxp 6/4/08 12:16 AM Page 156
Haghighat Sabet
Highlight
Haghighat Sabet
Highlight

3. Enter a topic.
Topic, which is a system-required field, is just a description of what youexpect to sell — for example, Consulting, Term Insurance, orTransporter System.
Figure 12-7:Entering
a newopportunity.
Figure 12-6:All open
opportuni-ties are
displayed.
157Chapter 12: Handling Leads and Opportunities
18_343258-ch12.qxp 6/4/08 12:16 AM Page 157

4. Select a Potential Customer (the second required field) to which thisopportunity relates.
Remember, a customer is either an account (a company) or a contact (a person). If you click the magnifying glass to the right of the PotentialCustomer field, another screen appears that allows you to browse to and select either an account record or a contact record.
5. If you have a price list set up, select the appropriate one.
We discuss price lists in Chapter 7.
6. For the Revenue field, if your price lists have been set up, selectSystem Calculated; otherwise, select User Provided.
By the way, you are the user, so be prepared to enter a forecastedamount if you select the User Provided option.
7. Enter information in the following fields:
a. In the Est. Revenue field, enter your best guess for the actual revenueyou’ll receive when you close the deal.
b. In the Probability field, enter a whole number between 1 and 99.
Although 0 and 100 are allowed, a 0 probability sale doesn’tdeserve to be an opportunity, and at 100 the deal must already beclosed and turned into an order.
c. In the Est. Close Date field, enter the date when you expect to closethe deal.
d. In the Rating field, enter a rating.
You can select Cold, Warm, or Hot to describe the rating, althoughthe Probability field already does a good job of rating.
Although none of these are system-required fields, you don’t have muchof an opportunity if you don’t have these estimates.
8. Click the Save and Close button to save the opportunity record.
From the Opportunities window, you can update an existing opportunityrecord by double-clicking the particular record, editing the information inany of the three tabbed areas (General, Administration, and Notes), and thensaving the record.
As your opportunity progresses through the sales cycle, you’ll want toupdate it often to maintain the current status of your real pipeline.
158 Part III: Managing Sales
18_343258-ch12.qxp 6/4/08 12:16 AM Page 158

Assigning and sharing opportunitiesYou can assign an opportunity to yourself or to another user. You can shareopportunities with other users or teams. For large or more complex opportu-nities, this is often a necessity.
When you assign an opportunity to someone else, you change the recordownership to that user. Sharing enables other users to see the opportunity intheir My Opportunities view just as if it were their own, but it doesn’t changethe record’s ownership.
To assign an opportunity to another user, follow these steps:
1. On the menu bar (at the top of the screen), choose Actions➪Assign.
The Assign Opportunity dialog box (available from the Opportunity recorditself, not from the Opportunity grid) appears, as shown in Figure 12-8.Although you can assign one or more opportunities to yourself or toanother user, you can’t assign an opportunity to multiple users or to ateam.
2. Select the second option, Assign to Another User. You can also assignrecords to yourself, but your organization may have some rulesregarding this.
3. Click the magnifying glass to the right of the Assign to Another Usertext field.
A Look Up Records dialog box appears.
4. Select the user to whom you want to assign this opportunity.
The Assign to User text field shown in Figure 12-8 is automatically filledin with that user’s name.
Figure 12-8:You can
assign anopportunityto yourself
or toanother
user.
159Chapter 12: Handling Leads and Opportunities
18_343258-ch12.qxp 6/4/08 12:16 AM Page 159
Haghighat Sabet
Highlight
Haghighat Sabet
Highlight

5. Click OK.
The system returns to the General tab of that record, even though theopportunity is no longer yours.
You share opportunities as follows:
1. In the Opportunities window, click the More Actions button.
A short list of options appears.
2. Choose Sharing.
The window shown in Figure 12-9 appears.
3. Select which users or teams you want to share this opportunity withand which rights you want to give them.
Unlike assigning, sharing allows you to choose multiple users and eventeams of users. For each user or team, you can decide how much author-ity to give. For example, you might decide to allow everyone to see theopportunity but not make changes to it. Or, if you’re going away on vaca-tion, you might share the opportunity with another user and give him orher complete rights to make changes (Write) and to share the opportu-nity with yet another user. Those choices and selections are shown inFigure 12-9. Chapter 8 has further details on security and rights.
4. Click OK after you’ve chosen the people or teams and their rights.
The system returns to the Opportunities window.
If you decide to share an opportunity, examine the permissions you grant toother team members. For example, you may want to be judicious about allow-ing other members the ability to delete or close an opportunity.
Figure 12-9:The
Opportunitysharing
window.
160 Part III: Managing Sales
18_343258-ch12.qxp 6/4/08 12:16 AM Page 160
Haghighat Sabet
Highlight

Relating opportunities to activities or other recordsOpportunity records are often associated with many other types of records.Opportunities can be, and should be, related to accounts, or contacts, or both.(We discuss how to associate an account or contact to an opportunity in thepreceding section, “Creating and sharing opportunities.”) This makes sensebecause you’re planning to sell something to either a company or a person.You may also want to relate activities (such as phone calls and appointments),quotes, orders, invoices, notes, or attachments to an opportunity.
While working on an opportunity, chances are you’re generating one or morequotes, making notes, and saving documents or data files that are associatedwith the opportunity. For example, in our business, CRM consulting, we oftenneed to save sample data files so we can analyze how best to convert alegacy system’s data into Microsoft CRM files. All these various files can belinked to the opportunity record.
Here are the steps to link activities or files to an opportunity:
1. In the Opportunities window, click an opportunity record to see itsdetails.
2. On the menu bar (at the top of the screen), choose Actions.
3. Select one of the choices shown in Figure 12-10.
4. Click the Save and Close button.
Figure 12-10:All the
potentialActionsfrom an
Opportunityrecord.
161Chapter 12: Handling Leads and Opportunities
18_343258-ch12.qxp 6/4/08 12:16 AM Page 161
Haghighat Sabet
Highlight

Managing stages and relationshipsWorkflow rules automate your sales process — assuming your organizationhas a process and the workflow rules are set up to emulate that process.Typically, a sales process has 3 to 12 stages ranging from initial contact togenerating a quote, negotiating with the customer, and closing the deal.Every company has a different process with different stages. In fact, a singlecompany may have a different process for every type of product or service it sells.
Setting up your processes is usually the domain of your sales managementteam, an outside consultant, or a combination of the two.
From the Actions menu, you can advance an opportunity through your prede-fined sequence of sales steps. We highly recommend this approach, but anintelligently designed workflow is key. Workflow rules are discussed inChapters 9 and 18.
The Relationships function enables you to link various accounts and con-tacts. This is often important, particularly in more complex deals. For exam-ple, you may have a pending deal with a prospect, and both an outsideconsultant and a leasing company are involved. Because the consultant andthe leasing company are each separate records in your database, you use the Relationship function to link them. From the Opportunities window, youselect the appropriate opportunity, select Relationships from the navigationpane on the left, and add new customers to the opportunity.
Closing, reopening, and deleting opportunitiesEventually, whether you win or lose the deal, you need to close the opportu-nity. This is easy enough to do. To close an opportunity properly, followthese steps directly from the Opportunity form (not the grid view):
1. On the menu bar (at the top of the screen), choose Actions➪CloseOpportunity.
The Close Opportunity window appears.
2. Under Status, click the appropriate option to indicate whether youwon or lost the opportunity.
162 Part III: Managing Sales
18_343258-ch12.qxp 6/4/08 12:16 AM Page 162
Haghighat Sabet
Highlight

3. In the Status Reason field, select one of the drop-down choices.
Microsoft CRM provides two reasons for losing a deal: The order wascanceled or you were outsold. We’ve never seen a salesperson selectthat second choice. Many other reasons exist for losing a deal, and yoursystem administrator or dealer should help expand this list.
4. Do one of the following:
• If you won, modify the Actual Revenue field to reflect the agreed-uponprice and then enter the Close Date.
• If you lost the opportunity, enter the competitor to whom you lost, ifyou know that information.
5. In the Description field, enter a sentence or two with your final comments.
An example is shown in Figure 12-11.
6. Click OK to close the opportunity.
The system returns to the General tab of the opportunity.
A previously closed opportunity may resurface and need to be reopened. Ifso, follow these steps:
1. In the Opportunities window, make sure the View menu displaysClosed Opportunities.
2. In the window’s list, select the appropriate opportunity.
The opportunity’s record appears.
Figure 12-11:Closing an
opportunity.
163Chapter 12: Handling Leads and Opportunities
18_343258-ch12.qxp 6/4/08 12:16 AM Page 163

3. On the menu bar (at the top of the screen), choose Actions➪ReopenOpportunity.
The Opportunity’s status changes immediately, and you can edit it justas you would any other active or open opportunity record.
You can also delete an opportunity. This may seem like a good idea, particu-larly if you’re upset that you lost a deal. In the long run, however, it’s a badidea because you never know when a deal may come back to life or you mayneed to refer to your notes on it. Don’t do it. Instead, close it and attach anote if need be.
164 Part III: Managing Sales
18_343258-ch12.qxp 6/4/08 12:16 AM Page 164

Chapter 13
Working with Accounts and Contacts
In This Chapter� Adding and editing contacts
� Adding accounts — and subaccounts
� Finding information on your accounts
� Assigning and sharing accounts
Account and contact records, as well as related lead and opportunityrecords, hold much of the primary information that your team has or
will collect. Depending on the nature of your business, you may use one orboth types of records. Microsoft CRM continually refers to accounts, con-tacts, and customers, so it’s important to keep the terms straight. Accountsare companies, contacts are people, and customers can be either companies or people.
Assuming for the moment that you sell to other businesses and that you useaccount records, you’ll also need to use contact records. Each accountrecord can have multiple people (contact records) associated with it. Thelarger the account, the more people you likely need to track.
If you sell only to individuals, you may never actually use account records to track your customers. In all likelihood, however, you’ll want to track morethan just your customers in Microsoft CRM. For example, keeping track ofyour company’s vendors in the same database is useful. Your competitorsmay also be candidates for their own account records if you don’t createactual competitor records for them. If you’re strictly a B2C company, you will probably still encounter situations like these where you need the account record.
In this chapter, we describe how you add new accounts and contacts andhow best to use and access those records after you create them.
19_343258-ch13.qxp 6/4/08 12:16 AM Page 165

Adding and Editing ContactsYou can add a contact record that stands alone, or you can add one that isassociated with an account record. Adding or editing contact records isalmost identical to the process you follow for account records.
Contacts have a list view just as accounts do. You can access this view fromthe Sales, Marketing, or Service areas. The Contact database is the same forall three areas of CRM, so all your users access the same contact records.
You can add or manually edit individual contacts in the same way that youhandle account. Contact records have a Parent Account field just as accountrecords do. If you do business only with individuals, you may never need theParent Account field. You should use it, however, if you need to associate aperson with a company. Note that you can associate many different peoplewith the same company (account record).
In addition to the manual entry of contact records, Microsoft CRM also comeswith an automated wizard-based system for importing contact records.Although the wizard was designed with Outlook files in mind, the import facil-ity can handle other types of data, such as text (.txt) files. See Appendix Bfor more information on importing data.
If you need to perform a significant amount of importing or something morecomplex than just basic contact information, investigate the third-partyimport products discussed in Chapter 27.
Adding and Editing Accounts and Subaccounts
The first step in getting started with CRM is to stock it with all the organiza-tions and people you deal with. If you already have the information organizedin data files (in Excel, other CRM systems, or accounting data files, for exam-ple), you’ll be doing some importing. We discuss importing data and convert-ing it to Microsoft CRM’s format in Appendixes A and B. If the data is storedin your head (or, worse, someone else’s head), you’re in for some typing. Thebasic entities into which this data will go are accounts and contacts.
As mentioned, accounts are companies. Subaccounts may be divisions of themain company or separate physical locations of the same company. Anythingyou add in Microsoft CRM, you can edit. And anything you add can bedeleted, but a better practice is to deactivate an account rather than delete
166 Part III: Managing Sales
19_343258-ch13.qxp 6/4/08 12:16 AM Page 166

it. Deactivating an account is like making it go dormant. If you deactivate anaccount, you can always resurrect the information later if you discover youneed it. Deletion is forever.
The ability to add, edit and/or delete records is a function of your securityrights.
Old-timers who used version 1 may be looking for the Quick Create function —the lazy person’s way to create new records using only required fields. Thisfunction bit the dust in version 4.
Every account you add will almost always be associated with one or morecontacts (people), so you’ll find it easier to create the contact records beforeyou create the account record. You can then easily link the two.
Exploring account records and their four sectionsYou can get to your account records from each of the three application modules — Sales, Marketing, and Service — and even from the Workplace. In each of those modules, Accounts appears up at the top of the navigationpane.
Each account record has four related tabs: General, Details, Administration,and Notes. You can access these tabs to create a new account, as follows:
1. At the top of the navigation pane, select Accounts.
The Accounts window appears on the right.
2. On the window’s toolbar, click the New button.
The Account: New window appears, as shown in Figure 13-1.
The General tabThe General tab has most of the critical contact information for your account,including the required field Account Name. Most of the fields on the Generaltab are self-explanatory, but the other three tabs deserve a little discussion.
The Details tabThe Details tab contains mostly financial information, such as annual revenueand a company’s stock symbol if it’s publicly traded. It’s the kind of stuffyou’ll get if you receive data from Dun & Bradstreet or other similar servicesor list providers. This provides useful demographic information about theaccount, assuming someone in your organization does the research to fill inthe information and keeps it current. The Details tab is shown in Figure 13-2.
167Chapter 13: Working with Accounts and Contacts
19_343258-ch13.qxp 6/4/08 12:16 AM Page 167

The Territory field on the Details tab is one of the most important. Manycompanies, particularly national or international ones, divide their businessinto territories usually based on geography. Salespeople, or teams of sales-people, are assigned to each territory and their revenue is tracked.
Figure 13-2:The Details
tab of theAccountwindow,housing
basiccompany
demo-graphics.
Figure 13-1:The Generaltab is where
you beginentering
informationabout theaccount.
168 Part III: Managing Sales
19_343258-ch13.qxp 6/4/08 12:16 AM Page 168

Territories should be set up in the Settings module. (See Chapter 5 for moreinformation.) Then you can manually select a territory for an account byclicking the magnifying glass to the right of the Territory field and selectingthe appropriate territory.
You can also customize the system so that each new account is automaticallyassigned to a territory or so that accounts are reassigned automatically whenit’s time to reorganize your territories. See Chapter 9 for instructions on cre-ating workflow rules that can automate these types of processes. Effectivedesign and implementation of workflow may require the services of an expe-rienced dealer or developer.
The Administration tabThe Administration tab, shown in Figure 13-3, is a catchall for accounting,marketing, and service information. The Owner field is the only required fieldand is filled in automatically with the name of the user creating the record.So, by default, the record owner is the person who enters the information. Ifthat isn’t the way it works in your organization, you can reassign the recordto another user by clicking the magnifying glass to the right of the Ownerfield and selecting the proper user.
Figure 13-3:You can add
all sorts ofinformation
here.
169Chapter 13: Working with Accounts and Contacts
19_343258-ch13.qxp 6/4/08 12:16 AM Page 169

The Originating Lead field automatically keeps track of the source of thisaccount record if it came from a converted lead record. (We tell you how toconvert a lead record in Chapter 12.) Your marketing department will defi-nitely want this field filled in accurately so that they can understand whichmarketing efforts are generating revenue.
The Originating Lead field is a system-generated field, so you can’t enter any-thing into it. To be filled in, the account must be generated from a lead whenit is qualified.
It’s a great advantage for salespeople to know at least a little bit about theirclients’ billing and credit situations. The fields in the Billing Information sec-tion are prime candidates for integration with whatever accounting system isused at your company. This integration will probably require some customwork and is usually the domain of the business partner who sold you the software.
The fields in the Contact Methods and Marketing Information sections regu-late how you market to and correspond with this account. Keeping track ofthis is increasingly important as more and more laws go into effect regulatinghow we market to prospects and clients.
Even if you aren’t using the Service module, the Service Preferences sectioncontains basic service-related information that can help you tailor manual orautomatic responses to service requests. For example, this is a simple placeto keep track of the equipment your customer has and who your preferredtechnician is whenever service is needed.
The Notes tabThe Notes tab starts out as a blank slate: a large area where you can begintyping. You should use the Notes section to record general information aboutthe account. After you finish typing your notes, just navigate to another sec-tion. This is one of the few areas in CRM where you don’t have to tell thesystem to save your work. It does so automatically. In fact, CRM also recordswho created the note and timestamps it. Figure 13-4 shows a Notes tab after afew notes have been entered.
Everything you write in the Notes section is public information — and CRMdoesn’t have a spell checker or grammar checker. Pay attention to your writ-ing style, and don’t enter anything that you wouldn’t want a client or a judgeto see.
When you’ve finished filling in data fields in the various tabs, you could clickthe Save and Close button with each tab. But you can often save some stepsby just clicking Save (the disk icon), which activates related actions on thenavigation pane.
170 Part III: Managing Sales
19_343258-ch13.qxp 6/4/08 12:16 AM Page 170

Setting up subaccountsAn account record may be the parent of other account records, and thoseother account records are called children. A child record is also referred to asa subaccount. Typically, you use the subaccount system to subordinate onerecord to another. An example is when you’re dealing with a company thathas multiple locations. The headquarters would be the parent account, andeach regional location would be a subaccount. By relating the accounts thisway, you can use the reporting system to consolidate, subtotal, or total rev-enue for all the related accounts.
The General tab (refer to Figure 13-1), which is the default window when youare creating a new account record, contains the field that relates one accountto another. This field is labeled Parent Account and lists all account recordsin the system. There is no limit to the number of levels of parenting. In otherwords, every parent account can have multiple children, grandchildren,great-grandchildren, and so on.
As you create this structure, the best approach is to map out the relation-ships between the accounts and begin at the top. First enter the parentaccount and then enter the children. As you enter each child account, clickthe magnifying glass next to the Parent Account field and select one parent toconnect each “generation.”
Figure 13-4:The Notestab of theAccountwindow
with somenotes
alreadyentered.
171Chapter 13: Working with Accounts and Contacts
19_343258-ch13.qxp 6/4/08 12:16 AM Page 171

Finding and Viewing AccountInformation
Almost no matter what your role is, as a user of CRM you’ll find yourself look-ing up accounts, contacts, leads, and opportunities on a regular basis. (Okay,if you’re a customer service rep, you may not spend much time checking outsales forecasts or opportunities. In fact, your access rights might even pre-clude you from doing so.) For the most part though you can locate records inMicrosoft CRM in two basic ways: the Find function and the Advanced Findfunction.
Finding an account by nameYou can access the Find function from any of the main windows. Using Find isthe simplest and fastest way to locate a record. Figure 13-5 shows a typicallist view as a result of a search for accounts beginning with the letter “e.”
At the top of the window is an unlabeled, blank search field. The magnifyingglass to the right of the field, actually sets this function in motion. You canlocate an account in several ways:
� Enter the first few letters of the account name in the search field andclick the magnifying glass. All the accounts beginning with those lettersappear in the list. Click the account in the list to navigate to that accountrecord.
The Find function isn’t case sensitive, so you needn’t worry aboutuppercase and lowercase.
� Enter part of the account name preceded or followed by an asterisk (*).If you want to locate all the companies that have LLC in their names, you can enter LLC in the search field. This locates all the accounts that start with LLC. If you think LLC may occur in the middle or at the end of the name, however, you can generalize your search by using *LLC*.
� Click a letter of the alphabet at the bottom of the grid and scroll throughthe listing of all companies that begin with that letter. This approach is useful if you have a small database — but if you have hundreds ofaccounts that span multiple pages, one of the other techniques is easier.
172 Part III: Managing Sales
19_343258-ch13.qxp 6/4/08 12:16 AM Page 172

Using Advanced Find to perform a more sophisticated searchThe Find function enables you to locate an account record quickly if youknow the name of the account, or part of the name as long as that’s the onlycriterion by which you’re searching. Advanced Find, however, provides amore powerful search capability, enabling you to locate specific records (andactivities) based on multiple fields, even if those fields are in different enti-ties. When you use Advanced Find, you can specify one or more search con-ditions. For example, you can find items by account name, city, and the nameof the salesperson responsible for the account. You may want to find all theA-level accounts in your city and send them an invitation to a seminar.
Your search can contain Boolean operators, such as AND or OR. While usingAdvanced Find, you can also enter an asterisk when performing a search (for example, when you’re searching for an account, a user, or a contact).
The values you enter aren’t case sensitive. For example, if you’re entering astate code, Microsoft CRM will find the same records whether you enter CTor ct.
Boolean logic dictates that conditions within parentheses are evaluatedbefore conditions separated by ANDs. ANDs are evaluated before ORs.However, the Advanced Find function doesn’t have parentheses and evalu-ates expressions in the order in which they appear in your search.
Figure 13-5:The Search
functionmakes it
easy to findrecords.
This figureshows the
results of asearch foraccounts
starting with “e”.
173Chapter 13: Working with Accounts and Contacts
19_343258-ch13.qxp 6/4/08 12:16 AM Page 173

To do a search with Advanced Find, follow these steps:
1. On the main toolbar, click the Advanced Find button.
The window shown in Figure 13-6 appears.
2. In the Look For drop-down list, select the appropriate choice.
In this example, the Look For list allows you to specify which recordtype Advanced Find will focus on. After you select the record type (inthis example, Accounts), all related fields are available to you. You nowproceed to the selection of specific fields, conditions, and values.
3. In the first row, select a field (in this example, Account Name) fromthe drop-down list by clicking the down arrow to the right of the fieldname.
Based on the field you choose, the system selects your available choicesfor conditions. You can see all the possible conditions by clicking thedown arrow to the right of the Condition field.
4. Choose a condition.
The most commonly used conditions are Equal, Does Not Equal,Contains, Begins With, Contains Data, and Does Not Contain Data. Clickthe condition you want from the drop-down list. In the example, wechose Greater than.
5. Enter a value in the Value field.
Microsoft CRM allows you to have multiple values in this field for thosefields that have drop-down lists. Relationship Type is an example of sucha field. If you separate individual values with a semicolon (;), the systemtreats that semicolon as if it were an OR condition.
Figure 13-6:A samplesearch is
alreadyentered.
Just as withdiet pills and
exerciseequipment,
your ownresults
may vary.
174 Part III: Managing Sales
19_343258-ch13.qxp 6/4/08 12:16 AM Page 174

6. Continue to the next row to add search criteria.
If you run out of rows, click the Select button to begin another row of criteria.
7. Select two or more rows you want to connect with either AND or ORand then select the Group And or the Group Or button.
To the left of the two selection criteria, a box appears with either anAND or an OR inside. You can change your choice by selecting the down arrow within that box.
8. Click the Save As button if you’d like to name your query and retainit for future use.
9. Click the Find button in the lower right corner to actually perform thesearch.
Assigning and Sharing AccountsThe Actions button at the top of every account window enables you to assignor share your accounts. You can also delete or deactivate an account.
Deleting accounts is usually a bad idea because any records attached to anaccount, such as contacts or opportunities, also go away. After you delete an account, you can never retrieve the information, and you can’t undo theaction. Deletion is forever. However, if you had previously set up a subac-count, that subaccount remains.
Deactivating an account turns it off, rendering it inactive. You can’t edit aninactive account or associate other types of records with it. It disappearsfrom your usual lookups and is visible only if you specifically search for inac-tive accounts. The advantage of deactivating over deleting is that you canrestore a deactivated account to active status should that become necessary.Any sub-accounts that were associated with the original account continue tobe active, however.
Assigning accounts to usersIf you go on an extended vacation, you may want to assign an account toanother user. Or perhaps the territories your company covers are beingrealigned, and many accounts need to be tended to by other managers. If youassign one of your accounts to another user, that new person becomes theaccount owner, and you are removed from that position.
175Chapter 13: Working with Accounts and Contacts
19_343258-ch13.qxp 6/4/08 12:16 AM Page 175

To assign one or more accounts, follow these steps:
1. In the upper part of the navigation pane, select Accounts.
The Accounts window appears.
2. Choose the accounts you want to reassign by clicking (highlighting)each account listing.
You can select multiple accounts by using the Shift key or the Ctrl key.The Shift key selects all the accounts from the first one you selected tothe one you’re currently positioned on. Hold down the Ctrl key and clickto select noncontiguous accounts.
3. Click the Assign icon (the little guy with the green megaphone).
The Assign Accounts window appears.
4. Click the radio button next to Assign to Another User.
5. Click the magnifying glass at the end of the Assign to Another Userfield.
The Assign Account dialog box opens for choosing the new user.
6. Select the new user and click OK.
The system returns to the Accounts window. You won’t see the reas-signed account in the list unless you change the View to ActiveAccounts.
Sharing accountsSharing is a little different from assigning. Sharing one of your accounts doesn’t remove you from ownership; it merely adds additional users to theteam servicing that account.
To share one or more accounts, follow these steps:
1. Go to the Account List View and select all the Accounts you want toshare.
You can select multiple Accounts at one time by using the Shift key orthe Ctrl key. The Shift key selects all the Accounts from the first one youselected to the one you’re currently positioned on. The Ctrl key allowsyou to randomly select individual Accounts.
2. On the window’s toolbar, choose Actions➪Sharing.
The Who Would You Like to Share the Selected Account With windowappears.
176 Part III: Managing Sales
19_343258-ch13.qxp 6/4/08 12:16 AM Page 176

3. Choose the users or the team from the Who Would You Like to ShareThis Account With dialog box.
After you select the users or teams, the system returns you to a ListView with check boxes for the security privileges assigned to each useror team. By default, none of these privileges are assigned.
4. Select the security privileges you want to give to each of the userswith whom you’re sharing by checking all the appropriate boxes.
For details on which type of security privileges each option allows,check out Chapter 8.
5. To save these sharing specifications, click OK.
177Chapter 13: Working with Accounts and Contacts
19_343258-ch13.qxp 6/4/08 12:16 AM Page 177

178 Part III: Managing Sales
19_343258-ch13.qxp 6/4/08 12:16 AM Page 178

Chapter 14
Creating and Managing ActivitiesIn This Chapter� Displaying your calendar
� Checking out your activities
� Making an appointment
� Scheduling others
� Assigning activities
� Completing activities
Microsoft CRM 4 comes with a basic activity management system thatenables you to schedule or log activities associated with the various
records in the database, such as opportunities, leads, contacts, accounts, orcases.
Your calendar is a subset of your activities and displays only appointments.Your activities show a wider assortment of things that take up your time,such as phone calls and miscellaneous tasks such as meeting with your bossor coordinating the company golf outing. In addition, only the appointmentson your calendar are coordinated with Outlook. Phone calls and tasks nevershow up in the main area of Outlook.
Aside from the obvious practice of entering all your activities in the systemto ensure that they’re properly documented and that you don’t forget to dothem, workflow rules can also have an important role with activities in yourbusiness processes. Workflow rules can look for overdue activities and alertyou to them. They can look for activities that should be scheduled (such asfollowing up on a quote that you sent out a week ago or an annual mainte-nance contract that’s due next month) and send a series of alerts to the rightteam members. This is a powerful use of scheduling, but it works well only ifeveryone on the team is consistently logging his or her activities. (We discussworkflow in detail in Chapter 9.)
20_343258-ch14.qxp 6/4/08 12:17 AM Page 179
Gostareh Negar
Highlight

The ingredients essential to activity management include viewing existingactivities, entering new activities, delegating activities, the inevitablerescheduling of activities, and completing activities. In the next few pages,you’ll find out how to manage your activities and, to the extent possible, theactivities of others as well.
No Outlook HereMicrosoft designed its CRM product assuming that most users also useOutlook. In this chapter, we discuss how to use Microsoft CRM’s activity management system assuming that you aren’t using Outlook. This is a bigassumption, but it helps simplify the discussion of calendar usage.
If you aren’t using Outlook, you’ll want to look at the Service Scheduling cal-endar as a way to keep you and your team members on the same page. Youwon’t get any alarms about appointments or due dates. (Maybe you view thisas a good thing!)
Chapter 2 covers using Outlook with Microsoft CRM. If you’re an Outlookuser, consider reviewing Chapter 2 next. Doing so will fill in the holes createdin this chapter.
If you’re coming to Microsoft CRM with experience using another CRMsystem, you may wonder where some of the more advanced teamwork func-tionality is hiding. So, before you start looking around, here are some of theprogram’s shortcomings:
� To look at everyone else’s activities, you have to go to the ServiceScheduling area from the Navigation pane. Using Outlook via Exchangeprovides some assistance here, though, in that it allows for shared calendars.
� You can schedule other users to do something, but no convenient, automatic way exists to notify them that you did the scheduling. Andbecause you can’t see their calendar easily, you may end up schedulingthem into a conflict. Outlook’s Meeting Request is the answer to this sit-uation. (And you can link Outlook Meeting Requests to CRM, so this is aviable workaround.)
� You can’t set an alarm on any kind of activity to alert you to an upcomingevent. Therefore, Microsoft also doesn’t have a snooze button in CRM.
� The system doesn’t automatically roll over activities from one day to the next if you don’t complete something when you’re supposed to.However, activities do remain on your calendar as past-due activitiesand show up on your activity list as long as you fail to complete them.
180 Part III: Managing Sales
20_343258-ch14.qxp 6/4/08 12:17 AM Page 180
Haghighat Sabet
Highlight
Haghighat Sabet
Highlight
Gostareh Negar
Highlight

Some of these oversights are resolved if you’re using the Outlook client. Moreon that in Chapter 2.
Having now finished our complaints, we must say, in all fairness, thatMicrosoft CRM enables you to schedule and track all the important activitiesassociated with customers. If you use this feature consistently, you’ll alwaysbe organized. You’ll never forget to do the important things. You’ll make moremoney, live longer, and prosper. But we do still need to easily see and shareour staff’s calendars. And, we’ve got to say it one more time: Use the Outlookclient if you really want the system to work well for you.
Viewing Your CalendarTo display your calendar, click the Workplace button near the bottom of the navigation pane. Then, near the top of the pane, click Calendar, whichappears under My Work. (If nothing appears under My Work, click the plussign next to it to display the list.) The Calendar window appears on the right,as shown in Figure 14-1.
The service calendar displays the weekly view of appointments and serviceactivities. Note that service activities are activities associated with the Servicemodule that have not only a user but also company resources. The informa-tion is available also in the Service Scheduling window, which allows users tosee other user’s calendars and activities.
Figure 14-1:A typical
week in thelife of awriter.
181Chapter 14: Creating and Managing Activities
20_343258-ch14.qxp 6/4/08 12:17 AM Page 181

The area on the far right of the screen contains a calendar you can use tochange the date or date range of the calendar display. You also can selectfrom three display modes — month, week, and day.
The calendar is just a subset of your activities (only appointments and service-related activities) with a more graphical view of them.
Viewing Your ActivitiesIf you really want to know what’s on your agenda, the Activities window is the place to go to look at your open activities. To get there, select Activitiesunder My Work at the top of the navigation pane. You can also set this as thedefault screen that shows up every time you start up CRM. This is discussedin Chapter 4. Figure 14-2 shows a typical Activities window. This is probablywhere your day should begin and where you should spend much of your pro-fessional life.
Figure 14-2 shows the Activities window for appointments, but remember youcan manage eight types of activities in Microsoft CRM:
� Tasks
� Fax
� Phone call
Figure 14-2:A snapshotof the life of
a certainwriter.
182 Part III: Managing Sales
20_343258-ch14.qxp 6/4/08 12:17 AM Page 182
Gostareh Negar
Highlight

� Letter
� Appointment
� Service Activity
� Campaign Response
Clicking the column title re-sorts your activities by that column, from ascend-ing to descending order. Activities are sorted within each day’s display. If youwant to adjust the width of a column, drag the border between the columntitles. You can change the columns displayed by saving your own AdvancedFind searches, or your system administrator or implementation partner cancreate customized views.
At the top of the window, the Look For field allows you to locate scheduledactivities based on the subject. Although you can use the alphabetical listingbar at the bottom of the window to locate Subjects beginning with a particu-lar letter, the Look For field is more flexible. For example, you can enter con-secutive characters, such as flor, to find activity subjects starting with, say,Florida. You can also use the wildcard character * to match any sequence ofcharacters.
If you’re trying to find all of your activities, enter * in the Look For field andthen click the Find button. This displays both open and closed activities. Youmight think by just choosing My Activities in the View drop-down list, all youractivities would be displayed. But you’d be missing the closed activities withthat method of searching.
You can use the View menu (in the upper-right corner of the Activitieswindow) to select from one of several views. Your selection of a view workswith your Search for Records selection. These views are
� All Activities: This comprehensive list displays open and completedactivities no matter whose they are.
� Closed Activities: These are all the completed activities the system contains — yours and everyone else’s.
� My Activities: These are the activities on your schedule. This is proba-bly the most important view and the one we use most often.
� My Closed Activities: These are all your completed activities that thesystem contains.
� Open Activities: These are all open activities, whether they belong tosomeone else or to you. Unfortunately, the default view doesn’t show towhom they belong.
� Scheduled Activities: These are all your scheduled appointments.
Of course, there are no activities to view if you don’t enter some in the firstplace. Creating these activities in CRM is the subject of the next section.
183Chapter 14: Creating and Managing Activities
20_343258-ch14.qxp 6/4/08 12:17 AM Page 183
Gostareh Negar
Highlight

Creating an Appointment for Yourselffrom the Activities Screen
You can create an appointment for yourself directly from the Workplace,which Microsoft online help suggests. This method is quick, but you caneasily cause yourself problems by flippantly agreeing to some appointmentwithout first checking your calendar — or better yet, your activity list.
An appointment is just a special kind of activity, and that’s why we some-times seem to refer to those two things (appointments and activities) almostinterchangeably. The calendar shows only appointments, not tasks or phonecalls. If you want to avoid scheduling two conference calls at the same time,for example, use the Activities window instead of the calendar.
You’re always better off checking before you schedule appointments. For thatreason, we recommend another approach to scheduling your appointmentswhen working online in Microsoft CRM:
1. Near the bottom of the navigation pane, click the Workplace button.At the top of the pane, select Activities (under My Work).
Review your schedule here before committing to another appointmentor activity.
2. On the Activities window’s toolbar, click the New button.
3. Select an activity (such as Appointment) and then click OK.
Figure 14-3 shows a typical window for entering appointment details. We describe this screen in detail in a moment.
4. Fill in the details.
5. When you’re finished, click the Save and Close button.
You return to the Activities window.
The Appointment window is divided into three tabs: Appointment, Notes, andDetails. The following fields deserve clarification or further elaboration:
� Appointment tab: the Appointment tab contains the information thatwill be transferred to your calendar display.
• Subject: The text you enter in the Subject field appears in theActivities window and the Calendar window. In the weekly view ofthe calendar, the text wraps so you can see it all. In the daily view,if the text is too long, it’s cut off.
• Required and Optional: When you click the magnifying glass to theright of each of these fields, CRM presents a window allowing you
184 Part III: Managing Sales
20_343258-ch14.qxp 6/4/08 12:17 AM Page 184

to specify one or more people involved in the meeting. The firstfield, Required, is for those people for whom attendance is manda-tory. The Optional field is for people not quite so important.
• Regarding: This field enables you to attach an activity to one ormore records, such as contacts, accounts, or leads. By associatingthe activity with more than one record, you can then see the activ-ity from any of those records.
• Start Time and End Time: If you don’t enter a start and end time,particularly for appointments, the times aren’t displayed on yourcalendar.
• All Day Event: By default, an event is a day-long activity. When youselect an All Day Event, you no longer have the option of selectingspecific times. However, you can specify the dates; if the end dateis different from the beginning date, you create an activity thatspans multiple days. Vacations are a good example of an appropri-ate use of All Day Event.
� Details tab: The Details tab houses the information on the meetingowner and the organizer — possibly two separate people.
� The organizer is the person coordinating the activity and isn’t necessar-ily one of the attendees. This is the person you blame when the meetingis messed up.
� Notes tab: The Notes section is an unlabeled free-form text area thatappears on the lines just below the time span and subject on the calendar.
That’s what it takes to schedule something for yourself. One of the more pow-erful features of CRM systems is the ability to schedule activities for otherpeople — that is, to delegate. That’s what we discuss next.
Figure 14-3:Planning
to meet with your
marketingdirector.
185Chapter 14: Creating and Managing Activities
20_343258-ch14.qxp 6/4/08 12:17 AM Page 185

Scheduling for Other PeopleHow you use Outlook determines how you can best schedule activities forothers on your team. Specifically, if calendar sharing is enabled in Outlook,scheduling is easy. Even if sharing isn’t enabled, you can use Outlook’s meet-ing request functionality to assist in setting up activities for other people. Wediscuss Outlook in detail in Chapter 2. Assuming you aren’t using Outlook,you still have a few options.
Because you can’t actually see anyone else’s complete schedule usingMicrosoft CRM, it would be improper to even try to put anything directly onsomeone else’s calendar. So you’re left with two options when attempting toschedule the activities of others: e-mail requests and instant messaging.
You can use Microsoft CRM’s e-mail system to send an activity “suggestion”to one or more users on your team. You can attach the e-mail to the appropri-ate record and request that the other users schedule that phone call orappointment. Chapter 2 discusses e-mail in some detail.
The second method for coordinating your activities with other members ofyour team is to use one of the instant messaging systems. They’re free, whichmakes them even more appealing. The most common ones are Microsoft’sInstant Messenger, Yahoo!, AOL, Trillian, and ICQ. In addition, Microsoft CRMversion 4 now has an “Integrated Office Communicator” which is really afancy way of saying that Instant Messaging is built-in. It’s your SystemAdministrator’s task to set this up if your organization thinks it’s appropriate.
Several compelling reasons exist for implementing such a system. You cansee who’s online and available at any given moment. You can coordinate withusers who are widely separated geographically. We like the instant part of theequation also. In addition, some instant messaging systems keep a history ofyour messages. You could, when the conversation is over, cut and paste themessage history into the Notes section of the appropriate record.
In a flash, you can ask another user to call a client and get a confirmation thatthat task is going to happen. This is an ideal way to respond to a client callrequesting service or support.
Assigning an Activity to SomeoneWhen you create an activity, you can assign it directly to yourself (by default)or to another user or to a queue. Similarly, you can reassign an activity toanother user or to a queue. When you do reassign an activity, the ownership
186 Part III: Managing Sales
20_343258-ch14.qxp 6/4/08 12:17 AM Page 186

of that activity doesn’t change until the intended user or queue accepts theassignment. You can assign activities from anywhere in CRM, but you canaccept them only from the Queues area of the Workplace.
Assigning an activity is our favorite. We love to delegate. To do so, followthese steps:
1. Near the bottom of the navigation pane, click the Workplace button.At the top of the pane, under My Work, click Activities.
The Activities window appears on the right. Based on your selection inthe View field, you see some or all of your scheduled activities.
2. Select one or more activities that you want to assign to someone else.
In Figure 14-4, we’ve selected two activities.
You can select one or more activities by highlighting those activities andusing either the Shift key (for contiguous activities) or the Ctrl key (fornoncontiguous activities.)
3. Click the Assign option from the Activities drop-down list.
The Assign to Queue or User dialog box appears, leading you throughthe sequence of actions to delegate all the activities you highlighted inStep 2.
Figure 14-4:Delegatingeverything
you don’twant to do.
187Chapter 14: Creating and Managing Activities
20_343258-ch14.qxp 6/4/08 12:17 AM Page 187

4. Click the magnifying glass at the end of the field to see the entire listof users to whom you might assign these activities.
5. Select one or more users from the list. Make sure you notify theassignees either by setting an alarm, sending an Instant Message,sending an e-mail, or by yelling down the hall.
6. Click OK.
CRM returns to the Activities window.
You can also choose to delete activities, but this is generally a poor choicebecause you can’t undo a deletion. If an activity is canceled, you should com-plete it (see the next section) and include a note that the activity was can-celed by the client or by a user.
Completing an ActivityNothing is as satisfying as getting things off of your activity list. To complete,or close, an activity, follow these steps:
1. Near the bottom of the navigation pane, click the Workplace button.At the top of the pane, under My Work, click Activities.
The Activities window appears on the right.
2. To follow along with the example, select an appointment that youwant to mark as completed.
The Appointment window appears, with three tabs: Appointment, Notes,and Details.
3. Click the Actions button and Add a Note to create a note that will beattached to the record. Save and close the Note.
Documenting what you do is important so that the historical trail forthis record is complete.
4. Click the Actions button and complete the activity as shown in Figure 14-5.
We have a saying in our office: “If it’s not in CRM, you didn’t do it.” A roughtranslation is that unless you enter your activities and close them whenyou’ve completed them, there’s no evidence that you did anything. Later,you’ll be explaining to a skeptical boss that you really did make those follow-up calls but just didn’t bother completing them in CRM. Complete everyactivity immediately afterwards. Then there’s no doubt.
188 Part III: Managing Sales
20_343258-ch14.qxp 6/4/08 12:17 AM Page 188
Haghighat Sabet
Highlight
Haghighat Sabet
Highlight
Haghighat Sabet
Highlight
Gostareh Negar
Highlight

Figure 14-5:Completingan activity
(afteradding your
notes).
189Chapter 14: Creating and Managing Activities
20_343258-ch14.qxp 6/4/08 12:17 AM Page 189

190 Part III: Managing Sales
20_343258-ch14.qxp 6/4/08 12:17 AM Page 190

Chapter 15
Using Notes and AttachmentsIn This Chapter� Creating a note
� Adding an attachment
� Deleting a note or an attachment
Almost every type of record in the Microsoft CRM system enables you topost notes and link attachments. Think of a note as information that you
manually type into the system. For example, if you find out that your maincontact at an account is about to leave, you probably want to document thatand create an action plan. Meetings and phone calls deserve this kind offollow-up documentation as well. At our company, every meeting and phonecall and almost every kind of activity is documented with notes so we havean audit trail of what we’ve promised or accomplished.
Attachments include a variety of files that are linked to individual records.These files may be the typical Word documents or Excel spreadsheets, orthey may be PowerPoint presentations, digital photos, contracts, images offaxes, and so on — almost anything.
In this chapter, you find out how to create and maintain notes and attach-ments, processes that have been significantly streamlined in version 4.
With regard to relating notes and attachments to other records — you can’tdo it. Notes and attachments are assigned to the one record they’re initiallyattached to — and that’s it. Sorry.
Creating NotesYou can associate notes with any kind of existing record, whether it’s anaccount, a contact, or a case, from the Customer Service area. All of thesetypes of records include a Notes tab. For example, Figure 15-1 shows theNotes tab for a typical account record.
21_343258-ch15.qxp 6/4/08 12:18 AM Page 191

To create a new note relating to a particular account, follow these steps:
1. At the top of the navigation pane, click Accounts.
The system displays the Accounts window. We use accounts here as anexample, but remember that what you do here applies equally well tocontact, lead, opportunity, and case records. In fact, almost every typeof record in CRM has a Notes field.
2. Select the specific account to which you want to attach a note.
3. Click the Notes tab at the top of the account’s screen.
4. Click the blue hyperlink that reads “Click here to enter a new note.”
5. Type your text in the rectangular area, as shown in Figure 15-2.
6. When you’ve finished entering text, click Save and Close.
The next time you return to the Notes tab for this account, you’ll see the noteyou entered, as well as the date and time and your name. This is one of thefew areas in Microsoft CRM where you don’t have to manually save your workbecause you simply could have navigated away from your newly enteredNote by selecting another option from the navigation pane. You can see thecompleted note in Figure 15-3.
Notes don’t have spell checking or grammar checking. If you’re challenged inthis department and think that others may end up reviewing your notes (andthey probably will), use Word to create your notes and spell check and gram-mar check them there. Then either cut and paste the Word text into the notessection or attach the Word file, as explained in the next section.
Figure 15-1:My notes for
the ENIACaccount.
192 Part III: Managing Sales
21_343258-ch15.qxp 6/4/08 12:18 AM Page 192
Haghighat Sabet
Highlight

Creating AttachmentsAttachments are separate files that you may associate with individualrecords such as accounts, contacts, opportunities, and cases. An attachmentcan be a Word document, but it can just as well be, say, an electronic set ofblueprints, or a series of digital photos, or a spreadsheet.
Figure 15-3:The
evidence ofa completed
and savednote. The
most recentnote is
always atthe top.
Figure 15-2:Entering anew note.
193Chapter 15: Using Notes and Attachments
21_343258-ch15.qxp 6/4/08 12:18 AM Page 193

You can add a note but not an associated attachment by using the Notes tabat the top of most records. You can add a single attachment, but you can’tmake notes, by choosing Actions➪Attach a File. A better and more generalapproach follows.
To add a note as an attachment, follow these steps:
1. Navigate to the record to which you want to attach a note or a file.
2. On the menu bar (at the top of the screen), choose Actions➪Add a Note.
The Note: New window appears, as shown in Figure 15-4. The systemautomatically fills in the Regarding field.
3. Enter a title in the Title text box.
4. Enter a description in the large text box (below the word Title).
The information you type in the larger field is displayed in the listing ofall associated notes — not what you enter in the Title field.
5. Use the Browse button to locate and select the file you want to attach.
6. Click the Attach button.
The system uploads your file to the server for storage. This gives otherusers (with the proper access rights) the ability to see the file and alsogives you access to it from any other computer you may be using later.
You can attach only one file per note. All attachments are stored on theserver, so when you’re first attaching a file or using it in some way, thesystem needs to move it using your Internet connection. Virtually any kind offile is a candidate for an attachment. The maximum size of the file that youcan attach to a record is defined by your system administrator, but if you
Figure 15-4:Adding
notes andattachments
at the same time.
194 Part III: Managing Sales
21_343258-ch15.qxp 6/4/08 12:18 AM Page 194
Haghighat Sabet
Highlight
Haghighat Sabet
Highlight
Haghighat Sabet
Highlight

expect to upload or download attachments from the server frequently, trynot to bog the system down with enormous files. (Video clips, fax images,and the like are often pretty big.)
Deleting a Note or an AttachmentIf you need to change the file attached to a record, perhaps because the fileitself has changed, you need to delete the original attachment. After anattachment is attached to the note, you can delete the attachment by clickingthe Remove button.
To delete a note associated with a record, follow these steps:
1. Navigate to the record.
If you’re deleting a note associated with an account, for example, selectAccounts from the upper part of the navigation pane and then select thespecific record from the Accounts window.
2. Click the record’s Notes tab.
All notes associated with this record appear.
3. Highlight and then right-click the note you want to delete.
The text of the note appears.
4. A context menu appears from which you can select the Delete option.See Figure 15-5.
The Confirm Deletion dialog box then appears, telling you that you areabout to delete not only this particular note but also any associatedattachment.
5. Click OK to proceed.
Figure 15-5:Your note is
about to bitethe dust.
195Chapter 15: Using Notes and Attachments
21_343258-ch15.qxp 6/4/08 12:18 AM Page 195

Deleting an attachment without deleting the associated note is now mucheasier than in prior versions of CRM. Follow these steps:
1. Navigate to the record.
2. Click the record’s Notes tab.
All notes associated with this record appear.
3. Double-click the note with an attachment that you want to delete.
The text of the note appears.
4. Click the Remove button in the lower-right corner. See Figure 15-6.
A confirmation screen appears with a warning that when you remove theattachment, it’s really gone. However, you can always reattach the samefile anytime you want to.
5. Click OK.
Another confirmation screen appears.
6. Click Save and Close to complete this action.
Figure 15-6:Your
attachmentis about to
bite thedust.
196 Part III: Managing Sales
21_343258-ch15.qxp 6/4/08 12:18 AM Page 196

Chapter 16
Generating Quotes, Orders, and Invoices
In This Chapter� Creating and activating a quote
� Creating associations between opportunities and quotes
� Printing your quote
� Changing your quote to an order
� Changing your order to an invoice
Microsoft CRM manages the entire process of generating quotations,orders, and invoices. An essential ingredient in developing quotes is
the product catalog, which we describe in Chapter 7. The product catalogcontains your list of products and their prices and discount structures.Microsoft CRM’s quotation system draws from these products, prices, anddiscounts to create pricing specific to each customer.
After you generate a quote and give it to a customer, the best scenario is thatthe quote comes back as a signed order. The second-best scenario is that thequote comes back for revisions. Even after a quote is converted to an order,however, you can still revise it (until you send it to the accounting system).After an order goes to accounting, it becomes an invoice.
Although the logical flow is from quote to order to invoice, you can alsocreate an order without creating a quote. And, in the same way, you cancreate an invoice without having created either a quote or an invoice. As youcan see, you can start anywhere in the cycle.
In this chapter, we cover how to use Microsoft CRM to create a quotation,turn the quote into an order, and make the order into an invoice.
22_343258-ch16.qxp 6/4/08 12:18 AM Page 197
Haghighat Sabet
Highlight
Haghighat Sabet
Highlight
Haghighat Sabet
Highlight
Haghighat Sabet
Highlight
Haghighat Sabet
Highlight
Haghighat Sabet
Highlight
Haghighat Sabet
Highlight
Haghighat Sabet
Highlight
Haghighat Sabet
Highlight
Haghighat Sabet
Rectangle
Haghighat Sabet
Highlight
Haghighat Sabet
Highlight
Haghighat Sabet
Highlight

Creating and Activating QuotesSeveral years ago, we met with a very large distributor of paper products.They had been in business for more than a hundred years and had a hundredmillion dollars of revenue. Their entire quotation procedure was a verbalsystem. They never even wrote down what price they had quoted. When thecustomer called back to order something, the salespeople would simply askwhat price they’d been given! We never got the go-ahead on installing a quo-tation system because they didn’t think such a thing could possibly work.
If your quotation system involves something more formal than just tellingyour clients their prices during a phone conversation, you need to generate aformal, written quotation.
Most quotes go through more than one iteration. Initially, you create a draftof your quote. You can continue editing your draft quote until it’s ready tosend. At that point, you activate the quote (also making it read-only) andsend it to the customer.
You can make multiple revisions of an activated quote, and each revision isstored as a separate record. The quote is then either accepted if it’s won orclosed if it’s lost. If it’s accepted, it’s recorded as part of the order history.
Creating a quoteMost significant sales are preceded by a series of quotes or proposals.
(Many people confuse proposals with quotations. Proposals are quotationson steroids; they include a great deal more background, discussion, andanalysis in addition to the more typical one- or two-page quotation. CRMdoesn’t have a built-in proposal system, but you can find third-party proposalsystems that integrate with Microsoft CRM in Chapter 27.)
To create a new quote, follow these steps:
1. At the bottom of the navigation pane, click the Sales button.
2. In the upper part of the navigation pane, select Quotes.
The Quotes window appears, displaying all your existing quotes.
3. On the Quotes window’s toolbar, click the New button.
The quote record appears, as shown in Figure 16-1, with General,Shipping, Addresses, Administration, and Notes tabs.
On the General tab, the quote ID is a unique, system-generated numberthat can help you identify the quote later. The revision ID is also createdand maintained by the system and enables you (and the system) to
198 Part III: Managing Sales
22_343258-ch16.qxp 6/4/08 12:18 AM Page 198

track all the various versions of quotes that you have created and acti-vated. The Quote ID and Revision ID fields are filled in after you save thequote. These fields cannot be filled in and will appear grayed out. Forthat reason, clicking the Save button (the disk icon) after you enter theName, Potential Customer, and Price List fields is essential. You don’tneed to click Save and Close until you have filled in all the relevant fieldsin each of the five tab areas.
4. In the Name field, enter some text that describes what this quote is all about.
For example, you might type Microsoft CRM Training Class in Maui.After you save all the details of the quote, the text in this Name field willappear in the Quotes window.
5. In the Potential Customer field, select an account or a contact to asso-ciate with the quote.
To do so, click the magnifying glass to the right of the field to display theLook Up Records dialog box for Accounts and Contacts. Alternatively,you can select a customer from the Form Assistant on the right.Whichever method you choose, select the appropriate record from thelist and click OK. The system returns you to the General tab.
6. In the Price List field, use the magnifying glass or the Form Assistantto select a price list.
7. In the Currency field, use the magnifying glass or the Form Assistantto select a Currency.
Figure 16-1:Developing
a newquote.
199Chapter 16: Generating Quotes, Orders, and Invoices
22_343258-ch16.qxp 6/4/08 12:18 AM Page 199

8. Now is a good time to click Save (the disk icon).
CRM displays the quote ID number in the Quote ID field. (If you wererevising a quote, CRM would also populate the Revision ID field.)
9. In the Totals section of the General tab, enter the Quote Discount andFreight Amount.
Microsoft CRM calculates the total amount and displays it in the lastfield in the General tab. Several fields on this screen, such as DetailAmount and Pre-Freight Amount, are system generated. You can tellbecause these fields are outlined in black rather than blue.
10. Click the Shipping tab and fill in the following:
a. Enter information into the Effective From, Effective To, RequestedDelivery Date, and Due By fields.
Each of these date fields has an associated calendar display (little grid box icons with a red oval in them) just to the right. (SeeFigure 16-2.) Clicking the calendar and then choosing a date is usu-ally easier than manually typing a date directly into the field.
b. Enter the Shipping Method, Payment Terms, and Freight Terms.
Each of these fields has an associated drop-down menu. If yoursystem is integrated with an accounting system, these fields can befilled in automatically.
Figure 16-2:The
Shipping tab —
deliveringthe goods.
200 Part III: Managing Sales
22_343258-ch16.qxp 6/4/08 12:18 AM Page 200

11. Click the Addresses tab (see Figure 16-3) and enter the Bill To andShip To information.
To look up this address information, click the Look Up Address buttonon the toolbar.
If the customer will be picking up the items, select Will Call for the ShipTo option (the first option in the Ship To Address section).
12. If you want to associate your quote with an opportunity, start thequote from the opportunity screen or do the following:
a. Click the Administration tab. (See Figure 16-4.)
b. Use the magnifying glass in the Opportunity field to find and selectthat opportunity.
c. Click OK.
13. Click the Save and Close button to save your quote.
The system returns to the Quotes window.
Figure 16-3:You don’t
always shipto the same
place yousend the bill.
201Chapter 16: Generating Quotes, Orders, and Invoices
22_343258-ch16.qxp 6/4/08 12:18 AM Page 201

Activating a quoteWhen you first create a quotation, it’s officially a draft. You can modify thedraft as many times as necessary. But before sending the quote to a cus-tomer, you must activate the quote. Follow these steps to do so:
1. In the Quotes window, select the quote you want to activate.
The details of the quote appear.
2. On the menu bar (at the top of the screen), choose Actions➪Activate Quote.
The quote now becomes read-only, and you can turn it into an orderwhen the time comes.
3. To save changes and continue working, click Save (the disk icon); tosave changes and close the form, click the Close button.
After you have activated the quote, it’s no longer a draft and the system cre-ates an official quotation. If the customer then requests a revision to thequote, you can modify that quote. The system stores an additional recordwith its own revision ID for each modified quote, so you may have a longseries of quotes as you continue to revise activated quotes.
Figure 16-4:Store
admin-istrative
details ofthe quote
here.
202 Part III: Managing Sales
22_343258-ch16.qxp 6/4/08 12:18 AM Page 202

Associating Opportunities and QuotesOpportunity records house all of your sales forecast information. By associat-ing an opportunity with a quote, you allow the system to calculate the esti-mated revenue for the opportunity automatically. As you revise an associatedquotation by changing products or discounts, those changes to the revenuestream are reflected in your overall forecast.
You can associate a quote with an opportunity or vice versa. If the opportunitydoesn’t exist yet, you need to create it before you can associate it with a quote.
We go through the steps of associating a quote with an opportunity record:
1. In the Opportunities window, select the opportunity that needs anassociated quote.
2. With the opportunity record displayed, click Quotes in the navigationpane (under Sales).
A list of all associated quotes appears in the main window.
3. If no quotes are yet associated with the opportunity, click the NewQuote button in the window’s toolbar. If quotes already exist, you can edit them if necessary.
4. Whether you’re entering a new quote or editing an existing quote,proceed with entering the information as detailed in Step 4 of the“Creating a quote” section, earlier in this chapter.
5. Assemble the individual items you want listed in your quote by click-ing Existing Products from the navigation pane or if you’re quoting acustom product or something that isn’t in the products list, selectWrite-In Products from the navigation pane.
Because we started this exercise from an opportunity record, the quote wejust created is automatically associated with this opportunity. No need to doany further association!
Printing a QuoteAfter you finish developing a quote and activate it, it’s a good idea to do aquick Microsoft CRM print. Follow these steps:
203Chapter 16: Generating Quotes, Orders, and Invoices
22_343258-ch16.qxp 6/4/08 12:18 AM Page 203

1. From the Quotes window, select the quote you want to print.
Your quote record appears on the screen.
2. Choose File➪Print or click Print Quote for Customer in the toolbar.
A preview of your quote appears so you can review it for accuracy.
3. When your previewed quote looks okay, you can send it to yourprinter by clicking the Print button.
Your bare-bones quotation prints, displaying the information from eachof the tab areas of your quote.
In most cases, this information won’t be formatted in your organization’sstyle. The good news is that you aren’t locked into a specific quotationformat. The bad news is that you need to create a format rather than selectfrom some canned ones.
Your system administrator or dealer can assist with the development of spe-cially formatted printouts and reports.
Converting a Quote to an OrderA successfully presented quote becomes an order. Only a previously acti-vated (status = active) quote can be turned into an order. The steps tochange a quote into an order are easy:
1. In the Quotes window, click the active quote.
The details of the quote appear.
2. On the Quotes window’s toolbar, click Create Order.
The Create Order dialog box appears, as shown in Figure 16-5. TheStatus Reason of the quote has automatically changed to Won. You cansee the Status in the list of quotes as long as the View is All Quotes. Theopportunity is no longer part of your forecasted sales because it’s now adone deal. Today’s date is automatically filled in, although you canmodify this if necessary.
3. Select the Close Opportunity option and click OK.
The opportunity is closed and no longer appears in the list of ActiveOpportunities (that is, when the View is set to Active Opportunities).
4. The quote window closes and a new window opens showing thedetails of the newly created order.
204 Part III: Managing Sales
22_343258-ch16.qxp 6/4/08 12:18 AM Page 204

Generating Invoices from OrdersWhen you’re ready to ship your goods or services to the customer, you usethe information in the order to generate an invoice to the customer. Followthese steps:
1. In the lower part of the navigation pane, click the Sales button. In theupper part of the pane, select Orders.
The Orders window appears.
2. Make sure the View menu (in the upper right) is set to All Orders.
3. Select the order you want to make into an invoice.
4. Click the Create Invoice button.
Microsoft CRM automatically generates and displays the invoice for you.Unless your system is integrated to a Dynamics accounting application,however, that invoice goes nowhere. Your invoice is typically printed (ordelivered in some other electronic way) from your accounting system.
5. Click Save and Close.
Figure 16-5:Creating an order.
205Chapter 16: Generating Quotes, Orders, and Invoices
22_343258-ch16.qxp 6/4/08 12:18 AM Page 205

One of the most compelling things about generating quotes, orders, andinvoices is CRM’s ability to integrate with accounting software. The extent orease of this integration depends on the accounting software you’re using. Ifyou’re using Microsoft Dynamics GP, for example, Microsoft has the integra-tion you need. If you’re using accounting software not from Microsoft, you’llprobably need a third-party module to integrate the two. See Chapter 27 forinformation on sources for this type of integration.
206 Part III: Managing Sales
22_343258-ch16.qxp 6/4/08 12:18 AM Page 206

Chapter 17
Setting Up Sales Literature andDealing with Competitors
In This Chapter� Adding sales literature
� Making changes to literature
� Relating literature to other records
� Adding and tracking competitors
The Sales Literature area is really a document management system. After youset up your subjects (formerly known as the Subject Manager) to provide
the structure for your company’s document library, you can file individualpieces of sales literature for future reference. (See Chapter 23 for full detailsabout how to set up the subjects.)
Subjects create an organizational structure for your literature, documents,and brochures. Think of it as the Dewey Decimal System for your own library.The Sales Literature area allows you to stock the shelves. And the shelves, bythe way, are on the server — not your local computer.
You may also want to keep track of your competitors and their sales literature.This information is particularly important when competing for projects. Whatyou find out (even in a losing battle) may help you win the next one.
Adding LiteratureAll new literature must be categorized by subject. This means your subjectsmust be set up with a structure to house your documents. (As mentioned,see Chapter 23 for information on subjects.)
23_343258-ch17.qxp 6/4/08 12:18 AM Page 207

To add a piece of literature — or any document or file — to the Sales Literaturearea, follow these steps:
1. In the lower part of the navigation pane, click the Sales button.
2. In the upper part of the navigation pane, select Sales Literature.
The Sales Literature window appears, as shown in Figure 17-1.
3. On the Sales Literature window’s toolbar, click the New button.
The Sales Literature: New window appears, as shown in Figure 17-2. Thisis the main information screen for entering and cataloging your literature.
4. In the Title field, enter a title for your article.
5. In the Subject field, select a subject as follows:
a. Click the magnifying glass to the right of the Subject field.
The Look Up Records window appears.
b. Select a subject from the list.
6. In the Type field, click the arrow and choose an item from the list.
This list displays likely topic descriptions for your literature.
Figure 17-1:Your salesliterature
appears in atypical view.
208 Part III: Managing Sales
23_343258-ch17.qxp 6/4/08 12:18 AM Page 208

7. If you want, associate a user with this literature as follows:
a. Click the magnifying glass to the right of the Employee Contact field.
b. Select an employee to associate with the literature.
This is probably the person on your staff who developed the litera-ture or the one who is responsible for the documentation.
8. To the right of the Expiration Date field, click the calendar icon andselect a date for your document to expire.
For example, you may have a sale advertisement or a company policythat expires on a particular date.
9. If you want, enter an abstract of the document in the Description field.
10. Click Save (the disk icon) or the Save and Close button.
If you select Save, the system saves what you’ve entered so far butremains on this same New Literature screen awaiting further edits. If youclick Save and Close, the system returns to the Sales Literature window.
Figure 17-2:Entering a
new article.
209Chapter 17: Setting Up Sales Literature and Dealing with Competitors
23_343258-ch17.qxp 6/4/08 12:18 AM Page 209

So far, you’ve entered only general information about the document. You stillneed to attach the document to the listing you just created. Follow these steps:
1. In the Sales Literature window, click the listing to which you want toadd one or more documents.
2. In the window’s pane on the left, select Documents (under Details).
3. On the window’s toolbar, click the New Document button.
The Document window appears, as shown in Figure 17-3.
4. Fill in the window as follows:
a. Title: Enter a descriptive title of the document, possibly including aversion number or a date.
b. Author: Enter either the author’s name or the name of the personresponsible for the document.
c. Keywords: Enter one or more keywords that anyone with access tothe database can use later to locate any document with one key-word or a combination of keywords.
d. Abstract: This is a short summary of the document’s contents.
e. File Name: This field connects Microsoft CRM to the stored file.You can use the Browse button to the right of the File Name field tolocate the document.
5. Click the Attach button in the lower-right corner of the window.
Doing so attaches the document entered in the File Name field anduploads the document to the server.
Figure 17-3:Entering thespecifics for
a piece ofliterature.
210 Part III: Managing Sales
23_343258-ch17.qxp 6/4/08 12:18 AM Page 210

6. Click the Save and Close button at the top of the window.
The system returns to the listing of documents associated with thisparticular subject.
Each title can be associated with multiple documents. When you completestep 6 above, you will be at the Sales Literature main window. To add a newdocument, simply repeat steps 3– 6 above. The structure of the entire titlelisting is similar to an organization chart, with each parent record capableof having multiple children. For example, you might have a document withpricing and terms and a separate document dealing with confidentialityassociated with consulting agreements. This is done by working withsubjects. Subjects are a way to organize records and to tie them together.All Sales Literature is categorized by subjects that are created in ahierarchy. We talk more about subjects in Chapter 23.
All documents are stored on the server. If you attach a document that’s currentlystored locally on your hard drive, Microsoft CRM makes a copy of the documenton the server. This way, other users (if they have access rights) will have accessto the document. When you need to retrieve the document, you have a choiceof downloading it from the server or just opening it directly from the server.
Modifying LiteratureMicrosoft CRM copies documents to the server so that all authorized teammembers can use them. Therefore, at least two copies of the same documentexist — one on your local computer and one on the server. Users may havetheir own original copy of the document on their own machine. Keep in mindthat you want everyone to work from the same version of the document.
Several document management systems allow multiple users to contribute tothe same document, more or less simultaneously. Even Microsoft Word has afacility called Track Changes. Each contributor is automatically assigned acolor, and you can easily see who has done what to the document. It’s alsoeasy to gracefully remove all signs of editing before printing the final edition.
You need one central repository for the current copies of all literature. Thatcan be the Microsoft CRM server, or it can be another readily accessible server,as long as everyone understands where the active documents are stored. If youuse CRM as a document repository, keep in mind any user of the system hasaccess to view and download it.
211Chapter 17: Setting Up Sales Literature and Dealing with Competitors
23_343258-ch17.qxp 6/4/08 12:18 AM Page 211

Assuming that the CRM server is the central library for current documents,follow these steps to edit an existing piece of literature:
1. In the Sales Literature window, click the row that contains the documentyou want to edit.
The General tab for that subject appears. You will soon have access tothe documents so that you can edit one or more of them.
2. In the pane on the left, select Documents.
You see a list of all the documents related to this subject.
3. Click the document you need to edit.
At the bottom of the window is a link to that document. This document,or attachment, is housed on the CRM server.
4. Click the link to the document and save it on your local drive.
You can’t edit the document while it’s on the CRM server.
5. Edit the document and save your changes on your local drive.
6. Upload the document to the CRM server so other users can access it.
If you simply reattach the document, it uploads automatically. Revisionnumbers aren’t automatically associated with revised documents, so youmight want to include a revision number in the file name or title of thedocument. In addition, you can track revisions, at least a little, by check-ing the Modified On date that appears in the Sales Literature window.
Relating Literature to CompetitorsOne of the more compelling aspects of the design of Microsoft CRM is theability to relate one kind of record to another. Suppose you want to associatea piece of sales literature with a competitor. You collect sample brochures fromeach of your competitors. You then catalog them in the Sales Literature areaand relate each brochure to the appropriate competitor. To do this, followthese steps:
1. In the lower part of the navigation pane, click the Sales button.
2. In the upper part of the navigation pane, select Competitors.
A list of all competitors appears in the window on the right.
3. Select the appropriate competitor.
The General tab for that competitor’s information appears.
212 Part III: Managing Sales
23_343258-ch17.qxp 6/4/08 12:18 AM Page 212

4. In the pane on the left, select Sales Literature (under Sales).
The Sales Literature window appears, showing all existing sales literatureassociated with the competitor you selected.
5. Select the piece of literature that you want to associate with this com-petitor by clicking the appropriate row in the list.
You can also set up a new piece of sales literature from here, as shown inthe “Adding Literature” section, earlier in this chapter.
6. In the window’s toolbar, click the Save button to save your associationof sales literature with the competitor.
Adding and Tracking CompetitorsWhenever you’re in a competitive situation, knowing as much as possibleabout the opposition is a good idea. You want to track their strengths so thatyou can anticipate the ammunition they’ll use against you. You want to knowtheir weaknesses so you can exploit them. Yes, it’s a tough world out there.
It’s a good idea not only to track the products they sell but also to compile asmuch literature about those products as possible. Your competitor’s Web siteis a great place to go to compile, download, and cut and paste all the informa-tion you can find. To add a new competitor to the database, follow these steps:
1. At the bottom of the navigation pane, click the Sales button.
2. At the top of the navigation pane, select Competitors.
3. In the Competitors window’s toolbar, click the New button.
The data entry window shown in Figure 17-4 appears.
213Chapter 17: Setting Up Sales Literature and Dealing with Competitors
Finding your competitorsYou may occasionally find yourself in a compet-itive situation but not know exactly who yourcompetitor is. Maybe you know the generalgeographic location of your competitor. TheAdvanced Find feature may come to yourrescue. For example, if you’re competing to sell
computer clones against another dealer some-where in Connecticut, you could use theAdvanced Find feature to find likely contenders.Choose Tools➪Advanced Find in theCompetitors window to access the AdvancedFind feature.
23_343258-ch17.qxp 6/4/08 12:18 AM Page 213

4. Enter at least the one required field, Name, and as many of the otherfields as you can.
Filling in the Key Product and Address fields may come in handy.
5. Click the Analysis tab.
The Analysis tab has five general, text-based topics for you to fill in. Ifyou’ve ever taken any Miller Heiman sales training, some of these topicsmay look familiar.
6. In these five fields, enter everything you know or suspect about thecompetitor.
7. Click the Save and Close button.
Compiling a library of your organization’s literature is one of the more usefulthings you can do for the group. Whether it’s just for internal consumption or,ultimately, for distribution to prospects and customers, having current literatureorganized in one place and available to everyone speeds up your sales andsupport efforts. Do it and then make sure you keep it all up-to-date.
Figure 17-4:Enteringdata onanother
annoyingcompetitor.
214 Part III: Managing Sales
23_343258-ch17.qxp 6/4/08 12:18 AM Page 214

Chapter 18
Implementing Sales ProcessesIn This Chapter� Understanding general process principles
� Adding and configuring sales stages
Business processes are intertwined with the workflow rules discussed indetail in Chapter 9. In this chapter, we discuss some of the basic principles
involved in designing your processes and how you can implement thosedesign principles in Microsoft CRM.
In the almost 20 years that we’ve been designing and implementing CRM systems(not always Microsoft CRM, of course), it has been made clear again and againthat two basic features allow CRM to earn its keep. The first is its ability toconsolidate an entire organization’s data into one useful, shareable place.Don’t underestimate this.
The second is its ability to automate business processes. The implementationof workflow not only forces you to think about — and then continuouslyrethink — your business processes but also allows you to replace notoriouslyinconsistent human activity with automation that always follows the rules.
Sadly, more than 90 percent of CRM implementations never achieve thatautomation. That initial goal seems to get lost in the effort to get the system upand running and the staff using the software. Too often, we’re out of energy andmoney to invest further in developing the workflow that really makes theinvestment in CRM pay for itself. If you want to maximize the value of yoursystem, however, don’t allow yourself to run out of resources before youfinish the entire job.
A good process guides your people through a series of well-documented stepsfor almost every type of situation. For example, although you can do a quotebefore properly qualifying an account, any well-thought-out system discouragesthis. Or you may remember to call a prospect back after sending a quote, buta good workflow-based process won’t let you forget.
24_343258-ch18.qxp 6/4/08 12:19 AM Page 215

Earlier in the book, we discuss in detail how to implement one of your well-thought-out processes in the Workflow Manager. (Actually, it may not be oneof your well-thought-out processes, but it might be similar to one of yours.)Please refer to Chapter 9 for a refresher on workflows.
In this chapter, you find out how to plan your sales stages and how to relatethese sales stages and other processes to your CRM system. You also dis-cover the basic principles of process design and how these affect the designof your overall CRM system.
The General PrinciplesA good business process includes the concepts of alerts, escalation, feed-back, and analysis. We describe each of these principles in this section.
AlertsAn alert, which is often an e-mail notice or some kind of screen pop-up, is calledfor when an activity should’ve been completed but for some reason wasn’t. Forexample, if you’ve obtained verbal approval and the prospect promises a writ-ten purchase order within a week, the system should alert the account manager10 days later if that purchase order hasn’t arrived. (If you’re a Type A personal-ity, you may want to adjust your waiting period to 10 minutes.) Please refer toChapter 9, “Managing Workflows,” for an example of setting up a workflow rule.
Alerts are appropriate also as a warning that an upcoming activity is almostdue. For example, you might want a polite warning 30 days before a client’sannual contract needs renewal.
Depending on the number of alerts you anticipate, you may decide on indi-vidual e-mail notices for each alert, or you may want a single e-mail or reportthat contains all the alerts. For example, you may set up a Workflow whiche-mails you a list of overdue purchase orders at the end of the day. A typicalsales alert might be to let a manager know on the 18th of the month that aforecasted sale that was slated to close on the 15th hasn’t closed yet. If youexpect more than two or three of these alerts, you’ll be better off planning toput them in a consolidated report that the manager receives. Otherwise, yourisk clogging up your manager’s in-box with dozens of these warnings, whichhe or she will soon learn to ignore. KnowledgeSync, discussed in Chapter 27,is a third-party alert messaging application. This is one tool you could use todisplay on-screen pop-up alerts.
216 Part III: Managing Sales
24_343258-ch18.qxp 6/4/08 12:19 AM Page 216

EscalationWhen something doesn’t get done on time, someone needs to know. Now, youcan do this properly, or you can do this in a way that gets everyone upset.Escalations are typically done by e-mail notices, by automatically schedulingactivities, or by some combination of the two.
Typical activities that deserve escalation are sales that haven’t closed when pre-dicted or customer support issues that haven’t been resolved in a timely way.
To be fair, the first step in escalating any issue is to notify the person towhom the issue was originally assigned. There might be a perfectly validreason why the issue hasn’t been resolved, and you should allow the originalperson to resolve it.
An administrator could set up a Workflow rule which automatically schedulesan activity or sends an e-mail when a scheduled activity is overdue. Pleaserefer to Chapter 9 on setting up a Workflow rule.
If the task or issue still hasn’t been resolved within a few days, a noticeshould go to the original person’s manager.
CRM can’t send a notice to the manager unless it knows who the manager is.Each user’s record has a field for the user’s manager’s name. Escalatingissues is probably the best use of this field. To see users’ managers, simplyclick on Settings on the main navigation pane, click on Administration andthen click on users. You will be presented with a list of all configured users.Simply double-click on any user to see his or her Manager.
The typical steps of an escalation plan are as follows:
1. Test to see whether an alert is required. You could do this by setting upa Workflow rule scan for any incomplete assigned tasks. (Refer to chapter9 on how to set up Workflow rules.)
2. Send an initial alert to the primary user. You could do this by setting upa Workflow rule to send an e-mail to the primary user.
3. Wait a reasonable period (one to seven days, for example) and test again.If the issue still isn’t resolved, escalate to the primary user’s manager.
4. Test again a reasonable time later. If the issue still isn’t resolved, notifythe manager’s manager. Continue this notification until you run out ofmanagement levels. Adjust the waiting period between notifications asappropriate. You could do this by setting up a Workflow rule to send ane-mail to the manager’s manager if the incomplete task has not been com-pleted after so many days. In this example, you waited up to seven days tonotify the primary manager (step 3), you could wait an additional sevendays to notify the manager’s manager.
217Chapter 18: Implementing Sales Processes
24_343258-ch18.qxp 6/4/08 12:19 AM Page 217

Each time a manager is notified, all users who received prior notificationsshould be copied.
Feedback and analysisIt isn’t a good process unless you can measure it. Losing weight is a process.Before you start that process, you undoubtedly weigh yourself and continueto do so as you work toward your desired weight. Without measuring, youdon’t know how well you’re doing, and you can’t make midcourse correc-tions. Business processes are the same.
If you’re implementing a sales process with a focus to move each sale fromone stage to the next, you want to measure a number of factors. You probablywant to know:
� Where and when the lead originated. The purpose of tracking thesource of each new record is to be able to better allocate your marketingdollars by determining which lead sources are best.
� Who is working on the lead. Aside from wanting to give credit wherecredit is due — that is, commissions, bonuses, or a pat on the back —you also want to identify salespeople who may be having problems withparticular types or stages of sales so you can correct these problems.
� How long it takes to get from each stage to the next. If your sales arebogged down at a particular stage, you want to know that and makecorrections to your process or workflow.
Planning Your Sales StagesMicrosoft Corporation and Microsoft CRM both follow the sales processcalled Solution Selling, which was originated by Sales Performance International.If you haven’t taken one of the classes, read one of the books that providesan overview of this sales philosophy. We’re partial to Solution Selling: CreatingBuyers in Difficult Selling Markets, by Michael T. Bosworth (McGraw-Hill).
If your company already has a sales process other than Solution Selling inplace, that’s okay. Microsoft CRM has enough flexibility to allow you to con-figure almost any kind of process.
Your organization undoubtedly needs more than one process. For example, ifyou sell software and technical support, the associated sales cycles and tech-niques are different, and you’ll want a process for each type of sale. Also, youmay need a different sales strategy just based on the size of the potential dealor even the size of the prospect. For example, you would sell 2 pounds of
218 Part III: Managing Sales
24_343258-ch18.qxp 6/4/08 12:19 AM Page 218

nails to a homeowner in a different manner than you would sell 200 tons of nailsto a home improvement store.
In CRM, sales processes are associated with opportunity records. Althoughyou may consider the sales process to begin when you enter a lead, this isn’tthe case. The process can’t begin until you convert a lead to an opportunity,which we tell you how to do in Chapter 12. We distinguish a lead from anopportunity the same way we distinguish a suspect from a prospect. It isn’tan opportunity or a prospect until this potential customer expresses someinterest in your products or services. After that happens, you may have anopportunity, and it’s time for the sales process to begin.
No immutable laws govern the development of a sales process. The salesprocess police won’t be knocking at your door if you have too few or toomany stages, but sales processes do have a few guidelines.
The more complex or the longer your sales cycle is, the more stages you’llneed to describe where each deal is in your pipeline. However, the morestages you program into the cycle, the more likely your salespeople willobject to being forced to enter unnecessary data or take unnecessary steps.So, the simpler, the better — with an eye toward gathering good informationabout where sales bog down or at what point a particular salesperson beginsto struggle.
In Table 18-1, we present a typical sales cycle. Before you can begin to imple-ment CRM’s workflow rules, you must define your process. Start with thetable and compare it with your own existing sales steps. Chances are, youdon’t even have a well-documented set of steps. Now’s the time to begin cre-ating that system.
Table 18-1 Typical Sales CycleStage Description Probability Comments
1 Prequalify 10 Make sure it’s the right kind ofclient.
2 Initial meeting 20 This can be a phone call or aphysical appointment; probabilityincreases to 25 if the prospectcomes to your office.
3 Qualified 30 Not only are they interested, buttheir timeframe and financialsmake a deal possible.
4 Demonstration 40 This is show and tell at their placeor, even better, at yours.
(continued)
219Chapter 18: Implementing Sales Processes
24_343258-ch18.qxp 6/4/08 12:19 AM Page 219

Table 18-1 (continued)Stage Description Probability Comments
5 Quotation or 60 There may be several of these,proposal presented and you may go back and forth
from stage 6 to 5 more than once.
6 Negotiating 75 Always be ready for some giveand take.
7 Verbal approval 85 This isn’t as good as a writtenobtained purchase order or a signed check.
8 Purchase order 99 It isn’t a done deal until the received money arrives.
Select your simplest product or service and compare the steps you use to thesteps in Table 18-1. Then create a table that best follows either the stepsyou’re taking today or, better yet, the steps you think you should be taking.
Before you just jump in and begin programming the workflow rules describedin Chapter 9, you need to organize your thoughts. Convene a brainstormingsession with the users who are involved on a day-by-day basis with eachprocess you want to automate.
The result of that brainstorming session should be a detailed outline or diagramof the process. Each outline needs to include, for each step:
� The action that will be taken
� Who will be responsible for that action
� What will trigger the action (for example, a change in the data or amissed appointment)
� How to escalate if the action isn’t completed
After you set this up for each step of the process, it’s time to go to Chapter 9and begin making your new process happen.
220 Part III: Managing Sales
24_343258-ch18.qxp 6/4/08 12:19 AM Page 220

Part IVMaking the Most
of Marketing
25_343258-pp04.qxp 6/4/08 12:19 AM Page 221

In this part . . .
Targeting your accounts, which we cover in Chapter 19,is a way to group just those accounts or records that
have something in common. For example, you could targetevery customer or prospect in your state that might beinterested in a new line of products you’re about to release.
Any marketing person worth his or her salt wants to mea-sure the cost and effectiveness of each marketing cam-paign, so we cover that in Chapter 20.
And, in a chapter new to this edition, in Chapter 21 we discuss how you can collect information from visitors toyour Web site and automatically get that to flow into yourCRM system and then, maybe, even use workflow to auto-matically respond to their requests.
25_343258-pp04.qxp 6/4/08 12:19 AM Page 222

Chapter 19
Targeting Accounts and ContactsIn This Chapter� Setting up fields
� Developing your marketing lists
� Editing marketing lists
� Merging marketing lists
Marketing professionals are often looking for ways to build lists of cus-tomers and prospects to help target their marketing message. Your
Microsoft CRM system is most likely full of useful marketing data. Fortunately,the developers of Microsoft CRM understand that and provide a multitude ofways to target customers and prospects directly from the CRM system. Thischapter addresses the marketing module contained in Microsoft CRM 4.
Target marketing with databases consists of storing critical business data,mining that data, and building lists of people that correspond to a marketingneed. This book isn’t a primer on database marketing, but that doesn’t meanwe can’t review some basic concepts.
Databases are wonderful tools for storing data and retrieving it. With MicrosoftCRM Marketing Lists, we can retrieve individual records, aggregate data, buildlists, and perform marketing-related actions against the aggregated lists ofdata. We can then associate marketing lists with marketing campaigns (as wediscuss in Chapter 20). Marketing campaigns store data on the types of chan-nels used to reach your target market: who responded, how much new busi-ness was created, and lots more. Analyzing this data helps to improve futurecampaigns by allowing you to focus on the channels and people that not onlyrespond to your marketing activities but more importantly purchase yourgoods and services.
Believe it or not, marketing list development starts with database design. A well-designed database allows for maximum output with minimal input.Simply put, a well-designed database puts few data entry requirements onusers while allowing the marketing department to query the database at will.We suggest you check with your Microsoft CRM dealer to aid in databasedesign.
26_343258-ch19.qxp 6/4/08 12:23 AM Page 223

Let’s take a look at an example to illustrate marketing list development. Mr. Spacely (of The Jetsons) wants to make a special offer to customers of his competitive product, Cogswell Cogs. Fortunately, Mr. Spacely had areader of Microsoft CRM 4 For Dummies design his database. His CRMdesigner added a field to the Account form called Product Owned, whichrecords the product that an account owns, either a Spacely Sprocket or aCogswell Cog. Mr. Spacely asks his marketing department to create a list of allcustomers who purchased Cogswell Cogs. His marketing team uses AdvancedFind to create the desired list. (For more on Advanced Find, see Chapter 3.)With the list created, the Spacely marketing will create a campaign targetedat Cogswell customers. To learn more about Marketing Campaigns, seeChapter 20.
We recommend that you work with a Microsoft CRM professional organiza-tion to help in determining the best approach for designing your database.
Here are some basic rules for designing your Microsoft CRM 4 system, to helpyou optimally market to customers, prospects, or leads, or any combinationof the three:
� Track company information on the account form only. If you need tosegment by industry, enter it on the account form and not on the con-tact form. If you know what industry a company is in, you can safelyassume the company’s employees also work in that industry. Similarly,when designating companies as prospects or customers, we recommendtracking that information on the account screen.
� Enter contact-specific data on the contact screen. This may seem obvi-ous, but should you want to send out birthday notices, put a birthdayfield on the contact screen.
� Query related entities. Microsoft CRM is a relational database. TheAdvanced Find lets you query related entities to help develop a list. Ifyou’re unaware of how to relate entities, call your reseller.
Targeting the Right PeopleLet’s not lose sight of an obvious fact: You market to people — not buildings,accounts, opportunities, or anything else. And some people don’t want youto market to them. Don’t worry if someone opts out of your marketing butsomehow ends up on one of your marketing lists anyway; Microsoft CRM hasa built-in safety net. (Okay, you may not be trapeze artists, so safety net ismore of a metaphor.) In any case, the aforementioned safety net is found onthe Administration tab of the Contact form, as well as the Account and Leadforms under Contact Methods.
224 Part IV: Making the Most of Marketing
26_343258-ch19.qxp 6/4/08 12:23 AM Page 224

Figure 19-1 shows the Contact form’s Administration tab. At the top of the tabis the Contact Methods section, where you can adjust the following settings:
� Preferred: This drop-down list allows you to choose the contact’s pre-ferred method of contact.
� E-Mail: If the contact opts out of e-mail, select the Do Not Allow radiobutton. Subsequent attempts to e-mail the contact from Microsoft CRMwill be blocked.
You can’t send an Outlook e-mail to a CRM record that has Do Not Allowset in the E-Mail field. When you click Track in CRM prior to sending thee-mail, you’ll receive the message shown in Figure 19-2.
Figure 19-2:An Outlook
messageindicating
that thecontact is
marked asDo Not
Allow fore-mail.
Figure 19-1:The
Adminis-trative tab
that’s inaccount,contact, and leadrecords.
225Chapter 19: Targeting Accounts and Contacts
26_343258-ch19.qxp 6/4/08 12:23 AM Page 225

Chapter 20 covers marketing campaigns; however, it will be helpful now if you understand the distinction between a campaign and a quickcampaign in Microsoft CRM. A quick campaign is a single marketingactivity sent to one or more records. A marketing campaign is a full mar-keting campaign that can have one or more events in a variety of chan-nels, such as e-mail, letter, fax, and more. Marketing campaigns can haveassociated planning steps, targeted responses, and more.
� Bulk E-Mail: Used for quick campaigns. Records marked “Do Not Allow”with this option will not receive quick campaigns.
� Phone: Indicates a person’s desire, or lack thereof, to accept marketingcalls from your organization.
� Fax: As with phone, you can indicate whether or not the person willaccept fax marketing messages.
� Mail: Indicates whether a person will accept marketing materials thatare mailed to them.
The next section, called Marketing Information, contains a radio button forsending marketing materials. Selecting the No radio button for the SendMarketing Materials option prevents all marketing campaigns from going tothat contact.
Note that setting Bulk E-Mail to Do Not Allow (in the Contact Methods sec-tion, above) prevents all quick campaigns. A Do Not Allow for E-Mail blocksall e-mail to the contact regardless of the selected choices for Bulk E-Mail andfor Send Marketing Materials (when the campaign is an e-mail campaign).
Figure 19-3 illustrates the proper settings for a contact with whom you oftenexchange e-mails, but who has declined to receive your e-mail marketing. InFigure 19-3 we’ve set: E-mail to Allow; Bulk E-mail to Do Not Allow; and SendMarketing Materials to No.
This contact is now someone with whom we can communicate on a regularbasis via e-mail but who won’t receive any of our e-mail marketing.
We recommend creating corporate best practices on how to utilize theContact Methods settings. More and more laws are being passed regulatingspam, opt-in/opt-out marketing, and the divulging of contact details to thirdparties. If you violate any of these rules, your marketing will probably notbenefit and may create all sorts of trouble.
We’re ready to build that marketing list we mentioned earlier in the chapter. Ifyou’ve properly designed your database, now you simply need to go aheadand build the list.
226 Part IV: Making the Most of Marketing
26_343258-ch19.qxp 6/4/08 12:23 AM Page 226

Developing and Saving Marketing ListsMarketing lists differ from Advanced Find in that, after a marketing list isbuilt, it requires human interaction to alter the contents. In contrast, when-ever you run an Advanced Find query, the result set that is returned encom-passes all the data in the database satisfying the query. If you create amarketing list with 100 records, 100 records will remain in that list forever,unless someone alters the marketing list. In contrast, an Advanced Findquery can differ in the number of records returned every time it’s executed.For example, an Advanced Find query run for all customers in Massachusettsreturns a specific number of records, such as 1,000. If we rerun the AdvanceFind later in the day we may now return 1,010 records as 10 new customershave been added to the database.
A marketing list isn’t dynamic, meaning that marketing list entries don’tchange automatically with changes to the database as an Advanced Finddoes. If we create a marketing list based on the Massachusetts AdvancedFind, we have 1,000 records in the marketing list. Later, when the AdvancedFind returns 1,010 records, the marketing list will continue to return 1,000records. This allows you to track the original group marketed to regardless ofadditions made to the database.
Figure 19-3:The
Adminis-trative tab
allowinge-mail
but notmarketing.
227Chapter 19: Targeting Accounts and Contacts
26_343258-ch19.qxp 6/4/08 12:23 AM Page 227

Creating marketing listsBefore creating a marketing list, have an idea as to the target audience ofyour marketing message (such as accounts, contacts, or leads). Then followthese steps:
1. On the navigation pane, click the Marketing button.
2. In the upper part of the navigation pane, select Marketing Lists.
The Marketing Lists window appears, as shown in Figure 19-4.
3. On the window’s toolbar, click the New button.
The Marketing List: New screen appears, as shown in Figure 19-5. Threefields are required: Name, Member Type, and Owner.
4. In the Name field, enter a unique name for your new list.
5. Select a Member Type from the drop-down list.
The Member Type simply indicates whether you’re building the list fromyour accounts, contacts, or leads. You can choose only one of these per list.
6. By default you will be the Owner; to change ownership of the market-ing list to another user, click the magnifying glass icon and selectanother user.
Figure 19-4:Your
marketinglists are
displayed.
228 Part IV: Making the Most of Marketing
26_343258-ch19.qxp 6/4/08 12:23 AM Page 228

7. Enter information in the other fields, as desired.
If you’re building this marketing list based on a purchased list that wasimported into the CRM system, indicate so in the Source field. Enter howmuch you paid for the list in the Cost field. You can enter notes either inthe Description field or in the Notes tab. If you use the Notes tab, eachnote is date and time stamped.
8. Click the Save button.
The navigation menu on the left of the marketing list is now available.
Now you have a list, but it has no records in it. The next section describeshow to populate your list.
Adding members to the marketing listYou can populate marketing lists by adding records one at a time or withAdvanced Find. The Advanced Find method populates the list with multiplerecords at a time. Similarly, you can remove marketing list members from thelist one at a time or en masse via Advanced Find.
In general, if a database relationship exists between the records you’d like totarget, Advanced Find is the best tool for the job. On the other hand, shouldyou want to add records without a common thread (no database relationshipcan be established), the Look Up feature is the way to go. Of course, youcould do both. The examples that follow illustrate these points.
Figure 19-5:Creating
a newmarketing
list form.
229Chapter 19: Targeting Accounts and Contacts
26_343258-ch19.qxp 6/4/08 12:23 AM Page 229

To add all contacts where the account type is Customer, use the AdvancedFind method. The database relationship between the account records is theaccount type of Customer. Your list will consist of contacts where the rela-tionship field on the Account form is Customer. This is in contrast to a listcreated that is not based on a database relationship. For example, a market-ing list called Newsletter will contain anyone requesting your corporatenewsletter. Other than adding these records to a marketing list calledNewsletter, there may not exist any other database relationship betweenthese records.
To add specific members to the marketing list, follow these steps:
1. On the marketing list navigation pane, click Marketing List Members.
2. At the top of the Marketing List Members pane, click ManageMembers.
Figure 19-6 shows the Manage Members screen.
3. Click the first option, Use Lookup to Add Members, and then click OK.
The Look Up Records dialog box opens.
4. In the Look For field, enter the name of the account(s) you want toadd to your list.
Figure 19-6:The
ManageMembers
form.
230 Part IV: Making the Most of Marketing
26_343258-ch19.qxp 6/4/08 12:23 AM Page 230

You can enter all or part of the name. We entered *mo*. The asterisk (*)is a wildcard that matches any sequence of characters. The mo finds anycontact record with mo in the first or last name. The characters aren’tcase sensitive and will display mo in the first or last names, such as MoeHoward, Amos Smith or Mickey Monaghan.
5. Click the Search Icon (magnifying glass).
All the contacts with mo in their first or last names appear in theAvailable Records pane, as shown in Figure 19-7. This list may includerecords you don’t want. For example, the figure shows many otherpeople that we don’t want to add to our marketing list.
6. Highlight the records you want to include in your marketing list andthen click the >> button.
To select a range of records, use the Shift key or the Ctrl key to selectmultiple records.
7. Click OK when you’re finished.
The system flashes a message, telling you that it’s adding records toyour list, and then returns to the Marketing Lists window.
Figure 19-7:You’re
adding two of the
recordsdisplayed.
231Chapter 19: Targeting Accounts and Contacts
26_343258-ch19.qxp 6/4/08 12:23 AM Page 231

To see the number of records added to a marketing list, follow thesesteps:
1. Click Marketing on the Navigation Bar.
2. Click Marketing Lists.
3. Double-click a marketing list to open it.
4. On the Local Marketing List navigation bar, click Marketing ListMembers.
5. The total number of list members is written near the top left of theform. (See Figure 19-8.)
Here’s an alternative way to add a record to the marketing list. After you’vecreated your marketing list, you can add members when you’re on the Lead,Contact, or Account forms. To do so, just follow these steps:
1. Open the contact record and Click Marketing Lists on the bottom ofthe contact navigation pane.
2. At the top of the Marketing List Members pane, click Add to MarketingList.
The Look Up Records - Marketing List dialog box opens. (See Figure 19-9.)
3. Select a record.
4. Click Save and Close.
Figure 19-8:The total
number ofrecords
added to aMarketing
List.
232 Part IV: Making the Most of Marketing
26_343258-ch19.qxp 6/4/08 12:23 AM Page 232

Populating a marketing list usingAdvanced FindWith Advanced Find, you can add many records to the marketing list at onetime; you create a query that returns a subset of data. For example, the queryyou create could be: All contact records in the state of California where the E-Mail field contains data and the contact’s title is VP of Operations. Thiscomplex query returns all the contact records in the database that satisfy thequery. Some benefits of using Advanced Find are:
� Advanced Find can look at any field within a record, not just the Namefield.
� Advanced Find can look at more than one field in a search. For example,Advanced Find can locate all the accounts in New York that also have faxnumbers.
� Advanced Find can search more than one entity. Your contact list can befiltered by values on the account form or any entity related to contacts.
� You can save Advanced Find queries for use later.
Figure 19-9:The Look Up
Records -MarketingList dialog
box.
233Chapter 19: Targeting Accounts and Contacts
26_343258-ch19.qxp 6/4/08 12:23 AM Page 233

To create a targeted list using Advanced Find, follow these steps:
1. On the navigation pane, click the Marketing button.
2. At the top of the navigation pane, select Marketing Lists.
3. Double-click to select the marketing list you want to populate (if youhave not yet created a marketing list, refer to creating marketing listsabove).
The marketing list form opens.
4. On the navigation pane, select Marketing List Members.
5. On the window’s toolbar, click the Manage Members button.
The Manage Members dialog box appears.
6. Click the second option, Use Advanced Find to Add Members, andthen click OK.
7. The type of record on which you’re basing your search is limited tolist type; however, you can query related entities, such as the Accountentity from Contacts, as shown in Figure 19-10.
You’re looking for contacts in Massachusetts with an accountRelationship Type of Customer. (See Figure 19-10.)
You can also use a saved Advanced Find query by clicking the SavedViews tab and selecting an existing query.
Figure 19-10:Advanced
Find forcontacts in
Massachus-etts with an
accountdesignation
of Customer.
234 Part IV: Making the Most of Marketing
26_343258-ch19.qxp 6/4/08 12:23 AM Page 234

8. In Figure 19-11, you can add selected members to the marketing listby using Ctrl+click or by clicking the Add All the Members Returnedby the Search to the Marketing List radio button. When done, click theAdd to Marketing List button.
9. If so desired, click the Back to Query button and save your AdvancedFind.
This adds the Advanced Find to your saved queries.
10. Click Save and Close to save this new entry as one of your marketinglists.
After a marketing list is created, it’s static. In other words, marketing listmembers don’t change without manual intervention.
Editing a Marketing ListWe mention several times that, unlike an Advanced Find, marketing lists arestatic and can be changed only manually. Why would you want to change a list?One reason is to add people to the list to comply with a request, such as anewsletter opt in. To update a list with many records at one time, you can useAdvanced Find in much the same way you use it when creating a marketing list.
Figure 19-11:Adding
AdvancedFind records
to amarketing
list.
235Chapter 19: Targeting Accounts and Contacts
26_343258-ch19.qxp 6/4/08 12:23 AM Page 235

To add records, follow the steps in the preceding “Populating a marketinglist” section.
You can enter a record into a specific marketing list only once, so don’t worryabout duplicating the entry.
Removing Records from a Marketing ListThere are two ways to remove records from a marketing list. We cover bothoptions in the steps that follow.
To remove records from a marketing list, follow these steps:
1. Open a contact record.
2. On the form’s navigation pane, click the marketing list icon secondfrom the bottom.
The marketing list view is displayed on the right.
3. Click the list item (or Ctrl+click several marketing lists) from whichyou’d like to remove the record.
4. On the toolbar, choose More Actions➪Remove.
The contact will be removed from chosen list or lists.
5. Click OK.
The second approach is to navigate to a particular marketing list where youhave several options to remove records. From the marketing list, you canremove one or multiple records at a time. Let’s explore those options:
1. On the navigation pane, click the Marketing button.
2. At the top of the navigation pane, select Marketing Lists.
3. Double-click to select the marketing list you want to edit.
The marketing list form opens.
4. On the navigation pane, select Marketing List Members.
5. Click the list member or Ctrl+click the members you want to remove.
6. On the toolbar, choose More Actions➪Remove From Marketing List.
7. Click OK.
236 Part IV: Making the Most of Marketing
26_343258-ch19.qxp 6/4/08 12:23 AM Page 236

Alternatively, you can remove records via an Advanced Find query. To do so,follow these steps:
1. From an open marketing list, Click Marketing List Members on thenavigation bar.
2. Click Manage Members on the top right.
The manage members dialog box opens. (Refer to Figure 19-6).
3. Select Use Advanced Find to remove members.
The Advanced Find query window opens.
4. Create an Advanced Find or use a saved one.
5. Click Find in the lower right corner.
The list of members satisfying the search is shown.
6. Ctrl+click to remove individual members or click the Remove All theMembers Returned by the Search from the Marketing List radiobutton.
7. Click the Remove from Marketing List button on the bottom of theform.
Or, finally, you can remove records with the Use Advanced Find to EvaluateMembers option. To do so, follow these steps:
1. From an open marketing list, click Marketing List Members on thenavigation bar.
2. Click Manage Members on the top right.
The manage members dialog box opens. (Refer to Figure 19-6.)
3. Select Use Advanced Find to evaluate members.
4. Click OK.
5. The Advanced Find window opens.
In this case, you’re going to evaluate the account state and remove any contacts whose parent account isn’t located in Massachusetts.Figure 19-12 shows your query.
Of your three records, Moe and Larry work for a company inMassachusetts, and Mickey Monaghan works for a company located inWashington state.
237Chapter 19: Targeting Accounts and Contacts
26_343258-ch19.qxp 6/4/08 12:23 AM Page 237

6. Click the Find button.
Figure 19-13 shows the results. Only two records appear based on thequery, which means Mickey will be removed from the list.
Figure 19-13:Query
results forevaluatingmembers.
Figure 19-12:Query toexcluderecordsfrom the
marketinglist.
238 Part IV: Making the Most of Marketing
26_343258-ch19.qxp 6/4/08 12:23 AM Page 238

7. Click the Keep All the Members Returned by Search in the MarketingList radio button.
8. Click the Update Marketing List button.
Merging Mail from Marketing ListsA new feature added to Microsoft CRM 4 is the ability to launch mail mergedocuments from the Internet Explorer client, a feature only found in theOutlook client in version 3. The mail merge feature enables the user to outputdata from the marketing list members to Microsoft Word, e-mail, fax, labels,or envelopes.
After you create a marketing list, the Mail Merge on List Members button isavailable at the top of the screen. Use it to create the mail merge as follows:
1. At the top of the marketing list form, click the Mail Merge on ListMembers button.
The Mail Merge for Microsoft Office Word dialog box opens, as shown inFigure 19-14.
Figure 19-14:The Mail
Merge forMicrosoft
Word Dialogbox.
239Chapter 19: Targeting Accounts and Contacts
26_343258-ch19.qxp 6/4/08 12:23 AM Page 239

2. In the Select the Mail Merge Type drop-down box, choose Letter,Email, Fax, Envelope, or Label, according to your needs.
3. Choose the type of document to start with: a blank document, or anorganization or personal mail merge template.
If you choose one of the templates, you’ll then have to click the lookupbox to the right of your selection. If you have a few templates they willshow in the dialog box. Select one and click OK. If you have many tem-plates, you can search for the desired template in the Look For box.When found, click on the template and click OK.
4. Select a template, if necessary, and click OK.
5. Click the Data Fields button.
You can select up to 62 fields.
6. Click OK twice.
7. Click Open when prompted with the file download dialog box.
8. If macros have been disabled, click Options in Word and enablemacros. (See Figure 19-15.)
If you’re using Word 2007, as we are in Figure 19-15, you’ll also have toclick the CRM button on the Add-Ins or Mailing tab.
9. Select the data to be merged and click OK.
Figure 19-16 shows the data to be merged.
Figure 19-15:A Microsoft
Wordtemplate
with CRMdata
merged.
240 Part IV: Making the Most of Marketing
26_343258-ch19.qxp 6/4/08 12:23 AM Page 240

10. In Word, on the bottom right, click Next: Preview your letters.
You’re merge document shows with actual CRM data merged.
11. In Word, on the bottom right, click Next: Complete the merge.
Your merge documents are now complete. You can print or save or both.
Figure 19-16:Merging
marketinglist data
withMicrosoft
Word.
241Chapter 19: Targeting Accounts and Contacts
26_343258-ch19.qxp 6/4/08 12:23 AM Page 241

242 Part IV: Making the Most of Marketing
26_343258-ch19.qxp 6/4/08 12:23 AM Page 242

Chapter 20
Managing CampaignsIn This Chapter� Creating campaigns
� Launching and managing campaigns
� Recording campaign responses
� Working with quick campaigns
As a Customer Relationship Management tool, Microsoft CRM 4 has anentire module related to marketing. A key component of the marketing
module is campaigns. Campaigns in Microsoft CRM deals with planning andexecuting a database marketing campaign. Campaigns are related to databasemarketing because the campaigns you create deal with data stored in yourMicrosoft CRM system, and the campaign results will also be stored in yourMicrosoft CRM system. You need not be a marketing professional to use cam-paigns. This chapter will introduce you to campaigns, how to execute themand how to record responses.
This chapter logically follows Chapter 19, in which we cull our database toproduce lists of customers, prospects, and so on. Now we want to put thoselists to good use.
Marketing campaigns can be simple. A campaign can be comprised of a singleactivity, such as sending a letter, or a campaign can be very sophisticatedand comprised of multiple steps. A complex campaign can consist of severalphone calls, letters, and trade show attendance involving many people.Whichever campaign is decided upon, marketing managers would like totrack campaign response rates. They can then correlate the number ofimpressions to responses to opportunities and hopefully to new business.This analysis is vital in determining a campaign’s effectiveness.
CRM campaigns allow for tracking responses and linking them to sales oppor-tunities. In addition to response rates, campaign managers can track a varietyof other campaign-related data and report on results. These tools can help amarketing manager improve planning and execution of future marketing campaigns.
27_343258-ch20.qxp 6/4/08 12:23 AM Page 243

Developing Your CampaignMicrosoft CRM is the tool to carry out and track a marketing campaign, butbefore you do that, you can use CRM to develop a clearly defined plan for the campaign. Proper planning is an essential component of any marketingcampaign (but you already knew that didn’t you?). When you’re armed with aplan that has clearly stated goals and a well-defined budget, you’re ready toexecute your first Microsoft CRM 4 marketing campaign.
But before we begin our journey through campaign management withMicrosoft CRM 4, let’s explore a marketing scenario. Our three funny guys,Moe, Larry, and Curly, are planning to attend the big Comedy Convention inLas Vegas later this year. The Comedy Convention sends a list of attendees to exhibitors prior to the convention. Our three funny guys have decided touse Microsoft CRM to market to the attendee list prior to the meeting in aneffort to maximize the number of prospects who visit their booth. Their pre-conference marketing consists of different channels — e-mails, letters, phonecalls, and so on.
After the conclusion of the conference, our heroes will post-market to theconference attendees that stopped by the booth. With Microsoft CRM, theywill be able to manage campaign responses and the effectiveness of the marketing campaign in terms of related opportunities and hopefully newbusiness.
The following list outlines several important aspects of the benefits of usingMicrosoft CRM for a marketing campaign:
� Track budget versus expenses. Money, money, money. Your budget isextremely important, and you want to make sure you have one estab-lished before you start. Then, as the campaign progresses, the cost isautomatically calculated in Microsoft CRM. You can enter and adjustinformation for the total budget of the campaign, the expected revenue,miscellaneous costs, or the total actual cost.
� Assign promotion codes. Use promotion codes to help track responses.Track responses by associating different codes with different media outlets.
� Target products. Add products to Microsoft CRM and associate thoseproducts with a marketing campaign. Now you’re experiencing thepower of a relational database!
� Define lists. All campaigns need at least one marketing list associatedwith it. Marketing lists are collections of accounts, contacts, or leads thathave been identified as the target market for a campaign. Marketing listcreation can be based on database queries (Advanced Find) or simplyby adding users to a particular list or lists. For more on lists, seeChapter 19.
244 Part IV: Making the Most of Marketing
27_343258-ch20.qxp 6/4/08 12:23 AM Page 244

� Collect marketing material. Now you’ll know who received the uniquecoffee mug you provided as a thank you. Or perhaps the pen that writesunderwater to a depth of 60 feet.
You’ll also want to set your revenue target and the starting and ending datesof your campaign. We suggest that you put all this together in an outlinebefore building your campaign. That way, you can see any holes in your campaign before they become an issue.
Creating CampaignsLet’s return to our marketing scenario. The Stooges in preparation for theupcoming Las Vegas conference create a campaign in Microsoft CRM. Let’screate the campaign together. Just follow these steps:
1. On the navigation pane, click the Marketing button.
2. At the top of the navigation pane, click Campaigns.
The Campaigns window appears, Most likely your view will be MyCampaigns, but you can switch your view by clicking on the View drop-down list (See Figure 20-1).
3. On the window’s toolbar, click the New button.
The New Campaign form is displayed, as shown in Figure 20-2.
Figure 20-1:All
campaignsstart here.
245Chapter 20: Managing Campaigns
27_343258-ch20.qxp 6/4/08 12:23 AM Page 245

4. Enter a name for your campaign in the Name field.
We’re entering 2008 Las Vegas Convention.
5. Click the arrow to the right of the Status Reason field to select anoption from the drop-down list.
Because we’re creating a campaign here, we choose Proposed. Afteryour campaign is defined and everything is in place, you can change thestatus to Ready to Launch. The other options are self-explanatory.
6. Enter your campaign code in the Campaign Code field.
You can enter a code (perhaps as part of a marketing gimmick) or let theprogram assign the code (just leave it blank for now). The campaigncode helps you link responses to the campaign for those importantreports and demographic data. The assigned code follows the formatyour system administrator chose in the settings area.
7. Choose your campaign type from the Campaign Type drop-down list.
The options are Advertisement, Direct Marketing, Event, Co-Branding,and Other. Select the option that best fits the type of campaign you arecreating.
8. Next, enter the expected number of responses to the campaign in theExpected Response field.
For example, if you’re sending 500 mailers and expect a 1 percentresponse rate, you would put 5 here. This allows you to later measurethe actual response rate against what you estimated.
Figure 20-2:The New
Campaignform.
246 Part IV: Making the Most of Marketing
27_343258-ch20.qxp 6/4/08 12:23 AM Page 246

9. In the Price List field, select a price list to associate with this campaign.
If you’re using products in Microsoft CRM, we recommend that youchoose a price list so that the campaign has something to work from. Ifyou’re not using products then leave this field blank. To learn moreabout using products with Microsoft CRM see Chapter 7.
10. In the Offer field, describe your offer.
11. Fill in the fields in the Schedule section.
These fields are optional, but we recommend you complete them. Theproposed dates let everyone working with the campaign know whenyou’d like to execute the campaign. The actual dates allow you to com-pare actual to proposed.
12. Enter a campaign description as needed.
13. Click Save (the disk icon).
Your data is saved, and you can move on to the other tabs.
Now enter information on the Financials tab as follows:
1. Click the Financials tab. (See Figure 20-3.)
2. Complete the Budget Allocated, Miscellaneous Costs, and EstimatedRevenue fields.
The other two fields (Total Cost of Campaign Activities and Total Cost of Campaign) are calculated automatically as you define and run yourcampaign.
We put $35,000 in the budget field and $350,000 in the estimated revenuefield. The Stooges want a minimum of a 10x return on any marketing venture.
3. Remember to click Save (the disk icon).
We suggest that you save your data each time you move to a new tab oroption within your campaign.
After you’ve entered your financial information, you can either click the Saveand Close button or enter notes in the Notes tab. You can use notes as a run-ning journal of campaign-related interactions. Notes are not required and willnot be reported on, so use them as you see fit.
The Administration tab contains basic campaign administration notes(Owner, Created date, date of last modification, and who did the change),which are filled in automatically. The only field you can edit on this tab isOwner. The Owner field defaults to the logged-in username; you can changethe owner by clicking the hourglass to the right of the field.
247Chapter 20: Managing Campaigns
27_343258-ch20.qxp 6/4/08 12:23 AM Page 247

Planning TasksIn the case of a trade show, there’s often a lot of preparation needed to have asuccessful conference. The planning tasks could include: reserve boothspace, book hotel and flights, ship the booth, order booth related items, andmore. All of these tasks are time sensitive and perfect candidates for the plan-ning tasks section. Additionally, each task can be individually assigned to theproper person within your organization. In Microsoft CRM, tasks are simplyactivities assigned to CRM users. These activities are associated with thecampaign and are found in the campaign planning tasks, on a user’s calendar,or in Activities (under Workplace). Completed activities remain listed with aStatus Reason of “Completed.”
In this section, we will explore the creation of Planning Tasks. All you have todo is follow these steps:
1. On the navigation pane, click the Marketing button.
2. At the top of the navigation pane, click Campaigns.
The Campaigns window appears. Most likely your view will be MyCampaigns, but you can switch your view by clicking on the View drop-down list. (Refer to Figure 20-1.)
3. Double-click a campaign to open it (or continue to use the campaignyou created above).
Figure 20-3:The
campaignfinancials.
248 Part IV: Making the Most of Marketing
27_343258-ch20.qxp 6/4/08 12:23 AM Page 248

4. On the navigation pane, select Planning Tasks.
The Planning Tasks window appears.
5. On the Planning Tasks window’s toolbar, click the New button tocreate a new task.
The Task: New window appears, as shown in Figure 20-4. This window issimilar to the one you see when scheduling activities (which we discussin Chapter 14).
6. Fill in the Subject field.
The subject should be descriptive such as Order Trade Show BoothGraphics.
7. Fill in the Description field (the large box below the Subject field).
8. (Optional) Change the owner from you to the person responsible forthe task.
If you’re the one responsible for the task, ignore this step.
9. Ensure the Regarding field has the campaign entered.
It will be by default, but if you change it, the planning task will no longerbe part of the campaign.
10. If desired, fill in the remaining optional fields.
Remember, the more information you have, the better you can completea task.
Figure 20-4:The
PlanningTask
form — it looksexactly like the
ScheduleTask
window!
249Chapter 20: Managing Campaigns
27_343258-ch20.qxp 6/4/08 12:23 AM Page 249

11. To add notes to this task, click the Notes tab and enter away.
As with other note fields in Microsoft CRM, you can enter informationfree-form.
12. Click the Save and Close button, which saves the task and returns youto the planning tasks workspace, or click Save and New and add moreplanning tasks.
Defining Campaign ActivitiesCampaign activities are often referred to as steps or waves. This is where allthe marketing takes place. The campaign responses are reactionary to theactivities. Therefore, the better your message (the activity) is, the greater theresponses. What’s great about this is that you can assess those activities thatgenerate the most response and improve future campaign responses.
To create a campaign activity, follow these steps:
1. On the navigation pane, click the Marketing button.
2. At the top of the navigation pane, click Campaigns.
The Campaigns window appears. Most likely your view will be MyCampaigns, but you can switch your view by clicking on the View drop-down list. (Refer to Figure 20-1.)
3. Double-click a campaign to open it (or continue to use the campaignyou created above).
4. From the campaign form, click Campaign Activities on the navigationbar.
5. Click the New button on the form toolbar.
The Campaign Activity: New window appears, as shown in Figure 20-5.Parent Campaign, Subject, and Owner are required fields, althoughSubject and Owner are the only fields you can edit.
The Status Reason field is set to Proposed and grayed out. This willchange later.
6. Select the appropriate option from the Channel drop-down list.
This is where you tell the program how you want this phase carried out:phone, fax, letter, e-mail, appointment, and so on. To clarify, this isn’t amarketing channel, such as direct marketing or distribution. By the way,you must make this selection to distribute campaign activities, a topicwe cover later in this chapter in the Distributing Campaign section.
250 Part IV: Making the Most of Marketing
27_343258-ch20.qxp 6/4/08 12:23 AM Page 250

Channel Options:
• Phone: Schedule phone calls to marketing list members. Thesecalls will be made by Microsoft CRM users.
• Appointment: Schedule appointments with marketing list mem-bers. These calls are made by Microsoft CRM users.
• Letter: Send letters to marketing list members. In reality, MicrosoftCRM does not create a letter but an activity to send a letter. If youwant to create an actual letter then use the Letter via Mail Mergeoption.
• Letter via Mail Merge: Send letters using the mail merge function.You can access letter templates that contain Microsoft CRM data.Note: You must use the Outlook Client to perform this step. See“Distributing Campaign Activities,” later in this chapter.
• Fax: As with letters, Microsoft CRM does not create a fax but anactivity to send a fax. If you want to create an actual fax then usethe Fax via Mail Merge option.
• Fax via Mail Merge: Send Faxes using the mail merge function. As with letter via Mail Merge, this feature is available from theOutlook Client.
• E-Mail: Send e-mail directly to marketing list members fromMicrosoft CRM. E-mails can be sent immediately or scheduled forusers to send. If scheduled, users will have to send them one at atime.
Figure 20-5:Start by
creating the firstwave of
yourcampaign.
251Chapter 20: Managing Campaigns
27_343258-ch20.qxp 6/4/08 12:23 AM Page 251

• E-Mail via Mail Merge: Send E-mails based on templates. This fea-ture is available from the Outlook Client only.
• Other: Use this to indicate a type of campaign activity that will notbe distributed, such as a Newspaper Advertisement.
7. Choose the appropriate option from the Type drop-down list.
The type is the purpose of the campaign activity, such as research orlead qualification.
8. In the Subject field, enter a subject for your campaign activity.
Although you can call the activity anything you want, we suggest thatyou keep the subject logical and self-explanatory. For example “first pre-conference e-mail to conference attendees” is preferable to “e-mailattendees.”
9. Add an activity description in the large text box below the Subjectfield.
If you’d like a label called Description associated with the box, speak toyour dealer, or ask us how (http://www.consultcore.com/dummies.htm).
10. (Optional) From the Owner drop-down list, choose an owner.
The Owner field automatically defaults to the user creating the cam-paign activity, but you can change it. If you want to delegate tasks in thecampaign, this is where you do it. Assign the owner here, and the taskappears in the owner’s activities.
11. In the Outsource Vendors field, assign an outsource vendor.
Use the magnifying glass to search for and select a vendor. For example,if the local printing company, Ink, Inc., is printing the invitations to yourwebinar, they are your outsource vendor.
12. Choose a scheduled start and end date.
This is self-explanatory.
To the right of these fields, you’ll see Actual Start and End Dates, whicharen’t enabled. These are filled in automatically when you start the campaign.
13. Fill in the Budget Allocated field with the cost of your budget.
This way, you can check your budget at a glance instead of having toe-mail folks or rifle through papers on your desk. The companion field tothe right, Actual Cost, is just that — the actual tally of everything relatedto this campaign.
14. Fill in the Priority field.
252 Part IV: Making the Most of Marketing
27_343258-ch20.qxp 6/4/08 12:23 AM Page 252

15. If desired, fill in the Anti-Spam No. (number) of Days field.
Microsoft CRM will scan the contact’s record to make sure the contacthasn’t received any other marketing materials within the time frame youspecified. It prevents you from overloading the contact with multiplemarketing messages. If done right, you can maintain the appropriatenumber of touches without spamming your customers and prospects.
16. Click Save (the disk icon) or the Save and Close button.
Remember, if you want to do some more work on the campaign activity,just click Save. Your campaign activity will be saved and the option inthe navigation pane will be enabled.
Prior to distributing this activity, we need to associate one or more marketinglists with the campaign. We’ll do so later in the chapter; for now, save andclose your campaign activity.
So let’s take a look at target products and sales literature.
Often, marketing campaigns are designed to sell a product. If your campaignis designed around one or more products, you can associate those productswith the marketing campaign (if not, skip this section). When the campaign is completed, you’ll be able to analyze response rates and close rates andcompare them by product as well as by campaign. A wonderful feature ofMicrosoft CRM is that it lets you analyze your data from many different perspectives.
To add a target product, follow these steps:
1. With the campaign form open, click Target Products in the Sales areaof the navigation pane.
The Target Products grid is displayed.
2. Click Add Existing.
Look up the product(s) you want to associate with the campaign andclick >> to add.
3. Click OK.
The product(s) are associated with the campaign.
The process for adding literature to this campaign is very similar to addingproducts. Adding literature to a campaign is not required, however doing solet’s you associate printed materials to the campaign:
1. With the campaign form open, click Sales Literature in the Sales areaof the navigation pane.
The Sales Literature grid is displayed.
253Chapter 20: Managing Campaigns
27_343258-ch20.qxp 6/4/08 12:23 AM Page 253

2. Click Add Existing.
Look up the literature you want to associate with the campaign and click >> to add.
3. Click OK.
The literature is associated with the campaign.
Marketing lists are mechanisms used to determine the target audience forcampaign activities. Every campaign needs at least one associated targetmarketing list to execute campaign activities. Without a target marketing list,you can’t distribute campaign activities. If your campaign does not includepersonalized marketing or sending something to person, then you will notneed to add a marketing list. However, most marketing done with MicrosoftCRM is targeted to people, and therefore one or more marketing lists will benecessary. Adding one or more target marketing lists is similar to addingproducts and literature. Just follow these steps to add a target marketing list:
1. With the campaign form open, click Target Marketing Lists in theMarketing area of the navigation pane.
The Target Marketing List grid is displayed.
2. Click Add.
Look up the marketing list(s) you want to associate with the campaignand click >> to add.
3. Click OK.
You’re prompted with the Add Marketing Lists to Campaign dialog boxshown in Figure 20-6. If you add the marketing list after you create campaign activities, you can add the list(s) to all existing activities. Ifyou’d like to have more control over this, deselect the check box in thedialog box.
Figure 20-6:Adding a
marketinglist to
existingcampaignactivities.
254 Part IV: Making the Most of Marketing
27_343258-ch20.qxp 6/4/08 12:23 AM Page 254

If you add the marketing list before you add all of your campaign activities —and you’d like to distribute the list over all campaign activities — simply re-add the marketing list.
Distributing Campaign ActivitiesWith at least one target marketing list assigned to the campaign, we canreturn to the campaign activity created earlier. Our activity is sitting dor-mant. It hasn’t been associated to a single record in the database, nor has itbeen assigned to anyone on our team to carry out the activity. Microsoft CRMhas a built-in mechanism called Distribute Campaign Activities to facilitatethe association and assignment of individual campaigns.
Consider this scenario, which illustrates how and why campaign activitiesare distributed. Assume that the initial step or wave in our campaign calls formaking outbound telephone calls. The marketing list we associated with thecampaign has 3,500 prospects, and our inside sales team consists of 35people responsible for making the calls. (They need not be sales people,simply users of Microsoft CRM.) Logistically, this task would be very difficultto do manually; however with Microsoft CRM, this task is quite manageable.
Here are the steps to take to distribute the campaign related calls to the salesteam:
1. On the navigation pane, click the Marketing button.
2. At the top of the navigation pane, click Campaigns.
The Campaigns window appears. Most likely your view will be MyCampaigns, but you can switch your view by clicking on the View drop-down list. (Refer to Figure 20-1.)
3. Double-click a campaign to open (or continue to use the campaign youcreated above).
4. Click Campaign Activities on the navigation menu.
5. Double-click the campaign activity to be distributed.
If you’ve already associated a Target Marketing list, skip to Step 11; otherwise, continue to Step 6.
6. From the campaign activity form, click Target Marketing Lists on thecampaign activity navigation pane.
255Chapter 20: Managing Campaigns
27_343258-ch20.qxp 6/4/08 12:23 AM Page 255

7. Click Add from Campaign on the form toolbar.
The Lookup Marketing List Dialog box opens
8. Click the magnifying glass on the upper-right to see all marketing listsor begin to type the marketing list name and click the magnifyingglass icon.
A list of all the marketing lists associated with the campaign appears. If thelookup dialog box is empty, you need to associate at least one marketing listwith this campaign. To do so, cancel out of this dialog box and follow thesteps to associate a marketing list above.
6. Click the marketing list or Ctrl+click the marketing lists that you’d liketo associate with the campaign.
7. Click OK.
8. On the Navigation Bar click Information. Ensure that the method ofdistribution from the Channel drop-down list is correct.
As you can see in Figure 20-7, we chose the Phone channel.
9. Click Distribute Campaign Activity on the toolbar at the top of theform.
The box that appears depends on the channel you selected. Because weselected Phone as the channel, the New Phone Calls dialog box appears,as shown in Figure 20-8.
Figure 20-7:The
campaignactivitybefore
distribution.
256 Part IV: Making the Most of Marketing
27_343258-ch20.qxp 6/4/08 12:23 AM Page 256

To distribute campaign activities where the channel option is Letter viaMail Merge, Fax via Mail Merge, or E-mail via Mail Merge, follow thesesteps from within the Outlook Client for Microsoft CRM. These activitiescannot be distributed from the Internet Explorer client.
10. Enter the subject.
Subject is a mandatory field. Basically, the subject is a description of theactivity you’re distributing.
11. Enter a description in the large text box beneath the Subject field.
The description can be a short script for the person making the call.
12. On the bottom right corner, click Distribute.
Again, the dialog box that appears depends on the channel you chose todeliver this activity. Because we’re using a phone call as our channel,the Distribute Phone Calls dialog box appears.
13. Select the appropriate options in the Confirm Distribution dialog box.
We have three options here to indicate the owner (the person the call isbeing assigned to) of the phone call. Choose one of the following radiobuttons, as shown in Figure 20-9.
If your campaign activity is e-mail, you can choose the option to sendthe e-mails automatically and close the activity. If you don’t, you’ll haveto send the campaign e-mails manually.
Figure 20-8:Distributingphone calls
as activities.
257Chapter 20: Managing Campaigns
27_343258-ch20.qxp 6/4/08 12:23 AM Page 257

14. Click OK.
You return to the campaign activity window. Take a look in the naviga-tion pane, where you’ll see added options to help you track this distribution.
15. Click Save (the disk icon) or the Save and Close button.
Voila! You’re done!
The phone call option and channel will track where the phone calls went andhow many failed attempts were made. As you can see, Microsoft CRM makescampaign scheduling especially easy for those in large companies and thosewho handle a large number of activities for marketing campaigns.
The navigation bar on the campaign activity form now has two additionalitems: Phone Calls Created and Failures. Figure 20-10 illustrates those changes.Failures lists those activities that were not distributed. Usually, failures arerelated to records where the contact method for the type of communication isset to Do Not Allow. To learn more about Do Not Allow, refer to Chapter 19.
After an activity has been distributed, the next step is to close the activity.This allows you to be able to distinguish between closed activities, com-pleted activities, and pending campaign activities. To close an activity, followthese steps:
1. On the navigation pane, click the Marketing button.
2. At the top of the navigation pane, click Campaigns.
Figure 20-9:Distributingphone call
assign-ments.
258 Part IV: Making the Most of Marketing
27_343258-ch20.qxp 6/4/08 12:23 AM Page 258

The Campaigns window appears. Most likely your view will be MyCampaigns, but you can switch your view by clicking on the View drop-down list. (Refer to Figure 20-1.)
3. Double-click a campaign to open (or continue to use the campaign youcreated above).
4. Choose Actions➪Close Campaign Activity.
The Close Campaign Activity dialog box appears (as shown in Figure 20-11).
5. Indicate the Status, choose the dates, and click OK.
Figure 20-11:The CloseCampaign
Activitydialog box.
Figure 20-10:The post-
distributionactivity
form.
259Chapter 20: Managing Campaigns
27_343258-ch20.qxp 6/4/08 12:23 AM Page 259

Recording Campaign ResponsesWhen you create a marketing campaign, you expect results or responses,whether they’re negative or positive. There are even folks dedicated to deter-mining response rates, filtering that information into percentages, andmaking little pie charts and bar graphs from those responses. Good news orbad, you can record it in Microsoft CRM.
Another little bonus to being able to record your responses in a centralsystem like this is that your sales department and your marketing depart-ment can see the same information! Whoa! Who doesn’t want their depart-ments working together, in sync and in harmony? (Okay, maybe not inharmony, as the marketing department stomped the sales department lastyear in the softball game, but you get the picture.)
Excited now? Good. Here’s how you (or your sales staff) can record thoseresponses. Essentially, there are two ways to record campaign responses,from the activity form or from Campaign Responses on the campaign naviga-tion bar. We explore both methods in the steps that follow.
Earlier in the chapter, we distributed phone calls to staff members.Presumably, an individual opens the activity and makes the call. If so, thatperson can convert the activity to a campaign response. Here’s how to do it:
1. On the navigation pane, click the Marketing button.
2. At the top of the navigation pane, click Campaigns.
3. In the Campaigns window, double-click your campaign.
The campaign window appears.
4. On the navigation pane of the open campaign window, clickCampaign Responses.
5. On the window’s toolbar, click New.
The Campaign Response: New window appears, as shown in Figure 20-12.
Another way to make this window appear? With the campaign activityopen, just click Actions➪Promote to Response.
Most of the fields are self-evident, but we touch on some of them here.
• Response Code: This indicates the response of the customer. Youcan choose from Interested, Not Interested, Do Not Send MarketingMaterials, and Error.
• Promotion Code: You can link the response to a particular promo-tion. If the customer is calling because of the free bunny slippers,for example, you can indicate that here. Several campaigns canhave the same promotion, so this is just another way of groupingdata for marketing analysis.
260 Part IV: Making the Most of Marketing
27_343258-ch20.qxp 6/4/08 12:23 AM Page 260

• Customer: This can be an account, a contact, or a lead. If youarrived at the campaign response form via Step 1, the customerfield will already be filled in.
6. When you’ve completed the form, click the Save button.
After the form is saved, look at the toolbar. A new button has beenadded — the Convert Campaign Response button.
7. Click the Convert Campaign Response button.
The Convert Campaign Response form opens. (See Figure 20-13.)
8. Click OK.
9. When you’ve completed the form, click the Save and Close button.
The Campaign Response window closes, and you return to the opencampaign window.
By recording campaign responses, you can easily check the status of eachcampaign throughout its lifespan. This is a great feature because you can see,for example, whether one promotion is taking off or a certain employee ishaving trouble making calls.
Figure 20-12:Did the
customersay yes
or no?Record it
here.
261Chapter 20: Managing Campaigns
27_343258-ch20.qxp 6/4/08 12:23 AM Page 261

Relating Campaigns to Each OtherNow, say you’re running two campaigns: one to identify interest by productcategory and one to reflect different marketing strategies for each productcategory. That’s great. But what if you want to compare them? Easy! Justrelate the campaigns to each other. Here’s how:
1. On the navigation pane of the open campaign window, click RelatedCampaigns.
The window switches to the Related Campaigns workspace, as shown inFigure 20-14.
2. On the window’s toolbar, click Add Existing.
Like the other options mentioned in this chapter, the Look Up Recordsdialog box appears.
3. Search for the other campaign you want to relate to this one, select it,and click the right-pointing arrow to add it to the right-hand pane.
Figure 20-13:The Convert
CampaignResponse
Button.
262 Part IV: Making the Most of Marketing
27_343258-ch20.qxp 6/4/08 12:23 AM Page 262
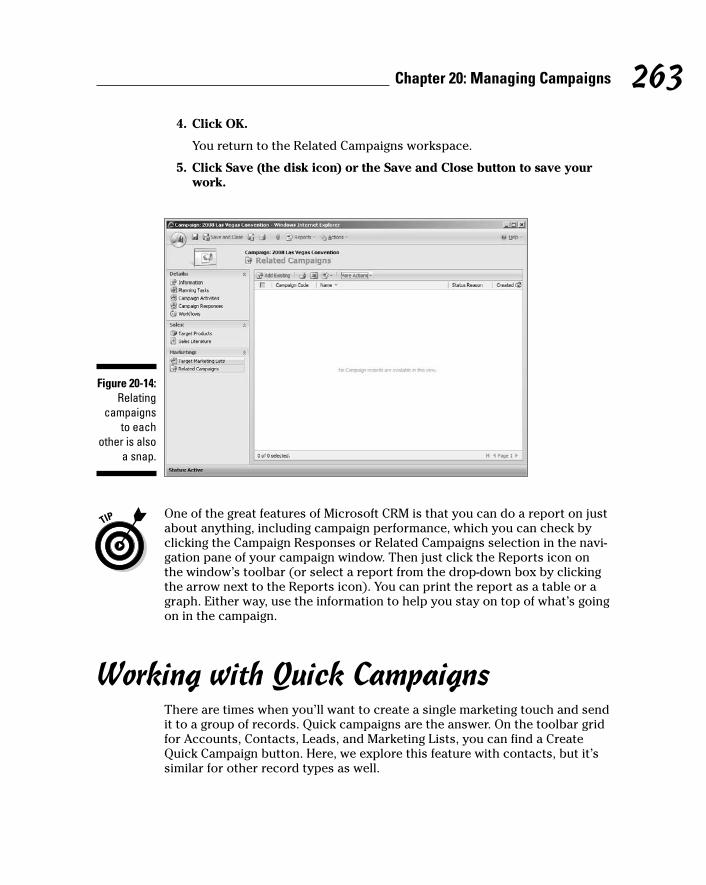
4. Click OK.
You return to the Related Campaigns workspace.
5. Click Save (the disk icon) or the Save and Close button to save yourwork.
One of the great features of Microsoft CRM is that you can do a report on justabout anything, including campaign performance, which you can check byclicking the Campaign Responses or Related Campaigns selection in the navi-gation pane of your campaign window. Then just click the Reports icon onthe window’s toolbar (or select a report from the drop-down box by clickingthe arrow next to the Reports icon). You can print the report as a table or agraph. Either way, use the information to help you stay on top of what’s goingon in the campaign.
Working with Quick CampaignsThere are times when you’ll want to create a single marketing touch and sendit to a group of records. Quick campaigns are the answer. On the toolbar gridfor Accounts, Contacts, Leads, and Marketing Lists, you can find a CreateQuick Campaign button. Here, we explore this feature with contacts, but it’ssimilar for other record types as well.
Figure 20-14:Relating
campaignsto each
other is alsoa snap.
263Chapter 20: Managing Campaigns
27_343258-ch20.qxp 6/4/08 12:23 AM Page 263

All you have to do to set up a quick campaign is follow these steps:
1. On the navigation pane, click Contacts.
The window switches to the contact grid.
2. On the grid toolbar, click Create Quick Campaign.
Figure 20-15 shows the three options available for a quick campaign:
• For Selected Records
• For All Records on Current Page
• For All Records on All Pages
If you want to select multiple records on the page, use Ctrl+click.
3. Choose an option and click Next.
4. Provide a name for your campaign.
Make the name as descriptive as possible, keeping the 200-characterlimit in mind.
5. Click Next.
6. Choose the activity type and the owner.
The next screen depends on what you choose for an activity. We’rechoosing Phone Call for this example.
7. Enter a subject and a description.
8. Click Next.
9. Click Create.
Figure 20-16 shows the Create a Quick Campaign Wizard. It summarizesthe number of records impacted by the quick create. If the summarylooks good, click Create.
Figure 20-15:Quick
Campaignoptions.
264 Part IV: Making the Most of Marketing
27_343258-ch20.qxp 6/4/08 12:23 AM Page 264

To view all of the quick campaigns in the system:
1. On the navigation pane, click the Marketing button.
2. At the top of the navigation pane, click Quick Campaigns.
The Quick Campaigns window appears.
3. Double-click a quick campaign.
4. Figure 20-17 depicts the Quick Campaign grid.
From the grid, you can easily ascertain how many people were targeted(total members), the number of success and failures, and the status ofthe campaign.
5. Double-click a quick campaign.
The Quick Campaign detail form opens. Figure 20-18 shows the quickcampaign detail form. The items are self explanatory; however we wantto point out that by clicking the Created item (Phone Calls Created, inour example) in the navigation pane, you open campaign activities andrecord responses as described in the “Recording Campaign Responses”section earlier in this chapter.
Figure 20-16:We’re ready
to launchthe quick
campaign.
265Chapter 20: Managing Campaigns
27_343258-ch20.qxp 6/4/08 12:23 AM Page 265

Figure 20-18:The QuickCampaign
results form.
Figure 20-17:The quickcampaign
shows keyresults.
266 Part IV: Making the Most of Marketing
27_343258-ch20.qxp 6/4/08 12:23 AM Page 266

Chapter 21
Integrating Your Web SiteIn This Chapter� Sending e-mail to a queue
� Creating a case or lead from an e-mail or Web form
� Creating Web portals
So you’ve been successful in driving customers and prospects to yourWeb site. Now you want your Web site to integrate with your CRM
system. The good news is that it can be done. The better news (admit it —you thought we were going to give you bad news) is that several integrationoptions don’t require much in the way of programming.
If your Web site has forms on it, say a lead form or a customer service helpform, you can have the data from those forms (or others) entered intoMicrosoft CRM 4. After it’s there, users can work directly with the data. Youcan also have workflow rules that further process the incoming data prior toany user interaction. There are also options for customer portals and dataentered in — and perhaps retrieved directly from — your Microsoft CRMsystem.
In this chapter, we cover the items that don’t require programming to inte-grate your Web site with Microsoft CRM. We also touch on some of theoptions that would require programming, as a means of introduction. Actualprogramming examples aren’t part of the scope of this book.
Sending E-Mail to a QueueIn Microsoft CRM, you can set up a queue to handle incoming e-mail. Forexample, your organization might have a Web site with a support form on it.In that case, your customers can go to the Web site, fill out a support request,and an e-mail is generated from your Web site to a support e-mail box that inturn is monitored by an individual or team at your organization.
28_343258-ch21.qxp 6/4/08 12:24 AM Page 267
Haghighat Sabet
Highlight
Haghighat Sabet
Highlight
Haghighat Sabet
Highlight
Haghighat Sabet
Highlight
Haghighat Sabet
Highlight

You don’t need a support request form on your Web site. You could have cus-tomers e-mail to a support mailbox. The e-mail received into the supportmailbox is then visible in a Microsoft CRM 4 queue. That way, an entire sup-port team can monitor the queue for incoming customer service requests.A customer service representative can then take ownership of the supportrequest and work with it. (To learn more about queues, see Chapter 25.)
A benefit of pointing a Microsoft CRM queue at a support e-mail box is thatyou can use CRM’s Workflow to automatically create a case when an e-mail isreceived.
Microsoft CRM’s workflow can associate a new case to a customer, based onthe customer’s e-mail address.
Should you choose to have an e-mail generated from a support form on yourWeb site and sent to a support box at your company, the e-mail’s Fromaddress is the e-mail address your Web administrator created and not theFrom address of the person completing the form. In that case, you cannotdirectly link the incoming support request to an existing contact. This isn’t aproblem for companies that sell business-to-business (B2B), because thosecompanies typically want to link cases to accounts and not to contacts. Ifyour support organization focuses on B2B support we suggest you create asupport account and link all cases created via workflow to that account.Then your support staff can re-link the cases when they’ve identified thecompany requesting support.
Ideally, you’d create a case from an e-mail sent to a queue and automaticallylink the e-mail to the newly created case. There’s a wonderful blog postauthored by Jagan Peri on the Microsoft CRM Team site with an example of aworkflow that does just that. You can find that blog at http://blogs.msdn.com/crm/archive/2008/02/19/e-mail-to-case-lead-using-crm-4-workflow.aspx.
The general flow is as follows:
1. An e-mail is received into a Microsoft CRM 4 queue. (See Figure 21-1.)
2. Workflow creates a new case and relates the e-mail activity to the newcase. The workflow that created the case assigns it to the Support Level1 queue. (See Figure 21-2.)
Figure 21-3 shows the newly created case, and Figure 21-4 shows theoriginal e-mail saved as a related activity.
268 Part IV: Making the Most of Marketing
28_343258-ch21.qxp 6/4/08 12:24 AM Page 268
Haghighat Sabet
Highlight
Haghighat Sabet
Highlight
Haghighat Sabet
Highlight

Figure 21-2:The newly
createdcase is
assigned tothe Support
Level 1queue.
Figure 21-1:A supportrequest isreceived
into theSupportLevel 1queue.
269Chapter 21: Integrating Your Web Site
28_343258-ch21.qxp 6/4/08 12:24 AM Page 269

Creating leads works exactly as creating cases. A lead sends an e-mail to aspecific e-mail account, such as [email protected], and from there,you can use workflow to create a new lead and associate the original e-mail tothe lead.
Figure 21-4:The original
e-mail isnow relatedto the case
as anactivity.
Figure 21-3:The new
case details.
270 Part IV: Making the Most of Marketing
28_343258-ch21.qxp 6/4/08 12:24 AM Page 270

Creating Records with ProgrammingWe don’t create code in this section, just simply discuss some options forcreating leads, cases, contacts, accounts, or whatever type of record you’dlike to create.
The Microsoft CRM SDK (Software Development Kit) is for programmers.The SDK allows programmers to extend the product beyond the built-in fea-tures. To help programmers or even beginners, the SDK provides severalcoding examples. The developers of Microsoft CRM recognize that theycannot anticipate how each organization will use Microsoft CRM and there-fore cannot pre-create every feature that every end-user would want. TheSDK goes a long way toward filling any gaps that exist between the built-infeature set and the features you will need.
The products listed in Chapter 21 use the SDK to interface with MicrosoftCRM. In fact, it is usually more cost-effective to check for add-on productsprior to creating custom solutions. Should you decide custom is the way togo, download the SDK. The SDK is available for free — yes we said free —from Microsoft at www.microsoft.com/downloads/details.aspx?FamilyID=82E632A7-FAF9-41E0-8EC1-A2662AAE9DFB&displaylang=en.
Creating a Web PortalWhat is a Web portal? A Web portal is a Web site that provides users externalto your organization access to certain Microsoft CRM data. We say certaindata because an important aspect of a Web portal is that you control the datamade available to people accessing your CRM database.
To allow for external users to access your Microsoft CRM database, MicrosoftCRM has a special Web portal license. With it, companies can have unlimiteduser access to the Microsoft CRM database. The license provides access butdoesn’t allow for unlimited use of the Microsoft CRM application interface. A Web portal is a way for organizations to provide customers, prospects, and so on, read and write access to their Microsoft CRM implementation. The easiest way to put a Web portal in place is to purchase one from an ISV(independent software vendor). One such portal is available from c360(www.c360.com), but there are others. We suggest you research the variousoptions prior to purchasing.
Make sure you understand what you’re purchasing when it comes to portallicenses. Most ISV portal software is purchased in addition to the MicrosoftCRM license.
271Chapter 21: Integrating Your Web Site
28_343258-ch21.qxp 6/4/08 12:24 AM Page 271

There are several aspects of the c360 portal we like, but one in particular isaccess to the CRM knowledge base. If your organization is diligent in creatingCRM knowledge base articles, your clients can access that knowledge via ac360 portal. (For more on the knowledge base, see Chapter 24.) A robustknowledge base drives customers to your Web site, reduces calls to your sup-port team, and is one element of providing superior customer service. Youcan learn more about the c360 portal at www.c360.com.
c360’s Customer Support Portal focuses on providing external users accessto cases and the knowledgebase. Through a configuration utility, you decidewhich case fields will be made available to the customer via the portal.
Once the portal is set up, customers are provided unique login information.They can then create new service cases, as shown in Figure 21-5. The cus-tomer uses this form to create a new case directly into your Microsoft CRMsystem.
Customers who have cases in the system can get a list of those cases via thec360 portal. Figure 21-6 is a list of cases for a particular customer. The cus-tomer can learn more details about the case status by drilling into the formfrom the list view.
Lastly, Figure 21-7 shows knowledge base articles. These articles are pub-lished in your CRM system and made available to your customers via thec360 portal.
Figure 21-5:The c360
new caseform.
272 Part IV: Making the Most of Marketing
28_343258-ch21.qxp 6/4/08 12:24 AM Page 272

Figure 21-7:The
customerview of
MicrosoftCRM casesvia the c360
portal.
Figure 21-6:A list of thecustomer’s
cases.
273Chapter 21: Integrating Your Web Site
28_343258-ch21.qxp 6/4/08 12:24 AM Page 273

Another commercially available Web portal is from Axonom. To learn moreabout their portal product go to www.axonom.com/crm_solutions/powertrak/pt_crm_partner_portal.html.
You need not purchase a Web portal. You can build one — or have one builtfor you. Building one is easier than it sounds, but it requires programmingskills and knowledge of the Microsoft CRM Software Developers Kit (SDK). Wesuggest you contact your Microsoft CRM reseller.
274 Part IV: Making the Most of Marketing
28_343258-ch21.qxp 6/4/08 12:24 AM Page 274

Part VTaking Care of
Your Customers
29_343258-pp05.qxp 6/4/08 12:24 AM Page 275

In this part . . .
O ne of the beautiful parts of Microsoft CRM is that ithandles sales and service. This integration enables
your organization to coordinate activities from both sidesof that fence. Salespeople, in the middle of trying to closea deal, won’t be blindsided by some raging customer sup-port issue, and customer service people will know enoughto provide that little extra help when a major sale is aboutto go down.
Customer service is one of the hot buttons in CRM, andit’s an area in which Microsoft CRM shines. When a cus-tomer calls with an issue, it’s logged as a case (which wediscuss in Chapter 22).
Managing your database of subjects is handled in Chapter23. You can use CRM to manage your organizationalknowledgebase, and that’s discussed in Chapter 24. Casesand tasks are put into a queue for orderly disposition andmanagement by staff members (which we discuss inChapter 25).
Microsoft CRM even includes contract administration, soeveryone can see what type of support a customer is enti-tled to and the software can properly decrement con-tracts and advise when renewals are in order (as weexplain in Chapter 26).
29_343258-pp05.qxp 6/4/08 12:24 AM Page 276

Chapter 22
Working with CasesIn This Chapter� Touring the Cases window
� Creating a case
� Assigning a case
� Resolving and reactivating cases
Before customer relationship management, or CRM, became a householdterm, organizations were focusing on something called sales force
automation or SFA, which was essentially software that helped automate thesales process. Sales activities, opportunities, prospects, clients, and morewere stored in the sales database. Salespeople would interact with the salesdatabase either in the office or from a remote office. Remote office data wasoften synchronized back to the home office system. SFA was a great tool to help sales people win new business, but what about the rest of the organization?
Prior to the introduction of CRM software, customer service departmentsalso recognized the need for effective case management software and oftenbuilt or developed specific software for case or incident management. Wethink you’re getting the picture: two products and two disparate databases.CRM solves the issue conceptually by treating the organization as a wholeand recognizing that all customer-facing interactions should be stored in asingle source or database.
A prime benefit of having sales and customer service share a single databaseis that customer interactions by both groups are captured in a central place.Sales people aren’t blindsided by ongoing customer issues when calling on anexisting customer. Customer service knows which customers or prospects tosupport, what the support requester’s value is to the organization, and lotsmore. Management can report on customer value — the amount of revenue ormargin attained from a specific customer minus the costs associated withsales and support.
30_343258-ch22.qxp 6/4/08 12:24 AM Page 277

In Microsoft CRM, the Service module (found in the navigation pane) has sev-eral entities, but the heart of the Service module is the Cases feature, whereyou can view, resolve, and reactivate cases in an easy and comprehensiblemanner.
A case (also known as an incident) is simply a record of customer interactionwith the customer service department. When a customer has a question or aproblem, the representative who interacts with the customer opens a case.The customer’s issue can originate from a phone call, e-mail, or a supportform on your Web site. (For more on this, see Chapter 21.) The customer service representative responsible for the incident opens a case to documentthe problem and its eventual solution. Cases need not be problems, but they should be a record of customer interaction with the customer servicedepartment.
Those of you without a customer service department need not skip thischapter. Cases still provide value to your organization if you view cases asimportant customer service follow-up. These can be items that — if theyaren’t attended to in a timely fashion — could alienate the customer. By usingthe Cases feature, you’re elevating certain customer issues above simple calendar follow-ups or tasks. Even if you don’t have a customer servicedepartment, we strongly recommend that you discuss how to use cases withyour CRM dealer.
Some companies refer to cases as tickets or issues. Whatever they’re called inyour organization, active case management is the name of the game; thebetter you manage your cases, the better your customer service and customer satisfaction.
In this chapter, we show you how to create cases and assign them to some-one on your team. You find out how to open an existing case and resolve it,scheduling activities related to gaining the solution along the way. We evenexplain how cases interact with queues and contracts. (For a refresher onqueues, see Chapter 25; for contracts, see Chapter 26.) You also find out howto reactivate a case when necessary.
Case Management OverviewThe case management path looks like this: A customer service representative(CSR) takes a call. Let’s say the customer’s having a problem with one of yourtime transporters. He dialed Camelot, A.D. 495 and ended up in Peoria, 1958.
The CSR creates a case and links it to the appropriate customer. The case is assigned to an engineer. The engineer sets about finding a solution,
278 Part V: Taking Care of Your Customers
30_343258-ch22.qxp 6/4/08 12:24 AM Page 278
Haghighat Sabet
Highlight
Haghighat Sabet
Highlight
Haghighat Sabet
Highlight
Haghighat Sabet
Highlight

generating a few e-mails to the customer along the way. The engineer solvesthe problem and closes the case.
A week later, the customer calls back with the same problem. A CSR (not necessarily the same one as before) reactivates the case, and the solutionprocess begins anew. A more thorough solution is developed and recorded,and the case is closed again. A month later, a different customer calls withthe same problem. Any CSR can search the database for all cases related tothe same problem. This is case management at its best.
Working in the Cases WindowCases are listed in the main display area of the Cases window, like the oneshown in Figure 22-1. You use this window to open cases, and then add notesand schedule activities, with the goal of resolving the case. The Caseswindow is also where you assign cases to other service representatives,share cases, or accept them yourself. The entire service team can use thiswindow to collectively track the current status and ultimate disposition ofcases.
To open the Cases window, click the Service button at the bottom of the navi-gation pane. Then select Cases from the list of options at the top of the pane.
Figure 22-1:The Caseswindow iswhere you
can viewand sort
cases.
279Chapter 22: Working with Cases
30_343258-ch22.qxp 6/4/08 12:24 AM Page 279
Haghighat Sabet
Highlight
Haghighat Sabet
Highlight
Haghighat Sabet
Highlight
Haghighat Sabet
Highlight

The main part of the window has a list of all your active cases. You can filterthis list by choosing one of the following options from the View drop-downmenu.
� Active Cases: All cases assigned to you or your fellow team membersthat haven’t been resolved.
� All Cases: All cases assigned to you or your fellow team members thatare open or have been resolved.
� My Active Cases: All cases assigned to you that haven’t been resolved.During a Microsoft CRM session, when entering the Cases window forthe first time or going back to it, the View option always reverts to MyActive Cases (unless it’s changed by the system administrator).
� My Resolved Cases: All cases assigned to you that have been resolved.
� Resolved Cases: All cases assigned to you or your fellow team membersthat have been resolved.
These are the views you get “out of the box.” Your implementation partner orsystem administrator can add, rename, and delete views.
You can sort cases also by column headings. Just click a column heading tosort as follows:
� Title displays cases alphabetically.
� Status displays cases alphabetically by status (resolved or active). Thestatus column is visible when choosing the All Cases view.
� Case Number displays cases in numerical order.
� Priority displays cases by level of importance.
� Created On displays cases in chronological order.
Again, note that your system administrator can add columns to this list ordelete columns from this list.
Click a column header a second time to display the cases in reverse order.
You have two ways to find specific cases. The Look For field at the top of theCases window lets you search active cases by title or case number. You maytype the full title or any part of it. Click the Find button, and a list of matchingcases appears. Use the wildcard character * to type only a portion of the textstring you’re looking for. For example, searching for *porter returns Porter,Transporter, and Exporter.
280 Part V: Taking Care of Your Customers
30_343258-ch22.qxp 6/4/08 12:24 AM Page 280

You can also use the Advanced Find feature to search various fields. To do so,choose Tools➪Advanced Find or click the Advanced Find button on the tool-bar at the top of the screen. Microsoft CRM lets you define search criteriaover several fields. Figure 22-2 shows just some of the case-related fields thatyou can use to perform a search.
Creating CasesAnyone with create case rights can create or add a case to the Microsoft CRMsystem. Rights are assigned by your system administrator. Cases can be cre-ated in two places: from the main Cases navigation area or from an accountor contact record. However you get to the new case window, the form is thesame. To open a case from the Cases area in the service module, follow thesesteps:
1. On the navigation pane, click the Service button.
2. At the top of the navigation pane, select Cases.
The Cases window appears on the right. (Refer to Figure 22-1.)
3. On the Cases toolbar, click New.
The Case: New window appears, as shown in Figure 22-3.
Figure 22-2:The
AdvancedFind featureenables you
to usemultiple
fields andspecific
definitionsto searchfor cases.
281Chapter 22: Working with Cases
30_343258-ch22.qxp 6/4/08 12:24 AM Page 281
Haghighat Sabet
Highlight

Filling in the General tabThe Case: New window has two tabs: the General tab and the Notes andArticle tab. The General tab is divided into three sections: Overview, whichhas six fields to further define the case; Assignment Information; andContract and Product Information.
Some fields (such as Subject) have a magnifying glass to the right of the field.This means you must use the magnifying glass or the Form Assistant to fill inthe field. For more information on both options, see Chapter 3.
Lookup fields (magnifying glass icons) now has autocomplete. To enter the“Sprocket Design” as the subject click in the subject field and begin typingpart of the word and tab out of the field. If auto-complete finds more than onematch, the various options will be displayed.
Remember, all fields with a red asterisk are required. Follow these steps tocomplete the Overview area of the General tab:
1. In the Title box of the General tab, enter a title for the case.
The title is a short description of the reported issue. The Title field canhold a maximum of 175 characters.
Figure 22-3:The General
tab of theCase: New
windowcontains
basicinformation
about thecase.
282 Part V: Taking Care of Your Customers
30_343258-ch22.qxp 6/4/08 12:24 AM Page 282

2. Click in the Customer field and begin typing the customer name(account or contact). Before you complete the name, tab to the Subjectfield.
You can use the magnifying glass instead, or the Form Assistant, butwe’re going to explore the autocomplete feature. By leaving theCustomer field — in our case, tabbing to the Subject field — we triggered auto-complete. The auto-complete options are:
a. If the customer name is unique in your database, it will show in thefield blue in color and underlined (hyperlink). If so, skip to Step 3.
b. If there is a yellow caution icon with the sequence of letters typedunderlined in red, it means more than one possible match has beenfound.
The more you type, the less likely you’ll find duplicate records.
c. Click the hyperlink field (Figure 22-4).
d. Select the account or contact from the list.
The account is entered into the Customer field.
The hyperlink field
Figure 22-4:A list of
possiblematchingrecords.
283Chapter 22: Working with Cases
30_343258-ch22.qxp 6/4/08 12:24 AM Page 283

3. Use the Form Assistant to fill in the Subject field.
The Subject option categorizes your cases by subject, such as SprocketDelivery Issues or Sprocket Quality. You can link the case to a subject inyour subject tree. (For more on the subject tree, see Chapter 23.)
4. Back on the General tab, in the Case Origin field, click the arrow andselect how you received the case.
Note: Your system administrator can edit this list.
5. In the Case Type field, select a value from the drop-down list.
The value categorizes the case as a question, problem, or request. (Yoursystem administrator can also edit this list.)
6. (Optional) In the Satisfaction field, select the option that best indicatesthe customer’s level of satisfaction with your service.
Typically, you fill out this field prior to closing the case, not when firstopening the case.
The Assignment Information area of the General tab has four fields. Fill themin as follows:
1. (Optional) Select the Owner field and choose who you want to assignthe case to for resolution.
This field defaults to you, the creator of the case. You can leave it as it isor reassign the case to another user.
2. In the Follow Up By field, select the date on which the owner shouldfollow up on the case.
You can click the calendar or make a selection from the drop-down list.
3. In the Status Reason field, select the option that best describes thecurrent status of the case.
4. In the Priority box, set a priority for this case.
The Contract and Product Information area offers five more fields to defineyour case:
1. In the Form Assistant, select the Contract option.
Select a contract to link this case to.
2. In the Form Assistant, select the Contract Line option.
Set the case to a contract line here.
3. In the Service Level field, click the arrow and select the appropriateservice level from the list.
284 Part V: Taking Care of Your Customers
30_343258-ch22.qxp 6/4/08 12:24 AM Page 284
Haghighat Sabet
Highlight
Haghighat Sabet
Highlight
Haghighat Sabet
Highlight
Haghighat Sabet
Highlight
Haghighat Sabet
Highlight
Haghighat Sabet
Highlight
Haghighat Sabet
Highlight
Haghighat Sabet
Highlight
Haghighat Sabet
Highlight
Haghighat Sabet
Highlight
Haghighat Sabet
Highlight
Haghighat Sabet
Highlight
Haghighat Sabet
Highlight
Haghighat Sabet
Highlight
Haghighat Sabet
Highlight

4. In the Form Assistant, select the Product option.
This lets you link the case to a particular product.
5. In the Serial Number field, enter a serial number associated with thiscase or with a product associated with this case.
If a serial number is associated with a contract line, you can fill it in fromthe Form Assistant.
Now you can move on to the Notes and Article tab.
Filling in the Notes and Article tabThe other tab of the Case: New window, Notes and Article, is much simplerthan the General tab, as you can see in Figure 22-5. This is where you canenter any notes and articles pertaining to the case. For example, you cannote your conversation with the customer in the Notes section and attach a knowledgebase article used to help the customer. You can also e-mail theknowledgebase article from here.
To fill in the first area of the Notes and Article tab, follow the self-explanatoryinstruction to “Click here to enter a new note.” A data entry area appears foryou to manually enter a note. Enter as many notes as you like.
Figure 22-5:The second
tab of theCase: New
windowshows theNotes and
KnowledgeBase Article
areas.
285Chapter 22: Working with Cases
30_343258-ch22.qxp 6/4/08 12:24 AM Page 285
Haghighat Sabet
Highlight
Haghighat Sabet
Highlight

In the second area, you can link an article that ties into this particular case. Ifyou use the Form Assistant and select the Article option, Microsoft CRMautomatically displays your top ten article selections based on the links youdefined in the knowledge base. (For more information on the knowledge base,see Chapter 24.) If this list doesn’t show you the article you need, you canuse the magnifying glass.
Click the Show Article check box to display the article you selected in theNotes and Article tab. After the article is displayed, you can e-mail it to aclient from this tab by clicking E-Mail KB Article.
To look up a knowledge base article in your library and attach it to this case,do the following:
1. Click the magnifying glass icon at the end of the Article field.
The Look Up Articles dialog box appears, as shown in Figure 22-6. Youhave a handful of ways for searching the knowledge base.
2. Click the arrow in the top drop-down box to choose one of the follow-ing options to search for articles:
• Full Text Search: Search the full text of articles for specific words.
• Keyword Search: Search by keyword.
• Title Search: Search by article title.
Figure 22-6:Search theknowledge
base forarticles
related tothe case.
286 Part V: Taking Care of Your Customers
30_343258-ch22.qxp 6/4/08 12:24 AM Page 286

• Article Number Search: Search for an article number.
• Subject Browse: Browse all the subjects to find what you want.
3. In the Search For field, enter the word or words that you want to find.
4. In the In Subject field, make a selection:
a. Click the magnifying glass to the right of the field.
The Look Up a Subject dialog box appears, listing your subjectsorganized by headings and subheadings. You can choose a specificsubject for the program to search. For example, if you select thesubject Marketing, the program won’t look for your text in Sales,Service, or Thank You Letters.
b. Select a subject.
c. Click OK.
5. In the Options field, make a selection from the drop-down list.
You have two options: Exact Text, which means the search looks forexact matches only, and Use Like Words, which searches for the string oftext you entered. For example, enter the word pro and you’ll get every-thing containing that sequence of letters.
6. Click the Search button.
A list of articles meeting your search criteria appears on the right.
7. When you find the article you want, double-click it (or select it andclick OK) to attach it to the case.
You return to the Case: New dialog box, where you can continue addingarticles or exit the case altogether. You can attach only one article percase.
You can view the article prior to selecting it by clicking View Article onthe bottom right.
8. To e-mail the article, click the Show Article check box.
The article displays below the check box.
9. In the knowledgebase article window, click E-Mail KB Article.
Fill out the e-mail form and send.
10. To save your data, click the Save and Close button in the upper leftcorner of the Case form.
The next step in working with a case is to assign it (if you’re the assigner) oraccept it (if you’re the assignee).
287Chapter 22: Working with Cases
30_343258-ch22.qxp 6/4/08 12:24 AM Page 287

Assigning and Accepting CasesOften, cases are assigned to a queue that customer service representatives(CSRs) monitor. (For more on queues, see Chapter 25.) Of course, you canassign cases directly to an individual based on skill set, availability, or both.Microsoft CRM has provisions for assignment to either a queue or an individ-ual. A case can be assigned to only one queue or one person at time.However, there is no limit to the number of times a case is assigned.
Through the use of workflow, case assignment can be automated based onthe rules you establish. (For more on workflow, see Chapter 9.) For example,if a case has a subject of “Shipment Missing,” a workflow rule could beemployed that will assign it to the shipping department queue.
The first thing you want to do to start work on a case is to assign it to aqueue or an individual. In the following steps, we assign a case to a queue.Here’s all you need to do:
1. On the navigation pane, click the Service button.
2. At the top of the navigation pane, select Cases.
The Cases window appears on the right.
3. In the Cases window, select a case.
To select several records for an ensuing action, hold down the Ctrl keyand click. Selecting the check box at the top of the first column (underthe New button) selects all cases.
4. Click the Assign icon on the toolbar above the list of cases.
The Assign to Queue or User dialog box appears, displaying two optionsfor managing cases. Route Case is a powerful option after you establishworkflow rules. Find out more about defining workflow rules andprocesses in Chapter 9.
5. Click the Assign to Another User or Queue option and then click themagnifying glass icon to the right of the field.
The Look Up Records dialog box appears, as shown in Figure 22-7.
6. In the Look For field, choose User or Queue.
By default, the field displays User. In this example, we’re assigning thecase to a queue, so we select Queue from the Look For drop-down box.
7. Select a Queue.
When you change the Look For field to Queue, a list of all of the queuesin the system are displayed. To limit the list, you can use the Search forRecords field to the right of the Look For field. Type in all or part of thequeue name and click the magnifying glass icon.
288 Part V: Taking Care of Your Customers
30_343258-ch22.qxp 6/4/08 12:24 AM Page 288

8. Select the Queue and click OK.
You must highlight the appropriate user or queue even if only one matchis listed.
When you click OK, you return to the Confirm Assignment dialog box,where the username appears.
9. Click OK to close the Confirm Assignment dialog box.
You return to the window of the case you were assigning, and that caseis assigned.
With this method, we assigned one or more cases to a queue without openingthe individual case form.
Alternatively, case assignments can happen from the open case form by performing these steps:
1. Open a case.
2. Click the magnifying glass to the right of the Owner field; or from thetoolbar, choose Actions➪Assign.
3. Follow Steps 4 through 8 in the preceding step list.
Figure 22-7:You can
assign thecase to anindividual
CSR orplace it in a service
queue.
289Chapter 22: Working with Cases
30_343258-ch22.qxp 6/4/08 12:24 AM Page 289

For queues to work effectively, people need to monitor them. When someoneresponsible for monitoring a particular queue sees that a case has beenassigned to the queue, he or she needs to take ownership of the case. Indoing, so, the case is removed from the queue and the owner is the CSR work-ing on the case.
Follow these steps to monitor a queue and accept ownership of a caserecord:
1. On the navigation pane, click the Workplace button.
2. At the top of the navigation pane, in the My Work section, selectQueues.
If a plus sign appears next to My Work, click it first to open the list. TheQueues window appears on the right, with its own navigation pane and alist of queues. (See Figure 22-8.)
3. In the Queues window, click a folder under My Work.
Each folder is a separate queue. All cases assigned to that queue appearin the main window.
In Microsoft CRM, you can’t reject a case or an activity. (By activity, wemean a task, a fax, a phone call, an e-mail, a letter, or an appointment.) Ifyou don’t want to accept a case or an activity that is assigned to you,you must reassign it to another user or queue.
Figure 22-8:The pane inthe Queues
windowenables you
to view allcases
assigned toa specific
queue.
290 Part V: Taking Care of Your Customers
30_343258-ch22.qxp 6/4/08 12:24 AM Page 290

4. Click the Case you want to accept.
To select multiple cases, hold down the Ctrl key and click.
5. At the top of the Queues window, click the Accept button.
The Confirm Assignment dialog box appears.
6. Click OK.
The case is now removed from the queue and assigned to you in your InProgress queue.
Tending to CasesAs you work toward resolving a case, you typically have to perform certainactivities to obtain a solution. For example, you might need to perform testson the Spacely Sprocket to see whether it will repeat the problem your customer reported.
In this scenario, you’d perform the following steps to log your time and associate it with the case:
1. On the navigation pane, click the Service button.
2. At the top of the navigation pane, select Cases.
The Cases window appears.
3. In the Cases window, double-click the case you’re working on.
To follow along with the example, we double-clicked the case for whichwe’re scheduling a test.
4. In the Case navigation pane, click the Activities option.
The window shows uncompleted activities associated with the case.
5. On the toolbar, click the New Activity button.
The New Activity dialog box appears. Because we’re performing a teston the equipment, we use Task.
6. Highlight Task and then click OK.
The Task: New window appears.
7. Enter a subject that describes the task you’ll perform.
Note that the Regarding field already displays the case title, and yourname should be in the Owner field. The Duration defaults to 30 minutes,but you can change this using the drop-down menu. If appropriate, youcan also complete the Due date and time; Priority; Category; andSubcategory fields.
291Chapter 22: Working with Cases
30_343258-ch22.qxp 6/4/08 12:24 AM Page 291

8. Click the Save and Close icon.
The task now appears in the main display for the associated case.
To complete the task (and automatically accrue billable time against thecase), follow these steps:
1. In the Cases window, double-click the appropriate case.
The Case window appears, showing the case you selected. (The title ofthe window includes the name of the case.)
2. In the navigation pane, click the Activities option.
You see a list of all activities associated with this case.
3. Double-click the task you want to close.
4. Click the Save as Completed icon.
In the Case window, you’ll see that the task is no longer displayed underActivities in the navigation pane. But wait! Click History, which shows thecompleted task. If you had spent one hour performing the task, for example,the customer would now be on the hook for one hour of contract time.
You can close an activity as completed instead of saving and reopening. If theactivity isn’t a scheduled activity, but one you’re entering in for historicalpurposes, simply click the Save as Completed icon.
You can associate existing activities with this case by clicking the AddExisting Activity button to the right of the New Activity button.
Resolving a caseCase resolution is the system’s way of indicating that the problem is solved.(Many organizations like to set an intermediate status indicating that, fromthe technician’s perspective, the case is resolved, but the customer has aperiod of time to indicate otherwise. This is a good topic to take up with yourdealer.) You can resolve cases on the first call as they happen, or after exten-sive research.
In some cases, multiple activities are generated to help resolve a case. InMicrosoft CRM, you can’t mark a case as resolved if any activities associatedwith the case remain uncompleted. This might require completing phonecalls, tasks, and appointments, sending e-mail messages, and more. This pre-vents a user from accidentally closing a case before completing all mandatedworkflow and activities.
292 Part V: Taking Care of Your Customers
30_343258-ch22.qxp 6/4/08 12:24 AM Page 292

After you determine a solution to a case and complete all associated activi-ties, follow these steps to change a case’s status to resolved:
1. In the Cases window, double-click the case you want to resolve.
You may find it helpful to first select My Active Cases from the Viewdrop-down menu in the upper right corner of the window.
2. From the menu bar (at the top of the screen), choose Actions➪Resolve Case.
The Resolve Case dialog box appears, as shown in Figure 22-9. Thedialog box has the following options:
• Resolution Type: A drop-down box in which you can indicate if theproblem is solved.
• Resolution: A required field (see the red asterisk) for a briefdescription of how the case was resolved.
• Total Time: Microsoft CRM automatically calculates and fills in theTotal Time field. Total time is defined as the sum of time spent onall activities associated with the resolution of the case. CRM recog-nizes the following activities in the total time calculation; task, fax,phone call, letter, e-mail, and appointment.
• Billable Time: A required field that defaults to total time, but youoverride it to adjust for the actual time to bill on the case. If thisactivity is linked to a contract, the billable time you indicate hereis applied against the total time listed in the contract.
• Description: A note field to any case-related information not cov-ered in the actual case. This is a good place to put the resolutionresults.
Figure 22-9:Document
the time you spentresolving
a case.
293Chapter 22: Working with Cases
30_343258-ch22.qxp 6/4/08 12:24 AM Page 293

3. Click OK.
The Resolve Case dialog box closes. Note that the case status updates toResolved in the lower left corner of the Case window.
Reactivating a caseIf a customer calls with a recurrence of a previously resolved problem, youneed to reopen or reactivate the case. Follow these steps:
1. In the Cases window, select My Resolved Cases or All Resolved Casesfrom the View drop-down menu.
A list of all your resolved cases appears.
2. Double-click the case you want to reactivate.
3. In the menu bar (at the top of the screen), choose Actions➪Reactivate.
The Reactivate Confirmation dialog box appears.
4. Click OK.
The case status in the lower left corner of the Case window appears asActive.
As you can see, Microsoft CRM offers extensive choices to help you betterserve your customers, with almost everything just a few clicks away.
294 Part V: Taking Care of Your Customers
30_343258-ch22.qxp 6/4/08 12:24 AM Page 294

Chapter 23
Managing Your SubjectsIn This Chapter� Creating an effective subject tree
� Adding, editing, and removing subjects
� Relating subjects to cases
� Finding and viewing cases by subject
� Associating subjects with knowledge base articles
� Tagging product listings and sales literature with subjects
Now you can slice and dice your data without a Ginsu! Subjects are greatway to organize and relate data. In Microsoft CRM, you can relate sub-
jects to cases, products, and knowledge base articles. Subjects are like buck-ets. Associate a case, for example, with a subject, and it goes into thatsubject bucket. Over time as cases build, you can run reports based on sub-ject bucket. For example, a computer laptop manufacturer may decide tocreate three subjects: Hard Drive, Screen, and Keyboard. When a customercalls and opens a case regarding her laptop’s malfunctioning screen, the caseis associated with the Screen subject.
By tracking the subject of a case, an organization’s support manager can thenreport on the number of cases open by support technician by subject.Additionally, support organizations can route cases by subject, ensuring themost qualified support technician is assigned to the case.
If subjects are arranged in buckets, it’s possible for buckets to contain otherbuckets. This is called nesting. Subject nesting allows one bucket to resideinside another bucket. For example, the hard drive bucket could be found inthe laptop bucket. Another, hard drive bucket could be found inside the desk-top computer bucket.
Also remember that Microsoft CRM subjects can not only be products butalso services. For this chapter, we use Bikes, Clothing and Accessories, andCompany Information as our subjects.
31_343258-ch23.qxp 6/4/08 12:25 AM Page 295

Structuring your subjects and their relationships to one another is important.We show you how to create your primary subjects and if required in yourorganization sub-subjects.
Tips for Defining Your SubjectsMicrosoft CRM uses a collapsible tree system — trees, not buckets — muchlike the ones that Windows and Microsoft Outlook use. Creating a subjecttree offers the following benefits:
� A consistent hierarchy for associating contacts with products, sales literature, and knowledge base information
� Easy access to information related to specific subjects
� Centralized management of subjects (including creating, editing, andremoving subjects) and their relationships to one another in the subjecttree
Building a subject tree is easy, but figuring out what to put on which branch canbe difficult. We recommend scheduling a brainstorming session with differentdepartments in your company. Divide your products and services into cate-gories and topics. Then determine if you will need to further define one or all ofyour topics into sub-topics. Repeat this process until you’re comfortable thatyour subject definition is detailed enough to aid in reporting, but not so detailedthat you will have trouble differentiating one branch from the branch above it.
Brainstorming can become perplexing and lead to lengthy discussions. Don’tworry — spending time on the subject tree at the beginning is far better thanbuilding the subject tree on the fly. And moving things around in the subjecttree later isn’t as easy as placing them at their appropriate level in the firstplace. Additionally, ad hoc subject design may not account for the needs ofyour entire organization. You can save yourself time and aggravation byhaving a blueprint in place first.
No hard-and-fast rules exist when defining the structure of a subject tree.Each company has its own priorities. But you might want to consider the fol-lowing items when defining your subject tree structure:
� Price lists
� Sales literature
� Product specs
� Warranty information
� Service contracts
� Knowledge base articles
296 Part V: Taking Care of Your Customers
31_343258-ch23.qxp 6/4/08 12:25 AM Page 296

Only users with the appropriate access rights can create subjects and additems to a subject tree. (See Chapter 8 for more information.)
You can also relate items such as product catalogs and sales literature to subjects.
Accessing the Subjects WindowAfter you create the outline or blueprint for your company’s subject tree, besure to save it where you can access it easily when you’re ready to build it. A good idea is to have the administrative assistant (who as we all know, trulyruns the company) create the outline in a Word document.
Before you can use subjects in CRM, you must create at least one subject.You add subjects, maintain them, and delete them from the subject manage-ment area, which you can find in Settings. Here’s how you get to it:
1. On the navigation pane, click the Settings button, which is second upfrom the bottom.
The Settings navigation options show at the top of the navigation pane.
2. In the navigation pane, click the Business Management Link, which issecond from the top.
Business Management options are now available on the right.
3. In the Business Management pane, click the Subjects link on thebottom right.
The Subject Management area replaces Business Management on theright. See Figure 23-1.
297Chapter 23: Managing Your Subjects
When is a subject not a subject?If you open an activity form (task, appointment,phone call, and so on) in Microsoft CRM, you’llnotice that there is a field called Subject. Undercloser scrutiny, one would notice that thelookup magnifying glass icon is missing. What
happened to our subject trees? Nothing, thissubject field is a text field. In this case, subjectrefers to the subject of the activity and isn’trelated to Subjects, the object of this chapter.
31_343258-ch23.qxp 6/4/08 12:25 AM Page 297

Three options appear in the Common Tasks pane, which is to the left of themain display: Add a Subject, Edit Selected Subject, and Remove SelectedSubject. We cover each of these in the following sections.
On the right is the Subject Tree. When accessing the Subject Managementarea for the first time, you’ll find a single subject: Default Subject. A plus signis located just to the left of the default subject, leading one to believe thatadditional subjects are available to cascade down. However, clicking the plussign doesn’t reveal any additional data; instead, the plus sign turns to a dot,indicating that this tree doesn’t have children.
Adding a SubjectYou’ve taken the time to create a subject hierarchy. Now it’s time to add yoursubject tree to Microsoft CRM. Because you can nest subjects in a treelikeformat, we add a new subject at the root level (or the tree trunk, which is thesame level as the default subject).
To add subjects, follow these steps:
1. In the Common Tasks area of the Subjects window, click Add aSubject.
The Add Subject dialog box appears.
2. Enter a title for the subject and (if desired) a description.
The title is required; you can’t save the form without a title.
Figure 23-1:Begin
managingyour
subjectshere.
298 Part V: Taking Care of Your Customers
31_343258-ch23.qxp 6/4/08 12:25 AM Page 298

3. To place the new subject under a previously created subject, click themagnifying glass icon next to the Parent Subject field, then click OK.
The Subject Lookup dialog box appears, as shown in Figure 23-2.
If you navigate to the selected parent and child before you click Add aSubject, the Parent Subject field is automatically populated with yourhighlighted selection.
4. Click the appropriate plus sign (+) to the left of a subject to open the subject tree, highlight the subject you want as the parent, andclick OK.
The new subject is added to the subject tree. This design flexibilityenables you to create a sophisticated hierarchy to match the blueprintyou came up with at the brainstorming session.
The desired parent can be the child of another subject.
5. If you selected a parent subject and you want to display the subjectyou just added, you must click the plus sign to the left of the parent.
If you add the new subject as the child of a child, continue clicking plussigns until you drill down to the appropriate level.
Clicking the plus sign to the left of a subject displays its children (if any exist)and is the easiest way to drill down into a subject. If the plus sign turns into adot, you know that you’re at the end of the line for that subject.
Figure 23-2:You can
associatethe new
subject to aparent
subject.
299Chapter 23: Managing Your Subjects
31_343258-ch23.qxp 6/4/08 12:25 AM Page 299

Note: Whenever you make an addition or revision to the subject tree andclick OK, Microsoft CRM saves the subject and refreshes the window. If youdrill down several levels to add a new subject and click OK, the screenrefresh takes you all the way back to the top-level view of the subject tree(arrgh!). It does this so that you’ll always have an up-to-date view of your sub-ject tree, but be prepared to spend a few extra mouse clicks when adding lotsof branch subjects.
Editing a SubjectThe Edit Selected Subject option is the second option in the Common Taskspane. (Refer to Figure 23-1.) This option enables you to rename a subject ormove it to another location in the subject tree.
Modifying and updating the subject tree is part of the evolutionary process ofany business. Should you do so, all edits cascade through the system, mean-ing the new subject name changes anywhere the subject is in use. Thisincludes historical data.
To edit a subject, follow these steps:
1. In the Subject Tree area of the Subjects window, highlight the subject.
2. In the Common Tasks pane, click Edit Selected Subject.
The Edit Subject dialog box appears.
3. Edit the subject’s title, change the subject’s parent/child relationshipin the subject tree, or revise the description notes, all by entering textinto the respective fields.
To change the parent subject, you must use the magnifying glass at theend of the field. You can modify the title and description by enteringtext.
Don’t forget to change the Default subject to something that matchesyour business.
If you made a subject a child of another subject and would like toremove the parental relationship (would that be orphaning the subject?)click the magnifying glass icon and select the None button at the top ofthe dialog box.
Moving a subject to a new parent subject will move all of the selectedsubject’s associated children. This action could lead to an unpleasantsurprise for your co-workers the next time they look for a subject.
300 Part V: Taking Care of Your Customers
31_343258-ch23.qxp 6/4/08 12:25 AM Page 300

4. Click OK.
The Edit Subject dialog box closes, and your edits are saved.
Changing the subject title changes the title throughout the application. Thismeans that historical records, such as cases, will have the new value as subject title and not the original value.
Removing a SubjectThe Remove Selected Subject option, the last option in the Common Taskspane, enables you to delete a subject from the subject tree. You might choosethis option if a product line is discontinued or a service is no longer offered.
Microsoft CRM allows you to remove only subjects that aren’t associatedwith existing records, such as Cases, Knowledgebase Articles, and Products.If you remove a subject from the subject tree, and that subject has childbranches, child subjects move up a level.
To remove a subject, follow these steps:
1. In the Subject Tree area of the Subjects window, highlight the subjectyou want to remove.
2. In the Common Tasks pane, click Remove Selected Subject.
3. When a window appears asking whether you’re sure you want todelete the subject, click OK.
The window closes and the subject tree refreshes, minus the subject youremoved.
Relating Subjects to Other EntitiesNow that you’ve built a rather complex subject tree, how do you use it? Aswe mention earlier, you can use subjects with knowledge base articles, cases,sales literature, and products.
For example, let’s assume that Dick in the service department opens a newcase pertaining to a software problem that Mr. Wayne is having with theSeries 211 Transporter. Something about this case strikes him as familiar.Because other cases are associated to the subject “Series 211 Transporter,”Dick can search for those cases and get a list of them almost instantly. Alfred,
301Chapter 23: Managing Your Subjects
31_343258-ch23.qxp 6/4/08 12:25 AM Page 301

his cube neighbor, gets a request for sales literature on the Series 211Transporter. He conducts a search for all sales literature linked to the subject“Series 211 Transporter” and gets a list of all related documents. Last but notleast, there’s Barbara, in the cube across the way. At a potential customer’srequest, she’s researching the electrical requirements of all backup powersupplies that your company sells. She performs a knowledge base search ofall articles related to the subject “Power Supplies” and prints those articles.
Holy association, Batman! You mean by associating and organizing subjecttrees with logical, explanatory details, you can easily retrieve your com-pany’s data and information? Correct, Boy Wonder!
Relating subjects to casesSubjects provide a mechanism to report on case issues. For example, theengineers responsible for developing future generations of The Series 211Transporter may propose a redesign based on metrics learned from subjects.
Let’s go back to Dick and the case he just opened with Mr. Wayne. He wantsto make sure this case is linked to the Series 211 Transporter subject. Othersmight come across the same problem. Dick knows that this is importantinformation for any of the customer service representatives in his company.
You can link new or existing cases to subjects by following these steps:
1. Third from the bottom of the navigation pane, click the Servicebutton.
2. At the top of the pane, click Cases (under Service).
3. To start a new case, click the New button in the upper-left corner ofthe form. Or to open an active case, double-click it.
Both options display the Case window.
4. In the Case window, click the magnifying glass icon to the right of theSubject field.
The Subject Lookup window displays the subject tree. Although youmay have only one subject tree for your company, you can design thesubject tree with as much complexity as you need.
5. Locate the subject to which you want to link the case.
You may need to click a plus sign or two to drill down to the appropriatesubject.
6. After you locate the subject you want, double-click it or highlight itand click OK.
The subject you select is displayed in the Subject field of the Casewindow.
302 Part V: Taking Care of Your Customers
31_343258-ch23.qxp 6/4/08 12:25 AM Page 302

The Form Assistant on the far right displays the subject tree when youenter the Subject field. You can locate the subject as in Step 5 above andskip Step 6 by simply selecting a subject from the form assistant.
7. Click the Save and Close icon in the upper-left corner of the window.
Your case is now related to the subject you selected.
We recommend that you relate cases to subjects when you first create thecases. However, if you aren’t sure of the best subject to link to, you canassign or change the subject later. Keep in mind that changing a subjectrelated to a case may cause problems if a user has worked on the case andrelated information to the previous subject.
Subjects relate similar cases. Searching for cases with similar issues helpscustomer service representatives quickly find solutions to problems.
Putting the case link to workSuppose a customer calls with a problem with one of your company’s products — the Hop-n-Pop toaster just won’t hop when it pops the bread out.Your customer service representatives can check to see whether any othercases are linked to the same product using the Advanced Find feature. Thisoffers you the ability to conduct detailed searches in almost any searchablefield in Microsoft CRM.
To view all cases linked to a specific subject, follow these steps:
1. In the menu bar (at the top of the screen), choose Tools➪AdvancedFind.
The Advanced Find dialog box appears, as shown in Figure 23-3. TheLook For field tells the program where to look for the parameters you’regoing to add later. The Use Saved View lists searches you’ve saved previ-ously. The area below these fields is where you’ll enter the data youwant to search for.
2. In the Look For field, verify that Cases is in the box; if it isn’t, click thearrow to the right and choose Cases.
The look for box defaults to the entity you are on when you launchAdvanced Find. It may not have cases in the box when the form firstopens.
3. If below the Look For drop-down box you see Show Details and per-haps certain field values such as Owner Equals Current User, click theShow Details button. If not, skip to step 5.
The Show Details button changes to Hide Details and now you canchange the query options.
303Chapter 23: Managing Your Subjects
31_343258-ch23.qxp 6/4/08 12:25 AM Page 303

4. Click the Clear button to clear out the current search parameters.
You can skip this step if there aren’t any search parameters showing.
5. Mouse over the Select option to activate the Select drop-down menu,and then click the arrow or in the box to open the menu.
The options in the Select drop-down box are related to the entity you’requerying and vary based on the item selected in the Look For drop-down list. For example, if you chose (in Step 2) to look for Documents,your search options are File Size, Author Name, File Name, and so on. If you chose Facilities/Equipment, you can search for Name, Primary E-Mail, Business Unit, and so on.
The list of items in the drop-down box have fields listed under two head-ers: Fields and Related. Fields represent the fields associated with theprimary entity you are querying (in this instance Cases). Related, on theother hand, contains a list of entities related to the primary entity (againin our example, Cases).
The options in the Select drop-down box are related to the entity you’requerying and vary based on the item selected in the Look For drop-down list. For example, if you chose (in Step 2) to look for Documents,your search options are File Size, Author Name, File Name, and so on. If you chose Facilities/Equipment, you can search for Name, Primary E-Mail, Business Unit, and so on.
6. Select a field to query.
In our case, Subject.
7. Place your cursor over the word Equals and set the Condition for thesearch from the drop-down menu.
Figure 23-3:You can
search forrecords
based onvalues you
define.
304 Part V: Taking Care of Your Customers
31_343258-ch23.qxp 6/4/08 12:25 AM Page 304

Again, placing your cursor over the word Equals activates the drop-downmenu. Click it to open the menu and make your selection.
8. Under Enter Value, select or enter the appropriate value.
The value you enter depends on the field you chose in step 6. Becausewe chose Subject in our example, the value field is a Lookup. If we chosea field that is a textbox, you would type your selection in the box.
9. Repeat steps 5-9 to add additional search criteria or skip to step 9.
The value you enter depends on the field you chose in step 6. Becausewe chose Subject in our example, the value field is a Lookup. If we chosea field that is a textbox, you would type your selection in the box.
10. Click the Find button (in the lower left).
A new window appears with your search results, created from thechoices you made in the main Advanced Find window.
11. To open an entry in the search results list, double-click it.
Single-clicking in a hyperlink field brings you to that record. If you wantto open a selection as per Step 9 above, double-click a non-hyperlinkedfield.
For more on Advanced Find, see Chapters 3 and 13.
Relating a subject to a knowledge base articleThe process of linking a subject to a knowledge base article is the same asthat for linking subjects to cases. (We discuss the knowledge base in detail inChapter 24.) A knowledge base article is a record (stored in the knowledgebase) that contains information. It may document a process, contain the his-tory of the company, provide details on the company’s health or retirementplan, or list employee addresses and phone numbers.
You can create a link between a knowledge base article and a subject whenyou create the article. You can also link existing articles to existing subjects.Linking knowledge base articles to specific subjects provides your customerservice representatives with a quick and easy way to search for similar prob-lems and solutions in a specific subject.
To link a new article to a subject, follow these steps:
1. On the menu bar (at the top of the screen), choose New Record➪Article.
The Select a Template dialog box appears, as shown in Figure 23-4.
305Chapter 23: Managing Your Subjects
31_343258-ch23.qxp 6/4/08 12:25 AM Page 305

2. Select the appropriate language and template.
Templates help format your articles so that they’re uniform in appear-ance, making them easier to read. (This is handy when you have a clienton the phone.) Microsoft CRM has several predefined templates, andyou can also create your own. (For more on templates, see Chapter 24.)Microsoft CRM also allows for multi-lingual templates. After you selectyour language in the Language drop-down box, click a template to high-light it and check the right side of the Select a Template window. You’llfind basic information about the template you selected.
3. Click OK.
The Article: New window appears, as shown in Figure 23-5. (You find outabout creating and submitting articles in Chapter 24.)
4. Enter a title for your new article.
5. Select the subject to which you want to link your article.
To do so, click the magnifying glass icon to the right of the Subject field.In the Subject Lookup window that appears, select the subject from thesubject tree. You may need to click a plus sign or two to drill down tothe appropriate subject.
6. Add keywords.
7. In the body of the template, place your cursor over the reddish textand click it.
The predefined text is removed, and a free-form field appears so you canenter your Article question.
You can edit text in this field just like in a Microsoft Word document.
Figure 23-4:The first
step tocreating an
article ischoosing
thetemplate.
306 Part V: Taking Care of Your Customers
31_343258-ch23.qxp 6/4/08 12:25 AM Page 306

8. Repeat step 7 as required by the template your chose.
Just like in Step 7, the predefined text is removed, and a free-form fieldappears so you can enter your answer.
9. Click the Save or Save and Close icon.
Your article is now related to the subject you selected.
To link a previously created knowledge base article to a subject, follow thesesteps:
Only users with the appropriate security access can edit knowledge base articles.
1. Click the Service button, which is third from the bottom of the naviga-tion pane.
2. At the top of the pane, select Knowledge Base.
The Knowledge Base window appears.
3. Under Article Queues: select Draft, Unapproved, or Published to findthe knowledge base articles you’d like to select from.
All draft or unapproved articles are displayed in the main window.
• Draft articles have been composed but haven’t been submitted forapproval by a user with editors’ rights; consider them works inprogress.
• Unapproved articles have been submitted to a user who has beenassigned the task of reviewing and approving articles.
Figure 23-5:From here,
you canstart
buildingyour article.
307Chapter 23: Managing Your Subjects
31_343258-ch23.qxp 6/4/08 12:25 AM Page 307

• Published articles have been approved for the general population.After an article is published, the Subject link can’t be altered.However, if you find you need to change a published article, youcan un-publish the article to make the necessary changes.
4. Click the desired article.
The Article window appears.
5. Select the subject to which you want to link your article.
To do so, click the magnifying glass icon to the right of the Subject field.In the Subject Lookup window that appears, select the subject from thesubject tree. You may need to click a plus sign or two to drill down tothe appropriate subject.
6. Click the Save and Close icon.
The article is now linked to the subject you selected.
Putting the article link to workLet’s say that another customer calls about the Hop-n-Pop toaster. She heardthat an attachment is available that allows the user to toast hamburger buns.You can search the knowledge base for the article that talks specificallyabout the bun toaster option.
To view knowledge base articles linked to a specific subject, choose GoTo➪Workplace➪Knowledge Base. The Workplace: Knowledge Base windowappears. Change the drop-down box from Full Text Search to Subject Browse.Select the subject from the subject tree just below the drop-down box. Thesystem automatically returns a list of related articles.
Relating a subject to the product catalogAs with cases and articles, you can link products listed in the product catalogto subjects. This is an efficient way to set up metrics for tracking sales bydepartment, product type, sub-product type, and so on. And you can edit theSubject field related to a product catalog item at any time, as long as theproduct remains active. (See Chapter 7.)
To link a product to a subject, follow these steps:
1. In the lower part of the navigation pane, click the Settings button.
2. In the upper part of the navigation pane, select Product Catalog.
The Product Catalog window appears. Detailed information on using theProduct Catalog is in Chapter 7.
308 Part V: Taking Care of Your Customers
31_343258-ch23.qxp 6/4/08 12:25 AM Page 308

3. In the Settings window, select Product Catalog.
4. Select Products.
The Products window appears, as shown in Figure 23-6.
5. In the window’s toolbar, click the New button (or double-click anexisting product to edit it).
The Product: New window appears. Chapter 7 contains detailed informa-tion about this window. For now, direct your attention to the Subjectfield.
6. Select the subject you want to link your product to.
To do so, click the magnifying glass icon to the right of the Subject field.In the Subject Lookup window that appears, select the subject from thesubject tree.
or
Use the form assistant to the right.
7. Click the Save and Close icon.
Your product is now related to the subject you selected.
Searching for products linked to a subject requires using the Advanced Findfeature, which is described earlier in this chapter in “Putting the case link towork.”
Figure 23-6:This
window listsall your
company’sproducts.
309Chapter 23: Managing Your Subjects
31_343258-ch23.qxp 6/4/08 12:25 AM Page 309

Relating a subject to sales literatureYou follow the same types of steps to link a piece of sales literature to a sub-ject as you do to link cases and articles to a subject. What’s the advantage?Here’s an example: Suppose you have a training manual that you sell. Yourmarketing department has created a two-page advertisement for the manualin PDF format. It would be handy to be able to link the ad with the productusing a subject relation.
When customers call to request training information related to a specificproduct, you can easily search for all the training materials associated withthe product, including the spiffy ad slick. You can then e-mail those docu-ments to your customers, and within minutes they can be perusing the infor-mation and deciding about training.
To link sales literature to a subject, follow these steps:
1. On the navigation pane, click the Sales button.
2. At the top of the pane, select Sales Literature.
The Sales Literature window appears.
3. On the Sales Literature window’s toolbar, click the New button ordouble-click an existing sales literature item.
If you click New, the Sales Literature: New window appears. Otherwise,you see the window for the existing literature item. Chapter 17 containsdetailed information about this window.
4. Select the subject you want to link your sales literature to.
To do so, click the magnifying glass to the right of the Subject field. Inthe Subject Lookup window that appears, select the subject from thesubject tree.
5. Click the Save and Close icon.
Your sales literature is now related to the subject you selected.
Note that you can edit subjects related to sales literature at any time.Searching for sales literature linked to a subject requires using the AdvancedFind feature, which we describe earlier in “Putting the case link to work.”
310 Part V: Taking Care of Your Customers
31_343258-ch23.qxp 6/4/08 12:25 AM Page 310

Chapter 24
Creating and Using the Knowledge Base
In This Chapter� Preparing your knowledge base
� Creating a knowledge base template
� Creating an article to add to the knowledge base
� Searching through the knowledge base
Based on templates and articles, Microsoft CRM’s library is called theknowledge base (also referred to as KB) and is a powerful tool for
sharing information across your organization and with your customers. Theknowledge base can house sales and technical literature as well as provideinformation to assist your customer service people with the thorniest customer issues.
Templates determine how information is formatted, found, and presented.Articles are the products created when information is stored in a template.
In this chapter, you find out how to create knowledge base templates andarticles. You also discover how to search the knowledge base and associaterelevant information with other sections of Microsoft CRM.
Organizing Information for Your Knowledge Base
The key to the knowledge base is organization. So announce a staff meetingand order pizza, the ultimate brainstorming food, because that’s what thismeeting is about — brainstorming and organizing your documentation and
32_343258-ch24.qxp 6/4/08 12:25 AM Page 311

processes. If you have a whiteboard (complete with the permanent-markerline that can’t be removed), make sure you use it to record ideas andthoughts for the stuff you want to put in the KB, so everyone can keep trackof what’s brought up. Your task is to organize all the sales and service docu-ments your company uses. Ultimately, these topics become the buildingblocks for your knowledge base. You should also consider which people inyour organization have access to each type of information and documents.
Your sales documents can include features and benefits of your products,pricing, system requirements, availability, delivery timelines, and fancy mar-keting advertisements.
On the service side, you have things like schematics, maintenance require-ments, warranty information, and installation procedures. Also, on the ser-vice side of your business, you may want to consider stocking the knowledgebase with a trouble-shooting guides to allow even rookie customer servicepeople to sound like experts on the phone.
Remember to keep your topics and titles in plain, easily discernible languagebecause, after you’re finished here, you’re going to put all your notestogether in Microsoft CRM to create your company’s knowledge base.
Creating Article TemplatesThe knowledge base contains articles built on templates. By using templatesfor the foundation of a new knowledge base article, all of your company’sarticles will be easy to enter and have a uniform layout, regardless ofwhether Accounting or Sales creates the article.
Microsoft CRM comes with a collection of default article templates:Procedure, Question & Answer, Solution to a Problem, and Standard KBArticle, as shown in Figure 24-1. And those of you who like to think outsidethe box can create your own templates.
The Procedure template is laid out using a standard format of three sections:Purpose & Scope, Procedure, and Additional Comments.
Normally, you create a new article within an existing template. But we’regoing to walk you through creating a new template, just in case none of thestandard ones fit what you’re looking for. Later in the chapter, you create anew article based on an existing template.
312 Part V: Taking Care of Your Customers
32_343258-ch24.qxp 6/4/08 12:25 AM Page 312

To create a template, follow these steps:
1. In the lower part of the navigation pane, click the Settings button.
2. In the Settings window, select the Templates option.
3. Select Article Templates.
The Article Templates window appears, displaying all available articletemplates. (Refer to Figure 24-1.)
4. On the Article Templates window’s toolbar, click the New button.
The Article Template: A new window opens and, right on top of that, theArticle Template Properties dialog box appears, as shown in Figure 24-2.
Figure 24-2:This
window isyour first
step increating atemplate.
Figure 24-1:The ArticleTemplates
windowdisplays a
list of allcurrentarticle
templates.
313Chapter 24: Creating and Using the Knowledge Base
32_343258-ch24.qxp 6/4/08 12:25 AM Page 313

5. Enter a title and a description of the article template and then click OK.
The description is optional, but we suggest you include it because itoffers one more way (in addition to the title) to describe the templateyou’re creating. When you click OK, you return to the Article Template:New window to design the template.
6. On the right of the Article Template: New window, in the CommonTasks pane, click Add a Section. A section, by the way, is just anotherlevel in the organizational structure of each template. You can scanahead to Figure 24-4 to get a picture of some of this structure.
7. In the Add a New Section window, enter the title and a description orinstructions for the section, and then click OK. The instructions, ofcourse, are for those people in your organization who may be readingor modifying these articles.
8. If you want to add another section, repeat Step 7.
You can add as many sections as you want to the template. These sec-tions will appear when you create articles (later in this chapter).
9. Click the Save and Close icon in the upper-left corner of the ArticleTemplate: New window.
The window closes, the new template is saved, and you return to theArticle Templates window.
Creating a Knowledge Base ArticleThe knowledge base acts as the staging area for all your company’s articles.This is where you store, edit, and publish articles, and also where your stafffinds the finished product.
Imagine that your company doesn’t have an assigned editor and this hap-pens: Bob from Sales adds an article regarding a quick blurb he heard on thenews about the competitor’s washing machine. Stan from Marketing adds acomic strip about computer repair guys. Jane from Accounting adds instruc-tions on placing orders and taking credit cards. Thomas the CSR adds oneabout what to do with irate customers.
Microsoft takes another step in preventing chaos by enabling your companyto choose who can add articles to and remove articles from the knowledgebase. We recommend that you set up this person, or team, to also approvearticles before they are published, checking for format, accuracy, and continuity.
314 Part V: Taking Care of Your Customers
32_343258-ch24.qxp 6/4/08 12:25 AM Page 314

The next few pages explain how to create and submit draft articles as well asapprove and publish them. As shown in Figure 24-3, the knowledge base cate-gorizes articles in three stages:
� Draft: Your works-in-progress, that is, composed articles that haven’tbeen submitted for approval. Drafts are visible only to their respectiveauthors, and users can’t search for them in the knowledge base.
� Unapproved: Store your articles pending editor approval here. Userscan’t search for these in the knowledge base either.
� Published: Your finished, editor-approved articles, ready for the generalpublic. Published articles are read-only (so your co-workers can’t editthem), but users can search for them in the knowledge base.
Follow these steps to create a new article:
1. In the lower part of the navigation pane, click the Service button.
2. Then, in the upper part of the pane, select Knowledge Base.
The Knowledge Base window appears (refer to Figure 24-3). You canview articles (based on their status and if any exist yet) in the main partof the window, on the right.
Figure 24-3:The
KnowledgeBase
workspace.
315Chapter 24: Creating and Using the Knowledge Base
32_343258-ch24.qxp 6/4/08 12:25 AM Page 315

3. On the Knowledge Base window’s toolbar, click the New button.
The KB Template window appears, listing all the templates currentlyavailable in your system. Find a template you would like to use.Template information (title and type, creator and description) appearson the right of the KB Template window as you highlight a template.
4. Highlight your template and click OK.
The Article: New window appears, as shown in Figure 24-4. The sectionsand instructions appear here.
5. Enter a title.
Required fields are Title and Subject; you must fill them in before youcan save the article.
6. Link the article to a subject.
To do so, click the magnifying glass to the right of the Subject field. TheLook Up a Subject window appears. Use the plus signs to open and col-lapse the subjects to specify a section within the subject. When you findyour subject, highlight it and click OK. (The Subject field includes infor-mation that your organization can use to organize and track specificissues and items entered into CRM. If you need more information aboutusing the Subject field in CRM, please see Chapter 23.)
7. In the Keywords field, enter words that will help your staff find thisarticle.
Figure 24-4:This is
where youbuild your
article.
316 Part V: Taking Care of Your Customers
32_343258-ch24.qxp 6/4/08 12:25 AM Page 316

Much like a search on the Internet, you can enter words here to searchfor articles pertaining to certain subjects. For example, if I were the CSRon the phone with Mrs. Reynolds concerning her air conditioner, I couldsearch the knowledge base for over-heating and this article would showup in my search results — if the person who created the article tagged itwith the term over-heating in the Keywords field.
Separate each of your keywords with a comma.
Another suggestion for your article keywords is the model number ofyour product.
8. Click inside the text area and enter your information.
The instructions disappear, and you’re ready to type. Microsoft CRM’spredefined templates are already formatted with specific information.For example, if we had chosen the Procedure template to create our arti-cle, the following section headings would be in the template, promptingthe user to give all of the necessary information in the article: Purpose &Scope, Procedure, and Additional Comments.
The sections of the knowledge base article template allow you to createan easy-to-read, informative article for your customer service represen-tatives and your customers. You can write step-by-step instructions,create question-and-answer scripts, or even make a Frequently AskedQuestions (FAQ) section.
Use the toolbar under the Keywords field in the Article: A new windowappears to do basic editing of your article and even add color text foremphasis.
9. Click the Save and Close icon.
The article goes into your Draft folder for further editing and, ultimately,submission for approval.
Although this publishing process may seem overwhelming and (in somecases) unnecessary, maintaining the process is important. Carefully manag-ing information stored in the knowledge base guarantees that you’re provid-ing the latest, most accurate information to your sales and service staff and,even more importantly, your customers.
Submitting a draft articleNow is the moment every writer dreads: time to hand over your masterpieceto the person your company designated as editor (when your business unitswere defined in Chapter 6).
317Chapter 24: Creating and Using the Knowledge Base
32_343258-ch24.qxp 6/4/08 12:25 AM Page 317

To submit a draft article for approval, follow these steps:
1. In the navigation pane, click the Service button.
2. Then in the upper part of the navigation pane, select Knowledge Base.
The Knowledge Base window appears on the right.
3. On the left side of the Knowledge Base window, click the Draft folderto access your drafts.
4. On the right side of the window, highlight the article you want tosubmit.
5. In the Knowledge Base window toolbar, click the Submit button.
The Confirm Submittal dialog box shown in Figure 24-5 appears.
6. Click OK.
The article you submitted moves from the Draft folder to theUnapproved folder.
You can check that your article has been moved by clicking the Unapprovedfolder on the left side of the Knowledge Base window. All the articles pendingeditor approval are here. Just a reminder: These aren’t searchable.
Approving an articleAll those articles in the Unapproved folder are yours (if you have editingrights, that is) to check, edit, correct, and otherwise make your high schoolEnglish teacher proud (or cry).
Anyone with editing rights can open and edit articles in the Unapprovedfolder. After all appropriate changes have been made, the editor can approvethe article and add it to your company’s knowledge base.
Figure 24-5:This
appearswhen you’re
submittingan article
for approval.
318 Part V: Taking Care of Your Customers
32_343258-ch24.qxp 6/4/08 12:25 AM Page 318

Follow these steps to approve an article:
1. In the navigation pane, click the Service button.
2. Then in the upper part of the navigation pane, select Knowledge Base.
3. On the left side of the Knowledge Base window, click the Unapprovedfolder.
All the articles awaiting approval are displayed.
4. On the right side of the window, find your article, highlight it, anddouble-click to open it.
This opens the article so that you can make changes. If you makechanges, make sure to click Save (the disk icon) in the upper-left cornerof the screen.
5. On the Knowledge Base window toolbar, click Approve.
In the event that you have to reject the article, click Reject instead ofApprove. You’re given the option to add comments explaining yourrejection in the Provide a Reason dialog box, as shown in Figure 24-6.
6. In the confirmation window that appears, click OK.
The Article is automatically moved to the Published folder and is nowsearchable in the knowledge base.
Figure 24-6:Enter your
suggestionsand reasonsfor rejecting
an article.
319Chapter 24: Creating and Using the Knowledge Base
32_343258-ch24.qxp 6/4/08 12:25 AM Page 319

Let’s say you’ve approved the article, but a week later, someone finds anerror in it. For example, the company logo’s reddish color isn’t calledCinnamon. It’s called Beauty Red. In this situation, you (with the appropriaterights) can unpublish an article. To do so, follow these steps:
1. Click the Published folder in the Knowledge Base window.
2. Click the article you want to unpublish.
3. Click the Unpublish button.
The article is automatically moved to the Unapproved folder for revisions.
Now let’s say that you’ve found an article that is out of date and you need todelete it. Again, you’ll need the appropriate rights to complete this two-stepprocess: Unpublish the article first and then delete it.
1. Click the Published folder in the Knowledge Base window.
All published articles are displayed.
2. Click the article you want to unpublish.
3. Click the Unpublish button and then click OK.
Your article is moved to the Unapproved folder. When you return to thePublished folder, the list is refreshed automatically.
4. Click the Unapproved folder.
5. Highlight the article you want to delete and then click the Deletebutton.
The Delete Confirmation dialog box appears.
6. Click OK.
Goodbye out-of-date article. The Unapproved folder refreshes automatically.
Because all articles and subjects in Microsoft CRM are related, you’re warnedthat deleting an article will also cause Microsoft CRM to remove any filesattached to the article. Normally, this isn’t a problem because the onlyattachment an article can have is to a subject, but we recommend that youand your staff use the delete feature sparingly. For those of you who don’twant to delete the article and start over, you can simply add a comment to iton the Comments tab in the open article window.
Searching the Knowledge BaseMrs. Reynolds is on the phone again, and you need to find the article youread aloud to her last week. Problem is, you don’t remember the article’sname. That’s right, retreat to your trusty knowledge base and take advantage
320 Part V: Taking Care of Your Customers
32_343258-ch24.qxp 6/4/08 12:25 AM Page 320

of the search function. Like a card catalog in a library, the knowledge base isthe warehouse of information for your company.
With Mrs. Reynolds in one ear, here’s how you search the knowledge base:
1. At the bottom of the navigation pane, click the Workplace button.
2. In the upper part of the navigation pane, select Service and thenselect Knowledge Base.
All of your company’s published articles are displayed. You can reachthis section also by clicking the Service button at the bottom of the navi-gation pane and then selecting Knowledge Base at the top of the pane.
3. On the left side of the Knowledge Base window, click the down arrowto the right of Article Queues and then select the appropriate searchoption.
The Search pane appears, as shown in Figure 24-7.
4. Fill in the following fields to define your search criteria:
• Unlabeled Field: Use the drop-down menu in the first field to tellyour search engine which fields to search. Full Text searches thetitle, case number, and body of every article. It doesn’t search forkeywords. Keyword Search goes through only the keyword field ofevery article. Title Search looks at the title field of every article.Article Number Search can find a specific article number. Similarly,Subject Browse helps you find all the articles with a particular sub-ject, and Article Queues show all the articles in the system in theirvarious stages of being published.
Figure 24-7:Use theSearch
pane to zeroin on the
article youwant.
321Chapter 24: Creating and Using the Knowledge Base
32_343258-ch24.qxp 6/4/08 12:25 AM Page 321

• Search For: This is where you enter your search words. For ourexample with Mrs. Reynolds, you might enter air conditioner andthe model number. If you remember only part of the modelnumber, you can use a wildcard character. For example, entering*1138* returns every article with the numbers 1138 in the fieldyou search.
• In Subject: Narrow your search even more by selecting the subjectyou want to search. This is especially helpful if you have, say, several hundred articles.
• Options: Another drill-down feature, this option allows you tosearch for the exact text you enter in Search For, or you canchoose a broader search with Use Like Words. An Exact Textsearch is quicker but less forgiving; you’ll need the exact wordingto ping the articles you want. Use Like Words takes longer butallows you some freedom if you can’t remember whether Mrs.Reynolds has, say, the Model 1138 or the Model 1138A.
In the Options field, you can use the * wildcard only with Options:Exact Text. Using the wildcard character with the Use Like Wordsoption results in an error message.
5. Click the Search button.
All articles that match your search criteria appear on the right side ofthe window.
Just a note on searching for articles: When you add a new article to theknowledge base, you can view it from the Published folder, but you can’tsearch for it until the catalog’s index is updated. Microsoft CRM does thisautomatically every 15 minutes (unless your administrator changes thisvalue).
322 Part V: Taking Care of Your Customers
32_343258-ch24.qxp 6/4/08 12:25 AM Page 322

Chapter 25
Managing QueuesIn This Chapter� Defining types of queues
� Creating queues
� Assigning cases or activities to a queue
� Accepting activities from a queue
According to the dictionary, a queue is a line of people waiting. Queues inMicrosoft CRM are collections of information waiting for action, such as
activities and cases waiting for processing. Activities are tasks, appointments,calls, and e-mails. (See Chapter 14 for more about creating and managingactivities.) Cases are service support tickets. (See Chapter 22 for more aboutworking with cases.) Processing means assigning and accepting activities andcases. Queues are handy not only for providing centralized lists of outstand-ing activities and cases, but also for sorting tasks by subject matter or assignment.
Queues are ways to route issues and cases to departments without having toassign them directly to individuals. Issues requiring third-level support (thatis, the people in your organization who know how to fix anything) can simplybe assigned as such to the queue. The people responsible for providing third-level support monitor their queue and, when they’re available, take over thecase. In some organizations, an individual has the responsibility for issuerouting monitoring the various queues and assigning the cases to peoplebased on skill sets.
Cases or issues can be assigned to more than one queue but not at the sametime. Perhaps a customer calls with an issue that is handled by a level 1 cus-tomer service representative (CSR). If that person can’t solve the problem,the level 1 CSR escalates the issue to a level 2 CSR. That CSR does most of thelegwork and reassigns the case back to the first CSR to ensure that the clientis informed of the solution. Soon after, the case is closed.
33_343258-ch25.qxp 6/4/08 12:26 AM Page 323

Queues can also be used as e-mail inboxes. In Microsoft CRM 4, a queue canbe associated with an e-mail inbox, and all incoming e-mail to that mailboxwill show in the queue.
Queues are a valuable tool for your company. You can examine them for up-to-the-minute information on how many customers have a specific issue orhow many CSRs are engaged with issues relating to a specific product. Thisinformation can go a long way toward optimizing the efficiency of the servicedepartment and helping identify issues in other departments as well.
Before associating a queue with an inbox, ensure that the e-mail associatedwith that inbox should be seen by everyone with access to the queue.
In this chapter, we discuss the various queues defined by Microsoft CRM, andwe tell you how to use them. You’ll also discover how to create, modify, andmanage your own queues.
Queue OverviewYour company probably has a person who acts as a human router, directingservice calls and e-mails to the appropriate CSRs or taking care of an esca-lated situation when the CSR can’t handle it. You may call these people cus-tomer service managers, quality attention retainers, or what have you, butfor this book, we call them service managers. They are the optimal choice forcreating and defining your queues because they manage the front lines ofyour customer service department. Your service managers also know thestrengths and weaknesses of your CSRs and can assign them to the properqueues; in this way, your best washing machine guy isn’t dealing with refrig-erator issues.
When you assign your CSRs to queues and then assign activities and cases tothose queues, you’re giving your people (and your company) an effective andefficient means of solving problems and making customers happy.
How many queues should your company have? Queues should be as numer-ous as it makes sense logistically in your company. An organization with onlya few CSRs should not have a large number of queues, when one or twowould do the trick. Larger organizations should decide on queue designbased on the types of products or services sold. Queues could be set upbased on product line, such as one for coffee beans, one for coffee brewers,and one for coffee grinders. Another approach is to set up queues based ondepartment, such as engineering, billing, and shipping departments. Then ifyou need a department involved in a case, you can assign an activity or theentire case to that departmental queue.
324 Part V: Taking Care of Your Customers
33_343258-ch25.qxp 6/4/08 12:26 AM Page 324

Looking at Personal and Public QueuesMicrosoft CRM comes with two predefined queue areas, which you can see inthe Queues window’s navigation pane: the My Work queue, listing folders forthe activities and cases assigned to you, and the Queues area. The Queuesarea displays all the queues that you have access to.
When you look into a public queue, you see all activities and cases associ-ated with that queue, whether they’re assigned to you or not. Everyone whois a member of that queue can see these activities and cases.
The My Work queue, shown in Figure 25-1, has two folders:
� Assigned: You’ll find all the cases that are assigned to you. These arecases that you haven’t accepted yet. We cover accepting cases in thesection called “Working with Cases and Activities Assigned to Queues,”later in this chapter.
� In Progress: These are all the cases you’ve accepted, and you’re cur-rently working on them.
Figure 25-1:Your folders
in the MyWork
queue.
325Chapter 25: Managing Queues
33_343258-ch25.qxp 6/4/08 12:26 AM Page 325

Creating a QueueUsers who are assigned the appropriate rights can create queues. Becauseyou can create many queues in Microsoft CRM, we recommend that you planyour queues around your company’s workflow. Create a master plan of allyour services and products and determine how you want to handle customerservice scenarios before building your queues.
For example, a chocolate chip cookie manufacturer could have a queue forshipping-related issues: freshness or breakage. Whereas a bank may createqueues based on the depositor: ordinary depositors, wealthy depositors,small business accounts, and large corporate accounts. Cases can beassigned based on the person or organization initiating the issue.
Follow these steps to add your new queues:
1. On the navigation pane, click the Settings button.
2. At the top of the navigation pane, click Business Management.
The Business Management window appears on the right.
3. Click Queues.
The Queues window appears, as shown in Figure 25-2. All queues arelisted here.
Figure 25-2:All current
queues aredisplayed
here.
326 Part V: Taking Care of Your Customers
33_343258-ch25.qxp 6/4/08 12:26 AM Page 326

4. In the window’s toolbar, click the New button.
The Queue: New window appears, as shown in Figure 25-3. Three fieldsare required: Queue Name, Business Unit, and Owner.
5. In the Queue Name field, enter a name for this queue.
Remember to keep it simple and descriptive. This is the only way yourusers will know which queue a case belongs to.
6. In the Business Unit field, click the magnifying glass to display theLook Up Records window and select the appropriate business unit.
Business units are similar to departments or regions. For example, ifyou’re in the Customer Care department or a regional center, and youwant to create a queue for your staff, you would select Customer Care orthe name of your regional center here. See Chapter 6 more on creatingbusiness units.
7. In the Owner field, choose an owner for the group.
Clicking the magnifying glass opens a Look Up Records window with allyour users. Choose one and click OK. You’re returned to the Queue: Newwindow. The owner essentially monitors the queue — assigning cases,shifting workloads, and so on.
Figure 25-3:Create your
queues inthis window.
327Chapter 25: Managing Queues
33_343258-ch25.qxp 6/4/08 12:26 AM Page 327

8. Indicate the e-mail account associated with the queue.
This step is optional. However, if you have an e-mail support box such [email protected], add the e-mail address here. All e-mailsent to [email protected] can be seen in the queue. Seeyour system administrator for help with setting up the routing of e-mailto a queue.
9. If you want, enter a description for the queue, as well as any impor-tant notes.
10. Make a choice from the Convert to E-Mail Activities drop-down list.The choices are as follows:
• All E-Mail Messages: All e-mail sent to the inbox listed above will besent to the queue.
• E-Mail Messages in Response to CRM E-Mail: Only e-mail sent bypeople outside of your organization in response to your e-mail willbe sent to the queue.
• E-Mail Messages from CRM Leads, Contacts, and Accounts: All sente-mail that can be associated with existing Lead, Account, orContact records will be sent to the queue.
11. Make choices from the E-Mail Access Type - Incoming and E-MailAccess Type - Outgoing drop-down lists.
This pertains to the setup of the e-mail router, which is beyond thescope of this book. Ask your system administrator what values youshould enter in these fields.
12. Click the Save and Close button.
The Queue: New window closes, and you return to the main Queues display, where your newly created queue is listed along with the otherqueues. The e-mail address and business unit for each queue is also displayed.
Working with Cases and ActivitiesAssigned to Queues
In Chapter 22, we discuss cases and how to assign them to queues. In someorganizations, case-related activities — and not entire cases — are assignedto queues. For example, a CSR logs an issue with a Spacely Sprocket thatneeds to be reviewed by a technical designer. The CSR retains ownership ofthe case but assigns a review and comment task to the new VP ofDevelopment, Mr. Jetson.
328 Part V: Taking Care of Your Customers
33_343258-ch25.qxp 6/4/08 12:26 AM Page 328

We already mentioned that when a new activity (a task, a phone call, ane-mail, an appointment, and so on) is created, it can be found in the InProgress queue of the person who created the activity. This is true unless thecreator of the activity changes the owner, in which case the activity will be inthe Assigned queue of the assignee or the queue Assigned. Microsoft CRMdoesn’t automatically assign it to a queue except as mentioned above.
Your service manager isn’t going to monitor all activities created by everyCRM user, only those assigned to a queue. Service-related activities createdby workflow and assigned to a queue are easily monitored by the servicemanager. (See Chapter 9 for more on workflow.)
Here’s where your service manager ensures his job security. He looks at theactivity and assesses the situation: Simple issues can go to the level 1 sup-port queue but advanced issues can jump all the way to the level 3 supportqueue. This efficient utilization of your company’s resources (that is, the ser-vice manager’s training and fancy computer equipment) saves time, preventsredundancy, and most importantly, makes the customer happy. This is CRMworking as all managers envision.
Activities should be created first and then assigned to a queue. You can’tcreate an activity from within a queue. (See Chapter 14 for details about creating an activity.)
Assigning an activity to a queueAs we mention earlier in the chapter, activities can be assigned to queues orto users. The difference? Queues can have a number of users assigned tothem, and a user is just that: a single individual.
Keeping that in mind, as the service manager, when should you assign activi-ties to an individual CSR or manager and when should you drop an activityinto a queue for the next available CSR to pick it up?
A good service manager determines the answer to these questions based onthe situation. He then determines the best course of action and assigns activi-ties accordingly. If the assignment process is the same all the time, workflowrules can be created to automate the functions of assignments and escala-tion. (See Chapter 9 for details on rules and workflow.)
As we discussed earlier, most likely case activities are assigned to a queuebut other activities can be assigned to users. Because this chapter is allabout queues, we’re going to assign an activity to a queue. Activity assign-ment can happen regardless of how you get to the activity form — we’regoing to get there from the Activities window, but you can do so from the InProgress queue, case, contact, account, opportunity, or any entity associatedwith activities. Follow these steps to assign an activity to a queue or a user:
329Chapter 25: Managing Queues
33_343258-ch25.qxp 6/4/08 12:26 AM Page 329

1. On the navigation bar on the left, click Workplace.
2. At the top of the navigation pane, click Activities.
You can sort the activities by clicking the column headers or filter theactivities according to date, type, or status (under the View drop-downlist).
3. Double-click the activity to open it.
4. On the menu bar, choose Actions➪Assign or click the magnifyingglass to the right of the owner field.
The Confirm Assignment dialog box appears.
5. Select the queue to which you want to assign this activity:
a. Click the magnifying glass icon.
A Look Up Records dialog box appears, as shown in Figure 25-4.
b. In the Look For field, click the arrow and select Queue from the list.
A list of all current queues is displayed in the lower part of thescreen. You can also assign activities to users from this window.
Queues don’t accept assignments, but users do! (We show you howto do that in the next section, “Accepting activities.”)
Figure 25-4:Search for a
queue andassign the
activity to it.
330 Part V: Taking Care of Your Customers
33_343258-ch25.qxp 6/4/08 12:26 AM Page 330

c. Double-click the queue or highlight the queue and click OK.
You return to the Confirm Assignment dialog box.
You can also search for queues using the Find box or alphabetize thequeues by clicking the Name column header.
6. In the Confirm Assignment dialog box, click OK.
You’re back in the Activity window.
7. Click the Save and Close icon.
Note that the task is still displayed in the Workplace: Activities window.It’s still a legitimate activity. However, you can see the task also in theQueues display because you’ve assigned the task to a queue.
8. Under My Work in the navigation pane, select Queues and find thequeue to which you assigned the activity. Click that queue to open it.
The Queues window appears (refer to Figure 25-1). You now see theactivity assigned to that queue.
Remember to save, Save, SAVE! Always click the Save and Close button, evenif you’re reassigning a previously created activity. This way, you guaranteethat all changes will be saved.
Accepting Queue AssignmentsFor this section, let’s become the CSR. We need to picture ourselves in a cubi-cle with a bunch of information attached to the cubicle walls by push pins.Our cube mates are also CSRs, so when you understand this section, yellEUREKA! And perhaps you can teach them. Better yet, have them buy theirown copies of this book.
There are two types of activities:
� Activities or Cases assigned directly to you (which are in the Assignedfolder under My Work: Queues).
� Activities or Cases assigned to a queue that you monitor (which arefound in the public queue in the Queues window).
In either case, you have to accept the activity or case before you can beginwork on it. If no workflow rules are in place, it’s up to you to monitor yourqueues for outstanding activities or cases.
331Chapter 25: Managing Queues
33_343258-ch25.qxp 6/4/08 12:26 AM Page 331

You need to find the queues you are monitoring before you can accept anassignment. To find queues:
1. On the navigation pane, click the Workplace button. In the upper partof the pane, select Queues (under My Work).
2. In the pane on the right, click the Assigned folder under My Work orclick a folder under Queues to display any pending activities or cases.
3. Click an item to highlight it.
4. Click the Accept button on the toolbar.
The Confirm Assignment dialog box appears, asking you to verify thatyou want to move the selected activity to your In Progress folder.
5. Click OK.
Queue windows don’t automatically refresh, you can click the refreshicon on the top right of the grid or click the queue on and off and thenon again.
You’ve now accepted the activity or case.
After the activity or case moves to your In Progress folder, you can open it,create associated activities, and ultimately complete it. You may also reas-sign the activity or case. When completed, it will no longer be in your InProgress folder. It will be found in the history of the case, contact, account orwhatever entity you related to it.
332 Part V: Taking Care of Your Customers
33_343258-ch25.qxp 6/4/08 12:26 AM Page 332

Chapter 26
Working with ContractsIn This Chapter� Making a contract template
� Understanding the status of a contract
� Making a contract
� Adding contract lines
� Renewing a contract
� Managing a case against a contract
What are contracts? In Microsoft CRM contracts aren’t legal documents,they’re an indication that the person requesting support is under a
support plan.
Essentially, a contract is defined in Microsoft CRM as an agreement or planthat depreciates with time or use. For instance, say a customer purchases anextended warranty. That warranty expires over time, perhaps over the nextthree years. That’s a contract. Or say your customer purchases a supportplan based on a number of incidents or cases. His contract will expire whenhe’s used up the number of incidents. Microsoft CRM also allows you to com-bine the two options. This means that customers can purchase number-of-incident plans that expire either when they use all of the incidents or whenthe contract expires.
The best part about contracts is that you don’t have to do anything afterthey’re executed. Contracts are tracked by the system. Better yet, if youdefine some workflow rules, contract renewal can be handled in an auto-mated function as well. (See Chapter 9 for more on workflow rules.)
When creating contracts in Microsoft CRM you first create a contract template. Templates are a great way to quickly execute contracts, as most organizations have a few standard contracts.
After you create them, you can associate contracts with cases. If per-incidentcontracts are associated with cases, they’ll automatically decrement whenyou use them.
34_343258-ch26.qxp 6/4/08 12:27 AM Page 333

This chapter is all about creating and using contracts. Getting started withcontracts is simple. You first need to create a new contract template.
Creating a Contract TemplateWhy contract templates? As we discussed, Microsoft CRM contracts arebased on duration or the total number of cases. When they’re based on thetotal number of cases, contracts can also have an expiration date. This cre-ates a “whatever comes first” scenario. Defining a template aids in the cre-ation of contracts by simplifying data entry later. And of course, we createcontract templates because we have to. All new contracts are based on contract templates.
In this chapter, we look at how Bob’s Building Blocks (BBB) uses contracts inMicrosoft CRM. BBB sells building blocks that children the world over love.Often, the children (or most likely their parents), need help building the intri-cate block models. A few years ago, BBB had the inventive idea of selling sup-port access at a discounted rate. The support plans are prepaid and allowmembers to call 10 times at a deeply discounted rate. To track the status of aclient’s support plan, BBB uses Microsoft CRM. (If not, what would be thepoint of this chapter?)
You need to create contract template before creating the actual customercontract.
The first step in creating a Microsoft CRM contract is to create a contracttemplate. First, follow these steps to create a contract template:
1. Click the Settings button, which is the second button from the bottomof the navigation pane.
2. At the top of the navigation pane, click Templates.
3. Click the Contract Templates option.
The Contract Templates window appears, listing all current contracttemplates.
4. On the Contract Templates window’s toolbar, click the New button.
The Contract Template: New window appears, as shown in Figure 26-1.
5. Fill in the Name and Abbreviation fields.
The name can be anything you want. For the abbreviation, use some-thing that you think logically abbreviates your contract name. Theabbreviation is an alternate way to refer to the contract.
334 Part V: Taking Care of Your Customers
34_343258-ch26.qxp 6/4/08 12:27 AM Page 334

6. Choose a billing frequency from the Billing Frequency drop-down list.
Choose a billing cycle, whether it’s monthly, bimonthly, quarterly, semiannually, or annually.
7. Select an Allotment Type.
The three options for providing support are Number of Cases, Time, andCoverage Dates.
• Number of Cases: Offer your services by the case or call. For exam-ple, you might offer a five-call service package in which Bob’sBuilding Blocks allows five support calls.
• Time: You can provide your services for an amount of time,whether it’s hours, days, and so on. For example, Bob’s BuildingBlocks might offer their support contract for 5 hours of time.
• Coverage Dates: Set a time frame for your services. For example,Bob’s Building Blocks may offer unlimited support 12 months fromthe date of purchase.
8. If you want, select a service level and discount, and fill in theDescription field.
Use the Service Level field to designate the contract’s status.
9. Fill in the Calendar grid.
Set the days and hours of support this contract offers by clicking in theappropriate box. A green dot appears in each box you click. In our exam-ple, Mr. Wayne provides his services from 8 a.m. to 5 p.m., Mondaythrough Friday.
Figure 26-1:Build your
contracttemplatesusing theContract
Template:New
feature.
335Chapter 26: Working with Contracts
34_343258-ch26.qxp 6/4/08 12:27 AM Page 335

If you provide an option for clients to purchase a support contract withextended support hours (weekends or after 5 p.m. in our example), youmust create additional contract templates to reflect those options.
Here’s a quick trick to save clicks: Assume Bob’s Building Blocks offers24-hour support on weekdays. Their support is closed on weekends.Click the 24x7 check box at the bottom and then click the Sunday label(Su) at the top of the grid. The green dots in the Sunday row disappear.Repeat for the Saturday (Sa) row.
10. Click the Save and Close icon in the upper left corner.
The Contract Template: New window closes, and your new contractappears in the Contract Templates window.
After you save a contract template, you can’t edit it.
Understanding Contract StatusBefore we get into showing you how to create your contracts, let’s go overthe different levels of contract status: draft, invoiced, active, on hold, can-celled, and expired. Because everyone can see contracts, the status allowsyour sales and service staff to be consistent with their answers and support.
Each contract starts out as a draft and automatically moves to active statusonce the beginning date has been reached, regardless of whether it’s still adraft or has been invoiced. Contracts expire on the end date specified in thecontract. Your sales and service staff can place contracts on hold or cancelthem.
Here’s the list of contract status types:
� Draft: After a contract is created, it automatically has draft status. Thisis the default option and allows your staff full access to it for modifica-tions or updates.
� Invoiced: After the contract is ready for use, it can be invoiced (from the Actions menu). We show you how to do this later in the “AddingContract Lines to a New Contract” section. After you invoice the con-tract, you can’t edit the dates, contract names, and contract ID.
� Active: A contract still in draft status moves to active status automati-cally after the beginning date set in the contract is reached. For exam-ple, if your beginning date is June 18, 2009, the contract will go to activestatus on that date. As with invoiced contracts, you can’t edit the dates,contract names, and contract ID after the contract becomes active.
336 Part V: Taking Care of Your Customers
34_343258-ch26.qxp 6/4/08 12:27 AM Page 336
Haghighat Sabet
Highlight
Haghighat Sabet
Highlight

� Expired: A contract expires automatically on the end date set in the con-tract. After this happens, you can’t open new cases against it. (Althoughyou can close existing cases.) You can renew expired contracts. Whenrenewing you can edit the Contract Start and End dates, the ContractName, as well as billing information on the General tab. On the detailstab, you can change the Service Level, the Contract Template, and theOwner. For more information, see the section, “Renewing Contracts,”later in this chapter.
� Cancelled: You can cancel (from the Actions menu) a contract that isactive or invoiced, but you can’t edit cancelled contracts.
� On Hold: You can place a contract on hold (from the Actions menu).While it’s on hold, you can’t log cases against it. To take it off hold,choose Release Hold from the Actions menu.
Creating a ContractAs we mentioned earlier, you’ll need to create a contract template before cre-ating a contract. If you haven’t, please see the section, “Creating a ContractTemplate,” earlier in this chapter. With at least one contract template, theBob’s Building Blocks team is ready to sell contracts to customers. That’s a good thing because little Timmy is on the phone and wants his block set built . . . NOW! After your support specialist has determined that Timmyneeds to purchase a set of five support cases — and Timmy’s mom has provided a valid credit card number — you’re ready to create a contract.
Here’s how to create a contract:
1. In the lower part of the navigation pane, click the Service button.
2. In the upper part of the navigation pane, select Contracts.
3. In the Contracts window’s toolbar, click the New button.
The Template Explorer dialog box appears.
4. Double-click the contract template you’d like to use.
The Contract: New window appears, as shown in Figure 26-2. For ourexample, we’ll choose the B5P Template to create the contract forTimmy.
We’d like to point out two things about this Contract: New window. First,as with most of Microsoft CRM, the fields with the red asterisks (on yourscreen) are required. Second, you can’t modify the Contract ID field. Thecontract ID is generated automatically when you click the Save andClose button to create the contract. However, your system administratorcan specify some of the characteristics of the contract ID.
337Chapter 26: Working with Contracts
34_343258-ch26.qxp 6/4/08 12:27 AM Page 337
Haghighat Sabet
Highlight
Haghighat Sabet
Highlight
Haghighat Sabet
Highlight
Haghighat Sabet
Highlight

5. In the Contract Name field, enter a name for the contract.
For our example, we’ve used Little Timmy and his street address
6. Fill in the Customer field.
To do so, click the magnifying glass and select the customer from theLook Up Records window. You can also open the Form Assistant on theright of the screen and select Customer from the drop-down list. Whenyou do, a list of customers appears.
7. Enter the contract start and end dates.
You can use the calendars or enter the dates manually.
8. Use the magnifying glass to select the Contract Address.
The contract address Look Up shows the address on hand for the cus-tomer. Select the appropriate address. In our example, we have only oneaddress for Little Timmy. (See Figure 26-3.)
The Bill To Address automatically fills in to reflect the contract address;change it if necessary.
When creating a contact address, make sure to enter an address name.Without it, the address won’t show in the contract address field.
It’s worth taking the time to add these addresses now because you needthem later when you change the contract’s status.
9. Click Save (the disk icon) to record these addresses.
Figure 26-2:The
Contract:New
window.
338 Part V: Taking Care of Your Customers
34_343258-ch26.qxp 6/4/08 12:27 AM Page 338

10. Click the Details tab in the Contract: New window and fill it in as necessary.
The only required fields (Contract Template and Owner) are alreadyfilled in. You can choose the type of discount you want the customer tohave (percentage or amount) and enter a description for the contract.You can also indicate the service level agreement.
11. To add a note, do so on the Notes tab.
12. Click Save (the disk icon).
Your contract is now a draft. Keep this in mind for the rest of the chap-ter. We will move it out of draft status later, in the “Adding ContractLines to a New Contract” section.
Now that you’ve saved the contract, the following options are live. Theseoptions allow you to enter or view information relative to the contract duringits life:
� Information: You entered the initial information for the contract here.
� Contract Lines: This option outlines what the contract covers. You canassociate several contract lines (for example, hardware, software, parts,and maintenance) with a single contract.
Figure 26-3:Add a
customerbilling
address.
339Chapter 26: Working with Contracts
34_343258-ch26.qxp 6/4/08 12:27 AM Page 339

� Activities: This is where you find every activity scheduled as part of the support in the contract, such as phone calls, e-mails, tasks, andappointments.
� History: All completed or closed activities go here.
� Cases: All cases related to this contract are visible here.
Shortcut alert! For the most part, your contracts will contain a lot of the sameinformation (such as billing frequency or pricing). Instead of creating a con-tract from the template, you can open a contract similar to the one you wantto create and copy it.
Follow these steps to copy a contract:
1. In the lower part of the navigation pane, click the Service button.
2. In the upper part of the navigation pane, select Contracts.
3. Double-click the contract you want to copy.
We recommend that you write down the current contract ID number.When you get to Step 4, the contract is copied with all the same informa-tion except the contract ID. The program generates a new contract ID forthe new contract you’re creating. The only way you can distinguish yournew contract from the old one is by the contract ID.
4. On the main menu (at the top of the screen), choose Actions➪CopyContract.
The Create from Existing Contract dialog box appears. You can chooseto copy over cancelled contract lines as well, just by selecting the box inthis window. (For more on contract lines, see the next section.)
5. Click OK.
You return to the open contract window. The new contract usually takesa minute to pop up, so be sure to keep an eye on that contract ID.
6. Check the contract ID to make sure you’re using the new contract.
7. Go ahead and change the new contract information.
For our example, we made a new contract for Little Timmy’s neighbor,Little Suzie, by copying her contract and giving it a new name, as shownin Figure 26-4.
When changing the information, make sure that that you change both the Billto Customer and the Bill to Address in the Billing Information section.
340 Part V: Taking Care of Your Customers
34_343258-ch26.qxp 6/4/08 12:27 AM Page 340

Adding Contract Lines to a New ContractNow that you have your new contract for Little Suzie set up, it’s time tocreate one or more contract lines. A contract line is a description of what thecontract is covering. For example, you might offer an in-home building blockinspection. Once a month, your team of Bob’s Building Blocks Building BlockInspectors will visit the customer’s home to check on the stability and overallstructural safety of the building blocks. Or you may want to indicate that thecontract is covering Little Timmy’s new purchase, the Astro Wars SpaceStation. That would mean that this contract will not cover his purchase of theAstro Wars Moon Station. Of course, you could have more than one contractline associated with a contract, so if it is appropriate you could add the MoonStation as one of the products covered by the contract.
Contracts need not be associated with products. If you’re simply allowingLittle Suzie to call for support, then a single contract line is all that is needed.
The Contract Line: New window has three tabs: General, Administration, andNotes. The General tab has areas for the following:
� General Information: This includes the name of the contract line andthe product.
� Allotment Details: These details show the total minutes or cases, howmany have been used, how many remain, and pricing.
� Total Price: This shows the price for the product for this contract.
Figure 26-4:The
Contractswindow
with acopied
contract.
341Chapter 26: Working with Contracts
34_343258-ch26.qxp 6/4/08 12:27 AM Page 341

To add a contract line, follow these steps:
1. In the lower part of the navigation pane, click the Service button.
2. In the upper part of the navigation pane, select Contracts.
3. Double-click the contract that you want to add a line to.
4. In the navigation pane, click Contract Lines.
The Contract Lines window for that contract appears.
5. In the window’s toolbar, click the New Contract Line button.
In our example, shown in Figure 26-5, we’re using Little Timmy’s AstroFighter.
6. In the first section, type a title for this contract line and choose thestart and end dates.
These three fields are required, but the others in the top section aren’t.The start and end dates default to the contract start and end dates butcan be changed.
7. In the Allotment Details section, enter the number of minutes or casesyou want to specify for this contract.
The other two fields are optional and show how much the customer hasused and how much is left.
Figure 26-5:Establish
Serviceterms that
your ser-vice staffmemberscan track
as theysupport the
customer.
342 Part V: Taking Care of Your Customers
34_343258-ch26.qxp 6/4/08 12:27 AM Page 342

8. In the Pricing section, enter the total price for this product for thiscontract.
Of the remaining fields under Pricing, Discount is the only one you canfill in. Keep in mind that the amount or percentage of the discount isdetermined by what was entered for this product on the product list.The other two fields are filled in automatically based on the discountyou enter. Net is the total after the discount is applied.
9. Click Save (the disk icon).
10. Click the Administration tab and check your customer. Enter a serialnumber if necessary.
The customer field is required and should already be filled in. The serialnumber field is optional and is a good place to track product serial num-bers against the contract (say for inventory or quality assurance, forinstance).
11. On the Notes tab, enter information important to this contract.
The Notes tab, like the other Notes areas in Microsoft CRM, offers a free-form place to enter data.
12. Click the Save and Close icon.
The new contract line appears in the Contract window’s main display.You see the contract line’s title, product, allotments remaining, and net(a dollar amount).
Clicking any column heading sorts the list of contract lines by that criterion.
Now that you’ve added a contract and the contract lines, you can see howMicrosoft CRM tracks things such as time, available cases, or remaining min-utes. In just a few clicks and a glance, you can easily see the status anddetails of a contract. We know what that translates to: getting information tothe customer quickly, which means happy customers.
As we mentioned, you can move a contract from draft to invoiced status, ifthe start date hasn’t yet been reached.
Follow these steps to move a contract from draft to invoiced status:
1. In the lower part of the navigation pane, click the Service button.
2. In the upper part of the navigation pane, select Contracts.
The Contracts window appears.
3. Double-click the contract you created earlier.
343Chapter 26: Working with Contracts
34_343258-ch26.qxp 6/4/08 12:27 AM Page 343

4. On the menu bar (at the top of the screen), choose Actions➪Invoice Contract.
The status of the contract, displayed in the lower left corner of thewindow, is updated to Invoiced (if the start date has not yet beenreached) or Active (if the start date has been reached).
Expired contracts are automatically updated to expired status on their enddates. The other status levels — cancelled, on hold, and renew — can beupdated.
Renewing a ContractAs we mentioned, you can renew cancelled or expired contracts in a fewshort steps:
1. In the lower part of the navigation pane, click the Service button.
2. In the upper part of the navigation pane, select Contracts.
The Contracts window appears.
3. Double-click the contract you want to renew.
4. From the menu bar (at the top of the screen), choose Actions➪Renew Contract.
The Renew Contract dialog box appears, asking for verification andwhether you want to copy the cancelled contract lines as well.
5. Click OK.
Keep an eye on the status in the lower left corner. When you renew acontract, its status is changed automatically to draft.
Creating a Case and Linking It to a Contract
Little Timmy needs help completing his Astro Fighter. He calls Bob’s BuildingBlocks for help. The Bob’s support agent takes his call and, prior to begin-ning the session, she opens a case. She wants to associate Little Timmy’s sup-port contract with the case. (You can learn how to create a case in Chapter22.) Here we show you how to associate that case to the contract.
See the instructions in Chapter 22 for opening a new case. Then follow thesesteps to link the new case to Little Timmy’s contract.
344 Part V: Taking Care of Your Customers
34_343258-ch26.qxp 6/4/08 12:27 AM Page 344

1. In the newly created case, go to the Form Assistant and selectContract from the first drop-down menu.
Available contracts associated with the customer are listed in the FormAssistant under the lookup field. Only active and invoiced contractsappear.
2. Find and select the contract.
The Contract field under Contract and Product Information in the mainwindow should now be filled in. (See Figure 26-6.) Now that you’veassigned the contract, you have to assign the contract line associatedwith this call.
3. Click the magnifying glass icon to the right of the Contract Lines field.
The Look Up Records dialog box appears, listing all the contract linesassociated with this contract.
4. Find the contract line, highlight it, and click OK.
The case is now properly linked to the contract, and any work per-formed while resolving the case will be tracked against the active contract.
5. Click the Save and Close button.
Remember the cardinal rule of computers: save, Save, SAVE!
Figure 26-6:Your caseassigned
to thecustomer’s
contract.
345Chapter 26: Working with Contracts
34_343258-ch26.qxp 6/4/08 12:27 AM Page 345

346 Part V: Taking Care of Your Customers
34_343258-ch26.qxp 6/4/08 12:27 AM Page 346

Part VIThe Part of Tens
35_343258-pp06.qxp 6/4/08 12:28 AM Page 347

In this part . . .You can find many official and unofficial independent
software vendors (ISVs), all madly developing add-onproducts for Microsoft CRM. We review what we think arethe best products and present the top ten in Chapter 27.
Everyone needs a little help once in a while. In Chapter 28,we describe the best places for getting an essential tip,training, or consulting.
35_343258-pp06.qxp 6/4/08 12:28 AM Page 348

Chapter 27
The Top 10 (Or So) Add-onProducts for Microsoft CRM 4
In This Chapter� Adding a spell checker
� Automating processes and generating alerts
� Joining the c360 family
� Migrating and manipulating your data
� Getting instant sales tips from the experts
� Adding customized charts
� Upgrading your service
It’s surprising that now, even after several years in the marketplace, thereare so few add-on products for Microsoft CRM. There’s a crying need for
more. We’re still looking for a good expense reporting system that works withCRM, for example. Now that the Enterprise version supports multi-currency,how about a real-time, automated system to update exchange rates? Howabout an automated way to check and update zip codes and postal codes?Maybe we’ve missed these. Certainly, there are good add-ons under develop-ment and still under our radar.
There is no one, good consolidated place to find all the CRM add-ons, so inconjunction with the release of Microsoft Dynamics CRM 4 For Dummies, we’vecreated a site to review the contenders and the pretenders. Check outwww.consultcore\add-ons.html. To cull the list in this chapter toapproximately ten (depending on how you count), we established several criteria for making selections, including the following:
� General applicability: CRM is about managing prospect and client data.And it’s about making it easier for a team of users to work together. If anadd-on module didn’t address one or both of these issues, it didn’t makethe cut.
36_343258-ch27.qxp 6/4/08 12:28 AM Page 349

� Integration with Microsoft CRM: Many vendors advertise their productsas Microsoft CRM add-ons even when little, if any, integration exists. Ifthere’s little integration or no apparent reason for the integration, theproduct didn’t make the cut.
� History of and support from a vendor: The CRM dealer industry is stilla bit of a cottage industry, with dealers coming and going. Often, avendor writes a custom application for one client and then decides tooffer it as a general product to an unsuspecting public. We’ve tried tocheck out the vendors and their motivations as well. Evaluating motiva-tion, of course, is much more subjective than the first two criteria.
� Updated for Version 4: Some of the less popular add-ons for versions 1or 3 haven’t been overhauled for version 4. Any add-on we mention hereworks with version 4.
Just because a product doesn’t appear in this chapter doesn’t mean that youshouldn’t be interested in it. The product may not have been available forreview at the time of this writing, or it may be of special interest to your com-pany but not of more general interest. And, conversely, just because a prod-uct appears in this chapter doesn’t mean that you should buy it withoutfurther evaluation.
Many developers put out advertising materials on products that they’re think-ing about developing. That is known as vaporware. Before plunking down yourhard-earned money, make sure that the product exists and has documentationand support — maybe even a reference site or two. The consultcore site refer-enced previously attempts to separate the wheat from the chaff for you.
Checking Spelling with Google ToolbarMicrosoft CRM doesn’t include any spell-checking or grammar-checking fea-tures, and these are among the most asked-for applications. Google comes tothe rescue, and the price is right — free. Because almost everyone likes“free,” Google’s spell-checker tops our list.
The Google Toolbar’s spell-checker feature can correct most spelling mis-takes you make when you type into a Web form, including Web-based e-mail,discussion forums, and even intranet Web applications. Of course, if you type“to” instead of “too,” there’s still no help for you. And, if your notion of gram-mar has always prevented you from writing something as complex andsophisticated as a For Dummies book, this tool won’t help you either.
To run Google spell-checker, go to www.google.com, install the GoogleToolbar, and click the Check button on your toolbar. Spell-checker sends textfor review to Google’s servers, so it catches and highlights any incorrectspellings.
350 Part VI: The Part of Tens
36_343258-ch27.qxp 6/4/08 12:28 AM Page 350

Google’s spell-checker feature automatically corrects your spelling if youclick the arrow to the right of the Check button and select click AutoFix.Don’t worry; if Google spell-checker isn’t sure, it highlights the words it’sunsure of and allows you to correct them yourself.
Automating Processes and Generating Alerts
Workflow and escalation (also known as automated processes) functionalityis built into Microsoft CRM. And it has even been enhanced for version 4.With workflow, you can automate a variety of business rules, processes, andalerts. However, Microsoft’s workflow integrates only with the files (entities)that are part of Microsoft CRM. Workflow can’t trigger activity based on datathat might be in an accounting system or in an HR system.
Sometimes it’s important to base your automated decisions on data outsideCRM. If you want your salespeople to be notified when one of their accountsis overdue with its payments, for example, you’ll want one of the add-onproducts cited in this section. If you want to focus on client retention, one ofthese add-ons may also be on your short list of add-ons.
There are two add-on packages that provide this additional functionality and,in fact, go well beyond the features and functions that come out of the box withMicrosoft CRM. KnowledgeSync, from Vineyardsoft (which you can find onlineat www.vineyardsoft.com), has been around for many years integratingwith many earlier CRM systems. TaskCentre (can you tell from the spelling?) isa more recent entrant from the U.K. (Go to www.orbis-software.com formore information on TaskCentre.) Both require some self-paced or Web-basedtraining before you can expect to become proficient.
KnowledgeSync v7 is a business-activity monitoring application that detectsand responds to critical, time-sensitive data in Microsoft CRM, in incominge-mail, and in many other applications. KnowledgeSync v7 updates MicrosoftCRM, other databases, and users (through e-mail, faxes, pagers, and the Web)with critical information. KnowledgeSync comes with many canned alerts(called EventPaks). To develop a customized alert, you may want to find aspecialist — probably a Vineyardsoft partner.
KnowledgeSync can easily alert you to a variety of conditions within yourdatabase. Here are a few examples:
� A forecasted sale is suddenly overdue.
� A lead distributed to an outside salesperson hasn’t been pursued.
� Money has come in (or has not come in) from a client.
351Chapter 27: The Top 10 (Or So) Add-on Products for Microsoft CRM 4
36_343258-ch27.qxp 6/4/08 12:28 AM Page 351

� A request was made from your Web site by a prospect and the systemhas responded by sending literature and scheduling you to follow up.
� A deal was closed.
TaskCentre, from Orbis Software, is functionally similar to KnowledgeSync,but it’s a bit more graphical.
Increasing Your Productivity with c360According to Microsoft, c360’s productivity packs are included in about halfof Microsoft CRM implementations. c360 packages groups of utilities intothree productivity packs: a Core Productivity Pack, a Sales Productivity Pack,and a Service Productivity Pack.
The Core Productivity Pack includes the following:
� A utility for combining multiple screen views into one screen to reducethe number of clicks to get from one screen to another.
� Duplicate record detection across multiple record types. For example, ifyou enter a new lead record for ABC Corp., it can check to make surethat ABC Corp. doesn’t already exist as an account record.
� Alerts that trigger pop-up windows based on any type of record.
� Roll-up summaries for all record types. A roll-up summary, by the way,compiles results from separate but related records.
� Relationship charting to see how various records in the database relateto each other.
� E-mail linking that simplifies connecting an e-mail to a CRM record.
The Sales Productivity Pack includes:
� An enhancement to CRM’s forecasting.
� A connection to your Web site to automate creating and updatingrecords. This is particularly useful if you combine this automation withworkflow to automatically respond to inquiries.
The Service Productivity Pack includes:
� The ability to link e-mails to cases.
� A workplace configuration that enhances the use of queues.
In particular, if you want to integrate your Web site with your CRM system,c360 has a Web connector for you. This is traditionally one of the most compelling integrations for any CRM package. You want your clients and
352 Part VI: The Part of Tens
36_343258-ch27.qxp 6/4/08 12:28 AM Page 352

Haghighat Sabet
Highlight
Haghighat Sabet
Highlight
Haghighat Sabet
Highlight
Haghighat Sabet
Highlight
Haghighat Sabet
Highlight
Haghighat Sabet
Highlight
Haghighat Sabet
Highlight
Haghighat Sabet
Highlight
Haghighat Sabet
Highlight
Haghighat Sabet
Highlight

Accessing Instant Advice, Tips, and Tricks
Every once in a while, it’s nice to have a coach sitting on your shoulder whispering advice in your ear just when you want it. That’s what CanDoGo(at www.candogo.com) does. They’ve assembled a world-renowned team ofsales, marketing, and business experts who’ve written and recorded snippetsof advice. So, when you get stuck or frustrated, you can press a button andsearch for just the snippet you may need.
This really comes under the heading of training, but it’s so task-specific thatwe hesitate to call it training — although it could be.
Displaying Data in Graphical FormatsMicrosoft CRM allows you to relate contacts to accounts and, in fact, recordsin nearly every entity to records in other entities: one-to-one and many-to-oneand even many-to-many. The problem is that sometimes you want to seegraphically how various records relate to one another. A good example is an organizational chart: If you want a traditional org chart, SalesCentric (at www.salescentric.com) provides that functionality.
On the other hand, if you’d like a full set of dashboard displays, FusionCharts(at www.fusioncharts.com) fits that bill. With FusionCharts, you (or yourdealer) can develop a series of realtime pie and line charts that show criticalCRM or other data. A useful example might be the display of your salespipeline showing upcoming sales in various categories.
Upgrading Your Service AreaWe haven’t used the Neocase add-on ourselves, but according to Neocase (at www.neocase.com), their customer service module is an on-demand oran on-premise customer service solution that maximizes the productivity andquality of customer service through collaboration, self service, knowledgemanagement, partner centers, and advanced workflow management withstrict adherence to service level agreements (SLAs).
What we particularly like is the self-service component of the system. In self-service systems, clients can use the Web to look up the status of their orders ortheir customer service issues. Each client doesn’t have to have a CRM license inorder to do so. If you have a large number of clients often making inquiriesabout their order status, or if you just need a more sophisticated approach toMicrosoft’s Customer Service module, Neocase might be your ticket.
354 Part VI: The Part of Tens
36_343258-ch27.qxp 6/4/08 12:28 AM Page 354

Chapter 28
Ten Ways to Get HelpIn This Chapter� Using Microsoft CRM’s online help
� Reading the CRM blog
� Accessing the Resource Center
� Getting the straight story from newsgroups
� Finding an expert
� Using technical sites for developers
� Investing in training
� Getting in touch with the authors
� Accessing general CRM resources online
In this chapter, we show you ten ways to get help. There are other ways toget help, of course, and we’re sure you’ll stumble across them as you
investigate the various features described here. But here, we explore somefree options (our favorite) and some paid-for services. The paid-for servicesare usually worth the investment. However, we leave it up to you to decidehow much you’re willing to pay for the help you need. Free help is availablethrough Microsoft CRM’s online help system, blogs, the Resource Center, andfrom the newsgroups. Then there’s paid help from dealers, developers, andMicrosoft itself.
It seems that most dynamic help options are blogs and newsgroups. Often,newsgroup articles point to blogs. Blogging has become so popular that thenumber of Microsoft CRM blogs grows almost daily. With newsgroups, youcan simply read posts or, as you become more comfortable with them, youcan post your own questions. Subscribing to a newsgroup now and gettingcomfortable with the posting process is a good idea. As time goes by, moreand more users will be sharing information, best practices, and the inevitableworkarounds.
37_343258-ch28.qxp 6/4/08 12:28 AM Page 355

You can find Microsoft partners all over the world, and they serve as yourbest — and often local — support. Beyond that group is a cadre of indepen-dent software vendors (ISVs), ready to sell you their custom CRM add-onproducts. (See Chapter 27 for more on CRM add-ons.) Don’t overlook ISVs asresources, too. They have a lot of experience dealing with the substance ofCRM’s programming code and can offer insights into problems you mayencounter. These developers can also help you design custom enhancementsto the program. After all, that’s their business.
Using Microsoft CRM’s Built-in HelpMicrosoft CRM’s help is available from any and all screens. To access help,you simply click the Help button on the top right of the screen you’re on.From there, you’re provided a few options, but most likely you’ll choose theHelp on this Page option. The depth of help provided depends on the pageyou’re on.
Figure 28-1 shows the Microsoft CRM help menu. When you need help with aparticular form — such as the Account form — the Help on this Page featureis quite handy.
To use the Help on This Page feature, follow these steps:
1. Click the Help button at the top right of the form.
2. Select Help on This Page from the drop-down box.
An option list appears. (See Figure 28-2.)
3. Choose the best option for your needs by clicking the appropriateradio button.
The help text appears at the bottom of the pane.
4. When you’ve finished exploring everything that the built-in help fea-ture has to offer, click the X in the upper-right corner to close thewindow and return to Microsoft CRM.
Figure 28-1:The
MicrosoftCRM Help
menu.
356 Part VI: The Part of Tens
37_343258-ch28.qxp 6/4/08 12:28 AM Page 356

Reading the BlogThe Microsoft CRM blogosphere has grown significantly since the release ofversion 3. Our favorite blogs are those written by the Microsoft CRM develop-ers. In fact, there is a single blog maintained by the Microsoft CRM develop-ers called (have you guessed?) The Microsoft CRM Team Blog. You can find itat http://blogs.msdn.com/crm.
Accessing the Resource CenterNew to Microsoft CRM 4 is the Resource Center. It’s a collection of CRMknowledge that’s maintained by Microsoft. There are links to the MicrosoftCRM Team Blog (which we discuss in the previous section) and the news-groups (see the next section) as well as lots of general CRM knowledge. Youcan’t update the content that is handled directly by Microsoft, however. Toaccess the Resource Center, here’s what you need to do:
1. At the bottom of the navigation pane, click Resource Center.
The Resource Center appears. (See Figure 28-3.)
Figure 28-2:An example
of contextualhelp from
the Accountform.
357Chapter 28: Ten Ways to Get Help
37_343258-ch28.qxp 6/4/08 12:28 AM Page 357

2. At the top of the navigation pane, select one of the following:
• Highlights: Topics that transcend the other options below. Oftenthe items listed here are interesting ways to use Microsoft CRM orsome interesting tips.
• Sales: Sales related information, such as articles suggesting waysMicrosoft CRM can benefit your sales team.
• Marketing: Marketing-related content is found here. Often you’llfind interesting suggestions on how to get more out of theMarketing module in Microsoft CRM.
• Service: Suggestions on how to use Microsoft CRM to its fullest inyour support organization.
• Settings: Links to content on how to customize or configure yourMicrosoft CRM system.
The content changes to reflect what is selected in the navigation pane.
Getting the Straight Story fromNewsgroups or Forums
The newsgroups contain a wealth of knowledge. Microsoft has an MVP pro-gram where frequent contributors to the newsgroups are nominated andawarded MVP status. Microsoft CRM MVPs are people who frequently pro-vide useful responses on the CRM newsgroup.
Figure 28-3:The
MicrosoftCRM
ResourceCenter.
358 Part VI: The Part of Tens
37_343258-ch28.qxp 6/4/08 12:28 AM Page 358

Within the newsgroup threads (a thread is a chain of related responses), youcan find input from users, dealers, developers, and an occasional responsefrom someone at Microsoft. Mostly, the tone is polite and professional.Usually, the information is correct — but not always.
Often, your issue has already been posted to the newsgroup, so we suggestyou start by searching existing newsgroup posts. If you post or choose totake the free help provided in the newsgroup, do so with caution. If you’reunsure as to the proper course of action and the newsgroup post suggestssomething that you’re unfamiliar with, we suggest you find help in more tradi-tional ways (read on).
To access the newsgroups, follow these steps:
1. At the bottom of the navigation pane, click Resource Center.
The Resource Center appears.
2. Click the Newsgroup hyperlink in the rightmost column (near the top).
Figure 28-4 shows the Newsgroup window. You can read, search, and addyour own threads. You can also reply to an existing thread. Note the fol-lowing elements of this window:
• On the left is a display of many different newsgroups. There arethree Microsoft CRM-specific newsgroups: Microsoft DynamicsCRM, Microsoft Dynamics CRM Deployment, and Microsoft CRMDynamics CRM Developer.
• The top contains a search field.
• The center column contains the newsgroup threads. Click the + toexpand and read the entire thread.
• When a newsgroup article is highlighted, the right panel displaysthe text.
3. To search for case-related threads, type case in the Search For field.
4. Click the Go button or press Enter.
All existing threads related to your keywords appear. Figure 28-5 showsmany threads that relate to the search criteria of email to case.
5. Click whichever thread seems most relevant and interesting.
6. You can then browse through the conversations everyone is having.
If you don’t find an answer to your question on an existing thread, you canstart your own thread instead. Just follow these steps:
1. From the Newsgroup window’s toolbar, click the New button. (Refer toFigure 28-5.)
2. When asked whether you want to submit a question or a comment,make a selection.
359Chapter 28: Ten Ways to Get Help
37_343258-ch28.qxp 6/4/08 12:28 AM Page 359

Figure 28-5:Newsgroup
threadsregarding
email tocase.
Figure 28-4:There are
threeMicrosoft
CRMnewsgroups
to choosefrom.
360 Part VI: The Part of Tens
37_343258-ch28.qxp 6/4/08 12:28 AM Page 360

You’re prompted for your Windows Live ID. (If you don’t have aWindows Live ID, you can sign up for one to the left of the logon boxes.)You now see a screen where you can begin your new thread. You mayalso need to create a profile before you can create your first message.
3. Enter as much as you can about your issue and then click Post (at thebottom of the window).
This submits your issue to the world.
4. Go about the rest of your business for a while.
Please note that “a while” might be minutes, hours, or days.
5. Return to the newsgroup area occasionally to see whether anyone hasresponded.
Chances are that within a day, various people will have replied withhelpful advice.
The Microsoft CRM forums are much like the newsgroups in that they’re mon-itored by Microsoft CRM experts and allow for searching and posting of ques-tions and comments. To reach the forums, click Resource Center at thebottom of the navigation pane, then click the Forums hyperlink. (Refer toFigure 28-3 for a view of the Resource Center.)
Finding an ExpertMicrosoft products are typically implemented by Microsoft partners. Thepartner community consists of companies that have passed certain certifica-tion exams and met other Microsoft criteria. The Microsoft CRM partner com-munity is vast, but not all partners are the same. A certification in MicrosoftCRM doesn’t necessarily translate into strong CRM knowledge. We suggestyou do your due diligence prior to engaging a partner.
A partner is often the best place to get help. Sure you’ll pay for the advice,but your implementation cycle will often be shorter and your use of the prod-uct will be better. The partner community is a prime place to go for serioushelp. If you need assistance with installation, customization, training, integra-tion with other software, importing data, or just routine support, there’s nobetter place to go. In the United States, rates range from $140 to $200 perhour.
Microsoft doesn’t publish a comprehensive list of all their CRM dealers. Oneway to get a few names, however, is to go to the following Web address:
http://www.microsoft.com/dynamics/crm/purchase/default.mspx#EDAA
361Chapter 28: Ten Ways to Get Help
37_343258-ch28.qxp 6/4/08 12:28 AM Page 361

Using Technical Sites for DevelopersIf you’re interested in learning how to write custom code for Microsoft CRM,there are two sites of interest:
� Microsoft Dynamics Code Gallery: The Microsoft Dynamics CodeGallery is housed on the MSDN code gallery site. There are interestingcode examples posted to this site. This is a fluid site, with code beingposted often. If you want to develop custom code for Microsoft CRM andyou’re a developer, you should check this site out.
http://code.msdn.microsoft.com/Project/ProjectDirectory.aspx?ProjectSearchText=crm
� Microsoft Dynamics CRM Dev Center: The Microsoft Dynamics CRM Dev Center provides links to the Microsoft CRM SDK (SolutionDevelopers Kit) as well as some links found in the Resource Center. Aswith the Code Gallery, this is a valuable site to developers. It can bereached via this Web address:
http://msdn2.microsoft.com/en-us/dynamics/crm/default.aspx
Investing in TrainingA key ingredient to a successful implementation of Microsoft CRM is training — end-user training and administrative training. Overlook these andyour implementation won’t be a success. New training materials and compa-nies are appearing so rapidly that a list printed here will quickly become out-dated. Again, surfing the Web (using the keywords Microsoft CRM training) orasking your dealer is probably the best approach to finding the right training.
Training is a tradeoff in time, budget, and commitment. In the following list,we itemize the best training at the top, with a gradual descent toward barelyuseful:
� Send all your users to a training facility away from your office and dailydistractions. Maui is good.
� Bring an experienced Microsoft CRM trainer to the facility and makesure it really is a training facility.
� Have your own in-house trainer trained and come back to train all ofyour users. This is almost never as good as having an experienced CRMtrainer do the job, but it’s less expensive.
362 Part VI: The Part of Tens
37_343258-ch28.qxp 6/4/08 12:28 AM Page 362

� Find some live Web-based training that each of your users can access.
� Find a Web-based or CD-based tutorial for your users.
� Attend free webinars.
� Just tell each user to use the new software. Some of them will probablyget it.
Microsoft offers many types of training, not only for their CRM product butalso for many of their other business software products. A good startingpoint to find out about all these options is
www.microsoft.com/learning/training/default.asp
And, of course, buy each user a copy of this For Dummies book. Give eachone a raise after they’ve read it.
Selecting Microsoft Packaged Service and Support
Microsoft offers several levels of decision-making, design, and support ser-vices. They each cost real money, but it may be money well spent. Design andplanning always pay off in the end. You can access the details of Microsoft’sprograms by going to
www.microsoft.com/dynamics/crm/support/serviceplans.mspx
Microsoft offers different support plan options. They range from Flex Per-Incident Support, where you can pay on a per-incident basis, to a deluxe sup-port service that provides faster response times and a host of other benefits.These plans are offered by Microsoft directly, so we suggest you check outthe link above.
Microsoft offers software assurance as means of keeping you current on thelatest product versions. Software assurance is usually renewed on an annualor semiannual basis, but longer terms can be purchased. Customers currenton software assurance also have access to CustomerSource, which is a Webportal that allows you access to a considerable amount of information abouteach of your Microsoft products. CustomerSource also provides you withdetailed information about various types of training that are available. Inaddition, you can search the official Microsoft knowledge base, submit sup-port incidents, and much more.
363Chapter 28: Ten Ways to Get Help
37_343258-ch28.qxp 6/4/08 12:28 AM Page 363

Getting in Touch with UsWe use Microsoft CRM. We write about Microsoft CRM. We sell and support it.We have a team of experts who do nothing but CRM consulting. We can evenhelp you find additional resources, if that’s what’s needed. You can get intouch with us at the following address:
www.consultcore.com/dummies.htm
Accessing General CRM Resources Online
Not to be confusing, but the CRM that we talk about in this section isn’trelated specifically to Microsoft CRM. These CRM resources are dedicated toclient relationship management in general. Much of the information on theWeb sites we list here doesn’t deal with software. Instead, it’s about the phi-losophy and concepts behind more actively managing your customer base.
A solid understanding of CRM concepts can enhance your Microsoft CRMinvestment. Here are a few resources to get you started:
� www.crmguru.com: Membership is free. Newsletters arrive directly inyour e-mail inbox. This site has a Community Forum link and a GuruPanel link. The site also features a searchable GuruBase.
� www.crmdaily.com: The site’s self-proclaimed description is Real-TimeCRM Industry News from Around the World, but we think it’s bestdescribed as an online newspaper. Articles are fresh, and the layout isgreat. Each article has a brief overview on the front page with a link tothe details. This site also has a searchable archive.
� www.crm2day.com: Excellent articles and a concise design make thispage easy to read. It features an Experts Corner and a searchable library,which puts a lot of great CRM information only a few clicks away. Andthe free company listing is great for networking!
We hope this chapter provides you with a good start. Everyone needs a littlehelp when they’re first starting, or even later when digging a little deeper intoa new feature.
364 Part VI: The Part of Tens
37_343258-ch28.qxp 6/4/08 12:28 AM Page 364

Appendix A
Converting to Microsoft CRMIn This Chapter� Planning the conversion
� Designing a system that meets your needs
� Establishing the new system and testing it
� Cleaning and importing the data
� Showing co-workers how to use the new installation
Although the end results can dramatically increase effectiveness, formost sales organizations, the prospect of migrating to a different CRM
system is a harrowing prospect. Most sales managers would rather donate akidney . . . without anesthesia!
It can be technically challenging, but the key to an effective migration is inmanagement. It’s important to get everybody on board and excited. Ofcourse, if in the end everything goes wrong, if all of your contacts have thefirst and last names switched and billing information is mismatched, the chal-lenge will be having enough lifeboats for everyone jumping ship. But the bestadvice before the migration is to keep morale high and keep people partici-pating in the process.
We recommend working with a Microsoft CRM professional who has donethis hundreds or even thousands of times. Let her handle the technical stuffwhile you keep everyone excited.
If you’re committed to Microsoft CRM, it’s a good idea to order the hardwareand software early in the process so that when you get to the point of instal-lation there won’t be a delay. Obviously, there are financial considerations tobe made, but there is no reason that the hardware and software installationcan’t proceed in parallel with the system design.
In this appendix, we discuss the best, most efficient way to migrate yoursystem to CRM.
38_343258-bapp01.qxp 6/4/08 12:28 AM Page 365

Developing a Process for the ConversionWhether you work with a CRM professional or with in-house talent, theprocess should be similar to the one outlined in this chapter. Here it is in anutshell:
1. Evaluate the current system.
2. Define expectations.
3. Design the system.
4. Implement the design.
5. Test the system.
6. Clean the data.
7. Migrate the data.
8. Train the staff.
The following sections discuss all of these steps in greater detail.
Evaluating the Current SystemThe first step in converting your existing CRM system is to take a critical lookat it. You know what I mean: Take a look at it with your head tilted sidewaysand one eye squinted shut, like the way your dog responds to the strangesounds your stomach makes after a muy grande burrito for dinner.
You may think that you don’t have an existing CRM system, but if you’redoing business with people and organizations, you must be keeping track ofthem somewhere. Maybe it’s all in your accounting system. Maybe in a littleblack book. There are some professions where the little black book is the defacto method of CRM.
You need to take a good look at your current method for tracking your cus-tomers and consider its strengths, its weaknesses. Find out what kind of datayou’re tracking. Try to write it all down, or document it somehow, maybe in aspreadsheet. Note features that you need to keep, features you want to keep,and features you’d like to add with the new system. This is a good thing to doeven before you start shopping for a new CRM solution.
Keep in mind how the data relates to itself. In the strange and mysteriousworld of relational data, there are only three basic types of relationships: one-to-one, one-to-many, and many-to-many. (Actually, there are four, but themany-to-one relationship is just a one-to-many turned around.) Let’s look atthese in a little more detail. They are as follows:
366 Microsoft Dynamics CRM 4 For Dummies
38_343258-bapp01.qxp 6/4/08 12:28 AM Page 366

� One-to-one: This one is simple. It’s like your social security number.Unless you’re a spy or someone doing some very interesting tax report-ing, you have only one, and it belongs to you only.
� One-to-many: This is a little more complex. An example might be creditcards. You have many, but each belongs to you only.
� Many-to-one: Yeah, I said I wasn’t going mention it, but I have twicealready. A good example of a many-to-one relationship is your birthday.You have only one (hopefully), but it isn’t just yours. Many people sharethat birthday with you.
� Many-to-many: Ah yes, the granddaddy of them all. This relationship willallow you to make a bigger mess of your data faster than all the others.Use with caution. However, it’s also the most flexible. An everyday illus-tration might be the relationship between a household and its vehicles.A household may have many drivers and many cars, and any driver canuse any car. The thing is that with this kind of relationship the relation-ship generally goes through an intermediate entity, with this intermedi-ate having a one-to-many relationship with the other two entities. In thepreceding example, the intermediate entity is actually the household,and it has one-to-many relationships with both vehicles and drivers.
Okay, enough with the ugly data details.
Defining ExpectationsWhether you’re working with a CRM professional or your own in-housetalent, this is the point where you really need to nail down your expectations.Clearly understood expectations are critical to effective system design, imple-mentation, and ultimately end user adoption. Don’t take anything for grantedand document everything. Everybody needs to be on the same page!
Start with the data. What do you need to track in the system and how is thedata related? Don’t look only at your current CRM solution, which might justbe Outlook or a series of Excel spreadsheets. Look at your paper forms. Howmuch of that data can you enter and track in CRM? Even if you scan and linkthe document to a client record in CRM, you can’t effectively search on it orreport against it. Think how much easier it would be to fill out that formonline or to be able to print a nice typed copy of it instead of having to deci-pher someone’s handwritten interpretation of our Latin alphabet every time.
Keep in mind also that most CRM systems track much more than just clients.They might also track employees, vendors, competitors, suppliers, strategicallies, possibly even personal contacts, and more. In fact, with the release ofCRM 4, Microsoft has billed Dynamics as an XRM system, meaning that youcan use it as a general relationship management system in addition to thetypical client or contact management system.
367Appendix A: Converting to Microsoft CRM
38_343258-bapp01.qxp 6/4/08 12:28 AM Page 367

After fully exploring the specific information that you want to track for eachof your customers and any other relationships that you decide to keep trackof in CRM, you should look at process. If you have clearly defined businessprocesses, it will be easier to automate them using CRM than if you don’t. Forinstance, you might have a business rule that states this: After a lead is quali-fied, we send the lead an information packet. Then one week later, the salesrepresentative calls or follows up with an e-mail to the lead, . . . and so on. InMicrosoft Dynamics CRM, you can automate most of this process. Forautomation of your sales representative, on the other hand, look for theupcoming Mind Control For Dummies.
Different installations have different priorities. Some companies have verystrict security policies and complex organizational structures, and othershave a very flat org chart and allow nearly everyone full access to thesystem. Some may make extensive use of the product catalog and workflow,and another might work mostly through a customized add-on.
For some organizations, help-desk support is a main part of their business;these businesses can benefit from using cases. Cases are a way to track sup-port requests, who handled them, and whether they need to be escalated tosenior technician.
For some organizations, reports are the ultimate end product of CRM. Theyshow them who is producing and who isn’t. What kind of marketing is work-ing and what isn’t. Reporting also tends to be very dynamic. People like tosay, “We’ll just run a report on it.” As stated previously, you can’t run a reporton widget sales by color if you aren’t tracking the color.
Very few installations are actually comprehensive and make extensive use ofall the features of CRM.
A Word on ReportsAs important as they are, not much has been said about reports. In fact,reporting is probably one of the major reasons that organizations try to stan-dardize their contact management.
Reporting can be a very enigmatic element of data management. More timesthan not, a system is meticulously designed, implemented, tested, and thenrolled out, and users find out later that important information necessary tokey reports isn’t being tracked effectively.
368 Microsoft Dynamics CRM 4 For Dummies
38_343258-bapp01.qxp 6/4/08 12:28 AM Page 368

The point is that even if you have an in-house report writer who creates andupdates reports, you still need to keep the reports in the conversation for theentire process. The project manager needs to know what kind of reportingyou’ll expect to be doing, even if the reports aren’t part of the project.
Some items to consider as part of the process of your business:
� Templates
� Territories
� Business units
� Workflow
� Product catalog
� Cases
� Reports
� Security
� Customization
Designing the SystemAfter you have all of your expectations hammered out, it’s time to design thesystem. The design will be mostly on paper or, more likely, Excel, and willgenerally be performed by a project manager if you’re working with a CRMprofessional. If you’re doing this in-house, it will most likely be done by you.
The design process will include such mundane tasks as naming and labelingall the attributes and possibly new entities with unique names. For instance,you’ll most likely have a spreadsheet that lists all the entities and attributesalong with their system names, their “friendly” label names, as well as wherethey will appear on forms and in relationships in CRM.
It will also include mappings for the data migration. There will be a list ofevery discrete piece of information that will be coming from the old systemalong with where it will be going in the new system — as well as the relationalinformation, so all of the linkages will remain intact.
It will also describe in great detail all of the elements in “defining expectations”above.
The design will result in several documents, which you’ll then send to theengineer(s), who will implement the design and bring the data in; these engi-neers may be the same person or they may be two or more individuals thatwill work in parallel setting up the system and migrating the data.
369Appendix A: Converting to Microsoft CRM
38_343258-bapp01.qxp 6/4/08 12:28 AM Page 369

Implementing the DesignOkay, now that you have a highly defined design to work from, it’s time tostart implementation. Hopefully, you’re already working with a CRM profes-sional at this point, but if you aren’t, this is the time to start.
At this point, it’s a good idea to stand up a demo or test system to begindesigning on. This might vary depending on how your CRM professional orin-house IT staff works. Your CRM professional might set up a developmentsystem at his site and give you remote access to it, or you might set one up atyour location. You might even just start developing on your productionsystem if your CRM professional or IT staff doesn’t expect the configurationto be too complex. Regardless, there should be a system with demo data thatthe developers can start configuring based on your design.
Testing the SystemAt some point, or more likely, several points, you or your staff will log in tothe system to test and sign off on certain functionality. It’s very important totest as extensively as you can. One excellent, albeit time-consuming, way totest is to spend a day using the new system and your existing system in paral-lel. That is, enter all of your activities, clients you work with, and so on in thenew system just as you’re entering them in the old system. You’ll be sur-prised how much you’ll learn through this exercise. Much of it will be minu-tia, but it will most likely be a real eye opener. Eventually, after several testruns, the system will be complete. Well, complete for now. CRM systemsseem to continuously evolve.
Cleaning the DataData cleanup is a touchy subject. Qualified data experts can do nearly any-thing with the data, as long as they understand what the expected result is.Unfortunately, they speak an entirely different language than most otherhumans. Well, that’s not entirely true, but it can be difficult and frustrating forsomeone from the sales world and someone from the data world to findcommon ground. “Assign all clients in Atlanta to the Southeastern region”means nothing to the data guy. He needs to know to insert a value of 7 into afield named region when the date in the field named state is equal to GA andthe data in the field named city is equal to Atlanta, Alpharetta, . . . or a half
370 Microsoft Dynamics CRM 4 For Dummies
38_343258-bapp01.qxp 6/4/08 12:28 AM Page 370

dozen other suburbs. This is why the project manager and the documentsthat come out of the design process are so important.
The rules for any data cleaning need to be very specific. “Delete all the oldunimportant stuff” will generally result in the data expert making no changesbecause there isn’t enough information to work with. Part of the designprocess should’ve been to decide which data isn’t being migrated to the newsystem, as well as which is being migrated. Again, it’s important that expecta-tions are clearly understood.
As well as removing the old unimportant stuff, this is an ideal time to finallycorrect all the inconsistencies in your data, such as converting all of thoserecords where the city was entered as atl instead of Atlanta.
The process of cleaning the data will be tied to the entire data migrationprocess, and the experienced engineer will use the best tools he has at hisdisposal. It might be best to perform some cleaning while the data is on theexisting system. Many engineers prefer to work with data in the SQL world(SQL is a programming language commonly used for databases) and won’teven bother looking at it on the existing system. They simply find a way toexport it, import it into a SQL database, and then go to work on it with thetools they’re most familiar and skilled with. If you have this kind of skill in-house, you may want your SQL expert to work on the data before turning itover to the migration team.
Migrating the DataAfter the design of the system is fully implemented and signed off on and thedata has been fully cleansed, the data will be imported. In many cases, thedata import will run in parallel with the design implementation. The importengineer will probably work on a separate system that cleans, converts, andmaps the data.
It’s possible, especially on complex systems, that the data import overlapswith the design implementation where small samples of data aren’t enough toeffectively test the system.
Your migration might take several, import, review, revise, and re-importcycles. Hopefully, this has been accounted for in time and budget. The betterthat communication is in the beginning, the smoother the process should be.Don’t despair if the first time you log in to review the import, some data ismissing or misplaced.
371Appendix A: Converting to Microsoft CRM
38_343258-bapp01.qxp 6/4/08 12:28 AM Page 371

It is, however, another area where it’s important to scrutinize heavily. It canbe much more difficult to correct an import issue after the system has beenused for a few weeks or even a few days. You may also be billed for the workif you’ve already signed off on the original import.
Your team will have many options on the data import. There is the built-inimport tool mentioned in Appendix B, as well as several third-party tools thatcan be used for more complex importing.
Training the StaffSo you’ve completed the harrowing task of migrating your CRM system toMicrosoft CRM. You’ve tested the new installation heavily and gone throughall the data with a fine-toothed comb. Everything is perfect, but . . . you’rereally only half way there! Training your staff to effectively use the newsystem is at least as important as all the technical work required to actuallymigrate the data and processes to the new system.
How you train your staff will depend on a number of factors, with size, cul-ture, and geographic dispersion being just a few.
Training can be done all at once in a room large enough to hold everyone oronline. For larger organizations, it can be done as part of a roll-out where dif-ferent subsets of the organization are trained and go online with the newinstallation on different dates.
For very large organizations, a train-the-trainer model can be used, whereregional or departmental representatives are trained first and then sent backout into the field to train others.
372 Microsoft Dynamics CRM 4 For Dummies
38_343258-bapp01.qxp 6/4/08 12:28 AM Page 372

Appendix B
Managing Your DataIn This Chapter� Defining and creating duplicate detection rules
� Editing duplicate detection rules
� Publishing and unpublishing detection rules
� Importing and exporting data
While the cloning debate rages in political circles, database users havealready decided, no clones, no duplicates!
In version 4, Microsoft CRM lets the system administrator determine therules an organization will use to determine what constitutes a duplicaterecord. Microsoft CRM calls this Duplicate Detection.. The administrator canadd duplicate detection rules to any entity in the system, even custom enti-ties. Duplicate detection rules are run behind the scenes when creating orupdating a record, going online with the Outlook client, or during data import.
This chapter discusses CRM’s ability to implement duplicate detection rulesand how to use those rules to manage your data.
Tips for Creating Duplicate Detection Rules
Microsoft CRM uses the concept of match codes to determine duplicaterecords. For example, if the duplicate detection rule for your contact consistsof the first four letters of the last name and the first three digits of the zipcode, the match code for John Smith, 123 Main Street Boston, MA 02111would be SMIT021. Meaning, Sally Smith of 999 Tremont Street, Boston, MA02111 would also be SMIT021. The records would match. Therefore, we sug-gest the following rules when setting up your match codes:
39_343258-bapp02.qxp 6/4/08 12:29 AM Page 373

� Use a unique identifier whenever possible. This can be the e-mailaddress of a contact or the account number of an account.
� Keep your detection rules as simple as possible, or you’ll end updetecting too many duplicates, slowing down data entry.
� You can have more than one rule per entity, but do so sparingly.
� After your rules are established, try not to change them. Changingduplicate detection rules means match codes will be regenerated. Thiscould be slow when done against large entities.
Creating duplicate detection rules isn’t easy. You need to consider many vari-ables when creating the match code. Remember, you’re creating a string ofdata to match on. Should your rules be too strict, every record will match,causing continuous duplicate detection prompts. (See Figure B-1.) If yourrules are too loose, many duplicates won’t be detectect and your databasewill be full of duplicates.
Create rules that match your business best practices. For example, determinehow your users should import the account name. Should the account namebe: Department of Usually Micro Managed Important Executive Secretaries,or DUMMIES, or D.U.M.M.I.E.S? Now imagine what your match code would be.
For the record: A best practice for account names is to use the organization’sfull name in the account name field — such as, Department of Usually MicroManaged Important Executive Secretaries.
To Dot or Not to Dot, That Is the QuestionThe administrator can add a second field to the account form for the shorter,abbreviated name. A second duplicate detection rule could monitor the shortname field. What’s next? Decide upon and create a best practice aroundabbreviations. Should the short name be DUMMIES or D.U.M.M.I.E.S? Decideat design time and have your users follow this best practice.
What do you do with Inc, Incorporated, Company, Co, LTD, and so on? Don’task us — it’s up to you. It is your job to establish a corporate best practice.
You can have more than one rule per entity.
An on-change event that with the help of regular expressions helps toenforce your corporate standards, however, is beyond the scope of this book.To learn more about both on-change events and regular expressions, contactyour Microsoft CRM professional.
374 Microsoft Dynamics CRM 4 For Dummies
39_343258-bapp02.qxp 6/4/08 12:29 AM Page 374

Defining Duplicate Detection RulesSo you and your users are ready to establish duplicate detection rules. Let’sstop cloning around!
Before your duplicate detection rules can run, you need to enable duplicatedetection and define when the rules will fire. To do so, just follow these steps:
1. On the navigation pane, click the Settings button second up from thebottom.
The Settings navigation options appear at the top of the navigation pane.
2. In the navigation pane, click the Data Management button.
Data Management options are now available on the right.
3. In the Data Management pane, click the Duplicate Detection Settingslink on the top left.
The Enable Duplicate Detection Settings dialog box opens. (Refer toFigure B-1.)
This dialog box includes a primary check box to enable duplicate detection.
4. Select the Enable Duplicate Detection check box.
These three additional options activate:
• When a Record Is Created or Updated: This option turns duplicatedetection on when records are created or updated. However, only
Figure B-1:Enable and
define whenduplicatedetection
rules will beapplied.
375Appendix B: Managing Your Data
39_343258-bapp02.qxp 6/4/08 12:29 AM Page 375

entities with detection rules active will actually be evaluated. Seethe section, “Creating a Duplicate Detection Rule,” later in thischapter to learn more.
• When Microsoft Dynamics CRM for Outlook Goes from Offline toOnline: If you don’t have any users using CRM in offline mode,don’t select this option.
• During Data Import: Select this check box if you regularly importexternal data such as trade show attendees or purchased market-ing lists. If your initial import doesn’t contain duplicates, don’tselect this option.
5. Select any of the check boxes that apply.
6. Click OK.
You still need to create the actual duplicate detection rules. This step simplyenables duplicate detection.
Creating a Duplicate Detection RuleBecause matching on a unique identifier is a great way to establish your rule,we will create a contact rule based on the contact’s e-mail address. The wrin-kle here is that your database will probably contain more than one e-mailaddress. Microsoft CRM ships with three e-mail address fields for the contact.Our rule will need to address all contact e-mail addresses.
Duplicate detection rules are created in a similar fashion to Advanced Find.(See Chapter 26 for more on Advanced Find.)
To create a duplicate detection rule for the Contact entity, follow these steps:
1. In the Data Management area, click Duplicate Detection Rules.
The Duplicate Detection Area replaces data management.
2. Click New to create a new duplicate detection rule.
The Duplicate Detection Rule: New form opens. (See Figure B-2.) Thisform has three tabs: General, Administration, and Notes.
All the action happens on the General tab, but you can explore theAdministration and Notes tabs on your own.
3. Fill out the required Name field.
We’re calling our rule “Contacts with the same e-mail addresses.”
Status Reason is a system field; you can skip it.
4. From the Base Record Type drop-down list, select Contact.
376 Microsoft Dynamics CRM 4 For Dummies
39_343258-bapp02.qxp 6/4/08 12:29 AM Page 376

5. From the Matching Record Type drop-down box, select Contact.
6. Mouse over Select in the Attribute area.
A list of contact attributes is displayed.
7. Select the E-mail Address option.
8. For Criteria, select Exact Match.
We want the e-mail addresses to match exactly. The other two choicesare Same First Characters and Same Last Characters. If either of these isselected, the third box, No. of Characters, becomes available.
9. Repeat Steps 6-8 two more times with E-mail Address2 and E-mailAddress3.
You only have to add E-mail Address2 and E-mail address3 if those fieldsare on the contact form, ergo you’re using those fields.
10. Click Save.
The matchcode that your rule generates can not exceed 450 characters. Planyour rules accordingly. The bottom left of the Duplicate Detection Rule formkeeps a count for you. (Refer to Figure B-2.)
To publish a rule, follow these steps:
1. Click on the rule you want to publish
The rule is highlighted.
2. Click the Publish button on the menu bar.
Figure B-2:Create a
duplicatedetectionrule form.
377Appendix B: Managing Your Data
39_343258-bapp02.qxp 6/4/08 12:29 AM Page 377

3. Click OK to begin the match code generation.
A prompt indicating that the rule is going to generate the match codeswhile running in the background appears. (See Figure B-3.)
Should you decide that a published duplicate detection rule is not working asyou’d like, you can un-publish the rule. In doing so, the rule will not be run. Tounpublish a rule, follow these steps:
1. Click on a rule to be un-published.
2. On the toolbar, click More Actions.
3. Click Unpublish.
The Status Reason will remain Publishing until the match codes are gen-erated. The Status Reason field changes to Published when the matchcodes are generated.
Editing a Duplicate Detection RuleTo edit a duplicate detection rule for a contact (or any other entity), followthese steps:
1. On the Navigation Bar, click Settings.
The settings menu is displayed in the top of the Navigation Bar.
2. In the top portion of the Navigation Bar, click Data Management.
The data management options are displayed.
3. In the Data Management area, click Duplicate Detection Rules.
The Duplicate Detection Area replaces Data Management.
4. Double Click on a duplicate detection rule to edit.
The Duplicate Detection Rule form opens.
5. Edit your rule as necessary.
Figure B-3:Publishing aduplication
rule.
378 Microsoft Dynamics CRM 4 For Dummies
39_343258-bapp02.qxp 6/4/08 12:29 AM Page 378

6. Click the Save icon (The Blue Disk) or the Save and Close Icon.
You’ll be prompted with a message indicating that modifying the rulenecessitates a regeneration of match codes. The match codes will beremoved and the rule will be unpublished. (See Figure B-4.)
7. Click OK.
8. On the Menu Bar click Publish.
New match codes will be generated for the rule.
Only changes to the rule’s match code rules will result in unpublishing andclearing of existing match codes. You can edit the Description or other fieldssuch as a the rule name, without regenerating the match code.
Putting the Rule to WorkIf you’ve followed our instructions in the “Creating a Duplicate DetectionRule” section, you can test out the new rule. To do that, create a contact witha test e-mail address, such as [email protected]. Save and close the record.Then create another contact with the same e-mail address. You’ll beprompted with the Duplicate Detection dialog box. (See Figure B-5.)
The Duplicate Detection dialog box is split into two areas. The top is therecord you’re trying to create. The bottom half of the dialog box lists thepotential duplicate records.
The drop-down box at the top of the second portion shows the duplicatedetection rule or rules that triggered the dialog box. Below that are thepotential duplicate records.
Figure B-4:The
unpublishprompt
when editinga Duplicate
Detectionrule.
379Appendix B: Managing Your Data
39_343258-bapp02.qxp 6/4/08 12:29 AM Page 379

Here are some tips about manipulating records:
� To open a possible duplicate record: Double-click the record or selectEdit from the Action button on the menu bar.
� To activate or deactivate records: Click the More Actions button andselect Activate or Deactivate.
� To activate or deactivate multiple records: Ctrl+click all the appropri-ate records’ rows in the grid and select Activate or Deactivate.
� To affect all the records in the grid: Click the check box on the top leftof the grid first.
� To delete a record: Highlight the record and click the X icon on themenu bar.
Importing and ExportingWith the duplicate detection rules in place, you’re now ready to importrecords into Microsoft CRM. Microsoft CRM 4 Import/Export Wizard allowsimportation to any and all entities in the system. This is an enhancementover prior versions. To import data, keep in mind the following:
Figure B-5:The
DuplicateDetection
dialog box.
380 Microsoft Dynamics CRM 4 For Dummies
39_343258-bapp02.qxp 6/4/08 12:29 AM Page 380

� The file to import must be a CSV file.
� When mapping to a drop-down list, the source values need to bemapped to drop-down list items.
� When the import has finished, you have the option of receiving an auto-mated e-mail indicating that the import has finished.
For our example, we import sample data collected at a trade show. The tradeshow data was collected by the marketing team working the trade showbooth. When they returned to the office they provided us with a file calledtradeshow.csv.
Because the data is coming from a trade show, we will import the recordsinto the Lead entity. You can import into other entities, but the process is the same.
The trade show list import is subject to the duplicate detection rules youcreate earlier in this chapter.
Creating data mapsMicrosoft CRM uses data maps to translate the incoming data to the properfields in Microsoft CRM. A data map is simply the mapping of the sourcefields (the data you wish to import) with the target fields (the fields inMicrosoft CRM where the data will be going). The Import Wizard is based ona data map. So the first step is to create a data map. To create a data map foran account, follow these steps:
1. In the Navigation Bar Click Settings.
The Settings options show at the top of the Navigation Bar.
2. Click Data Management on the top of Navigation Bar.
The Data Map area replaces Data Management.
3. In the Data Management area, click Data Maps.
The Data Map area replaces Data Management.
4. Click New in the upper left corner.
The Data Map: New form opens. (See Figure B-6.)
5. Give the map a name in the Name field.
In this example, we use ABC Trade Show Leads.
381Appendix B: Managing Your Data
39_343258-bapp02.qxp 6/4/08 12:29 AM Page 381

6. Make sure that the value in the Record Type drop-down list is Lead.
You use the drop-down list to select the target entity —– the entitywhere the data will reside., such as Contact.
7. Provide a description in the Description field.
8. Click Save at the top left of the form.
9. On the left navigation pane, click Attributes.
The Attributes form is displayed on the right.
10. On the bottom left, click the Load Sample Data button.
Browse to the CSV file that you’re importing. (In our case, it’s called ABCTrade Show Leads.csv.)
The Attributes section is now split into two sections: Source on the leftand Target on the right. (See Figure B-7.)
Source is further split into two columns: Column Headings and MappedTarget Attributes.
11. On the Source side, map the items under Column Headings with theappropriate fields in the Target column. Highlight the source row tomap, find the appropriate target row item, and click the Map buttonon the bottom right.
Figure B-6:The Data
Map: Newform.
382 Microsoft Dynamics CRM 4 For Dummies
39_343258-bapp02.qxp 6/4/08 12:29 AM Page 382

The required fields in the Microsoft CRM have a red asterisk to the rightof the field name.
Double-clicking the target item also maps it to the highlighted source row.
If you’re importing to the Lead entity, Topic is a required field. Add aTopic column to your import CSV file and add copy a topic to eachrecord.
If your source data has fields being mapped to drop-down list fields, thesource values need to be mapped to the values in Microsoft CRM.
12. Click List Values on the left navigation pane.
The List Attributes form appears.
The left panel lists the drop-down fields that were mapped in Step 11. Onthe right, there are two boxes. The top box lists the distinct values in thesource file. The box on the bottom lists the options in Microsoft CRM.
13. Highlight a source value in the top box and a corresponding value inthe bottom box and click Map below. Repeat for all fields on the left.
14. When all attributes and list values are mapped, click Save and Closeon the menu bar at the top of the form.
The data map is completed.
Figure B-7:Detailedview of
attributemapping.
383Appendix B: Managing Your Data
39_343258-bapp02.qxp 6/4/08 12:29 AM Page 383

Editing data mapsIf your data map needs to be updated or edited, follow these steps:
1. In the Navigation Bar Click Settings.
The Settings options show at the top of the Navigation Bar.
2. Click Data Management on the top of Navigation Bar.
The Data Map area replaces Data Management.
3. In the Data Management area, click Data Maps.
The Data Map area replaces Data Management.
4. Find the Data Map in the grid and double-click.
The data map form opens.
5. Double Click a Data Map.
The data map form opens.
Edit the items in in much the same way you created the map. Refer to steps 9–14 in the section, “Creating Data Maps,” above.
Importing recordsTo import records you first need a data map. The data map created earliermaps where the source data will go in Microsoft CRM, but until you actuallyimport the data, it remains in the CSV file where it currently resides. Toimport records, follow these steps:
1. From the menu bar at the top of the screen, choose Tools➪ImportData.
The Import Records Wizard launches. (See Figure B-8.)
2. Click the Browse button and browse to the file containing the data tobe imported.
3. Click Next.
4. In the Record Type drop-down list, select the target source.
In our example, you’ll select Account.
384 Microsoft Dynamics CRM 4 For Dummies
39_343258-bapp02.qxp 6/4/08 12:29 AM Page 384

5. In the data map box, select your map from the lookup box.
Clicking New from the data map lookup form is another way to add anew data map. For details see the section, “Creating a New Data Map,”earlier in this chapter.
It’s best if the field headings in the source file match the field names inthe target columns. If not, there’s a chance the import will fail.
6. Click Next.
7. Determine who the record owner will be.
The assign to lookup will set the owner of the imported records. Bydefault it is set to the importing user, but can be changed here.
8. Choose Do Not Duplicate if you’ve created a duplicate detection rule(if not, and you want a rule, review the beginning of this chapter) or ifyou’re interested in duplicate records, choose Import Duplicates.
9. Name the import rule and select the Notification check box if you’dlike an e-mail notification when the job is completed.
10. Click Import.
To review the import job status, just follow these steps:
1. On the navigation bar, click Settings.
2. In the Settings area, click Data Management.
The data management options are displayed on the right.
Figure B-8:Importingdata with
the wizard.
385Appendix B: Managing Your Data
39_343258-bapp02.qxp 6/4/08 12:29 AM Page 385

3. Click Imports.
4. Double Click an Import.
The Import Source form opens. (See Figure B-9.)
5. On the left navigation pane, Click <<Entity>> Created.
A list of records created is displayed (Leads in our example).
6. On the navigation bar Click Failures.
A list of failed records is displayed.
7. If desired, Click Export Error Rows on the toolbar.
The failed records will be exported to Excel.
8. Close the form when done.
Exporting and re-importing dataThere are several reasons to export data from Microsoft CRM. A commonrequest is to export certain data from Microsoft CRM to further manipulate inExcel, which is covered in Chapter 10.
Figure B-9:System JobInformation.
386 Microsoft Dynamics CRM 4 For Dummies
39_343258-bapp02.qxp 6/4/08 12:29 AM Page 386

However, a new feature in Microsoft CRM is the ability to export data, updatethe data, and re-import the changed data. This feature has been added to theExport to Excel function. The fields that are available to update are those thatare in the grid view. To export, update, and re-import, follow these steps:
1. When viewing a grid of data, click the Excel icon on the toolbar.
The Export to Excel dialog box opens.
2. At the top of the box, select Static Worksheet with Records from thisPage.
3. At the bottom of the form, select the Make this Data Available for Re-Import by Including Required Columns check box.
4. Click Open when prompted.
5. Edit the Excel spreadsheet and Save it as a CSV file.
6. From the menu bar at the top of the screen, choose Tools➪ImportData.
The Import Records Wizard launches. (See Figure B-6.)
7. Click the Browse button and browse to the file containing the data tobe imported.
8. Click Next.
9. Ensure that the Enrich Data by Updating Existing Records RatherThan Creating New Records check box is selected.
10. Click Next twice.
11. Name the import rule and select the Notification check box if you’dlike an e-mail notification when the job is completed.
12. Click Import.
Fields not contained in the grid can’t be updated. To update these fields,ask your system administrator to add those fields.
387Appendix B: Managing Your Data
39_343258-bapp02.qxp 6/4/08 12:29 AM Page 387

388 Microsoft Dynamics CRM 4 For Dummies
39_343258-bapp02.qxp 6/4/08 12:29 AM Page 388

• A •abbreviations, duplicate detection rules
and, 374access levels, defining security, 91–92Account: New window
adding to marketing lists via, 232–233Administration tab, 169–170, 224–227Details tab, 167–169General tab, 167–168Notes tab, 170–171, 192–193
accounting, integrating with MS CRM,11–12
accounts. See also contactsaccount records
accessing, 167for competitors, 165editing, 166–167finding using Advanced Find, 41–44,
174–175finding using Find, 172–173parent/child records, 171
adding, 166–167assigning
to account managers, 103–108to other users, 175–176to territories, 67–68warning, 175
deactivating, 175defined, 10, 165deleting, 175methods for contacting, 224–227sharing, 176–177subaccounts, 166, 171
Accounts window, 32–33
activitiesassigned to queues, accepting, 331–332assigning to queues, 328, 331associating with cases, 291–292auto-assigned to queues, 329campaign activities. See also campaigns
Channel options, 251–252closing, 258–259defining, 250–255distributing, 255–258
defined, 179, 290deleting, 188editing appointments, 37enactable in workflows, 115–116finding, 183managing without Outlook
assigning to others, 186–188completing, 188–189limitations of, 180–181scheduling for others, 186scheduling for yourself, 184–185viewing your activities, 182–183viewing your calendar, 181–182
processing, 323scheduling appointments, 36–37service activities, 181types of, 182–183warning, 188workflow rules and, 179
Activities windowaccessing, 182versus calendar, 184changing columns, 183Look For field, 183navigating, 36–37sorting activities, 183View menu, 183
Index
40_343258-bindex.qxp 6/4/08 12:29 AM Page 389

Add Marketing Lists to Campaign dialogbox, 254
add-on productsto access expert advice, 354to automate processes, 351–352c360, 271–273, 352–353CanDoGo, 354criteria for selecting, 349–350to display data graphically, 354FusionCharts, 354to generate alerts, 351–352Google Toolbar spell-checker, 350–351to increase productivity, 352–353to integrate with Web sites, 271–273,
352–353KnowledgeSync, 68, 116, 351–352to migrate/manipulate data, 353Neocase, 354Powertrak from Axonom, 274, 353product review site, 349–350SalesCentric, 354Scribe, 353TaskCentre, 351–352to upgrade customer service, 354warning, 350
Addresses tab, Quote: New window, 201addresses in user profiles, 59Administration tab
Account: New window, 169–170, 224–227Campaign: New window, 247Contact: New window, 224–227Contract Line: New window, 343Lead: New window, 224–227Quote: New window, 201–202
Administration window, 139–141administrative reports, 118Advanced Find feature. See also Find
feature; Look For field; searchingaccessing, 41adding to marketing lists using, 229–230,
233–235Back to Query button, 44
Boolean operators, 173Clear button, 304defined, 41–44, 173–175versus Find, 173finding
account records, 41–44, 174–175cases, 281competitors, 213
finding entities related to subjectscases, 303–305products, 309sales literature, 310
Look For field, 41–42, 303–304versus marketing lists, 227personalizing searches, 50removing marketing list records using,
237–239Select options, 304Show/Hide Details buttons, 303–304Use Saved View field, 41–42, 43, 303–304
alerts, defined, 216alerts, generating, 351–352announcements, posting, 37–38application modules, 34–35Appointment: New window, 36–37, 184–185appointments. See activitiesArticle: New window, 306–307, 316Article Template Properties dialog box,
313–314Article: Templates window, 313articles. See knowledge baseAssign Opportunity dialog box, 159assigning
accountsto account managers, 103–108to other users, 175–176to territories, 67–68
activities to others, 186–188activities to queues, 328, 329–331cases to users or queues, 288–289contract lines to cases, 345contracts to cases, 344–345
390 Microsoft Dynamics CRM 4 For Dummies
40_343258-bindex.qxp 6/4/08 12:29 AM Page 390

opportunities to another user, 159–160records to team members, 95, 99security roles to users, 94tasks to individuals, 12teams to business units, 72–73users to teams, 60, 73–74
associating. See also relatingactivities with cases, 291–292campaigns
with marketing lists, 254–256with products, 253with sales literature, 253–254
quotes with opportunities, 203attachments. See also notes
adding notes as, 194–195defined, 191–193deleting, 195–196warning, 191
attribute mapping, 382–383authors site, book, 364autocomplete feature in Lookup fields,
282–283automating processes. See also workflow
rulesusing KnowledgeSync add-on, 351–352sales force automation systems, 9, 277using TaskCentre add-on, 351–352
Axonom add-on product, 274, 353
• B •base units, 80, 81blogs, 355, 357Boolean operators, 173Bosworth, Michael T., 218business processes. See also sales
processesalerts, 216assigning tasks, 12escalation, 13, 217–218feedback, 13
reporting and measuring, 13, 218workflow rules and, 12–13, 215–216
business unitsassigning teams to, 72–73defined, 59, 63, 69–70setting up, 70–71versus teams, 69
Business Units window, 70–71business-recommended fields, 68business-required fields, 68
• C •c360 add-on product, 271–273, 352–353calendar
versus Activities window, 184personalizing default views, 52–53viewing without Outlook, 181–182
Campaign Activity: New window, 250–251Campaign: New window
accessing, 245–246Administration tab, 247Financials tab, 247–248General tab, 246–247Notes tab, 247
Campaign Response: New window, 260–261campaigns
associating withmarketing lists, 254–256products, 253sales literature, 253–254
benefits of using MS CRM for, 244–245campaign activities
Channel options, 251–252closing, 258–259defining, 250–255distributing, 255–258
creating, 245–248defined, 243Do Not Allow option and, 258failures, 258
391Index
40_343258-bindex.qxp 6/4/08 12:29 AM Page 391

campaigns (continued)planning, 244–245planning tasks for, 248–250quick campaigns
creating, 263–265defined, 226versus marketing campaigns, 226viewing results, 265–266
recording responses to, 260–262relating to each other, 262–263reporting on, 263
CanDoGo add-on product, 354Case: New window
General tabAssignment Information area, 284Contract/Product Information area,
284–285Lookup fields autocomplete feature,
282–283Overview area, 282–284
Notes and Article tabdefined, 285Knowledge Base Article area, 286–287Notes area, 285
opening, 281cases. See also customers
assigned to queues, accepting, 290–291,331–332
assigning contracts to, 344–345assigning to users or queues, 288–289associating activities with, 291–292attaching articles to, 286–287completing, 292creating by customers, 272creating from e-mail in queues, 268–270defined, 34, 278filtering, 280finding
cases related to subjects, 303–305using Advanced Find, 281, 303–305using Look For field, 280
logging time spent resolving, 291–293management before CRMs, 277management path, 278–279processing, 323reactivating, 294related to subjects, viewing, 303–305relating to subjects, 302–303resolving, 292–294sorting, 280view options, 280viewing by customers, 272–273warning, 292
Cases windowAdvanced Find feature, 281column headings, 280defined, 278–279Look For field, 280opening, 279View menu, 280
child account records, 171Clear button in Advanced Find, 304Close Campaign Activity dialog box, 259closing. See also completing
campaign activities, 258–259opportunities, 162–163
CMS (contact management system), 9competitors
account records for, 165adding and tracking, 213–214associating sales literature with, 212–213finding, 213
completing. See also closingactivities, 188–189cases, 292
conditions, workflow and, 114–115Confirm Distribution dialog box, 257–258Confirm Submittal dialog box, 318Contact: New window
adding to marketing lists via, 232–233Administration tab, 224–227
392 Microsoft Dynamics CRM 4 For Dummies
40_343258-bindex.qxp 6/4/08 12:29 AM Page 392

contacts. See also accountscontact records
accessing, 35–36adding manually, 166defined, 165importing, 166Parent Account fields in, 166warning, 166
defined, 10, 165methods for contacting, 224–227tracking, 10
context-sensitivity, 29Contract Line: New window
accessing, 342Administration tab, 343General tab, 341–343Notes tab, 343
Contract: New windowaccessing, 337Details tab, 339General tab, 337–339
Contract Template: New window, 334–336contracts
active status, 336assigning to cases, 344–345cancelled status, 337, 344contract lines
adding to contracts, 341–343assigning to cases, 345defined, 339, 341sorting list of, 343
copying, 340–341creating contract templates, 334–336creating drafts, 337–341defined, 334draft status, 336expired status, 337, 344on hold status, 337, 344invoiced status, 336moving drafts to invoiced status, 343–344MS CRM tracking of, 343
renewing, 337, 344warning, 336
contrast, personalizing display, 51Convert Campaign Response form, 261–262Convert Lead dialog box, 153–155Convert Utility tool, 27converting leads to opportunities, 155–156converting quotes to orders, 204–205copying contracts, 340–341Create New Phone Calls dialog box,
256–257Create Order dialog box, 204–205Create Quick Campaign Wizard, 264–265CRM (customer relationship management)
systems. See also Microsoft DynamicsCRM 4
defined, 9most important features of, 215online resources on, 364prime benefit of, 277systems previous to, 9, 277
CSRs (customer service representatives).See also service managers
managing cases, 278–279managing queues, 324
Currencies setting, 65currency formats, 53–54currency types, 51customer service, add-on to upgrade, 354customer service cases. See casescustomer value, 277customers
adding to opportunities, 162c360 add-on and, 272, 273communicating with, 10–11defined, 10e-mail from, sending to queues, 267–268e-mailing articles to, 286–287giving access to cases, 272–273giving tasks feedback to, 13retaining, 14
393Index
40_343258-bindex.qxp 6/4/08 12:29 AM Page 393

• D •data. See also records
add-on to display graphically, 354add-on to import/manipulate, 353cleaning, 370–371duplicate detection rules
abbreviations and, 374creating, 373–374, 376–377defining when to run, 375–376editing, 378–379enabling, 375manipulating duplicates, 380overview, 373publishing, 377–378testing, 379–380unpublishing, 378, 379warning, 377
exporting to Excel, updating, and re-importing, 386–387
forecast, exporting to Excel, 146–147importing into MS CRM
creating data maps before, 381–383editing data maps, 384overview, 380–381re-importing updated data, 387reviewing status of, 385–386using Import Wizard, 384–385warning, 385
saving, 31sharing with team members
assigning records, 95, 99defining teams, 95overview, 95–96sharing records, 95–98streamlining, 100unsharing records, 95–99
synchronizable types, 27synchronization enhancements, 28synchronizing, 25–26
data access, offline. See Outlook, offlineclient
data access in Live versus On-Premiseversions, 16–17
data entry enhancements, 27Data Map: New form, 381–383data maps, 381–384databases, relational, 366–367date/time formats, 53–54deleting. See also removing
accounts, 175activities, 188articles, 320attachments, 195–196duplicate records, 380leads, 154notes, 195opportunities, 164
Details tabAccount: New window, 167–169Appointment: New window, 185Contract: New window, 339
developer resources, 362Diagnostic Tool enhancements, 27discount lists, 77–79Discount Lists window, 78Do Not Allow option, 225–227, 258Document window, 210Domain Logon Name, 59drilling down into reports, 123drilling down into subjects, 299–300Duplicate Detection Rule: New window,
376–377duplicate detection rules. See also data;
workflow rulesabbreviations and, 374creating, 373–374, 376–377defining when to run, 375–376editing, 378–379enabling, 375manipulating duplicate records, 380overview, 373publishing, 377–378testing, 379–380
394 Microsoft Dynamics CRM 4 For Dummies
40_343258-bindex.qxp 6/4/08 12:29 AM Page 394

unpublishing, 378, 379warning, 377
Duplicate Detection Settings dialog box,375–376
Duplicates Detected dialog box, 379–380
• E •e-mail
bulk/direct/blast/opt-in e-mail, 54customer, sending to queues, 267–268overview, 11in queues, creating cases from, 268–270in queues, creating leads from, 270in scheduling activities for others, 186warning, 54
e-mail address of book authors, 5e-mail templates, personalizing, 54–55e-mail tracking, personalizing, 55–56e-mailing articles to customers, 286–287editing. See also modifying
account records, 166–167appointments, 37data maps, 384default report filters, 119, 122duplicate detection rules, 378–379knowledgebase articles, 318marketing lists, 235–236reports, 131–132sales literature, 211–212subjects, 300–301
Enable Duplicate Detection Settings dialogbox, 375–376
Enterprise Server license, 19error reporting to Microsoft,
personalizing, 56escalation, 13, 217–218events, workflow and, 114Excel 2007 For Dummies (Harvey), 146Export to Excel feature
creating Excel records, 132–134enhancements, 28, 387
exporting, updating, and re-importingdata, 386–387
exporting forecast data, 146–147exporting, printing as, 124exporting reports to other file formats, 124
• F •faxing, 11feedback, giving customers, 13filtering. See also searching
cases, 280records, 32, 38reports, 119, 121running reports without, 119–120versus searching, 39
filters, editing default report, 119, 122Financials tab in Campaign: New window,
247, 248Find feature. See also Advanced Find; Look
For field; searchingaccessing, 172versus Advanced Find, 173finding accounts by name, 172–173searching for report text, 123
fiscal year settings, 137–139follow-up rules, 110–112Form Assistant, searching with, 40–41forums, 361FusionCharts add-on product, 354
• G •General tab
Account: New window, 167, 168Campaign: New window, 246–247Case: New window
Assignment Information area, 284Contract/Product Information area,
284–285Overview area, 282–284
395Index
40_343258-bindex.qxp 6/4/08 12:29 AM Page 395

General tab (continued)Contract Line: New window, 341–343Contract: New window, 337–339Duplicate Detection Rule: New window,
376–377Lead: New window, 151–152Quote: New window, 198–200
Google Toolbar spell-checker add-on,350–351
graphic data display, add-on products for, 354
• H •Harvey, Greg, 146help. See also add-on products; Web site
addressesbuilt-in help
blogs, 357forums, 361Help menu, 356–357newsgroups, 358–361overview, 355Resource Center, 357–358
outside servicesbook’s authors, 364for developers, 362general CRM resources, 364Microsoft service/support plans, 363Microsoft software assurance, 363MS CRM partners, 361MS CRM training, 362–363overview, 355–356
Hide Details button in Advanced Find, 303–304
house-holding, 353
• I •Import Source File form, 386importing data
contact records, 166creating data maps before, 381–383
editing data maps, 384using Import Wizard, 166, 384–385overview, 380–381re-importing updated exported data, 387reviewing status of, 385–386using Scribe add-on, 353warnings, 166, 385when migrating to MS CRM, 371–372
instant messaging, 186invoices. See also orders; quotes
accounting software and, 206generating from orders, 205overview, 197
• K •knowledge base (KB)
articlesaccessing via c360 portal, 272–273approving, 318–319attaching to cases, 286–287creating drafts, 315–317defined, 305, 311deleting, 320Draft folder, 315e-mailing to customers, 286–287editing, 318overview, 314–315Published folder, 315, 319–320rejecting, 319related to subjects, viewing, 308relating to subjects, 305–308, 316searching for in Case: New window,
286–287searching for in KB window, 320–322submitting drafts for approval, 317–318Unapproved folder, 315, 318unpublishing, 320
defined, 311
396 Microsoft Dynamics CRM 4 For Dummies
40_343258-bindex.qxp 6/4/08 12:29 AM Page 396

organizing, 311–312preventing chaos, 314templates
creating, 312–314default templates, 312–313defined, 311selecting, 305–306, 316
Knowledge Base window, 315KnowledgeSync add-on product, 68, 116,
351–352
• L •language options, 57Lead: New window
adding to marketing lists via, 232–233Contact Methods settings, 224–227entering data in, 151–152
leads. See also opportunitiesconverting to opportunities, 155–156creating from e-mail in queues, 270defined, 149deleting, 154disqualifying, 153–154entering manually, 150–152methods for contacting, 224–227modifying, 152reactivating, 154–155sources of, 150viewing, 152–153warning, 154
Leads window, 30–31, 150–151linking. See relating; associatingLive versus On-Premise versions. See also
Microsoft Dynamics CRM 4data access, 16–17defined, 15overview, 1, 15–16security, 16total cost of ownership, 17
Look For field. See also Advanced Findfeature; Find feature; searching
in Advanced Find, 41–42, 303–304finding activities using, 183finding cases using, 280in Look Up Records dialog box, 330
Look Up Articles dialog box, 286–287Look Up Records dialog box
adding marketing list members, 229–233adding users to territories, 67defined, 40searching for queues, 330
lookup fields (magnifying glass icon)autocomplete feature, 282–283search enhancement, 27searching with, 40
• M •magnifying glass icon. See lookup fieldsmail merge enhancements, 27mail merges from marketing lists, 239–241Manage Members form, 230Manage Quotas dialog box, 140–141Manager module. See also workflow rules
accessing, 103creating automatic rules, 103–108creating manual rules, 110–112defined, 102
managersaccount managers, 103–108personal information managers, 9service managers, 324, 329of users, viewing, 217
marketing campaigns. See campaignsmarketing lists
adding membersusing Advanced Find, 229–230, 233–235from Lead/Contact/Account forms,
232–233using Look Up Records, 229–233
397Index
40_343258-bindex.qxp 6/4/08 12:29 AM Page 397

marketing lists (continued)versus Advanced Find, 227associating campaigns with, 254–256creating, 228–229database design and, 223–224defined, 223, 244Do Not Allow option, 225–227editing, 235–236merging mail from, 239–241removing records from, 236–239seeing number of records in, 232setting contact method options, 224–227warning, 225
Marketing Lists window, 228Marketing module
Accounts window, 32Campaigns window, 245Leads window, 30–31, 150Marketing Lists window, 228navigating to, 34–35overview, 34Sales Literature window, 207–211
marketing reports, 118measuring business processes, 13, 218merging mail from marketing lists, 239–241Microsoft CRM SDK (Software Developers
Kit), 271, 274Microsoft CustomerSource portal, 363Microsoft Dynamics, 11Microsoft Dynamics Code Gallery, 362Microsoft Dynamics CRM 4. See also CRM
accessing, 34accessing via offline Outlook client
defined, 21, 25overview, 18synchronizing data, 25–26
accessing via online Outlook clientCRM menu options, 24–25CRM toolbar, 22–23defined, 21–22Outlook Shortcuts folders, 23
accessing via Web client, 21, 26
add-on productsto access instant expert advice, 354to automate processes, 351–352c360, 271–273, 352–353CanDoGo, 354criteria for selecting, 349–350to display data graphically, 354FusionCharts, 354to generate alerts, 351–352Google Toolbar spell-checker, 350–351to import/manipulate data, 353to increase productivity, 352–353to integrate with Web sites, 271–273,
352–353KnowledgeSync, 68, 116, 351–352Neocase, 354Powertrak from Axonom, 274, 353product review site, 349–350SalesCentric, 354Scribe, 353TaskCentre, 351–352to upgrade customer service, 354warning, 350
allowing external access to, 271–274application modules, 34–36business processes setup, 12–13contact tracking, 10context-sensitive elements, 29customer communications, 10–11customer retention, 14evolution of, 9goals for implementing, 14implementing pilot programs, 15integration with accounting, 11–12integration with Web sites
creating cases from e-mail in queues,268–270
creating leads from e-mail in queues, 270creating records using MS CRM SDK,
271, 274overview, 267
398 Microsoft Dynamics CRM 4 For Dummies
40_343258-bindex.qxp 6/4/08 12:29 AM Page 398

sending customer e-mail to queues, 267–268
warning, 271via Web portals/connectors, 271–274,
352–353limitations, 180–181Live versus On-Premise versions
data access, 16–17defined, 15overview, 1, 15–16security, 16total cost of ownership, 17
migrating tocleaning the data, 370–371considering reporting, 368–369defining expectations, 367–368designing the system, 369evaluating current system, 366–367implementing the design, 370importing the data, 371–372overview, 365–366testing the system, 370training the staff, 372
mobile functionality, 18needs analysis for, 14offline data access, 18Outlook client enhancements
Convert Utility tool, 27data entry, 27Diagnostic Tool, 27Export to Excel features, 28mail merge, 27offline synchronization, 28overview, 26record searches, 27Regarding feature, 27Report Wizard, 27–28reporting services, 27–28synchronizable data types, 27user interface, 27
overview, 1–2
personalizingadvanced searches, 50currency type, 51default calendar view, 52–53default start page, 49–50default work hours, 53display contrast, 51e-mail templates, 54–55e-mail tracking, 55–56error reporting to Microsoft, 56language, 57number/currency/time/date formats,
53–54overview, 47–48records per page, 50roles, 51time zones, 50–51workplace, 51
Planning Guide, 13–15pop-up blockers and, 34Resource Center, 44server licenses
Enterprise, 19migrating to other versions, 19overview, 18Professional, 19Workgroup, 18–19
signing on, 33–34terminology, 10user profile settings
addresses, 59Details group and, 59general information, 59overview, 57–59security roles, 60Service group and, 59team assignments, 60work hours, 60–61workflows, 61
using successfully, 20using without Outlook, 180–181warning, 180
399Index
40_343258-bindex.qxp 6/4/08 12:29 AM Page 399

Microsoft Dynamics CRM 4 (continued)workflow rules, 12–13workplace screen
context-sensitivity of, 30defined, 29–30editing appointments, 37getting back to, 34navigation buttons, 30navigation pane, 30–31posting announcements, 37–38scheduling appointments, 36–37status bar, 31windows, 30–33
as XRM system, 367Microsoft Dynamics CRM Dev Center, 362Microsoft Outlook. See OutlookMicrosoft service/support plans, 363Microsoft software assurance plan, 363Microsoft SQL Server 2005 Reporting
Services, 124, 130migrating to MS CRM. See also Microsoft
Dynamics CRM 4cleaning the data, 370–371considering reporting, 368–369defining expectations, 367–368designing the system, 369evaluating current system, 366–367implementing the design, 370importing the data, 371–372overview, 365–366testing the system, 370training the staff, 372
mobile functionality, 18modifying. See also editing
leads, 152report display size, 123
Monitor module. See also workflow rulesdefined, 102, 113monitoring rules, 113setting monitoring options, 61
• N •navigation buttons, 30navigation pane, 30–31needs analysis, 14Neocase add-on product, 354nesting subjects, 295.NET assemblies, 116networked mode, 1newsgroups, 358–361notes. See also attachments
adding as attachments, 194–195creating, 191–193defined, 191deleting, 195grammar/spell checking, 192warning, 191
Notes and Article tabCase: New window
defined, 285Knowledge Base Article area, 286–287Notes area, 285
Notes tabAccount: New window, 170–171, 192–193Appointment: New window, 185Campaign: New window, 247Contract Line: New window, 343overview, 191
number format options, 53–54
• O •object-based security. See security, internaloffline data access. See Outlook, offline
clientonline Outlook client. See Outlook, online
clientOn-Premise versus Live versions. See also
Microsoft Dynamics CRM 4data access, 16–17defined, 15overview, 1, 15–16
400 Microsoft Dynamics CRM 4 For Dummies
40_343258-bindex.qxp 6/4/08 12:29 AM Page 400

security, 16total cost of ownership, 17
operators, Boolean, 173opportunities. See also leads; sales
forecastsadding customers to, 162assigning, 159–160associating quotes with, 203closing, 162–163converting leads to, 149, 155–156creating records, 149, 156–158defined, 149deleting, 164linking to activities or files, 161Relationships function and, 162reopening, 163–164sales processes and, 219sharing records, 159–160updating records, 158warning, 160workflow rules and, 162
Opportunities window, 35, 141–142opportunity reports, 145orders. See also invoices; quotes
accounting software and, 206converting quotes to, 204–205generating invoices from, 205overview, 197
Outlookclient enhancements
Convert Utility tool, 27data entry, 27Diagnostic Tool, 27Export to Excel features, 28mail merge, 27offline synchronization, 28overview, 26record searches, 27Regarding feature, 27
Report Wizard, 27–28reporting services, 27–28synchronizable data types, 27user interface, 27
offline clientdefined, 21, 25overview, 18synchronizing data, 25–26
online clientCRM menu options, 24–25CRM toolbar, 22–23defined, 21, 22Outlook Shortcuts folders, 23
• P •Parent Account fields in contact
records, 166parent account records, 171partners, MS CRM, 361Peri, Jagan, 268phone numbers
Axonom, 353c360, 353
pilot programs, implementing, 15PIMs (personal information managers), 9pipeline reports, 145Planning Guide for MS CRM, 13–14, 15pop-up blockers, 34Powertrak add-on from Axonom, 274, 353price lists, 82–85Price Lists window, 83price quotes. See quotesprinting
as exporting, 124overview, 11quotes, 203–204reports, 124
processing, defined, 323
401Index
40_343258-bindex.qxp 6/4/08 12:29 AM Page 401

product catalogsadding products, 85–88creating
discount lists, 77–79price lists, 82–85in Product Catalog window, 76–77unit groups, 80–82
overview, 75–76product kits, 86product substitutes, 86products
associating campaigns with, 253related to subjects, viewing, 309relating to subjects, 308–309vertically-oriented products, 353
Products window, 309Professional Server license, 19profiles. See user profile settingsproposals versus quotes, 198prospects, 149Published articles folder, 315, 319–320publishing duplicate detection rules,
377–378
• Q •Queue: New window, 327–328queues
accepting activities/cases assigned to,331–332
activities auto-assigned to, 329assigning activities to, 328–331creating, 326–328creating cases from e-mail in, 268–270creating leads from e-mail in, 270defined, 65, 323–324designing, 324, 326personal/public queues, 325sending customer e-mail to, 267–268service managers/CSRs for, 324, 329
Queues windowaccessing, 326My Work queue, 325Queues area, 325, 326
quick campaigns. See also campaignscreating, 263–265defined, 226versus marketing campaigns, 226viewing results, 265–266
Quick Campaigns window, 265–266quotas. See sales quotasQuote: New window
accessing, 198Addresses tab, 201Administration tab, 201–202General tab, 198–200Shipping tab, 200
quotes. See also invoices; ordersaccounting software and, 206activating, 202associating with opportunities, 203converting to orders, 204–205creating, 198–202overview, 197–198printing, 203–204versus proposals, 198
• R •recording campaign responses, 260–262records. See also data
accessing in application modules, 35–36assigning, 95, 99creating using MS CRM SDK, 271, 274filtering, 32per page, personalizing, 50previewing, 32–33related to reports, 130search enhancements, 27selecting, 33sharing, 95–98sorting, 33
402 Microsoft Dynamics CRM 4 For Dummies
40_343258-bindex.qxp 6/4/08 12:29 AM Page 402

unsharing, 95–99viewing, 32–33warning, 225
Regarding feature, 27Related Campaigns window, 262–263relating. See also associating
campaigns to each other, 262–263opportunities to activities or files, 161to subjects
articles, 305–308, 316cases, 302–303overview, 301–302products, 308–309sales literature, 310
Relationships function, 162removing. See also deleting
marketing list records, 236–239reports from report area, 132subjects, 301
Report: New dialog box, 125Report Wizard
accessing, 125–126creating reports, 117, 126–129editing reports, 131–132enhancements, 27–28overview, 117
reportingon business processes, 13enhancements in, 27–28in migrating to MS CRM, 368–369
reportsadding report categories, 117–118built-in report categories, 118on campaigns, 263creating Excel reports, 132–134creating report snapshots, 122creating with Report Wizard, 117, 125–129drilling down into, 123editing default report filters, 119, 122editing with Report Wizard, 131–132exporting, 124
filtering, 119, 121modifying display size, 123navigating pages in, 123navigating report area, 118–123opportunity reports, 145parent reports, 130pipeline reports, 145printing, 124related record types, 130removing from report area, 132running without filtering, 119–120for sales forecasts, 145–146saving and running, 131searching for text in, 123setting general options, 130sharing, 122SQL Reporting Service reports, 130types of, 130view options, 123
reports for, built-in, sales forecasts, 145resolving cases, 292–294Resource Center, 44, 357–358resource groups, 64resources. See add-on products; Web site
addresses; helprole-based security. See security, internalRoles settings, Relationship, 65roll-up summaries, 352
• S •SaaS (software as a service), 15sales force automation (SFA) systems,
9, 277sales forecasts. See also opportunities
entering new, 141–143exporting forecast data to Excel, 146–147importance of, 146reports for, 145–146updating, 144–145
sales invoices. See invoices
403Index
40_343258-bindex.qxp 6/4/08 12:29 AM Page 403

sales leads. See leadssales literature
adding, 207–211associating campaigns with, 253–254associating with competitors, 212–213editing, 211–212overview, 207related to subjects, viewing, 310relating to subjects, 310usefulness of, 214
Sales Literature window, 208–211Sales module, 34–35sales opportunities. See sales forecasts;
opportunitiessales orders. See orderssales processes. See also business
processesopportunities and, 219planning, 218–220Solution Selling process, 218typical sales cycle, 219–220workflow rules and, 162
sales quotasdefined, 137setting fiscal year options, 137–139setting saleperson quotas, 139–141warnings, 138, 139, 140
sales reports, 118Sales Territories window, 65SalesCentric add-on product, 354Salesforce.com, 16saving data, 31scheduling activities
appointments, 36–37for others, 186without Outlook, 184–186for yourself, 184–185
Scribe add-on product, 353SDK (Software Developers Kit), Microsoft
CRM, 271, 274
searching. See also Advanced Find feature;Find feature; Look For field
versus filtering, 39with Form Assistant, 40–41for knowledgebase articles, 286–287,
321–322in lookup fields (magnifying glass icon)
autocomplete feature, 282–283defined, 40search enhancement, 27
overview, 38using Search for Records/View fields, 39
security, internaldefined, 90object-based security
defined, 90–91defining access levels, 91–92setting user privileges, 91
role-based securityassigning roles to users, 94defined, 90predefined roles, 92–94setting up roles, 34, 51, 60viewing roles, 60
sharing data with team membersassigning records, 95, 99defining teams, 95overview, 95–96sharing records, 95–98streamlining, 100unsharing records, 95, 98–99
security, physical, 89security in Live versus On-Premise
versions, 16Security Roles window, 92–93Select options in Advanced Find, 304Select a Template dialog box, 305–307server licenses. See also Microsoft
Dynamics CRM 4Enterprise, 19migrating to other versions, 19
404 Microsoft Dynamics CRM 4 For Dummies
40_343258-bindex.qxp 6/4/08 12:29 AM Page 404

overview, 18Professional, 19Workgroup, 18–19
service activities, 181service cases. See casesService group in user profiles, 59service managers, 324, 329. See also CSRsService module, 34–35service plans, Microsoft, 363service reports, 118services, defined, 65Set Personal Options tabs
Activities, 52–53E-mail, 55–56E-mail Templates, 54–55Formats, 53–54General, 48–51Languages, 57Privacy, 56Workplace, 48, 51
Settings module, 35, 64–65SFA (sales force automation) systems,
9, 277sharing
accounts, 176–177data with team members. See also
security, internalassigning records, 95, 99defining teams, 95overview, 95–96sharing records, 95–98streamlining, 100unsharing records, 95, 98–99
opportunities, 159, 160report snapshots, 122
Shipping tab in Quote: New window, 200Show Details button in Advanced Find,
303–304single tenancy, 19sites, 65snapshots, report, 122
software assurance plan, Microsoft, 363Solution Selling: Creating Buyers in Difficult
Selling Markets (Bosworth), 218sorting
activities, 183cases, 280contract lines, 343
spam, 54SQL (Structured Query Language), 371SRS (SQL Reporting Service) reports,
124, 130start page, default, 49–50status bar, 31subaccounts, 166, 171Subject field, 297, 316Subject Lookup dialog box, 299subjects
accessing subject trees, 298, 303accessing Subjects window, 297adding, 298–300defined, 295–296defining subject trees, 296–297drilling down into, 299–300editing, 300–301nesting, 295relating other entities to
articles, 305–308, 316cases, 302–303overview, 301–302products, 308–309sales literature, 310warning, 303
removing, 301subject buckets, 295versus Subject field, 297viewing entities related to
articles, 308cases, 303–305products, 309sales literature, 310
warning, 300
405Index
40_343258-bindex.qxp 6/4/08 12:29 AM Page 405

support plans, Microsoft, 363suspects, 149synchronization, data, 25–28System Jobs Information page, 386
• T •Task: New window, 249TaskCentre add-on product, 351–352tasks
assigning, 12escalation and, 13giving customers feedback on, 13planning campaign tasks, 248–250
TCO (total cost of ownership), 17teams
assigning to business units, 72–73assigning users to, 60, 73–74versus business units, 69creating, 72–73defined, 58, 63defining, 95overview, 71–72
telephone numbersAxonom, 353c360, 353
templatescontract, creating, 334–336e-mail, personalizing, 54–55knowledge base
creating, 312–314default templates, 312–313defined, 311selecting, 305–306, 316
territoriesadding user/members to, 67assigning accounts to, 67–68defined, 59, 63Sales Territories, 64–67setting up, 64–67, 168–169warning, 68
testingautomatic workflow rules, 108–109duplicate detection rules, 379–380manual workflow rules, 112migration to MS CRM, 370
third-party products. See add-on productsthreads, newsgroup, 359time zones, 48, 50–51time/date formats, 53–54toggle switch, 100training, 362–363, 372
• U •unit groups, 80–82Units window, 82updating
exported data, 386–387opportunities, 158re-importing updated data, 387sales forecasts, 144–145
Use Advanced Find to Evaluate Membersoption, 237–239
Use Saved View field in Advanced Find,41–42, 43, 303–304
user interface enhancements, 27user profile settings
addresses, 59general information, 59overview, 57–59security roles, 60team assignments, 60work hours, 60–61workflows, 61
usersadding to territories, 67assigning accounts to, 175–176assigning cases to, 288–289assigning opportunities to, 159–160assigning roles to, 94assigning to teams, 60, 73–74
406 Microsoft Dynamics CRM 4 For Dummies
40_343258-bindex.qxp 6/4/08 12:29 AM Page 406

setting privileges, 91viewing managers of, 217
• V •vaporware, 350vertically-oriented products, 353View field, 39View menu in Activities window, 183View menu in Cases window, 280viewing
activities, 182–183calendar without Outlook, 181–182cases, 272–273, 280entities related to subjects
articles, 308cases, 303–305products, 309sales literature, 310
leads, 152–153managers of users, 217previewing records, 32–33quick campaign results, 265–266reports, 123roles, 60
views, default calendar, 52–53
• W •Web client, accessing MS CRM via, 21, 26Web portals, 271–274Web services, 9Web site addresses
authors, 364CAN-SPAM Act of 2003, 54general CRM resources, 364Microsoft CRM
Code Gallery, 362Community, 89dealers, 361
Dev Center, 362Implementation Guide, 89planning guide, 14SDK, 271service/support plans, 363TCO comparison spreadsheet, 17Team Blog, 357training, 363workflow blog by Jagan Peri, 268
Microsoft CRM add-onsc360, 271, 353CanDoGo, 354FusionCharts, 354Google Toolbar spell-checker, 350KnowledgeSync from Vineyardsoft, 351Neocase, 354Powertrak from Axonom, 274, 353review site, 349SalesCentric, 354Scribe, 353TaskCentre from Orbis, 351Web portals, 271, 274
Microsoft SQL Server Reporting Services, 124
Web site integration with MS CRMcreating cases from e-mail in queues,
268–270creating leads from e-mail in queues, 270creating records using MS CRM SDK,
271, 274overview, 267sending customer e-mail to queues,
267–268warning, 271via Web portals/connectors, 271–274,
352–353work hour settings, 53, 60–61workflow blog by Jagan Peri, 268Workflow Manager window, 103–104Workflow Monitor window, 113
407Index
40_343258-bindex.qxp 6/4/08 12:29 AM Page 407

workflow rules. See also duplicatedetection rules
actions and, 115–116activities and, 179automatic rules
creating, 103–108overview, 12–13, 101–102testing, 108–109warning, 108
business processes and, 12–13, 215–216conditions and, 114–115creating cases from e-mail in queues,
268–270creating leads from e-mail in queues, 270defined, 101events and, 114KnowledgeSync and, 116limitations, 102, 351Manager module
accessing, 103creating automatic rules, 103–108creating manual rules, 110–112defined, 102
Monitor moduledefined, 102, 113monitoring rules, 113setting monitoring options, 61
.NET assemblies and, 116On-Demand (manual) rules
calling, 109–110creating follow-up rules, 110–112defined, 109testing, 112
sales processes and, 162Workgroup Server license, 18–19workplace
accessing application modules, 34–35accessing record level, 35–36context-sensitivity of, 30defined, 29–30, 51getting back to, 34navigation buttons, 30navigation pane, 30–31personalizing, 51windows
defined, 30–33records in, 32–33toolbar, 32
• X •XRM system, MS CRM as an, 367
408 Microsoft Dynamics CRM 4 For Dummies
40_343258-bindex.qxp 6/4/08 12:29 AM Page 408

Notes____________________________________________________________________________________________________________________________________________________________________________________________________________________________________________________________________________________________________________________________________________________________________________________________________________________________________________________________________________________________________________________________________________________________________________________________________________________________________________________________________________________________________________________________________________________________________________________________________________________________________________________________________________________________________________________________________________________________________________________________________________________________
40_343258-bindex.qxp 6/4/08 12:29 AM Page 409

Notes____________________________________________________________________________________________________________________________________________________________________________________________________________________________________________________________________________________________________________________________________________________________________________________________________________________________________________________________________________________________________________________________________________________________________________________________________________________________________________________________________________________________________________________________________________________________________________________________________________________________________________________________________________________________________________________________________________________________________________________________________________________________
40_343258-bindex.qxp 6/4/08 12:29 AM Page 410

BUSINESS, CAREERS & PERSONAL FINANCE
Also available:Business Plans Kit For Dummies 0-7645-9794-9Economics For Dummies 0-7645-5726-2Grant Writing For Dummies0-7645-8416-2Home Buying For Dummies 0-7645-5331-3Managing For Dummies 0-7645-1771-6Marketing For Dummies 0-7645-5600-2
Personal Finance For Dummies 0-7645-2590-5*Resumes For Dummies 0-7645-5471-9Selling For Dummies 0-7645-5363-1Six Sigma For Dummies 0-7645-6798-5Small Business Kit For Dummies 0-7645-5984-2Starting an eBay Business For Dummies 0-7645-6924-4Your Dream Career For Dummies 0-7645-9795-7
0-7645-9847-3 0-7645-2431-3
Also available:Candy Making For Dummies0-7645-9734-5Card Games For Dummies 0-7645-9910-0Crocheting For Dummies 0-7645-4151-XDog Training For Dummies 0-7645-8418-9Healthy Carb Cookbook For Dummies 0-7645-8476-6Home Maintenance For Dummies 0-7645-5215-5
Horses For Dummies 0-7645-9797-3Jewelry Making & Beading For Dummies 0-7645-2571-9Orchids For Dummies 0-7645-6759-4Puppies For Dummies 0-7645-5255-4Rock Guitar For Dummies 0-7645-5356-9Sewing For Dummies 0-7645-6847-7Singing For Dummies 0-7645-2475-5
FOOD, HOME, GARDEN, HOBBIES, MUSIC & PETS
0-7645-8404-9 0-7645-9904-6
Available wherever books are sold. For more information or to order direct: U.S. customers visit www.dummies.com or call 1-877-762-2974. U.K. customers visit www.wileyeurope.com or call 0800 243407. Canadian customers visit www.wiley.ca or call 1-800-567-4797.
HOME & BUSINESS COMPUTER BASICS
Also available:Cleaning Windows Vista For Dummies 0-471-78293-9Excel 2007 For Dummies0-470-03737-7Mac OS X Tiger For Dummies 0-7645-7675-5MacBook For Dummies 0-470-04859-XMacs For Dummies 0-470-04849-2Office 2007 For Dummies0-470-00923-3
Outlook 2007 For Dummies0-470-03830-6PCs For Dummies 0-7645-8958-XSalesforce.com For Dummies 0-470-04893-XUpgrading & Fixing Laptops For Dummies 0-7645-8959-8Word 2007 For Dummies 0-470-03658-3Quicken 2007 For Dummies 0-470-04600-7
0-470-05432-8 0-471-75421-8
Also available:Blogging For Dummies 0-471-77084-1Digital Photography For Dummies0-7645-9802-3Digital Photography All-in-One Desk Reference For Dummies0-470-03743-1Digital SLR Cameras and Photography For Dummies0-7645-9803-1eBay Business All-in-One Desk Reference For Dummies0-7645-8438-3HDTV For Dummies 0-470-09673-X
Home Entertainment PCs For Dummies 0-470-05523-5MySpace For Dummies 0-470-09529-6Search Engine Optimization For Dummies0-471-97998-8Skype For Dummies 0-470-04891-3The Internet For Dummies 0-7645-8996-2Wiring Your Digital Home For Dummies 0-471-91830-X
INTERNET & DIGITAL MEDIA
0-470-04529-9 0-470-04894-8
* Separate Canadian edition also available† Separate U.K. edition also available
41_343258-badvert01.qxp 6/4/08 12:30 AM Page 411

Also available:3D Game Animation For Dummies 0-7645-8789-7AutoCAD 2006 For Dummies 0-7645-8925-3Building a Web Site For Dummies 0-7645-7144-3Creating Web Pages For Dummies 0-470-08030-2Creating Web Pages All-in-One Desk Reference For Dummies 0-7645-4345-8Dreamweaver 8 For Dummies 0-7645-9649-7
InDesign CS2 For Dummies 0-7645-9572-5Macromedia Flash 8 For Dummies 0-7645-9691-8Photoshop CS2 and Digital Photography For Dummies 0-7645-9580-6Photoshop Elements 4 For Dummies 0-471-77483-9Syndicating Web Sites with RSS Feeds For Dummies 0-7645-8848-6Yahoo! SiteBuilder For Dummies 0-7645-9800-7
SPORTS, FITNESS, PARENTING, RELIGION & SPIRITUALITY
Also available:Catholicism For Dummies 0-7645-5391-7Exercise Balls For Dummies 0-7645-5623-1Fitness For Dummies 0-7645-7851-0Football For Dummies 0-7645-3936-1Judaism For Dummies 0-7645-5299-6Potty Training For Dummies 0-7645-5417-4Buddhism For Dummies 0-7645-5359-3
Pregnancy For Dummies 0-7645-4483-7 †Ten Minute Tone-Ups For Dummies 0-7645-7207-5NASCAR For Dummies 0-7645-7681-XReligion For Dummies 0-7645-5264-3Soccer For Dummies 0-7645-5229-5Women in the Bible For Dummies 0-7645-8475-8
Also available:Alaska For Dummies 0-7645-7746-8Cruise Vacations For Dummies 0-7645-6941-4England For Dummies 0-7645-4276-1Europe For Dummies 0-7645-7529-5Germany For Dummies 0-7645-7823-5Hawaii For Dummies 0-7645-7402-7
Italy For Dummies 0-7645-7386-1Las Vegas For Dummies 0-7645-7382-9London For Dummies 0-7645-4277-XParis For Dummies 0-7645-7630-5RV Vacations For Dummies 0-7645-4442-XWalt Disney World & Orlando For Dummies 0-7645-9660-8
TRAVEL
GRAPHICS, DESIGN & WEB DEVELOPMENT
0-471-76871-5 0-7645-7841-3
0-7645-7749-2 0-7645-6945-7
0-7645-8815-X 0-7645-9571-7
Also available:Access 2007 For Dummies 0-470-04612-0ASP.NET 2 For Dummies 0-7645-7907-XC# 2005 For Dummies 0-7645-9704-3Hacking For Dummies 0-470-05235-XHacking Wireless Networks For Dummies 0-7645-9730-2Java For Dummies 0-470-08716-1
Microsoft SQL Server 2005 For Dummies 0-7645-7755-7Networking All-in-One Desk Reference For Dummies 0-7645-9939-9Preventing Identity Theft For Dummies 0-7645-7336-5Telecom For Dummies 0-471-77085-XVisual Studio 2005 All-in-One Desk Reference For Dummies 0-7645-9775-2XML For Dummies 0-7645-8845-1
NETWORKING, SECURITY, PROGRAMMING & DATABASES
0-7645-7728-X 0-471-74940-0
41_343258-badvert01.qxp 6/4/08 12:30 AM Page 412

Available wherever books are sold. For more information or to order direct: U.S. customers visit www.dummies.com or call 1-877-762-2974. U.K. customers visit www.wileyeurope.com or call 0800 243407. Canadian customers visit www.wiley.ca or call 1-800-567-4797.
Get smart @ dummies.com®• Find a full list of Dummies titles
• Look into loads of FREE on-site articles
• Sign up for FREE eTips e-mailed to you weekly
• See what other products carry the Dummies name
• Shop directly from the Dummies bookstore
• Enter to win new prizes every month!
Also available:Bipolar Disorder For Dummies 0-7645-8451-0Chemotherapy and Radiation For Dummies 0-7645-7832-4Controlling Cholesterol For Dummies 0-7645-5440-9Diabetes For Dummies 0-7645-6820-5* † Divorce For Dummies 0-7645-8417-0 †
Fibromyalgia For Dummies 0-7645-5441-7Low-Calorie Dieting For Dummies 0-7645-9905-4Meditation For Dummies 0-471-77774-9Osteoporosis For Dummies 0-7645-7621-6Overcoming Anxiety For Dummies 0-7645-5447-6Reiki For Dummies 0-7645-9907-0Stress Management For Dummies 0-7645-5144-2
HEALTH & SELF-HELP
0-7645-8450-2 0-7645-4149-8
Also available:The ACT For Dummies 0-7645-9652-7Algebra For Dummies 0-7645-5325-9Algebra Workbook For Dummies 0-7645-8467-7Astronomy For Dummies 0-7645-8465-0Calculus For Dummies 0-7645-2498-4Chemistry For Dummies 0-7645-5430-1Forensics For Dummies 0-7645-5580-4
Freemasons For Dummies 0-7645-9796-5French For Dummies 0-7645-5193-0Geometry For Dummies 0-7645-5324-0Organic Chemistry I For Dummies 0-7645-6902-3The SAT I For Dummies 0-7645-7193-1Spanish For Dummies 0-7645-5194-9Statistics For Dummies 0-7645-5423-9
EDUCATION, HISTORY, REFERENCE & TEST PREPARATION
0-7645-8381-6 0-7645-9554-7
* Separate Canadian edition also available† Separate U.K. edition also available
41_343258-badvert01.qxp 6/4/08 12:30 AM Page 413

Check out the Dummies Specialty Shop at www.dummies.com for more information!
Do More with Dummies
Instructional DVDs • Music Compilations Games & Novelties • Culinary Kits Crafts & Sewing PatternsHome Improvement/DIY Kits • and more!
41_343258-badvert01.qxp 6/4/08 12:30 AM Page 414