Social Structure and Marketplace Formation within California Biotechnology
Upload
khangminh22Category
view
0download
0
Magento2 Product Return RMAwebkul.com/blog/magento-2-product-return-rma/
Magento2 Product Return RMA module allows you to organize a system for customers to request a return withoutany efforts. RMA is very useful for product return and order return. With the help of this module, a customer canreturn the products, have them exchanged or refunded within the admin specified time limit.
Features of Product Return RMA
Return Merchandise Authorization for Magento2.
Fully Admin handled module.
Guest Customers can generate RMA too.
Buyer and Admin can communicate at Store end.
RMA History with Filters and Pagination.
Return Policy Page.
Dynamic order selection with various option.
The customer can upload RMA images.
Print RMA details and shipping label easily.
The customer can also enter consignment number and upload images after RMA generation.
Admin can set Order status for RMA.
Admin can manage RMA status as well as Reasons.
Admin and buyer both can receive notification mail.
Using Return Quantity, Admin will return RMA quantity to their store.
After the upload, you can see the folders in your Magento2 Root Directory.
After the successful installation, you have to run a command on Magento2 root directory. You can refer the belowscreenshot.
Configuration For Multilingual Support
For the multilingual support, admin will navigate through Store->Configuration->General ->Locale Options andselect the locale as German (the language into which admin want to translate his store content).
1/17
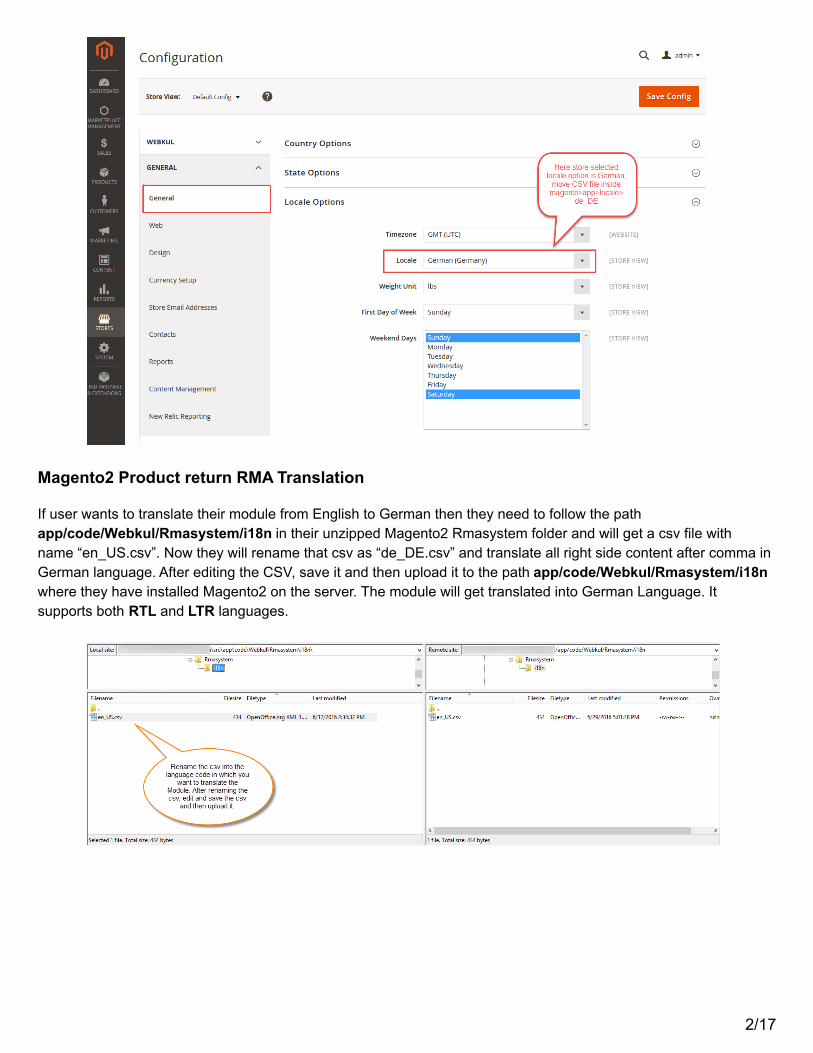
Magento2 Product return RMA Translation
If user wants to translate their module from English to German then they need to follow the pathapp/code/Webkul/Rmasystem/i18n in their unzipped Magento2 Rmasystem folder and will get a csv file withname “en_US.csv”. Now they will rename that csv as “de_DE.csv” and translate all right side content after comma inGerman language. After editing the CSV, save it and then upload it to the path app/code/Webkul/Rmasystem/i18nwhere they have installed Magento2 on the server. The module will get translated into German Language. Itsupports both RTL and LTR languages.
2/17
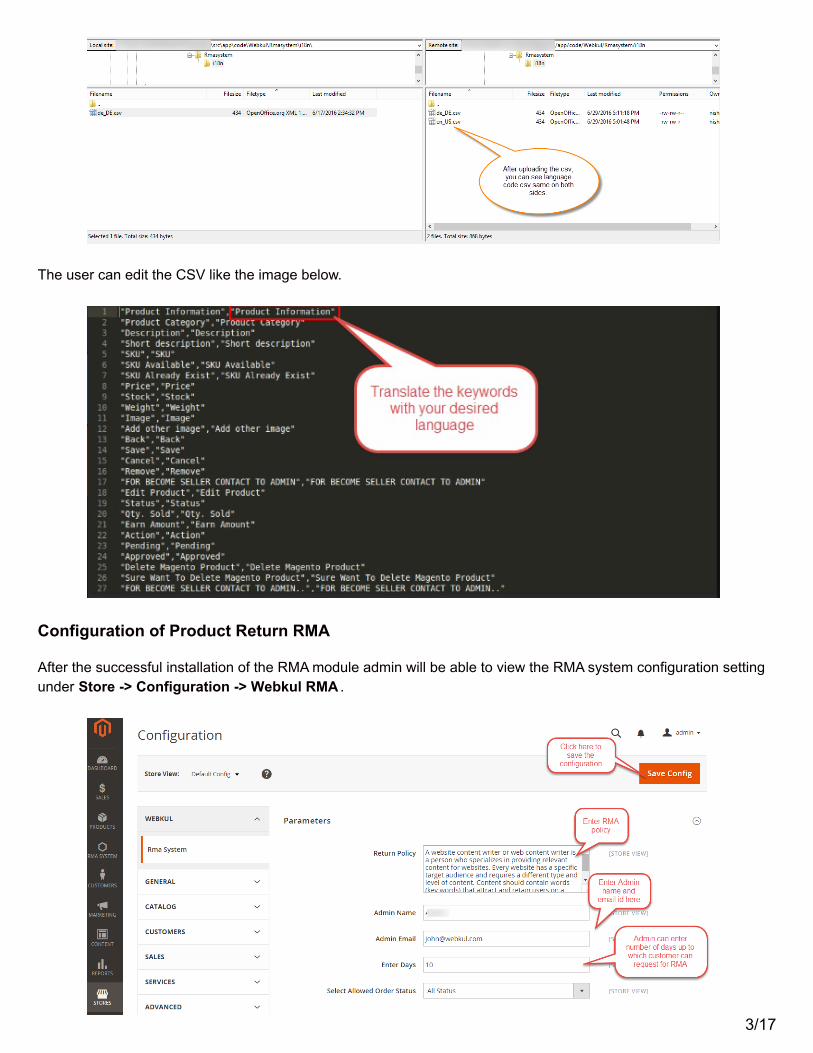
The user can edit the CSV like the image below.
Configuration of Product Return RMA
After the successful installation of the RMA module admin will be able to view the RMA system configuration settingunder Store -> Configuration -> Webkul RMA .
3/17
Return Policy
Admin can easily set up terms and conditions for RMA requests and show them to customers/guest.Customers/guest will not be able to create a request without accepting the RMA policy.
Admin Name and email id
Admin can send or receive the notification message using this Email Id and name.
Enter Days
Admin can select or enter a number of days up to which customer can request for RMA after placing the order. If thenumber of days will exceed from order date to RMA requesting date then the customer can not request RMA of thatorder.
Select Allowed Order Status
The customer can file RMA only for those status of the order which is selected by Admin. If admin will select“Complete” in “Select Allowed Order Status” then the customer can select only that item for RMA which is shippedfrom that order. If admin will select “All status” then the customer will able to register RMA with all status. Likeprocessing, pending, complete.
Admin Management for Product Return RMA
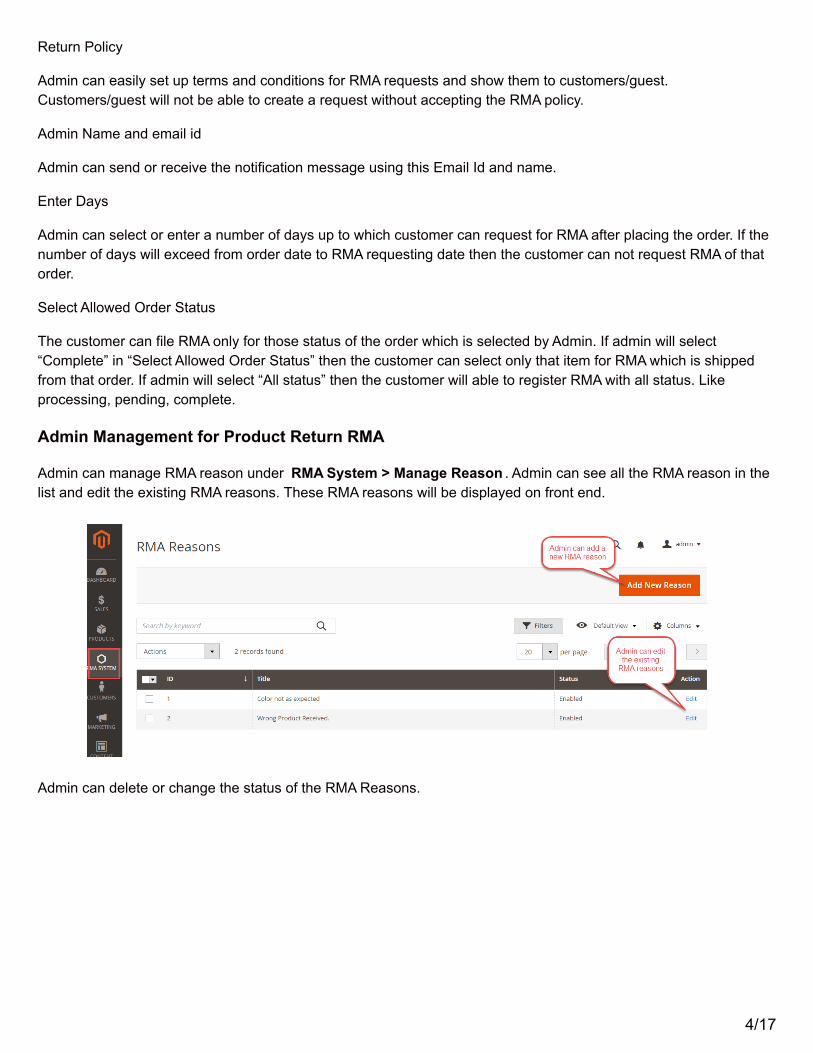
Admin can manage RMA reason under RMA System > Manage Reason . Admin can see all the RMA reason in thelist and edit the existing RMA reasons. These RMA reasons will be displayed on front end.
Admin can delete or change the status of the RMA Reasons.
4/17
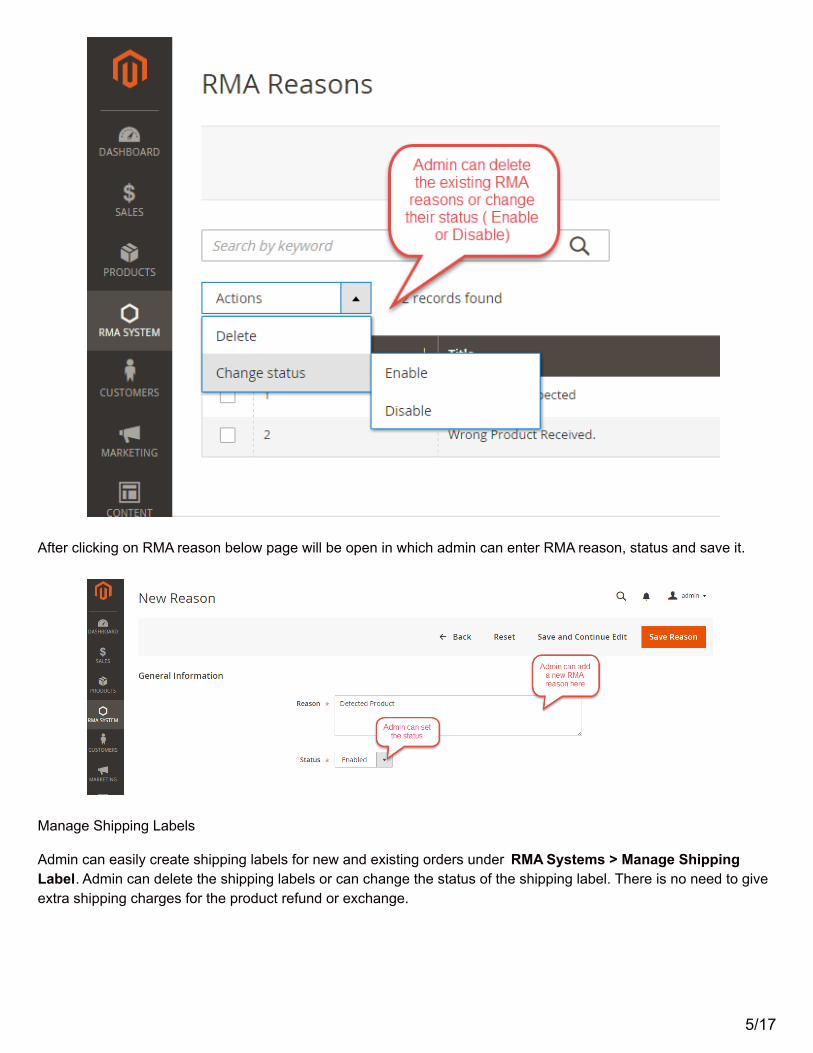
After clicking on RMA reason below page will be open in which admin can enter RMA reason, status and save it.
Manage Shipping Labels
Admin can easily create shipping labels for new and existing orders under RMA Systems > Manage ShippingLabel. Admin can delete the shipping labels or can change the status of the shipping label. There is no need to giveextra shipping charges for the product refund or exchange.
5/17
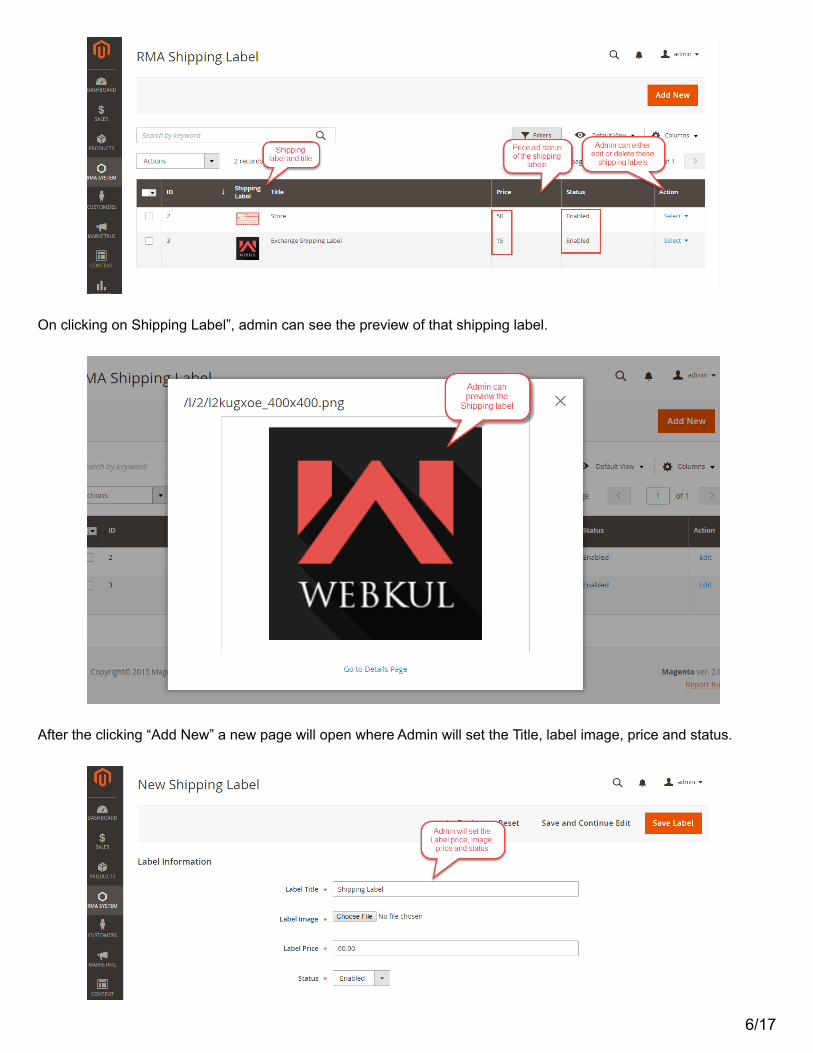
On clicking on Shipping Label”, admin can see the preview of that shipping label.
After the clicking “Add New” a new page will open where Admin will set the Title, label image, price and status.
6/17
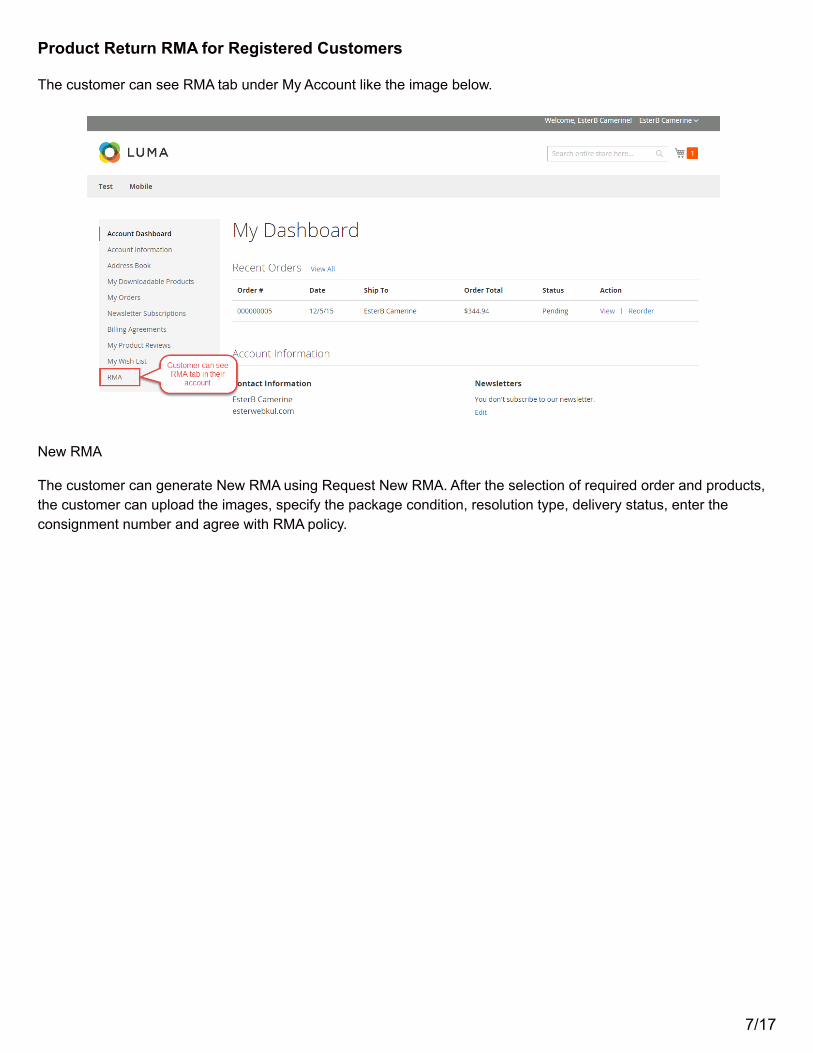
Product Return RMA for Registered Customers
The customer can see RMA tab under My Account like the image below.
New RMA
The customer can generate New RMA using Request New RMA. After the selection of required order and products,the customer can upload the images, specify the package condition, resolution type, delivery status, enter theconsignment number and agree with RMA policy.
7/17

The customer can filter their order very easily. If they bought many items in single order, then they can select oneitem among them for RMA.
Package Condition
For the creation of New RMA, the customer has to specify the package condition as Open or Packed. There is twooption for Resolution type.
8/17
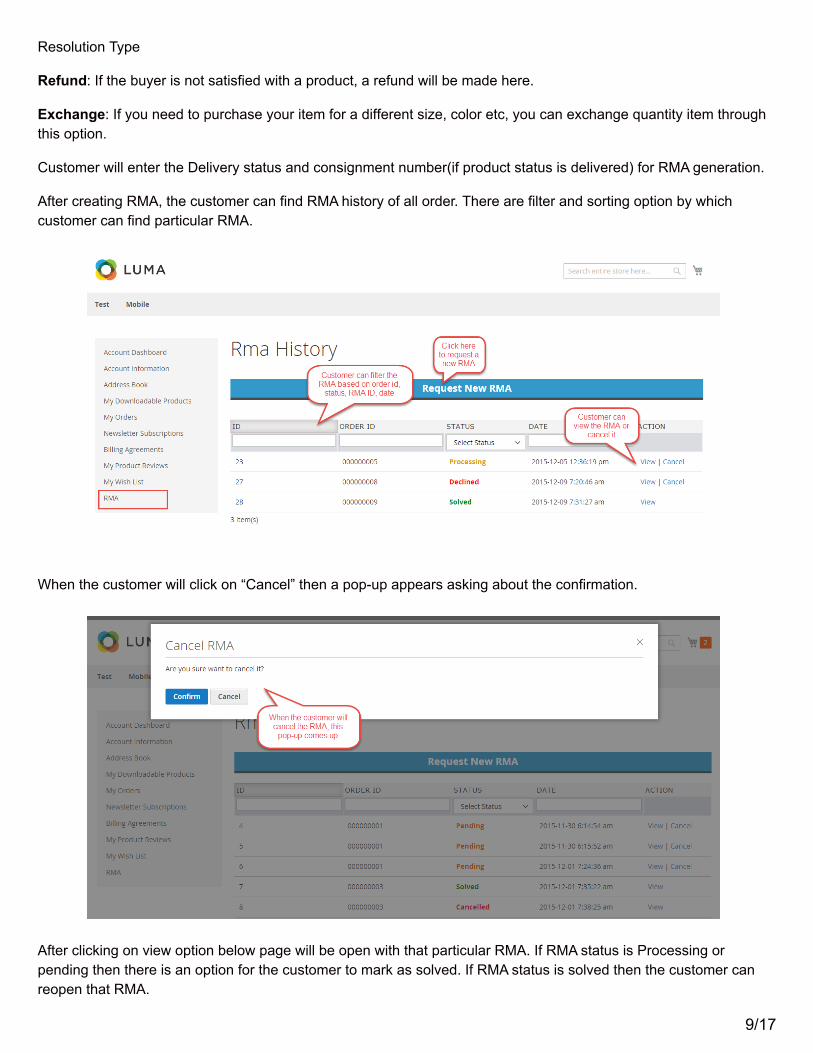
Resolution Type
Refund: If the buyer is not satisfied with a product, a refund will be made here.
Exchange: If you need to purchase your item for a different size, color etc, you can exchange quantity item throughthis option.
Customer will enter the Delivery status and consignment number(if product status is delivered) for RMA generation.
After creating RMA, the customer can find RMA history of all order. There are filter and sorting option by whichcustomer can find particular RMA.
When the customer will click on “Cancel” then a pop-up appears asking about the confirmation.
After clicking on view option below page will be open with that particular RMA. If RMA status is Processing orpending then there is an option for the customer to mark as solved. If RMA status is solved then the customer canreopen that RMA.
9/17
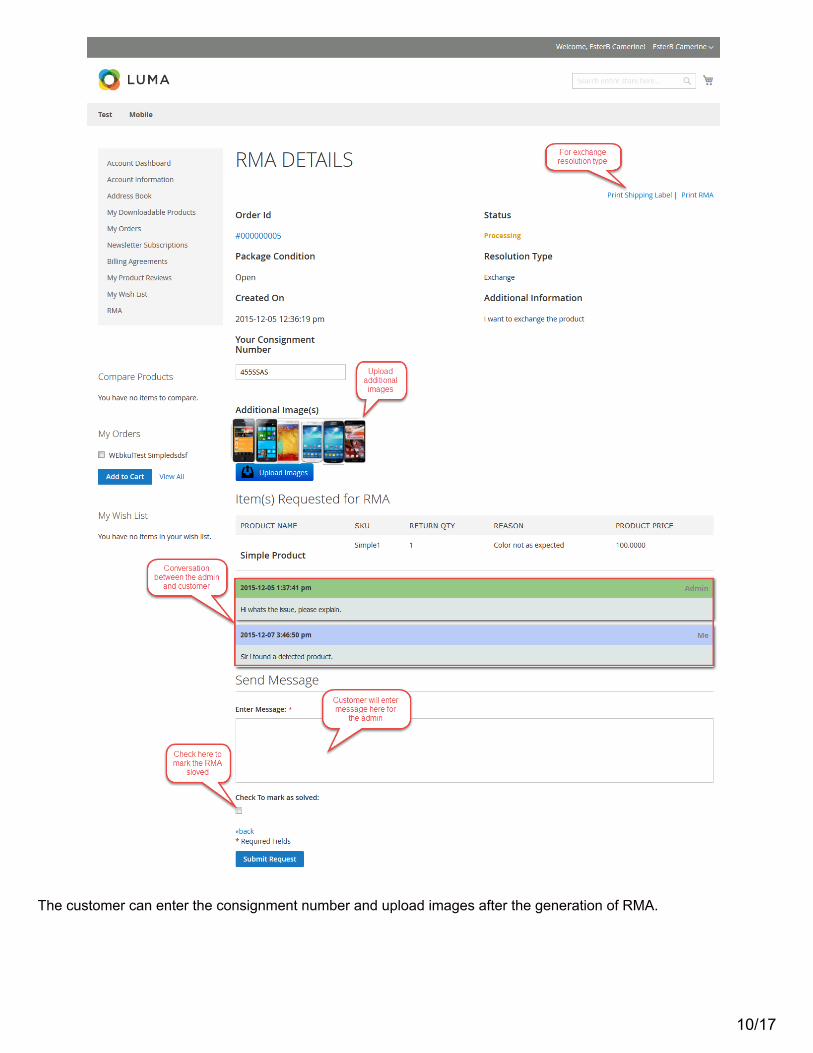
The customer can enter the consignment number and upload images after the generation of RMA.
10/17

The customer can print a shipping label for Exchange resolution type. After clicking Print shipping label, customerwill be redirected to print page.
11/17

Product Return RMA for Guest User
Magento2 RMA module provides RMA for the guest user also. You just need to click the Order Returns link at thefooter of the home page.
12/17

After clicking on this link you just need to enter their correct Order Id and Email.
The guest user can create new RMA very easily.
13/17

After the generation of New RMA, Customer/Guest will receive an Email.
14/17
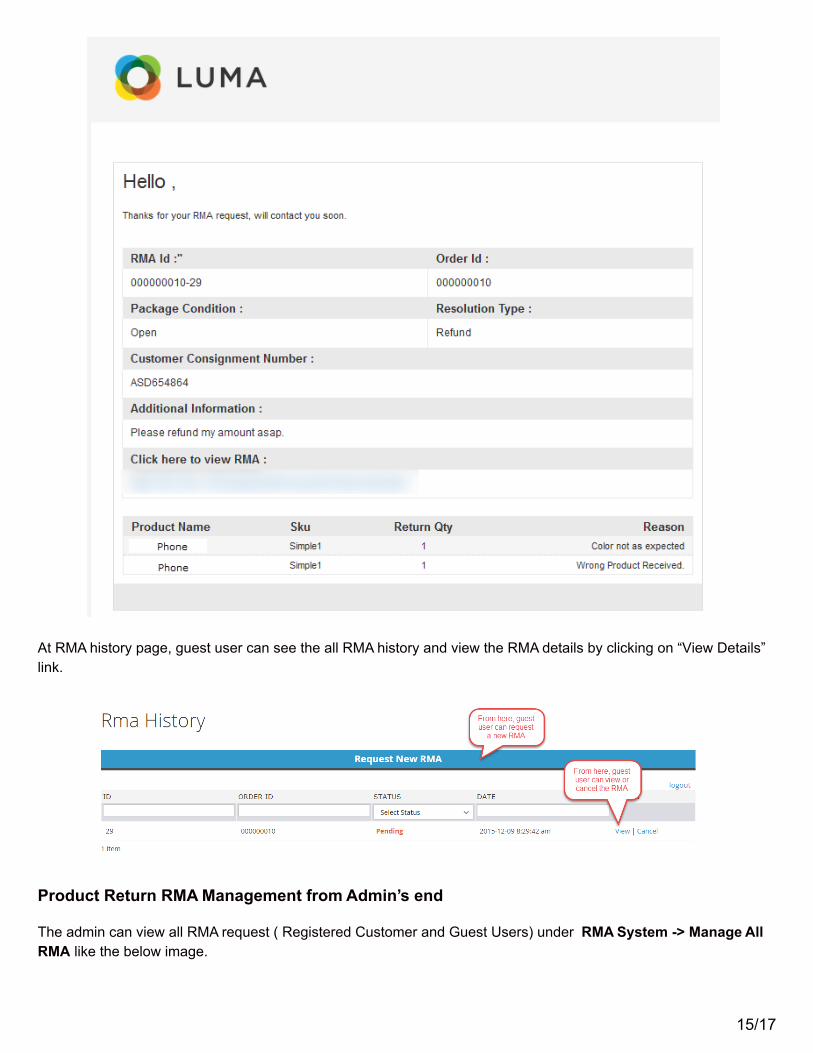
At RMA history page, guest user can see the all RMA history and view the RMA details by clicking on “View Details”link.
Product Return RMA Management from Admin’s end
The admin can view all RMA request ( Registered Customer and Guest Users) under RMA System -> Manage AllRMA like the below image.
15/17
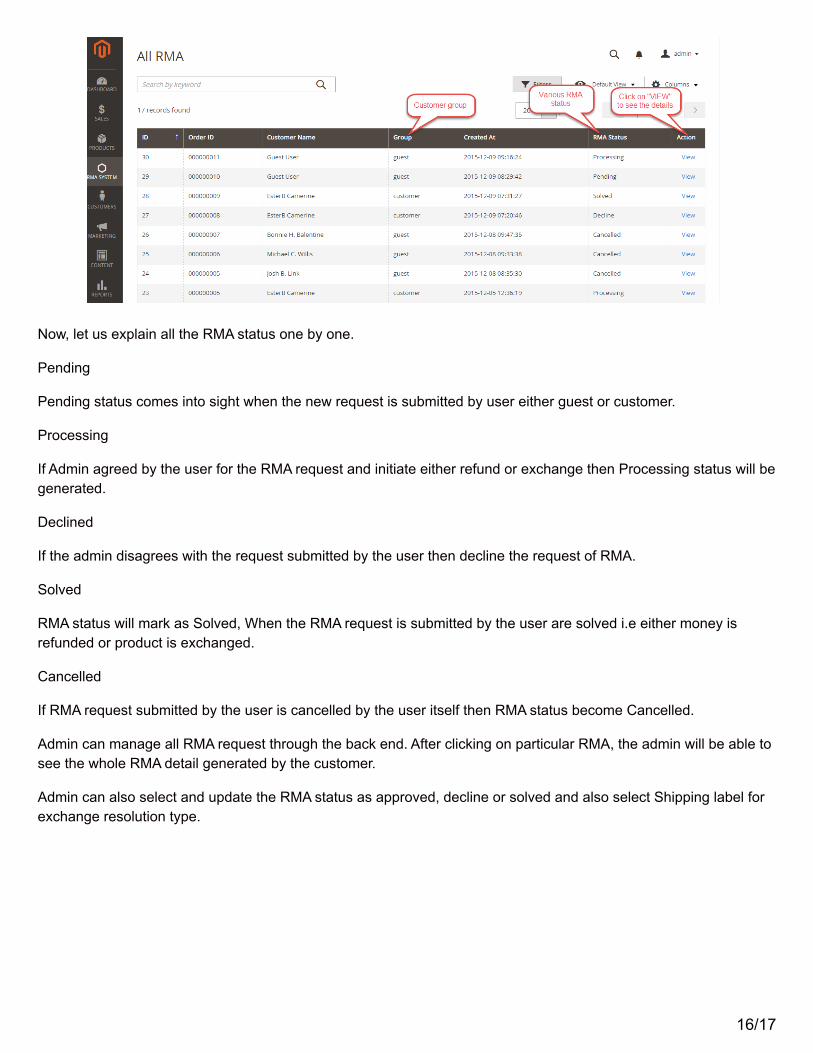
Now, let us explain all the RMA status one by one.
Pending
Pending status comes into sight when the new request is submitted by user either guest or customer.
Processing
If Admin agreed by the user for the RMA request and initiate either refund or exchange then Processing status will begenerated.
Declined
If the admin disagrees with the request submitted by the user then decline the request of RMA.
Solved
RMA status will mark as Solved, When the RMA request is submitted by the user are solved i.e either money isrefunded or product is exchanged.
Cancelled
If RMA request submitted by the user is cancelled by the user itself then RMA status become Cancelled.
Admin can manage all RMA request through the back end. After clicking on particular RMA, the admin will be able tosee the whole RMA detail generated by the customer.
Admin can also select and update the RMA status as approved, decline or solved and also select Shipping label forexchange resolution type.
16/17
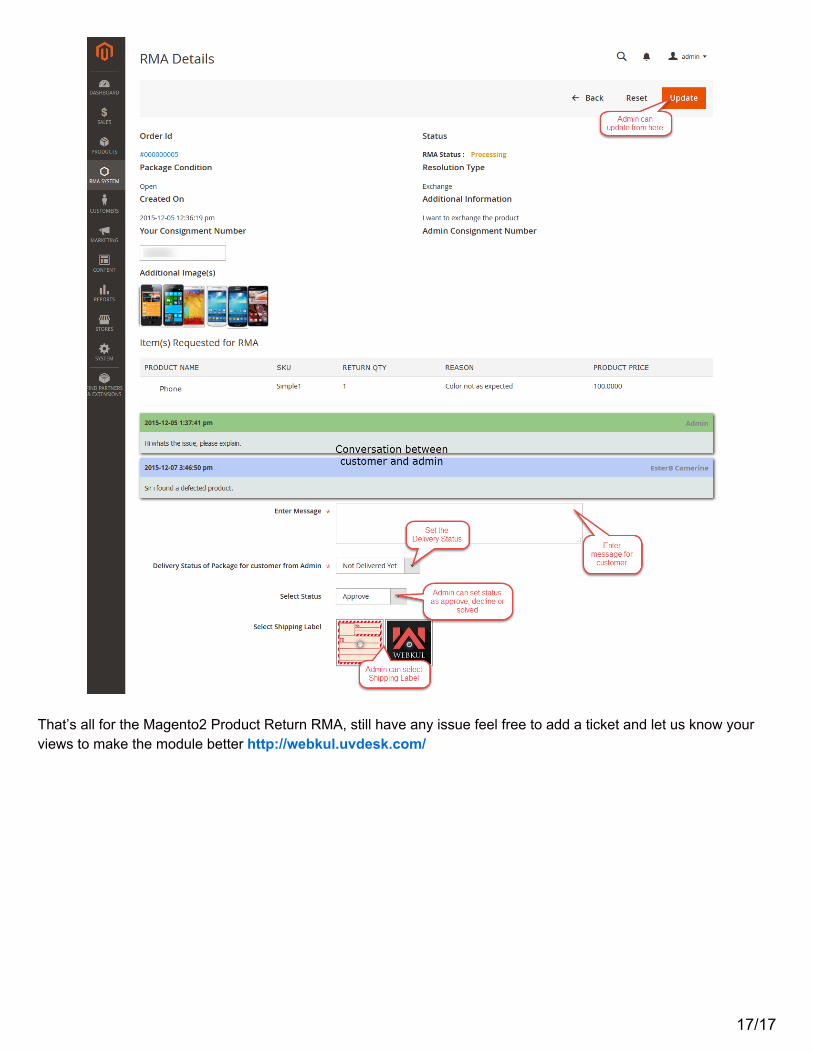
That’s all for the Magento2 Product Return RMA, still have any issue feel free to add a ticket and let us know yourviews to make the module better http://webkul.uvdesk.com/
17/17
Copyright © 2022 FDOKUMEN