Luna Network HSM 7 Partition Administration Guide
474
Thales Luna Network HSM 7 PARTITION ADMINISTRATION GUIDE
-
Upload
khangminh22 -
Category
Documents
-
view
8 -
download
0
Transcript of Luna Network HSM 7 Partition Administration Guide

Thales Luna Network HSM 7PARTITION ADMINISTRATION GUIDE

Document Information
Last Updated 2022-07-26 23:53:21 GMT-04:00
Trademarks, Copyrights, and Third-Party SoftwareCopyright 2001-2022 Thales Group. All rights reserved. Thales and the Thales logo are trademarks and servicemarks of Thales and/or its subsidiaries and are registered in certain countries. All other trademarks and servicemarks, whether registered or not in specific countries, are the property of their respective owners.
DisclaimerAll information herein is either public information or is the property of and owned solely by Thales Group and/orits subsidiaries who shall have and keep the sole right to file patent applications or any other kind of intellectualproperty protection in connection with such information.
Nothing herein shall be construed as implying or granting to you any rights, by license, grant or otherwise, underany intellectual and/or industrial property rights of or concerning any of Thales Group’s information.
This document can be used for informational, non-commercial, internal, and personal use only provided that:
> The copyright notice, the confidentiality and proprietary legend and this full warning notice appear in allcopies.
> This document shall not be posted on any publicly accessible network computer or broadcast in any media,and no modification of any part of this document shall be made.
Use for any other purpose is expressly prohibited and may result in severe civil and criminal liabilities.
The information contained in this document is provided “AS IS” without any warranty of any kind. Unlessotherwise expressly agreed in writing, Thales Group makes no warranty as to the value or accuracy ofinformation contained herein.
The document could include technical inaccuracies or typographical errors. Changes are periodically added tothe information herein. Furthermore, Thales Group reserves the right to make any change or improvement in thespecifications data, information, and the like described herein, at any time.
Thales Group hereby disclaims all warranties and conditions with regard to the information contained herein,including all implied warranties of merchantability, fitness for a particular purpose, title and non-infringement. Inno event shall Thales Group be liable, whether in contract, tort or otherwise, for any indirect, special orconsequential damages or any damages whatsoever including but not limited to damages resulting from loss ofuse, data, profits, revenues, or customers, arising out of or in connection with the use or performance ofinformation contained in this document.
Thales Group does not and shall not warrant that this product will be resistant to all possible attacks and shall notincur, and disclaims, any liability in this respect. Even if each product is compliant with current security standardsin force on the date of their design, security mechanisms' resistance necessarily evolves according to the state ofthe art in security and notably under the emergence of new attacks. Under no circumstances, shall ThalesGroup be held liable for any third party actions and in particular in case of any successful attack against systemsor equipment incorporating Thales products. Thales Group disclaims any liability with respect to security fordirect, indirect, incidental or consequential damages that result from any use of its products. It is further stressed
Luna Network HSM 7 Partition Administration GuideLast Updated: 2022-07-26 23:53:21 GMT-04:00 Copyright 2001-2022 Thales Group 2

that independent testing and verification by the person using the product is particularly encouraged, especially inany application in which defective, incorrect or insecure functioning could result in damage to persons orproperty, denial of service, or loss of privacy.
All intellectual property is protected by copyright. All trademarks and product names used or referred to are thecopyright of their respective owners. No part of this document may be reproduced, stored in a retrieval system ortransmitted in any form or by any means, electronic, mechanical, chemical, photocopy, recording or otherwisewithout the prior written permission of Thales Group.
Regulatory ComplianceThis product complies with the following regulatory regulations. To ensure compliancy, ensure that you install theproducts as specified in the installation instructions and use only Thales-supplied or approved accessories.
USA, FCCThis equipment has been tested and found to comply with the limits for a “Class B” digital device, pursuant to part15 of the FCC rules.
CanadaThis class B digital apparatus meets all requirements of the Canadian interference-causing equipmentregulations.
EuropeThis product is in conformity with the protection requirements of EC Council Directive 2014/30/EU. This productsatisfies the CLASS B limits of EN55032.
Luna Network HSM 7 Partition Administration GuideLast Updated: 2022-07-26 23:53:21 GMT-04:00 Copyright 2001-2022 Thales Group 3

CONTENTS
Preface: About the Partition Administration Guide 15Customer Release Notes 16Audience 16Document Conventions 16Support Contacts 18
Chapter 1: Luna HSM Client Software Installation 19Windows Command-line Scripted/Unattended Luna HSM Client Installation/Uninstallation 20Command line options overview 20Installing all components and features 22Installing the Luna HSM Client for the Luna Network HSM 23Installing the Luna HSM Client for the Luna PCIe HSM 23Installing the Luna HSM Client for the Luna USB HSM 24Installing the Luna HSM Client for the Luna Backup HSM 24Installing the Luna HSM Client for Remote PED 24Installation Location 25Logging 25Uninstalling the Luna HSM Client 25
Windows Interactive Luna HSM Client Installation 26Required Client Software 26Prerequisites 26Installing the Luna HSM Client Software 27Modifying the Installed Windows Luna HSM Client Software 30Java 31Luna CSP and KSP 31USB-powered PED 32Modifying the Number of Luna Backup HSM Slots 32Uninstalling the Luna HSM Client Software 33After Installation 35Troubleshooting 35
Linux Luna HSM Client Installation 36Prerequisites 36Where to install, and SELinux 37About Installing the Client Software 38
Scripted or Unattended Installation 40Interrupting the Installation 41Installing the Minimal Client Software 44Controlling User Access to Your Attached HSMs and Partitions 44Uninstalling the Client Software or Removing Components 45Java 45
Luna Network HSM 7 Partition Administration GuideLast Updated: 2022-07-26 23:53:21 GMT-04:00 Copyright 2001-2022 Thales Group 4

Modifying the Number of Luna Backup HSM Slots 46Effects of Kernel Upgrades 46Troubleshooting 46
Luna Minimal Client Install for Linux - Overview 46Included in the Minimal Client 48Installation Prerequisites 50Preparing the Configuration File for Use with Luna Minimal Client and Docker 51
Installing Luna Minimal Client on Linux Using Docker 52To install the Luna Minimal Client software on a Linux 64-bit Docker instance: 52Functionality Modules (FMs) with Luna Minimal Client 55Thales Data Protection on Demand Luna Cloud HSM Service with Luna Minimal Client 55
From Linux Minimal Client Create a Docker Container to Access a DPOD Luna Cloud HSM Service 56Create a Luna HSM Client Docker image for use with Functionality Modules 57Solaris Luna HSM Client Installation 60Prerequisites 60Installing the Client Software 61Uninstalling the Luna HSM Client Software 63Java 63Scripted or Unattended Installation 63Interrupting the installation - [Ctrl] [C] 64
AIX Luna HSM Client Installation 66Prerequisites 66Installing the Client Software 66Uninstalling the Luna HSM Client Software 69Installing Java 69Scripted or Unattended Installation 69Interrupting the Installation 70
Adding a Luna Cloud HSM Service 71Initializing a Luna Cloud HSM Service 72Configuration File Summary 73UC Dynamic UserID Loading for Luna Cloud HSM Services 97Sections and Settings 98
Updating the Luna HSM Client Software 104
Chapter 2: Client-Partition Connections 105Comparing NTLS and STC 105Network Trust Link Service 106Secure Trusted Channel 108
Client to HSM Security Best Practices 110Security around Password-authenticated systems 111
Creating an NTLS Connection Using Self-Signed Certificates 111Multi-Step NTLS Connection Procedure 112One-Step NTLS Connection Procedure 114Older Clients Can Fail to Complete One-Step NTLS with Newer Appliance Software 115
Creating an NTLS Connection Using a Self-Signed Appliance Certificate and a Client Certificate Signedby a Trusted Certificate Authority 116Registering the Appliance Certificate on the Client 117
Luna Network HSM 7 Partition Administration GuideLast Updated: 2022-07-26 23:53:21 GMT-04:00 Copyright 2001-2022 Thales Group 5

Authenticating a Client Using a Trusted CA 117Registering the Client Certificate and CA Certificate Chain on the Appliance 118
Creating an NTLS Connection Using Certificates Signed by a Trusted Certificate Authority 119Authenticating the Appliance Using a Trusted CA 120Authenticating a Client Using a Trusted CA 121Registering a Client to the Appliance 122Using a Combination of Self-Signed and CA-Signed Certificates 123
Assigning or Revoking NTLS Client Access to a Partition 124Creating an STC Connection 125Preparing the HSM/Partition to Use STC 126Preparing the Client to Use STC 127Creating a Client-Partition STC Connection 128
Connecting an Initialized STC Partition to Multiple Clients 129Preparing the Additional Client to Use STC 130Connecting an Additional Client to the Initialized STC Partition 131
Converting Initialized NTLS Partitions to STC 133Using the STC Admin Channel 135Configuring STC Identities and Settings 137Configuring STC Settings 137Configuring STC Tokens and Identities 139
Restoring Broken NTLS or STC Connections 141Restoring NTLS/STC Connections after Regenerating the Server and/or Client Certificates 141Restoring Connections After HSM Zeroization 142Restoring STC Connections After Partition Zeroization 142
Behavior of "pre-firmware 7.7.0", and V0, and V1 partitions? 144The Origin of Each Partition Type 145The Effects of Each Partition Type on HSM and Partition Functionality 146Partition Policy Considerations 146General HSM Behavior 147Cloning 147SMK (SKS Master Key) 148Behavior at Partition Level 149Structure of Partition 149Objects in a Partition 150Memory 150Behavior at Key Level 151Partition Policy Template 151Per-Key Authorization 152Multi-Factor Authentication (PED-auth) 152Client Software Interaction 153Client-Mediated High Availability 153High Availability Indirect Login 154Functionality Modules 154Partition Roles 155Backup/Restore 155Secure Trusted Channel 156
Luna Network HSM 7 Partition Administration GuideLast Updated: 2022-07-26 23:53:21 GMT-04:00 Copyright 2001-2022 Thales Group 6

Converting Partitions from V0 to V1 or V1 to V0 157Converting a Partition From V0 to V1 157Converting a Partition From V1 to V0 159
Scalable Key Storage (SKS) 160What is Scalable Key Storage? 160Keys secure anywhere, the SKS eIDAS model 160When to use SKS (Use Cases) 162When would it be appropriate to use SKS? 162Security consideration 163
SKS model 163The SKS model - how it works 163
Characteristics and Implementation Notes 165Characteristics of the SKS Implementation 165Functional Notes 165SMK Locations in a Partition 166
High Availability and SKS 166Preparing and Administering SKS Partitions 167Checklist 167Provisioning SKS 168Replicating the SMK to another SKS Partition 168
Preparing to use SKS 169Using SKS 169Using SKS - options 170API 170ckdemo example 171Java Sample 171High Availability 172
SKS Backup and Restore 173Constraints on SKS Backup and Restore 174Backup the SKS Master Key (SMK) 175Restore an SKS Master Key (SMK) 176Backup objects 177Troubleshooting SKS Backup and Restore 178
SMK Rollover 179Migrating Scalable Key Storage (SKS) 180Cloning the SKS Master Key (SMK) 180To migrate an older SMK 181SKS Blob Migration 183To migrate an older SKS blob: 184
Per-Key Authorization (PKA) 185Example Use Case 185New Role and Handling 186No New Administrative Commands 186Dependencies and Interactions with Other Features 186
Chapter 6: Key Cloning 187
Luna Network HSM 7 Partition Administration GuideLast Updated: 2022-07-26 23:53:21 GMT-04:00 Copyright 2001-2022 Thales Group 7

Overview and Key Concepts 187Domain Planning 188What is a security domain or cloning domain? 188Only one domain per partition - no copying across domains 188No common domains across Password-authenticated and PED-authenticated HSMs 188Characteristics of Cloning Domains 189
Cloning Objects to Another Application Partition 190Cloning Keys Between Luna 6, Luna 7, and Luna Cloud HSM 191Luna/Luna Cloud HSM Cloning 192Supported Software/Firmware Versions 193Mismatched Partition Policies and FIPS Mode 193Minimum Key Sizes 194SafeXcel 1746 Co-Processor 194RSA-186 Key Remapping for FIPS Compliance 195HA Performance Optimization 195
Chapter 7: PED Authentication 197PED Authentication Architecture 198Comparing Password and PED Authentication 198
PED Keys 199PED Key Types and Roles 199Shared PED Key Secrets 201PED PINs 202M of N Split Secrets (Quorum) 203Updated PED Behavior Notes 204New-series PED Behavior Notes 204Updating or Rolling-back PED-auth HSM Firmware 205
Luna PED Received Items 205Luna PED Hardware Functions 207Physical Features 207Keypad Functions 208Modes of Operation 209PED with Newer CPU (AC Power Block Now Optional) 210
Local PED Setup 211Setting Up a Local PED Connection 211PED Actions 212Secure Local PED 212Secure Communication Between the Local PED and Luna Network HSMsWith Firmware 7.7.0 andNewer 212
About Remote PED 213Remote PED Architecture 213Remote PED Connections 214Secure Communication Between the Remote PED and Luna Network HSMsWith Firmware 7.7.0 andNewer 216Secure Communication Between the Remote PED and Luna Network HSMsWith Firmware 7.4.2 andOlder 217Initializing the Remote PED Vector and Creating an Orange Remote PED Key 219
Luna Network HSM 7 Partition Administration GuideLast Updated: 2022-07-26 23:53:21 GMT-04:00 Copyright 2001-2022 Thales Group 8

Installing PEDserver and Setting Up the Remote Luna PED 222Opening a Remote PED Connection 224HSM-Initiated Remote PED 224To launch PEDserver 225To open a Remote PED connection from the Luna Network HSM appliance (LunaSH) 226To open a Remote PED connection from a client workstation (LunaCM) 227PED-Initiated Remote PED 228To open a PED-initiated Remote PED connection 229Workaround when you need PED-initiated Remote PED for Client 231Ending or Switching the Remote PED Connection 232Remote PED Troubleshooting 233
Updating External Supply-Powered Luna PED Firmware 237Files Included in the Upgrade Package 238Preparing for the Update 238Updating the Luna PED Firmware 239Troubleshooting 240
Updating USB-Powered Luna PED Firmware 241Preparing for the Upgrade 241Upgrading the Luna PED Firmware to Version 2.9.0 (or newer) 242
PED Key Management 243Creating PED Keys 243Performing PED Authentication 249Consequences of Losing PED Keys 250Blue HSM SO Key 251Red HSM Domain Key 251Orange Remote PED Key 251Blue Partition SO Key 252Red Partition Domain Key 252Black Crypto Officer Key 252Gray Crypto User Key 253White Audit User Key 253Identifying a PED Key Secret 253Duplicating Existing PED Keys 254Changing a PED Key Secret 255Blue HSM SO Key 255Red HSM Domain Key 255Orange Remote PED Key 256Blue Partition SO Key 256Red Partition Domain Key 256Black Crypto Officer Key 256Gray Crypto User Key 257White Audit User Key 257
PEDserver and PEDclient 257The PEDserver Utility 257The PEDclient Utility 258
pedserver 259pedserver -appliance 260
Luna Network HSM 7 Partition Administration GuideLast Updated: 2022-07-26 23:53:21 GMT-04:00 Copyright 2001-2022 Thales Group 9
pedserver -appliance delete 261pedserver -appliance list 262pedserver -appliance register 263pedserver mode 264pedserver -mode config 265pedserver -mode connect 267pedserver -mode disconnect 268pedserver -mode show 269pedserver -mode start 271pedserver -mode stop 273pedserver -regen 274pedclient 274pedclient -mode assignid 276pedclient -mode config 277pedclient -mode deleteid 279pedclient -mode releaseid 280pedclient -mode setid 281pedclient -mode show 282pedclient -mode start 283pedclient -mode stop 285pedclient -mode testid 286
Chapter 8: Initializing an Application Partition 287Initializing a New Partition 287Re-initializing an Existing Partition 289
Chapter 9: Partition Capabilities and Policies 291Policy descriptions and settings 292Cloning vs Key Management 303
Setting Partition Policies Manually 303Setting Partition Policies Using a Template 304Creating a Partition Policy Template 305Editing a Partition Policy Template 305Applying a Partition Policy Template 307
Configuring the Partition for Cloning or Export of Private/Secret Keys 308Cloning Mode 309Key Export Mode 310No Backup Mode 311
Chapter 10: Partition Roles 312Partition Security Officer (PO) 312Crypto Officer (CO) 312Limited Crypto Officer (LCO) 313Crypto User (CU) 315
Changing a Partition Role Credential 318Resetting the Crypto Officer, Limited Crypto Officer, or Crypto User Credential 319Activation and Auto-activation on Multi-factor- (PED-) Authenticated Partitions 320
Luna Network HSM 7 Partition Administration GuideLast Updated: 2022-07-26 23:53:21 GMT-04:00 Copyright 2001-2022 Thales Group 10

Enabling Activation on a Partition 321Activating a Role 321Enabling Auto-activation 322Deactivating a Role 323
Security of Your Partition Challenge 324Name, Label, and Password Requirements 325Custom Appliance User Accounts 325Custom Appliance Roles 325Appliance User Passwords 325HSM Labels 326Cloning Domains 326Partition Names 326Partition Labels 326HSM/Partition Role Passwords or Challenge Secrets 326
Chapter 11: Verifying the HSM's Authenticity 328Public Key Confirmations 328Verifying the HSM's Authenticity 329
Chapter 12: Migrating Keys to Your New HSM 331Supported Luna HSMs 331Order of operations 331Migration methods 332Preconditions 332Roles required for migration 332
Luna Network HSM (5.x or 6.x) to Luna Network HSM (7.x) 333Backup and Restore 333Cloning 335Cloning Using an HA Group 337
Luna USB HSM (5.x or 6.x) to Luna Network HSM (7.x) 339Backup and Restore 340Cloning 342
Luna PCIe HSM (5.x or 6.x) to Luna Network HSM (7.x) 344Backup and Restore 344Cloning 346
Luna PCIe HSM or Luna USB HSM (5.x or 6.x) to Luna PCIe HSM (7.x) 349Backup and Restore 349Cloning 351Cloning Using an HA Group 353
Moving from Pre-7.7.0 to Firmware 7.7.0 or Newer 355
Chapter 13: High-Availability Groups 356Key/object replication options for HA and other uses 357
Client-driven High Availability 358Performance 359Load Balancing 360Key Replication 361
Luna Network HSM 7 Partition Administration GuideLast Updated: 2022-07-26 23:53:21 GMT-04:00 Copyright 2001-2022 Thales Group 11

Failover 362Recovery 364Standby Members 365Mixed-Version HA Groups 366Process Interaction 366Application Object Handles 366Example: Database Encryption 367
Planning Your HA Group Deployment 368HSM and Partition Prerequisites 369Sample Configurations 370
Setting Up an HA Group 373Prerequisites 373
Verifying an HA Group 377Setting an HA Group Member to Standby 379Configuring HA Auto-Recovery 381Enabling/Disabling HA Only Mode 381HA Logging 382Configuring HA Logging 382HA Log Messages 383
Adding/Removing an HA Group Member 386Manually Recovering a Failed HA Group Member 389Manually Recovering a Failed HA Group Member 389
Replacing an HA Group Member 390Deleting an HA Group 393HA Troubleshooting 393Administration Tasks on HA Groups 393Unique Object IDs (OUID) 393Client-Side Limitations 393Client-Side Failures 394Failures Between the HSM Appliance and Client 394Avoid direct access to individual HA group members when securing with STC 394Effect of PED Operations 395Some security settings and implications 395
Guidelines and Recommendations For Updating or Converting HA Member Partitions 395
Chapter 14: Backup and Restore Using a Luna Backup HSM (G5) 397Backup and Restore Best Practices 397Planning Your Backup HSM Deployment 398Partition to Partition 398Backup HSM Connected to the Appliance 399Backup HSM Connected to the Client Workstation 399Backup HSM Installed Using Remote Backup Service (RBS) 400
About the Luna Backup HSM (G5) 401Physical Features 402Luna Backup HSM (G5) Functionality 402Storage and Maintenance 403
Luna Backup HSM (G5) Required Items 404
Luna Network HSM 7 Partition Administration GuideLast Updated: 2022-07-26 23:53:21 GMT-04:00 Copyright 2001-2022 Thales Group 12

Installing the Backup HSM 405Installing or Replacing the Luna Backup HSM (G5) Battery 406Backup HSM Secure Transport and Tamper Recovery 408Creating a Secure Recovery Key 409Setting Secure Transport Mode 410Recovering From a Tamper Event or Secure Transport Mode 410Disabling Secure Recovery 411
Initializing the Backup HSM Remote PED Vector 411Updating the Luna Backup HSM (G5) Firmware 413Resetting the Backup HSM to Factory Conditions 415Backup/Restore Using an Appliance-Connected Luna Backup HSM (G5) 415Initializing the Backup HSM 416Backing Up an Application Partition 417Restoring an Application Partition from Backup 418
Backup/Restore Using a Client-Connected Luna Backup HSM (G5) 419Initializing the Backup HSM 420Backing Up an Application Partition 421Restoring an Application Partition from Backup 422
Configuring a Remote Luna Backup HSM (G5) Server 424Installing/Configuring the Remote Backup Service 424
Chapter 15: Backup and Restore Using a Luna B700 Backup HSM 426Overview and Key Concepts 426Overview 427Credentials Required to Perform Backup and Restore Operations 427Client Software Required to Perform Backup and Restore Operations From a Client Workstation 428PED Authentication with the Luna B700 Backup HSM 428Backup and Restore Best Practices 429
Luna B700 Backup HSM Hardware Installation 430Luna Backup HSM Received Items 430Installing the Luna Backup HSM Hardware 432
Initializing a Client-Connected Luna B700 Backup HSM 432Initializing a PED-Authenticated HSM 433Initializing a Password-Authenticated HSM 436Configuring the Luna B700 Backup HSM for FIPS Compliance 437
Backing Up to a Client-Connected Luna B700 Backup HSM 437Backing Up a Multi-factor- (PED-) Authenticated Partition 438Backing Up a Password-Authenticated Partition 442
Restoring From a Client-Connected Luna B700 Backup HSM 444Restoring a Multi-factor- (PED-) Authenticated Partition 444Restoring a Password-Authenticated Partition 447
Initializing an Appliance-Connected Luna B700 Backup HSM 449Recovering the Luna B700 Backup HSM from Secure Transport Mode 450Initializing a PED-Authenticated HSM 450Initializing a Password-Authenticated HSM 453Configuring the Luna B700 Backup HSM for FIPS Compliance 454
Backing Up to an Appliance-Connected Luna B700 Backup HSM 454
Luna Network HSM 7 Partition Administration GuideLast Updated: 2022-07-26 23:53:21 GMT-04:00 Copyright 2001-2022 Thales Group 13

Backing Up a PED-Authenticated Partition 455Backing Up a Password-Authenticated Partition 459
Restoring From an Appliance-Connected Luna B700 Backup HSM 461Restoring a PED-Authenticated Partition 462Restoring a Password-Authenticated Partition 465
Backup and Restore to a Remote Backup Service (RBS)-Connected Luna B700 Backup HSM 467Installing and Configuring the Remote Backup Service 467
Updating the Luna B700 Backup HSM Firmware 469Updating the Client-Connected Luna B700 Backup HSM Firmware 469Updating the Appliance-Connected Luna B700 Backup HSM Firmware 470
Rolling Back the Luna B700 Backup HSM Firmware 471
Chapter 16: Slot Numbering and Behavior 472Order of Occurrence for Different Luna HSMs 472Settings Affecting Slot Order 473Effects of Settings on Slot List 473Effects of New Firmware on Slot Login State 474
Luna Network HSM 7 Partition Administration GuideLast Updated: 2022-07-26 23:53:21 GMT-04:00 Copyright 2001-2022 Thales Group 14

PREFACE: About the Partition AdministrationGuide
This document describes the operational and administrative tasks you can perform to maintain the functionalityand efficiency of your application partitions. It contains the following chapters:
> "Luna HSM Client Software Installation" on page 19
> "Client-Partition Connections" on page 105
> "Behavior of "pre-firmware 7.7.0", and V0, and V1 partitions?" on page 144
> "Converting Partitions from V0 to V1 or V1 to V0" on page 157
> "Key Cloning" on page 187
> "Scalable Key Storage (SKS)" on page 160
> "Per-Key Authorization (PKA)" on page 185
> "PED Authentication" on page 197
> "Initializing an Application Partition" on page 287
> "Partition Capabilities and Policies" on page 291
> "Partition Roles" on page 312
> "Verifying the HSM's Authenticity" on page 328
> "Migrating Keys to Your New HSM" on page 331
> "High-Availability Groups" on page 356
> "Backup and Restore Using a Luna Backup HSM (G5) " on page 397
> "Backup and Restore Using a Luna B700 Backup HSM" on page 426
> "Configuring a Remote Luna Backup HSM (G5) Server" on page 424
> "Slot Numbering and Behavior" on page 472
The preface includes the following information about this document:
> "Audience" on the next page
> "Document Conventions" on the next page
> "Support Contacts" on page 18
For information regarding the document status and revision history, see "Document Information" on page 2.
Luna Network HSM 7 Partition Administration GuideLast Updated: 2022-07-26 23:53:21 GMT-04:00 Copyright 2001-2022 Thales Group 15

Preface: About the Partition Administration Guide
Customer Release NotesThe customer release notes (CRN) provide important information about this release that is not included in thecustomer documentation. Read the CRN to fully understand the capabilities, limitations, and known issues forthis release. You can view or download the latest version of the CRN from the Technical Support CustomerPortal at https://supportportal.thalesgroup.com.
AudienceThis document is intended for personnel responsible for maintaining your organization's security infrastructure.This includes Luna HSM users and security officers, key manager administrators, and network administrators.
All products manufactured and distributed by Thales are designed to be installed, operated, and maintained bypersonnel who have the knowledge, training, and qualifications required to safely perform the tasks assigned tothem. The information, processes, and procedures contained in this document are intended for use by trainedand qualified personnel only.
It is assumed that the users of this document are proficient with security concepts.
Document ConventionsThis document uses standard conventions for describing the user interface and for alerting you to importantinformation.
NotesNotes are used to alert you to important or helpful information. They use the following format:
NOTE Take note. Contains important or helpful information.
CautionsCautions are used to alert you to important information that may help prevent unexpected results or data loss.They use the following format:
CAUTION! Exercise caution. Contains important information that may help preventunexpected results or data loss.
WarningsWarnings are used to alert you to the potential for catastrophic data loss or personal injury. They use thefollowing format:
**WARNING** Be extremely careful and obey all safety and security measures. In thissituation you might do something that could result in catastrophic data loss orpersonal injury.
Luna Network HSM 7 Partition Administration GuideLast Updated: 2022-07-26 23:53:21 GMT-04:00 Copyright 2001-2022 Thales Group 16

Preface: About the Partition Administration Guide
Command syntax and typeface conventions
Format Convention
bold The bold attribute is used to indicate the following:> Command-line commands and options (Type dir /p.)> Button names (Click Save As.)> Check box and radio button names (Select the Print Duplex check box.)> Dialog box titles (On the Protect Document dialog box, click Yes.)> Field names (User Name: Enter the name of the user.)> Menu names (On the Filemenu, click Save.) (ClickMenu >Go To > Folders.)> User input (In the Date box, type April 1.)
italics In type, the italic attribute is used for emphasis or to indicate a related document. (See theInstallation Guide for more information.)
<variable> In command descriptions, angle brackets represent variables. You must substitute a value forcommand line arguments that are enclosed in angle brackets.
[optional][<optional>]
Represent optional keywords or <variables> in a command line description. Optionally enterthe keyword or <variable> that is enclosed in square brackets, if it is necessary or desirable tocomplete the task.
{a|b|c}{<a>|<b>|<c>}
Represent required alternate keywords or <variables> in a command line description. Youmust choose one command line argument enclosed within the braces. Choices are separatedby vertical (OR) bars.
[a|b|c][<a>|<b>|<c>]
Represent optional alternate keywords or variables in a command line description. Chooseone command line argument enclosed within the braces, if desired. Choices are separated byvertical (OR) bars.
Luna Network HSM 7 Partition Administration GuideLast Updated: 2022-07-26 23:53:21 GMT-04:00 Copyright 2001-2022 Thales Group 17

Preface: About the Partition Administration Guide
Support ContactsIf you encounter a problem while installing, registering, or operating this product, please refer to thedocumentation before contacting support. If you cannot resolve the issue, contact your supplier or ThalesCustomer Support. Thales Customer Support operates 24 hours a day, 7 days a week. Your level of access isgoverned by the support plan negotiated between Thales and your organization. Please consult this plan fordetails regarding your entitlements, including the hours when telephone support is available to you.
Customer Support PortalThe Customer Support Portal, at https://supportportal.thalesgroup.com, is where you can find solutions for mostcommon problems and create and manage support cases. It offers a comprehensive, fully searchable databaseof support resources, including software and firmware downloads, release notes listing known problems andworkarounds, a knowledge base, FAQs, product documentation, technical notes, and more.
NOTE You require an account to access the Customer Support Portal. To create a newaccount, go to the portal and click on the REGISTER link.
TelephoneThe support portal also lists telephone numbers for voice contact (Contact Us).
Luna Network HSM 7 Partition Administration GuideLast Updated: 2022-07-26 23:53:21 GMT-04:00 Copyright 2001-2022 Thales Group 18

CHAPTER 1: Luna HSM Client SoftwareInstallation
You can install the client for all Luna General Purpose HSMs, or for a specific type (Network or PCIe). Install theclient as follows:
> For Luna Network HSM, install the Luna HSM Client on any computer that must connect to the appliance as aclient.
> For Luna PCIe HSM, install the Luna HSM Client on the workstation into which the Luna PCIe HSM isinstalled.
> Install the Luna HSM Client on any computer that is to have a Remote Luna PED connected.
> Install the Luna HSM Client on any computer that is to serve as a Remote Backup server.
For a list of supported operating systems by client version, refer to the CRN:
> Supported Luna HSM Client Operating Systems
Choose the instructions for your operating system:
> "Windows Command-line Scripted/Unattended Luna HSM Client Installation/Uninstallation" on the next page
• "Windows Interactive Luna HSM Client Installation" on page 26
> "Linux Luna HSM Client Installation" on page 36
• "Luna Minimal Client Install for Linux - Overview" on page 46
• "Installing Luna Minimal Client on Linux Using Docker" on page 52
• "From Linux Minimal Client Create a Docker Container to Access a DPOD Luna Cloud HSM Service" onpage 56
• "Create a Luna HSM Client Docker image for use with Functionality Modules" on page 57
> "AIX Luna HSM Client Installation" on page 66
> "Solaris Luna HSM Client Installation" on page 60
> "Adding a Luna Cloud HSM Service" on page 71
> Dynamic Partition Loading for Luna Cloud HSM Services
> "Configuration File Summary" on page 73
> "Updating the Luna HSM Client Software" on page 104
Luna Network HSM 7 Partition Administration GuideLast Updated: 2022-07-26 23:53:21 GMT-04:00 Copyright 2001-2022 Thales Group 19

Chapter 1: Luna HSM Client Software Installation
Windows Command-line Scripted/Unattended Luna HSM ClientInstallation/UninstallationThis section describes how to invoke the Windows Luna HSM Client perform unattended or scripted installationsonWindows platforms.
NOTE The GUI interactive installer "Windows Interactive Luna HSM Client Installation" onpage 26 is deprecated, and will be removed from a future release.
Use the /quiet switch (see below) to ensure no pauses or prompting during installation. The following proceduresare described:
> "Command line options overview" below
> "Installing the Luna HSM Client for the Luna Network HSM" on page 23
> "Installing the Luna HSM Client for the Luna PCIe HSM" on page 23
> "Installing the Luna HSM Client for the Luna USB HSM" on page 24
> "Installing the Luna HSM Client for the Luna Backup HSM" on page 24
> "Installing the Luna HSM Client for Remote PED" on page 24
> "Installation Location " on page 25
> "Logging" on page 25
> "Uninstalling the Luna HSM Client" on page 25
If you want to perform an interactive installation, using the graphical, interactive installer, see "WindowsInteractive Luna HSM Client Installation" on page 26
NOTE Unattended installation stores the root certificate in the certificate store and marks thepublisher (in this case, Thales) as trusted for future installations. You are not prompted to trustThales as a driver publisher during unattended installation.
Command line options overviewThe following command-line options are available:
Option Values Description
addlocal= Various (see below) Takes one-or-more device values, and one-or-more feature values,as a comma-separated list. Case insensitive. Values may be quotedor not.
installdir= A fully qualified folderpath to install the clientsoftware
Case insensitive. Default value is “c:\program files\safenet\lunaclient”.Enclose paths containing spaces in “”.
/install N/A Install the product and features.
Luna Network HSM 7 Partition Administration GuideLast Updated: 2022-07-26 23:53:21 GMT-04:00 Copyright 2001-2022 Thales Group 20

Chapter 1: Luna HSM Client Software Installation
Option Values Description
/uninstall N/A Remove the product and features.
/quiet N/A Performs a silent installation; no prompts or messages.(See Notebelow this table)
/norestart N/A Prevents a reboot, post-installation. Any reboots must be performedmanually.
/log The name of a log file Generates a highly detailed series of logs of the installation progress.This is required only for product support.
NOTE Windows defaults to launching the interactive graphical installer, unless you specify/quiet at the command line. Always include the /quiet option for scripted/unattended LunaHSM Client installation.
The following devices or components are available for use with the addlocal= option:
Device identifier value Can be used with these installable features
NETWORK CSP_KSP, JSP, SDK, JCProv (*)
PCI CSP_KSP, JSP, SDK, JCProv, SNMP
USB CSP_KSP, JSP, SDK, JCProv, SNMP
BACKUP SNMP (this device performs backup and restore operations and is not enabled forcryptographic applications)
PED N/A (Used for remotely authenticating to PED-authenticated HSMs; not used bycryptographic applications - use of this device requires hands-on presence)
The device names are not case-sensitive.
(* The Network HSM appliance contains its own SNMP support; therefore the SNMP feature is not installed onclients where the Network HSM is the only HSM to be used.)
The following features are available for use with the addlocal= option :
Featureidentifiervalue
Can be installed with these Lunadevices
Description
CSP_KSP NETWORK, PCI, USB Microsoft CSP and KSP
FMSDK NETWORK, PCIe * Functionality Modules Software Development Kit
Luna Network HSM 7 Partition Administration GuideLast Updated: 2022-07-26 23:53:21 GMT-04:00 Copyright 2001-2022 Thales Group 21

Chapter 1: Luna HSM Client Software Installation
Featureidentifiervalue
Can be installed with these Lunadevices
Description
FMTOOLS NETWORK, PCIe * Tools for use when preparing FunctionalityModules
JCProv NETWORK, PCIe, USB JCPROV PKCS#11
JSP NETWORK, PCIe, USB Java Provider component
SDK NETWORK, PCIe, USB Software SDK – Java / C++ samples
SNMP PCIe, USB, Backup SNMP subagent
The features can be installed together with the listed device(s) only - they cannot be installed separately - andneed to be included only once in the command line. For example, if you are installing the NETWORK and PCIdevices and you wish to install the CSP / KSP feature, specify CSP_KSP one time. The feature names are notcase-sensitive.
NOTE * If you install FMTOOLS for NETWORK only, then justmkfm and the library areinstalled.If you install FMTOOLS for PCI, thenmkfm and the library along with ctfm and fmrecover areinstalled.If you install FMTOOLS for both NETWORK and PCIe devices, then all four elements areinstalled.If you install the FM SDK, the Luna SDK is installed as well, to satisfy dependencies.Options for addlocal= are separated by spaces. Device and feature values are separated bycommas, with no spaces, unless the whole list is enclosed between quotation marks. If a spaceis encountered, outside of paired quotation marks, the next item found is treated as a commandoption.
Installing all components and featuresSubsequent sections detail how to install the Luna HSM Client software, drivers (if necessary), and optionalfeatures (like Java support and the SDK), for individual HSMs. This section describes how to install everything atonce, so that all Luna HSMs and Remote PED are supported and all the optional features are available.
Use the ADDLOCAL= option together with the value all to install the base client software and the drivers for allLuna devices, along with all the features.
To install the Luna HSM Client software and drivers for all Luna devices and all features
From the location of LunaHSMClient.exe run the following command:> Install the full Luna HSM Client software with drivers for all Luna HSMs (Network HSM (no driver), PCIe HSM,
Backup HSM, Remote PED), as well as all the features (CSP/KSP, JSP, JCProv, C++ SDK, SNMPSubagent)
LunaHSMClient.exe /install /quiet ADDLOCAL=all
Luna Network HSM 7 Partition Administration GuideLast Updated: 2022-07-26 23:53:21 GMT-04:00 Copyright 2001-2022 Thales Group 22

Chapter 1: Luna HSM Client Software Installation
NOTE You can omit the /quiet option to see all options in the GUI dialog.
> [Optional logging] Install the full Luna HSM Client software with drivers for all Luna HSMs (Network HSM (nodriver), PCIe HSM, Backup HSM, Remote PED), as well as all the features (CSP/KSP, JSP, JCProv, C++SDK, SNMP Subagent), and log the process.
LunaHSMClient.exe /install /log install.log /quiet ADDLOCAL=all
NOTE The setting /log is optional and saves the installation logs to the file named install.login the example. The install.log file (whatever name you give it) is required only iftroubleshooting an issue with Thales GroupTechnical Support.
Installing the Luna HSM Client for the Luna Network HSMUse the ADDLOCAL=NETWORK option to install the base client software for the Luna Network HSM. Includethe values for any optional, individual software components you desire. The base software must be installed first.
To install the Luna HSM Client for the Luna Network HSM
From the location of LunaHSMClient.exe run one of the following commands:> Install the base Luna HSM Client software necessary to communicate with Luna Network HSM
LunaHSMClient.exe /install /quiet ADDLOCAL=NETWORK> [Optional] Install the base Luna HSM Client software and any of the optional components for the Luna
Network HSM that you desire:
For example, the following command installs the base software and all of the optional components:
LunaHSMClient.exe /install /quiet ADDLOCAL=NETWORK,CSP_KSP,JSP,SDK,JCProvIf you wish to install only some of the components, just specify the ones you want after the product name(NETWORK in this example).
Installing the Luna HSM Client for the Luna PCIe HSMUse the ADDLOCAL=PCI option to install the base client software for the Luna PCIe HSM. Include any featuresyou desire. The base software must be installed first.
To install the Luna HSM Client for the Luna PCIe HSM
From the location of LunaHSMClient.exe run one of the following commands:> Install the base Luna HSM Client software for Luna PCIe HSM
LunaHSMClient.exe /install /quiet ADDLOCAL=PCI> Install the base Luna HSM Client software and any of the optional features for the Luna PCIe HSM that you
desire:
For example, the following command installs the base software and all of the optional components:
LunaHSMClient.exe /install /quiet ADDLOCAL=PCI,CSP_KSP,JSP,SDK,JCProv,SNMP
Luna Network HSM 7 Partition Administration GuideLast Updated: 2022-07-26 23:53:21 GMT-04:00 Copyright 2001-2022 Thales Group 23

Chapter 1: Luna HSM Client Software Installation
If you wish to install only some of the components, just specify the ones you want after the product name (PCIin this example).
Installing the Luna HSM Client for the Luna USB HSMUse the ADDLOCAL=USB option to install the base client software for the Luna USB HSM. Include any featuresyou desire. The base software must be installed first.
To install the Luna HSM Client for the Luna USB HSM
From the location of LunaHSMClient.exe run one of the following commands:> Install for Luna USB HSM
LunaHSMClient.exe /install /quiet ADDLOCAL=USB> Install the base Luna HSM Client software and any of the optional features for the Luna USB HSM that you
desire:
For example, the following command installs the base software and all of the optional components:
LunaHSMClient.exe /install /quiet ADDLOCAL=USB,CSP_KSP,JSP,SDK,JCProv,SNMPIf you wish to install only some of the components, just specify the ones you want after the product name(USB in this example).
Installing the Luna HSM Client for the Luna Backup HSMUse the ADDLOCAL=BACKUP option to install the base client software for the Luna Backup HSM, and theoptional feature, if desired. For the Backup HSM, which performs backup and restore operations and is notenabled for use with cryptographic applications, the feature you might add is SNMP, if applicable in yourenvironment.
To install the Luna HSM Client for the Luna Backup HSM
From the location of LunaHSMClient.exe run one of the following commands:> Install the base Luna HSM Client software for Luna Backup HSM
LunaHSMClient.exe /install /quiet /norestart ADDLOCAL=BACKUP> Install the base Luna HSM Client software and an optional component for the Luna Backup HSM:
For example, the following command installs the base software and the optional component:
LunaHSMClient.exe /install /quiet /norestart ADDLOCAL=backup,snmp
Installing the Luna HSM Client for Remote PEDUse the ADDLOCAL= option with component value PEDto install the client software for the Luna Backup HSM.
To install the Luna HSM Client for the Luna Backup HSM
> From the location of LunaHSMClient.exe run the following command:LunaHSMClient.exe /install /quiet addlocal=ped
Luna Network HSM 7 Partition Administration GuideLast Updated: 2022-07-26 23:53:21 GMT-04:00 Copyright 2001-2022 Thales Group 24

Chapter 1: Luna HSM Client Software Installation
Installation LocationSpecify the installation location, if the default location is not suitable for your situation.
This applies to installation of any Luna Device. Provide the INSTALLDIR= option, along with a fully qualified pathto the desired target location. For example:
LunaHSMClient.exe /install /quiet addlocal=all installdir=c:\lunaclientThat command silently installs all of the Luna device software and features to the folder c:\lunaclient (in thisexample). The software is installed into the same subdirectories per component and feature, under that namedfolder, as would be the case if INSTALLDIR was not provided. That is, INSTALLDIR changes the prefix orprimary client installation folder to the one you specify, and the libraries, devices, tools, certificate folders, etc.are installed in their predetermined relationship, but under the new main folder location.
LoggingIf problems are encountered during installation or uninstallation of the software and you wish to determine thereason, or if Thales Technical Support has requested you to do so, detailed logs can be generated and capturedby specifying the /log option and providing a filename to capture the log output. Two logs are generated – oneaccording to the name given and the other similarly named, with a number appended. Both log files must be sentto Thales support if assistance is required.
Example commands that include logging are:
LunaHSMClient.exe /install /quiet /log install.log /norestart ADDLOCAL=backup,snmpLunaHSMClient.exe /uninstall /quiet /log uninstall.log
Uninstalling the Luna HSM ClientYou can also perform scripted/unattended uninstallation.
To uninstall the Luna HSM Client
> From the location of LunaHSMClient.exe run the following command:LunaHSMClient.exe /uninstall /quiet
> To log the uninstallation process, run the following command:
LunaHSMClient.exe /uninstall /quiet /log uninstall.log
Luna Network HSM 7 Partition Administration GuideLast Updated: 2022-07-26 23:53:21 GMT-04:00 Copyright 2001-2022 Thales Group 25

Chapter 1: Luna HSM Client Software Installation
Windows Interactive Luna HSM Client Installation
NOTE The GUI interactive installer "Windows Interactive Luna HSM Client Installation" aboveis deprecated, and will be removed from a future release.
This section describes how to install the Luna HSM Client software onWindows, using the GUI interactiveinstaller. It contains the following topics:
> "Required Client Software" below
> "Prerequisites" below
> "Installing the Luna HSM Client Software" on the next page
> "Modifying the Installed Windows Luna HSM Client Software" on page 30
> "Java" on page 31
> "Luna CSP and KSP" on page 31
> "Modifying the Number of Luna Backup HSM Slots" on page 32
> "Uninstalling the Luna HSM Client Software" on page 33
> "After Installation" on page 35
> "Troubleshooting" on page 35
> "Windows Command-line Scripted/Unattended Luna HSM Client Installation/Uninstallation" on page 20
Applicability to specific versions of Windows is summarized in the Customer Release Notes for this release.
NOTE Before installing a Luna HSM system, confirm that the product you have received is infactory condition and has not been tampered with in transit. Refer to the Startup Guide includedwith your product shipment. If you have any questions about the condition of the product thatyou have received, contact Technical Support immediately.
Required Client SoftwareEach computer that connects to a Luna Network HSM as a Client must have the cryptoki library, the vtl clientshell and other utilities and supporting files installed.
Each computer that contains, or is connected to a Luna PCIe HSM or a Luna USB HSMmust have the cryptokilibrary and other utilities and supporting files installed.
PrerequisitesThe Luna HSM Client installer requires the Microsoft Universal C Runtime (Universal CRT) to run properly.Universal CRT requires your Windows machine to be up to date. Before running the installer, ensure that youhave the Universal C Runtime in Windows (KB2999226) update and its prerequisites installed on your machine.The following updates must be installed in order:
1. March 2014Windows servicing stack update (see https://support.microsoft.com/en-us/help/2919442)
2. April 2014Windows update (see https://support.microsoft.com/en-us/help/2919355)
Luna Network HSM 7 Partition Administration GuideLast Updated: 2022-07-26 23:53:21 GMT-04:00 Copyright 2001-2022 Thales Group 26

Chapter 1: Luna HSM Client Software Installation
3. Visual C++ Redistributable for Visual Studio 2015 (see https://www.microsoft.com/en-in/download/details.aspx?id=481450)
Installing the Luna HSM Client SoftwareLuna HSM Client can be installed on 64-bit Windows operating systems. Hardware drivers are 64-bit only. Olderclient versions include 32-bit libraries and binaries.
NOTE Luna HSM Client 10.1 and newer includes libraries for 64-bit operating systems only.
For compatibility of our HSMs with Windows CAPI we have Luna CSP, and for the newer Windows CNG wehave Luna KSP. See "Luna CSP and KSP" on page 31 for more information.
Interactive (prompted, this page) and non-interactive (no prompts "Windows Command-lineScripted/Unattended Luna HSM Client Installation/Uninstallation" on page 20) installation options are available.
Compatibility of HSM version, Client version, and Windows OSversionsLuna HSM Client 10.3.0 was the last client version to support Windows Server 2012 R2, whichaccepts the Luna PCIe HSM 6.x driver.If you have Windows Server 2012 R2 computer with a Luna PCIe 6.x HSM onboard, do notinstall Luna HSM Client 10.4.0 for Windows there.
Luna HSM Client 10.4.0 release is for Luna PCIe HSM 7.x-compatible Windows 10, WindowsServer 2016, and Windows Server 2019, which will not load the Luna PCIe 6.x (a.k.a. K6)driver.
If you had both a Luna PCIe 6.x and a Luna PCIe 7.x HSM card in the same system, failure ofthe 6.x driver would prevent loading of the 7.x driver as well. If your application works withLinux, the Luna PCIe 6.x will continue to work there, and will not block Luna PCIe 7.x.
Luna Network HSM (LNH) does not make use of client-side drivers, so you can use Luna HSMClient 10.4.0 with LNH 6.x and with LNH 7.x, Cloud HSM, etc.
To install the Luna HSM Client software
1. Log into Windows as “Administrator”, or as a user with administrator privileges (see "Troubleshooting" onpage 35).
2. Uninstall any previous versions of the Client software before you proceed (see "Uninstalling the Luna HSMClient Software" on page 33).
Luna Network HSM 7 Partition Administration GuideLast Updated: 2022-07-26 23:53:21 GMT-04:00 Copyright 2001-2022 Thales Group 27

Chapter 1: Luna HSM Client Software Installation
NOTE If you do not uninstall previous Luna HSM Client versions, you might face installationissues, such as failure to install the new client.
3. Download the Luna HSM Client from the Thales Support Portal at https://supportportal.thalesgroup.com and
TIP We recommend verifying the integrity of the Universal Client packages, by calculatingtheir SHA256 hash values and comparing with the hash values posted on the Support Portal,before installing them on your client machines.You can use the sha256sum tool on Linux machines to calculate the SHA256 hash values.
4. Extract the .zip to an appropriate folder.5. In the extracted directory, locate the folder for your Windows architecture and double click
LunaHSMClient.exe.
6. The Custom Setup dialog allows you to choose which software components you wish to install. Click aproduct to select the components to install, or click Select All to install all available components.
The installer includes the Luna SNMP Subagent as an option with any of the Luna HSMs, except LunaNetwork HSM, which has agent and subagent built in. After installation of the Luna SNMP Subagent iscomplete, you will need to move the SafeNet MIB files to the appropriate directory for your SNMP application,and you will need to start the SafeNet subagent and configure for use with your agent, as described in SNMPMonitoring.
Luna Network HSM 7 Partition Administration GuideLast Updated: 2022-07-26 23:53:21 GMT-04:00 Copyright 2001-2022 Thales Group 28

Chapter 1: Luna HSM Client Software Installation
NOTE Dependencies and considerations when installing:> The FM Tools and FM SDK are useful to you only if you will be using or creating
Functionality Modules, to add custom abilities to your HSMs.> The FM SDK requires that you install PCIe HSM software and drivers.> Similarly, if you are using third-party software to make standard cryptographic calls to the
HSM, and are not creating application programs, then you can forego loading the SoftwareDevelopment Kit.
> There is no harm in installing unneeded components; they do not conflict.> The FM SDK option remains gray/unselectable until "Software SDK" is selected, because
some of the FM SDK samples have dependencies on General Cryptoki Samples that arepart of "Software SDK".
After you select the components you want to install, click Install.a. Agree to the terms of the License Agreement to proceed with installation. To view the agreement text, click
the link in the dialog. The installer loads a PDF version if a PDF reader is available; otherwise it launches atext editor and a plain-text version of the agreement.
b. If Windows presents a security notice asking if you wish to install the device driver from Thales, click"Always trust software from Thales DIS CPL USA, Inc." and click Install to accept.
c. If you choose not to install the driver(s), your Luna HSM Client cannot function with any locally-connectedLuna hardware (which includes Luna PCIe HSM, Luna USB HSM, or Luna Backup HSMs).
7. When the installation completes, the button options are Uninstall, Modify, or Quit; clickQuit to finish.
If you launch the installer again, you should see the final dialog, above, allowing you to modify the currentLuna HSM Client installation if desired, or to uninstall.
8. [Optional] For easy use of the Luna HSM Client command-line tools, add the directory to the system PATHvariable.
Luna Network HSM 7 Partition Administration GuideLast Updated: 2022-07-26 23:53:21 GMT-04:00 Copyright 2001-2022 Thales Group 29

Chapter 1: Luna HSM Client Software Installation
"C:\Program Files\SafeNet\Lunaclient"
Modifying the Installed Windows Luna HSM Client SoftwareIf you wish to modify the installation (perhaps to add a component or product that you did not previously install),you must re-run the current installer and ensure that the desired options are selected.
NOTE This feature requires minimum client version 7.2. See Version Dependencies byFeature for more information.
To modify the installed Luna HSM Client software
1. Run the LunaHSMClient.exe program again. Because the software is already installed on your computer,the following dialog is displayed (in this example, devices and features were previously installed, and the taskis to uninstall a couple of items):
2. Select or deselect individual Devices or Features, as desired.
Luna Network HSM 7 Partition Administration GuideLast Updated: 2022-07-26 23:53:21 GMT-04:00 Copyright 2001-2022 Thales Group 30

Chapter 1: Luna HSM Client Software Installation
3. ClickModify. The client software is updated (items are added or removed).If you are uninstalling some items, or if you are adding features, the dialog shows a progress bar briefly, andthen shows the current status.
If you are adding a Luna Device, then you might be prompted with the operating system pop-up toaccept/trust the driver. Do so.
4. ClickQuit when the modification is complete.
NOTE You can also use Programs and Features in the Windows Control Panel to launch theUninstall/Modify dialog for the client software.
JavaIf you install the Luna Java Security Provider (JSP), refer to Luna JSP Overview and Installation for additionalsetup procedures for your operating system.
Luna CSP and KSPThales provides Luna CSP for applications running in older Windows crypto environments running MicrosoftCertificate Services (CAPI), and Luna KSP for newer Windows clients running Cryptography Next Generation(CNP). Consult Microsoft documentation to determine which one is appropriate for your client operating system.
> Luna CSP Registration Utilities
> Luna KSP for CNG Registration Utilities
If the Luna CSP (CAPI) / Luna KSP(CNG) option is selected at installation time, the SafeNetKSP.dll file isinstalled in C:\Windows\System32 (used for 64-bit KSP). If you are installing a Luna HSM Client version olderthan 10.1, SafeNetKSP.dll is also installed in C:\Windows\SysWOW64 (used for 32-bit KSP).
Luna Network HSM 7 Partition Administration GuideLast Updated: 2022-07-26 23:53:21 GMT-04:00 Copyright 2001-2022 Thales Group 31

Chapter 1: Luna HSM Client Software Installation
NOTE The cryptoki.ini file, which specifies many configuration settings for your HSM andrelated software, includes a line that specifies the path to the appropriate libNT for use withyour application(s). Verify that the path is correct.
USB-powered PEDThe Luna PIN Entry Device (PED) v2.8 contains new hardware that enables the PED to be USB-powered; thereis no longer a requirement for an external DC power Adapter. PED v2.8 is functionally equivalent to your existing(previous-generation) PEDs and is compatible with HSM versions, 5.x, 6.x, and 7.x.
PED v2.8 ships with firmware 2.8.0. Note that you cannot upgrade existing PEDs to the 2.8.0 version; existingPEDs continue to need a separate DC power adapter for remote PED and upgrade use. The model number onthe manufacturer's label identifies the refreshed PED: PED-06-0001. An installed driver is required; see step 1,below.
To use the new USB-powered PED
1. Ensure the Luna HSM Client software is installed on the Windows computer that will act as the PED Server toyour Luna HSM. Installing the Remote PED component of the Luna HSM Client installs the required driver.
NOTE A USB connection, without the driver software, only illuminates the PED screen, with nomenu. An installed and running PED driver, on the connected computer, is required for thePED to fully boot and to display its menu.
2. Connect the PED to the computer where you installed the Remote PED component of the Luna HSM Client,using the USB micro connector on the PED and a USB socket on your computer.
3. After you connect the PED to the host computer, it will take 30 to 60 seconds for initial boot-up, during whichtime a series of messages are displayed, as listed below:
BOOT V.1.1.0-1CORE V.3.0.0-1Loading PED...Entering...
4. After the boot process is complete, the PED displays Local PED mode and the Awaiting command...prompt. Your new PED is now ready for use.
5. To enter Remote PEDmode, if needed, exit Local PEDmode with the "< " key, and from the Select Modemenu, select option 7 Remote PED.
Modifying the Number of Luna Backup HSM SlotsBy default, the Luna HSM Client allows for three slots reserved for each model of Luna Backup HSM. You canedit crystoki.ini to modify the number of reserved slots. See also "Configuration File Summary" on page 73.
To modify the number of reserved Backup HSM slots
1. Navigate to the crystoki.ini file and open in a text editor.2. Add the following line(s) to the CardReader section of the file:
Luna Network HSM 7 Partition Administration GuideLast Updated: 2022-07-26 23:53:21 GMT-04:00 Copyright 2001-2022 Thales Group 32

Chapter 1: Luna HSM Client Software Installation
• For Luna Backup HSM (G5):
LunaG5Slots = <value>;• For Luna B700 Backup HSM:
LunaG7Slots = <value>;
Uninstalling the Luna HSM Client SoftwareYou need to uninstall Luna HSM Client before installing a new version. If you wish to modify the installation(perhaps to add a component or product that you did not previously install), you must uninstall the currentinstallation and re-install with the desired options. If you have a Luna Backup HSM connected to the clientworkstation, either disconnect it or stop the PEDclient service ("pedclient -mode stop" on page 285) before youproceed.
To uninstall the Luna HSM Client software
1. Run the LunaHSMClient.exe program again. Because the software is already installed on your computer,the following dialog is displayed, showing which components are currently installed (for this example, allDevices and all Features were previously installed):
2. Click Uninstall. The client software is uninstalled.
Luna Network HSM 7 Partition Administration GuideLast Updated: 2022-07-26 23:53:21 GMT-04:00 Copyright 2001-2022 Thales Group 33

Chapter 1: Luna HSM Client Software Installation
3. When the uninstallation is complete, clickOK to dismiss the operating system's confirmation dialog.
NOTE You can also use Programs and Features in the Windows Control Panel to uninstallthe client software.
Uninstall if not presentIf the Luna HSM Client software has been uninstalled, and you launch the installer in uninstall mode, from thecommand line, the installer starts, looks for the installed software, fails to find it, and presents a Windows dialogto that effect.
If the Luna HSM Client software has been uninstalled, nothing related to the client appears in Windows ControlPanel, so nothing exists to launch from that avenue.
Luna Network HSM 7 Partition Administration GuideLast Updated: 2022-07-26 23:53:21 GMT-04:00 Copyright 2001-2022 Thales Group 34

Chapter 1: Luna HSM Client Software Installation
After InstallationOpen a new command-line/console window to allow the library path to be found before you run LunaCM or otherutilities that require the library.
TroubleshootingIf you are not the Administrator of the computer on which Luna HSM Client is being installed, or if the bundle ofpermissions in your user profile does not allow you to launch the installer with "Run as Administrator", then someservices might not install properly. One option is to have the Administrator perform the installation for you.
Another approach might be possible. If you have sufficient elevated permissions, you might be able to right-clickand open a Command Prompt window as Administrator.
If that option is available, then you can use the command line to move to the location of the LunaHSMClient.exefile and launch it there, which permits the needed services to load for PEDclient. See "Windows Command-lineScripted/Unattended Luna HSM Client Installation/Uninstallation" on page 20 for instructions on how to installthe client software from the command line.
Luna Network HSM 7 Partition Administration GuideLast Updated: 2022-07-26 23:53:21 GMT-04:00 Copyright 2001-2022 Thales Group 35

Chapter 1: Luna HSM Client Software Installation
Linux Luna HSM Client InstallationYou must install the Luna HSM Client software on each client workstation you will use to access a Luna HSM.This section describes how to install the client on a workstation running Linux, and contains the following topics:
> "Prerequisites" below
> "Where to install, and SELinux " on the next page
> "About Installing the Client Software" on page 38
> "Scripted or Unattended Installation" on page 40> "Installing the Minimal Client Software" on page 44
> "Controlling User Access to Your Attached HSMs and Partitions" on page 44
> "Uninstalling the Client Software or Removing Components" on page 45
> "Java" on page 45
> "Interrupting the Installation" on page 41
> "Modifying the Number of Luna Backup HSM Slots" on page 46
Refer to the Customer Release Notes for a complete list of the supported Linux operating systems. Theseinstructions assume that you have already acquired the Luna HSM Client software.
PrerequisitesBefore starting the installation, ensure that you have satisfied the following prerequisites:
Components Required to Build the PCIe Driver and the Backup HSM DriverOn Linux, the PCIe driver module (and optionally the Backup HSM driver) is built by the client as part of theinstallation if you choose to install the Luna PCIe HSM component or the Backup HSM. To build the driver, theclient requires the following items:
> Kernel headers for build
> kernel-devel package
> rpmbuild package
> C and C++ compilers
> make command
If any one of these items is missing, the driver build will fail and the client software will not be installed.
NOTE The installed kernel and kernel-devel versions on the Client systemmust match, inorder for the drivers to compile successfully. In general, if the versions do not match, or if youare not sure, use this command yum install kernel-devel-`uname -r` before installing LunaHSM Client. Note the required backticks, (the key to the left of the 1/! key on the keyboard)surrounding `uname –r` (or equivalent command yum install kernel-devel-$(uname -r)).To check installed versions related to the currently running kernel: rpm -qa kernel * | grep$(uname -r).
Luna Network HSM 7 Partition Administration GuideLast Updated: 2022-07-26 23:53:21 GMT-04:00 Copyright 2001-2022 Thales Group 36

Chapter 1: Luna HSM Client Software Installation
Debian Requires alienThe Luna HSM Client software is provided as RPM packages. If you are installing on a Debian system, you musthave alien installed to allow the Luna HSM Client installation script to convert the RPM packages to DEBpackages. The installation script will stop with a message if you attempt to install on a Debian system withoutalien installed. This applies to any other supported Debian-based Linux distribution, such as Ubuntu.
SUSE Linux on IBM PPCJCE un-restriction files must be downloaded from IBM, not from SUN, for this platform. Attempting to use SUNJCE un-restriction files on IBM PowerPC systems with SUSE Linux causes signing errors.
Where to install, and SELinuxThe instructions on this page assume that much of the installation goes into /usr. If you retain that defaultlocation, installation "should just work" uneventfully.
You can change that install location (see "Flexible Install paths" on page 39). There might be some interactionwith SELinux that you would need to consider.
Security Enhanced Linux or SELinux is a security mechanism built into the Linux kernel used by RHEL-baseddistributions.
By default, in CentOS 8 and newer, SELinux is enabled and in enforcing mode.
SELinux adds an additional layer of security to the system by allowing administrators and users to control accessto objects based on policy rules.
SELinux policy rules specify how processes and users interact with each other as well as how processes andusers interact with files. When there is no rule explicitly allowing access to an object, such as for a processopening a file, access is denied.
SELinux has three modes of operation:
• Enforcing: SELinux allows access based on SELinux policy rules.
• Permissive: SELinux only logs actions that would have been denied if running in enforcing mode. Thismode is useful for debugging and creating new policy rules.
• Disabled: No SELinux policy is loaded, and no messages are logged.
So if, for example, your non- /usr installation completes uneventfully, but pedclient errors show up in the logs,then consider setting SELinux to "Permissive" mode. Or set explicit rules that will make SELinux happy when it isin Enforcing mode.
Luna Network HSM 7 Partition Administration GuideLast Updated: 2022-07-26 23:53:21 GMT-04:00 Copyright 2001-2022 Thales Group 37

Chapter 1: Luna HSM Client Software Installation
NOTE MutexFolder : For Luna clients on Linux, the callback service (CBS) employed bypedclient originally placed mutex entries in /tmp. This was fine in most cases, but could be anissue if operating system services cleared the /tmp folder, causing the cbs process to stop.The workaround was to restart the service.A solution was provided that moved the mutex folder to /var/log. However, this was found to bean issue for installations by non-root users, where the service did not have permission to writeinto /var/log.
Beginning with Luna HSM Client 10.4.0, a chrystoki.conf entry "MutexFolder =" is added. Ifaccess to the default folder /tmp is not desired or is restricted, the MutexFolder= entry allows anadministrator to specify an accessible folder
Misc = {…MutexFolder = /usr/lock;
}However, the indicated folder must exist. If this is set to a non-existent folder, the service fails tostart properly, such as in this example of logs for the cbs service:(MutexFolder = /nosuchfolder/lock)
.. daemon info systemd: Starting CallBack Server...
... user notice root: cbs started.
... daemon info cbs: Starting cbs:[ OK ]#015LunaNamedSystemMutex: open()failed: No such file or directory... daemon info cbs: LOGGER_init failed... daemon info cbs: Failed to initialize the logger. Exiting.... user crit pedClient: Failed to initialize the logger. Exiting.... daemon info systemd: Started CallBack Server.
About Installing the Client SoftwareIt is recommended that you refer to the Luna HSM Customer Release Notes for any installation-related issues orinstructions before installing the client software.
CAUTION! You must install the client software using root-level privileges. For securityreasons, we recommend that you do not log in as root (or use su root) to run the installationscript, but instead use the sudo command to run the installation script, as detailed below.
The installation scriptThe installation script is install.sh and is usually launched with sh install.sh followed by any options orparameters.
> interactive: sh install.sh [-install_directory <prefix>]> all: sh install.sh all [-install_directory <prefix>]> scriptable: sh install.sh -p [network|pci|usb|backup|ped] [-c sdk|jsp|jcprov|snmp]|fmsdk|fm_tools [-
install_directory </usr>]The options on the script are:
> device(s)
Luna Network HSM 7 Partition Administration GuideLast Updated: 2022-07-26 23:53:21 GMT-04:00 Copyright 2001-2022 Thales Group 38

Chapter 1: Luna HSM Client Software Installation
• "network" is the Luna Network HSM (software only, no drivers)
• "pci" is the Luna PCIe HSM (software plus driver for the PCI HSM)
• "usb" is the Luna USB and Backup HSMs (software plus driver for the USB-connected HSMs)
• "backup" is software to enable Remote Backup
• "ped" is software for the Luna Remote PED
> components include the optional Software Development kit, Java providers, SNMP instance (not needed forNetwork HSM which has it built in), Functional Module tools, and the Functional Module SDK
Install.sh syntax and options:[myhost]$ sh install.sh help
usage:install.sh - Luna HSM Client install through menuinstall.sh help - Display scriptable install optionsinstall.sh all - Complete Luna HSM Client install
install.sh -p [network|pci|usb|backup|ped] [-c sdk|jsp|jcprov|snmp|fmsdk|fm_tools] [-install_directory </usr>]
-p <list of Luna products>-c <list of Luna components|all> - Optional. Default components are installed if not
provided-install_directory <Defaults to /usr> - Optional. Sets the installation directory prefix.
Non-root install is restricted to installation of Luna Network HSMproduct and Luna SDK, Luna JSP (Java) and Luna JCPROV (Java) components.
Luna products optionsnetwork - Luna Network HSMpci - Luna PCIe HSMusb - Luna USB HSMbackup - Luna Backup HSMped - Luna Remote PED
Luna components optionssdk - Luna SDKjsp - Luna JSP (Java) --> Luna Network HSM, Luna PCIe HSM and Luna USB HSM default
componentjcprov - Luna JCPROV (Java) --> Luna Network HSM, Luna PCIe HSM and Luna USB HSM default
componentsnmp - Luna SNMP subagent
By default, the Client programs are installed in the /usr/safenet/lunaclient directory.
Flexible Install pathsAn administrative (root) user, in charge of installing and uninstalling the software, has access wherever theinstalled material eventually resides. However, the operational, application-level use of Luna HSM Client mightbe assigned to a non-root user with constrained access and privileges. That non-root user might be a person or a
Luna Network HSM 7 Partition Administration GuideLast Updated: 2022-07-26 23:53:21 GMT-04:00 Copyright 2001-2022 Thales Group 39

Chapter 1: Luna HSM Client Software Installation
departmental function or an application. By changing the install path to (for example)%home/bigapplication/safenet/luna you allow that non-root user access to tools and files for connecting to theHSM and using HSM partitions.
You can change the installation path for scriptable (non-interactive) installs by changing the prefix with the scriptoption -install_directory <prefix>The prefix, or major location is your choice, and replaces the /usr default portion. (See mention of SELinux,earlier on this page)
NOTEAvoid the use of space characters in directory names.
The script option -install_directory <prefix> is available for scriptable installation, where either "all" or a list ofproducts and components is specified on the command line. The script option -install_directory <prefix> is notused with interactive installation; instead, you are prompted.
The /safenet/lunaclient portion is appended by the install script, and provides a predictable structure foradditional subdirectories to contain certificate files, and optionally STC files.
Regardless of -install_directory <prefix> provided, some files are not affected by that option (for example, theChrystoki.conf configuration file goes under /etc, service files need to be in the service directory expected byLinux in order to run at boot time, and so on).
TIP We recommend verifying the integrity of the Universal Client packages, by calculatingtheir SHA256 hash values and comparing with the hash values posted on the Support Portal,before installing them on your client machines.You can use the sha256sum tool on Linux machines to calculate the SHA256 hash values.
Scripted or Unattended InstallationIf you prefer to provide all installation options from the command-line (script), rather than interactively, do thefollowing.
To install the Luna HSM Client software in non-interactive or scripted fashion on a Linuxworkstation
1. Ensure that you have sudo privileges on the client workstation.2. Access the installation software:
Copy or move the .tar archive to a suitable directory where you can untar the archive and extract thecontents:
tar xvf <filename>.tar3. Go to the untarred directory for your operating system (32 or 64-bit):
cd /<untarred_dir>/<32/64>4. To see the syntax and all available options, run the command with help
Luna Network HSM 7 Partition Administration GuideLast Updated: 2022-07-26 23:53:21 GMT-04:00 Copyright 2001-2022 Thales Group 40

Chapter 1: Luna HSM Client Software Installation
5. To install the software, run the install.sh installation script with the options -p <list of Luna products> and -c <list of Luna components>.install.sh -p [network|pci|usb|backup|ped] [-c sdk|jsp|jcprov|snmp|fmsdk|fm_tools] [-install_directory </usr>]
Be sure to include the -install_directory option.
NOTE Following the "-c" option, you can provide a space-separated list of components toinclude in the installation. If JSP and JCProv are not explicitly listed, they are installed bydefault, but if one is explicitly listed, then only the listed component is included.If the SNMP component is selected, it works with Luna PCIe HSM, Luna USB HSM, and LunaBackup HSM products only.Following the "-p" option, you can provide a space-separated list of HSM products to include inthe installation.
For scripted/automated installation, your script will need to capture and respond to the License Agreementprompt, and to the confirmation prompt. For example:[myhost]$ sudo sh install.sh all
IMPORTANT: The terms and conditions of use outlined in the softwarelicense agreement (Document #008-010005-001_053110) shipped with the product("License") constitute a legal agreement between you and SafeNet Inc.Please read the License contained in the packaging of thisproduct in its entirety before installing this product.
Do you agree to the License contained in the product packaging?
If you select 'yes' or 'y' you agree to be bound by all the termsand conditions se out in the License.
If you select 'no' or 'n', this product will not be installed.
(y/n) y
Complete Luna Client will be installed. This includes Luna Network HSM,Luna PCIe HSM, Luna USB HSM, Luna Backup HSM and Luna Remote PED.
Select 'yes' or 'y' to proceed with the install.
Select 'no' or 'n', to cancel this install.
Continue (y/n)? y
Interrupting the InstallationDo not interrupt the installation script in progress, and ensure that your host computer is served by anuninterruptible power supply (UPS). If you press [CTRL] [C], or otherwise interrupt the installation (OS problem,power outage, other), some components will not be installed. It is not possible to resume an interrupted installprocess. The result of an interruption depends on where, in the process, the interruption occurred (whatremained to install before the process was stopped).
Luna Network HSM 7 Partition Administration GuideLast Updated: 2022-07-26 23:53:21 GMT-04:00 Copyright 2001-2022 Thales Group 41

Chapter 1: Luna HSM Client Software Installation
As long as the cryptoki RPM package is installed, any subsequent installation attempt results in refusal with themessage "A version of Luna HSM Client is already installed."
If components are missing or are not working properly after an interrupted installation, or if you wish to install anyadditional components at a later date (following an interrupted installation, as described), you would need touninstall everything first. If sh uninstall.sh is unable to do it, then you must uninstall all packages manually.
To install the Luna HSM Client software interactively on a Linux workstation
1. Ensure that you have sudo privileges on the client workstation.2. Access the installation software:
Copy or move the .tar archive to a suitable directory where you can untar the archive and extract thecontents:
tar xvf <filename>.tar3. Go to the untarred directory for your operating system (32 or 64-bit):
cd /<untarred_dir>/<32/64>4. To install the software, run the install.sh installation script. You can run the script in interactive mode, or you
can script the installation, as described in "Scripted or Unattended Installation" on page 40.
• To display the help, or a list of available installer options, type:
sudo sh install.sh -? or sudo sh install.sh help• To install all available products and optional components, type:
sudo sh install.sh all• To selectively install individual products and optional components, type the command without arguments:
sudo sh install.sh
NOTE Do not interrupt the installation script in progress. An uninterruptible power supply(UPS) is recommended. See "Interrupting the Installation" on the previous page for moreinformation.
5. Type y if you agree to be bound by the license agreement. You must accept the license agreement beforeyou can install the software.
6. A list of installable Luna devices is displayed. Select as many as you require, by typing the number of each (inany order) and pressing Enter. As each item is selected, the list updates, with a * in front of any item that hasbeen selected.
This example shows items 1 and 3 have been selected, and item 4 is about to be selected. The selectionswork as a toggle - if you wish to make a change, simply type a number again and press Enter to de-select it.ProductsChoose Luna Products to be installed
*[1]: Luna Network HSM
[2]: Luna PCIe HSM
*[3]: Luna USB HSM
Luna Network HSM 7 Partition Administration GuideLast Updated: 2022-07-26 23:53:21 GMT-04:00 Copyright 2001-2022 Thales Group 42

Chapter 1: Luna HSM Client Software Installation
[4]: Luna Backup HSM
[5]: Luna Remote PED
[N|n]: Next
[Q|q]: QuitEnter selection: 4
When selection is complete, type N or n for "Next", and press Enter. The "Advanced" menu is displayed.AdvancedChoose Luna Components to be installed
[1]: Luna SDK
[2]: Luna JSP (Java)
[3]: Luna JCProv (Java)
[4]: Luna SNMP subagent
[5]: Luna Functionality Module Tools
[6]: Luna Functionality Module Software Development Kit
[B|b]: Back to Products selection
[I|i]: Install
[Q|q]: Quit
Enter selection:
7. Select or de-select any additional items you want to install. Selected items are indicated with a *. Some itemsmight be pre-selected to provide the optimum experience for the majority of customers, but you can changeany selection in the list. When the Components list is adjusted to your satisfaction, press Enter.
NOTE The installer includes the Luna SNMP Subagent as an option. If you select this option,you will need to move the SafeNet MIB files to the appropriate directory for your SNMPapplication after installation is complete, and you will need to start the SafeNet subagent andconfigure it for use with your agent.Luna SDK required with FMs - If you choose the Functionality Module (FM) options, theinteractive install.sh script populates the Luna SDK as well, because of dependencies in theFM samples. If you run the installer with command-line options (non-interactive), and youchoose FM items without also choosing Luna SDK, the script just gives a warning and stops.ELDK (the Embedded Linux Development Kit) is installed with FMs - The ELDK package isinstalled as part of the FM SDK component, for Linux, and must reside at /opt/eldk-5.6. It is notrelocatable.
If the script detects an existing cryptoki library, it stops and suggests that you uninstall your previous Lunasoftware before starting the Luna HSM Client installation again.
8. The system installs all packages related to the products and any optional components that you selected.
Luna Network HSM 7 Partition Administration GuideLast Updated: 2022-07-26 23:53:21 GMT-04:00 Copyright 2001-2022 Thales Group 43

Chapter 1: Luna HSM Client Software Installation
9. [Optional] For easy use of the Luna HSM Client tools, add their directories to the $PATH.
a. Edit your system's bash_profile file using an editing tool.vi ~/.bash_profile
b. Add the following lines to the end of the file:export PATH="$PATH:/usr/safenet/lunaclient/bin"export PATH="$PATH:/usr/safenet/lunaclient/sbin"
c. Source the updated bash_profile.source ~/.bash_profile
Installing the Minimal Client SoftwareThe minimal client package contains the minimum run-time libraries required for a cryptography application toconnect to Luna Network HSM using PKCS#11 or Java APIs, or Functionality Modules on an FM-enabled HSM.Minimal client install is intended for container instances to interact with Luna HSM partitions or services.
Installing is as simple as copying the tarball and untarring it where you want it. A copy of a configuredChrystoki.conf file, along with client and server certificate files (and optionally, STC configuration files) must beavailable to any instance of Luna Minimal Client at run time.
See "Luna Minimal Client Install for Linux - Overview" on page 46 for a general example using Docker.
Controlling User Access to Your Attached HSMs and PartitionsBy default, only the root user has access to your attached HSMs and partitions. You can specify a set of non-rootusers that are permitted to access your attached HSMs and partitions, by adding them to the hsmusers group.
NOTE The client software installation automatically creates the hsmusers group if one doesnot already exist on your system. The hsmusers group is retained when you uninstall the clientsoftware, allowing you to upgrade your client software while retaining your hsmusers groupconfiguration.
TIP Users on your system that are not members of hsmusers group are not able to see theslots/partitions when using lunacm, other Luna tools, or your applications. If you open (say)lunacm, expecting to see one or more slots, and none are visible, check that your current useris a member of hsmusers before doing other troubleshooting.
Adding users to hsmusers groupTo allow non-root users or applications access your attached HSMs and partitions, assign the users to thehsmusers group. The users you assign to the hsmusers group must exist on the client workstation. Users youadd to the hsmusers group are able to access your attached HSMs and partitions. Users who are not part of thehsmusers group are not able to access your attached HSMs and partitions.
To add a user to hsmusers group
1. Ensure that you have sudo privileges on the client workstation.2. Add a user to the hsmusers group:
Luna Network HSM 7 Partition Administration GuideLast Updated: 2022-07-26 23:53:21 GMT-04:00 Copyright 2001-2022 Thales Group 44

Chapter 1: Luna HSM Client Software Installation
sudo gpasswd --add <username> hsmuserswhere <username> is the name of the user you want to add to the hsmusers group.
Removing users from hsmusers groupShould you wish to rescind a user's access to your attached HSMs and partitions, you can remove them from thehsmusers group.
NOTE The user you delete will continue to have access to the HSM until you reboot the clientworkstation.
To remove a user from hsmusers group
1. Ensure that you have sudo privileges on the client workstation.2. Remove a user from the hsmusers group:
sudo gpasswd -d <username> hsmuserswhere <username> is the name of the user you want to remove from the hsmusers group. You must log inagain to see the change.
Uninstalling the Client Software or Removing ComponentsYou may need to uninstall the client software before upgrading to a new version, or if it is no longer required.
To uninstall the client software
1. Ensure that you have sudo privileges on the client workstation.2. Go to the client installation directory:
cd /usr/safenet/lunaclient/bin3. Run the uninstall script:
sudo sh uninstall.sh
CAUTION! The hsmusers group is not removed when the client software is uninstalled.Should you install the client again on the same system, all users previously in the group willhave access to your attached HSMs and partitions by default. You must remove users from thegroup if you want to restrict their access. See "Removing users from hsmusers group" above.
To remove individual components
To uninstall the JSP component or the SDK component, you must uninstall Luna HSM Client completely, then re-run the installation script without selecting the unwanted component(s).
JavaIf you install the Luna Java Security Provider (JSP), refer to Luna JSP Overview and Installation for additionalsetup procedures for your operating system.
Luna Network HSM 7 Partition Administration GuideLast Updated: 2022-07-26 23:53:21 GMT-04:00 Copyright 2001-2022 Thales Group 45

Chapter 1: Luna HSM Client Software Installation
Modifying the Number of Luna Backup HSM SlotsBy default, the Luna HSM Client allows for three slots reserved for each model of Luna Backup HSM. You canedit Chrystoki.conf to modify the number of reserved slots. See also "Configuration File Summary" on page 73.
To modify the number of reserved Backup HSM slots
1. Navigate to the Chrystoki.conf file and open in a text editor.2. Add the following line(s) to the CardReader section of the file:
• For Luna Backup HSM (G5):
LunaG5Slots = <value>;• For Luna B700 Backup HSM:
LunaG7Slots = <value>;
Effects of Kernel UpgradesIf you upgrade the Linux kernel after successful installation of Luna Client, then you must install the kernel-headers for the new kernel and build the UHD, K6 and K7 drivers again for the new kernel. The new kernel takeseffect after reboot.
To update the kernel and then bring the system back to readiness:
1. Install development tools if not already installed.2. Update kernel if needed.3. Reboot.4. Install kernel-headers for the new kernel, example: yum install kernel-headers-$(uname -r)5. Rebuild the drivers for the new kernel: rpmbuild --rebuild uhd-7.3.0-165.src
Do the same for k6 and k7 drivers.
TroubleshootingNo slots visible for Luna Network HSM = user can’t read certs directory.
No slots visible for Luna PCIe HSM or Luna USB HSM = user can’t read device (/dev/k7pf0, /dev/viper0, or/dev/lunauhd0).
You might have left a user out of hsmusers group, or you might have set an overly restrictive umask.
Luna Minimal Client Install for Linux - OverviewMinimal client install is intended for container instances to interact with Luna HSM partitions, and contains theminimum run-time libraries required for a cryptography application to connect to Luna Network HSM usingPKCS#11 or Java APIs, in addition to some configuration tools. The Luna Minimal Install is provided as a tarballthat you can unpack where desired, and choose the files that you need.
Luna Network HSM 7 Partition Administration GuideLast Updated: 2022-07-26 23:53:21 GMT-04:00 Copyright 2001-2022 Thales Group 46

Chapter 1: Luna HSM Client Software Installation
NOTE This feature requires minimum client version 7.2. See Version Dependencies byFeature for more information.The minimal client does not have an installer, and omits drivers and other material, for backupHSMs, for Luna PED, or for the Luna PCIe HSM. For any of those, you would use the full LunaHSM Client Installer.
Mandatory files for configuration and secure communication, where to get them andwhere to keep themThe Luna Minimal Client, when installed on minimalist or micro-service containers, requires that you have theappropriate files and folders available
> Chrystoki.conf configuration file (includes settings, and pointers to resources),
> certificates folders (for secure communications protocols, NTLS or STC)
> libraries and plugins required for secure communications protocols.
The Luna Minimal Client tarball includes a "template" version of the Chrystoki.conf file that you can edit for anynon-default settings needed by your application, and to reflect the actual paths to resources.
Alternatively, you might already have a configured Chrystoki.conf file that you can copy into the Docker containerwith the minimal client, or that you can leave at an external location that is mountable from within the Dockercontainer.
Similarly, the Docker container with the minimal client must have access to the certificates (local host certificate,and certificates from any registered application partitions or Thales Data Protection on Demand (DPoD) LunaCloud HSM services) for secure communication. Those can reside inside the container, or can reside on anexternal mountable drive - either way, the paths in the Chrystoki.conf file must point to their location.
Configure and link, inside your Docker containerYou will need to untar the Minimal Client tarball in your container, or open it elsewhere and copy the desired filesto your container.
If you already have a Chrystoki.conf file with most, or all, of your desired settings, you can copy it into thecontainer and edit it manually.
If you do not have suitable Chrystoki.conf file, the minimal client tarball contains a config template file that youcan modify with the configurator utility.
At the same time, you can create and exchange certificates by means of the included vtl utility. Ensure that theresulting certificates are pointed-to in Chrystoki.conf file. For example instructions, see "Installing Luna MinimalClient on Linux Using Docker" on page 52.
Configure and link, exterior to your Docker containerTo configure Chrystoki.conf and to establish an NTLS or STC link outside your Docker container, for later use byone-or-more Docker containers, you can
> Untar the Luna Minimal Client tarball at the desired staging location, use configurator or manually edit theChrystoki.conf file, and use vtl to establish the secure link to Luna Network HSM appliance.
OR
Luna Network HSM 7 Partition Administration GuideLast Updated: 2022-07-26 23:53:21 GMT-04:00 Copyright 2001-2022 Thales Group 47

Chapter 1: Luna HSM Client Software Installation
> Install the full Luna HSM Client, and follow the instructions to create/update the Chrystoki.conf file, and createand exchange certificates for a secure link to a Network HSM appliance.
The above could be done before the Docker container is created, or after one exists.
Whether you elect to pre-configure externally, with a full Luna HSM Client Installation or with a copy of the LunaMinimal Client, or from inside each Docker container after it is created (and populated and configured with theLuna Minimal Client), two general networking approaches are possible:
[Network OPTION] Dynamic private IP address per containerIf each Docker container (default) has a private IP address dynamically assigned to the container at run time:
• A single set of configuration file and certificate folders is needed, that will apply to any container within thathidden/translated subnet.
• Each container can mount the needed configuration from the one location on the host.
• Because all containers have the same IP address and appear as the same client, you must disable ntlsipchecking on the Luna Network HSM appliance.
[Network OPTION] Unique public IP address per containerIf a unique public IP address is assigned to each Docker container, visible to the Luna Network HSM appliance:
• A separate NTLS configuration is performed, either externally on the host computer, for each proposedcontainer IP, with the resulting configuration file and certificates folders saved to unique mountablelocations on the host file system, OR configuration and certificate exchange is performed from the minimalclient within each container after it is created.
• Each container gets its own configuration file and unique certificates whether mounted externally orresiding inside the container.
• Because each container has its own unique public IP address, and is considered its own client, keep ntlsipcheck enabled on the Luna Network HSM appliance.
DPoDWith the additional tools included in the minimal install archive, as of release 7.6, the expanded minimal clienthas the needed tools for local (in-container) configuration. If you intend to connect with DPoD Luna Cloud HSMservices, see "From Linux Minimal Client Create a Docker Container to Access a DPOD Luna Cloud HSMService" on page 56 for additional steps.
Included in the Minimal ClientThe following components are included in the Luna Minimal Client tar ball:
Component Used or needed for...
JCPROV
LunaClient-Minimal-<release_version>.x86_64/jcprov/jcprov.jar
JCPROV jar file
LunaClient-Minimal-<release_version>.x86_64/jcprov/64/libjcprov.so
JCPROV library
Luna Network HSM 7 Partition Administration GuideLast Updated: 2022-07-26 23:53:21 GMT-04:00 Copyright 2001-2022 Thales Group 48

Chapter 1: Luna HSM Client Software Installation
Component Used or needed for...
JSP
LunaClient-Minimal-<release_version>.x86_64/jsp/LunaProvider.jar
JSP jar file
LunaClient-Minimal-<release_version>.x86_64/jsp/64/libLunaAPI.so
JSP library
LIBRARIES
LunaClient-Minimal-<release_version>.x86_64/libs/64/libCryptoki2.so
Library to address cryptographic functions of the HSM
LunaClient-Minimal-<release_version>.x86_64/libs/64/libCryptoki2_64.so
Symbolic link pointing to libCryptoki2.so, needed for FM hostappscompiled against libCryptoki2_64.so
LunaClient-Minimal-<release_version>.x86_64/libs/64/libethsm.so
Library to interact with Functionality Modules
LunaClient-Minimal-<release_version>.x86_64/libs/64/libSoftToken.so
Library for STC connection (alternative to NTLS)
LunaClient-Minimal-<release_version>.x86_64/libs/64/libcklog2.so
Logging library - invoked by vtl cklog enable command to logcommands before passing them to the cryptoki library and the HSM.
PLUG-INS
LunaClient-Minimal-<release_version>.x86_64/plugins/libdpod.plugin
Enable connection protocol with Luna Cloud HSM services(See also the related XTC and REST sections of chrystoki.conf file)
CONFIGURATION FILES
LunaClient-Minimal-<release_version>.x86_64/Chrystoki-template.conf
Chrystoki.conf template in case you don't already have a conf file.
LunaClient-Minimal-<release_version>.x86_64/openssl.cnf
Configuration file for OpenSSL.
BINARIES/TOOLS
LunaClient-Minimal-<release_version>.x86_64/bin/64/mkfm
Allow client to connect to Functionality Modules (if you have installedany in the HSM)
LunaClient-Minimal-<release_version>.x86_64/bin/64/configurator
Configuration file management tool
LunaClient-Minimal-<release_version>.x86_64/bin/64/ckdemo
Demonstrates individual, atomic, PKCS#11 operations in the HSM
LunaClient-Minimal-<release_version>.x86_64/bin/64/lunacm
Partition administration tool
Luna Network HSM 7 Partition Administration GuideLast Updated: 2022-07-26 23:53:21 GMT-04:00 Copyright 2001-2022 Thales Group 49

Chapter 1: Luna HSM Client Software Installation
Component Used or needed for...
LunaClient-Minimal-<release_version>.x86_64/bin/64/cmu
Certificate Management Utility
LunaClient-Minimal-<release_version>.x86_64/bin/64/multitoken
Perform multiple crypto commands on multiple slots
LunaClient-Minimal-<release_version>.x86_64/bin/64/pscpLunaClient-Minimal-<release_version>.x86_64/bin/64/plink
Used for One Step NTLS
LunaClient-Minimal-<release_version>.x86_64/bin/64/salogin
Persistent application connection tool
LunaClient-Minimal-<release_version>.x86_64/bin/64/vtl
Configuration tool (certificate creation and exchange, registration ofclients with partitions, logging, etc.)
LICENSE AGREEMENT
LunaClient-Minimal-<release_version>.x86_64/008-010068-001_EULA_HSM7_SW_revB.pdf
LunaClient-Minimal-<release_version>.x86_64/008-010068-001_EULA_HSM7_SW_revB.txt
The configuration template file is included, in case you wish to populate it via direct editing (perhaps by script).Otherwise, a configuration file is created and modified when you perform a full (non-minimal) installation andconfiguration elsewhere, and you can simply have your Docker containers mount the external location to makeuse of the resulting chrystoki.conf file and certificate folders.
Installation PrerequisitesEnsure that you have the following prerequisites before installing the Luna Minimal Client:
> A Linux host system with Docker installed (see https://www.docker.com/ for Docker download and install)
> A copy of the Luna Minimal Client tarball package
> A Luna Network HSM 7.x appliance, already initialized and ready to use (or an account for access to DPoDLuna Cloud HSM services) -- perform any of the actions not already done:
• Configure the Luna Network HSM network settings.
• Initialize the HSM.
• Create an application partition on the Network HSM.
• Exchange host certificates between Luna HSM Client and the Luna Network HSM and register each withthe other (On the client side, add the Network HSM's certificate to the server certs folder and to the CAFile.On the Network HSM, register the client with lunash:>client register).
• Start the NTLS service on the appliance with lunash:>service restart ntls, and assign the client to theapplication partition with lunash:>client assign partition.
Luna Network HSM 7 Partition Administration GuideLast Updated: 2022-07-26 23:53:21 GMT-04:00 Copyright 2001-2022 Thales Group 50

Chapter 1: Luna HSM Client Software Installation
• On the client side, use LunaCM to configure the application partition (see "Initializing an ApplicationPartition" on page 287), initializing the partition and creating roles as appropriate.
• After configuring Luna HSM Client on a host system, edit the Chrystoki.conf file for use in containers, asdescribed in "Preparing the Configuration File for Use with Luna Minimal Client and Docker" below below.
> A working knowledge of Docker.
Preparing the Configuration File for Use with Luna Minimal Client and DockerMake the following edits to the Chrystoki.conf file before using it in the containers:
1. Change all the library paths (for example LibUNIX64) to /usr/local/luna/libs/642. Change the certificate and client token paths to the the directory you are making available to the containers at
run-time (for example /usr/local/luna/config/certs)
Entry in Chrystoki.conf Value in the host system Value in the containers
ClientPrivKeyFile /usr/safenet/lunaclient/cert/client /usr/local/luna/config/certs
ClientCertFile /usr/safenet/lunaclient/cert/client /usr/local/luna/config/certs
ServerCAFile /usr/safenet/lunaclient/cert/server /usr/local/luna/config/certs/
PartitionPolicyTemplatePath /usr/safenet/lunaclient/data/partition_policy_templates
/usr/local/luna/config/ppt/partition_policy_templates
LibUNIX64 /usr/safenet/lunaclient/lib/libCryptoki2_64.so
/usr/local/luna/libs/64/libCryptoki2.so
ClientTokenLib /usr/safenet/lunaclient/lib/libSoftToken.so /usr/local/luna/libs/64/libSoftToken.so
SoftTokenDir /usr/safenet/lunaclient/configData/token /usr/local/luna/config/stc/token
ClientIdentitiesDir /usr/safenet/lunaclient/data/client_identities
/usr/local/luna/config/stc/client_identities
PartitionIdentitiesDir /usr/safenet/lunaclient/data/partition_identities
/usr/local/luna/config/stc/partition_identities
ToolsDir /usr/safenet/lunaclient/bin /usr/local/luna/bin/64
SSLConfigFile /usr/safenet/lunaclient/bin/openssl.cnf /usr/local/luna/openssl.cnf
Ready to Install Minimal ClientFor detailed instructions, see "Installing Luna Minimal Client on Linux Using Docker" on the next page.
For additional instructions on using the minimal client with Functionality Modules, see "Create a Luna HSMClient Docker image for use with Functionality Modules" on page 57.
For additional instructions on using the minimal client with DPoD Luna Cloud HSM services, see "From LinuxMinimal Client Create a Docker Container to Access a DPOD Luna Cloud HSM Service" on page 56.
Luna Network HSM 7 Partition Administration GuideLast Updated: 2022-07-26 23:53:21 GMT-04:00 Copyright 2001-2022 Thales Group 51

Chapter 1: Luna HSM Client Software Installation
Installing Luna Minimal Client on Linux Using DockerThe following procedure allows you to install the Luna Minimal Client in a Docker container on Linux, so thatapplications in that container can access Luna Network HSM partitions. For an overview description of LunaMinimal Client and its prerequisites, see "Luna Minimal Client Install for Linux - Overview" on page 46.
NOTE This feature requires minimum client version 7.2. See Version Dependencies byFeature for more information.If SELinux is enabled in Enforcing mode, you must assign proper permissions to any containerthat needs to access the config directory.
To install the Luna Minimal Client software on a Linux 64-bit Docker instance:This example uses NTLS. The use of STC is optional.This example is based on CentOS 7; other operating systems might require adjustments to the commands andto the docker file.
1. Create a directory. In this example:$HOME/luna-docker
The name is not important, only that you use it consistently.
2. Create the following subdirectories under that first directory:$HOME/luna-docker/config$HOME/luna-docker/config/certs
additionally, if you are configuring STC:$HOME/luna-docker/config/stc$HOME/luna-docker/config/stc/client_identities$HOME/luna-docker/config/stc/partition_identities$HOME/luna-docker/config/stc/token/001
and create an empty file
for pre-7.7.0$HOME/luna-docker/config/stc/token/001/token.db
for 7.7.0 onward$HOME/luna-docker/config/stc/token/001/token_v2.db
The contents of the config directory are needed by the Docker containers.
3. Copy the Luna Minimal Client tarball to $HOME/luna-docker.4. Untar the Luna Minimal Client tarball.
>tar -xf $HOME/luna-docker/LunaClient-Minimal-<release_version>.x86_64.tar -C $HOME/luna-docker5. Copy the Chrystoki.conf file from the Minimal Client directory to $HOME/luna-docker/config.
>cp $HOME/luna-docker/LunaClient-Minimal-<release_version>.x86_64/Chrystoki-template.conf$HOME/luna-docker/config/Chrystoki.conf
6. Define the following environment variable:>export ChrystokiConfigurationPath=$HOME/luna-docker/config
Luna Network HSM 7 Partition Administration GuideLast Updated: 2022-07-26 23:53:21 GMT-04:00 Copyright 2001-2022 Thales Group 52

Chapter 1: Luna HSM Client Software Installation
7. [Optional] If you choose to use STC, review the Luna Network HSM documentation and modify the followinginstructions. The goal is to have an HSM partition created and registered with the full Luna HSM Client beforeyou create the Docker image and containers.
8. Update the Chrystoki.conf file paths so the tools work as expected>MIN_CLIENT_DIR=$HOME/luna-docker/LunaClient-Minimal-<release_version>.x86_64>$MIN_CLIENT_DIR/bin/64/configurator setValue -s Chrystoki2 -e LibUNIX -v $MIN_CLIENT_DIR/libs/64/libCryptoki2.so>$MIN_CLIENT_DIR/bin/64/configurator setValue -s Chrystoki2 -e LibUNIX64 -v $MIN_CLIENT_DIR/libs/64/libCryptoki2_64.so>$MIN_CLIENT_DIR/bin/64/configurator setValue -s Misc -e ToolsDir -v $MIN_CLIENT_DIR/bin/64>$MIN_CLIENT_DIR/bin/64/configurator setValue -s "LunaSA Client" -e SSLConfigFile -v $MIN_CLIENT_DIR/openssl.cnf>$MIN_CLIENT_DIR/bin/64/configurator setValue -s "LunaSA Client" -e ClientPrivKeyFile -v$HOME/luna-docker/config/certs/dockerlunaclientKey.pem>$MIN_CLIENT_DIR/bin/64/configurator setValue -s "LunaSA Client" -e ClientCertFile -v$HOME/luna-docker/config/certs/dockerlunaclient.pem>$MIN_CLIENT_DIR/bin/64/configurator setValue -s "LunaSA Client" -e ServerCAFile -v$HOME/luna-docker/config/certs/CAFile.pem>$MIN_CLIENT_DIR/bin/64/configurator setValue -s "Secure Trusted Channel" -e ClientTokenLib -v$MIN_CLIENT_DIR/libs/64/libSoftToken.so>$MIN_CLIENT_DIR/bin/64/configurator setValue -s "Secure Trusted Channel" -e SoftTokenDir -v$HOME/luna-docker/config/stc/token>$MIN_CLIENT_DIR/bin/64/configurator setValue -s "Secure Trusted Channel" -e ClientIdentitiesDir-v $HOME/luna-docker/config/stc/client_identities>$MIN_CLIENT_DIR/bin/64/configurator setValue -s "Secure Trusted Channel" -ePartitionIdentitiesDir -v $HOME/luna-docker/config/stc/partition_identities
9. Create a Luna HSM Client certificate for the Docker containers.
>$MIN_CLIENT_DIR/bin/64/vtl createCert -n <cert_name>10.Copy the client certificate to the Luna Network HSM appliance.
>scp $HOME/luna-docker/config/certs/<cert_name>.pem admin@<Network_HSM_IP>:11.Copy the appliance server certificate (server.pem) to $HOME/luna-docker/config/certs
>scp admin@<Network_HSM_IP>:server.pem $HOME/luna-docker/config/certs12.Register the appliance server certificate with the Client.
>$MIN_CLIENT_DIR/bin/64/vtl addServer -c $HOME/luna-docker/config/certs/server.pem -n<Network_HSM_IP>
13.Connect via SSH to the Luna Network HSM appliance and log in to LunaSH.
>ssh admin@<Network_HSM_IP>
From this point it is assumed that the appliance already has a valid server.pem. If not, then generate a newone via the lunash:> sysconf regenCert command.
Luna Network HSM 7 Partition Administration GuideLast Updated: 2022-07-26 23:53:21 GMT-04:00 Copyright 2001-2022 Thales Group 53

Chapter 1: Luna HSM Client Software Installation
14.Create a partition, if one does not already exist on the HSM.lunash:>partition create -partition <partition_name>The HSMmust already have been initialized, via lunash:> hsm init command, and the HSM SOmust log invia hsm login command, for application partitions to be created.For HSMs at firmware 7.7.0 or newer, any new partition defaults to version zero (V0), unless you specify V1 inthe partition create command.
15.Register the full Luna HSM Client with the appliance, and assign the partition to the client.
lunash:> client register -client <client_name> {-ip <client_IP> | -hostname <client_hostname>}lunash:> client assignpartition -client <client_name> -partition <partition_name>lunash:> ntls ipcheck disablelunash:> exit
16.On the Client workstation, run LunaCM, set the active slot to the registered partition, and initialize it.>$MIN_CLIENT_DIR/bin/64/lunacmlunacm:> slot set -slot <slotnum>lunacm:> partition init -label <partition_label>lunash:> exit
17.Update the paths of the libraries, certs and general fields to their future Docker image locations within the$ChrystokiConfigurationPath/Chrystoki.conf.>sed -i -e 's#'$HOME'/luna-docker/config#/usr/local/luna/config#g' -e 's#'$HOME'/luna-docker/LunaClient-Minimal-\([0-9\.-]\+\)x86_64#/usr/local/luna#g'$ChrystokiConfigurationPath/Chrystoki.conf
Create a Luna HSM Client Docker imageThe minimal client tarball includes files necessary for basic operation, and some tools; copy any additional filesyou want to include in the docker image to $HOME/luna-docker/. This example includes the entire Luna MinimalClient.
1. Create a file named Dockerfile with the following contents:FROM ubuntu:xenial#FROM centos:centos7
ARG MIN_CLIENTCOPY $MIN_CLIENT.tar /tmpRUN mkdir -p /usr/local/lunaRUN tar xvf /tmp/$MIN_CLIENT.tar --strip 1 -C /usr/local/lunaENV ChrystokiConfigurationPath=/usr/local/luna/configENV PATH="/usr/local/luna/bin/64:${PATH}"
# The package below is necessary for One-Step NTLS if you want to setup NTLS within theDocker container.# The only requirement beyond glibc.i686 (required by plink and pscp) would be a configuredChrystoki.conf# The minimal client documentation section 8 has example commands, you should modify thevalue parameter ("-v")# to point to desired files/directories.# One-Step NTLS uses the section “Misc” entry “ToolsDir” to find the plink/pscp binaries,
Luna Network HSM 7 Partition Administration GuideLast Updated: 2022-07-26 23:53:21 GMT-04:00 Copyright 2001-2022 Thales Group 54

Chapter 1: Luna HSM Client Software Installation
# The Chrystoki.conf needs the following entries to be updated for One-Step NTLS to work:# Section | Entry# --------------------------# Chrystoki2 | LibUNIX# Chrystoki2 | LibUNIX64# Misc | ToolsDir# "LunaSA Client" | SSLConfigFile# "LunaSA Client" | ClientPrivKeyFile# "LunaSA Client" | ClientCertFile# "LunaSA Client" | ServerCAFile# Syntax: configurator setValue –s <Section> -e <Entry> -v <value># Example: configurator setValue -s Misc -e ToolsDir -v /usr/local/luna/bin/64# Ubuntu:#RUN dpkg --add-architecture i386#RUN apt-get update#RUN apt-get -y install libc6:i386# Centos:#RUN yum install -y glibc.i686
ENTRYPOINT /bin/bash#End of the Dockerfile
2. Build a Docker image.>docker build . --build-arg MIN_CLIENT=LunaClient-Minimal-<release_version>.x86_64 -t lunaclient-image
3. Use the following command to verify the Docker image has been created:>docker images
Run the Docker container1. Make the contents of the config directory available to the Containers when you create them, by mounting the
config directory as a volume.
>docker run -it --name lunaclient -v $PWD/config:/usr/local/luna/config lunaclient-image2. From the Docker container, verify that the container has a connection to the Luna Network HSM partition.
Functionality Modules (FMs) with Luna Minimal ClientTo use FMs with the minimal client, see "Create a Luna HSM Client Docker image for use with FunctionalityModules" on page 57.
Thales Data Protection on Demand Luna Cloud HSM Service with Luna MinimalClientTo connect to Thales Data Protection on Demand (DPoD) Luna Cloud HSM services with the minimal client, see"From Linux Minimal Client Create a Docker Container to Access a DPOD Luna Cloud HSM Service" on the nextpage.
Luna Network HSM 7 Partition Administration GuideLast Updated: 2022-07-26 23:53:21 GMT-04:00 Copyright 2001-2022 Thales Group 55

Chapter 1: Luna HSM Client Software Installation
From Linux Minimal Client Create a Docker Container to Accessa DPOD Luna Cloud HSM ServiceThis section describes steps to view Thales Data Protection on Demand (DPoD) Luna Cloud HSM services froma Luna Minimal Client. This example assumes that you have followed the steps in "Installing Luna Minimal Clienton Linux Using Docker" on page 52, or have otherwise created the appropriate directories and Dockerfile. Thissection assumes you have purchased a Luna Cloud HSM service.
1. Download the Luna Cloud HSM service client configuration zip file.
2. Unzip the Luna Cloud HSM service client configuration zip file.
>cd $HOME/luna-docker>mkdir $HOME/luna-docker/dpod>unzip </path/to/luna-cloud-hsm-client>.zip -d $HOME/luna-docker/dpod
3. Untar the cvclient-min.tar file in the <luna-cloud-hsm-client> directory.>cd $$HOME/luna-docker/dpod/<luna-cloud-hsm-client>>tar xvf cvclient-min.tar -d $HOME/luna-docker/dpod/<luna-cloud-hsm-client>
4. Set the environment variable
NOTE If Luna HSM Client is not installed in the default directory, or if setenv was runpreviously, you must clear the ChrystokiConfigurationPath environment variable or update itto point to the location of the correct configuration file:> [Windows] In the Control Panel, search for "environment" and select Edit the system
environment variables. Click Environment Variables. In both the list boxes for thecurrent user and system variables, edit ChrystokiConfigurationPath to point to thecrystoki.ini file in the correct client install directory.
> [Linux] Either open a new shell session, or reset the environment variable for the currentsession to the location of the correct Chrystoki.conf file:# export ChrystokiConfigurationPath=/etc/
>source ./setenv --addcloudhsm5. Attach the Docker container. If it is stopped you must start the container first.
>docker ps -a>docker start <container_id>>docker attach <container_id>
6. At this point you should be able to see the Luna Cloud HSM service
>lunacm
Luna Network HSM 7 Partition Administration GuideLast Updated: 2022-07-26 23:53:21 GMT-04:00 Copyright 2001-2022 Thales Group 56

Chapter 1: Luna HSM Client Software Installation
Create a Luna HSM Client Docker image for use withFunctionality ModulesThe example "Installing Luna Minimal Client on Linux Using Docker" on page 52 uses the Luna Minimal Client togain connection to a Luna Network HSM partition. This section explores some additional steps to sign aFunctionality Module (FM) from a Docker container, and also execute a Host Application in order tocommunicate with the Functionality Module in the Luna Network HSM.
NOTE This feature requires minimum client version 7.4. See Version Dependencies byFeature for more information.
FMs consist of two components - the FM itself, that resides in the HSM, extending its functionality, and the HostApplication component that resides with the clients that need to connect with that FM.
Due to the size of the FM SDK and ELDK, those have not been included in the Minimal Client as they wouldgreatly expand the size of the minimal client. The assumption is that you installed the full Luna HSM Client withHSM Software Development Kit, FM Software Development Kit and other components, and then created andcompiled your Functionality Modules elsewhere, and that you would be importing FM components and usingFMs, but not developing and compiling them inside a Docker container.
But the above-mentioned use-cases should help in common tasks such as signing Functionality Modules orCommunicating with them via Host Applications.
1. On a Linux client with the Functionality Module SDK Component installed (which also installs the EmbeddedLinux Development Kit (ELDK)), compile the sample FMs and Host application binaries.
>make -C /usr/safenet/lunafmsdk/samples/pinenc all>make -C /usr/safenet/lunafmsdk/samples/skeleton all>make -C /usr/safenet/lunafmsdk/samples/wrap-comp all
2. Create a directory on the shared volume to store the Host applications and unsigned FM binaries.
>mkdir $HOME/luna-docker/config/fm3. Copy the generated files over.
>cp /usr/safenet/lunafmsdk/samples/pinenc/fm/bin-ppc/* $HOME/luna-docker/config/fm/>cp /usr/safenet/lunafmsdk/samples/skeleton/fm/bin-ppc/* $HOME/luna-docker/config/fm/>cp /usr/safenet/lunafmsdk/samples/wrap-comp/fm/bin-ppc/* $HOME/luna-docker/config/fm/>cp /usr/safenet/lunafmsdk/samples/pinenc/host/output/bin/* $HOME/luna-docker/config/fm/>cp /usr/safenet/lunafmsdk/samples/skeleton/host/output/bin/* $HOME/luna-docker/config/fm/>cp /usr/safenet/lunafmsdk/samples/wrap-comp/host/output/bin/* $HOME/luna-docker/config/fm/
4. Go back to the Docker container. If it is stopped you must start the container first.>docker ps -a>docker start <container_id>>docker attach <container_id>
Luna Network HSM 7 Partition Administration GuideLast Updated: 2022-07-26 23:53:21 GMT-04:00 Copyright 2001-2022 Thales Group 57
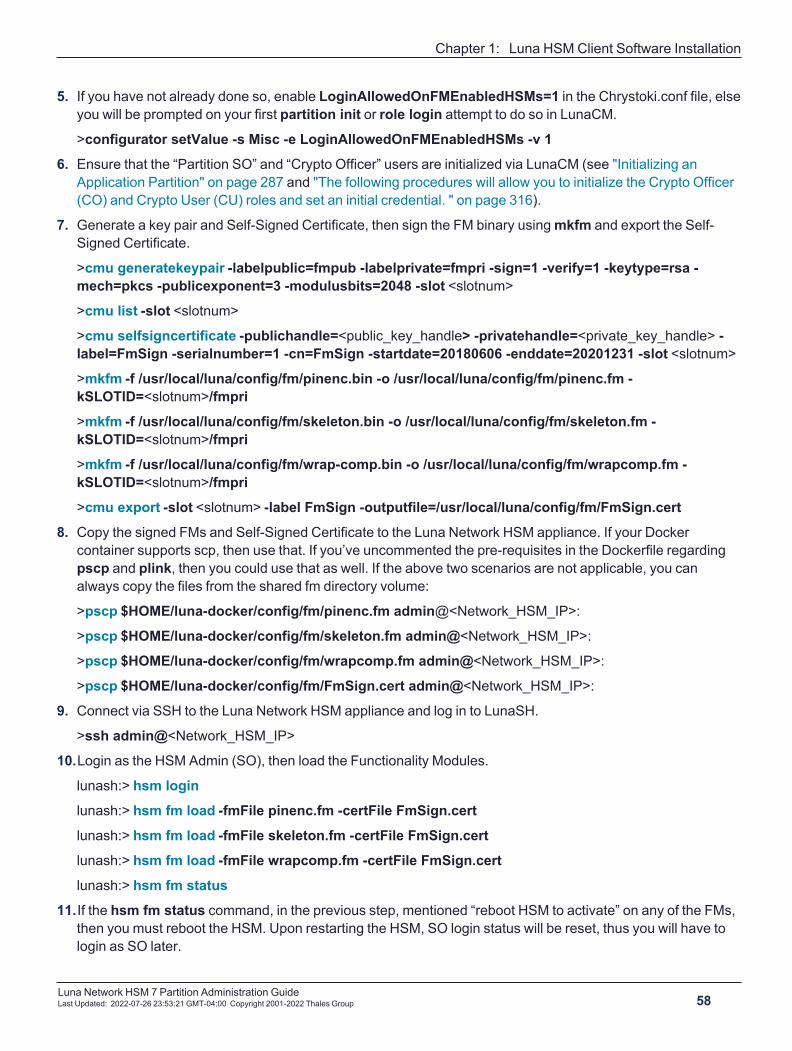
Chapter 1: Luna HSM Client Software Installation
5. If you have not already done so, enable LoginAllowedOnFMEnabledHSMs=1 in the Chrystoki.conf file, elseyou will be prompted on your first partition init or role login attempt to do so in LunaCM.>configurator setValue -s Misc -e LoginAllowedOnFMEnabledHSMs -v 1
6. Ensure that the “Partition SO” and “Crypto Officer” users are initialized via LunaCM (see "Initializing anApplication Partition" on page 287 and "The following procedures will allow you to initialize the Crypto Officer(CO) and Crypto User (CU) roles and set an initial credential. " on page 316).
7. Generate a key pair and Self-Signed Certificate, then sign the FM binary usingmkfm and export the Self-Signed Certificate.
>cmu generatekeypair -labelpublic=fmpub -labelprivate=fmpri -sign=1 -verify=1 -keytype=rsa -mech=pkcs -publicexponent=3 -modulusbits=2048 -slot <slotnum>>cmu list -slot <slotnum>>cmu selfsigncertificate -publichandle=<public_key_handle> -privatehandle=<private_key_handle> -label=FmSign -serialnumber=1 -cn=FmSign -startdate=20180606 -enddate=20201231 -slot <slotnum>>mkfm -f /usr/local/luna/config/fm/pinenc.bin -o /usr/local/luna/config/fm/pinenc.fm -kSLOTID=<slotnum>/fmpri>mkfm -f /usr/local/luna/config/fm/skeleton.bin -o /usr/local/luna/config/fm/skeleton.fm -kSLOTID=<slotnum>/fmpri>mkfm -f /usr/local/luna/config/fm/wrap-comp.bin -o /usr/local/luna/config/fm/wrapcomp.fm -kSLOTID=<slotnum>/fmpri>cmu export -slot <slotnum> -label FmSign -outputfile=/usr/local/luna/config/fm/FmSign.cert
8. Copy the signed FMs and Self-Signed Certificate to the Luna Network HSM appliance. If your Dockercontainer supports scp, then use that. If you’ve uncommented the pre-requisites in the Dockerfile regardingpscp and plink, then you could use that as well. If the above two scenarios are not applicable, you canalways copy the files from the shared fm directory volume:
>pscp $HOME/luna-docker/config/fm/pinenc.fm admin@<Network_HSM_IP>:
>pscp $HOME/luna-docker/config/fm/skeleton.fm admin@<Network_HSM_IP>:
>pscp $HOME/luna-docker/config/fm/wrapcomp.fm admin@<Network_HSM_IP>:
>pscp $HOME/luna-docker/config/fm/FmSign.cert admin@<Network_HSM_IP>:
9. Connect via SSH to the Luna Network HSM appliance and log in to LunaSH.
>ssh admin@<Network_HSM_IP>
10.Login as the HSM Admin (SO), then load the Functionality Modules.
lunash:> hsm loginlunash:> hsm fm load -fmFile pinenc.fm -certFile FmSign.certlunash:> hsm fm load -fmFile skeleton.fm -certFile FmSign.certlunash:> hsm fm load -fmFile wrapcomp.fm -certFile FmSign.certlunash:> hsm fm status
11.If the hsm fm status command, in the previous step, mentioned “reboot HSM to activate” on any of the FMs,then you must reboot the HSM. Upon restarting the HSM, SO login status will be reset, thus you will have tologin as SO later.
Luna Network HSM 7 Partition Administration GuideLast Updated: 2022-07-26 23:53:21 GMT-04:00 Copyright 2001-2022 Thales Group 58

Chapter 1: Luna HSM Client Software Installation
lunash:> hsm restartlunash:> hsm login
12.Activate Secure Memory File System (SMFS); you must be logged in as the HSM Admin. If you check thestatus of the FMs, they should all be “Enabled” status now.
lunash:> hsm fm smfs activatelunash:> hsm fm status
13.Verify that the Host Application can interact with the FM. If you have trouble loading the shared libraries, youcan set the LD_LIBRARY_PATH environment variable.
>export LD_LIBRARY_PATH="/usr/local/luna/libs/64">/usr/local/luna/config/fm/pinenctest -s<slotnum> gen>/usr/local/luna/config/fm/pinenctest -d<slotnum> test>/usr/local/luna/config/fm/skeleton -s<slotnum> -t "Hello all">/usr/local/luna/config/fm/wrapcomptest -s<slotnum>
Luna Network HSM 7 Partition Administration GuideLast Updated: 2022-07-26 23:53:21 GMT-04:00 Copyright 2001-2022 Thales Group 59

Chapter 1: Luna HSM Client Software Installation
Solaris Luna HSM Client Installation
NOTE Solaris Client was not included for Luna HSM 7.7.0 or 7.7.1 releases, or UniversalClient 10.3. To use Luna HSM with this operating system, you might need to try another Clientrelease version.
These instructions assume that you have already acquired the Luna HSM Client software, in the form of adownloaded .tar archive.
NOTE Check the Customer Release Notes for Luna HSM Client versions that can be installedon Solaris.
You must install the Luna HSM Client software on each client workstation you will use to access a Luna HSM.This section describes how to install the client on a workstation running Solaris, and contains the following topics:
> "Prerequisites" below
> "Installing the Client Software" on the next page
> "Solaris Luna HSM Client Installation" above
> "Uninstalling the Luna HSM Client Software" on page 63
> "Java" on page 63
> "Scripted or Unattended Installation" on page 63
> "Interrupting the installation - [Ctrl] [C]" on page 64
Applicability to specific versions of Solaris is summarized in the Customer Release Notes.
NOTE Before installing a Luna system, you should confirm that the product you have receivedis in factory condition and has not been tampered with in transit. Refer to the Startup Guideincluded with your product shipment. If you have any questions about the condition of theproduct that you have received, contact Thales Support.
Each computer that connects to the Luna Network HSM appliance as a client must have the cryptoki library, thevtl client shell and other utilities and supporting files installed.
Each computer that contains a Luna PCIe HSM, or is connected to a Luna USB HSM, must have the cryptokilibrary and other utilities and supporting files installed.
NOTE This example shows all the Luna HSM Client products and components. Some itemsare not supported on all operating systems and therefore do not appear as you proceedthrough the installation script.
PrerequisitesBefore starting the installation, ensure that you have satisfied the following prerequisites:
Luna Network HSM 7 Partition Administration GuideLast Updated: 2022-07-26 23:53:21 GMT-04:00 Copyright 2001-2022 Thales Group 60

Chapter 1: Luna HSM Client Software Installation
Random Number Generator (RNG) or Entropy Gathering Daemon (EGD)Ensure that you have a Random Number Generator (RNG) or Entropy Gathering Daemon (EGD) on your systemin one of the following locations:
> /dev/egd-pool
> /etc/egd-pool,
> /etc/entropy
> /var/run/egd-pool
RNG/EGDCryptographic algorithms, including those that assure the security of communication – such as in OpenSSL andother protocols – depend upon random numbers for the creation of strong keys and certificates. A readilyavailable source of random data is the entropy that exists in complex computer processes. Utilities exist for everyoperating system, to gather bits of system entropy into a pool, which can then be used by other processes.
Windows and Linux have these installed by default. Other systems might not. See your system administrator.
Entropy PoolIn the case of Luna Network HSM, the Luna HSM Client administration tool (vtl) expects to find a source ofrandomness at /dev/random. If one is not found, vtl fails, because the link cannot be secured from the Clientend.
If your system does have an entropy pool, but the random number generator (RNG) is not in the expected place,then you can create a symbolic link between the actual location and one of the following:
> /dev/random
> /dev/egd-pool
> /etc/egd-pool
> /etc/entropy
> /var/run/egd-pool
If your system does not have an entropy-gathering daemon or random number generator, please direct yoursystem administrator to install one, and point it to one of the named devices.
Installing the Client Software
TIP We recommend verifying the integrity of the Universal Client packages, by calculatingtheir SHA256 hash values and comparing with the hash values posted on the Support Portal,before installing them on your client machines.You can use the sha256sum tool on Linux machines to calculate the SHA256 hash values.
It is recommended that you refer to the Luna HSM Customer Release Notes for any installation-related issues orinstructions before you begin the following software installation process.
CAUTION! You must be logged in as root when you run the installation script.
Luna Network HSM 7 Partition Administration GuideLast Updated: 2022-07-26 23:53:21 GMT-04:00 Copyright 2001-2022 Thales Group 61

Chapter 1: Luna HSM Client Software Installation
By default, the Client programs are installed in the /opt/safenet/lunaclient/bin directory.
To install the Luna HSM Client software on a Solaris workstation
1. Log on to the client system, open a console or terminal window, and use su to gain administrativepermissions for the installation.
2. Access the Luna HSM Client software:
a. Copy or move the .tar archive to a suitable directory where you can untar the archive and launch theinstallation script.
b. Extract the contents from the archive:
tar xvf <filename>.tar3. Go to the install directory for your architecture:
NOTE Luna HSM Client 10.1 and newer includes libraries for 64-bit operating systems only.
Architecture Path
Solaris Sparc 32-bit LunaClient_7.X.0_SolarisXXSparc/32
Solaris Sparc 64-bit LunaClient_7.X.0_SolarisXXSparc/64
Solaris x86 32-bit LunaClient_7.X.0_SolarisXXx86/32
Solaris x86 64-bit LunaClient_7.X.0_SolarisXXx86/64
4. To see the help, or a list of available installer options, type:sh install.sh -? or sh install.sh --helpTo install all available products and optional components, type:
sh install.sh allTo selectively install individual products and optional components, type the command without arguments:
sh install.sh5. Type y if you agree to be bound by the license agreement.6. A list of installable Luna products is displayed (might be different, depending on your platform). Select as
many as you require, by typing the number of each (in any order) and pressing Enter. As each item isselected, the list updates, with a "*" in front of any item that has been selected. The following example showsthat items 1 and 3 have been selected, and item 4 is about to be selected.ProductsChoose Luna Products to be installed
*[1]: Luna Network HSM[2]: Luna PCIe HSM
*[3]: Luna USB HSM[4]: Luna Backup HSM[N|n]: Next[Q|q]: Quit
Enter selection: 4
7. When the selection is complete, type N or n for "Next", and press Enter. If you wish to make a change, simplytype a number again and press Enter to de-select a single item.
Luna Network HSM 7 Partition Administration GuideLast Updated: 2022-07-26 23:53:21 GMT-04:00 Copyright 2001-2022 Thales Group 62

Chapter 1: Luna HSM Client Software Installation
8. The next list is titled "Advanced" and includes additional items to install. Some items might be pre-selected toprovide the optimum Luna HSM experience for the majority of customers, but you can change any selectionin the list. When the Components list is adjusted to your satisfaction, press Enter.
NOTE The installer includes the Luna SNMP Subagent as an option. If you select this option,you will need to move the SafeNet MIB files to the appropriate directory for your SNMPapplication after installation is complete, and you will need to start the SafeNet subagent andconfigure for use with your agent.
9. If the script detects an existing cryptoki library, it stops and suggests that you uninstall your previous Lunasoftware before starting the Luna HSM Client installation again.
10.The system installs all packages related to the products and any optional components that you selected.
11.Although FMs are supported on Linux andWindows clients only in this release, the FM architecture requiresa configuration file setting to allow partition login on an FM-enabled HSM. If the HSM you will be using withthis client is FM-enabled (see "Preparing the Luna Network HSM to Use FMs" on page 1 for moreinformation), you must add the following entry to the [Misc] section of the Chrystoki.conf file:
[Misc]LoginAllowedOnFMEnabledHSMs=1
NOTE As a general rule, do not modify the Chrystoki.conf/crystoki.ini file, unless directed to doso by Thales Technical Support. If you do modify the file, never insert TAB characters - useindividual space characters. Avoid modifying the PED timeout settings. These are nowhardcoded in the appliance, but the numbers in the Chrystoki.conf file must match.
Uninstalling the Luna HSM Client Software1. cd /opt/safenet/lunaclient/bin2. sh uninstall.sh
JavaIf you install the Luna Java Security Provider (JSP), refer to Luna JSP Overview and Installation for additionalsetup procedures for your operating system.
Scripted or Unattended InstallationIf you prefer to run the installation from a script, rather than interactively, run the command with the options -p<list of Luna products> and -c <list of Luna components>. To see the syntax, run the command with help likethis:[myhost]$ sudo sh install.sh help[sudo] password for fred
At least one product should be specified.
usage:install.sh - Luna Client install through menuinstall.sh help - Display scriptable install options
Luna Network HSM 7 Partition Administration GuideLast Updated: 2022-07-26 23:53:21 GMT-04:00 Copyright 2001-2022 Thales Group 63

Chapter 1: Luna HSM Client Software Installation
install.sh all - Complete Luna Client install
install.sh -p [sa|pci|g5|rb] [-c sdk|jsp|jcprov|ldpc|snmp]
-p <list of Luna products>-c <list of Luna components> - Optional. All components are installed if not provided
Luna products optionssa - Luna Network HSMpci - Luna PCIe HSMg5 - Luna USB HSMrb - Luna Backup HSM
Luna components optionssdk - Luna SDKjsp - Luna JSP (Java)jcprov - Luna JCPROV (Java)snmp - Luna SNMP subagent
[myhost]$For scripted/automated installation, your script will need to capture and respond to the License Agreementprompt, and to the confirmation prompt. For example:[myhost]$ sudo sh install.sh all
IMPORTANT: The terms and conditions of use outlined in the softwarelicense agreement (Document #008-010005-001_053110) shipped with the product("License") constitute a legal agreement between you and SafeNet Inc.Please read the License contained in the packaging of thisproduct in its entirety before installing this product.
Do you agree to the License contained in the product packaging?
If you select 'yes' or 'y' you agree to be bound by all the termsand conditions se out in the License.
If you select 'no' or 'n', this product will not be installed.
(y/n) y
Complete Luna Client will be installed. This includes Luna Network HSM,Luna PCIe HSM, Luna USB HSM AND Luna Backup HSM.
Select 'yes' or 'y' to proceed with the install.
Select 'no' or 'n', to cancel this install.
Continue (y/n)? y
Interrupting the installation - [Ctrl] [C]Do not interrupt the installation script in progress, and ensure that your host computer is served by anuninterruptible power supply (UPS). If you press [Ctrl] [C], or otherwise interrupt the installation (OS problem,power outage, other), some components will not be installed. It is not possible to resume an interrupted installprocess. The result of an interruption depends on where, in the process, the interruption occurred (whatremained to install before the process was stopped).
Luna Network HSM 7 Partition Administration GuideLast Updated: 2022-07-26 23:53:21 GMT-04:00 Copyright 2001-2022 Thales Group 64

Chapter 1: Luna HSM Client Software Installation
As long as the cryptoki package is installed, any subsequent installation attempt results in refusal with themessage "A version of Luna Client is already installed." Removing the library allows the script to clean upremaining components, so that you can install again.
What to do if installation is incomplete or damaged
1. If SNFTlibcryptoki has been installed, uninstall it manually.2. Run the Client install script again. Now that SNFTlibcryptoki is removed, the install script removes any stray
packages and files.
3. Install again, to perform a clean installation.
Luna Network HSM 7 Partition Administration GuideLast Updated: 2022-07-26 23:53:21 GMT-04:00 Copyright 2001-2022 Thales Group 65

Chapter 1: Luna HSM Client Software Installation
AIX Luna HSM Client Installation
NOTE AIX Client was not included for Luna HSM 7.7.0 or 7.7.1 releases, or Universal Client10.3. To use Luna HSM with this operating system, you might need to try another Client releaseversion.
These instructions assume that you have already acquired the Luna HSM Client software, usually in the form of adownloaded .tar archive.
You must install the Luna HSM Client software on each client workstation you will use to access a Luna HSM.This section describes how to install the client on a workstation running AIX, and contains the following topics:
> "Prerequisites" below
> "Installing the Client Software" below
> "AIX Luna HSM Client Installation" above
> "Uninstalling the Luna HSM Client Software" on page 69
> "Installing Java" on page 69
> "Scripted or Unattended Installation" on page 69
> "Interrupting the Installation" on page 70
Applicability to specific versions of AIX is summarized in the Customer Release Notes for the current release.
NOTE Before installing a SafeNet system, you should confirm that the product you havereceived is in factory condition and has not been tampered with in transit. Refer to the ContentSheet included with your product shipment. If you have any questions about the condition of theproduct that you have received, please contact Thales Technical Support.
PrerequisitesEach computer that connects to the Luna Network HSM appliance as a Client must have the cryptoki library, thevtl client shell and other utilities and supporting files installed. Each computer that is connected to a Luna RemoteBackup HSMmust have the cryptoki library and other utilities and supporting files installed - in this case, thatwould be aWindows or Linux computer with the "Luna Backup HSM" option chosen when Luna Client softwareis installed.
TIP We recommend verifying the integrity of the Universal Client packages, by calculatingtheir SHA256 hash values and comparing with the hash values posted on the Support Portal,before installing them on your client machines.You can use the sha256sum tool on Linux machines to calculate the SHA256 hash values.
Installing the Client SoftwareCheck the Luna HSM Customer Release Notes for any installation-related issues or instructions before youbegin the following software installation process.
Luna Network HSM 7 Partition Administration GuideLast Updated: 2022-07-26 23:53:21 GMT-04:00 Copyright 2001-2022 Thales Group 66

Chapter 1: Luna HSM Client Software Installation
To install the Luna HSM Client software on AIX:
1. Log on to the client system, open a console or terminal window, and use su or sudo to gain administrativepermissions for the installation.
2. If you downloaded the software, copy or move the .tar archive (which usually has a name like "LunaClient_7.x.y-nn_AIX.tar") to a suitable directory where you can untar the archive and launch the installation script.
3. Enter the following command to extract the contents from the archive:
tar xvf <filename>.tar4. Change directory to the software version suitable for your system.5. Install the client software as follows:
• To see the 'help', or a list of available installer options, type:
sh install.sh -? or ./sh install.sh --help• To install all available products and optional components, type:
sh install.sh all• To selectively install individual products and optional components, type the command without arguments:
sh install.sh
NOTE Do not interrupt the installation script in progress. An uninterruptible power supply(UPS) is recommended. See "Interrupting the Installation" on page 70 for more information.
6. Type y if you agree to be bound by the license agreement:[mylunaclient-1 32]$ sh install.sh
IMPORTANT: The terms and conditions of use outlined in the softwarelicense agreement (Document #008-010005-001_EULA_HSM_SW_revN) shipped with the product("License") constitute a legal agreement between you and SafeNet.Please read the License contained in the packaging of thisproduct in its entirety before installing this product.
Do you agree to the License contained in the product packaging?
If you select 'yes' or 'y' you agree to be bound by all the termsand conditions set out in the License.
If you select 'no' or 'n', this product will not be installed.
(y/n)
7. A list of installable Luna products appears (might be different, depending on your platform). Select as manyas you require, by typing the number of each (in any order) and pressing Enter. As each item is selected, thelist updates, with a "*" in front of any item that has been selected. This example shows item 1 has beenselected.ProductsChoose Luna Products to be installed *[1]: Luna Network HSM
[N|n]: Next
Luna Network HSM 7 Partition Administration GuideLast Updated: 2022-07-26 23:53:21 GMT-04:00 Copyright 2001-2022 Thales Group 67

Chapter 1: Luna HSM Client Software Installation
[Q|q]: Quit
Enter selection: 1
NOTE When the above was captured, the AIX client supported only Luna Network HSM. Toinstall the Luna Backup HSM, you will need one of the other supported host platforms.
8. When selection is complete, type N or n for "Next", and press Enter. If you wish to make a change, simplytype a number again and press Enter to de-select a single item.
9. The next list is called "Advanced" and includes additional items to install. Some items might be pre-selectedto provide the optimum Luna HSM experience for the majority of customers, but you can change anyselection in the list.ProductsChoose Luna Products to be installed
[1]: Luna Network HSM[N|n]: Next[Q|q]: Quit
Enter selection: 1
AdvancedChoose Luna Components to be installed
[1]: Luna SDK
*[2]: Luna JSP (Java)
*[3]: Luna JCProv (Java)
[B|b]: Back to Products selection
[I|i]: Install
[Q|q]: Quit
Enter selection:
If you wish to make a change, simply type a number again and press Enter to select or de-select a singleitem.
If the script detects an existing cryptoki library, it stops and suggests that you uninstall your previous Lunasoftware before starting the Luna HSM Client installation again.
10.The system installs all packages related to the products and any optional components that you selected. Bydefault, the Client programs are installed in the /usr/safenet/lunaclient directory.
NOTE When installing, ensure that the full path of a package does not contain any spacecharacters. (The IBM examples do not show any spaces, implying that this might be a systemrequirement.)
11.Although FMs are supported on Linux andWindows clients only in this release, the FM architecture requiresa configuration file setting to allow partition login on an FM-enabled HSM. If the HSM you will be using with
Luna Network HSM 7 Partition Administration GuideLast Updated: 2022-07-26 23:53:21 GMT-04:00 Copyright 2001-2022 Thales Group 68

Chapter 1: Luna HSM Client Software Installation
this client is FM-enabled (see "Preparing the Luna Network HSM to Use FMs" on page 1 for moreinformation), you must add the following entry to the [Misc] section of the Chrystoki.conf file:
[Misc]LoginAllowedOnFMEnabledHSMs=1
NOTE As a general rule, do not modify the Chrystoki.conf/crystoki.ini file, unless directed to doso by Thales Technical Support. If you do modify the file, never insert TAB characters - useindividual space characters. Avoid modifying the PED timeout settings. These are nowhardcoded in the appliance, but the numbers in the Chrystoki.conf file must match.
Uninstalling the Luna HSM Client SoftwareYou may need to uninstall the Luna HSM Client software prior to upgrading to a new release, or if the software isno longer required.
To uninstall the Luna HSM Client software:
1. Log in as root. (use sudo instead)2. Go to the client installation directory:
cd /usr/safenet/lunaclient/bin3. Run the uninstall script:
sudo sh uninstall.sh
Installing JavaIf you install the Luna Java Security Provider (JSP), refer to Luna JSP Overview and Installation for additionalsetup procedures for your operating system.
Scripted or Unattended InstallationIf you prefer to run the installation from a script, rather than interactively, run the command with the options -p <list of Luna products> and -c <list of Luna components>. To see the syntax, run the command with help likethis:[myhost]$ sudo sh install.sh help[sudo] password for fred
At least one product should be specified.
usage:install.sh - Luna Client install through menuinstall.sh help - Display scriptable install optionsinstall.sh all - Complete Luna Client install
install.sh -p [sa|pci|g5|rb] [-c sdk|jsp|jcprov|ldpc|snmp]
-p <list of Luna products>-c <list of Luna components> - Optional. All components are installed if not provided
Luna products options
Luna Network HSM 7 Partition Administration GuideLast Updated: 2022-07-26 23:53:21 GMT-04:00 Copyright 2001-2022 Thales Group 69

Chapter 1: Luna HSM Client Software Installation
sa - Luna Network HSMpci - Luna PCIe HSMg5 - Luna USB HSMrb - Luna Backup HSM
Luna components optionssdk - Luna SDKjsp - Luna JSP (Java)jcprov - Luna JCPROV (Java)snmp - Luna SNMP subagent
[myhost]$For scripted/automated installation, your script will need to capture and respond to the License Agreementprompt, and to the confirmation prompt. For example:[myhost]$ sudo sh install.sh all
IMPORTANT: The terms and conditions of use outlined in the softwarelicense agreement (Document #008-010005-001_053110) shipped with the product("License") constitute a legal agreement between you and SafeNet Inc.Please read the License contained in the packaging of thisproduct in its entirety before installing this product.
Do you agree to the License contained in the product packaging?
If you select 'yes' or 'y' you agree to be bound by all the termsand conditions se out in the License.
If you select 'no' or 'n', this product will not be installed.
(y/n) y
Complete Luna HSM Client will be installed. This includes Luna Network HSM,Luna PCIe HSM, Luna USB HSM AND Luna Backup HSM.
Select 'yes' or 'y' to proceed with the install.
Select 'no' or 'n', to cancel this install.
Continue (y/n)? y
Interrupting the InstallationDo not interrupt the installation script in progress, and ensure that your host computer is served by anuninterruptible power supply (UPS). If you press [Ctrl] [C], or otherwise interrupt the installation (OS problem,power outage, other), some components will not be installed. It is not possible to resume an interrupted installprocess. The result of an interruption depends on where, in the process, the interruption occurred (whatremained to install before the process was stopped).
As long as the cryptoki RPM package is installed, any subsequent installation attempt results in refusal with themessage "A version of Luna HSM Client is already installed."
If components are missing or are not working properly after an interrupted installation, or if you wish to install anyadditional components at a later date (following an interrupted installation, as described), you would need touninstall everything first. If sh uninstall.sh is unable to do it, then you must uninstall all packages manually.
Luna Network HSM 7 Partition Administration GuideLast Updated: 2022-07-26 23:53:21 GMT-04:00 Copyright 2001-2022 Thales Group 70

Chapter 1: Luna HSM Client Software Installation
Because interruption of the install.sh script is not recommended, and mitigation is possible, this is considered alow-likelihood corner case, fully addressed by these comments.
Adding a Luna Cloud HSM ServiceLuna HSM Client allows you to use both Luna partitions and Thales Data Protection on Demand (DPoD) LunaCloud HSM service partitions. Using a single client workstation, you can back up or migrate your keys betweenLuna and the Luna Cloud HSM service, or combine partitions and services into an HA group.
NOTE Refer to the Luna HSM Client Releasesfor supported client versions. Thalesrecommends keeping your Luna HSM Client software updated to the latest version, especiallyif your deployment includes Luna Cloud HSM.
Prerequisites> If Luna HSM Client is not installed at the default location, the ChrystokiConfigurationPathmust be set for
the Luna Cloud HSM service to use the correct location.
> DPoD Luna Cloud HSM services support Windows and Linux operating systems only. This procedurepresumes that you have already set up Luna HSM Client on your Windows or Linux workstation:
• "Windows Interactive Luna HSM Client Installation" on page 26
• "Linux Luna HSM Client Installation" on page 36
> Luna Cloud HSM services are only compatible with password-authenticated Luna Network HSM partitions.For more information on Luna/Luna Cloud HSM service compatibility, refer to "Cloning Keys Between Luna 6,Luna 7, and Luna Cloud HSM" on page 191. You can still use Luna Cloud HSM and PED-authenticated Lunapartitions from the same client workstation, but they cannot clone cryptographic objects between them
To add a DPoD Luna Cloud HSM service to an existing Luna HSM Client
1. After purchasing a Luna Cloud HSM service, refer to the DPoD Luna Cloud HSM documentation forinstructions on downloading the Luna Cloud HSM service client. Transfer the zip file to your workstation usingpscp, scp, or other secure means.
2. Extract the zip file into a directory on your client workstation.3. Extract or untar the appropriate client package for your operating system. Do not extract to a new
subdirectory; place the files in the Luna Cloud HSM service client install directory. The other client packagecan be safely deleted.
• [Windows] cvclient-min.zip• [Linux] cvclient-min.tar
# tar -xvf cvclient-min.tar4. Run the provided setenv script to automatically copy the necessary Luna Cloud HSM service configuration
entries to the existing Luna HSM Client configuration file. The existing Luna HSM Client configuration filemust be writable to execute setenv.
Luna Network HSM 7 Partition Administration GuideLast Updated: 2022-07-26 23:53:21 GMT-04:00 Copyright 2001-2022 Thales Group 71

Chapter 1: Luna HSM Client Software Installation
CAUTION! Running setenv will overwrite any existing Luna Cloud HSM serviceconfigurations in the Luna HSM Client configuration file.
NOTE If Luna HSM Client is not installed in the default directory, or if setenv was runpreviously, you must clear the ChrystokiConfigurationPath environment variable or update itto point to the location of the correct configuration file:> [Windows] In the Control Panel, search for "environment" and select Edit the system
environment variables. Click Environment Variables. In both the list boxes for thecurrent user and system variables, edit ChrystokiConfigurationPath to point to thecrystoki.ini file in the correct client install directory.
> [Linux] Either open a new shell session, or reset the environment variable for the currentsession to the location of the correct Chrystoki.conf file:# export ChrystokiConfigurationPath=/etc/
• [Windows cmd prompt] Open a command prompt as Administrator and run the script with the -addcloudhsm option.
> .\setenv.cmd -addcloudhsm• [Linux] Source the setenv script with the --addcloudhsm option.
# source ./setenv --addcloudhsm5. Launch or relaunch LunaCM to verify that both your Luna partitions and Luna Cloud HSM service are
available. Once the Luna Cloud HSM service has been added to the Luna HSM Client, you can delete theclient package downloaded from Thales DPoD.
Initializing a Luna Cloud HSM ServiceYou must now initialize the Luna Cloud HSM service for use with your existing Luna partitions. If your LunaHSMs are password-authenticated, the cloning domain you set on the Luna Cloud HSM service must match thepartition(s) with which it will share keys.
> "Initializing an Application Partition" on page 287
> "The following procedures will allow you to initialize the Crypto Officer (CO) and Crypto User (CU) roles andset an initial credential. " on page 316
If you will be using the Luna Cloud HSM service with PED-authenticated Luna partitions, LunaCM provides theoption to import the credential from a red domain PED key to Luna Cloud HSM, as described below.
NOTE This feature requires minimum Luna HSM Client 10.4.1, and is available for Luna CloudHSM only.
Prerequisites> The uninitialized Luna Cloud HSM service must be available in LunaCM on a client computer with Luna HSM
Client 10.4.1 installed.
> The client computer must have the Luna PED driver installed:
Luna Network HSM 7 Partition Administration GuideLast Updated: 2022-07-26 23:53:21 GMT-04:00 Copyright 2001-2022 Thales Group 72

Chapter 1: Luna HSM Client Software Installation
Windows: "Modifying the Installed Windows Luna HSM Client Software" on page 30 (Remote PEDpackage)
Linux: "About Installing the Client Software" on page 38 ([5] Luna Remote PED package or -p ped inscripted installation)
> Connect a Luna PED to the client computer and set it to Local PED-USBmode (see "Modes of Operation" onpage 209).
> If you were previously using this client computer as a Remote PED server, you must stop PEDserver beforecontinuing:
"pedserver -mode stop" on page 273> If your Luna partition domain uses an M of N PED key scheme, ensure that you have enough keys on hand to
provide the M of N quorum.
To initialize a Luna Cloud HSM service using an imported PED domain secret
1. Launch LunaCM on the client computer.
2. Set the active slot to the uninitialized Luna Cloud HSM service.
lunacm:> slot set -slot <slot#>3. Initialize the Luna Cloud HSM service, specifying an identifying label and including the -importpeddomain
option.
lunacm:> partition init -label <label> -importpeddomainFollow the prompts in LunaCM and on the Luna PED to import the PED domain and complete the initializationprocess.
Refer to "Cloning Keys Between Luna 6, Luna 7, and Luna Cloud HSM" on page 191 for guidelines on usingLuna Cloud HSM with Luna 7 HSMs. You can back up your partitions to Luna Cloud using slot-to-slot cloning orby setting up an HA group to synchronize your partition contents with Luna Cloud.
CAUTION! Failover to Luna Cloud HSM is supported in an HA group with password-authenticated Luna partitions only. When configured in an HA group with PED-authenticatedLuna partitions, Luna Cloud HSM functions as a backup only.
> "Cloning Objects to Another Application Partition" on page 190
> "Setting Up an HA Group" on page 373
Configuration File SummaryThe Luna HSM Client software installation includes a configuration file that controls many aspects of clientoperation. The fields in the configuration file are used to alter the default behavior of the library. So the defaultvalue is the value that would result in the normal (non-altered) behavior (but see TIP below). The configurationfile can be found in the following default locations:
> Luna HSM Client• Windows: C:Program Files\SafeNet\LunaClient\crystoki.ini
• Linux/UNIX: /etc/Chrystoki.conf
Luna Network HSM 7 Partition Administration GuideLast Updated: 2022-07-26 23:53:21 GMT-04:00 Copyright 2001-2022 Thales Group 73

Chapter 1: Luna HSM Client Software Installation
> Luna Cloud HSM• Windows: <service_client_path>\crystoki.ini
• Linux: <service_client_path>/Chrystoki.conf
NOTE The crystoki.ini and Chrystoki.conf files included with the Luna Cloud HSM serviceclient provide a default set of configuration options. The setenv executable assists with thebasic configuration requirements for communicating with the Luna Cloud HSM service.
The configuration file is organized into named sections, containing various configuration entries. It is installedwith the default settings described in the table below. In addition to the default sections and entries, someadditional sections/entries can be added to customize functionality. Generally, Thales does not recommendediting the configuration file directly; many entries are changed by entering commands in LunaCM or vtl.However, some entries can only be edited manually.
If you update the Luna HSM Client software by running the uninstaller and then installing a newer version, theexisting configuration file is saved. This preserves your configuration settings, including the location ofcertificates necessary for your partition NTLS/STC connections for Luna products.
The following table describes all valid sections and entries in the configuration file. When editing the file, ensurethat you maintain the applicable syntax conventions for your operating system (use existing sections/entries as atemplate for new entries). Where applicable, entries are listed with the valid range of values and the defaultsetting.
Luna Network HSM 7 Partition Administration GuideLast Updated: 2022-07-26 23:53:21 GMT-04:00 Copyright 2001-2022 Thales Group 74

Chapter 1: Luna HSM Client Software Installation
TIP
Configuration settings and Section HeadingsSome of the sections and entries listed here do not appear in the base configuration file as youwould receive it via download; in many use-cases, your application's employment of the HSMwould not require any direct intervention in the configuration file. "Factory" settings would besufficient. If an application would benefit from a setting that differs from the stock values, and avisible entry is not already in the configuration file on your host system, then you must add arelevant entry in order to change the behavior described in the table below.
• If the configuration file contains no explicit entries that would reside under a particularheading, then the heading itself would also not be present.
• If you intend to add a setting to the file, and there is no pre-existing section-heading for it,then create a heading as indicated in the table, below, following the format of the othersections in your config file, appropriate for the host operating system (Linux/UNIX orWindows).
The majority of fields are Boolean (true/false or 0/1), or a range of values.Some of the entries listed include a default setting that is observed if the entry is not included inthe configuration file by default; you must add the entry explicitly, only in the case where youneed to change the default behavior.
Exceptions include...• In the case where
– an explicit location is not set for the library location (which is normally inserted as partof installation if you use the Client installer),
– or if you moved the library after a path value was included,then an error message is generated about the field/path/file not being found, and youmust provide a proper library location in order to proceed.
• If you intend to use an NTLS connection (Luna Network HSM) or an XTC connection(Luna Cloud HSM), then the relevant settings must be present to define that connection,or the connection does not take place.
The take-awayDo not edit the Chrystoki.conf or crystoki.ini file unless you need to do so. If you need to edit,refer to the guidance in the table below, and ask for help from our technical support engineers ifthis document is not sufficient.
Section/Setting Description
Chrystoki2
Luna Network HSM 7 Partition Administration GuideLast Updated: 2022-07-26 23:53:21 GMT-04:00 Copyright 2001-2022 Thales Group 75

Chapter 1: Luna HSM Client Software Installation
Section/Setting Description
LibNT Path to the Chrystoki2 library on Windows operatingsystems.Default: C:\ProgramFiles\SafeNet\LunaClient\cryptoki.dll
LibNT32 Path to the Chrystoki2 library on 32-bit Windows systemsonly.Default: C:\ProgramFiles\SafeNet\LunaClient\win32\libCryptoki2.dll
NOTE Luna HSM Client 10.1 and newerincludes libraries for 64-bit operating systemsonly.
LibUNIX64 Path to the Chrystoki2 library on 64-bit Linux/UNIXoperating systems.Default:> Linux/AIX:
/usr/safenet/lunaclient/libs/64/libCryptoki2_64.so> Solaris: /opt/safenet/lunaclient/libs/64/libCryptoki2_
64.so
Luna (see * below this table)
CloningCommandTimeout The amount of time (in milliseconds) the library allows forthe HSM to respond to a cloning command.Default: 300000
CommandTimeoutPedSet This is an exception to DefaultTimeout (below). It definesthe time (in milliseconds) allowed for all PED-related HSMcommands. PED-related commands can take longer thanordinary commands governed by DefaultTimeOut.Generally, the following formula applies:CommandTimeOutPedSet = DefaultTimeOut +PEDTimeout1 + PEDTimeout2 + PEDTimeout3Default: 720000
Luna Network HSM 7 Partition Administration GuideLast Updated: 2022-07-26 23:53:21 GMT-04:00 Copyright 2001-2022 Thales Group 76

Chapter 1: Luna HSM Client Software Installation
Section/Setting Description
DefaultTimeOut Defines the time (in milliseconds) the HSM driver in the hostsystem waits for HSM commands to return a result. If aresult is not returned in that time, the driver halts the HSMand returns DEVICE_ERROR to all applications using theHSM. The only exceptions are when a command's timeoutis hard-coded in the Cryptoki library, or the command fallsinto a class governed by one of the other timeout intervalsdescribed elsewhere in this section.Default: 500000
DomainParamTimeout Timeout (in milliseconds) for Domain ParameterGeneration.Default: 5400000
KeypairGenTimeOut Defines the time (in milliseconds) the library waits for akeypair generation operation to return a value. Therandomization component of keypair generation can causelarge keypairs to take a long time to generate, and thissetting keeps the attempts within a reasonable time. Youcan change this value to manage your preferred balancebetween long waits and the inconvenience of restarting akeygen operation.Default: 2700000
PEDTimeout1 Defines the time (in milliseconds) the HSM attempts to pingthe PED before sending a PED operation request. If thePED is unreachable, the HSM returns a code indicating thatthe PED is not connected.Default: 100000
PEDTimeout2 Defines the time (in milliseconds) that the HSM waits for thelocal PED to respond to a PED operation request. If thelocal PED does not respond to the request within the spanof PEDTimeout2, the HSM returns an appropriate resultcode (such as PED_TIMEOUT). This is the timeout youmight increase from the Default value if you were initializinglarger MofN PED Key sets - the HSM allows M and N toeach be up to 16 splits - maybe applying PED PINS, andmaking a duplicate set as well.Default: 200000
Luna Network HSM 7 Partition Administration GuideLast Updated: 2022-07-26 23:53:21 GMT-04:00 Copyright 2001-2022 Thales Group 77

Chapter 1: Luna HSM Client Software Installation
Section/Setting Description
PEDTimeout3 Defines the additional time (in milliseconds) the HSM waitsfor a remote PED to respond to a PED operation request.Therefore, the actual time the firmware waits for a remotePED response is PEDTimeout2 + PEDTimeout3.Default: 20000
CardReader
LunaG5Slots Number of Luna Backup HSM (G5) slots reserved so thatthe library will check for connected devices.Valid Values:> 0: If you have no Luna Backup HSM (G5)s and wish to
eliminate the reserved spaces in your slot list, use thissetting.
> 1-N: Can be set to any number, but is effectively limitedby the number of external USB devices supported byyour client workstation.
Default: 3
LunaG7Slots Number of Luna G7 Backup HSM slots reserved so that thelibrary will check for connected devices.Valid Values:> 0: If you have no Luna G7 Backup HSMs and wish to
eliminate the reserved spaces in your slot list, use thissetting.
> 1-N: Can be set to any number, but is effectively limitedby the number of external USB devices supported byyour client workstation.
Default: 3
RemoteCommand This setting was used when debugging older Lunaproducts. For modern products it is ignored.Valid Values:> 0: false> 1 (default): true
CKLog2
NOTE See "Using CKlog" on page 1. Config is done via vtl utility or by editing this config file directly.
RBS NOTE RBS is not supported with Luna CloudHSM services.
Luna Network HSM 7 Partition Administration GuideLast Updated: 2022-07-26 23:53:21 GMT-04:00 Copyright 2001-2022 Thales Group 78

Chapter 1: Luna HSM Client Software Installation
Section/Setting Description
CmdProcessor The location of the RBS library.Default:> Windows: C:\Program
Files\SafeNet\LunaClient\rbs_processor2.dll> Linux/AIX: /usr/safenet/lunaclient/rbs/lib/librbs_
processor2.dll> Solaris: /opt/safenet/lunaclient/rbs/lib/librbs_
processor2.dll
HostPort The port number used by the RBS server.Valid Values: any unassigned portDefault: 1792
ClientAuthFile The location of the RBS Client authentication file.Default:> Windows: C:\Program
Files\SafeNet\LunaClient\config\clientauth.dat> Linux/AIX: /usr/safenet/lunaclient/rbs/clientauth.dat> Solaris: /opt/safenet/lunaclient/rbs/clientauth.dat
ServerSSLConfigFile The location of the OpenSSL configuration file used byRBS Server or Client.Default:> Windows: C:\Program
Files\SafeNet\LunaClient\rbs\server.cnf> Linux/AIX:
/usr/safenet/lunaclient/rbs/server/server.cnf> Solaris:
/opt/safenet/lunaclient/rbs/server/server.cnf
ServerPrivKeyFile The location of the RBS Server certificate private key file.Default:> Windows: C:\Program
Files\SafeNet\LunaClient\cert\server\serverkey.pem> Linux/AIX:
/usr/safenet/lunaclient/rbs/server/serverkey.pem> Solaris:
/opt/safenet/lunaclient/rbs/server/serverkey.pem
Luna Network HSM 7 Partition Administration GuideLast Updated: 2022-07-26 23:53:21 GMT-04:00 Copyright 2001-2022 Thales Group 79

Chapter 1: Luna HSM Client Software Installation
Section/Setting Description
ServerCertFile The location of the RBS Server certificate file.Default:> Windows: C:\Program
Files\SafeNet\LunaClient\cert\server\server.pem> Linux/AIX:
/usr/safenet/lunaclient/rbs/server/server.pem> Solaris:
/opt/safenet/lunaclient/rbs/server/server.pem
NetServer Determines whether RBS acts as a server or client.Valid Values:> 0: Client> 1 (default): Server
HostName The hostname or IP address that the RBS server will listenon.Valid Value: any hostname or IP addressDefault: 0.0.0.0 (any IP on the local host)
Available Lists the serial numbers of Luna Backup HSMs available onthe RBS server.
LunaSA Client
ReceiveTimeout Time in milliseconds before a receive timeout.Default: 20000
SSLConfigFile Location of the OpenSSL configuration file.Default:> Windows: C:\Program
Files\SafeNet\LunaClient\openssl.cnf> Linux/AIX: /usr/safenet/lunaclient/bin/openssl.cnf> Solaris: /opt/safenet/lunaclient/bin/openssl.cnf
Luna Network HSM 7 Partition Administration GuideLast Updated: 2022-07-26 23:53:21 GMT-04:00 Copyright 2001-2022 Thales Group 80

Chapter 1: Luna HSM Client Software Installation
Section/Setting Description
ClientPrivKeyFile Location of the client private key. This value is set by vtl orlunacm:> clientconfig deploy.Default:> Windows: C:\Program
Files\SafeNet\LunaClient\cert\client\<ClientName>Key.pem
> Linux/AIX:/usr/safenet/lunaclient/cert/client/<ClientName>Key.pem
> Solaris:/opt/safenet/lunaclient/cert/client/<ClientName>Key.pem
ClientCertFile Location of the client certificate that is uploaded to LunaNetwork HSM for NTLS. This value is set by vtl or lunacm:>clientconfig deploy.Default:> Windows: C:\Program
Files\SafeNet\LunaClient\cert\client\<ClientName>Cert.pem
> Linux/AIX:/usr/safenet/lunaclient/cert/client/<ClientName>Cert.pem
> Solaris:/opt/safenet/lunaclient/cert/client/<ClientName>Cert.pem
ServerCAFile Location of the server certificate file on the clientworkstation. This value is set by vtl or lunacm:>clientconfig deploy.Default:> Windows: C:\Program
Files\SafeNet\LunaClient\cert\server\CAFile.pem> Linux/AIX:
/usr/safenet/lunaclient/cert/server/CAFile.pem> Solaris:
/opt/safenet/lunaclient/cert/server/CAFile.pem
NetClient Determines whether the library searches for network slots.Valid Values:> 0: The library does not search for network slots.> 1 (default): The library searches for network slots.
Luna Network HSM 7 Partition Administration GuideLast Updated: 2022-07-26 23:53:21 GMT-04:00 Copyright 2001-2022 Thales Group 81

Chapter 1: Luna HSM Client Software Installation
Section/Setting Description
TCPKeepAlive TCPKeepAlive is a TCP stack option, available at the LunaHSM Client and the Luna Network HSM appliance. It iscontrolled via an entry in the Luna HSM Client configurationfile, and an equivalent file on the Luna Network HSM.On the Luna Network HSM appliance, where you do nothave direct access to the file system, the TCPKeepAlive=setting is controlled by lunash:> ntls tcp_keepalive set.The settings at the appliance and the client areindependent. This allows a level of assurance, in case (forexample) a firewall setting blocks communication in onedirection.Valid Values:> 0: false> 1 (default): true
ServerName## These entries identify NTLS-linked Luna Network HSMservers/ports, and determines the order in which they arepolled to create a slot list. These values are set by vtl orlunacm:> clientconfig deploy.ServerPort##
Presentation NOTE This section is not created automatically. To changeany of the following values, you must first create this sectionin the configuration file.
OneBaseSlotId Determines whether slot listing begins at 0 or 1.Default: 0
ShowAdminTokens Determines whether the Admin partitions of locally-installedLuna PCIe HSMs are visible in the slot list.Valid Values:> no: Admin slots are hidden.> yes (default): Admin slots are visible.
Luna Network HSM 7 Partition Administration GuideLast Updated: 2022-07-26 23:53:21 GMT-04:00 Copyright 2001-2022 Thales Group 82

Chapter 1: Luna HSM Client Software Installation
Section/Setting Description
ShowEmptySlots Determines whether slot numbers are reserved forpartitions that have not yet been created on the HSM.When this setting is enabled, slot numbers remainconsistent over time, even when new partitions are created.Valid Values:> no (default): Only existing partitions are assigned slot
numbers.> yes: Slot numbers are reserved for the maximum
number of partitions that can be created on HSMsconnected to the client.
NOTE This does not apply to Luna NetworkHSM partitions assigned to the client, which willalways appear in the lowest-numbered slots,causing locally-connected and Luna Cloud HSMservice slots to increment higher.
ShowUserSlots Allows you to set permanent slot numbers for specificpartitions. If you use this setting, you must specify a slot forall partitions on a specific HSM, or the partitions not listedhere will not be visible to the client.Valid Values: Comma-delimited list in the format<slotnum>(<serialnum>)Example:ShowUserSlots=1(351970018022),2(351970018021),3(351970018020),...
VirtualToken NOTE This section is created only if the HA auto-recoverymode is set to activeEnhanced. See "Configuring HAAuto-Recovery" on page 381.
VirtualToken##Label The label of the HA group.This value is set by using the lunacm:> hagroupcreategroup command to set up an HA group. See "SettingUp an HA Group" on page 373.
VirtualToken##SN The pseudo serial number of the HA group.This value is set by using the lunacm:> hagroupcreategroup command to set up an HA group. See "SettingUp an HA Group" on page 373.
Luna Network HSM 7 Partition Administration GuideLast Updated: 2022-07-26 23:53:21 GMT-04:00 Copyright 2001-2022 Thales Group 83

Chapter 1: Luna HSM Client Software Installation
Section/Setting Description
VirtualToken##Members The serial number of the HA group members.This value is set by using the lunacm:> hagroupaddmember command to add a member to the HA group.See "Setting Up an HA Group" on page 373.
VirtualTokenActiveRecovery The HA auto-recovery mode.This value is set by using the lunacm:> hagrouprecoverymode command to configure the HA auto-recoverymode. See "Configuring HA Auto-Recovery" on page 381.
HAConfiguration
AutoReconnectInterval Specifies the interval (in seconds) at which the library willattempt to reconnect with a missing HA member, until theset number of attempts is reached. This value is set usinglunacm:> hagroup interval.Valid Values:> 60-1200: Wait the specified number of seconds
between reconnection attempts.Default: 60 seconds
HAOnly Determines whether individual HA member slots are visibleto client applications. Hiding individual members helpsprevent synchronization errors by preventing applicationsfrom directing calls to individual member partitions. If amember partition fails, the other slots in the system change,which can cause applications to send calls to the wrong slotnumber. This setting prevents this by hiding all physicalslots from applications.Valid Values:> 0 (default): All partitions are visible to applications as
slots.> 1: Only HA virtual slots are visible to applications.
NOTE This setting does not affect how slotsare numbered in LunaCM; you can stillconfigure individual member partitions withHAOnly mode enabled.
Luna Network HSM 7 Partition Administration GuideLast Updated: 2022-07-26 23:53:21 GMT-04:00 Copyright 2001-2022 Thales Group 84

Chapter 1: Luna HSM Client Software Installation
Section/Setting Description
reconnAtt Specifies the number of reconnection attempts the clientmakes to a missing HA member. Once this number isreached, you must manually reconnect the member when itbecomes available (see "Manually Recovering a Failed HAGroup Member" on page 389).This value is set using lunacm:> hagroup retry.Valid Values:> -1: Perform infinite reconnection attempts.> 0: Disable HA auto-recovery.> 1-500: Perform the specified number of reconnection
attempts.
Misc
AppId = <xxx> Application IDs are generated when the application starts,and are 16 bytes for Luna firmware 7.7.0 and compatibleclient software. Application IDs are not supported for LunaCloud HSM services. For earlier HSM firmware or clients,see "Application IDs" on page 1. You can override thisfunctionality and specify an AppId if desired.
CopyRSAPublicValuesFromPrivateTemplate Controls whether the public exponent of an RSA key can becopied from the private key template, if the public keytemplate does not already have a public exponent attributeset.Valid Values:> 0: if no public exponent is provided in the public
template, an error is returned (expected behavior).> 1(default): if no public exponent is provided in the public
template, the private exponent is copied from the privatetemplate to populate the public template.
For PKCS#11 compliance, this should be set to 0.
NOTE This functionality requires Luna HSMClient 7.1.0 or newer.
FunctionBindLevel Determines what action to take if a function binding failsduring a CryptokiConnect() operation.Valid Values:> 0 (default): fail if not all functions can be resolved> 1: do not fail but issue warning for each function not
resolved> 2: do not fail and do not issue warning (silent mode)
Luna Network HSM 7 Partition Administration GuideLast Updated: 2022-07-26 23:53:21 GMT-04:00 Copyright 2001-2022 Thales Group 85

Chapter 1: Luna HSM Client Software Installation
Section/Setting Description
LoginAllowedOnFMEnabledHSMs Determines whether the client can log in to a partition on anHSM that uses Functionality Modules (FMs). FMs consist ofcustom-designed code that introduces new functionality,which can be more or less secure than standard HSMfunctions.Possible values include:> 0: the client does not allow login to an FM-enabled
partition> 1: the client allows login to an FM-enabled partitionThis entry is added to the configuration file the first time youinitialize or log in to an FM-enabled partition using LunaCM.You are prompted to confirm that you want to allow login.
PE1746Enabled Enables the SafeXcel 1746 security co-processor on Luna6 HSMs, which is used to offload packet processing andcryptographic computations from the host processor. Doesnot apply to Luna 7 HSMs or Luna Cloud HSMservices.This must be set to 0 to use Luna 6 partitions in amixed-version HA group (see "Cloning Keys Between Luna6, Luna 7, and Luna Cloud HSM" on page 191).Valid Values:> 0: SafeXcel co-processor is disabled on Luna 6 HSMs.> 1 (default): SafeXcel co-processor is enabled on Luna 6
HSMs.
PluginModuleDir Specifies the location of client plugins. This setting isrequired to use the cloud plugin to access Luna Cloud HSMservices.Default:> Windows: C:\Program
Files\SafeNet\LunaClient\plugins> Linux: /usr/safenet/lunaclient/libs/64/plugins
ProtectedAuthenticationPathFlagStatus Specifies which role to check for challenge request status.Valid Values:> 0 (default): no challenge request> 1: check for Crypto Officer challenge request> 2: check for Crypto User challenge request
NOTE This functionality requires Luna HSMClient 7.1.0 or newer.
Luna Network HSM 7 Partition Administration GuideLast Updated: 2022-07-26 23:53:21 GMT-04:00 Copyright 2001-2022 Thales Group 86

Chapter 1: Luna HSM Client Software Installation
Section/Setting Description
RSAKeyGenMechRemap This entry remaps calls to certain older mechanisms, nolonger supported on the latest firmware, to use newer, moresecure mechanisms instead.> 0: No re-mapping is performed.> 1: The following re-mapping occurs:
• PKCS Key Gen -> 186-3 Prime key gen• X9.31 Key Gen -> 186-3 Aux Prime key gen (see
Mechanism Remap for FIPS Compliance)
NOTE Mechanism remapping isautomatic, and ignores the configurationfile entry:
• if you are using Luna HSM Client10.1 or newer, and
• HSM firmware is earlier thanversion 7.7.1 (which introducedthe ability for a partition to beFIPS-mode when the HSM is non-FIPS; clients up to, and including,10.3.0 are unaware of theindependent partition setting anddo not remap mechanisms).
Luna HSM Clients 10.4.0 or newer areaware of the firmware 7.7.1 change anddo perform the mechanism remapping,as expected, when the current partition isin FIPS mode.
Luna Network HSM 7 Partition Administration GuideLast Updated: 2022-07-26 23:53:21 GMT-04:00 Copyright 2001-2022 Thales Group 87

Chapter 1: Luna HSM Client Software Installation
Section/Setting Description
RSAPre1863KeyGenMechRemap This entry remaps calls to newer mechanisms, when theyare not available on older firmware, to use oldermechanisms instead. Intended for evaluation purposes,such as with existing integrations that require newermechanisms, before you update to firmware that actuallysupports the more secure mechanisms. Be careful with thissetting, which makes it appear you are using a new, securemechanism, when really you are using an outdated,insecure mechanism (see Mechanism Remap for FIPSCompliance).> 0: No re-mapping is performed.> 1: The following re-mapping occurs if the HSM firmware
permits:• 186-3 Prime key gen -> PKCS Key Gen• 186-3 Aux Prime key gen -> X9.31 Key Gen
NOTE Mechanism remapping isautomatic, and ignores the configurationfile entry:
• if you are using Luna HSM Client10.1 or newer, and
• HSM firmware is earlier thanversion 7.7.1 (which introducedthe ability for a partition to beFIPS-mode when the HSM is non-FIPS; clients up to, and including,10.3.0 are unaware of theindependent partition setting anddo not remap mechanisms).
Luna HSM Clients 10.4.0 or newer areaware of the firmware 7.7.1 change anddo perform the mechanism remapping,as expected, when the current partition isin FIPS mode.
ToolsDir The location of the Luna HSM Client tools.Full Luna HSM Client Default:> Windows: C:\Program Files\SafeNet\LunaClient\> Linux/AIX: /usr/safenet/lunaclient/bin/> Solaris: /opt/safenet/lunaclient/bin/Minimal Luna HSM Client Default:> Linux: /usr/safenet/lunaclient/bin/64/
Luna Network HSM 7 Partition Administration GuideLast Updated: 2022-07-26 23:53:21 GMT-04:00 Copyright 2001-2022 Thales Group 88

Chapter 1: Luna HSM Client Software Installation
Section/Setting Description
ValidateHost= Set this flag to have the Luna HSM Client validate theserver's hostname/IP against the Subject Alternate Name(SAN) values in the server's certificate.Default: 0
Secure Trusted Channel NOTE Secure Trusted Channel is not supported with LunaCloud HSM Services.
ClientIdentitiesDir Specifies the directory used to store the STC client identity.Default:> Windows: C:\Program
Files\SafeNet\LunaClient\data\client_identities> Linux/AIX: /usr/safenet/lunaclient/data/client_
identities> Solaris: /opt/safenet/lunaclient/data/client_
identities
ClientTokenLib(for 64-bit Windows systems)
Specifies the location of the token library on 64-bit Windowssystems. This value must be correct in order to use a clienttoken. If you are using a hard token, you must manuallychange this value to point to the hard token library for youroperating system. The exact location of the hard tokenlibrary may vary depending on your installer.Default: C:\ProgramFiles\SafeNet\LunaClient\softtoken.dll
ClientTokenLib32(for 32-bit Windows systems)
Specifies the location of the token library on 32-bit Windowssystems. This entry appears on Windows only.By default, ClientTokenLib32 points to the location of thesoft token library. If you are using a hard token, you mustmanually change this value to point to the hard token libraryfor your operating system. The exact location of the hardtoken library may vary depending on your installer.Soft Token Default: C:\ProgramFiles\SafeNet\LunaClient\win32\softtoken.dllHard Token Default:C:\Windows\SysWOW64\etoken.dll
NOTE Luna HSM Client 10.1 and newerincludes libraries for 64-bit operating systemsonly.
Luna Network HSM 7 Partition Administration GuideLast Updated: 2022-07-26 23:53:21 GMT-04:00 Copyright 2001-2022 Thales Group 89

Chapter 1: Luna HSM Client Software Installation
Section/Setting Description
PartitionIdentitiesDir Specifies the directory used to store the STC partitionidentities exported using lunacm:> stcconfigpartitionidexport.Default:> Windows: C:\Program
Files\SafeNet\LunaClient\data\partition_identities> Linux/AIX: /usr/safenet/lunaclient/data/partition_
identities> Solaris: /opt/safenet/lunaclient/data/partition_
identities
SoftTokenDir Specifies the location where the STC client soft token(token.db) is stored.Default:> Windows: C:\Program
Files\SafeNet\LunaClient\softtoken\001\> Linux/AIX: /usr/safenet/lunaclient/softtoken/001/> Solaris: /opt/safenet/lunaclient/softtoken/001/
Session NOTE This section is not created automatically. To changeany of the following values, you must first create this sectionin the configuration file.
AutoCleanUpDisabled Determines whether AutoCleanUp closes orphanedsessions in the event that an application leaves sessionsopen. Useful for Luna PCIe HSM hosts. AutoCleanUp runsduring C_Finalize on the client. Luna Network HSMsessions are tracked and closed by the NTLS service.Valid Values:> 0 (default): Run AutoCleanUp if your application leaks
sessions and you cannot rewrite the application.> 1: Disable AutoCleanUp if you have a Luna PCIe HSM
and your client application does proper housekeeping,or if your application is connecting via NTLS to a LunaNetwork HSM.
Shim2 NOTE This section is not created automatically. To changeany of the following values, you must first create this sectionin the configuration file.
Luna Network HSM 7 Partition Administration GuideLast Updated: 2022-07-26 23:53:21 GMT-04:00 Copyright 2001-2022 Thales Group 90

Chapter 1: Luna HSM Client Software Installation
Section/Setting Description
(Linux)LibUNIX64=/usr/safenet/lunaclient/lib/libCryptoki2_64.so;(Windows)LibNT=C:\ProgramFiles\SafeNet\LunaClient\cryptoki.dll
This section is required when a shim is to be used.If the cryptoki library is not at the indicated location, thenadjust the example path value to reflect the actual location.
Toggles NOTE This section is not created automatically. To changeany of the following values, you must first create this sectionin the configuration file.
legacy_memory_rep = Controls the manner in which the HSM reports the availableRAM space.Valid Values:> 0 (default): the public and private memory total/free
values reported in the CK_TOKEN_INFO structureindicate the available flash memory for permanent(TOKEN) objects that are in either the public or privatespace respectively; this method is PKCS#11 compliant.
> 1: the public memory values indicate the total/free RAMmemory; this non-standard legacy method was used bysome customers to determine space available forsession based objects, and must be explicitly selectedin order to continue using the legacy method.
NOTE This functionality requires minimumfirmware version 7.1.0.
lunacm_cv_ha_ui = Controls whether Thales DPoD Luna Cloud HSM servicescan be active members of an HA group.Valid Values:> 0: Luna Cloud HSM services can be added as active HA
members.> 1: (default): Luna Cloud HSM services can be added to
HA groups as standby members only. This is the defaultbehavior to maximize HA performance, which maysuffer due to network latency.
NOTE This functionality requires Luna HSMClient 10.1 or newer.
Luna Network HSM 7 Partition Administration GuideLast Updated: 2022-07-26 23:53:21 GMT-04:00 Copyright 2001-2022 Thales Group 91

Chapter 1: Luna HSM Client Software Installation
Section/Setting Description
REST NOTE This section configures a connection to a LunaCloud HSM and applies only to a Luna Cloud HSM. Thissection is not created automatically for clients obtained fromthe Thales Support Portal. See "Adding a Luna Cloud HSMService" on page 71 for detailed instructions on adding aLuna Cloud HSM service client to a Luna HSM Client.This section governs Luna Cloud HSM service functionalityonly and is not related to the Luna REST API. Thisfunctionality requires Luna HSM Client 10.1 or newer.
AppLogLevel Defines the maximum severity level of application logs tobe displayed in the application console.Valid Values:> trace (unavailable for client version 10.4 and newer)> debug (unavailable for client version 10.4 and newer)> error (default setting for Luna HSM Client 10.2 and
10.3)> warning> infoApplication Error Logs are printed to the Event Viewer onWindows 10 and to the system and console on Linux.Windows: Windows operating systems print applicationerror logs to the Event Viewer. Access the logs by openingEvent Viewer >Windows Logs > Application andfiltering the results for LunaClientEventProvider.
NOTE To display Windows Logs in the EventViewer as a non-administrator user you mustregister the LunaClientEventProvider.dll asdescribed in "RegisterLunaClientEventProvider.dll" on page 1. Failureto register the LunaClientEventProvider.dllwill result in the logs displaying to the console.
Linux: Linux operating systems print application error logsto /var/log/message. Access the logs by opening/var/log/message and searching the results for lunacm.Ubuntu: Ubuntu operating systems print application errorlogs to /var/log/syslog. Access the logs by opening/var/log/syslog and searching the results for lunacm.
AuthTokenConfigURI The identifier for the authentication service which issuesthe tokens required to validate the client's identity to theLuna Cloud HSM service. Your client host must have aninternet connection to reach this resource. Do not edit thedefault value unless instructed to by customer support.
Luna Network HSM 7 Partition Administration GuideLast Updated: 2022-07-26 23:53:21 GMT-04:00 Copyright 2001-2022 Thales Group 92

Chapter 1: Luna HSM Client Software Installation
Section/Setting Description
AuthTokenClientId The client identity required by the authentication service toissue a token. Do not edit the default value unlessinstructed to by customer support.
AuthTokenClientSecret The client passphrase required by the authenticationservice to issue a token. Do not edit the default valueunless instructed to by customer support.
CurlLogsEnabled Enables libcurl logging. This variable applies to Luna HSMClient 10.3 and newer.Valid Values:> False:Libcurl logging is disabled.> True(default): Libcurl logging is enabled.
NOTE If using a Luna HSM Client 10.4 ornewer youmust have AppLogLevel=infodefined in your Chrystoki.conf\crystoki.ini toretrieve curl logs. See "AppLogLevel" on theprevious page for more information.
Curl Logs are printed to the Event Viewer on Windows 10and to the system and console on Linux.Windows: Windows operating systems print applicationerror logs to the Event Viewer. Access the logs by openingEvent Viewer >Windows Logs > Application andfiltering the results for LunaClientEventProvider.
NOTE To display Windows Logs in the EventViewer as a non-administrator user you mustregister the LunaClientEventProvider.dll asdescribed in "RegisterLunaClientEventProvider.dll" on page 1. Failureto register the LunaClientEventProvider.dllwill result in the logs displaying to the console.
Linux: Linux operating systems print application error logsto /var/log/message. Access the logs by opening/var/log/message and searching the results for lunacm.Ubuntu: Ubuntu operating systems print application errorlogs to /var/log/syslog. Access the logs by opening/var/log/syslog and searching the results for lunacm.
ClientConnectIntervalMs Interval in milliseconds between client connection attempts.Default: 1000
Luna Network HSM 7 Partition Administration GuideLast Updated: 2022-07-26 23:53:21 GMT-04:00 Copyright 2001-2022 Thales Group 93

Chapter 1: Luna HSM Client Software Installation
Section/Setting Description
ClientConnectRetryCount Maximum connection attempts between a client and aserver.Default: 900
ClientEofRetryCount Maximum command retries.Default: 15
ClientPoolSize Number of threads in the thread pool available for clientoperations.Default: 32
ClientTimeoutSec Time in seconds that a client waits for a response. Thistimeout applies to each retry attempt individually.Default: 600
NOTE This entry does not appear in the defaultconfiguration file, but the default value applies tothis timeout. You can manually add the entry ifyou wish to edit the timeout.
CVAppSpecificData String containing identifying information about your LunaCloud HSM service. Only included if AuthToken entries arenot present.
NOTE CVAppSpecificData is deprecated andis only available for Luna Cloud HSM servicesusing Luna HSM Client 10.1 and older versions.
PartitionData The partition serial number, load balancer IP address orhostname, and load balancer port.
NOTE PartitionData is deprecated and is onlyavailable for Luna Cloud HSM services usingLuna HSM Client 10.1 and older versions.
Luna Network HSM 7 Partition Administration GuideLast Updated: 2022-07-26 23:53:21 GMT-04:00 Copyright 2001-2022 Thales Group 94

Chapter 1: Luna HSM Client Software Installation
Section/Setting Description
PartitionData00 The partition serial number, load balancer IP address orhostname, and load balancer port.Executing setenv, when configuring the Luna HSM Client,removes PartitionData00 and replaces it with values forServerName and ServerPort.The following format is used:PartitionData00=<partition_serial_number>, <service_ip_address/hostname>, <service_port>;
CAUTION! The Luna Cloud HSM servicefailover to the redundant datacenter uses achange to DNS to direct client traffic to asecondary datacenter. The client configurationfile includes the FQDN for the Luna CloudHSM service datacenter in the REST =PartitionData00 section or the REST =ServerName section after executing setenv(eu.hsm.dpondemand.io orna.hsm.dpondemand.io). In the event of afailover the DNS record for FQDN is updated topoint to the secondary datacenter.Ensure that the client is configured to use thedomain name for the datacenter and to notconfigure any filtering based on the IPaddresses. Failure to use the domain name andfiltering IP addresses could result in the clientbeing unable to failover to the secondarydatacenter.
RestClient Indicates that cvclient and associated tools are acting asREST clients.Default: 1
SSLClientSideVerifyFile Location of the server certificate chain file./etc/ssl/ca/intermediate/public/ca-chain.cert.pem;
NOTE SSLClientSideVerifyFile is deprecatedand is only available for Luna CloudHSM services using Luna HSM Client 10.1 andolder versions.
ServerName The name of the Luna Cloud HSM service server providingLuna Cloud HSM services. For Luna HSM Client 10.2 andnewer.
ServerPort The port used for Luna Cloud HSM service server traffic. ForLuna HSM Client 10.2 and newer.
Luna Network HSM 7 Partition Administration GuideLast Updated: 2022-07-26 23:53:21 GMT-04:00 Copyright 2001-2022 Thales Group 95

Chapter 1: Luna HSM Client Software Installation
Section/Setting Description
XTC NOTE This section configures a connection to a LunaCloud HSM and applies only to a Luna Cloud HSM. Thissection is not created automatically for clients obtained fromthe Thales Support Portal. See "Adding a Luna Cloud HSMService" on page 71 for detailed instructions on adding aLuna Cloud HSM service client to a Luna HSM Client.This section governs Luna Cloud HSM service functionalityonly and is not related to the Luna REST API. Thisfunctionality requires Luna HSM Client 10.1 or newer.
Enabled Indicates that XTC (Transferable Token Channel) isenabled. This channel must be enabled for the client tocommunicate with a Luna Cloud HSM service.Valid Values:> 0: XTC is disabled.> 1 (default): XTC is enabled.
PartitionCAPath Location of the Luna Cloud HSM service partition origincertificate (partition-ca-certificate.pem)
NOTE PartitionCAPath is deprecated and isonly available for Luna Cloud HSM servicesusing Luna HSM Client 10.1 and older versions.
PartitionCertPath00 Location of the Luna Cloud HSM service partitionmessaging certificate (partition-certificate.pem).
NOTE PartitionCertPath00 is deprecated andis only available for Luna Cloud HSM servicesusing Luna HSM Client 10.1 and older versions.
TimeoutSec Time (in seconds) before a cryptographic request expires.Timestamps are included in XTC headers, and the HSMrejects messages which have expired.Valid Values: 1-600
GemEngine NOTE This section is not created automatically.
Luna Network HSM 7 Partition Administration GuideLast Updated: 2022-07-26 23:53:21 GMT-04:00 Copyright 2001-2022 Thales Group 96

Chapter 1: Luna HSM Client Software Installation
Section/Setting Description
DisableCheckFinalize Determines how the gem engine behaves for finalizing thecryptoki library. If an application has forking processes,then this causes the connection with the HSM to be sharedbetween the parent and the child process which must beaddressed for Linux/UNIX.Valid Values:> 0 (default): Perform pre-fork checking -- when crypto
calls are made in the parent process, the cryptoki libraryis finalized after each crypto call. However, in the childprocess, the library is initialized and the connection tothe HSM is maintained after crypto calls. The parent andchild will have different connections to the HSM.
> 1: Perform post-fork checking -- the engine initializesthe cryptoki library and maintains the connection to theHSM until the application terminates.
If your application (own or 3rd party) is using OpenSSL andhas forking processes, set this value to 0. Otherwise,setting the option to 1 will improve performance.Not used for Windows.
* If you intend to invoke a large number N for an M of N keyset (maximum is 16 splits), including also a backupset, you will need to increase the various PED timeout values well beyond the default values, in order to haveenough time to comfortably complete the task. As a rough example, increase the PED's timeout for creating akeyset by a factor of 10. Altogether, the combined value works out to:CommandTimeOutPedSet >= ( DefaultTimeOut + PEDTimeout1 + PEDTimeout2 + PEDTimeout3 )
So, for example, in the Luna section of the .conf file (similar for the .ini file in Windows): Luna ={ DefaultTimeOut = 500000; PEDTimeout1 = 100000; PEDTimeout2 = 2000000; PEDTimeout3 = 20000;KeypairGenTimeOut = 2700000; CloningCommandTimeOut = 300000; CommandTimeOutPedSet = 2620000; }
The longest such activity would be creating a 16-key split of a new-format orange PED Key (RPK), withduplicates, which might take a little more than half an hour at a comfortable pace with no interruptions. This isconsidered an extreme edge-case. Your situation will probably require settings somewhere between the defaultsand the values suggested above.
UC Dynamic UserID Loading for Luna Cloud HSM ServicesAs of UC 10.5, the UC Dynamic Loading feature is introduced for Luna Cloud HSM services. This allows eachUser Account and Authentication (UAA) user to have the ability to have one or more partition(s) associated withthem. The DPoD tenant role can now configure multiple UAA Users and manage them in one place instead ofmanaging each one separately. This will also allow customers to add multiple UserID's (combination of uniqueauthtokenclientsecret, authtokenclientid and URI) without the need to restart the application after the addition ofa new UserID.
Luna Network HSM 7 Partition Administration GuideLast Updated: 2022-07-26 23:53:21 GMT-04:00 Copyright 2001-2022 Thales Group 97

Chapter 1: Luna HSM Client Software Installation
The ability to load multiple partitions to the same UserID without impacting service to other users is alsosupported. If an attempt is made to add the same partition ID to a different user that will be ignored and a warninglog will be generated.
When a new configuration is added, running the "slot list" command will display the new partition ID for that user.
NOTE The maximum amount of users to be added using the "MaxUserIDCount" variable isdefaulted at 100.Multiple partitions for the same user will NOT have a sequential slot ID.
In Linux:export AuthtokenConfigURI2=***********export AuthTokenClientID2=**********export AuthTokenClientSecret2=***********
export AuthtokenConfigURI3=***********export AuthTokenClientID3=**********export AuthTokenClientSecret3=***********
In Windows:set var=AuthTokenConfigURI2=***********set var=AuthTokenClientID2=**********set var=AuthTokenClientSecret2=***********
set var=AuthTokenConfigURI3=***********set var=AuthTokenClientID3=**********set var=AuthTokenClientSecret3=***********
Sections and SettingsThe following table lists sections and settings that are present in the Luna Network HSM configuration file. Eachsetting is named, with default values, allowed range of values, and description of the setting.
Setting Default Value Description
Chrystoki2
LibNT= C:\Program Files\SafeNet\Cryptovisor\cryptoki.dll 64-bit Windows path to theChrystoki2 library.
LibNT32= C:\ProgramFiles\SafeNet\Cryptovisor\win32\cryptoki.dll
32-bit Windows path to theChrystoki2 library.
LibUNIX= /usr/safenet/cryptovisor/client/p11/lib.i686/libCryptoki2.so;
32-bit Linux path to theChrystoki2 library.
LibUNIX64= /usr/safenet/cryptovisor/client/p11/lib/libCryptoki2.so; 64-bit Linux path to theChrystoki2 library.
Luna
Luna Network HSM 7 Partition Administration GuideLast Updated: 2022-07-26 23:53:21 GMT-04:00 Copyright 2001-2022 Thales Group 98

Chapter 1: Luna HSM Client Software Installation
Setting Default Value Description
DefaultTimeOut= 500000; Sets the default timeoutinterval - defines how long(in milliseconds) the HSMdriver in the host systemwaits for HSM commandsto return a result code. Ifthe result code is notreturned in that time, thedriver assumes that theHSM is stuck and halts it,with the DEVICE_ERRORreturned to all applicationsthat use the HSM. MostHSM commands use thistimeout. Very fewexceptions exist, when acommand's timeout ishard-coded in the Cryptokilibrary, or separatetimeouts are specified inthe Chrystoki.conf forcertain classes of HSMcommands.
KeypairGenTimeOut= 2700000; The amount of time (inmilliseconds) the libraryallows for a Keypairgenerate operation toreturn a value. Due to therandom component, largekey sizes can take anarbitrarily long time togenerate, and this settingkeeps the attempts withinreasonable bounds. Thedefault is calculated as thebest balance between theinconvenience ofoccasional very long waitsand the inconvenience ofrestarting a keygenoperation. You can changeit to suit your situation.
Luna Network HSM 7 Partition Administration GuideLast Updated: 2022-07-26 23:53:21 GMT-04:00 Copyright 2001-2022 Thales Group 99

Chapter 1: Luna HSM Client Software Installation
Setting Default Value Description
CloningCommandTimeOut=
300000; The amount of time (inmilliseconds) the libraryallows for the HSM torespond to a cloningcommand. Applies to keymigration from SafeNetNetwork HSMs to LunaNetwork HSM.
Misc
DynamicPartitionEnabled= true (on) Default is True so thatdynamic feature is alwaysON. When set to False theability to add multipleuserid's is still availablehowever the applicationwould have to berestarted. For moreinformation see DynamicPartition Loading for LunaCloud HSM Services.
ToolsDir= /usr/bin; The location of the clienttools. You must set this forWindows clients, but it ispopulated automaticallyfor Linux clients.
WindowsEventProvider no default value This is the name of the dllthat needs to be registeredfor logging onWindows towork.
Presentation
ShowEmptySlots= no; This setting ensures thatunused slots are notdisplayed. This isnecessary for someintegrations.
REST
Luna Network HSM 7 Partition Administration GuideLast Updated: 2022-07-26 23:53:21 GMT-04:00 Copyright 2001-2022 Thales Group 100

Chapter 1: Luna HSM Client Software Installation
Setting Default Value Description
AppConsoleLogsEnabled false This setting is to turn on/offconsole level logging. Setto true will enable consolelogs.
AppLogLevel error Change the value settingto info or warning to seemore or less of the logs
ClientTimeoutSec = 600; Time in seconds that aclient waits for a response.This timeout applies toeach retry attemptindividually.
NOTE Thisentry does notappear in thedefaultconfigurationfile, but thedefault valueapplies to thistimeout. Youcan manuallyadd the entry ifyou wish to editthe timeout.
ClientPoolSize= 32; Number of threads in thethread pool available forclient operations.
ClientEofRetryCount= 15; Maximum commandretries.
ClientConnectRetryCount= 900; Maximum connectionattempts between a clientand a server.
ClientConnectIntervalMs= 1000; Interval in millisecondsbetween client connectionattempts.
SSLClientSideVerifyFile= /etc/ssl/ca/intermediate/public/ca-chain.cert.pem; Location of the servercertificate chain file.
Luna Network HSM 7 Partition Administration GuideLast Updated: 2022-07-26 23:53:21 GMT-04:00 Copyright 2001-2022 Thales Group 101

Chapter 1: Luna HSM Client Software Installation
Setting Default Value Description
MaxUserIDCount= 100 The maximum amount ofUserID's allowed perdynamic loading session.For more information seeDynamic Partition Loadingfor Luna Cloud HSMServices.
RestClient= 1; Indicates that cvclient andassociated tools are actingas REST clients.
PartitionData= no default value The partition serialnumber, load balancerIP address or hostname,and load balancer port.The following format isused:PartitionData00=<partition_serial_number>,<service_ip_address/hostname>,<service_port>;
XTC
Enabled= 1; Indicates that XTC (Transferable TokenChannel) is enabled.
TimeoutSec= 600; Time in seconds for whicha cryptographic requestexpires. Timestamps areincluded in XTC headers,and the HSM rejectsmessages which haveexpired. The valid range is1-600 inclusive, and thevalue must be an integer.
PartitionCAPath= no default value Location of the partitionorigin certificate.
PartitionCertPath00= no default value Location of the partitionmessaging certificate.
Luna Network HSM 7 Partition Administration GuideLast Updated: 2022-07-26 23:53:21 GMT-04:00 Copyright 2001-2022 Thales Group 102

Chapter 1: Luna HSM Client Software Installation
Setting Default Value Description
LunaSA Client
SSLConfigFile <client_install_dir>/openssl.cnf; For key migration fromLuna Network HSMs.Location of the OpenSSLconfiguration file.
ReceiveTimeout 20000; For key migration fromLuna Network HSMs. Timein milliseconds before areceive timeout.
TCPKeepAlive 1; For key migration fromLuna Network HSMs.TCPKeepAlive is a TCPstack option.
NetClient 1; For key migration fromLuna Network HSMs. Iftrue, library will search fornetwork slots.
ServerCAFile <client_install_dir>/CAFile.pem; For key migration fromLuna Network HSMs.Location, on the client, ofthe Luna NetworkHSM server certificate file(set by vtl).
ClientCertFile <client_install_dir>/ClientNameCert.pem; For key migration fromLuna Network HSMs.Location of the Clientcertificate file that isuploaded to SafeNet LunaNetwork HSM for NTLS(set by vtl).
ClientPrivKeyFile <client_install_dir>/ClientNameKey.pem; For key migration fromLuna Network HSMs.Location of the Clientprivate key file (set by vtl).
Luna Network HSM 7 Partition Administration GuideLast Updated: 2022-07-26 23:53:21 GMT-04:00 Copyright 2001-2022 Thales Group 103

Chapter 1: Luna HSM Client Software Installation
Updating the Luna HSM Client SoftwareTo update the Luna HSM Client software, first uninstall any previous version of the Client. Then, run the newinstaller the same way you performed the original installation (refer to "Luna HSM Client Software Installation" onpage 19).
The client uninstaller removes libraries, utilities, and other material related to the client, but does not removeconfiguration files and certificates. This allows you to install the newer version and resume operations withouthaving to manually restore configuration settings and re-register client and appliance NTLS certificates.
TIP We recommend verifying the integrity of the Universal Client packages, by calculatingtheir SHA256 hash values and comparing with the hash values posted on the Support Portal,before installing them on your client machines.You can use the sha256sum tool on Linux machines to calculate the SHA256 hash values.
Luna Network HSM 7 Partition Administration GuideLast Updated: 2022-07-26 23:53:21 GMT-04:00 Copyright 2001-2022 Thales Group 104

CHAPTER 2: Client-Partition Connections
To allow clients to perform cryptographic operations, you must first give them access to an application partitionon the HSM. This section contains the following information about client-partition connections:
> "Comparing NTLS and STC" below
> "Creating an NTLS Connection Using Self-Signed Certificates" on page 111
> "Creating an NTLS Connection Using a Self-Signed Appliance Certificate and a Client Certificate Signed by aTrusted Certificate Authority" on page 116
> "Creating an NTLS Connection Using Certificates Signed by a Trusted Certificate Authority" on page 119
> "Assigning or Revoking NTLS Client Access to a Partition" on page 124
> "Creating an STC Connection" on page 125
> "Connecting an Initialized STC Partition to Multiple Clients" on page 129
> "Converting Initialized NTLS Partitions to STC" on page 133
> "Using the STC Admin Channel" on page 135
> "Configuring STC Identities and Settings" on page 137
> "Restoring Broken NTLS or STC Connections" on page 141
Comparing NTLS and STCClient access to the Luna Network HSM is provided via two different types of channel:
> "Network Trust Link Service" on the next page
> "Secure Trusted Channel" on page 108
Luna Network HSM 7 Partition Administration GuideLast Updated: 2022-07-26 23:53:21 GMT-04:00 Copyright 2001-2022 Thales Group 105

Chapter 2: Client-Partition Connections
NTLS STC
> Ideally suited for high-performance applications andenvironments, executing many cryptographicoperations per second.
> Best used in traditional data center environments,where the client can be identified by its IP addressor hostname; not recommended for use with publicnetworks.
> Suited for higher-assurance applications requiringsession protection beyond TLS; STC’s messageintegrity and optional additional layer of encryptionoffers additional protection of client-to-HSMcommunications
> Best for virtual and cloud environments where virtualmachines are frequently cloned, launched, andstopped—such as when virtual machine auto-scaling is implemented to meet service-levelagreements
> Preferred in "HSM as a Service" environmentswhere multiple customers, departments, or groupsaccess partitions on a common HSM and wantcommunication to be terminated on the Luna HSMcard within the appliance
> Suited for applications with moderate performancerequirements
Network Trust Link ServiceA Network Trust Link is a secure, authenticated network connection between the Luna Network HSM applianceand a client computer. NTLS uses two-way digital certificate authentication and TLS data encryption to protectyour sensitive data during all communications between HSM partitions on the appliance and its clients.
The Luna Network HSM appliance can support up to 800 simultaneous NTLS connections.
The certificates that identify appliances and clients can be self-signed or signed by a trusted Certificate Authority(CA).
NTLS Authenticated by Self-Signed CertificatesThe figure below shows how a secure NTLS connection is created using self-signed certificates exchangedbetween the client and the appliance.
Luna Network HSM 7 Partition Administration GuideLast Updated: 2022-07-26 23:53:21 GMT-04:00 Copyright 2001-2022 Thales Group 106

Chapter 2: Client-Partition Connections
Self-signed certificates are created on both the appliance and the client. These certificates are exchanged toregister the appliance and client with each other. Once registered, the client can access any partitions assignedto it in LunaSH. NTLS encrypts data between the network interfaces of the appliance (eth0 above) and client, butnot between the network interface and the HSM within the appliance.
There are two methods of assigning partitions to a client via a self-signed NTLS connection:
> Amulti-step procedure, performed by the appliance administrator and a client administrator
> A single-step procedure that automates the manual process. It can be used when the client administrator hasadmin-level access to the appliance, or through a custom registration account (see Creating a One-StepNTLS Registration Role).
See "Creating an NTLS Connection Using Self-Signed Certificates" on page 111.
NTLS Authenticated by a Certificate Authority on the Client Side OnlyThe figure below shows how a secure NTLS connection is created using a self-signed appliance certificate and aclient certificate signed by a trusted CA. This can be a commercial third-party CA or your organization's ownsigning station. This method requires Luna HSM Client 10.1.0 or newer.
A Certificate Signing Request (CSR) is created on the client; this is an unsigned certificate that must be signedby your trusted Certificate Authority. The signed certificate is installed on the client, and the CA certificate chainis added to the trust store on the appliance. Finally, the client certificate is registered on the appliance and theclient is then able to access any partitions that are assigned to it.
See "Creating an NTLS Connection Using a Self-Signed Appliance Certificate and a Client Certificate Signed bya Trusted Certificate Authority" on page 116.
NTLS Authenticated by a Certificate AuthorityThe figure below shows how a secure NTLS connection is created using client and server certificates signed by atrusted Certificate Authority (CA). This can be a commercial third-party CA or your organization's own signingstation. This method requires minimum Luna HSM Client 10.1.0 and Luna Network HSM appliance software7.7.0.
Luna Network HSM 7 Partition Administration GuideLast Updated: 2022-07-26 23:53:21 GMT-04:00 Copyright 2001-2022 Thales Group 107

Chapter 2: Client-Partition Connections
A Certificate Signing Request (CSR) is created on the appliance, the client, or both—this is an unsignedcertificate that must be signed by your trusted Certificate Authority. Each signed certificate is installed on itsrespective appliance/client, and the required material from the CA certificate chain is added to the applianceand/or client trust stores (this step varies depending on whether you are using only CA-signed certificates or acombination of self-signed and CA-signed certificates). Finally, the client certificate is registered on the applianceand the client is then able to access any partitions that are assigned to it.
See "Creating an NTLS Connection Using Certificates Signed by a Trusted Certificate Authority" on page 119.
Secure Trusted ChannelIf you require a higher level of security for your network links than is offered by NTLS, such as in cloudenvironments, or in situations where message integrity is paramount, you can use Secure Trusted Channel(STC) to provide very secure client-partition links, even over unsecured networks. STC offers the followingfeatures to ensure the security and integrity of your client-partition communications:
> All data is transmitted using symmetric encryption; only the end-points can decrypt messages
> Message authentication codes prevent an attacker from intercepting and modifying any command orresponse
> Mutual authentication of the HSM and the end-point ensure that only authorized entities can establish an STCconnection
The figure below shows how an STC connection is made between the client and an application partition.
Luna Network HSM 7 Partition Administration GuideLast Updated: 2022-07-26 23:53:21 GMT-04:00 Copyright 2001-2022 Thales Group 108

Chapter 2: Client-Partition Connections
See the following procedures:
> "Creating an STC Connection" on page 125
> "Connecting an Initialized STC Partition to Multiple Clients" on page 129
> "Converting Initialized NTLS Partitions to STC" on page 133
Secure Tunnel CreationEach STC connection is established between a client application and a specific partition on the HSM. As such,each application and partition pair goes through STC tunnel establishment individually. Before STC can createsecure tunnels, trust must be established between the client and the partition through the manual exchange ofpublic keys. Once trust has been established, unique session keys are created for each STC connection.
Session Re-Negotiation
Session keys for the tunnel are periodically renegotiated, as specified by the STC rekey threshold set for apartition. The rekey threshold specifies the number of API calls, or messages, that can be transmitted over anSTC link to the partition before the session keys are renegotiated. You can adjust this value based on yourapplication use cases and security requirements. See "Configuring STC Identities and Settings" on page 137 formore information.
Abnormal Termination
When a client shuts down a connection under normal conditions, it sends a secured message informing the HSMthat the connection can be terminated. If a client terminates abnormally, or the network link is lost, the STCDaemon (STCD) detects the abnormal termination, and sends a message to the HSM informing it that theconnection has ended, and the connection is closed. If the STCD sends an incorrect connection terminationmessage, the client transparently re-establishes a new STC tunnel.
Secure Message TransportOnce a secure tunnel is established, any messages sent over the STC link are encrypted and authenticatedusing the unique session keys created when the tunnel is established. In addition, as with NTLS, all STC linksuse the TLS protocol to secure the link when it traverses a network.
Luna Network HSM 7 Partition Administration GuideLast Updated: 2022-07-26 23:53:21 GMT-04:00 Copyright 2001-2022 Thales Group 109

Chapter 2: Client-Partition Connections
Messages traversing an STC link are protected using Symmetric Encryption and Message Integrity Verification.These features are configurable for each partition and are used for each STC link to that partition. See"Configuring STC Identities and Settings" on page 137 for more information.
All messages protected outside the HSMWhen STC is fully enabled on an HSM, all sensitive communications are protected all the way into the HSM. Thatis, any messages exchanged between a client application and the HSM use STC encryption, authentication, andverification from the client interface to the HSM interface, regardless of whether those links traverse a network, orare internal to the appliance (LunaSH to HSM) or Luna HSM Client workstation (client to HSM). All STC links thatuse a network connection also have the same network protection as NTLS links, that is, they are wrapped usingSSL.
In addition to the STC connection between client and partition, you can also configure an STC connectionbetween the HSM SO partition and the local services running on the appliance. This is referred to as the STCAdmin channel.
See "Using the STC Admin Channel" on page 135.
Configurable optionsThe security features offered by STC are configurable, allowing you to specify the level of security you require,and achieve the correct balance between security and performance. Client/partition STC link parameters areconfigured using LunaCM. LunaSH/partition STC link parameters are configured using LunaSH.
Client and Partition IdentitiesThe identity of a client or partition at an STC endpoint is defined by a 2048-bit RSA asymmetric public/private keypair, unique to each endpoint. Before you can establish an STC link, you must exchange public keys between theclient and partition to establish trust.
The partition's private key is always kept in the HSM and is strongly associated with its partition. Only thepartition security officer can retrieve the partition’s public key for delivery to a client. Upon receipt, the clientadministrator can use the public key hash to confirm its authenticity, before registering it. You can registermultiple partition public keys to a client.
By default, the client’s identity pair is stored in a software token on the client’s file system, protected by theoperating system’s access control systems. When using a software token, the client’s private key can be movedor copied to another host and used – so any client that possesses this identity pair is considered the authenticclient. This enables an elastic client model for many applications.
Performance ConsiderationSTC introduces additional overhead to the communication channel. Depending on the application use case andcryptographic algorithms employed, this could have an impact on application performance.
Client to HSM Security Best PracticesWhile the Luna HSM is very secure, it is not the only component in the overall system. The HSM's applicationpartitions become useful when client applications can communicate with those partitions, however this expandsthe potential attack surface. Good practices can go a long way toward minimizing that exposure.
Luna Network HSM 7 Partition Administration GuideLast Updated: 2022-07-26 23:53:21 GMT-04:00 Copyright 2001-2022 Thales Group 110

Chapter 2: Client-Partition Connections
This section suggests areas where practical choices and consistency can enhance security without sacrificingoperational convenience.
Security around Password-authenticated systemsTwo things must be secured: NTLS private key and partition password
Securing the partition passwordThe partition password is needed when logging in, so the primary means of protecting the partition password isto protect the connection to the HSM via NTLS or STC. NTLS and STC certificates reside in a subdirectory of theLuna HSM Client directory, on every system that connects to an application partition on a Luna Network HSM.
To secure an enterprise connection to the HSM the following means are available:
> use operating system controls/permissions on the client to prevent unathorized users from accessing the keymaterial
> use network segration/software-defined networking or subnetting to prevent unauthorized machines fromaccessing the network HSM at all
> implement a full firewall security flow policy, to assist in preventing unauthorized network access, allowingonly certain IP addresses and ports to be open to the network HSM
> practice proper password hygiene, in the form of a key and partition password-rotation policy, to prevent over-exposure should an NTLS key and/or partition password be compromised.
Securing the NTLS private keyTo secure a PaaS*/container connection to the HSM the following means are available:
> make use of whatever vault/secret-store approach a given PaaS implementation provides but ensure that it istruly secure and not merely a pretense of "security"-by-obfuscation
> avoid bundling NTLS keys or partition passwords in VM/container images, but instead use theaforementioned PaaS vault/secret
> if the PaaS implementation provides some form of service mesh, then take advantage of it to further mitigateclient private-key/partition-password vulnerability, as the service mesh would prevent an attacker from beingable to use the key/password outside of the service mesh; this forces the attacker to use the exposed materialin a more secure and monitored environment, where the attack could be outright prevented or at leastdetected much sooner.
(*PaaS = Platform as a Service)
Creating an NTLS Connection Using Self-Signed CertificatesTo create an NTLS connection, the Luna Network HSM and the client must exchange certificates. Each registersthe other's certificate in a trusted list. When both certificates are registered, the Network Trust Link is ready, andthe appliance administrator can assign application partitions to the client for cryptographic operations. By default,this procedure uses self-signed certificates. To register your clients using certificates signed by a trustedCertificate Authority, see "Creating an NTLS Connection Using a Self-Signed Appliance Certificate and a ClientCertificate Signed by a Trusted Certificate Authority" on page 116.
Luna Network HSM 7 Partition Administration GuideLast Updated: 2022-07-26 23:53:21 GMT-04:00 Copyright 2001-2022 Thales Group 111

Chapter 2: Client-Partition Connections
NOTE Secure Trusted Channel (STC) offers enhanced HSM-client message integrity, and anadditional layer of protection for client-to-HSM communications, even over unsecurednetworks. To take advantage of this feature, see "Creating an STC Connection" on page 125.For more on the differences between NTLS and STC connections, see "Comparing NTLS andSTC" on page 105.
There are two methods of assigning partitions to a client via a self-signed NTLS connection:
> "Multi-Step NTLS Connection Procedure" below: performed by the appliance administrator and a clientadministrator
> "One-Step NTLS Connection Procedure" on page 114: automates the multi-step process. It can be usedwhen the client administrator has admin-level access to the appliance, or through a custom registrationaccount.
Multi-Step NTLS Connection ProcedureThe multi-step procedure is performed by the appliance administrator and the client administrator.
Prerequisites> You must have admin-level access to LunaSH on the appliance to register a client, or a custom account
created to handle client registration (see Creating a One-Step NTLS Registration Role).
> By default, you do not need to log in as HSM SO. You can force the appliance to require HSM SO login for thisprocedure with lunash:> sysconf forcesologin enable.
> Luna HSM Client software must be installed on the client workstation (see "Luna HSM Client SoftwareInstallation" on page 19 in the Installation Guide)
> The client workstation must have an SSH client installed to provide secure shell access to the Luna NetworkHSM appliance. The PuTTY SSH client (putty.exe) is included in the Windows client installation.
> Read/write access to the Luna HSM Client installation directory is required for the certificate exchange.
> The client workstation must have network access to the Luna Network HSM appliance. The appliance auto-negotiates network bandwidth. See Recommended Network Characteristics for more information.
Luna Network HSM 7 Partition Administration GuideLast Updated: 2022-07-26 23:53:21 GMT-04:00 Copyright 2001-2022 Thales Group 112

Chapter 2: Client-Partition Connections
NOTE Administration commands can take a few seconds to be noted by NTLS. If you haveadded or deleted a client, wait a few seconds before connecting.
To create a multi-step NTLS connection between the appliance and a client
1. On the client workstation, open a command prompt and navigate to the Luna HSM Client directory.
NOTE OnWindows, ensure that you open a command prompt with Administrator privileges.
• Windows: C:\Program Files\SafeNet\LunaClient• Linux/AIX: /usr/safenet/lunaclient/bin• Solaris: /opt/safenet/lunaclient/bin
2. Use pscp or scp to import the HSM Appliance Server Certificate (server.pem) from the appliance to theclient workstation. You require admin- or operator-level account access to complete this step. If you do nothave SSL access to the appliance, or a firewall blocks file transfer over the network, the appliance adminmust provide this certificate by other secure means.
TIP If you are importing certificates from multiple appliances to this client, rename eachincoming certificate during the pscp/scp transfer. This will prevent you from accidentallyoverwriting one server.pem certificate with another.
pscp <user>@<host/IP>:server.pem <target_filename>
NOTE When using pscp or scp over an IPv6 network, enclose addresses in square brackets.
You must accept the SSH certificate the first time you open a pscp/scp or SSH link. You can check the SSHfingerprint in LunaSH to confirm the secure connection.
lunash:> sysconf fingerprint sshIf the HSM appliance IP or hostname is changed, SSH detects a mismatch in the HSM appliance's servercertification information and warns you of a potential security breach. To resolve this issue, delete the server'scertificate information from the client’s known host file at: /<user home dir>/.ssh/known_hosts2, and re-import the server certificate.
3. Register the HSM Server Certificate with the client, using the vtl utility from the command line or shell prompt.If using a host name, ensure the name is reachable over the network (ping <hostname>). Thalesrecommends specifying an IP address to avoid network issues.
>vtl addServer -n <Network_HSM_hostname/IP> -c <server_certificate>4. Create a certificate and private key for the client. If you specify a client hostname, it must match exactly the
hostname reported by the hostname command.
CAUTION! If you are registering this client with multiple Luna Network HSM appliances, youonly need to complete this step once. Use the same client certificate for all appliances. If yourecreate the client certificate and key, any existing NTLS connections will be broken.
Luna Network HSM 7 Partition Administration GuideLast Updated: 2022-07-26 23:53:21 GMT-04:00 Copyright 2001-2022 Thales Group 113

Chapter 2: Client-Partition Connections
>vtl createCert -n <client_hostname/IP>The certificate and private key are saved to the <client_install_dir>/cert/client directory and are named<client_hostname/IP>.pem and <client_hostname/IP>Key.pem, respectively. The command output displaysthe filepath.
5. Use pscp or scp to export the client certificate to the admin account (or an admin-level custom account) onthe Network HSM appliance. The file arriving at the appliance is automatically placed in the appropriatedirectory. Do not specify a target directory.
pscp <cert_path/filename> admin@<host/IP>:[<target_filename>]6. Connect to the appliance via SSH or a serial connection, and log in to LunaSH using an admin- or operator-
level account (see Logging In to LunaSH).
7. Register the client certificate with the appliance, selecting a client name that can be used to easily identify theclient. Specify either the -hostname or -ip option, according to which one you used to create the certificate.lunash:> client register -client <client_name> {-hostname <client_hostname> | -ip <client_IP>}
8. [Optional] Verify the client registration.lunash:> client list
Now that the NTLS connection is established, the Luna Network HSM appliance admin can assign partitions forthe client to access (see "Assigning or Revoking NTLS Client Access to a Partition" on page 124).
One-Step NTLS Connection ProcedureThe Luna HSM Client provides a one-step NTLS setup option, which automates the multi-step proceduredescribed above.
The One-Step NTLS procedure is performed by the client administrator, and requires SSL access to an admin-level account (or a specialized NTLS registration account) on the Luna Network HSM appliance. If you do nothave SSL access to the appliance, an authorized user must provide the appliance certificate by other securemeans, and you must use the multi-step procedure to manually register certificates.
This procedure uses pscp/scp to exchange certificates over the network. If a firewall prevents this file transfer,the procedure will fail. You must exchange the certificates by other secure means and perform the manualprocedure.
One-Step NTLS can only be used to create a new NTLS connection, and not to assign additional partitions to theclient. If an NTLS connection already exists between the client and the appliance, or if one has already registeredthe other's certificate, the operation fails.
Luna Network HSM 7 Partition Administration GuideLast Updated: 2022-07-26 23:53:21 GMT-04:00 Copyright 2001-2022 Thales Group 114

Chapter 2: Client-Partition Connections
Older Clients Can Fail to Complete One-Step NTLS with NewerAppliance SoftwareNewer Luna Network HSM can have outdated (weaker) ciphers removed from file transferprotocols, as a security measure. If your installed Luna Client is version 10.3.0 or older, it mightnot be possible to negotiate a common cipher for a secure link. You might see an error similarto: FATAL ERROR: Couldn't agree a host key algorithm (available: ecdsa-sha2-
nistp256,ssh-ed25519).To resolve this issue, you can download a new version of PuTTY from PuTTY.org at:https://www.chiark.greenend.org.uk/~sgtatham/putty/latest.htmlCopy pscp.exe and plink.exe to C:\Program Files\SafeNet\LunaClient and retry One-StepNTLS.Alternatively, install UC-10.4 or newer, which includes plink and pscp 0.76 or newer.
Luna Network HSM Prerequisites> The appliance certificate (server.pem) must be available on the appliance (see Generating the HSM Server
Certificate).
> An application partition must be available on the HSM (see Creating or Deleting an Application Partition).
> The client must not have a certificate already registered on the appliance.
Luna HSM Client Prerequisites> Client software must be installed (see "Luna HSM Client Software Installation" on page 19).
> The client administrator must have access to an admin-level account, or a specialized NTLS registrationaccount, on the appliance (see Creating a One-Step NTLS Registration Role).
> The client administrator must know the name of an existing application partition that will be assigned to theclient.
> The appliance must not have a certificate already registered with the client.
> If you are running Luna HSM Client 10.3.0 or older on a Linux platform, the plink executable included in theLuna HSM Client package requires one of the following 32-bit C/C++ standard libraries:
• glibc.i686 for Red Hat Enterprise Linux (RHEL) distributions. Install glibc.i686 by running the followingcommand:
yum install glibc.i686• gcc-multilib for Ubuntu distributions. Install gcc-multilib by running the following command:
sudo apt-get install gcc-multilibIf you do not wish to install the C/C++ standard library, use the "Multi-Step NTLS Connection Procedure" onpage 112 instead.
To create a One-Step NTLS connection between the appliance and a client
1. Launch LunaCM on the client workstation.
Luna Network HSM 7 Partition Administration GuideLast Updated: 2022-07-26 23:53:21 GMT-04:00 Copyright 2001-2022 Thales Group 115

Chapter 2: Client-Partition Connections
2. Initiate the One-Step NTLS procedure by specifying the appliance and client hostnames/IPs, and the name ofthe application partition to assign to this client. By default, the request is sent to the admin account, but youcan specify any other account.
lunacm:> clientconfig deploy -server <server_hostname/IP> -client <client hostname/IP> -partition<partition_name> [-user <appliance_username>] [-password <password>] [-verbose]
NOTE After you enter the account password, LunaCM appears to pause for 1-2 minutes whilethe registration procedure is completed. This is expected behavior.
The NTLS connection is now active, and the specified partition has been assigned to the client. If you want thisclient to have access to more partitions on this HSM, see "Assigning or Revoking NTLS Client Access to aPartition" on page 124.
To initialize the application partition, see "Initializing an Application Partition" on page 287.
To restore a broken NTLS client connection, see "Restoring Broken NTLS or STC Connections" on page 141.
Creating an NTLS Connection Using a Self-Signed ApplianceCertificate and a Client Certificate Signed by a Trusted CertificateAuthorityA trusted Certificate Authority (CA) can provide authentication for your NTLS connections. This can be acommercial third-party CA or your organization's own signing station. This type of connection is created in thefollowing stages:
1. "Registering the Appliance Certificate on the Client" on the next page2. "Authenticating a Client Using a Trusted CA" on the next page3. "Registering the Client Certificate and CA Certificate Chain on the Appliance" on page 118
NOTE This feature requires minimum Luna HSM Client version 10.1. See VersionDependencies by Feature for more information.
Luna Network HSM 7 Partition Administration GuideLast Updated: 2022-07-26 23:53:21 GMT-04:00 Copyright 2001-2022 Thales Group 116

Chapter 2: Client-Partition Connections
Registering the Appliance Certificate on the ClientUse the following procedure to transfer the appliance's self-signed certificate to the client and register it.
Prerequisites> You must have admin- or operator-level access to LunaSH on the appliance, or access to a custom LunaSH
account.
> You must have Administrator privileges on the client workstation.
To register the appliance certificate to the client
1. Use pscp (Windows) or scp (Linux/UNIX) to import the HSM Appliance Server Certificate (server.pem) fromthe appliance to the client workstation. You require admin- or operator-level account access to complete thisstep. If you do not have SSL access to the appliance, or a firewall blocks file transfer over the network, theappliance adminmust provide this certificate by other secure means.
TIP If you are importing certificates from multiple appliances to this client, rename eachincoming certificate during the pscp/scp transfer. This will prevent you from accidentallyoverwriting one server.pem certificate with another.
pscp <user>@<host/IP>:server.pem <target_filename>
NOTE When using pscp/scp over an IPv6 network, enclose addresses in square brackets.
You must accept the SSH certificate the first time you open a pscp/scp or SSH link. You can check the SSHfingerprint in LunaSH to confirm the secure connection.
lunash:> sysconf fingerprint sshIf the HSM appliance IP or hostname is changed, SSH detects a mismatch in the HSM appliance's servercertification information and warns you of a potential security breach. To resolve this issue, delete the server'scertificate information from the client’s known host file at: /<user home dir>/.ssh/known_hosts2, and re-import the server certificate.
2. Register the HSM Server Certificate with the client, using the vtl utility from the command line or shell prompt.If using a host name, ensure the name is reachable over the network (ping <hostname>). Thales Grouprecommends specifying an IP address to avoid network issues.
>vtl addServer -n <Network_HSM_hostname/IP> -c <server_certificate>
Authenticating a Client Using a Trusted CAUse the following procedure to authenticate the client by having its certificate signed by your trusted CA.
Prerequisites> You must have Administrator privileges on the client workstation.
To authenticate a client using a certificate signed by a trusted CA
1. On the client workstation, open a command prompt and navigate to the Luna HSM Client directory.
Luna Network HSM 7 Partition Administration GuideLast Updated: 2022-07-26 23:53:21 GMT-04:00 Copyright 2001-2022 Thales Group 117

Chapter 2: Client-Partition Connections
NOTE OnWindows, ensure that you open a command prompt with Administrator privileges.
• Windows: C:\Program Files\SafeNet\LunaClient• Linux/AIX: /usr/safenet/lunaclient/bin• Solaris: /opt/safenet/lunaclient/bin
2. Create a Certificate Signing Request (CSR) for the client—an unsigned certificate to be signed by a third-party Certificate Authority (CA). You must specify the client hostname or IP. You have the option to specifyother information about the certificate.
CAUTION! Regenerating the client certificate will break any existing NTLS/STC connections.
> vtl createCSR -n <client_hostname/IP>The certificate and private key are saved to the <client_install_dir>/cert/client directory and are named<client_hostname/IP>CSR.pem and <client_hostname/IP>Key.pem, respectively. The command outputdisplays the filepath.
3. Submit the CSR file to be signed by your preferred or in-house Certificate Authority. You require the followingartifacts from the CA:
• Signed base64(PEM)-encoded client certificate in x509 format
• The CA's base64(PEM)-encoded client certificate in x509 format, including the root certificate
4. Copy the signed client certificate to the following location in the Luna HSM Client directory:
• Windows: C:\Program Files\SafeNet\LunaClient\cert\client\• Linux/AIX: /usr/safenet/lunaclient/cert/client/• Solaris: /opt/safenet/lunaclient/cert/client/
Registering the Client Certificate and CA Certificate Chain on the ApplianceUse the following procedure to register the client certificate on the appliance, and register the CA certificate chainso that the appliance can authenticate the client certificate.
Prerequisites> You must have admin- or operator-level access to LunaSH on the Luna Network HSM appliance.
> You require the signed base64(PEM)-encoded client certificate and the CA's base64-encoded certificatechain, including the root certificate, in x509 format.
Luna Network HSM 7 Partition Administration GuideLast Updated: 2022-07-26 23:53:21 GMT-04:00 Copyright 2001-2022 Thales Group 118

Chapter 2: Client-Partition Connections
NOTE> All certificate chain files must be named for the certificate Common Name, with a .pem
extension.> The following procedure assumes that you are configuring an NTLS client-partition
connection for the first time. If an NTLS client-partition connection has been established andthe client certificate is being periodically replaced, for example in the case of clientcertificate renewals or deployment on multiple virtual machines, the new client certificatemust be transferred to and registered with the appliance only if it was authenticated by theCA under a new host name or IP; that is, the appliance will continue trusting the CA-signedclient certificate based on the registered certificate chain and maintain the NTLS client-partition connection if the new client certificate has been authenticated by the CA under apreviously used client host name or IP. In such cases, where client certificates must beperiodically replaced while maintaining an NTLS client-partition connection, Thalesrecommends that you replace the client certificate in the client and leave the expired clientcertificate in the appliance to avoid incurring application downtime.
To register the client certificate and CA certificate chain on the appliance
1. Transfer the client certificate and the CA certificate chain to the admin or operator user on the appliance (orthe custom role that will perform the registration) using pscp or scp. The files arriving at the appliance areautomatically placed in the appropriate directory. Do not specify a target directory.
2. Log in to LunaSH and register the client certificate with the appliance, selecting a client name that can beused to easily identify the client. Specify either the -hostname or -ip option, according to which one you usedto create the certificate.
lunash:> client register -client <client_name> {-hostname <client_hostname> | -ip <client_IP>}3. Register the CA certificate chain in the appliance trust store. Specify each certificate's filename, minus the
.pem extension, using the -hostname option. Repeat this step until the entire certificate chain is registered.lunash:> client register -client <cert_name> -hostname <cert_filename>
You can now assign partitions to the client (see "Assigning or Revoking NTLS Client Access to a Partition" onpage 124).
Creating an NTLS Connection Using Certificates Signed by aTrusted Certificate AuthorityA trusted Certificate Authority (CA) can provide authentication for your NTLS connections. This can be acommercial third-party CA or your organization's own signing station. This type of connection is created in thefollowing stages:
1. "Authenticating the Appliance Using a Trusted CA" on the next page2. "Authenticating a Client Using a Trusted CA" on page 1213. "Registering a Client to the Appliance" on page 122
Luna Network HSM 7 Partition Administration GuideLast Updated: 2022-07-26 23:53:21 GMT-04:00 Copyright 2001-2022 Thales Group 119

Chapter 2: Client-Partition Connections
NOTE This feature requires minimum Luna HSM Client version 10.1.0 and appliance softwareversion 7.7.0. See Version Dependencies by Feature for more information.
See also "Using a Combination of Self-Signed and CA-Signed Certificates" on page 123.
Authenticating the Appliance Using a Trusted CAUse the following procedure to authenticate the appliance by having its certificate signed by your trusted CA.
Prerequisites> You must have admin-level access to LunaSH on the appliance.
To authenticate the appliance using a certificate signed by a trusted CA
1. Log in to LunaSH as admin (see Logging In to LunaSH).2. Regenerate the Luna Network HSM server certificate, specifying the -csr option to create a Certificate
Signing Request (CSR)—an unsigned certificate to be signed by a Certificate Authority (CA). You have theoption to specify other information about the certificate.
CAUTION! Regenerating the server certificate will break any existing NTLS/STC connections.
lunash:> sysconf regencert -csr3. Transfer the CSR (serverCSR.pem) from the appliance to a workstation using scp or pscp.
pscp <user>@<host/IP>:server.pem <target_filename>
NOTE When using pscp or scp over an IPv6 network, enclose addresses in square brackets.
You must accept the SSH certificate the first time you open an SCP/PSCP or SSH link. You can check theSSH fingerprint in LunaSH to confirm the secure connection.
lunash:> sysconf fingerprint ssh
Luna Network HSM 7 Partition Administration GuideLast Updated: 2022-07-26 23:53:21 GMT-04:00 Copyright 2001-2022 Thales Group 120

Chapter 2: Client-Partition Connections
4. Submit the serverCSR.pem certificate file to be signed by the Certificate Authority, as directed by thedocumentation of the particular Certificate Authority. You require the following artifacts from the CA:
• Signed base64(PEM)-encoded client certificate in x509 format
• The CA's base64 certificate in x509 format, including the root certificate
5. Upon receiving the signed server certificate, transfer the signed server certificate and the CA certificate chainto the admin user on the appliance using scp or pscp. The files arriving at the appliance are automaticallyplaced in the appropriate directory. Do not specify a target directory.
6. Log in to LunaSH as admin and register the CA certificate chain in the appliance trust store. Specify eachcertificate's filename, minus the .pem extension. Repeat this step until the entire certificate chain isregistered.
lunash:> client addCA <filename>lunash:>client addCA CAroot
Attempting to install CA cert CAroot:
Command Result : 0 (Success)
7. [Optional] Display a list of CA certificates registered on the appliance.
lunash:> client listCAs8. Install the signed appliance server certificate. This replaces the appliance's server.pem with the signed
certificate.
lunash:> sysconf installcert <filename>9. Restart the NTLS, STC and CBS services.
lunash:> service restart <service>
Authenticating a Client Using a Trusted CAUse the following procedure to authenticate the client by having its certificate signed by your trusted CA.
Prerequisites> You must have Administrator privileges on the client workstation.
To authenticate a client using a certificate signed by a trusted CA
1. On the client workstation, open a command prompt and navigate to the Luna HSM Client directory.
NOTE OnWindows, ensure that you open a command prompt with Administrator privileges.
• Windows: C:\Program Files\SafeNet\LunaClient• Linux/AIX: /usr/safenet/lunaclient/bin• Solaris: /opt/safenet/lunaclient/bin
2. Create a Certificate Signing Request (CSR) for the client—an unsigned certificate to be signed by a third-party Certificate Authority (CA). You must specify the client hostname or IP. You have the option to specifyother information about the certificate.
Luna Network HSM 7 Partition Administration GuideLast Updated: 2022-07-26 23:53:21 GMT-04:00 Copyright 2001-2022 Thales Group 121

Chapter 2: Client-Partition Connections
CAUTION! Regenerating the client certificate will break any existing NTLS/STC connections.
> vtl createCSR -n <client_hostname/IP>The certificate and private key are saved to the <client_install_dir>/cert/client directory and are named<client_hostname/IP>CSR.pem and <client_hostname/IP>Key.pem, respectively. The command outputdisplays the filepath.
3. Submit the CSR file to be signed by your preferred or in-house Certificate Authority. You require the followingartifacts from the CA:
• Signed base64(PEM)-encoded client certificate in x509 format
• The CA's base64(PEM)-encoded certificate chain in x509 format, including the root certificate
4. Register the CA certificate chain in the client's trust store. Specify the full path and filename for eachcertificate. Repeat this step until the entire certificate chain is registered.
> vtl addCA -n <cert_name> -c <cert_filepath/name>5. Copy the signed client certificate to the following location in the Luna HSM Client directory:
• Windows: C:\Program Files\SafeNet\LunaClient\cert\client\• Linux/AIX: /usr/safenet/lunaclient/cert/client/• Solaris: /opt/safenet/lunaclient/cert/client/
6. Add the IP/hostname of any Luna Network HSM appliance where the client will access application partitions.The CA chain used to sign the certificate must be added to the trust store of the appliance, as described in"Authenticating the Appliance Using a Trusted CA" on page 120.
> vtl addServerNoCert -n <IP/hostname>7. [Optional] Edit crystoki.ini/Chrystoki.conf to enable server IP/hostname validation on the client. Do this
only if the appliance server certificate was created with Subject Alternate Names (SANs).[Misc]ValidateHost=1
Registering a Client to the ApplianceFinally, you must transfer the signed client certificate to the appliance and register it.
Prerequisites> The CA chain used to sign the certificate must be added to both the client's and the appliance's trust store.
> You must have admin-level access to LunaSH on the appliance.
Luna Network HSM 7 Partition Administration GuideLast Updated: 2022-07-26 23:53:21 GMT-04:00 Copyright 2001-2022 Thales Group 122

Chapter 2: Client-Partition Connections
NOTE The following procedure assumes that you are configuring an NTLS client-partitionconnection for the first time. If an NTLS client-partition connection has been established andthe client certificate is being periodically replaced, for example in the case of client certificaterenewals or deployment on multiple virtual machines, the new client certificate must betransferred to and registered with the appliance only if it was authenticated by the CA under anew host name or IP; that is, the appliance will continue trusting the CA-signed client certificatebased on the registered certificate chain and maintain the NTLS client-partition connection ifthe new client certificate has been authenticated by the CA under a previously used client hostname or IP. In such cases, where client certificates must be periodically replaced whilemaintaining an NTLS client-partition connection, Thales recommends that you replace theclient certificate in the client and leave the expired client certificate in the appliance to avoidincurring application downtime.
To register a client to the appliance
1. Transfer the signed client certificate to the appliance using pscp or scp.2. Log in to LunaSH as admin (see Logging In to LunaSH).3. Register the client's certificate on the appliance. Specify the client's IP address or hostname, depending on
which was used to create the certificate.
lunash:> client register -client <clientname> {-hostname <hostname> | -ip <IPaddress>}You can now assign partitions to the client (see "Assigning or Revoking NTLS Client Access to a Partition" on thenext page).
Using a Combination of Self-Signed and CA-Signed CertificatesIt is possible to use a combination of self-signed and CA-signed certificates; meaning a CA-signed certificate onthe Luna Network HSM appliance and a self-signed certificate on the client, or vice-versa. To use thisconfiguration, modify the instructions above as follows:
To use a self-signed client certificate and a CA-signed appliance certificate
> Transfer the client's self-signed certificate (<IP/hostname>.pem) to the appliance and register it.
lunash:> client register -client <clientname> {-hostname <hostname> | -ip <IPaddress>}> Transfer the CA-signed appliance certificates to the appliance.
> Transfer the root CA to the appliance.
> Transfer the root CA to the client.
To use a self-signed appliance certificate and a CA-signed client certificate
> Transfer the appliance's self-signed certificate (server.pem) to the client and register it.
> vtl addServer -n <IP/hostname> -c <cert_filename>> Transfer CA-signed client certificates to the client.
> Transfer the root CA to the client.
> Transfer the root CA to the appliance.
Luna Network HSM 7 Partition Administration GuideLast Updated: 2022-07-26 23:53:21 GMT-04:00 Copyright 2001-2022 Thales Group 123

Chapter 2: Client-Partition Connections
Assigning or Revoking NTLS Client Access to a PartitionOnce an NTLS connection is established between the appliance and a client, the appliance adminmustdetermine which application partitions the client can access. Usually this is done by the HSM Security Officerafter they create the partition, but any admin-level appliance user can assign or revoke existing partitions toregistered NTLS clients. You can assign a partition to more than one client at a time.
After you assign a partition to a client, the client can see the partition as a slot in LunaCM, initialize it, and use itfor cryptographic applications.
Prerequisites> An NTLS connection must be established between the appliance and the client (see "Client-Partition
Connections" on page 105)
> The HSM SOmust create the application partition on the HSM (see Creating or Deleting an ApplicationPartition)
To assign a partition to a client
1. Connect to the appliance via SSH or a serial connection, and log in to LunaSH as admin, or a custom userwith an admin role (see Logging In to LunaSH).
2. [Optional] Display a list of available partitions.lunash:> partition list
3. [Optional] Display a list of available registered clients.lunash:> client list
4. Assign a partition to a registered client.lunash:> client assignpartition -client <client_name> -partition <partition_name>
5. [Optional] Verify that the partition is assigned to the client.lunash:> client show -client <client_name>
6. If you registered the client by hostname, the appliance uses a DNS server to look up the device IP address.To ensure that the client is reachable in the event of a DNS failure, map the client hostname to its IP address,and save the mapping locally on the appliance.
lunash:> client hostip map -client <client_name> -ip <client_IP>7. Notify the client administrator that they can now access the partition and initialize it using LunaCM (see
"Initializing an Application Partition" on page 287).
To revoke partition access from a client
1. Connect to the appliance via SSH or a serial connection, and log in to LunaSH as admin, or a custom userwith an admin role (see "Logging In To LunaSH" on page 1).
2. [Optional] Display a list of partitions currently assigned to the client.lunash:> client show -client <client_name>
3. Revoke the client's access to the partition.
Luna Network HSM 7 Partition Administration GuideLast Updated: 2022-07-26 23:53:21 GMT-04:00 Copyright 2001-2022 Thales Group 124

Chapter 2: Client-Partition Connections
lunash:> client revokepartition -client <client_name> -partition <partition_name>
Creating an STC ConnectionTo create a Secure Trusted Channel (STC) connection, a partition identity is created directly on the partition, andthe client and partition exchange identities. This allows end-to-end encryption of all communications betweenpartition and client. This section describes how to establish an STC connection between a client and a newpartition. The procedure involves the HSM SO and the administrator of the client workstation.
NOTE> The Luna Network HSM can create STC and NTLS channels to different clients as required.
The client can also support both STC and NTLS links. However, all links from a specificclient to a specific Luna Network HSM appliance must be either STC or NTLS.
> STC links are not supported over an IPv6 network. You must use NTLS to make partition-client connections via IPv6.
> If you are using a Luna HSM with firmware 7.7.0 or newer, note the following beforeproceeding:• STC has been updated for the Luna 7.7.0 release and the older version of STC is not
supported on Luna HSMs with firmware 7.7.0 or newer, which contain V0 or V1partitions.
• The newer version of STC, requires appliance software 7.7.0 or newer, Luna HSMfirmware 7.7.0 or newer, and Luna HSM Client 10.3.0 or newer.
For more information about the newer version of STC, refer to "Secure Trusted Channel" onpage 156.
> To use functionality modules (FMs) with STC client connections, you require the newerversion of STC, which is used in Client-V0/V1 partition connections. For more information,refer to "Secure Trusted Channel" on page 156.
1. "Preparing the HSM/Partition to Use STC" on the next page2. "Preparing the Client to Use STC" on page 1273. "Creating a Client-Partition STC Connection" on page 128
Luna Network HSM 7 Partition Administration GuideLast Updated: 2022-07-26 23:53:21 GMT-04:00 Copyright 2001-2022 Thales Group 125

Chapter 2: Client-Partition Connections
Preparing the HSM/Partition to Use STCTo establish an STC connection between partition and client, you must first enable STC on the HSM (dependingon your HSM firmware version), create one or more partitions and export their partition identities. Theseoperations are performed by the HSM SO.
NOTE When you enable HSM policy 39: Allow Secure Trusted Channel on Luna 7.4.x orearlier, the following LunaSH commands are blocked to protect the integrity of any STC linksthat are created:> hsm stc identity create> hsm stc identity initialize> hsm stc identity delete> hsm stc identity partition deregisterIf you plan to use STC on the admin channel and want to recreate the HSM identity first, see"Configuring STC Identities and Settings" on page 137 before continuing.
To prepare the HSM and partition(s) for STC connections
1. Connect to the appliance via SSH or a serial connection, and log in to LunaSH as admin (see Logging In toLunaSH).
2. Log in as HSM SO (see Logging In as HSM Security Officer).
lunash:> hsm login3. Enable HSM Policy 39: Allow Secure Trusted Channel. If you are using Luna version 7.7.0 or newer, this
policy has been removed; skip this step.
lunash:> hsm changepolicy -policy 39 -value 14. Create one or more new partitions for the client (see Creating or Deleting an Application Partition).
lunash:> partition create -partition <partition_name> [-size <bytes>]
NOTE The following client identity storage overhead must be noted:> When running appliance software 7.4.0 or lower, Luna HSM firmware 7.3.3 or lower, and
Luna HSM Client 10.2.0 or lower (old STC partitions), each client identity registered to apartition uses 2392 bytes of storage on the partition.
> When running appliance software 7.7.0 or newer, Luna HSM firmware 7.7.0 or newer, andLuna HSM Client 10.3.0 or newer (updated STC partitions), each client identity registered toa partition uses 512 bytes of storage on the partition.
Ensure that you create partitions large enough to store the identity of every client that willaccess the partition, in addition to cryptographic objects.
When you create a partition, a partition identity key/key pair is automatically created.
5. For each partition, export the partition identity public key to the Luna Network HSM file system. The file will benamed with the partition's serial number. The command syntax is different depending on the Lunasoftware/firmware version:
• Luna 7.7.0 or newer:
Luna Network HSM 7 Partition Administration GuideLast Updated: 2022-07-26 23:53:21 GMT-04:00 Copyright 2001-2022 Thales Group 126

Chapter 2: Client-Partition Connections
lunash:> partition stcidentity export -partition <partition_name>lunash:>partition stcidentity export -partition app_par1Successfully exported partition identity for partition app_par1 to file: 154438865304.pid
• Luna 7.4.x or earlier:lunash:> stc partition export -partition <partition_name>lunash:>stc partition export -partition app_par1Successfully exported partition identity for partition app_par1 to file: 154438865304.pid
6. [Optional] View the partition identity public key hash. If you are not the client administrator, it is recommendedthat you provide it (via separate channel) so that the client administrator can verify the key's integrity asdescribed in "Creating a Client-Partition STC Connection" on the next page. The command syntax is differentdepending on the Luna software/firmware version:
• Luna 7.7.0 or newer:lunash:> partition stcidentity show -partition <partition_name>
• Luna 7.4.x or earlier:lunash:> stc partition show -partition <partition_name>
7. If the client administrator does not have admin access to the appliance, or a firewall prevents you from usingpscp or scp, you must transfer these files from the HSM and provide them to the client administrator by othersecure means:
• The HSM Server Certificate (server.pem) from the Luna Network HSM.
• The partition identity public key for each partition the client will access (154438865304.pid in the exampleabove).
• [Optional] The partition identity public key hash for each partition the client will access. This isrecommended so that the client can verify the key's integrity before using the partition. Do not send thehash by the same means as the certificates.
Preparing the Client to Use STCTo access partitions on the HSM using STC, you must first create an STC token and identity on the client. Theseoperations are performed by the client administrator.
CAUTION! If you already have STC connections to partitions on other HSMs, skip thisprocedure and use the existing client token/identity. If you re-initialize an existing clienttoken/identity, active STC connections to this client will be broken.
To prepare the client for STC connections
1. Open a command prompt or terminal and navigate to the Luna HSM Client directory.
NOTE OnWindows, ensure that you open a command prompt with Administrator privileges.
• Windows: C:\Program Files\SafeNet\LunaClient• Linux/AIX: /usr/safenet/lunaclient/bin• Solaris: /opt/safenet/lunaclient/bin
Luna Network HSM 7 Partition Administration GuideLast Updated: 2022-07-26 23:53:21 GMT-04:00 Copyright 2001-2022 Thales Group 127

Chapter 2: Client-Partition Connections
2. [Optional] Launch LunaCM and verify that the STC client token is uninitialized.
lunacm:> stc tokenlist3. Initialize the STC client token, specifying a token label.
lunacm:> stc tokeninit -label <token_label>4. Create a client identity on the token.
lunacm:> stc identitycreate -label <client_identity>The STC client identity public key is automatically exported to:
<client_install_directory>/data/client_identities/
Creating a Client-Partition STC ConnectionTo access STC partitions on the Luna Network HSM appliance, you must first register the HSM ServerCertificate. The STC connection is then created by registering one or more partition identity public keys to theclient identity and enabling STC on the client. These operations are performed by the client administrator, withadmin access to the Luna Network HSM appliance. If you do not have admin access, or a firewall blocks filetransfer over the network, the appliance adminmust provide these files by other secure means.
To create a Client-Partition STC Connection
1. On the client workstation, use pscp or scp to import the HSM Appliance Server Certificate (server.pem) fromthe appliance. You require the appliance's admin password to complete this step.
TIP If you are importing certificates from multiple appliances to this client, rename eachcertificate during the pscp/scp transfer. This will prevent you from accidentally overwriting oneserver.pem certificate with another.
pscp admin@<host/IP>:server.pem <target_filename>
2. Register the HSM Server Certificate with the client, using the vtl utility from the command line or shell prompt.If using a host name, ensure the name is reachable over the network (ping <hostname>). Thalesrecommends specifying an IP address to avoid network issues.
> vtl addServer -n <Network_HSM_hostname/IP> -c <server_certificate>3. [Optional] To check that you have successfully registered the appliance with the client, display the list of
registered servers.
> vtl listServers4. Use pscp or scp to import the partition identity public keys for all partitions you will access with STC. The files
are named with the partition serial number (<partitionSN>.pid). You require the appliance's admin passwordto complete this step.
5. Register the partition identity public key to the client. Specify the path to the key file and, optionally, a label forthe partition identity.
lunacm:> stc partitionregister -file <partition_identity> [-label <partition_label>]
Luna Network HSM 7 Partition Administration GuideLast Updated: 2022-07-26 23:53:21 GMT-04:00 Copyright 2001-2022 Thales Group 128

Chapter 2: Client-Partition Connections
lunacm:> stc partitionregister -file /usr/safenet/lunaclient/data/partition_identities/154438865304.pid -label app_par1
Partition identity 154438865305 successfully registered.
Repeat this step for each partition identity public key you wish to register to this client.
6. [Optional] If the HSM SO provided the partition identity public key hash, verify that the hashes match.
lunacm:> stc identityshowIf the hashes do not match, deregister the partition and contact your HSM SO.
lunacm:> stc partitionderegister -serial <partitionSN>7. Display the list of registered Luna Network HSM servers to find the server ID of the appliance that hosts the
partition(s).
lunacm:> clientconfig listservers8. Enable the STC connection.
CAUTION! This forces the client to use STC for all links to the specified Luna Network HSMappliance. If the server has partitions assigned to this client using NTLS, those connections willbe terminated. Ensure you have registered the partition identity for all applicable partitions onthis HSM before continuing.
lunacm:> stc enable -id <server_ID>LunaCM restarts. If successful, the partition appears in the list of available slots.
9. [Optional] Set the active slot to the new partition and verify the STC link.
lunacm:> slot set -slot <slot>lunacm:> stc status
The Partition SO can now initialize the partition (see "Initializing an Application Partition" on page 287). When thepartition is initialized, the following actions are performed automatically:
> The client identity public key is registered to the partition.
> Partition policy 37: Force Secure Trusted Channel is enabled on the partition.
Once the partition is initialized, you can allow additional clients to connect to it using STC (see "Connecting anInitialized STC Partition to Multiple Clients" below).
STC provides several configurable options that define the network settings for an STC link, and the securitysettings for the messages transmitted over the link. Although default values are provided that provide the optimalbalance between security and performance, you can override the defaults, if desired. See "Configuring STCIdentities and Settings" on page 137 for more information.
Connecting an Initialized STC Partition to Multiple ClientsOnce an STC connection has been established between the partition and Client1, and the partition initialized, thePartition SO can allow other clients to access the partition. Since the Partition SO has control of the partition viaClient1, they must provide the partition ID key to the Client2 administrator, and register Client2's ID key to thepartition.
Luna Network HSM 7 Partition Administration GuideLast Updated: 2022-07-26 23:53:21 GMT-04:00 Copyright 2001-2022 Thales Group 129

Chapter 2: Client-Partition Connections
This procedure is completed by the Partition SO (using Client1) and the Client2 administrator in the followingphases:
1. "Preparing the Additional Client to Use STC" below2. "Connecting an Additional Client to the Initialized STC Partition" on the next page
Preparing the Additional Client to Use STCTo access partitions on the HSM using STC, you must first create an STC token and identity on the client. Theseoperations are performed by the client administrator.
CAUTION! If you already have STC connections to partitions on other HSMs, skip thisprocedure and use the existing client token/identity. If you re-initialize an existing clienttoken/identity, active STC connections to this client will be broken.
To prepare the client for STC connections
1. Open a command prompt or terminal and navigate to the Luna HSM Client directory.
NOTE OnWindows, ensure that you open a command prompt with Administrator privileges.
• Windows: C:\Program Files\SafeNet\LunaClient• Linux/AIX: /usr/safenet/lunaclient/bin• Solaris: /opt/safenet/lunaclient/bin
2. [Optional] Launch LunaCM and verify that the STC client token is uninitialized.
lunacm:> stc tokenlist3. Initialize the STC client token, specifying a token label.
lunacm:> stc tokeninit -label <token_label>4. Create a client identity on the token.
lunacm:> stc identitycreate -label <client_identity>The STC client identity public key is automatically exported to:
Luna Network HSM 7 Partition Administration GuideLast Updated: 2022-07-26 23:53:21 GMT-04:00 Copyright 2001-2022 Thales Group 130

Chapter 2: Client-Partition Connections
<client_install_directory>/data/client_identities/5. [Optional] Display the client ID key hash. You can provide this hash to the Partition SO to verify the key's
integrity.
lunacm:> stc identityshow6. Provide the following certificate/information to the Partition SO (Client1) via pscp, scp, or other secure
means:
• Client2 identity public key
• [Optional] Client2 identity public key hash (do not provide the hash by the same means as the key)
Connecting an Additional Client to the Initialized STC PartitionThis procedure will allow an additional client (Client2 in the examples below) to access an initialized STCpartition. The Partition SO (using Client1) and the Client2 administrator must complete the procedure.
Partition SO (Client1): To allow an additional client access to the STC partition
1. Ensure that you have received the following certificates/information from the Client2 administrator:
• Client2 identity public key
• [Optional] Client2 identity public key hash
2. On Client1, launch LunaCM and log in as Partition SO.
lunacm:> slot set -slot <slotnum>lunacm:> role login -role po
3. Register the Client2 ID key to the partition. Specify a label for Client2 and the path to the key file.
lunacm:> stcconfig clientregister -label <client_label> -file <path/client_ID>4. [Optional] Display the hash for the Client2 identity.
lunacm:> stcconfig clientlistIf the displayed hash does not match the hash you received from the Client2 administrator, deregister theclient identity and contact the Client2 administrator:
lunacm:>stcconfig clientderegister -label <client_label>
NOTE If the Client2 administrator has admin access to the Luna Network HSM appliance, andthe partition identity public key is still available in the admin user's files on the appliance(lunash:>my file list), steps 5-7 are unnecessary.
5. Export a copy of the partition identity public key to the Client1 filesystem.lunacm:> stcconfig partitionidexportThe partition ID key is named for the partition serial number (<serialnum>.pid) and automatically exported to:<Lunaclient_install_directory>/data/partition_identities/
6. [Optional] Display the partition ID key hash. You can provide this hash to the Client2 administrator to verifythe key's integrity. Do not send the hash by the same means as the key.
Luna Network HSM 7 Partition Administration GuideLast Updated: 2022-07-26 23:53:21 GMT-04:00 Copyright 2001-2022 Thales Group 131

Chapter 2: Client-Partition Connections
lunacm:> stc identityshow7. Provide the following certificates/information to the Client2 administrator via scp, pscp, or other secure
means (see SCP and PSCP):
• Partition identity public key
• [Optional] Partition identity public key hash (do not provide the hash by the same means as the key)
• HSM Server Certificate, located in:
<Lunaclient_install_directory>/cert/server/<hostname/IP>Cert.pem
Client2 administrator: To create the client-partition STC connection
1. Ensure that you have received the following certificates/information from the Partition SO:
• HSM Server Certificate (*.pem)
• Partition identity public key (*.pid)• [Optional] Partition identity public key hash
NOTE If the Client2 administrator has admin access to the Luna Network HSM appliance, andthe partition identity public key is still available in the admin user's files on the appliance(lunash:>my file list), you can retrieve the HSM Server Certificate (server.pem) and thepartition ID key (<partition_serialnum>.pid) directly from the appliance using pscp or scp.
2. Open a command prompt or terminal window and navigate to the Luna Network HSM client installationdirectory.
3. Register the HSM Server Certificate to the client.
> vtl addServer -n <HSM_hostname/IP> -c <server_certificate>4. Launch LunaCM and register the partition ID key to the client. Specify the path to the key file and an optional
label for the partition.
lunacm:> stc partitionregister -file <path/IDfile>.pid [-label <partition_label>]5. [Optional] Display the hash for the partition ID key.
lunacm:> stc identityshowIf the displayed hash does not match the hash you received from the Partition SO, deregister the partition andcontact the Partition SO:
lunacm:> stc partitionderegister -serial <partition_serialnum>6. Display the list of registered Luna Network HSM servers to find the server ID of the appliance that hosts the
partition(s).
lunacm:> clientconfig listservers7. Enable the STC connection.
Luna Network HSM 7 Partition Administration GuideLast Updated: 2022-07-26 23:53:21 GMT-04:00 Copyright 2001-2022 Thales Group 132

Chapter 2: Client-Partition Connections
CAUTION! This forces the client to use STC for all links to the specified Luna Network HSMappliance. If the server has partitions assigned to this client using NTLS, those connections willbe terminated. Ensure you have registered the partition identity for all applicable partitions onthis HSM before continuing.
lunacm:> stc enable -id <server_ID>LunaCM restarts. If successful, the partition appears in the list of available slots.
8. [Optional] Set the active slot to the new partition and verify the STC link.
lunacm:> slot set -slot <slot>lunacm:> stc status
Client2 can now access the partition via an STC connection. You can repeat the procedure to allow more clientsto access the partition.
NOTE Each client identity registered to a partition uses 2392 bytes of storage on the partition.Ensure that the partition is large enough to store the identity of every client that will access thepartition, in addition to cryptographic objects. If necessary, the HSM SO can re-size an existingpartition (see Customizing Partition Sizes).
STC provides several configurable options that define the network settings for an STC link, and the securitysettings for the messages transmitted over the link. Although default values are provided that provide the optimalbalance between security and performance, you can override the defaults, if desired. See "Configuring STCIdentities and Settings" on page 137 for more information.
Converting Initialized NTLS Partitions to STCIf you have initialized partitions already assigned to a client using NTLS, you can use the following procedure toswitch to a more secure STC connection. All of the client's assigned partitions on the specified Luna NetworkHSMmust be converted. It is not possible for a client to connect to multiple partitions on a single Luna NetworkHSM using a combination of NTLS and STC.
The Partition SOmust complete this procedure on the client workstation.
Luna Network HSM 7 Partition Administration GuideLast Updated: 2022-07-26 23:53:21 GMT-04:00 Copyright 2001-2022 Thales Group 133

Chapter 2: Client-Partition Connections
Prerequisites> If you are using Luna HSM firmware 7.4.x or earlier, the HSM SOmust set HSM Policy 39: Allow Secure
Trusted Channel to 1 (ON).
To convert an NTLS partition-client connection to STC
1. Launch LunaCM and create the client token and identity.
NOTE This step is not required if you have already created a client token and identity. Verifyusing stc identityshow. If you recreate the client identity, you will have to re-register anyexisting STC partitions.
lunacm:> stc tokeninit -label <token_label>lunacm:> stc identitycreate -label <client_identity>The STC client identity public key is automatically exported to:
<client_install_directory>/data/client_identities/2. Log in as Partition SO and export the partition ID key.
lunacm:> slot set -slot <slotnum>lunacm:> role login -name polunacm:> stcconfig partitionidexportThe partition identity public key is named for the partition serial number (<partitionSN>.pid) and automaticallyexported to:
<client_install_directory>/data/partition_identities/3. Register the partition's public key with the client identity. Specify the path to the key file.
lunacm:> stc partitionregister -file <path/filename>.pid [-label <partition_label>]4. Register the client identity to the partition. Specify a label for the client and the path to the client identity file.
NOTE Each client identity registered to a partition uses 2392 bytes of storage on the partition.Ensure that there is enough free space before registering a client identity.
lunacm:> stcconfig clientregister -label <client_label> -file <path/client_identity>5. Depending on your firmware version, enable partition policy 37: Force STC Connection.
• Luna HSM firmware 7.4.x or earlier: You must enable policy 37 to use STC. All clients accessing thispartition must perform the STC registration procedure in steps 1-4.
• Luna HSM firmware 7.7.0 or newer: To enforce STC on all client connections to this partition, enablepolicy 37. If you want some clients to connect to this partition using NTLS, do not enable this policy.
CAUTION! Any existing NTLS client connections to this partition will be terminated when youenable policy 37. Ensure that all clients that access this partition have performed the STCregistration procedure in steps 1-4 before you enable policy 37.
Luna Network HSM 7 Partition Administration GuideLast Updated: 2022-07-26 23:53:21 GMT-04:00 Copyright 2001-2022 Thales Group 134

Chapter 2: Client-Partition Connections
lunacm:> partition changepolicy -slot <slotnum> -policy 37 -value 1
NOTE When you enable partition policy 37, the client loses contact with the partition until youenable the STC connection in step 7. This is expected behavior.
6. Repeat steps 2-5 for each NTLS partition on the same Luna Network HSM you want to register to this client.
7. Find the server ID for the Luna Network HSM hosting the partition and enable its STC connection. You will beprompted to restart LunaCM and all current sessions will be closed.
CAUTION! This forces the client to use STC for all links to the specified appliance. Anyremaining NTLS links from this client to the appliance will be terminated. Ensure that you havecompleted steps 2-5 for each of this client's partitions before continuing.
lunacm:> clientconfig listserverslunacm:> stc enable -id <server_ID>If a partition is not visible as a slot when LunaCM restarts, disable STC for the server using lunacm:> stcdisable -id <server_ID>, and ensure that you have activated partition policy 37.
STC provides several configurable options that define the network settings for an STC link, and the securitysettings for the messages transmitted over the link. Although default values are provided that provide the optimalbalance between security and performance, you can override the defaults, if desired. See "Configuring STCIdentities and Settings" on page 137 for more information.
Using the STC Admin ChannelSecure Trusted Channel (STC) can protect all communications to the HSM, including those originating on theLuna Network HSM appliance. The STC admin channel is local to the appliance, and is used to encrypt datatransmitted between the HSM and the local services running on the appliance (such as LunaSH, NTLS, and theSTC service). The STC admin channel link is configured separately from the client-partition links, and can beenabled or disabled as required by the HSM SO.
NOTE The STC admin channel is configurable using Luna Network HSM appliance softwareand Luna HSM firmware 7.4.x and earlier. This feature is not available in Luna Network HSM7.7 and newer.
Unique STC identities, each defined by a 2048-bit RSA asymmetric public/private key pair, exist on the HSM andthe Luna Network HSM appliance operating system. When you enable the STC admin channel, the HSM and theappliance create a trust link by exchanging public keys, and the private keys are used to encrypt allcommunications between them.
NOTE Enabling the STC admin channel forces all client-partition links (NTLS or STC) to useSTC for communications between the appliance and the HSM. This may affect NTLS linkperformance.
Luna Network HSM 7 Partition Administration GuideLast Updated: 2022-07-26 23:53:21 GMT-04:00 Copyright 2001-2022 Thales Group 135

Chapter 2: Client-Partition Connections
Enabling the STC Admin ChannelWhen enabled, all communications from the appliance operating system to the HSM are transmitted over theSTC admin channel.
NOTE When you enable HSM policy 39: Allow Secure Trusted Channel on Luna 7.4.x orearlier, the following LunaSH commands are blocked to protect the integrity of any STC linksthat are created:> hsm stc identity create> hsm stc identity initialize> hsm stc identity delete> hsm stc identity partition deregisterIf you plan to use STC on the admin channel and want to recreate the HSM identity first, see"Configuring STC Identities and Settings" on the next page before continuing.
To enable the STC admin channel
1. Open a LunaSH session on the appliance and log in as the HSM SO.
lunash:> hsm login2. If you have not already done so, enable HSM Policy 39: Allow Secure Trusted Channel.
lunash:> hsm changepolicy -policy 39 -value 13. Enable the STC admin channel.
CAUTION! Enabling the STC admin channel is service-affecting. It causes an STC servicerestart, which temporarily terminates all existing STC links to the appliance. It also terminatesthe existing HSM login session.
lunash:> hsm stc enable
Disabling the STC Admin ChannelWhen disabled, all communications from the appliance operating system to the HSM are transmitted,unencrypted, over the local bus.
NOTE Disabling the STC admin channel is service affecting. It causes an STC service restart,which temporarily terminates all existing STC links to the appliance. It also terminates theexisting HSM login session.
To disable the STC admin channel
1. Open a LunaSH session on the appliance and log in as HSM SO.
lunash:> hsm login2. Disable the STC admin channel.
lunash:> hsm stc disable
Luna Network HSM 7 Partition Administration GuideLast Updated: 2022-07-26 23:53:21 GMT-04:00 Copyright 2001-2022 Thales Group 136

Chapter 2: Client-Partition Connections
Configuring the STC Admin ChannelSTC provides several configurable options that define the network settings for an STC link, and the securitysettings for the messages transmitted over the link. Although default values are provided that provide the optimalbalance between security and performance, you can override the defaults, if desired. See "Configuring STCIdentities and Settings" below for more information.
Configuring STC Identities and SettingsDepending on your organization's security needs, you may need to customize some aspects of your SecureTrusted Channel (STC) connections. This can include encryption levels for message verification, requesttimeouts, periodic replacement of client identities, and more. Luna Network HSM provides configurable optionsfor customizing your STC connections.
> "Configuring STC Settings" below
> "Configuring STC Tokens and Identities" on page 139
Configuring STC SettingsSTC provides configurable options that define network settings for an STC link, and security settings for themessages transmitted over that link. Although default values are provided that provide the optimal balancebetween security and performance, you can override the defaults, if desired.
> "Link Activation Timeout" below
> "Message Encryption" on the next page
> "Message Integrity Verification" on the next page
> "Rekey Threshold" on page 139
For client-partition STC links, these options are set individually for each partition. Using Luna 7.4.x and earlier,they can be set by the HSM SO (using LunaSH) before the STC connection is established, or by the Partition SO(using LunaCM) after the STC partition is initialized. Using Luna 7.7.0 and newer, only the Partition SO canconfigure STC options, after the partition is initialized.
For the STC admin channel, the configuration applies to all communications between the HSM and localservices on the appliance, such as LunaSH and NTLS. The STC admin channel options are set by the HSM SO.
NOTE The STC admin channel is configurable using Luna Network HSM appliance softwareand Luna HSM firmware 7.4.x and earlier. This feature is not available in Luna Network HSM7.7 and newer.
Link Activation TimeoutThe activation timeout is the maximum time allowed to establish the STC link before the channel request isdropped. You can use the following commands to specify the activation timeout for STC links to this partition.
STC admin channel (HSM SO, Luna 7.4.x and earlier)
lunash:> hsm stc activationtimeout showlunash:> hsm stc activationtimeout set -time <seconds>
Luna Network HSM 7 Partition Administration GuideLast Updated: 2022-07-26 23:53:21 GMT-04:00 Copyright 2001-2022 Thales Group 137

Chapter 2: Client-Partition Connections
Uninitialized STC Partition (HSM SO, Luna 7.4.x and earlier)
lunash:> stc activationtimeout showlunash:> stc activationtimeout set -partition <partition> -time <seconds>
Initialized STC Partition (Partition SO)
lunacm:> stcconfig activationtimeoutshowlunacm:> stcconfig activationtimeoutset -time <seconds>
Message EncryptionBy default, all messages traversing an STC link are encrypted. You can use the following commands to specifythe level of encryption used (AES 128, AES 192, or AES 256) on all STC links to a partition, or to disableencryption on all STC links to a partition.
STC admin channel (HSM SO, Luna 7.4.x and earlier)
lunash:> hsm stc cipher showlunash:> hsm stc cipher enable {-all | -id <cipher_id>}lunash:> hsm stc cipher disable {-all | -id <cipher_id>}
Uninitialized STC Partition (HSM SO, Luna 7.4.x and earlier)
lunash:> stc cipher showlunash:> stc cipher enable -partition <partition_name> {-all | -id <cipher_id>}lunash:> stc cipher disable -partition <partition_name> {-all | -id <cipher_id>}
Initialized STC Partition (Partition SO)
lunacm:> stcconfig ciphershowlunacm:> stcconfig cipherenable {-id <cipher_ID> -all}lunacm:> stcconfig cipherdisable {-id <cipher_ID> -all}
Message Integrity VerificationBy default, the integrity of all messages traversing an STC link is verified using an HMACmessage digestalgorithm. You can use the following commands to specify the algorithm used (HMAC with SHA 256, or HMACwith SHA 512).
STC admin channel (HSM SO, Luna 7.4.x and earlier)
lunash:> hsm stc hmac showlunash:> hsm stc hmac enable -id <hmac_ID>lunash:> hsm stc hmac disable -id <hmac_ID>
Luna Network HSM 7 Partition Administration GuideLast Updated: 2022-07-26 23:53:21 GMT-04:00 Copyright 2001-2022 Thales Group 138

Chapter 2: Client-Partition Connections
Uninitialized STC Partition (HSM SO, Luna 7.4.x and earlier)
lunash:> stc hmac showlunash:> stc hmac enable -partition <partition_name> -id <hmac_ID>lunash:> stc hmac disable -partition <partition_name> -id <hmac_ID>
Initialized STC Partition (Partition SO)
lunacm:> stcconfig hmacshowlunacm:> stcconfig hmacenable -id <hmac_ID>lunacm:> stcconfig hmacdisable -id <hmac_ID>
Rekey ThresholdThe session keys and encryption keys created when an STC tunnel is established are automatically regeneratedafter the number of messages specified by the rekey threshold have traversed the link. You can use the followingcommands to specify the key life for the session and encryption keys used on all STC links to a partition. Specifythe <threshold> value in millions of messages.
STC admin channel (HSM SO)
lunash:> hsm stc rekeythreshold showlunash:> hsm stc rekeythreshold set -value <threshold>
Uninitialized STC Partition (HSM SO)
lunash:> stc rekeythreshold showlunash:> stc rekeythreshold set -partition <partition_name> -value <threshold>
Initialized STC Partition (Partition SO)
lunacm:> stcconfig rekeythresholdshowlunacm:> stcconfig rekeythresholdset -value <threshold>
Configuring STC Tokens and IdentitiesEach Luna HSM Client and partition that serves as an STC endpoint (including the HSM SO partition and theappliance operating system) has a unique identity, defined by a 2048-bit RSA asymmetric public/private key pair.The STC identity key pair is stored in the STC token associated with the client or partition (or the appliance orHSM). Before STC can create secure tunnels, trust must be established through the exchange of public keys.
Partition and HSM tokens and identities are created automatically and cannot be recreated. Client tokens andidentities are created manually using LunaCM. The appliance token and identity is created automatically but canbe recreated if necessary using LunaSH.
Under normal operating conditions, you should not need to recreate the STC tokens or identities. If you haveoperational or security reasons to do so, use the following commands:
Luna Network HSM 7 Partition Administration GuideLast Updated: 2022-07-26 23:53:21 GMT-04:00 Copyright 2001-2022 Thales Group 139

Chapter 2: Client-Partition Connections
Client Tokens and IdentitiesUse the following LunaCM commands:
Command Description
stc identitycreate Create a client identity on the STC client token.
stc identitydelete Delete a client identity from the STC identity token.
stc identityexport Export the STC client identify to a file.
stc identityshow Display the client name, public key hash, and registered partitions forthe STC client token.
stc partitionderegister Remove a partition identity from the STC client token.
stc partitionregister Register a partition to the STC client token.
stc tokeninit Initialize a client token.
stc tokenlist List the available STC client identity tokens.
STC Admin Channel Appliance Identity
NOTE The STC admin channel is configurable using Luna Network HSM appliance softwareand Luna HSM firmware 7.4.x and earlier. This feature is not available in Luna Network HSM7.7 and newer.To ensure the integrity of existing STC connections, many of the following commands cannotbe used when HSM policy 39: Allow Secure Trusted Channel is on. You must disable HSMpolicy 39 before recreating the admin channel identity.
Use the following LunaSH commands:
Command Description
hsm stc identity create Create a STC client identity for the STC admin channel.
hsm stc identity delete Delete the STC admin channel client identity.
hsm stc identity initialize Initialize the STC admin channel client token.
hsm stc identity partition deregister Remove the HSM SO partition identity public key that is currentlyregistered with the STC admin channel client token.
hsm stc identity partition register Register the HSM SO partition identity public key with the STC adminchannel client token.
Luna Network HSM 7 Partition Administration GuideLast Updated: 2022-07-26 23:53:21 GMT-04:00 Copyright 2001-2022 Thales Group 140

Chapter 2: Client-Partition Connections
Command Description
hsm stc identity show Display the name, public key hash, and registered partitions for theSTC admin channel client token.
Restoring Broken NTLS or STC ConnectionsIf a certificate used to authenticate NTLS or STC connections is deleted, regenerated, or has expired, the TLShandshake fails, and connections must be re-established before cryptographic operations can resume. This canbe the result of HSM or partition zeroization (STC), regeneration/expiry of the HSM server certificate(server.pem) on the Luna Network HSM appliance, or expiry of a client certificate. The procedures on this pagewill allow you to restore your broken connections, wherever possible.
> "Restoring NTLS/STC Connections after Regenerating the Server and/or Client Certificates" below
> "Restoring Connections After HSM Zeroization" on the next page
> "Restoring STC Connections After Partition Zeroization" on the next page
Restoring NTLS/STC Connections after Regenerating the Server and/or ClientCertificatesIf you regenerate the HSM server certificate (server.pem) and/or a client certificate, you must restore all NTLSand STC connections using the new certificate(s).
To restore NTLS connections using an HSM server certificate signed by a third-party CA
Restore NTLS connections using the procedure for "Authenticating the Appliance Using a Trusted CA" onpage 120. You do not need to re-install the CA certificate chain, only the new server certificate.
To restore NTLS connections using a client certificate signed by a third-party CA
Restore NTLS connections using the procedures for "Authenticating a Client Using a Trusted CA" on page 121and "Registering a Client to the Appliance" on page 122. You do not need to re-install the CA certificate chain,only the new server certificate.
To restore NTLS or STC connections using a self-signed HSM server certificate
Appliance admin:1. Using LunaSH, restart the NTLS and STC services.
lunash:> service restart ntlslunash:> service restart stc
2. Provide the new HSM Server Certificate (server.pem) to each client by pscp, scp, or other secure means.Client administrators:1. If you have access to LunaSH on the Luna Network HSM appliance, you can retrieve the new HSM server
certificate (server.pem) using pscp or scp. Otherwise, the appliance administrator must provide it.2. Delete the original server identity from the client.
Luna Network HSM 7 Partition Administration GuideLast Updated: 2022-07-26 23:53:21 GMT-04:00 Copyright 2001-2022 Thales Group 141

Chapter 2: Client-Partition Connections
>vtl deleteServer -n <hostname/IP>3. Register the new HSM server certificate with the client.
>vtl addServer -n <hostname/IP> -c <cert_filename>4. If you are restoring STC connections, launch LunaCM, find the new Server ID, and enable STC for the server.
lunacm:> clientconfig listserverslunacm:> stc enable -id <server_ID>
Restoring Connections After HSM ZeroizationIf the HSM is zeroized, all partitions and their contents are erased. New partitions must be created and assignedto their clients via the usual connection procedure.
NTLS connections
The HSM SOmust re-initialize the HSM, create new partitions, and assign them to their respective registeredclients (see "Assigning or Revoking NTLS Client Access to a Partition" on page 124). You do not need to registernew appliance/client certificates unless they are regenerated.
STC connections
When the HSM is zeroized, the following occurs:
> HSM policy 39: Allow Secure Trusted Channel is turned off.
> The STC application partition identities are deleted along with the partitions.
> If the STC admin channel is enabled, the STC admin partition identity is deleted, breaking the STC adminchannel between LunaSH and the HSM.
Create new STC connections using the standard procedure found in "Creating an STC Connection" onpage 125. You can use the existing client tokens/identities. You do not need to register a new HSM servercertificate unless it was regenerated using lunash:> sysconf regencert.
Restoring STC Connections After Partition ZeroizationThe registered client identities used to validate STC clients are stored on each partition. Since they are notcryptographic objects, they are not backed up as part of a normal partition backup operation. If the partition iszeroized due to multiple login failures, the registered client identities are erased and regenerated. The HSM SOmust provide the new partition identity to the client administrator, who must register the new identity.
To restore an STC connection after partition zeroization
HSM SO:1. Log in to LunaSH and log in as HSM SO.
lunash:> hsm login2. Export the new partition identity key to the appliance filesystem.
lunash:> stc partition export -partition <label>3. Provide the new partition identity key (<partitionSN>.pem) to the client by pscp, scp, or other secure means.
Luna Network HSM 7 Partition Administration GuideLast Updated: 2022-07-26 23:53:21 GMT-04:00 Copyright 2001-2022 Thales Group 142

Chapter 2: Client-Partition Connections
Client administrator:1. If you have access to LunaSH on the Luna Network HSM appliance, you can retrieve the new partition identity
key (<partitionSN>.pem) using pscp or scp. Otherwise, the HSM SOmust provide it.
2. Launch LunaCM and de-register the original partition identity from the client.
lunacm:> stc partitionderegister -serial <partitionSN>3. Register the new partition identity key (<partitionSN>.pem)to the client.
lunacm:> stc partitionregister -file <path/filename> [-label <label>]4. Restart LunaCM.
lunacm:> clientconfig restartYou can now re-initialize the STC partition.
Luna Network HSM 7 Partition Administration GuideLast Updated: 2022-07-26 23:53:21 GMT-04:00 Copyright 2001-2022 Thales Group 143

Behavior of "pre-firmware 7.7.0", and V0, and V1partitions?Luna HSM Firmware 7.7.0 and newer preserve the traditional keys-in-hardware mode of operation and improveon it with fixes and security updates, while also adding the option to securely store more keys than will fit insidean HSM. Traditional support of Luna features is retained in what we call version zero (V0) partitions, todistinguish from version one (V1) partitions that do the following:
> Implement "Scalable Key Storage (SKS)" on page 160 to securely externally store and manage keys in vastlygreater quantities than can fit inside an HSM.
> Conform with FIPS SP 800-131A (revised).
> Comply with current and anticipated Common Criteria and eIDAS requirements (including "Per-KeyAuthorization (PKA)" on page 185).
Partition type ==>Firmware 7.7.0 and newer
V0 V1
Description ==>> Continues the Luna tradition of "keys always
in hardware", for ongoing compatibility withexisting applications and use-cases
> Adds the abilityto store largenumbers ofkeys safelyoutside theHSM,
> Adds Per-KeyAuthorizationcapability,
> ... both for RSSand otherapplications.
After updating to Luna HSM Firmware 7.7.0 or newer, any pre-existing partition becomes a V0 partition. If youcreate new partitions after the firmware update, the default is V0 with a further option to convert to V1 if there isever a need. V0 partitions preserve your content, allow your applications to continue functioning with thosepartitions as they always did, and leverage the benefits of new fixes and security updates introduced with thenewer firmware. To access the new features mentioned above, V0 partitions must be converted to V1 partitionsafter the update to Luna HSM Firmware 7.7.0 or newer. A summary of the origin of each partition type is providedin "The Origin of Each Partition Type" on the next page. For more information about converting V0 partitions toV1, refer to "Converting Partitions from V0 to V1 or V1 to V0" on page 157.
Luna Network HSM 7 Partition Administration GuideLast Updated: 2022-07-26 23:53:21 GMT-04:00 Copyright 2001-2022 Thales Group 144

Behavior of "pre-firmware 7.7.0", and V0, and V1 partitions?
NOTE V0 partitions have been designed to preserve as much compatibility as possible withyour existing applications, while setting some necessary infrastructure for Luna HSM Firmware7.7.0 features and future developments. However, the conversion of pre-existing partitions toV0 has implications for the firmware update process that must be considered before updatingto Luna HSM Firmware 7.7.0 or newer. If you have not updated your Luna HSM to Luna HSMFirmware 7.7.0 or newer but plan to do so, Thales recommends reading SpecialConsiderations for Luna HSM Firmware 7.7.0 and Newer before updating and reading theinformation in this section.
This section is of interest
> to customers who already have HSMs in operation and are looking to upgrade to Luna HSM Firmware 7.7.0or newer, where possible, or
> to anyone wanting to know what differences in behavior to expect if you elect to change from the default V0partition type to V1.
Version 7.x hardware can accept upgraded firmware, discussed in this section, and works best in conjunctionwith
• Luna Client software 10.3.0 or newer and
• Luna Network HSM appliance software 7.7.0 or newer.
You might be looking to migrate existing keys and objects from their application partitions to updated partitions,both for older HSM generations being supplanted, and for current hardware being updated.
The ability to migrate keys and objects from "pre-firmware 7.7.0" to new partitions is preserved. Some newadministrative commands, and new options to pre-existing commands, have been added. Any API changes areas transparent as possible to maintain the function of existing customer and partner applications.
The Origin of Each Partition TypeThis section describes the origin of pre-firmware 7.7.0, V0, and V1 partitions.
Pre-Firmware 7.7.0 PartitionThis is any partition on a Luna HSM from firmware version from 7.0 up to (but not including) version 7.7.0.
V0 PartitionAny pre-existing partition, when HSM firmware is updated to version 7.7.0 or newer, becomes a V0 partition.
Any new partition, created using the default partition type (-version option) of the command "partition create" onpage 1 (in lunash).
Any partition created on a firmware-7.7.0 (or newer) HSM, by an older client that does not know about the V0 / V1distinction, is always V0.
The V0 status is a partition policy (#41).
Luna Network HSM 7 Partition Administration GuideLast Updated: 2022-07-26 23:53:21 GMT-04:00 Copyright 2001-2022 Thales Group 145

Behavior of "pre-firmware 7.7.0", and V0, and V1 partitions?
V1 PartitionAny partition created with the [non-default] V1 option selected in the command "partition create" on page 1 (inlunash).
A V0 partition (whether created as V0 or a pre-existing partition that got upgraded with 7.7.0 firmware) can beconverted to a V1 partition, without losing any contained objects. Do this by changing Policy 41 to value 1.
The Effects of Each Partition Type on HSM and PartitionFunctionalityThe following sections describe how various aspects of HSM and application-partition functionality are affectedby upgrading and by creating new partitions with the relevant creation-time options.
Partition Policy Considerations
Pre-firmware 7.7.0 PartitionThere are no special considerations for pre-existing partitions, created with earlier firmware. Behavior withrespect to Partition Policies is unchanged.
V0 Partition and V1 PartitionPartition policy 41 - Partition version
> Defaults to version zero (partition V0)
• when a new partition is created on a firmware 7.7.0 (or newer) HSM
• when a partition already exists on a pre-7.7.0 HSM that is then updated to firmware 7.7.0 (or newer)
> Becomes version one (partition V1)
• when -version 1 is specified as a new partition is created on a firmware 7.7.0 (or newer) HSM
• when lunacm command partition changepolicy -policy 41 -value 1 is issued> V0 partition contents are preserved if/when policy 41 is set to version 1 (convert V0 partition to V1)
> The V1 status persists for the life of the partition unless command partition changepolicy -policy 41 -value0 is issued• which reverts the partition to V0, and
• all partition contents are erased, and
• Scalable Key Storage and Per-Key Authorization are disabled.
> Some other policies are also interdependent with the partition version status. See "Partition Capabilities andPolicies" on page 291 3, 7, 31, 32, and 40.
Luna Network HSM 7 Partition Administration GuideLast Updated: 2022-07-26 23:53:21 GMT-04:00 Copyright 2001-2022 Thales Group 146

Behavior of "pre-firmware 7.7.0", and V0, and V1 partitions?
General HSM Behavior
Pre-firmware 7.7.0 PartitionThere are no special considerations for pre-existing partitions, created with earlier firmware. Behavior withrespect to cloning, backup, etc. is unchanged.
V0 PartitionBehavior defaults to V0 behavior, where keys reside in hardware.
Keys can be archived to a Backup HSM or shared for purposes of redundancy and load-balancing in an HAenvironment, but only when securely cloned among HSMs within the same encryption domain.
Your historic applications and integrations are supported.
V1 PartitionV1 option adds key export capability when you need to support larger numbers of keys than will fit inside anHSM, yet they must remain within the secure cryptographic boundary ("Scalable Key Storage (SKS)" onpage 160)
The exported keys are always encrypted by a master key (SMK) that remains within an HSM and can besecurely copied only to another HSM that shares the same cryptographic domain.
Admin Partition Behavior with Pre-7.7.0 HSM / Pre-10.3.0 ClientOlder client software (example 7.4 or 10.2.0) cannot create a V1 partition on an HSM with firmware 7.7.0 ornewer.
Similarly, if a V1 partition is created on a 7.7.0 (or newer) Network HSM appliance and linked to an older Client,the client can see the remote partition, but cannot initialize or use the V1 partition. (Expect error CKR_ACCESS_ID_INVALID)
Client must be version 10.3.0 or newer to create and work with V1 partitions (see ** at the bottom of this page).
Cloning
Pre-firmware 7.7.0 PartitionThere are no special considerations for pre-existing partitions, created with earlier firmware. Behavior withrespect to cloning, Key Export etc. is unchanged.
V0 PartitionWhen an HSM's firmware is updated to version 7.7.0 or newer, any existing partitions become V0, and allcontents are updated.
Keys/objects that have newer attributes, unknown to the older firmware, can be cloned if the newer attributes areat default value (unset), allowing them to be dropped by the older, receiving HSM. If a newer security-relatedattribute has been set, then the object is not cloned to an older HSM that is not aware of the attribute.
Keys can be imported from a pre-7.x HSM (5.x or 6.x) into a V0 partition on the firmware 7.7.0 (or newer) HSM,just as you would any object.
Luna Network HSM 7 Partition Administration GuideLast Updated: 2022-07-26 23:53:21 GMT-04:00 Copyright 2001-2022 Thales Group 147

Behavior of "pre-firmware 7.7.0", and V0, and V1 partitions?
When cloning objects from HSM firmware earlier than 7.7.0 into V0 partition, the size of the object increases. Assuch, synchronization from partition in pre-7.7.0-firmware HSM to V0 partition may fail due to storage limitation.
V1 PartitionWhen a new V1 partition is created, or when a V0 partition is converted to V1,
> Objects cannot be cloned from a V0 partition or from a pre-7.7.0 partition into a V1 partition, and
> objects cannot be cloned from a V1 partition to a non-V1 partition.
NOTE The library attempts to perform the individual actions of a cloning operation insequence on the respective partitions. If the policies and partition types on the source andtarget partitions are incompatible, the partition clone command (or an attempted HAsynchronization) can fail with a message like CKR_DATA_LEN_RANGE while trying to clone.This can occur if a key object from the source partition is a different size than an equivalentobject expected by the target.
Objects can be cloned, unwrapped, or legacy-SKS-inserted, directly to a V1 partition (i.e., SIMinsert) - note thatcloning in such case is a one-way operation; V1 partitions perform outbound cloning only for SMKs.
SMK (SKS Master Key)
Pre-firmware 7.7.0 PartitionThis is not applicable before firmware 7.7.0, because SKS and therefore the SMK do not exist in Luna HSMversion 7 prior to firmware 7.7.0.
V0 PartitionEach V0 partition has a unique Primary SMK generated when the Crypto Officer role logs in for the first time, butit cannot be seen or used while the partition is in V0 state. However, that SMK is in place, in case you everchange partition policy 41 to make the current partition a V1 partition.
V1 PartitionEach V1 partition has a unique Primary SMK generated when the Crypto Officer role logs in for the first time, butit can also accept a replacement Primary SMK via cloning (such as when joining a partition to an existing HAgroup)
Each V1 partition also has additional SMK slots or holding areas for:
> Rollover SMK,
> SMKs from earlier-model HSMs,
> FM SMK for partitions with Functionality Modules enabled.
The Primary SMK secret is used to extract and to insert keys/objects; all other SMK secrets can be used only toinsert keys/objects.
Luna Network HSM 7 Partition Administration GuideLast Updated: 2022-07-26 23:53:21 GMT-04:00 Copyright 2001-2022 Thales Group 148

Behavior of "pre-firmware 7.7.0", and V0, and V1 partitions?
Behavior at Partition Level
Pre-firmware 7.7.0 PartitionThere are no special considerations for pre-existing partitions, created with earlier firmware. Behavior withrespect to cloning, backup, HA, etc., is unchanged.
V0 PartitionWhether pre-existing and updated, or newly created, V0 partitions should be generally indistinguishable fromprevious-firmware partitions -- continuing to work with your applications -- with provisos mentioned below.Cloning or Export/Import function as expected:
> from older versions (pre-firmware 7.7),
> to-or-from V0 partitions (firmware 7.7.0 or newer),
> but not back to older-version partitions.
Client versions earlier than 10.3 do not support expression of V0/V1 partition types (policy 41) for Partition PolicyTemplate (PPT)
> partition showPolicies -exportTemplate does not report V0/V1 partition policy.> partition init -label <somelabel> -applytemplate <template file> supports management of V0/V1 partition
template correctly.
> Partition initialization without V0/V1 partition policy succeeds with correct default value (V0).
V1 PartitionOnly the SKS Master Key (the SMK) is cloned from partition to partition, or from HSM to HSM for HA or forBackup/Restore. All other objects are encrypted with the SMK and Extracted for external storage or retrievedfrom external storage and inserted for use within the HSM.
Structure of Partition
Pre-firmware 7.7.0 PartitionThere are no special considerations for pre-existing partitions, created with earlier firmware. Structure isunchanged until you update firmware to version 7.7.0 or newer.
V0 PartitionPartition structure is generally as for pre-7.7.0 partition, but with some updated overhead taking up some space;a completely filled pre-7.7.0 partition would need more room for objects after migration/firmware-update, but thisis taken care of by partition size increases, as needed, during firmware update. The increase is enabled by anincrease in available memory that is also part of the update process (see below).
V1 PartitionWhen a new partition is created at V1 or a V0 partition is converted to V1, the new structural overhead applies,including the space allotted for Primary and other SMKs.
Also, some keys can have new/additional attributes necessary to satisfy newer crypto and security standards.
Luna Network HSM 7 Partition Administration GuideLast Updated: 2022-07-26 23:53:21 GMT-04:00 Copyright 2001-2022 Thales Group 149

Behavior of "pre-firmware 7.7.0", and V0, and V1 partitions?
Objects in a Partition
Pre-firmware 7.7.0 PartitionObject characteristics and behavior are unchanged until you update firmware to version 7.7.0 or newer.
V0 PartitionMemory allotment is increased (from pre-7.7) to allow increased partition size, all pre-existing keys and all newkeys receive new attributes (if applicable to key type) but those attributes are not used for anything in V0partitions (see * at the bottom of this page).
NOTE The doubling of the memory allotted to partitions does not double the key capacity ofpartitions. It increases headroom to allow for increases in the data space required by keys, toaccommodate new features and abilities, and does not alter published baselines for keycapacity.
V1 PartitionMemory allotment is increased (from pre-7.7) to allow increased partition size. There are no pre-existing keys innew V1 partitions, and all new keys receive the new attributes.
NOTE The doubling of the memory allotted to partitions does not double the key capacity ofpartitions. It increases headroom to allow for increases in the data space required by keys, toaccommodate new features and abilities, and does not alter published baselines for keycapacity.
Memory
Pre-firmware 7.7.0 PartitionMemory availability and usage are unchanged until you update firmware to version 7.7.0 or newer.
V0 Partition and V1 Partition
Size limit with FW version< 7.7.0 New size limit after upgrading to FW version >= 7.7
2 MB 4 MB
16 MB 32 MB
32 MB 64 MB
Example after mid-size update:Partition Storage:
Total Storage Space: 3306327Used Storage Space: 0Free Storage Space: 3306327Object Count: 0Overhead: 15560
Luna Network HSM 7 Partition Administration GuideLast Updated: 2022-07-26 23:53:21 GMT-04:00 Copyright 2001-2022 Thales Group 150

Behavior of "pre-firmware 7.7.0", and V0, and V1 partitions?
NOTE The doubling of the memory allotted to partitions does not double the key capacity ofpartitions. It increases headroom to allow for increases in the data space required by keys, toaccommodate new features and abilities, and does not alter published baselines for keycapacity.
In summary, if you could store X-number of a given size of keys on your partition or HSM, then you can still storethem all after 7.7.0 f/w update. The increase, at each allotment level was chosen to accommodate increasedpartition overhead and object size changes, plus some extra just in case (see * at the bottom of this page).
Behavior at Key Level
Pre-firmware 7.7.0 PartitionKey object characteristics and behavior are unchanged until you update firmware to version 7.7.0 or newer.
V0 Partition and V1 PartitionSome key types and algorithms might have constraints on the allowed uses of some older key and algorithmtypes and sizes, due to changes in the security and threat environments over time.
Check the latest mechanism summary tables in the SDK.
As with any firmware version update, some key types might be newly added, and some existing key types mighthave attributes that are used differently from previous. Where this might become apparent is when keys arereplicated in an HA group with a mix of HSM firmware versions - for example, an existing application mightattempt to make use of key sizes that are recognized as too small and of low security by group members withnewer firmware, or a newer application might make use of newer attributes that are not recognized by olderfirmware (see Per-key Authorization, below, for example).
Partition Policy Template
Pre-firmware 7.7.0 Partitionpartition showPolicies -exportTemplate generates a template file containing current policy settingspartition init -label <label> -applytemplate <template file> applies an existing template with the containedpolicy settings
V0 PartitionBoth commands behave the same as in previous versions. V0 partitions have some policies that do not exist inpre-7.7.0 partitions. As long as none of the policies in your template conflict with the state of a new policy, yourpre-existing templates should work correctly. Any policy that is not mentioned in a template is set to its defaultvalue when the template is applied.
If there is a mismatch between template policies and the default values of newer or dependent policies, then theattempt to apply the old policy would fail with CKR_FAILED_DEPENDENCIES.
You have the option to edit a policy file before applying it, to add newer policies.
Luna Network HSM 7 Partition Administration GuideLast Updated: 2022-07-26 23:53:21 GMT-04:00 Copyright 2001-2022 Thales Group 151

Behavior of "pre-firmware 7.7.0", and V0, and V1 partitions?
V1 PartitionThe default for new partition creation with firmware 7.7.0 (or newer) is a V0 partition. You could apply your PPT tocreating a V1 partition only by pre-editing the policy template file to include setting policy 41 to a value of 1.
See also the lists of dependencies below the table at "Partition Capabilities and Policies" on page 291.
Per-Key Authorization
Pre-firmware 7.7.0 PartitionThis is a new feature with firmware 7.7.0 and has no bearing on partitions at earlier firmware versions.
V0 PartitionPartition Policy 40 Enable Per-key Authorization Data defaults to 0 (zero, or off) for V0 partitions, and cannot beturned on. V0 partitions do not immediately provide per-key authentication data or attributes upon conversion tothis partition version and key objects received from partitions on other HSMs (7.x-pre-7.7.0 HSMs, as well as 5.xand 6.x HSMs) come into the partition without auth data.
V1 PartitionPartition Policy 40 Enable Per-key Authorization Data defaults to 1 (one, or on) for V1 partitions, and can beturned off for performance.
Relevant keys have attributes, and are automatically assigned the CKA_AUTH_DATA attribute, that allow HSMowner to provide individual users access to specific keys for Sole Ownership and Control, such as in RemoteSigning and Sealing applications.
Special considerations apply when importing key objects without per-key auth data into a Luna 7.7.0+ partitionthat enforces per-key authentication. For more information, refer to Migration Scenarios for Per-Key Auth.
Multi-Factor Authentication (PED-auth)
Pre-firmware 7.7.0 PartitionBehavior of partitions at earlier firmware versions continues as-is (except see exceptions in next paragraph, ifPEDs are updated).
V0 Partition and V1 Partition> PEDs with firmware 2.7.4 or 2.9.0 or newer can function with Luna HSM 7.7.0 and newer HSMs that have
been updated for compliance with eIDAS/Common Criteria and NIST 800-56A standards.
> When an HSM is at firmware version 7.7.0 or newer, it verifies that any connecting PED is at PED firmware2.7.4 or firmware 2.9.0, or the HSM refuses the connection and issues an error.
> The RPV of an orange PED Key, created with PED firmware 2.7.4 or 2.9.0 against a firmware 7.7.0 HSM hasadditional features compared to previous RPV, necessary for current authentication standards.
> PEDs with firmware older than 2.7.4 or 2.9.0 can do the following:
• Use a newer RPV, which was created with PED firmware 2.7.4 or 2.9.0 against a Luna HSM with firmware7.7.0. However, the PED remains unaware of the newer security components.
Luna Network HSM 7 Partition Administration GuideLast Updated: 2022-07-26 23:53:21 GMT-04:00 Copyright 2001-2022 Thales Group 152

Behavior of "pre-firmware 7.7.0", and V0, and V1 partitions?
• Duplicate a newer RPV onto another orange key while only imprinting the older security components; thatis, the newer security components are lost. The duplicated RPV can then be used with pre-firmware-7.7.0HSMs, but since the newer security components are missing, the 'duplicate' orange key (and any copy ofit) cannot be used with HSMs at version 7.7.0 or newer.
> For Remote PED operation,
• any blank RPK must first be provisioned with new Critical Security Parameters (CSP) via a local PEDconnection;
• the content of a previously provisioned orange Remote PED Key (RPK) with old CSP must be migrated tonew CSP. The same is true for a newer-style RPV that had the newer security components stripped bycopying with a non-updated PED, as described above. For more information, refer to Migrating ExistingOrange Remote PED Keys.
• When the ped vector init’ command raises the PED prompt about "reuse an existing keyset?", this will leadto RPK migration (old to new).
> For Local PED, the local-connection handshake is now similar to that being used for updated, improved-security connections with Remote PED.
Client Software Interaction
Pre-firmware 7.7.0 PartitionNewer client software can include commands and options that are not applicable to partitions in older-firmwareHSMs.
V0 PartitionOlder client software (example 7.4) can create only a V0 partition on an HSM with firmware 7.7.0 or newer (see **at the bottom of this page).
V1 PartitionOlder client software (example 7.4 or 10.2.0) cannot create a V1 partition on an HSM with firmware 7.7.0 ornewer.
Similarly, if a V1 partition is created on a 7.7.0 (or newer) Network HSM appliance and linked to an older Client,the client can see the remote partition, but cannot initialize or use the V1 partition. (Expect error CKR_ACCESS_ID_INVALID)
Client must be version 10.3.0 or newer to create and work with V1 partitions (see ** at the bottom of this page).
Client-Mediated High Availability
Pre-firmware 7.7.0 PartitionHA behaves as it always has, for pre-7.7.0 HSMs.
Luna Network HSM 7 Partition Administration GuideLast Updated: 2022-07-26 23:53:21 GMT-04:00 Copyright 2001-2022 Thales Group 153
Behavior of "pre-firmware 7.7.0", and V0, and V1 partitions?
V0 PartitionGenerally as-is (backward compatible) except for any provisos around permissibility of certain mechanisms andkey sizes, such as in FIPS mode, and the usual considerations where an HA group should have all members atthe same firmware .
Migration must be done via G5 or G7 Backup HSM while any application partitions on an HSM being updated tofirmware 7.7.0 (or newer) must be removed from any HA group, at the time. The partitions can become membersof HA groups after all are at the newer version.
Key/object replication among HA group members continues to use cloning.
V0 primary partitions in an HA group cannot synchronize with other members on a pre-7.7.0-firmware HSM.
A V0 partition on an appliance with HSM firmware 7.7.0 (or newer) can be added to an existing HA group thatalready has HA members made up of partitions from an HSM with pre-version-7.7.0 firmware.
V1 PartitionWith V1 partitions, HA must function with SKS as the method of object / key replication among members, ratherthan cloning. Because this type of HA is client-mediated, you need Luna Client 10.3.0 or newer.
V1 partition can be added to an existing HA group that already has HA members made up of partitions from apre-7.7.0-firmware HSM. However, when V1 partition becomes the primary member of the HA group,synchronization with remaining member of the HA group will no longer function.
An HA group with V1 partitions must have all members at V1 and all members sharing the same SMK.
A V1 partition cannot be a member of more than one HA group unless both groups have the same SMK. If amember of an existing HA group is added to a different HA group with a different SMK, the new member takes onthe SMK of the new HA group and ceases to function properly in its original group (and should be removed).
High Availability Indirect LoginThis type of HA is set up and managed by means of the HA Indirect Login API (a.k.a. "roll your own HA"), anddoes not rely on the Client.
Pre-firmware 7.7.0 PartitionHA behaves as it always has, for pre-7.7.0 HSMs (see High Availability Indirect Login Functions Prior to HSMFirmware 7.7.0 ).
V0 Partition and V1 PartitionFor adjustments to API and behavior, see High Availability Indirect Login For HSM Firmware 7.7.0 and Newer
Functionality Modules
Pre-firmware 7.7.0 PartitionFM behavior is as previously, for pre-7.7.0 HSMs.
V0 Partition and V1 PartitionBackup HSM (G5) at firmware 6.28 - FM-vs-non-FM support
Luna Network HSM 7 Partition Administration GuideLast Updated: 2022-07-26 23:53:21 GMT-04:00 Copyright 2001-2022 Thales Group 154

Behavior of "pre-firmware 7.7.0", and V0, and V1 partitions?
to HSMFW<= 7.4 FM
to HSM FW<= 7.4 non-FM
to HSM FW7.7V0 FM
to HSM FW7.7V0 non-FM
to HSM FW7.7V1 FM
to HSM FW 7.7V1 non-FM
From HSMFW7.4 FM
yes no yes yes yes yes
From HSMFW7.4 non-FM
no yes no yes no yes
"yes" indicates a supported backup/restore path
Partition Roles
Pre-firmware 7.7.0 PartitionRoles and their behavior remain as-is for pre-7.7.0 HSMs.
V0 PartitionAs in pre-7.7.0
V1 PartitionV1 partitions add the Limited Crypto Officer role for Per-Key Authorization operations see "Partition Roles" onpage 312.
Backup/Restore
Pre-firmware 7.7.0 PartitionBackup and restore remain as-is for pre-7.7.0 HSMs.
V0 Partition and V1 PartitionUse of Luna Backup HSM (G5) with V0 or V1 partitions implies Backup HSM firmware 6.28 and Luna Client 10.3(or newer). Both the Client and the RBS server version must be aligned -- that is, the RBS server must beinstalled from the 10.3 Client or newer, replacing any previous RBS server.
A Luna Backup HSM (G5) with firmware earlier than 6.28.0 can restore onto a partition in a firmware-7.7.0 (ornewer) HSM, but the Luna Backup HSM (G5) must be at firmware 6.28.0 in order to properly backup from aversion 7.7.0 (or newer) application partition. In other words, if your Luna Backup HSM (G5) is not updated, thenits contents can be considered a backup for key-migration, but not a production backup for firmware 7.7.0 (andnewer) HSM partitions.
If there is a need to maintain an older version of client library for your main application and to use Luna BackupHSM (G5) firmware 6.28.0 for backup/restore purposes, then you must have a separate workstation dedicatedfor running the RBS server from Luna Client 10.3.
Even if RBS service is not required, you would still need the separate workstation to run lunacm to takeadvantage of Luna Backup HSM (G5) firmware 6.28.0.
Luna Network HSM 7 Partition Administration GuideLast Updated: 2022-07-26 23:53:21 GMT-04:00 Copyright 2001-2022 Thales Group 155

Behavior of "pre-firmware 7.7.0", and V0, and V1 partitions?
Luna Backup HSM (G5) at firmware 6.28.0 used locally with Luna Network HSM appliance with software<=7.4
to HSM FW<= 7.4
to HSM FW7.7 V0
to HSM FW7.7 V1
From HSMFW <= 7.4
notrecommended
supported supported
See also the functionality module-related G5 Backup concerns, above on this page.
NOTE To perform backup operations on HSM firmware 7.7.0 or newer (V0 or V1 partitions):> Luna Backup HSM (G7) requires minimum firmware version 7.7.1> Luna Backup HSM (G5) requires minimum firmware version 6.28.0You can use a Luna Backup HSM with older firmware to restore objects to a V0 or V1 partition,but this is supported for purposes of getting your objects from the older partitions onto thenewer V0 or V1 partitions only.V0 and V1 partitions are considered more secure than partitions at earlier firmware versions -any attempt to restore from a higher-security status to lower-security status fails gracefully.SMK backup for appliance is supported only with local connection.
The Limited Crypto Officer role does not do cloning, and therefore cannot transfer the current partition's SMK to aBackup HSM for SKS backup.
Secure Trusted Channel
Pre-firmware 7.7.0 PartitionSTC remains as-is for pre-7.7.0 HSMs.
V0 Partition and V1 Partition> A newer version of STC is supported with cryptography that has been enhanced in the following ways:
• New FIPS and Common Criteria compliant cipher suites added -- ECDH P-521 + AES-GCM and ECDH P-521 + AES-CTR + HMAC-SHA-512 -- for key derivation, encryption and authentication.
• Key Derivation – Perfect forward secrecy
– Each party provides an ephemeral key and a static key
– Compromising the static key doesn’t compromise all past and future communications
• Bilateral Key Confirmation and Unidirectional AES keys [NIST requirement]
– Both parties ensure that the other party has derived the same keys
– 2 AES keys are derived: one for encryption and one for decryption
– Prevents reverse replay attacks
For more information See "Creating an STC Connection" on page 125
Luna Network HSM 7 Partition Administration GuideLast Updated: 2022-07-26 23:53:21 GMT-04:00 Copyright 2001-2022 Thales Group 156

Behavior of "pre-firmware 7.7.0", and V0, and V1 partitions?
> The previous version of STC is not supported.
> To use functionality modules (FMs) with STC client connections, you require the newer version of STC, whichis used in Client-V0/V1 partition connections.
> To use the updated STC connections, you require appliance software 7.7.0 or newer, Luna HSM firmware7.7.0 or newer, and Luna HSM Client 10.3.0 or newer.
------------
(* If you had [say] thousands of very small keys, you would notice a definite increase in the partition space takenby those keys after update.If you had [say] 100 big keys or fewer in the partition, you would barely notice a change in required space, as theoverhead [new attributes] per key is proportionately much smaller against an individual large key. )
(**Luna Client software has historically been named/numbered for the associated HSM version. The Clientnumbering has been restarted at 10.x to decouple from specific firmware and software versions. )
Converting Partitions from V0 to V1 or V1 to V0
CAUTION! Back up any important keys and objects before proceeding.
This section describes how to convert partitions from V0 to V1 and from V1 to V0. It assumes that you haveupdated your Luna HSMs to Luna HSM Firmware 7.7.0 or newer, with all pre-existing partitions automaticallyconverted to V0. For more information about V0 and V1 partitions, refer to "Behavior of "pre-firmware 7.7.0", andV0, and V1 partitions?" on page 144.
Converting a Partition From V0 to V1To convert a partition from V0 to V1, the procedure differs, depending on whether the partition is a memberpartition of an HA group or a non-member partition.
Converting a non-member partition from V0 to V1To convert your non-member partitions to V1 partitions with minimum application downtime, use the followingprocedure.
To convert a non-member partition from V0 to V1
1. Have the chosen partition visible in lunaCM.2. Select that partition with the lunaCM command slot set -slot <slot number>3. [Optional] Show the current partition policy values and verify that policy 41 is set to version 0, partition
showpolicies4. Log in to the partition as the Partition Security Officer with role login -name po5. Change the value of Partition Policy 41: Enable Partition Version to version 1, with partition
changepolicy -policy 41 -value 1
Luna Network HSM 7 Partition Administration GuideLast Updated: 2022-07-26 23:53:21 GMT-04:00 Copyright 2001-2022 Thales Group 157

Behavior of "pre-firmware 7.7.0", and V0, and V1 partitions?
Converting an HA group member partition from V0 to V1To convert your HA group member partitions to V1 partitions with minimum application downtime, use thefollowing procedure. This procedure is performed by the HSM SO for each Luna Network HSM, the Partition SOand Crypto Officer for the HA group members.
Prerequisites
> You must be aware of the guidelines for upgrading an HA member partition to any firmware version andadhere to them carefully. For more information, read "Guidelines and Recommendations For Updating orConverting HA Member Partitions" on page 395.
NOTE You must update/convert secondary partitions first and the primary partition last. If youdo not adhere to this guideline, you may experience issues while updating/converting.
> You require admin-level access to the Luna Network HSM.
To convert an HA group member partition from V0 to V1
1. Migrate the HA group to V0 by completing the procedures described in Migrate High Availability Groups toLuna HSM Firmware 7.7.0 or Newer for every member partition.
2. On the client workstation that administers the HA group, stop all client applications.
3. Update the Luna HSM Client software to version 10.3.0 or newer (see "Updating the Luna HSM ClientSoftware" on page 104).
4. [Optional] You may now restart your client applications, or wait until the end of the procedure.
5. Launch LunaCM and use the following procedure to convert each HA member partition to V1. To prevent theHA group serial number from changing and disrupting your client applications, the member originally used tocreate the group must be the last member still remaining in the group:
NOTE The member partition that has the same serial number as the HA group, minus theleading 1, is the original member.
a. Remove a member partition from the HA group (see "Adding/Removing an HA Group Member" onpage 386).
lunacm:> hagroup removemember-group <label> {-slot <slotnum> | -serial <serialnum>}b. Log in as Partition SO.
lunacm:> role login-name poc. Convert the partition to V1 by changing partition policy 41: Partition Version.
lunacm:> partition changepolicy-policy 41 -value 1d. Repeat steps a-c until only the original member remains in the HA group.
e. When only the original member remains in the group, log in as Partition SO and convert it to V1. Thismember's SMK will be the one used for the entire HA group (see "Scalable Key Storage (SKS)" onpage 160 for more information).
lunacm:> role login-name po
Luna Network HSM 7 Partition Administration GuideLast Updated: 2022-07-26 23:53:21 GMT-04:00 Copyright 2001-2022 Thales Group 158

Behavior of "pre-firmware 7.7.0", and V0, and V1 partitions?
lunacm:> partition changepolicy-policy 41 -value 1f. Add each V1 partition back to the HA group (see "Adding/Removing an HA Group Member" on page 386).
The primary member's SMK is automatically cloned to each new member added to the HA group.
lunacm:> hagroup addmember-group <label> {-slot <slotnum> | -serial <serialnum>}
Converting a Partition From V1 to V01. Backup any valuable keys or objects.
CAUTION! This operation, going from V1 back to V0, is destructive. All objects on the partitionare destroyed, as well as the SMK(s). If any valuable objects were created and archived from aversion one (V1) partition, then they must have been SKS-stored off the HSM, and the SMKthat encrypted those objects must be preserved on a Backup HSM or in another partition (thatremains at V1), if those objects might ever be needed in future.If no valuable SKS blobs have been encrypted by the partition's current SMK, then there is noneed for backup.
2. Have the chosen partition visible in lunaCM.3. Select that partition with the lunaCM command slot set -slot <slot number>4. [Optional] Show the current partition policy values and verify that policy 41 is set to version 1, partition
showpolicies5. Log into the partition as the Partition Security Officer with role login -name po6. Change the value of policy 41 to version 0, with partition changepolicy -policy 41 -value 0
Luna Network HSM 7 Partition Administration GuideLast Updated: 2022-07-26 23:53:21 GMT-04:00 Copyright 2001-2022 Thales Group 159

Scalable Key Storage (SKS)This section describes the Scalable Key Storage (SKS) feature for Luna HSMs and assumes the following:
> You understand the differences between V0 and V1 partitions and how these partitions affect the operation ofLuna HSM. For more information, refer to "Behavior of "pre-firmware 7.7.0", and V0, and V1 partitions?" onpage 144.
> You plan on converting a partition from V0 to V1. For more information, refer to "Converting Partitions from V0to V1 or V1 to V0" on page 157.
You do not need anything on the pages in this section until you convert an existing V0 partition to V1 or createnew version one (V1) partitions, which will be using the new cloning protocol and SKS feature.
What is Scalable Key Storage?SKS is virtually unlimited secure storage and handling of your sensitive keys.
By default, keys have resided in HSM hardware for Luna HSMs. This remains true, by default, with theintroduction of HSM firmware 7.7.0. However, firmware 7.7.0 (and newer) adds key export flexibility to expandthe Luna HSM's assurance boundary, to encompass much greater numbers of keys than the internal capacity ofan HSM.
Keys secure anywhere, the SKS eIDAS modelBeginning with firmware 7.7.0, you have the option to use the Scalable Key Storage (SKS) feature by convertingor creating a partition as Version 1 (V1). When a partition is created, it is given a unique SKS Master Key (SMK).( See "Behavior of "pre-firmware 7.7.0", and V0, and V1 partitions?" on page 144 )
SKS is based upon a model where keys generated on the HSM:
> are securely extracted as encrypted SKS objects and
> are inserted back into the HSM, to be temporarily decrypted, when cryptographic operations are to beperformed with those keys.
Similarly, when a unique key encrypts data, the data and the key can be stored as an encrypted binary largeobject (blob) up to 64KB in size, that can be decrypted only within the HSM.
If the HSM is upgraded from an earlier HSM firmware version to firmware 7.7.0 or newer, then any existingpartitions become version zero (V0). Similarly, if you create a new partition on a firmware 7.7.0 (or newer) HSM,with the default "-version 0" option, it becomes a V0 partition. A V0 partition retains compatibility with olderpartitions and applications:
> that rely on cloning (secure copying/moving of objects between HSMs or HSM partitions or Backup HSMs,also known as Keys Always in Hardware)
> while benefiting from fixes and security updates that come with the new firmware, but with no access to thenewer eIDAS-mandated features.
Luna Network HSM 7 Partition Administration GuideLast Updated: 2022-07-26 23:53:21 GMT-04:00 Copyright 2001-2022 Thales Group 160

Scalable Key Storage (SKS)
If you create a new partition in an HSM with firmware 7.7.0 or newer, and select the V1 option ("-version 1"), thenthe new partition is version one (V1) and gets a unique SMK and uses SKS (rather than cloning) to replicate keysfor HA or to Backup and Restore. The partition also engages Per Key Authorization and other eIDAS relatedfeatures, but is incompatible with V0. You can also update a V0 partition to V1 while retaining existing objects(but de-converting, or converting back is not an option).
Here is what you will find in the pages of this section:
"What is Scalable Key Storage?" on the previous page
"When to use SKS (Use Cases)" on the next page
"The SKS model - how it works " on page 163
• "How does SKS work? " on page 164
• "Limitation and scalability " on page 165
"Characteristics of the SKS Implementation " on page 165
• "Characteristics and Implementation Notes " on page 165
• "Functional Notes" on page 165
• "SMK Locations in a Partition " on page 166
"High Availability and SKS" on page 166
"Preparing and Administering SKS Partitions " on page 167
• "Provisioning SKS" on page 168
• "Replicating the SMK to another SKS Partition" on page 168
• "Backing up the SMK" on page 168
• "Restoring the SMK from Backup" on page 169
• "Preparing to use SKS" on page 169
"Using SKS" on page 169
• "Using SKS - options" on page 170
• "API" on page 170
• "ckdemo example" on page 171
• "Java Sample" on page 171
• "High Availability" on page 172
– "Constraints on SKS HA" on page 172
– "Replicating the SMK to all group members " on page 172
– "When NOT to address the virtual slot" on page 173
"SKS Backup and Restore" on page 173
• "Constraints on SKS Backup and Restore" on page 174
• "Backup the SKS Master Key (SMK)" on page 175
• "Restore an SKS Master Key (SMK)" on page 176
• "Troubleshooting SKS Backup and Restore " on page 178
Luna Network HSM 7 Partition Administration GuideLast Updated: 2022-07-26 23:53:21 GMT-04:00 Copyright 2001-2022 Thales Group 161

Scalable Key Storage (SKS)
"SMK Rollover" on page 179
"Migrating Scalable Key Storage (SKS) " on page 180
• "Cloning the SKS Master Key (SMK)" on page 180
• "SKS Blob Migration" on page 183
When to use SKS (Use Cases)
When would it be appropriate to use SKS?Use SKS when you need to handle greater numbers of keys and objects than can be stored within the HSM, andyou want to employ methods more secure than wrap-off / wrap-on. You would also use it when needed to complywith a regulatory regime like eIDAS.
Any application where large numbers of very sensitive keys or records must be protected with the highestpossible security, while remaining available and accessible to authorized users and applications, is a candidatefor the Luna HSM with Scalable Key Storage. The SKS method - in contrast with merely wrapping-off/unwrapping-on - is needed when the HSMmust be the assurance boundary for the keys. If it is permissible forthe key material to originate outside the assurance boundary, or to reside outside the assurance boundary, thenthe extra security of SKS is not required.
A general use case for SKS is storing encrypted keys in external databases.
> Generate keys inside the HSM.
> Using the SIMExtract API, extract the encrypted keys and store them in external databases and delete theoriginal keys inside the HSM.
> Insert individual encrypted keys back into the HSM when you need to use them for cryptographic operationsinside the HSM.
One example might be the creation and use of electronic signatures (for natural persons) or electronic seals (fororganizations) for remote signing (RSS). The signatures or seal key materials are created within the HSM,extracted (not wrapped) in strongly encrypted form that preserves attributes, and stored in a repository. Whenthey are needed, they are found in the repository by the managing system, inserted into the HSM for decryptionby a master key that never resides outside an HSM, then used for signing or sealing respectively, and discardedfrom the HSM (the encrypted versions remain stored in the repository for the next time they are needed).
Another example might be a database of customers, with their contact and shipping information, credit-cardinformation, history of purchases, current/recent browse interests on your commerce site, etc. All of that is likelyto be sensitive information protected by regulations and by your own published privacy policies. In this case, theprimary concern is privacy of data.
A third example might be a government database of land ownership, including detailed and official propertydescriptions, current ownership with identifying details, history of title transfers, subdivisions, legal rulings andencumbrances (such as rights of way and covenants), liens, and so on. In this case, the data is meant to bepublicly viewable, but its integrity against unauthorized change is paramount.
Luna Network HSM 7 Partition Administration GuideLast Updated: 2022-07-26 23:53:21 GMT-04:00 Copyright 2001-2022 Thales Group 162

Scalable Key Storage (SKS)
Security considerationVarious models exist in the industry for handling of huge numbers of sensitive keys and objects. An importantconsideration is the manner in which the keys and objects are handled.
Method Security
Wrap-off/wrap-on
Keys and objects can have unknown, uncontrolled origin, potentially outside the assuranceboundary.Keys and objects can potentially be accessed outside the HSM, made available and usedexternally, in potentially unsafe environments. .Keys can have security attributes stripped.
SKSextract/insert
The history of keys and objects is known, controlled, auditable.Keys and objects remain within the security and access envelope of the HSM. The master keynever exists outside a Luna HSM, and all extracted keys and objects must be inserted back into theHSM at time of decryption and use.Keys retain their attributes.
.
SKSmodelOn this page:
• "The SKS model - how it works " below
• "How does SKS work? " on the next page
• "Limitation and scalability " on page 165
The SKSmodel - how it worksIn an SKS model, in compliance with relevant standards, an application maintains thousands or millions ofencrypted objects as records in a repository (such as a database, file system, cloud storage, etc.). The repositorymight have each record/object encrypted with a unique key. Examples of applications might include RemoteSigning identities (Common Criteria PP 419221-5 use case). The salient points, for SKS, are that:
> encryption and decryption of objects must take place in the HSM;
> more individual object-encryption keys are needed by the application than can be accommodated by theinternal capacity of any HSM;
> records or objects, and the keys that encrypt them, do not exist in-the-clear - both the record (data object, ID,etc.) and its encrypting key are stored in encrypted form;
> keys that encrypt objects or signatures must have originated within the assurance boundary and are only everdecrypted within the assurance boundary;
> objects extracted from a current-version HSM cannot be inserted into older version HSMs with knownvulnerabilities
Luna Network HSM 7 Partition Administration GuideLast Updated: 2022-07-26 23:53:21 GMT-04:00 Copyright 2001-2022 Thales Group 163

Scalable Key Storage (SKS)
> objects extracted from an HSM with Functionality Modules disabled cannot be inserted into an HSM with FMsenabled (including via backup/restore operations) - security rules prevent moving keys from a more-secure toa less-secure environment.
How does SKS work?A key is created in an HSM partition at the direction of an application.
It might be intended as an ID for purposes of signing documents and verifying by private persons, or for sealingof documents and records by organizations.
It might be intended to encrypt records stored in an external database (perhaps customer-identifying records,perhaps medical records, perhaps supply-chain information, or other uses that require privacy and controlledaccess).
> Each record-encrypting key, or ID key, when not in immediate use inside an HSM is itself encrypted forextraction by an extraction/insertion key derived (in compliance with NIST SP800-108) from a masterencryption key that never leaves the HSM; this is the SKS Master Key, or SMK.
> From the application's perspective, the data record, or the key/cert-as-ID, emerges from the HSM uniquelyencrypted as a secure SKS blob (binary large object up to 64KB) that remains within the HSM's security andaccess envelope, so it can be safely stored anywhere.
> The operations that an application might perform are:
• creating an identity or a record or data object
• acquiring a suitable key (SKS key) for encrypting that record or data object by either
– requesting a new object-encryption key (new SKS key) to be generated by the HSM,or
– providing an already existing object-encryption-key (SKS key) for the HSM to use
• encrypting that ID or object with the new SKS key, (or with the pre-existing, supplied SKS key, which mustfirst be inserted and decrypted for use by the HSM)
• storing the encrypted record or key within the repository
• retrieving the encrypted record or key at a later time (when called by the application)
• inserting/decrypting the SKS blob into the HSM, using the SKS Master Key (SMK)
• using the decrypted key
– to sign or seal documents or transactions in the case of RSS, or
– to further decrypt a database record for reading or editing and then re-encrypting the record if itchanged and sending the re-encrypted changed record back to storage
• deleting / destroying the material from the HSM, once it is not needed (the encrypted SKS blob still existsin the external repository, for the next time it is required)
> The application is responsible for the storage and availability of the SKS object in the repository of choice(database, file system, directory, NAS, cloud, etc.).
It is possible to create data objects to store any kind of data in an HSM partition, SKS blobs included (which isessentially what is done if you choose to archive SKS objects in a Backup HSM), but that is not the envisionedgeneral workflow. Instead, a practical workflow is assumed to include backing up SMKs, but not SKS blobs,
Luna Network HSM 7 Partition Administration GuideLast Updated: 2022-07-26 23:53:21 GMT-04:00 Copyright 2001-2022 Thales Group 164

Scalable Key Storage (SKS)
since the latter are already securely encrypted and can be stored anywhere that is reasonably secure, and innumbers far greater than the capacity of any HSM. However, we cannot anticipate all use-cases, so the onboardstorage option exists.
Optionally, such as in the case of Trust Service Providers, during the SKS object creation process,authentication can be added such that a password must be provided before the keys in an SKS object can beused. SKS objects use 256-bit AES-GCM encryption for confidentiality and integrity protection. SHA-512 is alsoused for further integrity protection. See "Per-Key Authorization (PKA)" on page 185.
Limitation and scalabilityBecause the SKS objects are stored external to the HSM (but must be individually inserted back into the HSMbefore use), there is no capacity limitation from an HSM perspective. The only scalability limitation would bebased upon the number of SKS operations to be performed simultaneously (that is, SKS objectcreation/extract/insert, and resulting cryptographic operations).
Characteristics and Implementation NotesOn this page:
• "Characteristics and Implementation Notes " above
• "Functional Notes" below
• "SMK Locations in a Partition " on the next page
Characteristics of the SKS Implementation> The SKS feature is implemented at the application partition level; this differs from the older SKS protocol that
was applied HSM-wide.
> The SKS mechanism complies with the per-key authorization requirements of Common Criteria PP 419221-5( "Per-Key Authorization (PKA)" on page 185 ).
> The cryptographic mechanisms employed by SKS comply with the FIPS 140-2 and PP 419221-5 standards ( "Secure External Scalable Key Storage (SKS) Extensions " on page 1 ).
> Amigration path is available for customers using the Luna HSM firmware 6 SKS protocol, such that existingcustomer applications continue to work against the SKS implementation.
> For certification requirements and/or security best practices, the following are not allowed:
• The SKS implementation prevents objects that are extracted from an HSM with firmware 7.x beinginserted into an older version of the HSM that might have known vulnerabilities.
• The SKS implementation prevents objects that are extracted from an HSM that has Functionality Modules(FMs) disabled, from being inserted into an HSM that has FMs enabled (or ever had FMs enabled) - doingso via a backup HSM is also prevented.
Functional NotesSKS supports the following functionality:
> You can extract all key objects within a given partition by specifying an empty list on the input. Otherwise,specify only individual objects that you wish to extract at one time.
Luna Network HSM 7 Partition Administration GuideLast Updated: 2022-07-26 23:53:21 GMT-04:00 Copyright 2001-2022 Thales Group 165

Scalable Key Storage (SKS)
> You have the option to impose/require two possible authentication methods when extracting key objects:
• None (no extra authentication data)
• Password (MofN supported)
> The AES-GCM algorithm is used for encryption of objects during the creation of SKS blobs (extraction fromthe partition) or decryption upon insertion of an external SKS blob into the partition.
> You can see, and practice, examples of such usage in the ckdemo utility :
• "OFFBOARD KEY STORAGEMenu Functions" on page 1
SMK Locations in a PartitionEach SKS-capable partition supports several types of SMK, each with its own location and limitations within thepartition.
The Primary SMK, generated at partition creation time, or replaced via partition smkclone command fromanother partition, resides in the Primary SMK location in the partition, and is used for extraction and insertionoperations. Only the firmware 7.x primary SMK can be used for extraction. No path is allowed for extraction toolder-version HSMs and partitions.
The Rollover SMK location holds the replaced primary, when partition smkrollover start command creates anew primary SMK. The rollover SMK is retained while SMK rollover is taking place, to allow all SKS blobs thatwere encrypted/extracted with the old SMK to be brought back into the HSM partition so that they can be re-extracted with the new primary SMK. When partition smkrollover end signals the completion of the rolloveroperation, the rollover SMK is deleted and the new Primary SMK remains.
The FM SMK location is specifically for transfer from an FM-enabled partition to an FM-never-enabled partition.That is, a partition smkclone command from an FM-enabled HSM partition places the source Primary SMK intothe FM SMK location of the target partition. This ensures that key material can be transferred from FM-enabledpartitions to FM-never-enabled partitions. It is not permitted to move key material from FM-never-enabledpartition to FM-enabled partition, because a Functionality Module could extract in plain text. Similarly, there is noFM SMK rollover location.
The Firmware 6 SMK location can contain an SMK from a firmware 6.x HSM (if one has been cloned in) for thepurpose of inserting SKS blobs that were extracted from a firmware 6.x partition. After insertion of such olderblobs, the key material is extracted as a new firmware 7 SKS blob, encrypted via the partition's primary SMK.Whenever a partition is on the receiving end of a partition smkclone operation, any contents of the primary andnon-primary locations from the source partition overwrite their equivalent locations in the target pafrtition.
High Availability and SKSTo address performance and availability requirements SKS supports high availability configurations similar toLuna HSM Cloning models, with some minor differences. High availability and load balancing is implemented inthe Luna HSM Client software and is completely transparent to the application, in that the application isconfigured to use a virtual slot and not a physical slot on the HSM.
One difference, from cloning HSMs in HA configuration is that, for SKS HA, the hagroup addmember commandclones the SMK from the initial SKS application partition to all other group member partitions as they are added.Thereafter, your application deals with the HA virtual slot, and HA operation is automatic.
Luna Network HSM 7 Partition Administration GuideLast Updated: 2022-07-26 23:53:21 GMT-04:00 Copyright 2001-2022 Thales Group 166

Scalable Key Storage (SKS)
NOTE Back up the SMK in any partition where that SMK is likely to be overwritten, if that SMKis ever likely to be needed to insert (decrypt) any SKS blobs.If an SMK is cloned from one partition to another (such as must be done when adding membersto an HA group), a pre-existing SMK already in the target partition is overwritten by theincoming SMK. Any blobs still encrypted with it are lost, unless a backup exists.
NOTE If a remote partition is involved (Network HSM) on either side of the SMK cloningoperation, the HSM that contains the remote partition must have Network Replication enabled.See "HSM Capabilities and Policies" on page 1 "Policy 16 - Allow network replication".
When the application needs to perform a cryptographic operation, it employs the SKS API call, which imports anSKS object into the HSM. In an HA configuration, the Luna HSM Client also replicates the SKS blob to all HSMsthat have been included in the defined HA group (by performing sksExtract from the source partition andsksInsert into the target partition as a single, combined operation, repeated for each), unless HA synchronizationis turned off. When the application requests the "HSM" to perform a cryptographic operation (sign, encrypt,decrypt, etc.) the Luna HSM Client load balances the request to the application partition that is available, inessence making the SKS operation stateless. The SKS operation succeeds because all partitions in the HAgroup have a copy of the imported SKS object.
Replication of objects in HA is accomplished by SKS feature's SIMextract and SIMinsert in one call,transparently.
TIP If your primary use-case is to insert a key and use it for one signing operation, thenconsider using the multisign API for better performance with SKS under HA, since invokingmultisign would use the key on just the one physical partition, and would avoid the overhead ofhaving the inserted key replicated unnecessarily to other HA group members.
NOTE HA failover is not supported in the case of member failure during a SIMInsert,SIMExtract, or SIMMultisign operation.
Preparing and Administering SKS PartitionsOn this page:
"Provisioning SKS" on the next page
• "Replicating the SMK to another SKS Partition" on the next page
• "Backing up the SMK" on the next page
• "Restoring the SMK from Backup" on page 169
• "Preparing to use SKS" on page 169
ChecklistThe following subsections describe briefly what you need
> to set up one or more SKS partitions ready for use,
Luna Network HSM 7 Partition Administration GuideLast Updated: 2022-07-26 23:53:21 GMT-04:00 Copyright 2001-2022 Thales Group 167

Scalable Key Storage (SKS)
> to backup and restore SKS Master Keys (SMK) from-and-to the SKS partition, and
> to directly replicate the SMK from one SKS partition to another for High Availability operation.
Cross-reference links are provided to each topic or section, containing explicit instructions for each task.
Provisioning SKS> You need at least one Luna Network HSM at appliance software version 7.7.0 or newer and HSM firmware
version 7.7.0 or newer, or Luna PCIe HSM at firmware version 7.7.0 or newer.
> If you already have an older 7.x HSM, download and install the updates from the Support Portal.
> Install a suitable Client software that includes a version of the lunacm tool that supports the "partitionsmkrollover" commands - this ensures that the associated library has the updated SKS capabilities and isalso able to handle migration from legacy SKS instances
> Follow the instructions at the beginning of "Preparing to use SKS" on the next page to get the applianceinstalled and network connected
> If you plan to use an HA group, then repeat the above process with the second Network or PCIe HSM, andagain with any additional active or standby members.
Replicating the SMK to another SKS PartitionStand-alone - If you are using a single HSM with your application, you should have at least one backup copy ofthe SMK (for each partition) so that any SKS blobs encrypted by that SMK are recoverable in case of loss ordamage to the original HSM or partition.
> proceed to "Backup the SKS Master Key (SMK)" on page 175.
HA group - If you are using an HA group with your application, then initially, each member has a unique SMKcreated when its SKS partition is created. For HA operation, the hagroup addmember command replicates thedesired SMK from the initial member to all additional members of the group. This means that, in order for apartition to take part in HA operation as the second or later member, its original SMK is overwritten by the SMK ofthe first member of the group.
> Safeguard the desired SMK by backing it up to a Backup HSM before going further. See "SKS Backup andRestore" on page 173.
NOTE If an SMK, already existing on a partition, has ever been used to encrypt an SKS key orobjects, then you must backup the existing SMK before replacing/overwriting it, if you wish toever retrieve the previously encrypted SKS key and objects.
> Follow the instructions for using the partition smkclone command in "High Availability and SKS" onpage 166.
Backing up the SMKAlways ensure that you have safeguarded any important SMK (one that has been used to encrypt key materialfor export from the HSM) by backing it up to a Backup HSM partition before you perform any action that mightdestroy that SMK (such as cloning a different SMK to the current HSM, or restoring a different SMK from aBackup HSM partition).
> To backup, see "Backup the SKS Master Key (SMK)" on page 175.
Luna Network HSM 7 Partition Administration GuideLast Updated: 2022-07-26 23:53:21 GMT-04:00 Copyright 2001-2022 Thales Group 168

Scalable Key Storage (SKS)
Restoring the SMK from BackupWhen you wish to use the SKS partition to encrypt objects or decrypt objects with an SMK other than theSMK that resides in the current partition, you must restore from a Backup of the desired SMK to overwrite thecurrent SMK in the current partition. If the current SMK (before restoring from archive) is valuable, then back it upfirst before restoring a different SMK to overwrite the current one.
> To restore, see "Restore an SKS Master Key (SMK)" on page 176.
Preparing to use SKSPerform all the steps to install and configure a Luna HSM, as described at "Installing and Configuring Your NewLuna Network HSM" on page 1.
1. If your HSM is not already at firmware version 7.7.0, follow the instructions in the 7.7.0 Customer ReleaseNotes, to securely copy the Release 7.7.0 Appliance Software Update package to the appliance, and performthe software and firmware update.
NOTE To update an HA group to firmware 7.7 or newer, all the non-primary partitionsmust beupdated first, to ensure that the key objects from the firmware 7.7-or-newer primary can stillmove to the non-primaries through key cloning. Then the primary member can be updated.
2. When you reach the steps to create an application partition, ensure that it is created as the default versionone (V1), which is necessary for SKS operation.
NOTE The SKSMaster Key (or SMK) is created when the partition Crypto Officer logs in. Forsecurity reasons the SMK is not made visible in output of the usual commands that showobjects on an HSM partition (lunacm:>partition contents and lunash:>partitionshowcontents).
3. Go to "Using SKS" below to continue with SKS.
Using SKSOn this page:
"Using SKS - options" on the next page
• "API" on the next page
• "ckdemo example" on page 171
• "Java Sample" on page 171
• "High Availability" on page 172
– "Constraints on SKS HA" on page 172
– "Replicating the SMK to all group members " on page 172
– "When NOT to address the virtual slot" on page 173
Logistical considerations for SKS operation include:
Luna Network HSM 7 Partition Administration GuideLast Updated: 2022-07-26 23:53:21 GMT-04:00 Copyright 2001-2022 Thales Group 169

Scalable Key Storage (SKS)
> you must create a V1 partition before you can use the SKS functionality;
> creating and logging into an SKS partition (as CO) creates a unique SMK in that partition, at the same time;
> you have the option to use the SMK that is created with the partition, or you can overwrite that SMK with
• an SMK that is restored from an SKS partition on a Backup HSM (with partition archive restore), or• an SMK that is cloned (with partition smkclone) from another partition (usually for purposes of HA
operation);
NOTE Back up the SMK in any partition where that SMK is likely to be overwritten, if that SMKis ever likely to be needed to insert (decrypt) any SKS blobs.If an SMK is cloned from one partition to another (such as must be done when adding membersto an HA group), a pre-existing SMK already in the target partition is overwritten by theincoming SMK. Any blobs still encrypted with it are lost, unless a backup exists.
Using SKS - optionsTwo approaches are available, to use SKS :
> Use the API, where you have the ability to write or modify your applications:
• Directly access the PKCS#11 C-language extensions that interact with the HSM.
or
• Use the provided Java toolkit.
> Use a commercial, off-the-shelf Windows CNG application, mediated by the provided SKS Client Extensionfor Luna HSM KSP.
APIAuthorization forms currently supported are none, and password.
Export a key from a partition as an SMK-encrypted blob, using SIMExtract functionSIM_AUTH_FORMS = (CKA_SIM_NO_AUTHORIZATION, CKA_SIM_PASSWORD)CK_RV CA_SIMExtract(CK_ULONG handleCount, CK_ULONG *handleList,
CK_ULONG authForm, CK_ULONG authDataCount, CK_ULONG subsetRequired,
CK_BYTE **authDataList,
CK_BOOL deleteAfterExtract,
CK_ULONG *pBlobSize, CK_BYTE *pBlob );
Import a previously extracted blob, using the SIMInsert functionCK_RV SIMInsert( CK_ULONG blobSize, CK_BYTE *pBlob,
CK_ULONG authForm, CK_ULONG authDataCount, CK_BYTE **authDataList,
CK_ULONG *pHandleListSize, CK_ULONG *pHandleList );
Luna Network HSM 7 Partition Administration GuideLast Updated: 2022-07-26 23:53:21 GMT-04:00 Copyright 2001-2022 Thales Group 170

Scalable Key Storage (SKS)
For further information, refer to the SDK Guide ( "Secure External Scalable Key Storage (SKS) Extract / Insert" on page 1 ).
ckdemo example1. Start by running ckdemo and executingOpen Session (1) to the slot and Login (3) as Crypto Officer, giving
the partition password.
2. Generate an AES key using Simple Generate Key (45) and keep track of the object handle for the generatedkey.
3. Execute SIMExtract (105).Enter the object handle for Enter handle of object to add to blob and thenEnter 0 to end the list.Enter 1 for Enter authentication form.
Enter 1 for number of authorization secrets (N value).Enter 1 for Enter subset size required for key use (M value).Enter a password.
Enter 1 for Delete after extract.The masked key is saved to blobfile.sim.
4. List all of the objects in the partition by running Find object (26) with option All Standard Objects (6).5. Execute SIMInsert (106).
Enter blobfile.sim for Enter filename with object to insert.Enter 1 for Enter authentication form.
Enter 1 for Enter number of authorization secrets to be provided.Enter the password that was entered in the previous step.
6. List all of the objects in the partition by running Find object (26) with option All Standard Objects (6). Thekey that was extracted should now be present in the partition.
NOTE The example above uses the password authentication form. Other authentication formscan be used.
Java SampleAs a prerequisite, ensure that the LunaProvider.jar and libLunaAPI.so has been installed to your JDK.1. Navigate to the directory that contains the java sample:
cd JavaSample2. In the SIMExtractInsert.java,modify the slot and hsmPass variables appropriately.3. Compile the sample using javac:
javac SIMExtractInsert.java4. Run the sample using java.
Luna Network HSM 7 Partition Administration GuideLast Updated: 2022-07-26 23:53:21 GMT-04:00 Copyright 2001-2022 Thales Group 171

Scalable Key Storage (SKS)
High AvailabilityReplication of objects in HA is accomplished by SIMExtract and SIMInsert in one call, transparently.
TIP Turn off HA synchronization for better performance if the inserted keys are to be used forsingle operations. An inserted key would be replicated to all HA group members even if it wereto be used only by one member for (say) one signing operation.If inserted keys are likely to be used for multiple load-balanced operations, then the overheadof replicating to all members is unavoidable and would be minimal in that context.
OPTIONS for HA Operation are:
> Use with V0 partitions. The assumption is that you have existing partitions and application(s) that use thosepartitions in HA. Continue as you already do. Your pre-existing upgraded partitions, as well as any newpartitions that you create with the V0 option will work as before.
> Use with V1 partitions - all HA group members must be at V1, and your application must be SKS-aware,because only SMKs are cloned between V1 partitions; all other objects are extracted/inserted as SKS blobs.
Constraints on SKS HAHA for SKS requires that each member of the HA group must have the same SMK.
NOTE For HA environments, if you perform SMK rollover on a member, then the new SMKmust be cloned to all members. However, database / repository update for rollover should bedone by directly addressing the primary physical member, and not using the virtual slot (toavoid the performance penalty when keys inserted to the virtual slot during rollover would bepropagated to all members before the re-extraction).
Replicating the SMK to all group members
CAUTION! Each SKS partition contains a single SMK, and this operation overwrites the SMKin the target partition. Therefore, always ensure that the SMK in the target partition is not of anyuse, or that it has been backed up, before you perform partition smkclone.
These steps are performed from the lunacm utility in the client computer.
1. Use slot set to select one of the HSM partitions, with the desired SMK, as the current slot.lunacm:> slot set -slot 0
Command Result : No Error
2. Log into the current slot as Crypto Officer.lunacm:> role login -name Crypto Officer
Luna Network HSM 7 Partition Administration GuideLast Updated: 2022-07-26 23:53:21 GMT-04:00 Copyright 2001-2022 Thales Group 172

Scalable Key Storage (SKS)
Please attend to the PED.
Command Result : No Error
3. Use the partition smkclone operation to clone the desired SMK from the current slot SKS partition toanother SKS partition in a named slot. The SMK from the source slot overwrites the SMK in the targetslot. You are logged into the source partition, where you are launching this command, but not to the targetpartition; specify the password for the target partition.partition smkclone -slot 1 -password userpin
Logging in to target slot 1
Cloning the SMK.
The SMK was cloned successfully.
Command Result : No Error
To verify that the SMKclone operation was successful, see below.
4. Repeat the previous step for any other HA group members, to ensure that all members share the same SMK.
5. Set HA-only mode for the group, so that your application sees only the HA virtual slot, and not any of thephysical slots.lunacm:> haGroup HAOnly -enable
Command Result : No Error
6. Note the number of the HA virtual slot. Your application will direct all operations to that slot.
Verify SMKclone
If necessary, verify the success of the SMKclone operation as follows.
1. Create an object on the original HSM partition (for example, a keypair).
2. SIMExport the object from that original HSM and SIMInsert it into the second (target) HSM, using any of themethods (API, CKDemo, or Java, earlier on this page). If the importation is successful, then the SMK on thesecond HSM is the same as the SMK on the first, or source HSM.
When NOT to address the virtual slotAs indicated above, blob insertion results in the inserted key being propagated to the other HA members.
However, key external storage database rollover should not be done over the virtual slot as this would cause theinserted keys to be propagated before the re-extraction, affecting performance. Ideally, the database updateshould be done by direct communication with the primary HA member.
SKS Backup and RestoreOn this page:
Luna Network HSM 7 Partition Administration GuideLast Updated: 2022-07-26 23:53:21 GMT-04:00 Copyright 2001-2022 Thales Group 173

Scalable Key Storage (SKS)
• "Constraints on SKS Backup and Restore" below
• "Backup the SKS Master Key (SMK)" on the next page
• "Restore an SKS Master Key (SMK)" on page 176
• "Troubleshooting SKS Backup and Restore " on page 178
As described, the partition permanently stores the SKS Master Key (SMK) from the time of its creation when thepartition is created. The application partition is intended :
> to create encryption keys as session objects
> to encrypt those keys with the SMK, for SKS extraction from the HSM
> to extract those encrypted keys, as encrypted SKS blobs, for storage by your application, external to the HSM
> to temporarily SKS insert (decrypt) blobs to make individual keys available for crypto operations within thepartition
> to use the decrypted key
• to sign or seal documents and other digital objects, using the inserted key as a personal or orgainzationidenity, or
• to encrypt data (records) for your external database, archive, cloud, or other repository, or
• decrypt and modify such records before re-encrypting them to go back into your repository.
Therefore, it is not intended that objects other than the SMK be stored in the SKS partitions; however, you can doso if you wish, up to the limits of the partition capacity.
From HSM firmware 7.7.0 onward, SMKs are replicated (for HA) or are backed up and restored using cloning. Allother objects are treated as SKS objects and are encrypted/decrypted by the SMK for extraction and[re-]insertion as needed.
Constraints on SKS Backup and RestoreSKS Backup and Restore are intended to redundantly safeguard the SMK, only. The following conditions andconstraints apply :
> The SMK is not visible as a partition object, and does not appear in list output.
> Backing up and restoring the SMK uses the same commands as backing up and restoring ordinarycryptographic objects.
> SKS Backup and Restore require a Backup HSM with firmware 6.28.0 or firmware 7.7.0 (or newer).
> SKS Backup and Restore is supported only when the currently selected slot is an SKS partition (V1).
> Individual SKS blobs are limited to 64KB in size. Large groups of keys, or larger data objects might need to besplit across multiple blobs for extraction or insertion.
> The partition archive backup and partition archive restore commands test the currently selected slot toensure it is an SKS-capable (V1) partition.
> If the current slot is an SKS partition, then the partition archive commands perform backup or restore of theSMK, and ignore any other objects.
Luna Network HSM 7 Partition Administration GuideLast Updated: 2022-07-26 23:53:21 GMT-04:00 Copyright 2001-2022 Thales Group 174

Scalable Key Storage (SKS)
TIP The assumption is that since any extracted SKS blobs are solidly encrypted and remainwithin the assurance boundary, they can be safely stored in any repository. There is no need tostore such blobs in another crypto-capable HSM partition, nor in a Backup HSM partition(though you could do the latter by storing as data objects, if desired) - they can be decryptedand used only by SKS insertion into an HSM partition that contains the relevant SMK.
Backup the SKS Master Key (SMK)The SMK backup operation creates a new partition on the backup HSM, using a partition name that isautomatically created at the time of the backup operation. The system ensures that the archive partition namedoes not already exist on the Backup HSM by creating the target partition with a unique name that combines
• the serial number of the source partition (from your Network HSM)with
• a time stamp.
To back up the SMK, do the following:1. Have a Backup HSM connected to the client workstation from which you are running the command, or have a
Backup HSM connected through a Remote Backup Server (see "Backup and Restore to a Remote BackupService (RBS)-Connected Luna B700 Backup HSM " on page 467or "Configuring a Remote Luna BackupHSM (G5) Server" on page 424). The Backup HSMmust be visible as a slot.
2. Launch the lunacm utility.
3. Use slot list to determine the slot numbers of the SKS partition and of the Backup HSM.
4. Set the SKS partition as the current slot.lunacm:> slot set -slot 4
Command Result : No Error
5. Log into the current slot as Crypto Officer.lunacm:> role login -name Crypto Officer
Please attend to the PED.
Command Result : No Error
6. Use partition archive backup to backup the SMK from the current slot to the indicated Backup HSM.
NOTE Do not name the target partition to be created on the Backup HSM, because SKSbackup creates the name from the serial number of the source partition, combined with a time-stamp.
lunacm:>partition archive backup -slot 5
You are backing up a SKS partition.Only the SKS master key (SMK) will be backed up.No other objects will be cloned.
Are you sure you wish to continue?
Luna Network HSM 7 Partition Administration GuideLast Updated: 2022-07-26 23:53:21 GMT-04:00 Copyright 2001-2022 Thales Group 175

Scalable Key Storage (SKS)
Type 'proceed' to continue, or 'quit' to quit now ->proceed
Logging in as the SO on slot 5.
Please attend to the PED.
Creating partition 358628973182_2017:03:09-16:52:47 on slot 5.
Please attend to the PED.
Logging into the container 358628973182_2017:03:09-16:52:47 on slot 5 as the user.
Please attend to the PED.
Creating Domain for the partition 358628973182_2017:03:09-16:52:47 on slot 5.
Please attend to the PED.
The SMK was cloned successfully.
Command Result : No Error
7. You can test the success bya. creating and initializing a V1 test partition on any HSM with firmware 7.7.0 or newer,
b. restoring the backed-up SMK onto that test partition, and
c. successfully importing an SKS blob (that was previously extracted using the specific SMK) into thatpartition.
Restore an SKS Master Key (SMK)To restore the SMK from backup, follow these steps.
CAUTION! When you restore an SMK from a Backup HSM, that restored SMK overwrites(destroys) any SMK that was already present on the partition. If the current SMK has been usedto encrypt any important keys, ensure that you have backed it up safely before restoring adifferent SMK over it.
Also be sure to record the particulars of that backup, including the backup partition name andsome notes to identify which keys have been encrypted by the SMK archived in that partition,for future reference.
1. Have a Backup HSM connected to the client workstation from which you are running the command, or have aBackup HSM connected through a Remote Backup Server (see "Backup and Restore to a Remote BackupService (RBS)-Connected Luna B700 Backup HSM " on page 467or "Configuring a Remote Luna BackupHSM (G5) Server" on page 424). The Backup HSMmust be visible as a slot.
2. Launch the lunacm utility.
3. Use slot list to determine the slot numbers of the SKS partition and of the Backup HSM.
4. Set the SKS partition as the current slot.
Luna Network HSM 7 Partition Administration GuideLast Updated: 2022-07-26 23:53:21 GMT-04:00 Copyright 2001-2022 Thales Group 176

Scalable Key Storage (SKS)
lunacm:> slot set -slot 4
Command Result : No Error
5. Log into the current slot as Crypto Officer.lunacm:> role login -name Crypto Officer
Please attend to the PED.
Command Result : No Error
6. Use partition archive restore to restore the SMK from the current slot to the indicated Backup HSM, namingthe partition with the desired SMK,on the Backup HSM.
lunacm:>partition archive restore -slot 5 -partition 358628973182_2017:03:09-16:52:47
You are restoring a SKS partition.Only the SKS master key (SMK) will be restored.No other objects will be cloned.
Are you sure you wish to continue?
Type 'proceed' to continue, or 'quit' to quit now ->proceed
Logging in to partition 358628973182_2017:03:09-16:52:47 on slot 5 as the user.
Please attend to the PED.
The SMK was cloned successfuly.
Command Result : No Error
7. You could test the success by restoring the SMK to a test partition, and successfully importing an SKS objectthat was previously exported, encrypted with that SMK.
Backup objectsIn most cases, only the SMK needs preserving, and any crypto objects on the SKS partition are just passingthrough (as temporary session objects), so there is no provision to backup crypto objects from an SKS partition.It is possible to store SKS blobs, but only as data objects, not as crypto objects. Therefore, to use them in anyway, they must be inserted back into a V1 partition that has the correct SMK in either the Primary SMK location orthe Rollover SMK location.
The Backup HSM can support a mix of
> SKS-only archive partitions that each can contain a single SMK, and
> ordinary cloning-backup partitions that each can contain multiple crytographic objects for traditional cloning-based (non-SKS) HSM backup and restore operations.
In other words,
> you can use an SKS client to backup crypto objects
• from a non-SKS partition
• into a non-SKS archive partition on the Backup HSM)
Luna Network HSM 7 Partition Administration GuideLast Updated: 2022-07-26 23:53:21 GMT-04:00 Copyright 2001-2022 Thales Group 177

Scalable Key Storage (SKS)
> you can restore crypto objects
• from a non-SKS archive partition on the Backup HSM
• to a regular cloning-based (non-SKS) HSM partition.
> you cannot restore ordinary objects onto an SKS partition; they must be SKS inserted (siminsert API call.)
Troubleshooting SKS Backup and RestoreThe following are some examples that highlight incorrect usage, along with the communication from the system.
Not logged into partition at current slotHere is an example of the output if you attempt to use the partition archive command without logging in as"Crypto Officer" on the SKS partition slot, which must be the current slot.
NOTE "-slot 5" in the example points to the Backup HSM slot, not the current SKS partitionslot.
lunacm:>partition archive backup -slot 5
You are backing up a SKS partition.Only the SKS master key (SMK) will be backed up.No other objects will be cloned.
Are you sure you wish to continue?
Type 'proceed' to continue, or 'quit' to quit now ->proceed
Error: Failed to open session.
Command Result : 0xb0 (CKR_SESSION_CLOSED)
An incorrect option is specified for backupIn this example, the command fails because the "-partition" option is not applicable for SKS backup:lunacm:>partition archive backup -slot 5 -partition test
You are backing up a SKS partition.Only the SKS master key (SMK) will be backed up.No other objects will be cloned.
Are you sure you wish to continue?Type 'proceed' to continue, or 'quit' to quit now ->proceed
Syntax Error: Option -partition cannot be used for SKS operation.
Command Result : No Error
Archive contains crypto objectsIf the backup partition to be restored contains crypto objects and SKS backup is being performed, restore of theSMK proceeds with a warning.
Luna Network HSM 7 Partition Administration GuideLast Updated: 2022-07-26 23:53:21 GMT-04:00 Copyright 2001-2022 Thales Group 178

Scalable Key Storage (SKS)
lunacm:> par ar r -s 5 -par pre-7-7
You are restoring an SKS partition.Only the SKS master key (SMK) will be restored.CAUTION: The existing SMK will be overwritten.
Are you sure you wish to continue?Type 'proceed' to continue, or 'quit' to quit now -> proceedLogging in to partition mypar on slot 5 as the user.
Please attend to the PED.
WARNING: Crypto object(s) detected in the backup device container.Dedicated backup container for SKS Master key is recommended.
The SMK was cloned successfully.
Command Result : No Error
SMK RolloverMandated rollover schedules might place limits on the allowable lifetimes of important keys, like the SMK.Toward this end, the partition smkrollover command generates a new SMK and allows you to re-encrypt yourSKS blobs with a new SMK.
However, if a new SMK is created - such as in the SMK rollover operation - then every blob that has beenencrypted with the old SMKmust be inserted, its contained keys/objects re-encrypted with the new SMK andextracted as a new blob, and this must be accomplished for all such externally stored blobs, during thesmkrollover -start to smkrollover -end interval. Any blobs for which the encrypting SMK no longer exists canno longer be decrypted.
To rollover the current SMKIf you wish to perform SMK rollover, please realize that it is a disruptive process and a major one. Hence, plan itappropriately by scheduling a down-time and then follow this three-step procedure:
1. Dismantle the HA group.
2. Perform SMK Rollover.
a. Begin with partition smkrollover -start– the original SMK is moved to the Rollover area, and
– a new SMK is created and placed in the Primary SMK area of the current HSM.
b. Retrieve every blob from your repository, one at a time, insert it into the HSM partition - the insert action isperformed with SIMInsert API using the former-primary-now-rollover SMK.
c. After each key or object is inserted, extract it again to external storage - the extract action is performedwith SIMExtract using the new Primary SMK.
d. When all blobs have been retrieved (from repository, database, backup HSM, etc), inserted and re-extracted, then perform partition smkrollover -end one time, to delete the previous SMK from therollover slot, to conclude the rollover operation.
Luna Network HSM 7 Partition Administration GuideLast Updated: 2022-07-26 23:53:21 GMT-04:00 Copyright 2001-2022 Thales Group 179

Scalable Key Storage (SKS)
3. Re-create the HA group, cloning the new SMK to each HSM that will become a member of the recreated HAgroup, and resume operations.
You can generate a new SMK and immediately discard the old one with partition smkrollover -start -endcommand. Do this only if you know that no blobs exist that are encrypted with the old SMK, otherwise they will beorphaned.
NOTE For HA environments, if you perform SMK rollover on a member, then the new SMKmust be cloned to all members. However, database / repository update for rollover should bedone by directly addressing the primary physical member, and not using the virtual slot (toavoid the performance penalty when keys inserted to the virtual slot during rollover would bepropagated to all members before the re-extraction).
Migrating Scalable Key Storage (SKS)On this page:
• "Cloning the SKS Master Key (SMK)" below
• "SKS Blob Migration" on page 183
The SKS feature beginning with HSM firmware version 7.7.0 (and newer) uses the same API as previous SKSversions, to retain backward compatibility; your applications that used older SKS should still work. However, thenew structure for SKS was developed in conjunction with an updated cloning protocol and other features offirmware 7.7.0 associated with V1 partitions, and you (or a regulatory regime under which your organizationoperates) might see benefit in migrating existing SKS secrets to the newer form.
For purposes of migration, the SKS Master Key (SMK) is cloned to a target partition - this is the only use for thecloning protocol in V1 partitions. Objects encrypted by the SMK (SKS blobs) are generally expected to be storedexternally in a repository via SKS extract operation (SIMextract API call) from the partition and later SKS insertoperation (SIMinsert API call) when needed. If blobs are small enough or few enough in number, such objectscould be replicated to other members in an HA group, or stored on a Backup HSM if desired, but as data objectsonly.
Off-board storage is assumed to be the primary method of storing such blobs (and not storage inside a generalpurpose crypto HSM or a backup HSM).
Cloning the SKS Master Key (SMK)No changes to the existing older SKS host API are necessary for the cloning of the earlier and the newer SMKs.The choice is based on the formatting of the incoming SMK Secret.
NOTE If a remote partition is involved (Network HSM) on either side of the SMK cloningoperation, the HSM that contains the remote partition must have Network Replication enabled.See "HSM Capabilities and Policies" on page 1 "Policy 16 - Allow network replication".
Luna Network HSM 7 Partition Administration GuideLast Updated: 2022-07-26 23:53:21 GMT-04:00 Copyright 2001-2022 Thales Group 180

Scalable Key Storage (SKS)
The following table shows possible migration paths for existing SMKs -- the leftmost column is possible sources,while the heading row across the top lists possible destinations, and the intersecting table cells are the possibleresult for each source-to-destination scenario.
FM6 SKSappliance
FW6 SKSG5 Backup(6.25)
FW7.7eIDAS G5Backup(6.28)
FW<7.7 HSM FW>=7.7FM HSM
FW>=7.7Non-FMHSM
FW6 SKSappliance
FW6 SMKs FW6 SMKs FW6 SMKs No SMKsupport ontarget
Target hasFM cert only
FW6 SMKs
FW6 SKSG5 Backup(6.25)
FW6 SMKs FW6 SMKs FW6 SMKs No SMKsupport ontarget
Target hasFM cert only
FW6 SMKs
FW7.7eIDAS G5Backup(6.28)
FW6 SMKs FW6 SMKs All SMKs(cloningprotocolused by V1partitions)
No SMKsupport onsource/target
All SMKs(cloningprotocolused by V1partitions)
All SMKs(cloningprotocolused by V1partitions)
FW<7.7HSM
No SMKsupport onsource
No SMKsupport onsource
No SMKsupport onsource
No SMKsupport ontarget
No SMKsupport onsource
No SMKsupport onsource
FW7.7 FMHSM
Source hasFM cert only
Source hasFM cert only
All SMKs(cloningprotocolused by V1partitions)
No SMKsupport ontarget
All SMKs(cloningprotocolused by V1partitions)
All SMKs(FW7.7-Primary ->FW7.7-FM,FW7.7-Rolloverdropped)(V1 partition)
FW7.7 Non-FM SKSHSM
Requiredcloningprotocol noton target
Requiredcloningprotocol noton target
All SMKs(cloningprotocolused by V1partitions)
No SMKsupport ontarget
Blocked byV1 cloningprotocol
All SMKs(cloningprotocolused by V1partitions)
( FW>=7.7 means HSM firmware version 7.7 or newer)
To migrate an older SMKTo move/copy an SMK from one of the supported source configurations to one of the supported targets
Luna Network HSM 7 Partition Administration GuideLast Updated: 2022-07-26 23:53:21 GMT-04:00 Copyright 2001-2022 Thales Group 181

Scalable Key Storage (SKS)
1. If the source and target are crypto partitions, clone the SMK secrets between partitions with the partitionsmkclone lunacm command.
2. If the target is a Luna Backup HSM clone to the Backup HSM with the partition archive backup lunacmcommand.
3. If the source is a Luna Backup HSM, clone from the Backup HSM with the partition archive restore lunacmcommand.
Only some combinations of source and target are supported. Reasons for a path to not be supported aresummarized in the table.
SCENARIO 1:
0. You have a pre-existing 7.7.0 SMK, and a bunch of extracted blobs (encrypted with that SMK) in a repository,all of which you want to preserve, and to which you want to add 6.x SMK and SKS blobs after migrating them.
1. Backup the modern 7.7.0 SMK to a partition on a firmware 6.28.0 or 7.7.0 Backup HSM (partition archivebackup).
2. Backup the 6.x or 4.x SMK (partition archive backup).3. Restore the 6.x SMK onto a V1 partition (partition archive restore). This puts it in the Primary SMK slot of
that partition, overwriting any SMK that was there.
4. Perform partition smkrollover -start on the V1 partition. This moves the 6.x SMK into the Rollover slot of thepartition and generates a new Primary SMK.
5. Restore the production 7.7.0 SMK that you backed-up earlier (partition archive restore). This overwrites thenewly-generated Primary, but the Rollover partition still has the 6.x SMK.
6. Insert one of your 6.x SKS blobs. The HSM tests it and knows to use the Rollover SMK to perform the SKSinsert operation.
7. Extract the key/crypto-object as a new blob - the HSM allows only the Primary (the one you just got back fromarchive) to perform the extraction.
8. Repeat for all your old-style blobs to get them all encrypted with the new SMK for storage in your repository.
9. Perform partition smkrollover -start which deletes the old SMK from the Rollover slot of the V1 partition.
SCENARIO 2:
You have 6.x SMK and SKS blobs. You want to migrate the older blobs to use in a new V1 partition (7.7). So, no7.7.0 SMK and blobs currently exist that need conserving.
1. 1. Backup the 6.x (to partition on 6.28.0 or 7.7.0 Backup HSM) with partition archive backup command.2. Create a new V1 partition (partition create), initialize it (partition initialize), log in as CO (role login -name
co) etc., but you don't care about the generated 7.7.0 SMK.3. Restore the 6.x SMK onto the V1 partition (partition archive restore). This puts it in the Primary SMK slot of
that partition, overwriting any SMK that was there.
4. Perform partition smkrollover -start on the V1 partition. This moves the 6.x SMK into the Rollover slot of thepartition and generates a new Primary SMK.
5. Insert one of your 6.x SKS blobs. The HSM tests it and knows to use the Rollover SMK to perform theSIMinsert operation.
6. Extract the blob - the HSM allows only the Primary (recently generated) to do the extraction.
Luna Network HSM 7 Partition Administration GuideLast Updated: 2022-07-26 23:53:21 GMT-04:00 Copyright 2001-2022 Thales Group 182

Scalable Key Storage (SKS)
7. Repeat for all your old-style blobs to get them all encrypted with the new SMK for storage in your repository.
8. Perform partition smkrollover -start which deletes the old SMK from the Rollover slot of the V1 partition.
SKS Blob MigrationWith no modifications to the pre-existing host API for offboard key storage (SKS), the version number for themechanism used is prepended to the SKS blobs and employed to select the correct mechanism to insert the blobback into the HSM.
HSMs are allowed to extract key blobs using only the latest and greatest SMK secret and mechanism availableto them. Incoming older blobs with older SMK secrets and mechanisms are accepted, provided that the HSM f/wsupports them.
NOTE Migration from older HSMs, that used possibly outdated encrypting keys/mechanismsshould not present a problem, since older blobs would be inserted only. The same materialwould then be extracted using newer or unrestricted key types or sizes.
The following table shows options for SKS blob insertion into a partition, Protocol and Key Import/Export vsExternal Storage.The leftmost column is possible sources, while the heading row across the top lists possible destinations, andthe intersecting table cells are the possible result for each source-to-destination scenario.
FW6 SKSappliance
FW7.7.0 Non-FM HSM (V0Partition)
FW7.7.0 FMHSM (V0Partition)
FW7.7.0 Non-FMHSM (V1 Partition)
FW7.7.0 FM HSM(V1 Partition)
FW6 SKSappliance
Using FW6 SMK(V1 partitioncloning protocol)Import/Export
No SKSSupport onsource/target
No SKSSupport onsource/target
Using FW6 SMK (V0partition cloningprotocol)Import/Export
No FW6 SMKs onTarget
FW7.7.0Non-FMHSM (V0Partition)
No FW7.7.0-Primary SMK onTarget
No SKSSupport onsource/target
No SKSSupport onsource/target
No SKS Support onsource
No identicalFW7.7.0-PrimarySMK on Target
FW7.7.0 FMHSM (V0Partition)
No FW7.7.0-FMSMK on Target
No SKSSupport onsource/target
No SKSSupport onsource/target
No SKS Support onsource
No SKS Support onsource
FW7.7.0Non-FMHSM (V1Partition)
No FW7.7.0-Primary SMK onTarget
No SKSSupport onsource/target
No SKSSupport onsource/target
Using FW7.7.0-Primary SMK (V1partition cloningprotocol) ExternalStorage
No identicalFW7.7.0-PrimarySMK on Target
FW7.7.0 FMHSM (V1Partition)
No FW7.7.0-FMSMK on Target
No SKSSupport onsource/target
No SKSSupport onsource/target
Using FW7.7.0-FMSMK (V1 partitioncloning protocol)External Storage
Using FW7.7.0-Primary SMK (V1partition cloningprotocol) ExternalStorage
Luna Network HSM 7 Partition Administration GuideLast Updated: 2022-07-26 23:53:21 GMT-04:00 Copyright 2001-2022 Thales Group 183

Scalable Key Storage (SKS)
To migrate an older SKS blob:To insert an SKS blob, for any of the supported scenarios (table above),
1. Insert with the SIMinsert operation as you always have.The CKDemo Utility, command 106, demonstrates the action - see "OFFBOARD KEY STORAGEMenuFunctions" on page 1.
.
Luna Network HSM 7 Partition Administration GuideLast Updated: 2022-07-26 23:53:21 GMT-04:00 Copyright 2001-2022 Thales Group 184

Per-Key Authorization (PKA)Per-key authorization or authentication (PKA) is a feature introduced with HSM firmware 7.7.0 to support theeIDAS use case of Remote Signing and Sealing (RSS) and the relevant Protection Profile (PP 419-221.5). PKAintroduces data structures to keys that are created and manipulated in the HSM such that keys can be handled inthe ways that applications normally handle key material, but under the sole ownership and control of an end-usernatural person or legal entity. The attributes are applied to keys that are created with firmware 7.7.0 (or newer).In V0 partitions those attributes are simply ignored. In V1 partitions the attributes are actively used. See more at"Behavior of "pre-firmware 7.7.0", and V0, and V1 partitions?" on page 144.
Keys for use in eIDAS schemas:> have authentication data structures that allow the possibility for an entity to have sole ownership and control
> can be unassigned, waiting for distribution to eventual owners/Users, or
> can be assigned to the control of a specific owner/User.
When a key has auth code data attached, then by definition anyone who holds the auth code is a/the key owner.But before it is assigned, the key does not have an owner/User, and might be part of a pool of unassigned keys,waiting for distribution to users. Keys do take some time to generate, so in times of high demand, it could bepractical and convenient to have some ready-to-go.
Keys are intended to be used, but they must also be administered. That is, an individual natural person (or a non-natural legal entity) authorizes cryptographic usage of a key, perhaps to sign forms or documents. At the sametime, the HSM has roles that perform actions within the HSM, either:
> generally - the eIDAS Administrator role represented by the Crypto Officer (CO) role in the HSM) or
> specifically/individually - the eIDAS User role represented by the Limited Crypto Officer (LCO) role in theHSM.
So, a citizen might log into a service and perform an action that directs the application to retrieve their existingpersonal key from a database/repository and insert/decrypt the key into an HSM partition, where the citizenauthorizes a signing or other operation, and then the copy of the key is deleted from the HSM partition, but thearchived, encrypted copy resides safely in the database for future retrieval and use. Alternatively, a citizen mightrequest a single-use key, that is generated 'on-the-spot' in the HSM partition (by the LCO role) and is authorizedby that citizen to perform one action (like signing) and then the key is permanently deleted, with no copy existinganywhere.
Generally, these and other operations related to keys are not performed by administrative commands (tools likelunacm); rather, they are performed via the PKA API or REST, while the performing application is logged in asone or the other of the partition roles.
Example Use CaseFor example, an application might be instructed to retrieve a certain key and use it to sign a document on behalfof a citizen. The application acquires the key from a database (in the form of an encrypted blob) and inserts it intoan HSM where it is decrypted to reveal the key that is to be used. But the application is able to actually use thatkey only when the owner/citizen presents her/his unique authentication data, which is part of the key attributes.
Luna Network HSM 7 Partition Administration GuideLast Updated: 2022-07-26 23:53:21 GMT-04:00 Copyright 2001-2022 Thales Group 185

New Role and HandlingIn order to manage this service, the individual application partition's Crypto Officer role and a new role calledLimited Crypto User handle the actions of creating, modifying, and using keys containing auth data.
A key can be created in an assigned state, where it is immediately associated with an entity, or a key can becreated in unassigned state and only later assigned to an owner, when convenient.
No New Administrative CommandsBecause the operations around PKA and RSS are handled programmatically, no particular administrativecommands are introduced - only a new -version option for partition creation and a new partition policy 40, whichis off for V0 partitions, and which defaults to on for V1 partitions, but can be turned off if desired. Everything elseabout PKA is handled by the "PKA API" on page 1.
Dependencies and Interactions with Other FeaturesPKA generally requires HSM firmware 7.7.0 or newer and Luna Client 10.3 or newer, and for the Network HSMAppliance, appliance software 7.7.0 or newer. The feature is ignored by older clients and applications that do notknow how to make use of it. Active use of PKA requires a V1 partition, which means that cloning is used for:
> incoming keys and objects from older firmware, but not outgoing (that is, on V1 partitions, cloning of keys isinbound migration, only)
> copying (such as for HA), or backing-up/restoring, of the SMK
All other objects are stored, encrypted by the SMK, in external storage using the Scalable Key Storage (SKS)feature.
Stored Data Integrity (SDI) is also mandated by eIDAS and is therefore applied by HSM firmware 7.7.0 andnewer.
HA Indirect Login support is constrained differently for V0 and V1 partitions - see section "V0 Partitions" in "PKAAPI" on page 1.
Luna Network HSM 7 Partition Administration GuideLast Updated: 2022-07-26 23:53:21 GMT-04:00 Copyright 2001-2022 Thales Group 186

CHAPTER 6: Key Cloning
You can clone key material between partitions to back up the keys, or to migrate the keys from one HSM toanother. The rules, prerequisites, and procedures for migrating your key material are described in the followingtopics:
> "Domain Planning" on the next page
> "Cloning Objects to Another Application Partition" on page 190
> "Cloning Keys Between Luna 6, Luna 7, and Luna Cloud HSM" on page 191
Overview and Key ConceptsA Crypto Officer can clone the cryptographic objects (keys) from one user partition to another user partitionprovided that:
> The user partitions share the same domain. See "Domain Planning" on the next page.
> The user partitions use the same authentication method (PED or password).
> The CO has the required credentials on both user partitions.
> The capabilities and policies set on the source and target HSM and user partitions allow cloning. See HSMCapabilities and Policies and "Partition Capabilities and Policies" on page 291.
Changes introduced with firmware 7.7.0 (and newer)You can update Luna Client software, and Luna HSM firmware, and Luna Network HSM Appliance softwareat different times, according to your needs.
When firmware is updated to version 7.7.0 or newer, some changes take place in the partitions and theircontents, such that updated Client software is needed to make full use of the updated partitions and theircontents. See "Behavior of "pre-firmware 7.7.0", and V0, and V1 partitions?" on page 144 for more detail onbehaviors and constraints of the partition types.
• In HA groups, update the secondary members first, and then the primary member last.
• Older clients will continue to work with V0 partition for Network HSM.
• For PCIe, must use Client 10.3 or
• Need newer client for V1 partitions when you want to use SKS or PKA.
• Client software must be version 10.3 or newer to support SKS, to work with V1 partitions and HA.See"Behavior of "pre-firmware 7.7.0", and V0, and V1 partitions?" on page 144 for more detail.
Luna Network HSM 7 Partition Administration GuideLast Updated: 2022-07-26 23:53:21 GMT-04:00 Copyright 2001-2022 Thales Group 187

Chapter 6: Key Cloning
NOTE The library attempts to perform the individual actions of a cloning operation insequence on the respective partitions. If the policies and partition types on the source andtarget partitions are incompatible, the partition clone command (or an attempted HAsynchronization) can fail with a message like CKR_DATA_LEN_RANGE while trying to clone.This can occur if a key object from the source partition is a different size than an equivalentobject expected by the target.
Cloning support when Client is version 10.3 or newer
Domain PlanningThe cloning or security domain is an element of "Layered Encryption" on page 1.
What is a security domain or cloning domain?A security domain or cloning domain is a layer of encryption that is created, during initialization, on an HSM orHSM partition that you control. The domain determines whether a crypto object can leave the HSM, and where itcan go if it is allowed to leave.
Cloning is a secure-copy operation by which sensitive HSM objects are copied, while strongly encrypted, fromone HSM to another HSM. The security domain, or cloning domain, is a special-purpose secret that is attachedto a partition on an HSM. It determines to which, and from which, other partitions (on the same HSM or on otherHSMs) the current partition can clone objects. Partitions that send or receive partition objects by means of thecloning protocol must share identical cloning domain secrets. That is, the protocol verifies that the destinationdomain matches the source domain; otherwise an error is displayed and the attempted operation fails. This isimportant for:
> Cloning in backup and restore operations, and
> Synchronization in HA groups.
Only one domain per partition - no copying across domainsAn application partition can have one cloning domain. It is not possible to clone objects from two or more differentcloning domains to a single partition. By design, there is no provision to change the cloning domain of a partitionwithout initializing it, which destroys any objects in that partition.
No common domains across Password-authenticated and PED-authenticatedHSMsPassword authenticated application partitions, with identical security domains, can clone partition contents oneto the other, if the HSM type supports cloning.
Multi-factor authenticated (PED authenticated) application partitions, with identical security domains, can clonepartition contents one to the other, if the HSM type supports cloning.
But password authenticated HSM partitions cannot perform cloning with PED-authenticated HSM partitions.
The security design consideration is that, if you have a key or object stored in a multi-factor-authenticated (PED-authenticated) partition:
Luna Network HSM 7 Partition Administration GuideLast Updated: 2022-07-26 23:53:21 GMT-04:00 Copyright 2001-2022 Thales Group 188

Chapter 6: Key Cloning
> It cannot be altered to a less-secure state and moved outside the protection of its original security/cloningdomain.
> You are assured that the key or object has never been outside its original security/cloning domain, or in anyless-secure state.
As of firmware 7.7.0, and any V1 (non-backward-compatible) partitions, backup and HA replication of cryptoobjects are accomplished with SKS encrypted blobs, and the cloning protocol is reserved for the SMK - the keythat encrypts the SKS blobs.
Characteristics of Cloning DomainsPassword authenticated HSMs have text-string cloning domains for the HSM admin partition and for anypartitions that are created on the HSM. HSM and Partition domains are typed at the command line of the hostcomputer, when required. Password authentication cloning domains are created by you.
Luna Network HSM 7 Partition Administration GuideLast Updated: 2022-07-26 23:53:21 GMT-04:00 Copyright 2001-2022 Thales Group 189

Chapter 6: Key Cloning
PED authenticated cloning domains are created by a Luna HSM, which could be the current HSM, or it could bea previously initialized HSM that you wish to include in a cloning group with the current HSM. PED authenticatedHSMs have cloning domains in the form of encrypted secrets on red PED keys, for the admin partition and forany partitions that are created on the HSM.
The following characteristics are common to security (cloning) domains on all Luna HSMs.
> The unique admin partition security domain can be created in the HSM at initialization time, or it can beimported, meaning that it is shared with one-or-more other HSMs.
> The application partition security domain can be created by the current HSM when the partition is initialized,or it can be imported, meaning that it is shared with one-or-more other HSM partitions, and therefore directcloning, backup/restore, and HA sync operations can be performed among the partitions that share a givendomain.
> The application partition security domain is usually distinct from the HSM domain, as they are controlled bydifferent people; on multi-partition HSMs, the PSO is usually not the same person as the HSM SO, but on asingle-partition HSM the two SOs might be the same person.
> The application partition security domain can be the same as the domain of another partition on the sameHSM (for HSMs that support multiple partitions).
For PED authenticated HSMs, the domain secret for the admin partition or for an application partition can be asingle red PED key, or it can be split (by the MofN quorum feature) over several red keys, which are thendistributed among trusted personnel such that no single person is able to provide the cloning domain withoutoversight from other trusted personnel.
In scenarios where multiple HSM partitions are in use, it can be useful to segregate those partitions according todepartment or business unit, or according to function groups within your organization. This ensures thatpersonnel in a given group are able to clone or backup/restore only the contents of partitions sharing the domainfor which they are responsible. The segregation is maintained by physical and procedural control of the relevantPED keys that each group is allowed to handle.
For Password authenticated HSMs, that sort of segregation is maintained entirely by procedure and by trust, asyou rely on personnel not to share the domain text strings, just as you rely on them not to share other passwords.
Have your naming conventions and allotments planned out ahead of HSM initialization and partition creation,including a well-thought-out map of who should control cloning domain access for admin partitions and forapplication partitions. These decisions must be made before you create the partitions.
Cloning Objects to Another Application PartitionYou can back up partition objects from an application partition to any other partition that shares its cloningdomain. The Crypto Officer of both partitions can perform this operation using LunaCM.
Prerequisites> Partition policy 0: Allow private key cloningmust be set to 1 (ON) on both the source and target
partitions.
> The target partition must be initialized with the same cloning domain as the source partition.
> You require the Crypto Officer credential for both the source and the target partition.
> Both partitions must be visible as slots in LunaCM.
Luna Network HSM 7 Partition Administration GuideLast Updated: 2022-07-26 23:53:21 GMT-04:00 Copyright 2001-2022 Thales Group 190

Chapter 6: Key Cloning
> [Remote PED] This procedure is simpler when both partitions are activated (see "Activation and Auto-activation on Multi-factor- (PED-) Authenticated Partitions" on page 320). If the partitions are not activated,you must connect the source partition to PEDserver before logging in, disconnect it, and then connect thetarget partition to PEDserver by specifying its slot.
lunacm:> ped connect [-ip <IP>] [-port <port>]lunacm:> ped disconnectlunacm:> ped connect -slot <target_slot> [-ip <IP>] [-port <port>]
NOTE The library attempts to perform the individual actions of a cloning operation insequence on the respective partitions. If the policies and partition types on the source andtarget partitions are incompatible, the partition clone command (or an attempted HAsynchronization) can fail with a message like CKR_DATA_LEN_RANGE while trying to clone.This can occur if a key object from the source partition is a different size than an equivalentobject expected by the target.
To clone partition objects to another application partition
1. In LunaCM, set the active slot to the source partition and log in as Crypto Officer.lunacm:> slot set -slot <slotnum>lunacm:> role login -name co
2. [Optional] View the partition objects and their object handles.
lunacm:> partition contents3. Clone objects on the partition to the target partition by specifying the target slot. You can choose which
objects to clone by specifying a comma-separated list of object handles, or specify all to clone all objects onthe partition. Present the target partition's Crypto Officer credential when prompted.
lunacm:> partition clone -slot <slotnum> -objects <comma-separated_list/all>The specified objects are cloned to the target partition. Any objects that already exist on the target are notcloned.
Cloning Keys Between Luna 6, Luna 7, and Luna Cloud HSMLuna HSM Client allows you to clone keys between Luna 6 partitions, Luna 7 partitions, and Thales DataProtection on Demand (DPoD) Luna Cloud HSM services. This includes creating HA groups made up of differentHSM versions. This configuration is useful for:
> migrating your keys directly from Luna 6 to your new Luna 7 HSMs
> migrating your keys from Luna Network HSM to the cloud, or vice-versa
> gradually upgrading your on-premises production environment from Luna 6 to Luna 7 HSMs
> maintaining a real-time, cloud-based backup of your cryptographic objects
This page contains guidelines and general considerations for cloning keys between the different HSMs, or usingmixed-version HA groups. Mixed-version HA groups have all the same requirements of standard HA groups (see"Planning Your HA Group Deployment" on page 368), in addition to the considerations listed below.
Luna Network HSM 7 Partition Administration GuideLast Updated: 2022-07-26 23:53:21 GMT-04:00 Copyright 2001-2022 Thales Group 191

Chapter 6: Key Cloning
> "Luna/Luna Cloud HSM Cloning" below
> "Supported Software/Firmware Versions" on the next page
> "Mismatched Partition Policies and FIPS Mode" on the next page
> "Mismatched Key Types/Cryptographic Mechanisms" on page 194
> "Minimum Key Sizes" on page 194
> "SafeXcel 1746 Co-Processor" on page 194
> "RSA-186 Key Remapping for FIPS Compliance" on page 195
> "HA Performance Optimization" on page 195
Luna/Luna Cloud HSM CloningCloning between Luna partitions and Luna Cloud HSM services require the following special considerations, inaddition to the general considerations below.
NOTE This feature requires minimum Luna HSM Client 10.2.0 for password-authenticatedpartitions, and minimum Luna HSM Client 10.4.1 for PED-authenticated partitions.
AuthenticationLuna Cloud HSM services use password authentication, but you can use them with PED-authenticated LunaHSM partitions by importing a PED domain secret during initialization. This feature requires minimum Luna HSMClient 10.4.1. Refer to "Initializing a Luna Cloud HSM Service" on page 72 for the procedure.
Network Latency and Luna Cloud HSM as Active HA MemberRequests performed by cloud services like Luna Cloud HSMmay experience greater network latency than thosesent to on-premise HSMs. Thales recommends using a Luna Cloud HSM service as a standby HA member toachieve the best performance. By default, you can add a Luna Cloud HSM service as a standby HA memberonly. If all other HA members fail and the Luna Cloud HSM service becomes active, it will revert to standby whenanother member recovers.
If you prefer to use the Luna Cloud HSM service as an active HA member, you must first edit the following togglein the Chrystoki.conf/crystoki.ini configuration file (see "Configuration File Summary" on page 73):[Toggles]lunacm_cv_ha_ui = 0
CAUTION! Failover to Luna Cloud HSM is supported in an HA group with password-authenticated Luna partitions only. When configured in an HA group with PED-authenticatedLuna partitions, Luna Cloud HSM functions as a backup only.
Cloning Capacity LimitationsThe following limitations apply to clients accessing a Luna Cloud HSM service:
> 100 token objects (or 50 RSA-2048 key pairs) per service.
> 100 session objects (or 50 RSA-2048 key pairs) per application.
> 100 simultaneous sessions per application.
Luna Network HSM 7 Partition Administration GuideLast Updated: 2022-07-26 23:53:21 GMT-04:00 Copyright 2001-2022 Thales Group 192

Chapter 6: Key Cloning
Clients that exceed the token object and session object limits can experience slow or failed request responses.The session limit is enforced, and the client receives the error CKR_MAX_SESSION_COUNT when theapplication reaches the limit.
If you exceed the recommended maximum number of objects cloned to/from a Luna Cloud HSM service in asingle cloning operation, the operation sometimes fails with CKR_DEVICE_ERROR. In the case of HA groups,this could include key creation operations, since objects are then cloned to the Luna Cloud HSM service.
Supported Software/Firmware VersionsThales supports cloning between Luna 6/7 partitions and Luna Cloud HSM services using combinations ofappliance software/firmware as outlined in the table below.
NOTE Luna HSM Firmware 7.7.0 is not compatible with older Luna versions or Luna CloudHSM.
Client Software Luna Appliance Software Luna HSM Firmware
Luna only: 10.3.0 or higher 7.7.0 or higher 7.7.0 or higher
Luna Cloud HSM with password-authenticated Luna 6/7: 10.2 orhigherLuna Cloud HSM with PED-authenticated Luna 6/7:10.4.1 or higherLuna 6/7: 7.2 or higher
6.2.1 or higher 6.10.9 or higher
Mismatched Partition Policies and FIPS ModePartitions in an HA group, and the HSMs on which they reside, must be configured with the same policy settings(see "HSM and Partition Prerequisites" on page 369). For example, Luna 6 HSMs have certain policies that havebeen removed from Luna 7 and Luna Cloud HSM, and new policies have been introduced.
Ensure that policies common to Luna 6/7/Luna Cloud HSMmembers have the same settings, according to yourdeployment requirements.
lunacm:> partition showpoliciesWhen setting up HA groups, note the following:
> If you are using Luna HSM Client 10.4.0 or newer, you can set up an HA group with a mix of FIPS and non-FIPS partitions as members. However, some limitations must be considered. For more information, refer to"Key Replication" on page 361.
> If you are using Luna HSM Client 10.3.0 or older, you cannot set up an HA group with a mix of FIPS and non-FIPS partitions as members.
Luna Network HSM 7 Partition Administration GuideLast Updated: 2022-07-26 23:53:21 GMT-04:00 Copyright 2001-2022 Thales Group 193

Chapter 6: Key Cloning
Mismatched Key Types/Cryptographic MechanismsCloning is limited to key types that are recognized by the firmware on both HSMs. If an HSM does not recognizethe type of key being cloned to it, the cloning operation may fail. Ensure that the firmware on the destination HSMis capable of recognizing all cryptographic objects stored on the source HSM.
NOTE Luna HSMs comply closely with the relevant FIPS standards and their generallyaccepted interpretations. These are moving targets, as the crypto and security climatecontinues to evolve. It is possible for a validated HSM version (firmware) to be fully compliantwhen its NIST certificate is issued, and for same-model HSMs with newer firmware and morestringent restrictions to refuse to accept "less secure" objects.Alternatively, the more up-to-date HSMmight accept an object from an earlier-firmware HSM,but permit only limited uses of such an object. This can affect the operation of HA groups, andother situations, where applications attempt operations against old keys, or with the use ofantiquated mechanisms.If you are cloning between HSMs operating in FIPS mode, please consult SupportedMechanisms for the destination HSM's version to determine if all key types can be cloned.
Mixed-version HA groups are limited to functions that are common to all member partitions. Mechanisms areadded to/removed from new firmware releases, to provide new functionality and fix vulnerabilities. Operationsassigned by load-balancing to a member lacking the correct mechanism will fail. Keys created on one membermay fail to replicate to the other group members.
Ensure that your applications use only mechanisms that are available on all HA group members. Use LunaCM tosee a list of mechanisms available on each partition/service.
lunacm:> partition showmechanism
Minimum Key SizesMinimum key sizes are enforced when using certain cryptographic algorithms. These minimums may differbetween versions. If a Luna 6 partition creates a key that is smaller than the minimum size required by Luna 7 orLuna Cloud HSM, the key will not be replicated to the other partitions in the HA group.
NOTE Minimum key sizes for many mechanisms are larger in FIPS mode, and FIPSminimums may vary among firmware releases.
To avoid this, use LunaCM to check a mechanism's minimum key size. Check the same mechanism on each HAmember slot, and always use the highest minimum reported in the HA group.
lunacm:> partition showmechanism -m <mechanism_ID>
SafeXcel 1746 Co-ProcessorLuna 6 HSMs include the SafeXcel 1746 security co-processor, which is used to offload packet processing andcryptographic computations from the host processor. Applications using this co-processor are not compatiblewith mixed-version HA groups.
The co-processor is not enabled by default. If you have previously enabled it on your Luna 6 HSMs, you candisable it by editing the Chrystoki.conf/crystoki.ini configuration file as follows:
Luna Network HSM 7 Partition Administration GuideLast Updated: 2022-07-26 23:53:21 GMT-04:00 Copyright 2001-2022 Thales Group 194

Chapter 6: Key Cloning
[Misc]PE1746Enabled=0
RSA-186 Key Remapping for FIPS ComplianceUnder FIPS 186-3/4, the only RSA methods permitted for generating keys are 186-3 with primes and 186-3 withaux primes. RSA PKCS and X9.31 key generation is not approved in a FIPS-compliant HSM. While Luna 6.10.9firmware allows these older mechanisms, later firmware does not (and keys created using these mechanismscannot be replicated to Luna 7 HSMs or Luna Cloud HSM services).
If you have older applications that use RSA PKCS and X9.31 key generation, you can remap these calls to usethe newer, secure mechanisms. Add a line to the Chrystoki.conf/crystoki.ini configuration file as follows:[Misc]RSAKeyGenMechRemap=1
NOTE This setting is intended for older applications that call outdated mechanisms, to redirectcalls to FIPS-approved mechanisms. The ideal solution is to update your applications to call theapproved mechanisms.Mechanism remapping is automatic, and ignores the configuration file entry: if you are usingLuna HSM Client 10.1 or newer, andHSM firmware is earlier than version 7.7.1 (whichintroduced the ability for a partition to be FIPS-mode when the HSM is non-FIPS; clients up to,and including, 10.3.0 are unaware of the independent partition setting and do not remapmechanisms).Luna HSM Clients 10.4.0 or newer are aware of the firmware 7.7.1 change anddo perform the mechanism remapping, as expected, when the current partition is in FIPSmode.
HA Performance OptimizationLuna Network HSM 7 provides significant (10x) performance improvements over Luna 6 HSMs. In a mixed-version HA group, operations assigned to Luna 6 member partitions will take longer than those assigned to Luna7 members. The HA logic does not compensate for these performance differences, and schedules operations onthe partition with the shortest queue. Since Luna 7 partitions complete operations more quickly, they will naturallybe assigned more operations, but a mixed-version HA group generally does not perform as well as an HA groupmade up entirely of Luna 7 partitions.
The performance of Luna Cloud HSM services may be limited by network latency, compared to on-premisesLuna HSMs. See "Luna/Luna Cloud HSM Cloning" on page 192.
Thales recommends that you set a Luna 7 partition as the primary HA member (the first member specified whencreating the HA group). All key generation takes place on the primary HA member, so this allows you to takeadvantage of the Luna Network HSM's vastly improved performance for:
> key generation
> random number generation
The load-balancing logic is determined by the Luna HSM Client software, so the Luna 7 behavior applies tomixed-version HA (see "Load Balancing" on page 360).
Luna Network HSM 7 Partition Administration GuideLast Updated: 2022-07-26 23:53:21 GMT-04:00 Copyright 2001-2022 Thales Group 195

Chapter 6: Key Cloning
NOTE The primary HA member may not remain the same over time. If the primary memberfails, another member takes over all key generation operations. If you notice a significant dropin performance for key generation operations, it could mean that a Luna 6 partition or LunaCloud HSM service has become the primary member. By default, a Luna Cloud HSM servicewill revert to standby once another HA member recovers.
Luna Network HSM 7 Partition Administration GuideLast Updated: 2022-07-26 23:53:21 GMT-04:00 Copyright 2001-2022 Thales Group 196

CHAPTER 7: PED Authentication
The Luna PIN Entry Device (Luna PED) provides PIN entry and secret authentication to a Luna HSM thatrequires Trusted Path Authentication. The requirement for PED or password authentication is configured at thefactory, according to the HSMmodel you selected at time of purchase.
The Luna PED and PED keys are the only means of accessing the PED-authenticated HSM's administrativefunctions. They prevent key-logging exploits on workstations connected to the host HSM, becauseauthentication is delivered directly from the hand-held PED to the HSM via the independent, trusted-pathinterface. No password is entered via computer keyboard.
NOTE> If you are updating or have already updated to Luna HSM Firmware 7.7.0 or newer, refer to
Special Considerations for Updating to Luna Network HSM Firmware 7.7.0 or Higher formore information about PED Authentication on Luna HSMs running firmware 7.7.0 ornewer.
> Luna Network HSM 7.x.x requires Luna PED firmware version 2.7.1 or higher. This firmwareis backward-compatible with Luna Network HSM 6.x.
This chapter contains the following sections about PED authentication:
> "PED Authentication Architecture" on the next page
• "Comparing Password and PED Authentication" on the next page
> "PED Keys" on page 199
• "PED Key Types and Roles" on page 199
• "Shared PED Key Secrets" on page 201
• "Domain PED Keys" on page 202
• "PED PINs" on page 202
• "M of N Split Secrets (Quorum)" on page 203
> "Luna PED Received Items" on page 205
> "Luna PED Hardware Functions" on page 207
> "Updating External Supply-Powered Luna PED Firmware" on page 237
> "Local PED Setup" on page 211
> "About Remote PED" on page 213
> Remote PED Setup
> "PED Key Management" on page 243
> "PEDserver and PEDclient" on page 257
Luna Network HSM 7 Partition Administration GuideLast Updated: 2022-07-26 23:53:21 GMT-04:00 Copyright 2001-2022 Thales Group 197

Chapter 7: PED Authentication
PED Authentication ArchitectureThe PED Authentication architecture consists of the following components:
> Luna PED: a PIN Entry Device with a local or remote connection to the HSM. The PED reads authenticationsecrets from PED keys on behalf of an HSM or partition (see "Luna PED Hardware Functions" on page 207).
> Authentication secrets: Cryptographic secrets generated by the HSM and stored on PED keys. Thesesecrets serve as login credentials for the various roles on the HSM. They can be shared among roles, HSMs,and partitions according to your security scheme.
> PED Keys: physical USB-connected devices that contain authentication secrets, created by the HSM (see"PED Keys" on the next page). PED Keys have the following custom authentication features:
• Shared Secrets: PED keys of the same type can be reused or shared among HSMs or partitions,allowing domain sharing (necessary for HA and backup configurations), legacy-style Security Officerauthentication, and other custom configurations. See "Shared PED Key Secrets" on page 201.
• PED PINs: optional PINs associated with specific PED keys, set by the owner of the PED key at the timeof creation. PED PINs offer an extra layer of security for PED keys which could be lost or stolen. See "PEDPINs" on page 202.
• M of N Split Key Scheme: optional configuration which allows a role to split its authentication secretacross multiple PED keys, and require a minimum number of those keys for authentication. This schemecan be customized to be as simple or complex as your organization's security policy dictates. See "M of NSplit Secrets (Quorum)" on page 203.
Comparing Password and PED AuthenticationThe following table describes key differences between password- and PED-authenticated HSMs.
Password-authentication
PED-authentication
Ability torestrict accesstocryptographickeys
> Knowledge of rolepassword issufficient
> Forbackup/restore,knowledge ofpartition domainpassword issufficient
> Ownership of the black Crypto Officer PED key is mandatory> For backup/restore, ownership of both black CO and red domain
PED keys is mandatory> The Crypto User role is available to restrict access to read-only,
with no key management authority> Option to associate a PED PIN with any PED key, imposing a two-
factor authentication requirement on any role
Dual Control > Not available > MofN (split-knowledge secret sharing) requires "M" differentholders of portions of the role secret (a quorum) in order toauthenticate to an HSM role - can be applied to any, all, or none ofthe administrative and management operations required on theHSM
Luna Network HSM 7 Partition Administration GuideLast Updated: 2022-07-26 23:53:21 GMT-04:00 Copyright 2001-2022 Thales Group 198

Chapter 7: PED Authentication
Password-authentication
PED-authentication
Key-custodianresponsibility
> Passwordknowledge only
> Linked to partition password knowledge> Linked to black PED key(s) ownership and optional PED PIN
knowledge
Two-factorauthenticationfor remoteaccess
> Not available > Remote PED and orange (Remote PED Vector) PED key deliverhighly secure remote management of HSM, including remotebackup
PED KeysA PED key is a USB authentication device, embedded in a molded plastic body. It contains a secret, generatedby the HSM, that authenticates a role, cloning domain, or remote PED server. This secret is retained untildeliberately changed by an authorized user.
The Luna PED does not hold the authentication secrets. They reside only on the portable PED keys.
PED keys are created when an HSM, partition, role, or Remote PED vector is initialized. A PED key can containonly one authentication secret at a time, but it can be overwritten with a new authentication secret. See "PEDKey Management" on page 243.
CAUTION! Do not subject PED keys to extremes of temperature, humidity, dust, or vibration.Use the included key cap to protect the USB connector.
PED Key Types and RolesThe PED uses PED keys for all credentials. You can apply the appropriate labels included with your PED keys,according to the table below, as you create them.
The PED key colors correspond with the HSM roles described in "HSM Roles and Procedures" on page 1. Thefollowing table describes the keys associated with the various roles:
Luna Network HSM 7 Partition Administration GuideLast Updated: 2022-07-26 23:53:21 GMT-04:00 Copyright 2001-2022 Thales Group 199

Chapter 7: PED Authentication
Lifecycle PED Key PED Secret Function
HSMAdministration
Blue HSM SecurityOfficer (HSM SO)secret
Authenticates the HSM SO role. The HSM SOmanages provisioning functions and securitypolicies for the HSM.Mandatory
Red HSMDomain orKey Cloning Vector
Cryptographically defines the set of HSMs that canparticipate in cloning for backup. See "DomainPED Keys" on page 202.Mandatory
Orange Remote PEDVector
Establishes a connection to a Remote PED server.See * below table.Optional
HSM Auditing White Auditor (AU) secret Authenticates the Auditor role, responsible foraudit log management. This role has no access toother HSM services.Optional
PartitionAdministration
Blue Partition SecurityOfficer (PO) secret
Authenticates the Partition SO role. The POmanages provisioning activities and securitypolicies for the partition.NOTE: If you want the HSM SO to also performPartition SO duties, you can use the same bluekey to initialize both roles.Mandatory
Red Partition Domain orKey Cloning Vector
Cryptographically defines the set of partitions thatcan participate in cloning for backup or high-availability. See "Domain PED Keys" on page 202.Mandatory
Luna Network HSM 7 Partition Administration GuideLast Updated: 2022-07-26 23:53:21 GMT-04:00 Copyright 2001-2022 Thales Group 200

Chapter 7: PED Authentication
Lifecycle PED Key PED Secret Function
PartitionOperation
Black Crypto Officer (CO)secret
Authenticates the Crypto Officer role. The CO canperform both cryptographic services and keymanagement functions on keys within the partition.Mandatory
Gray Limited CryptoOfficer (LCO)secret**
Authenticates the Limited Crypto Officer role. TheLCO can perform a subset of the actions availableto the Crypto Officer.Optional (used in eIDAS-compliant schemes)
Gray Crypto User (CU)secret
Authenticates the Crypto User role. The CU canperform cryptographic services using keys alreadyexisting within the partition. It can create and backup public objects only.NOTE: If administrative separation is notimportant, you can use a single black key toinitialize the Crypto Officer and Crypto User rolesand still have two separate challenge secrets todistinguish read-write and read-only roleprivileges.Optional
*
NOTE Orange PED Keys (RPK) for use with HSMs at firmware 7.7 or newer, with enhancedsecurity to address modern threat environments and to comply with updated standards, haveincreased infrastructure onboard the key. If such an initialized RPK is overwritten to become adifferent role PED Key (example SO), this process that formerly would take about six secondsnow takes about 36 seconds.
**
NOTENo use-case is anticipated that requires both the LCO and the CU roles at the same time(Crypto User for Luna use-cases and Limited Crypto Officer for eIDAS use-cases), so the grayCypto User stickers should be adequate to identify either role as you manage and distributePED Keys.
Shared PED Key SecretsThe Luna PED identifies the type of authentication secret on an inserted PED key, and secrets of the same type(color designation) can be used interchangeably. During the key creation process, you have the option of reusingan authentication secret from an existing key rather than have the HSM create a new one. This means that youcan use the same PED key(s) to authenticate multiple HSMs or partitions. This is useful for:
Luna Network HSM 7 Partition Administration GuideLast Updated: 2022-07-26 23:53:21 GMT-04:00 Copyright 2001-2022 Thales Group 201

Chapter 7: PED Authentication
> legacy-style authentication schemes, where the HSM SO also functions as the owner of applicationpartitions. This is achieved by using the same blue PED key to initialize the HSM and some or all of thepartitions on the HSM.
> allowing a single HSM SO to manage multiple HSMs, or a single Partition SO to manage multiple partitions
> ensuring that HSMs/partitions share a cloning domain (see "Domain PED Keys" below)
> allowing a read-write Crypto Officer role and a read-only Crypto User role to be managed by the same user
It is not necessary for partitions in an HA group to share the same blue Partition SO key. Only the red cloningdomain key must be identical between HA group members.
NOTE Using a single PED key secret to authenticate multiple roles, HSMs, or partitions is lesssecure than giving each its own PED key. Refer to your organization's security policy forguidance.
Domain PED KeysA red domain PED key holds the key-cloning vector (the domain identifier) that allows key cloning betweenHSMs and partitions, and is therefore the PED key most commonly shared between HSMs or partitions. Cloningis a secure method of copying cryptographic objects between HSMs and partitions, required for backup/restoreand within HA groups. It ensures that keys copied between HSMs or partitions are:
> strongly encrypted
> copied only between HSMs and partitions that share a cloning domain.
For more information about cloning domains, see "Domain Planning" on page 188.
NOTE An HSM or partition can be a member of only one domain, decided at initialization. Adomain can only be changed by re-initializing the HSM. Partition domains may not be changedafter initialization.
PED PINsThe Luna PED allows the holder of a PED key to set a numeric PIN, 4-48 characters long, to be associated withthat PED key. This PIN must then be entered on the PED keypad for all future authentication. The PED PINprovides two-factor authentication and ensures security in case a key is lost or stolen. If you forget your PEDPIN, it is the same as losing the PED key entirely; you cannot authenticate the role.
PED PINs can be set only at the time of key creation, and can be changed only by changing the secret on thePED key. Duplicate keys made at the time of creation can have different PED PINs, allowing multiple peopleaccess to the role (see "Creating PED Keys" on page 243). Copies made later are true copies with the samePED PIN, intended as backups for one person (see "Duplicating Existing PED Keys" on page 254). Duplicates ofthe PED key all have the same PED PIN.
If you are using an M of N configuration, each member of the M of N keyset may set a different PED PIN.
CAUTION! Forgetting a PED PIN is equivalent to losing the key entirely; you can no longerauthenticate the role, domain, or RPV. See "Consequences of Losing PED Keys" on page 250.
Luna Network HSM 7 Partition Administration GuideLast Updated: 2022-07-26 23:53:21 GMT-04:00 Copyright 2001-2022 Thales Group 202

Chapter 7: PED Authentication
M of N Split Secrets (Quorum)The Luna PED can split an authentication secret among multiple PED keys (up to 16), and require a minimumnumber of the split keys (a quorum of key-holders) to authenticate the role. This provides a customizable layer ofsecurity by requiring multiple trusted people (sometimes called the quorum) to be present for authentication tothe role. The key splits are presented to the Luna PED and combined inside the Luna HSM firmware toauthenticate the role.
This can be likened to a club or a legislature, with some arbitrary number of members. You don't need allmembers present, to make a decision or perform an action, but you do not want a single person to be able toarbitrarily make decisions or take action affecting everyone. So your security rules set out a number ofparticipants - a quorum - who must be assembled in order to perform certain actions
For example, you could decide (or your security policy could dictate) that at least three trusted people must bepresent for changes to the HSM policies or for client partition assignments. To accommodate illness, vacations,business travel, or any other reasons that a key-holder might not be present at the HSM site, it is advisable tosplit the authentication secret between more than three people. If you decide on a five-key split, you wouldspecify M of N for the HSM SO role, or for the cloning domain to be 3 of 5. That is, the pool of individual holders ofspits of that role secret is five persons, and from among them, a quorum of three must be available to achieveauthentication (any three in this 3 of 5 scenario, but cannot be the same key presented more than once during anauthentication attempt).
In this scenario, the HSM SO authentication secret is split among five blue PED keys, and at least three of thosekeys must be presented to the Luna PED to log in as HSM SO.
This feature can be used to customize the level of security and oversight for all actions requiring PEDauthentication. You can elect to apply an M of N split-secret scheme to all roles and secrets, to some of them, orto none of them. If you do choose to use M of N, you can set different M and N values for each role or secret.Please note the following recommendations:
> M = N is not recommended; if one of the key holders is unavailable, you cannot authenticate the role.
> M = 1 is not recommended; it is no more secure than if there were no splits of the secret - a single person canunlock the role without oversight. If you want multiple people to have access to the role, it is simpler to createmultiple copies of the PED key.
NOTE Using an M of N split secret can greatly increase the number of PED keys you require.Ensure that you have enough blank or rewritable PED keys on hand before you begin backingup your M of N scheme.
Activated Partitions and M of NFor security reasons, the HSM and its servers are often kept in a locked facility, and accessed under specificcircumstances, directly or by secure remote channel. To accommodate these security requirements, the CryptoOfficer and Crypto User roles can be Activated (to use a secondary, alpha-numeric login credential toauthenticate - Partition Policy 22), allowing applications to perform cryptographic functions without having topresent a black or gray PED key (see "Activation and Auto-activation on Multi-factor- (PED-) AuthenticatedPartitions" on page 320). In this case, if the HSM is rebooted for maintenance or loses power due to an outage,the cached PED secret is erased and the role must be reactivated (by logging in the role via LunaCM andpresenting the requisite M number, or quorum, of PED keys) before normal operations can resume. A furthermeasure called Auto-Activation (Partition Policy 23) can cache the authenticated state as long as two hours,allowing automatic, hands-off resumption of operation.
Luna Network HSM 7 Partition Administration GuideLast Updated: 2022-07-26 23:53:21 GMT-04:00 Copyright 2001-2022 Thales Group 203

Chapter 7: PED Authentication
Updated PED Behavior NotesUSB-powered Luna PEDs and DC-powered Luna PEDs can be updated to firmware 2.9.0 and 2.7.4respectively.
> Updated PEDs support new communications security protocols for compliance with evolving standards. Formore information about these changes, refer to the following sections:
• "Secure Communication Between the Local PED and Luna Network HSMsWith Firmware 7.7.0 andNewer" on page 212
• "Secure Communication Between the Remote PED and Luna Network HSMsWith Firmware 7.7.0 andNewer" on page 216
> A Luna HSM at firmware 7.7.0 or newer requires connection with an updated PED.
• If you are updating to Luna HSM Firmware 7.7.0 or newer, refer to Special Considerations for Luna HSMFirmware 7.7.0 and Newer, Luna PED Firmware 2.9.0, and Luna PED Firmware 2.7.4 before proceedingwith the update.
• For more information about PED behavior on Luna HSMs that contain V0 or V1 partitions, refer to "Multi-Factor Authentication (PED-auth)" on page 152.
> PEDs with firmware 2.7.4 or 2.9.0 or newer can also function with the following HSMs:
• HSMs with firmware 5.x and 6.x that will not be updated with the new PED communication protocols.
• HSMs with firmware 7.x that have yet to be updated for compliance with current eIDAS/Common Criteriaand NIST standards.
New-series PED Behavior NotesAll of the following points apply to the newer-series PED (firmware versions 2.8.0, 2.8.1, or 2.9.0).
> If a PED is connected via USB to a version 7.x HSM (whether that HSM is installed in a host computer or isembedded in a Network HSM appliance), if the server housing the HSM is booted from a power-off condition,the PED display might come up blank. The PEDmust be reset.
> If a new-series PED is powered via USB from a 7.x HSM, and the HSM is reset, the PED will becomeunresponsive. The PEDmust be reset.
> If a PED is connected via USB to a PED server (for Remote PED), if the server is booted from a power-offcondition, the PED display might come up blank OR the PEDmight be unresponsive to the PED server. ThePEDmust be reset.
> A new-series PED will be unresponsive after a 7.x HMS firmware update or rollback, and/or the display mightcome up blank. The PEDmust be reset.
> In environments where the user is switching RPED connections to the same PED between a Luna NetworkHSM with firmware 7.7.0 and a Luna Network HSM with a firmware older than 7.7.0, the following error mayoccur after receiving a prompt to present the orange PED key:
• PED_ERROR when running Luna HSM Client 10.3.0 or higher.
• DEVICE_ERROR when running Luna HSM Client 10.2.0 or lower.
The user may need to clear the RPK from the PED's cache before attempting to switch connection to the non-7.7.0 HSM by pressing the < key, or repeat the command after encountering the error.
Luna Network HSM 7 Partition Administration GuideLast Updated: 2022-07-26 23:53:21 GMT-04:00 Copyright 2001-2022 Thales Group 204

Chapter 7: PED Authentication
References to resetting the PEDmean cycling the power. This can be done by disconnecting and reconnectingthe USB cable.
A new-series PED, powered by a 7.x HSM over USB retains the AC power socket of the older-series model. If anAC power block is plugged into the power socket of the PED, this will reset the PED.
Updating or Rolling-back PED-auth HSM FirmwareAfter a version 7.x HSM is updated to f/w version 7.7.0 (or newer), or rolled back to an earlier f/w version, a USB-connected PED should be power cycled. Also restart the PED after any appliance reboot. Without this action,attempted operations against the HSM can result in "device error".
Luna PED Received ItemsThis chapter describes the items you received with your Luna PED device. For instructions on setting up thePED, see "PED Authentication" on page 197.
Required ItemsThe following items are included with your PED. All are required for a successful installation.
Qty Item
1 Luna PED (with firmware 2.7.1 or newer)
Luna Network HSM 7 Partition Administration GuideLast Updated: 2022-07-26 23:53:21 GMT-04:00 Copyright 2001-2022 Thales Group 205

Chapter 7: PED Authentication
Qty Item
1 PED Power Supply kit with replaceable mains plug modules for international use (employed when thePED is operated in Remote PEDmode)
NOTE: If your PED has firmware 2.8.0 or newer, it contains refreshed internal hardware and is poweredby USB connection. Refreshed PEDs are not shipped with the external power supply, as they do notneed it.
1 Cable, USB 2.0, Type A to Mini B connectors (for Remote PED operation).
Luna Network HSM 7 Partition Administration GuideLast Updated: 2022-07-26 23:53:21 GMT-04:00 Copyright 2001-2022 Thales Group 206

Chapter 7: PED Authentication
Qty Item
1 Cable, Data, 9-pin, Micro-D to Micro-D connectors (for local PED operation prior to HSM firmwareversions 7.x.).
1 Ten-pack of iKey 1000 PED keys, and sheets of peel-and-stick labels
Luna PED Hardware FunctionsThe Luna PED reads authentication secrets from PED keys on behalf of an HSM or partition. This sectioncontains the following information about the Luna PED device:
> "Physical Features" below
> "Keypad Functions" on the next page
> "Modes of Operation" on page 209
> "Admin Mode Functions" on page 210
> "PED with Newer CPU (AC Power Block Now Optional)" on page 210
Physical FeaturesThe Luna PED is illustrated below, with important features labeled.
Luna Network HSM 7 Partition Administration GuideLast Updated: 2022-07-26 23:53:21 GMT-04:00 Copyright 2001-2022 Thales Group 207

Chapter 7: PED Authentication
1 Liquid Crystal Display (LCD), 8 lines.
2 Keypad for command and data entry. See "Keypad Functions" below.
3 DC power connector. Not used for PED version 2.8 and above. *
4 USBmini-B connector. Used for connecting to the HSM and for file transfer to or from the PED. PED version2.8 and above is powered by this USB connection.
5 Micro-D subminiature (MDSM) connector. Not used for Luna release 7.x.
6 USB A-type connector for PED keys.
7 PED key. Keys are inserted in the PED key connector (item 6).
* PEDs with firmware version 2.8 and above are powered by any USB 2.x or 3.x connection, and do not have anexternal DC power supply. The PED driver must be installed on the connected computer. If the PED is connectedto a hub or to a computer without the driver, then the PED display backlight illuminates, but no PEDmenu ispresented.)
Keypad FunctionsThe Luna PED keypad functions are as follows:
Luna Network HSM 7 Partition Administration GuideLast Updated: 2022-07-26 23:53:21 GMT-04:00 Copyright 2001-2022 Thales Group 208

Chapter 7: PED Authentication
Key Function
Clear > Clear the current entry, such as when entering a PED PIN> Hold the key down for five seconds to reset the PED during an operation. This applies only if
the PED is engaged in an operation or is prompting for action. There is no effect when nocommand has been issued or when a menu is open
< > Backspace: clear the most recent digit you typed on the PED> Exit: return to the previous PEDmenu
> > Log: displays the most recent PED actions (since entering Local or Remote Mode)
Numeric keys > Select numbered menu items> Input PED PINs
Yes and No > Respond to Yes or No questions from the PED
Enter > Confirm an action or entry
Modes of OperationThe Luna PED can operate in four different modes, depending on the type of HSM connection you want to use:
> Local PED-SCP: This mode is reserved for legacy Luna 6.x HSMs that use an MDSM connector between thePED and the HSM. It does not apply to Luna 7.x. Initial HSM configuration must be done in Local PEDmode.See "Local PED Setup" on page 211 for instructions.
> Admin: This mode is for upgrading the PED device firmware, diagnostic tests, and PED key duplication. See"Admin Mode Functions" on the next page for the functions available in this mode.
> Remote PED: In this mode, the PED is connected to a remote workstation and authenticated to the HSM withan orange PED key containing a Remote PED Vector (RPV) secret. This mode allows the Luna Network HSMto be located in a data center or other location restricting physical access. See "About Remote PED" onpage 213 for more information.
> Local PED-USB: In this mode, the PED is connected directly to the HSM card with a USBmini-B to USB-Aconnector cable. Initial HSM configuration must be done in Local PEDmode.
If the Luna PED is connected to an interface when it is powered up, it automatically detects the type ofconnection being used and switches to the appropriate mode upon receiving the first command from the HSM.
Changing ModesIf you change your PED configuration without disconnecting the PED from power, you must select the correctmode from the main menu.
To change the Luna PED's active mode
1. Press the < key to navigate to the main menu.
Luna Network HSM 7 Partition Administration GuideLast Updated: 2022-07-26 23:53:21 GMT-04:00 Copyright 2001-2022 Thales Group 209

Chapter 7: PED Authentication
The main menu displays all the available modes, as well as the PED’s current firmware version.
2. Press the corresponding number on the keypad for the desired mode.
NOTE The Luna PEDmust be in Local PED-USBmode when connected to a Release 7.xLuna Network HSM card, or LunaSH/LunaCM will return an error (CKR_DEVICE_ERROR)when you attempt authentication.
Admin Mode FunctionsIn this mode, you can upgrade the PED device software, run diagnostic tests, and duplicate PED keys withouthaving the Luna PED connected to an HSM. Press the corresponding number key to select the desired function.
> PED Key: allows you to identify the secret on an inserted PED key, or duplicate the key, without having theLuna PED connected to an HSM.
> Backup Devices: Not applicable to Luna 7.x.> Software Update: requires a PED software file and instructions sent from Thales.
> Self Test: test the PED’s functionality. Follow the on-screen instructions to test button functions, display,cable connections, and the ability to read PED keys. The PED returns a PASS/FAIL report once it concludesthe test.
PED with Newer CPU (AC Power Block Now Optional)A refresh of PED hardware (December 2017) was made necessary by suppliers discontinuing some originalcomponents. One of the replaced parts was the CPU, which necessitated a new line of PED firmware,incompatible with the previous versions.
The older PED was shipped with an AC adapter.
The newer PED has the same socket, for connection to an AC adapter, but an adapter/power-block is notshipped with the PED. You can purchase one locally if desired, but the new-CPU PED is reliably powered viaUSB.
The following points apply to the new-CPU PED - versions 2.8, 2.8.1, 2.9.0 - (that is, any released new CPU PEDfirmware version)
> when connected over USB to a PCIe HSM or to a Network HSM, if the server housing the HSM card is bootedfrom power off - the PED display might come up blank. The PEDmust be reset. Reset = power cycle
Luna Network HSM 7 Partition Administration GuideLast Updated: 2022-07-26 23:53:21 GMT-04:00 Copyright 2001-2022 Thales Group 210

Chapter 7: PED Authentication
> when connected via USB to a server (but not directly to the HSM card), if the server is booted from power off -the PED display may come up blank OR unresponsive to PED server; the PEDmust be reset.
> when powered by the HSM over USB, if an AC power block is then connected, the PED resets.
> when powered by an AC power block, and also plugged into the HSM's USB port ,then if the AC power blockis disconnected, the PED will power off.
> the new-CPU PED will be unresponsive after HSM firmware update or rollback, and the display might comeup blank; the PEDmust be reset.
> if the new-CPU PED is powered via the USB connection on the HSM, and the HSM is reset, the PEDbecomes unresponsive; the PEDmust be reset.
> if the new-CPU PED is connected to AC and to the HSM's USB connector, if the server housing the HSM ispower cycled (not the PED), the PED will not be unresponsive when the server and the HSM are back online;nevertheless, the PEDmust be reset.
"The PEDmust be reset" means that the PEDmust be power cycled by unplugging/replugging the USB cable, orby removing/reinserting the cord from the AC power block (if it is in use).
Local PED SetupA Local PED connection is the simplest way to set up the Luna PED. In this configuration, the PED is connecteddirectly to the HSM card. It is best suited for situations where all parties who need to authenticate credentialshave convenient physical access to the HSM. When the HSM is stored in a secure data center and accessedremotely, you must use a Remote PED setup.
Setting Up a Local PED ConnectionThe Luna Network HSM administrator can use these directions to set up a Local PED connection. You require:
> Luna PED with firmware 2.7.1 or newer
> USBmini-B to USB-A connector cable
> Luna PED DC power supply (if included with your Luna PED)
To set up a Local PED connection
1. Connect the Luna PED to the HSM using the supplied USB mini-B to USB-A connector cable.
NOTE To operate in Local PED-USBmode, the Luna PEDmust be connected directly to theHSM card's USB port, and not one of the other USB connection ports on the appliance.
2. PED version 2.8 and above is powered via the USB connection. If you are using PED version 2.7.1, connect itto power using the Luna PED DC power supply.
Luna Network HSM 7 Partition Administration GuideLast Updated: 2022-07-26 23:53:21 GMT-04:00 Copyright 2001-2022 Thales Group 211

Chapter 7: PED Authentication
As soon as the PED receives power, it performs start-up and self-test routines. It verifies the connection typeand automatically switches to the appropriate operation mode when it receives the first command from theHSM.
3. If you prefer to set the operation mode to Local PED-USBmanually, see "Changing Modes" on page 209.
The Luna PED is now ready to perform authentication for the HSM. You may proceed with setting up ordeploying your Luna Network HSM. All commands requiring authentication (HSM/partition initialization, login,etc.) will now prompt the user for action on the locally-connected Luna PED.
PED ActionsThere are several things that you can do with the Luna PED at this point:
> Wait for a PED authentication prompt in response to a LunaSH or LunaCM command (see "Performing PEDAuthentication" on page 249)
> Create copies of your PED keys (see "Duplicating Existing PED Keys" on page 254)
> Change to the Admin Mode to run tests or update PED software (see "Changing Modes" on page 209)
> Prepare to set up a Remote PED server (see "About Remote PED" on the next page)
Secure Local PEDPED firmware can be updated to version 2.7.4 in the PED with older CPU, and to version 2.9.0 in the PED withnew CPU.
> The firmware update
• is optional and continues to work just fine, with older PED-auth HSMs, and with 7.x HSMs with firmwareversions less than 7.7.0,
• while also being required to work with HSMs at firmware 7.7.0 and newer.
> The PED firmware update is mandatory before updating or using any HSM with firmware 7.7.0 or newer. Thiscombination complies an eIDAS-related requirement for an updated secure channel.
> The updated secure channel for Remote PED operation is now also replicated in the local channel, butbecause it is local it does not need to be mediated via an orange PED Key. The PED, however, sees bothlocal and remote connections as equivalent.
NOTE Pressing the "<" key on the PED, to change menus, now warns that the RPV will beinvalidated, even though the local connection does not use an orange PED Key. Simply ignorethe message.
Secure Communication Between the Local PED and Luna Network HSMsWithFirmware 7.7.0 and NewerLuna HSM Firmware 7.7.0 introduces a level of protection for data that is exchanged between the Local PED(running PED firmware 2.9.0 or 2.7.4) and Luna Network HSM. All exchanged data is protected in the followingway:
> All CSPs exchanged between the Local PED and the Luna Network HSM are protected using an AES-256-KWP CSP wrapping key (CWK).
Luna Network HSM 7 Partition Administration GuideLast Updated: 2022-07-26 23:53:21 GMT-04:00 Copyright 2001-2022 Thales Group 212

Chapter 7: PED Authentication
> The CWK is established using the One-pass Diffie-Hellman key agreement scheme C(1e, 1s ECDH CDH)with unilateral key confirmation, as defined in NIST Special Publication 800-56A Revision 3.The keyagreement scheme requires the following:
• The Luna Network HSM uses a static ECDH key pair. In this case, the HSM generates its own static P-521ECDH key on startup and the key is assigned a certificate which chains back to the HSM’s ECC HOC.
• The Local PED uses an ephemeral ECDH key pair. In this case, the Local PED generates its ephemeralP-521 ECDH key pair during the key agreement.
> The SHA-512 based Single-step key derivation function defined in NIST Special Publication 800-56CRevision 1 is used to derive the CWKs from the shared secret. The derivation function derives separateCWKs for HSM-to-Local PED and Local PED-to-HSM communication.
About Remote PEDA Remote PED connection allows you to access PED-authenticated HSMs that are kept in a secure data centeror other remote location where physical access is restricted or inconvenient. This section provides descriptionsof the following aspects of Remote PED connections:
> "Remote PED Architecture" below
> "Remote PED Connections" on the next page
> "Secure Communication Between the Remote PED and Luna Network HSMsWith Firmware 7.7.0 andNewer" on page 216
Remote PED ArchitectureThe Remote PED architecture consists of the following components:
> Remote PED: a Luna PED with firmware 2.7.1 or newer, connected to a network-connected workstation,powered on, and set to Remote PEDmode.
NOTE Luna PED firmware versions• 2.7.4 for PEDs that require the external power block, and• 2.9.0 for USB-powered PEDs
are required for the enhanced connection security and NIST SP 800-131A Rev.1 complianceimplemented with Luna HSM 7.7.0 and newer.
> Remote PED Vector (RPV): a randomly generated, encrypted value used to authenticate between aRemote PED (via PEDserver) and a Luna HSM (via PEDclient).
> Remote PED Key (RPK): an orange PED key containing an RPV (or multiple PED keys with a split RPV inan M of N quorum implementation).
> PEDserver: software that runs on the remote workstation with a USB-connected Luna PED. PEDserveraccepts requests from and serves PED actions and data to PEDclient.
> PEDclient: software that requests remote PED services from PEDserver. PEDclient runs on the network-connected system hosting the HSM, which can be one of the following:
• Luna Network HSM
Luna Network HSM 7 Partition Administration GuideLast Updated: 2022-07-26 23:53:21 GMT-04:00 Copyright 2001-2022 Thales Group 213

Chapter 7: PED Authentication
• Host computer with Luna PCIe HSM installed
• Host computer with USB-connected Luna Backup HSM, configured for remote backup
Remote PED ConnectionsA Luna Network HSM can establish a Remote PED connection with any workstation that meets the followingcriteria:
> PEDServer is running
> a Luna PED with firmware version 2.7.1 or newer is connected
> The orange PED key containing the Remote PED Vector (RPV) for that HSM is available
Luna Network HSM 7 Partition Administration GuideLast Updated: 2022-07-26 23:53:21 GMT-04:00 Copyright 2001-2022 Thales Group 214

Chapter 7: PED Authentication
Bi-directionalityThere are two methods of establishing a Remote PED connection to the HSM:
> HSM-initiated:When the HSM requires authentication, it sends (via PEDclient) a request for PED services tothe Remote PED host (which receives the request via PEDserver). This requires that the Luna Network HSMbe allowed to initiate external connections, and that the PEDserver IP port remains open. If the Luna NetworkHSM resides behind a firewall with rules prohibiting these connections, or if your IT policy prohibits opening aport on the Remote PED host, use a PED-initiated connection. See "HSM-Initiated Remote PED" onpage 224.
> PED-initiated: The HSM and Remote PED host exchange and register certificates, creating a trustedconnection. This allows the Remote PED host (via PEDserver) to initiate the connection to the Luna NetworkHSM. If you have firewall or other constraints that prevent your HSM from initiating a connection to a RemotePED in the external network, use this connection method. See "PED-Initiated Remote PED" on page 228.
The following constraints apply to PED-initiated connections:
> Amaximum of 20 Remote PED servers can be registered in PEDclient.
> Amaximum of 80 Network HSM appliances can be registered in PEDserver.
> If the connection is terminated abnormally (for example, a router switch died), there is no auto-reconnection.PEDserver automatically restarts and runs in HSM-initiated connection mode.
> When running in PED-initiated connection mode, PEDserver does not listen for new HSM-initiatedconnections, for security and to simplify usability.
Priority and LockoutIf a Local PED connection is active and an operation is in progress, a Remote PED connection cannot beinitiated until the active Local PED operation is completed. If the Local PED operation takes too long, the RemotePED command may time out.
Luna Network HSM 7 Partition Administration GuideLast Updated: 2022-07-26 23:53:21 GMT-04:00 Copyright 2001-2022 Thales Group 215

Chapter 7: PED Authentication
When a Remote PED connection is active, the Local PED connection is ignored, and all authentication requestsare routed to the Remote PED. Attempts to connect to a different Remote PED server are refused until thecurrent connection times out or is deliberately ended. See "Ending or Switching the Remote PED Connection" onpage 232.
One Connection at a TimeRemote PED can provide PED services to only one HSM at a time. To provide PED service to another HSM, youmust first end the original Remote PED connection. See "Ending or Switching the Remote PED Connection" onpage 232.
TimeoutPEDserver and PEDclient both have configurable timeout settings (default: 1800 seconds). See "pedserver -mode config" on page 265 or "hsm ped timeout" on page 1. The utilities are not aware of each other's timeoutvalues, so the briefer value determines the actual timeout duration. Timeout does not apply to PED-initiatedRemote PED connections.
Once a partition has been Activated and cached the primary authentication (PED key) credential, the CryptoOfficer or Crypto User can log in using only the secondary (alphanumeric) credentials and the Remote PEDconnection can be safely ended until the Partition SO needs to log in again.
Broken ConnectionsA Remote PED connection is broken if any of the following events occur:
> The connection is deliberately ended by the user
> The connection times out (default: 1800 seconds)
> Luna PED is physically disconnected from its host
> VPN or network connection is disrupted
> You exit Remote PEDmode on the Luna PED. If you attempt to change menus, the PED warns:
If the link is broken, as long as the network connection is intact (or is resumed), you can restart PEDserver on theRemote PED host and run hsm ped connect in LunaSH or ped connect in LunaCM to re-establish the RemotePED link. In a stable network situation, the link will remain available until timeout.
Secure Communication Between the Remote PED and Luna Network HSMsWithFirmware 7.7.0 and NewerCommunication between the Remote PED and Luna Network HSM is kept secure before and after RPVinitialization.
Luna Network HSM 7 Partition Administration GuideLast Updated: 2022-07-26 23:53:21 GMT-04:00 Copyright 2001-2022 Thales Group 216

Chapter 7: PED Authentication
Secure Communication Before RPV InitializationBefore the RPV is initialized, data exchanged between the Remote PED and Luna Network HSM is protectedusing the same method that is used to secure communication between a Local PED and Luna Network HSM(see "Secure Communication Between the Local PED and Luna Network HSMsWith Firmware 7.7.0 andNewer" on page 212). However, the SHA-512 based single-step key derivation function defined in NIST SpecialPublication 800-56C Revision 1 is used to derive the CWKs from the shared secret, with a password usedinstead of an RPV.
After the RPV is initialized, the Luna Network HSM and Remote PED re-establish a full secure channel. For moreinformation, see the section below.
Secure Communication After RPV InitializationAfter the RPV is initialized, all communication between the Remote PED and the Luna Network HSM istransmitted within a secure channel that is protected using an AES-256-CTR data encryption key (DEK) and aSHA-512-HMAC data MAC key (DMK). CSPs transmitted within the secure channel are additionally encryptedusing an AES-256-KWP CSP wrapping key (CWK). The secure channel is established using the Full Unified C(2e, 2s ECDH CDH) key agreement scheme with bilateral key confirmation, as defined in NIST SpecialPublication 800-56A Revision 3. The key agreement scheme requires each party to use a static ECDH key pairand an ephemeral ECDH key pair. The key pairs are generated in the following ways:
> The HSM generates its own static P-521 ECDH key on startup. During RPV initialization, the HSM generatesa static P-521 ECDH key and loads it onto the RPK along with the RPV (or RPV split is MofN is used). Bothstatic keys are assigned certificates which chains back to the HSM’s ECC HOC.
> During the key agreement, the Luna Network HSM and Remote PED both generate their ephemeral P-521ECDH key pair.
As part of the key agreement, the SHA-512 based single-step key derivation function defined in NIST SpecialPublication 800-56C Revision 1 is used to combine the shared secret, the RPV, and the derived the securechannel protection keys; that is, the DEK, DMK, and CWK. The derivation function derives separate keys (DEK,DMK, and CWK) for HSM-to-Remote PED and Remote PED-to-HSM communication.
The RPV ensures mutual authentication of both end points and the HSM’s static ECDH key ensures additionalauthentication of the HSM.
Secure Communication Between the Remote PED and Luna Network HSMsWithFirmware 7.4.2 and OlderAll communication between the Remote PED and the HSM is transmitted within an AES-256 encrypted channel,using session keys based on secrets shared out-of-band. This is considered a very secure query/responsemechanism. The authentication conversation is between the HSM and the PED. Authentication data retrievedfrom the PED keys never exists unencrypted outside of the PED or the HSM. PEDclient and PEDserver providethe communication pathway between the PED and the HSM, and the data remains encrypted along that path.
Once the PED and HSM are communicating, they establish a common Data Encryption Key (DEK). DEKestablishment is based on the Diffie-Hellman key establishment algorithm and a Remote PED Vector (RPV),shared between the HSM and the PED via the orange Remote PED Key (RPK). Once a common Diffie-Hellmanvalue is established between the parties via the Diffie-Hellman handshake, the RPV is mixed into the value tocreate a 256-bit AES DEK on each side. If the PED and the HSM do not hold the same RPV, the resulting DEKsare different and communication is blocked.
Luna Network HSM 7 Partition Administration GuideLast Updated: 2022-07-26 23:53:21 GMT-04:00 Copyright 2001-2022 Thales Group 217

Chapter 7: PED Authentication
Mutual authentication is achieved by exchanging random nonces, encrypted using the derived data encryptionkey. The authentication scheme operates as follows:
HSM _ Remote PED
Send 8 bytes random nonce, R1, encryptedusing the derived encryption key.
{R1 || padding}Ke ->
<- {R2 || R1}Ke Decrypt R1. Generate an 8 byte randomnonce, R2. Concatenate R2 || R1and encrypt the result using the derivedencryption key.
Decrypt R2 || R1. Verify that received R1value is the same as the originallygenerated value. Re-encrypt R2 and returnit to Remote PED.
{padding || R2}Ke -> Verify that received R2 value is the same asthe originally generated value.
Following successful authentication, the random nonce values are used to initialize the feedback buffers neededto support AES-OFB mode encryption of the two communications streams (one in each direction).
Sensitive data in transition between a PED and an HSM is end-to-end encrypted: plaintext security-relevant datais never exposed beyond the HSM and the PED boundaries at any time. The sensitive data is also hashed, usinga SHA-256 digest, to protect its integrity during transmission.
PEDServer Configuration FilePED-initiated Remote PED introduces a pedServer.ini/pedServer.conf file. The Appliances section managesregistered appliances.
CAUTION! Do not edit the pedServer.ini/pedServer.conf file. If you have any issues, contactThales Technical Support.
[Appliances]ServerCAFile=C:\Program Files\SafeNet\LunaClient\cert\PedServerCAFile.pemSSLConfigFile=C:\Program Files\SafeNet\LunaClient\openssl.cnfServerName00=myHSMServerIP00=192.20.11.78ServerPort00=9697CommonCertName00=66331[RemotePed]AdminPort=1502BGProcessShutdownTimeoutSeconds=25BGProcessStartupTimeoutSeconds=10ExternalAdminIF=0ExternalServerIF=1IdleConnectionTimeoutSeconds=1800InternalShutdownTimeoutSeconds=10LogFileError=1LogFileInfo=1LogFileName=C:\Program Files\SafeNet\LunaClient\remotePedServerLog.logLogFileTrace=0LogFileWarning=1MaxLogFileSize=4194304
Luna Network HSM 7 Partition Administration GuideLast Updated: 2022-07-26 23:53:21 GMT-04:00 Copyright 2001-2022 Thales Group 218

Chapter 7: PED Authentication
PingInterval=1PongTimeout=5RpkSerialNumberQueryTimeout=15ServerPortValue=1503SocketReadRspTimeoutSeconds=60SocketReadTimeoutSeconds=60SocketWriteTimeoutSeconds=15A new entry in the main Crystoki.ini/Chrystoki.conf file points to the location of the pedServer.ini/pedServer.conffile.[Ped Server]PedConfigFile = /usr/safenet/lunaclient/data/ped/config
Initializing the Remote PED Vector and Creating an Orange Remote PED KeyThe Remote PED (via PEDserver) authenticates itself to the Luna Network HSM with a randomly-generatedencrypted value stored on an orange PED key. That secret originates in an HSM, and can be carried to otherHSMs via the orange key. An HSM being newly configured either
> generates its own RPV secret to imprint on an orange PED Key,
or
> accepts a pre-existing RPV from a previously imprinted orange key, at your discretion.
The orange key proves to the HSM that the Remote PED is authorized to provide authentication for HSM roles. ALuna Network HSM administrator can create this key using one of the following two methods:
> Local RPV Initialization: The RPV is initialized using a Luna PED connected to the USB port on the HSMcard. This is the standard method of initializing the RPV.
See "Local RPV Initialization" below.
> Remote RPV Initialization: The RPV is initialized using a Luna PED connected to a remote workstationrunning PEDserver. A one-time numeric password is used to authenticate the Remote PED to the HSMbefore initializing the RPV. This optional method is useful if the HSM SO has only remote SSH access to theappliance. It is available only if the HSM is in a zeroized state (uninitialized) and your firewall settings allow anHSM-initiated Remote PED connection. If you choose this method, you will set up Remote PED beforeinitializing the RPV ("Remote RPV Initialization" on the next page).
Continue to "Installing PEDserver and Setting Up the Remote Luna PED" on page 222.
NOTE Generally, the HSM SO creates an orange PED key (and backups), makes a copy foreach valid Remote PED server, and distributes them to the Remote PED administrators.
Local RPV InitializationIf the HSM is already initialized, the HSM SOmust log in to complete this procedure. You require:
> Luna PED with firmware 2.7.1 or newer
> USBmini-B to USB-A connector cable
> Luna PED DC power supply (if included with your Luna PED)
> Blank or reusable orange PED key (or multiple keys, if you plan to make extra copies or use an M of Nsecurity scheme). See "Creating PED Keys" on page 243 for more information.
Luna Network HSM 7 Partition Administration GuideLast Updated: 2022-07-26 23:53:21 GMT-04:00 Copyright 2001-2022 Thales Group 219

Chapter 7: PED Authentication
NOTE Orange PED Keys (RPK) for use with HSMs at firmware 7.7 or newer, with enhancedsecurity to address modern threat environments and to comply with updated standards, haveincreased infrastructure onboard the key. If such an initialized RPK is overwritten to become adifferent role PED Key (example SO), this process that formerly would take about six secondsnow takes about 36 seconds.
To initialize the RPV and create the orange PED key locally
1. If you have not already done so, set up a Local PED connection (see "Local PED Setup" on page 211).
2. Using a serial or SSH connection, log in to the Luna Network HSM appliance as admin.3. If the HSM is initialized, login as HSM SO (see Logging In as HSM Security Officer). If not, skip to the next
step.
lunash:> hsm login4. Ensure that you have the orange PED key(s) ready. Initialize the RPV.
lunash:> hsm ped vector init5. Attend to the Luna PED and respond to the on-screen prompts. See "Creating PED Keys" on page 243 for a
full description of the key-creation process.
• If you have an orange PED key with an existing RPV that you wish to use for this HSM, press Yes.• If you are creating a new RPV, press No.
Continue following the prompts for PED PIN, M of N, and duplication options.
To continue setting up a Remote PED server, see "Installing PEDserver and Setting Up the Remote LunaPED" on page 222.
Remote RPV InitializationWhen you initialize an RPV with the PED connected locally, you have direct physical control of the operation andits security.
When you initialize an RPV remotely, you must secure the link and the operation with a one-time password. TheHSMmust be uninitialized for this operation.
Luna Network HSM 7 Partition Administration GuideLast Updated: 2022-07-26 23:53:21 GMT-04:00 Copyright 2001-2022 Thales Group 220

Chapter 7: PED Authentication
NOTE This feature requires minimum Luna Network HSM appliance software version 7.2.0and Luna HSM Client 7.2.0. See Version Dependencies by Feature for more information.
Use the following procedure to initialize the RPV. You require:
> A blank or reusable orange PED key (or multiple keys, if you plan to make extra copies or use an M of Nsecurity scheme). See "Creating PED Keys" on page 243 for more information.
> The HSMmust be in a zeroized state and the RPV uninitialized.
To initialize the RPV and create the orange key remotely
1. Open an HSM-initiated Remote PED connection.
lunash:> hsm ped connectThe Remote PED connection command prepares to secure the connection and LunaSH does one of thefollowing:
• If you are using Luna HSM Firmware 7.7.0 or newer and Luna HSM Client 10.3.0 or newer, LunaSHpresents a randomly-generated 8-digit numeric one-time password that the HSM will use to identify theRemote PED server.
Please attend to the PED and enter following password: 18246843
Command Result : No Error
The remote Luna PED prompts you for the one-time password:
• If you are using Luna HSM Firmware 7.4.2 or older and Luna HSM Client 10.2.0 or older, LunaSH returnsthe following message:Luna PED operation required to connect to Remote PED - use orange PED key(s).
Enter PED Password:
In LunaSH, when prompted to "Enter PED Password" set any 8-digit numeric one-time password that theHSM will use to identify the Remote PED server. The following message is displayed in LunaSH, and theLuna PED prompts you for the password:Luna PED operation required to connect to remote PED - Enter PED password.
Luna Network HSM 7 Partition Administration GuideLast Updated: 2022-07-26 23:53:21 GMT-04:00 Copyright 2001-2022 Thales Group 221

Chapter 7: PED Authentication
2. Enter the numeric password on the PIN pad, exactly as you entered it in LunaSH/displayed in LunaSH, andpress Enter.
3. Ensure that you have the orange PED key(s) ready. Initialize the RPV.
lunash:> hsm ped vector init4. Attend to the Luna PED and respond to the on-screen prompts. See "Creating PED Keys" on page 243 for a
full description of the key-creation process.
When you have created the orange key, the HSM launches PEDclient and establishes a Remote PEDconnection using the newly-created RPV.Ped Client Version 2.0.1 (20001)Ped Client launched in "Release ID" mode.Callback Server is running..ReleaseID command passed."Release ID" command passed.Ped Client Version 2.0.1 (20001)Ped Client launched in "Delete ID" mode.Callback Server is running..DeleteID command passed."Delete ID" command passed.
Command Result : 0 (Success)
You may now initialize the HSM. See Initializing the HSM for more information.
NOTE After creating the orange (Remote PED Vector) key for an HSM using the single-session, one-time password authenticated PED connection that is used to create the key, thePED prompts for the one-time password when you end the session using ped disconnect.You can ignore the prompt. The PED session is disconnected properly by pressing the Enterkey on the PED, without entering the password.
Installing PEDserver and Setting Up the Remote Luna PEDThe PEDserver software, installed on the Remote PED host workstation, allows the USB-connected Luna PEDto communicate with remotely-located HSMs. The Remote PED administrator can install PEDserver using theLuna HSM Client installer. You require:
> Network-connected workstation with compatible operating system (refer to the release notes)
> Luna HSM Client installer
> Luna PED with firmware 2.7.1 or higher
> USBmini-B to USB-A connector cable
> Luna PED DC power supply (PED 2.7.1 only; PED 2.8 and higher is powered by the USB connection)
NOTE To set up a Remote PED Server on Linux, you require Luna HSM Client 10.1.0 ornewer.
Luna Network HSM 7 Partition Administration GuideLast Updated: 2022-07-26 23:53:21 GMT-04:00 Copyright 2001-2022 Thales Group 222

Chapter 7: PED Authentication
To install PEDserver and the PED driver, and set up the Luna PED
1. Run the Luna HSM Client installer and follow the on-screen instructions, as detailed in "Luna HSM ClientSoftware Installation" on page 19, and select the Luna Remote PED option. Any additional installationchoices are optional, for the purpose of this procedure.
2. OnWindows, when you are prompted to install the driver, click Install.
3. OnWindows, reboot the computer to ensure that the Luna PED driver is accepted by Windows. This step isnot required for Linux or Windows Server operating systems.
4. Connect the Luna PED to a USB port on the host system using the supplied USB mini-B to USB-A connectorcable.
PED version 2.8 and above is powered via the USB connection. If you are using PED version 2.7.1, connect itto power using the Luna PED DC power supply.
As soon as the PED receives power, it performs start-up and self-test routines (for PED v2.8 and later, thePED driver must be installed on the connected computer, or the display remains blank). It verifies theconnection type and automatically switches to the appropriate operation mode when it receives the firstcommand from the HSM.
To manually set the operation mode to Remote PED, see "Changing Modes" on page 209.
Luna Network HSM 7 Partition Administration GuideLast Updated: 2022-07-26 23:53:21 GMT-04:00 Copyright 2001-2022 Thales Group 223

Chapter 7: PED Authentication
5. OnWindows, open the Windows Device Manager to confirm that the Luna PED is recognized as PED2. If itappears as an unrecognized USB device:
a. Disconnect the Luna PED from the host USB port.
b. Reboot the computer to ensure that the Luna PED driver is accepted by Windows.
c. Reconnect the Luna PED.To continue setting up a Remote PED connection, see "Opening a Remote PED Connection" below.
Opening a Remote PED ConnectionThere are two methods of establishing a Remote PED connection to the HSM:
> HSM-initiated:When the HSM requires authentication, it sends (via PEDclient) a request for PED services tothe Remote PED host (which receives the request via PEDserver). This requires that the Luna Network HSMbe allowed to initiate external connections, and that the PEDserver IP port remains open. If the Luna NetworkHSM resides behind a firewall with rules prohibiting these connections, or if your IT policy prohibits opening aport on the Remote PED host, use a PED-initiated connection instead.
See "HSM-Initiated Remote PED" below.
> PED-initiated: The HSM and Remote PED host exchange and register certificates, creating a trustedconnection. This allows the Remote PED host (via PEDserver) to initiate the connection to the Luna NetworkHSM. If you have firewall or other constraints that prevent your HSM from initiating a connection to a RemotePED in the external network, use this connection method.
See "PED-Initiated Remote PED" on page 228.
NOTE For the Luna Network HSM, only Luna Shell commands can be used with a PED-initiated Remote PED connection. Client-side LunaCM commands such as partition initcannot be executed. This means that only administrative personnel, logging in via Luna Shell(lunash:>) can authenticate to the HSM using a PED-initiated Remote PED connection.
To perform actions requiring authentication on Network HSM partitions (that is, from the clientside) any Remote PED connection must be launched by the HSM, and the data-center firewallrules must permit such outward initiation of contact.
If you encounter issues, see "Remote PED Troubleshooting" on page 233.
HSM-Initiated Remote PEDThe HSM/client administrator can use this procedure to establish an HSM-initiated Remote PED connection. Theprocedure is different depending on whether you are setting up Remote PED for the HSM appliance or a client.You require:
> Administrative access to a network-connected workstation with PEDserver installed and Luna PEDconnected (see "Installing PEDserver and Setting Up the Remote Luna PED" on page 222)
> Administrative access to the Luna Network HSM via SSH (if using Remote PED for HSM-level authentication)
> Administrative access to a Luna HSM Client workstation with an assigned user partition (if using Remote PEDfor partition-level authentication)
> One of the following:
Luna Network HSM 7 Partition Administration GuideLast Updated: 2022-07-26 23:53:21 GMT-04:00 Copyright 2001-2022 Thales Group 224

Chapter 7: PED Authentication
• Orange PED key with the HSM's RPV (see "Initializing the Remote PED Vector and Creating an OrangeRemote PED Key" on page 219)
• Blank orange PED key (or multiple keys, if you plan to use an M of N scheme)
To launch PEDserver1. OnWindows, open an Administrator command prompt by right-clicking the Command Prompt icon and
selecting Run as administrator. This step is not necessary if you are running Windows Server 20xx, as theAdministrator prompt is launched by default.
2. Navigate to the Luna HSM Client install directory.
Windows default: cd C:\Program Files\SafeNet\LunaClient\Linux/UNIX default: cd /usr/safenet/lunaclient
3. Launch PEDserver. If you are launching PEDserver on an IPv6 network, you must include the -ip option.> "pedserver -mode start" on page 271 [-ip <PEDserver_IP>]C:\Program Files\SafeNet\LunaClient>pedserver mode startPed Server Version 1.0.6 (10006)Ped Server launched in startup mode.Starting background processBackground process startedPed Server Process created, exiting this process.
4. Verify that the service has launched successfully.> "pedserver -mode show" on page 269Note the Ped2 Connection Status. If it says Connected, PEDserver is able to communicate with the LunaPED.
Note also the server port number (default: 1503). You must specify this port along with the PEDserver host IPwhen you open a connection.c:\Program Files\SafeNet\LunaClient>pedserver mode showPed Server Version 1.0.6 (10006)Ped Server launched in status mode.
Server Information:Hostname: DWG9999IP: 0.0.0.0Firmware Version: 2.7.1-5PedII Protocol Version: 1.0.1-0Software Version: 1.0.6 (10006)
Ped2 Connection Status: ConnectedPed2 RPK Count 0Ped2 RPK Serial Numbers (none)
Client Information: Not Available
Operating Information:Server Port: 1503External Server Interface: YesAdmin Port: 1502External Admin Interface: No
Luna Network HSM 7 Partition Administration GuideLast Updated: 2022-07-26 23:53:21 GMT-04:00 Copyright 2001-2022 Thales Group 225

Chapter 7: PED Authentication
Server Up Time: 190 (secs)Server Idle Time: 0 (secs) (0%)Idle Timeout Value: 1800 (secs)
Current Connection Time: 0 (secs)Current Connection Idle Time: 0 (secs)Current Connection Total Idle Time: 0 (secs) (100%)Total Connection Time: 0 (secs)Total Connection Idle Time: 0 (secs) (100%)
Show command passed.
5. Use ipconfig (Windows) or ifconfig (Linux) to determine the PEDserver host IP. A static IP is recommended,but if you are connecting over a VPN, you may need to determine the current IP each time you connect to theVPN server.
If you are setting up Remote PED with a Luna Network HSM appliance, see "To open a Remote PED connectionfrom the Luna Network HSM appliance (LunaSH)" below.
If you are setting up Remote PED with a client, see "To open a Remote PED connection from a client workstation(LunaCM)" on the next page.
To open a Remote PED connection from the Luna Network HSM appliance(LunaSH)1. Open an SSH session to the Luna Network HSM and log in to LunaSH as admin.2. Initiate the Remote PED connection from the Luna Network HSM.
lunash:> hsm ped connect -ip <PEDserver_IP> -port <PEDserver_port> [-serial <serial#>]
NOTE The -serial option is required only if you are using Remote PED to authenticate a LunaBackup HSM connected to one of the Luna Network HSM's USB ports. If a serial number is notspecified, the appliance's internal HSM is used.
lunash:>hsm ped connect -ip 192.124.106.100 -port 1503
Luna PED operation required to connect to Remote PED - use orange PED key(s).
• If you have not yet initialized the RPV, and the HSM is not in initialized state, LunaSH prompts you to entera password.Enter PED Password:
See "Remote RPV Initialization" on page 220 for this procedure.
• If you already initialized the RPV, the Luna PED prompts for the orange PED key.
Luna Network HSM 7 Partition Administration GuideLast Updated: 2022-07-26 23:53:21 GMT-04:00 Copyright 2001-2022 Thales Group 226

Chapter 7: PED Authentication
Present the orange PED key with the correct RPV. The HSM authenticates the RPV, and control isreturned to the LunaSH prompt.Command Result : 0 (Success)
The HSM-initiated Remote PED connection is now open.
3. Verify the Remote PED connection by entering a command that requires PED authentication.
• If the HSM is already initialized and you have the blue HSM SO key, you can use lunash:> hsm login.• If the HSM is uninitialized, you can initialize it now with lunash:> hsm init -label <label>. Have blank or
reusable blue and red PED keys ready (or multiple blue and red keys for M of N or to make multiplecopies). See "Creating PED Keys" on page 243 for more information.
NOTE The HSM-initiated Remote PED connection eventually times out (default: 1800seconds), and must be re-initiated each time authentication is required. To simplify thisprocess, you can set a default IP address and/or port for LunaSH to use each time you connect.To drop the Remote PED connection manually, see "Ending or Switching the Remote PEDConnection" on page 232.
4. [OPTIONAL] Set a default IP address and/or port for the Luna Network HSM to look for a configured RemotePED.
lunash:> hsm ped set -ip <PEDserver_IP> -port <PEDserver_port>lunash:>hsm ped set -ip 192.124.106.100 -port 1503
Command Result : 0 (Success)
With this default address set, the HSM administrator can use lunash:> hsm ped connect (without specifyingthe IP/port) to initiate the Remote PED connection. The orange PED key will be required each time.
NOTE If you want to use the Remote PED to authenticate a different HSM, you must first dropthe current connection. See "Ending or Switching the Remote PED Connection" on page 232.
To open a Remote PED connection from a client workstation (LunaCM)1. Launch LunaCM on the client.
2. Initiate the Remote PED connection.
lunacm:> ped connect -ip <PEDserver_IP> -port <PEDserver_port>lunacm:>ped connect -ip 192.124.106.100 -port 1503
Command Result : No Error
3. Issue the first command that requires authentication.• If the partition is already initialized and you have the blue Partition SO key, log in.
lunacm:> role login -name po• If the partition is uninitialized, you can initialize it now. Have blank or reusable blue and red PED keys
ready (or multiple blue and red keys for MofN or for multiple copies). See "Creating PED Keys" onpage 243 for more information on creating PED keys.
lunacm:> partition init -label <label>
Luna Network HSM 7 Partition Administration GuideLast Updated: 2022-07-26 23:53:21 GMT-04:00 Copyright 2001-2022 Thales Group 227

Chapter 7: PED Authentication
4. The Luna PED prompts for an orange PED key. Present the orange PED key with the correct RPK.
5. The Luna PED prompts for the key associated with the command you issued. Follow the on-screen directionsto complete the authentication process.
NOTE The HSM-initiated Remote PED connection eventually times out (default: 1800seconds), and must be re-initiated each time authentication is required. To simplify thisprocess, you can set a default IP address and/or port for LunaCM to use each time youconnect. To drop the Remote PED connection manually, see "Ending or Switching the RemotePED Connection" on page 232.
6. [OPTIONAL] Set a default IP address and/or port for the Luna Network HSM to look for a configured RemotePED.
lunacm:> ped set -ip <PEDserver_IP> -port <PEDserver_port>lunacm:>ped set -ip 192.124.106.100 -port 1503
Command Result : 0 (Success)
With this default address set, the HSM administrator can use lunacm:> ped connect (without specifying theIP/port) to initiate the Remote PED connection. The orange PED key may be required if the RPK has beeninvalidated on the PED since you last used it.
NOTE If you want to use the Remote PED to authenticate a different HSM, you must first dropthe current connection. See "Ending or Switching the Remote PED Connection" on page 232.
PED-Initiated Remote PEDA PED-initiated connection requires the HSM and Remote PED host to exchange and register certificates,creating a trusted connection. This allows the Remote PED host (via PEDserver) to initiate the connection to theLuna Network HSM. If you have firewall or other constraints that prevent your HSM from initiating a connection toa Remote PED in the external network, use this connection method. The HSM administrator can use thisprocedure to set up the connection. You require:
> Administrative access to a network-connected workstation with PEDserver installed and Luna PEDconnected (see "Installing PEDserver and Setting Up the Remote Luna PED" on page 222)
Luna Network HSM 7 Partition Administration GuideLast Updated: 2022-07-26 23:53:21 GMT-04:00 Copyright 2001-2022 Thales Group 228

Chapter 7: PED Authentication
> Orange PED key with the HSM's RPV (see "Initializing the Remote PED Vector and Creating an OrangeRemote PED Key" on page 219)
> Administrative access to the Luna Network HSM via SSH
NOTE The PED-initiated Remote PED connection procedure requires admin access to theappliance via LunaSH, and therefore this method cannot directly provide authenticationservices for client partitions.
To open a PED-initiated Remote PED connection1. OnWindows, open an Administrator command prompt on the Remote PED host. (If you are running Windows
Server 20xx, the Administrator prompt is launched by default. For any other supported Windows version,right-click the Command Prompt icon and select Run as administrator.)
2. Navigate to the Luna HSM Client install directory (C:\Program Files\SafeNet\LunaClient\ or/usr/safenet/lunaclient)
3. You will need the Remote PED host's NTLS certificate. If you have already set up an NTLS client connectionto the appliance using LunaCM, you can find the certificate in C:\ProgramFiles\SafeNet\LunaClient\cert\client\ or /usr/safenet/lunaclient/cert/client. If the certificate is notavailable, you can generate it with the PEDserver utility.
CAUTION! If the Remote PED host has registered NTLS partitions on any HSM, regeneratingthe certificate will cause you to lose contact with your registered NTLS partitions. Use theexisting certificate instead.
> "pedserver -regen" on page 274 -commonname <name>c:\Program Files\SafeNet\LunaClient>pedserver -regen -commonname RemotePED1Ped Server Version 1.0.6 (10006)
Are you sure you wish to regenerate the client certificate?All registered partitions may disappear.
Are you sure you wish to continue?
Type 'proceed' to continue, or 'quit' to quit now -> proceed
Private Key created and written to: C:\ProgramFiles\SafeNet\LunaClient\cert\client\RemotePED1Key.pemCertificate created and written to: C:\ProgramFiles\SafeNet\LunaClient\cert\client\RemotePED1.pem
Successfully regenerated the client certificate.
4. Use pscp or scp to securely retrieve the Luna Network HSM's NTLS certificate. Enter the appliance's adminaccount password when prompted. Note the period at the end of the command.
>pscp admin@<appliance_IP>:server.pem .c:\Program Files\SafeNet\LunaClient>pscp [email protected]:server.pem [email protected]'s password:
server.pem | 1 kB | 1.1 kB/s | ETA: 00:00:00 | 100%
Luna Network HSM 7 Partition Administration GuideLast Updated: 2022-07-26 23:53:21 GMT-04:00 Copyright 2001-2022 Thales Group 229

Chapter 7: PED Authentication
5. Use pscp or scp to securely transfer the Remote PED host's NTLS certificate to the Luna Network HSM'sadmin account.>pscp .\cert\client\<certname> admin@<appliance_IP>:c:\Program Files\SafeNet\LunaClient>pscp .\cert\client\RemotePED1.pem [email protected]:[email protected]'s password:
RemotePED1.pem | 1 kB | 1.1 kB/s | ETA: 00:00:00 | 100%
6. Register the Luna Network HSM certificate with PEDserver. Use the mandatory -name argument to set aunique name for the appliance. The appliance listens for the SSL connection from PEDserver at the defaultport 9697.>"pedserver -appliance register" on page 263 -name <appliance_name> -certificate <cert_filename> -ip<appliance_IP> -port <port>
7. Open an SSH session to the Luna Network HSM and log in to LunaSH as admin.8. Register the PEDserver host certificate.
lunash:> hsm ped server register -certificate <certname>lunash:>hsm ped server register -certificate RemotePED1.pem
'hsm ped server register' successful.
Command Result : 0 (Success)
9. Initiate the connection between PEDserver and the Luna Network HSM.>"pedserver -mode connect" on page 267 -name <appliance_name>c:\Program Files\SafeNet\LunaClient>pedserver mode connect -name myLunaHSMPed Server Version 1.0.6 (10006)
Connecting to myLunaHSM. Please wait..
Successfully connected to myLunaHSM.
10.Using LunaSH, list the available registered Remote PED servers to find the server name (taken from thecertificate filename during registration). Select the server you want to use to authenticate credentials for theappliance.
lunash:> hsm ped server listlunash:> hsm ped select -host <server_name>lunash:>hsm ped server list
Number of Registered PED Server : 1
PED Server 1 : CN = RemotePED1
Command Result : 0 (Success)
lunash:>hsm ped select -host RemotePED1
Luna PED operation required to connect to Remote PED - use orange PED key(s).
Luna Network HSM 7 Partition Administration GuideLast Updated: 2022-07-26 23:53:21 GMT-04:00 Copyright 2001-2022 Thales Group 230

Chapter 7: PED Authentication
11.The Luna PED prompts for an orange PED key. Present the orange PED key with the correct RPK for theHSM.
The secure network connection is now in place between PEDserver and the appliance. You may now performany actions that require Remote PED authentication. The PED-initiated Remote PED connection does nottime out as long as PEDserver is running. If you wish to end the connection in order to connect to a differentinstance of PEDserver, see "Ending or Switching the Remote PED Connection" on the next page.
Workaround when you need PED-initiated Remote PED for ClientLunaCM, which is a client-side tool, is not able to launch a PED-initiated Remote PED connection if the firewallblocks the initial attempt. LunaCM does not have administrative access to the HSM appliance and is not aware ofPED-client settings on the HSM side (such as the port at which the HSM will look for the PED.
If you control two roles, if you are both the HSM owner/SO and the owner/user/PSO of the application partitionthat is assigned for crypto operations, then you can coordinate actions in Luna Shell (lunash command line) andin LunaCM at the client end, to establish a Remote PED connection.
Or, you can do the same, if you are the partition owner and are also able to coordinate closely with a person whohas administrative access to LunaSH on the HSM appliance.
> On the HSM appliance, use the hsm ped commands, as described earlier, to prepare the HSM for RemotePED.
• Register a PedServer's certificate with hsm ped server register.• Make a connection with the desired PedServer with hsm ped connect, specifying the IP of the Remote
PED Server and a port number that you know is accessible through the firewall.
> On the Remote PED host, use the lunacm ped commands to set the identity of the PedServer to match whatyou have told the HSM to expect
• Use ped set to provide the IP address and the port number that you determined (or that your colleaguedetermined) in the lunash session.
> On the HSM appliance, use the hsm ped select command to select the Remote PED server that you justconfigured, as the PED that will be requested by any upcoming HSM operations that need PEDauthentication.
> On the Client (which could also be the Remote PED host, or could be a separate computer/applicationserver), run a command that invokes PED operation, like the role login command.
> The HSM receives the command and looks to the PED (in this case the Remote PED) that has beenpreviously specified in lunash.
Example:Person with access to admin account on the Network HSM verfies that the HSM is expecting a Remote PEDconnection on a specific port, from a specific IP address -
Luna Network HSM 7 Partition Administration GuideLast Updated: 2022-07-26 23:53:21 GMT-04:00 Copyright 2001-2022 Thales Group 231

Chapter 7: PED Authentication
lunash:>hsm ped show
Default Remote PED Server Port: 1503<snip>Callback Server is running..
Callback Server Information:Hostname: sa7-78IP: 192.168.0.78Software Version: 2.0.1 (20001)
Operating Information:Admin Port: 1501
:<snip>:
Show command passed.
Command Result : 0 (Success)lunash:>If not, see earlier on this page to set up Remote PED.
Person at the PEDserver (which could be the same computer as the partition client, or could be a separatecomputer, dedicated to being PED server) uses LunaCM to ensure that the PEDserver is using the correct portand IP that the HSM (above) is expecting.lunacm:> ped set -ip pedserver_ip -port pedserver_portlunacm:> ped connectPerson who is the PSO of the current slot (which is the desired application partition on the distant Network HSM)runs the LunaCM commands that will require the HSM to look for PED interaction.lunacm:> partition init -label 550097_par1 -flunacm:> ped connectlunacm:> role login -n polunacm:> ped connectlunacm:> role init -n co
NOTE The use of lunacm:> ped connect before every partition administrative command isnot always necessary, but is a best-practice in unstable network conditions or in situationswhere network/firewall rules might drop the pedclient-pedserver connection frequently orunexpectedly.If the [re-] connection fails, have the person with "admin" access on the Network HSM re-establish the HSM side of the connection to the PEDserver (expected port and IP) before youissue any more client-side commands that need PED authentication.
Ending or Switching the Remote PED ConnectionPEDserver runs on the Remote PED host until explicitly stopped. PEDclient (running on the Luna Network HSM)behaves differently depending on the type of Remote PED connection. If you want to connect to a differentRemote PED server, or allow another HSM to use the current server, you must manually break the Remote PEDconnection.
Luna Network HSM 7 Partition Administration GuideLast Updated: 2022-07-26 23:53:21 GMT-04:00 Copyright 2001-2022 Thales Group 232

Chapter 7: PED Authentication
To end or switch an HSM-initiated Remote PED connection using LunaSH
1. End the Remote PED connection.
lunash:> hsm ped disconnect2. You are now able to initiate a connection to a different Remote PED host running PEDserver. You will need to
present the orange PED key.
lunash:> hsm ped connect -ip <PEDserver_IP> -port <port>
NOTE Running this command does not change the default Remote PED IP/port you may havepreviously set. If you want this new Remote PED server to be the default, set it using lunash:>hsm ped set -ip <PEDserver_IP> -port <port>.
To end or switch an HSM-initiated connection using LunaCM
1. End the Remote PED connection.
lunacm:> ped disconnect2. You are now able to initiate a connection to a different Remote PED host running PEDserver. You will need to
present the orange PED key.
lunacm:> ped connect -ip <PEDserver_IP> -port <port>
NOTE Running this command does not change the default Remote PED IP/port you may havepreviously set. If you want this new Remote PED server to be the default, set it using lunacm:>ped set -ip <PEDserver_IP> -port <port>.
To end or switch a PED-initiated Remote PED connection
1. End the Remote PED connection with the current host ().
lunash:> hsm ped deselect -host <server_name>2. Check the available list of Remote PED servers.
lunash:> hsm ped server listIf the Remote PED you want to use is not in the list, see "PED-Initiated Remote PED" on page 228.
3. The new Remote PED server must initiate the connection to the appliance.
> "pedserver -mode connect" on page 267 -name <appliance_name>4. In LunaSH, you are now able to select the new Remote PED server from the available list.
lunash:> hsm ped select -host <server_name>
Remote PED TroubleshootingIf you encounter problems at any stage of the Remote PED connection process, the following troubleshootingtips may help resolve the problem:
> "No Menu Appears on PED Display: Ensure Driver is Properly Installed" on the next page
> "RC_SOCKET_ERROR: PEDserver Requires Administrator Privileges" on the next page
Luna Network HSM 7 Partition Administration GuideLast Updated: 2022-07-26 23:53:21 GMT-04:00 Copyright 2001-2022 Thales Group 233

Chapter 7: PED Authentication
> "LUNA_RET_PED_UNPLUGGED: Reconnect HSM-initiated Remote PED Before IssuingCommands" below
> "Remote PED Firewall Blocking" on the next page
> "Remote PED Blocked Port Access" on page 236
> "ped connect Fails if IP is Not Accessible" on page 237
> "PEDserver on VPN fails" on page 237
> "PED connection Fails with Error: pedClient is not currently running" on page 237
No Menu Appears on PED Display: Ensure Driver is Properly InstalledIf the PED driver is not properly installed before connecting the PED to the workstation's USB port, the PEDscreen does not display the menu. If you encounter this problem, ensure that you have followed the entireprocedure at "Installing PEDserver and Setting Up the Remote Luna PED" on page 222.
RC_SOCKET_ERROR: PEDserver Requires Administrator PrivilegesIf PEDserver is installed in the default Windows directory, it requires Administrator privileges to make changes. ifyou run PEDserver as an ordinary user, you may receive an error like the following:c:\Program Files\SafeNet\LunaClient>pedserver mode startPed Server Version 1.0.6 (10006)Ped Server launched in startup mode.Starting background processFailed to recv query response command: RC_SOCKET_ERROR c0000500Background process failed to start : 0xc0000500 RC_SOCKET_ERRORStartup failed. : 0xc0000500 RC_SOCKET_ERRORTo avoid this error, when opening a command line for PEDserver operations, right-click the Command Prompticon and select Run as Administrator. Windows Server 20xx opens the Command Prompt as Administrator bydefault.
NOTE If you do not have Administrator permissions on the Remote PED host, contact your ITdepartment or install Luna HSM Client in a non-default directory (outside the Program Filesdirectory) that is not subject to permission restrictions.
LUNA_RET_PED_UNPLUGGED: Reconnect HSM-initiated Remote PED Before Issuing CommandsAs described in the connection procedures, HSM-initiated Remote PED connections time out after a defaultperiod of 1800 seconds (30 minutes). If you attempt PED authentication after timeout or after the connection hasbeen broken for another reason, the Luna PED will not respond and you will receive an error like this:lunash:>hsm login
Luna PED operation required to login as HSM Administrator - use Security Officer (blue) PEDkey.
Error: 'hsm login' failed. (300142 : LUNA_RET_PED_UNPLUGGED)
Command Result : 65535 (Luna Shell execution)To avoid this error, re-initiate the connection before issuing any commands requiring PED authentication:
lunash:> hsm ped connect -ip <PEDserver_IP> -port <PEDserver_port>
Luna Network HSM 7 Partition Administration GuideLast Updated: 2022-07-26 23:53:21 GMT-04:00 Copyright 2001-2022 Thales Group 234

Chapter 7: PED Authentication
lunacm:> ped connect -ip <PEDserver_IP> -port <PEDserver_port>
Remote PED Firewall BlockingIf you experience problems while attempting to configure a SafeNet Remote PED session over VPN, you mightneed to adjust Windows Firewall settings. If your security policy prohibits changes to Windows Firewall, you canuse a PED-initiated connection for HSM SO-level operations. See "PED-Initiated Remote PED" on page 228.
1. From the Windows Start Menu, select Control Panel.2. SelectWindows Firewall.3. Select Change notification settings.
4. In the dialog Customize settings for each type of network, go to the appropriate section and activateNotify me when Windows Firewall blocks a new program.
Luna Network HSM 7 Partition Administration GuideLast Updated: 2022-07-26 23:53:21 GMT-04:00 Copyright 2001-2022 Thales Group 235

Chapter 7: PED Authentication
With notifications turned on, a dialog box appears whenever Windows Firewall blocks a program, allowing you tooverride the block as Administrator. This allows PEDserver to successfully listen for PEDclient connections.
Remote PED Blocked Port AccessThe network might be configured to block access to certain ports. If ports 1503 (the default PEDserver listeningport) and 1502 (the administrative port) are blocked on your network, choose a different port when startingPEDserver, and when using lunacm:> ped connect or lunash:> hsm ped connect to initiate the Remote PEDconnection. Contact your network administrator for help.
You might choose to use a port-forwarding jump server, co-located with the Luna Network HSM(s) on thedatacenter side of the firewall. This can be a low-cost solution for port-blocking issues. It can also be used toimplement a PKI authentication layer for Remote PED or other SSH access, by setting up smart-card accesscontrol to the jump server.
For example, you can use a standard Ubuntu Server distribution with OpenSSH installed and no other changesmade to the standard installation with the following procedure:
1. Connect the Luna PED to a Windows host with Luna HSM Client installed and PEDserver running.
2. Open an Administrator command prompt on the Remote PED host and start the port-forwarding service.
>plink -ssh -N -T -R 1600:localhost:1503 <user>@<Ubuntu_server_IP>.3. Login to the appliance as admin and open the HSM-initiated connection.
lunash:> hsm ped connect -ip <Ubuntu_server_IP> -port 1600The Remote PED host initiates the SSH session, via the Ubuntu jump server, which returns to the Remote PEDhost running PEDserver.
Luna Network HSM 7 Partition Administration GuideLast Updated: 2022-07-26 23:53:21 GMT-04:00 Copyright 2001-2022 Thales Group 236

Chapter 7: PED Authentication
A variant of this arrangement also routes port 22 through the jump server, which allows administrative access tothe Luna Network HSM under the PKI access-control scheme.
ped connect Fails if IP is Not AccessibleOn a system with two network connections, if PEDserver attempts to use an IP address that is not externallyaccessible, lunacm:>ped connect can fail. To resolve this:1. Ensure that PEDserver is listening on the IP address that is accessible from outside.
2. If not, disable the network connection on which PEDserver is listening.3. Restart PEDserver and confirm that it is listening on the IP address that is accessible from outside.
PEDserver on VPN failsIf PEDserver is running on a laptop that changes location, the active network address changes even though thelaptop is not shutdown. If you unplugged from working at home, over the corporate VPN, commuted to the office,and reconnected the laptop there, PEDserver is still configured with the address you had while using the VPN.Running pedserver -mode stop does not completely clear all settings, so running pedserver -mode startagain fails with a message like "Startup failed. : 0x0000303 RC_OPERATION_TIMED_OUT". To resolve thisproblem:
1. Close the current command prompt window.2. Open a new Administrator command prompt.
3. Verify the current IP address.
>ipconfig4. Start PEDserver, specifying the new IP and port number ().
> "pedserver -mode start" on page 271 -ip <new_IP> -port <port>
PED connection Fails with Error: pedClient is not currently runningIt can happen that the callback server gets shut down, which prevents connections that use it, like Remote PEDand remote backup. To resolve this:
1. On the appliance, restart the callback service.lunash:> service restart cbs
2. Start the Remote PED connection again (initiated at the PED side or at the HSM side, as appropriate to yournetwork and firewall protocols).
The callback service also restarts when the appliance is rebooted.
Updating External Supply-Powered Luna PED FirmwareThis section describes how to update the firmware on your Luna PED that is powered by a power-block. Refer toCustomer Release Notes for valid update paths.
NOTE If your Luna PED is the newer model that is powered by a USB connection (and is notshipped with a power-block), see "Updating USB-Powered Luna PED Firmware" on page 241.
Luna Network HSM 7 Partition Administration GuideLast Updated: 2022-07-26 23:53:21 GMT-04:00 Copyright 2001-2022 Thales Group 237

Chapter 7: PED Authentication
Files Included in the Upgrade PackageThe update package includes the following files. Both files are required to successfully perform the update:
> Firmware update file for the desired version (<PED_firmware_file_name>.bin, where the version is in therange 2.7.x)
> if the package contains LunaPED_Update.exe use that; otherwise, download KB0015846 from the SupportPortal for a copy of LunaPED_Update.exe that works with PEDs powered by power block.
Preparing for the UpdateBefore you can install the new firmware, you must download the update package to the Windows Luna HSMClient workstation you will use to perform the update, and configure the PED to accept the update.
CAUTION! It is strongly recommended that you protect both your computer and Luna PEDwith an uninterruptible power supply during the upgrade operation. A power failure while any ofthe file images are being applied to the PED can result in loss of function that might require anRMA.
To prepare your computer for the update
1. Ensure that Luna HSM Client software, including the Remote PED option, is installed on the Windows PC youwill use to update the PED. To verify, ensure that the following files/directories are installed:
• C:\Program Files\SafeNet\LunaClient\RemotePEDDriver• C:\Program Files\SafeNet\LunaClient\pedserver.exe
2. The update files are provided in an archive file named for the PED upgrade part number. Extract the files tothe Windows Luna HSM Client workstation connected to the Luna PED you are updating.
3. On your Luna HSM Client workstation, open a command prompt window and move to the directory where youcopied the files in the update package.
To prepare the Luna PED for the firmware update
1. Connect the Luna PED to power (if you have an older PED that is not powered by the USB connection) andconnect the USB cable between the Luna PED and your Luna HSM Client workstation.
2. Allow the PED to boot normally until it reaches the default Local PED mode Awaiting command….
3. Press the < key to display theModemenu.4. Verify the currently-installed PED firmware version.
CAUTION! If you are updating an older PED (not powered by the USB connection), thisprocedure requires starting from version 2.6.0-6 or newer. If your PED displays an earlierversion, the update will fail and the PED will require RMA. If you have an older version, updatethe PED to 2.6.0-6 before continuing with this procedure.
5. Select 4 to display the Adminmenu.6. Select 7 for Software Update.
Luna Network HSM 7 Partition Administration GuideLast Updated: 2022-07-26 23:53:21 GMT-04:00 Copyright 2001-2022 Thales Group 238

Chapter 7: PED Authentication
7. Select 0 to reset the PED and immediately press and hold the < key while the PED is resetting. Continue tohold the < key until the Select Modemenu is displayed.
8. Select USB Mode (4) when prompted to Select Mode. The PED displays USB Mode.
Updating the Luna PED FirmwareDuring this procedure, each of the .bin files is individually uploaded from your computer to the Luna PED, andthen saved into permanent memory as the new version of that component. Individual responses are required atthe PED to accept and load each file.
CAUTION! Complete the following instructions in the order provided, or the PED could be leftin an unusable state.
Once you start transferring / uploading a file to the PED, pay attention and promptly respond to the PEDmessages to acknowledge the upload and then to confirm installation of that new file. The individual PEDoperations do impose a timeout. However, you can pause before the next file transfer step, as there is no timerestriction from one file upload to the next.
To update the Luna PED firmware
1. In the command prompt window on the Windows Luna HSM Client workstation you prepared to perform theupdate, execute the following command:
> LunaPED_Update.exe <PED_firmware_file_name>.bin
NOTE If you have both older Luna PEDs (that are powered by a power block), and the newerLuna PEDs (powered by USB connection and addressed in "Updating USB-Powered LunaPED Firmware" on page 241), then the LunaPED_Update.exe files for each are different andnot interchangeable.
2. On the Luna PED, select Yes in response to the prompt: Software update. Upload Image? YES/NO.Wait approximately six minutes. While transfer is in progress, the command line shows a progress indicator(remaining bytes to transfer), and the PED displays the following message:USB ModeSoftware updateUploading image
3. The output of the update command in the Windows command prompt should be similar to the following:LunaPED_Update v2.1.0-1 Nov 25 2013 12:44:48PED operation is required (to upload image)...(Sent 3199130 bytes in 327977000 microsecs).PED operation is required (to save image)...
4. If the image has been sent correctly, the PED displays the following message:USB ModeSoftware update** WARNING **A power failure during save is unsupported!Save Image? YES/NO
Select Yes to save the new image.
Luna Network HSM 7 Partition Administration GuideLast Updated: 2022-07-26 23:53:21 GMT-04:00 Copyright 2001-2022 Thales Group 239

Chapter 7: PED Authentication
5. Wait for 20-30 seconds. When the PED displays the following message, press the Enter key on the PEDkeypad to return to USB mode:Software updateSuccessPress ENTER
6. Unplug all cables from the PED and then reconnect to restart the PED. As the PED starts booting, it shoulddisplay the following messages:BOOT V.1.0.6-2,loading PED…Local PED Mode Awaiting command…
7. Press < to exit to the Select Modemenu. If the update was successful, the new PED version is displayed atthe bottom of the PED screen.
8. Your Luna PED is now updated and ready to use. Repeat the procedure for each Luna PED that you own.
TroubleshootingThis section provides guidance for resolving problems you may encounter when updating the PED firmware.
If your update attempt fails with a Receive error (rx error), check if you have Remote PED services running on thecomputer to which the PED is connected.Issue the command PedServer –m stop and restart the update to resolve the problem.
No PED PromptsYou must attend to the PED when image files are being applied. If no prompts appear on the PED shortly afteryou issue the LunaPED_Update.exe command, re-check your connections, as follows:> The PED power block must be connected to AC power and to the power socket on the PED.
> A USB connection must exist between a USB port on the sending computer and the USB-mini port on thePED (immediately beside the power socket).
> The PEDmust be powered on, and in USB mode.
Files Uploaded in the Wrong OrderIf you attempt to upload the files in the wrong order, the PED performs some verification at the end of a fileupload. If the PED displays a message similar to the following, it is a good indication that you uploaded the wrongfile first:Failure (VERIFY) (7)Press EnterYou are not given an opportunity to attempt to install/confirm the file if the upload does not verify.
To resolve the issue, restart the process from the beginning of these instructions, ensuring that you follow thesequence in these instructions, taking the upgrade files in the order specified. If that does not correct theproblem, contact Technical Support.
Upgrade Failed Message (or Similar)If the PED displays an Upgrade Failedmessage, or any message that does not say Upgrade in Progressfollowed by Upgrade Complete, before the Adminmenu appears, stop the upgrade process immediately.To resolve the issue, you can take the following actions:
Luna Network HSM 7 Partition Administration GuideLast Updated: 2022-07-26 23:53:21 GMT-04:00 Copyright 2001-2022 Thales Group 240

Chapter 7: PED Authentication
> Reboot the PED by disconnecting and then re-connecting the PED cables. This might clear the problem. Ifthe problem clears, the PED displays a Nothing to Upgrademessage. In this case, try the update again.
> If the PED shows Upgrade in Progress followed by Upgrade Failed! every time you reboot it, contactCustomer Support.
> You can re-upload the file and try again if the upload action failed to complete, or if you failed to acknowledgeit on the PED.
Updating USB-Powered Luna PED FirmwareThis section describes how to update the firmware on your Luna PED that is powered by USB connection. Referto Customer Release Notes for valid update paths.
To update the Luna PED Firmware from Version 2.8.0 to a newer version 2.8.x or 2.9.x, follow the steps below.
If your Luna PED is the older type, that was shipped with a power-block, then do not use these instructions; see"Updating External Supply-Powered Luna PED Firmware" on page 237 instead.
Preparing for the Upgrade
CAUTION! It is strongly recommended that both your computer and Luna PED be protectedby an uninterruptible power supply during the upgrade operation. A power failure while any ofthe file images is being applied to the PED can result in loss of function that might require repairat a Thales facility.
Prepare your computer for the upgradeThe needed upgrade files are provided in an archive file named for the PED upgrade part number. At time ofwriting this instruction, KB0023048 from the Support Portal contained the appropriate firmware and updater files.
1. Extract the files like ped-2.9.1-0-x-production-itb-real.bin (or newer if available) and LunaPED_Update.execontained in the zip file, to the Windows PC that is connected to the Luna PED that you are upgrading.
NOTE If you have both older Luna PEDs (that are powered by a power block and addressedon "Updating External Supply-Powered Luna PED Firmware" on page 237), and the newerLuna PEDs (powered by USB connection and addressed on this page), then the LunaPED_Update.exe files for each are different and not interchangeable.
2. On your Windows PC, open a command prompt window and move to the directory where you copied the filesin the upgrade package.
Prepare the Luna PED for the firmware upgrade1. Ensure that the Luna client, including the Remote PED option, is installed on your Windows PC. To verify,
ensure that the following files / directories are installed:
• C:\Program Files\SafeNet\LunaClient\RemotePEDDriver
• C:\Program Files\SafeNet\LunaClient\pedserver.exe
Luna Network HSM 7 Partition Administration GuideLast Updated: 2022-07-26 23:53:21 GMT-04:00 Copyright 2001-2022 Thales Group 241

Chapter 7: PED Authentication
2. Connect the USB data cable between the USB-mini port on top of the Luna PED and a USB port on yourcomputer.
NOTE LUNA PED version 2.8.X (or 2.9.x) is powered by the USB port; a separate powersupply to the Luna PED is not provided nor required.
3. Allow the PED to boot normally until it reaches the default “Local PEDmode Awaiting command…”
4. Press the < key to display theModemenu.5. Verify the PED version – the bottom line of the PED display should say “PED V.2.8.0”
CAUTION! If any other version is shown, stop, acquire a factory shipped LUNA PED version2.8.0, and then return and resume these instructions. If your LUNA PED version is older than2.8.0 (such as 2.6.x) it can only ever be updated to version 2.7.x - see "Updating ExternalSupply-Powered Luna PED Firmware" on page 237 for the relevant update instructions.
6. Select 4 to display the Adminmenu.7. Select 7 for Software Update.
Upgrading the Luna PED Firmware to Version 2.9.0 (or newer)During this procedure, the .bin file is individually uploaded from your computer to the Luna PED, and then savedinto permanent memory as the new version. Individual responses are required at the PED to accept and load thefile.
CAUTION! Complete the instructions in the order provided, otherwise the PED could be left inan unusable state.
Once you start transferring / uploading a file to the PED, pay attention and promptly respond to the PEDmessages to acknowledge the upload and then to confirm installation of that new file. The individual PEDoperations do impose a timeout. However, you can pause before the next file transfer step, as there is no timerestriction from one file upload to the next.
Transfer and confirm the PED FW Update1. In a command prompt window, on your Windows PC, from the directory where you copied the files in the
upgrade package, execute the following command:
Prompt > LunaPED_Update.exe ped-2.9.x-y-z-production-itb-real.bin (where x-y-z are numbers specificto the released build of the firmware)
2. At the Luna PED keypad, select Yes in response to the prompt.3. The output of the update command in the Windows command prompt should be similar to the following:
LunaPED_Update v3.0.0-1 May 10 2017 22:52:25PED operation is required (to upload image)...(Sent xxxxxxx bytes in xxxxxxxxx microsecs).PED operation is required (to save image)...
4. If the image has transferred correctly, Luna PED displays the following message:
Luna Network HSM 7 Partition Administration GuideLast Updated: 2022-07-26 23:53:21 GMT-04:00 Copyright 2001-2022 Thales Group 242

Chapter 7: PED Authentication
USB Mode Software update** WARNING **A power failure during save is unsupported!Save Image? YES/NO"
5. Select Yes to save the new image.
6. Wait approximately 20 seconds. The PED displays the following message:USB Mode Software update Success Press ENTER
Press the Enter key on the PED to continue.
7. Unplug all cables from the PED and then reconnect to restart the PED.
8. As the PED starts booting, it should show “BOOT V.1.1.0-1”, then “loading PED…,” and then should finish in“Local PEDMode awaiting command…”
If you press “<” to exit to “Select Mode” menu, the bottom of the PED screen should now show "PED V.2.8.1-0" (or "PED V.2.9.0" or a newer version, as one becomes available).
DoneLuna PED is now updated and ready to use. Repeat the above sequence for each USB-powered Luna PED thatyou want to upgrade.
PED Key ManagementOnce you have established a Local or Remote PED connection, you can proceed with initializing roles on theHSM that require PED authentication. The procedures in this section will guide you through the PED prompts ateach stage of PED key creation, PED authentication, and other operations with the Luna PED.
> "Creating PED Keys" below
• "Stage 1: Reusing Existing PED Keys" on page 245
• "Stage 2: Defining M of N" on page 246
• "Stage 3: Setting a PED PIN" on page 247
• "Stage 4: Duplicating New PED Keys" on page 248
> "Performing PED Authentication" on page 249
> "Consequences of Losing PED Keys" on page 250
> "Identifying a PED Key Secret" on page 253
> "Duplicating Existing PED Keys" on page 254
> "Changing a PED Key Secret" on page 255
Creating PED KeysWhen you initialize an HSM, partition, or role, the Luna PED issues a series of prompts for you to follow to createyour PED keys. PED key actions have a timeout setting (default: 200 seconds); ensure that you have everything
Luna Network HSM 7 Partition Administration GuideLast Updated: 2022-07-26 23:53:21 GMT-04:00 Copyright 2001-2022 Thales Group 243

Chapter 7: PED Authentication
you need before issuing an initialization command. The requirements for the operation depend on the PED keyscheme you have chosen in advance, based on your organization's security policy. Consider these guidelinesbefore you begin:
> If you are reusing an existing PED key or keyset, the owners of those keys must be present with their keysand PED PINs ready.
> If you plan to use an M of N authentication scheme (quorum, or split-secret), all the parties involved must bepresent and ready to create their authentication split. It is advisable for each key holder to create backupduplicates, so you must have a sufficient number of blank or rewritable PED keys ready before you begin.
> If you plan to make backup duplicates of PED keys, you must have a sufficient number of blank or rewritablePED keys ready.
> If you plan to use PED PINs, ensure that they can be privately entered on the Luna PED and memorized, orwritten down and securely stored.
Whenever the Luna PED prompts you to insert a PED key, use the USB port on the top of the PED:
To initiate PED key creation
1. Issue one of the following LunaSH or LunaCM commands to initialize the applicable role, domain, or vector.
• Blue HSM SO and Red HSM Domain Keys:lunash:> hsm init
• Orange Remote PED Key:lunash:> hsm ped vector init
• Blue Partition SO and Red Partition Domain Keys:lunacm:> partition init
• Black Crypto Officer Key:lunacm:> role init -name co
• Gray Crypto User Key:lunacm:> role init -name cu
• White Audit User Key:lunash:> audit init
The Luna PED responds, displaying:
Luna Network HSM 7 Partition Administration GuideLast Updated: 2022-07-26 23:53:21 GMT-04:00 Copyright 2001-2022 Thales Group 244

Chapter 7: PED Authentication
NOTE The PED screen prompts for a Black PED Key for any of "User", "Crypto Officer","Limited Crypo Officer", "Crypto User". The PED is not aware that the key you present has ablack or a gray sticker on it. The colored stickers are visual identifiers for your convenience inkeeping track of your PED Keys. You differentiate by how you label, and how you use, a givenphysical key that the PED sees as "black" (once it has been imprinted with a secret).
2. Follow the PED prompts in the following four stages.
Stage 1: Reusing Existing PED KeysIf you want to use a PED key with an existing authentication secret, have the key ready to present to the PED.Reasons for reusing keys may include:
> You want to use the same blue SO key to authenticate multiple HSMs/partitions
> You want to initialize a partition in an already-existing cloning domain (to be part of an HA group)
CAUTION! The initialization procedure is the only opportunity to set the HSM/partition'scloning domain. It cannot be changed later without reinitializing the HSM, or deleting andrecreating the partition. Ensure that you have the correct red key(s) ready.
See "Shared PED Key Secrets" on page 201 and "Domain PED Keys" on page 202 for more information.
1. The first PED prompt asks if you want to reuse an existing PED key. Press Yes or No on the keypad tocontinue.
• If you select No, skip to "Stage 2: Defining M of N" on the next page.
• If you select Yes, the PED prompts you for a key. Insert the key you want to reuse and press Enter.
2. If the key has a PED PIN, the PED prompts you to enter it now. Enter the PIN on the keypad and press Enter.
Luna Network HSM 7 Partition Administration GuideLast Updated: 2022-07-26 23:53:21 GMT-04:00 Copyright 2001-2022 Thales Group 245

Chapter 7: PED Authentication
3. If the key is part of an M of N scheme, the PED prompts you for the next key. You must present enough keysplits (M) to reconstitute the entire authentication secret.
4. The PED asks if you want to create a duplicate set of keys. If you are duplicating an M of N keyset, you need anumber of blank or rewritable keys equal to N.
• If you select No, the process is complete.• If you select Yes, complete "Stage 3: Setting a PED PIN" on the next page for all the duplicate keys you
want.
Stage 2: Defining M of NIf you chose to create a new keyset, the Luna PED prompts you to define the M of N scheme (quorum and pool ofsplits) for the role, domain, or vector. See "M of N Split Secrets (Quorum)" on page 203 for more information. Ifyou do not want to use M of N (authentication by one PED key), enter a value of 1 for both M and N.
1. The PED prompts you to enter a value for M (the minimum number of split-secret keys required toauthenticate the role, domain, or vector - the quorum). Set a value for M by entering it on the keypad andpressing Enter. If you are not using an M of N scheme, enter "1".
2. The PED prompts you to enter a value for N -- the total number of split-secret keys you want to create (thepool of splits from which a quorum will be drawn). Set a value for N by entering it on the keypad and pressingEnter. If you are not using an M of N scheme, enter "1".
Luna Network HSM 7 Partition Administration GuideLast Updated: 2022-07-26 23:53:21 GMT-04:00 Copyright 2001-2022 Thales Group 246

Chapter 7: PED Authentication
3. Continue to "Stage 3: Setting a PED PIN" below. You must complete stage 3 for each key in the M of Nscheme.
Stage 3: Setting a PED PINIf you are creating a new key or M of N split, you have the option of setting a PED PIN that must be entered by thekey owner during authentication. PED PINs must be 4-48 digits long. Do not use 0 for the first digit. See "PEDPINs" on page 202 for more information.
CAUTION! If you forget your PED PIN, it is the same as losing the PED key entirely; youcannot authenticate the role. See "Consequences of Losing PED Keys" on page 250.
1. The PED prompts you to insert a blank or reusable PED key. If you are creating an M of N split, the number ofalready-created splits is displayed.
2. Insert the PED key and press Enter. The PED prompts for confirmation.
If the PED key you inserted is not blank, you must confirm twice that you want to overwrite it.
3. The PED prompts you for a PIN.
• If you want to set a PED PIN, enter it on the keypad and press Enter. Enter the PIN again to confirm it.
Luna Network HSM 7 Partition Administration GuideLast Updated: 2022-07-26 23:53:21 GMT-04:00 Copyright 2001-2022 Thales Group 247

Chapter 7: PED Authentication
• If you do not want to set a PED PIN, press Enter twice without entering anything on the keypad. You willnot be asked to enter a PIN for this key in the future.
4. If there are more keys in the M of N scheme, repeat this stage. Otherwise, continue to "Stage 4: DuplicatingNew PED Keys" below.
Stage 4: Duplicating New PED KeysYou now have the option to create duplicates of your newly-created PED key(s). There are two reasons to do thisnow:
> If you want more than one person to be able to authenticate a role, you can create multiple keys for that rolenow, with each person being able to set their own PED PIN. Duplicates you create later are intended asbackups, and will have the same PED PIN (or none) as the key they are copied from.
> In case of key loss or theft.
You can make backups now or later. See also "Duplicating Existing PED Keys" on page 254.
1. The next PED prompt asks if you want to create a duplicate keyset (or another duplicate). Press Yes or No onthe keypad to continue.
• If you select No, the key creation process is complete.• If you select Yes, complete "Stage 3: Setting a PED PIN" on the previous page for the duplicate keyset.
You can set the same PED PIN to create a true copy, or set a different PED PIN for each duplicate.
2. If you specified an M of N scheme, you are prompted to repeat "Stage 3: Setting a PED PIN" on the previouspage for each M of N split. Otherwise, the key creation process is complete.
Luna Network HSM 7 Partition Administration GuideLast Updated: 2022-07-26 23:53:21 GMT-04:00 Copyright 2001-2022 Thales Group 248

Chapter 7: PED Authentication
Performing PED AuthenticationWhen connected, the Luna PED responds to authentication commands in LunaSH or LunaCM. Commands thatrequire PED actions include:
> Role login commands (blue, black, gray, or white PED keys)
> Backup/restore commands (red PED keys)
> Remote PED connection commands (orange PED key)
NOTE The PED screen prompts for a Black PED Key for any of "User", "Crypto Officer","Limited Crypo Officer", "Crypto User". The PED is not aware that the key you present has ablack or a gray sticker on it. The colored stickers are visual identifiers for your convenience inkeeping track of your PED Keys. You differentiate by how you label, and how you use, a givenphysical key that the PED sees as "black" (once it has been imprinted with a secret).
When you issue a command that requires PED interaction, the interface returns a message like the following:lunash:>hsm login
Luna PED operation required to login as HSM Administrator - use Security Officer (blue) PEDkey.The PED briefly displays the following message before prompting you for the appropriate PED key:
Whenever the Luna PED prompts you to insert a PED key, use the USB port on the top of the PED:
CAUTION! Multiple failed authentication attempts result in zeroization of the HSM or partition,or role lockout, depending on the role. This is a security measure designed to thwart repeated,unauthorized attempts to access cryptographic material. For details, see Logging In as HSMSecurity Officer or "Before you can perform administrative tasks on the partition or its storedcryptographic objects, you must log in with the appropriate role:" on page 315.
To perform PED authentication
1. The PED prompts for the corresponding PED key. Insert the PED key (or the first M of N split-secret key) andpress Enter.
Luna Network HSM 7 Partition Administration GuideLast Updated: 2022-07-26 23:53:21 GMT-04:00 Copyright 2001-2022 Thales Group 249

Chapter 7: PED Authentication
lunacm:>role login -name po
Please attend to the PED.
• If the key you inserted has an associated PED PIN, continue to step 2.
• If the key you inserted has no PED PIN, but it is an M of N split, skip to step 3.
• Otherwise, authentication is complete and the PED returns control to the command interface.Command Result : No Error
2. The PED prompts for the PED PIN. Enter the PIN on the keypad and press Enter.
• If the key you inserted is an M of N split, continue to step 3.
• Otherwise, authentication is complete and the PED returns control to the command interface.Command Result : No Error
3. The PED prompts for the next M of N split-secret key. Insert the next PED key and press Enter.
• If the key you inserted has an associated PED PIN, return to step 2.
• Repeat steps 2 and/or 3 until the requisite M number of keys have been presented to the PED. At thispoint, authentication is complete and the PED returns control to the command interface.Command Result : No Error
Consequences of Losing PED KeysPED keys are the only means of authenticating roles, domains, and RPVs on the PED-authenticated LunaNetwork HSM. Losing a PED keyset effectively locks the user out of that role. Always keep secure backups ofyour PED keys, including M of N split secrets. Forgetting the PED PIN associated with a key is equivalent tolosing the key entirely. Losing a split-secret key is less serious, unless enough splits are lost so that M cannot besatisfied.
Luna Network HSM 7 Partition Administration GuideLast Updated: 2022-07-26 23:53:21 GMT-04:00 Copyright 2001-2022 Thales Group 250

Chapter 7: PED Authentication
If a PED key is lost or stolen, log in with one of your backup keys and change the existing PED secretimmediately, to prevent unauthorized HSM access.
The consequences of a lost PED key with no backup vary depending on the type of secret:
> "Blue HSM SO Key" below
> "Red HSM Domain Key" below
> "Orange Remote PED Key" below
> "Blue Partition SO Key" on the next page
> "Red Partition Domain Key" on the next page
> "Black Crypto Officer Key" on the next page
> "Gray Crypto User Key" on page 253
> "White Audit User Key" on page 253
Blue HSM SO KeyIf the HSM SO secret is lost, you can no longer perform administrative tasks on the HSM, including partitioncreation and client assignment. If you use the same blue SO key for your HSM backup partitions, the contents ofthe HSM SO space are unrecoverable. Take the following steps:
1. Contact all Crypto Officers and have them immediately make backups of their existing partitions.
2. When all important partitions are backed up, execute a factory reset of the HSM.
3. Initialize the HSM and create a new HSM SO secret. Use the original red HSM cloning domain key.
4. Restore the HSM SO space contents from a recent backup, if you have one.
5. Recreate the partitions and reassign them to their respective clients.
6. Partition SOs must initialize the new partitions using their original blue and red key(s), and initialize the CryptoOfficer role (and Activation secret, if applicable). Supply the new black CO keys to the Crypto Officers.
7. Crypto Officers must change the login credentials from the new black CO key to their original black keys (andreset the Activation secret password, if applicable).
8. Crypto Officers can now restore all partition contents from backup.
9. If you are using Remote PED, you must recreate the Remote PED Vector (RPV). Reuse the original orangekey.
Red HSM Domain KeyIf the HSM Key Cloning Vector is lost, you can no longer perform backup/restore operations on the HSM SOspace(s). If the HSM is factory-reset, the contents of the HSM SO space are unrecoverable. Follow the sameprocedure as you would if you lost the blue HSM SO key, but you cannot restore the HSM SO space frombackup.
Orange Remote PED KeyIf the Remote PED Vector is lost, create a new one and distribute a copy to the administrator of each RemotePED server. See "Initializing the Remote PED Vector and Creating an Orange Remote PED Key" on page 219.
Luna Network HSM 7 Partition Administration GuideLast Updated: 2022-07-26 23:53:21 GMT-04:00 Copyright 2001-2022 Thales Group 251

Chapter 7: PED Authentication
Blue Partition SO KeyIf the Partition SO secret is lost, you can no longer perform administrative tasks on the partition. Take thefollowing steps:
1. Have the Crypto Officer immediately make a backup of the partition objects.2. Have the HSM SO delete the partition, create a new one, and assign it to the same client.
3. Initialize the new partition with a new blue Partition SO key and the original red cloning domain key(s).
4. Initialize the Crypto Officer role (and Activation secret, if applicable). Supply the new black CO key to theCrypto Officer.
5. The Crypto Officer must change the login credentials from the new black CO key to their original black key(and reset the Activation secret password, if applicable).
6. The Crypto Officer can now restore all partition contents from backup.
Red Partition Domain KeyIf the Partition Key Cloning Vector is lost, you can no longer perform backup/restore operations on the partition(s), or make changes to HA groups in that cloning domain. You can still perform all other operations on thepartition. Take the following steps:
1. Have the HSM SO create a new partition (or multiple partitions, to replace the entire HA group) and assign itto the same client(s).
2. Initialize the partition(s)with a new cloning domain.
3. Initialize the Crypto Officer role with the original black Crypto Officer key (and Activation password, ifapplicable).
4. Create objects on the new partition to replace those on the original partition.
5. As soon as possible, change all applications to use the objects on the new partition.
6. When objects on the original partition are no longer in production use, the HSM SO can delete the originalpartition.
Black Crypto Officer KeyIf the Crypto Officer secret is lost, you can no longer create objects on the partition, or perform backup/restoreoperations. You might still be able to use the partition, depending on the following criteria:
> PIN reset by Partition SO:• If HSM policy 15: Enable SO reset of partition PIN is set to 1, the Partition SO can reset the Crypto
Officer secret and create a new black CO key.
lunacm:>role resetpw -name co• If this policy is set to 0 (default), the CO is locked out unless other criteria in this list apply.
> Partition Activation:• If the partition is Activated, you can still access it for production using the CO challenge secret. Change
your applications to use objects on a new partition as soon as possible.
• If the partition is not Activated, read-only access of essential objects might still be available via the CryptoUser role.
Luna Network HSM 7 Partition Administration GuideLast Updated: 2022-07-26 23:53:21 GMT-04:00 Copyright 2001-2022 Thales Group 252

Chapter 7: PED Authentication
> Crypto User• If the Crypto User is initialized, you can use the CU role for read-only access to essential partition objects
while you change your applications to use objects on a new partition.
If none of these criteria apply, the contents of the partition are unrecoverable.
Gray Crypto User KeyIf the Crypto User secret is lost, the Crypto Officer can reset the CU secret and create a new gray key:
lunacm:>role resetpw -name cu
White Audit User KeyIf the Audit User secret is lost, you can no longer cryptographically verify existing audit logs or make changes tothe audit configuration. The existing logs can still be viewed. Re-initialize the Audit User role on the affectedHSMs, using the same white key for HSMs that will verify each other's logs.
Identifying a PED Key SecretYou can use this procedure to identify the type of secret (role, domain, or RPV) stored on an unidentified PEDkey. This procedure will not tell you:
> identifying information about the HSM the key is associated with
> whether the key is part of an M of N scheme, or how many keys are in the set
> whether the key has a PED PIN assigned
> who the key belongs to
You require:
> Luna PED in Admin Mode (see "Changing Modes" on page 209)
> the key you want to identify
To identify the type of secret stored on a PED key
1. Insert the PED key you want to identify.
2. From the Admin mode menu, press 1 on the keypad to select the PED Key option.
3. From the PED Key mode menu, press 3 on the keypad to select the List types option.
Luna Network HSM 7 Partition Administration GuideLast Updated: 2022-07-26 23:53:21 GMT-04:00 Copyright 2001-2022 Thales Group 253

Chapter 7: PED Authentication
The PED secret type is identified on-screen.
Duplicating Existing PED KeysDuring the key creation process, you have the option to create multiple copies of PED keys. If you want to makebackups of your keys later, you can use this procedure to copy PED keys. You require:
> Luna PED in Admin Mode (see "Changing Modes" on page 209)
> Enough blank or rewritable keys to make your copies
The PED key is duplicated exactly by this process. If there is a PED PIN assigned, the same PIN is assigned tothe duplicate key. If the key is part of an M of N scheme, the duplicates may not be used in the same loginprocess to satisfy the M of N requirements. You must also have copies of the other keys in the M of N keyset.See "M of N Split Secrets (Quorum)" on page 203.
To duplicate an existing PED key
1. Insert the PED key you want to duplicate. Have a blank or rewritable PED key ready.
2. From the Admin mode menu, press 1 on the keypad to login to the PED key.
3. Press 7 on the keypad and follow the on-screen instructions.
Luna Network HSM 7 Partition Administration GuideLast Updated: 2022-07-26 23:53:21 GMT-04:00 Copyright 2001-2022 Thales Group 254

Chapter 7: PED Authentication
Changing a PED Key SecretIt may be necessary to change the PED secret associated with a role. Reasons for changing credentials include:
> Regular credential rotation as part of your organization's security policy
> Compromise of a role due to loss or theft of a PED key
> Personnel changes in your organization or changes to individual security clearances
> Changes to your security scheme (implementing/revoking M of N, PED PINs, or shared secrets)
The procedure for changing a PED key credential depends on the type of key. Procedures for each type areprovided below.
CAUTION! If you are changing a PED credential that is shared among multipleHSMs/partitions/roles, always keep at least one copy of the old keyset until the affectedHSMs/partitions/roles are all changed to the new credential. When changing PED credentials,you must always present the old keyset first; do not overwrite your old PED keys until you haveno further need for them.
> "Blue HSM SO Key" below
> "Red HSM Domain Key" below
> "Orange Remote PED Key" on the next page
> "Blue Partition SO Key" on the next page
> "Red Partition Domain Key" on the next page
> "Black Crypto Officer Key" on the next page
> "Gray Crypto User Key" on page 257
> "White Audit User Key" on page 257
Blue HSM SO KeyThe HSM SO can use this procedure to change the HSM SO credential.
To change the blue HSM SO PED key credential
1. In LunaSH, log in as HSM SO.
lunash:> hsm login2. Initiate the PED key change.
lunash:> hsm changepw3. You are prompted to present the original blue key(s) and then to create a new HSM SO keyset. See "Creating
PED Keys" on page 243.
Red HSM Domain KeyIt is not possible to change an HSM's cloning domain without factory-resetting the HSM and setting the newcloning domain as part of the standard initialization procedure.
Luna Network HSM 7 Partition Administration GuideLast Updated: 2022-07-26 23:53:21 GMT-04:00 Copyright 2001-2022 Thales Group 255

Chapter 7: PED Authentication
CAUTION! If you set a different cloning domain for the HSM, you cannot restore the HSM SOspace from backup.
Orange Remote PED KeyThe HSM SO can use this procedure to change the Remote PED Vector (RPV) for the HSM.
To change the RPV/orange key credential
1. In LunaSH, log in as HSM SO.
lunash:> hsm login2. Initialize the RPV.
lunash:> hsm ped vector initYou are prompted to create a new Remote PED key.
3. Distribute a copy of the new orange key to the administrator of each Remote PED server.
Blue Partition SO KeyThe Partition SO can use this procedure to change the Partition SO credential.
To change a blue Partition SO PED key credential
1. In LunaCM, log in as Partition SO.lunacm:> role login -name po
2. Initiate the PED key change.
lunacm:> role changepw -name po3. You are prompted to present the original blue key(s) and then to create a new Partition SO keyset.
Red Partition Domain KeyIt is not possible to change a partition's cloning domain. A new partition must be created and initialized with thedesired domain. The new partition will not have access to any of the original partition's backups. It cannot bemade a member of the same HA group as the original.
Black Crypto Officer KeyThe Crypto Officer can use this procedure to change the Crypto Officer credential.
To change a black Crypto Officer PED key credential
1. In LunaCM, log in as Crypto Officer.lunacm:> role login -name co
2. Initiate the PED key change.lunacm:> role changepw -name co
3. You are prompted to present the original black key(s) and then to create a new Crypto Officer keyset.
Luna Network HSM 7 Partition Administration GuideLast Updated: 2022-07-26 23:53:21 GMT-04:00 Copyright 2001-2022 Thales Group 256

Chapter 7: PED Authentication
Gray Crypto User KeyThe Crypto User can use this procedure to change the Crypto User credential.
To change a gray Crypto User PED key credential
1. In LunaCM, log in as Crypto User.lunacm:> role login-name cu
2. Initiate the PED key change.lunacm:> role changepw -name cu
3. You are prompted to present the original gray key(s) and then to create a new Crypto User keyset.
NOTE The PED screen prompts for a Black PED Key for any of "User", "Crypto Officer","Limited Crypo Officer", "Crypto User". The PED is not aware that the key you present has ablack or a gray sticker on it. The colored stickers are visual identifiers for your convenience inkeeping track of your PED Keys. You differentiate by how you label, and how you use, a givenphysical key that the PED sees as "black" (once it has been imprinted with a secret).
White Audit User KeyThe Audit User can use this procedure to change the Audit User credential.
To change the white Audit User PED key credential
1. Log into LunaSH as audit.2. Log in as the Audit User.
lunash:> audit login3. Initiate the PED key change.
lunash:> audit changepwd4. You are prompted to present the original white key(s) and then to create a new Audit User keyset.
PEDserver and PEDclientYou can use the PEDserver and PEDclient utilities to manage your remote PED devices.
The PEDserver UtilityPEDserver is required to run on any computer that has a SafeNet Remote PED attached, and is providing PEDservices.
The PEDserver utility has one function. It resides on a computer with an attached Luna PED (in Remote Mode),and it serves PED operations to an instance of PEDclient that operates on behalf of an HSM. The HSM could belocal to the computer that has PEDserver running, or it could be on another HSM host computer at some distantlocation.
Luna Network HSM 7 Partition Administration GuideLast Updated: 2022-07-26 23:53:21 GMT-04:00 Copyright 2001-2022 Thales Group 257

Chapter 7: PED Authentication
PEDserver can also run in peer-to-peer mode, where the server initiates the connection to the Client. This isneeded when the Client (usually Luna Network HSM) is behind a firewall that forbids outgoing initiation ofconnections.
See "pedserver" on the next page.
The PEDclient UtilityPEDclient is required to run on any host of an HSM that needs to be served by a Remote Luna PED. PEDclientmust also run on any host of a Remote Backup HSM that will be serving remote primary HSMs.
The PEDclient utility performs the following functions:
> It mediates between the HSM where it is installed and the Luna PED where PEDserver is installed, to providePED services to the requesting HSM(s).
> It resides on a computer with RBS and an attached Luna Backup HSM, and it connects with another instanceof PEDclient on a distant host of an HSM, to provide the link component for Remote Backup Service. See"Configuring a Remote Luna Backup HSM (G5) Server" on page 424 for more information.
> It acts as the logging daemon for HSM audit logs.
NOTE PEDclient exists on the Luna Network HSM appliance, but is not directly exposed.Instead, the relevant features are accessed via LunaSH hsm ped commands.
Thus, for example, in the case where an administrative workstation or laptop has both a Remote PED and aRemote Backup HSM attached, PEDclient would perform double duty. It would link with a locally-runninginstance of PEDserver, to convey HSM requests from the locally-connected Backup HSM to the locally-connected PED, and return the PED responses. As well, it would link a locally-running instance of RBS and adistant PEDclient instance to mediate Remote Backup function for that distant HSM's partitions. See"Configuring a Remote Luna Backup HSM (G5) Server" on page 424 for more information.
See "pedclient" on page 274.
Luna Network HSM 7 Partition Administration GuideLast Updated: 2022-07-26 23:53:21 GMT-04:00 Copyright 2001-2022 Thales Group 258

Chapter 7: PED Authentication
pedserverUse the pedserver commands to manage certificates in PEDserver and the appliance, initiate connectionsbetween the PED and HSM, and select the PED for HSM operation.
To run PEDserver from the command line, you must specify one of the following three options.
Syntaxpedserver
-appliance-mode-regen
Option Description
-appliance Registers or deregisters an appliance, or lists the registered appliances. Appliesto server-initiated (peer-to-peer) mode only. See "pedserver -appliance" on thenext page.
-mode Specifies the mode that the PED Server will be executed in. See "pedservermode" on page 264.
-regen Regenerates the client certificate. Applies to server-initiated (peer-to-peer) modeonly. See "pedserver -regen" on page 274.
Luna Network HSM 7 Partition Administration GuideLast Updated: 2022-07-26 23:53:21 GMT-04:00 Copyright 2001-2022 Thales Group 259

Chapter 7: PED Authentication
pedserver -applianceRegisters or deregisters an appliance, or lists the registered appliances. These commands apply to PED-initiated mode only.
Syntaxpedserver -appliance
deletelistregister
Option Description
delete Deregisters an appliance. See "pedserver -appliance delete" on the next page.
list Lists the registered appliances. See "pedserver -appliance list" on page 262.
register Registers an appliance. See "pedserver -appliance register" on page 263
Luna Network HSM 7 Partition Administration GuideLast Updated: 2022-07-26 23:53:21 GMT-04:00 Copyright 2001-2022 Thales Group 260

Chapter 7: PED Authentication
pedserver -appliance deleteDeregister an appliance certificate from PEDserver.
Syntaxpedserver -appliance delete -name <unique name> [-force]
Option Description
-name <unique name> Specifies the name of the appliance to be deregistered from PEDserver.
-force Optional parameter. Suppresses any prompts.
ExampleC:\Program Files\Safenet\LunaClient>pedServer –appliance delete –name hello -force
Luna Network HSM 7 Partition Administration GuideLast Updated: 2022-07-26 23:53:21 GMT-04:00 Copyright 2001-2022 Thales Group 261

Chapter 7: PED Authentication
pedserver -appliance listDisplays a list of appliances registered with PEDserver.
Syntaxpedserver -appliance list
ExampleC:\Program Files\Safenet\LunaClient>pedServer –appliance list>Server Name IP Address Port Number Certificate Common
Name____________________________________________________________________________abox 192.20.1.23 9697 test2bbox 192.20.12.34 9696 test1hello 192.20.1.34 9876 hellocert
Luna Network HSM 7 Partition Administration GuideLast Updated: 2022-07-26 23:53:21 GMT-04:00 Copyright 2001-2022 Thales Group 262

Chapter 7: PED Authentication
pedserver -appliance registerRegister an appliance certificate with PEDserver.
Syntaxpedserver -appliance register -name <unique name> -certificate <appliance certificate file> -ip <applianceserver IP address> [-port <port number>]
Option Description
-name <unique name> Specifies the name of the appliance to be registered to PED Server.
-certificate <appliancecertificate file>
Specifies the full path and filename of the certificate that was retrieved from theappliance.
-ip <appliance server IPaddress>
Specifies the IP address of the appliance server.
-port <port number> Optional field. Specifies the port number used to connect to the appliance(directly or indirectly according to network configuration).Range: 0-65525
ExampleC:\Program Files\Safenet\LunaClient>pedServer –appliance register –name hello -certificate the-best-appliance.pem -ip 123.321.123.321 –port 9697
Luna Network HSM 7 Partition Administration GuideLast Updated: 2022-07-26 23:53:21 GMT-04:00 Copyright 2001-2022 Thales Group 263

Chapter 7: PED Authentication
pedserver modeSpecifies the mode that PEDserver will be executed in.
Syntaxpedserver -mode
configconnectdisconnectshowstartstop
Option Description
config Modifies or shows existing configuration file settings. See "pedserver -modeconfig" on the next page.
connect Connects to the appliance. See "pedserver -mode connect" on page 267.
disconnect Disconnects from the appliance. See "pedserver -mode disconnect" onpage 268.
show Queries if PEDserver is currently running, and gets details about PEDserver.See "pedserver -mode show" on page 269.
start Starts PEDserver. See "pedserver -mode start" on page 271.
stop Shuts down PEDserver. See "pedserver -mode stop" on page 273
Luna Network HSM 7 Partition Administration GuideLast Updated: 2022-07-26 23:53:21 GMT-04:00 Copyright 2001-2022 Thales Group 264

Chapter 7: PED Authentication
pedserver -mode configShows and modifies internal PEDserver configuration file settings.
Syntaxpedserver -mode config -name <registered appliance name> -show -set [-port <server port>] [-set][-configfile <filename>] [-admin <admin port number>] [-eserverport <0 or 1>] [-eadmin <0 or 1>] [-idletimeout<int>] [-socketreadtimeout <int>] [-socketwritetimeout <int>] [-internalshutdowntimeout <int>] [-bgprocessstartuptimeout <int>] [-bgprocessshutdowntimeout <int>] [-logfilename <filename>] [-loginfo<0 or 1>] [-logwarning <0 or 1>] [-logerror <0 or 1>] [-logtrace <0 or 1>] [-maxlogfilesize <size>] [-pinginterval <int>] [-pingtimeout <int>]
Option Description
-name <registered appliancename>
Specifies the name of the registered appliance to be configured.
-show Displays the contents of the PEDserver configuration file.
-set Updates the PEDserver configuration file to be up to date with other suppliedoptions.
-port <server port> Optional. Specifies the server port number.
-configfile <filename> Optional. Specifies which PEDserver configuration file to use.
-admin <admin port number> Optional. Specifies the administration port number.
-eserverport <0 or 1> Optional. Specifies if the server port is on "localhost" or listening on theexternal host name.
-eadmin <0 or 1> Optional. Specifies if the administration is on "localhost" or listening on theexternal host name.
-idletimeout <int> Optional. Specifies the idle connection timeout, in seconds.
-socketreadtimeout <int> Optional. Specifies the socket read timeout, in seconds.
-socketwritetimeout <int> Optional. Specifies socket write timeout, in seconds.
-internalshutdowntimeout <int> Optional. Specifies the shutdown timeout for internal services, in seconds.
-bgprocessstartuptimeout<int>
Optional. Specifies the startup timeout for the detached process, in seconds.
-bgprocessshutdowntimeout<int>
Optional. Specifes the shutdown timeout for the detached process, inseconds.
Luna Network HSM 7 Partition Administration GuideLast Updated: 2022-07-26 23:53:21 GMT-04:00 Copyright 2001-2022 Thales Group 265

Chapter 7: PED Authentication
Option Description
-logfilename <filename> Optional. Specifies the log file name to which the logger should log messages.
-loginfo <0 or 1> Optional. Specifies if the logger should log "info" messages. Set to 0 for no, 1for yes.
-logwarning <0 or 1> Optional. Specifies if the logger should log "warning" messages. Set to 0 forno, 1 for yes.
-logerror <0 or 1> Optional. Specifies if the logger should log "error" messages. Set to 0 for no, 1for yes.
-logtrace <0 or 1> Optional. Specifies if the logger should log "trace" messages. Set to 0 for no, 1for yes.
-maxlogfilesize <size> Optional. Specifies the maximum log file size in KB.
-pinginterval <int> Optional. Specifies the time interval between pink commands, in seconds.
-pingtimeout <int> Optional. Specifies timeout of the ping response, in seconds.
ExampleC:\Program Files\Safenet\LunaClient>pedServer –mode config -name hellohi -show
Luna Network HSM 7 Partition Administration GuideLast Updated: 2022-07-26 23:53:21 GMT-04:00 Copyright 2001-2022 Thales Group 266

Chapter 7: PED Authentication
pedserver -mode connectConnects to the appliance by retrieving information (IP address, port, PEDserver certificate) from the PEDserverconfiguration file.
If the running mode is legacy, an error is returned. pedserver -mode connect is not a valid command for legacyconnections.
The connect command will try connecting to PEDclient 20 times before giving up.
Syntaxpedserver -mode connect -name <registered appliance name> [-configfile <filename>] [-logfilename<filename>] [-loginfo <0 or 1>] [-logwarning <0 or 1>] [-logerror <0 or 1>] [-logtrace <0 or 1>] [-maxlogfilesize <size>]
Option Description
-name <registered appliancename>
Specifies the name of the registered appliance to be connected to PEDserver.
-configfile <filename> Optional. Specifies which PEDserver configuration file to use.
-logfilename <filename> Optional. Specifies the log file name to which the logger should log messages.
-loginfo <0 or 1> Optional. Specifies if the logger should log "info" messages. Set to 0 for no, 1 foryes.
-logwarning <0 or 1> Optional. Specifies if the logger should log "warning" messages. Set to 0 for no,1 for yes.
-logerror <0 or 1> Optional. Specifies if the logger should log "error" messages. Set to 0 for no, 1for yes.
-logtrace <0 or 1> Optional. Specifies if the logger should log "trace" messages. Set to 0 for no, 1for yes.
-maxlogfilesize <size> Optional. Specifies the maximum log file size in KB.
ExampleC:\Program Files\Safenet\LunaClient>pedServer –mode connect -name hellohi>Connecting to Luna SA. Please wait....>Successfully connected to Luna SA.
Luna Network HSM 7 Partition Administration GuideLast Updated: 2022-07-26 23:53:21 GMT-04:00 Copyright 2001-2022 Thales Group 267

Chapter 7: PED Authentication
pedserver -mode disconnectDisconnects PEDserver from the appliance.
If the running mode is legacy, an error is returned. pedserver -mode disconnect is not a valid command forlegacy connections.
Termination of the connection may take a few minutes.
Syntaxpedserver -mode disconnect -name <registered appliance name> [-configfile <filename>] [-logfilename<filename>] [-loginfo <0 or 1>] [-logwarning <0 or 1>] [-logerror <0 or 1>] [-logtrace <0 or 1>] [-maxlogfilesize <size>]
Option Description
-name <registered appliancename>
Specifies the name of the registered appliance to be disconnected fromPEDserver.
-configfile <filename> Optional. Specifies which PEDserver configuration file to use.
-logfilename <filename> Optional. Specifies the log file name to which the logger should log messages.
-loginfo <0 or 1> Optional. Specifies if the logger should log "info" messages. Set to 0 for no, 1 foryes.
-logwarning <0 or 1> Optional. Specifies if the logger should log "warning" messages. Set to 0 for no,1 for yes.
-logerror <0 or 1> Optional. Specifies if the logger should log "error" messages. Set to 0 for no, 1for yes.
-logtrace <0 or 1> Optional. Specifies if the logger should log "trace" messages. Set to 0 for no, 1for yes.
-maxlogfilesize <size> Optional. Specifies the maximum log file size in KB.
ExampleC:\Program Files\Safenet\LunaClient>pedServer –mode disconnect -name hellohi>Connection to Luna SA terminated.
Luna Network HSM 7 Partition Administration GuideLast Updated: 2022-07-26 23:53:21 GMT-04:00 Copyright 2001-2022 Thales Group 268

Chapter 7: PED Authentication
pedserver -mode showQueries if PEDserver is currently running, and gets details about PEDserver.
Syntaxpedserver -mode show [-name <registered appliance name>] [-configfile <filename>] [-logfilename<filename>] [-loginfo <0 or 1>] [-logwarning <0 or 1>] [-logerror <0 or 1>] [-logtrace <0 or 1>] [-maxlogfilesize <size>]
Option Description
-name <registered appliancename>
Specifies the name of the registered appliance to be queried. Applies to server-initiated (peer-to-peer) mode only.
-configfile <filename> Optional. Specifies which PEDserver configuration file to use.
-logfilename <filename> Optional. Specifies the log file name to which the logger should log messages.
-loginfo <0 or 1> Optional. Specifies if the logger should log "info" messages. Set to 0 for no, 1 foryes.
-logwarning <0 or 1> Optional. Specifies if the logger should log "warning" messages. Set to 0 for no,1 for yes.
-logerror <0 or 1> Optional. Specifies if the logger should log "error" messages. Set to 0 for no, 1for yes.
-logtrace <0 or 1> Optional. Specifies if the logger should log "trace" messages. Set to 0 for no, 1for yes.
-maxlogfilesize <size> Optional. Specifies the maximum log file size in KB.
ExampleC:\Program Files\Safenet\LunaClient>pedServer –mode show -name hellohi>Ped Server launched in status mode.
Server Information:Hostname: ABC1-123123IP: 192.10.10.123Firmware Version: 2.5.0-1PedII Protocol Version: 1.0.1-0Software Version: 1.0.5 (10005)Ped2 Connection Status: ConnectedPed2 RPK Count 1Ped2 RPK Serial Numbers (1a123456789a1234)
Client Information: Not AvailableOperating Information:
Server Port: 1234External Server Interface: YesAdmin Port: 1235
Luna Network HSM 7 Partition Administration GuideLast Updated: 2022-07-26 23:53:21 GMT-04:00 Copyright 2001-2022 Thales Group 269

Chapter 7: PED Authentication
External Admin Interface: NoServer Up Time: 8 (secs)Server Idle Time: 8 (secs) (100%)Idle Timeout Value: 1800 (secs)Current Connection Time: 0 (secs)Current Connection Idle Time: 0 (secs)Current Connection Total Idle Time: 0 (secs) (100%)Total Connection Time: 0 (secs)Total Connection Idle Time: 0 (secs) (100%)
>Show command passed.
Luna Network HSM 7 Partition Administration GuideLast Updated: 2022-07-26 23:53:21 GMT-04:00 Copyright 2001-2022 Thales Group 270

Chapter 7: PED Authentication
pedserver -mode startStarts up PEDserver.
Syntaxpedserver -mode start [-name <registered appliance name>] [-ip <server_IP>] [-port <server port>] [-configfile <filename>] [-admin <admin port number>] [-eserverport <0 or 1>] [-eadmin <0 or 1>] [-idletimeout<int>] [-socketreadtimeout <int>] [-socketwritetimeout <int>] [-internalshutdowntimeout <int>] [-bgprocessstartuptimeout <int>] [-bgprocessshutdowntimeout <int>] [-logfilename <filename>] [-loginfo<0 or 1>] [-logwarning <0 or 1>] [-logerror <0 or 1>] [-logtrace <0 or 1>] [-maxlogfilesize <size>] [-pinginterval <int>] [-pingtimeout <int>] [-force]
Option Description
-admin <admin port number> Optional. Specifies the administration port number.
-bgprocessshutdowntimeout<int>
Optional. Specifes the shutdown timeout for the detached process, inseconds.
-bgprocessstartuptimeout<int>
Optional. Specifies the startup timeout for the detached process, in seconds.
-configfile <filename> Optional. Specifies which PED Server configuration file to use.
-eadmin <0 or 1> Optional. Specifies if the administration is on "localhost" or listening on theexternal host name.
-eserverport <0 or 1> Optional. Specifies if the server port is on "localhost" or listening on theexternal host name.
-force Optional parameter. Suppresses any prompts.
-idletimeout <int> Optional. Specifies the idle connection timeout, in seconds.
-internalshutdowntimeout <int> Optional. Specifies the shutdown timeout for internal services, in seconds.
-ip <server_IP> Optional. Specifies the server listening IP address. When running pedserver-mode start on an IPv6 network, you must include this option.
-logerror <0 or 1> Optional. Specifies if the logger should log "error" messages. Set to 0 for no, 1for yes.
-logfilename <filename> Optional. Specifies the log file name to which the logger should log messages.
-loginfo <0 or 1> Optional. Specifies if the logger should log "info" messages. Set to 0 for no, 1for yes.
Luna Network HSM 7 Partition Administration GuideLast Updated: 2022-07-26 23:53:21 GMT-04:00 Copyright 2001-2022 Thales Group 271

Chapter 7: PED Authentication
Option Description
-logtrace <0 or 1> Optional. Specifies if the logger should log "trace" messages. Set to 0 for no, 1for yes.
-logwarning <0 or 1> Optional. Specifies if the logger should log "warning" messages. Set to 0 forno, 1 for yes.
-maxlogfilesize <size> Optional. Specifies the maximum log file size in KB.
-name <registered appliancename>
-pinginterval <int> Optional. Specifies the time interval between pink commands, in seconds.
-pingtimeout <int> Optional. Specifies timeout of the ping response, in seconds.
-port <server port> Optional. Specifies the server port number.
-socketreadtimeout <int> Optional. Specifies the socket read timeout, in seconds.
-socketwritetimeout <int> Optional. Specifies socket write timeout, in seconds.
ExampleC:\Program Files\Safenet\LunaClient>pedServer –mode start -name hellohi -force>Ped Server launched in startup mode.>Starting background process>Background process started>Ped Server Process created, exiting this process.
Luna Network HSM 7 Partition Administration GuideLast Updated: 2022-07-26 23:53:21 GMT-04:00 Copyright 2001-2022 Thales Group 272

Chapter 7: PED Authentication
pedserver -mode stopStops PEDserver.
Syntaxpedserver -mode stop [-name <registered appliance name>] [-configfile <filename>] [-socketwritetimeout<int>] [-internalshutdowntimeout <int>] [-bgprocessstartuptimeout <int>] [-bgprocessshutdowntimeout<int>] [-logfilename <filename>] [-loginfo <0 or 1>] [-logwarning <0 or 1>] [-logerror <0 or 1>] [-logtrace <0 or1>] [-maxlogfilesize <size>]
Option Description
-name <registered appliancename>
Specifies the name of the registered appliance on which PEDserver will bestopped. Applies to server-initiated (peer-to-peer) mode only.
-configfile <filename> Optional. Specifies which PEDserver configuration file to use.
-socketreadtimeout <int> Optional. Specifies the socket read timeout, in seconds.
-socketwritetimeout <int> Optional. Specifies socket write timeout, in seconds.
-internalshutdowntimeout <int> Optional. Specifies the shutdown timeout for internal services, in seconds.
-bgprocessstartuptimeout<int>
Optional. Specifies the startup timeout for the detached process, in seconds.
-bgprocessshutdowntimeout<int>
Optional. Specifes the shutdown timeout for the detached process, inseconds.
-logfilename <filename> Optional. Specifies the log file name to which the logger should log messages.
-loginfo <0 or 1> Optional. Specifies if the logger should log "info" messages. Set to 0 for no, 1for yes.
-logwarning <0 or 1> Optional. Specifies if the logger should log "warning" messages. Set to 0 forno, 1 for yes.
-logerror <0 or 1> Optional. Specifies if the logger should log "error" messages. Set to 0 for no, 1for yes.
-logtrace <0 or 1> Optional. Specifies if the logger should log "trace" messages. Set to 0 for no, 1for yes.
-maxlogfilesize <size> Optional. Specifies the maximum log file size in KB.
ExampleC:\Program Files\Safenet\LunaClient>pedServer –mode stop -name hellohi
Luna Network HSM 7 Partition Administration GuideLast Updated: 2022-07-26 23:53:21 GMT-04:00 Copyright 2001-2022 Thales Group 273

Chapter 7: PED Authentication
pedserver -regenRegenerates the client certificate. This command is available in server-initiated (peer-to-peer) mode only.
Existing links (PEDserver, NTLS or STC) will not be affected until they are terminated. Afterward, the user isrequired to re-register the client certificate to NTLS and PEDserver.
NOTE The pedserver -regen command should be used only when there is no Luna HSMClient installed. When Luna HSM Client is installed on the host computer, use the LunaCMcommand clientconfig deploy with the -regen option or, if necessary, vtl createCert.
Syntaxpedserver -regen -commonname <commonname> [-force]
Option Description
-commonname<commonname>
The client's common name (CN).
-force Optional parameter. Suppresses any prompts.
ExampleC:\Program Files\SafeNet\LunaClient>pedServer -regen -commonname win2016_server -forcePed Server Version 1.0.6 (10006)
Private Key created and written to: C:\Program Files\SafeNet\LunaClient\cert\client\win2016_serverKey.pemCertificate created and written to: C:\Program Files\SafeNet\LunaClient\cert\client\win2016_server.pem
Successfully regenerated the client certificate.
pedclientUse the pedclient commands to start, stop, and configure the PEDclient service.
Syntaxpedclient -mode
assignidconfigdeleteidreleaseidsetidshow
Luna Network HSM 7 Partition Administration GuideLast Updated: 2022-07-26 23:53:21 GMT-04:00 Copyright 2001-2022 Thales Group 274

Chapter 7: PED Authentication
startstoptestid
Option Description
assignid Assigns a PED ID mapping to an HSM. See "pedclient -mode assignid" on thenext page.
config Modifies or shows existing configuration file settings. See "pedclient -modeconfig" on page 277.
deleteid Deletes a PED ID mapping. See "pedclient -mode deleteid" on page 279.
releaseid Releases a PED ID mapping from an HSM. See "pedclient -mode releaseid" onpage 280.
setid Creates a PED ID mapping. See "pedclient -mode setid" on page 281.
show Queries if PEDclient is currently running and gets details about PEDclient. See"pedclient -mode show" on page 282.
start Starts up PEDclient. See "pedclient -mode start" on page 283.
stop Shuts down PEDclient. See "pedclient -mode stop" on page 285.
testid Tests a PED ID mapping. See "pedclient -mode testid" on page 286.
Luna Network HSM 7 Partition Administration GuideLast Updated: 2022-07-26 23:53:21 GMT-04:00 Copyright 2001-2022 Thales Group 275

Chapter 7: PED Authentication
pedclient -mode assignidAssigns a PED ID mapping to a specified HSM.
Syntaxpedclient -mode assignid -id <pedid> -id_serialnumber <serial> [-logfilename <filename>] [-loginfo <0 or1>] [-logwarning <0 or 1>] [-logerror <0 or 1>] [-logtrace <0 or 1>] [-maxlogfilesize <size>] [-locallogger]
Option Description
-id <pedid> Specifies the ID of the PED to be assigned.
-id_serialnumber <serial> Specifies the serial number of the HSM to be linked to the specified PED ID.
-logfilename <filename> Optional. Specifies the log file name to which the logger should log messages.
-loginfo <0 or 1> Optional. Specifies if the logger should log "info" messages. Set to 0 for no, 1 foryes.
-logwarning <0 or 1> Optional. Specifies if the logger should log "warning" messages. Set to 0 for no,1 for yes.
-logerror <0 or 1> Optional. Specifies if the logger should log "error" messages. Set to 0 for no, 1for yes.
-logtrace <0 or 1> Optional. Specifies if the logger should log "trace" messages. Set to 0 for no, 1for yes.
-maxlogfilesize <size> Optional. Specifies the maximum log file size in KB.
-locallogger Optional. Specifies that the Remote PED logger should be used, not the ISlogging system.
ExampleC:\Program Files\Safenet\LunaClient>pedClient –mode assignid -id 1234 -id_serialnumber123456789
Luna Network HSM 7 Partition Administration GuideLast Updated: 2022-07-26 23:53:21 GMT-04:00 Copyright 2001-2022 Thales Group 276

Chapter 7: PED Authentication
pedclient -mode configModifies or shows existing configuration file settings.
Syntaxpedclient -mode config -show -set [-eadmin <0 or 1>] [-idletimeout <int>] [-ignoreideltimeout] [-socketreadtimeout <int>] [-socketwritetimeout <int>] [-shutdowntimeout <int>] [-pstartuptimeout <int>][-pshutdowntimeout <int>] [-logfilename <filename>] [-loginfo <0 or 1>] [-logwarning <0 or 1>] [-logtrace <0or 1>] [-maxlogfilesize <size>] [-locallogger]
Option Description
-show Displays the contents of the configuration file.
-set Updates the configuration file to be up to date with other supplied options.
-eadmin <0 or 1> Optional. Specifies if the administration port is on "localhost" or on the externalhost name.
-idletimeout <int> Optional. Specifies the idle connection timeout, in seconds.
-ignoreidletimeout Optional. Specifies that the idle connection timeout should not apply to theconnection established between the PED and HSM during their assignment.
-socketreadtimeout <int> Optional. Specifies the socket read timeout, in seconds.
-socketwritetimeout <int> Optional. Specifies the socket write timeout, in seconds.
-shutdowntimeout <int> Optional. Specifies the shutdown timeout for internal services, in seconds.
-pstartuptimeout <int> Optional. Specifies the startup timeout for the detached process, in seconds.
-pshutdowntimeout <int> Optional. Specifies the shutdown timeout for the detached process, in seconds.
-logfilename <filename> Optional. Specifies the log file name to which the logger should log messages.
-loginfo <0 or 1> Optional. Specifies if the logger should log "info" messages. Set to 0 for no, 1 foryes.
-logwarning <0 or 1> Optional. Specifies if the logger should log "warning" messages. Set to 0 for no,1 for yes.
-logerror <0 or 1> Optional. Specifies if the logger should log "error" messages. Set to 0 for no, 1for yes.
-logtrace <0 or 1> Optional. Specifies if the logger should log "trace" messages. Set to 0 for no, 1for yes.
Luna Network HSM 7 Partition Administration GuideLast Updated: 2022-07-26 23:53:21 GMT-04:00 Copyright 2001-2022 Thales Group 277

Chapter 7: PED Authentication
Option Description
-maxlogfilesize <size> Optional. Specifies the maximum log file size in KB.
-locallogger Optional. Specifies that the Remote PED logger should be used, not the ISlogging system.
ExampleC:\Program Files\Safenet\LunaClient>pedClient –mode config -show
Luna Network HSM 7 Partition Administration GuideLast Updated: 2022-07-26 23:53:21 GMT-04:00 Copyright 2001-2022 Thales Group 278

Chapter 7: PED Authentication
pedclient -mode deleteidDeletes a PED ID mapping between a specified PED and PEDserver.
Syntaxpedclient -mode deleteid -id <PED_ID> [-logfilename <filename>] [-loginfo <0 or 1>] [-logwarning <0 or 1>][-logerror <0 or 1>] [-logtrace <0 or 1>] [-maxlogfilesize <size>] [-locallogger]
Option Description
-id <PED_ID> Specifies the ID of the PED to be deleted from the map.
-logfilename <filename> Optional. Specifies the log file name to which the logger should log messages.
-loginfo <0 or 1> Optional. Specifies if the logger should log "info" messages. Set to 0 for no, 1 foryes.
-logwarning <0 or 1> Optional. Specifies if the logger should log "warning" messages. Set to 0 for no,1 for yes.
-logerror <0 or 1> Optional. Specifies if the logger should log "error" messages. Set to 0 for no, 1for yes.
-logtrace <0 or 1> Optional. Specifies if the logger should log "trace" messages. Set to 0 for no, 1for yes.
-maxlogfilesize <size> Optional. Specifies the maximum log file size in KB.
-locallogger Optional. Specifies that the Remote PED logger should be used, not the ISlogging system.
ExampleC:\Program Files\Safenet\LunaClient>pedClient –mode deleteid -id 1234
Luna Network HSM 7 Partition Administration GuideLast Updated: 2022-07-26 23:53:21 GMT-04:00 Copyright 2001-2022 Thales Group 279

Chapter 7: PED Authentication
pedclient -mode releaseidReleases a PED ID mapping from the HSM it was assigned to.
Syntaxpedclient -mode releaseid -id <PED_ID> [-logfilename <filename>] [-loginfo <0 or 1>] [-logwarning <0 or1>] [-logerror <0 or 1>] [-logtrace <0 or 1>] [-maxlogfilesize <size>] [-locallogger]
Option Description
-id <PED_ID> Specifies the ID of the PED to be released.
-logfilename <filename> Optional. Specifies the log file name to which the logger should log messages.
-loginfo <0 or 1> Optional. Specifies if the logger should log "info" messages. Set to 0 for no, 1 foryes.
-logwarning <0 or 1> Optional. Specifies if the logger should log "warning" messages. Set to 0 for no,1 for yes.
-logerror <0 or 1> Optional. Specifies if the logger should log "error" messages. Set to 0 for no, 1for yes.
-logtrace <0 or 1> Optional. Specifies if the logger should log "trace" messages. Set to 0 for no, 1for yes.
-maxlogfilesize <size> Optional. Specifies the maximum log file size in KB.
-locallogger Optional. Specifies that the Remote PED logger should be used, not the ISlogging system.
ExampleC:\Program Files\Safenet\LunaClient>pedClient –mode releaseid -id 1234
Luna Network HSM 7 Partition Administration GuideLast Updated: 2022-07-26 23:53:21 GMT-04:00 Copyright 2001-2022 Thales Group 280

Chapter 7: PED Authentication
pedclient -mode setidCreates a PED ID mapping between a specified PED and PEDserver.
Syntaxpedclient -mode setid -id <PED_ID> -id_ip <hostname> -id_port <port> [-logfilename <filename>] [-loginfo<0 or 1>] [-logwarning <0 or 1>] [-logerror <0 or 1>] [-logtrace <0 or 1>] [-maxlogfilesize <size>] [-locallogger]
Option Description
-id <PED_ID> Specifies the ID of the PED to be mapped.
-id_ip <hostname> Specifies the IP address or hostname of the PED Server to be linked with thePED ID.
-id_port <port> Specifies the PED Server port to be linked with the PED ID.
-logfilename <filename> Optional. Specifies the log file name to which the logger should log messages.
-loginfo <0 or 1> Optional. Specifies if the logger should log "info" messages. Set to 0 for no, 1 foryes.
-logwarning <0 or 1> Optional. Specifies if the logger should log "warning" messages. Set to 0 for no,1 for yes.
-logerror <0 or 1> Optional. Specifies if the logger should log "error" messages. Set to 0 for no, 1for yes.
-logtrace <0 or 1> Optional. Specifies if the logger should log "trace" messages. Set to 0 for no, 1for yes.
-maxlogfilesize <size> Optional. Specifies the maximum log file size in KB.
-locallogger Optional. Specifies that the Remote PED logger should be used, not the ISlogging system.
ExampleC:\Program Files\Safenet\LunaClient>pedClient –mode setid -id 1234 -id_ip myhostname -id_port3456
Luna Network HSM 7 Partition Administration GuideLast Updated: 2022-07-26 23:53:21 GMT-04:00 Copyright 2001-2022 Thales Group 281

Chapter 7: PED Authentication
pedclient -mode showQueries if PEDclient is currently running and gets details about PEDclient.
Syntaxpedclient -mode show [-admin <admin port number>] [-eadmin <0 or 1>] [-socketreadtimeout <int>] [-socketwritetimeout <int>] [-logfilename <filename>] [-loginfo <0 or 1>] [-logwarning <0 or 1>] [-logtrace <0or 1>] [-maxlogfilesize <size>] [-locallogger]
Option Description
-admin <admin port number> Optional. Specifies the administration port number to use.
-eadmin <0 or 1> Optional. Specifies if the administration port is on "localhost" or on the externalhost name.
-socketreadtimeout <int> Optional. Specifies the socket read timeout, in seconds.
-socketwritetimeout <int> Optional. Specifies the socket write timeout, in seconds.
-logfilename <filename> Optional. Specifies the log file name to which the logger should log messages.
-loginfo <0 or 1> Optional. Specifies if the logger should log "info" messages. Set to 0 for no, 1 foryes.
-logwarning <0 or 1> Optional. Specifies if the logger should log "warning" messages. Set to 0 for no,1 for yes.
-logerror <0 or 1> Optional. Specifies if the logger should log "error" messages. Set to 0 for no, 1for yes.
-logtrace <0 or 1> Optional. Specifies if the logger should log "trace" messages. Set to 0 for no, 1for yes.
-maxlogfilesize <size> Optional. Specifies the maximum log file size in KB.
-locallogger Optional. Specifies that the Remote PED logger should be used, not the ISlogging system.
ExampleC:\Program Files\Safenet\LunaClient>pedClient –mode show
Luna Network HSM 7 Partition Administration GuideLast Updated: 2022-07-26 23:53:21 GMT-04:00 Copyright 2001-2022 Thales Group 282

Chapter 7: PED Authentication
pedclient -mode startStarts up the PED Client.
Syntaxpedclient -mode start [-winservice] [-eadmin <0 or 1>] [-idletimeout <int>] [-socketreadtimeout <int>] [-socketwritetimeout <int>] [-shutdowntimeout <int>] [-pstartuptimeout <int>][-pshutdowntimeout <int>] [-logfilename <filename>] [-loginfo <0 or 1>] [-logwarning <0 or 1>] [-logtrace <0 or 1>] [-maxlogfilesize<size>] [-locallogger]
Option Description
-winservice Starts PEDclient for Windows service. The standard parameters used forpedclient mode start can be used for pedclient mode start -winservice aswell.
-eadmin <0 or 1> Optional. Specifies if the administration port is on "localhost" or on the externalhost name.
-idletimeout <int> Optional. Specifies the idle connection timeout, in seconds.
-socketreadtimeout <int> Optional. Specifies the socket read timeout, in seconds.
-socketwritetimeout <int> Optional. Specifies the socket write timeout, in seconds.
-shutdowntimeout <int> Optional. Specifies the shutdown timeout for internal services, in seconds.
-pstartuptimeout <int> Optional. Specifies the startup timeout for the detached process, in seconds.
-pshutdowntimeout <int> Optional. Specifies the shutdown timeout for the detached process, in seconds.
-logfilename <filename> Optional. Specifies the log file name to which the logger should log messages.
-loginfo <0 or 1> Optional. Specifies if the logger should log "info" messages. Set to 0 for no, 1 foryes.
-logwarning <0 or 1> Optional. Specifies if the logger should log "warning" messages. Set to 0 for no,1 for yes.
-logerror <0 or 1> Optional. Specifies if the logger should log "error" messages. Set to 0 for no, 1for yes.
-logtrace <0 or 1> Optional. Specifies if the logger should log "trace" messages. Set to 0 for no, 1for yes.
-maxlogfilesize <size> Optional. Specifies the maximum log file size in KB.
Luna Network HSM 7 Partition Administration GuideLast Updated: 2022-07-26 23:53:21 GMT-04:00 Copyright 2001-2022 Thales Group 283

Chapter 7: PED Authentication
Option Description
-locallogger Optional. Specifies that the Remote PED logger should be used, not the ISlogging system.
ExampleC:\Program Files\Safenet\LunaClient>pedClient –mode start
Luna Network HSM 7 Partition Administration GuideLast Updated: 2022-07-26 23:53:21 GMT-04:00 Copyright 2001-2022 Thales Group 284

Chapter 7: PED Authentication
pedclient -mode stopShuts down PEDclient.
Syntaxpedclient -mode stop [-eadmin <0 or 1>] [-socketreadtimeout <int>] [-socketwritetimeout <int>] [-shutdowntimeout <int>] [-pstartuptimeout <int>][-pshutdowntimeout <int>] [-logfilename <filename>] [-loginfo <0 or 1>] [-logwarning <0 or 1>] [-logtrace <0 or 1>] [-maxlogfilesize <size>] [-locallogger]
Option Description
-eadmin <0 or 1> Optional. Specifies if the administration port is on "localhost" or on the externalhost name.
-socketreadtimeout <int> Optional. Specifies the socket read timeout, in seconds.
-socketwritetimeout <int> Optional. Specifies the socket write timeout, in seconds.
-shutdowntimeout <int> Optional. Specifies the shutdown timeout for internal services, in seconds.
-pstartuptimeout <int> Optional. Specifies the startup timeout for the detached process, in seconds.
-pshutdowntimeout <int> Optional. Specifies the shutdown timeout for the detached process, in seconds.
-logfilename <filename> Optional. Specifies the log file name to which the logger should log messages.
-loginfo <0 or 1> Optional. Specifies if the logger should log "info" messages. Set to 0 for no, 1 foryes.
-logwarning <0 or 1> Optional. Specifies if the logger should log "warning" messages. Set to 0 for no,1 for yes.
-logerror <0 or 1> Optional. Specifies if the logger should log "error" messages. Set to 0 for no, 1for yes.
-logtrace <0 or 1> Optional. Specifies if the logger should log "trace" messages. Set to 0 for no, 1for yes.
-maxlogfilesize <size> Optional. Specifies the maximum log file size in KB.
-locallogger Optional. Specifies that the Remote PED logger should be used, not the ISlogging system.
ExampleC:\Program Files\Safenet\LunaClient>pedClient –mode stop
Luna Network HSM 7 Partition Administration GuideLast Updated: 2022-07-26 23:53:21 GMT-04:00 Copyright 2001-2022 Thales Group 285

Chapter 7: PED Authentication
pedclient -mode testidTests a PED ID mapping between a specified PED and PEDserver.
Syntaxpedclient -mode testid -id <PED_ID> [-logfilename <filename>] [-loginfo <0 or 1>] [-logwarning <0 or 1>] [-logerror <0 or 1>] [-logtrace <0 or 1>] [-maxlogfilesize <size>] [-locallogger]
Option Description
-id <PED_ID> Specifies the ID of the PED to be tested.
-logfilename <filename> Optional. Specifies the log file name to which the logger should log messages.
-loginfo <0 or 1> Optional. Specifies if the logger should log "info" messages. Set to 0 for no, 1 foryes.
-logwarning <0 or 1> Optional. Specifies if the logger should log "warning" messages. Set to 0 for no,1 for yes.
-logerror <0 or 1> Optional. Specifies if the logger should log "error" messages. Set to 0 for no, 1for yes.
-logtrace <0 or 1> Optional. Specifies if the logger should log "trace" messages. Set to 0 for no, 1for yes.
-maxlogfilesize <size> Optional. Specifies the maximum log file size in KB.
-locallogger Optional. Specifies that the Remote PED logger should be used, not the ISlogging system.
ExampleC:\Program Files\Safenet\LunaClient>pedClient –mode testid -id 1234
Luna Network HSM 7 Partition Administration GuideLast Updated: 2022-07-26 23:53:21 GMT-04:00 Copyright 2001-2022 Thales Group 286

CHAPTER 8: Initializing an ApplicationPartition
Before it can be used to store cryptographic objects or perform operations, an application partition must beinitialized. Initialization is performed by the Partition Security Officer and sets the authentication credential. Thereare two scenarios where the Partition SO would initialize the partition:
> Preparing a new partition:On a new partition, initialization sets the Partition SO authentication credential,an identifying label for the partition, and the partition's cloning domain (see "Initializing a NewPartition" below).
> Erasing an existing partition: The Partition SO can re-initialize a partition to erase all cryptographic objectsand the Crypto Officer/Crypto User roles, and select a new partition label. The Partition SO credential and thecloning domain remain the same (see "Re-initializing an Existing Partition" on page 289).
Initializing a New PartitionInitializing an application partition for the first time establishes you as the Partition SO and sets a cloning domainfor the partition. This procedure can be performed
> from an administrative connection to the network HSM appliance (via SSH) using Luna Shell (lunash)commands
• (beginning with Network appliance software 7.7.1 [and newer] the administrator (HSM SO) can initializethe newly created partition, creating the PSO role
• and then use the new PSO credential on that partition to initialize the Crypto Officer role), or
> from a registered client, with an NTLS or STC connection, using LunaCM commands.
The Crypto User role is created from the client side, via lunacm.
Any subsequent re-initialization of an application partition is performed from the client.
Prerequisites> The new partition must be created and visible in Luna Shell if it is to be initialized on the Network appliance, in
lunash (appliance software 7.7.1 and later - see "partition init [ LUNA-16119 ] " on page 1).
> The new partition must be assigned to the client and visible in LunaCM if it is to be initialized from that client,in lunacm (see "Client-Partition Connections" on page 105).
> If you want to configure the partition's policies with a policy template using lunacm, the template file must beavailable on the client (see "Setting Partition Policies Using a Template" on page 304).
> If you want to configure the partition's policies with a policy template using lunash on the appliance, the pre-edited template file must be uploaded to the appliance.
> PED authentication: A local or remote PED connection must be established (see "Local PED Setup" onpage 211 or Remote PED Setup). Ensure that you have enough blue (Partition SO) and red (Domain) PEDkeys for your planned authentication scheme (see "Creating PED Keys" on page 243).
Luna Network HSM 7 Partition Administration GuideLast Updated: 2022-07-26 23:53:21 GMT-04:00 Copyright 2001-2022 Thales Group 287

Chapter 8: Initializing an Application Partition
To initialize a new application partition in LunaSH on the Network HSM appliance
The following steps assume that the Network HSM administrator has created the partition ( "partitioncreate" on page 1 ).1. In Lunash, log in to the HSM as SO if you are not already logged in.
lunash:> "hsm login" on page 12. Create the partition, if it has not already been created
lunash:> "partition create" on page 1 -partition <partition name>3. Initialize the partition by specifying its partition name. To initialize the partition using a policy template, specify
the path to the template file.
Partition names created in LunaSHmust be 1-32 characters in length. The following characters are allowed:abcdefghijklmnopqurstuvwxyzABCDEFGHIJKLMNOPQRSTUVWXYZ 0123456789!@#$%^*()-_=+{}[]:,./?~
Spaces are allowed; enclose the partition name in double quotes if it includes spaces.The following characters are not allowed: &\|;<>`'"?No two partitions can have the same name.
• Password authentication: You can specify a Partition SO password and/or a domain string with theinitialization command, or enter them when prompted.
In LunaSH, HSM role passwords must be 8-255 characters in length. The following characters areallowed:abcdefghijklmnopqrstuvwxyzABCDEFGHIJKLMNOPQRSTUVWXYZ0123456789 !@#$%^*()-_=+[]{}/:',.~
The following characters are invalid or problematic and must not be used in passwords: "&;<>\`|Spaces are allowed; to specify a password with spaces, enclose the password in double quotation marks.
The domain string must be 1-128 characters in length. The following characters are allowed:abcdefghijklmnopqrstuvwxyzABCDEFGHIJKLMNOPQRSTUVWXYZ0123456789 !@#$%^*-_=+[]{}/:',.~
The following characters are problematic or invalid and must not be used in a domain string: "&;<>\`|()Spaces are allowed, as long as the leading character is not a space; to specify a domain string withspaces using the -domain option, enclose the string in double quotation marks. For password-authenticated HSMs, the domain string should match the complexity of the partition password.
lunash:> "partition init [ LUNA-16119 ] " on page 1 -partition <name> [-applytemplate <template_file>] [-password <password>] [-domain <domain_string>]
• PED authentication:lunash:> "partition init [ LUNA-16119 ] " on page 1-partition <name> [-applytemplate <template_file>]
Respond to the Luna PED prompts to create the blue Partition SO key and the red domain key (see"Creating PED Keys" on page 243).
4. After the partition is initialized and the PSO created, you can create the Crypto Officer role via lunash on theappliance or with lunacm on a registered client see "The following procedures will allow you to initialize theCrypto Officer (CO) and Crypto User (CU) roles and set an initial credential. " on page 316
To initialize a new application partition in LunaCM on the Client
1. Launch LunaCM on the client workstation.
2. Set the active slot to the partition you want to initialize.
Luna Network HSM 7 Partition Administration GuideLast Updated: 2022-07-26 23:53:21 GMT-04:00 Copyright 2001-2022 Thales Group 288

Chapter 8: Initializing an Application Partition
lunacm:> slot set -slot <slot_number>3. Initialize the partition by specifying an identifying label. To initialize the partition using a policy template,
specify the path to the template file.
The partition label created during initialization must be 1-32 characters in length. If you specify a longer label,it will automatically be truncated to 32 characters. The following characters are allowed:abcdefghijklmnopqrstuvwxyzABCDEFGHIJKLMNOPQRSTUVWXYZ0123456789 !@#$%^&*()-_=+[]
{}\|/;:',.<>`~
Question marks (?) and double quotation marks (") are not allowed.Spaces are allowed; enclose the label in double quotation marks if it includes spaces.
• Password authentication: You can specify a Partition SO password and/or a domain string with theinitialization command, or enter them when prompted.
In LunaCM, passwords and activation challenge secrets must be 8-255 characters in length (NOTE: If youare using firmware version 7.0.x, 7.3.3, or 7.4.2, activation challenge secrets must be 7-16 characters inlength). The following characters are allowed:abcdefghijklmnopqrstuvwxyzABCDEFGHIJKLMNOPQRSTUVWXYZ0123456789 !@#$%^&*()-_=+[]
{}\|/;:',.<>?`~
Double quotation marks (") are problematic and should not be used within passwords.Spaces are allowed; to specify a password with spaces using the -password option, enclose thepassword in double quotation marks.
The domain string must be 1-128 characters in length. The following characters are allowed:abcdefghijklmnopqrstuvwxyzABCDEFGHIJKLMNOPQRSTUVWXYZ0123456789 !@#$%^*-_=+[]{}/:',.~
The following characters are problematic or invalid and must not be used in a domain string: "&;<>\`|()Spaces are allowed, as long as the leading character is not a space; to specify a domain string withspaces using the -domain option, enclose the string in double quotation marks. For password-authenticated HSMs, the domain string should match the complexity of the partition password.
lunacm:> partition init -label <label> [-applytemplate <template_file>] [-password <password>] [-domain <domain_string>]
• PED authentication:lunacm:> partition init -label <label> [-applytemplate <template_file>]Respond to the Luna PED prompts to create the blue Partition SO key and the red domain key (see"Creating PED Keys" on page 243).
Re-initializing an Existing PartitionThe Partition SO can re-initialize an existing partition at any time. Re-initialization erases all cryptographicobjects on the partition, and the login credentials for the Crypto Officer and Limited Crypto Officer and CryptoUser roles. The Partition SO login credential and cloning domain are retained.
Prerequisites> The partition must be already initialized.
> Back up any important cryptographic objects stored on the partition.
> [PED authentication] A local or remote PED connection must be established (see "Local PED Setup" onpage 211 or "Remote PED Setup" on page 1).
Luna Network HSM 7 Partition Administration GuideLast Updated: 2022-07-26 23:53:21 GMT-04:00 Copyright 2001-2022 Thales Group 289

Chapter 8: Initializing an Application Partition
To re-initialize an existing application partition
1. Launch LunaCM on the client workstation.
2. Set the active slot to the partition you want to re-initialize.lunacm:> slot set -slot <slot_number>
3. Initialize the partition by specifying an identifying label. You must specify a label for the partition (the samelabel or a new one). You are prompted for the current Partition SO credential.
lunacm:> partition init -label <label>
Luna Network HSM 7 Partition Administration GuideLast Updated: 2022-07-26 23:53:21 GMT-04:00 Copyright 2001-2022 Thales Group 290

CHAPTER 9: Partition Capabilities andPolicies
An application partition can be configured to provide a range of different functions. The Partition Security Officercan customize this functionality using partition policies. This configuration is governed by the following settings:
> Partition Capabilities are features of partition functionality that are inherited from the parent HSM policies(see HSM Capabilities and Policies). The HSM SO can configure HSM policies to allow or disallow partitioncapabilities. Some capabilities have corresponding modifiable partition policies.
> Partition Policies are configurable settings that allow the Partition Security Officer to modify the function oftheir corresponding capabilities.
The table below describes all partition capabilities, their corresponding policies, and the results of changing theirsettings. This section contains the following procedures:
> "Setting Partition Policies Manually" on page 303
> "Setting Partition Policies Using a Template" on page 304
Destructive PoliciesAs a security measure, changing some partition policies forces deletion of all cryptographic objects on thepartition. These policies are listed as destructive in the table below. Some policy changes are destructive ineither direction (OFF-to-ON andON-to-OFF), while others are destructive only in the direction resulting inlowered partition security.
Use lunacm:> partition showpolicies -verbose to check whether the policy you want to enable/disable isdestructive.
Luna Network HSM 7 Partition Administration GuideLast Updated: 2022-07-26 23:53:21 GMT-04:00 Copyright 2001-2022 Thales Group 291

Chapter 9: Partition Capabilities and Policies
Policy descriptions and settings
# Partition Capability Partition Policy
0 Enable private key cloningAlways 1. This capability allows private keys tobe cloned to another Luna HSM partition(required for backup and HA).
NOTE The HSM SO can disablecloning for all partitions on the HSMby turning off HSM policy 7 (seeHSM Capabilities and Policies). Inthis case, cloning is not possible onthe partition, regardless of thiscapability/policy's setting.
See also " Cloning vs Key Management" onpage 303 at the bottom of this page.
Allow private key cloning (destructive OFF-to-ON)> 1 (default): The partition is capable of cloning
private keys to another partition. This policy mustbe enabled to back up partitions or create HAgroups. Public keys and objects can always becloned, regardless of this policy's setting.
> 0: Private keys can never be cloned to anotherapplication partition.
Partition policies 0 and 1may not be set to 1 (ON) atthe same time.
NOTE Key attributes can be setmodifiable, and a key can then beset with (for example) attribute -extractable (see "cmugeneratekeypair" on page 1 ), butPartition Policies overrule objectattributes; Cloning ON and PrivateKey Wrapping OFF would preventexport despite the attribute settings.
1 Enable private key wrappingAlways 1. This capability allows private keys tobe encrypted (wrapped) and exported off thepartition.
Allow private key wrapping (destructive OFF-to-ON)> 1: Private keys may be wrapped and saved to an
encrypted file off the partition. Public keys andobjects can always be wrapped and exported,regardless of this policy's setting.
> 0 (default): Private keys can never be wrapped andexported off the partition.
Partition policies 0 and 1may not be set to 1 (ON) atthe same time.
NOTE Key attributes can be setmodifiable, and a key can then beset with (for example) attribute -extractable (see "cmugeneratekeypair" on page 1 ), butPartition Policies overrule objectattributes; Cloning ON and PrivateKey Wrapping OFF would preventexport despite the attribute settings.
Luna Network HSM 7 Partition Administration GuideLast Updated: 2022-07-26 23:53:21 GMT-04:00 Copyright 2001-2022 Thales Group 292

Chapter 9: Partition Capabilities and Policies
# Partition Capability Partition Policy
2 Enable private key unwrappingAlways 1. This capability allows wrapped privatekeys to be imported to the partition.
Allow private key unwrapping> 1 (default): Private keys can be unwrapped and
stored on the partition.> 0: Private keys cannot be unwrapped onto the
partition.
3 Enable private key maskingPrivate keys can be masked off the partition.
Allow private key masking> 1 (default for V1 partitions): Private keys can be
masked off the partition.> 0 (default for V0 partitions): Private keys cannot be
masked off the partition.
4 Enable secret key cloningAlways 1. This capability allows secret keys tobe cloned to another Luna HSM partition(required for backup and HA).
NOTE The HSM SO can disablecloning for all partitions on the HSMby turning off HSM policy 7 (seeHSM Capabilities and Policies). Inthis case, cloning is not possible onthe partition, regardless of thiscapability/policy's setting.
See also " Cloning vs Key Management" onpage 303 at the bottom of this page.
Allow secret key cloning (destructive OFF-to-ON)> 1 (default): Secret keys on the partition can be
cloned to another partition. This is required forpartition backup and HA groups.
> 0: Secret keys cannot be backed up, and will notbe cloned to other HA group members.
5 Enable secret key wrappingAlways 1. This capability allows secret keys tobe encrypted (wrapped) and exported off thepartition.
Allow secret key wrapping (destructive OFF-to-ON)> 1 (default): Secret keys can be wrapped and saved
to an encrypted file off the partition.> 0: Secret keys can never be wrapped and exported
off the partition.
6 Enable secret key unwrappingAlways 1. This capability allows wrapped secretkeys to be imported to the partition.
Allow secret key unwrapping> 1 (default): Secret keys can be unwrapped and
stored on the partition.> 0: Secret keys cannot be unwrapped onto the
partition.
Luna Network HSM 7 Partition Administration GuideLast Updated: 2022-07-26 23:53:21 GMT-04:00 Copyright 2001-2022 Thales Group 293

Chapter 9: Partition Capabilities and Policies
# Partition Capability Partition Policy
7 Enable secret key maskingEnable masking secret keys off the partition.
Allow secret key masking> 1 (default for V1 partitions): Secret keys can be
masked and stored off the partition.> 0 (default for V0 partitions): Secret keys cannot be
masked off the partition.
10 Enable multipurpose keysAlways 1. This capability allows keys that arecreated or unwrapped on the partition to havemore than one of the following attributesenabled (set to 1), and can therefore be used fromultiple types of operation:
• Encrypt/Decrypt• Sign/Verify• Wrap/Unwrap• Derive
Allow multipurpose keys (destructive OFF-to-ON)> 1 (default): Keys that are created or unwrapped on
the partition may be used for multiple operations.> 0: Keys that are created or unwrapped on the
partition may have only one of the affectedattributes enabled. Thales recommends that youcreate keys with only the attributes required fortheir intended purpose. Disabling this policyenforces this rule on the partition.
NOTE This policy does not affect Diffie-Hellman keys, which are always createdwith only Derive set to 1.
11 Enable changing key attributesAlways 1. This capability allows the CryptoOfficer to modify the following non-sensitiveattributes of keys on the partition, changing keyfunctions:> CKA_ENCRYPT> CKA_DECRYPT> CKA_WRAP> CKA_UNWRAP> CKA_SIGN> CKA_SIGN_RECOVER> CKA_VERIFY> CKA_VERIFY_RECOVER> CKA_DERIVE> CKA_EXTRACTABLE
Allow changing key attributes (destructive OFF-to-ON)> 1 (default): The Crypto Officer can modify the non-
sensitive attributes of keys on the partition.> 0: Keys created on the partition cannot be
modified.
Luna Network HSM 7 Partition Administration GuideLast Updated: 2022-07-26 23:53:21 GMT-04:00 Copyright 2001-2022 Thales Group 294

Chapter 9: Partition Capabilities and Policies
# Partition Capability Partition Policy
15 Allow failed challenge responsesAlways 1. This capability/policy applies to PED-authenticated Luna Network HSM only. Itdetermines whether failed login attempts usinga challenge secret count towards a partitionlockout.
Ignore failed challenge responses (destructiveOFF-to-ON)> 1 (default): Failed challenge secret login attempts
are not counted towards a partition lockout. Onlyfailed PED key authentication attempts incrementthe counter.
> 0: Failed login attempts using either a PED key or achallenge secret will count towards a partitionlockout.
See "Activation and Auto-activation on Multi-factor-(PED-) Authenticated Partitions" on page 320 and"Before you can perform administrative tasks on thepartition or its stored cryptographic objects, you mustlog in with the appropriate role:" on page 315 for moreinformation.
16 Enable operation without RSA blindingAlways 1. RSA blinding is a technique thatintroduces random elements into the signatureprocess to prevent timing attacks on the RSAprivate key. Some security policies may requirethis technique, but it does affect performance.
Operate without RSA blinding (destructive OFF-to-ON)> 1 (default): The partition does not use RSA
blinding.> 0: The partition uses RSA blinding. Performance
will be affected.
17 Enable signing with non-local keysAlways 1. Keys generated on the HSM have theattribute CKA_LOCAL=1. Keys that areimported (unwrapped) to the HSM have CKA_LOCAL=0. These attributes are maintained ifkeys are backed up or cloned to another HSMpartition.
Allow signing with non-local keys> 1 (default): Keys with attribute CKA_LOCAL=0 can
be used for signing and their trust history is notassured.
> 0: Only keys with attribute CKA_LOCAL=1 can beused to sign data on the partition.
18 Enable raw RSA operationsAlways 1. This capability enables the RSAmechanism CKM_RSA_X_509 on the partition,which allows weak signatures and weakencryption.
Allow raw RSA operations (destructive OFF-to-ON)> 1 (default): The partition allows operations using
the RSA mechanism CKM_RSA_X_509.> 0: Operations using CKM_RSA_X_509 are
blocked on the partition.
Luna Network HSM 7 Partition Administration GuideLast Updated: 2022-07-26 23:53:21 GMT-04:00 Copyright 2001-2022 Thales Group 295

Chapter 9: Partition Capabilities and Policies
# Partition Capability Partition Policy
20 Max failed user logins allowedDisplays the maximum number of failed partitionlogin attempts (10) before the partition is lockedout (see "Before you can perform administrativetasks on the partition or its stored cryptographicobjects, you must log in with the appropriaterole:" on page 315).
Max failed user logins allowedThe Partition SO can lower the effective number offailed logins below the maximum if desired.Default: 10
21 Enable high availability recoveryAlways 1. This capability enables theRecoveryLogin feature on the partition. Thisfeature allows other HA group members torestore the login state of the partiton in the eventof a power outage or other such deactivation.
Allow high availability recovery> 1 (default): RecoveryLogin is enabled on the
partition. This feature must be configured inadvance (see role recoveryinit and rolerecoverylogin).
> 0: RecoveryLogin is disabled on the partition.
22 Enable activationThis capability allows the partition to beactivated. See "Activation and Auto-activationon Multi-factor- (PED-) AuthenticatedPartitions" on page 320.> 1: Always enabled on PED-authenticated
HSMs.> 0: Always disabled on password-
authenticated HSMs.
Allow activation> 1: The black and/or gray PED key secrets can be
encrypted and cached, so that only a keyboard-entered challenge secret is required to log in.
> 0 (default): PED keys must be presented at eachlogin, whether via LunaCM or a client application.
This policy is overridden and activation is disabled if atamper event occurs, or if an uncleared tamper eventis detected on reboot. See Tamper Events for moreinformation.
23 Enable auto-activationThis capability allows the partition to remainactivated for up to two hours if the Luna NetworkHSM loses power. See "Activation and Auto-activation on Multi-factor- (PED-) AuthenticatedPartitions" on page 320.> 1: Always enabled on PED-authenticated
HSMs.> 0: Always disabled on password-
authenticated HSMs.
Allow auto-activation> 1: Partition activation (see policy 22 above) is
maintained after an HSM power loss of up to twohours.
> 0 (default): The partition is deactivated in the eventof a power loss. When power is restored, the blackand/or gray PED keys must be presented to re-activate the partition.
Luna Network HSM 7 Partition Administration GuideLast Updated: 2022-07-26 23:53:21 GMT-04:00 Copyright 2001-2022 Thales Group 296

Chapter 9: Partition Capabilities and Policies
# Partition Capability Partition Policy
25 Minimum PIN lengthAlways 247 (8 characters).The absolute minimum length for a rolepassword/challenge secret is 8 characters. Thisis displayed as a value subtracted from 255.The reason for this inversion is that a policy canonly be set to a value equal to or lower than thevalue set by its capability. If the absoluteminimum length was set to 8, the Partition SOwould be able to set the preferred minimum to 2,a less-secure policy. The Partition SOmay onlychange the minimum length to increase securityby forcing stronger passwords.
Minimum PIN lengthThe Partition SO can choose to increase the effectiveminimum length of a role password/challenge secretby setting this policy. The policy value is determinedas follows:Subtract the desired minimum length from 255 (theabsolute maximum length), and set policy 25 to thatvalue.255 - (desired length) = (policy value)For example, to set the minimum length to 10characters, set the value of this policy to 245:255 - 10 = 245Default: 247 (8 characters)
26 Maximum PIN lengthAlways 255. The absolute maximum length for arole password/challenge secret is 255characters.
Maximum PIN lengthThe effective maximum role password/challengesecret length may be changed by the Partition SO. Itmust always be greater than or equal to the effectiveminimum length, determined by the formula describedin policy 25 (above).Default: 255
28 Enable Key Management FunctionsAlways 1. This capability allows cryptographicobjects to be created, deleted, generated,derived, modified on the partition.
See also " Cloning vs Key Management" onpage 303 at the bottom of this page.
Allow Key Management Functions (destructiveOFF-to-ON)> 1 (default): The Crypto Officer can manage
(create/delete, etc.) objects on the partition. TheCrypto User is restricted to read-only operations.
> 0: Partition objects are read-only for both the COand CU roles.
29 Enable RSA signing without confirmationAlways 1. This capability governs the HSM'sinternal signing verification.
Perform RSA signing without confirmation(destructive OFF-to-ON)> 1 (default): No internal signing verification is
performed.> 0: The HSM performs an internal verification of
signing operations to validate the signature. Thishas a performance impact on signature operations.
Luna Network HSM 7 Partition Administration GuideLast Updated: 2022-07-26 23:53:21 GMT-04:00 Copyright 2001-2022 Thales Group 297

Chapter 9: Partition Capabilities and Policies
# Partition Capability Partition Policy
31 Enable private key unmaskingAlways 1. Private keys can be unmasked ontothe partition.
Allow private key unmasking> 1 (default for V1 partitions): Private keys can be
unmasked onto the partition (meaning they alsocan be migrated from legacy Luna HSMs that usedSIM).
> 0 (default for V0 partitions): Private keys cannot beunmasked onto the partition (meaning thatmigration of private keys from legacy HSMs usingSIM is also not possible).
32 Enable secret key unmaskingEnable unmasking of a secret key onto thepartition.
Allow secret key unmasking> 1 (default for V1 partitions): Secret keys can be
masked and stored onto the partition.> 0 (default for V0 partitions): Secret keys cannot be
masked onto the partition.
33 Enable RSA PKCS mechanismAlways 1. The mechanism CKM_RSA_PKCShas known weaknesses, which you can addressin your applications. If you are not prepared toaddress these issues, you can choose todisable the mechanism entirely.
Allow RSA PKCS mechanism (destructive OFF-to-ON)> 1 (default): CKM_RSA_PKCS is enabled on the
partition.> 0: CKM_RSA_PKCS is disabled on the partition.
Luna Network HSM 7 Partition Administration GuideLast Updated: 2022-07-26 23:53:21 GMT-04:00 Copyright 2001-2022 Thales Group 298

Chapter 9: Partition Capabilities and Policies
# Partition Capability Partition Policy
34 Enable CBC-PAD (un)wrap keys of any sizeAlways 1. There are known vulnerabilities usingsmall keys wrapped/unwrapped with CBC_PADmechanisms (and with small keys in general).You can choose to enforce a size restriction sothat small weak keys cannot be unwrapped ontothe partition. The following mechanisms areaffected:> CKM_AES_CBC_PAD> CKM_AES_CBC_PAD_IPSEC> CKM_ARIA_CBC_PAD> CKM_ARIA_L_CBC_PAD> CKM_CAST3_CBC_PAD> CKM_CAST5_CBC_PAD> CKM_DES_CBC_PAD> CKM_DES3_CBC_PAD> CKM_DES3_CBC_PAD_IPSEC> CKM_RC2_CBC_PAD> CKM_RC5_CBC_PAD> CKM_SEED_CBC_PAD> CKM_SM4_CBC_PAD
Allow CBC-PAD (un)wrap keys of any size> 1 (default): All keys can be wrapped or unwrapped
using CBC_PADmechanisms.> 0: Small keys cannot be wrapped or unwrapped
using CBC_PADmechanisms.
37 Enable Secure Trusted ChannelAlways 1. This capability allows the partition touse STC for client access.
NOTE The HSM SOmust firstenable STC by turning on HSMpolicy 39.
Force Secure Trusted Channel (destructive ON-to-OFF)> 1: If this policy is set, STC is used for all client
access to this partition. You must first set up andregister the STC identities (see "Creating an STCConnection" on page 125).
> 0 (default): NTLS is used by default for clientaccess to this partition , but STC can be used ifdesired.
39 Enable Start/End Date AttributesAlways 1. This capability allows you to enforcethe CKA_START_DATE and CKA_END_DATEattributes of partition objects.
Allow Start/End Date Attributes (destructive ON-to-OFF)> 1: CKA_START_DATE and CKA_END_DATE
attributes are enforced for all partition objects.> 0 (default): These attributes can be set for partition
objects, but their values are ignored.
Luna Network HSM 7 Partition Administration GuideLast Updated: 2022-07-26 23:53:21 GMT-04:00 Copyright 2001-2022 Thales Group 299

Chapter 9: Partition Capabilities and Policies
# Partition Capability Partition Policy
40 Enable Per-Key Authorization DataBoth assigned and unassigned secret keys ( symmetric or private) are given per-keyauthorization attributes in the form of CKA_AUTH_DATA, in any newly created or upgradedfirmware 7.7.0 (or newer) partition. For V0partitions PKA is ignored and applications canuse the pre-existing APIs as before. For V1partitions it is actively used, for eIDAScompliance with newer API.
Require Per-Key Authorization Data> 1 (default for V1 partitions): Per-Key-Authorization
is on by default, but can be turned off forperformance.
> 0 (default for V0 partitions): Per-Key-Authorizationis off by default, and cannot be turned on - V0partitions do not allow policy changes that wouldrequire new clients.
41 Enable Partition VersionAlways 1. This capability is visible for anypartition at firmware version 7.7.0 or newer, andallows you to switch a partition between versionV0 and V1.
Partition Version (destructive ON-to-OFF)> 1 : Version 1 (V1) partition supports all features of
firmware 7.7.0 (or newer).• cloning is used/permitted only for SMKs• key objects are transferred using SKS• only HA Login version 2 is supported.
> 0 (default): Version 0 (V0) supports older API andyour pre-existing applications (used with f/w < 7.7),enhanced by fixes and security updates offirmware 7.7.0 (or newer), but Per KeyAuthorization, SKS, and other V1-dependentfeatures are not available. Pre-7.7.0 version of HALogin can be used (full use of v1.1 or version 2.0 ,while v1.0 HA Login for use as primary only)
Luna Network HSM 7 Partition Administration GuideLast Updated: 2022-07-26 23:53:21 GMT-04:00 Copyright 2001-2022 Thales Group 300

Chapter 9: Partition Capabilities and Policies
# Partition Capability Partition Policy
42 Enable CPv1This capability is visible for any partition atfirmware version 7.7.1 or newer, and allows thepartition to use the cloning protocol needed forHA with older partitions.
Allow CPv1 (destructive OFF-to-ON)For V0 partitions created while the HSM is at firmwareversion 7.7.1 or newerWhen the HSM is in non-FIPS mode (where HSMpolicy 12 is set to ON)> 1 (default): Cloning (CPv1) can be used by the
partition for key objects.> 0 (default): Cloning (CPv1) is not allowed by the
partition for key objects. When the HSM is in FIPSmode (where HSM policy 12 is set to OFF), thispolicy setting cannot be changed. Cloning (CPv1)is not allowed, by the partition, for key objects.
For firmware 7.7.0 V0 partitions, "Allow CPv1" is OFFafter firmware update from version 7.7.0 to version7.7.1 or newer.For firmware 7.7.0 V1 partitions, "Allow CPv1" isalways OFF.For pre-7.7.0 firmware partitions, CPv1 is turned ONafter update, if the HSM is not in FIPS mode, OFF ifthe HSM is in FIPS mode.The Luna B700 Backup HSM with firmware 7.7.1cannot restore keys to a partition with CPv1 enabled ifthey were backed up from a partition with CPv1disabled. This limitation is restricted to the BackupHSM. You can still use direct slot-to-slot cloning (see"Cloning Objects to Another Application Partition" onpage 190). ]
Luna Network HSM 7 Partition Administration GuideLast Updated: 2022-07-26 23:53:21 GMT-04:00 Copyright 2001-2022 Thales Group 301

Chapter 9: Partition Capabilities and Policies
# Partition Capability Partition Policy
43 Enable non-FIPS algorithmsThis capability is visible for any partition atfirmware version 7.7.1 or newer, and allows theuse of algorithms that are FIPS non-compliant,within the current partition. Requires that HSMpolicy 12 be set to ON (i.e., HSM is in non-FIPSmode).
Allow non-FIPS algorithms (destructive OFF-to-ON)For V0 partitions created while the HSM is at firmwareversion 7.7.1 or newerWhen the HSM is in non-FIPS mode (where HSMpolicy 12 is set to ON)> 1 (default): Non-FIPS-compliant algorithms can be
used by the partition.> 0 (default): Non-FIPS-compliant algorithms are not
permitted.When the HSM is in FIPS mode (where HSM policy 12is set to OFF), this policy setting cannot be changed;non-FIPS-compliant algorithms are not permitted onany partition on the HSM.For firmware 7.7.0 V0 partitions, "Allow CPv1" is OFFafter firmware update from version 7.7.0 to version7.7.1 or newer. For firmware 7.7.0 V1 partitions, "Allow non-FIPS"follows the HSM policy (on if on, off if off).For pre-7.7.0 firmware partitions, this partition policyfollows the HSM policy.
A number of partition capabilities are linked to the corresponding HSM capabilities and policies including:
> Partition Policy (0) Enable private key cloning is dependent on HSM Policy (7) Allow cloning;
> Partition Policy (3) Enable private key masking is dependent on HSM Policy (6) Allow Masking;
> Partition Policy (4) Enable secret key cloning is dependent on HSM Policy (7) Allow cloning;
> Partition Policy (7) Enable secret key masking is dependent on HSM Policy (6) Allow Masking;
> Partition Policy (22) Enable Activation and Partition Policy (23) Enable Auto-Activation are dependent onHSM Policy (1) Allow PED-based authentication;
> Partition Policy (31) Enable private key unmasking is dependent on HSM Policy (6) Allow Masking; and
> Partition Policy (32) Enable secret key unmasking is dependent on HSM Policy (6) Allow Masking.
In addition – the following dependencies within the partition level policies are observed:
> Partition Policy (7) Allow cloning cannot be enabled at the same time as Partition Policy (1) Allow private keywrapping;
> Partition Policy (1) Allow private key wrapping cannot be enabled at the same time as either one of thepolicies, Partition Policy (0) Enable private key cloning, Partition Policy (3) Allow private key masking,Partition Policy (31) Enable private key unmasking;
> Partition Policy (23) Allow Activation is dependent on Partition Policy (22) Allow Activation being enabled;
> Partition Policies related to ‘Masking’ (3, 7, 31 and 32) can only be enabled when Partition Policy (41)Partition Version is ‘0’; and
Luna Network HSM 7 Partition Administration GuideLast Updated: 2022-07-26 23:53:21 GMT-04:00 Copyright 2001-2022 Thales Group 302

Chapter 9: Partition Capabilities and Policies
> Partition Policy (41) Partition Version cannot be set to ‘1’ at the same time as either Partition Policy (40)Enable Per-Key Authorization Data or any of the Partition Policies covering key masking (3, 7, 31 and 32).
> Partition Policy (40) Enable Per-Key Authorization Data is enabled by default but is disabled if Partition Policy(41) Partition Version is set to ‘0’.
NOTE With the HSM in FIPS mode, then at partition level• you are never allowed cloning (CPV1) and• you can never to turn FIPS mode off per partition.
This is to prevent keys/objects in a more secure container from being transferred to a less-secure container.
Cloning vs Key Management
TIP Security Note -Cloning policies (0 and 4) permit or deny the ability to securely copy keysand objects into and out of a partition.The Key Management Functions policy (28) controls the ability to create, delete, generate,derive, or modify cryptographic objects in the current partition.
These controls are independent of each other. With Key Management functions denied, youcan still clone objects in and out of partitions where Cloning policy is allowed. Thus HA (highavailability) operation can clone keys into a partition that disallows Key Management functions(creation, deletion, etc.). Cloning a key or object into a partition is not consideredcreation - the key or object already existed within the security / cloning domain thatencompasses the partition.
Ultimately the security administrators define where keys can exist by controlling distribution ofthe security / cloning domain, and by defining policies around those keys.
Additionally, key owners can choose to make their keys non-modifiable and non-extractable, ifthose options are indicated by your use-case.
Setting Partition Policies ManuallyThe Partition Security Officer can change available policies to customize partition functionality. Policy settingsapply to all roles/objects on the partition. Refer to "Partition Capabilities and Policies" on page 291 for a completelist of partition policies and their effects.
In most cases, partition policies are either enabled (1) or disabled (0), but some allow a range of values.
To change multiple policy settings during partition initialization, see "Setting Partition Policies Using aTemplate" on the next page.
See also "Configuring the Partition for Cloning or Export of Private/Secret Keys" on page 308.
Luna Network HSM 7 Partition Administration GuideLast Updated: 2022-07-26 23:53:21 GMT-04:00 Copyright 2001-2022 Thales Group 303

Chapter 9: Partition Capabilities and Policies
Prerequisites> The partition must be initialized (see "Initializing an Application Partition" on page 287).
> If you are changing a destructive policy, back up any important cryptographic objects (see "Backup andRestore Using a Luna Backup HSM (G5) " on page 397 or "Backup and Restore Using a Luna B700 BackupHSM" on page 426).
NOTE If you are running more than one LunaCM session against the same partition, andchange a partition policy in one LunaCM session, the new policy setting is visible in thatsession only (although it is in effect). You must exit and restart the other LunaCM sessions todisplay the new policy setting.
To manually set or change a partition policy
1. Launch LunaCM and set the active slot to the partition.
lunacm:> slot set -slot <slotnum>2. [Optional] Display the existing partition policy settings.
lunacm:> partition showpolicies3. Log in as Partition SO (see "Before you can perform administrative tasks on the partition or its stored
cryptographic objects, you must log in with the appropriate role:" on page 315).
lunacm:> role login -name po4. Change the policy setting by specifying the policy number and the desired value (0, 1, or a number in the
accepted range for that policy). You can specify multiple policy changes in the same command by usingcomma-separated lists (for example, -policy 33,37,40 -value 0,1,1).lunacm:> partition changepolicy -policy <policy_ID> -value <value>If you are changing a destructive policy, you are prompted to enter proceed to continue the operation.
Setting Partition Policies Using a TemplateA partition policy template is a file containing a set of preferred partition policy settings, used to initialize partitionswith those settings. You can use the same file to initialize multiple partitions, rather than changing policiesmanually after initialization. This can save time and effort when initializing partitions that are to function as an HAgroup, or must comply with your company's overall security strategy. Templates enable scalable policymanagement and simplify future audit and compliance requirements.
See also Setting HSM Policies Using a Policy Template.
NOTE This feature requires minimum firmware version 7.1.0 and client 7.1. See VersionDependencies by Feature for more information.
You can create a partition policy template file from an initialized or uninitialized partition, and edit it using astandard text editor. Partition policy templates have additional customization options.
Luna Network HSM 7 Partition Administration GuideLast Updated: 2022-07-26 23:53:21 GMT-04:00 Copyright 2001-2022 Thales Group 304

Chapter 9: Partition Capabilities and Policies
Policy templates cannot be used to alter settings for an initialized partition. Once a partition has been initialized,the Partition SOmust change individual policies manually (see "Setting Partition Policies Manually" onpage 303).
This section provides instructions for the following procedures, and some general guidelines and restrictions:
> "Creating a Partition Policy Template" below
> "Editing a Partition Policy Template" below
> "Applying a Partition Policy Template" on page 307
Creating a Partition Policy TemplateThe following procedure describes how to create a policy template for a partition. This can be done optionally attwo points in the partition setup process:
> before the partition is initialized: this produces a template file containing the default policy settings, which canthen be edited
> after initializing and setting the parititon policies manually: this produces a template file with the current policysettings, which can then be used to initialize other partitions with the same settings. The Partition SOmustcomplete the procedure.
To create a partition policy template
1. Launch LunaCM and set the active slot to the partition. If you are creating a template from an initializedpartition, you must log in as Partition SO.
lunacm:> slot set -slot <slotnum>lunacm:> role login -name po
2. Create the partition policy template file. Specify an existing save directory and original filename. No fileextension is required. If a template file with the same name exists in the specified directory, it is overwritten.
lunacm:> partition showpolicies -exporttemplate <filepath/filename>lunacm:> partition showpolicies -exporttemplate /usr/safenet/lunaclient/templates/ParPT
Partition policies for Partition: myPartition1 written to/usr/safenet/lunaclient/templates/ParPT
Command Result : No Error
Editing a Partition Policy TemplateUse a standard text editor to manually edit policy templates for custom configurations. This section providestemplate examples and customization guidelines.
Partition Policy Template ExampleThis example shows the contents of a partition policy template created using the factory default policy settings.Use a standard text editor to change the policy and/or destructiveness values (0=OFF, 1=ON, or the desiredvalue 0-255).
Luna Network HSM 7 Partition Administration GuideLast Updated: 2022-07-26 23:53:21 GMT-04:00 Copyright 2001-2022 Thales Group 305

Chapter 9: Partition Capabilities and Policies
Partition policy template entries have two additional fields:Off to on destructive andOn to off destructive(see example below). Change these values to 0 or 1 to determine whether cryptographic objects on the partitionshould be deleted when this policy is changed in the future. Policies that lower the security level of the objectsstored on the partition are normally destructive, but it may be useful to customize this behavior for your ownsecurity strategy. See "Partition Capabilities and Policies" on page 291 for more information.
CAUTION! Setting policy destructiveness to 0 (OFF) makes partitions less secure. Use thisfeature only if your security strategy demands it.
If you export a policy template from an uninitialized partition, the Sourced from partition header field remainsblank. This field is informational and you can still apply the template.
The Policy Description field is included in the template for user readability only. Policies are verified by thenumber in the Policy ID field.# Policy template FW Version 7.1.0# Field format - Policy ID:Policy Description:Policy Value:Off to on destructive:On to offdestructive# Sourced from partition: myPartition1, SN: 154438865290
0:"Allow private key cloning":1:1:01:"Allow private key wrapping":0:1:02:"Allow private key unwrapping":1:0:03:"Allow private key masking":0:1:04:"Allow secret key cloning":1:1:05:"Allow secret key wrapping":1:1:06:"Allow secret key unwrapping":1:0:07:"Allow secret key masking":0:1:010:"Allow multipurpose keys":1:1:011:"Allow changing key attributes":1:1:015:"Ignore failed challenge responses":1:1:016:"Operate without RSA blinding":1:1:017:"Allow signing with non-local keys":1:0:018:"Allow raw RSA operations":1:1:020:"Max failed user logins allowed":10:0:021:"Allow high availability recovery":1:0:022:"Allow activation":0:0:023:"Allow auto-activation":0:0:025:"Minimum pin length (inverted 255 - min)":248:0:026:"Maximum pin length":255:0:028:"Allow Key Management Functions":1:1:029:"Perform RSA signing without confirmation":1:1:031:"Allow private key unmasking":1:0:032:"Allow secret key unmasking":1:0:033:"Allow RSA PKCS mechanism":1:1:034:"Allow CBC-PAD (un)wrap keys of any size":1:1:039:"Allow Start/End Date Attributes":0:1:040:"Require Per-Key Authorization Data":0:1:041:"Partition Version":0:0:1
Editing Guidelines and RestrictionsWhen creating or editing partition policy templates:
Luna Network HSM 7 Partition Administration GuideLast Updated: 2022-07-26 23:53:21 GMT-04:00 Copyright 2001-2022 Thales Group 306

Chapter 9: Partition Capabilities and Policies
> You can remove a policy from the template by adding # at the beginning of the line or deleting the line entirely.When you apply the template, the partition will use the default values for that policy.
> Partition policy templates from older Luna versions (6.x or earlier) cannot be applied to Luna 7.x partitions.
> This version of the partition policy template feature is available on Luna 7.x application partitions only. Whenthe active slot is set to a Luna 6.x partition, the -exporttemplate option is not available.
> If you are using Secure Trusted Channel (STC) client connections, you cannot use partition policy templates.
> The following restrictions apply when configuring partitions for Cloning or Key Export (see "Configuring thePartition for Cloning or Export of Private/Secret Keys" on the next page for more information):
• Partition policy 0: Allow private key cloning and partition policy 1: Allow private key wrapping cannever be set to 1 (ON) at the same time. Initialization fails if the template contains a value of 1 for bothpolicies.
• Partition policy 1: Allow private key wrappingmust always haveOff-to-on destructiveness set to 1(ON). Initialization fails if the template contains a value of 0 in this field.
> You may not use invalid policy values (outside the acceptable range), or values that conflict with your HSM orpartition's capabilities. For example, Partition capability 3: Enable private key masking is always 0, soyou cannot set the corresponding partition policy to 1. If you attempt to initialize a partition with a templatecontaining invalid policy values, an error is returned and initialization fails.
If there is a mismatch between template policies and the default values of newer or dependent policies, then theattempt to apply the old policy would fail with CKR_FAILED_DEPENDENCIES.
You have the option to edit a policy file before applying it, to add newer policies.
Applying a Partition Policy TemplateThe following procedure describes how to initialize a partition using a policy template.
To apply a policy template to a new partition
1. Ensure that the template file is saved on the client workstation.2. Launch LunaCM and set the active slot to the new partition.
lunacm:> slot set -slot <slotnum>3. Initialize the partition, specifying a label and the policy template file. If the template file is not in the same
directory as LunaCM, include the correct filepath.
lunacm:> partition init -label <label> -applytemplate <filepath/filename>4. [Optional] Verify that the template has been applied correctly by checking the partition's policy settings.
Include the -verbose option to view the destructiveness settings.
lunacm:> partition showpolicies [-verbose]
Luna Network HSM 7 Partition Administration GuideLast Updated: 2022-07-26 23:53:21 GMT-04:00 Copyright 2001-2022 Thales Group 307

Chapter 9: Partition Capabilities and Policies
Configuring the Partition for Cloning or Export of Private/SecretKeysBy default, the Luna Network HSM stores all keys in hardware, allowing private asymmetric and secret keys tobe copied only to another Luna HSM (cloning). Cloning allows you to move or copy key material from a partitionto a backup HSM or to another partition in the same HA group. You might, however, want to export private orsecret keys to an encrypted file for off-board storage or use. Individual partitions can be configured in one ofthree modes for handling private keys.
NOTE This feature requires minimum firmware version 7.1.0. See Version Dependencies byFeature for more information.
The Partition SO can set the mode by changing the following policies (see "Partition Capabilities and Policies" onpage 291 for more information):
> Partition policy 0: Allow private key cloning (default: 1)> Partition policy 1: Allow private key wrapping (default: 0)
NOTE These partition policies can never be set both to 1 (ON) at the same time. An error willresult (CKR_CONFIG_FAILS_DEPENDENCIES) if it is attempted.
The policies can be set at the time of initialization, using a policy template (see "Setting Partition Policies Using aTemplate" on page 304) or by following the procedures described below:
> "Cloning Mode" on the next page
> "Key Export Mode" on page 310
> "No Backup Mode" on page 311
NOTE Partition configurations are listed in LunaCM as "Key Export With Cloning Mode". Thisindicates that the partition is capable of being configured for either Key Export or Cloning, withthe mode of operation defined by the policies listed above. You can never configure a partitionto allow both export and cloning of private keys at once.
Luna Network HSM 7 Partition Administration GuideLast Updated: 2022-07-26 23:53:21 GMT-04:00 Copyright 2001-2022 Thales Group 308

Chapter 9: Partition Capabilities and Policies
TIP Security Note -Cloning policies (0 and 4) permit or deny the ability to securely copy keysand objects into and out of a partition.The Key Management Functions policy (28) controls the ability to create, delete, generate,derive, or modify cryptographic objects in the current partition.
These controls are independent of each other. With Key Management functions denied, youcan still clone objects in and out of partitions where Cloning policy is allowed. Thus HA (highavailability) operation can clone keys into a partition that disallows Key Management functions(creation, deletion, etc.). Cloning a key or object into a partition is not consideredcreation - the key or object already existed within the security / cloning domain thatencompasses the partition.
Ultimately the security administrators define where keys can exist by controlling distribution ofthe security / cloning domain, and by defining policies around those keys.
Additionally, key owners can choose to make their keys non-modifiable and non-extractable, ifthose options are indicated by your use-case.
Cloning ModeA partition in Cloning mode has the following capabilities and restrictions:
> All keys/objects can be cloned to another partition or Luna Backup HSM in the same cloning domain.
> All keys/objects are replicated within the partition's HA group.
> Private asymmetric and secret keys cannot be wrapped off the HSM (cannot be exported to a file encryptedwith a wrapping key).
In this mode, private and secret keys are never allowed to exist outside of a trusted Luna HSM in the designatedcloning domain. Cloning mode is the default setting for new partitions.
Setting Cloning Mode on a PartitionCloning mode is the default setting on new partitions. If another mode was set previously, the Partition SO canuse the following procedure to set Cloning mode. Use lunacm:> partition showpolicies to see the current policysettings.
CAUTION! Partition policy 0: Allow private key cloning is Off-to-On destructive by default.Back up any important cryptographic material on the partition before continuing. Thisdestructiveness setting can be customized by initializing the partition with a policy template(see "Editing a Partition Policy Template" on page 305).
To manually set Cloning mode on a partition
1. Log in to the partition as Partition SO.lunacm:> slot set -slot <slotnum>lunacm:> role login -name po
2. Set partition policy 1: Allow private key wrapping to 0 (OFF).
Luna Network HSM 7 Partition Administration GuideLast Updated: 2022-07-26 23:53:21 GMT-04:00 Copyright 2001-2022 Thales Group 309

Chapter 9: Partition Capabilities and Policies
lunacm:> partition changepolicy -policy 1 -value 03. Set partition policy 0: Allow private key cloning to 1 (ON).
lunacm:> partition changepolicy -policy 0 -value 1
To initialize a partition in Cloning mode using a policy template
Use a standard text editor to include the following lines in the policy template file (see "Editing a Partition PolicyTemplate" on page 305):0:"Allow private key cloning":1:1:01:"Allow private key wrapping":0:1:0
Key Export ModeA partition in Key Export mode has the following capabilities and restrictions:
> Private asymmetric and secret keys cannot be cloned to other partitions nor to a Luna Backup HSM.
> The partition cannot be part of an HA group (private keys will not be replicated).
> All keys/objects, including private keys, can be wrapped off the HSM (can be exported to a file encrypted witha wrapping key).
This mode is useful when generating key pairs for identity issuance, where transient key-pairs are generated,wrapped off, and embedded on a device. They are not used on the HSM, but generated and issued securely, andthen deleted from the HSM.
Setting Key Export Mode on a PartitionThe Partition SO can use the following procedure to set Key Export mode. Use lunacm:> partitionshowpolicies to see the current policy settings.
CAUTION! Partition policy 1: Allow private key wrapping is always Off-to-On destructive.Back up any important cryptographic material on the partition before continuing. Thisdestructiveness setting cannot be changed with a policy template (see "Editing Guidelines andRestrictions" on page 306).
To manually set Key Export mode on a partition
1. Launch LunaCM and log in to the partition as Partition SO.
lunacm:> slot set -slot <slotnum>lunacm:> role login-name po
2. Set partition policy 0: Allow private key cloning to 0 (OFF).lunacm:> partition changepolicy -policy 0 -value 0
3. Set partition policy 1: Allow private key wrapping to 1 (ON).lunacm:> partition changepolicy -policy 1 -value 1
Luna Network HSM 7 Partition Administration GuideLast Updated: 2022-07-26 23:53:21 GMT-04:00 Copyright 2001-2022 Thales Group 310

Chapter 9: Partition Capabilities and Policies
To initialize a partition in Key Export mode using a policy template
Use a standard text editor to include the following lines in the policy template file (see "Editing a Partition PolicyTemplate" on page 305):0:"Allow private key cloning":0:1:01:"Allow private key wrapping":1:1:0
No Backup ModeA partition in No Backup mode has the following restrictions:
> Private asymmetric and secret keys cannot be cloned to other partitions or to a Luna Backup HSM. All otherobjects can still be cloned.
> Private asymmetric and secret keys cannot be wrapped off the HSM (exported to a file encrypted with awrapping key). All other objects can still be wrapped off.
Without backup capability, private keys can never leave the HSM. This mode is useful when keys are intended tohave short lifespans, and are easily replaced.
Setting No Backup Mode on a PartitionThe Partition SO can use the following procedure to set No Backup mode. Use lunacm:> partitionshowpolicies to see the current policy settings.
To manually set No Backup mode on a partition
1. Launch LunaCM and log in to the partition as Partition SO.
lunacm:> slot set -slot <slotnum>lunacm:> role login -name po
2. If partition policy 0: Allow private key cloning is set to 1 (ON), set it to 0 (OFF).lunacm:> partition changepolicy -policy 0 -value 0
3. If partition policy 1: Allow private key wrapping is set to 1 (ON), set it to 0 (OFF).lunacm:> partition changepolicy -policy 1 -value 0
To initialize a partition in No Backup mode using a policy template
Use a standard text editor to include the following lines in the policy template file (see "Editing a Partition PolicyTemplate" on page 305):0:"Allow private key cloning":0:1:01:"Allow private key wrapping":0:1:0
Luna Network HSM 7 Partition Administration GuideLast Updated: 2022-07-26 23:53:21 GMT-04:00 Copyright 2001-2022 Thales Group 311
CHAPTER 10: Partition Roles
The security of an HSM and its cryptographic contents depends on well-controlled access to that HSM. Acontrolled access policy is defined by:
> the set of users with valid login credentials for the appliance, the HSM and the application partition
> the actions each user is allowed to perform when logged in (the user's role)
For example, an access policy that adheres to the PKCS#11 standard requires two roles: the security officer(SO), who administers the user account(s), and the standard user, who performs cryptographic operations.When a user logs in to the HSM, they can perform only those functions that are permitted for their role.
All cryptographic operations take place on an application partition. This partition is created on the HSM by theHSM SO and assigned to a registered client over a network (see Application Partitions). Partition roles allow thepartition to function as an independent virtual HSM, with its own Security Officer and users. This design providesmore flexibility in meeting the security needs of your organization. Personnel holding the roles described belowmust have administrative access to a client workstation with a partition assigned to it and Luna HSM Clientinstalled. They do not require SSH access to LunaSH on the Luna Network HSM appliance.
The partition-level roles are as follows:
Partition Security Officer (PO)The Partition SO handles all administrative and configuration tasks on the application partition, including:
> Initializing the partition, setting the PO credential, and setting a cloning domain for the partition (see"Initializing an Application Partition" on page 287)
> Configuring partition policies (see "Partition Capabilities and Policies" on page 291)
> Initializing the Crypto Officer role (see "Initializing the Crypto Officer Role " on page 316)
> Activating the partition (see "Activation and Auto-activation on Multi-factor- (PED-) AuthenticatedPartitions" on page 320)
Managing the Partition SO RoleRefer also to the following procedures to manage the PO role:
> "Before you can perform administrative tasks on the partition or its stored cryptographic objects, you must login with the appropriate role:" on page 315
> "Changing a Partition Role Credential" on page 318
Crypto Officer (CO)The Crypto Officer is the primary user of the application partition and the cryptographic objects stored on it. TheCrypto Officer has the following responsibilities:
> Creating, deleting, and modifying cryptographic objects via user applications
> Performing cryptographic operations via user applications
Luna Network HSM 7 Partition Administration GuideLast Updated: 2022-07-26 23:53:21 GMT-04:00 Copyright 2001-2022 Thales Group 312

Chapter 10: Partition Roles
> Managing backup and restore operations for partition objects:
• "Backup and Restore Using a Luna Backup HSM (G5) " on page 397
• "Backup and Restore Using a Luna B700 Backup HSM" on page 426
> Create and configure HA groups (see "Setting Up an HA Group" on page 373)
> Initializing the Crypto User role (see "Initializing the Crypto User Role" on page 318)
> The CO can modify keys - must provide per-key authorisation (PKA) data for unassigned keys
> The CO can unblock blocked (due to per-key auth failures) PKA keys
> The CO can increment usage counters and change/set the limit
> The CO can perform SMK rollover
Managing the Crypto Officer RoleRefer also to the following procedures to manage the CO role:
> "Before you can perform administrative tasks on the partition or its stored cryptographic objects, you must login with the appropriate role:" on page 315
> "Changing a Partition Role Credential" on page 318
Limited Crypto Officer (LCO)The Limited Crypto Officer is a role needed for eIDAS compliance and the performance of Per Key Authorizationfunctions, with a subset of the abilities and responsibilities of the Crypto Officer, but wider authority and abilitythan the Crypto User. The LCO is created by the partition CO. The LCO role is visible and accessible in V1partitions if the Client software version is 10.3 or newer. The Limited Crypto Officer has the following abilities andresponsibilities:
> Creating, deleting, and modifying cryptographic objects via user applications
> Performing cryptographic operations via user applications
• The LCO can copy and modify keys and private objects- must provide per-key authorisation (PKA) datafor unassigned keys
• The LCO can increment usage counters, but cannot change/set the limit
• The LCO cannot unblock blocked (due to per-key auth failures) PKA keys
• The LCO can wrap/unwrap keys - must specify the per-key auth data for both the wrapping/unwrappingkeys and the wrapped/unwrapped keys
• The LCO can derive keys - must provide the per-key auth data for the key used for derivation and specifythe per-key auth data for the key being derived in the template
• The LCO can derive-and-wrap - must provide per-key auth data as above
• The LCO can perform SKS operations (SIMExtract / SIMInsert)
• The LCO cannot perform SMK rollover
> Creating and configuring HA groups (see "Setting Up an HA Group" on page 373)
> Initializing the Crypto User role (see "Initializing the Crypto User Role" on page 318)
Luna Network HSM 7 Partition Administration GuideLast Updated: 2022-07-26 23:53:21 GMT-04:00 Copyright 2001-2022 Thales Group 313

Chapter 10: Partition Roles
Managing the Limited Crypto Officer RoleRefer also to the following procedures to manage the LCO role:
> "Before you can perform administrative tasks on the partition or its stored cryptographic objects, you must login with the appropriate role:" on the next page
> "Changing a Partition Role Credential" on page 318
> The LCO role does not support cloning
> The LCO role is not visible for V0 partitions.
> The LCO role is subject to role-affecting partition policies like
• Minimum PIN length [25]
• Maximum PIN length [26]
• Maximum failed challenge responses [15]
• Maximum failed user logins allowed [20]
– Upon reaching the limit, the LCO is locked out; CO and CU remain operational
– Partition CO can unlock a locked LCO by resetting its credentials
> The LCO can create and destroy private objects
> The LCO can generate keys assigned or unassigned, but cannot assign a key after it is generated.
> The LCO can delete keys
• Unlike CO role, LCOmust provide per-key authorization (PKA) data
• LCO supports the “single-use signing keys” scenario where a user generates a key, signs with that key,and deletes the key
> The LCO can modify keys - must provide per-key authorisation (PKA) data for unassigned keys
> The LCO can increment usage counters but, unlike CO, cannot change/set the limit
> The LCO can wrap/unwrap
• PKA behaviour for wrap: must provide the per-key auth data for both the wrapping and the wrapped keys
• PKA behaviour for unwrap: must provide the per-key auth data for unwrapping key and specify the per-keyauth data for the unwrapped key in the template
> For PKA operation
• The LCO can derive keys
• The LCO can derive-and-wrap
> The LCO can extract/insert in all scenarios
• Including SKS key migration (old SKS: Insert; no Extract)
• Including new SKS (Extract and Insert)
> The LCO cannot clone/replicate in any scenario - this means that LCO is not self-sufficient for HA; the CO isneeded to clone SMK(s)
> Unlike the CO, the LCO cannot perform SMK rollover
Luna Network HSM 7 Partition Administration GuideLast Updated: 2022-07-26 23:53:21 GMT-04:00 Copyright 2001-2022 Thales Group 314

Chapter 10: Partition Roles
Crypto User (CU)The Crypto User is an optional role that can perform cryptographic operations using partition objects in a read-only capacity, but can create only public objects. This role is useful in that it provides limited access; the CryptoOfficer is the only role that can make significant changes to the contents of the partition. The Crypto User has thefollowing capabilities:
> Performing operations like encrypt/decrypt and sign/verify using objects on the partition
> Creating and backing up public objects:
• "Backup and Restore Using a Luna Backup HSM (G5) " on page 397
• "Backup and Restore Using a Luna B700 Backup HSM" on page 426
> The CU can increment usage counters but, unlike CO, cannot change/set the limit
Managing the Crypto User RoleRefer also to the following procedures to manage the CU role:
> "Before you can perform administrative tasks on the partition or its stored cryptographic objects, you must login with the appropriate role:" below
> "Changing a Partition Role Credential" on page 318
Before you can perform administrative tasks on the partition or its stored cryptographic objects, you must log inwith the appropriate role:
> Partition Security Officer (specify po for <role>)> Crypto Officer (specify co for <role>)> Crypto User (specify cu for <role>)
To log in to the application partition
1. Launch LunaCM on the Luna Network HSM client workstation.
2. Set the active slot to the desired partition.lunacm:> slot set -slot <slotnum>
3. Log in by specifying your role on the partition.lunacm:> role login -name <role>You are prompted for the role's credential.
Failed Partition Login AttemptsThe consequences of multiple failed login attempts vary by role, depending on the severity of the security riskposed by that role being compromised. This is a security feature meant to thwart repeated, unauthorizedattempts to access your cryptographic material.
NOTE The systemmust actually receive some erroneous/false information before it logs afailed attempt; if you merely forget to insert a PED key, or insert the wrong color key, that is notcounted as a failed attempt. You must insert an incorrect PED key of the correct type, or enteran incorrect PED PIN or challenge secret, to fail a login attempt.
Luna Network HSM 7 Partition Administration GuideLast Updated: 2022-07-26 23:53:21 GMT-04:00 Copyright 2001-2022 Thales Group 315

Chapter 10: Partition Roles
Partition Security OfficerIf you fail ten consecutive Partition SO login attempts, the partition is zeroized and all cryptographic objects aredestroyed. The Partition SOmust re-initialize the partition and Crypto Officer role, who can restore key materialfrom a backup device.
Crypto OfficerIf you fail ten consecutive Crypto Officer login attempts, the CO and CU roles are locked out. The default lockoutthreshold of 10 is governed by partition policy 20: Max failed user logins allowed, and the Partition SO can setthis threshold lower if desired (see "Partition Capabilities and Policies" on page 291). Recovery depends on thesetting of HSM policy 15: Enable SO reset of partition PIN:> If HSM policy 15 is set to 1 (enabled), the CO and CU roles are locked out. The Partition SOmust unlock the
CO role and reset the credential (see "Resetting the Crypto Officer, Limited Crypto Officer, or Crypto UserCredential" on page 319).
> If HSM policy 15 is set to 0 (disabled), the CO and CU roles are permanently locked out and the partitioncontents are no longer accessible. The Partition SOmust re-initialize the partition and the Crypto Officer role,who can restore key material from a backup. This is the default setting.
CAUTION! If this is not the desired outcome, ensure that the HSM SO enables this destructivepolicy before creating and assigning partitions to clients.
Crypto UserIf you fail ten consecutive Crypto User login attempts, the CU role is locked out. The default lockout threshold of10 is governed by partition policy 20: Max failed user logins allowed, and the Partition SO can set thisthreshold lower if desired (see "Partition Capabilities and Policies" on page 291). The COmust unlock the CUrole and reset the credential (see "Resetting the Crypto Officer, Limited Crypto Officer, or Crypto UserCredential" on page 319).
The following procedures will allow you to initialize the Crypto Officer (CO) and Crypto User (CU) roles and setan initial credential.
As of Network appliance software 7.7.1 (and newer), in addition to creating an application partition, theadministrator (HSM SO) can also initialize the partition, creating the PSO role. The administrator can then usethe new PSO credential on that partition to initialize the Crypto Officer role. The Crypto User role is still createdfrom the client side, via lunacm.
Initializing the Crypto Officer RoleThe Crypto Officer (CO) is the primary user of the application partition and the cryptographic objects stored on it.The Partition Security Officer (PO) must initialize the CO role and assign an initial credential.
To initialize the Crypto Officer role from the Client via lunacm
1. In LunaCM, log in to the partition as Partition SO (see "Before you can perform administrative tasks on thepartition or its stored cryptographic objects, you must log in with the appropriate role:" on the previous page).
lunacm:> role login -name po
Luna Network HSM 7 Partition Administration GuideLast Updated: 2022-07-26 23:53:21 GMT-04:00 Copyright 2001-2022 Thales Group 316

Chapter 10: Partition Roles
2. Initialize the Crypto Officer role. If you are using a password-authenticated partition, specify a CO password.If you are using a PED-authenticated partition, ensure that you have a blank or rewritable black PED keyavailable. Refer to "Creating PED Keys" on page 243 for details on creating PED keys.
In LunaCM, passwords and activation challenge secrets must be 8-255 characters in length (NOTE: If youare using firmware version 7.0.x, 7.3.3, or 7.4.2, activation challenge secrets must be 7-16 characters inlength). The following characters are allowed:abcdefghijklmnopqrstuvwxyzABCDEFGHIJKLMNOPQRSTUVWXYZ0123456789 !@#$%^&*()-_=+[]
{}\|/;:',.<>?`~
Double quotation marks (") are problematic and should not be used within passwords.Spaces are allowed; to specify a password with spaces using the -password option, enclose the password indouble quotation marks.
lunacm:> role init -name co3. Provide the CO credential to your designated Crypto Officer.
NOTE If HSM policy 21: Force user PIN change after set/reset is enabled (this is thedefault setting), the COmust change the credential before any other actions are permitted. See"Changing a Partition Role Credential" on the next page.
To initialize the Crypto Officer role from the Network appliance via lunash
The following steps assume that the Network HSM administrator has created the partition ( "partitioncreate" on page 1 ) and has initialized the partition ( "partition init " on page 1 ), thus initializing the PSO rolefor that partition.
1. In LunaSH, log in to the HSM as SO if you are not already logged in.
lunash:> "hsm login" on page 12. Initialize the Crypto Officer role, providing the partition name, the PSO credential (already created) for that
partition, and the credential for the CO that is being created. If you are using a password-authenticatedpartition, specify a CO password. If you are using a PED-authenticated partition, ensure that you have a blankor rewritable black PED key available. Refer to "Creating PED Keys" on page 243 for details on creating PEDkeys.
In LunaSH, HSM role passwords must be 8-255 characters in length. The following characters are allowed:abcdefghijklmnopqrstuvwxyzABCDEFGHIJKLMNOPQRSTUVWXYZ0123456789 !@#$%^*()-_=+[]{}/:',.~
The following characters are invalid or problematic and must not be used in passwords: "&;<>\`|Spaces are allowed; to specify a password with spaces, enclose the password in double quotation marks.
lunash:> "partition init co [ LUNA-16119 ]" on page 1 -partition <partition name> -psopin<PSO'spassword> -copin <CO's password>
(Text credentials presented at the command line are ignored for PED-authenticated HSMs.)
3. Provide the CO credential to your designated Crypto Officer.
NOTE If HSM policy 21: Force user PIN change after set/reset is enabled (this is thedefault setting), the COmust change the credential before any other actions are permitted. Thisis done from a registered client, via lunacm commands -- see "Changing a Partition RoleCredential" on the next page.
Luna Network HSM 7 Partition Administration GuideLast Updated: 2022-07-26 23:53:21 GMT-04:00 Copyright 2001-2022 Thales Group 317

Chapter 10: Partition Roles
Any crypto operations, as well as initialization of the Crypto User role, performed by the CO, are done from aregistered client via a suitable API, or lunacm commands, respectively.
Initializing the Crypto User RoleThe Crypto User (CU) is an optional role that can perform cryptographic operations using partition objects in aread-only capacity, but can only create public objects. The Crypto Officer must initialize the CU role and assignan initial credential.
To initialize the Crypto User role
1. In LunaCM, log in to the partition as Crypto Officer (see "Before you can perform administrative tasks on thepartition or its stored cryptographic objects, you must log in with the appropriate role:" on page 315).
lunacm:> role login -name co2. Initialize the Crypto User role. If you are using a password-authenticated partition, specify a CU password. If
you are using a PED-authenticated partition, ensure that you have a blank or rewritable gray PED keyavailable. Follow the instructions on the Luna PED screen. Refer to "Creating PED Keys" on page 243 fordetails on creating PED keys.
In LunaCM, passwords and activation challenge secrets must be 8-255 characters in length (NOTE: If youare using firmware version 7.0.x, 7.3.3, or 7.4.2, activation challenge secrets must be 7-16 characters inlength). The following characters are allowed:abcdefghijklmnopqrstuvwxyzABCDEFGHIJKLMNOPQRSTUVWXYZ0123456789 !@#$%^&*()-_=+[]
{}\|/;:',.<>?`~
Double quotation marks (") are problematic and should not be used within passwords.Spaces are allowed; to specify a password with spaces using the -password option, enclose the password indouble quotation marks.
lunacm:> role init -name cu3. Provide the CU credential to your designated Crypto User.
NOTE If HSM policy 21: Force user PIN change after set/reset is enabled (this is thedefault setting), the CUmust change the credential before any other actions are permitted. See"Changing a Partition Role Credential" below.
Changing a Partition Role CredentialFrom time to time, you may need to change the credential for a role. The credential might have beencompromised, or your organization's security policy may mandate password changes after a specific timeinterval. The following procedure allows you to change the credential for a partition role (Partition SO, CryptoOfficer, Crypto User). You must first log in using the role's current credential.
NOTE If partition policy 21: Force user PIN change after set/reset is set to 1 (default), thisprocedure is required after initializing or resetting the CO or CU role and/or creating a challengesecret.
Luna Network HSM 7 Partition Administration GuideLast Updated: 2022-07-26 23:53:21 GMT-04:00 Copyright 2001-2022 Thales Group 318

Chapter 10: Partition Roles
To change a partition role credential
1. In LunaCM, log in using the role's current credential (see "Before you can perform administrative tasks on thepartition or its stored cryptographic objects, you must log in with the appropriate role:" on page 315).
lunacm:> role login -name <role>2. Change the credential for the logged-in role. If you are using a password-authenticated partition, specify a
new password. If you are using a PED-authenticated partition, ensure that you have a blank or rewritablePED key available. Refer to "Creating PED Keys" on page 243 for details on creating PED keys.
In LunaCM, passwords and activation challenge secrets must be 8-255 characters in length (NOTE: If youare using firmware version 7.0.x, 7.3.3, or 7.4.2, activation challenge secrets must be 7-16 characters inlength). The following characters are allowed:abcdefghijklmnopqrstuvwxyzABCDEFGHIJKLMNOPQRSTUVWXYZ0123456789 !@#$%^&*()-_=+[]
{}\|/;:',.<>?`~
Double quotation marks (") are problematic and should not be used within passwords.Spaces are allowed; to specify a password with spaces using the -password option, enclose the password indouble quotation marks.
lunacm:> role changepw -name <role>3. To change the CO or CU challenge secret for an activated PED-authenticated partition, specify the -oldpw
and/or -newpw options.
lunacm:> role changepw -name <role> -oldpw <oldpassword> -newpw <newpassword>
TIP Where you have an HA Indirect Login setup (see High Availability Indirect Login), yourHSM is made accessible by other HSMs.Adding a challenge secret to your role, that is unknown to other parties, does not prevent otherparties from logging into your HSM.Rather it prevents other parties from using your particular role without that extra credential.To prevent other parties accessing your HSM, change the PIN.
Resetting the Crypto Officer, Limited Crypto Officer, or CryptoUser CredentialIf necessary, the Crypto Officer can reset the Crypto User credential at any time, without providing the currentcredential. This is useful in cases where the Crypto User credential has been lost or otherwise compromised.
Prerequisites for Crypto Officer ResetThe Partition SO can also reset the Crypto Officer's credential, if HSM policy 15: Enable SO reset of partitionPIN is enabled. By default, this policy is not enabled, and changing it is destructive. If you want the Partition SOto be able to reset the CO's credential, the HSM SOmust enable this policy before creating the applicationpartition (see "Partition Capabilities and Policies" on page 291).
Luna Network HSM 7 Partition Administration GuideLast Updated: 2022-07-26 23:53:21 GMT-04:00 Copyright 2001-2022 Thales Group 319

Chapter 10: Partition Roles
CAUTION! HSM policy 15 is destructive when turned on. All partitions on the HSM and theircontents will be erased.
To reset the Crypto Officer, Limited Crypto Officer, or Crypto User credential
1. Log in with the appropriate role (see "Before you can perform administrative tasks on the partition or its storedcryptographic objects, you must log in with the appropriate role:" on page 315).
2. Reset the desired role's credential.In LunaCM, passwords and activation challenge secrets must be 8-255 characters in length (NOTE: If youare using firmware version 7.0.x, 7.3.3, or 7.4.2, activation challenge secrets must be 7-16 characters inlength). The following characters are allowed:abcdefghijklmnopqrstuvwxyzABCDEFGHIJKLMNOPQRSTUVWXYZ0123456789 !@#$%^&*()-_=+[]
{}\|/;:',.<>?`~
Double quotation marks (") are problematic and should not be used within passwords.Spaces are allowed; to specify a password with spaces using the -password option, enclose the password indouble quotation marks.
lunacm:> role resetpw -name <role>You are prompted to set a new credential for the role.
3. Provide the new credential to the Crypto Officer, Limited Crypto Officer(*), or Crypto User.
NOTE If HSM policy 21: Force user PIN change after set/reset is enabled, the user mustchange the credential before any other actions are permitted. See "Changing a Partition RoleCredential" on page 318.The CO can reset the LCO's primary credentials (lunacm:> role resetpw) regardless of thestatus of "Enable SO reset of a partition PIN" policy 15.
(*LCO is applicable to firmware 7.7.0 and newer.)
Activation and Auto-activation on Multi-factor- (PED-)Authenticated PartitionsAmulti-factor-authenticated partition (also known as PED-authenticated) requires a PED key each time a role(Partition SO, Crypto Officer, Limited Crypto Officer, Crypto User) logs in. For some use cases, such as keyvaulting, this physical key requirement is desirable. For many applications, however, it is impractical to requirethe full PED interaction every time.
For these use cases, the Partition SO can activate the partition and set a secondary password referred to as achallenge secret. When a partition is activated, the HSM caches the Crypto Officer and Limited Crypto Officerand Crypto User PED secrets upon first login, and subsequent logins require the challenge secret only. The PEDkey secret remains cached until the role is explicitly deactivated or the HSM loses power due to a reboot orpower outage.
Activation does not provide much advantage for clients that log in to the partition and remain logged in. It is anindispensable advantage in cases where the client application repeatedly logs in to perform a task, and then logsout or closes the cryptographic session after the task is completed.
Luna Network HSM 7 Partition Administration GuideLast Updated: 2022-07-26 23:53:21 GMT-04:00 Copyright 2001-2022 Thales Group 320

Chapter 10: Partition Roles
Auto-activationAuto-activation allows PED key credentials to remain cached even in the event of a reboot or a brief poweroutage (up to 2 hours).
Tamper events and activation/auto-activationWhen a tamper event occurs, or if an uncleared tamper event is detected on reboot, the cached PED key data iszeroized, and activation/auto-activation is disabled. See Tamper Events and "Partition Capabilities andPolicies" on page 291 for more information.
This section contains instructions for the following procedures:
> "Enabling Activation on a Partition" below
> "Activating a Role" below
> "Enabling Auto-activation" on the next page
> "Deactivating a Role" on page 323
Enabling Activation on a PartitionThe Partition SO can enable activation on a partition by setting partition policy 22: Allow activation to 1 (on).This setting enables activation for the Crypto Officer and Limited Crypto Officer and Crypto User roles. Whenpartition policy 22 is enabled, the Partition SO can set an initial challenge secret for the Crypto Officer.
Prerequisites> The partition must be initialized (see "Initializing an Application Partition" on page 287).
To enable activation on a partition
1. Log in to the partition as Partition SO (see "Before you can perform administrative tasks on the partition or itsstored cryptographic objects, you must log in with the appropriate role:" on page 315).
lunacm:> role login -name po2. Enable partition policy 22.
lunacm:> partition changepolicy -policy 22 -value 1
Activating a RoleAfter enabling partition policy 22, activate the CO or LCO or CU roles on the partition. You must set a PEDchallenge password for each role you want to activate. The Partition SOmust set the initial challenge secret forthe Crypto Officer, who must set it for the Limited Crypto Officer or Crypto User. The role becomes activated thefirst time the user logs in to the partition.
Prerequisites> Partition policy 22: Allow activationmust be enabled on the partition (see "Enabling Activation on a
Partition" above).
> The role you wish to activate must be initialized on the partition (see "The following procedures will allow youto initialize the Crypto Officer (CO) and Crypto User (CU) roles and set an initial credential. " on page 316).
Luna Network HSM 7 Partition Administration GuideLast Updated: 2022-07-26 23:53:21 GMT-04:00 Copyright 2001-2022 Thales Group 321

Chapter 10: Partition Roles
To activate a role
1. Log in to the partition using the appropriate role (see "Before you can perform administrative tasks on thepartition or its stored cryptographic objects, you must log in with the appropriate role:" on page 315):
• If you are activating the Crypto Officer role, log in as Partition SO.
• If you are activating the Crypto User or Limited Crypto Officer role, log in as Crypto Officer.
lunacm:> role login -name <role>2. Set an initial challenge secret for the role you wish to activate. The length of the challenge secret is
configurable by the Partition SO (see "Partition Capabilities and Policies" on page 291).
In LunaCM, passwords and activation challenge secrets must be 8-255 characters in length (NOTE: If youare using firmware version 7.0.x, 7.3.3, or 7.4.2, activation challenge secrets must be 7-16 characters inlength). The following characters are allowed:abcdefghijklmnopqrstuvwxyzABCDEFGHIJKLMNOPQRSTUVWXYZ0123456789 !@#$%^&*()-_=+[]
{}\|/;:',.<>?`~
Double quotation marks (") are problematic and should not be used within passwords.Spaces are allowed; to specify a password with spaces using the -password option, enclose the password indouble quotation marks.
lunacm:> role createchallenge -name <role>
NOTE Activation requires that a challenge secret is set for the specified role. If the role doesnot have a challenge secret, you are prompted for the PED key, regardless of the policy setting.
3. Log out of the partition.lunacm:> role logout
4. Provide the initial challenge secret to the designated CO or CU by secure means. The PED secret is cachedwhen they log in for the first time. The CO or CU can store the black or gray PED key in a safe place. Thecached PED secret allows their application(s) to open and close sessions and perform operations withinthose sessions.
NOTE If HSM policy 21: Force user PIN change after set/reset is enabled (this is thedefault setting), the CO or CUmust change the challenge secret before any other actions arepermitted. See "Changing a Partition Role Credential" on page 318.
NOTE The PED screen prompts for a Black PED Key for any of "User", "Crypto Officer","Limited Crypo Officer", "Crypto User". The PED is not aware that the key you present has ablack or a gray sticker on it. The colored stickers are visual identifiers for your convenience inkeeping track of your PED Keys. You differentiate by how you label, and how you use, a givenphysical key that the PED sees as "black" (once it has been imprinted with a secret).
Enabling Auto-activationAuto-activation allows PED key credentials to be cached even in the event of a reboot or a brief power outage(up to 2 hours). Clients can re-connect and continue using the application partition without needing to re-authenticate using a PED key.
Luna Network HSM 7 Partition Administration GuideLast Updated: 2022-07-26 23:53:21 GMT-04:00 Copyright 2001-2022 Thales Group 322

Chapter 10: Partition Roles
The Partition SO can enable auto-activation on a partition by setting partition policy 23: Allow auto-activation.
Prerequisites> Partition policy 22: Allow activationmust be enabled on the partition (see "Enabling Activation on a
Partition" on page 321).
To enable auto-activation on a partition
1. Log in to the partition as Partition SO (see "Before you can perform administrative tasks on the partition or itsstored cryptographic objects, you must log in with the appropriate role:" on page 315).
lunacm:> role login -name po2. Enable partition policy 23.
lunacm:> partition changepolicy -policy 23 -value 1Auto-activation takes effect for each affected role (CO and/or CU) the next time the role is authenticated.
3. [Optional] For optimal reliability, the Luna Network HSM admin or operator can set the appliance to rebootautomatically if it fails to complete a normal shutdown. Log in to LunaSH to change this setting.
lunash:> sysconf appliance rebootonpanic enable
Deactivating a RoleAn activated role on a partition remains activated until it is explicitly deactivated, or the HSM loses power due to areboot or power outage (with auto-activation disabled). This deletes the cached PED secret for the role.
Prerequisites> You must be authorized to deactivate the role. The CO and CU can manually deactivate their own or each
other's roles. The Partition SO can deactivate both the CO and CU roles.
To deactivate a role on a partition
1. Log in to the partition with the appropriate role (see "Before you can perform administrative tasks on thepartition or its stored cryptographic objects, you must log in with the appropriate role:" on page 315).
lunacm:> role login -name <role>2. Specify the role you wish to deactivate.
lunacm:> role deactivate -name <role>This deletes the cached authentication credential for the role. The next time the role logs in, the credential isre-cached.
3. If you wish to disable activation entirely, so that credentials are not re-cached at the next login, the PartitionSO can disable partition policy 22: Allow activation.lunacm:> partition changepolicy -policy 22 -value 0
4. If partition policy 22 is disabled, auto-activation is also disabled (even though partition policy 23: Allowauto-activation is set to 1). When partition policy 22 is enabled again, auto-activation resumes. To turn offauto-activation, you must disable partition policy 23.
Luna Network HSM 7 Partition Administration GuideLast Updated: 2022-07-26 23:53:21 GMT-04:00 Copyright 2001-2022 Thales Group 323

Chapter 10: Partition Roles
lunacm:> partition changepolicy -policy 23 -value 0
Security of Your Partition ChallengeFor Luna Network HSMs with Password Authentication, the partition password used for administrative access bythe Crypto Officer is also the partition challenge secret or password used by client applications.
For Luna Network HSMs with PED Authentication, the partition authentication used for administrative access bythe Crypto Officer is the secret on the black PED key(s) for that partition. The partition challenge secret orpassword used by client applications is a separate character string, set by the Partition SO and then changed bythe Crypto Officer (mandatory) for the CO's use. This is one way in which we implement separation of roles in theLuna HSM security paradigm.
How Secure Is the Challenge Secret or Password?The underlying concern is that a password-harvesting attack might eventually crack the secret that protects thepartition. Layers of protection are in place, to minimize or eliminate such a risk.
First, such an attack must be run from a Luna HSM Client computer. For interaction with HSM partitions on aLuna Network appliance, like Luna Network HSM, a Luna HSM Client computer is one with Luna softwareinstalled, on which you have performed the exchange of certificates to create a Network Trust Link (NTL). Thatexchange requires the knowledge and participation of the appliance administrator and the Partition SO (whomight, or might not, be the same person). It is not possible to secretly turn a computer into a Client of a LunaHSM partition - an authorized person within your organization must participate.
Second, for Luna HSMs with password authentication, you set the partition password directly when you createthe partition, so you can make it as secure as you wish (for an example of guidance on password strength, seehttp://howsecureismypassword.net/ or http://xkcd.com/936/)
For Luna HSMs with PED authentication, an optional partition password (also called a challenge secret) may beadded for the initialized Crypto Officer (CO) and/or Crypto User (CU) roles. See role createchallenge for theproper command syntax.
Using LunaCM or LunaSH, you can change the partition password (or challenge secret) if you suspect it hasbeen compromised, or if you are complying with a security policy that dictates regular password changes.
As long as you replace any password/challenge secret with one that is equally secure, the possible vulnerabilityis extremely small.
Conversely, you can choose to replace a secure, random password/challenge-secret with one that is shorter ormore memorable, but less secure - you assume the risks inherent in such a tradeoff.
Third, Luna HSM partition policy 15: Ignore failed challenge responses can be set to 0 (off). When thatpolicy is off, the HSM stops ignoring bad challenge responses (that is, attempts to submit the partition secret)and begins treating them as failed login attempts. Each bad login attempt is counted. Partition policy 20: Maxfailed user logins allowed determines how high that count can go before the partition is locked out.
Once a partition is locked by bad login attempts, it cannot be accessed until the HSM Security Officer (SO)unlocks it. This defeats an automated harvesting attack that relies on millions of attempts occurring at computer-generated speeds. As well, after one or two lockout cycles, the HSM SO would realize that an attack was underway and would rescind the NTL registration of the attacking computer. That computer would no longer exist asfar as the HSM partition was concerned. The SO or your security organization would then investigate how the
Luna Network HSM 7 Partition Administration GuideLast Updated: 2022-07-26 23:53:21 GMT-04:00 Copyright 2001-2022 Thales Group 324

Chapter 10: Partition Roles
client computer had been compromised, and would correct the problem before allowing any new NTLregistration from that source. See "Before you can perform administrative tasks on the partition or its storedcryptographic objects, you must log in with the appropriate role:" on page 315 for more information.
As the owner/administrator of the HSM, you determine any tradeoffs with respect to security, convenience, andother operational parameters.
Name, Label, and Password RequirementsThis page describes length and character requirements for setting names, labels, domains, passwords, andchallenge secrets on the Luna Network HSM. This information can also be found in relevant sections throughoutthe documentation. Refer to the applicable section below:
> "Custom Appliance User Accounts" below
> "Custom Appliance Roles" below
> "Appliance User Passwords" below
> "HSM Labels" on the next page
> "Cloning Domains" on the next page
> "Partition Names" on the next page
> "Partition Labels" on the next page
> "HSM/Partition Role Passwords or Challenge Secrets" on the next page
Custom Appliance User AccountsLunaSH user names can be 1-32 characters in length, chosen from letters a-z, or A-Z, numbers 0-9, the dash,the dot, or the underscore:
abcdefghijklmnopqrstuvwxyzABCDEFGHIJKLMNOPQRSTUVWXYZ0123456789-._
No spaces are allowed. User names cannot begin with a dot, dash, or number. As with any secure system, notwo users (regardless of role) can have the same name.
Custom Appliance RolesLunaSH role names can be 1-64 characters in length. The following characters are allowed:
abcdefghijklmnopqrstuvwxyzABCDEFGHIJKLMNOPQRSTUVWXYZ0123456789-._
No spaces are allowed. Role names cannot start with a dot or dash. Creating a role name that begins with anumber is not recommended. As with any secure system, no two roles can have the same name.
Appliance User PasswordsLunaSH passwords must be at least eight characters in length, and include characters from at least three of thefollowing four groups:
> lowercase alphabetic: abcdefghijklmnopqrstuvwxyz> uppercase alphabetic: ABCDEFGHIJKLMNOPQRSTUVWXYZ
Luna Network HSM 7 Partition Administration GuideLast Updated: 2022-07-26 23:53:21 GMT-04:00 Copyright 2001-2022 Thales Group 325

Chapter 10: Partition Roles
> numeric: 0123456789> special (spaces allowed): !@#$%^&*()-_=+[]{}\|/;:'",.<>?`~
HSM LabelsThe HSM label created during initialization must be 1-32 characters in length. If you specify a longer label, it willautomatically be truncated to 32 characters. Only alphanumeric characters and the underscore are allowed:abcdefghijklmnopqrstuvwxyzABCDEFGHIJKLMNOPQRSTUVWXYZ0123456789_
Cloning DomainsThe domain string must be 1-128 characters in length. The following characters are allowed:abcdefghijklmnopqrstuvwxyzABCDEFGHIJKLMNOPQRSTUVWXYZ0123456789 !@#$%^*-_=+[]{}/:',.~
The following characters are problematic or invalid and must not be used in a domain string: "&;<>\`|()
Spaces are allowed, as long as the leading character is not a space; to specify a domain string with spaces usingthe -domain option, enclose the string in double quotation marks.For password-authenticated HSMs, the domain string should match the complexity of the partition password.
Partition NamesPartition names created in LunaSHmust be 1-32 characters in length. The following characters are allowed:abcdefghijklmnopqurstuvwxyzABCDEFGHIJKLMNOPQRSTUVWXYZ 0123456789!@#$%^*()-_=+{}[]:,./?~
Spaces are allowed; enclose the partition name in double quotes if it includes spaces.
The following characters are not allowed: &\|;<>`'"?
No two partitions can have the same name.
Partition LabelsThe partition label created during initialization must be 1-32 characters in length. If you specify a longer label, itwill automatically be truncated to 32 characters. The following characters are allowed:abcdefghijklmnopqrstuvwxyzABCDEFGHIJKLMNOPQRSTUVWXYZ0123456789 !@#$%^&*()-_=+[]{}\|/;:',.<>`~
Question marks (?) and double quotation marks (") are not allowed.
Spaces are allowed; enclose the label in double quotation marks if it includes spaces.
HSM/Partition Role Passwords or Challenge SecretsIn LunaSH, HSM role passwords must be 8-255 characters in length. The following characters are allowed:abcdefghijklmnopqrstuvwxyzABCDEFGHIJKLMNOPQRSTUVWXYZ0123456789 !@#$%^*()-_=+[]{}/:',.~
The following characters are invalid or problematic and must not be used in passwords: "&;<>\`|
Spaces are allowed; to specify a password with spaces, enclose the password in double quotation marks.
In LunaCM, passwords and activation challenge secrets must be 8-255 characters in length (NOTE: If you areusing firmware version 7.0.x, 7.3.3, or 7.4.2, activation challenge secrets must be 7-16 characters in length). Thefollowing characters are allowed:abcdefghijklmnopqrstuvwxyzABCDEFGHIJKLMNOPQRSTUVWXYZ0123456789 !@#$%^&*()-_=+[]{}\|/;:',.<>?`~
Luna Network HSM 7 Partition Administration GuideLast Updated: 2022-07-26 23:53:21 GMT-04:00 Copyright 2001-2022 Thales Group 326

Chapter 10: Partition Roles
Double quotation marks (") are problematic and should not be used within passwords.
Spaces are allowed; to specify a password with spaces using the -password option, enclose the password indouble quotation marks.
Luna Network HSM 7 Partition Administration GuideLast Updated: 2022-07-26 23:53:21 GMT-04:00 Copyright 2001-2022 Thales Group 327

CHAPTER 11: Verifying the HSM'sAuthenticity
Hardware Security Modules have traditionally been deployed in the corporate data center’s most secure zone.Establishing trust with the HSM is, in part, achieved by physical access control. In cases of remote client usage(such as cloud cryptography), the client needs a way to verify the authenticity of the device protecting their mostvalued cryptographic keys.
Public Key ConfirmationsThales's Luna HSMs include factory-issued device identities certified by a Thales authority. The root of thisauthority is maintained by Thales in HSMs locked in a vault with layered physical and logical access controls.These certificates are used as the root of trust for the issuance of “public key confirmations” (PKCs), certificatesissued by the HSM attesting to the life cycle of a specific private key. A Luna HSM will issue confirmations onlyfor private keys that were created by the HSM and that can never exist outside of the HSM. A valid confirmationis cryptographic proof that a specific key is inside the identified HSM. The confirmation is also proof that that theidentified HSM is real.
The key pair within the HSM that signs the confirmation is called a Hardware Origin Key (HOK). It is protectedinside the HSM’s FIPS 140-2 Level 3 security boundary. Each HOK is unique and there is no way to extract orreplace it. The HOK is created in the HSM at the time of manufacture and certified by Thales’s securemanufacturing authority, which is certified by Thales’s root authority.
Public key confirmations are automatically generated for RSA key pairs in the HSM. A user can get aconfirmation through the PKCS #11 API or the Luna cmu utility, and use it to verify that any RSA key is protectedand has always been protected by a Luna HSM. A PKC bundle contains the following certificates:
> MIC:Manufacturing Integrity Certificate; corresponds to the Manufacturing Integrity Private Key (MIK),signed by the SafeNet Root.
> HOC: Hardware Origin Certificate; corresponds to the Hardware Origin Private Key (HOK). Unique to eachHSM. Signed by MIK.
> DAC: Device Authentication Certificate; corresponds to the Device Authentication Private Key (DAK). Uniqueto each HSM. Signed by HOK.
> PKC: Public Key Confirmation Certificate; certificate for a private key on the HSM. Signed by DAK.Public key confirmations are delivered as PKCS #7 files containing a certificate chain. The PKCS #7 files can beviewed using tools like OpenSSL and Microsoft’s Certificates snap-in for MMC.
NOTE While third-party tools are capable of cryptographically validating the certificatesignature chain, they may display some certificate errors, since they do not recognize someSafeNet-specific key usage attributes included in the certificates.
Luna Network HSM 7 Partition Administration GuideLast Updated: 2022-07-26 23:53:21 GMT-04:00 Copyright 2001-2022 Thales Group 328

Chapter 11: Verifying the HSM's Authenticity
Chains of TrustThe chain of trust available via the cmu utility included with the Luna HSM Client, Chrysalis-ITS, is built in bydefault, and originates from Thales's root certificate authority. It uses the MIC, HOC, DAC, and the PKC.
NOTE Since the introduction of Functionality Modules, HSMs are shipped from the factorywith FM-ready hardware. This means that they contain, and use, the HOK and the HOC, butthey also have the FM-HOK and FM-HOC on standby. If FMs are enabled on the HSM, theoriginal HOK and HOC are deleted, and the chain-of-trust, thereafter, proceeds through theFM-HOC.
Verifying the HSM's AuthenticityThe cmu utility also includes a command, cmu verifyhsm, that tests an HSM’s authenticity by creating andverifying a confirmation on a temporary key created in the HSM. The test includes a proof of possession thatasks the HSM to sign a user-entered string as proof the associated private key is present within the target HSM.
NOTE This confirmation procedure is currently not supported on FM-enabled HSMs. Refer toFM Deployment Constraints for details.
The test requires the SafeNet root certificate, provided below:
NOTE The current certificate is valid until 2031-12-31, but it might change before this date atThales's discretion. Ensure that you have the most recent version of this documentation.
To verify the HSM's authenticity
1. Right-click the link above and save the root certificate to the Luna HSM Client directory.
2. Open a command line and navigate to the Luna HSM Client directory.
3. Use the cmu utility to authenticate the HSM. You must specify a challenge string for the HSM to sign, and theroot certificate file:
# cmu verifyhsm -challenge <string> -rootcert safenet-root.pemWhen prompted, specify the partition you wish to use and the Crypto Officer credential for that partition.>cmu verifyhsm -challenge "1234567890" -rootcert safenet-root.pemSelect token[0] Token Label: mypartition-1[1] Token Label: mypartition-2Enter choice: 0
Luna Network HSM 7 Partition Administration GuideLast Updated: 2022-07-26 23:53:21 GMT-04:00 Copyright 2001-2022 Thales Group 329

Chapter 11: Verifying the HSM's Authenticity
Please enter password for token in slot 0 : ********Reading rootcert from file "safenet-root.pem"... ok.Generating temporary RSA keypair in HSM... ok.Extracting PKC bundle from HSM... ok.Verifying PKC certificate... ok.Verifying DAC certificate... ok.Verifying HOC certificate... ok.Verifying MIC certificate... ok.Verifying MIC against rootcert... ok.Signing and verifying challenge... ok.Verifying HSM serial number... ok.Overall status: Success.
If this test fails, contact the HSM SO.
Luna Network HSM 7 Partition Administration GuideLast Updated: 2022-07-26 23:53:21 GMT-04:00 Copyright 2001-2022 Thales Group 330

CHAPTER 12: Migrating Keys to Your NewHSM
This chapter describes how to migrate your keys and configuration from a Luna HSM 5.x or 6.x partition to aLuna HSM 7.x partition by using one of three methods; backup and restore, cloning, or cloning using a temporaryHA group:
> "Luna Network HSM (5.x or 6.x) to Luna Network HSM (7.x)" on page 333
> "Luna USB HSM (5.x or 6.x) to Luna Network HSM (7.x)" on page 339
> "Luna PCIe HSM (5.x or 6.x) to Luna Network HSM (7.x)" on page 344
> "Luna PCIe HSM or Luna USB HSM (5.x or 6.x) to Luna PCIe HSM (7.x)" on page 349
> "Moving from Pre-7.7.0 to Firmware 7.7.0 or Newer" on page 355
Refer also to the chapter on "Key Cloning" on page 187, particularly "Cloning Keys Between Luna 6, Luna 7, andLuna Cloud HSM" on page 191.
This document guides you through several migration scenarios consisting of older and newer Luna HSMs, usingeach applicable migration method. Before migrating, preconditions are provided for each scenario that must bemet. There are specific user roles that are identified for performing the migration. In addition, both authenticationmethods (password and PED-authenticated) are supported.
Supported Luna HSMsThis document describes key migration for these Luna HSMs:
> Luna Network HSM, version 5.x or 6.x to 7.x
> Luna USB HSM, version 5.x or 6.x to 7.x
> Luna PCIe HSM, version 5.x or 6.x to 7.x
Order of operationsAs indicated below, a variety of migration methods and paths are possible, and in your own situation, you mightbe performing different parts of an overall migration strategy at different times over some period. We advise tothink carefully about the order in which actions are performed, and this section is a quick summary ofconsiderations that might apply in your situation.
> If you have the older Luna HSMs and are using the older Luna Backup HSM (G5), then maintain that BackupHSM at firmware below version 6.26.0. Firmware 6.26.0 and above will work only with Luna HSMs 7.x. Bykeeping the pre-6.26.0 Backup firmware, initially, you maintain the option to make new backups from yourolder HSMs if that need arises before your 5.x or 6.x HSMs are decommissioned.
> Until you are ready to advance further, maintain your new 7.x HSMs at firmware below version 7.7.0 (werecommend 7.4.2) - with the Backup HSM (G5) below firmware 6.26.0, you can backup Luna 7.x HSMs up tofirmware version 7.4.2 which benefits from many fixes and improvements / features compared to prior 7.xversions.
Luna Network HSM 7 Partition Administration GuideLast Updated: 2022-07-26 23:53:21 GMT-04:00 Copyright 2001-2022 Thales Group 331

Chapter 12: Migrating Keys to Your New HSM
> In the case of multi-factor authenticated HSMs (PED-auth), the Luna PEDmust be at least at PED firmwareversion 2.7.1, which is the minimum PED firmware required for use with Luna 7.x HSMs.
> Assuming that everything goes well in your migration from HSMs version 5.x or 6.x to new version 7.x HSMs,you can then upgrade the Backup HSM (G5) and Luna PED to their latest firmware versions, and alsoupgrade the new Luna 7.x HSMs to the target firmware version 7.7.X or newer.
> These are the eventual target versions for all components:
• Luna PED firmware version 2.9.0 or newer (for the USB-powered PED) or PED firmware 2.7.4 or newer(for the AC-mains powered PED) are the minimum required to support Luna HSMs at firmware 7.7.x
• Backup HSM (G5) goes to firmware version 6.28 or newer, which is needed to support backup of LunaHSMs at firmware 7.7.x, and is compatible with client UC-10.3.
• UC-10.3 or newer is needed to support Luna HSMs at firmware version 7.7.x or newer
HSM firmware version 7.7.1 should be the target for both FIPS 140-2 Level 3 and CC EAL4+ (refer to the CRN tofind the latest FIPS and CC evaluated versions and to the NIST and Common Criteria sites for completed and in-progress applications).
Migration methodsThe three migration methods used in this guide are:
> Backup and restore
The backup and restore method uses the LunaCM partition archive backup command to backup keymaterial on an HSM (5.x or 6.x) partition and the Restore command to then restore this material to an HSM7.x partition.
> Cloning
The cloning method uses the LunaCM partition clone command to clone from an HSM (5.x or 6.x) partitionto an HSM 7.x partition. It is also referred to as slot-to slot cloning.
> Cloning using an HA group
The HA group method uses the LunaCM ha synchronize command on members of a temporary HA groupconsisting of a 5.x or 6.x HSM and a 7.x HSM, set up solely for the purpose of migration. After migration, thisgroup should be removed since the members are not using the same software version.
PreconditionsEach migration procedure in this document is prefaced by a "Preconditions" section that specifies the hardwareand software requirements along with any assumptions the procedure is using to perform the migration steps.Examples are a 5.x or 6.x HSM, a 7.x HSM, 5.x, 6.x or 7.x client software, user roles and the slot #s used in theprocedure.
Roles required for migrationThe following partition roles are needed to migrate key material:
> Partition Security Officer. The partition security officer role is needed to perform LunaCM HA operations andto create the Crypto Officer role.
Luna Network HSM 7 Partition Administration GuideLast Updated: 2022-07-26 23:53:21 GMT-04:00 Copyright 2001-2022 Thales Group 332

Chapter 12: Migrating Keys to Your New HSM
> Partition Crypto Officer. The partition Crypto Officer role is needed to perform LunaCM backup/restore andcloning operations.
NOTE When logging in to a partition, be mindful of whether you’re working with pre-PPSO orPPSO firmware. Use the partition login command if your HSM has pre-PPSO firmware(version 6.21.2 and earlier). Use the role login command if your HSM has PPSO firmware(version 6.22.0 and later). Also, with PPSO firmware 6.22.0 and later (up to but not includingfirmware 7.x), be careful with user names; that is, type Crypto Officer in full (is case sensitive)and not the abbreviation co.In firmware version release 7.x, partition login name requirements allow for abbreviations. Thatis, you can log in using po for Partition Security Officer or co for Crypto Officer.
Luna Network HSM (5.x or 6.x) to Luna Network HSM (7.x)This chapter describes how to migrate your key material from a release 5.x or 6.x Luna Network HSM partition toa release 7.x Luna Network HSM partition. You can migrate your key material using one of the following threemethods:
> "Backup and Restore" below
> "Cloning" on page 335
> "Cloning Using an HA Group" on page 337
Backup and RestoreCryptographic key material can be backed up and then restored to a release 7.x Luna Network HSM partitionusing a Luna Backup HSM.
The new configuration's operating systemmust be compatible with both the new 7.x and the old 5.x/6.xhardware. Consult the 5.x/6.x CRN for a list of compatible operating systems.
To backup and restore cryptographic keys from one HSM to another, the HSMs must share the same cloningdomain. For password-authenticated HSMs, this domain should have been specified when the partition wasinitialized. For PED-authenticated HSMs, the red key determines the cloning domain. You will need the same redkey that was imprinted during 5.x/6.x partition creation to initialize the 7.x partition (see "Initializing an ApplicationPartition" on page 287).
The 7.x client software should be installed, and the connection to both the source and destination partitionsverified, before attempting this procedure (see "Luna HSM Client Software Installation" on page 19 for details).The source and destination partitions must both be assigned to the client machine issuing the backup andrestore commands (see "Client-Partition Connections" on page 105 for details). Use slot list to ensure bothpartitions are visible to the client.
PreconditionsThe following instructions assume that:
> the 10.x client software has been installed
> an uninitialized partition has been created on the 7.x HSM
> the source and destination partitions are both registered with the client (visible)
Luna Network HSM 7 Partition Administration GuideLast Updated: 2022-07-26 23:53:21 GMT-04:00 Copyright 2001-2022 Thales Group 333

Chapter 12: Migrating Keys to Your New HSM
> the source partition's security policy allows cloning of private and secret keys
In the following example:
> Slot 0: the source 5.x/6.x partition
> Slot 1: the destination 7.x partition
> Slot 2: the Backup HSM partition
NOTE Partition login name requirements have changed with the hardware versions. Withrelease 7.x , you can log in using the abbreviated po (Partition Security Officer) or co (CryptoOfficer).
To migrate cryptographic keys from a 5.x/6.x partition to a 7.x partition using a Backup HSM
Follow these steps to back up all cryptographic material on a 5.x/6.x partition to a Backup HSM, and restore to anew 7.x partition.
1. Run LunaCM, set the current slot to the 7.x partition, and initialize the partition and the Partition SO role.
slot set -slot 0partition init -label <7.x_partition_label>a. If you are backing up a PED-authenticated 5.x/6.x partition, use the 5.x/6.x partition's red key when
prompted.
b. If you are backing up a password-authenticated 5.x/6.x partition, enter the same cloning domain whenprompted.
2. Log in as the po (Partition Security Officer) and initialize the co (Crypto Officer) role.role login -name porole init -name coIf you are backing up a PED-authenticated 5.x/6.x partition, you can create an optional challenge secret forthe Crypto Officer.
role createchallenge -name co -challengeSecret <password>3. Connect your backup HSM and make sure it is visible to the client, along with the 5.x/6.x and 7.x HSMs.
4. Set the current slot to the source 5.x/6.x slot.slot listslot set -slot 0
5. Log in as the Crypto Officer.
NOTE Be mindful of whether you’re working with pre-PPSO or PPSO firmware and use thepartition login or role login commands as specified below. Also, with PPSO firmware 6.22.0and up, be careful with user names, i.e., type Crypto Officer in full (is case sensitive) and notco.
a. If you are cloning a release 5.x or 6.x pre-PPSO partition (up to and including Firmware 6.21.2), use:
partition login
Luna Network HSM 7 Partition Administration GuideLast Updated: 2022-07-26 23:53:21 GMT-04:00 Copyright 2001-2022 Thales Group 334

Chapter 12: Migrating Keys to Your New HSM
b. If you are cloning a release 6.x PPSO partition (Firmware 6.22.0 and up) , use:
role login -name Crypto Officer6. Optional: To verify the objects in the 5.x/6.x partition to be cloned, issue the “partition contents” command.
partition contents7. Back up the 5.x/6.x partition contents to the Backup HSM.
partition archive backup -slot 2 -partition <backup_label>a. If you are backing up a PED-authenticated 5.x/6.x partition, use the 5.x/6.x partition's red key when
prompted.
b. If you are backing up a password-authenticated 5.x/6.x partition, enter the same cloning domain whenprompted.
Optionally, verify that all objects were backed up successfully on the Backup HSM by checking the partitioncontents.
8. Set the current slot to the 7.x partition, log in as the Crypto Officer, and restore from backup.
slot set -slot 1role login -name copartition archive restore -slot 2 -partition <backup_label>Afterwards, you can verify the partition contents on the 7.x partition:
partition contents
CloningThe simplest method of migrating key material to a new 7.x partition is slot-to-slot cloning. This procedure copiesall permitted cryptographic material from a 5.x/6.x Network HSM partition to a 7.x Network HSM partition.
The new configuration's operating systemmust be compatible with both the new 7.x and the old 5.x/6.xhardware. Consult the 5.x/6.x CRN for a list of compatible operating systems.
To clone cryptographic keys from one HSM to another, the HSMs must share the same cloning domain. Forpassword-authenticated HSMs, this domain should have been specified when the partition was initialized. ForPED-authenticated HSMs, the red key determines the cloning domain. You will need the same red key that wasimprinted during 5.x/6.x partition creation to initialize the 7.x partition (see "Initializing an Application Partition" onpage 287).
The 7.x client software should be installed, and the connection to both the source and destination partitionsverified, before attempting this procedure (see "Luna HSM Client Software Installation" on page 19 for details).The source and destination partitions must both be assigned to the client machine issuing the cloning commands(see "Client-Partition Connections" on page 105 for details). Use slot list to ensure both partitions are visible tothe client.
If the source partition contains asymmetric keys, its security policy must allow cloning of private and secret keys.Use lunacm:> partition showpolicies to ensure that your source partition's security template allows this. If the5.x/6.x HSM's security template does not allow cloning of private/secret keys, the HSM Admin may be able toturn this feature on using lunacm:> partition changepolicy.
Luna Network HSM 7 Partition Administration GuideLast Updated: 2022-07-26 23:53:21 GMT-04:00 Copyright 2001-2022 Thales Group 335

Chapter 12: Migrating Keys to Your New HSM
CAUTION! Check your source partition policies and adjust them to be sure you can cloneprivate and symmetric keys. Depending on the configuration of your partition and HSM, thesepolicies may be destructive.
PreconditionsThe following instructions assume that:
> the 7.x client software has been installed
> an uninitialized partition has been created on the 7.x Network HSM
> the source and destination partitions must be registered with the client (visible)
> the source 5.x/6.x partition's security policy allows cloning of private and secret keys
In the following examples:
> Slot 0: the source 5.x/6.x partition
> Slot 1: the destination 7.x partition
NOTE Partition login name requirements have changed with the hardware versions. Withrelease 7.x, you can log in using the abbreviated PO (Partition Security Officer) or CO (CryptoOfficer).
To clone cryptographic keys from a 5.x/6.x partition to a 7.x partition
Follow these steps to clone all cryptographic material on a 5.x/6.x partition to a 7.x partition.
1. Run LunaCM, set the current slot to the 7.x partition, and initialize the Partition SO role.
slot listslot set -slot 1partition init -label <7.x_partition_label>a. If you are cloning a PED-authenticated 5.x/6.x partition, use the 5.x/6.x partition's red key when prompted.b. If you are cloning a password-authenticated 5.x/6.x partition, enter the same cloning domain when
prompted.
2. Log in as the po (Partition Security Officer) and initialize the co (Crypto Officer) role.role login -name porole init -name coIf you are cloning a PED-authenticated 5.x/6.x partition, you can create an optional challenge secret for theCrypto Officer.
role createchallenge -name co -challengesecret <password>3. Set the current slot to the source 5.x/6.x slot, log in as the Crypto Officer.
slot set -slot 0
Luna Network HSM 7 Partition Administration GuideLast Updated: 2022-07-26 23:53:21 GMT-04:00 Copyright 2001-2022 Thales Group 336

Chapter 12: Migrating Keys to Your New HSM
NOTE Be mindful of whether you’re working with pre-PPSO or PPSO firmware and use the“partition login” or “role login” commands as specified below. Also, with PPSO firmware 6.22.0and up, be careful with user names, i.e., type “Crypto Officer” in full (is case sensitive) and not"co".
a. If you are cloning a release 5.x or 6.x pre-PPSO partition (up to and including Firmware 6.21.2), use:
partition loginb. If you are cloning a release 6.x PPSO partition (Firmware 6.22.0 and up) , use:
role login -name Crypto Officer4. Optional: To verify the objects in the 5.x/6.x partition to be cloned, issue the “partition contents” command.
partition contents5. Clone the objects to the 7.x partition slot (see "partition clone" on page 1 for correct syntax).
partition clone -objects 0 -slot 1Afterward, you can set the current slot to the 7.x partition and verify that all objects have cloned successfully.
slot set -slot 1role login -name co -password <password>partition contentsYou should see the same number of objects that existed on the 5.x/6.x HSM. You can now decommission theold 5.x/6.x HSM.
Cloning Using an HA GroupHigh Availability (HA) groups duplicate key material between the HSMs in the group. This function can be used tocopy all cryptographic key material from a 5.x/6.x Network HSM partition to a new 7.x Network HSM partition.
The new configuration's operating systemmust be compatible with both the new 7.x and the old 5.x/6.xhardware. Consult the 5.x/6.x CRN for a list of compatible operating systems.
To clone cryptographic keys from one HSM to another, the HSMs must share the same cloning domain. Forpassword-authenticated HSMs, this domain should have been specified when the partition was initialized. ForPED-authenticated HSMs, the red key determines the cloning domain. You will need the same red key that wasimprinted during 5.x/6.x partition creation to initialize the 7.x partition (see "Initializing an Application Partition" onpage 287).
The 7.x client software should be installed, and the connection to both the source and destination HSM partitionsverified, before attempting this procedure (see "Luna HSM Client Software Installation" on page 19 for details).The source and destination partitions must both be assigned to the client machine issuing the cloning commands(see "Client-Partition Connections" on page 105 for details). Use slot list to ensure both partitions are visible tothe client.
NOTE It is not recommended to maintain an HA group with different versions of the LunaNetwork HSM hardware.
Luna Network HSM 7 Partition Administration GuideLast Updated: 2022-07-26 23:53:21 GMT-04:00 Copyright 2001-2022 Thales Group 337

Chapter 12: Migrating Keys to Your New HSM
PreconditionsThe following instructions assume that:
> the 7.x client software has been installed
> an uninitialized partition has been created on the 7.x Network HSM
> the source and destination partitions are both registered with the client (visible)
In the following examples:
> Slot 0 = the source 5.x/6.x partition
> Slot 1 = the destination 7.x partition
NOTE Partition login name requirements have changed between hardware versions. Withrelease 7.x, you can log in using the abbreviated po (Partition Security Officer) or co (CryptoOfficer).
To clone cryptographic keys from a 5.x/6.x partition to a 7.x partition using an HA group
Follow these steps to copy cryptographic material from an 5.x/6.x partition to a new 7.x partition by creating anHA group that includes both partitions.
1. Run LunaCM, set the current slot to the SA7 partition, and initialize the Partition SO role.
slot set -slot 1partition init -label <7.x_partition_label>a. If you are cloning a multi-factor-authenticated (PED-authenticated) 5.x/6.x partition, use the 5.x/6.x
partition's red key when prompted.
b. If you are cloning a password-authenticated 5.x/6.x partition, enter the same cloning domain whenprompted.
2. Log in as the po (Partition Security Officer) and initialize the co (Crypto Officer) role.role login -name porole init -name coIf you are cloning a multi-factor-authenticated (PED-authenticated) 5.x/6.x partition, create a challenge secretfor the Crypto Officer. This is required to set an HA activation policy.
role createchallenge -name co -challengesecret <password>3. Set the current slot to the source 5.x/6.x slot, log in as the Crypto Officer.
slot set -slot 0
NOTE Be mindful of whether you’re working with pre-PPSO or PPSO firmware and use thepartition login or role login commands as specified below. Also, with PPSO firmware 6.22.0and up, be careful with user names, i.e., type Crypto Officer in full (is case sensitive) and notco.
a. If you are cloning a release 5.x or 6.x pre-PPSO partition (up to and including Firmware 6.21.2), use:
partition login
Luna Network HSM 7 Partition Administration GuideLast Updated: 2022-07-26 23:53:21 GMT-04:00 Copyright 2001-2022 Thales Group 338

Chapter 12: Migrating Keys to Your New HSM
b. If you are cloning a release 6.x PPSO partition (Firmware 6.22.0 and up) , use:
role login -name Crypto Officer4. Optional: To verify the objects in the 5.x/6.x partition to be cloned, use:
partition contents5. Using LunaCM, create an HA group of the 5.x/6.x slot and the 7.x slot.
NOTE HA requires that all members have an activation policy set. See "Activation and Auto-activation on Multi-factor- (PED-) Authenticated Partitions" on page 320 for details.
a. Via LunaSH, log in as Security Officer and set policy 22 on the 5.x/6.x partition:partition changepolicy -partition <5.x_partition_label> -policy 22 -value 1
b. In LunaCM, log in to the 7.x partition as Partition Security Officer, and set the activation policy from theclient machine:
slot set -slot 1role login -name popartition changepolicy -policy 22 -value 1
c. Create the HA group with the 5.x/6.x partition as the primary partition. Select the "copy" option to preserveobjects.
hagroup creategroup -label <group_label> -slot 0 -password <password>d. Add the 7.x partition slot to the HA group. Repeat this step to add multiple 7.x partitions to the group.
hagroup addmember -group <group_label> -slot 1 -password <password>6. Synchronize the group to clone the objects to the 7.x member(s).
hagroup synchronize -group <group_label> -password <password>7. Check synchronization status of the group.
hagroup listgroupsNotice the entry "Needs sync: no". This means that the objects have been successfully cloned among allmembers of the HA group. You can also log in to the 7.x slot as the Crypto Officer and check the partitioncontents.
Luna USB HSM (5.x or 6.x) to Luna Network HSM (7.x)This chapter describes how to migrate your key material from a release 5.x or 6.x Luna USB HSM partition to arelease 7.x Luna Network HSM partition. You can migrate your key material using one of the following methods:
> "Backup and Restore" on the next page
> "Cloning" on page 342
Luna Network HSM 7 Partition Administration GuideLast Updated: 2022-07-26 23:53:21 GMT-04:00 Copyright 2001-2022 Thales Group 339

Chapter 12: Migrating Keys to Your New HSM
Backup and RestoreCryptographic key material can be backed up from a release 5.x or 6.x Luna USB HSM partition and thenrestored to a release 7.x Luna Network HSM partition using a Luna Backup HSM. The following procedureperforms a backup of a 5.x/6.x partition on an older operating system to a Luna Backup HSM. The Backup HSMis then moved to a newer operating system where the 5.x/6.x key material is restored to a 7.x partition.
Consult the 5.x/6.x/7.x CRN for a list of compatible operating systems.
To clone cryptographic keys from one HSM to another, the HSMs must share the same cloning domain. Forpassword-authenticated HSMs, this domain should have been specified when the 5.x/6.x partition wasinitialized. For PED-authenticated HSMs, the red key determines the cloning domain. You will need the same redkey that was imprinted during 5.x/6.x partition creation to initialize the 7.x partition (see "Initializing an ApplicationPartition" on page 287).
HSM Client software must be installed before attempting this procedure (see "Luna HSM Client SoftwareInstallation" on page 19 for details). The source and destination partitions must be assigned to the client machineissuing the backup or restore command (see "Client-Partition Connections" on page 105 for details). Use slotlist to ensure both partitions are visible to the client.
PreconditionsOn the older operating system, the following instructions assume that:
> 5.x/6.x HSM Client Software is installed
> the source 5.x/6.x partition is visible
> the source partition's security policy allows cloning of private and secret keys
> the destination Backup HSM partition is visible
On the new operating system, the following instructions assume that:
> 7.x HSM Client Software is installed
> you have created an uninitialized partition on the 7.x Network HSM
> the destination 7.x partition is registered with the client software (visible)
> the source Backup HSM partition's security policy allows cloning of private and secret keys
Slots used in the following instructions:
On the older operating system running 5.x/6.x client software:
• Slot 0: the source 5.x/6.x partition
• Slot 2: the destination Luna Backup HSM partition
On the new operating system running 7.x client software:
• Slot 1: the destination 7.x partition
• Slot 2: the source Luna Backup HSM partition (with the backup of the 5.x/6.x partition)
NOTE Partition login name requirements have changed with the hardware versions. Withrelease 7.x , you can log in using the abbreviated PO (Partition Security Officer) or CO (CryptoOfficer).
Luna Network HSM 7 Partition Administration GuideLast Updated: 2022-07-26 23:53:21 GMT-04:00 Copyright 2001-2022 Thales Group 340

Chapter 12: Migrating Keys to Your New HSM
To backup/restore cryptographic keys from a 5.x/6.x partition to a 7.x partition using a BackupHSM
Follow these steps to back up all cryptographic material on a 5.x/6.x partition to a Luna Backup HSM, and restoreto a new 7.x partition.
1. On the old operating system running 5.x/6.x client software, run LunaCM and set the current slot to the 5.x/6.xpartition.
slot listslot set -slot 0
2. Log in as the Crypto Officer.
NOTE Be mindful of whether you’re working with pre-PPSO or PPSO firmware and use the“partition login” or “role login” commands as specified below. Also, with PPSO firmware 6.22.0and up, be careful with user names, i.e., type “Crypto Officer” in full (is case sensitive) and not"co".
a. If you are backing up a release 5.x or 6.x pre-PPSO partition (up to and including Firmware 6.21.2), use:
partition loginb. If you are backing up a release 6.x PPSO partition (Firmware 6.22.0 and up), use:
role login -name Crypto Officer3. Optional: To verify the objects in the 5.x/6.x partition to be backed up, use:
partition contents4. Back up the 5.x/6.x partition contents to the Luna Backup HSM.
partition archive backup -slot 2 -partition <backup_label>a. If you are backing up a PED-authenticated 5.x/6.x partition, use the 5.x/6.x partition's red key when
prompted.
b. If you are backing up a password-authenticated 5.x/6.x partition, enter the same cloning domain whenprompted.
Optionally, verify that all objects were backed up successfully on the Luna Backup HSM by issuing thepartition contents command.
5. Move the Luna Backup HSM (with the backup of the 5.x/6.x partition) to the new operating system running the7.x client software, and make sure it is visible to the client along with the 7.x HSM.
6. On the new operating system running the 7.x client software, run LunaCM, set the current slot to the 7.xpartition, and initialize the partition and the PPSO role.
slot set -slot 1partition init -label <7.x_partition_label>a. If you are backing up a PED-authenticated 5.x/6.x partition, use the 5.x/6.x partition's red key when
prompted.
b. If you are backing up a password-authenticated 5.x/6.x partition, enter the same cloning domain whenprompted.
Luna Network HSM 7 Partition Administration GuideLast Updated: 2022-07-26 23:53:21 GMT-04:00 Copyright 2001-2022 Thales Group 341

Chapter 12: Migrating Keys to Your New HSM
7. Log in as the po (Partition Security Officer) and initialize the co (Crypto Officer) role.role login -name porole init -name coIf you are backing up a PED-authenticated 5.x/6.x partition, you can create an optional challenge secret forthe Crypto Officer.
role createchallenge -name co -challengesecret <password>8. Set the current slot to the 7.x partition, log in as the Crypto Officer, and restore from backup.
slot set -slot 1role login -name copartition archive restore -slot 2 -partition <backup_label>Afterwards, you can verify the partition contents on the 7.x partition:
partition contents
CloningThe simplest method of migrating key material to a new 7.x partition is slot-to-slot cloning. This procedure copiesall permitted cryptographic material from a 5.x/6.x USB HSM partition to a 7.x Network HSM partition.
The new configuration's operating systemmust be compatible with both the new 7.x and the old 5.x/6.xhardware. Consult the 5.x/6.x CRN for a list of compatible operating systems.
To clone cryptographic keys from one HSM to another, the HSMs must share the same cloning domain. Forpassword-authenticated HSMs, this domain should have been specified when the partition was initialized. ForPED-authenticated HSMs, the red key determines the cloning domain. You will need the same red key that wasimprinted during 5.x/6.x partition creation to initialize the 7.x partition (see "Initializing an Application Partition" onpage 287).
The 7.x client software should be installed, and the connection to both the source and destination partitionsverified, before attempting this procedure (see "Luna HSM Client Software Installation" on page 19 for details).The source and destination partitions must both be assigned to the client machine issuing the cloning commands(see "Client-Partition Connections" on page 105 for details). Use slot list to ensure both partitions are visible tothe client.
If the source partition contains asymmetric keys, its security policy must allow cloning of private and secret keys.Use lunacm:> partition showpolicies to ensure that your source partition's security template allows this. If the5.x/6.x HSM's security template does not allow cloning of private/secret keys, the HSM Admin may be able toturn this feature on using lunacm:> partition changepolicy.
CAUTION! Check your source partition policies and adjust them to be sure you can cloneprivate and symmetric keys. Depending on the configuration of your partition and HSM, thesepolicies may be destructive.
PreconditionsThe following instructions assume that:
> the 7.x client software has been installed
> an uninitialized partition has been created on the 7.x Network HSM
Luna Network HSM 7 Partition Administration GuideLast Updated: 2022-07-26 23:53:21 GMT-04:00 Copyright 2001-2022 Thales Group 342

Chapter 12: Migrating Keys to Your New HSM
> the destination 7.x partition must be registered with the client (visible)
> the source 5.x/6.x partition's security policy allows cloning of private and secret keys
In the following examples:
> Slot 0: the source 5.x/6.x partition
> Slot 1: the destination 7.x partition
NOTE Partition login name requirements have changed with the hardware versions. Withrelease 7.x, you can log in using the abbreviated PO (Partition Security Officer) or CO (CryptoOfficer).
To clone cryptographic keys from a 5.x/6.x partition to a 7.x partition
Follow these steps to clone all cryptographic material on a 5.x/6.x partition to a 7.x partition.
1. Run LunaCM, set the current slot to the 7.x partition, and initialize the Partition SO role.
slot listslot set -slot 1partition init -label <7.x_partition_label>a. If you are cloning a PED-authenticated 5.x/6.x partition, use the 5.x/6.x partition's red key when prompted.b. If you are cloning a password-authenticated 5.x/6.x partition, enter the same cloning domain when
prompted.
2. Log in as the po (Partition Security Officer) and initialize the co (Crypto Officer) role.role login -name porole init -name coIf you are cloning a PED-authenticated 5.x/6.x partition, you can create an optional challenge secret for theCrypto Officer.
role createchallenge -name co -challengesecret <password>3. Set the current slot to the source 5.x/6.x slot, log in as the Crypto Officer.
slot set -slot 0
NOTE Be mindful of whether you’re working with pre-PPSO or PPSO firmware and use the“partition login” or “role login” commands as specified below. Also, with PPSO firmware 6.22.0and up, be careful with user names, i.e., type “Crypto Officer” in full (is case sensitive) and not"co".
a. If you are cloning a release 5.x or 6.x pre-PPSO partition (up to and including Firmware 6.21.2), use:
partition loginb. If you are cloning a release 6.x PPSO partition (Firmware 6.22.0 and up) , use:
role login -name Crypto Officer4. Optional: To verify the objects in the 5.x/6.x partition to be cloned, issue the “partition contents” command.
Luna Network HSM 7 Partition Administration GuideLast Updated: 2022-07-26 23:53:21 GMT-04:00 Copyright 2001-2022 Thales Group 343

Chapter 12: Migrating Keys to Your New HSM
partition contents5. Clone the objects to the 7.x partition slot (see "partition clone" on page 1 for correct syntax).
partition clone -objects 0 -slot 1Afterward, you can set the current slot to the 7.x partition and verify that all objects have cloned successfully.
slot set -slot 1role login -name co -password <password>partition contentsYou should see the same number of objects that existed on the 5.x/6.x HSM. You can now decommission theold 5.x/6.x HSM.
Luna PCIe HSM (5.x or 6.x) to Luna Network HSM (7.x)This chapter describes how to migrate your key material from a release 5.x or 6.x Luna PCIe HSM partition to arelease 7.x Luna Network HSM partition. You can migrate your key material using one of the following methods:
> "Backup and Restore" below
> "Cloning" on page 346
Backup and RestoreCryptographic key material can be backed up from a release 5.x or 6.Luna PCIe HSM partition and then restoredto a release 7.x Luna Network HSM partition using a Luna Backup HSM. The following procedure performs abackup of a 5.x/6.x partition on an older operating system to a Luna Backup HSM. The Backup HSM is thenmoved to a newer operating system where the 5.x/6.x key material is restored to a 7.x partition.
Consult the 5.x/6.x/7.x CRN for a list of compatible operating systems.
To clone cryptographic keys from one HSM to another, the HSMs must share the same cloning domain. Forpassword-authenticated HSMs, this domain should have been specified when the 5.x/6.x partition wasinitialized. For PED-authenticated HSMs, the red key determines the cloning domain. You will need the same redkey that was imprinted during 5.x/6.x partition creation to initialize the 7.x partition (see "Initializing an ApplicationPartition" on page 287).
HSM Client software must be installed on both operating systems (older and new) before attempting thisprocedure (see "Luna HSM Client Software Installation" on page 19 for details). The destination partition must beassigned to the client machine (see "Client-Partition Connections" on page 105 for details). Use slot list toensure partitions are visible to the client.
PreconditionsOn the older operating system, the following instructions assume that:
> 5.x/6.x HSM Client Software is installed with "Luna Backup HSM" option selected.
> the source 5.x/6.x partition is visible
> the source partition's security policy allows cloning of private and secret keys
> the destination Backup HSM partition is visible
On the new operating system, the following instructions assume that:
Luna Network HSM 7 Partition Administration GuideLast Updated: 2022-07-26 23:53:21 GMT-04:00 Copyright 2001-2022 Thales Group 344

Chapter 12: Migrating Keys to Your New HSM
> 7.x HSM Client Software is installed with "Luna Backup HSM" option selected.
> you have created an uninitialized partition on the 7.x Network HSM
> the destination 7.x partition is registered with the client software (visible)
> the source Backup HSM partition's security policy allows cloning of private and secret keys
Slots used in the following instructions:
On the older operating system running 5.x/6.x client software:
• Slot 0: the source 5.x/6.x partition
• Slot 2: the destination Luna Backup HSM partition
On the new operating system running 7.x client software:
• Slot 1: the destination 7.x partition
• Slot 2: the source Backup HSM partition (with the backup of the 5.x/6.x partition)
NOTE Partition login name requirements have changed with the hardware versions. Withrelease 7.x , you can log in using the abbreviated po (Partition Security Officer) or co (CryptoOfficer).
To backup/restore cryptographic keys from a 5.x/6.x partition to a 7.x partition using a BackupHSM
Follow these steps to back up all cryptographic material on a 5.x/6.x partition to a Luna Backup HSM, and restoreto a new 7.x partition.
1. On the old operating system running 5.x/6.x client software, run LunaCM and set the current slot to the 5.x/6.xpartition.
slot listslot set -slot 0
2. Log in as the Crypto Officer.
NOTE Be mindful of whether you’re working with pre-PPSO or PPSO firmware and use the“partition login” or “role login” commands as specified below. Also, with PPSO firmware 6.22.0and up, be careful with user names, i.e., type “Crypto Officer” in full (is case sensitive) and not"co".
a. If you are backing up a release 5.x or 6.x pre-PPSO partition (up to and including Firmware 6.21.2), use:
partition loginb. If you are backing up a release 6.x PPSO partition (Firmware 6.22.0 and up), use:
role login -name Crypto Officer3. Optional: To verify the objects in the 5.x/6.x partition to be backed up, use:
partition contents4. Back up the 5.x/6.x partition contents to the Luna Backup HSM.
partition archive backup -slot 2 -partition <backup_label>
Luna Network HSM 7 Partition Administration GuideLast Updated: 2022-07-26 23:53:21 GMT-04:00 Copyright 2001-2022 Thales Group 345

Chapter 12: Migrating Keys to Your New HSM
a. If you are backing up a PED-authenticated 5.x/6.x partition, use the 5.x/6.x partition's red key whenprompted.
b. If you are backing up a password-authenticated 5.x/6.x partition, enter the same cloning domain whenprompted.
Optionally, verify that all objects were backed up successfully on the Luna Backup HSM by issuing thepartition contents command.
5. Move the Luna Backup HSM (with the backup of the 5.x/6.x partition) to the new operating system running the7.x client software, and make sure it is visible to the client along with the 7.x HSM.
6. On the new operating system running the 7.x client software, run LunaCM, set the current slot to the 7.xpartition, and initialize the partition and the PPSO role.
slot set -slot 1partition init -label <7.x_partition_label>a. If you are backing up a PED-authenticated 5.x/6.x partition, use the 5.x/6.x partition's red key when
prompted.
b. If you are backing up a password-authenticated 5.x/6.x partition, enter the same cloning domain whenprompted.
7. Log in as the po (Partition Security Officer) and initialize the co (Crypto Officer) role.role login -name porole init -name coIf you are backing up a PED-authenticated 5.x/6.x partition, you can create an optional challenge secret forthe Crypto Officer.
role createchallenge -name co -challengesecret <password>8. Set the current slot to the 7.x partition, log in as the Crypto Officer, and restore from backup.
slot set -slot 1role login -name copartition archive restore -slot 2 -partition <backup_label>Afterwards, you can verify the partition contents on the 7.x partition:
partition contents
CloningThe simplest method of migrating key material to a new 7.x partition is slot-to-slot cloning. This procedure copiesall permitted cryptographic material from a 5.x/6.x PCIe HSM partition to a 7.x Network HSM partition.
The new configuration's operating systemmust be compatible with both the new 7.x and the old 5.x/6.xhardware. Consult the 5.x/6.x CRN for a list of compatible operating systems.
To clone cryptographic keys from one HSM to another, the HSMs must share the same cloning domain. Forpassword-authenticated HSMs, this domain should have been specified when the partition was initialized . ForPED-authenticated HSMs, the red key determines the cloning domain. You will need the same red key that wasimprinted during 5.x/6.x partition creation to initialize the 7.x partition (see "Initializing an Application Partition" onpage 287).
Luna Network HSM 7 Partition Administration GuideLast Updated: 2022-07-26 23:53:21 GMT-04:00 Copyright 2001-2022 Thales Group 346

Chapter 12: Migrating Keys to Your New HSM
The 7.x client software should be installed, and the connection to both the source and destination partitionsverified, before attempting this procedure (see "Luna HSM Client Software Installation" on page 19 for details).The destination partition must be assigned to the client machine issuing the cloning commands (see "Client-Partition Connections" on page 105 for details). Use the slot list command to ensure both partitions are visibleto the client.
If the source partition contains asymmetric keys, its security policy must allow cloning of private and secret keys.Use the command partition showpolicies in LunaCM to ensure that your source partition's security templateallows this (see "partition showpolicies" on page 1). If the 5.x/6.x HSM's security template does not allow cloningof private/secret keys, the HSM Admin may be able to turn this feature on using partition changepolicy (see"partition changepolicy" on page 1).
If the source partition contains asymmetric keys, its security policy must allow cloning of private and secret keys.Use lunacm:> partition showpolicies to ensure that your source partition's security template allows this. If the5.x/6.x HSM's security template does not allow cloning of private/secret keys, the HSM Admin may be able toturn this feature on using lunacm:> partition changepolicy.
CAUTION! Check your source partition policies and adjust them to be sure you can cloneprivate and symmetric keys. Depending on the configuration of your partition and HSM, thesepolicies may be destructive.
PreconditionsOn the operating system running 5.x/6/x client software, verify:
> that the 5.x/6.x PCIe HSM partition's security policy allows cloning of private and secret keys
> all key material on the 5.x/6.x PCIe HSM partition to be cloned
Regarding the operating system running 7.x client software, the following instructions assume that:
> the 7.x client software has been installed with "Luna PCIe HSM" option selected.
> an uninitialized partition has been created on the 7.x HSM
> the destination 7.x HSM partition must be registered with the client (visible)
> the Luna PCIe HSM card (with 5.x/6.x key material) has been installed
Slots used in the following instructions:
> Slot 0: the source 5.x/6.x Luna PCIe HSM partition
> Slot 1: the destination 7.x partition
NOTE Partition login name requirements have changed with the hardware versions. Withrelease 7.x, you can log in using the abbreviated po (Partition Security Officer) or co (CryptoOfficer).
To clone cryptographic keys from a 5.x/6.x partition to a 7.x partition
Follow these steps to clone all cryptographic material on a 5.x/6.x partition to a 7.x partition.
1. Run LunaCM, set the current slot to the 7.x partition, and initialize the Partition SO role.
slot listslot set -slot 1
Luna Network HSM 7 Partition Administration GuideLast Updated: 2022-07-26 23:53:21 GMT-04:00 Copyright 2001-2022 Thales Group 347

Chapter 12: Migrating Keys to Your New HSM
partition init -label <7.x_partition_label>a. If you are cloning a PED-authenticated 5.x/6.x partition, use the 5.x/6.x partition's red key when prompted.b. If you are cloning a password-authenticated 5.x/6.x partition, enter the same cloning domain when
prompted.
2. Log in as the po (Partition Security Officer) and initialize the co (Crypto Officer) role.role login -name porole init -name coIf you are cloning a PED-authenticated 5.x/6.x partition, you can create an optional challenge secret for theCrypto Officer.
role createchallenge -name co -challengesecret <password>3. Set the current slot to the source 5.x/6.x slot, log in as the Crypto Officer.
slot set -slot 0
NOTE Be mindful of whether you’re working with pre-PPSO or PPSO firmware and use the“partition login” or “role login” commands as specified below. Also, with PPSO firmware 6.22.0and up, be careful with user names, i.e., type “Crypto Officer” in full (is case sensitive) and not"co".
a. If you are cloning a release 5.x or 6.x pre-PPSO partition (up to and including Firmware 6.21.2), use:
partition loginb. If you are cloning a release 6.x PPSO partition (Firmware 6.22.0 and up) , use:
role login -name Crypto Officer4. Optional: To verify the objects in the 5.x/6.x partition to be cloned, issue the “partition contents” command.
partition contents5. Clone the objects to the 7.x partition slot (see "partition clone" on page 1 for correct syntax).
partition clone -objects 0 -slot 1Afterward, you can set the current slot to the 7.x partition and verify that all objects have cloned successfully.
slot set -slot 1role login -name co -password <password>partition contentsYou should see the same number of objects that existed on the 5.x/6.x HSM. You can now decommission theold 5.x/6.x HSM.
Luna Network HSM 7 Partition Administration GuideLast Updated: 2022-07-26 23:53:21 GMT-04:00 Copyright 2001-2022 Thales Group 348

Chapter 12: Migrating Keys to Your New HSM
Luna PCIe HSM or Luna USB HSM (5.x or 6.x) to Luna PCIeHSM (7.x)This chapter describes how to migrate your key material from release 5.x or 6.x of the Luna PCIe HSM orLuna USB HSM partition to release 7.x of the Luna PCIe HSM partition. You can migrate your key material usingone of the following three methods:
> "Backup and Restore" below
> "Cloning" on page 351
> "Cloning Using an HA Group" on page 353
Backup and RestoreCryptographic key material can be backed up and then restored to a release 7.x Luna PCIe HSM partition usinga Luna Backup HSM.
The new configuration's operating systemmust be compatible with both the new 7.x and the old 5.x/6.xhardware. Consult the 5.x/6.x CRN for a list of compatible operating systems.
To backup and restore cryptographic keys from one HSM to another, the HSMs must share the same cloningdomain. For password-authenticated HSMs, this domain should have been specified when the partition wasinitialized. For PED-authenticated HSMs, the red key determines the cloning domain. You will need the same redkey that was imprinted during 5.x/6.x partition creation to initialize the 7.x partition (see "Initializing an ApplicationPartition" on page 287).
The 7.x client software should be installed, and the connection to both the source and destination partitionsverified, before attempting this procedure (see "Luna HSM Client Software Installation" on page 19 for details).The source and destination partitions must both be assigned to the client machine issuing the cloning commands(see "Client-Partition Connections" on page 105 for details). Use slot list to ensure both partitions are visible tothe client.
PreconditionsThe following instructions assume that:
> the 10.x client software has been installed
> an uninitialized partition has been created on the 7.x HSM
> the source and destination partitions are both registered with the client (visible)
> the source partition's security policy allows cloning of private and secret keys
In the following example:
> Slot 0: the source 5.x/6.x partition
> Slot 1: the destination 7.x partition
> Slot 2: the Backup HSM partition
Luna Network HSM 7 Partition Administration GuideLast Updated: 2022-07-26 23:53:21 GMT-04:00 Copyright 2001-2022 Thales Group 349

Chapter 12: Migrating Keys to Your New HSM
NOTE Partition login name requirements have changed with the hardware versions. Withrelease 7.x , you can log in using the abbreviated po (Partition Security Officer) or co (CryptoOfficer).
To migrate cryptographic keys from a 5.x/6.x partition to a 7.x partition using a Backup HSM
Follow these steps to back up all cryptographic material on a 5.x/6.x partition to a Backup HSM, and restore to anew 7.x partition.
1. Run LunaCM, set the current slot to the 7.x partition, and initialize the partition and the Partition SO role.
slot set -slot 0partition init -label <7.x_partition_label>a. If you are backing up a PED-authenticated 5.x/6.x partition, use the 5.x/6.x partition's red key when
prompted.
b. If you are backing up a password-authenticated 5.x/6.x partition, enter the same cloning domain whenprompted.
2. Log in as the po (Partition Security Officer) and initialize the co (Crypto Officer) role.role login -name porole init -name coIf you are backing up a PED-authenticated 5.x/6.x partition, you can create an optional challenge secret forthe Crypto Officer.
role createchallenge -name co -challengeSecret <password>3. Connect your backup HSM and make sure it is visible to the client, along with the 5.x/6.x and 7.x HSMs.
4. Set the current slot to the source 5.x/6.x slot.slot listslot set -slot 0
5. Log in as the Crypto Officer.
NOTE Be mindful of whether you’re working with pre-PPSO or PPSO firmware and use thepartition login or role login commands as specified below. Also, with PPSO firmware 6.22.0and up, be careful with user names, i.e., type Crypto Officer in full (is case sensitive) and notco.
a. If you are cloning a release 5.x or 6.x pre-PPSO partition (up to and including Firmware 6.21.2), use:
partition loginb. If you are cloning a release 6.x PPSO partition (Firmware 6.22.0 and up) , use:
role login -name Crypto Officer6. Optional: To verify the objects in the 5.x/6.x partition to be cloned, issue the “partition contents” command.
partition contents7. Back up the 5.x/6.x partition contents to the Backup HSM.
Luna Network HSM 7 Partition Administration GuideLast Updated: 2022-07-26 23:53:21 GMT-04:00 Copyright 2001-2022 Thales Group 350

Chapter 12: Migrating Keys to Your New HSM
partition archive backup -slot 2 -partition <backup_label>a. If you are backing up a PED-authenticated 5.x/6.x partition, use the 5.x/6.x partition's red key when
prompted.
b. If you are backing up a password-authenticated 5.x/6.x partition, enter the same cloning domain whenprompted.
Optionally, verify that all objects were backed up successfully on the Backup HSM by checking the partitioncontents.
8. Set the current slot to the 7.x partition, log in as the Crypto Officer, and restore from backup.
slot set -slot 1role login -name copartition archive restore -slot 2 -partition <backup_label>Afterwards, you can verify the partition contents on the 7.x partition:
partition contents
CloningThe simplest method of migrating key material to a new 7.x partition is slot-to-slot cloning. This procedure copiesall permitted cryptographic material from a 5.x/6.x PCIe or USB HSM partition to a 7.x PCIe HSM partition.
The new configuration's operating systemmust be compatible with both the new 7.x and the old 5.x/6.xhardware. Consult the 5.x/6.x CRN for a list of compatible operating systems.
To clone cryptographic keys from one HSM to another, the HSMs must share the same cloning domain. Forpassword-authenticated HSMs, this domain should have been specified when the partition was initialized . ForPED-authenticated HSMs, the red key determines the cloning domain. You will need the same red key that wasimprinted during 5.x/6.x partition creation to initialize the 7.x partition (see "Initializing an Application Partition" onpage 287).
The 7.x client software should be installed, and the connection to both the source and destination partitionsverified, before attempting this procedure (see "Luna HSM Client Software Installation" on page 19 for details).The source and destination partitions must both be assigned to the client machine issuing the cloning commands(see "Client-Partition Connections" on page 105 for details). Use slot list to ensure both partitions are visible tothe client.
If the source partition contains asymmetric keys, its security policy must allow cloning of private and secret keys.Use lunacm:> partition showpolicies to ensure that your source partition's security template allows this. If the5.x/6.x HSM's security template does not allow cloning of private/secret keys, the HSM Admin may be able toturn this feature on using lunacm:> partition changepolicy.
CAUTION! Check your source partition policies and adjust them to be sure you can cloneprivate and symmetric keys. Depending on the configuration of your partition and HSM, thesepolicies may be destructive.
PreconditionsThe following instructions assume that:
> the 7.x client software has been installed
Luna Network HSM 7 Partition Administration GuideLast Updated: 2022-07-26 23:53:21 GMT-04:00 Copyright 2001-2022 Thales Group 351

Chapter 12: Migrating Keys to Your New HSM
> an uninitialized partition has been created on the 7.x Network HSM
> the destination 7.x partition must be registered with the client (visible)
> the source 5.x/6.x partition's security policy allows cloning of private and secret keys
In the following examples:
> Slot 0: the source 5.x/6.x partition
> Slot 1: the destination 7.x partition
NOTE Partition login name requirements have changed with the hardware versions. Withrelease 7.x, you can log in using the abbreviated PO (Partition Security Officer) or CO (CryptoOfficer).
To clone cryptographic keys from a 5.x/6.x partition to a 7.x partition
Follow these steps to clone all cryptographic material on a 5.x/6.x partition to a 7.x partition.
1. Run LunaCM, set the current slot to the 7.x partition, and initialize the Partition SO role.
slot listslot set -slot 1partition init -label <7.x_partition_label>a. If you are cloning a PED-authenticated 5.x/6.x partition, use the 5.x/6.x partition's red key when prompted.b. If you are cloning a password-authenticated 5.x/6.x partition, enter the same cloning domain when
prompted.
2. Log in as the po (Partition Security Officer) and initialize the co (Crypto Officer) role.role login -name porole init -name coIf you are cloning a PED-authenticated 5.x/6.x partition, you can create an optional challenge secret for theCrypto Officer.
role createchallenge -name co -challengesecret <password>3. Set the current slot to the source 5.x/6.x slot, log in as the Crypto Officer.
slot set -slot 0
NOTE Be mindful of whether you’re working with pre-PPSO or PPSO firmware and use the“partition login” or “role login” commands as specified below. Also, with PPSO firmware 6.22.0and up, be careful with user names, i.e., type “Crypto Officer” in full (is case sensitive) and not"co".
a. If you are cloning a release 5.x or 6.x pre-PPSO partition (up to and including Firmware 6.21.2), use:
partition loginb. If you are cloning a release 6.x PPSO partition (Firmware 6.22.0 and up) , use:
role login -name Crypto Officer
Luna Network HSM 7 Partition Administration GuideLast Updated: 2022-07-26 23:53:21 GMT-04:00 Copyright 2001-2022 Thales Group 352

Chapter 12: Migrating Keys to Your New HSM
4. Optional: To verify the objects in the 5.x/6.x partition to be cloned, issue the “partition contents” command.partition contents
5. Clone the objects to the 7.x partition slot (see "partition clone" on page 1 for correct syntax).partition clone -objects 0 -slot 1Afterward, you can set the current slot to the 7.x partition and verify that all objects have cloned successfully.
slot set -slot 1role login -name co -password <password>partition contentsYou should see the same number of objects that existed on the 5.x/6.x HSM. You can now decommission theold 5.x/6.x HSM.
Cloning Using an HA GroupHigh Availability (HA) groups duplicate key material between the HSMs in the group. This function can be used tocopy all cryptographic key material from a 5.x/6.x PCIe or USB HSM partition to a new 7.x PCIe HSM partition.
The new configuration's operating systemmust be compatible with both the new 7.x and the old 5.x/6.xhardware. Consult the 5.x/6.x CRN for a list of compatible operating systems.
To clone cryptographic keys from one HSM to another, the HSMs must share the same cloning domain. Forpassword-authenticated HSMs, this domain should have been specified when the partition was initialized . ForPED-authenticated HSMs, the red key determines the cloning domain. You will need the same red key that wasimprinted during 5.x/6.x partition creation to initialize the 7.x partition (see "Initializing an Application Partition" onpage 287).
The 7.x client software should be installed, and the connection to both the source and destination HSM partitionsverified, before attempting this procedure (see "Luna HSM Client Software Installation" on page 19 for details).The source and destination partitions must both be assigned to the client machine issuing the cloning commands(see "Client-Partition Connections" on page 105 for details). Use slot list to ensure both partitions are visible tothe client.
NOTE It is not recommended to maintain an HA group with different versions of the LunaNetwork HSM hardware.
PreconditionsThe following instructions assume that:
> the 7.x client software has been installed
> an uninitialized partition has been created on the 7.x Network HSM
> the source and destination partitions are both registered with the client (visible)
In the following examples:
> Slot 0 = the source 5.x/6.x partition
> Slot 1 = the destination 7.x partition
Luna Network HSM 7 Partition Administration GuideLast Updated: 2022-07-26 23:53:21 GMT-04:00 Copyright 2001-2022 Thales Group 353

Chapter 12: Migrating Keys to Your New HSM
NOTE Partition login name requirements have changed between hardware versions. Withrelease 7.x, you can log in using the abbreviated po (Partition Security Officer) or co (CryptoOfficer).
To clone cryptographic keys from a 5.x/6.x partition to a 7.x partition using an HA group
Follow these steps to copy cryptographic material from an 5.x/6.x partition to a new 7.x partition by creating anHA group that includes both partitions.
1. Run LunaCM, set the current slot to the SA7 partition, and initialize the Partition SO role.
slot set -slot 1partition init -label <7.x_partition_label>a. If you are cloning a multi-factor-authenticated (PED-authenticated) 5.x/6.x partition, use the 5.x/6.x
partition's red key when prompted.
b. If you are cloning a password-authenticated 5.x/6.x partition, enter the same cloning domain whenprompted.
2. Log in as the po (Partition Security Officer) and initialize the co (Crypto Officer) role.role login -name porole init -name coIf you are cloning a multi-factor-authenticated (PED-authenticated) 5.x/6.x partition, create a challenge secretfor the Crypto Officer. This is required to set an HA activation policy.
role createchallenge -name co -challengesecret <password>3. Set the current slot to the source 5.x/6.x slot, log in as the Crypto Officer.
slot set -slot 0
NOTE Be mindful of whether you’re working with pre-PPSO or PPSO firmware and use thepartition login or role login commands as specified below. Also, with PPSO firmware 6.22.0and up, be careful with user names, i.e., type Crypto Officer in full (is case sensitive) and notco.
a. If you are cloning a release 5.x or 6.x pre-PPSO partition (up to and including Firmware 6.21.2), use:
partition loginb. If you are cloning a release 6.x PPSO partition (Firmware 6.22.0 and up) , use:
role login -name Crypto Officer4. Optional: To verify the objects in the 5.x/6.x partition to be cloned, use:
partition contents5. Using LunaCM, create an HA group of the 5.x/6.x slot and the 7.x slot.
NOTE HA requires that all members have an activation policy set. See "Activation and Auto-activation on Multi-factor- (PED-) Authenticated Partitions" on page 320 for details.
Luna Network HSM 7 Partition Administration GuideLast Updated: 2022-07-26 23:53:21 GMT-04:00 Copyright 2001-2022 Thales Group 354

Chapter 12: Migrating Keys to Your New HSM
a. Via LunaSH, log in as Security Officer and set policy 22 on the 5.x/6.x partition:partition changepolicy -partition <5.x_partition_label> -policy 22 -value 1
b. In LunaCM, log in to the 7.x partition as Partition Security Officer, and set the activation policy from theclient machine:
slot set -slot 1role login -name popartition changepolicy -policy 22 -value 1
c. Create the HA group with the 5.x/6.x partition as the primary partition. Select the "copy" option to preserveobjects.
hagroup creategroup -label <group_label> -slot 0 -password <password>d. Add the 7.x partition slot to the HA group. Repeat this step to add multiple 7.x partitions to the group.
hagroup addmember -group <group_label> -slot 1 -password <password>6. Synchronize the group to clone the objects to the 7.x member(s).
hagroup synchronize -group <group_label> -password <password>7. Check synchronization status of the group.
hagroup listgroupsNotice the entry "Needs sync: no". This means that the objects have been successfully cloned among allmembers of the HA group. You can also log in to the 7.x slot as the Crypto Officer and check the partitioncontents.
Moving from Pre-7.7.0 to Firmware 7.7.0 or NewerLuna HSM Firmware 7.7.0 is a major release for the Luna Network HSM that introduces significant changes tovarious product components. Some of these changes have been introduced to help customers attain eIDAScompliance, PP 419-221.5 compliance, or conformity with FIPS SP 800-131A (revised). If you are migrating keysfrom a Luna Network HSM with firmware 7.4.2. or older to firmware 7.7.0 or newer, all information that is relevantto the migration process can be found in the following sections:
> Special Considerations for Luna HSM Firmware 7.7.0 and Newer for information you must be aware of andprocedures you must complete before and after updating to Luna HSM Firmware 7.7.0 or newer.
> "Behavior of "pre-firmware 7.7.0", and V0, and V1 partitions?" on page 144 for information about thedistinction between V0 and V1 partitions; one of the major changes introduced to Luna HSM partitions withLuna HSM Firmware 7.7.0.
> "Converting Partitions from V0 to V1 or V1 to V0" on page 157 for information about converting partitions fromV0 to V1 after updating to Luna HSM Firmware 7.7.0 or newer.
NOTE If you are operating an HA group and would like to migrate the pool of HA memberpartitions to Luna HSM Firmware 7.7.0 or newer, relevant information is contained or linked towithin the topics above.
Luna Network HSM 7 Partition Administration GuideLast Updated: 2022-07-26 23:53:21 GMT-04:00 Copyright 2001-2022 Thales Group 355

CHAPTER 13: High-Availability Groups
Luna HSMs can provide scalability and redundancy for cryptographic applications that are critical to yourorganization. For applications that require continuous, uninterruptible uptime, the Luna HSM Client allows you tocombine application partitions on multiple HSMs into a single logical group, known as a High-Availability (HA)group.
High Availability Options for Luna HSMsLuna HSMs support two, non-overlapping approaches to High Availability:
> client-mediated HA creation and management of HA groups, by means of the LunaCM hagroup commands,with preparation, management, and usage described at "High-Availability Groups" above (this is believed tobe the majority of HA implementations among Luna HSM customers)
versus
> extensions to the PKCS#11 API to allow interested customers to create and maintain High Availabilityprogrammatically.
That is, if you want the redundancy and performance of High Availability,
> you can do what many Luna HSM customers do and use LunaCM commands to declare and manage HAgroups and their membership, while relying on the Luna Client library to carry out the day-to-dayinfrastructure and activity
or
> you can program your own complete HA environment, in full, or tie into (integrate with) suitable COTS HighAvailability solutions that provide a suitable Application Interface, using HA Indirect Login calls to handlecommon authentication among HSM partitions in groups.
If you are looking for information about HA Indirect Login, refer to High Availability Indirect Login.
Network Latency and Luna Cloud HSM as Active HA MemberRequests performed by cloud services like Luna Cloud HSMmay experience greater network latency than thosesent to on-premise HSMs. Thales recommends using a Luna Cloud HSM service as a standby HA member toachieve the best performance. By default, you can add a Luna Cloud HSM service as a standby HA memberonly. If all other HA members fail and the Luna Cloud HSM service becomes active, it will revert to standby whenanother member recovers.
If you prefer to use the Luna Cloud HSM service as an active HA member, you must first edit the following togglein the Chrystoki.conf/crystoki.ini configuration file (see "Configuration File Summary" on page 73):[Toggles]lunacm_cv_ha_ui = 0
Luna Network HSM 7 Partition Administration GuideLast Updated: 2022-07-26 23:53:21 GMT-04:00 Copyright 2001-2022 Thales Group 356

Chapter 13: High-Availability Groups
CAUTION! Failover to Luna Cloud HSM is supported in an HA group with password-authenticated Luna partitions only. When configured in an HA group with PED-authenticatedLuna partitions, Luna Cloud HSM functions as a backup only.
Key/object replication options for HA and other usesHA ensures that your applications can continue to access a functioning partition as long as at least one partitionis running, and reachable, in the HA group. Proper HA operation requires that all member partitions be populatedwith the same keys and objects, relying on replication and synchronization of keys among group-memberpartitions.
Luna HSMs have three ways to replicate partition objects (keys) among partitions, depending on partition typeand settings. Each method can have limitations related to key type.
The replication of symmetric keys is enabled by default for each partition that belongs to the same HA group.
Different private-key replication options are offered for asymmetric keys, to adapt the level of security needed forcustomer use cases.
Each partition of an HSM can be configured in any of the modes,
• Key Export, or
• cloning, or
• the newer SKS.
Key Export and cloning are set by partition policies, while availability of SKS is determined by selecting V1 as thepartition type at partition creation time (requires firmware version 7.7.0 or later). Cloning is the default mode, soKey Export needs to be explicitly selected if desired.
CloningTo maintain the highest security level, enable the cloning mode (and thus turn off the export mode).
In cloning mode, the asymmetric private keys are cloned automatically between all the partitions of the HA group.In that mode, neither private keys nor secret keys are ever allowed to exist outside of a trusted Luna HSM that isa member of the designated cloning domain (sometimes also called "security domain"). As indicated above,symmetric keys are replicated. Cloning mode is the default setting for new partitions.
Key ExportFor use cases that require asymmetric private keys, generated on the HSM, to be embedded or used on a device(for example identity issuance), cloning mode must be turned off and key export mode enabled. In that mode,your application is responsible:
• to ensure the availability of the generated asymmetric private keys (by storing the keys in a file ordatabase), and
• to ensure the availability and security of the storage solution.
Cloning and Key Export are mutually exclusiveFor a use case where applications require both modes, then it is possible to create separate partitions on anHSM, configured for cloning mode or export mode - an individual partition is set to be one or the other, but cannotbe both at the same time. Changing the replication mode of a partition requires recreating the partition, which
Luna Network HSM 7 Partition Administration GuideLast Updated: 2022-07-26 23:53:21 GMT-04:00 Copyright 2001-2022 Thales Group 357

Chapter 13: High-Availability Groups
loses all content (and removes it from any HA group). Backup any important keys and objects before taking suchaction.
Where a partition belongs to an HA group, all member partitions must be configured for the same replicationmode. Thus, if your use case needed to employ some partitions in cloning mode and some partitions in keyexport mode, you would need to have separate HA groups to accommodate the separate sets of keys.
Keys cannot pass between replication modes.
An HA group in Key Export mode replicates only the symmetric keys, and not the asymmetric keys.
SKSFor a use case that generates greater numbers of keys than can be stored within an HSM, but also demandsgreater security of externally stored keys than is provided by Key Export mode, the Scalable Key Storage (SKS)mode is provided in Luna HSM release 7.7.0 and onward.
• SKS ensures that the HSM remains the assurance boundary for your asymmetric private keys.
• In that mode SKS blobs, containing the key material and the associated objects, are encrypted with asymmetric key (SMK) that is cloned when managed within an HA group. Your application is responsible toensure the availability of the SKS blobs (by storing the blobs into a file, or database and to ensure theavailability of that storage solution). Because replication of the SMK is done by cloning, the SMK neverexists outside a Luna HSM, thus the security of all keys and objects encrypted by that SMK is as high assecurity for the cloned key option, but without the storage limitation of the HSM.
• SKS requires that your partition be created as type V1. ( See "Scalable Key Storage (SKS)" on page 160and "Behavior of "pre-firmware 7.7.0", and V0, and V1 partitions?" on page 144 )
Client-driven High AvailabilityThis section is about the Client-driven HA feature, traditionally used by most Luna HSM customers. (To developyour own HA solution or integrate with a commercial one, see High Availability Indirect Login For HSM Firmware7.7.0 and Newer instead.)
This feature is best suited to provide redundancy to the Network HSM and PCI-E HSM products. Network HSMpartitions can be grouped with other Network HSM partitions or with a Luna Cloud HSM Service. PCI-E HSMpartitions can be grouped with other PCI-E HSM partitions or with a Luna Cloud HSM Service.
An HA group allows your client application to access cryptographic services as long as one member HSM isfunctional and network-connected. This allows you to perform maintenance on any individual member withoutever pausing your application, and provides redundancy in the case of individual failures. Cryptographicrequests are distributed across all active group members, enabling a performance gain for each member added.Cryptographic objects are replicated across the entire group, so HA can also be used to keep a current,automatic, remote backup of the group contents.
HA functionality is handled by the Luna HSM Client software. The individual partitions have no way to know theyare configured in an HA group, so you can configure HA on a per-application basis. The way you group yourHSMs depends on your circumstances and desired performance.
This chapter contains the following sections:
> "Planning Your HA Group Deployment" on page 368
> "Setting Up an HA Group" on page 373
Luna Network HSM 7 Partition Administration GuideLast Updated: 2022-07-26 23:53:21 GMT-04:00 Copyright 2001-2022 Thales Group 358

Chapter 13: High-Availability Groups
> "Verifying an HA Group" on page 377
> "Setting an HA Group Member to Standby" on page 379
> "Configuring HA Auto-Recovery" on page 381
> "Enabling/Disabling HA Only Mode" on page 381
> "HA Logging" on page 382
> "Adding/Removing an HA Group Member" on page 386
> "Manually Recovering a Failed HA Group Member" on page 389
> "Replacing an HA Group Member" on page 390
> "Deleting an HA Group" on page 393
> "Managing Your HA Groups" on page 1
> "HA Troubleshooting" on page 393
> "Guidelines and Recommendations For Updating or Converting HA Member Partitions" on page 395
If you plan to create an HA group consisting of different kinds of Luna HSMs, refer also to:
> "Cloning Keys Between Luna 6, Luna 7, and Luna Cloud HSM" on page 191
PerformanceFor repetitive operations (for example, many signings using the same key), an HA group provides linearperformance gains as group members are added. The best approach is to maintain an HA group at a size thatbest balances application server capability and the expected loads, with an additional unit providing capacity forbursts of traffic.
For best overall performance, keep all group members running near their individual performance ideal, about 30simultaneous threads per HSM. If you assemble an HA group that is significantly larger than your server(s) canmanage, you might not achieve full performance from all members. Gigabit Ethernet connections arerecommended to maximize performance.
Performance is also affected by the kind of cryptographic operations being requested. For some operations, anHA group can actually hinder performance by requiring extra operations to replicate new key objects. Forexample, if the operation involves importing and unwrapping keys:
Luna Network HSM 7 Partition Administration GuideLast Updated: 2022-07-26 23:53:21 GMT-04:00 Copyright 2001-2022 Thales Group 359

Chapter 13: High-Availability Groups
Using an HA group Using an individual partition
1. Encryption (to wrap the key)2. Decryption on the primary member partition (to
unwrap the key)3. Object creation on the primary member partition (the
unwrapped key is created and stored as a keyobject)
4. Key replication across the HA group:a. RSA 4096-bit operation is used to derive a
shared secret between HSMsb. Encryption of the key on the primary HA member
using the shared secretc. Decryption of the key on each HA member using
the shared secretd. Object creation on each HA member
5. Encryption (using the unwrapped key object toencrypt the data)
1. Encryption (to wrap the key)2. Decryption (to unwrap the key)3. Object creation (the unwrapped key is created and
stored as a key object)4. Encryption (using the unwrapped key object to
encrypt the data)
In this case, the HA group must perform many more operations than an individual partition, most significantly theRSA-4096-bit operation and creating the additional objects. Those two operations are by far the most time-consuming on the list, and so this task would have much better performance on an individual partition.
The crucial HA performance consideration is whether the objects on the partitions are constant, or always beingcreated and replaced. If tasks make use of already-existing objects, those objects exist on all HA groupmembers; operations can be performed by different group members, boosting performance. If new objects arecreated, they must be replicated across the entire group, causing a performance loss.
NOTE The way your application uses the C_FindObjects function to search for objects in avirtual HA slot can have a significant impact on your application performance (see "ApplicationObject Handles" on page 366).
Load BalancingCryptographic requests sent to the HA group's virtual slot are load-balanced across all active members of the HAgroup. The load-balancing algorithm sends requests for cryptographic operations to the least busy partition in theHA group. This scheme accounts for operations of variable length, ensuring that queues are balanced evenwhen some partitions are assigned very long operations. When an application requests a repeated set ofoperations, this method works. When the pattern is interrupted, however, the request type becomes relevant, asfollows:
> Single-part (stateless) cryptographic operations are load-balanced.
> Multi-part (stateful) cryptographic operations are load-balanced.
> Multi-part (stateful) information retrieval requests are not load-balanced. In this case, the cost of distributingthe requests to different HA group members is generally greater than the benefit. For this reason, multi-partinformation retrieval requests are all targeted at one member.
Luna Network HSM 7 Partition Administration GuideLast Updated: 2022-07-26 23:53:21 GMT-04:00 Copyright 2001-2022 Thales Group 360

Chapter 13: High-Availability Groups
> Key management requests are not load-balanced. Operations affecting the state of stored keys (creation,deletion) are performed on a single HA member, and the result is then replicated to the rest of the HA group.
For example, when a member partition is signing and an asymmetric key generation request is issued, additionaloperations on that member are queued while the partition generates the key. In this case, the algorithmschedules more operations on other partitions in the HA group.
The load-balancing algorithm operates independently in each application process. Multiple processes on thesame client or on different clients do not share information when scheduling operations. Some mixed-use casesmight cause applications to use some partitions more than others (see "Planning Your HA GroupDeployment" on page 368). If you increase key sizes, interleave other cryptographic operations, or if networklatency increases, performance may drop for individual active members as they become busier.
NOTE Partitions designated as standby members are not used to perform cryptographicoperations, and are therefore not part of the load-balancing scheme (see "StandbyMembers" on page 365).
The Primary PartitionThe primary partition is the first partition you specify as a member of the HA group. While cryptographicoperations are load-balanced across all the partitions in the group, new keys are always created on the primarypartition, and then replicated on the other partitions (see "Key Replication" below). Depending on how many newkeys you are creating on your HA group, this can mean that the primary partition has a heavier workload than theother partitions in the group. If your HSMs are in different remote locations, you could select one with the leastlatency as the primary partition.
Despite its name, the primary partition is not more critical than any other partition in the HA group. If the primarypartition fails, its operations fail over to other partitions in the group, and the next member added to the groupbecomes the new primary partition.
NOTE The mechanism list available to the current primary partition is the only mechanism listthat is available to HA virtual slot.
Network TopographyThe network topography of the HA group is generally not important to the functioning of the group. As long as theclient has a network path to each member, the HA logic will function. Different latencies between the client andeach HA member cause a command scheduling bias towards the low-latency members. Commands scheduledon the long-latency devices have a longer overall latency associated with each command.
In this case, the command latency is a characteristic of the network. To achieve uniform load distribution, ensurethat partitions in the group have similar network latency.
Key ReplicationObjects (session or token) are replicated immediately to all members in an HA group when they are generated inthe virtual HA slot. Similarly, deletion of objects (session or token) from the virtual HA slot is immediatelyreplicated across all group members. Therefore, when an application creates a key on the virtual HA slot, the HAlibrary automatically replicates the key across all group members before reporting back to the application. Keys
Luna Network HSM 7 Partition Administration GuideLast Updated: 2022-07-26 23:53:21 GMT-04:00 Copyright 2001-2022 Thales Group 361

Chapter 13: High-Availability Groups
are created on one member partition and replicated to the other members. If a member fails during this process,the HA group reattempts key replication to that member until it recovers, or failover attempts time out. Once thekey exists on all active members of the HA group, a success code is returned to the application.
NOTE If you are using Luna HSM Client 10.4.0 or newer and are setting up an HA group with amix of FIPS and non-FIPS partitions as members, objects will not replicate across all HSMs inthe group in the following cases:> If you have set a non-FIPS primary, a FIPS secondary, and created a non-FIPS approved
key on the group, the key will not replicate to the FIPS secondary. No error is returned whenthis occurs.
> If you synchronize group members with the hagroup synchronize LunaCM command, anynon-FIPS keys will fail to replicate to the FIPS member(s). An error is returned when thisoccurs, but lunaCM synchronizes everything else.
NOTE If your application bypasses the virtual slot and creates or deletes directly in a physicalmember slot, the action occurs only in that single physical slot, and can be overturned by thenext synchronization operation. For this reason we generally advise to enable HA-only, unlessyou have specific reason to access individual physical slots, and are prepared (in yourapplication) to perform the necessary housekeeping.
Key replication, for pre-firmware-7.7.0 HSM partitions and for V0 partitions, uses the Luna cloningprotocol, which provides mutual authentication, confidentiality, and integrity for each object that is copied fromone partition to another. Therefore, all HA group member partitions must be initialized with the same cloningdomain.Key replication for V1 partitions uses the Luna cloning protocol to ensure that all HA group members have thesame SMK, and uses SKS to export a key originating at one member and to import and decrypt that key (usingthe common SMK) on each other member in the group. Again, all HA group member partitions must be initializedwith the same cloning domain in order that the common SMK can be available on every member.
The cloning protocol (for pre-firmware-7.7.0 or V0 or mixed-version HA), or the SKS protocol (for blob transfers ina V1 partition HA) is invoked separately for each object to be replicated and the sequence of required calls mustbe issued by an authorized client library residing on a client platform that has been authenticated to each of thepartitions in the HA group). That is, the client must have an authenticated NTLS or STC channel to the HSMappliance; only an authorized client can perform object synchronization across all HA members.
FailoverWhen any active HA group member fails, a failover event occurs – the affected partition is dropped from the list ofavailable HA group members, and all operations that were pending on the failed partition are transparentlyrescheduled on the remaining member partitions. The Luna HSM Client continuously monitors the health ofmember partitions at two levels:
> network connectivity – disruption of the network connection causes a failover event after a 20-secondtimeout.
> command completion – any command that is not executed within 20 seconds causes a failover event.
Luna Network HSM 7 Partition Administration GuideLast Updated: 2022-07-26 23:53:21 GMT-04:00 Copyright 2001-2022 Thales Group 362

Chapter 13: High-Availability Groups
NOTE Most commands are completed within milliseconds. Some can take longer, eitherbecause the command itself is time-consuming (for example, key generation), or because theHSM is under extreme load. The HSM automatically sends a "heartbeat" signal every twoseconds for commands that are pending or in progress. The client extends the 20-secondtimeout whenever it receives a heartbeat, preventing false failover events. When an HA groupis active, the client sends another heartbeat signal every 10 seconds to check the status of HAmember partitions.
When an HA group member fails, the HA group status (see "hagroup listgroups" on page 1) reports a deviceerror for the failed member. The client tries to reconnect the failed member at a minimum retry rate of once every60 seconds, for the specified number of times (see "Recovery" on the next page).
When a failover occurs, the application experiences a latency stall on the commands in process on the failingunit, but otherwise there is no impact on the transaction flow. The scheduling algorithm described in "LoadBalancing" on page 360 automatically minimizes the number of commands that stall on a failing unit during the20-second timeout.
As long as one HA group member remains functional, cryptographic service is maintained no matter how manyother group members fail. As described in "Recovery" on the next page, members can be returned to servicewithout restarting the application.
Mid-operation failuresAny operation that fails mid-point needs to be re-sent from the calling application. The entire operation returns afailure (CKR_DEVICE_ERROR). This is more likely to happen in a multi-part operation, but a failure couldconceivably happen during a single atomic operation as well.
For example, multi-part operations could be block encryption/decryption or any other command where theprevious state of the HSM is critical to the processing of the next command. These operations must be re-sent,since the HA group does not synchronize partitions' internal memory state, only the stored key material.
NOTE You must ensure that your applications can deal with the rare possibility of a mid-operation failure, by re-issuing the affected commands.
Possible Causes of FailureIn most cases, a failure is a brief service interruption, like a system reboot. These temporary interruptions areeasily dealt with by the failover and auto-recovery functions. In some cases, additional actions may be requiredbefore auto-recovery can take place. For example, if a partition becomes deactivated, it must be reactivated bythe Crypto Officer (see "Activation and Auto-activation on Multi-factor- (PED-) Authenticated Partitions" onpage 320). Some permanent failures may require manual recovery (see "Recovery" on the next page). Possiblefailure events include:
> HSM-side failures• HSM card failure
• HSM re-initialization
• HSM reboot
• HSM power failure
• Deactivated partition
Luna Network HSM 7 Partition Administration GuideLast Updated: 2022-07-26 23:53:21 GMT-04:00 Copyright 2001-2022 Thales Group 363

Chapter 13: High-Availability Groups
• NTLS service failure
• STC service failure
> Client-side failures• Client workstation power failure
• Client workstation reboot
• Network keepalive failure
> Network failures• Network failure near the HSM (one member partition disappears from client's view)
• Network failure near the client (client loses contact with all member partitions)
RecoveryRecovery of a failed HA group member is designed to be automatic in as many cases as possible. You canconfigure your auto-recovery settings to require as much manual intervention as is convenient for you and yourorganization. In either an automated or manual recovery process, there is no need to restart your application. Aspart of the recovery process:
> Any cryptographic objects created while the member was offline are automatically replicated to the recoveredpartition.
> The recovered partition becomes available for its share of load-balanced cryptographic operations.
Auto-recoveryWhen auto-recovery is enabled, Luna HSM Client performs periodic recovery attempts when it detects amember failure. You can adjust the frequency (maximum once per minute) and the total number of retries (nolimit). If the failed partition is not recovered within the scheduled number of retries, it remains a member of the HAgroup, but the client will no longer attempt to recover it. You must then address whatever equipment or networkissue caused the failure, and execute a manual recovery of the member partition.
With each recovery attempt, a single application thread experiences a slight latency delay of a few hundredmilliseconds while the client uses the thread to recover the failed member partition.
There are two HA auto-recovery modes:
> activeBasic – uses a separate, non-session-based Active Recovery Thread to perform background checksof HA member availability, recover failed members, and synchronize the contents of recovered members withthe rest of the group. It does not restore existing sessions if all members fail simultaneously and arerecovered.
> activeEnhanced – works the same as activeBasic, but restores existing sessions and login states if allmembers fail and are recovered.
HA auto-recovery is disabled by default. It is automatically enabled when you set the recovery retry count (see"Configuring HA Auto-Recovery" on page 381). Thales recommends enabling auto-recovery in allconfigurations.
Luna Network HSM 7 Partition Administration GuideLast Updated: 2022-07-26 23:53:21 GMT-04:00 Copyright 2001-2022 Thales Group 364

Chapter 13: High-Availability Groups
NOTE If a member partition loses Activation when it fails (it remains offline for more than twohours) you must present the black Crypto Officer PED key to re-cache the PED secret beforethe member can be recovered.
Manual RecoveryWhen auto-recovery is disabled, or fails to recover the partition within the scheduled number of retries, you mustexecute a manual recovery in LunaCM. Even if you use manual recovery, you do not need to restart yourapplication. When you execute the recovery command, the client makes a recovery attempt the next time theapplication uses the group member (see "Manually Recovering a Failed HA Group Member" on page 389).
Even with auto-recovery enabled and configured for a large number of retries, there are some rare occasionswhere a manual recovery may be necessary (for example, when a member partition and the client application failat the same time).
CAUTION! Never attempt a manual recovery while the application is running and auto-recovery is enabled. This can cause multiple concurrent recovery processes, resulting in errorsand possible key corruption.
Failure of All Group MembersIf all members of an HA group fail (and no standby members are configured), all logged-in sessions are lost, andoperations that were active when the last member failed are terminated. If you have set the HA auto-recoverymode to activeEnhanced, all sessions will be restarted when one or more members are recovered, and normaloperations will resume. Otherwise, you must restart the client application once the group members have beenrecovered.
Permanent FailuresSometimes an HSM failure is permanent (from the perspective of the HA group). For example, if the HSM is re-initialized, the member partition is erased and must be recreated. In this case, you can decide to recreate theoriginal member or deploy a new member to the group. The client automatically replicates cryptographic objectsto the new member and begins assigning operations to it (see "Replacing an HA Group Member" on page 390).
Standby MembersAfter you add member partitions to an HA group, you can designate some as standby members. Cryptographicobjects are replicated on all members of the HA group, including standby members, but standby members do notperform any cryptographic operations unless all the active members go offline. In this event, all standbymembers are immediately promoted to active service, and operations are load-balanced across them. Thisprovides an extra layer of assurance against a service blackout for your application.
Since standby members replicate keys but do not perform operations, they can also serve as an automaticbackup partition for the cryptographic objects on the HA group. The contents of standby partitions are alwayskept up-to-date, so it is not possible to keep multiple backups (different generations of preserved material) usingan HA group (see "Planning Your HA Group Deployment" on page 368). You can consider HA standby membersto be your backup only in the case where the most recent sync always replicates all objects you are interested inpreserving and recovering.
Luna Network HSM 7 Partition Administration GuideLast Updated: 2022-07-26 23:53:21 GMT-04:00 Copyright 2001-2022 Thales Group 365

Chapter 13: High-Availability Groups
If you have audit-compliance rules or other mandate to preserve earlier partition contents (keys and objects),then you should perform intentional backups with dedicated backup devices (see "Backup and Restore Using aLuna Backup HSM (G5) " on page 397 if you already have a Luna Backup HSM (G5), or "Backup and RestoreUsing a Luna B700 Backup HSM" on page 426 if you purchase a new Backup HSM).
Mixed-Version HA GroupsGenerally, Thales recommends using HSMs with the same software/firmware in HA groups; different versionshave different capabilities, and a mixed HA group is limited to those functions that are common to the versionsinvolved. A mixed-version HA group may have access to fewer cryptographic mechanisms, or have differentrestrictions in FIPS mode. However, HA groups containing both Luna 6 and 7 partitions and Luna Cloud HSMservices from Thales Data Protection on Demand are supported. This mixed-version configuration is useful formigrating keys to a new Luna 7 HSM or the cloud, or to gradually upgrade your production environment fromLuna 6 to Luna 7.
Process InteractionAt the lowest communication level, the transport protocol (TCP) maintains communication between the clientand the appliance (whether HA is involved or not). For HA groups involving member partitions on Luna NetworkHSM, the protocol timeout is 10 seconds. This means:
> In a period of no activity by client or appliance, the appliance's TCP will wonder if the client is still there, andsend a packet after 10 seconds of silence.
> If that packet is acknowledged, the 10-second TCP timer restarts, and the cycle repeats indefinitely.
> If the packet is not acknowledged, TCP sends another every 10 seconds. If there is no response after 2minutes, the connection is considered dead, and higher levels are alerted to perform their cleanup.
Above that level, the NTLS/STC layer provides the connection security and some other services. Any time aclient sends a request for a cryptographic operation, the HSM on the appliance begins working on that operation.
While the HSM processes the request, appliance-side NTLS/STC sends a "keep-alive" ping every 2 seconds,until the HSM completes the request. NTLS/STC does not perform any interpretation of the ping, but simplykeeps the TCP layer active. If your client application requests a lengthy operation (for example, an 8192-bitkeygen), the random-number-generation portion of that operation could take minutes, during which the HSMwould legitimately be sending nothing back to the client. The NTLS ping ensures that the connection remainsalive during long pauses.
Application Object HandlesApplication developers should be aware that the PKCS #11 object handle model is fully virtualized when usingan HA slot. The application must not assume fixed handle numbers across instances of an application. Ahandle’s value remains consistent for the life of a process; but it might be a different value the next time theapplication is executed.
When you use an HA slot with your applications, the client behaves as follows when interacting with theapplication:
1. Intercept the call from the application.
2. Translate virtual object handles to physical object handles using the mappings specified by the virtual objecttable. The virtual object table is created and updated for the current session only, and only contains of list ofthe objects accessed in the current session.
Luna Network HSM 7 Partition Administration GuideLast Updated: 2022-07-26 23:53:21 GMT-04:00 Copyright 2001-2022 Thales Group 366

Chapter 13: High-Availability Groups
3. Launch any required actions on the appropriate HSM or partition.
4. Receive the result from the HSM or partition and forward the result to your application,
5. Propagate any changes in objects on the physical HSM that performed the action to all of the other membersof the HA group.
Virtual slots and virtual objectsWhen an application uses a non-HA physical slot, it addresses all objects in the slot by their physical objecthandles. When an application uses an HA slot, however, a virtual layer of abstraction overlays the underlyingphysical slots that make up the HA group, and the HA group is presented to the application as a virtual slot. Thisvirtual slot contains virtual objects that have virtual object handles. The object handles in an HA slot arevirtualized since the object handles on each of the underlying physical slots might be different from slot to slot.Furthermore, the physical object handles could change if a member of the HA group drops out (fails or losescommunication) and is replaced.
The virtual object tableHA slots use a virtual object table to map the virtual objects in the virtual HA slot to the real objects in the physicalslots that make up the HA group. The HA client builds a virtual object table for each application that loads thelibrary. The table is ephemeral, and only exists for the current session. It is created and updated, if necessary,each time an application makes a request to access an object. To maximize performance and efficiency, thetable only contains a list of the objects accessed in the current session. For example, the first time an applicationaccesses an object after application start up, the table is created, a look up is performed to map the virtual objectto its underlying physical objects, and an entry for the object is added to the table. For each subsequent requestfor that object, the data in the table is used and no look up is required. If the application then accesses a differentobject that is not listed in the table, a new look up is performed and the table is updated to add an entry for thenew object.
C_FindObjects behavior and application performanceSince the client must perform a lookup to create the virtual object table, the way you use the C_FindObjectsfunction can have a significant impact on the performance of your applications. For example, if you use the C_FindObjects function to ask for specific attributes, the client only needs to update the table to include therequested objects. If, however, you use the C_FindObjects function to find all objects, the client queries eachHSM/partition in the group, for each object, to create the table. This can take a significant amount of time if theslot contains a large number of objects, or if the HA group includes many members.
To mitigate performance degradation when using the C_FindObjects function to list the objects on an HA slot, werecommend that you structure your applications to search by description, handles, or other attributes, rather thansearching for all objects. Doing so minimizes the number of objects returned and the time required to create orupdate the table. If your application must find all objects, we recommend that you add the C_FindObjects allfunction call to the beginning of your application so that the table is built on application start up, so that the tableis available to the application for all subsequent C_FindObjects function calls.
Example: Database EncryptionThis section walks through a sample use case of some of the HA logic with a specific application – a transparentdatabase encryption.
Luna Network HSM 7 Partition Administration GuideLast Updated: 2022-07-26 23:53:21 GMT-04:00 Copyright 2001-2022 Thales Group 367

Chapter 13: High-Availability Groups
Typical Database Encryption Key ArchitectureDatabase engines typically use a two-layered key architecture. At the top layer is a master encryption key that isthe root of data protection. Losing this key is equivalent to losing the database, so it obviously needs to be highlydurable. At the second layer are table keys used to protect table-spaces and/or columns. These table keys arestored with the database as blobs encrypted by the master encryption key (MEK). This architecture maps to thefollowing operations on the HSM:
1. Initial generation of master key for each database.2. Generation and encryption of table keys with the master key.3. Decryption of table keys when the database needs to access encrypted elements.4. Generation of new master keys during a re-key and then re-encrypting all table keys with it.
5. Generation and encryption of new table keys for storage in the database (often done in a software module).
The HSM is not involved in the use of table keys. Instead it provides the strong protection of the MEK which isused to protect the table keys. Users must follow backup procedures to ensure their MEK is as durable as thedatabase itself ("Backup and Restore Using a Luna Backup HSM (G5) " on page 397).
HSM High Availability with Database EncryptionWhen the HSMs are configured as an HA group, the database’s master key is automatically and transparentlyreplicated to all the members when the key is created or re-keyed. If an HSM group member was offline or failsduring the replication, it does not immediately receive a copy of the key. Instead the HA group proceeds afterreplicating to all of the active members. Once a member is re-joined to the group the HSM client automaticallyreplicates the new master keys to the recovered member.
Before every re-key event, the user must ensure the HA group has sufficient redundancy. A re-key will succeedas long as one HA group member exists, but proceeding with too few HSMs will result in an availability risk. Forexample, proceeding with only one HSMmeans the new master key will be at risk since it exists only on a singleHSM. Even with sufficient redundancy, Thales Group recommends maintaining an offline backup of a database’smaster key.
HSM Load Balancing with Database EncryptionWhile a database is up and running, the master key exists on all members in the HA group. Requests to encryptor decrypt table keys are distributed across the entire group. The load-balancing feature is able to deliverimproved performance and scalability when the database requires a large number of accesses to the table keys.Most deployments will not need much load balancing as the typical database deployment results in a smallnumber of table keys.
While the table keys are re-keyed, new keys are generated in the HSM and encrypted for storage in thedatabase. Within an HA group, these keys are generated on the primary member and then replicated to theentire HA group, even though they exist on the HSM for only a moment. These events are infrequent enough thatthis extra replication has minimal impact.
Planning Your HA Group DeploymentThis section describes important considerations and constraints to keep in mind as you plan your High-Availability (HA) group deployment. The benefits of HA are described in detail in "High-Availability Groups" onpage 356. There are several sample configurations described in this section that take advantage of different HA
Luna Network HSM 7 Partition Administration GuideLast Updated: 2022-07-26 23:53:21 GMT-04:00 Copyright 2001-2022 Thales Group 368

Chapter 13: High-Availability Groups
features. Depending on your organization's security needs, you might choose one of these configurations, oryour own variation.
> "HSM and Partition Prerequisites" below
> "Sample Configurations" on the next page
• "Performance and Load Balancing" on the next page
• "Redundancy and Failover" on page 371
• "Automatic Remote Backup" on page 372
• "HA Group Sharing" on page 372
If you plan to create an HA group consisting of different kinds of Luna HSMs, refer also to:
> "Cloning Keys Between Luna 6, Luna 7, and Luna Cloud HSM" on page 191
HSM and Partition PrerequisitesThe HSM partitions you plan to use in an HA group must meet the following prerequisites before you can usethem in an HA group.
Compatible HSM Software/Firmware VersionsGenerally, Thales recommends using HSMs with the same software/firmware in HA groups; different versionshave different capabilities, and a mixed-version HA group is limited to those functions that are common to theversions involved. This means they have access to fewer cryptographic mechanisms, or have differentrestrictions in FIPS mode. However, mixed-version HA groups containing Luna 6 and 7 member partitions andLuna Cloud HSM services are supported. See "Cloning Keys Between Luna 6, Luna 7, and Luna Cloud HSM" onpage 191 for more information.
Common Cloning DomainAll key replication in an HA group uses the Luna cloning protocol, which provides mutual authentication,confidentiality, and integrity for each object that is copied from one partition to another. Therefore, all HA groupmember partitions must be initialized with the same cloning domain. If you are planning to combine already-existing partitions into an HA group, you must first re-initialize them using the same domain string or red PEDkey.
Common Crypto Officer CredentialsAn HA group essentially allows you to log in to all its member partitions simultaneously, using a single credential.Password-authenticated partitions must all be initialized with the same Crypto Officer password. PED-authenticated partitions must all be initialized with the same black Crypto Officer PED key and activated with thesame CO challenge password.
It is not possible to create an HA group made up of both password- and PED-authenticated partitions.
Common HSM/Partition Policies (FIPS Mode)Generally, all HSMs/partitions used in an HA group must have the same policy configuration.
If you are planning to set up an HA group with a mix of FIPS and non-FIPS partitions as members, note thefollowing:
Luna Network HSM 7 Partition Administration GuideLast Updated: 2022-07-26 23:53:21 GMT-04:00 Copyright 2001-2022 Thales Group 369

Chapter 13: High-Availability Groups
> If you are using Luna HSM Client 10.4.0 or newer, you can set up an HA group with a mix of FIPS and non-FIPS partitions as members. However, some limitations must be considered. For more information, refer to"Key Replication" on page 361.
> If you are using Luna HSM Client 10.3.0 or older, you cannot set up an HA group with a mix of FIPS and non-FIPS partitions as members.
Functionality ModulesIf you intend to use Functionality Modules (FMs) with your HA group, all HSMs containing HA group membersmust have FMs enabled and they must all have the same FM(s) loaded. See FM Deployment Constraints fordetails. FMs are not supported for Luna Cloud HSM services.
Sample ConfigurationsYour ideal HA group configuration depends on the number of HSMs you have available and the purpose of yourapplication(s). Sample configurations for different types of deployment are described below.
Performance and Load BalancingIf your application is designed to perform many cryptographic operations as quickly as possible, using keys orother objects that do not change often, you can create a large HA group using partitions on many HSMs. Thisdeployment uses load balancing to provide linear performance gains for each HSM added to the group.
For example: your application uses keys stored on the HSM to perform many encrypt/decrypt or sign/verifyoperations. You want to minimize transaction latency by providing enough HSMs to handle capacity.
The Luna HSM Client allows HA groups with up to 32 member partitions. The best approach in this example is toadd enough group members to handle the usual number of operations, plus enough extra members to handleperiods of high demand.
Luna Network HSM 7 Partition Administration GuideLast Updated: 2022-07-26 23:53:21 GMT-04:00 Copyright 2001-2022 Thales Group 370

Chapter 13: High-Availability Groups
Redundancy and FailoverIf your application requires continuous, uninterruptible uptime, operations assigned to an HA group arereassigned to other group members in the event of a member failure (see "Failover" on page 362 for details).Additional group members can be added and set to standby mode for an extra layer of redundancy (see"Standby Members" on page 365 for details).
To maximize the use of your HSMs, plan which member partitions you will set to standby mode. Although theconfiguration above is a straightforward example of an HA group with a single standby member, it is not an idealproduction configuration, because the standby member is idle unless all the other members fail. Theconfiguration below is a more useful implementation of two HA groups, each with standby members on theother's HSMs.
As depicted below, applications can be deployed in geographically dispersed locations. In this scenario, Luna’sstandby capability allows you to use the HSMs in Datacenter B to cost-effectively improve availability for the localHA group at Datacenter A, and vice-versa. This approach allows the HA groups to avoid using remote HSMs withhigh latency, unless they are urgently required. If all local members fail, the standby partitions are automaticallypromoted to active status.
Luna Network HSM 7 Partition Administration GuideLast Updated: 2022-07-26 23:53:21 GMT-04:00 Copyright 2001-2022 Thales Group 371

Chapter 13: High-Availability Groups
Automatic Remote BackupSince the contents of member partitions are always kept up-to-date, you can use an HA group to keep anautomatic backup of your cryptographic objects. Set the backup member to standby mode so that it does notperform operations. If the regular member(s) fail, the standby member takes over operations.
HA Group SharingGenerally, an HA group is defined on a single client, which runs an application against the virtual HA group. Youcan share the HA group across multiple clients by assigning all member partitions to both clients and creating theHA group independently on each one.
TIP When an HA group is shared across multiple clients, the group can be defined with adifferent primary member (the first partition assigned to the group) on each client. Thisapproach optimizes an HA group to distribute the key management and/or multi-partcryptographic operation load more equally.
Luna Network HSM 7 Partition Administration GuideLast Updated: 2022-07-26 23:53:21 GMT-04:00 Copyright 2001-2022 Thales Group 372

Chapter 13: High-Availability Groups
Setting Up an HA GroupUse LunaCM to create an HA group from partitions assigned to your client. This procedure is completed by theCrypto Officer. Ensure that you have met all necessary prerequisites before proceeding with group creation. Fora detailed description of HA functionality, see "High-Availability Groups" on page 356.
NOTE Your LunaCM instance needs to update the Chrystoki.conf (Linux/UNIX) orcrystoki.ini file (Windows) when setting up or reconfiguring HA. Ensure that you haveAdministrator privileges on the client workstation.Back up the SMK in any partition where that SMK is likely to be overwritten, if that SMK is everlikely to be needed to insert (decrypt) any SKS blobs. If an SMK is cloned from one partition toanother (such as must be done when adding members to an HA group), a pre-existing SMKalready in the target partition is overwritten by the incoming SMK. Any blobs still encrypted withit are lost, unless a backup exists.
PrerequisitesHA groups are set up in LunaCM by the Crypto Officer. Before the CO can perform this setup, however, all HSMsand member partitions must meet the following prerequisites, completed by the HSM and Partition SecurityOfficers.
HSMsThe HSM SOmust ensure that all HSMs containing HA group member partitions meet the followingprerequisites:
> All HSMs must use the same authentication method (Password/PED). Luna Cloud HSM Services supportpassword authentication only.
> HA groups cannot contain both PCIe HSMs and Network HSMs.
Luna Network HSM 7 Partition Administration GuideLast Updated: 2022-07-26 23:53:21 GMT-04:00 Copyright 2001-2022 Thales Group 373

Chapter 13: High-Availability Groups
> All must be running one of the supported software/firmware versions. Generally, Thales recommends usingHSMs with the same software/firmware for HA. However, mixed-version HA groups containing Luna 6 and 7member partitions and Luna Cloud HSM services are supported. See "Cloning Keys Between Luna 6, Luna 7,and Luna Cloud HSM" on page 191 for more information.
> For Network HSMs, network setup must be complete and the appliances must be accessible via SSH.
> HSM policies 7: Allow Cloning and 16: Allow Network Replicationmust be set to 1( see Setting HSMPolicies Manually).
> HSM policies must be consistent across all HSMs.
NOTE For HSM policy 12: Allow non-FIPS algorithms, note the following:> If you are using Luna HSM Client 10.4.0 or newer, you can set up an HA group with a mix of
FIPS and non-FIPS partitions as members. However, some limitations must be considered.For more information, refer to "Key Replication" on page 361.
> If you are using Luna HSM Client 10.3.0 or older, you cannot set up an HA group with a mixof FIPS and non-FIPS partitions as members.
> The client must be able to access all the application partitions using NTLS or STC links for Network HSMs, orXTC/REST for Luna Cloud HSM Services (see "Client-Partition Connections" on page 105).
A client can have a session with an STC slot, making use of only one appID. When running an HA command ifyou are already logged in or have a session open with an appID to a member of that HA slot, you will not be ableto log into that slot at this time. When you run a command like "ha list", lunacm logs into each member using arandomly created appID. If any one of these slots already has a login session, such an attempt is rejected withCKR_ACCESS_ID_ALREADY_EXISTS. The workaround is to close the problem session first.
PartitionsThe Partition SOmust ensure that all partitions in an HA group meet the following prerequisites:
> The partitions must be created on different HSMs; partitions on a single HSM cannot provide failover for eachother, as they have a single point of failure.
> All partitions must be visible in LunaCM on the client workstation.
> All partitions must be initialized with the same cloning domain:
• Password-authenticated partitions must share the same domain string.
• PED-authenticated partitions must share the same red domain PED key.
> Partition policies 0: Allow private key cloning and 4: Allow secret key cloningmust be set to 1 on allpartitions.
> Partition policies must be consistent across all member partitions.
> The Crypto Officer role on each partition must be initialized with the same CO credential (password or blackPED key).
> PED-authenticated partitions must have partition policies 22: Allow activation and 23: Allow auto-activation set to 1. All partitions must be activated and have auto-activation enabled, so that they can retaintheir login state after failure/recovery. Each partition must have the same activation challenge secret set (see"Activation and Auto-activation on Multi-factor- (PED-) Authenticated Partitions" on page 320)
Luna Network HSM 7 Partition Administration GuideLast Updated: 2022-07-26 23:53:21 GMT-04:00 Copyright 2001-2022 Thales Group 374

Chapter 13: High-Availability Groups
NOTE If HSM policy 21: Force user PIN change after set/reset is set to 1 (the defaultsetting), the Crypto Officer must change the initial CO credential before using the partition forcryptographic operations. This applies to the activation challenge secret as well (see rolechangepw).
To set up an HA group
1. Decide which partition will serve as the primary member (see "The Primary Partition" on page 361). Create anew HA group, specifying the following information:
• the group label (do not call the group "HA")
• the Serial number OR the slot number of the primary member partition
• the Crypto Officer password or challenge secret for the partition
lunacm:>hagroup creategroup -label <label> {-slot <slotnum> | -serialnumber <serialnum>}lunacm:> hagroup creategroup -label myHAgroup -slot 0
Enter the password: ********
New group with label "myHAgroup" created with group number 1154438865287.Group configuration is:
HA Group Label: myHAgroupHA Group Number: 1154438865287
HA Group Slot ID: Not AvailableSynchronization: enabledGroup Members: 154438865287
Needs sync: noStandby Members: <none>
Slot # Member S/N Member Label Status====== ========== ============ ======
0 154438865287 par0 alive
Command Result : No Error
LunaCM generates a serial number for the HA group (by adding a "1" before the primary partition serialnumber), assigns it a virtual slot number, and automatically restarts.lunacm (64-bit) v7.3.0. Copyright (c) 2018 SafeNet. All rights reserved.
Available HSMs:
Slot Id -> 0Label -> par0Serial Number -> 154438865287Model -> LunaSA 7.3.0Firmware Version -> 7.3.0Configuration -> Luna User Partition With SO (PW) Key
Export With Cloning ModeSlot Description -> Net Token Slot
Luna Network HSM 7 Partition Administration GuideLast Updated: 2022-07-26 23:53:21 GMT-04:00 Copyright 2001-2022 Thales Group 375

Chapter 13: High-Availability Groups
Slot Id -> 1Label -> par1Serial Number -> 1238700701509Model -> LunaSA 7.3.0Firmware Version -> 7.3.0Configuration -> Luna User Partition With SO (PW) Key
Export With Cloning ModeSlot Description -> Net Token Slot
Slot Id -> 5HSM Label -> myHAgroupHSM Serial Number -> 1154438865287HSM Model -> LunaVirtualHSM Firmware Version -> 7.3.0HSM Configuration -> Luna Virtual HSM (PW) Key Export With
Cloning ModeHSM Status -> N/A - HA Group
Current Slot Id: 0
2. Add another partition to the HA group, specifying either the slot or the serial number. If the new membercontains cryptographic objects, you are prompted to decide whether to replicate the objects within the HAgroup, or delete them.
lunacm:>hagroup addmember -group <grouplabel> {-slot <slotnum> | -serialnumber <serialnum>}lunacm:> hagroup addmember -group myHAgroup -slot 1
Enter the password: ********
Warning: There are objects currently on the new member.Do you wish to propagate these objects within the HAgroup, or remove them?
Type 'copy' to keep and propagate the existingobjects, 'remove' to remove them before continuing,or 'quit' to stop adding this new group member.> copy
Member 1238700701509 successfully added to group myHAgroup. New groupconfiguration is:
HA Group Label: myHAgroupHA Group Number: 1154438865287
HA Group Slot ID: 5Synchronization: enabledGroup Members: 154438865287, 1238700701509
Needs sync: noStandby Members: <none>
Slot # Member S/N Member Label Status====== ========== ============ ======
0 154438865287 par0 alive1 1238700701509 par1 alive
Luna Network HSM 7 Partition Administration GuideLast Updated: 2022-07-26 23:53:21 GMT-04:00 Copyright 2001-2022 Thales Group 376

Chapter 13: High-Availability Groups
Please use the command "ha synchronize" when you are readyto replicate data between all members of the HA group.(If you have additional members to add, you may wish to waituntil you have added them before synchronizing to save time byavoiding multiple synchronizations.)
Command Result : No Error
Repeat this step for each additional HA group member.
3. If you are adding member partitions that already have cryptographic objects stored on them, initiate a manualsynchronization. You can tell whether this step is required by checking the line Needs Sync : yes/no in theHA group output. This will also confirm that the HA group is functioning correctly.
lunacm:> hagroup synchronize -group <grouplabel>4. [Optional] If you created an HA group out of empty partitions, and you want to verify that the group is
functioning correctly, see "Verifying an HA Group" below.
5. Specify which member partitions, if any, will serve as standby members.See "Setting an HA Group Member to Standby" on page 379.
6. Set up and configure auto-recovery (recommended). If you choose to use manual recovery, you will have toexecute a recovery command whenever a group member fails.
See "Configuring HA Auto-Recovery" on page 381.
7. [Optional] Enable HA Only mode (recommended).
See "Enabling/Disabling HA Only Mode" on page 381.
8. [Optional] Configure HA logging.
See "HA Logging" on page 382 for procedures and information on reading HA logs.
The HA group is now ready for your application.
Verifying an HA GroupAfter creating an HA group in LunaCM, you can see the group represented as a virtual slot alongside the physicalslots:lunacm (64-bit) v7.3.0. Copyright (c) 2018 SafeNet. All rights reserved.
Available HSMs:
Slot Id -> 0Label -> par0Serial Number -> 154438865287Model -> LunaSA 7.3.0Firmware Version -> 7.3.0Configuration -> Luna User Partition With SO (PW) Key Export With Cloning ModeSlot Description -> Net Token Slot
Slot Id -> 1Label -> par1Serial Number -> 1238700701509
Luna Network HSM 7 Partition Administration GuideLast Updated: 2022-07-26 23:53:21 GMT-04:00 Copyright 2001-2022 Thales Group 377

Chapter 13: High-Availability Groups
Model -> LunaSA 7.3.0Firmware Version -> 7.3.0Configuration -> Luna User Partition With SO (PW) Key Export With Cloning ModeSlot Description -> Net Token Slot
Slot Id -> 5HSM Label -> myHAgroupHSM Serial Number -> 1154438865287HSM Model -> LunaVirtualHSM Firmware Version -> 7.3.0HSM Configuration -> Luna Virtual HSM (PW) Key Export With Cloning ModeHSM Status -> N/A - HA Group
Current Slot Id: 0The following procedure is one way to verify that your HA group is working as intended:
To verify an HA group
1. Exit LunaCM and runmultitoken against the HA group slot number (slot 5 in the example) to create someobjects on the HA group partitions.
./multitoken -mode <keygen_mode> -key <key_size> -nodestroy -slots <HA_virtual_slot>You can hit Enter at any time to stop the process before the partitions fill up completely. Any number ofcreated objects will be sufficient to show that the HA group is functioning.
2. Run LunaCM and check the partition information on the two physical slots. Check the object count under"Partition Storage":
lunacm:> partition showinfoCurrent Slot Id: 0
lunacm:> partition showinfo
...(clip)...
Partition Storage:Total Storage Space: 325896Used Storage Space: 22120Free Storage Space: 303776Object Count: 14Overhead: 9648
Command Result : No Error
lunacm:> slot set slot 1
Current Slot Id: 1 (Luna User Slot 7.0.1 (PW) Signing With Cloning Mode)
Command Result : No Error
lunacm:> partition showinfo
...(clip)...
Luna Network HSM 7 Partition Administration GuideLast Updated: 2022-07-26 23:53:21 GMT-04:00 Copyright 2001-2022 Thales Group 378

Chapter 13: High-Availability Groups
Partition Storage:Total Storage Space: 325896Used Storage Space: 22120Free Storage Space: 303776Object Count: 14Overhead: 9648
Command Result : No Error
3. To remove the test objects, login to the HA virtual slot and clear the virtual partition.
lunacm:> slot set -slot <HA_virtual_slot>lunacm:> partition loginlunacm:> partition clear
If you are satisfied that your HA group is working, you can begin using your application against the HA virtual slot.The virtual slot assignment will change depending on how many more application partitions are added to yourclient configuration. If your application invokes the HA group label, this will not matter. If you have applicationsthat invoke the slot number, see "Enabling/Disabling HA Only Mode" on page 381.
Setting an HA Group Member to StandbySome HA group members can be designated as standby members. Standby members do not perform anycryptographic operations unless all active members have failed (see "Standby Members" on page 365 fordetails). They are useful as a last resort against loss of application service.
Prerequisites> The partition you want to designate as a standby member must already be a member of the HA group (see
"Adding/Removing an HA Group Member" on page 386).
> The group member must be online.
> The Crypto Officer must perform this procedure.
To set an HA group member to standby
1. [Optional] Check the serial number of the member you wish to set to standby mode.lunacm:> hagroup listgroups
2. Set the desired member to standby mode by specifying the serial number.lunacm:> hagroup addstandby -group <label> -serialnumber <member_serialnum>lunacm:> hagroup addstandby -group myHAgroup -serialnumber 2855496365544
The member 2855496365544 was successfully added to the standby list for the HA GroupmyHAgroup.
Command Result : No Error
Luna Network HSM 7 Partition Administration GuideLast Updated: 2022-07-26 23:53:21 GMT-04:00 Copyright 2001-2022 Thales Group 379

Chapter 13: High-Availability Groups
To make a standby HA member active
NOTE By default, a Luna Cloud HSM service from Thales DPoD is always added to an HAgroup as a standby member. If you prefer to use the Luna Cloud HSM service as an active HAmember, you must first edit the following toggle in the Chrystoki.conf/crystoki.iniconfiguration file (see "Configuration File Summary" on page 73):[Toggles]lunacm_cv_ha_ui = 0
1. [Optional] Check the serial number of the standby member.lunacm:> hagroup listgroups
If you would like to see synchronization data for group myHAgroup,please enter the password for the group members. Sync infonot available in HA Only mode.
Enter the password: ********
HA auto recovery: disabledHA recovery mode: activeBasic
Maximum auto recovery retry: 0Auto recovery poll interval: 60 seconds
HA logging: disabledOnly Show HA Slots: no
HA Group Label: myHAgroupHA Group Number: 11238700701509HA Group Slot ID: 5Synchronization: enabled
Group Members: 154438865287, 1238700701509Needs sync: no
Standby Members: 2855496365544
Slot # Member S/N Member Label Status====== ========== ============ ======
0 154438865287 par0 alive1 1238700701509 par1 alive2 2855496365544 par2 alive
2. Remove the member from standby and return it to active HA use.
lunacm:> hagroup removestandby -group <label> -serialnumber <member_serialnum>lunacm:> hagroup removestandby -group myHAgroup -serialnumber 2855496365544
The member 2855496365544 was successfully removed from the standby list for the HAGroup myHAgroup.
Command Result : No Error
Luna Network HSM 7 Partition Administration GuideLast Updated: 2022-07-26 23:53:21 GMT-04:00 Copyright 2001-2022 Thales Group 380

Chapter 13: High-Availability Groups
Configuring HA Auto-RecoveryWhen auto-recovery is enabled, Luna HSM Client performs periodic recovery attempts when it detects amember failure. HA auto-recovery is disabled by default for new HA groups. To enable it, you must set amaximum number of recovery attempts. You can also set the frequency of recovery attempts, and the auto-recovery mode (activeBasic or activeEnhanced). These settings will apply to all HA groups configured on theclient.
To configure HA auto-recovery
1. Set the desired number of recovery attempts by specifying the retry count as follows:• Set a value of 0 to disable HA auto-recovery
• Set a value of -1 for unlimited retries• Set any specific number of retries from 1 to 500lunacm:> hagroup retry -count <retries>
2. [Optional] Set the desired frequency of recovery attempts by specifying the time in seconds. The acceptablerange is 60-1200 seconds (default: 60).lunacm:> hagroup interval -interval <seconds>
3. [Optional] Set the auto-recovery mode. The default is activeBasic.lunacm:> hagroup recoverymode -mode {activeBasic | activeEnhanced}
4. [Optional] Check that auto-recovery has been enabled. You are prompted for the Crypto Officerpassword/challenge secret.
lunacm:> hagroup listgroups
Enabling/Disabling HA Only ModeBy default, client applications can see both physical slots and virtual HA slots. Directing applications at thephysical slots bypasses the high availability and load balancing functionality. An application must be directed atthe virtual HA slot to use HA load balancing and redundancy. HA Only mode hides the physical slots and leavesonly the HA group slots visible to applications, simplifying the PKCS#11 slot numbering (see "Slot Numberingand Behavior" on page 472).
If an HA group member partition fails and is recovered, all visible slot numbers can change, including the HAgroup virtual slots. This can cause applications to direct operations to the wrong slot. If a physical slot in the HAgroup receives a direct request, the results will not be replicated on the other partitions in the group (see "HATroubleshooting" on page 393) When HA Only mode is enabled, the HA virtual slots are not affected by partitionslot changes. Thales recommends enabling HA Only mode on all clients running HA groups.
NOTE Individual partition slots are still visible in LunaCM when HA Only mode is enabled.They are hidden only from client applications. Use CKdemo (Option 11) to see the slotnumbers to use with client applications.
Luna Network HSM 7 Partition Administration GuideLast Updated: 2022-07-26 23:53:21 GMT-04:00 Copyright 2001-2022 Thales Group 381

Chapter 13: High-Availability Groups
To enable HA Only mode
1. Enable HA Only mode in LunaCM.
lunacm:> hagroup haonly -enable2. [Optional] Since LunaCM still displays the partitions, you can check the status of HA Only mode at any time.
lunacm:> hagroup haonly -show
To disable HA Only mode
1. Disable HA Only mode in LunaCM.
lunacm:> hagroup haonly -disable
HA LoggingLogging of HA-related events takes place on the Luna HSM Client workstation. The log file haErrorLog.txtshows HA errors, as well as add-member and delete-member events. It does not record status changes of thegroup as a whole (like adding or removing the group). Some information is recorded in the log file to help Thalescustomer support staff troubleshoot operational issues.
The HA log rotates after the configured maximum length is reached. When it finishes writing the current record(even if that record slightly exceeds the configured maximum), the file is renamed to include the timestamp andthe next log entry begins a new haErrorLog.txt.
> "Configuring HA Logging" below
> "HA Log Messages" on the next page
Configuring HA LoggingUsing Luna HSM Client 7.2.0 or newer, logging is automatically enabled when you configure an HA group (see"Setting Up an HA Group" on page 373), but you must configure a valid destination path before logging canbegin. HA groups are configured on the client using LunaCM. The HA configuration settings are saved to theChrystoki.conf (Linux/Unix) or crystoki.ini (Windows) file, as illustrated in the following example:VirtualToken = {VirtualToken00Label = haGroup1; // The label of the HA group.VirtualToken00SN = 11234840370164; // The pseudo serial number of the HA group.VirtualToken00Members = 1234840370164, 1234924189183; // The serial number of the members.VirtualTokenActiveRecovery = activeEnhanced; // The recovery mode.}HASynchronize = {haGroup1 = 1; // Enable automatic synchronization of objects.}HAConfiguration = {HAOnly = 1; // Enable listing HA groups only via PKCS#11 library.haLogPath = /tmp/halog; // Base path of the HA log file; i.e., “/tmp/halog/haErrorLog.txt”.haLogStatus = enabled; // Enable HA log.logLen = 100000000; // Maximum size of HA log file in bytes.failover_on_deactivation = 1; // if a partition becomes deactivated then the client willimmediately failover and resume its operation on the other HA partitions. This is currently analpha featurereconnAtt = 120; // Number of recovery attempts.}
Luna Network HSM 7 Partition Administration GuideLast Updated: 2022-07-26 23:53:21 GMT-04:00 Copyright 2001-2022 Thales Group 382

Chapter 13: High-Availability Groups
HARecovery = {haGroup1 = 1; // Deprecated in this release as auto recovery will cover the use case. Whencryptoki loads into memory it reads the number and if the number changes (gets incremented)then cryptoki interprets this as a manual recovery attempt.}
To configure HA logging
Use the LunaCM command hagroup halog.1. Set a valid path for the log directory. You must specify an existing directory.
lunacm:> hagroup halog -path <filepath>lunacm:> hagroup halog -path "C:\Program Files\Safenet\Lunaclient\halog"
HA Log path successfully set to C:\Program Files\Safenet\Lunaclient\halog.
Command Result : No Error
2. [Optional] Set the maximum length for individual log files.
lunacm:> hagroup halog -maxlength <max_file_length>lunacm:> hagroup halog -maxlength 500000
HA Log maximum file size was successfully set to 500000.
Command Result : No Error
3. [Optional] Enable or disable HA logging at any time.
lunacm:> hagroup halog -disablelunacm:> hagroup halog -enablelunacm:> hagroup halog -disable
HA Log was successfully disabled.
Command Result : No Error
4. [Optional] View the current status of the HA logging configuration.
lunacm:> hagroup halog -showlunacm:> hagroup halog -show
HA Log: enabledLog File: C:\Program Files\Safenet\Lunaclient\halog\haErrorLog.txt
Max File Length: 500000 bytes
Command Result : No Error
HA Log MessagesThe following table provides descriptions of the messages generated by the HA sub-system and saved to the HAlog. The HA log is saved to the location specified by haLogPath in the Chrystoki.conf (Linux/Unix) orcrystoki.ini (Windows) file.
Luna Network HSM 7 Partition Administration GuideLast Updated: 2022-07-26 23:53:21 GMT-04:00 Copyright 2001-2022 Thales Group 383

Chapter 13: High-Availability Groups
Message FormatEvery HA log message has a consistent prefix consisting of the date, time, process id, and serial number (of theaffected HA group). For example:Wed Oct 4 16:29:21 2017 : [17469] HA group: 11234840370164 …
Message DescriptionsIn the message descriptions, the term connection refers to the connection between the Luna HSM Client andthe Luna Network appliance. A connection is considered valid if the appliance responds correctly on the IPaddress and port. The connection can transition to invalid for a number of reasons. Some examples include ifthe appliance Ethernet cable is detached, if the appliance is shutdown/rebooted, or if the NTLS service isstopped/restarted.
Message ID Message/Description
HALOG_CONFIGURED_AS_PASSWORD
<MessagePrefix> configured as a "PASSWORD Based" virtual device
Description:Message advising that the virtual partition is password-authenticated. This means that you cannot add a PED-authenticated member tothe group.
HALOG_CONFIGURED_AS_PED
<MessagePrefix> configured as a "PED Based" virtual device
Description:Message advising that the virtual partition is PED-authenticated.This means that you cannot add a password-authenticated member to the group.
HALOG_DROPMEMBER <MessagePrefix> has dropped member: <SerialNumber>
Description: The connection changed from valid to invalid, determined after anHSM command (such as C_Sign) fails.
HALOG_DROPUNRECOVERABLE
<MessagePrefix> unable to reach member: <SerialNumber>. ManualRecover or Auto Recovery will be able to recover this member
Description: The connection is invalid, as determined during a call to C_Initialize.
HALOG_LOGINFAILED <MessagePrefix> can not login to member: <SerialNumber>,autorecovery will be disabled. Code: <ErrorCodeHex> :<ErrorCodeString>
Description: The connection changed from valid to invalid, as determined duringa call to C_Login.
HALOG_MEMBER_DEACTIVATED
<MessagePrefix> member: <SerialNumber> deactivated
Description: The user manually deactivated the partition, as determined after anHSM command (such as C_Sign) fails.
HALOG_MEMBER_NOW_ACTIVATED
<MessagePrefix> recovery attempt <AttemptNumber> member<SerialNumber> is now activated and will be reintroduce back intothe HA group.
Description: Additional info about the recovered partition, which was deactivatedand is now becoming activated.
Luna Network HSM 7 Partition Administration GuideLast Updated: 2022-07-26 23:53:21 GMT-04:00 Copyright 2001-2022 Thales Group 384

Chapter 13: High-Availability Groups
Message ID Message/Description
HALOG_MEMBER_REVOKED
<MessagePrefix> member: <SerialNumber> revoked
Description: The user manually revoked the partition, as determined during aperiodic recovery attempt.
HALOG_MEMBERS_OFFLINE
<MessagePrefix> all members gone offline.
Description: A situation where all members go offline. Recovery is not possibleat this point.
HALOG_MGMT_THREAD_START
<MessagePrefix> management thread started
Description: This thread is responsible for managing all members and HA ingeneral while the HA group is active. The thread starts up when the applicationfirst launches.
HALOG_MGMT_THREAD_TERMINATE
<MessagePrefix> management thread terminated
Description: This thread is responsible for managing all members and HA ingeneral while the HA group is active. If the client application shuts down, thisthread will simply terminate. The thread will start up again once the application re-launches.
HALOG_NEWMEMBER <MessagePrefix> detected new member member: <SerialNumber>
Description: The user manually added a member to the HA group withoutrestarting the application, as determined during a periodic recovery attempt.
HALOG_RECOVERED <MessagePrefix> recovery attempt <Integer> succeeded for member:<SerialNumber>
Description: The connection changed from invalid to valid, as determined duringa periodic recovery attempt.
HALOG_RECOVERY_ATTEMPT_#_REINTRODUCING
<MessagePrefix> recovery attempt <AttemptNumber> reintroducing<Number> token objects to recovered token <TokenNumber>
Description: Additional info about the recovered partition at which some objectswere cloned.
HALOG_RECOVERYFAILED <MessagePrefix> recovery attempt <Integer> failed for member:<SerialNumber>. Code: <ErrorCodeHex> : <ErrorCodeString>.
If autorecovery fails, then a second message is logged, as follows:<MessagePrefix> exceeded maximum number of autorecovery attemptsfor member: <SerialNumber>. Autorecovery will be disabled
Description: The connection remains invalid, as determined during a periodicrecovery attempt.
HALOG_RENABLEMEMBER(deprecated)
<MessagePrefix> Re-enable auto recovery process for member:<SerialNumber>
Description: The user manually requested partition recovery, as determinedduring a periodic recovery attempt before an HSM command.
Luna Network HSM 7 Partition Administration GuideLast Updated: 2022-07-26 23:53:21 GMT-04:00 Copyright 2001-2022 Thales Group 385

Chapter 13: High-Availability Groups
Message ID Message/Description
HALOG_UNRECOVERABLE(deprecated)
<MessagePrefix> recovery attempt <Integer> failed for member:<SerialNumber>. Manual Recover or Auto Recovery will not be ableto recover this member. Code: <ErrorCodeHex> : <ErrorCodeString>
Description: The connection is invalid and is not eligible for recovery.
No ID* <MessagePrefix> member <SerialNumber> is not activated and isexcluded from the HA group
Description: The HA member was not activated at the time when a C_Initializecall was made, and is therefore excluded from the HA group. Once the partition isactivated, the HA group will attempt an automatic recovery, resulting in one of thetwo messages below
No ID* <MessagePrefix> recovery attempt <SerialNumber> is not activatedand cannot be reintroduced back into the HA group\n
Description: Recovery failed
No ID* <MessagePrefix> recovery attempt <SerialNumber> is now activatedand will be reintroduce back into the HA group.\n
Description: Recovery succeeded
* You might encounter these extra messages in the HA logs. They were added for HA development testing andtherefore have no Message IDs assigned to them. They could duplicate information covered by other logmessages as defined above.
Adding/Removing an HA Group MemberYou can add a new member to an HA group at any time using LunaCM, even if your application is running.Cryptographic objects will be replicated on the new partition and operations will be scheduled according to theload-balancing algorithm (see "Load Balancing" on page 360).
Likewise, you can remove a member at any time, and currently-scheduled operations will fail over to the rest ofthe group members (see "Failover" on page 362).
NOTE If you remove the partition that was used to create the group, the HA group serialnumber changes to reflect this. This is to prevent another HA group from being assigned thesame serial number as the original. If your application queries the HA group serial number, itmust redirect operations to the new serial.
PrerequisitesThe new member partition must:
> be assigned to the client and visible in LunaCM
> be initialized with the same domain string/red domain PED key as the other partitions in the group
> have the Crypto Officer role initialized with the same credentials as the other partitions in the group
> be activated and have auto-activation enabled (PED-authenticated)
Luna Network HSM 7 Partition Administration GuideLast Updated: 2022-07-26 23:53:21 GMT-04:00 Copyright 2001-2022 Thales Group 386

Chapter 13: High-Availability Groups
NOTE Back up the SMK in any partition where that SMK is likely to be overwritten, if that SMKis ever likely to be needed to insert (decrypt) any SKS blobs.If an SMK is cloned from one partition to another (such as must be done when adding membersto an HA group), a pre-existing SMK already in the target partition is overwritten by theincoming SMK. Any blobs still encrypted with it are lost, unless a backup exists.
To add an HA group member
1. Open LunaCM on the client workstation and ensure that the new partition is visible.lunacm (64-bit) v7.3.0. Copyright (c) 2018 SafeNet. All rights reserved.
Available HSMs:
Slot Id -> 0Label -> par0Serial Number -> 154438865287Model -> LunaSA 7.3.0Firmware Version -> 7.3.0Configuration -> Luna User Partition With SO (PW) Key Export With Cloning
ModeSlot Description -> Net Token Slot
Slot Id -> 1Label -> par1Serial Number -> 1238700701509Model -> LunaSA 7.3.0Firmware Version -> 7.3.0Configuration -> Luna User Partition With SO (PW) Key Export With Cloning
ModeSlot Description -> Net Token Slot
Slot Id -> 2Label -> par2Serial Number -> 2855496365544Model -> LunaSA 7.3.0Firmware Version -> 7.3.0Configuration -> Luna User Partition With SO (PW) Key Export With Cloning
ModeSlot Description -> Net Token Slot
Slot Id -> 5HSM Label -> myHAgroupHSM Serial Number -> 1154438865287HSM Model -> LunaVirtualHSM Firmware Version -> 7.3.0HSM Configuration -> Luna Virtual HSM (PW) Key Export With Cloning ModeHSM Status -> N/A - HA Group
Current Slot Id: 0
2. Add the new partition to the HA group by specifying either the slot or the serial number. You are prompted forthe Crypto Officer password/challenge secret.
lunacm:> hagroup addmember -group <label> {-slot <slotnum> | -serial <serialnum>}
Luna Network HSM 7 Partition Administration GuideLast Updated: 2022-07-26 23:53:21 GMT-04:00 Copyright 2001-2022 Thales Group 387

Chapter 13: High-Availability Groups
lunacm:> hagroup addmember -group myHAgroup -slot 2
Enter the password: ********Member 2855496365544 successfully added to group myHAgroup. New groupconfiguration is:
HA Group Label: myHAgroupHA Group Number: 1154438865287
HA Group Slot ID: 5Synchronization: enabled
Group Members: 154438865287, 1238700701509, 2855496365544Needs sync: no
Standby Members: <none>
Slot # Member S/N Member Label Status====== ========== ============ ======
0 154438865287 par0 alive1 1238700701509 par1 alive2 2855496365544 par2 alive
Please use the command "ha synchronize" when you are readyto replicate data between all members of the HA group.(If you have additional members to add, you may wish to waituntil you have added them before synchronizing to save time byavoiding multiple synchronizations.)
Command Result : No Error
To remove an HA group member
1. Remove the partition from the group by specifying either the slot or the serial number.
lunacm:> hagroup removemember -group <label> {-slot <slotnum> | -serial <serialnum>}lunacm:> hagroup removemember -group myHAgroup -slot 0
Member 154438865287 successfully removed from group myHAgroup.
Note: Serial number for the group changed to 11238700701509.Command Result : No Error
NOTE If you remove the partition that was used to create the group, the HA group serialnumber changes to reflect this. This is to prevent another HA group from being assigned thesame serial number as the original. If your application queries the HA group serial number, itmust redirect operations to the new serial.
LunaCM restarts.lunacm (64-bit) v7.3.0. Copyright (c) 2018 SafeNet. All rights reserved.
Available HSMs:
Slot Id -> 0
Luna Network HSM 7 Partition Administration GuideLast Updated: 2022-07-26 23:53:21 GMT-04:00 Copyright 2001-2022 Thales Group 388

Chapter 13: High-Availability Groups
Label -> par0Serial Number -> 154438865287Model -> LunaSA 7.3.0Firmware Version -> 7.3.0Configuration -> Luna User Partition With SO (PW) Key Export With Cloning
ModeSlot Description -> Net Token Slot
Slot Id -> 1Label -> par1Serial Number -> 1238700701509Model -> LunaSA 7.3.0Firmware Version -> 7.3.0Configuration -> Luna User Partition With SO (PW) Key Export With Cloning
ModeSlot Description -> Net Token Slot
Slot Id -> 2Label -> par2Serial Number -> 2855496365544Model -> LunaSA 7.3.0Firmware Version -> 7.3.0Configuration -> Luna User Partition With SO (PW) Key Export With Cloning
ModeSlot Description -> Net Token Slot
Slot Id -> 5HSM Label -> myHAgroupHSM Serial Number -> 11238700701509HSM Model -> LunaVirtualHSM Firmware Version -> 7.3.0HSM Configuration -> Luna Virtual HSM (PW) Key Export With Cloning ModeHSM Status -> N/A - HA Group
Current Slot Id: 0
2. [Optional] Check that the partition was removed from the group.
lunacm:> hagroup listgroups
Manually Recovering a Failed HA Group Member
Manually Recovering a Failed HA Group MemberThales recommends using auto-recovery for all HA group configurations (see "Configuring HA Auto-Recovery" on page 381). If you do not enable auto-recovery and a member partition fails, or if the recovery retrycount expires before the partition comes back online, you must recover the partition manually using LunaCM.You do not need to pause your application(s) to perform a manual recovery; the HA group handles load-balancing and automatically replicates any new or changed keys to the recovered member.
To perform a manual recovery of a failed HA group member
1. [Optional] Ensure that the failed member is available and visible in LunaCM by addressing the problem thatcaused the failure. Display the HA group to see the failed members. You are prompted for the Crypto Officer
Luna Network HSM 7 Partition Administration GuideLast Updated: 2022-07-26 23:53:21 GMT-04:00 Copyright 2001-2022 Thales Group 389

Chapter 13: High-Availability Groups
password/challenge secret.
lunacm:> hagroup listgroupsHA Group Label: myHAgroupHA Group Number: 1154438865287
HA Group Slot ID: 5Synchronization: enabled
Group Members: 154438865287, 1238700701509Needs sync: no
Standby Members: <none>
Slot # Member S/N Member Label Status====== ========== ============ ======------ 154438865287 par0 alive------ 1238700701509 ------------ down
2. If you are using a PED-authenticated partition with auto-activation disabled, or if the partition was down forlonger than two hours, log in to the partition as Crypto Officer and present the black CO PED key.
lunacm:> slot set -slot <slotnum>lunacm:> role login -name co
3. Execute the manual recovery command, specifying the HA group label.
lunacm:>hagroup recoverIf you have an application running on the HA group, the failed members will be recovered the next time anoperation is scheduled. Load-balancing and key replication is automatic.
4. If you do not currently have an application running, you can manually synchronize the contents of the HAgroup.
CAUTION! Never use manual synchronization if you have an application running. The HAgroup performs this automatically. Using this command on an HA group that is running anapplication could create conflicting key versions.
lunacm:> hagroup synchronize -group <label>
Replacing an HA Group MemberSometimes an HSM failure is permanent (from the perspective of the HA group). For example, if the HSM is re-initialized, the member partition is erased and must be recreated. In this case, you can recreate a partition on thesame HSM or another HSM, and deploy the new member to the group. You do not need to pause yourapplication to replace an HA group member.
PrerequisitesThe Crypto Officer must complete this procedure, but any new member partition must first be created andassigned to the client by the HSM SO, and initialized by the Partition SO. All the prerequisites listed in "SettingUp an HA Group" on page 373 must be met.
Luna Network HSM 7 Partition Administration GuideLast Updated: 2022-07-26 23:53:21 GMT-04:00 Copyright 2001-2022 Thales Group 390

Chapter 13: High-Availability Groups
NOTE Back up the SMK in any partition where that SMK is likely to be overwritten, if that SMKis ever likely to be needed to insert (decrypt) any SKS blobs.If an SMK is cloned from one partition to another (such as must be done when adding membersto an HA group), a pre-existing SMK already in the target partition is overwritten by theincoming SMK. Any blobs still encrypted with it are lost, unless a backup exists.
To replace an HA group member
1. [Optional] Display the HA group to see the failed member. You are prompted for the Crypto Officerpassword/challenge secret.
lunacm:> hagroup listgroupsHA Group Label: myHAgroupHA Group Number: 1154438865287
HA Group Slot ID: 5Synchronization: enabled
Group Members: 154438865287, 1238700701509Needs sync: no
Standby Members: <none>
Slot # Member S/N Member Label Status====== ========== ============ ======------ 154438865287 par0 alive------ 1238700701509 ------------ down
2. Prepare the new HA group member, whether that means creating a new partition on the original HSM orconfiguring a new Luna Network HSM, and assign the new partition to the HA client. Ensure that the newmember partition and the HSM on which it resides meet the prerequisites outlined in "Setting Up an HAGroup" on page 373 and is visible in LunaCM.lunacm (64-bit) v7.3.0. Copyright (c) 2018 SafeNet. All rights reserved.
Available HSMs:
Slot Id -> 0Label -> par0Serial Number -> 154438865287Model -> LunaSA 7.3.0Firmware Version -> 7.3.0Configuration -> Luna User Partition With SO (PW) Key Export With Cloning
ModeSlot Description -> Net Token Slot
Slot Id -> 1Label -> par1Serial Number -> 1238700701510Model -> LunaSA 7.3.0Firmware Version -> 7.3.0Configuration -> Luna User Partition With SO (PW) Key Export With Cloning
ModeSlot Description -> Net Token Slot
Slot Id -> 5HSM Label -> myHAgroup
Luna Network HSM 7 Partition Administration GuideLast Updated: 2022-07-26 23:53:21 GMT-04:00 Copyright 2001-2022 Thales Group 391

Chapter 13: High-Availability Groups
HSM Serial Number -> 1154438865287HSM Model -> LunaVirtualHSM Firmware Version -> 7.3.0HSM Configuration -> Luna Virtual HSM (PW) Key Export With Cloning ModeHSM Status -> N/A - HA Group
Current Slot Id: 0
3. Add the new partition to the HA group by specifying either the slot or the serial number. You are prompted forthe Crypto Officer password/challenge secret.
lunacm:> hagroup addmember -group <label> {-slot <slotnum> | -serial <serialnum>}lunacm:> hagroup addmember -group myHAgroup -slot 1
Enter the password: ********Member 1238700701510 successfully added to group myHAgroup. New groupconfiguration is:
HA Group Label: myHAgroupHA Group Number: 1154438865287
HA Group Slot ID: 5Synchronization: enabled
Group Members: 154438865287, 1238700701509, 1238700701510Needs sync: no
Standby Members: <none>
Slot # Member S/N Member Label Status====== ========== ============ ======
0 154438865287 par0 alive------ 1238700701509 ------------ down
1 1238700701510 par1 alive
Please use the command "ha synchronize" when you are readyto replicate data between all members of the HA group.(If you have additional members to add, you may wish to waituntil you have added them before synchronizing to save time byavoiding multiple synchronizations.)
Command Result : No Error
The new partition is now an active member of the HA group. If you have an application currently running,cryptographic objects are automatically replicated to the new member and it is assigned operations accordingto the load-balancing algorithm.
4. Remove the old partition from the group by specifying the serial number.
lunacm:> hagroup removemember -group <label> -serial <serialnum>LunaCM restarts.
5. [Optional] If you do not currently have an application running, you can manually synchronize the contents ofthe HA group.
Luna Network HSM 7 Partition Administration GuideLast Updated: 2022-07-26 23:53:21 GMT-04:00 Copyright 2001-2022 Thales Group 392

Chapter 13: High-Availability Groups
CAUTION! Never use manual synchronization if you have an application running. The HAgroup performs this automatically. Using this command on an HA group that is running anapplication could create conflicting key versions.
lunacm:> hagroup synchronize -group <label>6. [Optional] If you intend to have the new partition serve as a standby member, see "Setting an HA Group
Member to Standby" on page 379.
Deleting an HA GroupUse LunaCM to delete an HA group from your configuration.
NOTE This procedure only removes the HA group virtual slot; the member partitions and alltheir contents remain intact. Only the HSM SO can delete individual partitions.
To delete an HA group
1. Stop any applications currently using the HA group.
2. Delete the group by specifying its label (see hagroup listgroups).lunacm:> hagroup deletegroup -label <label>lunacm:> hagroup deletegroup -label myHAgroup
The HA group myHAgroup was successfully deleted.Command Result : No Error
HA TroubleshootingIf you encounter problems with an HA group, refer to this section.
Administration Tasks on HA GroupsDo not attempt to run administrative tasks on an HA group virtual slot (such as changing the CO password oraltering partition policies). These virtual slots are intended for cryptographic operations only. It is not possible touse an HA group to make administrative changes to all partitions in the group simultaneously.
Unique Object IDs (OUID)If two applications using the same HA group modify the same object using different members, the objectfingerprint might conflict.
Client-Side LimitationsNew features or abilities, or new cryptographic mechanisms added by firmware update, or previously usablemechanisms that become restricted for security reasons, can have an impact on the working of an HA group,when the Client version is older. Luna Clients are "universal" in the sense that they are able to work fully with
Luna Network HSM 7 Partition Administration GuideLast Updated: 2022-07-26 23:53:21 GMT-04:00 Copyright 2001-2022 Thales Group 393

Chapter 13: High-Availability Groups
current Luna HSMs/partitions, and with earlier versions, as well as with cloud crypto solutions (DPoD Luna CloudHSM service), but a client version cannot be aware of HSM versions that were not yet developed when the Clientwas released.
Client-Side FailuresAny failure of the client (such as operating system problems) that does not involve corruption or removal of files,should resolve itself when the client is rebooted.
If the client workstation seems to be working fine otherwise, but you have lost visibility of the HSMs in LunaCM oryour client, try the following remedies:
> verify that the Thales drivers are running, and retry
> reboot the client workstation
> restore your client configuration from backup
> re-install Luna HSM Client and re-configure the HA group
Failures Between the HSM Appliance and ClientThe only failure that could likely occur between a Luna Network HSM (or multiple HSMs) and a client computercoordinating an HA group is a network failure. In that case, the salient factor is whether the failure occurred nearthe client or near one (or more) of the Luna Network HSM appliances.
If the failure occurs near the client, and you have not set up port bonding on the client, then the client would losesight of all HA group members, and the application fails. The application resumes according to its timeouts anderror-handling capabilities, and HA resumes automatically if the members reappear within the recovery windowthat you had set.
If the failure occurs near a Luna Network HSMmember of the HA group, then that member disappears from thegroup until the network failure is cleared, but the client can still see other members, and normal failover occurs.
Avoid direct access to individual HA group members when securing with STCThis is best ensured by having HAonly setting turned ON, in the configuration file, so that only the HA virtual slotis visible and all requests and responses are handled transparently by the HA system ( see "Configuration FileSummary" on page 73 ). If you cannot avoid directly accessing an individual HA member slot, then be sure to logout of it before your application attempts to use the HA virtual slot. This is especially important when STC isinvoked ( see "Client-Partition Connections" on page 105 ).
Each HSM keeps track of any appid registered against a remote connection, and rejects any attempt to create anew session with different appID from the same client. That is, only one access ID is permitted per STC channel.If a client opens a session directly to an individual HA member partition, then an ID is assigned. If the client nextattempts operation via the HA virtual slot, then as part of that process, random appids are assigned to eachmember partition for the open channel, but one of those member partitions already has the earlier ID, so theHSM responds with CKR_ACCESS_ID_ALREADY_EXISTS and the operation fails.
Log out of any individual member slot, before invoking the HA slot, to avoid this problem.
Luna Network HSM 7 Partition Administration GuideLast Updated: 2022-07-26 23:53:21 GMT-04:00 Copyright 2001-2022 Thales Group 394

Chapter 13: High-Availability Groups
Effect of PED OperationsPED operations can block some cryptographic operations, so that while a member of an HA group is performinga PED operation, it could appear to the HA group as a failed member. When the PED operation is complete,failover and recovery HA logic are invoked to return the member to normal operation.
Some security settings and implications
TIP Security Note -Cloning policies (0 and 4) permit or deny the ability to securely copy keysand objects into and out of a partition.The Key Management Functions policy (28) controls the ability to create, delete, generate,derive, or modify cryptographic objects in the current partition.
These controls are independent of each other. With Key Management functions denied, youcan still clone objects in and out of partitions where Cloning policy is allowed. Thus HA (highavailability) operation can clone keys into a partition that disallows Key Management functions(creation, deletion, etc.). Cloning a key or object into a partition is not consideredcreation - the key or object already existed within the security / cloning domain thatencompasses the partition.
Ultimately the security administrators define where keys can exist by controlling distribution ofthe security / cloning domain, and by defining policies around those keys.
Additionally, key owners can choose to make their keys non-modifiable and non-extractable, ifthose options are indicated by your use-case.
Guidelines and Recommendations For Updating or ConvertingHA Member PartitionsThis section lists some general guidelines for users that are updating High Availability (HA) member partitions toa new firmware version or converting them to V0 or V1. Refer to the following relevant topics before reading theinformation in this section:
> Updating the Luna HSM Firmware
> Special Considerations for Luna HSM Firmware 7.7.0 and Newer
> "Behavior of "pre-firmware 7.7.0", and V0, and V1 partitions?" on page 144
> "Converting Partitions from V0 to V1 or V1 to V0" on page 157
Adhere to the following guidelines and recommendations when you are updating or converting HA memberpartitions:
> Before beginning the update or conversion process, remove the partition from the HA group and stop allongoing operations with HA.
> Update or convert members one at a time, leaving the primary member for last.
Luna Network HSM 7 Partition Administration GuideLast Updated: 2022-07-26 23:53:21 GMT-04:00 Copyright 2001-2022 Thales Group 395

Chapter 13: High-Availability Groups
NOTE You must update/convert secondary partitions first and the primary partition last. If youdo not adhere to this guideline, you may experience issues while updating/converting.
> Resume HA group operation after allmembers have been updated or converted.
> If HA operation cannot be stopped for an update or conversion, you must be aware of the followingconstraints and guidelines:
• Expect HA functionality (with some caveats) when members have been updated, but not during firmwareupdate to version 7.7.0 (or newer) or during conversion of member partitions from V0 to V1.
• Thales does not recommend operating HA groups with mixed firmware and partition versions because theHA group will not work as expected. For proper HA functionality, all members of a working HA groupshould have the following properties:
– Identical firmware versions. As a result, firmware updates should take place while the partition is not amember of an HA group.
– Identical partition types; that is, either all partitions are V0 or all partitions are V1. As a result, partitionconversions to V0 (which happens as a result of updating from pre-7.7.0 firmware to firmware 7.7.0 ornewer) or V1 should take place while the partition is not a member of an HA group.
– Identical history of functionality module (FM) deployment; that is, either all members are FM-enabled orall members are FM-never-enabled, but not some of each.
• Converting a partition from V1 to V0 is destructive, so the partition cannot remain an HA member.
• Cloning of keys and objects can proceed only from a lower-security environment to a higher-securityenvironment but not in the other direction; that is, cloning of keys and objects can proceed in the followingdirections:
– Older firmware to newer firmware.
– Pre-7.7.0 partitions to V0 partitions.
– V0 partitions to V1 partitions.
– Partitions of an HSM that has had FMs enabled to partitions that have never had functionality modulesenabled.
The above constraint has implications for the update and conversion process; that is, the primary partitionmust be at the same firmware and partition version as the remaining HA member partitions, or lower. If thisrequirement is not met, attempts to synchronize the HA group will fail. For example, V1 partition can beadded to an existing HA group that already has HA members made up of partitions from a pre-7.7.0-firmware HSM. However, when V1 partition becomes the primary member of the HA group,synchronization with remaining member of the HA group will no longer function.
• Avoid direct access to individual HA group members when securing with STC. For more information, referto "Avoid direct access to individual HA group members when securing with STC" on page 394.
> For best results, the client library that enables HA among several HSMs should be up-to-date.
Luna Network HSM 7 Partition Administration GuideLast Updated: 2022-07-26 23:53:21 GMT-04:00 Copyright 2001-2022 Thales Group 396

CHAPTER 14: Backup and Restore Using aLuna Backup HSM (G5)
Luna Network HSM allows secure creation, storage, and use of cryptographic data (keys and other objects). It iscritically important, however, to safeguard your important cryptographic objects against unforeseen damage ordata loss. No device can offer total assurance against equipment failure, physical damage, or human error.Therefore, a comprehensive strategy for making regular backups is essential. There are multiple ways toperform these operations, depending on your implementation.
This section contains the following information:
> "Backup and Restore Best Practices" below
> "Planning Your Backup HSM Deployment" on the next page
> "About the Luna Backup HSM (G5) " on page 401
> "Installing the Backup HSM" on page 405
> "Installing or Replacing the Luna Backup HSM (G5) Battery" on page 406
> "Backup HSM Secure Transport and Tamper Recovery" on page 408
> "Resetting the Backup HSM to Factory Conditions" on page 415
> "Backup/Restore Using an Appliance-Connected Luna Backup HSM (G5)" on page 415
> "Backup/Restore Using a Client-Connected Luna Backup HSM (G5)" on page 419
> "Configuring a Remote Luna Backup HSM (G5) Server" on page 424
Backup and Restore Best PracticesTo ensure that your data is protected in the event of a failure or other catastrophic event, Thales recommendsthat you use the following best practices as part of a comprehensive backup strategy:
CAUTION! Failure to develop and exercise a comprehensive backup and recovery plan mayprevent you from being able to recover from a catastrophic event. Although Thales provides arobust set of backup hardware and utilities, we cannot guarantee the integrity of your backed-up key material, especially if stored for long periods. Thales strongly recommends that youexercise your recovery plan at least semi-annually (every six months) to ensure that you canfully recover your key material.
Develop and document a backup and recovery planThis plan should include the following:
> What is being backed up
> The backup frequency
Luna Network HSM 7 Partition Administration GuideLast Updated: 2022-07-26 23:53:21 GMT-04:00 Copyright 2001-2022 Thales Group 397

Chapter 14: Backup and Restore Using a Luna Backup HSM (G5)
> Where the backups are stored
> Who is able to perform backup and restore operations
> Frequency of exercising the recovery test plan
Make multiple backupsTo ensure that your backups are always available, build redundancy into your backup procedures.
Use off-site storageIn the event of a local catastrophe, such as a flood or fire, you might lose both your working HSMs and locally-stored backup HSMs. To fully protect against such events, always store a copy of your backups at a remotelocation.
Regularly exercise your disaster recovery planExecute your recovery plan at least semi-annually (every six months) to ensure that you can fully recover yourkey material. This involves retrieving your stored Backup HSMs and restoring their contents to a test partition, toensure that the data is intact and that your recovery plan works as documented.
Planning Your Backup HSM DeploymentWhen setting up your backup deployment, you have multiple configuration options. This section will help youchoose the right configuration for your organization, depending on where you prefer to keep your backups. Youcan use a Luna Backup HSM or an application partition on any other Luna HSM for backup/restore operations.
Backup and restore operations require that cloning be enabled on the HSM/partition.
> "Partition to Partition" below
> "Backup HSM Connected to the Appliance" on the next page
> "Backup HSM Connected to the Client Workstation" on the next page
> "Backup HSM Installed Using Remote Backup Service (RBS)" on page 400
NOTE The diagrams below depict the client workstation as the remote PED server, but youcan also use a separate remote PED station. Since remote PED is supported onWindowsclients only, this will be necessary if you use Linux/UNIX clients.
Partition to PartitionYou can clone objects from any Luna 7 application partition to any other Luna 7 partition that shares its cloningdomain. You must have the Crypto Officer credential for both partitions. Both partitions must use the sameauthentication method (either password or PED).
Luna Network HSM 7 Partition Administration GuideLast Updated: 2022-07-26 23:53:21 GMT-04:00 Copyright 2001-2022 Thales Group 398

Chapter 14: Backup and Restore Using a Luna Backup HSM (G5)
See "Cloning Objects to Another Application Partition" on page 190.
Backup HSM Connected to the ApplianceIn this configuration, the Luna Backup HSM is connected directly to one of the USB ports on the Luna NetworkHSM appliance. It is useful in deployments where backups are kept in the same location as the HSM. Backupand restore operations are performed using LunaSH commands via a serial or SSH connection. The CryptoOfficer must have admin-level access to LunaSH on the appliance to use this configuration.
Figure 1: Locally-connected Backup HSM using password authentication
Figure 2: Locally-connected Backup HSM using local PED authentication
NOTE This configuration cannot be used to back up or restore a partition that uses an STCconnection. STC partitions must be backed up at the client using LunaCM.This configuration cannot be used with Remote PED.
See "Backup/Restore Using an Appliance-Connected Luna Backup HSM (G5)" on page 415.
Backup HSM Connected to the Client WorkstationIn this configuration, the Luna Backup HSM is connected to a USB port on the client workstation. It is useful indeployments where the partition Crypto Officer keeps backups at the client. This allows you to performbackup/restore operations for all application partitions that appear as visible slots in LunaCM. You can restore apartition backup to the original source partition or to another existing Luna application partition that shares thesame cloning domain.
Luna Network HSM 7 Partition Administration GuideLast Updated: 2022-07-26 23:53:21 GMT-04:00 Copyright 2001-2022 Thales Group 399

Chapter 14: Backup and Restore Using a Luna Backup HSM (G5)
Figure 3: Client-connected backup HSM using password authentication
Figure 4: Client-connected backup HSM using remote PED authentication
See "Backup/Restore Using a Client-Connected Luna Backup HSM (G5)" on page 419.
Backup HSM Installed Using Remote Backup Service (RBS)In this configuration, the Luna Backup HSM is connected to a remote client workstation that communicates withthe client via the Remote Backup Service (RBS). It is useful in deployments where backups are stored in aseparate location from the Luna Network HSM, to mitigate the consequences of catastrophic loss (fire, flood,etc).
Figure 5: Remote backup (RBS) using password authentication
Luna Network HSM 7 Partition Administration GuideLast Updated: 2022-07-26 23:53:21 GMT-04:00 Copyright 2001-2022 Thales Group 400

Chapter 14: Backup and Restore Using a Luna Backup HSM (G5)
Figure 6: Remote backup (RBS) using remote PED authentication at the client
Figure 7: Remote backup (RBS) using remote PED authentication at the RBS server
See "Configuring a Remote Luna Backup HSM (G5) Server" on page 424.
About the Luna Backup HSM (G5)The Luna Backup HSM (G5) allows you to safeguard your important cryptographic objects by making securebackups, and restoring those backups to an application partition. It uses the Luna G5 architecture. This sectioncontains the following information about the Luna Backup HSM (G5):
> "Physical Features" on the next page
> "Luna Backup HSM (G5) Functionality" on the next page
> "Storage and Maintenance" on page 403
> "Installing the Backup HSM" on page 405
> "Installing or Replacing the Luna Backup HSM (G5) Battery" on page 406
> "Backup HSM Secure Transport and Tamper Recovery" on page 408
> "Initializing the Backup HSM Remote PED Vector" on page 411
> "Resetting the Backup HSM to Factory Conditions" on page 415
Luna Network HSM 7 Partition Administration GuideLast Updated: 2022-07-26 23:53:21 GMT-04:00 Copyright 2001-2022 Thales Group 401

Chapter 14: Backup and Restore Using a Luna Backup HSM (G5)
Physical FeaturesThe front panel of the Luna Backup HSM (G5) is illustrated below, with important features labeled. In the secondimage, the front bezel has been removed, exposing the battery enclosure.
The rear panel of the Luna Backup HSM (G5) is illustrated below, with important features labeled. The first imagedepicts a Backup HSM with an internal power supply. The second image depicts one that ships with an externalpower supply.
1 Status LEDs. When illuminated, they indicate:> Active: The Backup HSM is performing a procedure. Do not disconnect or unplug the device when this
light is illuminated.> Tamper: The Backup HSM is in a tamper state. You must clear the tamper state before backing up or
restoring partitions.> Error: HSM device driver error. Contact Thales Customer Support (see "Support Contacts" on
page 18).
2 Serial port for attaching a local Luna PED using a 9-pin Micro-D to Micro-D cable.
3 USB port. Not applicable to backup/restore functions.
4 Battery enclosure. See "Installing or Replacing the Luna Backup HSM (G5) Battery" on page 406.
5 Power connector for a Luna Backup HSM with an internal power supply. See "Storage andMaintenance" on the next page for more information.
6 Index hole. Engages with the index post on a Luna Backup HSM rack shelf.
7 Mini-USB port for connecting the Luna Backup HSM to a Luna HSM or client workstation. See "Installing theBackup HSM" on page 405.
8 Power source connector for a Luna Backup HSM (G5) with an external power supply (included).
Luna Backup HSM (G5) FunctionalityThe Luna Backup HSM allows you to back up application partitions from one or more Luna General PurposeHSMs. Backup operations are performed on a per-partition basis.
Luna Network HSM 7 Partition Administration GuideLast Updated: 2022-07-26 23:53:21 GMT-04:00 Copyright 2001-2022 Thales Group 402

Chapter 14: Backup and Restore Using a Luna Backup HSM (G5)
Password or PED AuthenticationThe Luna Backup HSM (G5) can be configured to back up either password- or PED-authenticated partitions. Youmust specify the authentication method when you initialize the Luna Backup HSM (see ). Once initialized, theBackup HSM can only be used with partitions sharing the same authentication type. The only way to change theauthentication method is to restore the Backup HSM to factory condition and re-initialize it.
Storage Capacity and Maximum Allowable Backup PartitionsThe storage capacity and maximum number of backup partitions allowed on the Backup HSM is determined bythe firmware. You can check the capacity using lunash:>token backup show -serial <serialnum> or lunacm:>hsm showinfo. To update the Backup HSM firmware to a version that allows more backups, see "Updating theLuna Backup HSM (G5) Firmware" on page 413.
NOTE Objects stored on a Backup HSMmay be smaller than their originals. For example,symmetric keys are 8 bytes smaller when stored on a Backup HSM. This size difference has noeffect on backup and restore operations.
Storage and MaintenanceThe Luna Backup HSM can be safely stored, containing backups, when not in use. When stored properly, thehardware has a lifetime of 10+ years. Newer Backup HSMs ship with an external power supply.
CAUTION! The internal power supply on older Luna Backup HSMs uses capacitors that maybe affected if they are left unpowered for extended periods of time. If your Backup HSM has aninternal power supply, power it on occasionally to recharge the capacitors. If the capacitors losefunction, the Backup HSM will no longer receive power.With the introduction of external power supplies, this is no longer a requirement. If the externalpower supply fails from being left unpowered, it can be easily replaced.
The Backup HSM BatteryThe battery powers the NVRAM and Real-Time-Clock (RTC), and must be installed for use. The battery can beremoved for storage, and this is generally good practice. Thales uses high-quality, industrial-grade batteries thatare unlikely to leak and damage the HSM hardware, but an externally-stored battery will last longer. The batterymust be stored in a clean, dry area (less than 30% Relative Humidity). Temperature should not exceed +30 ºC.When properly stored, the battery has a shelf life of 10 years.
If the battery dies or is removed, and the main power is not connected, NVRAM and the RTC lose power. Batteryremoval triggers a tamper event. After replacing the battery, the HSM SOmust clear the tamper event beforeoperation can resume. The working copy of the Master Tamper Key (MTK) is lost (see "Backup HSM SecureTransport and Tamper Recovery" on page 408). Backup objects are stored in non-volatile memory, so they arepreserved and remain uncorrupted.
There is no low battery indicator, or other provision for checking the battery status. The voltage remains constantuntil the very end of battery life.
Luna Network HSM 7 Partition Administration GuideLast Updated: 2022-07-26 23:53:21 GMT-04:00 Copyright 2001-2022 Thales Group 403

Chapter 14: Backup and Restore Using a Luna Backup HSM (G5)
Luna Backup HSM (G5) Required ItemsThis section provides a list of the components you should have received with your Luna Backup HSM (G5) order.
Luna Backup HSM (G5) Order Items
Qty Item
1 Luna Backup HSM (G5)
1 External Power SupplyThe Luna Backup HSM (G5) now ships with an external power supply. Previously, these HSMs relied onan internal power supply, requiring the HSM to be periodically powered on to recharge internalcapacitors. Failure to charge the capacitors could result in an inability to power on the HSM.With the introduction of external power supplies, periodically powering on the HSM is no longer required.A failed external power supply can be replaced and there is no need to return the HSM for repair (RMA).
NOTE External power supplies do contain capacitors which may be affected by extendedperiods of being unpowered, but they are more easily replaced in the event of failure.
1 Power Supply CordYour order should include one power supply cord for the Luna Backup HSM (G5). The actual cordreceived depends on the country for which you ordered the Luna Backup HSM (G5).
Luna Network HSM 7 Partition Administration GuideLast Updated: 2022-07-26 23:53:21 GMT-04:00 Copyright 2001-2022 Thales Group 404

Chapter 14: Backup and Restore Using a Luna Backup HSM (G5)
Qty Item
1 USB cable (USB A to USB mini B)
Your order should include one USB A to 5-pin (Mini-B) cable.
Optional ItemsYour order may also include the following optional item.
Luna Backup HSM (G5) Rack-Mount ShelfThe Luna Backup HSM (G5) rack-mount shelf (available by separate order) fits a standard 19-inch equipmentrack, allowing you to install up to two Luna Backup HSM (G5) units side-by side in server-room racks. For officeuse, without rack mounting, Luna Backup HSM (G5) units can be placed on a desktop and are stackable.
Installing the Backup HSMYou can connect the Luna Backup HSM to a Luna Network HSM, a Luna HSM Client workstation, or a hostmachine containing a Luna PCIe HSM. Refer to "Planning Your Backup HSM Deployment" on page 398 fordetailed descriptions of the configuration options.
To install the Luna Backup HSM
1. Connect the Luna Backup HSM to power using the external power source or a standard power cable.
2. If you are connecting the Backup HSM to a client workstation or PCIe HSM host, ensure that you haveinstalled the Backup option in the Luna HSM Client installer (see "Luna HSM Client Software Installation" onpage 19 for details).
3. [Local PED] If you plan to authenticate the Luna Backup HSM with a local Luna PED, connect the PED usinga 9-pin Micro-D to Micro-D cable (see "Physical Features" on page 402).
To use the same local PED to authenticate both the Backup HSM and Luna Network HSM, connect the PEDto the Luna Network HSM using a USBMini-B to USB cable (see "Physical Features" on page 207). You canswitch between the two using PEDmodes (see "Modes of Operation" on page 209).
4. Connect the Luna Backup HSM using the included Mini-USB to USB cable. If you are connecting the BackupHSM to:
Luna Network HSM 7 Partition Administration GuideLast Updated: 2022-07-26 23:53:21 GMT-04:00 Copyright 2001-2022 Thales Group 405

Chapter 14: Backup and Restore Using a Luna Backup HSM (G5)
a. Luna Network HSM: Connect to one of the USB ports on the front or rear panel of the appliance.
b. Luna HSM Client: Connect to a USB port on the client workstation.
c. Luna PCIe HSM host: Connect to a USB port on the host workstation.
5. If your Backup HSM was shipped in Secure Transport Mode, see "Backup HSM Secure Transport andTamper Recovery" on page 408.
Installing or Replacing the Luna Backup HSM (G5) BatteryThe Luna Backup HSM (G5) must have a functioning battery installed to preserve the NVRAM and RTC in caseof primary power loss. You can purchase a replacement battery from any supplier who can match the followingspecifications:
> 3.6 V Primary lithium-thionyl chloride (Li-SOCl2)
> Fast voltage recovery after long term storage and/or usage
> Low self discharge rate
> 10 years shelf life
> Operating temperature range -55 ºC to +85 ºC
> U.L. Component Recognition, MH 12193
Prerequisites> Removing the battery causes a tamper event. If you have created a Secure Recovery Vector (purple PED
key) and enabled Secure Recovery, you will need this key to clear the tamper after replacing the battery.
To install or replace the Luna Backup HSM (G5) battery
1. Remove the front bezel. It is held in place by two spring clips.
2. The battery compartment is spring-loaded and can be removed without much pressure. Use a coin or yourfingers to press in the compartment cover and turn counter-clockwise to remove it.
Luna Network HSM 7 Partition Administration GuideLast Updated: 2022-07-26 23:53:21 GMT-04:00 Copyright 2001-2022 Thales Group 406

Chapter 14: Backup and Restore Using a Luna Backup HSM (G5)
3. If you are replacing the old battery, remove it from the battery compartment.
4. Insert the new battery, negative end first. The positive end should be visible.
Luna Network HSM 7 Partition Administration GuideLast Updated: 2022-07-26 23:53:21 GMT-04:00 Copyright 2001-2022 Thales Group 407

Chapter 14: Backup and Restore Using a Luna Backup HSM (G5)
5. Use the battery compartment cover to push the battery into the compartment, aligning the tabs on the coverwith the compartment slots. Twist the cover clockwise to lock the compartment.
6. Replace the front bezel by aligning the clips with their posts and pushing it into place.Removing the battery causes a tamper event on the Luna Backup HSM (G5).
7. To clear the tamper, see "Backup HSM Secure Transport and Tamper Recovery" below.
Backup HSM Secure Transport and Tamper RecoveryThe Luna Backup HSM recognizes a similar list of tamper conditions to the Luna Network HSM (see TamperEvents). When a tamper event occurs, a tamper state is reported in the HSM Status field in LunaCM's list ofslots.
By default, tamper events are cleared automatically when you reboot the Backup HSM and log in as HSM SO.However, you can choose to prevent any further operations on the Backup HSM. The following procedures willallow you to create a purple Secure Recovery Key (SRK) that the Backup HSM SOmust present to unlock theHSM after a tamper event. This key contains part of the Master Tamper Key (MTK), which encrypts all sensitivedata stored on the Backup HSM. By splitting the MTK and storing part of it on an SRK (purple PED key), youensure that none of the stored material can be accessible until the SRK is presented.
You can create the purple SRK even for a Backup HSM that is initialized for password authentication. There is nopassword-based SRK equivalent; you must have a Luna PED and a purple PED key to use Secure TamperRecovery and Secure Transport Mode.
Initializing the SRK also allows you to place the Backup HSM in Secure Transport Mode (STM). STM on theBackup HSM functions differently from STM on the Luna Network HSM (see "Secure Transport Mode" on page 1for comparison). When the SRK is initialized and secure recovery enabled, STM on the Backup HSM iseffectively a voluntary tamper state, where no operations are possible until you present the purple PED key.
CAUTION! Always keep a securely-stored backup copy of the purple PED key. If you lose thiskey, the Backup HSM is permanently locked and you will have to obtain an RMA for the BackupHSM.
This section provides directions for the following procedures:
Luna Network HSM 7 Partition Administration GuideLast Updated: 2022-07-26 23:53:21 GMT-04:00 Copyright 2001-2022 Thales Group 408

Chapter 14: Backup and Restore Using a Luna Backup HSM (G5)
> "Creating a Secure Recovery Key" below
> "Setting Secure Transport Mode" on the next page
> "Recovering From a Tamper Event or Secure Transport Mode" on the next page
> "Disabling Secure Recovery" on page 411
Creating a Secure Recovery KeyTo enable secure recovery, you must create the Secure Recovery Key (purple PED key). This procedure willzeroize the SRK split on the Backup HSM, so that you must present the purple PED key to recover from a tamperevent or Secure Transport Mode.
Prerequisites> Install the Backup HSM at the client and connect it to power (see "Installing the Backup HSM" on page 405).
This procedure is only available using LunaCM. If the Backup HSM is connected directly to a Luna NetworkHSM, disconnect it and connect it to a workstation with Luna HSM Client software installed.
> You require the Backup HSM SO credential (blue PED key).
> Ensure that the Backup HSM can access PED service (Local or Remote PED), and that you have enoughblank or rewritable purple PED keys available for your desired authentication scheme (see "Creating PEDKeys" on page 243).
• [Local PED] Connect the PED using a 9-pin Micro-D to Micro-D cable. Set the PED to Local PED-SCPmode (see "Modes of Operation" on page 209).
• [Remote PED] Set up a Remote PED server to authenticate the Backup HSM (see Remote PED Setup).
• [Remote PED] Initialize the Backup HSM RPV (see "Initializing the Backup HSM Remote PED Vector" onpage 411). You require the orange PED key.
To create a Secure Recovery Key
1. Launch LunaCM on the client workstation.
2. Set the active slot to the Luna Backup HSM.lunacm:> slot set -slot <slotnum>
3. [Remote PED] Connect the Backup HSM to the Remote PED server.
lunacm:> ped connect -ip <PEDserver_IP> -port <portnum>4. Create a new split of the MTK on the Backup HSM.
lunacm:> srk generate5. Log in as Backup HSM SO.
lunacm:> role login -name so6. Enable secure recovery.
lunacm:> srk enableAttend to the Luna PED prompts to create the purple PED key. Secure Recovery is now enabled on theBackup HSM.
Luna Network HSM 7 Partition Administration GuideLast Updated: 2022-07-26 23:53:21 GMT-04:00 Copyright 2001-2022 Thales Group 409

Chapter 14: Backup and Restore Using a Luna Backup HSM (G5)
Setting Secure Transport ModeThe following procedure will allow you to set Secure Transport Mode on the Backup HSM.
Prerequisites> Ensure the Backup HSM can access PED services.
> Secure Recovery must be enabled on the Backup HSM (see "Creating a Secure Recovery Key" on theprevious page). You require the Secure Recovery Key (purple PED key) for the Backup HSM.
To set Secure Transport Mode on the Backup HSM
1. Launch LunaCM on the client workstation.
2. Set the active slot to the Luna Backup HSM.lunacm:> slot set -slot <slotnum>
3. [Remote PED] Connect the Backup HSM to the Remote PED server.
lunacm:> ped connect -ip <PEDserver_IP> -port <portnum>4. Set Secure Transport Mode.
lunacm:> srk transporta. You are prompted for the SRK (purple PED key). This is to ensure that you have the key that matches the
SRK split on the HSM.
b. The Luna PED displays a 16-digit verification code. Write this code down as an additional optional check.
The SRK is zeroized on the Backup HSM and STM is now active.
Recovering From a Tamper Event or Secure Transport ModeWith Secure Recovery Mode enabled, the procedure to recover from a tamper event or to exit STM is the same.
Prerequisites> Ensure the Backup HSM can access PED services.
> You require the Secure Recovery Key (purple PED key) for the Backup HSM.
> If you are recovering from a tamper event, reboot the Backup HSM and LunaCM before recovering.
lunacm:> hsm restartlunacm:> clientconfig restart
To recover from a tamper event or exit STM
1. Launch LunaCM on the client workstation.
2. Set the active slot to the Luna Backup HSM.lunacm:> slot set -slot <slotnum>
3. [Remote PED] Connect the Backup HSM to the Remote PED server.
lunacm:> ped connect -ip <PEDserver_IP> -port <portnum>
Luna Network HSM 7 Partition Administration GuideLast Updated: 2022-07-26 23:53:21 GMT-04:00 Copyright 2001-2022 Thales Group 410

Chapter 14: Backup and Restore Using a Luna Backup HSM (G5)
4. Recover the Backup HSM from the tamper event or STM.
lunacm:> srk recoverAttend to the Luna PED prompts:
a. You are prompted for the SRK (purple PED key).
b. [STM] The Luna PED displays a 16-digit verification code. If this code matches the one that was presentedwhen you set STM, you can be assured that the Backup HSM has remained in STM since then.
The Backup HSM is recovered from the tamper/STM state and you can resume backup/restore operations.
Disabling Secure RecoveryTo disable secure recovery, you must present the Secure Recovery Key (purple PED key) so that it can bestored on the Backup HSM. You will no longer need to present the purple key to recover from a tamper event.
Prerequisites> Ensure the Backup HSM can access PED services.
> You require the Secure Recovery Key (purple PED key) for the Backup HSM.
To disable secure recovery
1. Launch LunaCM on the client workstation.
2. Set the active slot to the Luna Backup HSM.lunacm:> slot set -slot <slotnum>
3. [Remote PED] Connect the Backup HSM to the Remote PED server.
lunacm:> ped connect -ip <PEDserver_IP> -port <portnum>4. Log in as Backup HSM SO.
lunacm:> role login -name so5. Disable secure recovery.
lunacm:> srk disableYou are prompted for the SRK (purple PED key).
Initializing the Backup HSM Remote PED VectorThe Remote PED (via PEDserver) authenticates itself to the Luna Backup HSM with a randomly-generatedencrypted value stored on an orange PED key. The orange key proves to the HSM that the Remote PED isauthorized to perform authentication. The Backup HSM SO can create this key using LunaCM (connected to aclient workstation) or LunaSH (connected to a Luna Network HSM appliance).
If the Backup HSM is already initialized, the HSM SOmust log in to complete this procedure.
Prerequisites> Luna PED with firmware 2.7.1 or newer
Luna Network HSM 7 Partition Administration GuideLast Updated: 2022-07-26 23:53:21 GMT-04:00 Copyright 2001-2022 Thales Group 411

Chapter 14: Backup and Restore Using a Luna Backup HSM (G5)
> USBmini-B to USB-A connector cable
> Luna PED DC power supply (if included with your Luna PED)
> Blank or reusable orange PED key (or multiple keys, if you plan to make extra copies or use an M of Nsecurity scheme). See "Creating PED Keys" on page 243 for more information.
> Install the Backup HSM at the client/appliance and connect it to power (see "Installing the Backup HSM" onpage 405).
> If you are using LunaSH, the Backup HSMmust be initialized first (see "Initializing the Backup HSM" onpage 416).
> Connect the PED to the Backup HSM using a 9-pin Micro-D to Micro-D cable. Set the PED to Local PED-SCPmode (see "Modes of Operation" on page 209).
To initialize the RPV and create the orange PED key using LunaCM
1. Launch LunaCM on the client workstation.
2. Set the active slot to the Backup HSM.lunacm:> slot set -slot <slotnum>
3. If the Backup HSM is initialized, log in as HSM SO. If not, continue to the next step.
lunacm:> role login -name so4. Ensure that you have the orange PED key(s) ready. Initialize the RPV.
lunacm:> ped vector init5. Attend to the Luna PED and respond to the on-screen prompts. See "Creating PED Keys" on page 243 for a
full description of the key-creation process.
• If you have an orange PED key with an existing RPV that you wish to use for this HSM, press Yes.• If you are creating a new RPV, press No.
Continue following the prompts for PED PIN, M of N, and duplication options.
To set up a Remote PED server, see "Installing PEDserver and Setting Up the Remote Luna PED" on page 222.
Luna Network HSM 7 Partition Administration GuideLast Updated: 2022-07-26 23:53:21 GMT-04:00 Copyright 2001-2022 Thales Group 412

Chapter 14: Backup and Restore Using a Luna Backup HSM (G5)
To initialize the RPV and create the orange PED key using LunaSH
NOTE This procedure requires appliance software version 7.7.0 or newer.
1. Log in to LunaSH as admin, or an admin-level custom user.
2. [Optional] View the Luna Backup HSMs currently connected to the appliance and find the correct serialnumber.
lunash:> token backup list3. Log in as HSM SO.
lunash:> token backup login -serial <serialnum>4. Ensure that you have the orange PED key(s) ready. Initialize the RPV by specifying the Backup HSM serial
number.
lunash:> hsm ped vector init -serial <serialnum>5. Attend to the Luna PED and respond to the on-screen prompts. See "Creating PED Keys" on page 243 for a
full description of the key-creation process.
• If you have an orange PED key with an existing RPV that you wish to use for this HSM, press Yes.• If you are creating a new RPV, press No.
To set up a Remote PED server, see "Installing PEDserver and Setting Up the Remote Luna PED" on page 222.
Updating the Luna Backup HSM (G5) FirmwareTo update the firmware on a Luna Backup HSM (G5), use LunaCM on a client computer that is connected to theLuna Backup HSM. You require:
> Luna Backup HSM (G5) firmware update file (<filename>.fuf)> the firmware update authentication code file(s) (<filename>.txt)
Luna Network HSM 7 Partition Administration GuideLast Updated: 2022-07-26 23:53:21 GMT-04:00 Copyright 2001-2022 Thales Group 413

Chapter 14: Backup and Restore Using a Luna Backup HSM (G5)
CAUTION! Use an uninterruptible power supply (UPS) to power your HSM. There is a smallchance that a power failure during an update could leave your HSM in an unrecoverablecondition.
NOTE To perform backup operations on HSM firmware 7.7.0 or newer (V0 or V1 partitions):> Luna Backup HSM (G7) requires minimum firmware version 7.7.1> Luna Backup HSM (G5) requires minimum firmware version 6.28.0You can use a Luna Backup HSM with older firmware to restore objects to a V0 or V1 partition,but this is supported for purposes of getting your objects from the older partitions onto thenewer V0 or V1 partitions only.V0 and V1 partitions are considered more secure than partitions at earlier firmware versions -any attempt to restore from a higher-security status to lower-security status fails gracefully.SMK backup for appliance is supported only with local connection.
To update the Luna Backup HSM (G5) firmware
1. Copy the firmware file (<filename>.fuf) and the authentication code file (<filename>.txt) to the Luna HSMClient root directory.
• Windows: C:\Program Files\SafeNet\LunaClient
• Linux: /usr/safenet/lunaclient/bin
• Solaris: /opt/safenet/lunaclient/bin
NOTE On someWindows configurations, you might not have authority to copy or unzip filesdirectly into C:\Program Files\.... If this is the case, put the files in a known location that youcan reference in a LunaCM command.
2. Launch LunaCM.3. If more than one HSM is installed, set the active slot to the Admin partition of the HSM you wish to update.
lunacm:> slot set -slot <slot_number>4. Log in as HSM SO. Depending on the currently-installed firmware version, use one of the following two
commands:
• lunacm:> role login -name so• lunacm:> hsm login
5. Apply the new firmware update by specifying the update file and the authentication code file. If the files arenot located in the Luna HSM Client root directory, specify the filepaths.
lunacm:> hsm updatefw -fuf <filename>.fuf -authcode <filename>.txt
Luna Network HSM 7 Partition Administration GuideLast Updated: 2022-07-26 23:53:21 GMT-04:00 Copyright 2001-2022 Thales Group 414

Chapter 14: Backup and Restore Using a Luna Backup HSM (G5)
Resetting the Backup HSM to Factory ConditionsThese instructions will allow you to restore your Luna Backup HSM to its original factory conditions, erasing itscontents. This could be necessary if you have old backups that you do not wish to keep, or if you want to re-initialize the Backup HSM to store backups using a different authentication method (password or PED). If youhave performed firmware updates, they are unaffected. Factory reset can be performed via LunaSH or LunaCM,depending on your Backup HSM deployment.
To reset the Backup HSM to factory conditions using LunaSH
1. Log in to LunaSH as admin or an admin-level custom user using a local serial connection.
2. [Optional] View the Luna Backup HSMs currently connected to the appliance and find the correct serialnumber.
lunash:> token backup list3. Reset the Backup HSM by specifying its serial number.
lunash:> token backup factoryreset -serial <Backup_HSM_serialnum>
To reset the Backup HSM to factory conditions using LunaCM
1. Launch LunaCM on the Luna Backup HSM host workstation.
2. Set the active slot to the Backup HSM.lunacm:> slot set -slot <slotnum>
3. Reset the Backup HSM.lunacm:> hsm factoryreset
Backup/Restore Using an Appliance-Connected Luna BackupHSM (G5)You can connect the Luna Backup HSM directly to one of the USB ports on the Luna Network HSM appliance.This configuration allows you to perform backup/restore operations using LunaSH, via a serial or SSHconnection to the appliance. It is useful in deployments where backups are kept in the same location as the HSM.The Crypto Officer must have admin-level access to LunaSH on the appliance. You can restore a partitionbackup to the original source partition or to another existing Luna application partition that shares the samecloning domain.
Luna Network HSM 7 Partition Administration GuideLast Updated: 2022-07-26 23:53:21 GMT-04:00 Copyright 2001-2022 Thales Group 415

Chapter 14: Backup and Restore Using a Luna Backup HSM (G5)
NOTE Please note the following conditions for using an appliance-connected Luna BackupHSM (G5):> If you are backing up or restoring encrypted blobs stored on a V1 partition, the Backup HSM
must be connected to the client (see "Backup/Restore Using a Client-Connected LunaBackup HSM (G5)" on page 419). Only the SMK can be backed up/restored using anappliance-connected Backup HSM.
> If partition policy 37: Force Secure Trusted Channel is enabled on the partition, theBackup HSMmust be connected to the client (see "Backup/Restore Using a Client-Connected Luna Backup HSM (G5)" on page 419).
> You can use an appliance-connected Backup HSM with Remote PED only if the sourcepartition is activated ("Activation and Auto-activation on Multi-factor- (PED-) AuthenticatedPartitions" on page 320) and appliance software version 7.7.0 or newer is installed.
This section provides instructions for the following procedures using this kind of deployment:
> "Initializing the Backup HSM" below
> "Backing Up an Application Partition" on the next page
> "Restoring an Application Partition from Backup" on page 418
NOTE To perform backup operations on HSM firmware 7.7.0 or newer (V0 or V1 partitions):> Luna Backup HSM (G7) requires minimum firmware version 7.7.1> Luna Backup HSM (G5) requires minimum firmware version 6.28.0You can use a Luna Backup HSM with older firmware to restore objects to a V0 or V1 partition,but this is supported for purposes of getting your objects from the older partitions onto thenewer V0 or V1 partitions only.V0 and V1 partitions are considered more secure than partitions at earlier firmware versions -any attempt to restore from a higher-security status to lower-security status fails gracefully.SMK backup for appliance is supported only with local connection.
Initializing the Backup HSMBefore you can use the Luna Backup HSM to back up your partition objects, it must be initialized. This procedureis analogous to the standard HSM initialization procedure.
Prerequisites> Install the Backup HSM and connect it to power (see "Installing the Backup HSM" on page 405).
> Ensure that the Backup HSM is not in Secure Transport Mode and that any tamper events are cleared (see"Backup HSM Secure Transport and Tamper Recovery" on page 408).
> [PED Authentication] Ensure that you have enough blank or rewritable blue and red PED keys available foryour desired authentication scheme (see "Creating PED Keys" on page 243).
> [Local PED] Connect the PED using a 9-pin Micro-D to Micro-D cable. Set the PED to Local PED-SCPmode(see "Modes of Operation" on page 209).
Luna Network HSM 7 Partition Administration GuideLast Updated: 2022-07-26 23:53:21 GMT-04:00 Copyright 2001-2022 Thales Group 416

Chapter 14: Backup and Restore Using a Luna Backup HSM (G5)
To initialize a locally-connected Backup HSM using LunaSH on the Luna Network HSM
1. Log in to LunaSH as admin, or an admin-level custom user.
2. [Optional] View the Luna Backup HSMs currently connected to the appliance and find the correct serialnumber.
lunash:> token backup list3. Initialize the Backup HSM by specifying its serial number and a label.
lunash:> token backup init -serial <serialnum> -label <label>You are prompted to set the HSM SO credential and cloning domain for the Backup HSM.
Backing Up an Application PartitionYou can use LunaSH to back up the contents of an application partition to the locally-connected Luna BackupHSM. You can use this operation to create a backup on the Backup HSM, or add objects from the sourcepartition to an existing backup.
Prerequisites> The Backup HSMmust be initialized (see "Initializing the Backup HSM" on the previous page).
> You must have admin or admin-level access to LunaSH on the Luna Network HSM.
> The following policies are set (see HSM Capabilities and Policies and "Partition Capabilities and Policies" onpage 291 for more information):
• HSM policy 16: Enable network replicationmust be set to 1 (ON) on the HSM that hosts the sourcepartition.
• Partition policy 0: Allow private key cloningmust be set to 1 (ON) on the source partition.• Partition policy 4: Allow secret key cloningmust be set to 1 (ON) on the source partition.
> You must have the Crypto Officer credential (black PED key) and domain (red PED key) for the sourcepartition.
> [Local PED] Connect the PED to the Luna Network HSM using a Mini-B to USB-A cable (see "Local PEDSetup" on page 211), and to the Backup HSM using a 9-pin Micro-D to Micro-D cable. Set the PED to LocalPED-USBmode (see "Modes of Operation" on page 209).
> [Remote PED] The source partition must be activated (see "Activation and Auto-activation on Multi-factor-(PED-) Authenticated Partitions" on page 320).
> [Remote PED] Set up a Remote PED server to authenticate the Backup HSM (see "Remote PED Setup" onpage 1).
> [Remote PED] You require the orange PED key for the Backup HSM, which must be initialized using a localPED connection (see "Initializing the Backup HSM Remote PED Vector" on page 411).
To back up an application partition to a locally-connected Backup HSM using LunaSH
1. Log in to LunaSH as admin, or an admin-level custom user.
2. [Remote PED] Connect the Backup HSM to the remote PED server.
lunash:> hsm ped connect -ip <PEDserver_IP> -serial <Backup_HSM_serialnum>
Luna Network HSM 7 Partition Administration GuideLast Updated: 2022-07-26 23:53:21 GMT-04:00 Copyright 2001-2022 Thales Group 417

Chapter 14: Backup and Restore Using a Luna Backup HSM (G5)
3. [Optional] View the Luna Backup HSMs currently connected to the appliance and find the correct serialnumber.
lunash:> token backup list4. Back up the partition, specifying the source partition label, a label for the backup (either a new or existing
label), and the Backup HSM serial number. If you specify an existing backup, use one of the following options:
• -add to keep the existing partition contents and add new objects only
• -replace to erase the partition contents and replace them with the backup
You do not need to specify these options when backing up a V1 partition, as only the SMK is backed up.
If you omit the -tokenpar option when creating a new backup, the partition is assigned a default name(<source_partition_name>_<YYYYMMDD>) based on the source HSM's internally-set time and date.
lunash:> partition backup -partition <source_label> -serial <Backup_HSM_serialnum> [-tokenpar<target_label>] [-add] [-replace]You are prompted for the source partition's Crypto Officer credential (black PED key or challenge secret).
[Remote PED] You are prompted for a Crypto Officer credential for the backup (black PED key) and for thecloning domain that matches the source partition (red PED key). If you are adding to an existing backup, youare not asked for the cloning domain.
5. [Local PED] LunaSH prompts you to connect the Luna PED to the Backup HSM. Set the mode on the LunaPED to Local PED-SCP (see "Modes of Operation" on page 209). Enter proceed in LunaSH.You are prompted to set the following credentials:
• Crypto Officer (password or black PED key) for the backup (can be the same as the source partition)
• Cloning domain (string or red PED key) for the backup (must be the same as the source partition)
The partition contents are cloned to the backup.
Restoring an Application Partition from BackupYou can use LunaSH to restore the contents of a backup to the original application partition, or any other Lunaapplication partition that shares the same cloning domain.
Prerequisites> The target partition must be initialized with the same cloning domain as the backup.
> You must have admin or admin-level access to LunaSH on the Luna Network HSM.
> The following policies are set (see HSM Capabilities and Policies and "Partition Capabilities and Policies" onpage 291 for more information):
• HSM policy 16: Enable network replicationmust be set to 1 (ON) on the HSM that hosts the targetpartition.
• Partition policy 0: Allow private key cloningmust be set to 1 (ON) on the target partition.• Partition policy 4: Allow secret key cloningmust be set to 1 (ON) on the target partition.
> You must have the Crypto Officer credentials (black PED key) for the backup and the target partition.
Luna Network HSM 7 Partition Administration GuideLast Updated: 2022-07-26 23:53:21 GMT-04:00 Copyright 2001-2022 Thales Group 418

Chapter 14: Backup and Restore Using a Luna Backup HSM (G5)
> [Local PED] Connect the PED to the Luna Network HSM using a Mini-B to USB-A cable (see "Local PEDSetup" on page 211), and to the Backup HSM using a 9-pin Micro-D to Micro-D cable. Set the PED to LocalPED-USBmode (see "Modes of Operation" on page 209).
> [Remote PED] The source partition must be activated (see "Activation and Auto-activation on Multi-factor-(PED-) Authenticated Partitions" on page 320).
> [Remote PED] Set up a Remote PED server to authenticate the Backup HSM (see "Remote PED Setup" onpage 1). You require the orange PED key for the Backup HSM.
To restore the contents of a backup to an application partition
1. Log in to LunaSH as admin, or an admin-level custom user.
2. [Remote PED] Connect the Backup HSM to the remote PED server.
lunash:> hsm ped connect -ip <PEDserver_IP> -serial <Backup_HSM_serialnum>3. [Optional] View the Luna Backup HSMs currently connected to the appliance and find the correct serial
number.
lunash:> token backup list4. [Optional] View the backups currently available on the Backup HSM.
lunash:> token backup partition list -serial <Backup_HSM_serialnum>5. Restore the partition contents, specifying the target partition label, the backup label, the Backup HSM serial
number, and either:
• -add to keep the existing partition contents and add new objects only
• -replace to erase the partition contents and replace them with the backup
CAUTION! If you are restoring a V1 backup to a V1 partition, use -add to restore the SMK.Use -replace only if you wish to erase any existing cryptographic material on the targetpartition. By default, V1 backups only include the SMK.
lunash:> partition restore -partition <target_label> -tokenpar <backup_label> -serial <Backup_HSM_serialnum> {-add | -replace}You are prompted for the target partition's Crypto Officer credential (black PED key or challenge secret).
6. [Local PED] LunaSH prompts you to connect the Luna PED to the Backup HSM. Change the mode on theLuna PED to Local PED-SCP (see "Modes of Operation" on page 209). Enter proceed in LunaSH.You are prompted for the backup's Crypto Officer credential (black PED key or challenge secret).
The backup contents are cloned to the application partition.
Backup/Restore Using a Client-Connected Luna Backup HSM(G5)You can connect the Luna Backup HSM to a USB port on the client workstation. This configuration allows you toperform backup/restore operations for all application partitions that appear as visible slots in LunaCM. It is usefulin deployments where the partition Crypto Officer wants to keep backups at the client. You can restore a partition
Luna Network HSM 7 Partition Administration GuideLast Updated: 2022-07-26 23:53:21 GMT-04:00 Copyright 2001-2022 Thales Group 419

Chapter 14: Backup and Restore Using a Luna Backup HSM (G5)
backup to the original source partition or to another existing Luna application partition that shares the samecloning domain.
This section provides instructions for the following procedures using this kind of deployment:
> "Initializing the Backup HSM" below
> "Backing Up an Application Partition" on the next page
> "Restoring an Application Partition from Backup" on page 422
NOTE To perform backup operations on HSM firmware 7.7.0 or newer (V0 or V1 partitions):> Luna Backup HSM (G7) requires minimum firmware version 7.7.1> Luna Backup HSM (G5) requires minimum firmware version 6.28.0You can use a Luna Backup HSM with older firmware to restore objects to a V0 or V1 partition,but this is supported for purposes of getting your objects from the older partitions onto thenewer V0 or V1 partitions only.V0 and V1 partitions are considered more secure than partitions at earlier firmware versions -any attempt to restore from a higher-security status to lower-security status fails gracefully.SMK backup for appliance is supported only with local connection.
Initializing the Backup HSMBefore you can use the Luna Backup HSM to back up your partition objects, it must be initialized. This procedureis analogous to the standard HSM initialization procedure.
Prerequisites> Install the Backup HSM at the client and connect it to power (see "Installing the Backup HSM" on page 405).
> Ensure that the Backup HSM is not in Secure Transport Mode and that any tamper events are cleared (see"Backup HSM Secure Transport and Tamper Recovery" on page 408).
> [PED Authentication] Ensure that you have enough blank or rewritable blue and red PED keys available foryour desired authentication scheme (see "Creating PED Keys" on page 243).
• [Local PED] Connect the PED using a 9-pin Micro-D to Micro-D cable. Set the PED to Local PED-SCPmode (see "Modes of Operation" on page 209).
• [Remote PED] Initialize the Backup HSM RPV (see "Initializing the Backup HSM Remote PED Vector" onpage 411). You require the orange PED key.
• [Remote PED] Set up a Remote PED server to authenticate the Backup HSM (see "Remote PEDSetup" on page 1).
To initialize a client-connected Backup HSM
1. Launch LunaCM on the client workstation.
2. Set the active slot to the Luna Backup HSM.lunacm:> slot set -slot <slotnum>
3. [Remote PED] Connect the Backup HSM to the Remote PED server.
lunacm:> ped connect -ip <PEDserver_IP> -port <portnum>
Luna Network HSM 7 Partition Administration GuideLast Updated: 2022-07-26 23:53:21 GMT-04:00 Copyright 2001-2022 Thales Group 420

Chapter 14: Backup and Restore Using a Luna Backup HSM (G5)
4. Initialize the Backup HSM, specifying a label and the method of authentication (-initwithped or -initwithpwd). You must initialize the HSM with the same authentication method as the partition(s) you plan toback up.
lunacm:> hsm init -label <label> {-initwithped | -initwithpwd}You are prompted to set an HSM SO credential and cloning domain for the Backup HSM.
Backing Up an Application PartitionYou can use LunaCM to back up the contents of an application partition to the client-connected Luna BackupHSM. You can use this operation to create a backup on the Backup HSM, or add objects from the sourcepartition to an existing backup.
Prerequisites> The Backup HSMmust be initialized (see "Initializing the Backup HSM" on the previous page).
> The following policies are set (see HSM Capabilities and Policies and "Partition Capabilities and Policies" onpage 291 for more information):
• HSM policy 16: Enable network replicationmust be set to 1 (ON) on the HSM that hosts the sourcepartition.
• [Pre-7.7.0 and V0 partitions only] Partition policy 0: Allow private key cloning is set to 1 (ON) on thesource partition.
• [Pre-7.7.0 and V0 partitions only] Partition policy 4: Allow secret key cloning is set to 1 (ON) on thesource partition.
> You must have the Crypto Officer credential (black PED key) and domain (red PED key) for the sourcepartition.
> You must have the Backup HSM SO credential (blue PED key).
> [PED Authentication] This procedure is simpler if the source partition is activated (see "Activation and Auto-activation on Multi-factor- (PED-) Authenticated Partitions" on page 320), since you require a Luna PED onlyfor the Backup HSM.
• [Local PED] Connect the PED to the Backup HSM using a 9-pin Micro-D to Micro-D cable. The sourcepartition must be activated. If not, you must use Remote PED.
• [Remote PED] You must have the orange PED key for the Backup HSM (see "Initializing the Backup HSMRemote PED Vector" on page 411). If the source partition is not activated, you may need the orange PEDkey for the Luna Network HSM as well.
• [Remote PED] Set up Remote PED on the workstation you plan to use for PED authentication (see"Remote PED Setup" on page 1). If the partition is not activated, you must connect to PEDserver with pedconnect before logging in, and disconnect with ped disconnect before initiating the backup.
To back up an application partition to a client-connected Backup HSM
1. Launch LunaCM on the client workstation.
2. Set the active slot to the source partition and log in as Crypto Officer.lunacm:> slot set -slot <slotnum>lunacm:> role login -name co
Luna Network HSM 7 Partition Administration GuideLast Updated: 2022-07-26 23:53:21 GMT-04:00 Copyright 2001-2022 Thales Group 421

Chapter 14: Backup and Restore Using a Luna Backup HSM (G5)
3. [PED Authentication] Connect the Backup HSM to the Luna PED.
• [Local PED] Set the mode on the Luna PED to Local PED-SCP (see "Modes of Operation" on page 209).
• [Remote PED] Connect the Backup HSM slot to PEDserver.
lunacm:> ped connect -slot <Backup_HSM_slotnum> -ip <PEDserver_IP> -port <portnum>4. Back up the partition, specifying the Backup HSM slot and a label for the backup (either a new or existing
label). If you specify an existing backup label, include the -append option to add only new objects to thebackup (duplicate objects will not be cloned). By default, the existing backup will be overwritten with thecurrent contents of the source partition.
lunacm:> partition archive backup -slot <Backup_HSM_slotnum> [-partition <backup_label>] [-append][-replace] [-smkonly]If you omit the -partition option when creating a new backup, the partition is assigned a default name(<source_partition_name>_<YYYYMMDD>) based on the source HSM's internally-set time and date.
If you are backing up a V1 partition, include -smkonly to back up the SMK only. By default, the SMK and anyencrypted cryptographic material on the partition are backed up.
The backup begins once you have completed the authentication process. Objects are backed up one at atime. For existing backups, you can use the following options to define how individual objects are backed up:
-append Add only new objects to an existing backup.
-replace Delete the existing objects in a target backup partition and replace them with the contents of thesource user partition. This is the default.
-appendand -replace
Add new objects and replace existing objects that have the same OUID but a different fingerprint(such as would occur if any of the object attributes were changed since the previous backup).
You are prompted to present or set the following credentials:
• [Remote PED] Backup HSM Remote PED vector (orange PED key)
• Backup HSM SO (password or blue PED key)
• Crypto Officer (password or black PED key) for the backup (can be the same as the source partition)
• Cloning domain (string or red PED key) for the backup (must be the same as the source partition)
The partition contents are cloned to the backup.
5. [Remote PED] Disconnect the Backup HSM from PEDserver.
lunacm:> ped disconnect
Restoring an Application Partition from BackupYou can use LunaCM to restore the contents of a backup to the original application partition, or any other Lunaapplication partition that shares the same cloning domain.
Prerequisites> The target partition must be initialized with the same cloning domain as the backup partition.
> The following policies are set (see HSM Capabilities and Policies and "Partition Capabilities and Policies" onpage 291 for more information):
Luna Network HSM 7 Partition Administration GuideLast Updated: 2022-07-26 23:53:21 GMT-04:00 Copyright 2001-2022 Thales Group 422

Chapter 14: Backup and Restore Using a Luna Backup HSM (G5)
• HSM policy 16: Enable network replicationmust be set to 1 (ON) on the HSM that hosts the targetpartition.
• [Pre-7.7.0 and V0 partitions only] Partition policy 0: Allow private key cloning is set to 1 (ON) on thetarget partition.
• [Pre-7.7.0 and V0 partitions only] Partition policy 4: Allow secret key cloning is set to 1 (ON) on thetarget partition.
> You must have the Crypto Officer credentials for the backup partition and the target partition.
> [PED Authentication] This procedure is simpler if the application partition is activated (see "Activation andAuto-activation on Multi-factor- (PED-) Authenticated Partitions" on page 320), since you require a Luna PEDonly for the Backup HSM.
• [Local PED] Connect the PED to the Backup HSM using a 9-pin Micro-D to Micro-D cable. The sourcepartition must be activated. If not, you must use Remote PED.
• [Remote PED] Set up Remote PED on the workstation you plan to use for PED authentication (see"Remote PED Setup" on page 1). If the partition is not activated, you must connect to PEDserver with pedconnect before logging in, and disconnect with ped disconnect before initiating the backup.
To restore the contents of a backup to an application partition
1. Launch LunaCM on the client workstation.
2. Set the active slot to the target partition and log in as Crypto Officer.lunacm:> slot set -slot <slotnum>lunacm:> role login -name co
3. [PED Authentication] Connect the Backup HSM to the Luna PED.
• [Local PED] Set the mode on the Luna PED to Local PED-SCP (see "Modes of Operation" on page 209).
• [Remote PED] Connect the Backup HSM slot to PEDserver.
lunacm:> ped connect -slot <Backup_HSM_slotnum> -ip <PEDserver_IP> -port <portnum>4. [Optional] Display the available backups by specifying the Backup HSM slot. Each available backup also
appears as a slot in LunaCM.
lunacm:> partition archive list -slot <Backup_HSM_slotnum>5. [Optional] Display the contents of a backup by specifying the Backup HSM slot and the backup partition label
in LunaCM.
lunacm:> partition archive contents -slot <backup_slotnum> -partition <backup_label>6. Restore the partition contents, specifying the Backup HSM slot and the backup you wish to use. By default,
duplicate backup objects with the same OUID as objects currently existing on the partition are not restored.
If you have changed attributes of specific objects since your last backup and you wish to revert thesechanges, include the -replace option.If you are restoring a V1 partition and you only want to restore the SMK, include the -smkonly option.lunacm:> partition archive restore -slot <Backup_HSM_slotnum> -partition <backup_label> [-replace] [-smkonly]You are prompted for the backup's Crypto Officer credential.
Luna Network HSM 7 Partition Administration GuideLast Updated: 2022-07-26 23:53:21 GMT-04:00 Copyright 2001-2022 Thales Group 423

Chapter 14: Backup and Restore Using a Luna Backup HSM (G5)
The backup contents are cloned to the application partition.
Configuring a Remote Luna Backup HSM (G5) ServerIn this configuration, the Luna Backup HSM is connected to a remote client workstation that communicates withthe client via the Remote Backup Service (RBS). It is useful in deployments where backups are stored in aseparate location from the Luna Network HSM, to protect against catastrophic loss (fire, flood, etc).
RBS is a utility, included with the Luna HSM Client software, that runs on a workstation hosting one or moreBackup HSMs. When RBS is configured and running, other clients or HSMs registered to it can see its BackupHSM(s) as slots in LunaCM. RBS is compatible with both Luna G5 and G7 Backup HSMs.
Installing/Configuring the Remote Backup ServiceRBS is installed using the Luna HSM Client installer. You must create a certificate for the RBS workstation andregister it on all clients/appliances that will use the remote Backup HSMs. These instructions will allow you toinstall and configure RBS.
Prerequisites> On any Luna Network HSM client workstation, install the following Luna HSM Client components (see "Luna
HSM Client Software Installation" on page 19):
• Network: The Network component includes utilities that are required for remote backups• Remote PED: if you are backing up PED-authenticated partitions
NOTE The Luna HSM Client version installed on the RBS workstation must be the sameversion installed on the client workstation(s). Ensure that you use a client version that iscompatible with your Backup HSM firmware.
> Install the Luna Backup HSM(s) at the workstation that will host RBS (see "Installing the Backup HSM" onpage 405).
> [PED Authentication] Initialize the remote PED vector for each Backup HSM. You will need the orange PEDkey for backup/restore operations (see "Initializing the Backup HSM Remote PED Vector" on page 411).
To install and configure RBS
1. On the workstation hosting the Backup HSM(s), install the Backup component of the Luna HSM Client (see"Luna HSM Client Software Installation" on page 19). If this workstation will also host a Remote PED, installthe Remote PED component as well (Windows only).
2. Navigate to the Luna HSM Client home directory (/usr/safenet/lunaclient/rbs/bin on Linux/Unix) andgenerate a certificate for the RBS host.
> rbs --genkeyYou are prompted to enter and confirm an RBS password. The certificate is generated in:
• Linux/UNIX: <LunaClient_install_directory>/rbs/server/server.pem• Windows: <LunaClient_install_directory>\cert\server\server.pem
Luna Network HSM 7 Partition Administration GuideLast Updated: 2022-07-26 23:53:21 GMT-04:00 Copyright 2001-2022 Thales Group 424

Chapter 14: Backup and Restore Using a Luna Backup HSM (G5)
3. Specify the Backup HSM(s) that RBS will make available to clients.
> rbs --configRBS displays a list of Backup HSMs currently connected to the workstation. Select the ones you want toprovide remote backup services. When you have specified your selection, enter X to exit the configurationtool.
4. Launch the RBS daemon (Linux/UNIX) or console application (Windows).
• Linux/UNIX: # rbs --daemon• Windows: Double-click the rbs application. A console window will remain open.
You are prompted to enter the RBS password.
5. Securely transfer the RBS host certificate (server.pem) to your Luna HSM Client workstation using pscp orscp.
6. On the client workstation, register the RBS host certificate to the server list.
> vtl addServer -n <Backup_host_IP> -c server.pem7. [Optional] Launch LunaCM on the client to confirm that the Backup HSM appears as an available slot.
NOTE If you encounter issues, try changing the RBS and PEDclient ports from their defaultvalues. Check that your firewall is not blocking ports used by the service.
You can now use the Backup HSM(s) as though they were connected to the client workstation locally, usingRemote PED. See "Backup/Restore Using a Client-Connected Luna Backup HSM (G5)" on page 419 forprocedures.
Luna Network HSM 7 Partition Administration GuideLast Updated: 2022-07-26 23:53:21 GMT-04:00 Copyright 2001-2022 Thales Group 425

CHAPTER 15: Backup and Restore Using aLuna B700 Backup HSM
The following topics describe how to configure and use the Luna B700 Backup HSM to backupand restore the cryptographic objects in your user partitions. You can perform backup andrestore operations by connecting the Luna B700 Backup HSM to a Luna HSM Clientworkstation or Luna Network HSM appliance:
About Backup/Restore Using the Luna B700 Backup HSM> "Overview and Key Concepts" below
Installing the Luna B700 Backup HSM Hardware> "Luna B700 Backup HSM Hardware Installation" on page 430
Backup/Restore from a Luna HSM Client Workstation Using LunaCM> "Initializing a Client-Connected Luna B700 Backup HSM" on page 432> "Backing Up to a Client-Connected Luna B700 Backup HSM" on page 437> "Restoring From a Client-Connected Luna B700 Backup HSM " on page 444
Backup/Restore from a Luna HSM Client Workstation Using the RemoteBackup Service (RBS)> "Backup and Restore to a Remote Backup Service (RBS)-Connected Luna B700 Backup
HSM " on page 467
Backup/Restore from a Luna Network HSM Appliance Using LunaSH> "Initializing an Appliance-Connected Luna B700 Backup HSM" on page 449> "Backing Up to an Appliance-Connected Luna B700 Backup HSM" on page 454> "Restoring From an Appliance-Connected Luna B700 Backup HSM" on page 461
Backup HSM Firmware Update/Rollback> "Updating the Luna B700 Backup HSM Firmware" on page 469> "Rolling Back the Luna B700 Backup HSM Firmware" on page 471
Overview and Key ConceptsThis topic provides the following background information you need to perform backup and restore operationsusing a Luna B700 Backup HSM:
> "Overview" on the next page
Luna Network HSM 7 Partition Administration GuideLast Updated: 2022-07-26 23:53:21 GMT-04:00 Copyright 2001-2022 Thales Group 426

Chapter 15: Backup and Restore Using a Luna B700 Backup HSM
> "Credentials Required to Perform Backup and Restore Operations" below
> "Client Software Required to Perform Backup and Restore Operations From a Client Workstation" on the nextpage
> "PED Authentication with the Luna B700 Backup HSM " on the next page
> "Backup and Restore Best Practices" on page 429
OverviewA Crypto Officer (CO) can use the backup HSM to backup the objects in any partition they can log in to, providedthat:
> The user partition and the backup HSM share the same domain.
> The user partition and the backup HSM use the same authentication method (PED or password).
> The CO has the required credentials on the backup HSM.
You can perform backup/restore operations on your user partitions by connecting the backup HSM to a LunaHSM Client workstation, or to a Luna Network HSM appliance:
> When you connect the backup HSM to a Luna HSM Client workstation, the backup HSM Admin partition isadded to the slots listed in LunaCM, allowing you to clone objects between the <source> user partition andthe <target> backup partition.
> When you connect the backup HSM to a Luna Network HSM appliance, the backup HSM is available as anattached backup token identified by its serial number, allowing you to use LunaSH to clone objects betweenthe <source> user partition and the <target> backup partition. Local backup via LunaSH requires minimumLuna Network HSM appliance software 7.7.0 (see Version Dependencies by Feature for more information).
NOTE To perform backup operations on HSM firmware 7.7.0 or newer (V0 or V1 partitions):> Luna Backup HSM (G7) requires minimum firmware version 7.7.1> Luna Backup HSM (G5) requires minimum firmware version 6.28.0You can use a Luna Backup HSM with older firmware to restore objects to a V0 or V1 partition,but this is supported for purposes of getting your objects from the older partitions onto thenewer V0 or V1 partitions only.V0 and V1 partitions are considered more secure than partitions at earlier firmware versions -any attempt to restore from a higher-security status to lower-security status fails gracefully.SMK backup for appliance is supported only with local connection.
Backups are created and stored as partitions within the Admin partition on the backup HSM.
Credentials Required to Perform Backup and Restore OperationsYou require the following credentials to perform backup/restore operations:
<source> User HSM Remote PED (orange) key. Required for PED-authenticated backups only, toestablish a remote PED connection to the HSM that hosts the <source> userpartition.
Luna Network HSM 7 Partition Administration GuideLast Updated: 2022-07-26 23:53:21 GMT-04:00 Copyright 2001-2022 Thales Group 427

Chapter 15: Backup and Restore Using a Luna B700 Backup HSM
<source> User Partition Crypto Officer (CO). Required to access the objects in the <source> user partitionthat will be backed up.Domain. Required to allow objects to be cloned between the <source> user partitionand <target> backup partition. The domains for the <source> user partition and<target> backup partition must match, otherwise the backup will fail.
<target> Backup HSM HSM Security Officer (SO). Required to create or access the <target> backuppartition in the Admin slot, where all backups are archived.Remote PED (orange) key. Required for PED-authenticated backups only, toestablish a remote PED connection to the HSM that hosts the <target> backuppartition.Note: You create new credentials for both roles on HSM initialization, and use themfor subsequent backups to the <target> backup HSM.
<target> BackupPartition
Partition owner (PSO). Required to access the <target> backup partition.Crypto Officer (CO). Required to access the objects in the <target> backup partition.Note: You create new credentials for both roles on the initial backup, and use themfor subsequent backups to the <target> backup partition.
Client Software Required to Perform Backup and Restore Operations From a ClientWorkstationYou must install the Luna HSM Client software and USB driver for the backup HSM on the workstation you intendto use to perform backup and restore operations. The Luna B700 Backup HSM requires minimum client version10.1. Refer to "Luna HSM Client Software Installation" on page 19 for detailed installation instructions.
NOTE Ensure that the backup HSM is not connected to the Luna HSM Client workstationwhen you install or uninstall the client software. Failure to do so may result in the backup HSMbecoming unresponsive.
When you install the client software, you must select the following options:
> The USB option. This installs the driver for the backup HSM.> The Network and/or PCIe options, depending on which type of HSM you intend to backup.> The Remote PED option, if you want to backup PED-authenticated partitions. Note that you can install and
use a remote PED on the same workstation used to host the backup HSM, or on a different workstation.
> The Backup option, if you want to backup to a remote backup HSM using RBS.
PED Authentication with the Luna B700 Backup HSMThe Luna B700 Backup HSM is equipped with a single USB port that is used to connect the backup HSM to aLuna HSM Client workstation or Luna Network HSM appliance. As such, any PED connections to the backupHSM must use a remote PED and the pedserver service:> When the Luna B700 Backup HSM is connected to a client workstation, you authenticate to it with a remote
PED connected to the same client workstation, or to a separate workstation set up as a Remote PED server.
Luna Network HSM 7 Partition Administration GuideLast Updated: 2022-07-26 23:53:21 GMT-04:00 Copyright 2001-2022 Thales Group 428

Chapter 15: Backup and Restore Using a Luna B700 Backup HSM
To backup or restore a partition, you must use lunacm:> ped connect to establish remote PED connectionsto both the <source> user partition and <target> backup HSM.
> When the Luna B700 Backup HSM is connected to a Luna Network HSM appliance you authenticate to it witha remote PED that is also connected to the appliance. To backup or restore a partition, you must use lunash:>hsm ped connect to establish a remote PED connection to the appliance loopback IP address (127.0.0.1)using the pedserver service running on the appliance. Neither the PED nor the Backup HSM can beconnected to the HSM USB port (see Physical Features); each must be connected to one of the applianceUSB ports.
Backup and Restore Best PracticesTo ensure that your data is protected in the event of a failure or other catastrophic event, Thales recommendsthat you use the following best practices as part of a comprehensive backup strategy:
CAUTION! Failure to develop and exercise a comprehensive backup and recovery plan mayprevent you from being able to recover from a catastrophic event. Although Thales provides arobust set of backup hardware and utilities, we cannot guarantee the integrity of your backed-up key material, especially if stored for long periods. Thales strongly recommends that youexercise your recovery plan at least semi-annually (every six months) to ensure that you canfully recover your key material.
Develop and document a backup and recovery planThis plan should include the following:
> What is being backed up
> The backup frequency
> Where the backups are stored
> Who is able to perform backup and restore operations
> Frequency of exercising the recovery test plan
Make multiple backupsTo ensure that your backups are always available, build redundancy into your backup procedures.
Use off-site storageIn the event of a local catastrophe, such as a flood or fire, you might lose both your working HSMs and locally-stored backup HSMs. To fully protect against such events, always store a copy of your backups at a remotelocation.
Regularly exercise your disaster recovery planExecute your recovery plan at least semi-annually (every six months) to ensure that you can fully recover yourkey material. This involves retrieving your stored Backup HSMs and restoring their contents to a test partition, toensure that the data is intact and that your recovery plan works as documented.
Luna Network HSM 7 Partition Administration GuideLast Updated: 2022-07-26 23:53:21 GMT-04:00 Copyright 2001-2022 Thales Group 429

Chapter 15: Backup and Restore Using a Luna B700 Backup HSM
Luna B700 Backup HSM Hardware InstallationThe following topics describe how to install and connect a Luna B700 Backup HSM. To ensure a successfulinstallation, perform the following tasks in the order indicated:
1. Ensure that you have all of the required components, as listed in "Luna Backup HSM Received Items" below2. Install and connect the hardware, as described in "Installing the Luna Backup HSM Hardware" on page 432
CAUTION! To ensure the security and integrity of your new device, refer to "Verifying theIntegrity of Your Shipment" on page 1 before unpacking your new Luna Backup HSM.
The Luna B700 Backup HSM complies with the following:
Luna Backup HSM Received ItemsThis section provides a list of the components you should have received with your order.
Included ItemsThe following items are included with your new backup HSM.
Luna Network HSM 7 Partition Administration GuideLast Updated: 2022-07-26 23:53:21 GMT-04:00 Copyright 2001-2022 Thales Group 430

Chapter 15: Backup and Restore Using a Luna B700 Backup HSM
Quantity Item
1 Luna Backup HSM
Luna Network HSM 7 Partition Administration GuideLast Updated: 2022-07-26 23:53:21 GMT-04:00 Copyright 2001-2022 Thales Group 431

Chapter 15: Backup and Restore Using a Luna B700 Backup HSM
Quantity Item
1 USB 3.0 Cable: Type A to Type C
1 5V Power Supply with replaceable plug modules for international use.
NOTE Onmost workstations, the USB connection provides adequate power to thebackup HSM. If you are using a low-power workstation, such as a netbook, the USBconnection may not provide adequate power, in which case you will also need to connectthe external power supply.
Installing the Luna Backup HSM HardwareThe backup HSM is a USB device. To install the backup HSM, connect it to a Luna HSM Client workstation usingthe included USB cable. The workstation must be running Luna HSM Client software that supports the backupHSM and provides the required drivers. Refer to the release notes and see "Backup and Restore Using a LunaB700 Backup HSM" on page 426 for more information.
NOTE Onmost workstations, the USB connection provides adequate power to the BackupHSM and it will begin the boot sequence. If you are using a low-power workstation, such as anetbook, the USB connection may not provide adequate power, in which case you will alsoneed to connect the external power supply.
Initializing a Client-Connected Luna B700 Backup HSMYou must initialize the backup HSM prior to first use. Initialization does the following:
> Recovers the HSM from Secure Transit Mode (STM). STM allows you to verify that the HSM was nottampered in transit. All new HSMs are shipped from the factory in Secure Transport Mode.
> Creates the orange (Remote PED vector) key for the backup HSM (PED-authenticated HSMs only). Youcreate the orange key using a one-time, password-secured connection between the PED and the backupHSM. You then use this orange key to secure all subsequent connections between the PED and the backupHSM.
Luna Network HSM 7 Partition Administration GuideLast Updated: 2022-07-26 23:53:21 GMT-04:00 Copyright 2001-2022 Thales Group 432

Chapter 15: Backup and Restore Using a Luna B700 Backup HSM
> Sets the authentication mode of the HSM. PED-authenticated backup HSMs can backup PED-authenticatedpartitions. Password-authenticated backup HSMs can backup password-authenticated partitions.
> Sets the security domain of the HSM. You can only backup partitions that share the same domain as thebackup HSM.
> Creates the HSM SO role on the HSM (see HSM Roles and Procedures). This role is required to create ormodify a backup partition, and must be logged in to perform a backup.
The procedure is different for PED-authenticated and password-authenticated backups, as detailed in thefollowing sections:
> "Initializing a PED-Authenticated HSM" below
> "Initializing a Password-Authenticated HSM" on page 436
> "Configuring the Luna B700 Backup HSM for FIPS Compliance" on page 437
NOTE This feature requires minimum Luna HSM Client 10.1.0.
Initializing a PED-Authenticated HSMInitializing your backup HSM as PED authenticated allows you to backup PED-authenticated partitions.
SummaryTo initialize a PED-authenticated HSM you connect it and a remote PED (using a USB or network connection) toa Luna HSM Client workstation, and performing the following tasks:
> Recover the HSM from Secure Transport Mode.
> Create the orange (Remote PED vector) key for the backup HSM.
> Initialize the HSM to set the authentication mode (PED) and HSM domain, and create the HSM SO PED key.
PrerequisitesBefore beginning, ensure that you are familiar with the concepts in "PED Authentication" on page 197. You willneed the following PED keys:
> A blank orange (PED vector) PED key, plus the number required to create duplicate PED keys as necessary.
CAUTION! Always make copies of your orange PED Keys, or declare MofN as one-of-several,and store at least one safely. For the Luna B700 Backup HSM, the orange PED Key is asimportant as the HSM SO blue key or the Domain red key. (This contrasts with other LunaHSMs, where a lost or damaged orange key can be easily replaced via a local PEDconnection.)A Remote PED Vector (RPV), on an orange PED Key (RPK) or on an associated HSM, is not arole; it is required to set up the secure tunnel for Remote PED operation.When used with a PED-authenticated Luna B700 Backup HSM, the PED always connectsremotely. The single USB port on the Backup HSM is for the connection to a Client computer orto a Luna Network HSM appliance - the PED is never connected locally/directly to the LunaB700 Backup HSM. Therefore, losing the RPK for that Luna B700 Backup HSM, withoutaccess to a copy, would mean losing the material backed-up on that Backup HSM.
Luna Network HSM 7 Partition Administration GuideLast Updated: 2022-07-26 23:53:21 GMT-04:00 Copyright 2001-2022 Thales Group 433

Chapter 15: Backup and Restore Using a Luna B700 Backup HSM
> N number of blue (HSM SO) PED keys, as defined by the M of N scheme you choose for the HSM SO role,plus the number required to create duplicate PED keys as necessary.
> An existing red (Domain) PED key for the cloning domain of the partitions you want to backup to the HSM.You can also insert a blank red (Domain) PED key if you want to create a new domain for the HSM (althoughyou won't be able to backup any existing partitions if you do).
To initialize a PED-authenticated Backup HSM
1. Configure your Luna HSM Client workstation using one of the following configurations:
a. Install the required client software on the Luna HSM Client workstation. See "Initializing a Client-Connected Luna B700 Backup HSM" on page 432 for details.
b. Connect the backup HSM directly to the Luna HSM Client workstation using the included USB cable.
NOTE Onmost workstations, the USB connection provides adequate power to the backupHSM and it will begin the boot sequence. If you are using a low-power workstation, such as anetbook, the USB connection may not provide adequate power, in which case you will alsoneed to connect the external power supply.
c. Connect the PED to the Luna HSM Client workstation used to host the remote PED, using the PED USBcable.
NOTE You connect to the remote PED using the IP address of the workstation used to hostthe PED. This can be the same workstation that hosts the user and backup partition slots, or adifferent workstation. The workstation used to host the PEDmust be running pedServer.
2. Start the pedserver service on the workstation used to host the remote PED:
Windows C:\Program Files\Safenet\LunaClient> "pedserver -mode start" on page 271
Linux /usr/safenet/lunaclient> "pedserver -mode start" on page 271
3. Launch LunaCM on the workstation that hosts the user and backup partition slots.
4. Select the slot assigned to the backup HSM Admin partition.
lunacm:> slot set -slot <slot_id>
Luna Network HSM 7 Partition Administration GuideLast Updated: 2022-07-26 23:53:21 GMT-04:00 Copyright 2001-2022 Thales Group 434

Chapter 15: Backup and Restore Using a Luna B700 Backup HSM
5. Recover the HSM from Secure Transport Mode. See Secure Transport Mode for more information:
lunacm:> stm recover -randomuserstring <string>
NOTE Recovering a Luna HSM (G7) from secure transport mode may take up to threeminutes.
6. Connect to the Luna HSM Client workstation that hosts the PED. If defaults are not ped set, specify an IPaddress (and port if required; 1503 is default).
lunacm:> ped connect -ip <ip_address> -pwdLunaCM generates and displays a one-time password that is used to set up a secure channel between thebackup HSM and the PED, allowing you to securely initialize the orange (Remote PED Vector) key. Enter thedisplayed password on the PED when prompted to complete setup of the secure channel.
7. Create an orange (Remote PED vector) key for the backup HSM. The PED vector key is required forsubsequent PED-authenticated sessions to the HSM. Ensure that you label any new PED keys that youcreate during this process.
lunacm:> ped vector init
CAUTION! The orange PED key is required for all Luna G7 Backup HSM operations. If thiskey is lost, your backups will become irretrievable. Thales recommends keeping multiplebackups of all PED keys stored in a secure location.
8. Tear down the one-time, password-protected secure channel between the backup HSM and the PED youused to create the orange (Remote PED vector) key.
lunacm:> ped disconnectYou are prompted to enter the one-time password that was generated when you performed the ped connect.Enter the password and press Enter to proceed.
9. Set up a new secure channel between the backup HSM and the PED. If defaults are not ped set, specify an IPaddress (and port if required; 1503 is default). You are prompted to insert the orange PED key you created instep 7.
lunacm:> ped connect10.Initialize the selected backup HSM in PED-authenticated mode. You are prompted by the PED for the red
Domain key(s) (existing or new) and blue HSM SO key(s) (new). Respond to the PED prompts and insert andset the PINs on the required keys when requested. Ensure that you label any new PED keys that you createduring this process.
lunacm:> hsm init -iped -label <label>lunacm:> hsm init -iped -label USB_BACKUP_HSM_G7
11.Use the Duplicate function on the PED to create and label duplicates of the new PED keys, as required. See"Duplicating Existing PED Keys" on page 254 for details.
12.Disconnect the PED when done.
lunacm:> ped disconnect
Luna Network HSM 7 Partition Administration GuideLast Updated: 2022-07-26 23:53:21 GMT-04:00 Copyright 2001-2022 Thales Group 435

Chapter 15: Backup and Restore Using a Luna B700 Backup HSM
Initializing a Password-Authenticated HSMInitializing your backup HSM as password-authenticated allows you to backup password-authenticatedpartitions.
SummaryTo initialize a password-authenticated HSM you connect it to a Luna HSM Client workstation and perform thefollowing tasks:
> Recover the HSM from Secure Transport Mode.
> Initialize the HSM to set the authentication mode (password), the HSM domain, and the initial password forthe HSM SO role.
PrerequisitesBefore beginning, ensure that you have the following:
> The password for the cloning domain of the partitions you want to backup to the HSM. You can also enter anew password to create a new domain for the HSM (although you won't be able to backup any existingpartitions if you do).
To initialize a password-authenticated HSM
1. Configure your Luna HSM Client workstation as illustrated below:
a. Install the required client software on the Luna HSM Client workstation. See "Initializing a Client-Connected Luna B700 Backup HSM" on page 432 for details.
b. Connect the backup HSM directly to the Luna HSM Client workstation using the included USB cable.
NOTE Onmost workstations, the USB connection provides adequate power to the backupHSM and it will begin the boot sequence. If you are using a low-power workstation, such as anetbook, the USB connection may not provide adequate power, in which case you will alsoneed to connect the external power supply.
2. Launch LunaCM on the workstation that hosts the user and backup partition slots.
3. Select the slot assigned to the backup HSM Admin partition:
lunacm:> slot set -slot <slot_id>4. Recover the HSM from Secure Transport Mode. See Secure Transport Mode for more information:
lunacm:> stm recover
Luna Network HSM 7 Partition Administration GuideLast Updated: 2022-07-26 23:53:21 GMT-04:00 Copyright 2001-2022 Thales Group 436

Chapter 15: Backup and Restore Using a Luna B700 Backup HSM
NOTE Recovering a Luna HSM (G7) from secure transport mode may take up to threeminutes.
5. Initialize the selected backup HSM in password-authenticated mode. You are prompted for the new HSM SOpassword and the HSM domain string (existing or new):
lunacm:> hsm init -ipwd -label <label>
Configuring the Luna B700 Backup HSM for FIPS ComplianceLuna Backup HSM Firmware 7.7.1 and newer uses the same updated cloning protocol as Luna HSM Firmware7.7.0 and newer. For the Luna B700 Backup HSM to be FIPS-compliant, it must restrict restore operations toapplication partitions that use the new protocol. This restriction is applied by setting HSM policy 55: EnableRestricted Restore to 1 on the backup HSM. The B700 Backup HSMmust be initialized and connected to aLuna HSM Client computer to set this policy.
When this policy is enabled on the Luna B700 Backup HSM, objects that have been backed up from partitionsusing firmware older than Luna HSM Firmware 7.7.0 can be restored to Luna HSM Firmware 7.7.0 or newer (V0or V1) partitions only.
NOTE HSM policy 12: Allow Non-FIPS Algorithms, which is used to set FIPS-compliantmode on other Luna HSMs, does not apply to the Luna B700 Backup HSM. Attempts to changethis policy will fail with the error CKR_CANCEL.
To configure the Luna B700 Backup HSM for FIPS compliance
1. On the Luna HSM Client computer, run LunaCM.
2. Set the active slot to the Luna B700 Backup HSM.lunacm:> slot set -slot <slot_id>
3. Log in as Backup HSM SO.
lunacm:> role login -name so4. Set HSM policy 55: Enable Restricted Restore to 1.
lunacm:> hsm changehsmpolicy -policy 55 -value 15. [Optional] Check that the Luna B700 Backup HSM is now in FIPS 140-2 approved operation mode.
lunacm:> hsm showinfo*** The HSM is in FIPS 140-2 approved operation mode. ***
Backing Up to a Client-Connected Luna B700 Backup HSMTo perform a backup, you connect the backup HSM to the Luna HSM Client workstation that hosts the slot for thepartition you want to backup, and run the LunaCM partition archive backup command. Backups are created andstored as partitions within the Admin partition on the backup HSM.
Luna Network HSM 7 Partition Administration GuideLast Updated: 2022-07-26 23:53:21 GMT-04:00 Copyright 2001-2022 Thales Group 437

Chapter 15: Backup and Restore Using a Luna B700 Backup HSM
A new backup partition is created on initial backup. For subsequent backups, you can choose to replace thecontents of the existing <target> backup partition with the current <source> user partition objects, or append newobjects in the <source> user partition to the existing <target> backup partition.
The procedure is different for PED-authenticated and password-authenticated backups, as detailed in thefollowing sections:
> "Backing Up a Multi-factor- (PED-) Authenticated Partition" below
> "Backing Up a Password-Authenticated Partition" on page 442
NOTE This feature requires minimum Luna HSM Client 10.1.0. See Version Dependencies byFeature for more information.
Backing Up a Multi-factor- (PED-) Authenticated PartitionYou require a PED-authenticated backup HSM to backup a PED-authenticated user partition.
SummaryTo perform a backup, you connect the backup HSM and a remote PED to the Luna HSM Client workstationthat hosts the slot for the user partition you want to backup, and perform the following tasks:
1. Log in to the <source> user partition as the Crypto Officer (CO):• If the <source> user partition is activated, you need to provide the challenge secret.
• If the <source> user partition is not activated, you need to open a remote PED connection to the<source> HSM and use the required PED keys to log in to the <source> user partition as the CryptoOfficer (CO).
2. Open a remote PED connection to the <target> backup HSM. You are prompted for the orange (Remote PEDvector) key for the backup HSM.
3. Perform the backup operation and respond to the prompts for the HSM SO, partition SO (PO), crypto officer(CO), and domain PED keys for the backup HSM/partition. The backup HSM and the partition you want torestore to must be members of the same domain.
PrerequisitesBefore beginning, ensure that you have satisfied the following prerequisites:
> You are familiar with the concepts in "PED Authentication" on page 197.
> You have the required credentials as listed in the summary above.
TIP To simplify the backup process and minimize interactions with the PED, it isrecommended that you activate the CO role on the user partitions you want to backup. See"Activation and Auto-activation on Multi-factor- (PED-) Authenticated Partitions" on page 320for more information.
> The following policies are set (see HSM Capabilities and Policies and "Partition Capabilities and Policies" onpage 291 for more information):
Luna Network HSM 7 Partition Administration GuideLast Updated: 2022-07-26 23:53:21 GMT-04:00 Copyright 2001-2022 Thales Group 438

Chapter 15: Backup and Restore Using a Luna B700 Backup HSM
• HSM policy 16: Enable network replicationmust be set to 1 (ON) on the HSM that hosts the userpartition.
• [Pre-7.7.0 and V0 partitions only] Partition policy 0: Allow private key cloning is set to 1 (ON) on theuser partition.
• [Pre-7.7.0 and V0 partitions only] Partition policy 4: Allow secret key cloning is set to 1 (ON) on the userpartition.
To backup a PED-authenticated partition
1. Configure your Luna HSM Client workstation using one of the following configurations:
a. Install the required client software on the Luna HSM Client workstation. See "Backing Up to a Client-Connected Luna B700 Backup HSM" on page 437 for details.
b. Connect the backup HSM directly to the Luna HSM Client workstation using the included USB cable.
Luna Network HSM 7 Partition Administration GuideLast Updated: 2022-07-26 23:53:21 GMT-04:00 Copyright 2001-2022 Thales Group 439

Chapter 15: Backup and Restore Using a Luna B700 Backup HSM
NOTE Onmost workstations, the USB connection provides adequate power to the backupHSM and it will begin the boot sequence. If you are using a low-power workstation, such as anetbook, the USB connection may not provide adequate power, in which case you will alsoneed to connect the external power supply.
c. Connect the PED to the Luna HSM Client workstation used to host the remote PED, using the PED USBcable.
NOTE You connect to the remote PED using the IP address of the workstation used to hostthe PED. This can be the same workstation that hosts the user and backup partition slots, or adifferent workstation. The workstation used to host the PEDmust be running pedServer.
2. Start the pedserver service on the workstation used to host the remote PED:
Windows C:\Program Files\Safenet\LunaClient> "pedserver -mode start" on page 271
Linux /usr/safenet/lunaclient> "pedserver -mode start" on page 271
3. Launch LunaCM on the workstation that hosts the user and backup partition slots.
4. Identify the slot assignments for:• The <source> user partition you want to backup.
• The <target> admin partition (where all backups are stored).
lunacm:> slot listIf you cannot see both slots, check your connections or configure your client as required.
5. Select the <source> user partition:lunacm:> slot set -slot <slot_id>
6. Authenticate as the Crypto Officer (CO) to the <source> user partition:• If the partition is activated, proceed as follows:
i. Log in to the selected <source> user partition as the Crypto Officer (CO):
lunacm:> role login -name co• If the partition is not activated, proceed as follows:
i. Connect to the Luna HSM Client workstation that hosts the PED. If defaults are not ped set, specify anIP address (and port if required; 1503 is default).
lunacm:> ped connect [-ip <pedserver_host_ip>]ii. Log in to the selected <source> user partition as the Crypto Officer (CO):
lunacm:> role login -name coiii. Respond to the prompts on the PED to provide the orange (PED vector) key(s) and PIN for the
<source> HSM and the black (CO) key(s) and PIN for the CO role on the <source> user partition.
iv. Disconnect the PED session. Note that you will remain logged in to the <source> user partition:
lunacm:> ped disconnect7. Select the backup HSM Admin partition:
Luna Network HSM 7 Partition Administration GuideLast Updated: 2022-07-26 23:53:21 GMT-04:00 Copyright 2001-2022 Thales Group 440

Chapter 15: Backup and Restore Using a Luna B700 Backup HSM
lunacm:> slot set -slot <slot_id>8. Connect to the Luna HSM Client workstation that hosts the PED. If defaults are not ped set, specify an IP
address (and port if required; 1503 is default):
lunacm:> ped connect [-ip <pedserver_host_ip>]9. Select the <source> user partition:
lunacm:> slot set -slot <slot_id>10.Initiate the backup:
lunacm:> partition archive backup -slot <backup_HSM_admin_slot> [-partition <target_partition_label>][-append] [-replace] [-smkonly]If you omit the -partition option when creating a new backup, the partition is assigned a default name(<source_partition_name>_<YYYYMMDD>) based on the source HSM's internally-set time and date.
If you are backing up a V1 partition, include -smkonly to back up the SMK only. By default, the SMK and anyencrypted cryptographic material on the partition are backed up.
The backup begins once you have completed the authentication process. Objects are backed up one at atime. For existing backups, you can use the following options to define how individual objects are backed up:
-append Add only new objects to an existing backup.
-replace Delete the existing objects in a target backup partition and replace them with the contents of thesource user partition. This is the default.
-appendand -replace
Add new objects and replace existing objects that have the same OUID but a different fingerprint(such as would occur if any of the object attributes were changed since the previous backup).
NOTE If the backup operation is interrupted (if the Backup HSM is unplugged, or if you fail torespond to PED prompts, for example), the Backup HSM's full available space can becomeoccupied with a single backup partition. If this occurs, delete the backup partition with lunacm:>partition archive delete before reattempting the backup operation.
11.Respond to the prompts on the PED to insert the following keys:
a. The blue (HSM SO) key for the backup HSM. This is an existing key that was created when the backupHSM was initialized.
b. The blue (Partition SO) key for the <target> backup partition.– If this is the first time the <source> user partition is being backed up to this backup HSM, you are
prompted to initialize the backup Partition SO role by creating a new key or reusing an existing key(SETTING SO PIN). After you initialize the role, you are prompted to insert the key again to log in to therole (SO LOGIN).
– For all subsequent backups, you must present the key used to initialize the backup partition SO role.
c. The red (Domain) key. This must be the same key used for the <source> user partition, otherwise thebackup will fail.
d. The black (Crypto Officer) key for the <target> backup partition.
Luna Network HSM 7 Partition Administration GuideLast Updated: 2022-07-26 23:53:21 GMT-04:00 Copyright 2001-2022 Thales Group 441

Chapter 15: Backup and Restore Using a Luna B700 Backup HSM
– If this is the first time the <source> user partition is being backed up to this backup HSM, you must firstinitialize the backup partition CO role. This requires partition SO credentials, so you are prompted forthe blue (Partition SO) key. After authenticating as the partition SO, you are prompted to initialize thebackup partition CO role by creating a new key or reusing an existing key (SETTING SO PIN). Afteryou initialize the partition CO role, you are prompted to insert the key again to log in to the role (SOLOGIN).
– For all subsequent backups, you must present the key used to initialize the backup partition CO role.
12.Disconnect the PED from the <source> and <target> HSMs:
a. Disconnect the PED from the <target> backup HSM:
lunacm:> ped disconnectb. Select the slot for the <source> user partition:
lunacm:> slot set -slot <slot_id>c. Disconnect the PED from the <source> user partition:
lunacm:> ped disconnect13.If this is the first backup to the <target> backup partition, use the Duplicate function on the PED to create and
label a set of backup keys for the new <target> backup partition PSO (blue) and CO (black) keys. See"Duplicating Existing PED Keys" on page 254 for details.
Backing Up a Password-Authenticated PartitionYou require a password-authenticated backup HSM to backup a password-authenticated user partition.
SummaryTo perform a backup, you connect the backup HSM to the Luna HSM Client workstation that hosts the slot for thepartition you want to backup, and perform the following tasks:
1. Log in to the <source> user partition as the Crypto Officer (CO).2. Perform the backup operation and respond to the prompts for the HSM SO, partition SO (PO), crypto officer
(CO), and domain passwords for the backup HSM/partition. The backup HSM and the partition you want torestore to must be members of the same domain.
PrerequisitesBefore beginning, ensure that you have satisfied the following prerequisites:
> You have the required credentials as listed in the summary above.
> The following policies are set (see HSM Capabilities and Policies and "Partition Capabilities and Policies" onpage 291 for more information):
• HSM policy 16: Enable network replicationmust be set to 1 (ON) on the HSM that hosts the userpartition.
• [Pre-7.7.0 and V0 partitions only] Partition policy 0: Allow private key cloning is set to 1 (ON) on theuser partition.
• [Pre-7.7.0 and V0 partitions only] Partition policy 4: Allow secret key cloning is set to 1 (ON) on the userpartition.
Luna Network HSM 7 Partition Administration GuideLast Updated: 2022-07-26 23:53:21 GMT-04:00 Copyright 2001-2022 Thales Group 442

Chapter 15: Backup and Restore Using a Luna B700 Backup HSM
To backup a password-authenticated partition
1. Configure your Luna HSM Client workstation as illustrated below:
a. Install the required client software on the Luna HSM Client workstation and start LunaCM. See "BackingUp to a Client-Connected Luna B700 Backup HSM" on page 437 for more information.
b. Connect the backup HSM directly to the Luna HSM Client workstation using the included USB cable.
NOTE Onmost workstations, the USB connection provides adequate power to the backupHSM and it will begin the boot sequence. If you are using a low-power workstation, such as anetbook, the USB connection may not provide adequate power, in which case you will alsoneed to connect the external power supply.
2. Identify the slots assigned to:• The <source> user partition slot (to be backed up).
• The <target> admin slot (where all backups are stored).
lunacm:> slot listIf you cannot see both slots, check your connections or configure your client as required.
3. Select the <source> user partition:lunacm:> slot set -slot <slot_id>
4. Log in to the <source> user partition as the Crypto Officer (CO):lunacm:> role login -name co
5. Initiate backup of the <source> user partition to the <target> backup partition:lunacm:> partition archive backup -slot <backup_hsm_admin_partition_slot_id> [-partition <target_backup_partition_label>] [-append] [-replace] [-smkonly]If you omit the -partition option when creating a new backup, the partition is assigned a default name(<source_partition_name>_<YYYYMMDD>) based on the source HSM's internally-set time and date.
If you are backing up a V1 partition, include -smkonly to back up the SMK only. By default, the SMK and anyencrypted cryptographic material on the partition are backed up.
The backup begins once you have completed the authentication process. Objects are backed up one at atime. For existing backups, you can use the following options to define how individual objects are backed up:
-append Add only new objects to the existing backup.
-replace Delete the existing objects in the target backup partition and replace them with the contents of thesource user partition. This is the default.
Luna Network HSM 7 Partition Administration GuideLast Updated: 2022-07-26 23:53:21 GMT-04:00 Copyright 2001-2022 Thales Group 443

Chapter 15: Backup and Restore Using a Luna B700 Backup HSM
-appendand -replace
Add new objects and replace existing objects that have the same OUID but a different fingerprint(such as would occur if any of the object attributes were changed since the previous backup).
NOTE If the backup operation is interrupted (if the Backup HSM is unplugged, for example),the Backup HSM's full available space can become occupied with a single backup partition. Ifthis occurs, delete the backup partition with lunacm:> partition archive delete beforereattempting the backup operation.
6. You are prompted for the following (you can also enter these options on the command line, although doing soexposes the strings, whereas using the prompts obscures the strings):
• The domain string for the <target> backup partition. The domain must match the domain configured on the<source> user partition.
• The <target> backup partition password. You will create a new password on the initial backup, and use thepassword for subsequent backups to the <target> backup partition.
• The backup HSM SO password. This is required to create or access the backup partition in the Admin slot.
Restoring From a Client-Connected Luna B700 Backup HSMRestoring objects from a backup is essentially the same as the backup procedure, except in reverse. That is, aCrypto Officer can restore the objects from a backup partition to a new or existing user partition, provided theyhave the credentials required to access the objects in the backup and user partitions.
The procedure is different for PED-authenticated and password-authenticated backups, as detailed in thefollowing sections:
> "Restoring a Multi-factor- (PED-) Authenticated Partition" below
> "Restoring a Password-Authenticated Partition" on page 447
NOTE This feature requires minimum Luna HSM Client 10.1.0. See Version Dependencies byFeature for more information.
Restoring a Multi-factor- (PED-) Authenticated PartitionYou can restore the objects from a PED-authenticated backup partition to a PED-authenticated user partition.You can restore to an existing user partition, or you can create a new user partition and restore the objects to thenew partition.
SummaryTo restore the objects from a backup, you connect the backup HSM and a remote PED to the Luna HSM Clientworkstation that hosts the slot for the user partition you want to restore from backup and perform the followingtasks.
1. Log in to the user partition you want to restore to as the Crypto Officer (CO):• If the user partition is activated, you need to provide the challenge secret.
Luna Network HSM 7 Partition Administration GuideLast Updated: 2022-07-26 23:53:21 GMT-04:00 Copyright 2001-2022 Thales Group 444

Chapter 15: Backup and Restore Using a Luna B700 Backup HSM
• If the user partition is not activated, you need to open a remote PED connection to the HSM that hosts theuser partition you want to restore to, and use the required PED keys to log in to the user partition as theCrypto Officer (CO).
2. Open a remote PED connection to the backup HSM.
3. Perform the restore operation and respond to the prompts for the HSM SO, partition SO (PO), crypto officer(CO), and domain PED keys for the backup HSM/partition. The backup HSM and the partition you want torestore to must be members of the same domain.
PrerequisitesBefore beginning, ensure that you have satisfied the following prerequisites:
> You are familiar with the concepts in "PED Authentication" on page 197.
> You have the credentials listed in the summary above.
TIP To simplify the restore process and minimize interactions with the PED, it is recommendedthat you activate the CO role on the user partitions you want to restore to. See "Activation andAuto-activation on Multi-factor- (PED-) Authenticated Partitions" on page 320 for moreinformation.
> The following polices are set (see HSM Capabilities and Policies and "Partition Capabilities and Policies" onpage 291 for more information):
• HSM policy 16: Enable network replicationmust be set to 1 (ON) on the HSM that hosts the target userpartition.
• [Pre-7.7.0 and V0 partitions only] Partition policy 0: Allow private key cloningmust be set to 1 (ON) onthe target user partition.
• [Pre-7.7.0 and V0 partitions only] Partition policy 4: Allow secret key cloningmust be set to 1 (ON) onthe target user partition.
To restore a PED-authenticated partition
1. Configure your Luna HSM Client workstation using one of the following configurations:
Luna Network HSM 7 Partition Administration GuideLast Updated: 2022-07-26 23:53:21 GMT-04:00 Copyright 2001-2022 Thales Group 445

Chapter 15: Backup and Restore Using a Luna B700 Backup HSM
a. Install the required client software on the Luna HSM Client workstation. See "Luna HSM Client SoftwareInstallation" on page 19 for details.
b. Connect the backup HSM directly to the Luna HSM Client workstation using the included USB cable.
NOTE Onmost workstations, the USB connection provides adequate power to the backupHSM and it will begin the boot sequence. If you are using a low-power workstation, such as anetbook, the USB connection may not provide adequate power, in which case you will alsoneed to connect the external power supply.
c. Connect the PED to the Luna HSM Client workstation used to host the remote PED, using the PED USBcable.
NOTE You connect to the remote PED using the IP address of the workstation used to hostthe PED. This can be the same workstation that hosts the user and backup partition slots, or adifferent workstation. The workstation used to host the PEDmust be running pedserver.
2. Ensure that HSM policy 16: Enable network replication is set to 1 on the HSM that hosts the user partitionyou want to restore to. See HSM Capabilities and Policies for more information.
3. Start the pedserver service on the workstation used to host the remote PED:
Windows C:\Program Files\Safenet\LunaClient> "pedserver -mode start" on page 271
Linux /usr/safenet/lunaclient> "pedserver -mode start" on page 271
4. Launch LunaCM on the workstation that hosts the user and backup partition slots.
5. Identify the slot assignments for:• the user partition you want to restore to.
• the backup HSM admin partition (where all backups are stored).
lunacm:> slot listIf you cannot see both slots, check your connections or configure your client as required.
6. Select the user partition you want to restore from backup:
Luna Network HSM 7 Partition Administration GuideLast Updated: 2022-07-26 23:53:21 GMT-04:00 Copyright 2001-2022 Thales Group 446

Chapter 15: Backup and Restore Using a Luna B700 Backup HSM
lunacm:> slot set -slot <slot_id>7. Authenticate as the Crypto Officer (CO) to the selected user partition:
• If the partition is activated, proceed as follows:
i. Log in to the selected user partition as the Crypto Officer (CO):
lunacm:> role login -name co• If the partition is not activated, proceed as follows:
i. Connect to the Luna HSM Client workstation that hosts the PED. If defaults are not ped set, specify anIP address (and port if required; 1503 is default).
lunacm:> ped connect [-ip <pedserver_host_ip>]ii. Log in to the selected user partition as the Crytpo Officer (CO).
lunacm:> role login -name coiii. Respond to the prompts on the PED to provide the the orange (PED vector) key(s) and PIN for the
HSM that hosts the user partition you want to restore from backup and the black (CO) key(s) and PINfor the CO role on the user partition you want to restore from backup.
iv. Disconnect the PED session. Note that you will remain logged in to the selected user partition.
lunacm:> ped disconnect8. Connect the PED to the backup HSM. If defaults are not ped set, specify an IP address (and port if required;
1503 is default):
lunacm:> ped connect [-ip <pedserver_host_ip>]9. Initiate the restore operation. Respond to the prompts on the PED to insert the required PED keys.
lunacm:> partition archive restore -slot <backup_HSM_admin_slot> -partition <target_partition_label> [-replace] [-smkonly]The restore operation begins once you have completed the authentication process. Objects are restored oneat a time. If you wish to restore previous versions of keys with the same OUID (where attributes havechanged, for example), include the -replace option.
NOTE If you are restoring a V1 backup to a V1 partition, include -smkonly to restore the SMKonly (see "Behavior of "pre-firmware 7.7.0", and V0, and V1 partitions?" on page 144 for moreinformation). By default, the SMK and any cryptographic material on the backup are restored.
Restoring a Password-Authenticated PartitionYou can restore the objects from a password-authenticated backup partition to a password-authenticated userpartition. You can restore to an existing user partition, or you can create a new user partition and restore theobjects to the new partition.
SummaryTo restore the objects from a backup, you connect the backup HSM to the Luna HSM Client workstationthat hosts the slot for the user partition you want to restore from backup and perform the following tasks.
1. Log in to the user partition you want to restore to as the Crypto Officer (CO):
Luna Network HSM 7 Partition Administration GuideLast Updated: 2022-07-26 23:53:21 GMT-04:00 Copyright 2001-2022 Thales Group 447

Chapter 15: Backup and Restore Using a Luna B700 Backup HSM
2. Perform the restore operation. You are prompted for the HSM SO, partition SO (PO), crypto officer (CO), anddomain passwords for the backup partition. The backup partition and the partition you want to restore to mustbe members of the same domain.
Prerequisites> You have the credentials listed in the summary above.
> The following polices are set (see HSM Capabilities and Policies and "Partition Capabilities and Policies" onpage 291 for more information):
• HSM policy 16: Enable network replicationmust be set to 1 (ON) on the HSM that hosts the target userpartition.
• [Pre-7.7.0 and V0 partitions only] Partition policy 0: Allow private key cloningmust be set to 1 (ON) onthe target user partition.
• [Pre-7.7.0 and V0 partitions only] Partition policy 4: Allow secret key cloningmust be set to 1 (ON) onthe target user partition.
To restore a password-authenticated partition
1. Configure your Luna HSM Client workstation as illustrated below:
a. Install the required client software on the Luna HSM Client workstation and start LunaCM. See "RestoringFrom a Client-Connected Luna B700 Backup HSM " on page 444 for more information.
b. Connect the backup HSM directly to the Luna HSM Client workstation using the included USB cable.
NOTE Onmost workstations, the USB connection provides adequate power to the backupHSM and it will begin the boot sequence. If you are using a low-power workstation, such as anetbook, the USB connection may not provide adequate power, in which case you will alsoneed to connect the external power supply.
2. Ensure that HSM policy 16: Enable network replication is set to 1 on the HSM that hosts the user partitionyou want to restore to. See HSM Capabilities and Policies for more information.
3. Identify the slots assigned to:• The user partition slot (to be restored).
• The backup HSM admin slot (where all backups are stored).
lunacm:> slot listIf you cannot see both slots, check your connections or configure your client as required.
4. Select the user partition you want to restore to:lunacm:> slot set -slot <slot_id>
Luna Network HSM 7 Partition Administration GuideLast Updated: 2022-07-26 23:53:21 GMT-04:00 Copyright 2001-2022 Thales Group 448

Chapter 15: Backup and Restore Using a Luna B700 Backup HSM
5. Log in to the user partition as the Crypto Officer (CO):lunacm:> role login -name co
6. List the available backups on the Backup HSM by specifying the Backup HSM's slot number. You will requirethe backup partition label to perform the restore operation.
lunacm:> partition archive list -slot <backup_HSM_slot>7. Initiate the restore operation. Respond to the prompts to provide the required passwords, as detailed in the
summary above.
lunacm:> partition archive restore -slot <backup_HSM_admin_slot> -partition <backup_partition_label>[-replace] [-smkonly]The restore operation begins once you have completed the authentication process. Objects are restored oneat a time. If you wish to restore previous versions of keys with the same OUID (where attributes havechanged, for example), include the -replace option.
NOTE If you are restoring a V1 backup to a V1 partition, include -smkonly to restore the SMKonly (see "Behavior of "pre-firmware 7.7.0", and V0, and V1 partitions?" on page 144 for moreinformation). By default, the SMK and any encrypted cryptographic material on the backup arerestored.
Initializing an Appliance-Connected Luna B700 Backup HSMYou must initialize the backup HSM prior to first use. You can initialize the backup HSM by connecting it to aLuna Network HSM and using LunaSH commands to perform the initialization. Initialization does the following:
> Creates the orange (Remote PED vector) key for the backup HSM (PED-authenticated HSMs only). Youcreate the orange key using a one-time, password-secured connection between the PED and the backupHSM. You then use this orange key to secure all subsequent connections between the PED and the backupHSM.
> Sets the authentication mode of the HSM. The authentication mode is set automatically to the same mode asthe Luna Network HSM the backup HSM is connected to when it is initialized. PED-authenticated backupHSMs can backup PED-authenticated partitions. Password-authenticated backup HSMs can backuppassword-authenticated partitions.
> Sets the security domain of the HSM. You can only backup partitions that share the same domain as thebackup HSM.
> Creates the HSM SO role on the HSM (see HSM Roles and Procedures.) This role is required to create ormodify a backup partition, and must be logged in to perform a backup.
NOTE If you require the Luna B700 Backup HSM to be FIPS-compliant, you must complete anadditional configuration step after initialization that requires LunaCM on a Luna HSM Clientcomputer. For this reason, Thales recommends using the procedure for "Initializing a Client-Connected Luna B700 Backup HSM" on page 432 instead.This functionality requires minimum Luna Network HSM Appliance Software 7.7.0. If you areusing an older appliance software version, you must connect the Luna B700 Backup HSM to aclient workstation with Luna HSM Client 10.1.0 or newer.
Luna Network HSM 7 Partition Administration GuideLast Updated: 2022-07-26 23:53:21 GMT-04:00 Copyright 2001-2022 Thales Group 449

Chapter 15: Backup and Restore Using a Luna B700 Backup HSM
The procedure is different for PED-authenticated and password-authenticated backups, as detailed in thefollowing sections:
> "Recovering the Luna B700 Backup HSM from Secure Transport Mode" below
> "Initializing a PED-Authenticated HSM" below
> "Initializing a Password-Authenticated HSM" on page 453
> "Configuring the Luna B700 Backup HSM for FIPS Compliance" on page 454
Recovering the Luna B700 Backup HSM from Secure Transport ModeThe Luna B700 Backup HSM is shipped in Secure Transport Mode (STM). STM provides a logical check on theG7 firmware and critical security parameters (such as configuration, keys, policies, roles, etc.) so that theauthorized recipient can determine if these have been altered while the HSM was in transit. For a more detaileddescription of STM, see Secure Transport Mode.
NOTE Recovering the Luna B700 Backup HSM from STM requires connecting it to a clientworkstation running Luna HSM Client 10.1.0 or newer.
To recover the Luna B700 Backup HSM from STM
1. Connect the Luna B700 Backup HSM to a USB port on a client workstation running Luna HSM Client 10.1 ornewer, with the Backup option installed (refer to "Luna HSM Client Software Installation" on page 19 for yourclient operating system).
2. Launch LunaCM on the client workstation.
3. Select the slot assigned to the Luna B700 Backup HSM Admin partition.
lunacm:> slot set -slot <slot_id>4. Recover the HSM from Secure Transport Mode. See Secure Transport Mode for more information about the
Random User String:
lunacm:> stm recover -randomuserstring <string>
NOTE Recovering a Luna B700 Backup HSM from STMmay take up to three minutes.
Initializing a PED-Authenticated HSMInitializing your backup HSM as PED authenticated allows you to backup PED-authenticated partitions.
SummaryTo initialize a PED-authenticated HSM you connect it and a remote PED (using a USB or network connection) toa PED-authenticated Luna Network HSM, and performing the following tasks:
> Create the orange (Remote PED vector) key for the backup HSM.
> Initialize the HSM to set the HSM domain, and create the HSM SO PED key.
Luna Network HSM 7 Partition Administration GuideLast Updated: 2022-07-26 23:53:21 GMT-04:00 Copyright 2001-2022 Thales Group 450

Chapter 15: Backup and Restore Using a Luna B700 Backup HSM
Prerequisites> If necessary, recover the Luna B700 Backup HSM from Secure Transport Mode as described in "Recovering
the Luna B700 Backup HSM from Secure Transport Mode" on the previous page.
> Before beginning, ensure that you are familiar with the concepts in "PED Authentication" on page 197. Youwill need the following PED keys:
• A blank orange (PED vector) PED key, plus the number required to create duplicate PED keys asnecessary.
• N number of blue (HSM SO) PED keys, as defined by the M of N scheme you choose for the HSM SO role,plus the number required to create duplicate PED keys as necessary.
• An existing red (Domain) PED key for the cloning domain of the partitions you want to backup to the HSM.You can also insert a blank red (Domain) PED key if you want to create a new domain for the HSM(although you won't be able to backup any existing partitions if you do).
To initialize a PED-authenticated Backup HSM
1. Configure your PED-authenticated Luna Network HSM using one of the following configurations:
a. Open a network (SSH) or serial connection to the appliance and log in as admin, or other admin-leveluser, to start a LunaSH session.
Luna Network HSM 7 Partition Administration GuideLast Updated: 2022-07-26 23:53:21 GMT-04:00 Copyright 2001-2022 Thales Group 451

Chapter 15: Backup and Restore Using a Luna B700 Backup HSM
b. Connect the backup HSM directly to one of the USB ports on the Luna Network HSM appliance using theincluded USB cable.
c. Connect the Remote PED to the Luna Network HSM appliance. You can connect a Remote PED directlyto one of the USB ports on the Luna Network HSM appliance using the included USB cable, or you canconnect to a network-attached Luna HSM Client workstation that hosts a remote PED:
– If you connect the Remote PED directly to a USB port on the appliance, use the appliance loopback IPaddress (127.0.0.1) to connect to the local pedserver service running on the appliance, and specifythe serial number of the connected backup HSM you want to use. You can read the serial number fromthe Backup HSM display screen. The pedserver service must be running on the appliance. You canuse the lunash:> service commands to administer the service:lunash:> hsm ped connect -ip 127.0.0.1 -serial <backup_hsm_serial_number>
– If you are using a network-attached Remote PED, connect to the IP address of the workstation used tohost the Remote PED. This can be the same workstation you are using to host the LunaSH session, ora different workstation.
lunash:> hsm ped connect -ip <pedserver_host>
NOTE You can connect the backup HSM to any USB port on the Luna Network HSMappliance (see Physical Features). Do not attempt to connect the backup HSM to the USB porton the HSM card.
2. Get the serial number of the backup HSM, or read the serial number from the Backup HSM display screen.
lunash:> token backup list3. Create a Remote PED Vector (orange) PED key for the backup HSM:
lunash:> hsm ped vector init -serial <backup_hsm_serial_number>LunaSH generates and displays a one-time password that is used to set up a secure channel between thebackup HSM and the PED, allowing you to securely initialize the orange (Remote PED Vector) key. Enter thedisplayed password on the PED when prompted to complete setup of the secure channel and respond to theprompts to create the Remote PED Vector (orange) PED key.Please attend to the PED and enter following password: 94485995
CAUTION! The orange PED key is required for all Luna G7 Backup HSM operations. If thiskey is lost, your backups will become irretrievable. Thales recommends keeping multiplebackups of all PED keys stored in a secure location.
4. Initialize the backup HSM:lunash:> token backup init -label <backup_hsm_label> -serial <backup_hsm_serial_number>You are prompted by the PED for the red Domain key(s) (existing or new) and black HSM SO key(s) (new).Respond to the PED prompts and insert and set the PINs on the required keys when requested. Ensure thatyou label any new PED keys that you create during this process.
5. Use the Duplicate function on the PED to create and label duplicates of the new PED keys, as required. See"Duplicating Existing PED Keys" on page 254 for details.
6. Disconnect the PED when done:
Luna Network HSM 7 Partition Administration GuideLast Updated: 2022-07-26 23:53:21 GMT-04:00 Copyright 2001-2022 Thales Group 452

Chapter 15: Backup and Restore Using a Luna B700 Backup HSM
• If you connected the Remote PED directly to a USB port on the appliance:
lunash:> hsm ped disconnect -serial <backup_hsm_serial_number>• If you connected to a network-attached Remote PED:
lunash:> hsm ped disconnect
Initializing a Password-Authenticated HSMInitializing your backup HSM as password-authenticated allows you to backup password-authenticatedpartitions.
SummaryTo initialize a password-authenticated HSM you connect it to a password-authenticated Luna Network HSM andperform the following tasks:
> Initialize the HSM to set the HSM domain, and set the initial password for the HSM SO role.
Prerequisites> If necessary, recover the Luna B700 Backup HSM from Secure Transport Mode as described in "Recovering
the Luna B700 Backup HSM from Secure Transport Mode" on page 450.
> You require the password for the cloning domain of the partitions you want to backup to the HSM. You canalso enter a new password to create a new domain for the HSM (although you won't be able to backup anyexisting partitions if you do).
To initialize a password-authenticated HSM
1. Configure your password-authenticated Luna Network HSM as illustrated below:
a. Open a network (SSH) or serial connection to the appliance and log in as admin, or other admin-leveluser, to start a LunaSH session.
b. Connect the backup HSM directly to the Luna Network HSM using the included USB cable.
2. Get the serial number of the backup HSM, or read the serial number from the Backup HSM display screen.
lunash:> token backup list
Luna Network HSM 7 Partition Administration GuideLast Updated: 2022-07-26 23:53:21 GMT-04:00 Copyright 2001-2022 Thales Group 453

Chapter 15: Backup and Restore Using a Luna B700 Backup HSM
3. Initialize the backup HSM:lunash:> token backup init -label <backup_hsm_label> -serial <backup_hsm_serial_number>You are prompted for the new HSM SO password and the HSM domain string (existing or new).
Configuring the Luna B700 Backup HSM for FIPS ComplianceLuna Backup HSM Firmware 7.7.1 and newer uses the same updated cloning protocol as Luna HSM Firmware7.7.0 and newer. For the Luna B700 Backup HSM to be FIPS-compliant, it must restrict restore operations toapplication partitions that use the new protocol. This restriction is applied by setting HSM policy 55: EnableRestricted Restore to 1 on the backup HSM. The B700 Backup HSMmust be initialized and connected to aLuna HSM Client computer to set this policy.
When this policy is enabled on the Luna B700 Backup HSM, objects that have been backed up from partitionsusing firmware older than Luna HSM Firmware 7.7.0 can be restored to Luna HSM Firmware 7.7.0 or newer (V0or V1) partitions only.
NOTE HSM policy 12: Allow Non-FIPS Algorithms, which is used to set FIPS-compliantmode on other Luna HSMs, does not apply to the Luna B700 Backup HSM. Attempts to changethis policy will fail with the error CKR_CANCEL.
To configure the Luna B700 Backup HSM for FIPS compliance
1. On the Luna HSM Client computer, run LunaCM.
2. Set the active slot to the Luna B700 Backup HSM.lunacm:> slot set -slot <slot_id>
3. Log in as Backup HSM SO.
lunacm:> role login -name so4. Set HSM policy 55: Enable Restricted Restore to 1.
lunacm:> hsm changehsmpolicy -policy 55 -value 15. [Optional] Check that the Luna B700 Backup HSM is now in FIPS 140-2 approved operation mode.
lunacm:> hsm showinfo*** The HSM is in FIPS 140-2 approved operation mode. ***
Backing Up to an Appliance-Connected Luna B700 Backup HSMYou can connect a Luna B700 Backup HSM to a USB port on the Luna Network HSM appliance to allow a CryptoOfficer (CO) to use LunaSH (via a serial or SSH connection to the appliance) to backup the objects on anypartition the CO can log in to on the appliance. You can connect the backup HSM to the Luna Network HSM onlywhen you want to perform a backup/restore, or you can leave the backup HSM connected to the appliance toenable remote backups.
Luna Network HSM 7 Partition Administration GuideLast Updated: 2022-07-26 23:53:21 GMT-04:00 Copyright 2001-2022 Thales Group 454

Chapter 15: Backup and Restore Using a Luna B700 Backup HSM
NOTE This functionality requires minimum Luna appliance software 7.7.0. See VersionDependencies by Feature for more information.> If you are backing up or restoring encrypted blobs stored on a V1 partition, the Backup HSM
must be connected to the client (see "Backup/Restore Using a Client-Connected LunaBackup HSM (G5)" on page 419). Only the SMK can be backed up/restored using anappliance-connected Backup HSM.
> If partition policy 37: Force Secure Trusted Channel is enabled on the partition, theBackup HSMmust be connected to the client (see "Backup/Restore Using a Client-Connected Luna Backup HSM (G5)" on page 419).
To perform a backup/restore, you connect the backup HSM to a USB port on the Luna Network HSM that hoststhe partition you want to backup, and run the LunaSH partition backup or partition restore commands.Backups are created and stored as partitions within the Admin partition on the backup HSM. A new backuppartition is created on initial backup. For subsequent backups, you can choose to replace the contents of theexisting <target> backup partition with the current <source> user partition objects, or add new objects in the<source> user partition to the existing <target> backup partition. You can restore a backup to a new or existinguser partition that shares the same domain as the backup partition.
In addition to the credentials listed in "Backup and Restore Using a Luna B700 Backup HSM" on page 426, theCrypto Officer requires admin-level access to the appliance to access the LunaSH partition backup andpartition restore commands (see Appliance Roles and Procedures).
NOTE To perform backup operations on HSM firmware 7.7.0 or newer (V0 or V1 partitions):> Luna Backup HSM (G7) requires minimum firmware version 7.7.1> Luna Backup HSM (G5) requires minimum firmware version 6.28.0You can use a Luna Backup HSM with older firmware to restore objects to a V0 or V1 partition,but this is supported for purposes of getting your objects from the older partitions onto thenewer V0 or V1 partitions only.V0 and V1 partitions are considered more secure than partitions at earlier firmware versions -any attempt to restore from a higher-security status to lower-security status fails gracefully.SMK backup for appliance is supported only with local connection.
The procedure is different for PED-authenticated and password-authenticated backups, as detailed in thefollowing sections:
> "Backing Up a PED-Authenticated Partition" below
> "Backing Up a Password-Authenticated Partition" on page 459
Backing Up a PED-Authenticated PartitionYou require a PED-authenticated backup HSM to backup a PED-authenticated user partition. You also require aremote PED, which you connect directly to one of the USB ports on the Luna Network HSM appliance using theincluded USB cable, or remotely to a network-attached Luna HSM Client workstation that hosts a remote PED:
Luna Network HSM 7 Partition Administration GuideLast Updated: 2022-07-26 23:53:21 GMT-04:00 Copyright 2001-2022 Thales Group 455

Chapter 15: Backup and Restore Using a Luna B700 Backup HSM
NOTE A remote PED connected to the USB port on the appliance uses the appliancepedserver service. If the PED is not responding, use the lunash:> service commands to verifythe service status and restart if necessary. The PEDmust be in Remote mode.
SummaryTo perform a backup, you connect the backup HSM and a remote PED (using a USB or network connection) tothe Luna Network HSM appliance that hosts the slot for the user partition you want to backup, and perform thefollowing tasks, as detailed in "To backup a PED-authenticated partition" on the next page:
1. Log in to the appliance (LunaSH) as admin, or other admin-level user.2. Connect the Remote PED (hsm ped connect) to the appliance loopback IP (127.0.0.1) or remote host IP.3. Perform the backup operation (partition backup) and respond to the prompts for the following PED keys:
<source> partition > Remote PED Vector (orange)> Crypto officer (CO) (black)
<target> backup partition > Remote PED Vector (orange)> HSM SO (blue)> Partition SO (PO) (blue)> Crypto officer (CO) (black)> Domain (red).
PrerequisitesBefore beginning, ensure that you have satisfied the following prerequisites:
> You are familiar with the concepts in "PED Authentication" on page 197.
TIP To simplify the backup process and minimize interactions with the PED, it isrecommended that you activate the CO role on the user partitions you want to backup. See"Activation and Auto-activation on Multi-factor- (PED-) Authenticated Partitions" on page 320for more information.
> You are able to log in to the Luna Network HSM using an admin-level account to access LunaSH.> You have the required credentials as listed in the summary above.
> The following policies are set (see HSM Capabilities and Policies and "Partition Capabilities and Policies" onpage 291 for more information):
• HSM policy 16: Enable network replicationmust be set to 1 (ON) on the HSM that hosts the userpartition.
• [Pre-7.7.0 and V0 partitions only] Partition policy 0: Allow private key cloning is set to 1 (ON) on theuser partition.
• [Pre-7.7.0 and V0 partitions only] Partition policy 4: Allow secret key cloning is set to 1 (ON) on the userpartition.
Luna Network HSM 7 Partition Administration GuideLast Updated: 2022-07-26 23:53:21 GMT-04:00 Copyright 2001-2022 Thales Group 456

Chapter 15: Backup and Restore Using a Luna B700 Backup HSM
To backup a PED-authenticated partition
1. Configure your Luna Network HSM appliance using one of the following configurations:
a. Open a network (SSH) or serial connection to the appliance and log in as admin, or other admin-leveluser, to start a LunaSH session.
b. Connect the backup HSM directly to one of the USB ports on the Luna Network HSM appliance using theincluded USB cable.
c. Connect the Remote PED to the Luna Network HSM appliance. You can connect a Remote PED directlyto one of the USB ports on the Luna Network HSM appliance using the included USB cable, or you canconnect to a network-attached Luna HSM Client workstation that hosts a remote PED:
– If you connect the Remote PED directly to a USB port on the appliance, use the appliance loopback IPaddress (127.0.0.1) to connect to the local pedserver service running on the appliance, and specifythe serial number of the connected backup HSM you want to use. The pedserver service must berunning on the appliance. You can use the lunash:> service commands to administer the service:lunash:> hsm ped connect -ip 127.0.0.1 -serial <backup_hsm_serial_number>
– If you are using a network-attached Remote PED, connect to the IP address of the workstation used tohost the Remote PED. This can be the same workstation you are using to host the LunaSH session, ora different workstation.
Luna Network HSM 7 Partition Administration GuideLast Updated: 2022-07-26 23:53:21 GMT-04:00 Copyright 2001-2022 Thales Group 457

Chapter 15: Backup and Restore Using a Luna B700 Backup HSM
lunash:> hsm ped connect -ip <remote_ped_host_ip_address>
NOTE You can connect the backup HSM to any USB port on the Luna Network HSMappliance (see Physical Features). Do not attempt to connect the backup HSM to the USB porton the HSM card.
2. Get the serial number of the backup HSM, or read the serial number from the backup HSM display screen.
lunash:> token backup list3. Initiate the backup operation:
lunash:> partition backup -partition <source_partition_label> -serial <backup_hsm_serial_number> [-tokenpar <target_backup_partition_label>] [-add | -replace]
NOTE You must specify -add or -replace when backing up to an existing backup partition.Use -add to add only new objects. Use -replace to add new objects and overwrite existingobjects. You do not need to specify these options when backing up a V1 partition, as only theSMK is backed up.If you omit the -tokenpar option when creating a new backup, the partition is assigned a defaultname (<source_partition_name>_<YYYYMMDD>) based on the source HSM's internally-settime and date.If the backup operation is interrupted (if the Backup HSM is unplugged, or if you fail to respondto PED prompts, for example), the Backup HSM's full available space can become occupiedwith a single backup partition. If this occurs, delete the backup partition with lunash:> tokenbackup partition delete before reattempting the backup operation.
4. Respond to the prompts on the PED to insert the following keys:
<source>partition
> Remote PED Vector (orange)> Crypto officer (CO) (black). If the partition is activated, you are prompted to provide the challenge
password only. You do not need to provide the PED key.
Luna Network HSM 7 Partition Administration GuideLast Updated: 2022-07-26 23:53:21 GMT-04:00 Copyright 2001-2022 Thales Group 458

Chapter 15: Backup and Restore Using a Luna B700 Backup HSM
<target>backuppartition
> Remote PED Vector (orange). This is an existing key that was created when the backupHSM was initialized.
> HSM SO (blue). This is an existing key that was created when the backup HSM was initialized.> Partition SO (PO) (blue).
• If this is the first time the <source> user partition is being backed up to this backup HSM, youare prompted to initialize the backup Partition SO role by creating a new key or reusing anexisting key (SETTING SO PIN). After you initialize the role, you are prompted to insert thekey again to log in to the role (SO LOGIN).
• For all subsequent backups, you must present the key used to initialize the backup partitionSO role.
> Crypto officer (CO) (black):• If this is the first time the <source> user partition is being backed up to this backup HSM, you
must first initialize the backup partition CO role. This requires partition SO credentials, so youare prompted for the blue (Partition SO) key. After authenticating as the partition SO, you areprompted to initialize the backup partition CO role by creating a new key or reusing anexisting key (SETTING SO PIN). After you initialize the partition CO role, you are prompted toinsert the key again to log in to the role (SO LOGIN).
• For all subsequent backups, you must present the key used to initialize the backup partitionCO role.
> Domain (red). The backup HSM and the partition you want to backup must be members of thesame domain.
The backup begins once you have completed the authentication process. Objects are backed up one at atime.
5. Disconnect the PED when done:
• If you connected the Remote PED directly to a USB port on the appliance:
lunash:> hsm ped disconnect -serial <backup_hsm_serial_number>• If you connected to a network-attached Remote PED:
lunash:> hsm ped disconnect6. If this is the first backup to the <target> backup partition, use the Duplicate function on the PED to create and
label a set of backup keys for the new <target> backup partition PSO (blue) and CO (black) keys. See"Duplicating Existing PED Keys" on page 254 for details.
Backing Up a Password-Authenticated PartitionYou require a password-authenticated backup HSM to backup a password-authenticated user partition.
SummaryTo perform a backup, you connect the backup HSM and a remote PED (using a USB or network connection) tothe Luna Network HSM appliance that hosts the slot for the user partition you want to backup, and perform thefollowing tasks, as detailed in "To backup a password-authenticated partition " on the next page:
1. Log in to the appliance (LunaSH) as admin, or other admin-level user.2. Perform the backup operation (partition backup) and respond to the prompts for the following passwords:
Luna Network HSM 7 Partition Administration GuideLast Updated: 2022-07-26 23:53:21 GMT-04:00 Copyright 2001-2022 Thales Group 459

Chapter 15: Backup and Restore Using a Luna B700 Backup HSM
<source> partition > Crypto officer (CO)
<target> backuppartition
> HSM SO> Partition SO (PO)> Domain. The backup HSM and the partition you want to backup must be members of
the same domain.
PrerequisitesBefore beginning, ensure that you have satisfied the following prerequisites:
> You are able to log in to the Luna Network HSM using an admin-level account to access LunaSH.> You have the required credentials as listed in the summary above.
> The following policies are set (see HSM Capabilities and Policies and "Partition Capabilities and Policies" onpage 291 for more information):
• HSM policy 16: Enable network replicationmust be set to 1 (ON) on the HSM that hosts the userpartition.
• [Pre-7.7.0 and V0 partitions only] Partition policy 0: Allow private key cloning is set to 1 (ON) on theuser partition.
• [Pre-7.7.0 and V0 partitions only] Partition policy 4: Allow secret key cloning is set to 1 (ON) on the userpartition.
To backup a password-authenticated partition
1. Configure your Luna Network HSM as illustrated below:
a. Open a network (SSH) or serial connection to the appliance and log in as admin, or other admin-leveluser, to start a LunaSH session.
b. Connect the backup HSM directly to the Luna Network HSM using the included USB cable.
2. Get the serial number of the backup HSM, or read the serial number from the Backup HSM display screen.
lunash:> token backup list3. Initiate the backup operation:
Luna Network HSM 7 Partition Administration GuideLast Updated: 2022-07-26 23:53:21 GMT-04:00 Copyright 2001-2022 Thales Group 460

Chapter 15: Backup and Restore Using a Luna B700 Backup HSM
lunash:> partition backup -partition <source_partition_label> -serial <backup_hsm_serial_number> [-tokenpar <target_backup_partition_label>] [-add | -replace]
NOTE You must specify -add or -replace when backing up to an existing backup partition.Use -add to add only new objects. Use -replace to add new objects and overwrite existingobjects. You do not need to specify these options when backing up a V1 partition, as only theSMK is backed up.If you omit the -tokenpar option when creating a new backup, the partition is assigned a defaultname (<source_partition_name>_<YYYYMMDD>) based on the source HSM's internally-settime and date.If the backup operation is interrupted (if the Backup HSM is unplugged, for example), theBackup HSM's full available space can become occupied with a single backup partition. If thisoccurs, delete the backup partition with lunash:> token backup partition delete beforereattempting the backup operation.
4. Respond to the prompts for the following passwords:
<source>partition
> Crypto officer (CO)
<target>backuppartition
> HSM SO. This is an existing password that was created when the backup HSM wasinitialized. It is required to create or access the backup partition in the Admin slot.
> Partition SO (PO). You will create a new password on the initial backup, and use thepassword for subsequent backups to the <target> backup partition.
> Domain. The backup HSM and the partition you want to backup must be members of thesame domain.
The backup begins once you have completed the authentication process. Objects are backed up one at atime.
Restoring From an Appliance-Connected Luna B700 BackupHSMRestoring objects from a backup is essentially the same as the backup procedure, except in reverse. That is, aCrypto Officer can restore the objects from a backup partition to a new or existing user partition, provided theyhave the credentials required to access the objects in the backup and user partitions.
Luna Network HSM 7 Partition Administration GuideLast Updated: 2022-07-26 23:53:21 GMT-04:00 Copyright 2001-2022 Thales Group 461

Chapter 15: Backup and Restore Using a Luna B700 Backup HSM
NOTE This functionality requires minimum Luna appliance software 7.7.0. See VersionDependencies by Feature for more information.> If you are backing up or restoring encrypted blobs stored on a V1 partition, the Backup HSM
must be connected to the client (see "Backup/Restore Using a Client-Connected LunaBackup HSM (G5)" on page 419). Only the SMK can be backed up/restored using anappliance-connected Backup HSM.
> If partition policy 37: Force Secure Trusted Channel is enabled on the partition, theBackup HSMmust be connected to the client (see "Backup/Restore Using a Client-Connected Luna Backup HSM (G5)" on page 419).
The procedure is different for PED-authenticated and password-authenticated backups, as detailed in thefollowing sections:
> "Restoring a PED-Authenticated Partition" below
> "Restoring a Password-Authenticated Partition" on page 465
Restoring a PED-Authenticated PartitionYou can restore the objects from a PED-authenticated backup partition to a PED-authenticated user partition.You can restore to an existing user partition, or you can create a new user partition and restore the objects to thenew partition.
SummaryTo restore the objects from a backup, you connect the backup HSM and a remote PED (either locally using USBor remotely using hsm ped connect) to the Luna Network HSM appliance that hosts the slot for the user partitionyou want to restore to, and perform the following tasks, as detailed in "To restore a PED-authenticated partition" on the next page:
1. Log in to the appliance (LunaSH) as admin, or other admin-level user.2. Perform the restore operation (partition restore) and respond to the prompts for the following PED keys:
<source> backup partition > Remote PED Vector (orange)> HSM SO (blue)> Partition SO (PO) (blue)> Crypto officer (CO) (black)> Domain (red)
<target> user partition > Remote PED Vector (orange)> Crypto officer (CO) (black)
PrerequisitesBefore beginning, ensure that you have satisfied the following prerequisites:
> You are familiar with the concepts in "PED Authentication" on page 197.
> You have the required credentials listed in the summary above.
Luna Network HSM 7 Partition Administration GuideLast Updated: 2022-07-26 23:53:21 GMT-04:00 Copyright 2001-2022 Thales Group 462

Chapter 15: Backup and Restore Using a Luna B700 Backup HSM
TIP To simplify the restore process and minimize interactions with the PED, it is recommendedthat you activate the CO role on the user partitions you want to restore to. See "Activation andAuto-activation on Multi-factor- (PED-) Authenticated Partitions" on page 320 for moreinformation.
> You are able to log in to the Luna Network HSM using an admin-level account to access LunaSH.> The following policies are set (see HSM Capabilities and Policies and "Partition Capabilities and Policies" on
page 291 for more information):
• HSM policy 16: Enable network replicationmust be set to 1 (ON) on the HSM that hosts the userpartition you want to restore to.
• [Pre-7.7.0 and V0 partitions only] Partition policy 0: Allow private key cloningmust be set to 1 (ON) onthe user partition you want to restore to.
• [Pre-7.7.0 and V0 partitions only] Partition policy 4: Allow secret key cloningmust be set to 1 (ON) onthe user partition you want to restore to.
To restore a PED-authenticated partition
1. Configure your Luna HSM Client workstation using one of the following configurations:
Luna Network HSM 7 Partition Administration GuideLast Updated: 2022-07-26 23:53:21 GMT-04:00 Copyright 2001-2022 Thales Group 463

Chapter 15: Backup and Restore Using a Luna B700 Backup HSM
a. Open a network (SSH) or serial connection to the appliance and log in as admin, or other admin-leveluser, to start a LunaSH session.
b. Connect the backup HSM directly to one of the USB ports on the Luna Network HSM appliance using theincluded USB cable.
c. Connect the Remote PED to the Luna Network HSM appliance. You can connect a Remote PED directlyto one of the USB ports on the Luna Network HSM appliance using the included USB cable, or you canconnect to a network-attached Luna HSM Client workstation that hosts a remote PED.
– If you connect the Remote PED directly to a USB port on the appliance, use the appliance loopback IPaddress (127.0.0.1) to connect to the local pedserver service running on the appliance, and specifythe serial number of the connected backup HSM you want to use. The pedserver service must berunning on the appliance. You can use the lunash:> service commands to administer the service:lunash:> hsm ped connect -ip 127.0.0.1 -serial <backup_hsm_serial_number>
– If you are using a network-attached Remote PED, use to connect to the IP address of the workstationused to host the Remote PED. This can be the same workstation you are using to host the LunaSHsession, or a different workstation.
lunash:> hsm ped connect
NOTE You can connect the backup HSM to any USB port on the Luna Network HSMappliance (see Physical Features). Do not attempt to connect the backup HSM to the USB porton the HSM card.
2. Get the serial number of the backup HSM, or read the serial number from the Backup HSM display screen:
lunash:> token backup list3. Initiate the restore operation:
lunash:> partition restore -partition <target_user_partition_label> -tokenpar <source_backup_partition_label> -serial <backup_hsm_serial_number> {-add | -replace}Use the -add option to add only new objects, or the -replace option to add new objects and overwrite existingobjects.
CAUTION! If you are restoring a V1 backup to a V1 partition, use -add to restore the SMK.Use -replace only if you wish to erase any existing cryptographic material on the targetpartition. By default, V1 backups only include the SMK.
4. Respond to the prompts on the PED to insert the following keys:
Luna Network HSM 7 Partition Administration GuideLast Updated: 2022-07-26 23:53:21 GMT-04:00 Copyright 2001-2022 Thales Group 464

Chapter 15: Backup and Restore Using a Luna B700 Backup HSM
<source>backuppartition
> Remote PED Vector (orange). This is an existing key that was created when the backup HSMwas initialized.
> HSM SO (blue). This is an existing key that was created when the backup HSM was initialized.> Partition SO (PO) (blue). This is an existing key that was created when the backup partition was
created.> Crypto officer (CO) (black). This is an existing key that was created when the backup partition
was created.> Domain (red). The backup HSM and the partition you want to backup must be members of the
same domain.
<target>userpartition
> Remote PED Vector (orange). This is an existing key that was created when the Luna NetworkHSM was initialized.
> Crypto officer (CO) (black). This is an existing key that was created when the user partition wascreated. If the partition is activated, you are prompted to provide the challenge password only.You do not need to provide the PED key.
The restore operation begins once you have completed the authentication process. Objects are restored oneat a time.
5. Disconnect the PED when done:
• If you connected the Remote PED directly to a USB port on the appliance:
lunash:> hsm ped disconnect -serial <backup_hsm_serial_number>• If you connected to a network-attached Remote PED:
lunash:> hsm ped disconnect
Restoring a Password-Authenticated PartitionYou can restore the objects from a password-authenticated backup partition to a password-authenticated userpartition. You can restore to an existing user partition, or you can create a new user partition and restore theobjects to the new partition.
SummaryTo restore the objects from a backup, you connect the backup HSM to the Luna Network HSM appliancethat hosts the slot for the user partition you want to restore to, and perform the following tasks, as detailed in "Torestore a password-authenticated partition" on the next page:
1. Log in to the appliance (LunaSH) as admin, or other admin-level user.2. Perform the restore operation (partition restore) and respond to the prompts for the following passwords:
<source> backup partition > HSM SO.> Partition SO (PO).> Crypto officer (CO).> Domain.
<target> user partition > Crypto officer (CO).
Luna Network HSM 7 Partition Administration GuideLast Updated: 2022-07-26 23:53:21 GMT-04:00 Copyright 2001-2022 Thales Group 465

Chapter 15: Backup and Restore Using a Luna B700 Backup HSM
PrerequisitesBefore beginning, ensure that you have satisfied the following prerequisites:
> You have the credentials listed in the summary above.
> You are able to log in to the Luna Network HSM appliance using an admin-level account to access LunaSH.> [Pre-7.7.0 and V0 partitions only] The following policies are set (see HSM Capabilities and Policies and
"Partition Capabilities and Policies" on page 291 for more information):
• HSM policy 16: Enable network replicationmust be set to 1 (ON) on the HSM that hosts the userpartition you want to restore to.
• Partition policy 0: Allow private key cloningmust be set to 1 (ON) on the user partition you want torestore to.
• Partition policy 4: Allow secret key cloningmust be set to 1 (ON) on the user partition you want torestore to.
To restore a password-authenticated partition
1. Configure your Luna Network HSM as illustrated below:
a. Open a network (SSH) or serial connection to the appliance and log in as admin, or other admin-leveluser, to start a LunaSH session.
b. Connect the backup HSM directly to the Luna Network HSM using the included USB cable.
2. Initiate the restore operation:lunash:> partition restore -partition <target_user_partition_label> -tokenpar <backup_partition_label> -serial <backup_hsm_serial_number> {-add | -replace}Use the -add option to add only new objects, or the -replace option to add new objects and overwrite existingobjects.
CAUTION! If you are restoring a V1 backup to a V1 partition, use -add to restore the SMK.Use -replace only if you wish to erase any existing cryptographic material on the targetpartition. By default, V1 backups only include the SMK.
3. Respond to the prompts for the following passwords:
Luna Network HSM 7 Partition Administration GuideLast Updated: 2022-07-26 23:53:21 GMT-04:00 Copyright 2001-2022 Thales Group 466

Chapter 15: Backup and Restore Using a Luna B700 Backup HSM
<source> backuppartition
> Crypto officer (CO). This is an existing password that was created when the backuppartition was created.
<target> userpartition
> Crypto officer (CO). This is an existing password that was created when the userpartition was created.
The restore operation begins once you have completed the authentication process. Objects are restored oneat a time.
Backup and Restore to a Remote Backup Service (RBS)-Connected Luna B700 Backup HSMThe Remote Backup Service (RBS) is an optional Luna client component that allows you to connect one or morebackup HSMs to a remote Luna client workstation to backup the slots on any local Luna HSM Client workstationsthat are registered with the RBS server. RBS is useful in deployments where backups are stored in a separatelocation from the Luna Network HSM, to protect against catastrophic loss (fire, flood, etc).
RBS is a utility, included with the Luna HSM Client software, that runs on a workstation hosting one or moreBackup HSMs. When RBS is configured and running, other clients or HSMs registered to it can see its BackupHSM(s) as slots in LunaCM.
Installing and Configuring the Remote Backup ServiceRBS is installed using the Luna HSM Client installer. You must create a certificate for the RBS workstation andregister it on all clients/appliances that will use the remote Backup HSMs. These instructions will allow you toinstall and configure RBS.
NOTE The Luna HSM Client version installed on the RBS workstation must be the sameversion installed on the client workstation(s). Ensure that you use a client version that iscompatible with your Backup HSM firmware.This feature requires minimum Luna HSM Client version 10.1.0, or 10.3.0 if you are using LunaB700 Backup HSM firmware 7.7.1 or newer. See Version Dependencies by Feature for moreinformation.
Prerequisites> Install the following Luna HSM Client components on any Luna Network HSM client workstation that hosts
slots for the partitions you want to backup using RBS (see "Luna HSM Client Software Installation" onpage 19):
• Network• Remote PED: if you are backing up PED-authenticated partitions.
> Connect the backup HSM(s) directly to the Luna HSM Client workstation that will host RBS using the includedUSB cable.
Luna Network HSM 7 Partition Administration GuideLast Updated: 2022-07-26 23:53:21 GMT-04:00 Copyright 2001-2022 Thales Group 467

Chapter 15: Backup and Restore Using a Luna B700 Backup HSM
NOTE Onmost workstations, the USB 3.0 connection provides adequate power to the backupHSM and it will begin the boot sequence. If you are using a low-power workstation, such as anetbook, the USB connection may not provide adequate power, in which case you will alsoneed to connect the external power supply. It is recommended that you use the power supplyfor all backup HSMs connected to the RBS host workstation. If you are connecting multiplebackup HSMs, you can use an external USB 3.0 hub if required.
> Initialize the backup HSMs if necessary. See "Initializing a Client-Connected Luna B700 Backup HSM" onpage 432.
> Ensure that HSM Policy 16: Enable Network Replication is allowed on the HSMs used to host thepartitions you want to backup. This is the default setting.
To install and configure RBS
1. On the workstation hosting the Backup HSM(s), install the Backup component of the Luna HSM Client (see"Luna HSM Client Software Installation" on page 19). If this workstation will also host a Remote PED, installthe Remote PED component as well (Windows only).
2. Navigate to the Luna HSM Client home directory (/usr/safenet/lunaclient/rbs/bin on Linux/Unix) andgenerate a certificate for the RBS host.
> rbs --genkeyYou are prompted to enter and confirm an RBS password. The certificate is generated in:
• Linux/UNIX: <LunaClient_install_directory>/rbs/server/server.pem• Windows: <LunaClient_install_directory>\cert\server\server.pem
3. Specify the Backup HSM(s) that RBS will make available to clients.
> rbs --configRBS displays a list of Backup HSMs currently connected to the workstation. Select the ones you want toprovide remote backup services. When you have specified your selection, enter X to exit the configurationtool.
4. Launch the RBS daemon (Linux/UNIX) or console application (Windows).
• Linux/UNIX: # rbs --daemon• Windows: Double-click the rbs application. A console window will remain open.
You are prompted to enter the RBS password.
5. Securely transfer the RBS host certificate (server.pem) to your Luna HSM Client workstation using pscp orscp.
6. On the client workstation, register the RBS host certificate to the server list.
> vtl addServer -n <Backup_host_IP> -c server.pem7. [Optional] Launch LunaCM on the client to confirm that the Backup HSM appears as an available slot.
NOTE If you encounter issues, try changing the RBS and PEDclient ports from their defaultvalues. Check that your firewall is not blocking ports used by the service.
Luna Network HSM 7 Partition Administration GuideLast Updated: 2022-07-26 23:53:21 GMT-04:00 Copyright 2001-2022 Thales Group 468

Chapter 15: Backup and Restore Using a Luna B700 Backup HSM
You can now use the Backup HSM(s) as though they were connected to the client workstation locally, usingRemote PED. See "Backing Up to a Client-Connected Luna B700 Backup HSM" on page 437 and "RestoringFrom a Client-Connected Luna B700 Backup HSM " on page 444 for detailed procedures.
Updating the Luna B700 Backup HSM FirmwareTo update the Luna B700 Backup HSM firmware, download the desired firmware version from the ThalesSupport Portal. If you are updating a Backup HSM connected to a Luna Network HSM appliance, the G7firmware update file is included in the appliance software update package. See Updating the Luna Network HSMAppliance Software for the procedure.
Depending on whether the Backup HSM is connected to a Luna Network HSM appliance or a Luna HSM Clientworkstation, you can use LunaSH or LunaCM to perform the firmware update.
> "Updating the Client-Connected Luna B700 Backup HSM Firmware" below
> "Updating the Appliance-Connected Luna B700 Backup HSM Firmware" on the next page
Updating the Client-Connected Luna B700 Backup HSM FirmwareUse the following procedure to update the Backup HSM firmware using LunaCM. The Backup HSM SOmustcomplete this procedure.
NOTE This functionality requires minimum Luna HSM Client 10.3.0. See VersionDependencies by Feature for more information.
Prerequisites
> Luna B700 Backup HSM firmware update file (<filename>.fuf)> firmware update authentication code file (<filename>.txt)> If you have backups currently stored on the Backup HSM, they must take up less than 60% of storage
capacity, or the firmware upgrade will not proceed.
NOTE If you are updating the firmware to version 7.7.x or newer, objects and partitions mustbe re-sized to include additional object overhead associated with the new V1 partitions - this isincluded in the process, no additional action from you (see "Behavior of "pre-firmware 7.7.0",and V0, and V1 partitions?" on page 144). This conversion can take much longer than previousfirmware updates, depending on the number of objects stored on the HSM (a few minutes toseveral hours). Ensure that you can leave the update operation uninterrupted for this amount oftime. Do not interrupt the procedure even if the operation appears to have stalled.
To update the Luna B700 Backup HSM firmware using LunaCM
1. Copy the firmware file (<filename>.fuf) and the authentication code file (<filename>.txt) to the Luna HSMClient root directory.
• Windows: C:\Program Files\SafeNet\LunaClient
• Linux: /usr/safenet/lunaclient/bin
• Solaris: /opt/safenet/lunaclient/bin
Luna Network HSM 7 Partition Administration GuideLast Updated: 2022-07-26 23:53:21 GMT-04:00 Copyright 2001-2022 Thales Group 469

Chapter 15: Backup and Restore Using a Luna B700 Backup HSM
NOTE On someWindows configurations, you might not have authority to copy or unzip filesdirectly into C:\Program Files\.... If this is the case, put the files in a known location that youcan reference in a LunaCM command.
2. Launch LunaCM.3. If more than one HSM is installed, set the active slot to the Admin partition of the HSM you wish to update.
lunacm:> slot set -slot <slot_number>4. [PED-Authenticated] If you are updating a PED-authenticated Backup HSM, connect to the Remote PED
server.
lunacm:> ped connect [-ip <IP_address>] [-port <port#>]5. Log in as HSM SO.
lunacm:> role login -name so6. Apply the new firmware update by specifying the update file and the authentication code file. If the files are
not located in the Luna HSM Client root directory, specify the full filepaths.
lunacm:> hsm updatefw -fuf <filename>.fuf -authcode <filename>.txtThe previous version of the firmware is stored in reserve on the HSM. To restore the previous firmware version,see "Rolling Back the Luna B700 Backup HSM Firmware" on the next page.
Updating the Appliance-Connected Luna B700 Backup HSM FirmwareUse the following procedure to update the Backup HSM firmware using LunaSH. The Backup HSM SOmustcomplete this procedure.
NOTE This functionality requires minimum Luna Network HSM appliance software 7.7.0. SeeVersion Dependencies by Feature for more information.
Prerequisites
> The G7 firmware package is included with the Luna Network HSM appliance software package. SeeUpdating the Luna Network HSM Appliance Software if you have not already updated the appliance software.
> If you have backups currently stored on the Backup HSM, they must take up less than 60% of storagecapacity, or the firmware upgrade will not proceed.
NOTE If you are updating the firmware to version 7.7.x or newer, objects and partitions mustbe re-sized to include additional object overhead associated with the new V1 partitions - this isincluded in the process, no additional action from you (see "Behavior of "pre-firmware 7.7.0",and V0, and V1 partitions?" on page 144). This conversion can take much longer than previousfirmware updates, depending on the number of objects stored on the HSM (a few minutes toseveral hours). Ensure that you can leave the update operation uninterrupted for this amount oftime. Do not interrupt the procedure even if the operation appears to have stalled.
To update the Luna B700 Backup HSM firmware using LunaSH
1. Using a serial or SSH connection, log in to the appliance as admin (see Logging In to LunaSH).
Luna Network HSM 7 Partition Administration GuideLast Updated: 2022-07-26 23:53:21 GMT-04:00 Copyright 2001-2022 Thales Group 470

Chapter 15: Backup and Restore Using a Luna B700 Backup HSM
2. [Optional] List the available Backup HSMs connected to the appliance and note the serial number of the oneyou wish to update.
lunash:> token backup list3. [PED-Authenticated] If you are updating a PED-authenticated Backup HSM, connect to the PED server.
lunacm:> hsm ped connect [-ip <IP_address>] [-port <port#>]4. Log in to the Backup HSM as HSM SO.
lunash:> token backup login -serial <serialnum>5. Apply the Backup HSM firmware update.
lunash:> token backup update firmware -serial <serialnum>
Rolling Back the Luna B700 Backup HSM FirmwareWhen you update the Luna B700 Backup HSM firmware, the previous version of the firmware is stored in reserveon the HSM. If required, you can use the following procedure to roll back the HSM firmware to the previousversion. Firmware rollback must be initiated using LunaCM; the Backup HSMmust be connected to a Luna HSMClient workstation.
CAUTION! Firmware rollback is destructive; earlier firmware versions might have oldermechanisms and security vulnerabilities that a new version does not. Ensure that you do nothave any important backups stored on the HSM before you proceed. This procedure zeroizesthe HSM and all backups are erased.
Prerequisites
> Connect the Luna B700 Backup HSM to a Luna HSM Client workstation.
To roll back the Luna B700 Backup HSM firmware to the previous version
1. At the LunaCM prompt, set the active slot to the Backup HSM.
lunacm:> slot set -slot <slot_number>2. Check the previous firmware version that is available on the HSM.
lunacm:> hsm showinfo3. [PED-Authenticated] If you are rolling back a PED-authenticated Backup HSM, connect to the Remote PED
server.
lunacm:> ped connect [-ip <IP_address>] [-port <port#>]4. Log in as HSM SO.
lunacm:> role login -name so5. Roll back the Backup HSM firmware.
lunacm:> hsm rollbackfw
Luna Network HSM 7 Partition Administration GuideLast Updated: 2022-07-26 23:53:21 GMT-04:00 Copyright 2001-2022 Thales Group 471

CHAPTER 16: Slot Numbering and Behavior
Administrative partitions and application partitions are identified as PKCS#11 cryptographic slots in SafeNetutilities, such as LunaCM andmultitoken, and for applications that use the Luna library.
Order of Occurrence for Different Luna HSMsA host computer with Luna HSM Client software and Luna libraries installed can have Luna HSMs connected inany of three ways:
> PCIe embedded/inserted Luna PCIe HSM card (one or multiple HSMs installed - administrative partitions andapplication partitions are shown separately)
> USB-connected Luna USB HSMs (one or multiple - administrative partitions and application partitions areshown separately)
> Luna Network HSM application partitions*, registered and connected via NTLS or STC.
Any connected HSM partitions are shown as numbered slots. Slots are numbered from zero or from one,depending on configuration settings (see "Settings Affecting Slot Order" on the next page, below), and on thefirmware version of the HSM(s).
*One or multiple application partitions. Administrative partitions on Luna Network HSMs are not visible viaLunaCM or other client-side tools. Only registered, connected application partitions are visible. The number ofvisible partitions (up to 100) depends on your model's capabilities. That is, a remote Luna Network HSMmightsupport 100 application partitions, but your application and LunaCM will only see partitions that have establishedcertificate-exchange NTLS links with the current Client computer.
In LunaCM, a slot list would normally show:
> Luna Network HSM application partitions for which NTLS links are established with the current host, followedby
> Luna PCIe HSM cards, followed by
> Luna USB HSMs
For Luna Network HSM, as seen from a client (via NTLS), only application partitions are visible. The HSMadministrative partition of a remote Luna Network HSM is never seen by a Luna HSM Client. The Luna NetworkHSM slots are listed in the order they are polled, dictated by the entries in the Luna Network HSM section of theCrystoki.ini / chrystoki.conf file, like this:ServerName00=192.20.17.200ServerPort00=1792ServerName01=192.20.17.220ServerPort01=1793
For Luna PCIe HSM and Luna USB HSM, if you have multiple of either HSM type connected on a single host,then the order in which they appear is the hardware slot number, as discovered by the host computer.
Luna Network HSM 7 Partition Administration GuideLast Updated: 2022-07-26 23:53:21 GMT-04:00 Copyright 2001-2022 Thales Group 472

Chapter 16: Slot Numbering and Behavior
For Luna PCIe HSM and Luna USB HSM, the HSM administrative slot always appears immediately after theapplication partition. If no application partition has yet been created, a space is reserved for it, in the slotnumbering.
Settings Affecting Slot OrderSettings in the Presentation section of the configuration file (Chrystoki.conf for UNIX/Linux, crystoki.ini forWindows) can affect the numbering that the API presents to Luna tools (like LunaCM) or to your application.
[Presentation]ShowUserSlots=<slot>(<serialnumber>)
> Sets starting slot for the identified partition.
> Default, when ShowUserSlots is not specified, is that all available partitions are visible and appear in defaultorder.
> Can be applied, individually, to multiple partitions, by a single entry containing a comma-separated list (withpartition serial numbers in brackets):ShowUserSlots=1(351970018022), 2(351970018021), 3(351970018020),....
> If multiple partitions on the same HSM are connected to the Luna HSM Client host computer, redirecting oneof those partitions with ShowUserSlots= causes all the others to disappear from the slot list, unless they arealso explicitly re-ordered by the same configuration setting.
ShowAdminTokens=yes
> Default is yes. Admin partitions of local HSMs are visible in a slot listing.
> Remotely connected partitions (Luna Network HSM) are not affected by this setting, because NTLS connectsonly application partitions, not HSM SO (Admin) partitions to clients, so a Luna Network HSM SOadministrative partition would never be visible in a client-side slot list, regardless.
ShowEmptySlots=1
> Controls how C_GetSlotList - as used by lunacm slot list command, or ckdemo command 14, and by yourPKCS#11 application - displays, or does not display unused potential slots, when the number of partitions onan HSM is not at the limit.
OneBaseSlotId=1
> Causes basic slot list to start at slot number 1 (one) instead of default 0 (zero).(Any submitted number other than zero is treated as "1". Any letter or other non-numeric character is treatedas "0".)
Effects of Settings on Slot ListSay, for example, you have multiple HSMs connected to your host computer (or installed inside), with anycombination of firmware 7.0.1 and newer, and no explicit entries exist for slot order in the config file. The defaultsprevail and the slot list would start at zero.
If you set OneBaseSlotId=1 in the configuration file, then the slot list starts at "1" instead of at "0". You could setthis for personal preference, or according to how your application might expect slot numbering to occur (or if youhave existing scripted solutions that depend on slot numbering starting at zero or starting at one). OneBaseSlotIdaffects the starting number for all slots, regardless of firmware.
Luna Network HSM 7 Partition Administration GuideLast Updated: 2022-07-26 23:53:21 GMT-04:00 Copyright 2001-2022 Thales Group 473

Chapter 16: Slot Numbering and Behavior
If you set ShowUserSlots=20(17923506), then the identified token or HSM or application partition would appearat slot 20, regardless of the locations of other HSMs and partitions.
Effects of New Firmware on Slot Login StateSlots retain login state when current-slot focus changes. You can use the LunaCM command slot set to shiftfocus among slots, and whatever login state existed when you were previously focused on a slot is still in effectwhen you return to that slot.
Luna Network HSM 7 Partition Administration GuideLast Updated: 2022-07-26 23:53:21 GMT-04:00 Copyright 2001-2022 Thales Group 474