Lab Manual & Record - Kamaraj College of Engineering ...
159
IT8711 FOSS and Cloud Computing Lab Page 1 DEPARTMENT OF INFORMATION TECHNOLOGY Course : B.Tech Subject Code : IT8711 Subject Name : FOSS and Cloud Computing Lab Class & Semester : IV IT / VII Semester Regulation : 2017 Academic year : 2020-2021 (ODD semester) Lab Manual & Record
-
Upload
khangminh22 -
Category
Documents
-
view
0 -
download
0
Transcript of Lab Manual & Record - Kamaraj College of Engineering ...
IT8711 FOSS and Cloud Computing Lab
Page 1
DEPARTMENT OF INFORMATION TECHNOLOGY
Course : B.Tech
Subject Code : IT8711
Subject Name : FOSS and Cloud Computing Lab
Class & Semester : IV IT / VII Semester
Regulation : 2017
Academic year : 2020-2021 (ODD semester)
Lab Manual & Record
IT8711 FOSS and Cloud Computing Lab
Page 2
Name : Malik Chandra Pandian T
Registration Number : 920417205019
Roll Number : 17UITE021
Branch : INFORMATION TECHNOLOGY
Year : IV
This is the Bonafide Record work done in the IT8711 FOSS and
Cloud Computing Lab during the academic year 2020-2021.
STAFF IN CHARGE HEAD OF THE DEPARTMENT
Submitted for the Practical Examination held on 21.01.2021 at Kamaraj College of
Engineering and Technology, S.P.G.C.Nagar, K.Vellakulam, Near Virudhunagar, Madurai.
INTERNAL EXAMINER EXTERNAL EXAMINER
IT8711 FOSS and Cloud Computing Lab
Page 3
DEPARTMENT OF INFORMATION TECHNOLOGY
VISION, MISSION
PROGRAMME EDUCATION OBJECTIVE, PROGRAMME OUTCOMES,
PROGRAMME SPECIFIC OUTCOME
VISION OF THE INSTITUTE
To make this institute the unique of its kind in the field of Research and
Development activities in this part of world
MISSION OF THE INSTITUTE
To impart highly innovative and technical knowledge to the urban and unreachable
rural student folks through Total Quality Education
VISION OF THE DEPARTMENT
To make the department of Information Technology the unique of its kind in the
field of Research and Development activities in this part of world
MISSION OF THE DEPARTMENT
To impart highly innovative and technical knowledge in the field of Information
Technology to the urban and unreachable rural student folks through Total Quality
Education
PROGRAM EDUCATION OBJECTIVE [PEO]
PEO 1: Graduates of the programme will exhibit expertise in technical knowledge by
applying distinctive
skills in various fields of Information Technology
PEO 2: Graduates will become pioneers in the field of IT by working collaboratively and
providing solutions to meet societal needs through persistent learning
PEO 3: Graduates will be able to adopt innovative practices and contribute towards
research and technological development in the field of IT through Total Quality
Education
Page 4
IT8711 FOSS and Cloud Computing Lab
PROGRAM OUTCOMES (POs)
Engineering Graduates will be able to:
1. Engineering knowledge: Apply the knowledge of mathematics, science,
engineering fundamentals, and an engineering specialization to the solution of
complex engineering problems.
2. Problem analysis: Identify, formulate, review research literature, and analyse
complex engineering problems reaching substantiated conclusions using first
principles of mathematics, natural sciences, and engineering sciences.
3. Design/development of solutions: Design solutions for complex engineering
problems and design system components or processes that meet the specified needs
with appropriate consideration for the public health and safety, and the cultural,
societal, and environmental considerations.
4. Conduct investigations of complex problems: Use research-based knowledge and
research methods including design of experiments, analysis and interpretation of
data, and synthesis of the information to provide valid conclusions.
5. Modern tool usage: Create, select, and apply appropriate techniques, resources, and
modern engineering and IT tools including prediction and modelling to complex
engineering activities with an understanding of the limitations.
6. The engineer and society: Apply reasoning informed by the contextual knowledge
to assess societal, health, safety, legal and cultural issues and the consequent
responsibilities relevant to the professional engineering practice.
7. Environment and sustainability: Understand the impact of the professional
engineering solutions in societal and environmental contexts, and demonstrate the
knowledge of, and need for sustainable development.
8. Ethics: Apply ethical principles and commit to professional ethics and
responsibilities and norms of the engineering practice.
9. Individual and team work: Function effectively as an individual, and as a member
or leader in diverse teams, and in multidisciplinary settings.
10. Communication: Communicate effectively on complex engineering activities
with the engineering community and with society at large, such as, being able to
comprehend and write effective reports and design documentation, make effective
presentations, and give and receive clear instructions.
Page 5
IT8711 FOSS and Cloud Computing Lab
11. Project management and finance: Demonstrate knowledge and understanding of
the engineering and management principles and apply these to one‘s own work, as
a member and leader in a team, to manage projects and in multidisciplinary
environments.
12. Life-long learning: Recognize the need for, and have the preparation and ability
to engage in independent and life-long learning in the broadest context of
technological change.
PROGRAM SPECIFIC OUTCOMES (PSO)
Engineering Graduates will be able to:
1. Design an algorithm, process or component to address its real time needs in the field
of Information Technology through analytical skills.
2. Ability to adopt the evolutionary changes in computing and pursue a career in IT and
IT enabled industries.
Page 6
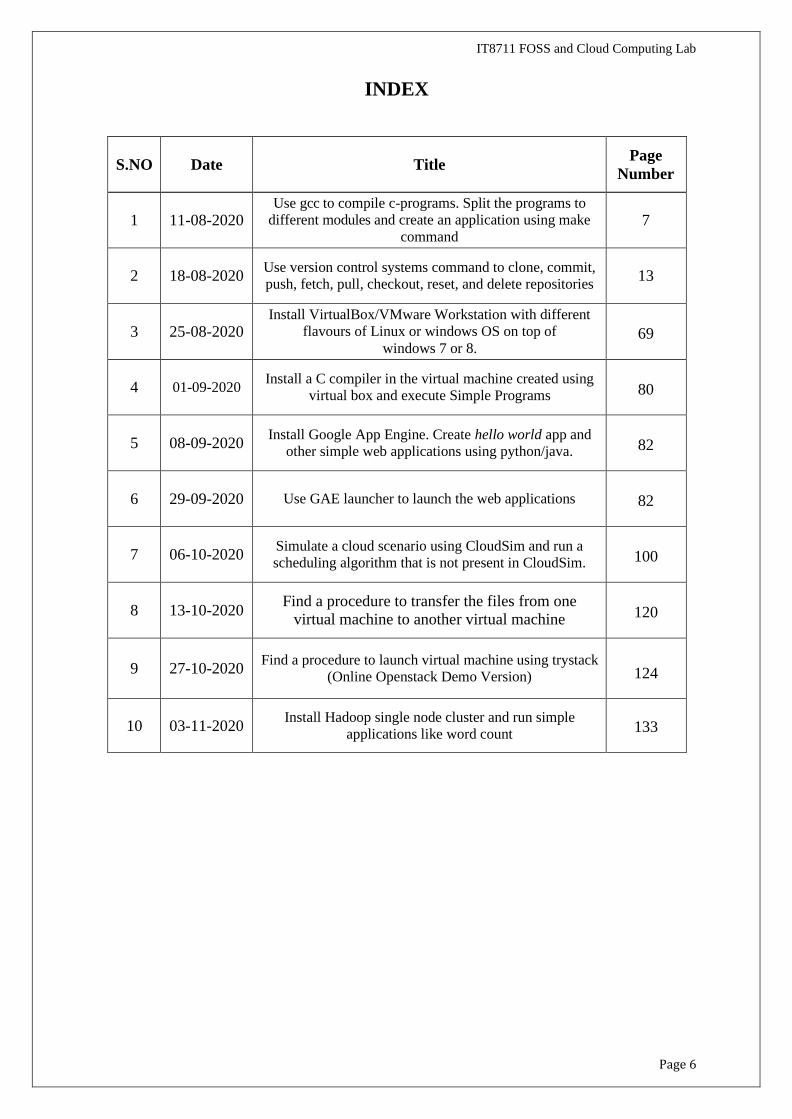
INDEX
IT8711 FOSS and Cloud Computing Lab
S.NO
Date
Title Page
Number
1
11-08-2020 Use gcc to compile c-programs. Split the programs to
different modules and create an application using make
command
7
2
18-08-2020 Use version control systems command to clone, commit,
push, fetch, pull, checkout, reset, and delete repositories
13
3
25-08-2020 Install VirtualBox/VMware Workstation with different
flavours of Linux or windows OS on top of
windows 7 or 8.
69
4
01-09-2020 Install a C compiler in the virtual machine created using
virtual box and execute Simple Programs
80
5
08-09-2020 Install Google App Engine. Create hello world app and
other simple web applications using python/java.
82
6
29-09-2020
Use GAE launcher to launch the web applications
82
7
06-10-2020 Simulate a cloud scenario using CloudSim and run a
scheduling algorithm that is not present in CloudSim.
100
8
13-10-2020 Find a procedure to transfer the files from one
virtual machine to another virtual machine
120
9
27-10-2020
Find a procedure to launch virtual machine using trystack
(Online Openstack Demo Version)
124
10
03-11-2020 Install Hadoop single node cluster and run simple
applications like word count
133

Page 7
Page 7
IT8711 FOSS and Cloud Computing Lab
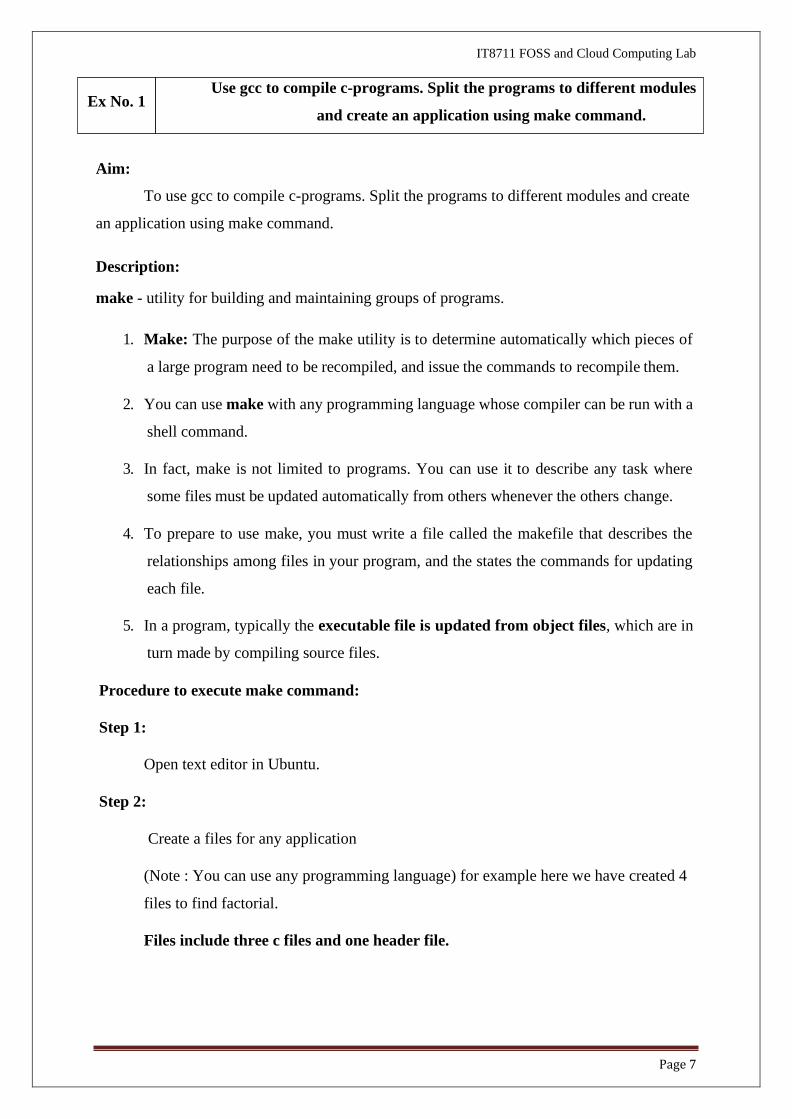
Aim:
To use gcc to compile c-programs. Split the programs to different modules and create
an application using make command.
Description:
make - utility for building and maintaining groups of programs.
1. Make: The purpose of the make utility is to determine automatically which pieces of
a large program need to be recompiled, and issue the commands to recompile them.
2. You can use make with any programming language whose compiler can be run with a
shell command.
3. In fact, make is not limited to programs. You can use it to describe any task where
some files must be updated automatically from others whenever the others change.
4. To prepare to use make, you must write a file called the makefile that describes the
relationships among files in your program, and the states the commands for updating
each file.
5. In a program, typically the executable file is updated from object files, which are in
turn made by compiling source files.
Procedure to execute make command:
Step 1:
Open text editor in Ubuntu.
Step 2:
Create a files for any application
(Note : You can use any programming language) for example here we have created 4
files to find factorial.
Files include three c files and one header file.
Use gcc to compile c-programs. Split the programs to different modules
and create an application using make command. Ex No. 1
Page 8
IT8711 FOSS and Cloud Computing Lab
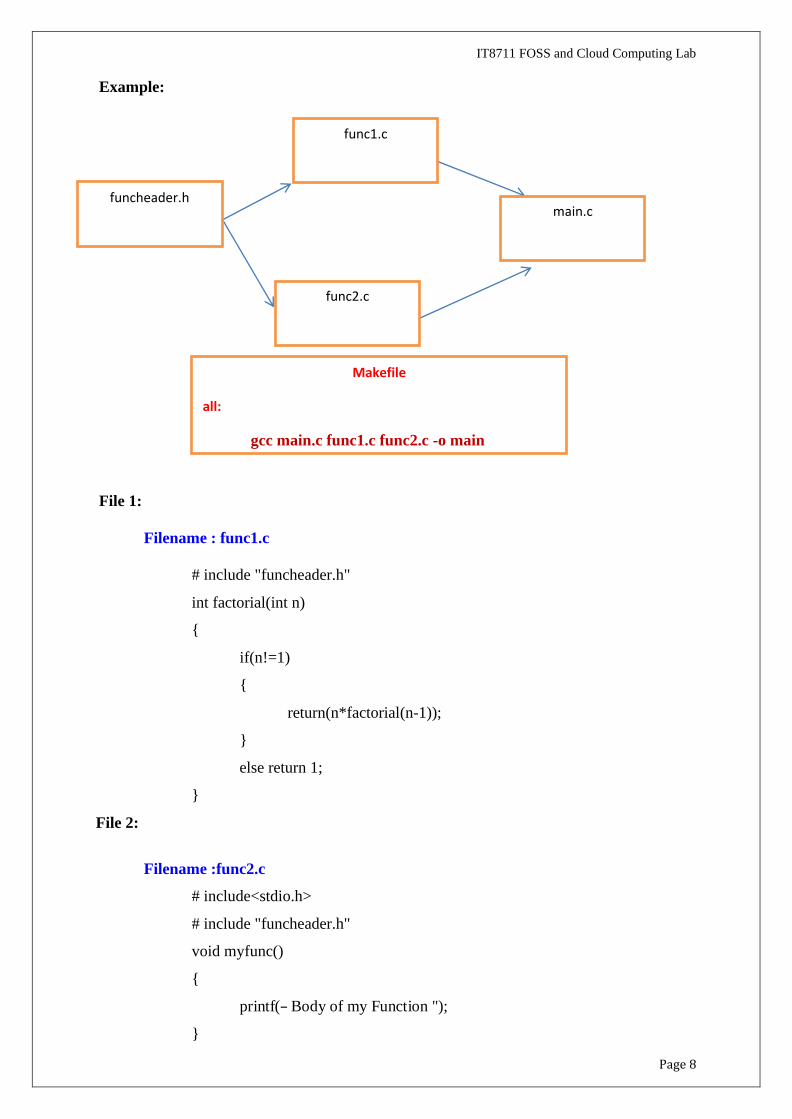
Example:
File 1:
Filename : func1.c
# include "funcheader.h"
int factorial(int n)
{
if(n!=1)
{
return(n*factorial(n-1));
}
File 2:
else return 1;
}
Filename :func2.c
# include<stdio.h>
# include "funcheader.h"
void myfunc()
{
printf(― Body of my Function ");
}
funcheader.h main.c
func1.c
Makefile
all:
gcc main.c func1.c func2.c -o main
func2.c

Page 9
Page 9
File 3:
File 4:
File Name : funcheader.h
void myfunc();
int factorial(int n);
File Name: main.c
# include <stdio.h>
# include "funcheader.h"
int main()
{
IT8711 FOSS and Cloud Computing Lab
Step 3:
myfunc();
printf(― The factorial of 5 is %d‖,factorial(5));
return 0;
}
Create Make file
Syntax:
target: (use tab space) prereq1 prereq2..
Open new text editor and do the following
File 5:
File Name : Makefile
all:
gcc main.c func1.c func2.c -o main
Step 4:
you can create an executable file for the above application (Factorial)
Move to run time environment
desktop/sample/$ make
gcc main.c func1.c func2.c -o main
desktop/sample/$ ./main

Page 10
Page 11
IT8711 FOSS and Cloud Computing Lab
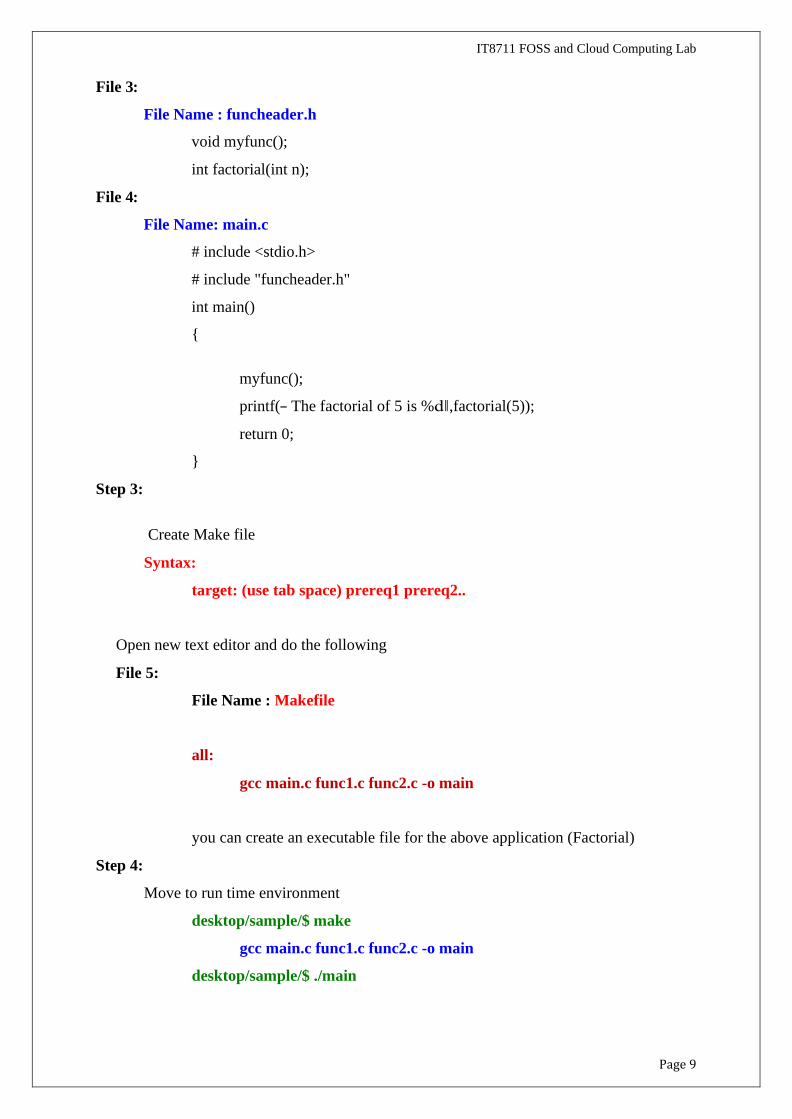
Output:
Example 2 :
• We can also use variables in the Makefile to generalise Makefile.
• In this example, we are writing Makefile using variables and clean target name to
remove all object (.o extension files) and binary file (main).
Makefile
#make file - this is a comment section
CC=gcc #compiler
TARGET=main #target file name
all:
$(CC) main.c func1.c func2.c -o $(TARGET)
clean:
rm $(TARGET)
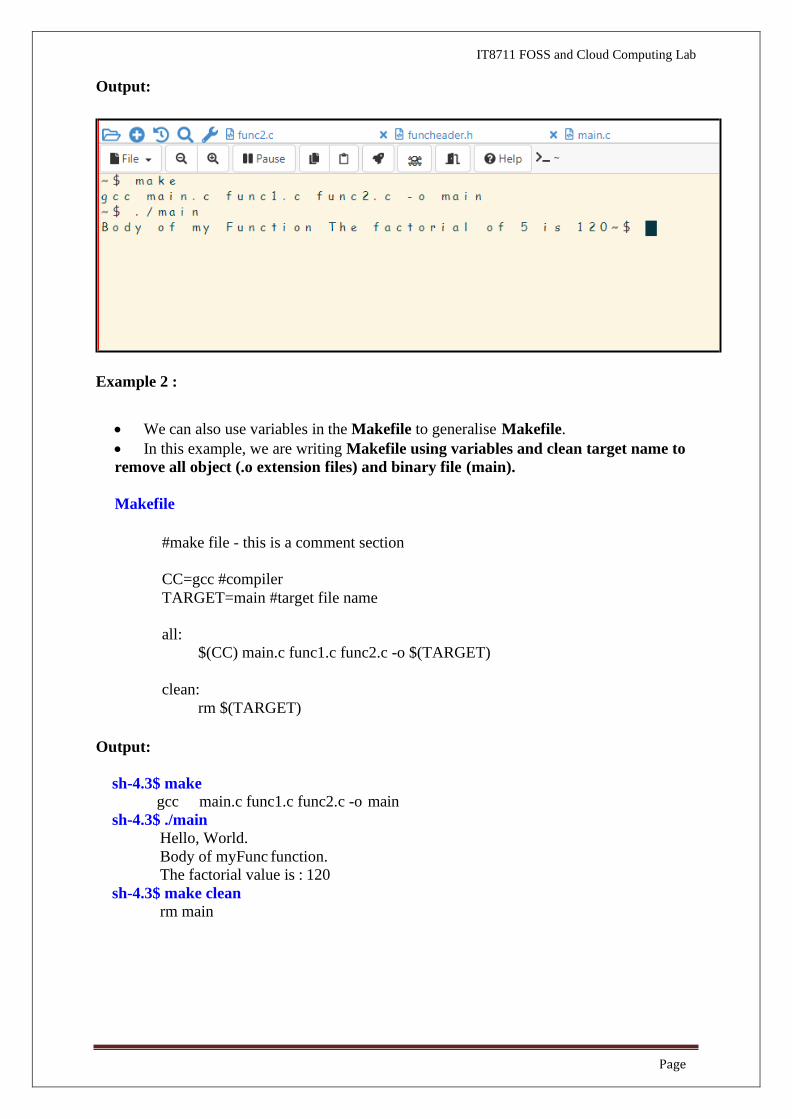
Output:
sh-4.3$ make
gcc main.c func1.c func2.c -o main
sh-4.3$ ./main
Hello, World.
Body of myFunc function.
The factorial value is : 120
sh-4.3$ make clean
rm main
Page 12
IT8711 FOSS and Cloud Computing Lab
Example 3:
• Makefile with creating Object of source files and Cleaning Object files and Binary File
• When we have multiple files then we can write command in Makefile to create Object files for each source file.
• If you do this – Only those files will be compiled which are modified.
Makefile
#make file - this is a comment section
CC=gcc #compiler
TARGET=main #target file name
all: main.o func1.c func2.c
$(CC) main.c func1.c func2.c -o $(TARGET)
clean:
rm *.o $(TARGET)
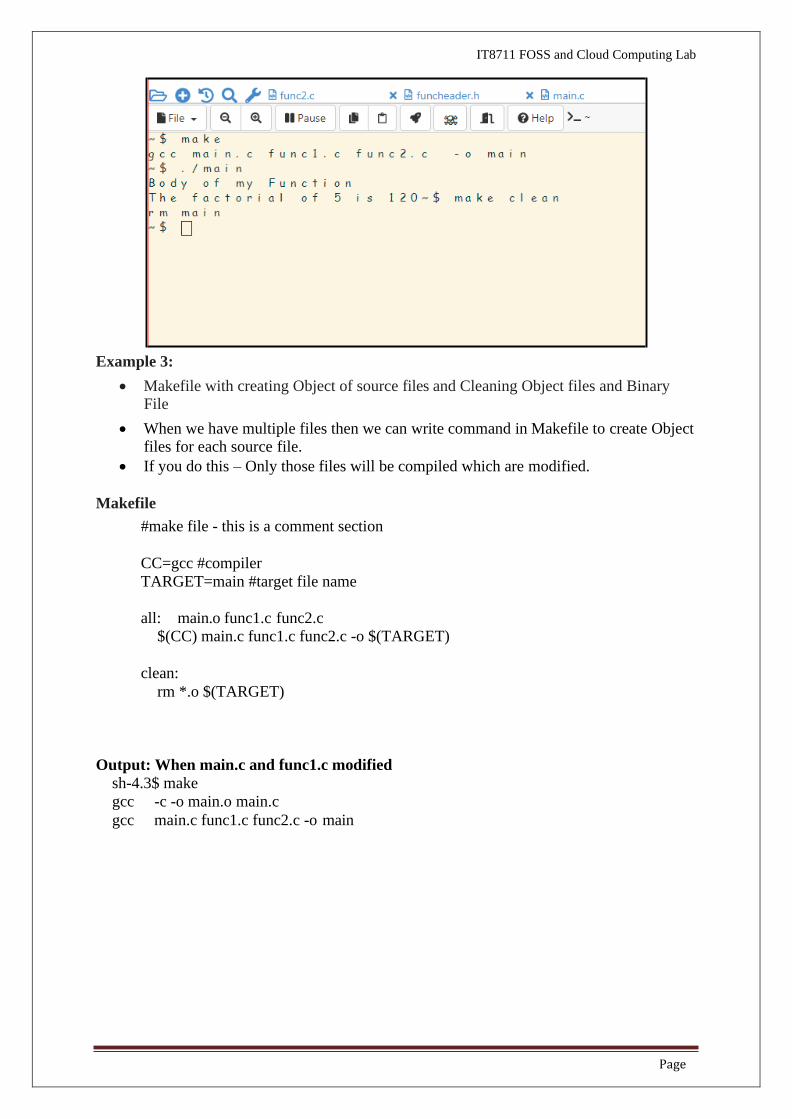
Output: When main.c and func1.c modified
sh-4.3$ make
gcc -c -o main.o main.c
gcc main.c func1.c func2.c -o main
Page 13
IT8711 FOSS and Cloud Computing Lab
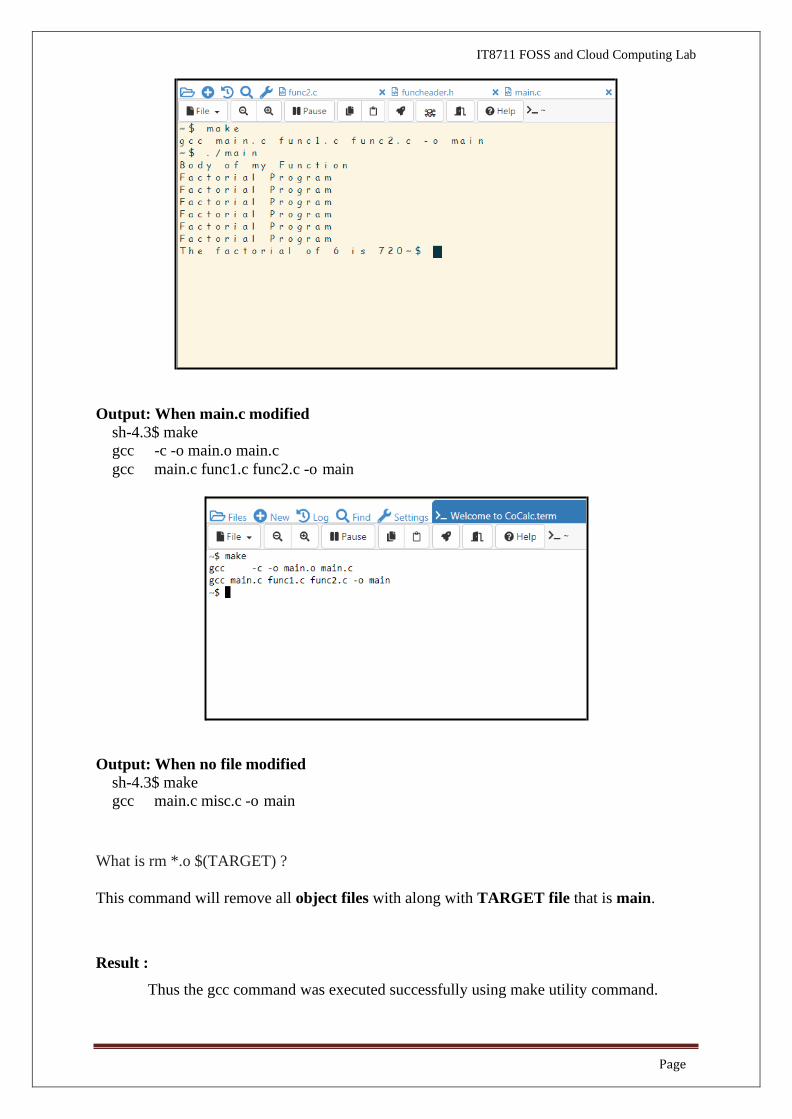
Output: When main.c modified
sh-4.3$ make
gcc -c -o main.o main.c
gcc main.c func1.c func2.c -o main
Output: When no file modified
sh-4.3$ make
gcc main.c misc.c -o main
What is rm *.o $(TARGET) ?
This command will remove all object files with along with TARGET file that is main.
Result :
Thus the gcc command was executed successfully using make utility command.
Page 14
IT8711 FOSS and Cloud Computing Lab
What is a version control system?
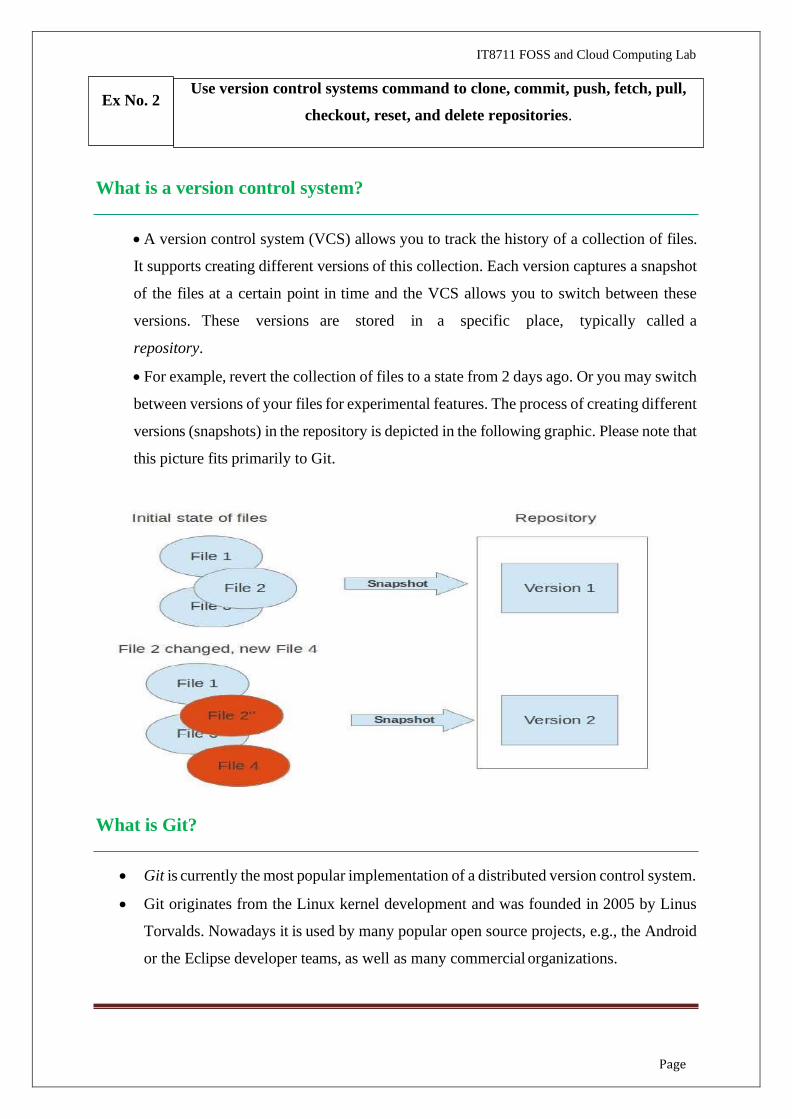
• A version control system (VCS) allows you to track the history of a collection of files.
It supports creating different versions of this collection. Each version captures a snapshot
of the files at a certain point in time and the VCS allows you to switch between these
versions. These versions are stored in a specific place, typically called a
repository.
• For example, revert the collection of files to a state from 2 days ago. Or you may switch
between versions of your files for experimental features. The process of creating different
versions (snapshots) in the repository is depicted in the following graphic. Please note that
this picture fits primarily to Git.
What is Git?
• Git is currently the most popular implementation of a distributed version control system.
• Git originates from the Linux kernel development and was founded in 2005 by Linus
Torvalds. Nowadays it is used by many popular open source projects, e.g., the Android
or the Eclipse developer teams, as well as many commercial organizations.
Use version control systems command to clone, commit, push, fetch, pull,
checkout, reset, and delete repositories. Ex No. 2
Page 14
IT8711 FOSS and Cloud Computing Lab
• The core of Git was originally written in the programming language C, but Git has also
been re-implemented in other languages, e.g., Java, Ruby and Python.
Setting Up Git
You need to setup Git on your local machine, as follows:
1. Download & Install:
• For Windows and Mac, download the installer from ―http://git-
scm.com/downloads and run the downloaded installer”
• For Ubuntu, issue command "sudo apt-get install git".
For Windows, use the "Git Bash" command shell bundled with Git Installer to issue
commands. For Mac/Ubuntu, use the "Terminal".
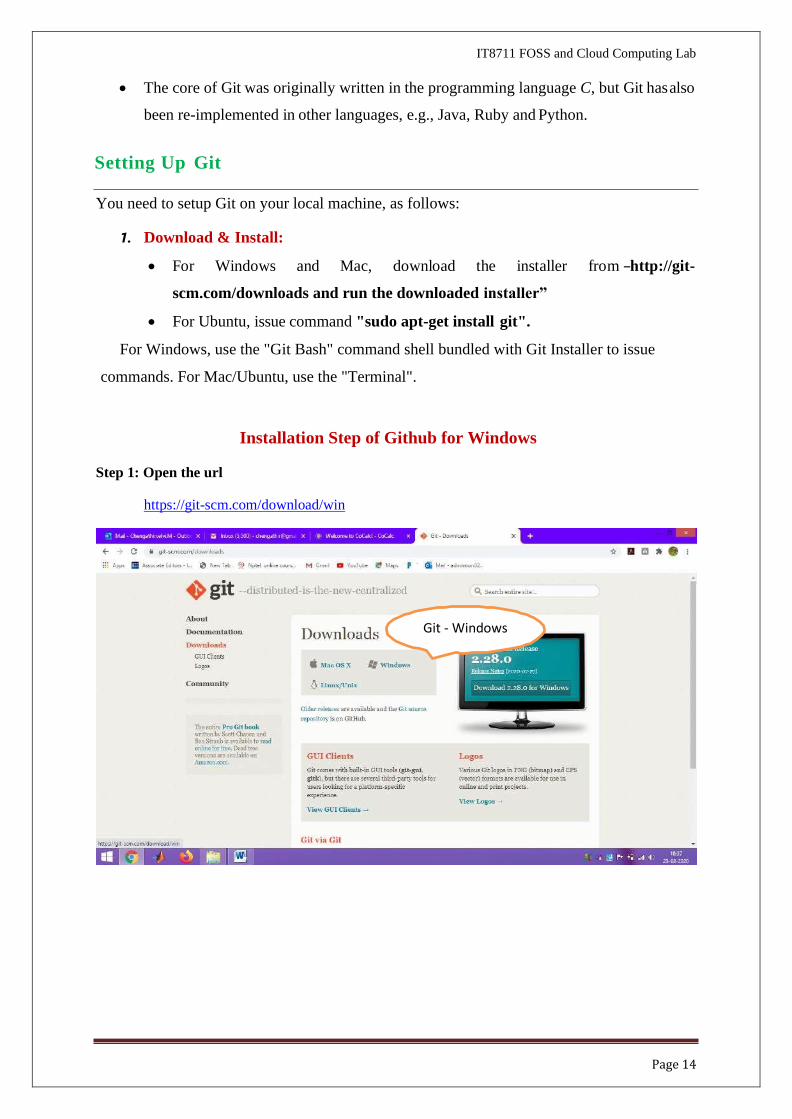
Installation Step of Github for Windows
Step 1: Open the url
https://git-scm.com/download/win
Git - Windows
Page 15
IT8711 FOSS and Cloud Computing Lab
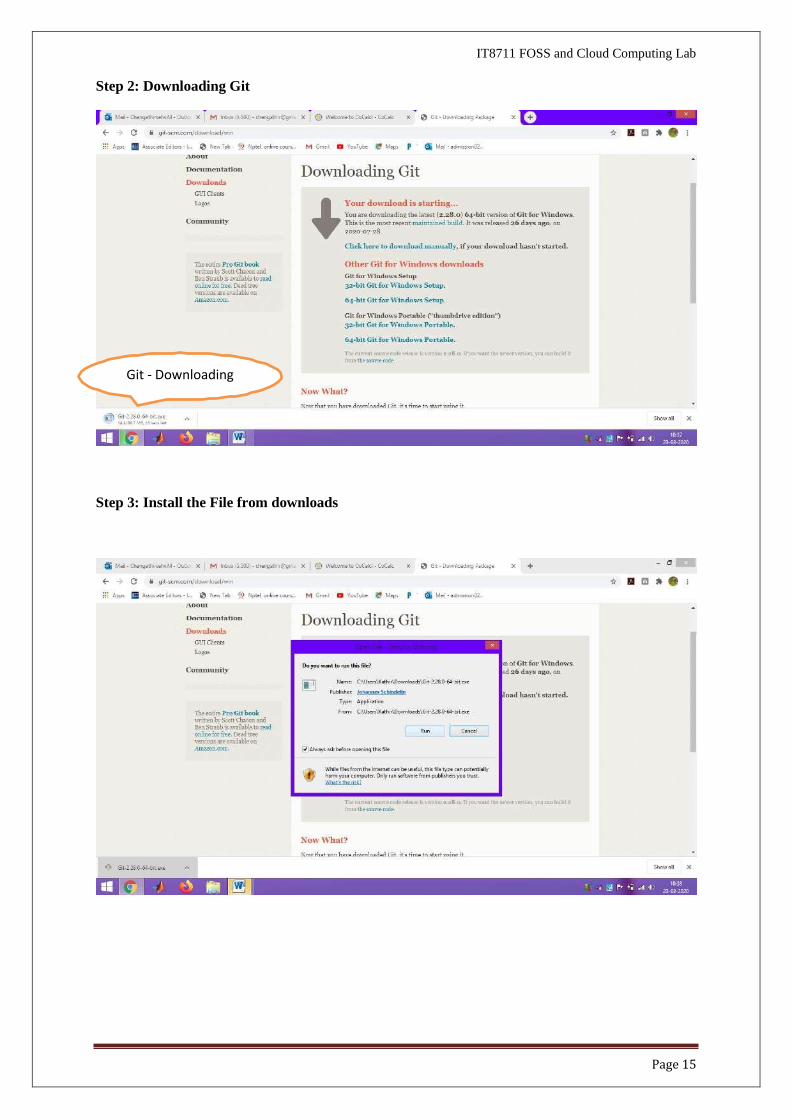
Step 2: Downloading Git
Step 3: Install the File from downloads
Git - Downloading
Page 16
IT8711 FOSS and Cloud Computing Lab
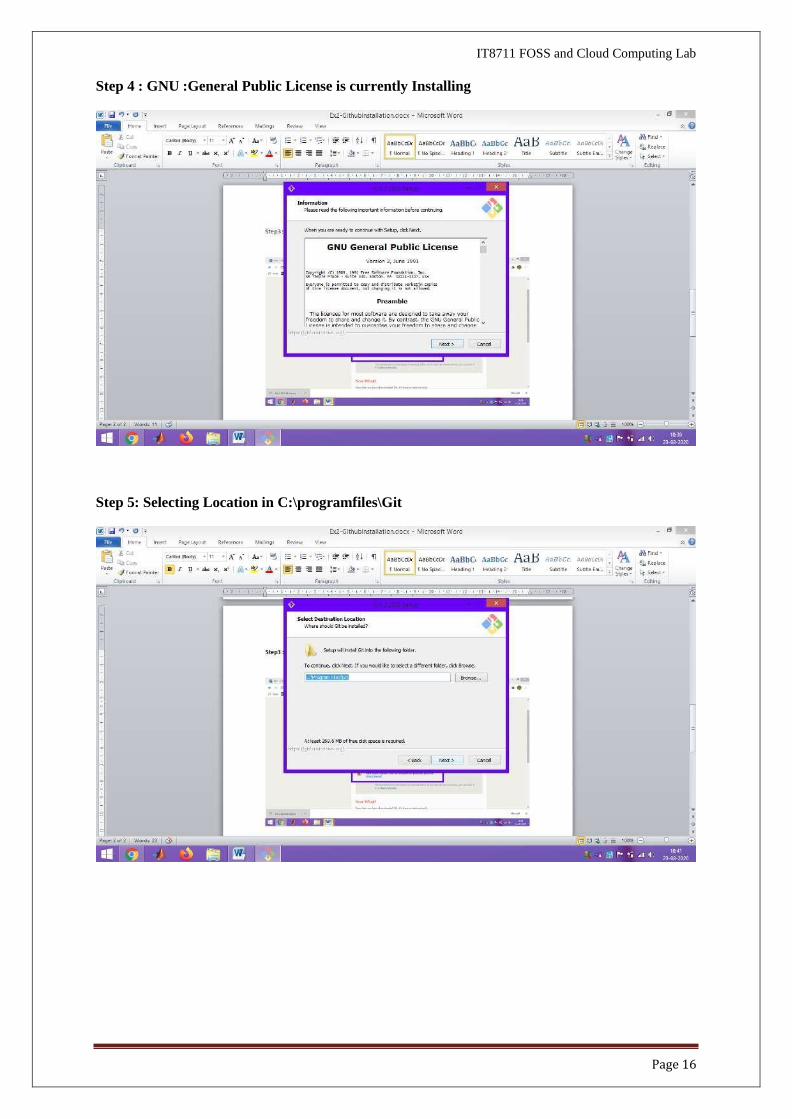
Step 4 : GNU :General Public License is currently Installing
Step 5: Selecting Location in C:\programfiles\Git
Page 17
IT8711 FOSS and Cloud Computing Lab
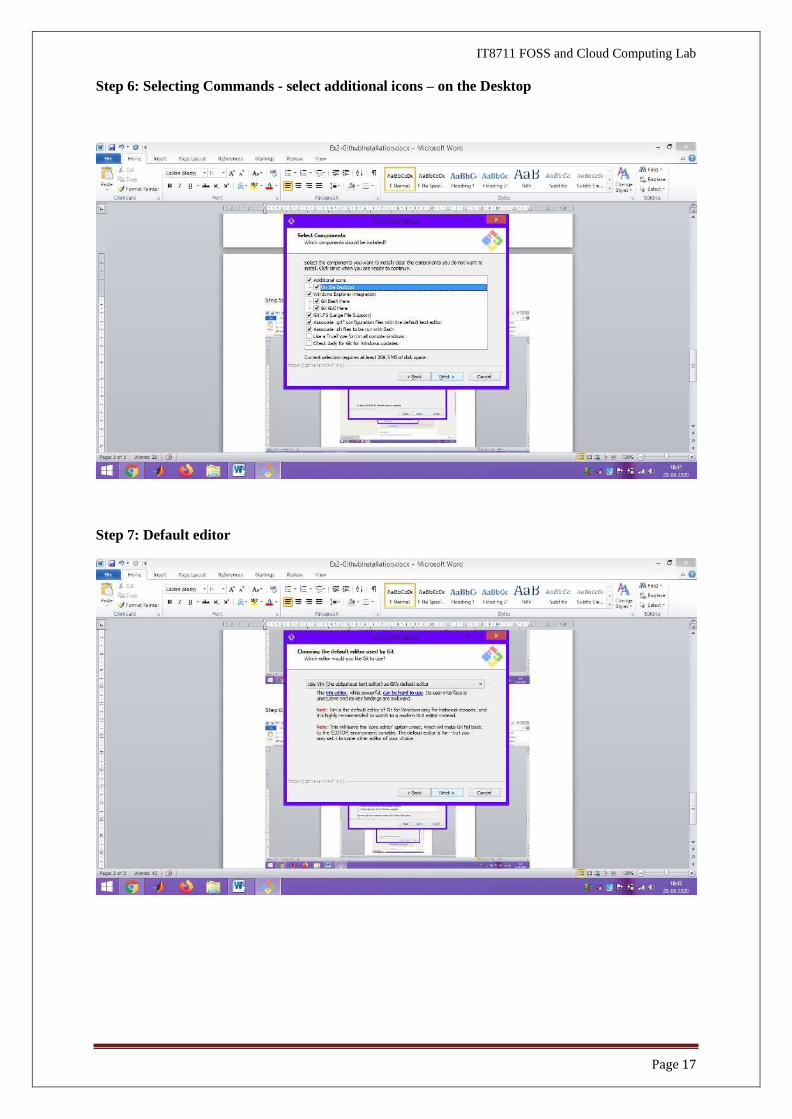
Step 6: Selecting Commands - select additional icons – on the Desktop
Step 7: Default editor

Page 18
IT8711 FOSS and Cloud Computing Lab
Step8: Use Git from Bash only
Step 9: Use open SSL Library
Page 19
IT8711 FOSS and Cloud Computing Lab
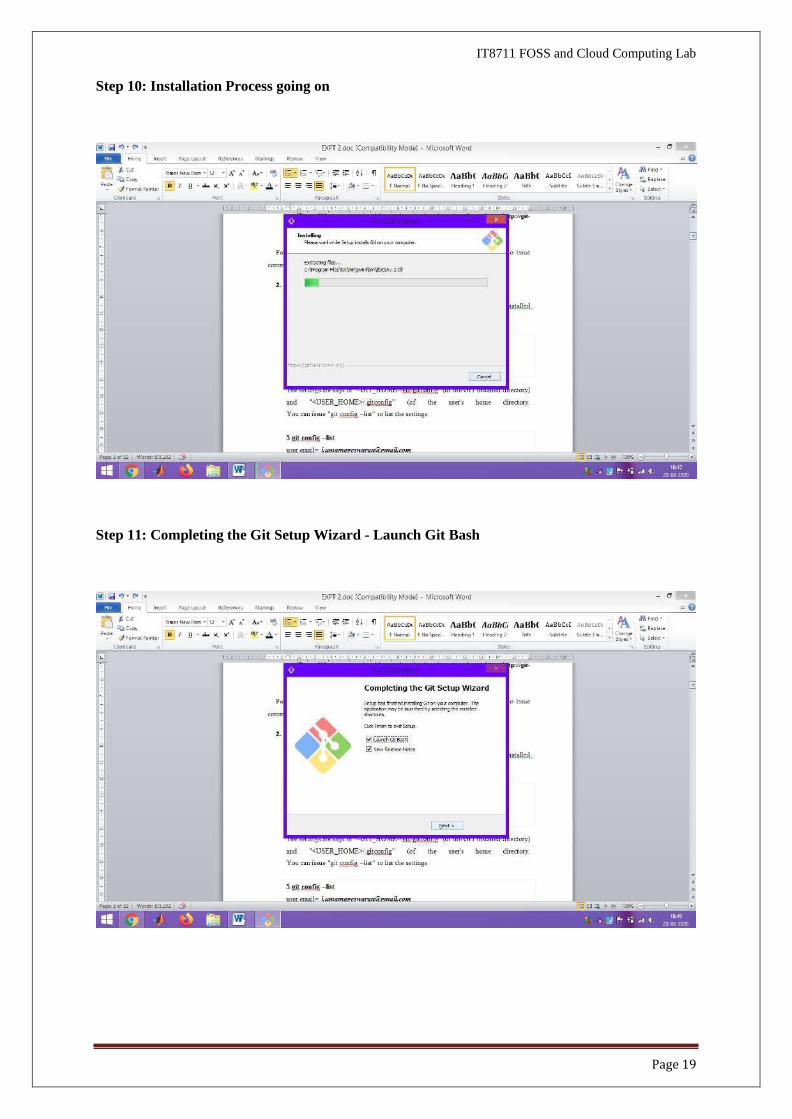
Step 10: Installation Process going on
Step 11: Completing the Git Setup Wizard - Launch Git Bash
Page 20
IT8711 FOSS and Cloud Computing Lab
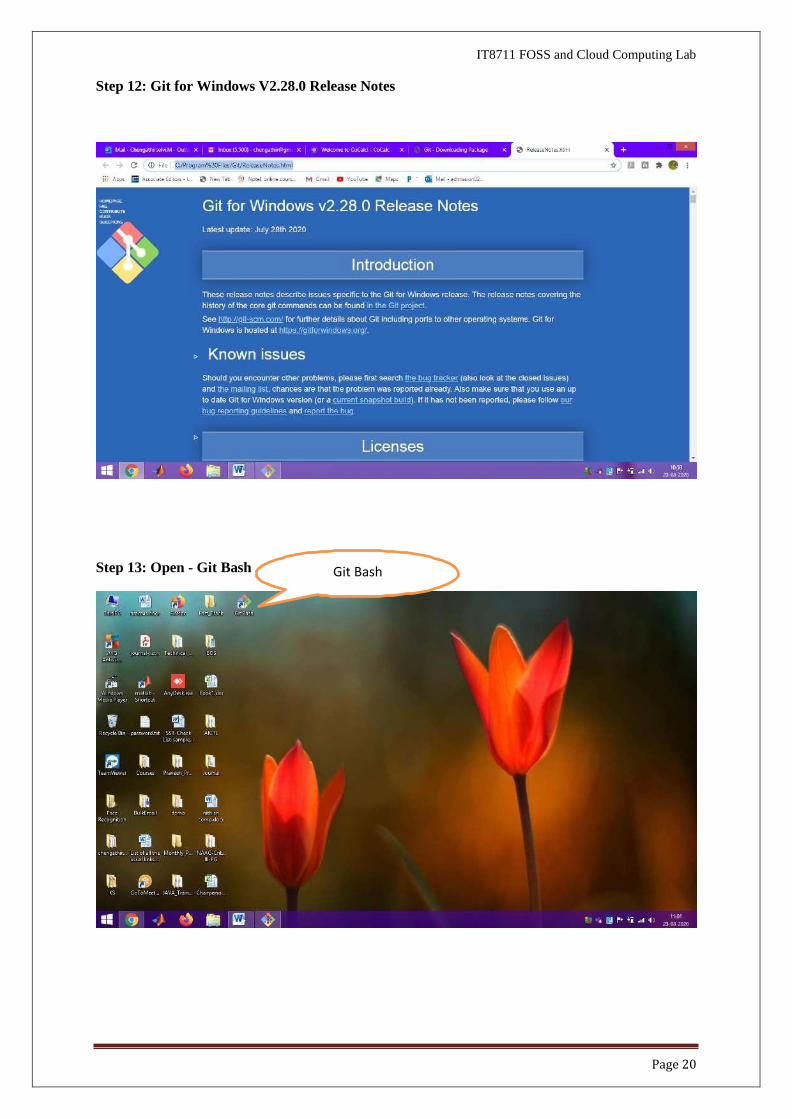
Step 12: Git for Windows V2.28.0 Release Notes
Step 13: Open - Git Bash Git Bash
Page 21
IT8711 FOSS and Cloud Computing Lab
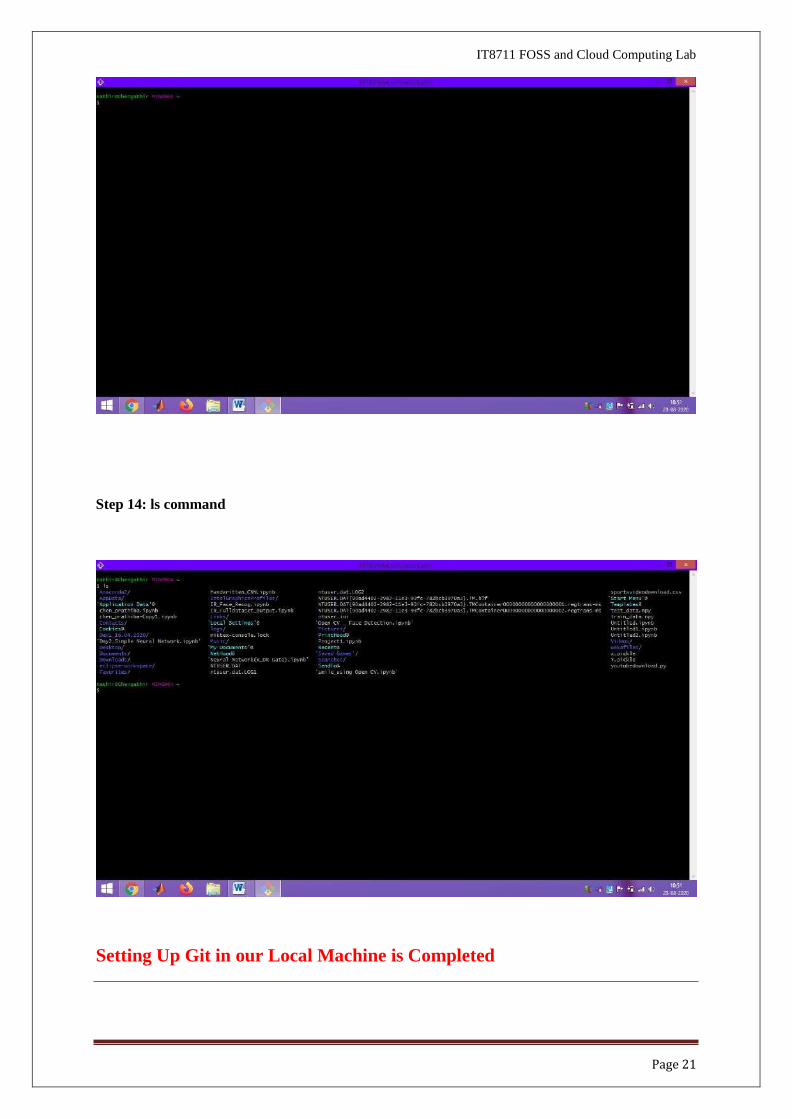
Step 14: ls command
Setting Up Git in our Local Machine is Completed

Page 22
IT8711 FOSS and Cloud Computing Lab
Customize Git
Step 1:
// Set up your username and email (to be used in labeling your commits)
$git config --global user.name "kathir"
Step 2:
$ git config --global user.email "[email protected]"
Page 23
IT8711 FOSS and Cloud Computing Lab
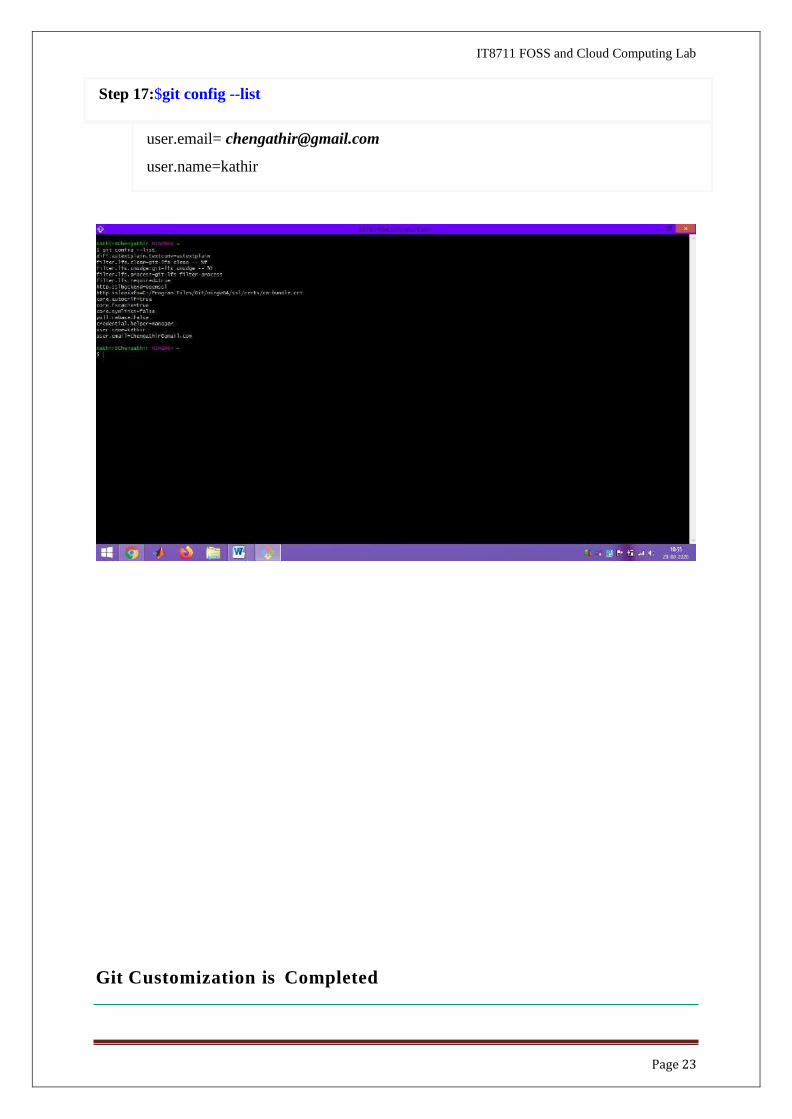
Step 17:$git config --list
user.email= [email protected]
user.name=kathir
Git Customization is Completed
IT8711 FOSS and Cloud Computing Lab
Git Basics
➢ Git Commands
• Git provides a set of simple, distinct, standalone commands developed according
to the "Unix toolkit" philosophy - build small, interoperable tools.
• To issue a command, start a "Terminal" (for Ubuntu/Mac) or "Git Bash" (for
Windows):
The commonly-used commands are:
1. init, clone, config: for starting a Git-managed project.
2. add, mv, rm: for staging file changes.
3. commit, rebase, reset, tag:
4. status, log, diff, grep, show: show status
5. checkout, branch, merge, push, fetch, pull
➢ Help and Manual
Getting Started with Local Repo
➢ There are 2 ways to start a Git-managed project:
o Starting your own project;
o Cloning an existing project from a GIT host.
➢ Setup the Working Directory for a New Project
o Creating a working Directory
$ mkdirJavaProgram
o working directory called "JavaProgram", with one source file "Hello.java"
(or "Hello.cpp", or "Hello.c") as follows:
// Hello.java
public class Hello {
Page 24
$git<command><arguments>
$ git help <command>
// or
$ git<command> --help
Page 25
IT8711 FOSS and Cloud Computing Lab
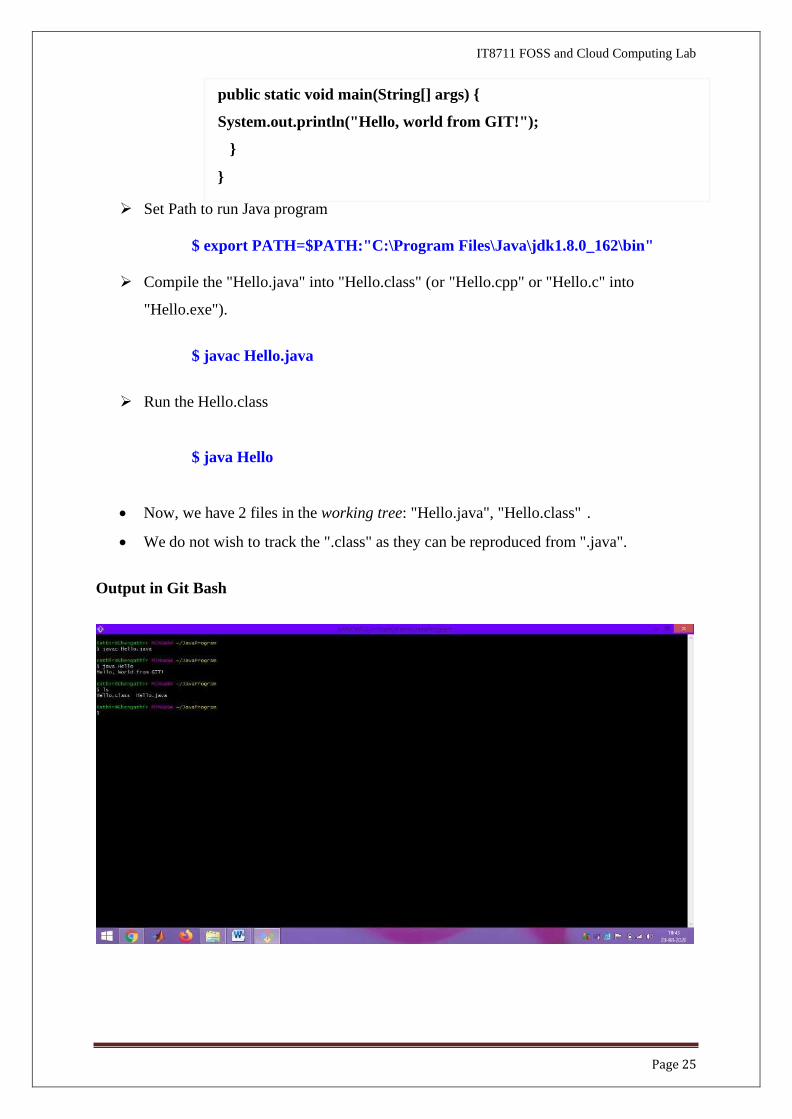
➢ Set Path to run Java program
$ export PATH=$PATH:"C:\Program Files\Java\jdk1.8.0_162\bin"
➢ Compile the "Hello.java" into "Hello.class" (or "Hello.cpp" or "Hello.c" into
"Hello.exe").
$ javac Hello.java
➢ Run the Hello.class
$ java Hello
• Now, we have 2 files in the working tree: "Hello.java", "Hello.class" .
• We do not wish to track the ".class" as they can be reproduced from ".java".
Output in Git Bash
public static void main(String[] args) {
System.out.println("Hello, world from GIT!");
}
}
Page 26
IT8711 FOSS and Cloud Computing Lab
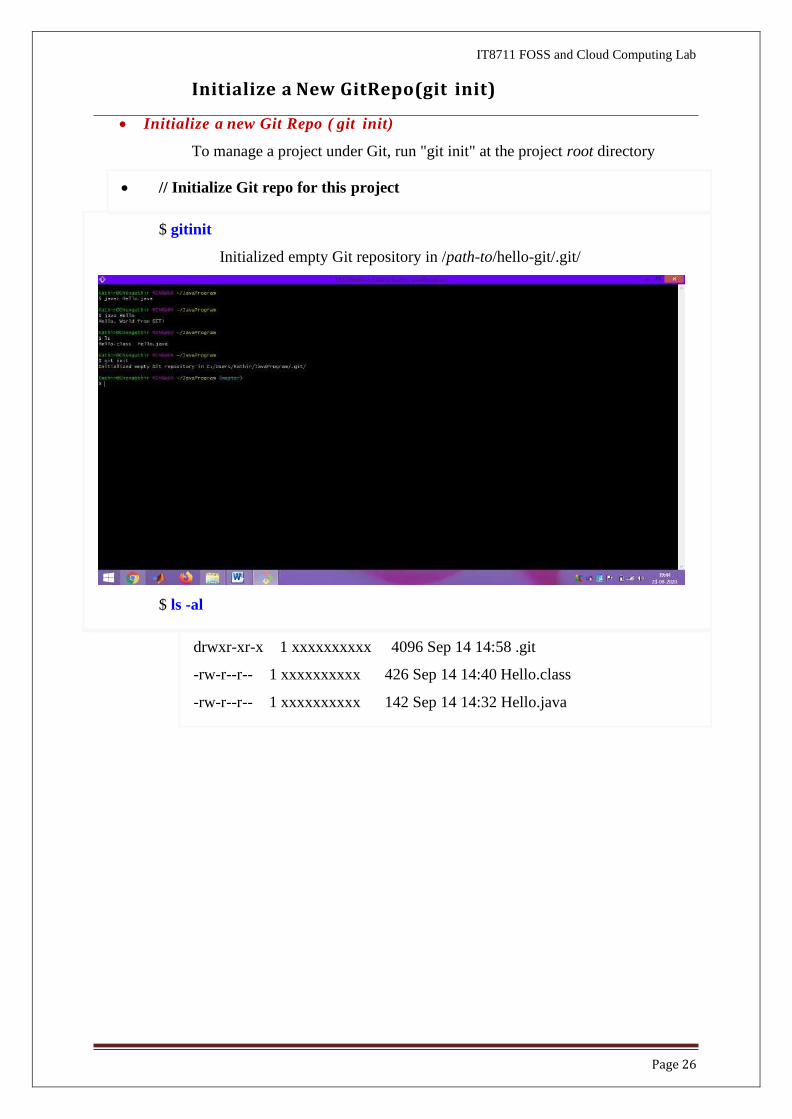
Initialize a New GitRepo(git init)
• Initialize a new Git Repo ( git init)
To manage a project under Git, run "git init" at the project root directory
• // Initialize Git repo for this project
$ gitinit
Initialized empty Git repository in /path-to/hello-git/.git/
$ ls -al
drwxr-xr-x 1 xxxxxxxxxx 4096 Sep 14 14:58 .git
-rw-r--r-- 1 xxxxxxxxxx 426 Sep 14 14:40 Hello.class
-rw-r--r-- 1 xxxxxxxxxx 142 Sep 14 14:32 Hello.java
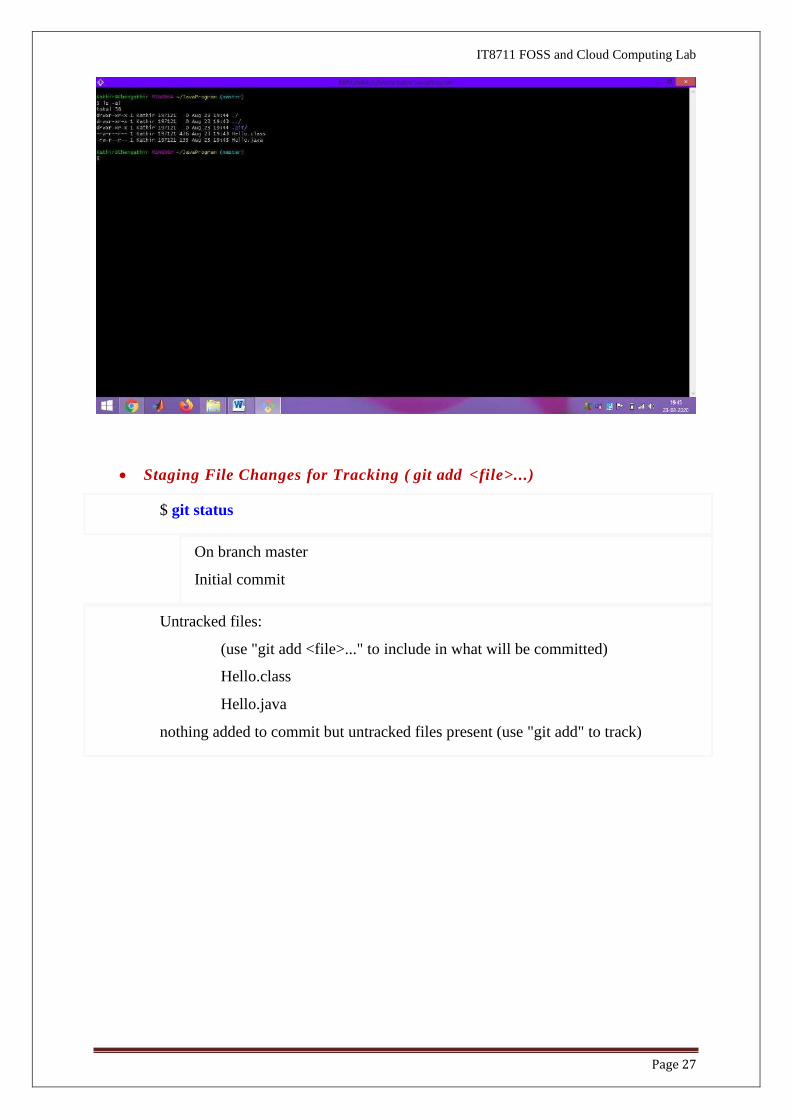
Page 27
IT8711 FOSS and Cloud Computing Lab
• Staging File Changes for Tracking ( git add <file>...)
$ git status
On branch master
Initial commit
Untracked files:
(use "git add <file>..." to include in what will be committed)
Hello.class
Hello.java
nothing added to commit but untracked files present (use "git add" to track)
Page 28
IT8711 FOSS and Cloud Computing Lab
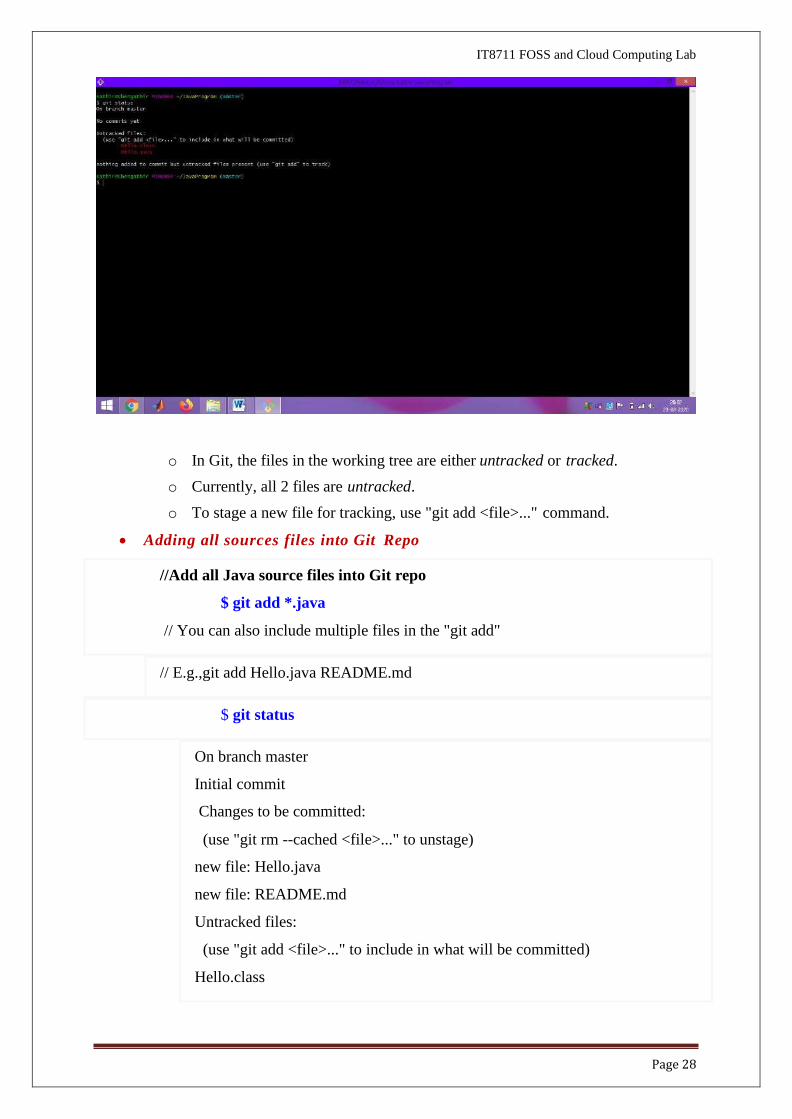
o In Git, the files in the working tree are either untracked or tracked.
o Currently, all 2 files are untracked.
o To stage a new file for tracking, use "git add <file>..." command.
• Adding all sources files into Git Repo
//Add all Java source files into Git repo
$ git add *.java
// You can also include multiple files in the "git add"
// E.g.,git add Hello.java README.md
$ git status
On branch master
Initial commit
Changes to be committed:
(use "git rm --cached <file>..." to unstage)
new file: Hello.java
new file: README.md
Untracked files:
(use "git add <file>..." to include in what will be committed)
Hello.class
Page 29
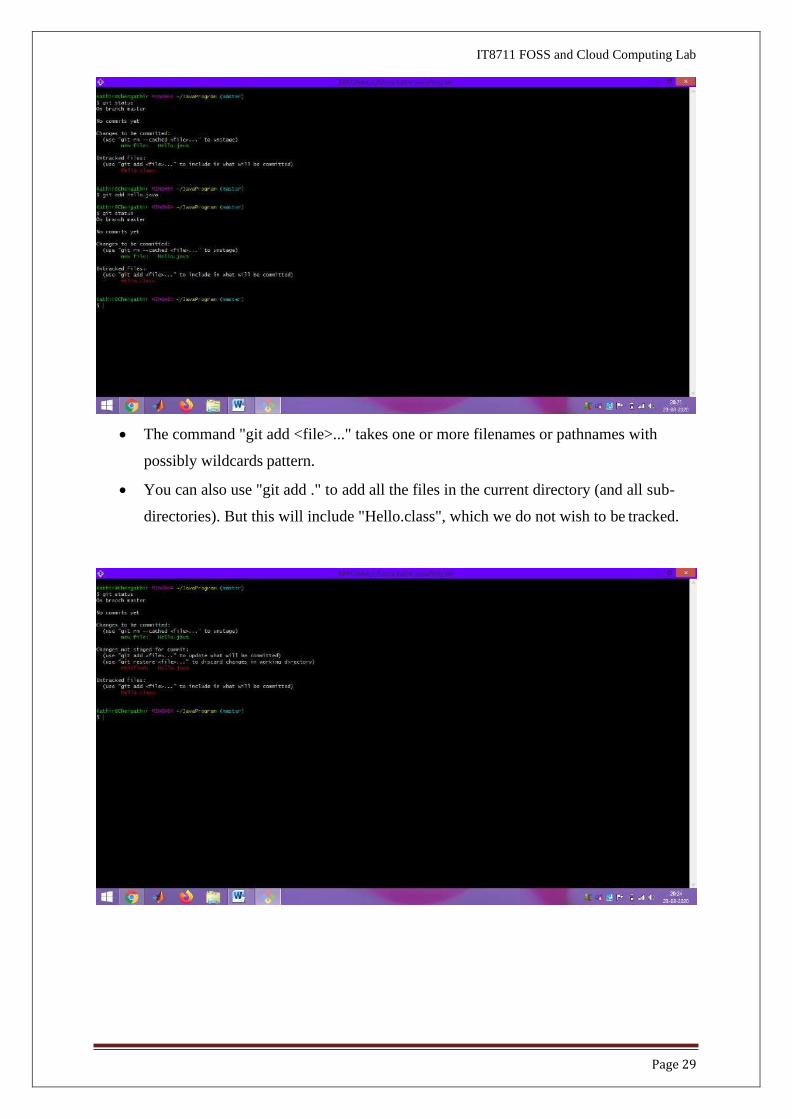
IT8711 FOSS and Cloud Computing Lab
• The command "git add <file>..." takes one or more filenames or pathnames with
possibly wildcards pattern.
• You can also use "git add ." to add all the files in the current directory (and all sub-
directories). But this will include "Hello.class", which we do not wish to be tracked.
IT8711 FOSS and Cloud Computing Lab
Commit Command
• When a new file is added, it is staged (or indexed, or cached) in the staging area (as
shown in the GIT storage model), but NOT yet committed.
• Git uses two stages to commit file changes:
1. "git add <file>" to stage file changes into the staging area, and
2. "git commit" to commit ALL the file changes in the staging area to the local
repo.
• The staging area allows you to group related file changes and commit them together.
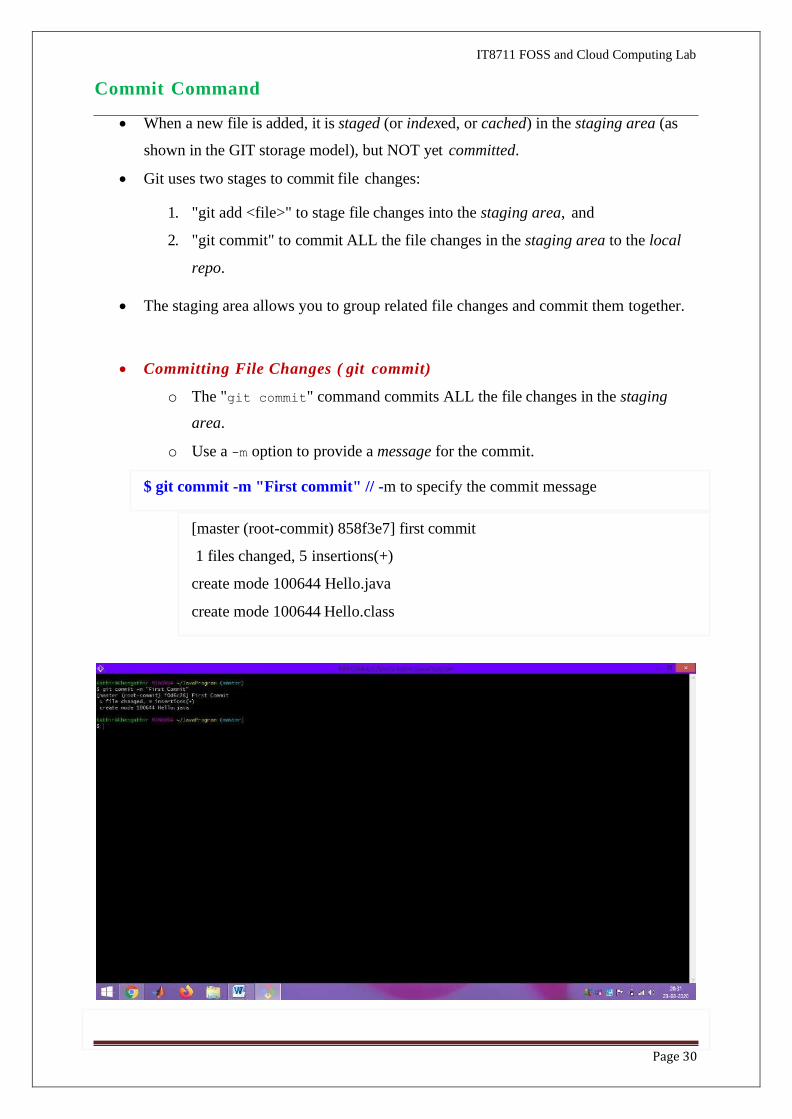
• Committing File Changes ( git commit)
o The "git commit" command commits ALL the file changes in the staging
area.
o Use a -m option to provide a message for the commit.
Page 30
[master (root-commit) 858f3e7] first commit
1 files changed, 5 insertions(+)
create mode 100644 Hello.java
create mode 100644 Hello.class
$ git commit -m "First commit" // -m to specify the commit message
IT8711 FOSS and Cloud Computing Lab
Page 31
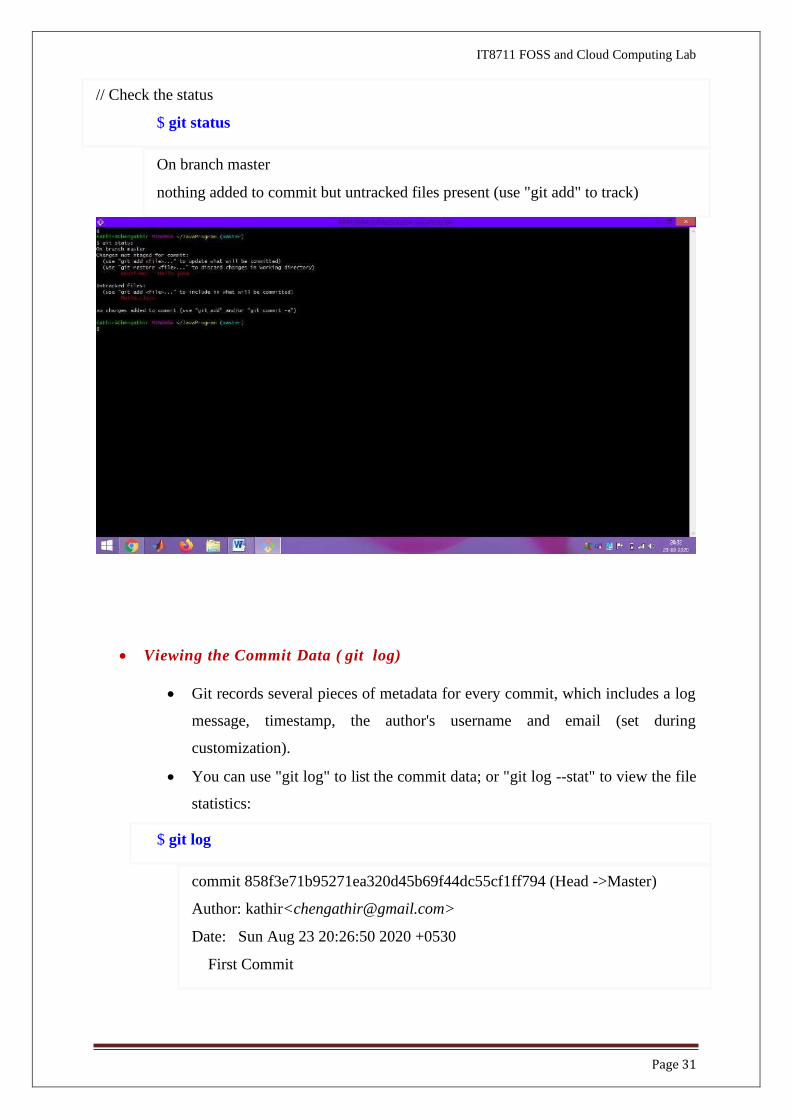
• Viewing the Commit Data ( git log)
• Git records several pieces of metadata for every commit, which includes a log
message, timestamp, the author's username and email (set during
customization).
• You can use "git log" to list the commit data; or "git log --stat" to view the file
statistics:
On branch master
nothing added to commit but untracked files present (use "git add" to track)
// Check the status
$ git status
commit 858f3e71b95271ea320d45b69f44dc55cf1ff794 (Head ->Master)
Author: kathir<[email protected]>
Date: Sun Aug 23 20:26:50 2020 +0530
First Commit
$ git log
IT8711 FOSS and Cloud Computing Lab
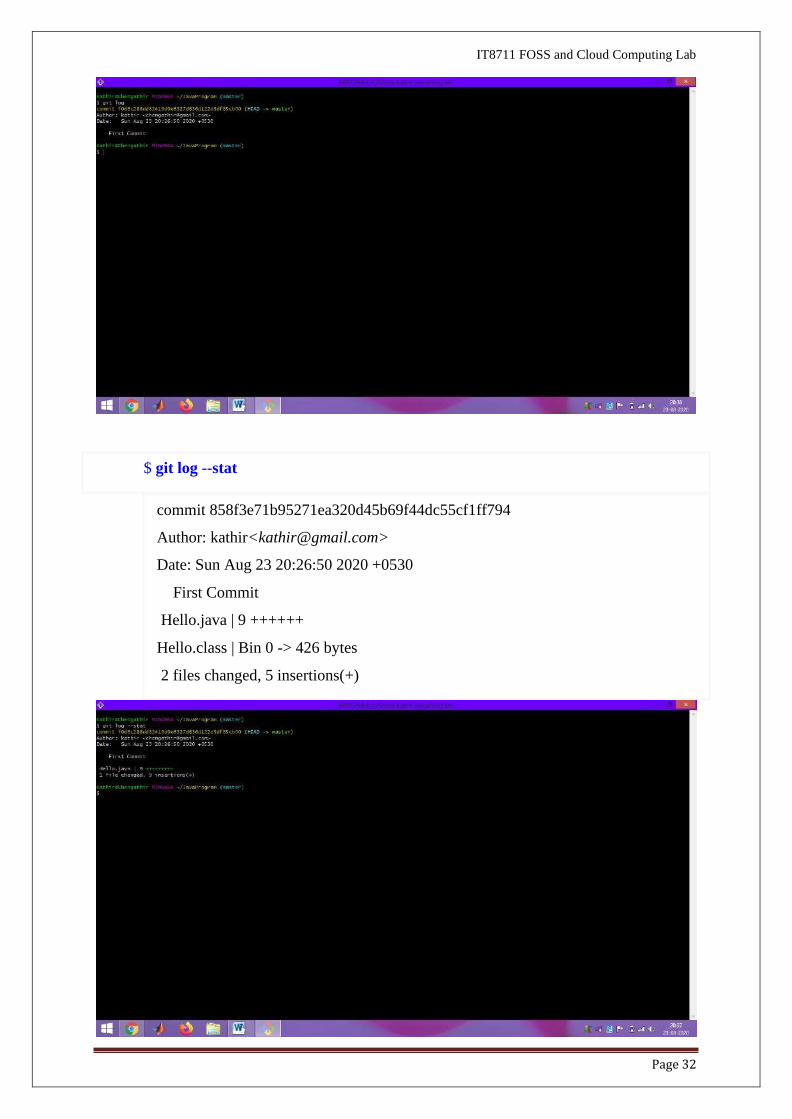
Page 32
commit 858f3e71b95271ea320d45b69f44dc55cf1ff794
Author: kathir<[email protected]>
Date: Sun Aug 23 20:26:50 2020 +0530
First Commit
Hello.java | 9 ++++++
Hello.class | Bin 0 -> 426 bytes
2 files changed, 5 insertions(+)
$ git log --stat
IT8711 FOSS and Cloud Computing Lab
Page 33
• File Status (git status)
A file could be untracked or tracked.
As mentioned, Git tracks file changes at commits. In Git, changes for a tracked file
could be:
1. unstaged (in Working Tree) - called unstaged changes, staged (in Staging Area
or Index or Cache) - called staged changes, or committed (in local repo object
database).The files in "working tree" or "staging area" could have status of
unmodified, added, modified, deleted, renamed, copied, as reported by "git
status".
2. The "git status" output is divided into 3 sections: "Changes not staged for
commit" for the unstaged changes in "working tree", "Changes to be committed"
for the staged changes in the "staging area", and "Untracked files". In each
section, It lists all the files that have been changed, i,e., files having status other
than unmodified.
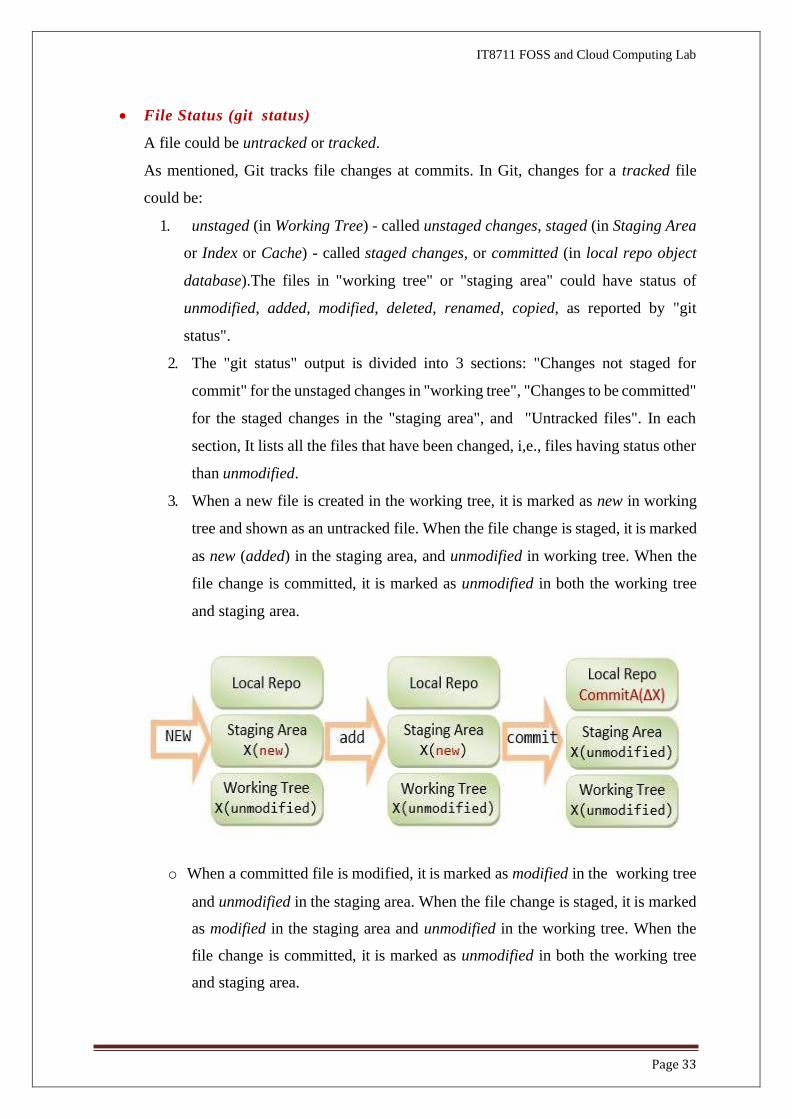
3. When a new file is created in the working tree, it is marked as new in working
tree and shown as an untracked file. When the file change is staged, it is marked
as new (added) in the staging area, and unmodified in working tree. When the
file change is committed, it is marked as unmodified in both the working tree
and staging area.
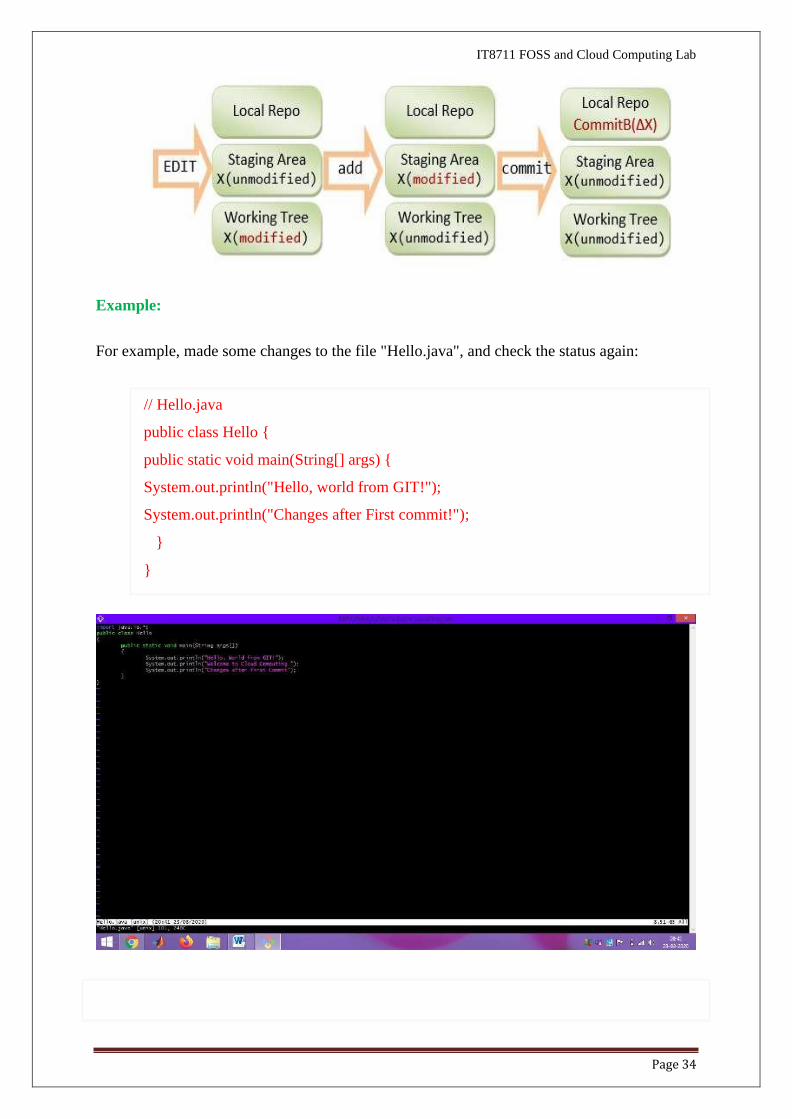
o When a committed file is modified, it is marked as modified in the working tree
and unmodified in the staging area. When the file change is staged, it is marked
as modified in the staging area and unmodified in the working tree. When the
file change is committed, it is marked as unmodified in both the working tree
and staging area.
IT8711 FOSS and Cloud Computing Lab
Page 34
Example:
For example, made some changes to the file "Hello.java", and check the status again:
// Hello.java
public class Hello {
public static void main(String[] args) {
System.out.println("Hello, world from GIT!");
System.out.println("Changes after First commit!");
}
}
IT8711 FOSS and Cloud Computing Lab
Page 35
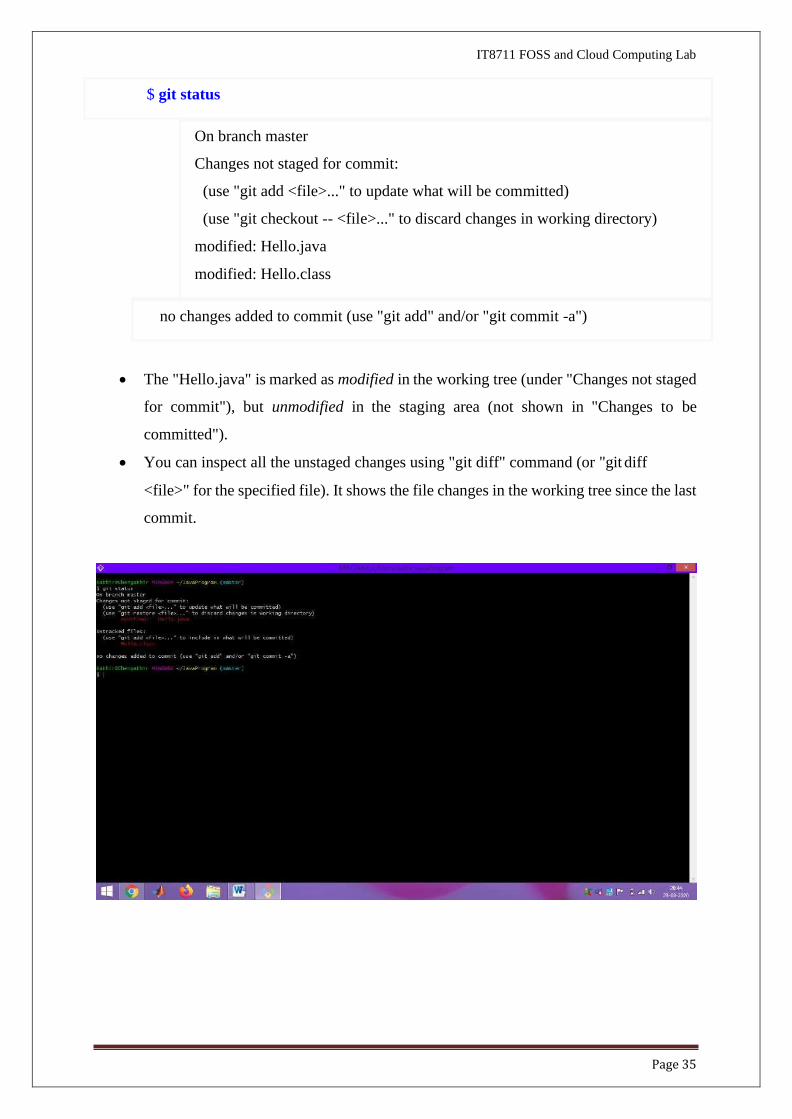
$ git status
On branch master
Changes not staged for commit:
(use "git add <file>..." to update what will be committed)
(use "git checkout -- <file>..." to discard changes in working directory)
modified: Hello.java
modified: Hello.class
no changes added to commit (use "git add" and/or "git commit -a")
• The "Hello.java" is marked as modified in the working tree (under "Changes not staged
for commit"), but unmodified in the staging area (not shown in "Changes to be
committed").
• You can inspect all the unstaged changes using "git diff" command (or "git diff
<file>" for the specified file). It shows the file changes in the working tree since the last
commit.
IT8711 FOSS and Cloud Computing Lab
Page 36
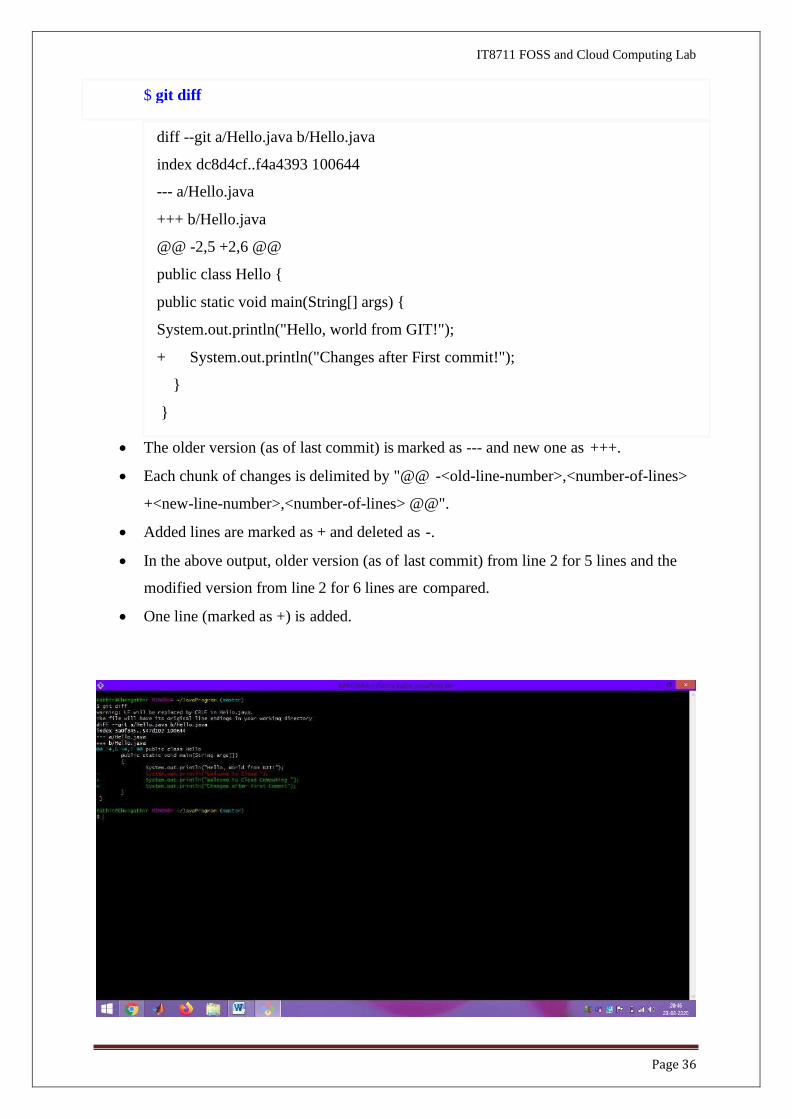
• The older version (as of last commit) is marked as --- and new one as +++.
• Each chunk of changes is delimited by "@@ -<old-line-number>,<number-of-lines>
+<new-line-number>,<number-of-lines> @@".
• Added lines are marked as + and deleted as -.
• In the above output, older version (as of last commit) from line 2 for 5 lines and the
modified version from line 2 for 6 lines are compared.
• One line (marked as +) is added.
diff --git a/Hello.java b/Hello.java
index dc8d4cf..f4a4393 100644
--- a/Hello.java
+++ b/Hello.java
@@ -2,5 +2,6 @@
public class Hello {
public static void main(String[] args) {
System.out.println("Hello, world from GIT!");
+ System.out.println("Changes after First commit!");
}
}
$ git diff
Page 37
IT8711 FOSS and Cloud Computing Lab
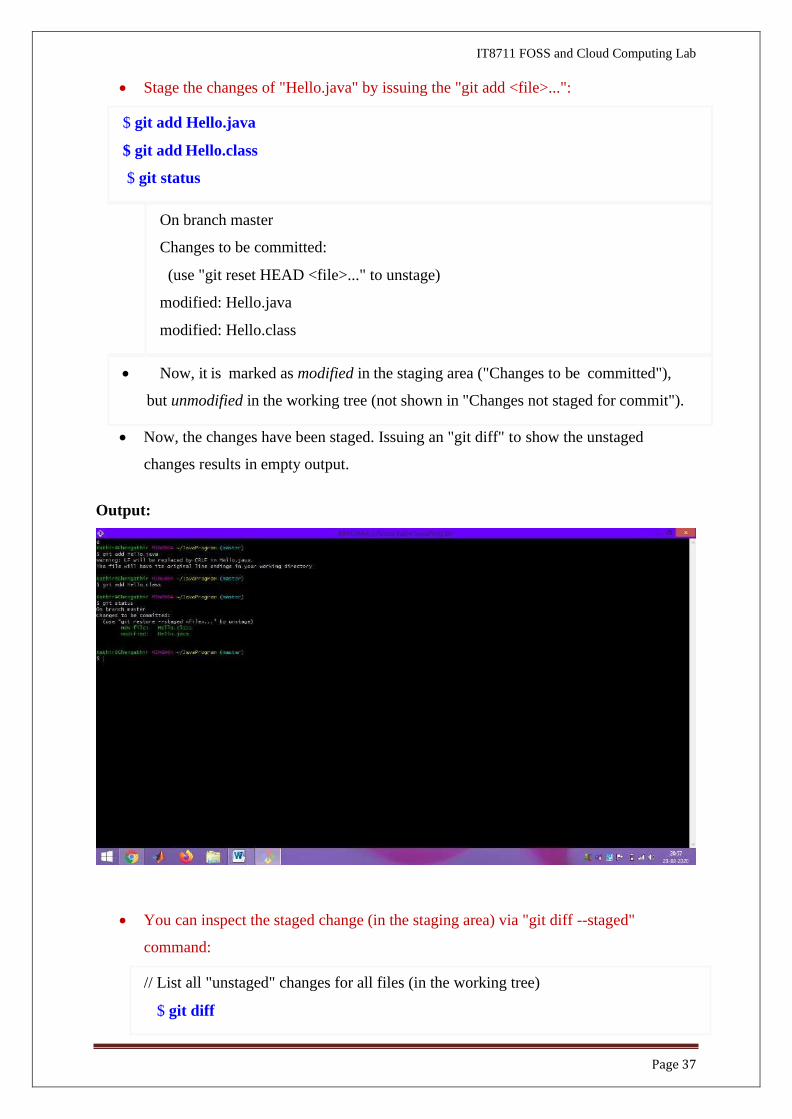
• Stage the changes of "Hello.java" by issuing the "git add <file>...":
$ git add Hello.java
$ git add Hello.class
$ git status
On branch master
Changes to be committed:
(use "git reset HEAD <file>..." to unstage)
modified: Hello.java
modified: Hello.class
• Now, it is marked as modified in the staging area ("Changes to be committed"),
but unmodified in the working tree (not shown in "Changes not staged for commit").
• Now, the changes have been staged. Issuing an "git diff" to show the unstaged
changes results in empty output.
Output:
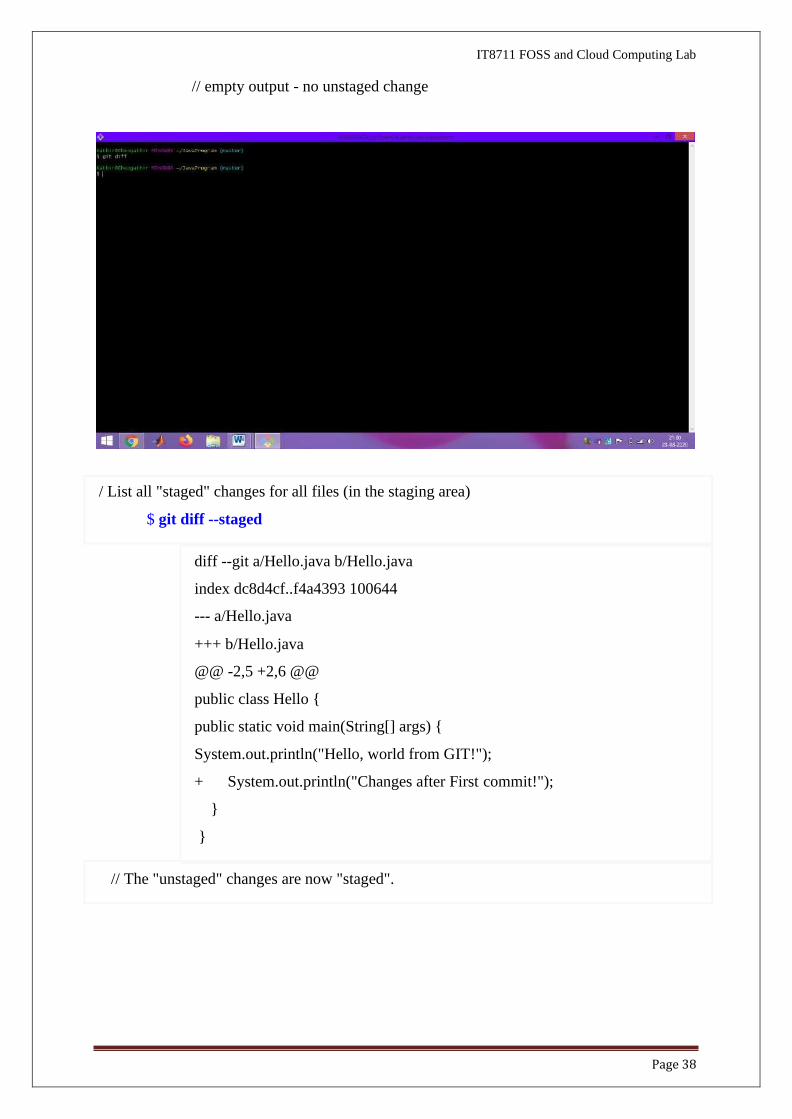
• You can inspect the staged change (in the staging area) via "git diff --staged"
command:
// List all "unstaged" changes for all files (in the working tree)
$ git diff
Page 38
IT8711 FOSS and Cloud Computing Lab
// empty output - no unstaged change
/ List all "staged" changes for all files (in the staging area)
$ git diff --staged
diff --git a/Hello.java b/Hello.java
index dc8d4cf..f4a4393 100644
--- a/Hello.java
+++ b/Hello.java
@@ -2,5 +2,6 @@
public class Hello {
public static void main(String[] args) {
System.out.println("Hello, world from GIT!");
+ System.out.println("Changes after First commit!");
}
}
// The "unstaged" changes are now "staged".
Page 39
IT8711 FOSS and Cloud Computing Lab
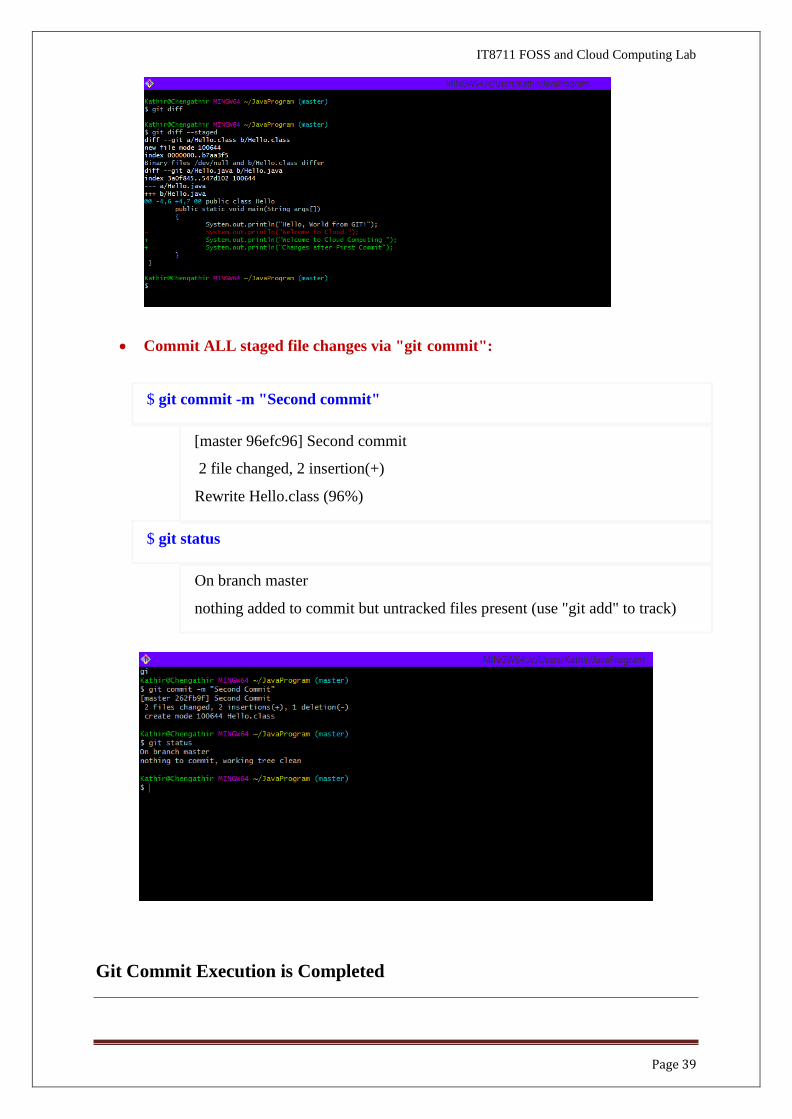
• Commit ALL staged file changes via "git commit":
$ git commit -m "Second commit"
[master 96efc96] Second commit
2 file changed, 2 insertion(+)
Rewrite Hello.class (96%)
$ git status
On branch master
nothing added to commit but untracked files present (use "git add" to track)
Git Commit Execution is Completed
Page 40
IT8711 FOSS and Cloud Computing Lab
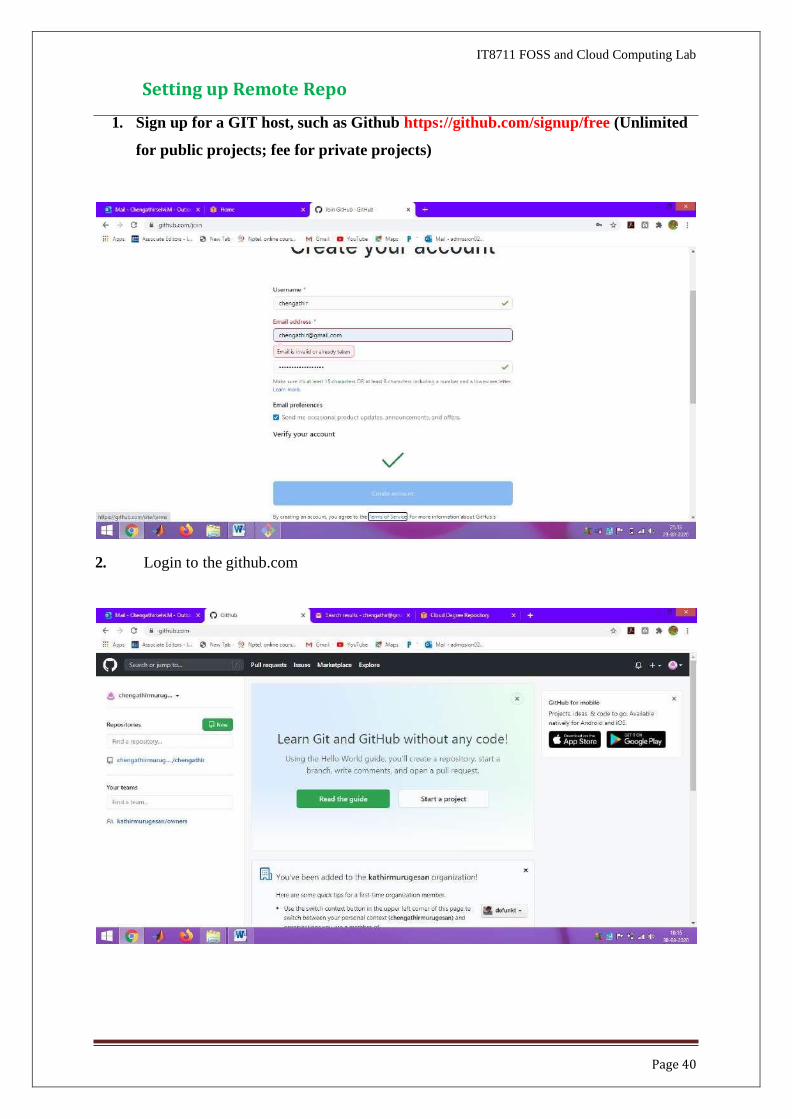
Setting up Remote Repo
1. Sign up for a GIT host, such as Github https://github.com/signup/free (Unlimited
for public projects; fee for private projects)
2. Login to the github.com
Page 41
IT8711 FOSS and Cloud Computing Lab
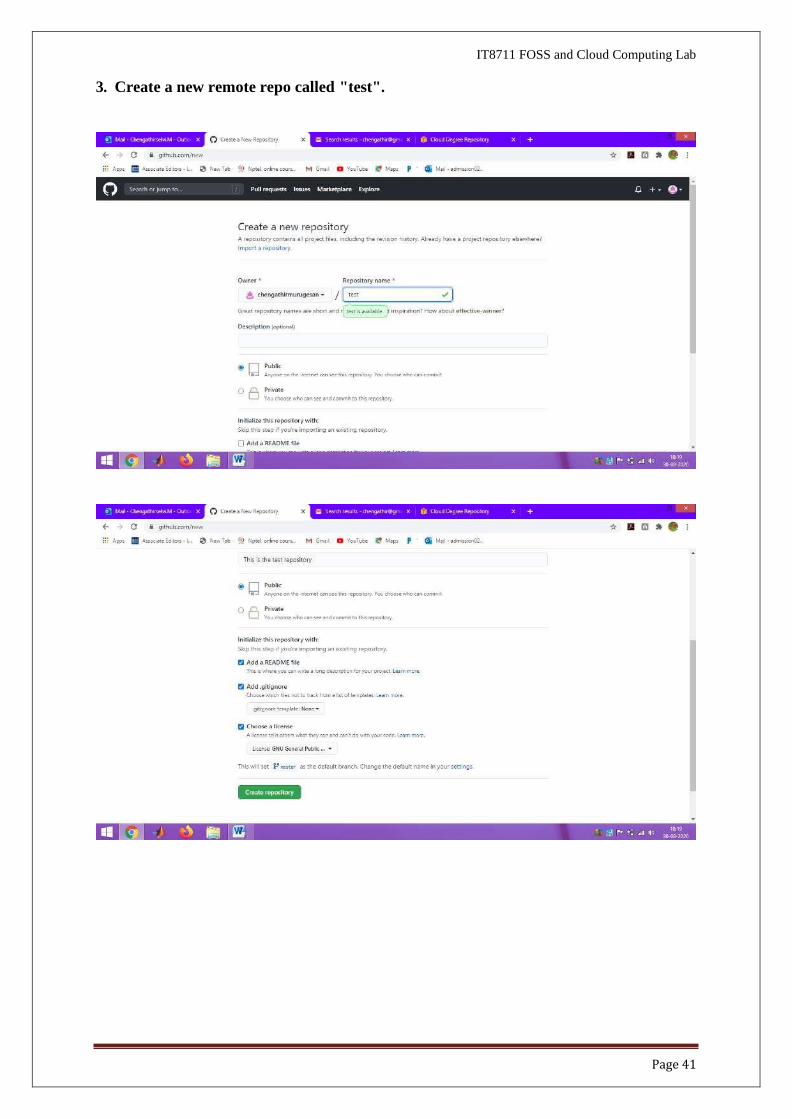
3. Create a new remote repo called "test".
Page 42
IT8711 FOSS and Cloud Computing Lab
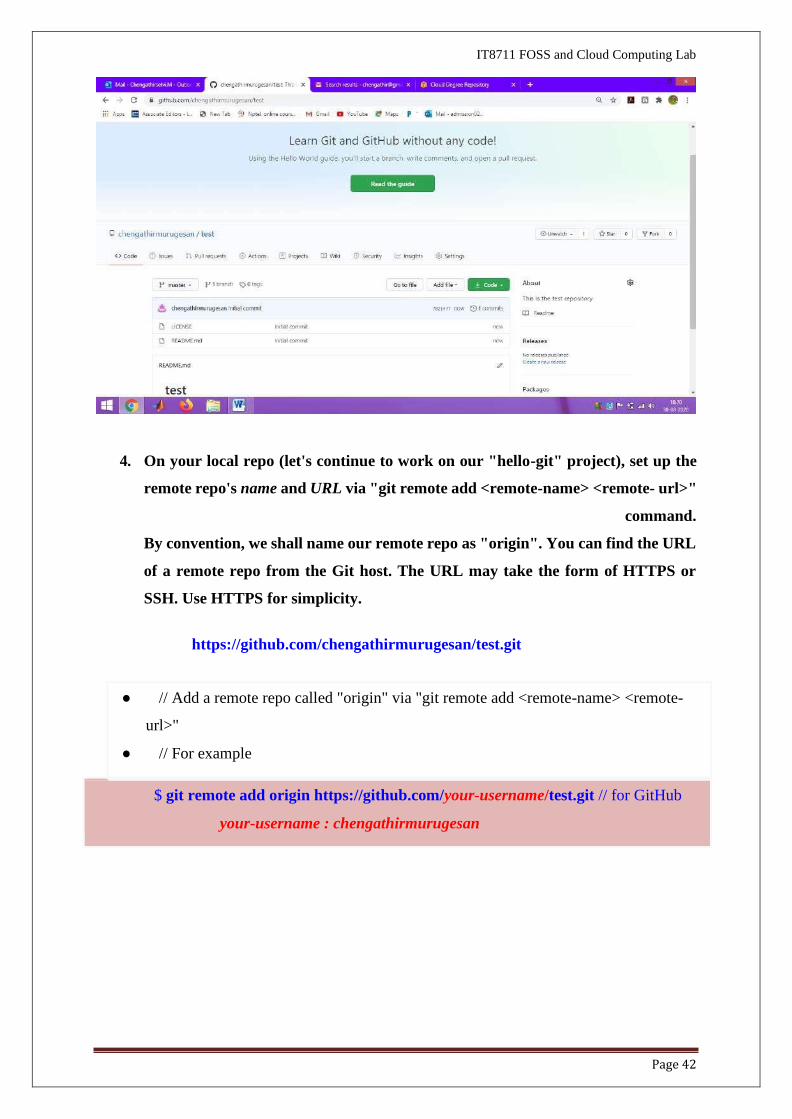
4. On your local repo (let's continue to work on our "hello-git" project), set up the
remote repo's name and URL via "git remote add <remote-name> <remote- url>"
command.
By convention, we shall name our remote repo as "origin". You can find the URL
of a remote repo from the Git host. The URL may take the form of HTTPS or
SSH. Use HTTPS for simplicity.
https://github.com/chengathirmurugesan/test.git
● // Add a remote repo called "origin" via "git remote add <remote-name> <remote-
url>"
● // For example
$ git remote add origin https://github.com/your-username/test.git // for GitHub
your-username : chengathirmurugesan
Page 43
IT8711 FOSS and Cloud Computing Lab
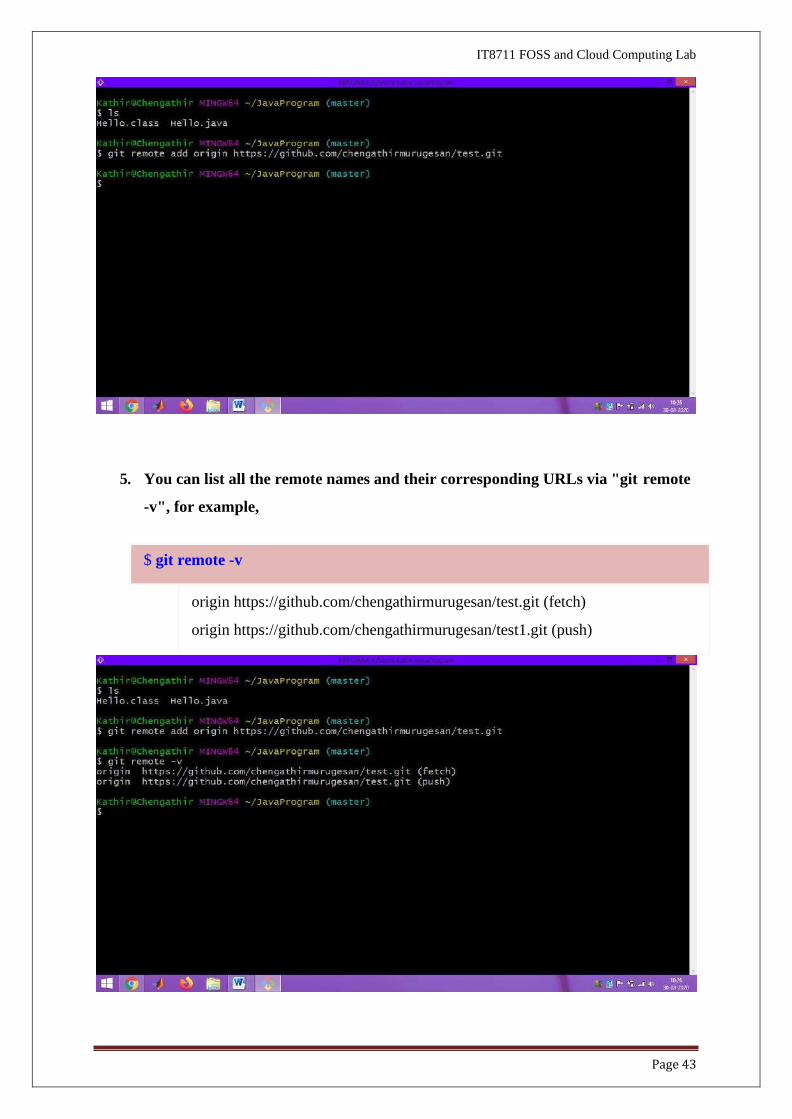
5. You can list all the remote names and their corresponding URLs via "git remote
-v", for example,
origin https://github.com/chengathirmurugesan/test.git (fetch)
origin https://github.com/chengathirmurugesan/test1.git (push)
$ git remote -v
Page 44
IT8711 FOSS and Cloud Computing Lab
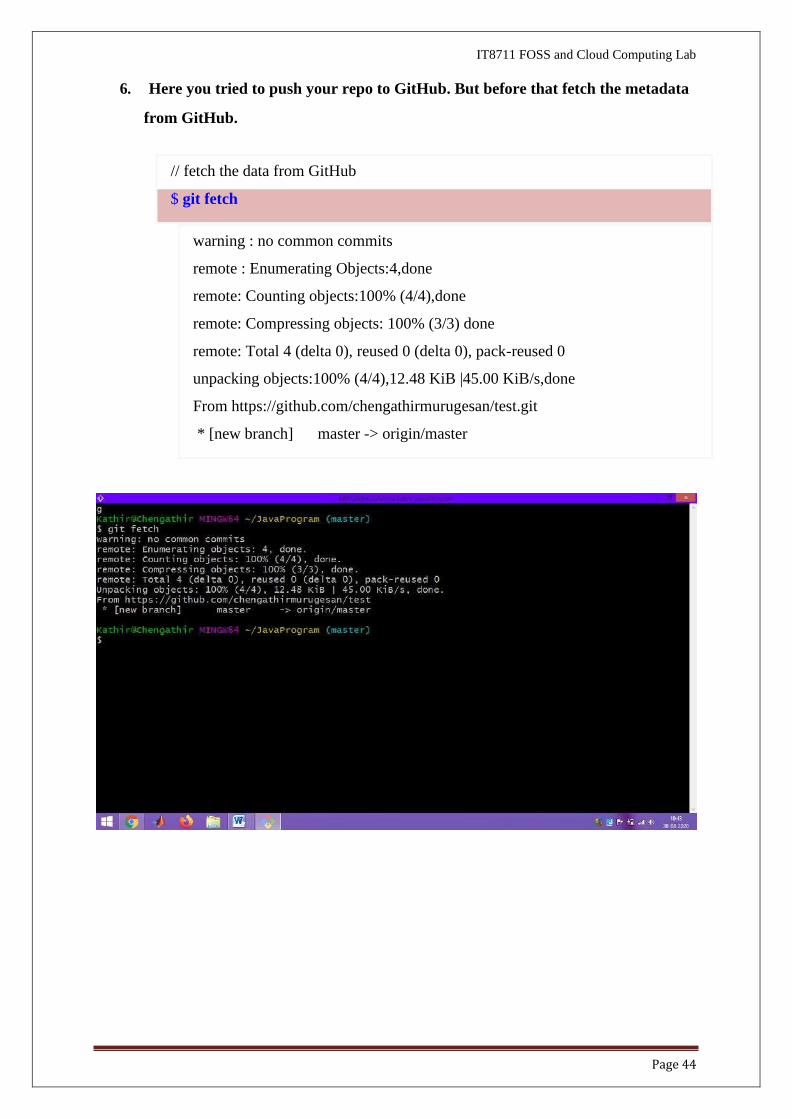
6. Here you tried to push your repo to GitHub. But before that fetch the metadata
from GitHub.
// fetch the data from GitHub
$ git fetch
warning : no common commits
remote : Enumerating Objects:4,done
remote: Counting objects:100% (4/4),done
remote: Compressing objects: 100% (3/3) done
remote: Total 4 (delta 0), reused 0 (delta 0), pack-reused 0
unpacking objects:100% (4/4),12.48 KiB |45.00 KiB/s,done
From https://github.com/chengathirmurugesan/test.git
* [new branch] master -> origin/master
Page 45
IT8711 FOSS and Cloud Computing Lab
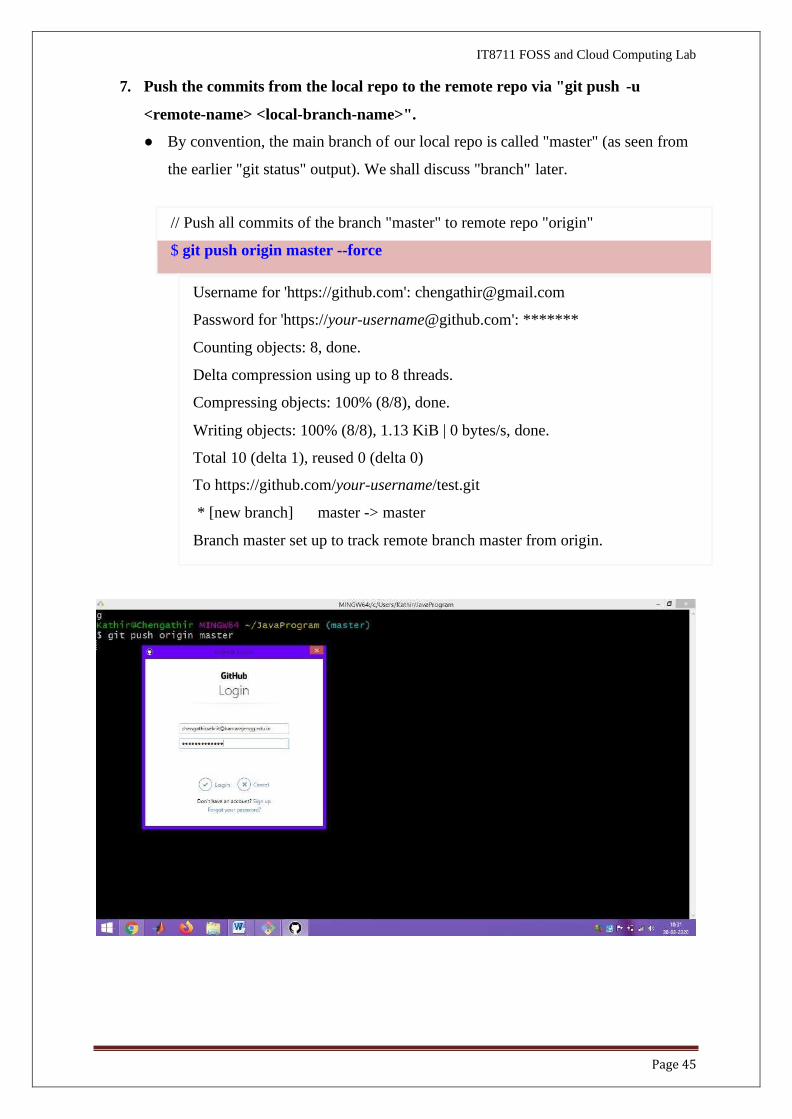
7. Push the commits from the local repo to the remote repo via "git push -u
<remote-name> <local-branch-name>".
● By convention, the main branch of our local repo is called "master" (as seen from
the earlier "git status" output). We shall discuss "branch" later.
// Push all commits of the branch "master" to remote repo "origin"
$ git push origin master --force
Username for 'https://github.com': [email protected]
Password for 'https://[email protected]': *******
Counting objects: 8, done.
Delta compression using up to 8 threads.
Compressing objects: 100% (8/8), done.
Writing objects: 100% (8/8), 1.13 KiB | 0 bytes/s, done.
Total 10 (delta 1), reused 0 (delta 0)
To https://github.com/your-username/test.git
* [new branch] master -> master
Branch master set up to track remote branch master from origin.
Page 46
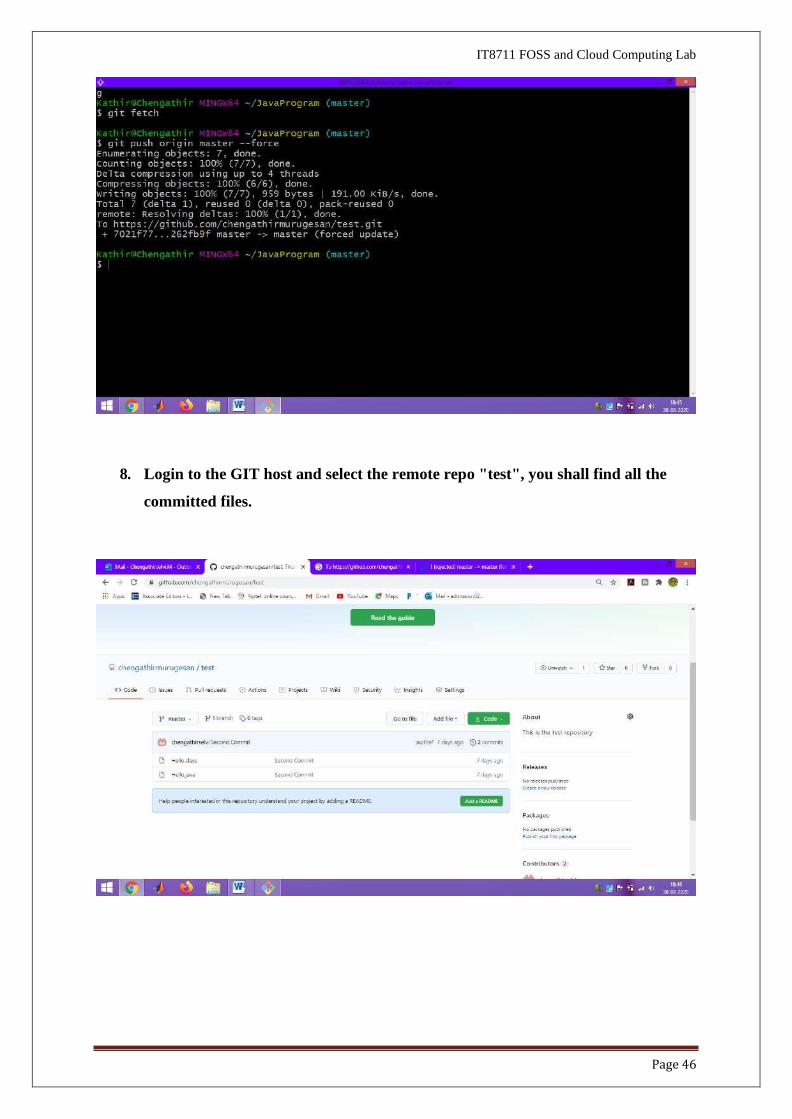
IT8711 FOSS and Cloud Computing Lab
8. Login to the GIT host and select the remote repo "test", you shall find all the
committed files.
Page 47
IT8711 FOSS and Cloud Computing Lab
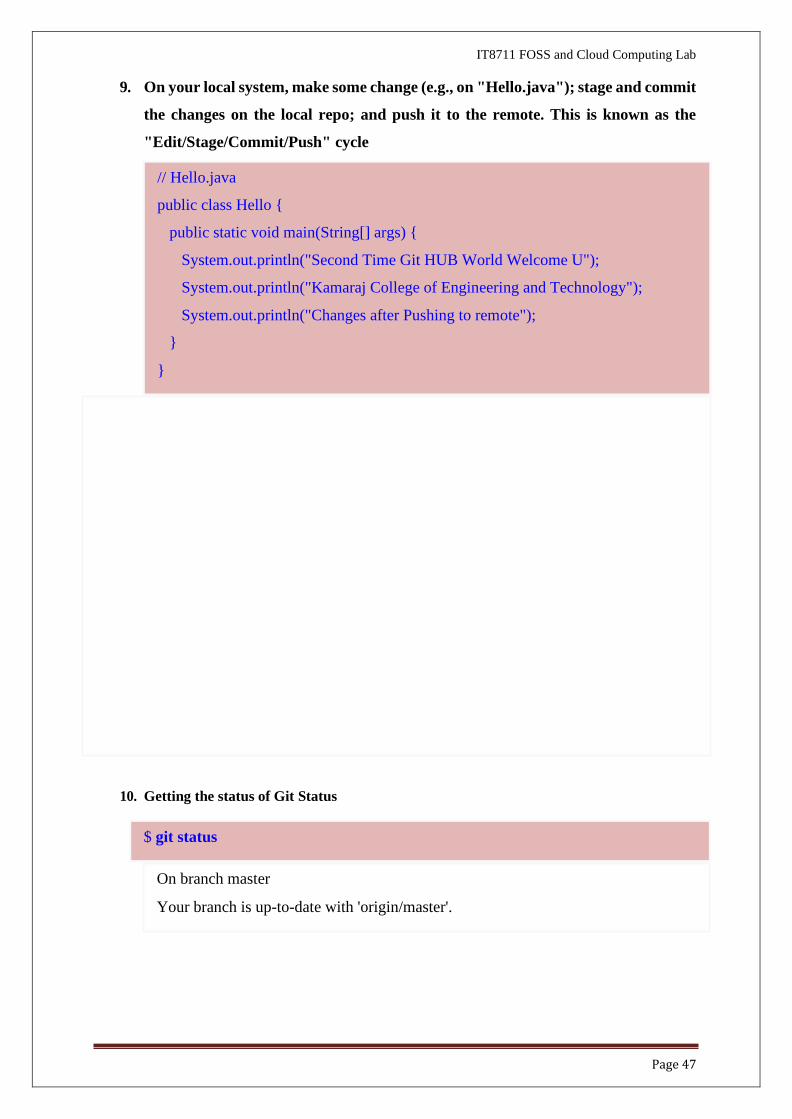
9. On your local system, make some change (e.g., on "Hello.java"); stage and commit
the changes on the local repo; and push it to the remote. This is known as the
"Edit/Stage/Commit/Push" cycle
10. Getting the status of Git Status
// Hello.java
public class Hello {
public static void main(String[] args) {
System.out.println("Second Time Git HUB World Welcome U");
System.out.println("Kamaraj College of Engineering and Technology");
System.out.println("Changes after Pushing to remote");
}
}
On branch master
Your branch is up-to-date with 'origin/master'.
$ git status
Page 48
IT8711 FOSS and Cloud Computing Lab
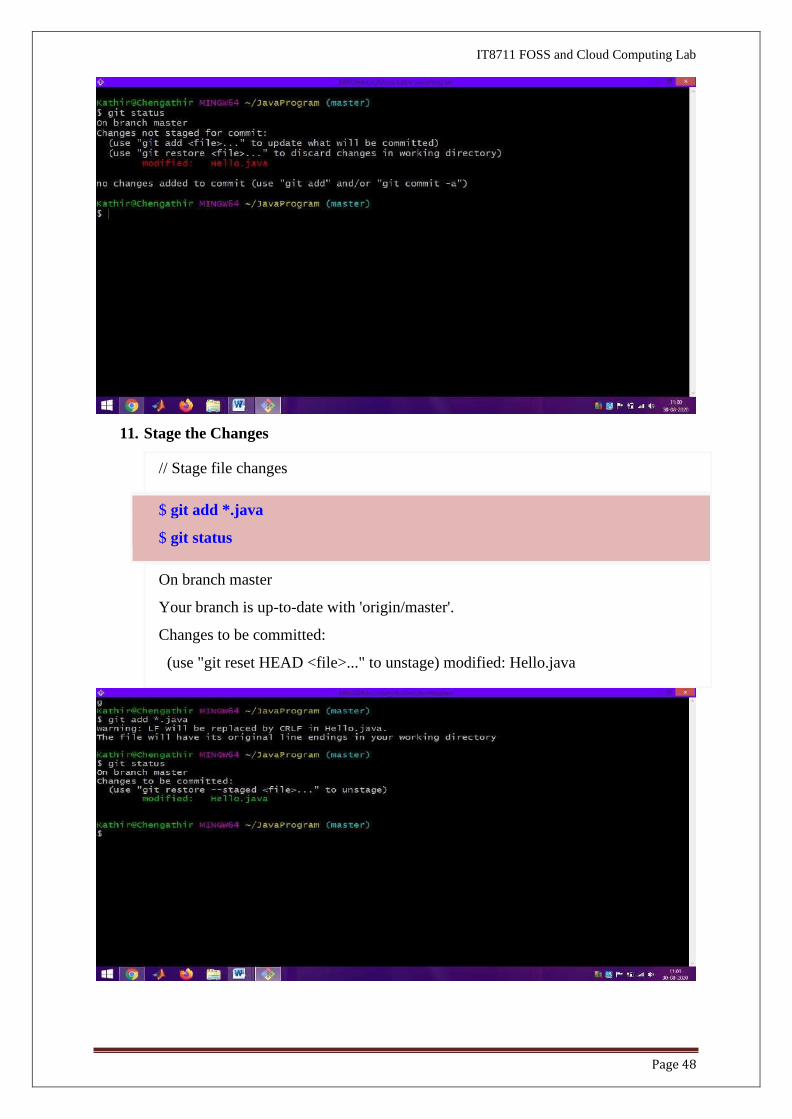
11. Stage the Changes
// Stage file changes
$ git add *.java
$ git status
On branch master
Your branch is up-to-date with 'origin/master'.
Changes to be committed:
(use "git reset HEAD <file>..." to unstage) modified: Hello.java

Page 49
IT8711 FOSS and Cloud Computing Lab
12. Commit all staged File Changes
// Commit all staged file changes
$ git commit -m "Third commit"
[master 744307e] Third commit
1 file changed, 1 insertion(+)
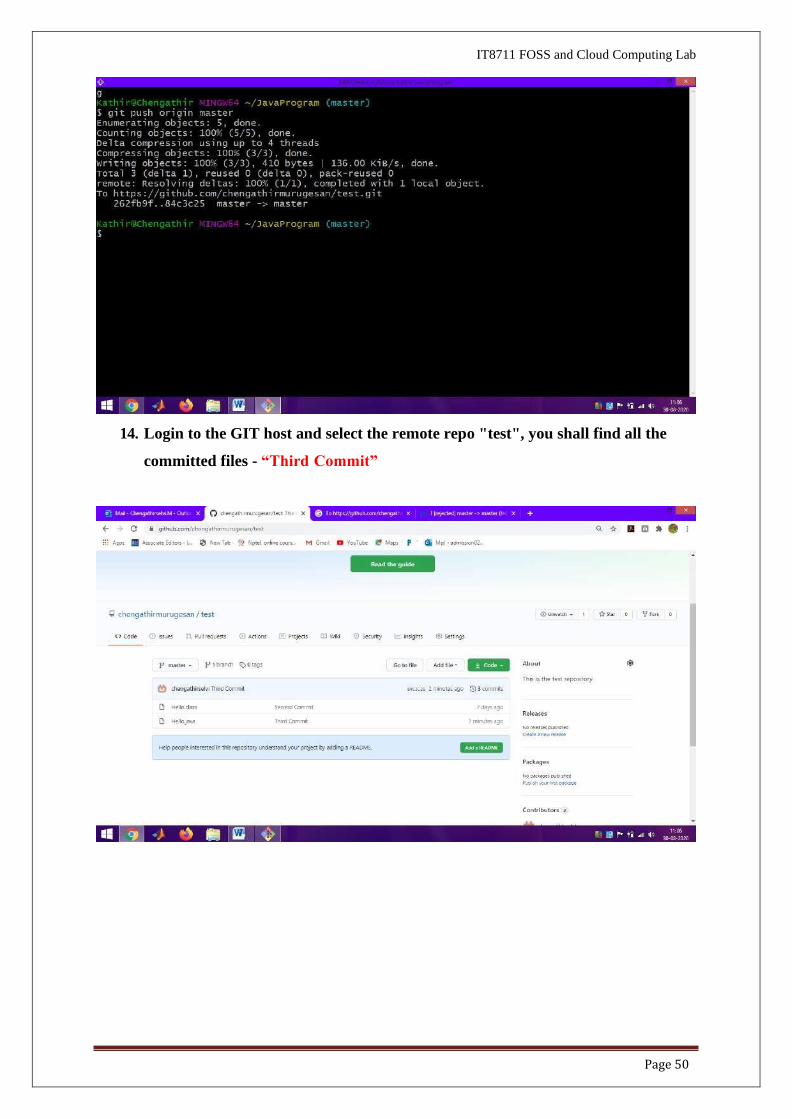
13. Push the commits on Local Master Branch to remote
// Push the commits on local master branch to remote
$ git push origin master
Username for 'https://github.com': ******
Password for 'https://[email protected]': ******
Counting objects: 5, done.
Delta compression using up to 8 threads.
Compressing objects: 100% (3/3), done.
Writing objects: 100% (3/3), 377 bytes | 0 bytes/s, done.
Total 3 (delta 1), reused 0 (delta 0)
To https://github.com/your-username/test.git
711ef4f..744307e master -> master
IT8711 FOSS and Cloud Computing Lab
Page 50
14. Login to the GIT host and select the remote repo "test", you shall find all the
committed files - “Third Commit”
IT8711 FOSS and Cloud Computing Lab
Page 51
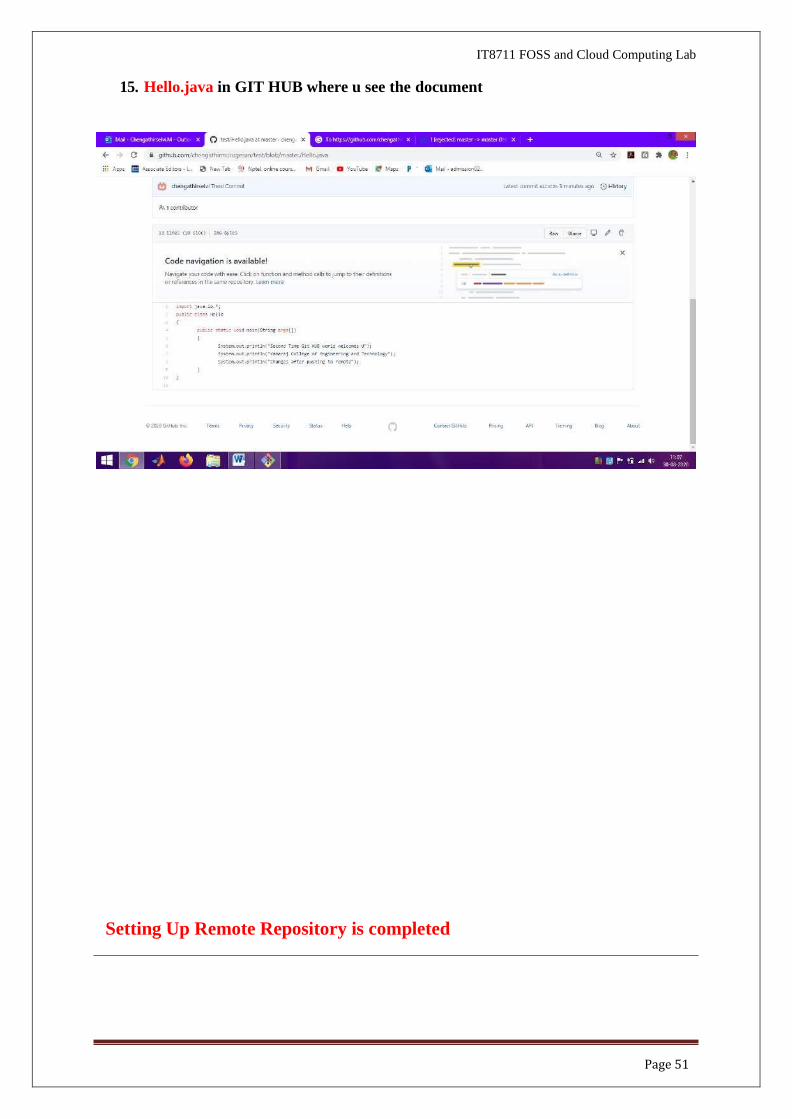
15. Hello.java in GIT HUB where u see the document
Setting Up Remote Repository is completed

Page 52
IT8711 FOSS and Cloud Computing Lab
Cloning a Project from a Remote Repo
● As mentioned earlier, you can start a local GIT repo either running "git init" on your own
project, or "git clone <remote-url>" to copy from an existing project.
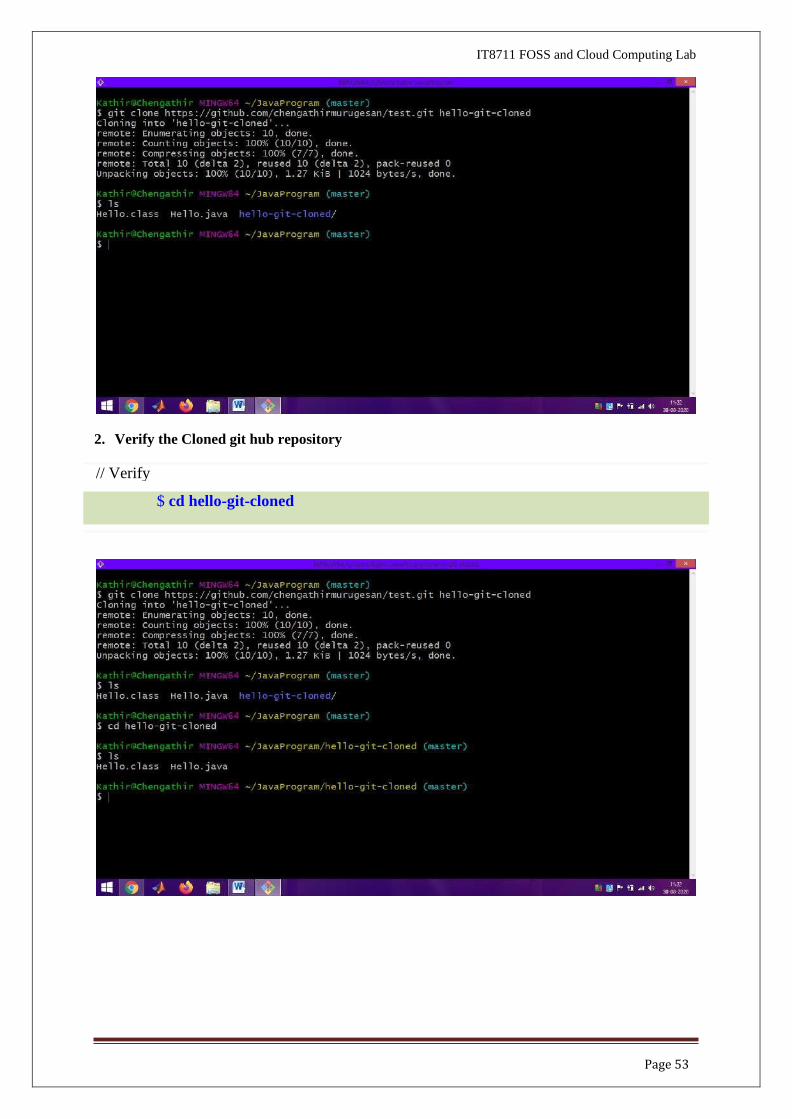
1. Cloning the git hub repository
git clone <remote-url>
// <url>: can be https (recommended), ssh or file.
// Clone the project UNDER the current directory
// The name of the "working directory" is the same as the remote project name
git clone <remote-url> <working-directory-name>
// Clone UNDER current directory, use the given "working directory" name
● SYNTAX
Cloning into 'hello-git-cloned'...
remote: Counting objects: 13, done.
remote: Compressing objects: 100% (11/11), done.
remote: Total 13 (delta 2), reused 13 (delta 2)
Unpacking objects: 100% (13/13), done.
Checking connectivity... done.
$ git clone https://github.com/Umamageswaran/test1.git hello-git-cloned
Page 53
IT8711 FOSS and Cloud Computing Lab
2. Verify the Cloned git hub repository
// Verify
$ cd hello-git-cloned
Page 54
IT8711 FOSS and Cloud Computing Lab
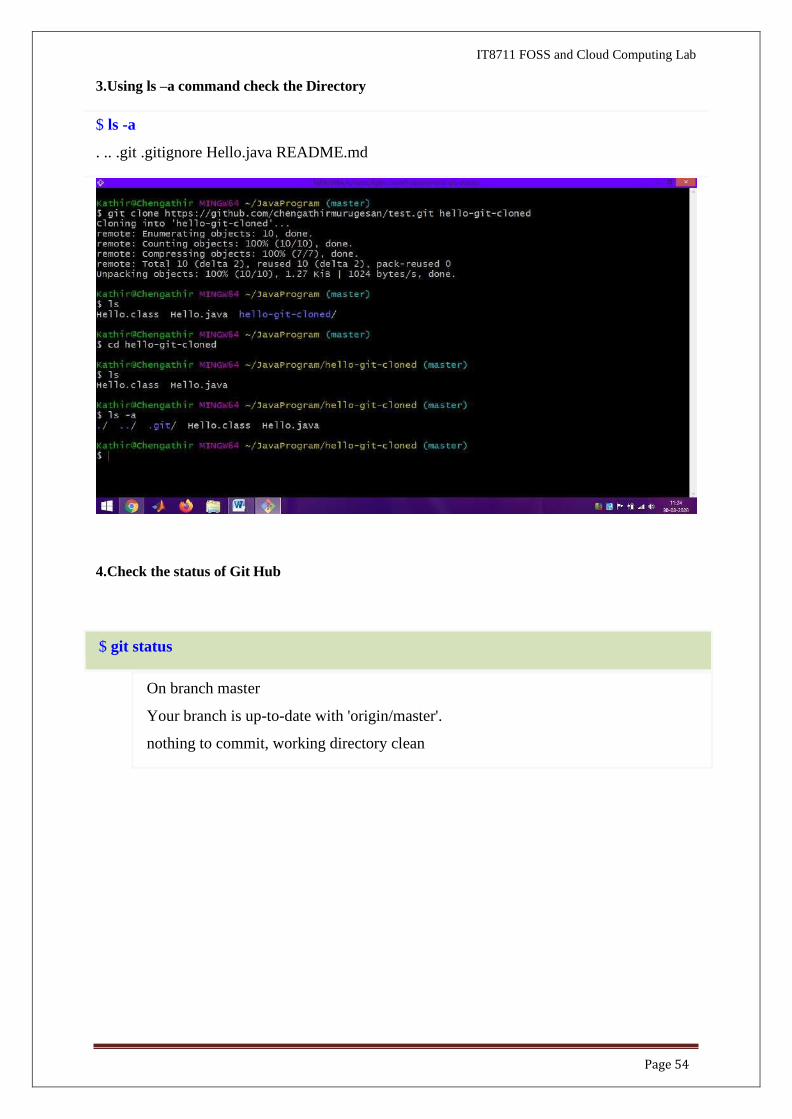
3. Using ls –a command check the Directory
4. Check the status of Git Hub
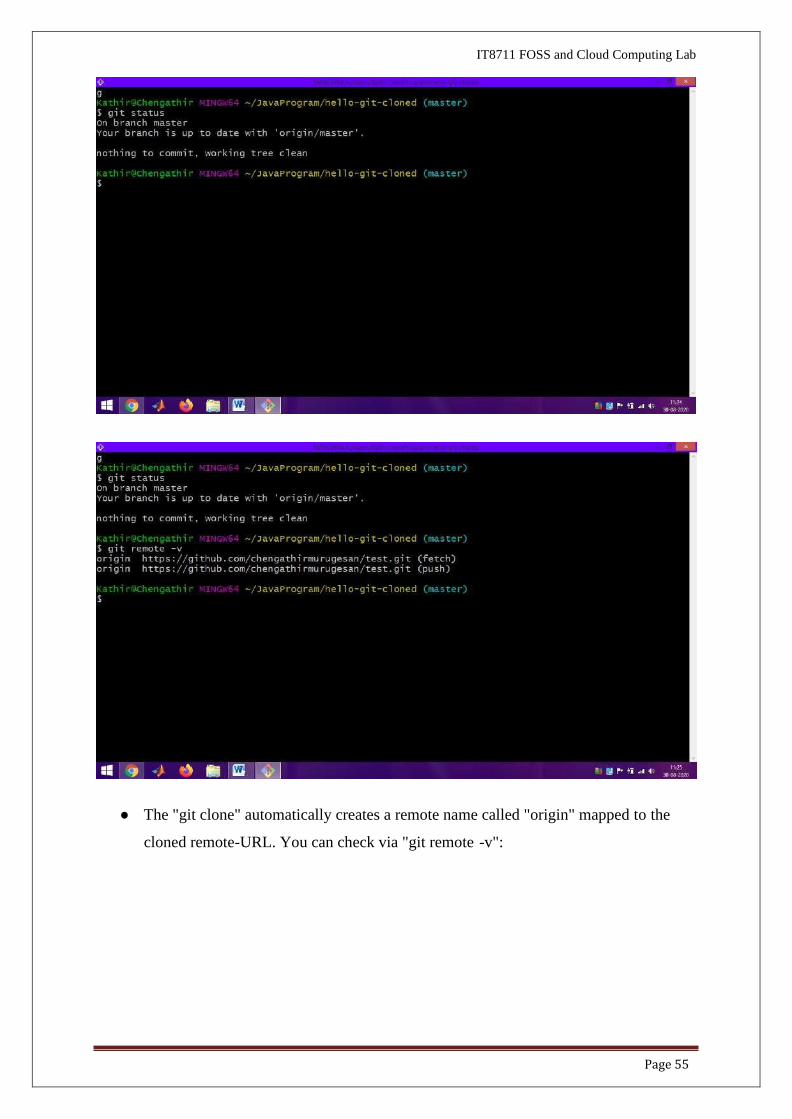
$ git status
On branch master
Your branch is up-to-date with 'origin/master'.
nothing to commit, working directory clean
$ ls -a
. .. .git .gitignore Hello.java README.md
Page 55
IT8711 FOSS and Cloud Computing Lab
● The "git clone" automatically creates a remote name called "origin" mapped to the
cloned remote-URL. You can check via "git remote -v":
Page 56
IT8711 FOSS and Cloud Computing Lab
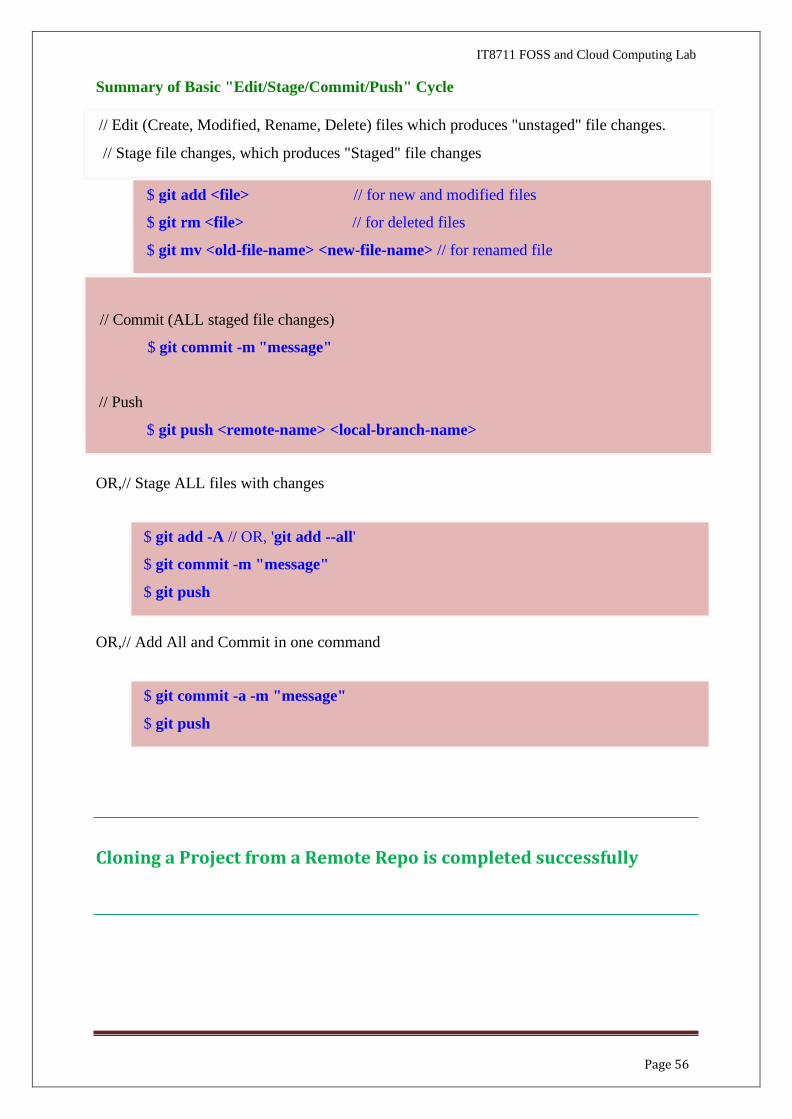
Summary of Basic "Edit/Stage/Commit/Push" Cycle
// Edit (Create, Modified, Rename, Delete) files which produces "unstaged" file changes.
// Stage file changes, which produces "Staged" file changes
$ git add <file> // for new and modified files
$ git rm <file> // for deleted files
$ git mv <old-file-name> <new-file-name> // for renamed file
// Commit (ALL staged file changes)
$ git commit -m "message"
// Push
$ git push <remote-name> <local-branch-name>
OR,// Stage ALL files with changes
OR,// Add All and Commit in one command
Cloning a Project from a Remote Repo is completed successfully
$ git add -A // OR, 'git add --all'
$ git commit -m "message"
$ git push
$ git commit -a -m "message"
$ git push
Page 57
Check Out
IT8711 FOSS and Cloud Computing Lab
Switching to a Branch (git checkout <branch-name>)
● Branching allows you and your team members to work on different aspects of the
software concurrently (on so-called feature branches), and merge into the
master branch as and when they completes.
● Branching is the most important feature in a concurrent version control system.
● A branch in Git is a lightweight movable pointer to one of the commits.
● For the initial commit, Git assigns the default branch name called master and sets
the master branch pointer at the initial commit.
● As you make further commits on the master branch, the master branch pointer move
forward accordingly.
● Git also uses a special pointer called HEAD to keep track of the branch that you are
currently working on.
● The HEAD always refers to the latest commit on the current branch.
● Whenever you switch branch, the HEAD also switches to the latest commit on the
branch switched.
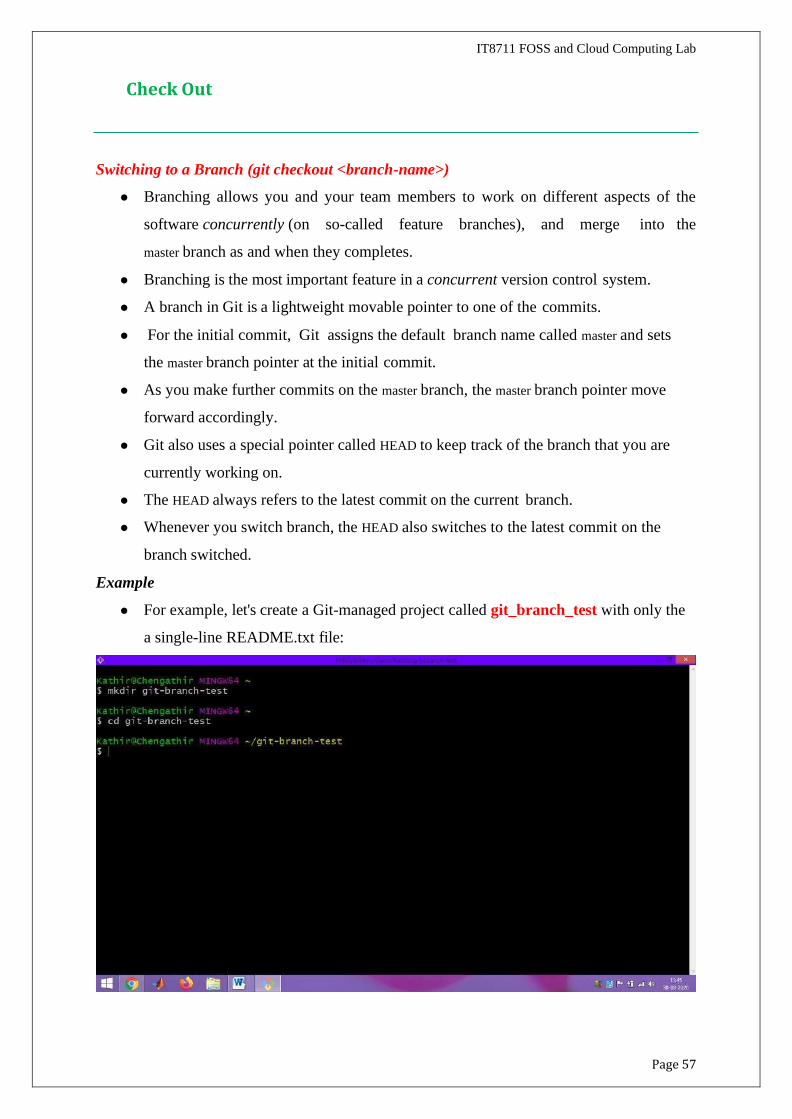
Example
● For example, let's create a Git-managed project called git_branch_test with only the
a single-line README.txt file:

Page 58
Page 59
IT8711 FOSS and Cloud Computing Lab
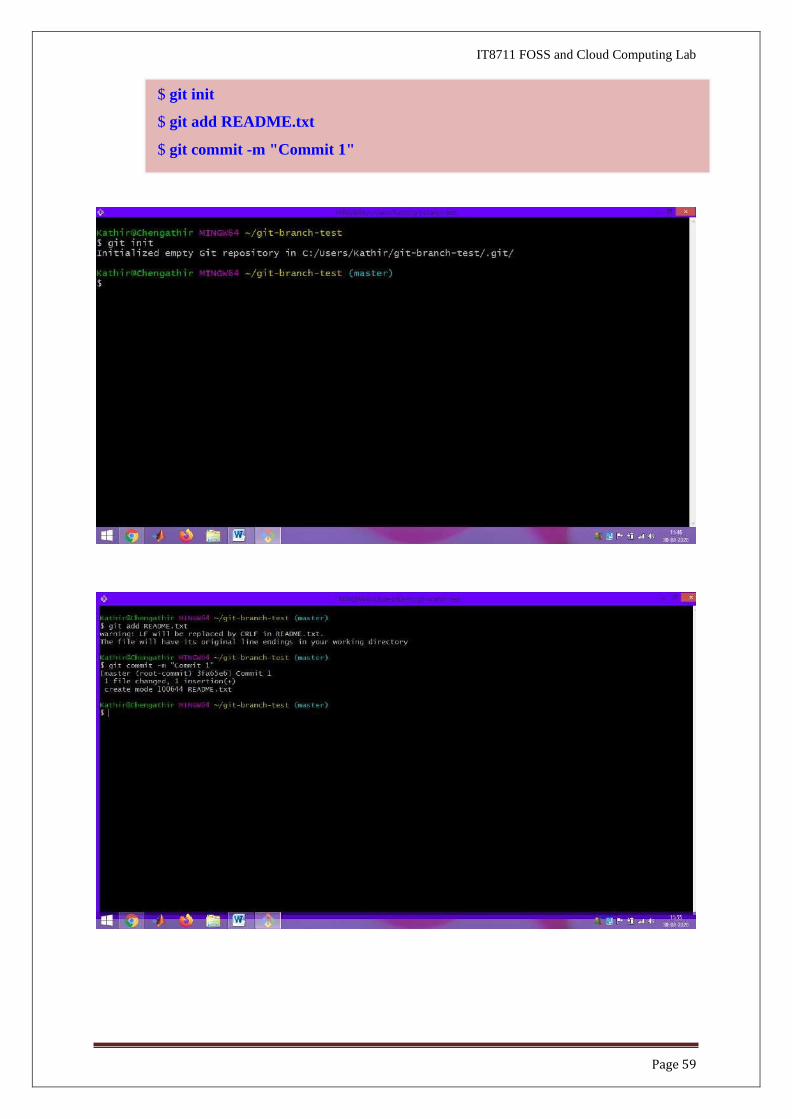
$ git init
$ git add README.txt
$ git commit -m "Commit 1"

Page 60
IT8711 FOSS and Cloud Computing Lab
// Append a line in README.txt: This line is added after Commit 1
$ git status
$ git add README.txt
$ git commit -m "Commit 2"
// Append a line in README.txt: This line is added after Commit 2
$ git status
$ git add README.txt
$ git commit -m "Commit 3"
Page 61
IT8711 FOSS and Cloud Computing Lab
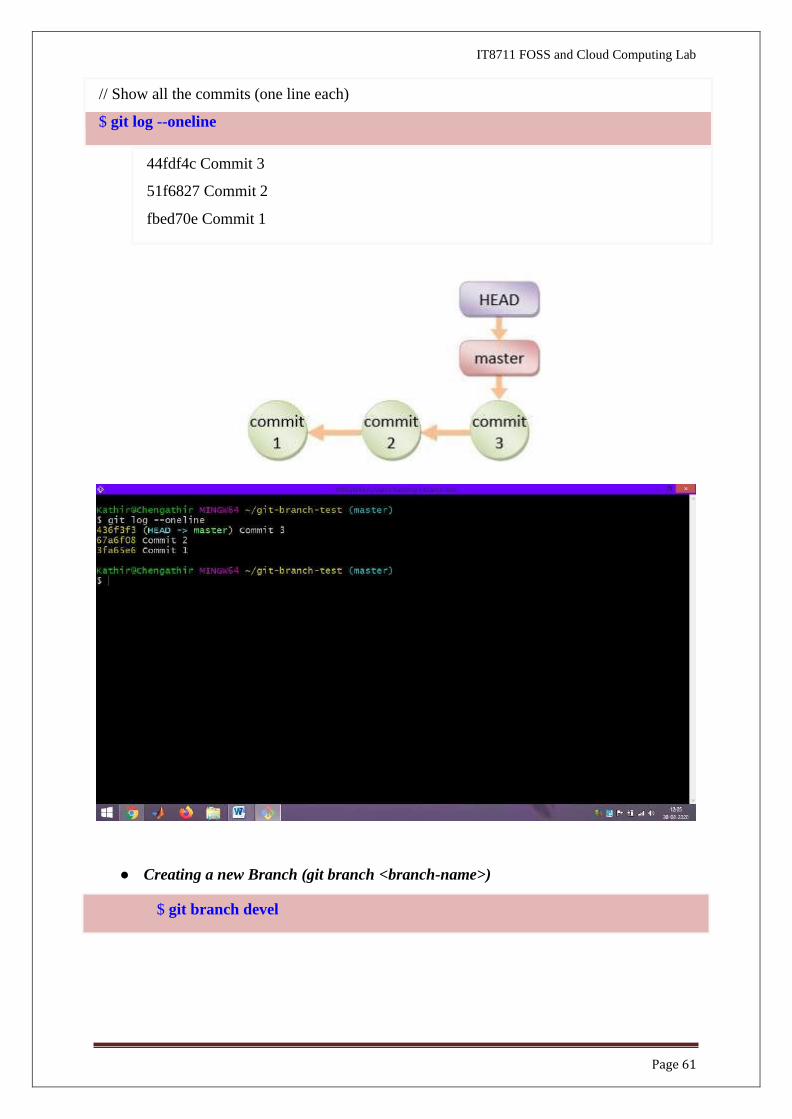
// Show all the commits (one line each)
$ git log --oneline
44fdf4c Commit 3
51f6827 Commit 2
fbed70e Commit 1
● Creating a new Branch (git branch <branch-name>)
$ git branch devel
Page 62
IT8711 FOSS and Cloud Computing Lab
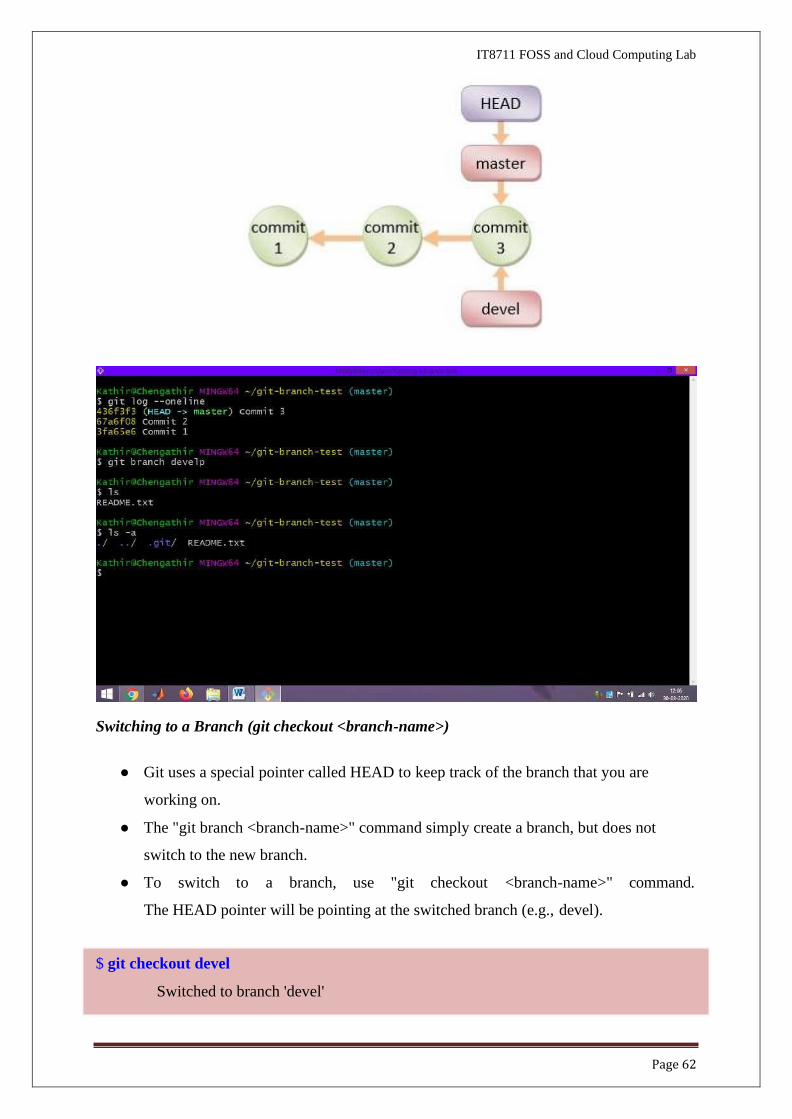
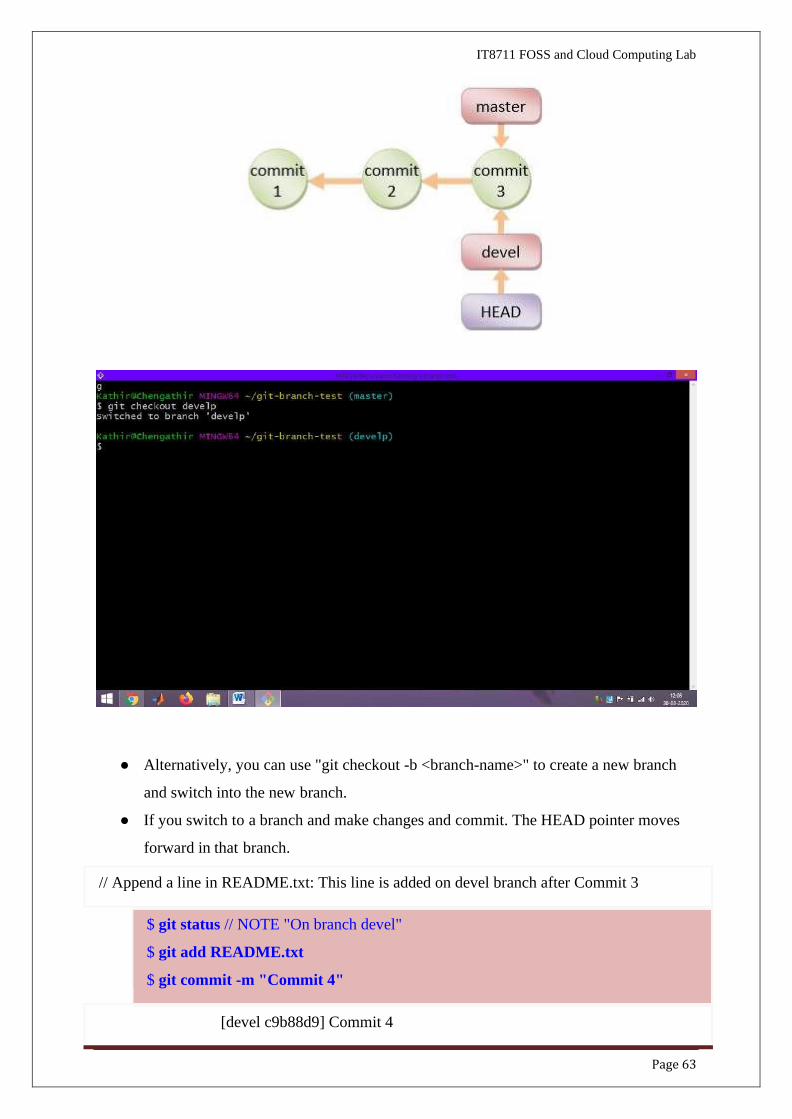
Switching to a Branch (git checkout <branch-name>)
● Git uses a special pointer called HEAD to keep track of the branch that you are
working on.
● The "git branch <branch-name>" command simply create a branch, but does not
switch to the new branch.
● To switch to a branch, use "git checkout <branch-name>" command.
The HEAD pointer will be pointing at the switched branch (e.g., devel).
$ git checkout devel
Switched to branch 'devel'
Page 63
IT8711 FOSS and Cloud Computing Lab
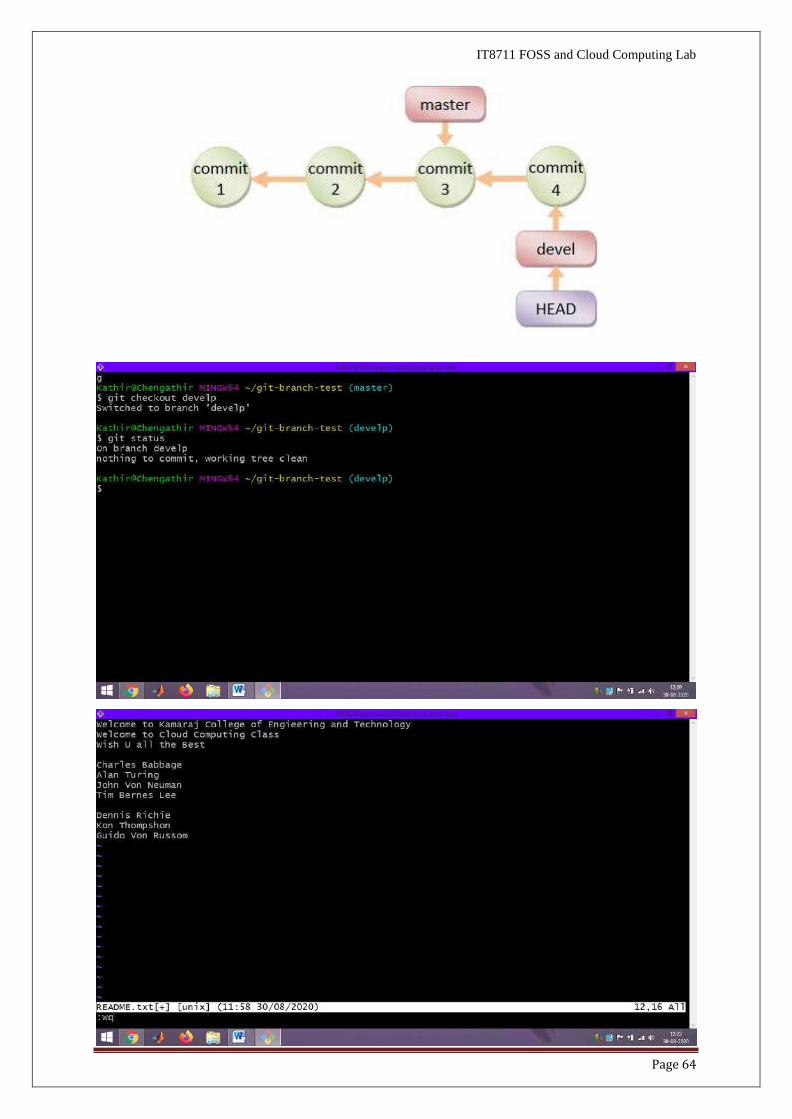
● Alternatively, you can use "git checkout -b <branch-name>" to create a new branch
and switch into the new branch.
● If you switch to a branch and make changes and commit. The HEAD pointer moves
forward in that branch.
// Append a line in README.txt: This line is added on devel branch after Commit 3
$ git status // NOTE "On branch devel"
$ git add README.txt
$ git commit -m "Commit 4"
[devel c9b88d9] Commit 4
Page 64
IT8711 FOSS and Cloud Computing Lab
Page 65
IT8711 FOSS and Cloud Computing Lab
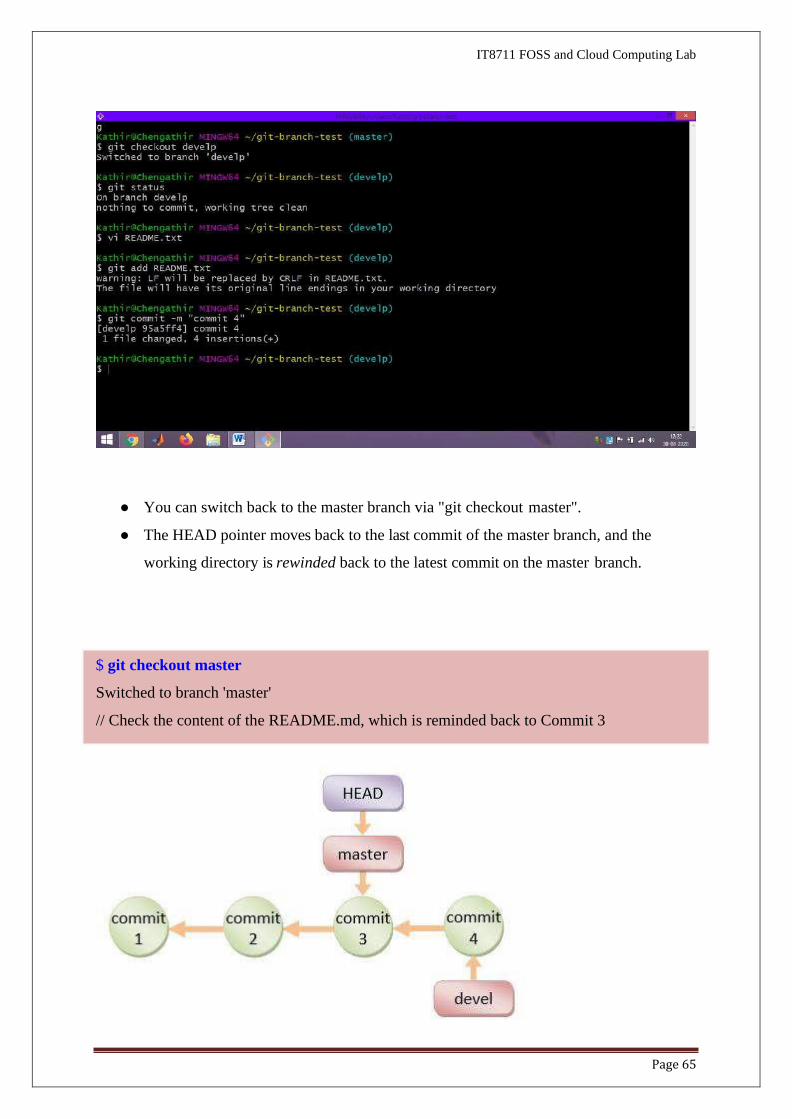
● You can switch back to the master branch via "git checkout master".
● The HEAD pointer moves back to the last commit of the master branch, and the
working directory is rewinded back to the latest commit on the master branch.
$ git checkout master
Switched to branch 'master'
// Check the content of the README.md, which is reminded back to Commit 3
Page 66
IT8711 FOSS and Cloud Computing Lab
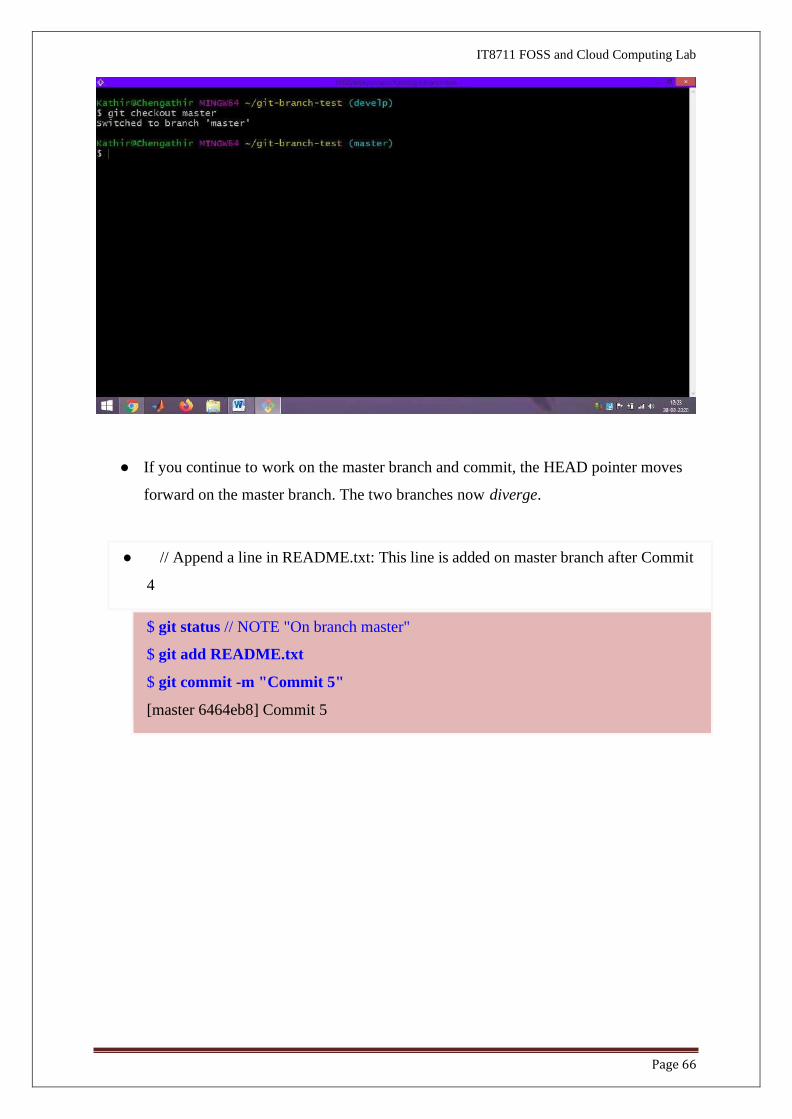
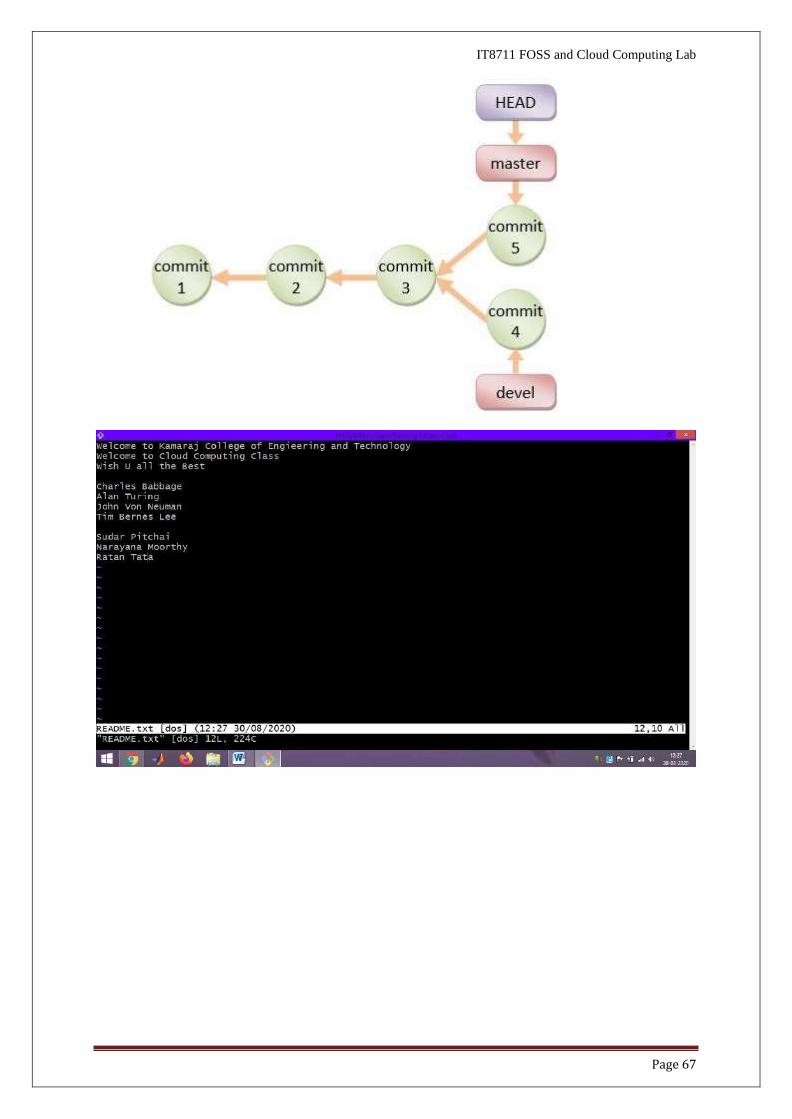
● If you continue to work on the master branch and commit, the HEAD pointer moves
forward on the master branch. The two branches now diverge.
● // Append a line in README.txt: This line is added on master branch after Commit
4
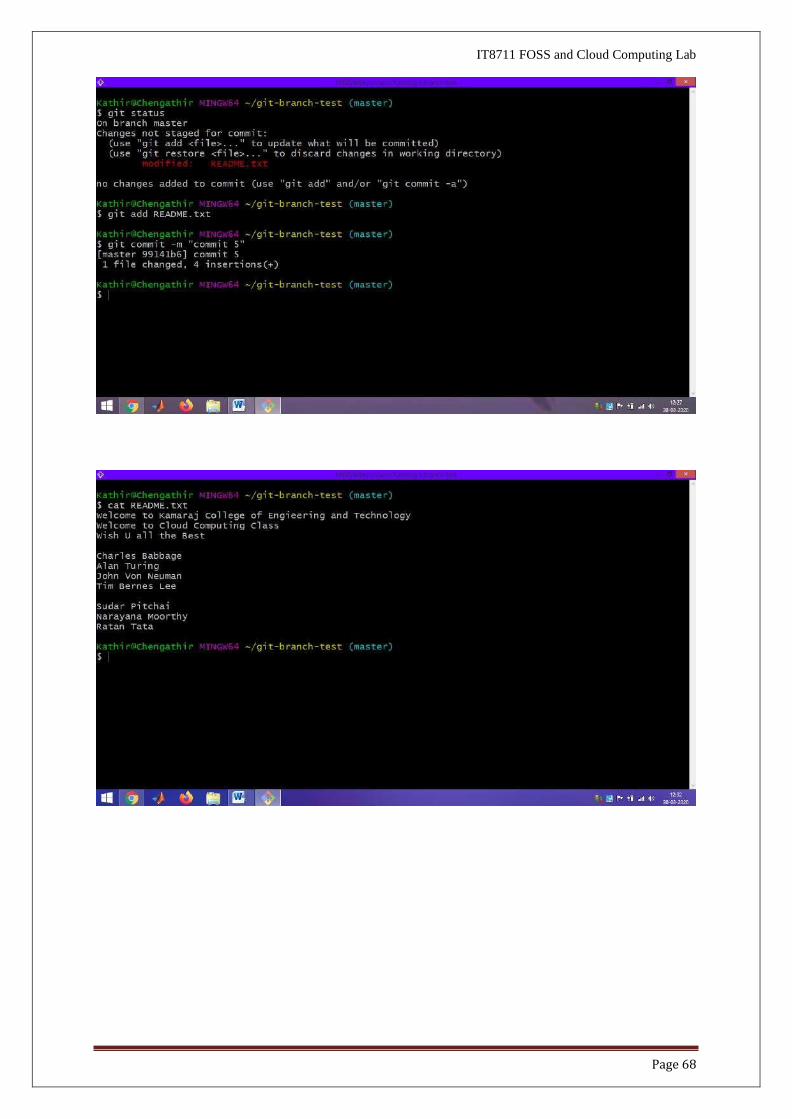
$ git status // NOTE "On branch master"
$ git add README.txt
$ git commit -m "Commit 5"
[master 6464eb8] Commit 5
Page 67
IT8711 FOSS and Cloud Computing Lab
Page 68
IT8711 FOSS and Cloud Computing Lab
Page 69
IT8711 FOSS and Cloud Computing Lab
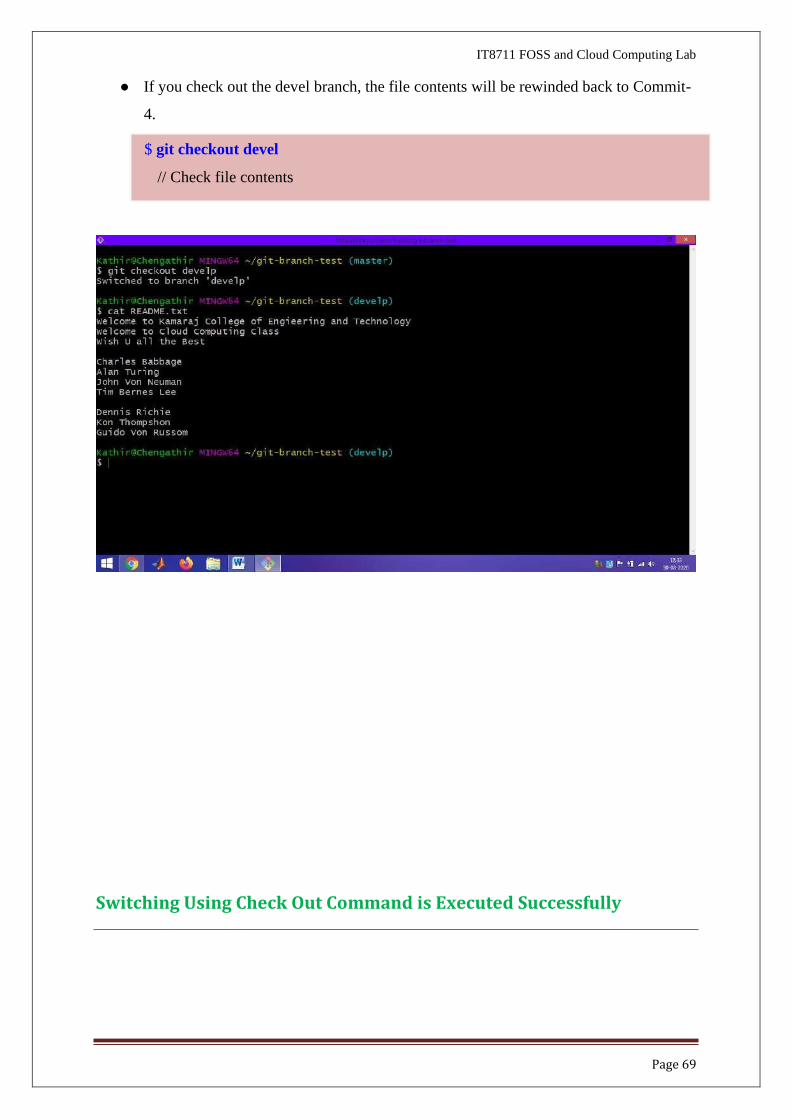
● If you check out the devel branch, the file contents will be rewinded back to Commit-
4.
Switching Using Check Out Command is Executed Successfully
$ git checkout devel
// Check file contents
Page 69
IT8711 FOSS and Cloud Computing Lab
Introduction
❖ Virtualization:
• Virtualization is the creation of virtual servers, infrastructures, devices and computing resources.
• Virtualization changes the hardware-software relations and is one of the
foundational elements of cloud computing technology that helps utilize the
capabilities of cloud computing to the full.
• Virtualization techniques allow companies to turn virtual their networks, storage, servers, data, desktops and applications.
❖ Hypervisor or Virtual Machine Monitor (VMM)
A hypervisor or virtual machine monitor (VMM) is a piece of computer
software, firmware or hardware that creates and runs virtual machines. A
computer on which a hypervisor is running one or more virtual machines is
defined as a host machine. Each virtual machine is called a guest machine. The
hypervisor presents the guest operating systems with a virtual operating platform
and manages the execution of the guest operating systems. Multiple instances of
a variety of operating systems may share the virtualized hardware resources.
❖ Types of Virtualization
• Operating-system-level virtualization - is a server-virtualization method
where the kernel of an operating system allows for multiple isolated user-
space instances, instead of just one. Such instances (sometimes called
containers, software containers,[1] virtualization engines (VE), virtual
private servers (VPS), or jails) may look and feel like a real server from the
point of view of its owners and users
• Platform / Hardware virtualization -Hardware virtualization or platform
virtualization refers to the creation of a virtual machine that acts like a real
computer with an operating system. Software executed on these virtual
machines is separated from the underlying hardware resources. For example,
a computer that is running Microsoft Windows may host a virtual machine
that looks like a computer with the Ubuntu Linux operating system; Ubuntu-
based software can be run on the virtual machine.
• In hardware virtualization, the host machine is the actual machine on which
the virtualization takes place, and the guest machine is the virtual machine.
The words host and guest are used to distinguish the software that runs on the
physical machine from the software that runs on the virtual machine. Different
types of hardware virtualization include:
Install VirtualBox/VMware Workstation with different flavours of Linux or
windows OS on top of windows 7 or 8.
Ex No. 3
Page 70
IT8711 FOSS and Cloud Computing Lab
o Full virtualization: Almost complete simulation of the actual hardware to allow software, which typically consists of a guest operating system, to run unmodified.
o Partial virtualization: Some but not all of the target environment is simulated. Some guest programs, therefore, may need modifications to run in this virtual environment.
o Para virtualization: A hardware environment is not simulated; however, the guest programs are executed in their own isolated domains, as if they are running on a separate system.
• Application virtualization is software technology that encapsulates computer
programs from the underlying operating system on which it is executed. A fully
virtualized application is not installed in the traditional sense, although it is still
executed as if it were.
❖ Oracle Virtualbox
o VirtualBox is a general-purpose full virtualizer for x86 hardware, targeted at
server, desktop and embedded use.Each virtual machine can execute its own
operating system, including versions of Microsoft Windows, Linux, BSD, and
MS-DOS. VMware Workstation is developed and sold by VMware, Inc., a
division of EMCCorporation
❖ Ubuntu
o Ubuntu is an operating system like any other and it is free & open source. It
means that we can download it freely and install on as many computers as we
like. By the term open source it means that we can actually see its code. To
provide a more secure environment, the ―SUDO‖ tool is used to assign
temporary privileges for performing administrative tasks. Ubuntu comes
installed with a wide range of Software that includes Libre Office ,Firefox,
Thunderbird
Steps in Installing Oracle Virtualbox with CentOS 7
Step 1:
Step 2:
• Download and Install Oracle Virtual Box latest version & Extension
package
o https://virtualbox.org/wiki/downloads
• Download CentOS 7 OVA(Open Virtual Appliance) from
o Link : https://linuxvmimages.com/images/centos-7
Page 71
IT8711 FOSS and Cloud Computing Lab
Step 3: The files are downloaded in your Local machine and Click the Oracle VM
VirtualBox 6.0.8 Setup Wizard
Oracle VM VirtualBox 6.0.8 Setup Wizard is open and follows the steps to install

Page 72
IT8711 FOSS and Cloud Computing Lab
Page 73
IT8711 FOSS and Cloud Computing Lab
Oracle VM VirtualBox 6.0.8 installation is completed
Page 74
IT8711 FOSS and Cloud Computing Lab
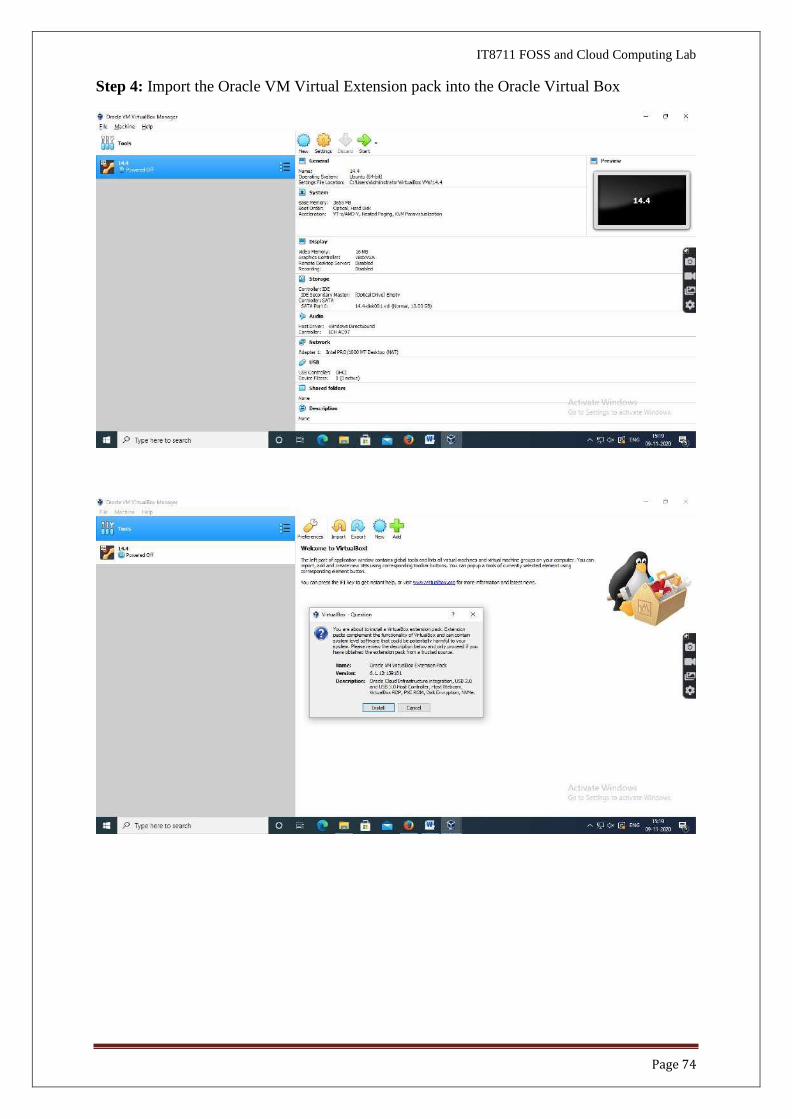
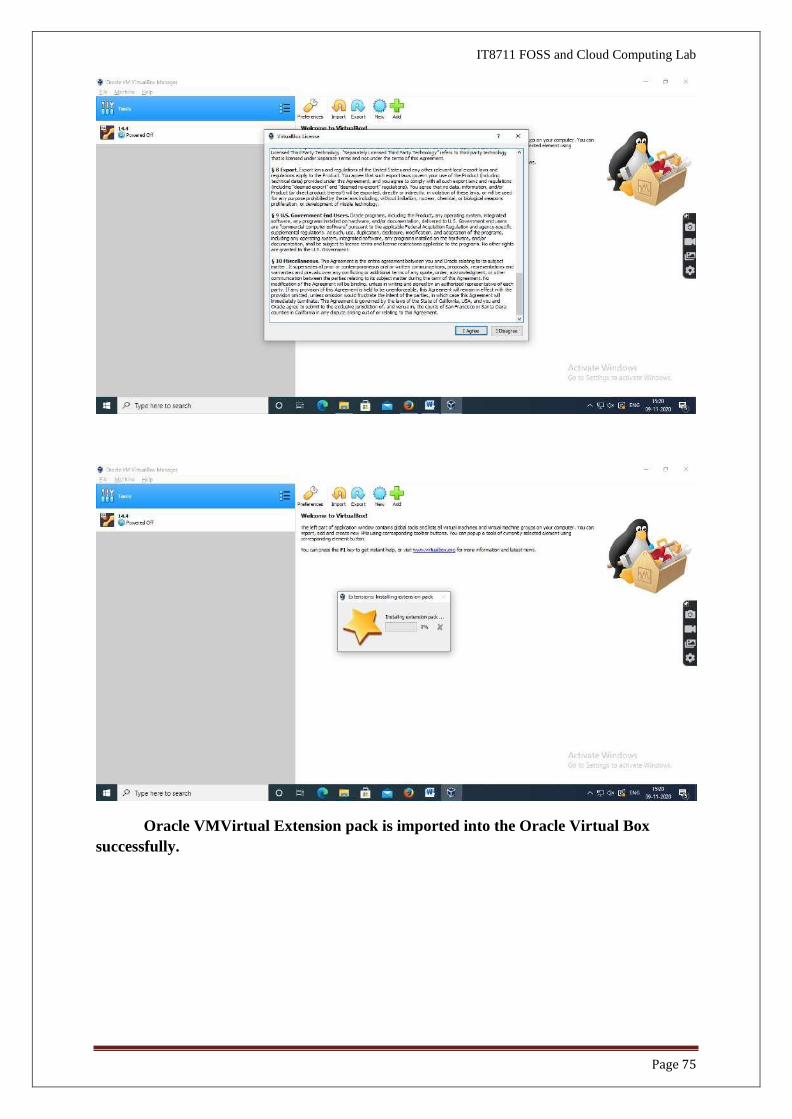
Step 4: Import the Oracle VM Virtual Extension pack into the Oracle Virtual Box
Page 75
IT8711 FOSS and Cloud Computing Lab
Oracle VMVirtual Extension pack is imported into the Oracle Virtual Box
successfully.

Page 76
IT8711 FOSS and Cloud Computing Lab
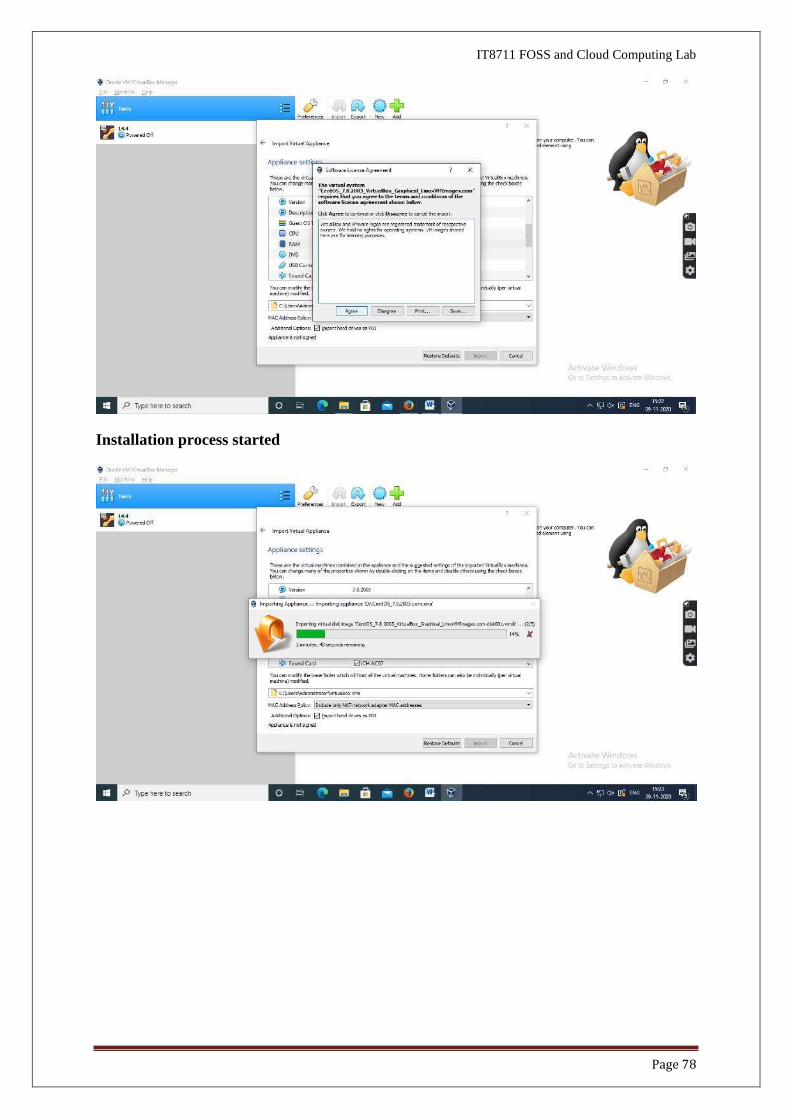
Step 5: Click import Appliance and select CentOS-7.8.2003.com OVA (Open Virtual
Appliance) file from download directory

Page 77
IT8711 FOSS and Cloud Computing Lab
Page 78
IT8711 FOSS and Cloud Computing Lab
Installation process started
Page 79
IT8711 FOSS and Cloud Computing Lab
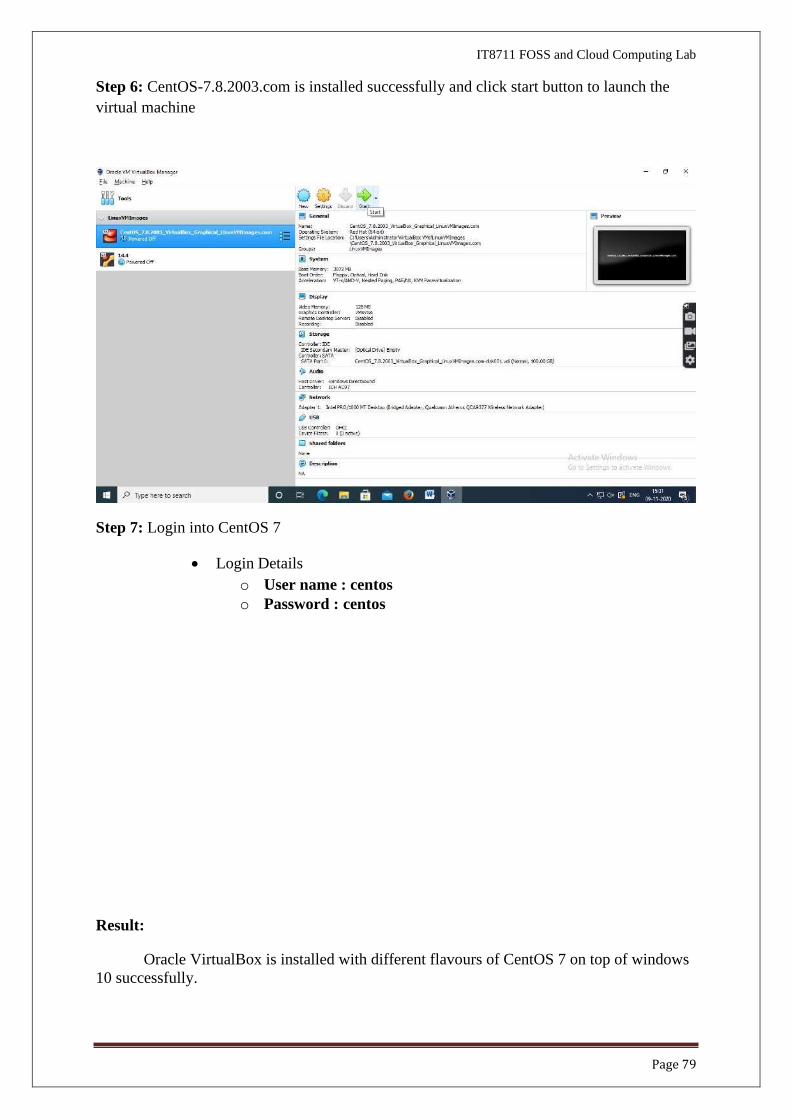
Step 6: CentOS-7.8.2003.com is installed successfully and click start button to launch the
virtual machine
Step 7: Login into CentOS 7
• Login Details
o User name : centos
o Password : centos
Result:
Oracle VirtualBox is installed with different flavours of CentOS 7 on top of windows
10 successfully.
Page 80
IT8711 FOSS and Cloud Computing Lab
Steps in Installing C or C++ Compiler in Virtual machine and executing simple
programs
Step 1 : Install the C or C++ compiler on Ubuntu-14.04 Virtual Machine by
$ sudo apt install g++
Step 2: Create a file for writing C program.
Source Code:
$ sudogedit add.c
Sum of two numbers
#include<stdio.h>
int main()
{
int a,b,c;
printf("Enter two nos:");
scanf("%d%d",&a,&b);
c=0;
c=a+b;
printf("Sum of two nos is: %d",c);
return 0;
}
Step 3: Compile the Program
$sudo g++ add.c
Step 4: Run the Program
$ ./a.out
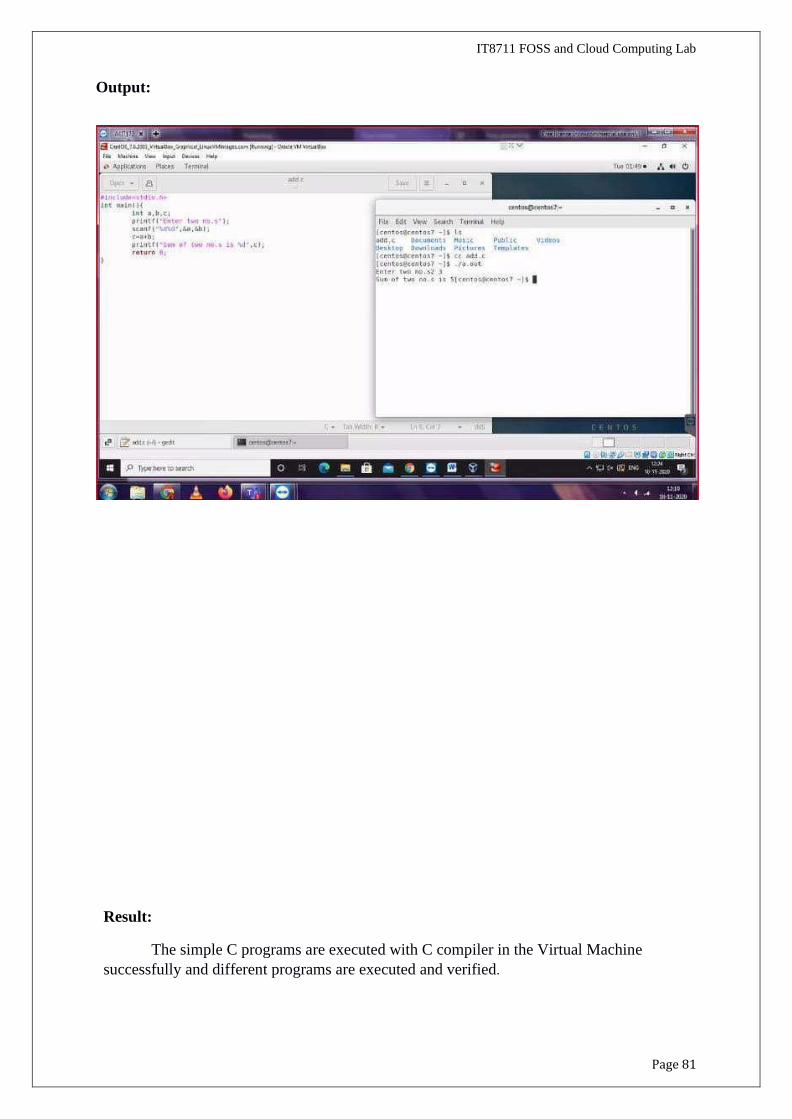
Expected Output:
Enter two nos : 2 3
Sum of two nos is: 5
Install a C compiler in the virtual machine created using virtual box
and execute Simple Programs
Ex No. 4
Page 81
Output:
IT8711 FOSS and Cloud Computing Lab
Result:
The simple C programs are executed with C compiler in the Virtual Machine
successfully and different programs are executed and verified.

Page 82
Page 82
IT8711 FOSS and Cloud Computing Lab
Introduction
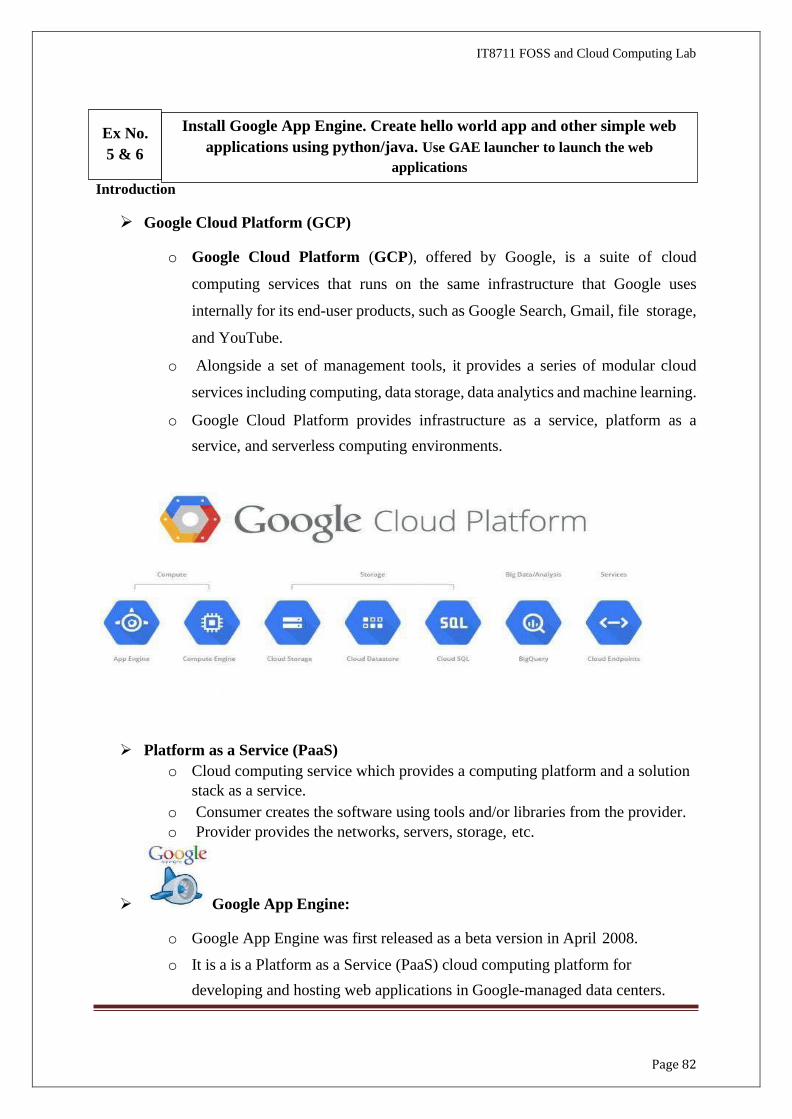
➢ Google Cloud Platform (GCP)
o Google Cloud Platform (GCP), offered by Google, is a suite of cloud
computing services that runs on the same infrastructure that Google uses
internally for its end-user products, such as Google Search, Gmail, file storage,
and YouTube.
o Alongside a set of management tools, it provides a series of modular cloud
services including computing, data storage, data analytics and machine learning.
o Google Cloud Platform provides infrastructure as a service, platform as a
service, and serverless computing environments.
➢ Platform as a Service (PaaS)
o Cloud computing service which provides a computing platform and a solution
stack as a service.
o Consumer creates the software using tools and/or libraries from the provider.
o Provider provides the networks, servers, storage, etc.
➢ Google App Engine:
o Google App Engine was first released as a beta version in April 2008.
o It is a is a Platform as a Service (PaaS) cloud computing platform for
developing and hosting web applications in Google-managed data centers.
Install Google App Engine. Create hello world app and other simple web
applications using python/java. Use GAE launcher to launch the web
applications
Ex No.
5 & 6
Page 83
IT8711 FOSS and Cloud Computing Lab
o Google‘s App Engine opens Google‘s production to any person in the world at
no charge.
o Google App Engine is software that facilitates the user to run his web
applications on Google infrastructure.
o It is more reliable because failure of any server will not affect either the
performance of the end user or the service of the Google.
o It virtualizes applications across multiple servers and data centers.
▪ Other cloud-based platforms include offerings such as Amazon Web
Services and Microsoft's Azure Services Platform.
➢ Introduction of Google App Engine
• Google App Engine lets you run your web applications on Google's
infrastructure. App Engine applications are easy to build, easy to maintain, and
easy to scale as your traffic and data storage needs grow. With App Engine,
there are no servers to maintain: You just upload your application, and it's ready
to serve your users.
• You can serve your app from your own domain name (such as
https://www.example.com/) using Google Apps. Or, you can serve your app
using a free name on the appspot.com domain. You can share your application
with the world, or limit access to members of your organization.
• Google App Engine supports apps written in several programming languages.
With App Engine's Java runtime environment, you can build your app using
standard Java technologies, including the JVM, Java servlets, and the Java
programming language—or any other language using a JVM-based interpreter
or compiler, such as JavaScript or Ruby. App Engine also features a dedicated
Python runtime environment, which includes a fast Python interpreter and the
Python standard library. The Java and Python runtime environments are built to
ensure that your application runs quickly, securely, and without interference
from other apps on the system.
• With App Engine, you only pay for what you use. There are no set-up costs and
no recurring fees. The resources your application uses, such as storage and
bandwidth, are measured by the gigabyte, and billed at competitive rates. You
control the maximum amounts of resources your app can consume, so it always
stays within your budget. App Engine costs nothing to get started. All
applications can use up to 500 MB of storage and enough CPU and bandwidth
to support an efficient app serving around 5 million page views a month,
Page 84
IT8711 FOSS and Cloud Computing Lab
absolutely free. When you enable billing for your application, your free limits
are raised, and you only pay for resources you use above the free levels.
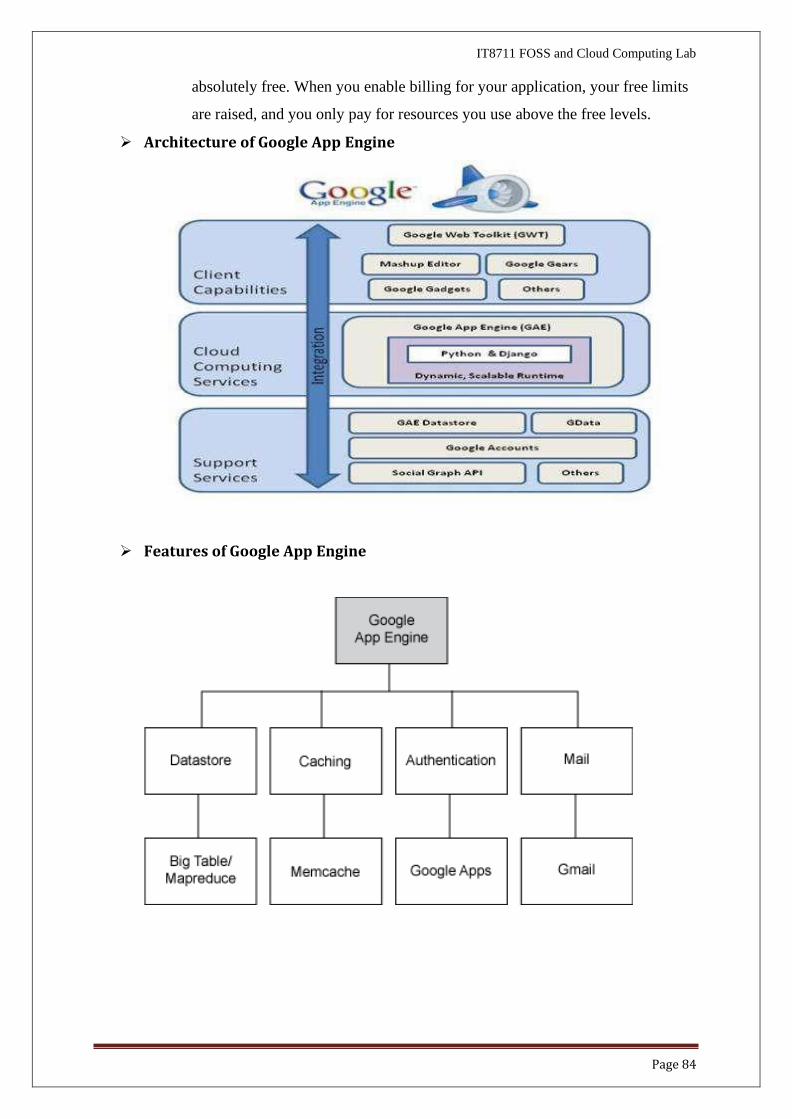
➢ Architecture of Google App Engine
➢ Features of Google App Engine
Page 85
➢ GAE Application Environment:
IT8711 FOSS and Cloud Computing Lab
• Google App Engine makes it easy to build an application that runs reliably, even
under heavy load and with large amounts of data. App Engine includes the
following features:
• Persistent storage with queries, sorting and transactions
• Automatic scaling and load balancing
• APIs for authenticating users and sending email using Google Accounts
• Task queues for performing work outside of the scope of a web request
• Scheduled tasks for triggering events at specified times and regular intervals
• Dynamic web serving, with full support for common web technologies
➢ Java Runtime Environment
• You can develop your application for the Java runtime environment using
common Java web development tools and API standards. Your app interacts
with the environment using the Java Servlets standard, and can use common
web application technologies such as Java Server Pages
• The Java runtime environment uses Java 6. The App Engine Java SDK supports
developing apps using either Java 5 or 6. The environment includes the Java SE
Runtime Environment (JRE) 6 platform and libraries. The restrictions of the
sandbox environment are implemented in the JVM. An app can use any JVM
byte code or library feature, as long as it does not exceed the sandbox
restrictions. For instance, byte code that attempts to open a socket or write to a
file will throw a runtime exception.
• Your app accesses most App Engine services using Java standard APIs. For the
App Engine data store, the Java SDK includes implementations of the Java Data
Objects (JDO) and Java Persistence API (JPA) interfaces. Your app can use the
JavaMail API to send email messages with the App Engine Mail service. The
java.net HTTP APIs accesses the App Engine URL fetch service.
• App Engine also includes low-level APIs for its services to implement
additional adapters, or to use directly from the application. See the
documentation for the data store, memcache, URL fetch, mail, images and
Google Accounts APIs. Typically, Java developers use the Java programming
language and APIs to implement web applications for the JVM. With the use

Page 86

Page 86
IT8711 FOSS and Cloud Computing Lab
of JVM-compatible compilers or interpreters, you can also use other languages
to develop web applications, such as JavaScript, Ruby.
➢ Workflow of Google App Engine
Page 87
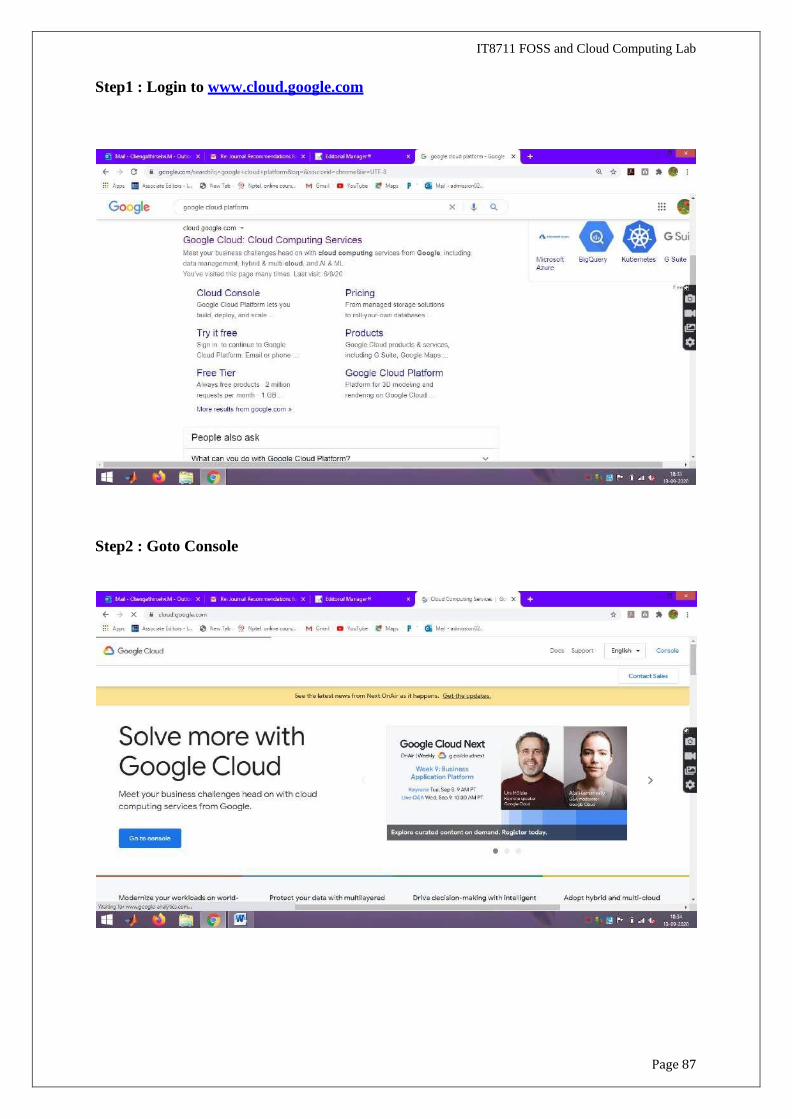
Step1 : Login to www.cloud.google.com
IT8711 FOSS and Cloud Computing Lab
Step2 : Goto Console

Page 88
Page 88
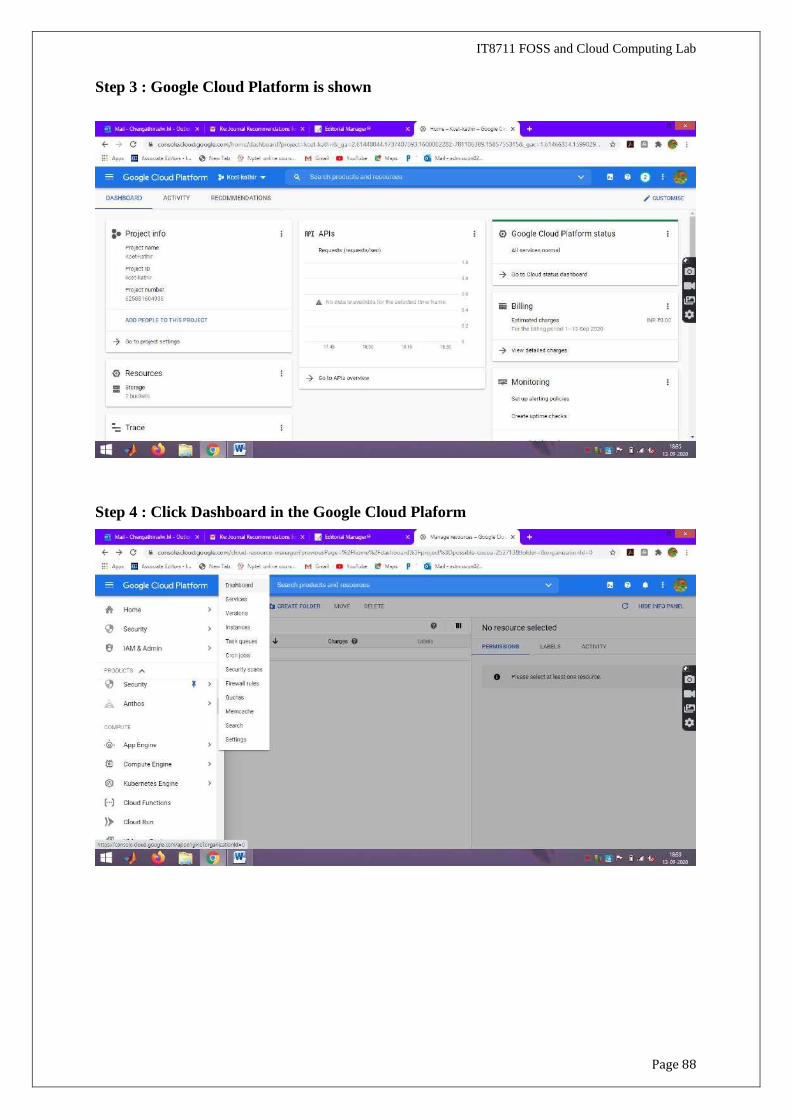
Step 3 : Google Cloud Platform is shown
IT8711 FOSS and Cloud Computing Lab
Step 4 : Click Dashboard in the Google Cloud Plaform

Page 89
Page 89
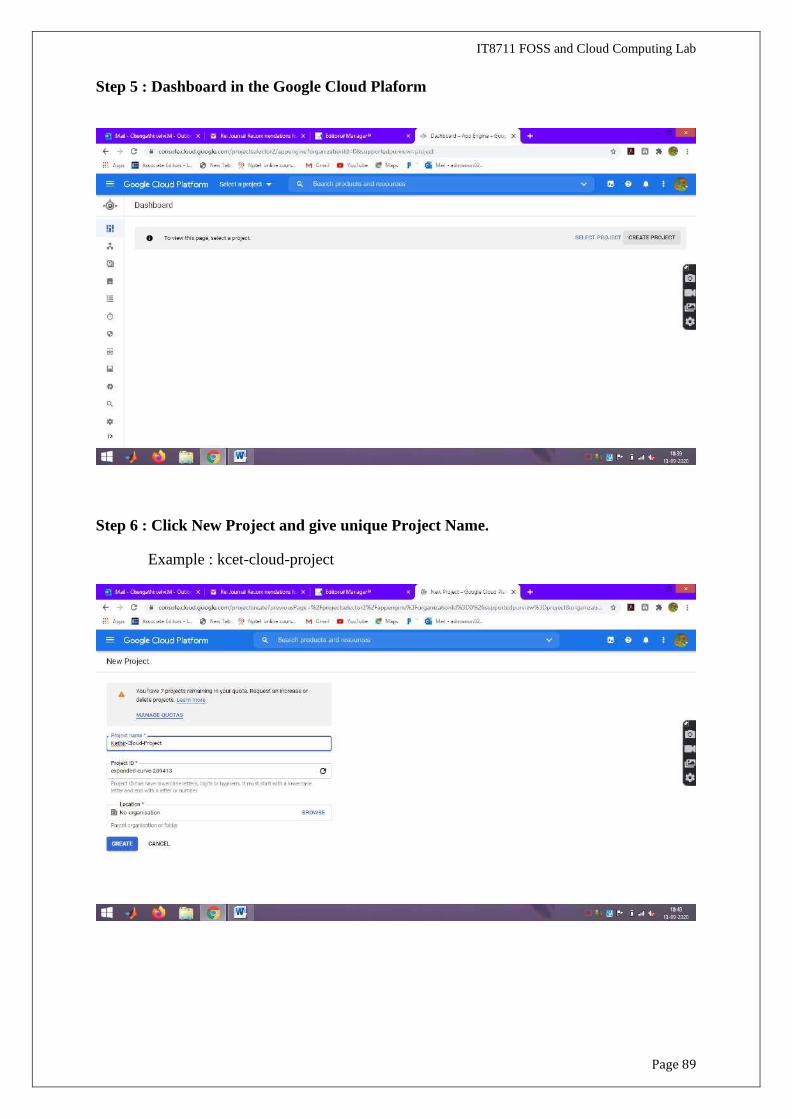
Step 5 : Dashboard in the Google Cloud Plaform
IT8711 FOSS and Cloud Computing Lab
Step 6 : Click New Project and give unique Project Name.
Example : kcet-cloud-project

Page 90
Page 90
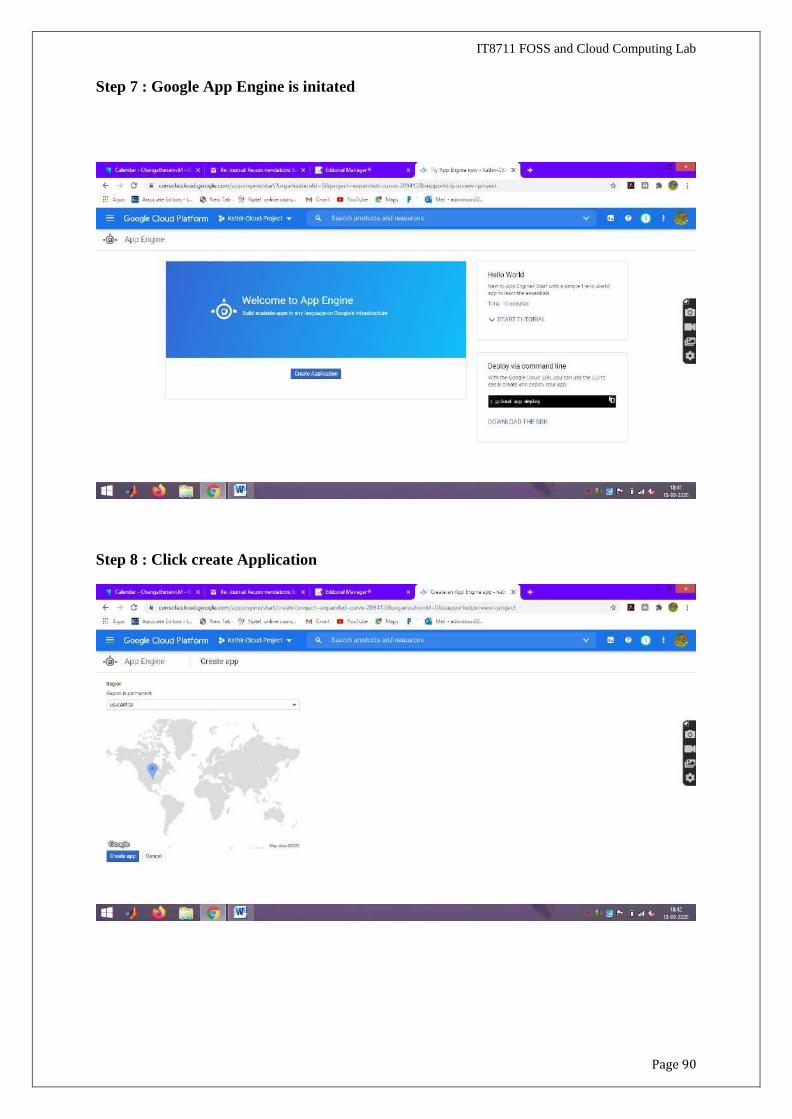
Step 7 : Google App Engine is initated
IT8711 FOSS and Cloud Computing Lab
Step 8 : Click create Application

Page 91
Page 91
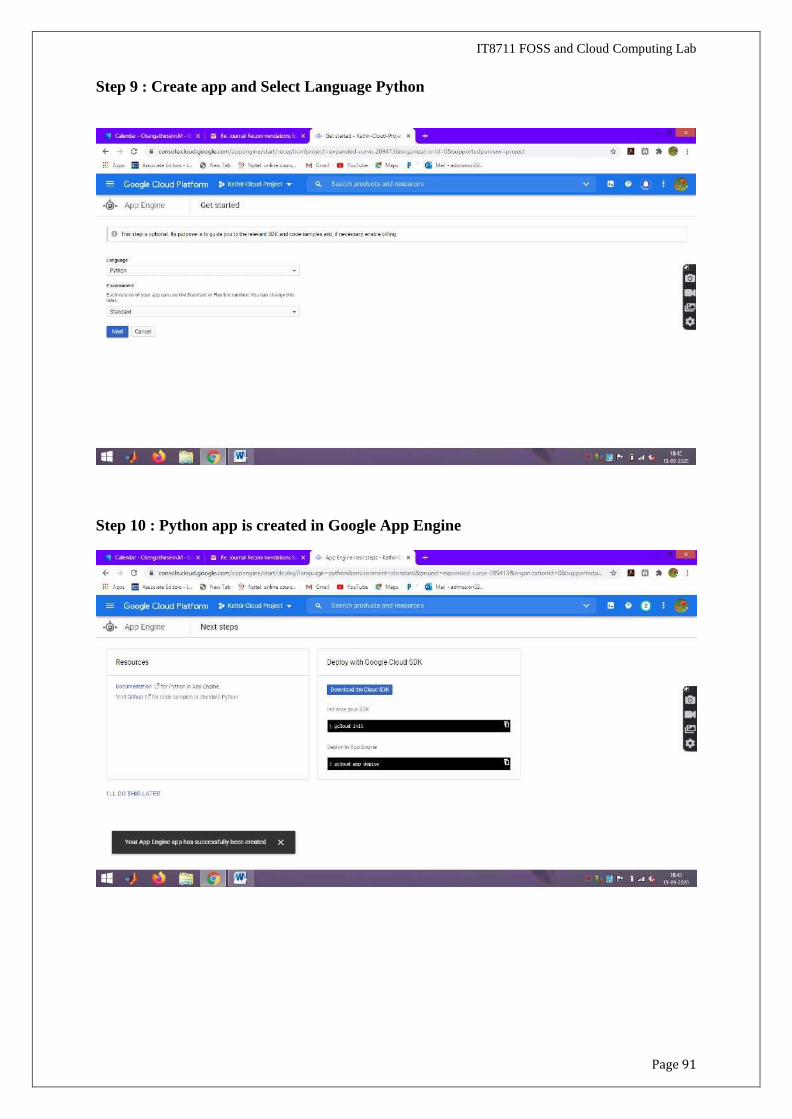
Step 9 : Create app and Select Language Python
IT8711 FOSS and Cloud Computing Lab
Step 10 : Python app is created in Google App Engine

Page 92
Page 92
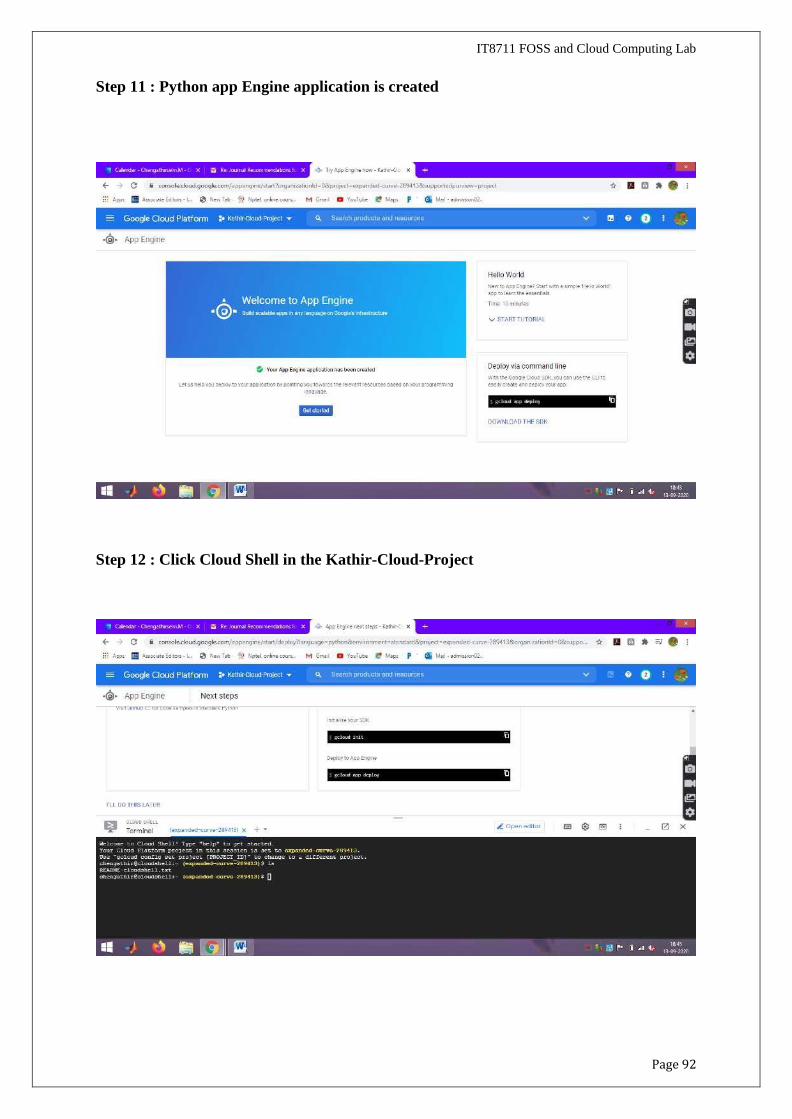
Step 11 : Python app Engine application is created
IT8711 FOSS and Cloud Computing Lab
Step 12 : Click Cloud Shell in the Kathir-Cloud-Project

Page 93
Page 93
IT8711 FOSS and Cloud Computing Lab
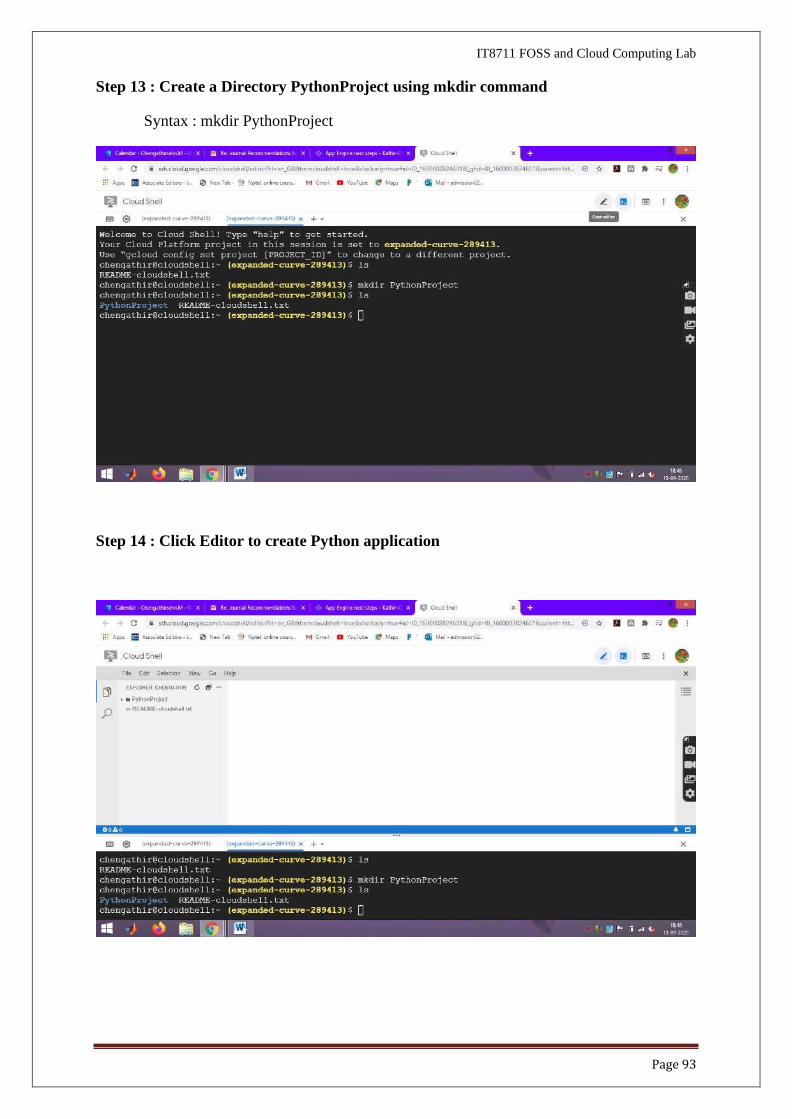
Step 13 : Create a Directory PythonProject using mkdir command
Syntax : mkdir PythonProject
Step 14 : Click Editor to create Python application
Page 94
IT8711 FOSS and Cloud Computing Lab
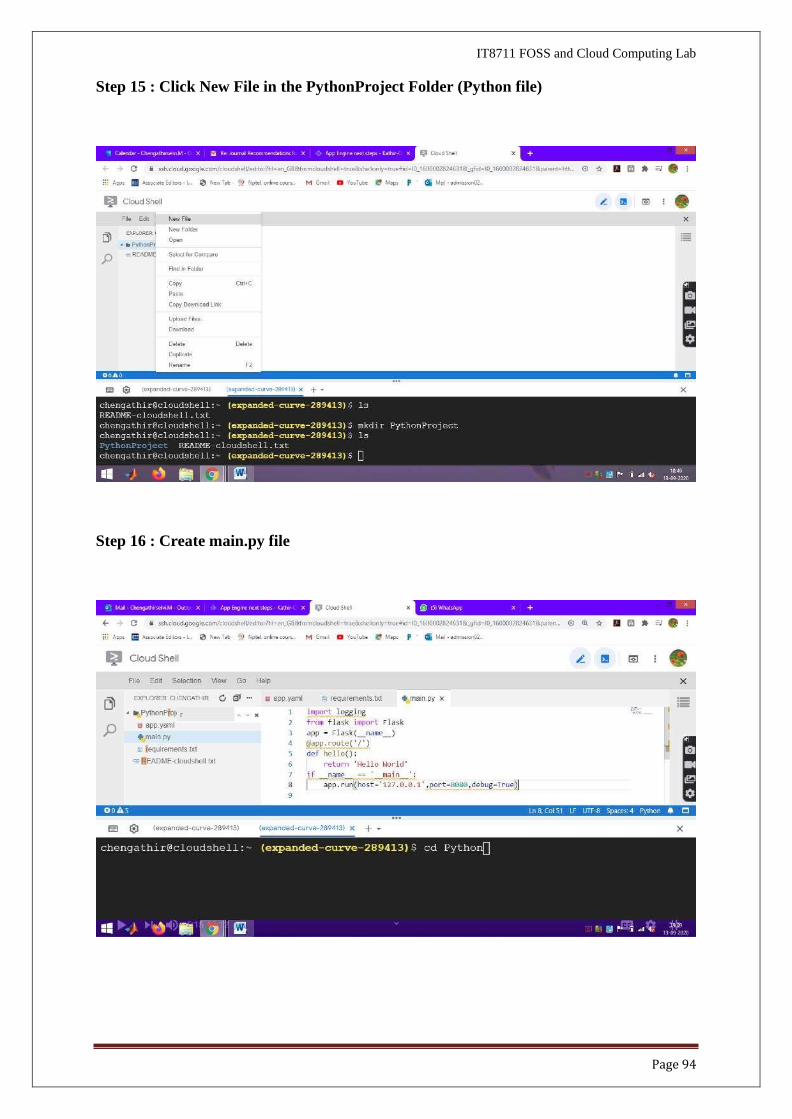
Step 15 : Click New File in the PythonProject Folder (Python file)
Step 16 : Create main.py file
Page 95
IT8711 FOSS and Cloud Computing Lab
main.py file
import  logging
from  flask import  Flask
app = Flask( name )
@app.route('/')
def hello():
return 'Hello World'
if name == ' main ':
 app.run(host='127.0.0.1',port=8080, debug=True)
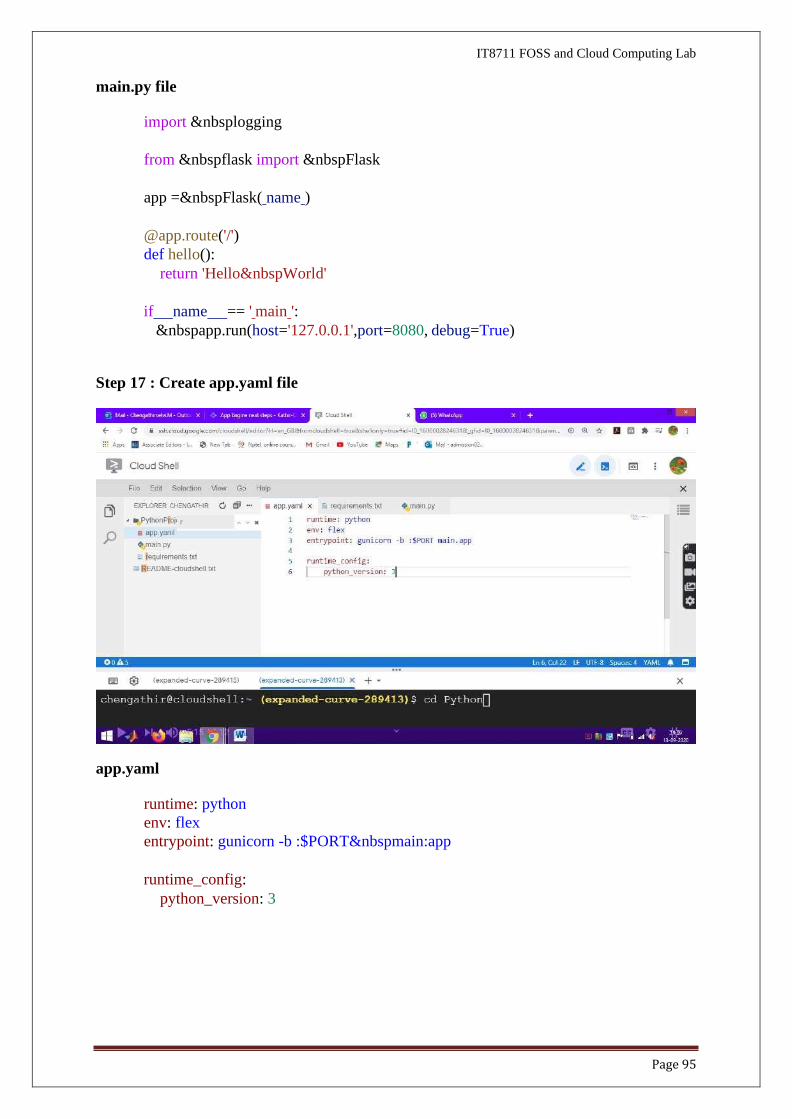
Step 17 : Create app.yaml file
app.yaml
runtime: python
env: flex
entrypoint: gunicorn -b :$PORT main:app
runtime_config:
python_version: 3
Page 96
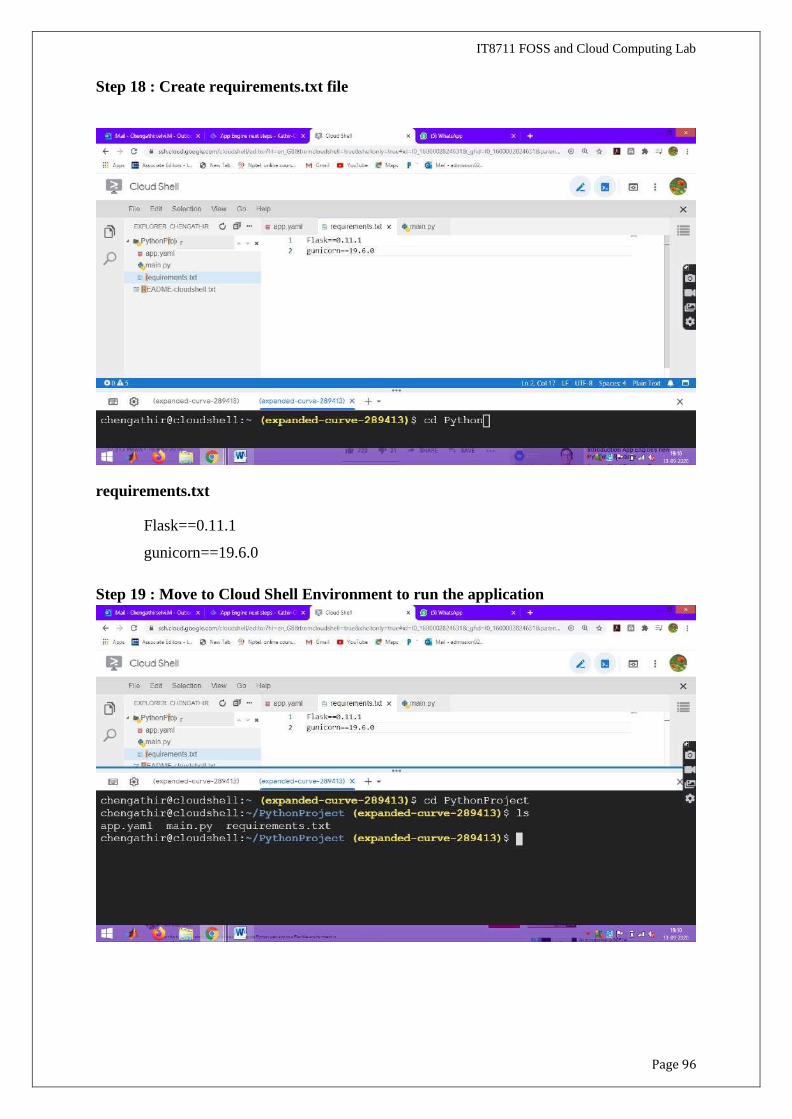
Step 18 : Create requirements.txt file
IT8711 FOSS and Cloud Computing Lab
requirements.txt
Flask==0.11.1
gunicorn==19.6.0
Step 19 : Move to Cloud Shell Environment to run the application

Page 97
Page 98
IT8711 FOSS and Cloud Computing Lab
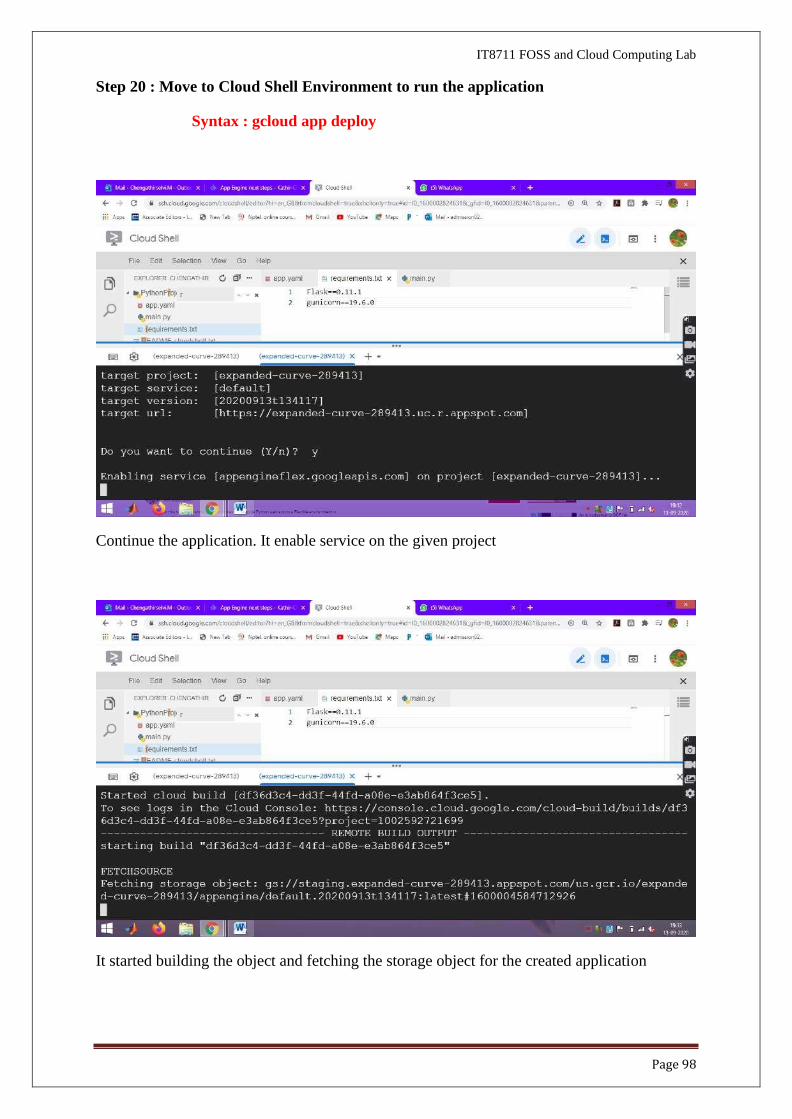
Step 20 : Move to Cloud Shell Environment to run the application
Syntax : gcloud app deploy
Continue the application. It enable service on the given project
It started building the object and fetching the storage object for the created application
Page 99
IT8711 FOSS and Cloud Computing Lab
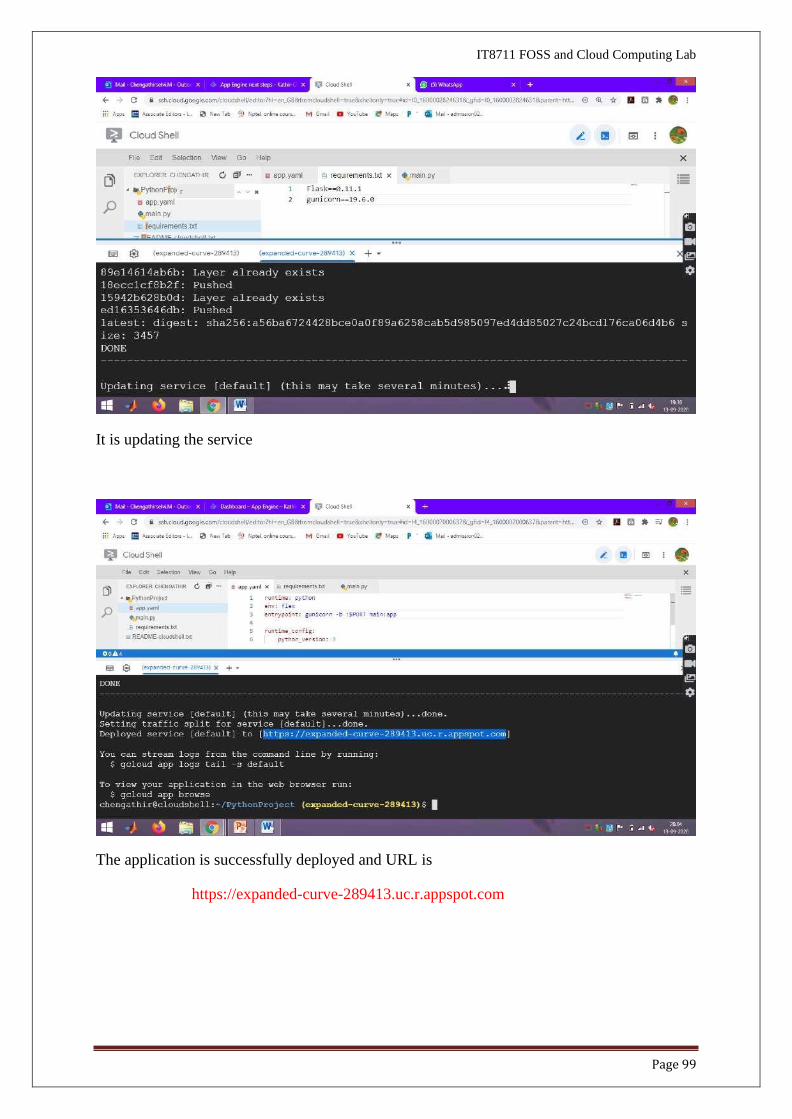
It is updating the service
The application is successfully deployed and URL is
https://expanded-curve-289413.uc.r.appspot.com
Page 100
IT8711 FOSS and Cloud Computing Lab
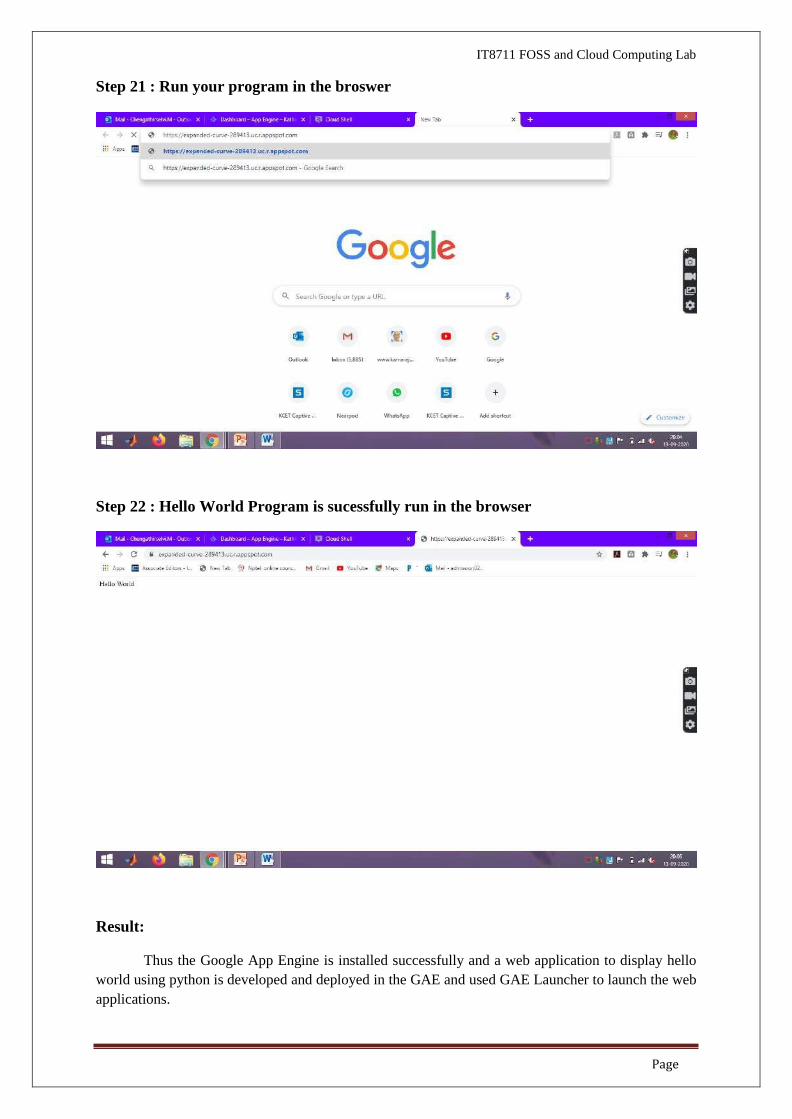
Step 21 : Run your program in the broswer
Step 22 : Hello World Program is sucessfully run in the browser
Result:
Thus the Google App Engine is installed successfully and a web application to display hello
world using python is developed and deployed in the GAE and used GAE Launcher to launch the web
applications.
Page 100
IT8711 FOSS and Cloud Computing Lab
Introduction:
❖ CloudSim
• A Framework for modeling and simulation of Cloud Computing
Infrastructures and services
• Originally built at the Cloud Computing Distributed Systems (CLOUDS)
Laboratory, The University of Melbourne, Australia
• It is completely written in JAVA
❖ Main Features of CloudSiM
o Modeling and simulation
o Data centre network topologies and message-passing applications
o Dynamic insertion of simulation elements
o Stop and resume of simulation
o Policies for allocation of hosts and virtual machines
❖ Cloudsim – Essentials
• JDK 1.6 or above http://tinyurl.com/JNU-JAVA
• Eclipse 4.2 or above http://tinyurl.com/JNU-Eclipse
• Alternatively NetBeanshttps://netbeans.org/downloads
• Up & Running with cloudsim guide: https://goo.gl/TPL7Zh
❖ Cloudsim-Directory structure
• cloudsim/ -- top level CloudSim directory
• docs/ -- CloudSim API Documentation
• examples/ -- CloudSim examples
• jars/ -- CloudSim jar archives
• sources/ -- CloudSim source code
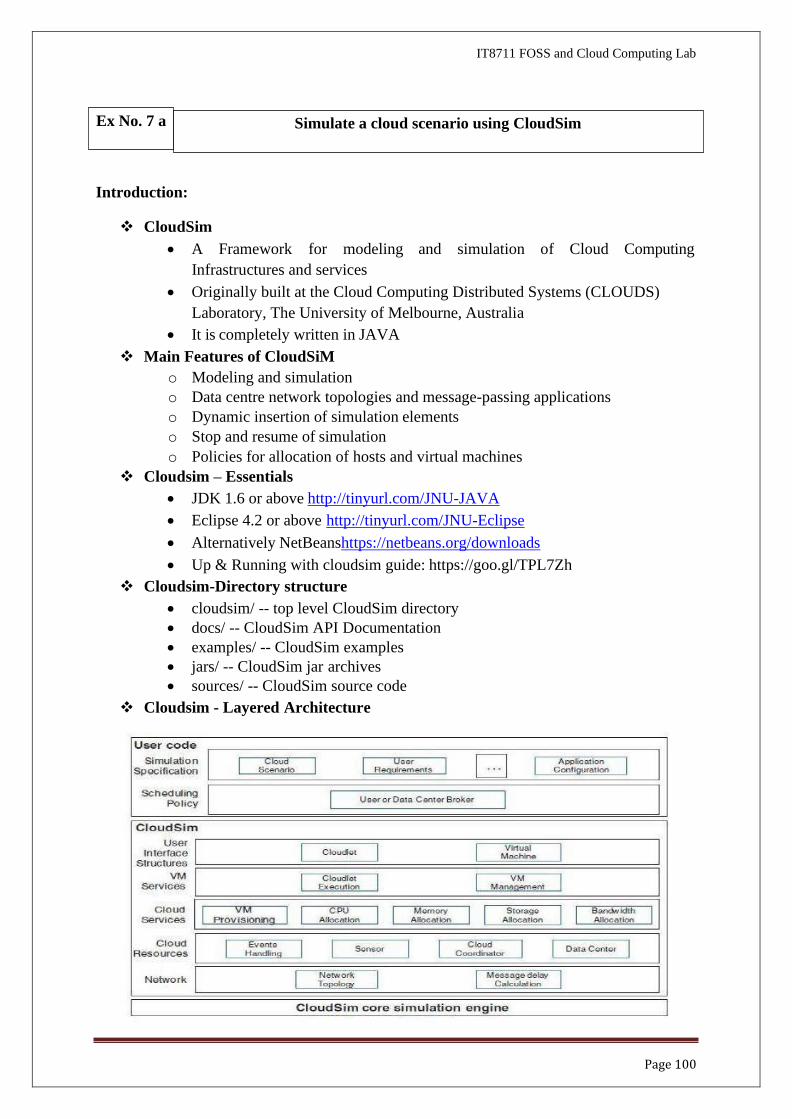
❖ Cloudsim - Layered Architecture
Simulate a cloud scenario using CloudSim Ex No. 7 a
Page 101
IT8711 FOSS and Cloud Computing Lab
❖ Cloudsim - Component model classes
o CloudInformationService.java
o Datacenter.java,Host.java,Pe.java
o Vm.java,Cloudlet.java
o DatacenterBroker.java
o Storage.java,HarddriveStorage.java, SanStorage.java
❖ Cloudsim - Major blocks/Modules
o org.cloudbus.cloudsim
o org.cloudbus.cloudsim.core
o org.cloudbus.cloudsim.core.predicates
o org.cloudbus.cloudsim.distributions
o org.cloudbus.cloudsim.lists
o org.cloudbus.cloudsim.network
o org.cloudbus.cloudsim.network.datacenter
o org.cloudbus.cloudsim.power
o org.cloudbus.cloudsim.power.lists
o org.cloudbus.cloudsim.power.models
o org.cloudbus.cloudsim.provisioners
o org.cloudbus.cloudsim.util
❖ Cloudsim - key components
o Datacenter
o DataCenterCharacteristics
o Host
o DatacenterBroker
o RamProvisioner
o BwProvisioner
o Storage
o Vm
o VMAllocationpolicy
o VmScheduler
o Cloudlet
o CloudletScheduler
o CloudInformationService
o CloudSim
o CloudSimTags
o SimEvent
o SimEntity
o CloudsimShutdown
o FutureQueue
o DefferedQueue
o Predicate and associative classes.
Page 102
IT8711 FOSS and Cloud Computing Lab
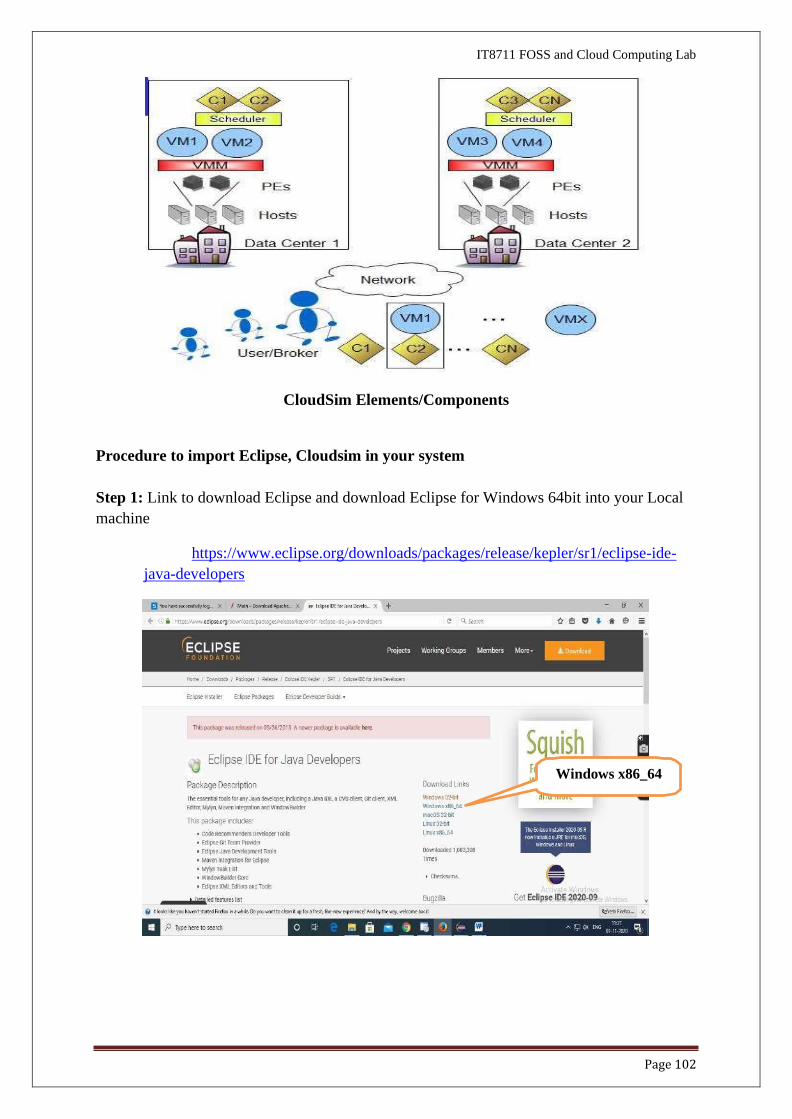
CloudSim Elements/Components
Procedure to import Eclipse, Cloudsim in your system
Step 1: Link to download Eclipse and download Eclipse for Windows 64bit into your Local
machine
https://www.eclipse.org/downloads/packages/release/kepler/sr1/eclipse-ide-
java-developers
Windows x86_64
Page 103
IT8711 FOSS and Cloud Computing Lab
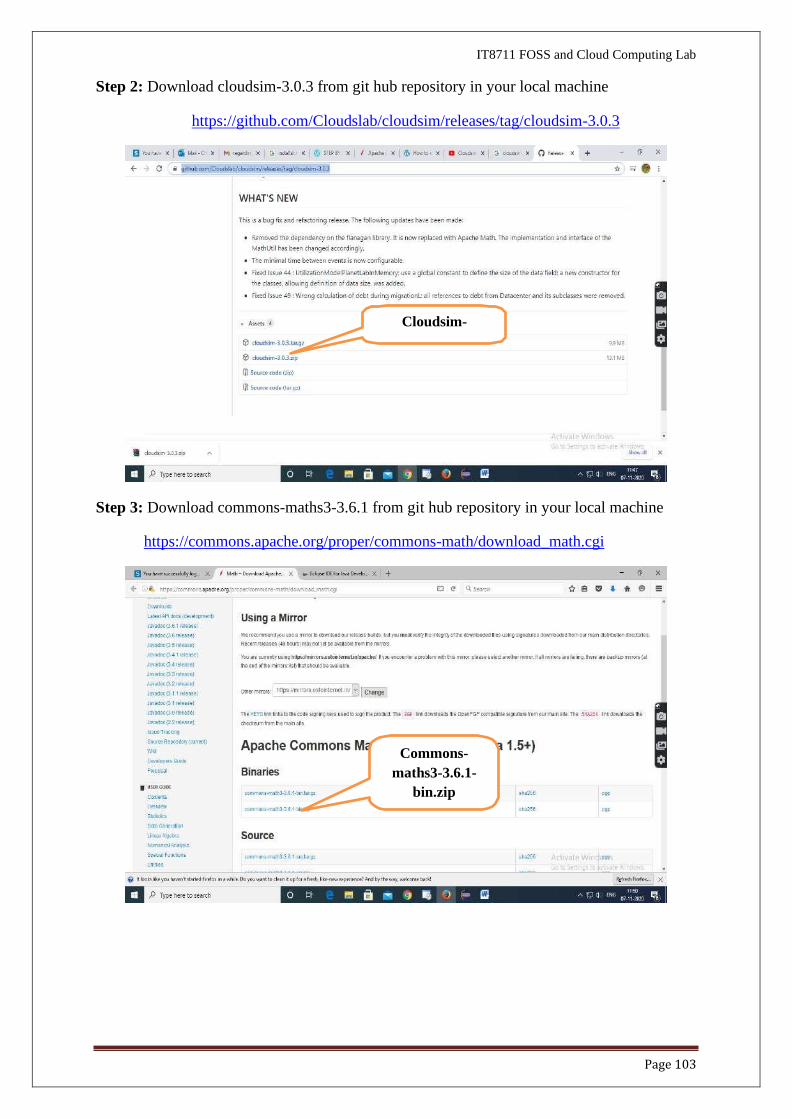
Step 2: Download cloudsim-3.0.3 from git hub repository in your local machine
https://github.com/Cloudslab/cloudsim/releases/tag/cloudsim-3.0.3
Step 3: Download commons-maths3-3.6.1 from git hub repository in your local machine
https://commons.apache.org/proper/commons-math/download_math.cgi
Cloudsim-
Commons-
maths3-3.6.1-
bin.zip
Page 104
IT8711 FOSS and Cloud Computing Lab
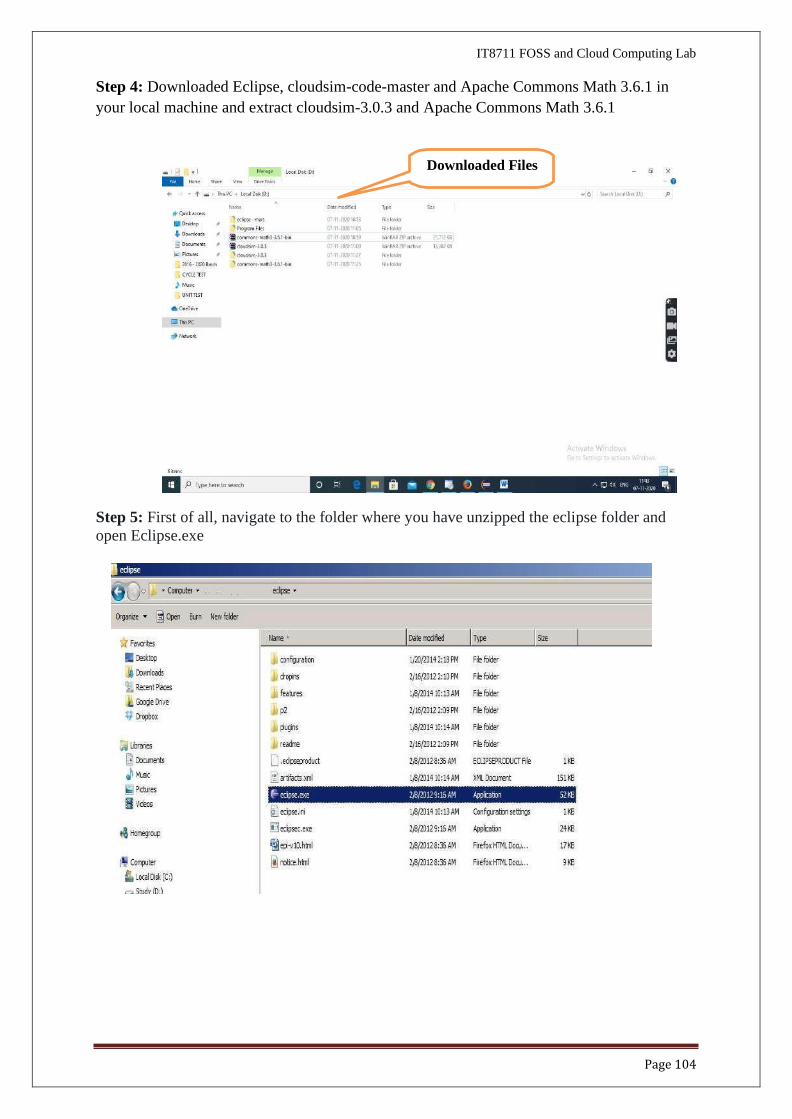
Step 4: Downloaded Eclipse, cloudsim-code-master and Apache Commons Math 3.6.1 in
your local machine and extract cloudsim-3.0.3 and Apache Commons Math 3.6.1
Step 5: First of all, navigate to the folder where you have unzipped the eclipse folder and
open Eclipse.exe
Downloaded Files
Page 105
IT8711 FOSS and Cloud Computing Lab
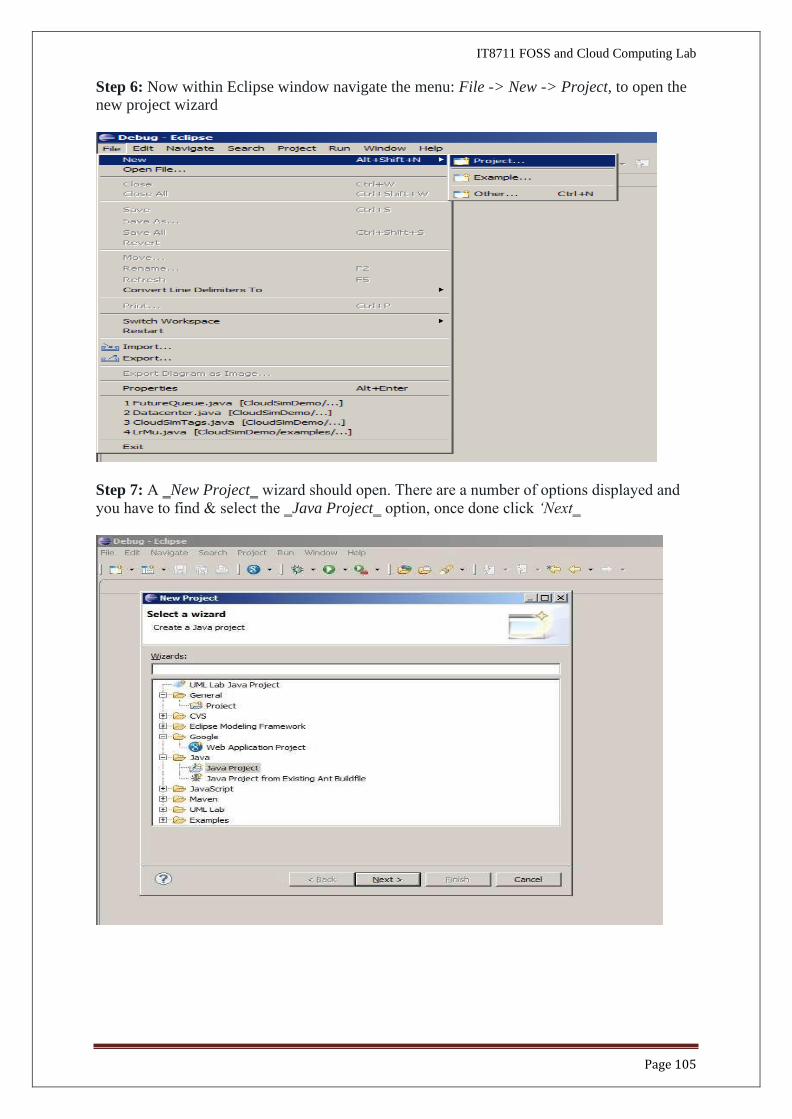
Step 6: Now within Eclipse window navigate the menu: File -> New -> Project, to open the new project wizard
Step 7: A ‗New Project‗ wizard should open. There are a number of options displayed and
you have to find & select the ‗Java Project‗ option, once done click ‘Next‗
Page 106
IT8711 FOSS and Cloud Computing Lab
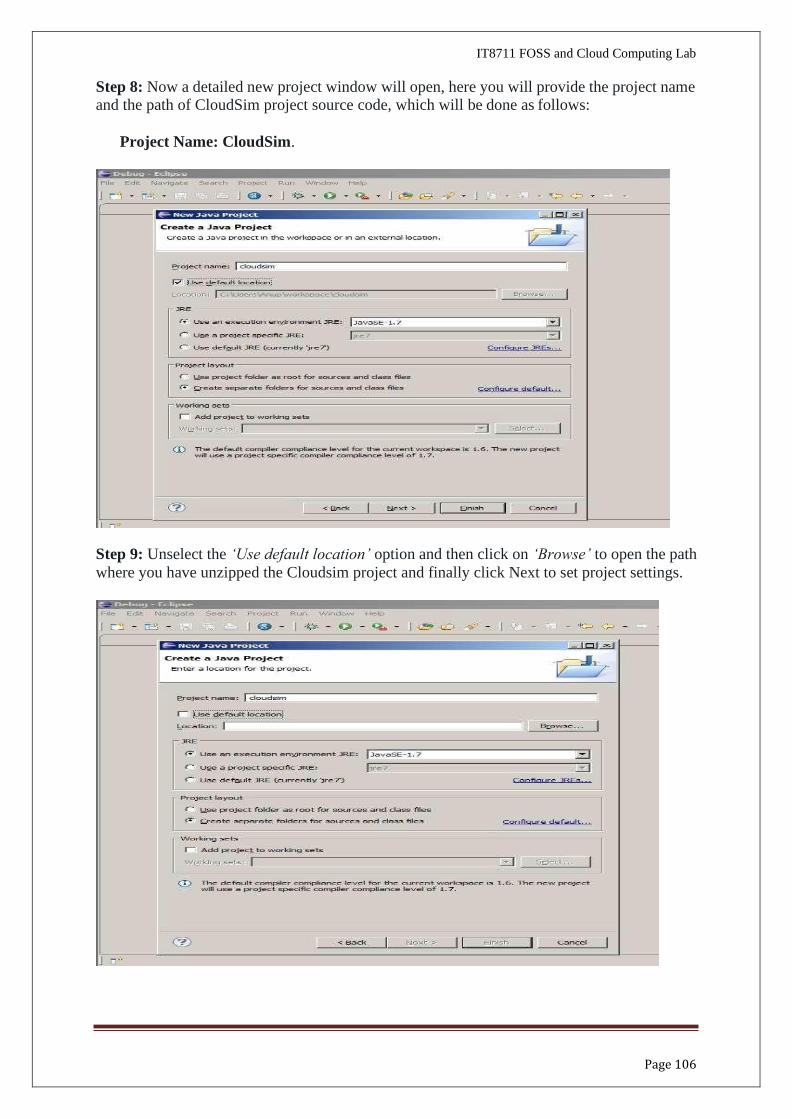
Step 8: Now a detailed new project window will open, here you will provide the project name and the path of CloudSim project source code, which will be done as follows:
Project Name: CloudSim.
Step 9: Unselect the ‘Use default location’ option and then click on ‘Browse’ to open the path
where you have unzipped the Cloudsim project and finally click Next to set project settings.
Page 107
IT8711 FOSS and Cloud Computing Lab
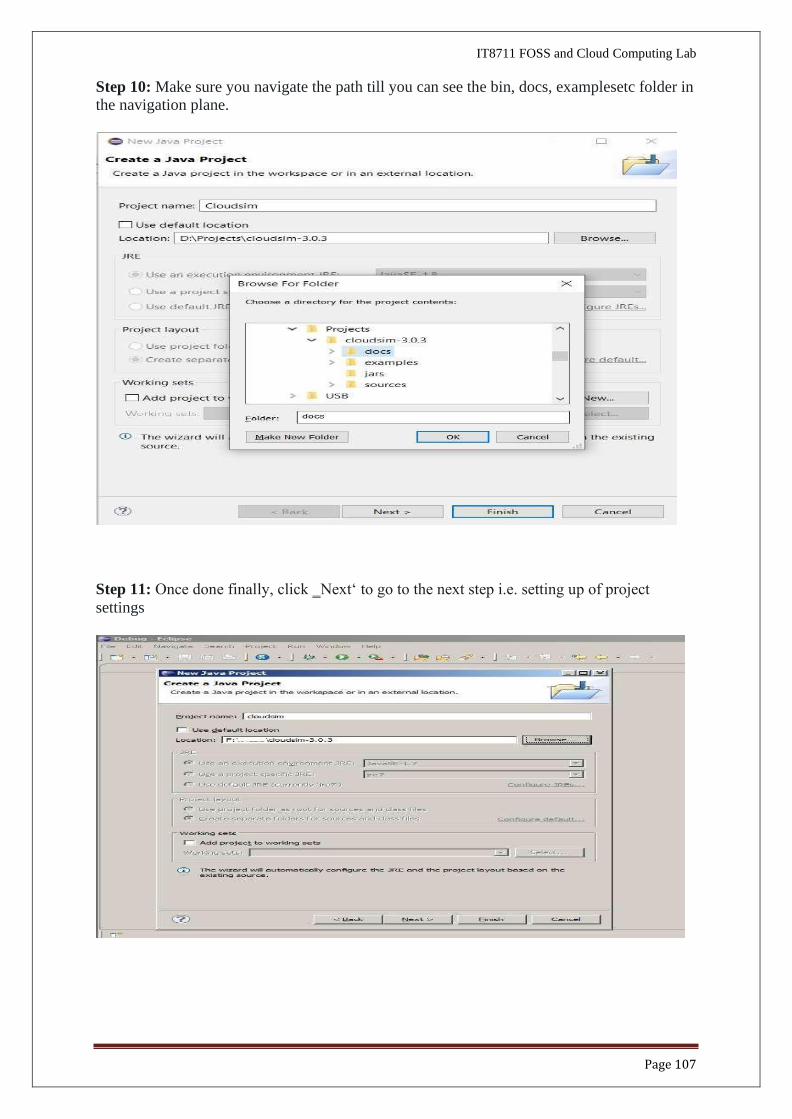
Step 10: Make sure you navigate the path till you can see the bin, docs, examplesetc folder in the navigation plane.
Step 11: Once done finally, click ‗Next‘ to go to the next step i.e. setting up of project
settings
Page 108
IT8711 FOSS and Cloud Computing Lab
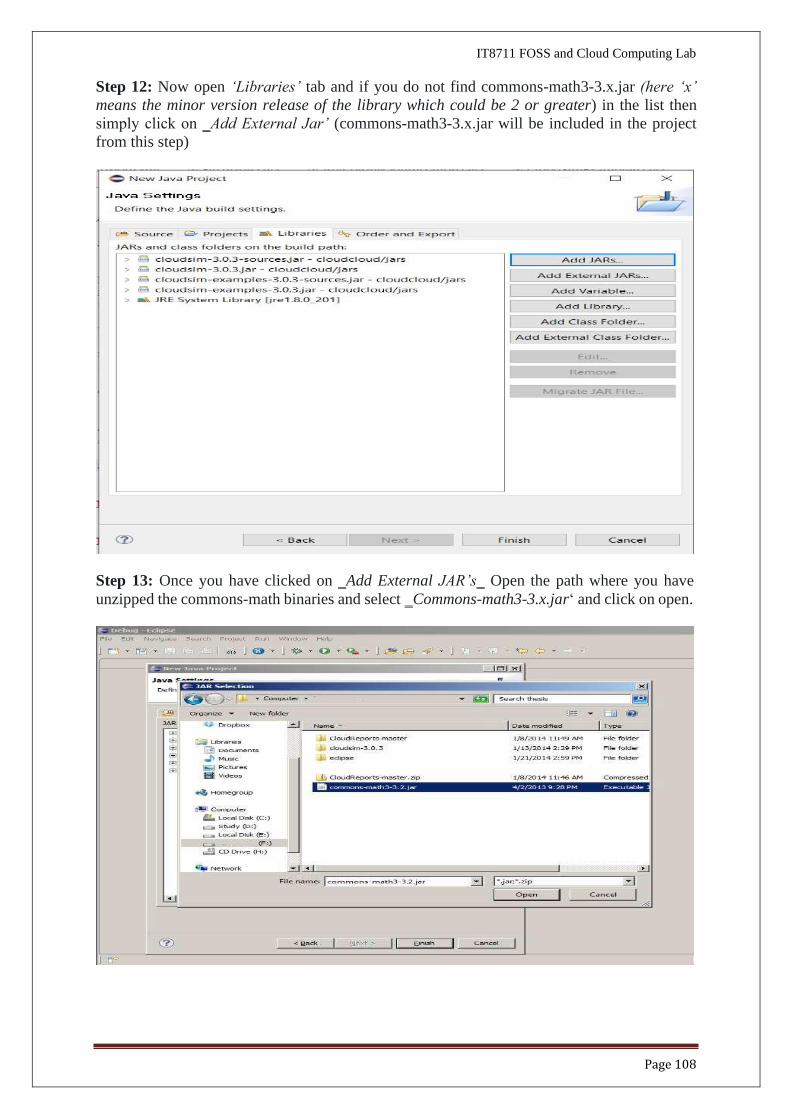
Step 12: Now open ‘Libraries’ tab and if you do not find commons-math3-3.x.jar (here ‘x’
means the minor version release of the library which could be 2 or greater) in the list then
simply click on ‗Add External Jar’ (commons-math3-3.x.jar will be included in the project
from this step)
Step 13: Once you have clicked on ‗Add External JAR’s‗ Open the path where you have
unzipped the commons-math binaries and select ‗Commons-math3-3.x.jar‘ and click on open.
Page 109
IT8711 FOSS and Cloud Computing Lab
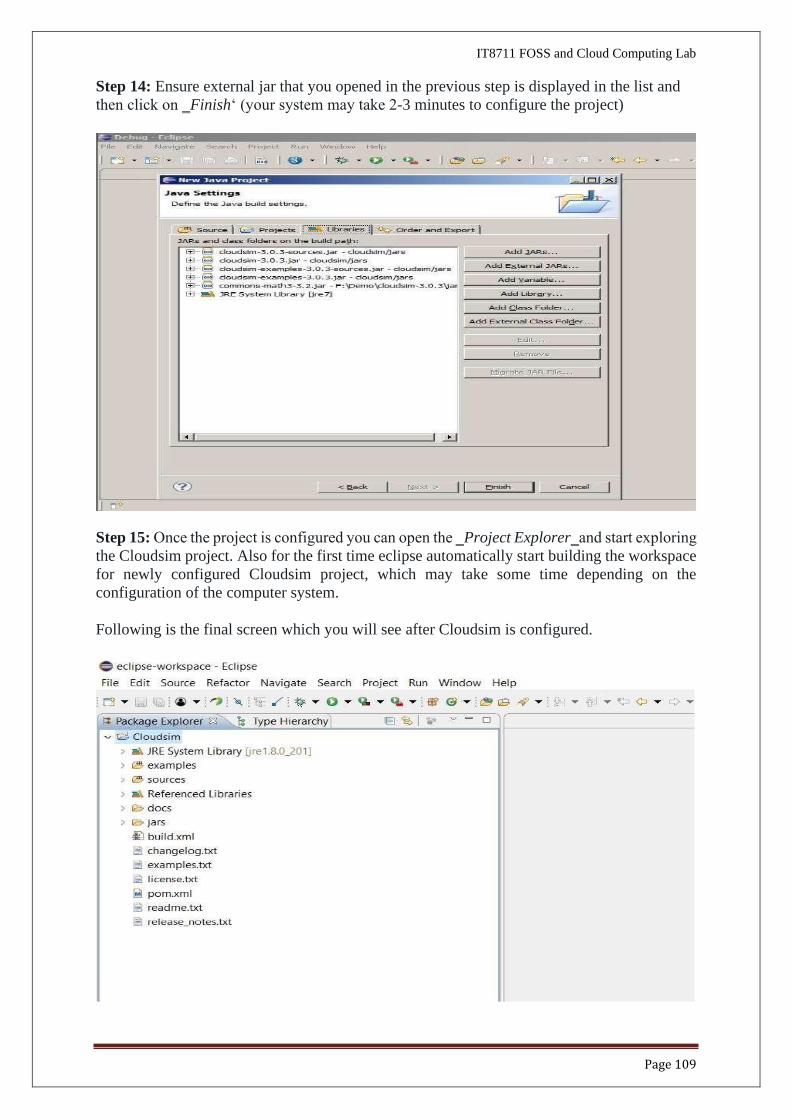
Step 14: Ensure external jar that you opened in the previous step is displayed in the list and
then click on ‗Finish‘ (your system may take 2-3 minutes to configure the project)
Step 15: Once the project is configured you can open the ‗Project Explorer‗and start exploring
the Cloudsim project. Also for the first time eclipse automatically start building the workspace
for newly configured Cloudsim project, which may take some time depending on the
configuration of the computer system.
Following is the final screen which you will see after Cloudsim is configured.
IT8711 FOSS and Cloud Computing Lab
Page 110
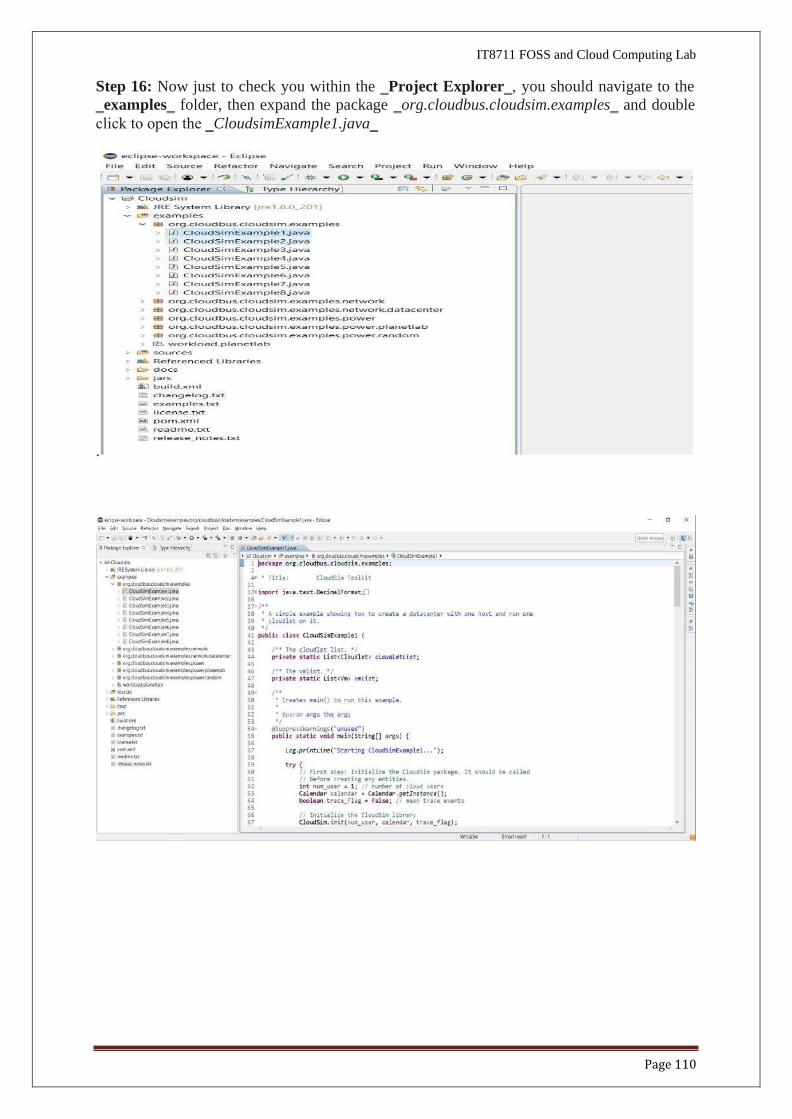
Step 16: Now just to check you within the ‗Project Explorer‗, you should navigate to the
‗examples‗ folder, then expand the package ‗org.cloudbus.cloudsim.examples‗ and double
click to open the ‗CloudsimExample1.java‗
.
IT8711 FOSS and Cloud Computing Lab
Page 111
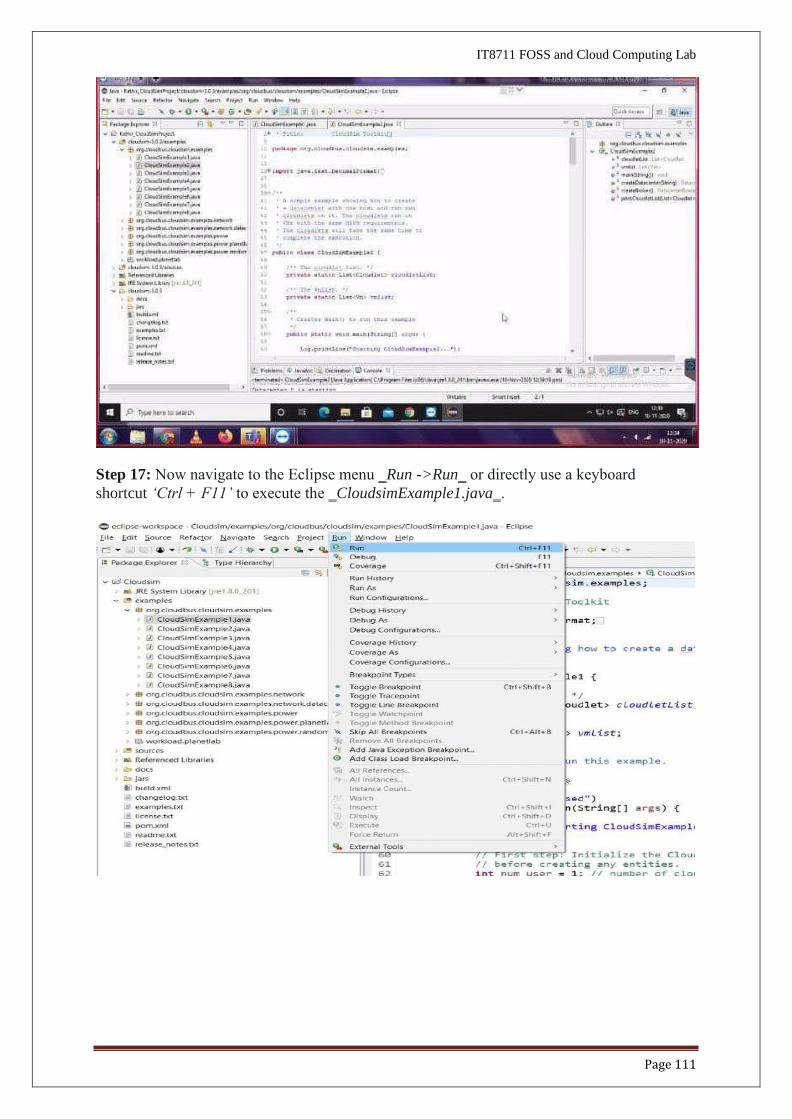
Step 17: Now navigate to the Eclipse menu ‗Run ->Run‗ or directly use a keyboard
shortcut ‘Ctrl + F11’ to execute the ‗CloudsimExample1.java‗.
IT8711 FOSS and Cloud Computing Lab
Page 112
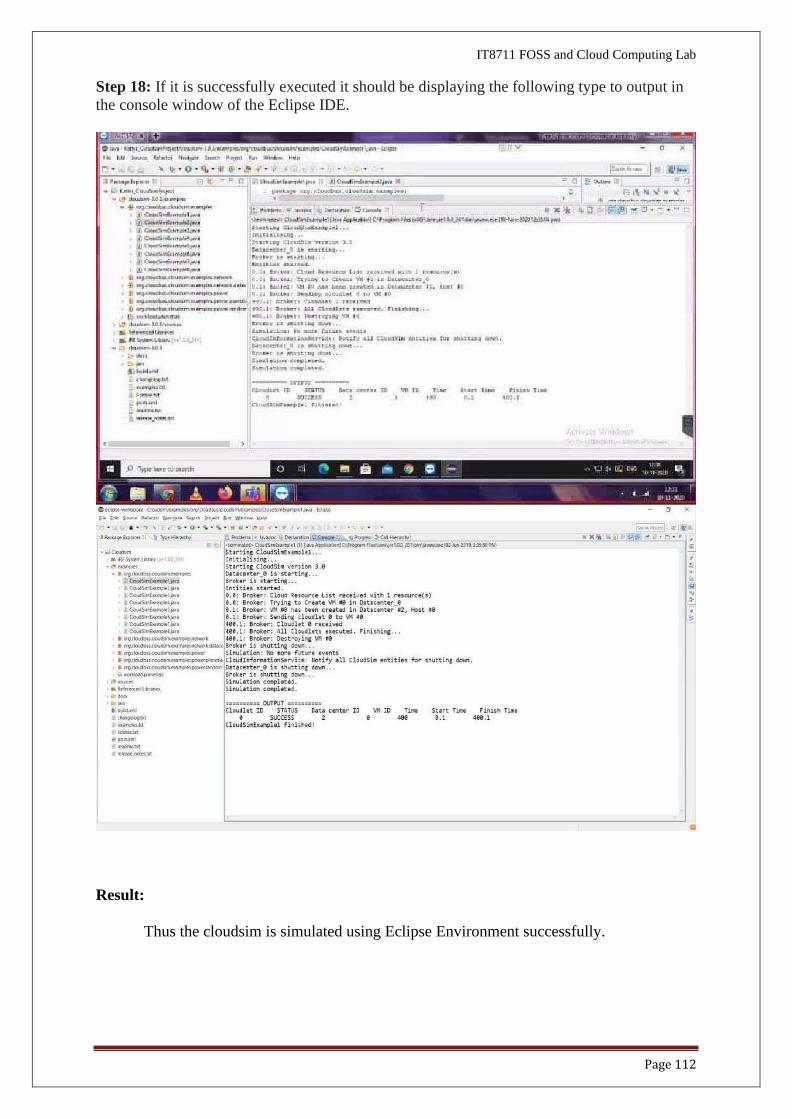
Step 18: If it is successfully executed it should be displaying the following type to output in
the console window of the Eclipse IDE.
Result:
Thus the cloudsim is simulated using Eclipse Environment successfully.
Page 113
IT8711 FOSS and Cloud Computing Lab
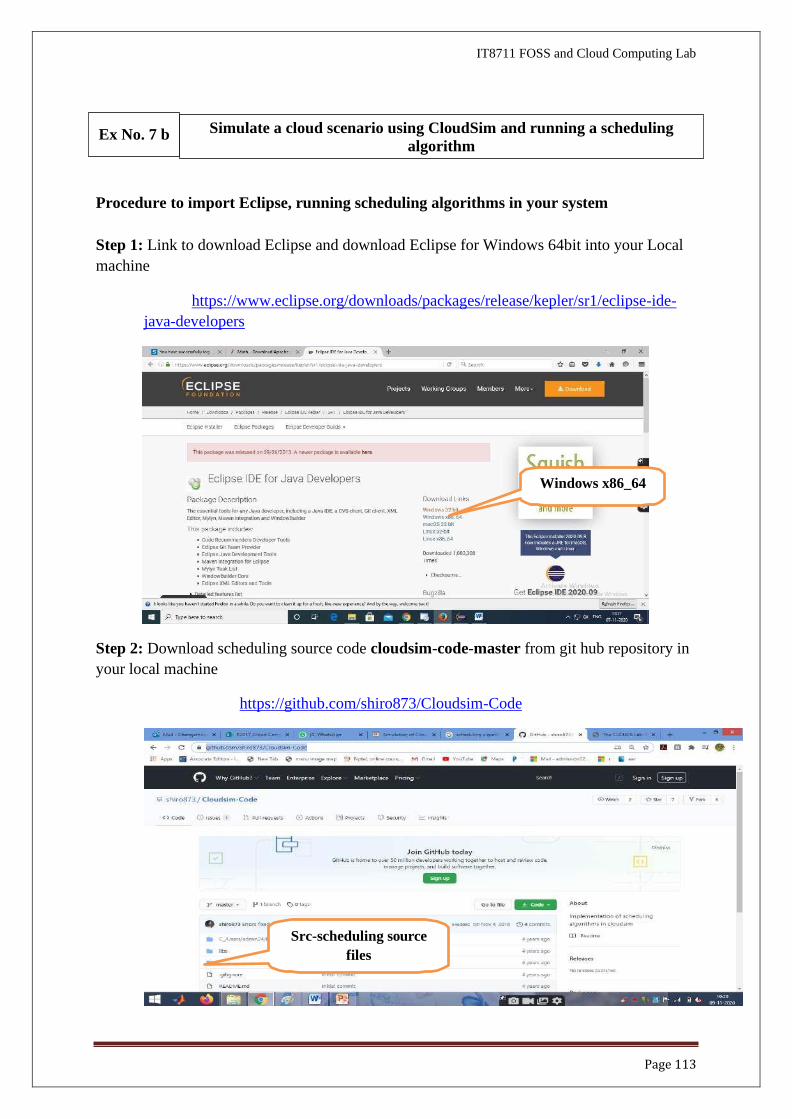
Procedure to import Eclipse, running scheduling algorithms in your system
Step 1: Link to download Eclipse and download Eclipse for Windows 64bit into your Local
machine
https://www.eclipse.org/downloads/packages/release/kepler/sr1/eclipse-ide-
java-developers
Step 2: Download scheduling source code cloudsim-code-master from git hub repository in
your local machine
https://github.com/shiro873/Cloudsim-Code
Simulate a cloud scenario using CloudSim and running a scheduling
algorithm
Windows x86_64
Src-scheduling source
files
Ex No. 7 b
Page 114
IT8711 FOSS and Cloud Computing Lab
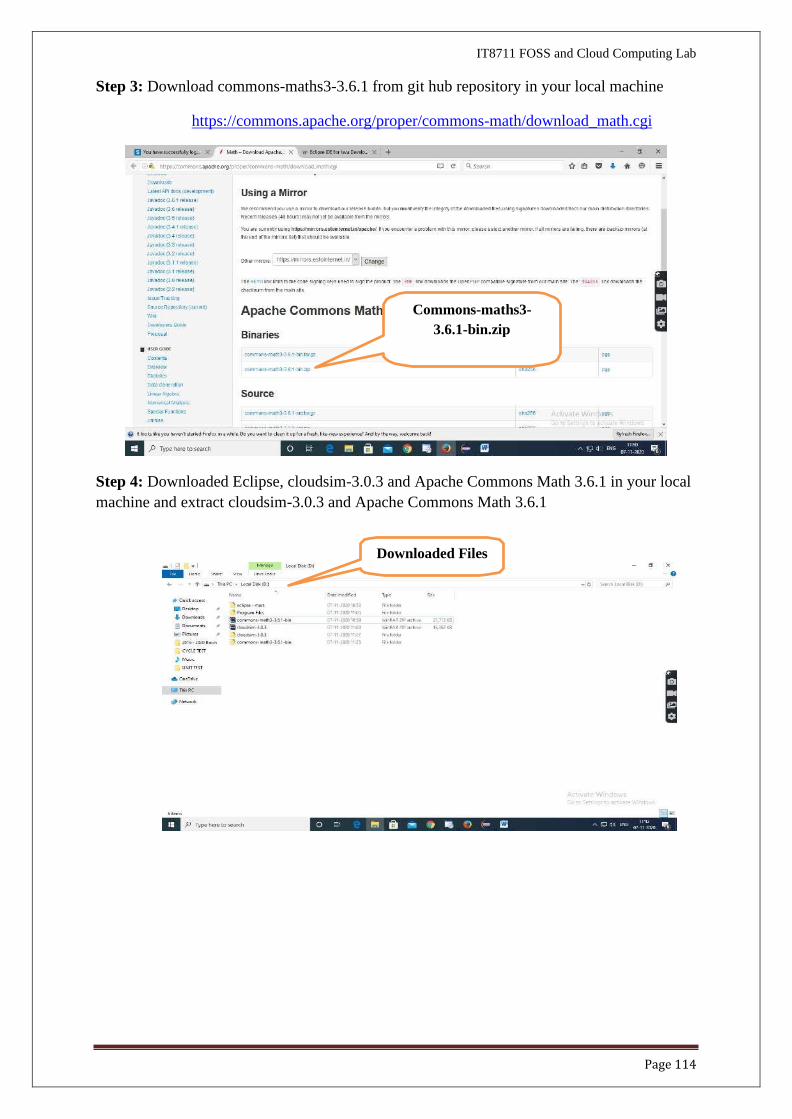
Step 3: Download commons-maths3-3.6.1 from git hub repository in your local machine
https://commons.apache.org/proper/commons-math/download_math.cgi
Step 4: Downloaded Eclipse, cloudsim-3.0.3 and Apache Commons Math 3.6.1 in your local
machine and extract cloudsim-3.0.3 and Apache Commons Math 3.6.1
Commons-maths3-
3.6.1-bin.zip
Downloaded Files
Page 115
IT8711 FOSS and Cloud Computing Lab
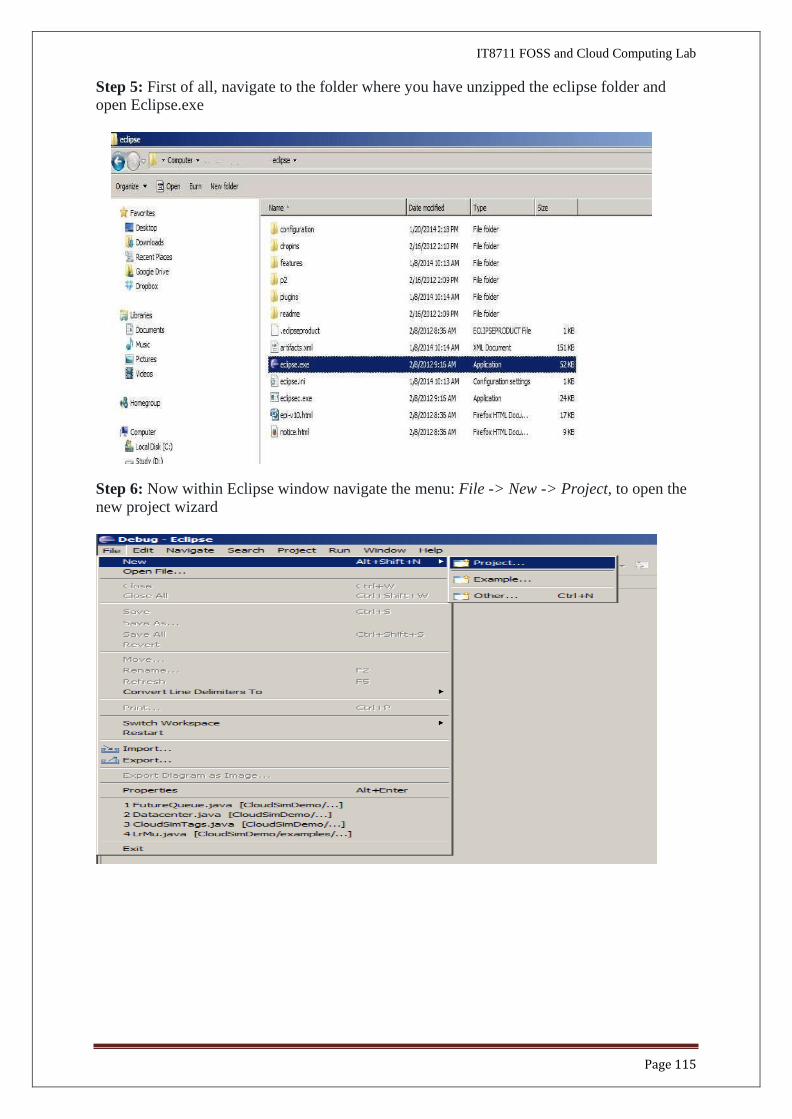
Step 5: First of all, navigate to the folder where you have unzipped the eclipse folder and open Eclipse.exe
Step 6: Now within Eclipse window navigate the menu: File -> New -> Project, to open the
new project wizard

Page 116
IT8711 FOSS and Cloud Computing Lab
Step 7: A ‗New Project‗ wizard should open. There are a number of options displayed and
you have to find & select the ‗Java Project‗ option, once done click ‘Next‗
Step 8: Now a detailed new project window will open, here you will provide the project name
and the path of CloudSim-master-code project source code, which will be done as follows:
Project Name: CloudSim
Page 117
IT8711 FOSS and Cloud Computing Lab
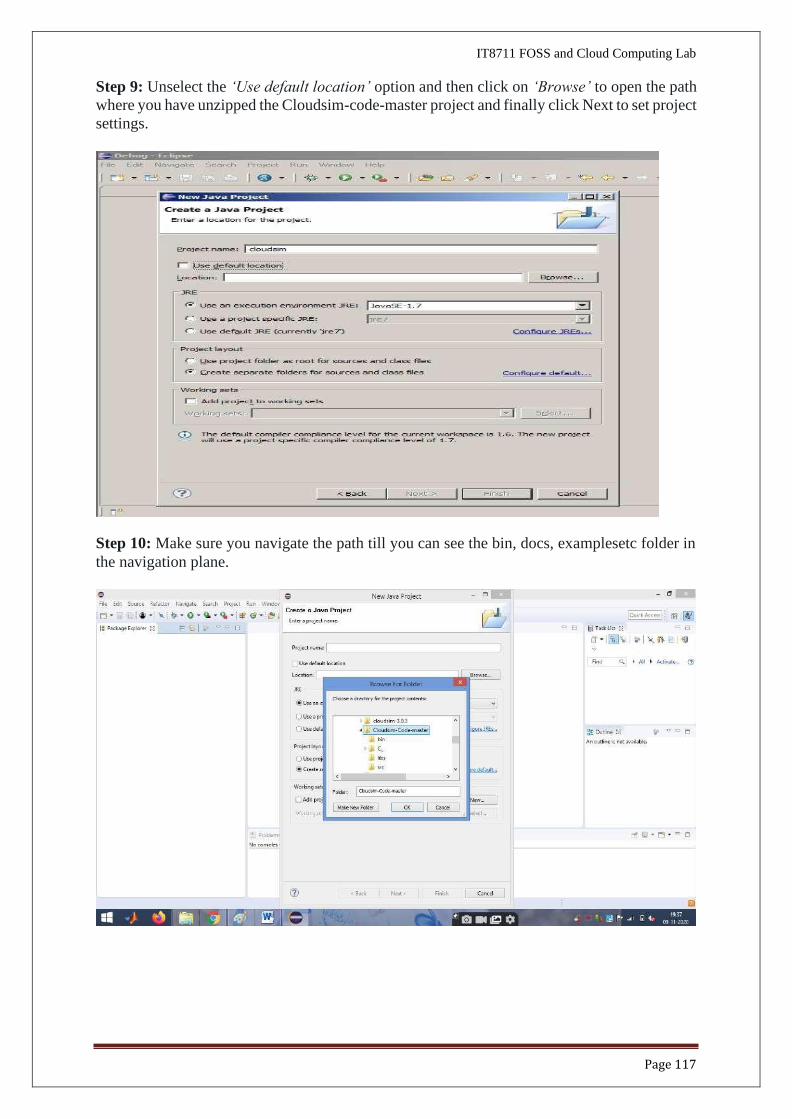
Step 9: Unselect the ‘Use default location’ option and then click on ‘Browse’ to open the path
where you have unzipped the Cloudsim-code-master project and finally click Next to set project
settings.
Step 10: Make sure you navigate the path till you can see the bin, docs, examplesetc folder in
the navigation plane.
Page 118
IT8711 FOSS and Cloud Computing Lab
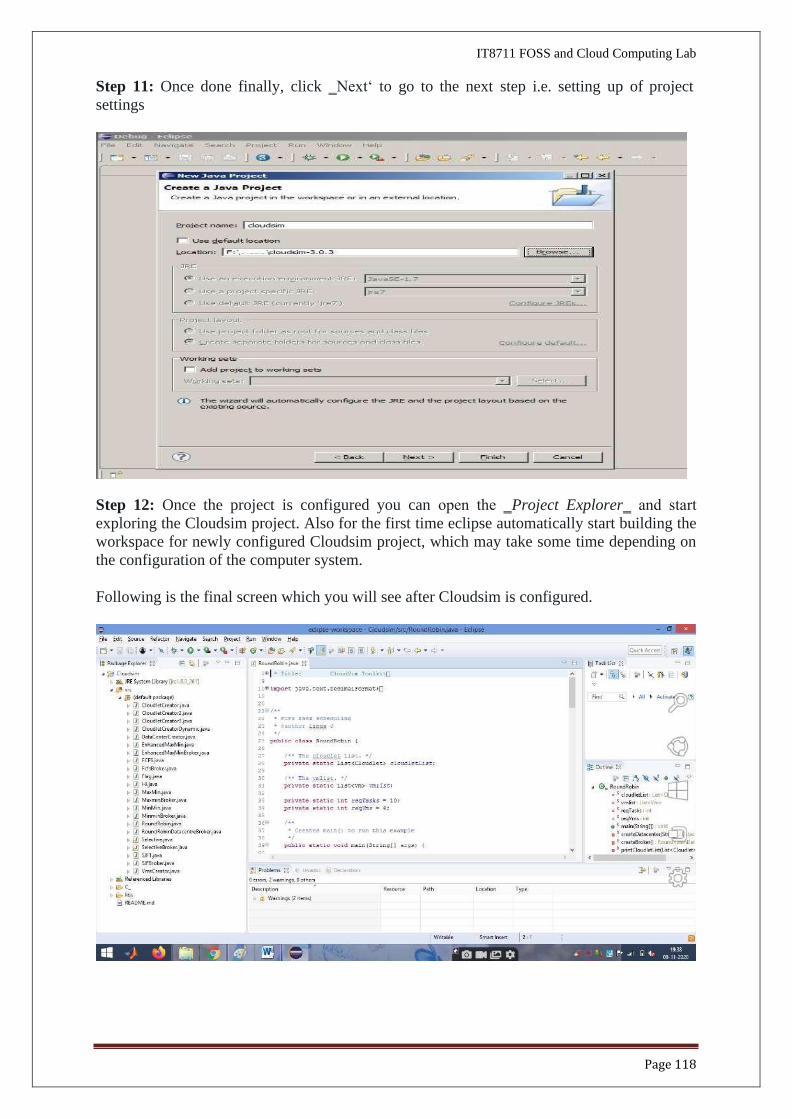
Step 11: Once done finally, click ‗Next‘ to go to the next step i.e. setting up of project
settings
Step 12: Once the project is configured you can open the ‗Project Explorer‗ and start
exploring the Cloudsim project. Also for the first time eclipse automatically start building the
workspace for newly configured Cloudsim project, which may take some time depending on
the configuration of the computer system.
Following is the final screen which you will see after Cloudsim is configured.
Page 119
IT8711 FOSS and Cloud Computing Lab
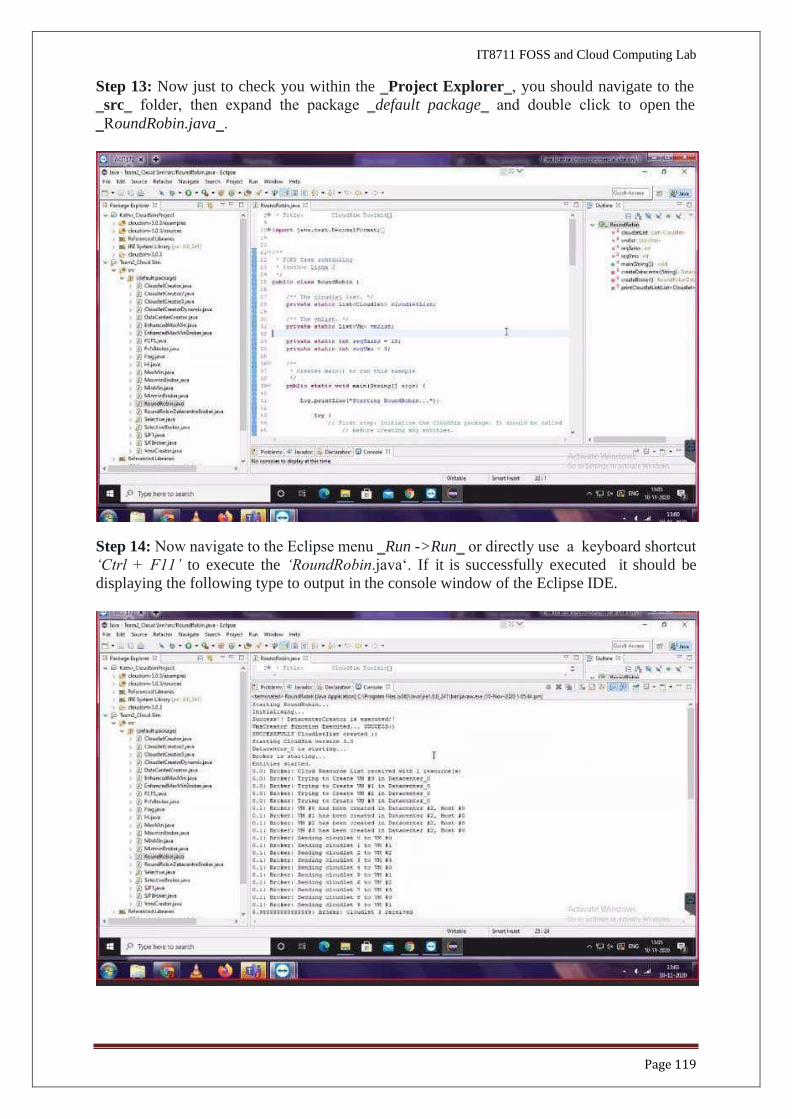
Step 13: Now just to check you within the ‗Project Explorer‗, you should navigate to the
‗src‗ folder, then expand the package ‗default package‗ and double click to open the
‗RoundRobin.java‗.
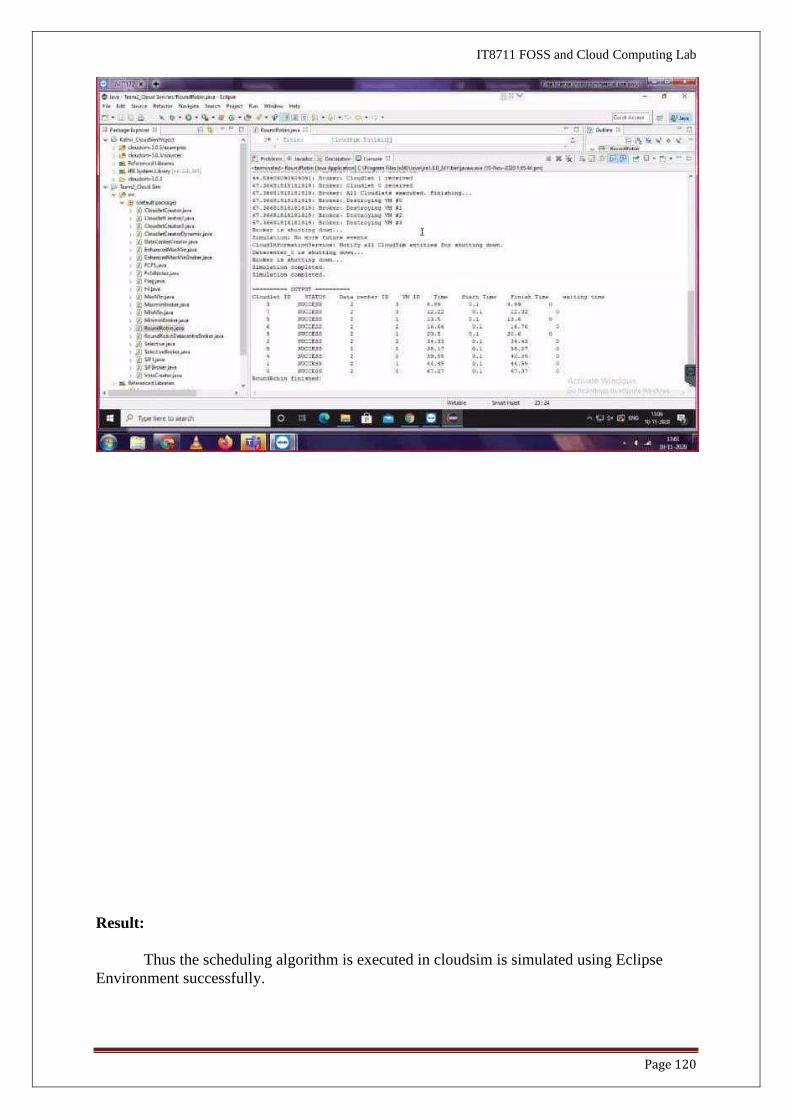
Step 14: Now navigate to the Eclipse menu ‗Run ->Run‗ or directly use a keyboard shortcut
‘Ctrl + F11’ to execute the ‘RoundRobin.java‘. If it is successfully executed it should be
displaying the following type to output in the console window of the Eclipse IDE.
IT8711 FOSS and Cloud Computing Lab
Page 120
Result:
Thus the scheduling algorithm is executed in cloudsim is simulated using Eclipse
Environment successfully.
IT8711 FOSS and Cloud Computing Lab
Page 121
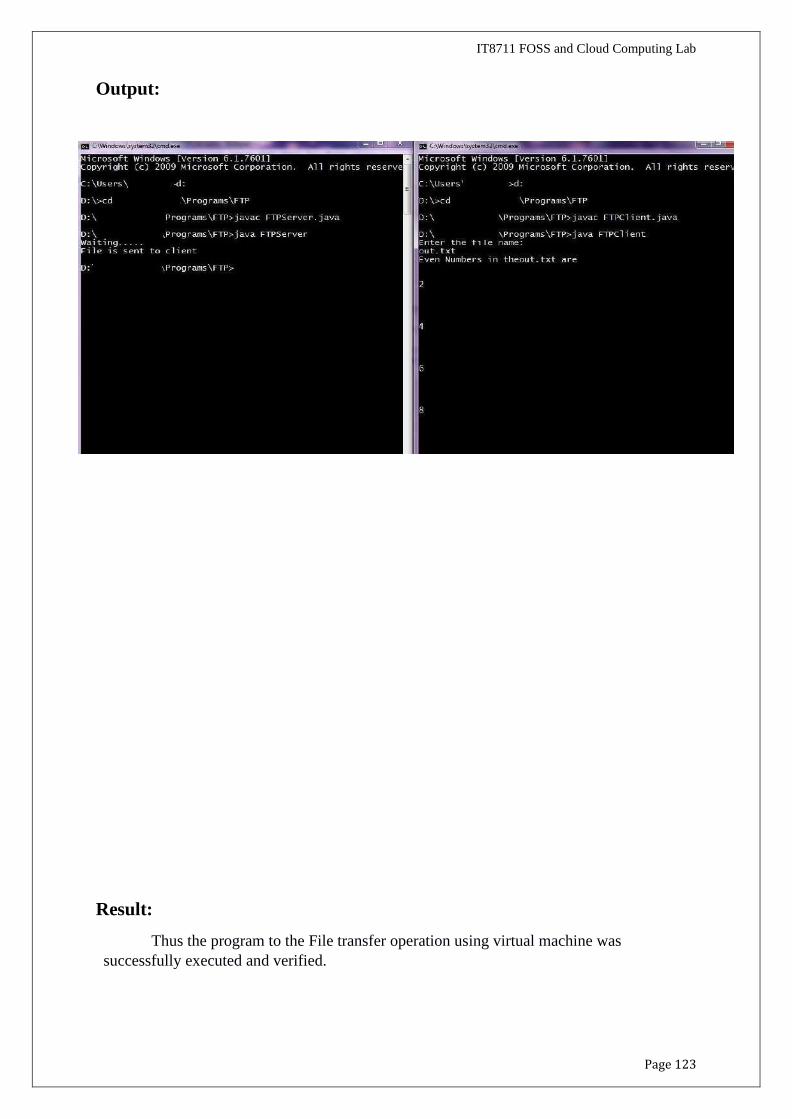
Aim: To procedure File Transfer in Client & Server using virtual machine
Steps: Steps to perform File Transfer in Client & Server using virtual machine.
Step 1: Open a virtual machine to do file transfer.
Step 2: Write the java program for FTP Client and FTP Server.
Step 3: Run the program.
Source Code:
FTPClient.java import java.io.*;
import java.net.*;
import java.util.*;
public class FTPClient{
public static void main(String args[])throws IOException {
try {
int number;
Socket s=new Socket("127.0.0.1",10087);
Scanner sc=new Scanner(System.in);
System.out.println("Enter the file name:");
String fn=sc.next();
DataOutputStream dos=new DataOutputStream(s.getOutputStream());
dos.writeUTF(fn);
DataInputStream dis=new DataInputStream(s.getInputStream());
String input=(String)dis.readUTF();
FileInputStream fis=new FileInputStream(input);
System.out.println("Even Numbers in the" +fn+" are");
int i=0;
while((i=fis.read())!=-1){
System.out.println((char)i);
}
s.close();
}
catch(Exception e){
System.out.println("Port not available "+e);
}
}
}
Procedure File Transfer in Client & Server using virtual machine. Ex No. 8
Page 122
IT8711 FOSS and Cloud Computing Lab
FTPServer.java
import java.io.*;
import java.net.*;
import java.util.*;
public class FTPServer{
public static void main(String args[])throws IOException{
try{
int num;
Scanner sc=new Scanner(System.in);
ServerSocket ss=new ServerSocket(10087);
Socket s=ss.accept();
System.out.println("Waiting. ... ");
DataInputStream dis=new DataInputStream(s.getInputStream());
String input=(String)dis.readUTF();
DataOutputStream dos=new DataOutputStream(s.getOutputStream());
FileInputStream fis = new FileInputStream("out.txt");
FileOutputStream fos = new FileOutputStream(input);
while((num=fis.read())!= -1) {
if(num%2==0) {
fos.write(num);
}
}
dos.writeUTF(input);
System.out.println("File is sent to client");
ss.close();
s.close();
}
catch(Exception e) {
System.out.println("Port not available"+e);
}
}
}
Out.txt 1
2
3
4
5
6
7
8
9
Page 123
Output:
IT8711 FOSS and Cloud Computing Lab
Result:
Thus the program to the File transfer operation using virtual machine was
successfully executed and verified.

Page 124
Page 124
IT8711 FOSS and Cloud Computing Lab
Introduction:
❖ OpenStack was introduced by Rackspace and NASA in July 2010.
❖ OpenStack is an Infrastructure as a Service known as Cloud Operating System, that
take resources such as Compute, Storage, Network and Virtualization Technologies and
control those resources at a data center level
❖ The project is building an open source community - to share resources and technologies
with the goal of creating a massively scalable and secure cloud infrastructure.
❖ The software is open source and limited to just open source APIs such as Amazon.
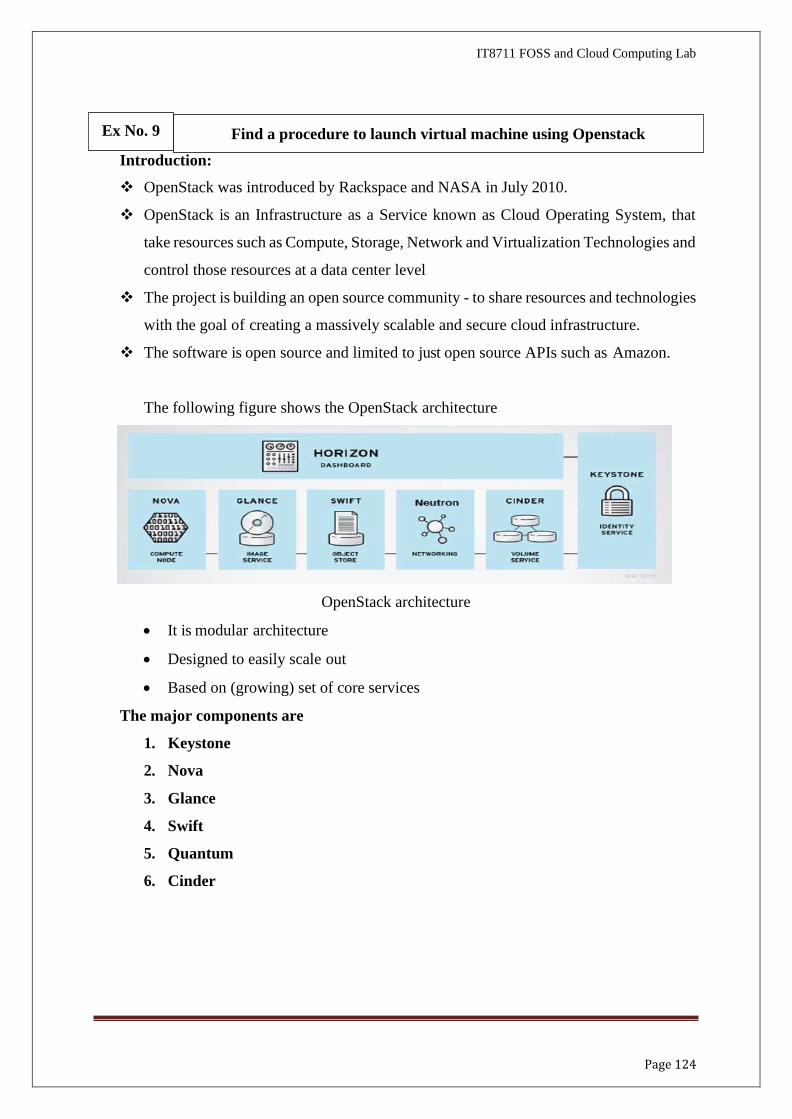
The following figure shows the OpenStack architecture
OpenStack architecture
• It is modular architecture
• Designed to easily scale out
• Based on (growing) set of core services
The major components are
1. Keystone
2. Nova
3. Glance
4. Swift
5. Quantum
6. Cinder
Find a procedure to launch virtual machine using Openstack Ex No. 9
Page 125
IT8711 FOSS and Cloud Computing Lab
• KEYSTONE :
o Identity service
o Common authorization framework
o Manage users, tenants and roles
o Pluggable backends (SQL,PAM,LDAP, IDM etc)
• NOVA
o Core compute service comprised of
▪ Compute Nodes – hypervisors that run virtual machines
• Supports multiple hypervisors KVM,Xen,LXC,Hyper-V
and ESX
▪ Distributed controllers that handle scheduling, API calls, etc
• Native OpenStack API and Amazon EC2 compatible
API
• GLANCE
o Image service
o Stores and retrieves disk images (Virtual machine templates)
o Supports RAW,QCOW,VHD,ISO,OVF & AMI/AKI
o Backend Storage : File System, Swift, Gluster, Amazon S3
• SWIFT
o Object Storage service
o Modeled after Amazon‘s Service
o Provides simple service for storing and retrieving arbitrary data
o Native API and S3 compatible API
• NEUTRON
o Network service
o Provides framework for Software Defined Network
o Plugin architecture
▪ Allows intergration of hardware and software based network
solutions
• Open vSwitch, Cisco UCS,Standard Linux
Bridge,NiCira NVP
Page 126
IT8711 FOSS and Cloud Computing Lab
• CINDER
o Block Storage (Volume) service
o Provides block storage for Virtual machines(persistent disks)
o Similar to Amazon EBS service
o Plugin architecture for vendor extensions
▪ NetApp driver for cinder
• HORIZON
o Dashboard
o Provides simple self service UI for end-users
o Basic cloud administrator functions
▪ Define users, tenants and quotas
▪ No infrastructure management
• HEAT OpenStack Orchestration
o Provides template driven cloud application orchestration
o Modeled after AWS Cloud Formation
o Targeted to provide advanced functionality such as high availability
and auto scaling
o Introduced by Redhat
• CEILOMETER – OpenStack Monitoring and Metering
o Goal: To Provide a single infrastructure to collect measurements from
an entire OpenStack Infrastructure; Eliminate need for multiple agents
attaching to multiple OpenStack Projects
o Primary targets metering and monitoring: Provided extensibility
❖ Steps in Installing Openstack
Step 1:
Step 2:
• Download and Install Oracle Virtual Box latest version & Extension
package
o https://virtualbox.org/wiki/downloads
• Download CentOS 7 OVA(Open Virtual Appliance) from
o Link : https://linuxvmimages.com/images/centos-7
• Import CentOS 7 OVA(Open Virtual Appliance) into Oracle Virtual Box
Page 127
IT8711 FOSS and Cloud Computing Lab
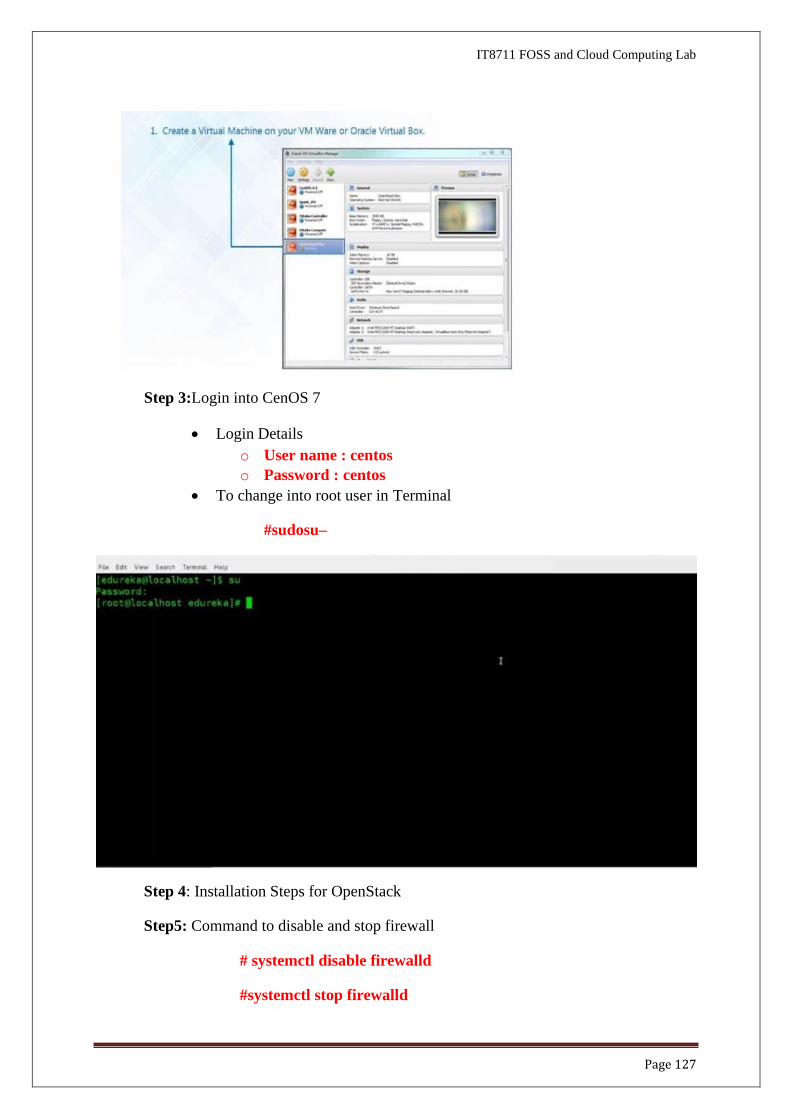
Step 3:Login into CenOS 7
• Login Details
o User name : centos
o Password : centos
• To change into root user in Terminal
#sudosu–
Step 4: Installation Steps for OpenStack
Step5: Command to disable and stop firewall
# systemctl disable firewalld
#systemctl stop firewalld
Page 128
IT8711 FOSS and Cloud Computing Lab
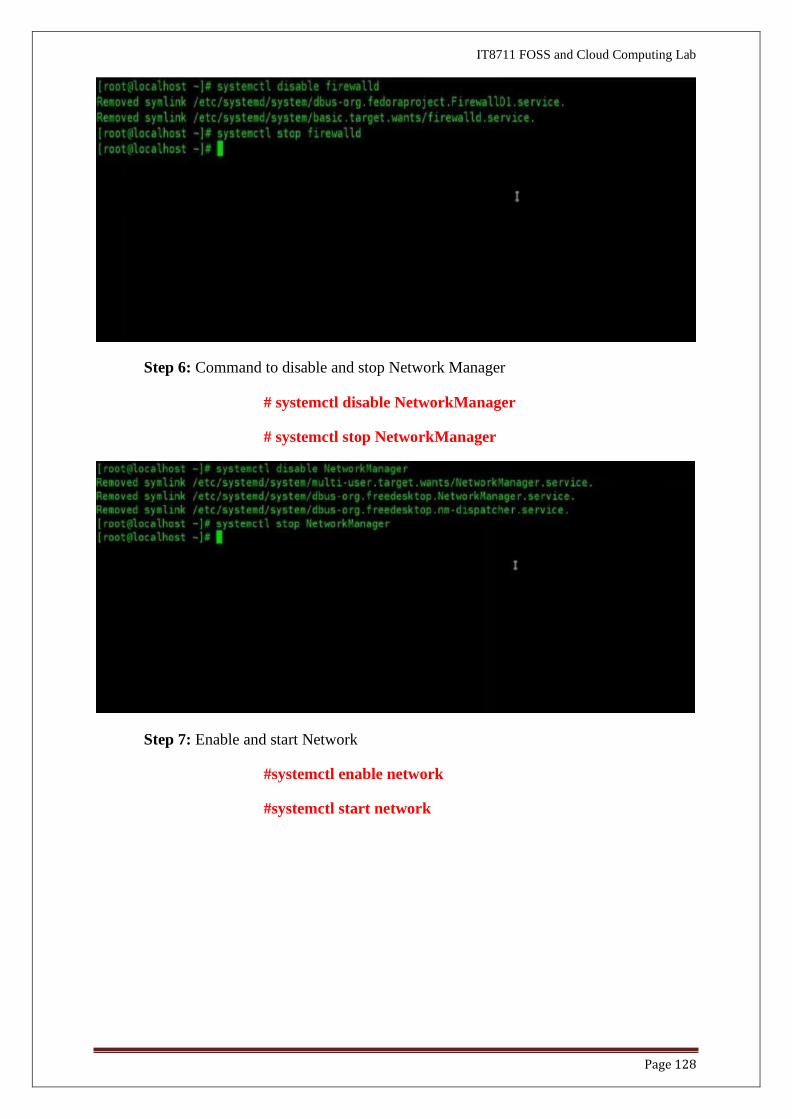
Step 6: Command to disable and stop Network Manager
# systemctl disable NetworkManager
# systemctl stop NetworkManager
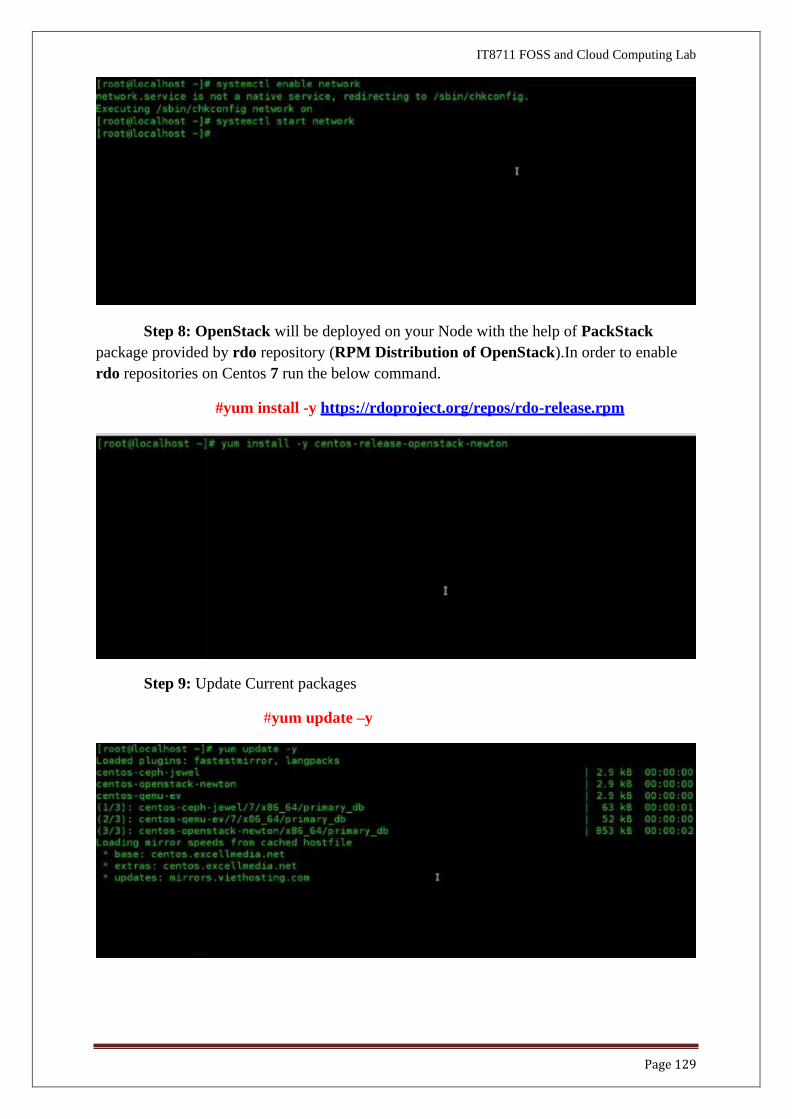
Step 7: Enable and start Network
#systemctl enable network
#systemctl start network
Page 129
IT8711 FOSS and Cloud Computing Lab
Step 8: OpenStack will be deployed on your Node with the help of PackStack
package provided by rdo repository (RPM Distribution of OpenStack).In order to enable
rdo repositories on Centos 7 run the below command.
#yum install -y https://rdoproject.org/repos/rdo-release.rpm
Step 9: Update Current packages
#yum update –y

IT8711 FOSS and Cloud Computing Lab
Page 130
Step 10:Install OpenStack Release for CentOS
#yum install –y openstack-packstack
Step 11:Start packstack to install OpenStack Newton
#packstak --allinone
Step 12:Note the user name and password from keystonerc_admin
#cat keystonerc_admin

IT8711 FOSS and Cloud Computing Lab
Page 131
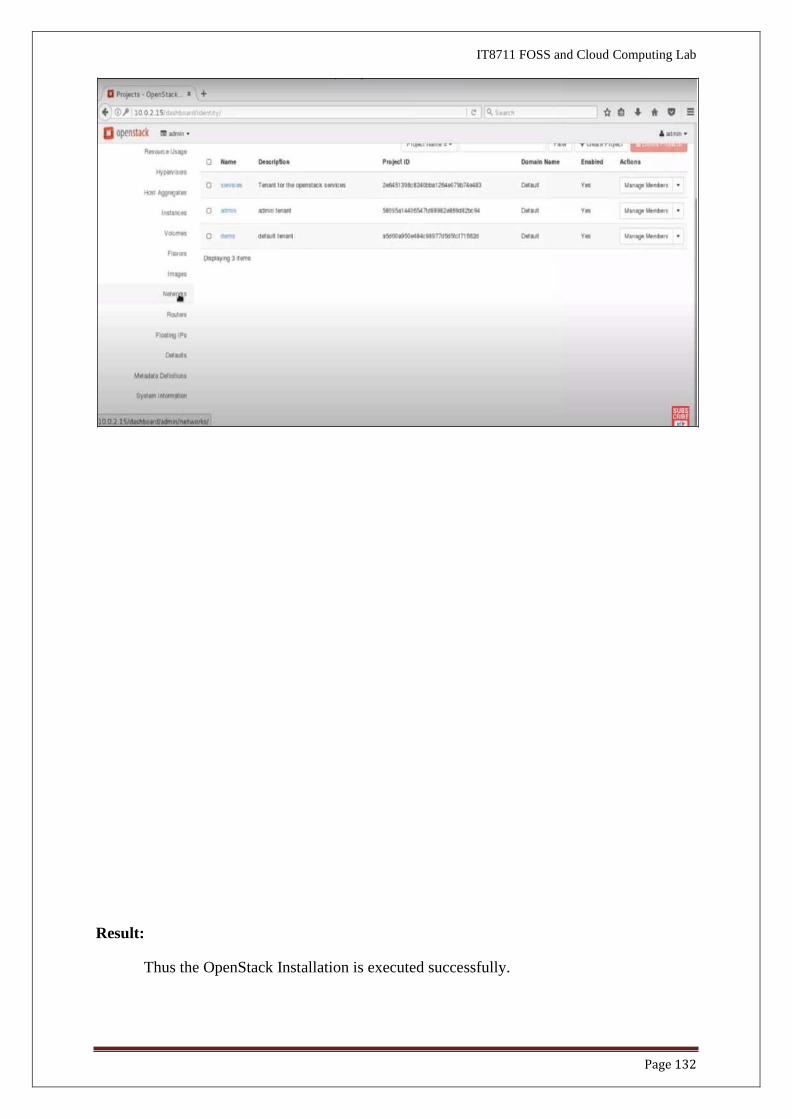
Step 13: Click the URL and enter the user name and password to start OpenStack
OpenStack is successfully launched in your machine
IT8711 FOSS and Cloud Computing Lab
Page 132
Result:
Thus the OpenStack Installation is executed successfully.
Page 133
IT8711 FOSS and Cloud Computing Lab
Aim:
To find procedure to set up the one node Hadoop cluster.
Procedure:
Step 1:
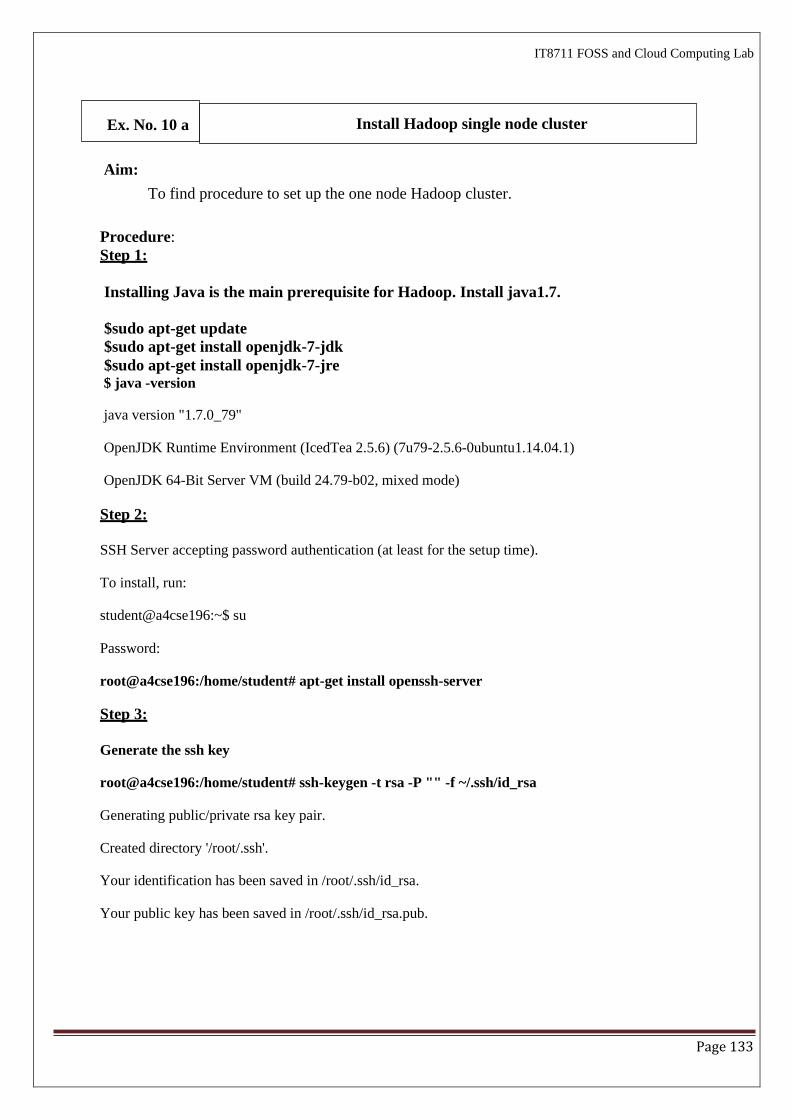
Installing Java is the main prerequisite for Hadoop. Install java1.7.
$sudo apt-get update
$sudo apt-get install openjdk-7-jdk
$sudo apt-get install openjdk-7-jre $ java -version
java version "1.7.0_79"
OpenJDK Runtime Environment (IcedTea 2.5.6) (7u79-2.5.6-0ubuntu1.14.04.1)
OpenJDK 64-Bit Server VM (build 24.79-b02, mixed mode)
Step 2:
SSH Server accepting password authentication (at least for the setup time).
To install, run:
student@a4cse196:~$ su
Password:
root@a4cse196:/home/student# apt-get install openssh-server
Step 3:
Generate the ssh key
root@a4cse196:/home/student# ssh-keygen -t rsa -P "" -f ~/.ssh/id_rsa
Generating public/private rsa key pair.
Created directory '/root/.ssh'.
Your identification has been saved in /root/.ssh/id_rsa.
Your public key has been saved in /root/.ssh/id_rsa.pub.
Install Hadoop single node cluster Ex. No. 10 a
Page 134
IT8711 FOSS and Cloud Computing Lab
The key fingerprint is:
77:a1:20:bb:db:95:6d:89:ce:44:25:32:b6:81:5d:d5 root@a4cse196
The key's random art image is:
+--[ RSA 2048] ---+
| .... |
| o . E |
| o B . o |
| + * + . |
| . S + . |
| . o = . |
| . = + |
|
|
o = .
. . o |
|
+ +
Step 4:
If the master also acts a slave (`ssh localhost` should work without a password)
root@a4cse196:/home/student# cat $HOME/.ssh/id_rsa.pub >>$HOME/.ssh/authorized_keys
Step 5:
Create hadoop group and user:
Step 5.1 root@a4cse196:/home/student# sudo addgroup hadoop
Adding group `hadoop' (GID 1003) ...
Done.
Step 5.2 root@a4cse196:/home/student# sudo adduser --ingroup hadoop hadoop
Adding user `hadoop' ...
Adding new user `hadoop' (1003) with group `hadoop' ...
Creating home directory `/home/hadoop' ...
Copying files from `/etc/skel' ...
Enter new UNIX password:
Page 135
IT8711 FOSS and Cloud Computing Lab
Retype new UNIX password:
passwd: password updated successfully
Changing the user information for hadoop
Enter the new value, or press ENTER for the default
Full Name []:
Room Number []:
Work Phone []:
Home Phone []:
Other []:
Is the information correct? [Y/n] y
root@a4cse196:/home/student#
Step 6:
Copy your .tar file to home.(hadoop-2.7.0.tar.gz)
Step 7:
Extracting the tar file.
root@a4cse196:/home/student# sudo tar -xzvf hadoop-2.7.0.tar.gz -C /usr/local/lib/
Step 8:
Changing the Ownership
root@a4cse196:/home/student# sudo chown -R hadoop:hadoop /usr/local/lib/hadoop-2.7.0
Step 9:
Create HDFS directories:
root@a4cse196:/home/student# sudo mkdir -p /var/lib/hadoop/hdfs/namenode
root@a4cse196:/home/student# sudo mkdir -p /var/lib/hadoop/hdfs/datanode
root@a4cse196:/home/student# sudo chown -R hadoop /var/lib/hadoop
Step 10:
Check where your Java is installed:
root@a4cse196:/home/student# readlink -f /usr/bin/java
/usr/lib/jvm/java-7-openjdk-amd64/jre/bin/java
Page 136
IT8711 FOSS and Cloud Computing Lab
Step 11:
Open gedit and do it
root@a4cse196:/home/student# gedit ~/.bashrc
Add to ~/.bashrc file:
export JAVA_HOME=/usr/lib/jvm/java-7-openjdk-amd64
export HADOOP_INSTALL=/usr/local/lib/hadoop-2.7.0
export PATH=$PATH:$HADOOP_INSTALL/bin
export PATH=$PATH:$HADOOP_INSTALL/sbin
export HADOOP_MAPRED_HOME=$HADOOP_INSTALL
export HADOOP_COMMON_HOME=$HADOOP_INSTALL
export HADOOP_HDFS_HOME=$HADOOP_INSTALL
export YARN_HOME=$HADOOP_INSTALL
export HADOOP_COMMON_LIB_NATIVE_DIR=$HADOOP_INSTALL/lib/native
export HADOOP_OPTS="-Djava.library.path=$HADOOP_INSTALL/lib/native"
Step 12:
Reload source
root@a4cse196:/home/student# source ~/.bashrc
Step 13:
Modify JAVA_HOME in /usr/local/lib/hadoop-2.7.0/etc/hadoop/hadoop-env.sh:
root@a4cse196:/home/student# cd /usr/local/lib/hadoop-2.7.0/etc/hadoop
root@a4cse196:/usr/local/lib/hadoop-2.7.0/etc/hadoop# gedit hadoop-env.sh
export JAVA_HOME=${ JAVA_HOME}
Changed this to below path
export JAVA_HOME=/usr/lib/jvm/java-7-openjdk-amd64
Step 14:
Modify /usr/local/lib/hadoop-2.7.0/etc/hadoop/core-site.xml to have something like:
root@a4cse196:/usr/local/lib/hadoop-2.7.0/etc/hadoop# gedit core-site.xml
<configuration>
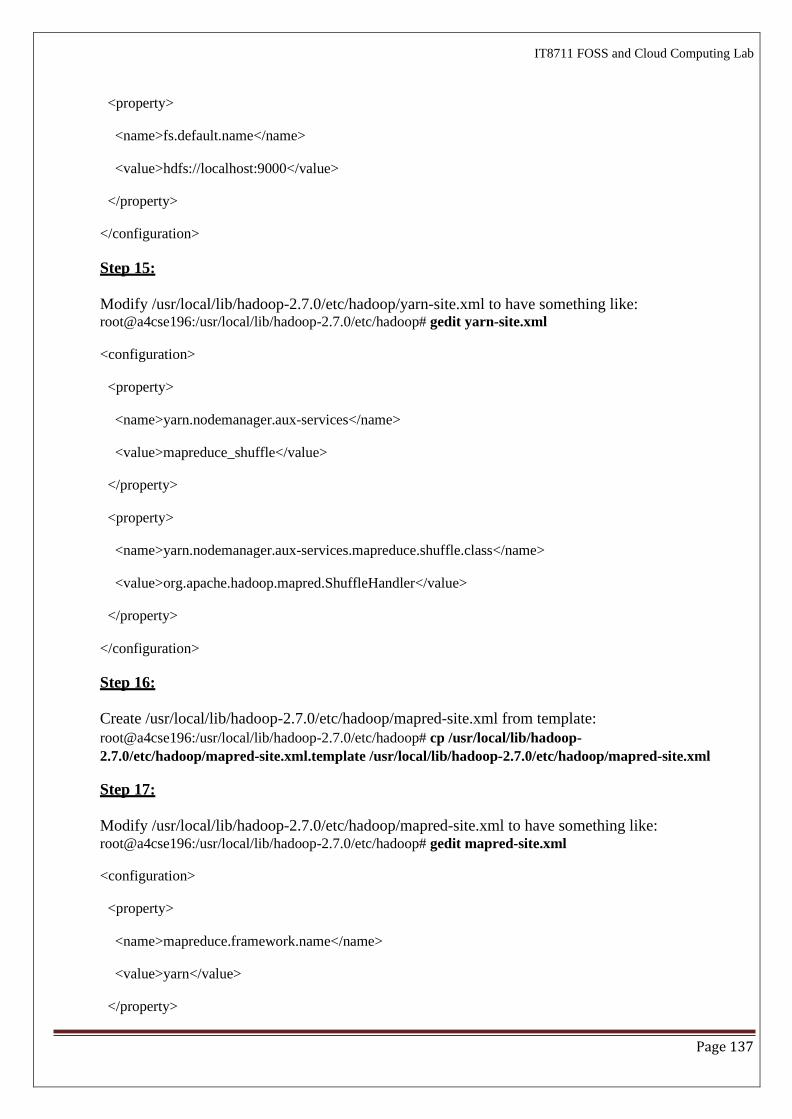
Page 137
IT8711 FOSS and Cloud Computing Lab
<property>
<name>fs.default.name</name>
<value>hdfs://localhost:9000</value>
</property>
</configuration>
Step 15:
Modify /usr/local/lib/hadoop-2.7.0/etc/hadoop/yarn-site.xml to have something like: root@a4cse196:/usr/local/lib/hadoop-2.7.0/etc/hadoop# gedit yarn-site.xml
<configuration>
<property>
<name>yarn.nodemanager.aux-services</name>
<value>mapreduce_shuffle</value>
</property>
<property>
<name>yarn.nodemanager.aux-services.mapreduce.shuffle.class</name>
<value>org.apache.hadoop.mapred.ShuffleHandler</value>
</property>
</configuration>
Step 16:
Create /usr/local/lib/hadoop-2.7.0/etc/hadoop/mapred-site.xml from template:
root@a4cse196:/usr/local/lib/hadoop-2.7.0/etc/hadoop# cp /usr/local/lib/hadoop-
2.7.0/etc/hadoop/mapred-site.xml.template /usr/local/lib/hadoop-2.7.0/etc/hadoop/mapred-site.xml
Step 17:
Modify /usr/local/lib/hadoop-2.7.0/etc/hadoop/mapred-site.xml to have something like: root@a4cse196:/usr/local/lib/hadoop-2.7.0/etc/hadoop# gedit mapred-site.xml
<configuration>
<property>
<name>mapreduce.framework.name</name>
<value>yarn</value>
</property>
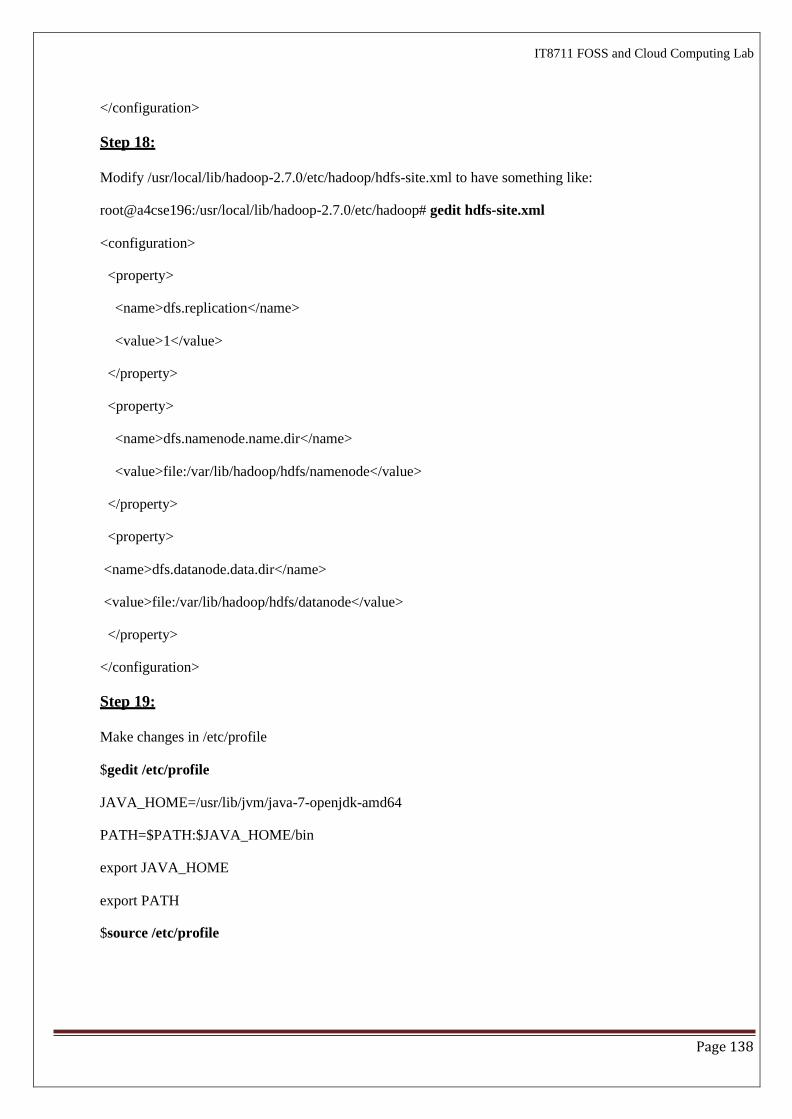
Page 138
IT8711 FOSS and Cloud Computing Lab
</configuration>
Step 18:
Modify /usr/local/lib/hadoop-2.7.0/etc/hadoop/hdfs-site.xml to have something like:
root@a4cse196:/usr/local/lib/hadoop-2.7.0/etc/hadoop# gedit hdfs-site.xml
<configuration>
<property>
<name>dfs.replication</name>
<value>1</value>
</property>
<property>
<name>dfs.namenode.name.dir</name>
<value>file:/var/lib/hadoop/hdfs/namenode</value>
</property>
<property>
<name>dfs.datanode.data.dir</name>
<value>file:/var/lib/hadoop/hdfs/datanode</value>
</property>
</configuration>
Step 19:
Make changes in /etc/profile
$gedit /etc/profile
JAVA_HOME=/usr/lib/jvm/java-7-openjdk-amd64
PATH=$PATH:$JAVA_HOME/bin
export JAVA_HOME
export PATH
$source /etc/profile
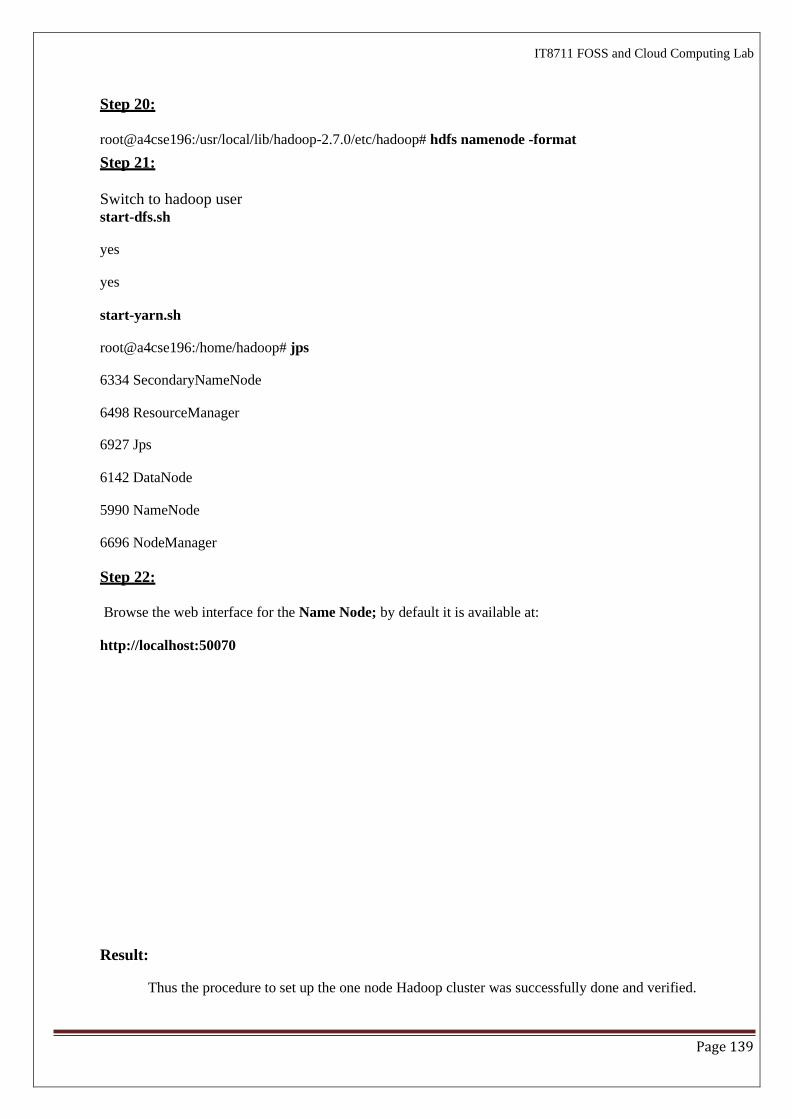
Page 139
IT8711 FOSS and Cloud Computing Lab
Step 20:
root@a4cse196:/usr/local/lib/hadoop-2.7.0/etc/hadoop# hdfs namenode -format
Step 21:
Switch to hadoop user start-dfs.sh
yes
yes
start-yarn.sh
root@a4cse196:/home/hadoop# jps
6334 SecondaryNameNode
6498 ResourceManager
6927 Jps
6142 DataNode
5990 NameNode
6696 NodeManager
Step 22:
Browse the web interface for the Name Node; by default it is available at:
http://localhost:50070
Result:
Thus the procedure to set up the one node Hadoop cluster was successfully done and verified.
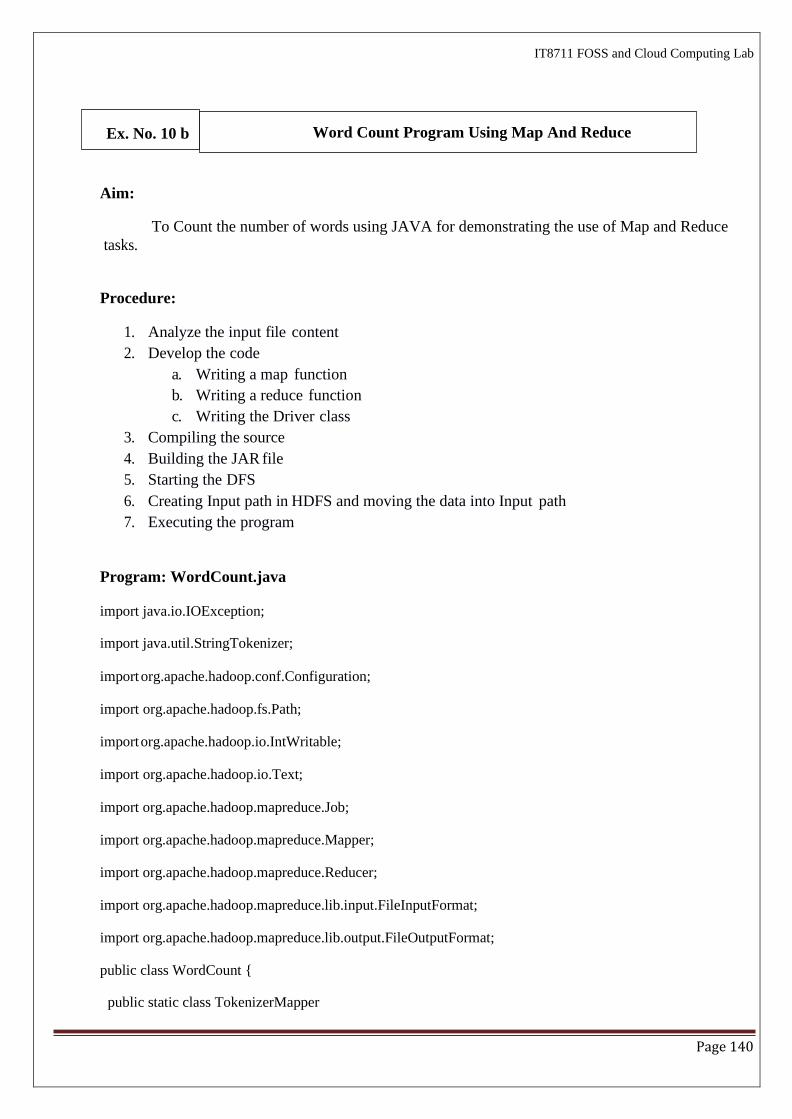
Page 140
IT8711 FOSS and Cloud Computing Lab
Aim:
tasks.
To Count the number of words using JAVA for demonstrating the use of Map and Reduce
Procedure:
1. Analyze the input file content
2. Develop the code
a. Writing a map function
b. Writing a reduce function
c. Writing the Driver class
3. Compiling the source
4. Building the JAR file
5. Starting the DFS
6. Creating Input path in HDFS and moving the data into Input path
7. Executing the program
Program: WordCount.java
import java.io.IOException;
import java.util.StringTokenizer;
import org.apache.hadoop.conf.Configuration;
import org.apache.hadoop.fs.Path;
import org.apache.hadoop.io.IntWritable;
import org.apache.hadoop.io.Text;
import org.apache.hadoop.mapreduce.Job;
import org.apache.hadoop.mapreduce.Mapper;
import org.apache.hadoop.mapreduce.Reducer;
import org.apache.hadoop.mapreduce.lib.input.FileInputFormat;
import org.apache.hadoop.mapreduce.lib.output.FileOutputFormat;
public class WordCount {
public static class TokenizerMapper
Word Count Program Using Map And Reduce Ex. No. 10 b
Page 141
extends Mapper<Object, Text, Text, IntWritable>{
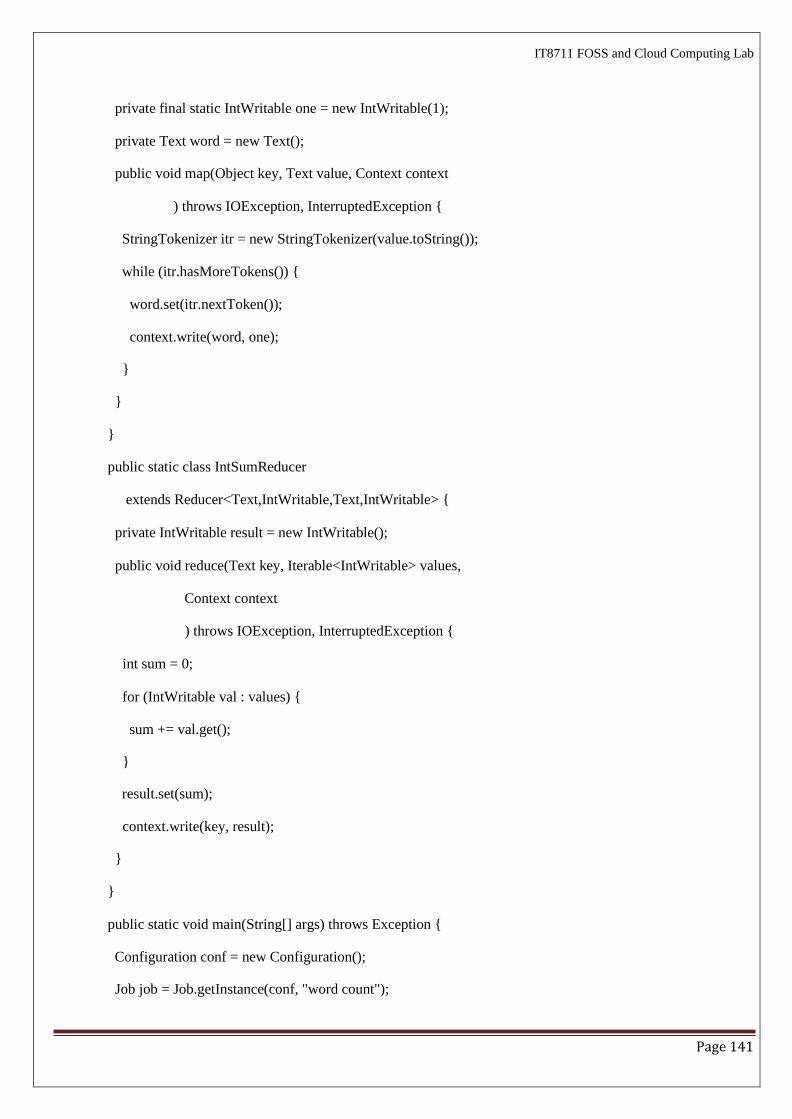
Page 141
IT8711 FOSS and Cloud Computing Lab
private final static IntWritable one = new IntWritable(1);
private Text word = new Text();
public void map(Object key, Text value, Context context
) throws IOException, InterruptedException {
StringTokenizer itr = new StringTokenizer(value.toString());
while (itr.hasMoreTokens()) {
word.set(itr.nextToken());
context.write(word, one);
}
}
}
public static class IntSumReducer
extends Reducer<Text,IntWritable,Text,IntWritable> {
private IntWritable result = new IntWritable();
public void reduce(Text key, Iterable<IntWritable> values,
Context context
) throws IOException, InterruptedException {
int sum = 0;
for (IntWritable val : values) {
sum += val.get();
}
result.set(sum);
context.write(key, result);
}
}
public static void main(String[] args) throws Exception {
Configuration conf = new Configuration();
Job job = Job.getInstance(conf, "word count");
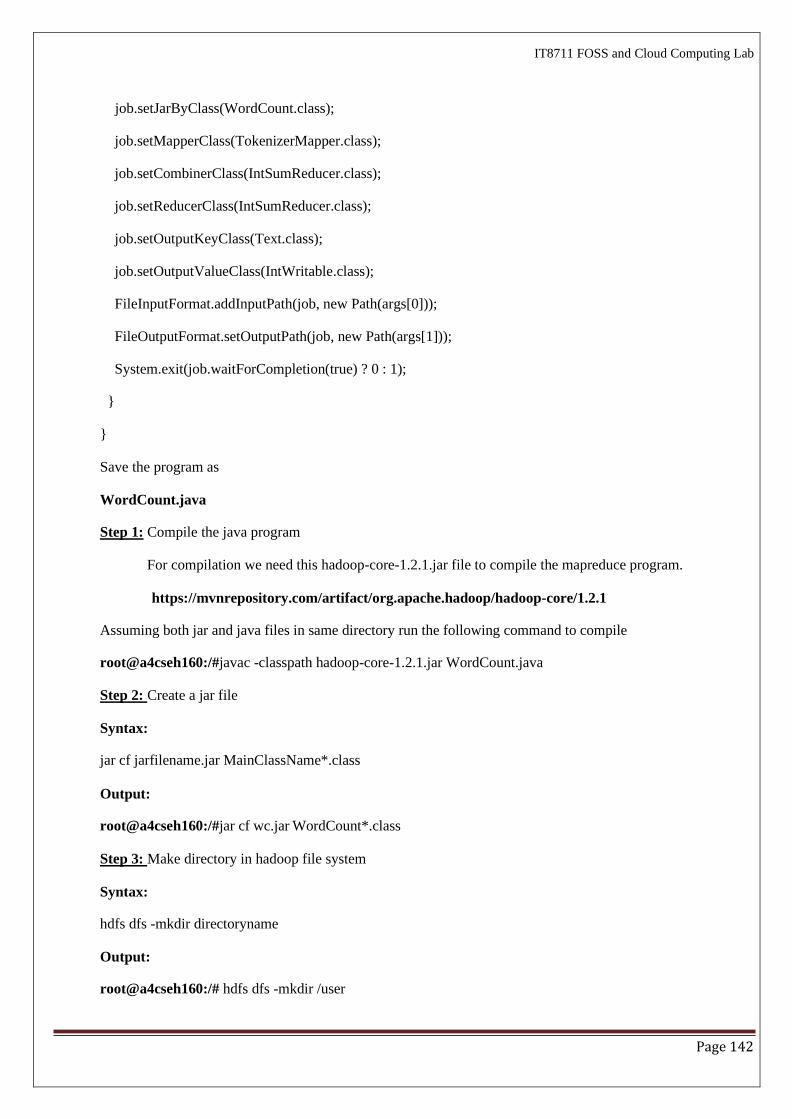
Page 142
IT8711 FOSS and Cloud Computing Lab
job.setJarByClass(WordCount.class);
job.setMapperClass(TokenizerMapper.class);
job.setCombinerClass(IntSumReducer.class);
job.setReducerClass(IntSumReducer.class);
job.setOutputKeyClass(Text.class);
job.setOutputValueClass(IntWritable.class);
FileInputFormat.addInputPath(job, new Path(args[0]));
FileOutputFormat.setOutputPath(job, new Path(args[1]));
System.exit(job.waitForCompletion(true) ? 0 : 1);
}
}
Save the program as
WordCount.java
Step 1: Compile the java program
For compilation we need this hadoop-core-1.2.1.jar file to compile the mapreduce program.
https://mvnrepository.com/artifact/org.apache.hadoop/hadoop-core/1.2.1
Assuming both jar and java files in same directory run the following command to compile
root@a4cseh160:/#javac -classpath hadoop-core-1.2.1.jar WordCount.java
Step 2: Create a jar file
Syntax:
jar cf jarfilename.jar MainClassName*.class
Output:
root@a4cseh160:/#jar cf wc.jar WordCount*.class
Step 3: Make directory in hadoop file system
Syntax:
hdfs dfs -mkdir directoryname
Output:
root@a4cseh160:/# hdfs dfs -mkdir /user
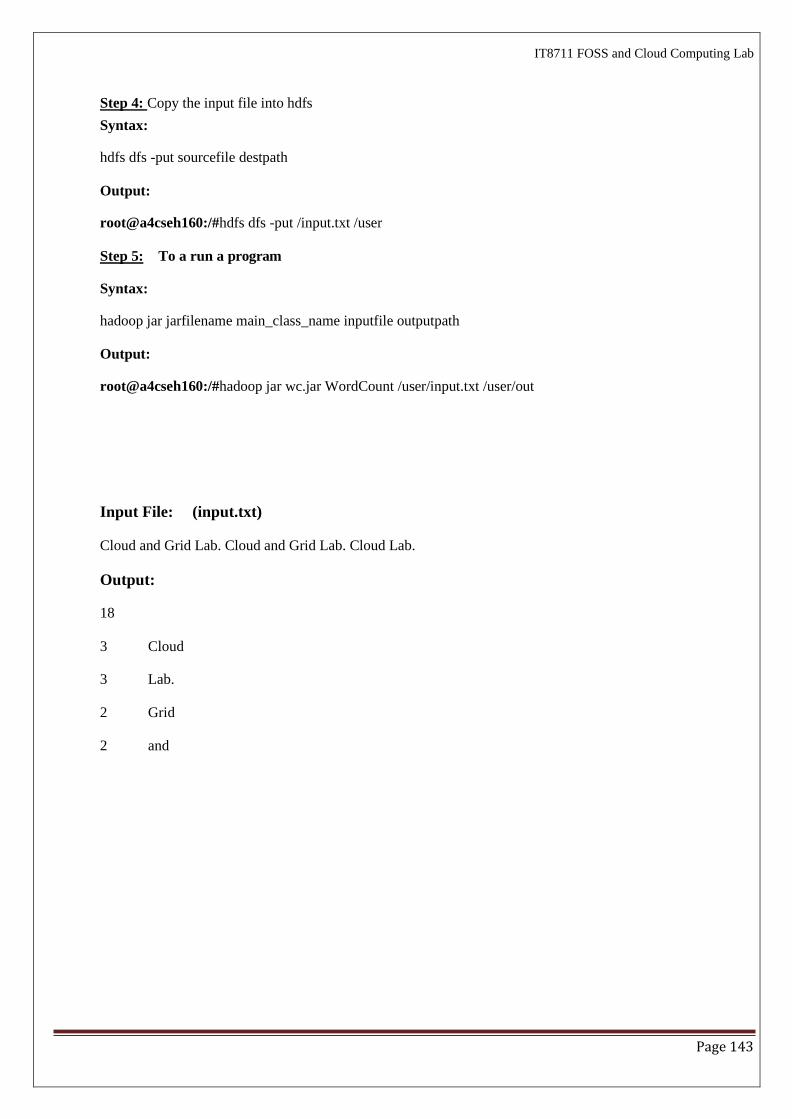
Page 143
IT8711 FOSS and Cloud Computing Lab
Step 4: Copy the input file into hdfs
Syntax:
hdfs dfs -put sourcefile destpath
Output:
root@a4cseh160:/#hdfs dfs -put /input.txt /user
Step 5: To a run a program
Syntax:
hadoop jar jarfilename main_class_name inputfile outputpath
Output:
root@a4cseh160:/#hadoop jar wc.jar WordCount /user/input.txt /user/out
Input File: (input.txt)
Cloud and Grid Lab. Cloud and Grid Lab. Cloud Lab.
Output:
18
3 Cloud
3 Lab.
2 Grid
2 and
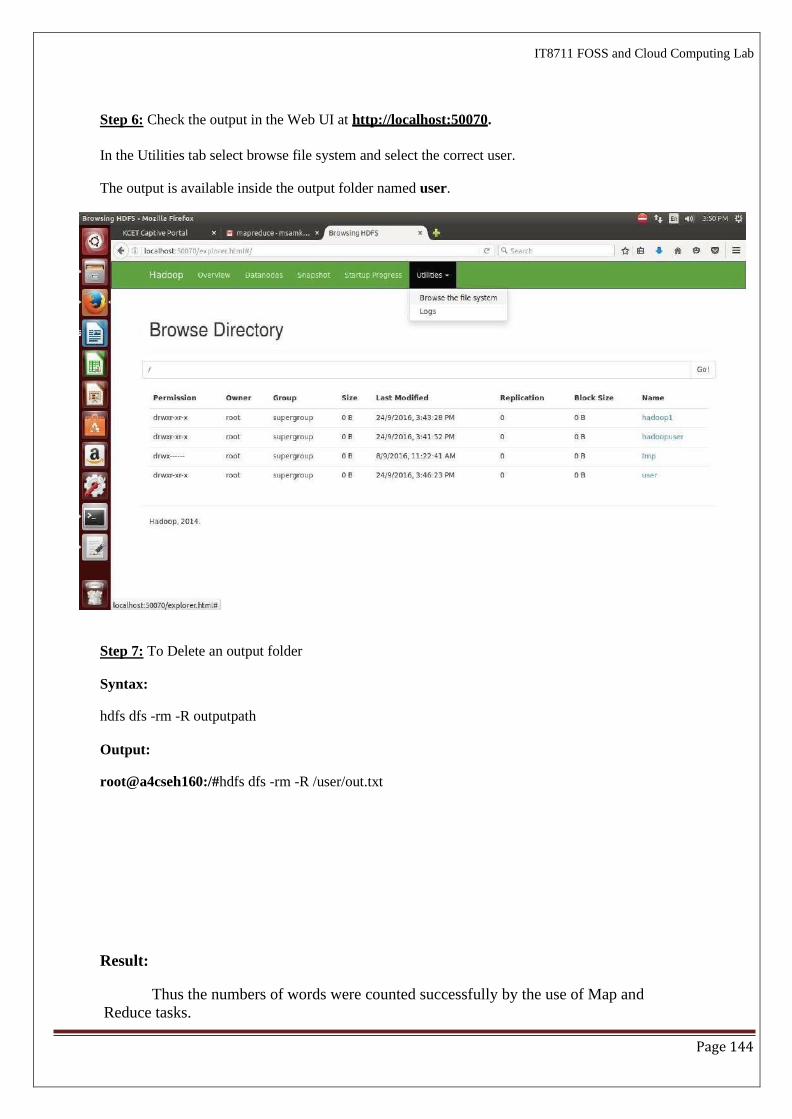
Page 144
IT8711 FOSS and Cloud Computing Lab
Step 6: Check the output in the Web UI at http://localhost:50070.
In the Utilities tab select browse file system and select the correct user.
The output is available inside the output folder named user.
Step 7: To Delete an output folder
Syntax:
hdfs dfs -rm -R outputpath
Output:
root@a4cseh160:/#hdfs dfs -rm -R /user/out.txt
Result:
Thus the numbers of words were counted successfully by the use of Map and
Reduce tasks.
![[Lab Report] PSpice](https://static.fdokumen.com/doc/165x107/631a338ebb40f9952b01e638/lab-report-pspice.jpg)