INVESTIGATIONS GUIDE - Delta Education
62
Full Option Science System Developed at the Lawrence Hall of Science, University of California, Berkeley Published and Distributed by Delta Education Next Generation INVESTIGATIONS GUIDE Sound and Light
-
Upload
khangminh22 -
Category
Documents
-
view
1 -
download
0
Transcript of INVESTIGATIONS GUIDE - Delta Education
Full Option Science SystemDeveloped at the Lawrence Hall of Science, University of California, Berkeley
Published and Distributed by Delta Education
Next Generation
I N V E S T I G A T I O N S G U I D E
Sound and Light
FOSS Next GenerationFOSS Next Generation
Full Option Science System
The FOSS Program DesignFOSS includes a wide range of experiences that help build student understanding of science concepts and scientific habits of mind. Students are actively engaged and have ownership of their learning in everything they do with FOSS Next Generation.
The Elements of Active Investigation
Using Formative Assessment
Taking FOSS Outdoors
Integrating Science
Notebooks
Engaging Science–Centered Language Development
Act
ive
Investigation
Accessing Technology
Reading FOSS Science
Resources Books

FOSS Next GenerationFOSS Next Generation
Tap into TechnologyFOSSweb is the gateway to the digital resources you need.Here is a sampling of the many resources you’ll find:
Teacher preparation videos provide detailed investigation information.
eInvestigations Guides provide teachers access beyond the classroom.
Online activities and streaming videos to extend learning. Interactive whiteboard activities provide
engaging practice and formative assessment.
FOSSweb

FOSS provides the right tools for the job!
FOSS Next Generation
Investigations GuideThe new strategies in this core instructional tool provide you with unprecedented support that will allow you to easily manage learning around both the concepts and practices of science and engineering.
FOSS Science Resource BooksThese student readings connect students’
first-hand experiences to informational text.
FOSSwebThe new FOSSweb provides you with even more resources to engage students. Our new tablet-ready eInvestigations Guides puts the support you need right at your fingertips in an easy-to-navigate digital format. There are also videos, interactive whiteboard activities, new virtual investigations and tutorials, FOSSmap assessment, teacher preparation videos, and much more.
Teacher ResourcesThis tool guides teachers in how the elements of FOSS work and provides notebook and assessment masters.
Equipment KitSpecifically-designed materials in FOSS kits lead to successful investigations for all students organized for your convenience
with new grade-level kits.
PUBLISHED AND DISTRIBUTED BY DEVELOPED AT
Also Available in
Big BookFormat

Full Option Science System 197
PURPOSEContent
• Light sources are objects that give off light (radiate), such as lamps, flashlights, candles, and the Sun.
• Mirror images are the result of light reflected from a surface. An image produced by something that reflects, such as a mirror, is always reversed.
• Light travels in straight lines. A mirror can be used to redirect light.
• Light is necessary for animals to see. Animal eyes receive light from objects and transfer the light to the brain to interpret as vision. Animal eyes are not all the same. There are different sizes, shapes, and placements on the head.
• Light can be used to communicate over long distances. Flashing lights of different colors communicate different information.
Practices
• Plan and carry out investigations with light and mirrors.
• Meet design challenges using light and mirrors.
Part 1Mirrors and Light Beams ...... 208
Part 2Reflections .......................... 216
Part 3Eyes and Seeing ................... 223
Part 4Designing with Light ........... 233
Science and Engineering Practices
• Asking questions and defining problems
• Developing and using models• Planning and carrying out
investigations• Analyzing and interpreting data• Constructing explanations and
designing solutions• Obtaining, evaluating, and
communicating information
Crosscutting Concepts
• Patterns• Cause and effect• Systems and system models
Disciplinary Core Ideas
PS4: How are waves used to transfer energy and information?PS4.B: Electromagnetic radiationPS4.C: Information technologies and instrumentationLS1: How do organisms live, grow, respond to their environment, and reproduce?LS1.D: Information processingETS1: How do engineers solve problems?ETS1.A: Defining and delimiting engineering problemsETS1.B: Developing possible solutionsETS1.C: Optimizing the design solution
InvESTIgATIOn 4 – Light and Mirrors

Full Option Science System198
InvESTIgATIOn 4 – Light and MirrorsPA
RT
3PA
RT
2PA
RT
1PA
RT
4
Investigation Summary Time Focus Question/Practices Content Related to DCIs Writing/Reading Assessment
Mirrors and Light BeamsStudents are introduced to a mirror as an opaque object with a reflective surface. They use a flashlight and mirror to redirect a beam of light from their desks to the ceiling. Students go outside and use the mirror to redirect sunlight onto a wall.
Active Inv.1 Session
How can we redirect a light beam?
PracticesPlanning and carrying out investigationsAnalyzing and interpreting dataConstructing explanations
● Light sources are objects that give off light (radiate), such as lamps, flashlights, candles, and the Sun.
● A mirror can be used to redirect light.
● Light travels in straight lines.
Science Notebook EntryMirrors and Light Beams (optional)
Embedded AssessmentPerformance assessment
ReflectionsStudents explore how they can use a mirror to see things behind them, to the side of them, and on their face. They use a mirror to study and make a drawing of their own eyes. Students discuss photographs that have images reflected from smooth surfaces such as mirrors, glass, and water.
Active Inv.1 Session
Reading1 Session
What can we see with a mirror?
PracticesAsking questions and defining problemsPlanning and carrying out investigationsAnalyzing and interpreting data
● Mirror images are the result of light reflected from a surface.
● Light travels in straight lines.● An image produced by something
that reflects, such as a mirror, is always reversed.
Science Notebook EntryReflections
Science Resources Book“Reflections”
Embedded AssessmentScience notebook entry
Eyes and Seeing Students investigate what they can see in the dark, using a small closed box. On the back wall of the box is a card with four images of different shapes and colors. At first, students cannot see anything. As they gradually allow more light into the box, students find that they can first detect shapes and then color. They read about the process of seeing and compare a variety of animal eyes.
Active Inv.1 Session
Reading1 Session
What can be seen with no light?
PracticesPlanning and carrying out investigationsAnalyzing and interpreting dataConstructing explanations and designing solutionsObtaining, evaluating, and communicating information
● Light is necessary for animals to see. Animal eyes receive light from objects and transfer the light to the brain to interpret as vision. Animal eyes are not all the same. There are different sizes, shapes, and placements on the head.
Science Notebook EntryEyes and Seeing
Science Resources Book“Seeing the Light”
VideoLight and Darkness
Embedded AssessmentScience notebook entry
Designing with LightStudents review how to redirect light using one mirror. They design a way to redirect light with two mirrors. Students explore ways to communicate long distances, using light.
Active Inv.2 Sessions
Reading1 Session
Assessment1 Session
How can we communicate with light?
PracticesAsking questionsDeveloping and using modelsPlanning and carrying out investigationsConstructing explanations and designing solutionsObtaining, evaluating, and communicating information
● Light travels in straight lines.● Light can be used to communicate
over long distances. Flashing lights of different colors communicate different information.
Science Notebook EntryDesigning with Light
Science Resources Book“Communicating with Light”
Embedded AssessmentPerformance assessment
Benchmark AssessmentInvestigation 4 I-Check
NGSS Performance Expectations addressed in this investigation 1-PS4-2; 1-PS4-4; 1-LS1-1K–2 ETS1-1; K–2 ETS1-2; K–2 ETS1-3

At a Glance
Sound and Light Module—FOSS Next Generation 199
Investigation Summary Time Focus Question/Practices Content Related to DCIs Writing/Reading Assessment
Mirrors and Light BeamsStudents are introduced to a mirror as an opaque object with a reflective surface. They use a flashlight and mirror to redirect a beam of light from their desks to the ceiling. Students go outside and use the mirror to redirect sunlight onto a wall.
Active Inv.1 Session
How can we redirect a light beam?
PracticesPlanning and carrying out investigationsAnalyzing and interpreting dataConstructing explanations
● Light sources are objects that give off light (radiate), such as lamps, flashlights, candles, and the Sun.
● A mirror can be used to redirect light.
● Light travels in straight lines.
Science Notebook EntryMirrors and Light Beams (optional)
Embedded AssessmentPerformance assessment
ReflectionsStudents explore how they can use a mirror to see things behind them, to the side of them, and on their face. They use a mirror to study and make a drawing of their own eyes. Students discuss photographs that have images reflected from smooth surfaces such as mirrors, glass, and water.
Active Inv.1 Session
Reading1 Session
What can we see with a mirror?
PracticesAsking questions and defining problemsPlanning and carrying out investigationsAnalyzing and interpreting data
● Mirror images are the result of light reflected from a surface.
● Light travels in straight lines.● An image produced by something
that reflects, such as a mirror, is always reversed.
Science Notebook EntryReflections
Science Resources Book“Reflections”
Embedded AssessmentScience notebook entry
Eyes and Seeing Students investigate what they can see in the dark, using a small closed box. On the back wall of the box is a card with four images of different shapes and colors. At first, students cannot see anything. As they gradually allow more light into the box, students find that they can first detect shapes and then color. They read about the process of seeing and compare a variety of animal eyes.
Active Inv.1 Session
Reading1 Session
What can be seen with no light?
PracticesPlanning and carrying out investigationsAnalyzing and interpreting dataConstructing explanations and designing solutionsObtaining, evaluating, and communicating information
● Light is necessary for animals to see. Animal eyes receive light from objects and transfer the light to the brain to interpret as vision. Animal eyes are not all the same. There are different sizes, shapes, and placements on the head.
Science Notebook EntryEyes and Seeing
Science Resources Book“Seeing the Light”
VideoLight and Darkness
Embedded AssessmentScience notebook entry
Designing with LightStudents review how to redirect light using one mirror. They design a way to redirect light with two mirrors. Students explore ways to communicate long distances, using light.
Active Inv.2 Sessions
Reading1 Session
Assessment1 Session
How can we communicate with light?
PracticesAsking questionsDeveloping and using modelsPlanning and carrying out investigationsConstructing explanations and designing solutionsObtaining, evaluating, and communicating information
● Light travels in straight lines.● Light can be used to communicate
over long distances. Flashing lights of different colors communicate different information.
Science Notebook EntryDesigning with Light
Science Resources Book“Communicating with Light”
Embedded AssessmentPerformance assessment
Benchmark AssessmentInvestigation 4 I-Check
NGSS Performance Expectations addressed in this investigation 1-PS4-2; 1-PS4-4; 1-LS1-1K–2 ETS1-1; K–2 ETS1-2; K–2 ETS1-3

Full Option Science System200
InvESTIgATIOn 4 – Light and Mirrors
BACkgROUnD for the Teacher
How Can We Redirect a Light Beam?We see things because the surfaces of objects reflect light. A ray of light travels from a light source to an object. Some of the light bounces off the object. When the reflected light reaches your eyes, you see the object.
Smooth surfaces reflect light better than rough surfaces. This is because rough surfaces scatter light in many directions, while smooth surfaces reflect light in a very regular way. Highly polished surfaces form clear images. They act as mirrors.
A mirror is any surface that reflects light. Car bumpers, department store windows, soup spoons, and the surface of calm water are all mirrors. The objects that we most often call mirrors are pieces of glass or plastic with a thin layer of metal plated on the back. Students will use mirrors in this investigation.
Mirrors work in a straightforward fashion. Light hitting a mirror reflects off the surface of the silver plating. The angle at which the light hits the mirror determines the angle at which it bounces off. Light that hits perpendicular to the plane of a mirror will be reflected straight back to the source. Light coming at an angle from one side of a mirror (angle of incidence) will bounce off at the same angle from the other side of the mirror (angle of reflection).
Mirrors can reflect light from a luminous source, such as a lamp or the Sun, or light reflecting from an object, such as your face. It has been speculated that mirrors were used to deliver sunlight to the pharaoh’s subjects laboring in the dark interior of the pyramids. Because the angle of reflection is true, light can be herded through convoluted pathways to illuminate a dark space or to achieve interesting optical stunts. Students will have opportunities to develop their skill of reflection by directing beams of light in interesting way, including around corners.
Smooth surface: Light reflects in a very regular way.
Rough surface: Light scatters in many directions.
Sound and Light Module—FOSS Next Generation 201
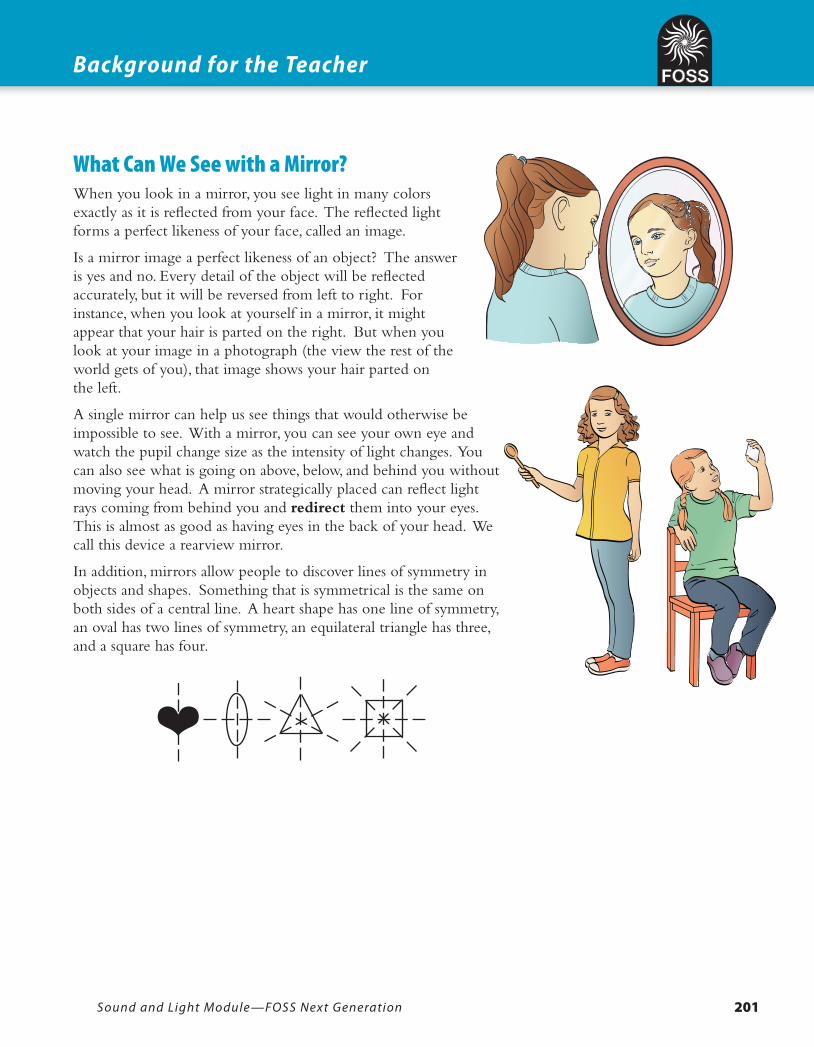
What Can We See with a Mirror?When you look in a mirror, you see light in many colors exactly as it is reflected from your face. The reflected light forms a perfect likeness of your face, called an image.
Is a mirror image a perfect likeness of an object? The answer is yes and no. Every detail of the object will be reflected accurately, but it will be reversed from left to right. For instance, when you look at yourself in a mirror, it might appear that your hair is parted on the right. But when you look at your image in a photograph (the view the rest of the world gets of you), that image shows your hair parted on the left.
A single mirror can help us see things that would otherwise be impossible to see. With a mirror, you can see your own eye and watch the pupil change size as the intensity of light changes. You can also see what is going on above, below, and behind you without moving your head. A mirror strategically placed can reflect light rays coming from behind you and redirect them into your eyes. This is almost as good as having eyes in the back of your head. We call this device a rearview mirror.
In addition, mirrors allow people to discover lines of symmetry in objects and shapes. Something that is symmetrical is the same on both sides of a central line. A heart shape has one line of symmetry, an oval has two lines of symmetry, an equilateral triangle has three, and a square has four.
Background for the Teacher
❤

Full Option Science System202
InvESTIgATIOn 4 – Light and Mirrors
What Can Be Seen with No Light? In order for any object to be visible, it must either produce light or reflect it. Objects such as the Sun, a candle flame, and a lightbulb produce light. Objects such as the Moon, a candlestick, and people reflect light.
The human eye is a light detector. It has evolved specialized sensory receptors called photoreceptors (rods and cones). They turn visible light into electric pulses, which are processed in the brain to create what we know as vision. Vision is a direct response to light interacting with photoreceptors. Contrary to a widely held misconception, our eyes never get used to absolute dark. Our eyes accommodate to very low levels of light, but in the total absence of light, vision is impossible.
There are two types of photoreceptors (cells) on the retina of the human eye—rods and cones—and they function in different ways. The rods are sensitive to dim light and are inhibited by bright light. Rods cannot detect colors. On the other hand, the cones are very responsive in bright light, distinguish color, and detect fine details of objects. There are three kinds of cones in the human eye, each responding to a different color of light—red, green, and blue. Damage to one or more of the kinds of cone cells produces color blindness.
The photoreceptors in the human eye function within their own limited ranges of light intensity, rods being far more sensitive to light than cones are. Under a night sky illuminated only by starlight, or at the crack of dawn, we can see well enough to get around without walking into trees or stepping off cliffs. However, the world is seen in shades of gray. The rods are firing, but the light intensity is below the threshold for cones. As the Sun rises in the morning and crests over the horizon, we start to see muted colors. The rods are still firing, and the most sensitive cones are starting to fire too, informing the brain of the color out there. When the Sun makes its full fiery appearance, the world springs into color as the full complement of cones snaps into action. The rods now lapse into inactivity, because they are getting too much light to evoke a response.
Cones respond to bright light, but they can be overstimulated, too. When cones are subjected to light too intense for their design, they can be permanently damaged. That is why you must caution students never to look directly at the Sun: direct sunlight can destroy the cone cells. When this happens, a person loses vision in the center of the visual field, the part where we detect color and detail.
“Contrary to a widely held misconception, our eyes never get used to absolute dark. Our eyes accommodate to very low levels of light, but in the total absence of light, vision is impossible.”

Sound and Light Module—FOSS Next Generation 203
How Can We Communicate with Light?Mirrors can be used in combination to produce interesting effects and useful tools. Making physical models to describe how light travels in straight lines can help us figure out how to use mirrors to redirect light.
When you arrange mirrors so that you see not the image of an object, but another mirror in which there is an image of an object, interesting things can happen. With properly placed mirrors, you can see over, around, and through solid objects. This is what a periscope does for its user.
If two or more mirrors are placed so that the image of an object is reflected back and forth countless times between them, an interesting vision of infinity can result. If two mirrors are placed so that one edge of each is touching, and they are opened just a little, to about 30° or 49°, you can make a kaleidoscope.
People use light to communicate. Lights can be a warning, such as the red or white flashing lights on top of a lighthouse on a rocky sea coast warning ships of the shoreline, or on the top of tall towers on land warning airplane pilots of the presence of a structure high in the air. Traffic lights communicate to drivers of vehicles or pedestrians when it is safe to move forward and when to stop and wait. Emergency vehicles such as fire trucks, ambulances, and police cars also use flashing lights to warn people of their presence.
Background for the Teacher

Full Option Science System204
InvESTIgATIOn 4 – Light and Mirrors
TEACHIng CHILDREn about Light and MirrorsDeveloping Disciplinary Core Ideas (DCI) When students look into a mirror, what do they see? They will tell you that they see themselves. This is not a trivial observation. Many animals are able to see an image in a mirror, but do not understand that they are seeing their own reflected image. Birds will spend hours attacking their own image in a window, shiny hubcap, or rearview mirror, presumably because it represents the encroachment of a rival on its territory. But when a smudge of color is placed on the forehead of a chimp, it will reach up and attempt to remove it when it sees its image in a mirror. Self-recognition is present.
When students report that they see themselves in a mirror, they are mistaken. What they see is an image of themselves. Images are not real; they are representations. Mirrors and the images they produce are so familiar that we rarely give them a second thought, unless we encounter a distorted mirror or an example of some mirror trickery.
It might be interesting to ask students for their explanations of how a mirror works. Listen for any mention of light. You probably won’t hear it. Students will have at least a partially formed concept of an image as a picture, but they may well think the image is in the mirror. The idea that the mirror is a passive player, simply redirecting the light from an object into your eyes, is not intuitive. The idea that the image actually forms in your brain is a deeper abstraction yet and will be saved for older students.
What can students learn from mirrors? They can learn what mirrors do. Mirrors can redirect a light beam. Mirrors make an image—a likeness of an object or a scene. Mirrors turn things around; that is, they make mirror images. When two mirrors create images of images, interesting things happen.
Can students see in the dark? They may think they can. This is a very durable misconception; young children find it difficult to say they can’t do something that they think they should be able to do. Don’t be concerned if they hold onto the idea that they can see in the dark. Dim-light vision is another matter, and students may equate very dim-light with no light. Provide them with the experience of looking into a box and trying to detect an image, the shape of the image, and the color of the image and allow them to draw conclusions for themselves.
NGSS Foundation Box for DCI
PS4.B: Electromagnetic radiation• Objects can be seen only when light
is available to illuminate them. Some objects give off their own light.
• Some materials allow light to pass through them, others allow only some light through, and others block all the light and create a dark shadow on any surface beyond them, where the light cannot reach. Mirrors can be used to redirect a light beam.
PS4.C: Information technologies and instrumentation • People also use a variety of devices
to communicate (send and receive information) over long distances.
LS1.D: Information processing• Animals have body parts that
capture and convey different kinds of information needed for growth and survival. Animals respond to these inputs with behaviors that help them survive.
ETS1.A: Defining and delimiting engineering problems• Before beginning to design a solution,
it is important to clearly understand the problem.
ETS1.B: Developing possible solutions• Designs can be conveyed through
sketches, drawings, or physical models. These representations are useful in communicating ideas for a problem’s solution to other people.
ETS1.C: Optimizing the design solution• Because there is always more than
one possible solution to a problem, it is useful to compare and test designs.

Sound and Light Module—FOSS Next Generation 205
The experiences students have in this investigation as they work with light and mirrors contribute to the disciplinary core ideas PS4.B: Electromagnetic radiation; PS4.C: Information technologies and instrumentation; and LS1.D: Information processing; and the core ideas of engineering design (ETS1.A, ETS1.B, and ETS1.C).
Engaging in Science and Engineering Practices (SEP)In this investigation, students engage in these practices.
Asking questions about the design of systems that redirect light from place to place and systems that communicate information using light.
Developing and using models to compare the similarities (common features) and differences in the models (drawings and diagrams) of light and mirror systems, and to demonstrate patterns in the behavior of light.
Planning and carrying out investigations by observing how light can be redirected with mirrors.
Analyzing and interpreting data by describing observations of simple systems that redirect light (flashlights and mirrors), and by drawing pictures and diagrams of systems to communicate answers to questions about how light travels from place to place.
Constructing explanations and designing solutions by assembling systems that serve specific functions (mirror and light systems and devices that communicate information over distance) and making firsthand observations to develop claims from evidence.
Obtaining, evaluating, and communicating information about light and mirrors and about animal eyes using grade-appropriate text, and communicating information orally and in writing.
NGSS Foundation Box for SEP
• Define a simple problem that can be solved through the development of a new or improved object or tool.
• Compare models to identify common features and differences.
• Develop and/or use a model to represent amounts, relationships, relative scales, and/or patterns in the natural and designed world(s).
• Plan and conduct an investigation collaboratively to produce data to serve as the basis for evidence to answer a question.
• Make observations (firsthand or from media) and/or measurements to collect data that can be used to make comparisons.
• Record information (observations, thoughts, and ideas).
• Use and share pictures, drawings, and/or writings of observations.
• Use observations (firsthand or from media) to describe patterns and/or relationships in the natural and designed world(s) in order to answer scientific questions and solve problems.
• Make observations (firsthand or from media) to construct an evidence-based account for natural phenomena.
• Read grade-appropriate texts and/or use media to obtain scientific and/or technical information to determine patterns in and/or evidence about the natural and designed world(s).
• Communicate information or design ideas and/or solutions with others in oral and/or written forms using models, drawings, writing, or numbers that provide detail about scientific ideas, practices, and/or design ideas.
Teaching Children about Light and Mirrors
Full Option Science System206
InvESTIgATIOn 4 – Light and Mirrors
Exposing Crosscutting Concepts (CC)In this investigation, the focus is on these crosscutting concepts.
• Patterns. A light beam travels in a straight line and can be redirected predictably using mirrors.
• Cause and effect. Mirrors reflect light and change its direction of travel in predictable ways.
• Systems and system models. Light and mirrors can be organized into a system to change where light goes.
Connections to Science, Technology, Society, and the Environment
• Influence of engineering, technology, and science on society and the natural world. Every human-made product is designed by applying some knowledge of the natural world and is built by using natural materials.
Connections to the Nature of Science• Science addresses questions about the natural and
material world. Scientists study the natural and material world.
• Scientific knowledge is based on empirical evidence. Scientists look for patterns and order when making observations about the world.
• Scientific investigations use a variety of methods. Scientists use different ways to study the world.
NGSS Foundation Box for CC
• Patterns: Patterns in the natural and human-designed world can be observed, used to describe phenomena, and used as evidence.
• Cause and effect: Events have causes that generate observable patterns. Simple tests can be designed to gather evidence to support or refute student ideas about causes.
• Systems and system models: Objects and organisms can be described in terms of their parts. Systems in the natural and human designed world have parts that work together.
Angle EyeLight detectorMirrorModelRedirectReflectReflectionVision
Hear it
S
ee it
W
rite it
NewWord
Say it
Sound and Light Module—FOSS Next Generation 207
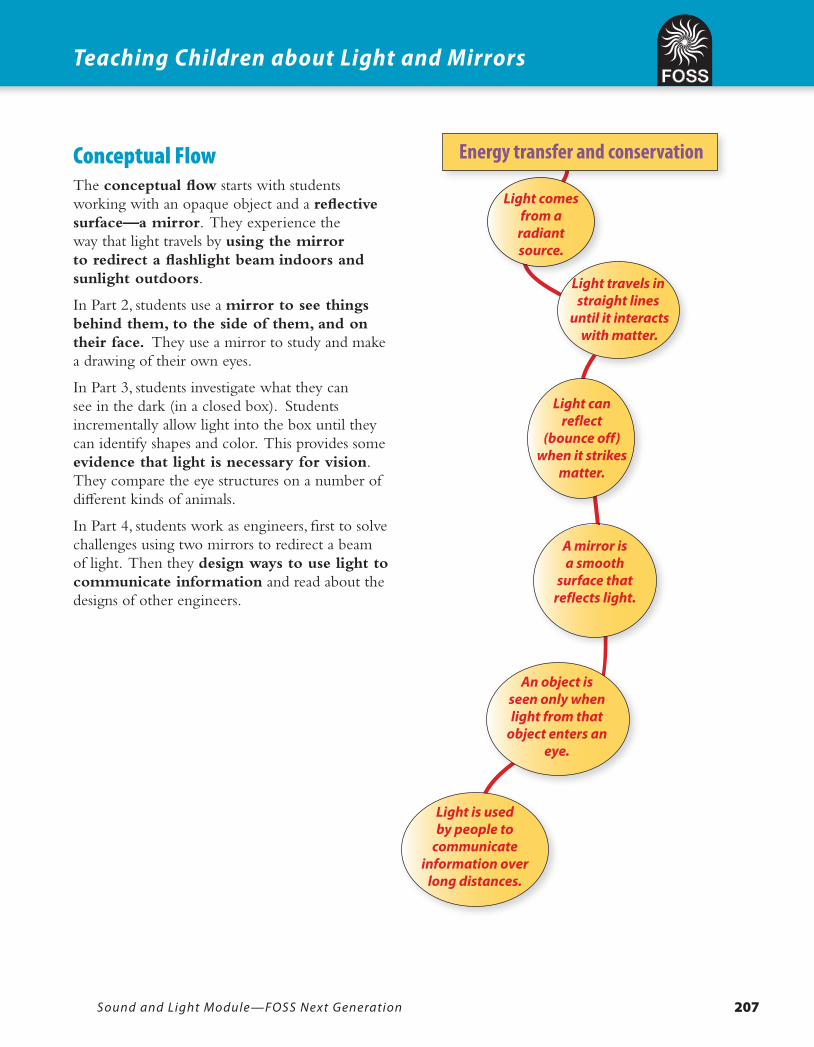
Conceptual FlowThe conceptual flow starts with students working with an opaque object and a reflective surface—a mirror. They experience the way that light travels by using the mirror to redirect a flashlight beam indoors and sunlight outdoors.
In Part 2, students use a mirror to see things behind them, to the side of them, and on their face. They use a mirror to study and make a drawing of their own eyes.
In Part 3, students investigate what they can see in the dark (in a closed box). Students incrementally allow light into the box until they can identify shapes and color. This provides some evidence that light is necessary for vision. They compare the eye structures on a number of different kinds of animals.
In Part 4, students work as engineers, first to solve challenges using two mirrors to redirect a beam of light. Then they design ways to use light to communicate information and read about the designs of other engineers.
Teaching Children about Light and Mirrors
Light comes from a
radiant source.
Energy transfer and conservation
Light travels in straight lines
until it interacts with matter.
Light can reflect
(bounce off) when it strikes
matter.
An object is seen only when light from that
object enters an eye.
A mirror is a smooth
surface that reflects light.
Light is used by people to
communicate information over
long distances.
Full Option Science System208
InvESTIgATIOn 4 – Light and Mirrors
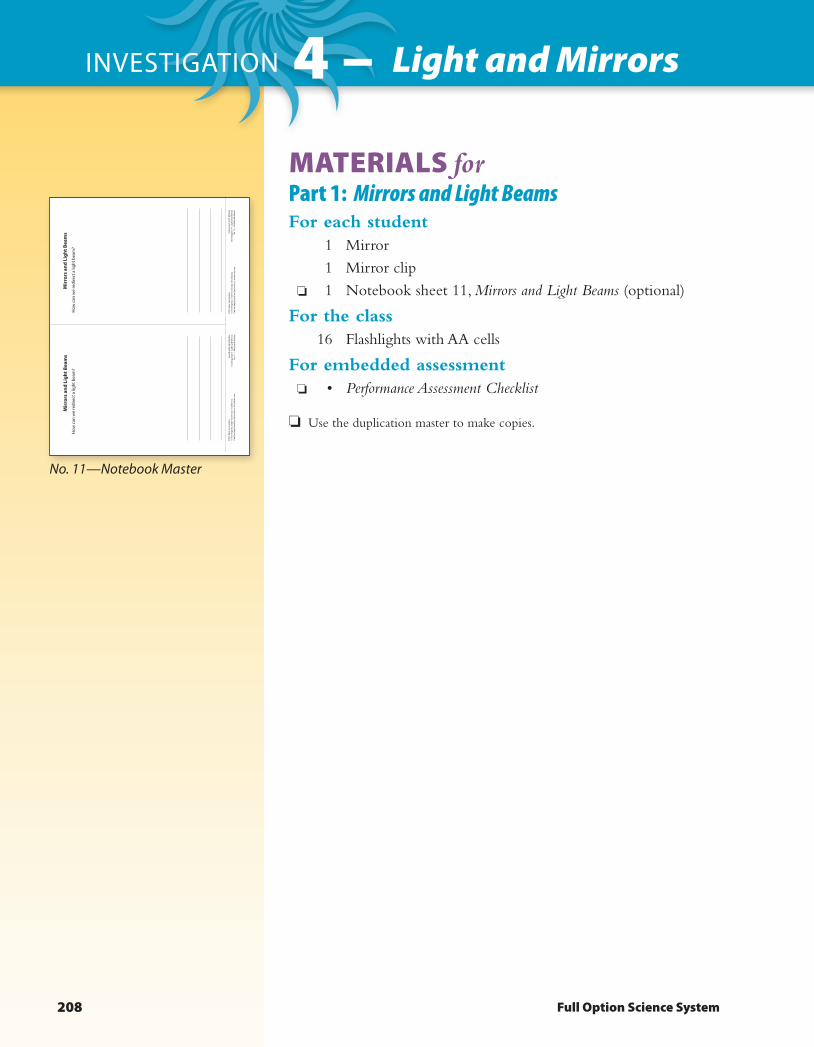
MATERIALS forPart 1: Mirrors and Light BeamsFor each student 1 Mirror
1 Mirror clip
❏ 1 Notebook sheet 11, Mirrors and Light Beams (optional)
For the class 16 Flashlights with AA cells
For embedded assessment ❏ • Performance Assessment Checklist
❏ Use the duplication master to make copies.
FOSS
Nex
t Gen
erat
ion
© T
he R
egen
ts o
f the
Uni
vers
ity o
f Cal
iforn
iaCa
n be
dup
licat
ed fo
r cla
ssro
om o
r wor
ksho
p us
e.
FOSS
Nex
t Gen
erat
ion
© T
he R
egen
ts o
f the
Uni
vers
ity o
f Cal
iforn
iaCa
n be
dup
licat
ed fo
r cla
ssro
om o
r wor
ksho
p us
e.
Soun
d an
d Li
ght M
odul
eIn
vest
igat
ion
4: L
ight
and
Mirr
ors
No.
11—
Not
eboo
k M
aste
r
Soun
d an
d Li
ght M
odul
eIn
vest
igat
ion
4: L
ight
and
Mirr
ors
No.
11—
Not
eboo
k M
aste
r
Mir
rors
and
Lig
ht B
eam
s
How
can
we
redi
rect
a li
ght b
eam
?
Mir
rors
and
Lig
ht B
eam
sH
ow c
an w
e re
dire
ct a
ligh
t bea
m?
No. 11—Notebook Master
Sound and Light Module—FOSS Next Generation 209
gETTIng READy forPart 1: Mirrors and Light Beams1. Schedule the investigation
This part will take one session for active investigation.
2. Preview Part 1Students are introduced to a mirror as an opaque object with a reflective surface. They use a flashlight and mirror to redirect a beam of light from their desks to the ceiling. Students go outside and use the mirror to redirect sunlight onto a wall. The focus question is How can we redirect a light beam?
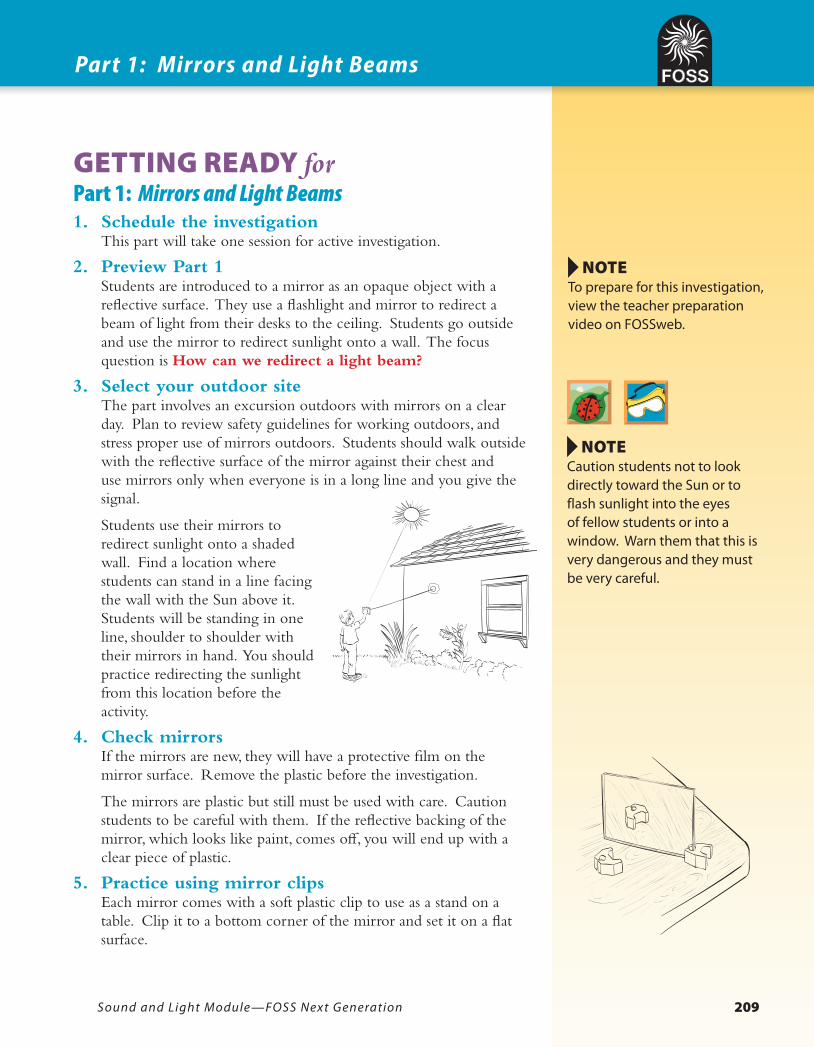
3. Select your outdoor siteThe part involves an excursion outdoors with mirrors on a clear day. Plan to review safety guidelines for working outdoors, and stress proper use of mirrors outdoors. Students should walk outside with the reflective surface of the mirror against their chest and use mirrors only when everyone is in a long line and you give the signal.
Students use their mirrors to redirect sunlight onto a shaded wall. Find a location where students can stand in a line facing the wall with the Sun above it. Students will be standing in one line, shoulder to shoulder with their mirrors in hand. You should practice redirecting the sunlight from this location before the activity.
4. Check mirrorsIf the mirrors are new, they will have a protective film on the mirror surface. Remove the plastic before the investigation.
The mirrors are plastic but still must be used with care. Caution students to be careful with them. If the reflective backing of the mirror, which looks like paint, comes off, you will end up with a clear piece of plastic.
5. Practice using mirror clipsEach mirror comes with a soft plastic clip to use as a stand on a table. Clip it to a bottom corner of the mirror and set it on a flat surface.
Part 1: Mirrors and Light Beams
nOTETo prepare for this investigation, view the teacher preparation video on FOSSweb.
nOTECaution students not to look directly toward the Sun or to flash sunlight into the eyes of fellow students or into a window. Warn them that this is very dangerous and they must be very careful.

Full Option Science System210
InvESTIgATIOn 4 – Light and Mirrors
6. Practice with the flashlightPractice using a flashlight to redirect the beam of light from the desk to the ceiling as described in Step 3 of Guiding the Investigation. Dim the lights in the room as necessary to observe the light beam.
7. Prepare flashlightsTest each flashlight to make sure it works. Replace cells as needed.
8. Plan assessment: performance assessmentIn Steps 5 and 11 of Guiding the Investigation, students work with a mirror to redirect a light beam, first indoors and then outdoors. Observe students as they work and note the science practices they use to plan and carry out the investigation. Record your observations on Performance Assessment Checklist.

Sound and Light Module—FOSS Next Generation 211
gUIDIng the InvestigationPart 1: Mirrors and Light Beams1. Introduce the mirror
Tell students that you have another tool for them to use to investigate light. Hold up a mirror and ask what the tool is called. Confirm that it is a mirror and that it must be handled very carefully. Show students the two sides of the mirror and ask them how they are different. [One is shiny and one is dull].
2. Discuss mirror propertiesAsk,
➤ How could we find out if the mirror is transparent, translucent, or opaque? [Shine light at it and see if the light goes through.]
Ask a student to look through it from the dull side. Then bring out a flashlight and shine it at the dull side of the mirror. Have students confirm that the mirror is not transparent. No light goes through the mirror, so it is an opaque object.
Ask,
➤ What would happen if I shined the beam of light onto the shiny surface of the mirror?
Tell students that they will work with a partner to find out. Each pair of students will have only one flashlight.
3. Focus question: How can we redirect a light beam?Write or project the focus question on the board while you say it aloud.
➤ How can we redirect a light beam?
Show students how to shine the flashlight beam so you can see the circle of light on the tabletop. Give them this challenge.
Use the mirror to redirect the light beam onto the ceiling without pointing the flashlight toward the ceiling.
Ask students to turn to a neighbor and describe to each other what the challenge is.
4. Distribute materialsDistribute the materials to each pair of students and have them return to their tables to meet the light-and-mirror challenge.
Part 1: Mirrors and Light Beams
F o C u S Q u E S t I o NHow can we redirect a light beam?
Materials for Step 4• Mirrors• Flashlights
Hear it
S
ee it
W
rite it
NewWord
Say it
Hear it
S
ee it
W
rite it
NewWord
Say it
E L N o t EMake sure students understand the words “direct” and “redirect” in this context. Provide examples such as redirecting a kick ball so it travels in a different direction or redirecting a line of students so they avoid walking in a puddle.
This is a good time to review that opaque objects makes shadows.
TEACHING NOTE

Full Option Science System212
InvESTIgATIOn 4 – Light and Mirrors
5. Visit students as they workVisit the pairs of students as they work and offer encouragement to those who need more time to meet the challenge. For students who quickly meet the challenge, offer them a second challenge, such as redirecting the light to a book on their table. Ask,
➤ How can you get the light to shine on the book with the flashlight facing the other direction?
Provide students with a mirror clip so that the mirror stands on the table by itself.
6. Assess progress: performance assessmentIn this step, and again in Step 11, observe students’ work and conduct 30-second interviews with them as they work with the mirror to redirect the light beam. Ask questions such as,
➤ What do you have to do to redirect the light (to a card or a wall)?
➤ What is the shape of the light beam on the card or wall? Does it always have the same shape? Can you make it a different shape?
What to Look For
• Students can describe how to use a mirror to redirect light. (Planning and carrying out investigations.)
• Students can show that when the light hits the wall at different angles, the shape of the beam is changed. (Constructing explanations; cause and effect.)
You will have a second opportunity to observe students when they redirect sunlight outside.
SCIEnCE AnD EngInEERIng PRACTICES
Planning and carrying out investigationsConstructing explanations
CROSSCUTTIng COnCEPTS
Cause and effect
Materials for Step 5• Mirror clips
nOTEBe sure students place the clip on the side corner and not on the bottom of the mirror. Light will go under the mirror if the clip is on the bottom.

Sound and Light Module—FOSS Next Generation 213
7. Discuss the explorationsAsk students to share their observations.
➤ How did you redirect the light beam?
➤ What did the light beam look like on the ceiling?
➤ What else did you observe when you worked with the mirror and the light beam?
➤ What else could you do with light and mirrors?
8. Introduce reflectTell students that the mirror reflects the light beam. Reflect means to bounce off. By putting the mirror on the table and shining the light on the mirror, the mirror redirects the light to the ceiling. Light reflects off the mirror and is redirected in a new direction—up to the ceiling.
Focus on cause and effect. Tell students,
The effect is that light bounces back and travels in another direction. The cause is the mirror.
9. Discuss using mirrors outdoorsDescribe the outdoor location where students will use mirrors. Review safety and behavior rules for being out of the classroom. Tell students that the mirrors should be carried with the shiny side against their chests as they walk outside to line up facing the building wall.
Remind students that it is very dangerous to look toward the Sun or to reflect sunlight into a person’s eyes. Direct sunlight damages eyes. For that reason, they will reflect the sunlight only onto the wall.
Admonish students that anyone who breaks these safety rules will lose mirror privileges for the rest of the activity. You must follow through on this warning. No compromise on this issue is permissible.
10. Go outdoorsHave students line up with their mirrors in hand (shiny side against their chests) and move to the outdoor location. Help students form a single line the appropriate distance from the building wall they will use.
Part 1: Mirrors and Light Beams
Hear it
S
ee it
W
rite it
NewWord
Say it
CROSSCUTTIng COnCEPTS
Cause and effect
SCIEnCE AnD EngInEERIng PRACTICES
Asking questionsAnalyzing and interpreting data

Full Option Science System214
InvESTIgATIOn 4 – Light and Mirrors
11. Give the signal to startWhen everyone is ready, give the signal to turn their mirrors around and try to redirect the sunlight onto the wall. Monitor student progress and help students who have difficulty. If there is something on the wall that you can refer to (such as a vent or pipe), challenge students to direct the sunlight to that location.
Ask students to observe how the light beam changes as they move it around to different locations on the wall.
12. Assess progress: performance assessmentObserve students’ work and conduct 30-second interviews with students as they work with the mirrors to redirect the sunlight. Ask questions such as,
➤ What do you have to do to redirect the sunlight to the wall?
➤ What is the shape of the light beam on the wall? Does it always have the same shape? Can you make it a different shape?
➤ Can you direct sunlight onto your feet with the mirror?
What to Look For
• Students can describe how to use a mirror to redirect light. (Planning and carrying out investigations.)
• Students can show that when the light hits the wall at different angles, the shape of the beam is changed. (Constructing explanations; cause and effect.)
13. Return to classWhen everyone has had success, ask students to turn their mirrors toward their chests and slowly walk back in a line into the classroom. When they return, have them return their mirrors to the materials station.
14. Review vocabularyReview key vocabulary words used during this part and make sure that the words are added to the word wall.
Have students practice using these words in a sentence with a partner. Encourage them to use their own experiences as examples.
mirrorredirectreflect
SCIEnCE AnD EngInEERIng PRACTICES
Planning and carrying out investigationsConstructing explanations
CROSSCUTTIng COnCEPTS
Cause and effect

Sound and Light Module—FOSS Next Generation 215
15. Answer the focus questionAsk students to review the focus question and to prepare an answer to the question in their notebooks. You can use notebook sheet 11, Mirrors and Light Beams, for this purpose or have students write their response on a blank page of their notebooks. They might choose to write a sentence or two, or answer with one or more labeled illustrations.
➤How can we redirect a light beam?
For students who need scaffolding, provide a prompt such as, “Describe what you did with a mirror and a flashlight inside and with the Sun and a mirror outside.” Or ask guiding questions such as, “What happens when light shines on a mirror?”
For students who need maximum support, provide sentence frames such as, “I used a to a light beam. The indoor light source was a , and outdoors it was the .”
Students can draw a picture to show how they used a mirror to redirect light from a flashlight to the ceiling.
WRAP-UP/WARM-UP16. Share notebook entries
Conclude Part 1 or start Part 2 by having students share notebook entries. Ask students to open their science notebooks to the most recent entry. Read the focus question together.
➤How can we redirect a light beam?
Ask students to pair up with a partner to describe their answers to the question and share their drawings.
Have students pair up with someone from another group to share their answers to the focus question. Review how to give constructive feedback and then ask students to help each other make their entries stronger. For example, student A tells student B one thing they think is good about his/her entry and one thing that could be better (e.g., add a drawing or label the parts of the drawing; use the words from the word wall, etc.).
Part 1: Mirrors and Light Beams
This suggested strategies address the Common Core State Standards for ELA.
SL 1: Participate in collaborative conversations.
W 5: Respond to questions and suggestions from peers, and add details to strengthen writing.
ELA CONNECTION

Full Option Science System216
investigation 4 – Light and Mirrors
MaterialS forPart 2: ReflectionsFor each student 1 Mirror
1 Mirror clip
❏ 1 Notebook sheet 12, Reflections
1 FOSS Science Resources: Sound and Light
• “Reflections”
For the class 1 Big book, FOSS Science Resources: Sound and Light
For embedded assessment ❏ • Embedded Assessment Notes
❏ Use the duplication master to make copies.
FOSS
Nex
t Gen
erat
ion
© T
he R
egen
ts o
f the
Uni
vers
ity o
f Cal
iforn
iaCa
n be
dup
licat
ed fo
r cla
ssro
om o
r wor
ksho
p us
e.
FOSS
Nex
t Gen
erat
ion
© T
he R
egen
ts o
f the
Uni
vers
ity o
f Cal
iforn
iaCa
n be
dup
licat
ed fo
r cla
ssro
om o
r wor
ksho
p us
e.
Soun
d an
d Li
ght M
odul
eIn
vest
igat
ion
4: L
ight
and
Mirr
ors
No.
12—
Not
eboo
k M
aste
r
Soun
d an
d Li
ght M
odul
eIn
vest
igat
ion
4: L
ight
and
Mirr
ors
No.
12—
Not
eboo
k M
aste
r
Re�e
ctio
nsW
hat c
an w
e se
e w
ith a
mirr
or?
Re�e
ctio
nsW
hat c
an w
e se
e w
ith a
mirr
or?
No. 12—Notebook Master
1487587_IG_SL_Inv_4.indd 216 5/19/15 12:44 PM

Sound and Light Module—FOSS Next Generation 217
gETTIng READy forPart 2: Reflections1. Schedule the investigation
This part will take one session for active investigation and one for reading.
2. Preview Part 2Students explore how they can use a mirror to see things behind them, to the side of them, and on their face. They use a mirror to study and make a drawing of their own eyes. Students discuss photographs that have images reflected from smooth surfaces such as mirrors, glass, and water. The focus question is What can we see with a mirror?
3. Plan to read Science Resources: “Reflections”Plan to read “Reflections” during a reading period at the end of this part.
4. Plan assessment: notebook entryIn Step 12 of Guiding the Investigation, students complete their notebook entry. Review students’ work for evidence that students understand what mirrors show. Record your observations on Embedded Assessment Notes.
Part 2: Reflections
Full Option Science System218
InvESTIgATIOn 4 – Light and Mirrors
gUIDIng the InvestigationPart 2: Reflections1. Review reflecting light beam
Call students to the rug. Ask how they redirected the light from the flashlight and from the Sun. They should recall they used a mirror to reflect the light. Ask,
➤ What can you see with a mirror that you can’t see without it?
Ask students to talk with a partner about this question. Then ask for a report. Students may report, that they saw their face, eyes, nose, hair; their responses may be limited to structures on or around their faces.
2. Introduce rearview mirrorTurn your back toward the board. Ask one student to write a secret number on the board, so that you can’t see it but the class can. They should not say the number so it is kept a secret from you. As the student is writing, ask the rest of the class,
➤ Can I see what he or she is writing on the board? [No.]
➤ What can I do to see that number?
Students may say “turn your head around,” “guess,” “pay attention,” or they may suggest using a mirror. If students don’t suggest a mirror, ask if there is a tool that you could use to see the number written on the board. Use a mirror to find and report the secret number. Make the connection to rearview mirrors in cars and on bikes, which help us see behind us for safety.
3. Focus question: What can we see with a mirror?Project or write the focus question on the board while you say it aloud.
➤ What can we see with a mirror?
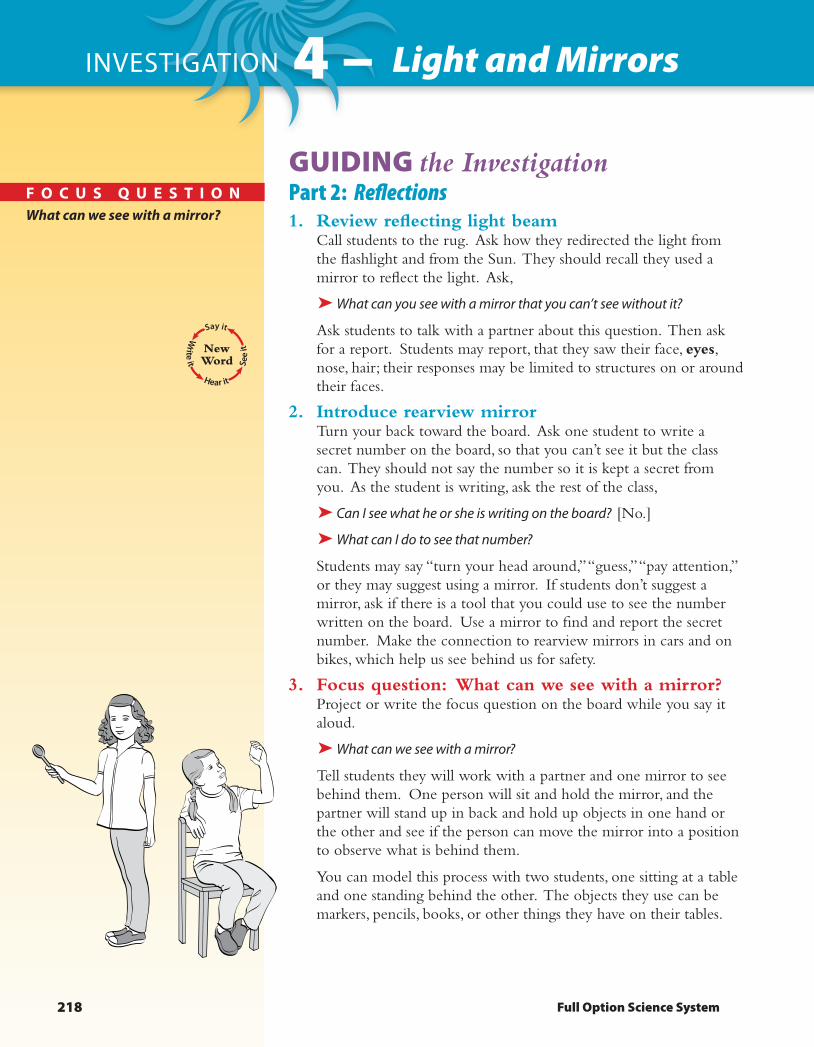
Tell students they will work with a partner and one mirror to see behind them. One person will sit and hold the mirror, and the partner will stand up in back and hold up objects in one hand or the other and see if the person can move the mirror into a position to observe what is behind them.
You can model this process with two students, one sitting at a table and one standing behind the other. The objects they use can be markers, pencils, books, or other things they have on their tables.
F o C u S Q u E S t I o NWhat can we see with a mirror?
Hear it
S
ee it
W
rite it
NewWord
Say it
Sound and Light Module—FOSS Next Generation 219
4. Distribute materialsDistribute one mirror to each pair of students and have them return to their tables to meet the rearview mirror challenge. With one mirror, students will need to take turns, one using the mirror and the other standing behind them.
5. Visit students as they workVisit the pairs of students as they work and offer encouragement and suggestions to help them carry out the investigation. Make sure they take turns using the mirror.
For pairs of students who meet the challenge easily, offer them a second challenge, such as determining how the mirror image is different from the actual image. They might hold up book covers so they can see the right-to-left reversal. They might notice that writing on the walls behind them shows the words backward.
6. Share observationsWhen students have all had a turn to observe behind them with a mirror, ask,
➤ Is it easy to use a mirror to see behind you? [No.]
➤ What did you learn about using rearview mirrors? [Things are backward or reversed left to right.]
➤ What new challenge would you like to meet?
If you have time, have students try to meet student-generated challenges with mirrors.
7. Introduce reflectionTell students there is a word for the image they see in a mirror. It is called a reflection. Go over the words reflect and reflection. One is an action word (to reflect; it reflects), and the other is an object word (a reflected image or reflection).
Tell students that they should study their own reflection in the mirror and draw a picture of their eyes in their science notebooks. They should draw a scientific illustration, an accurate picture of what they actually see, not cartoon eyes.
8. Distribute more mirrorsDistribute more mirrors and clips so each student has one of each. Have them open their notebooks, date a page, and draw a picture of their eyes.
Part 2: Reflections
Hear it
S
ee it
W
rite it
NewWord
Say it
Materials for Step 8• Mirrors• Mirror clips
SCIEnCE AnD EngInEERIng PRACTICES
Asking questions and defining problemsPlanning and carrying out investigations
Materials for Step 4• Mirrors

Full Option Science System220
investigation 4 – Light and Mirrors
9. Compare two shapesYou may find that students need help drawing the shape of their eyes. They may draw big circles or cartoon eyes, rather than ovals. Provide technical assistance as necessary. One way to do this is to draw a critical competitor on the board for students to study. Draw a circle and an oval next to each other. Ask students to compare the two shapes and determine which one is more like the shape of their own eyes.
10. Generate a list of student questionsEncourage students to share observations and ask questions they have about the structures of their eyes (iris, pupil, blood vessels, lid, eyelash). Make a list of their comments for later discussions.
When students have finished drawing their eyes, they can continue to explore what they can see using a mirror.
11. Review vocabularyReview key vocabulary used during this part and make sure that the words are added to the word wall.
12. Answer the focus questionDistribute a copy of notebook sheet 12, Reflections, to each student and review the focus question. Ask students to write an answer on the notebook sheet. After they finish, they can glue the sheet in their notebooks.
➤ What can we see with a mirror?
For students who need scaffolding, provide a sentence frame such as, “With a mirror I can see , , and .”
13. Assess progress: notebook entryCollect students’ notebooks at the end of class. Check that students can describe what they can see using mirrors. Use Embedded Assessment Notes to record your observations.
What to Look For
•Students indicate by writing or drawing that mirrors reflect light.
•Students indicate that they can see things that are behind them when they use a mirror.
14. Clean upHave students return the mirrors and clips to the materials station.
Science and engineering practiceS
asking questionsanalyzing and interpreting data
eyereflection
1487587_IG_SL_Inv_4.indd 220 5/19/15 10:30 AM

Sound and Light Module—FOSS Next Generation 221
READIng in Science Resources15. Read “Reflections”
Read “Reflections” using the strategy that is most effective for your class: read it aloud from the big book, or have students read independently or in small guided reading groups. This article continues the exploration of reflected light and provides questions for students to think about and discuss as they read.
Before reading, give students a few minutes to preview the text by looking at and discussing the photographs. Have students share any personal connections they have with the photographs with a reading partner. Tell students that the text has questions for them to think about as they read to help them with their learning about light.
16. Use a reading comprehension strategyRead the first page aloud or call on a volunteer to read. Pause after the question, “What happens to light when it hits a mirror?” Have students share their responses with their reading partner; then, tell them to read (or listen) to see if their ideas match those of the author. Repeat the process with the next page. Ask students to compare the photographs to the words in the text.
Have students look at the photographs on the next page (the kitten and the duckling) and describe what they notice. Call on a volunteer to read the sentence or have students read it on their own.
Repeat the process for the next page. 1. Have students describe what they notice in the photograph. 2. Read the text to confirm their ideas.
For pages 50 and 51, ask students what is the same and what is different about these examples of reflection compared to the previous examples. Tell students to read the text to find out.
Repeat the process for the next two pages. 1. Compare the photographs to the ones they’ve seen so far. 2. Read to find out what is the same and what is different
about these types of reflections.
For the last page, have students discuss their reasoning and provide evidence for what they think is a shadow and what is a reflection. Encourage students to use examples from the reading, their investigations, or a demonstration to support their ideas.
These suggested strategies address the Common Core State Standards for ELA.
RF 4: Read with sufficient accuracy and fluency to support comprehension.
RI 1: Ask and answer questions about key details in a text.
RI 2: Identify the main topic and retell key details of a text.
RI 3: Describe the connection between pieces of information in a text.
RI 4: Ask and answer questions to help determine or clarify the meaning of words and phrases in a text.
RI 6: Distinguish between information provided by illustrations and by words.
RI 7: Use illustrations and details to describe its key ideas.
RI 8: Identify the reasons the author gives to support points.
ELA CONNECTION
Part 2: Reflections
A mirror is a shiny surface .
What happens when light hits a mirror?
Light reflects off a mirror .
It goes in a different direction .
Reflections
46

Full Option Science System222
investigation 4 – Light and Mirrors
17. Discuss the readingAfter reading, use the discussion questions below to check for understanding.
➤ On what types of objects can you see reflections? [Mirrors, windows, water.]
➤ What do the surfaces of these objects have in common? [Shiny, smooth.]
➤ Why do reflections from a spoon look different? [Spoon has a curved surface.]
Use the questions at the end of the article to clarify students’ understanding.
➤ How is a shadow different from a reflection? [They are both an image of an object; a reflection happens when light bounces off a shiny surface and we see a clear image of the object; a shadow happens when light is blocked by an object and we see a darker image of the object’s shape.]
➤ What can you see with a mirror that you can’t see otherwise? [Your face, behind you, or far to the side.]
Wrap-Up/WarM-Up 18. Share notebook entries
Conclude Part 2 or start Part 3 by having students share notebook entries. Ask students to open their science notebooks to the most recent entry. Read the focus question together.
➤What can we see with a mirror?
Ask students to pair up with a partner to describe their answers to the focus question. They should also share the results of their mirror explorations and show their drawings of their eyes.
Have students work with their partner to come up with a question they would like to investigate using mirrors.
See the Home/School Connection for Investigation 4 in the Interdisciplinary Extensions section. This is a good time to send it home with students.
TEACHING NOTE
1487587_IG_SL_Inv_4.indd 222 5/19/15 10:30 AM

Sound and Light Module—FOSS Next Generation 223
No. 13—Notebook Master
Part 3: Eyes and Seeing
MATERIALS for Part 3: Eyes and SeeingFor each student ❏ 1 Notebook sheet 13, Eyes and Seeing
1 FOSS Science Resources: Sound and Light
• “Seeing the Light”
For the class 16 Small cardboard boxes (See Step 3 of Getting Ready.)
16 Flashlights with AA cells
8 Color-cards, A and B (See Step 3 of Getting Ready.)
1 Painter’s tape roll
1 Computer with Internet access *
1 Big book, FOSS Science Resources: Sound and Light
For embedded assessment ❏ • Embedded Assessment Notes
* Supplied by the teacher. ❏ Use the duplication master to make copies.
FOSS N
ext Generation
© The Regents of the U
niversity of CaliforniaCan be duplicated for classroom
or workshop use.
FOSS N
ext Generation
© The Regents of the U
niversity of CaliforniaCan be duplicated for classroom
or workshop use.
Sound and Light Module
Investigation 4: Light and Mirrors
No. 13—
Notebook M
aster
Sound and Light Module
Investigation 4: Light and Mirrors
No. 13—
Notebook M
aster
Eyes and SeeingW
hat can be seen with no light?
Eyes and Seeing
What can be seen w
ith no light?

Full Option Science System224
InvESTIgATIOn 4 – Light and Mirrors
gETTIng READy forPart 3: Eyes and Seeing1. Schedule the investigation
This part will take one session for active investigation and one session for reading.
2. Preview Part 3Students investigate what they can see in the dark, using a small closed box. On the back wall of the box is a card with four images of different shapes and colors. At first, students cannot see anything. As they gradually allow more light into the box, students find that they can first detect shapes and then color. They read about the process of seeing and compare a variety of animal eyes. The focus question is What can be seen with no light?
3. Prepare no-light boxesA no-light box is a 18 ✕ 13 ✕ 13 centimeter (cm) box (provided in the kit) with a 3.5 cm hole punched in one end. A colored picture of several shapes (color card) is attached to the inside wall of the box opposite the hole.
Prepare eight A boxes and eight B boxes and label them. a. Assemble 16 boxes by folding and taping the flaps on one side
of the box. Use the blue painter’s tape, so it can be removed later without damaging the boxes.
b. Cut out the color cards. Slide a color card into the box and tape it against the back wall, opposite the hole.
A
A
B

Sound and Light Module—FOSS Next Generation 225
Part 3: Eyes and Seeing
c. Push the large flaps together tightly and close the box with tape.d. Label the box with the same letter that is on the top of the color
card.
e. Look inside the box to be sure that very little light leaks through the seam. The inside of each box must be quite dark.
At the end of this part, you may want to keep several boxes assembled at an activity center for further exploration. Remove the tape and the cards from the rest of the boxes. Store the boxes flat.
4. Preview the videoPreview the Anchu cartoon in the video Light and Darkness (duration 2 minutes). The cartoon illustrates how human eyes gradually adjust to dim light (not total darkness) and can eventually distinguish objects and light sources. The video is used to introduce Step 2 of Guiding the Investigation.
The link to this video for teachers is in “Resources by Investigation” on FOSSweb.
5. Plan to read Science Resources: “Seeing the Light”Plan to read “Seeing the Light” during a reading period at the end of this part.
6. Plan assessment: notebook entryIn Step 16 of Guiding the Investigation, students answer the focus question. Review students’ work for evidence that students understand about eyes and vision. Record your observations on Embedded Assessment Notes.
BOX A

Full Option Science System226
InvESTIgATIOn 4 – Light and Mirrors
gUIDIng the InvestigationPart 3: Eyes and Seeing1. Discuss eyes as light detectors
Call students to the rug. Ask students to remember when they worked with sound sources and sound receivers. Ask them to talk with a partner and give an example of a sound source and a sound receiver.
Focus on the sound receiver and confirm that their ears are sound receivers. Ears detect the vibrations that we hear as sound.
Ask students to focus on light. Say,
Talk with your partner about light. Give an example of a light source and identify a light receiver.
Listen to what students report after the discussion. Focus on the light receiver. Confirm that eyes are light receivers or light detectors. Our eyes detect light.
2. View the videoTell students they are going to watch a short cartoon about what we can see in dim light. Show the 2-minute video about Anchu, who describes his experience with his eyes adjusting to a dimly lit bedroom at night. At first, he can’t see anything. Then he sees the light coming in the crack of his bedroom door, the light from the streetlight coming in through the window curtains, and the moving lights of cars driving by his house.
After the video, have students discuss and share personal connections to Anchu’s experience. Reinforce that Anchu observed light coming into his room.
3. Focus question: What can be seen with no light? Project or write the focus question on the board while you say it aloud.
➤ What can be seen with no light?
Tell students that they will investigate this with some new tools. Emphasize that this is not a contest, but that as a class, they will try to figure out if humans can see things without light.
F o C u S Q u E S t I o NWhat can be seen with no light?
Hear it
S
ee it
W
rite it
NewWord
Say it

Sound and Light Module—FOSS Next Generation 227
4. Introduce the boxTell students that they can’t make the classroom totally dark, so they will make a dark room using an opaque box. Hold up a box that is taped shut. Tell students that the box should remain taped shut until you tell them to open the top. Show them the eye hole and how to put their eye right up to the hole to look inside the box.
Turn the room lights off so the classroom is dim. Close the curtains to make the room as dim as possible.
5. Describe the investigationExplain that each group of four students will get one box A and one box B. Students will work in pairs. A pair of students will work with one box at a time and take turns looking into the box. Tell them that there is a card with several images on the back wall of the box. Their task is to look through the hole into the box and identify
• The shapes of the images
• The colors of the images
• The relative position of the shapes in the box
• The color of the background in the box
6. Distribute materialsDistribute one box A and box B to each group of four students. Have each pair of students take turns peeking in the box and waiting for their eyes to adjust.
7. Discuss first viewingsWhen every student has had a chance to peek in one box, ask students what they could identify. Here are the likely answers.
• I couldn’t see anything because it’s too dark.
• I saw a little bit of light coming in the crack or through the tape.
• I saw a little hole in there (from the corner of the box).
Ask,
➤ Is there light in this room?
Students may say no if you have the ceiling lights off, but challenge them to identify sources of light such as the exit sign, the clock, the hallway window, or the outside windows. If they can see how many fingers you hold up, there must be light in the room.
Part 3: Eyes and Seeing
Materials for Step 4• No-light boxes, A and B
SCIEnCE AnD EngInEERIng PRACTICES
Planning and carrying out investigations

Full Option Science System228
InvESTIgATIOn 4 – Light and Mirrors
8. Shine a little light in the boxAsk students what they could use to get some light in the box. They may ask for the flashlight. Provide each pair of students with a light so one person can hold the light while the other holds the box. They can run the light along the top seam of tape and see what that does. They can also run the light beam along the bottom seam of the box.
They may want to punch a small hole in the side of the box with a pencil to shine light in. (These holes can be covered up with tape afterwards.)
Let the pairs work with the flashlight to get light into the box to identify the images and their shapes and colors.
When students identify the images, they can record them in their notebook by drawing the four shapes with the appropriate colors and location on the card.
9. Exchange boxesHave the pairs of students exchange boxes in their group. If one pair of students worked with box A, they will now work with box B. Have them start with no light and then add light to identify the objects, shapes, and colors.
10. Discuss observationsAfter 5 minutes, gather students and ask them to describe their observations. They should report that with no light, they couldn’t see any of the objects’ shapes or colors. They may report that with a little light, they could identify shapes and colors more easily. Ask,
➤ When you looked through the hole into the dark box, what did you see inside? [Nothing.]
➤ You didn’t see anything. Was that because there was nothing in the box? Why couldn’t you see the objects? [There was no light.]
Materials for Step 8• Flashlights
SCIEnCE AnD EngInEERIng PRACTICES
Planning and carrying out investigationsAnalyzing and interpreting dataConstructing explanations and designing solutions
CROSSCUTTIng COnCEPTS
Cause and effect
nOTEIf the task is still too difficult, let students carefully loosen the tape on the top of the box and carefully lift one ceiling flap a little bit.

Sound and Light Module—FOSS Next Generation 229
➤ What did you do to see the shapes in the dark box? [Introduced a little light into the box.]
Explain,
Light is required for vision. Eyes are light detectors. Humans can’t see in the absolute dark because there is no light to detect. In fact, no animal can see with no light. Even cats and owls, which are known for being able to see in the dark, cannot see in complete darkness. These animals can, however, see in very dim light.
11. Review vocabularyReview key vocabulary used during this part and make sure that the words are added to the word wall.
12. Clean upAsk students to make sure their flashlights are switched off. Have them return the boxes and flashlights to the materials station. Decide whether you want to keep some boxes out at a center for further exploration.
Later, you could ask some students to help you disassemble the boxes before storing them flat.
Part 3: Eyes and Seeing
light detectorvision
Hear it
S
ee it
W
rite it
NewWord
Say it

Full Option Science System230
InvESTIgATIOn 4 – Light and Mirrors
READIng in Science Resources13. Read “Seeing the Light”
Read “Seeing the Light” using the strategy that is most effective for your class: read it aloud from the big book, or have students read independently or in small guided-reading groups. This article provides more information about light sources and light detectors.
Before reading, give students a few minutes to preview the text by looking at and discussing the photographs with a reading partner. Brainstorm with students a list of questions about light that they think might be answered in this article. Add these questions to the list of questions about eyes and vision.
14. Use a reading comprehension strategyRead the first page aloud, pausing after the question to let students think about where they can see light. Continue reading the rest of the page; then tell students to close their eyes and visualize what the text says. For example say, “Imagine a place where you have been and think about where the light comes from.”
On page 57, ask students where the light is coming from in this photograph. Tell students to listen (or read) the text to find out if their ideas match those of the author. Reread the last two sentences and model how a reader might make sense of these two statements.
Light comes from a radiant source.
Sound comes from a vibrating source.
Hmm, It seems like both sound and light come from different things. Sound comes from a vibration like clapping; light comes from something radiant. What does radiant mean? Does it have to do with rays of light? I know a light source gives off light. I’ll look it up in the glossary to be sure…
Continue to the next page and have students examine the photographs. Ask, “What do you notice about these two images? How are they the same and how are they different?” Read the text aloud or call on a volunteer. Tell students to practice paraphrasing what they just heard with their reading partner. Ask, “What does this text and the photographs make you think about?”
On page 59, have students examine the photographs and read. Ask,
➤ How are these light sources the same? How are they different? Have you seen them before?
Then, read the following page (60) or have students read it independently.
These suggested strategies address the Common Core State Standards for ELA.
RI 1: Ask and answer questions to demonstrate understanding.
RI 2: Identify the main topic of a text.
RI 3: Describe the connections between pieces of information in a text.
RI 4: Ask and answer questions to help determine or clarify the meaning of words and phrases in a text.
RI 5: Know and use text features.
RI 6: Distinguish between information provided by illustrations and by words.
RI 7: Use illustrations and details to describe its key ideas.
RI 10: Read informational texts.
L 6: Use acquired words and phrases.
ELA CONNECTION
Where can you see light?
You can see light in many places .
You can see sunlight during the day .
Seeing the Light
56

Sound and Light Module—FOSS Next Generation 231
On page 61, focus students’ attention on the eye and candle images. Ask,
➤ What do you notice about these images?
➤ What do the lines mean?
➤ What do you think this diagram is trying to explain?
➤ How is this diagram similar to the sound model on page 9?
Read the text aloud or have students read independently to find out if their ideas match those of the author. Ask students to take turns telling their reading partner what the main idea is on this page and give some of their own examples.
For the last six pages, have students look at and discuss the photographs of the eyes. Ask,
➤ What is the same and what is different about the eyes in the photographs?
Read aloud or have students read the text independently. Have students reread the text or talk-through the photographs with a reading partner. Have them discuss with a partner or small group how they think the eye positions for each animal helps them survive.
15. Discuss the readingReview the questions students had before reading and add new information from the article. Then, check for understanding using these discussion questions.
Review the photographs and questions about reflections.
➤ Where do you see light? [From the Sun, lamps, candles, bulbs.]
➤ What is the difference between a light source and a sound source? [Light sources radiate; sound sources vibrate.]
➤ What is a light receiver? [Eyes.]
➤ What is a sound receiver? [Ears.]
➤ How do animals use their eyes to survive?
End the reading session by discussing the two questions at the end of the reading.
➤ How are the eyes of a cat different from the eyes of a frog?
➤ Compare your eyes to the eyes of a cat. How are they the same? How are they different?
Part 3: Eyes and Seeing
SCIEnCE AnD EngInEERIng PRACTICES
Constructing explanations
CROSSCUTTIng COnCEPTS
Patterns
SCIEnCE AnD EngInEERIng PRACTICES
Obtaining, evaluating, and communicating information

Full Option Science System232
InvESTIgATIOn 4 – Light and Mirrors
16. Answer the focus questionAsk students to recall the focus question.
➤ What can be seen with no light?
Give students a couple of minutes to think about their investigation and to write a sentence or two to answer the focus question.
For students who need scaffolding, provide a prompt such as, “Describe what happened when you looked into the box without light and then with light.” Or a guiding question such as, “Why couldn’t you see anything in the box without the flashlight?
For maximum support, provide sentence frames such as, “To see, you need ________. We found out that _________ .”
17. Assess progress: notebook entryCollect students’ notebooks at the end of class. Check that students report that they need light to see. Use the Embedded Assessment Notes to record your observations.
What to Look For
• Students indicate that they can see things only when illuminated by a light source.
WRAP-UP/WARM-UP 18. Share notebook entries
Conclude Part 3 or start Part 4 by having students share notebook entries. Ask students to open their science notebooks to the most recent entry. Read the focus question together.
➤ What can be seen with no light?
Ask students to pair up with a partner to describe their answers to the focus question using evidence from their investigations to support their explanation.
Call on a few volunteers and write their claims and evidence on the board. Discuss how the evidence supports the claim for each statement. To support productive conversations, provide sentence starters such as, “I claim .” “My evidence is .”
This suggested strategy addresses the Common Core State Standards for ELA.
SL 1: Participate in collaborative conversations.
ELA CONNECTION

Sound and Light Module—FOSS Next Generation 233
MATERIALS for Part 4: Designing with LightFor each student 1 Mirror
1 Mirror clip
❏ 1 Notebook sheet 14, Designing with Light
1 FOSS Science Resources: Sound and Light
• “Communicating with Light”
For the class 16 Flashlights with AA cells
16 Books *
1 String, 2 m
• Masking tape
1 Scissors *
For embedded assessment ❏ • Performance Assessment Checklist
For benchmark assessment ❏ • Investigation 4 I-Check
❏ • Assessment Record
* Supplied by the teacher. ❏ Use the duplication master to make copies.
Part 4: Designing with Light
FOSS N
ext Generation
© The Regents of the U
niversity of CaliforniaCan be duplicated for classroom
or workshop use.
FOSS N
ext Generation
© The Regents of the U
niversity of CaliforniaCan be duplicated for classroom
or workshop use.
Sound and Light Module
Investigation 4: Light and Mirrors
No. 14—
Notebook M
aster
Sound and Light Module
Investigation 4: Light and Mirrors
No. 14—
Notebook M
aster
Designing w
ith LightH
ow can people com
municate w
ith light?
Designing w
ith LightH
ow can people com
municate w
ith light?
No. 14—Notebook Master

Full Option Science System234
InvESTIgATIOn 4 – Light and Mirrors
gETTIng READy forPart 4: Designing with Light1. Schedule the investigation
This part will take two sessions for active investigation, one session for reading, and one session for the benchmark assessment.
2. Preview Part 4Students review how to redirect light using one mirror. They design a way to redirect light with two mirrors. Students explore ways to communicate long distances, using light. The focus question is How can we communicate with light?
3. Prepare to demonstrate using one mirror to redirect light
Practice the class demonstration described in Steps 1–4 of Guiding the Investigation. This demonstration best done on the floor with students sitting in a circle. Cut a length of string that you can use in this demonstration.
4. Plan to read Science Resources: “Communicating with Light”
Plan to read “Communicating with Light” during a reading period before giving the I-Check.

Sound and Light Module—FOSS Next Generation 235
5. Plan assessment: performance assessmentThere are two opportunities for you to observe students. In Steps 6–8 in Guiding the Investigation, students work in pairs with two mirrors to solve challenges. In Steps 11–15, students work in pairs to solve a communication problem. Observe students as they work and note the science and engineering practices they use to plan and carry out the investigation and design a solution. Record your observations on Performance Assessment Checklist.
6. Plan benchmark assessment: I-CheckPlan to give Investigation 4 I-Check at the conclusion of the investigation. Students can work independently, or you can read the items aloud to the whole class. Review student responses using the information in the Assessment chapter.
Part 4: Designing with Light

Full Option Science System236
InvESTIgATIOn 4 – Light and Mirrors
gUIDIng the InvestigationPart 4: Designing with Light1. Review reflect with a demonstration
Call students to the rug. Have the materials ready for the light-and-mirror demonstration. Set up the book and the flashlight, but don’t add the mirror.
Ask,
➤ How can we get the light to shine on the book with the flashlight pointing away from the book?
Ask a student volunteer to set up the demonstration. If this volunteer needs any assistance, have the student ask another student to help.
Ask students to talk to a partner about how the light is going from the flashlight to the book. You should hear them using the word reflects or reflected.
Confirm that the light beam from the flashlight hits the mirror and is reflected toward the book. The light bounces off the mirror and travels to the book, where it can be seen.
2. Move the book to a new positionMove the book to a different location and ask another student to redirect the beam by reflecting it onto the book without moving the flashlight. Wait to see if the student changes the angle of the mirror to have the light hit the book. If the student needs assistance, have the student ask another student to help.
Tell students,
We have made a light system. Our system has three parts. We have a beam from a flashlight, a mirror, and a target book.
➤ What causes the light to be redirected? [The angle of the mirror.]
➤ What does the mirror do in the system? [It reflects a beam of light to a target book.]
➤ What would happen to the light if we removed the mirror? [It would shine on one of the students sitting in a straight line away from the front of the flashlight.]
3. Use string to show the light pathTell students that you are going to use string to follow the path of the light beam as it travels from the flashlight to create a model.
F o C u S Q u E S t I o NHow can we communicate with light?
Hear it
S
ee it
W
rite it
NewWord
Say it
CROSSCUTTIng COnCEPTS
Cause and effectSystems and system models

Sound and Light Module—FOSS Next Generation 237
Tape one end of the string to the flashlight. Extend the string to the mirror and fasten it with a piece of tape.
Ask students where the string should go from the mirror. They should say to the book. Ask a student to hold the end of the string by the book.
Explain,
Our system is now a model of how a light beam travels from the flashlight to the mirror, and is reflected and travels to the book. The string shows the path of one of many light beams. The string models the straight path that the light travels. Light always travels in straight lines.
Note: The model follows only one ray of light. The light rays go out in straight lines in all directions from the source, but for the model, we will follow just one light ray.
4. Move the book to another positionMove the book to a different location and ask another student to get the light to reflect onto the book without moving the flashlight. The string should show the new path taken by the light beam traveling in a straight line.
This is an opportunity to introduce the term angle. You can draw a line on the board to represent the mirror. The line should be straight up and down like a pole. Then you can change the angle like the hands of a clock moving to the right. The next line would not be straight up and down, but at a slight angle.
5. Introduce the two mirror challengeTell students to work with a partner and two mirrors to see what systems they can create to redirect light. Offer these two challenges, and model the challenge with a book and flashlight, showing where the light should be reflected.
• Use two mirrors to direct light around a book.
• Use two mirrors to reflect light around a corner.
6. Distribute materialsDistribute two mirrors and two mirror clips to each pair of students and have them return to their tables to work on the advanced light-and-mirror challenges.
7. Visit students as they workVisit the pairs of students as they work and offer encouragement and suggestions to help them meet these high-level challenges. Help them to work together to solve the problems. They may want to team up with other students to solve other challenges.
Part 4: Designing with Light
Materials for Step 6• Flashlights• Mirrors• Mirror clips
SCIEnCE AnD EngInEERIng PRACTICES
Developing and using models
Hear it
S
ee it
W
rite it
NewWord
Say it
Full Option Science System238
investigation 4 – Light and Mirrors
8. Assess progress: performance assessmentAssess students’ science and engineering practices as they work with the mirror challenges (and then again in Steps 11–15). Record your observations on Performance Assessment Checklist.
What to Look For
•Students ask questions, make observations, and gather information to solve the mirror challenges. (Asking questions; planning and conducting investigations; obtaining, evaluating, and communicating information.)
•Students draw simple sketches/models to illustrate their challenge solutions. (Developing and using models; constructing explanations.)
•Students analyze data from testing their solutions (their observations) to compare the strengths and weaknesses of how their systems of mirrors are performing. (Analyzing and interpreting data; systems and system models.)
9. Share light and mirror systemsProvide time for students to share their systems and describe how they function. You might ask each pair to draw their system in their notebook.
10. Clean upHave students make sure the flashlights are turned off and return all the materials to the materials station.
11. Introduce an engineering challengeRemind students that they designed ways to communicate using sound. They found a way to use what they knew about sound to send information from one place to another.
Tell them they will have a chance to design with light to send information. Ask them for examples of ways that light is used to communicate.
12. Focus question: How can we communicate with light?
Project or write the focus question on the board while you say it aloud.
➤ How can we communicate with light?
Tell students they will work with a partner in this part and design a way to communicate using light.
b r e a k P O I N T
Science and engineering practiceS
asking questionsDeveloping and using modelsPlanning and carrying out investigationsanalyzing and interpreting dataConstructing explanationsobtaining, evaluating and communicating information
crOSScutting cOnceptS
PatternsCause and effectsystems and system models
1487587_IG_SL_Inv_4.indd 238 5/19/15 3:23 PM

Sound and Light Module—FOSS Next Generation 239
13. Describe the challenge and the constraintsProvide a specific challenge and write it on the board. Communicate to another group that is around the corner when they should stand up and when they should sit down (or a similar task).
Show students the materials that each pair of students can use—1 flashlight, 2 mirrors and clips, 1 set of drop objects, and any other materials that you can provide from classroom supplies, such as colored paper, colored gel or cellophane, or colored fabric.
14. Start the engineeringLet students discuss their ideas in groups and begin designing their solutions in pairs.
Provide some guiding questions as needed.
➤ What could you do with the test objects? ➤ Could you do anything with blocking the light sometimes and letting it
pass through other times?
➤ What could you use to send the message around the corner?
➤ Could you use colored objects to send signals?
15. Draw a diagram of the systemWhen students have a design they are satisfied with, ask them to draw their system and explain how it works in their notebook.
16. Share systems and outcomesAs you visit the groups, ask for volunteers to share their system with the class. Plan for time for sharing and discussion of designs that met the challenge as well as things that still need improvement.
17. Clean upHave students return the materials to the materials station and make sure the flashlights are switched off.
18. Review vocabularyReview key vocabulary developed in this investigation. Refer to the word wall for the list.
19. Answer the focus questionAsk students to write and draw their answer to the focus question.
➤ How can we communicate with light?
Give students a couple of minutes to think about their investigation and to write a sentence or two to answer the focus question.
For students who need scaffolding, provide sentence frames such as, “We can send information using light by . ”
SCIEnCE AnD EngInEERIng PRACTICES
Designing solutions
anglemodel
Part 4: Designing with Light

Full Option Science System240
InvESTIgATIOn 4 – Light and Mirrors
READIng in Science Resources20. Read “Communicating with Light”
Read “Communicating with Light” using the strategy that is most effective for your class: read it aloud from the big book, or have students read independently or in small guided reading groups. This article provides examples of communicating with light for students to ponder and discuss.
Before reading, review the class list of ways to communicate using light and the designs that students came up with. For each of the examples, ask students to think about and discuss what they think is being communicated and why it is important. Start a content grid to help students focus on the details of the examples they will read about in the article, (e.g., light source, way light is communicated, intended receiver, and purpose).
objectLight
SourceWay it is
CommunicatedIntended Receiver Purpose
Light house Big lamp on top
Powerful beam Ship captains
Warn captains of dangerous rocks along the coast
Traffic light
Railroad crossing
Fire truck
Police car
Tall building
Tower
Park ride
Baseball park
Fireworks
Give students a few minutes to look at the photographs in their books. Then, conduct a partner parade to activate prior knowledge. Have students choose one photograph that interests them the most. Next, have them stand up and form two even parallel lines. Tell them that when you give them the signal, they will share their photograph with the person facing them from the other line and answer the prompt.
Give students about a minute to share, and then give them the signal to stop. Direct the last person in line A to walk up to the front of the line and the rest of the students to move over one spot. Line B doesn’t move. Everyone should now have a new partner in front of him or her. Give the next prompt for students to discuss. Repeat the process one more time. Here are some suggested prompts for each round.
SCIEnCE AnD EngInEERIng PRACTICES
Obtaining, evaluating, and communicating information
These suggested strategies address the Common Core State Standards for ELA.
RI 1: Ask and answer questions about key details in a text.
RI 2: Identify the main topic and retell key details of a text.
RI 3: Describe the connection between pieces of information in a text.
RI 7: Use illustrations and details to describe its key ideas.
RI 10: Read informational texts.
SL 4: Describe events with relevant details.
ELA CONNECTION
Communicating with Light
Light can be a warning .
Lighthouses sit on rocky shores .
Their light warns ships to stay away .
69

Sound and Light Module—FOSS Next Generation 241
Round 1: Tell your partner what you notice about your photograph.
Round 2: Tell your partner what is happening in your photograph.Round 3: Tell your partner a personal connection you have to
your photograph.
21. Use a reading comprehension strategyRead the first page aloud or have students read independently. Pause to give students a few minutes to think about the main idea of this page and to share their thoughts with their reading partner. Then, use the content grid to help guide the discussion of the key details. Repeat the process with following sections of text and images in the rest of the article.
22. Discuss the readingDiscuss any questions students have; then, check for understanding using these discussion questions.
➤ Talk about how we use light to communicate information.
➤ What do the light house, fire truck, and railroad crossing lights have in common?
23. Assess progress: I-CheckWhen students have completed the active investigations, readings, and discussions, give them Investigation 4 I-Check.
Review student responses. Use the information in the Assessment chapter for guidance. Note concepts that you might want to revisit with students, using the next-step suggestions.
The students’ experiences in this investigation contribute to their understanding that objects can be seen if light is available to illuminate them or if they give off their own light; that some materials allow light to pass through them, others allow only some light through, and others block all the light and create a shadow; and that mirrors can be used to redirect a light beam. The experiences also contribute to the life science understanding that animals have body parts (eyes) that capture and convey information that helps the animal survive. The engineering experiences develop an understanding that it is important to understand the problem before beginning a design solution; that designs can be conveyed through drawings or physical models that communicate ideas to others; and it is useful to compare solutions as there is always more than one possible solution to a problem.
B R E A k P O I N T
Part 4: Designing with Light
DISCIPLInARy CORE IDEAS
PS4.B: Electromagnetic radiationPS4.C: Information technologies and instrumentationLS1.D: Information processingETS1.A: Defining and delimiting engineering problemsETS1.B: Developing possible solutionsETS1.C: Optimizing the design solution

Full Option Science System242
InvESTIgATIOn 4 – Light and Mirrors
InTERDISCIPLInARy ExTEnSIOnS Language Extension• Read books about light and reflections
There are many wonderful children’s books about light and reflections. Many books include shadows, so students can compare and contrast shadows and reflections. Here are a few suggestions.
• Light, Shadows, Mirrors, and Rainbows by Natalie M. Rosinsky
• Shadows and Reflections by Tana Hoban
Math Extensions• Math problem
Put the mirror on the dotted lines below. Does the reflection make a shape? What shape do you see?
Notes on the problem. It is recommended that the teacher model the first one for the students to help them determine how to place the mirror and where to look. Several of the images make geometric shapes while others make curvy lines or other figures.
• Observe symmetryUse a mirror and one of the color cards from the no-light boxes. Place the edge of the mirror across one of the shapes and look into the mirror at an angle. What do you observe? Slowly move the mirror across the image and continue to observe the image. Can you describe what is happening and why? Try another one of the images. Try to create a design and observe it in a mirror.
Art Extension• Hold a fabulous eye contest
Provide students with different colors of construction paper, tape, crayons, markers, and scissors. Sponsor a fabulous eye contest. Have students design eyes on an imaginary animal and describe how the animal uses them to see. One style could be for seeing things close to the ground. Another style could be for looking at things in the air. How about one for seeing behind the head? Encourage originality, style, inventiveness, and creative design.
12 34 5
FOSS Next Generation© The Regents of the University of CaliforniaCan be duplicated for classroom or workshop use.
Sound and Light ModuleInvestigation 4: Light and Mirrors
No. 20—Teacher Master
MATH EXTENSIONInvestigation 4: Light and Mirrors
Name Date
Put the mirror on the dotted lines below. Does the re� ection make a shape? What shape do you see?
Makes a shape? Yes or NoName of shape __________
Makes a shape? Yes or NoName of shape __________
Makes a shape? Yes or NoName of shape __________
Makes a shape? Yes or NoName of shape __________
Makes a shape? Yes or NoName of shape __________
Makes a shape? Yes or NoName of shape __________
Makes a shape? Yes or NoName of shape __________
Makes a shape? Yes or NoName of shape __________
Makes a shape? Yes or NoName of shape __________
No. 20—Teacher Master
Refer to the teacher resources on FOSSweb for a list of appropriate trade books that relate to this module.
TEACHING NOTE

Sound and Light Module—FOSS Next Generation 243
Science Extensions• Research animal eyes
Have students pick two different kinds of animals and find out about their eyes and vision. They should compare the eyes of the two animals and find out how the eyes help the animals survive.
• Look at multiple imagesGet a coin and two mirrors with clips. How can you position the mirrors to see multiple images of the coin? How do you position the mirrors to see the greatest number of images? How can you explain the multiple images?
• Make unusual hand imagesPlace the edge of a mirror in the palm of your hand and look into the mirror at an angle. Can you make a hand with three fingers? Eight, nine, or ten fingers?
• Construct a periscopeA periscope is a tube with a mirror at each end. It works by following two basic principles. One is that light travels in a straight line. The other is the law of reflection, that the angle of incidence is equal to the angle of reflection. In a periscope, the far mirror is pointed at an object. Light from the object reflects off the far mirror. The light bounces onto the closer mirror and then into the eyes of the observer.
Make a cereal-box periscope with a box and two mirrors.
Interdisciplinary Extensions

Full Option Science System244
InvESTIgATIOn 4 – Light and Mirrors
Home/School ConnectionStudents and their family investigate what they can see in a large mirror at home. Make copies of teacher master 21, Home/School Connection for Investigation 4, and send it home with students after Part 2.
FOSS Next Generation© The Regents of the University of CaliforniaCan be duplicated for classroom or workshop use.
Sound and Light ModuleInvestigation 4: Light and Mirrors
No. 21—Teacher Master
Find a mirror at home. If it is not a hanging mirror, work with an adult to position it at about eye height on a wall.
Here are some things to do.
1. Stand close to the mirror, right in front of it. • How much of your body can you see? • What do you have to do to see more of your body?• Do you move closer or farther away? • Does it matter where you stand?
2. Stand a little bit o� to one side with your face close to the mirror. • Look at the scene you can see in the mirror. • Move back from the mirror. • What happens to the scene? • Can you see more or less? • What do you have to do to see more in the mirror?
HOME/SCHOOL CONNECTIONInvestigation 4: Light and Mirrors
No. 21—Teacher Master

Sound and Light Module—FOSS Next Generation 257
Recording Benchmark Assessment DataUse Assessment Record to document progress on benchmark (I-Check) assessment items. When you’re ready to record student performance on the benchmark items, we suggest that you focus on one item at a time, recording data for all students on that one item before moving on to another item. Using this method to record progress will give you a better sense of trends and patterns of understanding across the class, and you’ll be more consistent.
Avoid putting any marks on the I-Checks; instead, return the unmarked I-Checks and let students do the marking. As you go over the items, plan activities to help students reflect on the responses they wrote, and allow them to edit their answers as needed. Students enjoy using colored pencils to make their edits.
Recording Assessment Data
FOSS Next Generation© The Regents of the University of CaliforniaCan be duplicated for classroom or workshop use.
Sound and Light ModuleAssessment Record
No. 8—Assessment Master
Assessment Record—Investigation 2 I-Check Date
Student names 1 2 3 4a 4b 4c 5
FOSS Next Generation© The Regents of the University of CaliforniaCan be duplicated for classroom or workshop use.
Sound and Light ModuleAssessment Record
No. 7—Assessment Master
Assessment Record—Investigation 1 I-Check Date
Student names 1 2 3 4

Full Option Science System280
sound and light – Assessment
i-check 4Investigation 4: Light and Mirrors
I-Check Item 1Directions for teachers. Read the first direction aloud to help students orient themselves to a bird’s-eye view, looking down into the room. Read the second sentence and discuss as needed what students need to do to complete this item.
What to Look For
• Students draw a line from the flashlight to the mirror and another line from the mirror to the wall. (Both lines should be to the left of the flashlight; the line from the mirror to the wall should be left of the line drawn from the flashlight to the mirror.)
Next steps. Set up a class demonstration. Position students in the room so that one holds a mirror, one holds a flashlight, and one is the wall. Hand the end of a long string to the student holding the flashlight. Keeping the string taut, unroll it as you move toward the student holding the mirror. Tape the string to the mirror where the light is reflecting into it. Continue to unroll the string having the student near the wall hold it where the light is hitting. The idea is to create a visible path showing how light travels in straight lines. You can create other string paths to demonstrate how light travels. Let students revise this item after they see the demonstration.
diSciplinAry cOre ideAS
PS4.B: objects can be seen if light is available to illuminate them or if they give off their own light.Mirrors can be used to redirect a light beam.
Science And engineering prAcTiceS
Constructing explanations and designing solutions: Make observations to construct an evidence-based account for natural phenomena.
crOSScuTTing cOncepTS
Patterns: Patterns in the natural and human designed world can be observed, used to describe phenomena, and used as evidence.

Sound and Light Module—FOSS Next Generation 281
FOSS Next Generation© The Regents of the University of CaliforniaCan be duplicated for classroom or workshop use.
INVESTIGATION 4 I-CHECKSOUND AND LIGHT
1. Pretend you are looking down into a dollhouse living room.
Draw lines to show how the light would travel from the ashlight to the wall.
Mirror
Wall
Sound and Light Module Investigation 4 I-Check
Page 1 of 4
Name
Date ANSWERS
Investigation 4 I-Check

Full Option Science System282
sound and light – Assessment
I-Check Item 2Directions for teachers. Read the directions aloud. Give students time to complete their answers before moving on to the next question.
What to Look For
• Students draw a dark scribble, write the word “nothing,” or indicate in some other way that they would not be able to see anything.
Next steps. Suggest students work with a parent or guardian. At night time when it’s dark, find a bathroom, closet, or other small room in which they can block out all light. Have students enter the room with their parent or guardian and report their observations back at school the next day. Remind students that the most important thing is safety, so they need to do this with a parent or guardian. The next day you can discuss their experiences (which should be that they were not able to see anything if they blocked out all the light).
I-Check Item 3Directions for teachers. Read the first sentence aloud. Give students a moment to fill in the missing word. Follow the same procedure for the other three sentences.
What to Look For
• Students write from top to bottom, “light,” “sound,” “sound,” “light.”
Next steps. Ask students what kinds of sources and receivers they have been talking about for the last few weeks. As students tell you, list the words “light” and “sound” on the board. Tell the class that you are going to read each sentence two times, the first time filling in the blank with the word “sound” and the second time filling in the blank with the word “light.” After you have read the sentence twice, they should hold up one or two fingers to indicate which sentence is true, the first one or the second. Discuss any disagreement, then give students time to write the correct answer in the blank.
diSciplinAry cOre ideAS
PS4.B: objects can be seen if light is available to illuminate them or if they give off their own light.
crOSScuTTing cOncepTS
Cause and effect: Events have causes that generate observable patterns.

Sound and Light Module—FOSS Next Generation 283
FOSS Next Generation© The Regents of the University of CaliforniaCan be duplicated for classroom or workshop use.
INVESTIGATION 4 I-CHECKSOUND AND LIGHT
Name
Date
Sound and Light Module Investigation 4 I-Check
Page 2 of 4
2. Two students go in a room. There is a red apple sitting on a table.
The room has no windows. They close the door. It is completely dark. No light can get in.
Draw a picture or write a word or two to show what the students see.
3. Complete these sentences. Write “sound” or “light” in each blank.
Your eyes are _______________________ receivers.
Your ears are _______________________ receivers.
A siren is a _______________________ source.
A lightbulb is a _______________________ source.
ANSWERS
light
Investigation 4 I-Check
sound
Nothing!
soundlight

Full Option Science System284
sound and light – Assessment
I-Check Item 4Directions for teachers. Read the first sentence aloud. Give students time to draw a drum in Box 1 before reading the next direction.
Read the second sentence aloud. Give students the time they need to draw another drum in Box 3.
What to Look For
• Students draw a drum in Box 1 that is larger than the one in Box 2.
• Students draw a drum in Box 3 that is smaller than the one in Box 2.
Next steps. Have students take out their science notebooks and look for evidence to support what happens to pitch when the size of an instrument is changed. Make an evidence list on the board or chart paper. For example, as xylophone tubes get longer, the pitch gets lower. Shorter metal strips on the kalimba have a higher pitch. Use these statements to develop a general rule, such as the longer or larger an instrument is, the lower its pitch. Then have students revise their drawings as needed.
I-Check Item 5Directions for teachers. Read the directions aloud. Make sure students understand that they are drawing something to modify the flashlight to narrow the beam of light shining on the puppet stage. Give them time to complete their drawings.
What to Look For
• Students draw something like a long tube on the flashlight to focus the light into a narrower path.
Next steps. Use a document camera to have a number of students share their work with the class. As students show their drawing, have them explain what they did to focus the light. Let other students ask questions to clarify the explanations. Give students time to revise their answers as needed.
diSciplinAry cOre ideAS
PS4.A: sound can make matter vibrate, and vibrating matter can make sound.PS4.B: objects can be seen if light is available to illuminate them or if they give off their own light.
Science And engineering prAcTiceS
Constructing explanations and designing solutions: Make observations to construct an evidence-based account for natural phenomena.
crOSScuTTing cOncepTS
Cause and effect: Events have causes that generate observable patterns.

Sound and Light Module—FOSS Next Generation 285
FOSS Next Generation© The Regents of the University of CaliforniaCan be duplicated for classroom or workshop use.
4. In Box 1, draw a picture of a drum that would have a lower pitch than the drum in Box 2.
In Box 3, draw a picture of a drum that would have a higher pitch than the drum in Box 2.
INVESTIGATION 4 I-CHECKSOUND AND LIGHT
Name
Sound and Light Module Investigation 4 I-Check
Page 3 of 4
5. A student needs to make a spotlight for his puppet theater.
He has a � ashlight, but it shines on the whole stage area.
He wants the light to shine only on one puppet.
Draw on the picture or use words to show how to use the � ashlight to make a spotlight.
1 2 3
ANSWERS
Investigation 4 I-Check
Answers will vary. Students might use a tube of some sort to focus light from the flashlight to one puppet, for example.

Full Option Science System286
sound and light – Assessment
I-Check Item 6Directions for teachers. Read aloud the directions and the two notebook entries on the sheet. Make sure that they understand that the notes describe the students’ observations when they tested the two phone systems. Suggest students compare the two lists to see how they differ. Give students time to write their answers.
What to Look For
• Students indicate that although the two systems worked almost in the same way, the paper-cup phone was better because you could even hear a whisper (unlike the plastic-cup phone system).
Next steps. Display this item on a document camera or copy the test observations onto chart paper. Go through the observations line by line and discuss how they are the same and different. Have students vote for which system they think is better and have them explain why, especially if there is disagreement. Give students time to revise their answers as needed.
diSciplinAry cOre ideAS
PS4.C: People also use a variety of devices to communicate (send and receive information) over long distances.
Science And engineering prAcTiceS
Anaylzing and interpreting data: use observations to describe patterns and/or relationships in the natural and designed world(s) in order to answer scientific questions and solve problems.analyze data from tests of an object or tool to determine if it works as intended.

Sound and Light Module—FOSS Next Generation 287
FOSS Next Generation© The Regents of the University of CaliforniaCan be duplicated for classroom or workshop use.
6. Here are the drawings of two string phones that students made in class. They tested the paper-cup phones and the plastic-cup phones.
They wrote the test results in their notebooks.
INVESTIGATION 4 I-CHECKSOUND AND LIGHT
Name
Sound and Light Module Investigation 4 I-Check
Page 4 of 4
Louder when string is straightCan hear whisperCan hear normal voiceCan hear shout
Which is the better design? Explain why.
Louder when string is straightCannot hear whisperCan hear normal voiceCan hear shout
Paper-Cup String Phone Plastic-Cup String Phone
ANSWERS
The paper-cup phone. They are almost the same, but you can hear a whisper with the paper-cup phones, but not the plastic ones.
Investigation 4 I-Check

Full Option Science System288
sound and light – Assessment
benchmArk ASSeSSmenT Summary Chart
I-Check 1 I-Check 2 I-Check 3 I-Check 4Energy Transfer and ConservationConcept C Waves are a repeating pattern of motion that transfers energy from place to place without displacement of matter. Electromagnetic waves can be detected over a wide range of frequencies; some can be observed by humans, others can be detected by designed technologies.
• Sound. Vibration is a rapid back-and-forth motion. sound always comes from a source that is vibrating. Ears are sound detectors or receivers.
1, 2, 3, 1 3
• Sound. sound vibrations travel through objects and air.
4
• Sound. Volume is how loud or soft a sound is; loud sounds have more energy.
3
• Sound. Pitch is how high or low a sound is. high-pitched sounds come from objects that are short and vibrate quickly. low-pitched sounds come from longer objects that vibrate more slowly.
4abc 4
• Light. light sources are objects or systems that radiate light; light travels away from a source in all directions. Eyes are light detectors or receivers. objects can be seen if light is available to illuminate them or if they give off their own light.
4 2, 3, 5
• Light. shadows are the dark areas that result when light is blocked. the length and direction of a shadow depends on the position of the light source. some materials block light entirely or partially; other materials allow light to travel through.
1, 2abc, 3
• Light. Mirrors can be used to redirect light. 1
• Light and sound convey information. Communication devices use light and sound.
2, 5
Engineering DesignConcept A defining and delimiting engineering problems.
6
Concept B developing possible solutions. 6
Concept C optimizing the design solution. 6