
Technological approaches to linguistic documentation and meta-documentation
Upload
khangminh22Category
view
0download
0
This PDF is generated from authoritative online content, andis provided for convenience only. This PDF cannot be usedfor legal purposes. For authoritative understanding of whatis and is not supported, always use the online content. Tocopy code samples, always use the online content.
Management Framework 8.5.0
Framework Deployment Guide
12/29/2021

Table of ContentsManagement Framework Deployment Guide 4About Genesys Framework 6
Architecture 7Configuration Layer 9Management Layer 11User Interaction Layer 13Media Layer 15Services Layer 16
Framework Connections 17New in This Release 18
Deployment Planning 21Initial Considerations 22
Telephony Network Description 23Configuration Environments 25Using National Languages 27Management Framework and Solution Availability 29Communication Session Failures 31Security Considerations 34
Network Locations for Framework Components 39Installation Worksheet 48
Deploying Framework 53Deployment Overview 54Prerequisites 57
Database Prerequisites 58Operating Environment Prerequisites 59Licensing Prerequisites 60Permission Prerequisites 64
Deploying Configuration Layer 70First-Time Deployment 71Configuration Database 72Configuration Server 76Install Genesys Administrator 84Create Hosts 85
Enabling Management Layer to Control Configuration Layer 87Deploying Management Layer 88

Local Control Agent (LCA) 90Database Access Points 94Message Server 95Centralized Log Database 99Solution Control Server 101Genesys SNMP Master Agent 106
Deploying the Rest of Your Framework 110Redundant Configurations 115
Redundant (HA) Configuration Servers 116Redundant (HA) Message Servers 127Redundant (HA) Solution Control Servers 131Redundant (HA) SNMP Master Agents 135
Sharing the Load Configurations 140Configuration Server Proxy 142Distributed Solution Control Servers 153
Disaster Recovery / Business Continuity 158Starting and Stopping Framework Components 162
Using Startup Files 163Using the Management Layer 164Starting Manually 166Using Windows Service Manager 179
Additional Information 180Silent Setup 181Generic Configuration Procedures 185Generic Installation Procedures 192Standard Login 197Configuration History Log 199Accessing History of Configuration Changes 201Advanced Disconnect Detection Protocol 204Disaster Recovery Configuration 205Internet Protocol version 6 (IPv6) 214IPv6 vs. IPv4 Overview 226

Management Framework DeploymentGuideUse this guide to introduce you to the concepts and terminology relevant to the Genesys Framework,and procedures to install, configure, and run Management Framework.
About Framework
OverviewArchitecture and FunctionalityConnectionsNew in This Release
Deployment Planning
Initial ConsiderationsNetwork LocationsInstallation Worksheet
Deploying Framework
Deployment OverviewPrerequisitesConfiguration LayerManagement Layer
Redundant ConfigurationsDeploy high availability (HA)Management Framework components:
HA Configuration ServersHA Message ServersHA Solution Control ServersHA SNMP Master Agents
Sharing the Load SystemsDeploy distributed components:
Disaster Recovery/Business Continuity
Suggested Disaster Recovery Architecture
Management Framework Deployment Guide
Framework Deployment Guide 4

Configuration Server ProxiesDistributed Solution Control Servers
More Information and Configuration Notes
Starting and Stopping FrameworkComponents
Using Start FilesUsing the Management LayerStarting ManuallyUsing Windows Service Manager
Additional Information
Silent SetupGeneric Deployment and Login ProceduresConfiguration Server History LogHistory of Configuration Changes UtilityAutomatic Disconnect Detect Protocol(ADDP)Internet Protocol version 6 (IPv6)
Management Framework Deployment Guide
Framework Deployment Guide 5

About Genesys FrameworkThe Genesys Framework is a mandatory part of any Genesys-based interaction management system.It provides functions required for the normal operation of any Genesys solution:
• Configuration centralizes processing and storage of all the data required for Genesys solutions to workwithin a particular environment.
• Access Control sets and verifies users' permissions for access to, and manipulation of, solution functionsand data.
• Solution Control starts and stops solutions and monitors their status.• Alarm Processing defines and manages conditions critical to the operation of solutions.• Troubleshooting hosts a user-oriented, unified logging system with advanced storage, sorting, and
viewing capabilities.• Fault Management automatically detects and corrects situations that might cause operational problems
in solutions.• External Interfaces enable communication with a variety of telephony systems and database
management systems (DBMS).• Attached Data Distribution supports the distribution of business data attached to interactions, within
and across solutions.
About Genesys Framework
Framework Deployment Guide 6

ArchitectureThe Genesys Framework consists of five layers (see the figure below). In sophisticated configurationsusing Management Layer functionality, each layer depends on the layers below it to work properly.
• The Configuration Layer processes and stores all the data required for running Genesys solutions in aparticular environment; it notifies clients of any configuration changes. The Configuration Layer alsocontrols user access to a solution's functions and data.
• The Management Layer controls the startup and status of solutions, logging of maintenance events,generation and processing of alarms, and management of application failures.
• The User Interaction Layer provides a comprehensive user interface to configure, monitor, and controlthe management environment.
• The Media Layer enables Genesys solutions to communicate across media, including traditionaltelephony systems, Voice over IP (VOIP), e-mail, and the Web. This layer also provides the mechanismto distribute interaction-related business data within and across solutions.
• The Services Layer generates the statistical data used for interaction processing and contact centerreporting.
Genesys Framework Architecture
ImportantA Genesys installation depends on Genesys License Reporting Manager (LRM), not
About Genesys Framework Architecture
Framework Deployment Guide 7
shown in the diagram, for license control.
About Genesys Framework Architecture
Framework Deployment Guide 8
Configuration Layer
Functionality
The Configuration Layer provides:
• Centralized configuration data processing and storage for one-time entry of any information aboutcontact center entities that any number of applications require to function in a particular businessenvironment. Any number of applications can use this information.
• An advanced, configuration data-distribution mechanism, so applications can read their configurationupon startup and be notified of updates at runtime without service interruptions.
• Comprehensive data-integrity control functions that prevent entry of illogical configuration data thatmight cause solution malfunction.
• Advanced reconnection management which ensures that applications have up-to-date data afterreestablishing connection to Configuration Server.
• Access control functions to regulate user access to solution functions and data, based on the accessprivileges set for each item.
• Wizards to help users through the automated process of solution deployment.• Support for geographically distributed environments.• Integration with external data sources, from which you can import configuration data to the
Configuration Database.• Import and export of configuration data to and from the Configuration Database.• Secure data transfer between Genesys components using the Transport Layer Security (TLS) protocol.
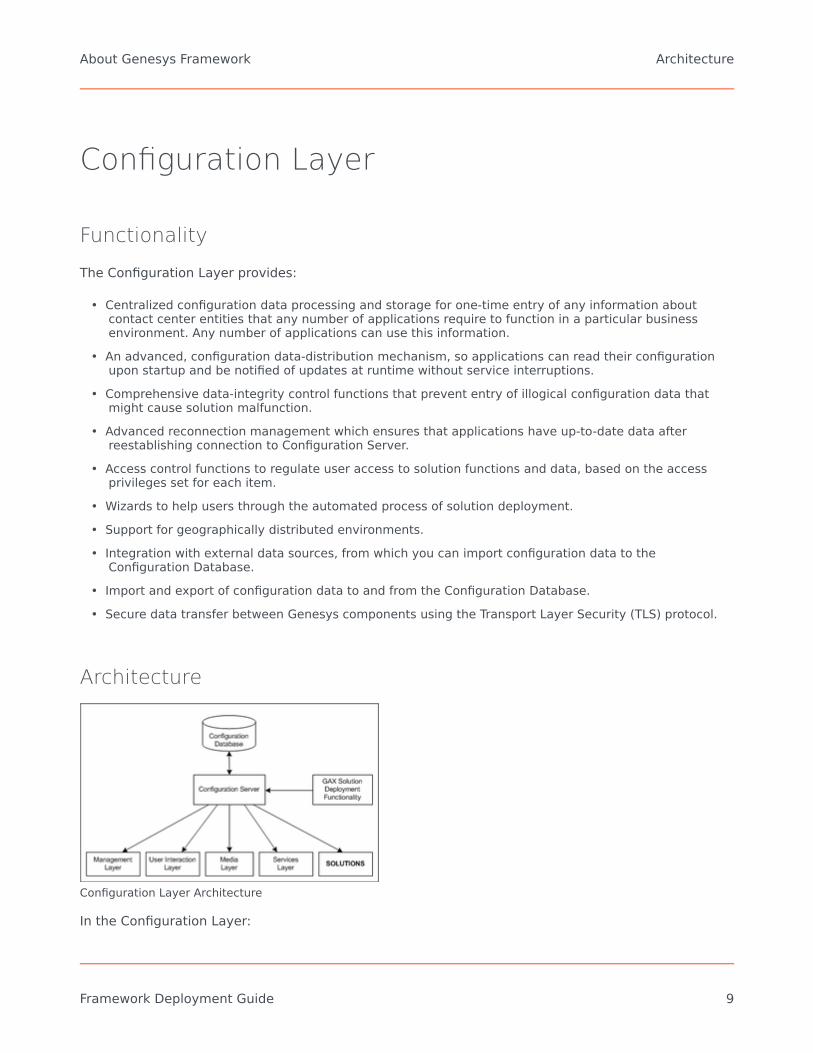
Architecture
Configuration Layer Architecture
In the Configuration Layer:
About Genesys Framework Architecture
Framework Deployment Guide 9
• Configuration Server provides centralized access to the Configuration Database, based on permissionsthat super administrators can set for any user to any configuration object. Configuration Server alsomaintains the common logical integrity of configuration data and notifies applications of changes madeto the data. Optionally, you can run Configuration Server in Proxy mode to support a geographicallydistributed environment. (The geographically distributed architecture is more complex than shown inthe diagram.)
• Genesys Administrator, part of the User Interface Layer, provides a user-friendly interface formanipulating the contact center configuration data that solutions use and for setting user permissionsfor solution functions and data.
• The Configuration Database stores all configuration data.
WarningNever add, delete, or modify any data in the Configuration Database, except throughapplications developed by Genesys, or through applications instrumented with theGenesys Configuration Server application programming interface (API). If you havecompelling reasons for accessing the database directly, consult Genesys CustomerCare before you do so.
• Genesys Administrator Extension solution deployment functionality automates deployment andupgrade. This functionality also handles solution-specific data integrity.
• Configuration Conversion Wizard (CCW) (not shown in the diagram) provides a user-friendly interface formigrating Genesys configuration data to the most recent data format. Database migration is optional,but required if you want to take advantage of the most recent features of Management Framework.Starting in release 8.1.3, CCW also enables you to migrate the Configuration Database to a multi-language format using UTF-8, and to migrate a single-tenant (enterprise) Configuration Database to ahierarchical multi-tenant database. Refer to the Genesys Migration Guide for more information aboutCCW.
About Genesys Framework Architecture
Framework Deployment Guide 10

Management Layer
Functionality
The Management Layer provides:
• Centralized solution control and monitoring, displaying the real-time status of every configured Solutionobject, and activating and deactivating solutions and single applications, including user-definedsolutions.
• Centralized logging that records applications maintenance events. The unified log format enables easyselection of required log records and centralized log storage for convenient access and solution-leveltroubleshooting. Centralized logging also allows you to track individual interactions, audit activities inyour contact center, and store alarm history.
• Flexible alarm signaling that triggers alarms based on application maintenance events, systemperformance parameters, or Simple Network Management Protocol (SNMP) thresholds. Alarms arecommunicated to Genesys Administrator and can be written to system logs. You can configure thesystem to convert alarms into SNMP traps and send them as e-mails to a specified Internet address.(The latter automatically enables paging notifications.) The Management Layer automaticallyassociates alarms with the solutions they affect and stores alarms as active conditions in the systemuntil they are either removed by another maintenance event or cleared by the user.
• Fault-management functions, consisting of detection, isolation, and correction of application failures. Fornon-redundant configurations, the Management Layer automatically restarts applications that fail. Forredundant configurations, this layer supports a switchover to the standby applications and alsoautomatically restarts applications that fail.
• Built-in SNMP support for both alarm processing and SNMP data exchange with an SNMP-compliantnetwork management system (NMS). As a result, you can integrate a third-party NMS with a Genesyssystem to serve as an end-user interface for control and monitoring functions and for alarm signalingfunctions.
• Individual host monitoring, including CPU and memory usage records and information about runningprocesses and services.
• Support for geographically distributed environments.• Support for the remote deployment of Genesys components, as performed in Genesys Administrator
Extension.,
About Genesys Framework Architecture
Framework Deployment Guide 11
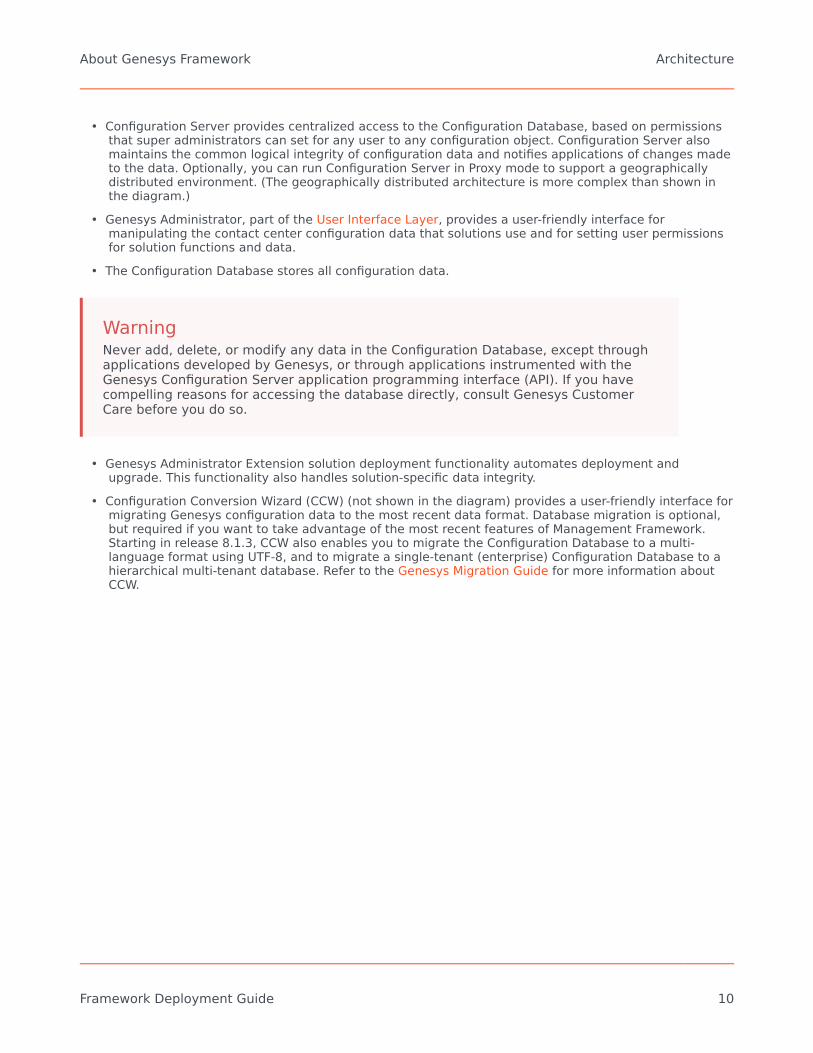
Architecture
Management Layer Architecture
In the Management Layer:
• Local Control Agent (not shown in the diagram), located on every host that the Management Layercontrols and/or monitors, is used to start and stop applications, detect application failures, andcommunicate application roles in redundancy context. The Local Control Agent Installation Package (IP)also includes a remote deployment agent (not shown in the diagram), referred to as the GenesysDeployment Agent, that is used to deploy Genesys IPs remotely.
• Message Server provides centralized processing and storage of every application's maintenance events.Events are stored as log records in the Centralized Log Database where they are available for furthercentralized processing. Message Server also checks for log events configured to trigger alarms. If itdetects a match, it sends the alarm to Solution Control Server for immediate processing.
• Solution Control Server is the processing center of the Management Layer. It uses Local Control Agentsto start solution components in the proper order, monitor their status, and provide a restart orswitchover in case of application failure. Solution Control Server also includes four utilities that providethe ability to gracefully stop T-Servers, handle T-Server stuck calls, send log messages on behalf ofapplications, and exchange information with Solution Control Server. These utilities can be installedwith or without Solution Control Server.
• Genesys Administrator, a User Interaction Layer component, displays the status of all installed Genesyssolutions and information about each active alarm, enables the user to start and stop solutions orsingle applications (including third-party applications), and enables advanced selection and viewing ofmaintenance logs.
• The Centralized Log Database (also called the Log Database) stores all application log records, includinginteraction-related records, alarm history records, and audit records.
• Genesys SNMP Master Agent (an optional component not shown in the diagram) provides an interfacebetween the Management Layer and an SNMP-compliant NMS. It is required to support MicrosoftOperational Manager (MOM) technology, and optional to support Master Agent or a third-party AgentXprotocol-compliant SNMP master agent.
About Genesys Framework Architecture
Framework Deployment Guide 12
User Interaction Layer
Functionality
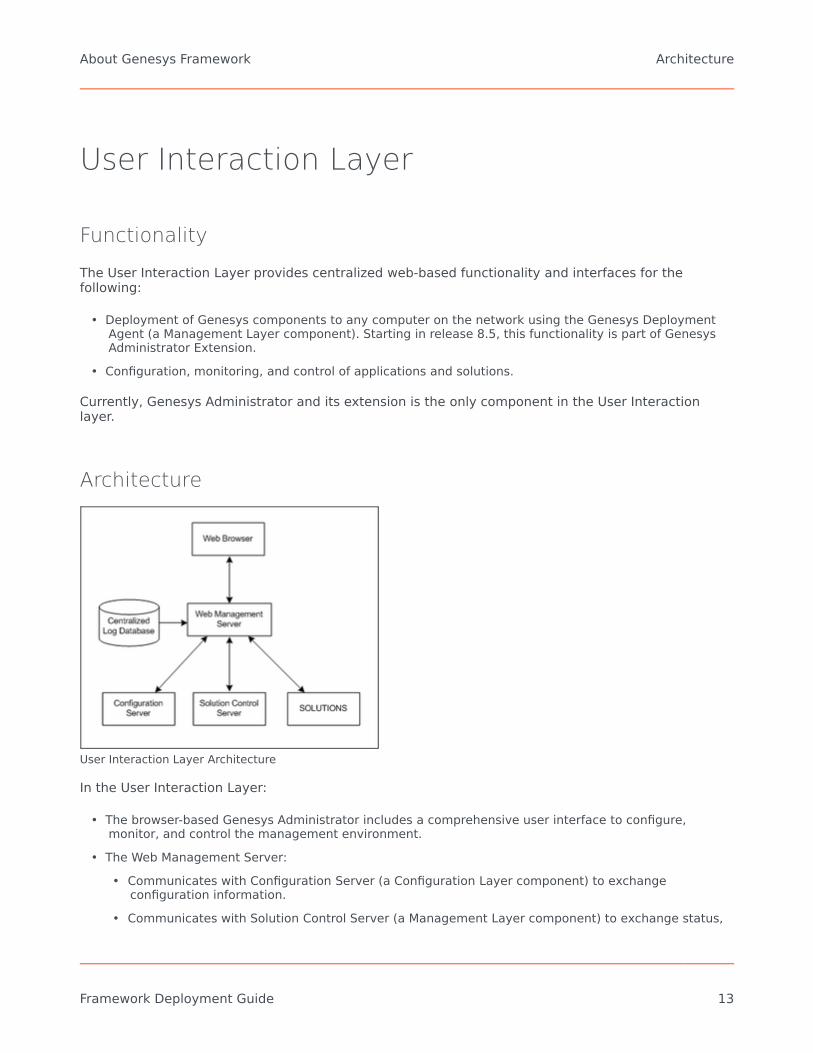
The User Interaction Layer provides centralized web-based functionality and interfaces for thefollowing:
• Deployment of Genesys components to any computer on the network using the Genesys DeploymentAgent (a Management Layer component). Starting in release 8.5, this functionality is part of GenesysAdministrator Extension.
• Configuration, monitoring, and control of applications and solutions.
Currently, Genesys Administrator and its extension is the only component in the User Interactionlayer.
Architecture
User Interaction Layer Architecture
In the User Interaction Layer:
• The browser-based Genesys Administrator includes a comprehensive user interface to configure,monitor, and control the management environment.
• The Web Management Server:• Communicates with Configuration Server (a Configuration Layer component) to exchange
configuration information.• Communicates with Solution Control Server (a Management Layer component) to exchange status,
About Genesys Framework Architecture
Framework Deployment Guide 13

operations, and control information.• Reads logs from the Centralized Log Database (a Management Layer component).• Provides web services for the browser-based Genesys Administrator.
• Depending on the solutions deployed in the system, the Web Management Server may alsocommunicate with other back end servers to retrieve solution-specific information.
About Genesys Framework Architecture
Framework Deployment Guide 14

Media Layer
Functionality
The Media Layer provides:
• Interfaces to communication media.• Distribution of interaction-related business data within and across solutions.
Architecture
Media Layer Architecture
In the Media Layer:
• Interaction Server provides an interface with Internet media like e-mail and web communications. T-Server provides an interface with traditional telephony systems.
• T-Servers provide an interface with traditional telephony systems.• T-Servers for IP Solutions provide an interface with VoIP telephony systems.
All of these servers communicate interaction-processing requests from the Genesys solutions to themedia devices and distribute interaction-processing events in the opposite direction. They alsomaintain the current state of each interaction and all the business data collected about eachinteraction during processing stages. These servers distribute attached data to all the applicationsthat participate in processing the interaction. They can also transfer that data across multipleinteraction-processing sites.
Another Media Layer component, Load Distribution Server (LDS), not shown in the diagram, increasessystem scalability and availability.
About Genesys Framework Architecture
Framework Deployment Guide 15

Services Layer
Functionality
The Services Layer provides:
• Conversion of events related to management of single interactions into statistical data, which is thenused for interaction processing and contact center reporting.
Architecture
Services Layer Architecture
Stat Server tracks real-time states of interaction management resources and collects statistics aboutcontact center performance. Genesys solutions use the statistical data to more intelligently managereal-time interactions. Through Genesys Reporting, you can use the data to generate real-time andhistorical contact center reports.
About Genesys Framework Architecture
Framework Deployment Guide 16

Framework ConnectionsThe following diagram shows connections that Framework components establish to each other and tosolutions.
Framework Connections
IPv6 Support
All Framework server components support IPv6, except for the following:
• When obtaining technical licenses connecting to the FlexNet license server, all Framework serverssupport IPv6 on only the RHEL 5 64-bit and Windows 2008 64-bit operating systems.
For more information about IPv6, see Internet Protocol version 6 (IPv6) and IPv6 vs. IPv4 Overview.
About Genesys Framework Framework Connections
Framework Deployment Guide 17

New in This ReleaseBefore you familiarize yourself with the Genesys Framework architecture and functionality, note thefollowing major changes that were implemented in the 8.5 release of Framework, and the sourcesthat describe them in detail.
New in Release 8.5.0
General Features
• Recommendations for Disaster Recovery: If a natural, man-made, or unintended event occurs atthe main site, forcing Configuration Server, Solution Control Server (SCS), and Message Server to fail,Genesys now recommends a multi-site deployment model to maintain operations. See DisasterRecovery/Business Continuity.
• Enhanced Migration: Migration of Management Framework Components is improved, enabling theupgrade to occur with minimal downtime and impact to the production environment. Refer to the''Genesys Migration Guide'' for more information.
• Logging Resilience: Throttling can be applied to log outputs, including the Centralized Log, to preventa log queue from growing to a size that could impact normal operation of an application.
• Support for new Database Management Systems and a new virtual platform. For updated informationabout supported operating systems, Database Management Systems (DBMS), and Virtual Machines,see the Genesys Supported Operating Environment Reference Guide.
Configuration Layer
• Improved Database Access: DB Server is no longer required for access to the ConfigurationDatabase. Refer to the Framework 8.5 Database Connectivity Reference Guide for more information.
ImportantIf you will be using the Configuration Conversion Wizard to convert your ConfigurationDatabase, you still need DB Server for the conversion.
• Licensing Enhancements: Before Configuration Server starts for the first time, it now checks andconfirms that the license file is valid. This step does not require any new license or license file; theexisting license file is simply checked for validity. In addition, Genesys License Reporting Manager(LRM) is now supported; it works with Configuration Server to ensure that all applications have a validlicense before they can be installed and started. Refer to Licensing Prerequisites for more information.
• Language Pack Support for Localization of Configuration Layer: Configuration Server allows youto install language packs to enable support of a particular language in which messages are displayed.Refer to the documentation with your Language Packs for more information.
About Genesys Framework New in This Release
Framework Deployment Guide 18

• Improved handling of Business Attributes: New configuration options have been introduced tocontrol the existence of legacy values of MediaType business attributes, and the automatic inheritanceof legacy business attributes when creating new tenants.
• Extended audit trail of configuration changes: Configuration Server now supports an extendedaudit trail of all changes in the Configuration Database, including new and previous values. A newutility outputs a report of this information when necessary. Refer to History of Configuration Changesfor more information.
• New types of Application configuration objects: Users can now define the following new types ofApplication configuration objects:• LRM Server• Recording Crypto Server
Management LayerSee the ''Framework 8.5 Management Layer User's Guide'' for information about the following newfeatures that are specific to the Management Layer:
• Improved Database Access: DB Server is no longer required for access to the Log Database.• Extended Hang-up Detection: The Message Server process thread now supports hang-up detection
between Message Server and the Log Database at the thread level.• Enhanced Logging: Some log events have been updated to provide extended information application .
Security Features
• Extended support of Kerberos authentication protocol: Configuration Server supports Kerberosfor user logins. Configuration Server can operate with Windows Active Directory and MIT keydistribution centers to facilitate Single Sign-on via Genesys UI applications. Refer to the ''Framework 8.5External Authentication Reference Manual'' for more information.
• Reinforced user authentication: All active sessions are immediately invalidated when a user isdisabled in, or removed from, the Configuration Database. Refer to the ''Genesys 8.1 SecurityDeployment Guide'' for more information about user authentication measures for your system.
Retired Features
• DB Server is no longer required by Management Framework. If you must use DB Server because you areusing Genesys components that are older and/or do not support this functionality, see Using DB Server.
• Except for Configuration Conversion Wizard, all other Management Framework-related configuration anddeployment Wizards, including the Configuration Import Wizard and Database Import Wizard, are nolonger available as part of Management Framework 8.5. However, most are available and can be usedif needed.
• The Simple Object Access Protocol (SOAP) is deprecated in Management Framework.• Support is discontinued for all versions of the following:
• HP-UX and HP Itanium operating systems
About Genesys Framework New in This Release
Framework Deployment Guide 19

• IBM Informix and Sybase DBMS
About Genesys Framework New in This Release
Framework Deployment Guide 20
Deployment PlanningAchieving optimal performance with your Genesys installation requires comprehensive planning. Howwell Genesys Framework components function in a particular environment depends on a number ofvariables, including amount of computer memory, network location of the applications, and thespecific tasks the applications perform. The information in this section describes variouscharacteristics of Framework components and looks at how they interact with each other and theapplications they serve. It provides basic data and makes recommendations that will help you selectthe optimal components for your specific needs, choose a computer for each component, and definethe optimal location for each component on the network.
Start your deployment planning by identifying the existing telephony resources in your contact centerenvironment. Then follow the deployment recommendations for each architecture layer given inNetwork Locations for Framework Components.
Consider whether you can benefit from:
• Using the Management Layer.• Having redundant components.• Installing additional Configuration Servers in Proxy mode.• Installing a number of Solution Control Servers in Distributed mode.• Using Load Distribution Server.
In addition, review Solution Availability and Security Considerations, which are common aspects ofany Genesys installation.
Finally, prepare an installation worksheet summarizing your configuration requirements, and fill it inand refer to it as you deploy Framework.
Deployment Planning New in This Release
Framework Deployment Guide 21

Initial ConsiderationsHow well Genesys Framework components function in a particular environment depends on a numberof variables, including amount of computer memory, network location of the applications, and thespecific tasks the applications perform. This section provides basic data and makes recommendationsthat will help you select the optimal components for your specific needs, choose a computer for eachcomponent, and define the optimal location for each component on the network.
Deployment Planning Initial Considerations
Framework Deployment Guide 22

Telephony Network DescriptionCertain information is required to deploy Framework, so prepare a description of your telephony andmedia network as discussed in this section. You will use data from this description when supplyingconfiguration parameters to Deployment Wizards or when configuring objects for your contact centerusing Genesys Administrator.
You must have the following information available for every switch that you plan to use in yourinteraction management solution:
• Switch type, which usually corresponds to the switch vendor, brand name, and model number.• Version of the switch software.• Type of CTI Link (TCP/IP, X.25, or ISDN).• Version of the CTI Link software.• Information required to connect to the CTI Link (for example, for TCP/IP connection, host name and port
number), including password, service id, and other parameters required for switch security.• Types and numbers of telephony devices, also called Directory Numbers or DNs. You may have to
configure specific types of DNs (for example, Routing Points) on the switches to support functions of theinteraction management solutions.
• Login codes to be assigned to agents for runtime associations between agents and their working places.• Information about how the switch DNs are arranged into working places.• Information about how DNs that belong to a particular switch can be reached from other switches in a
multi-site installation.
In addition, describe your contact center resources:
• For every user who must access any interaction management application, define the followingparameters: a unique employee ID, unique user name, and password. The role of a user in the contactcenter defines the set of access privileges for this user in the system. For more information, seeSecurity Considerations.
• For agents, define Login codes in every switch at which they might be working.• For agents, define skills that might be considered as criteria for effective interaction processing.• Note how agents are arranged into groups.• Decide how to arrange the working places into groups.
Guidelines for Naming HostsTo ensure that the operating systems properly interpret host names, follow these guidelines whennaming the host computers in your system:
1. If possible, use the host's DNS name.
2. If it is not possible to use the DNS name, use the host's IP address, in the format x.x.x.x. However,
Deployment Planning Initial Considerations
Framework Deployment Guide 23

verify the availability of that IP address by using the command ping <IP address> on the command-line before starting the installation process.
Deployment Planning Initial Considerations
Framework Deployment Guide 24

Configuration EnvironmentsGenesys provides its software to two types of companies:
• Companies that own their telephony equipment and use it for their own needs.• Companies (such as service providers) that make their telephony equipment available to other
companies.
A single Genesys configuration environment can be used to address the needs of both of these typesof companies. You establish that configuration environment, called Hierarchical Multi-tenant, whenyou create the Configuration Database structure during the Configuration Layer installation.
Hierarchical Multi-Tenant
The hierarchical multi-tenant configuration environment serves the needs of a company, typically aservice provider, making its telephony equipment available to other companies. So, this configurationenvironment also serves the needs of every company using the service. In this environment,configuration information about the resources that are managed exclusively by the service provider isvisible on the service provider side only. Only personnel from the service provider company canregister the entities that provide the technical foundation for setting up the CTI services, such asswitching offices, data network hosts, and CTI applications. These resources may be shared by someor all of the companies using the service ("Tenants"). The resources of the individual companies, suchas user accounts, agent groups, outbound campaigns, and so forth, are configured separately by thepersonnel of these companies. This configuration is visible only to that company's users.
This general structure can be extended to an unlimited number of layers. The service provider canprovide its services not only to companies that use its services directly (as existed prior to release8.0), but to other companies, such as resellers, who in turn sell those services to other companies.The customers of these resellers can, in turn, be direct users and perhaps other resellers. Thishierarchical layering can be from one to an unlimited number of levels. Tenants that provide servicesto other tenants are called parent tenants; those that use these services are called child tenants.Therefore, a single Tenant object can be a parent, a child, or both.
This structure can also support a single-tenant, or Enterprise, environment, by configuring the pre-defined Environment tenant. As an alternative, a single-tenant Configuration Server can be deployed,but Genesys strongly recommends against this for new deployments. If you are already running asingle-tenant environment, refer to the ''Genesys Migration Guide'' for information about converting itto a hierarchical multi-tenant environment with only one tenant.
ImportantPrior to release 8.0, the hierarchical multi-tenant environment was known as themulti-tenant environment, because the latter was limited to one layer of hierarchy. Inrelease 8.0 and later, the two terms are used interchangeably, but always refer to ahierarchical multi-tenant environment.
Deployment Planning Initial Considerations
Framework Deployment Guide 25

Recommendations for Large Configuration Environments
Genesys defines a large configuration environment as one in which the Configuration Databasestores 50,000 or more configuration objects. Genesys strongly recommends that you consider theseguidelines when operating within a large configuration environment:
• Use Genesys Administrator and other Configuration Server clients with special care, to prevent loadingproblems. For example, create user accounts with different configuration access capabilities, so thatcontact center staff can log in to Genesys Administrator and perform only those tasks they are requiredto perform over the configuration objects for which they have permissions. This saves GenesysAdministrator from loading all the objects from the Configuration Database.
• There are special considerations for the number of Management Framework server components and theamount of RAM required by each component to serve a particular number of clients. Refer to the"Management Framework" section of the ''Genesys Hardware Sizing Guide'' to determine appropriatevalues.
• Consider using Folder objects when creating a large number of configuration objects. The recommendednumber of configuration objects per folder is up to 4,000. Anything larger significantly increasesGenesys Administrator time for loading configuration objects.
• When creating configuration objects of the Script type (for example, routing strategies), keep in mindthat both the number of Script objects and the script size significantly affect the time it takesConfiguration Manager to load the Script configuration objects. If you create large scripts, reduce thenumber of Script objects in a subfolder to achieve an acceptable loading speed. For instance, for thescript-type configuration objects approximately 150 KB in size, limiting the number of script-typeobjects to 30 per subfolder guarantees an acceptable loading speed.
• When creating a large number of configuration objects of the Agent Login type, assign them to Userconfiguration objects as you create the logins. When the Configuration Database contains too manyunassigned agent logins, Genesys Administrator takes a long time to open the Agent Login browsedialog box from the Configuration tab or the Person Properties dialog box. To guarantee an acceptableloading speed, keep the number of unassigned Agent Login objects below 1000 per Tenant object.
• For all configuration objects, do not store large amounts of data as text properties in an object's Annex,unless it is explicitly required by Genesys applications.
Deployment Planning Initial Considerations
Framework Deployment Guide 26

Using National Languages
Single-language Environments
The default (legacy) deployment of Genesys software can support only one language in addition toEnglish with which to process data and display messages. Genesys recommends that you select onelanguage for your installation, and use that language across all components and databases.
Multi-language Environments
UTF-8 data encoding enables a system to work with multi-language data that is encoded with UTF-8.This support applies to all string fields of all configuration objects, with some exceptions noted laterin this section.
This functionality is optional, and must be enabled to take effect.
WarningYou must use a separate set of initialization scripts to enable multi-language modewhen creating the database, following the setup of the configuration file option formaster Configuration Servers.
You can perform an object search of data encoded in UTF-8, using the standard wildcard symbols,with search data supplied by UTF-8. The search parameters, in UTF-8, are compared with the data. Allfields that are searchable with non-UTF-8 data are searchable with the UTF-8 data.
To configure your system to support multiple languages, satisfy the database prerequisites, thenfollow the steps in Deploying the Configuration Layer, taking note of the special requirements tosupport UTF-8.
Framework Support for UTF-8Framework supports UTF-8 encoding of the following:
• Most configuration fields (exceptions below)• Solution Control Server alarm names, messages, and display thereof• Content of log messages in Message Server and in the centralized Log Database• UTF-8 initialization of the Configuration Database and the Log Database
Framework does not support UTF-8 encoding of the following items; they must be in ASCII.
Deployment Planning Initial Considerations
Framework Deployment Guide 27
• Names of Application objects• Command-line arguments specified during configuration in the Start Info section• Command-line arguments used by mlcmd and logutility• Local configuration file used by Configuration Server• SNMP traps and scalar data• Database parameters in Database Access Points• Host names• Database table name in Table Access objects• Log names and log file names specified in the log configuration option section
DBMS Support for UTF-8 Encoding
The following DBMS can be used with UTF-8 encoding:
• DB2• MS SQL (uses UCS-2 encoding)• Oracle• PostgreSQL
Converting from a non-UTF-8 Database to a UTF-8 DatabaseStarting in release 8.1.3, you can use the Configuration Conversion Wizard (CCW) to convert a non-UTF-8 compatible Configuration Database into a database that can store and work with encodeddata. Refer to the ''Genesys Migration Guide'' for information about using CCW to convert yourconfiguration database.
Except for the conversion of the Configuration Database, Genesys does not otherwise provide anytools to support the migration of an existing database, that cannot work with UTF-8 data, into adatabase than can store and work with encoded data. Genesys recommends that you use tools andutilities provided by the DBMS you are using to do any such conversion.
WarningAfter you have upgraded to UTF-8, legacy applications will be unable to connect toConfiguration Server, unless you use the allow-mixed-encoding configuration option.Refer to the ''Framework Configuration Options Reference Manual'' for moreinformation about this option.
Deployment Planning Initial Considerations
Framework Deployment Guide 28
Management Framework and SolutionAvailabilityThink of the availability of an interaction management solution as the amount of time that thesolution is available to process enterprise interactions. Two major categories of events affectavailability: changes in the operating conditions and failures. The first category combines the variousoperational and maintenance activities that require temporary shutdown and restart of the entiresystem or of one of its components. The second category deals with the temporary inability of thesolution to perform its required functions because of operator errors or software faults.
Given the complexity of the solution architecture, remember that:
• Any interaction management solution relies on functionality provided by a number of components, eachperforming a specific task. The overall availability of a solution depends on the availability of each ofthe components involved.
• Interaction management solutions do not operate in isolation. On the contrary, they essentially bringtogether various business resources, such as telephony switches, call-processing telephonyterminations, database management systems, and Internet communication servers. As such, theinability of an interaction management solution to perform its required function may be the result ofthe unavailability of an external component or system.
• Genesys solutions, which consist of software components only, operate on hardware platforms thatrequire maintenance and that are subject to failures. For example, running redundant processes on thesame host may work in the presence of a software failure; however, it offers no protection if thecomputer itself or a communication link to it fails. The availability of a solution can never be greaterthan the availability of the underlying hardware platform.
The Genesys Framework is designed to minimize the impact on solution availability associated withoperational and maintenance activities. Because the Configuration Layer updates solutions about anyconfiguration changes at runtime, uninterrupted solution operations are guaranteed regardless of thenumber or frequency of changes made to the contact center environment. Dynamic reconfiguration isa standard feature of every Genesys 7.x and 8.x component and does not require you to make anyspecial adjustments to enable configuration settings.
Solution availability can also be affected by accidental operator errors, unauthorized actions, oractions that are carried out in a less than skillful manner. The data integrity rules implemented in theConfiguration Layer greatly reduce errors of the first type. The basic integrity rules common across allsolutions are supported by Configuration Server, and therefore enforced regardless of the type ofclient application through which the data is managed. More advanced integrity rules specific to aparticular solution are implemented in the solution wizards. Genesys recommends that you usewizards for the initial deployment of solutions and major configuration updates in the course ofsolution operation.
Solution availability can also be impacted by the occurrence of a disaster, natural of man-made, thatcauses an entire site to go down. See Disaster Recovery/Business Continuity for a new DisasterRecovery architecture to prevent permanent failure of Management Framework itself because of theloss of the entire site.
Genesys Framework also provides a comprehensive set of access control functions that help minimizethe risk of failures associated with unskilled or unauthorized operator actions. For more information
Deployment Planning Initial Considerations
Framework Deployment Guide 29
about these functions, see Security Considerations.
Finally, to reduce the impact on solution operations, schedule all operational and maintenanceactivities that directly affect system behavior for off-peak hours, when solutions operate at minimumloads.
Faults-accidental and unplanned events causing a system to fail-present the biggest challenge tosolution availability. The functions that detect, isolate, and correct various types of faults are partlyincorporated into every Genesys component and partly implemented in the Management Layer of theGenesys Framework. Refer to the ''Framework 8.5 Management Layer User's Guide'' for moreinformation about the various fault-detection mechanisms implemented in Genesys software.
Deployment Planning Initial Considerations
Framework Deployment Guide 30

Communication Session FailuresIn a distributed interaction management solution, components must communicate continuously witheach other and with some external resources. A communication session with a required resource canfail for any of these reasons:
• Failure of the resource itself• Problem with the hardware where the resource is located• Network connectivity problem between the two points• Forced termination of the connection that has not shown any activity for a specified amount of time
Any time a solution component cannot communicate with a required resource, the solution may notbe able to perform its required function.
After a failure is detected, the fault correction procedure normally consists of repeated attempts toregain access to either the resource in question or to a redundant resource, if one is available.
Each underlying communication protocol is typically equipped with functions that monitor opencommunication sessions. When a failure is detected, the communication software signals anabnormal condition to the interacting processes. This detection mechanism is fully supported in theGenesys solution, whose connection layer translates system messages into appropriate events on theapplication level.
However, communication protocols do not always provide adequate detection times. The TCP/IPstack, for example, may take several minutes to report a failure associated with a hardware problem(such as when a computer goes down or a cable is disconnected). This delay presents a seriouschallenge to the availability of any interaction management solution.
Software Exceptions
A software exception is an interruption in the normal flow of a program caused by an internal defect.An operating system generates exceptions in response to illegal operations that a software programattempts to perform. After generating an exception, the operating system terminates the process,which may make unavailable all solutions that use the functionality of this component.
Genesys provides an exception-handling function that monitors the exceptions that the operatingsystem generates. The function attempts to prevent application termination by skipping the programblock from which the exception originated. In most cases, this action amounts to losing oneprocessing step with respect to a single interaction in favor of preventing an application failure.
Although the function attempts to prevent application termination, it still reports the exception withthe highest priority marking. This ensures that operators know about the exception and can takeappropriate measures.
You can configure the number of times during which the function tries to prevent an application fromfailing if it continues to generate the same exception. If this threshold is exceeded, the exception-
Deployment Planning Initial Considerations
Framework Deployment Guide 31

handling function abandons the recovery procedure, allowing the operating system to terminate theapplication. This termination can then be detected and corrected by external fault-managementfunctions.
By default, the exception-handling function is enabled in any daemon application; six exceptionsoccurring in 10 seconds will not cause an application to terminate. To change these parameters ordisable the exception handling, use a corresponding command-line parameter when starting anapplication.
Application Failures
A complete application failure may be a result of either an internal defect (for example, an infiniteloop) or an external event (for example, a power failure). It may manifest as either a processnonresponse or termination. Typically, if a solution component stops working, the solution is nolonger available to process customer interactions.
Because the application that fails cannot perform any functions, you must use an externalmechanism for both detection and correction of faults of this type. In Framework, the ManagementLayer is this mechanism. For information about the architecture and components in the ManagementLayer, see the ''Framework 8.5 Management Layer User's Guide''.
Configuration Server Failure Because of Memory StarvationWhen Configuration Server responds to client requests with data, the responses are stored inConfiguration Server memory until they are sent. The rate at which they are send depends on severalfactors, such as:
• load on Configuration Server• network throughput• ability of the client to receive and process the data
In some cases, the unsent messages might accumulate in memory. In severe cases, they couldaccumulate to the point where Configuration has to terminate unexpectedly because it has used100% of memory.
To resolve this, you can impose flow control by limiting how much memory is used by unsent mail.When this limit is reached, Configuration Server stops processing client requests. When the backlogof unsent requests starts to clear and its memory usage drops below the imposed limit, ConfigurationServer starts process client requests again, in the order in which they were received.
Flow control is activated by two configuration options. max-client-output-queue-size providesflow control for communications for a single client. max-output-queue-size defines flow control forall clients.
WarningBe very careful when using this option, as it effectively stops Configuration Server
Deployment Planning Initial Considerations
Framework Deployment Guide 32

until all of its output buffers drop below the specified limit. Use this option only as alast resort.
Refer to the ''Framework Configuration Options Reference Manual'' for detailed descriptions aboutthese options.
Remote Site Failures
Starting in release 8.0, each Solution Control Server in a Distributed Solution Control Serverenvironment can detect the failure of a remote site controlled by another Solution Control Server.Refer to the ''Framework 8.5 Management Layer User's Guide'' for more information.
Deployment Planning Initial Considerations
Framework Deployment Guide 33

Security ConsiderationsThis section outlines some of the security capabilities provided in Configuration Layer for your data,both from access by unauthorized users and during its transfer between components. For moreinformation about these and other security features, and for full implementation instructions, refer tothe ''Genesys 8.1 Security Deployment Guide''.
Access to Hosts File at Start-up
By default, Genesys components try to read from the hosts file at startup to enable them to resolvehost names. If an organization has a security policy against this, they can configure the environmentvariable GCTI_DNS_USE_HOSTSFILE=0 to disable this access.
User Authentication
User authentication refers to ensuring that the user is actually who he or she claims to be. In Genesyssoftware, this is implemented by the Configuration Server. The data that a Genesys solution requiresfor operating in a particular environment, as well as the applications and the solutions, is representedas Configuration Database objects. Any person who needs access to this data or these applicationsmust have an account in this database.
Logging InAt startup, every Genesys GUI application opens a Login dialog box for users to supply a User Nameand Password, which are used for authentication. The authentication procedure succeeds only if aUser with the specified User Name and Password is registered in the Configuration Database.Otherwise, the working session is stopped.
Last Logged InStarting in release 8.0, you can configure Configuration Server so that some Genesys GUIapplications display the date and time of the previous login for the currently logged-in user. Each usercan then detect if someone else had accessed the system using their credentials.
Forced Re-Login for InactivityYou can configure some Genesys GUIs to automatically force a logged-in user to log in again if he orshe has not interacted with any element of the interface for a set period of time. In some interfaces,open windows are also minimized, and are restored only when the user logs back in.
This functionality is configured in each interface, and is therefore specific to that interface. Bydefault, this functionality is not active, and must be activated on an instance-by-instance basis forthose GUI applications that are to use the feature.
Deployment Planning Initial Considerations
Framework Deployment Guide 34

ImportantThis inactivity feature survives reconnection timeouts. In other words, if the interfaceapplication becomes disconnected from Configuration Server after the forced re-logintimeout has expired but before the user has logged in again, the user must still log inbefore he or she can access the system.
User Authorization
User authorization refers to ensuring that an authenticated user is entitled to access the system,either all or parts thereof, and defines what the user can do to or with the data that they can access.
The security mechanism implemented in Configuration Server allows the system administrator todefine, for each valid user account, a level of access to sets of objects. The access privileges of validuser accounts define what the user can and cannot do within the corresponding set of objects.
Starting in release 8.0, an additional layer of security is available through Genesys Administrator,called Role-Based Access Control. This enables the system administrator (or a designated individual)to define access to objects based on what is to be done (viewed, modified, deleted) to the objects.
This section provides an overview of the various mechanisms in place to ensure data is accessed byonly authorized users. For detailed information about how Genesys software implements userauthorization, refer to the ''Genesys 8.1 Security Deployment Guide''.
Access PermissionsThe level of access to sets of objects granted by the system administrator is defined by acombination of elementary permissions. Each user must be assigned at least one permission; withoutit, the user has no access to any data.
Access control for daemon applications is different from that for GUI applications. Access permissionsfor GUI applications are determined by the profile of the person who is currently logged in.
Access GroupsAccess Groups are groups of Users who need to have the same set of permissions for ConfigurationDatabase objects. By adding individuals to Access Groups-and then setting permissions for thosegroups-access control is greatly simplified.
Genesys provides preconfigured default Access Groups. You can also create your own Access Groupsto customize your own security environment.
Master Account and Super AdministratorsThe Configuration Database contains a predefined User object, otherwise known as the MasterAccount or Default User. The Default User, named default and with a password of password, is notassociated with any Access Group. The Master Account always exists in the system and has a full set
Deployment Planning Initial Considerations
Framework Deployment Guide 35
of permissions with respect to all objects in the Configuration Database. You must use this accountwhen you log in to the Configuration Layer for the first time since the Configuration Databaseinitialization. Genesys recommends changing the default name and password of the Master Account,storing them securely, and using this account only for emergency purposes or whenever it isspecifically required.
Changing Default PermissionsThe default permissions that the Configuration Layer sets provide users with a broad range of accessprivileges. You can always change those default settings to match the access needs of a particularcontact center environment.
ImportantGenesys does not recommend changing the default access control setting unlessabsolutely necessary. Remember, the more complex the security system is, the moredifficult it becomes to manage the data and the more it affects the performance of theConfiguration Layer software.
Genesys provides two mechanisms to help you manage changes to your permissions-propagationand recursion. Refer to the ''Genesys 8.1 Security Deployment Guide'' for details about thesemechanisms and how to use them.
New UsersConfiguration Server does not assign a new user to an Access Group when the user is created. Ineffect, the new user has no privileges, and cannot log in to any interface or use a daemonapplication. The new user must be explicitly added to appropriate Access Groups by an Administratoror by existing users with access rights to modify the user's account. Refer to ''Genesys Administrator8.1 Help'' for more information about adding a user to an Access Group.
By default, this behavior applies to all new users added by Configuration Server release 7.6 or later.Users created before release 7.6 keep their existing set of permissions and Access Groupassignments. If you want new users to be added automatically to pre-defined Access Groups, as wasthe behavior prior to release 7.6, you must manually disable this feature by using the ConfigurationServer configuration option no-default-access.
For more information about this feature, including how it works and how to modify it, refer to the''Genesys 8.1 Security Deployment Guide''.
Login Security BannerYou can create your own security banner to be displayed to a user logging in to GenesysAdministrator. You define the content of the banner, typically the terms of use of the application.Users must accept the terms to proceed, or they can reject the terms to close the application withoutaccess.
The user-defined security banner is specified during the installation of each instance of a GUIapplication, such as Configuration Manager and Solution Control Interface, and during the installation
Deployment Planning Initial Considerations
Framework Deployment Guide 36

of any Framework Wizard.
Refer to the ''Genesys 8.1 Security Deployment Guide'' for more details about the security banner.
Genesys Security Using the TLS Protocol
Genesys supports the optional use of the Transport Layer Security (TLS) protocol to secure datatransfer between its components. TLS is supported on Windows and UNIX platforms.
To enable secure data transfer between Genesys components that support this functionality, youmust configure additional parameters in the Host objects and Application objects that representthese components. Certificates and corresponding private keys are generated using standard PublicKey Infrastructure (PKI) tools, such as OpenSSL and Windows Certification services.
For detailed information about Genesys Security Using the TLS Protocol, refer to the ''Genesys 8.1Security Deployment Guide''.
Multiple PortsTo provide flexibility in configuring a system with the Genesys Security using the TLS Protocol feature,you can configure multiple ports on a given server with either secure or unsecured connections. Youspecify the additional ports in the Server Info of the server's Application object.
Each port can have one of the following listening modes:
• unsecured-The port is not secured by TLS. This is the default status of a port.• secured-The port is secured by TLS.• auto-detect-This status applies only to ports on the Configuration Server, and is used only when
configuring secure connections to the Configuration Server. If an application that is trying to connect toan auto-detect port has security settings specified in its configuration, Configuration Server checks thevalidity of those settings. Depending on the results, the client will be connected in secure or unsecuredmode.
Refer to the ''Genesys 8.1 Security Deployment Guide'' for more information about multiple ports.
<div="multCSports">Multiple Ports on Configuration Server
When you install Configuration Server, the listening port that you specify during installation is storedin the configuration file as the port option. When Configuration Server first starts with an initializeddatabase, it reads the port option in the configuration file. The value of the port option is alsopropagated to the Configuration Database, where it is stored as part of the Configuration ServerApplication object. As additional ports are configured, they are also stored in the ConfigurationDatabase as part of the Configuration Server Application object. On subsequent startups ofConfiguration Server-that is, on all startups after the first-Configuration Server reads the portinformation from the Configuration Server Application object, ignoring the port option in theconfiguration file.
Deployment Planning Initial Considerations
Framework Deployment Guide 37

If necessary, you can specify an additional unsecured listening port in the Configuration Servercommand line during subsequent startups. This additional port is not written to the ConfigurationServer Application object, and does not survive a restart of Configuration Server. Use this optiononly when regular ports cannot be opened. See -cfglib_port for more information about this option.
Secure ConnectionsIn addition to configuring secure ports on your server applications, you must configure your clientapplications, both server and user interface types, to connect to these ports. Use GenesysAdministrator to configure these connections.
There are only two exceptions to this standard procedure, as follows:
• Configuring secure connections to the Configuration Server-You must configure a Configuration Serverport as an auto-detect port.
• Configuring a secure connection between DB Server and Configuration Server-You must configure thesecure connection in the configuration files of the two components.
Refer to the ''Genesys 8.1 Security Deployment Guide'' for detailed instructions for configuring secureconnections.
European Data Protection Directive Disclaimer
The Genesys suite of products is designed to make up part of a fully functioning contact centersolution, which may include certain non-Genesys components and customer systems. Genesysproducts are intended to provide customers with reasonable flexibility in designing their own contactcenter solutions. As such, it is possible for a customer to use the Genesys suite of products in amanner that complies with the European Data Protection Directive (EDPD). However, the Genesysproducts are merely tools to be used by the customer and cannot ensure or enforce compliance withthe EDPD. It is solely the customer's responsibility to ensure that any use of the Genesys suite ofproducts complies with the EDPD. Genesys recommends that the customer take steps to ensurecompliance with the EDPD as well as any other applicable local security requirements.
Deployment Planning Initial Considerations
Framework Deployment Guide 38

Network Locations for FrameworkComponentsThis section provides basic data and makes recommendations that will help you select the optimalcomponents for your specific needs, choose a computer for each component, and define the optimallocation for each component on the network.
A separate section presents the information for each layer of Framework.
ImportantIn release 8.x, Genesys Administrator is the recommended interface for ManagementFramework, in place of Configuration Manager and Solution Control Interface, both ofwhich are still available for download and use with this release of ManagementFramework. For this reason, Configuration Manager and Solution Control Interface arenot mentioned in this section. For more information, refer to User Interaction Layer(Genesys Administrator), and to the Framework 8.1 Genesys AdministratorDeployment Guide.
Configuration Layer
The Configuration Layer is a mandatory part of any Genesys CTI installation. You cannot configureand run any other layers of Framework-or any solutions-unless Configuration Layer components arerunning.
This section provides recommendations for planning and installing the Configuration Layercomponents.
Configuration DatabaseThe Configuration Database stores all configuration data.
[+] Recommendations for planning Configuration Database installationWhen planning your installation, follow these recommendations for the Configuration Database:
• The size of the Configuration Database depends on the size of the contact center, or-more precisely-onthe number of entities in the contact center that you specify as configuration data objects. If datastorage capacity is limited, consider allocating 10 KB of space for every object in the contact center asa general guideline. Otherwise, allocating 300 MB accommodates a Configuration Database for atypical enterprise installation.
• If you want to deploy a Disaster Recovery/Business Continuity architecture, you must set up
Deployment Planning Network Locations for Framework Components
Framework Deployment Guide 39

Configuration Databases across sites. Refer to Disaster Recovery/Business Continuity for moreinformation.
• Treat the Configuration Database as a mission-critical data storage. Ensure that only the properlyqualified personnel gain access to the DBMS that contains the Configuration Database itself.Information about access to the database is stored in the configuration file of Configuration Server. Toprotect this file, place it in a directory that is accessible only to the people directly involved withConfiguration Layer maintenance.
• Consider encrypting the database access password via Configuration Server.• As with any mission-critical data, regularly back up the Configuration Database. Base the frequency of
scheduled backups on the rate of modifications in a particular configuration environment. Always backup the database before making any essential modifications, such as the addition of a new site orsolution.
• Switch Configuration Server to Read-Only mode before performing any maintenance activities related tothe Configuration Database.
• Save the records of all maintenance activities related to the Configuration Database.• Users of the Configuration Database should have at least the following privileges for all tables in the
database:• SELECT• INSERT• UPDATE• DELETE
Warning• Never add, delete, or modify any data in the Configuration Database, except through
applications developed by Genesys, or through applications instrumented with theGenesys Configuration Server application programming interface (API). If you havecompelling reasons for accessing the database directly, consult Genesys Customer Carebefore you do so.
• Configuration Server treats its information and checks integrity constraints in a case-sensitive manner. Therefore, your SQL database must be installed and configured incase-sensitive mode. Refer to your SQL Server Administrator documentation foradditional information.
Configuration ServerConfiguration Server provides centralized access to the Configuration Database, based onpermissions that you can set for any user to any configuration object. Configuration Server alsomaintains the common logical integrity of configuration data and notifies applications of changesmade to the data.
[+] Recommendations for planning Configuration Server deploymentWhen planning your installation, follow these recommendations for Configuration Server:
Deployment Planning Network Locations for Framework Components
Framework Deployment Guide 40

• Genesys solutions installed in a particular environment can have only one Configuration Databasemanaged though one Configuration Server at a time.
• Because Configuration Server keeps all configuration data in its memory, allocate memory for thisserver based on the expected size of the Configuration Database. Refer to the Management Frameworksection of the ''Genesys Hardware Sizing Guide'' for assistance in determining the amount of memoryto allocate for Configuration Server.
• If you want to deploy a Disaster Recovery/Business Continuity architecture, you must set upConfiguration Servers across sites. Refer to Disaster Recovery/Business Continuity for moreinformation.
• For client connections:• Connect all administrative applications that do WRITE operations to Configuration Server directly.• Any other Genesys server applications should be connected to either Configuration Server (if server
capacity permits) or Configuration Server Proxy. Server applications that communicate directly witheach other, such as URS and T-Server, must be connected to the same Configuration Server orConfiguration Server Proxy.
• You can deploy redundant (HA) Configuration Servers.• Always use SCS to control Configuration Server HA pairs. This SCS must be directly connected to the
master Configuration Server.
ImportantConfiguration Servers in HA Pairs cannot be switched over manually.
Configuration Server ProxyTo support a large number of clients and/or distributed installations, Configuration Server can operatein Proxy mode. In this document, a Configuration Server that operates in Proxy mode is calledConfiguration Server Proxy. For more information about Configuration Server Proxy, see SolutionAvailability.
[+] Recommendations for planning Configuration Server ProxydeploymentWhen planning your installation, follow these recommendations for Configuration Server Proxy:
• Refer to the Management Framework section of the ''Genesys Hardware Sizing Guide'' for assistance indetermining the amount of memory to allocate for Configuration Server Proxy.
• You can install Configuration Server Proxy anywhere on the network because it does not generate heavytraffic.
• If you want to deploy a Disaster Recovery/Business Continuity architecture, you might consider settingup Configuration Server Proxies across sites. Refer to Disaster Recovery/Business Continuity for moreinformation.
• If you are using any agent-facing interfaces, such as Workspace Desktop Edition, or interfaces that willbe accessing the Configuration Database on a read-only basis, connect those interfaces toConfiguration Server Proxy.
Deployment Planning Network Locations for Framework Components
Framework Deployment Guide 41

• You can deploy redundant (HA) Configuration Server Proxies.• Always use SCS to control Configuration Server Proxy.
Genesys Security Pack on UNIXGenesys Security Pack on UNIX, an optional component of the Configuration Layer, provides thecomponents, such as shared libraries, which are used for generation of certificates and theirdeployment on UNIX computers on which Genesys components are installed. For more information,refer to the ''Genesys 8.1 Security Deployment Guide''.
Management Layer
The exact configuration of the Management Layer depends on which of the following managementfunctions you would like to use. Genesys recommends that you use all of these capabilities tooptimize solution management.
Required ComponentsIf you intend to use one or more of the Management Layer capabilities, plan to install thecomponents required for each capability, as outlined below. Refer to the ''Framework 8.5Management Layer User's Guide'' for descriptions of, and recommendations for, these components.
[+] Required componentsSolution and application control and monitoring
Install these components to control and monitor solutions and applications:
• Local Control Agent• Solution Control Server
Centralized Logging
Install these components to use centralized logging:
• Centralized Log Database• Message Server
ImportantAlthough Solution Control Server is not required, it is a source of log events vital forsolution maintenance. For example, Solution Control Server generates log eventsrelated to detection and correction of application failures. As such, it is useful forcentralized logging.
Deployment Planning Network Locations for Framework Components
Framework Deployment Guide 42

Alarm Signaling
Install these components to provide alarm signaling:
• Message Server• Solution Control Server• Genesys SNMP Master Agent, if SNMP alarm signaling is required. See also Built-in SNMP Support.
Application Failure Management
Install these components to detect and correct application failures:
• Local Control Agent• Solution Control Server
See Application Failures for information about the application-failure management mechanism.
Built-in SNMP Support
Install the following components to integrate Genesys Framework with an SNMP-compliant third-partynetwork management system (NMS):
• Local Control Agent• Solution Control Server• Genesys SNMP Master Agent or a third-party SNMP master agent compliant with the AgentX protocol• Message Server if SNMP alarm signaling is required
Management Layer ComponentsThis section provides recommendations for planning and installing the Management Layercomponents.
Local Control Agent
[+] Recommendations for planning Local Control Agent deploymentWhen planning your installation, follow these recommendations for Local Control Agent:
• Install an instance of LCA on each computer running a monitored application, whether a Genesysdaemon or a third-party application. LCA is installed at the port number you specify in the LCA Portproperty of the corresponding Host object in the Configuration Database. If you do not specify a valuefor LCA Port, the LCA default port number is 4999. By default, LCA runs automatically on computerstartup.
Deployment Planning Network Locations for Framework Components
Framework Deployment Guide 43

ImportantOn Windows operating systems, the installation script always installs LCA as aWindows Service. If you are changing the LCA port number in the host configurationafter the installation, you must also change the port number in the ImagePath in theapplication folder, which you can find in the Registry Editor. Refer to Notes onConfiguring the LCA Port for instructions.
• If you want to deploy a Disaster Recovery/Business Continuity architecture, you must set up an LCAacross all sites. Refer to Disaster Recovery/Business Continuity for more information.
• On UNIX platforms, LCA must be added to the r/c files during the installation, so that LCA can startautomatically on computer startup. In practice, this means that the person installing LCA must havesufficient permissions.
• If you will be using Genesys Administrator Extension to deploy Genesys applications and solutions toany hosts in your network, you must install and run the latest instance of LCA on each target host. Thiswill install a remote deployment agent (referred to as the Genesys Deployment Agent) that is used byGenesys Administrator Extension to carry out the deployment on that host.
Message Server
[+] Recommendations for planning Message Server deploymentWhen planning your installation, follow these recommendations for Message Server:
• Genesys recommends the use of one Message Server and of one Log Database for all but largeinstallations. If you are working within a large installation and are considering evenly dividing the totallog-event traffic among number of Message Servers, each serving any number of clients, keep thefollowing facts in mind:• Although any number of Message Servers can store log records in the same Log Database, one
Message Server cannot store log records in more than one Log Database.• Because any number of Message Servers can send log records to Solution Control Server, Genesys
Administrator can display alarms based on log records from a few Message Servers.
• If you want to deploy a Disaster Recovery/Business Continuity architecture, you must set up MessageServers across sites, with one dedicated for communication between all Solution Control Servers at allsites. Refer to Disaster Recovery/Business Continuity for more information.
• If you want an application to generate alarms, you must configure it to send log events to MessageServer. Use the same Message Server for both the centralized logging and alarm signaling.
• If you want Message Server to provide alarms, you must connect it to Solution Control Server. Thismeans that you must configure a connection to every Message Server in the SCS Application.
• As with any other daemon application, you can deploy redundant Message Servers.• To optimize the performance of the connection to the Log Database, configure the number of messages
that the Message Server sends to the database before receiving a response. The smaller the number ofmessages, the greater the decrease in performance. See the "Message Server" section of the''Framework Configuration Options Reference Manual'', for more information.
Deployment Planning Network Locations for Framework Components
Framework Deployment Guide 44

Solution Control Server
[+] Recommendations for planning Solution Control Server deploymentWhen planning your installation, follow these recommendations for Solution Control Server:
• Given that you can install and use more than one SCS that is operating in Distributed mode within agiven configuration environment, consider deploying a few Solution Control Servers in this mode forlarge or geographically distributed installations. In these installations, each server controls its ownsubset of Host, Application, and Solution objects. Distributed Solution Control Servers communicatewith each other through a dedicated Message Server.
• If you want to deploy a Disaster Recovery/Business Continuity architecture, you must set up DistributedSolution Control Servers across sites. Refer to Disaster Recovery/Business Continuity for moreinformation.
• As with any other daemon application, you can deploy redundant Solution Control Servers. Redundancysupport for SCS is implemented through direct communication between the backup SCS and the LCA ofthe host on which the primary SCS runs. Be sure to synchronize the ports between primary and backupSolution Control Servers.
ImportantYou cannot perform a manual switchover for Solution Control Server.
Centralized Log Database
As with any historical database, the size of the Centralized Log Database grows with time. When youare planning your installation, keep in mind that:
• The maximum allowable record size is 1 KB.• The size of the Centralized Log Database depends on:
• The number of applications in the system.• The log level you have set for the network output for each application.• The required time the log records should be kept in the database. The following table provides
general timing recommendations:
Logging Level Supported Call Volume Recommended Storage TimeSTANDARD 100 calls/sec 10 daysINTERACTION 10 calls/sec 1 dayTRACE 5 calls/sec 1 day
[+] Recommendations for planning Centralized Log DatabaseinstallationWith these limits in mind, follow these recommendations for the Centralized Log Database:
• For efficient online log viewing, allocate temporary database space of at least 30 percent of the
Deployment Planning Network Locations for Framework Components
Framework Deployment Guide 45

expected Centralized Log Database size.• Limit permissions to modify the Centralized Log Database content to Message Servers only.• Define how long the log records are to be kept in the database before they become obsolete. Use the
Log Database Maintenance Wizard to delete obsolete records or configure the removal of obsoleterecords using the DBMS mechanisms.
• Users of the Centralized Log Database should have at least the following privileges for all tables in thedatabase:• SELECT• INSERT• UPDATE• DELETE
• Make a trade-off between how long the log records are to be kept and the ability to access themefficiently. If both a considerable period of record storage and quick online access to the log records areimportant, back up the more dated records in a separate database.
• If you want to deploy the Disaster Recovery/Business Continuity feature, you must set up log databasesacross sites. Refer to Disaster Recovery/Business Continuity for more information.
SNMP Master Agent
When planning your installation, Genesys recommends that you use SNMP Master Agent only if bothof these conditions apply:
• You want to access the Management Layer functions via an NMS interface; or you have another SNMP-enabled Genesys application and want to access its features via an NMS interface.
• You don't have another AgentX-compatible SNMP master agent in place.
User Interaction Layer (Genesys Administrator)
Install the Genesys Administrator web server preferably in close proximity with Configuration Server.You can then install as many web browsers as required, from which you can access and use GenesysAdministrator.
Media Layer
For every switch that you plan to make a part of your interaction management solution, install atleast one T-Server application.
T-Server
T-Server provides an interface between traditional telephony systems and Genesys applications.
[+] Recommendations for planning T-Server deployment
Deployment Planning Network Locations for Framework Components
Framework Deployment Guide 46

When planning your installation, follow these recommendations for T-Server:
• At the premise level, always associate one switch with one T-Server.• Allocate memory for T-Server based on the number of interactions you expect to be simultaneously
processed at a given site during the busiest hour and the typical amount of business data attached tothe interactions. Allocate at least 500 bytes per interaction plus memory space for a "typical" amountof attached data.
• Provide sufficient RAM to run T-Server processes. To ensure adequate performance, do not run T-Serverprocesses in Swap mode.
• Do not install real-time third-party applications on the computer running T-Server.• Consider using a dedicated subnetwork for T-Server connection to the link.• Do not enable IP routing between the link subnet and the network when T-Server is installed on a
computer with two or more network cards (one of which is used for link connection and the others forconnection to the rest of the network).
Services Layer (Stat Server)
Although StatServer is considered an element of Framework, it is logical to install it when you installthe solution that it will serve.
Stat Server tracks real-time states of interaction management resources and collects statistics aboutcontact center performance. Genesys solutions use the statistical data to more "intelligently" manageinteractions. Use Genesys Reporting to generate real-time and historical contact center reports basedon data that Stat Server collects.
For specific recommendations on Stat Server installation, refer to Stat Server documentation.
Deployment Planning Network Locations for Framework Components
Framework Deployment Guide 47
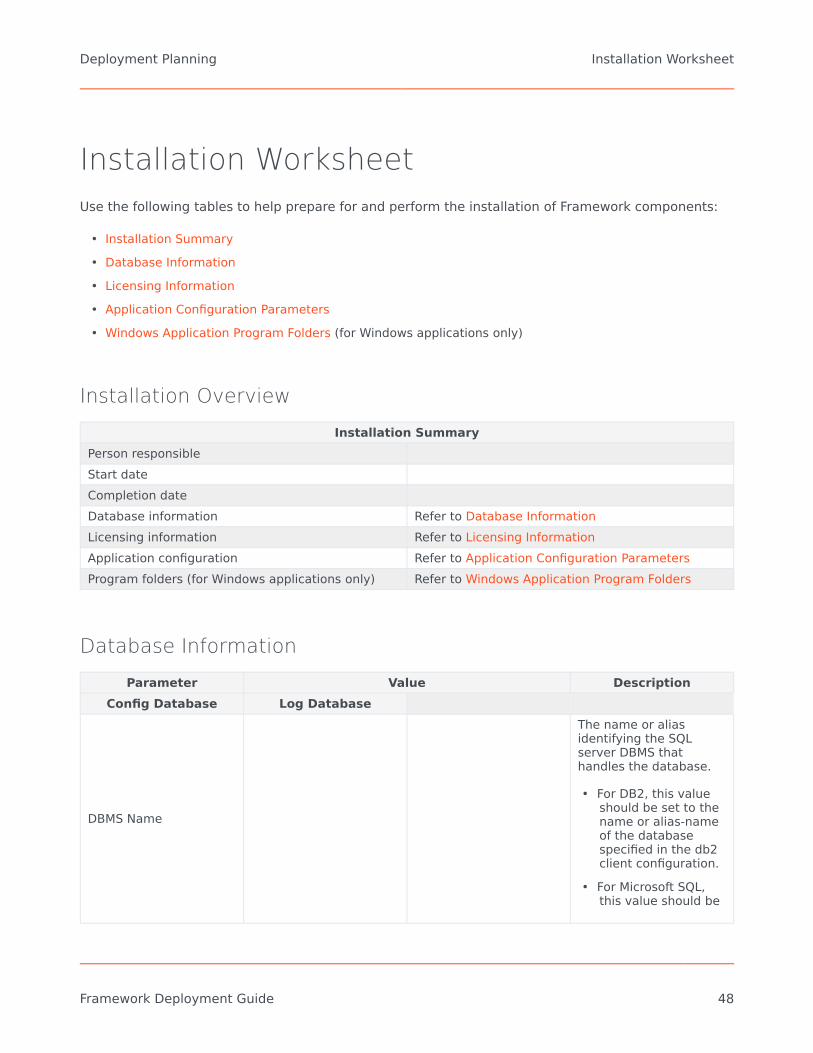
Installation WorksheetUse the following tables to help prepare for and perform the installation of Framework components:
• Installation Summary• Database Information• Licensing Information• Application Configuration Parameters• Windows Application Program Folders (for Windows applications only)
Installation OverviewInstallation Summary
Person responsibleStart dateCompletion dateDatabase information Refer to Database InformationLicensing information Refer to Licensing InformationApplication configuration Refer to Application Configuration ParametersProgram folders (for Windows applications only) Refer to Windows Application Program Folders
Database InformationParameter Value Description
Config Database Log Database
DBMS Name
The name or aliasidentifying the SQLserver DBMS thathandles the database.
• For DB2, this valueshould be set to thename or alias-nameof the databasespecified in the db2client configuration.
• For Microsoft SQL,this value should be
Deployment Planning Installation Worksheet
Framework Deployment Guide 48

Parameter Value Description
set to the name ofthe SQL server(usually the same asthe host name of thecomputer on whichMicrosoft SQL runs).
• For Oracle, it is theSID or the netservice name asspecified in thetnsnames.ora file.
• For PostgreSQL, thisvalue should be setto the name of thePostgreSQL server(usually the same asthe host name of thecomputer on whichPostgreSQL runs).
DBMS Type
The name of thedatabase as it isspecified in your DBMS.This value is requiredfor all database typesexcept Oracle. For DB2,Microsoft SQL, andPostgreSQL, this value isthe name of thedatabase where theclient will connect.
User NameThe user nameestablished to accessthe database.
Password The password used foraccessing the database.
Licensing InformationLicensing Information
Parameter ValueLicense Manager
hostport
License FilesFull path and filename
Deployment Planning Installation Worksheet
Framework Deployment Guide 49

Licensing InformationFull path and filenameFull path and filename
Application Configuration Parameters
When completing this table, remember that:
• All applications must be configured in the Configuration Layer unless otherwise noted.• Host name or IP address can be specified as the value for the host parameter.• Application port and working directory are only specified for server applications.• Working directory is the full path to the directory in which the application is installed and/or is to be
running.
Application Type ApplicationName Application Host Application Port Working
DirectoryConfiguration Layer Components
ConfigurationServer, Primary,for ConfigurationDatabase(configured viaconfiguration file)ConfigurationServer, Backup, forConfigurationDatabase(configured viaconfiguration file)
Management Layer ComponentsLocal ControlAgent Not applicable Configured in Host
properties Not applicable
Database AccessPoint Not applicable
Message Server,PrimaryMessage Server,BackupSolution ControlServer, PrimarySolution ControlServer, BackupSNMP MasterAgent, Primary
Deployment Planning Installation Worksheet
Framework Deployment Guide 50

Application Type ApplicationName Application Host Application Port Working
DirectorySNMP MasterAgent, Backup
User Interaction Layer ComponentsGenesysAdministrator Not applicable
Media Layer ComponentsT-Server, Primary,for switch ...T-Server, Backup,for switch ...T-Server, Primary,for switch ...T-Server, Backup,for switch ...
Services Layer ComponentsStat Server,PrimaryStat Server,Backup
Windows Application Program FoldersApplication Application Program Folder
Configuration Layer ComponentsConfiguration Server, Primary, for ConfigurationDatabase (configured via configuration file)Configuration Server, Backup, for ConfigurationDatabase (configured via configuration file)
Management Layer ComponentsLocal Control AgentDatabase Access PointMessage Server, PrimaryMessage Server, BackupSolution Control Server, PrimarySolution Control Server, BackupSNMP Master Agent, PrimarySNMP Master Agent, Backup
User Interaction Layer ComponentsGenesys Administrator
Deployment Planning Installation Worksheet
Framework Deployment Guide 51
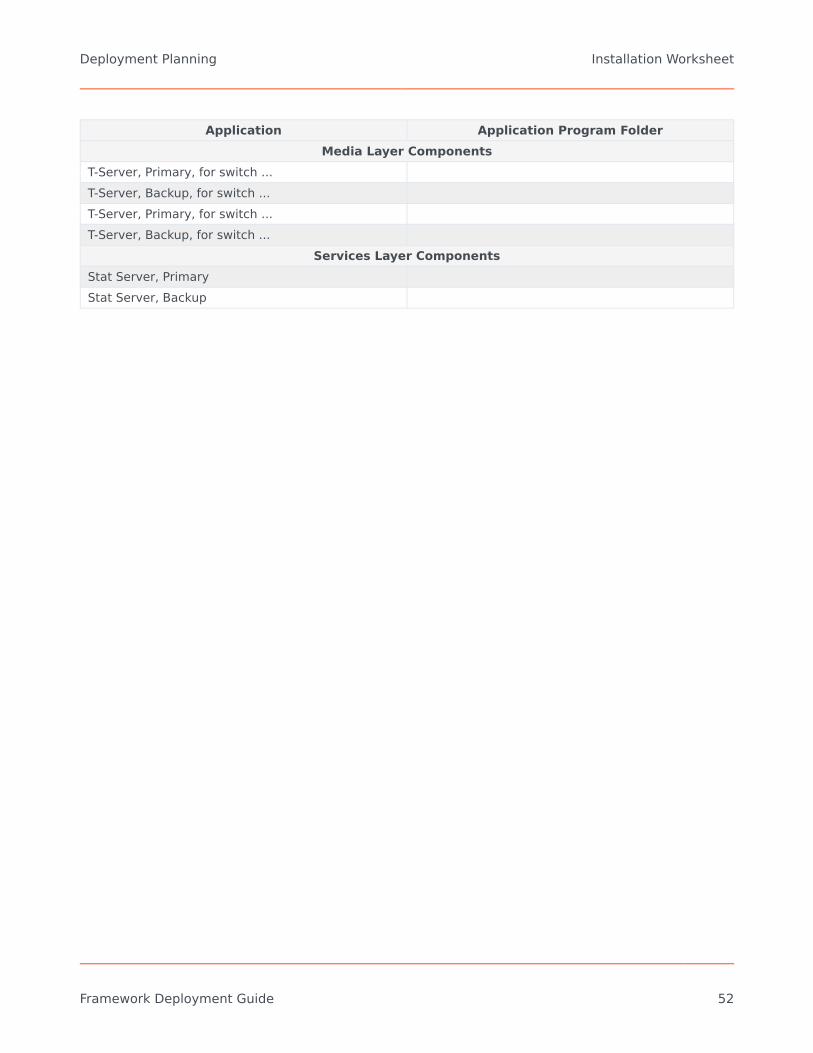
Application Application Program FolderMedia Layer Components
T-Server, Primary, for switch ...T-Server, Backup, for switch ...T-Server, Primary, for switch ...T-Server, Backup, for switch ...
Services Layer ComponentsStat Server, PrimaryStat Server, Backup
Deployment Planning Installation Worksheet
Framework Deployment Guide 52
Deploying FrameworkThis section of the Framework Deployment Guide lists the prerequisites for installing the GenesysFramework, and prescribes the deployment order. It then describes how to install and configure theManagement Framework components.
TipUse the sample worksheet as you prepare for and perform the Framework installation.
Deploying Framework Installation Worksheet
Framework Deployment Guide 53
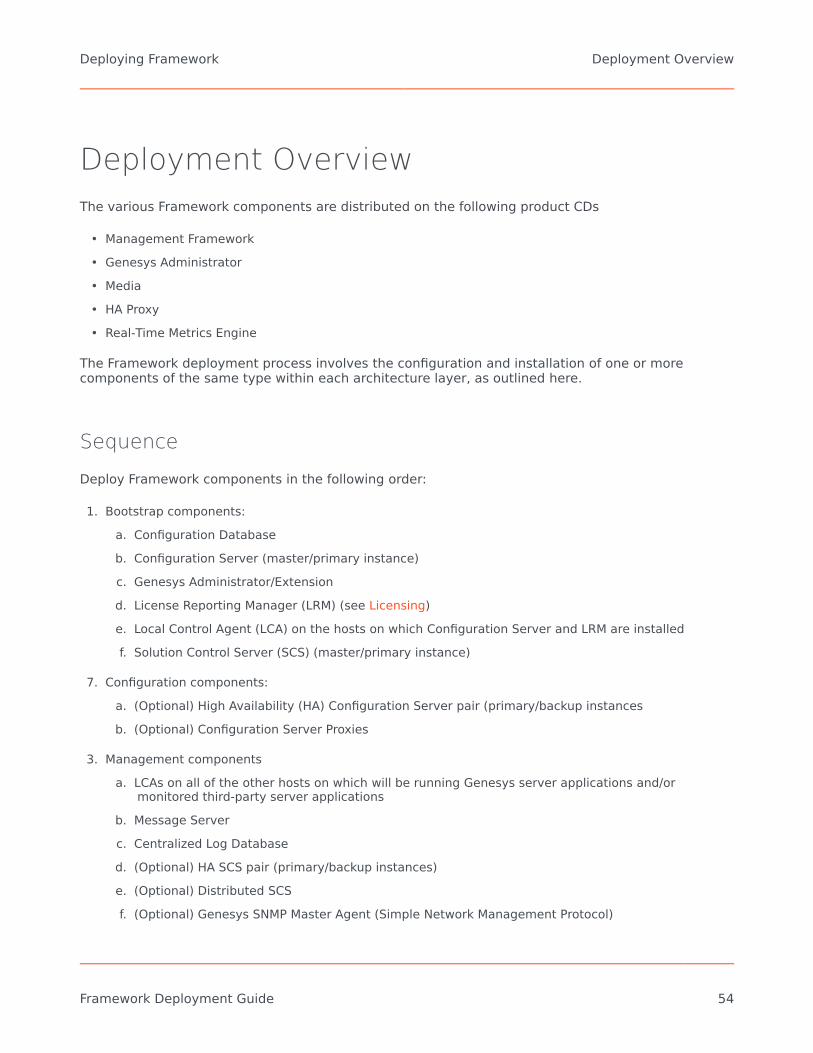
Deployment OverviewThe various Framework components are distributed on the following product CDs
• Management Framework• Genesys Administrator• Media• HA Proxy• Real-Time Metrics Engine
The Framework deployment process involves the configuration and installation of one or morecomponents of the same type within each architecture layer, as outlined here.
Sequence
Deploy Framework components in the following order:
1. Bootstrap components:a. Configuration Databaseb. Configuration Server (master/primary instance)c. Genesys Administrator/Extensiond. License Reporting Manager (LRM) (see Licensing)e. Local Control Agent (LCA) on the hosts on which Configuration Server and LRM are installedf. Solution Control Server (SCS) (master/primary instance)
7. Configuration components:a. (Optional) High Availability (HA) Configuration Server pair (primary/backup instancesb. (Optional) Configuration Server Proxies
3. Management componentsa. LCAs on all of the other hosts on which will be running Genesys server applications and/or
monitored third-party server applicationsb. Message Serverc. Centralized Log Databased. (Optional) HA SCS pair (primary/backup instances)e. (Optional) Distributed SCSf. (Optional) Genesys SNMP Master Agent (Simple Network Management Protocol)
Deploying Framework Deployment Overview
Framework Deployment Guide 54

7. Media Layer componentsa. T-Serverb. HA Proxy for a specific type of T-Server (if required)
ImportantConfiguration and installation instructions for T-Servers apply to Network T-Servers as well. You can find detailed deployment information about T-Serverand HA Proxy in the latest version of the T-Server Deployment Guide for yourspecific T-Server.
3. Services Layer component: Stat Server
ImportantAlthough Interaction Server, SMCP (Simple Media Control Protocol) T-Server, andStat Server components are all parts of the Framework architecture, configuringthem directly depends on their usage in a Genesys solution. Therefore, you mustinstall them during deployment of a specific solution.
Creation of Configuration Objects
In addition to installed Framework components, the following resources must be registered asConfiguration Database objects (or configuration objects) at the time of Framework deployment:
• Hosts• Switching Offices• Switches• Agent Logins• DNs• Access Groups• Skills• Persons• Agent Groups• Places• Place Groups
To deploy components of the Configuration Layer, you must first configure the objects and theninstall them, as described later in these pages.
Deploying Framework Deployment Overview
Framework Deployment Guide 55

WarningNever add, delete, or modify any data in the Configuration Database, except throughapplications developed by Genesys, or through applications instrumented with theGenesys Configuration Server application programming interface (API). If you havecompelling reasons for accessing the database directly, consult Genesys CustomerCare before you do so.
Using DB Server
Starting in release 8.5, databases are accessed directly by the servers that need to store and/orretrieve data in them, removing the need to install DB Server. However, you can still use DB Serveras in previous releases, if you have legacy components that require DB Server or you are unable toconfigure Genesys components to access databases from their local hosts.
ImportantGenesys strongly recommends that you use newer components that support directdatabase access. Note that, if you use DB Server, you will not be able to enjoy anybenefits and new features for databases and database access that are introduced inthis release.
For Configuration Server to access the Configuration Database, set the dbthread configuration optionto false in the confserv section of the primary Configuration Server, and in the appropriately-named section of the backup server, if configured. For Message Server to access the Log Database,set the dbthread configuration option to false in the messages section of the primary MessageServer and the backup Message Server, if configured. Refer to the ''Framework Configuration OptionsReference Manual'' for more information about these options. For other products supporting thisapproach database access, refer to the product-specific documentation for the option name andinstructions.
Then refer to the Framework 8.1 documentation for information about deploying and using DB Serverto access the various databases in your environment.
Refer to the Framework Database Connectivity Reference Guide for detailed information aboutsetting up and accessing a database.
Deploying Framework Deployment Overview
Framework Deployment Guide 56

PrerequisitesBefore you deploy Framework, investigate aspects of its size, security, availability and performance,as applied to the specific environment of your contact center. See Deployment Planning forrecommendations on these issues. Be sure those applications that require licenses are licensedproperly (see the ''Genesys Licensing Guide'').
Review the following prerequisites for your Framework installation:
• Databases• Operating Environment, including hardware, networking, software, and internet browsers• Licensing
For prerequisites for Genesys Administrator, refer to the ''Framework 8.1 Genesys AdministratorDeployment Guide''.
Deploying Framework Prerequisites
Framework Deployment Guide 57

Database PrerequisitesGenesys recommends that you or your database administrator create databases in your databasemanagement system (DBMS) before you start a Genesys installation. For Framework, you must createtwo databases:
• Configuration Database-Mandatory for any Genesys installation.• Centralized Log Database-Required only if you are using the Management Layer's centralized-logging
function.
Genesys also recommends that you or your database administrator back up your Genesys databaseson a regular basis.
Refer to Network Locations for Framework Components for recommendations on database sizing.Refer to your DBMS documentation for instructions on how to create a new database.
Refer to the Installation Worksheet for the list of database parameters you must use in your Genesysinstallation.
Creating Databases for Multi-language EnvironmentsIf your system will be configured in a multi-language environment, or at least be required to handledata encoded in UTF-8 format, you may have to take special steps when creating your database,depending on the DBMS you will be using. Refer to the table in the "Creating Databases for Multi-language Environments" section of the Framework Database Connectivity Reference Guide for theseadditional steps.
Creating Databases for Single-language EnvironmentsIf your system will be configured in a single-language environment, you must make sure that theencoding used in their database matches the encoding set up on all hosts. If they have to performsome type of conversion, because they are unable to store data in the same encoding specified atthe operation system level, they must depend on the DBMS capabilities of the vendor client software.
Deploying Framework Prerequisites
Framework Deployment Guide 58

Operating Environment Prerequisites
Hardware and Networking
Genesys recommends that you or your IT specialist assign host computers to Genesys softwarebefore you start Genesys installation.
If you are considering using IPv6 for some or all connections, make sure that you first review theinformation in IPv6.
Refer to Network Locations for Framework Components for recommendations on server locations.
Software
Refer to the Genesys Supported Operating Environment Reference Guide for the list of operatingsystems and database systems supported in Genesys releases. Refer to the ''Genesys SupportedMedia Interfaces Reference Guide'' for the list of supported switch and PBX versions.
For UNIX operating systems, also review the list of patches Genesys uses for software product buildsand upgrade your patch configuration if necessary. A description of patch configuration is linked tothe Readme files for the Genesys applications that operate on UNIX.
Internet Browsers
To view all elements of Genesys Administrator, you need any combination of Internet Explorer andand/or Mozilla Firefox internet browsers.
Refer to the ''Framework Genesys Administrator Deployment Guide'' for information about supportedbrowser versions, and requirements for the Genesys Administrator web server.
Deploying Framework Prerequisites
Framework Deployment Guide 59

Licensing PrerequisitesGenesys applications require licenses. There are two aspects of licensing for Genesys software:
• Sellable Item licenses, which provide the legal right to deploy and use the components and functionalityrelated to the solutions that you purchased from Genesys.
• Technical license keys, which enable you to use particular functionality. For example, if you are planningto deploy redundant configurations of any Genesys servers, you must have a special high-availability(HA) license. Otherwise, the Management Layer will not perform a switchover between the primary andbackup servers. As another example, a technical license is required to deploy Configuration ServerProxy.
Technical licenses are managed and controlled by the FlexNet Publisher (formerly FlexLM) LicenseManager. In release 8.5, the use of sellable item licenses is now measured by License ReportingManager (LRM), which provides historical usage reports to system administrators.
For information about which products require what types of licenses, refer to the ''Genesys LicensingGuide''. That Guide also describes how to install FlexNet Publisher License Manager, if required,before you start to deploy Management Framework.
License File
Genesys Technical licensing is based on a valid license file that contains license key informationrequired to operate Genesys components, where required. Request the initial license file fromGenesys after you purchase your Genesys system, when you are ready to deploy ManagementFramework. FlexNet Publisher uses the license keys in the license file to enable certain componentsto operate. Starting in release 8.5, Configuration Server also uses the license file to authenticate theright to use the software at startup of every new deployment of Genesys Framework.
License Files and the Configuration Database
Configuration Server stores the license file in the Configuration Database. When you are setting upyour new Genesys environment, or when you have just upgraded your Configuration Database in anexisting Genesys environment, you must upload the license file into the Database before you startConfiguration Server for the first time. To do this, run the following command on the command-line,as appropriate:
• On UNIX: confserv –license <license file name>• On Windows: confserv.exe –license <filename>
After that, you can start Configuration Server.
Deploying Framework Prerequisites
Framework Deployment Guide 60

Genesys License Reporting Manager
Genesys Framework uses the Genesys License Reporting Manager (LRM) to report on historical usageof licensed Genesys products (sellable items) and user-defined bundles. This data is used to provideGenesys users with license management reports, and Hosted Service Providers with billing data.
For a new deployment of Genesys Framework, LRM must be installed after Configuration Server andGenesys Administrator are installed. After you have uploaded the contents of the license file to theConfiguration Database and LRM is installed, additional applications can then be deployed, based onthe validity of their licenses.
The License Reporting Manager (LRM) Server connects only to the master Configuration Server.
ImportantGenesys strongly recommends that you start LRM before you install a backupConfiguration Server. If you start LRM afterwards, restart the backup ConfigurationServer to avoid a period of downtime for clients of Configuration Server, other thanLRM, when Configuration Server switchover occurs.
When the first LRM instance is connected (or reconnected) to the Configuration Server instance thatis enabled for LRM monitoring, Configuration Server generates the log event 21-25100 LRM Serverconnected successfully, system operating normally.
A connection between LRM Server and Configuration Server is not required for Configuration Serverto accept connections from other Genesys Framework components. However, if Configuration Serveris running on a new (or upgraded) database and is only in the first startup stage (LRM has not startedyet), it will not accept a connection from any Genesys Business Application.
At initial startup only, when a Genesys Business Application tries to connect to Configuration Serverand Configuration Server cannot validate the presence of LRM, Configuration Server generates logevent 21-25101 Unable to accept connection: LRM Server has not been started and refusesthe connection request. After LRM has been detected at least once, connections are no longerrefused for this reason.
If the connection to the LRM Server is lost, Configuration Server generates log event 21-25102 LRMServer has disconnected. However, Configuration Server still continues to accept connections fromGenesys Business Applications.
For more information about LRM, including how to install and use it, refer to LRM documentation.
Configuration Server and LRM
Periodically, at startup and during normal operations, Configuration Server and LRM interact toensure that the license file and the Configuration Database are synchronized.
Deploying Framework Prerequisites
Framework Deployment Guide 61

At Intial StartupAfter Configuration Server has started up for the first time against a new (or upgraded) database,Configuration Server is able to accept client applications of the following types:
• Genesys Administrator and Genesys Administrator Extension• Message Server and Solution Control Server• LRM Server• ITC Utility (IP installer)
Attempting to start and connect any other application at this stage, before LRM has started, willresult in Configuration Server generating an error and log message 21-25101 Unable to acceptconnection: LRM Server has not been started.
TipGenesys recommends that if you want to configure a backup Configuration Server,you do so only after LRM has started.
At this point, LRM must be installed and started, after which it creates the entitlement descriptionbased on the license and entitlement information retrieved from the copy of the license file in theConfiguration Database. LRM uses this entitlement information as a reference and to flag over-use onreports.
If the license information has uploaded successfully and Configuration Server initialized properly, theread-only option license might appear in the configuration options of the Configuration Serverobject.
WarningDo not attempt to modify the value of this option in any way. Any such attempt mightrender Configuration Server to become inoperable.
At Subsequent RestartsAfter subsequent restarts (after LRM has started), all connections are allowed. If LRM does notconnect shortly after the current Configuration Server switching to primary, Configuration Servergenerates log message 21-25102 LRM Server has disconnected. When LRM finally reconnects, logmessage 21-25100 LRM Server connected successfully, system operating normally isgenerated, to clear the previous condition. Otherwise, there is no impact on Configuration Serverfunctionality if LRM does not reconnect.
Deploying Framework Prerequisites
Framework Deployment Guide 62

WarningGenesys License Compliance policy requires that LRM be connected and operating atall times for Genesys 8.5 and later releases. Disconnection of LRM for an extendedperiod may be considered a violation of Genesys licensing terms and agreements.
During Normal OperationsConfiguration Server constantly monitors the content of the license file stored in the ConfigurationDatabase to confirm that the information is still valid. When the file expires, Configuration Server logsan error message but continues to serve clients. To dismiss this error, you must load the new licensefile by running the following command on the command-line, as appropriate:
• On UNIX: confserv –license <license file name>• On Windows: confserv.exe –license <filename>
You do not need to stop and/or restart the Configuration Server that is currently running in primarymode.
ImportantAfter the database is updated, it may take up to 10 minutes for the new licenseinformation to propagate to LRM and for Configuration Server to stop generating out-of-compliance log messages.
Deploying Framework Prerequisites
Framework Deployment Guide 63

Permission PrerequisitesThis section describes the minimum permissions required to install and run Management Frameworkcomponents. For information about minimum permissions required for other Genesys components,refer to product- or component-specific documentation.
System Permissions
The following table provides the minimum permissions required to install and run Frameworkcomponents.
Component Minimum Permissions (UNIX) Minimum Permissions(Windows)
Configuration Server users group Administrators group a
Solution Control Server users group Administrators groupMessage Server users group Administrators groupSNMP Master Agent users group Administrators groupLocal Control Agent b root Administrators group
a. The user account for the running process is usually determined by the user or object that startedthe process. For example, if a process is started by LCA, then the process inherits its permissionsfrom LCA.
b. root or Administrators permission is required to install the component because, duringinstallation, it updates the startup file and registry.
After a component is installed, you can update the component to start under a different user accountwith lower privileges. However, before doing so, make sure that you updated the working directorieswith the correct read and write permissions.
ExampleTo run LCA and Genesys Deployment Agent (GDA) as a non-root user, do one of the following,depending on your operating system:
On UNIX
Create startup scripts for LCA and GDA that set up LCA and GDA to run under the non-root user. Forthese scripts, it is assumed that LCA is installed in /home/genesys/GCTI, and the name of the non-root user is genesys. See LCA Startup Script-gctilca and GDA Startup Script-gctigda for examples ofthese scripts. To install the startup scripts, put them in the directory /etc/rc/d/init.d/ and run oneor both of the following commands, as required:
Deploying Framework Prerequisites
Framework Deployment Guide 64

chkconfig -add gctilcachkconfig -add gctigda
On Windows
Change the account associated with the LCA service. One way to do this is through WindowsAdministrative Services, as follows:
1. Go to Start > Settings > Control Panel > Administrative Services > Services, right-click LCAand select Properties.
2. Open the Log On tab and in the Log on as section, select This account, and change the accountassociated with the LCA service.
Database User Privileges
A database user that accesses the Configuration Database on behalf of Configuration Server, that is,the user identified in the Configuration Server configuration file, requires basic database privileges,as defined in this section.
When the database is created, it is assumed that it is created under the new user and theinitialization scripts are under that user account, unless otherwise stated.
Oracle
After the new database user is created, grant the necessary privileges as follows:GRANT CONNECT TO <DB user>GRANT CREATE TABLE TO <DB user>GRANT UNLIMITED TABLESPACE TO <DB user>GRANT CREATE PROCEDURE TO <DB user>
MS SQL
For MS SQL 2000, grant the public role to the new database user on the Database Access tab of theSQL Server Login Properties dialog box for the new user. In addition, grant the followingprivileges:GRANT CREATE TABLE TO <DB user>GRANT CREATE PROCEDURE TO <DB user>
For MS SQL 2005 and later, grant the public and db_owner roles to the new database user.
Deploying Framework Prerequisites
Framework Deployment Guide 65

DB2
Grant the necessary privileges as follows:CONNECT TO <database>;GRANT CREATE TAB,CONNECT ON DATABASE TO USER <DB user>;CONNECT RESET;
PostgreSQL
From pgAdmin, grant the following privileges:
• Can create database object• Can create roles
Or, you can execute the following query:CREATE ROLE <DB user> LOGIN ENCRYPTED PASSWORD <encrypted
password> NOINHERIT CREATEDB CREATEROLE VALID UNTIL 'infinity';To configure client authentication, update the pg_hba.conf file, located in thedata directory under the PostgreSQL installation folder. For example:host GCTI_Test gctitest <IP address1>/32 trusthost GCTI_Test gctitest <IP address2>/32 trust
This enables the DB user gctitest to connect to the GCTI_Test database fromthe hosts <IP address1> and <IP address2>.
Sample Scripts
This section contains sample scripts required to run LCA and GDA on UNIX under a non-root user.
LCA Startup Script-gctilcaThe following is an example of a script to allow LCA to run under a non-root user.
#!/bin/bash## chkconfig: 345 80 20# description: run lca## You should put this script to /etc/rc.d/init.d and run command:# chkconfig --add gctilca#GCTI home dirGCTI=/home/genesys/GCTIDIRNAME=LCAHOMEDIR=$GCTI/$DIRNAMEUSER=genesysSCRIPTNAME=gctilcaHOME_USER=/home/genesys
Deploying Framework Prerequisites
Framework Deployment Guide 66

PATH=/sbin:/bin:/usr/bin:/usr/sbinprog=lcaRETVAL=0if [ ! -x $HOMEDIR/$prog ]; thenexit 1fi# Source function library.. /etc/rc.d/init.d/functionsstart () {echo -n $"Starting $SCRIPTNAME: "if [ -e /var/lock/subsys/$prog ]; thenecho -n $"$SCRIPTNAME is already running.";failure $"cannot start $SCRIPTNAME: $SCRIPTNAME already running.";echoreturn 1fidaemon --user=$USER ". $HOME_USER/.bash_profile ; cd $HOMEDIR ;
./run.sh >/dev/null 2>/dev/null &"sleep 1CHECK=`ps -e | grep $prog | grep -v $SCRIPTNAME | awk '{print $4}'`if [ "$CHECK" = "$prog" ]; thenRETVAL=0elseRETVAL=1fi[ $RETVAL -eq "0" ] && touch /var/lock/subsys/$progechoreturn $RETVAL}stop () {echo -n $"Stopping $SCRIPTNAME: "if [ ! -e /var/lock/subsys/$prog ]; thenecho -n $"$SCRIPTNAME is not running."failure $"cannot stop $SCRIPTNAME: $SCRIPTNAME is not running."echoreturn 1;fikillproc $progRETVAL=$?echo[ $RETVAL -eq 0 ] && rm -f /var/lock/subsys/$prog;return $RETVAL}usage (){echo "Usage: service $PROG {start|stop|restart}"}case $1 instart)start;;stop)stop;;restart)stopstart;;*)usage ; RETVAL=2;;esacexit $RETVAL</tt>
Deploying Framework Prerequisites
Framework Deployment Guide 67
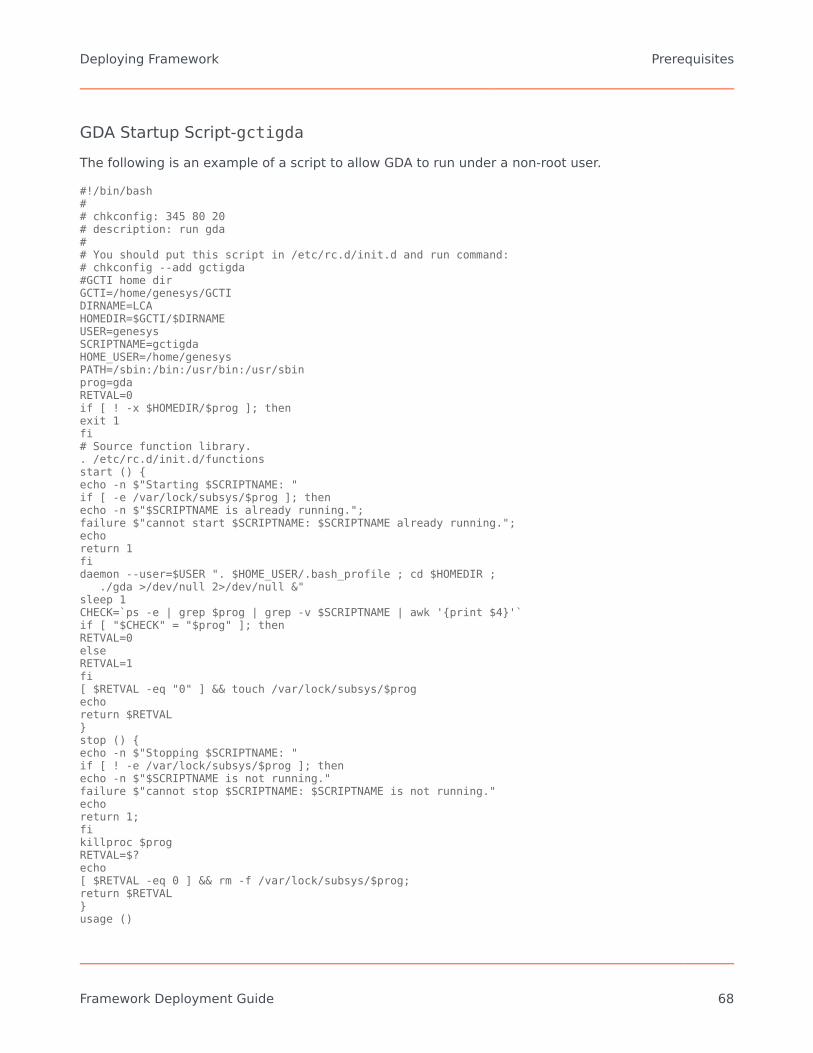
GDA Startup Script-gctigdaThe following is an example of a script to allow GDA to run under a non-root user.
#!/bin/bash## chkconfig: 345 80 20# description: run gda## You should put this script in /etc/rc.d/init.d and run command:# chkconfig --add gctigda#GCTI home dirGCTI=/home/genesys/GCTIDIRNAME=LCAHOMEDIR=$GCTI/$DIRNAMEUSER=genesysSCRIPTNAME=gctigdaHOME_USER=/home/genesysPATH=/sbin:/bin:/usr/bin:/usr/sbinprog=gdaRETVAL=0if [ ! -x $HOMEDIR/$prog ]; thenexit 1fi# Source function library.. /etc/rc.d/init.d/functionsstart () {echo -n $"Starting $SCRIPTNAME: "if [ -e /var/lock/subsys/$prog ]; thenecho -n $"$SCRIPTNAME is already running.";failure $"cannot start $SCRIPTNAME: $SCRIPTNAME already running.";echoreturn 1fidaemon --user=$USER ". $HOME_USER/.bash_profile ; cd $HOMEDIR ;
./gda >/dev/null 2>/dev/null &"sleep 1CHECK=`ps -e | grep $prog | grep -v $SCRIPTNAME | awk '{print $4}'`if [ "$CHECK" = "$prog" ]; thenRETVAL=0elseRETVAL=1fi[ $RETVAL -eq "0" ] && touch /var/lock/subsys/$progechoreturn $RETVAL}stop () {echo -n $"Stopping $SCRIPTNAME: "if [ ! -e /var/lock/subsys/$prog ]; thenecho -n $"$SCRIPTNAME is not running."failure $"cannot stop $SCRIPTNAME: $SCRIPTNAME is not running."echoreturn 1;fikillproc $progRETVAL=$?echo[ $RETVAL -eq 0 ] && rm -f /var/lock/subsys/$prog;return $RETVAL}usage ()
Deploying Framework Prerequisites
Framework Deployment Guide 68

{echo "Usage: service $PROG {start|stop|restart}"}case $1 instart)start;;stop)stop;;restart)stopstart;;*)usage ; RETVAL=2;;esacexit $RETVAL
Deploying Framework Prerequisites
Framework Deployment Guide 69
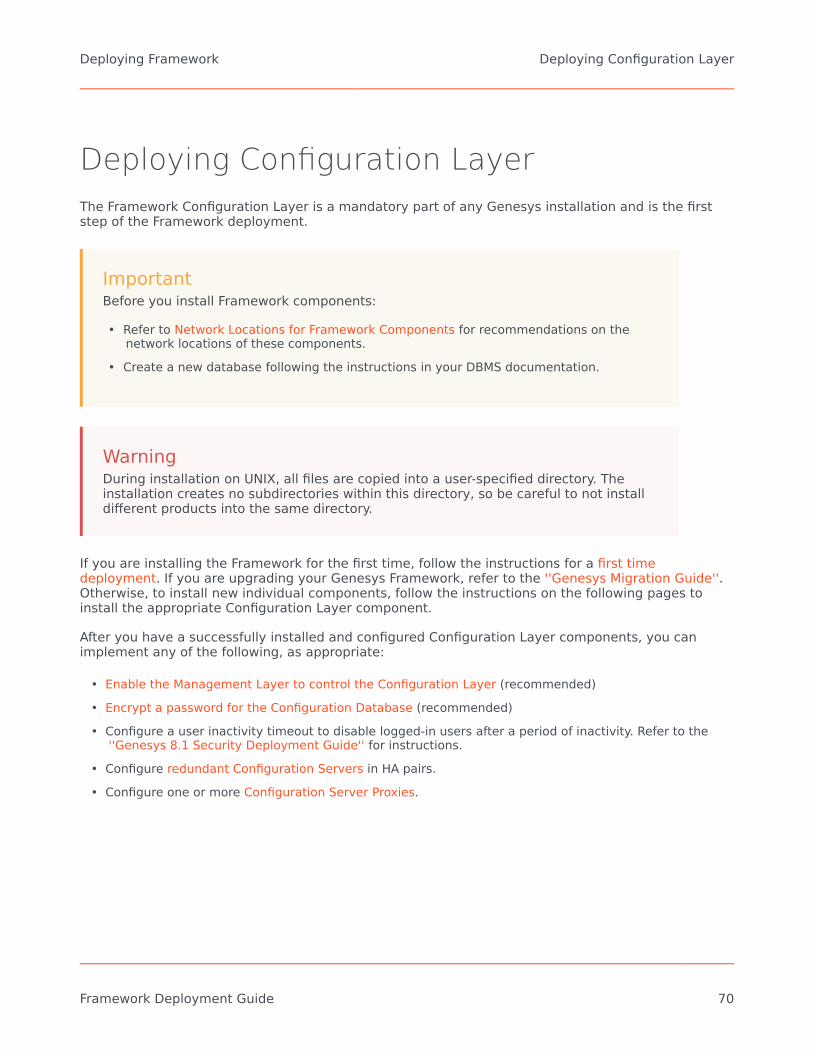
Deploying Configuration LayerThe Framework Configuration Layer is a mandatory part of any Genesys installation and is the firststep of the Framework deployment.
ImportantBefore you install Framework components:
• Refer to Network Locations for Framework Components for recommendations on thenetwork locations of these components.
• Create a new database following the instructions in your DBMS documentation.
WarningDuring installation on UNIX, all files are copied into a user-specified directory. Theinstallation creates no subdirectories within this directory, so be careful to not installdifferent products into the same directory.
If you are installing the Framework for the first time, follow the instructions for a first timedeployment. If you are upgrading your Genesys Framework, refer to the ''Genesys Migration Guide''.Otherwise, to install new individual components, follow the instructions on the following pages toinstall the appropriate Configuration Layer component.
After you have a successfully installed and configured Configuration Layer components, you canimplement any of the following, as appropriate:
• Enable the Management Layer to control the Configuration Layer (recommended)• Encrypt a password for the Configuration Database (recommended)• Configure a user inactivity timeout to disable logged-in users after a period of inactivity. Refer to the
''Genesys 8.1 Security Deployment Guide'' for instructions.• Configure redundant Configuration Servers in HA pairs.• Configure one or more Configuration Server Proxies.
Deploying Framework Deploying Configuration Layer
Framework Deployment Guide 70

First-Time DeploymentTo install the Framework Configuration Layer components for the first time, follow these steps:
1. Install Configuration Server2. Initialize the Configuration Database3. Configure Configuration Server4. Start Configuration Server5. Deploy and start Genesys Administrator6. Deploy and start License Reporting Manager (LRM) as described in the LRM 8.5 Deployment Guide
7. Create Hosts for each computer in your network
Deploying Framework Deploying Configuration Layer
Framework Deployment Guide 71
Configuration DatabaseAfter you have created a database in your DBMS (see Databases), you can populate the tables of theConfiguration Database manually (using your DBMS tools).
Setting Up the Configuration Database
ImportantIf you install Configuration Server and the Configuration Database separately, youmust install and configure an SQL Server client for your database type on the samehost where Configuration Server is running. Please refer to the Framework DatabaseConnectivity Reference Guide for recommendations on environment settings for yourdatabase client.
WarningConfiguration Server treats its information and checks integrity constraints in a case-sensitive manner. Therefore, your SQL database must be installed and configured incase-sensitive mode. Refer to your SQL Server Administrator documentation foradditional information.
1. In the directory in which Configuration Server is installed, open the sql_scripts folder.2. Open the folder that matches your database type.3. Load and execute the initialization script that corresponds to your DBMS and your environment
(enterprise or multi-tenant), as listed in the table below.
TipIf you are using the DB2 DBMS, Genesys recommends using the DB2 Command-Line Processor to run Genesys SQL scripts. [+] Show steps1. Start the Command-Line Processor.2. Type quit at the DB2 prompt to exit the DB2.exe process.3. Specify the database connection parameters by typing the following command line,
substituting values in brackets with the actual values:db2 connect to <database name> user <user> using <password>
Deploying Framework Deploying Configuration Layer
Framework Deployment Guide 72

4. Execute the script by typing the following command line, substituting the value inbrackets with the actual value:db2 -f <script name including full path>For example, to execute the initialization script for the enterprise version of theConfiguration Database, type (all on one line):db2 -f C:\GCTI\ConfigurationServer\sql_scripts\db2\init_single_db2.sql
DBMS Enterprise ScriptName
Multi-Tenant ScriptName
Multi-languageScript Name (see
Note)
DB2 init_single_db2.sql init_multi_db2.sql
Enterprise:init_single_multilang_db2.sql
Multi-tenant:init_multi_multilang_db2.sql
Microsoft SQL init_single_mssql.sql init_multi_mssql.sql
Enterprise:init_single_multilang_mssql.sql
Multi-tenant:init_multi_multilang_mssql.sql
Oracle init_single_ora.sql init_multi_ora.sql
Enterprise:init_single_multilang_ora.sql
Multi-tenant:init_multi_multilang_ora.sql
PostgreSQL init_single_postgre.sql init_multi_postgre.sql
Enterprise:init_single_multilang_postgre.sql
Multi-tenant:init_multi_multilang_postgre.sql
Note: Use the multi-language scripts if you are setting up Configuration Server in multi-languagemode.
4. Load and execute the script that loads the CfgLocale table into the initialized database, depending onyour database type, as shown in the table below.
TipIf you are using the DB2 DBMS, Genesys recommends using the DB2 Command-Line Processor to load and execute the script, as follows: [+] Show steps1. Start the Command-Line Processor.2. Type quit at the DB2 prompt to exit the DB2.exe process.3. Specify the database connection parameters by typing the following command line,
substituting values in brackets with the actual values:
Deploying Framework Deploying Configuration Layer
Framework Deployment Guide 73

db2 connect to <database name> user <user> using <password>
4. Execute the script by typing the following command line, substituting the value inbrackets with the actual value:db2 -f <script name including full path>For example, to execute the CfgLocale script, type (all on one line):db2 -f C:\GCTI\ConfigurationServer\sql_scripts\db2\CfgLocale_db2.sql
DBMS Script NameDB2 CfgLocale_db2.sqlMicrosoft SQL CfgLocale_mssql.sqlOracle CfgLocale_ora.sqlPostgreSQL CfgLocale_postgre.sql
About the Initialized Configuration Database
WarningNever add, delete, or modify any data in the Configuration Database except throughapplications developed by Genesys, or through applications instrumented with theGenesys Configuration Server application programming interface (API). If you havecompelling reasons for accessing the database directly, consult Genesys TechnicalSupport before you do so.
The Configuration Database contains the following predefined objects, which allow initial access tothe database through Genesys Administrator:
• A User object with user name set to default, and password set to password. Use this Master Accountto log in to the Configuration Layer for the first time. A user logged on through this Master Account hasall possible privileges with respect to objects in the Configuration Database. The Master Account is notalterable in any way, and you should not use it to perform regular contact center administrative tasks.Rather, it exists as a guarantee that, no matter what happens to the regular accounts, you will alwaysbe able to access the Configuration Database.Genesys recommends changing the default user name and password of the Master Account during thefirst session, securing these login parameters, and using the Master Account for emergency purposesonly. For regular operations, create a real working account and add it to the access group SuperAdministrators. (By default, this Access Group has the same privileges as the Master Account.) Use thisreal working account for any subsequent sessions.
Deploying Framework Deploying Configuration Layer
Framework Deployment Guide 74

ImportantFor instructions on creating new configuration objects, and working with existing configuration objects, referto ''Framework 8.1 Genesys Administrator Help''.
• Four Application Template objects, as follows:• Configuration Server• Configuration Manager• Genesys Administrator• Genesys Administrator Server
• Five Application objects, as follows:• confserv object of type Configuration Server.• default object of type Configuration Manager.• Genesys Administrator object of type Genesys Administrator.
TipConsider changing the name of this application during the first session.
• Genesys AdministratorServer object of type Genesys Administrator Server.• Installation Configuration Utility Application object with the name set to ITCUtility. This utility
supports configuration updates during installation processes for Genesys components. No additionalconfiguration is needed..
• The default Access Groups objects: Users, Administrators, and Super Administrators. For moreinformation, refer to Security Considerations.
• Folders for all types of objects managed by the Configuration Layer.
The Configuration Database also contains a number of other predefined objects (for example, AlarmConditions) that help you set up some Genesys functionality as you deploy other Framework andsolution components.
Deploying Framework Deploying Configuration Layer
Framework Deployment Guide 75

Configuration ServerIf you want Configuration Server to operate with the Configuration Database, you must installConfiguration Server in Master mode. This Configuration Server must be configured through a localconfiguration file.
Important• The procedures given in this section are for deploying a primary Configuration Server. To
deploy a Configuration Server Proxy, refer to Configuration Server Proxy for relevantinstallation instructions. To install a backup Configuration Server, refer to RedundantConfiguration Servers.
• Refer to the Framework 8.5 External Authentication Reference Manual for informationabout Configuration Server's External Authentication feature and for relevantdeployment instructions.
Deploying Configuration Server
For more information about the Configuration Server configuration file, see Configuration ServerConfiguration File. For information about Configuration Server configuration options and their values,refer to the Framework Configuration Options Reference Manual.
1. Install Configuration Server. [+] Show steps
Installing on UNIX
Installing Configuration Server on UNIX
1. On the Management Framework 8.5 product CD, locate and open the installation directory appropriatefor your environment:• For an enterprise (single-tenant) environment, the installation directory is configuration_layer/
configserver/single/<operating_system>.• For a multi-tenant environment, the installation directory is configuration_layer/configserver/
multi/<operating_system>.
The installation script, called install.sh, is located in the appropriate directory.2. Type the file name at the command prompt, and press Enter.3. For the installation type, type 1 to select Configuration Server Master Primary, and press Enter.
Deploying Framework Deploying Configuration Layer
Framework Deployment Guide 76
4. For the external authentication option, type the number corresponding to the type of externalauthentication that will be used (LDAP, Radius, both, or neither), and press Enter.
TipIf you select LDAP, be prepared with the URL to access the LDAP Server. For more information about LDAPconfiguration, see the Framework 8.5 External Authentication Reference Manual.
5. Specify the full path of the destination directory, and press Enter.6. If the target installation directory has files in it, do one of the following:
• Type 1 to back up all the files in the directory, and press Enter. Specify the path to where you wantthe files backed up, and press Enter.
• Type 2 to overwrite only the files in this installation package, and press Enter. Then type y toconfirm your selection, and press Enter. Use this option only if the application already installedoperates properly.
• Type 3 to erase all files in this directory before continuing with the installation, and press Enter.Then type y to confirm your selection, and press Enter.
The list of file names will appear on the screen as the files are copied to the destination directory.7. For the product version to install, do one of the following:
• Type 32 to select the 32-bit version, and press Enter.• Type 64 to select the 64-bit version, and press Enter.
8. To configure the Configuration Server during, or after, installation, do one of the following:• Type y to configure Configuration Server during installation (now), and press Enter. Go to Step 9 to
specify values for the configuration file. For information about the Configuration Serverconfiguration options and their values, refer to the Framework Configuration Options ReferenceManual.
• Type n to not configure Configuration Server during installation. In this case, you have finishedinstalling Configuration Server-do not continue to the next step in this procedure. Before you canstart Configuration Server, however, you must create a configuration file and set the configurationoptions in it.
9. For the [confserv] section:a. Specify a value for the Configuration Server port, and press Enter.b. Specify a value for the Configuration Server management port, and press Enter.
10. For the [dbserver] section:a. Type the number corresponding to the database engine that this Configuration Server uses
(dbengine), and press Enter.b. Specify the name or alias of the DBMS that handles the Configuration Database (dbserver), and
press Enter.c. To specify the name of the Configuration Database (dbname), do one of the following:
Deploying Framework Deploying Configuration Layer
Framework Deployment Guide 77
• If you are using an Oracle database engine (that is, you typed 3 in Step c), press Enter. Thisvalue is not required for Oracle.
• If you are using any other database engine, specify the name of the Configuration Database,and press Enter.{{NoteFormat|If you are using DB Server to access the Configuration Database, you must also specify values for hostand port fields. Refer to Framework 8.1 documentation in this case.
d. Specify the Configuration Database username, and press Enter.e. To specify the Configuration Database password, do one of the following:
• Specify the password, and press Enter.• Press Enter if there is no password; that is, the password is empty, with no spaces.
When the installation process is finished, a message indicates that installation was successful. The process places ConfigurationServer in the directory specified during the installation process. The installation script also writes a sample configuration file,confserv.sample, in the directory in which Configuration Server is installed.
If you chose to configure the Configuration Server during installation, the sample configuration file, confserv.sample, is renamedconfserv.conf, and the parameters specified in Steps 9 through 11 are written to this file.
If you chose to configure the Configuration Server after installation, you must manually rename the sample file confserv.conf andmodify the configuration options before you start Configuration Server. Go to the next step.
Installing on Windows
Installing Configuration Server on Windows
WarningGenesys does not recommend installation of its components via a Microsoft Remote Desktop connection. Theinstallation should be performed locally.
1. On the Management Framework 8.5 product CD, locate and open the installation directory appropriatefor your environment:• For an enterprise (single-tenant) environment, the installation directory is configuration_layer/
configserver/single/windows.• For a multi-tenant environment, the installation directory is configuration_layer/configserver/
multi/windows.
2. Locate and double-click setup.exe to start the Genesys Installation Wizard.3. Click About on the wizard's Welcome page to review the read_me file. The file also contains a link to
the server's Release Notes file.4. On the Welcome page, click Next.5. On the Configuration Server Run Mode page, select Configuration Server Master Primary.6. On the Configuration Server Parameters page:
Deploying Framework Deploying Configuration Layer
Framework Deployment Guide 78

a. Specify the Server Port and Management Port for Configuration Server.b. Click Next.
7. On the Database Engine Option page, select the database engine that the Configuration Serveruses, and click Next.
8. On the DB Server Parameters page:a. Specify the Database Server Name and Database Name.b. Specify the Database User Name and Password.
9. On the Configuration Server External Authentication page, select the type of externalauthentication that the Configuration Server uses, or select None if Configuration Server is not usingexternal authentication.
10. On the Choose Destination Location page, the wizard displays the destination directory specified inthe Working Directory property of the server's Application object. If the path configured asWorking Directory is invalid, the wizard generates a path to C:\Program Files\GCTI\<Singletenant or Multitenant> Configuration Server.
If necessary, click one of the following:• Browse to select another destination folder. In this case, the wizard will update the Application
object's Working Directory in the Configuration Database.• Default to reinstate the path specified in Working Directory. Click Next to proceed.
11. On the Ready to Install information page, click one of the following:• Back to update any installation information.• Install to proceed with the installation.
12. On the Installation Complete page, click Finish.As a result of the installation, the wizard adds Application icons to the:
• Windows Start menu, under Programs > Genesys Solutions > Framework.• Windows Add or Remove Programs window, as a Genesys server.• Windows Services list, as a Genesys service, with Automatic startup type.
2. Configure Configuration Server. If you manually installed Configuration Server on Windows, it wasconfigured automatically during the installation process. You can skip this step. If you manually installedConfiguration Server on UNIX and chose not to configure it during the installation process, you mustconfigure it now. [+] Show steps
Prerequisites
• You manually installed Configuration Server on UNIX.• You chose not to configure Configuration Server during the installation process.• The Configuration Database has been initialized.
Deploying Framework Deploying Configuration Layer
Framework Deployment Guide 79

Procedure
1. From the directory in which Configuration Server is installed, open the sample configuration file(confserv.sample) in a text editor.
2. Set the configuration options to work with the Configuration Database and DB Server. Consult therelevant chapters in the Framework Configuration Options Reference Manual for option descriptionsand values. Refer also to Configuration Server Configuration File for a description of the configurationfile.
3. Save the configuration file as confserv.conf.
End of procedure
3. If required, configure Configuration Server for multi-language environment support. [+] Show steps
Enable Configuration Server to Support UTF-8 Encoding in Multi-language EnvironmentsAdd the following options to the confserv (for Configuration Server) or csproxy (for Configuration Server Proxy) section of theconfiguration file:
• Set the locale option to the value corresponding to English (US). The database against which a UTF-8enabled Configuration Server or Configuration Server Proxy is launched must be initialized usingEnglish locale scripts.
• Set the encoding option to utf-8.• Set the multi-languages option to true. You must set this option after initializing the database and
before you start Configuration Server against the UTF-8 enabled database.For more information about these options, refer to the Framework Configuration Options Reference Manual.
4. Start Configuration Server. [+] Show steps
ParametersFor descriptions of command-line parameters specific to Configuration Server, refer to Configuration Server.
ImportantUse the -c command line option to point Configuration Server to a configuration file with the name other thanthe default name (confserv.conf on UNIX or confserv.cfg on Windows). For example, confserv -c<configuration file name>.
Prerequisites
• Configuration Database is initialized.• DB Server is installed and running.• Configuration Server is installed.• The Configuration Server configuration file is configured. Configuration Server uses this file for startup.
Deploying Framework Deploying Configuration Layer
Framework Deployment Guide 80
Starting on UNIX
Starting Configuration Server on UNIXGo to the directory in which Configuration Server is installed and do one of the following:
• To use only the required command-line parameters, type the following command line:sh run.sh
• To specify the command line yourself, or to use additional command-line parameters, type thefollowing command line:
confserv [<additional parameters and arguments as required>]
Starting on Windows
Starting Configuration Server on WindowsDo one of the following:
• Use the Start > Programs menu.• To use only the required command-line parameters, go to the directory in which Configuration Server
is installed, and double-click the startServer.bat file.• To specify the command line yourself, or to use additional command-line parameters, open the MS-
DOS window, go to the directory in which Configuration Server is installed, and type the followingcommand line:
confserv.exe [<additional parameters and arguments as required>]
• Use Windows Services Manager. Refer to Starting and Stopping with Windows Services Manager formore information.
Configuration Server Configuration File
At a minimum, the configuration file contains the Configuration Server, Configuration Database, andLog sections.
The Configuration Server section contains the configuration options that define Configuration Server.The name of the section corresponds to the name of the Configuration Server Application object.For the initial installation of Configuration Server, it is called confserv by default. You can choose torename this Configuration Server later. In all other cases, or if you rename the initial ConfigurationServer, the name of this section will be different. The server configuration option in this sectionspecifies the name of the Configuration Database section.
Deploying Framework Deploying Configuration Layer
Framework Deployment Guide 81

By default, the Configuration Database section does not have a name. The section name must be thesame as the value of the server configuration option that you specified in the Configuration Serversection. The Configuration Database section contains information about the Configuration Database.
The name of the Log section is log. This section contains configuration information about the loggingto be done by Configuration Server.
You can find a sample Configuration Server configuration file in the Framework Configuration OptionsReference Manual.
Configuring Configuration Server Logging
If you plan to use the centralized logging and auditing functionality of the Management Layer, specifyappropriate log options in the Configuration Server configuration file before you start usingConfiguration Server. Most importantly, enable the network log output (for example, create a newoption called standard and set its value to network). Refer to the Framework Configuration OptionsReference Manual for more information.
Changing Configuration Server Port Assignments
When you install Configuration Server, you specify values for the listening and management ports inthe configuration file. You can change these values at any time.
Changing these port assignments depends on the type of port. To change the value of themanagement port, you must update the configuration file with the revised information, and restartConfiguration Server.
Changing the value of the listening port is more complex. As described in Multiple Ports onConfiguration Server, Configuration Server reads its listening port assignment from the configurationfile once, at initial startup. For subsequent startups, it reads the port value from the ConfigurationDatabase. Therefore, you must change the value in the Configuration Database by modifying thePort property of the Configuration Server Application object.
[+] Show stepsPrerequisites
• You are logged in to Genesys Administrator.
Procedure
1. In Genesys Administrator, select the Provisioning tab, go to Environment > Applications, anddouble-click the Configuration Server Application object for which you want to change the listeningport.
2. On the Configuration tab, open the Server Info section.3. In the list of Listening Ports, do one of the following:
Deploying Framework Deploying Configuration Layer
Framework Deployment Guide 82

• Click the port number that you want to change, enter the new port number, and either click outsideof the edit box or press Enter.
• Highlight the port that you want to change and click Edit. On the General tab of the Port Infodialog box, enter the new port number in the Port text box. Then click OK to close the Port Infodialog box.
4. Click Save or Save & Close in the toolbar to save your configuration changes.
Encrypting the Configuration Database Password
You can use Configuration Server to encrypt your password for accessing the Configuration Databaseso that it does not appear in plain text in the Configuration Server logs. This improves the security ofyour configuration data.
You can encrypt the password at any time, either during installation, or later. However, keep in mindthat Configuration Server must be stopped during the encryption process.
For instructions on encrypting the Configuration Database password, refer to the Genesys 8.1Security Deployment Guide.
Deploying Framework Deploying Configuration Layer
Framework Deployment Guide 83
Install Genesys AdministratorGenesys Administrator is a web-based GUI application that replaces Configuration Manager andSolution Control Interface. You must install it before you can deploy the rest of your system.
Refer to the detailed instructions in ''Framework 8.1 Genesys Administrator Deployment Guide'' todeploy and start Genesys Administrator for your system.
Deploying Framework Deploying Configuration Layer
Framework Deployment Guide 84

Create HostsHost objects represent computers in a network. Before you set up the Management Layer, you mustconfigure a Host object for each computer on the data network on which you are going to run theGenesys daemon processes (usually server applications).
Prerequisite
• You are logged in to Genesys Administrator.
Procedure
1. In Genesys Administrator, go to Provisioning > Environment > Hosts.2. Click New.3. On the Configuration tab:
a. Enter the name of the host, exactly as it is defined in the system configuration.
WarningThe host Name must be exactly the same as the host name defined in the system configuration.
b. Enter the IP address of the host.c. Select the type of operating system from the OS Type drop-down list, and enter its version, if
known.d. Enter the Local Control Agent (LCA) port number or accept the default (4999), to enable the
Management Layer to control applications running on this host. This is also the port used by otherapplications installed on this host to connect to LCA. Refer to Notes on Configuring the LCA Port foradditional information about configuring the LCA port value.
4. To customize the Advanced Disconnect Detection Protocol (ADDP) functionality that will be enabledbetween Solution Control Server (SCS) and LCA, on the Options tab:a. In the View drop-down list, select Advanced View (Annex).b. To specify the ADDP timeout between LCA and SCS, create a section called addp, add the option
addp-timeout inthis section, and specify a value.c. To enable sending LCA polling messages to SCS, in the section addp, add the option addp-remote-
timeout, and specify a value.
Refer to Configuring ADDP Between Solution Control Server and Local Control Agent for moreinformation. For detailed information about the configuration options themselves, refer to the''Framework Configuration Options Reference Manual''.
5. Click Save and Close.
For more information about setting configuration options using Genesys Administrator, refer to
Deploying Framework Deploying Configuration Layer
Framework Deployment Guide 85
''Genesys Administrator 8.1 Help''. For more information about specific configuration options, refer tothe ''Framework Configuration Options Reference Manual''.
Deploying Framework Deploying Configuration Layer
Framework Deployment Guide 86
Enabling Management Layer to ControlConfiguration LayerTo enable the Management Layer to control (start, stop, and monitor) Configuration Server, you mustmodify the Configuration Server application to communicate with the Local Control Agent (LCA), asfollows:
Prerequisites
• Configuration Server is installed and running, and its Application object is created.• A Host object exists for the computer on which this Configuration Server will be running. See Creating
Hosts.• You are logged in to Genesys Administrator.
Procedure
1. Go to Provisioning > Environment > Applications, and click the Configuration Server Applicationobject (named confserv) to open its properties.
2. On the Configuration tab, open the Server Info section.3. Select the host on which this Configuration Server runs.4. Define the Working Directory and Command Line properties for the primary Configuration Server, if
not already defined.5. Click Save and Close to save the changes.
Deploying Framework Enabling Management Layer to Control Configuration Layer
Framework Deployment Guide 87

Deploying Management LayerThe Management Layer controls the startup and status of solutions, logging of maintenance events,generation and processing of alarms, and management of application failures.
Deployment Summary
Deploy Management Layer in this order:
1. Local Control Agent (LCA)—LCA must be installed to enable the Management Layer's solution-controland fault-management capabilities. You must install one LCA on each host running a Genesys serverapplication.
ImportantAn application started by LCA inherits the environment variables from LCA.Therefore, when an application requires that particular environment variables beset, the same environment variables must be set for the account that runs LCA.
2. Database Access Point (DAP) for the Log Database3. Message Server—You must configure a connection to Message Server for each Genesys server
application to enable the Management Layer's centralized-logging and alarm-signaling capabilities.4. Initialize the Log Database5. Solution Control Server6. Genesys SNMP Master Agent
Starting in 8.5, Genesys Administrator replaces Configuration Manager and Solution Control Interface(SCI) as the preferred interface for Management Framework. If you still want to use SCI, deploy itusing the deployment instructions in the ''Framework 8.1 Deployment Guide''.
Remote Deployment
You can deploy the Management Layer servers (Message Server, Solution Control Server, andGenesys SNMP Master Agent) to any host on your network using Genesys Administrator Extension.Refer to Genesys Administrator Extension documentation for more information and instructions.
Deploying Framework Deploying Management Layer
Framework Deployment Guide 88

Next Steps
After you have successfully installed and configured the Management Layer components, considerwhether you would like to configure the following:
• Force logged-in users to log in again after a period of inactivity. See Forced Re-Login for Inactivity.• Redundant Message Servers, Solution Control Servers, or SNMP Master Agents. See Redundant
Configurations.• Distributed Solution Control Servers.
Continuing the Installation of Your SystemOnce the Management Layer is set up, you can then deploy the rest of the Framework components,the contact center environment, and other Genesys Voice and Data applications.
Deploying Framework Deploying Management Layer
Framework Deployment Guide 89

Local Control Agent (LCA)To enable the Management Layer to control the startup and status of applications and solutions, andmanage application failures, you must install an instance of Local Control Agent on every computerthat is to run either Genesys server applications or third-party server applications you want to controlwith Management Layer.
Installing LCA also installs and activates a remote deployment agent, called the Genesys DeploymentAgent, on that computer. Genesys Administrator Extension uses the Genesys Deployment Agent toremotely deploy Installation Packages to remote hosts in the network. See the Genesys AdministratorExtension Help for more information about this functionality.
Notes on Configuring the LCA Port
• The LCA port must be set to a value of 2000 or greater. When the LCA port is specified within the rangeof 1-1999, LCA starts on port number 4999 (default value).
• If the LCA port value is changed in the Host configuration while Solution Control Server (SCS) isconnected to LCA, SCS does not disconnect from and reconnect to LCA; instead, the new LCA port valuetakes effect after LCA restarts.
• If you change the LCA port value for the LCA installed as a Windows Service, you must also change theLCA port number in the LCA startup parameters in the Registry Editor. The LCA Registry Key is locatedat:(HKEY_LOCAL_MACHINE\SYSTEM\CurrentControlSet\Services\lca_service\ImagePath)
The value must have the following format:<full path>\lca.exe lt;LCA port number> -service <lca_service_name>
Change the LCA port number to the current value.
Installing Local Control Agent
ImportantAll running LCA processes must be stopped before installing another LCA.
[+] Installation Steps
Installing on UNIX
Deploying Framework Deploying Management Layer
Framework Deployment Guide 90

Installing LCA on UNIX
1. Stop all LCA processes that are running. If there are any LCA processes that are running when you beginthe installation, the installation process will stop, and not restart until you have stopped thoseprocesses (see Step 4).
2. On the Management Framework product CD in the appropriate management_layer/lca/<operating_system> directory, locate a shell script called install.sh.
3. Type the file name at the command prompt, and press Enter.4. Type Enter. This action will have one of the two following results.
• If there are any LCA processes still running, you must exit from the installation and have to stopthese processes before you can restart it.
• Otherwise, you continue with the installation.
5. To specify the hostname for this LCA, do one of the following:• Type the name of the host, and press Enter.• Press Enter to select the current host.
6. Enter the Configuration Server host name, and press Enter.7. Enter the Configuration Server network port, and press Enter.8. Enter the Configuration Server user name, and press Enter.9. Enter the Configuration Server password, and press Enter.
10. To specify the destination directory, do one of the following:• Press Enter to accept the default.• Enter the full path of the directory, and press Enter.
11. If the target installation directory has files in it, do one of the following:• Type 1 to back up all the files in the directory, and press Enter. Then specify the path to which you
want the files backed up, and press Enter.• Type 2 to overwrite only the files in this installation package, and press Enter. Then type y to
confirm your selection, and press Enter. Use this option only if the application already installedoperates properly.
• Type 3 to erase all files in this directory before continuing with the installation, and press Enter.Then type y to confirm your selection, and press Enter.
The list of file names will appear on the screen as the files are copied to the destination directory.12. For the product version to install, do one of the following:
• Type 32 to select the 32-bit version, and press Enter.• Type 64 to select the 64-bit version, and press Enter.
13. If you are authorized to modify startup (RC) files, you are prompted to add LCA to the startup files. Doone of the following:• Press Enter to add LCA to the startup files.• Type n to leave LCA out of the startup files, and press Enter.
Deploying Framework Deploying Management Layer
Framework Deployment Guide 91

ImportantOn UNIX systems, LCA 8.1.0 and earlier is installed with the autostart capability created automatically forrun level 3. If you are using another run level, you must modify your operating system startup scripts byadding the startup of LCA.
Installing on Windows
Installing LCA on Windows
1. Stop all LCA processes that are running.2. On the Management Framework product CD in the appropriate management_layer\lca\windows
directory, locate and double-click setup.exe to start the Genesys Installation Wizard.3. Use the About button on the wizard's Welcome page to view the read_me file. The file also contains a
link to the server's Release Notes file.4. Click Next to start the installation.5. On the Connection Parameters to the Genesys Configuration Server page, specify the host
name, port, user name, and password for Configuration Server, and then click Next.6. On the Choose Destination Location page, the wizard displays the default folder C:\Program
Files\GCTI\Local Control Agent.If necessary, click one of the following:• Browse to select another destination folder.• Default to reinstate the default folder, C:\Program Files\GCTI\Local Control Agent.
7. On the Ready to Install page, click one of the following:• Back to update any installation information.• Install to proceed with the installation.
8. On the Installation Complete page, click Finish.
As a result of the installation, the wizard adds Application icons to the:
• Windows Start menu, under Programs > Genesys Solutions > Management Layer.• Windows Add or Remove Programs window, as a Genesys server.• Windows Services list, as a Genesys service, with Automatic startup type.
{{NoteFormat|
• Because the Management Layer functionality requires LCA to be always running while its host computeris up, LCA is installed as a Windows Service with the autostart capability.
Deploying Framework Deploying Management Layer
Framework Deployment Guide 92
LCA Log Options
Local Control Agent supports the unified set of log options (common log options) to allow preciseconfiguration of log output. For a complete list of unified log options and their descriptions, see the"Common Log Options" section of the ''Framework Configuration Options Reference Manual''.
If you do not specify any log options for LCA, the default values apply. To specify log options for LCA,modify the lca.cfg configuration file that was created during LCA deployment, and is located in thesame directory as the LCA executable. The LCA configuration file has the following format:
[log]<log option name> = <log option value><log option name> = <log option value>...
A sample LCA configuration file is available in the ''Framework Configuration Options ReferenceManual''.
Configuring ADDP Between Solution Control Server and LocalControl Agent
Advanced Disconnection Detection Protocol (ADDP) is enabled automatically between SolutionControl Server (SCS) and LCA. By default, SCS generates polling messages to LCA. If SCS does notreceive messages from LCA within this interval, SCS sends a polling message. A lack of response tothe polling message from LCA within the same time period is interpreted as a loss of connection.
If you want to change the ADDP timeout between SCS and LCA, configure the addp-timeout option. Ifyou also want to enable LCA polling messages to SCS, configure the addp-remote-timeout option.Both of these options are set in the Annex of the Host object configured for the computer on whichLCA runs. For detailed instructions on specifying these options, refer to the ''Framework ConfigurationOptions Reference Manual''.
To avoid false disconnect states that might occur because of delays in the data network, Genesysrecommends setting the ADDP timeouts to values equal to or greater than ten seconds.
Deploying Framework Deploying Management Layer
Framework Deployment Guide 93

Database Access PointsTo cover the variety of ways the applications in the Genesys installation can be interfaced withdatabases, the Configuration Layer uses the concept of a Database Access Point.
A Database Access Point (DAP) is a configuration object of the Application type that describes boththe parameters required for communication with a particular database, such as JDBC parameters,and the parameters of the database itself. The DAP application you configure for the ManagementLayer enables Message Server to connects to the Log Database directly. If, according to yourconfiguration, a database can be accessed by multiple applications simultaneously, register one DAPfor each possible connection.
For detailed instructions for configuring the Log DAP, and more information about how ManagementFramework servers connect to databases, refer to the Framework Database Connectivity ReferenceGuide.
To interface an Application object with a database through a certain Database Access Point, add theDAP to the list of the application's Connections.
Deploying Framework Deploying Management Layer
Framework Deployment Guide 94

Message ServerTo deploy Message Server, do the following:
1. Configure a Message Server Application object. [+] Show steps
Prerequisites
• A Database Access Point for the Log Database is configured.• You are logged in to Genesys Administrator.
Procedure
1. In Genesys Administrator, go to Provisioning > Environment > Applications, and select New in thetoolbar. This opens a Browse dialog box that lists the available application templates. If a MessageServer template file is not listed, do one of the following:• Import the Message_Server_<current-version>.apd file from the Management Framework 8.1
product CD.• Create a new template and repeat this step.
2. In the Browse dialog box, select the Message Server template file. The Configuration tab for the newMessage Server Application object appears in the Details panel.
3. In the General section:• Enter a descriptive name in the Name field; for example, MsgServer.• Add a connection to the Log Database DAP. In the Connections field:
i. Click Add.ii. Enter the properties of the connection in the Connection Info dialog box.iii. Click OK.
4. In the Server Info section:a. In the Host field, click the magnifying glass icon to select the host on which this Message Server is
running.b. For each listening port that an application must use to connect to Message Server:
i. In the Listening Ports field, click Add.ii. Enter the port properties in the Port Info dialog box.iii. Click OK.
c. For the Working Directory, Command Line, and Command Line Arguments fields, do one of thefollowing:• Enter the appropriate information in the three text boxes. For information about command-line
parameters, see Message Server.
Deploying Framework Deploying Management Layer
Framework Deployment Guide 95

• Type a period (.) in the Working Directory and Command Line text boxes, and leave theCommand Line Arguments text box blank. The information will be filled in automatically whenyou install Message Server, but only if the Installation Package can connect to ConfigurationServer.
5. If you want Message Server to direct log events to the Log Database, on the Options tab:a. In the drop-down list in the top-right corner, select Options if not already selected.b. In the messages section, change the value of the db_storage option to true.
6. Click Save or Apply in the toolbar to save the new object. The new object will appear in the list ofapplications.
2. Install Message Server. [+] Show steps
On UNIX
WarningDuring installation on UNIX, all files are copied into the directory you specify. The install process does not createany subdirectories within this directory, so do not install different products into the same directory.
Prerequisite
• A Message Server Application object exists.
Procedure
1. On the Management Framework 8.1 product CD in the appropriate management_layer/message_server/<operating_system> directory, locate a shell script called install.sh.
2. Type the file name at the command prompt, and press Enter.3. To specify the host name for this Message Server, do one of the following:
• Type the name of the host, and press Enter.• Press Enter to select the current host.
4. Enter the Configuration Server host name, and press Enter.5. Enter the Configuration Server network port, and press Enter.6. Enter the Configuration Server user name, and press Enter.7. Enter the Configuration Server password, and press Enter.8. The installation displays the list of Application objects of the specified type configured on this Host
object. Type the number corresponding to the Message Server Application object you configuredabove, and press Enter.
Deploying Framework Deploying Management Layer
Framework Deployment Guide 96

9. To specify the destination directory, do one of the following:• Press Enter to accept the default.• Enter the full path of the directory, and press Enter.
10. If the target installation directory has files in it, do one of the following:• Type 1 to back up all the files in the directory, and press Enter. Specify the path to which you want
the files backed up, and press Enter.• Type 2 to overwrite only the files in this installation package, and press Enter. Then type y to
confirm your selection, and press Enter.Use this option only if the application already installed operates properly.
• Type 3 to erase all files in this directory before continuing with the installation, and press Enter.Then type y to confirm your selection, and press Enter.The list of file names will appear on the screen as the files are copied to the destination directory.
11. For the product version to install, do one of the following:• Type 32 to select the 32-bit version, and press Enter.• Type 64 to select the 64-bit version, and press Enter.
On Windows
WarningGenesys does not recommend installation of its components via a Microsoft Remote Desktop connection. Theinstallation should be performed locally.
Prerequisite
• A Message Server Application object exists.
Procedure
1. On the Management Framework 8.1 product CD in the appropriate management_layer\message_server\windows directory, locate and double-click setup.exe to start the GenesysInstallation Wizard.
2. Click About on the wizard's Welcome page to review the read_me file. The file also contains a link tothe server's Release Notes file.
3. Click Next to start the installation.4. On the Connection Parameters to the Genesys Configuration Server page, specify the host
name, port, user name, and password of Configuration Server, and then click Next.5. On the Select Application page, select the name of the Message Server Application object that
Deploying Framework Deploying Management Layer
Framework Deployment Guide 97
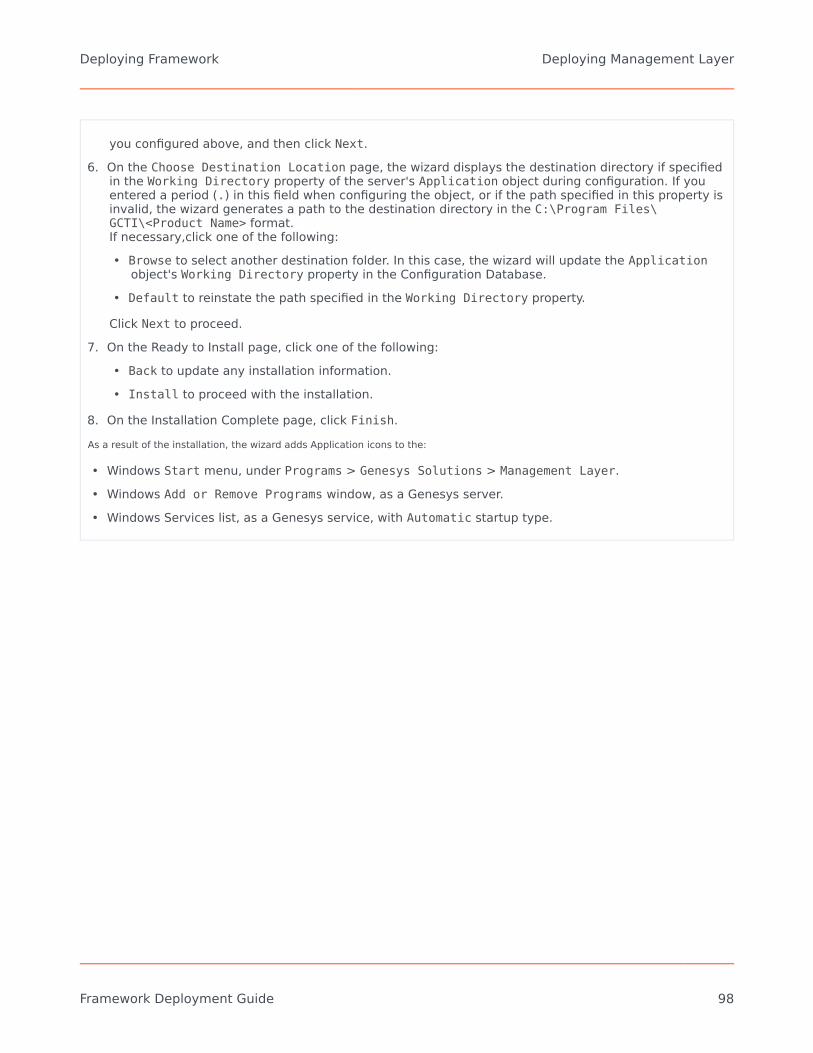
you configured above, and then click Next.6. On the Choose Destination Location page, the wizard displays the destination directory if specified
in the Working Directory property of the server's Application object during configuration. If youentered a period (.) in this field when configuring the object, or if the path specified in this property isinvalid, the wizard generates a path to the destination directory in the C:\Program Files\GCTI\<Product Name> format.If necessary,click one of the following:• Browse to select another destination folder. In this case, the wizard will update the Application
object's Working Directory property in the Configuration Database.• Default to reinstate the path specified in the Working Directory property.
Click Next to proceed.7. On the Ready to Install page, click one of the following:
• Back to update any installation information.• Install to proceed with the installation.
8. On the Installation Complete page, click Finish.As a result of the installation, the wizard adds Application icons to the:
• Windows Start menu, under Programs > Genesys Solutions > Management Layer.• Windows Add or Remove Programs window, as a Genesys server.• Windows Services list, as a Genesys service, with Automatic startup type.
Deploying Framework Deploying Management Layer
Framework Deployment Guide 98

Centralized Log Database
Initializing the Log Database
Important• Message Server can only write logs to a PostgreSQL DBMS if the corresponding DB
Server also supports PostgreSQL.• If you are using the Oracle DBMS, Genesys strongly recommends that you use the SQL
Plus command line utility initializing the Log Database.• If you are setting up the Log Database for use in a multi-language environment, refer to
the Framework Database Connectivity Reference Guide for additional information.
Prerequisites
• A DBMS is installed, and a blank database has been created.• Message Server is installed and running.
Start of procedure
1. In your DBMS interface, go to the directory in which Message Server is installed and open the scriptsfolder.
2. Open the folder that matches your database type.3. Load and execute the script that corresponds to your DBMS, as provided in the following table.
DBMS Script Name Multi-language Script Namea
DB2 init_db2.sql init_multilang_db2.sqlMicrosoft SQL init_mssql.sql init_multilang_mssql.sql b
Oracle init_oracle.sql init_multilang_oracle.sqlPostgreSQL init_postgre.sql Not requiredNotes:a. Use the multi-language scripts if you are setting up your Centralized Log system in multi-languagemode.b. A multi-language MS SQL database uses UCS-2 encoding instead of UTF-8 encoding. You must setutf8-ucs2=true in the dbclient section in the annex of the corresponding Database Access Point.Refer to the ''Framework Configuration Options Reference Manual'' for more information about thisoption.
Deploying Framework Deploying Management Layer
Framework Deployment Guide 99

4. Save the initialized database.
DBMS Adjustment
You must install and configure an SQL Server client for your database type. Refer to the FrameworkDatabase Connectivity Reference Guide for recommended environment settings for your databaseclient.
Deploying Framework Deploying Management Layer
Framework Deployment Guide 100

Solution Control Server
Deploying Solution Control Server
To deploy Solution Control Server, do the following:
1. Configure a Solution Control Application object. [+] Show steps
Prerequisite
• You are logged in to Genesys Administrator.
Procedure
1. In Genesys Administrator, go to Provisioning > Environment > Applications, and select New in thetoolbar. This opens a Browse dialog box that lists available application templates. If a Solution ControlServer template file is not listed, do one of the following:• Import the Solution_Control_Server_<current-version>.apd file from the Management
Framework 8.5 product CD.• Create a new template and repeat this step.
2. In the Browse dialog box, select the Solution Control Server template file. The Configuration tab forthe new Solution Control Server Application object appears in the Details panel.
3. In the General section:a. Enter a descriptive name in the Name field-for example, SCS.b. If you want to enable alarm signaling, add a connection to the Message Server. In the Connections
field:i. Click Add.ii. Enter the properties of the connection in the Connection Info dialog box.iii. Click OK.
4. In the Server Info section:a. In the Host field, click the magnifying glass icon to select the Host object on which this Solution
Control Server is running.b. For each listening port that an application must use to connect to Solution Control Server:
i. In the Listening Ports field, click Add.ii. Enter the port properties in the Port Info dialog box.iii. Click OK.
c. For the Working Directory, Command Line, and Command Line Arguments fields, do one of thefollowing:
Deploying Framework Deploying Management Layer
Framework Deployment Guide 101
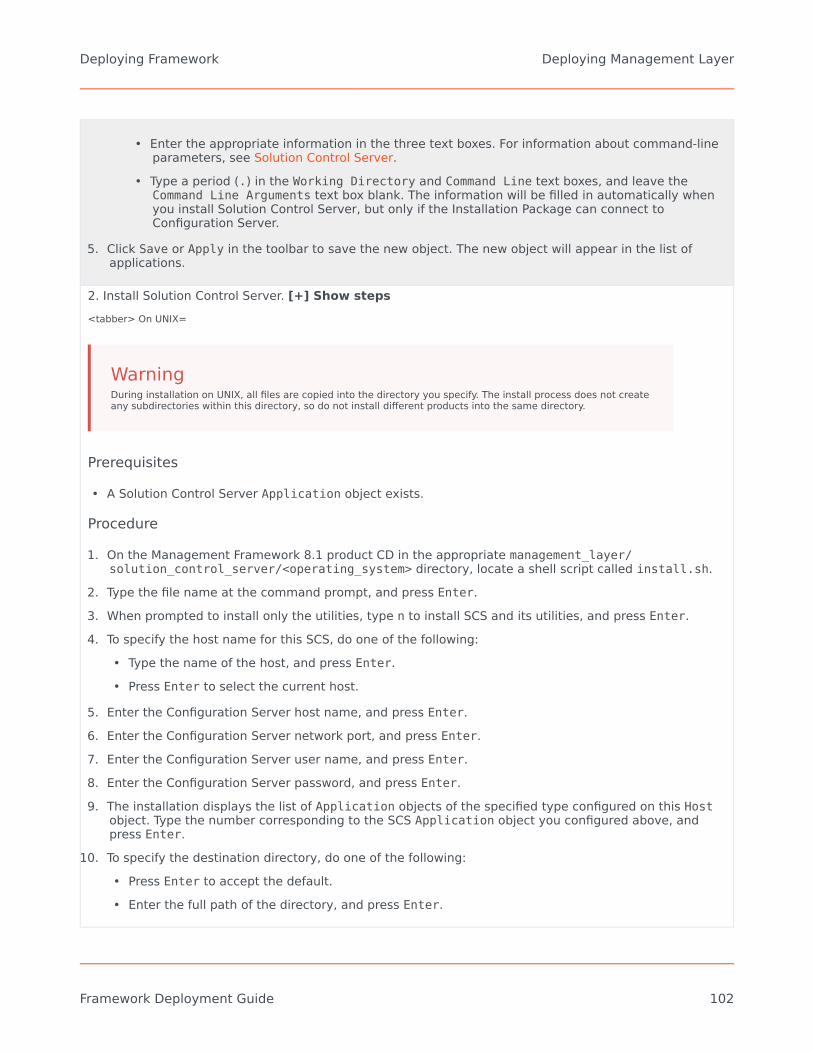
• Enter the appropriate information in the three text boxes. For information about command-lineparameters, see Solution Control Server.
• Type a period (.) in the Working Directory and Command Line text boxes, and leave theCommand Line Arguments text box blank. The information will be filled in automatically whenyou install Solution Control Server, but only if the Installation Package can connect toConfiguration Server.
5. Click Save or Apply in the toolbar to save the new object. The new object will appear in the list ofapplications.
2. Install Solution Control Server. [+] Show steps<tabber> On UNIX=
WarningDuring installation on UNIX, all files are copied into the directory you specify. The install process does not createany subdirectories within this directory, so do not install different products into the same directory.
Prerequisites
• A Solution Control Server Application object exists.
Procedure
1. On the Management Framework 8.1 product CD in the appropriate management_layer/solution_control_server/<operating_system> directory, locate a shell script called install.sh.
2. Type the file name at the command prompt, and press Enter.3. When prompted to install only the utilities, type n to install SCS and its utilities, and press Enter.4. To specify the host name for this SCS, do one of the following:
• Type the name of the host, and press Enter.• Press Enter to select the current host.
5. Enter the Configuration Server host name, and press Enter.6. Enter the Configuration Server network port, and press Enter.7. Enter the Configuration Server user name, and press Enter.8. Enter the Configuration Server password, and press Enter.9. The installation displays the list of Application objects of the specified type configured on this Host
object. Type the number corresponding to the SCS Application object you configured above, andpress Enter.
10. To specify the destination directory, do one of the following:• Press Enter to accept the default.• Enter the full path of the directory, and press Enter.
Deploying Framework Deploying Management Layer
Framework Deployment Guide 102

11. If the target installation directory has files in it, do one of the following:• Type 1 to back up all the files in the directory, and press Enter. Specify the path to which you want
the files backed up, and press Enter.• Type 2 to overwrite only the files in this installation package, and press Enter. Then type y to
confirm your selection, and press Enter.Use this option only if the application already installed operates properly.
• Type 3 to erase all files in this directory before continuing with the installation, and press Enter.Then type y to confirm your selection, and press Enter.The list of file names will appear on the screen as the files are copied to the destination directory.
12. For the product version to install, do one of the following:• Type 32 to select the 32-bit version, and press Enter.• Type 64 to select the 64-bit version, and press Enter.
13. To decide whether you require a license, refer to the ''Genesys Licensing Guide'' for information aboutlicensing requirements. Then, do one of the following:• Type y if you require a license, and press Enter.• Type n if you do not require a license, and press Enter.
14. If you typed y in the previous step, enter the license location format, press Enter, and enter therequired parameters.
|-|
On Windows=
WarningGenesys does not recommend installation of its components via a Microsoft Remote Desktop connection. Theinstallation should be performed locally.
Prerequisite
• A Solution Control Server Application object exists.
Procedure
1. On the Management Framework 8.1 product CD in the appropriate management_layer\solution_control_server\windows directory, locate and double-click setup.exe to start the GenesysInstallation Wizard.
2. Click About on the wizard's Welcome page to review the read_me file. The file also contains a link tothe server's Release Notes file.
3. Click Next to start the installation.4. On the Solution Control Server Installation Mode page, select Solution Control Server and
Utilities, and then click Next.
Deploying Framework Deploying Management Layer
Framework Deployment Guide 103

5. On the Connection Parameters to the Genesys Configuration Server page, specify the hostname, port, user name, and password of Configuration Server, and then click Next.
6. On the Select Application page, select the name of the SCS Application object that youconfigured above, and then click Next.
7. On the Run-time License Configuration page, select whether you are using a license. Refer to the''Genesys Licensing Guide'' for information about licensing requirements, and then click Next.
8. If you selected Use License in the previous step, on the Access to License page, enter the licenseaccess type and required parameters.
9. On the Choose Destination Location page, the wizard displays the destination directory if specifiedin the Working Directory property of the server's Application object during configuration. If youentered a period (.) in this field when configuring the object, or if the path specified in this property isinvalid, the wizard generates a path to the destination directory in the C:\Program Files\GCTI\<Product Name> format.If necessary, click one of the following:• Browse to select another destination folder. In this case, the wizard will update the Application
object's Working Directory property in the Configuration Database.• Default to reinstate the path specified in the Working Directory property.
Click Next to proceed.10. On the Ready to Install page, click:
• Back to update any installation information.• Install to proceed with the installation.
11. On the Installation Complete page, click Finish.As a result of the installation, the wizard adds Application icons to the:
• Windows Start menu, under Programs > Genesys Solutions > Management Layer.• Windows Add or Remove Programs window, as a Genesys server.• Windows Services list, as a Genesys service, with Automatic startup type.
Solution Control Server Utilities
Solution Control Server includes four utilities:
• ccgs.pl-Graceful Call Center T-Servers stop script.• gstuckcalls utility and Stuck Calls detection and deletion scripts-To handle T-Server stuck calls and raise
alarms.• logmsg utility-To send log messages on behalf of applications.• mlcmd utility-To send and receive information to and from Solution Control Server.
For more information about these utilities and how to use them, see the ''Framework 8.5Management Layer User's Guide''.
Deploying Framework Deploying Management Layer
Framework Deployment Guide 104

By default, the utilities are installed with SCS, but can be installed separately. [+]Show steps
On UNIX
Separately Installing SCS Utilities on UNIX
1. On the Management Framework 8.1 product CD in the appropriate directory undermanagement_layer/solution_control_server/<operating_system>locate a shell script called install.sh.
2. Type the file name at the command prompt, and press Enter.3. Type y to specify that you want to install only the utilities, and press Enter.4. Enter the full path of the directory in which you want to install the utilities, for example, /opt/genesys/
scsutil, and press Enter. The installation displays the list of files being extracted and copied to thedestination directory.
5. Enter the bit version of the system on which you are installing the utilities, either 32 or 64, and pressEnter.
On Windows
Separately Installing SCS Utilities on Windows
1. On the Management Framework 8.1 product CD in the appropriate directory in:management_layer\solution_control_server\windowslocate and double-click setup.exe to start the Genesys Installation Wizard.
2. On the wizard's Welcome page, click Next to start the installation.3. On the Solution Control Server Installation Mode page, select Solution Control Server
Utilities, and then click Next.4. On the Choose Destination Location page, do one of the following to specify the directory where the
utilities will be installed:• Click Next to accept the default directory.• Specify a different path and directory by entering it in the text box or using the Browse button. If
necessary, use the Default button to reinstate the original default. Click Next to proceed.
5. On the Ready to Install page, click:• Back to update any installation information.• Install to proceed with the installation.
6. On the Installation Complete page, click Finish.
Deploying Framework Deploying Management Layer
Framework Deployment Guide 105

Genesys SNMP Master AgentFor the Management Layer to communicate with an SNMP Master Agent, provided by either a third-party or Genesys, you must configure an Application object of type SNMP Agent in theConfiguration Database, and configure a connection to this Application object in Solution ControlServer.
If you do not want to use a redundant configuration or your SNMP Master Agent application does notsupport redundant configuration, configure your SNMP Master Agent as a stand-alone application.This section provides instructions for deploying a stand-alone SNMP Master Agent application.
ImportantDepending on the solutions for which you want to enable SNMP monitoring, you mayneed to install several instances of SNMP Master Agent, using the same approachgiven in this section.Generally, you have to install and configure one instance of Genesys SNMP MasterAgent on each computer on which you will be using SMNP functionality.
For more information about Genesys SNMP Master Agent, refer to the ''Framework 8.5 ManagementLayer User's Guide''.
To deploy SNMP Master Agent, do the following:
1. Configure an SNMP Master Agent Application object. [+] Show steps
Prerequisites
• You are logged in to Genesys Administrator.
Procedure1. In Genesys Administrator, go to Provisioning > Environment > Applications, and select New in the
toolbar. This opens a Browse dialog box that lists available application templates. If an SNMP MasterAgent template file is not listed, do one of the following:• Import the SNMP_Master_Agent_<current-version>.apd file from the Management Framework
8.5 product CD.• Create a new template and repeat this step.
2. In the Browse dialog box, select the SNMP Master Agent template file. The Configuration tab for thenew SNMP Master Agent Application object appears in the Details panel.
3. In the General section, enter a descriptive name in the Name field-for example, SNMP_MA.4. In the Server Info section:
Deploying Framework Deploying Management Layer
Framework Deployment Guide 106

a. In the Host field, click the magnifying glass icon to select the Host object on which this SNMPMaster Agent is running.
b. For each listening port that an application must use to connect to SNMP Master Agent:i. In the Listening Ports field, click Add.ii. Enter the port properties in the Port Info dialog box.iii. Click OK.
c. For the Working Directory, Command Line, and Command Line Arguments fields, do one of thefollowing:• Enter the appropriate information in the three text boxes. For information about command-line
parameters, see SNMP Master Agent.• Type a period (,) in the Working Directory and Command Line text boxes, and leave the
Command Line Arguments text box blank. The information will be filled in automatically whenyou install SNMP Master Agent, but only if the Installation Package can connect toConfiguration Server.
5. Click Save or Apply in the toolbar to save the new object. The new object will appear in the list ofapplications.
6. Add a connection from Solution Control Server to this SNMP Master Agent, as follows:a. Open the Solution Control Server Application object's Configuration tab.b. In the General section, add the connection to the SNMP Master Agent object just created. In the
Connections field:i. Click Add to open the Connection Info dialog box.ii. Enter the properties of the connection.iii. Click OK.
c. Click Save or Apply in the toolbar to save the configuration changes
2. Installing SNMP Master Agent. [+] Show steps
On UNIX
WarningDuring installation on UNIX, all files are copied into the directory you specify. The install process does not createany subdirectories within this directory, so do not install different products into the same directory.
Prerequisite
• A SNMP Master Agent Application object exists.
Deploying Framework Deploying Management Layer
Framework Deployment Guide 107

Procedure
1. On the Management Framework 8.1 product CD in the appropriate management_layer/snmp_master_agent/<operating_system> directory, locate a shell script called install.sh.
2. Type the file name at the command prompt, and press Enter.3. To specify the host name for this SNMP Master Agent, do one of the following:
• Type the name of the host, and press Enter.• Press Enter to select the current host.
4. Enter the Configuration Server host name, and press Enter.5. Enter the Configuration Server network port, and press Enter.6. Enter the Configuration Server user name, and press Enter.7. Enter the Configuration Server password, and press Enter.8. The installation displays the list of Application objects of the specified type configured on this Host
object. Type the number corresponding to the SNMP Master Agent Application object you configuredabove, and press Enter.
9. To specify the destination directory, do one of the following:• Press Enter to accept the default.• Enter the full path of the directory, and press Enter.
10. If the target installation directory has files in it, do one of the following:• Type 1 to back up all the files in the directory, and press Enter. Specify the path to which you want
the files backed up, and press Enter.• Type 2 to overwrite only the files in this installation package, and press Enter. Then type y to
confirm your selection, and press Enter.Use this option only if the application already installed operates properly.
• Type 3 to erase all files in this directory before continuing with the installation, and press Enter.Then type y to confirm your selection, and press Enter.The list of file names will appear on the screen as the files are copied to the destination directory.
11. For the product version to install, do one of the following:• Type 32 to select the 32-bit version, and press Enter.• Type 64 to select the 64-bit version, and press Enter.
On Windows
Deploying Framework Deploying Management Layer
Framework Deployment Guide 108
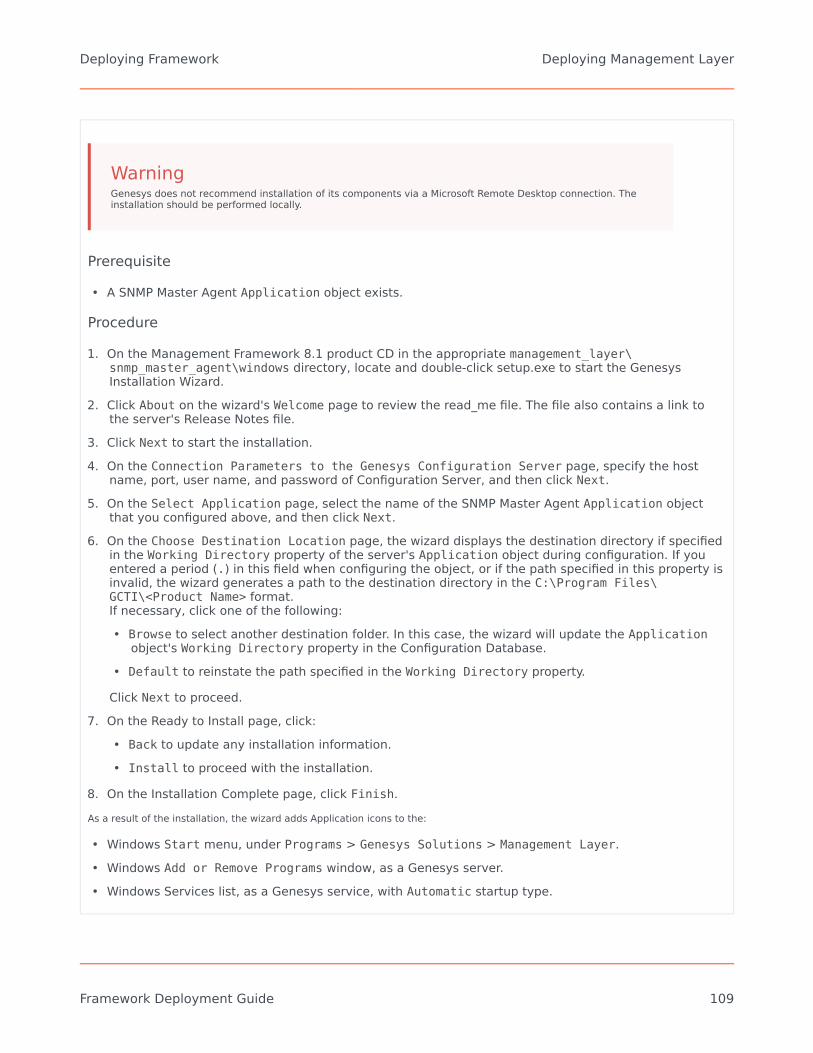
WarningGenesys does not recommend installation of its components via a Microsoft Remote Desktop connection. Theinstallation should be performed locally.
Prerequisite
• A SNMP Master Agent Application object exists.
Procedure
1. On the Management Framework 8.1 product CD in the appropriate management_layer\snmp_master_agent\windows directory, locate and double-click setup.exe to start the GenesysInstallation Wizard.
2. Click About on the wizard's Welcome page to review the read_me file. The file also contains a link tothe server's Release Notes file.
3. Click Next to start the installation.4. On the Connection Parameters to the Genesys Configuration Server page, specify the host
name, port, user name, and password of Configuration Server, and then click Next.5. On the Select Application page, select the name of the SNMP Master Agent Application object
that you configured above, and then click Next.6. On the Choose Destination Location page, the wizard displays the destination directory if specified
in the Working Directory property of the server's Application object during configuration. If youentered a period (.) in this field when configuring the object, or if the path specified in this property isinvalid, the wizard generates a path to the destination directory in the C:\Program Files\GCTI\<Product Name> format.If necessary, click one of the following:• Browse to select another destination folder. In this case, the wizard will update the Application
object's Working Directory property in the Configuration Database.• Default to reinstate the path specified in the Working Directory property.
Click Next to proceed.7. On the Ready to Install page, click:
• Back to update any installation information.• Install to proceed with the installation.
8. On the Installation Complete page, click Finish.As a result of the installation, the wizard adds Application icons to the:
• Windows Start menu, under Programs > Genesys Solutions > Management Layer.• Windows Add or Remove Programs window, as a Genesys server.• Windows Services list, as a Genesys service, with Automatic startup type.
Deploying Framework Deploying Management Layer
Framework Deployment Guide 109

Deploying the Rest of Your FrameworkNow that you deployed the Configuration Layer and, if required, the Management Layer, you candeploy the rest of the Framework components and the contact center environment.
Recommended Order
Manual deployment of the other Framework components and contact center environment objectsinvolves:
• Configuring the components using Genesys Administrator. Refer to ''Genesys Administrator 8.1 Help'' formore information.
• Manually installing the configured components.
Before you proceed, make sure that the Configuration Layer and Management Layer components areinstalled, configured, and running. To help you prepare accurate configuration information andbecome familiar with the configuration process, review Deployment Planning for help with object-configuration information.
Follow this order for the manual deployment of the other Framework components and contact centerenvironment objects:
1. Media Layer:• T-Server• HA Proxy for a specific type of T-Server (if applicable)
ImportantDeployment instructions for T-Server and HA Proxy (if applicable) are located in the latest version of theFramework T-Server Deployment Guide for your specific T-Server.
2. Telephony Objects:• Switching Offices• Switches• Agent Logins• DNs
Important
Deploying Framework Deploying the Rest of Your Framework
Framework Deployment Guide 110

Configuration instructions for telephony objects are located in the latest version of the Framework T-ServerDeployment Guide for your specific T-Server.
3. Contact Center Objects:• Access Groups• Skills• Persons• Agent Groups• Places• Place Groups
4. Services Layer:• Stat Server
Genesys recommends registering only those entities that you plan to use in the current configuration.The more data in the Configuration Database, the longer it takes for your system to start up, and thelonger it takes to process configuration data. Remember that adding configuration objects to theGenesys Configuration Database does not cause any interruption in the contact center operation.
Depending on how much work it is to configure all applications and objects, consider registering moreUser objects first, with a set of privileges that lets them perform configuration tasks.
WarningWhen configuring redundant applications, do not select the redundancy type NotSpecified unless using a switchover mechanism other than that provided by theManagement Layer. It is acceptable, however, to leave the redundancy type NotSpecified for non-redundant applications (that is, applications that do not havebackup servers associated with them).
.
Media Layer
Component (T-Server and HA Proxy, if applicable) configuration and installation for the Media Layer iscovered in the latest version of the Framework T-Server Deployment Guide for your specific T-Server.Also covered in that Guide is information about deploying components for redundant and multi-siteconfigurations.
Deploying Framework Deploying the Rest of Your Framework
Framework Deployment Guide 111

Telephony Objects
The configuration of Configuration Database objects for the telephony equipment used in the contactcenter is described in the latest version of the Framework T-Server Deployment Guide for yourspecific T-Server.
Contact Center Objects
Configure Configuration Database objects for the contact center personnel and related entities.
Access GroupsBefore deciding what kind of Access Groups you must configure, look at the default Access Groupsthe Configuration Layer supports and the default access control settings in general.
The default security system may cover all of your needs. If a more complex access control systemmakes sense for your contact center, Genesys recommends managing it through Access Groups andfolders rather than at the level of individuals and objects.
To define an Access Group and its permissions:
1. Identify groups of people that are handling specific activities in the customer interaction network.2. Create the required Access Group objects.3. Set Access Group privileges with respect to the object types, using the folders' Permissions and Roles
tabs.
In addition, to simplify the security settings, make sure that permissions are set and changedrecursively using the permission propagation mechanism.
SkillsDefine agent skills that might be considered as criteria for interaction processing. Skills areconfigured as independent configuration objects; any Agent can be associated with more than oneconfigured Skill. Therefore, it may be more practical to register Skills before the Agents areconfigured.
UsersThere are two major categories of Users: Agents and Non-agents. The latter category includes allUsers other than agents that need access to the CTI applications; for example, Center Administrators,Data Network and Telephony Network personnel, designers of interaction-processing algorithms, andSupervisors.
The characteristics of your business environment and your current priorities completely determinethe order of registering Persons. Most often, you will want to first configure a few registered Non-agents with a high level of access to help you set up the Configuration Database.
Deploying Framework Deploying the Rest of Your Framework
Framework Deployment Guide 112

Assign Agent Logins and Skills when registering Agents.
ImportantYou create Agent Logins when you are configuring the Switch object. Refer to thelatest version of the Framework T-Server Deployment Guide for your specific T-Serverfor instructions.
If a few Agents have a certain Skill of the same level, consider using a wizard that adds the Skill tomultiple User objects after you create them. To launch the wizard, select two or more User objectsthat have the Is Agent check box selected, right-click, and select Manage Skills. Refer to ''GenesysAdministrator 8.1 Help'' for more information.
Remember that the Configuration Layer requires that you assign a unique user name to each User,including agents. Consider using employee IDs configured in User objects as default user names andpasswords.
New Users by default are not automatically assigned to any access group, by default. They must beassigned to one or more Access Groups explicitly. If you want new users to be added automatically topredefined Access Groups, you must manually disable this feature using the configuration option no-default-access. Refer to the chapter "No Default Access for New Users" in the ''Genesys 8.1Security Deployment Guide'' for more information about this feature, and how to use or disable it.
Some GUI applications also use Ranks to determine what functionality is made available to the Usercurrently logged in. Unless Agents are required to use rank-dependent applications in their work, youdo not have to assign any specific Ranks to them.
Ranks and access privileges are more important when registering non-agents. When registering non-agents, consider the role they have in the customer interaction business. Do these Users need tomonitor agents' performance? Will they need to configure the telephony resources? Are they going todesign routing strategies? Having answers to these questions makes it easier to correctly set up theaccess privileges with respect to configuration objects, and Ranks with respect to differentapplications objects.
Remember that Ranks with respect to applications are not the same as access privileges with respectto the configuration objects. You must explicitly define Ranks. Access privileges are assigned bydefault, according to whether the User is an agent or not.
Genesys does not recommend changing the default access-control setting unless absolutelynecessary. Remember, the more complex the security system implemented, the more difficult itbecomes to administer the database, and the more it affects the performance of the ConfigurationLayer software.
Agent GroupsAgent Groups are an indispensable element of almost every contact center. Remember that you canassign an agent to more than one group at a time. If you create agent groups based on Skills, use theFind command or the Dependency tab of a Skill to quickly identify all the agents that have the Skill inquestion.
Deploying Framework Deploying the Rest of Your Framework
Framework Deployment Guide 113

PlacesIf you use Genesys CTI applications to distribute calls to individual agents or agent groups that arenot limited by the switch ACD configuration, set up Places and assign individual DNs to them.Because a typical Place consists of more than one DN, prepare the actual layout of the numberingplan to correctly configure the Places, and assign DNs to them.
Place GroupsDefine Place Groups and assign individual Places to them only if they will be used for distributing callsto groups of Places and, therefore, you will need to collect availability information and real-timestatistics for such groups.
Services Layer
Genesys recommends that you configure and install components of the Services Layer when youdeploy the solution they will serve.
Stat ServerThe configuration and installation procedures for Stat Server are described in the documentation forStat Server.
Deploying Framework Deploying the Rest of Your Framework
Framework Deployment Guide 114

Redundant ConfigurationsYou can increase the availability of your Genesys solutions by deploying redundant pairs of primaryand backup servers of the same type, controlled by the Management Layer. You must have speciallicenses to use these configurations.
All Management Framework servers support the warm standby redundancy type, meaning that abackup server application remains initialized and ready to take over the operations of the primaryserver. Redundancy types are described in the ''Genesys 8.1 Security Deployment Guide''.
Configuration Layer and Management Layer also support switchovers between redundant clientapplications, regardless of the redundancy type specified by those applications.
Important• The instructions in this section assume that the primary server is already installed and
operating. This section provides only instructions for installing the backup server andconfiguring the primary and backup servers to operate as a redundant pair.
• When configuring the backup component in a redundant pair, use the same account asfor the primary component. Two applications with different accounts cannot be linked(configured) as a redundant high availability (HA) pair.
• If you need to make changes in the configuration of one or both servers in the HA pair,you must unlink the two servers before any changes are made. They can then be linkedtogether and restarted.
Redundant Configurations Deploying the Rest of Your Framework
Framework Deployment Guide 115

Redundant (HA) Configuration ServersThis section describes how to deploy redundant Configuration Servers.
Redundancy
Redundant Configuration Servers support only the warm standby redundancy type.
Both the primary and backup Configuration Servers operate with the same Configuration Database.The backup Configuration Server does not accept client connections or make changes to the datauntil its role is switched to primary. When the backup Configuration Server starts, it establishes aconnection to the primary Configuration Server. During the operation, the primary ConfigurationServer sends notifications about all changes made in the Configuration Database to the backupConfiguration Server.
If there are any Configuration Server Proxies connected to the primary Configuration Server when itfails, those Proxy servers connect to the backup Configuration Server when it assumes the primaryrole.
Deploying Redundant Configuration Servers
This section describes how to install and set up redundant Configuration Servers.
Installation Recommendations
• To ensure proper redundancy, Genesys recommends running the primary and backup ConfigurationServers on separate computers.
Warning• When both the primary and backup Configuration Servers are running, do not remove
the backup Configuration Server Application object from the configuration.• You are responsible for ensuring that the configuration options of the primary and
backup Configuration Servers are the same, with some exceptions: the log options inthe primary Configuration Server can differ from those in the backup ConfigurationServer configuration.
Redundant Configurations Redundant (HA) Configuration Servers
Framework Deployment Guide 116
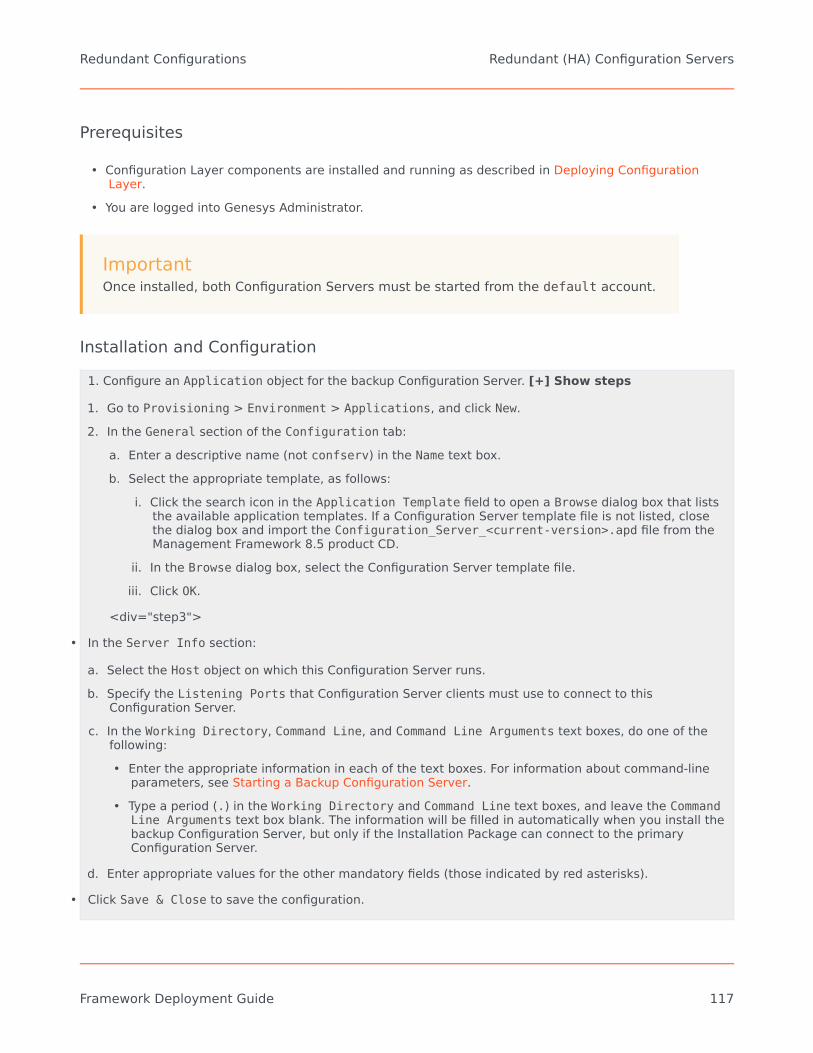
Prerequisites
• Configuration Layer components are installed and running as described in Deploying ConfigurationLayer.
• You are logged into Genesys Administrator.
ImportantOnce installed, both Configuration Servers must be started from the default account.
Installation and Configuration1. Configure an Application object for the backup Configuration Server. [+] Show steps
1. Go to Provisioning > Environment > Applications, and click New.2. In the General section of the Configuration tab:
a. Enter a descriptive name (not confserv) in the Name text box.b. Select the appropriate template, as follows:
i. Click the search icon in the Application Template field to open a Browse dialog box that liststhe available application templates. If a Configuration Server template file is not listed, closethe dialog box and import the Configuration_Server_<current-version>.apd file from theManagement Framework 8.5 product CD.
ii. In the Browse dialog box, select the Configuration Server template file.iii. Click OK.
<div="step3">
• In the Server Info section:
a. Select the Host object on which this Configuration Server runs.b. Specify the Listening Ports that Configuration Server clients must use to connect to this
Configuration Server.c. In the Working Directory, Command Line, and Command Line Arguments text boxes, do one of the
following:• Enter the appropriate information in each of the text boxes. For information about command-line
parameters, see Starting a Backup Configuration Server.• Type a period (.) in the Working Directory and Command Line text boxes, and leave the Command
Line Arguments text box blank. The information will be filled in automatically when you install thebackup Configuration Server, but only if the Installation Package can connect to the primaryConfiguration Server.
d. Enter appropriate values for the other mandatory fields (those indicated by red asterisks).
• Click Save & Close to save the configuration.
Redundant Configurations Redundant (HA) Configuration Servers
Framework Deployment Guide 117
2. Install the backup Configuration Server. [+] Show steps
Prerequisite
• The backup Configuration Server Application object exists.
On UNIX
Installing the Backup Configuration Server on UNIX
1. On the Management Framework 8.1 product CD, run the installation script install.sh located in oneof the following:• For an enterprise (single-tenant) environment, configuration_layer/configserver/
single/<operating_system>/• For a multi-tenant environment, configuration_layer/configserver/
multi/<operating_system>/.
2. Type the file name at the command prompt, and press Enter.3. For the installation type, type 2 to select Configuration Server Master Backup, and press Enter.4. For the external authentication option, type the number corresponding to the type of External
Authentication that will be used (LDAP, Radius, both, or neither), and press Enter.
ImportantIf you select LDAP, be prepared with the URL to access the LDAP Server. For more information about LDAPconfiguration, see the ''Framework 8.5 External Authentication Reference Manual''
.5. For the host name of this backup Configuration Server, do one of the following:
• Specify the host name, and press Enter.• Press Enter to select the host on which this backup Configuration Server is being installed.
6. Specify the primary Configuration Server, as follows:a. Specify the primary Configuration Server Hostname, and press Enter.b. Specify a value for the port for the primary Configuration Server, and press Enter.c. Specify the User name of the primary Configuration Server, and press Enter.d. Specify the Password for the primary Configuration Server, and press Enter.
7. Type the number corresponding to the Application object for the backup Configuration Server thatyou created, and press Enter.
8. Specify the full path of the destination directory, and press Enter.
Redundant Configurations Redundant (HA) Configuration Servers
Framework Deployment Guide 118

9. If the target installation directory has files in it, do one of the following:• Type 1 to back up all the files in the directory, and press Enter. Then specify the path to where you
want the files backed up, and press Enter.• Type 2 to overwrite only the files in this installation package, and press Enter. Then, type y to
confirm your selection, and press Enter. Use this option only if the application already installedoperates properly.
• Type 3 to erase all files in this directory before continuing with the installation, and press Enter.Then, type y to confirm your selection, and press Enter.
The list of file names will appear on the screen as they are extracted and written to the destinationdirectory.
10. For the product version to install, do one of the following:• Type 32 to select the 32-bit version, and press Enter.• Type 64 to select the 64-bit version, and press Enter.
11. Do one of the following:• Type y to configure the backup Configuration Server during installation (now), and press Enter. Go
to Step 12 to specify values for the configuration file. For information about Configuration Serverconfiguration options and their values, refer to the ''Framework Configuration Options ReferenceManual''.
• Type n to not configure backup Configuration Server during installation. In this case, you havefinished installing Configuration Server; do not continue to the next step in this procedure. Beforeyou can start Configuration Server, however, you must create a configuration file and set theconfiguration options in it, as described in Configuration Server Configuration File.
12. For the confserv section:a. Specify a value for the backup Configuration Server port, and press Enter.b. Specify a value for the backup Configuration Server management port, and press Enter.
13. For the dbserver section:a. Type the number corresponding to the database engine that this Configuration Server uses
(dbengine), and press Enter.b. Specify the name or alias of the DBMS that handles the Configuration Database (dbserver), and
press Enter.c. To specify the name of the Configuration Database (dbname), do one of the following:
• If you are using an Oracle database engine (that is, you typed 3 in Step a), press Enter. Thisvalue is not required for Oracle.
• If you are using any other database engine, specify the name of the Configuration Database,and press Enter.
d. Specify the Configuration Database username, and press Enter.e. To specify the Configuration Database password, do one of the following:
• Specify the password, and press Enter.• Press Enter if there is no password; that is, the password field is empty, with no spaces.
Redundant Configurations Redundant (HA) Configuration Servers
Framework Deployment Guide 119
When the installation process is finished, a message indicates that installation was successful. The process places the backupConfiguration Server in the directory specified during the installation process. The installation script also writes a sampleconfiguration file, confserv.sample, in the directory in which the backup Configuration Server is installed.
If you chose to configure the backup Configuration Server during installation, the sample configuration file, confserv.sample, isrenamed confserv.conf, and the parameters specified in Steps 12 through 14 are written to this file.
Next StepsIf you chose to configure the backup Configuration Server after installation, you must manually rename the sample file asconfserv.conf and modify the configuration options before you start the backup Configuration Server. See ConfigurationServer Configuration File.
On Windows
Installing the Backup Configuration Server on UNIX
WarningGenesys does not recommend installation of its components via a Microsoft Remote Desktop connection. Theinstallation should be performed locally.
1. On the Management Framework 8.5 product CD, locate and open the appropriate installation directoryfor your environment:• For an enterprise (single-tenant) environment, the installation directory is configuration_layer/
configserver/single/windows.• For a multi-tenant environment, the installation directory is configuration_layer/configserver/
multi/windows.
The installation script, setup.exe, is located in the appropriate directory.2. Double-click setup.exe to start the Genesys Installation Wizard.3. Click About on the wizard's Welcome page to review the read_me file. The file also contains a link to
the server's Release Notes file.4. Click Next on the Welcome page to proceed with the installation.5. On the Maintenance Setup Type page, select Install new instance of the application and
click Next.6. On the Configuration Server Run Mode page, select Configuration Server Master Backup and
click Next.7. On the Configuration Server Parameters page, specify the Server Port and Management Port for
Configuration Server, and click Next.8. On the Database Engine Option page, select the database engine used by Configuration Server, and
click Next.9. On the Database Parameters page:
Redundant Configurations Redundant (HA) Configuration Servers
Framework Deployment Guide 120

a. Specify the Database Server Name and Database Name.b. Specify the Database User Name and Password.c. Click Next.
10. On the Configuration Server External Authentication page, select the type of externalauthentication Configuration Server uses, or select None if Configuration Server is not using externalauthentication. Click Next.
11. On the Connection Parameters to the Genesys Configuration Server page:a. Specify the Host name and Port of the primary Configuration Server.b. Specify the User name and Password for the primary Configuration Server.c. Click Next.
12. In the upper pane of the Select Application page, select the backup Configuration ServerApplication object that you just configured, and click Next.
13. On the Choose Destination Location page, the wizard displays the destination directory (ifspecified during installation) in the Working Directory property of the server's Application object.If you entered a period (.) in this property, or if the specified path is invalid, the wizard generates apath to the destination directory in the C:\ProgramFiles\GCTI\<Product Name> format.If necessary, click:• Browse to select another destination folder. In this case, the wizard will update the Application
object's Working Directory in the Configuration Database.• Default to reinstate the path specified in the Working Directory property.
Click Next to proceed.14. On the Ready to Install information page, click:
• Back to update any installation information.• Install to proceed with the installation.
15. On the Installation Complete page, click Finish.As a result of the installation, the wizard adds Application icons to the:
• Windows Add or Remove Programs window, as a Genesys server.• Windows Services list, as a Genesys service, with Automatic startup type.
For more information about the Configuration Server configuration file, see Configuration Server Configuration File. For informationabout Configuration Server configuration options and their values, refer to the relevant chapters in the ''Framework ConfigurationOptions Reference Manual''.
3. Modify the primary Configuration Server Application object to work with the backup ConfigurationServer. [+] Show steps
Prerequisite
• The primary and backup Configuration Server Application objects exist.
Redundant Configurations Redundant (HA) Configuration Servers
Framework Deployment Guide 121
Procedure
1. Go to Provisioning > Environment > Applications, and click the primary Configuration ServerApplication object (named confserv) to open its properties.
2. On the Configuration tab, open the Server Info section.3. Use the Browse button next to the Backup Server property to locate the backup Configuration Server
Application object you want to use as the backup server.4. Select Warm Standby as the Redundancy Type.5. Select Auto-Restart.6. Click Save & Close to save the changes.
4. If you installed the backup Configuration Server on UNIX and chose to configure it after installation,create and modify the configuration file for the backup Configuration Server. [+] Show stepsThe configuration file for the backup Configuration Server must be the same as that for the primary Configuration Server with thefollowing exceptions:
• The name of the section in the backup Configuration Server configuration file must match the name ofthe backup Configuration Server Application object.
• The values for the port and management-port options in the backup Configuration Serverconfiguration file must be those values specified as Communication Port and Management Portvalues, respectively, during installation of the backup Configuration Server.
• The log options can be different.The name of the Configuration Server section must be exactly the same as the name of the Application object for the backupConfiguration Server.
For both the primary and backup Configuration Servers, specify the same database and user account for accessing this database,for both the primary and backup Configuration Servers.
The No Default Access for New Users feature must be configured the same in both the primary and backup Configuration Servers. Inother words, both Configuration Servers must have the feature either configured or not.
Sample configuration files are shown side-by-side in the figure below. The arrows show the differences described in this section.
Redundant Configurations Redundant (HA) Configuration Servers
Framework Deployment Guide 122

Sample Configuration Files for Primary and Backup Configuration Servers.
5. If you installed the backup Configuration Server on UNIX, modify the run.sh file to enable the backupserver to be started. [+] Show steps
1. In a text editor, open the run.sh file.2. Add the following at the end of the command line in the file:
-s <section name> -c <configuration file name>
6. Manually synchronize options and ports between the redundant Configuration Servers.7. Manually synchronize high-availability (HA) ports between the redundant Configuration Servers. [+]Show stepsWhen Configuration Servers operate in a high-availability (HA) environment, the backup Configuration Server must be ready to takeon the primary role when required. This requires that both Configuration Servers are running and that they must have the sameinformation. When you configure redundant Configuration Servers to operate with the warm standby redundancy type, the primaryConfiguration Server uses the connection to the backup to deliver synchronization updates. Genesys recommends that you enableAdvanced Disconnect Detection Protocol (ADDP) for this connection.
ImportantYou can configure multiple ports for any application of type Server. When multiple ports are configured for a
Redundant Configurations Redundant (HA) Configuration Servers
Framework Deployment Guide 123
server in a warm standby redundancy pair, the number of ports, their Port IDs, and the Listening Modesettings of the primary and backup servers must match respectively.
8. Solution Control Server is required for HA Configuration Servers to switch over. Modify and start theSCS responsible for that pair to work with the Configuration Server running in Primary mode. [+] ShowstepsThe SCS configuration file has a filename extension of .cfg (for Windows), and .conf (for UNIX). Here is a sample of the contents:
[backup_configserver]host=<backup CS host name>port=<backup CS port>name=<SCS application name>server=primary_configserver[primary_configserver]host=<primary CS host name>port=<primary CS port>name=<SCS application name>server=backup_configserver
When using HA Configuration Servers, you must restart Solution Control Server to enable it to connect it to the Configuration Serverrunning in Primary mode. If a Master Configuration Server is part of an HA pair, the SCS responsible for that pair of servers must beprovisioned with a startup option as follows:
scs.exe -f <SCS configuration file>
Starting the Backup Configuration Server
When starting a backup Configuration Server, specify the following values in the startup commandline:
-sThe name of the Configuration Server sectionwithin the configuration file for the backupConfiguration Server.
-cThe name of the configuration file that containsconfiguration information for the backupConfiguration Server.
For a description of the command-line parameters specific to Configuration Server, refer toConfiguration Server.
On UNIX
Redundant Configurations Redundant (HA) Configuration Servers
Framework Deployment Guide 124

Starting a Backup Configuration Server on UNIX
ImportantMake sure you have modified the run.sh file as directed in step 5, above.
• To start from Genesys Administrator, refer to Starting and Stopping with the Management Layer.• To start manually, go to the directory in which the backup Configuration Server is installed, and do one
of the following:• To use only the required command-line parameters, type the following command line:
sh run.sh
• To specify the command line yourself, or to use additional command-line parameters, type thefollowing command line:confserv -s <section name> -c <configuration file name> [<additional parameters asrequired>]
On Windows
Starting a Backup Configuration Server on Windows
• To start as a Windows Service, refer to Starting and Stopping with Windows Services Manager.• To start from Genesys Administrator, refer to Starting and Stopping with the Management Layer.• To start manually, do one of the following:
• Use the Start > Programs menu.• To use only the required command-line parameters, go to the directory in which the backup
Configuration Server is installed, and double-click the file startServer.bat.• To specify the command line yourself, or to use additional command-line parameters, open the MS-
DOS window, go to the directory in which the backup Configuration Server is installed, and type thefollowing command line:confserv.exe -s <section name> -c <configuration file name> [<additional parametersas required>]
Configuring ADDP between Redundant Configuration Servers
Advanced Disconnect Detection Protocol (ADDP) is supported between primary and backupConfiguration Servers. Use the new configuration options protocol, addp-timeout, addp-remote-timeout, and addp-trace, setting them in the configuration server section of the configuration filesfor both Configuration Servers. For the primary Configuration Server, this section is called confserv.For the backup Configuration Server, this section has the same name as the backup ConfigurationServer Application object. For detailed descriptions of these options, refer to the ''FrameworkConfiguration Options Reference Manual''.
Redundant Configurations Redundant (HA) Configuration Servers
Framework Deployment Guide 125

For example, in a primary Configuration Server configuration file, the ADDP options would appear asfollows:
[confserv]...protocol=addpaddp-timeout=16addp-remote-timeout=32addp-trace=both...
Redundant Configurations Redundant (HA) Configuration Servers
Framework Deployment Guide 126
Redundant (HA) Message ServersThis section describes how to deploy redundant Message Servers.
Redundancy
Redundant Message Servers support only the warm standby redundancy type, with the addition thatthe data is synchronized between the primary and backup servers.
Deploying Redundant Message Servers
This section describes how to install and set up redundant Message Servers.
Installation RecommendationsIf you are installing the primary and backup Message Servers on the same host computer:
• Install them in different directories.• Specify a different port number for each server.
Prerequisites
• Configuration Layer components are installed and running as described in Deploying ConfigurationLayer.
• You are logged into Genesys Administrator.
ImportantOnce installed, the two Message Servers must be started from the same account.
Installation and Configuration
Tip(Optional) If the backup Message Server is to reside on a remote Host, you can deployit to that Host using Genesys Administrator Extension. For instructions, refer to the
Redundant Configurations Redundant (HA) Message Servers
Framework Deployment Guide 127

''Framework 8.1 Genesys Administrator Extension Help''.
1. Configure an Application object for the backup Message Server. [+] Show steps
Configuring an Application Object for the Backup Message Server
1. Go to Provisioning > Environment > Applications.2. If the Application object for this backup Message Server does not already exist, click New to create it.3. In the General section of the Configuration tab:
a. Enter a descriptive name in the Name text box.b. Select the appropriate template, as follows:
i. Click the search icon in the Application Template field to open a Browse dialog box that liststhe available application templates. If a Message Server template file is not listed, close thedialog box and import the Message_Server_<current-version>.apd file from theManagement Framework 8.1 product CD.
ii. In the Browse dialog box, select the Message Server template file.iii. Click OK.
4. In the Server Info section of the Configuration tab, enter the following information, as required:a. In the Host field, click the magnifying glass icon to select the Host object on which this Message
Server is running.b. For each listening port that an application must use to connect to this Message Server:
i. In the Listening Ports field, click Add.ii. Enter the port properties in the Port Info dialog box.iii. Click OK.
c. For the Working Directory, Command Line, and Command Line Arguments fields, do one of thefollowing:• Enter the appropriate information in each of the text boxes. For information about command-
line parameters, see Starting a Backup Message Server.• Type a period (.) in the Working Directory and Command Line text boxes, and leave the
Command Line Arguments text box blank. The information will be filled in automatically whenyou install Message Server, but only if the Installation Package can connect to ConfigurationServer.
d. Select the Auto-Restart check box.
5. Click Save and Close in the toolbar to save the new object.
2. If you did not deploy the backup Message Server using Genesys Administrator Extension, install it now.3. Modify the primary Message Server Application object to work with the backup Message Server. [+]Show steps
Redundant Configurations Redundant (HA) Message Servers
Framework Deployment Guide 128

Prerequisite
• The primary and backup Message Server Application objects exist.
Procedure
1. Go to Provisioning > Environment > Applications, and double-click the primary Message ServerApplication object to open its properties.
2. In the Server Info section of the Configuration tab:a. Select the backup Message Server Application object.b. Select Warm Standby as the redundancy type.c. Select Auto-Restart if required.
3. Click Save and Close to save the configuration.
4. If you installed the backup Message Server on UNIX, check the run.sh file and modify it, if necessary,so the application can be started properly. [+] Show steps
1. In a text editor, open the run.sh file.2. Check if the following parameters are currently in the command line in the file, and if not, add them:
-host <configuration server host> -port <configuration server port> -app <applicationobject name>
5. Synchronize options and ports between the redundant Message Servers.
Starting the Backup Message Server
When starting a backup Message Server, be sure to use the following command-line options:
-host The name of the host on which ConfigurationServer is running.
-port The communication port that client applicationsmust use to connect to Configuration Server.
-appThe exact name of the backup Message ServerApplication object as configured in theConfiguration Database.
For a description of the command-line parameters specific to Message Server, refer to MessageServer.
On UNIX
Redundant Configurations Redundant (HA) Message Servers
Framework Deployment Guide 129

Starting the Backup Message Server on UNIXPrerequisite
• The run.sh file has been modified accordingly. See Step 5, above.
Procedure
• To start from Genesys Administrator, refer to Starting and Stopping with the Management Layer.• To start manually, go to the directory in which the backup Message Server is installed, and do one of the
following:• To use only the required command-line parameters, type the following command line:
sh run.sh
• To specify the command line yourself, or to use additional command-line parameters, type thefollowing command line:MessageServer -host <Configuration Server host> -port <Configuration Server port>-app <backup Message Server Application> [<additional parameters and arguments asrequired>]
On Windows
Starting the Backup Message Server on Windows
• To start as a Windows Service, refer to Starting and Stopping with Windows Services Manager.• To start from Genesys Administrator, refer to Starting and Stopping with the Management Layer.• To start manually, do one of the following:
• Use the Start > Programs menu.• To use only the required command-line parameters, go to the directory in which the backup Message
Server is installed, and double-click the file startServer.bat.• To specify the command line yourself, or to use additional command-line parameters, open the MS-
DOS window, go to the directory in which the backup Message Server is installed, and type thefollowing command line:MessageServer.exe -host <Configuration Server host> -port <Configuration Serverport> -app <backup Message Server Application> [<additional parameters andarguments as required>]
Redundant Configurations Redundant (HA) Message Servers
Framework Deployment Guide 130
Redundant (HA) Solution Control ServersThis section describes how to deploy redundant Solution Control Servers.
Redundancy
Redundant Solution Control Servers support only the warm standby redundancy type, with theaddition that the data is synchronized between the primary and backup servers.
Deploying Redundant Solution Control Servers
This section describes how to install and set up redundant Solution Control Servers.
RecommendationsIf you are installing the primary and backup Solution Control Servers on the same host computer:
• Install them in different directories.• Specify a different port number for each server.
Prerequisites
• Configuration Layer components are installed and running as described in Deploying ConfigurationLayer.
• You are logged into Genesys Administrator.
ImportantOnce installed, the two Solution Control Servers must be started from the sameaccount.
Installation and Configuration
Tip(Optional) If the backup Solution Control Server is to reside on a remote Host, you can
Redundant Configurations Redundant (HA) Solution Control Servers
Framework Deployment Guide 131

deploy it to that Host using Genesys Administrator Extension. For detailedinstructions, refer to ''Framework Genesys Administrator Extension Help''.
1. Configure an Application object for the backup Solution Control Server. [+] Show steps
Configuring an Application Object for the Backup Solution Control Server
1. Go to Provisioning > Environment > Applications.2. If the Application object for this backup Solution Control Server does not already exist, click New to
create it.3. In the General section of the Configuration tab:
a. Enter a descriptive name in the Name text box.b. Select the appropriate template, as follows:
i. Click the search icon in the Application Template field to open a Browse dialog box that liststhe available application templates. If a Solution Control Server template file is not listed, closethe dialog box and import the Solution_Control_Server_<current-version>.apd file fromthe Management Framework 8.1 product CD.
ii. In the Browse dialog box, select the Solution Control Server template file.iii. Click OK.
4. In the Server Info section of the Configuration tab, enter the following information, as required:a. In the Host field, click the magnifying glass icon to select the Host object on which this Solution
Control Server is running.b. For each listening port that an application must use to connect to this Solution Control Server:
i. In the Listening Ports field, click Add.ii. Enter the port properties in the Port Info dialog box.iii. Click OK.
c. For the Working Directory, Command Line, and Command Line Arguments fields, do one of thefollowing:• Enter the appropriate information in each of the text boxes. For information about command-
line parameters, see Starting a Backup Solution Control Server.• Type a period (.) in the Working Directory and Command Line text boxes, and leave the
Command Line Arguments text box blank. The information will be filled in automatically whenyou install Solution Control Server, but only if the Installation Package can connect toConfiguration Server.
d. Select the Auto-Restart check box.
5. Click Save & Close in the toolbar to save the new object.
2. If you did not deploy the backup Solution Control Server remotely using Genesys Administrator, installit now.3. Modify the primary Solution Control Server Application object to work with the backup Solution
Redundant Configurations Redundant (HA) Solution Control Servers
Framework Deployment Guide 132

Control Server. [+] Show steps
Prerequisites
• The primary and backup Solution Control Server Application objects exist.
Procedure
1. Go to Provisioning > Environment > Applications, and double-click the primary Solution ControlServer Application object to open its properties.
2. In the Server Info section of the Configuration tab:a. Select the backup Solution Control Server Application object.b. Select Warm Standby as the redundancy type.c. Select Auto-Restart if required.
3. Click Save & Close to save the configuration.
4. If you installed the backup Solution Control Server on UNIX, check the run.sh file and modify it, ifnecessary, so the application can be started properly. [+] Show steps
1. In a text editor, open the run.sh file.2. Check if the following parameters are currently in the command line in the file, and if not, add them:
-host <configuration server host> -port <configuration server port> -app <SCSapplication object name>
5. Synchronize options and ports between the redundant Solution Control Servers.
Starting the Backup Solution Control Server
When starting a backup Solution Control Server, be sure to use the following command-line options:
-host The name of the host on which ConfigurationServer is running.
-port The communication port that client applicationsmust use to connect to Configuration Server.
-appThe exact name of the backup Solution ControlServer Application object as configured in theConfiguration Database.
For a description of the command-line parameters specific to Solution Control Server, refer toSolution Control Server.
On UNIX
Redundant Configurations Redundant (HA) Solution Control Servers
Framework Deployment Guide 133

Prerequisite
• The run.sh file has been modified accordingly. See Step 4, above.
Procedure
• To start from Genesys Administrator, refer to Starting and Stopping with the Management Layer.• To start manually, go to the directory in which the backup Solution Control Server is installed, and do
one of the following:• To use only the required command-line parameters, type the following command line:
sh run.sh
• To specify the command line yourself, or to use additional command-line parameters, type thefollowing command line:scs -host <Configuration Server host> -port <Configuration Server port> -app<backup Solution Control Server Application> [<additional parameters and argumentsas required>]
On Windows
Starting the Backup Solution Control Server on Windows
• To start as a Windows Service, refer to Starting and Stopping with Windows Services Manager.• To start from Genesys Administrator, refer to Starting and Stopping with the Management Layer.• To start manually, do one of the following:
• Use the Start > Programs menu.• To use only the required command-line parameters, go to the directory in which the backup Solution
Control Server is installed, and double-click the file startServer.bat.• To specify the command line yourself, or to use additional command-line parameters, open the MS-
DOS window, go to the directory in which the backup Solution Control Server is installed, and typethe following command line:scs.exe -host <Configuration Server host> -port <Configuration Server port> -app<backup Solution Control Server Application> [<additional parameters and argumentsas required>]
Redundant Configurations Redundant (HA) Solution Control Servers
Framework Deployment Guide 134

Redundant (HA) SNMP Master AgentsThe Management Layer supports configuration with a redundant pair of SNMP master agents.Redundant configuration assumes the presence of two SNMP master agent applications, one primaryand one backup. When Solution Control Server loses a connection with the primary SNMP masteragent, SCS switches all NMS communications to the backup SNMP master agent.
If your SNMP master agent application can operate in a redundant mode (as does, for example,Genesys SNMP Master Agent), and you would like to deploy this configuration, follow the instructionsin this section.
Redundancy
Redundant SNMP Master Agents support only the warm standby redundancy type.
Deploying Redundant SNMP Master Agents
This section describes how to install and set up redundant SNMP Master Agents.
Installation RecommendationsIf you are installing the primary and backup SNMP Master Agents on the same host computer:
• Install them in different directories.• Specify a different port number for each server.
Prerequisites
• Configuration Layer components are installed and running as described in Deploying ConfigurationLayer.
• Management Layer components are installed and running as described in Deploying ManagementLayer.
• The SNMP Master Agent to be designated as primary is deployed as described in Deploying SNMPMaster Agent.
• You are logged into Genesys Administrator.
Redundant Configurations Redundant (HA) SNMP Master Agents
Framework Deployment Guide 135

Installation and Configuration
Tip(Optional) If the backup SNMP Master Agent is to reside on a remote Host, you candeploy it to that Host using Genesys Administrator Extension. Refer to ''Framework 8.1Genesys Administrator Extension Help'' for instructions.
1. Configure an Application object for the backup SNMP Master Agent. [+] Show steps
Configure an Application Object for the Backup SNMP Master Agent
1. Go to Provisioning > Environment > Applications.2. If the Application object for this backup SNMP Master Agent does not already exist, click New to
create it.3. In the General section of the Configuration tab:
a. Enter a descriptive name in the Name text box.b. Select the appropriate template, as follows:
i. Click the search icon in the Application Template field to open a Browse dialog box that liststhe available application templates. If an SNMP Master Agent template file is not listed, closethe dialog box and import the SNMP_Master_Agent_<current-version>.apd file from theManagement Framework 8.5 product CD.
ii. In the Browse dialog box, select the SNMP Master Agent template file.iii. Click OK.
4. In the Server Info section of the Configuration tab, enter the following information, as required:a. In the Host field, click the magnifying glass icon to select the Host object on which this SNMP
Master Agent is running.b. For each listening port that an application must use to connect to this SNMP Master Agent:
i. In the Listening Ports field, click Add.ii. Enter the port properties in the Port Info dialog box.iii. Click OK.
c. For the Working Directory, Command Line, and Command Line Arguments fields, do one of thefollowing:• Enter the appropriate information in each of the text boxes. For information about command-
line parameters, see Starting a Backup SNMP Master Agent.• Type a period (.) in the Working Directory and Command Line text boxes, and leave the
Command Line Arguments text box blank. The information will be filled in automatically whenyou install SNMP Master Agent, but only if the Installation Package can connect toConfiguration Server.
Redundant Configurations Redundant (HA) SNMP Master Agents
Framework Deployment Guide 136

d. Select the Auto-Restart check box.
5. Click Save & Close in the toolbar to save the new object.
2. If you did not deploy the backup SNMP Master Agent to a remote site using Genesys AdministratorExtension, install it now.3. Modify the primary SNMP Master Agent Application object to work with the backup SNMP MasterAgent. [+] Show steps
Prerequisite
• The primary and backup SNMP Master Agent Application objects exist.
Procedure
1. Go to Provisioning > Environment > Applications, and double-click the primary SNMP MasterAgent Application object to open its properties.
2. In the Server Info section of the Configuration tab:a. Select the backup SNMP Master Agent Application object.b. Select Warm Standby as the redundancy type.c. Select Auto-Restart if required.
3. Click Save and Close to save the configuration.
4. If you installed the backup SNMP Master Agent on UNIX, check the run.sh file and modify it, ifnecessary, so the application can be started properly. [+] Show steps
1. In a text editor, open the run.sh file.2. Check if the following parameters are currently in the command line in the file, and if not, add them:
-host <configuration server host> -port <configuration server port> -app <backup SNMPMaster Agent application object name>
Starting the Backup SNMP Master Agent
ImportantOnce installed, the two SNMP Master Agents must be started from the same account.
When starting a backup SNMP Master Agent, be sure to use the following command-line options:
-host The name of the host on which ConfigurationServer is running.
-port The communication port that client applications
Redundant Configurations Redundant (HA) SNMP Master Agents
Framework Deployment Guide 137

must use to connect to Configuration Server.
-appThe exact name of the backup SNMP Master AgentApplication object as configured in theConfiguration Database.
For a description of the command-line parameters specific to SNMP Master Agent, refer to SNMPMaster Agent.
On UNIX
Starting a Backup SNMP Master Agent on UNIXPrerequisites
• The run.sh file has been modified accordingly. See Step 4, above.
Procedure
Do one of the following:
• To start from Genesys Administrator, refer to Starting and Stopping with the Management Layer.• To start manually, go to the directory in which the backup SNMP Master Agent is installed, and do one of
the following:• To use only the required command-line parameters, type the following command line:
sh run.sh
• To specify the command line yourself, or to use additional command-line parameters, type thefollowing command line:gsnmpmasteragent -host <Configuration Server host> -port <Configuration Serverport> -app <backup SNMP Master Agent Application> [<additional parameters andarguments as required>]
On Windows
Starting the Backup SNMP Master Agent on WindowsDo one of the following:
• To start as a Windows Service, refer to Starting and Stopping with Windows Services Manager.• To start from Genesys Administrator, refer to Starting and Stopping with the Management Layer.• To start manually, do one of the following:
• Use the Start > Programs menu.
Redundant Configurations Redundant (HA) SNMP Master Agents
Framework Deployment Guide 138

• To use only the required command-line parameters, go to the directory in which the backup SNMPMaster Agent is installed, and double-click the file startServer.bat.
• To specify the command line yourself, or to use additional command-line parameters, open the MS-DOS window, go to the directory in which the backup SNMP Master Agent is installed, and type thefollowing command line:gsnmpmasteragent.exe -host <Configuration Server host> -port <Configuration Serverport> -app <SNMP Master Agent Application> [<additional parameters and arguments asrequired>]
Redundant Configurations Redundant (HA) SNMP Master Agents
Framework Deployment Guide 139
Sharing the Load ConfigurationsLarge enterprises often run contact-center operations at numerous locations worldwide. Yet, forGenesys software to function as a single unit it is usually critical that all configuration objectscomprising an enterprise be stored in a single Genesys Configuration Database. Under thesecircumstances, network delays, component failures, and similar factors might complicate or slowdown the operations of a large enterprise.
By operating two Framework components in different modes you can somewhat simplify theoperation of a distributed installation with a single Configuration Database:
• Distributed configuration environments• Distributed management environments• Distributing call loads
Starting Configuration Server in Proxy mode or Solution Control Server in Distributed mode requiresspecial licenses. Refer to the ''Genesys Licensing Guide'' for more information.
Distributed Configuration Environments
In a distributed configuration environment, the master Configuration Server is running at the sitewhere the Configuration Database is located. Configuration Servers at multiple remote sites areworking in so-called Proxy mode and are connecting to the master Configuration Server.
Distributed Management Environments
In a distributed management environment, Solution Control Servers are communicating with eachother and controlling a particular part of the Genesys environment while running at multiple remotesites (but within the same configuration environment).
Distributing Loads
Genesys recommends deploying additional of Configuration Server Proxies and Solution ControlServers in Distributed mode to distribute loads.
The number of instances deployed at the same site for purposes of load distribution should becalculated based on the number of clients to serve (for Configuration Server Proxy) and the numberof hosts to control (for Distributed Solution Control Servers). Refer to the Management Frameworksection of the ''Genesys Hardware Sizing Guide''.
Genesys also recommends using Configuration Server Proxy and Distributed Solution Control Servers
Sharing the Load Configurations Redundant (HA) SNMP Master Agents
Framework Deployment Guide 140

in multi-site and/or multi-tenant environments.
Architecture
The figure below illustrates how Configuration Server Proxy and Distributed Solution Control Serversfit into a Genesys configuration environment. This diagram does not include distributed componentsfor Disaster Recovery/Business Continuity.
Distributed Installation
Sharing the Load Configurations Redundant (HA) SNMP Master Agents
Framework Deployment Guide 141

Configuration Server ProxyUsing Configuration Server Proxy increases the robustness of the whole system, decreases thenumber of client connections to Configuration Server, and minimizes network traffic. That is, existingclients can continue, and new clients start, their operations when Configuration Server fails. Inaddition, after Configuration Server recovers, the client reconnect takes far less time than if all clientswere directly connected to Configuration Server.
Configuration Server Proxy is an Application of the Configuration Server type operating in a specialmode. As such, it replaces Configuration Server seamlessly for the clients. You can also configureConfiguration Server Proxy permissions so that clients of a particular proxy access only the part ofthe configuration environment relevant to their site. See User Authorization and the ''Genesys 8.1Security Deployment Guide'' for more information about setting permissions.
How it WorksIn a distributed configuration environment, the master Configuration Server is running at the sitewhere the Configuration Database is located. Configuration Server Proxies at multiple remote sitesare connecting to the master Configuration Server.
Instead of sending all the requests to Configuration Server, Configuration Server clients that requireread-only access to Configuration Server can operate with one or more Configuration Server Proxies.Configuration Server Proxy passes messages to and from Configuration Server. Moreover, the proxykeeps the configuration data in its memory and responds to client data requests. Any configurationdata updates are passed immediately to Configuration Server Proxy, so that it is always up to date;no additional configuration is required to specify an update interval.
Configuration Server Proxy Functions
• Receives subscription requests from clients and handles them without passing the requests toConfiguration Server.
• Stores in internal memory all configuration data it receives from Configuration Server.• Receives notifications on data changes from Configuration Server, updates internal memory, and passes
notifications to clients.• Receives read-data requests from clients and responds to them using the data stored in the internal
memory.
WarningAlways run Configuration Server Proxy under the default account Environment\default.
Sharing the Load Configurations Configuration Server Proxy
Framework Deployment Guide 142

ImportantA hierarchical configuration of Configuration Server Proxies-for example, aConfiguration Server Proxy application working with another Configuration ServerProxy that operates directly with Configuration Server-is not supported.
Deploying Configuration Server Proxy
ImportantTo ensure faultless operation, all Configuration Servers in the configurationenvironment must be running the same release. Configuration Server Proxy may startwith a master Configuration Server running a later release, but only during themigration process. Refer to the ''Genesys Migration Guide'' for more information.
Prerequisites
• The Configuration Layer components, including the master Configuration Server, are installed andrunning as described in Deploying Configuration Layer.
• You are logged in to Genesys Administrator.
Installation and Configuration1. Configure as many instances of Configuration Server Proxy as needed. [+] Show steps
Prerequisite
• You are logged in to Genesys Administrator.
Procedure
1. Go to Provisioning > Environment > Applications, and select New in the toolbar. This opens aBrowse dialog box that lists available application templates. If a Configuration Server Proxy templatefile is not listed, do one of the following:• Import the Configuration Server Proxy_<current-version>.apd file from the Management
Framework 8.5 product CD.• Create a new template using the procedure in [https://docs.genesys.com/Documentation/IW/8.5.0/
Dep/StdConf#appTmplts Application Templates, and repeat this step.
2. In the Browse dialog box, select the Configuration Server Proxy template file.3. In the General section of the Configuration tab:
Sharing the Load Configurations Configuration Server Proxy
Framework Deployment Guide 143

a. Enter a descriptive name in the Name text box.b. In the list of Connections, add a connection to the master Configuration Server Application
object. If redundant master Configuration Servers are configured, specify a connection to theprimary Configuration Server.
4. In the Server Info section:a. Select the Host object on which this Configuration Server Proxy runs.b. Specify the Listening Ports that Configuration Server Proxy clients must use to connect to this
Configuration Server.c. In the Working Directory, Command Line, and Command Line Arguments text boxes, do one of
the following:• Enter the appropriate information in each of the text boxes. For information about command-
line parameters, see [[CSProxy#stCSP|Starting Configuration Server Proxy].• Type a period (.) in the Working Directory and Command Line text boxes, and leave the
Command Line Arguments text box blank. The information will be filled in automatically whenyou install Configuration Server Proxy, but only if the Installation Package can connect to themaster Configuration Server.
d. Enter appropriate values for the other mandatory fields (those indicated by red asterisks).e. In the Log On As Account field, you must use the default account, Environment\default.
WarningAlways run Configuration Server Proxy under the default account Environment\default.
5. (Optional) On the Options tab, do any of the following as required:• If you want this Configuration Server Proxy to be writable, set the option proxy-writable in the
csproxy section to true.• Set the values of the log configuration options.
6. Click Save & Close to save the configuration.
2. Install the corresponding number of Configuration Server Proxies. [+] Show steps
Prerequisite
• The Configuration Server Proxy Application object is created.
On UNIX
Sharing the Load Configurations Configuration Server Proxy
Framework Deployment Guide 144

Installing Configuration Server Proxy on UNIX1. On the Management Framework 8.5 product CD, locate and open the installation directory appropriate
for your environment:• For an enterprise (single-tenant) environment, the installation directory is configuration_layer/
configserver/single/<operating_system>.• For a multi-tenant environment, the installation directory is configuration_layer/configserver/
multi/<operating_system>.
The installation script, called install.sh, is located in the appropriate directory.2. Type install.sh at the command prompt, and press Enter.3. For the installation type, type 3 to select Configuration Server Proxy, and press Enter.4. To specify the host name for this Configuration Server Proxy, do one of the following:
• Type the name of the host, and press Enter.• Press Enter to select the current host.
5. Enter the Master Configuration Server host name, and press Enter.6. Enter the Master Configuration Server network port, and press Enter.7. Enter the Master Configuration Server user name, and press Enter.8. Enter the Master Configuration Server password, and press Enter.9. The installation displays the list of Application objects of the specified type configured for this Host
object. Type the number corresponding to the Configuration Server Proxy Application object youconfigured in step 1, and press Enter.
10. To specify the destination directory, do one of the following:• Press Enter to accept the default.• Enter the full path of the directory, and press Enter.
11. If the target installation directory has files in it, do one of the following:• Type 1 to back up all the files in the directory, and press Enter. Specify the path to which you want
the files backed up, and press Enter.• Type 2 to overwrite only the files in this installation package, and press Enter. Then type y to
confirm your selection, and press Enter. Use this option only if the application already installedoperates properly.
• Type 3 to erase all files in this directory before continuing with the installation, and press Enter.Then type y to confirm your selection, and press Enter.
The list of file names will appear on the screen as the files are copied to the destination directory.12. Specify the full path to, and the exact name of, the license file that Configuration Server Proxy will
use, and press Enter. When the installation process is finished, a message indicates that installationwas successful. The process places Configuration Server Proxy in the directory that you specifiedduring installation.
Sharing the Load Configurations Configuration Server Proxy
Framework Deployment Guide 145

On Windows
Installing Configuration Server Proxy on Windows
WarningGenesys does not recommend installation of its components via a Microsoft Remote Desktop connection. Theinstallation should be performed locally.
1. On the Management Framework 8.5 product CD, locate and open the installation directory appropriatefor your environment:• For an enterprise (single-tenant) environment, the installation directory is configuration_layer/
configserver/single/windows.• For a multi-tenant environment, the installation directory is configuration_layer/configserver/
multi/windows.
The installation script, called setup.exe, is located in the appropriate directory.2. Locate and double-click setup.exe to start the Genesys Installation Wizard.3. Use the About button on the wizard's Welcome page to review the read_me file. This file also contains a
link to the server's Release Notes file.4. Click Next.5. On the Configuration Server Run Mode page, select Configuration Server Proxy.6. On the Connection Parameters to the Genesys Configuration Server page, specify the host
name, port, user name, and password for the Master Configuration Server, then click Next.7. On the Select Application page, select the name of the Configuration Server Application object
that you created in step 1, and click Next.8. On the Access to License page, specify the license access type and the appropriate parameters,
and click Next.9. On the Choose Destination Location page, the wizard displays the destination directory specified in
the Working Directory property of the server's Application object. If the specified path is invalid,the wizard generates a path to C:\Program Files\GCTI\<Singletenant or Multitenant>Configuration Server. If necessary, click:• Browse to select another destination folder. In this case, the wizard will update the Application
object's Working Directory property in the Configuration Database.• Default to reinstate the path specified in the Working Directory property.
Click Next to proceed.10. On the Ready to Install information page, click:
• Back to update any installation information.
Sharing the Load Configurations Configuration Server Proxy
Framework Deployment Guide 146
• Install to proceed with the installation.
11. On the Installation Complete page, click Finish. When the installation process is finished, amessage indicates that installation was successful. The process places Configuration Server Proxy inthe directory that you specified during the installation process.
3. Modify each Configuration Server Proxy client to work with Configuration Server Proxy. [+] Showsteps
Prerequisites
• The Configuration Server Proxy Application object is created.• You have identified the client applications that are to operate with this particular Configuration Server
Proxy.• You are logged in to Genesys Administrator.
ImportantRepeat this procedure for each application that is to be a client of Configuration Server Proxy.
Procedure
1. Go to Provisioning > Environment > Applications, and double-click the client Application objectthat you want to connect to Configuration Server Proxy.
2. In the General section of the Configuration tab, add a Connection to the Configuration Server Proxyto which the client application should connect.
3. Click Save & Close to save the configuration changes.Now, when you start the client application, it will operate with the given Configuration Server Proxy.
4. Start the client application using one of the following methods:• From Genesys Administrator.• From the command line. In this case, you must use the parameters -host and -port to point to
the Configuration Server Proxy with which the application will be operating.
5. Click Save & Close to save the changes.
4. (Optional) Configure redundant Configuration Server Proxies. [+] Show steps
Prerequisites
• A primary Configuration Server Proxy Application object already exists.• You are logged in to Genesys Administrator.
Sharing the Load Configurations Configuration Server Proxy
Framework Deployment Guide 147
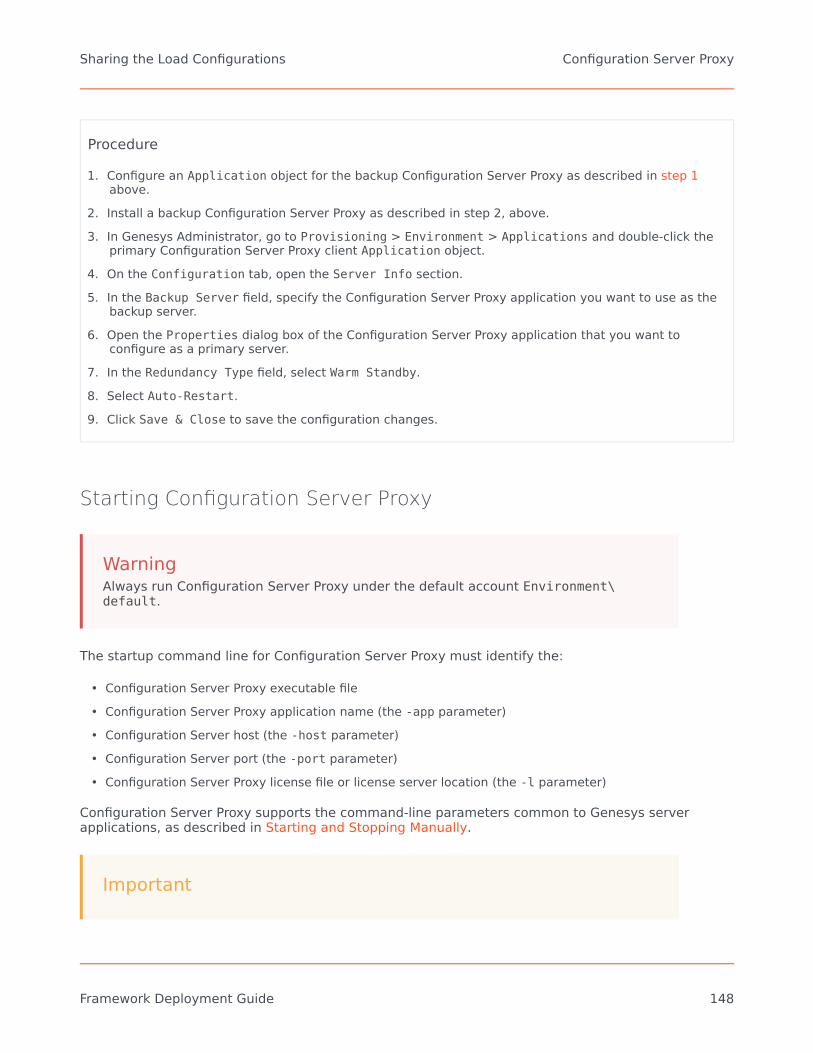
Procedure
1. Configure an Application object for the backup Configuration Server Proxy as described in step 1above.
2. Install a backup Configuration Server Proxy as described in step 2, above.3. In Genesys Administrator, go to Provisioning > Environment > Applications and double-click the
primary Configuration Server Proxy client Application object.4. On the Configuration tab, open the Server Info section.5. In the Backup Server field, specify the Configuration Server Proxy application you want to use as the
backup server.6. Open the Properties dialog box of the Configuration Server Proxy application that you want to
configure as a primary server.7. In the Redundancy Type field, select Warm Standby.8. Select Auto-Restart.9. Click Save & Close to save the configuration changes.
Starting Configuration Server Proxy
WarningAlways run Configuration Server Proxy under the default account Environment\default.
The startup command line for Configuration Server Proxy must identify the:
• Configuration Server Proxy executable file• Configuration Server Proxy application name (the -app parameter)• Configuration Server host (the -host parameter)• Configuration Server port (the -port parameter)• Configuration Server Proxy license file or license server location (the -l parameter)
Configuration Server Proxy supports the command-line parameters common to Genesys serverapplications, as described in Starting and Stopping Manually.
Important
Sharing the Load Configurations Configuration Server Proxy
Framework Deployment Guide 148

If using a primary-backup pair of Configuration Server Proxies, follow the samestarting procedure for both primary and backup applications but make sure youspecify the correct application name for each.
On Unix
Starting Configuration Server Proxy on UNIX
Go to the directory in which Configuration Server Proxy is installed, and do one of the following:
• To use only the required command-line parameters, type the following command line: sh run.sh• To specify the command line yourself, or to use additional command-line parameters, type the following
command line:confserv -host <Configuration Server host> -port <Configuration Server port> -app <CSproxy application objects name> [<additional parameters and arguments as required>]
On Windows
Starting Configuration Server Proxy on Windows
Do one of the following:
• Use the Start > Programs menu.• To use only the required command-line parameters, go to the directory in which Configuration Server
Proxy is installed, and double-click the startServer.bat file.• To specify the command line yourself, or to use additional command-line parameters, open the MS-DOS
window, go to the directory in which Configuration Server Proxy is installed, and type the followingcommand line:confserv.exe -host <Configuration Server host> -port <Configuration Server port> -app<CS proxy application objects name> [<additional parameters and arguments asrequired>]
Writable Configuration Server Proxies
By default, Configuration Server Proxy provides read-only access to configuration data. ConfigurationServer clients that require write access to Configuration Server must still connect directly toConfiguration Server. Some of Genesys Supervisor- and Agent-facing applications (such as WorkspaceDesktop Edition), while deployed in high numbers, require write access to configuration data andshould be deployed against Configuration Server Proxy in Writable mode.
Administrative applications, such as Genesys Administrator, should still connect to the Master
Sharing the Load Configurations Configuration Server Proxy
Framework Deployment Guide 149

Configuration Server to perform complex configuration updates, because Configuration Server Proxyis writable mode is not designed to handle all types of configuration updates. Updates made in bulkmight result in a significant extra load on the system when done by the Proxy server rather than theMaster server.
To configure a Configuration Server Proxy as writable, use the Configuration Server Proxyconfiguration option proxy-writable. For more information about this option, refer to the''Framework Configuration Options Reference Manual''.
Redundant Configuration Server Proxies
The high-availability (HA) architecture implies the existence of redundant applications, a primary anda backup, monitored by a management application. Like Configuration Server, Configuration ServerProxy supports the warm standby redundancy type between redundant Configuration Server Proxies.For more information, refer to Redundant Configuration Servers.
Prior to release 8.1.3, when a switchover occurred between the primary and backup ConfigurationServer Proxies, Configuration Server Proxy clients had to read configuration information anew andreestablish the connections to the backup server themselves. Especially in large configurationenvironments, this often led to detrimental effects on system performance, leading clients toquestion the usefulness of the backup proxy server.
Starting in release 8.1.3, client connections are restored automatically by the backup ConfigurationServer Proxy when it switches to primary mode if the connection between the main ConfigurationServer and Configuration Server Proxy is lost, because the main Configuration Server is stopped viathe Management Layer. This makes the switchover practically invisible to clients, and essentiallyeliminates the performance impact on the system. This restoration is made possible by the backupConfiguration Server Proxy keeping its own record of client connections and disconnections. Undernormal conditions, the primary proxy server notifies the backup proxy of client connections anddisconnections, which the backup stores in its History Log Database. When the backup switches toprimary, it is able to restore client connections based on the connection and disconnectioninformation it has stored.
If the connection between the main and proxy servers is lost, and ADDP is configured betweenConfiguration Server Proxy and the main Configuration Server and also between the proxy server andits client, the session is not restored. Clients of the Configuration Server Proxy must reregister andread all data from scratch.
ImportantTwo Configuration Server Proxies configured as an HA pair cannot be separated intotwo standalone servers in runtime. Each of the servers must be stopped, re-configured, and then restarted.
Using Configuration Server Proxy with External Authentication
Sharing the Load Configurations Configuration Server Proxy
Framework Deployment Guide 150
Systems
In distributed systems prior to release 8.0, external authentication was configured only on the MasterConfiguration Server, and each Configuration Server Proxy passed authentication requests to it. Now,RADIUS and LDAP external authentication, starting in release 8.0 and 8.1, respectively, can beconfigured on the Master Configuration Server and on each Configuration Server Proxy. Therefore,each Configuration Server Proxy can process authentication requests itself, and does not need topass them on to the Master Configuration Server. For more information about setting up externalconfiguration on Configuration Server Proxy, refer to the ''Framework 8.5 External AuthenticationReference Manual''.
Support for Multi-Language Environments
You do not need to perform any additional configuration to have Configuration Server Proxy supportmulti-language environments. If the master Configuration Server supports UTF-8 encoded data, allConfiguration Server Proxies connected to that master Configuration Server also support UTF-8encoding. See Multi-language Environments for more information about using UTF-8 encoding toenable multi-language environments.
Configuration History Log
You can configure a history log with Configuration Server Proxy to store historical information aboutclient sessions and changes to configuration objects. Refer to Configuration History Log for moreinformation.
Failure of Configuration Server Proxy
When Configuration Server Proxy fails or disconnects from its clients, the clients attempt to reconnectto Configuration Server Proxy. If it is not available and if a backup Configuration Server Proxy isconfigured, the clients attempt to connect to the backup.
When Configuration Server Proxy fails, you must restart it manually or use the Management Layer forautorestart.
Failure of Master Configuration Server
When the master Configuration Server fails or the connection to it is lost, the clients of ConfigurationServer Proxy continue their normal operations. Configuration Server Proxy initiates reconnectattempts to the master Configuration Server. Meanwhile, Configuration Server Proxy responds toclient requests using the configuration data stored in its memory.
When the master Configuration Server fails, you must restart it manually or use the Management
Sharing the Load Configurations Configuration Server Proxy
Framework Deployment Guide 151

Layer for autorestart.
The following diagram shows Configuration Server Proxy behavior when a primary-backup pair ofmaster Configuration Servers is configured.
Distributed Installation
When the primary master Configuration Server fails or the connection to it is lost, ConfigurationServer Proxy initiates reconnect attempts to the master Configuration Server and, if it is notavailable, to the backup Configuration Server. If the connection to the backup Configuration Server isestablished, Configuration Server Proxy remains connected to the backup server until:
• The connection to the backup Configuration Server is lost.• The backup Configuration Server fails.• Configuration Server Proxy fails or is restarted.
Sharing the Load Configurations Configuration Server Proxy
Framework Deployment Guide 152

Distributed Solution Control ServersMultiple Solution Control Servers operating in Distributed mode (referred to as Distributed SolutionControl Servers) distribute management-related tasks among the sites in a distributed enterprise thatuses a single Genesys Configuration Database. In these installations, each SCS controls its ownsubset (defined by you) of the hosts, applications, and solutions, and communicates with the othersthrough a dedicated Message Server.
Specifically, Distributed Solution Control Servers perform the following functions:
• Performs the same functions of monitoring, control, alarm detection, and alarm processing as the SCS innon-Distributed mode, but on a subset of hosts, applications and solutions explicitly assigned to thisSCS in the Configuration Database.
• Communicates all the updates to statuses of the assigned objects to other Distributed Solution ControlServers, using a dedicated Message Server.
• Receives notifications about updates to the status of non-assigned objects (that is, objects assigned toother Solution Control Servers) from Message Server.
• When receiving a control command on an object not assigned to this SCS, forwards this command viaMessage Server to the appropriate SCS.
Because Distributed Solution Control Servers communicate with each other, they all have the sameinformation about all hosts, applications, and solutions. Thus, you can connect the interface objectassociated with Genesys Administrator to any Distributed SCS and monitor and control the wholeenvironment as a single entity (given appropriate permissions). When a Distributed SCS receives acontrol command for an object that this SCS does not control, it forwards this command to theappropriate SCS and passes any further notifications back to the requestor.
Using Distributed Solution Control Servers helps you resolve some problems common to distributedinstallations:
• It eliminates false switchovers that occur when SCS disconnects from LCA at a remote site because ofthe slow network connection between sites or because of temporary network problems.
• It prevents a single point of failure. A failure of one Distributed SCS only means a temporary loss ofcontrol over a subset of hosts, applications, and solutions; other Distributed Solution Control Serverscontinue to control the rest of the environment.
Because Distributed Solution Control Servers communicate with each other, they all have the sameinformation about all hosts, applications, and solutions. Therefore, given appropriate permissions, youcan connect to any Distributed Solution Control Server and monitor and control the wholeenvironment as a single entity.
Sharing the Load Configurations Distributed Solution Control Servers
Framework Deployment Guide 153
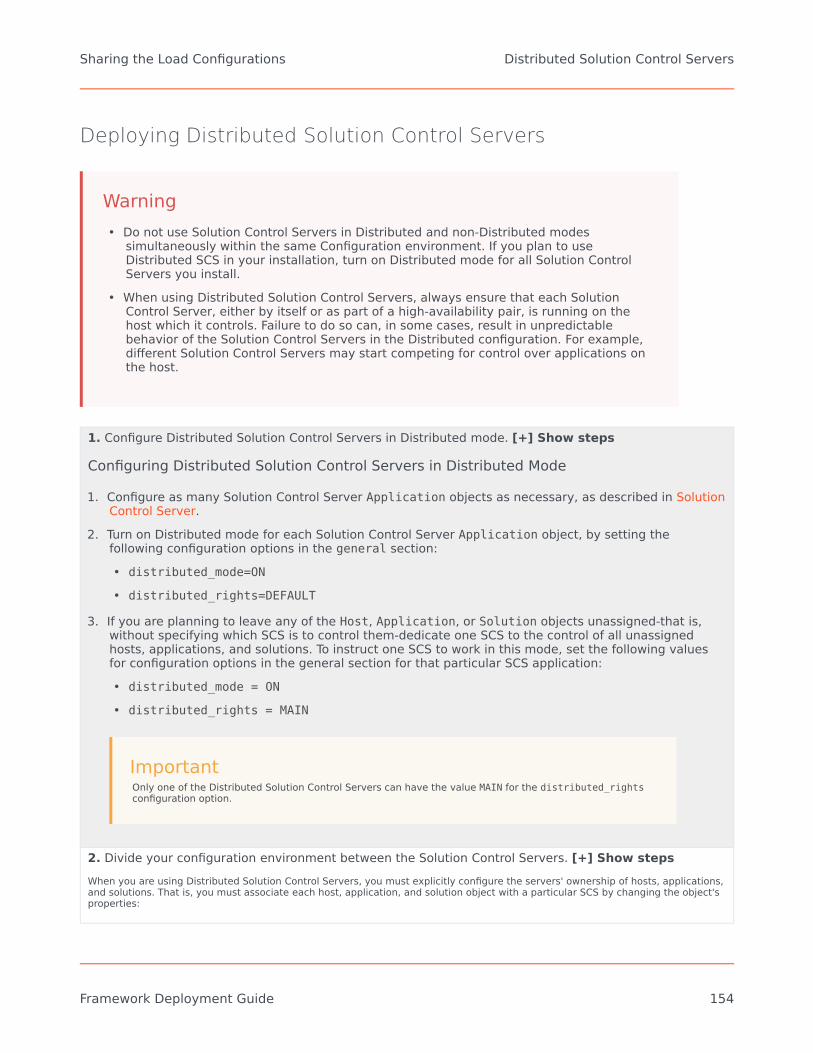
Deploying Distributed Solution Control Servers
Warning• Do not use Solution Control Servers in Distributed and non-Distributed modes
simultaneously within the same Configuration environment. If you plan to useDistributed SCS in your installation, turn on Distributed mode for all Solution ControlServers you install.
• When using Distributed Solution Control Servers, always ensure that each SolutionControl Server, either by itself or as part of a high-availability pair, is running on thehost which it controls. Failure to do so can, in some cases, result in unpredictablebehavior of the Solution Control Servers in the Distributed configuration. For example,different Solution Control Servers may start competing for control over applications onthe host.
1. Configure Distributed Solution Control Servers in Distributed mode. [+] Show steps
Configuring Distributed Solution Control Servers in Distributed Mode
1. Configure as many Solution Control Server Application objects as necessary, as described in SolutionControl Server.
2. Turn on Distributed mode for each Solution Control Server Application object, by setting thefollowing configuration options in the general section:• distributed_mode=ON
• distributed_rights=DEFAULT
3. If you are planning to leave any of the Host, Application, or Solution objects unassigned-that is,without specifying which SCS is to control them-dedicate one SCS to the control of all unassignedhosts, applications, and solutions. To instruct one SCS to work in this mode, set the following valuesfor configuration options in the general section for that particular SCS application:• distributed_mode = ON
• distributed_rights = MAIN
ImportantOnly one of the Distributed Solution Control Servers can have the value MAIN for the distributed_rightsconfiguration option.
2. Divide your configuration environment between the Solution Control Servers. [+] Show stepsWhen you are using Distributed Solution Control Servers, you must explicitly configure the servers' ownership of hosts, applications,and solutions. That is, you must associate each host, application, and solution object with a particular SCS by changing the object'sproperties:
Sharing the Load Configurations Distributed Solution Control Servers
Framework Deployment Guide 154

ImportantTo distribute control over the primary and backup servers in a redundant pair between different DistributedSolution Control Servers, all Solution Control Servers in the configuration must be running release 7.6 or later.
Recommendations
• Do not distribute control over the primary and backup servers in a redundant pair between differentDistributed Solution Control Servers if any SCS in the configuration environment is running a pre-7.5release. Genesys recommends that you configure the same SCS to control both the primary andbackup servers in a redundant pair.
• When you are distributing control over the configuration objects among Distributed Solution ControlServers, ensure that the same SCS that controls a solution also controls all applications included inthis solution. Although one SCS can technically control a solution while other servers controlapplications included in that solution, avoiding this configuration helps minimize network trafficbetween Solution Control Servers.
• Genesys strongly recommends that you not assign each component in an HA pair to different SolutionControl Servers in a distributed environment. In this configuration, the functionality of each SolutionControl Server in the HA pair might be limited to handling simple application failures only (the failureof an application within the pair). In addition, the state of each component in the monitored HA pairmight become inconsistent if network failures occur between the Distributed Solution Control Servers.
Assigning a Distributed Solution Control Server
• To control a host: Specify the SCS application in the Solution Control Server field in the Generalsection of the Configuration tab of the Host object.
• To control an application: Do not make any changes to the Application object. Specifying SCSownership of the application's host is enough. The Distributed SCS automatically controls anyapplications assigned to the host this SCS controls.
• To control a solution: Specify the SCS application in the Solution Control Server field in theGeneral section of the Configuration tab of the Solution object.
3. Configure a dedicated Message Server through which the Distributed Solution Control Servers willcommunicate with each other. [+] Show steps
RecommendationsDistributed Solution Control Servers communicate with each other through Message Server. Genesys recommends that you use adedicated Message Server for this purpose.
Prerequisites
• An Application object exists for each Distributed SCS in the configuration environment.• You are logged in to Genesys Administrator.
Sharing the Load Configurations Distributed Solution Control Servers
Framework Deployment Guide 155

Configuring a Dedicated Message Server
1. Configure a Message Server Application object with appropriate configuration parameters. Refer toMessage Server.
2. Double-click the Message Server Application object, and click the Options tab.3. Create a new configuration options section called MessageServer.4. In this section, create a new configuration option called signature and set its value to
scs_distributed. Each Distributed SCS will process this option to determine which of the MessageServers specified in its Connections to use for communications with other Solution Control Servers.
5. In the Application object for each Distributed Solution Control Server, add a connection to thisMessage Server, as follows:a. Enter ADDP as the Connection protocol.b. Set the ADDP Local Timeout and Remote Timeout to values that are less than half the minimum
alive_timeout values between all Distributed Solution Control Servers in the configurationenvironment.In other words:
Taddp < Tscs * 0.5where:
Taddp = ADDP timeoutTscs = minimum alive_timeout between all Distributed Solution Control Servers
Refer to the ''Framework Configuration Options Reference Manual'' for a detailed description of thealive_timeout option.
4. (Optional) Configure a Message Server for centralized logging at each site with Distributed SolutionControl Servers. [+] Show stepsFor distributed environments using a single Configuration Database, Genesys recommends using a dedicated Message Server forcentralized logging at each site. In most cases, you have to configure as many Message Servers as there are Distributed SolutionControl Servers.
ImportantYou can configure as many Message Servers for centralized logging as you need per site. These are in additionto the Message Server dedicated to handle communications between the distributed servers.
After you have installed the Message Servers, you should verify that each Message Server used for centralized logging is configuredand connected to a Solution Control Server and to each of the applications controlled by that Solution Control Server as follows:
Prerequisites
• Distributed Solution Control Servers are set up in the configuration environment.• The Message Server used for centralized logging in this environment is installed.• You are logged in to Genesys Administrator.
Verifying Configuration of Message Servers used for Centralized Logging
1. Go to Provisioning > Applications, and double-click a particular Solution Control Server
Sharing the Load Configurations Distributed Solution Control Servers
Framework Deployment Guide 156

Application object to open its Configuration tab.2. In the General section, make sure that a connection to the Message Server that is providing the
centralized logging is added to the list of Connections.3. For each Application object that this particular Solution Control Server controls:
a. Open the Configuration tab of the object.b. In the General section, make sure that a connection to that same Message Server is added to the
list of Connections.
5. (Optional) Configure redundant applications for Distributed Solution Control Servers. [+] Show stepsDistributed Solution Control Servers support the warm standby redundant configuration in the same way as other Genesys servers,with the added benefit that the backup maintains data synchronization with the primary. That is, you can configure a primary and abackup pair of Distributed Solution Control Servers to operate with warm-standby redundancy. Refer to Redundant Solution ControlServers for more information.
6. After you are finished with the configuration tasks, physically install all instances of Solution ControlServer and Message Server to match the configuration.
Starting Distributed Solution Control Servers
ImportantStarting a Solution Control Server in Distributed mode requires a special license. Referto the ''Genesys Licensing Guide'' for more information.
Start each Distributed Solution Control Server in the same way as you would start a non-distributedSCS. See Starting SCS and Starting a Backup SCS for more information.
Sharing the Load Configurations Distributed Solution Control Servers
Framework Deployment Guide 157

Disaster Recovery / Business ContinuityThis section describes a recommended architecture to ensure successful disaster recovery, orbusiness continuity, following a scenario in which the main site was rendered inoperable because ofsome natural or other disaster. For more information, including configuration details, see DisasterRecovery Configuration.
Overview
The Genesys system configuration is stored in a single database and can be accessed by only oneprimary master Configuration Server connection at a time. The Configuration Database is constantlymodified by Configuration Server clients, is archived periodically to prevent the loss of data.Database maintenance and periodic backup can cause significant downtime. It cannot prevent partialor whole loss of configuration data if a major disaster occurs, such as one in which the ConfigurationDatabase and all updates and modifications made since the last backup is completely lost.
To improve the robustness of the Management Framework solution and to reduce downtime forsystem maintenance, this architecture replicates a live database to a secondary live standbydatabase. If a major disaster occurs, that secondary database can be accessed by a secondarymaster Configuration Server that is brought online from a dormant state, and changing IP addressname resolution for Configuration Server Proxies to the host running that secondary masterConfiguration Server. Operations at sites can be continued uninterrupted in limited mode without aconfiguration change until the secondary master Configuration Server is brought online and restoredto normal mode after the Proxy servers reconnect to the secondary master Configuration server.
Components
This architecture consists of the following components:
• Main live DBMS database server at Site 1.• Secondary live DBMS at Site 2.• DBMS solution to replicate the live Configuration Database to a secondary live standby database and
log message databases cross sites replication.• Main live redundant pair master Configuration Server primary/backup pair at Site 1.• Secondary dormant (not running in normal operation mode) master Configuration Server primary/
backup pair at Site 2.• Main live Solution Control Server in distributed mode to control the main master Configuration Server
pair at Site 1.• Secondary dormant Solution Control Server in distributed mode to control the secondary Master
Configuration Server pair at Site 2.• Main Message Server at Site 1 to support communication between Solution Control Servers controlling
Disaster Recovery / Business Continuity Distributed Solution Control Servers
Framework Deployment Guide 158

site components, such as Configuration Server Proxy pairs, T-Servers, Log Message Servers.• Secondary dormant (not running in normal operation mode) Message Server at Site 2 to support
communication between Solution Control Servers controlling site components, such as ConfigurationServer Proxy pairs, T-Servers, and Log Message Servers.
• Live Configuration Server Proxy pair at Site 1.• Live Configuration Server Proxy pair at Site 2.• Live Solution Control Server at Site 1.• Live Solution Control Server at Site 2.• Live Message Server for network logging at Site 1, connected to the Log Database at Site 1.• Live Message Server for network logging at Site 2, connected to the Log Database at Site 1.• Scripts to start and stop the master Configuration Server primary/backup pair and master Solution
Control Servers.• DBMS scripts to enable and disable database access.• DBMS solution scripts to start and stop replication processes.• A script residing at the DNS server host to change IP address name resolution for the master
Configuration Server host.• A switchover script to push name resolution changes for Configuration Server Proxy hosts at Sites 1 and
2 after the IP address name resolution changes at the DNS server host.
Architecture
The following diagram illustrates the disaster recovery architecture for a multi-site configurationunder normal conditions.
Disaster Recovery / Business Continuity Distributed Solution Control Servers
Framework Deployment Guide 159

Multi-Site Disaster Recovery Architecture underNormal Operations
Solution Control ServerThe Solution Control Servers used in this deployment are configured in distributed SCS mode. Someor all can also be configured in HA pairs at each site.
At each site, a Solution Control Server is deployed on the management host (Hosts 3 and 5 in thediagram above) and is dedicated to managing applications on the management hosts, specifically theConfiguration Server and the dedicated Message Server for the distributed Solution Control Servers,described next.
For distributed Solution Control Servers to communicate with each other, a Message Server dedicatedfor distributed Solution Control Server use (that is, configured with[MessageServer]signature=scs_distributed) is also installed on each of the management hosts.
Each site also has a separate Solution Control Server deployed on the application host configured tomanage Genesys applications running on each site (that is, the site SCS in the diagram above).
Depending on the number of applications, it is possible to deploy additional distributed SolutionControl Servers for load balancing.
For additional fault tolerance, Solution Control Servers can be deployed in high-availability (HA) pairs.
Disaster Recovery / Business Continuity Distributed Solution Control Servers
Framework Deployment Guide 160

Message ServerEach site has its own instance of a Log Message Server to be used for network logging byapplications running on the same site. The Message Servers are installed on the application host andmanaged by the site Solution Control Server. A Log Database is used at each site.
In addition, a Message Server is also dedicated to communications between the distributed SolutionControl Servers. This requires two instances (or two HA pairs) of Message Servers to be deployed, oneof which is dormant.
DNS Server Configuration and Switchover ScriptsThe DNS Server configures a record type A to resolve the IP address of a host running the live masterConfiguration Server primary/backup pair. It resolves the IP address to the main host in normal mode,and to the secondary host in failover mode. It consists of two scripts setting the IP address resolution,one for the main host and the second for the secondary host.
DBMS Solution Replication Processes ConfigurationThe DBMS Solution must have replication processes designed to cross-replicate the Configuration andLog Databases, such as:
• From the database on the main system to that on the secondary system.• From the database on the secondary system to that on the main system.
The following diagram illustrates the DBMS configuration in normal operating mode. In this mode, theConfiguration Database replication process from the secondary system to the main system is inSTOPPED state (marked *). It is started only when the secondary Configuration Database is switchedfrom live standby to live mode and used for the initial data replication from the secondary to maindatabase after the main system is restored.
Multi-Site Database Replication
Disaster Recovery / Business Continuity Distributed Solution Control Servers
Framework Deployment Guide 161

Starting and Stopping FrameworkComponentsYou can start and stop a Framework component in any of the following ways:
• Using the startup file created by the installation script. This file can only be used to start thecomponent, you must use one of the other ways to stop the component.
• Using the Management Layer.• Manually, specifying command-line parameters.• Using the Windows Services Manager, available only in Windows.
Starting and Stopping Framework Components Distributed Solution Control Servers
Framework Deployment Guide 162

Using Startup FilesStartup files are files named run.sh (on UNIX) or startServer.bat (on Windows), and whichinstallation scripts create and place in the applications' directories during installation. For additionalinformation about how to use startup files, refer to the ''Framework 8.5 Management Layer User'sGuide''.
ImportantYou must manually modify the run.sh file created for a redundant server before youcan use it to start the server. Refer to Configuring Redundant Components for moreinformation.
Prerequisites
• The startup parameters in the startup file are correct.• The required applications that should be running for this application to start are installed and running.
See the appropriate sections in Starting Components to identify which applications should be runningfor a particular application to start.
On UNIX
To start the application on UNIX, go to the directory in which the application is installed and type thefollowing on the command line:sh run.sh
On Windows
To start the application on Windows, do one of the following:
• Go to the directory in which the application is installed and double-click the following:startServer.bat
• From the MS-DOS window, go to the directory in which the application is installed and type the followingon the command line:startServer.bat
Starting and Stopping Framework Components Using Startup Files
Framework Deployment Guide 163

Using the Management LayerYou can use Genesys Administrator to start and stop applications via the Management Layer.
ImportantTo operate with the Management Layer, Genesys Administrator must be configured asdescribed in the ''Genesys Administrator 8.1 Deployment Guide''.
Before starting an application with the Management Layer, make sure the application's startupparameters are correctly specified in the Application properties. In the Server Info section of theapplication's Configuration tab, check that the following entries are correct:
• Working Directory - Directory in which the application is installed and/or is to run• Command Line - Name of the executable file• Command Line Arguments - Command-line parameters
See Command-line parameters for Framework components for descriptions of the parameters.
After you correctly specify the command-line parameters, you can start and stop the followingFramework components from Genesys Administrator:
• Configuration Server (the Command Line Arguments are not required for the primary ConfigurationServer)
ImportantFor the Management Layer to start Configuration Server, you must modify theConfiguration Server application.
• Configuration Server Proxy• Message Server• SNMP Master Agent• T-Server• HA Proxy• Stat Server
The Management Layer can also restart failed applications; to enable the autorestart functionalityfor a particular application, select the corresponding check box in the properties of the Application.
Note that when an application is started (or restarted) via the Management Layer, it inherits
Starting and Stopping Framework Components Using the Management Layer
Framework Deployment Guide 164

environment variables from LCA, which executes the startup command. Therefore, you must also setthe environment variables required for the application for the account that runs LCA.
WarningStopping an application via the Management Layer is not considered an applicationfailure. Therefore, the Management Layer does not restart applications that it hasstopped unless you have configured an appropriate alarm condition and alarmreaction for them.
Stop vs. Graceful Shutdown
When you stop an application or a solution, the application or solution shuts down, ceasing allprocessing immediately. This may have a detrimental effect on the rest of the system.
Starting in release 8.0, you can stop an application or a solution gracefully, known as a gracefulshutdown or graceful stop. Applications refuse any new requests, but continue to process theircurrent requests. A solution gracefully shuts down all of its composite applications, then stops.
ImportantBecause a number of solutions can share the same applications, some solutioncomponents may continue to have Started status after you stop the solution.
Only applications and solutions that support the graceful stop functionality can be stopped gracefully.Applications and solutions that do not support this functionality shut down ungracefully.
If you are unsure if the application supports graceful shutdown, you can use the suspending-wait-timeout configuration option to configure a timeout. If the status of the application changes toSuspending within this time, the application supports graceful shutdown. If the status does notchange to Suspending within the timeout, the application does not support graceful shutdown, andthe application will then stop ungracefully after the timeout expires. Refer to the ''FrameworkConfiguration Options Reference Manual'', for a detailed description of this configuration option andhow to use it.
Refer to ''Genesys Administrator 8.1 Help'' for more information about stopping gracefully, and aboutconfiguring a timeout.
Starting and Stopping Framework Components Using the Management Layer
Framework Deployment Guide 165

Starting ManuallyWhen using a manual procedure to start an application, specify the startup parameters in thecommand prompt. In the command prompt, command-line parameters must follow the name of theexecutable file. On the Shortcut tab of the Program Properties dialog box, command-line parametersmust also follow the name of the executable file.
Some Genesys interface components also require that you log in to them using preassigned logincredentials. Use the procedure Logging In.
Common Command Line Parameters[+] Show ParametersThe following table lists command-line parameters that are common to all Framework components.
-host The name of the host on which ConfigurationServer is running.
-port The communication port that client applicationsmust use to connect to Configuration Server.
-app The exact name of an application as configured inthe Configuration Database.
-l
The license address. Use for the server applicationsthat check out technical licenses. Can be either ofthe following:
• Full path to and the exact name of the licensefile used by an application. For example, -l/opt/mlink/license/license.dat.
• The host name and port of the license server, asspecified in the SERVER line of the license file, inthe port@host format. For example, -l7260@ctiserver.
-vThe version of a Framework component. Thisparameter does not start an application, butreturns its version number instead. Eitheruppercase (V) or lowercase (v) letter can be used.
-nco X/Y
The Nonstop Operation feature is activated; Xexceptions occurring within Y seconds do not causean application to exit. If the specified number ofexceptions is exceededwithin the specified number of seconds, the application exits or,if so configured, the Management Layer restarts the application.If you do not specify a value for the -nco parameter, the defaultvalue (6 exceptions handled in 10 seconds) applies. To disable
Starting and Stopping Framework Components Starting Manually
Framework Deployment Guide 166

the Nonstop Operation feature, specify -nco 0 when startingthe application.
-lmspath
The full path to the log messages files (thecommon file named common.lms and theapplication-specific file with the extension *.lms)that an application uses to generate log events.This parameter is used when the common andapplication-specific log message files are located ina directory other than the application's workingdirectory, for example, when the application'sworking directory differs from the directory towhich the application is originally installed. Notethat if the full path to the executable file isspecified in the startup command line (for instance,c:\gcti\multiserver.exe), the path specified forthe executable file is used for locating the *.lmsfiles, and the value of the -lmspath parameter isignored.
WarningAn application that does not find its *.lms file atstartup cannot generate application-specific logevents and send them to Message Server.
Starting Components
ImportantWhen an application is installed on a UNIX operating system and the applicationname, as configured in the Configuration Database, contains spaces (for example, MyT-Server), you must surround the application name by quotation marks (" ") in thecommand line, as follows:-app "My T-Server"
Specify the rest of the command-line parameters as for any other application.
This section contains prerequisites, procedures, and other information about starting each Frameworkcomponent, as follows:
• Configuration Server• Configuration Server Proxy• Local Control Agent• Genesys Deployment Agent• Message Server
Starting and Stopping Framework Components Starting Manually
Framework Deployment Guide 167

• Solution Control Server• Genesys SNMP Master Agent
Prerequisites for starting other Framework components are also provided, as follows:
• License Manager• Genesys Administrator• HA Proxy• T-Server• Stat Server
Configuration ServerPrerequisites
• The license file has been uploaded into the Configuration Database and is valid.• FlexNet Publisher License Manager is installed and running.
Configuration Server does not require any of the common command-line parameters for startup. Toverify the database object integrity, you can specify the following additional command-lineparameters that are specific to Configuration Server:
-checkdbAn instance of Configuration Server starts, verifiesthe database object integrity, and terminates; alllog messages are written in the log output.
-checkerrorsAn instance of Configuration Server starts, verifiesthe database object integrity, and terminates; errorlog messages are written in the log output.
You can also use the following command-line parameters when starting Configuration Server:
-c
Configuration Server reads its configurationsettings from a configuration file with the specifiedname. If you set this parameter, its value overridesthe default name of the configuration file(confserv.conf on UNIX or confserv.cfg onWindows).
-s
Configuration Server reads its configurationsettings from a configuration section with thespecified name. The section must be configuredwithin Configuration Server's configuration file; thesection name must be the same as the name of theConfiguration Server application configured in theConfiguration Database. Use this parameter tostart a backup Configuration Server.
-pForces an instance of Configuration Server to start,encrypt the database password in the configurationfile, and terminate. Refer to the ''Genesys 8.1
Starting and Stopping Framework Components Starting Manually
Framework Deployment Guide 168

Security Deployment Guide'' for instructions onencrypting the Configuration Database password.
-cfglib_port
Configuration Server opens the listening portspecified in the command line. The port is openedin unsecured mode. This port is not written to theConfiguration Server Application object, and doesnot survive a restart of Configuration Server. Do notuse this option as a part of normal startup. Use itonly as a last resort when regular secure portscannot be accessed because of a configurationproblem, such as incorrect or expired securitycertificates, or when a duplicate port (notnecessarily secure) is specified in the configurationand therefore cannot be opened.
On UNIX
Go to the directory in which Configuration Server is installed and do one of the following:
• To use only the required command-line parameters, type the following on the command line:sh run.sh
• To specify the command line yourself, or to use additional command-line parameters, type the followingcommand on the command line:confserv [<additional parameters and arguments as required>]
On Windows
Do one of the following:
• Use the Start > Programs menu.• To use only the required command-line parameters, go to the directory in which Configuration Server is
installed, and double-click the startServer.bat file.• To specify the command line yourself, or to use additional command-line parameters, open the MS-DOS
window, go to the directory in which Configuration Server is installed, and type the appropriatecommand on the command line:confserv.exe [<additional parameters and arguments as required>]
Configuration Server ProxyConfiguration Server Proxy supports only the command-line parameters common to Frameworkserver components; it does not support the additional command-line parameters specific toConfiguration Server.
Prerequisites
• The Master Configuration Server is installed and running.
Starting and Stopping Framework Components Starting Manually
Framework Deployment Guide 169

• License Manager is installed and running.
On UNIX
Go to the directory in which Configuration Server Proxy is installed and do one of the following:
• To use only the required command-line parameters, type the following on the command line:sh run.sh
• To specify the command line yourself, or to use additional command-line parameters, type the followingcommand on the command line:confserv [<additional parameters and arguments as required>]
On Windows
Do one of the following:
• Use the Start > Programs menu.• To use only the required command-line parameters, go to the directory in which Configuration Server
Proxy is installed, and double-click the startServer.bat file.• To specify the command line yourself, or to use additional command-line parameters, open the MS-DOS
window, go to the directory in which Configuration Server Proxy is installed, and type the appropriatecommand on the command line:confserv.exe [<additional parameters and arguments as required>]
Local Control AgentWith default settings, Local Control Agent starts automatically every time a computer is started orrebooted. In Windows, you can manually start LCA from the Start > Programs menu. You can alsochange the default LCA port value, following the instructions in Step 3 when Creating a Host.
Starting LCA on Linux Without Root Privileges
On Red Hat Enterprise Linux systems, you can configure LCA to start automatically when the Hoststarts, and without root privileges.
To configure the runlevel for LCA and Genesys Deployment Agent (GDA) on Linux, do one of thefollowing:
• For runlevel 3:• LCA: ln -s /etc/init.d/gctilca /etc/rc3.d/S99gctilca• GDA: ln -s /etc/init.d/gctigda /etc/rc3.d/S98gctigda
• For runlevel 5:• LCA: ln -s /etc/init.d/gctilca /etc/rc5.d/S99gctilca
Starting and Stopping Framework Components Starting Manually
Framework Deployment Guide 170

• GDA: ln -s /etc/init.d/gctigda /etc/rc5.d/S98gctigda
ImportantDo not use /etc/rc.local, which will cause LCA and GDA to start at run levels 2, 3,4, and 5, which you do not need.
There are various run levels available for Linux, and some of them are listed in the following table.Refer to the Linux website for a complete list of run levels.
Run Level Description
0 System halt; no activity, the system can be safelypowered down.
1 Single user; rarely used.
2 Multiple users, no Network File System (NFS); rarelyused.
3Multiple users, command-line (all-text mode)interface; the standard runlevel for most Linux-based server hardware.
4 User-definable.
5Multiple users, graphical user interface; thestandard runlevel for most Linux-based desktopsystems.
Configuring different (but non-root) <user> and <group> for LCA and GDA on Linux
1. Install the LCA as root.2. Select the <user> and <group> that you want to use as a replacement for the user "root" and the
group "root".3. Ensure that the <user> and <group> each have the adequate privileges for the folders/directories in
which LCA is installed, and for the other applications and modules that will be controlled/managed byLCA.
4. Change the owner and group for LCA, as follows:a. Set the current working directory to the location where LCA is installed.b. Enter the following commands and press Enter after each:
• chown <user> lca
• chgrp <group> lca
5. Change the current user from root to <user>.6. On the command line, enter su - <user>, and press Enter.7. Set the setUID and setGID attributes for LCA. On the command line, enter chmod ug+s lca, and press
Enter.This essentially equates the user/group ID to <user>/<group> when LCA is launched by another user.
Starting and Stopping Framework Components Starting Manually
Framework Deployment Guide 171
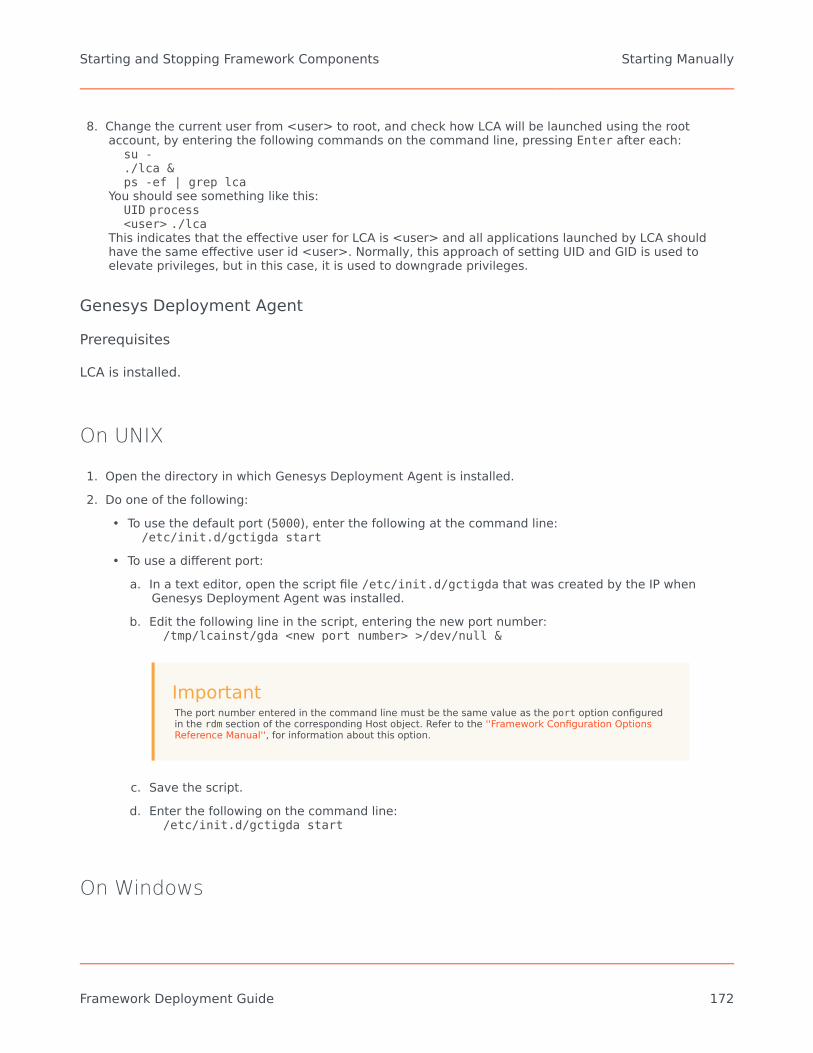
8. Change the current user from <user> to root, and check how LCA will be launched using the rootaccount, by entering the following commands on the command line, pressing Enter after each:
su -./lca &ps -ef | grep lca
You should see something like this:UID process<user> ./lca
This indicates that the effective user for LCA is <user> and all applications launched by LCA shouldhave the same effective user id <user>. Normally, this approach of setting UID and GID is used toelevate privileges, but in this case, it is used to downgrade privileges.
Genesys Deployment AgentPrerequisites
LCA is installed.
On UNIX
1. Open the directory in which Genesys Deployment Agent is installed.2. Do one of the following:
• To use the default port (5000), enter the following at the command line:/etc/init.d/gctigda start
• To use a different port:a. In a text editor, open the script file /etc/init.d/gctigda that was created by the IP when
Genesys Deployment Agent was installed.b. Edit the following line in the script, entering the new port number:
/tmp/lcainst/gda <new port number> >/dev/null &
ImportantThe port number entered in the command line must be the same value as the port option configuredin the rdm section of the corresponding Host object. Refer to the ''Framework Configuration OptionsReference Manual'', for information about this option.
c. Save the script.d. Enter the following on the command line:
/etc/init.d/gctigda start
On Windows
Starting and Stopping Framework Components Starting Manually
Framework Deployment Guide 172

1. Open the directory in which Genesys Deployment Agent is installed.2. Do one of the following:
• To use the default port (5000), run the gda.exe file.• To use a different port, enter the following command on the command line: gda.exe <new port
number>
ImportantThe port number entered in the command line must be the same value as the port option configured inthe rdm section of the corresponding Host object. Refer to the ''Framework Configuration OptionsReference Manual'' for information about this option.
Message ServerMessage Server supports the common command-line parameters.
Prerequisites
• Configuration Server is installed and running.
On UNIX
Go to the directory in which Message Server is installed and do one of the following:
• To use only the required command-line parameters, type the following on the command line:sh run.sh
• To specify the command line yourself, or to use additional command-line parameters, type the followingcommand on the command line:MessageServer -host <Configuration Server host> -port <Configuration Server port> -app<Message Server Application> [<additional parameters and arguments as required>]
On Windows
Do one of the following:
• Use the Start > Programs menu.• To use only the required command-line parameters, go to the directory in which Message Server is
installed, and double-click the startServer.bat file.• To specify the command line yourself, or to use additional command-line parameters, open the MS-DOS
window, go to the directory in which Message Server is installed, and type the appropriate command onthe command line:MessageServer.exe -host <Configuration Server host> -port <Configuration Server port>
Starting and Stopping Framework Components Starting Manually
Framework Deployment Guide 173
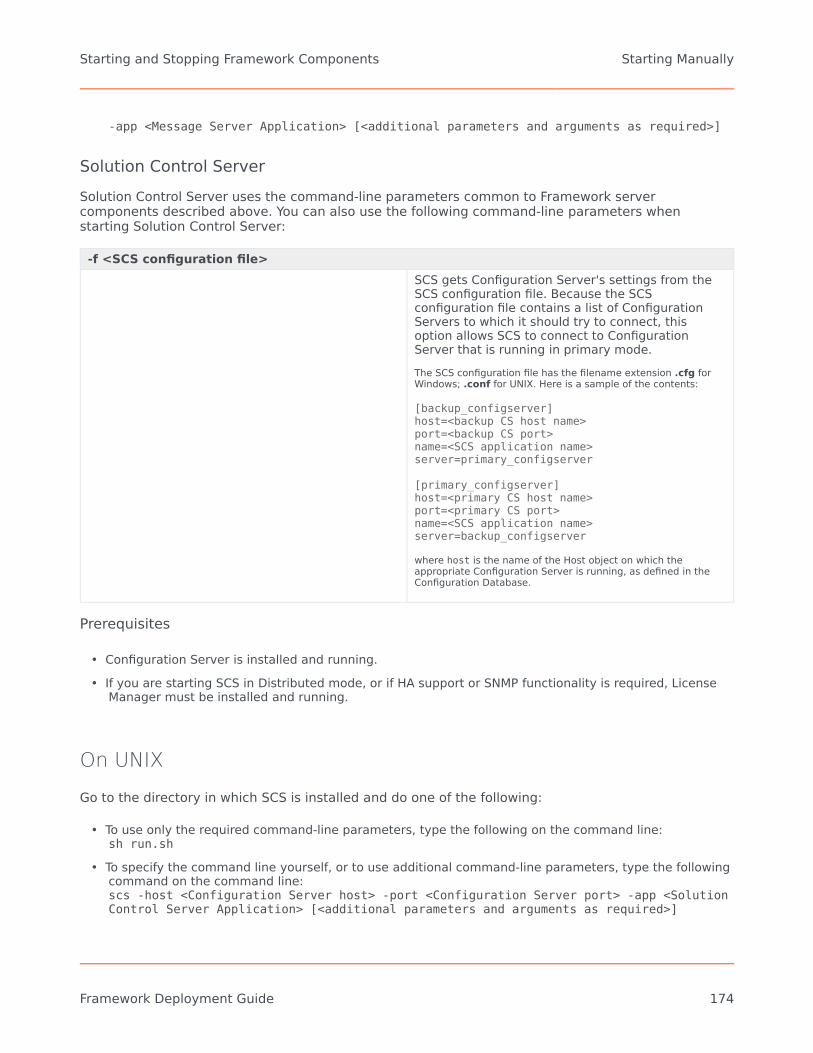
-app <Message Server Application> [<additional parameters and arguments as required>]
Solution Control ServerSolution Control Server uses the command-line parameters common to Framework servercomponents described above. You can also use the following command-line parameters whenstarting Solution Control Server:
-f <SCS configuration file>SCS gets Configuration Server's settings from theSCS configuration file. Because the SCSconfiguration file contains a list of ConfigurationServers to which it should try to connect, thisoption allows SCS to connect to ConfigurationServer that is running in primary mode.The SCS configuration file has the filename extension .cfg forWindows; .conf for UNIX. Here is a sample of the contents:
[backup_configserver]host=<backup CS host name>port=<backup CS port>name=<SCS application name>server=primary_configserver
[primary_configserver]host=<primary CS host name>port=<primary CS port>name=<SCS application name>server=backup_configserver
where host is the name of the Host object on which theappropriate Configuration Server is running, as defined in theConfiguration Database.
Prerequisites
• Configuration Server is installed and running.• If you are starting SCS in Distributed mode, or if HA support or SNMP functionality is required, License
Manager must be installed and running.
On UNIX
Go to the directory in which SCS is installed and do one of the following:
• To use only the required command-line parameters, type the following on the command line:sh run.sh
• To specify the command line yourself, or to use additional command-line parameters, type the followingcommand on the command line:scs -host <Configuration Server host> -port <Configuration Server port> -app <SolutionControl Server Application> [<additional parameters and arguments as required>]
Starting and Stopping Framework Components Starting Manually
Framework Deployment Guide 174

ImportantIf you are operating on a dual-stack machine, and dual stack is enabled, add the following start-up parameteron the command line:-transport-ip-version 6,4
This specifies what internet protocol versions you are using, in this case IPv4 and IPv6.
On Windows
Do one of the following:
• Use the Start > Programs menu.• To use only the required command-line parameters, go to the directory in which SCS is installed, and
double-click the startServer.bat file.• To specify the command line yourself, or to use additional command-line parameters, open the MS-DOS
window, go to the directory in which SCS is installed, and type the appropriate command on thecommand line:scs.exe -host <Configuration Server host> -port <Configuration Server port> -app<Solution Control Server Application> [<additional parameters and arguments asrequired>]
ImportantIf you are operating on a dual-stack machine, and dual stack is enabled, add the following start-up parameteron the command line:-transport-ip-version 6,4
This specifies what internet protocol versions you are using, in this case IPv4 and IPv6.
Genesys SNMP Master AgentGenesys SNMP Master Agent uses the command-line parameters common to Framework servercomponents, described above.
Prerequisites
• Configuration Server is installed and running.• If you plan to use SNMP alarm signaling, Message Server must be installed and running.
On UNIX
Go to the directory in which SNMP Master Agent is installed and do one of the following:
Starting and Stopping Framework Components Starting Manually
Framework Deployment Guide 175

• To use only the required command-line parameters, type the following on the command line:sh run.sh
• To specify the command line yourself, or to use additional command-line parameters, type the followingcommand on the command line:gsnmpmasteragent -host <Configuration Server host> -port <Configuration Server port>-app <SNMP Master Agent Application> [<additional parameters and arguments asrequired>]
On Windows
Do one of the following:
• Use the Start > Programs menu.• To use only the required command-line parameters, go to the directory in which SNMP Master Agent is
installed, and double-click the startServer.bat file.• To specify the command line yourself, or to use additional command-line parameters, open the MS-DOS
window, go to the directory in which SNMP Master Agent is installed, and type the appropriatecommand on the command line:gsnmpmasteragent.exe -host <Configuration Server host> -port <Configuration Serverport> -app <SNMP Master Agent Application> [<additional parameters and arguments asrequired>]
License ManagerFor information about starting License Manager, see the ''Genesys Licensing Guide''.
Genesys AdministratorInformation about starting and stopping Genesys Administrator is located in the ''Framework 8.1Genesys Administrator Deployment Guide''.
Prerequisites
• Configuration Server is installed and running.
HA ProxyDetails on starting and stopping HA Proxy, if applicable, are located in the latest version of theFramework T-Server Deployment Guide for your specific T-Server.
If one or more HA Proxy components are required for T-Server connection to its switch, start HA Proxybefore starting T-Server.
Prerequisites
• Configuration Server is installed and running.
Starting and Stopping Framework Components Starting Manually
Framework Deployment Guide 176

T-ServerDetails on starting and stopping T-Server are located in the latest version of the Framework T-ServerDeployment Guide for your specific T-Server.
Before starting T-Server, be sure that the following components are running:
• Configuration Server• License Manager
ImportantIf an HA Proxy component is required for T-Server connection to its switch, you muststart HA Proxy before starting T-Server.
Stat ServerDetails on starting and stopping Stat Server are located in the documentation for your release of StatServer.
Prerequisites
• Configuration Server is installed and running.
ImportantFor Stat Server to operate correctly, T-Server must also be running.
Stopping
Server Applications
On UNIX
To stop a server application on UNIX, use one of the following commands:
• Ctrl+C
• kill <process number>
Starting and Stopping Framework Components Starting Manually
Framework Deployment Guide 177

On Windows
To stop a server application on Windows, do one of the following:
• Type Ctrl+C in the application's console window.• Click End Task in the Windows Task Manager.
GUI Applications
Windows-based
To stop a Windows-based GUI application, select File > Exit in the main window.
Web-based
To stop a web-based GUI application, such as Genesys Administrator, click Logout on the main page.
Starting and Stopping Framework Components Starting Manually
Framework Deployment Guide 178
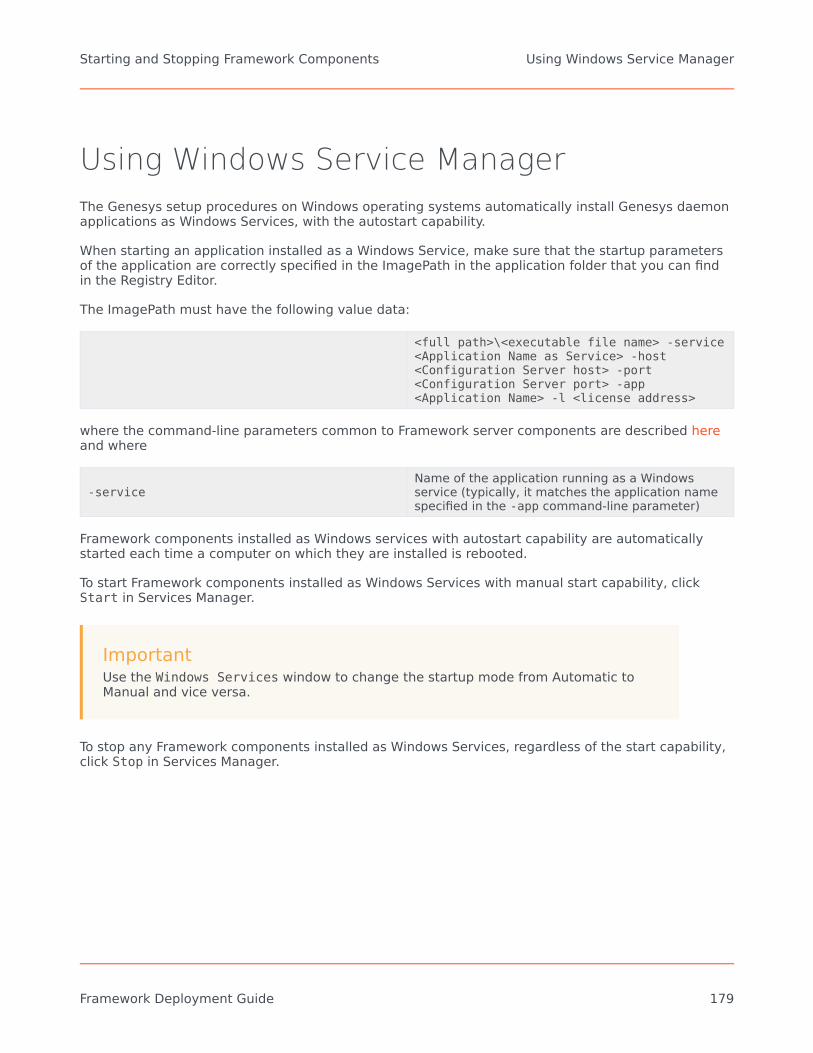
Using Windows Service ManagerThe Genesys setup procedures on Windows operating systems automatically install Genesys daemonapplications as Windows Services, with the autostart capability.
When starting an application installed as a Windows Service, make sure that the startup parametersof the application are correctly specified in the ImagePath in the application folder that you can findin the Registry Editor.
The ImagePath must have the following value data:
<full path>\<executable file name> -service<Application Name as Service> -host<Configuration Server host> -port<Configuration Server port> -app<Application Name> -l <license address>
where the command-line parameters common to Framework server components are described hereand where
-serviceName of the application running as a Windowsservice (typically, it matches the application namespecified in the -app command-line parameter)
Framework components installed as Windows services with autostart capability are automaticallystarted each time a computer on which they are installed is rebooted.
To start Framework components installed as Windows Services with manual start capability, clickStart in Services Manager.
ImportantUse the Windows Services window to change the startup mode from Automatic toManual and vice versa.
To stop any Framework components installed as Windows Services, regardless of the start capability,click Stop in Services Manager.
Starting and Stopping Framework Components Using Windows Service Manager
Framework Deployment Guide 179

Additional InformationThe following pages contain additional information that will help you use Genesys Framework.
Additional Information Using Windows Service Manager
Framework Deployment Guide 180

Silent SetupGenesys Silent Configuration allows for an automated electronic software distribution, also known asa silent setup. With silent setup, you do not have to monitor the setup or provide input via dialogboxes. Instead, the setup parameters are stored in a response file, and the silent setup runs on itsown, without any intervention by the end-user.
An installation procedure for a server application differs slightly from an installation procedure for aGUI application. Both, however, require that you update a response file with the necessaryparameters and then use it for the actual installation.
Genesys Silent Configuration works on both UNIX and Windows operating systems.
The following Framework components support Silent Setup installation:
• Configuration Server• Message Server• Solution Control Server• T-Server• HA Proxy• Stat Server
Creating the Response File
A template for the response file, called genesys_silent.ini, is included in the Installation Package(IP) for each supporting component. This template file, called genesys_silent.ini, guides youthrough the task of entering required information, by providing the following information for eachfield:
• A full description of the field.• If applicable, a description of valid values, either a range or a list.• If application, any conditions in which the parameters may not be used.
Open this file and provide values for all required fields by replacing the text contained in anglebrackets (<>)(see the examples). Then save the file. By default, it is saved as genesys_silent.ini inthe installation folder.
Subsequently, you can use the same response file any time you need to install an application withthe configured parameters.
Additional Information Silent Setup
Framework Deployment Guide 181

Sample Response File Entries (genesys_silent.ini)The following is an example of the Genesys Configuration Server information section in thegenesys_silent.ini for Configuration Server, with values entered for the required fields.
[+] Show sample entries#===============================================================================# Genesys Configuration Server information section# NOTE: If Genesys Configuration Wizard .ini file (GCTISetup.ini file) is# detected in IP root directory, then Host, Port, User,# xPassword/Password Configuration Server parameters specified in# Genesys Silent Configuration file are ignored.#===============================================================================[ConfigServer]
#-------------------------------------------------------------------------------# Host name where Genesys Configuration Server is running.#-------------------------------------------------------------------------------Host=CSHost
#-------------------------------------------------------------------------------# Port number of Genesys Configuration Server.#-------------------------------------------------------------------------------Port=2010
#-------------------------------------------------------------------------------# User name in Genesys Configuration Server.#-------------------------------------------------------------------------------User=User1
#-------------------------------------------------------------------------------# User's password in Genesys Configuration Server.# The password can be specified in encrypted or none encrypted form:# xPassword - is used to specify the encrypted password;# Password - is used to specify the non encrypted password;# If 'xPassword' key value specified then 'Password' key value is ignored.#-------------------------------------------------------------------------------xPassword=********
#-------------------------------------------------------------------------------# Application name in Genesys Configuration Server.# NOTE: This parameter is ignored if only one application was defined in# GCTISetup.ini file by Genesys Configuration Wizard (Setup reads# application name from '[<ApplicatonName>]' section name# of GCTISetup.ini file).# This is a mandatory parameter if Installation uses application# template in Genesys Configuration Server and GCTISetup.ini file# does not exist or contains more then one defined application.#-------------------------------------------------------------------------------ApplicationName=config
Running the Silent Installation
The silent setup program does not display a message if an error occurs. The status information forthe silent installation is recorded in a file called (by default) genesys_install_result.log.
Additional Information Silent Setup
Framework Deployment Guide 182

Use the appropriate command line to launch the Genesys Silent Configuration, depending on youroperating platform as follows:
On UNIX
./install.sh -s -fr <full path to the setup response file> -fl <full path to thesetup log file>
where:
<full path to the setup response file>The full path to the the setupresponse file. By default,install.sh looks for a responsefile called genesys_silent.iniin the same directory asinstall.sh.
<full path to the setup log file>The full path to the setup log file.By default,genesys_install_result.log isgenerated in the same directoryas the response file being used.
Example
.\install.sh -s -fr /home/user/genesys_silent.ini -fl /home/user/genesys_install_result.log
On Windows
.\setup.exe /s /z"-s <full path to the setup response file> -sl <full path to thesetup log file>"
where:
<full path to the setup response file>The full path to the setupresponse file. By default,setup.exe looks for a responsefile called genesys_silent.iniin the same directory assetup.exe.
Additional Information Silent Setup
Framework Deployment Guide 183

<full path to the setup log file>The full path to the setup log file.By default,genesys_install_result.log isgenerated in the same directoryas the response file being used.
Important• Enclose the entire string of parameters -s <full path to the setup response file>
-sl <full path to the setup log file> in double quotation marks.• Do not enter a space between the /z parameter and its value.
Example
.\setup.exe /s /z"-s c:\win\genesys_silent.ini -sl c:\win\genesys_install_result.log"
Silent Setup Log File
The silent setup program prints installation results into a setup log file. By default, the results file isnamed genesys_install_result.log, and is stored in the same folder as genesys_silent.ini.
Additional Information Silent Setup
Framework Deployment Guide 184
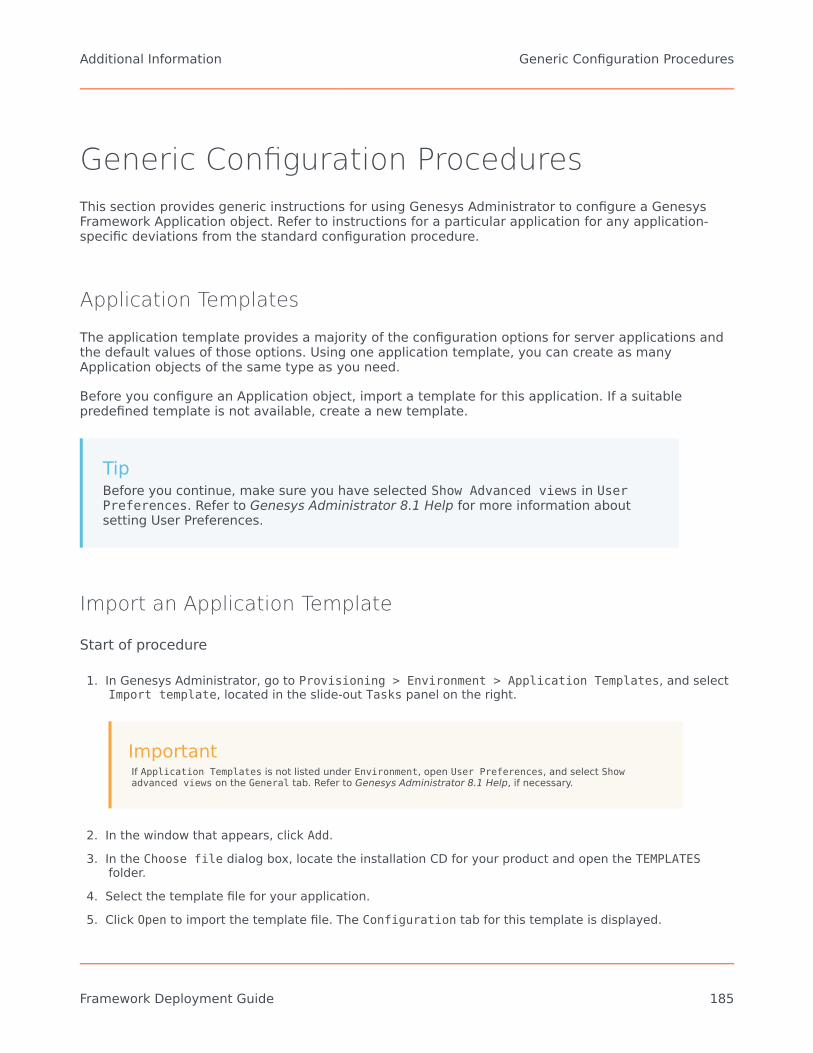
Generic Configuration ProceduresThis section provides generic instructions for using Genesys Administrator to configure a GenesysFramework Application object. Refer to instructions for a particular application for any application-specific deviations from the standard configuration procedure.
Application Templates
The application template provides a majority of the configuration options for server applications andthe default values of those options. Using one application template, you can create as manyApplication objects of the same type as you need.
Before you configure an Application object, import a template for this application. If a suitablepredefined template is not available, create a new template.
TipBefore you continue, make sure you have selected Show Advanced views in UserPreferences. Refer to Genesys Administrator 8.1 Help for more information aboutsetting User Preferences.
Import an Application Template
Start of procedure
1. In Genesys Administrator, go to Provisioning > Environment > Application Templates, and selectImport template, located in the slide-out Tasks panel on the right.
ImportantIf Application Templates is not listed under Environment, open User Preferences, and select Showadvanced views on the General tab. Refer to Genesys Administrator 8.1 Help, if necessary.
2. In the window that appears, click Add.3. In the Choose file dialog box, locate the installation CD for your product and open the TEMPLATES
folder.4. Select the template file for your application.5. Click Open to import the template file. The Configuration tab for this template is displayed.
Additional Information Generic Configuration Procedures
Framework Deployment Guide 185

6. Make any changes that you require, then click Save to save your changes and return to the list ofavailable templates.
7. If there is metadata associated with this template, import the metadata file.
End of procedure
Create an Application Template
Start of procedure
1. In Genesys Administrator, go to Provisioning > Environment > Application Templates, and clickNew in the toolbar.
ImportantIf Application Templates is not listed under Environment, open User Preferences, and select the Showadvanced views checkbox on the General tab. Refer to Genesys Administrator 8.1 Help if necessary.
2. Specify the template Name, select a template Type, and specify a Version.3. If required, define default configuration options on the Options tab.4. Click Save to save the changes and return to the list of available templates.
The new template is stored in the Environment > Application Templates folder, and can be used tocreate a new Application object; you do not have to import it.
End of procedure
Application MetadataStarting with release 8.0, application templates for some Genesys components come with additionalXML files called Application Metadata files. These files are used by only Genesys Administrator, andprovide a user-friendly way to further configure an object. The metadata file contains all of theconfiguration options that can be used for the particular application, including those that are alreadyin the template.
The metadata file is located in the same folder with the corresponding application template, and hasthe same filename with the extension .xml. To enable the metadata, you must import the metadatafile and associate it with the application template.
Prerequisites
• The application template to be associated with the metadata is available.• You are logged in to Genesys Administrator.
Additional Information Generic Configuration Procedures
Framework Deployment Guide 186
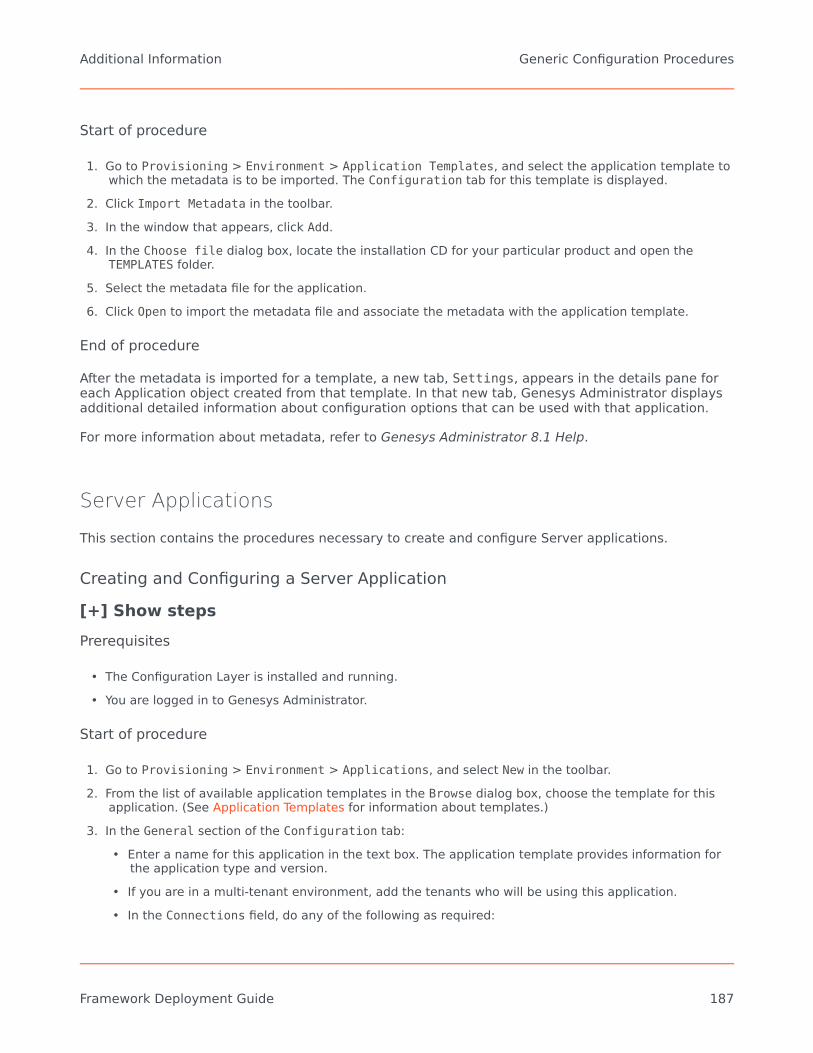
Start of procedure
1. Go to Provisioning > Environment > Application Templates, and select the application template towhich the metadata is to be imported. The Configuration tab for this template is displayed.
2. Click Import Metadata in the toolbar.3. In the window that appears, click Add.4. In the Choose file dialog box, locate the installation CD for your particular product and open the
TEMPLATES folder.5. Select the metadata file for the application.6. Click Open to import the metadata file and associate the metadata with the application template.
End of procedure
After the metadata is imported for a template, a new tab, Settings, appears in the details pane foreach Application object created from that template. In that new tab, Genesys Administrator displaysadditional detailed information about configuration options that can be used with that application.
For more information about metadata, refer to Genesys Administrator 8.1 Help.
Server Applications
This section contains the procedures necessary to create and configure Server applications.
Creating and Configuring a Server Application[+] Show stepsPrerequisites
• The Configuration Layer is installed and running.• You are logged in to Genesys Administrator.
Start of procedure
1. Go to Provisioning > Environment > Applications, and select New in the toolbar.2. From the list of available application templates in the Browse dialog box, choose the template for this
application. (See Application Templates for information about templates.)3. In the General section of the Configuration tab:
• Enter a name for this application in the text box. The application template provides information forthe application type and version.
• If you are in a multi-tenant environment, add the tenants who will be using this application.• In the Connections field, do any of the following as required:
Additional Information Generic Configuration Procedures
Framework Deployment Guide 187

• Add a connection to any server application to which this application should be a client. To enableAdvanced Disconnect Detection Protocol (ADDP) for this connection, see Configuring ADDP.
• To enable ADDP between this server and Configuration Server, add the Configuration ServerApplication object (named confserv) to the connections and specify the values for theconnection protocol, in seconds (see Configuring ADDP.) For more information, refer to ''GenesysAdministrator 8.1 Help''.
• Add a connection to Message Server to provide alarm-signaling and centralized-loggingcapabilities.
4. In the Server Info section, specify the following:• The host computer on which this server is to be installed and/or to run.• Listening ports that applications must use to connect to this server.• Working Directory-The full path to the directory from which the application starts.• Command Line properties-The command line used for starting the application; usually, it is the
name of the executable file.• Command Line Arguments-Additional parameters, if any, used for starting the application.
Note that the path, command line, and command-line parameters are updated automatically duringthe application's installation procedure.
• If another server application is used as a backup for this one, specify the Backup Server and theRedundancy Type.
WarningYou must have a special high-availability (HA) license to use redundant configurations. Otherwise, theManagement Layer does not perform a switchover between the primary and backup servers. Refer to the''Genesys Licensing Guide'' for details.
5. Select the Options tab and specify (or change) the values of the configuration options as necessary.Click on the option name for its description. For additional information about the options, see:• The ''Framework Configuration Options Reference Manual'' for Configuration Layer and Management
Layer component options.• The latest version of the Framework T-Server Deployment Guide for your specific T-Server and/or HA
Proxy options.• The latest version of the Framework 8.1 Stat Server User's Guide for Stat Server options.
If the application's working directory differs from the directory in which the application was originallyinstalled, configure an option named messagefile in the log section. Specify the full path to theapplication-specific log messages file (*.lms) as the option value. Otherwise, the application is unableto generate its specific log events.
6. Click Save or Apply to save your changes. The new application is now listed in the list of applications.
End of procedure
Additional Information Generic Configuration Procedures
Framework Deployment Guide 188

ImportantIf you configure two applications as a redundant pair (primary and backup), Genesysstrongly recommends that you synchronize configuration options and server portsbetween the two applications. When a port is defined on the primary serverapplication, a compatible port is automatically allocated on the backup serverapplication. If the two server applications are configured as a redundant pair, youcannot remove or change the ports on the backup server. If the two are not linked as aredundant pair, you can delete the ports on the application that had been the backup.
Configuring ADDPYou can enable ADDP for a connection between any two Genesys applications that are configured asclient-server pair and that support ADDP.
ImportantSome applications do not support ADDP for certain connections. Refer to application-specific documentation or Release Notes to determine if your application supportsADDP.
[+] Show stepsPrerequisites
• The Configuration Layer is installed and running.• Application objects for each application in the client-server pair exist.• You are logged in to Genesys Administrator.
Start of procedure
1. In Genesys Administrator, go to Provisioning > Environment > Applications, and select the clientapplication in the client-server pair.
2. Select the Configuration tab, and expand the General section.3. In the Connections list, click Add.4. In the CfgConnectionInfo dialog box that opens:
a. From the list of servers, select the application name that represents the connection for which youwant to configure ADDP.
b. Specify addp as the value for the Connection Protocol field.c. Specify any integer as the value for the Local Timeout field. This indicates how often, in seconds,
the client application sends polling signals to the server application.
Additional Information Generic Configuration Procedures
Framework Deployment Guide 189
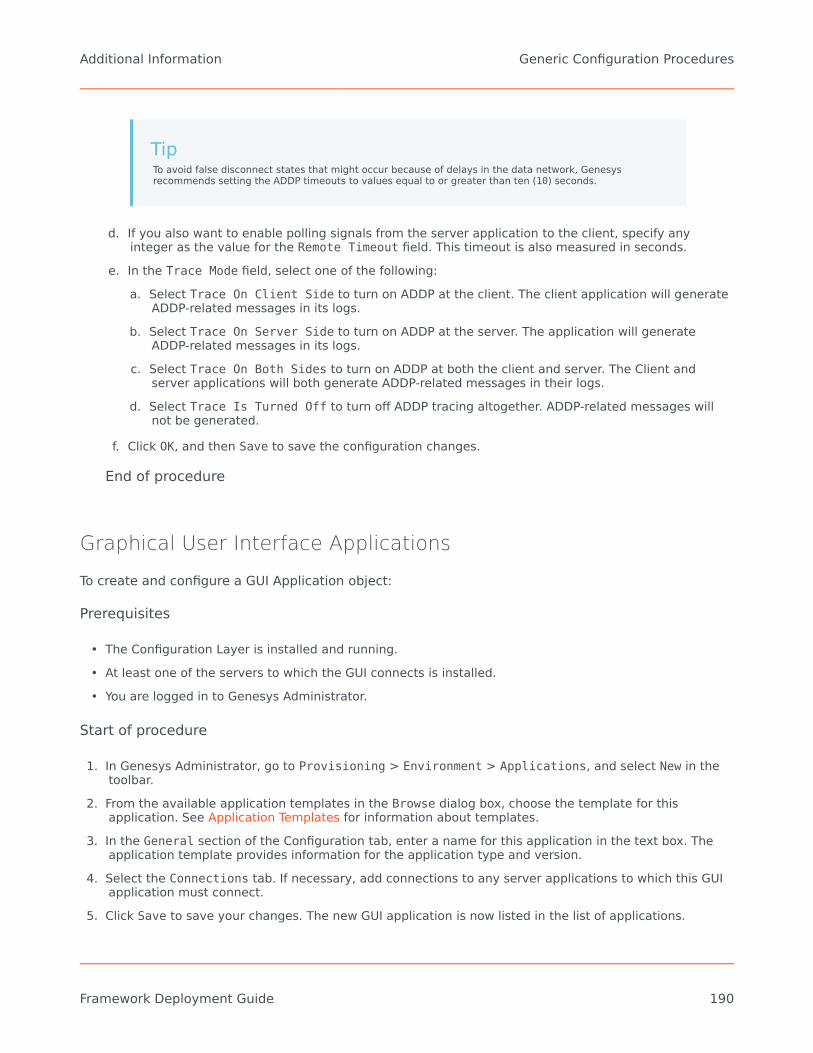
TipTo avoid false disconnect states that might occur because of delays in the data network, Genesysrecommends setting the ADDP timeouts to values equal to or greater than ten (10) seconds.
d. If you also want to enable polling signals from the server application to the client, specify anyinteger as the value for the Remote Timeout field. This timeout is also measured in seconds.
e. In the Trace Mode field, select one of the following:a. Select Trace On Client Side to turn on ADDP at the client. The client application will generate
ADDP-related messages in its logs.b. Select Trace On Server Side to turn on ADDP at the server. The application will generate
ADDP-related messages in its logs.c. Select Trace On Both Sides to turn on ADDP at both the client and server. The Client and
server applications will both generate ADDP-related messages in their logs.d. Select Trace Is Turned Off to turn off ADDP tracing altogether. ADDP-related messages will
not be generated.
f. Click OK, and then Save to save the configuration changes.
End of procedure
Graphical User Interface Applications
To create and configure a GUI Application object:
Prerequisites
• The Configuration Layer is installed and running.• At least one of the servers to which the GUI connects is installed.• You are logged in to Genesys Administrator.
Start of procedure
1. In Genesys Administrator, go to Provisioning > Environment > Applications, and select New in thetoolbar.
2. From the available application templates in the Browse dialog box, choose the template for thisapplication. See Application Templates for information about templates.
3. In the General section of the Configuration tab, enter a name for this application in the text box. Theapplication template provides information for the application type and version.
4. Select the Connections tab. If necessary, add connections to any server applications to which this GUIapplication must connect.
5. Click Save to save your changes. The new GUI application is now listed in the list of applications.
Additional Information Generic Configuration Procedures
Framework Deployment Guide 190

End of procedure
Additional Information Generic Configuration Procedures
Framework Deployment Guide 191

Generic Installation ProceduresThis section provides instructions for installing a typical Genesys application that you have configuredusing Genesys Administrator.
Refer to the instructions for a particular application for the location of installation packages on aproduct CD and for any application-specific deviations from the standard installation procedure.
Server Applications
This section describes a standard installation procedure for a server application on UNIX and Windowsoperating systems.
Prerequisites
• An Application object exists for the server application. See Creating and Configuring a ServerApplication object.
On UNIX
WarningDuring installation on UNIX, all files are copied into the directory you specify. Theinstall process does not create any subdirectories within this directory,; therefore, donot install different products into the same directory.
1. On the product CD, locate a shell script called install.sh.2. Run this script from the command prompt by typing the file name.3. When prompted, specify the Host Name of the computer on which this server is to run.4. When prompted, specify the:
• Host Name of the computer on which Configuration Server is running.• Port used by client applications to connect to Configuration Server.• User Name used to log in to the Configuration Layer.• Password used to log in to the Configuration Layer.
5. The installation displays the list of applications of the specified type configured for this host. Type thenumber of the server application to be installed.
Additional Information Generic Installation Procedures
Framework Deployment Guide 192

6. Specify the the full path of the destination directory into which this server is to be installed.If the installation script finds that the destination directory is not empty, it prompts you to do one of thefollowing:• Back up all files in the directory.• Overwrite only the files contained in this package.• Wipe the directory clean.
Type the number that corresponds to your selection and confirm your choice.
7. If asked which version of the product to install, 32-bit or 64-bit, choose the one appropriate to yourenvironment.
8. If you plan to use functionality that requires a license, such as Solution Control Server (SCS) with SimpleNetwork Management Protocol (SNMP), type y when prompted and enter one of the following:• The full path to the license file• The License Manager port and host
As soon as the installation process is finished, a message appears indicating that installation wassuccessful. The process places the server application in the directory specified during the installation.
On Windows
WarningGenesys does not recommend installation of its components via a Microsoft RemoteDesktop connection. The installation should be performed locally.
1. On the product CD, locate and double-click setup.exe to start the Genesys Installation Wizard.2. Click About on the wizard's Welcome page to review the read_me file. The file also contains a link to the
server's Release Notes file.3. Click Next on the Welcome page to proceed with the installation.
TipClick Next at the end of each step to proceed to the next page.
4. On the Connection Parameters to the Genesys Configuration Server page, specify the followinglogin parameters:• Host and Port of Configuration Server• User name and Password used to log in to the Configuration Layer.
5. The Select Application page displays all applications of this type that the Configuration Database
Additional Information Generic Installation Procedures
Framework Deployment Guide 193

contains. When you select one application from the list, the wizard displays some parametersconfigured for the selected application (such as application type, host, working directory, commandline, and command-line arguments).Select the application to install.
WarningIf the component does not require a technical license, omit step 6 and step 7. Ifthe component requires a technical license for startup, omit step 6. If thecomponent requires a technical license to enable a certain feature, but the licenseis not otherwise required, proceed with step 6.
6. On the Run-time License Configuration page, select one of the following options:• Use License if you plan to use features that require special licenses.• Without License if you do not plan to use features that require special licenses. In this instance, go
to step 8.If you decide to use a licensed feature later on, reinstall the server and enter the appropriatelicense information through the Genesys Installation Wizard.
7. On the Access to License page, select one of the following options:• License Manager-You want your server application to use host and port parameters to connect to
the license server. In this instance, you must enter values for the host and the port of the licenseserver.
• License File-You want your server application to retrieve license server information from thelicense file. Click Browse to navigate to the license file.
8. On the Choose Destination Location page, the wizard displays the destination directory, as specifiedin the Working Directory property of the server's Application object. If the path configured asWorking Directory is invalid, the wizard generates a path to the destination directory in the C:\ProgramFiles\GCTI\<Product Name> format.</bw> If necessary, click one of the following:• Browse to select another destination folder. In this case, the wizard will update the Application
object's Working Directory in the Configuration Database.• Default to reinstate the path specified in Working Directory.
9. On the Ready to Install information page, click:• Back to update any installation information.• Install to proceed with installation. Installation Status displays the progress of the installation.
10. On the Installation Complete page, click Finish.
As a result of the installation, the wizard adds Application icons to the:
• Windows Start menu, under Programs > Genesys Solutions.• Windows Add or Remove Programs window, as a Genesys server.• Windows Services list, as a Genesys service, with Automatic startup type.
Additional Information Generic Installation Procedures
Framework Deployment Guide 194

Graphical User Interface Applications
This section describes a standard installation procedure for a graphical user interface (GUI)application on Windows operating systems. If you are installing a web- or UNIX-based GUI, refer to theproduct documentation for installation instructions.
If you want to implement a security banner with a GUI application, make sure that you have thenecessary files prepared before you start installing the GUI application. Refer to the ''Genesys 8.1Security Deployment Guide'' for detailed information about the Security Banner feature.
1. From the product CD, locate and double-click setup.exe to start the Genesys Installation Wizard.2. Use the About button on the wizard's Welcome page to review the read_me file. The file also contains
a link to the application's Release Notes file.3. Click Next to proceed with the installation.4. On the Security Banner Configuration page, choose whether you want to configure a security
banner for this GUI application.Do one of the following:• If you do not want to configure a security banner for this application, clear the Enable Security
Banner check box, and click Next.• If you want to configure a security banner for this application:
i. Select Enable Security Banner.ii. Follow the instructions in the procedure "Installing and configuring the Security Banner" in the
''Genesys 8.1 Security Deployment Guide''. When you are finished that procedure, return hereand finish this procedure.
5. On the Choose Destination Location page, the wizard displays the path to the destination directoryin the C:\Program Files\GCTI\<Product Name> format. If necessary, use the:• Browse button to select another destination folder.• Default button to reinstate the wizard-generated path (C:\Program Files\GCTI\<Product Name>).
Click Next.
Important....If the GUI application requires any non-standard installation input from the user, extra pages appear here.
....
6. On the Ready to Install page, click:• Back to update any installation information.• Install to proceed with the installation. Installation Status displays the progress of the
installation progress.
7. On the Installation Complete page, click Finish.
Additional Information Generic Installation Procedures
Framework Deployment Guide 195
As a result of the installation, the wizard adds Application icons to the:
• Windows Start menu, under Programs > Genesys Solutions.• Windows Add or Remove Programs window, as a Genesys application.
Troubleshooting the Installation of a Genesys Application
To determine and fix the cause of a warning generated during the installation procedure for anyGenesys application that Configuration Server is unavailable and that configuration cannot beupdated, do the following:
1. Finish installing the Genesys application.2. When installation of the application is complete, open the Configuration tab of the corresponding
Application object.3. Select the State Enabled check box.4. Verify that the Working Directory, Command Line, and Command Line Arguments are specified
correctly.5. Save the configuration updates.
Additional Information Generic Installation Procedures
Framework Deployment Guide 196
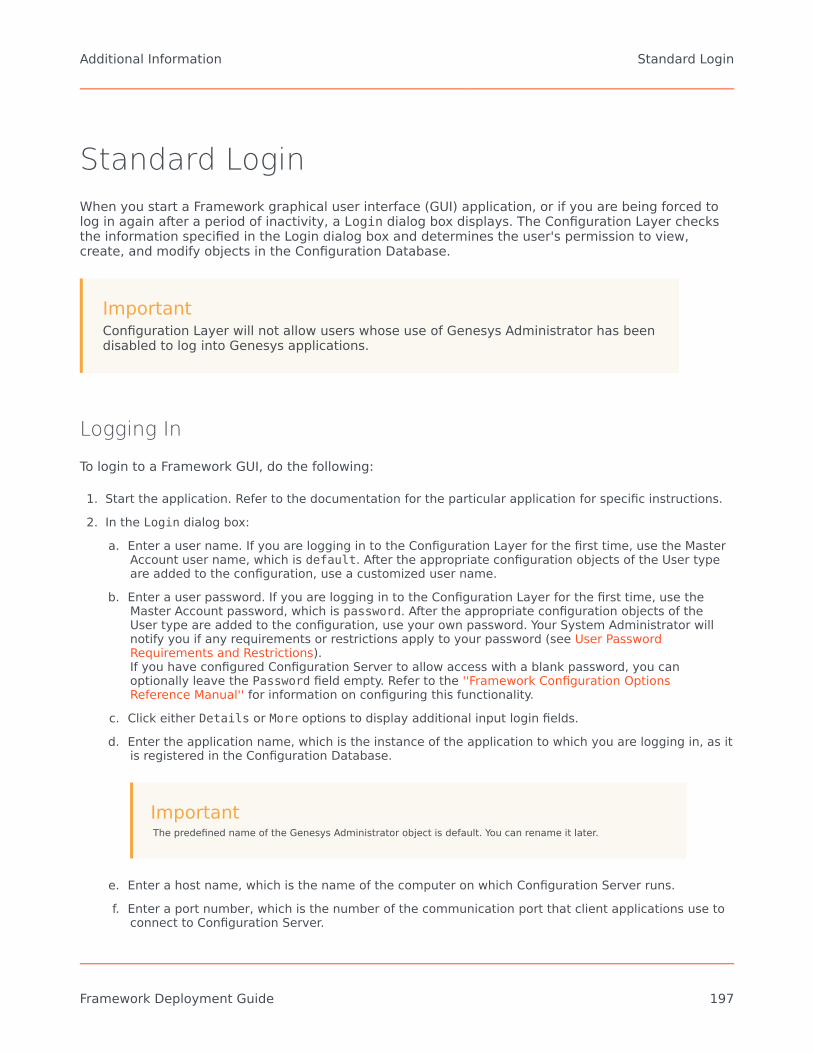
Standard LoginWhen you start a Framework graphical user interface (GUI) application, or if you are being forced tolog in again after a period of inactivity, a Login dialog box displays. The Configuration Layer checksthe information specified in the Login dialog box and determines the user's permission to view,create, and modify objects in the Configuration Database.
ImportantConfiguration Layer will not allow users whose use of Genesys Administrator has beendisabled to log into Genesys applications.
Logging In
To login to a Framework GUI, do the following:
1. Start the application. Refer to the documentation for the particular application for specific instructions.2. In the Login dialog box:
a. Enter a user name. If you are logging in to the Configuration Layer for the first time, use the MasterAccount user name, which is default. After the appropriate configuration objects of the User typeare added to the configuration, use a customized user name.
b. Enter a user password. If you are logging in to the Configuration Layer for the first time, use theMaster Account password, which is password. After the appropriate configuration objects of theUser type are added to the configuration, use your own password. Your System Administrator willnotify you if any requirements or restrictions apply to your password (see User PasswordRequirements and Restrictions).If you have configured Configuration Server to allow access with a blank password, you canoptionally leave the Password field empty. Refer to the ''Framework Configuration OptionsReference Manual'' for information on configuring this functionality.
c. Click either Details or More options to display additional input login fields.d. Enter the application name, which is the instance of the application to which you are logging in, as it
is registered in the Configuration Database.
ImportantThe predefined name of the Genesys Administrator object is default. You can rename it later.
e. Enter a host name, which is the name of the computer on which Configuration Server runs.f. Enter a port number, which is the number of the communication port that client applications use to
connect to Configuration Server.
Additional Information Standard Login
Framework Deployment Guide 197

If your configuration uses both primary and backup Configuration Servers, your GUI applicationsmight automatically reconnect to the backup server if they lose their connection to the primaryserver. You can specify automatic or manual reconnection; refer to the on-line Help file of your GUIapplication.
User Password Requirements and Restrictions
Starting in release 8.1.1, the System Administrator or other authorized person can configurerestrictions for user passwords and how they are used. The restrictions include:
• The type and case of characters allowed in a password.• Whether a password can expire, and after how long.• After using a given password, how many different passwords must be used before using that given
password again, or if re-use is permitted at all.• Whether the user must change their password the next time they log in.• The number of unsuccessful login attempts that can be made after which the account is locked.
For more information about these requirements, and how to configure them, refer to the ''Genesys8.1 Security Deployment Guide''.
Additional Information Standard Login
Framework Deployment Guide 198

Configuration History LogThe Configuration History Log consists of a set of a records that contains historical information aboutclient sessions and changes to configuration objects. It enables a client to restore a session that wasterminated by a service interruption, and request any changes to configuration objects that occurredduring that service interruption.
For all Configuration Servers, the records are stored in the Configuration Database. ConfigurationServer Proxy reads the information from its primary Configuration Server.
The History Log is installed with default parameters when you install Configuration Server. Youconfigure the History Log parameters in the options of the Configuration Server Application objectin Genesys Administrator. Refer to the ''Framework Configuration Options Reference Manual'' fordetailed descriptions of the configuration options that relate to the History Log.
When requested by a client that is recovering from a service interruption, Configuration Server orConfiguration Server Proxy does the following:
• Restores the client's session according to a client session record.• Returns all data that has been changed since that client disconnected.
History Log functionality is mandatory, and cannot be turned off permanently.
History Log Maintenance
No maintenance is required for the History Log, because it is maintained automatically byConfiguration Server. The history log records are stored in the Configuration Database and aremaintained using configuration records. Based on the expiration parameters, Configuration Serverpurges information from the database, both at startup and during normal operations.
History Log Errors
Any errors that occur when writing to the History Log generate Log Event 21-22138.
ImportantGenesys strongly recommends that you associate an alarm with this Log Event, andthat you inform Genesys Customer Care if you encounter any errors or corruption.
Additional Information Configuration History Log
Framework Deployment Guide 199

Minimizing Performance Impacts
Depending partially on the size of the updates, the History Log can affect the performance ofConfiguration Server. To minimize these performance impacts, you can turn off the History Logfunctionality temporarily by setting the active option to false for the Configuration ServerApplication object. The functionality will be turned back on either when you manually reset the option(to true), or when you restart Configuration Server.
WarningWhen History Log functionality is turned off, current activities are not recorded.Therefore, clients that are disconnected during this time cannot retrieve the updatesnecessary to restore their sessions.
If you want to keep the History Log active (that is, active=true, consider setting write-former-value=false when performing large or significant updates. This will prevent previous values frombeing written to the history database, but will greatly improve performance.
Refer to the ''Framework Configuration Options Reference Manual'' for more information about theoptions used to configure the Configuration Server History Log.
Additional Information Configuration History Log
Framework Deployment Guide 200

Accessing History of Configuration ChangesConfiguration Server uses the Configuration History Log to keep track of changes being made in theConfiguration Database. The History Log within Configuration Server contains more dealiedinformation than is output in Audit-level log messages. Starting in release 8.5.0, Genesys provides atool to extract this detailed information.
Also in release 8.5.0, previous values (as they were before a change) can also be stored in the historylog along with the actual changes.
ImportantThe history log does not provide complete information about changes to assignedaccess Permissions
Retrieving the History
Extract the changes history to an XML file by starting an instance of Configuration Server (anyinstance in the configuration will suffice; it does not have to be the Configuration Server currentlyrunning) and specifying the following parameter on the command line with the startup command:
-dumpauditxml <file name> [-last <days>]
where:
<file name> - The name of the XML file to which the information will be extracted. The informationwill be in the XML format shown in the example below.
-last <days> - (Optional) The results for the operations for the last number of days; if thisargument is not specified, all audit history in the database is exported.
The Configuration Server starts, exports the information into the file specified in the parameter, andthen terminates.
Exported File Format
The exported XML file contains two primary sections. The CfgAuditEntry section contain informationabout the type of update, what object was updated, and who updated it. Its fields are described inthe table below. Each CfgAuditEntry section contains one or more CfgHistoryRecord sections, thatcontain the former value and the action that was taken during the update identified in theCfgAuditEntry. An excerpt of a sample exported file is available after the table.
Additional Information Accessing History of Configuration Changes
Framework Deployment Guide 201

Field Name Description
id The ID of the audit record that exists in thedatabase.
operation_typeThe type of operation performed based on theinternal enumeration of the Configuration Serverimplementation.
operation_time The timestamp when the operation occurred.object_dbid The internal DBID of the object being updated.user_name The username of the user performing the update.
object_data_size The size of the audit record, as contained in theCfgHistory Record tag.
object The name of the object being updated.
hostThe name of the host or IP address from which theuser performing the update is connected toConfiguration Server.
applicationThe name of the user application that is connectedto Configuration Server when performing theupdate operation.
application_dbidThe DBID of the user application that is connectedto the Configuration Server when performing theupdate operation.
user_tenant The name of the tenant to which the userperforming the update belongs.
user_tenant_dbid The DBID of the tenant to which the userperforming the update belongs.
tenant The name of the tenant to which the object beingupdated belongs.
tenant_dbid The DBID of the tenant to which the object beingupdated belongs.
Sample File[+] Show sample file
<CfgAuditEntryid="187"operation_type="4"operation_time="[01/07/14 09:35:04]"object_type="CfgCampaign"object_dbid="101"user_name="default"object_data_size="529"object="CampaignA"host="135.17.178.16"application="default"application_dbid="100"user_tenant="Environment"
Additional Information Accessing History of Configuration Changes
Framework Deployment Guide 202

user_tenant_dbid="1"tenant="Environment"tenant_dbid="1">
<CfgHistoryRecordid="187">
<former_value><action
action="change"><CfgCampaignUpdate
DBID="101"><callingLists
action="change"><CfgCallingListInfo
linkDBID="101"share="22" />
</callingLists></CfgCampaignUpdate>
</action></former_value><action><CfgCampaignUpdate
DBID="101"><callingLists
action="change"><CfgCallingListInfo
linkDBID="101"share="20" />
</callingLists></CfgCampaignUpdate>
</action></CfgHistoryRecord></CfgAuditEntry>
Additional Information Accessing History of Configuration Changes
Framework Deployment Guide 203

Advanced Disconnect Detection ProtocolAll but a few Genesys interfaces use the TCP/IP stack. To compensate for the manner in which thisstack operates, Genesys components use the Advanced Disconnect Detection Protocol (ADDP), whichperiodically polls the opposite process when no actual activity occurs at a given connection. If aconfigurable timeout expires without a response from the opposite process, the connection isconsidered lost and an appropriate event is sent to the application.
Genesys recommends enabling ADDP on the links between any pair of Genesys components. ADDPhelps detect a connection failure on both the client and the server side. For most connections,enabling detection on the client side only is sufficient and it reduces network traffic. However,Genesys strongly recommends that you use detection on both sides for all connections betweenConfiguration Server and its clients (including Solution Control Interface), as well as between any twoT-Servers.
To enable ADDP between two applications, specify addp as the Connection Protocol when configuringthe connection between applications; also, set values for the Local Timeout, Remote Timeout, andTrace Mode properties. For more information, refer to the ''Framework Configuration OptionsReference Manual''.
For complete instructions on configuring ADDP between two applications, refer to Configuring ADDP.For instructions on configuring ADDP between the primary and backup T-Servers, refer to theDeployment Guide for your specific T-Server.
After a communication session failure is detected, the application makes repeated attempts to regainaccess to the required resource. If a redundant process is not configured, the reaction is a repeatedattempt to restore the communication session with the same process. If a redundant process isconfigured, the application makes alternate attempts to restore the failed communication session andto establish a session with the redundant process. This way, if the session has terminated because ofa failure of the opposite process, the application eventually connects to the standby processconfigured to provide the same type of service.
ImportantBackwards compatibility of the Keep-Alive Protocol (KPL) is not supported. If you usedKPL in previous versions of Genesys, consider using ADDP instead.
Additional Information Advanced Disconnect Detection Protocol
Framework Deployment Guide 204

Disaster Recovery ConfigurationThis section describes the configuration of a Disaster Recovery / Business Continuity architecture, asdescribed in Disaster Recovery Architecture. The configuration is based on the Oracle GoldenGatesoftware.
Operation
System Startup Procedure and Normal Operating Mode1. Start the replication process. [+] Show steps
TipFor reference, use the Oracle® GoldenGate Windows and UNIX Administrator’s Guide 11g Release 1 (11.1.1)E17341-01 (Ref 1.)
a. On the MAIN and SECONDARY systems, run the script that removes INSERT, UPDATE, and DELETEpermissions to CFG_DB and MS_DB users.
b. Use the START MANAGER command to start manager processes at both sites.c. At the SECONDARY site, using GGSCI, start REPLICATs in preparation to receive changes from the
Configuration and Log Databases on the live MAIN system.START REPLICAT CSPSTART REPLICAT MSP
d. At the MAIN site, using GGSCI, start REPLICAT MSS in preparation to receive changes from the logDatabase on the live SECONDERY system.
START REPLICAT MSS
e. On the MAIN site system, alter the primary Extract to begin capturing data based on the currenttimestamp. Otherwise, Extract will spend unnecessary time looking for operations that date back tothe time that the group was created using the ADD EXTRACT command.
ALTER EXTRACT CSP, BEGIN NOWALTER EXTRACT MSP, BEGIN NOW
f. On the SECONDARY site system, alter the secondary Extract to begin capturing data based on thecurrent timestamp. Otherwise, Extract will spend unnecessary time looking for operations that dateback to the time that the group was created with the ADD EXTRACT command.
ALTER EXTRACT MSS, BEGIN NOW
g. On the MAIN system, start the primary Extracts so they are ready to capture transactional changes.START EXTRACT CSPSTART EXTRACT MSP
h. On the SECONDARY system, start the secondary Extract so it is ready to capture transactional changes
Additional Information Disaster Recovery Configuration
Framework Deployment Guide 205

at the secondary Log Database.START EXTRACT MSS
i. On the MAIN system, do the following:• Run the script that grants INSERT, UPDATE, and DELETE permissions to CFG_DB and MS_DB users.• Run the script that enables triggers and cascade delete constraints.
j. On the SECONDARY system, do the following:• Run the script that grants INSERT, UPDATE, and DELETE permissions to MS_DB users.• Run the script that enables triggers and cascade delete constraints.
At this point, the database system is ready for normal operation.
2. Start the system. [+] Show steps
a. Run the scripts that switchover cfgmaster host name IP resolution to a MAIN live system.b. Launch the MAIN live Master Configuration Server primary/backup pair at Site 1.c. Launch the MAIN live Master Solution Control Server to control the main Master Configuration server
pair at Site 1.d. Launch the MAIN Message server at Site 1 to support communications for Solution Control Servers
controlling site components.e. Launch Solution Control Server at Sites 1 and 2.f. Using Solution Control Server, start the Configuration Proxy Server pair at Sites 1 and 2.
g. Using Solution Control Server, start the Framework site components.
Disaster Recovery SwitchoverAt this point, all system components residing at the MAIN site on Host 3 are lost and not running:
• MAIN live Master Configuration Server primary/backup pair• MAIN live Master Solution Control Server• MAIN Message server at Site 1• Oracle database• Oracle GoldenGate
Operations on other sites can be continued non-stop in limited mode without a configuration changeusing Configuration Server Proxies running in Read-Only mode until the SECONDARY MasterConfiguration Server is brought on-line.
Perform the following steps to move activity to the SECONDARY live Master Configuration Serverprimary/backup pair.
1. On the SECONDARY live standby system, using GGSCI, issue the LAG REPLICAT command until itreturns At EOF (end of file) to confirm that REPLICAT applied all of the data from the trail to the
Additional Information Disaster Recovery Configuration
Framework Deployment Guide 206
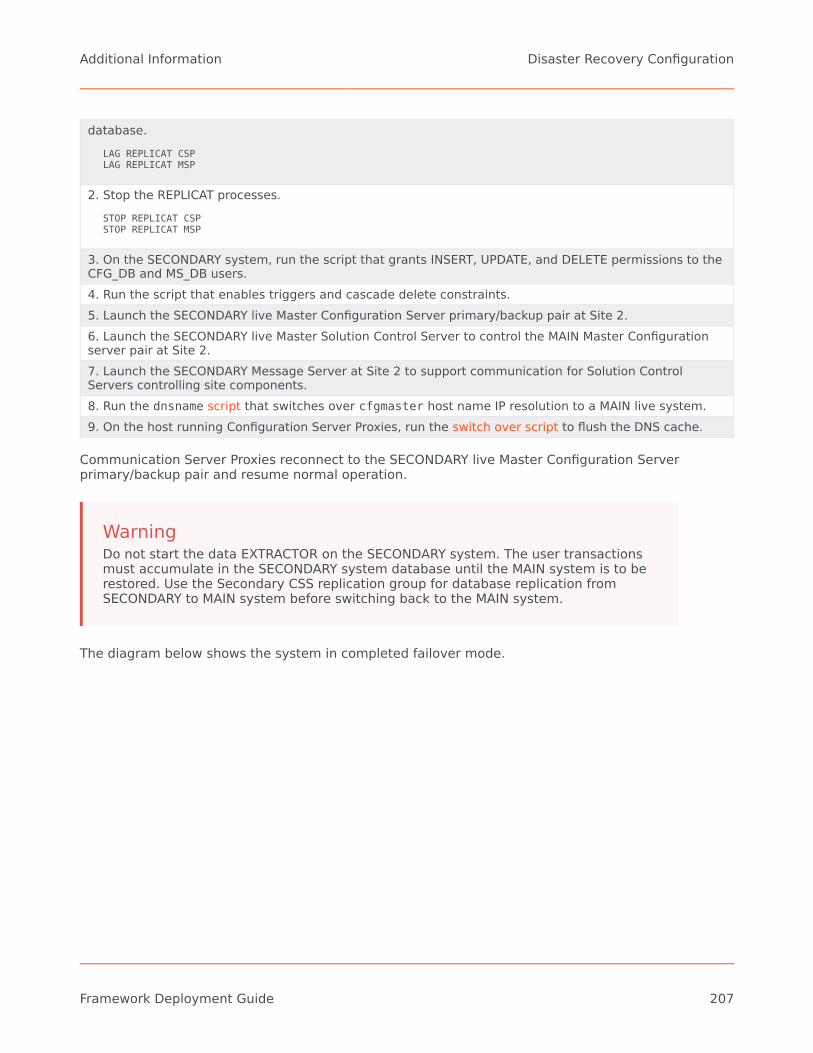
database.LAG REPLICAT CSPLAG REPLICAT MSP
2. Stop the REPLICAT processes.STOP REPLICAT CSPSTOP REPLICAT MSP
3. On the SECONDARY system, run the script that grants INSERT, UPDATE, and DELETE permissions to theCFG_DB and MS_DB users.4. Run the script that enables triggers and cascade delete constraints.5. Launch the SECONDARY live Master Configuration Server primary/backup pair at Site 2.6. Launch the SECONDARY live Master Solution Control Server to control the MAIN Master Configurationserver pair at Site 2.7. Launch the SECONDARY Message Server at Site 2 to support communication for Solution ControlServers controlling site components.8. Run the dnsname script that switches over cfgmaster host name IP resolution to a MAIN live system.9. On the host running Configuration Server Proxies, run the switch over script to flush the DNS cache.
Communication Server Proxies reconnect to the SECONDARY live Master Configuration Serverprimary/backup pair and resume normal operation.
WarningDo not start the data EXTRACTOR on the SECONDARY system. The user transactionsmust accumulate in the SECONDARY system database until the MAIN system is to berestored. Use the Secondary CSS replication group for database replication fromSECONDARY to MAIN system before switching back to the MAIN system.
The diagram below shows the system in completed failover mode.
Additional Information Disaster Recovery Configuration
Framework Deployment Guide 207

Multi-Site Disaster Recovery Architecture
Configuration Example
Configuration for Oracle GoldenGate Replication Processes1. At the MAIN and SECONDARY Oracle databases, create a user CFG_DB for the Configuration Serverdatable, and user MS_DB for the Log Message Server database.2. Using the initialization scripts in the Installation Package, create the database objects for theConfiguration and Log Message Server Databases.3. Use Oracle® GoldenGate Oracle Installation and Setup Guide11g Release 1 (11.1.1) E17799-01 (Ref 1.)and the examples of Parameter files below to configure the EXTRACT and REPLICAT processes. [+] Showdetails
Process Table (EXTRACT) / Map (REPLICAT)Parameters
EXTRACT CSP SEQUENCE CFG_DB.*;
TABLE CFG_DB.*;TABLEEXCLUDE CFG_DB.cfg_refresh;EXTRACT CSS
Additional Information Disaster Recovery Configuration
Framework Deployment Guide 208

Process Table (EXTRACT) / Map (REPLICAT)Parameters
EXTRACT MSP
SEQUENCE MS_DB_1.*;
TABLE MS_DB_1.*;TABLEEXCLUDE MS_DB_1.G_LOG_SCHEMA_INFO;
EXTRACT MSS
SEQUENCE MS_DB_2.*;
TABLE MS_DB_2.*;TABLEEXCLUDE MS_DB_2.G_LOG_SCHEMA_INFO;
REPLICAT CSS MAP CFG_DB.*,TARGET CFG_DB.*;
MAPEXCLUDE CFG_DB.cfg_refresh;REPLICAT CSP
REPLICAT MSPMAP MS_DB_1.*,TARGET MS_DB_1.*;
MAPEXCLUDE MS_DB_1.G_LOG_SCHEMA_INFO;
REPLICAT MSSMAP MS_DB_2.*,TARGET MS_DB_2.*;
MAPEXCLUDE MS_DB_2.G_LOG_SCHEMA_INFO;
4. Register Oracle GoldenGate EXTRACT and REPLICAT using GGSCI. [+] Show stepsOn the MAIN live system:dblogin userid gg_user, password gg_passwordregister extract CSP, LOGRETENTIONregister extract MSP, LOGRETENTION
On the SECONDARY live standby system:dblogin userid gg_user, password gg_passwordregister extract CSS, LOGRETENTIONregister extract MSS, LOGRETENTION
Extract Group CSP at Primary Site Configuration Example
1. At MAIN system, start GGSCI.2. Use the ADD EXTRACT command to create an Extract group CSP.
ADD EXTRACT CSP , TRANLOG, BEGIN NOWUse TRANLOG as the data source option.
3. Use the ADD RMTTRAIL command to specify a remote trail to be created on the target system.ADD RMTTRAIL ./CS, EXTRACT CSP
Use the EXTRACT argument to link this trail to the Extract group.
4. Use the EDIT PARAMS command to create a parameter file for the Extract group. Include the followingparameters plus any others that apply to your database environment.
EDIT PARAMS CSP
CSP EXTRACT Parameters File Example: [+] Show file
EXTRACT CSP
Additional Information Disaster Recovery Configuration
Framework Deployment Guide 209

RMTHOST <Secondary host name>, MGRPORT 7809RMTTRAIL ./dirdat/CPUSERID gg_user PASSWORD gg_passwordTRACE ./trace/cfg_db.trc--Only use if DDL is configuredWILDCARDRESOLVE DYNAMICDDL INCLUDE MAPPED OBJNAME cfg_db.*DDLOPTIONS ADDTRANDATA RETRYOP RETRYDELAY 20 MAXRETRIES 60 REPORT-- TRANLOGOPTIONS DBLOGREADER, DBLOGREADERBUFSIZE 1024000-- TRANLOGOPTIONS DBLOGREADERBUFSIZE 1024000
STATOPTIONS RESETREPORTSTATSREPORT AT 00:01REPORTROLLOVER AT 00:01REPORTCOUNT EVERY 60 SECONDS, RATE--SEQUENCE cfg_db.*;TABLE cfg_db.*;TABLEEXCLUDE cfg_db.cfg_refresh;
REPLICAT Group CSP at Secondary Site Configuration Example
1. At the SECONDARY system, start GGSCI.2. Use the ADD REPLICAT command to create a Replicat group CSP.
ADD REPLICAT CSP, EXTTRAIL CSP, BEGIN NOWUse the EXTTRAIL argument to link the Replicat group to the remote trail.
3. Use the EDIT PARAMS command to create a parameter file for the Replicat group. Include the followingparameters plus any others that apply to your database environment:
EDIT PARAMS CSP
CSP REPLICAT Parameters File Example: [+] Show file
MACRO #exception_handlerBEGIN, TARGET ggate.exceptions, COLMAP ( rep_name = "rep", table_name = @GETENV ("GGHEADER", "TABLENAME"), errno = @GETENV ("LASTERR", "DBERRNUM"), dberrmsg = @GETENV ("LASTERR", "DBERRMSG"), optype = @GETENV ("LASTERR", "OPTYPE"), errtype = @GETENV ("LASTERR", "ERRTYPE"), logrba = @GETENV ("GGHEADER", "LOGRBA"), logposition = @GETENV ("GGHEADER", "LOGPOSITION"), committimestamp = @GETENV ("GGHEADER", "COMMITTIMESTAMP")), INSERTALLRECORDS, EXCEPTIONSONLY;END;-- This ends the macroREPLICAT CSPHANDLECOLLISIONS--END RUNTIMEUSERID gg_user, PASSWORD gg_passwordASSUMETARGETDEFSDISCARDFILE ./dirrpt/CP.dsc, purgeTRACE ./trace/CSP.trc
Additional Information Disaster Recovery Configuration
Framework Deployment Guide 210

-- INCLUDE ALL -- &-- STATOPTIONS RESETREPORTSTATSDDL INCLUDE ALL--INCLUDE MAPPED -- &
-- DBOPTIONS SUPPRESSTRIGGERS, DEFERREFCONSTDBOPTIONS DEFERREFCONSTREPORT AT 00:01REPORTROLLOVER AT 00:01REPORTCOUNT EVERY 60 SECONDS, RATE---DDLOPTIONS REPORTDDLERROR DEFAULT IGNOREREPERROR (DEFAULT, EXCEPTION)REPERROR (DEFAULT2, ABEND)REPERROR (-1, EXCEPTION)MAP CFG_DB.*,TARGET CFG_DB.*;MAPEXCLUDE CFG_DB.cfg_refresh;--MAP CFG_DB.* #exception_handler();
Configuration of Genesys Components1. Start the replication process (P.3.3.1.1).2. Run the dnscmd script that switches over cfgmaster host name IP resolution to a MAIN live system.3. Install the MAIN live Master Configuration Server primary/backup pair at Site 1.4. Install the SECONDARY dormant Configuration Server primary/backup pair at Site 2.5. Launch the MAIN live Master Configuration Server primary/backup pair at Site 1.6. Using Genesys Administrator connected to the Primary Master Configuration Server at Site 1, configureMaster Solution Control Server, Message Server for distributed SCS, and Backup Master ConfigurationServer.7. Install Master Solution Control Server, Message Server for distributed SCS, and Master BackupConfiguration Server on Site 1.8. Copy Master Solution Control Server, Message Server for distributed SCS, and Master BackupConfiguration Server working directories to Site 2.9. Launch Master Solution Control Server and Message Server for distributed SCS.10. Using Genesys Administrator connected to the Primary Master Configuration Server at Site 1,configure and install Configuration Server Proxies, Solution Control Servers, and Message Servers fornetwork logging for Sites 1 and 2.11. Start Configuration Server Proxies at Sites 1 and 2.12. Start Solution Control Servers at Sites 1 and 2.13. Start Message Servers for network logging at Sites 1 and 2.14. Install Framework Components at Site 1 using the Configuration Server Proxy host and port at Site 1.15. Install Framework Components at Site 2 using the Configuration Server Proxy host and port at Site 2.
Additional Information Disaster Recovery Configuration
Framework Deployment Guide 211

File and Script Examples
EXTRACT Parameters File[+] Show fileEXTRACT <extract_name>RMTHOST <target databse host name>, MGRPORT 7809RMTTRAIL ./dirdat/<rmttrail_name>USERID <golden_gate_user> PASSWORD <golden_gate_password>TRACE ./trace/<oracle_user_name>.trc--Only use if DDL is configuredWILDCARDRESOLVE DYNAMICDDL INCLUDE MAPPED OBJNAME <oracle_user_name>.*DDLOPTIONS ADDTRANDATA RETRYOP RETRYDELAY 20 MAXRETRIES 60 REPORT-- TRANLOGOPTIONS DBLOGREADER, DBLOGREADERBUFSIZE 1024000-- TRANLOGOPTIONS DBLOGREADERBUFSIZE 1024000
STATOPTIONS RESETREPORTSTATSREPORT AT 00:01REPORTROLLOVER AT 00:01REPORTCOUNT EVERY 60 SECONDS, RATE--SEQUENCE <oracle_user_name>.*;TABLE <oracle_user_name>.*;TABLEEXCLUDE <exclude_filter>;
REPLICAT Parameters File[+] Show fileMACRO #exception_handlerBEGIN, TARGET ggate.exceptions, COLMAP ( rep_name = "rep", table_name = @GETENV ("GGHEADER", "TABLENAME"), errno = @GETENV ("LASTERR", "DBERRNUM"), dberrmsg = @GETENV ("LASTERR", "DBERRMSG"), optype = @GETENV ("LASTERR", "OPTYPE"), errtype = @GETENV ("LASTERR", "ERRTYPE"), logrba = @GETENV ("GGHEADER", "LOGRBA"), logposition = @GETENV ("GGHEADER", "LOGPOSITION"), committimestamp = @GETENV ("GGHEADER", "COMMITTIMESTAMP")), INSERTALLRECORDS, EXCEPTIONSONLY;END;-- This ends the macroREPLICAT <replicat_name>HANDLECOLLISIONS--END RUNTIMEUSERID <golden_gate_user>, PASSWORD <golden_gate_password>ASSUMETARGETDEFSDISCARDFILE ./dirrpt/<discard_file_name>.dsc, purgeTRACE ./trace/<traice_file_name>.trc-- INCLUDE ALL -- &-- STATOPTIONS RESETREPORTSTATSDDL INCLUDE ALL--INCLUDE MAPPED -- &
Additional Information Disaster Recovery Configuration
Framework Deployment Guide 212

-- DBOPTIONS SUPPRESSTRIGGERS, DEFERREFCONSTDBOPTIONS DEFERREFCONSTREPORT AT 00:01REPORTROLLOVER AT 00:01REPORTCOUNT EVERY 60 SECONDS, RATE---DDLOPTIONS REPORTDDLERROR DEFAULT IGNOREREPERROR (DEFAULT, EXCEPTION)REPERROR (DEFAULT2, ABEND)REPERROR (-1, EXCEPTION)MAP <oracle_user_name>.*,TARGET <oracle_user_name>.*;MAPEXCLUDE <exclude_filter>;--MAP CFG_DB.* #exception_handler();
dnscmd Scripts[+] Show scriptsSwitch to SECONDARY Master Serverrem DNSCMD DELETE commanddnscmd 135.17.36.102 /RecordDelete mst.lab cfgmaster A /frem DNSCMD ADD commanddnscmd 135.17.36.102 /RecordAdd mst.lab cfgmaster A 135.17.36.140
Switch to MAIN Master Server
rem DNSCMD DELETE commanddnscmd 135.17.36.102 /RecordDelete mst.lab cfgmaster A /frem DNSCMD ADD commanddnscmd 135.17.36.102 /RecordAdd mst.lab cfgmaster A 135.17.36.139
Switch over Script[+] Show scriptipconfig /flushdnsping cfgmaster.mst.lab
Additional Information Disaster Recovery Configuration
Framework Deployment Guide 213
Internet Protocol version 6 (IPv6)IPv6 is a network layer for packet-switched inter-networks. It is designated as the successor of IPv4,the current version of the Internet Protocol, for general use on the Internet.
Important• This section contains a detailed description of IPv6 and deployment considerations
associated with it. See IPv6 vs. IPv4 Overview for information about activating supportfor IPv6 for a Genesys component. For a list of Framework connections that supportIPv6, see IPv6 Support.
• This section includes material that is freely available on the Internet and from otherpublic sources.
Addressing
The primary change from IPv4 to IPv6 is the length of network addresses. IPv6 addresses are 128 bitslong (as defined by RFC 4291), whereas IPv4 addresses are 32 bits. This amounts to an addressspace for IPv4 of approximately 4 billion addresses, compared to 3.4 x 1038 unique addresses forIPv6.
IPv6 addresses are typically composed of two logical parts: a 64-bit network or subnetwork prefix,and a 64-bit host part. This host part is either generated automatically from the MAC address of theinterface, or assigned sequentially. Because globally unique MAC addresses offer an opportunity totrack user equipment (and therefore users) across IPv6 address changes, RFC 3041 was developed toreduce the chance of user identity being permanently tied to an IPv6 address, thus restoring some ofthe anonymity existing with IPv4. RFC 3041 specifies a mechanism by which time-varying random bitstrings can be used as interface circuit identifiers, replacing unchanging and traceable MACaddresses.
NotationIPv6 addresses are normally written as eight groups of four hexadecimal digits separated by colons(:). For example:
2001:0db8:85a3:08d3:1319:8a2e:0370:7334
If one or more four-digit groups is 0000, the zeros can be omitted and replaced with two colons (::).For example:
2001:0db8:0000:0000:0000:0000:1428:57abcan be shortened to
2001:0db8::1428:57ab
Following this rule, any number of consecutive 0000 groups can be reduced to two colons, as long as
Additional Information Internet Protocol version 6 (IPv6)
Framework Deployment Guide 214
there is only one double colon used in an address. Leading zeros in a group can also be omitted (as in::1 for a localhost address). Therefore, the following addresses are all valid and are equivalent:
2001:0db8:0000:0000:0000:0000:1428:57ab2001:0db8:0000:0000:0000::1428:57ab2001:0db8:0:0:0:0:1428:57ab2001:0db8:0:0::1428:57ab2001:0db8::1428:57ab2001:db8::1428:57ab
Note that having more than one double-colon syntax element in an address is invalid, as it wouldmake the notation ambiguous. For example, the following address:
2001:0000:0000:FFD3:0000:0000:0000:57ababbreviated to
2001::FFD3::57abcould imply any of the following:
2001:0000:0000:0000:0000:FFD3:0000:57ab2001:0000:FFD3:0000:0000:0000:0000:57ab
or any other similar permutation.
For more information about IPV6 addressing, refer to RFC 4291.
Literal IPv6 Addresses in URLsIn a URL, the IPv6 address is enclosed in brackets. For example:
http://[2001:0db8:85a3:08d3:1319:8a2e:0370:7344]/
This notation enables the parsing of a URL without confusing the IPv6 address and port number, suchas in:
https://[2001:0db8:85a3:08d3:1319:8a2e:0370:7344]:443/
Additional information can be found in RFC 2732 and RFC 3986.
Network NotationIPv6 networks are written using Classless Inter-Domain Routing (CIDR) notation.
An IPv6 network (or subnet) is a contiguous group of IPv6 addresses, the size of which must be apower of two. The initial bits of any address in the network are called the prefix, and are identical forall hosts in the network.
A network is denoted by the first address in the network, and the size (in bits) of the prefix (indecimal), separated with a forward-slash (/). For example:
2001:0db8:1234::/48stands for the network with addresses
2001:0db8:1234:0000:0000:0000:0000:0000through
2001:0db8:1234:ffff:ffff:ffff:ffff:ffff
Because a single host can be seen as a network with a 128-bit prefix, host addresses are oftenfollowed with /128.
Additional Information Internet Protocol version 6 (IPv6)
Framework Deployment Guide 215
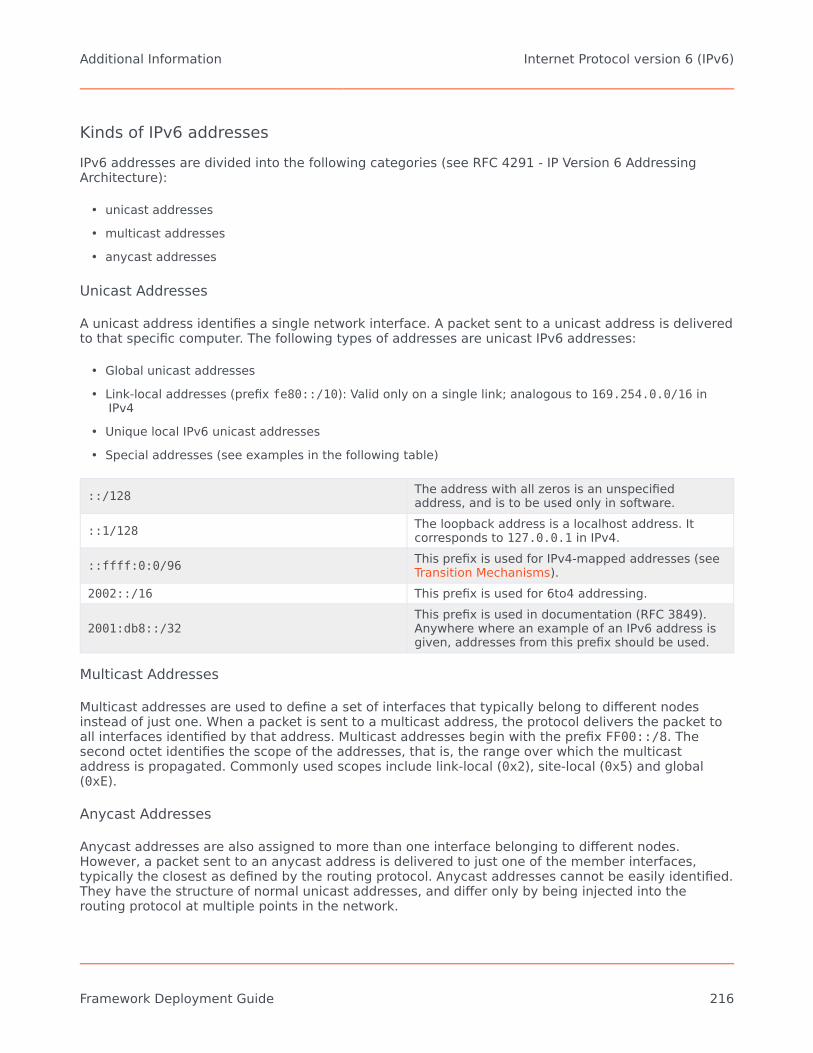
Kinds of IPv6 addressesIPv6 addresses are divided into the following categories (see RFC 4291 - IP Version 6 AddressingArchitecture):
• unicast addresses• multicast addresses• anycast addresses
Unicast Addresses
A unicast address identifies a single network interface. A packet sent to a unicast address is deliveredto that specific computer. The following types of addresses are unicast IPv6 addresses:
• Global unicast addresses• Link-local addresses (prefix fe80::/10): Valid only on a single link; analogous to 169.254.0.0/16 in
IPv4• Unique local IPv6 unicast addresses• Special addresses (see examples in the following table)
::/128 The address with all zeros is an unspecifiedaddress, and is to be used only in software.
::1/128 The loopback address is a localhost address. Itcorresponds to 127.0.0.1 in IPv4.
::ffff:0:0/96 This prefix is used for IPv4-mapped addresses (seeTransition Mechanisms).
2002::/16 This prefix is used for 6to4 addressing.
2001:db8::/32This prefix is used in documentation (RFC 3849).Anywhere where an example of an IPv6 address isgiven, addresses from this prefix should be used.
Multicast Addresses
Multicast addresses are used to define a set of interfaces that typically belong to different nodesinstead of just one. When a packet is sent to a multicast address, the protocol delivers the packet toall interfaces identified by that address. Multicast addresses begin with the prefix FF00::/8. Thesecond octet identifies the scope of the addresses, that is, the range over which the multicastaddress is propagated. Commonly used scopes include link-local (0x2), site-local (0x5) and global(0xE).
Anycast Addresses
Anycast addresses are also assigned to more than one interface belonging to different nodes.However, a packet sent to an anycast address is delivered to just one of the member interfaces,typically the closest as defined by the routing protocol. Anycast addresses cannot be easily identified.They have the structure of normal unicast addresses, and differ only by being injected into therouting protocol at multiple points in the network.
Additional Information Internet Protocol version 6 (IPv6)
Framework Deployment Guide 216

Broadcast Addresses
There are no address ranges reserved for broadcast in IPv6. Applications use multicast to the all-hosts group instead. The Internet Assigned Numbers Authority (IANA) maintains the official list of theIPv6 address space. Global unicast assignments can be found on the various Regional InternetRegistries (RIR) or on the Ghost Route Hunter Default Free Prefixes (GRH DFP) pages.
Transition MechanismsUntil IPv6 completely supplants IPv4, which is not expected to occur in the foreseeable future, anumber of transition mechanisms are needed to enable IPv6-only hosts to reach IPv4 services and toallow isolated IPv6 hosts and networks to reach the IPv6 Internet over the IPv4 infrastructure. Anoverview of some of the various IPv6 transitions that currently exist is provided at: [1]
Dual Stack
Because IPv6 is a conservative extension of IPv4, it is relatively easy to write a network stack thatsupports both IPv4 and IPv6 while sharing most of the source code. Such an implementation is calleda dual stack, and a host implementing a dual stack is called a dual-stack host. This approach isdescribed in RFC 4213.
Most current implementations of IPv6 use a dual stack. Some early experimental implementationsused independent IPv4 and IPv6 stacks. There are no known implementations that implement IPv6only.
Tunneling
To reach the IPv6 Internet, an isolated host or network must be able to use the existing IPv4infrastructure to carry IPv6 packets. This is done using a technique referred to as tunneling. Tunnelingconsists of encapsulating IPv6 packets within IPv4, in effect using IPv4 as a link layer for IPv6.
IPv6 packets can be directly encapsulated within IPv4 packets using Protocol 41. They can also beencapsulated within User Datagram Protocol (UDP) packets, for example, to cross a router or NetworkAddress Translation (NAT) device that blocks Protocol 41 traffic. They can also use genericencapsulation schemes, such as Anything In Anything (AYIYA) or Generic Routing Encapsulation(GRE).
Architecture
Dual-Stack IPv6 ImplementationGenesys support for IPv6 relies on true dual-stack IPv6 implementation of the operating system asspecified in RFC 3493. Conceptually, the configuration of a dual-stack machine with a v4 TCP and av6 TCP application is shown in the following figure.
Additional Information Internet Protocol version 6 (IPv6)
Framework Deployment Guide 217

Dual-Stack Architecture
Using this approach, you can write an application that can operate with both IPv4 and IPv6 peersusing just one socket. In addition, an application that uses a properly designed Transport Layer libraryand does not have to operate directly with IP addresses (and other Network Layer elements) may notbe aware of the IP version used at all.
Microsoft Windows ImplementationMicrosoft uses slightly different terminology when describing IPv6 architecture. For Microsoft, dual-layer refers to dual-network layers sharing a single transport layer. Dual-stack refers to dual-networklayers and dual transport layers, that is, two separate stacks. Only a dual-layer architecture iscompliant with RFC 3493.
ImportantIn this document dual-stack always refers to RFC 3493-compliant implementations,not the Microsoft definition.
Windows Server 2000/2003 and Windows XP
The following figure illustrates Microsoft Windows IPv6 implementation prior to Windows Vista.Microsoft calls this a dual-stack architecture, but it is actually implemented as two separate stackswith separate TCP and UDP paths. This implementation forces an application to open separatesockets to talk to IPv4 and IPv6 peers.
Microsoft IPv6 Stack Prior to Windows Vista
Additional Information Internet Protocol version 6 (IPv6)
Framework Deployment Guide 218

Windows Vista
In Windows Vista, Microsoft calls its next generation IP stack dual-layer architecture, but it is actuallya correct dual-stack implementation as described above, where there is only a single transport layercomponent for TCP and UDP.
Operating Systems Supporting Dual-Stack Architecture for IPv6Operating system support of dual-stack IPv6 implementation (RFC 3493-compliant) by differentoperating system platforms is provided in the following table. Refer to platform-specificdocumentation (including web sites) for additional information about supporting and implementingIPv6.
Operating System Supporting ReleasesAIX AIX 4.3.3 and later
Linux kernel 2.6 (Red Hat Enterprise Linux release 4) andlater
Mac OS X Mac OS 10.3 Panther and laterSolaris Solaris 8 and later
Windows Windows Vista and later, Windows Server 2008 andlater
DNS
Genesys products are using Domain Name System (DNS) resolution of hostnames specified inconfiguration, and require that the DNS is operating according to the AAAA schema. IPv6 addressesare represented in the Domain Name System by AAAA records (so-called quad-A records) for forwardlookups; reverse lookups take place under ip6.arpa (previously ip6.int), where the address spaceis delegated on nibble boundaries. This scheme, which is a straightforward adaptation of the familiarA record and in-addr.arpa schemes, is defined in RFC 3596. The following table describes the fields inan AAAA record.
Field Name DescriptionNAME Domain nameTYPE AAAA (28)CLASS Internet (1)TTL Time to live (seconds)RDLENGTH Length of RDATA field
RDATA String form of the IPv6 address as described in RFC3513
RFC 3484 specifies how applications should select an IPv6 or IPv4 address for use, includingaddresses retrieved from DNS. For mixed networks, the DNS must provide both A and AAAA records.
On a historical note, the AAAA schema was one of two proposals at the time the IPv6 architecture
Additional Information Internet Protocol version 6 (IPv6)
Framework Deployment Guide 219
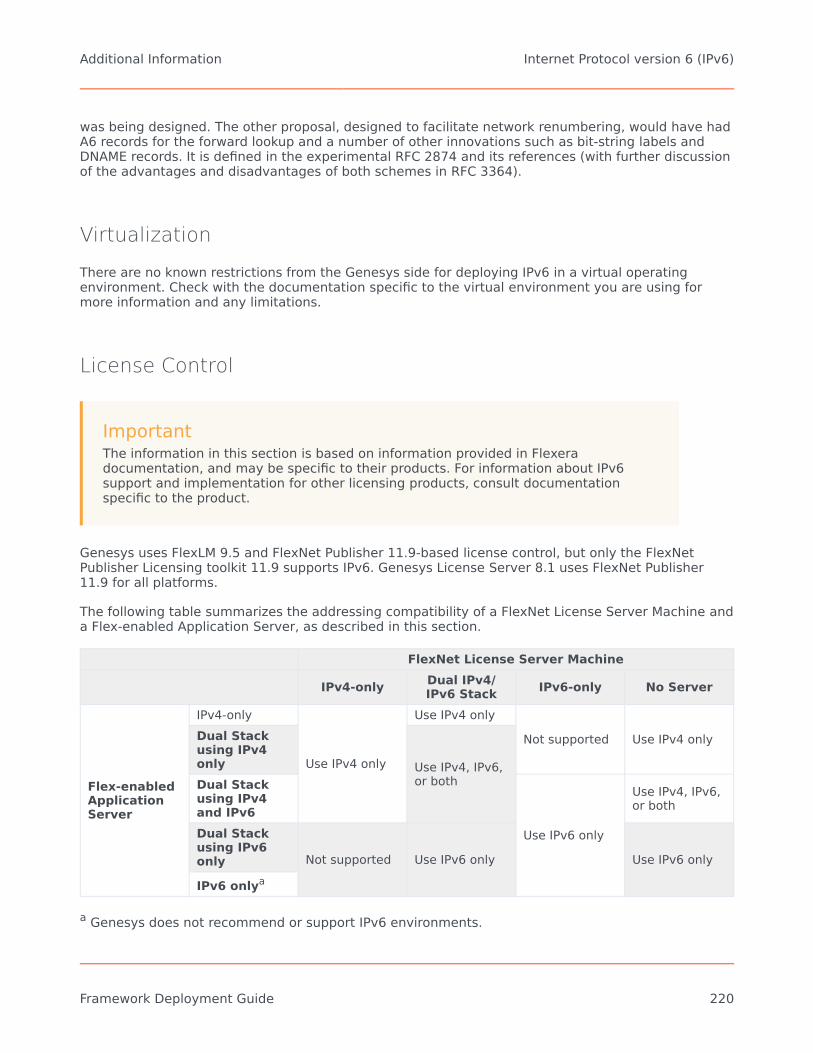
was being designed. The other proposal, designed to facilitate network renumbering, would have hadA6 records for the forward lookup and a number of other innovations such as bit-string labels andDNAME records. It is defined in the experimental RFC 2874 and its references (with further discussionof the advantages and disadvantages of both schemes in RFC 3364).
Virtualization
There are no known restrictions from the Genesys side for deploying IPv6 in a virtual operatingenvironment. Check with the documentation specific to the virtual environment you are using formore information and any limitations.
License Control
ImportantThe information in this section is based on information provided in Flexeradocumentation, and may be specific to their products. For information about IPv6support and implementation for other licensing products, consult documentationspecific to the product.
Genesys uses FlexLM 9.5 and FlexNet Publisher 11.9-based license control, but only the FlexNetPublisher Licensing toolkit 11.9 supports IPv6. Genesys License Server 8.1 uses FlexNet Publisher11.9 for all platforms.
The following table summarizes the addressing compatibility of a FlexNet License Server Machine anda Flex-enabled Application Server, as described in this section.
FlexNet License Server Machine
IPv4-only Dual IPv4/IPv6 Stack IPv6-only No Server
Flex-enabledApplicationServer
IPv4-only
Use IPv4 only
Use IPv4 onlyNot supported Use IPv4 onlyDual Stack
using IPv4only Use IPv4, IPv6,
or bothDual Stackusing IPv4and IPv6
Use IPv6 only
Use IPv4, IPv6,or both
Dual Stackusing IPv6only Not supported Use IPv6 only Use IPv6 only
IPv6 onlya
a Genesys does not recommend or support IPv6 environments.
Additional Information Internet Protocol version 6 (IPv6)
Framework Deployment Guide 220
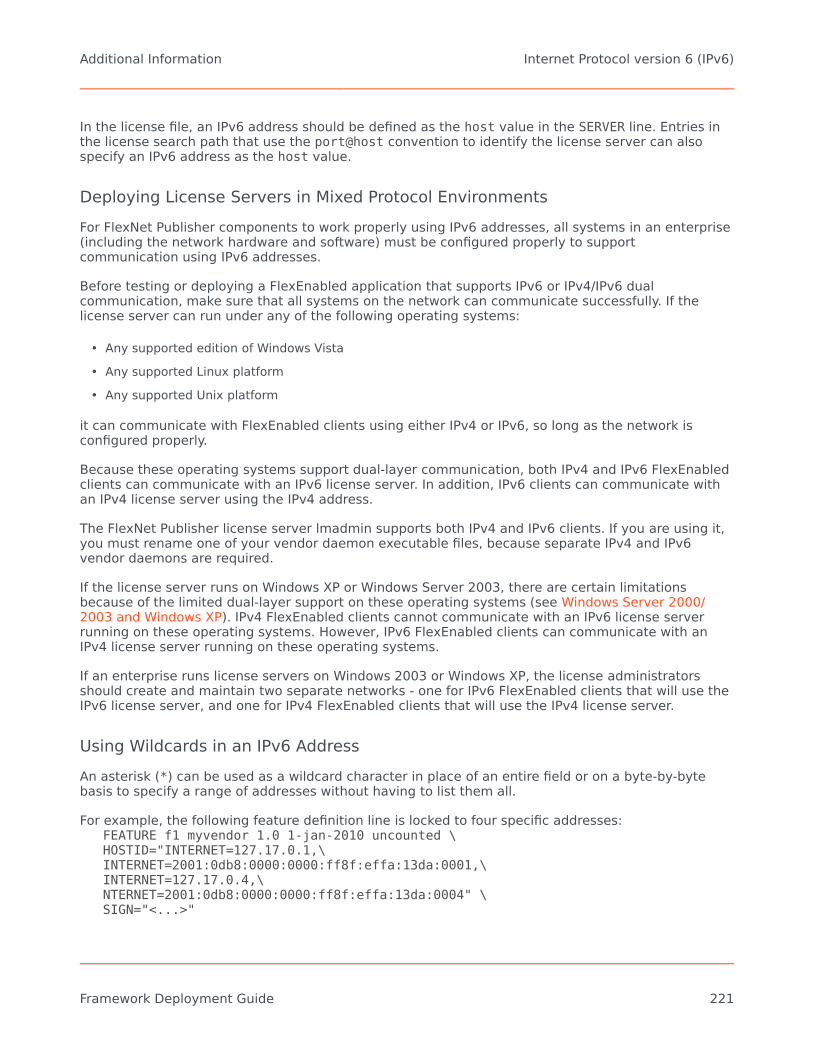
In the license file, an IPv6 address should be defined as the host value in the SERVER line. Entries inthe license search path that use the port@host convention to identify the license server can alsospecify an IPv6 address as the host value.
Deploying License Servers in Mixed Protocol EnvironmentsFor FlexNet Publisher components to work properly using IPv6 addresses, all systems in an enterprise(including the network hardware and software) must be configured properly to supportcommunication using IPv6 addresses.
Before testing or deploying a FlexEnabled application that supports IPv6 or IPv4/IPv6 dualcommunication, make sure that all systems on the network can communicate successfully. If thelicense server can run under any of the following operating systems:
• Any supported edition of Windows Vista• Any supported Linux platform• Any supported Unix platform
it can communicate with FlexEnabled clients using either IPv4 or IPv6, so long as the network isconfigured properly.
Because these operating systems support dual-layer communication, both IPv4 and IPv6 FlexEnabledclients can communicate with an IPv6 license server. In addition, IPv6 clients can communicate withan IPv4 license server using the IPv4 address.
The FlexNet Publisher license server lmadmin supports both IPv4 and IPv6 clients. If you are using it,you must rename one of your vendor daemon executable files, because separate IPv4 and IPv6vendor daemons are required.
If the license server runs on Windows XP or Windows Server 2003, there are certain limitationsbecause of the limited dual-layer support on these operating systems (see Windows Server 2000/2003 and Windows XP). IPv4 FlexEnabled clients cannot communicate with an IPv6 license serverrunning on these operating systems. However, IPv6 FlexEnabled clients can communicate with anIPv4 license server running on these operating systems.
If an enterprise runs license servers on Windows 2003 or Windows XP, the license administratorsshould create and maintain two separate networks - one for IPv6 FlexEnabled clients that will use theIPv6 license server, and one for IPv4 FlexEnabled clients that will use the IPv4 license server.
Using Wildcards in an IPv6 AddressAn asterisk (*) can be used as a wildcard character in place of an entire field or on a byte-by-bytebasis to specify a range of addresses without having to list them all.
For example, the following feature definition line is locked to four specific addresses:FEATURE f1 myvendor 1.0 1-jan-2010 uncounted \HOSTID="INTERNET=127.17.0.1,\INTERNET=2001:0db8:0000:0000:ff8f:effa:13da:0001,\INTERNET=127.17.0.4,\NTERNET=2001:0db8:0000:0000:ff8f:effa:13da:0004" \SIGN="<...>"
Additional Information Internet Protocol version 6 (IPv6)
Framework Deployment Guide 221

The following feature definition line specifies an entire range of addresses, including the four specificones from the line above:
FEATURE f1 myvendor 1.0 1-jan-2010 uncounted \HOSTID="INTERNET=127.17.0.*,\INTERNET=2001:0db8:0000:0000:*:*:*:000*"\SIGN="<...>"
Genesys 8.1 IPv6 Support
Genesys supports IPv6 as described in this section.
Common PrinciplesThe implementation of IPv6 in Genesys is based on the following assumptions:
• Dual-stack requirement and backward compatibility• Dual IPv4/IPv6 server sockets• IPv4 preference for DNS
Dual-Stack Requirement and Backward Compatibility
Only dual-stack IPv6 implementations are supported. Support of IPv6 on Windows 2002/2003 and XPis not required, while all recent versions of UNIX have dual-stack support already. However, theconnection layer must still operate on all other platforms in IPv4 mode only.
On the platforms where IPv6 support is available, the default mode of operation is IPv4 for backwardcompatibility. IPv6 support must be turned on explicitly by each application using one of the followingmethods:
• Set the environment variable GCTI_CONN_IPV6_ON to 1.• In the common section of the Application object's options, set enable-ipv6 to 1.
Refer to IPv6 vs. IPv4 Overview for more details about enabling IPv6 in Genesys software.
ImportantIPv6 is, by default, not enabled. But once it is enabled using one of the methodsdescribed above, it can only be disabled by turning it off in both places-theenvironment variable and the option. That is, turning it off in one location onlydisables it if it is not enabled in the other.
Dual IPv4/IPv6 Server Sockets
By default, a server socket opened by a standard method should accept both IPv4 and IPv6 clientconnections. That is, unless IPv6 is disabled on a particular node, unbound server sockets are opened
Additional Information Internet Protocol version 6 (IPv6)
Framework Deployment Guide 222

with the AF_INET6 family and use the AI_V4MAPPED flag to interact with IPv4 clients. However, aserver socket bound to a particular IP address (either IPv4 or IPv6) only accepts a connection of thesame IP family.
IPv4 Preference for DNS
Within an application, a name service should be used whenever possible. An AAAA record may returnboth a IPv4 and IPv6 address for dual stack nodes. For backward compatibility reasons, clientconnections in this case should prefer IPv4 over IPv6. That preference can be set using theconfiguration option ip-version.
However, a client connection bound to a particular IP address (either IPv4 or IPv6) can only interactwith the server using a connection of the same IP family.
Implementation CharacteristicsIndividual Genesys components support the following features related to IPv6:
• Full IPv6 support in DNS lookup: Support both AAAA records and DNS over IPv6.• Transparent server-side socket handling: The existing server-side interface allows IPv6 connections
whenever possible using the AI_V4MAPPED flag.• Transparent client-side connection: The existing client-side connection interface allows IPv6 connections
by host name or explicit IP address in text format.• DNS Lookup modes: Full DNS support using the synchronous method (name lookup using standard
system calls) and asynchronous DNS (enabled by the enable-async-dns option in the common sectionof an Application object's options). Server and client side IPv6 sockets and connections are supportedtransparently, including hosts being addressed either by name, or by textual IP address in either IPv4 orIPv6 format.
• IPv6-related changes in the configuration environment: Configuration Server keeps IP addresses for allconfigured hosts, but it is not a replacement for DNS. However it is expected to be affected very little.In particular, a new field for the IPv6 address is not added to the CfgHost structure; while the newconfiguration option ip-version set at the connection level determines whether the connection usesIPv4 first (4,6; the default), or IPv6 first (6,4). To achieve compatibility with legacy servers (that is, aserver without IPv6 support running on a dual-stack host, while IPv6-enabled clients try to connect), thesuggested solution is to create an IPv4-only hostname alias for that host.
For more information about the two configuration options, refer to IPv6 vs. IPv4 Overview.
IPv6 Support by Genesys ProductsTo determine if a Genesys product supports IPv6, refer to the documentation for that product.Framework connections that support IPv6 are listed in IPv6 Support.
Deployment Considerations
When deploying IPv6 in your Genesys environment, you must take into consideration the factorsdiscussed in this section.
Additional Information Internet Protocol version 6 (IPv6)
Framework Deployment Guide 223

SecurityPreparation for IPv6 utilization will require careful planning of security measures, because IPv6presents new challenges compared to IPv4. Some, but not all, of the challenges are discussed in thissection.
TLS
In some deployments, multiple hostnames are assigned to a given computer, and are resolved todifferent IP versions. In this case, the TLS certificate of the given computer will have to be generatedfor all assigned hostnames.
Refer to the ''Genesys 8.1 Security Deployment Guide'' for information about generating certificates.
Firewall and Client-Side Port
Genesys supports fine-grain firewall configuration at the port-level and applied both to incomingclient connections and their target server destinations.
In IPv6 deployments, this might become even more valuable, for example, as a countermeasureagainst Network Discovery (ND) attacks. ND in IPv6 utilizes five different types of ICMPv6 messagesfor several purposes. ND attacks in IPv6 will likely replace ARP spoofing in IPv4.
Internet Protocol Security
Internet Protocol Security (IPSec) is an optional feature in IPv4, but is mandatory in IPv6. In certaindeployments, it could make the use of TLS unnecessary.
DNS Security Extensions
Genesys recommends the use of DNS Security Extensions (DNSSEC), but it is not mandatory. Thereare no dependencies from the Genesys side.
IP TunnelingWhen connecting sites, you may want to use IP tunneling. For example, two sites could be operatingin IPv4 mode while the interconnection requires IPv6. In this case, one could consider embedding theIPv4 protocol into an IPv6 connection between sites.
LicensingThe G8.1 License Server (the Genesys vendor daemon) is based on FlexNet Publisher 11.9, and isIPv6 enabled.
However, within G8.1 the IPv6-enabled licensing client libraries (FlexNet Publisher 11.9) areimplemented for only the RHEL 5 64-bit, Windows 2008 64-bit, and HP-UX Integrity (Itanium)operating systems. For all other platforms, the G8.1 applications are still using the older clientlibraries, which are not IPv6 enabled. This is done to provide backward compatibility; otherwise, thedeployment of a G8.1 application in an existing environment would have required a completeupgrade of the licensing system.
Additional Information Internet Protocol version 6 (IPv6)
Framework Deployment Guide 224

Therefore, Genesys recommends that IPv4 be used for licensing.
SIPThe SIP protocol can contain explicit IP address values. This creates additional challenges, forexample at the NAT level, but also if the same SIP Server instance has to concurrently supportmultiple SIP interfaces where one is operating in IPv4 mode and another in IPv6 mode.
It is recommended to address those scenarios by using a dedicated SIP Server for IPv4 only andanother one for IPv6 only.
You could also consider using available NAT solutions that perform configurable SIP protocolinspection and conversion. One example is F5 Networks Big-IP LTM.
ImportantIPv6 support for SIP is not yet implemented in Genesys components.
Thin ClientsSome Genesys client applications offer a web browser interface with an HTTP connection to a webserver. These connections are under control of the given web technology, and all modern browsersalready support IPv6. However, IPv6 must be enabled at both the client computer and servercomputer sides, and the DNS involved must also support IPv6.
External InterfacesIPv4 dependencies at external interfaces must be considered. This includes, for example, interfacesto Session Border Controllers (SBC), media gateways, switches, and databases.
Dynamic Runtime ChangesChanges in the IPv4/IPv6 configuration should be performed during maintenance windows, as theywill require a restart of impacted processes. These changes will include setting the following:
• Transport parameter ip-version• DNS entries for hostnames• Local computing node settings
Third-Party DependenciesGenesys uses several third-party products as part of the suite. The IPv6 capabilities of those productsmust be considered.
Additional Information Internet Protocol version 6 (IPv6)
Framework Deployment Guide 225
IPv6 vs. IPv4 Overview
ImportantThis section provides a high-level view of IPv6, and how to enable it in a Genesyscomponent. For detailed information about IPv6, the operating systems that supportit, and things to consider when deploying it, see Internet Protocol version 6 (IPv6). Fora list of Framework connections that support IPv6, see IPv6 Support.
Internet Protocol version 6, commonly known as IPv6, is a network layer protocol for packet-switchedinter-networks. It is designated as the successor of IPv4, the current version of the Internet Protocol,for general use on the Internet.
Configuring IPv6
IPv6 must be configured on each component that is going to support it. You can do this using anenvironment variable or a configuration option, depending on the situation:
You must use an enironment variable if:
• An IPv6 connection is to be established before an application is able to, or must, read information fromConfiguration Server.
• You want all Genesys applications on the same host to support IPv6. You only have to configure this onthe host once, rather than configure each application on that host individually. The host-level settingwill override any application-level setting.
Otherwise, you can use either an environment variable or a configuration option.
Set Environment Variable
Set the environment variable GCTI_CONN_IPV6_ON to true (represented by any non-zero integervalue) to enable IPv6; or to false (represented by zero (0)) to disable IPv6. The default value of thisenvironment variable is false (0), indicating that IPv6 support is disabled. This default value ensuresbackward compatibility.
Set Configuration Option
Using Genesys Administrator, set the enable-ipv6 option in the common section of the options of thecomponent's Application object. Refer to the ''Framework Configuration Options Reference Manual''
Additional Information IPv6 vs. IPv4 Overview
Framework Deployment Guide 226

for more information about this option.
Refer to component-specific documentation and Internet Protocol version 6 (IPv6) for moreinformation about IPv6 and any specific considerations for deploying IPv6 in your situation.
Mixed IPv4 and IPv6 Environments
You can configure IPv6 and IPv4 in the same environment, as described in Internet Protocol version 6(IPv6). In this mixed environment, you can configure connections with servers that support IPv4, IPv6,and both. For connections with servers that support both IPv4 and IPv6, you can specify whichversion you prefer to use. For example, if you are setting up a connection to a DB Server thatsupports both IP4 and IPv6, you can choose to use IPv4 or IPv6 for that connection. There is nouniversal rule that determines what version should be used, so the choice is up to you.
To configure this choice, you can use either an environment variable or a transport option.
Set Environment Variable
Set the environment variable GCTI_CONN_IP_VERSION to either 4,6 to indicate a preference for IPv4;or to 6,4 to indicate a preference for IPv6. The default value of this environment variable is 4,6,indicating that IPv4 is preferred. This default value ensures backward compatibility. The value of thisenvironment variable is overridden if the transport parameter ip-version is configured at theapplication level.
Set Transport Option
Using Genesys Administrator, set the Transport parameter ip-version on the Advanced tab of theConnection Info dialog box for the connection. Refer to the ''Framework Configuration OptionsReference Manual'' for more information about this parameter.
ImportantThis option has no affect on connections to Configuration Server that are establishedbefore the option value can be read from the Configuration Database.
The same option can also be set in the transport section of the Host's Annex to set the IP versionused on the connection between Solution Control Server and LCA. Otherwise, ManagementFramework components do not support this option. When the same transport option is set on theapplication level, it overrides the value of the environment variable GCTI_CONN_IP_VERSION.
Refer to the ''Framework Configuration Options Reference Manual'' for more information about settingthis option in an application or in a host.
Additional Information IPv6 vs. IPv4 Overview
Framework Deployment Guide 227

The following table summarizes how this environment variable or option affects the connection forwhich it is configured.
Connecting Server 4,6 6,4Supports only IPv4 ipv4 is used ipv4 is usedSupports both IPv4 and IPv6 ipv4 is used ipv6 is usedSupports only IPv6 ipv6 is used ipv6 is used
WarningGenesys does not recommend or support IPv6-only environments.
Additional Information IPv6 vs. IPv4 Overview
Framework Deployment Guide 228
Copyright © 2022 FDOKUMEN