Fluid resin technique
61
Transcript of Fluid resin technique

The conventional compression molding technique of denture base processing requires considerable attention to time consuming details in achieving accurate results, and requires expensive equipment as well as special processing.
Compression-molded dentures processed with heat cure acrylic resins become ill fitting in the mouth because they warp severely during processing and while in service.

Setting expansion of gypsum investment, as used in compression molding methods, has been shown to change the relative positions of teeth to cast during investing.
This information, as well as laboratory and clinical observation, reveals a need for a method of denture base processing that is accurate, requires no complex special equipment, eliminates time-consuming details, and reduces processing time.

In 1955 the fluid resin technique, with which dentures are processed with pourable self-curing acrylic resins in hydrocolloid molds, was developed.
When used as a denture base, self curing resins have been shown to exhibit a greater degree of accuracy than that exhibited by the heat-polymerizing resins.
Though the heat-curing resins are somewhat stiffer and stronger than room-temperature polymerizing resins, self polymerizing resins have sufficient strength and stiffness to withstand the forces to which dentures are subjected without distorting in use.

Many fluid resin techniques of denture base processing generally employ reversible hydrocolloid molds.
This simplifies flasking and deflasking, reduces finishing time, and permits the use of relatively inexpensive equipment.
However, problems with these procedures are: tooth movement and tilting of the cast, vertical dimension decrease, seepage of resin onto the teeth, and dimensional changes in the denture base during processing.

To minimize the problems associated with fluid resin processing, the technique has been evolved in terms of the type of investment materials used like silicone and soft stone.

Apart from processing complete dentures, fluid resin technique is predominantly used in the instance where the partial denture has a free-end extension.
Packing pressures of compression molding technique frequently cause warping of the meshwork during processing.
Therefore, when the pressure packed free-end extension partial denture is inserted in the mouth, the dentist often
finds that the denture has an antero-posterior displacement.

The fluid resin processing method eliminates the warping effect because it requires no application of pressure.
Another advantage is the ability to recover the partial denture from the mold without damage to the cast. This situation greatly facilitates remounting procedures for occlusal correction after processing.

( 1) A pourable type of acrylic resin.
(2) A special flask.
(3) Reversible hydrocolloid/silicone/soft stone.
(4)Standard Nos. 4 and 5 laboratory cork borers.
(5)Resin-processing unit, or pressure pot, capable of holding at least 15 psi of air pressure.
(6) Alginate separating medium diluted with one part water.

13
2
1.Metal base with retaining clips 2. Upper half of the flask3. Strainer with compartments and metallic bottons.

The base of the cast should have a slight taper, with the convergence towards its occlusal surface. This permits easier withdrawal from the soft mold.
There should be an adequate shelf (land area) of approximately 3 mm. extending beyond the border roll of the upper cast.
The wax-up should represent exactly the desired form of the finished denture.
It is important that the teeth be cleaned of all wax residue prior to investing.
NOTE: If the teeth are not well cleaned, the resin will flash onto the tooth surface when the resin is poured, and this may result in tooth movement.

Partial dentures should have severe undercut areas blocked out with dental plaster to prevent tearing of the soft investment during the removal and reinsertion of the cast.
The labial region and the part beneath the lingual bar are the regions most commonly requiring a plaster block-out.
The use of modeling clay is not recommended, because it is easily distorted and may prevent the proper reseating of the cast in the hydrocolloid.
When an anterior denture base on a partial denture is to be processed, a roll of utility wax is used to connect the facial aspect of the anterior denture base wax-up with the posterior denture base wax-up or with the posterior surface of the cast.
This will permit a connection to be made with the vent..

Soak the cast with the waxed denture in slurry water at room temperature for 10 min. prior to investing to displace any air within the cast .
Center the waxed up denture on the metal base so that an equal amount of investing material surrounds it and thereby prevents distortion.

Place the metal base over the strainer so that the distal aspect of the denture faces the metallic buttons of the strainer to allow access areas of the denture base through which sprues and vents can be cut.

Assemble the top of the flask and position the retaining clips.

Mix silicone duplicating material or manipulate hydrocolloids and pour into the assembled flask.
Continue pouring till it is full.
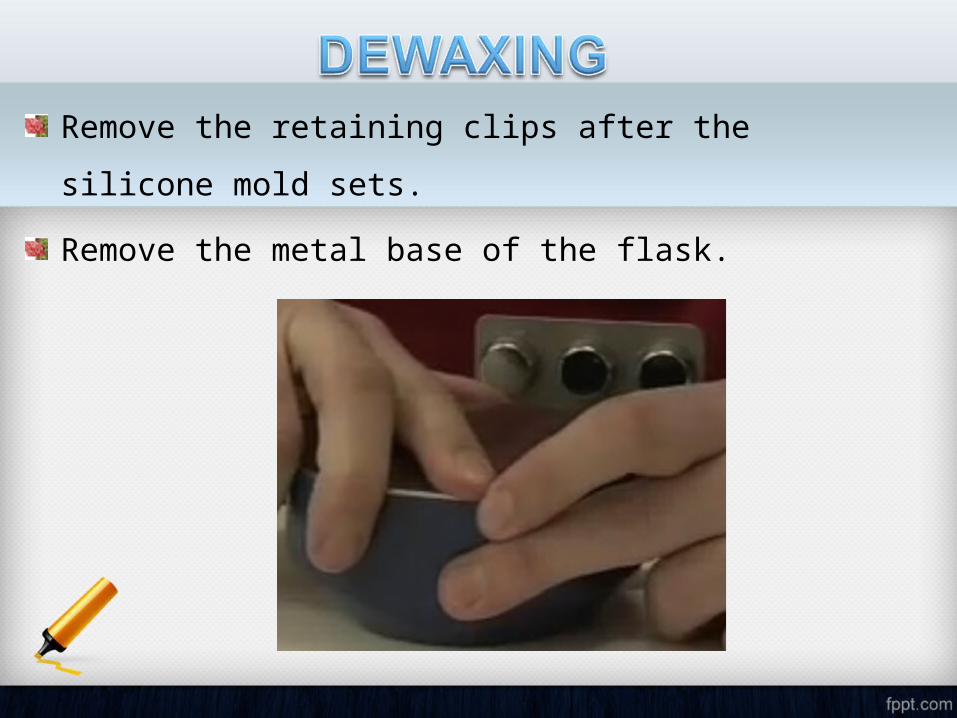
Remove the retaining clips after the silicone mold sets.
Remove the metal base of the flask.

Bevel the silicone mold around the base of the cast slightly to permit access with a knife blade on each side of the cast to facilitate removal of the cast and waxed denture.
Grip the knive blades firmly at each side of the base of the cast, and apply downward leverage with the knife handles to remove the waxed denture from the mold.

Dislodge the denture teeth from the wax, and place them in the compartmentalized strainer in proper sequence.

Remove the waxed denture base, clean the cast with wax solvent and a household detergent and rinse it with hot water.

Apply a thin coat of separating medium evenly over the impression surface of the cast while it is still hot , set the cast aside, and permit it to cool.

CAUTION:Avoid pooling the separating medium on any
part of the cast. Since the resin is fluid, it does not
require any packing pressure and will not displace thick areas of separating medium during processing. Therefore voids can occur on the
impression surface and border areas of the finished denture.

The teeth are cleaned with a household detergent and
steam of boiling water. A small amount of ammonia added to the detergent will help cut the wax residue.

NOTE: Wax solvents are not used in cleaning the teeth because they leave an oily residue which prevents good bonding with the denture base.

Some resin teeth are made of a highly cross-linked plastic, and they do not bond well with cross-linked resin base materials.
The ridge lap of these resin teeth therefore,should be lightly roughened by sand blasting prior to set-up. This seems to result in a better bond between the teeth and the denture base resin.

•
NOTE: When using porcelain teeth, remove any water
remaining in the diatoric portion of tooth with a blast of air.

Position the no.4 cork borer so that it will cut through the silicone mold to the most distal area to provide a vent.
Usually these areas are disto-lingual flange areas of lower denture and hamular notch area of the upper denture.

After cutting the vents and removing the silicone plugs, make the main pouring sprue. Make the slightly larger pouring sprue with a no.5 cork borer.
Position it, so that it will make contact with the denture base in the distal midline of the upper denture and disto-lingual midline area of the lower denture.

NOTE: The principle consideration when spruing is having the fluid resin reach the most central anterior area of the denture as quickly as possible and permitting it to travel up the lateral aspects of the denture and force air ahead of it.

Following spruing, the mold must be inspected carefully for any loose pieces of silicone.
These must be removed or they may become incorporated into the resin and result in a defect in the denture base.
A light air blast is usually sufficient to remove any loose pieces that might be present.

Spruing for partial dentures will vary with each denture, but the same basic principles apply.
The main sprue should permit entry of the resin at the deepest anterior base surface accessible, and the vent should permit exit of the resin at the most distal aspect of the base.

Replace the teeth in their respective positions in the mold with cotton pliers.

After repositioning all of the teeth in the mold, invert the flask, and shake it gently to make certain that the teeth remain in position. If no teeth fall from the mold, good tooth engagement is assumed.
If a tooth has been ground extensively to accommodate occlusal or denture space requirements, a small amount of petroleum jelly is applied to the occlusal and facial surface of the tooth to retain it in position.

PRECAUTION: Prevent contact between petroleum jelly
and the ridge lap area of the teeth because the result will be a poor bond between the tooth and resin.

Replace the cast in the mold and reposition the base of the flask and retaining clips.

The cast should be cool before it is placed back into the mold, because a warm cast will accelerate the polymerization of the fluid resin and result in a lack of density of the denture base.
Care should be exercised in replacing partial denture casts so that the artificial teeth are not moved by the elements of the metal framework.
When the cast is repositioned in the mold, the flask is reassembled and placed on end with the sprue holes accessible for filling the mold with resin.

The polymer is a very fine, high molecular weight polymethyl methacrylate.
This fine particle size permits it to pass into and through relatively narrow spaces, while the high molecular weight restricts the initial solubility of the material so that the viscosity of a liquid phase of the mixture does not increase rapidly during the first few minutes after mixing.

The powder has, however been given a treatment which causes it to fragment into smaller irregular particles after a few minutes exposure to monomer.This fragmentation solves the problem of retaining a low viscosity early in the pouring process while still getting a sufficiently rapid reaction of the monomer and polymer that the material can be entirely softened to a gel before the curing reaction starts.
This thorough softening has important effects on both the color of the finished denture, and on the occurrence of internal porosity. Almost all polymer particles contain a dispersion of very small pores which contain air. If the resin is not softened the small pores will remain and scatter light, making the resin appear more opaque and lighter in color.
NOTE: The pores which lie at the borderline between the softened and unsoftened material may be exposed to pressure far too short a time to allow them to dissolve, and they can then serve as nuclei of bubbles into which monomer will evaporate as the temperature rises, and thus grow into holes of substantial size.

The acrylic resin monomer should be stored under refrigeration, if possible. If the monomer is kept cool, the resin will have a longer working time. The polymer and monomer must be accurately measured in cubic centimeters at the ratio of 30:12 (2.5:1 by volume). This amount is sufficient for the average complete denture. There will be increased shrinkage of the base during polymerization if too much monomer is used.

The monomer is poured into a glass beaker, and the polymer is added to it.
The resin is stirred rapidly for 10 seconds with a metal spatula, swirled in the beaker for several seconds.
.
CAUTION : Over spatulation can cause the undesirable
incorporation of air in the resin.

Approximately 0.5 C.C. of the monomer will remain in the graduate after the monomer has been poured into the mixing beaker.
This should be compensated for at the time the monomer is measured. NOTE: To avoid a build-up of set monomer in
the graduate over a period of time, which will render the graduate inaccurate, the graduate should be inverted following each use to permit it to drain.

The resin powder of fluid or pour type resins, when mixed with the liquid, typically monomer and 1,4-butanediol dimethacrylate, produces a fluid mix. Fluid mix also results from a much lower polymer-monomer ratio.
Pour the resin slowly through the main pouring sprue only.
Do not add any resin in the vents.
Adding resin through vents could produce voids.

The pouring should be completed within one minute.
The resin tends to become too viscous for accurate
results after this time.
A slight rocking of the flask from side to side during pouring will help displace any air that might be trapped within the mold and will prevent voids.

It is possible to add more material through the pouring sprue if it’s level drops as a result of overflow through the vent.
Following pouring, the flask is allowed to set on the bench for 3 minutes before being placed in the processing unit.

The flask is positioned in the processing unit so that the vents and sprue holes are not directly under the air intake valve.
If they are positioned directly under the intake valve, the initial blast of air may displace some of the fluid resin in the mold and result in a void in the denture base.

About one inch of water at room temperature is placed in the processing unit, and the lid and air outlet valve axe closed; At least 15 psi, of air pressure is turned into the processing unit and maintained for 35 minutes.
Depending on the resin, temperatures required for curing vary from 38C to 51.5C

Air pressures of over 15 psi neither improve the density of the denture base nor shorten the curing time, but air pressures under 10 psi result in less dense base and may lead to pinpoint porosity.
Therefore, it is mandatory to monitor the pressure gauge to make certain that the unit does not lose pressure.

After 35 minutes, the air is evacuated from the processing unit, and the flasks are removed and disassembled.
A major advantage of this method of processing is the ease with which it is possible to recover the dentures after curing.

After the flask is disassembled, cut open the silicone mold and eject the dentures with finger pressure.

If the sprues or vents interfere with remounting, remove them with a separating disk. If it is possible to remount the dentures without interference, remove the sprues and vents later.
Equilibrate the occlusion, remove the casts, and finish and polish the dentures in the conventional manner.

Less time needed for processing.
Less damage to denture teeth while deflasking.
Simplified deflasking.
Minimum finishing and polishing required.
Reversible hydrocolloid mold material can be reused.

Poor bonding of acrylic teeth to denture base.
Shifting of teeth due to soft investment.
Larger polymerization shrinkage.
Air trapping
Decrease in vertical dimension.
Higher residual monomer
Inferior mechanical properties
Higher solubility
Denture bases processed from a fluid resin Walter. Shepard The Journal of Prosthetic Dentistry Volume 19, Issue 6, June 1968, Pages 561-572.Dental Laboratory Procedures: Complete dentures, Volume 1 Robert M. Morrow, Kenneth D Rudd, Harold F Eissmann. Mosby, 1980.Dental Materials at a Glance, 2nd edition. J. Anthony von Fraunhofer, Wiley 2013.

Dimensional and occlusal changes in fluid resin dentures Alexander N Antomopoulos. The Journal of Prosthetic Dentistry Volume 39, Issue 6, June 1978, Pages 605–615
Fluid denture resin processing in a rigid mold. Frank F.Koblitz, richard A. Smith, Hugh E Wolfe The Journal of Prosthetic Dentistry Volume 30, issue 3, September 1973, Pages 339-346
Video:https://www.youtube.com/watch?v=p1_RtqQfPNY