ESET Endpoint Security
313
ESET Endpoint Security User guide Click here to display the Online help version of this document
-
Upload
khangminh22 -
Category
Documents
-
view
0 -
download
0
Transcript of ESET Endpoint Security

ESET Endpoint SecurityUser guideClick here to display the Online help version of this document

Copyright ©2022 by ESET, spol. s r.o.
ESET Endpoint Security was developed by ESET, spol. s r.o.For more information visit https://www.eset.com.All rights reserved. No part of this documentation may be reproduced, stored in a retrievalsystem or transmitted in any form or by any means, electronic, mechanical, photocopying,recording, scanning, or otherwise without permission in writing from the author.ESET, spol. s r.o. reserves the right to change any of the described application softwarewithout prior notice. Technical Support: https://support.eset.com REV. 2/25/2022

1 ESET Endpoint Security 7 1 .................................................................................................... 1.1 What's new in version 7 2 ................................................................................................. 1.2 System requirements 3 ....................................................................................................
1.2 Supported languages 5 ..................................................................................................... 1.3 Prevention 6 ................................................................................................................... 1.4 Help pages 7 ...................................................................................................................
2 Documentation for endpoints managed remotely 8 ............................................................... 2.1 Introduction to ESET Security Management Center 9 ........................................................... 2.2 Introduction to ESET PROTECT Cloud 10 ............................................................................. 2.3 Password protected settings 10 ........................................................................................ 2.4 What are policies 12 ........................................................................................................
2.4 Merging policies 12 ......................................................................................................... 2.5 How flags work 13 ...........................................................................................................
3 Using ESET Endpoint Security by itself 14 .............................................................................. 3.1 Installation methods 14 ...................................................................................................
3.1 Installation with ESET AV Remover 15 ..................................................................................... 3.1 ESET AV Remover 16 ....................................................................................................... 3.1 Uninstallation using ESET AV Remover ended with error 18 .............................................................. 3.1 Installation (.exe) 19 ........................................................................................................ 3.1 Change installation folder (.exe) 21 ....................................................................................... 3.1 Installation (.msi) 22 ........................................................................................................ 3.1 Advanced installation (.msi) 24 ............................................................................................ 3.1 Command-line installation 26 .............................................................................................. 3.1 Deployment using GPO or SCCM 31 ....................................................................................... 3.1 Upgrading to a more recent version 34 .................................................................................... 3.1 Common installation problems 35 ......................................................................................... 3.1 Activation failed 35 .........................................................................................................
3.2 Product activation 35 ....................................................................................................... 3.3 Computer scan 35 ............................................................................................................ 3.4 Beginner's guide 36 .........................................................................................................
3.4 The user interface 36 ....................................................................................................... 3.4 Update setup 40 ............................................................................................................ 3.4 Zones setup 43 ............................................................................................................. 3.4 Web control tools 44 ........................................................................................................
4 Work with ESET Endpoint Security 44 ..................................................................................... 4.1 Computer 47 ...................................................................................................................
4.1 Detection engine (7.2 and later) 48 ........................................................................................ 4.1 Detection engine advanced options 54 .................................................................................... 4.1 Detection engine (7.1 and below) 54 ...................................................................................... 4.1 An infiltration is detected 55 ............................................................................................... 4.1 Shared local cache 57 ...................................................................................................... 4.1 Real-time file system protection 58 ........................................................................................ 4.1 Checking real-time protection 60 .......................................................................................... 4.1 When to modify real-time protection configuration 60 ................................................................... 4.1 What to do if real-time protection does not work 60 ...................................................................... 4.1 Computer scan 61 ..........................................................................................................

4.1 Custom scan launcher 63 .................................................................................................. 4.1 Scan progress 65 ........................................................................................................... 4.1 Computer scan log 67 ...................................................................................................... 4.1 Malware scans 67 ........................................................................................................... 4.1 Idle-state scan 67 ........................................................................................................... 4.1 Scan profiles 68 ............................................................................................................. 4.1 Scan targets 68 ............................................................................................................. 4.1 Advanced scan options 69 ................................................................................................. 4.1 Device control 70 ........................................................................................................... 4.1 Device control rules editor 70 .............................................................................................. 4.1 Detected devices 72 ........................................................................................................ 4.1 Device groups 72 ........................................................................................................... 4.1 Adding Device control rules 73 ............................................................................................. 4.1 Host-based Intrusion Prevention System (HIPS) 75 ....................................................................... 4.1 HIPS interactive window 78 ................................................................................................ 4.1 Potential ransomware behavior detected 79 .............................................................................. 4.1 HIPS rule management 80 .................................................................................................. 4.1 HIPS rule settings 81 ........................................................................................................ 4.1 HIPS advanced setup 84 .................................................................................................... 4.1 Drivers always allowed to load 85 ......................................................................................... 4.1 Presentation mode 85 ...................................................................................................... 4.1 Startup scan 86 ............................................................................................................. 4.1 Automatic startup file check 86 ............................................................................................ 4.1 Document protection 87 .................................................................................................... 4.1 Exclusions 87 ............................................................................................................... 4.1 Performance exclusions 88 ................................................................................................. 4.1 Add or Edit performance exclusion 89 ..................................................................................... 4.1 Path exclusion format 92 ................................................................................................... 4.1 Detection exclusions 93 .................................................................................................... 4.1 Add or Edit detection exclusion 95 ......................................................................................... 4.1 Create detection exclusion wizard 96 ...................................................................................... 4.1 Exclusions (7.1 and below) 97 ............................................................................................. 4.1 Processes exclusions 98 .................................................................................................... 4.1 Add or Edit processes exclusions 99 ....................................................................................... 4.1 HIPS exclusions 100 ........................................................................................................ 4.1 ThreatSense parameters 100 .............................................................................................. 4.1 Cleaning levels 104 ........................................................................................................ 4.1 File extensions excluded from scanning 106 ............................................................................. 4.1 Additional ThreatSense parameters 106 ..................................................................................
4.2 Network 107 ................................................................................................................... 4.2 Firewall 109 ................................................................................................................ 4.2 Learning mode 111 ........................................................................................................ 4.2 Network attack protection 113 ............................................................................................ 4.2 Advanced filtering options 113 ............................................................................................ 4.2 IDS exceptions 117 ......................................................................................................... 4.2 Suspected threat blocked 120 ............................................................................................. 4.2 Network protection troubleshooting 120 ..................................................................................

4.2 Connected networks 121 .................................................................................................. 4.2 Known networks 121 ....................................................................................................... 4.2 Known networks editor 122 ................................................................................................ 4.2 Network authentication - Server configuration 125 ...................................................................... 4.2 Firewall profiles 125 ........................................................................................................ 4.2 Profiles assigned to network adapters 126 ............................................................................... 4.2 Application modification detection 126 ................................................................................... 4.2 Applications excluded from modification detection 127 ................................................................. 4.2 Configuring and using rules 127 ........................................................................................... 4.2 Firewall rules list 128 ...................................................................................................... 4.2 Adding or editing Firewall rules 129 ....................................................................................... 4.2 Firewall rule - Local 131 .................................................................................................... 4.2 Firewall rule - Remote 132 ................................................................................................. 4.2 Temporary IP address blacklist 133 ....................................................................................... 4.2 Trusted zone 134 ........................................................................................................... 4.2 Configuring zones 134 ..................................................................................................... 4.2 Firewall zones 134 ......................................................................................................... 4.2 Firewall log 135 ............................................................................................................ 4.2 Establishing connection - detection 136 .................................................................................. 4.2 Solving problems with ESET Firewall 137 ................................................................................. 4.2 Troubleshooting wizard 137 ............................................................................................... 4.2 Logging and creating rules or exceptions from log 137 .................................................................. 4.2 Create rule from log 138 ................................................................................................... 4.2 Creating exceptions from firewall notifications 138 ...................................................................... 4.2 Advanced PCAP logging 139 ............................................................................................... 4.2 Solving problems with protocol filtering 139 ..............................................................................
4.3 Web and email 140 .......................................................................................................... 4.3 Protocol filtering 142 ....................................................................................................... 4.3 Excluded applications 143 ................................................................................................. 4.3 Excluded IP addresses 143 ................................................................................................ 4.3 SSL/TLS 144 ................................................................................................................ 4.3 Certificates 146 ............................................................................................................ 4.3 Encrypted network traffic 146 ............................................................................................. 4.3 List of known certificates 147 ............................................................................................. 4.3 List of SSL/TLS filtered applications 148 .................................................................................. 4.3 Email client protection 148 ................................................................................................ 4.3 Email protocols 150 ........................................................................................................ 4.3 Email alerts and notifications 151 ......................................................................................... 4.3 Integration with email clients 152 ......................................................................................... 4.3 Microsoft Outlook toolbar 152 ............................................................................................. 4.3 Outlook Express and Windows Mail toolbar 153 .......................................................................... 4.3 Confirmation dialog 154 ................................................................................................... 4.3 Rescan messages 154 ..................................................................................................... 4.3 Antispam protection 155 ................................................................................................... 4.3 Antispam address books 157 .............................................................................................. 4.3 Blacklist/Whitelist/Exceptions list 158 ..................................................................................... 4.3 Add/Edit Blacklist/Whitelist/Exceptions address 158 .....................................................................

4.3 Web access protection 159 ................................................................................................ 4.3 Web access protection advanced setup 161 .............................................................................. 4.3 Web protocols 161 ......................................................................................................... 4.3 URL address management 162 ............................................................................................ 4.3 URL addresses list 163 ..................................................................................................... 4.3 Create new URL address list 164 .......................................................................................... 4.3 How to add URL mask 165 ................................................................................................. 4.3 Anti-Phishing protection 166 ...............................................................................................
4.4 Web control 168 .............................................................................................................. 4.4 Web control rules 169 ...................................................................................................... 4.4 Adding Web control rules 170 ............................................................................................. 4.4 Category groups 171 ....................................................................................................... 4.4 URL groups 173 ............................................................................................................ 4.4 Blocked webpage message customization 174 ...........................................................................
4.5 Updating the program 177 ............................................................................................... 4.5 Update setup 181 .......................................................................................................... 4.5 Update rollback 185 ........................................................................................................ 4.5 Program component update 186 .......................................................................................... 4.5 Connection options 187 .................................................................................................... 4.5 Update mirror 189 ......................................................................................................... 4.5 HTTP Server and SSL for the Mirror 190 ................................................................................... 4.5 Updating from the Mirror 191 .............................................................................................. 4.5 Troubleshooting Mirror update problems 193 ............................................................................ 4.5 How to create update tasks 194 ...........................................................................................
4.6 Tools 194 ....................................................................................................................... 4.6 Log files 195 ................................................................................................................ 4.6 Log filtering 198 ............................................................................................................ 4.6 Logging configuration 199 ................................................................................................. 4.6 Audit logs 201 .............................................................................................................. 4.6 Scheduler 202 .............................................................................................................. 4.6 Protection statistics 205 ................................................................................................... 4.6 Watch activity 206 ......................................................................................................... 4.6 ESET SysInspector 207 ..................................................................................................... 4.6 Cloud-based protection 208 ............................................................................................... 4.6 Exclusion filter for Cloud-based protection 211 ........................................................................... 4.6 Running processes 212 .................................................................................................... 4.6 Security report 214 ........................................................................................................ 4.6 Network connections 215 .................................................................................................. 4.6 ESET SysRescue Live 217 .................................................................................................. 4.6 Submission of samples for analysis 217 .................................................................................. 4.6 Select sample for analysis - Suspicious file 219 .......................................................................... 4.6 Select sample for analysis - Suspicious site 219 .......................................................................... 4.6 Select sample for analysis - False positive file 219 ....................................................................... 4.6 Select sample for analysis - False positive site 220 ...................................................................... 4.6 Select sample for analysis - Other 220 .................................................................................... 4.6 Notifications 220 ........................................................................................................... 4.6 Application notifications 222 ..............................................................................................

4.6 Desktop notifications 223 .................................................................................................. 4.6 Email notifications 224 ..................................................................................................... 4.6 Customization of notifications 226 ........................................................................................ 4.6 Quarantine 227 ............................................................................................................. 4.6 Proxy server setup 229 .................................................................................................... 4.6 Time slots 230 .............................................................................................................. 4.6 Microsoft Windows update 231 ............................................................................................ 4.6 License interval check 232 ................................................................................................
4.7 User interface 232 ........................................................................................................... 4.7 User interface elements 233 ............................................................................................... 4.7 Application statuses 234 ................................................................................................... 4.7 Access setup 235 ........................................................................................................... 4.7 Password for Advanced setup 236 ........................................................................................ 4.7 Alerts and message boxes 237 ............................................................................................ 4.7 Interactive alerts 239 ...................................................................................................... 4.7 Confirmation messages 241 ............................................................................................... 4.7 Advanced settings conflict error 241 ...................................................................................... 4.7 Restart required 242 ....................................................................................................... 4.7 Restart recommended 244 ................................................................................................ 4.7 Removable media 246 ..................................................................................................... 4.7 System tray icon 247 ...................................................................................................... 4.7 Context menu 248 ......................................................................................................... 4.7 Help and support 249 ...................................................................................................... 4.7 About ESET Endpoint Security 250 ........................................................................................ 4.7 Submit system configuration data 251 .................................................................................... 4.7 Profile manager 251 ....................................................................................................... 4.7 Keyboard shortcuts 252 .................................................................................................... 4.7 Diagnostics 252 ............................................................................................................ 4.7 Command line scanner 254 ................................................................................................ 4.7 ESET CMD 256 .............................................................................................................. 4.7 Idle-state detection 258 ................................................................................................... 4.7 Import and export settings 259 ........................................................................................... 4.7 Revert all settings to default 260 .......................................................................................... 4.7 Revert all settings in current section 260 ................................................................................. 4.7 Error while saving the configuration 260 .................................................................................. 4.7 Remote monitoring and management 261 ............................................................................... 4.7 ERMM Command Line 262 ................................................................................................. 4.7 List of ERMM JSON commands 264 ........................................................................................ 4.7 get protection-status 265 .................................................................................................. 4.7 get application-info 266 .................................................................................................... 4.7 get license-info 268 ........................................................................................................ 4.7 get logs 268 ................................................................................................................ 4.7 get activation-status 270 .................................................................................................. 4.7 get scan-info 270 ........................................................................................................... 4.7 get configuration 272 ...................................................................................................... 4.7 get update-status 273 ..................................................................................................... 4.7 start scan 273 ..............................................................................................................

4.7 start activation 274 ........................................................................................................ 4.7 start deactivation 275 ..................................................................................................... 4.7 start update 276 ........................................................................................................... 4.7 set configuration 277 ......................................................................................................
5 Common Questions 278 ......................................................................................................... 5.1 How to update ESET Endpoint Security 279 ........................................................................ 5.2 How to activate ESET Endpoint Security 279 ......................................................................
5.2 Entering your License Key during activation 280 ......................................................................... 5.2 Login to ESET Business Account 281 ...................................................................................... 5.2 How to use legacy license credentials to activate a newer ESET endpoint product 281 ...............................
5.3 How to remove a virus from my PC 281 .............................................................................. 5.4 How to allow communication for a certain application 282 ................................................... 5.5 How to create a new task in Scheduler 282 ........................................................................
5.5 How to schedule a weekly computer scan 283 ........................................................................... 5.6 How to connect ESET Endpoint Security to ESET Security Management Center 284 .................
5.6 How to use Override mode 284 ........................................................................................... 5.6 How to apply a recommended policy for ESET Endpoint Security 286 ..................................................
5.7 How to configure a mirror 289 .......................................................................................... 5.8 How do I upgrade to Windows 10 with ESET Endpoint Security 289 ....................................... 5.9 How to activate Remote monitoring and management 290 ................................................... 5.10 How to block the download of specific file types from the Internet 293 ................................ 5.11 How to minimize the ESET Endpoint Security user interface 294 .........................................
6 End User License Agreement 294 ........................................................................................... 7 Privacy Policy 302 ...................................................................................................................

1
ESET Endpoint Security 7ESET Endpoint Security 7 represents a new approach to truly integrated computer security.The most recent version of the ThreatSense® scanning engine, combined with our customFirewall and Antispam module, utilizes speed and precision to keep your computer safe. Theresult is an intelligent system that is constantly on alert for attacks and malicious softwareendangering your computer.
ESET Endpoint Security 7 is a complete security solution produced from our long-term effortto combine maximum protection and a minimal system footprint. The advanced technologies,based on artificial intelligence, are capable of proactively eliminating infiltration by viruses,spyware, trojan horses, worms, adware, rootkits, and other Internet-borne attacks withouthindering system performance or disrupting your computer.
ESET Endpoint Security 7 is primarily designed for use on workstations in a small businessenvironment.
In the Using ESET Endpoint Security by itself section you can find help topics divided intoseveral chapters and subchapters to provide orientation and context, including Download,Installation and Activation.
Using ESET Endpoint Security with ESET Security Management Center in an enterpriseenvironment allows you to easily manage any number of client workstations, apply policiesand rules, monitor detections and remotely configure clients from any networked computer.
The Common Questions chapter covers some of the most frequently asked questions andproblems encountered.
Features and benefits
Redesigned user interface
The user interface in this version has been significantlyredesigned and simplified based on the results of usabilitytesting. All GUI wording and notifications have been carefullyreviewed and the interface now provides support for right-to-left languages such as Hebrew and Arabic. Online Help isnow integrated into ESET Endpoint Security and offersdynamically updated support content.

2
Antivirus and antispyware
Proactively detects and cleans more known and unknownviruses, worms, trojans and rootkits. Advanced heuristicsflags even never-before-seen malware, protecting you fromunknown threats and neutralizing them before they can doany harm. Web access protection and Anti-Phishing works bymonitoring communication between web browsers andremote servers (including SSL). Email client protectionprovides control of email communication received throughthe POP3(S) and IMAP(S) protocols.
Regular updatesRegularly updating the detection engine (previously knownas "virus signature database") and program modules is thebest way to ensure the maximum level of security on yourcomputer.
ESET LiveGrid®(Cloud-poweredReputation)
You can check the reputation of running processes and filesdirectly from ESET Endpoint Security.
Remote management
ESET Security Management Center allows you to manageESET products on workstations, servers and mobile devicesin a networked environment from one central location. Usingthe ESET Security Management Center Web Console (ESMCWeb Console), you can deploy ESET solutions, managetasks, enforce security policies, monitor system status andquickly respond to problems or threats on remotecomputers.
Network attack protectionAnalyses the content of network traffic and protects fromnetwork attacks. Any traffic which is considered harmful willbe blocked.
Web control (ESETEndpoint Security only)
Web control lets you block webpages that may containpotentially offensive material. In addition, employers orsystem administrators can prohibit access to more than 27pre-defined website categories and over 140 subcategories.
What's new in version 7ESET Endpoint Security 7 has been released and is available to download.
What's new in ESET Endpoint Security 7.0
• New design of graphical user interface.
• Drag and drop files scan – You can scan a file or folder manually just by moving the file orfolder to the marked area.
• Network attack protection is now available in ESET Endpoint Antivirus. For moreinformation, see Network attack protection.
• In Protection status, quick action link can be disabled by ESET Security ManagementCenter policy.

3
• Device control rules and Web control rules can be applied now for a certain time period.For more information, see Time slots.
What's new in ESET Endpoint Security 7.1
• New type of logging – Advanced type of logging is now available. For more information,see Audit logs.
What's new in ESET Endpoint Security 7.2
• Advanced machine learning is an advanced layer of protection that improves detectionbased on machine learning. Read more about this type of protection in the Glossary. TheDetection engine setup no longer provides ON/OFF switches as for version 7.1 and below.ON/OFF buttons are replaced with four thresholds - "Aggressive", "Balanced", "Cautious"and "Off".
• Latvian localization added.
• Changes to exclusions. Performance exclusions allow you to exclude files and foldersfrom scanning. Detection exclusions allow you to exclude objects from cleaning using thedetection name, path or its hash.
• New HIPS program module includes Deep Behavioral Inspection, which analyzes thebehavior of all programs running on the computer and warns you if the behavior of theprocess is malicious. Find more about HIPS in our help pages.
• Configurable interactive alerts allows you to adjust behavior for configurable interactivealerts (for example, hide the "Restart recommended" alert on endpoint machines).
What's new in ESET Endpoint Security 7.3
• This minor release comes with various bug fixes and performance improvements.
For additional information and screenshots about the new features in ESET Endpoint Securityplease read the following ESET Knowledgebase article:
• What's new in ESET Endpoint Security 7?
System requirementsFor seamless operation of ESET Endpoint Security, the system should meet the followinghardware and software requirements (default product settings):

4
Processors SupportedIntel or AMD processor, 32-bit (x86) with SSE2 instruction set or 64bit (x64), 1 GHz or higher
Operating SystemsMicrosoft® Windows® 10Microsoft® Windows® 8.1Microsoft® Windows® 8
Microsoft® Windows® 7 SP1 with latest Windows updates (at least KB4474419 andKB4490628)
Windows XP and Windows Vista is no longer supported for version 7.
Other• System requirements of the operating system and other software installed on thecomputer are fulfilled
• 0.3 GB of free system memory (see Note 1)
• 1 GB of free disk space (see Note 2)
• Minimum display resolution 1024x768
• Internet connection or a local area network connection to a source (see Note 3) ofproduct updates
Although it might be possible to install and run the product on systems that do not meetthese requirements, we recommend prior usability testing to be done based on performancerequirements.
Note(1): The product might use more memory if the memory would be otherwiseunused on a heavily infected computer or when huge lists of data are beingimported into the product (e.g. URL white lists).(2): The disk space needed to download the installer, install the product and tokeep a copy of the installation package in program data as well as backups ofproduct updates to support the rollback feature. The product might use moredisk space under different settings (e.g. when more product update backupversions are stored, memory dumps or huge amounts of log records are kept) oron an infected computer (e.g. due to the quarantine feature). We recommend tokeep enough free disk space to support the updates of the operating systemand for ESET product updates.(3): Although not recommended, the product might be updated manually froma removable media.

5
Supported languagesESET Endpoint Security is available for installation and download in the following languages.
Language Language code LCIDEnglish (United States) en-US 1033Arabic (Egypt) ar-EG 3073Bulgarian bg-BG 1026Chinese Simplified zh-CN 2052Chinese Traditional zh-TW 1028Croatian hr-HR 1050Czech cs-CZ 1029Estonian et-EE 1061Finnish fi-FI 1035French (France) fr-FR 1036French (Canada) fr-CA 3084German (Germany) de-DE 1031Greek el-GR 1032*Hebrew he-IL 1037Hungarian hu-HU 1038*Indonesian id-ID 1057Italian it-IT 1040Japanese ja-JP 1041Kazakh kk-KZ 1087Korean ko-KR 1042*Latvian lv-LV 1062Lithnuanian lt-LT 1063Nederlands nl-NL 1043Norwenian nn-NO 1044Polish pl-PL 1045Portuguese (Brazil) pt-BR 1046Romanian ro-RO 1048Russian ru-RU 1049Spanish (Chile) es-CL 13322Spanish (Spain) es-ES 3082Swedish (Sweden) sv-SE 1053Slovak sk-SK 1051Slovenian sl-SI 1060Thai th-TH 1054Turkish tr-TR 1055*Vietnamese vi-VN 1066
* ESET Endpoint Security is available in this language, but Online user guide is not available(redirects to the English version).

6
To change the language of this Online user guide, see the language select box (in the upper-right corner).
PreventionWhen you work with your computer, and especially when you browse the Internet, pleasekeep in mind that no antivirus system in the world can completely eliminate the risk ofdetections and remote attacks. To provide maximum protection and convenience, it isessential that you use your antivirus solution correctly and adhere to several useful rules:
Update regularlyAccording to statistics from ESET LiveGrid®, thousands of new, unique infiltrations arecreated each day in order to bypass existing security measures and bring profit to theirauthors – all at the expense of other users. The specialists at the ESET Virus Lab analyzethese threats on a daily basis and prepare and release updates in order to continuallyimprove the level of protection for our users. To ensure the maximum effectiveness of theseupdates it is important that updates are configured properly on your system. For moreinformation on how to configure updates, see the Update setup chapter.
Download security patchesThe authors of malicious software often exploit various system vulnerabilities in order toincrease the effectiveness of spreading malicious code. With this in mind, softwarecompanies watch closely for any vulnerabilities in their applications to appear and releasesecurity updates to eliminate potential threats on a regular basis. It is important to downloadthese security updates as they are released. Microsoft Windows and web browsers such asInternet Explorer are two examples of programs for which security updates are released on aregular schedule.
Back up important dataMalware writers usually do not care about user’s needs, and the activity of maliciousprograms often leads to total malfunction of an operating system and the loss of of importantdata. It is important to regularly back up your important and sensitive data to an externalsource such as a DVD or external hard drive. This will make it far easier and faster to recoveryour data in the event of system failure.
Regularly scan your computer for virusesDetection of more known and unknown viruses, worms, trojans and rootkits are handled bythe Real-time file system protection module. This means that every time you access or opena file, it is scanned for a malware activity. We recommend that you run a full Computer scanat least once a month because malware signatures may vary and the detection engineupdates itself each day.

7
Follow basic security rulesThis is the most useful and most effective rule of all – always be cautious. Today, manyinfiltrations require user intervention in order to be executed and distributed. If you arecautious when opening new files, you will save considerable time and effort that wouldotherwise be spent cleaning infiltrations. Here are some useful guidelines:
• Do not visit suspicious websites with multiple pop-ups and flashing advertisements.
• Be careful when installing freeware programs, codec packs, etc. Only use safeprograms and only visit safe Internet websites.
• Be cautious when opening email attachments, particularly those from mass-mailedmessages and messages from unknown senders.
• Don't use an Administrator account for everyday work on your computer.
Help pagesWelcome to the ESET Endpoint Security help files. The information provided here willfamiliarize you with your product and help you make your computer more secure.
Getting startedBefore you start using ESET Endpoint Security please note that our product can be used byusers connected via ESET Security Management Center or by itself. We also recommend thatyou familiarize yourself with the various types of detections and remote attacks you mightencounter when using your computer.
See new features to learn about features introduced in this version of ESET EndpointSecurity. We have also prepared a guide to help you setup and customize the basic settingsof ESET Endpoint Security.
How to use ESET Endpoint Security Help pagesHelp topics are divided into several chapters and subchapters to provide orientation andcontext. You can find related information by browsing the help pages structure.
Press F1 to learn more about any window in the program. The help page related to thewindow you are currently viewing will be displayed.
You can search the Help pages by keyword or by typing words or phrases. The differencebetween these two methods is that a keyword may be logically related to help pages that donot contain that particular keyword in the text. Searching by words and phrases will searchthe content of all pages and display only those containing the searched word or phrase.

8
For consistency and to help prevent confusion, terminology used in this guide is based on theESET Endpoint Security parameter names. We also use a uniform set of symbols to highlighttopics of particular interest or significance.
NoteA note is just a short observation. Although you can omit it, notes can providevaluable information, such as specific features or a link to some related topic.
ImportantThis requires your attention that we encourage you not to skip over. Usually, itprovides non-critical but significant information.
WarningThis is information that requires extra attention and caution. Warnings areplaced specifically to deter you from committing potentially harmful mistakes.Please read and understand text placed in warning brackets, as it referenceshighly sensitive system settings or something risky.
ExampleThis is a use case or a practical example that aims to help you understand howa certain function or feature can be used.
Convention MeaningBold type Names of interface items such as boxes and option buttons.Italic type Placeholders for information you provide. For example, file name or path
means you type the actual path or a name of file.Courier New Code samples or commands.Hyperlink Provides quick and easy access to cross-referenced topics or external web
location. Hyperlinks are highlighted in blue and may be underlined.%ProgramFiles%The Windows system directory where programs installed on Windows are
stored.
Online Help is the primary source of help content. The latest version of Online Help willautomatically be displayed when you have a working internet connection.
Documentation for endpoints managedremotelyESET business products as well as ESET Endpoint Security can be managed remotely onclient workstations, servers and mobile devices in a networked environment from one centrallocation. System administrators who manage more than 10 client workstations may considerdeploying one of the ESET remote management tools to deploy ESET solutions, managetasks, enforce security policies, monitor system status and quickly respond to problems orthreats on remote computers from one central location.

9
ESET remote management toolsESET Endpoint Security can be managed remotely by either ESET Security ManagementCenter or ESET PROTECT Cloud.
• Introduction to ESET Security Management Center
• Introduction to ESET PROTECT Cloud
Third-party remote management tools• Remote monitoring and management (RMM)
Best practices• Connect all endpoints with ESET Endpoint Security to ESET Security Management Center
• Protect the Advanced setup settings on connected client computers to avoidunauthorized modifications
• Apply a recommended policy to enforce available security features
• Minimize the user interface – to reduce or limit user interaction with ESET EndpointSecurity
How to guides• How to use Override mode
• How to deploy ESET Endpoint Security using GPO or SCCM
Introduction to ESET SecurityManagement CenterESET Security Management Center allows you to manage ESET products on workstations,servers and mobile devices in a networked environment from one central location.
ESET Security Management Center (ESMC) is a new generation of remote managementsystem that differs significantly from previous versions of ESET Remote Administrator (ERA).Since the architecture is completely different, ESET Security Management Center 7 is onlypartially compatible with ERA 6 and there is no backward compatibility with ERA 5. However,compatibility with previous versions of ESET Security products remains.
To perform a complete deployment of the ESET security solutions portfolio, the followingcomponents must be installed (Windows and Linux platforms):

10
• ESMC Server
• ESMC Web Console
• ESET Management Agent
The following supporting components are optional, we recommend that you install them forbest performance of the application on the network:
• RD Sensor
• Apache HTTP Proxy
• Mobile Device Connector
Using the ESET Security Management Center Web Console (ESMC Web Console), you candeploy ESET solutions, manage tasks, enforce security policies, monitor system status andquickly respond to problems or threats on remote computers.
More informationFor more information please see the ESET Security Management Center Onlineuser guide.
Introduction to ESET PROTECT CloudESET PROTECT Cloud allows you to manage ESET products on workstations and servers in anetworked environment from one central location without the requirement to have a physicalor virtual server like for ESMC. Using the ESET PROTECT Cloud, you can deploy ESETsolutions, manage tasks, enforce security policies, monitor system status and quicklyrespond to problems or threats on remote computers.
• Read more about this in the ESET PROTECT Cloud Online user guide
Password protected settingsTo provide maximum security for your system, ESET Endpoint Security needs to beconfigured correctly. Any unqualified change or setting may result in lowering the clientsecurity and level of protection. To limit user access to advanced settings, an administratorcan password protect the settings.
The administrator can create a policy to password protect the Advanced setup settings forESET Endpoint Security on connected client computers. To create a new policy:
1. In the ESMC Web Console, click Policies in the left-hand main menu.
2. Click New Policy.

11
3. Name your new policy and optionally, give it a short description. Click the Continuebutton.
4. From the list of products, select ESET Endpoint for Windows.
5. Click User interface in the Settings list and expand Access setup.
6. According to a version of ESET Endpoint Security, click the slider bar to enablePassword to protect settings. Note that ESET Endpoint products version 7 offersenhanced protection. If you have both version 7 and version 6 of Endpoint products inthe network, set a different password for each. We recommend that you do not set thepassword only in the filed for version 6 as it will lower the security on Endpoint productswith version 7.
7. In the pop-up window, create a new password, confirm it and click OK. Click Continue.
8. Assign the policy to clients. Click Assign and select the computers or groups ofcomputers to password protect. Click OK to confirm.
9. Check that all desired client computers are in the target list and click Continue.
10. Review the policy settings in the summary and click Finish to save your new policy.

12
What are policiesThe administrator can push specific configurations to ESET products running on clientcomputers using policies from the ESMC Web Console. A policy can be applied directly toindividual computers as well as to groups of computers. You can also assign multiple policiesto a computer or to a group.
A user must have the following permissions to create a new policy: Read permission to readthe list of policies, Use permission to assign policies to target computers and Writepermission to create, modify or edit policies.
Policies are applied in the order that Static Groups are arranged. This is not true for DynamicGroups, where policies are applied to child Dynamic Groups first. This allows you to applypolicies with greater impact to the top of the Group tree and apply more specific policies tosubgroups. Using flags, an ESET Endpoint Security user with access to groups located higherin the tree can override the policies of lower groups. The algorithm is explained in ESMCOnline user guide.
Assign more generic policiesWe recommend that you assign more generic policies (for example, the updateserver policy) to groups that are higher within the group tree. More specificpolicies (for example, device control settings) should be assigned deeper in thegroup tree. The lower policy usually overrides the settings of the upper policieswhen merged (unless defined otherwise using policy flags).
Merging policiesA policy applied to a client is usually the result of multiple policies being merged into onefinal policy. Policies are merged one by one. When merging policies, the general rule is thatthe later policy always replaces the settings set by the former one. To change this behavior,you can use policy flags (Available for each setting).
When creating policies, you will notice that some settings have an additional rule(replace/append/prepend) that you can configure.
• Replace - the whole list is replaced, adds new values and removes all previous one.
• Append - items are added to the bottom of the currently applied list (must be anotherpolicy, the local list is always overwritten).
• Prepend - items are added to the top of the list (the local list is overwritten).
ESET Endpoint Security supports merging of local settings with the remote policies in a newway. If the setting is a list (for example a list of blocked websites) and remote policy conflictswith an existing local setting, the remote policy overwrites it. You can choose how to combine

13
local and remote lists by selecting the different merging rules for:
• Merging settings for remote policies.
• Merging of remote and local policies - local settings with the resulting remote policy.
To learn more about merging policies, follow the ESMC Online user guide and see theexample.
How flags workThe policy that is applied to a client computer is usually the result of multiple policies beingmerged into one final policy. When merging policies, you can adjust the expected behavior ofthe final policy, due to the order of applied policies, by using policy flags. Flags define howthe policy will handle a specific setting.
For each setting, you can select one of the following flags:
Not apply Any setting with this flag is not set by the policy. Since the setting is not set by thepolicy, it can be changed by other policies applied later.
Apply
Settings with the Apply flag will be applied to the client computer. However, whenmerging policies, it can be overwritten by other policies applied later. When a policy issent to a client computer containing settings marked with this flag, those settings willchange the local configuration of the client computer. Since the setting is not forced, itcan still be changed by other policies applied later.
Force
Settings with the Force flag have priority and cannot be overwritten by any policyapplied later (even if it also has a Force flag). This assures that other policies appliedlater won't be able to change this setting during merging. When a policy is sent to aclient computer containing settings marked with this flag, those settings will change thelocal configuration of the client computer.

14
EXAMPLE: Allow users to see all policiesScenario: The Administrator wants to allow user John to create or edit policiesin his home group and see all policies created by the Administrator includingPolicies that have Force flags. The Administrator wants John to be able to seeall policies, but not edit existing policies created by Administrator. John can onlycreate or edit policies within his Home Group, San Diego.Solution: Administrator has to follow these steps:Create custom static groups and permission sets1. Create a new Static Group called San Diego.2. Create a new Permission set called Policy - All John with access to the StaticGroup All and with Read permission for Policies.3. Create a new Permission set called Policy John with access to Static GroupSan Diego, with functionality access Write permission for Group & Computersand Policies. This permission set allows John to create or edit policies in hisHome Group San Diego.4. Create a new user John and in the Permission Sets section select Policy - AllJohn and Policy John.Create policies5. Create a new policy All- Enable Firewall, expand the Settings section, selectESET Endpoint for Windows, navigate to Personal Firewall > Basic andapply all settings by Force flag. Expand the Assign section and select theStatic Group All.6. Create a new policy John Group- Enable Firewall, expand the Setting section,select ESET Endpoint for Windows, navigate to Personal Firewall > Basicand apply all settings by Apply flag. Expand the Assign section and selectStatic Group San Diego.ResultThe Policies created by Administrator will be applied first since Force flagswere applied to the policy settings. Settings with the Force flag applied havepriority and cannot be overwritten by another policy applied later. The policiesthat are created by user John will be applied after the policies created by theAdministrator.To see the final policy order, navigate to More > Groups > San Diego. Selectthe computer and select Show details. In the Configuration section, clickApplied policies.
Using ESET Endpoint Security by itselfThis section and the Work with ESET Endpoint Security section of this User Guide is intendedfor users who are using ESET Endpoint Security without ESET Security Management Center orESET PROTECT Cloud. All features and functionalities of ESET Endpoint Security are fullyaccessible depending on a user's account rights.
Installation methodsThere are several ESET Endpoint Security version 7.x installation methods on a clientworkstation, unless you deploy ESET Endpoint Security remotely to client workstations via

15
ESET Security Management Center or ESET PROTECT Cloud.
• Click here if you want to install or upgrade ESET Endpoint Security to version 6.6.x
Method Purpose Download linkInstallation with ESETAV Remover
The ESET AV Remover tool will help you to removealmost any antivirus software previously installed onyour system before proceeding with installation.
Download 64-bitDownload 32-bit
Installation (.exe) Installation process without ESET AV Remover. N/AInstallation (.msi) In business environments, the .msi installer is the
preferred installation package. This is mainly due tooffline and remote deployments that use varioustools such as ESET Security Management Center.
Download 64-bitDownload 32-bit
Command-lineinstallation
ESET Endpoint Security can be installed locally usingcommand-line or remotely using a client task fromESET Security Management Center.
N/A
Deployment usingGPO or SCCM
Use management tools such as GPO or SCCM todeploy ESET Management Agent and ESET EndpointSecurity to client workstations.
N/A
Deployment usingRMM tools
ESET DEM plugins for the Remote Management andMonitoring (RMM) tool allows you to deploy ESETEndpoint Security to client workstations.
N/A
ESET Endpoint Security is available in more than 30 languages.
Installation with ESET AV RemoverBefore you continue with the installation process, it is important that you uninstall anyexisting security application on the computer. Select the check box next to I want touninstall unwanted antivirus applications using ESET AV Remover to have ESET AVRemover scan your system and remove any supported security applications. Leave the checkbox deselected and click Continue to install ESET Endpoint Security without running ESET AVRemover.

16
ESET AV RemoverThe ESET AV Remover tool will help you to remove almost any antivirus software previouslyinstalled on your system. Follow the instructions below to remove an existing antivirusprogram using ESET AV Remover:
1. To view a list of antivirus software that ESET AV Remover can remove, visit this ESETKnowledgebase article.
2. Read the End-User License Agreement and click Accept to acknowledge youracceptance. Clicking Decline will continue to installation of ESET Endpoint Securitywithout removal of existing security application on the computer.

17
3. ESET AV Remover will begin searching your system for antivirus software.
4. Select any listed antivirus applications and click Remove. Removal may take amoment.
5. When removal is successful, click Continue.

18
6. Restart your computer to apply changes and continue with installation of ESET EndpointSecurity. If uninstallation is unsuccessful, see the Uninstallation with ESET AV Removerended with an error section of this guide.
Uninstallation using ESET AV Removerended with errorIf you are not able to remove an antivirus program using ESET AV Remover, you will receive anotification that the application you are trying to remove might not be supported by ESET AVRemover. Visit the list of supported products or uninstallers for common Windows antivirussoftware on ESET Knowledgebase to see if this specific program can be removed.

19
When the uninstallation of the security product was unsuccessful or some of its componentwas uninstalled partially, you are prompted to Restart and rescan. Confirm UAC afterstartup and continue with the scanning and uninstallation process.
If necessary, contact ESET Technical Support to open a support request and have theAppRemover.log file available to assist ESET Technicians. The AppRemover.log file islocated in the eset folder. Browse to %TEMP% in Windows Explorer to access this folder.ESET Technical Support will respond as quickly as possible to help resolve your issue.
Installation (.exe)Once you launch the .exe installer, the installation wizard will guide you through theinstallation process.
ImportantMake sure that no other antivirus programs are installed on your computer. Iftwo or more antivirus solutions are installed on a single computer, they mayconflict with each other. We recommend that you uninstall any other antivirusprograms on your system. See our knowledgebase article for a list of uninstallertools for common antivirus software (available in English and several otherlanguages).
1. Read the End User License Agreement and click I Accept to acknowledge youracceptance of the End-User License Agreement. Click Next after you accept the terms tocontinue with installation.

20
2. Choose whether enable ESET LiveGrid® feedback system. ESET LiveGrid® helps ensurethat ESET is immediately and continuously informed about new infiltrations, which allowsus to better protect our customers. The system allows you to submit new threats to theESET Virus Lab, where they are analyzed, processed and added to the detection engine.
3. The next step in the installation process is to configure detection of Potentiallyunwanted applications. See the Potentially unwanted applications chapter for more details. You can install ESET Endpoint Security to a specific folder by clicking Change installationfolder.
5. The final step is to confirm installation by clicking Install. After installation is complete,you will be prompted to activate ESET Endpoint Security.

21
Change installation folder (.exe)After selecting your preference for detection of potentially unwanted applications and clickingChange installation folder, you will be prompted to select a location for the installationESET Endpoint Security folder. By default, the program installs to the following directory:
C:\Program Files\ESET\ESET Security\
You can specify a location for program modules and data. By default, they are installed to thefollowing directories, respectfully:
C:\Program Files\ESET\ESET Security\Modules\C:\ProgramData\ESET\ESET Security\
Click Browse to change these locations (not recommended).

22
Click Continue and then Install to start installation.
Installation (.msi)Once you launch the .msi installer, the installation wizard will guide you through theinstallation process.
Purpose of the .msi installerIn business environments, the .msi installer is the preferred installationpackage. This is mainly due to offline and remote deployments that use varioustools such as ESET Security Management Center.
ImportantMake sure that no other antivirus programs are installed on your computer. Iftwo or more antivirus solutions are installed on a single computer, they mayconflict with each other. We recommend that you uninstall any other antivirusprograms on your system. See our knowledgebase article for a list of uninstallertools for common antivirus software (available in English and several otherlanguages).
1. Select a desired language and click Next.

23
2. Read the End User License Agreement and click I Accept the terms in the LicenseAgreement to acknowledge your acceptance of the End-User License Agreement. ClickNext after you accept the terms to continue with installation.
3. Select your preference for ESET LiveGrid® feedback system. ESET LiveGrid® helpsensure that ESET is immediately and continuously informed about new infiltrations, whichallows us to better protect our customers. The system allows you to submit new threats tothe ESET Virus Lab, where they are analyzed, processed and added to the detectionengine.

24
4. The next step in the installation process is to configure the detection of Potentiallyunwanted applications. See the Potentially unwanted applications chapter for more details. Click Advanced settings if you wish to proceed with Advanced installation (.msi).
5. The final step is to confirm installation by clicking Install. After installation is complete,you will be prompted to activate ESET Endpoint Security.
Advanced installation (.msi)Advanced installation allow you to customize a number of installation parameters notavailable when performing a typical installation.

25
5. After selecting your preference for detection of Potentially unwanted applications andclicking Advanced settings, you will be prompted to select a location for the installationESET Endpoint Security folder. By default, the program installs to the following directory:
C:\Program Files\ESET\ESET Security\
You can specify a location for program modules and data. By default, they are installed to thefollowing directories, respectfully:
C:\Program Files\ESET\ESET Security\Modules\C:\ProgramData\ESET\ESET Security\
Click Browse to change these locations (not recommended).
6. Choose which product components will be installed. Product components in theComputer section include Real-time file system protection, Computer scan, Documentprotection and Device control. Please note that the first two components are mandatoryfor your security solution to work. The Network section offers the option to install ESETfirewall, which monitors all incoming and outgoing network traffic and applies rules forindividual network connections. Firewall also provides protection against attacks fromremote computers. Network attack protection (IDS) analyses the content of network trafficand protects from network attacks. Any traffic which is considered harmful will be blocked.Components in the Web and email section are responsible for your protection while youare browsing the Internet and communicating via email. The Update mirror component canbe used to update other computers on your network. Remote Monitoring and Management(RMM) is the process of supervising and controlling software systems using a locallyinstalled agent that can be accessed by a management service provider.

26
7. The final step is to confirm installation by clicking Install.
Command-line installationYou can install ESET Endpoint Security locally using the command-line or you can installremotely using a client task from ESET Security Management Center.
Supported parameters
APPDIR=<path>
• Path – Valid directory path.
• Application installation directory.
APPDATADIR=<path>
• Path – Valid directory path.
• Application Data installation directory.
MODULEDIR=<path>
• Path – Valid directory path.
• Module installation directory.
ADDLOCAL=<list>
• Component installation – list of non-mandatory features to be installed locally.

27
• Usage with ESET .msi packages: ees_nt64_ENU.msi /qn ADDLOCAL=<list>
• For more information about the ADDLOCAL property seehttp://msdn.microsoft.com/en-us/library/aa367536%28v=vs.85%29.aspx
ADDEXCLUDE=<list>
• The ADDEXCLUDE list is a comma-separated list of all feature names not to beinstalled, as a replacement for the obsolete REMOVE.
• When selecting a feature not to install, then the whole path (i.e., all its sub-features)and related invisible features must be explicitly included in the list.
• Usage with ESET .msi packages: ees_nt64_enu.msi /qn ADDEXCLUDE=Firewall,Network
NoteADDEXCLUDE cannot be used together with ADDLOCAL.
See documentation for the msiexec version used for the appropriate command line switches.
Rules• The ADDLOCAL list is a comma separated list of all feature names to be installed.
• When selecting a feature to install, the whole path (all parent features) must beexplicitly included in the list.
• See additional rules for correct usage.
Components and features
NoteComponent installation using ADDLOCAL/ADDEXCLUDE parameters will notwork with ESET Endpoint Antivirus.
The features are divided into 4 categories:
• Mandatory – the feature will always be installed.
• Optional – the feature can be deselected so that it is not installed.
• Invisible – logical feature that is mandatory for other features to work properly.
• Placeholder – feature with no effect on the product, but must be listed with sub-features.
The feature set of ESET Endpoint Security is following:

28
Description Feature Name Feature Parent PresenceBase program components Computer PlaceholderDetection engine Antivirus Computer MandatoryDetection engine / Malware scans Scan Computer MandatoryDetection engine / Real-time filesystem protection
RealtimeProtection Computer Mandatory
Detection engine / Malware scans /Document protection
DocumentProtection Antivirus Optional
Device control DeviceControl Computer OptionalNetwork protection Network PlaceholderNetwork protection / Firewall Firewall Network OptionalNetwork protection / Networkattack protection / ...
IdsAndBotnetProtection Network Optional
Web and e-mail WebAndEmail PlaceholderWeb and e-mail / Protocol filtering ProtocolFiltering WebAndEmail InvisibleWeb and e-mail / Web accessprotection
WebAccessProtection WebAndEmail Optional
Web and e-mail / E-mail clientprotection
EmailClientProtection WebAndEmail Optional
Web and e-mail / E-mail clientprotection / Email clients
MailPlugins EmailClientProtection Invisible
Web and e-mail / E-mail clientprotection / Antispam protection
Antispam EmailClientProtection Optional
Web and e-mail / Web control WebControl WebAndEmail OptionalTools / ESET RMM Rmm OptionalUpdate / Profiles / Update mirror UpdateMirror OptionalESET Enterprise Inspector plugin EnterpriseInspector Invisible
Group feature set:
Description Feature Name Feature PresenceAll mandatory features _Base InvisibleAll available features ALL Invisible
Additional rules
• If any of the WebAndEmail features are selected for installation, the invisibleProtocolFiltering feature must be included in the list.
• Names of all the features are case sensitive, for example UpdateMirror is not equal toUPDATEMIRROR.
List of configuration propertiesProperty Value FeatureCFG_POTENTIALLYUNWANTED_ENABLED= 0 - Disabled
1 - EnabledPUA detection

29
CFG_LIVEGRID_ENABLED= See below See the LiveGrid property belowFIRSTSCAN_ENABLE= 0 - Disabled
1 - EnabledSchedule and run a Computer scanafter installation
CFG_PROXY_ENABLED= 0 - Disabled1 - Enabled
Proxy server settings
CFG_PROXY_ADDRESS= <ip> Proxy server IP addressCFG_PROXY_PORT= <port> Proxy server port numberCFG_PROXY_USERNAME= <username> User name for authenticationCFG_PROXY_PASSWORD= <password> Password for authenticationACTIVATION_DATA= See below Product activation, License Key or
offline license fileACTIVATION_DLG_SUPPRESS= 0 - Disabled
1 - EnabledWhen set to "1", do not show theproduct activation dialog after thefirst start
ADMINCFG= <path> Path to exported XML configuration(default value cfg.xml)
Configuration properties only in ESET Endpoint Security
CFG_EPFW_MODE=
0 - Automatic (default)1 - Interactive2 - Policy-based3 - Learning
Firewall filtering mode
CFG_EPFW_LEARNINGMODE_ENDTIME= <timestamp> End date of the LearningMode as Unix timestamp
LiveGrid® property
When installing ESET Endpoint Security with CFG_LIVEGRID_ENABLED, the behavior of theproduct after the installation will be:
Feature CFG_LIVEGRID_ENABLED=0 CFG_LIVEGRID_ENABLED=1ESET LiveGrid® reputationsystem
On On
ESET LiveGrid® feedback system Off OnSubmit anonymous statistics Off On
ACTIVATION_DATA property
Format MethodACTIVATION_DATA=key:AAAA-BBBB-CCCC-DDDD-EEEE Activation using ESET
License Key (Internetconnection should beactive)
ACTIVATION_DATA=offline:C:\ProgramData\ESET\ESETSecurity\license.lf
Activation using anoffline license file

30
Language properties
ESET Endpoint Security language (you must specify both properties).
Property ValuePRODUCT_LANG= LCID Decimal (Locale ID), for example 1033 for English (United
States), see the list of language codes.PRODUCT_LANG_CODE= LCID String (Language Culture Name) in lowercase, for example en-
us for English - United States, see the list of language codes.
Command line installation examples
ImportantMake sure that you read the End User License Agreement and haveadministrative privileges prior to running the installation.
ExampleExclude the NetworkProtection section from the installation (you must also specifyall child features):msiexec /qn /i ees_nt64.msi ADDEXCLUDE=Network,Firewall,IdsAndBotnetProtection
ExampleIf you want your ESET Endpoint Security to be automatically configured after theinstallation, you can specify basic configuration parameters within theinstallation command.Install ESET Endpoint Security with ESET LiveGrid® enabled:msiexec /qn /i ees_nt64.msi CFG_LIVEGRID_ENABLED=1
ExampleInstall to a different application installation directory than the default.msiexec /qn /i ees_nt64_enu.msi APPDIR=C:\ESET\
ExampleInstall and activate ESET Endpoint Security using your ESET License Key.msiexec /qn /i ees_nt64_enu.msi ACTIVATION_DATA=key:AAAA-BBBB-CCCC-DDDD-EEEE
ExampleSilent installation with detailed logging (useful for troubleshooting), and RMMonly with mandatory components:msiexec /qn /i ees_nt64.msi /l*xv msi.log ADDLOCAL=_Base,Rmm

31
ExampleForced silent full installation with a specified language.msiexec /qn /i ees_nt64.msi ADDLOCAL=ALL PRODUCT_LANG=1033 PRODUCT_LANG_CODE=en-us
Post-installation command line options• ESET CMD – import an .xml configuration file or turn on/off a security feature
• Command line scanner – run a Computer scan from the command line
Deployment using GPO or SCCMApart from installing ESET Endpoint Security directly on a client workstation or remotelydeploying using a Server task in ESMC, you can also install using management tools such asGroup Policy Object (GPO), Software Center Configuration Manager (SCCM), Symantec Altirisor Puppet.
Managed (recommended)For managed computers, we first install ESET Management Agent, then deploy ESET EndpointSecurity via ESET Security Management Center (ESMC). ESMC must be installed in yournetwork.
1. Download the standalone installer for ESET Management Agent.
2. Prepare the GPO/SCCM remote deployment script.
3. Deploy ESET Management Agent using either GPO or SCCM.
4. Ensure that the client computers has been added to ESMC.
5. Deploy and activate ESET Endpoint Security to your client computers.
Illustrated instructionsThe following ESET Knowledgebase article may only be available in English:• Deploy the ESET Management Agent via SCCM or GPO (7.x)• Deploy the ESET Management Agent using a Group Policy Object (GPO)

32
UnmanagedFor unmanaged computers, you can deploy ESET Endpoint Security directly to clientworkstations. This is not recommended because you will not be able to monitor and enforcepolicies for all your ESET endpoint products on workstations.
By default, ESET Endpoint Security is not activated after installation and therefore notfunctional.
Option 1 (Software installation)
1. Download the .msi installer for ESET Endpoint Security.
2. Create an .mst transform package from the .msi file (for example by using the Orca .msieditor) to include the product activation property (see ACTIVATION_DATA in Command-lineinstallation). Show steps for creating .mst in Orca

33
1. Open Orca.2. Load the .msi installer by clicking File > Open.3. Click Transform > New Transform.4. Click Property in the Tables section and then in the menu Tables > Add row.5. In the Add Row windows type ACTIVATION_DATA as Property and the licenseinformation as Value.
6. Click Transform > Generate Transform to save the .mst file.
3. Optional: To import your customized ESET Endpoint Security .xml configuration file (forexample, to enable RMM or configure proxy server settings), put the cfg.xml file in thesame location as the .msi installer.
4. Deploy the .msi installer with the .mst file remotely using one of the method - GPO (viaSoftware installation) or SCCM.
Option 2 (using a scheduled task)
1. Download the .msi installer for ESET Endpoint Security.
2. Prepare a Command-line installation script to include the product activation property(see ACTIVATION_DATA).
3. Make the .msi installer and the .cmd script accessible in the network for allworkstations.
4. Optional: To import your customized ESET Endpoint Security .xml configuration file (forexample, to enable RMM or configure proxy server settings), put the cfg.xml file in thesame location as the .msi installer.

34
5. Apply a prepared command-line installation script using either GPO or SCCM.
• For GPO, use Group Policy Preferences > Group Policy Schedule Tasks > Immediatetask
Remote monitoring and managementIf you do not want to use ESMC or ESET PROTECT Cloud to remotely manageyour ESET endpoint products, ESET Endpoint Security contains the ESET pluginfor RMM which allows you to supervise and control software systems using alocally installed agent that can be accessed by a management service provider.• Find more information
Upgrading to a more recent versionNew versions of ESET Endpoint Security are issued to implement improvements or fix issuesthat cannot be resolved by automatic updates to program modules.
Upgrading to a more recent version can be accomplished in several ways:
1.Automatically, using ESET Security Management Center (ESMC) or ESET PROTECT Cloud.ESET Endpoint Security version 7 cannot be managed by ESET Remote Administrator.
2.Automatically, using GPO or SCCM.
3.Manually, by downloading and installing a more recent version over the previous one.
Recommended upgrade scenarios
I manage or I want to manage my ESET products remotely
If you manage more than 10 ESET Endpoint products, consider handling upgrades usingESMC or ESET PROTECT Cloud.
Please refer to the following documentation:
• ESMC | Upgrade ESET software via a client task• ESMC | Guide for a small to medium-sized businesses that manage up to 250 WindowsESET endpoint products• Introduction to ESET PROTECT Cloud
Upgrading manually on a client workstation
Do not install version 7 over a version 4.x, similarly, if you have an older/non-functionalESET Endpoint Security version 5.x or 6.x.
If you plan to handle upgrades on individual client workstations manually:
1. Verify that your operating system is supported (Windows Vista and Windows XP is not

35
supported for version 7).
2. Download and install a more recent version over the previous one.
Common installation problemsIf problems occur during installation, see our list of common installation errors andresolutions to find a solution to your problem.
Activation failedIn the case activation of ESET Endpoint Security was not successful, the most-commonpossible scenarios are:
• License key already in use
• Invalid License key. Product activation form error
• Additional information necessary for activation is missing or invalid
• Communication with the activation database failed. Please try to activate again in 15minutes
• No or disabled connection to ESET activation servers
Make sure you have entered the proper License key or attached an Offline license andattempt to activate again.
If you are unable to activate, our welcome package will walk you through to commonquestions, errors, problems about activation and licensing (available in English and severalother languages).
• Start ESET product activation troubleshooting
Product activationAfter installation is complete, you will be prompted to activate your product.
Select one of the available methods to activate ESET Endpoint Security. See How to activateESET Endpoint Security for more information.
Computer scanWe recommend that you perform regular computer scans, or schedule a regular scan, tocheck for threats. In the main program window, click Computer scan and then click Smart

36
scan. For more information about computer scans, see Computer scan.
Beginner's guideThis chapter provides an initial overview of ESET Endpoint Security and its basic settings.
The user interfaceThe main program window of ESET Endpoint Security is divided into two main sections. Theprimary window on the right displays information that corresponds to the option selectedfrom the main menu on the left.
The following is a description of options within the main menu:
Protection status – Provides information about the protection status of ESET EndpointSecurity.
Computer scan – This option allows you to configure and launch of Smart scan, Customscan, or Removable media scan. You can also repeat the last scan that was run.
Update – Displays information about the detection engine and allows to check for updatesmanually.

37
Setup – Select this option to adjust your Computer, Network or Web and Email securitysettings.
Tools – Provides access to Log files, Protection statistics, Watch activity, Running processes,Scheduler, Quarantine, Network connections, ESET SysInspector and ESET SysRescue tocreate a rescue CD. You can also submit a sample for analysis.
Help and support – Provides access to help files, ESET Knowledgebase and the ESETcompany website. Also available are links to open a Technical Support support request,support tools, and information about product activation.
The Protection status screen informs you about the security and current protection level ofyour computer. The green Maximum protection status indicates that maximum protectionis ensured.
The status window also displays quick links to frequently used features in ESET EndpointSecurity and information about the last update.
What to do if the program doesn't work properly?A green check mark will be displayed next to all program modules that are fully functional. Ared exclamation point or orange notification icon is displayed if a module needs attention.Additional information about the module, including our recommendation about how to restorefull functionality is shown in the upper part of the window. To change a module's status, click

38
Setup in the main menu and then click the desired module.
The red exclamation point (!) icon indicates that maximum protection of yourcomputer is not ensured. You may encounter this type of notification in the followingscenarios:
• Antivirus and antispyware protection is paused – Click Start all antivirus andantispyware protection modules to re-enable antivirus and antispyware protection inProtection status pane or Enable Antivirus and antispyware protection in Setuppane in the main program window.• Antivirus protection is non-functional – Virus scanner initialization failed. Most ESETEndpoint Security modules will not function properly.• Anti-Phishing protection is non-functional – This feature is not functional becauseother required program modules are not active.
• The ESET Firewall is disabled – This problem is indicated by a red icon and a securitynotification next to the Network item. Click Enable filtering mode to re-enable networkprotection.
• Firewall initialization failed – The firewall is disabled due to system integration issues.Restart your computer as soon as possible.
• Detection engine is out of date – This error will appear after several unsuccessfulattempts to update the detection engine (formerly virus signature database). We

39
recommend that you check the update settings. The most common reason for this error isincorrectly entered authentication data or incorrectly configured connection settings.
• Product is not activated or License expired – This is indicated by a red protectionstatus icon. The program is not able to update after your license expires. Follow theinstructions in the alert window to renew your license.
• Host Intrusion Prevention System (HIPS) is disabled – This problem is indicatedwhen HIPS disabled from Advanced setup. Your computer is not protected against sometypes of threats and protection should be re-enabled immediately by clicking Enable HIPS.
• ESET LiveGrid® is disabled – This problem is indicated when ESET LiveGrid® disabledin Advanced setup.
• No regular updates scheduled – ESET Endpoint Security will not check for or receiveimportant updates unless you schedule update task.
• Anti-Stealth is disabled – Click Enable Anti-Stealth to re-enable this functionality.
• Network access blocked – Displayed when the Isolate computer from networkclient task of this workstation from ESMC is triggered. Contact your system administratorfor more information.
• Real-time file system protection is paused – Real-time protection was disabled bythe user. Your computer is not protected against threats. Click Enable Real-timeprotection re-enable this functionality.
The orange "i" indicates that your ESET product requires attention for a non-criticalproblem. Possible reasons include:
• Web access protection is disabled – Click on the security notification to re-enableWeb access protection and then click Enable Web access protection.
• Your license will expire soon – This is indicated by the protection status icondisplaying an exclamation point. After your license expires, the program will not be ableto update and the Protection status icon will turn red.
• Botnet protection is paused – Click Enable Botnet protection to re-enable thisfeature.
• Network attack protection (IDS) is paused – Click Enable Network attackprotection (IDS) to re-enable this feature.
• Antispam protection is paused – Click Enable Antispam protection to re-enablethis feature.
• Web control is paused – Click Enable Web control to re-enable this feature.

40
• Policy override active – The configuration set by the policy is temporarily overridden,possibly until troubleshooting is complete. Only authorized user can override the policysettings. For more information see How to use Override mode.
• Device control is paused – Click Enable Device control to re-enable this feature.
To adjust visibility in-product statuses in the first pane of ESET Endpoint Security, seeApplication statuses.
If you are unable to solve a problem by using the suggested solutions, click Help andsupport to access the help files or search the ESET Knowledgebase. If you still needassistance, you can submit an ESET Technical Support request. ESET Technical Support willrespond quickly to your questions and help find a resolution.
NoteIf a status belongs to a feature that is blocked by ESMC policy, the link will not beclickable.
Update setupUpdating modules is an important part of maintaining complete protection against maliciouscode. Please pay careful attention to update configuration and operation. From the mainmenu, select Update > Check for updates to check for a newer module update.
If your License Key is not entered yet, you will be unable to receive new updates and will beprompted to activate your product.

41
The Advanced setup window (click Setup > Advanced setup from the main menu, orpress F5 on your keyboard) contains additional update options. To configure advancedupdate options such as update mode, proxy server access, LAN connections and detectionengine copy creation settings, click Update in the Advanced setup tree.
• If you experience problems with an update, click Clear to clear the temporary updatecache.

42
• The Choose automatically option in Profiles > Updates > Modules Updates isenabled default. When using an ESET update server for receiving updates, we recommendthat you leave this as is.
• If you do not want the successful update system tray notification at the bottom rightcorner of the screen to appear, expand Profiles > Updates, click Edit next to Selectreceived update notifications and then adjust check boxes for the Detection Enginewas successfuly updated notification.

43
For optimal functionality, it is important that the program is automatically updated. This isonly possible if the correct License key is entered in Help and support > ActivateProduct.
If you did not enter your License key after installation, you can do so at any time. For moredetailed information about activation see How to activate ESET Endpoint Security and enterthe credentials you received with your ESET Security product in License details window.
Zones setupIt is necessary to configure Trusted zones to protect your computer in a networkenvironment. You can allow other users to access your computer by configuring a Trustedzone to allow sharing. Click Advanced Setup (F5) > Network protection > Firewall >Advanced > Zones to access settings for Trusted zones.
Trusted zone detection occurs after ESET Endpoint Security installation and whenever yourcomputer connects to a new network. Therefore, there is usually no need to define theTrusted zone. By default, a dialog window is displayed upon detection of a new zone whichallows you to set the protection level for that zone.

44
ImportantAn incorrect trusted zone configuration may pose a security risk to your computer.
NoteBy default, workstations from a Trusted zone are granted access to shared filesand printers, have incoming RPC communication enabled and have remotedesktop sharing available.
For more details about this feature, read the following ESET Knowledgebase article:
• New network connection detected in ESET Endpoint Security
Web control toolsIf you have already enabled Web control in ESET Endpoint Security, you must also configureWeb control for your desired user accounts in order for Web control to function properly.Please refer to the Web control chapter for instructions on how to create specific restrictionsfor your client workstations to protect them from potentially offensive material.
Work with ESET Endpoint SecurityThe ESET Endpoint Security setup options allow you to adjust the level of protection for yourcomputer, web, email and network.

45
NoteWhen creating a policy from ESET Security Management Center Web Consoleyou can select the flag for each setting. Settings with the Force flag havepriority and cannot be overwritten by a later policy (even if the later policy hasa Force flag). This assures that this setting will not be changed (e.g. by user orby later policies during merging). For more information see Flags in ESMCOnline Help.
The Setup menu contains the following sections:
• Computer
• Network
• Web and Email
Computer section allows you to enable or disable the following components:
• Real-time file system protection – All files are scanned for malicious code whenthey are opened, created or run.
• Device control – Provides automatic device (CD/DVD/USB/...) control. This moduleallows you to block or adjust extended filters/permissions and define a users ability toaccess and work with a given device.

46
• Host Intrusion Prevention System (HIPS) – The HIPS system monitors events thatoccur within the operating system and reacts to them according to a customized set ofrules.
• Advanced memory scanner – Works in combination with Exploit Blocker tostrengthen protection against malware that has been designed to evade detection byantimalware products through the use of obfuscation or encryption. Advanced memoryscanner is enabled by default. Read more about this type of protection in the glossary.
• Exploit blocker – Designed to fortify commonly exploited application types such asweb browsers, PDF readers, email clients and MS Office components. Exploit blocker isenabled by default. Read more about this type of protection in the glossary.
• Ransomware shield – It is another layer of protection that works as a part of HIPSfeature. You must have the ESET LiveGrid® reputation system enabled for Ransomwareshield to work. Read more about this type of protection.
• Presentation mode – A feature for users that demand uninterrupted usage of theirsoftware, do not want to be disturbed by pop-up windows, and want to minimize CPUusage. You will receive a warning message (potential security risk) and the mainprogram window will turn orange after enabling Presentation mode.
The Network protection section allows you to configure the Firewall, Network attackprotection (IDS) and Botnet protection.
Web and email protection setup allows you to enable or disable the following components:
• Web control – Blocks web pages that may contain potentially offensive material. Inaddition, system administrators can specify access preferences for 27 pre-definedwebsite categories.• Web access protection – If enabled, all traffic through HTTP or HTTPS is scanned formalicious software.• Email client protection – Monitors communication received through the POP3 andIMAP protocol.• Antispam protection – Scans unsolicited email or spam.• Anti-Phishing protection – Protects you from attempts to acquire passwords,banking data and other sensitive information by illegitimate websites disguised aslegitimate ones.
To temporarily disable individual modules, click the green switch next to the desiredmodule. Note that this may decrease the protection level of your computer.
To re-enable the protection of a disabled security component, click the red switch toreturn a component to its enabled state.
When ESMC/ERA policy is applied, you will see the lock icon next to a specificcomponent. The policy applied by ESET Security Management Center can be overriddenlocally after authentication by logged user (e.g. administrator). For more information see the

47
ESMC Online Help.
NoteAll protective measures disabled this way will be re-enabled after a computerrestart.
To access detailed settings for a particular security component, click the gear wheel nextto any component.
There are additional options at the bottom of the setup window. To load setup parametersusing an .xml configuration file, or to save the current setup parameters to a configurationfile, use Import/Export settings. Please see Import/Export settings for more detailedinformation.
For more detailed options, click Advanced Setup or press F5.
ComputerThe Computer module can be found under Setup > Computer. It displays an overview ofthe protection modules described in the previous chapter. In this section, the followingsettings are available:
Click the gear wheel next to Real-time file system protection and click Editexclusions to open the Exclusion setup window, which allows you to exclude files andfolders from scanning. To open Real-time file system protection advanced setup, clickConfigure....

48
Computer section allows you to enable or disable the following components:
• Real-time file system protection – All files are scanned for malicious code whenthey are opened, created or run on your computer.
• Device control – Provides automatic device (CD/DVD/USB/...) control. This moduleallows you to block or adjust extended filters/permissions and define a users ability toaccess and work with a given device.
• Host Intrusion Prevention System (HIPS) – The HIPS system monitors events thatoccur within the operating system and reacts to them according to a customized set ofrules.
• Advanced memory scanner – Works in combination with Exploit Blocker tostrengthen protection against malware that has been designed to evade detection byantimalware products through the use of obfuscation or encryption. Advanced memoryscanner is enabled by default. Read more about this type of protection in the glossary.
• Exploit blocker – Designed to fortify commonly exploited application types such asweb browsers, PDF readers, email clients and MS Office components. Exploit blocker isenabled by default. Read more about this type of protection in the glossary.
• Ransomware shield – It is another layer of protection that works as a part of HIPSfeature. You must have the ESET LiveGrid® reputation system enabled for Ransomwareshield to work. Read more about this type of protection.
• Presentation mode – A feature for users that demand uninterrupted usage of theirsoftware, do not want to be disturbed by pop-up windows, and want to minimize CPUusage. You will receive a warning message (potential security risk) and the mainprogram window will turn orange after enabling Presentation mode.
Pause Antivirus and antispyware protection – Any time that you temporarily disableAntivirus and antispyware protection, you can select the period of time for which you wantthe selected component to be disabled using the drop-down menu and then click Apply todisable the security component. To re-enable protection, click Enable Antivirus andantispyware protection.
Detection engine (7.2 and later)Detection engine guards against malicious system attacks by controlling file, email andinternet communication. For example, if an object classified as malware is detected,remediation will start. The detection engine can eliminate it by first blocking it and thencleaning, deleting or moving it to quarantine.
To configure the detection engine settings in detail, click Advanced Setup or press F5.
In this section:

49
• Real-time & Machine learning protection categories
• Malware scans
• Reporting setup
• Protection setup
• Best practices
Changes to the detection engine scanner configurationStarting in version 7.2, the Detection engine section no longer provides ON/OFFswitches as for version 7.1 and below. ON/OFF buttons are replaced with fourthresholds - Aggressive, Balanced, Cautious and Off.
Real-time & Machine learning protection categoriesReal-time & Machine learning protection for all protection modules (for example, Real-time file system protection, Web access protection, ...) allows you to configure reporting andprotection levels of the following categories:
• Malware – A computer virus is a piece of malicious code that is prepended or appendedto existing files on your computer. However, the term “virus” is often misused. "Malware”(malicious software) is a more accurate term. Malware detection is performed by thedetection engine module combined with the machine learning component.Read more about these types of applications in the Glossary.
• Potentially unwanted applications – Grayware or Potentially Unwanted Applications(PUAs) is a broad category of software, whose intent is not as unequivocally malicious aswith other types of malware, such as viruses or trojan horses. However, it could installadditional unwanted software, change the behavior of the digital device, or performactivities not approved or expected by the user.Read more about these types of applications in the Glossary.
• Potentially unsafe applications – Refers to legitimate commercial software that hasthe potential to be misused for malicious purposes. Examples of potentially unsafeapplications (PUAs) include remote access tools, password-cracking applications, andkeyloggers (programs recording each keystroke typed by a user).Read more about these types of applications in the Glossary.
• Suspicious applications include programs compressed with packers or protectors.These types of protectors are often exploited by malware authors to evade detection.

50
Improved protectionAdvanced machine learning is now a part of detection engine as an advancedlayer of protection which improves detection based on machine learning. Readmore about this type of protection in the Glossary.
Malware scansScanner settings can be configured separately for the real-time scanner and the on-demandscanner. By default, Use real-time protection settings is enabled. When enabled, relevantOn-demand scan settings are inherited from the Real-time & Machine Learningprotection section.
Reporting setupWhen a detection occurs (e.g., a threat is found and classified as malware), information isrecorded to the Detections log, and Desktop notifications occur if configured in ESET Endpoint

51
Security.
Reporting threshold is configured for each category (referred to as "CATEGORY"):
1.Malware
2.Potentially unwanted applications
3.Potentially unsafe
4.Suspicious applications
Reporting performed with the detection engine, including the machine learning component. Itis possible to set a higher reporting threshold than the current protection threshold. Thesereporting settings do not influence blocking, cleaning or deleting objects.
Read the following before modifying a threshold (or level) for CATEGORY reporting:
Threshold ExplanationAggressive CATEGORY reporting configured to maximum sensitivity. More detections are
reported. The Aggressive setting can falsely identify objects as CATEGORY.Balanced CATEGORY reporting configured as balanced. This setting is optimized to
balance the performance and accuracy of detection rates and the number offalsely reported objects.
Cautious CATEGORY reporting configured to minimize falsely identified objects whilemaintaining a sufficient level of protection. Objects are reported only when theprobability is evident and matches CATEGORY behavior.
Off Reporting for CATEGORY is not active, and detections of this type are not found,reported or cleaned. As a result, this setting disables protection from thisdetection type.Off is not available for malware reporting and it is default value for potentiallyunsafe applications.
Availability of ESET Endpoint Security protection modules
Availability (enabled or disabled) of a protection module for a selected CATEGORYthreshold is as follows: Aggressive Balanced Cautious Off**Advanced machine learningmodule*
✓(aggressive mode)
✓(conservative mode)
X X
Detection engine module ✓ ✓ ✓ XOther protection modules ✓ ✓ ✓ X* Available in ESET Endpoint Security version 7.2 and later.** Not recommended.
Determine product version, program module versions and build dates
1. Click Help and support > About ESET Endpoint Security.2. In the About screen, the first line of text displays the version number of your ESETproduct.3. Click Installed components to access information about specific modules.

52
Keynotes
Several keynotes when setting up an appropriate threshold for your environment:
• The Balanced threshold is recommended for most of the setups.
• The Cautious threshold represents a comparable level of protection from previousversions of ESET Endpoint Security (7.1 and below). This is recommended forenvironments where the priority focuses on minimizing false identified objects bysecurity software.
• The higher reporting threshold, the higher detection rate but a higher chance of falselyidentified objects.
• From the real-world perspective, there is no guaranty of a 100% detection rate as wellas a 0% chance to avoid incorrect categorization of clean objects as malware.
• Keep ESET Endpoint Security and its modules up-to-date to maximize the balancebetween performance and accuracy of detection rates and the number of falselyreported objects.
Protection setupIf an object classified as CATEGORY is reported, the program blocks the object and thencleans, deletes or moves it to Quarantine.
Read the following before modifying a threshold (or level) for CATEGORY protection:
Threshold ExplanationAggressive Reported aggressive (or lower) level detections are blocked, and automatic
remediation (i.e., cleaning) is started. This setting is recommended when allendpoints have been scanned with aggressive settings and falsely reportedobjects have been added to detection exclusions.
Balanced Reported balanced (or lower) level detections are blocked, and automaticremediation (i.e., cleaning) is started.
Cautious Reported cautious level detections are blocked, and automatic remediation (i.e.,cleaning) is started.
Off Useful to identify and exclude falsely reported objects.Off is not available for malware protection and it is default value for potentiallyunsafe applications.
ESMC policy conversion table for ESET Endpoint Security 7.1 and below
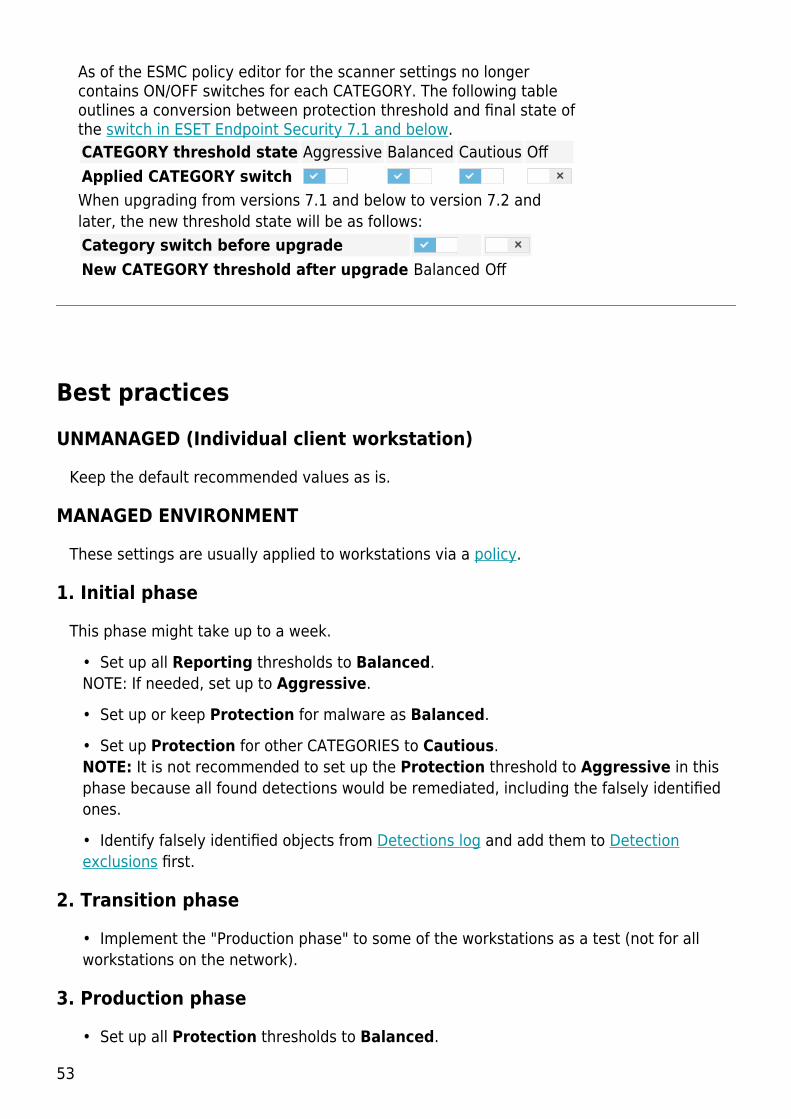
53
As of the ESMC policy editor for the scanner settings no longercontains ON/OFF switches for each CATEGORY. The following tableoutlines a conversion between protection threshold and final state ofthe switch in ESET Endpoint Security 7.1 and below.CATEGORY threshold state Aggressive Balanced Cautious OffApplied CATEGORY switchWhen upgrading from versions 7.1 and below to version 7.2 andlater, the new threshold state will be as follows:Category switch before upgradeNew CATEGORY threshold after upgrade Balanced Off
Best practices
UNMANAGED (Individual client workstation)
Keep the default recommended values as is.
MANAGED ENVIRONMENT
These settings are usually applied to workstations via a policy.
1. Initial phase
This phase might take up to a week.
• Set up all Reporting thresholds to Balanced.NOTE: If needed, set up to Aggressive.
• Set up or keep Protection for malware as Balanced.
• Set up Protection for other CATEGORIES to Cautious.NOTE: It is not recommended to set up the Protection threshold to Aggressive in thisphase because all found detections would be remediated, including the falsely identifiedones.
• Identify falsely identified objects from Detections log and add them to Detectionexclusions first.
2. Transition phase
• Implement the "Production phase" to some of the workstations as a test (not for allworkstations on the network).
3. Production phase
• Set up all Protection thresholds to Balanced.

54
• When managed remotely, use an appropriate antivirus pre-defined policy for ESETEndpoint Security.
• Aggressive protection threshold can be set if the highest detection rates are requiredand falsely identified objects are accepted.
• Check Detection log or ESMC reports for possible missing detections.
Detection engine advanced optionsAnti-Stealth technology is a sophisticated system that provides the detection of dangerousprograms such as rootkits, which are able to hide themselves from the operating system. Thismeans it is not possible to detect them using ordinary testing techniques.
Enable advanced scanning via AMSI – Microsoft Antimalware Scan Interface tool thatallows application developers new malware defenses (Windows 10 only).
Detection engine (7.1 and below)Detection engine guards against malicious system attacks by controlling file, email andinternet communication. For example, if an object classified as malware is detected,remediation will start. The detection engine can eliminate it by first blocking it and thencleaning, deleting or moving it to quarantine.
To configure the detection engine settings in detail, click Advanced Setup or press F5.
Changes to detection engine scanner configurationStarting from version 7.2, the Detection engine section looks different.
Scanner options for all protection modules (for example Real-time file system protection,Web access protection, ...) allows you to enable or disable detection of the following:
• Potentially unwanted applications – Grayware or Potentially Unwanted Application(PUA) is a broad category of software, whose intent is not as unequivocally malicious aswith other types of malware, such as viruses or trojan horses. It may however installadditional unwanted software, change the behavior of the digital device, or performactivities not approved or expected by the user.Read more about these types of applications in the glossary.
• Potentially unsafe applications refers to legitimate commercial software that has thepotential to be misused for malicious purposes. Examples of potentially unsafe applicationsinclude remote access tools, password-cracking applications, and keyloggers (programsrecording each keystroke typed by a user). This option is disabled by default.Read more about these types of applications in the glossary.
• Suspicious applications include programs compressed with packers or protectors.

55
These types of protectors are often exploited by malware authors to evade detection.
Anti-Stealth technology is a sophisticated system that provides the detection of dangerousprograms such as rootkits, which are able to hide themselves from the operating system. Thismeans it is not possible to detect them using ordinary testing techniques.
Exclusions enable you to exclude objects from scanning. See Exclusions for moreinformation.
Enable advanced scanning via AMSI – Microsoft Antimalware Scan Interface tool thatallows application developers new malware defenses (Windows 10 only).
An infiltration is detectedInfiltrations can reach the system from various entry points such as webpages, sharedfolders, via email or from removable devices (USB, external disks, CDs, DVDs, etc.).
Standard behaviorAs a general example of how infiltrations are handled by ESET Endpoint Security, infiltrationscan be detected using:
• Real-time file system protection

56
• Web access protection
• Email client protection
• On-demand computer scan
Each uses the standard cleaning level and will attempt to clean the file and move it toQuarantine or terminate the connection. A notification window is displayed in the notificationarea at the bottom right corner of the screen. For more information about cleaning levels andbehavior, see Cleaning.
Cleaning and deletingIf there is no predefined action to take for Real-time file system protection, you will beprompted to select an option in the alert window. Usually the options Clean, Delete and Noaction are available. Selecting No action is not recommended, as this will leave infectedfiles uncleaned. The exception to this is when you are sure that a file is harmless and hasbeen detected by mistake.
Apply cleaning if a file has been attacked by a virus that has attached malicious code to thefile. If this is the case, first attempt to clean the infected file in order to restore it to itsoriginal state. If the file consists exclusively of malicious code, it will be deleted.

57
If an infected file is “locked“ or in use by a system process, it will usually only be deletedafter it is released (normally after a system restart).
Multiple threatsIf any infected files were not cleaned during Computer scan (or the Cleaning level was set toNo Cleaning), an alert window prompting you to select action for those files is displayed.
Deleting files in archivesIn Default cleaning mode, the entire archive will be deleted only if it contains infected filesand no clean files. In other words, archives are not deleted if they also contain harmlessclean files. Use caution when performing a Strict cleaning scan, with Strict cleaning enabledan archive will be deleted if it contains at least one infected file regardless of the status ofother files in the archive.
If your computer is showing signs of a malware infection, for example, it is slower, oftenfreezes, etc., we recommend that you do the following:
• Open ESET Endpoint Security and click Computer scan
• Click Smart scan (for more information, see Computer scan)
• After the scan has finished, review the log for the number of scanned, infected andcleaned files
If you only want to scan a certain part of your disk, click Custom scan and select targets tobe scanned for viruses.
Shared local cacheShared local cache can boost performance in isolated environments (for example, virtualmachines) by eliminating duplicate scanning in the network. This ensures that each file willbe scanned only once and stored in the shared cache.
ESET Shared Local Cache must be installed and configured first.
• Download ESET Shared Local Cache.
• For more information, see ESET Shared Local Cache online help.
Turn on the Caching option switch to save information about scans of files and folders onyour network to ESET Shared Local Cache. If you perform a new scan, ESET Endpoint Securitywill search for scanned files in ESET Shared Local Cache. If files match, they will be excludedfrom scanning.

58
The setup of Cache server contains the following:
• Hostname – Hostname or IP address of the computer where ESET Shared Local Cacheis located.
• Port – Port number used for communication (same as was set in ESET Shared LocalCache).
• Password – Specify the password for ESET Shared Local Cache if required.
Real-time file system protectionReal-time file system protection controls all files in the system for malicious code whenopened, created, or run.
By default, Real-time file system protection launches at system start-up and providesuninterrupted scanning. We do not recommend disabling Enable Real-time file systemprotection in Advanced setup under Detection engine > Real-time file systemprotection > Basic.
Media to scanBy default, all types of media are scanned for potential threats:

59
• Local drives – Scans all system and fixed hard drives (example: C:\, D:\).
• Removable media – Scans CD/DVDs, USB storage, memory cards, etc.
• Network drives – Scans all mapped network drives (example: H:\ as \\store04) ordirect access network drives (example: \\store08).
We recommend that you use default settings and only modify them in specific cases, such aswhen scanning certain media significantly slows data transfers.
Scan onBy default, all files are scanned upon opening, creation, or execution. We recommend thatyou keep these default settings, as they provide the maximum level of real-time protectionfor your computer:
• File open – Scans when a file is opened.
• File creation – Scans a created or modified file.
• File execution – Scans when a file is executed or run.
• Removable media boot sector access – When removable media that contains aboot sector is inserted in the device, the boot sector is immediately scanned. This optiondoes not enable removable media file scanning. Removable media file scanning islocated Media to scan > Removable media. For Removable media boot sectoraccess to work correctly, keep Boot sectors/UEFI enabled in ThreatSense parameters.
Processes to be excluded from scanning – Read more about this type of exclusion in theProcesses exclusions chapter.
Real-time file system protection checks all types of media and is triggered by various systemevents such as accessing a file. Using ThreatSense technology detection methods (asdescribed in the ThreatSense engine parameter setup section), Real-time file systemprotection can be configured to treat newly created files differently than existing files. Forexample, you can configure Real-time file system protection to more closely monitor newlycreated files.
To ensure a minimal system footprint when using real-time protection, files that have alreadybeen scanned are not scanned repeatedly (unless they have been modified). Files arescanned again immediately after each update of the detection engine. This behavior iscontrolled using Smart optimization. If this Smart optimization is disabled, all files arescanned each time they are accessed. To modify this setting, press F5 to open Advancedsetup and expand Detection engine > Real-time file system protection. ClickThreatSense parameters > Other and select or deselect Enable Smart optimization.

60
Checking real-time protectionTo verify that real-time protection is working and detecting viruses, use a test file fromeicar.com. This test file is a harmless file detectable by all antivirus programs. The file wascreated by the EICAR company (European Institute for Computer Antivirus Research) to testthe functionality of antivirus programs.
The file is available for download at http://www.eicar.org/download/eicar.comAfter you enter this URL into your browser, you should see a message that the threat hasbeen removed.
When to modify real-time protectionconfigurationReal-time file system protection is the most essential component for maintaining a securesystem. Always be careful when modifying its parameters. We recommend that you onlymodify its parameters in specific cases.
After installing ESET Endpoint Security, all settings are optimized to provide the maximumlevel of system security for users. To restore default settings, click next to each tab in thewindow (Advanced setup > Detection engine > Real-time file system protection).
What to do if real-time protection doesnot workIn this chapter, we describe problems that may arise when using real-time protection andhow to troubleshoot them.
Real-time protection is disabledIf real-time protection was inadvertently disabled by a user, it needs to be reactivated. Toreactivate real-time protection, navigate to Setup in the main program window and clickReal-time file system protection.
If real-time protection is not initiated at system startup, it is usually because Start Real-time file system protection automatically is deselected. To enable this option, navigateto Advanced setup (F5) and click Detection engine > Real-time file system protection> Basic. Make sure that the Start Real-time file system protection automaticallyswitch is turned on.

61
If Real-time protection does not detect and cleaninfiltrationsMake sure that no other antivirus programs are installed on your computer. If two real-timeprotection shields are enabled at the same time, they may conflict with each other. Werecommend that you uninstall any other antivirus programs on your system before installingESET.
Real-time protection does not startIf real-time protection is not initiated at system startup (and Enable Real-time file systemprotection is enabled), it may be due to conflicts with other programs. For assistanceresolving this issue, please contact ESET Technical Support.
Computer scanThe on-demand scanner is an important part of ESET Endpoint Security. It is used to performscans of files and folders on your computer. From a security point of view, it is essential thatcomputer scans are not just run when an infection is suspected, but regularly as part ofroutine security measures. We recommend that you perform regular (for example once amonth) in-depth scans of your system to detect viruses not detected by Real-time file systemprotection. This can happen if Real-time file system protection was disabled at the time, if thedetection engine was obsolete or if the file was not detected as a virus when it was saved tothe disk.

62
Two types of Computer scan are available. Scan your computer quickly scans the systemwith no need for further configuration of the scan parameters. Custom scan allows you toselect any of the predefined scan profiles and define specific scan targets.
See Scan progress for more information about the scanning process.
Scan your computerSmart scan allows you to quickly launch a computer scan and clean infected files with noneed for user intervention. The advantage of Smart scan is that it is easy to operate and doesnot require detailed scanning configuration. Smart scan checks all files on local drives andautomatically cleans or deletes detected infiltrations. The cleaning level is automatically setto the default value. For more detailed information on types of cleaning, see Cleaning.
Custom scanCustom scan is an optimal solution if you want to specify scanning parameters such as scantargets and scanning methods. The advantage of Custom scan is the ability to configure theparameters in detail. Configurations can be saved to user-defined scan profiles, which can beuseful if scanning is repeatedly performed using the same parameters.
To select scan targets, select Computer scan > Custom scan and select an option from theScan targets drop-down menu, or select specific targets from the tree structure. A scantarget can also be specified by entering the path of the folder or file(s) you want to include. If

63
you are only interested in scanning the system without additional cleaning actions, selectScan without cleaning. When performing a scan, you can choose from three cleaninglevels by clicking Setup... > ThreatSense parameters > Cleaning.
Performing computer scans with Custom scan is suitable for advanced users with previousexperience using antivirus programs.
You can also use the Drag and drop scan feature to scan a file or folder manually byclicking the file or folder, moving the mouse pointer to the marked area while keeping themouse button pressed, and then releasing it. After that, the application is moved to theforeground.
Removable media scanSimilar to Scan your computer – quickly launch a scan of removable media (such asCD/DVD/USB) that are currently connected to the computer. This may be useful when youconnect a USB flash drive to a computer and want to scan its content for malware and otherpotential threats.
This type of scan can be also initiated by clicking Custom scan and then selectingRemovable media from the Scan targets drop-down menu and clicking Scan.
Repeat last scanAllows you to quickly launch the previously performed scan using the same settings it wasrun with.
You can select No action, Shutdown or Reboot from Action after scan drop-down menu.The actions Sleep or Hibernate are available based on your computer Power & sleepoperating system settings or your computer/laptop capabilities. The selected action will startafter all of the running scans are finished. When Shutdown is selected, a shutdownconfirmation dialog window will display a 30-second countdown (click Cancel to deactivatethe requested shutdown). See Advanced scan options for more details.
NoteWe recommend that you run a computer scan at least once a month. Scanningcan be configured as a scheduled task from Tools > Scheduler. How do Ischedule a weekly computer scan?
Custom scan launcherIf only want to scan a specific target, you can use the Custom scan tool by clickingComputer scan > Custom scan and selecting an option from the Scan targets drop-down

64
menu or selecting specific targets from the folder (tree) structure.
The scan targets window allows you to define which objects (memory, drives, sectors, filesand folders) are scanned for infiltrations. Select targets from the tree structure, which lists alldevices available on the computer. The Scan targets drop-down menu allows you to selectpredefined scan targets.
• By profile settings – Selects targets set in the selected scan profile.
• Removable media – Selects diskettes, USB storage devices, CD/DVD.
• Local drives – Selects all system hard drives.
• Network drives – Selects all mapped network drives.
• Custom selection – Allows user to create a custom selection of targets.
To quickly navigate to a scan target or add a target folder or file(s), enter the target directoryin the blank field below the folder list.
Infected items are not cleaned automatically. Scanning without cleaning can be used toobtain an overview of the current protection status. Furthermore, you can choose from threecleaning levels by clicking Advanced setup > Detection engine > On-demand scan >ThreatSense parameters > Cleaning. If you are only interested in scanning the systemwithout additional cleaning actions, select Scan without cleaning. Scan history is saved tothe scan log.
When Ignore exclusions is selected, files with extensions that were previously excludedfrom scanning will be scanned with no exception.
You can choose a profile from the Scan profile drop-down menu to be used for scanning

65
chosen targets. The default profile is Smart scan. There are two more pre-defined scanprofiles called In-depth scan and Context menu scan. These scan profiles use differentThreatSense parameters. The available options are described in Advanced setup >Detection engine > Malware scans > On-demand scan > ThreatSense parameters.
Click Scan to execute the scan using the custom parameters that you have set.
Scan as Administrator allows you to execute the scan under the Administrator account.Click this if the current user doesn't have privileges to access the appropriate files to bescanned. Note that this button is not available if the current user cannot call UAC operationsas Administrator.
NoteYou can view the computer scan log when a scan completes by clicking Showlog.
Scan progressThe scan progress window shows the current status of the scan and information about thenumber of files found that contain malicious code.

66
NoteIt is normal that some files, such as password protected files or files exclusivelybeing used by the system (typically pagefile.sys and certain log files), cannot bescanned.
Scan progress – The progress bar shows the status of already-scanned objects compared toobjects still waiting be scanned. The scan progress status is derived from the total number ofobjects included in scanning.
Target – The name of the currently scanned object and its location.
Threats found – Shows the total number of threats found during a scan.
Pause – Pauses a scan.
Resume – This option is visible when scan progress is paused. Click Resume to continuescanning.
Stop – Terminates the scan.
Scroll scan log – If enabled, the scan log will scroll down automatically as new entries areadded so that the most recent entries are visible.

67
Computer scan logThe Computer scan log gives you general information about the scan such as:
• Date and time of scan
• Scanned disks, folders and files
• Number of scanned objects
• Number of threats found
• Time of completion
• Total scanning time
Malware scansThe Malware scans section is accessible in the Advanced setup menu. Press the F5 key,click Detection engine > Malware scans and provides options to select scanningparameters. This section includes the following options:
• Selected profile – A specific set of parameters used by the on-demand scanner.To create a new profile, click Edit next to List of profiles. See Scan profiles for moredetails.
• On-demand & Machine learning protection – see Detection engine (7.2 and later).
• Scan targets – If you only want to scan a specific target, you can click Edit next toScan targets and select an option from the drop-down menu or select specific targetsfrom the folder (tree) structure. See Scan targets for more details.
• ThreatSense parameters – Advanced setup options, such as file extensions you wantto control, detection methods used, etc. can be found in this section. Click to open a tabwith advanced scanner options.
Idle-state scanYou can enable the idle-state scanner in Advanced setup under Detection engine >Malware scans > Idle-state scan.
Idle-state scanSet the switch next to Enable Idle-state scanning to On to enable this feature. Whenthe computer is in idle state, a silent computer scan is performed on all local drives.

68
By default, the idle-state scanner will not run when the computer (notebook) is operating onbattery power. You can override this setting by activating the switch next to Run even ifcomputer is powered from battery in Advanced setup.
Turn on the Enable logging switch in Advanced setup to record a computer scan output inthe Log files section (from the main program window click Tools > Log files, and then selectComputer scan from the Log drop-down menu).
Idle-state detectionSee Idle state detection triggers for a full list of conditions that must be met in order totrigger the idle-state scanner.
Click ThreatSense engine parameter setup to modify scan parameters (for example,detection methods) for the Idle-state scanner.
Scan profilesYour preferred scan parameters can be saved for future scanning. We recommend that youcreate a different profile (with various scan targets, scan methods and other parameters) foreach regularly used scan.
To create a new profile, open the Advanced setup window (F5) and click Detection engine> Malware scans > On-demand scan > List of profiles. The Profile manager windowincludes the Selected profile drop-down menu that lists existing scan profiles and theoption to create a new one. To help you create a scan profile to fit your needs, see theThreatSense engine parameters setup section for a description of each parameter of the scansetup.
NoteSuppose that you want to create your own scan profile and the Scan yourcomputer configuration is partially suitable, but you do not want to scanruntime packers or potentially unsafe applications and you also want to applyStrict cleaning. Enter the name of your new profile in the Profile managerwindow and click Add. Select your new profile from the Selected profile drop-down menu and adjust the remaining parameters to meet your requirements,and then click OK to save your new profile.
Scan targetsThe scan targets window allows you to define which objects (memory, drives, sectors, filesand folders) are scanned for infiltrations. Select targets from the tree structure, which lists alldevices available on the computer. The Scan targets drop-down menu allows you to selectpredefined scan targets.

69
• By profile settings – Selects targets set in the selected scan profile.
• Removable media – Selects diskettes, USB storage devices, CD/DVD.
• Local drives – Selects all system hard drives.
• Network drives – Selects all mapped network drives.
• Custom selection – Allows user to create a custom selection of targets.
To quickly navigate to a scan target or add a target folder or file(s), enter the target directoryin the blank field below the folder list.
Advanced scan optionsIn this window, you can specify advanced options for a scheduled computer scan task. Youcan set an action to be performed automatically after a scan finishes using the drop-downmenu:
• Shut down – The computer turns off after a scan finishes.
• Reboot – Closes all open programs and restarts the computer after a scan finishes.
• Sleep – Saves your session and puts the computer in a low-power state so that youcan quickly resume working.
• Hibernate – Takes everything you have running on RAM and moves it to a special fileon your hard drive. Your computer shuts down but will resume its previous state the nexttime you start it.
• No action – After a scan finishes, no action will be performed.
NotePlease keep in mind that a sleeping computer is still a working computer. It is stillrunning basic functions and using electricity when your computer is operating onbattery power. To preserve battery life, for example when traveling outside ofyour office, we recommend using the Hibernate option.
Select Action cannot be canceled by user to deny non-privileged users the ability to stopactions taken after scanning.
Select The scan may be paused by user for (min) option if you want to allow the limiteduser to pause the computer scan for a specified time period.
See also the Scan progress chapter.
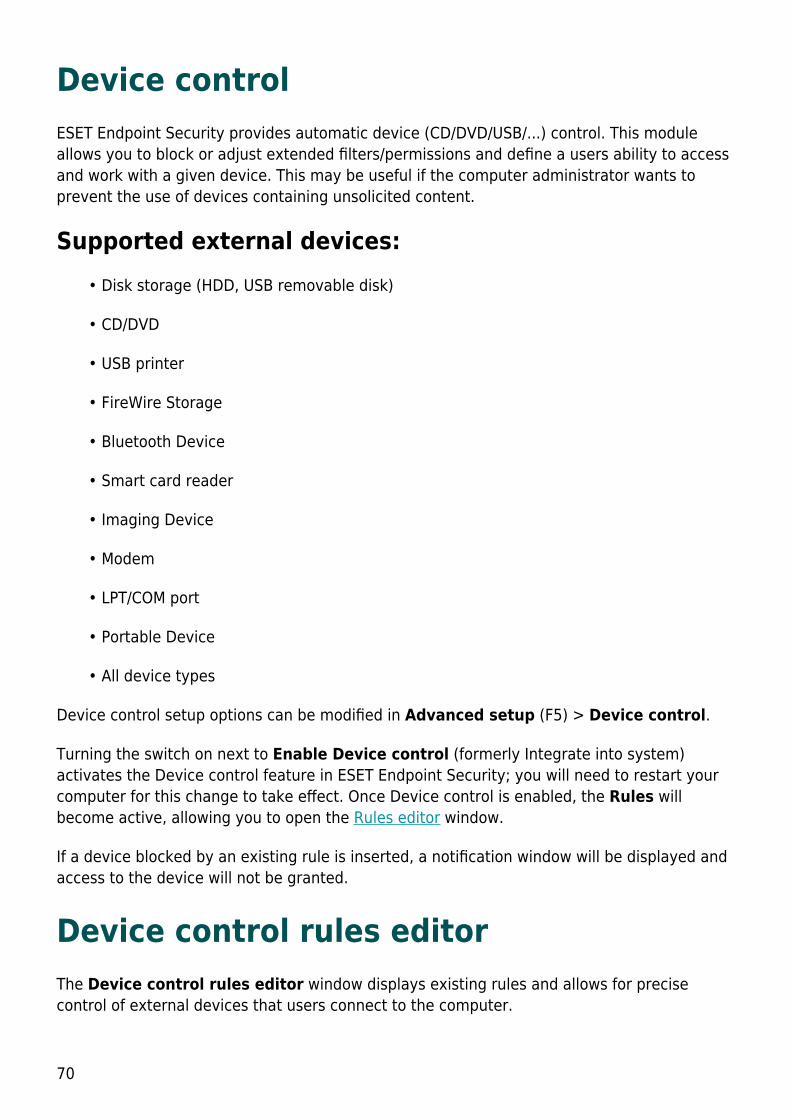
70
Device controlESET Endpoint Security provides automatic device (CD/DVD/USB/...) control. This moduleallows you to block or adjust extended filters/permissions and define a users ability to accessand work with a given device. This may be useful if the computer administrator wants toprevent the use of devices containing unsolicited content.
Supported external devices:• Disk storage (HDD, USB removable disk)
• CD/DVD
• USB printer
• FireWire Storage
• Bluetooth Device
• Smart card reader
• Imaging Device
• Modem
• LPT/COM port
• Portable Device
• All device types
Device control setup options can be modified in Advanced setup (F5) > Device control.
Turning the switch on next to Enable Device control (formerly Integrate into system)activates the Device control feature in ESET Endpoint Security; you will need to restart yourcomputer for this change to take effect. Once Device control is enabled, the Rules willbecome active, allowing you to open the Rules editor window.
If a device blocked by an existing rule is inserted, a notification window will be displayed andaccess to the device will not be granted.
Device control rules editorThe Device control rules editor window displays existing rules and allows for precisecontrol of external devices that users connect to the computer.

71
Illustrated instructionsThe following ESET Knowledgebase article may only be available in English:• Add and modify Device control rules using ESET endpoint products
Specific devices can be allowed or blocked according to their user, user group, or any ofseveral additional parameters that can be specified in the rule configuration. The list of rulescontains several descriptions of a rule such as name, type of external device, action toperform after connecting an external device to your computer and log severity.
Click Add or Edit to manage a rule. Deselect the Enabled check box next to a rule to disableit until you want to use it in the future. Select one or more rules and click Delete to deletethe rule(s) permanently.
Copy – Creates a new rule with predefined options used for another selected rule.
Click Populate to auto-populate removable media device parameters for devices connectedto your computer.
Rules are listed in order of priority with higher-priority rules closer to the top. Rules can bemoved by clicking Top/Up/Down/Bottom and can be movedindividually or in groups.
The Device control log records all occurrences where Device control is triggered. Log entriescan be viewed from the main program window of ESET Endpoint Security in Tools > Logfiles.

72
Detected devicesThe Populate button provides an overview of all currently connected devices withinformation about: device type, about device vendor, model and serial number (if available).
If a device is selected (from the list of Detected devices) and OK is clicked, a rule editorwindow appears with predefined information (all settings can be adjusted).
Device groups
WarningDevice connected to your computer may pose a security risk.
The Device groups window is divided into two parts. The right part of the window contains alist of devices belonging to respective group and the left part of the window contains createdgroups. Select a group with a list of devices you want to display in the right pane.
When you open the Device groups window and select a group, you can add or removedevices from the list. Another way to add devices to the group is to import them from a file.Alternatively, you can click Populate button and all devices connected to your computer willbe listed in the Detected devices window. Select a devices from the populated list to add itto the group by clicking OK.
Control elementsAdd – You can add a group by entering its name, or a device to existing group (optionally,you can specify details such as vendor name, model and serial number) depending onwhich part of the window you clicked the button.
Edit – Lets you modify the name of selected group or device's parameters (vendor, model,serial number).
Delete – Deletes selected group or device depending on which part of the window youclicked on the button.
Import – Imports a list of devices from a file.
The Populate button provides an overview of all currently connected devices withinformation about: device type, about device vendor, model and serial number (if available).
When you are done with customization click OK. Click Cancel if you want to leave theDevice groups window without saving changes.

73
ExampleYou can create different groups of devices for which different rules will be applied.You can also create only one group of devices for which the rule with actionRead/Write or Read only will be applied. This ensures blocking unrecognizeddevices by Device control when connected to your computer.
Note that not all Actions (permissions) are available for all device types. If it is a device ofstorage type, all four Actions are available. For non-storage devices, there are only threeActions available (for example Read Only is not available for Bluetooth, therefore Bluetoothdevices can only be allowed, blocked or warned).
Adding Device control rulesA Device control rule defines the action that will be taken when a device meeting the rulecriteria is connected to the computer.
Enter a description of the rule into the Name field for better identification. Click the switchnext to Rule enabled to disable or enable this rule; this can be useful if you don't want todelete the rule permanently.
Apply during – Allows you to apply created rule during the certain time. From the drop-downmenu, select created time slot. For more information click here.

74
Device typeChoose the external device type from the drop-down menu (Disk storage/Portabledevice/Bluetooth/FireWire/...). Device type information is collected from the operating systemand can be seen in the system Device manager if a device is connected to the computer.Storage devices include external disks or conventional memory card readers connected viaUSB or FireWire. Smart card readers include all readers of smart cards with an embeddedintegrated circuit, such as SIM cards or authentication cards. Examples of imaging devicesare scanners or cameras. Because these devices only provide information about their actionsand do not provide information about users, they can only be blocked globally.
NoteThe user list functionality is not available for the modem device type. The rule willbe applied for all users and the current user list will be deleted.
ActionAccess to non-storage devices can either be allowed or blocked. In contrast, rules for storagedevices allow you to select one of the following rights settings:
• Read/Write – Full access to the device will be allowed.• Block – Access to the device will be blocked.• Read Only – Only read access to the device will be allowed.• Warn – Each time that a device is connected, the user will be notified if it isallowed/blocked, and a log entry will be made. Devices are not remembered, anotification will still be displayed upon subsequent connections of the same device.
Note that not all Actions (permissions) are available for all device types. If it is a device ofstorage type, all four Actions are available. For non-storage devices, there are only threeActions available (for example Read Only is not available for Bluetooth, therefore Bluetoothdevices can only be allowed, blocked or warned).
Criteria type – Select Device group or Device.Additional parameters shown below can be used to fine-tune rules and tailor them to devices.All parameters are case-insensitive:
• Vendor – Filter by vendor name or ID.• Model – The given name of the device.• Serial – External devices usually have their own serial numbers. In the case of aCD/DVD, this is the serial number of the given media, not the CD drive.

75
NoteIf these parameters are undefined, the rule will ignore these fields while matching.Filtering parameters in all text fields are case-insensitive and no wildcards (*, ?)are supported.
NoteTo view information about a device, create a rule for that type of device, connectthe device to your computer and then check the device details in the Devicecontrol log.
Logging Severity
• Always – Logs all events.• Diagnostic – Logs information needed to fine-tune the program.• Information – Records informative messages, including successful update messages,plus all records above.• Warning – Records critical errors and warning messages and sends them to ERAServer.• None – No logs will be recorded.
Rules can be limited to certain users or user groups by adding them to the User list:
• Add – Opens the Object types: Users or Groups dialog window that allows you toselect desired users.• Delete – Removes the selected user from the filter.
NoteNot all devices can be filtered by user rules, (for example imaging devices do notprovide information about users, only about actions).
Host-based Intrusion Prevention System(HIPS)
WarningChanges to HIPS settings should only be made by an experienced user. Incorrectconfiguration of HIPS settings can lead to system instability.
The Host-based Intrusion Prevention System (HIPS) protects your system frommalware and unwanted activity attempting to negatively affect your computer. HIPS utilizesadvanced behavioral analysis coupled with the detection capabilities of network filtering tomonitor running processes, files and registry keys. HIPS is separate from Real-time filesystem protection and is not a firewall; it only monitors processes running within theoperating system.

76
HIPS settings can be found in Advanced setup (F5) > Detection engine > HIPS > Basic.The HIPS state (enabled/disabled) is shown in the ESET Endpoint Security main programwindow, in the Setup > Computer.
BasicEnable HIPS – HIPS is enabled by default in ESET Endpoint Security. Turning off HIPS willdisable rest of the HIPS features like Exploit Blocker.
Enable Self-Defense – ESET Endpoint Security uses the built-in Self-defense technologyas a part of HIPS to prevent malicious software from corrupting or disabling your antivirusand antispyware protection. Self-defense protects crucial system and ESET's processes,registry keys and files from being tampered with. ESET Management Agent is protected aswell when installed.
Enable Protected Service – enables protection for ESET Service (ekrn.exe). When enabled,the service is started as a protected Windows process to defend attacks by malware. Thisoption is available in Windows 8.1 and Windows 10.
Enable Advanced memory scanner – works in combination with Exploit Blocker tostrengthen protection against malware that has been designed to evade detection byantimalware products through the use of obfuscation or encryption. Advanced memoryscanner is enabled by default. Read more about this type of protection in the glossary.
Enable Exploit Blocker – designed to fortify commonly exploited application types such as

77
web browsers, PDF readers, email clients and MS Office components. Exploit blocker isenabled by default. Read more about this type of protection in the glossary.
Deep Behavioral InspectionEnable Deep Behavioral Inspection – another layer of protection that works as a part ofthe HIPS feature. This extension of HIPS analyzes the behavior of all programs running on thecomputer and warns you if the behavior of the process is malicious.
HIPS exclusions from Deep Behavioral Inspection enable you to exclude processes fromanalysis. To ensure that all processes are scanned for possible threats, we recommend onlycreating exclusions when it is absolutely necessary.
Ransomware shieldEnable Ransomware shield – another layer of protection that works as a part of HIPSfeature. You must have the ESET LiveGrid® reputation system enabled for Ransomwareshield to work. Read more about this type of protection.
Enable Audit mode – Everything detected by the Ransomware shield is not automaticallyblocked, but logged with a warning severity and sent to the management console with the"AUDIT MODE" flag. Administrator can either decide to exclude such detection to preventfurther detection, or keep it active, which means that after Audit mode ends, it will beblocked and removed. Enabling/disabling the Audit mode will also be logged in ESET EndpointSecurity. This option is available only in the ESMC or ESET PROTECT Cloud policyconfiguration editor.
HIPS settingsFiltering mode can be performed in one of the following modes:
Filtering mode DescriptionAutomatic mode Operations are enabled with the exception of those blocked by pre-
defined rules that protect your system.Smart mode The user will only be notified about very suspicious events.Interactive mode User will be prompted to confirm operations.Policy-basedmode
Blocks all operations that are not defined by a specific rule that allowsthem.

78
Learning mode Operations are enabled and a rule is created after each operation. Rulescreated in this mode can be viewed in the HIPS rules editor, but theirpriority is lower than the priority of rules created manually or rulescreated in automatic mode. When you select Learning mode from theFiltering mode drop down menu, the Learning mode will end atsetting will become available. Select the time span that you want toengage learning mode for, the maximum duration is 14 days. When thespecified duration has passed, you will be prompted to edit the rulescreated by HIPS while it was in learning mode. You can also choose adifferent filtering mode, or postpone the decision and continue usinglearning mode.
Mode set after learning mode expiration – Select the filtering mode that will be usedafter learning mode expires. After expiration, the Ask user option requires administrativeprivileges to perform a change to the HIPS filtering mode.
The HIPS system monitors events inside the operating system and reacts accordingly basedon rules similar to those used by the Firewall. Click Edit next to Rules to open the HIPSrules editor. In the HIPS rules window you can select, add, edit or remove rules. More detailson rule creation and HIPS operations can be found in Edit a HIPS rule.
HIPS interactive windowThe HIPS notification window allows you to create a rule based on new actions that HIPSdetects and then define the conditions under which to allow or deny that action.
Rules created from the notification window are considered to be equivalent to rules createdmanually. A rule created from a notification window can be less specific than the rule thattriggered that dialog window. This means that after creating a rule in the dialog box, thesame operation can trigger the same window. For more information see Priority for HIPSrules.
If the default action for a rule is set to Ask every time, a dialog window will be displayedeach time that the rule is triggered. You can choose to Deny or Allow the operation. If youdo not choose an action in the given time, a new action is selected based on the rules.
Remember until application quits causes the action (Allow/Deny) to be used until achange of rules or filtering mode, a HIPS module update or a system restart. After any ofthese three actions, temporary rules will be deleted.
The Create rule and remember permanently option will create a new HIPS rule which canbe later altered in the HIPS rule management section (requires administration privileges).
Click Details on the bottom to see what application triggers the operation, what is thereputation of the file or what kind of operation you are asked to allow or deny.
Settings for the more detailed rule parameters can be accessed by clicking Advancedoptions. The options below are available if you select Create rule and remember

79
permanently:
• Create a rule valid only for this application – If you deselect this check box, the rulewill be created for all source applications.
• Only for operation – Select the rule file/application/registry operation(s). Seedescriptions for all HIPS operations.
• Only for target –Select the rule file/application/registry target(s).
Endless HIPS notifications?To stop the notifications from appearing, change the filtering mode toAutomatic mode in Advanced setup (F5) > Detection engine > HIPS >Basic.
Potential ransomware behavior detectedThis interactive window will appear when potential ransomware behavior is detected. You canchoose to Deny or Allow the operation.

80
Click Details to view specific detection parameters. The dialog window allows youSubmit for analysis or Exclude from detection.
ImportantESET LiveGrid® must be enabled for Ransomware protection to functionproperly.
HIPS rule managementThis is a list of user-defined and automatically-added rules in the HIPS system. More detailsabout rule creation and HIPS operations can be found in the HIPS rules settings chapter. Seealso General principle of HIPS.
ColumnsRule – User-defined or automatically chosen rule name.
Enabled – Deactivate this option if you want to keep the rule in the list but do not want touse it.
Action – The rule specifies an action – Allow, Block or Ask – that should be performedwhen the conditions are met.
Sources – The rule will be used only if the event is triggered by an application(s).
Targets – The rule will be used only if the operation is related to a specific file, applicationor registry entry.
Logging severity – If you activate this option, information about this rule will be written tothe HIPS log.

81
Notify – A small pop-up notification appears in the lower-right corner if an event istriggered.
Control elementsAdd – Creates a new rule.
Edit – Enables you to edit selected entries.
Delete – Removes selected entries.
Priority for HIPS rulesThere are no options to adjust the priority level of HIPS rules using the top/bottom buttons (asfor Firewall rules where rules are executed from top to bottom).
• All rules that you create have the same priority
• The more specific the rule, the higher the priority (for example, the rule for a specificapplication has higher priority than the rule for all applications)
• Internally, HIPS contains higher-priority rules that are not accessible to you (forexample, you cannot override Self-defense defined rules)
• A rule you create that might freeze your operating system will not be applied (will havethe lowest priority)
HIPS rule settingsSee HIPS rule management as first.
Rule name – User-defined or automatically chosen rule name.
Action – Specifies an action – Allow, Block or Ask – that should be performed if conditionsare met.
Operations affecting – You must select the type of operation for which the rule will beapplied. The rule will be used only for this type of operation and for the selected target.
Enabled – Disable this switch if you want to keep the rule in the list but not apply it.
Logging severity – If you activate this option, information about this rule will be written tothe HIPS log.
Notify user – A small pop-up window appears in the lower-right corner if an event istriggered.

82
The rule consists of parts that describe the conditions triggering this rule:
Source applications – The rule will be used only if the event is triggered by thisapplication(s). Select Specific applications from drop-down menu and click Add to add newfiles or you can select All applications from the drop-down menu to add all applications.
Files – The rule will be used only if the operation is related to this target. Select Specificfiles from drop-down menu and click Add to add new files or folders or you can select Allfiles from the drop-down menu to add all files.
Applications – The rule will be used only if the operation is related to this target. SelectSpecific applications from the drop-down menu and click Add to add new files or folders oryou can select All applications from the drop-down menu to add all applications.
Registry entries – The rule will be used only if the operation is related to this target. SelectSpecific entries from the drop-down menu and click Add to add new files or folders, or youcan select All entries from the drop-down menu to add all applications.
NoteSome operations of specific rules predefined by HIPS cannot be blocked and areallowed by default. In addition, not all system operations are monitored by HIPS.HIPS monitors operations that may be considered unsafe.
Descriptions of important operations:
File operations• Delete file – Application is asking for permission to delete the target file.• Write to file – Application is asking for permission to write to the target file.• Direct access to disk – Application is trying to read from or write to the disk in a non-standard way that will circumvent common Windows procedures. This may result in filesbeing modified without the application of corresponding rules. This operation may becaused by malware trying to evade detection, backup software trying to make an exactcopy of a disk, or a partition manager trying to reorganize disk volumes.• Install global hook – Refers to calling the SetWindowsHookEx function from the MSDNlibrary.• Load driver – Installation and loading of drivers onto the system.
Application operations• Debug another application – Attaching a debugger to the process. While debuggingan application, many details of its behavior can be viewed and modified and its data canbe accessed.• Intercept events from another application – The source application is attemptingto catch events targeted at a specific application (for example a keylogger trying tocapture browser events).

83
• Terminate/suspend another application – Suspending, resuming or terminating aprocess (can be accessed directly from Process Explorer or the Processes pane).• Start new application – Starting of new applications or processes.• Modify state of another application – The source application is attempting to writeinto the target applications' memory or run code on its behalf. This functionality may beuseful to protect an essential application by configuring it as a target application in a ruleblocking the use of this operation.
NoteIt is not possible to intercept process operations on the 64-bit version of WindowsXP.
Registry operations• Modify startup settings – Any changes in settings that define which applications willbe run at Windows startup. These can be found, for example, by searching for the Run keyin the Windows Registry.• Delete from registry – Deleting a registry key or its value.• Rename registry key – Renaming registry keys.• Modify registry – Creating new values of registry keys, changing existing values,moving data in the database tree or setting user or group rights for registry keys.
NoteUsing wildcards in rulesAn asterisk in rules can only be used to substitute a particular key, e.g.“HKEY_LOCAL_MACHINE\SYSTEM\CurrentControlSet\*\Start”. Other ways of usingwildcards are not supported.Creating rules targeting HKEY_CURRENT_USER keyThis key is just a link to the appropriate subkey of HKEY_USERS specific to theuser identified by SID (secure identifier). In order to create a rule only for thecurrent user, instead of using a path to HKEY_CURRENT_USER, use a path pointingto HKEY_USERS\%SID%. As SID you can use an asterisk to make the ruleapplicable for all users.
WarningIf you create a very generic rule, the warning about this type of rule will be shown.
In the following example, we will demonstrate how to restrict unwanted behavior of a specificapplication:
1.Name the rule and select Block (or Ask if you prefer to choose later) from theAction drop-down menu.2.Enable the Notify user switch to display a notification any time that a rule is applied.3.Select at least one operation in the Operations affecting section for which the rulewill be applied.4.Click Next.

84
5.In the Source applications window, select Specific applications from the drop-down menu to apply your new rule to all applications attempting to perform any of theselected application operations on the applications you specified.6.Click Add and then ... to choose a path to a specific application and then press OK.Add more applications if you prefer.For example: C:\Program Files (x86)\Untrusted application\application.exe7.Select the Write to file operation.8.Select All files from the drop-down menu. This will block any attempts to write toany files by the selected application(s) from the previous step.9.Click Finish to save your new rule.
HIPS advanced setupThe following options are useful for debugging and analyzing an application's behavior:
Drivers always allowed to load – Selected drivers are always allowed to load regardless ofconfigured filtering mode, unless explicitly blocked by user rule.
Log all blocked operations – All blocked operations will be written to the HIPS log.
Notify when changes occur in Startup applications – Displays a desktop notificationeach time an application is added to or removed from system startup.

85
Drivers always allowed to loadDrivers shown in this list will always be allowed to load regardless of HIPS filtering mode,unless explicitly blocked by user rule.
Add – Adds a new driver.
Edit – Edits a selected driver.
Remove – Removes a driver from the list.
Reset – Reloads a set of system drivers.
NoteClick Reset if you do not want drivers that you have added manually to beincluded. This can be useful if you have added several drivers and you cannotdelete them from the list manually.
Presentation modePresentation mode is a feature for users that demand uninterrupted usage of their software,do not want to be disturbed by pop-up windows, and want to minimize CPU usage.Presentation mode can also be used during presentations that cannot be interrupted byantivirus activity. When enabled, all pop-up windows are disabled and scheduled tasks arenot run. System protection still runs in the background, but does not require any userinteraction.
Click Setup > Computer and then click the switch next to Presentation mode to enablepresentation mode manually. In Advanced setup (F5), click Tools > Presentationmode, and then click the switch next to Enable Presentation mode when runningapplications in full-screen mode automatically to have ESET Endpoint Securityengage Presentation mode automatically when full-screen applications are run.Enabling Presentation mode is a potential security risk, so the protection status icon in thetaskbar will turn orange and display a warning. You will also see this warning in the mainprogram window where you will see Presentation mode enabled in orange.
When Enable Presentation mode when running applications in full-screenautomatically is engaged, Presentation mode will start whenever you initiate a full-screenapplication and will automatically stop after you exit the application. This is especially usefulfor starting Presentation mode immediately after starting a game, opening a full screenapplication or starting a presentation.
You can also select Disable Presentation mode automatically after to define the amountof time in minutes after which Presentation mode will automatically be disabled.

86
NoteIf the firewall is in Interactive mode and Presentation mode is enabled, you mighthave trouble connecting to the Internet. This can be problematic if you start agame that connects to the Internet. Normally, you would be asked to confirm suchan action (if no communication rules or exceptions have been defined), but userinteraction is disabled in Presentation mode. The solution is to define acommunication rule for every application that might be in conflict with thisbehavior or to use a different Filtering mode in the firewall. Keep in mind that ifPresentation mode is enabled and you go to a webpage or an application thatmight be a security risk, it may be blocked but you will not see any explanation orwarning because user interaction is disabled.
Startup scanBy default, the automatic startup file check will be performed on system startup and duringmodules updates. This scan is dependent upon the Scheduler configuration and tasks.
Startup scan options are a part of the System startup file check scheduler task. To modifyStartup scan settings, navigate to Tools > Scheduler, click on Automatic startup filecheck and then click Edit. In the last step, the Automatic startup file check window willappear (see the following chapter for more details).
For detailed instructions about Scheduler task creation and management, see Creating newtasks.
Automatic startup file checkWhen creating a System startup file check scheduled task, you have several options to adjustthe following parameters:
The Scan target drop-down menu specifies the scan depth for files run at system startupbased on secret sophisticated algorithm. Files are arranged in descending order according tothe following criteria:
• All registered files (most files scanned)• Rarely used files• Commonly used files• Frequently used files• Only the most frequently used files (least files scanned)
Two specific groups are also included:
• Files run before user logon – Contains files from locations that may be accessedwithout the user being logged in (includes almost all startup locations such as services,

87
browser helper objects, winlogon notify, Windows scheduler entries, known dll's, etc.).• Files run after user logon - Contains files from locations that may only be accessedafter a user has logged in (includes files that are only run by a specific user, typically filesin HKEY_CURRENT_USER\SOFTWARE\Microsoft\Windows\CurrentVersion\Run).
Lists of files to be scanned are fixed for each aforementioned group.
Scan priority – The level of priority used to determine when a scan will start:
• When idle – the task will be performed only when the system is idle,• Lowest – when the system load is the lowest possible,• Lower – at a low system load,• Normal – at an average system load.
Document protectionThe Document protection feature scans Microsoft Office documents before they are opened,as well as files downloaded automatically by Internet Explorer such as Microsoft ActiveXelements. Document protection provides a layer of protection in addition to Real-time filesystem protection, and can be disabled to enhance performance on systems that do nothandle a high number of Microsoft Office documents.
To activate Document protection, open the Advanced setup window (press F5) >Detection engine > Malware scans > Document protection and click the EnableDocument protection (formerly Integrate into system) switch.
NoteThis feature is activated by applications that use the Microsoft Antivirus API (forexample, Microsoft Office 2000 and higher, or Microsoft Internet Explorer 5.0and higher).
ExclusionsExclusions enable you to exclude objects from the detection engine. To ensure that allobjects are scanned, we recommend only creating exclusions when it is absolutely necessary.Situations where you may need to exclude an object might include scanning large databaseentries that would slow your computer during a scan or software that conflicts with the scan.
Performance exclusions allow you to exclude files and folders from scanning. Performanceexclusions are useful to exclude file-level scanning of gaming applications or when causingabnormal system behavior or increased performance.
Detection exclusions allow you to exclude objects from cleaning using the detection name,path or its hash. Detection exclusions do not exclude files and folders from scanning asperformance exclusions do. Detection exclusions exclude objects only when they are

88
detected by the detection engine and an appropriate rule is present in the exclusion list.
The exclusions in version 7.1 and below have both Performance exclusions and Detectionexclusions merged into one.
Not to be confused with other types of exclusions:
• Process exclusions – All file operations attributed to excluded application processes areexcluded from scanning (may be required to improve backup speed and serviceavailability).
• Excluded file extensions
• HIPS exclusions
• Exclusion filter for Cloud-based protection
Performance exclusionsPerformance exclusions allow you to exclude files and folders from scanning.
To ensure that all objects are scanned for threats, we recommend creating performanceexclusions only when it is absolutely necessary. However, there are situations when you mayneed to exclude an object, for example, large database entries that would slow yourcomputer during a scan or software that conflicts with the scan.
You can add files and folder to be excluded from scanning into the list of exclusions viaAdvanced setup (F5) > Detection engine > Exclusions > Performance exclusions >Edit.
To exclude an object (path: file or folder) from scanning, click Add and enter the applicablepath or select it in the tree structure.

89
NoteA threat within a file will not be detected by the Real-time file systemprotection module or Computer scan module if a file meets the criteria forexclusion from scanning.
Control elements• Add – Add a new entry to exclude objects from scanning.
• Edit – Enables you to edit selected entries.
• Delete – Removes selected entries (CTRL + click to select multiple entries).
• Import/Export – Importing and exporting of performance exclusions is useful if youneed to backup your current exclusions for use at a later time. The export settingsoption is also convenient for users in unmanaged environments who want to use theirpreferred configuration on multiple systems, they can easily import a .txt file to transferthese settings. Display example of the import/export file format
# {"product":"endpoint","version":"7.2.2055","path":"plugins.01000600.settings.PerformanceExclusions","columns":["Path","Description"]}C:\Backup\*,custom commentC:\pagefile.sys,
Add or Edit performance exclusionThis dialog window excludes a specific path (file or directory) for this computer.

90
Choose path or enter manuallyTo choose an appropriate path, click ... in the Path field.When entering manually, see more exclusion format examples below.
You can use wildcards to exclude a group of files. A question mark (?) represents a singlecharacter whereas an asterisk (*) represents a string of zero or more characters.
Exclusion format• If you want to exclude all files in a folder, type the path to the folder and usethe mask *.*• If you want to exclude doc files only, use the mask *.doc• If the name of an executable file has a certain number of characters (withvarying characters) and you only know the first one (for example, "D”), use thefollowing format:D????.exe (question marks replace the missing / unknown characters)

91
System variables in exclusionsYou can use system variables like %PROGRAMFILES% to define scan exclusions.• To exclude the Program Files folder using this system variable, use the path%PROGRAMFILES%\* (remember to add backslash and asterisk at the end ofpath) when adding to exclusions• To exclude all files and folders in a %PROGRAMFILES% subdirectory, use thepath %PROGRAMFILES%\Excluded_Directory\* Expand list of supported system variables
The following variables can be used in the path exclusion format:• %ALLUSERSPROFILE%• %COMMONPROGRAMFILES%• %COMMONPROGRAMFILES(X86)%• %COMSPEC%• %PROGRAMFILES%• %PROGRAMFILES(X86)%• %SystemDrive%• %SystemRoot%• %WINDIR%• %PUBLIC%User-specific system variables (like %TEMP% or %USERPROFILE%) orenvironment variables (like %PATH%) are not supported.
Path exclusions using an asteriskA few more exclusion examples using an asterisk:C:\Tools\* – The path must ends with the backslash and asterisk to indicate thatit is a folder and all its subfolders that are being excluded.C:\Tools\*.dat – This will exclude .dat files in the Tools folder.C:\Tools\sg.dat – This will exclude this particular file located in the exact path.An exception for performance exclusions:C:\Tools\*.* – Same behavior as C:\Tools\* (not to be confused that the mask *.*will exclude only files with extensions in the Tools folder).A wrong manually entered exclusion example:C:\Tools – Tools folder will not be excluded. From the scanner perspective, Toolscan also be a file name.C:\Tools\ – Do not forget to add the asterisk at the end of the path: C:\Tools\*
Wildcards in the middle of a pathWe highly recommend that you do not use wildcards in the middle of a path (forexample C:\Tools\*\Data\file.dat) unless your system infrastructure requires it.See the following Knowledgebase article for more information.There are no restrictions to using wildcards in the middle of a path when usingdetection exclusions.

92
Order of exclusions• There are no options to adjust the priority level of exclusions using thetop/bottom buttons (as for Firewall rules where rules are executed from top tobottom)• When the first applicable rule is matched by the scanner, the secondapplicable rule will not be evaluated• The fewer the rules, the better the scanning performance• Avoid creating concurrent rules
Path exclusion formatYou can use wildcards to exclude a group of files. A question mark (?) represents a singlecharacter whereas an asterisk (*) represents a string of zero or more characters.
Exclusion format• If you want to exclude all files in a folder, type the path to the folder and usethe mask *.*• If you want to exclude doc files only, use the mask *.doc• If the name of an executable file has a certain number of characters (withvarying characters) and you only know the first one (for example, "D”), use thefollowing format:D????.exe (question marks replace the missing / unknown characters)
System variables in exclusionsYou can use system variables like %PROGRAMFILES% to define scan exclusions.• To exclude the Program Files folder using this system variable, use the path%PROGRAMFILES%\* (remember to add backslash and asterisk at the end ofpath) when adding to exclusions• To exclude all files and folders in a %PROGRAMFILES% subdirectory, use thepath %PROGRAMFILES%\Excluded_Directory\* Expand list of supported system variables
The following variables can be used in the path exclusion format:• %ALLUSERSPROFILE%• %COMMONPROGRAMFILES%• %COMMONPROGRAMFILES(X86)%• %COMSPEC%• %PROGRAMFILES%• %PROGRAMFILES(X86)%• %SystemDrive%• %SystemRoot%• %WINDIR%• %PUBLIC%User-specific system variables (like %TEMP% or %USERPROFILE%) orenvironment variables (like %PATH%) are not supported.

93
Detection exclusionsDetection exclusions allow you to exclude objects from cleaning by filtering the detectionname, object path or its hash.
How detection exclusions workDetection exclusions do not exclude files and folders from scanning asPerformance exclusions do. Detection exclusions exclude objects only whenthey are detected by the detection engine and an appropriate rule is present inthe exclusion list.For example (see the first row on the image below), when an object is detectedas Win32/Adware.Optmedia and the detected file is C:\Recovery\file.exe. On thesecond row, each file, which has the appropriate SHA-1 hash, will always beexcluded despite the detection name.
To ensure that all threats are detected, we recommend creating detection exclusions onlywhen it is absolutely necessary.
To add files and folders to the exclusions list, Advanced setup (F5) > Detection engine >Exclusions > Detection exclusions > Edit.
To exclude an object (by its detection name or hash) from cleaning, click Add.
Detection exclusions object criteria• Path – Limit a detection exclusion for a specified path (or any).
• Detection name – If there is a name of a detection next to an excluded file, it means

94
that the file is only excluded for the given detection, not completely. If that file becomesinfected later with other malware, it will be detected. This type of exclusion can only beused for certain types of infiltrations and it can be created either in the alert windowreporting the infiltration (click Show advanced options and then select Exclude fromdetection), or by clicking Tools > Quarantine and then right-clicking the quarantinedfile and selecting Restore and exclude from scanning from the context menu.
• Hash – Excludes a file based on a specified hash (SHA1), regardless of the file type,location, name or its extension.
Control elements• Add – Add a new entry to exclude objects from cleaning.
• Edit – Enables you to edit selected entries.
• Delete – Removes selected entries (CTRL + click to select multiple entries).
• Import/Export – Importing and exporting of detection exclusions is useful if you needto backup your current exclusions for use at a later time. The export settings option isalso convenient for users in unmanaged environments who want to use their preferredconfiguration on multiple systems, they can easily import a .txt file to transfer thesesettings. Display example of the import/export file format
# {"product":"endpoint","version":"7.2.2055","path":"Settings.ExclusionsManagement.DetectionExclusions","columns":["Id","Path","ThreatName","Description","FileHash"]}4c59cd02-357c-4b20-a0ac-ca8400000001,,,SuperApi.exe,00117F70C86ADB0F979021391A8AEAA497C2C8DF2c362ac8-a630-496e-9665-c76d00000001,C:\Recovery\*.*,Win32/Adware.Optmedia,,
Detection exclusions setup in ESMCESMC 7.1 includes a new wizard for detection exclusions management—create a detectionexclusion and apply it to more computers/group(s).
Possible detection exclusions override from ESMC
When there is an existing presence of a detection exclusions local list, the admin has to applya policy with Allow appending detection exclusions to locally defined list. After that,appending detection exclusions from ESMC will work as expected.

95
Add or Edit detection exclusionExclude detection
A valid ESET detection name should be provided. For a valid detection name, see Log filesand then select Detections from the Log files drop-down menu. This is useful when a falsepositive sample is being detected in ESET Endpoint Security. Exclusions for real infiltrationsare very dangerous, consider excluding only affected files / directories by clicking ... in thePath field and/or only for a temporary period of time. Exclusions apply also to Potentiallyunwanted applications, potentially unsafe applications and suspicious applications.
See also Path exclusion format.
See the Detection exclusions example below.
Exclude hash
Excludes a file based on a specified hash (SHA1), regardless of the file type, location, nameor its extension.

96
Exclusions by detection nameTo exclude a specific detection by its name, enter the valid detection name:Win32/Adware.OptmediaYou can also use the following format when you exclude a detection from theESET Endpoint Security alert window:@NAME=Win32/Adware.Optmedia@TYPE=ApplicUnwnt@NAME=Win32/TrojanDownloader.Delf.QQI@TYPE=Trojan@NAME=Win32/Bagle.D@TYPE=worm
Control elements• Add – Excludes objects from detection.
• Edit – Enables you to edit selected entries.
• Delete – Removes selected entries (CTRL + click to select multiple entries).
Create detection exclusion wizardA detection exclusion can also be created from the Log files context menu (not available formalware detections):
1. In the main program window, click Tools > Log files.
2. Right-click a detection in the Detections log.
3. Click Create exclusion.
To exclude one or more detections based on the Exclusion criteria, click Change criteria:
• Exact files – Exclude each file by its SHA-1 hash.
• Detection – Exclude each file by its detection name.
• Path + Detection – Exclude each file by its detection name and path, including file

97
name (e.g., file:///C:/Users/user/AppData/Local/Temp/34e1824e/ggdsfdgfd.pdf.exe).
The recommended option is pre-selected based on the detection type.
Optionally, you can add a Comment before clicking Create exclusion.
Exclusions (7.1 and below)The exclusions in version 7.1 and below have both Performance exclusions and Detectionexclusions merged into one.

98
Processes exclusionsThe Processes exclusions feature allows you to exclude application processes from Real-timefile system protection. To improve backup speed, process integrity and service availability,some techniques that are known to conflict with file-level malware protection are used duringbackup. Similar problems can occur when attempting live migrations of virtual machines. Theonly effective way to avoid both situations is to deactivate Anti-Malware software. Byexcluding specific process (for example those of the backup solution) all file operationsattributed to such excluded process are ignored and considered safe, thus minimizinginterference with the backup process. We recommend that you use caution when creatingexclusions – a backup tool that has been excluded can access infected files without triggeringan alert which is why extended permissions are only allowed in the real-time protectionmodule.
Processes exclusions help minimize the risk of potential conflicts and improve theperformance of excluded applications, which in turn has a positive effect on the overallperformance and stability of the operating system. The exclusion of a process / application isan exclusion of its executable file (.exe).
You can add executable files into the list of excluded processes via Advanced setup (F5) >Detection engine > Real-time file system protection > Processes exclusions.
This feature was designed to exclude backup tools. Excluding the backup tool's process fromscanning not only ensures system stability, but it also does not affect backup performance asthe backup is not slowed down while it is running.

99
ExampleClick Edit to open the Processes exclusions management window, where youcan add exclusions and browse for executable file (for example Backup-tool.exe), which will be excluded from scanning.As soon as the .exe file is added to the exclusions, activity of this process is notmonitored by ESET Endpoint Security and no scanning is run on any fileoperations performed by this process.
ImportantIf you do not use browse function when selecting process executable, you needto manually enter a full path to the executable. Otherwise, the exclusion will notwork correctly and HIPS may report errors.
You can also Edit existing processes or Delete them from exclusions.
NoteWeb access protection does not take into account this exclusion, so if youexclude the executable file of your web browser, downloaded files are stillscanned. This way an infiltration can still be detected. This scenario is anexample only, and we do not recommend you to create exclusions for webbrowsers.
Add or Edit processes exclusionsThis dialog window enables you to add processes excluded from detection engine. Processesexclusions help minimize the risk of potential conflicts and improve the performance ofexcluded applications, which in turn has a positive effect on the overall performance andstability of the operating system. The exclusion of a process / application is an exclusion of itsexecutable file (.exe).
ExampleSelect the file path of an excepted application by clicking ... (for exampleC:\Program Files\Firefox\Firefox.exe). Do NOT enter the name of the application.As soon as the .exe file is added to the exclusions, activity of this process is notmonitored by ESET Endpoint Security and no scanning is run on any fileoperations performed by this process.
ImportantIf you do not use browse function when selecting process executable, you needto manually enter a full path to the executable. Otherwise, the exclusion will notwork correctly and HIPS may report errors.
You can also Edit existing processes or Delete them from exclusions.

100
HIPS exclusionsExclusions enable you to exclude processes from HIPS Deep Behavioral Inspection.
To exclude an object, click Add and enter the path to an object or select it in the treestructure. You can also Edit or Delete selected entries.
Learn more about exclusionsRefer to the Exclusions chapter.
ThreatSense parametersThreatSense is comprised of many complex threat detection methods. This technology isproactive, which means it also provides protection during the early spread of a new threat. Ituses a combination of code analysis, code emulation, generic signatures and virus signatureswhich work in concert to significantly enhance system security. The scanning engine iscapable of controlling several data streams simultaneously, maximizing efficiency anddetection rate. ThreatSense technology also successfully eliminates rootkits.
ThreatSense engine setup options allow you to specify several scan parameters:
• File types and extensions that are to be scanned• The combination of various detection methods• Levels of cleaning, etc.
To enter the setup window, click ThreatSense parameters in the Advanced setup windowfor any module that uses ThreatSense technology (see below). Different security scenariosmay require different configurations. With this in mind, ThreatSense is individuallyconfigurable for the following protection modules:
• Real-time file system protection• Idle-state scanning• Startup scan• Document protection• Email client protection• Web access protection• Computer scan

101
ThreatSense parameters are highly optimized for each module, their modification cansignificantly influence system operation. For example, changing parameters to always scanruntime packers, or enabling advanced heuristics in the Real-time file system protectionmodule could result in system slow-down (normally, only newly-created files are scannedusing these methods). We recommend that you leave the default ThreatSense parametersunchanged for all modules except Computer scan.
Objects to scanThis section allows you to define which computer components and files will be scanned forinfiltrations.
Operating memory – Scans for threats that attack the operating memory of the system.
Boot sectors/UEFI – Scans boot sectors for the presence of malware in the master bootrecord. Read more about UEFI in the glossary.
Email files – The program supports the following extensions: DBX (Outlook Express) andEML.
Archives – The program supports the following extensions: ARJ, BZ2, CAB, CHM, DBX, GZIP,ISO/BIN/NRG, LHA, MIME, NSIS, RAR, SIS, TAR, TNEF, UUE, WISE, ZIP, ACE, and many others.
Self-extracting archives – Self-extracting archives (SFX) are archives that can extractthemselves.
Runtime packers – After being executed, runtime packers (unlike standard archive types)

102
decompress in memory. In addition to standard static packers (UPX, yoda, ASPack, FSG,etc.), the scanner is able to recognize several additional types of packers through the useof code emulation.
Scan optionsSelect the methods used when scanning the system for infiltrations. The following optionsare available:
Heuristics – A heuristic is an algorithm that analyzes the (malicious) activity of programs.The main advantage of this technology is the ability to identify malicious software which didnot exist or was not covered by the previous versions of the detection engine module. Thedisadvantage is a (very small) probability of false alarms.
Advanced heuristics/DNA signatures – Advanced heuristics are a unique heuristicalgorithm developed by ESET, optimized for detecting computer worms and trojan horsesand written in high-level programming languages. The use of advanced heuristics greatlyincreases the threat detection capabilities of ESET products. Signatures can reliably detectand identify viruses. Utilizing the automatic update system, new signatures are availablewithin a few hours of a threat discovery. The disadvantage of signatures is that they onlydetect viruses they know (or slightly modified versions of these viruses).
CleaningThe cleaning settings determine the behavior of ESET Endpoint Security while cleaningobjects.
ExclusionsAn extension is the part of a file name delimited by a period. An extension defines the typeand content of a file. This section of the ThreatSense parameter setup lets you define thetypes of files to scan.
OtherWhen configuring ThreatSense engine parameters setup for a On-demand computer scan,the following options in Other section are also available:
Scan alternate data streams (ADS) – Alternate data streams used by the NTFS filesystem are file and folder associations which are invisible to ordinary scanning techniques.Many infiltrations try to avoid detection by disguising themselves as alternate data streams.
Run background scans with low priority – Each scanning sequence consumes a certainamount of system resources. If you work with programs that place a high load on systemresources, you can activate low priority background scanning and save resources for yourapplications.
Log all objects – The Scan log will show all the scanned files in self-extracting archives,even those not infected (may generate a lot of scan log data and increase the scan log file

103
size).
Enable Smart optimization – With Smart Optimization enabled, the most optimal settingsare used to ensure the most efficient scanning level, while simultaneously maintaining thehighest scanning speeds. The various protection modules scan intelligently, making use ofdifferent scanning methods and applying them to specific file types. If the SmartOptimization is disabled, only the user-defined settings in the ThreatSense core of theparticular modules are applied when performing a scan.
Preserve last access timestamp – Select this option to keep the original access time ofscanned files instead of updating them (for example, for use with data backup systems).
LimitsThe Limits section allows you to specify the maximum size of objects and levels of nestedarchives to be scanned:
Object settingsMaximum object size – Defines the maximum size of objects to be scanned. The givenantivirus module will then scan only objects smaller than the size specified. This optionshould only be changed by advanced users who may have specific reasons for excludinglarger objects from scanning. Default value: unlimited.
Maximum scan time for object (sec.) – Defines the maximum time value for thescan of files in a container object (such as a RAR/ZIP archive or an email with multipleattachments). This setting does not apply for standalone files. If a user-defined valuehas been entered and that time has elapsed, a scan will stop as soon as possible,regardless of whether the scan of each file in a container object has finished.In the case of an archive with large files, the scan will stop no sooner than a file from thearchive is extracted (for example, when a user-defined variable is 3 seconds, but theextraction of a file takes 5 seconds). The rest of the files in the archive will not bescanned when that time has elapsed.To limit scanning time, including bigger archives, use Maximum object size andMaximum size of file in archive (not recommended due to possible security risks).Default value: unlimited.
Archive scan setupArchive nesting level – Specifies the maximum depth of archive scanning. Defaultvalue: 10.
Maximum size of file in archive – This option allows you to specify the maximum filesize for files contained in archives (when they are extracted) that are to be scanned.Default value: unlimited.

104
NoteWe do not recommend changing the default values; under normal circumstances,there should be no reason to modify them.
Cleaning levelsTo access cleaning level settings for a desired protection module, expand ThreatSenseparameters (for example, Real-time file system protection) and then click Cleaning.
Real-time protection and other protection modules have the following remediation (i.e.cleaning) levels.
Remediation in ESET Endpoint Security 7.2 and laterCleaning level DescriptionAlways remedydetection
Attempt to remediate the detection while cleaning objects without anyend-user intervention. In some rare cases (for example, system files), ifthe detection cannot be remediated, the reported object is left in itsoriginal location. Always remedy detection is the recommendeddefault setting in a managed environment.
Remedydetection if safe,keep otherwise
Attempt to remediate the detection while cleaning objects without anyend-user intervention. In some cases (for example, system files orarchives with both clean and infected files), if a detection cannot beremediated, the reported object is left in its original location.
Remedydetection if safe,ask otherwise
Attempt to remediate the detection while cleaning objects. In somecases, if no action can be performed, the end-user receives aninteractive alert and must select a remediation action (for example,delete or ignore). This setting is recommended in most cases.
Always ask theend-user
The end-user receives an interactive window while cleaning objects andmust select a remediation action (for example, delete or ignore). Thislevel is designed for more advanced users who know which steps to takein the event of a detection.

105
Cleaning levels in ESET Endpoint Security 7.1 andbelow
Cleaning level DescriptionNo cleaning Detections will not be cleaned automatically. The program will display a
warning window and allow the user to choose an action. This level isdesigned for more advanced users who know which steps to take in theevent of a detection.
Normalcleaning
The program will attempt to automatically clean or delete detections basedon a predefined action (depending on the type of infiltration). Detection anddeletion of an object is signaled by a notification the bottom-right corner ofthe screen. If it is not possible to select the correct action automatically, theprogram provides other follow-up actions. The same happens when apredefined action cannot be completed.
Strictcleaning
The program will clean or delete all detections. The only exceptions are thesystem files. If it is not possible to clean them, the user is prompted to selectan action by a warning window.
The mentioned cleaning level is applied when setting up an ESMC policy for older versions ofESET Endpoint Security:
Cleaning level in the ESMC policy Applied cleaning levelAlways remedy detection Strict cleaningRemedy detection if safe, keep otherwise Normal cleaning

106
Remedy detection if safe, ask otherwise* Normal cleaningAlways ask the end-user No cleaning
* Default value when upgrading to version 7.2 and later with Normal cleaning set in ESETEndpoint Security.
File extensions excluded from scanningAn extension is the part of a file name delimited by a period. An extension defines the typeand content of a file. This section of the ThreatSense parameter setup lets you define thetypes of files to scan.
NoteNot to be confused with other types of Exclusions.
By default, all files are scanned. Any extension can be added to the list of files excluded fromscanning.
Excluding files is sometimes necessary if scanning certain file types prevents the programthat is using certain extensions from running properly. For example, it may be advisable toexclude the .edb, .eml and .tmp extensions when using Microsoft Exchange servers.
ExampleTo add a new extension to the list, click Add. Type the extension into the blankfield (for example tmp) and click OK. When you select Enter multiple values,you can add multiple file extensions delimited by lines, commas or semicolons(for example, choose Semicolon from drop-down menu as a separator, andtype edb;eml;tmp).You can use a special symbol ? (question mark). The question mark representsany symbol (for example ?db).
NoteIn order to see the exact extension (if any) of a file in a Windows operatingsystem you have to uncheck the Hide extensions for known file typesoption at Control Panel > Folder Options > View (tab) and apply thischange.
Additional ThreatSense parametersAdditional ThreatSense parameters for newly created and modified files – Theprobability of infection in newly-created or modified files is comparatively higher than inexisting files. For this reason, the program checks these files with additional scanningparameters. Along with common signature-based scanning methods, advanced heuristics,which can detect new threats before the detection engine update is released, are also used.

107
In addition to newly-created files, scanning is performed on self-extracting files (.sfx) andruntime packers (internally compressed executable files). By default, archives are scannedup to the 10th nesting level and are checked regardless of their actual size. To modifyarchive scan settings, disable Default archive scan settings.
To learn more about Runtime packers, Self-extracting archives and Advancedheuristics see ThreatSense engine parameters setup.
Additional ThreatSense parameters for executed files – By default, Advancedheuristics is used when files are executed. When enabled, we strongly recommend keepingSmart optimization and ESET LiveGrid® enabled to mitigate impact on system performance.
NetworkThe Network section allows you to have quick access to the following components orsettings in Advanced setup:
• Firewall – Here you can adjust the filtering mode for the ESET Firewall. To accessmore detailed settings, click the gear wheel > Configure next to Firewall, or pressF5 to access Advanced setup.
• Network attack protection (IDS) – Analyzes the content of network traffic andprotects from network attacks. Any traffic which is considered harmful will be blocked.ESET Endpoint Security will inform you when you connect to an unprotected wirelessnetwork or a network with weak protection.
• Botnet protection – Quickly and accurately identifies malware in the system. Todisable Botnet protection for a specific period of time, click (not recommended).
• Connected networks – Displays the networks to which network adapters areconnected. After clicking the gear wheel, you will be prompted to select a protection typefor the network you are connected to via your network adapter. In this window you canalso see Network adapters in lower right corner. You can view each network adapterand its assigned firewall profile and trusted zone. For more detailed information, seeNetwork adapters.
• Temporary IP address blacklist – View a list of IP addresses that have beendetected as the source of attacks and added to the blacklist to block connections for acertain period of time. For more information, click this option and press F1.
• Troubleshooting wizard – Helps you solve connectivity problems caused by ESETFirewall. For more detailed information see Troubleshooting wizard.

108
Click the gear wheel next to Firewall to access the following settings:
• Configure... – Opens the firewall window in Advanced setup, where you can definehow the firewall will handle network communication.
• Block all traffic – All inbound and outbound communication will be blocked by thefirewall. Only use this option if you suspect a critical security risk that requires thesystem to be disconnected from the network. To restore the firewall to normal operationwhile Network traffic filtering is in the Block all traffic mode, click Stop blocking alltraffic.
• Pause firewall (allow all traffic) – The opposite of blocking all network traffic. Ifselected, all firewall filtering options are turned off and all incoming and outgoingconnections are permitted. To re-enable the firewall while Network traffic filtering is inthis mode, click Enable firewall.
• Automatic mode – (when another filtering mode is enabled) – Click to change thefiltering mode to automatic filtering mode (with user-defined rules).
• Interactive mode – (when another filtering mode is enabled) – Click to change thefiltering mode to interactive filtering mode.

109
FirewallThe Firewall controls all network traffic to and from the system. This is accomplished byallowing or denying individual network connections based on specified filtering rules. Itprovides protection against attacks from remote computers and can block potentiallythreatening services.
Basic
Enable Firewall
We recommend that you leave this feature enabled to ensure the security of your system.With the firewall engaged, network traffic is scanned in both directions.
Also evaluate rules from Windows firewall
In automatic mode, allow also incoming traffic allowed by rules from Windows Firewall, unlessexplicitly blocked by ESET rules.
ImportantRules from Windows firewall configured using Group Policy (GPO) are notevaluated.
Filtering mode
The behavior of the firewall changes based on the filtering mode. Filtering modes alsoinfluence the level of user interaction required.
The following filtering modes are available for the ESET Endpoint Security Firewall:
Filtering mode DescriptionAutomaticmode
The default mode. This mode is suitable for users who prefer easy andconvenient use of the firewall without the need to define rules. Custom,user-defined rules can be created but are not required in Automaticmode. Automatic mode allows all outbound traffic for a given system andblocks most inbound traffic with the exception of some traffic from theTrusted Zone (as specified in IDS and advanced options/Allowed services)and responses to recent outbound communications.
Interactivemode
Allows you to build a custom configuration for your Firewall. When acommunication is detected and no existing rules apply to thatcommunication, a dialog window reporting an unknown connection will bedisplayed. The dialog window gives the option to allow or deny thecommunication, and the decision to allow or deny can be saved as a newrule for the Firewall. If you choose to create a new rule, all futureconnections of this type will be allowed or blocked according to that rule.

110
Policy-basedmode
Blocks all connections that are not defined by a specific rule that allowsthem. This mode allows advanced users to define rules that permit onlydesired and secure connections. All other unspecified connections will beblocked by the Firewall.
Learning mode Automatically creates and saves rules; this mode is best used for the initialconfiguration of the Firewall, but should not be left on for prolongedperiods of time. No user interaction is required, because ESET EndpointSecurity saves rules according to predefined parameters. Learning modeshould only be used until all rules for required communications have beencreated to avoid security risks.
Profiles can be used to customize the behavior of the ESET Endpoint Security Firewall byspecifying different sets of rules in different situations.
Advanced
Rules
Rules setup allows you to view all rules applied to traffic generated by individual applicationswithin trusted zones and the Internet.
Zones
A zone represents a collection of network addresses that create one logical group.

111
NoteYou can create an IDS exception when a Botnet attacks your computer. Anexception can be modified in Advanced setup (F5) > Network protection >Network attack protection > IDS exceptions by clicking Edit.
Learning modeLearning mode automatically creates and saves a rule for each communication that has beenestablished in the system. No user interaction is required, because ESET Endpoint Securitysaves rules according to the predefined parameters.
This mode can expose your system to risk, and is only recommended for initial configurationof the firewall.
Select Learning mode from drop-down menu in Advanced setup (F5) > Firewall > Basic> Filtering mode to activate Learning mode options. This section includes the followingitems:

112
WarningWhile in Learning mode, the firewall does not filter communication. All outgoingand incoming communications are allowed. In this mode, your computer is notfully protected by the firewall.
Mode set after learning mode expiration – Define which filtering mode the ESETEndpoint Security Firewall will revert to after the time period for learning mode ends. Readmore about filtering modes. After expiration, the Ask user option requires administrativeprivileges to perform a change to the firewall filtering mode.
Communication type – Select specific rule creation parameters for each type ofcommunication. There are four types of communication:
Inbound traffic from the Trusted zone – An example of an incoming connection withinthe trusted zone would be a remote computer from within the trusted zone attempting toestablish communication with a local application running on your computer.
Outbound traffic to the Trusted zone – A local application attempting to establish aconnection to another computer within the local network, or within a network in the trustedzone.
Inbound Internet traffic – A remote computer attempting to communicate with anapplication running on the computer.
Outbound Internet traffic – A local application attempting to establish a connection toanother computer.
Each section allows you to define parameters to be added to newly created rules:
Add local port – Includes the local port number of the network communication. For outgoingcommunications, random numbers are usually generated. For this reason, we recommendenabling this option only for incoming communications.
Add application – Includes the name of the local application. This option is suitable forfuture application-level rules (rules that define communication for an entire application). Forexample, you can enable communication only for a web browser or email client.
Add remote port – Includes the remote port number of the network communication. Forexample you can allow or deny a specific service associated with a standard port number(HTTP – 80, POP3 – 110, etc.).
Add remote IP address/Trusted zone – A remote IP address or zone can be used as aparameter for new rules defining all network connections between the local system and thatremote address / zone. This option is suitable if you want to define actions for a certaincomputer or a group of networked computers.
Maximum number of different rules for an application – If an application communicatesthrough different ports to various IP addresses, etc., the firewall in learning mode creates

113
appropriate count of rules for this application. This option allows you to limit the number ofrules that can be created for one application.
Network attack protectionEnable Network attack protection (IDS) – Analyses thecontent of network traffic and protects from networkattacks. Any traffic which is considered harmful will beblocked.Enable Botnet protection – Detects and blocks communication with malicious commandand control servers based on typical patterns when the computer is infected and a bot isattempting to communicate. Read more about Botnet protection in the glossary.
IDS exceptions – This option allows you to configure advanced filtering options to detectseveral types of attacks and exploits that might be used to harm your computer.
Advanced filtering optionsThe Firewall and Network attack protection sections allow you to configure advanced filteringoptions to detect several types of attacks and vulnerabilities that can be carried out againstyour computer.
Notifications and loggingIn some cases you will not receive a threat notification about blockedcommunications. Please consult the Logging and creating rules or exceptionsfrom log section for instructions to view all blocked communications in thefirewall log.
Availability of particular options in this help pageThe availability of particular options in Advanced setup (F5) > NetworkProtection > Firewall and Advanced setup (F5) > Network Protection >Network attack protection may vary depending on the type or version ofyour firewall module, as well as the version of your operating system.
Allowed services
Settings in this group are meant to simplify theconfiguration of access to this computer´s services

114
from the trusted zone. Many of them enable/disablepredefined firewall rules.
• Allow file and printer sharing in the Trusted zone – Allows remote computers in theTrusted zone to access your shared files and printers.
• Allow UPNP for system services in the Trusted zone – Allows incoming andoutgoing requests of UPnP protocols for system services. UPnP (Universal Plug and Play alsoknown as Microsoft Network Discovery) is used in Windows Vista and later operatingsystems.
• Allow incoming RPC communication in the Trusted zone – Enables TCP connectionsfrom the Trusted zone allowing access to the MS RPC Portmapper and RPC/DCOM services.
• Allow remote desktop in the Trusted zone – Enables connections via MicrosoftRemote Desktop Protocol (RDP) and allows computers in the Trusted zone to access yourcomputer using a program that uses RDP (for example, "Remote Desktop Connection"). Seealso how to allow RDP connections outside Trusted zone.
• Enable logging into multicast groups through IGMP – Allows incoming/outgoingIGMP and incoming UDP multicast streams, for example video streams generated byapplications using the IGMP protocol (Internet Group Management Protocol).
• Allow communication for bridged connections – Select this option to avoidterminating bridged connections. Bridged networking connects a virtual machine to anetwork using the host computer's Ethernet adapter. If you use bridged networking, thevirtual machine can access other devices on the network, and vice versa as if it were aphysical computer on the network.
• Allow Metro applications – Communication of Windows Store applications that arerunning in the Metro environment is allowed according to the Metro application manifest.This option will override all rules and exceptions for Metro applications regardless ofwhether you have selected Interactive mode or Policy-based mode in ESET Firewallsettings.
• Allow automatic Web Services Discovery (WSD) for system services in theTrusted zone – Allows incoming Web Services Discovery requests from Trusted zonesthrough the firewall. WSD is the protocol used to locate services on a local network.
• Allow multicast addresses resolution in the Trusted zone (LLMNR) – The LLMNR(Link-local Multicast Name Resolution) is a DNS packet based protocol that allows both IPv4and IPv6 hosts to perform name resolution for hosts on the same local link without requiringa DNS server or DNS client configuration. This option allows incoming multicast DNSrequests from the Trusted zone through the firewall.
• Windows HomeGroup support – Enables HomeGroup support for Windows 7 and lateroperating systems. A HomeGroup is able to share files and printers on a home network. Toconfigure a Homegroup, navigate to Start > Control Panel > Network and Internet >

115
HomeGroup.
Intrusion detection• Protocol SMB – Detects and blocks various security problems in SMB protocol, namely:
• Rogue server challenge attack authentication detection – Protects against anattack that uses a rogue challenge during authentication in order to obtain usercredentials.
• IDS evasion during named pipe opening detection – Detection of known evasiontechniques used for opening MSRPCS named pipes in SMB protocol.
• CVE detections (Common Vulnerabilities and Exposures) – Implemented detectionmethods of various attacks, forms, security holes and exploits over SMB protocol. Pleasesee the CVE website at cve.mitre.org to search and obtain more detailed info about CVEidentifiers (CVEs).
• Protocol RPC – Detects and blocks various CVEs in the remote procedure call systemdeveloped for the Distributed Computing Environment (DCE).
• Protocol RDP – Detects and blocks various CVEs in the RDP protocol (see above).
• ARP Poisoning attack detection – Detection of ARP poisoning attacks triggered byman in the middle attacks or detection of sniffing at network switch. ARP (AddressResolution Protocol) is used by the network application or device to determine the Ethernetaddress.
• Allow response to ARP requests from outside the Trusted zone – Select thisoption if you want the system to respond to ARP requests with IP addresses that are notfrom the Trusted zone. ARP (Address Resolution Protocol) is used by the networkapplication to determine the Ethernet address.
• DNS Poisoning attack detection – Detection of DNS poisoning – relieving a fakeanswer to a DNS request (sent by an attacker) which can point you to fake and maliciouswebsites. DNS (Domain name systems) are distributed database systems that translatebetween human-friendly domain names and numeric IP addresses and allow users to referto a website simply by using its domain name. Read more about this type of attack in theglossary.
• TCP/UDP Port Scanning attack detection – Detects attacks of port scanning software– application designed to probe a host for open ports by sending client requests to a rangeof port addresses with the goal of finding active ports and exploiting the vulnerability of theservice. Read more about this type of attack in the glossary.
• Block unsafe address after attack detection – IP addresses that have been detectedas sources of attacks are added to the Blacklist to prevent connection for a certain period oftime.

116
• Display notification after attack detection – Turns on the system tray notification atthe bottom right corner of the screen.
• Display notifications also for incoming attacks against security holes – Alertsyou if attacks against security holes are detected or if an attempt is made by a threat toenter the system this way.
Packet inspection• Allow incoming connection to admin shares in SMB protocol - The administrativeshares (admin shares) are the default network shares that share hard drive partitions (C$,D$, ...) in the system together with the system folder (ADMIN$). Disabling connection toadmin shares should mitigate many security risks. For example, the Conficker wormperforms dictionary attacks in order to connect to admin shares.
• Deny old (unsupported) SMB dialects – Deny SMB sessions that use an old SMBdialect unsupported by IDS. Modern Windows operating systems support old SMB dialectsdue to backward compatibility with old operating systems such as Windows 95. Theattacker can use an old dialect in an SMB session in order to evade traffic inspection. Denyold SMB dialects if your computer does not need to share files (or use SMB communicationin general) with a computer with an old version of Windows.
• Deny SMB sessions without extended security – Extended security can be usedduring the SMB session negotiation in order to provide a more secure authenticationmechanism than LAN Manager Challenge/Response (LM) authentication. The LM scheme isconsidered weak and is not recommended for use.
• Deny opening of executable files on a server outside the Trusted zone in SMBprotocol – Drops connection when you are trying to open an executable file (.exe, .dll, ...)from a shared folder on the server that does not belong to the Trusted zone in firewall. Notethat copying executable files from trusted sources can be legitimate, however thisdetection should mitigate risks from the unwanted opening of a file on a malicious server(for example, a file opened by clicking a hyperlink to a shared malicious executable file).
• Deny NTLM authentication in SMB protocol for connecting a server in/outsidethe Trusted zone – Protocols that use NTLM (both versions) authentication schemes aresubject to a credentials forwarding attack (known as an SMB Relay attack in the case ofSMB protocol). Denying NTLM authentication with a server outside the Trusted zone shouldmitigate risks from forwarding credentials by a malicious server outside the Trusted zone.Similarly, you can deny NTLM authentication with servers in the Trusted zone.
• Allow communication with the Security Account Manager service – For moreinformation about this service see [MS-SAMR].
• Allow communication with the Local Security Authority service – For moreinformation about this service see [MS-LSAD] and [MS-LSAT].
• Allow communication with the Remote Registry service – For more information

117
about this service see [MS-RRP].
• Allow communication with the Service Control Manager service – For moreinformation about this service see [MS-SCMR].
• Allow communication with the Server service – For information about this servicesee [MS-SRVS].
• Allow communication with the other services – Other MSRPC services. MSRPC is theMicrosoft implementation of the DCE RPC mechanism. Moreover, MSRPC can use namedpipes carried into the SMB (network file sharing) protocol for transport (ncacn_nptransport). MSRPC services provide interfaces for accessing and managing windowssystems remotely. Several security vulnerabilities have been discovered and exploited inthe wild in the Windows MSRPC system (for example, Conficker worm, Sasser worm,…).Disable communication with MSRPC services that you do not need to provide to mitigatemany security risks (such as remote code execution or service failure attacks).
• Check TCP connection status – Checks to see if all TCP packets belong to an existingconnection. If a packet does not exist in a connection, it will be dropped.
• Maintain inactive TCP connections – In order to function, some applications requirethat the TCP connection that they establish is maintained even though the TCP connectionmay be inactive. Select this option to avoid terminating inactive TCP connections.
• TCP protocol overload detection – The principle of this method involves exposing thecomputer/server to multiple requests – also see DoS (Denial of service attacks).
• ICMP protocol message checking – Prevents attacks that exploit the weaknesses ofthe ICMP protocol, which could lead to computer unresponsiveness - also see DoS (Denial ofservice attacks).
• Covert data in ICMP protocol detection – Checks to see if the ICMP protocol is usedfor data transfer. Many malicious techniques use the ICMP protocol to bypass the firewall.
Please see this ESET Knowledgebase article for an updated version of this help page.
IDS exceptionsIn some situations the Intrusion Detection Service (IDS) may detect communication betweenrouters or other internal networking devices as a potential attack. For example, you can addthe known safe address to the Addresses excluded from IDS zone to bypass the IDS.
Illustrated instructionsThe following ESET Knowledgebase articles may only be available in English:• Create IDS exclusions on client workstations in ESET Endpoint Security• Create IDS exclusions for client workstations in ESET Security ManagementCenter

118
Columns• Alert – Type of alert.
• Application – Select the file path of an excepted application by clicking ... (forexample C:\Program Files\Firefox\Firefox.exe). Do NOT enter the name of the application.
• Remote IP – A list of remote IPv4 or IPv6 address / ranges / subnets. Multipleaddresses must be separated by a comma.
• Block – Each system process has its own default behavior and assigned action (blockor allow). To override the default behavior for ESET Endpoint Security you can choose toblock or allow it using the drop-down menu.
• Notify – Select Yes to display Desktop notifications on your computer. Select No ifyou do not want desktop notifications. The available values are Default/Yes/No.
• Log – Select Yes to log events to ESET Endpoint Security log files. Select No if you donot want to log events. The available values are Default/Yes/No.
Managing IDS exceptions• Add – Click to create a new IDS exception.
• Edit – Click to edit an existing IDS exception.
• Delete – Select and click if you want to remove an existing exception from the list ofIDS exceptions.
• Top/Up/Down/Bottom – Allows you to adjust the priority level of

119
exceptions (exceptions are evaluated from top to bottom).
ExampleYou want to display a notification and collect a log each time the event occurs:1.Click Add to add a new IDS exception.2.Select particular alert from the Alert drop-down menu.3.Click ... and select the file path of the application to which you want to applythe notification.4.Leave Default in the Block drop-down menu. This will inherit the defaultaction applied by ESET Endpoint Security.5.Set both the Notify and Log drop-down menus to Yes.6.Click OK to save this notification.
ExampleYou want to remove recurring notifications for a type of alert you do notconsider to be a threat:1.Click Add to add a new IDS exception.2.Select particular alert from the Alert drop-down menu, for example SMBsession without security extensions or TCP Port Scanning attack.3.Select In from the direction drop-down menu in case it is from an inboundcommunication.4.Set the Notify drop-down menu to No.5.Set the Log drop-down menu to Yes.6.Leave Application blank.7.If the communication is not coming from a particular IP address, leaveRemote IP addresses blank.8.Click OK to save this notification.

120
Suspected threat blockedThis situation can occur when an application on your computer is trying to transmit malicioustraffic to another computer on the network, exploiting a security hole or if someone is tryingto scan ports on your network.
Threat – Name of the threat.
Source – Source network address.
Target – Target network address.
Stop blocking – Creates an IDS exception for the suspected threat with settings to allowcommunication.
Keep blocking – Blocks the detected threat. To create an IDS exception with settings toblock communication for this threat, select Do not notify me again.
NoteInformation shown in this notification window may vary depending on the typeof threat detected.For more information about threats and other related terms see Types ofremote attacks or Types of detections.
Network protection troubleshootingThe Troubleshooting wizard helps you resolve connectivity problems caused by the ESETFirewall. From the drop-down menu, select a period of time during which communication hasbeen blocked. A list of recently blocked communications gives you an overview about thetype of application or device, reputation and total number of application and devices blockedduring that time period. For more details about blocked communication, click Details. Thenext step is to unblock the application or device on which you are experiencing connectivityproblems.
When you click Unblock, the previously blocked communication will be allowed. If youcontinue to experience problems with an application, or your device does not work asexpected, click The application still doesn't work and all communications previouslyblocked for that device will now be allowed. If the issue persist, restart the computer.
Click Show changes to see rules created by the wizard. Additionally, you can see rulescreated by the wizard Advanced setup > Network protection > Firewall > Advanced >Rules.
Click Unblock another to troubleshoot communications issues with a differentdevice or application.

121
Connected networksThe Connected network section is accessible from the main program window of ESETEndpoint Security by clicking Setup > Network > Connected networks.
It shows the networks to which network adapters are connected. After clicking the link belowthe network name, you will be prompted to select a protection type (strict or allowed) for thenetwork you are connected to via your network adapter, or you can click the gear wheel to change this selection in Advanced setup. This setting defines how accessible yourcomputer is to other computers on the network.
Clicking the Network adapters in lower right corner of the window allows you to view eachnetwork adapter and its assigned firewall profile and trusted zone. For more detailedinformation, see Network adapters.
Known networksWhen using a computer that frequently connects to public networks or networks outside ofyour normal work network, we recommend that you verify the network credibility of newnetworks that you are connecting to. Once networks are defined, ESET Endpoint Security canrecognize trusted (Home/office) networks using various network parameters configured inNetwork Identification. Computers often enter networks with IP addresses that are similarto the trusted network. In such cases, ESET Endpoint Security may consider an unknownnetwork to be trusted (Home/office). We recommend that you use Network authenticationto avoid this type of situation.
When a network adapter is connected to a network or its network settings are reconfigured,ESET Endpoint Security will search the known network list for a record that matches the newnetwork. If Network identification and Network authentication (optional) match, thenetwork will be marked connected in this interface. When no known network is found,network identification configuration will create a new network connection to identify thenetwork the next time that you connect to it. By default, the new network connection usesthe Public network protection type. The New Network Connection Detected dialogwindow will prompt you to choose between the Public network, Home or office networkor Use Windows setting protection type. If a network adapter is connected to a knownnetwork and that network is marked as Home or office network, local subnets of theadapter will be added to the Trusted zone.
Protection type of new networks – Select which of the following options: Use Windowssetting, Ask user or Mark as public is used by default for new networks.

122
NoteWhen you select Use Windows setting a dialog will not appear and the networkyou are connected to will automatically be marked according to your Windowssettings. This will cause certain features (for example file sharing and remotedesktop) to become accessible from new networks.
Known networks can be configured manually in the Known networks editor window.
Known networks editorKnown networks can be configured manually in Advanced setup > Network protection >Firewall > Known Networks by clicking Edit next to Known networks.
ColumnsName – Name of known network.
Protection type – Shows if the network is set to Home or office network, Public or UseWindows setting.
Firewall profile – Select a profile from the Display rules used in the profile drop-downmenu to display the profiles rules filter.
Update profile – Allows you to apply created update profile when connected to thisnetwork.
Control elementsAdd – Creates a new known network.
Edit – Click to edit an existing known network.
Delete – Select a network and click Delete to remove it from the list of known networks.
Top/Up/Down/Bottom – Allows you to adjust the priority level of knownnetworks (networks are evaluated from top to bottom).
Network configuration settings are arranged in the following tabs:
NetworkHere you can define the Network name and select the Protection type (Public network,Home or office network or Use Windows setting) for the network. Use the Firewall profiledrop-down menu to select the profile for this network. If the network uses the Home oroffice network protection type, all directly connected network subnets are consideredtrusted. For example, if a network adapter is connected to this network with the IP address192.168.1.5 and the subnet mask 255.255.255.0, the subnet 192.168.1.0/24 is added to thatadapter's trusted zone. If the adapter has more addresses/subnets, all of them will be

123
trusted, regardless of the Network Identification configuration of the known network.
Additionally, addresses added under Additional trusted addresses are always added tothe trusted zone of adapters connected to this network (regardless of the network'sprotection type).
Warn about weak WiFi encryption – ESET Endpoint Security will inform you when youconnect to an unprotected wireless network or network with weak protection.
Firewall profile – Select firewall profile that will be used when connected to this network.
Update profile – Select update profile that will be used when connected to this network.
The following conditions must be met for a network to be marked as connected in the list ofconnected networks:
• Network identification – All filled in parameters must match active connectionparameters.• Network authentication – if authentication server is selected, successfulauthentication with the ESET Authentication Server must take place.
Network identificationNetwork identification is performed based on the local network adapter's parameters. Allselected parameters are compared against the actual parameters of active networkconnections. IPv4 and IPv6 addresses are allowed.

124
Network authenticationNetwork authentication searches for a specific server in the network and uses asymmetricencryption (RSA) to authenticate that server. The name of the network being authenticatedmust match the zone name set in authentication server settings. The name is case sensitive.Specify a server name, server listening port and a public key that corresponds to the privateserver key (see Network authentication – Server configuration). The server name can beentered in the form of an IP address, DNS or NetBios name and can be followed by a pathspecifying the location of the key on the server (for example,server_name_/directory1/directory2/authentication). You can specify alternate servers to useby appending them to the path, separated by semicolons.
Download the ESET Authentication Server.
The public key can be imported using any of the following file types:
• PEM encrypted public key (.pem), this key can be generated using the ESETAuthentication Server (see Network authentication – Server configuration).• Encrypted public key• Public key certificate (.crt)
Click Test to test your settings. If authentication is successful, Server authentication wassuccessful will be displayed. If authentication is not configured properly, one of the followingerror messages will be displayed:
Server authentication failed. Invalid or mismatched signature.Server signature does not match the public key entered.
Server authentication failed. Network name doesn't match.The configured network name does not correspond with the authentication server zone

125
name. Review both names and ensure they are identical.
Server authentication failed. Invalid or no response from server.No response is received if the server is not running or is inaccessible. An invalid responsemay be received if another HTTP server is running on the specified address.
Invalid public key entered.Verify that the public key file you have entered is not corrupted.
Network authentication - ServerconfigurationThe authentication process can be executed by any computer/server connected to thenetwork that is to be authenticated. The ESET Authentication Server application needs to beinstalled on a computer/server that is always accessible for authentication whenever a clientattempts to connect to the network. The installation file for the ESET Authentication Serverapplication is available for download on ESET’s website.
After you install the ESET Authentication Server application, a dialog window will appear (youcan access the application by clicking Start > Programs > ESET > ESET AuthenticationServer).
To configure the authentication server, enter the authentication network name, the serverlistening port (default is 80) as well as the location to store the public and private key pair.Next, generate the public and private key that will be used in the authentication process. Theprivate key will remain on the server while the public key needs to be imported on the clientside in the Network authentication section when setting up a network in the firewall setup.
Firewall profilesGlobal default profile – If there is no profile from network nor from network adapterconfiguration, the global default profile is used.
List of profiles – Profiles can be used to control the behavior of the ESET Endpoint SecurityFirewall. When creating or editing a firewall rule, you can assign it to a specific profile, orhave it apply to every profile. When a profile is active on a network interface, only the globalrules (rules with no profile specified) and the rules that have been assigned to that profile areapplied to it. You can create multiple profiles with different rules assigned to networkadapters or assigned to networks to easily alter firewall behavior.
Profiles assigned to network adapters – A network adapter can be set up to use a profileconfigured for a specific network when it is connected to that network.
You can also assign a specific profile to use when on a given network in Advanced setup(F5) > Firewall > Known networks. Select a network from the list of Known networks

126
and click Edit to assign a firewall profile to the specific network from the Firewall profiledrop-down menu. If that network has no assigned profile, then the adapter's default profilewill be used. If the adapter is set up not to use the network's profile, its default profile will beused regardless of which network it is connected to. If there is no profile for a network or foradapter configuration, the global default profile is used. To assign a profile to a networkadapter, select the network adapter, click Edit next to Profiles assigned to networkadapters, select the profile from Default firewall profile drop-down menu and then clickOK.
When the firewall switches to another profile, a notification will appear in the lower rightcorner by the system clock.
Profiles assigned to network adaptersBy switching profiles you can quickly make multiple changes to firewall behavior. Customrules can be set and applied for particular profiles. Network adapter entries for all adapterspresent on the machine are added to the list of Network adapters automatically.
Columns
Name – Name of the network adapter.
Default firewall profile – The default profile is used when the network you are connectedto has no configured profile, or your network adapter is set not to use a network profile.
Prefer network's profile – Network adapter can use firewall profile configured for theconnected known network. If that network has no configured profile, or network adapter isset up not to use the network's profile, then adapter's default profile is used.
Control elementsAdd – Adds a new network adapter.
Edit – Allows you to edit an existing network adapter.
Delete – Select a network adapter and click Delete if you want to remove a networkadapter from the list.
OK/Cancel – Click OK if you want to save changes or click Cancel to leave without anychanges.
Application modification detectionThe application modification detection feature displays notifications if modified applications,for which a firewall rule exists, attempt to establish connections. This is useful to avoidabusing rules configured for some application by another application by temporarily orpermanently replacing the original application's executable file with the other applicationsexecutable file, or by maliciously modifying the original application's executable file.

127
Please be aware that this feature is not meant to detect modifications to any application ingeneral. The goal is to avoid abusing existing firewall rules, and only applications for whichspecific firewall rules exist are monitored.
Enable detection of application modifications – If selected, the program will monitorapplications for changes (updates, infections, other modifications). When a modifiedapplication attempts to establish a connection, you will be notified by the firewall.
Allow modification of signed (trusted) applications – Don't notify if the application hasthe same valid digital signature before and after the modification.
List of applications excluded from checking – You can add or remove individualapplications for which modifications are allowed without notification.
Applications excluded from modificationdetectionThe firewall in ESET Endpoint Security detects changes to applications for which rules exist(see Application modification detection).
In certain cases you may not want to use this functionality for some applications if you wantto exclude them from checking by the firewall.
Add – Opens a window where you can select an application to add to the list of applicationsexcluded from modification detection.
Edit – Opens a window where you can change the location of an application that is on the listof applications excluded from modification detection.
Delete – Removes entries from the list of applications excluded from modification detection.
Configuring and using rulesRules represent a set of conditions used to test all network connections and all actionsassigned to these conditions. Using a firewall rules, you can define the action that is takenwhen different types of network connections are established. To access rule filtering setup,navigate to Advanced setup (F5) > Network protection > Firewall > Advanced. Someof predefined rules are bound to the check boxes from allowed services (Allowed servicesand advanced options) and they can not be turned off directly, instead you can use thoserelated check boxes to do it.
Unlike the previous version of ESET Endpoint Security, rules are evaluated from top tobottom. The action of the first matching rule is used for each network connection beingevaluated. This is an important behavioral change from the previous version, in which thepriority of rules was automatic and more specific rules had higher priority then more general

128
ones.
Connections can be divided into incoming and outgoing connections. Incoming connectionsare initiated by a remote computer attempting to establish a connection with the localsystem. Outgoing connections work the opposite way – the local system contacts a remotecomputer.
If a new unknown communication is detected, consider carefully whether to allow or deny it.Unsolicited, unsecured or unknown connections pose a security risk to the system. If such aconnection is established, we recommend that you pay particular attention to the remotecomputer and the application attempting to connect to your computer. Many infiltrations tryto obtain and send private data, or download other malicious applications to hostworkstations. The firewall allows you to detect and terminate such connections.
Firewall rules listThe Firewal rules list can be found in Advanced setup (F5) > Network protection >Firewall > Basic by clicking Edit next to Rules.
ColumnsName – Name of rule.
Enabled – Shows if rule is enabled or disabled; the corresponding check box must beselected to activate a rule.
Protocol – The Internet protocol this rule is valid for.
Profile – Shows the firewall profile this rule is valid for.
Action – Shows the status of communication (block/allow/ask).
Direction – Direction of communication (incoming/outgoing/both).
Local – Remote IPv4 or IPv6 address / range / subnet and port of local computer.
Remote – Remote IPv4 or IPv6 address / range / subnet and port of remote computer.
Applications – The application to which the rule applies.

129
Control elementsAdd – Creates a new rule.
Edit – Edit an existing rule.
Delete – Remove an existing rule.
Copy – Create a copy of a selected rule.
Show built in (predefined) rules – Rules predefined by ESET Endpoint Security whichallow or deny specific communications. You can disable these rules, but you cannot delete apredefined rule.
Top/Up/Down/Bottom – Allows you to adjust the priority level of rules(rules are executed from top to bottom).
NoteClick the search icon at the top right to search for rule(s) by name, protocolor port.
Adding or editing Firewall rulesModification is required each time that monitored parameters are changed. If changes aremade such that a rule cannot fulfill the conditions and the specified action cannot be applied,the given connection may be refused. This can lead to problems with the operation of theapplication affected by a rule. An example is a change of network address or port number forthe remote side.

130
Illustrated instructionsThe following ESET Knowledgebase articles may only be available in English:• Create or edit firewall rules in ESET Endpoint Security• Create or edit firewall rules for client workstations in ESET SecurityManagement Center
The upper part of the window contains three tabs:
• General – Specify a rule name, the direction of the connection, the action (Allow,Deny, Ask), the protocol and the profile to which the rule will apply.
• Local – Displays information about the local side of the connection, including thenumber of the local port or port range and the name of the communicating application.Also allows you to add a predefined or created zone with a range of IP addresses here byclicking Add.
• Remote – This tab contains information about the remote port (port range). It allowsyou to define a list of remote IP addresses or zones for a given rule. You can also add apredefined or created zone with range of IP addresses here by clicking Add.
When creating a new rule, you must enter a name for the rule in the Name field. Select thedirection to which the rule applies from the Direction drop-down menu and the action to beexecuted when a communication meets the rule from the Action drop-down menu.
Protocol represents the transfer protocol used for the rule. Select which protocol to use for agiven rule from the drop-down menu.
ICMP Type/Code represents an ICMP message identified by a number (for example; 0represents "Echo Reply").
All rules are enabled for Any profile by default. Alternatively, select a custom firewall profileusing the Profiles drop-down menu.
If you enable Logging severity, the activity connected with the rule will be recorded in alog. Notify user displays a notification when the rule is applied.

131
NoteFirewall logs with Warning status can be collected by ESET Security ManagementCenter.
ExampleWe create a new rule to allow the Firefox web browser application to access theInternet / local network websites. In this example, the following must beconfigured:1.In the General tab, enable outgoing communication via the TCP and UDPprotocol.2.Click the Local tab.3.Select the file path of the web browser you use by clicking ... (for exampleC:\Program Files\Firefox\Firefox.exe). Do NOT enter the name of the application.4.In the Remote tab, enable port numbers 80 and 443 if you want to allowstandard Internet browsing.
NotePlease be aware that predefined rules can be modified in a limited way.
Firewall rule - LocalSpecify the name of the local application and the local port/ports that a rule applies to.
Port – Remote port number(s). If there are no numbers supplied, the rule will apply for allports. Add a single communication port or a range of communication ports.

132
IP – Allows you to add a remote address/addresses, address range, or subnet on which therule is applied. If there is no value supplied, the rule will apply for all communication.
Zones – List of added zones.
Add – Add a created zone from the drop-down menu. To create a zone, use the Zone setuptab.
Delete – Removes zones from the list.
Application – The name of the application to which the rule applies. Add the location of theapplication for which the rule will apply.
Service – The drop-down menu shows system services.
ExampleYou might want to create a rule for your Mirror which provides updates via port2221 using the EHttpSrv service for communication in the drop-down menu.
Firewall rule - RemotePort – Remote port number(s). If there are no numbers supplied, the rule will apply for allports. Add a single communication port or a range of communication ports.
IP – Allows you to add a remote address, address range, or subnet. The address,range/subnet or remote zone for which the rule is applied. If there is no value supplied, the

133
rule will apply for the whole communication.
Zones – List of added zones.
Add – Add a zone by selecting it from drop-down menu. To create a zone, use the Zone setuptab.
Delete – Removes zones from the list.
Temporary IP address blacklistTo view IP addresses that have been detected as sources of attacks are added to the blacklistto block connection for a certain period of time, from ESET Endpoint Security navigate toSetup > Network protection > Temporary IP address blacklist.
ColumnsIP address – shows an IP address that has been blocked.
Block reason – shows type of attack that has been prevented from the address (forexample TCP Port Scanning attack).
Timeout – shows time and date when the address will expire from the black list.

134
Control elementsRemove – click to remove an address from the blacklist before it will expire.
Remove all – click to remove all addresses from the blacklist immediately.
Add exception – click to add an firewall exception into IDS filtering.
Trusted zoneThe trusted zone represents a group of network addresses from which the firewall allowssome inbound traffic using default settings. Settings for features like file sharing and remotedesktop inside of the trusted zone are determined in Allowed services and advanced options.
The actual trusted zone is computed dynamically and separately for each network adapterbased on what network the computer is currently connected to. Addresses defined as insideof the trusted zone in the Zones editor are always trusted. If a network adapter is connectedto a known network, then the Additional trusted addresses configured for that networkare added to the adapter's trusted zone. If a network has the Home/office protection type, alldirectly connected subnets are included in the trusted zone. The actual trusted zone for eachnetwork adapter can be viewed from the Setup window under Network > Networkadapters.
NotePer-interface trusted zone is not supported on Windows XP operating systems. Forthese operating systems, all adapters have the same trusted zone, and this is alsovisible in the Network adapters page.
Configuring zonesA zone represents a collection of network addresses that create one logical group of IPaddresses, useful when you need to reuse the same set of addresses in multiple rules. Eachaddress in a given group is assigned similar rules defined centrally for the whole group. Oneexample of such a group is a Trusted zone. A Trusted zone represents a group of networkaddresses that are not blocked by the Firewall in any way. These zones can be configured inAdvanced setup > Network protection> Firewall > Advanced, by clicking Edit next toZones. To add a new zone click Add, enter a Name for the zone, a Description and add aremote IP address into the Remote computer address (IPv4/IPv6, range, mask) field.See also Firewall zones.
Firewall zonesFor more information about zones, see the section Configuring zones.

135
ColumnsName – Name of a group of remote computers.
IP addresses – Remote IP addresses that belong to a zone.
Control elementsWhen you add or edit a zone, the following fields are available:
Name – Name of a group of remote computers.
Description – A general description of the group.
Remote computer address (IPv4, IPv6, range, mask) – Allows you to add a remoteaddress, address range or subnet.
Delete – Removes a zone from the list.
NotePlease be aware that predefined zones cannot be removed.
Firewall logThe ESET Endpoint Security Firewall saves all important events in a log file, which can beviewed directly from the main menu. Click Tools > Log files, and then select Firewall fromthe Log drop-down menu. To enable firewall logging, navigate to Advanced setup > Tools> Log files and set the minimum logging verbosity to Diagnosic. All denied connectionswill be recorded.
Log files can be used to detect errors and reveal intrusions on your system. The ESET Firewalllogs contain the following data:
• Time – Date and time of event.• Event – Name of event.• Source – Source network address.• Target – Target network address.• Protocol – Network communication protocol.• Rule/worm name – Rule applied, or name of worm, if identified.• Application – Application involved.
• User – Name of the user logged in at the time the infiltration was detected.
A thorough analysis of this data can help detect attempts to compromise system security.Many other factors indicate potential security risks and allow you to minimize their impact.Some examples of potential threat indicators include frequent connections from unknownlocations, multiple attempts to establish connections and unknown applicationscommunicating or unusual port numbers being used.

136
Establishing connection – detectionThe firewall detects each newly-created network connection. The active firewall modedetermines which actions are performed for the new connection. If Automatic mode orPolicy-based mode is activated, the firewall will perform predefined actions with no userinteraction.
Interactive mode displays an informational window that reports detection of a new networkconnection, supplemented with detailed information about the connection. You can opt toallow the connection or refuse (block) it. If you repeatedly allow the same connection in thedialog window, we recommend that you create a new rule for the connection. To do this,select Remember action (create rule) and save the action as a new rule for the firewall. Ifthe firewall recognizes the same connection in the future, it will apply the existing rulewithout requiring user interaction.
Temporarily remember action for the process causes an action (Allow/Deny) to beused until application restart, a change of rules or filtering modes, a Firewall module updateor a system restart. After any of these actions, temporary rules will be deleted.
Please be careful when creating new rules and only allow connections that you know aresecure. If all connections are allowed, then the firewall fails to accomplish its purpose. Theseare the important parameters for connections:
• Remote side – Only allow connections to trusted and known addresses.
• Local application – It is not advisable to allow connections for unknown applications
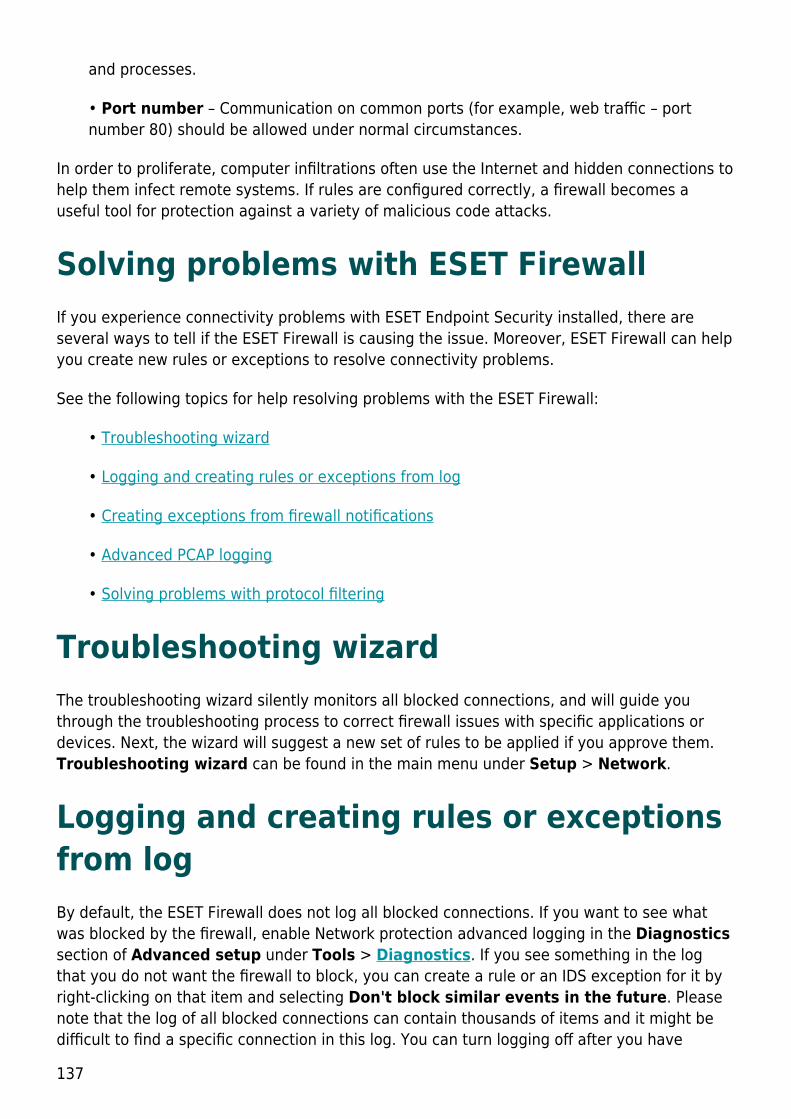
137
and processes.
• Port number – Communication on common ports (for example, web traffic – portnumber 80) should be allowed under normal circumstances.
In order to proliferate, computer infiltrations often use the Internet and hidden connections tohelp them infect remote systems. If rules are configured correctly, a firewall becomes auseful tool for protection against a variety of malicious code attacks.
Solving problems with ESET FirewallIf you experience connectivity problems with ESET Endpoint Security installed, there areseveral ways to tell if the ESET Firewall is causing the issue. Moreover, ESET Firewall can helpyou create new rules or exceptions to resolve connectivity problems.
See the following topics for help resolving problems with the ESET Firewall:
• Troubleshooting wizard
• Logging and creating rules or exceptions from log
• Creating exceptions from firewall notifications
• Advanced PCAP logging
• Solving problems with protocol filtering
Troubleshooting wizardThe troubleshooting wizard silently monitors all blocked connections, and will guide youthrough the troubleshooting process to correct firewall issues with specific applications ordevices. Next, the wizard will suggest a new set of rules to be applied if you approve them.Troubleshooting wizard can be found in the main menu under Setup > Network.
Logging and creating rules or exceptionsfrom logBy default, the ESET Firewall does not log all blocked connections. If you want to see whatwas blocked by the firewall, enable Network protection advanced logging in the Diagnosticssection of Advanced setup under Tools > Diagnostics. If you see something in the logthat you do not want the firewall to block, you can create a rule or an IDS exception for it byright-clicking on that item and selecting Don't block similar events in the future. Pleasenote that the log of all blocked connections can contain thousands of items and it might bedifficult to find a specific connection in this log. You can turn logging off after you have
138
resolved your issue.
For more information about the log see Log files.
NoteUse logging to see the order in which the firewall blocked specific connections.Moreover, creating rules from the log allows you to create rules that do exactlywhat you want.
Create rule from logThe new version of ESET Endpoint Security allows you to create a rule from the log. From themain menu click Tools > Log files. Choose Network protection from drop-down menu,right-click your desired log entry and select Don't block similar events in the future fromthe context menu. A notification window will display your new rule.
To allow for the creation of new rules from the log, ESET Endpoint Security must beconfigured with the following settings:
• set the minimum logging verbosity to Diagnostic in Advanced setup (F5) > Tools >Log files,
• enable Display notifications also for incoming attacks against security holes inAdvanced setup (F5) > Network protection > Network attack protection >Advanced options > Intrusion detection.
Creating exceptions from firewallnotificationsWhen ESET Firewall detects malicious network activity, a notification window describing theevent will be displayed. This notification contains a link that will allow you to learn moreabout the event and set up an exception for this event if you want.
NoteIf a network application or device does not implement network standards correctlyit can trigger repetitive firewall IDS notifications. You can create an exceptiondirectly from the notification to keep the ESET Firewall from detecting thisapplication or device.

139
Advanced PCAP loggingThis feature is intended to provide more complex log files for ESET customer support. Usethis feature only when requested to by ESET customer support, as it might generate a hugelog file and slow down your computer.
1. Navigate to Advanced setup > Tools > Diagnostics and enable Enable Protocolfiltering advanced logging.
2. Attempt to reproduce the problem you are experiencing.
3. Disable advanced PCAP logging.
4. The PCAP log file can be found in the same directory where diagnostic memory dumpsare generated:
• Microsoft Windows Vista or newer
C:\ProgramData\ESET\ESET Security\Diagnostics\
• Microsoft Windows XP
C:\Documents and Settings\All Users\...
Solving problems with protocol filteringIf you experience problems with your browser or email client, the first step is to determine ifprotocol filtering is responsible. To do that, try temporarily disabling application protocolfiltering in the advanced setup (remember to turn it back on after you're finished, otherwiseyour browser and email client will remain unprotected). If your problem disappears afterturning it off, here is a list of common problems and a way to solve them:
Update or secure communication problemsIf your application complains about the inability to update or that a communication channel isnot secure:
• If you have SSL protocol filtering enabled, try temporarily turning it off. If that helps, youcan keep using SSL filtering and make the update work by excluding the problematiccommunication:Switch SSL protocol filtering mode to interactive. Rerun the update. There should be adialog informing you about encrypted network traffic. Make sure the application matchesthe one you're troubleshooting and the certificate looks like coming from the server it isupdating from. Then choose to remember action for this certificate and click ignore. If nomore relevant dialogs are show, you can switch the filtering mode back to automatic andthe problem should be solved.

140
• If the application in question is not a browser or email client, you can completely excludeit from protocol filtering (doing this for browser or email client would leave you exposed).Any application that had its communication filtered in the past should already be in the listprovided to you when adding exception, so manually adding one shouldn't be necessary.
Problem accessing a device on your networkIf you are unable to use any functionality of a device on your network (this could meanopening a webpage of your webcam or playing video on a home media player), try adding itsIPv4 and IPv6 addresses to the list of excluded addresses.
Problems with a particular websiteYou can exclude specific websites from protocol filtering using URL address management. Forexample if you can't access https://www.gmail.com/intl/en/mail/help/about.html, try adding*gmail.com* to the list of excluded addresses.
Error "Some of the applications capable of importingthe root certificate are still running“When you enable SSL protocol filtering, ESET Endpoint Security makes sure that installedapplications trust the way it filters SSL protocol by importing a certificate to their certificatestore. For some applications this is not possible while they are running. This includes Firefoxand Opera. Make sure none of them are running (the best way to do this is to open TaskManager and make sure there is no firefox.exe or opera.exe under Processes tab), then hitretry.
Error about untrusted issuer or invalid signatureThis most likely means that the import described above failed. First make sure that none ofthe mentioned applications are running. Then disable SSL protocol filtering and enable it backon. This reruns the import.
Web and emailWeb and email configuration can be found under Setup > Web and email. From here youcan access more detailed program settings.

141
Secure Browser......
The Web control module allows you to configure settings that provide administrators withautomated tools to help protect their workstations and set restrictions for internet browsing.The aim of the Web control functionality is to prevent access to pages with inappropriate orharmful content. See Web control for more information.
Internet connectivity is a standard feature for personal computers. Unfortunately, theInternet has become the primary medium for distributing malicious code. For this reason it isessential that you carefully consider your Web access protection settings.
Email client protection provides control of email communications received through thePOP3(S) and IMAP(S) protocols. Using the plug-in program for your email client, ESETEndpoint Security provides control of all communications from/to the email client.
Antispam protection filters unsolicited email messages.
When you click the gear wheel next to Antispam protection the following options areavailable:
Configure... – Opens advanced settings for Email client antispam protection.
User's Whitelist/Blacklist/Exceptions list – Opens a dialog window where you canadd, edit or delete email addresses that are considered safe or unsafe. According to rulesdefined here, email from these addresses will not be scanned or will be treated as spam.

142
Click User´s Exceptions list to open a dialog where you can add, edit or delete emailaddresses that may be spoofed and used for sending spam. Email messages receivedfrom addresses listed in the Exception list will always be scanned for spam.
Anti-Phishing protection is another layer of protection that provides increased defensefrom illegitimate websites that attempt to acquire passwords and other sensitive information.Anti-Phishing protection can be found in the Setup pane under Web and email. See Anti-Phishing protection for more information.
You can disable the web/email/anti-phishing/antispam protection module temporarily byclicking .
Protocol filteringAntivirus protection for application protocols is provided by the ThreatSense scanning engine,which seamlessly integrates all advanced malware scanning techniques. Protocol filteringworks automatically, regardless of the Internet browser or email client used. To editencrypted (SSL) settings, go to Advanced Setup (F5) > Web and email > SSL/TLS.
Enable application protocol content filtering – Can be used to disable protocol filtering.Note that many ESET Endpoint Security components (Web access protection, Email protocolsprotection, Anti-Phishing, Web control) depend on this and will be non-functional without it.
Excluded applications – Allows you to exclude specific applications from protocol filtering.Useful when protocol filtering causes compatibility issues.
Excluded IP addresses – Allows you to exclude specific remote addresses from protocolfiltering. Useful when protocol filtering causes compatibility issues.
Example of excluded IP addressesIPv4 addresses and mask:• 192.168.0.10 – IP address of an individual computer for which the rule is to beapplied.• 192.168.0.1 to 192.168.0.99 – the starting and ending address IP address tospecify the IP range (of several computers) for which the rule is to be applied.• Subnet (a group of computers) defined by an IP address and mask. Forexample, 255.255.255.0 is the network mask for the 192.168.1.0/24 prefix, thatmeans 192.168.1.1 to 192.168.1.254 address range.IPv6 address and mask:• 2001:718:1c01:16:214:22ff:fec9:ca5 – the IPv6 address of an individualcomputer for which the rule is to be applied• 2002:c0a8:6301:1::1/64 – IPv6 address with the prefix length of 64 bits, thatmeans 2002:c0a8:6301:0001:0000:0000:0000:0000 to2002:c0a8:6301:0001:ffff:ffff:ffff:ffff
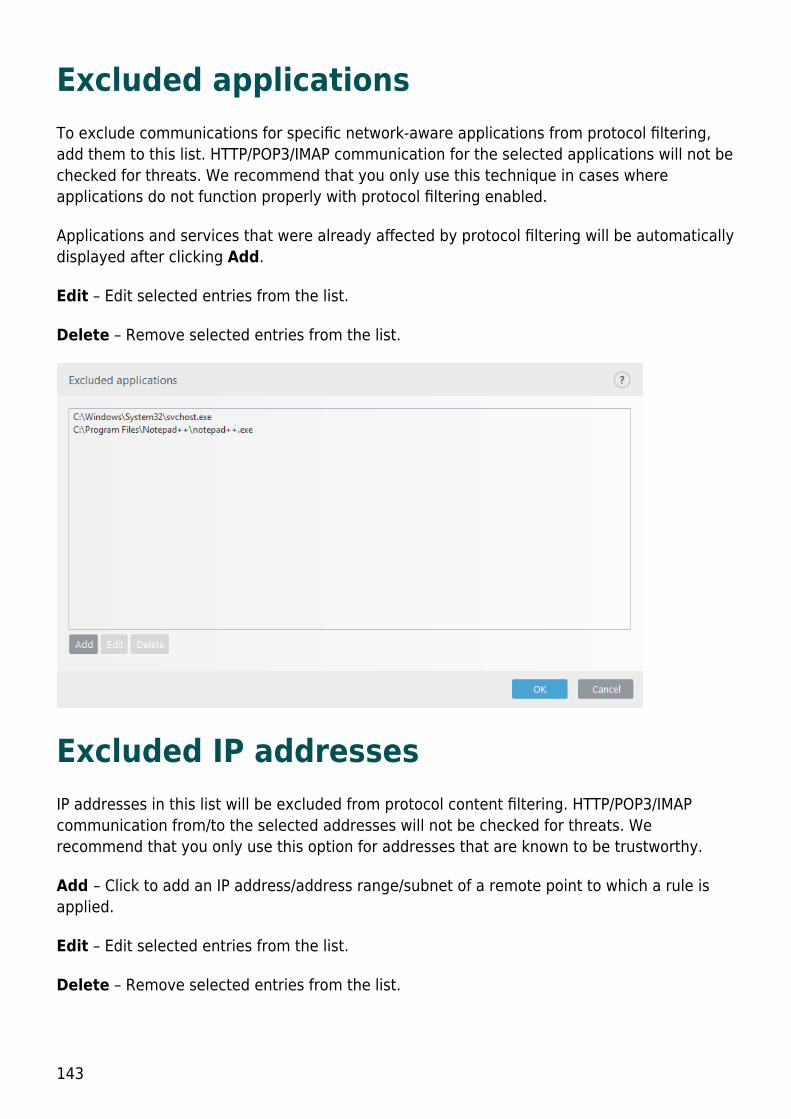
143
Excluded applicationsTo exclude communications for specific network-aware applications from protocol filtering,add them to this list. HTTP/POP3/IMAP communication for the selected applications will not bechecked for threats. We recommend that you only use this technique in cases whereapplications do not function properly with protocol filtering enabled.
Applications and services that were already affected by protocol filtering will be automaticallydisplayed after clicking Add.
Edit – Edit selected entries from the list.
Delete – Remove selected entries from the list.
Excluded IP addressesIP addresses in this list will be excluded from protocol content filtering. HTTP/POP3/IMAPcommunication from/to the selected addresses will not be checked for threats. Werecommend that you only use this option for addresses that are known to be trustworthy.
Add – Click to add an IP address/address range/subnet of a remote point to which a rule isapplied.
Edit – Edit selected entries from the list.
Delete – Remove selected entries from the list.

144
SSL/TLSESET Endpoint Security is capable of checking for threats in communication that use the SSLprotocol. You can use various scanning modes to examine SSL-protected communication withtrusted certificates, unknown certificates, or certificates that are excluded from SSL-protected communication checking.
Enable SSL/TLS protocol filtering – Protocol filtering is enabled by default. You can disableSSL/TLS protocol filtering in Advanced setup > Web and email > SSL/TLS or via policy. Ifprotocol filtering is disabled, the program will not scan communication over SSL.
SSL/TLS protocol filtering mode is available in the following options:
Filtering mode DescriptionAutomaticmode
Default mode will only scan appropriate applications such as web browsersand email clients. You can override it by selecting applications for whichtheir communication will be scanned.
Interactivemode
If you enter a new SSL-protected site (with an unknown certificate), anaction selection dialog is displayed. This mode allows you to create a list ofSSL certificates/applications that will be excluded from scanning.
Policy mode Select this option to scan all SSL-protected communication exceptcommunication protected by certificates excluded from checking. If a newcommunication using an unknown, signed certificate is established, you willnot be notified and the communication will automatically be filtered. Whenyou access a server with an untrusted certificate that is marked as trusted(it is on the trusted certificates list), communication to the server is allowedand the content of the communication channel is filtered.
The List of SSL/TLS filtered applications can be used to customize ESET EndpointSecurity behavior for specific applications.

145
List of known certificates allows you to customize ESET Endpoint Security behavior forspecific SSL certificates.
Exclude communication with trusted domains – When enabled, communication withtrusted domains will be excluded from checking. The trustworthiness of a domain isdetermined by a built-in whitelist.
Block encrypted communication utilizing the obsolete protocol SSL v2 –Communication using the earlier version of the SSL protocol will automatically be blocked.
NoteAddresses will not be filtered if the setting Exclude communication withtrusted domains is enabled and the domain is considered trusted.
Root certificateRoot certificate – For SSL communication to work properly in your browsers/emailclients, it is essential that the root certificate for ESET be added to the list of known rootcertificates (publishers). Add the root certificate to known browsers should beenabled. Select this option to automatically add the ESET root certificate to knownbrowsers (for example, Opera and Firefox). For browsers using the system certificationstore, the certificate is added automatically (for example, in Internet Explorer).
To apply the certificate to unsupported browsers, click View Certificate > Details >Copy to File... and manually import it into the browser.
Certificate validityIf the certificate trust cannot be established – In some cases, a website certificatecannot be verified using the Trusted Root Certification Authorities (TRCA) store. Thismeans that the certificate is signed by someone (for example, the administrator of a webserver or a small business) and considering this certificate as trusted is not always a risk.Most large businesses (for example banks) use a certificate signed by the TRCA. If Askabout certificate validity is selected (selected by default), the user will be prompted toselect an action to take when encrypted communication is established. You can selectBlock communication that uses the certificate to always terminate encryptedconnections to sites with unverified certificates.
If the certificate is corrupt – This means that the certificate was incorrectly signed or isdamaged. In this case, we recommend that you leave Block communication that usesthe certificate selected. If Ask about certificate validity is selected, the user will beprompted to select an action to take when the encrypted communication is established.

146
Illustrated examplesThe following ESET Knowledgebase article may only be available in English:• Certificate notifications in ESET products• "Encrypted network traffic: Untrusted certificate" is displayed when visitingweb pages
CertificatesFor SSL communication to work properly in your browsers/email clients, it is essential that theroot certificate for ESET be added to the list of known root certificates (publishers). Add theroot certificate to known browsers should be enabled. Select this option to automaticallyadd the ESET root certificate to the known browsers (for example, Opera and Firefox). Forbrowsers using the system certification store, the certificate is added automatically (e.g.Internet Explorer). To apply the certificate to unsupported browsers, click View Certificate> Details > Copy to File... and then manually import it into the browser.
In some cases, the certificate cannot be verified using the Trusted Root CertificationAuthorities store (e.g. VeriSign). This means that the certificate is self-signed by someone(e.g. administrator of a web server or a small business company) and considering thiscertificate as trusted is not always a risk. Most large businesses (for example banks) use acertificate signed by TRCA. If Ask about certificate validity is selected (selected bydefault), the user will be prompted to select an action to take when encryptedcommunication is established. An action selection dialog will be displayed where you candecide to mark the certificate as trusted or excluded. If the certificate is not present in theTRCA list, the window is red. If the certificate is on the TRCA list, the window will be green.
You can select Block communication that uses the certificate to always terminate anencrypted connection to the site that uses the unverified certificate.
If the certificate is invalid or corrupt, it means that the certificate expired or was incorrectlyself-signed. In this case, we recommend that you block the communication that uses thecertificate.
Encrypted network trafficIf your system is configured to use SSL protocol scanning, a dialog window prompting you tochoose an action will be displayed in two situations:
First, if a website uses an unverifiable or invalid certificate, and ESET Endpoint Security isconfigured to ask the user in such cases (by default yes for unverifiable certificates, no forinvalid ones), a dialog box will ask you whether to Allow or Block the connection. If thecertificate is not located in the Trusted Root Certification Authorities store (TRCA), it isconsidered untrusted.
Second, if SSL protocol filtering mode is set to Interactive mode, a dialog box for each

147
website will ask whether to Scan or Ignore the traffic. Some applications verify that theirSSL traffic is not modified nor inspected by anyone, in such cases ESET Endpoint Securitymust Ignore that traffic to keep the application working.
Illustrated examplesThe following ESET Knowledgebase article may only be available in English:• Certificate notifications in ESET products• "Encrypted network traffic: Untrusted certificate" is displayed when visitingweb pages
In both cases, the user can choose to remember the selected action. Saved actions arestored in the List of known certificates.
List of known certificatesThe List of known certificates can be used to customize ESET Endpoint Security behaviorfor specific SSL certificates, and to remember actions chosen if Interactive mode is selectedin SSL/TLS protocol filtering mode. The list can be viewed and edited in Advanced setup(F5) > Web and email > SSL/TLS > List of known certificates.
The List of known certificates window consists of:
Columns
Name – Name of the certificate.Certificate issuer – Name of the certificate creator.
Certificate subject – The subject field identifies the entity associated with the public keystored in the subject public key field.
Access – Select Allow or Block as the Access action to allow/block communicationsecured by this certificate regardless of its trustworthiness. Select Auto to allow trustedcertificates and ask for untrusted ones. Select Ask to always ask user what to do.
Scan – Select Scan or Ignore as the Scan action to scan or ignore communicationsecured by this certificate. Select Auto to scan in automatic mode and ask in interactivemode. Select Ask to always ask the user what to do.
Control elementsAdd – A certificate can be loaded manually as a file with the extension .cer, .crt or .pem.Click File to upload a local certificate or click URL to specify the location of a certificateonline.
Edit – Select the certificate that you want to configure and click Edit.

148
Delete – Select the certificate that you want to delete and click Remove.
OK/Cancel – Click OK if you want to save changes or click Cancel to exit without saving.
List of SSL/TLS filtered applicationsThe List of SSL/TLS filtered applications can be used to customize ESET EndpointSecurity behavior for specific applications, and to remember actions chosen if Interactivemode is selected in SSL/TLS protocol filtering mode. The list can be viewed and edited inAdvanced setup (F5) > Web and email > SSL/TLS > List of SSL/TLS filteredapplications.
The List of SSL/TLS filtered applications window consists of:
Columns
Application – Name of the application.Scan action – Select Scan or Ignore to scan or ignore communication. Select Auto toscan in automatic mode and ask in interactive mode. Select Ask to always ask the userwhat to do.
Control elementsAdd – Add filtered application.
Edit – Select the certificate that you want to configure and click Edit.
Delete – Select the certificate that you want to delete and click Delete.
OK/Cancel – Click OK if you want to save changes or click Cancel if you want to exitwithout saving.
Email client protectionIntegration of ESET Endpoint Security with your email client increases the level of activeprotection against malicious code in email messages. If your email client is supported,integration can be enabled in ESET Endpoint Security. When integrated into your email client,the ESET Endpoint Security toolbar is inserted directly into the email client, for more efficientemail protection. Integration settings are located under Advanced setup (F5) > Web andemail > Email client protection > Email clients.

149
Email client integrationEmail clients that are currently supported include Microsoft Outlook, Outlook Express,Windows Mail and Windows Live Mail. Email protection works as a plug-in for theseprograms. The main advantage of the plug-in is that it is independent of the protocol used.When the email client receives an encrypted message, it is decrypted and sent to the virusscanner. For a complete list of supported email clients and their versions, refer to thefollowing ESET Knowledgebase article.
Turn on Disable checking upon inbox content change if you experience a systemslowdown when retrieving emails.
Email to scanEnable email protection by client plugins – When disabled, protection by email clientplugins is turned off.
Received email – Checks email messages that are received when enabled.
Sent email – Checks email messages that are sent when enabled.
Read email – Checks email messages that are read when enabled.

150
NoteWe recommend that you keep Enable email protection by client pluginsenabled. Even if integration is not enabled or functional, emailcommunication is still protected by Protocol filtering (IMAP/IMAPS andPOP3/POP3S).
Action to be performed on infected emailNo action – If enabled, the program will identify infected attachments, but will leave emailswithout taking any action.
Delete email – The program will notify the user about infiltration(s) and delete the message.
Move email to the Deleted items folder – Infected emails will be moved automatically tothe Deleted items folder.
Move email to folder (default action) – Infected emails will be moved automatically tothe specified folder.
Folder – Specify the custom folder where you want to move infected emails when detected.
Repeat scan after update – Rescans the infected emails after a detection engine updatewhen enabled.
Accept scan results from other modules – Allows the email protection module to usethe scan results received from the other protection modules instead of scanning again.
Email protocolsThe IMAP and POP3 protocols are the most widespread protocols used to receive emailcommunication in an email client application. The Internet Message Access Protocol (IMAP) isanother Internet protocol for email retrieval. IMAP has some advantages over POP3, forexample, multiple clients can simultaneously connect to the same mailbox and maintainmessage state information such as whether or not the message has been read, replied to ordeleted. The protection module providing this control is automatically initiated at systemstartup and is then active in memory.
ESET Endpoint Security provides protection for these protocols regardless of the email clientused, and without requiring re-configuration of the email client. By default, all communicationover POP3 and IMAP protocols is scanned, regardless of the default POP3/IMAP port numbers.MAPI protocol is not scanned. However the communication with the Microsoft Exchangeserver can be scanned by the integration module in email clients such as Microsoft Outlook.
We recommend that you keep Enable email protection by protocol filtering enabled. Toconfigure IMAP/IMAPS and POP3/POP3S protocol checking, navigate to Advanced setup >Web and email > Email client protection > Email protocols.

151
ESET Endpoint Security also supports the scanning of IMAPS (585, 993) and POP3S (995)protocols, which use an encrypted channel to transfer information between server and client.ESET Endpoint Security checks communication utilizing the SSL (Secure Socket Layer), andTLS (Transport Layer Security) protocols. The program will only scan traffic on ports definedin Ports used by IMAPS/POP3S protocol, regardless of operating system version. Othercommunication ports can be added if necessary. Multiple port numbers must be delimited bya comma.
Encrypted communication will be scanned by default. To view the scanner setup, navigate toSSL/TLS in the Advanced setup section, click Web and email > SSL/TLS, and enable theEnable SSL/TLS protocol filtering option.
Email alerts and notificationsThe options for this functionality are available in Advanced setup under Web and email >Email client protection > Alerts and notifications.
After an email has been checked, a notification with the scan result can be appended to themessage. You can elect to Append tag messages to received and read email orAppend tag messages to sent email. Be aware that on rare occasions tag messages maybe omitted in problematic HTML messages or if messages are forged by malware. The tagmessages can be added to received and read email, sent email or both. The available optionsare:

152
• Never – No tag messages will be added at all.
• When a detection occurs – Only messages containing malicious software will bemarked as checked (default).
• To all email when scanned – The program will append messages to all scannedemail.
Update subject of sent email – Disable this if you do not want email protection to includea virus warning in the subject of an infected email. This feature allows for simple, subject-based filtering of infected emails (if supported by your email program). It also increases thelevel of credibility for the recipient and if an infiltration is detected, provides valuableinformation about the threat level of a given email or sender.
Text to add to subject of detected email – Edit this template if you wish to modify thesubject prefix format of an infected email. This function will replace the message subject"Hello" to the following format: "[detection %DETECTIONNAME%] Hello". The variable%DETECTIONNAME% represents the detection.
Integration with email clientsEmail clients that are currently supported include Microsoft Outlook, Outlook Express,Windows Mail and Windows Live Mail. Email protection works as a plug-in for these programs.The main advantage of the plug-in is that it is independent of the protocol used. When theemail client receives an encrypted message, it is decrypted and sent to the virus scanner. Fora complete list of supported email clients and their versions, refer to the following ESETKnowledgebase article.
Microsoft Outlook toolbarMicrosoft Outlook protection works as a plug-in module. After ESET Endpoint Security isinstalled, this toolbar containing the antivirus/antispam protection options is added toMicrosoft Outlook:
Spam – Marks chosen messages as spam. After marking, a "fingerprint" of the message issent to a central server storing spam signatures. If the server receives more similar"fingerprints" from several users, the message will be classified as spam in the future.
Not spam – Marks chosen messages as not spam.
Spam address (blacklist, a list of spam addresses) – Adds a new sender address to theBlacklist. All messages received from the list will be automatically classified as spam.

153
WarningBeware of spoofing – forging a sender's address on email messages to misleademail recipients into reading and responding.
Trusted address (whitelist, a list of trusted addresses) – Adds a new sender address to theWhitelist. All messages received from addresses in the Whitelist will never be automaticallyclassified as spam.
ESET Endpoint Security – Click on icon opens the main program window of ESET EndpointSecurity.
Rescan messages – Enables you to launch email checking manually. You can specifymessages that will be checked and you can activate rescanning of received email. For moreinformation see Email client protection.
Scanner setup – Displays the Email client protection setup options.
Antispam setup – Displays the Antispam protection setup options.
Address books – Opens the antispam protection window, where you can access lists ofexcluded, trusted and spam addresses.
Outlook Express and Windows MailtoolbarOutlook Express and Windows Mail protection works as a plug-in module. After ESET EndpointSecurity is installed, this toolbar containing the antivirus/antispam protection options isadded to Outlook Express or Windows Mail:
Spam – Marks chosen messages as spam. After marking, a "fingerprint" of the message issent to a central server storing spam signatures. If the server receives more similar"fingerprints" from several users, the message will be classified as spam in the future.
Not spam – Marks chosen messages as not spam.
Spam address – Adds a new sender address to the Blacklist. All messages received from thelist will be automatically classified as spam.
WarningBeware of spoofing – forging a sender's address on email messages to misleademail recipients into reading and responding.
Trusted address – Adds a new sender address to the Whitelist. All messages received fromaddresses in the Whitelist will never be automatically classified as spam.

154
ESET Endpoint Security – Click on icon opens the main program window of ESET EndpointSecurity.
Rescan messages – Enables you to launch email checking manually. You can specifymessages that will be checked and you can activate rescanning of received email. For moreinformation see Email client protection.
Scanner setup – Displays the Email client protection setup options.
Antispam setup – Displays the Antispam protection setup options.
User interfaceCustomize appearance – The appearance of the toolbar can be modified for your emailclient. Deselect the option to customize appearance independent of email programparameters.
Show text – Displays descriptions for icons.
Text to the right – Option descriptions are moved from the bottom to the right side oficons.
Large icons – Displays large icons for menu options.
Confirmation dialogThis notification serves to verify that user really wants to perform the selected action, whichshould eliminate possible mistakes.
On the other hand, the dialog also offers the option to disable confirmations.
Rescan messagesThe ESET Endpoint Security toolbar integrated in email clients enables users to specifyseveral options for email checking. The option Rescan messages offers two scanningmodes:
All messages in the current folder – Scans messages in the currently displayed folder.
Selected messages only – Scans only messages marked by the user.
The Rescan already scanned messages checkbox provides the user with the option to runanother scan on messages that have been scanned before.

155
Antispam protectionUnsolicited email, called spam, ranks among the greatest problems of electroniccommunication. Spam represents up to 50 percent of all email communication. Antispamprotection serves to protect against this problem. Combining several email securityprinciples, the Antispam module provides superior filtering to keep your inbox clean.
One important principle for spam detection is the ability to recognize unsolicited email basedon predefined trusted addresses (whitelist) and spam addresses (blacklist). All addressesfrom your contact list are automatically added to the whitelist, as well as all other addressesyou mark as safe.
The primary method used to detect spam is the scanning of email message properties.Received messages are scanned for basic Antispam criteria (message definitions, statisticalheuristics, recognizing algorithms and other unique methods) and the resulting index valuedetermines whether a message is spam or not.
Start email client antispam protection automatically – When enabled, antispamprotection will be activated automatically on system startup.
Allow advanced antispam scan – Additional antispam data will be downloadedperiodically, increasing antispam capabilities and producing better results.
Antispam protection in ESET Endpoint Security allows you to set different parameters to work

156
with mailing lists. Options are as follows:
Message processingAdd text to email subject – Enables you to add a custom prefix string to the subject lineof messages that have been classified as spam. The default is "[SPAM]".
Move messages to spam folder – When enabled, spam messages will be moved to thedefault junk email folder and also messages reclassified as not spam will be moved toinbox. When you right-click an email message and select ESET Endpoint Security from thecontext menu, you can choose from applicable options.
Use the folder – Specify the custom folder where you want to move infected emails whendetected.
Mark spam messages as read – Enable this to automatically mark spam as read. It willhelp you to focus your attention on "clean" messages.
Mark reclassified messages as unread – Messages originally classified as spam, butlater marked as “clean" will be displayed as unread.
Spam score logging – The ESET Endpoint SecurityAntispam engine assigns a spam score to everyscanned message. The message will be recorded in theantispam log (ESET Endpoint Security > Tools > Logfiles > Antispam protection).
• None – The score from antispam scanning will not be logged.• Reclassified and marked as spam – Select this if you want to record a spam scorefor messages marked as SPAM.• All – All messages will be recorded to the log with a spam score.
NoteWhen you click a message in junk email folder, you can choose Reclassifyselected messages as NOT spam and the message will be moved to inbox.When you click a message you consider spam in inbox, select Reclassifymessages as spam and the message will be moved to junk email folder. You canselect multiple messages and perform the action on all of them at the same time.
NoteESET Endpoint Security supports Antispam protection for Microsoft Outlook,Outlook Express, Windows Mail and Windows Live Mail.

157
Antispam address booksThe Antispam feature in ESET Endpoint Security allows you to configure various parametersfor address lists.
Address booksAllow user address list – Enable this option to activate the address book created by a userwithin their own email client.
Allow global address lists – Enable this option to activate the global address book sharedby all users on this workstation, the directory service within the email system. The GAL(Global Address List) contains information for all email users, distribution groups andresources.
User's Whitelist – List of contacts where you can add, edit or delete addresses that areconsidered safe and from whom the user wants to receive messages.
User's Blacklist – List of contacts where you can add, edit or delete addresses that areconsidered unsafe and from whom the user does not want to receive messages.
User's Exception list – This list of contacts contains email addresses that may be spoofedand used for sending spam. See also Exception list.
Global Whitelist/Blacklist/Exception list – These lists are used for applying antispampolicies to all users who use ESET Endpoint Security on this workstation. When ESET EndpointSecurity is remotely managed, the ESMC/ESET PROTECT Cloud policy will apply to allassigned workstations.
Add to user's Whitelist automaticallyAdd addresses from address book – Add addresses from your contact list to the Whitelist.
Add recipient addresses from outgoing messages – Add recipient addresses from sentmessages to the Whitelist.
Add addresses from messages reclassified as NOT spam – Add sender addresses frommessages reclassified as NOT spam to the Whitelist.
Add to user's Exception list automaticallyAdd addresses from own accounts – Add your addresses from existing email clientaccounts to the Exception list.

158
Blacklist/Whitelist/Exceptions listTo provide protection against unsolicited emails, ESET Endpoint Security allows you toclassify email addresses using specialized lists. The Whitelist contains email addresses youconsider to be safe. Messages from users on the Whitelist are always available in theincoming mail folder. The Blacklist contains email addresses classified as spam, and allmessages from senders on the Blacklist are marked accordingly. The exception list containsemail addresses that are always checked for spam but may also contain addresses fromunsolicited email messages that might not be recognized as spam initially.
All lists can be edited from main program window of ESET Endpoint Security in AdvancedSetup > Web and email > Email client protection > Antispam address books usingthe Add, Edit and Delete buttons in each list's dialog window, or from Setup > Web andemail after you click the gear wheel next to Antispam protection.
By default, ESET Endpoint Security adds all addresses from the address book of supportedemail clients to the Whitelist. The Blacklist is empty by default. The Exception list onlycontains user's own email addresses by default.
Add/Edit Blacklist/Whitelist/ExceptionsaddressThis window allows you to add or edit entries in the Whitelist or Blacklist.
Email address – The email address to add/edit.
Name – The name of the entry.

159
Whole domain – Select this option for the entry to be applied to the whole domain of thecontact (not only to the address specified in the Email address field, but all email addressesat the address.info domain).
Lower level domains – Select this option for the entry to be applied to the lower leveldomains of the contact (The address.info represents domain, while my.address.inforepresents a subdomain).
Web access protectionInternet connectivity is a standard feature in a personal computer. Unfortunately, it has alsobecome the main medium for transferring malicious code. Web access protection works bymonitoring communication between web browsers and remote servers, and complies withHTTP (Hypertext Transfer Protocol) and HTTPS (encrypted communication) rules.
Access to web pages known to contain malicious content is blocked before content isdownloaded. All other webpages are scanned by the ThreatSense scanning engine when theyare loaded and blocked if malicious content is detected. Web access protection offers twolevel of protection, blocking by blacklist and blocking by content.
We strongly recommend that Web access protection is enabled. This option can be accessedfrom the main window of ESET Endpoint Security by navigating to Setup > Internetprotection > Web access protection.

160
Web access protection will display the following message in your browser when the website isblocked:
Illustrated instructionsThe following ESET Knowledgebase articles may only be available in English:• Unblock a safe website on an individual workstation in ESET Endpoint Security• Unblock a safe website on an endpoint using ESET Security ManagementCenter
The following options are available in Advanced setup (F5) > Web and email > Webaccess protection:
• Basic – To enable or disable this feature from Advanced setup.
• Web protocols – Enables you to configure monitoring for these standard protocolswhich are used by most Internet browsers.
• URL address management – Enables you to specify URL addresses to block, allow orexclude from checking.

161
• ThreatSense parameters – Advanced virus scanner setup – enables you to configuresettings such as types of objects to scan (emails, archives, etc.), detection methods forWeb access protection etc.
Web access protection advanced setupThe following options are available in Advanced setup (F5) > Web and email > Webaccess protection > Basic:
Enable Web access protection – When disabled, Web access protection and Anti-Phishingprotection will not run.
Enable advanced scanning of browser scripts – When enabled, all JavaScript programsexecuted by web browsers will be checked by the detection engine.
NoteWe strongly recommend you leave Web access protection enabled.
Web protocolsBy default, ESET Endpoint Security is configured to monitor the HTTP protocol used by mostInternet browsers.

162
HTTP Scanner setupHTTP traffic is always monitored on all ports for all applications.
HTTPS Scanner setupESET Endpoint Security also supports HTTPS protocol checking. HTTPS communication usesan encrypted channel to transfer information between server and client. ESET EndpointSecurity checks communication utilizing the SSL (Secure Socket Layer), and TLS (TransportLayer Security) protocols. The program will only scan traffic on ports (443, 0-65535) definedin Ports used by HTTPS protocol, regardless of operating system version.
Encrypted communication will be scanned by default. To view the scanner setup, navigate toSSL/TLS in the Advanced setup section, click Web and email > SSL/TLS, and enable theEnable SSL/TLS protocol filtering option.
URL address managementThe URL address management section enables you to specify HTTP addresses to block, allowor exclude from content scan.
Enable SSL/TLS protocol filtering must be selected if you want to filter HTTPS addressesin addition to HTTP web pages. Otherwise only the domains of HTTPS sites that you havevisited will be added, the full URL will not be.
Websites in the List of blocked addresses will not be accessible unless they are alsoincluded in the List of allowed addresses. Websites in the List of addresses excludedfrom content scan are not scanned for malicious code when accessed.
If you want to block all HTTP addresses except addresses present in the active List ofallowed addresses, add * to the active List of blocked addresses.
The special symbols * (asterisk) and ? (question mark) can be used in lists. The asterisksubstitutes any character string, and the question mark substitutes any symbol. Particularcare should be taken when specifying excluded addresses, because the list should onlycontain trusted and safe addresses. Similarly, it is necessary to ensure that the symbols *and ? are used correctly in this list. See Add HTTP address / domain mask for how a wholedomain including all subdomains can be matched safely. To activate a list, select List active.If you want to be notified when entering an address from the current list, select Notify whenapplying.
Trussted domainsAddresses will not be filtered if the setting Web and email > SSL/TLS >Exclude communication with trusted domains is enabled and the domainis considered trusted.

163
Control elementsAdd – Creates a new list in addition to the predefined ones. This can be useful if you wantto logically split different groups of addresses. For example, one list of blocked addressesmay contain addresses from an external public blacklist, and a second one may containyour own blacklist, making it easier to update the external list while keeping yours intact.
Edit – Modifies existing lists. Use this to add or remove addresses.
Delete – Deletes existing lists. Only available for lists created with Add, not for defaultlists.
URL addresses listIn this section you can specify lists of HTTP addresses that will be blocked, allowed orexcluded from checking.
By default, the following three lists are available:
• List of addresses excluded from content scan – No checking for malicious codewill be performed for any address added to this list.
• List of allowed addresses – If allow access only to HTTP addresses in the list ofallowed addresses is enabled and the list of blocked addresses contains * (matcheverything), the user will be allowed to access addresses specified in this list only. Theaddresses in this list are allowed even if they are included in the list of blockedaddresses.
• List of blocked addresses - The user will not be allowed to access addressesspecified in this list unless they also occur in the list of allowed addresses.

164
Click Add to create a new list. To delete selected lists, click Delete.
Illustrated instructionsThe following ESET Knowledgebase articles may only be available in English:• Unblock a safe website on an individual workstation in ESET Endpoint Security• Unblock a safe website on an endpoint using ESET Security ManagementCenter
For more information see URL address management.
Create new URL address listThis section allows you to specify lists of URL addresses/masks that will be blocked, allowedor excluded from checking.
When creating a new list, the following options are available to configure:
Address list type – Three predefined list types are available:
• Excluded from checking – No checking for malicious code will be performed for anyaddress added to this list.• Blocked - The user will not be allowed to access addresses specified in this list.• Allowed – If your policy is configured to use this feature and the wildcard (*) value isadded to this list, you will be allowed to access addresses in this list even if thoseaddresses are also present in the blocked list.
List name – Specify the name of the list. This field will be unavailable if you are editing oneof the three predefined lists.

165
List description – Type a short description for the list (optional).This field will be unavailableif you are editing one of the three predefined lists.
List active – select the slider bar to activate the list.
Notify when applying – select the slider bar if you want to be notified when this list is usedto evaluate an HTTP site that you visited. For example, a notification will be issued when awebsite is either blocked or allowed because the website is included in the list of blocked orallowed addresses. The notification will display the list name for the list that specifies thewebsite.
Logging severity – Select the Logging severity from the drop-down menu. Records withWarning verbosity can be collected by Remote Administrator.
Control elementsAdd – Add a new URL address to the list (enter multiple values with separator).
Edit – Modifies existing address in the list. Only possible for addresses created with Add.
Delete – Deletes existing addresses in the list. Only possible for addresses created withAdd.
Import – Import a file with URL addresses (separate values with a line break, for example*.txt using encoding UTF-8).
How to add URL maskPlease refer to the instructions in this dialog before you enter the desired address/domainmask.
ESET Endpoint Security enables user to block access to specified websites and prevent theInternet browser from displaying their content. Furthermore, it allows user to specifyaddresses, which should be excluded from checking. If the complete name of the remoteserver is unknown, or the user wishes to specify a whole group of remote servers, so calledmasks can be used to identify such a group. The masks include the symbols “?” and “*”:
• use ? to substitute a symbol
• use * to substitute a text string.
For example *.c?m applies to all addresses, where the last part begins with the letter c, endswith the letter m and contains an unknown symbol in between them (.com, .cam, etc.).
A leading "*." sequence is treated specially if used at the beginning of domain name. First,the * wildcard does not match the slash character ('/') in this case. This is to avoidcircumventing the mask, for example the mask *.domain.com will not matchhttp://anydomain.com/anypath#.domain.com (such suffix can be appended to any URL

166
without affecting the download). And second, the "*." also matches an empty string in thisspecial case. This is to allow matching whole domain including any subdomains using a singlemask. For example the mask *.domain.com also matches http://domain.com. Using*domain.com would be incorrect, as that would also match http://anotherdomain.com.
Anti-Phishing protectionThe term phishing defines a criminal activity that uses social engineering (the manipulationof users in order to obtain confidential information). Phishing is often used to gain access tosensitive data such as bank account numbers, PIN numbers and more. Read more about thisactivity in the glossary. ESET Endpoint Security includes anti-phishing protection, whichblocks web pages known to distribute this type of content.
We strongly recommend that you enable Anti-Phishing in ESET Endpoint Security. To do so,open Advanced setup (F5) and navigate to Web and email > Anti-Phishing protection.
Visit our Knowledgebase article for more information on Anti-Phishing protection in ESETEndpoint Security.
Accessing a phishing websiteWhen you access a recognized phishing website, the following dialog will be displayed in yourweb browser. If you still want to access the website, click Proceed to the site (notrecommended).

167
NotePotential phishing websites that have been whitelisted will expire after severalhours by default. To allow a website permanently, use the URL addressmanagement tool. From Advanced setup (F5) expand Web and email > Webaccess protection > URL address management > Address list, click Editand then add the website that you want to edit to the list.
Phishing site reportingThe Report link enables you to report a phishing/malicious website to ESET for analysis.
NoteBefore submitting a website to ESET, make sure it meets one or more of thefollowing criteria:• the website is not detected at all,• the website is incorrectly detected as a threat. In this case, you can Report afalse-positive phishing site.
Alternatively, you can submit the website by email. Send your email to [email protected] to use a descriptive subject and enclose as much information about the websiteas possible (for example, the website that referred you there, how you learned of this
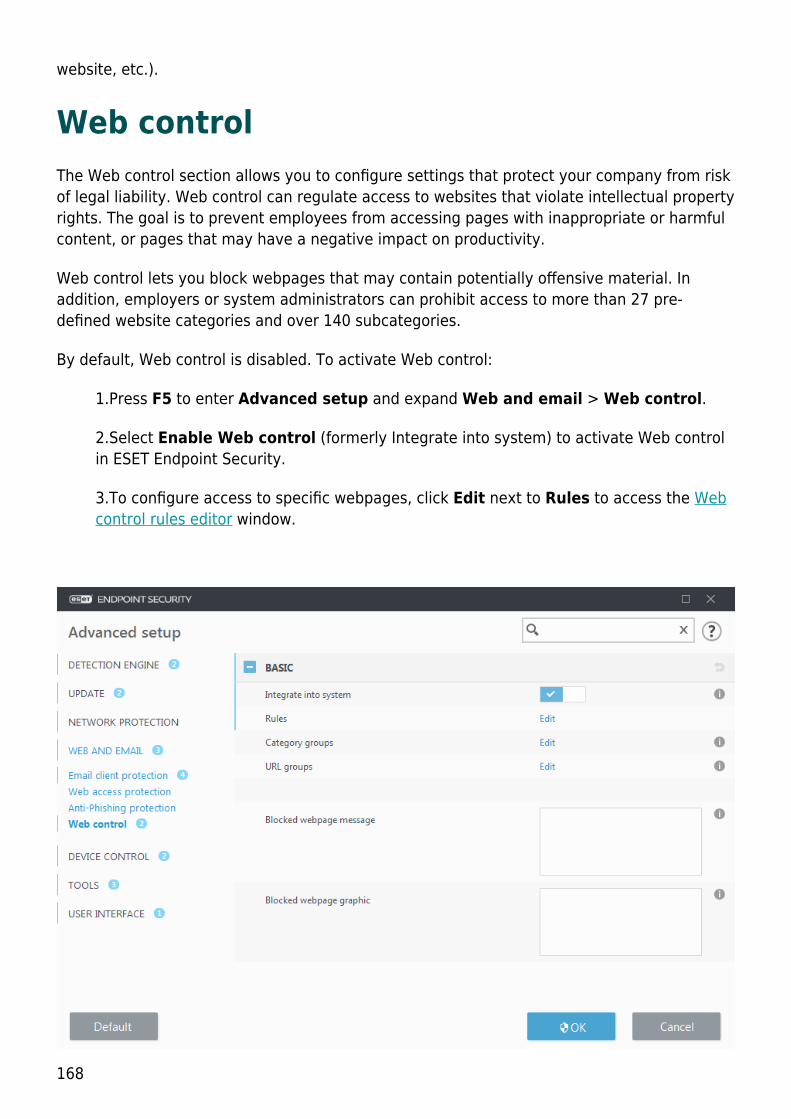
168
website, etc.).
Web controlThe Web control section allows you to configure settings that protect your company from riskof legal liability. Web control can regulate access to websites that violate intellectual propertyrights. The goal is to prevent employees from accessing pages with inappropriate or harmfulcontent, or pages that may have a negative impact on productivity.
Web control lets you block webpages that may contain potentially offensive material. Inaddition, employers or system administrators can prohibit access to more than 27 pre-defined website categories and over 140 subcategories.
By default, Web control is disabled. To activate Web control:
1.Press F5 to enter Advanced setup and expand Web and email > Web control.
2.Select Enable Web control (formerly Integrate into system) to activate Web controlin ESET Endpoint Security.
3.To configure access to specific webpages, click Edit next to Rules to access the Webcontrol rules editor window.

169
Blocked webpage message and Block webpage graphic fields allow you to easilycustomize the displayed message when a website is blocked.
NoteIn case you want to block all webpages and leave only certain available, use URLaddress management.
Web control rulesThe Rules editor window displays existing URL-based or Category-based rules.
The list of rules contains several descriptions of rules such as name, type of blocking, actionto perform after matching a Web control rule and log severity.
Click Add or Edit to manage a rule. Click Copy to create a new rule with predefined optionsused for another selected rule. By pressing Ctrl and clicking, you can select multiple rulesand delete all selected rules. The Enabled check box disables or enables a rule; this can beuseful if you do not want to delete a rule permanently because it might be used in the future.
Rules are sorted in the order determining their priority, with higher priority rules on top. Tochange the priority of a rule, select the rule and click the arrow button to increase ordecrease the rule priority. Click the double arrow to move the rule to the top or bottom of thelist.
For more information on creating rules click here.

170
Adding Web control rulesThe Web control rules window allows you to manually create or modify an existing Webcontrol filtering rule.
NameEnter a description of the rule into the Name field for better identification.
EnabledClick the Enabled switch to disable or enable the rule; this can be useful if you do not wantto delete the rule permanently.
ActionChoose between URL-based Action or Category-based Action:
URL-based Action
For rules that control access to a given website, enter the URL in the URL field.The special symbols * (asterisk) and ? (question mark) cannot be used in the URL addresslist. When creating a URL group that contains a website with multiple top-level-domains(TLDs), each TLD must be added separately. If you add a domain to the group, all contentlocated on this domain and all subdomains (for example, sub.examplepage.com) will beblocked or allowed based on your choice of URL-based action.URL or Use URL Group – Uses the URL link or URL group of links to allow, block or warnthe user when one of these URLs are detected.
Category-based Action

171
When this is selected, set the website category for your action using the drop-downmenu.URL Category or Use Group – Uses the website category or Category groups ofcategories to allow, block or warn the user when one of these groups are detected.
Access rights• Allow – Access to the URL address/category will be granted.
• Warn – Warns the user about the URL address/category.
• Block – Blocks the URL address/category.
Apply duringAllows you to apply created rule during the certain time. From the drop-down menu, selectcreated time slot.
• More information about Time slots
Logging severity• Always – Logs all online communications.• Diagnostic – Logs information needed to fine-tune the program.• Information – Records informative messages, including successful update messages,plus all records above.• Warning – Records critical errors and warning messages.• None – No logs will be created.
NoteThe Logging severity can be configured separately for each list. Logs withWarning status can be collected by ESET Security Management Center.
User list• Add – Opens the Select Users or Groups dialog window, which allows you to selectdesired users. When no user is entered the rule is applied for all users.• Delete – Removes the selected user from the filter.
Category groupsThe Category groups window is divided into two parts. The left part of the window contains alist of Category groups.
• Add – Click to create a new Category group.

172
• Edit – Click to edit an existing Category group.
• Remove – Select and click if you want to remove an existing Category group from thelist of Category groups.
The right part of the window contains a list of categories and subcategories. Select acategory in the Category list to display its subcategories. Each group contains adult and/orgenerally inappropriate subcategories as well as categories considered generally acceptable.When you open the Category groups window and click on the first group, you can add orremove categories/subcategories from the list of appropriate groups (for example Violence orWeapons). Web pages with inappropriate content can be blocked, or users can be informedafter a rule with predefined actions is created.
Select the check box to add or remove a subcategory to a particular group.
Here are some examples of categories that users might not be familiar with:
Miscellaneous – Usually private (local) IP addresses such as intranet, 192.168.0.0/16, etc.When you get a 403 or 404 error code, the website will also match this category.
Not resolved – This category includes web pages that are not resolved because of an errorwhen connecting to the Web control database engine.
Not categorized – Unknown web pages that are not yet in the Web control database.
Proxies – Web pages such as anonymizers, redirectors or public proxy servers can be usedto obtain (anonymous) access to web pages that are usually prohibited by the Web controlfilter.
File sharing – These web pages contain large amounts of data such as photos, videos or e-books. There is a risk that these sites contain potentially offensive material or adult content.

173
NoteA subcategory can belong to any group. There are some subcategories that arenot included in predefined groups (for example, Games). In order to match adesired subcategory using Web control filter, add it to your desired group.
URL groupsURL groups allow you to create a group that contains several URL links for which you want tocreate a rule (allow/disallow a particular website).
Create a new URL groupTo create a new URL group click Add and enter the name of new URL group.
Using a URL group can be useful when the administrator wants to create a rule for more webpages (blocked or allowed based on your choice).
Add URL addresses to the URL group list - manually
To add a new URL address to the list select a URL group and click Add in the bottom right ofthe window.
The special symbols * (asterisk) and ? (question mark) cannot be used in the URL address list.
It is not necessary to enter the full name of domain with http:// or https://.

174
If you add a domain to the group, all content located on this domain and all subdomains (forexample, sub.examplepage.com) will be blocked or allowed based on your choice of URL-based action.
If there is a conflict between two rules in the meaning of the first rule blocks the domain, andthe second rule allows the same domain, the specific domain or IP address will be blockedanyway. For more information on creating rules see URL-based Action.
Add URL addresses to the URL group list - import usinga .txt fileClick Import to import a file with a list of URL addresses (separate values with a line break,for example .txt file using encoding UTF-8). The special symbols * (asterisk) and ? (questionmark) cannot be used in the URL address list.
Using URL groups in Web controlIf you want to set an action to be performed for a specific URL group, open the Web controlrules editor, select your URL group using the drop-down menu, adjust other parametersand then click OK.
NoteBlocking or allowing a specific web page can be more accurate than blocking orallowing a whole category of web pages. Be careful when changing these settingsand adding a category/web page to the list.
Blocked webpage message customizationBlocked webpage message and Block webpage graphic fields allow you to easilycustomize the displayed message when a website is blocked.
This is the default message and design of the in-browser notification when a user tries toaccess a blocked website:

175
UsageLet's block the "Weapons" website category.
An example of a blocked webpage message would be:
The webpage %URL_OR_CATEGORY% was blocked because it is considered inappropriate or with harmful content.Please contact your administrator for details.
Variable Description%CATEGORY% Blocked Web control category.%URL_OR_CATEGORY% Blocked Web control website or category (depends on the Web
control blocking rule).%STR_GOBACK% "Go Back" button value.%product_name% Name of the ESET product (ESET Endpoint Security)%product_version% Version of the ESET product.
An example of a blocked webpage graphics will be:
https://help.eset.com/tools/indexPage/products/antitheft.png
The image size (width/height) will scale automatically if the size is too high.
The configuration in ESET Endpoint Security will look like:

176
The custom in-browser notification when a user tries to access a blocked website will looklike:

177
Updating the programRegularly updating ESET Endpoint Security is the best method to obtain the maximum levelof security on your computer. The Update module ensures that the program is always up todate in two ways, by updating the detection engine and by updating system components.Updates are automatic by default when the program is activated.
By clicking Update in the main program window, you can find the current update statusincluding the date and time of the last successful update and if an update is needed. You canalso click the Show all modules link to open the list of installed modules and check theversion and the last update of a module.
In addition, the option to manually begin the update process, Check for updates isavailable. Updating the detection engine and updating program components are importantparts of maintaining complete protection against malicious code. Please pay attention to theirconfiguration and operation. If you did not enter your License details during installation, youcan enter your license key by clicking Activate product when updating to access ESET’supdate servers.
If you activate ESET Endpoint Security with Offline license file without Username andPassword and try to update, the red information Modules update failed signals you candownload updates from the mirror only.
NoteYour license key is provided by ESET after purchasing ESET Endpoint Security.

178
Current version – The ESET Endpoint Security build number.
Last successful update – The date and time of the last successful update. Make sure itrefers to a recent date, which means that the detection engine is current.
Last successful check for updates – The date and time of the last successful attempt toupdate modules.
Show all modules – Click the link to open the list of installed modules and check the versionand the last update of a module.
Update processAfter clicking Check for updates, the download process begins. A download progress barand remaining time to download will be displayed. To interrupt the update, click Cancelupdate.
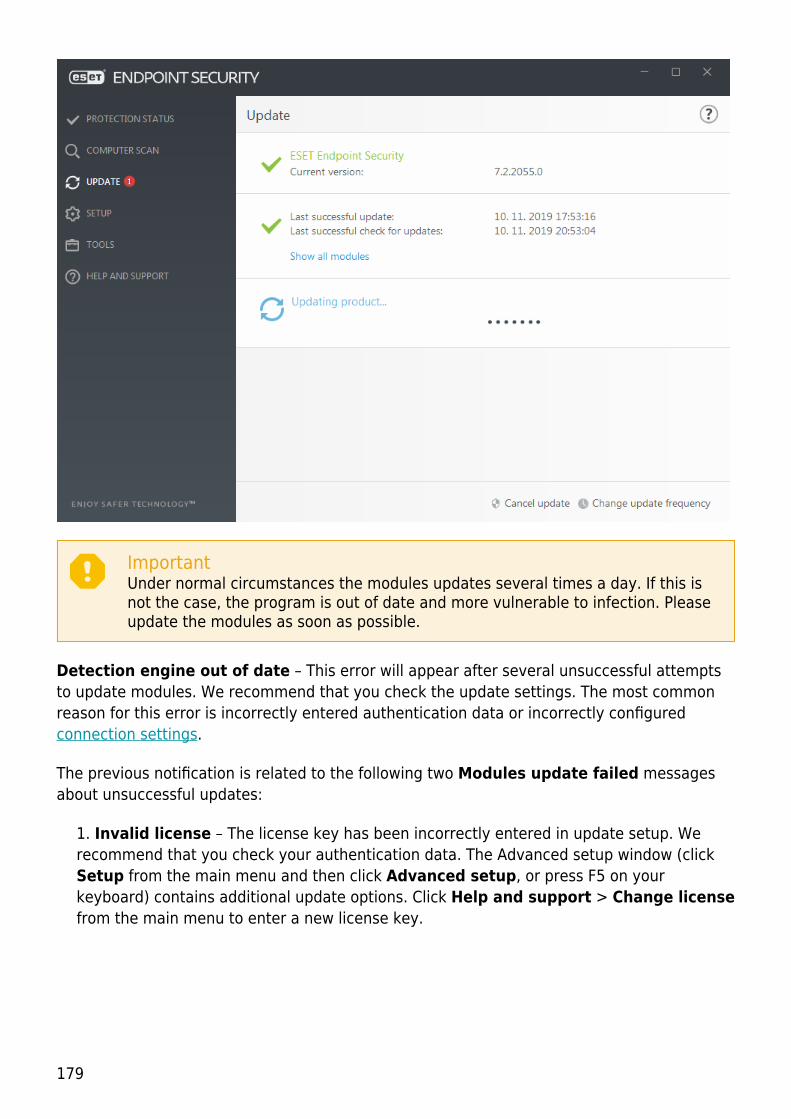
179
ImportantUnder normal circumstances the modules updates several times a day. If this isnot the case, the program is out of date and more vulnerable to infection. Pleaseupdate the modules as soon as possible.
Detection engine out of date – This error will appear after several unsuccessful attemptsto update modules. We recommend that you check the update settings. The most commonreason for this error is incorrectly entered authentication data or incorrectly configuredconnection settings.
The previous notification is related to the following two Modules update failed messagesabout unsuccessful updates:
1. Invalid license – The license key has been incorrectly entered in update setup. Werecommend that you check your authentication data. The Advanced setup window (clickSetup from the main menu and then click Advanced setup, or press F5 on yourkeyboard) contains additional update options. Click Help and support > Change licensefrom the main menu to enter a new license key.

180
2. An error occurred while downloading update files – A possible cause of the error isincorrect Internet connection settings. We recommend that you check your Internetconnectivity (by opening any website in your web browser). If the website does not open,it is likely that an Internet connection is not established or there are connectivity problemswith your computer. Please check with your Internet Service Provider (ISP) if you do nothave an active Internet connection.

181
NoteFor more information please visit this ESET Knowledgebase article.
Update setupUpdate setup options are available in the Advanced setup tree (F5) under Update. Thissection specifies update source information like the update servers being used andauthentication data for these servers.
Adjust update settings correctlyFor updates to be downloaded properly, it is essential that you fill in all updateparameters correctly. If you use a firewall, please make sure that your ESETprogram is allowed to communicate with the Internet (for example, HTTPScommunication).
BasicThe update profile that is currently in use is displayed in the Select default update profiledrop-down menu.
To create a new profile, see the Update profiles section.

182
Automatic profile switching – Assign an update profile according to Known networks inFirewall. Automatic profile switching allows to change the profile for specific networkdepending on the setting in Scheduler. Check help pages for more information
Configure update notifications (formerly Select received update notifications) – ClickEdit to select what application notifications are displayed. You can choose if the notificationsShow on a desktop and/or are Send by email.
If you are experiencing difficulty when attempting to download modules updates, click Clearnext to Clear update cache to clear the temporary update files/cache.
Outdated detection engine alertsSet maximum detection engine age automatically – Allows to set maximum time (indays) after which the detection engine will be reported as out of date. Default value ofMaximum detection engine age (days) is 7.
Module RollbackIf you suspect that a new update of the detection engine and/or program modules may beunstable or corrupt, you can roll back to the previous version and disable updates for a setperiod of time.

183
ProfilesUpdate profiles can be created for various update configurations and tasks. Creating updateprofiles is especially useful for mobile users who need an alternative profile for Internetconnection properties that regularly change.
The Select profile to edit drop-down menu displays the currently selected profile and is setto My profile by default.
To create a new profile, click Edit next to List of profiles, enter your own Profile name andthen click Add.
UpdatesBy default, the Update type is set to Regular update to ensure that update files willautomatically be download from the ESET server with the least network traffic. Pre-releaseupdates (the Pre-release update option) are updates that have gone through thoroughinternal testing and will be available to the general public soon. You can benefit fromenabling pre-release updates by having access to the most recent detection methods andfixes. However, pre-release updates might not be stable enough at all times and SHOULDNOT be used on production servers and workstations where maximum availability andstability is required. Delayed update allows updating from special update servers providingnew versions of virus databases with a delay of at least X hours (i.e. databases tested in areal environment and therefore considered as stable).
Enable update delivery optimization – When enabled, update files may be downloadedfrom CDN (content delivery network). Disabling this setting may cause downloadinterruptions and slowdowns when dedicated ESET update servers are overloaded. Disablingis useful when a firewall is limited to access ESET update server IP addresses only or aconnection to CDN services are not working.
Ask before downloading update – The program will display a notification where you canchoose to confirm or decline update file downloads. If the update file size is greater than thevalue specified in the Ask if an update file is greater than (kB) field, the program willdisplay a confirmation dialog. If the update file size is set to 0 kB, the program will alwaysdisplay a confirmation dialog.

184
Modules updates
The Choose automatically option is enabled by default. The Custom server option is thelocation where updates are stored. If you use an ESET update server, we recommend thatyou leave the default option selected.
Enable more frequent updates of detection signatures – Detection signatures will beupdated in shorter interval. Disabling this setting may negatively impact detection rate.
Allow module updates from removable media – Allows you to update from removablemedia if contains created mirror. When Automatic selected, update will run onbackground. If you want to show update dialogs select Always ask.
When using a local HTTP server – also known as a Mirror – the update server should be setas follows:http://computer_name_or_its_IP_address:2221
When using a local HTTP server with SSL – the update server should be set as follows:https://computer_name_or_its_IP_address:2221
When using a local shared folder – the update server should be set as follows:\\computer_name_or_its_IP_address\shared_folder
HTTP server port numberHTTP server port number specified in the examples above depends on whatport your HTTP/HTTPS server listens.

185
Program component update
See Program component update.
Connection options
See Connection options.
Update mirrorSee Update mirror.
Update rollbackIf you suspect that a new update of the detection engine and/or program modules may beunstable or corrupt, you can roll back to the previous version and disable updates for a setperiod of time. Alternatively, you can enable previously disabled updates if you hadpostponed them indefinitely.
ESET Endpoint Security records snapshots of detection engine and program modules for usewith the rollback feature. In order to create virus database snapshots, leave the Createsnapshots of modules switch enabled. The Number of locally stored snapshots fielddefines the number of previous detection engine snapshots stored.
If you click Rollback (Advanced setup (F5) > Update > Basic > Module rollback), youhave to select a time interval from the drop-down menu that represents the period of timethat the detection engine and program module updates will be paused.
Select Until revoked to postpone regular updates indefinitely until you restore updatefunctionality manually. Because it represents a potential security risk, we do not recommendselecting this option.
The detection engine version is downgraded to the oldest available and stored as a snapshotin the local computer file system.

186
NoteLet the number 19959 be the most recent version of detection engine. 19958 and19956 are stored as a detection engine snapshots. Note that 19957 is notavailable because, for example, the computer was turned off and a more recentupdate was made available before 19957 was downloaded. If the Number oflocally stored snapshots field is set to 2 and you click Roll back, the detectionengine (including program modules) will be restored to version number 19956.This process may take some time. Check whether the version of detection enginehas downgraded from the main program window of ESET Endpoint Security in theUpdate section.
Program component updateThe Program component update section contains options related to the programcomponent update. The program enables you to predefine its behavior when a new programcomponent upgrade is available.
Program component updates brings new features or makes changes to those that alreadyexist from previous versions. It can be performed automatically without user intervention, oryou can choose to be notified. After a program component update has been installed, acomputer restart may be required.
In the Update mode drop-down menu, three options are available:
• Ask before update – The default option. You will be prompted to confirm or refuseprogram component updates when they are available.
• Auto-update – A program component update will be downloaded and installedautomatically. Please remember that a computer restart may be required.
• Never update – Program component updates will not be performed at all. This optionis suitable for server installations, since servers can usually be restarted only when theyare undergoing maintenance.
By default, program component updates are downloaded from ESET repository servers. Inlarge or offline environments, the traffic can be distributed to allow internal caching of theprogram component files.
Define custom server for program component updates

187
1.Define the path to the program component update in the Custom server field.It can be an HTTP(S) link, SMB network share path, a local disk drive or a removable mediapath. For network drives, use the UNC path instead of a mapped drive letter.2.Leave Username and Password blank if not required.If required, define the appropriate credentials here for HTTP authentication on the customweb server.3.Confirm the changes and test the presence of a program component update using astandard ESET Endpoint Security update.
NoteSelecting the most appropriate option depends on the workstation where thesettings will be applied. Please be aware that there are differences betweenworkstations and servers – for example, restarting the server automatically after aprogram update could cause serious damage.
Connection optionsTo access the proxy server setup options for a given update profile, click Update in theAdvanced setup tree (F5) and then click Profiles > Updates > Connection options.
Proxy serverClick the Proxy mode drop-down menu and select one of the three following options:
• Do not use proxy server• Connection through a proxy server• Use global proxy server settings
Select Use global proxy server settings to use the proxy server configuration optionsalready specified in the Tools > Proxy server branch of the Advanced setup tree.
Select Do not use proxy server to specify that no proxy server will be used to update ESETEndpoint Security.
Connection through a proxy server option should be selected if:
• A different proxy server than the one defined in Tools > Proxy server is used toupdate ESET Endpoint Security. In this configuration, information for the new proxyshould be specified under Proxy server address, communication Port (3128 bydefault), and Username and Password for the proxy server if required.• Proxy server settings are not set globally, but ESET Endpoint Security will connect to aproxy server for updates.• Your computer is connected to the Internet via a proxy server. Settings are taken fromInternet Explorer during program installation, but if they are changed (for example, ifyou change your ISP), please make sure the proxy settings listed in this window arecorrect. Otherwise the program will not be able to connect to update servers.

188
The default setting for the proxy server is Use global proxy server settings.
Use direct connection if proxy is not available – Proxy will be bypassed during update ifit is unreachable.
Windows sharesWhen updating from a local server with a version of the Windows NT operating system,authentication for each network connection is required by default.
To configure such an account, select from the Connect to LAN as drop-down menu:
• System account (default),
• Current user,
• Specified user.
Select System account (default) to use the system account for authentication. Normally,no authentication process takes place if there is no authentication data supplied in the mainupdate setup section.
To ensure that the program authenticates using a currently logged-in user account, selectCurrent user. The drawback of this solution is that the program is not able to connect to theupdate server if no user is currently logged in.
Select Specified user if you want the program to use a specific user account forauthentication. Use this method when the default system account connection fails. Please beaware that the specified user account must have access to the update files directory on thelocal server. Otherwise the program will not be able to establish a connection and downloadupdates.
Username and Password settings are optional.
WarningWhen either Current user or Specified user is selected, an error may occurwhen changing the identity of the program to the desired user. We recommendentering the LAN authentication data in the main update setup section. In thisupdate setup section, the authentication data should be entered as follows:domain_name\user (if it is a workgroup, enter workgroup_name\name) andpassword. When updating from the HTTP version of the local server, noauthentication is required.
Select Disconnect from server after update to force a disconnection if a connection tothe server remains active even after updates have been downloaded.

189
Update mirrorESET Endpoint Security allows you to create copies of update files that can be used to updateother workstations on the network. The use of a "mirror" – a copy of the update files in theLAN environment is convenient because the update files do not need to be downloaded fromthe vendor update server repeatedly by each workstation. Updates are downloaded to thelocal mirror server and then distributed to all workstations to avoid the risk of network trafficoverload. Updating client workstations from a Mirror optimizes network load balance andsaves Internet connection bandwidth.
Use Apache HTTP Proxy to configure a mirror on large networksTo minimize Internet traffic on networks where ESET Security Management Center7 is used to manage a large number of clients, we recommend that you useApache HTTP Proxy rather than configure a client as a mirror. Apache HTTP Proxycan be installed with ESET Security Management Center Server (ESMC Server)using the all-in-one installer or as a standalone component if you have alreadyinstalled the ERA Server. For more information and differences between ApacheHTTP Proxy, Mirror Tool, and direct connectivity, see our ESMC Online Help page.
Configuration options for the local Mirror server are located in Advanced setup underUpdate. To access this section press F5 to access Advanced setup, click Update > Profilesand expand Update mirror.
To create a mirror on a client workstation, enable Create update mirror. Enabling this

190
option activates other Mirror configuration options such as the way update files will beaccessed and the update path to the mirrored files.
Access to update filesEnable HTTP server – If enabled, update files can be accessed through HTTP, no credentialsare required.
Methods to access the Mirror server are described in detail in Updating from the Mirror. Thereare two basic methods for accessing the Mirror – the folder with update files can bepresented as a shared network folder, or clients can access the mirror located on an HTTPserver.
The folder dedicated to storing update files for the Mirror is defined under Folder to storemirrored files. To choose a different folder click Clear to delete predefined folderC:\ProgramData\ESET\ESET Endpoint Security\mirror and click Edit to browse for a folder onthe local computer or shared network folder. If authorization for the specified folder isrequired, authentication data must be entered in the Username and Password fields. If theselected destination folder is located on a network disk running the Windows NT/2000/XPoperating system, the username and password specified must have write privileges for theselected folder. The username and password should be entered in the format Domain/User orWorkgroup/User. Please remember to supply the corresponding passwords.
Program component updateFiles – When configuring the Mirror you can specify the language versions of updates youwant to download. Languages selected must be supported by the mirror server configured bythe user.
Update components automatically – Allows for the installation of new features andupdates to existing features. An update can be performed automatically without userintervention, or you can choose to be notified. After a program component update has beeninstalled, a computer restart may be required.
Update components now – Updates your program components to the latest version.
HTTP Server and SSL for the MirrorIn the HTTP Server section of the Mirror tab you can specify the Server port where theHTTP server will listen as well as the type of Authentication used by the HTTP server. Bydefault, the Server port is set to 2221.
The Authentication option defines the method of authentication used for accessing theupdate files. The following options are available: None, Basic, and NTLM. Select Basic touse base64 encoding with basic username and password authentication. The NTLM optionprovides encoding using a safe encoding method. For authentication, the user created on the

191
workstation sharing the update files is used. The default setting is None, which grants accessto the update files with no need for authentication.
NoteAuthentication data such as Username and Password is intended only foraccessing the mirror HTTP server. Complete these fields only if a username andpassword are required.
Append your Certificate chain file, or generate a self-signed certificate if you want to runHTTP server with HTTPS (SSL) support. The following certificate types are available: ASN,PEM and PFX. For additional security, you can use HTTPS protocol to provide update files fordownload. It is almost impossible to track data transfers and login credentials using thisprotocol. The Private key type option is set to Integrated by default (and therefore thePrivate key file option is disabled by default). This means that the private key is a part ofthe selected certificate chain file.
Self-signed certificates for HTTPS mirrorIf you are using an HTTPS mirror server, you need to import its certificate to thetrusted root store on all client machines. See Installing the trusted root certificatein Windows.
Updating from the MirrorThere are two basic methods to configure a Mirror, which is essentially a repository whereclients can download update files. The folder with update files can be presented as a sharednetwork folder or as an HTTP server.
Accessing the Mirror using an internal HTTP serverThis is the default configuration specified in the predefined program configuration. To allowaccess to the Mirror using the HTTP server, navigate to Advanced setup > Update >Profiles > Update mirror and select Create update mirror.
In the HTTP Server section of the Mirror tab you can specify the Server port where theHTTP server will listen as well as the type of Authentication used by the HTTP server. Bydefault, the Server port is set to 2221. The Authentication option defines the method ofauthentication used for accessing the update files. The following options are available: None,Basic, and NTLM. Select Basic to use base64 encoding with basic username and passwordauthentication. The NTLM option provides encoding using a safe encoding method. Forauthentication, the user created on the workstation sharing the update files is used. Thedefault setting is None, which grants access to the update files with no need forauthentication.

192
WarningIf you want to allow access to the update files via the HTTP server, the Mirrorfolder must be located on the same computer as the ESET Endpoint Securityinstance creating it.
NoteAn error Invalid Username and/or Password will appear in the Update panefrom the main menu after several unsuccessful attempts to update the detectionengine from the Mirror. We recommend that you navigate to Advanced setup >Update > Profiles > Update mirror and check the Username and Password.The most common reason for this error is incorrectly entered authentication data.
After your Mirror server is configured, you must add the new update server on clientworkstations. To do this, follow the steps below:
• Access Advanced setup (F5) and click Update > Profiles > Updates > Moduleupdates.
• Disable Choose automatically and add a new server to the Update server fieldusing one of the following formats:http://IP_address_of_your_server:2221https://IP_address_of_your_server:2221 (if SSL is used)
Accessing the Mirror via system sharesFirst, a shared folder should be created on a local or network device. When creating thefolder for the Mirror, you must provide “write” access for the user who will save update filesto the folder and “read” access for all users who will update ESET Endpoint Security from theMirror folder.
Next, configure access to the Mirror in Advanced setup > Update > Profiles > Updatemirror tab by disabling Enable HTTP server. This option is enabled by default in theprogram install package.
If the shared folder is located on another computer in the network, you must enterauthentication data to access the other computer. To enter authentication data, open ESETEndpoint Security Advanced setup (F5) and click Update > Profiles > Updates >Connection options > Windows shares > Connect to LAN as. This is the same settingused for updating, as described in the Connect to LAN as section.
To access the mirror folder, this needs to be done under the same account as the one usedfor logging into the computer the mirror is created on. In case the computer is in a domain,"domain\user" username should be used. In case the computer is not in a domain,"IP_address_of_your_server\user" or "hostname\user" should be used.
After the Mirror configuration is complete, on client workstations set \\UNC\PATH as theupdate server using the steps below:

193
1. Open ESET Endpoint Security Advanced setup and click Update > Profiles >Updates.
2. Disengage Choose automatically next to Module updates and a new server tothe Update server field using the \\UNC\PATH format.
NoteFor updates to function properly, the path to the Mirror folder must be specified asa UNC path. Updates from mapped drives may not work.
Creating the Mirror using Mirror ToolThe Mirror tool creates a structure of folders different from what Endpoint mirrordoes. Each folder holds update files for a group of products. You have to specifythe full path to the correct folder in the update settings of the product using themirror.For example, to update the ESMC 7 from the mirrorm set the Update server to(according to your HTTP server root location):http://your_server_address/mirror/eset_upd/era6
The last section controls program components (PCUs). By default, downloaded programcomponents are prepared to copy to the local mirror. If Program component update isactivated, there is no need to click Update, because files are copied to the local mirrorautomatically when they are available. See Update mode for more information aboutprogram component updates.
Troubleshooting Mirror update problemsIn most cases, problems during an update from a Mirror server are caused by one or more ofthe following: incorrect specification of the Mirror folder options, incorrect authentication datato the Mirror folder, incorrect configuration on local workstations attempting to downloadupdate files from the Mirror, or by a combination of the reasons above. Below is an overviewof the most frequent problems which may occur during an update from the Mirror:
ESET Endpoint Security reports an error connecting to Mirror server – Likely causedby incorrect specification of the update server (network path to the Mirror folder) from whichlocal workstations download updates. To verify the folder, click the Windows Start menu,click Run, enter the folder name and click OK. The contents of the folder should bedisplayed.
ESET Endpoint Security requires a username and password – Likely caused byincorrect authentication data (username and password) in the update section. The usernameand password are used to grant access to the update server, from which the program willupdate itself. Make sure that the authentication data is correct and entered in the correctformat. For example, Domain/Username, or Workgroup/Username, plus the correspondingPasswords. If the Mirror server is accessible to “Everyone”, please be aware that this does

194
not mean that any user is granted access. “Everyone” does not mean any unauthorized user,it just means that the folder is accessible for all domain users. As a result, if the folder isaccessible to “Everyone”, a domain username and password will still need to be entered inthe update setup section.
ESET Endpoint Security reports an error connecting to the Mirror server –Communication on the port defined for accessing the HTTP version of the Mirror is blocked.
ESET Endpoint Security reports an error while downloading update files – Likelycaused by incorrect specification of the update server (network path to the Mirror folder)from which local workstations download updates.
How to create update tasksUpdates can be triggered manually by clicking Check for updates in the primary windowdisplayed after clicking Update from the main menu.
Updates can also be run as scheduled tasks. To configure a scheduled task, click Tools >Scheduler. By default, the following tasks are activated in ESET Endpoint Security:
• Regular automatic update
• Automatic update after dial-up connection
• Automatic update after user logon
Each update task can be modified to meet your needs. In addition to the default updatetasks, you can create new update tasks with a user-defined configuration. For more detailsabout creating and configuring update tasks, see Scheduler.
ToolsThe Tools menu includes modules that help simplify program administration and offersadditional options for advanced users.
This menu includes the following tools:
• Log files
• Security report (for non-managed endpoints)
• Running processes (if ESET LiveGrid® is enabled in ESET Endpoint Security)
• Watch activity
• Scheduler

195
• Network connections (if Firewall is enabled in ESET Endpoint Security)
• ESET SysInspector
• ESET SysRescue Live – Redirects you to the ESET SysRescue Live website, where youcan download the ESET SysRescue Live .iso CD/DVD image.
• Quarantine
• Submit sample for analysis – Allows you to submit a suspicious file for analysis to theESET Research Lab (may not be available based on your configuration of ESETLiveGrid®).
Log filesLog files contain information about all important program events that have occurred andprovide an overview of detected threats. Logs are an essential tool in system analysis, threatdetection and troubleshooting. Logging is performed actively in the background with no userinteraction. Information is recorded based on the current log verbosity settings. It is possibleto view text messages and logs directly from the ESET Endpoint Security environment. It isalso possible to archive log files.
Log files are accessible from the main program window by clicking Tools > Log files. Selectthe desired log type from the Log drop-down menu. The following logs are available:

196
• Detections – This log offers detailed information about detections and infiltrationsdetected by ESET Endpoint Security modules. The information includes the time ofdetection, name of detection, location, the performed action and the name of the userlogged in at the time the infiltration was detected. Double-click any log entry to display itsdetails in a separate window. Not-cleaned infiltrations are always marked with red text onlight red background, cleaned infiltrations are marked with yellow text on whitebackground. Not-cleaned PUAs or Potentially unsafe applications are marked with yellowtext on white background.
• Events – All important actions performed by ESET Endpoint Security are recorded in theevent log. The event log contains information about events and errors that have occurred inthe program. It is designed to help system administrators and users resolve problems.Often the information found here can help you find a solution for a problem occurring in theprogram.
• Computer scan – All scan results are displayed in this window. Each line corresponds toa single computer control. Double-click any entry to view the details of the respective scan.
• Blocked files – Contains records of files that were blocked and could not be accessible.The protocol shows the reason and the source module that blocked the file, as well as theapplication and user that executed the file.
• Sent files – Contains records of files that were sent to ESET LiveGrid® or ESET DynamicThreat Defense for analysis.
• Audit logs – Each log contains information about the date and time when the changewas performed, type of change, description, source and user. See Audit logs for moredetails.
• HIPS – Contains records of specific rules that are marked for recording. The protocolshows the application that called the operation, the result (whether the rule was permittedor prohibited) and the name of the rule created.
• Network protection – The firewall log displays all remote attacks detected by Networkattack protection or Firewall. Here you will find information about any attacks on yourcomputer. The Event column lists the detected attacks. The Source column informs youmore about the attacker. The Protocol column reveals the communication protocol used forthe attack. Analysis of the network protection log may help you to detect system infiltrationattempts in time to prevent unauthorized access to your system. For more details onparticular network attacks, see IDS and advanced options.
• Filtered websites – This list is useful if you want to view a list of websites that wereblocked by Web access protection or Web control. In these logs you can see the time, URL,user and application that opened a connection to the particular website.
• Antispam protection – Contains records related to email messages that were markedas spam.

197
• Web control – Shows blocked or allowed URL addresses and details about how they arecategorized. The Action performed column tells you how filtering rules were applied.
• Device control – Contains records of removable media or devices that were connectedto the computer. Only devices with a Device control rule will be recorded to the log file. Ifthe rule does not match a connected device, a log entry for a connected device will not becreated. Here you can also see details such as device type, serial number, vendor nameand media size (if available).
Select the contents of any log and press Ctrl + C to copy it to the clipboard. Hold Ctrl +Shift to select multiple entries.
Click Filtering to open the Log filtering window where you can define the filteringcriteria.
Right-click a specific record to open the context menu. The following options are available inthe context menu:
• Show – Shows more detailed information about the selected log in a new window.
• Filter same records – After activating this filter, you will only see records of thesame type (diagnostics, warnings, ...).
• Filter... – After clicking this option, the Log filtering window will allow you to definefiltering criteria for specific log entries.

198
• Enable filter – Activates filter settings.
• Disable filter – Clears all filter settings (as described above).
• Copy/Copy all – Copies information about all the records in the window.
• Delete/Delete all – Deletes the selected record(s) or all the records displayed – thisaction requires administrator privileges.
• Export... – Exports information about the record(s) in XML format.
• Export all... – Export information about all records in XML format.
• Find.../Find next/Find previous – After clicking this option, the Log filtering windowwill allow you to define filtering criteria to highlight the specific entry.
• Create exclusion – Create a new Detection exclusion using a wizard (Not availablefor malware detections).
Log filteringClick Filtering in Tools > Log files to define filtering criteria.
The log filtering feature will help you find the information you are looking for, especially whenthere are many records. It lets you narrow down log records, for example, if you are lookingfor a specific type of event, status or time period. You can filter log records by specifyingcertain search options, only records that are relevant (according to those search options) willbe displayed in the Log files window.
Type the keyword you are searching for into the Find text field. Use the Search in columnsdrop-down menu to refine your search. Choose one or more record from the Record logtypes drop-down menu. Define the Time period from which you want the results to bedisplayed. You can also use further search options, such as Match whole words only orCase sensitive.
Find text
Type a string (word, or part of a word). Only records that contain this string will be shown.Other records will be omitted.
Search in columns
Select what columns will be taken into account when searching. You can check one ormore columns to be used for searching.
Record types
Choose one or more log record types from the drop-down menu:

199
• Diagnostic - Logs information needed to fine-tune the program and all recordsabove.• Informative - Records informative messages, including successful update messages,plus all records above.• Warnings - Records critical errors and warning messages.• Errors - Errors such as "Error downloading file" and critical errors will be recorded.• Critical - Logs only critical errors (error starting antivirus protection).
Time period
Define the time period from which you want the results to be displayed:
• Not specified (default) - Does not search within time period, searches the whole log.• Last day• Last week• Last month• Time period - You can specify the exact time period (From: and To:) to filter only therecords of the specified time period.
Match whole words only
Use the check box if you want to search whole words for more precise results.
Case sensitive
Enable this option if it is important for you to use capital or lower case letters whilefiltering. Once you have configured your filtering/search options, click OK to show filteredlog records or Find to start searching. The log files are searched from top to bottom,starting from your current position (the record that is highlighted). The search stops whenit finds the first corresponding record. Press F3 to search for the next record or right-clickand select Find to refine your search options.
Logging configurationThe Logging configuration of ESET Endpoint Security is accessible from the main programwindow. Click Setup > Advanced Setup > Tools > Log files. The logs section is used todefine how the logs will be managed. The program automatically deletes older logs in orderto save hard disk space. You can specify the following options for log files:
Minimum logging verbosity – Specifies the minimum verbosity level of events to belogged:
• Diagnostic – Logs information needed to fine-tune the program and all records above.
• Informative – Records informative messages, including successful update messages,plus all records above.
• Warnings – Records critical errors and warning messages.

200
• Errors – Errors such as "Error downloading file" and critical errors will be recorded.
• Critical – Logs only critical errors (error starting antivirus protection, built-in firewall,etc...).
NoteAll blocked connections will be recorded when you select the Diagnosticverbosity level.
Log entries older than the specified number of days in the Automatically delete recordsolder than (days) field will automatically be deleted.
Optimize log files automatically – When engaged, log files will automatically bedefragmented if fragmentation percentage is higher than value specified in the If thenumber of unused records exceeds (%) field.
Click Optimize to begin defragmenting the log files. All empty log entries are removed toimprove performance and log processing speed. This improvement can be observedparticularly when the logs contain a large number of entries.
Enable text protocol enables the storage of logs in another file format separate from Logfiles:
• Target directory – Select the directory where log files will be stored (only applies toText/CSV). You can copy the path or select another directory by clicking Clear. Each logsection has its own file with a predefined file name (for example, virlog.txt for theDetected threats section of log files, if you use a plain text file format to store logs).
• Type – If you select the Text file format, logs will be stored in a text file and data willbe separated into tabs. The same applies to the comma-separated CSV file format. If youchoose Event, logs will be stored in the Windows Event log (can be viewed using EventViewer in Control panel) as opposed to the file.
• Delete all logs files – Erases all stored logs currently selected in the Type drop-downmenu. A notification about successful deletion of the logs will be shown.
Enable tracking of configuration changes in Audit log – Informs you about eachconfiguration change. See Audit logs for more information.
ESET Log CollectorIn order to help resolve issues more quickly, ESET may ask you to provide logsfrom your computer. ESET Log Collector makes it easy for you to collect theinformation needed. For more information about ESET Log Collector please visitour ESET Knowledgebase article.

201
Audit logsIn an enterprise environment there are usually multiple users with access rights defined forconfiguring endpoints. Since the modification of the product configuration might dramaticallyaffect how the product operates it is essential that administrators would like to trace thechanges done by users to help administrators quickly identify, resolve, and also to preventoccurring of the same or similar problems in the future.
The Audit log is a new type of logging from ESET Endpoint Security version 7.1 and solutionfor the identification of the origin of the problem. Audit log tracks changes in configuration orprotection state and records snapshots for later reference.
To see the Audit log, click Tools in the main menu and then click Log files and selectAudit logs from the drop-down menu.
The Audit log contains information about:
• Time - when the change was performed
• Type - what type of setting or feature was changed
• Description - what exactly was changed and which part of setting has been changedtogether with number of changed settings
• Source - where is the source of the change
• User - who made the change

202
Right-click any Settings changed type of audit log in the Log files window and select Showchanges from the context menu to display detailed information about the performedchange. Besides, you can restore setting change by clicking Restore from the context menu(not available for product managed by ESMC). If you select Delete all from the contextmenu, the log with information about this action will be created.
If Optimize log files automatically enabled in Advanced setup > Tools > Log files, theAudit logs will automatically be defragmented as other logs.
if Automatically delete records older than (days) enabled in Advanced setup > Tools> Log files, log entries older than the specified number of days will automatically bedeleted.
SchedulerThe Scheduler manages and launches scheduled tasks with predefined configuration andproperties.
The Scheduler can be accessed from the ESET Endpoint Security main program window byclicking Tools > Scheduler. The Scheduler contains a list of all scheduled tasks andconfiguration properties such as the predefined date, time and scanning profile used.
The Scheduler serves to schedule the following tasks: detection engine update, scanningtask, system startup file check and log maintenance. You can add or delete tasks directly

203
from the main Scheduler window (click Add task or Delete at the bottom). Right clickanywhere in the Scheduler window to perform the following actions: display detailedinformation, perform the task immediately, add a new task, and delete an existing task. Usethe check boxes at the beginning of each entry to activate/deactivate the tasks.
By default, the following scheduled tasks are displayed in Scheduler:
• Log maintenance
• Regular automatic update
• Automatic update after dial-up connection
• Automatic update after user logon
• Automatic startup file check (after user logon)
• Automatic startup file check (after successful module update)
To edit the configuration of an existing scheduled task (both default and user-defined), right-click the task and click Edit... or select the task you wish to modify and click the Edit button.

204
Add a new task1. Click Add task at the bottom of the window.
2. Enter a name of the task.
3. Select the desired task from the drop-down menu:
• Run external application – Schedules the execution of an external application.
• Log maintenance – Log files also contains leftovers from deleted records. This taskoptimizes records in log files on a regular basis to work effectively.
• System startup file check – Checks files that are allowed to run at system startup orlogon.
• Create a computer status snapshot – Creates an ESET SysInspector computersnapshot – gathers detailed information about system components (for example, drivers,applications) and assesses the risk level of each component.
• On-demand computer scan – Performs a computer scan of files and folders on yourcomputer.
• Update – Schedules an Update task by updating the detection engine and programmodules.
4. Turn on the Enabled switch if you want to activate the task (you can do this later byselecting/deselecting check box in the list of scheduled tasks), click Next and select one ofthe timing options:
• Once – The task will be performed at the predefined date and time.
• Repeatedly – The task will be performed at the specified time interval.
• Daily – The task will run repeatedly each day at the specified time.
• Weekly – The task will be run on the selected day and time.
• Event triggered – The task will be performed on a specified event.
5. Select Skip task when running on battery power to minimize system resourceswhile a laptop is running on battery power. The task will be run on the specified date andtime in Task execution fields. If the task could not be run at the predefined time, you canspecify when it will be performed again:
• At the next scheduled time
• As soon as possible

205
• Immediately, if the time since the last run exceeds a specified value (theinterval can be defined using the Time since last run scroll box)
You can review scheduled task when right click and click Show task details.
Protection statisticsTo view a graph of statistical data related to ESET Endpoint Security's protection modules,click Tools > Protection statistics. Select the applicable protection module from theStatistics drop-down menu to see the corresponding graph and legend. If you mouse overan item in the legend, only the data for that item will display in the graph.
A new type of reporting has been introduced from ESET Endpoint Security version 7.1 -Security report. The Protection statistics section will no longer be available.
The following statistic graphs are available:
• Antivirus and Antispyware protection – Displays the number of infected andcleaned objects.
• File system protection – Only displays objects that were read or written to the filesystem.
• Email client protection – Only displays objects that were sent or received by emailclients.
• Web access and Anti-Phishing protection – Only displays objects downloaded byweb browsers.
• Email client antispam protection – Displays the history of antispam statistics sincethe last startup.

206
Next to the statistics graphs, you can see the number of all scanned objects, number ofinfected objects, number of cleaned objects and the number of clean objects. Click Reset toclear statistics information or click Reset all to clear and remove all the existing data.
Watch activityTo see the current File system activity in graph form, click Tools > Watch activity. At thebottom of the graph is a timeline that records file system activity in real-time based on theselected time span. To change the time span, select from Refresh rate drop-down menu.
The following options are available:
• Step: 1 second – The graph refreshes every second and the timeline covers the last10 minutes.
• Step: 1 minute (last 24 hours) – The graph is refreshed every minute and thetimeline covers the last 24 hours.
• Step: 1 hour (last month) – The graph is refreshed every hour and the timelinecovers the last month.
• Step: 1 hour (selected month) – The graph is refreshed every hour and the timeline

207
covers the last X selected months.
The vertical axis of the File system activity graph represents the amount of read data(blue color) and the amount of written data (turquoise color). Both values are given in kB(kilobytes)/MB/GB. If you mouse over either read data or written data in the legend below thegraph, the graph will only display data for that activity type.
You can also select Network activity from the drop-down menu. The graph display andoptions for File system activity and Network activity are the same except that the latterdisplays the amount of received data (blue color) and amount of sent data (turquoise color).
ESET SysInspectorESET SysInspector is an application that thoroughly inspects your computer and gathersdetailed information about system components such as drivers and applications, networkconnections or important registry entries and assesses the risk level of each component. Thisinformation can help determine the cause of suspicious system behavior that may be due tosoftware or hardware incompatibility or malware infection. See also Online user guide forESET SysInspector.
The SysInspector window displays the following information about created logs:
• Time – The time of log creation.
• Comment – A short comment.
• User – The name of the user who created the log.
• Status – The status of log creation.
The following actions are available:
• Show – Opens created log. You can also right-click a given log file and select Showfrom the context menu.
• Compare – Compares two existing logs.
• Create... – Creates a new log. Please wait until ESET SysInspector is finished (logstatus will display as Created) before attempting to access the log.
• Delete – Removes the selected log(s) from the list.
The following items are available from the context menu when one or more log files areselected:
• Show – Opens the selected log in ESET SysInspector (same function as double-clickinga log).

208
• Compare – Compares two existing logs.
• Create... – Creates a new log. Please wait until ESET SysInspector is finished (logstatus will display as Created) before attempting to access the log.
• Delete – Deletes selected log.
• Delete all – Deletes all logs.
• Export... – Exports the log to an .xml file or zipped .xml.
Cloud-based protectionESET LiveGrid® (built on the ESET ThreatSense.Net advanced early warning system) utilizesdata that ESET users have submitted worldwide and sends it to the ESET Research Lab. Byproviding suspicious samples and metadata from the wild, ESET LiveGrid® enables us toreact immediately to needs of our customers and keep ESET responsive to the latest threats.
There are three options:
Option 1: Enable the ESET LiveGrid® reputation systemThe ESET LiveGrid® reputation system provides cloud-based whitelisting and blacklisting.
Check the reputation of Running processes and files directly from the program's interface orcontextual menu with additional information available from ESET LiveGrid®.
Option 2: Enable the ESET LiveGrid® feedback systemIn addition to the ESET LiveGrid® reputation system, the ESET LiveGrid® feedback systemcollects information about your computer related to newly-detected threats. This informationmay include a sample or copy of the file in which the threat appeared, the path to that file,the filename, the date and time, the process by which the threat appeared on your computerand information about your computer‘s operating system.
By default, ESET Endpoint Security is configured to submit suspicious files for detailedanalysis to the ESET Virus Lab. Files with certain extensions such as .doc or .xls are alwaysexcluded. You can also add other extensions if there are particular files that you or yourorganization want to avoid sending.
Option 3: Choose not to enable ESET LiveGrid®You will not lose any software functionality, but in some cases, ESET Endpoint Security mayrespond faster to new threats than the detection engine update when ESET LiveGrid® isenabled.

209
Related informationRead more about ESET LiveGrid® in the glossary.See our illustrated instructions available in English and several other languageson how to enable or disable ESET LiveGrid® in ESET Endpoint Security.
Cloud-based protection configuration in AdvancedsetupTo access ESET LiveGrid® settings, press F5 to enter Advanced setup and expandDetection Engine > Cloud-based Protection.
Enable ESET LiveGrid® reputation system (recommended) – The ESET LiveGrid®reputation system improves the efficiency of ESET anti-malware solutions by comparingscanned files to a database of whitelisted and blacklisted items in the cloud.
Enable ESET LiveGrid® feedback system – Sends relevant submission data (described inthe Submission of samples section below) along with crash reports and statistics to theESET Research lab for further analysis.
Enable ESET Dynamic Threat Defense (not visible in ESET Endpoint Security) – ESETDynamic Threat Defense is a paid service provided by ESET. Its purpose is to add a layer ofprotection specifically designed to mitigate threats that are new in the wild. Suspicious filesare automatically submitted to ESET cloud. In the cloud they are analyzed by our advancedmalware detection engines. The user who provided the sample will receive a behavior reportthat provides a summary of the observed sample's behavior.
Submit crash reports and diagnostics data – Submit ESET LiveGrid® related diagnosticsdata such as crash reports and modules memory dumps. We recommend keeping it enabledto help ESET diagnose problems, improve the products, and ensure better end-userprotection.
Submit anonymous statistics – Allow ESET to collect information about newly detectedthreats such as the threat name, date and time of detection, detection method andassociated metadata, product version, and configuration including information about yoursystem.
Contact email (optional) – Your contact email can be included with any suspicious files andmay be used to contact you if further information is required for analysis. Please note thatyou will not receive a response from ESET unless more information is needed.

210
Submission of samplesManual submission of samples – Enables the option to manually submit samples to ESETfrom the context menu, Quarantine or Tools > Submit sample for analysis.
Automatic submission of detected samples
Select what kind of samples are submitted to ESET for analysis and to help improve futuredetection. The following options are available:
• All detected samples – All detected objects by Detection engine (includingpotentially unwanted applications when enabled in the scanner settings).
• All samples except documents – All detected objects except Documents (seebelow).
• Do not submit – Detected objects will not be sent to ESET.
Automatic submission of suspicious samples
These samples will also be sent to ESET in case the detection engine did not detect them. Forexample, samples which nearly missed the detection, or one of the ESET Endpoint Securityprotection modules consider these samples as suspicious or have an unclear behavior.
• Executables – Includes files like .exe, .dll, .sys.

211
• Archives – Includes filetypes like .zip, .rar, .7z, .arch, .arj, .bzip, .gzip, .ace, .arc, .cab.
• Scripts – Includes filetypes like .bat, .cmd, .hta, .js, .vbs, .ps1.
• Other – Includes filetypes like .jar, .reg, .msi, .sfw, .lnk.
• Possible Spam emails – This will allow sending possible spam parts or wholepossible spam emails with attachment to ESET for further analysis. Enabling this optionimprove global detection of spam including improvements to future spam detection foryou.
• Documents – Include Microsoft Office or PDF documents with or without activecontent. Expand list of all included document file types
ACCDB, ACCDT, DOC, DOC_OLD, DOC_XML, DOCM, DOCX, DWFX, EPS,IWORK_NUMBERS, IWORK_PAGES, MDB, MPP, ODB, ODF, ODG, ODP, ODS, ODT, OLE2,OLE2_ENCRYPTED, OLE2_MACRO, OLE2_PROTECTED, ONE, ONEPKG, PDF, PPT, PPT_XML,PPTM, PPTX, PS, PSD, RTF, SYLK, THMX, VSD, VSD_XML, WPC, WPS, XLS, XLS_XML, XLSB,XLSM, XLSX, XPS
Exclusions
The Exclusion filter allows you to exclude certain files/folders from submission (for example, itmay be useful to exclude files that may carry confidential information, such as documents orspreadsheets). The files listed will never be sent to ESET labs for analysis, even if theycontain suspicious code. The most common file types are excluded by default (.doc, etc.).You can add to the list of excluded files if desired.
ESET Dynamic Threat DefenseTo enable ESET Dynamic Threat Defense service on a client machine using ESMC WebConsole, see EDTD configuration for ESET Endpoint Security.
If you have used ESET LiveGrid® before and have disabled it, there may still be datapackages to send. Even after deactivating, such packages will be sent to ESET. When allcurrent information is sent, no further packages will be created.
Exclusion filter for Cloud-basedprotectionThe Exclusion filter allows you to exclude certain files or folders from samples submission.The files listed will never be sent to ESET labs for analysis, even if they contain suspiciouscode. Common file types (such as .doc, etc.) are excluded by default.

212
NoteThis feature is useful to exclude files that may carry confidential information, suchas documents or spreadsheets.
Running processesRunning processes displays the running programs or processes on your computer and keepsESET immediately and continuously informed about new infiltrations. ESET Endpoint Securityprovides detailed information on running processes to protect users with ESET LiveGrid®technology enabled.
Reputation – In most cases, ESET Endpoint Security and ESET LiveGrid® technology assignrisk levels to objects (files, processes, registry keys, etc.) using a series of heuristic rules thatexamine the characteristics of each object and then weigh their potential for maliciousactivity. Based on these heuristics, objects are assigned a reputation level from 9 – Bestreputation (green) to 0 – Worst reputation (red).
Process – Image name of the program or process that is currently running on your computer.You can also use the Windows Task Manager to see all running processes on your computer.You can open Task Manager by right-clicking an empty area on the taskbar and then clickingTask Manager, or by pressing Ctrl+Shift+Esc on your keyboard.

213
PID – Is an ID of processes running in Windows operating systems.
NoteKnown applications marked green are definitely clean (white-listed) and will beexcluded from scanning, as this will improve the scanning speed of on-demandcomputer scan or Real-time file system protection on your computer.
Number of users – The number of users that use a given application. This information isgathered by ESET LiveGrid® technology.
Time of discovery – Period of time since the application was discovered by ESET LiveGrid®technology.
NoteWhen an application is marked as Unknown (orange) security level, it is notnecessarily malicious software. Usually it is just a newer application. If you are notsure about the file, use the submit file for analysis feature to send the file to theESET Virus Lab. If the file turns out to be a malicious application, its detection willbe added to one of the upcoming detection engine updates.
Application name – The given name of a program or process.
By clicking a given application at the bottom, the following information will appear at thebottom of the window:
• Path – Location of an application on your computer.
• Size – File size either in kB (kilobytes) or MB (megabytes).
• Description – File characteristics based on the description from the operating system.
• Company – Name of the vendor or application process.
• Version – Information from the application publisher.
• Product – Application name and/or business name.
• Created on – Date and time when an application was created.
• Modified on – Last date and time when an application was modified.
NoteReputation can also be checked on files that do not act as runningprograms/processes - mark files you want to check, right-click on them and fromthe context menu select Advanced options > Check File Reputation usingESET LiveGrid®.

214
Security reportThis feature gives an overview of the statistics for the following categories:
Blocked Web pages – Displays the number of blocked web pages (blacklisted URL for PUA,phishing, hacked router, IP or certificate).
Infected email objects detected – Displays the number of infected email objects that havebeen detected.
Web pages in Web control blocked – Displays the number of blocked web pages in Webcontrol.
PUA detected – Displays the number of Potentially unwanted applications (PUA).
Spam emails detected – Displays the number of detected spam emails.
Documents checked – Displays the number of scanned document objects.
Applications scanned – Displays the number of scanned executable objects.
Other objects scanned – Displays the number of other scanned objects.
Web page objects scanned – Displays the number of scanned web page objects.
Email objects scanned – Displays the number of scanned email objects.
The order of these categories is based on the numeric value from the highest to the lowest.The categories with zero values are not displayed. Click Show more to expand and displayhidden categories.
Below the categories, you can see the actual virus situation with the map of the world. Thepresence of virus in each country is indicated with color (the darker the color, the higher thenumber). Countries without data are grayed. Hover mouse over the country displays data forthe selected country. You can select the specific continent and it will be automaticallyzoomed.
Click the gear wheel in the upper right corner you can Enable/Disable Security reportnotifications or select whether the data will be displayed for the last 30 days or since theproduct was activated. If ESET Endpoint Security is installed less than 30 days, then only the

215
number of days from installation can be selected. The period of 30 days is set by default.
Reset data will clear all statistics and remove the existing data for Security report. Thisaction has to be confirmed except the case that you deselect the Ask before resettingstatistics option in Advanced setup > User interface > Alerts and message boxes >Confirmation messages.
Network connectionsIn the Network connections section, you can see a list of active and pending connections.This helps you control all applications establishing outgoing connections.

216
The first line displays the name of the application and its data transfer speed. To see the listof connections made by the application (and also more detailed information), click +.
ColumnsApplication/Local IP – Name of application, local IP addresses and communication ports.
Remote IP – IP address and port number of the particular remote computer.
Protocol – Transfer protocol used.
Up-Speed/Down-Speed – The current speed of outgoing and incoming data.
Sent/Received – Amount of data exchanged within the connection.
Show details – Choose this option to display detailed information about the selectedconnection.
Select an application or IP address in the Network connections screen and right-click on it willshow context menu with following structure:
Resolve host names – If possible, all network addresses are displayed in DNS format, notin the numeral IP address format.
Show only TCP connections – The list only displays connections which belong to the TCPprotocol suite.
Show listening connections – Select this option to only display connections, where no

217
communication is currently established, but the system has opened a port and is waiting fora connection.
Show connections within the computer – Select this option to only show connections,where the remote side is a local system – so-called localhost connections.
Right-click on a connection to see additional options that include:
Deny communication for the connection – Terminates the established communication.This option is available only after clicking on an active connection.
Refresh speed – Choose the frequency to refresh the active connections.
Refresh now – Reloads the Network connections window.
The following options are available only after clicking on an application or process, not anactive connection:
Temporarily deny communication for the process – Rejects current connections forthe given application. If a new connection is established, the firewall uses a predefined rule.A description of the settings can be found in the Rules and zones section.
Temporarily allow communication for the process – Permits current connections forthe given application. If a new connection is established, the firewall uses a predefined rule.A description of the settings can be found in the Rules and zones section.
ESET SysRescue LiveESET SysRescue Live is a free utility that allows you to create a bootable rescue CD/DVD orUSB drive. You can boot an infected computer from your rescue media, and then scan formalware and clean infected files.
The main advantage of ESET SysRescue Live is the fact that it runs independent of the hostoperating system, but has direct access to the disk and file system. This makes it possible toremove threats that under normal operating conditions might be impossible to delete (forexample, when the operating system is running, etc.).
• Online Help for ESET SysRescue Live
Submission of samples for analysisIf you find a suspiciously behaving file on your computer or suspicious site on the Internet,you can submit it to the ESET Research Lab for analysis (may not be available based on yourconfiguration of ESET LiveGrid®).

218
Before submitting samples to ESETDo not submit a sample unless it meets at least one of the following criteria:• The sample is not detected by your ESET product at all• The sample is incorrectly detected as a threat• We do not accept your personal files (that you would like to scan for malwareby ESET) as samples (ESET Research Lab does not perform on-demand scansfor users)• Use a descriptive subject line and enclose as much information about the fileas possible (for example, a screenshot or the website you downloaded it from)
Sample submission enables you to send a file or a site to ESET for analysis using one of thesemethods:
1. Using the sample submission dialog can be found in Tools > Submit sample foranalysis.
2. Alternatively, you can submit the file by email. If you prefer this option, pack the file(s)using WinRAR/ZIP, protect the archive with the password "infected", and send it [email protected].
3. To report spam, spam false positives or miscategorized websites by the Web controlmodule, please refer to our ESET Knowledgebase article.
With Select sample for analysis opened, select the description from the Reason forsubmitting the sample drop-down menu that best fits your message:
• Suspicious file
• Suspicious site (a website that is infected by any malware)
• False positive file (file that is detected as an infection but are not infected)
• False positive site
• Other
File/Site – The path to the file or website you intend to submit.
Contact email – This contact email is sent along with suspicious files to ESET and may beused to contact you if further information is required for analysis. Entering a contact email isoptional, select Submit anonymously to leave it empty.
You may not get a response from ESETYou will not get a response from ESET unless more information is required fromyou. Each day our servers receive tens of thousands of files, making itimpossible to reply to all submissions.If the sample turns out to be a malicious application or website, its detection willbe added to an upcoming ESET update.

219
Select sample for analysis - SuspiciousfileObserved signs and symptoms of malware infection – Enter a description of thesuspicious file behavior observed on your computer.
File origin (URL address or vendor) – Please enter the file origin (source) and how youencountered this file.
Notes and additional information – Here you can enter additional info or a descriptionthat will help with the process of identifying the suspicious file.
NoteThe first parameter – Observed signs and symptoms of malware infection– is required, but providing additional information will help our laboratories withthe identification process of samples significantly.
Select sample for analysis - SuspicioussitePlease select one of the following from the What's wrong with the site drop-down menu:
• Infected – A website that contains viruses or other malware distributed by variousmethods.
• Phishing – Often used to gain access to sensitive data such as bank account numbers,PIN numbers and more. Read more about this type of attack in the glossary.
• Scam – A swindle or a fraudulent website, especially for making a quick profit.
• Select Other if the aforementioned options do not refer the site you are going tosubmit.
Notes and additional information – Here you can enter additional info or a descriptionthat will help while analyzing the suspicious website.
Select sample for analysis - Falsepositive fileWe request that you submit files that are detected as an infection but are not infected toimprove our antivirus and antispyware engine and help others to be protected. False

220
positives (FP) may occur when a pattern of a file matches the same pattern contained in adetection engine.
Application name and version – Program title and its version (for example number, aliasor code name).
File origin (URL address or vendor) – Please enter a file origin (source) and note how youencountered this file.
Application's purpose – The general application description, type of an application (e.g.browser, media player, ...) and its functionality.
Notes and additional information – Here you can add additional information ordescriptions that will help while processing the suspicious file.
NoteThe first three parameters are required to identify legitimate applications anddistinguish them from malicious code. By providing additional information, youwill help our laboratories significantly in the identification process and in theprocessing of samples.
Select sample for analysis - Falsepositive siteWe request that you submit sites that are detected as an infected, scam or phishing but arenot. False positives (FP) may occur when a pattern of a file matches the same patterncontained in a detection engine. Please provide this website to improve our antivirus andanti-phishing engine and help others to be protected.
Notes and additional information – Here you can add additional information ordescriptions that will help while processing the suspicious file.
Select sample for analysis - OtherUse this form if the file cannot be categorized as a Suspicious file or as a False positive.
Reason for submitting the file – Please enter a detailed description and the reason forsending the file.
NotificationsTo manage the way how ESET Endpoint Security communicates events with the user,navigate to Advanced setup (F5) > Tools > Notifications. This configuration window

221
allows you to set the following types of notifications:
• Application notifications – Shows directly in the main program window.
• Desktop notifications – A desktop notification shown as a small pop-up window next tosystem taskbar.
• Email notifications – Email notifications are sent to the specified email address.
• Customization of notifications – Add custom message to e.g. a desktop notification.
In the Basic section, use the corresponding switches to adjust the following:
Switch Default DescriptionDisplay notifications ondesktop
Disable to hide pop-up notifications next to systemtaskbar. We recommend keeping this option enabled sothe product could inform you when a new event occurs.
Do not displaynotifications when...
Keep Do not display notifications when runningapplications in full-screen mode enabled to suppressall non-interactive notifications.
Display Security reportnotifications
Enable to receive a notification when a new version ofSecurity report is generated (available only if notmanaged by ESET Security Management Center).
Display notificationabout successful update
Enable to receive a notification when product updatesits components and Detection engine modules.
Send event notificationby email
Enable to activate Email notifications.
To enable or disable specific Application notifications, click Edit next to Applicationnotifications.

222
Application notificationsTo adjust the visibility of application notifications (displayed at the bottom right of thescreen) navigate to Tools > Notifications > Basic > Application notifications of theESET Endpoint Security Advanced setup tree.
List of notifications is divided into three columns. Notifications names are sorted bycategories in the first column. To change the way, how the product notifies about newapplication events, select the checkboxes in corresponding columns Show on desktop andSend by email.

223
To set general settings for Desktop notifications, for example, how long will be a messagedisplayed or minimum verbosity of events to display, see Desktop notifications in Advancedsetup > Tools > Notifications.
To set email message format and to configure SMTP server settings, see Email notifications inAdvanced setup > Tools > Notifications.
Notifications after submitting files for analysisIf you want to set-up notifications File analyzed and File not analyzed whileusing ESET Dynamic Threat Defense, Proactive protection must be set to Blockexecution until receiving the analysis result.
Desktop notificationsDesktop notification is represented by small pop-up window next to system taskbar. Bydefault, it is set to show for 10 seconds, then it slowly disappears. This is the main way howESET Endpoint Security communicates with user, notifying about successful product updates,new devices connected, virus scans tasks completion or new threat found.
Desktop notifications section allows to customize the behavior of pop-up notifications. Thefollowing attributes can be set:
Duration – Sets the duration of how long the notification message is visible. The value mustbe in the range of 3 to 30 seconds.
Transparency – Sets the transparency of notification message in percents. The supportedrange is 0 (no transparency) to 80 (very high transparency).
Minimum verbosity of events to display – From the drop-down menu, you can select the

224
starting severity level of notifications to be displayed:
• Diagnostic – Logs information needed to fine-tune the program and all records above.
• Informative – Records informative messages such as non-standard network events,including successful update messages, plus all records above.
• Warnings – Records critical errors and warning messages (Antistealth is not runningproperly or update failed).
• Errors – Errors (document protection not started) and critical errors will be recorded.
• Critical – Logs only critical errors error starting antivirus protection or infected system.
On multi-user systems, display notifications on the screen of this user – Type in thefull account names of users that should be allowed to receive desktop notifications. Forexample, if you use your computer using other than Administrator account and you want tokeep being informed about new product events.
Email notificationsESET Endpoint Security can automatically send notification emails if an event with theselected verbosity level occurs. In the Basic section, enable Send event notifications byemail to activate email notifications.

225
SMTP serverSMTP server – The SMTP server used for sending notifications (e.g.smtp.provider.com:587, predefined port is 25).
NoteSMTP servers with TLS encryption are supported by ESET Endpoint Security.
Username and password – If the SMTP server requires authentication, these fields shouldbe filled in with a valid username and password to access the SMTP server.
Sender address – This field specifies the sender address that will be displayed in theheader of notification emails.
Recipient addresses – This field specifies the recipient addresses that will be displayed inthe header of notification emails. Use a semi-collon ";" to separate multiple emailaddresses.
Enable TLS – Enable sending alert and notification messages supported by TLS encryption.
Email settingsFrom the Minimum verbosity for notifications drop-down menu, you can select thestarting severity level of notifications to be sent.
• Diagnostic – Logs information needed to fine-tune the program and all records above.• Informative – Records informative messages such as non-standard network events,including successful update messages, plus all records above.• Warnings – Records critical errors and warning messages (Antistealth is not runningproperly or update failed).• Errors – Errors (document protection not started) and critical errors will be recorded.• Critical – Logs only critical errors error starting antivirus protection or infected system.
Send each notification in a separate email – When enabled, the recipient will receive anew email for each individual notification. This may result in large number of emails beingreceived in a short period of time.
Interval after which new notification emails will be sent (min) – Interval in minutesafter which new notifications will be sent to email. If you set this value to 0, the notificationswill be sent immediately.
Message formatCommunications between the program and a remote user or system administrator are donevia emails or LAN messages (using the Windows messaging service). The default format ofthe alert messages and notifications will be optimal for most situations. In somecircumstances, you may need to change the message format of event messages.
Format of event messages – Format of event messages that are displayed on remotecomputers.

226
Format of threat warning messages – Threat alert and notification messages have apredefined default format. We advise against changing this format. However, in somecircumstances (for example, if you have an automated email processing system), you mayneed to change the message format.
Charset – Converts an email message to the ANSI character encoding based upon WindowsRegional settings (for example, windows-1250, Unicode (UTF-8), ACSII 7-bit, or Japanese(ISO-2022-JP)). As the result, "á" will be changed to "a" and an unknown symbol to "?".
Use Quoted-printable encoding – The email message source will be encoded to Quoted-printable (QP) format which uses ASCII characters and can correctly transmit specialnational characters by email in 8-bit format (áéíóú).
Keywords (strings separated by % signs) are replaced in the message by the actualinformation as specified. The following keywords are available:
• %TimeStamp% – Date and time of the event
• %Scanner% – Module concerned
• %ComputerName% – Name of the computer where the alert occurred
• %ProgramName% – Program that generated the alert
• %InfectedObject% – Name of infected file, message, etc
• %VirusName% – Identification of the infection
• %Action% – Action taken over infiltration
• %ErrorDescription% – Description of a non-virus event
The keywords %InfectedObject% and %VirusName% are only used in threat warningmessages, and %ErrorDescription% is only used in event messages.
Customization of notificationsIn this window you can customize the messaging used in notifications.
Default notification message – A default message to be shown in the footer of notification.
ThreatsEnable Do not close malware notifications automatically to have malware notificationsstay on screen until they are closed manually.
Disable Use default message and enter your own message in the Threat notificationmessage field to use customized notification messaging.

227
QuarantineThe main function of the quarantine is to safely store reported objects (such as malware,infected files or potentially unwanted applications).
The Quarantine can be accessed from the ESET Endpoint Security main program window byclicking Tools > Quarantine.
Files stored in the quarantine folder can be viewed in a table that displays:
• the date and time of quarantine,
• the path to the original location of the file,
• its size in bytes,
• reason (for example, object added by user),
• and a number of detections (for example, duplicated detections of the same file or if itis an archive containing multiple infiltrations).
• I manage the Quarantine on client workstations remotely

228
Quarantining filesESET Endpoint Security automatically quarantines deleted files (if you have not canceled thisoption in the alert window).
Additional files should be quarantined if they:a.cannot be cleaned,
b.if it is not safe or advisable to delete them,
c.if they are falsely detected by ESET Endpoint Security,
d.or if a file behaves suspiciously but is not detected by the scanner.
To quarantine a file, you have multiple options:
a.use the drag and drop feature to quarantine a file manually by clicking the file,moving the mouse pointer to the marked area while keeping the mouse button pressedand then releasing it. After that, the application is moved to the foreground.
b.Click Move to quarantine... from the main program window.
c.The context menu can also be used for this purpose; right-click in the Quarantinewindow and select Quarantine....
Restoring from the QuarantineQuarantined files can also be restored to their original location:
• Use the Restore feature for this purpose, which is available from the context menu byright-clicking a given file in the Quarantine.
• If a file is marked as a potentially unwanted application, the Restore and excludefrom scanning option is enabled. See also Exclusions.
• The context menu also offers the Restore to... option, which allows you to restore afile to a location other than the one from which it was deleted.
• The restore functionality is not available in some cases, for example, for files locatedon a read-only network share.
Deleting from the QuarantineRight-click on a given item and select Delete from Quarantine, or select the item you wantto delete and press Delete on your keyboard. You can also select multiple items and deletethem together.

229
Submitting a file from the QuarantineIf you have quarantined a suspicious file that was not detected by the program, or if a filewas determined to be infected incorrectly (for example, by heuristic analysis of the code) andsubsequently quarantined, please send the sample for analysis ESET Research Lab. To submita file, right-click the file and select Submit for analysis from the context menu.
Illustrated instructionsThe following ESET Knowledgebase article may only be available in English:• Manage the Quarantine in ESMC (7.x)• My ESET product notified me of a detection—what should I do?
Proxy server setupIn large LAN networks, communication between your computer and the internet can bemediated by a proxy server. Using this configuration, the following settings need to bedefined. Otherwise the program will not be able to update itself automatically. In ESETEndpoint Security, proxy server setup is available from two different sections of the Advancedsetup tree.
First, proxy server settings can be configured in Advanced setup under Tools > Proxyserver. Specifying the proxy server at this level defines global proxy server settings for all ofESET Endpoint Security. Parameters here will be used by all modules that require aconnection to the Internet.
To specify proxy server settings for this level, select Use proxy server and enter theaddress of the proxy server into the Proxy server field along with the Port number of theproxy server.
If communication with the proxy server requires authentication, select Proxy serverrequires authentication and enter a valid Username and Password into the respectivefields. Click Detect proxy server to automatically detect and populate proxy serversettings. The parameters specified in Internet options for Internet Explorer or Google Chromewill be copied.
NoteYou must manually enter your Username and Password in Proxy serversettings.
Use direct connection if proxy is not available – If ESET Endpoint Security is configuredto connect via proxy and the proxy is unreachable, ESET Endpoint Security will bypass theproxy and communicate directly with ESET servers.
Proxy server settings can also be established from Advanced update setup (Advancedsetup > Update > Profiles > Updates > Connection options by selecting Connection

230
through a proxy server from the Proxy mode drop-down menu). This setting applies forthe given update profile and is recommended for laptops that often receive detection engineupdates from remote locations. For more information about this setting, see Advancedupdate setup.
Time slotsTime slots can be created and then assigned to rules for Device control and Web control.The Time slots setting can be found in Advanced setup > Tools. This lets you definecommonly used time slots (e.g. work time, weekend, etc.) and reuse them easily withoutredefining the time ranges for every rule. Time slot is applicable to any relevant type of rulethat supports time-based control.

231
To create a time slot, complete the following:
1.Click Edit > Add.
2.Type the name and description of the time slot and click Add.
3.Specify the day and start/end time for the time slot or select All day.
4.Click OK to confirm.
A single time slot can be defined with one or more time ranges based on days and times.When the time slot is created, it will show in the Apply during drop-down menu in theDevice control rules editor window or Web control rules editor window.
Microsoft Windows updateThe Windows update feature is an important component of protecting users from malicioussoftware. For this reason, it is vital that you install Microsoft Windows updates as soon asthey become available. ESET Endpoint Security notifies you about missing updates accordingto the level you specify. The following levels are available:
• No updates – No system updates will be offered for download.
• Optional updates – Updates marked as low priority and higher will be offered fordownload.
• Recommended updates – Updates marked as common and higher will be offered fordownload.

232
• Important updates – Updates marked as important and higher will be offered fordownload.
• Critical updates – Only critical updates will be offered for download.
Click OK to save changes. The System updates window will be displayed after statusverification with the update server. Accordingly, the system update information may not beimmediately available after saving changes.
License interval checkESET Endpoint Security needs to connect to the ESET servers automatically. To change thissetting, navigate to Advanced setup (F5) > Tools > License. By default, Interval checkis set to Automatic, and ESET License server checks the product a few times every hour. Incase of an increased network traffic change settings to Limited to decrease overload. WhenLimited is selected, ESET Endpoint Security checks the license server only once a day, orwhen the computer restarts.
ImportantIf Interval check setting is set to Limited, all license-related changes done viaESET Business Account /ESET MSP Administrator may take up to one day toapply to the ESET Endpoint Security settings.
User interfaceThe User interface section allows you to configure the behavior of the program's Graphicaluser interface (GUI).
Using the User Interface elements tool, you can adjust the program's visual appearance andeffects used.
To provide maximum security of your security software, you can prevent any unauthorizedchanges using the Access setup tool.
By configuring Alerts and message boxes and Notifications, you can change the behavior ofdetection alerts and system notifications. These can be customized to fit your needs.
If you choose not to display some notifications, they will be displayed in User interfaceelements > Application statuses. Here you can check their status or alternatively preventto display these notifications.
The Context menu integration is displayed after right-clicking on the selected object. Use thistool to integrate the ESET Endpoint Security control elements into the context menu.
Presentation mode is useful for users, who want to work with an application and not be

233
interrupted by pop-up windows, scheduled tasks and any components that could load theprocessor and RAM.
See also How to minimize the ESET Endpoint Security user interface (useful for managedenvironments).
User interface elementsUser interface configuration options in ESET Endpoint Security allow you to adjust theworking environment to fit your needs. These configuration options are accessible in theUser interface > User interface elements branch of the ESET Endpoint SecurityAdvanced setup tree.
In the User interface elements section, you can adjust the working environment. Use theStart mode drop-down menu to select from the following Graphical user interface (GUI) startmodes:
Full – The complete GUI will be displayed.
Minimal – The GUI is running, but only notifications are displayed to the user.
Manual – The GUI is not started automatically on logon. Any user may start it manually.
Silent – No notifications or alerts will be displayed. The GUI can only be started by theAdministrator. This mode can be useful in managed environments or in situations where youneed to preserve system resources.
NoteOnce the Minimal GUI start mode is selected and your computer is restarted,notifications will be displayed but the graphical interface will not. To revert to fullgraphical user interface mode, run the GUI from the Start menu under AllPrograms > ESET > ESET Endpoint Security as an administrator, or you can dothis via ESET Security Management Center using a policy.
If you want to deactivate the ESET Endpoint Security splash-screen, deselect Show splash-screen at startup.
To have ESET Endpoint Security play a sound when important events occur during a scan, forexample when a threat is discovered or when the scan has finished, select Use soundsignal.
Integrate into the context menu – Integrate the ESET Endpoint Security control elementsinto the context menu.
Statuses
Application statuses – Click Edit button to manage (disable) statuses that are displayed

234
in the Protection status pane in main menu.
License informationShow license information – When disabled, the license expiration date on Protectionstatus and Help and support screen will not be displayed.
Show license messages and notifications – When disabled, the notifications andmessages will only be displayed when the license expired.
MSP licensesLicense information settings are applied but not accessible for ESET EndpointSecurity activated with an MSP license.
Application statusesTo adjust in-product statuses in the first pane of ESET Endpoint Security navigate to Userinterface > User interface elements > Application statuses of the ESET EndpointSecurity Advanced setup tree.

235
Enable or disable which application statuses will be or will not be displayed. For example,when you pause antivirus and antispyware protection or when you enable presentationmode. An application status will also be displayed if your product is not activated or if youlicense has expired. This setting can be changed via ESET Security Management Centerpolicies.
Access setupIn order to provide maximum security for your system, it is essential that ESET EndpointSecurity is correctly configured. Any unqualified change may result in a loss of importantdata. To avoid unauthorized modifications, the setup parameters of ESET Endpoint Securitycan be password protected.
Managed environmentsThe administrator can create a policy to password protect the settings for ESET EndpointSecurity on connected client computers. To create a new policy see Password protectedsettings.
UnmanagedConfiguration settings for password protection are located in Advanced setup (F5) underUser interface > Access setup.

236
Password protect settings – Indicate password settings. Click to open the Password setupwindow.
To set or change a password to protect setup parameters, click Set.
Require full administrator rights for limited administrator accounts – Leave thisoption active to prompt the current user (if he or she does not have administrator rights) toenter the administrator username and password when modifying certain system parameters(similar to the UAC in Windows Vista). The modifications include disabling protection modulesor turning off the firewall.
For Windows XP only:
Require administrator rights (system without UAC support) – Enable this option tohave ESET Endpoint Security prompt for administrator credentials.
Password for Advanced setupTo protect the setup paramaters of ESET Endpoint Security in order to avoid unauthorizedmodification, a new password must be set.
Managed environmentsThe administrator can create a policy to password protect the settings for ESET Endpoint

237
Security on connected client computers. To create a new policy see Password protectedsettings.
UnmanagedWhen you want to change an existing password:
1. Type your old password in the Old password field.
2. Enter your new password in the New password and Confirm password fields.
3. Click OK.
This password will be required for any future modifications to ESET Endpoint Security.
If you forget your password, access to advanced settings can be restored.
• Restore by using the "Restore password" method (version 7.1 and above)
• Restore by using the ESET Unlock Tool (version 7.0 and below)
Click here if you forgot your ESET-issued License Key, expiration date of your license, or otherlicense information for ESET Endpoint Security.
Alerts and message boxes
Looking for information about common alerts and notifications?• Threat found• Address has been blocked• Product not activated• Update is available• Update information is not consistent• Troubleshooting for "Modules update failed" message• 'File corrupt' or 'Failed to rename file'• Website certificate revoked• Network threat blocked
The Alerts and message boxes (formerly Alerts and notifications) section under Userinterface allows you to configure how detections, where a decision is needed to be made bya user (for example, potential phishing websites) are handled by ESET Endpoint Security.

238
Interactive alertsInteractive alert windows are displayed if a detection is found, or if user intervention isrequired.
Display interactive alerts
ESET Endpoint Security version 7.2 and later:
• For unmanaged users, we recommend that this option be left in its default setting(enabled).
• For managed users, keep this setting enabled and select a pre-defined action for usersin the List of interactive alerts.
Disabling Display interactive alerts will hide all alert windows and in-browser dialogs. Apre-defined default action will be automatically selected (for example, "potential phishingwebsite" will be blocked).
ESET Endpoint Security version 7.1 and below:
The name of this setting is Display alerts, and it is not possible to customize pre-definedactions for specific interactive alert windows.

239
Desktop notificationsNotifications on the Desktop and balloon tips are informative only, and do not require userinteraction. The Desktop notifications section was moved under Tools > Notifications inAdvanced setup (version 7.1 and later).
Message boxesTo close pop-up windows automatically after a certain period of time, select Close messageboxes automatically. If they are not closed manually, alert windows are automaticallyclosed after the specified time period elapses.
Confirmation messages – Shows you a list of confirmation messages that you can select todisplay or not to display.
Interactive alertsThis section outlines several interactive alert windows that ESET Endpoint Security willdisplay before any action is performed.
To adjust behavior for configurable interactive alerts, navigate to User interface > Alertsand message boxes > List of interactive alerts of the ESET Endpoint Security Advancedsetup tree and click Edit.
PurposeUseful for managed environments where the administrator can deselect Askuser everywhere and select a pre-defined action applied when interactive alertwindows are displayed.Also see in-product application statuses.

240
Check other help sections for reference to a specific interactive alert window:
Removable media
• New device detected
Network protection
• Network access blocked is displayed when the Isolate computer from network clienttask of this workstation from ESMC is triggered.
• Network communication blocked
• Network threat blocked
Web browser alerts
• Potentially unwanted content found
• Website blocked because of phishing
Computer
Presence of these alerts will change the user interface to orange:
• Restart computer (required)
• Restart computer (recommended)
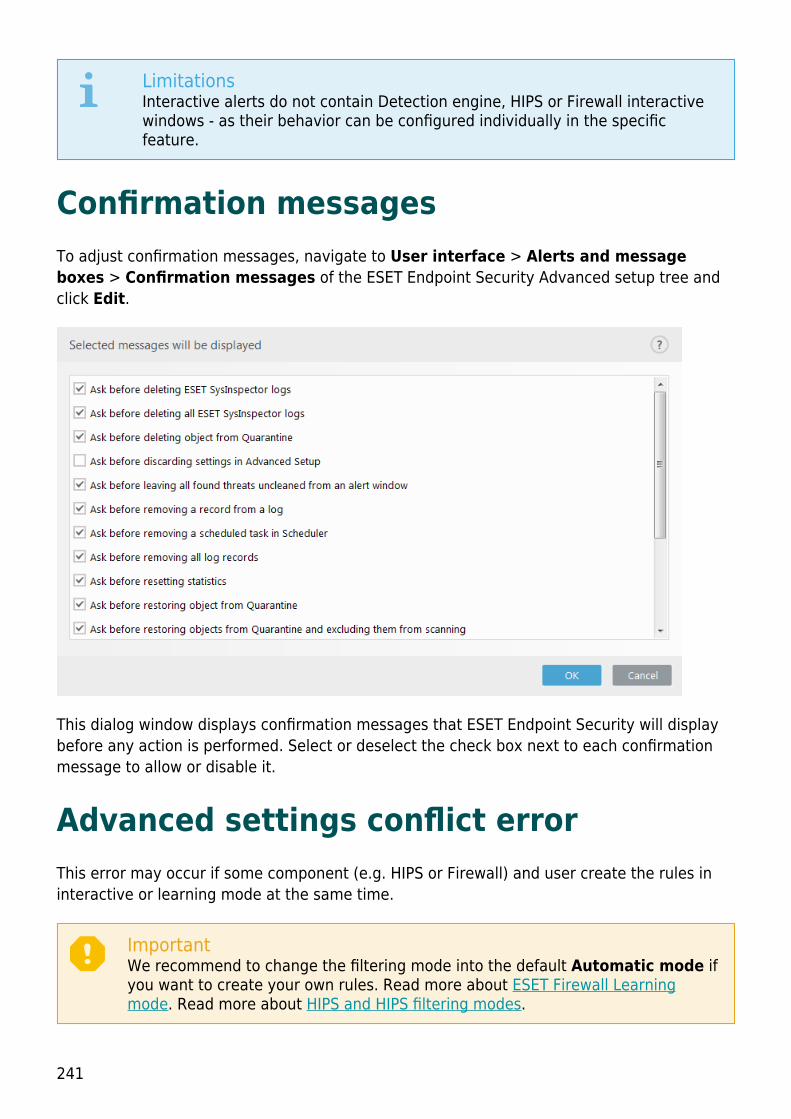
241
LimitationsInteractive alerts do not contain Detection engine, HIPS or Firewall interactivewindows - as their behavior can be configured individually in the specificfeature.
Confirmation messagesTo adjust confirmation messages, navigate to User interface > Alerts and messageboxes > Confirmation messages of the ESET Endpoint Security Advanced setup tree andclick Edit.
This dialog window displays confirmation messages that ESET Endpoint Security will displaybefore any action is performed. Select or deselect the check box next to each confirmationmessage to allow or disable it.
Advanced settings conflict errorThis error may occur if some component (e.g. HIPS or Firewall) and user create the rules ininteractive or learning mode at the same time.
ImportantWe recommend to change the filtering mode into the default Automatic mode ifyou want to create your own rules. Read more about ESET Firewall Learningmode. Read more about HIPS and HIPS filtering modes.

242
Restart requiredIf endpoint machines are receiving the "Restart required" red alert, you can disable the alertsfrom displaying.
To disable the "Restart required" or "Restart recommended" alert, follow the steps below:
1.Press the F5 key to access Advanced setup and expand the Alerts and MessageBoxes section.
2.Click Edit next to List of interactive alerts. In the Computer section, deselect thecheck boxes next to Restart computer (required) and Restart computer(recommended).

243
3.Click OK to save your changes in both open windows.
4.The alerts will no longer appear on the endpoint machine.
5.(optional) To disable the application status in the main program window of ESETEndpoint Security, from the Application statuses window deselect the check boxes next toComputer restart required and Computer restart recommended.

244
Restart recommendedIf endpoint machines are receiving the "Restart recommended" yellow alert, you can disablethe alerts from displaying.
To disable the "Restart required" or "Restart recommended" alert, follow the steps below:
1.Press the F5 key to access Advanced setup and expand the Alerts and MessageBoxes section.
2.Click Edit next to List of interactive alerts. In the Computer section, deselect thecheck boxes next to Restart computer (required) and Restart computer(recommended).

245
3.Click OK to save your changes in both open windows.
4.The alerts will no longer appear on the endpoint machine.
5.(optional) To disable the application status in the main program window of ESETEndpoint Security, from the Application statuses window deselect the check boxes next toComputer restart required and Computer restart recommended.

246
Removable mediaESET Endpoint Security provides automatic removable media (CD/DVD/USB/...) scanning uponinserting to a computer. This may be useful if the computer administrator wishes to preventthe users from using removable media with unsolicited content.
When a removable media is inserted, and Show scan options is set in ESET EndpointSecurity, the following dialog will be shown:
Options for this dialog:
• Scan now – This will trigger a scan of removable media.
• Scan later – Scan of removable media will be postponed.
• Setup – Opens the Advanced setup section.
• Always use the selected option – When selected, the same action will be performedwhen a removable media is inserted another time.
In addition, ESET Endpoint Security features the Device control functionality, which allowsyou to define rules for the use of external devices on a given computer. More details onDevice control can be found in the Device control section.
ESET Endpoint Security 7.2 and laterTo access settings for removable media scan, open Advanced setup (F5) > User interface> Alerts and message boxes > Interactive alerts > List of interactive alerts > Edit >New device detected.
If Ask user is not selected, choose the desired action upon inserting a removable media to acomputer:
• Do not scan – No action will be performed, and the New device detected windowwill not open.
• Automatic device scan – A computer scan of the inserted removable media devicewill be performed.

247
• Show scan options – Opens the Interactive alerts setup section.
ESET Endpoint Security 7.1 and belowTo access settings for removable media scan, open Advanced setup (F5) > Detectionengine > Malware scans > Removable media.
Action to take after inserting removable media – Select the default action that will beperformed when a removable media device is inserted into the computer (CD/DVD/USB).Choose the desired action upon inserting a removable media to a computer:
• Do not scan – No action will be performed, and the New device detected windowwill not open.
• Automatic device scan – A computer scan of the inserted removable media devicewill be performed.
• Show scan options – Opens the Removable media setup section.
System tray iconSome of the most important setup options and features are available by right-clicking thesystem tray icon .
Pause protection – Displays the confirmation dialog box that disables Detection engine,which guards against attacks by controlling file, web and email communication.

248
The Time interval drop-down menu represents the period of time that the protection willbe disabled for.
Pause firewall (allow all traffic) – Switches the firewall to an inactive state. See Networkfor more information.
Block all network traffic – Firewall will block all outgoing / incoming network and internettraffic. You can re-enable it by clicking Stop blocking all network traffic.
Advanced setup – Select this option to enter the Advanced setup tree. You can alsoaccess Advanced setup by pressing the F5 key or navigating to Setup > Advanced setup.
Log files – Log files contain information about all important program events that haveoccurred and provide an overview of detections.
Open ESET Endpoint Security – Opens the ESET Endpoint Security main program windowfrom the tray icon.
Reset window layout – Resets the ESET Endpoint Security window to its default size andposition on the screen.
Check for updates... – Starts updating the program modules to ensure your level ofprotection against malicious code.
About – Provides system information, details about the installed version of ESET EndpointSecurity and the installed program modules as well as your license expiration date.Information about your operating system and system resources can be found at the bottomof the page.
Context menuThe context menu is displayed after right-clicking an object (file). The menu lists all of theactions that you can perform on an object.
It is possible to integrate ESET Endpoint Security control elements into the context menu.Setup option for this functionality are available in the Advanced setup tree under UserInterface > User interface elements.
Integrate into the context menu – Integrate the ESET Endpoint Security control elementsinto the context menu.

249
Help and supportESET Endpoint Security contains troubleshooting tools and support information that will helpyou solve issues that you may encounter.
HelpSearch ESET Knowledgebase – The ESET Knowledgebase contains answers to the mostfrequently asked questions as well as recommended solutions for various issues. Regularlyupdated by ESET technical specialists, the Knowledgebase is the most powerful tool forresolving various problems.
Open help – Click this link to launch the ESET Endpoint Security help pages.
Find quick solution – Click this link to find solutions to the most frequently encounteredproblems. We recommend that you read this section before contacting Technical Support.
Technical SupportSubmit support request – If you could not find an answer to your problem, you can usethis form located on the ESET website to quickly contact our Technical Support department.
Details for Technical Support – When prompted, you can copy and send information toESET Technical Support (such as product name, product version, operating system andprocessor type).
Support ToolsThreat encyclopedia – Links to the ESET Threat Encyclopedia, which contains informationabout the dangers and symptoms of different types of infiltration.
Detection Engine history – Links to ESET Virus radar, which contains information abouteach version of the ESET detection database (previously known as "virus signaturedatabase").
ESET Log Collector – Links to the ESET Knowledgebase article, where you can downloadESET Log Collector, application that automatically collects information and logs from acomputer in order to help resolve issues more quickly. For more information see the ESET

250
Log Collector online user guide.
ESET Specialized Cleaner – Removal tools for common malware infections, for moreinformation please visit this ESET Knowledgebase article.
Product and License InformationAbout ESET Endpoint Security – Displays information about your copy of ESET EndpointSecurity.
Activate Product/Change License – Click to launch the activation window and activateyour product.
About ESET Endpoint SecurityThis window provides details about installed version of ESET Endpoint Security, youroperating system and system resources.
Click Installed components to see information about the list of installed program modulesand their versions. You can copy information about modules to the clipboard by clickingCopy. This may be useful during troubleshooting or when contacting Technical Support.
251
Submit system configuration dataIn order to provide assistance as quickly and accurate as possible, ESET requires informationabout ESET Endpoint Security configuration, detailed system information and runningprocesses (ESET SysInspector log file) and registry data. ESET will use this data only forproviding technical assistance to the customer.
When submit the web form, your system configuration data will be submitted to ESET. SelectAlways submit this information if you want to remember this action for this process. Tosubmit the form without sending any data click Don't submit data and you can contactESET Technical Support using the online support form.
This setting can also be configured in Advanced setup > Tools > Diagnostics >Technical Support.
NoteIf you have decided to submit system data it is needed to fill and submit the webform, otherwise your ticket will not be created and your system data will be lost.
Profile managerProfile manager is used in two places within ESET Endpoint Security – in the On-demandcomputer scan section and in the Update section.
On-demand computer scanYour preferred scan parameters can be saved for future scanning. We recommend that youcreate a different profile (with various scan targets, scan methods and other parameters) foreach regularly used scan.
To create a new profile, open the Advanced setup window (F5) and click Antivirus > On-demand computer scan and then Edit next to List of profiles. The Update profile drop-down menu that lists existing scan profiles. To help you create a scan profile to fit yourneeds, see the ThreatSense engine parameters setup section for a description of eachparameter of the scan setup.
NoteSuppose that you want to create your own scan profile and the Scan yourcomputer configuration is partially suitable, but you do not want to scanruntime packers or potentially unsafe applications and you also want to applyStrict cleaning. Enter the name of your new profile in the Profile managerwindow and click Add. Select your new profile from the Selected profile drop-down menu and adjust the remaining parameters to meet your requirements,and then click OK to save your new profile.

252
UpdateThe profile editor in the Update setup section allows users to create new update profiles.Create and use your own custom profiles (other than the default My profile) only if yourcomputer uses multiple means to connect to update servers.
For example, a laptop that normally connects to a local server (Mirror) in the local networkbut downloads updates directly from ESET update servers when disconnected from the localnetwork (business trip) might use two profiles: the first one for connecting to the local server;the other one for connecting to ESET servers. Once these profiles are configured, navigate toTools > Scheduler and edit the update task parameters. Designate one profile as primaryand the other as secondary.
Update profile – The currently used update profile. To change it, choose a profile from thedrop-down menu.
List of profiles – Create new or remove existing update profiles.
Keyboard shortcutsFor better navigation in ESET Endpoint Security, the following keyboard shortcuts can beused:
Keyboard shortcut Action takenF1 opens help pagesF5 opens Advanced setupUp/Down navigation in product through itemsTAB moves the cursor in a windowEsc closes the active dialog windowCtrl+U shows information about ESET license and your computer (Details for
Technical Support)Ctrl+R resets product window to its default size and position on the screen
DiagnosticsDiagnostics provides application crash dumps of ESET processes (for example, ekrn). If anapplication crashes, a dump will be generated. This can help developers debug and fixvarious ESET Endpoint Security problems.
Click the drop-down menu next to Dump type and select one of three available options:
• Select Disable to disable this feature.
• Mini (default) – Records the smallest set of useful information that may help identifywhy the application crashed unexpectedly. This kind of dump file can be useful when

253
space is limited, however because of the limited information included, errors that werenot directly caused by the thread that was running at the time of the problem may notbe discovered by an analysis of this file.
• Full – Records all the contents of system memory when the application stopsunexpectedly. A complete memory dump may contain data from processes that wererunning when the memory dump was collected.
Target directory – Directory where the dump during the crash will be generated.
Open diagnostics folder – Click Open to open this directory in a new Windows explorerwindow.
Create diagnostic dump – Click Create to create diagnostic dump files in the Targetdirectory.
Advanced logging
Enable Antispam engine advanced logging – Record all events that occur duringantispam scanning. This can help developers to diagnose and fix problems related to ESETAntispam engine.
Enable Computer Scanner advanced logging – Record all events that occur whilescanning files and folders by Computer scan or Real-time file system protection.
Enable Device control advanced logging – Record all events that occur in Device control.This can help developers diagnose and fix problems related to Device control.
Enable Kernel advanced logging – Record all events that occur in ESET kernel service(ekrn) to allow diagnosing and solving problems (available in version 7.2 and later).
Enable Licensing advanced logging – Record all product communication with ESETactivation and ESET Business Account servers.
Enable Memory tracing – Record all events which will help developers diagnose memoryleaks.
Enable Network protection advanced logging – Record all network data passing throughFirewall in the PCAP format in order to help developers diagnose and fix problems related toFirewall.
Enable Operating System advanced logging – Additional information about Operatingsystem such as running processes, CPU activity, disc operations will be gathered. This canhelp developers to diagnose and fix problems related to ESET product running on youroperating system.
Enable Protocol filtering advanced logging – Record all data passing through theProtocol filtering engine in the PCAP format in order to help the developers diagnose and fixthe problems related to Protocol filtering.

254
Enable Update engine advanced logging – Record all events that occur during updateprocess. This can help developers diagnose and fix problems related to the Update engine.
Enable Web control advanced logging – Record all events that occur in Web control. Thiscan help developers diagnose and fix problems related to Web control.
Log files locationOperating system Log files directoryWindows Vista and later C:\ProgramData\ESET\ESET Endpoint Security\Diagnostics\Earlier versions of Windows C:\Documents and Settings\All Users\...
Command line scannerESET Endpoint Security's antivirus module can be launched via the command line – manually(with the “ecls” command) or with a batch (“bat”) file.
ESET Command-line scanner usage:
ecls [OPTIONS..] FILES..
The following parameters and switches can be used while running the on-demand scannerfrom the command line:
Options/base-dir=FOLDER load modules from FOLDER/quar-dir=FOLDER quarantine FOLDER/exclude=MASK exclude files matching MASK from scanning/subdir scan subfolders (default)/no-subdir do not scan subfolders/max-subdir-level=LEVEL maximum sub-level of folders within folders to scan/symlink follow symbolic links (default)/no-symlink skip symbolic links/ads scan ADS (default)/no-ads do not scan ADS/log-file=FILE log output to FILE/log-rewrite overwrite output file (default – append)/log-console log output to console (default)/no-log-console do not log output to console/log-all also log clean files/no-log-all do not log clean files (default)/aind show activity indicator/auto scan and automatically clean all local disks
Scanner options/files scan files (default)/no-files do not scan files/memory scan memory

255
/boots scan boot sectors/no-boots do not scan boot sectors (default)/arch scan archives (default)/no-arch do not scan archives/max-obj-size=SIZE only scan files smaller than SIZE megabytes (default 0 = unlimited)/max-arch-level=LEVEL maximum sub-level of archives within archives (nested archives) to scan/scan-timeout=LIMIT scan archives for LIMIT seconds at maximum/max-arch-size=SIZE only scan the files in an archive if they are smaller than SIZE (default 0 = unlimited)
/max-sfx-size=SIZE only scan the files in a self-extracting archive if they are smaller than SIZE megabytes (default 0 =unlimited)
/mail scan email files (default)/no-mail do not scan email files/mailbox scan mailboxes (default)/no-mailbox do not scan mailboxes/sfx scan self-extracting archives (default)/no-sfx do not scan self-extracting archives/rtp scan runtime packers (default)/no-rtp do not scan runtime packers/unsafe scan for potentially unsafe applications/no-unsafe do not scan for potentially unsafe applications (default)/unwanted scan for potentially unwanted applications/no-unwanted do not scan for potentially unwanted applications (default)/suspicious scan for suspicious applications (default)/no-suspicious do not scan for suspicious applications/pattern use signatures (default)/no-pattern do not use signatures/heur enable heuristics (default)/no-heur disable heuristics/adv-heur enable Advanced heuristics (default)/no-adv-heur disable Advanced heuristics/ext-exclude=EXTENSIONS exclude file EXTENSIONS delimited by colon from scanning
/clean-mode=MODE
use cleaning MODE for infected objects The following options are available:• none (default) – No automatic cleaning will occur.• standard – ecls.exe will attempt to automatically clean or delete infected files.• strict – ecls.exe will attempt to automatically clean or delete infected files without user intervention(you will not be prompted before files are deleted).• rigorous – ecls.exe will delete files without attempting to clean regardless of what the file is.• delete – ecls.exe will delete files without attempting to clean, but will refrain from deleting sensitivefiles such as Windows system files.
/quarantine copy infected files (if cleaned) to Quarantine(supplements the action carried out while cleaning)
/no-quarantine do not copy infected files to Quarantine
General options/help show help and quit/version show version information and quit/preserve-time preserve last access timestamp
Exit codes0 no threat found1 threat found and cleaned10 some files could not be scanned (may be threats)50 threat found100 error

256
NoteExit codes greater than 100 mean that the file was not scanned and thus can beinfected.
ESET CMDThis is a feature that enables advanced ecmd commands. It allows you to export and importsettings using the command line (ecmd.exe). Until now, it was possible to export and importsettings using GUI only. ESET Endpoint Security configuration can be exported to an .xml file.
When you have enabled ESET CMD, there are two authorization methods available:
• None – no authorization. We do not recommend you this method because it allowsimportation of any unsigned configuration, which is a potential risk.
• Advanced setup password – a password is required to import a configuration from an.xml file, this file must be signed (see signing .xml configuration file further down). Thepassword specified in Access Setup must be provided before a new configuration can beimported. If you do not have access setup enabled, your password does not match or the.xml configuration file is not signed, the configuration will not be imported.
Once ESET CMD is enabled, you can use the command line to import or export ESET EndpointSecurity configurations. You can do it manually or create a script for the purpose ofautomation.
ImportantTo use advanced ecmd commands, you need to run them with administratorprivileges, or open Windows Command Prompt (cmd) using Run asadministrator. Otherwise, you will get Error executing command. message.Also, when exporting configuration, destination folder must exist. The exportcommand still works when the ESET CMD setting is switched off.
NoteAdvanced ecmd commands can only be run locally. Executing a client task Runcommand using ESMC will not work.
ExampleExport settings command:ecmd /getcfg c:\config\settings.xml Import settings command:ecmd /setcfg c:\config\settings.xml
Signing an .xml configuration file:

257
1. Download the XmlSignTool executable.
2. Open a Windows Command Prompt (cmd) using Run as administrator.
3. Navigate to the save location of xmlsigntool.exe
4. Execute a command to sign the .xml configuration file, usage: xmlsigntool /version1|2 <xml_file_path>
ImportantThe value of the /version parameter depends on your version of ESET EndpointSecurity. Use /version 2 for version 7 and newer.
5. Enter and Re-enter your Advanced Setup Password when prompted by theXmlSignTool. Your .xml configuration file is now signed and can be used to importanother instance of ESET Endpoint Security with ESET CMD using the passwordauthorization method.
ExampleSign exported configuration file command:xmlsigntool /version 2 c:\config\settings.xml
NoteIf your Access Setup password changes and you want to import a configurationthat was signed earlier with an old password, you need to sign the .xmlconfiguration file again using your current password. This allows you to use anolder configuration file without exporting it to another machine running ESETEndpoint Security before the import.

258
WarningEnabling ESET CMD without an authorization is not recommended, since this willallow the import of any unsigned configuration. Set the password in Advancedsetup > User interface > Access setup to prevent from unauthorizedmodification by users.
List of ecmd commands
Individual security features can be enabled and temporarily disabled with the ESMC ClientTask Run command. The commands do not override policy settings and any paused settingswill revert back to its original state after the command has executed or after a device reboot.To utilize this feature, specify the command line to run in the field of the same name.
Review the list of commands for each security feature below:
Security Feature Temporary Pause command Enable CommandReal-time file systemprotection
ecmd /setfeature onaccesspause
ecmd /setfeature onaccessenable
Document protection ecmd /setfeature documentpause
ecmd /setfeature documentenable
Device control ecmd /setfeature devcontrolpause
ecmd /setfeature devcontrolenable
Presentation mode ecmd /setfeature presentationpause
ecmd /setfeature presentationenable
Anti-Stealth technology ecmd /setfeature antistealthpause
ecmd /setfeature antistealthenable
Personal firewall ecmd /setfeature firewall pause ecmd /setfeature firewall enableNetwork attack protection(IDS)
ecmd /setfeature ids pause ecmd /setfeature ids enable
Botnet protection ecmd /setfeature botnet pause ecmd /setfeature botnet enableWeb Control ecmd /setfeature webcontrol
pauseecmd /setfeature webcontrolenable
Web access protection ecmd /setfeature webaccesspause
ecmd /setfeature webaccessenable
Email client protection ecmd /setfeature email pause ecmd /setfeature email enableAntispam protection ecmd /setfeature antispam
pauseecmd /setfeature antispamenable
Anti-Phishing protection ecmd /setfeature antiphishingpause
ecmd /setfeature antiphishingenable
Idle-state detectionIdle state detection settings can be configured in Advanced setup under Detection engine> Malware scans > Idle-state scanning > Idle state detection. These settings specify a

259
trigger for Idle-state scanning, when:
• the screen saver is running,
• the computer is locked,
• a user logs off.
Use the switches for each respective state to enable or disable the different idle statedetection triggers.
Import and export settingsYou can import or export your customized ESET Endpoint Security .xml configuration file fromthe Setup menu.
Importing and exporting of configuration files is useful if you need to backup your currentconfiguration of ESET Endpoint Security for use at a later time. The export settings option isalso convenient for users who want to use their preferred configuration on multiple systems,they can easily import an .xml file to transfer these settings.
Importing a configuration is very easy. In the main program window click Setup >Import/Export settings, and then select Import settings. Enter the file name of theconfiguration file or click the ... button to browse for the configuration file you want toimport.
The steps to export a configuration are very similar. In the main program window, clickSetup > Import/Export settings. Select Export settings and enter the file name of theconfiguration file (i.e. export.xml). Use the browser to select a location on your computer tosave the configuration file.
NoteYou may encounter an error while exporting settings if you do not have enoughrights to write the exported file to specified directory.

260
Revert all settings to defaultClick Default in Advanced setup (F5) to revert all program settings, for all modules. This willbe reset to the status they would have had after a new installation.
See also Import and export settings.
Revert all settings in current sectionClick the curving arrow ⤴ to revert all settings in the current section to the default settingsdefined by ESET.
Please note, any changes that have been made will be lost after you click Revert to default.
Revert contents of tables – When enabled, the rules, tasks or profiles that have beenadded manually or automatically will be lost.
See also Import and export settings.
Error while saving the configurationThis error message indicates that the settings were not saved correctly due to an error.
This usually means that the user who attempted to modify program parameters:

261
• has insufficient access rights or does not have the necessary operating systemprivileges required to modify configuration files and the system registry.> To perform desired modifications, the system administrator must log in.
• has recently enabled Learning mode in HIPS or Firewall and attempted to makechanges to Advanced setup.> To save the configuration and avoid the configuration conflict, close Advanced setupwithout saving and attempt to make desired changes again.
The second most common cause may be that the program no longer works properly, iscorrupted and therefore needs to be reinstalled.
Remote monitoring and managementRemote Monitoring and Management (RMM) is the process of supervising and controllingsoftware systems using a locally installed agent that can be accessed by a managementservice provider.
ERMM - ESET plugin for RMM• The default ESET Endpoint Security installation contains the file ermm.exe located in theEndpoint application within the directory:C:\Program Files\ESET\ESET Security\ermm.exe
• ermm.exe is a command line utility designed to facilitate the management of endpointproducts and communications with any RMM plugin.
• ermm.exe exchanges data with the RMM Plugin, which communicates with the RMM Agentlinked to an RMM Server. By default, the ESET RMM tool is disabled.
Additional resources
• ERMM Command Line
• List of ERMM JSON commands
• How to activate Remote monitoring and management in ESET Endpoint Security
ESET Direct Endpoint Management plugins for third-party RMM solutionsRMM Server is running as a service on a third-party server. For more information see the

262
following ESET Direct Endpoint Management online user guides:
• ESET Direct Endpoint Management Plug-in for ConnectWise Automate
• ESET Direct Endpoint Management Plugin for DattoRMM
• ESET Direct Endpoint Management for Solarwinds N-Central
• ESET Direct Endpoint Management for NinjaRMM
ERMM Command LineRemote monitoring management is run using the command line interface. The default ESETEndpoint Security installation contains the file ermm.exe located in the Endpoint applicationwithin the directory c:\Program Files\ESET\ESET Security.
Run the Command Prompt (cmd.exe) as an Administrator and navigate to the mentionedpath. (To open Command Prompt, press Windows button + R on your keyboard, type acmd.exe into the Run window and press Enter.)
The command syntax is: ermm context command [options]
Also note that the log parameters are case sensitive.

263
ermm.exe uses three basic contexts: Get, Start and Set. In the table below you can findexamples of commands syntax. Click the link in the Command column to see the furtheroptions, parameters, and usage examples. After successful execution of command, theoutput part (result) will be displayed. To see an input part, add parameter --debug at the ofthe command.
Context Command Descriptionget Get information about products
application-info Get information about productlicense-info Get information about licenseprotection-status Get protection statuslogs Get logsscan-info Get information about running scanconfiguration Get product configurationupdate-status Get information about update

264
Context Command Descriptionactivation-status Get information about last activation
start Start taskscan Start on demand scanactivation Start activation of productdeactivation Start deactivation of productupdate Start update of product
set Set options for productconfiguration Set configuration to product
In the output result of every command, the first information displayed is result ID. Tounderstand better the result information, check the table of IDs below.
ErrorID
Error Description
0 Success1 Command node not present "Command" node not present in input json2 Command not supported Particular command is not supported3 General error executing the
commandError during execution of command
4 Task already running Requested task is already running and has notbeen started
5 Invalid parameter for command Bad user input6 Command not executed because
it's disabledRMM isn't enabled in advanced settings or isn'tstarted as an administrator
List of ERMM JSON commands• get protection-status
• get application-info
• get license-info
• get logs
• get activation-status
• get scan-info
• get configuration
• get update-status
• start scan

265
• start activation
• start deactivation
• start update
• set configuration
get protection-statusGet the list of application statuses and the globalapplication status
Command lineermm.exe get protection-status
ParametersNone
Example
call{ "command":"get_protection_status", "id":1, "version":"1" }
result

266
{ "id":1, "result":{ "statuses":[{ "id":"EkrnNotActivated", "status":2, "priority":768, "description":"Product not activated" }], "status":2, "description":"Security alert" }, "error":null }
get application-infoGet information about the installed application
Command lineermm.exe get application-info
ParametersNone
Example
call{ "command":"get_application_info", "id":1, "version":"1" }
result

267
{ "id":1, "result":{ "description":"ESET Endpoint Antivirus", "version":"6.6.2018.0", "product":"eea", "lang_id":1033, "modules":[{ "id":"SCANNER32", "description":"Detection engine", "version":"15117", "date":"2017-03-20" },{ "id":"PEGASUS32", "description":"Rapid Response module", "version":"9734", "date":"2017-03-20" },{ "id":"LOADER32", "description":"Update module", "version":"1009", "date":"2016-12-05" },{ "id":"PERSEUS32", "description":"Antivirus and antispyware scanner module", "version":"1513", "date":"2017-03-06" },{ "id":"ADVHEUR32", "description":"Advanced heuristics module", "version":"1176", "date":"2017-01-16" },{ "id":"ARCHIVER32", "description":"Archive support module", "version":"1261", "date":"2017-02-22" },{ "id":"CLEANER32", "description":"Cleaner module", "version":"1132", "date":"2017-03-15" },{ "id":"ANTISTEALTH32", "description":"Anti-Stealth support module", "version":"1106", "date":"2016-10-17" },{ "id":"SYSTEMSTATUS32", "description":"ESET SysInspector module", "version":"1266", "date":"2016-12-22" },{ "id":"TRANSLATOR32", "description":"Translation support module", "version":"1588B", "date":"2017-03-01" },{ "id":"HIPS32", "description":"HIPS support module", "version":"1267", "date":"2017-02-16" },{ "id":"PROTOSCAN32", "description":"Internet protection module", "version":"1300", "date":"2017-03-03" },{ "id":"DBLITE32", "description":"Database module", "version":"1088", "date":"2017-01-05" },{ "id":"CONFENG32", "description":"Configuration module (33)", "version":"1496B", "date":"2017-03-17" },{ "id":"IRIS32", "description":"LiveGrid communication module", "version":"1022", "date":"2016-04-01" },{ "id":"SAURON32", "description":"Rootkit detection and cleaning module", "version":"1006", "date":"2016-07-15" },{ "id":"SSL32", "description":"Cryptographic protocol support module", "version":"1009", "date":"2016-12-02" } }, "error":null }}

268
get license-infoGet information about the license of the product
Command lineermm.exe get license-info
ParametersNone
Example
call{ "command":"get_license_info", "id":1, "version":"1" }
result{ "id":1, "result":{ "type":"NFR", "expiration_date":"2020-12-31", "expiration_state":"ok", "public_id":"3XX-7ED-7XF", "seat_id":"6f726793-ae95-4e04-8ac3-e6a20bc620bf", "seat_name":"M" }, "error":null }
get logsGet logs of the product

269
Command lineermm.exe get logs --name warnlog --start-date "2017-04-04 06-00-00" --end-date "2017-04-04 12-00-00"
Parameters
Name Value
name { all, virlog, warnlog, scanlog, blocked, hipslog, urllog, devctrllog } : log toretrieve
start-date start date from which logs should be retrieved (YYYY-MM-DD [HH-mm-SS])end-date end time until which logs should be retrieved (YYYY-MM-DD [HH-mm-SS])
Example
call{ "command":"get_logs", "id":1, "version":"1", "params":{ "name":"warnlog", "start_date":"2017-04-04 06-00-00", "end_date":"2017-04-04 12-00-00" } }
result{ "id":1, "result":{ "warnlog":{ "display_name":"Events", "logs":[{ "Time":"2017-04-04 06-05-59", "Severity":"Info", "PluginId":"ESET Kernel", "Code":"Malware database was successfully updated to version 15198 (20170404).", "UserData":"" },{ "Time":"2017-04-04 11-12-59", "Severity":"Info", "PluginId":"ESET Kernel", "Code":"Malware database was successfully updated to version 15199 (20170404).", "UserData":"" }] } }, "error":null }

270
get activation-statusGet information about the last activation. Result ofstatus can be { success, error }
Command lineermm.exe get activation-status
ParametersNone
Example
call{ "command":"get_activation_status", "id":1, "version":"1" }
result{ "id":1, "result":{ "status":"success" }, "error":null}
get scan-infoGet information about running scan.

271
Command lineermm.exe get scan-info
ParametersNone
Example
call{ "command":"get_scan_info", "id":1, "version":"1" }
result{ "id":1, "result":{ "scan-info":{ "scans":[{ "scan_id":65536, "timestamp":272, "state":"finished", "pause_scheduled_allowed":false, "pause_time_remain":0, "start_time":"2017-06-20T12:20:33Z", "elapsed_tickcount":328, "exit_code":0, "progress_filename":"Operating memory", "progress_arch_filename":"", "total_object_count":268, "infected_object_count":0, "cleaned_object_count":0, "log_timestamp":268, "log_count":0, "log_path":"C:\\ProgramData\\ESET\\ESET Security\\Logs\\eScan\\ndl31494.dat", "username":"test-PC\\test", "process_id":3616, "thread_id":3992, "task_type":2 }], "pause_scheduled_active":false } }, "error":null }

272
get configurationGet the product configuration. Result of status may be{ success, error }
Command lineermm.exe get configuration --file C:\tmp\conf.xml --format xml
Parameters
Name Valuefile the path where the configuration file will be savedformat format of configuration: json, xml. Default format is xml
Example
call{ "command":"get_configuration", "id":1, "version":"1", "params":{ "format":"xml", "file":"C:\\tmp\\conf.xml" } }
result{ "id":1, "result":{ "configuration":"PD94bWwgdmVyc2lvbj0iMS4w==" }, "error":null }

273
get update-statusGet information about the update. Result of status maybe { success, error }
Command lineermm.exe get update-status
ParametersNone
Example
call{ "command":"get_update_status", "id":1, "version":"1" }
result{ "id":1, "result":{ "last_update_time":"2017-06-20 13-21-37", "last_update_result":"error", "last_successful_update_time":"2017-06-20 11-21-45" }, "error":null }
start scanStart scan with the product

274
Command lineermm.exe start scan --profile "profile name" --target "path"
Parameters
Name Valueprofile Profile name of On-demand computer scan defined in producttarget Path to be scanned
Example
call{ "command":"start_scan", "id":1, "version":"1", "params":{ "profile":"Smart scan", "target":"c:\\" } }
result{ "id":1, "result":{ "task_id":458752 }, "error":null }
start activationStart activation of product

275
Command lineermm.exe start activation --key "activation key" | --offline "path to offline file" | --token "activation token"
Parameters
Name Valuekey Activation keyoffline Path to offline filetoken Activation token
Example
call{ "command":"start_activation", "id":1, "version":"1", "params":{ "key":"XXXX-XXXX-XXXX-XXXX-XXXX" } }
result{ "id":1, "result":{ }, "error":null}
start deactivationStart deactivation of the product
Command lineermm.exe start deactivation

276
ParametersNone
Example
call{ "command":"start_deactivation", "id":1, "version":"1" }
result{ "id":1, "result":{ }, "error":null }
start updateStart update of the product. Only one update may berunning in the product so in case the update is alreadyrunning, "Task already running" error code is returned
Command lineermm.exe start update
ParametersNone
Example
call

277
{ "command":"start_update", "id":1, "version":"1" }
result{ "id":1, "result":{ }, "error":{ "id":4, "text":"Task already running." } }
set configurationSet configuration to the product. Result of status may be { success, error }
Command lineermm.exe set configuration --file C:\tmp\conf.xml --format xml --password pass
Parameters
Name Valuefile the path where the configuration file will be savedpassword password for configurationvalue configuration data from the argument (encoded in base64)
Example
call

278
{ "command":"set_configuration", "id":1, "version":"1", "params":{ "format":"xml", "file":"C:\\tmp\\conf.xml", "password": "pass" } }
result{ "id":1, "result":{ }, "error":null }
Common QuestionsThis chapter covers some of the most frequently asked questions and problems encountered.Click a topic title to find out how to solve your problem:
• How to update ESET Endpoint Security
• How to activate ESET Endpoint Security
• How to use current credentials to activate a new product
• How to remove a virus from my PC
• How to allow communication for a certain application
• How to create a new task in Scheduler
• How to schedule a weekly computer scan
• How to connect my product to ESET Security Management Center- How to use Override mode- How to apply a recommended policy for ESET Endpoint Security
• How to configure a mirror
• How do I upgrade to Windows 10 with ESET Endpoint Security
• How to activate Remote monitoring and management
• How to block the download of specific file types from the Internet
• How to minimize the ESET Endpoint Security user interface

279
If your problem is not included in the help pages listed above, try searching by keyword orphrase describing your problem in the ESET Endpoint Security Help pages.
If you cannot find the solution to your problem/question in the Help pages, visit the ESETKnowledgebase where answers to common questions and issues are available.
• Best practices to protect against Filecoder (ransomware) malware
• ESET Endpoint Security and ESET Endpoint Antivirus 7 FAQ
• Create or edit a firewall rule to allow RDP connections in ESMC
• What addresses and ports on my third-party firewall should I open to allow fullfunctionality for my ESET product?
If necessary, you can contact our online technical support center with your questions orproblems. The link to our online contact form can be found in the Help and Support pane inthe main program window.
How to update ESET Endpoint SecurityUpdating ESET Endpoint Security can be performed either manually or automatically. Totrigger the update, click Update in the main program window and then click Check forupdates.
The default installation settings create an automatic update task which is performed on anhourly basis. To change the interval, navigate to Tools > Scheduler (for more informationon Scheduler, click here).
How to activate ESET Endpoint SecurityAfter installation is complete, you will be prompted to activate your product.
There are several methods for activating your product. Availability of a particular activationscenario in the activation window may vary depending on the country, and the means ofdistribution (ESET web page, installer type .msi or .exe, etc.).
To activate your copy of ESET Endpoint Security directly from the program, open the ESETEndpoint Security main program window and in the main menu, click Help and support >Activate product or Protection status > Activate product.
You can use any of the following methods to activate ESET Endpoint Security:
• Use a purchased License Key – A unique string in the format XXXX-XXXX-XXXX-XXXX-XXXX which is used for identification of the license owner and for activation of thelicense.

280
• ESET Business Account – An account created on the ESET Business Account portalwith credentials (email address + password). This method allows you to manage multiplelicenses from one location.
• Offline License – An automatically generated file that will be transferred to the ESETproduct to provide license information. If a license allows you to download an offlinelicense file (.lf) that file can be used to perform offline activation. The number of offlinelicenses will be subtracted from the total number of available licenses. For more detailsabout generation of an offline file see the ESET Business Account Online user guide.
Click Activate later if your computer is a member of managed network and youradministrator will perform remote activation via ESET Security Management Center. You canalso use this option if you would like to activate this client at a later time.
If you have a Username and Password used for activation of older ESET products and do notknow how to activate ESET Endpoint Security, convert your legacy credentials to a Licensekey.
Failed product activation?
You can change your product license at any time. To do so, click Help and support >Change license in the main program window. You will see the public license ID used toidentify your license to ESET Support. The Username under which your computer is registeredis stored in the About section, which you can view by right-clicking the system tray icon .
NoteESET Security Management Center can activate client computers silently usinglicenses made available by the administrator. For instructions to do so, see theESET Security Management Center Online help.
Entering your License Key duringactivationAutomatic updates are important for your security. ESET Endpoint Security will only receiveupdates once activated using your License Key.
If you did not enter your License Key after installation, your product will not be activated. Youcan change your license in the main program window. To do so, click Help and support >Activate License and enter the license data you received with your ESET Security productinto the Product activation window.
When entering your License Key, it is important to type it exactly as it is written:
• Your License Key is a unique string in the format XXXX-XXXX-XXXX-XXXX-XXXX whichis used for identification of the the license owner and activation of the license.

281
We recommend that you copy and past your License Key from your registration email toensure accuracy.poslem
Login to ESET Business AccountThe Security Admin account is an account created on the ESET Business Account portal withyour Email address and Password, which is able to see all seat authorizations. A SecurityAdmin account allows you to manage multiple licenses. If you do not have a Security Adminaccount click Create account and you will be redirected to the ESET Business Account portalwhere you can register with your credentials.
If you have forgotten your password click I forgot my password and you will be redirectedto the ESET Business Account portal. Enter your email address and click Sign in to confirm.After that you will obtain a message with instructions how to reset your password.
How to use legacy license credentials toactivate a newer ESET endpoint productIf you already have your Username and Password and would like to receive a License Key,visit the ESET Business Account portal, where you can convert your credentials to a newLicense Key.
How to remove a virus from my PCIf your computer is showing symptoms of malware infection, for example it is slower, oftenfreezes, we recommend that you do the following:
1. In the main program window, click Computer scan.
2. Click Smart scan to begin scanning your system.
3. After the scan has finished, review the log with the number of scanned, infected andcleaned files.
4. If you want to only scan a certain part of your disk click Custom scan and selecttargets to be scanned for viruses.
For additional information please see our regularly updated ESET Knowledgebase article.
How to allow communication for a certain

282
applicationIf a new connection is detected in interactive mode and if there is no matching rule, you willbe prompted to allow or deny the connection. If you want ESET Endpoint Security to performthe same action every time the application attempts to establish a connection, select theRemember action (create rule) check box.
You can create new firewall rules for applications before they are detected by ESET EndpointSecurity in the firewall setup window, located under Advanced setup > Firewall > Basic >Rules by clicking Edit.
Click Add to add the rule. In the General tab, enter the name, direction and communicationprotocol for the rule. This window allows you to define the action to be taken when the rule isapplied.
Enter the path to the application's executable and the local communication port in the Localtab. Click the Remote tab to enter the remote address and port (if applicable). The newly-created rule will be applied as soon as the application tries to communicate again.
How to create a new task in SchedulerTo create a new task in Tools > Scheduler, click Add task or right-click and select Add...from the context menu. Five types of scheduled tasks are available:
• Run external application – Schedules the execution of an external application.

283
• Log maintenance - Log files also contains leftovers from deleted records. This taskoptimizes records in log files on a regular basis to work effectively.
• System startup file check – Checks files that are allowed to run at system startup orlogon.
• Create a computer status snapshot – Creates an ESET SysInspector computersnapshot – gathers detailed information about system components (for example, drivers,applications) and assesses the risk level of each component.
• On-demand computer scan – Performs a computer scan of files and folders on yourcomputer.
• Update – Schedules an Update task by updating modules.
Since Update is one of the most frequently used scheduled tasks, we will explain how to adda new update task below:
From the Scheduled task drop-down menu, select Update. Enter the name of the task intothe Task name field and click Next. Select the frequency of the task. The following optionsare available: Once, Repeatedly, Daily, Weekly and Event triggered. Select Skip taskwhen running on battery power to minimize system resources while a laptop is runningon battery power. The task will be run on the specified date and time in Task executionfields. Next, define the action to take if the task cannot be performed or completed at thescheduled time. The following options are available:
• At the next scheduled time
• As soon as possible
• Immediately, if time since last exceeds a specified value (the interval can bedefined using the Time since last run scroll box)
In the next step, a summary window with information about the current scheduled task isdisplayed. Click Finish when you are finished making changes.
A dialog window will appear, allowing you to select the profiles to be used for the scheduledtask. Here you can set the primary and alternative profile. The alternative profile is used ifthe task cannot be completed using the primary profile. Confirm by clicking Finish and thenew scheduled task will be added to the list of currently scheduled tasks.
How to schedule a weekly computer scanTo schedule a regular task, open the main program window and click Tools > Scheduler.Below is a short guide on how to schedule a task that will scan your local drives every week.See our Knowledgebase article for more detailed instructions.
To schedule a scan task:

284
1. Click Add in the main Scheduler screen.
2. Select On-demand computer scan from the drop-down menu.
3. Enter a name for the task and select Weekly for the task frequency.
4. Set the day and time the task will execute.
5. Select Run the task as soon as possible to perform the task later if the scheduledtask does not run for any reason (for example, if the computer was turned off).
6. Review the summary of the scheduled task and click Finish.
7. From the Targets drop-down menu, select Local drives.
8. Click Finish to apply the task.
How to connect ESET Endpoint Securityto ESET Security Management CenterWhen you have installed ESET Endpoint Security on your computer and you want to connectvia ESET Security Management Center, make sure that you have also installed ESETManagement Agent on your client workstation. It is an essential part of every client solutionthat communicates with ESMC Server.
• Install or deploy ESET Management Agent on client workstations
See also:
• Documentation for endpoints managed remotely
• How to use Override mode
• How to apply a recommended policy for ESET Endpoint Security
How to use Override modeUsers with ESET Endpoint products (version 6.5 and above) for Windows installed on theirmachine can use the Override feature. Override mode allows users on the client-computerlevel to change settings in the installed ESET product, even if there is a policy applied overthese settings. Override mode can be enabled for certain AD users, or it can be password-protected. The function can not be enabled for more than four hours at once.

285
Warning• Override mode cannot be stopped from the ESMC Web Console once it isenabled. Override mode will be disabled automatically when the override timeperiod expires. It can also be turned off on the client machine.• The user who is using the Override mode needs to have Windows admin rightstoo. Otherwise, the user can not save the changes in settings of ESET EndpointSecurity.• Active Directory group authentication is supported for ESET Endpoint Securityversion 7.0.2100.4 and later.
To set the Override mode:
1. Navigate to Polices > New Policy.
2. In the Basic section, type in a Name and Description for this policy.
3. In the Settings section, select ESET Endpoint for Windows.
4. Click Override mode and configure rules for override mode.
5. In the Assign section, select the computer or group of computers on which this policywill be applied.
6. Review the settings in the Summary section and click Finish to apply the policy.

286
ExampleIf John has a problem with his endpoint settings blocking some importantfunctionality or web access on his machine, the Administrator can allow John tooverride his existing endpoint policy and tweak the settings manually on hismachine. Afterward, these new settings can be requested by ESMC so theAdministrator can create a new policy out of them.To do so, follow the steps below:1. Navigate to Polices > New Policy.2. Complete the Name and Description fields. In the Settings section, selectESET Endpoint for Windows.3. Click Override mode, enable the override mode for one hour and select Johnas the AD user.4. Assign the policy to John's computer and click Finish to save the policy.5. John has to enable the Override mode on his ESET endpoint and change thesettings manually on his machine.6. On the ESMC Web Console, navigate to Computers, select John's computerand click Show Details.7. In the Configuration section, click Request configuration to schedule aclient task to get the configuration from the client ASAP.8. After short time, the new configuration will appear. Click on the productwhich settings you want to save and then click Open Configuration.9. You can review settings and then click Convert to policy.10. Complete the Name and Description fields.11. In the Settings section, you can modify the settings if needed.12. In the Assign section, you can assign this policy to John's computer (orothers).13. Click Finish to save the settings.14. Do not forget to remove the override policy once it is no longer needed.
How to apply a recommended policy forESET Endpoint SecurityThe best practice after connecting ESET Endpoint Security to ESET Security ManagementCenter is to apply a recommended policy or apply a custom one.
There are several built-in policies for ESET Endpoint Security:
Policy DescriptionAntivirus - Balanced Security configuration recommended for most of the setups.Antivirus - Maximumsecurity
Taking advantage of machine learning, deep behavioralinspection and SSL filtering. Detection of potentially unsafe,unwanted and suspicious applications are affected.
Cloud-based reputationand feedback system
Enables ESET LiveGrid® cloud-based reputation as well asfeedback system to improve detection of latest threats and helpsharing malicious or unknown potential threats for furtheranalysis.

287
Device control - Maximumsecurity
All devices are blocked. When any device wants to be connected,it needs to be allowed by an admin.
Device Control - Read only All devices can only be read. No write is allowed.Firewall - Block all trafficexcept ESMC & EEIconnection
Block all traffic except connection to ESET Security ManagementCenter and ESET Enterprise Inspector Server (ESET EndpointSecurity only).
Logging - Full diagnosticlogging
This template will ensure that the administrator will have all logsavailable, when needed. Everything will be logged from minimumverbosity including HIPS and Threatsense parameters, Firewall.Logs are automatically deleted after 90 days.
Logging - Log importantevents only
Policy ensures that warnings, errors and critical events will belogged. Logs are automatically deleted after 90 days.
Visibility - Balanced Default setting for visibility. Statuses and notifications areenabled.
Visibility - Invisible mode Disabled notifications, alerts, GUI, integration to context menu.No egui.exe will run. Suitable for management solely from ESETPROTECT Cloud.
Visibility - Reducedinteraction with user
Disabled statuses, disabled notifications, GUI presented.
To set the policy named as Antivirus - Maximum security which enforces more than 50recommended settings for ESET Endpoint Security installed on your workstations, followthese steps:
Illustrated instructionsThe following ESET Knowledgebase article may only be available in English:• Apply a recommended or predefined policy for ESET Endpoint Security usingESMC
1. Open the ESMC Web Console.
2. Navigate to Polices and expand Built-in Policies > ESET Endpoint for Windows.
3. Click Antivirus - Maximum security - recommended.
4. In the Assigned to tab click Assign client(s) or Assign groups(s) and select theappropriate computers for which you wish to apply this policy.

288
To see which settings are applied for this policy, click the Settings tab and expand theAdvanced setup tree.
• The blue dot represents an altered setting for this policy
• The number in the blue frame represents a number of altered settings by this policy
• Read more about ESMC policies here

289
How to configure a mirrorESET Endpoint Security can be configured to store copies of detection engine update files anddistribute updates to other workstations that are running ESET Endpoint Security or ESETEndpoint Antivirus.
Configuring ESET Endpoint Security as a Mirror serverto provide updates via an internal HTTP server
1. Press F5 to access Advanced setup and expand Update > Profiles > Update Mirror.
2. Expand Updates and make sure the Choose automatically option under Modulesupdates is enabled.
3. Expand Update mirror and enable Create update mirror and Enable HTTP server.
For more information see Update mirror.
Configuring a Mirror server to provide updates via ashared network folder
1. Create a shared folder on a local or network device. This folder must be readable by allusers running ESET security solutions and writable from the local SYSTEM account.
2. Activate Create update mirror under Advanced setup > Update > Profiles >Update Mirror.
3. Choose an appropriate Storage folder by clicking Clear and then Edit. Browse andselect the created shared folder.
NoteIf you do not want to provide module updates via internal HTTP serverdisengage Create update mirror.
How do I upgrade to Windows 10 withESET Endpoint Security
WarningWe highly recommend that you upgrade to the latest version of your ESETproduct, then download the latest module updates, before upgrading toWindows 10. This will ensure maximum protection and preserve your programsettings and license information during the upgrade to Windows 10.

290
Version 7.x:Click the appropriate link below to download and install the latest version to prepare for yourupgrade to Microsoft Windows 10:
Download ESET Endpoint Security 7 32-bit Download ESET Endpoint Antivirus 7 32-bit
Download ESET Endpoint Security 7 64-bit Download ESET Endpoint Antivirus 7 64-bit
Version 5.x:
ImportantESET Endpoint products in version 5 are currently in Basic Support. This meansbuilds are no longer publicly available for download. We strongly recommendupgrading to the latest version of ESET Endpoint products. If you need to accessthe MSI installers, contact ESET Technical Support for further assistance.
Other language versions:If you are looking for another language version of your ESET endpoint product, please visitour download page.
NoteMore information about compatibility of ESET business products with Windows10.
How to activate Remote monitoring andmanagementRemote Monitoring and Management (RMM) is the process of supervising and controllingsoftware systems (such as those on desktops, servers and mobile devices) using a locallyinstalled agent that can be accessed by a management service provider. ESET EndpointSecurity can be managed by RMM from the version 6.6.2028.0.

291
By default, ESET RMM is disabled. To enable ESET RMM, press F5 to access Advanced setup,click Tools, expand ESET RMM and turn on the switch next to Enable RMM.
Working mode – Select Safe operations only if you want to enable RMM interface for safeand read only operations. Select All operations if you want to enable RMM interface for alloperations.
Operation Mode Safe operations only Mode All operationsGet application info ✔ ✔Get configuration ✔ ✔Get license info ✔ ✔Get logs ✔ ✔Get protection status ✔ ✔Get update status ✔ ✔Set configuration ✔Start activation ✔Start scan ✔ ✔Start update ✔ ✔
Authorization method – Set the RMM authorization method. To use authorization, selectApplication path from the drop-down menu, otherwise select None.

292
WarningRMM should always use authorization to prevent malicious software fromdisabling or circumventing ESET Endpoint protection.
Application paths – Specific application which is allowed to run RMM. If you have selectedApplication path as an authorization method, click Edit to open the Allowed RMMapplication paths configuration window.
Add – Create a new allowed RMM application path. Enter the path or click the … button toselect an executable.
Edit – Modify an existing allowed path. Use Edit if the location of the executable haschanged to another folder.
Delete – Delete an existing allowed path.
Default ESET Endpoint Security installation contains file ermm.exe located in Endpointapplication directory (default path C:\Program Files\ESET\ESET Security). The file ermm.exeexchange data with RMM Plugin, which communicates with RMM Agent, linked to a RMMServer.
• ermm.exe – command line utility developed by ESET that allows managing of Endpointproducts and communication with any RMM Plugin.
• RMM Plugin is a third party application running locally on Endpoint Windows system.The plugin was designed to communicate with specific RMM Agent (e.g. Kaseya only) andwith ermm.exe.

293
• RMM Agent is a third party application (e.g. from Kaseya) running locally on EndpointWindows system. Agent communicates with RMM Plugin and with RMM Server.
How to block the download of specific filetypes from the InternetIf you do not want to allow downloading of specific file types (f.e. exe, pdf or zip) from theinternet, use URL Address management with a combination of wildcards. Press the F5 key toaccess Advanced setup. Click Web and Email > Web access protection and expandURL Address Management. Click Edit next to Address list.
In the Address list window, select List of blocked addresses and click Edit, or click Addto create a new list. A new window opens. If you are creating a new list, select Blocked fromthe Address list type drop-down menu and name the list. If you want to be notified whenaccessing a file type from the current list, enable the Notify when applying slider bar.Select the Logging severity from the drop-down menu. Remote Administrator can collectrecords with Warning verbosity.

294
Click Add to enter a mask that specifies file types you want to block from downloading. Enterthe full URL if you want to block the download of a specific file from a specific website, forexample, http://example.com/file.exe . You can use wildcards to cover a group of files. Aquestion mark (?) represents a single variable character whereas an asterisk (*) represents avariable string of zero or more characters. For example, the mask */*.zip blocks all zipcompressed files to be downloaded.
Note that you can only block the download of specific file types using this method when thefile extension is the part of the file URL. If the webpage uses file download URLs, for example,www.example.com/download.php?fileid=42, any file located at this link would be downloadedeven if it has an extension that you have blocked.
How to minimize the ESET EndpointSecurity user interfaceWhen managed remotely, you can apply a "Visibility" pre-defined policy.
If not, perform the steps manually:
1. Press F5 to access Advanced setup and expand User interface > User interfaceelements.
2. Set Start mode to the desired value. More information about start modes.
3. Disable Show splash-screen at startup and Use sound signal.
4. Configure Notifications.
5. Configure Application statuses.
6. Configure Confirmation messages.
7. Configure Alerts and message boxes.
End User License AgreementIMPORTANT: Please read the terms and conditions of product application set out belowcarefully prior to download, installation, copy or use. THROUGH DOWNLOADING,INSTALLING, COPYING OR USING THE SOFTWARE YOU ARE EXPRESSING YOURCONSENT TO THESE TERMS AND CONDITIONS AND YOU ACKNOWLEDGE PRIVACYPOLICY.
End User License Agreement
Under the terms of this End User License Agreement (hereinafter referred to as "the

295
Agreement") executed by and between ESET, spol. s r. o., having its registered office atEinsteinova 24, 851 01 Bratislava, Slovak Republic, registered in the Commercial Registeradministered by Bratislava I District Court, Section Sro, Entry No 3586/B, BusinessRegistration Number: 31333532 (hereinafter referred to as "ESET" or "the Provider") and you,a physical person or legal entity (hereinafter referred to as "You" or "the End User"), You areentitled to use the Software defined in Article 1 of this Agreement. The Software defined inArticle 1 of this Agreement can be stored on a data carrier, sent via electronic mail,downloaded from the Internet, downloaded from the Provider's servers or obtained fromother sources, subject to the terms and conditions specified below.
THIS IS AN AGREEMENT ON END USER RIGHTS AND NOT AN AGREEMENT FOR SALE. TheProvider continues to own the copy of the Software and the physical media contained in thesales package and any other copies that the End User is authorized to make pursuant to thisAgreement.
By clicking on "I Accept" or "I Accept…" while installing, downloading, copying or using theSoftware, You agree to the terms and conditions of this Agreement. If You do not agree to allof the terms and conditions of this Agreement, immediately click on the canceling option,cancel the installation or download, or destroy or return the Software, installation media,accompanying documentation and sales receipt to the Provider or the outlet from which Youacquired the Software.
YOU AGREE THAT YOUR USE OF THE SOFTWARE ACKNOWLEDGES THAT YOU HAVE READTHIS AGREEMENT, UNDERSTAND IT AND AGREE TO BE BOUND BY ITS TERMS ANDCONDITIONS.
1. Software. As used in this Agreement the term "Software" means: (i) computer programaccompanied by this Agreement and all components thereof; (ii) all the contents of the disks,CD-ROMs, DVDs, e-mails and any attachments, or other media with which this Agreement isprovided, including the object code form of the Software supplied on a data carrier, viaelectronic mail or downloaded via the Internet; (iii) any related explanatory written materialsand any other possible documentation related to the Software, above all any description ofthe Software, its specifications, any description of the Software properties or operation, anydescription of the operating environment in which the Software is used, instructions for useor installation of the Software or any description of how to use the Software (hereinafterreferred to as " Documentation "); (iv) copies of the Software, patches for possible errors inthe Software, additions to the Software, extensions to the Software, modified versions of theSoftware and updates of Software components, if any, licensed to You by the Providerpursuant to Article 3 of this Agreement. The Software shall be provided exclusively in theform of executable object code.
2. Installation, Computer and a License key. Software supplied on a data carrier, sent viaelectronic mail, downloaded from the Internet, downloaded from the Provider's servers orobtained from other sources requires installation. You must install the Software on a correctlyconfigured Computer, complying at least with requirements set out in the Documentation.The installation methodology is described in the Documentation. No computer programs orhardware which could have an adverse effect on the Software may be installed on the

296
Computer on which You install the Software. Computer means hardware, including but notlimited to personal computers, laptops, workstations, palmtop computers, smart phones,hand-held electronic devices, or other electronic devices for which the Software is designed,on which it will be installed and/or used. License key means the unique sequence of symbols,letters, numbers or special signs provided to the End User in order to allow the legal use ofthe Software, its specific version or extension of the term of the License in compliance withthis Agreement.
3. License. Subject to the condition that You have agreed to the terms of this Agreementand You comply with all the terms and conditions stipulated herein, the Provider shall grantYou the following rights (hereinafter referred to as "License"):
a) Installation and use. You shall have the non-exclusive, non-transferable right to installthe Software on the hard disk of a Computer or other permanent medium for data storage,installation and storage of the Software in the memory of a computer system and toimplement, store and display the Software.
b) Stipulation of the number of licenses. The right to use the Software shall be bound bythe number of End Users. One End User shall be taken to refer to the following: (i) installationof the Software on one computer system; or (ii) if the extent of a license is bound to thenumber of mail boxes, then one End User shall be taken to refer to a computer user whoaccepts electronic mail via a Mail User Agent (hereinafter referred to as "MUA"). If MUAaccepts electronic mail and subsequently distributes it automatically to several users, thenthe number of End Users shall be determined according to the actual number of users forwhom the electronic mail is distributed. If a mail server performs the function of a mail gate,the number of End Users shall equal the number of mail server users for which the said gateprovides services. If an unspecified number of electronic mail addresses are directed to andaccepted by one user (e.g., through aliases) and messages are not automatically distributedby the client to a larger number of users, a License for one computer shall be required. Youmust not use the same License at the same time on more than one Computer. The End Useris entitled to enter the License key to the Software only to the extent in which has the right touse the Software in accordance the limitation arising from the number of Licenses granted byProvider. The License key is deemed confidential, You must not share the License with thirdparties or allow third parties to use the License key unless permitted by this Agreement orProvider. If your License key is compromised, notify Provider immediately.
c) Business Edition. A Business Edition version of the Software must be obtained to use theSoftware on mail servers, mail relays, mail gateways or Internet gateways.
d) Term of the License. Your right to use the Software shall be time-limited.
e) OEM Software. OEM Software shall be limited to the Computer You obtained it with. Itcannot be transferred to a different Computer.
f) NFR, TRIAL Software. Software classified as "Not-for-resale", NFR or TRIAL cannot beassigned for payment and must only be used for demonstration or testing the Software'sfeatures.

297
g) Termination of the License. The License shall terminate automatically at the end of theperiod for which granted. If You fail to comply with any of the provisions of this Agreement,the Provider shall be entitled to withdraw from the Agreement, without prejudice to anyentitlement or legal remedy open to the Provider in such eventualities. In the event ofcancellation of the License, You must immediately delete, destroy or return at your own cost,the Software and all backup copies to ESET or to the outlet from which You obtained theSoftware. Upon termination of the License, the Provider shall be also entitled to cancel theEnd User's entitlement to use the functions of the Software, which require connection to theProvider's servers or third-party servers.
4. Functions with data collection and internet connection requirements. To operatecorrectly the Software requires connection to the Internet and must connect at regularintervals to the Provider's servers or third-party servers and applicable data collection incompliance with Privacy Policy. Connection to the Internet and applicable data collection isnecessary for the following functions of the Software:
a) Updates to the Software. The Provider shall be entitled from time to issue updates tothe Software ("Updates"), but shall not be obliged to provide Updates. This function isenabled under the Software's standard settings and Updates are therefore installedautomatically, unless the End User has disabled automatic installation of Updates. For thepurpose of provisioning of Updates, License authenticity verification is required includinginformation about Computer and/or the platform on which the Software is installed incompliance with Privacy Policy.
b) Forwarding of infiltrations and information to the Provider. The Software containsfunctions which collect samples of computer viruses and other malicious computer programsand suspicious, problematic, potentially unwanted or potentially unsafe objects such as files,URLs, IP packets and ethernet frames (hereinafter referred to as "Infiltrations") and then sendthem to the Provider, including but not limited to information about the installation process,the Computer and/or the platform on which the Software is installed, information about theoperations and functionality of the Software and information about devices in local networksuch as type, vendor, model and/or name of device (hereinafter referred to as "Information").The Information and Infiltrations may contain data (including randomly or accidentallyobtained personal data) about the End User or other users of the Computer on which theSoftware is installed, and files affected by Infiltrations with associated metadata.
Information and Infiltrations may be collected by following functions of Software:
i. LiveGrid Reputation System function includes collection and sending of one-way hashesrelated to Infiltrations to Provider. This function is enabled under the Software's standardsettings.
ii. LiveGrid Feedback System function includes collection and sending of Infiltrations withassociated metadata and Information to Provider. This function may be activated by End Userduring the process of installation of the Software.
The Provider shall only use Information and Infiltrations received for the purpose of analysisand research of Infiltrations, improvement of Software and License authenticity verification

298
and shall take appropriate measures to ensure that Infiltrations and Information receivedremain secure. By activating this function of the Software, Infiltrations and Information maybe collected and processed by the Provider as specified in Privacy Policy and in compliancewith relevant legal regulations. You can deactivate these functions at any time.
For the purpose of this Agreement, it is necessary to collect, process and store data enablingthe Provider to identify You in compliance with Privacy Policy. You hereby acknowledge thatthe Provider checks using its own means whether You are using the Software in accordancewith the provisions of this Agreement. You hereby acknowledge that for the purpose of thisAgreement it is necessary for your data to be transferred, during communication between theSoftware and the Provider's computer systems or those of its business partners as part ofProvider’s distribution and support network to ensure functionality of Software andauthorization to use the Software and to protection of the Provider’s rights.
Following conclusion of this Agreement, the Provider or any of its business partners as part ofProvider’s distribution and support network shall be entitled to transfer, process and storeessential data identifying You for billing purposes, performance of this Agreement andtransmitting notifications on your Computer. You hereby agree to receive notification andmessages including but not limited to marketing information.
Details about privacy, personal data protection and Your rights as a data subjectcan be found in Privacy Policy which is available on Provider’s website andaccessible directly from the installation process. You can also visit it fromSoftware’s help section.
5. Exercising End User rights. You must exercise End User rights in person or via youremployees. You are only entitled to use the Software to safeguard your operations andprotect those Computers or computers systems for which You have obtained a License.
6. Restrictions to rights. You may not copy, distribute, extract components or makederivative works of the Software. When using the Software, You are required to comply withthe following restrictions:
(a) You may make one copy of the Software on a permanent storage medium as an archivalback-up copy, provided your archival back-up copy is not installed or used on any Computer.Any other copies You make of the Software shall constitute breach of this Agreement.
(b) You may not use, modify, translate or reproduce the Software or transfer rights to use theSoftware or copies of the Software in any manner other than as provided for in thisAgreement.
(c) You may not sell, sub-license, lease or rent or borrow the Software or use the Software forthe provision of commercial services.
(d) You may not reverse engineer, reverse compile or disassemble the Software or otherwiseattempt to discover the source code of the Software, except to the extent that this restrictionis expressly prohibited by law.

299
(e) You agree that You will only use the Software in a manner that complies with allapplicable laws in the jurisdiction in which You use the Software, including, but not limited to,applicable restrictions concerning copyright and other intellectual property rights.
(f) You agree that You will only use the Software and its functions in a way which does notlimit the possibilities of other End Users to access these services. The Provider reserves theright to limit the scope of services provided to individual End Users, to enable use of theservices by the highest possible number of End Users. Limiting the scope of services shallalso mean complete termination of the possibility to use any of the functions of the Softwareand deletion of Data and information on the Provider's servers or third-party servers relatingto a specific function of the Software.
(g) You agree not exercise any activities involving use the License key, contrary to the termsof this Agreement or leading to provide License key to any person who is not entitled to usethe Software, such as the transfer of used or unused License key in any form, as well as theunauthorized reproduction, or distribution of duplicated or generated License keys or usingthe Software as a result of the use of a License key obtained from the source other than theProvider.
7. Copyright. The Software and all rights, without limitation including proprietary rights andintellectual property rights thereto are owned by ESET and/or its licensors. They areprotected by international treaty provisions and by all other applicable national laws of thecountry in which the Software is being used. The structure, organization and code of theSoftware are the valuable trade secrets and confidential information of ESET and/or itslicensors. You must not copy the Software, except as set forth in Article 6(a). Any copieswhich You are permitted to make pursuant to this Agreement must contain the samecopyright and other proprietary notices that appear on the Software. If You reverse engineer,reverse compile, disassemble or otherwise attempt to discover the source code of theSoftware, in breach of the provisions of this Agreement, You hereby agree that anyinformation thereby obtained shall automatically and irrevocably be deemed to betransferred to and owned by the Provider in full, from the moment such information comesinto being, notwithstanding the Provider's rights in relation to breach of this Agreement.
8. Reservation of rights. The Provider hereby reserves all rights to the Software, with theexception of rights expressly granted under the terms of this Agreement to You as the EndUser of the Software.
9. Multiple language versions, dual media software, multiple copies. In the event thatthe Software supports multiple platforms or languages, or if You receive multiple copies ofthe Software, You may only use the Software for the number of computer systems and for theversions for which You obtained a License. You may not sell, rent, lease, sub-license, lend ortransfer versions or copies of the Software which You do not use.
10. Commencement and termination of the Agreement. This Agreement shall beeffective from the date You agree to the terms of this Agreement. You may terminate thisAgreement at any time by permanently uninstalling, destroying and returning, at your owncost, the Software, all back-up copies and all related materials provided by the Provider or itsbusiness partners. Irrespective of the manner of termination of this Agreement, the

300
provisions of Articles 7, 8, 11, 13, 19 and 21 shall continue to apply for an unlimited time.
11. END USER DECLARATIONS. AS THE END USER YOU ACKNOWLEDGE THAT THESOFTWARE IS PROVIDED "AS IS", WITHOUT WARRANTY OF ANY KIND, EXPRESS OR IMPLIED,AND TO THE MAXIMUM EXTENT PERMITTED BY APPLICABLE LAW. NEITHER THE PROVIDER, ITSLICENSORS OR AFFILIATES, NOR THE COPYRIGHT HOLDERS MAKE ANY REPRESENTATIONS ORWARRANTIES, EXPRESS OR IMPLIED, INCLUDING BUT NOT LIMITED TO THE WARRANTIES OFMERCHANTABILITY OR FITNESS FOR A PARTICULAR PURPOSE OR THAT THE SOFTWARE WILLNOT INFRINGE ANY THIRD-PARTY PATENTS, COPYRIGHTS, TRADEMARKS OR OTHER RIGHTS.THERE IS NO WARRANTY BY THE PROVIDER OR BY ANY OTHER PARTY THAT THE FUNCTIONSCONTAINED IN THE SOFTWARE WILL MEET YOUR REQUIREMENTS OR THAT THE OPERATIONOF THE SOFTWARE WILL BE UNINTERRUPTED OR ERROR-FREE. YOU ASSUME ALLRESPONSIBILITY AND RISK FOR THE SELECTION OF THE SOFTWARE TO ACHIEVE YOURINTENDED RESULTS AND FOR THE INSTALLATION, USE AND RESULTS OBTAINED FROM IT.
12. No other obligations. This Agreement creates no obligations on the part of the Providerand its licensors other than as specifically set forth herein.
13. LIMITATION OF LIABILITY. TO THE MAXIMUM EXTENT PERMITTED BY APPLICABLE LAW,IN NO EVENT SHALL THE PROVIDER, ITS EMPLOYEES OR LICENSORS BE LIABLE FOR ANY LOSTPROFITS, REVENUE, SALES, DATA OR COSTS OF PROCUREMENT OF SUBSTITUTE GOODS ORSERVICES, PROPERTY DAMAGE, PERSONAL INJURY, INTERRUPTION OF BUSINESS, LOSS OFBUSINESS INFORMATION OR FOR ANY SPECIAL, DIRECT, INDIRECT, INCIDENTAL, ECONOMIC,COVER, PUNITIVE, SPECIAL OR CONSEQUENTIAL DAMAGES, HOWEVER CAUSED ANDWHETHER ARISING UNDER CONTRACT, TORT, NEGLIGENCE OR OTHER THEORY OF LIABILITY,ARISING OUT OF THE USE OF OR INABILITY TO USE THE SOFTWARE, EVEN IF THE PROVIDEROR ITS LICENSORS OR AFFILIATES ARE ADVISED OF THE POSSIBILITY OF SUCH DAMAGES.BECAUSE SOME COUNTRIES AND JURISDICTIONS DO NOT ALLOW THE EXCLUSION OFLIABILITY, BUT MAY ALLOW LIABILITY TO BE LIMITED, IN SUCH CASES, THE LIABILITY OF THEPROVIDER, ITS EMPLOYEES OR LICENSORS OR AFFILIATES SHALL BE LIMITED TO THE SUMTHAT YOU PAID FOR THE LICENSE.
14. Nothing contained in this Agreement shall prejudice the statutory rights of any partydealing as a consumer if running contrary thereto.
15. Technical support. ESET or third parties commissioned by ESET shall provide technicalsupport at their own discretion, without any guarantees or declarations. The End User shallbe required to back up all existing data, software and program facilities prior to the provisionof technical support. ESET and/or third parties commissioned by ESET cannot accept liabilityfor damage or loss of data, property, software or hardware or loss of profits due to theprovision of technical support. ESET and/or third parties commissioned by ESET reserve theright to decide that resolving the problem is beyond the scope of technical support. ESETreserves the right to refuse, suspend or terminate the provision of technical support at itsown discretion. License information, Information and other data in compliance with PrivacyPolicy may be required for the purpose of technical support provision.
16. Transfer of the License. The Software can be transferred from one Computer toanother, unless contrary to the terms of the Agreement. If not contrary to the terms of the

301
Agreement, the End User shall only be entitled to permanently transfer the License and allrights ensuing from this Agreement to another End User with the Provider's consent, subjectto the condition that (i) the original End User does not retain any copies of the Software; (ii)the transfer of rights must be direct, i.e. from the original End User to the new End User; (iii)the new End User must assume all the rights and obligations incumbent on the original EndUser under the terms of this Agreement; (iv) the original End User has to provide the new EndUser with documentation enabling verification of the genuineness of the Software asspecified under Article 17.
17. Verification of the genuineness of the Software. The End User may demonstrateentitlement to use the Software in one of the following ways: (i) through a license certificateissued by the Provider or a third party appointed by the Provider; (ii) through a writtenlicense agreement, if such an agreement was concluded; (iii) through the submission of an e-mail sent by the Provider containing licensing details (user name and password). Licenseinformation and End User identification data in compliance with Privacy Policy may berequired for the purpose of Software genuineness verification.
18. Licensing for public authorities and the US Government. The Software shall beprovided to public authorities, including the United States Government, with the licenserights and restrictions described in this Agreement.
19. Trade control compliance.
(a) You will not, directly or indirectly, export, re-export, transfer or otherwise make availablethe Software to any person, or use it in any manner, or be involved in any act, that couldresult in ESET or its holding companies, its subsidiaries, and the subsidiaries of any of itsholding companies, as well as entities controlled by its holding companies (hereinafterreferred to as "Affiliates") being in violation of, or being subject to negative consequencesunder, Trade Control Laws which includes
i. any laws that control, restrict, or impose licensing requirements on export, re-export ortransfer of goods, software, technology, or services, issued or adopted by any government,state or regulatory authority of the United States of America, Singapore, the United Kingdom,the European Union or any of its Member States, or any country in which obligations underthe Agreement are to be performed, or in which ESET or any of its Affiliates are incorporatedor operate (hereinafter referred to as "Export Control Laws") and
ii. any economic, financial, trade or other, sanction, restriction, embargo, import or exportban, prohibition on transfer of funds or assets or on performing services, or equivalentmeasure imposed by any government, state or regulatory authority of the United States ofAmerica, Singapore, the United Kingdom, the European Union or any of its Member States, orany country in which obligations under the Agreement are to be performed, or in which ESETor any of its Affiliates are incorporated or operate (hereinafter referred to as "SanctionLaws").
(b) ESET shall have the right to suspend its obligations under, or terminate, these Terms withimmediate effect in the event that:

302
i. ESET determines that, in its reasonable opinion, the User has breached or is likely to breachprovision of Article 19.a of the Agreement; or
ii. the End User and/or the Software become subject to Trade Control Laws and, as a result,ESET determines that, in its reasonable opinion, the continued performance of its obligationsunder the Agreement could result in ESET or its Affiliates being in violation of, or beingsubject to negative consequences under, Trade Control Laws.
(c) Nothing in the Agreement is intended, and nothing should be interpreted or construed, toinduce or require either party to act or refrain from acting (or to agree to act or refrain fromacting) in any manner which is inconsistent with, penalized, or prohibited under anyapplicable Trade Control Laws.
20. Notices. All notices and return of the Software and Documentation must be delivered to:ESET, spol. s r. o., Einsteinova 24, 851 01 Bratislava, Slovak Republic.
21. Applicable law. This Agreement shall be governed by and construed in accordance withthe laws of the Slovak Republic. The End User and the Provider hereby agree that theprinciples of the conflict of laws and the United Nations Convention on Contracts for theInternational Sale of Goods shall not apply. You expressly agree that any disputes or claimsensuing from this Agreement with respect to the Provider or any disputes or claims relatingto use of the Software shall be settled by Bratislava I District Court and You expressly agreeto the said court exercising jurisdiction.
22. General provisions. Should any of the provisions of this Agreement be invalid orunenforceable, this shall not affect the validity of the other provisions of the Agreement,which shall remain valid and enforceable under the conditions stipulated therein. In case of adiscrepancy between language versions of this Agreement, the English version shall prevail.This Agreement may only be modified in written form, signed by an authorizedrepresentative of the Provider, or a person expressly authorized to act in this capacity underthe terms of a power of attorney.
This is the entire Agreement between the Provider and You relating to the Software and itsupersedes any prior representations, discussions, undertakings, communications oradvertising relating to the Software.
EULA ID: BUS-STANDARD-20-01
Privacy PolicyESET, spol. s r. o., having its registered office at Einsteinova 24, 851 01 Bratislava, SlovakRepublic, registered in the Commercial Register administered by Bratislava I District Court,Section Sro, Entry No 3586/B, Business Registration Number: 31333532 as a Data Controller("ESET" or "We") would like to be transparent when it comes to processing of personal dataand privacy of our customers. To achieve this goal, We are publishing this Privacy Policy withthe sole purpose of informing our customer ("End User" or "You") about following topics:

303
• Processing of Personal Data,
• Data Confidentiality,
• Data Subject's Rights.
Processing of Personal DataServices provided by ESET implemented in our product are provided under the terms of EndUser License Agreement ("EULA"), but some of them might require specific attention. Wewould like to provide You with more details on data collection connected with the provision ofour services. We render various services described in the EULA and product documentationsuch as update/upgrade service, ESET LiveGrid®, protection against misuse of data, support,etc. To make it all work, We need to collect the following information:
• Update and other statistics covering information concerning installation process and yourcomputer including platform on which our product is installed and information about theoperations and functionality of our products such as operation system, hardwareinformation, installation IDs, license IDs, IP address, MAC address, configuration settings ofproduct.
• One-way hashes related to infiltrations as part of ESET LiveGrid® Reputation Systemwhich improves the efficiency of our anti-malware solutions by comparing scanned files to adatabase of whitelisted and blacklisted items in the cloud.
• Suspicious samples and metadata from the wild as part of ESET LiveGrid® FeedbackSystem which enables ESET to react immediately to needs of our end users and keep usresponsive to the latest threats providing. We are dependent on You sending us
oinfiltrations such as potential samples of viruses and other malicious programs andsuspicious; problematic, potentially unwanted or potentially unsafe objects such asexecutable files, email messages reported by You as spam or flagged by our product;
oinformation about devices in local network such as type, vendor, model and/or name ofdevice;
oinformation concerning the use of internet such as IP address and geographicinformation, IP packets, URLs and ethernet frames;
ocrash dump files and information contained.
We do not desire to collect your data outside of this scope but sometimes it is impossible toprevent it. Accidentally collected data may be included in malware itself (collected withoutyour knowledge or approval) or as part of filenames or URLs and We do not intend it to formpart of our systems or process it for the purpose declared in this Privacy Policy.
• Licensing information such as license ID and personal data such as name, surname,address, email address is required for billing purposes, license genuineness verification andprovision of our services.
• Contact information and data contained in your support requests may be required forservice of support. Based on the channel You choose to contact us, We may collect your

304
email address, phone number, license information, product details and description of yoursupport case. You may be asked to provide us with other information to facilitate service ofsupport.
Data ConfidentialityESET is a company operating worldwide via affiliated entities or partners as part of ourdistribution, service and support network. Information processed by ESET may be transferredto and from affiliated entities or partners for performance of the EULA such as provision ofservices or support or billing. Based on your location and service You choose to use, Wemight be required to transfer your data to a country with absence of adequacy decision bythe European Commission. Even in this case, every transfer of information is subject toregulation of data protection legislation and takes place only if required. StandardContractual Clauses, Binding Corporate Rules or another appropriate safeguard must beestablished without any exception.
We are doing our best to prevent data from being stored longer than necessary whileproviding services under the EULA. Our retention period might be longer than the validity ofyour license just to give You time for easy and comfortable renewal. Minimized andpseudonymized statistics and other data from ESET LiveGrid® may be further processed forstatistical purposes.
ESET implements appropriate technical and organizational measures to ensure a level ofsecurity which is appropriate to potential risks. We are doing our best to ensure the ongoingconfidentiality, integrity, availability and resilience of processing systems and Services.However, in case of data breach resulting in a risk to your rights and freedoms, We are readyto notify supervisory authority as well as data subjects. As a data subject, You have a right tolodge a complaint with a supervisory authority.
Data Subject’s RightsESET is subject to regulation of Slovak laws and We are bound by data protection legislationas part of European Union. Subject to conditions laid down by applicable data protection laws,You are entitled to following rights as a data subject:
• right to request access to your personal data from ESET,
• right to rectification of your personal data if inaccurate (You also have the right to havethe incomplete personal data completed),
• right to request erasure of your personal data,
• right to request restriction of processing your personal data,
• right to object to processing,
• right to lodge a complaint as well as,
• right to data portability.

305
We believe that every information we process is valuable and necessary for the purpose ofour legitimate interest which is provision of services and products to our customers.
If You would like to exercise your right as a data subject or You have a question or concern,send us a message at:
ESET, spol. s r.o.Data Protection OfficerEinsteinova 2485101 BratislavaSlovak [email protected]