EMC SRDF Commands - NIXDRAFTS By RSY Digital World
12
EMC SRDF Commands By RSYDW Introduction In this article we are going to discuss about all important emc srdf commands you must need to know when you are working on EMC Storage Replication Technology. All these emc srdf commands is really handy when you have to perform various operations on these storage. We will try to show all emc srdf commands with examples wherever it is possible to show more visibility. We will try to create cheat sheet and will attach to this article so that it can be an effective doc for your convenience and reference point. These are very highly critical operations for an organization Disaster Recovery Plans and performing these tasks efficiently must be a crucial task to avoid any loss of organization data which may result in monitory loss to organizations. All this can be avoided by knowing what each emc srdf commands does exactly and what will be the impact of each commands while performing individual tasks.
-
Upload
khangminh22 -
Category
Documents
-
view
0 -
download
0
Transcript of EMC SRDF Commands - NIXDRAFTS By RSY Digital World
EMC SRDF Commands By RSYDW
Introduction In this article we are going to discuss about all important emc srdf commands you must need to know when you are working on EMC
Storage Replication Technology. All these emc srdf commands is
really handy when you have to perform various operations on these
storage. We will try to show all emc srdf commands with examples
wherever it is possible to show more visibility. We will try to create
cheat sheet and will attach to this article so that it can be an
effective doc for your convenience and reference point.
These are very highly critical operations for an organization
Disaster Recovery Plans and performing these tasks efficiently
must be a crucial task to avoid any loss of organization data which
may result in monitory loss to organizations.
All this can be avoided by knowing what each emc srdf commands
does exactly and what will be the impact of each commands while
performing individual tasks.
What is SRDF? SRDF is nothing but a short form of Symmetrix Remote Data Facility used by EMC Storage System. An intelligent system for data
replication from one Symmetrix Storage Array to another
geographically distant location through a SAN or over an IP
network. You can refer to know more about what is SRDF? In our
previous article.
We can perform below operations on emc storage. We will start
sequentially starting from validating before making any changes or
performing any intensive operations.
Just for better understandings like LVM (Logical Volume Manager)
or VxVM (Veritas Volume Manager) we create Volume Group
simply known as VG or in VxVM called Disk Group known as DG we
also groups individual disks into groups for efficient management
purpose only. In EMC world it is known as Symmetrix Disk Group
or SYMM DG.
Now we are ready to discuss emc srdf commands. So let’s explore
all of them one by one.

1. How to Identify an SRDF/A Group Just to know about the SYMDG available to the system you can use below
command to display SYMDG name to the system. This is most important
to know as it is required for any operations.
# symdg list
D E V I C E G R O U P S
Number of
Name Type Valid Symmetrix ID Devs GKs BCVs VDEVs TGTs
FS_SYBDUMPS RDF1 Yes 000190104472 1 0 0 0 0
2. How to Validate an SRDF/A Group Status
This is most important and very frequently used emc srdf command
which give the status of SYMDG before performing any activity or
verifying status after performing any activity.
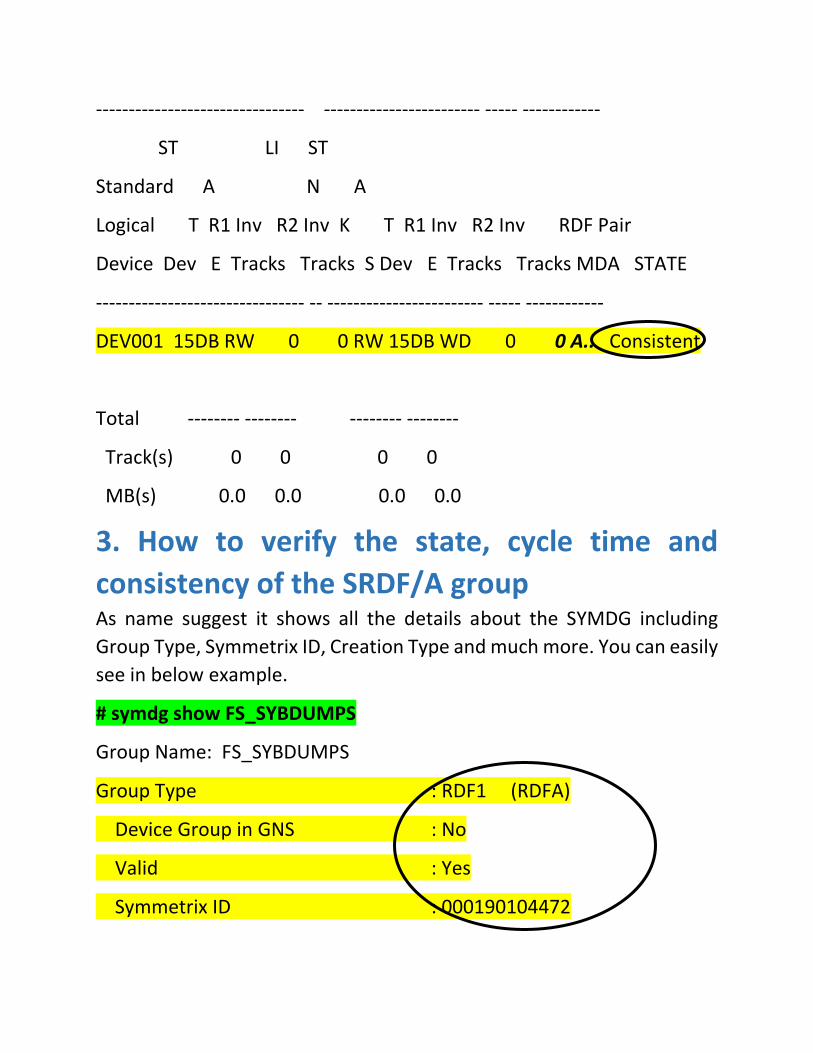
# symrdf -g FS_SYBDUMPS query
Device Group (DG) Name : FS_SYBDUMPS
DG's Type : RDF1
DG's Symmetrix ID : 000190104472
Source (R1) View Target (R2) View MODES
-------------------------------- ------------------------ ----- ------------
ST LI ST
Standard A N A
Logical T R1 Inv R2 Inv K T R1 Inv R2 Inv RDF Pair
Device Dev E Tracks Tracks S Dev E Tracks Tracks MDA STATE
-------------------------------- -- ------------------------ ----- ------------
DEV001 15DB RW 0 0 RW 15DB WD 0 0 A.. Consistent
Total -------- -------- -------- --------
Track(s) 0 0 0 0
MB(s) 0.0 0.0 0.0 0.0
3. How to verify the state, cycle time and
consistency of the SRDF/A group As name suggest it shows all the details about the SYMDG including
Group Type, Symmetrix ID, Creation Type and much more. You can easily
see in below example.
# symdg show FS_SYBDUMPS
Group Name: FS_SYBDUMPS
Group Type : RDF1 (RDFA)
Device Group in GNS : No
Valid : Yes
Symmetrix ID : 000190104472
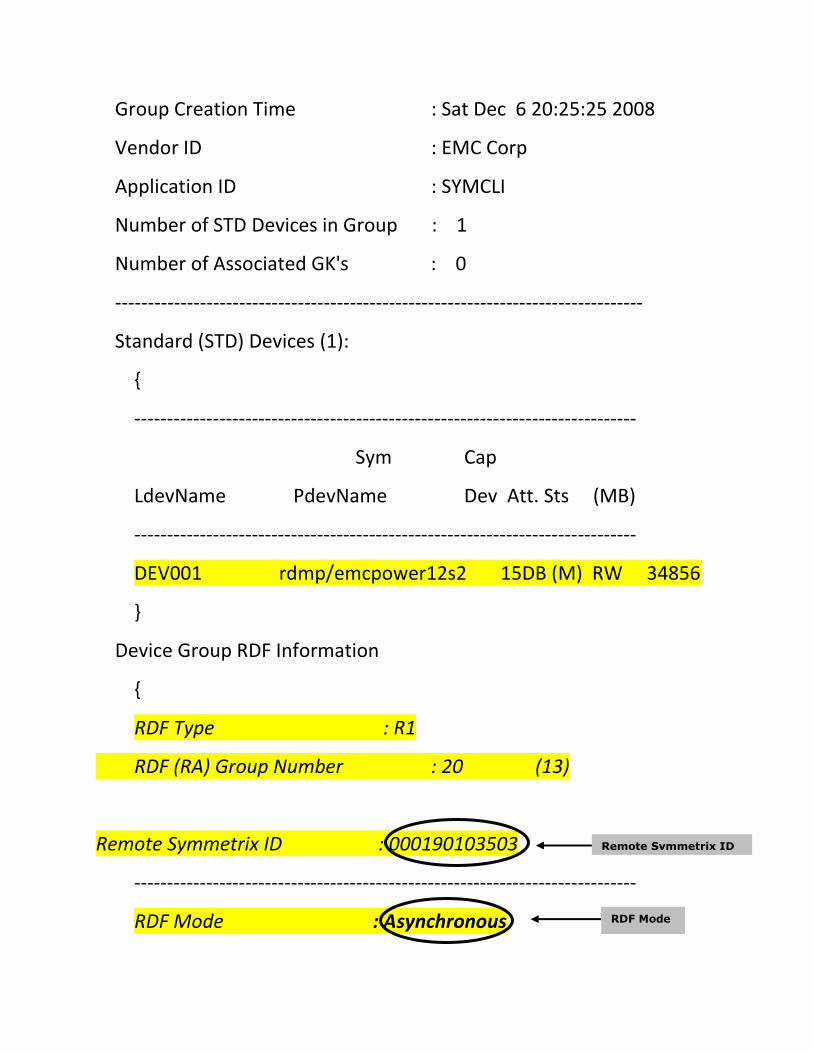
Group Creation Time : Sat Dec 6 20:25:25 2008
Vendor ID : EMC Corp
Application ID : SYMCLI
Number of STD Devices in Group : 1
Number of Associated GK's : 0
---------------------------------------------------------------------------------
Standard (STD) Devices (1):
{
-----------------------------------------------------------------------------
Sym Cap
LdevName PdevName Dev Att. Sts (MB)
-----------------------------------------------------------------------------
DEV001 rdmp/emcpower12s2 15DB (M) RW 34856
}
Device Group RDF Information
{
RDF Type : R1
RDF (RA) Group Number : 20 (13)
Remote Symmetrix ID : 000190103503
-----------------------------------------------------------------------------
RDF Mode : Asynchronous
Remote Symmetrix ID
RDF Mode
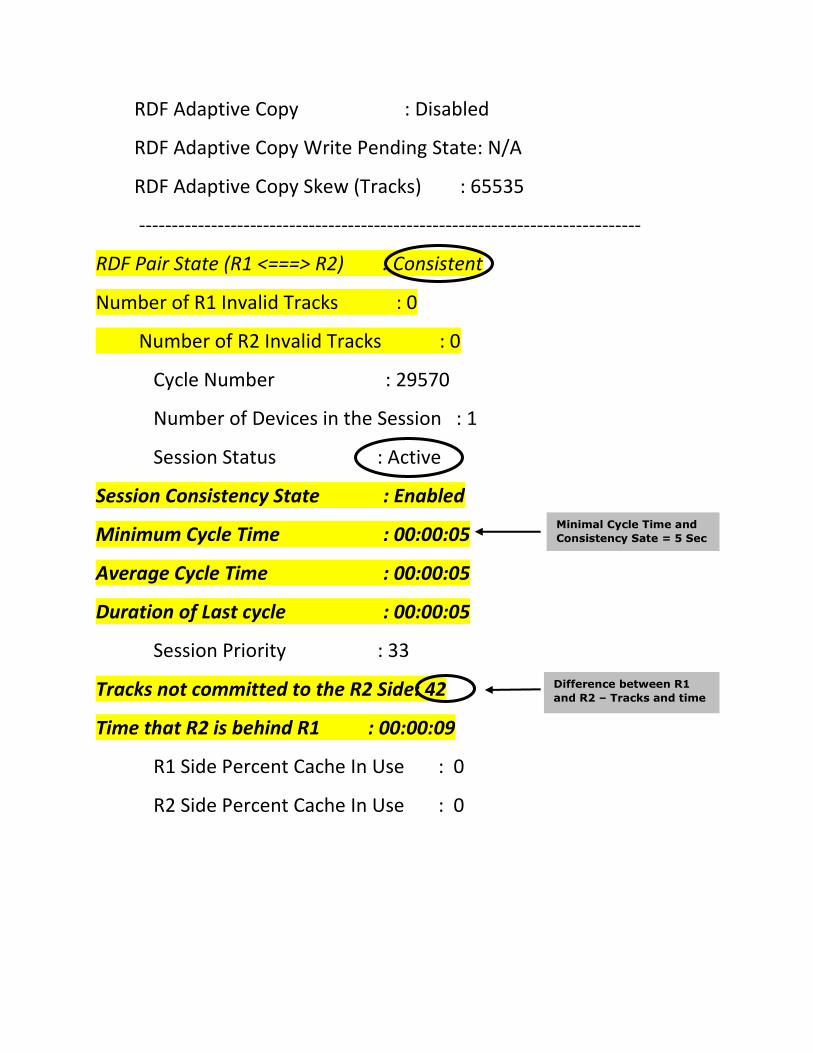
RDF Adaptive Copy : Disabled
RDF Adaptive Copy Write Pending State: N/A
RDF Adaptive Copy Skew (Tracks) : 65535
-----------------------------------------------------------------------------
RDF Pair State (R1 <===> R2) : Consistent
Number of R1 Invalid Tracks : 0
Number of R2 Invalid Tracks : 0
Cycle Number : 29570
Number of Devices in the Session : 1
Session Status : Active
Session Consistency State : Enabled
Minimum Cycle Time : 00:00:05
Average Cycle Time : 00:00:05
Duration of Last cycle : 00:00:05
Session Priority : 33
Tracks not committed to the R2 Side: 42
Time that R2 is behind R1 : 00:00:09
R1 Side Percent Cache In Use : 0
R2 Side Percent Cache In Use : 0
Difference between R1
and R2 – Tracks and time
Minimal Cycle Time and
Consistency Sate = 5 Sec
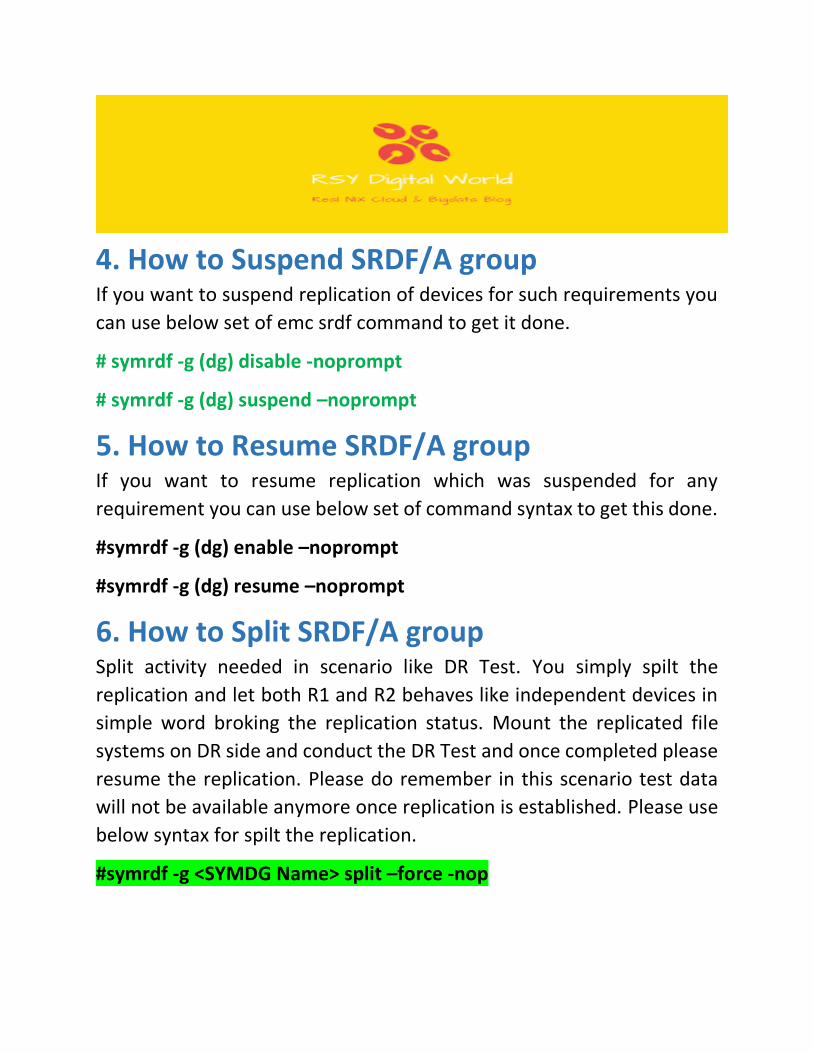
4. How to Suspend SRDF/A group If you want to suspend replication of devices for such requirements you
can use below set of emc srdf command to get it done.
# symrdf -g (dg) disable -noprompt
# symrdf -g (dg) suspend –noprompt
5. How to Resume SRDF/A group If you want to resume replication which was suspended for any
requirement you can use below set of command syntax to get this done.
#symrdf -g (dg) enable –noprompt
#symrdf -g (dg) resume –noprompt
6. How to Split SRDF/A group Split activity needed in scenario like DR Test. You simply spilt the
replication and let both R1 and R2 behaves like independent devices in
simple word broking the replication status. Mount the replicated file
systems on DR side and conduct the DR Test and once completed please
resume the replication. Please do remember in this scenario test data
will not be available anymore once replication is established. Please use
below syntax for spilt the replication.
#symrdf -g <SYMDG Name> split –force -nop
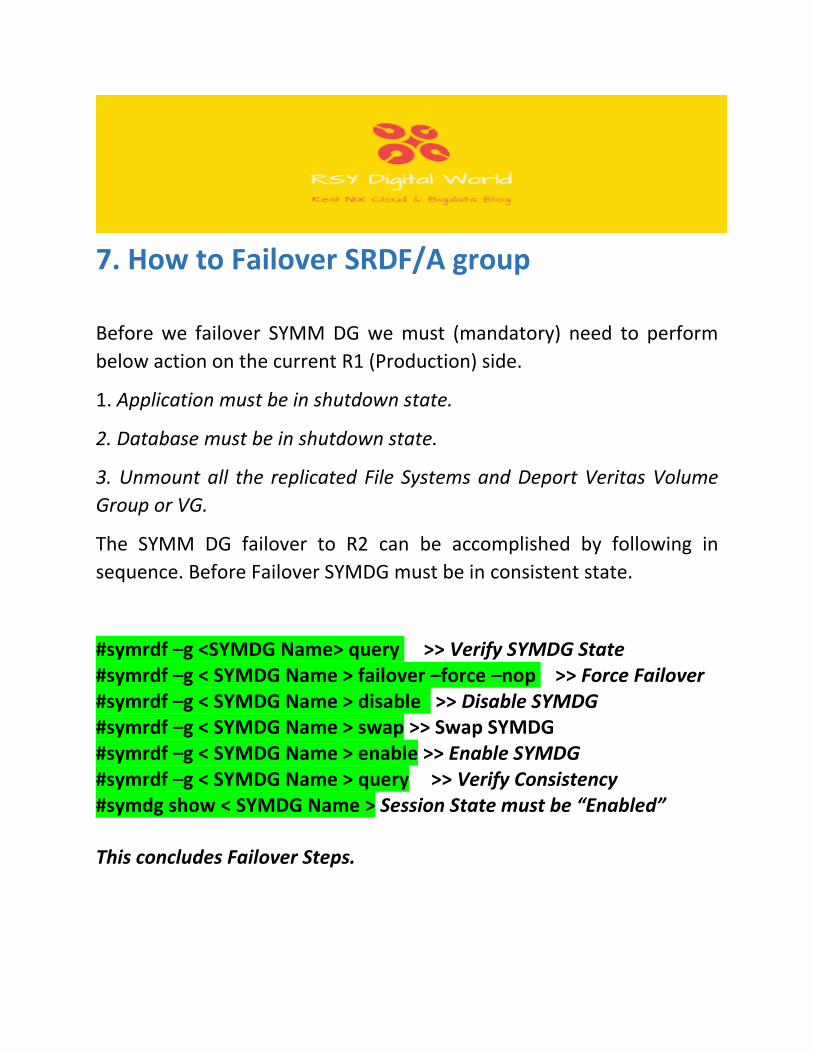
7. How to Failover SRDF/A group
Before we failover SYMM DG we must (mandatory) need to perform
below action on the current R1 (Production) side.
1. Application must be in shutdown state.
2. Database must be in shutdown state.
3. Unmount all the replicated File Systems and Deport Veritas Volume
Group or VG.
The SYMM DG failover to R2 can be accomplished by following in
sequence. Before Failover SYMDG must be in consistent state.
#symrdf –g <SYMDG Name> query >> Verify SYMDG State #symrdf –g < SYMDG Name > failover –force –nop >> Force Failover #symrdf –g < SYMDG Name > disable >> Disable SYMDG #symrdf –g < SYMDG Name > swap >> Swap SYMDG #symrdf –g < SYMDG Name > enable >> Enable SYMDG #symrdf –g < SYMDG Name > query >> Verify Consistency #symdg show < SYMDG Name > Session State must be “Enabled” This concludes Failover Steps.
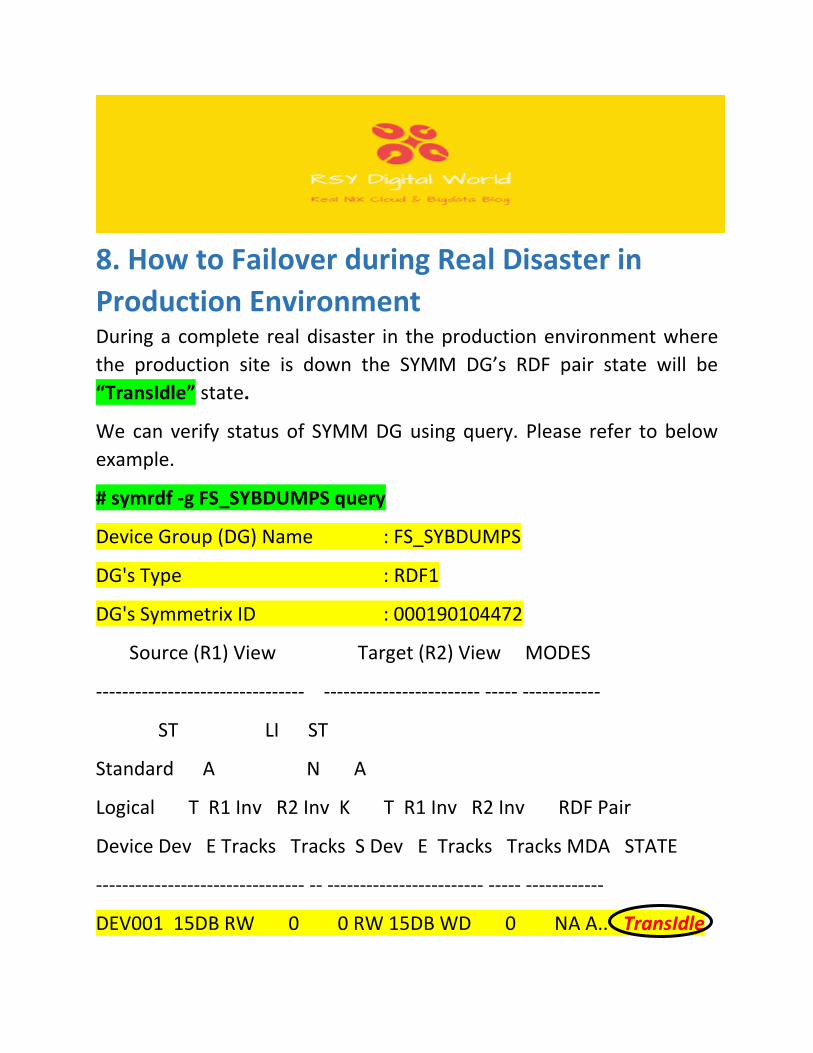
8. How to Failover during Real Disaster in
Production Environment During a complete real disaster in the production environment where
the production site is down the SYMM DG’s RDF pair state will be
“TransIdle” state.
We can verify status of SYMM DG using query. Please refer to below
example.
# symrdf -g FS_SYBDUMPS query
Device Group (DG) Name : FS_SYBDUMPS
DG's Type : RDF1
DG's Symmetrix ID : 000190104472
Source (R1) View Target (R2) View MODES
-------------------------------- ------------------------ ----- ------------
ST LI ST
Standard A N A
Logical T R1 Inv R2 Inv K T R1 Inv R2 Inv RDF Pair
Device Dev E Tracks Tracks S Dev E Tracks Tracks MDA STATE
-------------------------------- -- ------------------------ ----- ------------
DEV001 15DB RW 0 0 RW 15DB WD 0 NA A.. TransIdle

Total -------- -------- -------- --------
Track(s) 0 0 0 0
MB(s) 0.0 0.0 0.0 0.0
Note: In this state to bring the R2 side operational we can
use the “failover immediate” option. This will bring the R2
side to an R/W mode. This should only be used in a true
Disaster Scenario.
#symrdf –g <SYMDG Name> failover –immediate
9. How to Switch Between Sync and Async Let us understand when this might be helpful while it consumes lot of
bandwidth but sometime it is handy to replicate data faster.
For example you are failing over a huge system which contains too
much amount of data to be replicated and stayed to other side for few
hours and system gets data updated fast. If for some region you need
to sync the date it might take longer.
ASYNC TO SYNC If you have to switch from async to sync we can follow below process.
# symrdf -g FS_SYBDUMPS query If must be in Async state. # symrdf -g FS_SYBDUMPS disable Disable SYMDG before change. # symrdf -g FS_SYBDUMPS set mode sync Set Mode SYNC # symrdf -g FS_SYBDUMPS query Validate State
SYNC TO ASYNC
If you have to switch from sync to async we can follow below process.
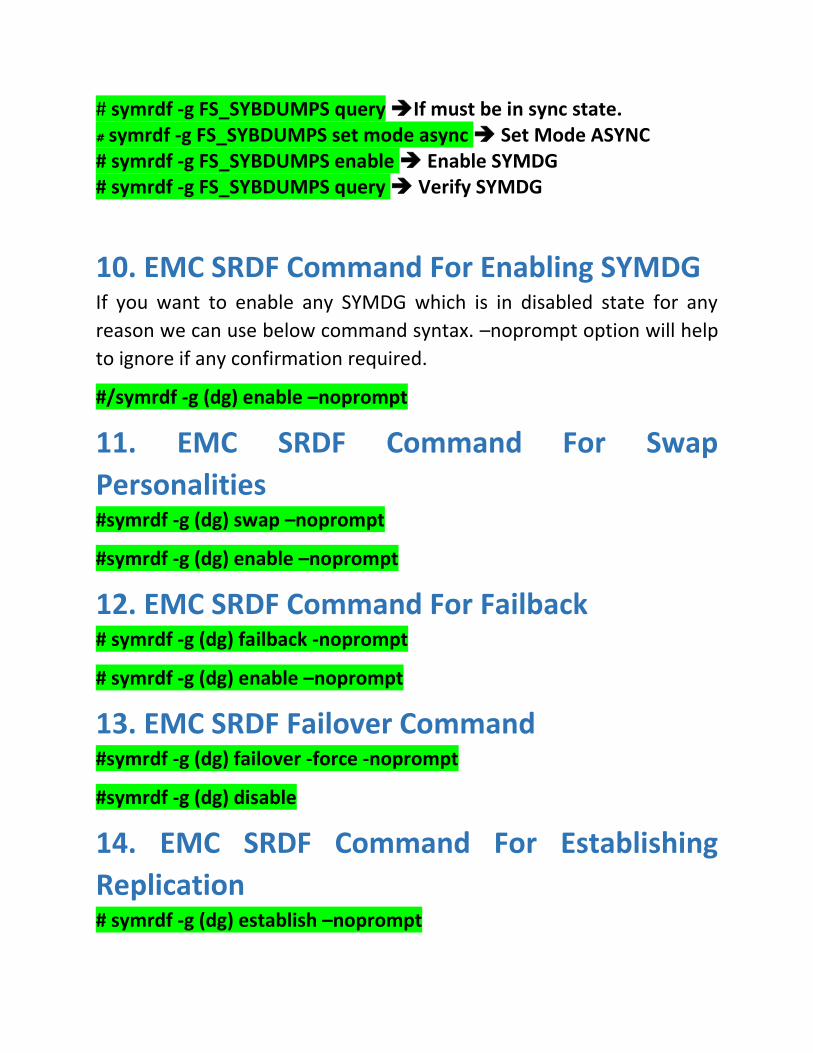
# symrdf -g FS_SYBDUMPS query If must be in sync state. # symrdf -g FS_SYBDUMPS set mode async Set Mode ASYNC # symrdf -g FS_SYBDUMPS enable Enable SYMDG # symrdf -g FS_SYBDUMPS query Verify SYMDG
10. EMC SRDF Command For Enabling SYMDG If you want to enable any SYMDG which is in disabled state for any
reason we can use below command syntax. –noprompt option will help
to ignore if any confirmation required.
#/symrdf -g (dg) enable –noprompt
11. EMC SRDF Command For Swap
Personalities #symrdf -g (dg) swap –noprompt
#symrdf -g (dg) enable –noprompt
12. EMC SRDF Command For Failback # symrdf -g (dg) failback -noprompt
# symrdf -g (dg) enable –noprompt
13. EMC SRDF Failover Command #symrdf -g (dg) failover -force -noprompt
#symrdf -g (dg) disable
14. EMC SRDF Command For Establishing
Replication # symrdf -g (dg) establish –noprompt
Conclusion As mentioned earlier this article is about emc srdf commands .We tried
to summarize all the emc srdf commands mostly used while working on
SRDF storage. We hope you must have liked it and as committed we will
upload cheat sheet which you can download as reference material.
You can use it applying your better understanding as this is shared to help
for better understanding. You need to have better understanding about
SRDF technology.
Thanks for downloading and going through this article. Hope it will help
for better control of SRDF activities as part of your responsibilities.