Fitness landscapes in orchids: Parametric and non-parametric approaches.
Upload
khangminh22Category
view
1download
0
DEVELOPING A PARAMETRIC SYSTEM FOR POINTE SHOE CUSTOMIZATION
Doctoral ThesisMarilena Christodoulou

Thesis presented for obtaining the doctorate title from the
Polytechnic University of Catalunya (UPC).
July 2021
DEVELOPING A PARAMETRIC SYSTEM FOR POINTE SHOE CUSTOMIZATION
Doctoral student: Marilena Christodoulou
Supervisors of the thesis:
Pau de Solà-Morales
Isidro Navarro Delgado
Program of Doctoral degree in Architectural, civil and urban heritage and refurbish-
ment of existing buildings
ETSAB - Escuela Técnica Superior de Arquitectura de Barcelona
Universitat Politècnica de Catalunya

Thesis Title: Developing a Parametric System for Pointe Shoe Customization
ABSTRACT
A Pointe Shoe is worn by ballet dancers while performing “en pointe”. This fun-damental ballet technique, which is performed by rising to the tips of the toes, en-ables dancers to create the illusion of incredible lightness and sylph-like appearance. However, pointe work causes pain, blisters, calluses, and disfigurement of the feet. Dancers, pointe shoe fitters, and podiatrists agree that finding Pointe Shoes which fit correctly and adjust throughout your career could help to avoid feet injuries. The different parts of the shoe require different performance, depending on the different parts of the foot. Each dancer has particular feet, with variations of toe length and shape, arch flexibility, and mechanical strength. Instead of having the dancer’s feet adjusted on the point shoes, the idea is to have the shoes, uniquely ‘adapt’ according to the morphology of the feet. The foot is not just a passive weight-bearer, it must assume positions and execute movements beyond its normal limits. Therefore, the parameters to take in account are classified in anatomical, mechanical, assembly and material.
From the study, it is deduced that the above parameters may be the key to define a proposal for a solution to the design of Pointe shoe.
Keywords: Parametric design · Algorithm · Mass customization · Pointe Shoes

ACKNOWLEDGMENTS:
Although it has been a quite lonely experience due to the circumstances, this thesis couldn’t be completed if it wasn’t for the contribution and support of many people.
First of all I would like to express my deepest appreciation to my three tutors:
Above all, Pau de Solà-Morales who believed in me and the project since the first moment, has always motivated me in his own way and has always been a great teacher, mentor and in-spiration.
Isidro Navarro Delgado who, even if he accompanied me only the last two years, his contri-bution to the project and thesis has been of a great significance, as well as his patience, trust, dedication and determination.
Joaquin Manuel Regot Marimon who believed in the project and gave me the opportunity of making this real.
A very big gratitude I owe it to my parents, Joana and Mario Christodoulou, for their trust, for not letting me quit in the most difficult moments, but mostly I owe it to my sister, Areti Christodoulou who even in distance has always been by my side offering me a great moral and intellectual support.
I would also like to extend my deepest gratitude to Marcel Bilurbina Camps for his patience and contribution to the project as a professional, a teacher and above all a friend.
I am also deeply indebted to:
Jordi Truco for the support and all the knowledge he shared with me in many years, but spe-cially for his mentoring during the first months of the project.
Robert Brufau for helping me making the project richer by introducing physics and structural principles to it.
Bernhard Spanlang for introducing me to the 3D scanning world and teaching me so many valuable things.
Juan Antonio López Vidal for all the knowledge he had the kindness to share with me about shoe designing and making.
My ballet teacher and RAD (Royal Academy of Dance) exterminator Meritxell Paradell who has been a great inspiration and who has taught me so much about dance anatomy.
My former ballet teachers Eleni Vaka and Elisenda Tarragó for, without them I wouldn’t be a ballet dancer and the idea of this project could never been conceived.

ELISAVA School of Design and Engineering for all the knowledge and the recognition I received from them, that motivated me for converting this idea to a project.
ATTA33 workshop for their help and advising about digital fabrication.
I would like to extend my sincere thanks to all the people who offered them-selves for scanning their feet but special thanks to Barbara Pla and Laura Stra-macchia for their patience during the scanning process.
Last but not least I would like to thank all my friends and family who believed in me and without them I would never be able to complete this thesis. Special thanks to Katerina Papaionannou for all the love and moral support, Marianna Legaki, Angelos Shiamaris, Zorana Melovic, Shashank Shrivastva and Cristina Centeno.

Table of Contents
1. Chapter 1: Introduction 11
1.1 Motivation 11
1.2 Hypothesis: 12
1.3 Objectives: 13
1.4 Innovation: 14
2. Chapter 2: History 19
2.1 History of Pointe Dancing 20
2.2 Shoe and Footwear Manufacturing History 27
2.3 History of Parametric Design and its Applications in Footwear Design 30
2.3.1. History of Parametric Design 30
2.3.2. Parametric Design: A New Design Style in the Footwear Industry 34
2.3.3. Parametric Design and Mass Customisation in Footwear Design 39
3. Chapter 3: Anatomy 45
3.1 Dance Anatomy & Anatomy of the Foot 46
3.1.1. Dance Anatomy: 46
3.1.2. Anatomy of the Foot 48
3.2 Anatomy of the traditional Pointe Shoe 54
4. Chapter 4: Manufacturing Process 59
4.1 The pointe shoemaking process 60
4.2 Preparing the Pointe Shoes: 63
5. Chapter 5: Areas of Investigation 71
5.1 Geometrical Approach 72

5.1.1. 3D Scanning: 72
5.1.2. Definingvariables:74
5.2 Structural Approach 83
5.2.1. Applied forces while dancing on pointe shoes 85
5.3 Material Approach 88
5.3.1. Mechanical properties: 89
5.3.2. Material properties for each part of the shoe: 90
5.3.3. MaterialsthatcanbeusedinRapidPrototyping 94
5.4 Additive Manufacturing (AM) 95
6. Chapter 6: Results 101
6.1 Scanning process: 103
6.1.1. Detailed methodology of the scanning process: 103
6.1.2. 3D Scanning results: 107
6.2 Parametrization of the model 120
6.2.1. Parametrizationoftheboxandthevampoftheshoe:122
6.2.2. Parametrization of the sole and the shank of the shoe: 128
6.2.3. Parametrizationoftheprotectivepadding: 134
6.2.4. Parametrization of the outer shoe: 136
6.3 Fabrication process: 142
6.3.1. Fabricationoftheboxandthevampoftheshoe: 144
6.3.2. Fabricationofthesoleandtheshankoftheshoe: 146
6.3.3. Fabricationoftheprotectivepadding: 149
6.3.4. Fabricationoftheoutershoe: 151
7. Chapter 7: Conclusions 157
8. References 163


Chapter One: Introduction


1. Chapter 1: Introduction
1.1 Motivation
Besides my background in Architecture and design, for the last 28 years I have been practicing ballet and I am considered as a proficient ballet dancer. Since I was a child, I remember that, the moment of buying a pair of pointe shoes was very crucial and significant. The length of the shoe, the width, the size of the box, the rigidity and so many other factors that you should take in account while trying out the shoes at the shop. That was just the start. Think-ing that you had bought the shoe that fits you the best, before even wearing the shoes, you had to sew the ribbons at the right position and then start hitting the shoe on the floor, or crushing it in the door so that the shank1 would gain some flexibility. I also remember that the first years of dancing on pointe, as there wasn’t any silicone cushion in the market, we would even add cotton in the box so that would make the shoe a bit more comfortable. Besides all these manual adjustments, when removing the shoes after danc-ing for an hour or two, the toes would be full of blisters and wounds.
Dancing on pointe shoe is like playing tennis with a racket. It’s the most important tool for ballerinas. The idea of designing a new pointe shoe that could adapt to every foot was sparked by my passion for ballet and design.
My relationship with contemporary design strategies within the Masters Degree of Advanced Design and Digital Architecture in Elisava, UPF, with the logic of emerging systems, biomimetics, efficiency and adaptability, supported by the new paradigms of digital tools and media, helped me to change the way I think about the design process and how to conceptualise a project. It made me realise the new possibilities that technology offers us as designers and that, as a designer that studies the capacities of the new design methods with softwares based on algorithms and digital fabrication, it is almost an obligation trying to apply these design methods to every part of life.
1 Shank: the reinforced sole of a pointe shoe that stands between the inner and outer sole of the shoe.

1.2 Hypothesis:
Until now, due to the high cost, custom made Pointe Shoes were considered
a forbidden fruit for an everyday dancer. The cost alone is the sole reason that
only professional dancers or “prima” ballerinas use custom made Pointe Shoes.
Common dancers, spend money buying Pointe Shoes that need “customization”
by removing or adding material, in order to make them softer and thus usable.
For that reason, one part of the investigation is the customization of the shoe us-
ing digital technologies. The hypothesis of this project is to study if it is possible
to develop a parametric system that can be used for designing a pointe shoe
adaptable to all feet.
Sports shoes and especially in this case point shoes are driven by highly spe-
cialized performance. Working on a project like this, it is impossible not to come
across with the new concept of the product commercialisation and mass custo-
misation. In the old days, the shoemakers would design and make the shoes for
each person individually. Later on, with the mass production this became impos-
sible (Boër & Dulio, 2007). However, the new technologies nowadays, allow us to
have a production of non-normalized repetitive components directly from the
digital data. This realization led me to the second part of the project that is the
functional customization using new materials and new manufacturing techniques
to help the user, reach the highest level of performance.
12 - Developing a Parametric System for Pointe Shoe Customization

1.3 Objectives:
The main objective of this project is to study well the geometrical and struc-
tural parameters that need to be considered while designing a pointe shoe, and
using a graphical algorithmic editor, to develop a parametric system for design-
ing and making pointe shoes that will be adaptable to all feet.
In order to achieve this objective, the study is divided in five individual sub-
sections:
I. Using 3d scanning technology and the theoretical background related
to foot and dancing anatomy, define the geometrical variables that need to be
taken in account while designing a pointe shoe and its specific parts.
II. Study the applied forces that take place while dancing and dancing on
pointe, specially the ones that need to be consider while designing a pointe
shoe. Study the impact that these forces have on the shoe and eventually on the
feet of the dancer.
III. Taking in account the forces that are being applied on the shoe while
dancing, investigate on which materials respond better to the requirements of
a pointe shoe in order to help the dancer to reach the top of her performance.
IV. Using generative algorithms and 3d modeling tools, develop a paramet-
ric system for designing a pointe shoe that geometrically and structurally can be
adaptable to all feet.
V. Once a parametric system is developed, produce prototypes using digital
Developing a Parametric System for Pointe Shoe Customization - 13

fabrication. These prototypes can be parts of the pointe shoe or even a complete
shoe and they need to be structurally tested before being used.
1.4 Innovation:
Following a centuries’ tradition, point shoe making process it’s an artisanal
craftsmanship. With the exception of Gaynor Minden1 that in the last years start-
ed introducing machines in a specific part of the manufacturing process, pointe
shoe making industries work with specialised, trained and hard to replace, arti-
sans. The need for modernising also stands for the material that is being used.
The traditional pointe shoes’ section, answers to cardboard, paste, burlap, little
nails, and even newspaper. On the other hand, customized point shoes it is not
an option for the majority of dancers.
The integration of digital technologies in the designing process, as well as the
digital fabrication in the manufacturing process, implies the introduction of new
materials. The objective of this thesis is to try and implement digital design and
manufacturing to the pointe shoe making process, opening in this way the door
for redefining the design, ergonomics and comfort of the shoe. The use of 3d
scanning technology and parametrics it’s an important part of the investigation,
as it will allow to personalise the design of the shoe for every individual according
to his/her anatomical characteristics or even, personal taste.
1 https://dancer.com/about-gaynor-minden/about-our-shoes/from-the-designer/
14 - Developing a Parametric System for Pointe Shoe Customization

Note:
The following dissertation is a work based on a quite wide theoretical back-
ground but mainly it is focused on a primary research that has been practically
evolved through the years. This dissertation is a transcript of a practical work that
has been done using different kind of instruments, between them a 3D scanning,
computer, design softwares, 3D printers etc. The theoretical part of this thesis has
been very important for laying the foundations of the work that followed in the
workshop and for developing the practical part of the investigation, which forms
the biggest part of this dissertation and that was documented with prototypes,
images, diagrams, tables etc.
Developing a Parametric System for Pointe Shoe Customization - 15


Chapter Two: History


2. Chapter 2: History
The world of Ballet dance has very strict and rigid principles that are not easy to change. Tradition and change are almost always in conflict. This is one of the reasons that pointe shoe industry has been incapable of changing the shoe making process and materials through out the centuries. Pointe Shoe making has a long history, beginning in 1832 when Marie Taglioni ap-peared for the first time dancing on pointe. Studying the origins of ballet and ballet shoes and what pointe shoes represent in the Ballet world, it has been very important for this thesis in order to understand the functionality and symbolism of the shoes.
Additionally, the world is changing very fast and as designers it is almost impossible not to think about integrating digital technology in every part of the designing process. That is the reason why in this chapter you can also find a brief history of how digital technologies and fabrication penetrated architecture, design and more particularly shoe design.
Figure 2.1. (left) Anna Matveyevna Pavlovna Pavlova performing The Dying Swan on pointe.

2.1 History of Pointe Dancing
Ballet dance was formed in the Italian and French Renaissance courts back in
the 15th and 16th centuries for aristocrats, whose need for entertainment and
political propaganda, made court ballet a combination of art, politics and enter-
tainment (Au, 2012). At the beginning it was nothing more than a court perfor-
mance formed by amateur dancers and the king or the queen. As the dancers
performed on ballroom floors, the audience would view the spectacle mostly
from above giving more importance to the geometrical symbolic shapes and
patterns that dancers would create by moving around. In those years, dancers
were only men and not highly skilled professionals. Through out the 17th century,
court ballet, coincided with the birth of opera in Italy and the opening of the first
public theaters in France, changing in that way its inspiration sources. Pantomim-
ic dance with acrobatic elements also started appearing. All these elements to-
gether, transformed ballet into a professional art and the grotesque or acrobatic
dancers, were replaced by professional dancers (Au, 2012).
In 1661, King Luis XIV (Fig. 2.2-3) founded the Royal Academy of Dance. Until
then, dancers performed on ballroom floors. With the foundation of the Royal
Academy of Dance they were raised up on the stage. This fact changed the au-
dience’s perception and dancers’ feet became more important. The stages start-
ed growing larger and choreographers became more concerned with sideways
movement, so they created the concept of turned-out1 legs. The height of the
1 Turnout is an external rotation of the stretched leg in the hip joint. Nowadays is a part of many dance styles and very essential for ballet. It is common that a forced turnout in order to achieve 180º causes a numerous of over-stress syndromes and injuries. See Simmel, 2014 pg. 63 for further information.
Figure 2.2. (left) Luis XIV was the King of France from 1643 to 1715. Not only he loved watching dance he also liked to dance. He integrated so much ballet in life at court that it became a symbol and a requirement of aristocratic identity.Figure 2.3. (right) King Luis XIV as the Sun god, Apollo in Le Ballet de la Nuit, at the age of 15 that´s why he was also known as Sun King.
20 - Developing a Parametric System for Pointe Shoe Customization

proscenium2 inspired a new movement vocabulary of elevated steps. Professional
dancers began to evolve technical feats that demanded a high degree of training
and skill, such as pirouettes3, cabrioles4 and entrechats5. In 1681, four pioneering,
female professional dancers appeared for the first time, dancing in the ballet Le
Triomphe de l’Amour, at Paris Opéra. These ballerinas, led by Mademoiselle de
Lafontaine (1655-1738), wore shoes with heels, constricted bodices, voluminous
skirts, unwieldy headpieces and enveloping shawls. Female dances, mostly be-
cause of their costume restrictions, were more serious and serene.
During the eighteenth century dance evolved rapidly and many spectacular
dancers made their debut. It was a time when both dancers and choreographers
began to let go the social dancing and they aimed to give importance not only
to the technique but also to the dramatic dimension of ballet. In 1714, Françoise
Prévost and Claude Balon, were the firsts to performed a dramatic dance in
France. Prévost was the teacher of two of the most famous dancers of the 18th
century, Marie Camargo and Marie Sallé. In 1726, Marie Camargo (Fig. 2.4) made
her debut at the Paris Opera Ballet with her teacher´s solo. Camargo was a bril-
liant technician and one of the firsts of introducing the entrechat and cabriole
steps. These beaten steps needed rapid changes of her feet from fifth position
2 Proscenium stage, was the most common form of theatre building in the 18th, 19th and 20th centuries
3 A pirouette is a ballet term meaning to whirl or spin while balanced on the toes.
4 A cabriole is a ballet step in which a dancer jumps in the air off one leg as the other is thrown upwards, as the bottom leg raises to meet and beat with the top leg, the top leg continues to go higher as the bottom leg returns to the floor.
5 An entrechat is a ballet step in which a dancer jumps vertically while repeatedly crosses the feet and beats them together.W
Figure 2.4. Marie Anne de Cupis who was born in Brussels in 1710, is consider to be a pioneer not only for the way she changed the ballerina’s dress and shoes but also because she introduced steps in her dances that by then only males could perform. She had altered not only ballet as an art but also the position of women in ballet.
Developing a Parametric System for Pointe Shoe Customization - 21

front to back and front again, so it was then when female dancers’ skirts gotten
shortened. For the same reason, even though at the beginning of her career she
danced with the commonly heeled shoes, later on she started wearing flatter
shoes to make easier the fast footwork. Camargo also devised an undergarment
to wear beneath her petticoats, from which tights later evolved.
Unlike Camargo who devoted her career in perfecting her technique, Marie
Sallé (Fig. 2.5) was more interested in exploring the dramatic potential of dance.
In 1734, she appeared at the Drury Lane Theatre in London, performing in a bal-
let called Pygmalion for the first time. This ballet was based on a greek myth and
the greek robes she wore, with a simple muslin dress that followed the lines of
her body replaced the corset that the dancers used to wear. That was the initi-
ation for rethinking ballet costuming (Barringer & Schlesinger, 2004). Until then,
the costumes used to be extremely stylised and rich, trying to please the vanity
of the aristocrats.
Although there is not exact date of the first use of pointe shoes, in 1712-22, a
dancer called Mr Sandham who used feature Commedia characters, performed
a play named “Dutch Skipper”, “upon his Toes” at Lincoln´s Inn Fields in London
(Hammond, n.d.). Around 1779, Antoine-Bomaventure Pitrot who was a perform-
er and a ballet master, was seen to be dancing on his toes. According to Gennaro
Magri’s texts, he “hoisted up his whole body on the big toe of the foot” (Ham-
mond, 1987).
The French Revolution brought a lot of changes. Ballet as an art tried to
get closer to the audience and connect with common people and not just with
Figure 2.5. (left) Marie Sallé, who was-born in 1707 in Paris, France, was the first female choreographer. She was one of the firsts who took of the mask while dancing, giving more importance in this way to the expression.Figure 2.6. (right) Didelot’s flying ma-chine challenged technically the danc-ers, who soon looked in new ways to dance in an elevated position. This was when they discovered that by rising higher and higher on half pointe, they could balance on the ends of their fully stretched toes.
22 - Developing a Parametric System for Pointe Shoe Customization

the court life. Costumes became lighter and shoes became more flexible. This
change, allowed to the female dancers to develop more demanding steps and
movements.
Charles Didelot6, during the Revolution left the Paris Opera to perform in En-
gland and other parts of Europe. In 1795 he introduced the concept of a flying
machine ((Fig. 2.6) in a production in Lyons. A year later his work Flore et Zéphire,
was deified because of this new invention. The concept of the flying machine
enabled dancers to stand on their toes for a moment, creating the illusion of
lightness as they portrayed the ethereal, unreal characters of classical ballets.
The audience loved Didelot´s flying machine, watching the dancers perform feats
like for example crossing the stage with the help of hidden wires, giving the illu-
sion as if they were flying, it was something completely new and exciting. When
the dancers landed on their toes, the audience reacted with enthusiasm. This
fact, encouraged choreographers to look for ways for the dancers to linger in an
elevated position and it was then when the introduce of pointe work became a
reality. After that, the next step was to try and on pointe without the support of
wires, which lead the dancers to give emphasis on their technical skills. In 1815
Genevière Gosselin, a french dancer of the Ballet de l’Opera de Paris, appeared
to be dancing the role of Flore on her toes (Jowitt, 1988).
In 1823 Amalia Brugnoli danced on full pointe in Vienna while in 1832, Marie
6 Charles-Louis Didelot (1767-1837) was a Swedish dancer, choreographer and teacher who was born in Sto-cholm. He started studying dance with his father at the Royal Theater in Stocholm. In 1790 he made his debut in Opera de Paris. From 1816 until the end of his life he lived and worked to St. Petersburg. Didelot was famous for his inventions and important costume and scenographic innovations. For further information look in Au, 2012 pg. 47
Figure 2.7. (left) Lithography of Ma-rie Taglioni dancing the Flor et Zéphire (1831) which was one act with choreogra-phy and libretto by Didelot, music by Ce-sare Bossi, and design by Liparotti. The story is based on the myth of Zéphire and his wife Flor who was a nymph. Figure 2.8. (right) Marie Taglione in La Sylphide. Eugène Fresnay was the de-signer of the muslin dress, that later be-came theuniform of the classical dance (tutu).
Developing a Parametric System for Pointe Shoe Customization - 23

Taglioni (Fig. 2.7), an Italian ballet dancer, performed on pointe at the first per-
formance of La Sylphide (Fig. 2.8) at the Paris Opera (Fig. 2.9). Marie Taglioni was
the daughter of the famous choreographer Filippo Taglioni7 and his work La Syl-
phide gave a boost to the Romantic ballet in the 19th century. Taglioni’s light and
fluid movements inspired a lot of people and dancers who started imitating her
style. The use of pointe shoes was done precisely for giving a weightless illusion
and an artistic and ethereal element to the performance. Her costume that had
the shape of a bell-skirt, was made of many layers of white transparent muslin was
the precursor of what we call a “tutu” today (Au, 2012).
The pointe shoes she used, were made of satin fabric, sewed up at the tip (Fig.
2.10). The box was not rigid in order to protect the toes and so the feet could
not be well supported, instead the sole was made of a flexible leather. They were
darned along the sides and over the toe in order to form the slippers (Barringer
& Schlesinger, 2004). Pointe shoes of that time were one sized obligating the toes
to be squeezed into a uniformly narrow pointe that was almost irrelevant with the
shape of the foot. As it was so difficult to dance with these such soft shoes, they
used to padded their toes in order to give some protection to their feet. As a re-
sult of their uncomfortableness and inefficiency, there was an obvious limitations
of the steps and technique. Despite of this limitations, Marie Taglioni changed
the image of her concurrent ballerinas, by adding the ingredient of innocence
and perfectionism.
7 Filippo Taglioni was born in Milan and trained by Carlos Blasis and Jean-François Coulon. La Sylphide was first presented at Paris Opera Ballet on the 12 of March 1832 choreographed by Taglioni to music of Jean Mad-eleine Schneitzhoeffer.
Figure 2.9. Salle Le Peletier, which was the home of the Paris Opera from 1821 to 1873 and where Taglioni performed. The Paris Opera Ballet (Ballet de l’Opéra national de Paris) is a French ballet com-pany that forms part of Paris Opera, was founded in 1713 by Louis XIV.
24 - Developing a Parametric System for Pointe Shoe Customization

Dancing on pointe gained a lot of popularity during 18th century creating in
that way the need of improving the technique and defining exercises for strength-
ening the feet and legs. Many steps required balancing on one foot or on half
pointe, obligating in this way the ballerinas to work their turnout. In order to im-
prove pointe work, by the mid of 18th century dancers started collaborating with
shoemakers for manufacturing better shoes (Clifton, 2009). Italian pointe shoes
manufacturing became famous and travelled to many other places like Russia.
Ballet started expanding across the world and by the end of the 19th western
Europe had nothing more to offer. Great talented choreographers and dancers
of the Romantic times were fading out until they disappeared. By the beginning
of the 20th century the ballet scene was transferred to Russia and although the
history of “Russian Ballet” goes back in time, it was then (1910s and 1930s), when
Russia became the epicenter. In 1890s and 1910s decades, the choreographer
Marius Petipa (1818-1910) who got inspired by the Italian ballet dancers, marked
the beginning of a new era with his works like The Sleeping Beauty and Swan
Lake (Fig. 2.11). Sleeping Beauty’s premiere was in 1890 at the Imperial Mariinsky
Theater with the music of Tchaikovsky and it was a play that was performed en-
tirely on pointe shoes with complicated steps. The fairy variations that the danc-
ers performed on their toes started spreading. The shoes were no longer the
soft slippers, instead, the toe box was made of layers of newspaper and floured
paste that it was reinforced by a midsole made of a light cardboard (Barringer &
Schlesinger, 2004).
While in America and Europe ballet was giving its place to contemporary
Figure 2.10. (left) Marie Taglioni’s pointe shoes who look like normal ballet slip-pers with reinforcement in the block of the shoesFigure 2.11. (right) Pierina Legnani as Odette (1895) in Swan Lake that was the first ballet by Peter Ilyich Tchaikovsky .The plot is based on an ancient German legend in which Princess Odette and her companions are turned into swans and she is found in the forest and loved by Prince Siegfried.
Developing a Parametric System for Pointe Shoe Customization - 25

dance in the beginning of the 20th century, in Russia a new ballet legend was
getting born. Anna Pavlova had a great expression and technique and was able
to seduce her audience (Fig. 2.12). The dying swan, that was choreographed by
Michel Fokine (1880-1942) was the role that followed her throughout her life and
was danced on pointe featuring bourrée, constantly. Her art and love of ballet,
made her an inspiration for many dancers and choreographers. It is said that
Pavlova used to prepare her pointe shoes on her own. She would have a student
breaking them in and then she would pull out the cardboard, fabric and leather
in order to replace them with an inner sole that she would design. It is also said
that, because of her big foot arc she wore shoes with a wide platforms in order
to balance better. In fact, she used to ask from photographers to edit her pho-
tographs so that her shoes would look narrower (Barringer & Schlesinger, 2004).
Even before the end of the 19th century, many pointe shoe manufacturing
companies, like Capezio, were founded and opened the possibility to the danc-
ers of having pointe shoes better fitted to their feet. The majority of companies,
like Freed of London that was founded in 1929, worked and still works with the
“turnout” process. That means that using a shoe last of the shape of the foot,
the shoe is constructed inside-out and turned right-side-out at the end (Clifton,
2009). As the century passed by, the pointe-shoe manufacturers kept experiment-
ing and the shoe boxes became harder in order to make pointe dancing more
comfortable and to respond to the needs of the pointe technique. The harder
they got though, the more they weighted and the less flexibility they had, having
as a result the absence of the contact between the dancer’s feet and the floor.
Figure 2.12. Anna Matveyevna Pav-lovna Pavlova was born on February 12, 1881 in St. Petersburg, Russia. The Dy-ing Swan became Pavlova’s signature role. Her legacy still inspires many ballet dancers even nowadays.
26 - Developing a Parametric System for Pointe Shoe Customization

Nowadays, pointe dance is big part of classical ballet dancing and although
time has passed by and romantic choreographs gave their place to new and
contemporary performances, a ballerina on pointe shoes is still a magical thing
to watch (Fig. 2.13-14). Although it has been questioned weather it’s a part of
the past, many dance companies and classical ballet education are focused on
pointe shoe techniques making them the most important tool of a ballet dancer.
2.2 Shoe and Footwear Manufacturing History
Designing and making shoes it is not an easy task. It requires a lot of diverse
knowledge in many aspects that may affect the quality, the aesthetics and the
functions of the shoe.
The first evidence of footwear, were found in the remains in Tianyuan Cave
and belonged to humans of Middle Upper Paleolithic. Shoes were not found but
the anatomical characteristics of their skeletons indicated supportive footwear.
Although shoes are mainly used to ease the motion and to prevent injuries, they
are also used for fashion and adornment and many times for indicating the status
of the person within a social structure. Footwear used to differ a lot between cul-
tures, mainly because of weather and landscape conditions, material disposition
and tradition. For example, the paintings inside the Cave of Altamira in Spain that
belonged to 15000 BC founding, represent hunters wearing boots made (Caroli-
na, 2015) of animal leather and fur. The first shoes ever found though, came out in
1938 in Fort Rock Cave in Oregon (Fig. 2.15). These were sandals made of twined
Figure 2.13. (left) Svetlana Yuryevna Zakharova a Russian prima ballerina of Bolshoi Ballet, performing Odile (Black Swan) in Swan Lake.Figure 2.14. (right) Sylvie Guillem is a French ballet dancer, considered to be one of the best of the 20th century. Now-adays pointe shoes are also introduces in contemporary plays as well.
Developing a Parametric System for Pointe Shoe Customization - 27

shredded sagebrush bark and were dated to more than 9000 years old. In Arme-
nia were found the first leather shoes, dated to 5500 years old. The first shoes
that were found in Egypt between 1550 and 1070 BC were made out of reed and
they had the shape of a boat (Bossan, 2012). Then the first shoes that were found
in China in 68 BC were made out of several layers of hemp.
Leather sandals was the basic foot protection in the Mediterranean until Mid-
dle Age when wooden shoes were spread around Europe. They were made from
a single piece of wood roughly cut into shoe form. The most famous shoe worn
in Europe during Middle Age was called patten (Fig. 2.16). Patten lasted up until
the early 20th century. They were shoes worn over a normal shoe for the outside
and they looked like wooden platforms, usually with a metal base. Their purpose
was to protect the shoes and clothes from mud and dust.
Little by little leather started being added and by the 1600s, leather shoes
came in two main types. Turn shoes that were put together inside out, and then
was turned right-side-out once finished and another type in which the upper was
united with an insole, which was subsequently attached to an out-sole with a
raised heel.
Heels initially, were invented from Persians for helping men riding their horses.
When heels came to Europe they were not designed for practical reasons. In-
stead, they were an extravagant status symbol and they were mostly worn along
socialites. By the late 1700s, heels became more related to feminine fashion.
Chopines, were some sort of ridiculously high platform shoes that were used
Figure 2.15. The first shoes ever found, in Fort Rock Cave in Oregon in 1938.
28 - Developing a Parametric System for Pointe Shoe Customization

as an overshoe for protecting their dresses from dust and mud (Bossan, 2012b).
Although they were invented in the 15th century in the Ottoman Empire, they
were worn mostly in Venice all throughout the Renaissance period. Their height
could reach up to 50cm.
Up until 19th century, shoemaking process was a traditional handicraft. The
shoemaker would measure the feet and cut out upper leathers according to
the required size. Later on the process was almost completely mechanized, and
the production was happening in large factories. Although industrial revolution,
brought the benefit of mass-production. On the other hand, with mass produc-
tion, the individual needs and physiology that the shoemaker was able to pro-
vide, disappeared as he knew everything about his clients feet.
The shoe designer appeared in the early 1900s, while shoe design appeared
as a discipline in the 20th century (McDowell, 1989).
As mentioned before, the shoemakers would design and make the shoes
for each person individually, something that later on changed because of the
mass production. Recent developments though, of 3D technology and comput-
er graphics have changed the way of product designing, allowing us to have
a production of non-normalized repetitive components directly from the digital
data. 3D printing as an addictive manufacturing processes allows us to transform
digitally developed 3D models into physical objects. Footwear companies taking
advantage of the new trend and technology, started looking for further customi-
sation by investing in 3D printing.
Figure 2.16. Patten shoes were used as a protective mechanism against the un-wanted dirt and mud.
Developing a Parametric System for Pointe Shoe Customization - 29

Although throughout the beginning of human history, shoe have been worn
for protecting the feet and making it easier to walk, nowadays have gone beyond
this. Nowadays, apart of being a protective barrier, they also represent a fashion
statement or a status symbol.
2.3 History of Parametric Design and its Applications in Footwear Design
2.3.1. History of Parametric Design
The term “parametric” has its origin in mathematics. A parametric equation
employs one or more independent variables that is called a “parameter”, in
which dependent variables are defined as continuous functions of the param-
eter and are not dependent on another existing variable. The first intentions of
expressing geometry with parametric equations were done in the first half of the
19th century, while a half century later, Antonio Gaudí started designing architec-
ture using parametric catenary curves and parametric hyperbolic paraboloids.
Parametric architecture is a non-linear design method that is based on pre-de-
fined parameters that serve to control the relationships between them and thus,
define a geometry. In parametric design, the designer defines some parameters,
within which he can adjust and control the geometry of his work in such a way
that allows him to have innumerable variations and solutions. Gaudí, for exam-
ple, could experiment with natural models to obtain the best possible results
Figure 2.17. Antonio Gaudí used to work with upside-down physical models of hanging chains.
30 - Developing a Parametric System for Pointe Shoe Customization

(Fig. 2.17). He used hanging chain models (catenaries8) to design the roof of the
Colonia Guel church, which was later used as an exemplar for the design of the
Sagrada Familia church (Burry & Burry, 2010). Using various weights (sandbags)
that were hanging on to the ends of the chains, the calculations could be done
automatically and thus change the roof geometry without having to do the cal-
culations manually. This prototype design and proportioning method was later
copied by Frei Otto for the design of the stadium in Munich for the 1972 Olympic
Games. In 1961, Frei Otto began to experiment with soap bubbles (Fig. 2.18). His
experiments were based on suspending soap film and dropping a looped string
into it in order to form a perfect circle, which by trying to pull it out, he was able
to create a minimal surface9. This way of designing was called “form finding”.
More or less at the same time, the first attempts at using the computer during
the design process were made (Sketchpad10, 1963). During the 1960s and 1970s,
various architects, mathematicians, computer scientists and physicists made ma-
jor progress with computer science, which had major consequences, and as it was
revealed a few years later, sealed the development and evolution of parametric
design. Postmodernism and deconstructivism were the transitional movements
that led designers to a new era of research and innovation. William J. Mitchel11,
8 The catenary is a mathematical curve, which, when rotated around its X-axis, gives the catenoid, or minimal surface (Burry, 2010)
9 Minimal surface’s technical definintion is a surface of vanishing mean curvature (for example plane).
10 Sketchpad is considered to be the ancestor of Computer-Aided Computer programs and who lead the road for Human-Computer Interaction. It was developed by Ivan Sutherland.
11 William J. Mitchel was an architect and an urban theorist who contributed in computational design, spe-cially with his book “The logic of Archicteure”.
Figure 2.18. The same as Gaudí, the soap bubble experiments of Frei Otto were fundamental for he was able to cre-ate forms and structures that were con-sidered to be imposiible before.
Developing a Parametric System for Pointe Shoe Customization - 31

with his Computer Aided Design; John Von Neumann, with automata cellular;
George Stiny12, with shape grammars; the development of Bézier curves13; and
the ideas of the philosopher Jacques Derrida, are a few of the artefacts that set
the foundations of what we today call parametric design.
By the 1980s, with the release of AutoCAD, computational design started af-
fecting architecture. The development of CATIA facilitated the work of the de-
constructivist architects. For many years, engineers told Frank Gehry that the ge-
ometries he was designing could not be built, until new computers and software
were developed, allowing him and his partners to materialise their ideas and
drawings (Fig. 2.19) (Taylor, 2003). Frank Gehry wasn’t the only one; CAD pen-
etrated architecture for good, while the work of Peter Eisenman, Frank Gehry,
Daniel Libeskind and Zaha Hadid are some of the most important examples of
deconstructionism and the precursor of parametricism (Lee, 2015).
According to Patrik Schumacher, the parametric style came as a response to
the needs of the post-fordist society (Schumacher, 2008). The need for unique-
ness that rose from the industrial society, driven by the demands of capitalism
for mass production and mass consumption (Taylor, 2003), led architects and de-
signers in search of a new style. Striving for globalisation and trying to break
12 George Stiny was a design and computation theorist, who created the concept of “shape grammars”. He defined a powerful type of grammar known as a parametric shape grammar. Shapes, according to Stiny, consist of points, lines and labels. Rules specify how sub shapes of a composition in progress may be replaces by other shapes.
13 Bezier curve is named after Pierre Bézier and is a parametric curve used in computer graphics. It’s the result of linear interpolations.
Figure 2.19. The Guggenheim Muse-um Bilbao that is a museum of modern and contemporary art designed by Frank Gehry who achieved the impossible by setting forms in motion and giving movement form (Taylor, 2003)
32 - Developing a Parametric System for Pointe Shoe Customization

past traditions, modern industrialism was characterised by a homogeneous and
universal consumption pattern. However, the new network culture was evolving
through the complexity of globalisation into a heterogeneous society, demand-
ing uniqueness and diversity, to which architecture and design were responding
with a new style that was called Parametricism (Schumacher, 2009).
Electronic computation offered high-speed, automated ways of deploying dif-
ferent families of algorithms to undertake this reversible form-finding exercise.
Parametric design opened the doors for more research and innovation. The
intention of engineers for manufacturing complex geometries, led them to the
development of digital fabrication tools (Fig. 2.20). Digital fabrication machines
are controlled by a computer which is programmed to make products directly
from digital designs. The most common forms of digital fabrication are the CNC
machine, 3D printer and Laser Cut. This new way of manufacturing required the
search or even the composition of new materials.
Furniture, fashion and product design did not remain unaffected. The new
possibilities that computer aided design offered, changed the scenery of fashion
and product design. A new era was awakened, where product commercialisation
moved from a universal mass production to mass customisation and personal-
isation (Piroozfar & Piller, 2013). Thus, a progressive movement towards an era
whereby the consumer would be able to have their products according to their
needs, taste and measurements.
The footwear industry, in the last ten years, has been characterised by a new
Figure 2.20. Sychronized robots wind-ing a core-less filament for the creation of the Elytra Filament Robotic Pavillion by Achim Menges and ICD Stuttgart in-stitute.
Developing a Parametric System for Pointe Shoe Customization - 33

movement of research and innovation. Great architects and designers, realising
the potentiality of parametric design and digital fabrication, have been making
intentions to change the concept of footwear consumption. On one hand, new
possibilities of the new design style allows designers to change the conventional
look of shoes as we know them today, by experimenting with new forms, geome-
tries and materials. On the other hand, parametric design is creating a new level
of product customisation by linking human data directly into the design, engi-
neering process and manufacturing.
2.3.2. Parametric Design: A New Design Style in the Footwear Industry
Designing and making shoes is not an easy task. It requires a lot of diverse
knowledge in many aspects that may affect the quality, aesthetics and the func-
tions of the shoe. Up until the 19th century, the shoemaking process was a tra-
ditional handicraft. The shoemaker would measure the feet and cut out upper
leathers according to the required size. Later on, the process was almost com-
pletely mechanised, with production taking place in large factories, and in this
way, generalising the needs and the particularity of every user. Although the in-
dustrial revolution has brought about the benefits of mass-production, the future
may allow us to return to the craft production of the past by using the advantages
of modern manufacturing. The expression of the ideals of craft production could
come into reality through contemporary industrial technology. Recent develop-
ments in 3D technology and computer graphics have changed the way of prod-
uct designing, allowing us to produce non-normalised repetitive components
Figure 2.21. Data-driven midsoles by New Balance and Nervous System.
34 - Developing a Parametric System for Pointe Shoe Customization

directly from digital data (Fig. 2.21). Footwear companies, taking advantage of
new trends and technology, have started looking for further customisation by in-
vesting in 3D printing. 3D printing as an additive manufacturing processes allows
us to transform digitally developed 3D models into physical objects.
In the last ten years, many fashion designers have realised that the study of
natural sciences like biology, chemistry and physics have a strong impact on the
aesthetics of clothing and footwear. For this reason, many of them have become
researches, providing a more scientific approach to their designs and use of ma-
terials. At the same time, as mentioned earlier, computer aided design and digi-
tal fabrication have facilitated the exploration of new forms and geometries. The
following case studies show the latest trends and how technology and material
science have affected footwear design.
Pauline van Dongen:
Pauline Van Dongen, a Dutch fashion designer and innovator, was one of the
first designers that started introducing 3D printing into her design process. Van
Dongen has been experimenting with wearable technology and hi-tech materials
for years.
In 2010, her project the “Morphogenesis” shoe collection, was a collaboration
with ‘Freedom of Creation’, a design and research company that was specialised
in 3D printing technologies (Fig. 2.22) (Smelik, 2010). With technology as a major
ally, Van Dongen was able to give an architectural approach to her design, and
managed to create new spatial forms. The innovative aspect of her designing
Figure 2.22. Morphogenesis project of 3D printed shoes by the fashion design-er Pauline Van Dongen.
Developing a Parametric System for Pointe Shoe Customization - 35

was that the entire design process was carried out using a computer, meaning
that the use of a mould, prototype or a moulage was not necessary. The virtual
design was directly transferred from the computer to a three-dimensional geom-
etry, through a 3D printer. One disadvantage of her designs was that the choice
of materials were quite limited in those years. Polyamide material was too hard
and rigid for creating a wearable shoe. Additionally, 3D printing was a very ex-
pensive technique used to make a commercial production. Despite these disad-
vantages, the ‘Morphogenesis’ project received various awards for shoe design.
Iris van Herpen
Iris van Herpen is also a Dutch fashion designer and one of the first to start
introducing digital fabrication techniques to her designs. She often refers to her
designs as ‘organic futurism’, as she often works with high technology techniques
trying to imitate nature, but she also uses natural materials or traditional tech-
niques to represent something artificial or imagined. As she has confessed, she
starts her design process with a simple sketch and with the help of architects that
are skilled at computer-aided design and programmers, her drawings are then
translated into software code (Tonkin, 2019). Looking at her work, her ambition to
explore the aesthetic and performance boundaries of synthetic polymers is very
obvious (Doubrovski and Verlinden, 2018). Her collaborations with companies
that specialise in additive manufacturing (for example Materialise), have helped
her to produce innovative and dynamic garments and shoes.
In July 2013, van Herpen collaborated with Rem D Koolhaas, founder of the
shoe brand United Nude, and Stratasys 3D printing company, to create 12 pairs
Figure 2.23. 3D printed shoes present-ed at the Wildness Embodied fashion show, designed by Iris van Herpen.
36 - Developing a Parametric System for Pointe Shoe Customization

of 3D printed shoes for Paris Fashion Week at van Herpen’s Couture show “Wild-
ness Embodied” (Fig. 2.23). Trying to mimic nature once again, the design of the
shoe was inspired by the roots of a tree. Twisted and detailed lattices embrace
the foot to form the shoe, imitating the roots. The shoes were 3D printed with the
multi-material Stratasys Objet Connex and Objet Eden 3D Printers.
Van Herpen’s designs have not only been challenging for additive manufac-
turing companies, but also for material engineers, as additive manufacturing is
trying to respond and adapt to the demands of mass-production. The solidifica-
tion of the polymeric material and the formation of the geometries of the objects
at the same time, helps designers to maintain quality control both during and
after the production of their creations, despite the lack of information about the
natural ageing behaviour of the materials that are used in these processes.
United Nude - The Re-inventing Shoe Project
The Re-inventing Shoe project that was organised by United Nude in 2015,
was a project that was focussed on the exploration of 3D printing being applied
to footwear design. Five designers and architects were invited: Ben van Berkel
(architect), Zaha Hadid (architect), Ross Lovegrove (product designer), Fernando
Romero (architect) and Micheal Young (product designer).
UNX2, designed by Ben Van Berkel and his studio Unstudio, was conceptu-
alised in such a way that it featured the mechanics of the foot and visual effects
while the shoe was in motion (Fig. 2.24). When the user was not moving, for
example, the silhouette of the foot would come into sight through the vertical
Figure 2.24. (left) UNX2 3D printed shoes, designed by Ben Van Berkel for the Re-inventing Shoe Project.
Figure 2.25. (right) Flames 3D printed shoes designed by Zaha Hadid for her participation in the Re-inventing Shoe Project.
Developing a Parametric System for Pointe Shoe Customization - 37

ribbons that embraced it. Once the user began to move, different levels of trans-
parency were created by the vertical lines, giving the illusion of rhythmical mo-
tion and creating, in this way, patterns of movement. The designers developed
a parametric workflow that would allow them to update the geometric model
of the foot, any time there was a need for changes in the shoe size, heel height,
formal shape and the patterning.
Flames, designed by Zaha Hadid, imitated flickering flames, featuring strips
that looked like flames that started from the heel and covered up the foot (Fig.
2.25). The insole was ergonomically studied and designed in such a way as to
provide support and comfort.
Ilabo, designed by Ross Lovegrove and his computational design team, was
formed by a mesh designed in Grasshopper, that covered the sole and the user’s
foot like a curtain that opened at the toe and heel (Fig. 2.26). Describing this
transmission from analogue to digital design as a second renaissance, Lovegrove
found it essential to scan the foot in order to maintain and to use as input for the
‘sophisticated surfaces’ of a female foot.
Ammonite, designed by Fernando Romaro, was inspired by fossils, making
very obvious the desire of the designer to study the mathematical relations of this
organic geometry and attempt to integrate them into his shoe design (Fig. 2.27).
Young Shoe, designed by Michael Young, gave the opportunity to the de-
signer and his team to explore the boundaries of 3D software and the associated
material by creating a heeled boot of lattice visuals.
Figure 2.26. (left) Ilabo 3D printed shoes, designed by Ross Lovegrovel for the Re-inventing Shoe Project trying to imate curtain.Figure 2.27. (right) Ammonite 3D print-ed shoes designed by the designer Fernando Romaro for the Re-inventing Shoe Project.
38 - Developing a Parametric System for Pointe Shoe Customization

The purpose of the project, as mentioned previously, was to push the limits of
rapid prototyping and apply it to footwear design. The production method was
the highest quality of 3D printing (Selective Laser Sintering), with a hard nylon
and-all new soft rubber material being used. United Nude was able to come up
with a way to combine harder and softer 3D printer parts in order to create fully
functioning shoes.
2.3.3. Parametric Design and Mass Customisation in Footwear Design
Until now, in mass production systems, the consumer/user remained anony-
mous, as well as their personalised needs. The aim of companies was to sell as
much standardised products as possible, in this case shoes, without getting to
know the user, their needs, or demands. One of the advantages of parametric
design and digital fabrication is that the manufacturer can have a direct link with
the anatomical and aesthetic demands of the user, opening up new possibilities
for product customisation. Mass customisation is about producing goods with a
high degree of personalisation with near industrial efficiencies. Many footwear
companies are moving towards the future by experimenting and trying to get
closer to satisfying consumer needs using contemporary technology and adjust-
ing to new design techniques.
New Balance and the Nervous System
New Balance have collaborated with Nervous System in order to develop
3D-printing midsoles for running shoes (Fig. 2.28). The innovation of this design
Figure 2.28. 3D printed midsoles for running shoes design by New Balance and Nervous System.
Developing a Parametric System for Pointe Shoe Customization - 39

stands behind the introduction of underfoot pressure data from runners as the
parameter for the design of the midsole. In this way, the designers are able to
generate variations of the cushioning density, allowing them to customise the
way that a runner performs.
These midsoles, instead of a uniform foam, form a structure that can be adapt-
ed to the performance data of different runners (Fig. 2.29). The basic data used,
is the pressure data from a foot strike by the user, that is recorded by a grid of
sensors under the foot, demonstrating the force as the foot hits the ground and
pushes off over time. Nervous System, instead of dealing with structural opti-
misation, decided to create a platform that allowed them to experiment with
variables that would respond to the data in several ways. They started testing
different ideas of how this midsole would be, getting runners to try them in order
to check how they performed and felt. Dealing with the midsole as a foam struc-
ture was one of the approaches that they followed. Their idea was to develop a
foam structure that would perform as a natural foam structure. The artificial foam
structures are usually limited by their uniformed structure and thus performance.
On the contrary, foam structures found in nature, like wood, corals, sponge, plant
leaves, bone, etc, are anisotropic14, which helps them to increase their mechan-
ical efficiency by placing material where it is most needed in order to resist ap-
plied forces (Gibson, Ashby & Harley, 2005). In the same way, Nervous System’s
idea was to create an anisotropic, macroscopic foam structure that would be
14 Anisotropic material: a material, which is considered to be a three-dimensional solid, is called isotropic when it exhibits the same properties (e.g., mechanical) regardless of the direction of loading. On the contrary, if the material exhibits different (mechanical) behaviour in different directions, it is called anisotropic.
Figure 2.29. The innovation of these midsoles is that they form a structure that can be adapted to the individual performance data of every runner.
40 - Developing a Parametric System for Pointe Shoe Customization

controlled according to the running data, with its geometry to be adapted to
different forces.
The interpretation of the data in a midsole was studied in many ways. For ex-
ample, they tried generating directional structures following the gradient of the
pressure data, unveiling in this way the anatomy of the foot or generating less
interconnected structures based on the Hyphae system.
Adidas
Since 2015, Adidas has been working on their “Futurecraft” project, introduc-
ing the future in sports footwear, with the ambition that customers, in a few years,
will be able to enter an Adidas store, run on a treadmill, and leave the store with
an instantly 3D-printed shoe (Fig. 2.30). Futurecraft is an open source collabo-
ration and craftsmanship that consists of a series of 3D-printed prototypes of a
running shoe midsole that try to imitate a runner’s footprint. Scanning a runner’s
foot, getting their footprint and pressure points, would allow for every athlete to
have their midsoles personalised in order to help them reach their peak perfor-
mance.
Adidas collaborated with Materialise for the release of Futurecraft 3D, with an
attempt to create a lightweight 3D printed midsole with variations of flexibility
and rigidness. The midsoles were laser sintered15 in TPU16 material.
15 Laser Sintering: is an additive manufacturing technique that uses laser for the fusion of material particles, usually nylon or polyamide.
16 TPU material: Thermoplastic Polyurethane or TPU is rubber-like material, with flexibility and durability as its main properties.
Figure 2.30. Futurecraft is an innova-tive project from Adidas that seeks to introduce the 3D printing technology in the footwear industry.
Developing a Parametric System for Pointe Shoe Customization - 41

As a result, a couple of years later, with their collaboration with Carbon com-
pany, Adidas launched Futurecraft 4D. Carbon is a company that specialises in
3D-print lattice structures (Fig. 2.31). A customised midsole requires a cushioning
with a variation of properties that can be adapted to the needs of every ath-
lete and to its anatomical characteristics. Carbon’s technology helped Adidas to
create a digitised footwear design process. Using a mixture of UV curable resin
and polyurethane, they were able to print a midsole with a variation of lattice
structures in the heel and forefoot in such a way that it responses to the different
cushioning needs for the above parts of the foot while running.
The introduction of new technologies in all fields of industry it’s a reality that
can not be avoided. Footwear industry, in particular, for the last decade has been
experimenting using computational design on a design level but also for trying
to achieve mass customization. Even though pointe shoe making follows a cen-
turies’ tradition of artisanal craftmanship, the introduction of new ways of design-
ing and customizing will be inevitable for the needs and the requirements of 21st
century’s dancers are also changing and need to adapt to the new reality.
Figure 2.31. With the Futurecraft proj-ect Adidas wants to experiment with different materials and 3D printing tech-niques.
42 - Developing a Parametric System for Pointe Shoe Customization

Chapter Three: Anatomy


3. Chapter 3: Anatomy
Dancing on pointe it is not just about bearing passively the weight of the body, while dancing on pointe the foot, also, has to confront the extreme demands of the movements. For that reason, the feet have to be very strong but at the same time sensitive (Chatfield, 1993). Ballerinas, in order to be able to dance on pointe, they need to have very strong feet. In fact a balle-rina should be able to stand on pointe with a naked feet, the pointe shoe is there just to cover the foot.
It was very essential for this investigation, to study the kind of move-ments that a ballerina has to do while dancing on pointe. Study the move-ments, understand the structure of the human body, understand which parts of the body or even which parts of the foot are participating while dancing on pointe. How is the weight of the body being distributed and most im-portantly, which is the role of the shoes? How is the traditional pointe shoe design and for which reason? Could we change the structure of the shoe? Which materials of the shoe could be replaced?
In order to answer all the questions above, it is also essential to study and understand well the anatomy of the shoes and how each part is being related to each part and movement of the foot.
Figure 3.1 (left) X-ray of a dancer while standing on pointe shoes.

3.1 Dance Anatomy & Anatomy of the Foot
3.1.1. Dance Anatomy:
Dance is defined by a rhythmically motion usually followed by a music. Aris-
totle who considered to be the father of biomechanics, in his work, “Motion and
its place in Nature” uses the term “motion” (κίνησις / kinesis) with a much wider
significant than the one we use nowadays. According to Aristotle, this term can
mean:
• Change of the substance (genesis and decay)
• Change of the size (increase and decrease)
• Change of the quality (alteration)
Aristotle, describes the movement of animals and treats bodies as mechanical
systems (Fig. 3.2). During the Renaissance, Leonardo da Vinci, was the one who
studied the mechanics of the bodies of living organisms in great detail and in a
scientific way. He studied in depth the anatomy and he came to early conclusions
about the transmission of forces from the muscles but also the function of joints
(Klenerman & Wood, 2006). In many of his inventions, he imitated nature to de-
sign animated machines. Another great personality of the Renaissance, Galileo,
was particularly interested in the strength of and the bone structure. Galileo was
the first who assumed that the bones are not solid but they have resources to
ensure maximum strength with minimum weight.
The execution of a movement is directly dependent on the structure and
Figure 3.2 Dancer perfoming a “grand jete” - Biomechanics study the structure, function and motion of the mechanical aspects of biological systems.
46 - Developing a Parametric System for Pointe Shoe Customization

properties of the human body. The complexity of the structure and the functions
of the human body makes the movement to be even more complex and compli-
cated procedure.
The kinetic mechanism of a human includes:
• the muscles (assets part-forces)
• the bones and joints (passive part-levers)
This mechanism is a part of the complex system of the human movement that
includes:
• the energy source
• the motor mechanism
• the motion object
• their address system (controls organs: brain, nerves, sensory)
In order to understand movement, it is fundamental to study well the structure
of bones, joints and muscles, which all of them together form the musculoskel-
etal system (Fig. 3.3). The musculoskeletal (locomotor system) system is respon-
sible for the form, stability and motion of the human body. It is subdivided into
skeletal and muscular system.
Skeletal system consists of the 206 bones of our body, which besides of shap-
ing us, providing protection to our organs (like the heart) and support, they also
Figure 3.3 The bones of the feet need to adapt to the shape of pointe shoes.
Developing a Parametric System for Pointe Shoe Customization - 47

connect with our muscles, functioning as levers and helping us in that way to
move (Haas, 2010). Bones are also responsible for storing minerals and lipids,
while some of them they are responsible for the reproduction of the red blood
cells. Bones articulate with each other through joints. Joints, apart from linking
the bones together, they also provide us with the flexibility that is needed for
featuring a movement (Simmel, 2014).
The muscular system contains all types of muscle of the human body and they
are responsible for all kind of movements of our body. There are the smooth
or involuntary muscles that are controlled by autonomous nerves that executive
movement without the conscious order of ours1, there is the heart muscle that is
also controlled by the autonomous nerve system and at last there are the skeletal
muscles that are the ones that are attached on the bones through the tendons
and the ones that consciously with the help of the nerve system, are responsible
for moving the skeleton (Fig. 3.4) (Simmel, 2014).
3.1.2. Anatomy of the Foot
A healthy foot is the basis of a dancer and although we don’t pay enough at-
tention to our feet, they are the barriers of our weight. Ballet teachers usually say
that if you have strong feet you don’t even need pointe shoes. The foot and every
muscle of it needs to be strong, flexible and sensitive. The foot has a complex
1 The nervous system could be distinguished, depending to its function into the somatic or voluntary nervous system and the autonomic nervous system. The first one is responsible for linking us to our environment by connecting with the skin, sensory organs and our skeletal muscles. It’s responsible for our voluntary movements and for processing sensory information. The autonomic nervous system it’s responsible for all the unconscious functions of our body such as heart beat, breathing or digesting. For more information look in (Simmel, 2014)
Figure 3.4 Anatomy of the foot - Skin, Nerves, muscles and bones form the foot which is the base of the whole body.
48 - Developing a Parametric System for Pointe Shoe Customization

structure that contains:
• 26 bones (one quarter of the bone of the human skeleton is at the feet)
• 33 joints
• over 100 muscles, tendons and ligaments;
• a very complex network of vessels, nerves and tissues
All the above work together in order to provide the body with the support,
balance and mobility it needs. A structural anomaly in any of the above may re-
sult in the onset and development of problems in some part of the body, such as
back pain (Haas, 2010).
Bones:
As mentioned above, the foot consists of 26 bones and it is structurally subdi-
vided into three parts: the hind-foot, the mid-foot and the forefoot.
The hind-foot (or tarsus) consists of the talus bone, the calcaneus (heel bone),
the navicular, the cuboid and the three cuneiforms. The mid-foot consists of the
five metatarsal bones that have the shape of a tube. The metatarsals are always
counted from the inside outwards, the metatarsal of the big toe is counted as
“no1” while the metatarsal of the small toe as “no5” (Simmel, 2014). The forefoot
consists of the phalanges (toe bones). Except from the big toe (or hallux) all other
toes are formed by three phalanges. The hallux has only two phalanges (Fig. 3.5).
The talus (or ankle bone) it´s the main connector between the foot and the leg
Figure 3.5 Anatomy of the foot: Bones in the foot and ankle of the left foot.
hallux
phalanges
cuneiforms medial malleolusnavicular talus tibia
metatarsals fibulalateral malleolus
calcanius
cuboid
Developing a Parametric System for Pointe Shoe Customization - 49

and it´s responsible for transferring our weight to the foot through the tibia bone
as well as transmitting the impact from the foot to the body while none muscle
it´s attached on it. It has a trapezoidal shape, which helps it to fit into a concave
mortise formed by tibia and fibula and it is covered with articular cartilage allow-
ing it to move against the other bones.
The calcaneus is the largest tarsal bone and forms the heel that we can see
and feel. The cuboid is a squared-shaped bone, situated between the calcaneus
and the two outer metatarsal bones and it forms a joint with the outer cuneiform
and navicular. The navicular (named by its shape which looks like a boat) is situat-
ed on the inside of the foot and it forms a joint with talus to the back and to the
front with the three cuneiforms. These last three form a joint with each other, the
three metatarsals in the front, the navicular and the cuboid behind.
The foot has to be stable but at the same time flexible and elastic. For that
reason, the bones of the foot form two kind of arches (the longitudinal and the
transverse arch) which can easily be compared to a spiral. The longitudinal arch
runs from calcaneus to the ball of the big toe, while the transverse runs between
the metatarsal bones.
Joints:
The foot bones are articulated with both tibia and fibula and as well as be-
tween them, forming 57 joints, allowing the foot to have a facility of movements.
Metatarsophalangeal joints:
3D Anatomy 127
A
B
Figure 6.5 The motion of the upper ankle joint:
A) in plantar fl exion the talus slides forwards,
B) in dorsifl exion the talus slides backwards.
The form of the talus is also interesting. Its articular surface is broader at the front than at the back. This explains the increased joint mobility on demi-pointe compared to when standing with one’s foot fl at on the ground. When the talus turns and slides forward, the narrower back part of the articular surface contacts with the ankle mortise and the joint has more play; bony stability in the upper ankle joint is thus lower in plantar fl exion. In a deep plié or when the foot is maximally fl exed it is exactly the opposite. Then the ankle mortise is slightly expanded by the broader articular surface of the frontal part of the talus. Part of the pressure within the joint is transformed into traction on the ligaments thus elastically stopping the movement. This intelligent construction relieves pressure on the joint.
Figure 6.6 The lateral ligaments of the foot: three lateral
ligaments stabilize the ankle joint.
An ingenious system of ligaments protects and stabilizes the upper ankle joint. On the outside, three external lateral ligaments run radially forwards and backwards from the outer malleolus to the talus as well as directly downwards to the calcaneus. These ligaments contain a large number of receptors which are responsible for the balance and stability of the ankle joint. On the medial side of the ankle joint lies the broad deltoid ligament, which extends fan-like from the inner malleolus to the bones of the hindfoot. Because of the fan-shaped arrangement of the lateral and medial ligaments the movement in the ankle joint is optimally guided in every position, regardless of whether it is a high demi-pointe or a deep plié.
The hinge movement, the raising and lowering of the foot, takes place in the upper ankle joint, while the sideways movements happen in the lower ankle joint. Together, both joints permit full mobility to the foot in all directions; this is why they are regarded as a functional unit. The axis of the upper ankle joint – between the medial and lateral malleolus – is slightly turned outwards relative to the axis of the knee joint (see Chapter 5, p. 101). It runs diagonally from back–top–outside to front–bottom–inside. This oblique position explains the tendency of the foot to sickle in the pointed position, while by contrast, in the plié, the tibia turns inwards on the talus thus
Figure 3.6 The lateral ligaments of the foot that stabilize the ankle joint
50 - Developing a Parametric System for Pointe Shoe Customization

The metatarsophalangeal joints (MTP joints) are the condyloid joints between
the metatarsal bones the foot and the proximal bones of the toe (Simmel, 2014).
The ankle joint:
The ankle is the joint that joins the tibia bone and fibula with the foot (talus). It
allows us to raise and lower the foot (bending / extension). Right under the ankle,
there is another hinge, the torso joint, which allows the feet to move to the left
and right (rotary movements). The hip joint protects the ankle joint by absorbing
the vibrations. Anatomically, the ankle joint is divided into two part: the lower and
the upper ankle joint (Fig. 3.6). The lower ankle joint stands between the talus,
calcaneus, navicular and cuboid bones. Because of its shape, it is consider to be
a very complex joint. The rotation of the foot around the sagittal axis takes place
at this part. Supination2, we call the raising of the inner side of the foot, and pro-
nation, the raising of the outer side of the foot3.
The upper ankle joint lies between the talus and the lower leg and is located
between the two bony prominences (malleoli) on either side of the ankle joint.
The outer malleolus is formed by the end of the fibula, the inner malleolus by the
end of the tibia. These two bones form the ankle “mortise”, into which the talus
fits. With each plantar flexion4 the posterior part of the talus is held in the mortise,
2 Supination trauma or twisting of the foot is a very common injury in ballet. This can happen while landing from a jump or when losing balance.
3 Pronation and Supination affects the arch type of the dancer and it’s one of the parameters that a dancer takes in account when trying on pointe shoes.
4 In dance this movement is called “point” position.
3D Anatomy 127
A
B
Figure 6.5 The motion of the upper ankle joint:
A) in plantar fl exion the talus slides forwards,
B) in dorsifl exion the talus slides backwards.
The form of the talus is also interesting. Its articular surface is broader at the front than at the back. This explains the increased joint mobility on demi-pointe compared to when standing with one’s foot fl at on the ground. When the talus turns and slides forward, the narrower back part of the articular surface contacts with the ankle mortise and the joint has more play; bony stability in the upper ankle joint is thus lower in plantar fl exion. In a deep plié or when the foot is maximally fl exed it is exactly the opposite. Then the ankle mortise is slightly expanded by the broader articular surface of the frontal part of the talus. Part of the pressure within the joint is transformed into traction on the ligaments thus elastically stopping the movement. This intelligent construction relieves pressure on the joint.
Figure 6.6 The lateral ligaments of the foot: three lateral
ligaments stabilize the ankle joint.
An ingenious system of ligaments protects and stabilizes the upper ankle joint. On the outside, three external lateral ligaments run radially forwards and backwards from the outer malleolus to the talus as well as directly downwards to the calcaneus. These ligaments contain a large number of receptors which are responsible for the balance and stability of the ankle joint. On the medial side of the ankle joint lies the broad deltoid ligament, which extends fan-like from the inner malleolus to the bones of the hindfoot. Because of the fan-shaped arrangement of the lateral and medial ligaments the movement in the ankle joint is optimally guided in every position, regardless of whether it is a high demi-pointe or a deep plié.
The hinge movement, the raising and lowering of the foot, takes place in the upper ankle joint, while the sideways movements happen in the lower ankle joint. Together, both joints permit full mobility to the foot in all directions; this is why they are regarded as a functional unit. The axis of the upper ankle joint – between the medial and lateral malleolus – is slightly turned outwards relative to the axis of the knee joint (see Chapter 5, p. 101). It runs diagonally from back–top–outside to front–bottom–inside. This oblique position explains the tendency of the foot to sickle in the pointed position, while by contrast, in the plié, the tibia turns inwards on the talus thus
Figure 3.7 A: in plantar flexion the talus slides forwards, B: in dorsiflexion the ta-lus slides backwards.
Developing a Parametric System for Pointe Shoe Customization - 51

and the joint is less stable. In dorsiflexion5 the anterior part of the talus is held in
the mortise, and the joint is more stable (Fig. 3.7).
The ankle functions as the foundation between vibration absorption and ki-
netic thrust. In other words, the ankle is a body-promoting machine with anti-vi-
brational features. An ingenious system of ligaments protects and supports the
upper ankle joint.
Muscles:
Muscles of the foot depending on the location of their outgrowth are divided
in the intrinsic muscles, which are located within the foot, and the extrinsic mus-
cles, which extend from the lower leg across the ankle joint into the foot (Grivas,
2002).
Intrinsic muscles:
The intrinsic muscles are muscles are located within the foot and are respon-
sible for the fine motor actions of the foot, for example movement of individual
digits. They have both their origin and insertion on the foot and thus have no
influence on movements within the ankle joint. They connect the hindfoot with
the proximal phalanges and flex or extend the toes. They are also responsible
for stabilizing the foot and its arches. For the dancer, the short flexor and the
extensor muscles of the toes are very crucial. They run from the hindfoot to the
proximal phalanges and flex or extend the toes. Together with the long flexor
5 In dance, this movement is called “flex” position.
6. The Foot as a Base136
BA
Figure 6.17 The “over-long” second toe:
A) the three phalanges are too long,
B) in relation to the neighbouring metatarsals the
second metatarsal is too long.
Claw toes: Not only unattractive and the cause of many a blister, claw toes are also a sign of weak intrinsic foot muscles. If, when pointing the foot, the long fl exor muscles of the toes running to the distal phalanges, are the most engaged ones, the toes will become fl exed in all their joints, resulting in the typical deformation of the claw toes. Training the intrinsic toe fl exors provides help (see p. 149).
Long �exorof the toes
Short �exorof the toes
Figure 6.18 Claw toes are often caused by muscle
imbalance.
Blisters and corns: These are everyday problems for virtually all dancers. They can mostly be found where there is excess pressure and friction. They can cause problems if they become infected, which happens particularly if they are manipulated
with sharp, non-sterile objects. Tears under the ball of the foot can arise either if the skin is very calloused or after dancing barefoot.
Chronic overload of the midfoot and hindfootStress fractures: Stress fractures, a slowly developing fracture of the bone, do not arise as a result of an acute trauma but following increasing stress with constant pressure and torsion at susceptible locations of the bone. The second and third metatarsals are particularly a�ected since on demi-pointe or full pointe they carry most of the body weight. If the bone is unable to withstand the constant stress, anything from a tiny fi ssure to a real fracture may occur. This can be caused by weak foot muscles, an “over-long” second metatarsal, hard fl oors, extreme stress during sensitive growth periods or “thin” bones as a result of malnutrition and low body weight. Usually, the pain begins insidiously, slowly becoming more intense. An early diagnosis is often diffi cult and treatment is protracted. Quite often stress fractures force the dancer to stop their dancing career.
Dancer’s tendinitis: The infl ammation of the tendon of the fl exor hallucis longus muscle, the FHL, is a typical dancer’s problem. Pain can occur at the transition between the muscle belly and the tendon somewhat above the medial malleolus, along the length of the tendon sheath behind the medial malleolus or on the inside of the foot. When infl amed, the tendon swells, getting thicker and losing its sliding ability. There is virtually no space left in the tendon sheath and every attempt to slide smoothly causes pain. Muscle imbalance is a common cause: if the short fl exor muscles of the toes are too weak, the FHL takes on the work. There are many reasons for an overload on the FHL, like curling the big toe when the foot is pointed or while dancing on point, a one-sided transfer of the body weight onto the big toe joint on demi-point or “rolling in” causing excess stress on the inner side of the foot. If the toes are curled – for example, in slippers that are too short, or on relevé – the long fl exor muscle of the toes contract.
Figure 3.8 Claw toes are problematic for they reduce the force of the muscles of the foot.
52 - Developing a Parametric System for Pointe Shoe Customization

and extensor muscles they are responsible for the movement and strength of
the toes. Strong toes in ballet are very important. While standing on demi-pointe
or even just standing on a lower heel position, toes have to be attached to the
ground in order to grow the surface and thus the dancer is being better support-
ed (Pearson and Whitaker, 2012). Strong toes help the dancer to have a better
control of the movement of the toes, thus helping him/her to avoid curled toes.
Curled toes is very bad for ballet dancers because they reduce the mobility in the
ankle joint as well as the arch of the foot (Fig. 3.8) (Simmel, 2014).
Extrinsic muscles:
All muscles originating on the lower leg except the popliteus muscle are at-
tached to the bones of the foot. The tibia and fibula and the interosseous mem-
brane separate these muscles into anterior and posterior groups, in their turn
subdivided into subgroups and layers. Some of these long muscles are attached
to the hindfoot or midfoot; they move the foot at the ankle joint and affect the
position of hind- and midfoot. Other muscles, like the long flexor and extensor
muscles of the toes, continue past the hind- and midfoot to the distal phalanges
of the toes. Their main task is to move the toes.
The calf muscle is located on the back of the lower leg and it is formed by
two muscles. The gastrocnemius and the soleus (Fig. 3.9). The gastrocnemius is
larger and it connects into the Achilles tendon. It is a two-joint muscle, one hand
helps the bending of the knee and on the other it controls the movement within
the ankle joint. The soleus stands underneath the gastrocnemius and it is small-
3D Anatomy 129
BA
Figure 6.8 The calf muscle consists of two muscles:
A) gastrocnemius, B) soleus.
times the body weight – but it is only minimally elastic.
The muscar “sling” of the hindfoot: As if in a hammock, the foot hangs in a sling of muscles which attaches on both sides of the hindfoot. Along the outer side of the fi bula the long and short peroneal muscles attach. Both cross around the back of the lateral malleolus; the short peroneal muscle continuing as far as the fi fth metatarsal bone and the long peroneal muscle passing underneath the sole of the foot to its insertion on the medial cuneiform and the fi rst metatarsal on the inner side of the foot. Their task
is to stabilize the ankle joint and prevent it from twisting outwards. This is especially important on demi-pointe or on pointe, since in these positions the bony architecture does not provide adequate stability.
The inside of the sling is formed by the anterior and posterior tibial muscles . The anterior tibial muscle runs from the outer front side of the tibia diagonally down and inwards to the inner side of the midfoot. It fl exes the foot or pulls the lower leg forwards into a plié, when the foot is fi rmly resting on the fl oor. The posterior tibial muscle also runs diagonally from the entire back of the lower leg to the inner side of the sole of the foot, inserting at the navicular and the cuneiforms. It is an important initiator for pointing the foot.
The muscular sling supports the 3D spiral of the foot. The long peroneal muscle rotates the forefoot inwards – it pronates – thereby ensuring the fi rm contact of the ball of the big toe with the fl oor. This is functionally important. By rotating outwards – or supinating – the calcaneus, the anterior and posterior tibial muscles you can ensure that the hindfoot remains in an upright position.
The long �exor muscle of the big toe: The flexor hallucis longus muscle is regarded as one of the most important muscles of the dancer’s foot; in literature it is often referred to as FHL. Its fame in the dance world is due not only to its function, but also to the problems which it can typically cause in dancers. Its muscle belly originates at the outer rear side of the lower leg running down towards the inner malleolus. There it turns into a strong tendon which, encased in a fi brous sheath, runs around the back of the medial malleolus. It continues along the inner side of the sole of the foot, passes between the two sesamoid bones beneath the ball of the big toe attaching at the end phalanx of the big toe. The main job of the FHL is the plantar fl exion of the big toe and the ankle joint. Working concentrically it is important for the powerful push o� of the foot while jumping and the stability on pointe; working eccentrically it helps to provide a soft landing in the plié.
Figure 3.9 The calf muscle consists of A: gastrocnemius and B: soleus
Developing a Parametric System for Pointe Shoe Customization - 53

er. Soleus also connects into the Achilles tendon6. It is also responsible for the
movement within the ankle joint.
The Tibialis Anterior (AT) runs from the front of the tibia down to the front
of the shin where it wraps around the medial arch at the first cuneiform and the
base of the first metatarsal. It is responsible for dorsiflexing the ankle and invert
the foot.
The Extensor Digitorum Longus (EDL) lies deep to the anterior tibials. It is
more of a lateral muscle, it origins on the lateral tibia and fibula. It’s related with
four tendons and it’s responsible for the movement of the 2-5 toes. The EDL it is
directly attached to two intrinsic muscles on the top of the foot.
The Fibularis Tertius (FT) is the lower part of the EDL muscle. It runs from the
fibula to the 5th metatarsal but it does not impact the EDL tendon to the 5th toe.
Its responsibility is the dorsiflexion of the ankle and the eversion of the foot.
The Extensor Hallicus Longus (EHL) is the most lateral of the shin muscles, it
lies to both AT and EDL and it runs from the fibula, over the tibia to the big toe.
EHL is responsible for extending the big toe7.
3.2 Anatomy of the traditional Pointe Shoe
6 Achilles tendon is the biggest and strongest tendon in our body and it can withstand 12 to 15 times, the weight of our body, mechanical rubbing though of shoe ribbon can cause its inflammation.
7 In ballet EHL is a very important muscle because it helps the dancer to have a powerful push off while jump-ing but also it offers stability while on pointe.
Figure 3.10 A section of the conven-tional pointe shoe where they can be seen the different parts of the shoe.
54 - Developing a Parametric System for Pointe Shoe Customization

The Box or Block is usually made from densely packed layers of fabric and
paper, which are shaped and dipped in glue. It is this hardened glue that makes
the shoe stiff (Fig. 3.10) (Barringer & Schlesinger, 2004). This box of fabric and
glue extends over the phalanges, encasing, protecting and supporting the toes
and keeping them straight (Fig. 3.11). The box is flat on the front end, forming
a platform for which the dancer to stand and balance on. Although it appears
very hard and it is not solid but layered when the dancer wears the shoes and the
warmth of her foot expands the air, it is not rigid anymore.
The platform is the outer, flat tip of the box, which contacts the floor when the
ballerina rises on pointe. The blocking is thickest at the tip but extends as far as
halfway down the shoe in a thinner form, providing a sturdy structure under a skin
or upper of satin, canvas, or leather.
Shoe blocks come in varying degrees of hardness and varying widths and
vamp lengths. The vamp covers the tops of the toes and foot. The vamp sup-
ports the dancers toes, but most importantly their metatarsals; the vamp can
be shaped differently, allowing for higher sides, or a higher throat in the front,
ensuring that all of the flexible joints are supported and encased within the box.
The outer sole is the bottom part of the shoe and it is made by thin leather
allows for flexibility and contact with the floor. Although most of these outer soles
are made in one piece, a few companies have introduced split outer soles to
provide more flexibility in the shoe. The outer sole usually is made of synthetic or
Figure 3.11 Anatomy of the traditional pointe shoe.
vamp
platform
shank
box
ribbons
drawstring
Developing a Parametric System for Pointe Shoe Customization - 55

leather. A sturdy but pliable insole made of various combinations of leather and
fibre reinforces the dancer’s arch. Between the outer and inner sole, there is a thin
supportive stiff sole that is called shank. The shank of a pointe shoe is supple but
the sturdy support the arch needs to hold a dancer’s body weight. Usually, the
shank the sole of the shoe corresponds in shape with hardened pieces of leather,
card-stock, or hardened burlap.
The ribbons are what make the pointe shoes’ design so famous and although
they seem to be there just as an ornament, their purpose is to give security and
to keep the pointe shoe on the foot. This is achieved by wrapping across the arch
of the foot and tiding above the ankle. In the last years an elastic is also usually
sewn to the heel of the pointe shoe to keep the shoe in place. The drawstring
might be either cotton or elastic and it is placed around the shoe encased on the
edge of the fabric.
56 - Developing a Parametric System for Pointe Shoe Customization

Chapter Four: Manufacturing Process


4. Chapter 4: Manufacturing Process
Traditional pointe shoes are usually manufactured with a method that is called turnshoe. This means that the shoes are sewn inside out on a last and then turned through. Manufactures use a standardised, common last for both left and right shoes. In this chapter will be studied which manufacturing process of pointe shoes is being used in almost every pointe shoe company and mostly, will be studied the example of Gaynor Minden, a company that has broken the tradition by adding machines in some parts of the process and has replaced some of the materials of the traditional pointe shoe.
Ballet dancers need to mold their shoes to their feet in order to make them more comfortable by adding or removing materials. This technique, is called “Breaking In” and it is very important to understand this as a part of the manufacturing process.
Figure 4.1 (left) A pointe shoemaker forming the box with layers of paper, burlap (hessian), fabric and glue.

4.1 The pointe shoemaking process
The shoe is made with a method that is called turnshoe. This means that the
shoes are sewn inside out and then turned through. Until 1870s, all shoes were
made with this method, nowadays only pointe shoemakers use this technique.
This happens because dancers cannot afford to have the stitches outside. The
shoe can be light and flexible while very strong. For a dancer, working the shoes
it’s what builds up the strength in the foot to enable them to move into more
demanding dancing.
The pointe shoemakers are usually men. Women often work in the prepara-
tion or finishing stages of the process. They are trained for doing this job and
many of them they do this job for a lifetime. As they are highly skilled craftsman
they are often irreplaceable unless they train their replace.
Some of the phases the shoemaking process, like cutting and sewing, have
been automated but the majority of the pointe shoemaking process is still done
by hand.
The pointe shoemaking process is divided into eleven steps:
1. Cutting or Clicking: The exterior or upper of the toe shoe that is formed
by the vamp section, quarter sections and lining1, are sewed using satin and lin-
ing material (Fig. 4.2). They cut these pieces using a hydraulic press equipped
with a metal mould in order to cut many layers at a time. Lining is used in order
1 Lining in sewing it’s the process where a piece of a fabric it is added on the inside of a garment.
Figure 4.2 Sewing the satin for forming the outer shoe.
60 - Developing a Parametric System for Pointe Shoe Customization

to protect dancers from irritations.
2. Sewing or Closing: The seamstresses extend the V (vamp) by attaching
the quarter sections to it and sewing the satin and cotton lining sections of the
upper together. Then they sew the ends of the V together, making a heel seam
which it’s being reinforced with ribbon. The same type of ribbon it’s fit through a
special machine that it folds it in half over a drawstring. They stitch it to the top
perimeter of the shoe. This drawstring enables dancers to pull the shoe tidily
around their feet.
3. Preparing the Insole, Shank and Outer Sole: The insole is made of rigid
cupboard for support, imbued from plastic for flexibility. In some factories, the
insole, shank and outer sole are made of leather. In fact, for some companies
the use of leather iss undoubted and is very difficult to find a regular supply for
leather (Fig. 4.3). On the soles and insoles, a channel or a groove is cut into it
about 2mm, around the perimeter of them, using a machine that looks like a
sewing machine. This groove will later be the stitching line of the assembling of
the shoe. On the outer sole they usually engrave the brand, the size and the last
information.
4. Pulling Over: The upper of the shoe is attached/stretched inside out over
the last. The last is a foot-shaped form mold that varies in sizes. The shape of the
last represents something between a flat and an arched foot and it’s what defines
the size and the specifications of each shoe. Usually, the professional dancers
have their own last molded to their feet, while common student dancers have to
compromise with stock shoes shaped in standard lasts in size, shape and style. In
Figure 4.3 Clipping the sole on the last .
Developing a Parametric System for Pointe Shoe Customization - 61

some cases, the last is covered with tissue paper for making the removement of
the shoe, easier.
5. Blocking: After the upper is placed over the last, the shoemaker starts
forming the “block” by using layers of paper, burlap (hessian), fabric and a spe-
cial glue in order to build up the inside of the box. This part of the process differs
from a manufacturer to manufacturer, mostly as far as it concerns the materials
that they use. The glue for example is made of bread flour and starch but the spe-
cific recipes are usually kept top secret. In many cases they pay a lot of attention
at this stage in order to make sure that the shoe will be “noiseless” or according
to the dancer’s specifications.
6. The Lasting Step: at this point, the block is pleated tightly around the
last (Fig. 4.4). This is the step when the shoemaker molds the up to this point soft
block into its pointe (square, long, flat, oval or curved) shape by pulling. Once
the pleats are formed, the maker holds them using his thumb while tying them
at the right position. The fit and flexibility depends on this particular step, while
shoemakers claim that this is the most difficult part of the process.
7. Stitching and Turning: at this step, the shoemaker stitches down the pleats
with a linen threat and he cuts off the surplus cloth. The upper it is stitched to the
sole in the pre-cut groove. Once this is done, they turn the shoe right side out.
8. Insole Insertion: after turning the shoe right side out, they place the insole
and the shank inside the shoe, attaching it with nails and glue. Then they stamp
and they shape the inside of the shoe, while they glue a softer inner sole or lining.
Figure 4.4 A shoemaker stitching and turning the pleats.
62 - Developing a Parametric System for Pointe Shoe Customization

9. Hammering Out: this is the part where the shoemaker reinserts the last
but this time in the right side, using a big shoehorn (Fig. 4.5). This happens in
order to shape the shoe from the outside. For this job, they use a smooth-edge
hammer and they hit the box to take the shape of the last and they try to max-
imize the smoothness of the pleats. In this way they are able to get rid of any
bumps or anomalies2.
10. Drying: once the shoes are done, they are placed in a hot air-oven over
night in order to dry and become more rigid. In some factories they are just
placed on a rack to dry for two to four days.
11. Inspection: when the shoes are dried they are inspected for quality. They
then prepare them for shipping or they keep them in the warehouse.
4.2 Preparing the Pointe Shoes:
When a dancer gets a new pair of pointe shoes, she needs to mold them to
her feet and make them more comfortable. Dancers wear through their pointe
shoes very quickly, although they have to spend extensive amounts of time mod-
ifying them before they use them. Professional dancers use numberless pairs of
pointe shoes a week during heavy performance period or even more than one
2 The Freed industry’s shoemakers at this point they stamp their mark on the sole. This mark is known as the “Maker Mark” and it was invented by the owner Fredrick Freed in order to determine who made malfunctioning shoes. In this way he knew whom to blame when shoes were returned with a complaint. For some Ballerinas it was obvious that certain shoes suited them better than others and they became aware of the significance of this mark on the shoes they preferred. They were then able to recognize the mark and get their preferred shoes.
Figure 4.5 A shoemaker hitting the platform with a hammer to make the sur-face as planar as possible.
Developing a Parametric System for Pointe Shoe Customization - 63

pair during a single performance.
Even though, most of them don’t have the time to modify their shoes, dancers
came up with many “breaking in” techniques. These are treatments that dancers
can apply to their pointe shoes before wearing them for the first time. These
treatments may include, pounding them with a hammer, smashing them in a
door, wetting them and many other techniques in order to smooth the box and
the shank. The purpose of this it is to try to compound the original rigidity of the
shoe, which is needed for support and the right amount of give needed for fluid
motion.
Protective padding:
There is a big debate among ballerinas and ballet teachers weather a pro-
tective padding is necessary while wearing the pointe shoes (Fig. 4.6). The most
common reasons for using one are the blisters, breaking nails or wounds on the
toes. The protective padding should never be thick or bulky as the dancer should
be able to “feel” the ground. Their purpose is to prevent and not to fill in the
box of the shoe. The most common paddings are made of foam or silicone gel
although it is believed that still, these types of padding do not allow them to feel
the floor. The most recommended is a small amount of lamp’s wool that could
even be wrapped around individual toes. The lamp’s wool allows the toe to slip
slightly agains the soft fibers, avoiding in this way the contact with the canvas
lining.
In the past years, even though protective padding was a taboo, ballerinas
Figure 4.6 Protective paddings made of foam for avoiding blisters and wounds.
64 - Developing a Parametric System for Pointe Shoe Customization

used foam rubber or fur toe pads. Their disadvantage was also that they would
not allow to the toes to move freely in the shoe and thus not contacting properly
with the floor.
Sewing and tying the ribbons:
The first thing that a dancer does when she gets her shoes, is to sew on the
ribbons (Fig. 4.7). The ribbons are usually made of polyester satin with either a
shiny or matte finish3. They are one and a half or two centimeters wide and 50-
60cm long. The length depends on the size of the dancer’s ankle. To attach the
ribbons, the dancer folds the heel of the shoe against the sole and towards the
front. They place the ribbons inside the shoe in the angles that are made by the
folding heel and they mark it with a light pencil. The ribbon is usually folded by
at least one centimeter before sewing and then using a strong thread (or den-
tal floss) they sew the ribbon securely onto the shoe using whip stitches and in
a square pattern. Many dancers apart from the ribbons they also sew elastics,
usually where the ribbons are sewn. Elastic is to provide more support, specially
if the dancer has highly developed arch and not very strong ankle (Barringer &
Schlesinger, 2004). Elastic can also be sewn at the back of the heel in order to
provide more support to the Achilles tendon.
The way that ballerinas tie their ribbons is very important because even though
they are the ones that hold the shoe on the feet in any position and the ones that
give security to the dancer while preventing injuries, they should never be very
3 https://dancer.com/ballet-info/about-pointe-shoes/sewing-ribbons/
Figure 4.7 Even though pointe shoes are not sold with the ribbons, they are very important and every dancer needs to sew them on her own on their shoes.
Developing a Parametric System for Pointe Shoe Customization - 65

tight for they could hurt the Achilles tendon or limit the mobility of the ankle.
There are many ways of tying the ribbons. While tying them up, the dancer has to
be kneeling on one knee while leaning a bit backwards. The knee of the other leg
is bend while the foot is placed flat on the floor. In this way is given the maximum
flexibility to the ankle. On the contrary, if the foot is on pointe position or the leg
straight the ribbons are tied very tight making it difficult for the dancer to pass
from fully on pointe to demi-pointe position. They then take the inside ribbon
and they wrap it around their foot and the back of the ankle, then wrapping it
around through the front of the ankle and the back again and stopping at the in-
side of the ankle. The ribbon has to lie flat on the foot. The second (outer) ribbon
is wrapped over the foot and around the back of the ankle, bringing it around to
the front to meet the inner ribbon at the inside of the ankle, between the ankle-
bone and the Achilles tendon. They are tied in a small, tight double knot4 that
they hide under or between the ribbons so that their ends are invisible. The know
should never go directly on the Achilles tendon or the shinbone in order to avoid
pressure and thus inflammation.
Some shoes they do not have a drawstring, or it is made of elastic. In general,
drawstring in front of the shoe is tightened in pointe position, until the shoe feels
secured. Again, it should never be very tight because it could dig into the Achil-
les tendon, causing inflammation in this way, or it could put too much pressure
and cause bursitis.
4 Ribbons are never tied up in a bow in order to point out that the ribbons are there for support and prevent-ing injuries and not for excessive look. They have to have a clean and dignified look.
Figure 4.8 Dancers need to search for ways for breaking the box of the pointe shoe in order to make it a bit more flexi-ble and comfortable.
66 - Developing a Parametric System for Pointe Shoe Customization

Softening the box:
Most of the dancers wear their new pointe shoes around the house and rising
from quarter- to demi- and three quarter pointe to mold them to their feet. They
even rise to full pointe many times on each foot and turn the toes back and forth.
They also work the shoes with the hands. Sometimes they step on the box with
their heel in order to crush the box and reduce its stiffness (Fig. 4.8). Another trick
for softening the box is to rub the shoes with alcohol or water. The ones that are
more experienced they even slam them in the door.
Adjusting the shank:
Some dancers, have ankles that are not very flexible and instep and for that
reason they find it difficult to break in the shanks of their shoes. That’s why they
have come up with many of clever ways to bend, cut, score and tape their shanks.
These adjustments can significantly improve a shoe’s performance. This is a high-
ly personalised process. One of the things that they do, is to try and bend the
shoe by hand or even cut off the inside of shank very carefully, layer by layer so
that the small part at the back of the heel is removed (Fig. 4.9). Some companies
have modified the shoes and now they make three-quarter shanks.
It is important here to mention that the moment of buying a new pair of pointe
shoes it is very crucial. Nowadays in the market there are plenty of variations of
the width of the vamp, the depth of the box or the flexibility of the shank (we will
analyze it on the next chapter).
Figure 4.9 Breaking in the shank is the first thing that a dancer does once she buys new pointe shoes, for their rigid material do not allow them to bend the foot and perform a full plantar flexion.
Developing a Parametric System for Pointe Shoe Customization - 67


Chapter Five: Areas of Investigation


5. Chapter 5: Areas of InvestigationIn order to be able to investigate as deeply as possible all the involved
disciplines for pointe shoe designing and making, the scope of the study has been divided into four subchapters:
• Geometrical Approach: In this first part of the investigation is concen-trated on the geometrical aspect of the problem. That means that after studying well the different parts of the feet that affect the geometry of the pointe shoe is needed to set up carefully the variables that have to be taken in account at the moment of the design. It is also important to define what is topology and understand the variations of the feet that could be found in nature.
• Structural Approach: While a dancer is dancing, there are outside forces that act on her/his body. These forces help the dancer to do the move-ments technically correct. In this section, will be studied the applied forc-es that have a major impact on the feet while dancing on pointe.
• Material Approach: As mentioned before, pointe shoe making process is an artisanal craftsmanship working with the same materials for at least two centuries. In this chapter will be studied the performance of the tra-ditional materials to try and understand their properties in order to be able to propose new materials.
• Digital Fabrication Approach: One of the advantages of the digital era is that you can link human data to the design and manufacturing. 3D print-ing as an addictive manufacturing process, allows us to transform digi-tally developed 3D models into physical objects. This possibility along with other computer aided manufacturing processes will be studied in this chapter.
Figure 5.1 (left) Diagram of the foot in plantar flexion with the most important points.

5.1 Geometrical Approach
5.1.1. 3D Scanning:
As explained before, the human foot is considered to be the base and the
barrier of our body. Its shape and form is related to the complexity of its bio-me-
chanical functionality. The shape of the foot, the shape of each muscle and bone
of the foot keeps adapting to every movement. Additionally, each one of us, has
a different foot that is designed and built in such a way that is unique and cor-
responds only to the body structure of each one of us. In order to study well the
geometry of a variation of feet we needed to get samples of different feet using
a 3D scanner (Piperi, Spahiu and Galantucci, 2014).
A 3D scanner is a device that analyses an object or environment and collects
data about its shape and possibly its appearance (e.g. color). Its functionality is
very similar of a camera. The most important common thing, is that they both
collect information about surfaces that are enlightened and not obscured. On
the other hand, cameras collect color information about surfaces while 3D scan-
ners collect distance information about surfaces that are included in their field of
view. The result image of a 3D scanner is nothing more but the description of the
distance to a surface at each point of the image (Ebrahim, 2011).
The first 3D scanner technology was created in the 1960s where they used a
combination of lights, cameras and projectors in order to complete the process.
In 1980s, the first contact 3D scanners were developed but as the accurate repli-
cation of an object, required a lot of effort and time because of the complexion
Figure 5.2 Manually operated arm and strip 3D scanner
72 - Developing a Parametric System for Pointe Shoe Customization

of the scans, soon they started using optical technology. By 1985 3D scanners
began to use white lights, lasers and shadowing in order to collect data points of
an object’s surface (Fig. 5.2).
Non-contact 3D scanners do not require a physical contact with an object.
Their functionality stands on some active or passive techniques. For example,
one of the techniques is the emission of light or some sort of radiation (ultra-
sound, x-ray) and the detection of its reflexion on an object. In this way, we are
able to collect a very accurate cloud of points that can be used for measurement
and visualization in many fields.
There are many ways of reconstruction of a model. One of the them is the
reconstruction from point clouds that is usually used in architecture or construc-
tion world. Another way is the reconstruction from a set of 2D slices that are put
together to produce a 3D representation and are used mostly by Computed To-
mography and MRI.
As most applications use polygonal 3D models, NURBS1, surface models or
editable feature-based CAD models, the collected point clouds are usually trans-
lated into polygon mesh models, surface models or solid CAD models (Fig. 5.3).
A mesh model, is a polygonal representation of an object for example, imagine a
curved surface that is described by as many small planar surface. Surface models
1 NURBS or Non Uniform Rational B-Splines are mathematical representations of any 3D geometry that are able to describe accurately, any shape, from a simple 2D line, circle, arc, or curve to the most complex 3D organic free-form surface or solid. NURBS curves and surfaces developed in the 1950s with the intention to introduce precision to the description of free-form surfaces mainly used in industrial design (for example, ship or car designing).
Figure 5.3 NURBS curve can be easily modified by moving its control points.
Developing a Parametric System for Pointe Shoe Customization - 73

are built up using NURBS, T-splines or any other curved representation, while
solid CAD models represent a digitized shape with an editable, parametric CAD
model.
As the collected data can then be used to construct digital three-dimensional
models and can give the exact model of any object, a 3D scanner was considered
to be the most appropriate tool for scanning different types of feet in order to
have a more complete topological analysis. The 3D models of the feet that were
scanned, were not only used for analyzing and defining the variables for devel-
oping the parametric system, they were also used for the development of the
parametric system.
For the 3D scanning it will be used a Structure Sensor connected to a comput-
er along with the software SKANECT (Fig. 5.4). Various feet had to be scanned
including dancers but also people that have never danced in their lives. All feet
scanned belonged to women. Scans were done with a naked foot, pointed as
much as possible. In order for the scan to be done, the structure sensor had to be
rotated 360 degrees around the foot to accomplishing the best result possible.
5.1.2. Defining variables:
Topology:
Ἀεὶ ὁ θεὸς γεωμετρεῖ2 is a greek saying credited by the greek philosopher Pla-
2 The phrase is also used as a mnemonic of the irrational number pi (π the ratio of circle’s circumference to its
Figure 5.4 3D scanner - Structure Sen-sor.
74 - Developing a Parametric System for Pointe Shoe Customization

ton which means that “Always, the great god applies geometry to everything”
and it outlines the importance of geometry in understanding the cosmos. In the
beginning of 20th century many scientists started studying and writing down the
linking lines between biology and mathematics (Weinstock, 2010). According to
D’Arcy Thompson3, the form of an object, living or dead and the changes of its
form can be described as a “diagram of forces” that acted on it (Fig. 5.5) (Thomp-
son, 1917). Form can be described by mathematical data, by mapping points in
three-dimensional coordinate space, by dimensions, angles and curvature radii
(Weinstock, 2010). In this particular thesis, a topological study of the anatomy of
the foot was needed to be done in order to understand its geometry and the
variations of its geometry in which can be found in humans.
The term topology in mathematics, refers to the study of the properties of ob-
jects that are preserved through deformations, twisting and stretching of the ob-
jects. It’s the study of the flexible geometry. It is, therefore, a kind of a generalized
geometry. However, we do not focus on the dimension or a generalized analysis
but we concentrate on the continuity or not of some functions. Topology4 is the
Topological Space5. Topological spaces are found in mathematical analysis, alge-
bra and geometry.
diameter) since the number of letters in each word give 3.1415
3 D’Arcy Wentworth Thompson was a Scottish biologist and a mathematician. His book On Growth and Form, set the boundaries of the scientific study of Morphogenesis. Morphogenesis comes from the greek words μορφή(shape) & γένεσης(creation) and it studies the biological process that makes a cell, tissue or organism to develop its form.
4 Topology (τοπολογία) comes from the Greek words τόπος (place, location) & λόγος (study).
5 A topological space is a set of points, together with a set of neighborhoods for each point, that satisfies a set of axioms relating to points and neighborhoods.
Figure 5.5 One of the famous Transfor-mation Diagrams from On Growth and Form.
Developing a Parametric System for Pointe Shoe Customization - 75

Fundamental concepts such as convergence, boundary, continuity, consisten-
cy, or compass meet their best formatting in topology. Topology6 is essentially
based on the concepts of topology and homogeneity.
In anatomy, topology refers to the topological approach in studying anatomy,
i.e. studying based on anatomic regions and the relations between the struc-
tures, and is referred to as topographic anatomy. In this chapter thought, we are
interested in the geometrical approach of the foot and the different variations of
its form. At a first glance we all humans look the same, taking a more closer look
though of the individual characteristics of each one of us, one can find many dif-
ferences (Fig. 5.6). One can have a small hand with short, chubby fingers, another
one can have thin, long fingers, another can have short, very thin fingers and a
big palm, etc. There are infinity combinations of characteristics that make each
one of us unique. The same happens with our feet. Below, you can find an inten-
tion of cataloging the most important characteristics of a foot and in which way,
each part of the foot relates with each part of the pointe shoe.
Types of foot:
Although in ballet the prevailing view is that the pointe is the foot and not the
shoe, the different parts of the shoe require different performance, depending
on the different parts of the foot. To meet the unique demands of the pointe
6 As a term it has been actively introduced into architectural discourse since the early 1990s but still lacks of a clear definition in architecture.
Figure 5.6 3D scans of different feet.
76 - Developing a Parametric System for Pointe Shoe Customization

dancing, the foot has to be strong, supple and sensitive as the hand. Rather than
serving as a passive weight-bearer, it must assume positions and execute move-
ments beyond its normal limits.
The physical characteristics of a ballet dancer’s foot can be either an advan-
tage or a disadvantage when it comes to the pointe shoe dancing.
Toe shape:
The toe shape is related to the box shape of the pointe shoes (Fig. 5.7). Box
Shape is arguably the most important aspect of the pointe shoe fit. The wrong
box shape can be the source of many frustrations, including big toe pain, zero
metatarsal support, bruised toenails and more. There are three very generalized
types7 of toe shape, the Greek, the Egyptian and the Giselle/Peasant/Roman
type.
The Greek or Morton´s foot is very easy to identify as there is an obvious dif-
ference of the length between the second and all other metatarsals, with the sec-
ond one being the longest of all. Wearing a pointe shoe, this is quite problematic
as it obviously means that the second metatarsal is also longer than the hallux,
and when in pointe shoe is forced to curl (Oztekin et al., 2007). At the same time,
even on demi-pointe because of its length, is forced to bear a disproportionate
amount of weight ((Simmel, 2014). Ballet dancers with this anatomic problem,
usually use a padding to fill in the gap between the first and second metatarsal
7 Even though there no serious scientific evidence, foot types are often labeled “Greek”, “Egyptian”, “Ro-man”, “Celtic”, or “Germanic”, in an intent to relate the foot type with our ancestry.
Figure 5.7 Toe shapes.
Egyptian Egyptian Roman Celtic
Developing a Parametric System for Pointe Shoe Customization - 77

or they even use a toe separator.
The Egyptian or tapered foot structurally may be the most functional in the
day day life. Usually these feet are quite narrow with the hallux being the longest
toe. Wearing a pointe shoe though, may cause hallux valgus (or bunions). This
is a condition where the big toe bends towards the second one and it is usually
combined with a bony bump that is formed on the joint at the base of the hallux.
This can be provoked by genetic factors but from a dancing style as well8. Wear-
ing the right shoes is important in order to try to align the hallux on its axis and
avoid the deviation.
There are innumerable types of feet and each one of us has different charac-
teristics, all the above are just some of the basic generalizations of the toe shape
types but there are many more.
Toe Length:
The length of the toes is a very important parameter and is related to the
part of the shoe that it’s called vamp (Fig. 5.8). The dancers who have long toes
require a longer vamp than the ones who have short toes. The vamp needs to
be long enough to cover the joint at the base of the hallux. If the vamp doesn’t
cover enough the toes, then there is the possibility that the toes fall out of the
shoe. The center of the front part of the vamp should always reach as far as, or
just beyond the third phalange of the first and second metatarsal. If the vamp is
8 “Rolling in” is a habit of many dancers that struggle with their turned-out position and they often force the ankles to roll in.
Figure 5.8 Toe Length
78 - Developing a Parametric System for Pointe Shoe Customization

too short it will cause the foot to fall over the toes. This not only makes the foot
look ugly, it also makes it almost impossible for the dancer to maintain her weight
at the right position. On the other hand, if the vamp is too long and covers the
foot more than the necessary, it will throw the dancer backwards and prevent her
from standing on a full-pointe position.
The length of the toes is also related to the box of the shoe. For example,
dancers with long toes and narrow feet usually use a more pointed box and those
with wider feet require a squarer box.
Foot Length:
In general, if a shoe is larger than it should, then the foot sinks into the shoe
forcing the big toe to twist. Bigger shoes, could also be the reason of causing
bunions, corns on the toes, blisters or bruised nails. On the other hand, if a shoe
is smaller than it should be, then it might be the cause of discomfort on the Achil-
les tendon. Smaller shoes can also cause inflammation at the ends of the toes for
putting much of a pressure. Usually foot length is proportioned to the height of a
person. It is commonly known though, that most people have at least a very small
variation of foot length or width. In that way, a shoe may be perfect on one foot
and a disaster on the other.
Foot Width:
The foot width, affects the shape and the width of the box, the vamp and also
the platform (Fig. 5.9). The width of the foot changes according to the move-
ment/position of the foot. For instance if you step your feet on the ground it
Figure 5.9 Foot width
Developing a Parametric System for Pointe Shoe Customization - 79

gets the maximum width. On the other hand, in the pointe position, depending
on the flexibility of the foot, the width becomes smaller. If a shoe it´s very narrow
squeezes the toes and joints and it doesn’t allow them to work properly. The shoe
should hold the toes tide but not so tide that they are bunched together. They
should be able to move just a bit side ways, but the most important is that the
tips of the toes should just feel the ends of the shoes when the dancer’s weight is
evenly spread. The toes should not feel sore inside the shoe, instead, they have
to be able to perform a demi-plie without the toes having a problem of expan-
sion inside the shoe (Barringer & Schlesinger, 2004).
Arch Type:
A high arch is especially important when dancing on pointe: tibia, talus, mid-
foot and fore-foot should all be aligned in a vertical line, the optimal line of grav-
ity (Fig. 5.10). This allows the load to be axially applied to the bones of the foot
that, bio-mechanically, provides the greatest stability. Some dancers (and people
in general) have anatomically “flat feet”. Some girls tend to have a flatter curve
to their arch in standing due to the actual shape of the bones in their foot, and
no matter how strong the small foot muscles get, the shape of the foot will not
change significantly. In addition, some girls have a very high arch to their foot, yet
are very weak in the small muscles of the feet, while it may appear that they have
good control of the arch. This is one of the parameters that affects the rigidity of
the shank.
Figure 5.10 Arch type
80 - Developing a Parametric System for Pointe Shoe Customization

Arch Flexibility:
Arch flexibility is related mostly to the shank of the shoe, in addition, is one of
the parameters that dancers are based to decide about the rigidness of the shoe
(Fig. 5.11). There is a big debate among ballerinas or ballet teachers weather a
shoe should be very soft or very hard. It is suggested for beginners to have hard-
er shoes for more support although they do not have the strength they need for
bending the arch of the shoe. On the other hand, harder shoes make them work
harder, thus they gain strength and flexibility. If a ballerina has a very flexible arch
and a weak ankle, it is also suggested to have a harder shoe in order to control
their balance better. Besides all these, it is believed that a ballerina should be
able to depend on the strength of her feet and not her shoes. A weak ankle or
weak foot with soft shoes, if there is absence of control, it could cause injuries
such as a twisted ankle.
Figure 5.11 Arch flexibility
Developing a Parametric System for Pointe Shoe Customization - 81

Box
Platform
Vamp
Shank
ArcFlexibility
ArcType
FootWidth
ToeLength
ToeType
82 - Developing a Parametric System for Pointe Shoe Customization

5.2 Structural Approach
While a dancer is dancing, there are outside forces that act on her/his body.
These forces help the dancer to do the movements technically correct. In this
chapter they will be studied the applied forces that have a major impact on the
feet while dancing on pointe and what forces need to be taken in account while
design a pointe shoe (Barber and Popalisky, 2008).
Gravity:
In physics, gravity is called the property of the material elements to attract and
be attracted to other elements. The drawn bodies move in accelerating motion
towards the attractor. The resistant forces are equal. The measure of resistance,
which shows each body in the change in its kinetic state, is called the mass of a
physical body. The pulling force, called weight, is greater when the bodies are
closer or when they have a larger mass. Gravity on Earth attracts material ele-
ments and causes them to fall on its surface when released. In addition, it helps
the dancer stay grounded by pushing her/him downwards.
The center of gravity of a physical body is the point at which the body will
balance. In order to remain balanced, the center of gravity must remain directly
above the area of contact with the floor. The gravity dragging downwards and
the floor pushing up, both forces help the dancer to move around and balance . Figure 5.12 (left) Each part of the pointe shoe sorresponds to a different part of the foot.
Developing a Parametric System for Pointe Shoe Customization - 83

(Barber et al., 2007)
Support from the ground:
Newton´s third law of motion, states that for every action there is an equal and
opposite reaction. When a physical body acts a force upon another body (action),
then the second body exerts a force of equal measure and opposite direction in
the first (reaction). Each action always has an opposite reaction. So, as for each
action there is a reaction, it appears that in nature forces always appear in pairs.
The action and the reaction act simultaneously upon two different bodies. The
measure of action and reaction is the same, regardless of the masses of the bod-
ies that interact. The law of reaction-action applies whether the bodies are immo-
bile or move at a speed.
FA = −FB
It does not matter which of the two forces we call action and what reaction. In
dance, as gravity pushes while the floor pushes up, the dancer is able to move.
Friction from the floor:
Friction is a resistance force that manifests itself against any movement of
parts of the same material element or the relative movement of two elements
with their surfaces touching. In the first case there is an internal friction, in the
second (between elements) external friction (Fig. 5.13). The direction of the fric-
tion is always opposite to the direction of movement. The frictional force is dis-
tinguished by static friction when the elements are balanced and in slip friction
push
friction
Figure 5.13 Friction from the floor is very importat for balancing while on pointe shoes.
84 - Developing a Parametric System for Pointe Shoe Customization

when the elements move between them. The frictional force is due to electrostat-
ic forces between the two surface molecules.
Static friction is the force that prevents a physical body from moving even
while the body is balancing. The measure is equal to the measure of the applied
force that tends to move the body and can take values from zero Newton up to a
maximum value equal to μs·FN. Where μs is a dimensionless size called static fric-
tion coefficient and depends on how rough a surface is. The coefficient of friction
is calculated experimentally. FN is the force that develops between the adjoining
bodies. When the external force exceeds the above value then the body begins
to slide and is now exercised on this slip friction. Sliding friction is slightly less
than the maximum of static friction, because when the body gains speed, the
frictional forces are slightly reduced.
The weight of the dancer changes the amount of friction between her/her
and the dance floor. Friction is needed to create the correct movements for each
step. Without friction, it would be impossible for a dancer to stop her/him self
from turning.
5.2.1. Applied forces while dancing on pointe shoes
While a dancer stands or even dance on pointe shoes there are many forces
that act on the shoe from the dancer and the floor and forces that act on the
dancer and the floor from the shoe. It has been very crucial the understanding of
the different forces that are applied on the specific parts of the shoes.
weight
normal force
Figure 5.14 Center of gravity while standing on pointe shoes.
Developing a Parametric System for Pointe Shoe Customization - 85

Gravity:
In ballet, what we define as a “center of gravity”9 is “that point where the
downward force of gravity appears to act on the body as a whole” (Fig. 5.14)
(Laws, 2002). While standing on one foot, the center of gravity lies on a vertical
line that passes through the “area of support at the floor” (the contact area of the
foot on the floor). When someone stands on pointe, the area of support is much
smaller than standing on one flat foot and it´s much more difficult for the dancer
to locate his/her gravity center. For the same reason, it is much easier if the tips
of all toes are able to “touch” the floor than forcing the body to balance just on
the big toe or the first two toes.
Additionally, when a dancer stands on a pointe shoe, apart from the box and
the toes of the dancer, also the shanks holds some of his/her weight. The shank
is the part of the shoe that bends and although the “center of gravity” should
not pass through the heel of the dancer, some of the dancer’s weight is being
distributes also on the shank. In order for this to happen, the dancer needs to
perform a complete plantar flexion of the foot and ankle and to try to combine
an angle of 90 degrees. This is the reason why the shank needs to be made of a
very resistant and flexible material.
Poisson’s effect:
One of the most important realizations is that the box of the shoe, is nothing
more than an application of Poisson’s effect (Fig. 5.15). Poisson’s effect describes
9 Dancers usually call this as his/her “center”.
Figure 5.15 Poisson’s effect is the phe-nomenon in which a material tends to expand in directions perpendicular to the direction of compression.
86 - Developing a Parametric System for Pointe Shoe Customization

the expansion of a material in directions perpendicular to the direction of com-
pression. The weight of the dancer, acts as a perpendicular force on the toes of
the feet. For that reason, the box of the shoe works as a “confinement reinforce-
ment" for the feet, tiding the toes together and not letting them to expand and
thus, it helps the dancer keeping the axis of his/her body perpendicular. That’s
why it is very important that the vamp covers the joint at the base of the toes and
at the same time has to hold the toes tide but at the same time letting the mini-
mum of space for the toes to move slightly sideways.
Traction:
Pointe shoes were invented from the desire of the ballerina to “fly”, to look
weightless, balancing on an almost non-existent area. When a ballerina dances
on demi-pointe (rising on the ball of the foot), the area of contact between the
feet and the floor is bigger than when she dances on pointe and the area of the
contact is just the small surface from the tapered box. As a result, the small con-
tact area, reduces the rotational traction that can be used and it increases the
possibilities of slipping. It is widely admitted by dancers that pointe shoes slip
more easily than “flat” shoes and they require much less force to turn.
As the magnitudes of coefficient of static and kinetic friction depend on the
chemical and mechanical properties of the surfaces, the properties of the mate-
rials of both pointe shoes (the area of the platform of the shoe) and the floor are
very important parameters when dancing on pointe.
Torque:
Figure 5.16 Torque is the force that en-ables dancers to perform pirouettes.
Developing a Parametric System for Pointe Shoe Customization - 87

If we exert a force on a body that has the ability to rotate around a fixed axis,
then the body rotates unless the force carrier passes through the axis rotation,
for example when the hand turns a screwdriver (Fig. 5.16). This in physics is called
torque. When turning on pointe (doing a pirouette), the dancer experiences a
torque (Imura and Yeadon, 2010). Unlike ice skater though, that turn on an almost
frictionless surface, ballerinas “need” the friction while experiencing a torque, in
order to be able to slow down and finally to stop turning after a specific number
of turn. In this case, the frictional force acts equally on each point of the contact
area. If the contact area increases, then the torque also increases. For this reason
the dimensions of the platform are a very important for having in mind for the
design.
5.3 Material Approach
As mentioned before, every part of the shoe needs to perform in a specific
way depending on the anatomical characteristic of the foot that corresponds to
a specific part of it. The applied forces while dancing also impact the specific
parts of the pointe shoe in a different way depending on the action that is being
performed. Each part of the shoe requires specific material properties (Fig. 5.17).
Depending on the functionality of each part, some need to be resistant to fruc-
ture and others need to be resistant to friction. Some of them need to protect
the toes and some others need to hold the weigh of the whole body. It has to be
defined, which are the material characteristics that are needed for every part of
the pointe shoe taking in account the health and comfort of the dancer as well as
Figure 5.17 Conventional pointe shoes are made of many and different materi-als because each part of the shoe needs to perform in a different way.
88 - Developing a Parametric System for Pointe Shoe Customization

the structural requirements.
5.3.1. Mechanical properties:
Below we appose a list of the mechanical properties that are required for the
different parts of the pointe shoes (Fig. 5.18):
Durability: Ability to withstand wear, pressure or damage. Hard wearing.
Elasticity: Ability of a body to resist a distorting influence or stress and to re-
turn to its original size and shape when the stress is removed.
Flexibility: Ability of an object to bend or deform in response to an applied
force, pliability, complementary to stiffness.
Plasticity: Ability of a material to undergo irreversible or permanent deforma-
tions without breaking or rupturing, opposite of brittleness
Specific weight: Weight per unit volume.
Stiffness: Ability of an object to resist deformation in response to an applied
force, rigidity, complementary to flexibility.
Toughness: Ability of a material to absorb energy (or withstand shock) and
plastically deform without fracturing (or rupturing)a material´s resistance to frac-
ture when stressed, combination of strength and plasticity.
Viscosity: A fluid´s resistance to gradual deformation by tensile or shear stress,
thickness.
Durability Elasticity Flexibility
Plasticity Specific Weight Stiffness
Toughness
Viscosity
Figure 5.18 Mechanical properties of the different materials of the pointe shoes.
Developing a Parametric System for Pointe Shoe Customization - 89

5.3.2. Material properties for each part of the shoe:
(Table 5.1)
Platform:
The platform for instance, that is the flat surface on the tip of the shoe, is the
part of the shoe that is in constant contact with the floor. As the platform forms
part of the box, traditionally, is made of packed layers of fabric, cardboard and/
or paper, dipped and hardened by glue and then it’s covered by satin.
The platform, as it holds the whole body, needs to be really rigid and sturdy.
On the other hand, the outer layer needs to be resistant to the friction with the
floor and at the same time, the dancer needs to be able to perform pirouettes
without slipping, otherwise there is the danger of falling out of balance.
Box:
The box, as already mentioned, is the part of the shoe that hold the toes
together. The box determines fit and comfort. With the exception of the brand
Gaynor Minden that is made from elastomeric materials layered with pieces of
shock-absorbing foam, the box is traditionally made the same way as the plat-
form, layers of fabric, paper and hard glue. The layered composition of the box
also functions as an absorber of the forces that the foot is subjected.
Usually, the inside of the box it is just covered with a fabric for absorbing the
Part of the shoe Material properties
Platform Durability, Rigidity, Toughness, Resistance
Box Durability, Rigidity, Stiffness, Plasticity, Viscosity
Shank Rigidity, Flexibility
Vamp Elasticity, Plasticity, Viscosity
Outer of the shoe Elasticity, Resistance
Ribbons Durability, Stability
Sole Durability, Elasticity, Resistance
Table 5.1 The different parts of the pointe shoes and the mechanical prop-erties that each part requires.
90 - Developing a Parametric System for Pointe Shoe Customization

sweat. The problem here is that the materials that are used are very rigid and
stiff that not only makes it very heavy and uncomfortable, it is also the reason of
many injuries, like bunions, callus, corns or even breaking of nails. Many dancers
in order to avoid all these injuries, they use protective paddings made of cotton,
fabric, foam or silicone (Fig. 5.19).
Another problem that dancers face, is the short life of the shoes. The box of
the conventional shoe after a short time of using the shoe, and if the dancer is
very strong or has to perform very demanding steps and spends too much time
en pointe, then the shoe degenerates quite fast. A professional dancer at the top
of her career might wear out 65 pairs of pointe shoes a month (Cunningham et
al., 1998). For that reason, the increased lifespan is another important parameter
to take in account when deciding for the material of the box, as is one of the first
parts of the shoe that begins to degenerate.
For all these reasons it would be suitable to use a hard material for the struc-
ture of the box that will offer durability, rigidity and stiffness and the inside of the
box should be resolved by materials that offer viscosity and plasticity like maybe
a material similar to a memory foam or silicone (Colucci and Klein, 2008).
Shank:
The shank plays a supporting role. In the conventional pointe shoes is a nar-
row spine that is placed between the inner and outer sole. Even though most of
the dancer’s weight is transmitted to the platform, her foot needs a support to
push her against in order to be able to remain on pointe. It is placed under the
Figure 5.19 A protective padding made of silicone using a mold to create it.
Developing a Parametric System for Pointe Shoe Customization - 91

arch of the foot and it has to be totally rigid along the sagittal plane of the foot
and quite flexible along the transverse plane. This is one of the most crucial parts
of the shoe because when the dancer stands on pointe, she needs a complete
support for she is in complete plantar flexion and she needs to remain stable for
maintaining her balance. At the same time though, when a dancer is rising from
demi-pointe to a full pointe, or when she is landing on the ground, she needs
to bend her toes to the opposite direction and thus, she needs to be able to
bend the shoe in the opposite direction. In consequence, the design of the shank
mush provide controlled flexibility in order to allow a smooth transition (from
demi-pointe to full pointe and the contrary).
In addition, the thickness of the shank of the conventional pointe shoe, is
equal, while it is observed that is not necessary to have the same support equally
along the foot. The part where most support is needed is under the toes. It has
to be noted that the shank and the box are created separately and it could be
proposed to be designed as one piece.
Outer sole:
The outer sole is usually made of thin leather allowing flexibility and absorbing
pulsations from the ground, specially when the dancer performs jumps.
Top and side of the shoe:
The top and side of the shoe are traditionally covered by cotton and an outer
layer of satin, canvas or leather. This is the part that holds the whole shoe togeth-
er and it has to be so elastic and flexible to fit the dancer like a second skin.
Figure 5.20 There are different kinds of ribbons, the most common are the satin ones.
92 - Developing a Parametric System for Pointe Shoe Customization

Ribbons:
The ribbons, even though they are usually sold as an extra part, they are very
important for adjusting the shoe on the foot (Fig. 5.20). It’s a traditional ornament
for the shoes and are not easily substituted because of the prestige they carry.
The ribbons are the image of the ballerina. Every conventional shoe needs two
pieces of 50-60cm long and 1,5cm width of a ribbon. The length truly depends on
the size of the ankle of the dancer. There are plenty of types. Some of them are
satin on one side and grosgrain or malt finish on the other. The reason they are
made like this, it’s because the grosgrain, as a rougher surface is placed toward
the leg for gripping the tights and holding the shoe in place. Ballerinas usually
tight their shoes too tightly. For this reason, they could be replaced by an elastic.
Every part of the shoe has its functions and requires materials with different
properties (Fig. 5.21). Having studied these requirements, along with the prop-
erties that are needed for better performance of the shoe, is easier to make a
proposal for replacing some of them. The reason of invastigating new materials
is because this project is proposed to be developed and to make various proto-
types using digital fabrication techniques and tools.
Figure 5.21 There are at least 13 differ-ent materials in the conventional pointe shoes.
Developing a Parametric System for Pointe Shoe Customization - 93

5.3.3. Materials that can be used in Rapid Prototyping
Even though pointe shoe making process has always been a craftsmanship,
in this investigation, additive manufacturing will be applied as the process for
creating point shoe prototypes.
There is a lot of investigation going on the last 20 years studying the potential-
ities of the 3D printers. Scientists are experimenting with many materials. Up until
today, the most studied and promising are polymers, ceramics and metal. The
majority of 3D printers though is concentrated on polymeric materials because
of their ease of manufacturing and manipulating.
There is a huge variety of polymeric materials that represent a very wide range
of mechanical properties and applications10. As already mentioned, because of
their processability and low cost, they are by far the most utilized class of materi-
als for 3D printing. There are many types of polymers, like thermoplastics, elasto-
mers, hydrogels, functional polymers, polymer blends and other composites that
can be used for 3D printing (Fig. 5.22).
Between the polymers that can be found in the market are Polycarbonate
(PC), acrylonitrile butadiene styrene (ABS), poly ether ester ketone (PEEK), poly
etherimide (ULTEM) and Nylon. These materials are usually used for processes
that require thermoplastics or processes that require heating to a semi-liquid
state and close to the melting point. Fused Deposition Modeling (FDM), Jetting
(InkJet) and Selective Laser Sintering (SLS) are some of the additive manufactur-
10 They are used for fabricating bottles, toys, tools, bags, phones, computers, tools, cushions, electronics etc.
Figure 5.22 Thermoplastic polymers are the most common for additive man-ufacturing.
94 - Developing a Parametric System for Pointe Shoe Customization

ing techniques that require thermoplastics. These materials become soft when
they get heated and once they are extruded, they solidify. In this process, no
chemical reaction occurs. They have low viscosity when heated and for that rea-
son the extrusion is made through a nozzle. Some other techniques, they use
polymers in their liquid state (resins) that they solidify after the process. These
polymers are called Thermoset polymers and have been used in many high-tech-
nology applications because of their thermo-mechanical properties.
5.4 Additive Manufacturing (AM)
Additive manufacturing is also called as rapid prototyping or 3D printing. The
term rapid prototyping (RP) is describing a process in which a quick prototype of
a product or a part of a product is made11 (Gibson et al., 2015). In AM a model
is created using a three-dimensional Computer Aided Design (3D CAD) system.
It functions by creating geometries by adding material in layers. Each layer is a
thin cross-section of the geometry that is derived from the CAD data. The quality
of the result is proportioned to the width of each layer. The thinner the layer is,
the closer will look to the original geometry. One of the advantages of the rapid
prototyping, is that mostly in the product industry the clients or the creator can
test their ideas and have a feedback during the development process.
3D printing technology was first appeared in the 1980s. In 1982, Dr Hideo Ko-
dana of Nagoya Municipal Industrial Research Institute invented the first layer by
11 This term is also used by management consultants and software engineers for describing a process of developing business and software solutions.
Figure 5.23 The Stereolithography Ap-paratus was invented by Charles Hull.
Developing a Parametric System for Pointe Shoe Customization - 95

layer photopolymer rapid prototyping process but his method was not commer-
cialized. Later, in 1983, Charles Hulls came up with his patent “stereolithography”
(Fig. 5.23) . This is a technique where a 3D object is created by a computer that
moves a laser beam that is able to build up a structure, layer by layer, from a liq-
uid polymer that hardens when it gets in contact with UV light. Hull was also the
developer of the STL file format, that is the most common file that 3D printers
use nowadays.
In the late 1980s, the Selective Laser Sintering (SLS) was also invented. It was
developed by Carl Deckard and it’s a technique where layers of powdered ma-
terial (usually metal) are fused using a high-power laser. In the 1980s the Fused
Deposition Modeling was also developed by Scott Crump and Lisa Crump. It’s
a technique where an object is created layer by layer by a material that is heat-
ed and extruded through a nozzle. Up until today, this is the most common 3D
printing technology. In the 1990s, engineers came up with the technology of Di-
rect Metal Sintering and Binder Jetting. This was also the decade that scientists
started developing Bioprinting for medical applications. From 2000 and up until
today, various additive processes matured. Today, 3D printers have reached in
such a level of quality and price that everyone could afford and be able to man-
age one (Fig. 5.24).
AM as a process, involves a number of steps that begin from the virtual CAD
description and they finish with the physical model (Fig. 5.25).
1. The first step is the model designing that can be done by any CAD mod-
eling software which can give as an output a 3D solid or a surface representation.
Figure 5.24 3D printer
96 - Developing a Parametric System for Pointe Shoe Customization

This representation can also be created by a 3D scanner.
2. The second step is the creation of the STL file format, that can be used by
almost all 3D printers. This can be created by the same CAD modeling software
or convert it using another program.
3. Then the STL file is transferred to an AM machine software where the STL
can be manipulated and checked of the scale, rotation, etc.
4. Before starting the build up process is important to set up the settings
that are related to the build up parameters, like for example the material con-
strains, energy source, layer thickness, building pattern, speed etc.
5. The file is sent to the AM machine and then the build up process is auto-
mated and done by deposing material layer by layer. The machine can carry on
almost without supervision.
6. Once the object is built up and the machine stops working, the object
needs to be removed from the build platform and if there is any, from its support
structure as well.
7. Finally, there might be required some post-processing such as cleaning,
polishing or painting.
As explained above, the advantage of the AM is the automatization of the
fabrication process and the fact that the feedback of the prototyping can happen
very fast. For this reason, AM is undoubtedly the most appropriate technique to
use for the pointe shoes prototypes.
CAD-based 3D model
.STL file Sliced layers AM system End part finishing
Figure 5.25 The steps of the process of 3D printing.
Developing a Parametric System for Pointe Shoe Customization - 97


Chapter Six: Results


6. Chapter 6: Results
The results of the investigation are explained and divided into three stag-es:
• The first part of the investigation is concentrated on the geometrical aspect of the problem. Using 3d scanning technology and the theo-retical background related to foot and dancing anatomy, were defined the geometrical variables that need to be taken in account while de-signing a pointe shoe and its specific parts. A 3d scanner can give us an exact 3d model of any object, that’s why scanning different types of feet was very helpful in order to have a more complete topolog-ical analysis. This analysis was needed in order to define better the variables for developing the parametric system. The 3d models of the scanning were also used for the development of the parametric system. For the 3D scanning we used a Structure Sensor connected to a computer along with the software SKANECT. Five women’s feet were scanned. Scans were done with a naked foot, pointed as much as possible. In order for the scan to be done, the structure sensor had to be rotated 360 degrees around the foot to accomplishing the best result possible.The defined variables, only concerning the geometrical approach of the study were translated into measurable data in or-der to be introduced to the graphical algorithm editor (Grasshopper 3D). These variables were fundamental for building the topological diagram of each foot. After defining these variables, it was crucial to map points of the foot so that they could be considered for draw-ing the diagram and thus be able to take the measurements. These points, corresponded to a specific anatomical part of the foot.
• The designing of a shoe using a graphical algorithm editor was made in parts because each part of the shoe has different requirements as per performance and needs to support a different part of the foot.
Figure 6.1 (left) A render of the pro-posed pointe shoe.

• The fabrication of the shoe that was done using digital fabrication tools. Pointe shoe making process is an artisanal craftsmanship work-ing with the same materials for at least two centuries. In this project, it was very crucial to study and understand the performance of the tra-ditional materials with the purpose of understanding their properties and be able to propose new materials. One of the advantages of the digital era is that you can link human data to the design and manufac-turing. 3D printing as an addictive manufacturing process, allows us to transform digitally developed 3D models into physical objects. For that reason most of the parts of the shoe, 3D printing was proposed as a fabricating process. The different requirements of the different parts of the shoe need different material properties. For that reason for some parts (for example the box) was used PLA filament because the box is the part of the shoe that needs to be strong for supporting the whole body. In other parts of the shoe (for example the inside cushioning) TPU filament was used which is a much more flexible ma-terial.
102 - Developing a Parametric System for Pointe Shoe Customization

6.1 Scanning process:
As already mentioned, the design process that is being investigating, begins
with the geometric analyzation of the foot and the definition of the geometric
variables that will be taken in account for designing each part of the shoe. More
specifically, the design process begins with the 3D scanning of the foot.
6.1.1. Detailed methodology of the scanning process:
For the 3D scanning, a Structure Light1 Sensor (SLS) has been used which, like
many others 3D scanners, consists of a light source and a camera that are sep-
arated. The first one projects a beam of light and the second one captures the
points on the surfaces. More precisely, a laser passes through a diffraction grid,
in order to project a speckle pattern onto the environment (Fig. 6.2). Then the
sensor (camera) gathers the reflected light and generates depth data. This point
data-set that is the output of the Structure Sensor, is processed through image
and triangulation algorithms in order to be converted into 3D information (Kalan-
tari and Nechifor, 2016).
The scans were made connecting the scanner directly to a computer and us-
ing the SKANECT software to process them. SKANECT2 is a software or a 3D re-
construction system that uses a Structure Sensor, Microsoft Kinect or Asus Cam-
1 Structured light is the process of projecting an accurate pattern (often a grid) onto a target, for measuring the displacement or distortion of it.
2 The recording feedback were executed by a CPU acceleration even though a GPU can also be used, spe-cially if you are willing to render the scanned object.
Figure 6.2 Structure Sensor is a mobile device that was developed by Occipital Inc. in 2014. One of its advantages is that can be attached on a mobile device (an ipad or a phone) and that it’s fully con-trolled by a software (it doesn’t have any buttons on its surface).
Developing a Parametric System for Pointe Shoe Customization - 103

era for scanning an object and it can create a 3D polygon mesh allowing us to
manipulate or render a geometry.
For scanning each foot, the person was placed sat on a chair with one foot
touching the ground and the other one (the one that was going to be scanned)
supported horizontally on a stool in such a way that the back of the calf touches
the stool and the foot, including the ankle is hanging (Fig. 6.3). This position is
considered to be quite comfortable for the models, as they had to remain in this
position for some time.
Beginning with SKANECT software, there is a list of settings that need to be
set in order to get the best possible result of the scanning process. In the first
window (Prepare – New), one of the most important setting is the size of the
bounding box. The bounding box defines the peripheral area of the object of
space we want to scan. In this case, the bounding box needs to include the foot
and a small part of the leg (from the ankle until one third of the calf). The vertical
dimension from the ground until the foot is also important for defining the size of
the bounding box, which it was set at 0.6m X 0.6m X 0.6m (Fig. 6.4).
At the window “Prepare-Settings”, it was set the feedback quality of the result
to high and the option “All Frames” was chosen for saving all depth and color
frames to the machine, so that it would be allowed to reconstruct the scan.
The next tab is called “Record” and this is when the scanning of the object-foot
starts. The workspace shows a grid as an x/y plane and the bounding box in the
middle. On the right of the screen appears a video and an infrared view of what’s
Figure 6.3 The first model prepared for the beginning of the scanning process.
104 - Developing a Parametric System for Pointe Shoe Customization

Figure 6.4 Defining the settings of the scanner before starting.
Figure 6.5 On the upper left corner, when a GPU acceleration is availiable, it can be seen also a normal video apart from the infrared view which record in real time, textures and colours that can be used later for rendering.
Figure 6.6 Apart from the giving the feedback of how many frames it captures, when moving too fast or getting far from the defined area of the bounding box, the geometries in the screen become red, meaning that there will be errors or that it cannot go on.
Developing a Parametric System for Pointe Shoe Customization - 105

included in the bounding box (Fig. 6.5). In the window below these two views it’s
going to appear the scanned geometry.
When starting the scanning (press “Record”), the scanner needs to capture
the foot covering all 360 degrees of the view (Fig. 6.6). The first scans were made
with the models having the foot in a relaxed position and the second ones were
done with the model performing a complete plantar flexion. One of the reasons
that it wa s decided that the foot should be hanging, was for avoiding any distor-
tions of the dimensions of the foot. For example, the width of the foot changed
slightly when we put pressure for stepping. Also, because of its structure and
depending on the individual flexibility of the joints and muscles, the foot width
changes when we are in relaxed position or performing a full plantar flexion and
the toes tend to come closer to each other. It was interesting to have both posi-
tions of the foot, in order to be able to compare the measurements.
As already told, the scanner should capture a 360 degrees of a view of the
foot, including the toes. The sensor should move fast enough to get high frame
rate between 18-20 frames but when moving very fast it may mess up the result.
Once the scanning is completed, the “Stop” button can be pressed. Then the
software starts processing the mesh, until it appears in the bounding box. In the
reconstruct tab we can try and fix the created mesh. Sometimes there might be
holes or the mesh may need to become a bit smoother. The “Fidelity” option
may add some detail to the textures. In the process tab, we can go on with the
reconstruction of the mesh, fill in any holes or make the mesh smooth.
Figure 6.7 A mesh is a representation of a 3D model that consists of a collection of vertices, edges and faces and it’s created through the triangulation of 3D points.
106 - Developing a Parametric System for Pointe Shoe Customization

The next step is the export of the model/mesh (Fig. 6.7). SKANECT gives us
four options of exporting type files3. The next steps of the design process re-
quires the manipulation of the model in Rhinoceros 3D software. After confirming
that all the options can be imported to Rhino, it was decided to go on with the
“PLY” file format.
PLY or Polygon File Format, or Stanford Triangle Format, represents a 3D file
format, that defines an object as a collection of polygons. More precisely, it de-
fines it as a collection of vertices, faces, edges but also the color and normal
direction (vectors) of the faces.
The process of the scanning includes the export of the mesh and then its
introduction to Rhino. Once in Rhino, the meshes need to be checked for any
discontinuities, reconstruct them and start measuring them (Fig. 6.8 & Fig. 6.9).
6.1.2. 3D Scanning results:
Five women’s feet were scanned. Three of them were ballerinas, one of them
had danced ballet in the past and another one had never danced in her life. Be-
low are reported the examples of one ballerina and the last two models. Besides
the variation of the width of the foot, the length, the type of foot, it was also in-
teresting to see the variation of the arch flexibility.
The first scans were made with a low resolution but it was a variable that it
3 Three of the options are PLY, STL or OBJ. There is a big debate which one of the three file formats is better. Even though STL is wide known, is used for the most 3D printing machines, while the other two formats were developed for completing that lack of properties of the STL. The file format one will use, it really depends on the needs, the situation and the software in which it will be used.
Figure 6.8 (left) Reconstructed meshes from a left foot, above in relaxed position and below performing a full plantar flex-ion (screenshots from Rhino). Figure 6.9 (right) A rendered mesh from a right foot.
Developing a Parametric System for Pointe Shoe Customization - 107

was changed because a lot of important information was missing, like have the
best possible representation of the toes. As already mentioned, the length of the
toes is a crucial parameter for defining the shape and length of the vamp and the
box of the shoe. That’s the reason why the scans should be done with the best
possible resolution (Fig. 6.10 & 6.11).
The next step was to open the PLY archives with Rhinoceros 3D software and
convert them to a 3D Rhino file. It was then important to recognize on the 3D
model, points that would help to define the geometric variables. As already ex-
plained, these variables were needed for the definition of a topological diagram
of a foot. For this reason, the points recognized on the model, had to correspond
to a specific anatomical part of the foot. This procedure, firstly required the study
and recognition of the principal axis (Bähler, 1986) of the foot in order to get an
orientation of the 3D models that would allow us to mark the needed points
(Mochimaru, Kouchi and Dohi, 2000). The first axis that was needed to define,
corresponds to the longitudinal axis of the foot that runs through the center of
the head of the second metatarsal and through the center of the calcaneal tu-
berosity (Fig. 6.12). This axis corresponds to the sagittal plane of the foot, that
separates the foot into medial and lateral halves (Fig. 6.13). Parallel to this plane,
dorsiflexion and plantar flexion refer to the relationship between the surface of
the foot and the anterior surface of the leg. This means that dorsiflexion is when
the dorsum4 of the foot moves toward the leg, and plantar flexion is defined
when the dorsum surface of the foot, moves away from the leg. This is the axis
4 Dorsum and planum refer to both mid foot and front foot. Dorsum is the area of the foot facing upwards while standing and planum is the area of the foot facing downwards while standing.
Figure 6.10 (left) The faces of the mesh are bigger and as it can be seen, it lacks of important information.Figure 6.11 (right) The faces of the mesh are smaller and this is the quality of the scans that it was needed.
108 - Developing a Parametric System for Pointe Shoe Customization

transverse arch
medial arch
lateral arch
Figure 6.12 The cardinal longitudinal axis of the foot is along the sagittal plane.
Figure 6.13 The sagittal and transverse plane along of which the foot can move.
Figure 6.14 Even though the idea of defining the foot as a vault is quite critiz-able, its construction, allows to the fore-foot to take a great amount of weight and also it allows to the foot to adapt to uneven surfaces.
Figure 6.15 From metatarsal I to metatarsal V, the metatarsal bones form an oblique arch.
Developing a Parametric System for Pointe Shoe Customization - 109

which traditional pointe shoe makers use for building the shoe last of the tradi-
tional point shoe. Some doctors, compare the foot architectonically to a vault
(Bähler, 1986) (Fig. 6.14). The second axis that we need, doesn’t correspond to a
mechanical plane as the first one but it corresponds to the arc of the Transversal
Anterior Vault of the foot (Fig. 6.15). This arc is formed by the metatarsal bones,
starting from the first metatarsal to the fifth metatarsal and while walking it tends
to drop due to excessive pressure and at the same time it can partly be attributed
to walking on level ground. While being on pointe shoes though, this arc reaches
its highest angle. The imaginary line that is formed when this arch is “dropped”
is the axis we need for the orientation of the 3D model (Hill et al., 2017).
Once the foot is oriented as mentioned above (Fig. 6.16), it was needed to
define the points that are important for drawing a topological diagram. The cho-
sen points (parts of the foot) had to be the ones that can be seen with a naked
eye and the ones that help for building a measurable diagram for the needed
variables (Fig. 6.17).
• The first two points correspond to the calcaneus bone and it can be seen
on the lateral and medial view of the foot. It is important to recognize the
calcaneus bone for it is needed for calculating the heel width and also the
foot length.
• The third point corresponds to the Lateral Malleolus that forms part of the
fibula bone and it can be seen on the lateral view of the foot, whereas the
forth point corresponds to the Medial Malleolus that forms part of the tibia
bone (Grivas, 2002).
Figure 6.16 Orientation of the scanned 3D models according to the sagittal and transverse plane.
110 - Developing a Parametric System for Pointe Shoe Customization

calcaneus
lateral malleolusof fibula bone
navicularlesserof 5th metatarsal
proximal phalanxof 2th metatarsal
navicularlesserof 5th metatarsal
distal phalanxof 2th metatarsal
proximal phalanxof 1st metatarsal
medial malleolus of tibia bone
medial malleolus of tibia bone
Dorsum of scanned foot
Dorsum of foot
Lateral of scanned foot
Figure 6.17 Mapping points on the scanned foot that correspond to specific anatomical part of the foot.
Developing a Parametric System for Pointe Shoe Customization - 111

• Another point that can be better seen when the foot is performing a com-
plete plantar flexion, corresponds to the navicular bone.
• The outer point on the joint between the Proximal Phalanx and Lesser of
the fifth metatarsal can be seen on the lateral view of the foot and along
with the Proximal Phalanx of the first metatarsal that can be seen on the
medial view of the foot, are needed for defining the width of the foot.
• Another point that is important to mark, is the end of the distal phalanx
of the first metatarsal that will help for calculating the length of the foot. It
is already mentioned, that some people have the second toe longer than
the first one. For those cases, it should be marked the distal phalanx of the
second metatarsal.
Even though while designing the shoe, the whole geometry has been taken
into account (Fig. 6.19-22), defining some important measurable variables, it’s
been very helpful for defining each part of the shoe. These variables are:
• Foot width
• Foot type
• Toe Length
• Arch Type & Angle
• Foot Length
• Heel width
Model 1 Model 2 Model 3
Foot width 83mm 89,5mm 83mm
Foot type Greek Roman Egyptian
Toe length 44mm 49mm 47mm
Arch Angle: 90°R:53mm
Angle: 69°R:67mm
Angle: 56°R:90mm
Foot Length 197mm 226mm 203mm
Heel width 48,5mm 54mm 57mm
Table 5.2 Measurements of the vari-ables of three of the models.
112 - Developing a Parametric System for Pointe Shoe Customization

As it can be seen from the table and diagrams of the feet below, there have
been three people with three different types of feet (Table. 5.2). Both No1 and
No3 models, have almost the same width and length of foot but the width of the
heel and the foot type are very different. The No2 model, has the bigger foot.
The angles of the arch of the feet, correspond to the relationship each one of the
models has with ballet. The biggest angle corresponds to the feet of the balleri-
na, the second bigger angle corresponds to the one that had done ballet in the
past and the smaller angle corresponds to the person who had never done ballet
in her life. Even though this is quite logic, it is also a coincidence. It cannot be
taken as granted that people who dance ballet have an arch with a big angle and
off course it doesn’t mean that people who never danced ballet have am arch
with a small angle.
Conclusion:
As a result from the scanning process, can be reported the successful scans of
different kind of feet. The detailed 3D mesh exported from the 3D scanning soft-
ware, provided the required high resolution structure that was needed for con-
tinuing with the next step of the process that was the design and parametrization
of the shoe. The results are considered to be done successfully as the detection
of the characteristics of the foot that can be done effortless. With the information
gathered from the scanning, combined with the theoretical background that was
Figure 5.26 Rhino and Grasshopper 3D, parametrization of the box based on the scanned foot.
Developing a Parametric System for Pointe Shoe Customization - 113

Figure 6.18 Model No 3 - bottom view of the right foot. It is quite notable that even that is smaller that the foot No 2, the heel is wider.
114 - Developing a Parametric System for Pointe Shoe Customization

foo
t w
idthtoe
length
toe shape
arch
foot length
heel
wid
th
heel width
foot width
Figure 6.19 Top view of a left foot. The length of the toes is defined by the head of the longer toe until the end of the lon-ger toe-separation line.
Figure 6.20 Lateral view of a left foot - defining arch of the foot. The angle of this arch is very important for ballerinas for obtaining at least 90° that gives a bet-ter support while dancing on pointe.
Figure 6.21 Bottom view of a left foot - defining length of the foot and the heel width. One of the injuries that dancers suffer while being on pointe, it’s because of the tightness of the heel of the shoe.
Figure 6.22 Front view of a left foot.
Developing a Parametric System for Pointe Shoe Customization - 115

toe sh
ape
toe sh
ape
toe
shap
e
toe length
44mm
toe length
49mm
toe length
47mm
Figure 6.23 Model No 1 - top view of the right foot. It obvious that the second toe is longer than the hallux.
Figure 6.24 Model No 2 - top view of the right foot. Here, the three first toes are quite equal between them, with the hallux being the longest toe.
Figure 6.25 Model No 3 - top view of the right foot. Her first metatarsal is the longest and the rest of them are gradual-ly smaller than the first one.
116 - Developing a Parametric System for Pointe Shoe Customization

arch
a: 90°
r:53mm
arch
a: 69°
r:67mm
arch
a: 56°
r:90mm
Figure 6.26 Model No 1 - lateral view of the right foot with the bigger angle of the arch.
Figure 6.27 Model No 2 - lateral view of the right foot, also with a quite flexible arch.
Figure 6.28 Model No 3 - lateral view of the right foot with the smaller angle of all .
Developing a Parametric System for Pointe Shoe Customization - 117

foot length
48,5
mm
heel
wid
th
197mm
foot length
54m
m
heel
wid
th
226mm
foot length
57m
m
heel
wid
th
203mm
Figure 6.29 Model No 1 - bottom view of the right foot. This is the smaller foot of all three.
Figure 6.30 Model No 2 - bottom view of the right foot. The biggest foot of all.
Figure 6.31 Model No 3 - bottom view of the right foot. It is quite notable that even that is smaller that the foot No 2, the heel is wider.
118 - Developing a Parametric System for Pointe Shoe Customization

83mm
foot width
89,5mm
foot width
83mm
foot width
Figure 6.32 Model No 1 - front view of the right foot.
Figure 6.33 Model No 2 - front view of the right foot.
Figure 6.34 Model No 3 - front view of the right foot.
Developing a Parametric System for Pointe Shoe Customization - 119

Figure 6.35 The interface of grasshop-per: components that represent com-mands, which need an input data to be activated and they give an output data that can connect with another compo-nent to do another command.
studied in the previous chapters regarding the anatomical characteristics of the
feet and the required performance of the pointe shoes, it was easy to define the
geometrical variables that need to be taken in account for the parametrization of
the pointe shoes.
6.2 Parametrization of the model
The design of the shoe and its parametrization has been done using Grass-
hopper5, which is a plug-in of Rhinoceros 3D CAD software and it’s a graphical al-
gorithm editor (Fig. 6.35). Basically it’s a visual programming language that allows
to the user to reference a geometry (surface, mesh, solid, point, curve, etc) from
Rhino. Whatever is created in grasshopper you can see it in Rhino but it doesn’t
really exist as a geometry, it’s like designing a “ghost” of a geometry which in
order to be able to make it exist in rhino, you have to “bake” it. This allows to the
user to manipulate a lot of parameters and data at the same time. The advantage
of this, is that you can change the variables/parameters of a geometry very fast
and sometimes just by moving a numeric slider. So, you can have many different
options at the same time without having to spend a lot of time designing the ge-
ometry over and over again. In grasshopper you can perform all the commands
of rhino but you can not use the mouse like almost all CAD softwares, instead,
everything needs to be defined as a variable, the vectors, the points, the rotation,
the movement, the scale etc.
5 Grasshopper was created by David Rutten around 2007 at Robert McNeel & Associates.
120 - Developing a Parametric System for Pointe Shoe Customization

Box & Vamp Sole & Shank Outer shoe Padding
Foot width √ √ √ √
Foot type √ √ √
Toe length √ √ √
Arch √ √
Foot Length √ √
Heel width √ √
Table 5.3 Variables that correspond to specific parts of the shoe.
The parametrization of the design starts by importing information from rhino
to grasshopper in order to start to modify and manipulate this information. The
most important data that exists up to this stage, is the mesh that we got from the
scanning process. Additionally, there were defined some points on the geometry
of the foot which are related to the variables that are needed to be taken in ac-
count for designing each part of the shoe. Also, there were defined the two axis
that helped with the orientation of the mesh geometry in rhino.
Apart of the design of the shoe that needs to answer to many geometrical and
performance problems, the complication of the process, consists of the design of
the parametric system. The whole design needed to be based on the common
information that was extracted for all feet from the scanning process. Meaning
that the whole design needed to be based on the mesh, the points and the axis.
The design, as well as the grasshopper definition, are divided into four gener-
al parts. These parts are:
1. The box and the vamp of the shoe.
2. The sole and the shank of the shoe.
3. The protective padding.
4. The outer shoe.
All these parts are obviously interconnected. The division was done consid-
ering the different mechanical properties that each part requires. At the same
time, the separation of the design into parts, facilitated the manipulation of the
Developing a Parametric System for Pointe Shoe Customization - 121

protective padding
main structure of the box
outer shoe
Figure 6.36 The proposal for the box of the shoe consists of three layers. The outer shoe, the main structure of the box and the protective padding.
code and, later on, the fabrication.
6.2.1. Parametrization of the box and the vamp of the shoe:
The first part of the shoe that was defined, was the box and the vamp. For
these parts, as already mentioned, the variables that are related to them are the
width of the foot, the length of the toes and the type of foot (Table. 6.2). The box
is the part that holds the most weight of the body and also holds all the toes to-
gether. It needs to be rigid and resistant to the jumps, turns and the difficult steps
that the dancer performs and also to the conditions and properties of the dance
floor. The platform, as the surface that holds almost the whole body, needs to be
completely flat. This surface is the only area of support that someone can have
while standing on pointe. The bigger this surface is, the more support would
have and the easier would be to stand on pointe. On the other hand, if the box,
vamp and platform are too wide, the toes are not well pressed together. The size
of the platform really depends on the width of the foot and the type of the foot.
Another important consideration is the size of the vamp, that also needs to be
proportioned to the width of the foot and its shape but also to the length of the
toes.
It was proposed to resolve the design of the box with three “layers” (Fig. 6.36).
The outer shoe layer, the main structure of the box, and the inside padding. In
this section will be described the main structure of the box. The structure of the
box is based on the widest section of the foot, that is an average section that
passes through the sections of the lesser of the 5th metatarsal and the proximal
phalanx of the 1st metatarsal . This section corresponds to the part of the foot
122 - Developing a Parametric System for Pointe Shoe Customization

Figure 6.37 This diagram intigates the section of the foot that corresponds to the bending axis of the toes.
that folds when the foot is on demi-pointe position and stretches when on full-
pointe position (Fig. 6.37). For having a better support while standing on pointe,
the toes need to be very well supported from behind, that’s also the reason why
this section is so important. The surface of the platform is based on the diameter
of the same elliptic section that is proportioned and scaled down in such a way
that it covers the tips of the toes (Fig. 6.40). This ellipse is placed in the center of
the axis that was defined in the scan process. This is because, as we have already
explained, this axis is also the axis of gravity and center of weight of the dancer,
so it is very important that the platform corresponds to the center of weight.
The box results from the unification of the two “ellipses” with a surface, cre-
ating something like an elliptical cone (Fig. 6.43). The two ellipses on the side
that the shoe touches the floor needs to be flat so that the dancer can balance
when in flat or demi-pointe position. On the top side of the box, what we call a
vamp, the ellipse needs to be modified in such a way that it will cover up until the
separation of the toes. Not less and not more than that. As explained in the 5th
chapter the center of the front part of the vamp should always reach as far as, or
just beyond the third phalange of the first and second metatarsal. Another issue
that was quite important, it was the thickness of the box that is also related to the
material. The thickness it was proposed to be 3mm.
Many trials have been made for this part of the shoe. The first ones were made
in a straight section but it didn’t correspond to the requirements of the vamp and
when putting it on and folding the toes like in demi-pointe position, it was really
uncomfortable (Fig. 6.46). The second trials were made, designing some sort of
Developing a Parametric System for Pointe Shoe Customization - 123

step 1 step 2
step 3 step 4
Figure 6.38 Step 1: Dividing into sections the mesh perpendicular to the defined axis for extraxting ac-curately the dimensions of the foot.
Figure 6.39 Step 2: Inticating the point the corre-sponds to proximal phalanx of the 1st metatarsal and introducing it as a parameter in grasshopper.
Figure 6.40 Step 3: Inticating the the section of the foot that is closer to the point.
Figure 6.41 Step 4: Scaling down and offsetting the elliptic section fot creating the surface of the platform.
124 - Developing a Parametric System for Pointe Shoe Customization

step 5 step 6
step 7 step 8
Figure 6.42 Step 5: Getting an average inclined section for fulfilling the requirements of the vamp.
Figure 6.43 Step 6: Unifying the two “ellipses” with a surface, creating the box that looks like a sec-tioned cone.
Figure 6.44 Step 7: Giving a thickness of 3mm to the box.
Figure 6.45 Step 8: Creating the surface of the platform and giving a thickness of 4mm.
Developing a Parametric System for Pointe Shoe Customization - 125

top view side view perspective view
Figure 6.46 The first designs of the box were done with a straight section on the vamp, making it very unconfortable and difficult to bend the toes.
Figure 6.47 Second trial with a small re-cession on the edge but not big enough for allowing a free movements of the toes.
a recession on the edge of the top side of the box (Fig. 6.47). But this was not
enough to avoid the discomfort. Also, there was a lot of unnecessary material
that was making the box heavier. That´s why it was resolved by designing an even
bigger recession based on the sections of the foot. Up to this stage, the thick-
ness of the box was equal all over the box. After trying out the prototypes, it was
realized that on the top side of the box, it could be reduced for aesthetic reasons
and for avoiding using unnecessary material (Fig. 6.49).
Figure 6.48 An inclination of the sec-tion would resolve the vamp problem, but in this case the vamp was very small, leaving a part of the toes un protected.
Figure 6.49 An inclination of the sec-tion, covering the toes and making thin-ner the edge of the top was much more functionable and comfortable.
126 - Developing a Parametric System for Pointe Shoe Customization

trial 1 trial 2 trial 3
trial 4 trial 5 trial 6
trial 7 trial 8 trial 9
trial 10 trial 11 trial 12
Figure 6.50 Renders of a series of tri-als. Each trial has a slight change in the creation of the ellipse. In some cases the vamp is shorter, in others the vamp is longer. In some cases the design of the ellipse is different, trying different widths on the back side of the box.
Developing a Parametric System for Pointe Shoe Customization - 127

6.2.2. Parametrization of the sole and the shank of the shoe:
The same as the traditional pointe shoe, the shank will be formed by an inner
rigid sole and will be covered by the outer sole. For the inner sole, the variables
that need to be taken in account are the arch, length and width of the foot and
the width of the heel. The shank needs to be supple but also rigid for providing
support to the arch and holding the dancer’s body weight. After studying well the
dancers’ needs and movements, it was decided that the shank could be resolved
separating it into a rigid and a more flexible part. The sturdy part would be an el-
ement that starts from the heel and reaches up until the beginning of the ball of
the foot and the supple would be another element from the ball until where the
box of the shoe starts. This was a very complicated part of the design because
on one hand it needs to be flexible enough so that the dancer cal fold the toes
to perform on demi-pointe and on the other hand it needs to provide support.
As a first step, the “hard” part of the shank, was resolved based on the curve
that was created from the average points of the sections on the lowest part of
the foot. This curve indicates the arch of the foot and the purpose of this design
process is to create a shank that will be completely adapted on the arch of the
foot. The rest of the geometry of the rigid part, was done following the outline
of the foot while trying not to use material where is not necessary (Fig. 6.52-58).
Figure 6.51 Rhino and Grasshopper 3D, parametrization of the shank based on the box.
128 - Developing a Parametric System for Pointe Shoe Customization

step 1 step 2
step 3 step 4
Figure 6.52 Step 1: Step 1: Dividing into sections the mesh perpendicular to the defined axis for ex-traxting accurately the dimensions of the foot.
Figure 6.53 Step 2: Selecting the sections that cor-respond to the part of the shank.
Figure 6.54 Step 3: Extracting straight lines that are tangent on the lower point of the sections.
Figure 6.55 Step 4: Getting the middle point of ev-ery straight line for creating the curve of the shank.
Developing a Parametric System for Pointe Shoe Customization - 129

step 5 step 6
step 7
Figure 6.56 Step 5: Defining the perimeter of the inner sole
Figure 6.57 Step 6: Defining the outline of the in-ner sole.
Figure 6.58 Step 7: Defining the surface with a spe-cific thickness for the creation of the outer sole.
130 - Developing a Parametric System for Pointe Shoe Customization

The supple part of the shank is the most complicated part of the shoe. It’s the
part where the traditional pointe shoe lacks effectiveness, functionality and ergo-
nomics. This happens because it needs to bend and work in two directions and
above all it needs to support the foot in both positions (demi- and full- pointe).
Most of the shoes that already exist, have a very sturdy shank that only provides
support while being on pointe and it’s almost impossible to bend it when being
on demi-pointe1. This part was resolved progressively. The initial idea was for it
to be a continuation of the rigid part and try to give flexibility by marking cuts in
the direction that it needs to be bent. After trying many types and sizes of cuts,
it was realized that it kept breaking because of the rigidity of the material. The
second idea was for it to be a continuation of the rigid part but with less thickness
at the folding part. This option didn’t work either because of the material and the
printing direction. The third idea was to have an extra element for this part of the
shank, that could be made from a different material and which would even allow
to add as a parameter also the strength of the individual and in this way be able
to have different materials or thicknesses for providing different levels of rigid-
ness (Fig. 6.59). This element will be attached on the other part of the shank and
on the box. The remaining hollow below the shank will be filled in automatically
with the outer sole.
1 Even though dancers do not perform many steps in demi-pointe while wearing pointe shoes, demi-pointe position is very important specially when rising on pointe and when land on the ground from full-pointe position or jumping.
supple part of the shank
hard part of the shank
outer sole
Figure 6.59 A section of the proposal of the shank.
Developing a Parametric System for Pointe Shoe Customization - 131

top view side view perspective view
Figure 6.60 The first designs of the shank were done with as a continuation of the box.
Figure 6.61 A trial of the shank in which the shank and box they come together with an angle and in which they are some cuts on part where it needs to bend.
Figure 6.62 The shank is made with an arch and here as well there are some cuts on part where it needs to bend.
Figure 6.63 The shank is made with an arch and as a continuation of the box without any cuts.
Figure 6.64 Instead of cuts, the supple part is done by a reduction of the mate-rial.
Figure 6.65 The supple part is added as a new element and maybe a new mate-rial, which gives the opportunity to add as a new parameter the strength of the dancer.
132 - Developing a Parametric System for Pointe Shoe Customization

trial 1 trial 2
trial 3 trial 4
trial 5 trial 6
trial 7 trial 8
Figure 6.66 Renders of a series of trials. Each trial has a change in the supple part of the shank.
Developing a Parametric System for Pointe Shoe Customization - 133

6.2.3. Parametrization of the protective padding:
Up until now, the protective padding it’s been an additional accessory for danc-
ers. Although it doesn’t form part of the shoe, all ballerinas use it for preventing
them from pain, ingrown toe-nails and blisters. Usually they are made of foam
or silicone or lamb’s wool and they look like a cover for the toes. These kind of
paddings are quite protective but in some parts there is a waste of material and
in some others they are too thin for providing protection. Also, in many cases,
dancers need to combine accessories, like toe pads between the toes or on the
tip of the toes. The idea here was not only to integrate it as a part of the shoe but
also to create a padding that would completely adapt to the individual’s type of
foot and toes. This could help for example the dancers who have the second toe
longer that hallux, giving them more support by filling in the “empty” space from
the hallux. In general, a padding adapting perfectly to the shape of toes would
prevent from pain and wounds and at the same time offer much more comfort.
The protective padding here, basically is created as a double mold of the foot
and the pre-designed box (Fig. 6.67). The idea was to have a padding that would
take exactly the shape of the foot, marking all the details of the toes and gaps
between the toes. This would help the dancers not only to feel more comfortable
but also it would help them to feel better supported as they would feel a support
below every toe.
Figure 6.67 The protective padding is created by a double mold.
134 - Developing a Parametric System for Pointe Shoe Customization

top
vie
wsi
de
view
per
spec
tive
view
Figure 6.68 The protective padding de-pends not only on the geometry of the foot but also on the size and shape of the box of the shoe.
Developing a Parametric System for Pointe Shoe Customization - 135

Figure 6.69 The outer sole is important for holding all the parts of the shoe to-gether.
6.2.4. Parametrization of the outer shoe:
The role of the outer shoe is to keep all the other parts of the shoe together
and to keep the shoe tight on the foot. The idea here was to create a covering
layer for the box and sole and a folding part on the sides (wings) that would sur-
round the foot and with the help of the ribbons to adapt perfectly on the foot
(Fig. 6.69). This part was also progressively designed because it had to adapt to
the changes of the other parts. Every change on the box or shank, required a
change on the outer shoe.
Overall, this covering element needs to clothe the dancer’s foot but at the
same time, the dancer should be able to adjust the tightness of the shoe with the
ribbons. In order to satisfy this requirement, besides of using a flexible material,
the idea was also to increase the adaptability with the geometry of the design.
The idea was to lighten the folding wings with some holes that would have the
shape of an ellipse and that their size would vary parametrically from smaller
holes to bigger ones. As closer the holes are getting to the edges, the bigger
size they have.
The ribbons would also pass through some holes that would be positioned
nearby the edges of the wings. The outer sole and the outer box were nothing
more than an offset of the inner sole and box. The dimensions of the side folding
parts, were extracted from the sections of the foot.
The base for starting the parametrization of the outer shoe was the already
designed shank that had to be flattened on a 2D plane for facilitating the param-
136 - Developing a Parametric System for Pointe Shoe Customization

etrization but more than anything for facilitating the fabrication. Based on the 2D
outer edges of the sole and on the dimensions from the sections of the foot, it
was created an unfolded covering of the foot (Fig. 6.70). The sides of the shoe
were then designed, progressively with the idea of using the less possible mate-
rial but also aiming to provide stability and confidence while wearing the shoe.
Initially, the two wings were designed as a continuation of the box and just with
one hole for passing through the ribbons. This solution though, did not provide
the wanted stability and there was too much unused material that was forcing
the material to crinkle. After many trials it was decided to separate the folding
parts from the box for avoiding the wrinkles. This modification was helpful but
not enough as the material kept crinkling right next to the arch of the foot. For
this reason it was decided to mark another hole next to the arch, following the
outline of the sole to avoid this effect. For better adaptation on the foot and for
providing more security there was also added another hole on each side for the
ribbons (Fig. 6.71-76).
Conclusion:
From the parametrization process, it can be deduced that using Grasshopper,
a parametric definition can be developed for designing a pointe shoe and its
individual parts. Based on the 3D geometry of the foot and using as measurable
parameters the width of the foot, the type, the toe length, the arch, the foot
length and the heel width, a point shoe is designed that can be adapted to every
different 3D geometry of a foot and thus to every different foot. The shoe can be
adapted to the characteristics and the needs of the foot of every individual. The
Figure 6.70 The dimensions of the “wings” of the outer shoe are based on the dimensions of the sections of the foot.
Developing a Parametric System for Pointe Shoe Customization - 137

step 1
Figure 6.71 Step 1: The design of the outer shoe is based on the outline of the already created inner sole that is flatened on a plane.
step 2
Figure 6.72 Step 2: A parallelogram is defined by the dimensions of the sections of the foot.
step 3
Figure 6.73 Step 3: The sides of the outer shoe are design so that they would “hug” the foot.
step 4
Figure 6.74 Step 4: The elliptic holes vary paramet-rically from smaller holes to bigger ones for increas-ing the adaptability and flexibility of the wings.
step 5
Figure 6.75 Step 5: Holes are marked also on the edg-es of the wings for the ribbons.
step 6
Figure 6.76 Step 6: Another hole was marked next to the arch of the foot for avoiding the wrinkles on the sides of the sole.
138 - Developing a Parametric System for Pointe Shoe Customization

Figure 6.77 Renders of a series of trials. for arriving progressively to the final de-sign.
Developing a Parametric System for Pointe Shoe Customization - 139

BOX
140 - Developing a Parametric System for Pointe Shoe Customization

SHANK
OUTER SHOE
Developing a Parametric System for Pointe Shoe Customization - 141

6.3 Fabrication process:
Additive manufacturing was the fabrication technique that was followed for
creating. This technique was chosen because allows the fabrication/print of the
prototypes directly from the computer, giving the opportunity to correct any kind
of errors or omissions. All pieces were fabricated by the printer 3D Creality Ender
3 Pro. Even though it’s an open source 3D printer that allows any kind of modifica-
tions for upgrading and changing parts for printing a greater variety of materials,
there is still a limitation of materials that can be used.
For printing a model, the geometry needs to be constructed as a mesh. From
Rhino, it needs to be exported in an STL1 file format. The STL file then, needs to
be imported into a slicing application for preparing a different kind of a file for-
mat and sending it to the 3D printer. The slicing software, in this case Cura2, slices
the 3D model into layers and it creates a g-code3 for printing. With Cura, you can
1 STL comes from Stereolithograophy or “Standard Triangle Language” or “Standard Tessellation Language” and it’s a file format that describes the surface geometry of a three-dimensional object without any representa-tion of color, texture or other common CAD model attributes. These files are usually created by CAD softwares and they are widely used for 3D printing. These files encode the information using the concept of tessellation. Tessellation, is the process of tiling a surface with one or more geometric shapes such that there are no overlaps or gaps.
2 Cura was developed by David Braam for the company Ultimaker.
3 G-code stands for Geometric Code and is a computer numerical control (CNC) programming language.
Figure 6.78 3D Creality Ender 3 Pro printing machine. Printinting the outer shoe.
design can be modified by adding parameters for more precision or for fulfilling
even more requirements but, the most important thing is that the design is 100%
based on the 3D scanning result, allowing us in this way to have a repetition of
the same shoe designed exactly in the same way for every individual.
142 - Developing a Parametric System for Pointe Shoe Customization

control the parameters of the printing process, meaning it can be controlled the
temperature of the bed or the print head, the size of the layer in which the model
can be printed and many other parameters. These parameters vary from material
to material.
The fabrication process followed the sequence of the parametrization process
and it was divided in four parts:
1. The box and the vamp of the shoe.
2. The sole and the shank of the shoe.
3. The protective padding.
4. The outer shoe.
As already explained, each part of the shoe needs to perform in a different
way and so the material properties of each part have to be distinct. For the print-
ing there were used two materials which are known as PLA and TPU.
PLA plastic or polylactic acid is a vegetable-based, fully biodegradable ther-
moplastic polymer that is usually produced by cornstarch or sugarcane (Farah et
al., 2016). It’s mainly used in the FDM (fused deposition modeling) technology.
As a thermoplastic material, can be melted and reshaped without changing its
mechanical properties. In general, it has very good material properties and it’s
quite resistant when it comes to compression, elongation or tension. It’s not con-
sider to be a flexible material although the printing parameters can influence its
mechanical properties.
Figure 6.79 3D Creality Ender 3 Pro printing machine.
Developing a Parametric System for Pointe Shoe Customization - 143

In rapid prototyping in general, there are various parameters than can affect
the mechanical properties of the PLA, in these are included the speed, the tem-
perature, the height of the layer, the thickness or width of the extruded filament
or even the direction of layer.
This material was used for the parts of the shoe that needed to be rigid and
resistant to breaking stress. TPU on the contrary, was used for the parts of the
shoe that needed to be elastic and flexible.
TPU or Thermoplastic Polyurethane is a thermoplastic elastomer and unlike
PLA it’s not biodegradable. It’s a rubber-like plastic that can be very flexible,
transparent, strong and at the same time smooth to touch. Same as other fila-
ments that are used in additive manufacturing, its mechanical properties can also
change depending on the defined printing parameters.
6.3.1. Fabrication of the box and the vamp of the shoe:
For the fabrication of the inside structure of the box it was used PLA material.
The box needs to be sturdy and very resistant for it’s the part of the shoe that not
only holds the toes together and the hole body of the dancer but it also needs to
put up with the landing on the ground from jumping and with steps that require
“hitting” on the floor. This way of fabrication and material allowed the printing of
many trials that were essential for the completion of the design (Fig. 6.80).
As already explained previously, the box was initially designed with a straight
section on its upper edge (vamp). Because of the rigidity of the material, that
cannot be folded, it was necessary to change the section of the vamp for provid-
Figure 6.80 Rhino 3D - Detail of the box.
144 - Developing a Parametric System for Pointe Shoe Customization

prototype 1
Figure 6.81 A series of prototypes. Each trial has a slight change in the cre-ation of the ellipse. In some cases the vamp is shorter, in others the vamp is longer. In some cases the design of the ellipse is different, trying different widths on the back side of the box.
prototype 3prototype 2
prototype 4 prototype 6prototype 5
prototype 7 prototype 9prototype 8
prototype 10 prototype 12prototype 11
Developing a Parametric System for Pointe Shoe Customization - 145

ing more comfort while folding the toes.
6.3.2. Fabrication of the sole and the shank of the shoe:
The inside sole and shank are the most complicated parts of the shoe because
although they need to perform as one piece, there is one part that needs to be
very sturdy and resistant and another one that needs to be flexible and resistant
at the same time. In the beginning they were fabricated as one piece and as a
continuation of the box using the same material (PLA) . On these first prototypes,
there was an intention of providing the required flexibility just by marking cuts on
the part of the shoe that needs to fold for performing on demi-point. These trials
didn’t work because when the cuts were too small it wasn’t providing flexibility at
all and when the cuts were bigger, the shank would break. Another idea was to
fabricate it as one piece, again as a continuation of the box, giving a thickness
of 3mm for the box and the rigid part and where the flexibility is needed, reduc-
ing the thickness of the material to 0,5mm and fill in the remaining gap with the
flexible material of the outer shoe. This idea didn’t work either because it kept
breaking. The last idea was to design and fabricate the supple part as an extra
piece that would be printed aside and that it would be attached on a recess on
the box and the sturdy part of the sole (Fig. 6.82). Here it was noted that when
this extra piece was printed with a direction of the material layers perpendicular
to the axis of the folding, the piece was very flexible and resistant (Fig. 6.83):
When the piece was printed with a direction of the material layers parallel
to the axis of the folding, the piece was breaking. Ideally, there was the idea of
printing this piece using another material, like fiberglass or carbon fiber but this
Figure 6.82 The flexible part is de-signed as an extra piece that would be printed aside and that it would be at-tached on a recess on the box and the rigid part of the sole.
146 - Developing a Parametric System for Pointe Shoe Customization

wasn’t possible due to the limitations of the available printer. In this case as well,
the remaining gap would be filled with the flexible material of the outer shoe.
The advantage of this piece being a separate element, is that it offers more pos-
sibilities of different materials, that can form a parameter related to the strength of each dancer.
Figure 6.83 On the left can be seen the prototype printed with the layers in par-allel with the axis of the folding and as it can be seen, it kept breaking even when trying to take off the support structure. On the right can be seen the prototype printed with the layers perpendicular to the axis of the folding which made it much more resistant..
Developing a Parametric System for Pointe Shoe Customization - 147

prototype 8prototype 7
prototype 6prototype 5
prototype 4prototype 3
prototype 2prototype 1
Figure 6.84 Series of prototypes of the inner sole. Each trial has a change in the supple part of the shank.
148 - Developing a Parametric System for Pointe Shoe Customization

Figure 6.85 The first trial of the protec-tive padding was made of a mold filled with liquid silicone.
6.3.3. Fabrication of the protective padding:
The protective padding needs to be made of a very comfortable and flexible
material for it’s the part of the shoe that provides comfort and it’s designed for
avoiding discomfort, blisters and wounds on the toes. At the beginning it was
proposed to fabricate this that using silicone. For that, it was fabricated a double
mold that on the exterior there was a layer of the box and on the interior a layer
of the mesh of the foot, leaving a gap between the two molds that needed to
be filled with liquid silicone (Fig. 6.85). The fill of the silicone was done using a
syringe. This material is believed to be ideal for this part of the shoe. The disad-
vantage was that it’s a very expensive process and that the human factor is very
crucial, as the fill in with the liquid silicone has to be done with extra attention
for avoiding air bubbles. The other idea was to fabricate this part of the shoe us-
ing the 3D printer and the TPU material. Depending on the printing parameters
the printed protective padding can provide protection but above all it resolves
the problem that many dancers have, that some toes are longer than the hallux,
or the fifth metatarsal is very short and as a result reduces the stability and bal-
ance of the dancer. The protective padding fabricated in this way takes the exact
shape of the foot.
Developing a Parametric System for Pointe Shoe Customization - 149

prototype 1
prototype 2
prototype 3
prototype 4
Figure 6.86 Prototypes of the protec-tive padding - Silicone and 3D printed with TPU material.
150 - Developing a Parametric System for Pointe Shoe Customization

Figure 6.87 The outer shoe needs to hold together all the part of the shoe and the ribbons are needed for adjusting it on the foot and holding it tight.
6.3.4. Fabrication of the outer shoe:
The outer shoe as the part that holds together the other parts of the shoe
needed to be fabricated substituting the role of the fabric or leather of the tra-
ditional shoe (Fig. 6.87). In the traditional pointe shoe, this part is fabricated by
a satin fabric on the upper and side part, and the outer sole is made of leather.
Here, it was proposed to fabricate the whole outer shoe using TPU material for
having a material continuity and for tiding together the rest of the parts. The way
that this part was designed was very important and affects the behavior of it. The
more thickness this part has, the more resistant it is. The holes that are drawn on
the sides are for providing flexibility to the outer sole for allowing it to adapt per-
fectly on the foot. There have be done various trials for the thickness in order to
have a quite flexible but at the same time very resistant cover of the shoe.
Conclusions:
As a result, for the fabrication part, it can be reported the successful fabrica-
tion of all the parts of the shoe, based on digital fabrication. The shoe was fab-
ricated by 3D printing all the parts of it using PLA and TPU material, depending
on the requirements of each part. The most important fact here is that an object
was fabricated by simply linking the digital representation of it, directly to the
3D printer, allowing us in this way the repetition of exactly the same process for
fabricating a shoe for every individual according to his/her own characteristics
and needs.
Developing a Parametric System for Pointe Shoe Customization - 151

Figure 6.88 A series of prototypes of the outer shoe 3D printed with TPU.
prototype 1 prototype 2
prototype 8prototype 7
prototype 6prototype 5
prototype 4prototype 3
152 - Developing a Parametric System for Pointe Shoe Customization

ribbons
outer shoe
shank
box
Developing a Parametric System for Pointe Shoe Customization - 153

154 - Developing a Parametric System for Pointe Shoe Customization

Chapter Seven: Conclusions
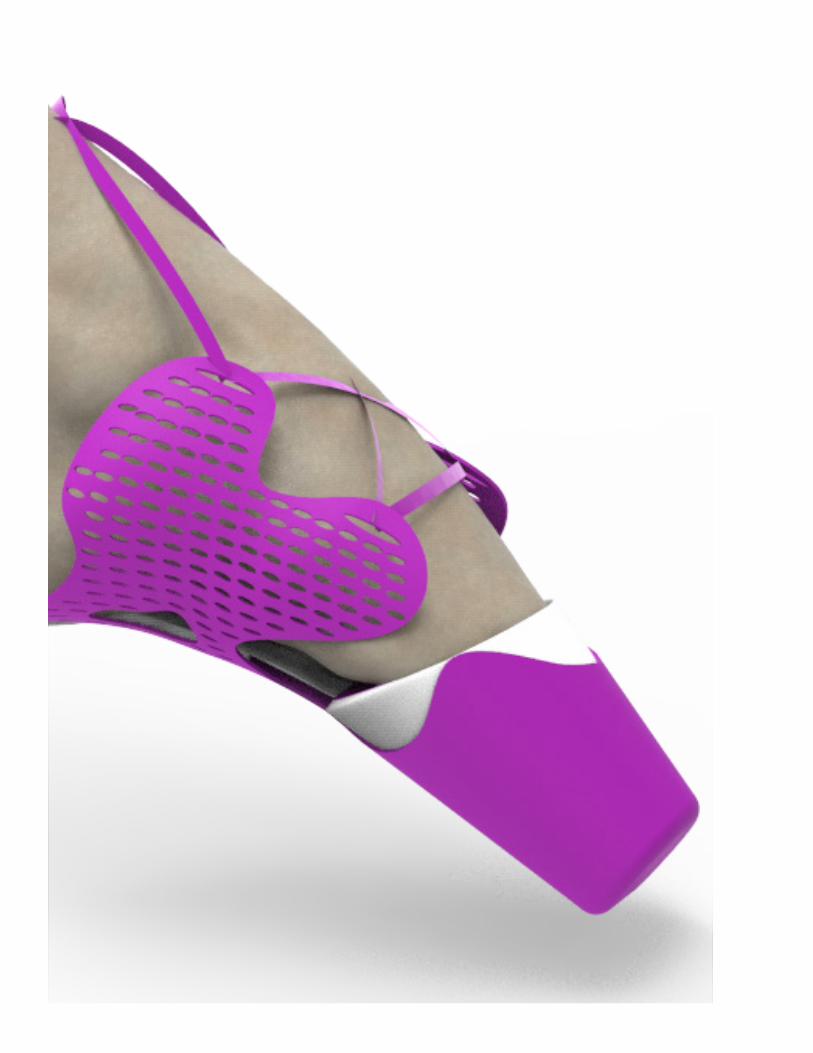

7. Chapter 7: Conclusions
Accomplishments:
The main objective of this project, as defined in the first chapter, was to study
well the geometrical and structural parameters that need to be taken into ac-
count while designing a pointe shoe and to develop a parametric system using a
graphical algorithmic editor, for designing and making pointe shoes that will be
adaptable to all feet was successfully accomplished.
In order to achieve this objective, as already explained, the study was divided
into five individual subsections:
• With the use of 3D scanning technology for getting many different 3D
foot samples, they were defined the geometrical parameters that need
to be considered while designing a pointe shoe. For achieving this, a very
deep study of a theoretical background which included foot and dance
anatomy, as well as the way that the conventional pointe shoe is designed
and fabricated was done. The 3D meshed that were extracted from the 3D
scanning process were then imported into a 3D software allowing the ex-
traction of measurable information about the geometry of the feet, help-
ing to define better these geometrical parameters.
• Deep research and understanding of the applied forces that act on the
foot and shoe while dancing and dancing on pointe were done for the

consideration of the impact that these forces have are very important for
designing the shoe.
• An investigation of the materials that could be used for fabricating the
shoe was done, having a great consideration of the applied forces while
dancing on pointe. The chosen materials had to respond to the require-
ments of a pointe shoe in order to help the dancer to reach the top of her
performance.
• After getting the 3D geometries of the scanning process, a parametric sys-
tem was developed using Grasshopper 3D, depending on the geometry
of each different foot. This parametric system can be used for designing
pointe shoes that can adapt to every individual foot.
• Once a parametric system was developed, using digital fabrication and
more specifically, 3D printing technology and two specific materials, PLA
material for the hard parts of the shoe and TPU material for the less rigid
and flexible parts of the shoe, several prototypes were made for each dif-
ferent part of the shoe forming a well-structured pointe shoe that can be
used for performing on pointe.
Discussion:
Using 3D scanning technology and the theoretical background related to foot
and dancing anatomy, a 3D mesh was provided, which was then imported into a

3d software allowing the extraction of important measurable information about
the geometry of the feet. After that, using the same 3D model, a parametric sys-
tem was developed depending on the geometry of each individual foot. Even
though this part of the project is considered to be accomplished successfully, the
samples provided from the scanning were only of a very few people, extracting
in this way information for only a very few foot typologies. Future work could be
done scanning more feet, maybe up to 100, from different ages and maybe even
from male dancers. In this way, it can be confirmed that the parametric system
works and has taken into account all the necessary parameters that are needed
for designing a shoe for any type of foot.
On the other hand, even though a thoughtful investigation about the applied
forces while dancing on pointe shoes was done and they were taken into account
while designing the shoe, they were not calculated. A future study should be
done on how the system could be further developed, adding the applied forces
while the shoe is being also used as a measurable parameter, as it has been done
with the geometrical approach. The flexibility of the arc of the foot, for example,
has been taken into account as well as the strength of the dancer, but as for the
last, it should be studied further in order to be introduced as a measurable pa-
rameter. For instance, a comparison measure could be the foot pressure that is
performed by a dancer while being on demi-pointe per his/her weight. Another
parameter that could be added, is the foot strength of the dancer, related to the
thickness of the box, of even the material rigidity of the box. The lifespan of a box
of conventional pointe shoes usually depends a lot on the individual’s strength.
Developing a Parametric System for Pointe Shoe Customization - 159

After the parametrization of the design, a prototype was successfully de-
veloped, using a 3D printer and a small range of materials. A future investigation
should be done for studying not only for trying out more materials but also for
trying out more ways for developing a 3D mesh structure which could also affect
the material properties and behavior.
The prototype was tried out by a ballerina and can be used for dancing. It
lacks of providing comfort and security. In order to reassure its functionality and
comfortableness, the inside of the shoe should be better resolved. For example,
the material of the padding should be further studied in order to be more flexible
and adaptable. It is also very important that the shoe will be tried out by many
more dancers.
Future work:
The innovation of this project lays in the integration of digital technologies
in the designing process, as well as in the integration of the digital fabrication
in the manufacturing process for customizing pointe shoes. In order to succeed
and to arrive at a final object (pointe shoe), a process was defined that included
a deep investigation, 3D scanning, the definition of variables that needed to
be considered for the parametrization, the parametrization of the design using
generative algorithms and at last the fabrication of the object using 3D printing
technology. In the same way, this process could be applied for designing shoes
that require an exceptional performance similar to the pointe shoes. For exam-
ple, this process could be used for designing shoes for football players, rock
160 - Developing a Parametric System for Pointe Shoe Customization

climbers, skiers or runners. Additionally, this process could be used for designing
equipment for different parts of the body, gloves for the hands of boxers and
motorcyclists, bicycle cushion seats for cyclists, helmets for many different sports
(motorcycling, cycling, roller skating, boxing, etc.), even for gaming controllers
that can be customized-made for every individual game player. In the future,
when digital fabrication will be cheaper and more accessible, this process could
be used for customizing wheelchairs for people that have disabilities.
Eventually, this project, combining parametric design and digital fabrica-
tion, opens the doors and gets a bit closer to the concept of mass customization,
allowing in this way, every person to be provided with garments and equipment
that adjusts to their own needs and taste.
Developing a Parametric System for Pointe Shoe Customization - 161

162 - Developing a Parametric System for Pointe Shoe Customization

8. References
• Au, S. (2012) Ballet and modern dance. 3rd Edition. London: Thames &
Hudson Ltd. doi: 10.5860/choice.40-1453.
• Bähler, A. (1986) ‘The Biomechanics of the Foot CHARACTERISTICS OF
THE FOOT’, Clinical Prosthetics and Orthotics, pp. 8–14. Available at:
http://www.oandplibrary.org/cpo/pdf/1986_01_008.pdf.
• Barber, R. P. et al. (2007) ‘Newton’s 2nd Law and the Physics of Dance’, p.
12. Available at: http://arxiv.org/abs/0706.2717.
• Barber, R. and Popalisky, D. (2008) ‘Dancing with physics’, Physics World,
21(1), pp. 29–32. doi: 10.1088/2058-7058/21/01/30.
• Barringer, J. and Schlesinger, S. (2004) The pointe book. 3rd Edition. New
Jersey: Princeton Book Company.
• Boër, C. R. and Dulio, S. (2007) Mass Customization and Footwear: Myth,
Salvation or Reality? London: Springer. Available at: file:///C:/Users/youhe/
Downloads/kdoc_o_00042_01.pdf.
• Bossan, M.-J. (2012) The art of the shoe. New York: Parkstone Interna-
tional. Available at: http://books.google.com/books?id=bkOMDgw-
FA28C&pg=PA168&lpg=PA168&dq=200+watt+piezoelectric+tran-
sducer&source=bl&ots=F39hTL71Po&sig=jJ2QHIS0GSZMBIgX0u-
jrnYmFnII&hl=en&ei=7wc7TvXyLInbgQfNmKHPBg&sa=X&oi=book_re-
sult&ct=result&resnum=1&sqi=2&ved=0CFYQ6AEwAA#v=o.
• Burry, J. and Burry, M. (2012) ‘The new mathematics of architecture’, Lon-
don: Thames & Hudson, pp. 254–269. doi: 10.1126/science.128.3328.807.
• Carlo, B. (1847) Notes Upon Dancing, Historical and Practical. Edited by M.
Delaporte. London.
• Chatfield, S. J. (1993) ‘Kinesiology and Medicine for Dance’, (January 1993).
• Clifton, G. (2009) ‘The coefficient of friction of the pointe shoe and implica-
tions for current manufacturing processes’.
• Colucci, L. A. and Klein, D. E. (2008) ‘Development of an Innovative Pointe
Shoe’, Ergonomics in Design, 16(3), pp. 6–12. Available at: https://doi.
org/10.1518/106480408X333091.
• Cox, R. and Herzog, V. W. (2013) ‘The effect of pointe shoe toe box shape
on proprioception in novice ballet dancers’, Internet Journal of Allied
Health Sciences and Practice, 11(2), pp. 1–5.
• Cunningham, B. W. et al. (1998) ‘A comparative mechanical analysis of the
pointe shoe toe box. An in vitro study’, American Journal of Sports Medi-
cine, 26(4), pp. 555–561. doi: 10.1177/03635465980260041501.
Developing a Parametric System for Pointe Shoe Customization - 163

• Doubrovski, Z. and Verlinden, J. C. (2018) ‘Fabricating the Foliage Dress:
Computational Design in Couture’.
• Ebrahim, M. (2011) ‘3D Laser Scanners: History, Applications and Fu-
ture’, LAP LAMBERT Academic Publishing, (October), p. 104. doi:
10.13140/2.1.3331.3284.
• Farah, S., Anderson, D. G. and Langer, R. (2016) ‘Physical and mechanical
properties of PLA, and their functions in widespread applications — A
comprehensive review’, Advanced Drug Delivery Reviews, 107, pp. 367–392.
doi: 10.1016/j.addr.2016.06.012.
• Fisher, J. (2012) ‘The swan brand: Reframing the legacy of Anna Pavlova’,
Dance Research Journal, 44(1), pp. 51–67. doi: 10.1017/S0149767711000374.
• Ford, S., Mortara, L. and Minshall, T. (2016) ‘The Emergence of Addi-
tive Manufacturing: Introduction to the Special Issue’, Technological
Forecasting and Social Change, 102, pp. 156–159. doi: 10.1016/j.tech-
fore.2015.09.023.
• Gibson, Ian, Rosen, David, Stucker, B. (2015) ‘“Additive Manufacturing Tech-
nologies: 3D Printing, Rapid Prototyping, and Direct Digital Manufactur-
ing”, 2nd Edition’, Johnson Matthey Technology Review, 59(3), pp. 193–198.
doi: 10.1595/205651315x688406.
• Gibson, I., Rosen, D. and Stucker, B. (2015) Directed Energy Deposition Pro-
cesses. In: Additive Manufacturing Technologies. New York.
• Gibson, L. J., Ashby, M. F. and Harley, B. A. (2005) ‘Cellular materials in
nature and medicine’, British Dental Journal. Cambridge: Cambridge
University Press, p. 627. Available at: https://books.google.com.sg/
books?hl=en&lr=&id=AKxiS4AKpyEC&oi=fnd&pg=PR9&ots=JlVO0Ax-
6qW&sig=CvvXz9Ui4MzGrUbJ_IdOUyU8BBs#v=onepage&q&f=-
false%0Ahttps://books.google.com.sg/books?
• Grivas, T. (2002) Foot and Ankle. Athens: Chr. Vasiliades.
• Haas, J. G. (2010) Dance anatomy, Choice Reviews Online. IL, USA: Human
Kinetics. doi: 10.5860/choice.48-1383.
• Hammond, S. N. (1987) ‘Searching for the Sylph: Documentation of Early
Developments in Pointe Techninque’, Dance Research Journal, 19(2), p. 27.
• Hill, M. et al. (2017) ‘The relationship between arch height and foot length:
Implications for size grading’, Applied Ergonomics, 59, pp. 243–250. doi:
10.1016/j.apergo.2016.08.012.
• Imura, A. and Yeadon, M. R. (2010) ‘Mechanics of the Fouetté turn’, Human
Movement Science, 29(6), pp. 947–955. doi: 10.1016/j.humov.2010.08.002.
• Jowitt, D. (1988) Time and the dancing image, Choice Reviews Online.
164 - Developing a Parametric System for Pointe Shoe Customization

Berkeley and Los Angeles: University of California Press. doi: 10.5860/
choice.26-2046.
• Kalantari, M. and Nechifor, M. (2016) ‘Accuracy and utility of the Structure
Sensor for collecting 3D indoor information’, Geo-Spatial Information Sci-
ence, 19(3), pp. 202–209. doi: 10.1080/10095020.2016.1235817.
• Klenerman, L. and Wood, B. (2006) The Human Foot: A companion to
Clinical Studies, Journal of Chemical Information and Modeling. London:
Springer. doi: 10.1017/CBO9781107415324.004.
• Krasnow, D. H. et al. (1997) ‘Imagery and Conditioning Practices for Danc-
ers’, Dance Research Journal, 29(1), p. 43. doi: 10.2307/1478236.
• Laws, K. (2002) Physics and the Art of Dance: Understanding Move-
ment, The Physics Teacher. Oxford: OXFORD UNIVERSITY PRESS. doi:
10.1119/1.1737979.
• Lee, Y. (2015) ‘The Parametric Design Genealogy of Zaha Hadid’, Asian
Architecture and Building Engineering.
• Lee, Y. C., Lin, G. and Wang, M. J. J. (2014) ‘Comparing 3D foot scanning
with conventional measurement methods’, Journal of Foot and Ankle Re-
search, 7(1), pp. 1–10. doi: 10.1186/s13047-014-0044-7.
• Lepidi, M. and Bacigalupo, A. (2018) ‘Parametric design of the band struc-
ture for lattice materials’, Meccanica, 53(3), pp. 613–628. doi: 10.1007/
s11012-017-0644-y.
• McDowell, C. (1989) Shoes-fashion and fantasy. New York: Rizzoli.
• Mochimaru, M., Kouchi, M. and Dohi, M. (2000) ‘Analysis of 3-d human foot
forms using the free form deformation method and its application in grad-
ing shoe lasts’, Ergonomics, pp. 1301–1313. doi: 10.1080/001401300421752.
• Novak, B., Možina, J. and Jezeršek, M. (2014) ‘3D laser measurements of
bare and shod feet during walking’, Gait and Posture, 40(1), pp. 87–93. doi:
10.1016/j.gaitpost.2014.02.015.
• Oztekin, H. H. et al. (2007) ‘Second-toe length and forefoot disorders in
ballet and folk dancers’, Journal of the American Podiatric Medical Associa-
tion, 97(5), pp. 385–388. doi: 10.7547/0970385.
• Pearson, S. J. and Whitaker, A. F. (2012) ‘Footwear in classical ballet: a study
of pressure distribution and related foot injury in the adolescent dancer.’,
Journal of dance medicine & science : official publication of the Internation-
al Association for Dance Medicine & Science, 16(2), pp. 51–56.
• Perrier, A. et al. (2017) ‘Biomechanical Modeling of the Foot’, Biomechanics
of Living Organs: Hyperelastic Constitutive Laws for Finite Element Model-
ing, (December), pp. 545–563. doi: 10.1016/B978-0-12-804009-6.00025-0.
Developing a Parametric System for Pointe Shoe Customization - 165

• Peteinarelis, A. (2016) ‘Parametric Design: from code to fabrication’.
• Piperi, E., Spahiu, T. and Galantucci, L. M. (2014) ‘From 3D foot
scans to footwear designing & production’, in. Tirana, pp. 1–24. doi:
10.13140/2.1.3172.6404.
• Piroozfar, P. and Piller, F. (2013) ‘Mass Customisation and Person-
alisation in Architecture and Construction’, New York: Routledge,
pp. 114–126. Available at: http://www.scopus.com/inward/record.
url?eid=2-s2.0-84925813765&partnerID=tZOtx3y1.
• Russell, J. A. et al. (2010) ‘Magnetic resonance imaging of the ankle in
female ballet dancers en pointe’, Acta Radiologica, 51(6), pp. 655–661. doi:
10.3109/02841851.2010.482565.
• Schumacher, P. (2008) ‘Parametricism as Style - Parametricist Manifesto’,
Darkside club, 11th Venice Architecture Biennale, pp. 1–5. Available at:
http://www.patrikschumacher.com/Texts/Parametricism as Style.htm.
• Schumacher, P. (2009) ‘Parametricism: A new global style for architecture
and urban design’, Architectural Design, 79(4), pp. 14–23. doi: 10.1002/
ad.912.
• Shahrubudin, N., Lee, T. C. and Ramlan, R. (2019) ‘An overview on 3D
printing technology: Technological, materials, and applications’, Procedia
Manufacturing, 35, pp. 1286–1296. doi: 10.1016/j.promfg.2019.06.089.
• Simmel, L. (2014) Dance Medicine in Practice. New York: Routledge.
• Smelik, A. (2019) ‘Cybercouture: The Fashionable Technology of Pauline
van Dongen, Iris van Herpen and Bart Hess’, Delft Blue to Denim Blue, (Oc-
tober). doi: 10.5040/9781350986039.ch-014.
• Spahiu, T. et al. (2016) ‘On the possible use of 3D printing for clothing and
shoe manufacture’, Proceedings of the 7th International Conference of Tex-
tile, 10-11 November, (10-11 November), pp. 1–7.
• Sun, L. (2015) ‘Accessing Axis ( 3D Printed Fashion )’, (October), pp. 1–3.
• Tang, Y. M. and Hui, K. C. (2011) ‘Human foot modeling towards foot-
wear design’, CAD Computer Aided Design, 43(12), pp. 1841–1848. doi:
10.1016/j.cad.2011.08.005.
• Taylor, M. C. (2003) ‘The Moment of Complexity Emerging Network Cul-
ture’, Culture. Chicago: The University of Chicago Press.
• Thompson, D. W. (1917) On Growth and Form. Cambridge: The University
Press.
• Tian, Y. et al. (2019) ‘Parametric Design of Grasshopper Based on Mould-
ing Characteristics of Longitudinal Profile of Shoe Last’, Journal of Physics:
Conference Series, 1267(1). doi: 10.1088/1742-6596/1267/1/012045.
166 - Developing a Parametric System for Pointe Shoe Customization

• Tonkin, L. (2019) ‘Re Imagining Embellishment The Conservation of Iris van
Herpens Radically Engineered Surfaces’, (January).
• Wienstock, M. (2010) The Architecture of Emergence: The Evolution of
Form in Nature and Civilisation. Chichester: Wiley.
• Zhang, Y.-F. et al. (2010) ‘3D foot scan to custom shoe last 3D Foot Scan
to Custom Shoe Last 3D Foot Scan to Custom Shoe Last’, Special Issue of
IJCCT, 1(January), pp. 3–5. Available at: https://www.researchgate.net/publi-
cation/228879419.
Web references:
h t t p s : / / 3 d p r i n t i n g i n d u s t r y. c o m / n e w s / a d i d a s - re v e a l s - f u t u re -
craft-strung-the-ultimate-3d-printed-running-shoe-177073/
https://www.3dsystems.com/blog/2015/04/re-inventing-shoes-united-nude
https://all3dp.com
https://all3dp.com/1/pla-plastic-material-polylactic-acid/
https://all3dp.com/what-is-stl-file-format-extension-3d-printing/
https://all3dp.com/2/tpu-filament-explained-and-compared/
https://www.britannica.com/biography/Louis-XIV-king-of-France
https://www.britannica.com/biography/Marie-Camargo
https://www.britannica.com/biography/Marie-Taglioni
https://www.britannica.com/biography/Anna-Pavlova
https://dancer.com
http://www.irisvanherpen.com
https://www.freedoflondon.com/in-the-making/
https://n-e-r-v-o-u-s.com/projects/albums/new-balance-midsoles/
https://www.operadeparis.fr/en/artists/ballet-school/history
https://www.patrikschumacher.com/index.htm
https://pointemagazine.com/history-of-pointe-shoes/?rebelltitem=4#rebell-
titem4
Developing a Parametric System for Pointe Shoe Customization - 167

https://radiologykey.com/footi/
https://skanect.occipital.com
https://theshoeman647325124.wordpress.com/2020/01/12/charles-didelot-
and-pointe-shoes/
https://www.wolfram.com/mathematica/new-in-10/data-and-mesh-regions/
meshes-in-3d.html
168 - Developing a Parametric System for Pointe Shoe Customization
Copyright © 2022 FDOKUMEN