Ravnatelj: pedagog in/ali manager (Director: pedagogue and/or manager)
Upload
khangminh22Category
view
1download
0
Deltek Costpoint® 7.0 Pre-Validation Guide
March 30, 2012

Pre-Validation Guide ii
While Deltek has attempted to verify that the information in this document is accurate and complete, some typographical or technical errors may exist. The recipient of this document is solely responsible for all decisions relating to or use of the information provided herein.
The information contained in this publication is effective as of the publication date below and is subject to change without notice.
This publication contains proprietary information that is protected by copyright. All rights are reserved. No part of this document may be reproduced or transmitted in any form or by any means, electronic or mechanical, or translated into another language, without the prior written consent of Deltek, Inc.
This edition published March 2012.
© 2012 Deltek, Inc.
Deltek’s software is also protected by copyright law and constitutes valuable confidential and proprietary information of Deltek, Inc. and its licensors. The Deltek software, and all related documentation, is provided for use only in accordance with the terms of the license agreement. Unauthorized reproduction or distribution of the program or any portion thereof could result in severe civil or criminal penalties.
All trademarks are the property of their respective owners.

Pre-Validation Guide iii
Contents Introduction ...................................................................................................................................... 1
Adding Custom Notes to This Guide ........................................................................................... 1
Installation Overview ................................................................................................................... 1
Installation Package Contents ..................................................................................................... 2
Installation Prerequisites ............................................................................................................. 2
What Has Changed with Costpoint 7.0 ....................................................................................... 2
Features/Platforms Not Supported In Costpoint 7.0 ................................................................... 4
Naming Conventions ................................................................................................................... 4
Internet Information ..................................................................................................................... 5
System Requirements ................................................................................................................. 7
Pre-Validation Checklist ................................................................................................................ 10
Pre-Installation for Oracle .............................................................................................................. 12
Notice to Costpoint Users ......................................................................................................... 12
1. Checking Referential Integrity ............................................................................................... 12
2. Running Link-Views............................................................................................................... 14
3. Checking Pre-Upgrade Transaction Database Status .......................................................... 15
4. Checking Pre-Upgrade Admin Database Status ................................................................... 19
5. Executing Outstanding Costpoint Processes ........................................................................ 20
6. Backing Up Costpoint 6.1 SP2 or 7.0 LA Database(s) ......................................................... 22
Pre-Installation for Microsoft SQL Server ...................................................................................... 24
Notice to Costpoint Users ......................................................................................................... 24
1. Checking Referential Integrity ............................................................................................... 24
2. Running Link-Views............................................................................................................... 25
3. Checking Pre-Upgrade Transaction Database Status .......................................................... 27
4. Executing Outstanding Costpoint Processes ........................................................................ 30
5. Backing Up Costpoint 6.1 SP2 or 7.0 LA Database(s) ......................................................... 32
Database Server Preparation for Oracle ....................................................................................... 35
Overview ................................................................................................................................... 35
Prerequisites ............................................................................................................................. 35
1. Creating Costpoint 7.0 Instance(s) and Tablespaces ........................................................... 35
2. Enabling Oracle JVM ............................................................................................................ 40
Microsoft IIS Preparation ............................................................................................................... 41
Overview ................................................................................................................................... 41
Prerequisites ............................................................................................................................. 41
1. Configuring Microsoft’s IIS for Costpoint 7.0 ......................................................................... 41

Pre-Validation Guide iv
Appendix A: Downloading Latest Upgrade Files ........................................................................... 43

Introduction
Introduction
Adding Custom Notes to This Guide In order to make your installation experience as beneficial as possible, you might want to add notes to this guide that are specific for your company installation. If you would like to add custom notes, Adobe® Reader® X provides this ability. If you do not already use Adobe Reader X, you can download it here free from Adobe.
To add a custom note using Adobe Reader X, complete the following steps:
1. On the Reader toolbar, click Comment at far right.
2. In the Annotations pane that displays, click Sticky Note. The cursor changes to match the button.
3. Position the cursor at the location in the guide where you want the note to appear, and click. A note icon is inserted at the location and a text box pops up.
4. Enter your information in the text box.
5. Continue adding notes as needed.
6. Save the document.
Deltek recommends that you save the document to a slightly different filename so as to keep the original from being overwritten.
When reading the document, cursor over a note icon to see the information. Double-click a note icon to edit the information.
Installation Overview This document provides instructions for installing the Deltek Costpoint 7.0 software. During this installation, you will perform the following steps:
Ensure that your system meets the installation prerequisites
Please refer to the “Installation Prerequisites” and “System Requirements” sections for additional information.
Install the Costpoint 7.0 Database Tier software, upgrade/create your Costpoint 7.0 Transaction database, and upgrade/create your Costpoint 7.0 System and Admin databases.
Install the Costpoint 7.0 Application Tier software, including both the Oracle WebLogic® Server software and the Costpoint 7.0 software.
Install the Costpoint 7.0 Report Tier software, including both the Actuate® iServer System software and the Costpoint 7.0 software.
Install the Costpoint 7.0 Web Tier software to your Internet Information Server (if applicable).
Pre-Validation Guide 1
Introduction
If you need help with this installation, please contact Costpoint Technical Support at 877.HLP.PROJ (877-457-7765).
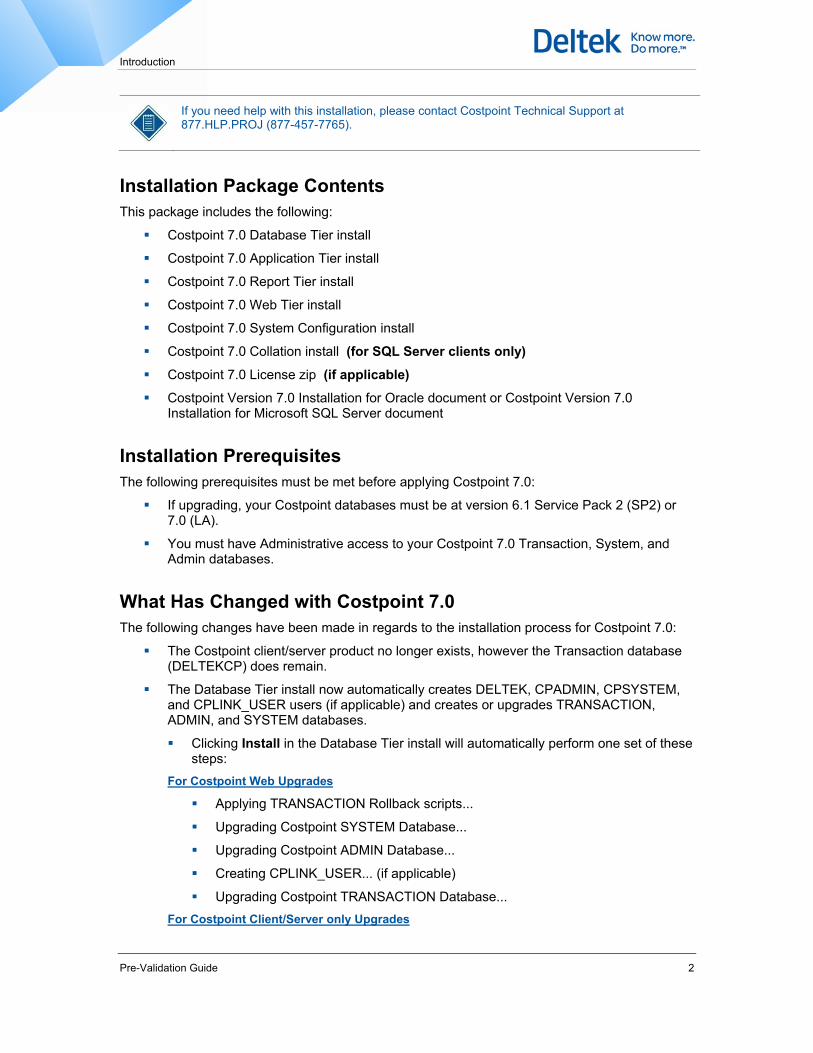
Installation Package Contents This package includes the following:
Costpoint 7.0 Database Tier install
Costpoint 7.0 Application Tier install
Costpoint 7.0 Report Tier install
Costpoint 7.0 Web Tier install
Costpoint 7.0 System Configuration install
Costpoint 7.0 Collation install (for SQL Server clients only)
Costpoint 7.0 License zip (if applicable)
Costpoint Version 7.0 Installation for Oracle document or Costpoint Version 7.0 Installation for Microsoft SQL Server document
Installation Prerequisites The following prerequisites must be met before applying Costpoint 7.0:
If upgrading, your Costpoint databases must be at version 6.1 Service Pack 2 (SP2) or 7.0 (LA).
You must have Administrative access to your Costpoint 7.0 Transaction, System, and Admin databases.
What Has Changed with Costpoint 7.0 The following changes have been made in regards to the installation process for Costpoint 7.0:
The Costpoint client/server product no longer exists, however the Transaction database (DELTEKCP) does remain.
The Database Tier install now automatically creates DELTEK, CPADMIN, CPSYSTEM, and CPLINK_USER users (if applicable) and creates or upgrades TRANSACTION, ADMIN, and SYSTEM databases.
Clicking Install in the Database Tier install will automatically perform one set of these steps:
For Costpoint Web Upgrades
Applying TRANSACTION Rollback scripts...
Upgrading Costpoint SYSTEM Database...
Upgrading Costpoint ADMIN Database...
Creating CPLINK_USER... (if applicable)
Upgrading Costpoint TRANSACTION Database... For Costpoint Client/Server only Upgrades
Pre-Validation Guide 2

Introduction
Pre-Validation Guide 3
Applying TRANSACTION Rollback Scripts...
Creating Costpoint ADMIN Database...
Creating Costpoint SYSTEM Database...
Creating CPLINK_USER...
Upgrading Costpoint TRANSACTION Database...
Restarting the Distributed Transaction Coordinator (MSDTC) Service... (SQL Server only)
For Costpoint New Installs
Creating Costpoint TRANSACTION Database...
Creating Costpoint ADMIN Database...
Creating Costpoint SYSTEM Database...
Creating CPLINK_USER...
Restarting the Distributed Transaction Coordinator (MSDTC) Service... (SQL Server only)
You will no longer use the DBWizard to perform the database upgrades (it will be used for other maintenance functions).
Database scripts have been rewritten using If/Exists logic so if there are errors they can be re-run without harm.
Install will apply the database scripts using vendor specific commands.
Clicking Install in the Application Tier, Report Tier, and Web Tier installs now automatically installs all software and handles all configurations.
Clicking Install in the Application Tier install will automatically perform all of these steps:
Uninstalling WebLogic... (if applicable)
Uninstalling Costpoint 6.1 SP2 WebLogic Wrapper... (if applicable)
Creating Backup of Costpoint 6.1 SP2... (if applicable)
Creating Backup of Costpoint 7.0 LA... (if applicable)
Uninstalling Costpoint 6.1 SP2 Software... (if applicable)
Uninstalling Costpoint 7.0 LA Software... (if applicable)
Extracting JDK... (if applicable)
Installing WebLogic...
Updating Config files...
Encrypting Passwords...
Running LinkViews...
Running License Menu Builder... (if applicable)
Applying License... (if applicable)
Migrating Org Sec Application Modules... (if applicable)
Extracting HelpFiles...

Introduction
Pre-Validation Guide 4
Creating Shortcuts...
The install will also create a CostpointToolsGroup with Sharing and Security Full Permissions on your Costpoint 7.0 Deltek directory (C:\Deltek) and Security Full Permissions on your WebLogic directory (C:\Oracle\Middleware12.1.1).
Clicking Install in the Report Tier install will automatically perform all of these steps:
Extracting JDK...
Exporting Archived Reports... (if applicable)
Stopping_AC_PROCESS_MGMT_DAEMON11 service... (if applicable)
Stopping_AC_PGSQL_11 service... (if applicable)
Uninstalling Actuate... (if applicable)
Installing Actuate...
Encrypting Passwords...
Upgrading Encyclopedia Database... (if applicable)
Starting_AC_PROCESS_MGMT_DAEMON11 service... (if applicable)
Starting_AC_PGSQL_11 service... (if applicable)
Importing Archived Report... (if applicable)
Importing Rox files...
Tuning Report Server...
Clicking Install in the Web Tier install will automatically perform all of these steps:
Uninstalling Costpoint 6.1 SP2 Web Server Software... (if applicable)
Resetting Internet Information Server...
Extracting Help Files...
Resetting Internet Information Server...
Configuring IIS... (if applicable)
The install will also create a CostpointToolsGroup with Sharing and Security Full Permissions on your Costpoint 7.0 Costpoint directory (C:\Deltek\Costpoint\70\applications or C:\Deltek\Costpoint).
Features/Platforms Not Supported In Costpoint 7.0 The Costpoint 7.0 system does not currently support Web servers other than Microsoft’s Internet Information Server and Oracle’s WebLogic Web server.
Naming Conventions The naming conventions specified in this section are used throughout these installation instructions.
Drive Letters The drive letters used in these installation instructions are listed in the following table.

Introduction
Pre-Validation Guide 5
Drive Description
C: The drive where the Costpoint 7.0 software is installed.
Directory Names The directory names used in these installation instructions are listed in the following table.
Directory Name Description
ACTUATE11 The name of the directory where the Actuate iServer System software is installed.
ORACLE/MIDDLEWARE12.1.1 The name of the directory where the Oracle WebLogic software is installed.
DELTEK The name of the directory where the Costpoint 7.0 software is installed.
Database Names The database names used in these installation instructions are listed in the following table.
Database Name Description
DELTEK The name of your Costpoint 7.0 Transaction schema.
CPSYSTEM The name of the Costpoint 7.0 System schema. The CPSYSTEM user is a separate database schema that stores the metadata that the Costpoint 7.0 software needs to function properly.
CPADMIN The name of the Costpoint 7.0 Admin schema. The CPADMIN user is a separate database schema that stores system and security information that the Costpoint 7.0 software needs to function properly.
Internet Information Software installs, install instructions, technical guides, and release notes are available for download from the Deltek Software Manager (DSM). For future releases of Costpoint 7.0, this is also where you will download software corrections and enhancements (hot fixes). DSM will be the only place to download the hot fix files. Deltek Knowledge Base articles will still exist explaining the fixes, but they will contain links to DSM for retrieving the actual files.
Deltek Software Manager Requirements You must meet the following requirements in order to run DSM:
Can be run from any desktop (that is, does not have to be run on Deltek application servers)
Requires Windows XP or later
Requires Microsoft .NET Framework 3.5 SP1 (3.5.1)

Introduction
The following Deltek Knowledge Base article has a link to download the framework and also has a few examples of what you may see if you do not have the framework installed:
https://deltek.custhelp.com/app/answers/detail/a_id/52469
Refer to the DeltekSoftwareManager.pdf to learn more about DSM and how it works.
To Launch DSM Go to https://dsm.deltek.com.
When downloading the Costpoint 7.0 software, if you are prompted to download Hot Fixes as well, please do so.
Logon Use the same username/password as for Deltek Customer Care Connect.
Deltek Knowledge Base articles will also exist on the Deltek Website (http://www.deltek.com).
To view Knowledge Base articles, complete the following steps:
1. Go to http://www.deltek.com.
2. Click Support Login in the upper right corner of the screen.
3. When the Deltek Support Login screen displays, perform the following:
Username — Enter your Support user name.
Password — Enter your Support user’s password.
4. Click Log In.
If you have forgotten your username or password, click Account Assistance. If you have forgotten your username, enter your email address and click Email My Username. If you have forgotten your password, enter your username and click Reset My Password.
5. When the Deltek Support Home Screen displays, click the Knowledge Center tab, and perform the following:
Refine by Product — Select Costpoint from the drop-down list.
Refine by Category/Version — Expand Service Pack / Hot Fix from the drop-down list and select 7.0.
Search Type — Leave as Phrases or select how you want to search from the drop-down list.
Search by Keyword — Enter the specific text you are looking for, or leave blank to return all records for this version.
6. Click Search.
Pre-Validation Guide 6
Introduction
7. When the search results appear, perform the following:
In the Summary column, click the link for the desired correction.
When the desired correction loads, click the links in the Answers section to download the files.
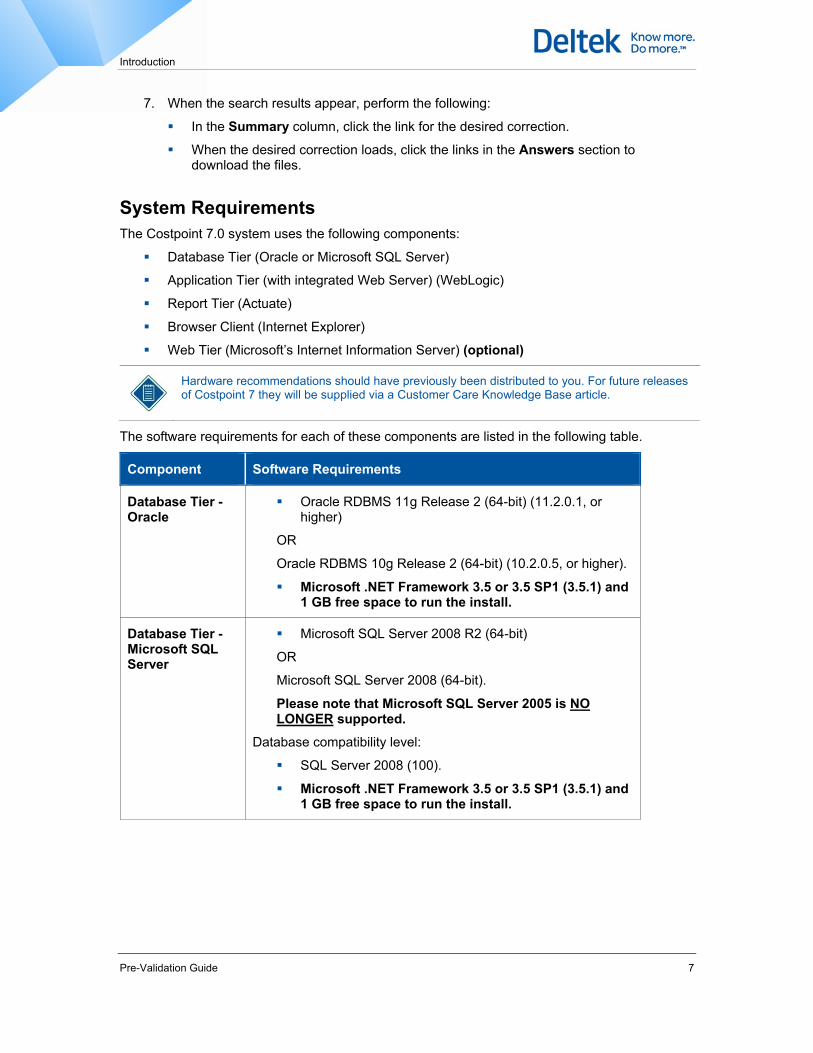
System Requirements The Costpoint 7.0 system uses the following components:
Database Tier (Oracle or Microsoft SQL Server)
Application Tier (with integrated Web Server) (WebLogic)
Report Tier (Actuate)
Browser Client (Internet Explorer)
Web Tier (Microsoft’s Internet Information Server) (optional)
Hardware recommendations should have previously been distributed to you. For future releases of Costpoint 7 they will be supplied via a Customer Care Knowledge Base article.
The software requirements for each of these components are listed in the following table.
Component Software Requirements
Database Tier - Oracle
Oracle RDBMS 11g Release 2 (64-bit) (11.2.0.1, or higher)
OR
Oracle RDBMS 10g Release 2 (64-bit) (10.2.0.5, or higher).
Microsoft .NET Framework 3.5 or 3.5 SP1 (3.5.1) and 1 GB free space to run the install.
Database Tier - Microsoft SQL Server
Microsoft SQL Server 2008 R2 (64-bit)
OR
Microsoft SQL Server 2008 (64-bit).
Please note that Microsoft SQL Server 2005 is NO LONGER supported.
Database compatibility level:
SQL Server 2008 (100).
Microsoft .NET Framework 3.5 or 3.5 SP1 (3.5.1) and 1 GB free space to run the install.
Pre-Validation Guide 7

Introduction
Pre-Validation Guide 8
Component Software Requirements
Application Tier Windows Server 2008 R2,
OR
Windows Server 2008 (64-bit).
Please note that Windows Server 2003 is NO LONGER supported.
WebLogic 12.1.1 (provided with this installation package).
Microsoft .NET Framework 3.5 or 3.5 SP1 (3.5.1) and 5 GB free space to run the install.
Report Tier Windows Server 2008 R2,
OR
Windows Server 2008 (64-bit).
Please note that Windows Server 2003 is NO LONGER supported.
Actuate iServer System for Windows, Release 11 Service Pack 3 (provided with this installation package).
Oracle’s Java Development Kit (JDK) version 1.7.0_02 (provided with this installation package).
Microsoft .NET Framework 3.5 or 3.5 SP1 (3.5.1) and 5 GB free space to run the install.
Browser Client Windows 7,
Windows XP Professional SP3,
OR
Windows Vista SP2.
Internet Explorer Version 9.0 (with latest service pack recommended)
OR
Internet Explorer Version 8.0 (with latest service pack recommended).
Adobe Reader 9.0, or higher (required only for users that wish to print Costpoint 7.0 reports in PDF format)
OR
Adobe Reader 8.0, or higher (required only for users that wish to print Costpoint 7.0 reports in PDF format).

Introduction
Component Software Requirements
Web Tier (optional)
Windows Server 2008 R2,
OR
Windows Server 2008 (64-bit).
Please note that Windows Server 2003 is NO LONGER supported.
Microsoft Internet Information Server 7.0 (with latest service pack recommended).
Microsoft .NET Framework 3.5 or 3.5 SP1 (3.5.1) and 2 GB free space to run the install.
The Microsoft Internet Information Server (IIS) component is optional. As part of this installation, you will install Oracle’s WebLogic Server application server software. The WebLogic Server software includes an integrated Web server component that you may use with the Costpoint 7.0 software.
Though the use of the IIS component is optional, Deltek strongly recommends installing it in your production environment. In addition to acting as the proxy, the IIS server is also used for load balancing the cluster nodes.
Pre-Validation Guide 9

Pre-Validation Checklist
Pre-Validation Checklist The following is a checklist of the overall pre-validation steps. Details for each step are provided on subsequent pages.
Print this checklist and use it as needed during this process.
Done? Step Notes
Step summary… Any pertinent notes…
Pre-Installation for Oracle Skip these steps if you are a Microsoft SQL Server client.
1. Check Referential Integrity
2. Run Link-Views
3. Check Pre-Upgrade Transaction Database Status
4. Check Pre-Upgrade Admin Database Status
5. Execute Outstanding Costpoint Processes
6. Back Up Costpoint 6.1 SP2 Database(s)
Pre-Installation for Microsoft SQL Server Skip these steps if you are an Oracle client.
1. Check Referential Integrity
2. Run Link-Views
3. Check Pre-Upgrade Transaction Database Status
4. Execute Outstanding Costpoint Processes
5. Back Up Costpoint 6.1 SP2 Database(s)
Database Server Preparation for Oracle Skip these steps if you are a Microsoft SQL Server client.
1. Create Costpoint 7.0 Instance(s) and Tablespaces
2. Enable Oracle JVM
Pre-Validation Guide 10

Pre-Validation Checklist
Pre-Validation Guide 11
Done? Step Notes
Microsoft IIS Preparation
1. Configure Microsoft’s IIS for Costpoint 7.0
Appendix A: Downloading Latest Upgrade Files
1. Download the latest upgrade files, if needed.

Pre-Installation for Oracle
Pre-Installation for Oracle
You must skip this step if you are a Microsoft SQL Server client.
You should skip this section if you are performing a Costpoint 7.0 New Installation. Only clients upgrading from Costpoint 6.1 SP2 (Client/Server only or Web) or Costpoint 7.0 LA need to perform the steps in this section.
This section provides instructions for preparing your Costpoint 6.1 SP2 or Costpoint 7.0 LA system to be upgraded to Costpoint 7.0. During the pre-installation steps, you will perform the following tasks:
Upgrading from Costpoint 6.1 SP2
Perform Referential Integrity check on your Costpoint 6.1 SP2 database.
Run link-views on your Costpoint Web 6.1 SP2 system.
Perform the pre-upgrade check on your Costpoint 6.1 SP2 Transaction database.
Execute any outstanding Costpoint Process Manager processes.
Make a backup of your Costpoint 6.1 SP2 database(s).
Upgrading from Costpoint 7.0 LA
Perform the pre-upgrade check on your Costpoint 7.0 LA Transaction database.
Execute any outstanding Costpoint Process Manager processes.
Make a backup of your Costpoint 7.0 LA database(s).
Notice to Costpoint Users You must coordinate the timing for this upgrade with all Costpoint users. No users should access the Costpoint database during the upgrade.
1. Checking Referential Integrity
Purpose This step includes instructions for checking the data validity of your Costpoint 6.1 SP2 database.
You should skip this step if you are performing a Costpoint 7.0 LA Upgrade. Only clients upgrading from Costpoint 6.1 SP2 (Client/Server only or Web) need to perform this step.
Where This step must be performed on a Windows client workstation that meets the following requirements:
The Costpoint 6.1 SP2 Database Wizard (CostpointDBWizard) has previously been installed.
You must have Administrative access to your Costpoint 6.1 SP2 TRANSACTION database (DELTEKCP).
Pre-Validation Guide 12

Pre-Installation for Oracle
To check your data validity, complete the following steps:
1. Click Start » All Programs » Costpoint 6.1 SP2 » CostpointDBWizard to open the Costpoint 6.1 SP2 Database Wizard. The Costpoint DBWizard screen displays.
2. Perform the following:
Available options — Select Child/Parent.
Click Next.
The Costpoint DBWizard: Referential Integrity screen displays.
3. Perform the following:
Select System — Select your Costpoint 6.1 SP2 database (for example, DELTEKCP) from the drop-down list.
Select Schema — Select DATA from the drop-down list.
Verify the default values of the following fields:
DB Platform — Accept the default of ORACLE.
Server — Accept the default of your Database Server IP address or hostname.
Port — Accept the default port (for example, 1521).
Instance/Database — Accept the default Oracle server instance (SID).
User — Accept the default of DELTEK.
Password — Accept the default of your DELTEK user password.
URL — Accept the default of your Oracle connect string.
Use Parallel Execution — Select this check box to apply multiple CPU and IO resources to the execution of these database operations.
4. Click Next. The DBWizard: Child/Parent screen displays.
5. Perform the following:
Log file — Click the ellipsis button, and perform the following:
File Name — Enter a log file name.
Files of Type — Accept the default of Select LOG file or folder (*.log).
Click Select.
6. Click Run. The following message displays:
Child/Parent verification process completed without errors.
If errors do exist, they must ALL be corrected before ugrading to Costpoint 7.0.
7. Click OK. The DBWizard: Child/Parent screen displays.
8. Click Cancel. The Costpoint DBWizard screen displays.
9. Click Exit.
Pre-Validation Guide 13

Pre-Installation for Oracle
2. Running Link-Views
Purpose This step includes instructions for running the Link-Views used in Costpoint Web 6.1 SP2. The Link-Views grant your Costpoint database schemas (for example, DELTEK, CPSYSTEM, and CPADMIN) the ability to view specific database objects owned by the each of the other Costpoint database schemas (for example, DELTEK, CPSYSTEM, and CPADMIN). If you have moved your database schemas to a new database server, you will need to run this before running the upgrade.
If you are not using Costpoint Web or are upgrading from Costpoint 7.0 LA, you should skip this step. This step is only for clients who will be upgrading their Costpoint Web 6.1 SP2 databases and have moved their schemas to a new database server.
Where You must perform this step on your Costpoint Web 6.1 SP2 WebLogic application server (you will need to modify the toolconnections.properties file on your Costpoint Web 6.1 SP2 application server to connect to the databases you will be upgrading to Costpoint 7.0).
To run link views, complete the following steps:
1. Click Windows Start » All Programs » Costpoint Web 6 » Costpoint Web DB Wizard to open the Costpoint 6.1 SP2 Database Wizard. The Costpoint DBWizard screen displays.
2. Perform the following:
Available options — Select Link-View.
Click Next. The Costpoint DBWizard: Link-View Select System screen displays.
3. Perform the following:
Select System — Select your Costpoint Web 6.1 System Name (DELTEKCP) from the drop-down list.
Accept the default values for CPSYSTEM, CPADMIN, CPDATA (DELTEKCP), and Link User.
Click Next. The DBWizard: Link-View SP2 Enter Passwords screen displays.
4. Perform the following:
DBA User — Accept the default of SYSTEM.
Password — Enter your Oracle SYSTEM user’s password.
5. Click Next. the DBWizard: Link-View Create Link-View screen displays.
6. Perform the following:
Log file — Accept the default of C:\Costpoint\Deltek\61\logs\linkView.log or click the ellipsis button, and perform the following:
File Name — Enter a log file name.
Files of Type — Accept the default of Select LOG file or folder (*.log).
Click Select.
7. Click Run.
Pre-Validation Guide 14

Pre-Installation for Oracle
Click Yes if the following message displays:
Link User “CPLINK_USER” does not exist on <Server_Name>. Do you want the Database Wizard to create “CPLINK_USER” now?
If the Creation Link User screen displays, perform the following:
User Name — Accept the default of CPLINK_USER.
TEMPDB — Accept the default of DELTEKCP.
Enforce SQL Server Password Complexity — Clear this check box.
Click OK.
8. When the process is complete, the following message displays:
Process completed without error.
9. Click OK, and then click Cancel. The Costpoint DBWizard screen displays.
If you are immediately proceeding to the next step, you do not need to exit out of the CostpointDBWizard. You may skip the next item and proceed to Step 2 of Deploying SYSTEM Jar.
10. When the Costpoint DBWizard screen displays, click Exit.
3. Checking Pre-Upgrade Transaction Database Status
Purpose This step includes instructions for performing a pre-upgrade check on your Costpoint 6.1 SP2 or Costpoint 7.0 LA Transaction database (DELTEKCP).
Where You must perform this step on your Costpoint 7.0 Transaction database server.
Your database server must have Internet access in order to automatically download the latest DeltekCostpoint70DatabaseUpgradeFiles.exe file. This file contains the latest database patch rollback scripts as well as the latest list of Costpoint 6.1 SP2 database patches that have been worked into the upgrade. This file automatically gets downloaded when you launch the Database Tier installation, assuming your database server has Internet access. If your database server does not have Internet access, you will need to perform the steps in Appendix A: Downloading Latest Upgrade Files prior to running the DeltekCostpoint70DatabaseTier.exe /prevalidation below.
To run the pre-upgrade check on your database, complete the following steps:
1. Run DeltekCostpoint70DatabaseTier.exe /prevalidation to launch the Costpoint 7.0 Database Tier pre-validation program. The Select Deltek Costpoint Install Type screen displays.
2. Indicate the type of install you will be performing:
Upgrade from CP 6.1 SP2 Client/Server or Web — Select this option if you are upgrading from Costpoint 6.1 SP2.
Upgrade from CP 7.0 LA — Select this option if you are upgrading from Costpoint 7.0 LA.
Pre-Validation Guide 15

Pre-Installation for Oracle
3. Click Next >. The Select Database Platform screen displays.
4. Select Oracle, and click Next >. The Oracle Home Information screen displays.
5. Select the Oracle Home location for your Costpoint 7.0 TRANSACTION database from the drop down (the install will read your registry to display all of your available Oracle homes) and click Next >. The Oracle for Deltek Costpoint 7.0 Transaction Database Information screen displays.
6. Perform the following:
IP Address or Hostname — Enter the IP address (for example, 10.2.2.154) or hostname (for example, dbsvr01) of your Costpoint 7.0 Transaction (DELTEKCP) database server. The default is your computer name.
The IP Address or Hostname cannot be 127.0.0.1 or localhost.
Port — Enter the port that your Costpoint 7.0 Transaction database server software uses to listen for requests. The default port for Oracle is 1521.
SID/SERVICE NAME — Select SID or SERVICE NAME and then enter the system identification name (SID) or Service Name value (ORC1) for the Oracle instance where your Costpoint 7.0 Transaction (DELTEKCP) database schema resides. The default is ORC1.
DELTEK Password — Enter the password for your DELTEK user. The default password was INSTALL.
Oracle SYSTEM Schema Password — Enter the password for your Oracle SYSTEM user.
7. Click Test Connection. If you have entered the proper database connection information, the “Connection Successful. Click Next.” message will display. If it does not display, correct the information entered and click Test Connection again. After the message displays, click Next >. The preValidation.log file opens. (This log file is also written to the C:\Program Files\Deltek\Costpoint\7.0 folder.)
8. Review the codes that display directly beneath the PRE-UPGRADE SUMMARY section.
If you do not find a PRE-UPGRADE SUMMARY section, then there are no CHECK codes for you to address.
If any CHECK codes display, match the code you received to the codes listed in the following table to determine your appropriate course of action.
Check Number Description Action
CHECK 01 Must be at Version 6.1 before upgrading.
Upgrade your database to Costpoint Version 6.1 SP2 before continuing.
CHECK 02 Service Pack 2 (SP2) must be applied before upgrading.
Apply Costpoint 6.1 SP2 before continuing.
Pre-Validation Guide 16

Pre-Installation for Oracle
Pre-Validation Guide 17
Check Number Description Action
CHECK 03 Process must be complete before upgrading.
Contact Deltek Costpoint Technical Support.
The SQL script below is provided to assist you in gathering information that the Deltek support representative may request. SELECT * FROM DELTEK.POST_SEMAPHORE ORDER BY S_APPL_FUNC_ID, STEP_SEQ_NO;
CHECK 04 Posting must be complete before upgrading.
Contact Deltek Costpoint Technical Support.
The SQL scripts below are provided to assist you in gathering information that the Deltek support representative may request. SELECT FY_CD, PD_NO, S_JNL_CD, POST_SEQ_NO, COMPLETED_FL FROM DELTEK.POSTING WHERE COMPLETED_FL = 'N' ORDER BY FY_CD, PD_NO, S_JNL_CD, POST_SEQ_NO;
SELECT S.* FROM DELTEK.S_POST_SEMAPHORE S, DELTEK.POSTING P WHERE P.COMPLETED_FL = 'N' AND S.FY_CD = P.FY_CD AND S.PD_NO = P.PD_NO AND S.S_JNL_CD = P.S_JNL_CD AND S.POST_SEQ_NO = P.POST_SEQ_NO ORDER BY S.FY_CD, S.PD_NO, S.S_JNL_CD, S.POST_SEQ_NO, S.STEP_SEQ_NO;
CHECK 06 Custom database changes have been applied.
You have a customized version of Costpoint.
Do not proceed with this upgrade until you are sure that you have received all the necessary custom software, database change scripts, and upgrade instructions.
If you proceed with this upgrade without also upgrading your custom work, you will either lose your custom work or encounter incompatibility problems between your programs and your database.
CHECK 08 Invalid BUYER_VEND.BUYER_ID.
Contact Deltek Costpoint Technical Support.

Pre-Installation for Oracle
Check Number Description Action
CHECK 10 Post Edit Manual Bills. Contact Deltek Costpoint Technical Support.
CHECK 11 Post Customer Product Bills.
Contact Deltek Costpoint Technical Support.
CHECK 12 Post Project Product Bills. Contact Deltek Costpoint Technical Support.
CHECK 13 Post Progress Payment Bills.
Contact Deltek Costpoint Technical Support.
CHECK 14 Post Edit Standard Bills. Contact Deltek Costpoint Technical Support.
You will not be able to proceed with this installation until all of these CHECKs are addressed.
If any Constraint Mismatches appear in the preValidation.log, contact Deltek Costpoint Technical Support to get steps on how to fix them.
Checking for Constraint Mismatches
TABLE_NAME CONSTRAINT_NAME INDEX_NAME
------------------------------ ------------------------------ ------------------------------
WAGE_DETERM PI_0155 SI_PAT1928_IDX3
If any Un-Identified Patches appear in the preValidation.log, you will not be able to upgrade to Costpoint 7.0. The patches listed have not yet been worked into the upgrade. Please contact Deltek Costpoint Technical Support to get an update on when they will be worked into the upgrade.
Un-Identified Patches
--------------------------------------------
Un-identified Patch 2104
Below are the current Costpoint 6.1 SP2 database patches that will cause this message:
None Currently
Below are the current Costpoint 7.0 LA database patches that will cause this message:
None Currently
You will not be able to proceed with this installation until all of these PATCHes are reversed or an updated DeltekCostpoint70DatabaseUpgradeFiles.exe file, working each of them in, has been uploaded to DSM.
Pre-Validation Guide 18

Pre-Installation for Oracle
4. Checking Pre-Upgrade Admin Database Status
Purpose This step includes instructions for performing a pre-upgrade check on your Costpoint 6.1 SP2 Admin database (CPADMIN).
If you are not using Costpoint Web or are upgrading from Costpoint 7.0 LA, you should skip this step. This step is only for clients who will be upgrading their Costpoint Web 6.1 SP2 databases.
Where You must perform this step on your Costpoint 7.0 Admin database server.
To run the pre-upgrade check on your database, complete the following steps:
1. Click Start » All Programs » SQLPlus.
2. Connect to your Costpoint 6.1 SP2 Admin database (CPADMIN) as your CPADMIN user, and execute the following SQL statement:
SELECT TABLE_NAME "TABLE_NAME", CONSTRAINT_NAME "CONSTRAINT_NAME", INDEX_NAME "INDEX_NAME"
FROM USER_CONSTRAINTS
WHERE INDEX_NAME != CONSTRAINT_NAME
AND TABLE_NAME IN (
SELECT TABLE_NAME FROM USER_INDEXES
GROUP BY TABLE_NAME
HAVING COUNT(INDEX_NAME) > 1);
3. If the SQL statement above returns any rows, you will need to fix before proceeding with the upgrade to Costpoint 7.0. Here is an example of a possible scenario:
RESULT
TABLE_NAME CONSTRAINT_NAME INDEX_NAME
GL_CONFIG PI_0132 PATCH1567_IDX10
Analysis of the Error
The results (output) of the query above show that a constraint named "PI_0132" is tied to an index named "PATCH1567_IDX10." The cause of the failure is that the presence of constraint "PI_0132" causes the dropping of index "PATCH1567_IDX10" to fail.
As per Costpoint 7 recommended best practices, every Primary Key constraint must have a corresponding Unique Index of the same name as the constraint itself. Secondly, after the Costpoint 7 upgrade completes successfully, the database should have no indexes named with the word "PATCH" in them.
Pre-Validation Guide 19

Pre-Installation for Oracle
Resolving the Error
To solve this problem, execute the following set of statements in the order specified below. Change the constraint name, index name, table name, and so on based on the output of above as relevant to your case.
a) ALTER TABLE DELTEK.GL_CONFIG DROP CONSTRAINT PI_0132;
b) DROP INDEX DELTEK.PATCH1567_IDX10;
c) Alter TABLE DELTEK.GL_CONFIG
ADD CONSTRAINT PI_0132
PRIMARY KEY (COMPANY_ID) USING INDEX;
d) CREATE INDEX DELTEK.PATCH1567_IDX10 ON DELTEK.GL_CONFIG
( COMPANY_ID, COMPANY_NAME);
4. Exit out of SQLPlus.
You will not be able to proceed with this installation until there are no rows returned from the above SQL statement.
5. Executing Outstanding Costpoint Processes
Purpose This step includes instructions for executing any remaining processes that have been submitted to Process Management queues within your Costpoint 6.1 SP2 system.
Any processes that remain in a queue during the upgrade are deleted automatically.
You can skip this step if you do not want to execute any processes that reside in your Process Management queues. The database upgrade automatically deletes any processes that remain in your Process Management queues.
Where This step must be performed on a Windows client workstation that can access your Costpoint 6.1 SP2 database using the Costpoint 6.1 SP2 software.
To execute any outstanding processes, complete the following steps:
1. Click Start » All Programs » Costpoint 6.1 » Costpoint to open Costpoint 6.1 SP2. The Costpoint 6.1 SP2 login screen displays.
2. Perform the following:
User ID — Enter a user ID that exists in your Costpoint system.
The User that you enter must have Full Rights to the Process Management/Maintain Queues screen and access to every Company.
Password — Enter your user password.
Pre-Validation Guide 20
Pre-Installation for Oracle
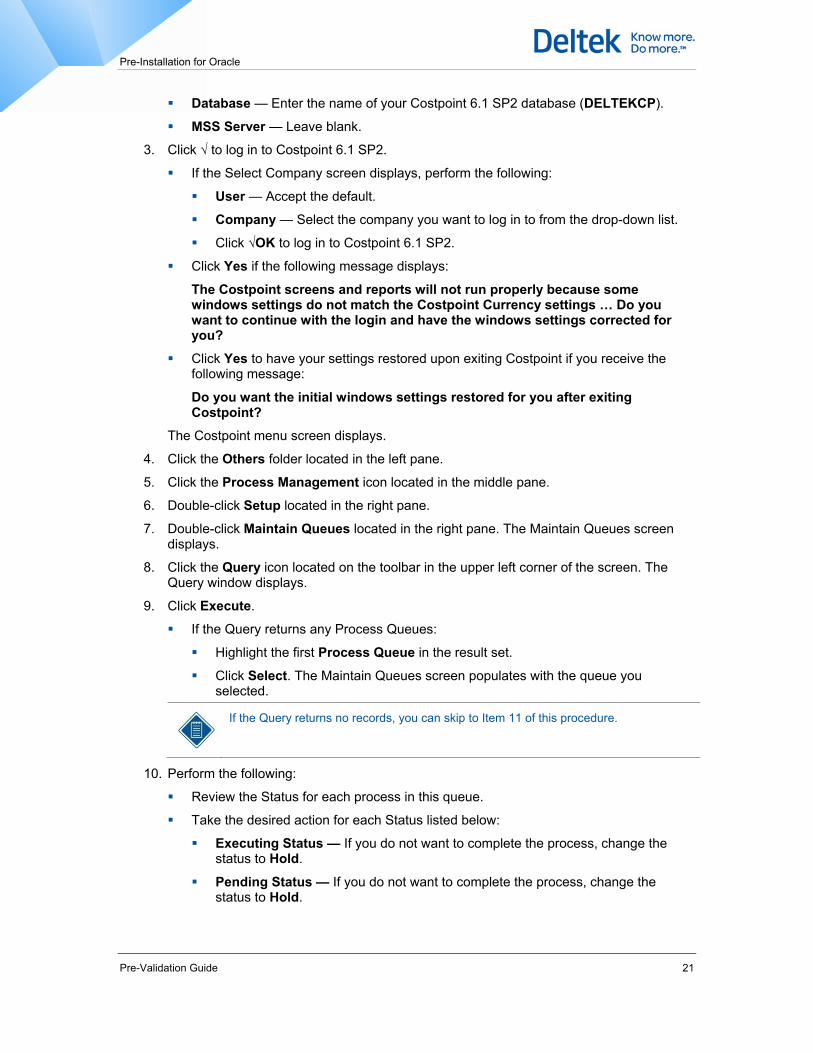
Database — Enter the name of your Costpoint 6.1 SP2 database (DELTEKCP).
MSS Server — Leave blank.
3. Click √ to log in to Costpoint 6.1 SP2.
If the Select Company screen displays, perform the following:
User — Accept the default.
Company — Select the company you want to log in to from the drop-down list.
Click √OK to log in to Costpoint 6.1 SP2.
Click Yes if the following message displays:
The Costpoint screens and reports will not run properly because some windows settings do not match the Costpoint Currency settings … Do you want to continue with the login and have the windows settings corrected for you?
Click Yes to have your settings restored upon exiting Costpoint if you receive the following message:
Do you want the initial windows settings restored for you after exiting Costpoint?
The Costpoint menu screen displays.
4. Click the Others folder located in the left pane.
5. Click the Process Management icon located in the middle pane.
6. Double-click Setup located in the right pane.
7. Double-click Maintain Queues located in the right pane. The Maintain Queues screen displays.
8. Click the Query icon located on the toolbar in the upper left corner of the screen. The Query window displays.
9. Click Execute.
If the Query returns any Process Queues:
Highlight the first Process Queue in the result set.
Click Select. The Maintain Queues screen populates with the queue you selected.
If the Query returns no records, you can skip to Item 11 of this procedure.
10. Perform the following:
Review the Status for each process in this queue.
Take the desired action for each Status listed below:
Executing Status — If you do not want to complete the process, change the status to Hold.
Pending Status — If you do not want to complete the process, change the status to Hold.
Pre-Validation Guide 21

Pre-Installation for Oracle
Hold Status — If you do not want to complete the process, do not change the status. If you want to complete the process, change the status to Pending.
Click Save to save your changes.
Click the Next icon (►), located in the toolbar in the middle of the screen, to retrieve the next queue, and then repeat Item 10 of this procedure for each Process Queue that you have.
11. Click Close, located on the toolbar in the upper left corner of the screen, to return to the Costpoint Menu screen.
12. On the menu bar, click Options » Change Company. The Select Company screen displays.
13. Select another company from the drop-down list in the Company field.
14. Click √OK.
Proceed to item 15 of this procedure if the following message displays:
You only have access to one company.
You must repeat Items 10 through 14 of this procedure for each Company in your database.
15. Click Close, located on the toolbar in the upper left corner of the screen, to exit out of Costpoint.
16. Start the Process Server for each queue containing processes that you wish to complete.
17. After all of these processes have successfully completed, stop all Process Servers. All remaining processes will be automatically deleted during the upgrade process.
You can skip this Item if there are no outstanding processes to complete.
6. Backing Up Costpoint 6.1 SP2 or 7.0 LA Database(s)
Purpose This step includes instructions for performing a backup of your Costpoint 6.1 SP2 or 7.0 LA TRANSACTION, ADMIN, and SYSTEM databases.
Where This step must be performed from the Oracle database server(s) that hosts your Costpoint 6.1 SP2 or 7.0 LA database(s), or on a Windows client workstation that has OLE DB connectivity to the Oracle database server(s) that hosts your Costpoint 6.1 SP2 or 7.0 LA database(s). The supported Oracle client software must be installed on the Windows client workstation.
See the “System Requirements” section for a list of supported client workstations.
Pre-Validation Guide 22

Pre-Installation for Oracle
To back up your Costpoint 6.1 SP2 or 7.0 LA database(s), complete the following step:
1. Perform an export of your Costpoint 6.1 SP2 or 7.0 LA database(s) using Oracle’s export utility. The recommended syntax for exporting the Costpoint database is:
exp deltek/<DeltekPassword>@<DatabaseInstance> file=<ExportName>.dmp log=<LogName>.log
Where:
<DeltekPassword> identifies the password for your DELTEK user. The default is INSTALL.
<DatabaseInstance> identifies the Oracle SID for the instance containing your Costpoint 6.1 SP2 database.
<ExportName> identifies the name of the export file you will be creating.
<LogName> identifies the name of the log file you will be creating.
If you are also running Costpoint Web 6.1 SP2 or 7.0 LA, repeat this step for both your ADMIN and SYSTEM databases.
Deltek strongly recommends that you regularly test and verify your database backups.
Pre-Validation Guide 23

Pre-Installation for Microsoft SQL Server
Pre-Installation for Microsoft SQL Server
You must skip this step if you are an Oracle client.
You should skip this section if you are performing a Costpoint 7.0 New Installation. Only clients upgrading from Costpoint 6.1 SP2 (Client/Server only or Web) or Costpoint 7.0 LA need to perform the steps in this section.
This section provides instructions for preparing your Costpoint 6.1 SP2 or Costpoint 7.0 LA system to be upgraded to Costpoint 7.0. During the pre-installation steps, you will perform the following tasks:
Upgrading from Costpoint 6.1 SP2
Perform Referential Integrity check on your Costpoint 6.1 SP2 database.
Run link-views on your Costpoint Web 6.1 SP2 system.
Perform the pre-upgrade check on your Costpoint 6.1 SP2 Transaction database.
Execute any outstanding Costpoint Process Manager processes.
Make a backup of your Costpoint 6.1 SP2 database(s).
Upgrading from Costpoint 7.0 LA
Perform the pre-upgrade check on your Costpoint 7.0 LA Transaction database.
Execute any outstanding Costpoint Process Manager processes.
Make a backup of your Costpoint 7.0 LA database(s).
Notice to Costpoint Users You must coordinate the timing for this upgrade with all Costpoint users. No users should access the Costpoint database during the upgrade.
1. Checking Referential Integrity
Purpose This step includes instructions for checking the data validity of your Costpoint 6.1 SP2 database.
You should skip this step if you are performing a Costpoint 7.0 LA Upgrade. Only clients upgrading from Costpoint 6.1 SP2 (Client/Server only or Web) need to perform this step.
Where This step must be performed on a Windows client workstation that meets the following requirements:
The Costpoint 6.1 SP2 Database Wizard (CostpointDBWizard) has previously been installed.
You must have Administrative access to your Costpoint 6.1 SP2 TRANSACTION database (DELTEKCP).
Pre-Validation Guide 24

Pre-Installation for Microsoft SQL Server
To check your data validity:
1. Click Start » All Programs » Costpoint 6.1 SP2 » CostpointDBWizard to open the Costpoint 6.1 SP2 Database Wizard. The Costpoint DBWizard screen displays.
2. Perform the following:
Available options — Select Child/Parent.
Click Next. The Costpoint DBWizard: Referential Integrity screen displays.
3. Perform the following:
Select System — Select your Costpoint 6.1 SP2 database (for example, DELTEKCP) from the drop-down list.
Select Schema — Select DATA from the drop-down list.
Verify the default values of the following fields:
DB Platform — Accept the default of SQLSERVER.
Server — Accept the default of your Database Server IP address or hostname.
Port — Accept the default port (for example, 1433).
Instance/Database — Accept the default of your Costpoint database name.
User — Accept the default of DELTEK.
Password — Accept the default of your DELTEK user password.
URL — Accept the default of your Microsoft SQL Server connect string.
4. Click Next. The DBWizard: Child/Parent screen displays.
5. Perform the following:
Log file — Click the ellipsis button, and perform the following:
File Name — Enter a log file name.
Files of Type — Accept the default of Select LOG file or folder (*.log).
Click Select.
6. Click Run. The following message displays:
Child/Parent verification process completed without errors.
If errors do exist, they must ALL be corrected before ugrading to Costpoint 7.0.
7. Click OK. The DBWizard: Child/Parent screen displays.
8. Click Cancel. The Costpoint DBWizard screen displays.
9. Click Exit.
2. Running Link-Views
Purpose This step includes instructions for running the Link-Views used in Costpoint Web 6.1 SP2. The Link-Views grant your Costpoint databases (for example, DELTEKCP, CPSYSTEM, and
Pre-Validation Guide 25

Pre-Installation for Microsoft SQL Server
CPADMIN) the ability to view specific database objects owned by the each of the other Costpoint databases (for example, DELTEKCP, CPSYSTEM, and CPADMIN). If you have moved your databases to a new database server you will need to run this before running the upgrade.
If you are not using Costpoint Web or are upgrading from Costpoint 7.0 LA, you should skip this step. This step is only for clients who will be upgrading their Costpoint Web 6.1 SP2 databases and have moved their schemas to a new database server.
Where You must perform this step on your Costpoint Web 6.1 SP2 WebLogic application server (you will need to modify the toolconnections.properties file on your Costpoint Web 6.1 SP2 application server to connect to the databases you will be upgrading to Costpoint 7.0).
To run link views, complete the following steps:
1. Click Windows Start » All Programs » Costpoint Web 6 » Costpoint Web DB Wizard to open the Costpoint 6.1 SP2 Database Wizard. The Costpoint DBWizard screen displays.
2. Perform the following:
Available options — Select Link-View.
Click Next. The Costpoint DBWizard: Link-View Select System screen displays.
3. Perform the following:
Select System — Select your Costpoint Web 6.1 System Name (DELTEKCP) from the drop-down list.
Accept the default values for CPSYSTEM, CPADMIN, CPDATA (DELTEKCP), and Link User.
Click Next. The DBWizard: Link-View SP2 Enter Passwords screen displays.
4. Perform the following:
DBA User — Accept the default of SA.
Password — Enter your Microsoft SQL Server SA user’s password.
5. Click Next.
6. When the DBWizard: Link-View Create Link-View screen displays, perform the following:
Log file — Accept the default of C:\Costpoint\Deltek\61\logs\linkView.log or click the ellipsis button, and perform the following:
File Name — Enter a log file name.
Files of Type — Accept the default of Select LOG file or folder (*.log).
Click Select.
7. Click Run.
Click Yes if the following message displays:
Link User “CPLINK_USER” does not exist on <Server_Name>. Do you want the Database Wizard to create “CPLINK_USER” now?
If the Creation Link User screen displays, perform the following:
User Name — Accept the default of CPLINK_USER.
Pre-Validation Guide 26
Pre-Installation for Microsoft SQL Server
TEMPDB — Accept the default of DELTEKCP.
Enforce SQL Server Password Complexity — Clear this check box.
Click OK.
8. When the process is complete, the following message displays:
Process completed without error.
9. Click OK, and then click Cancel. The Costpoint DBWizard screen displays.
If you are immediately proceeding to the next step, you do not need to exit out of the CostpointDBWizard. You may skip the next item and proceed to Step 2 of Deploying SYSTEM Jar.
10. When the Costpoint DBWizard screen displays, click Exit.
3. Checking Pre-Upgrade Transaction Database Status
Purpose This step includes instructions for performing a pre-upgrade check on your Costpoint 6.1 SP2 or Costpoint 7.0 LA Transaction database (DELTEKCP).
Where You must perform this step on your Costpoint 7.0 Transaction database server.
Your database server must have Internet access in order to automatically download the latest DeltekCostpoint70DatabaseUpgradeFiles.exe file. This file contains the latest database patch rollback scripts as well as the latest list of Costpoint 6.1 SP2 database patches that have been worked into the upgrade. This file automatically gets downloaded when you launch the Database Tier installation, assuming your database server has Internet access. If your database server does not have Internet access, you will need to perform the steps in Appendix A: Downloading Latest Upgrade Files, prior to running the DeltekCostpoint70DatabaseTier.exe /prevalidation below.
To run the pre-upgrade check on your database, complete the following steps:
1. Run DeltekCostpoint70DatabaseTier.exe /prevalidation to launch the Costpoint 7.0 Database Tier pre-validation program. The Select Deltek Costpoint Install Type screen displays.
2. Indicate the type of install you will be performing:
Upgrade from CP 6.1 SP2 Client/Server or Web — Select this option if you are upgrading from Costpoint 6.1 SP2.
Upgrade from CP 7.0 LA — Select this option if you are upgrading from Costpoint 7.0 LA.
3. Click Next >. The Select Database Platform screen displays.
4. Select Microsoft SQL Server and click Next >. The Microsoft SQL Server for Deltek Costpoint 7.0 Transaction Database Information screen displays.
5. Perform the following:
Pre-Validation Guide 27

Pre-Installation for Microsoft SQL Server
IP Address or Hostname — Enter the IP address (for example, 10.2.2.154) or hostname (for example, dbsvr01) of your Costpoint 7.0 Transaction (DELTEKCP) database server. The default is your computer name.
The IP Address or Hostname cannot be 127.0.0.1 or localhost.
Port — Enter the port that your Costpoint 7.0 Transaction database server software uses to listen for requests. The default port for Microsoft SQL Server is 1433.
Database Name — Enter the name of your Costpoint 7.0 Transaction (DELTEKCP) database. The default is DELTEKCP.
Instance Name — Enter the name of your Costpoint 7.0 Transaction (DELTEKCP) database instance. The default is LOCAL.
DELTEK User Password — Enter the password for your DELTEK user. The default password was INSTALL.
SA User Name — Enter the name of your Microsoft SQL Server SA user. The default is sa.
SA User Password — Enter the password for your Microsoft SQL Server SA user.
6. Click Test Connection. If you have entered the proper database connection information, the “Connection Successful. Click Next.” message will display. If it does not display, correct the information entered and click Test Connection again. Once the message appears, click Next >. The preValidation.log file opens. (This log file is also written to the C:\Program Files\Deltek\Costpoint\7.0 folder.)
7. Review the codes that display directly beneath the PRE-UPGRADE SUMMARY section.
If any CHECK codes display, match the code you received to the codes listed in the following table to determine your appropriate course of action.
Check Number Description Action
CHECK 01 Must be at Version 6.1 before upgrading.
Upgrade your database to Costpoint Version 6.1 SP2 before continuing.
CHECK 02 Service Pack 2 (SP2) must be applied before upgrading.
Apply Costpoint 6.1 SP2 before continuing.
CHECK 03 Process must be complete before upgrading.
Contact Deltek Costpoint Technical Support.
The SQL script below is provided to assist you in gathering information that the Deltek support representative may request. SELECT * FROM DELTEK.POST_SEMAPHORE ORDER BY S_APPL_FUNC_ID, STEP_SEQ_NO;
Pre-Validation Guide 28

Pre-Installation for Microsoft SQL Server
Pre-Validation Guide 29
Check Number Description Action
CHECK 04 Posting must be complete before upgrading.
Contact Deltek Costpoint Technical Support.
The SQL scripts below are provided to assist you in gathering information that the Deltek support representative may request. SELECT FY_CD, PD_NO, S_JNL_CD, POST_SEQ_NO, COMPLETED_FL FROM DELTEK.POSTING WHERE COMPLETED_FL = 'N' ORDER BY FY_CD, PD_NO, S_JNL_CD, POST_SEQ_NO;
SELECT S.* FROM DELTEK.S_POST_SEMAPHORE S, DELTEK.POSTING P WHERE P.COMPLETED_FL = 'N' AND S.FY_CD = P.FY_CD AND S.PD_NO = P.PD_NO AND S.S_JNL_CD = P.S_JNL_CD AND S.POST_SEQ_NO = P.POST_SEQ_NO ORDER BY S.FY_CD, S.PD_NO, S.S_JNL_CD, S.POST_SEQ_NO, S.STEP_SEQ_NO;
CHECK 06 Custom database changes have been applied.
You have a customized version of Costpoint.
Do not proceed with this upgrade until you are sure that you have received all the necessary custom software, database change scripts, and upgrade instructions.
If you proceed with this upgrade without also upgrading your custom work, you will either lose your custom work or encounter incompatibility problems between your programs and your database.
CHECK 08 Invalid BUYER_VEND.BUYER_ID.
Contact Deltek Costpoint Technical Support.
CHECK 10 Post Edit Manual Bills. Contact Deltek Costpoint Technical Support.
CHECK 11 Post Customer Product Bills.
Contact Deltek Costpoint Technical Support.
CHECK 12 Post Project Product Bills. Contact Deltek Costpoint Technical Support.
Pre-Installation for Microsoft SQL Server
Check Number Description Action
CHECK 13 Post Progress Payment Bills.
Contact Deltek Costpoint Technical Support.
CHECK 14 Post Edit Standard Bills. Contact Deltek Costpoint Technical Support.
You will not be able to proceed with this installation until all of these CHECKs are addressed.
If any Un-Identified Patches appear in the preValidation.log, you will not be able to upgrade to Costpoint 7.0. The patches listed have not yet been worked into the upgrade. Please contact Deltek Costpoint Technical Support to get an update on when they will be worked into the upgrade.
Un-Identified Patches
--------------------------------------------
Un-identified Patch 2104
Below are the current Costpoint 6.1 SP2 database patches that will cause this message:
None Currently
Below are the current Costpoint 7.0 LA database patches that will cause this message:
None Currently
You will not be able to proceed with this installation until all of these PATCHes are reversed or an updated DeltekCostpoint70DatabaseUpgradeFiles.exe file, working each of them in, has been uploaded to DSM.
4. Executing Outstanding Costpoint Processes
Purpose This step includes instructions for executing any remaining processes that have been submitted to Process Management queues within your Costpoint 6.1 SP2 system.
Any processes that remain in a queue during the upgrade are deleted automatically.
You can skip this step if you do not want to execute any processes that reside in your Process Management queues. The database upgrade automatically deletes any processes that remain in your Process Management queues.
Where This step must be performed on a Windows client workstation that can access your Costpoint 6.1 SP2 database using the Costpoint 6.1 SP2 software.
Pre-Validation Guide 30

Pre-Installation for Microsoft SQL Server
To execute any outstanding processes, complete the following steps:
1. Click Start » All Programs » Costpoint 6.1 » Costpoint to open Costpoint 6.1 SP2. The Costpoint 6.1 SP2 login screen displays.
2. Enter the following:
User ID — Enter a user ID that exists in your Costpoint system.
The User that you enter must have Full Rights to the Process Management/Maintain Queues screen and access to every Company.
Password — Enter your user password.
Database — Enter the name of your Costpoint 6.1 SP2 database (DELTEKCP).
MSS Server — Enter the IP address (10.2.2.154) or hostname (dbsvr01) of your Costpoint 6.1 SP2 (DELTEKCP) database server.
3. Click √ to log in to Costpoint 6.1 SP2.
If the Select Company screen displays, perform the following:
User — Accept the default.
Company — Select the company you want to log in to from the drop-down list.
Click √OK to log in to Costpoint 6.1 SP2.
If the following message displays:
The Costpoint screens and reports will not run properly because some windows settings do not match the Costpoint Currency settings … Do you want to continue with the login and have the windows settings corrected for you?
Click Yes.
If you receive the following message:
Do you want the initial windows settings restored for you after exiting Costpoint?
Click Yes to have your settings restored upon exiting Costpoint.
The Costpoint menu screen displays.
4. Click the Others folder located in the left pane.
5. Click the Process Management icon located in the middle pane.
6. Double-click Setup located in the right pane.
7. Double-click Maintain Queues located in the right pane. The Maintain Queues screen displays.
8. Click the Query icon, located on the toolbar in the upper left corner of the screen. The Query window displays.
9. Click Execute.
If the Query returns any Process Queues:
Highlight the first Process Queue in the result set.
Click Select. The Maintain Queues screen populates with the queue you selected.
Pre-Validation Guide 31

Pre-Installation for Microsoft SQL Server
If the Query returns no records, you can skip to Item 11 of this step.
10. Perform the following:
Review the Status for each process in this queue.
Take the desired action for each Status listed below:
Executing Status — If you do not want to complete the process, change the status to Hold.
Pending Status — If you do not want to complete the process, change the status to Hold.
Hold Status — If you do not want to complete the process, do not change the status. If you wish to complete the process, change the status to Pending.
Click the Save icon to save your changes.
Use the Next icon (►), located in the toolbar in the middle of the screen, to retrieve the next queue, and then repeat Item 10 of this step for each Process Queue that you have.
11. Click the Close icon, located on the toolbar in the upper left corner of the screen, to return to the Costpoint Menu screen.
12. On the menu bar, click Options » Change Company. The Select Company screen displays.
13. Select another company from the drop-down list in the Company field.
14. Click √OK.
Proceed to item 15 of this procedure if the following message displays:
You only have access to one company.
You must repeat Items 10 through 14 of this procedure for each Company in your database.
15. Click the Close icon, located on the toolbar in the upper left corner of the screen, to exit out of Costpoint.
16. Start the Process Server for each queue containing processes that you wish to complete.
17. After all of these processes have successfully completed, stop all Process Servers. All remaining processes will be automatically deleted during the upgrade process.
You can skip this Item if there are no outstanding processes to complete.
5. Backing Up Costpoint 6.1 SP2 or 7.0 LA Database(s)
Purpose This step includes instructions for performing a backup of your master database as well as your Costpoint 6.1 SP2 or 7.0 LA TRANSACTION, CPADMIN, and CPSYSTEM databases.
Pre-Validation Guide 32

Pre-Installation for Microsoft SQL Server
Pre-Validation Guide 33
Where You must perform this step from the Microsoft SQL Server database server that hosts your Costpoint 6.1 SP2 or 7.0 LA database(s), or a Windows client workstation that can connect to your Costpoint 6.1 SP2 or 7.0 LA or database(s) with the Microsoft SQL Server Enterprise Manager client software.
To back up your Costpoint 6.1 SP2 or 7.0LA database(s), complete the following steps:
1. Click Start » Programs » Microsoft SQL Server 2005/2008 » SQL Server Management Studio.
Select Database Engine as the Server Type.
Select your <your database server> as the Server Name.
If you choose SQL Server Authentication as the Authentication in the Connect to Server dialog box, you need to enter sa in the Login field along with the password you established for this username during the Microsoft SQL Server 2005 installation process in the Password field.
Click Connect.
2. Expand <your database server name> node.
3. Click the + on the Databases folder.
4. Right-click your Costpoint 6.1 SP2 or 7.0 LA database (DELTEKCP).
5. Click Tasks » Back Up. The Back Up Database screen displays.
6. Select the General page.
7. Perform the following:
Source
Database — Select your Costpoint Web 6.1 SP2 or 7.0 LA Database (DELTEKCP).
Backup type — Full.
Backup Set
Name — Enter a name for this backup set (for example, DELTEKCP.BAK).
Description — Enter a description for this backup set (optional).
Backup set will expire — Leave the default of 0 days.
Destination — Select Backup to Tape or Backup to Disk option, and then specify a backup destination. If no backup destinations appear, click Add to add an existing destination or to create a new one.
8. Select the Options page.
9. Perform the following:
Overwrite Media — Select Append to the existing backup set (to append the backup to an existing backup on the backup device) or Overwrite all existing backup sets (to overwrite an existing backup on the backup device).
10. Click OK to begin the backup procedure. When the backup is completed, the following message displays:
The backup operation has been completed successfully.

Pre-Installation for Microsoft SQL Server
11. Click OK.
12. Close the SQL Server Management Studio screen.
Please repeat this step for the master database.
If you are also running Costpoint Web 6.1 SP2 or 7.0 LA, repeat this step for both your CPADMIN and CPSYSTEM databases.
Deltek strongly recommends that you regularly test and verify your database backups.
For additional information on backing up your Microsoft SQL Server database, consult the Microsoft SQL Server documentation.
Pre-Validation Guide 34
Database Server Preparation for Oracle
Database Server Preparation for Oracle
You must skip this step if you are a Microsoft SQL Server client.
Overview This section provides instructions and recommendations for creating your Costpoint 7.0 System and Admin tablespaces.
Prerequisites Before beginning, the database server should meet the following prerequisites:
Software
Oracle RDBMS 11g Release 2 (11.2.0.1, or higher) or Oracle RDBMS 10g Release 2 (10.2.0.5, or higher).
You must know the Oracle SYSTEM and SYS user passwords to run the installation.
For the Costpoint 7.0 system to function properly, the system clocks on your WebLogic application server, Actuate report server, and the database server that hosts your Costpoint 7.0 database schemas must be synchronized with each other. Failure to synchronize your system clocks may result in login and other system problems
1. Creating Costpoint 7.0 Instance(s) and Tablespaces Purpose This step provides recommendations for configuring your Oracle instance(s) and setting up your Costpoint 7.0 Transaction, System, and Admin (DELTEK, CPSYSTEM, and CPADMIN) database tablespaces, if necessary.
You can skip this step if you are already using Costpoint Web 6.1 SP2 or Costpoint 7.0 LA and will be using the same tablespaces for Costpoint 7.0.
Where This step must be performed on the Oracle database server(s) that will host your DELTEK, CPSYSTEM, and CPADMIN database schemas.
The DELTEK, CPSYSTEM, and CPADMIN database schemas may reside on the same Oracle instance, separate Oracle instances, or separate Oracle database servers.
Pre-Validation Guide 35

Database Server Preparation for Oracle
To create the instance(s) and tablespaces that will host your DELTEK, CPSYSTEM, and CPADMIN database schemas, complete the following step:
1. Use your Oracle database software to create an Oracle instance(s) for hosting the DELTEK, CPSYSTEM, and CPADMIN database schema(s). The following tables provide recommendations for creating your Oracle instance(s).
The Oracle instance(s) should be created with the Oracle JVM enabled.
Table 1: Recommended Oracle Instance Parameter Values
Parameter Value
cursor_sharing EXACT
db_block_size 8192
dml_locks 1500
java_pool_size 20 MB
job_queue_processes 2
log_checkpoint_interval 10000
log_checkpoint_timeout 1800
open_cursors 2000
optimizer_index_caching 0
optimizer_index_cost_adj 100
optimizer_mode ALL_ROWS
processes 300
session_cached_cursors 1500
timed_statistics TRUE
sga_target Based on database size* (1 GB to 15 GB)
If 11g, set to 0
pga_aggregate_target Based on database size* (256 MB to 5 GB)
If 11g, set to 0
statistics_level Typical
db_file_multiblock_read_count 16
Pre-Validation Guide 36

Database Server Preparation for Oracle
Table 1: Recommended Oracle Instance Parameter Values
memory_target (11g only) Based on database size* (1 GB to 15 GB)
memory_max_target (11g only) Based on database size* (1 GB to 15 GB)
* The values for the Oracle parameters above are general guidelines based on internal testing done at Deltek with large databases. Customers must tune these parameters over time based on database size, concurrent users, workload etc. to achieve optimal performance.
Table 2: Recommended Tablespace Configuration for DELTEK
Type Tablespace Name Minimum Size (MB) Small Production System (MB)
System SYSTEM 100 100
Default COSTPOINT_DATA 200 500
Index COSTPOINT_INDEX 100 300
Dynamic COSTPOINT_DYN 100 300
Temporary TEMPORARY_DATA 100 400
These initial settings are only minimal recommendations. Your production environment may need to be analyzed and adjusted to meet your specific requirements.
For Databases over 50G, Deltek recommends the following additional tablespaces for optimal configuration.
Table 3: Recommended Customization Tablespace Configuration for DELTEK
Type Tablespace Name Minimum Size (MB)
Small Production System (MB)
Temporary Data
COSTPOINT_XZDATA 512 2048
Temporary Index
COSTPOINT_XZINDEX 256 1024
Report Data
COSTPOINT_RPTDATA 1024 5120
Report Index
COSTPOINT_RPTINDEX 512 2048
Pre-Validation Guide 37

Database Server Preparation for Oracle
These initial settings are only minimal recommendations. Your production environment may need to be analyzed and adjusted to meet your specific requirements.
Table 4: Recommended Tablespace Configuration for CPSYSTEM and CPADMIN
Type Tablespace Name Minimum Size (MB) Small Production System (MB)
System SYSTEM 450 450
Default CPMETA_DATA 400 400
Index CPMETA_INDEX 100 100
Temporary TEMPORARY_DATA 100 100
These initial settings are only minimal recommendations. Your production environment may need to be analyzed and adjusted to meet your specific requirements.
Pre-Validation Guide 38

Database Server Preparation for Oracle
Deltek recommends that you regularly refresh Optimizer statistics on your Costpoint 7.0 schemas. Regular statistic generation will enable the Oracle Cost-Based Optimizer to form accurate and efficient execution plans to access the Costpoint 7.0 data.
Deltek recommends using Oracle RDBMS 11g Release 2 or Oracle RDBMS 10g Release 2 to generate the most optimal schema statistics.
You can use the following Oracle PL/SQL procedure to generate schema statistics for your Costpoint 7.0 schema:
CREATE OR REPLACE PROCEDURE ANALYZE_DELTEK
AUTHID DEFINER AS
BEGIN
FOR AA IN (SELECT USERNAME
FROM ALL_USERS
WHERE USERNAME IN ('CPMETA', 'CPADMIN', 'CPSYSTEM', ‘CPSETUP’, 'DELTEK'))
LOOP
FOR T IN (SELECT TABLE_NAME FROM ALL_TABLES WHERE OWNER = AA.USERNAME)
LOOP
IF SUBSTR(T.TABLE_NAME,1,1) = 'Z' OR
SUBSTR(T.TABLE_NAME,1,1) = 'X' THEN
DBMS_STATS.DELETE_TABLE_STATS(
ownname => AA.USERNAME,
tabname => T.TABLE_NAME);
ELSE
DBMS_STATS.LATHER_TABLE_STATS(
ownname => AA.USERNAME,
tabname => T.TABLE_NAME,
estimate_percent => DBMS_STATS.AUTO_SAMPLE_SIZE,
method_opt => 'FOR ALL COLUMNS SIZE AUTO',
cascade => true,
degree => 4);
COMMIT;
END IF;
END LOOP;
END LOOP;
END;
Please see your Oracle Supplied PL/SQL Packages Reference documentation for additional information on using the DBMS_STATS PL/SQL package
Pre-Validation Guide 39

Database Server Preparation for Oracle
2. Enabling Oracle JVM Purpose This step provides instructions for enabling the Oracle JVM. The Oracle JVM must be enabled on the Oracle instance(s) that support your Costpoint 7.0 Database schemas (DELTEK, CPSYSTEM, and CPADMIN). If your Costpoint 7.0 Database schemas are hosted on separate instances, you will need to perform this step for each instance.
Where This step must be performed on the Oracle database server instance(s) that host your Costpoint 7.0 Database schemas, or a Windows client workstation that has SQL*Net connectivity to these Oracle database instances. The supported Oracle client software must be installed on the Windows client workstation.
You can skip this step if you are upgrading from Costpoint 7.0 LA and using the same database instances for Costpoint 7.0.
If your Costpoint 7.0 Database schemas reside on different instances, you must perform this step for each instance.
To enable the Oracle JVM, complete the following steps:
1. Start SQL*Plus, as the SYS user, log into your database instance, and execute Oracle SQL*Plus commands similar to the following:
SQL>show parameter java_pool_size;
SQL>alter system set java_pool_size=20m;
SQL>@<Oracle_Home>\javavm\install\INITJVM.SQL;
Where:
<Oracle_Home> identifies the directory where your Oracle software is installed (for example, C:\oracle\product\11.2.0.1\dbhome_1).
For example, @ C:\oracle\product\11.2.0.1\dbhome_1\javavm\install\INITJVM.SQL;
This command will take several minutes to complete and may exit you out of SQL*Plus.
2. If not already connected, start SQL*Plus, as the SYS user, log into your database instance, and execute Oracle SQL*Plus command similar to the following:
SQL>grant select on DBA_PENDING_TRANSACTIONS to PUBLIC;
3. Exit out of SQL*Plus.
Pre-Validation Guide 40
Microsoft IIS Preparation
Microsoft IIS Preparation
Overview This section provides instructions for preparing your Microsoft’s Internet Information Server (IIS) for Costpoint 7.0 installation.
The Microsoft Internet Information server component is optional. The WebLogic Server software included an integrated Web server component that you can use with the Costpoint 7.0 software.
Prerequisites The Web server that will host your Internet Information Server software should meet the following prerequisites:
Software
Windows Server 2008 R2 or Windows Server 2008 (64-bit).
Please note, Windows Server 2003 is NOT supported.
Microsoft Internet Information Server 7.0.
1. Configuring Microsoft’s IIS for Costpoint 7.0
Purpose This step provides instructions for configuring Microsoft’s Internet Information Server prior to installing Costpoint 7.0.
Where You must perform this step on a Web server that is using Microsoft’s Internet Information Server.
To configure Microsoft IIS web server, complete the following steps:
1. Click Windows Start » Administrative Tools » Server Manager.
2. Expand the Roles tree in the left pane and click on Web Server (IIS).
3. When the Web Server (IIS) screen displays, click Add Role Services in the bottom right pane.
4. When the Select Role Services screen displays, perform the following actions:
Under Web Server » Application Development, select ISAPI Extensions.
Under Web Server » Management Tools, select IIS Management Scripts and Tools.
Under Web Server » Management Tools » IIS 6 Management Compatibility, select IIS 6 Metabase Compatibility.
5. Click Next >, and then click Install.
6. After the install completes, click Close.
Pre-Validation Guide 41

Microsoft IIS Preparation
Pre-Validation Guide 42
7. Expand Web Server (IIS) tree in the left pane, and click Internet Information Services (IIS) Manager.
8. When the Internet Information Services (IIS) Manager screen displays, expand your IIS computer name icon that displays in the left pane of the Internet Information Services (IIS) Manager window, right-click your IIS computer name icon, and click Stop.
9. Right-click your IIS computer name icon that displays in the left pane of the Internet Information Services (IIS) Manager window, and click Start.
10. Close the Services Manager window.

Appendix A: Downloading Latest Upgrade Files
Appendix A: Downloading Latest Upgrade Files This appendix provides instructions for downloading the latest Costpoint 7.0 Database upgrade files. The Database Tier install will automatically download these files if your database server has internet access. If your database server does not, you will need to run this step.
You must perform this step on any machine that has Internet access.
To download the required upgrade files, complete the following steps:
1. Run DeltekCostpoint70DatabaseTier.exe /filedynamicdownloaddatabase to retrieve the file from DSM.
The following message displays.
2. After the file has downloaded, the following message displays.
3. Click OK.
4. Copy the downloaded DeltekCostpoint70GADatabaseUpgradeFiles.exe file to your Database server, in the same folder as your DeltekCostpoint70DatabaseTier.exe file. You can now proceed with the “3. Check Pre-Upgrade Transaction Database Status” step or the Database Tier installation.
Pre-Validation Guide 43

Deltek (Nasdaq: PROJ) is the leading global provider of enterprise software and information solutions for professional services firms, government contractors, and government agencies. For decades, we have delivered actionable insight that empowers our customers to unlock their business potential. Over 14,000 organizations and 1.8 million users in approximately 80 countries around the world rely on Deltek to research and identify opportunities, win new business, optimize resource, streamline operations, and deliver more profitable projects. Deltek – Know more. Do more.®
deltek.com
Copyright © 2022 FDOKUMEN