
Deltek GCS Premier®
23
Deltek GCS Premier® GCS Premier 5.0 SP9 HF30 September 2015 Quarter 3 Regulatory Release Notes September 18, 2015
-
Upload
khangminh22 -
Category
Documents
-
view
0 -
download
0
Transcript of Deltek GCS Premier®

Deltek GCS Premier® GCS Premier 5.0 SP9 HF30
September 2015 Quarter 3
Regulatory Release Notes
September 18, 2015

Regulatory Release Notes ii
While Deltek has attempted to verify that the information in this document is accurate and complete, some typographical or technical errors may exist. The recipient of this document is solely responsible for all decisions relating to or use of the information provided herein.
The information contained in this publication is effective as of the publication date below and is subject to change without notice.
This publication contains proprietary information that is protected by copyright. All rights are reserved. No part of this document may be reproduced or transmitted in any form or by any means, electronic or mechanical, or translated into another language, without the prior written consent of Deltek, Inc.
This edition published September 2015.
© Deltek, Inc.
Deltek’s software is also protected by copyright law and constitutes valuable confidential and proprietary information of Deltek, Inc. and its licensors. The Deltek software, and all related documentation, is provided for use only in accordance with the terms of the license agreement. Unauthorized reproduction or distribution of the program or any portion thereof could result in severe civil or criminal penalties.
All trademarks are the property of their respective owners.

Regulatory Release Notes iii
Contents
Overview .......................................................................................................................................... 1
Hot Fix Installation Information ........................................................................................................ 2
Important Installation Notes ........................................................................................................ 2
Upgrade Server Installation ......................................................................................................... 2
Upgrade Client Installation .......................................................................................................... 3
Post-Installation ........................................................................................................................... 4
Documentation ............................................................................................................................ 6
For Additional Information ............................................................................................................... 7
Deltek GCS Premier 5.0 User Documentation ............................................................................ 7
Customer Care Connect Site ...................................................................................................... 7
Updates and Enhancements ........................................................................................................... 8
Platform Support Upgrade .......................................................................................................... 8
Enhancements ............................................................................................................................ 8
State Updates ............................................................................................................................ 12
UDD and Impromptu Catalog Updates ..................................................................................... 16
Software Issues Resolved ............................................................................................................. 18
Accounting and Job Cost .......................................................................................................... 18
System Administration............................................................................................................... 18
Known Issues ................................................................................................................................ 19
Purchase Requisitions............................................................................................................... 19
Premier Billing ........................................................................................................................... 19
No Calendar Pop-up When Using RDWeb (Remote Desktop) ................................................. 19
Amyuni Not Installed When Using Windows Server 2008 R2 32-bit System ........................... 19

Overview
Regulatory Release Notes 1
Overview
These Deltek GCS Premier SP9 HF30 Release Notes for Quarter 3 2015 provide information for platform support upgrade, enhancements, regulatory updates, software issues resolved, and known issues.
Hot Fix Installation Information
Regulatory Release Notes 2
Hot Fix Installation Information
This section contains instructions for installing the Deltek GCS Premier Version 5.0 Service Pack (SP) 9 Hot Fix (HF) 30 upgrade.
Important Installation Notes
Deltek GCS Premier® 5.0 SP9 HF30 is a cumulative hot fix. Therefore, it includes all previously resolved software issues from Hot Fix 1 through Hot Fix 30 for SP9. GCS Premier 5.0 SP9 or higher must be installed in order to apply this hot fix.
This hot fix must first be installed at the file server itself, then subsequently on each workstation.
The release of GCS Premier 5.0 SP9 HFs 7 – 30 includes updates to the Contribution Codes in GCS Premier, which require your data files to convert to a new format. During the HF30 installation, all data directories identified in your DTShared.ini file automatically convert to the new format if they had not previously been converted.
Be sure to follow the post-installation steps detailed below.
Upgrade Server Installation
1. Begin the upgrade installation of GCS Premier Version 5.0 SP9 HF30 with the server installation. After you download DeltekGCSPremier50SP9HF30.exe from the distribution site, double-click the file to begin the installation.
The installation of Hot Fix 30 for Deltek GCS Premier Version 5.0 SP9 requires a reboot of the file server upon completion.
2. On the InstallShield Wizard page, click Next to extract the files and begin the installation.
3. On the Welcome page of the wizard, click Next to display the License Agreement page.
4. If you agree with the License Agreement stated, select I accept the terms of the license agreement, and then click Next. If you do not accept the terms of the license agreement, the Next button will not become enabled and you will not be allowed to proceed with the installation.
Installation of the software indicates acceptance of these terms unless there is a separate written license agreement for the software you are now installing with different or additional terms. By accepting the agreement, you represent that you are authorized to accept these terms on behalf of the licensee, if applicable.
5. On the Choose Destination Location page, browse to the location where your GCS Premier Parent folder is currently installed, or click Next to accept the default folder if it is accurately displayed.
6. On the Browse for DTSite.ini page, the correct location of the DTSite.ini file should be displayed. If the correct path does not auto-populate, browse to the \SiteData folder, located underneath the GCS Premier Parent folder on the server. Click Next to continue.

Hot Fix Installation Information
Regulatory Release Notes 3
7. The Start Copying Files page lists the previous options that were selected as well as any new folders that are created as part of the installation. Click Next to begin the GCS Premier server installation.
The Setup is updating files icon and the Setup Status screen appear while a series of processes are run. When the server installation has completed, the Update Complete screen displays.
8. Select Yes, I want to restart my computer now as required by the installer. Click Finish to exit the installation.
For full GCS Premier functionality, you must reboot the server.
9. If you select No, I will restart my computer later, a message displays but then the installation completes and allows you to exit.
Upgrade Client Installation
To perform the client installation, grant users local Administrator privileges for their workstations. Then at each workstation, log in as the user who will be running GCS Premier on that workstation and perform the installation. Additionally, if multiple profiles share the workstation and will be running GCS Premier, grant each profile local Administrator privileges on the workstation, and run the client installation once for each profile.
If the user does not currently have local Administrator privileges on their own workstation, grant them local Administrator privileges temporarily and manually perform the installation. Then set their privileges back to what they previously were.
1. To begin the upgrade installation, double-click the GCS Premier icon on the desktop. The Network Installation Manager appears with the message “An updated version of Deltek GCS Premier has been detected on the server. Do you want to install?” Click Yes to continue.
2. An error report message appears. Click Close to close the message and begin the installation.
3. On the Welcome page of the wizard, click Next to display the License Agreement page.
4. If you agree with the License Agreement stated, select I accept the terms of the license agreement, and then click Next. If you do not accept the terms of the license agreement, the Next button will not become enabled and you will not be allowed to proceed with the installation.
Installation of the software indicates acceptance of these terms unless there is a separate written license agreement for the software you are now installing with different or additional terms. By accepting the agreement, you represent that you are authorized to accept these terms on behalf of the licensee, if applicable.
5. On the Choose Destination Location page, accept the default location that auto-populates, and then click Next to continue.
6. On the Browse for DTSite.ini page, the correct location of the DTSite.ini file should be displayed. If this path does not auto-populate, browse to the \SiteData folder, located underneath the GCS Premier Parent folder on the server. Click Next to continue.
Hot Fix Installation Information
Regulatory Release Notes 4
7. The Start Copying Files page lists the previous options that were selected as well as any new folders that are created as part of the installation. Click Next to begin.
The Setup is updating files icon and the Setup Status screen appear while a series of processes run. When the client installation has completed, the Update Complete screen displays.
8. Select Yes, I want to restart my computer now as required by the installer. Click Finish to exit the installation.
For full GCS Premier functionality, you must reboot the workstation.
9. If you select No, I will restart my computer later, a message displays but then the installation completes and allows you to exit.
Post-Installation
You must complete the following instructions after installing GCS Premier.
1. Check each workstation to ensure that the GCS PDF Driver was installed. To do so, click Start » Control Panel » Printers and Other Hardware » View installed printers or fax printers, and see if the GCS PDF Driver is listed there.
The driver allows the user to Print/Print Preview from within GCS Premier in PDF format. You cannot print directly to the GCS PDF Driver from within GCS Premier, and it will not work with any other application.
If the GCS PDF Driver printer does not display after the Programs Installation is complete, the program was most likely not installed by users with local Administrator privileges on their own workstations. If they do not currently have local Administrator privileges on their own workstations, grant them local Administrator privileges temporarily and manually perform the installation. Then set their privileges back to whatever they were prior to temporarily changing them.
2. Within GCS Premier, click System Administration » File Utilities » File Utilities » Set Up Data Files to display the Set Up Data Files screen. Click the down arrow in the Files box, and choose <All>. Click Set Up, and let it run through all of the files.
This step must be performed in every data directory listed in your Data Directory drop-
down list on the login screen.
3. This step updates your Payroll Tax Information through September 2015. The Tax Table Update screen only needs to be run once and in the current data directory only. This program merges Deltek’s most current federal and state tax information into your existing federal and state tax files.
Within GCS Premier, click Payroll and Human Resources » Utilities » Tax Table Update to display the Tax Table Update screen.
To determine if you should select the Change taxability codes check box or not:
Some states have a taxability status which may depend on the structure of your company’s deductions. If you have changed the taxability codes for withholding and SUTA on the State Tax Information screen from our defaults and do not want this program to change them back, then do not select this check box. If you
Hot Fix Installation Information
Regulatory Release Notes 5
want the program to set the taxability codes to the system defaults, select the Change taxability codes check box.
Click the Process button.
4. This step is for Travel users only. If you do not use this product, skip this step. Within GCS Premier, click Travel » Setup Files » Update Per Diem File to display the Update Per Diem File screen. Click the Process button, and then click OK when you receive the “Processing Completed” message.
5. This step enables Hosted Help for all users. This step only needs to be performed if Hosted Help has not yet been previously enabled. There is an option for Hosted Help that allows users to launch the GCS Premier Help system through an online Deltek-hosted server, as opposed to launching it locally from the \Programs\WebHelp folder on their workstation.
Enabling Hosted Help gives users access to real-time Help system updates as they are made, without having to wait for the changes to be deployed to their local Help system folder when the next service pack or hot fix is installed.
Computers that have no internet connectivity will not be able to use Hosted Help. If
any of the computers in your company do not have internet connectivity, the Help
system will not work for those users if you choose to enable this feature. Once the
feature is enabled, it is enabled for all users in your company. If you have any users
running GCS Premier on a computer that does not have internet connectivity, do not
enable Hosted Help for your company.
The default setting is that Hosted Help is not selected. To enable this feature, you must follow a few steps.
To enable Hosted Help, complete the following steps:
a. Have all users log out of GCS Premier.
b. Have the user with GCS Premier System Administration access log on to GCS Premier and navigate to the System Administration » Configuration » System Configuration » Online Help Settings tab.
c. Select the Connect to Hosted Help via Customer Care Site check box, and enter any valid Deltek Customer Care Connect credentials into the User Name and Password fields.
Make sure to use your Deltek Customer Care Connect (support.deltek.com) web site
login credentials on this screen, and not your GCS Premier user ID and password. It is
suggested that you test your login credentials prior to entering them here to ensure
they are indeed valid. To test them, go to support.deltek.com and attempt to log in
with the same credentials you intend to enter on this screen.
d. Save your changes and close the System Configuration screen.
When the users log in to GCS Premier, they will now be accessing the Hosted Help system. To disable this feature at any point in the future, clear the Connect to Hosted Help via Customer Care Site check box on the Online Help Settings tab of the System Configuration screen.
More Information
If you have any questions, contact Deltek support at https://deltek.custhelp.com.

Hot Fix Installation Information
Regulatory Release Notes 6
Documentation
This section describes how to run the online help from outside the system, and where to locate Release Notes.
Running Online Help from Outside the System
To run the GCS Premier 5.0 Online Help from outside the system, complete the following steps:
1. In Microsoft Windows Explorer, browse to the folder where the Online Help system has been installed. Depending on your workstation operating system, it will be found in one of the following locations:
%SystemDrive%\Program Files\Deltek\GCSPremier\Programs\WebHelp
%SystemDrive%\ProgramData\Deltek\GCSPremier\Programs\WebHelp
%SystemDrive%\Documents and Settings\All Users\Application Data\Deltek\GCSPremier\Programs\WebHelp
2. Double-click any file with an .htm extension. The corresponding help topic opens.
3. Click Show to view the Table of Contents.
The HTML Online Help files are also available for download from the GCS Premier 5.0 Distribution site.
Where to Find Release Notes
You can download Release Notes from the Deltek Customer Care Connect web site.
You can locate the Deltek GCS Premier 5.0 Getting Started Guide in the Online Help, and on the GCS Premier 5.0 Distribution site.

For Additional Information
Regulatory Release Notes 7
For Additional Information
In addition to the information and contacts contained in these Release Notes, the following sources of information are available.
Deltek GCS Premier 5.0 User Documentation
Deltek GCS Premier provides HTML-based Online Help.
Customer Care Connect Site
The Deltek Customer Care Connect site is a support web site for Deltek customers who purchase an Ongoing Support Plan (OSP).
The following are some of the many options that the Customer Care Connect site provides:
Search for product documentation, such as release notes, install guides, technical information, online help topics, and white papers
Ask questions, exchange ideas, and share knowledge with other Deltek customers through the Deltek Connect Customer Forums
Access Cloud specific documents and forums
Download the latest versions of your Deltek products
Search Deltek’s knowledge base
Submit a support case and check on its progress
Transfer requested files to a Customer Care analyst
Subscribe to Deltek communications about your products and services
Receive alerts of new Deltek releases and hot fixes
Use Quick Chat to submit a question to a Customer Care analyst online
For more information regarding Deltek Customer Care Connect, refer to the online help available from the web site.
Access Customer Care Connect
To access the Customer Care Connect site, complete the following steps:
1. Go to http://support.deltek.com.
2. Enter your Customer Care Connect Username and Password.
3. Click Log In.
If you do not have a username and password for the Customer Care Connect site, contact your
firm’s GCS Premier Administrator.
If you forget your username or password, you can click the Account Assistance button on the
login screen for help.

Updates and Enhancements
Regulatory Release Notes 8
Updates and Enhancements
For this release, the primary changes are for enhancements and regulatory updates. All regulatory changes are effective as of July 1, 2015, unless otherwise noted. The updates in this section include:
Platform Support Upgrade
Enhancements
State Updates
UDD and Impromptu Catalog Updates
Platform Support Upgrade
GCS Premier now supports Windows Server 2012 R2.
Enhancements
VETS-4212 Reporting
Protected Veteran Information
GCS Premier now has the ability to identify employees who are protected veterans but declined to self-identify which specific veteran categories they may belong (Active Duty Wartime or Campaign Badge Veteran, Armed Forces Service Medal Veteran, Disabled Veteran, or Recently Separated Veteran). These employees will be counted under Protected Veterans in VETS-4212 reporting.
For more details and a sample invitation to self-identify, see http://www.dol.gov/ofccp/regs/compliance/vevraa/vevraa_rule_qa_508c.pdf.
This update affects the following applications:
Employee Master File — A new option, X - Protected Veteran (Declined to Self-Identify), has been added to the Military Status drop-down list. Select this option if the employee is a protected veteran but declined to specify to which veteran categories he/she may belong.
Employee Master File Mass Update — When you select Military Status from the Change Field drop-down list, the new option Protected Veteran (Declined to Self-Identify) is now available in the New Data and Old Data drop-down lists.
Employee Master File Preprocessor — The application now includes the new military status code X in the list of valid values for Military Status.
VETS-4212 Report — The report now includes the new military status code X in the list of protected veterans.
Other Changes
The VETS-100(A) Report screen is no longer available on the GCS Premier main menu and Batch Manager. Effective October 27, 2014, the VETS-100(A) Report will be replaced by the VETS-4212 Report, which will be implemented in the 2015 filing cycle.
Updates and Enhancements
Regulatory Release Notes 9
Affordable Care Act
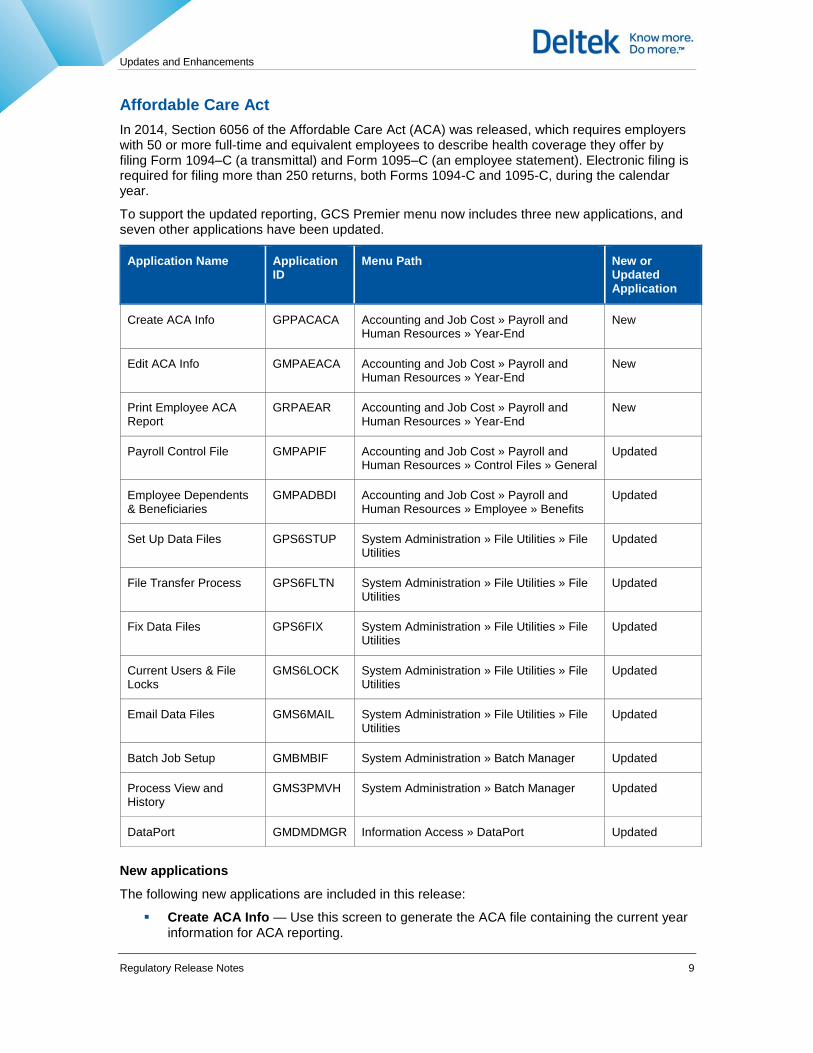
In 2014, Section 6056 of the Affordable Care Act (ACA) was released, which requires employers with 50 or more full-time and equivalent employees to describe health coverage they offer by filing Form 1094–C (a transmittal) and Form 1095–C (an employee statement). Electronic filing is required for filing more than 250 returns, both Forms 1094-C and 1095-C, during the calendar year.
To support the updated reporting, GCS Premier menu now includes three new applications, and seven other applications have been updated.
Application Name Application ID
Menu Path New or Updated Application
Create ACA Info GPPACACA Accounting and Job Cost » Payroll and Human Resources » Year-End
New
Edit ACA Info GMPAEACA Accounting and Job Cost » Payroll and Human Resources » Year-End
New
Print Employee ACA Report
GRPAEAR Accounting and Job Cost » Payroll and Human Resources » Year-End
New
Payroll Control File GMPAPIF Accounting and Job Cost » Payroll and Human Resources » Control Files » General
Updated
Employee Dependents & Beneficiaries
GMPADBDI Accounting and Job Cost » Payroll and Human Resources » Employee » Benefits
Updated
Set Up Data Files GPS6STUP System Administration » File Utilities » File Utilities
Updated
File Transfer Process GPS6FLTN System Administration » File Utilities » File Utilities
Updated
Fix Data Files GPS6FIX System Administration » File Utilities » File Utilities
Updated
Current Users & File Locks
GMS6LOCK System Administration » File Utilities » File Utilities
Updated
Email Data Files GMS6MAIL System Administration » File Utilities » File Utilities
Updated
Batch Job Setup GMBMBIF System Administration » Batch Manager Updated
Process View and History
GMS3PMVH System Administration » Batch Manager Updated
DataPort GMDMDMGR Information Access » DataPort Updated
New applications
The following new applications are included in this release:
Create ACA Info — Use this screen to generate the ACA file containing the current year information for ACA reporting.

Updates and Enhancements
Regulatory Release Notes 10
You can also use the Set Up Data Files screen to generate the ACAFILE.dat/idx file.
Edit ACA Info — Use this application to edit the information in the ACA file after the ACA file is created on the Create ACA Info screen. You can also use the Covered Individuals (Self-Insured) sub-screen on this application to enter ACA coverage information for the employee and his/her dependents if the employer offers self-insured coverage.
Print Employee ACA Report — Use this screen to print the ACA report after you ran the Create ACA Info application. This allows you to check the information generated in the ACA file.
The procedure in preparing and printing the ACA report is similar to the W-2 file process. You create the ACA file on the Create ACA Info screen. From the Print Employee ACA Report screen, you print the ACA report and review. You can do any editing on the Edit ACA Info screen, and then run the Print ACA Form 1095C application to print the ACA file. Lastly, you generate the magnetic media file on the Create ACA Magnetic Media File screen.
The Print ACA Form 1095C and Create ACA Magnetic Media File applications will be rolled out in the next GCS Premier release, when the 1095C form and the XML specifications from the Internal Revenue Service are available.
The start of filing returns for data collected in 2015 is January 1, 2016. However, Deltek recommends that you create and test the ACA report anytime and not wait for 2016.
Similar to the W-2 file, the ACA file can be recreated as needed. The new file overwrites the previous file for the same reporting year. Therefore, if you have been creating and posting payrolls with ACA information, you can test the ACA file process once you have installed Hot Fix 30.
Contact GCS Premier Customer Care for any feedback on testing. This case will not be charged against your case balance.
Updated Applications
These are the updates to existing applications:
Payroll Control File — On the Printing & Other Info tab, the Company group box is now named as ACA Contact & Pay Stubs. The Phone field’s new name is Phone Number, and you can now enter your ACA contact’s phone number (for ACA reports) or your company’s phone number (for pay stubs) in this field.
Employee Dependents & Beneficiaries — This application now allows you to enter the effectivity date of the employee’s ACA self-insured health plan coverage in the new Start Date and Stop Date columns.
Set Up Data Files — ACA File is now available from the Files drop-down list.
File Transfer Process — ACA File is now available from the Files drop-down list.
Fix Data Files — ACA File is now available from the Files drop-down list.
Current Users & File Locks — This application now includes the new ACA screens with file lock conditions similar to those of the W-2 applications.
Email Data Files — You can now enter the following new applications in the Application field on this screen:
Create ACA Info
Updates and Enhancements
Regulatory Release Notes 11
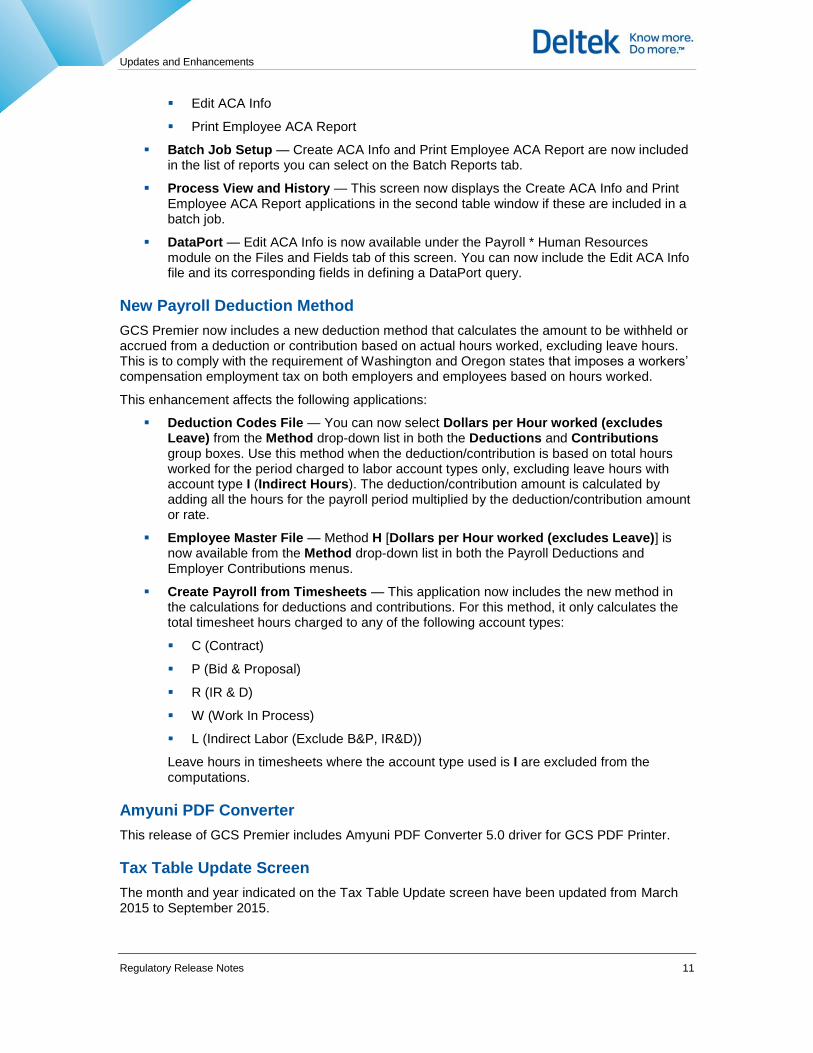
Edit ACA Info
Print Employee ACA Report
Batch Job Setup — Create ACA Info and Print Employee ACA Report are now included in the list of reports you can select on the Batch Reports tab.
Process View and History — This screen now displays the Create ACA Info and Print Employee ACA Report applications in the second table window if these are included in a batch job.
DataPort — Edit ACA Info is now available under the Payroll * Human Resources module on the Files and Fields tab of this screen. You can now include the Edit ACA Info file and its corresponding fields in defining a DataPort query.
New Payroll Deduction Method
GCS Premier now includes a new deduction method that calculates the amount to be withheld or accrued from a deduction or contribution based on actual hours worked, excluding leave hours. This is to comply with the requirement of Washington and Oregon states that imposes a workers’ compensation employment tax on both employers and employees based on hours worked.
This enhancement affects the following applications:
Deduction Codes File — You can now select Dollars per Hour worked (excludes Leave) from the Method drop-down list in both the Deductions and Contributions group boxes. Use this method when the deduction/contribution is based on total hours worked for the period charged to labor account types only, excluding leave hours with account type I (Indirect Hours). The deduction/contribution amount is calculated by adding all the hours for the payroll period multiplied by the deduction/contribution amount or rate.
Employee Master File — Method H [Dollars per Hour worked (excludes Leave)] is now available from the Method drop-down list in both the Payroll Deductions and Employer Contributions menus.
Create Payroll from Timesheets — This application now includes the new method in the calculations for deductions and contributions. For this method, it only calculates the total timesheet hours charged to any of the following account types:
C (Contract)
P (Bid & Proposal)
R (IR & D)
W (Work In Process)
L (Indirect Labor (Exclude B&P, IR&D))
Leave hours in timesheets where the account type used is I are excluded from the computations.
Amyuni PDF Converter
This release of GCS Premier includes Amyuni PDF Converter 5.0 driver for GCS PDF Printer.
Tax Table Update Screen
The month and year indicated on the Tax Table Update screen have been updated from March 2015 to September 2015.

Updates and Enhancements
Regulatory Release Notes 12
State Updates
Connecticut
The following tables are updated for Connecticut:
Personal Exemptions (Table A) for filing status F
Withholding Tax Calculation (Table B) for all filing statuses
Tax Recapture (Table D) for all filing statuses
Personal Tax Credits (Table E) for filing status F
Withholding Tax Calculation
The Department of Revenue released the updated percentage withholding tables that reflect the two new income tax rates for high earners. The tables are effective January 1, 2015. Employers should implement the tables by August 31, 2015, but do not have to adjust previous withholding during 2015.
Income of single taxpayers that is more than $250,000 and less than $500,000 and income of married individuals that is more than $500,000 and less than $1 million are to be taxed at 6.9%. Income of single employees that is more than $500,000 and income of married individuals that is more than $1 million are to be taxed at 6.99%. Connecticut’s previous top income tax rate was 6.7%. See the following tables for more details.
Filing Status: Single, Status 2, or Married
Withholding Code: A, D, or F
For Taxable Income Over
Base Tax Percent of Excess
0 0 3.00%
10,000 300 5.00%
50,000 2,300 5.50%
100,000 5,050 6.00%
200,000 11,050 6.50%
250,000 14,300 6.90%
500,000 31,550 6.99%
Filing Status: Head of Household
Withholding Code: B
For Taxable Income Over
Base Tax Percent of Excess
0 0 3.00%

Updates and Enhancements
Regulatory Release Notes 13
For Taxable Income Over
Base Tax Percent of Excess
16,000 480 5.00%
80,000 3,680 5.50%
160,000 8,080 6.00%
320,000 17,680 6.50%
400,000 22,880 6.90%
800,000 50,480 6.99%
Filing Status: Status 1
Withholding Code: C
For Taxable Income Over
Base Tax Percent of Excess
0 0 3.00%
20,000 600 5.00%
100,000 4,600 5.50%
200,000 10,100 6.00%
400,000 22,100 6.50%
500,000 28,600 6.90%
1,000,000 63,100 6.99%
Tax Recapture
These are the updated recapture amounts for Connecticut.
Single, Status 2 or Married
Head of Household Status 1
Phase-In Starting Point: Annual Salary Over
$200,000 $320,000 $400,000
Recapture Amount $90 per $5,000 of the annual salary over the starting point
$140 per $8,000 of the annual salary over the starting point
$180 per $10,000 of the annual salary over the starting point
Maximum Total Recapture Amount
$3,150 $4,920 $6,300
Updates and Enhancements
Regulatory Release Notes 14
For more information, see http://www.ct.gov/drs/lib/drs/forms/2015withholding/tpg-211_20150805.pdf.
Idaho
Idaho State Tax Commission in August 3 released the updated percentage method withholding tables, effective retroactively to January 1, 2015. Employers are not required to retroactively adjust withholding for the months before the withholding tables were released. Personal exemption amount increased from $3,950 to $4,000, while the supplemental withholding rate is unchanged.
For more information, see http://tax.idaho.gov/pubs/EPB00006_07-30-2015.pdf.
Kansas
The SUTA limit for Kansas increases from $8,000 to $12,000.
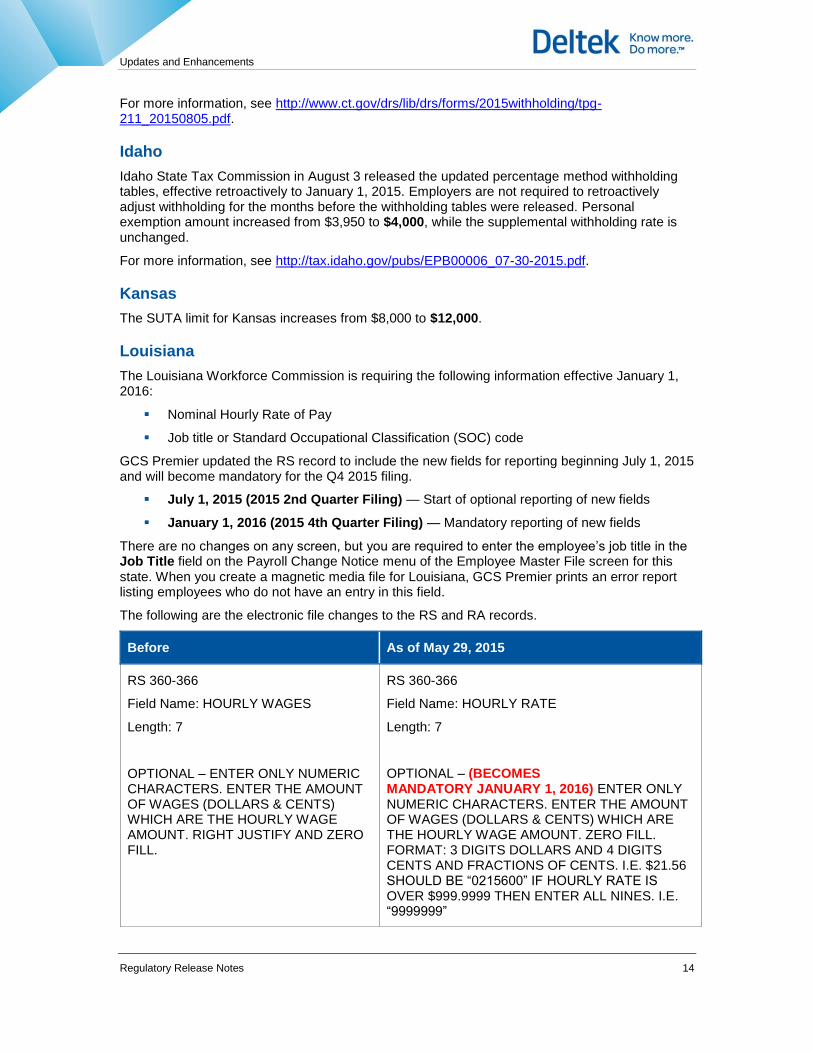
Louisiana
The Louisiana Workforce Commission is requiring the following information effective January 1, 2016:
Nominal Hourly Rate of Pay
Job title or Standard Occupational Classification (SOC) code
GCS Premier updated the RS record to include the new fields for reporting beginning July 1, 2015 and will become mandatory for the Q4 2015 filing.
July 1, 2015 (2015 2nd Quarter Filing) — Start of optional reporting of new fields
January 1, 2016 (2015 4th Quarter Filing) — Mandatory reporting of new fields
There are no changes on any screen, but you are required to enter the employee’s job title in the Job Title field on the Payroll Change Notice menu of the Employee Master File screen for this state. When you create a magnetic media file for Louisiana, GCS Premier prints an error report listing employees who do not have an entry in this field.
The following are the electronic file changes to the RS and RA records.
Before As of May 29, 2015
RS 360-366
Field Name: HOURLY WAGES
Length: 7
OPTIONAL – ENTER ONLY NUMERIC CHARACTERS. ENTER THE AMOUNT OF WAGES (DOLLARS & CENTS) WHICH ARE THE HOURLY WAGE AMOUNT. RIGHT JUSTIFY AND ZERO FILL.
RS 360-366
Field Name: HOURLY RATE
Length: 7
OPTIONAL – (BECOMES MANDATORY JANUARY 1, 2016) ENTER ONLY NUMERIC CHARACTERS. ENTER THE AMOUNT OF WAGES (DOLLARS & CENTS) WHICH ARE THE HOURLY WAGE AMOUNT. ZERO FILL. FORMAT: 3 DIGITS DOLLARS AND 4 DIGITS CENTS AND FRACTIONS OF CENTS. I.E. $21.56 SHOULD BE “0215600” IF HOURLY RATE IS OVER $999.9999 THEN ENTER ALL NINES. I.E. “9999999”

Updates and Enhancements
Regulatory Release Notes 15
Before As of May 29, 2015
RS 367-372
Field Name: OES CODE
Length: 6
OPTIONAL – SEE: OCCUPATIONAL CODES DICTIONARY (OES/SOC) ON WWW.LAWORKS.NET
RS 367-446
Field Name: SOC CODE/JOB TITLE
Length: 80
OPTIONAL – (BECOMES MANDATORY JANUARY 1, 2016) ENTER EITHER 6 DIGITS STANDARD OCCUPATIONAL CLASSIFICATION (SOC) OR ENTER JOB TITLE DESCRIPTION. NO DASH OR DOT ALLOWED IN SOC.
RS 373-487
Field Name: FILLER
Length: 115
FILL WITH BLANKS.
RS 447-487
Field Name: FILLER
Length: 41
FILL WITH BLANKS.
RA 003-011
Field Name: SECURED FILE TRANSFER PROTOCOL
Length: 9
REQUIRED – SUBMITTER’S FEIN NUMBER
RA 003-216
Field Name: FILLER
Length: 214
FILL WITH BLANKS.
Michigan
Effective third quarter of 2015, the SUTA limit for Michigan is $9,000, down from $9,500.
The amounts of unemployment tax paid on an employee’s unemployment-taxable wages above $9,000 for the first and second quarters of 2015 are not reimbursable because the wage base for all employers for those quarters is still $9,500.
New York
The income withholding tables are updated for New York City, effective June 1, 2015, after a legislative change was applied to those with taxable personal income greater than $500,000. The base tax for Married filers with taxable income exceeding $500,000 is now $20,828.46, while that for Single filers is $20,834.16.
For payrolls June 1 or later, New York City employers who use Method II, Exact Calculation Method, are required to use the revised exact calculation methods in NYS-50-T-NYC because of changes in line 7, Column 5 amounts in each of the tables.
For more information, see http://www.tax.ny.gov/pdf/publications/withholding/nys50_t_nyc.pdf.

Updates and Enhancements
Regulatory Release Notes 16
North Dakota
These are the updates for North Dakota:
Single and Married tax tables are updated.
The supplemental tax rate decreases from 2.28% to 2.05%.
Ohio
The withholding table of Ohio is updated with changes effective August 1, 2015.
UDD and Impromptu Catalog Updates
GCS Premier now includes three new screens, and several applications have been modified to accommodate the updates for the Affordable Care Act. We have updated UDD and Impromptu Catalog to include these changes. A new table, ACA File (ACAFILE), stores the fields included in the new screens, while the Dependent/Beneficiary Deduction Information (PR33DBD) table now contains the new fields added to the Employee Dependents & Beneficiaries screen. See the following table for more details.
UDD Catalog
PR33DBD (Dependent/Beneficiary Deduction Information)
DBD-START-DATE Dbd Start Date
DBD-STOP-DATE Dbd Stop Date
ACAFILE (ACA File)
ACA-PAYROLL-YEAR Aca Payroll Year
ACA-EMPL-ID Aca Empl Id
ACA-COVERAGE-CODE-ALL Aca Coverage Code All
ACA-EMPL-SHARE-ALL Aca Empl Share All
ACA-SAFE-HARBOR-ALL Aca Safe Harbor All
ACA-COVERAGE-CODE Aca Coverage Code
ACA-EMPL-SHARE Aca Empl Share
ACA-SAFE-HARBOR Aca Safe Harbor
ACA-DBI-NAME Aca Dbi Name
ACA-DBI-SSN Aca Dbi Ssn
ACA-DBI-DOB-DATE Aca Dbi Dob Date
ACA-DBI-12MOS-COVERED Aca Dbi 12mos Covered

Updates and Enhancements
Regulatory Release Notes 17
UDD Catalog
ACA-DBI-MONTHLY-COVER Aca Dbi Monthly Cover
Update UDD and Impromptu Catalog
To update UDD and Impromptu Catalog, complete the following steps:
1. Close Impromptu prior to updating the UDD and Catalog.
2. Rename the existing files (with a suggested tag of _OLD) instead of overwriting them. Store them in a separate file for backup purposes.
Rename as follows:
Current Name New Name Copy to Directory
GCSPremier.udd GCSPremier_OLD.udd Cognos\cer5\Deltek\IMP74GCSP50\UDD
All Tables.cat All Tables_OLD.cat \Cognos\cer5\Deltek\IMP74GCSP50\Catalog
3. Download the updated .UDD and .CAT files from the Deltek Software Manager site.
4. Unzip the file and copy the .UDD and .CAT files to the following directories where they are installed:
UDD: \Cognos\cer5\Deltek\IMP74GCSP50\UDD
Impromptu Catalog: \Cognos\cer5\Deltek\IMP74GCSP50\Catalog

Software Issues Resolved
Regulatory Release Notes 18
Software Issues Resolved
Accounting and Job Cost
Print A/P Advices
Deltek Defect Number: 518903
Description: When you tried to print A/P advices and selected No on the Print test form to
ensure proper alignment dialog box, the application displayed the following error message: “A
fatal error has occurred. DTCSVC - Internal error: Unable to retrieve current report information.”
Customers Impacted: This defect affects clients using this application.
Workaround Before Fix: None.
System Administration
Application Rights
Deltek Defect Number: 528867
Description: You were unable to restrict access in the Order Entry module because Order Entry
applications were missing in the SY08APP.dat/idx file.
Customers Impacted: This defect affects both On-Premise and Cloud clients.
Workaround Before Fix: None.
Email Data Files
Deltek Defect Number: 500873
Description: Order Entry applications were not available for selection on the Email Data Files
screen.
Customers Impacted: This defect affects both On-Premise and Cloud clients.
Workaround Before Fix: None.
File Utilities
Deltek Defect Number: 80082
Description: When the OE16CSN.dat file did not exist in the data directory and was not
supported by File Utilities, the following fatal error occurred when you ran the Print Stocking
Labels application: “Error 35 on CONFIGURATION SERIAL FILE in program PO74PLAB.”
Customers Impacted: This defect affects clients on GCS Premier version 5.0 SP5.
Workaround Before Fix: None.

Known Issues
Regulatory Release Notes 19
Known Issues
Purchase Requisitions
Changes to the data in in the Signature Titles section of the Requisition Control File » Approvals tab do not appear in Approval » Authorization until you log out of GCS Premier and then log back in.
Premier Billing
When using Premier Billing with Microsoft Office 2010, an error can occur when saving from the File ribbon. To avoid this, when you save a template, press (CTRL+S), or click the Save icon instead.
If you click Save on the File ribbon, the active Premier Billing application may close and erroneously save the template into the My Documents folder instead of the default Premier Billing Templates folder designated in DTShared.ini.
No Calendar Pop-up When Using RDWeb (Remote Desktop)
When populating date fields in GCS Premier, you can use the pop-up calendar to select the date. Users accessing GCS Premier via Microsoft’s RDWeb (Remote Desktop) service must manually key in the date.
Amyuni Not Installed When Using Windows Server 2008 R2 32-bit System
When using GCS Premier with Windows Server 2008 R2 32-bit, the generation of PDF reports
may not work correctly. This occurs when Amyuni is not properly installed along with GCS print
drivers and the Print Spooler option is set to Manual. To avoid this, prior to GCS installation, set
the Print Spooler to Automatic via Control Panel » Administrative Tools » Services » Print
Spooler, or you can also manually install Amyuni.

Deltek is the leading global provider of enterprise software and information solutions for government contractors, professional services firms and other project- and people-based businesses. For decades, we have delivered actionable insight that empowers our customers to unlock their business potential. 20,000 organizations and millions of users in over 80 countries around the world rely on Deltek to research and identify opportunities, win new business, recruit and develop talent, optimize resources, streamline operations and deliver more profitable projects. Deltek – Know more. Do more.®
deltek.com