Creating Quality UIs with LabVIEW
51
1 Creating Quality UIs with LabVIEW Grant Heimbach LabVIEW Product Manager
-
Upload
khangminh22 -
Category
Documents
-
view
2 -
download
0
Transcript of Creating Quality UIs with LabVIEW

1
Creating Quality UIs
with LabVIEW
Grant Heimbach
LabVIEW Product Manager

2
Agenda
1. Definitions, rules and advice(not LabVIEW specific, but important)
2. Some cool UI techniques for LabVIEW(and why you would consider using them in your application)
3. Where to go to download some reusable components
(because everybody loves free stuff)

3
What is a UI?
• Literally: User Interface
• How user interacts with program
• First thing user notices
• Make the user’s job easier
• Don’t be frustrating
4
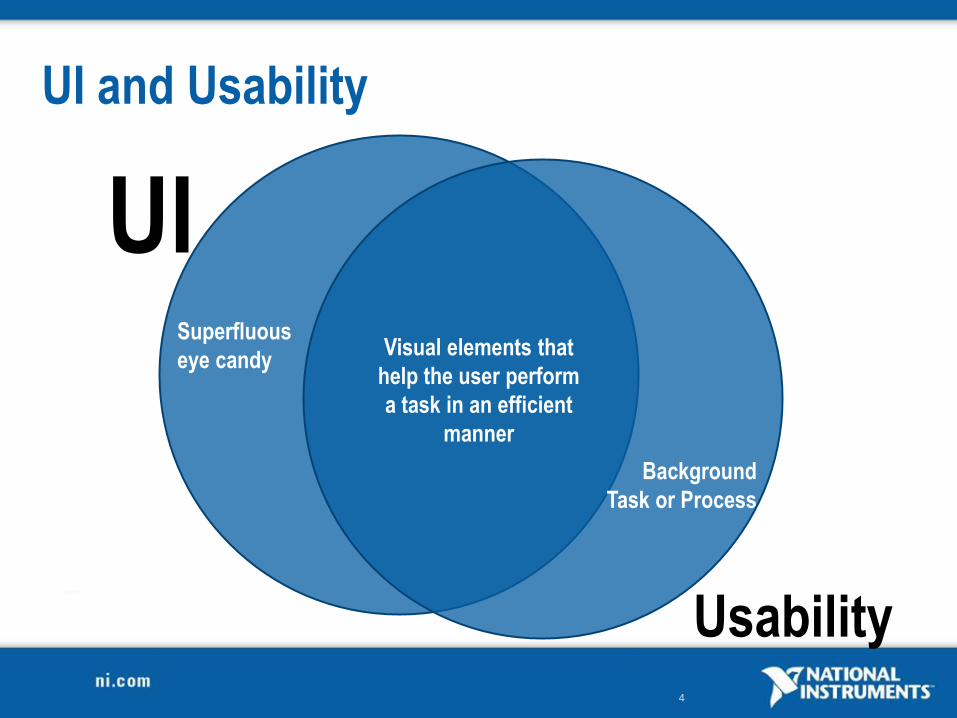
UI and Usability
Superfluous
eye candy
UI
Usability
Background
Task or Process
Visual elements that
help the user perform
a task in an efficient
manner

5
Some General Rules
1. Don’t be innovative
2. Less is more
3. Think About Your User

6
1. Don’t Be Innovative
Use familiar elements
Buttons
Icons
Terminology
Dialogs
Menus

7
1. Don’t Be Innovative
Still some license for
creativity
Don’t change the way
similar looking things
behave
Polish, don’t reinvent

8
2. Less is More
• Too much on screen at once is distracting
• Allow your user to focus on what is important

9
3. Think About Your User
• They probably don’t know as much as you Explain what buttons do
Keep them informed about what your program is doing
• Know how the user plans on using your application Mouse, Keyboard?
Touch Screen Large Buttons
Outdoors High Contrast
10
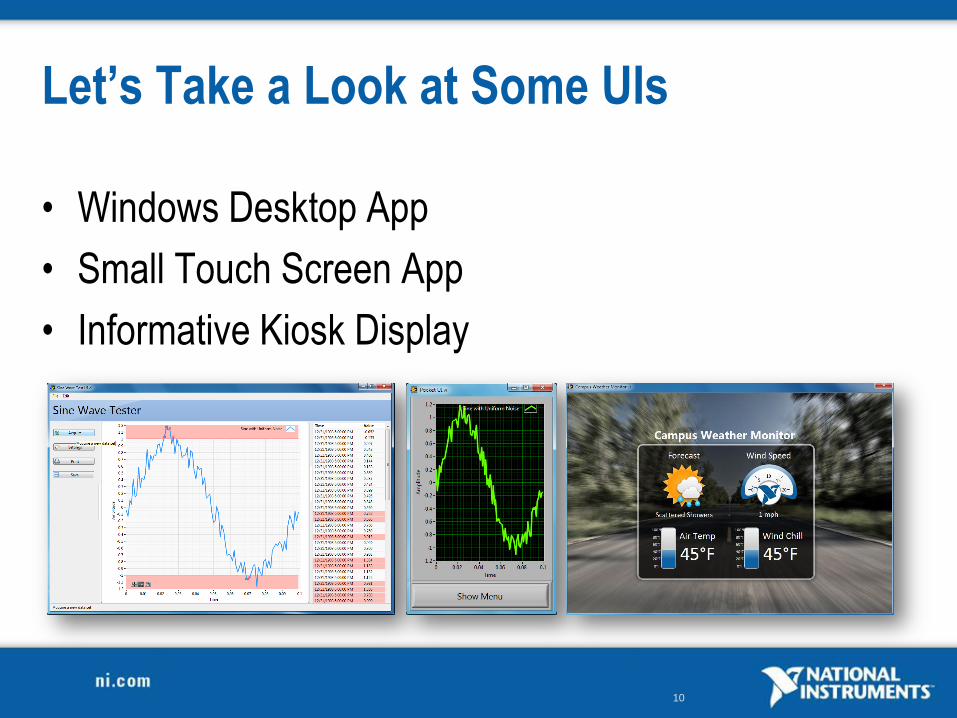
Let’s Take a Look at Some UIs
• Windows Desktop App
• Small Touch Screen App
• Informative Kiosk Display

11
Windows Desktop App

12
Applying the Rules
Don’t be innovative
• Use System Controls
• Add familiar icons to task buttons
• Use X to close application
Less is more
• Allow user to hide less important displays
• Hide the LV toolbar
• Don’t persist one-time configuration controls for no reason use temporary dialogs
• Customize the run-time menu
Think About Your User
• Create a status bar and use the busy cursor to update user
• Use tooltips to clarify functionality
• Allow the user to cancel long tasks
• Use panes to let user resize your application
Desktop Windows Application

13
Use Appropriate Controls
You can change your default type in Tools»Options»Front Panel

14
Add Decals to Buttons

15
Add Decals to Buttons - Demo
http://www.youtube.com/watch?v=2NdqXh67mak
How to Add Decals to Buttons
1. Drop a System OK Button on the front panel.
2. Right click on the control and select Advanced»Customize…
3. Edit»Import Picture to Clipboard and select your image -
• PNG files work best since transparency is preserved
4. Right click on the control and select Import Picture from Clipboard»Decal
5. Click the wrench icon to change customize mode
6. Move the decal or the text so they aren’t overlapping
7. Save your custom control
Reuse tip:
If you give your customized control an icon and save it in <LabVIEW>\user.lib it will show up in the
controls palette under User Controls.

16
Tooltips

17
Tooltips - Demo
http://www.youtube.com/watch?v=NGeElmr1q2g

18
Recolor Graphs

19
Recolor Graphs - Demo
http://www.youtube.com/watch?v=rOUcBvyHj5E

20
Hide the LabVIEW Toolbar

21
Hide the LabVIEW Toolbar - Demo
http://www.youtube.com/watch?v=2CbKuBVGzo0

22
Customizing the Run-Time Menu

23
Customizing the Run-Time Menu - Demo
http://www.youtube.com/watch?v=wkpiAmHFddM
You can also customize the run-time shortcut (right
click) menus for any control by right-clicking on the
control and going to Advanced»Run-Time Shortcut
Menu»Edit.

24
Spawning Dialogs
25
Spawning Dialogs - Demo
http://www.youtube.com/watch?v=L-hNmzQ9tFc

26
Using Panes Title Area
Status Bar
Menu /
Commands
Expandable
Content Area

27
Using Panes – Demo
http://www.youtube.com/watch?v=hZ180R7ADto

28
Hiding Panes

29
Status Bar
Another special-use case for panes can be to create a persistent status bar. In the bottom left of your status bar add a string control and
simply update the text contained in the status bar via local variable wherever you need to.
This simple technique is one of the most effective ways of keeping your user informed as to what state your application is in or what task it
is busy performing.

30
Busy Cursors
Along the lines of keeping the user updated – LabVIEW lets you change the cursor to a busy
cursor programmatically. The busy cursor is an OS-wide UI element that most users are quite
familiar with (it means – “wait, I’m trying to do something!”).

31
Busy Cursors - Demo
http://www.youtube.com/watch?v=_mosr-oTgRM

32
Keeping the User Updated
33
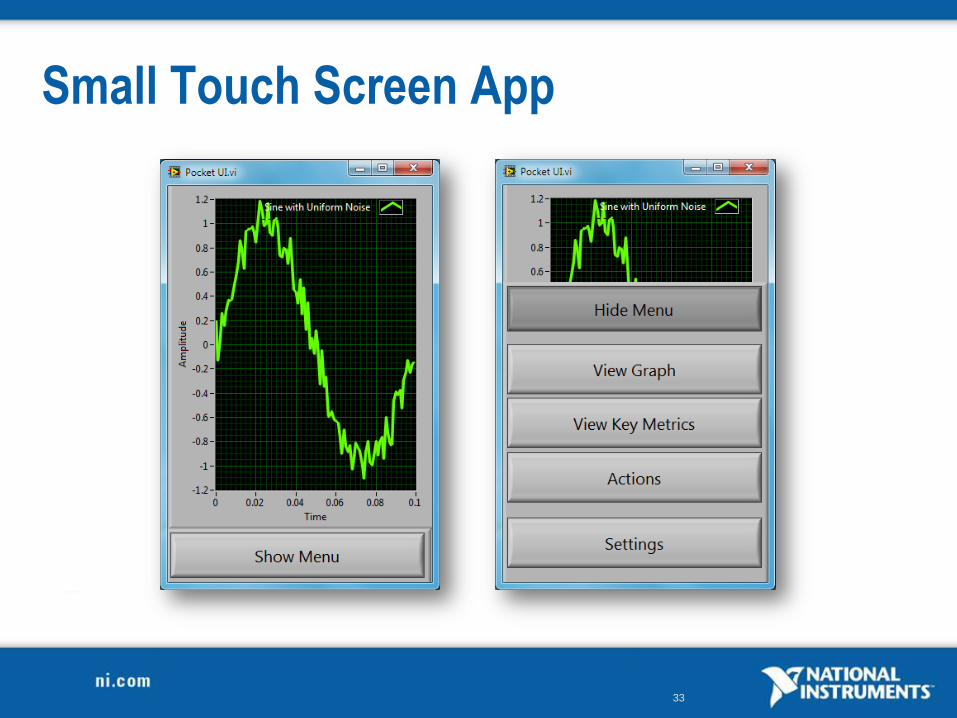
Small Touch Screen App

34
Applying the Rules
Don’t be innovative
• Use large controls & indicators that resemble their physical equivalents
• Simple is best
Less is more
• Screen real-estate is valuable, use it wisely
• Use trays, tabs or different screens to stretch screen space
Think About Your User
• Glare may be an issue use more contrast
• Touch screens require more spacing
• Users fingers may obscure part of the screen
Small Touch Screen

35
Tab Controls
• Tab controls are a familiar way to put
more information on a screen than
would otherwise fit
• Since the tabs themselves can be
hidden and changed
programmatically they are also useful
for some less obvious UI techniques

36
“Hidden” Tab Controls
Main Content Tab Control
Sliding Tab Control

37
Sliding a Control – Move.vi
• Moves an object to the Desired Position
• Moving half the remaining distance in each loop
iteration gives a natural sliding appearance
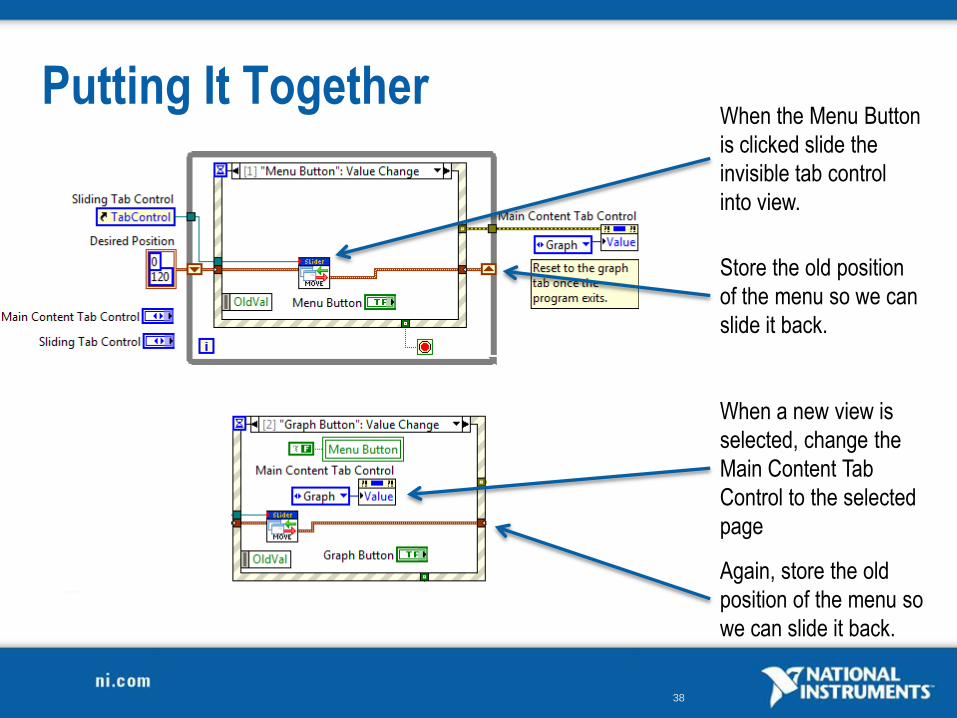
38
Putting It TogetherWhen the Menu Button
is clicked slide the
invisible tab control
into view.
Store the old position
of the menu so we can
slide it back.
When a new view is
selected, change the
Main Content Tab
Control to the selected
page
Again, store the old
position of the menu so
we can slide it back.

39
Informative Kiosk Display

40
Applying the Rules
Don’t be innovative
• Take inspiration from TV, websites or similar applications
Less is more
• Show only the important information in an instantly recognizable way
Think About Your User
• Passive audience visual appeal is more important
Informative Console Display

41
Panel Background

42
Panel Background - Demo
http://www.youtube.com/watch?v=gxXJfonTlFc

43
Create Decorations in PowerPoint

44
Create Decorations in PowerPoint - Demo
http://www.youtube.com/watch?v=gjYfqhlv2hQ
45
Transparent Indicators

46
Transparent Indicators - Demo
http://www.youtube.com/watch?v=jgUB1oDmf-4

47
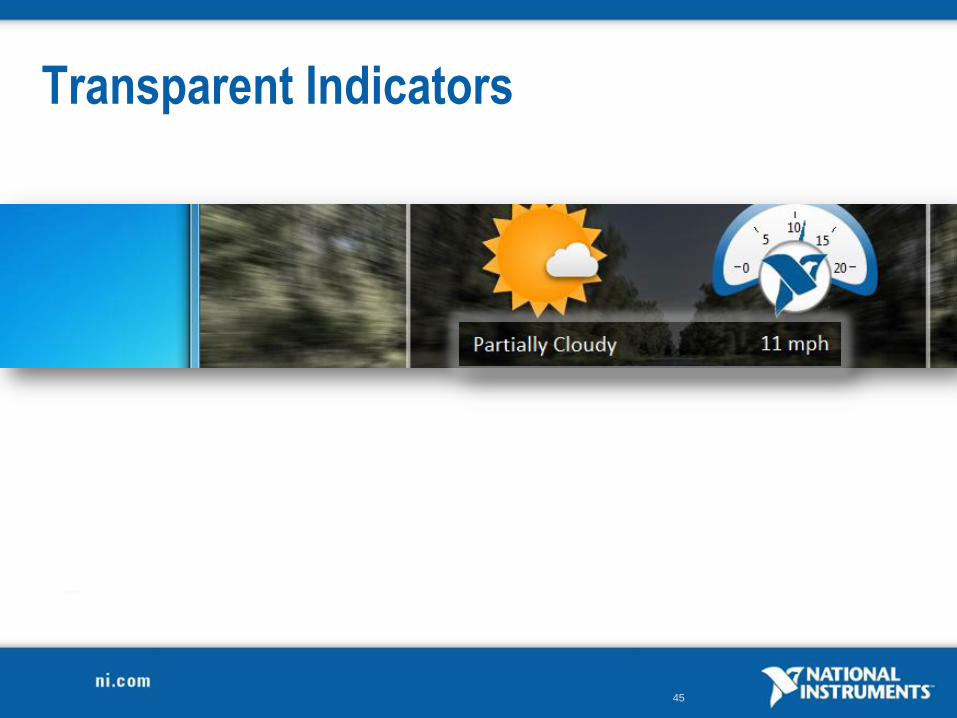
Transparent PNGs in a Picture Ring
The weather icon indicator is a special case of the previous technique. By combining a
transparent picture ring control with some transparent PNGs you can create some pretty
powerful, nice looking graphics which will add some visual appeal to your application
and also increase the usability of your UI by providing instantly recognizable icons for
various states.

48
Transparent PNGs in a Picture Ring - Demo
http://www.youtube.com/watch?v=AmDLCsnOegw

49
Heavily Customized Controls
Most of the default controls in LabVIEW can be customized by replacing
most of the source imagery using the control editor. Since doing so
requires a fair amount of artistic ability and knowledge of external
images editors we aren’t going to cover exactly how to create your own
controls in this presentation.
This particular control is part of the ni.com Inspired Control Suite
available for download from the ni.com community. In the community
you can also find a tutorial explaining the details of how to create
customized controls.

50
Free Stuff - UI Interest Group
http://decibel.ni.com/content/groups/ui

51
Key Take Aways
• The “Rules”1. Don’t be innovative
2. Less is more
3. Think about your user
• Take advantage of what LabVIEW gives you: Transparency
Different Controls/Control Customization
Panes/Tabs
• UI Interest Group on the community