CONCEPT MAPS: If you are making a Concept Map instead of a Care
81
CONCEPT MAPS: If you are making a Concept Map instead of a Care Plan you are in luck. Just do all thatstuff
Transcript of CONCEPT MAPS: If you are making a Concept Map instead of a Care

CONCEPT MAPS:If you are making a Concept Map instead of a Care Plan you are in luck. Just do all thatstuff

you just learned, but instead of copying and pasting the text into a Care Plantemplate, paste it into a

Concept Map template. Or, copy & paste blocks of text into aWord document, and manipulate theminto the “bubbles” and

“trees” that you like. Or,you can go really low techand cut them out with scissors, and really paste them
ontoanother sheet of paper.You could then copy your masterpiece on a copier to geta nice,clean copy, and then color it up

with colored pencils or highlighters ifyou want to getreally fancy.How far you take this depends only onhow badly you

are afflicted with OCD, or howmuch you feel you need to suck up to your instructor.Lastupdated 03/01/1

EVOLVE-CAREPLAN/CONCEPT MAP CONSTRUCTORTUTORIALI know this tutorial seems

really long, but it is just very detailed so you won’t get lost.Trust me, if you use this to create your care plansand care maps
you will save tons of time and brain cramps. Especially if you havebeen handwriting them (my hands hurts just

thinking about that). And, if you have a better, easier,or faster way, for heavenssakelet me know!ADD EVOLVE RESOURCES:

I use the Care Plan Constructor that comes withthe book, Ackley: NursingDiagnosisHandbook: An Evidence-Based
Guide to Planning Care, 9th
Ed.(I just switched from the8th
edition, so if you find

anything I needto change in the tutorial please email [email protected]), so I will walk youthrough the

process of adding and usingthat one, but the process is the same for others. REMEMBER: You DO NOT need toown

the book to addand use the associated resources for this book and most of theother products.1.

LOG-IN TO AN EXISTING EVOLVEACCOUNT:Click herehttps://evolve.elsevier.com/cs/Satellite/

StudentHome?Audience=Student OR CREATE A NEW EVOLVE ACCOUNT:If you don’t already have anEvolveaccount,

just go ahead and make one. It is free, there is no obligation of any kind,and itjust takes a few minutes. Click here
https://evolve.elsevier.com/cs/Satellite/StudentMyHome?Audience=StudentClick on the turquoise blue

button on the left side of the page that says, “JOINEVOLVE COMMUNITIES!” Just fill in the fields and hit “Submit”.

Make note of your user name and password (it will be emailedto you too). You will get anoption on thebottom of the

screen to “JumpRight In”; choose thatyou arenow automatically signed in.2.Click on the grey

“Products” at the top of the home page. Lookaround and findstuff you want. To find the Ackley book, look under
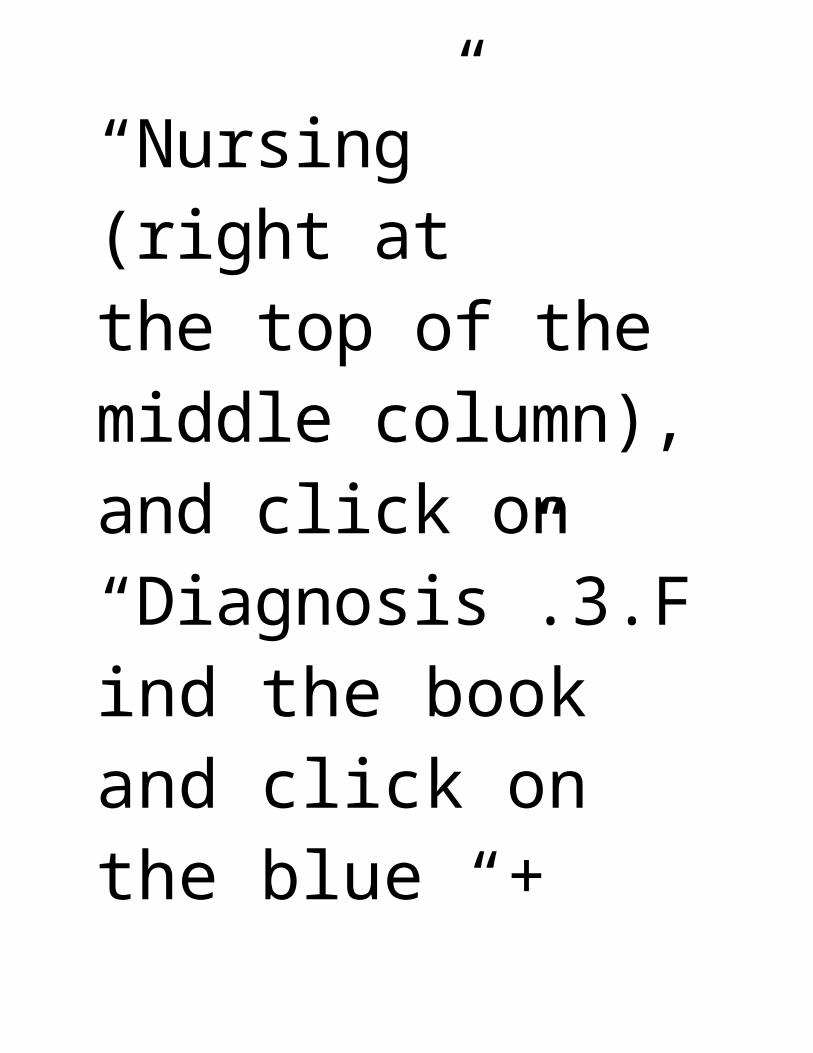
“Nursing” (right at the top of the middle column),and click on “Diagnosis”.3.Find the book and click on the blue “+
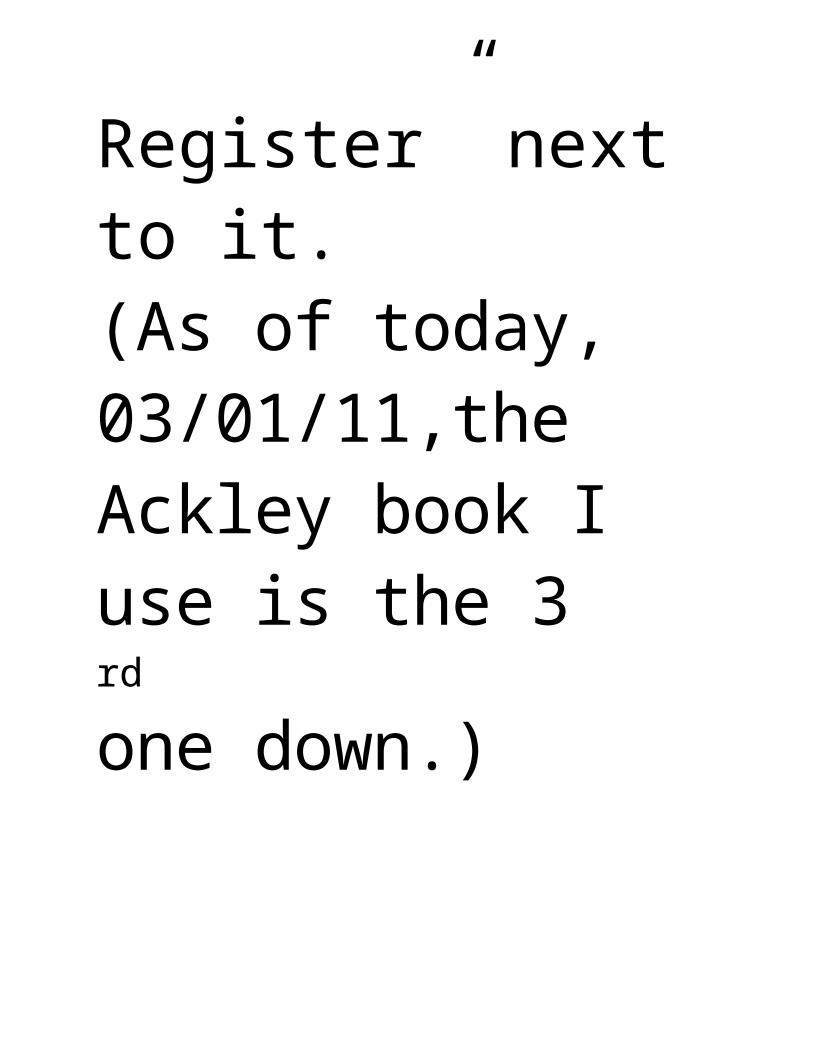
Register” next to it.(As of today, 03/01/11,the Ackley book I use is the 3rd
one down.)

4.Click the green “Register>” button on the bottom right. Click the box next to“Yes, I accept this agreement”, and

then click on the green “Submit” on thebottom right.5.Click on the blue “Get Started” link, to go back to

the home screen.6.Click on “My Content” on theupper left to expand it if itis not already.7.Clickon “Resources”,

and you should see the stuff you just added. It may take acouple minutesfor it to be added to your list, so if you
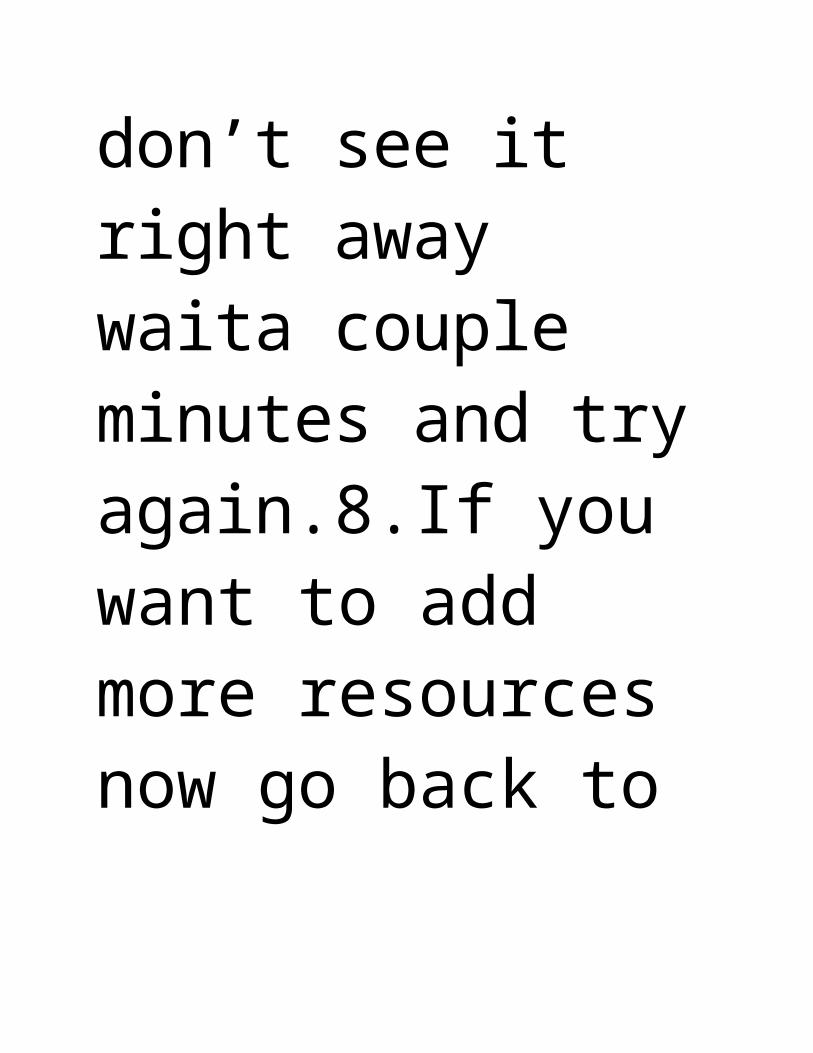
don’t see it right away waita couple minutes and tryagain.8.If you want to add more resources now go back to
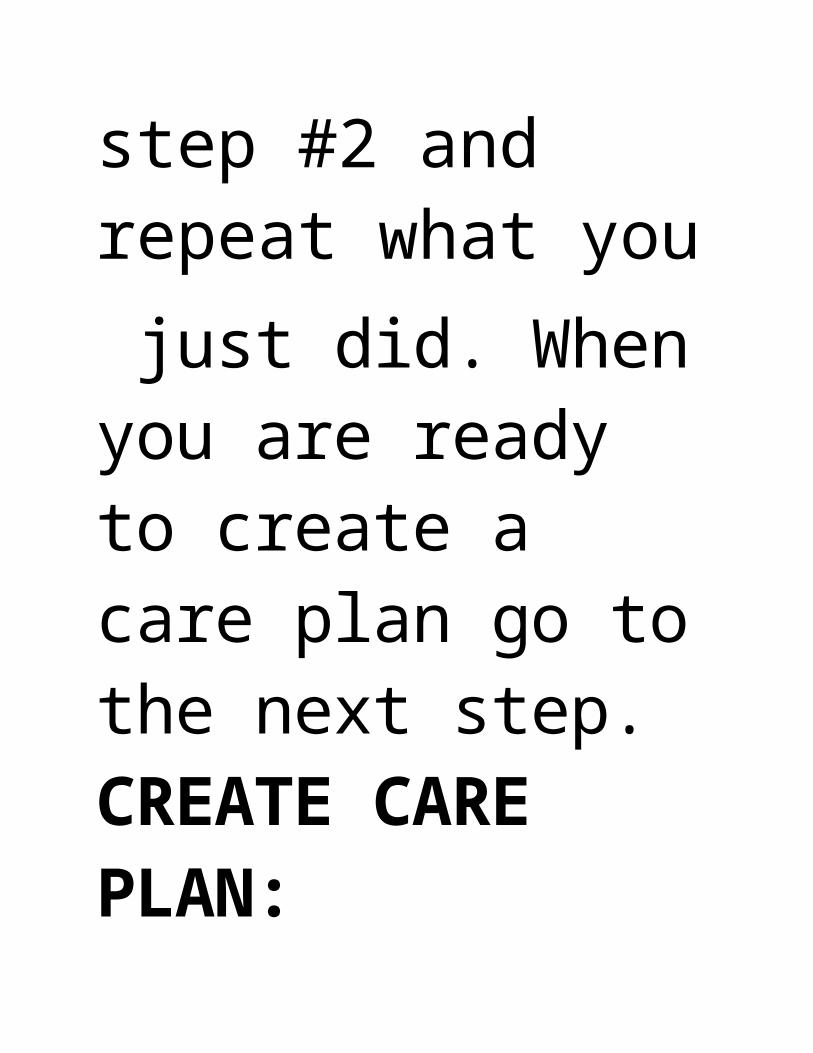
step #2 and repeat what you
just did. Whenyou are ready to create a care plan go tothe next step.CREATE CARE PLAN:

1.Okay, now down to business. Log in to EVOLVEhttps://evolve.elsevier.com/cs/Satellite/StudentHome?

Audience=Student Go to “My Content” on thehome page, click on “Resources” andclick on “Ackley:NursingDiagnosis

Handbook, 9th Edition”.2.Thistakes you to the Course Home; expand the “My Content” on theleft (click onthe little +

sign), expand “Resources” thesame way, and click on “Care PlanConstructor”.3.Choose a diagnosis (NANDA)…for instance, “Acti

vity intolerance”. This takesyou to a check box menu of choices for items you want to include in your careplan. You

can choose one or all to be included in your finished care plan.I am lazy so ICHOOSE THEM ALL. Here is why: If you choose

them all, whenyou copy/paste the info to a document (Word,PDF, rtf, etc) saved to your schoolfile on your computer,

you will have the informationto use the nexttime you needa care plan for this NANDA, no matter if your patient is 9 days or 90

years (youwill see what I mean when you do the first one). Also, if you are accessing thisfrom school, have

limited internet access, or a slow internet connection, saving itall and making yourchanges off-line makes more
sense.Additionally, some of the choices mayhelp guide you in adding NANDAs to your care plan. For instance,

look at the last choice under the Activity Intolerance Dueto Cardiovascular Disease heading, “See

care plan for Decreased Cardiac outputfor further interventions.”If this is appropriate foryour patient,

when you are donewith the “Activity intolerance”, you can go backand do another one for “Decreased Cardiac

output”. (See “REMEMBER” after step 5 below.)4.Click on little picture of a printer page “Create Printable Page”

at the top leftof the page, itdoesn’t matter what you name your care plan so don’t spend muchtime thinking of a name…remember,
you may need those neurons later, don’twaste ‘em. Click “Yes” to include rationales. The
n click “Continue”.Select andcopy the whole thing, paste itinto a document(Word, rtf, pdf, etc),and save
it as, “Activity Intolerance Care Plan Info”, or something like that. Now every timeyou need to use

this NANDA for a care plan youhave all the information youneed.A WORD:You may have noticed the “Save” at the

top where the “CreatePrintable Page” is. Youmay save your customized careplans here if you want. Ipreferred to save them to a

document in my school folder so they were easilyaccessible. Also, this is a good option if you are accessing the internet
fromschool, thelibrary, etc., or if you have a slow internetconnection.5.Ifyou found otherNANDAs you wantto add to your care

plan, click on“Diagnoses” on the top right of the page and repeatsteps 3 and 4 for eachNANDA, saving each oneas a separate

document on your computer.REMEMBER: If you close a care plan or let your session expire before you copy
and paste the information into a document, it all goes away forever.6.Now, copy and paste the appropriateparts

from each NANDAdocument youcreated intoyour care plan template (you were probably given one at school).This iswhere you

experience the “learning” portion of doing care plans. (The partyou will learn to hate.) You mustuse your

critical thinking skillsto choose whatinformationpertains to YOUR PATIENT. Have fun…sorry,

couldn’t help it.ADD MED INFO TOCARE PLAN:I use EpocratesOnline,http://online.epocrates.com/noFrame/for the

medicationinformation for my care plans and concept maps. You must register, but the account isfree unless you choose

to pay for additional subscription applications. The Drugs,Diseases,and MultiCheck Drug

Interaction Checker (m√) applications are free.1.Sign in to EpocratesOnline. You should be in the “DRUG
S” application. If not,click onthe “DRUGS” tabat the top of the page.2.Type in the name of the medication. As you type the

name the program will listall matching medications. Just click on theone you need.3.Onceyou are on the

specific drug page use the section menu ison the right sideof the pageto find the specific information youneed; just copy

& paste the infoyou want directly into your care plan. NOTE: Youmay want to create a “careplan medications”

document on your computer -most of the meds you will seeover & over - no need to look them up over & over.-choose “Adult

Dosing” or Peds Dosing” for safe dose range-drug classification/action is under “Pharmacology”-side
effects is under “Adverse Reactions”-nursing implications is under “Safety/Monitoring”-check under “Black B

ox Warnings” and “Contraindications/Cautions”for additional nursing implications informationAs you look up

each medicationbe sure to click the m√at the bottom of thesection menu to check for drug-drug interactions

(cool, huh?).The “Patient Education” section is alsoreally nice…check it out…ifyou use thisat the hospital to

get informationfor your patient you maywant to click on “PillPictures” and print that for them as well.Now, check

out the “DISEASES” tab at the top of the page. For instance, scrolldown the “Categories” menu on the
left side to “Pediatrics andAdolescentMedicine”, then scroll down the“Disease/Condition Name” menu on the right to“Cystic

Fibrosis” and click on it. Under “Diagnosis” click on “Risk Factors” andclick on each one to open it. Use

this application to find information on medicaldiagnosis, pathophysiology, and risk factors for

care plans and concept maps.Cool, huh?4.Printyour dazzling care plan and turn it in