Biosecurity Module 1 | P age - USDA APHIS
50
-
Upload
khangminh22 -
Category
Documents
-
view
3 -
download
0
Transcript of Biosecurity Module 1 | P age - USDA APHIS


Biosecurity Module 1 | P a g e
Table of Contents
Overview ......................................................................................................................... 2
Objectives ....................................................................................................................... 3
Introduction Lesson Overview ......................................................................................... 4
Introduction Lesson Contents .......................................................................................... 5
Biosecurity Guidelines ................................................................................................. 6
Biosecurity Awareness ................................................................................................ 7
Routes of Transmission ............................................................................................... 8
Clothing and PPE ...................................................................................................... 11
Roles and Responsibilities ......................................................................................... 12
Biosecurity Group ...................................................................................................... 13
Planning Lesson Overview ............................................................................................ 14
Planning Lesson Contents ............................................................................................ 15
Biosecurity Plan ......................................................................................................... 16
Mitigating Biosecurity Risks ....................................................................................... 17
Cleaning and Disinfection .......................................................................................... 18
Movement Controls ................................................................................................... 19
Carcass Management................................................................................................ 20
Transportation ........................................................................................................... 31
Operations Lesson Overview ........................................................................................ 32
Operations Lesson Contents ......................................................................................... 33
Briefings ..................................................................................................................... 34
Site Security .............................................................................................................. 35
Visitor Risk Mitigation ................................................................................................ 36
Biosecurity Protocol ................................................................................................... 37
Surveillance Biosecurity Protocol .............................................................................. 38
Work Zone Control .................................................................................................... 39
Establishing Control Zones ........................................................................................ 40
Support Zone ............................................................................................................. 41
Contamination Reduction Zone ................................................................................. 42
Exclusion Zone .......................................................................................................... 43
Contamination Prevention ......................................................................................... 44
Decontamination Area ............................................................................................... 45
Decontamination Practices ........................................................................................ 48
Summary ....................................................................................................................... 49

Biosecurity Module 2 | P a g e
Overview
Welcome to the Biosecurity Module of the online Carcass Management Course. While
completing this module, you may encounter references to the Emergency Management
Tools; Health, Safety, and PPE; and Secure Transport which are broadly covered in
their own separate training modules. These modules are found in the Introduction
Modules, beginning with the Orientation Module.
Effective management of animal carcasses and associated materials is a critical
component of a successful response during an animal health emergency. Carcass
management measures contain, treat, or destroy contaminated or potentially
contaminated materials in order to:
Prevent spread of a disease outbreak to protect the nation’s agricultural industry
Protect the environment by preventing carcass waste products from
contaminating soil, water, and air
Protect decaying carcasses from insects and scavengers which can transport
pathogens to other locations
Safeguard public health by removing potentially contaminated food products from
the human food supply
Safeguard animal health by removing potentially contaminated feed from the
animal feed supply

Biosecurity Module 3 | P a g e
Objectives
This module presents information in three different lessons:
Introduction
Planning
Operations
Upon completing this module, you should be able to:
Understand biosecurity principles, policies, and procedures for animal health
incidents
Recognize biosecurity implications associated with carcass management
Understand foreign animal disease and zoonotic disease risks
Describe the components of a biosecurity plan
Use operational guidance to implement biosecurity measures

Biosecurity Module 4 | P a g e
Introduction Lesson Overview
In the event of a major animal health emergency, USDA APHIS, in its role as an
emergency response agency, will deploy personnel to assist with response and
recovery efforts. Biosecurity measures and management practices will be instituted to
prevent the introduction and spread of disease agents during the response.
During an animal disease emergency, biosecurity measures are necessary to
Help keep disease agents out of livestock and poultry populations (e.g., herds,
flocks, or other groups of animals) where the agents are not already present
Help prevent the spread of disease agents from infected groups in the population
to uninfected groups within the same population
Help reduce the risk of spreading pathogenic agents during the movement of
personnel and materials necessary for activities associated with an animal health
emergency response
Help protect the health of responders and the general public

Biosecurity Module 5 | P a g e
Introduction Lesson Contents
This lesson is divided into the following sections:
Biosecurity Guidelines – Discusses biosecurity management practices to prevent
the introduction and spread of disease agents
Biosecurity Awareness – Introduces the biosecurity plan as useful guidance for
all emergency response personnel
Routes of Transmission – Examines the common routes of disease transmission
encountered while engaged in carcass management activities
Clothing and PPE – Reviews the use of PPE as a primary biosecurity defense in
preventing disease or its spread
Roles and Responsibilities – Presents the roles and duties of the ICS and the
biosecurity group

Biosecurity Module 6 | P a g e
Biosecurity Guidelines
During an animal disease emergency, biosecurity measures are necessary to:
Help keep disease agents out of livestock and poultry populations (e.g., herds,
flocks, or other groups of animals) where the agents are not already present
Prevent the spread of disease agents from infected groups in the population to
uninfected groups within the same population
An animal health emergency may adversely affect
Livestock which may become ill, die, or have to be euthanized as a result
of the disease;
Producers, growers, and farmers, who may suffer the loss of animals and
decreased income; as well as producers who are impacted because of
lost markets for healthy birds;
Livestock and associated industries, which may see decreased
production, sales, and international trade; and
Public health, in the case of zoonotic diseases
Figure 1. Carcass Management Team Wearing PPE

Biosecurity Module 7 | P a g e
Biosecurity Awareness
A biosecurity plan can only be useful if all emergency response personnel are trained
on the incident and site-specific biosecurity plans and strictly adhere to the guidance as
written. Fatigue, stress, distraction, and lack of forethought can cause even the most
conscientious individual to lose focus on the crucial importance of biosecurity measures.
Personnel should exercise the utmost thought, patience, persistence, and care
in creating and carrying out a biosecurity plan
Advanced thinking, planning, and extra effort in following biosecurity procedures
can prevent pathogen transmission, can protect the well-being of livestock and
poultry, and can safeguard American agriculture
During an animal health emergency response, some response personnel may be
required to visit multiple premises during the course of a work day. These personnel
must be aware that these activities increase the risk of disease transmission and must
be especially diligent with respect to compliance with biosecurity practices.
Figure 2. Biosecurity Signs

Biosecurity Module 8 | P a g e
Routes of Transmission
Pathogenic agents can be transmitted from animal to animal or animal to human, and
vice-versa through a variety of routes. The most common routes of transmission are
aerosol, oral, direct contact, fomites, vectors, and zoonotic.
Aerosol transmission occurs when droplets containing pathogenic agents from an
infected animal are inhaled by a susceptible animal.
Most pathogenic agents that may be transmitted via aerosols do not survive for
extended periods in droplets, so infected and susceptible animals must be in
close proximity for disease transmission to occur
Typically, respiratory diseases and some diarrheal diseases can be spread via
aerosol transmission
Oral transmission occurs when pathogenic agents are consumed by a susceptible
animal.
Feces, urine, saliva, and other secretions may contain pathogenic agents which
can contaminate feed, water, or other items (fomites)
Animals lick or chew contaminated items, such as feed bunks, equipment,
fencing, water troughs, and salt and mineral blocks, etc.

Biosecurity Module 9 | P a g e
Routes of Transmission (cont.)
Direct Contact transmission occurs when a susceptible animal physically contacts an
infected animal, wildlife, or a pathogenic agent in the environment, including feed,
bodies of water, soil, or air.
The susceptible animal is exposed when the pathogenic agent comes in direct
contact with its skin, mucus membranes, or an open wound. Also in milk
(nursing a calf, for example), in the urine, blood, saliva, nasal, ocular or genital
secretions, urine or feces.
Transmission can occur through rubbing, biting, licking, by contact with the blood
or saliva of an infected animal, or through contact with fomites
Diseases spread during breeding or from dam to offspring during gestation and
delivery are also considered to be transmitted by direct contact
Transmission can occur between animals of different species and through
contact with humans
Fomites are surfaces or objects capable of transferring disease agents through either
direct contact or oral transmission.
Fomites can include boots, clothing, vehicles, shovels, tools, bowls or buckets,
tack, brushes, clippers, needles, and other equipment
Vehicles and trailers with contaminated tires, wheel wells, and undercarriages
can serve as fomites (Note: contaminated vehicles and trailers were associated
with the spread of porcine diarrhea during the 2013 epidemic in the U.S.)
Humans with contaminated skin, clothing, shoes, or boots are also considered
fomites with the potential for moving disease agents within the facility or from one
facility to another

Biosecurity Module 10 | P a g e
Routes of Transmission (cont.)
Vectors include wildlife such as birds, mammals, reptiles, insects or arachnids capable
of transmitting pathogens from an infected animal to a healthy animal. Vectors can
transmit disease agents either mechanically or biologically.
In mechanical transmission, the vector transports the disease agent from one
animal to another, with the disease agent remaining unchanged. Many species of
flies serve as mechanical vectors, as do rats, mice, birds and other animals.
In biological transmission, the vector (e.g., fleas, ticks, mosquitos) acquires the
agent from an infected animal, usually through a blood meal, and the agent
replicates or develops within the vector. The disease agent is subsequently
introduced to a susceptible host, usually through a bite.

Biosecurity Module 11 | P a g e
Clothing and PPE
Because pathogenic agents can be transmitted via contaminated clothing, careful
attention to these garments is essential to a successful biosecurity effort.
Before entering animal areas, ask about biosecurity procedures and make sure
you understand them and comply with them (especially instructions for donning
and doffing PPE)
All responders, visitors, and employees should put on clean outerwear (e.g.,
coveralls) to cover their street clothes. Ideally, a separate set of clothing and
footwear should be used.
The outerwear may be either disposable or reusable once laundered
In some types of facilities (e.g., swine and poultry), biosecurity protocols may
include showering in and out of the facility. Also, protocols may require facility-
dedicated clothing, which stays at the facility and is not taken off-campus.
Refer to the Health, Safety, & PPE Module for more information
Figure 3. Examples of PPE

Biosecurity Module 12 | P a g e
Roles and Responsibilities
USDA APHIS utilizes the Incident Command System (ICS) to organize animal health
emergency responses. Under the ICS, the Incident Commander (IC) has overall
responsibility for the management of the entire incident.
The command staff includes the Logistics, Operations, Finance, and Planning
Section Chiefs. Each section is further divided into units or groups.
Prior to deployment, all responders should have received training about the
organization and structure of the ICS, roles and responsibilities, and their duties
For further guidance, see the FAD PReP APHIS Foreign Animal Disease Framework:
Roles and Coordination.

Biosecurity Module 13 | P a g e
Biosecurity Group
The Biosecurity Group is part of the Disease Support Branch. It is led by the Biosecurity
Group Supervisor, who reports to the Operations Section Chief. Biosecurity Team
Members work on infected or contact premises and provide frontline assistance in
containing and controlling a disease outbreak.
The Biosecurity Group Supervisor is
Assigned to the ICP and is in charge of all Biosecurity Teams
Identified and trained before an animal health emergency occurs
Responsible for ensuring that biosecurity measures are implemented to prevent
the disease agent from moving from infected premises to uninfected premises
and/or from infected animals to uninfected animals on the same premises
Tasked with preparing the site-specific biosecurity plan in consultation with the
Safety Officer and other members of the incident management team
Figure 4. Biohazard Sign

Biosecurity Module 14 | P a g e
Planning Lesson Overview
This lesson contains information to help you develop biosecurity measures which must
be instituted during a response to an animal health emergency. Planning is essential to
ensure that the carcass management task is carried out safely. Moreover, proper
planning protects the workers, the general public, and the environment.
Important considerations include:
Preparing a site-specific biosecurity plan
Using a job hazard analysis to identify risks associated with the job tasks
Deciding on the actions necessary to ensure responder biosecurity

Biosecurity Module 15 | P a g e
Planning Lesson Contents
This lesson presents the following information:
Biosecurity Plan – Details specific biosecurity measures to be implemented at a
specific site or incident
Movement Controls – Presents basic recommendations for controlling movement
of people, animals, and equipment
Carcass Management – Outlines necessary biosecurity measures during major
carcass management activities
Transportation – Discusses planning measures to prevent spread of disease
during transportation

Biosecurity Module 16 | P a g e
Biosecurity Plan
A site-specific biosecurity plan for the response is developed by the Biosecurity Group
Supervisor in consultation with the Safety Officer and approved by the Incident
Commander. The implementation and exercise of biosecurity protocols are integral to
response activities. Thus, the site-specific biosecurity plan must ensure adequate
biosecurity measures (such as respiratory protection shown in the figure below) are in
place for each part of the response.
Refer to the FAD PReP Foot-and-Mouth Disease and Classical Swine Fever SOP: 9
Biosecurity for additional information in writing a site-specific biosecurity plan.
Figure 5. Wearing Respirator

Biosecurity Module 17 | P a g e
Mitigating Biosecurity Risks
Properly implemented biosecurity during an outbreak is imperative as it helps reduce
the risk of disease transmission during the movement of personnel and material
necessary for the extensive activities of the control and eradication campaign.
Biosecurity measures to reduce the risk of disease introduction and transmission
include:
Follow hand hygiene protocols. Wash hands before eating and drinking
Use hand, head, face, and respiratory protection as per protocols
Wear protective outerwear and appropriate footwear, including steel-toed or
metatarsal protection, if needed
Follow disinfection protocols for PPE, equipment (including fomites, such as but
not limited to, pens, cell phones, note pads, etc.), yourself, and vehicles
Follow protocols for physical handling, containment, and shipping of biological
samples
Follow protocols for the disposal of used PPE and disinfectants
Follow protocols for the handling and disposal of biological materials, especially
infected/contaminated materials, animal carcasses, manure, bedding, etc.
Personnel Quarantine: limit personnel contact with other susceptible animals,
including pets. The quarantine period depends on the infectious organism.
Limit visits to other farms, zoos or livestock facilities and sharing equipment
within premises or with other farms
Figure 6. Hand Protection

Biosecurity Module 18 | P a g e
Cleaning and Disinfection
This refers to a combination of physical and chemical processes used to kill or remove
pathogenic microorganisms.
Effective cleaning and disinfection (C&D) minimizes pathogen transmission
between premises
Identification of the disease agent and understanding its biological properties and
route of transmission are essential to developing an effective C&D plan
Emphasis should be placed on adopting the basic microbiological principles of
isolating the source of infection and C&D of personnel, supplies, equipment,
vehicles, and sites
A key element is the cleaning of a surface to remove dirt, debris, and organic
material before using disinfectants
Use proper disinfectants, follow manufacturer’s instructions, and ensure
adequate contact time
Practices which reduce the risk of pathogen transmission include:
Disposing of contaminated materials that cannot be cleaned and disinfected
Avoiding sharing equipment between operations or between functions in an
operation (i.e., do not use the same equipment to handle both feed and manure)
Refer to the NAHEMS Guidelines: Cleaning and Disinfection
Figure 7. Cleaning Equipment

Biosecurity Module 19 | P a g e
Movement Controls
Controlling movements of people, animals, vehicles, and equipment is critical to the
maintenance of biosecurity. For day-to-day operations, movement control practices
include:
Maintaining a closed herd or flock
Identifying all animals, keeping accurate records
Protecting animals from contact with wildlife
Movement of people, animals, animal products and equipment on and off the property
during an animal health emergency should be governed by strict biosecurity protocols.
Ideally, premises should be fenced and have a single gated and locked entrance. Other
means of controlling access to the premises include
Placing a guard at facility entrances
Locking unguarded entrances
Patrolling and repairing boundary fences
Only moving animals and animal products under appropriate permits
Only moving compost from premises of origin under appropriate permit after the
required standards have been satisfied
Figure 8. Biosecurity Signs

Biosecurity Module 20 | P a g e
Carcass Management
Potential biosecurity risks for each option are discussed below.
Composting
Below are ways to minimize biosecurity risks during composting.
When constructing initial compost windrows, beginning with a 1-2 foot base of
carbon material will minimize infected liquids leaching from the windrows and
absorb excess precipitation that falls on the windrows. Biosecurity risks from
compost leaching can also be decreased by utilizing locations that are outside
floodplains, have a 2-4% slope, and are the required distance from ground and
surface water sources.
When constructing initial compost windrows, moving infected animal carcasses
and associated waste materials such as manure and bedding can create dust or
aerosols which may harbor active pathogens and drift to unaffected animals.
Indoor composting reduces the risk if it is performed without actively ventilating
the building. In either case, misting the materials with water during windrow
construction can suppress airborne particles.
Grinding or cutting infected carcasses prior to composting can aerosolize
pathogens and produce infected liquids. Grinding or cutting should be avoided or
performed so that aerosols and liquids are contained.

Biosecurity Module 21 | P a g e
Carcass Management (cont.)
Composting, cont.
Once windrows are built, covering them with a 1-2 foot thick cap of carbon
material such as wood chips will prevent wind from blowing exposed pathogens
to unaffected areas, control odors, and will prevent vectors such as wild birds,
insects, and animals from contacting infected material
If windrows are turned during the composting process before all portions of the
windrow have reached adequate temperatures for the required time to inactivate
pathogens, dust suppression measures can help control airborne pathogens.
Depending on the turning process and amount of remaining carcass material,
applying a new cap may be necessary for vector and odor control.
Ensuring all windrows meet required temperatures, for the required time, to
inactivate pathogens before releasing the compost from quarantine
See figure below for a schematic showing potential biosecurity risk pathways.
The thicker the arrow, the greater the potential risk.
Figure 9. Composting Potential Risks (Click on Image to Enlarge It)

Biosecurity Module 22 | P a g e
Carcass Management (cont.)
Rendering
Biosecurity risks and mitigations associated with rendering are listed below.
Loading infected carcasses into trucks for transport to rendering can create
airborne particles that may harbor active pathogens. Minimizing handling and
using dust suppression when needed can minimize this risk.
Transport of infected carcasses can result in dispersion of airborne particles and
liquid releases which can carry active pathogens. To minimize this risk, securely
containing infected carcasses in leak-proof, covered trucks or lining trucks with
impermeable materials and covering them will prevent release of pathogens.
Dumping infected carcasses at the rendering plant may generate airborne
pathogens. The risk can be reduced by minimizing handling and using dust
suppression or containment.

Biosecurity Module 23 | P a g e
Carcass Management (cont.)
Rendering, cont.
Grinding infected carcasses releases aerosolized pathogens. Pathogen spread
can be reduced by ensuring the grinding process is enclosed, all workers follow
biosecurity protocols, and ensuring the plant is properly cleaned and disinfected
after processing infected animals.
Continuous rendering may be preferable to batch rendering because each time a
vessel is opened (for re-filling) during the batch process, airborne pathogens may
be released
Figure 10. Rendering Potential Risks (Click on Image to Enlarge It)

Biosecurity Module 24 | P a g e
Carcass Management (cont.)
Permitted Landfill
Biosecurity risks and mitigations for landfilling are listed below:
Loading infected carcasses into trucks for transport to a landfill can create
airborne particles that may harbor active pathogens. Minimizing handling and
using dust suppression when needed can minimize this risk.
Transport of infected carcasses can result in dispersion of airborne particles and
liquid releases which can carry active pathogens. To minimize this risk, securely
contain infected carcasses in leak-resistant covered trucks or line trucks with
impermeable materials and covers to prevent release of pathogens.
Dumping infected carcasses at the landfill may generate airborne pathogens if
the container is breached during dumping. To reduce this risk, minimize handling;
avoid breaching the container, and use dust suppression.

Biosecurity Module 25 | P a g e
Carcass Management (cont.)
Permitted Landfill, cont.
Infected carcasses generate leachate that can contain active pathogens. To
minimize the risk of spreading pathogens, ensure there is more than 30 feet of
other waste between the carcasses and leachate collection system, avoid
spraying the leachate from infected carcasses on the surface of the landfill for at
least 30 days after receipt of the last load, or transport the leachate to a
wastewater treatment plant for processing rather than storing it in open ponds.
Figure 11. Permitted Landfill Potential Risks (Click on Image to Enlarge It)

Biosecurity Module 26 | P a g e
Carcass Management (cont.)
Burial
Biosecurity risks and mitigations for burial are listed below:
Loading infected carcasses into trucks for transport to the burial site can create
airborne particles that may harbor active pathogens. Minimizing handling and
using dust suppression when needed can minimize this risk.
Transport of infected carcasses can result in dispersion of airborne particles and
liquid releases which can carry active pathogens. To minimize this risk, securely
contain infected carcasses in leak-resistant covered trucks or line trucks with
impermeable materials and covers to prevent release of pathogens. Specialized
bags are available for this purpose, although the bags may need to be vented.
See the Secure Transport Module for more details.
Dumping infected carcasses at the burial site may generate airborne pathogens.
To reduce this risk, minimize handling, use dust suppression, and immediately
cover the carcasses with clean soil.
Infected carcasses generate methane and other gases during decomposition,
causing the decaying carcasses to rise to the top of the burial trench or pit and
emerge from the cover soil. Lancing the rumen of large animals or crushing
smaller animals such as poultry reduces the chance for gas accumulation, but
increases the risk of airborne pathogen spread. To avoid these risks, transport
infected carcasses to a permitted landfill which has a gas control system.

Biosecurity Module 27 | P a g e
Carcass Management (cont.)
Burial, cont.
Infected carcasses generate leachate that can contain active pathogens. To
minimize the risk of spreading pathogens to groundwater and surface water,
transport infected carcasses to a permitted landfill with liner and leachate
collection systems.
Decomposition of carcasses and related materials is a lengthy process, and
residues may persist in soil and groundwater for many years
Certain geological conditions, such as sandy soil and a high seasonal water
table, can increase the risk of pathogens reaching groundwater and surface
water, so these conditions should be avoided by consulting with environmental
professionals during site selection
Figure 12. Burial Potential Risks (Click on Image to Enlarge It)

Biosecurity Module 28 | P a g e
Carcass Management (cont.)
Thermal Methods
The biosecurity risks associated with off-site thermal methods include:
Loading infected carcasses into bags or boxes for transport to incineration can
create airborne particles that may harbor active pathogens. Minimizing handling
and using dust suppression, when needed, can minimize this risk.
Transport of infected carcasses can result in dispersion of airborne particles and
liquid releases which can carry active pathogens. To minimize this risk, securely
containing infected carcasses in leak-resistant, covered trucks, lining trucks with
impermeable materials and covering them, or packaging the materials in secure
containers will prevent release of pathogens.
Offloading containers of infected carcasses at the incineration facility may
generate airborne pathogens if the packages are opened. Thus, minimize
handling and use dust suppression or containment to reduce this risk.
Figure 13. Incinerator Potential Risks (Click on Image to Enlarge It)

Biosecurity Module 29 | P a g e
Carcass Management (cont.)
Thermal Methods, cont.
On-site thermal methods such as air curtain incineration or pyres, involves moving
infected carcasses in vehicles from the barn or pen to the air curtain incinerator or pyre
on the same premises, dumping the carcasses into the air curtain firebox/trench or onto
the pyre, then burning the carcasses with other fuel such as wood, coal, and/or liquid
fuel. Biosecurity risks and mitigations for on-site thermal methods are listed below.
Loading infected carcasses into the vehicle for transport to the on-site air curtain
firebox/trench or pyre can create airborne particles that may harbor active
pathogens. Minimizing handling and using dust suppression when needed can
minimize this risk.
Transport of infected carcasses can result in dispersion of airborne particles and
liquid releases which can carry active pathogens. To minimize this risk, securely
containing infected carcasses in leak-proof, covered trucks, lining trucks with
impermeable materials and covering them, or packaging the materials in secure
containers will prevent release of pathogens.

Biosecurity Module 30 | P a g e
Carcass Management (cont.)
Thermal Methods (cont.)
Offloading of infected carcasses at the on-site air curtain firebox/trench or pyre
may generate airborne pathogens. To reduce the risk, minimize handling and use
dust suppression or containment.
Once the materials are ignited in the air curtain firebox/trench or pyre, it takes
considerable time to fully combust the carcasses, which have high water content.
During this period of incomplete combustion, airborne particles (soot, ash, steam)
are emitted and could harbor active pathogens. Air curtain incinerators minimize
this risk by containing the emissions inside the box or trench with a curtain of air.
Figure 14. Air Curtain Incineration Potential Risks (Click on Image to Enlarge It)

Biosecurity Module 31 | P a g e
Transportation
Although not always possible, on-site carcass management is preferred from a
biosecurity perspective so that biosecurity issues associated with transportation of
carcasses are avoided. However, onsite options have serious limitations such as
environmental harm with unlined burial; lack of carbon sources and inadequate space
for composting; and limited throughput for transportable options, making transport likely
if large herds or flocks are infected with a disease.
Transportation requires thoughtful and extensive planning to ensure good
biosecurity and to prevent further spread of disease
Infected waste materials must be moved in closed, leak-resistant dumpsters or
trucks and the exterior of the vehicle must be disinfected prior to transport
Additional or secondary containment may be necessary
Refer to the Secure Transport Module for additional information.
Figure 15. Vehicle Cleaning & Disinfection

Biosecurity Module 32 | P a g e
Operations Lesson Overview
This lesson contains general procedures in preparing for safe practices during an
emergency animal response. This will help ensure that the carcass management
process is conducted in a biosecure manner and that disposal group personnel are
familiar with and exercise appropriate biosecurity measures.
The following topics will be briefly addressed:
Briefing team members on aspects of the biosecurity effort
Implementing site security and control measures
Establishing visitor risk mitigation policies and practices
Establishing and enforcing biosecurity and surveillance protocols
Understanding work zone controls and establishing control zones
Practicing contamination avoidance and prevention
Employing decontamination practices

Biosecurity Module 33 | P a g e
Operations Lesson Contents
This material in this lesson is presented in a step-wise manner that provides detailed
instructions and key steps based on the criteria and measures instituted during recent
U.S. animal disease outbreak responses.
Briefings – Members involved in the biosecurity effort must be briefed on their
duties, policies, and procedures such as biosecurity protocols
Site Security – Introduces control measures designed to limit access to the
infected premises by untrained personnel and visitors
Visitor Risk Mitigation – Lists policies and practices for controlling movement of
personnel visiting the potentially infected premises
Biosecurity and Surveillance Protocol – Presents steps for establishing and
enforcing biosecurity measures
Work and Control Zones – Shows defined working areas and practices for
instituting measures in each zone to prevent the spread of contamination
Contamination Avoidance – Reviews procedures for preventing contamination
and establishing a decontamination area
Decontamination – Examines decontamination processes and procedures

Biosecurity Module 34 | P a g e
Briefings
The Biosecurity Group Supervisor briefs Biosecurity Group Members on all aspects of
the biosecurity effort, including their duties, policies, and procedures such as biosecurity
protocols before entering the Hot Zone-EZ. The Biosecurity Group Supervisor regularly
prepares briefings and reports for the Operations Section Chief and notifies him or her
immediately of any problems.
Other briefings include:
The site safety officer briefs all responders on safety precautions for each
operation in accordance with the site-specific health and safety plan
Orientation and Training Cell personnel brief C&D Group members on the
nature of the disease and circumstances that might affect the response
Refer to the APHIS SOPS on Biosecurity for additional information.
Figure 16. Briefing the Carcass Management Team
Biosecurity Module 35 | P a g e
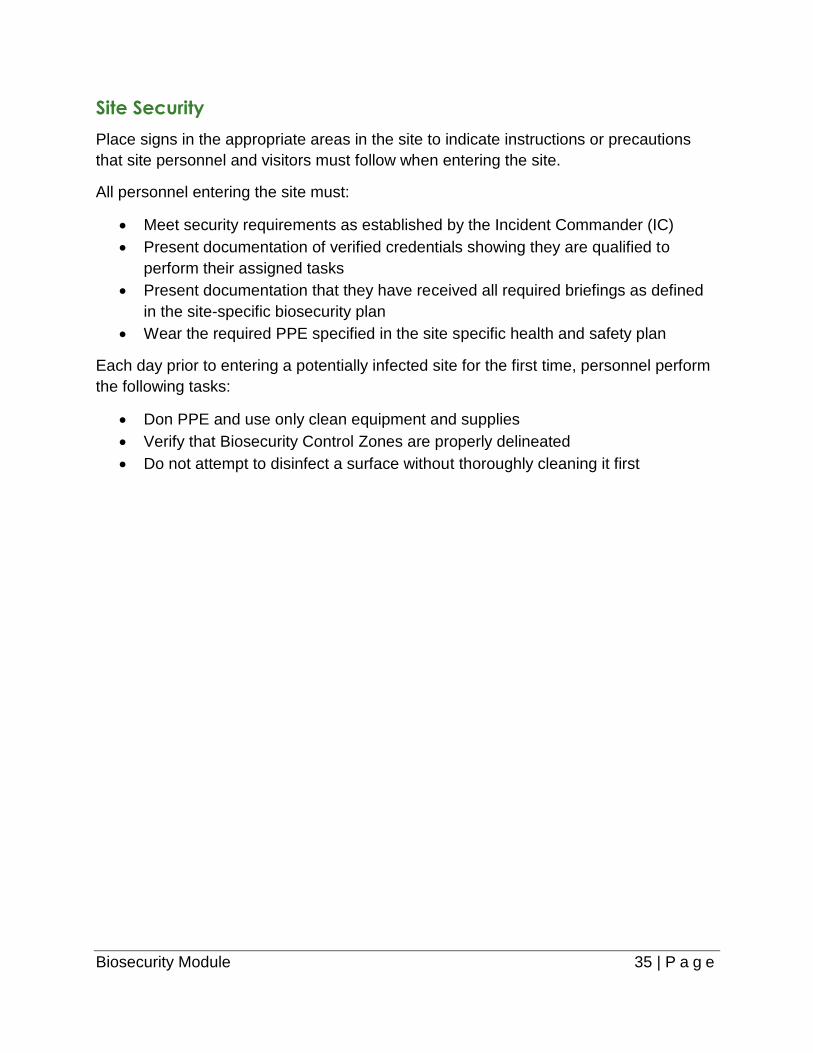
Site Security
Place signs in the appropriate areas in the site to indicate instructions or precautions
that site personnel and visitors must follow when entering the site.
All personnel entering the site must:
Meet security requirements as established by the Incident Commander (IC)
Present documentation of verified credentials showing they are qualified to
perform their assigned tasks
Present documentation that they have received all required briefings as defined
in the site-specific biosecurity plan
Wear the required PPE specified in the site specific health and safety plan
Each day prior to entering a potentially infected site for the first time, personnel perform
the following tasks:
Don PPE and use only clean equipment and supplies
Verify that Biosecurity Control Zones are properly delineated
Do not attempt to disinfect a surface without thoroughly cleaning it first

Biosecurity Module 36 | P a g e
Visitor Risk Mitigation
In the event of an animal health emergency, the risk posed by visitors increases,
especially if the premises are in or near the Control Area.
The Biosecurity Group Supervisor consults with the Quarantine and Movement
Control Group to establish policies for controlling access to quarantined areas
and premises
The closer a premises is to the IP, the greater the risk and need for strict
biosecurity and C&D procedures
In an outbreak, all visitors are considered high-risk, especially if the premises are
located in a quarantined area
The following is a general discussion of risks posed by visitors to animal production
facilities:
Social visitors, veterinarians, equipment service technicians, salespeople, and
delivery people are an example of the visitors a facility may have on a regular
basis. The degree of risk can be classified as low, medium, or high, depending
on the type of visitor and amount of animal contact.
In the event of an animal health emergency, visits to the premises should be
limited to essential personnel only; all visitors should be considered high risk.
Producers should develop biosecurity protocols for all visitors and strictly enforce
them.
Producers should restrict visitor contact with animals as much as possible

Biosecurity Module 37 | P a g e
Biosecurity Protocol
Government personnel, as well as other individuals, visit multiple premises routinely and
can inadvertently come into contact with viruses and bacteria on these properties.
Without the proper precautions, personnel can spread microorganisms to other
premises
Field personnel should make extraordinary efforts to prevent the spread of an
agent to other facilities or animals and follow sound Biosecurity Practices to
prevent spread of diseases in day-to-day operations (even when dealing with
healthy animals)
During a known emergency animal disease outbreak, animal health officials
specify additional precautions that must be followed
All response personnel must take minimum biosecurity measures, which include:
Wearing rubber boots (or other footwear that can be cleaned and disinfected) or
disposable plastic boots
Prior to entering or leaving an animal facility, removing all dirt and organic matter
from boots and thoroughly disinfecting them
Wearing disposable or reusable coveralls, laboratory coats, smocks, or other
suitable outerwear when coming into contact with animals, manure, or secretions
and disposing of or containing reusable coveralls for laundering.
Thoroughly washing hands with soap and water prior to entering and when
leaving a premises

Biosecurity Module 38 | P a g e
Surveillance Biosecurity Protocol
The following protocol applies to surveillance or similar operations where responders
travel to multiple potentially infected sites during the course of a workday. Below are
procedures for beginning the process:
Upon reaching the premises, park the vehicle in a location off the road and
outside the entrance of the premises
Team members don boots and legs of Tyvek suits before leaving the
vehicle then finish donning Tyvek suits, gloves, mask, and hair bonnet
before proceeding. See the Health, Safety & PPE Module for details.
One team member remains by the vehicle and is considered the “clean
team member”, who handles all clean equipment and forms
The team member entering the premises will be considered exposed or
contaminated and is designated the “dirty team member”
The clean team member hands equipment from the vehicle to the dirty
team member
The dirty team member remains dirty for the entire day
The dirty team member retrieves the sample bags containing the specimens
which have been properly surface-disinfected with a chemical disinfectant prior to
removal from premises. This prevents spread of infectious agents in the event
that animal samples come back positive for disease.
Properly decontaminates and disposes PPE (e.g., Tyvek suits, gloves, mask, hair
bonnet) per protocol
Disinfects vehicle tires. This is a sound biosecurity practice even during
surveillance or routine operations.

Biosecurity Module 39 | P a g e
Work Zone Control
This protocol applies to depopulation, carcass management, and decontamination
activities where response operations will occur in a single location over multiple days.
Biosecurity Control Zones are established to prevent spread of contamination away
from the IP. All work zones are adequately marked using signs, fencing, traffic cones,
and caution tape.
There are three types of Control Zones:
Exclusion Zone (EZ)—Hot Zone
Contamination Reduction Zone (CRZ)—Warm Zone
Support Zone (SZ)—Cold Zone
Figure 17. Work Zones and Decontamination Corridor

Biosecurity Module 40 | P a g e
Establishing Control Zones
1. Demarcate the outer edge SZ with green tape. This provides a visual barrier for
entry into the site. Only personnel who are a part of the operation may go beyond
the green tape.
2. Demarcate the inner edge of the support zone with yellow tape. Beyond the
yellow tape is the CRZ.
3. Place all tools, equipment, and water that will be used in the SZ between the
green and yellow tape.
4. The CRZ worker and two exclusion workers don PPE in accordance with the site-
specific health and safety plan.
5. The SZ worker remains in the SZ and does not need to don PPE.
6. Before entering the CRZ, the CRZ worker verifies that the exclusion workers are
in full PPE compliance.
7. Exclusion workers establish the EZ by placing the red tape appropriately.
8. The CRZ worker places a tarp on the ground to establish the corridor for entering
and exiting the CRZ from the SZ.
9. All required equipment is now transferred from the SZ to the CRZ. This includes
all equipment required for C&D, depopulation, and preparation for carcass
management.
10. Two exclusion workers enter the EZ with all equipment required for depopulation,
carcass management, and decontamination.

Biosecurity Module 41 | P a g e
Support Zone
The Support Zone (SZ) is the “cleanest” of the three zones and poses the lowest
relative risk of exposure to pathogens and hazards such as decontamination chemicals.
In this zone:
Personnel are not required to wear PPE or handle contaminated articles or
equipment, nor are they required to conduct decontamination
Medical support is provided to personnel in this zone, and facilities are provided
for personal needs such as eating, drinking, or bathroom use
Equipment resupply and assembly takes place
Donning of PPE occurs and accommodations for dressing are provided
Management of all activities occurs, directing personnel and depopulation,
decontamination, and carcass management activities
This area is staffed by at least one person
Workers are not exposed to hazardous conditions
Administrative, clerical, and other support functions are based here
Air and surface monitoring are conducted as needed to ensure that it remains
uncontaminated
If contamination is detected, zone boundaries are adjusted until corrective
action and monitoring results indicate that this zone is uncontaminated
Access to the EZ and CRZ are strictly limited to individuals who meet all medical
monitoring, training, and PPE requirements
Visitors must receive appropriate training, be medically cleared to wear the
appropriate level of protection, receive a safety briefing, and be escorted by
designated personnel
Visitors not meeting requirements must remain in the support zone

Biosecurity Module 42 | P a g e
Contamination Reduction Zone
The Contamination Reduction Zone (CRZ) is the high risk area with potential exposure
to pathogens, as well as, chemical exposure to disinfectants. In the CRZ:
Waste collection containers are decontaminated before transport off-site
Personnel complete the final decontamination of equipment and personnel,
perform final washing and rinsing, and apply disinfectant
Final doffing of personal protective equipment is completed
There is a strict adherence to restrictions on movement of contaminated
personnel and materials
At least one person remains in the CRZ to assist in the decontamination of
those exiting the EZ
All personnel are required to wear full PPE
Decontamination of PPE takes place
Based on monitoring results, the CRZ boundaries may be adjusted to ensure that
the SZ remains uncontaminated
Workers and equipment exit the EZ through the designated access points into
the CRZ
Workers and equipment are decontaminated, according to the procedures
specified in the decontamination section of the site-specific biosecurity plan
If necessary, emergency decontamination procedures are implemented
A decontamination corridor is established between the EZ and the CRZ
where decontamination of personnel and equipment takes place
Response teams enter and exit the EZ through the access control points
that are located at each end of the decontamination corridor

Biosecurity Module 43 | P a g e
Exclusion Zone
The Exclusion Zone (EZ) is the potentially infected area, likely an area of a farm, local
market, or roadside stand where infected animals have been stored and sold. This zone
is where:
Depopulation activities are performed and carcass management and
decontamination may be performed depending on the situation
Gross decontamination of equipment and personnel may be conducted to
facilitate cleaning and disinfection in the CRZ
PPE requirements can create risk of heat stress
Workers will need to be monitored and rotated out with some frequency
Staffing consists of at least a two-person team
Personnel and equipment enter and exit via the designated access points
Personnel adhere to established work procedures
A “hotline” where personnel routinely enter or exit is located upwind from the EZ
No person may exit until they have been properly decontaminated
No person may enter the EZ without the proper level of PPE
No person may enter the EZ prior to the establishment of a decontamination area
Once entry has been made into the EZ, anyone who remains in the CRZ must be
decontaminated or checked for contamination before they can exit into the SZ

Biosecurity Module 44 | P a g e
Contamination Prevention
Preventing contamination is the most important step to avoid a decontamination
process. Biosecurity measures include contamination avoidance activities as well as
proper decontamination areas.
Procedures for contamination avoidance include the following:
Do not walk through areas of obvious or known contamination
Do not handle or touch contaminated materials directly
Make sure all PPE has no cuts or tears prior to donning
Fasten all closures on suits, covering with tape, if necessary
Particular care should be taken to protect any skin injuries
Stay upwind of airborne contaminants
Do not carry cigarettes, gum, food, or drink into contaminated areas
Precautions to minimize contaminating equipment include the following:
Limit the amount of contamination that comes into contact with heavy equipment
and vehicles
If contaminated tools are to be placed on non-contaminated equipment or
vehicles for transport to the decontamination pad, use plastic to keep the
equipment or vehicles clean
If samples must be taken from a site, bag the sample containers and disinfect
outer surface before removing them from the site

Biosecurity Module 45 | P a g e
Decontamination Area
A decontamination area must be set up before any personnel or equipment may enter
areas that pose the potential for exposure to hazardous substances. The minimum
decontamination layout is explained and depicted below.
For large equipment and vehicles, the decontamination layout, consists of an
impermeable liner sloped back to the EZ or an impermeable contained area so wash
water can be collected and properly disposed. The impermeable liner or area is large
enough to accommodate workers, pressure washers, detergent, and disinfectant
supplies and equipment.
The roadway, in the figure below, indicates the location where vehicle decontamination
will occur.
Figure 18. Equipment & Vehicle Decontamination Layout

Biosecurity Module 46 | P a g e
Decontamination Area (cont.)
Figure below depicts the layout for both vehicle and trailer decontamination. The layout
consists of an impermeable liner sloped back to an area so wash water can be collected
and later properly disposed. The impermeable liner or area is large enough to
accommodate workers, pressure washers, detergent, and disinfectant supplies and
equipment.
Figure 19. Trailer Cleaning & Disinfection Layout

Biosecurity Module 47 | P a g e
Decontamination Area (cont.)
For personnel decontamination, the layout includes:
The Equipment Drop Area (from left to right) is indicated by a rectangle with a
circle below indicating the location of the Plastic sheet and a right pointing arrow
to another rectangle divided by a diagonal line into the Decon Outer Garments
area and the Remove Boot Covers and Outer Gloves area with a circle below
indicating the location of a 10 gallon can
A dashed line cutting vertically through this rectangle indicates the HOTLINE. To
the right of the HOTLINE, above the rectangle, two circles indicate the location of
the Decon Solution and Water. Two arrows continue from the second divided
Decon rectangle to a circle marked with an X that has an upward pointing arrow
that turns back toward the dashed HOTLINE to an area labelled Redress: Boot
Covers and Outer Gloves, and crosses the dashed HOTLINE.
Another arrow from the circle marked with an X continues to a rectangle
indicating the area to Remove Boots/Gloves and Outer Garments (For Disposal
and Off Site Decontamination) with a circle below indicating the location of a 32
gallon can. Another series of arrows pointing downward go to another rectangle,
the Remove Mask final decontamination area.
For additional information, see the OSHA Decontamination website
Figure 20. Level C Decon Layout (Click on Image to Enlarge It)

Biosecurity Module 48 | P a g e
Decontamination Practices
Detailed steps for conducting decontamination can be found in the FAD PReP SOP:
Cleaning and Disinfection and the APHIS SOPS on Biosecurity.
Locating a decontamination station at the hotline in the decontamination area of
the CRZ where personnel routinely enter or exit the EZ
Upon exiting the EZ, personnel will doff overboots (if used), chemical-resistant
boots, coveralls, and outer gloves at the specified decontamination station
Instructing personnel in proper decontamination techniques, including removing
protective clothing in an “inside out” manner
Arranging the decontamination area to avoid contaminating the ground under
and surrounding the area
Retaining all doffed reusable PPE at the decontamination station for
(cleaning/disinfection) and reuse
Figure 21. Personnel Cleaning & Disinfection Activities

Biosecurity Module 49 | P a g e
Summary
Congratulations! You have completed the Biosecurity Module of the Introduction Module
Series. In this module, you have learned to:
Understand biosecurity principles, policies, and procedures for animal health
incidents
Recognize biosecurity implications associated with carcass management
Understand foreign animal disease and zoonotic disease risks
Describe the components of a comprehensive biosecurity plan
Use operational guidance to implement biosecurity measures
Please click here to download the certificate of completion for this module. You can
enter your name on the certificate and save or print it for your records. Proceed to
Home Page to begin the next module, Secure Transport.