AWS RoboMaker - Developer Guide - CambiaElChip
234
AWS RoboMaker Developer Guide
-
Upload
khangminh22 -
Category
Documents
-
view
6 -
download
0
Transcript of AWS RoboMaker - Developer Guide - CambiaElChip

AWS RoboMakerDeveloper Guide

AWS RoboMaker Developer Guide
AWS RoboMaker: Developer GuideCopyright © 2018 Amazon Web Services, Inc. and/or its affiliates. All rights reserved.
Amazon's trademarks and trade dress may not be used in connection with any product or service that is not Amazon's, in any mannerthat is likely to cause confusion among customers, or in any manner that disparages or discredits Amazon. All other trademarks notowned by Amazon are the property of their respective owners, who may or may not be affiliated with, connected to, or sponsored byAmazon.

AWS RoboMaker Developer Guide
Table of ContentsWhat Is AWS RoboMaker? .... . . . . . . . . . . . . . . . . . . . . . . . . . . . . . . . . . . . . . . . . . . . . . . . . . . . . . . . . . . . . . . . . . . . . . . . . . . . . . . . . . . . . . . . . . . . . . . . . . . . . . . . . . . . . . . . 1
Are You a First-time User of AWS RoboMaker? .... . . . . . . . . . . . . . . . . . . . . . . . . . . . . . . . . . . . . . . . . . . . . . . . . . . . . . . . . . . . . . . . . . . . . . . . . . . . 1Supported Software and Versions .... . . . . . . . . . . . . . . . . . . . . . . . . . . . . . . . . . . . . . . . . . . . . . . . . . . . . . . . . . . . . . . . . . . . . . . . . . . . . . . . . . . . . . . . . . . . . 1
How It Works .... . . . . . . . . . . . . . . . . . . . . . . . . . . . . . . . . . . . . . . . . . . . . . . . . . . . . . . . . . . . . . . . . . . . . . . . . . . . . . . . . . . . . . . . . . . . . . . . . . . . . . . . . . . . . . . . . . . . . . . . . . . . . . . . . 3Robotics Development with AWS RoboMaker .... . . . . . . . . . . . . . . . . . . . . . . . . . . . . . . . . . . . . . . . . . . . . . . . . . . . . . . . . . . . . . . . . . . . . . . . . . . . . . 3Create a ROS Development Environment .... . . . . . . . . . . . . . . . . . . . . . . . . . . . . . . . . . . . . . . . . . . . . . . . . . . . . . . . . . . . . . . . . . . . . . . . . . . . . . . . . . . 4Create a Robot Application .... . . . . . . . . . . . . . . . . . . . . . . . . . . . . . . . . . . . . . . . . . . . . . . . . . . . . . . . . . . . . . . . . . . . . . . . . . . . . . . . . . . . . . . . . . . . . . . . . . . . . . . 4Develop Simulation and Testing Data .... . . . . . . . . . . . . . . . . . . . . . . . . . . . . . . . . . . . . . . . . . . . . . . . . . . . . . . . . . . . . . . . . . . . . . . . . . . . . . . . . . . . . . . . 5Fleet Management and Deployment .... . . . . . . . . . . . . . . . . . . . . . . . . . . . . . . . . . . . . . . . . . . . . . . . . . . . . . . . . . . . . . . . . . . . . . . . . . . . . . . . . . . . . . . . . . 5
Getting Started .... . . . . . . . . . . . . . . . . . . . . . . . . . . . . . . . . . . . . . . . . . . . . . . . . . . . . . . . . . . . . . . . . . . . . . . . . . . . . . . . . . . . . . . . . . . . . . . . . . . . . . . . . . . . . . . . . . . . . . . . . . . . . . . 6Important Licensing Information .... . . . . . . . . . . . . . . . . . . . . . . . . . . . . . . . . . . . . . . . . . . . . . . . . . . . . . . . . . . . . . . . . . . . . . . . . . . . . . . . . . . . . . . . . . . . . . . 6Step 1: Create an Account .... . . . . . . . . . . . . . . . . . . . . . . . . . . . . . . . . . . . . . . . . . . . . . . . . . . . . . . . . . . . . . . . . . . . . . . . . . . . . . . . . . . . . . . . . . . . . . . . . . . . . . . . 7
Create an AWS Account .... . . . . . . . . . . . . . . . . . . . . . . . . . . . . . . . . . . . . . . . . . . . . . . . . . . . . . . . . . . . . . . . . . . . . . . . . . . . . . . . . . . . . . . . . . . . . . . . . . . 7Create an IAM Administrator and Sign in .... . . . . . . . . . . . . . . . . . . . . . . . . . . . . . . . . . . . . . . . . . . . . . . . . . . . . . . . . . . . . . . . . . . . . . . . . . . 7
Step 2: Run the Hello World Sample Application .... . . . . . . . . . . . . . . . . . . . . . . . . . . . . . . . . . . . . . . . . . . . . . . . . . . . . . . . . . . . . . . . . . . . . . . . . 8Step 3: Configure Environment and Build Applications .... . . . . . . . . . . . . . . . . . . . . . . . . . . . . . . . . . . . . . . . . . . . . . . . . . . . . . . . . . . . . . . . . 9
Create a development environment .... . . . . . . . . . . . . . . . . . . . . . . . . . . . . . . . . . . . . . . . . . . . . . . . . . . . . . . . . . . . . . . . . . . . . . . . . . . . . . . . . . . 9Modify and Build Applications .... . . . . . . . . . . . . . . . . . . . . . . . . . . . . . . . . . . . . . . . . . . . . . . . . . . . . . . . . . . . . . . . . . . . . . . . . . . . . . . . . . . . . . . . . . 9
Step 4: Run Simulation .... . . . . . . . . . . . . . . . . . . . . . . . . . . . . . . . . . . . . . . . . . . . . . . . . . . . . . . . . . . . . . . . . . . . . . . . . . . . . . . . . . . . . . . . . . . . . . . . . . . . . . . . . . 10Bundle the Hello World Applications .... . . . . . . . . . . . . . . . . . . . . . . . . . . . . . . . . . . . . . . . . . . . . . . . . . . . . . . . . . . . . . . . . . . . . . . . . . . . . . . 10Restart the Hello World Simulation Application .... . . . . . . . . . . . . . . . . . . . . . . . . . . . . . . . . . . . . . . . . . . . . . . . . . . . . . . . . . . . . . . . . 10Explore the Simulation .... . . . . . . . . . . . . . . . . . . . . . . . . . . . . . . . . . . . . . . . . . . . . . . . . . . . . . . . . . . . . . . . . . . . . . . . . . . . . . . . . . . . . . . . . . . . . . . . . . . 11
Step 5: Deploy Robot Application .... . . . . . . . . . . . . . . . . . . . . . . . . . . . . . . . . . . . . . . . . . . . . . . . . . . . . . . . . . . . . . . . . . . . . . . . . . . . . . . . . . . . . . . . . . . . 11Prepare your TurtleBot3 robot .... . . . . . . . . . . . . . . . . . . . . . . . . . . . . . . . . . . . . . . . . . . . . . . . . . . . . . . . . . . . . . . . . . . . . . . . . . . . . . . . . . . . . . . . 11Bundle and deploy Hello World robot application .... . . . . . . . . . . . . . . . . . . . . . . . . . . . . . . . . . . . . . . . . . . . . . . . . . . . . . . . . . . . . . 12
Step 6: Clean up .... . . . . . . . . . . . . . . . . . . . . . . . . . . . . . . . . . . . . . . . . . . . . . . . . . . . . . . . . . . . . . . . . . . . . . . . . . . . . . . . . . . . . . . . . . . . . . . . . . . . . . . . . . . . . . . . . . . 13Additional Sample Robots .... . . . . . . . . . . . . . . . . . . . . . . . . . . . . . . . . . . . . . . . . . . . . . . . . . . . . . . . . . . . . . . . . . . . . . . . . . . . . . . . . . . . . . . . . . . . . . . . . . . . . . 13
Navigation and Person Recognition .... . . . . . . . . . . . . . . . . . . . . . . . . . . . . . . . . . . . . . . . . . . . . . . . . . . . . . . . . . . . . . . . . . . . . . . . . . . . . . . . . 13Voice Commands .... . . . . . . . . . . . . . . . . . . . . . . . . . . . . . . . . . . . . . . . . . . . . . . . . . . . . . . . . . . . . . . . . . . . . . . . . . . . . . . . . . . . . . . . . . . . . . . . . . . . . . . . . . . 14Robot Monitoring .... . . . . . . . . . . . . . . . . . . . . . . . . . . . . . . . . . . . . . . . . . . . . . . . . . . . . . . . . . . . . . . . . . . . . . . . . . . . . . . . . . . . . . . . . . . . . . . . . . . . . . . . . . 15Object Following using Reinforcement Learning .... . . . . . . . . . . . . . . . . . . . . . . . . . . . . . . . . . . . . . . . . . . . . . . . . . . . . . . . . . . . . . . . 16Self-Driving using Reinforcement Learning .... . . . . . . . . . . . . . . . . . . . . . . . . . . . . . . . . . . . . . . . . . . . . . . . . . . . . . . . . . . . . . . . . . . . . . . 17
Application Versioning .... . . . . . . . . . . . . . . . . . . . . . . . . . . . . . . . . . . . . . . . . . . . . . . . . . . . . . . . . . . . . . . . . . . . . . . . . . . . . . . . . . . . . . . . . . . . . . . . . . . . . . . . . . . . . . . . . . . 19The $LATEST Version .... . . . . . . . . . . . . . . . . . . . . . . . . . . . . . . . . . . . . . . . . . . . . . . . . . . . . . . . . . . . . . . . . . . . . . . . . . . . . . . . . . . . . . . . . . . . . . . . . . . . . . . . . . . . . 19Updating an Application Version .... . . . . . . . . . . . . . . . . . . . . . . . . . . . . . . . . . . . . . . . . . . . . . . . . . . . . . . . . . . . . . . . . . . . . . . . . . . . . . . . . . . . . . . . . . . . . 19Deleting an Application Version .... . . . . . . . . . . . . . . . . . . . . . . . . . . . . . . . . . . . . . . . . . . . . . . . . . . . . . . . . . . . . . . . . . . . . . . . . . . . . . . . . . . . . . . . . . . . . . 19
Developing Applications .... . . . . . . . . . . . . . . . . . . . . . . . . . . . . . . . . . . . . . . . . . . . . . . . . . . . . . . . . . . . . . . . . . . . . . . . . . . . . . . . . . . . . . . . . . . . . . . . . . . . . . . . . . . . . . . . . 20AWS RoboMaker Cloud Extensions .... . . . . . . . . . . . . . . . . . . . . . . . . . . . . . . . . . . . . . . . . . . . . . . . . . . . . . . . . . . . . . . . . . . . . . . . . . . . . . . . . . . . . . . . . . . 20
Prerequisites ... . . . . . . . . . . . . . . . . . . . . . . . . . . . . . . . . . . . . . . . . . . . . . . . . . . . . . . . . . . . . . . . . . . . . . . . . . . . . . . . . . . . . . . . . . . . . . . . . . . . . . . . . . . . . . . . . . 20Installing AWS RoboMaker cloud extensions .... . . . . . . . . . . . . . . . . . . . . . . . . . . . . . . . . . . . . . . . . . . . . . . . . . . . . . . . . . . . . . . . . . . . . 21
Developing with AWS Cloud9 .... . . . . . . . . . . . . . . . . . . . . . . . . . . . . . . . . . . . . . . . . . . . . . . . . . . . . . . . . . . . . . . . . . . . . . . . . . . . . . . . . . . . . . . . . . . . . . . . . 21Creating a Development Environment .... . . . . . . . . . . . . . . . . . . . . . . . . . . . . . . . . . . . . . . . . . . . . . . . . . . . . . . . . . . . . . . . . . . . . . . . . . . . . . 21Working with the development environment .... . . . . . . . . . . . . . . . . . . . . . . . . . . . . . . . . . . . . . . . . . . . . . . . . . . . . . . . . . . . . . . . . . . . 22Deleting an Environment .... . . . . . . . . . . . . . . . . . . . . . . . . . . . . . . . . . . . . . . . . . . . . . . . . . . . . . . . . . . . . . . . . . . . . . . . . . . . . . . . . . . . . . . . . . . . . . . . 23
Working with Robot Applications .... . . . . . . . . . . . . . . . . . . . . . . . . . . . . . . . . . . . . . . . . . . . . . . . . . . . . . . . . . . . . . . . . . . . . . . . . . . . . . . . . . . . . . . . . . . . . . . . . . . . 25Creating a Robot Application .... . . . . . . . . . . . . . . . . . . . . . . . . . . . . . . . . . . . . . . . . . . . . . . . . . . . . . . . . . . . . . . . . . . . . . . . . . . . . . . . . . . . . . . . . . . . . . . . . . 25Creating a Robot Application Version .... . . . . . . . . . . . . . . . . . . . . . . . . . . . . . . . . . . . . . . . . . . . . . . . . . . . . . . . . . . . . . . . . . . . . . . . . . . . . . . . . . . . . . . 26Viewing a Robot Application .... . . . . . . . . . . . . . . . . . . . . . . . . . . . . . . . . . . . . . . . . . . . . . . . . . . . . . . . . . . . . . . . . . . . . . . . . . . . . . . . . . . . . . . . . . . . . . . . . . . 26Updating a Robot Application .... . . . . . . . . . . . . . . . . . . . . . . . . . . . . . . . . . . . . . . . . . . . . . . . . . . . . . . . . . . . . . . . . . . . . . . . . . . . . . . . . . . . . . . . . . . . . . . . . 27Deleting a Robot Application .... . . . . . . . . . . . . . . . . . . . . . . . . . . . . . . . . . . . . . . . . . . . . . . . . . . . . . . . . . . . . . . . . . . . . . . . . . . . . . . . . . . . . . . . . . . . . . . . . . 28Deleting a Robot Application Version .... . . . . . . . . . . . . . . . . . . . . . . . . . . . . . . . . . . . . . . . . . . . . . . . . . . . . . . . . . . . . . . . . . . . . . . . . . . . . . . . . . . . . . . 28
Working with Simulation Applications .... . . . . . . . . . . . . . . . . . . . . . . . . . . . . . . . . . . . . . . . . . . . . . . . . . . . . . . . . . . . . . . . . . . . . . . . . . . . . . . . . . . . . . . . . . . . . . 30Creating a Simulation Application .... . . . . . . . . . . . . . . . . . . . . . . . . . . . . . . . . . . . . . . . . . . . . . . . . . . . . . . . . . . . . . . . . . . . . . . . . . . . . . . . . . . . . . . . . . . 30Creating a Robot Application Version .... . . . . . . . . . . . . . . . . . . . . . . . . . . . . . . . . . . . . . . . . . . . . . . . . . . . . . . . . . . . . . . . . . . . . . . . . . . . . . . . . . . . . . . 31
iii

AWS RoboMaker Developer Guide
Viewing a Simulation Application .... . . . . . . . . . . . . . . . . . . . . . . . . . . . . . . . . . . . . . . . . . . . . . . . . . . . . . . . . . . . . . . . . . . . . . . . . . . . . . . . . . . . . . . . . . . . 32Updating a Simulation Application .... . . . . . . . . . . . . . . . . . . . . . . . . . . . . . . . . . . . . . . . . . . . . . . . . . . . . . . . . . . . . . . . . . . . . . . . . . . . . . . . . . . . . . . . . . 32Deleting a Simulation Application .... . . . . . . . . . . . . . . . . . . . . . . . . . . . . . . . . . . . . . . . . . . . . . . . . . . . . . . . . . . . . . . . . . . . . . . . . . . . . . . . . . . . . . . . . . . 33Deleting a Simulation Application Version .... . . . . . . . . . . . . . . . . . . . . . . . . . . . . . . . . . . . . . . . . . . . . . . . . . . . . . . . . . . . . . . . . . . . . . . . . . . . . . . . 34
Running Simulation Jobs .... . . . . . . . . . . . . . . . . . . . . . . . . . . . . . . . . . . . . . . . . . . . . . . . . . . . . . . . . . . . . . . . . . . . . . . . . . . . . . . . . . . . . . . . . . . . . . . . . . . . . . . . . . . . . . . . 35VPC Settings .... . . . . . . . . . . . . . . . . . . . . . . . . . . . . . . . . . . . . . . . . . . . . . . . . . . . . . . . . . . . . . . . . . . . . . . . . . . . . . . . . . . . . . . . . . . . . . . . . . . . . . . . . . . . . . . . . . . . . . . . . 35
Configuring a AWS RoboMaker Simulation Job for Amazon VPC Access .... . . . . . . . . . . . . . . . . . . . . . . . . . . . . . . . . 35Internet Access for Simulation Jobs .... . . . . . . . . . . . . . . . . . . . . . . . . . . . . . . . . . . . . . . . . . . . . . . . . . . . . . . . . . . . . . . . . . . . . . . . . . . . . . . . . 36
Accessing Simulation Job Data .... . . . . . . . . . . . . . . . . . . . . . . . . . . . . . . . . . . . . . . . . . . . . . . . . . . . . . . . . . . . . . . . . . . . . . . . . . . . . . . . . . . . . . . . . . . . . . . . 36Managing Simulation Jobs .... . . . . . . . . . . . . . . . . . . . . . . . . . . . . . . . . . . . . . . . . . . . . . . . . . . . . . . . . . . . . . . . . . . . . . . . . . . . . . . . . . . . . . . . . . . . . . . . . . . . . . 37
Creating a Simulation Job .... . . . . . . . . . . . . . . . . . . . . . . . . . . . . . . . . . . . . . . . . . . . . . . . . . . . . . . . . . . . . . . . . . . . . . . . . . . . . . . . . . . . . . . . . . . . . . 37Viewing a Simulation Job .... . . . . . . . . . . . . . . . . . . . . . . . . . . . . . . . . . . . . . . . . . . . . . . . . . . . . . . . . . . . . . . . . . . . . . . . . . . . . . . . . . . . . . . . . . . . . . . 39Cancelling a Simulation Job .... . . . . . . . . . . . . . . . . . . . . . . . . . . . . . . . . . . . . . . . . . . . . . . . . . . . . . . . . . . . . . . . . . . . . . . . . . . . . . . . . . . . . . . . . . . . 39Cloning a Simulation Job .... . . . . . . . . . . . . . . . . . . . . . . . . . . . . . . . . . . . . . . . . . . . . . . . . . . . . . . . . . . . . . . . . . . . . . . . . . . . . . . . . . . . . . . . . . . . . . . 40Restarting a Simulation Job .... . . . . . . . . . . . . . . . . . . . . . . . . . . . . . . . . . . . . . . . . . . . . . . . . . . . . . . . . . . . . . . . . . . . . . . . . . . . . . . . . . . . . . . . . . . . 40
Simulation Tools ... . . . . . . . . . . . . . . . . . . . . . . . . . . . . . . . . . . . . . . . . . . . . . . . . . . . . . . . . . . . . . . . . . . . . . . . . . . . . . . . . . . . . . . . . . . . . . . . . . . . . . . . . . . . . . . . . . . . 41Gazebo .... . . . . . . . . . . . . . . . . . . . . . . . . . . . . . . . . . . . . . . . . . . . . . . . . . . . . . . . . . . . . . . . . . . . . . . . . . . . . . . . . . . . . . . . . . . . . . . . . . . . . . . . . . . . . . . . . . . . . . . . . 41rqt .... . . . . . . . . . . . . . . . . . . . . . . . . . . . . . . . . . . . . . . . . . . . . . . . . . . . . . . . . . . . . . . . . . . . . . . . . . . . . . . . . . . . . . . . . . . . . . . . . . . . . . . . . . . . . . . . . . . . . . . . . . . . . . . 43rviz ... . . . . . . . . . . . . . . . . . . . . . . . . . . . . . . . . . . . . . . . . . . . . . . . . . . . . . . . . . . . . . . . . . . . . . . . . . . . . . . . . . . . . . . . . . . . . . . . . . . . . . . . . . . . . . . . . . . . . . . . . . . . . . . 44Terminal ... . . . . . . . . . . . . . . . . . . . . . . . . . . . . . . . . . . . . . . . . . . . . . . . . . . . . . . . . . . . . . . . . . . . . . . . . . . . . . . . . . . . . . . . . . . . . . . . . . . . . . . . . . . . . . . . . . . . . . . . 44
Fleet Management .... . . . . . . . . . . . . . . . . . . . . . . . . . . . . . . . . . . . . . . . . . . . . . . . . . . . . . . . . . . . . . . . . . . . . . . . . . . . . . . . . . . . . . . . . . . . . . . . . . . . . . . . . . . . . . . . . . . . . . . . . 46Deploying a Robot Application .... . . . . . . . . . . . . . . . . . . . . . . . . . . . . . . . . . . . . . . . . . . . . . . . . . . . . . . . . . . . . . . . . . . . . . . . . . . . . . . . . . . . . . . . . . . . . . . . 46Managing Robots .... . . . . . . . . . . . . . . . . . . . . . . . . . . . . . . . . . . . . . . . . . . . . . . . . . . . . . . . . . . . . . . . . . . . . . . . . . . . . . . . . . . . . . . . . . . . . . . . . . . . . . . . . . . . . . . . . . 46
Creating a Robot .... . . . . . . . . . . . . . . . . . . . . . . . . . . . . . . . . . . . . . . . . . . . . . . . . . . . . . . . . . . . . . . . . . . . . . . . . . . . . . . . . . . . . . . . . . . . . . . . . . . . . . . . . . . 46Deleting a Robot .... . . . . . . . . . . . . . . . . . . . . . . . . . . . . . . . . . . . . . . . . . . . . . . . . . . . . . . . . . . . . . . . . . . . . . . . . . . . . . . . . . . . . . . . . . . . . . . . . . . . . . . . . . . 48
Managing Fleets ... . . . . . . . . . . . . . . . . . . . . . . . . . . . . . . . . . . . . . . . . . . . . . . . . . . . . . . . . . . . . . . . . . . . . . . . . . . . . . . . . . . . . . . . . . . . . . . . . . . . . . . . . . . . . . . . . . . . . 49Creating a Fleet ... . . . . . . . . . . . . . . . . . . . . . . . . . . . . . . . . . . . . . . . . . . . . . . . . . . . . . . . . . . . . . . . . . . . . . . . . . . . . . . . . . . . . . . . . . . . . . . . . . . . . . . . . . . . . 49Registering and Deregistering Robots .... . . . . . . . . . . . . . . . . . . . . . . . . . . . . . . . . . . . . . . . . . . . . . . . . . . . . . . . . . . . . . . . . . . . . . . . . . . . . . 50Deleting a Fleet ... . . . . . . . . . . . . . . . . . . . . . . . . . . . . . . . . . . . . . . . . . . . . . . . . . . . . . . . . . . . . . . . . . . . . . . . . . . . . . . . . . . . . . . . . . . . . . . . . . . . . . . . . . . . . 51
Managing Deployments .... . . . . . . . . . . . . . . . . . . . . . . . . . . . . . . . . . . . . . . . . . . . . . . . . . . . . . . . . . . . . . . . . . . . . . . . . . . . . . . . . . . . . . . . . . . . . . . . . . . . . . . . . . 51Creating a deployment job .... . . . . . . . . . . . . . . . . . . . . . . . . . . . . . . . . . . . . . . . . . . . . . . . . . . . . . . . . . . . . . . . . . . . . . . . . . . . . . . . . . . . . . . . . . . . . 52Viewing a Deployment Job .... . . . . . . . . . . . . . . . . . . . . . . . . . . . . . . . . . . . . . . . . . . . . . . . . . . . . . . . . . . . . . . . . . . . . . . . . . . . . . . . . . . . . . . . . . . . . 53
Security ... . . . . . . . . . . . . . . . . . . . . . . . . . . . . . . . . . . . . . . . . . . . . . . . . . . . . . . . . . . . . . . . . . . . . . . . . . . . . . . . . . . . . . . . . . . . . . . . . . . . . . . . . . . . . . . . . . . . . . . . . . . . . . . . . . . . . . . . . 54Authentication and Access Control ... . . . . . . . . . . . . . . . . . . . . . . . . . . . . . . . . . . . . . . . . . . . . . . . . . . . . . . . . . . . . . . . . . . . . . . . . . . . . . . . . . . . . . . . . . . 54
Introduction to Authorization and Access Control ... . . . . . . . . . . . . . . . . . . . . . . . . . . . . . . . . . . . . . . . . . . . . . . . . . . . . . . . . . . . . . . 54Permissions Required .... . . . . . . . . . . . . . . . . . . . . . . . . . . . . . . . . . . . . . . . . . . . . . . . . . . . . . . . . . . . . . . . . . . . . . . . . . . . . . . . . . . . . . . . . . . . . . . . . . . . . 55How AWS RoboMaker Works with IAM ..... . . . . . . . . . . . . . . . . . . . . . . . . . . . . . . . . . . . . . . . . . . . . . . . . . . . . . . . . . . . . . . . . . . . . . . . . . . . 57Troubleshooting Authentication and Access Control ... . . . . . . . . . . . . . . . . . . . . . . . . . . . . . . . . . . . . . . . . . . . . . . . . . . . . . . . . . . . 57What is Authentication? .... . . . . . . . . . . . . . . . . . . . . . . . . . . . . . . . . . . . . . . . . . . . . . . . . . . . . . . . . . . . . . . . . . . . . . . . . . . . . . . . . . . . . . . . . . . . . . . . . 58What is Access Control? ... . . . . . . . . . . . . . . . . . . . . . . . . . . . . . . . . . . . . . . . . . . . . . . . . . . . . . . . . . . . . . . . . . . . . . . . . . . . . . . . . . . . . . . . . . . . . . . . . . 59What are Policies? ... . . . . . . . . . . . . . . . . . . . . . . . . . . . . . . . . . . . . . . . . . . . . . . . . . . . . . . . . . . . . . . . . . . . . . . . . . . . . . . . . . . . . . . . . . . . . . . . . . . . . . . . . . 62Using Service-Linked Roles .... . . . . . . . . . . . . . . . . . . . . . . . . . . . . . . . . . . . . . . . . . . . . . . . . . . . . . . . . . . . . . . . . . . . . . . . . . . . . . . . . . . . . . . . . . . . . 64Getting Started with IAM ..... . . . . . . . . . . . . . . . . . . . . . . . . . . . . . . . . . . . . . . . . . . . . . . . . . . . . . . . . . . . . . . . . . . . . . . . . . . . . . . . . . . . . . . . . . . . . . 66
Security Compliance .... . . . . . . . . . . . . . . . . . . . . . . . . . . . . . . . . . . . . . . . . . . . . . . . . . . . . . . . . . . . . . . . . . . . . . . . . . . . . . . . . . . . . . . . . . . . . . . . . . . . . . . . . . . . . . 73Troubleshooting .... . . . . . . . . . . . . . . . . . . . . . . . . . . . . . . . . . . . . . . . . . . . . . . . . . . . . . . . . . . . . . . . . . . . . . . . . . . . . . . . . . . . . . . . . . . . . . . . . . . . . . . . . . . . . . . . . . . . . . . . . . . . 74
Troubleshooting Simulation Jobs .... . . . . . . . . . . . . . . . . . . . . . . . . . . . . . . . . . . . . . . . . . . . . . . . . . . . . . . . . . . . . . . . . . . . . . . . . . . . . . . . . . . . . . . . . . . . . 74My Simulation Job Failed .... . . . . . . . . . . . . . . . . . . . . . . . . . . . . . . . . . . . . . . . . . . . . . . . . . . . . . . . . . . . . . . . . . . . . . . . . . . . . . . . . . . . . . . . . . . . . . . 74
Troubleshooting AWS RoboMaker Development Environments .... . . . . . . . . . . . . . . . . . . . . . . . . . . . . . . . . . . . . . . . . . . . . . . . . . . . 77There is a Problem with the Sample Code .... . . . . . . . . . . . . . . . . . . . . . . . . . . . . . . . . . . . . . . . . . . . . . . . . . . . . . . . . . . . . . . . . . . . . . . . 77
Troubleshooting Deployments .... . . . . . . . . . . . . . . . . . . . . . . . . . . . . . . . . . . . . . . . . . . . . . . . . . . . . . . . . . . . . . . . . . . . . . . . . . . . . . . . . . . . . . . . . . . . . . . . . 77My Deployment Failed .... . . . . . . . . . . . . . . . . . . . . . . . . . . . . . . . . . . . . . . . . . . . . . . . . . . . . . . . . . . . . . . . . . . . . . . . . . . . . . . . . . . . . . . . . . . . . . . . . . . 77
Logging AWS RoboMaker API Calls with AWS CloudTrail .. . . . . . . . . . . . . . . . . . . . . . . . . . . . . . . . . . . . . . . . . . . . . . . . . . . . . . . . . . . . . . . . . . . . . . . 79AWS RoboMaker Information in CloudTrail .. . . . . . . . . . . . . . . . . . . . . . . . . . . . . . . . . . . . . . . . . . . . . . . . . . . . . . . . . . . . . . . . . . . . . . . . . . . . . . . . . 79Understanding AWS RoboMaker Log File Entries ... . . . . . . . . . . . . . . . . . . . . . . . . . . . . . . . . . . . . . . . . . . . . . . . . . . . . . . . . . . . . . . . . . . . . . . . 80
API Reference .... . . . . . . . . . . . . . . . . . . . . . . . . . . . . . . . . . . . . . . . . . . . . . . . . . . . . . . . . . . . . . . . . . . . . . . . . . . . . . . . . . . . . . . . . . . . . . . . . . . . . . . . . . . . . . . . . . . . . . . . . . . . . . . 81Actions .... . . . . . . . . . . . . . . . . . . . . . . . . . . . . . . . . . . . . . . . . . . . . . . . . . . . . . . . . . . . . . . . . . . . . . . . . . . . . . . . . . . . . . . . . . . . . . . . . . . . . . . . . . . . . . . . . . . . . . . . . . . . . . . . . 81
BatchDescribeSimulationJob .... . . . . . . . . . . . . . . . . . . . . . . . . . . . . . . . . . . . . . . . . . . . . . . . . . . . . . . . . . . . . . . . . . . . . . . . . . . . . . . . . . . . . . . . . . . 82
iv

AWS RoboMaker Developer Guide
CancelSimulationJob .... . . . . . . . . . . . . . . . . . . . . . . . . . . . . . . . . . . . . . . . . . . . . . . . . . . . . . . . . . . . . . . . . . . . . . . . . . . . . . . . . . . . . . . . . . . . . . . . . . . . . . 85CreateDeploymentJob .... . . . . . . . . . . . . . . . . . . . . . . . . . . . . . . . . . . . . . . . . . . . . . . . . . . . . . . . . . . . . . . . . . . . . . . . . . . . . . . . . . . . . . . . . . . . . . . . . . . . 87CreateFleet ... . . . . . . . . . . . . . . . . . . . . . . . . . . . . . . . . . . . . . . . . . . . . . . . . . . . . . . . . . . . . . . . . . . . . . . . . . . . . . . . . . . . . . . . . . . . . . . . . . . . . . . . . . . . . . . . . . . . 92CreateRobot .... . . . . . . . . . . . . . . . . . . . . . . . . . . . . . . . . . . . . . . . . . . . . . . . . . . . . . . . . . . . . . . . . . . . . . . . . . . . . . . . . . . . . . . . . . . . . . . . . . . . . . . . . . . . . . . . . . 95CreateRobotApplication .... . . . . . . . . . . . . . . . . . . . . . . . . . . . . . . . . . . . . . . . . . . . . . . . . . . . . . . . . . . . . . . . . . . . . . . . . . . . . . . . . . . . . . . . . . . . . . . . . . 98CreateRobotApplicationVersion .... . . . . . . . . . . . . . . . . . . . . . . . . . . . . . . . . . . . . . . . . . . . . . . . . . . . . . . . . . . . . . . . . . . . . . . . . . . . . . . . . . . . . . 102CreateSimulationApplication .... . . . . . . . . . . . . . . . . . . . . . . . . . . . . . . . . . . . . . . . . . . . . . . . . . . . . . . . . . . . . . . . . . . . . . . . . . . . . . . . . . . . . . . . . 106CreateSimulationApplicationVersion .... . . . . . . . . . . . . . . . . . . . . . . . . . . . . . . . . . . . . . . . . . . . . . . . . . . . . . . . . . . . . . . . . . . . . . . . . . . . . . . 110CreateSimulationJob .... . . . . . . . . . . . . . . . . . . . . . . . . . . . . . . . . . . . . . . . . . . . . . . . . . . . . . . . . . . . . . . . . . . . . . . . . . . . . . . . . . . . . . . . . . . . . . . . . . . . 114DeleteFleet ... . . . . . . . . . . . . . . . . . . . . . . . . . . . . . . . . . . . . . . . . . . . . . . . . . . . . . . . . . . . . . . . . . . . . . . . . . . . . . . . . . . . . . . . . . . . . . . . . . . . . . . . . . . . . . . . . . 121DeleteRobot .... . . . . . . . . . . . . . . . . . . . . . . . . . . . . . . . . . . . . . . . . . . . . . . . . . . . . . . . . . . . . . . . . . . . . . . . . . . . . . . . . . . . . . . . . . . . . . . . . . . . . . . . . . . . . . . . 123DeleteRobotApplication .... . . . . . . . . . . . . . . . . . . . . . . . . . . . . . . . . . . . . . . . . . . . . . . . . . . . . . . . . . . . . . . . . . . . . . . . . . . . . . . . . . . . . . . . . . . . . . . . 125DeleteSimulationApplication .... . . . . . . . . . . . . . . . . . . . . . . . . . . . . . . . . . . . . . . . . . . . . . . . . . . . . . . . . . . . . . . . . . . . . . . . . . . . . . . . . . . . . . . . . 127DeregisterRobot .... . . . . . . . . . . . . . . . . . . . . . . . . . . . . . . . . . . . . . . . . . . . . . . . . . . . . . . . . . . . . . . . . . . . . . . . . . . . . . . . . . . . . . . . . . . . . . . . . . . . . . . . . . 129DescribeDeploymentJob .... . . . . . . . . . . . . . . . . . . . . . . . . . . . . . . . . . . . . . . . . . . . . . . . . . . . . . . . . . . . . . . . . . . . . . . . . . . . . . . . . . . . . . . . . . . . . . . 132DescribeFleet ... . . . . . . . . . . . . . . . . . . . . . . . . . . . . . . . . . . . . . . . . . . . . . . . . . . . . . . . . . . . . . . . . . . . . . . . . . . . . . . . . . . . . . . . . . . . . . . . . . . . . . . . . . . . . . . 136DescribeRobot .... . . . . . . . . . . . . . . . . . . . . . . . . . . . . . . . . . . . . . . . . . . . . . . . . . . . . . . . . . . . . . . . . . . . . . . . . . . . . . . . . . . . . . . . . . . . . . . . . . . . . . . . . . . . . 139DescribeRobotApplication .... . . . . . . . . . . . . . . . . . . . . . . . . . . . . . . . . . . . . . . . . . . . . . . . . . . . . . . . . . . . . . . . . . . . . . . . . . . . . . . . . . . . . . . . . . . . . 142DescribeSimulationApplication .... . . . . . . . . . . . . . . . . . . . . . . . . . . . . . . . . . . . . . . . . . . . . . . . . . . . . . . . . . . . . . . . . . . . . . . . . . . . . . . . . . . . . . 145DescribeSimulationJob .... . . . . . . . . . . . . . . . . . . . . . . . . . . . . . . . . . . . . . . . . . . . . . . . . . . . . . . . . . . . . . . . . . . . . . . . . . . . . . . . . . . . . . . . . . . . . . . . . 149ListDeploymentJobs .... . . . . . . . . . . . . . . . . . . . . . . . . . . . . . . . . . . . . . . . . . . . . . . . . . . . . . . . . . . . . . . . . . . . . . . . . . . . . . . . . . . . . . . . . . . . . . . . . . . . . 154ListFleets ... . . . . . . . . . . . . . . . . . . . . . . . . . . . . . . . . . . . . . . . . . . . . . . . . . . . . . . . . . . . . . . . . . . . . . . . . . . . . . . . . . . . . . . . . . . . . . . . . . . . . . . . . . . . . . . . . . . . . 157ListRobotApplications .... . . . . . . . . . . . . . . . . . . . . . . . . . . . . . . . . . . . . . . . . . . . . . . . . . . . . . . . . . . . . . . . . . . . . . . . . . . . . . . . . . . . . . . . . . . . . . . . . . . 160ListRobots .... . . . . . . . . . . . . . . . . . . . . . . . . . . . . . . . . . . . . . . . . . . . . . . . . . . . . . . . . . . . . . . . . . . . . . . . . . . . . . . . . . . . . . . . . . . . . . . . . . . . . . . . . . . . . . . . . . . 163ListSimulationApplications .... . . . . . . . . . . . . . . . . . . . . . . . . . . . . . . . . . . . . . . . . . . . . . . . . . . . . . . . . . . . . . . . . . . . . . . . . . . . . . . . . . . . . . . . . . . . 166ListSimulationJobs .... . . . . . . . . . . . . . . . . . . . . . . . . . . . . . . . . . . . . . . . . . . . . . . . . . . . . . . . . . . . . . . . . . . . . . . . . . . . . . . . . . . . . . . . . . . . . . . . . . . . . . . 169RegisterRobot .... . . . . . . . . . . . . . . . . . . . . . . . . . . . . . . . . . . . . . . . . . . . . . . . . . . . . . . . . . . . . . . . . . . . . . . . . . . . . . . . . . . . . . . . . . . . . . . . . . . . . . . . . . . . . 172RestartSimulationJob .... . . . . . . . . . . . . . . . . . . . . . . . . . . . . . . . . . . . . . . . . . . . . . . . . . . . . . . . . . . . . . . . . . . . . . . . . . . . . . . . . . . . . . . . . . . . . . . . . . . 175SyncDeploymentJob .... . . . . . . . . . . . . . . . . . . . . . . . . . . . . . . . . . . . . . . . . . . . . . . . . . . . . . . . . . . . . . . . . . . . . . . . . . . . . . . . . . . . . . . . . . . . . . . . . . . . . 177UpdateRobotApplication .... . . . . . . . . . . . . . . . . . . . . . . . . . . . . . . . . . . . . . . . . . . . . . . . . . . . . . . . . . . . . . . . . . . . . . . . . . . . . . . . . . . . . . . . . . . . . . . 182UpdateSimulationApplication .... . . . . . . . . . . . . . . . . . . . . . . . . . . . . . . . . . . . . . . . . . . . . . . . . . . . . . . . . . . . . . . . . . . . . . . . . . . . . . . . . . . . . . . . 186
Data Types .... . . . . . . . . . . . . . . . . . . . . . . . . . . . . . . . . . . . . . . . . . . . . . . . . . . . . . . . . . . . . . . . . . . . . . . . . . . . . . . . . . . . . . . . . . . . . . . . . . . . . . . . . . . . . . . . . . . . . . . . . 190DeploymentApplicationConfig .... . . . . . . . . . . . . . . . . . . . . . . . . . . . . . . . . . . . . . . . . . . . . . . . . . . . . . . . . . . . . . . . . . . . . . . . . . . . . . . . . . . . . . . 191DeploymentConfig .... . . . . . . . . . . . . . . . . . . . . . . . . . . . . . . . . . . . . . . . . . . . . . . . . . . . . . . . . . . . . . . . . . . . . . . . . . . . . . . . . . . . . . . . . . . . . . . . . . . . . . . 192DeploymentJob .... . . . . . . . . . . . . . . . . . . . . . . . . . . . . . . . . . . . . . . . . . . . . . . . . . . . . . . . . . . . . . . . . . . . . . . . . . . . . . . . . . . . . . . . . . . . . . . . . . . . . . . . . . . 193DeploymentLaunchConfig .... . . . . . . . . . . . . . . . . . . . . . . . . . . . . . . . . . . . . . . . . . . . . . . . . . . . . . . . . . . . . . . . . . . . . . . . . . . . . . . . . . . . . . . . . . . . . 195Filter ... . . . . . . . . . . . . . . . . . . . . . . . . . . . . . . . . . . . . . . . . . . . . . . . . . . . . . . . . . . . . . . . . . . . . . . . . . . . . . . . . . . . . . . . . . . . . . . . . . . . . . . . . . . . . . . . . . . . . . . . . . . 197Fleet ... . . . . . . . . . . . . . . . . . . . . . . . . . . . . . . . . . . . . . . . . . . . . . . . . . . . . . . . . . . . . . . . . . . . . . . . . . . . . . . . . . . . . . . . . . . . . . . . . . . . . . . . . . . . . . . . . . . . . . . . . . . 198LaunchConfig .... . . . . . . . . . . . . . . . . . . . . . . . . . . . . . . . . . . . . . . . . . . . . . . . . . . . . . . . . . . . . . . . . . . . . . . . . . . . . . . . . . . . . . . . . . . . . . . . . . . . . . . . . . . . . . 200OutputLocation .... . . . . . . . . . . . . . . . . . . . . . . . . . . . . . . . . . . . . . . . . . . . . . . . . . . . . . . . . . . . . . . . . . . . . . . . . . . . . . . . . . . . . . . . . . . . . . . . . . . . . . . . . . . 201ProgressDetail .. . . . . . . . . . . . . . . . . . . . . . . . . . . . . . . . . . . . . . . . . . . . . . . . . . . . . . . . . . . . . . . . . . . . . . . . . . . . . . . . . . . . . . . . . . . . . . . . . . . . . . . . . . . . . . . 202RenderingEngine .... . . . . . . . . . . . . . . . . . . . . . . . . . . . . . . . . . . . . . . . . . . . . . . . . . . . . . . . . . . . . . . . . . . . . . . . . . . . . . . . . . . . . . . . . . . . . . . . . . . . . . . . . 203Robot .... . . . . . . . . . . . . . . . . . . . . . . . . . . . . . . . . . . . . . . . . . . . . . . . . . . . . . . . . . . . . . . . . . . . . . . . . . . . . . . . . . . . . . . . . . . . . . . . . . . . . . . . . . . . . . . . . . . . . . . . . 204RobotApplicationConfig .... . . . . . . . . . . . . . . . . . . . . . . . . . . . . . . . . . . . . . . . . . . . . . . . . . . . . . . . . . . . . . . . . . . . . . . . . . . . . . . . . . . . . . . . . . . . . . . . 206RobotApplicationSummary .... . . . . . . . . . . . . . . . . . . . . . . . . . . . . . . . . . . . . . . . . . . . . . . . . . . . . . . . . . . . . . . . . . . . . . . . . . . . . . . . . . . . . . . . . . . 207RobotDeployment .... . . . . . . . . . . . . . . . . . . . . . . . . . . . . . . . . . . . . . . . . . . . . . . . . . . . . . . . . . . . . . . . . . . . . . . . . . . . . . . . . . . . . . . . . . . . . . . . . . . . . . . . 208RobotSoftwareSuite .... . . . . . . . . . . . . . . . . . . . . . . . . . . . . . . . . . . . . . . . . . . . . . . . . . . . . . . . . . . . . . . . . . . . . . . . . . . . . . . . . . . . . . . . . . . . . . . . . . . . . 210SimulationApplicationConfig .... . . . . . . . . . . . . . . . . . . . . . . . . . . . . . . . . . . . . . . . . . . . . . . . . . . . . . . . . . . . . . . . . . . . . . . . . . . . . . . . . . . . . . . . . 211SimulationApplicationSummary .... . . . . . . . . . . . . . . . . . . . . . . . . . . . . . . . . . . . . . . . . . . . . . . . . . . . . . . . . . . . . . . . . . . . . . . . . . . . . . . . . . . . . 212SimulationJob .... . . . . . . . . . . . . . . . . . . . . . . . . . . . . . . . . . . . . . . . . . . . . . . . . . . . . . . . . . . . . . . . . . . . . . . . . . . . . . . . . . . . . . . . . . . . . . . . . . . . . . . . . . . . . 213SimulationJobSummary .... . . . . . . . . . . . . . . . . . . . . . . . . . . . . . . . . . . . . . . . . . . . . . . . . . . . . . . . . . . . . . . . . . . . . . . . . . . . . . . . . . . . . . . . . . . . . . . . 216SimulationSoftwareSuite .... . . . . . . . . . . . . . . . . . . . . . . . . . . . . . . . . . . . . . . . . . . . . . . . . . . . . . . . . . . . . . . . . . . . . . . . . . . . . . . . . . . . . . . . . . . . . . 218Source .... . . . . . . . . . . . . . . . . . . . . . . . . . . . . . . . . . . . . . . . . . . . . . . . . . . . . . . . . . . . . . . . . . . . . . . . . . . . . . . . . . . . . . . . . . . . . . . . . . . . . . . . . . . . . . . . . . . . . . . . 219SourceConfig .... . . . . . . . . . . . . . . . . . . . . . . . . . . . . . . . . . . . . . . . . . . . . . . . . . . . . . . . . . . . . . . . . . . . . . . . . . . . . . . . . . . . . . . . . . . . . . . . . . . . . . . . . . . . . . . 220VPCConfig .... . . . . . . . . . . . . . . . . . . . . . . . . . . . . . . . . . . . . . . . . . . . . . . . . . . . . . . . . . . . . . . . . . . . . . . . . . . . . . . . . . . . . . . . . . . . . . . . . . . . . . . . . . . . . . . . . . 221VPCConfigResponse .... . . . . . . . . . . . . . . . . . . . . . . . . . . . . . . . . . . . . . . . . . . . . . . . . . . . . . . . . . . . . . . . . . . . . . . . . . . . . . . . . . . . . . . . . . . . . . . . . . . . . 222
Common Errors ... . . . . . . . . . . . . . . . . . . . . . . . . . . . . . . . . . . . . . . . . . . . . . . . . . . . . . . . . . . . . . . . . . . . . . . . . . . . . . . . . . . . . . . . . . . . . . . . . . . . . . . . . . . . . . . . . . . . 222
v

AWS RoboMaker Developer Guide
Common Parameters ... . . . . . . . . . . . . . . . . . . . . . . . . . . . . . . . . . . . . . . . . . . . . . . . . . . . . . . . . . . . . . . . . . . . . . . . . . . . . . . . . . . . . . . . . . . . . . . . . . . . . . . . . . . . 224Document History .... . . . . . . . . . . . . . . . . . . . . . . . . . . . . . . . . . . . . . . . . . . . . . . . . . . . . . . . . . . . . . . . . . . . . . . . . . . . . . . . . . . . . . . . . . . . . . . . . . . . . . . . . . . . . . . . . . . . . . . 227AWS Glossary .... . . . . . . . . . . . . . . . . . . . . . . . . . . . . . . . . . . . . . . . . . . . . . . . . . . . . . . . . . . . . . . . . . . . . . . . . . . . . . . . . . . . . . . . . . . . . . . . . . . . . . . . . . . . . . . . . . . . . . . . . . . . . . 228
vi

AWS RoboMaker Developer GuideAre You a First-time User of AWS RoboMaker?
What Is AWS RoboMaker?AWS RoboMaker is a service that makes it easy to create robotics applications at scale. AWS RoboMakerextends the Robot Operating System (ROS) framework with cloud services. This includes AWS machinelearning services. It includes monitoring services. It even includes analytics services. These combine toenable a robot to do several things on it's own. Stream data, navigate, communicate, comprehend, andlearn. AWS RoboMaker provides a robotics application development environment. It provides a roboticssimulation service, which speeds application testing. It provides a fleet management service so you candeploy and manage applications remotely.
Are You a First-time User of AWS RoboMaker?If you are a first-time user of AWS RoboMaker, do the following.
1. Read How It Works (p. 3) – An overview of AWS RoboMaker. Learn the key concepts andcomponents involved in building robot applications and simulations. Read this topic in the orderpresented.
2. Read Getting Started with AWS RoboMaker (p. 6) – How to build your first robot application andsimulation. Explains how to run a simulation job. Use the sample code provided by AWS RoboMaker.
3. Explore robotics topics – Depending on your needs, do the following.• Learn about ROS – In AWS RoboMaker, you build applications and simulations based on the Robot
Operating System (ROS). For more information, see http://wiki.ros.org/ROS/Tutorials.• Learn about Gazebo – A simulator to test robots. Gazebo helps you test algorithms. It helps you
design robots and train artificial intelligence. For more information, see http://gazebosim.org/tutorials. Select version 7 when given the opportunity.
Supported Software and VersionsAWS RoboMaker supports the following.
Name Version Supported Description
Robot OperatingSystem (ROS)
Kinetic Libraries and tools tohelp you create robotapplications.
Colcon Latest Command line tool tobundle ROS robot andsimulation applications.
Gazebo 7 Tool to simulate robotsin an environment.
rviz Kinetic ROS Visualizer (rviz)is a tool to visualizesensor data and stateinformation from ROSin 3D.
1

AWS RoboMaker Developer GuideSupported Software and Versions
Name Version Supported Description
rqt Kinetic Qt-based frameworkand plugins for ROSGUI development.
2

AWS RoboMaker Developer GuideRobotics Development with AWS RoboMaker
How It WorksAWS RoboMaker is a service that allows you to quickly develop, test, and deploy robot applications. Thissection provides an overview of robot development. It explains how AWS RoboMaker works. If you are afirst-time user of AWS RoboMaker, we recommend that you read the following sections in order.
Topics• Robotics Development with AWS RoboMaker (p. 3)• Create a ROS Development Environment (p. 4)• Create a Robot Application (p. 4)• Develop Simulation and Testing Data (p. 5)• Fleet Management and Deployment (p. 5)
Robotics Development with AWS RoboMakerThis section describes a typical robot development workflow and tells how you accomplish those taskswith AWS RoboMaker.
Robot application development usually begins after you choose your physical robot hardware. First, youcreate a development environment and load the tools to build an application. Next, create the robotapplication. Write custom logic that responds to environmental data. Next, build simulations, or modelsof the world that your robot will inhabit. Collect data about how your robot performs in simulation jobs.When your tests are complete, deploy your robot application to your physical robots. Monitor them andupdate the software when needed.
As a robot developer, you typically perform the following activities.
1. Create a ROS development environment — To create a robot application, you need an environmentconfigured for ROS development along with tools like Colcon to build and bundle the application.You'll also need tools to help you cross-compile the application for your physical robot. Using anintegrated development environment makes it easier.
In AWS RoboMaker, you can create an AWS Cloud9 development environment that is alreadyconfigured with the tools to develop robot applications. You can also use your existing environment.
2. Create the robot application — This is where you get to write code. Build on the foundation providedby ROS and integrate functionality provided by the community. The application you create works withyour robot hardware, provides intelligence, and works with the cloud.
3. Develop simulation and testing data — In this stage, run your robot application in simulatedenvironments. Collect sensor data and other performance information produced by the simulation. Itcan take many iterations with different simulation applications to complete the robot implementation.
4. Deploy to robot fleets — When your robot application performs as expected, you are ready to deployit to your robot. In AWS RoboMaker, a robot must belong to a fleet (a group of robots) in order toreceive a robot application deployment. Each virtual robot in AWS RoboMaker represents a physicalrobot.
5. Monitor and update robots — Your robots are interacting in the world! Refine your robot applicationusing data you collect using AWS RoboMaker cloud extensions.
The following sections explore the details of each step.
3

AWS RoboMaker Developer GuideCreate a ROS Development Environment
Create a ROS Development EnvironmentBefore you create a robot application, you need a properly configured development environment. Robotdevelopment with AWS RoboMaker depends on a number of open source packages.
Package Version Description
Robot OperatingSystem (ROS)
Kinetic Libraries and tools tohelp developers createrobot applications.
Colcon Latest A command line toolfor bundling ROSrobot and simulationapplications.
Gazebo 7 Tool for simulatingrobots in complexenvironments.
rviz Kinetic ROS Visualizer (rviz) isa tool for visualizingsensor data and stateinformation from ROSin 3D.
rqt Kinetic Qt-based frameworkand plugins for ROSGUI development.
You can create your own development environment or update an existing development environment tosupport robot development with AWS RoboMaker. Most developers use Ubuntu or other supported Linuxvariants. Other operating systems might be compatible.
AWS RoboMaker provides a quick and easy way to create a development environment that is alreadyconfigured for robot development. In a few clicks, you can create a development environment in AWSRoboMaker, install a starter robot application, and begin writing code in your browser.
Create a Robot ApplicationAfter your development environment is configured, create a robot application by building on thefoundation ROS provides. ROS relies on a Computation Graph, which is a collection of concurrentprocesses (nodes) that perform a task like controlling wheel motors or communicating by passingmessages.
You do not have to create nodes for common robotic hardware and alogirthms. For example, thereare packages, which are nodes and dependent message definitions, for working with motors, lasers,actuators, lidar, and sensors of all kinds. There are also packages that consume data from other packagesto create maps of the environment, path finding, and more. For a more comprehensive list, see ros.organd go to kinetic.
Using the AWS RoboMaker cloud extensions, capture operational data to aid in troubleshooting andenhance your robot with intelligent functions. For more information, see the section called “AWSRoboMaker Cloud Extensions” (p. 20).
4

AWS RoboMaker Developer GuideDevelop Simulation and Testing Data
Develop Simulation and Testing DataRobot application developers use simulations to help refine behavior, test robotics algorithms, andperform regression testing. Simulations use realistic scenarios and detailed virtual environments tomodel the world and mimic robot behavior in the real world.
In AWS RoboMaker, a simulation application contains models for the robot, terrain, and assets organizedin a scene. The simulation application is responsible for simulating the physical aspects of a robot suchas its sensors, kinematics, and dynamics. Sensors may include cameras, lidars, and even GPS devices.Kinematics and dynamics are required to allow the robot to move its joints and wheels and interactphysically, such as colliding, with the simulated environment and objects.
To run a simulation, pair a robot application with a simulation application in a simulation job. Thesimulation job can run up to 14 days, and you can restart it with an updated simulation application whileit is running. You can interact with a running simulation by using Gazebo, rviz, rqt, and a terminal forinteracting on the command line with the running ROS environment. For example, you can use Gazeboto see a rendered model of the robot in the environment and use the terminal to listen or send ROSmessages to your robot.
The robot is unaware that it is inside a simulated environment. The simulator uses the same interfacesand data types as the robot's physical devices. This makes it possible to test the same robot software in asimulation and then deploy it to your robots.
Fleet Management and DeploymentAfter testing and simulation are complete, you can deploy the robot application to your robots usingthe AWS IoT Greengrass OTA (over-the-air) update mechanism. Before you deploy your application,configure each robot to accept updates from AWS RoboMaker and to communicate deployment status.Next, register your configured robots into a fleet. A fleet is a logical grouping of robots. When yourfleet is configured, you can deploy your robot application, controlling the pace of deployment and whathappens before and after the robot application launches on the robot.
Information about the deployment is provided by AWS RoboMaker. Additional information specific toyour robot and scenarios can be captured using AWS RoboMaker cloud extensions and custom code.
5

AWS RoboMaker Developer GuideImportant Licensing Information
Getting Started with AWSRoboMaker
In this section, you learn the basics of how to structure your robot applications and simulationapplications, edit code, build, launch new simulations, and deploy applications to robots. You will useHello World, an example robot application and simulation application built for TurtleBot3. The robotrotates in place. The simulation is an empty world.
• Build a robot application. A robot application is a ROS-based application that runs on a physicalrobot. To run your application in a AWS RoboMaker simulation, you need to build an X86_64architecture version of the robot application.
• Build a simulation application. A simulation application includes a 3D artificial world and Gazeboplugins that control the movement of a robot within that world. An X86_64 architecture version of thesimulation application is required.
• Launch a AWS RoboMaker simulation. Simulations can help you develop and test algorithms, trainmachine learning models, and regression-test robot applications.
• Deploy a robot application. You can build and deploy a robot application to a TurtleBot3 robot.Deployment is done over-the-air using AWS IoT Greengrass. For more information about TurtleBot3,see TurtleBot3.
• Access logging and monitoring features. You can access service metrics, data written to stdout, ROSbags, and Gazebo log files. Access can be limited using IAM.
Topics
• Important Licensing Information (p. 6)
• Step 1: Create an AWS Account and an Administrator (p. 7)
• Step 2: Run the Hello World Sample Application (p. 8)
• Step 3: Configure Environment and Build Applications (p. 9)
• Step 4: Run Simulation (p. 10)
• Step 5: Deploy Robot Application (p. 11)
• Step 6: Clean up (p. 13)
• Additional Sample Robots (p. 13)
Important Licensing InformationAWS RoboMaker sample applications include third-party software licensed under open-source licensesand is provided for demonstration purposes only. Incorporation or use of RoboMaker sample applicationsin connection with your production workloads or a commercial products or devices may affect your legalrights or obligations under the applicable open-source licenses. Source file information is included in thereadme file of each sample application:
• Hello World
6

AWS RoboMaker Developer GuideStep 1: Create an Account
• Navigation and Person Recognition
• Voice Commands
• Robot Monitoring
• Self-Driving using Reinforcement Learning
• Object Following using Reinforcement Learning
AWS RoboMaker development environment and simulation include third-party software licensed underopen-source licenses. View the source file and licensing information here:
• Simulation Environment
• Development Environment
Step 1: Create an AWS Account and anAdministrator
Before you use AWS RoboMaker for the first time, complete the following tasks:
Topics
• Create an AWS Account (p. 7)
• Create an IAM Administrator and Sign in (p. 7)
Create an AWS AccountIf you already have an AWS account, skip this step.
When you sign up for Amazon Web Services (AWS), your AWS account is automatically signed up for allAWS services, including AWS RoboMaker. You are charged only for the services that you use.
To create an AWS account
1. Open https://aws.amazon.com/, and then choose Create an AWS Account.
NoteIf you previously signed in to the AWS Management Console using AWS account root usercredentials, choose Sign in to a different account. If you previously signed in to the consoleusing IAM credentials, choose Sign-in using root account credentials. Then choose Createa new AWS account.
2. Follow the online instructions.
Part of the sign-up procedure involves receiving a phone call and entering a verification code usingthe phone keypad.
Write down your AWS account ID because you'll need it for the next task.
Create an IAM Administrator and Sign inWhen you create an AWS account, you get a single sign-in identity that has access to all of the AWSservices and resources in the account. This identity is called the AWS account root user. When you sign
7

AWS RoboMaker Developer GuideStep 2: Run the Hello World Sample Application
in to the AWS Management Console with the credentials that you used to create the account, you haveaccess to all of the AWS resources in your account.
We strongly recommend that you not use the root user for everyday tasks, even the administrative ones.Instead, adhere to the Create Individual IAM Users. Create an AWS Identity and Access Management(IAM) user with administrator permissions. Then, securely store your root user credentials and use themto perform only a few account and service management tasks.
To create an IAM user with administrator permissions and sign in to the console
1. Create an account with administrator permissions in your AWS account. For instructions, seeCreating Your First IAM User and Administrators Group in the IAM User Guide.
NoteWe assume that you use administrator-level credentials for the exercises and proceduresin this guide. If you choose to create and use another IAM user, grant that user minimumpermissions.
2. Sign in to the AWS Management Console.
To sign in to the AWS Management Console as a IAM user, you must use a special URL. For moreinformation, see How Users Sign In to Your Account in the IAM User Guide.
For more information about IAM, see the following:
• AWS Identity and Access Management (IAM)• Getting Started• IAM User Guide
Step 2: Run the Hello World Sample ApplicationBefore you begin working with a robot application and simulation application code, run the HelloWorld demo application in the AWS RoboMaker console. This sets up the AWS resources the applicationneeds, including the appropriate IAM roles and Amazon S3 bucket for loading applications and writingsimulation output.
To run the Hello World demo application
1. Sign in to the AWS RoboMaker console at https://us-west-2.console.aws.amazon.com/robomaker/home/.
2. In the AWS RoboMaker console, expand Resources on the left and then select Sample applications.3. In the Try AWS RoboMaker sample applications page, select Hello World! and then select Launch.
This opens the simulation job detail page while AWS RoboMaker launches the sample simulation.4. On the simulation job detail page, when status becomes running, select Gazebo.5. In the AWS RoboMaker gzclient window, use the mouse or keyboard to zoom in on the TurtleBot.
For more information, see Gazebo Keyboard Shortcuts.
It is spinning clockwise. Gazebo is fully functional, so you can try out other features. For example,if you want more light on the robot, choose the sun (point light) icon and then move the pointeraround the robot to illuminate it.
6. When you are done, close Gazebo by closing the browser window.
The Hello World simulation runs for 1 hour. In later steps, you have an opportunity to restart thesimulation. If you do, the simulation job timer is reset to zero and the simulation job will run another 1hour.
8

AWS RoboMaker Developer GuideStep 3: Configure Environment and Build Applications
Step 3: Configure Environment and BuildApplications
In this section, you create a AWS Cloud9 development environment integrated with AWS RoboMaker andinstall the Hello World code. In the development environment, you modify the robot application, andthen build the robot and simulation application.
Topics• Create a development environment (p. 9)• Modify and Build Applications (p. 9)
Create a development environmentThe AWS Cloud9 development environment provides the tools to develop robot applications andsimulation applications with ROS and AWS RoboMaker.
To create a development environment:
1. Sign in to the AWS RoboMaker console at https://us-west-2.console.aws.amazon.com/robomaker/home/.
2. On the left, expand Development, choose Development environments, and then choose Createenvironment.
3. In the Create AWS RoboMaker development environment page, enter HelloWorld as theenvironment name.
4. Accept the default Instance type (m4.large). You can select different instances type to improvebundling performance.
5. Choose Submit to create the AWS Cloud9 development environment.
Modify and Build ApplicationsIn this section, you use the AWS Cloud9 development environment to modify the robot application torotate counter-clockwise and then build the robot and simulation application.
To build the robot and simulation applications
1. Sign in to the AWS RoboMaker console at https://us-west-2.console.aws.amazon.com/robomaker/home/.
2. On the left, expand Development, choose Development environments, select HelloWorld, andthen choose Open IDE. It might take a few minutes to prepare the development environment.
3. In the HelloWorld AWS Cloud9 development environment, choose AWS RoboMaker Resources,then choose Download samples, and then select 1. Hello World.
4. On the left, in the Environment tab, expand HelloWorld, HelloWorld, robot_ws. src,hello_world_robot, and then nodes. Select the file rotate to load into the editor.
5. In the rotate tab, on line 15, modify the code to make the robot turn counter-clockwise by makingthe rate negative: self.twist.angular.z = -0.1. Save the file by selecting File and then Save.
6. Build the robot application. On the menu, choose AWS RoboMaker Run, then choose Build, andthen select HelloWorld Robot.
7. Build the simulation application. On the menu, choose AWS RoboMaker Run, then choose Build,and then select HelloWorld Simulation.
9

AWS RoboMaker Developer GuideStep 4: Run Simulation
Next Step
Step 4: Run Simulation (p. 10)
Step 4: Run SimulationIn this section, you bundle the robot application and simulation application into source files. A source fileincludes all of the dependencies needed to run the application. You use a robot application source fileand a simulation application source file to create a simulation job. You use a robot application source fileto create a deployment.
Topics
• Bundle the Hello World Applications (p. 10)
• Restart the Hello World Simulation Application (p. 10)
• Explore the Simulation (p. 11)
Bundle the Hello World ApplicationsIn the previous step, you built the robot application and simulation application. In this step, you bundleeach application with the resources and dependencies needed to run. For example, the simulationapplication needs a model and physical parameters of the TurtleBot3.
WarningBundling the robot application and simulation application might each take 20 minutes or moredepending on your instance type.
To bundle the Hello World applications
1. In the HelloWorld AWS Cloud9 development environment, choose AWS RoboMaker Run on themenu, then choose Bundle, and then select HelloWorld Robot.
2. On the menu, choose AWS RoboMaker Run, then choose Bundle, and then select HelloWorldSimulation.
Restart the Hello World Simulation ApplicationA running simulation can be restarted with updated robot application and simulation application source.This is useful when you are debugging code and making frequent changes.
When you restart a simulation, its timer is reset to zero. It will run for the original duration until reset orcancelled. For Hello World, the duration is 1 hour.
1. On the menu, choose AWS RoboMaker Simulation, then select Connect. Select the simulation jobfrom the list and then select Okay. Restart this running Hello World simulation with your new robotapplication.
2. Choose AWS RoboMaker Simulation, and select Restart with new bundle(s). In the Restartsimulation with selected bundles dialog, type in /HelloWorld/robot_ws/bundle/output.tar.gz for Robot app bundle path and /HelloWorld/simulation_ws/bundle/output.tar.gz for Simulation app bundle path, then select OK.
AWS RoboMaker restarts the simulation with the new applications. This extends the lifetime of thesimulation for another 1 hour.
10

AWS RoboMaker Developer GuideExplore the Simulation
3. On the menu, choose AWS RoboMaker Run, then choose Start simulation, and then selectHelloWorld.
Explore the SimulationWhen the simulation is running, you can launch Gazebo and verify that the robot is rotating counter-clockwise. You can also view the logs in the AWS Cloud9 development environment terminal.
1. The status of the simulation job is shown next to the AWS RoboMaker Simulation menu entry.When it transitions to Running, you can launch applications and explore the simulation.
2. In the AWS RoboMaker console, choose Simulation jobs on the left and then select the Hello Worldsimulation job.
3. In the Simulation details screen, in the Simulation tools section, select Gazebo.
4. In Gazebo, zoom in on the robot. It is rotating in place.
5. Log data is streamed to CloudWatch Logs and to tabs on the AWS Cloud9 developmentenvironment.
To view CloudWatch Logs, select Logs in the Simulation details screen.
6. Output files generated by the simulation job are available in the simulation job output destination.Select the link to access the Amazon S3 bucket.
Next Step
Step 5: Deploy Robot Application (p. 11)
Step 5: Deploy Robot ApplicationIn this section, you compile the Hello World robot application for the ARMHF platform, which is used byTurtleBot3. You also create a robot in AWS RoboMaker and then configure your TurtleBot3 robot withAWS IoT Greengrass software. Then you register the robot into a new fleet and deploy the application.
Topics
• Prepare your TurtleBot3 robot (p. 11)
• Bundle and deploy Hello World robot application (p. 12)
Prepare your TurtleBot3 robotBefore you can deploy a robot application to a physical robot, create the robot in AWS RoboMaker,configure your physical robot with AWS IoT Greengrass, and then create a fleet and register your robotinto the fleet.
To prepare your TurtleBot3 robot
1. First, create a robot in AWS RoboMaker and configure your TurtleBot3 robot. Follow the steps inCreating a Robot (p. 46).
2. Next, create a fleet. Follow the steps in Creating a Fleet (p. 49).
3. Register your robot as part of the new fleet. Follow the steps to Register your robot to your fleet inRegistering and Deregistering Robots (p. 50).
11

AWS RoboMaker Developer GuideBundle and deploy Hello World robot application
Bundle and deploy Hello World robot applicationIn this section, bundle the Hello World application for the ARMHF architecture using a Docker image.Then you copy the robot application bundle to an Amazon S3 bucket and deploy.
WarningBundling the robot application and simulation application might each take 20 minutes or moredepending on your instance type.
To bundle and deploy the Hello World robot application
1. Sign in to the AWS RoboMaker console at https://us-west-2.console.aws.amazon.com/robomaker/home/.
2. On the left, expand Development, choose Development environments, select HelloWorld, andthen select Open IDE. It might take a few minutes to prepare the development environment.
3. In the HelloWorld AWS Cloud9 development environment, choose the bash tab at the bottom ofthe page and then run the following commands to bundle the HelloWorld robot application forARMHF:
$ cd /opt/robomaker/cross-compilation-dockerfile/$ sudo bin/build_image.bash $ cd ~/environment/HelloWorld/robot_ws$ sudo docker run -v $(pwd):/ws -it ros-cross-compile:armhf$ cd ws$ apt update$ rosdep install --from-paths src --ignore-src -r -y$ colcon build --build-base armhf_build --install-base armhf_install$ colcon bundle --build-base armhf_build --install-base armhf_install --bundle-base armhf_bundle --apt-sources-list /opt/cross/apt-sources.yaml$ exit
4. Before you can deploy the robot application, copy it to an Amazon S3 bucket AWS RoboMaker canaccess. A bucket was created on your behalf for the HelloWorld robot application. Find the name ofthe bucket using the following command:
$ aws s3 ls | grep "robomakerhelloworld"
Now, copy the robot application to the bucket you found above.
$ aws s3 cp armhf_bundle/output.tar.gz s3://robomakersampleapplicationhelloworld-bundlesbucket-##########/hello-world-robot.armhf.tar.gz
The ARMHF version of the robot application is hello-world-robot.armhf.tar.gz.
5. Update the Hello World robot application created on your behalf with the ARMHF versionof the robot application. In the AWS RoboMaker console, select Development, then selectRobot applications, and then choose the robot application with a name beginning withroboMakerSampleApplicationHelloWorld_.
6. In the Robot application details page, in Versions, select $LATEST, and then choose Update.
7. In the Update robot application page, in Sources, copy the X86_64 source file into the ARMHFsource file field, then modify the robot application file name from hello-world-robot.tar.gzto hello-world-robot.armhf.tar.gz, then select Submit.
8. In the Robot application details page, in Versions, select Create new version, and then chooseCreate.
9. You are now ready to deploy the robot application to your TurtleBot3 robot. In the AWS RoboMakerconsole, select Fleet management, then select Deployments, and then select Create deployment.
12

AWS RoboMaker Developer GuideStep 6: Clean up
10. In the Create deployment page, select the Fleet you created with your robot registered, then selectthe Robot application and Robot application version you created.
11. In Deployment launch config, type in hello_world_robot for Package name. Then type inrotate.launch for Launch file.
12. In Deployment config, accept the default values for Concurrent deployment percentags andFailure threshold percentage.
13. Select Submit. You can track the deployment status on the deployment details page.
Next Step
Step 6: Clean up (p. 13)
Step 6: Clean upTo avoid extra charges, use the AWS Management Console to delete items that you created for thisexercise.
1. Open the AWS RoboMaker console at https://us-west-2.console.aws.amazon.com/robomaker/home/ . Choose Simulation jobs and then choose the Hello World simulation job. In theSimulation job details page, choose Actions, choose Cancel, and then choose Yes, cancel.
2. Open the AWS CloudFormation console at https://console.aws.amazon.com/cloudformation/ and delete the stack with HelloWorld. If there are multiple entries, choose bydate and time.
3. Open the IAM console at https://console.aws.amazon.com/iam/ and delete the IAM role. If youcreated permissions policies, delete them.
4. Open the AWS Cloud9 console at https://console.aws.amazon.com/cloud9/ . Choose theHelloWorld environment and then choose Delete. Confirm by typing Delete and then selectingDelete.
Additional Sample RobotsThis section contains more advanced robots and simulations.
Topics• Navigation and Person Recognition (p. 13)• Voice Commands (p. 14)• Robot Monitoring (p. 15)• Object Following using Reinforcement Learning (p. 16)• Self-Driving using Reinforcement Learning (p. 17)
Navigation and Person RecognitionIn this section, explore a robot that navigates between goal locations and recognizes faces in photos in asimulated home.
Before you use AWS RoboMaker for the first time, complete the tasks in Create an Account (p. 7).Then, in the AWS RoboMaker console, launch the Navigation and Person Recognition sample application.
Topics• View Simulated Camera Images (p. 14)
13

AWS RoboMaker Developer GuideVoice Commands
• View Recognized People (p. 14)
View Simulated Camera ImagesUse rqt to view images from the robot's camera.
To view simulated camera images
1. Sign in to the AWS RoboMaker console at https://us-west-2.console.aws.amazon.com/robomaker/home/.
2. In the AWS RoboMaker console, choose Simulation jobs on the left and then select the Navigationand Person Recognition simulation job.
3. In the Simulation details page, in the Simulation tools section, select rqt.4. In rqt, choose Plugins, Visualization, Image View.5. Select /camera/rgb/image_raw.
View Recognized PeopleUse the terminal and rostopic to view recognized people as the robot explores the virtual environment.
To view the logs
1. Sign in to the AWS RoboMaker console at https://us-west-2.console.aws.amazon.com/robomaker/home/.
2. In the AWS RoboMaker console, choose Simulation jobs on the left and then select the Navigationand Person Recognition simulation job.
3. In the Simulation details page, in the Simulation tools section, select terminal.4. In terminal, type in the following commands to set up the ROS environment and run the text
command tool:
BUNDLE_CURRENT_PREFIX=~/workspace/robot-application/bundle source ~/workspace/robot-application/bundle/setup.sh
5. Type in the following command:
rostopic echo /rekognized_people
When a person is recognized, you will see output similar to:
Data: "I see brandon"
Voice CommandsIn this section, explore a robot that accepts commands through natural language text and voice in asimulated bookstore using Amazon Lex. The robot supports the commands "move [direction] [rate]","turn [direction] [rate]", and "stop". Each command is acknowledged and then executed.
Before you use AWS RoboMaker for the first time, complete the tasks in Create an Account (p. 7).Then, in the AWS RoboMaker console, launch the Voice Commands sample application.
Topics
14

AWS RoboMaker Developer GuideRobot Monitoring
• Use Natural Language Text to Move the Robot (p. 14)
Use Natural Language Text to Move the RobotUse rqt to view images from the robot's camera.
To view simulated camera images
1. Sign in to the AWS RoboMaker console at https://us-west-2.console.aws.amazon.com/robomaker/home/.
2. In the AWS RoboMaker console, choose Simulation jobs on the left and then select the VoiceCommands simulation job.
3. In the Simulation details screen, in the Simulation tools section, select Gazebo. Zoom in on therobot. There are a series of obstacles positioned in front of it.
4. In the Simulation details screen, in the Simulation tools section, select terminal.5. In terminal, type in the following commands to set up the ROS environment and run the text
command tool:
BUNDLE_CURRENT_PREFIX=~/workspace/robot-application/bundle source ~/workspace/robot-application/bundle/setup.shrosrun voice_interaction_robot text_input.py
6. Type in the following to see the robot collide with the obstacles. The robot will be moving forwardat 0.4 meters per second.
move forward 0.4
The robot will try to move forward until it is told to stop. The faster the robot moves, the more theobstacles will be displaced. Reasonable speeds ar 0.3 to 0.5 meters per second.
You can also move the robot backward:
move backward 0.4
7. The robot can be commanded to turn clockwise or counterclockwise. For example:
turn clockwise .5turn counterclockwise .65
The turn rate is radians per second. Values between 0.4 and 0.78 are reasonable for the robot.8. Type stop to stop the robot.
Robot MonitoringThis section provides an example of how to monitor health and operational metrics for a robot in asimulated bookstore using Amazon CloudWatch Metrics and Amazon CloudWatch Logs. The streamsmetrics including speed, distance to nearest obstacle, distance to current goal, robot CPU utilization, andRAM usage.
Before you use AWS RoboMaker for the first time, complete the tasks in Create an Account (p. 7).Then, in the AWS RoboMaker console, launch the Robot Monitoring sample application.
Topics
15

AWS RoboMaker Developer GuideObject Following using Reinforcement Learning
• View Robot Health and Performance Metrics (p. 16)• View CloudWatch Logs (p. 16)
View Robot Health and Performance MetricsThe Robot Monitoring sample application uses AWS RoboMaker cloud extensions to write custom healthand performance metrics to Amazon CloudWatch.
To view robot health and performance metrics
1. Open the CloudWatch console at https://console.aws.amazon.com/cloudwatch/.2. In the CloudWatch console, select Metrics.3. On the Metrics page, in the All metrics tab, select the Robot Monitoring example.4. On the Metrics page, in the All metrics tab, select Robot. These are the operational metrics for the
robot.5. Select all of the metrics. Each metric will appear on the graph in a different color.6. Hover over the graph to see values for that moment. You can also select a region on the graph to
zoom in or select custom at the top of the page to select a custom time period.
View CloudWatch LogsWhen a simulation job runs, logs are generated by simulation tools and the applications in thesimulation job.
To view the logs
1. Open the CloudWatch console at https://console.aws.amazon.com/cloudwatch/.2. In the CloudWatch console, select Logs.3. On the Log groups page, select the Robot Monitoring Log Group, and then select Turtlebot3.4. Select an event to see details. For example, if you filter for monitor_obstacle_distance events,
you can see the distance to the nearest obstacle at that moment.
Object Following using Reinforcement LearningIn this section, you teach a robot to track and follow an object through reinforcement learning insimulation using the Coach Reinforcement Learning Library. View the reward metrics in AmazonCloudWatch Metrics to explore how the machine learning model improves over time. Customize yourreward function to improve the machine learning algorithm used for training.
Before you use AWS RoboMaker for the first time, complete the tasks in Create an Account (p. 7).Then, in the AWS RoboMaker console, launch the Object Following using Reinforcement Learning sampleapplication.
Topics• View Training Metrics (p. 16)• View Trained Machine Learning Models (p. 17)
View Training MetricsThe Object Following using Reinforcement Learning sample application uses AWS RoboMaker cloudextensions to write training metrics to Amazon CloudWatch.
16

AWS RoboMaker Developer GuideSelf-Driving using Reinforcement Learning
To view robot training metrics
1. Open the CloudWatch console at https://console.aws.amazon.com/cloudwatch/.
2. In the CloudWatch console, select Metrics.
3. On the Metrics page, in the All metrics tab, select AWSRoboMakerSimulation.
4. Select the metric named ObjectTrackerRewardPerEpisode.
5. Hover over the graph to see values for that moment. This graph plots the total reward received bythe robot in each trial/episode. An increase in reward with time indicates that the robot is gettingbetter at finding and following the target object.
View Trained Machine Learning ModelsWhen a simulation job runs, a frozen TensorFlow graph with weights is written to an Amazon S3 bucket.This file can be deployed to a robot.
To view the TensorFlow data
1. Open the Amazon Simple Storage Service console at https://console.aws.amazon.com/s3/. Openthe bucket name beginning with awsrobomakerobjecttracker.
2. In the bucket, open the folder named model-store/model, and then select model.pb.
Self-Driving using Reinforcement LearningIn this section, you teach a racecar to drive in a simulation through reinforcement learning using CoachReinforcement Learning Library. View the reward metrics in Amazon CloudWatch Metrics to explorehow the machine learning model improves over time. Customize your reward function to improve themachine learning algorithm used for training.
Before you use AWS RoboMaker for the first time, complete the tasks in Create an Account (p. 7).Then, in the AWS RoboMaker console, launch the Self-Driving using Reinforcement Learning sampleapplication.
Topics
• View Training Metrics (p. 17)
• View Trained Machine Learning Models (p. 18)
View Training MetricsThe Self-Driving using Reinforcement Learning sample application uses AWS RoboMaker cloudextensions to write training metrics to Amazon CloudWatch.
To view robot training metrics
1. Open the CloudWatch console at https://console.aws.amazon.com/cloudwatch/.
2. In the CloudWatch console, select Metrics.
3. On the Metrics page, in the All metrics tab, select AWSRoboMakerSimulation.
4. Select the metric named DeepRacerRewardPerEpisode.
5. Hover over the graph to see values for that moment. This graph plots the total reward receivedby the robot in each trial/episode. An increase in reward with time indicates that the race car isimproving its performance on the race track.
17

AWS RoboMaker Developer GuideSelf-Driving using Reinforcement Learning
View Trained Machine Learning ModelsWhen a simulation job runs, a frozen TensorFlow graph with weights is written to an Amazon S3 bucket.This file can be deployed to a DeepRacer.
To view the TensorFlow data
1. Open the Amazon Simple Storage Service console at https://console.aws.amazon.com/s3/. Openthe bucket name beginning with awsrobomakerdeepracer.
2. In the bucket, open the folder named model-store/model, and then select model.pb.
18

AWS RoboMaker Developer GuideThe $LATEST Version
Application VersioningAWS RoboMaker supports creating more than one version of your robot applications and simulationapplications. This helps you control which code your robots and simulations use. A version is a numberedsnapshot of your application. Create a version to use in different parts of your development workflow.For example, development, beta deployment, or production.
When you version an AWS RoboMaker robot application or simulation application you create a snapshotof the application. This way you can use the application as it existed when the version was made. Afteryou create a version it stays the same while you continue to work on your application.
You can create a maximum of 40 versions per application.
Topics• The $LATEST Version (p. 19)• Updating an Application Version (p. 19)• Deleting an Application Version (p. 19)
The $LATEST VersionWhen you create a version, AWS RoboMaker copies the $LATEST version to create the new version andincrements the version number by 1. Version numbers are never reused. For example, if you removea simulation application numbered version 10 and then recreate it, the next version number AWSRoboMaker assigns to the simulation application is version 11.
When you deploy a robot application, you must select a specific numbered version to deploy. Formore information on how to create a robot application version, see Creating a Robot ApplicationVersion (p. 26).
For more information how to create a simulation application version, see Creating a Robot ApplicationVersion (p. 31).
Updating an Application VersionYou can update only the $LATEST version of an AWS RoboMaker application . When you do this, it isavailable to use in AWS RoboMaker. For example, if you restart a simulation job, the latest version of theapplications will be used in the simulation.
For more information, see Updating a Robot Application (p. 27) and Updating a SimulationApplication (p. 32).
Deleting an Application VersionWhen you no longer need an application version, delete it. For more information, see Deleting a RobotApplication Version (p. 28) and Deleting a Simulation Application Version (p. 34).
19

AWS RoboMaker Developer GuideAWS RoboMaker Cloud Extensions
Developing ApplicationsThis section provides information about configuring your environment for ROS development, developingrobot and simulation applications with the preconfigured AWS Cloud9 development environment, andextending your robot application with AWS RoboMaker cloud extensions.
It also describes how to create and manage AWS RoboMaker robot applications and AWS RoboMakersimulation applications.
Topics
• AWS RoboMaker Cloud Extensions (p. 20)
• Developing with AWS Cloud9 (p. 21)
AWS RoboMaker Cloud ExtensionsAWS RoboMaker cloud extensions is a collection of ROS packages you can use with your robot andsimulation applications to easily access AWS. The extensions enable a number of exciting scenarios.For example you might capture video and other sensor data from your physical robot as it exploresthe environment. You might provide a voice for your robot and process voice commands. You mightrecognize faces and objects.
Available packages include the following.
• Amazon CloudWatch Metrics — Stream sensor data, performance metrics, and other informationfrom your robots. View data over time and set alarms to receive alerts if data reaches certainthresholds (like low battery).
• Amazon CloudWatch Logs — Stream logging data from your robot fleets to a central place for easyanalysis. Search data generated by hundreds of robots in one place.
• Amazon Kinesis Video Streams — Stream real-time video from your robot into AWS.
• Amazon Lex — Create a robot with engaging user experiences and lifelike conversation.
• Amazon Polly — Turn text into speech using lifelike voices in different languages.
To see these extensions in action, visit the AWS RoboMaker sample application page AWS RoboMakersample applications. You can quickly and easily launch and engage with different robot simulations.
PrerequisitesTo use the AWS RoboMaker cloud extensions, you must have:
• An AWS account. To sign up for an AWS account, see Step 1: Create an AWS Account and anAdministrator (p. 7).
• AWS credentials. These credentials are used to access AWS services.
• Configure IAM role permissions to allow AWS RoboMaker cloud extensions to use AWS services. Thepermissions needed are included in the README files included with each extension.
• ROS Kinetic Kame on Ubuntu 16.04. If you are using an AWS RoboMaker development environment, itis preconfigured for robotics development with ROS.
20

AWS RoboMaker Developer GuideInstalling AWS RoboMaker cloud extensions
Installing AWS RoboMaker cloud extensionsTo install the AWS RoboMaker cloud extensions, follow the instructions provided in the README file foreach package.
• Amazon Kinesis & Amazon Rekognition• Amazon Lex• Amazon Polly• Amazon CloudWatch Logs• Amazon CloudWatch Metrics
Developing with AWS Cloud9You can create an AWS Cloud9 development environment for AWS RoboMaker and roboticsdevelopment. The environment is preconfigured with ROS and integrated with other AWS RoboMakercapabilities. With it, you can manage build configurations, create simulation jobs, and explore runningsimulations with Gazebo, rviz, rqt and a terminal.
You access the AWS Cloud9 development environment through a web browser.
Topics• Creating a Development Environment (p. 21)• Working with the development environment (p. 22)• Deleting an Environment (p. 23)
Creating a Development EnvironmentIn this section, you create a development environment and access it from the browser.
NoteCompleting these procedures might result in charges to your AWS account. These includepossible charges for services such as Amazon EC2 and AWS RoboMaker. For more information,see Amazon EC2 Pricing, AWS RoboMaker Pricing, and Cloud Services Pricing.
To create a development environment
Follow these steps:
1. Sign in to the AWS RoboMaker console at https://us-west-2.console.aws.amazon.com/robomaker/home/.
2. In the left navigation pane, choose Development, and then choose IDEs.3. In the Create AWS RoboMaker development environment page, type a name for the environment.4. For Instance type, choose an instance type with the amount of RAM and vCPUs you think you need for
the kinds of tasks you want to do. Or leave the default choice.
NoteChoosing instance types with more RAM and vCPUs might result in additional charges to yourAWS account for Amazon EC2.
5. Optional: In Networking, if your development environment needs to access resources on an AmazonVPC, select the VPC and subnets.
6. Choose Submit to create the development environment. After you choose Submit, you are taken tothe Environment details page.
21

AWS RoboMaker Developer GuideWorking with the development environment
7. On the Environment details page, choose Open environment. It might take a few moments toprepare the environment.
You can list available development environments by choosing Development in the left navigation pane,then choosing Development environments.
Working with the development environmentThis section provides more information about AWS RoboMaker functionality in the AWS Cloud9development environment.
Topics• Menu Commands Reference (p. 22)
Menu Commands ReferenceThe following lists describe the default menu bar commands for AWS RoboMaker in the AWS Cloud9development environment. If the menu bar isn't visible, choose the thin bar along the top edge of thedevelopment environment to show it.
Topics• AWS RoboMaker Run (p. 22)• AWS RoboMaker Simulation (p. 22)
AWS RoboMaker Run
Command Description
Build Build selectedapplication or add/editbuild configurations.
Bundle Bundle selectedapplication or add/editbundle configurations.
Start simulation Start selectedsimulation or add/edit simulationconfigurations.
Workflow Run selected workflowor add/edit workflowconfigurations.
AWS RoboMaker Simulation
Command Description
Connect Connect to a runningsimulation job.
22

AWS RoboMaker Developer GuideDeleting an Environment
Command Description
Stop Stop the connectedrunning simulation job.
Restart Restart the connectedsimulation job. Onlyavailable if the currentworkflow contains asimulation step.
Restart with newselected bundle(s)
Restart simulation withnew bundles.
Restart with workflow Restart simulation withthe selected workflow.
Applications, Gazebo Launches Gazebo, atool for simulatingrobots in complexenvironments.
Applications, Rviz Launches rviz (ROSVisualizer), a tool forvisualizing sensor dataand state informationfrom ROS in 3D.
Applications, Rqt Launches rqt, a Qt-based framework andplugins for ROS GUIdevelopment.
Applications, Terminal Launches a terminalconnected to thesimulation host.
View Simulation jobdetails
Opens a new page withsimulation job details inthe RoboMaker console.
Switch simulation Connect to a differentrunning simulation.
Disconnect Disconnect from thesimulation.
Deleting an EnvironmentTo prevent any ongoing charges to your AWS account related to an AWS Cloud9 developmentenvironment that you're no longer using, you should delete the environment.
To delete an environment
Follow these steps:
1. Sign in to the AWS RoboMaker console at https://us-west-2.console.aws.amazon.com/robomaker/home/.
23

AWS RoboMaker Developer GuideDeleting an Environment
2. In the left navigation pane, choose Development, and then choose Development environments.3. Choose the environment you want to delete, then choose Edit.4. In the AWS Cloud9 Environment details page, choose Delete. Type in Delete and then choose Delete
to permanently delete the environment.
24

AWS RoboMaker Developer GuideCreating a Robot Application
Working with Robot ApplicationsAn AWS RoboMaker robot application includes one or more Amazon S3 locations with robot applicationbundles. The Amazon S3 resources include the ROS software suite used by the robot application.
Your robot application can be paired with a simulation application. This is called a simulation job. Youcan also deploy your application to physical robots.
Topics• Creating a Robot Application (p. 25)• Creating a Robot Application Version (p. 26)• Viewing a Robot Application (p. 26)• Updating a Robot Application (p. 27)• Deleting a Robot Application (p. 28)• Deleting a Robot Application Version (p. 28)
Creating a Robot ApplicationCreate a robot application to use in simulation applications. Deploy it to fleets of robots.
To create a robot application
Follow the steps under one of the following tabs.
NoteAmazon S3 objects must be located in the same region as AWS RoboMaker.
Using the console
1. Sign in to the AWS RoboMaker console at https://us-west-2.console.aws.amazon.com/robomaker/home/.
2. In the left pane, choose Development, and then choose Robot applications.3. Select Create robot application.4. In the Create robot application page, type a Name for the robot application. Choose a name that
helps you identify the robot.5. Select the Software suite used by your robot application.6. Select the Software suite version used by your robot application.7. Provide the Amazon S3 path to your bundled robot application file. If this robot application is
used only in simulations, specify a bundle built for the X86_64 platform. If you use this robotapplication in a fleet deployment, specify one or more bundles that represent the architectures ofthe robots in your fleet.
Optionally, choose Create new S3 folder to go to the Amazon Simple Storage Service AWSManagement Console to create and manage buckets.
8. Choose Submit.
Using the AWS CLI
25

AWS RoboMaker Developer GuideCreating a Robot Application Version
Example
Here's an example AWS CLI command that performs the equivalent of the console-based createrobot application on the other tab.
$ aws robomaker create-robot-application --name my-robot-application --robot-software-suite name=ROS,version=Kinetic --sources architecture=X86_64,s3Bucket=my-bucket,s3Key=my-folder/cloud-watch-robot.tar.gz
Creating a Robot Application VersionWhen you create a robot application, there is only one version—the $LATEST version. The $LATESTversion can be updated with new a new version of the application any time. If many people are makingchanges, or the robot application is updated frequently, you might not know all the details about the$LATEST version.
When you create a robot application version, you create an immutable snapshot of the $LATEST version.It cannot be updated, so it will not change even if the $LATEST version is updated. This is useful fordeployments, when you need to have the same version on all of the robots in a fleet.
You can use any version of a robot application when you create a simulation job. For deployments, youmust use a numbered version.
To create a robot application version
Follow the steps under one of these tabs.
Using the console
1. Sign in to the AWS RoboMaker console at https://us-west-2.console.aws.amazon.com/robomaker/home/.
2. In the left navigation pane, choose Development, and then choose Robot applications.
3. Choose the robot application name.
4. In the Robot applications details page, choose Create new version, and then choose Yes, create.
5. Choose Submit.
Using the AWS CLI
Example
Here's an example AWS CLI command that performs the equivalent of the console-based steps.
$ aws robomaker create-robot-application-version --name my-robot-application-arn
Viewing a Robot ApplicationView the details of your robot application including Amazon S3 location, version, and supportedarchitectures.
26

AWS RoboMaker Developer GuideUpdating a Robot Application
To see the details of a robot application
Follow the steps under one of these tabs.
Using the console
1. Sign in to the AWS RoboMaker console at https://us-west-2.console.aws.amazon.com/robomaker/home/.
2. In the left navigation pane, choose Development, then choose Robot applications.3. Choose the Name of a robot application.
Using the AWS CLI
Example
Here's an example AWS CLI command that performs the equivalent of the console-based steps.
$ aws robomaker describe-robot-application --application my-robot-application-arn
Updating a Robot ApplicationUpdate a robot application.
To update a robot application
Follow the steps under one of these tabs.
Using the console
1. Sign in to the AWS RoboMaker console at https://us-west-2.console.aws.amazon.com/robomaker/home/.
2. In the left navigation pane, choose Development, then choose Robot applications.3. Check the box next to the robot application you want to update.4. Choose Actions, then choose Update.5. Adjust the software suite and sources for your robot application. You can add or remove sources,
but you must have at least one source robot application file.6. Choose Submit to update the robot application.
Using the AWS CLI
Example
Here's an example AWS CLI command that performs the equivalent of the console-based steps.
$ aws robomaker update-robot-application ---application my-robot-application-arn --robot-software-suite name=ROS,version=Kinetic --sources architecture=X86_64,s3Bucket=my-bucket,s3Key=my-folder/cloud-watch-robot.tar.gz
27

AWS RoboMaker Developer GuideDeleting a Robot Application
Deleting a Robot ApplicationWhen you no longer need a AWS RoboMaker robot application and all of its versions, delete it.
To delete a robot application
Follow the steps under one of these tabs.
Using the console
1. Sign in to the AWS RoboMaker console at https://us-west-2.console.aws.amazon.com/robomaker/home/ .
2. In the left navigation pane, choose Development, then choose Robot applications.
3. Choose the Name of a robot application to see details including the time it was created and lastupdated.
Using the AWS CLI
Example
Here's an example AWS CLI command that performs the equivalent of the console-based steps.
$ aws robomaker delete-robot-application --application my-robot-application-arn
Deleting a Robot Application VersionDelete robot application versions you no longer need.
To delete a robot application version
Follow the steps under one of these tabs.
Using the console
1. Sign in to the AWS RoboMaker console at https://us-west-2.console.aws.amazon.com/robomaker/home/ .
2. In the left navigation pane, choose Development, then choose Robot applications.
3. Choose the Name of the robot application to see its versions.
4. In the robot detail page, choose the Version to see version details.
5. In the robot application version details page, choose Delete, and then choose Delete to confirm.
Using the AWS CLI
Example
Here's an example AWS CLI command that performs the equivalent of the console-based steps.
28

AWS RoboMaker Developer GuideDeleting a Robot Application Version
$ aws robomaker delete-robot-application--version --application my-robot-application-arn --version 1.5
29

AWS RoboMaker Developer GuideCreating a Simulation Application
Working with SimulationApplications
An AWS RoboMaker simulation application contains information about the simulation application. Itincludes the Amazon S3 location of a simulation application bundle for the X86_64 architecture, thename and version of the ROS software suite and rendering engine used.
When paired with a AWS RoboMaker robot application in a simulation job, you can interact with yourrobot using tools like Gazebo and develop simulation and test data.
Topics• Creating a Simulation Application (p. 30)• Creating a Robot Application Version (p. 31)• Viewing a Simulation Application (p. 32)• Updating a Simulation Application (p. 32)• Deleting a Simulation Application (p. 33)• Deleting a Simulation Application Version (p. 34)
Creating a Simulation ApplicationCreate a simulation application to use in simulation jobs.
To create a simulation application
Follow the steps under one of the following tabs:
NoteAmazon S3 objects must be located in the same region as AWS RoboMaker.
Using the console
1. Sign in to the AWS RoboMaker console at https://us-west-2.console.aws.amazon.com/robomaker/home/.
2. In the left navigation pane, choose Development, and then choose simulation applications.3. Type a name for the simulation application. Choose a name that helps you identify the robot.
For example, TurtleBot3 v2.4. Select the Software suite used by your simulation application.5. Select the Software suite version used by your simulation application.6. Select a Rendering engine name.7. Select a Rendering engine version.8. Provide the Amazon S3 path to your bundled robot application file built for the X86_64
platform.
Optionally, select Create new S3 folder to go to the Amazon Simple Storage Service AWSManagement Console to create and manage buckets.
30

AWS RoboMaker Developer GuideCreating a Robot Application Version
9. Select Submit.
Using the AWS CLI
You can use the following commands to create a simulation application:
• API/SDK: CreateSimulationApplication• AWS CLI: create-simulation-application
Example
Here's an example AWS CLI command that performs the equivalent of the console-based createsimulation application on the other tab.
$ aws robomaker create-simulation-application \--name HelloWorldSimulationApplication \--rendering-engine name=OGRE,version=1.x \--simulation-software-suite name=Gazebo,version=7 \--sources architecture=X86_64,s3Bucket=my-bucket-name,s3Key=my-key-name/hello-world-simulation.tar.gz
Creating a Robot Application VersionWhen you create a simulation application version, you create an immutable snapshot of the $LATESTversion. It cannot be updated, so it will not change even if the $LATEST version is updated.
To create a simulation application version
Follow the steps under one of the following tabs:
Using the console
1. Sign in to the AWS RoboMaker console at https://us-west-2.console.aws.amazon.com/robomaker/home/.
2. In the left navigation pane, choose Development, and then choose Simulation applications.3. Select the robot application name.4. In the Simulation applications details page, select Create new version, and then select Yes,
create.5. Select Submit.
Using the AWS CLI
Example
Here's an example AWS CLI command that performs the equivalent of the console-based createrobot application on the other tab.
$ aws robomaker create-simulation-application-version --name my-simulation-application-arn
31

AWS RoboMaker Developer GuideViewing a Simulation Application
Viewing a Simulation ApplicationView the details of a simulation application.
To see the details of a simulation application
Follow the steps under one of the following tabs:
Using the console
1. Sign in to the AWS RoboMaker console at https://us-west-2.console.aws.amazon.com/robomaker/home/.
2. In the left navigation pane, choose Development, then choose Simulation applications.3. Select the Name of a simulation application to see details including the time it was created and
last updated.
Using the AWS CLI
You can use the following commands to describe a simulation application:
• API/SDK: DescribeSimulationApplication• AWS CLI: describe-simulation-application
Example
Here's an example AWS CLI command that performs the equivalent of the console-based describesimulation application on the other tab.
$ aws robomaker describe-simulation-application \--job my-simulation-job-arn
Updating a Simulation ApplicationUpdate a simulation application.
To update a simulation application
Follow the steps under one of the following tabs:
Using the console
1. Sign in to the AWS RoboMaker console at https://us-west-2.console.aws.amazon.com/robomaker/home/.
2. In the left navigation pane, choose Development, then choose Simulation applications.3. Check the box next to the simulation application you want to update.4. Select Actions, then select Update.5. Adjust the software suite and sources for your simulation application. You can add or remove
sources, but you must have at least one source simulation application file.6. Select Submit to update the simulation application.
32

AWS RoboMaker Developer GuideDeleting a Simulation Application
Using the AWS CLI
You can use the following commands to update a simulation application:
• API/SDK: UpdateSimulationApplication• AWS CLI: update-simulation-application
Example
Here's an example AWS CLI command that performs the equivalent of the console-based updatesimulation application on the other tab.
$ aws robomaker update-simulation-application \--application my-robot-application-arn \--rendering-engine name=OGRE,version=1.x \--simulation-software-suite name=Gazebo,version=7 \--sources architecture=X86_64,s3Bucket=my-bucket-name,s3Key=my-key-name/hello-world-simulation.tar.gz
Deleting a Simulation ApplicationWhen you no longer need a AWS RoboMaker simulation application and all of its versions, you can deleteit.
To delete a simulation application
Follow the steps under one of the following tabs:
Using the console
1. Sign in to the AWS RoboMaker console at https://us-west-2.console.aws.amazon.com/robomaker/home/.
2. In the left navigation pane, choose Development, then choose Simulation applications.
3. Select the Name of a simulation application to see details including the time it was created andlast updated.
Using the AWS CLI
You can use the following commands to delete a simulation application:
• API/SDK: DeleteSimulationApplication• AWS CLI: delete-simulation-application
Example
Here's an example AWS CLI command that performs the equivalent of the console-based deletesimulation application on the other tab.
$ aws robomaker delete-simulation-application --application my-robot-application-arn
33

AWS RoboMaker Developer GuideDeleting a Simulation Application Version
Deleting a Simulation Application VersionYou can delete simulation application versions you no longer need.
To delete a simulation application version
Follow the steps under one of the following tabs:
Using the console
1. Sign in to the AWS RoboMaker console at https://us-west-2.console.aws.amazon.com/robomaker/home/.
2. In the left navigation pane, choose Development, then choose Simulation applications.3. Select the Name of the simulation application to see its versions.4. In the robot detail page, select the Version to see version details.5. In the simulation application version details page, select Delete, and then select Delete to
confirm.
Using the AWS CLI
You can use the following commands to delete a simulation application version:
• API/SDK: DeleteSimulationApplicationVersion• AWS CLI: delete-simulation-application-version
Example
Here's an example AWS CLI command that performs the equivalent of the console-based deletesimulation application on the other tab.
$ aws robomaker delete-simulation-application-version \--application my-robot-application-arn --version 1.5
34

AWS RoboMaker Developer GuideVPC Settings
Running Simulation JobsAn AWS RoboMaker simulation job is a pairing of a robot application and a simulation applicationrunning in the cloud. While the simulation job is running, you can interact with it using simulation toolslike Gazebo, rviz, rqt and a terminal to visualize sensor data or control components of the robot.
Topics• Configuring a AWS RoboMaker Simulation Job to Access Resources in an Amazon VPC (p. 35)• Accessing Simulation Job Data (p. 36)• Managing Simulation Jobs (p. 37)• Simulation Tools (p. 41)
Configuring a AWS RoboMaker Simulation Job toAccess Resources in an Amazon VPC
Typically, you create resources inside Amazon Virtual Private Cloud (Amazon VPC) so that they cannotbe accessed over the public Internet. These resources could be AWS service resources, such as AmazonRedshift data warehouses, Amazon ElastiCache clusters, or Amazon RDS instances. They could alsobe your own services running on your own EC2 instances. By default, resources within a VPC are notaccessible from within a AWS RoboMaker simulation job.
AWS RoboMaker runs your simulation job securely within a VPC by default. However, to enable your AWSRoboMaker simulation job to access resources inside your private VPC, you must provide additional VPC-specific configuration information that includes VPC subnet IDs and security group IDs. AWS RoboMakeruses this information to set up elastic network interfaces (ENIs) that enable your simulation job toconnect securely to other resources within your private VPC.
AWS RoboMaker does not support connecting to resources within Dedicated Tenancy VPCs. For moreinformation, see Dedicated VPCs.
Configuring a AWS RoboMaker Simulation Job forAmazon VPC AccessYou add VPC information to your AWS RoboMaker simulation job configuration using the VpcConfigparameter at the time you create a AWS RoboMaker simulation job (see CreateSimulationJob (p. 114)).The following is a AWS CLI example:
• The create-simulation-job CLI command specifies the --vpc-config parameter to provide VPCinformation at the time you create a AWS RoboMaker simulation job. In this example, a public IP isassigned.
$ aws robomaker create-simulation-job \--output-location s3Bucket=my-bucket,s3Prefix=my-output-folder \--max-job-duration-in-seconds 3600 \--iam-role my-role-arn \--failure-behavior Continue \--robot-applications application='my-robot-application-arn,launchConfig={packageName="hello_world_robot",launchFile="rotate.launch"}' \
35

AWS RoboMaker Developer GuideInternet Access for Simulation Jobs
--simulation-applications application='my-simulation-application-arn,launchConfig={packageName="hello_world_simulation",launchFile="empty_world.launch"}' \--vpc-config assignPublicIp=true,subnets=comma-separated-vpc-subnet-ids,securityGroups=comma-separated-security-group-ids
When a AWS RoboMaker simulation job is configured to run within a VPC, it incurs an additional ENIstart-up penalty. This means address resolution may be delayed when trying to connect to networkresources.
Internet Access for Simulation JobsAWS RoboMaker uses the VPC information you provide to set up ENIs that allow your AWS RoboMakersimulation job to access VPC resources. Each ENI is assigned a private IP address from the IP addressrange within the Subnets you specify, but is not assigned any public IP addresses by default.
If your AWS RoboMaker simulation job requires Internet access (for example, to access AWS servicesthat do not have VPC endpoints), you can configure a NAT instance inside your VPC or you can use theAmazon VPC NAT gateway, or you can request RoboMaker to assign a public IP. For more information,see NAT Gateways in the Amazon VPC User Guide. You cannot use an Internet gateway attached to yourVPC, since that requires the ENI to have public IP addresses.
To configure internet access when using public Subnets, set assignPublicIp=true to assign a publicIP to your ENI.
Accessing Simulation Job DataAWS RoboMaker can capture the following information from a running simulation job:
• Information written to standard output and standard error streams. This information is collected inAmazon CloudWatch Logs.
• CloudWatch metric RealTimeFactor. It is the ratio of the amount of time that was simulated versuswall clock time. If it takes an hour to simulate 30 minutes, the factor is .5. More complex simulationshave a lower real time factor.
• Gazebo log data including the state of models, links and joints. Gazebo log data is written to thegazebo-logs folder if an Amazon Simple Storage Service bucket was specified when the simulationjob was created.
• ROS bag files containing timestamped ROS messages. ROS bag files are written are written to theros-bag folder if an Amazon Simple Storage Service bucket was specified when the simulation jobwas created.
Standard output and standard error information is written to Amazon CloudWatch while the simulationjob is running. Gazebo logs and ROS bag files are available soon after the simulation job completes.
To access logs, metrics and optional output Amazon S3 bucket
1. In the AWS RoboMaker console, choose Simulation jobs on the left and then select the simulationjob.
2. In the Simulation details page, select the Configuration tab.
3. To see ROS bags, ROS logs and Gazebo logs, select the Amazon S3 location under Simulation joboutput destination to view the Amazon S3 bucket, then select the folder beginning with sim, andthen select the folder. If there are more than one, select by date and time.
36

AWS RoboMaker Developer GuideManaging Simulation Jobs
The folder includes gazebo-logs, ros-bags, and ros-logs.4. To see standard error, standard output, and other information in CloudWatch Logs, select Logs, and
then choose a simulation applicatoion or robot application log to view.5. To see CloudWatch metrics, select Metrics, and then select a metric. For example, select
RealTimeFactor.
Access CloudWatch Logs, metrics, and simulation output Amazon S3 bucket from the Simulation jobdetails page in the AWS RoboMaker console.
Managing Simulation JobsIn this section, learn how to create and manage simulation jobs.
Topics• Creating a Simulation Job (p. 37)• Viewing a Simulation Job (p. 39)• Cancelling a Simulation Job (p. 39)• Cloning a Simulation Job (p. 40)• Restarting a Simulation Job (p. 40)
Creating a Simulation JobYou will create a simulation job when you want to run your robot application in the simulation youcreated. Once running, you can interact with the simulation. For example, you can use rviz to see imagesfrom visual sensors on your robot.
To create a simulation job
Follow the steps under one of the following tabs:
NoteIf you are using an existing Amazon S3 bucket or creating a new bucket, it must be located inthe same region as AWS RoboMaker.
Using the console
1. Sign in to the AWS RoboMaker console at https://us-west-2.console.aws.amazon.com/robomaker/home/.
2. In the left navigation pane, choose Simulations, and then choose Simulation jobs.3. Choose Create simulation job.4. On the Simulation configuration page, select a simulation job duration. Select any value
between 1 second and 14 days.
ImportantTo learn more about how you are charged for AWS RoboMaker see AWS RoboMakerPricing.
5. Select a Failure behavior. Choose fail to terminate the host instance if the simulation job fails.Choose continue to keep the host instance so you can connect and investigate.
If you specify an optional S3 folder below, it will contain simulation data. It is availableindependent of the selected failure behavior.
37

AWS RoboMaker Developer GuideCreating a Simulation Job
6. For IAM Role, select a role or select Create new role to create one. AWS RoboMaker will usethis role to access resources on your behalf. It is also used by your application to access AWSresources like Amazon Rekognition or Amazon Lex.
7. Optional: In Simulation configuration, type in a Amazon S3 folder name where simulationjob output will be stored. Optionally, select Create new S3 folder to create a new Amazon S3folder.
8. Optional: In Networking, if your robot application or simulation application access resourceson an Amazon VPC, select the VPC, subnets and security groups. If you want to access thesimulation job from outside of the VPC, select Assign public IP.
9. Choose Next.
10. On the Specify robot application page, under Robot application, select Create newapplication. Optionally, you can select Choose existing application to use a robot applicationthat you have already created.
11. Type a name for the robot application.
12. Select the ROS Software suite name and Software suite version used by your robotapplication.
13. Under Sources, specify the Amazon S3 location for the X86_64 robot application source. AWSRoboMaker simulation jobs require an X86_64 source to run the simulation.
Optionally, if you plan on deploying the robot application to robots in a fleet, you can provideARMHF and ARM64 robot application source files. You can also update the robot application toinclude additional source files. For more information, see Updating a Robot Application (p. 27).
14. In Robot application configuration, provide the roslaunch Launch package name for yourrobot application.
15. Specify the roslaunch Launch file. A launch file contains configuration information about whichnodes to start up as well as other initialization parameters for roslaunch.
To learn more about roslaunch, see roslaunch.
16. Optional: If your robot application uses environment variables, specify the Name and Valuepairs. Select Add environment variable to add additional variables.
You can read environment variables in a launch file using roslaunch substituion args.
17. Choose Next.
18. On the Specify simulation application page, select Create new application. Optionally, youcan select Choose existing application use a simulation application that you have alreadycreated.
19. Type a name for the simulation application.
20. Select the Software suite name and Software suite version used by your simulationapplication.
21. Select the Render engine and Render engine version used by your simulation application.
22. Select S3, and then specify the path to your simulation application.
23. In Simulation application configuration, provide the roslaunch Launch package name and theroslaunch Launch file for your simulation application.
24. Optional: If your simulation application uses environment variables, specify the Name and Valuepairs. Select Add environment variable to add additional variables.
25. Choose Next.
26. Select Submit to create the simulation job.
Using the AWS CLI
38

AWS RoboMaker Developer GuideViewing a Simulation Job
Example
Here's an example AWS CLI command that performs the equivalent of the console-based simulationjob creation on the other tab.
$ aws robomaker create-simulation-job \--output-location s3Bucket=my-bucket,s3Prefix=my-output-folder \--max-job-duration-in-seconds 3600 \--iam-role my-role-arn \--failure-behavior Continue \--robot-applications application='my-robot-application-arn,launchConfig={packageName="hello_world_robot",launchFile="rotate.launch"}' \--simulation-applications application='my-simulation-application-arn,launchConfig={packageName="hello_world_simulation",launchFile="empty_world.launch"}'
Describe which parameters are not required (if any) and any other anomolies or insights for the AWSCLI.
Viewing a Simulation JobYou can view information about a simulation job and, if the job is running, launch Gazebo, rviz, rqt, or aterminal to interact with the simulation.
To see the details of a simulation job
Follow the steps under one of the following tabs:
Using the console
1. Sign in to the AWS RoboMaker console at https://us-west-2.console.aws.amazon.com/robomaker/home/.
2. In the left navigation pane, choose Simulations, then choose Simulation jobs.3. Select the Id of a simulation job to view its details including the time it was created and launch
commands for the robot application and simulation application.
Using the AWS CLI
Example
Here's an example AWS CLI command that performs the equivalent of the console-based viewsimulation job on the other tab.
$ aws robomaker list-simulation-jobs$ aws robomaker describe-simulation-job --job my-simulation-job-arn
Cancelling a Simulation JobA simulation job can be cancelled if it is running and no longer needed.
To cancel a simulation job
Follow the steps under one of the following tabs:
39

AWS RoboMaker Developer GuideCloning a Simulation Job
Using the console
1. Sign in to the AWS RoboMaker console at https://us-west-2.console.aws.amazon.com/robomaker/home/.
2. In the left navigation pane, choose Simulations, then choose Simulation jobs.3. Select the Id of the simulation job you want to cancel.4. In the Simulation job detail page, under Actions, choose Cancel.5. In the Cancel simulation job page, select Yes, cancel.
Using the AWS CLI
Example
Here's an example AWS CLI command that performs the equivalent of the console-based viewsimulation job on the other tab.
$ aws robomaker list-simulation-jobs$ aws robomaker cancel-simulation-job --job my-simulation-job-arn
Cloning a Simulation JobYou can create a new simulation job from an existing simulation job by cloning it from the Simulationjob detail page.
1. Sign in to the AWS RoboMaker console at https://us-west-2.console.aws.amazon.com/robomaker/home/.
2. In the left navigation pane, choose Simulations, then choose Simulation jobs.3. Select the Id of a running simulation job you would like to restart.4. In the Simulation job detail page, under Actions, choose Clone.5. In the Review and create simulation job, select Edit to make changes and then select Create.
Restarting a Simulation JobRunning simulation jobs can be restarted. When restarted, the simulation job will use the robotapplication and simulation application source files in the Amazon S3 location and all other configurationsettings specified when the simulation job was created.
To restart a simulation job
Follow the steps under one of the following tabs:
Using the console
1. Sign in to the AWS RoboMaker console at https://us-west-2.console.aws.amazon.com/robomaker/home/.
2. In the left navigation pane, choose Simulations, then choose Simulation jobs.3. Select the Id of a running simulation job you would like to restart.4. In the Simulation job detail page, under Actions, choose Restart.5. In the Restart simulation job page, select Yes, restart.
40

AWS RoboMaker Developer GuideSimulation Tools
Using the AWS CLI
Example
Here's an example AWS CLI command that performs the equivalent of the console-based restartsimulation job on the other tab. The simulation job must be running.
$ aws robomaker restart-simulation-job --job my-simulation-job-arn
Simulation ToolsAWS RoboMaker provides Gazebo, rqt, rviz and terminal access to interact with running simulation jobs.
Common tasks include:
• Pause a Running Simulation (p. 41)
• View Node Graph (p. 43)
• View Robot Sensor Data (p. 44)
• Inspect ROS Topics and Messages (p. 45)
Topics• Gazebo (p. 41)
• rqt (p. 43)
• rviz (p. 44)
• Terminal (p. 44)
GazeboGazebo lets you build 3D worlds with robots, terrain, and other objects. It also has has a physic enginefor modeling illumination, gravity, and other forces. Robotics developers use Gazebo to evaluate and testrobots in different scenarios, often times more quickly than using physical robots and scenarios. Gazeboalso makes it easier to test other aspects of your robot like error handling, battery life, navigation, andmachine learning algorithms.
To perform the tasks below, Gazebo must be open and connected to a running simulation job. You canopen Gazebo from the Simulation jobs detail page of a running simulation job.
Topics• Pause a Running Simulation (p. 41)
• View Robot and Objects in the Simulation (p. 42)
• Add and Move Objects in the Simulation (p. 42)
• Apply Forces to Robots and Objects (p. 42)
Pause a Running SimulationYou can pause a running simulation in Gazebo by selecting the pause icon. It is located under therendering of the world on the left.
41

AWS RoboMaker Developer GuideGazebo
When a running simulation is paused, it is paused in other simulation tools like rqt and rviz. This is usefulfor investigating simulation data at a moment in time. For example, using rqt to examine image datafrom a video camera mounted on a robot.
View Robot and Objects in the Simulation
When you open Gazebo, it presents a view of the simulated world. The initial perspective is configured bythe simulation application developer.
1. In Gazebo, use the mouse or keyboard to explore the world. Zoom in, pan out, and move the worldaround.
2. Switch to an orthographic (or perspective) camera angle. In the menu, select Camera and thenchoose Orthographic (or Perspective). Reset the camera by choosing Reset View Angle.
3. Select an alternate view to see objects differently. For example, select View and then chooseWireframe to see the world rendered as a wireframe.
4. It is easy to reset the world to its original configuration. Select Edit and then choose Reset World.Select Reset Model Poses to revert changes to model poses.
Add and Move Objects in the Simulation
Gazebo includes a collection of models that can be used to create an environment. Objects can be placedin the environment, moved, and posed to meet the needs of the scenario.
1. In Gazebo, on the left, select the Insert tab.
2. In the Insert tab, choose Bookshelf, then move the cursor to the room. As you move into the room,you will see the bookshelf model. Click the left mouse button to place it in the room.
3. Move the bookshelf by selecting Translation mode. Choose the multi-arrow plus icon in the menuor use the keyboard shortcut Control-T. Select the bookshelf, then move it to a new location andclick the mouse button.
4. Press Escape to exit Translation mode. Select the bookshelf and then in the World tab, expandPose to see different pose settings. Select a value and then change one increment at a time usingthe up and down selectors. Gazebo updates the world after each click.
Apply Forces to Robots and Objects
Things do not always go as planned in the physical world. A robot might be subjected to unexpectedforces and distrurbances during operation. Objects might tumble, spin, and interact with neighborhingobjects or the robot itself. Using Gazebo, you can create disturbances by applying force and/or torque tomodels during simulation.
This example uses the Navigation and Person Recognition (p. 13) sample. For more information, see AWSRoboMaker sample applications. The principles apply to robots and objects that are not static. Entitiesmarked as static only have collision geometry.
1. In Gazebo, verify the simulation is running. The simulation must be running to see how an objectresponds to force and torque.
2. In the World tab on the left, expand turtlebot3_waffle_pi. Right click wheel_left_link and thenchoose Apply Force/Torque.
3. Under Force, specify an X value of 1000. Use the mouse or keyboard to move the underlying view sothe robot is in view, then choose Apply Force. The robot will will mostly rotate counter-clockwise.
Select Clear and then choose Apply Force to remove the force.
42

AWS RoboMaker Developer Guiderqt
4. Now apply enough torque on the Y-axis to tumble the robot upsidedown. Under Torque, specifya Y value of 400. Make sure the robot is in view, then choose Apply Torque. The robot will flipupdsidedown. Choose Apply Torque and it will tumble upright.
Select Clear and then choose Apply Torque to remove the torque. Select Cancel to close the dialogbox.
5. No try applying force to an object. In the World tab on the left, right click ChairA_01_001 and thenchoose Apply Force. Use the mouse or keyboard to make sure the chair is in view.
6. Under Force, specify an Z value of 50000, then choose Apply Force. The chair will launch off theground and then return to rest.
Select Clear and then choose Apply Force to remove the force. Select Cancel to close the dialog box.
rqtrqt hosts a number of different plugins for visualizing ROS information. Multiple plugins can bedisplayed on a custom dashboard, providing a unique view of your robot. rqt includes many usefulplugins and provides a framework to write custom plugins.
To perform the tasks below, rqt must be open and connected to a running simulation job. You can openrqt from the Simulation jobs detail page of a running simulation job.
Topics
• View Image Data from Robot (p. 43)
• View Node Graph (p. 43)
• View Currently Advertised Topics (p. 44)
View Image Data from Robotrqt provides a plugin to help visualize image data from a robot. The image data is updated as the robotmoves in the simulated world.
1. In rqt, choose Plugins, Visualization, Image View.
2. In the Image View view, choose /camera/rgb/image_raw from the dropdown. You can save animage by choosing the Save as image icon on the right. To pause the simulation, see Pause aRunning Simulation (p. 41).
View Node GraphThe node graph is a visual representation of all of the ROS nodes and topics in your application.Directional arrows indicate which nodes (ovals) are advertising or subscribing to a topic (squares). Youcan filter the graph to show all topics, active topics, or nodes only. There are also options to hide ordisplay group, topic and node inforamtion.
The graph node view is helpful for verifying which nodes are running and to confirm that nodes andtopics are connected as expected.
To view the node graph
1. In rqt, select Plugins, then select Introspection, and then choose Node Graph.
2. Use the mouse or keyboard to zoom in on the graph. Select a node or a topic to see subscriptions(purple arrows) and advertisements (green arrows).
43

AWS RoboMaker Developer Guiderviz
3. The filter defaults to Nodes only. Choose Nodes/Topics (all) to see all of the nodes and topics.Toggle checkboxes to display additional information such as unreachable nodes or dead sinks.
View Currently Advertised TopicsThe Topic Monitor plugin makes it easy to view information about ROS topics including publishers,subscribers and publishing rate, and ROS messages. It is also helpful for validating message data,identifying nodes that are not publishing messages, and look for bandwidth issues.
To monitor topics
1. In rqt, select Plugins, then select Topics, and then choose Topic Monitor.2. Use the mouse or keyboard to scroll the list of currently advertised topics. Expand a topic to see
message details.3. Select the checkbox to the left of the expanded topic to subscribe to its messages. As new message
arrive, messages data, message bandwidth, and publication frequency are updated.
rvizrviz is a 3d visualization tool for ROS applications. It provides a view of your robot model, capture sensorinformation from robot sensors, and replay captured data. It can display data from camera, lasers, from3D and 2D devices including pictures and point clouds.
To perform the tasks below, rviz must be open and connected to a running simulation job. You can openrviz from the Simulation jobs detail page of a running simulation job.
Topics• View Robot Sensor Data (p. 44)
View Robot Sensor DataRobots typically have sensors to gather data from the world. For example, a robot might use a sensorto detect a collision with an object or a laser scanner to learn about objects in the surroundingenvironment.
1. In rviz, select File and then choose Open Config. In the dialog box, navigate to robomaker/workspace/simulation-application/bundle/opt/ros/kinetic/share/turtlebot3_description/rviz. Select model.rviz and then choose Open. If prompted aboutunsaved changed, select Discard.
2. In the Image View view, choose /camera/rgb/image_raw from the dropdown. You can save animage by choosing the Save as image icon on the right. To pause the simulation, see Pause aRunning Simulation (p. 41).
3. In the display, laser scan data appears as red dots. Walls and other objects can be identified by linesof red dots centered on the robot.
4. Open Gazebo. Compare the location and orientation of the robot in Gazebo to what the laser scandetects.
5. In Gazebo, drop a sphere next to the robot. In rviz, the laser scan detects part of the object.
TerminalThe Terminal provides access to a command-line on the simulation job host.
44

AWS RoboMaker Developer GuideTerminal
To perform the tasks below, the Terminal must be open and connected to a running simulation job. Youcan open the Terminal from the Simulation jobs detail page of a running simulation job.
Topics• Inspect ROS Topics and Messages (p. 45)• Inspect ROS Nodes and Services (p. 45)• View Log Files in Real Time (p. 45)
Inspect ROS Topics and MessagesUse rostopic to display information about ROS topics. For more information about rostopic, seehttp://wiki.ros.org/rostopic.
1. In terminal, type in the following commands to set up the ROS environment:
BUNDLE_CURRENT_PREFIX=~/workspace/robot-application/bundle source ~/workspace/robot-application/bundle/setup.sh
2. Type the following command to see a list of available topics:
rostopic list
3. Use the following command to view messages associated with a listed topic:
rostopic echo /topic_name
Inspect ROS Nodes and ServicesUse rosnode to display information about ROS nodes and services. For more information aboutrosnode, see http://wiki.ros.org/rosnode.
1. In terminal, type in the following commands to set up the ROS environment:
BUNDLE_CURRENT_PREFIX=~/workspace/robot-application/bundle source ~/workspace/robot-application/bundle/setup.sh
2. Type the following command to see a list of available topics:
rosnode list
3. Use the following command to view messages associated with a listed topic:
rostopic info /node_name
View Log Files in Real TimeLog files are written to tmp/robot-logs/stdout_and_stderror and tmp/simulation-logs/stdout_and_stderror. For example, to view the last part of the robot application log, use thefollowing command:
tail -f /tmp/robot-logs/stdout_and_stderror
45

AWS RoboMaker Developer GuideDeploying a Robot Application
Fleet ManagementThis section contains information on working with robots, fleets, and deployments.
Topics• Deploying a Robot Application (p. 46)• Managing Robots (p. 46)• Managing Fleets (p. 49)• Managing Deployments (p. 51)
Deploying a Robot ApplicationTo deploy a robot application to a physical robot, the physical robot must be configured to receivedeployments and belong to a fleet. At a minimum, to deploy, do this:
1. Create a robot application with sources for the architectures of your robots. Supported architecturesare X86_64, ARM64 and ARMHF.
2. Create the robot in AWS RoboMaker and configure it with AWS IoT Greengrass so it can receivedeployments. If your robot application uses AWS RoboMaker cloud extensions, then grant permissionsto access the underlying services.
3. Register the robot in a fleet. A fleet is logical grouping of robots with shared functionality defined bythe robot application.
4. Create a deployment to install the robot application to the fleet. Pick the robot application version,customize the launch configuration (including pre- and post-launch actions), and specify how therobot application is deployed.
5. Monitor the deployment. You can track the progress of your deployment and other information indeployment details. Customize your robot application to provide additional information by usingAWS RoboMaker cloud extensions.
You can learn how to do these steps in Getting Started with AWS RoboMaker (p. 6).
Managing RobotsIn this section, you learn how to create and delete robots.
Topics• Creating a Robot (p. 46)• Deleting a Robot (p. 48)
Creating a RobotBefore you can deploy a robot application, you must configure your robot hardware. When you createa robot, you select the hardware architecture and an IAM role for AWS IoT Greengrass. After the robotis created, download the AWS IoT Greengrass core and security resources, then configure your robothardware.
46

AWS RoboMaker Developer GuideCreating a Robot
Topics• Create deployment role (p. 47)• Create a robot (p. 48)
Create deployment roleBefore you create a robot, create an IAM role for robot application deployment. The role will also be usedby AWS RoboMaker to access resources like Amazon S3 (where your robot application is placed prior todeployment) and by your robot application to access resources it consumes like Amazon Lex or AmazonRekognition.
If you have already created these roles, you can skip to Create a robot (p. 48).
To create the AWS IoT Greengrass role
1. Sign in to the AWS Management Console and open the AWS Identity and Access Managementconsole at console.aws.amazon.com/iam.
2. Create the access policy. On the left, choose Policies, then choose Create policy. Choose JSON andpaste the code below:
{ "Version": "2012-10-17", "Statement": [ { "Effect": "Allow", "Action": [ "robomaker:UpdateRobotDeployment" ], "Resource": "*" }, { "Effect": "Allow", "Action": [ "s3:List*", "s3:Get*" ], "Resource": ["arn:aws:s3:::my-robot-application-source-bucket/*"] } ]}
Choose Review policy, type in a Name, and then choose Create policy.3. Choose Roles and then choose Create role.4. In the Create role: Step 1 page, choose Greengrass and then choose Next: Permissions.5. In the Permissions page, select the policy you created above, then choose Next: Tags.6. In the Add tags page, add optional tags to the role, then choose Next: Review.7. In the Review page, type in a Role name and then choose Create role.8. Next, update the trust policy to include AWS Lambda. Select the new role, then select the Trust
relationships tab.9. In the Trust relationship tab, select Edit trust relationship.10. Update the trust relationship with the following policy document:
{ "Version": "2012-10-17", "Statement": [ {
47

AWS RoboMaker Developer GuideDeleting a Robot
"Effect": "Allow", "Principal": { "Service": [ "lambda.amazonaws.com", "greengrass.amazonaws.com" ] }, "Action": "sts:AssumeRole" } ]}
11. Select Update Trust Policy.
Create a robot
To create a robot:
1. Sign in to the AWS RoboMaker console at https://us-west-2.console.aws.amazon.com/robomaker/home/.
2. In the left navigation pane, choose Fleet Management, and then choose Robots.3. Choose Create robot.4. In the Create robot page, type a name for the robot.5. Select the Architecture of the robot.6. Under AWS IoT Greengrass group defaults, select a Create new to create a new AWS IoT
Greengrass group for the robot. Optionally, you can select an existing AWS IoT Greengrass group.Each robot must have its own AWS IoT Greengrass group.
If you use an existing AWS IoT Greengrass group, it must have an IAM role associated with it. Tocreate the role, see Create deployment role (p. 47).
7. Optionally, modify the Greengrass prefix. This string is prepended to AWS IoT Greengrass objectscreated on your behalf.
8. Select a IAM role to assign to the AWS IoT Greengrass group created for the robot. It grantspermissions for AWS IoT Greengrass to access your robot application in Amazon S3 and read updatestatus from AWS RoboMaker.
9. Choose Submit.10. In the Download your Core device page, choose Download to download and store your robot's
security resources.11. Download the AWS IoT Greengrass core software matching the architecture of your physical
robot. To configure and run the AWS IoT Greengrass core software, follow the steps in Module 1:Environment Setup for Greengrass, then follow the steps in Start AWS Greengrass on the CoreDevice. Use the following command to unzip your security resources:
$ sudo unzip RobotName-setup.zip -d /greengrass
Deleting a RobotWhen you no longer need a robot, you can delete it. You can delete a robot that is unregistered orregistered as part of a fleet, even if there is an active deployment to the fleet.
The AWS IoT Greengrass group and other assets created for the robot by AWS RoboMaker are notdeleted. You can create a new robot and reuse the group. To delete AWS IoT Greengrass resources, usethe https://console.aws.amazon.com/iot/.
48

AWS RoboMaker Developer GuideManaging Fleets
To delete a robot
Follow the steps under one of the following tabs:
Using the console
1. Sign in to the AWS RoboMaker console at https://us-west-2.console.aws.amazon.com/robomaker/home/.
2. In the left navigation pane, choose Fleet Management, and then choose Robots.3. Select the robot you want to delete, then choose Delete.
NoteTo delete the underlying AWS IoT Greengrass group and resources, use the https://console.aws.amazon.com/iot/.
Using the AWS CLI
Example
Here's an example AWS CLI command that performs the equivalent of the console-based deleterobot on the other tab.
NoteTo delete the underlying AWS IoT Greengrass group and resources, use the https://console.aws.amazon.com/iot/.
$ aws robomaker delete-robot --robot my-robot-application-arn
Managing FleetsA fleet is a group of robots. When you are ready to deploy a robot application to your robots, they mustbe part of a fleet.
Topics• Creating a Fleet (p. 49)• Registering and Deregistering Robots (p. 50)• Deleting a Fleet (p. 51)
Creating a FleetTo create a fleet, follow the steps under one of the following tabs:
Using the console
1. Sign in to the AWS RoboMaker console at https://us-west-2.console.aws.amazon.com/robomaker/home/.
2. In the left navigation pane, choose Fleet Management, and then choose fleets.3. Select Create fleet.4. In the Create fleet page, type a name for the fleet and then select Create fleet.
49

AWS RoboMaker Developer GuideRegistering and Deregistering Robots
Using the AWS CLI
Example
Here's an example AWS CLI command that performs the equivalent of the console-based fleetcreation on the other tab.
$ aws robomaker create-fleet --name my-fleet
Registering and Deregistering RobotsYou can register (add) and deregister (remove) robots from fleets. This is useful if you want to remove arobot from a fleet for maintenance or move a robot from one fleet to another fleet.
You can register a robot to a single fleet only.
Register a robotTo register a robot to a fleet, follow the steps under one of the following tabs:
Using the console
1. Sign in to the AWS RoboMaker console at https://us-west-2.console.aws.amazon.com/robomaker/home/.
2. In the left navigation pane, choose Fleet Management, and then choose Fleets.
3. Select the Name of the fleet you want to modify.
4. Select the Name of the fleet you want to modify.
5. In the Fleet details page, select Register.
6. In the Register robots page, select the robot you want to register, then select Register robots.
Using the AWS CLI
Example
Here's an example AWS CLI command that performs the equivalent of the console-based robotregistration on the other tab.
$ aws robomaker register-robot --fleet my-fleet-arn --robot my-robot-arn
Deregister a robotTo deregister a robot, follow the steps under one of the following tabs:
Using the console
1. Sign in to the AWS RoboMaker console at https://us-west-2.console.aws.amazon.com/robomaker/home/.
50

AWS RoboMaker Developer GuideDeleting a Fleet
2. In the left navigation pane, choose Fleet Management, and then choose Fleets.3. Select the Name of the fleet you want to modify.4. In the Fleet details page, select the robot you want to deregister, then select Deregister.
Using the AWS CLI
Example
Here's an example AWS CLI command that performs the equivalent of the console-based robotderegistration on the other tab.
$ aws robomaker deregister-robot --fleet my-fleet-arn --robot my-robot-arn
Deleting a FleetWhen you no longer need a fleet, you can delete it. When you do this, robots registered to the fleet arederegistered.
To delete a fleet
Follow these steps under one of the following tabs:
Using the console
1. Sign in to the AWS RoboMaker console at https://us-west-2.console.aws.amazon.com/robomaker/home/.
2. In the left navigation pane, choose Fleet Management, and then choose Fleets.3. Select the fleet you want to delete, then select Delete.
Using the AWS CLI
Example
Here's an example AWS CLI command that performs the equivalent of the console-based fleetdeletion on the other tab.
$ aws robomaker delete-fleet --fleet my-fleet-arn
Managing DeploymentsIn AWS RoboMaker, a robot application is delivered and installed onto a physical robot using adeployment job. The robot application must be built for the platform supported by the robot (forexample, ARMHF).
Topics• Creating a deployment job (p. 52)• Viewing a Deployment Job (p. 53)
51

AWS RoboMaker Developer GuideCreating a deployment job
Creating a deployment jobCreate a deployment job to install a unique version of a robot application on robots in a fleet. You candefine custom environment variables and run a script before and after your application launches on therobot to perform additional configuration.
Create a deployment jobUsing the console
To create a deployment job:
1. Sign in to the AWS RoboMaker console at https://us-west-2.console.aws.amazon.com/robomaker/home/.
2. In the left navigation pane, choose Fleet Management, and then choose Deployments.
3. Click Create deployment.
4. In the Create deployment page, under Configuration, select a Fleet.
5. Select a Robot application.
6. Select the Robot application version to deploy. The robot application must have a numberedapplicationVersion for consistency reasons. If there are no versions listed, or to create anew version, see Creating a Robot Application Version (p. 26).
7. Under Deployment launch config, specify the Package name.
8. Specify the Launch file.
9. Optionally, specify the Prelaunch file for your application. The file and its dependencies mustbe part of the package.
10. Optionally, specify the Postlaunch file for your application. The file and its dependencies mustbe part of the package.
11. Optionally, under Environment variables, type in an environment Name and Value. Select Addenvironment variable to create additional environment variables.
12. Under Deployment config, specify a Concurrent deployment percentage. AWS RoboMaker willdeploy the robot application concurrently to a percentage of the fleet. If you have 200 robots inthe fleet and choose 10%, deployment will be attempted on 20 robots simultaneously.
13. Specify a Failure threshold percentage. Deployment will halt if this percentage of your fleetexperiences deployment failure.
WarningSpecify a failure threshold percentage larger than concurrent deployment percentageto ensure deployment halts at the threshold. If the value is smaller, the threshold canbe exceeded up to the concurrent deployment percentage.
14. Click Submit to create the deployment job.
Using the AWS CLI
Example
Here's an example AWS CLI command to create a deployment job.
$ aws robomaker create-deployment-job --fleet=my-fleet-arn --deployment-application-configs application=my-robotarn,applicationVersion="$LATEST",launchConfig={packageName="cloudwatch_robot",launchFile="cloudwatch_deploy.launch"}
52

AWS RoboMaker Developer GuideViewing a Deployment Job
--deployment-config concurrentDeploymentPercentage="100",failureThresholdPercentage="100"
Viewing a Deployment JobOnce a deployment job is created, you can view its details and track the deployment status.
To see the details of a deployment job
Follow the steps under one of the following tabs:
Using the console
1. Sign in to the AWS RoboMaker console at https://us-west-2.console.aws.amazon.com/robomaker/home/.
2. In the left navigation pane, choose Fleet management, then choose Deployments.3. Click on the Id of a deployment job to see details about the job including the time it was created
and robot application version, deployment status, and the status of each robot in the fleet.
Using the AWS CLI
Example
Here's an example AWS CLI command that performs the equivalent of the console-based viewdeployment job on the other tab.
$ aws robomaker list-deployment-jobs$ aws robomaker describe-deployment-job --job my-deployment-job-arn
53

AWS RoboMaker Developer GuideAuthentication and Access Control
SecurityThis section provides guidelines for securing different aspects of AWS RoboMaker.
Topics
• Authentication and Access Control for AWS RoboMaker (p. 54)
• Security Compliance (p. 73)
Authentication and Access Control for AWSRoboMaker
AWS Identity and Access Management (IAM) is an AWS service that helps an administrator securelycontrol access to AWS RoboMaker resources. Administrators use IAM to control who is authenticated(signed in) and authorized (has permissions) to use AWS RoboMaker resources. IAM is a feature of yourAWS account offered at no additional charge.
ImportantTo get started quickly, review the introductory information on this page and then see GettingStarted with IAM (p. 66). You can optionally learn more about authentication and accesscontrol by viewing What is Authentication? (p. 58), What is Access Control? (p. 59), andWhat are Policies? (p. 62).
Topics
• Introduction to Authorization and Access Control (p. 54)
• Permissions Required (p. 55)
• Understanding How AWS RoboMaker Works with IAM (p. 57)
• Troubleshooting Authentication and Access Control (p. 57)
Introduction to Authorization and Access ControlAuthentication – To sign in to AWS, you must use IAM user credentials, temporary credentials usingIAM roles, or root user credentials (not recommended). To learn more about these entities, see What isAuthentication? (p. 58).
Access Control – AWS administrators use policies to control access to AWS resources, such as the AWSRoboMaker robot application. To learn more, see What is Access Control? (p. 59) and What arePolicies? (p. 62).
ImportantAll resources in an account are owned by the account, regardless of who created those resources.You must be granted access to create a resource. However, just because you created a resourcedoes not mean that you automatically have full access to that resource. An administrator mustexplicitly grant permissions for each action that you want to perform. That administrator canalso revoke your permissions at any time.
To help you understand the basics of how IAM works, review the following terms:
54

AWS RoboMaker Developer GuidePermissions Required
• Resources – AWS services, such as AWS RoboMaker and IAM, are made up of objects called resources.You can create, manage, and delete these resources from the service. IAM resources include users,groups, roles, and policies.• Users – An IAM user represents the person or application who uses its credentials to interact with
AWS. A user consists of a name, a password to sign into the AWS Management Console, and up totwo access keys that can be used with the AWS CLI or AWS API.
• Groups – An IAM group is a collection of IAM users. You can use groups to specify permissions for itsmember users. This makes it easier for you to manage permissions for multiple users.
• Roles – An IAM role does not have any long-term credentials (password or access keys) associatedwith it. A role can be assumed by anyone who needs it and has permissions. An IAM user can assumea role to temporarily take on different permissions for a specific task. Federated users can assumea role by using an external identity provider that is mapped to the role. Some AWS services canassume a service role to access AWS resources on your behalf.
• Policies – Policies are JSON policy documents that define the permissions for the object to whichthey are attached. AWS supports identity-based policies that you attach to identities (users, groups,or roles). Some AWS services allow you to attach resource-based policies to resources to controlwhat a principal (person or application) can do to that resource. AWS RoboMaker does not supportresource-based policies.
• Identities – Identities are IAM resources for which you can define permissions. These include users,groups, and roles.
• Entities – Entities are IAM resources that you use for authentication. These include users and roles.• Principals – In AWS, a principal is a person or application that uses an entity to sign in and make
requests to AWS. As a principal, you can use the AWS Management Console, the AWS CLI, or the AWSAPI to perform an operation (such as deleting a robot application). This creates a request for thatoperation. Your request specifies the action, resource, principal, principal account, and any additionalinformation about your request. All of this information provides AWS with context for your request.AWS checks all the policies that apply to the context of your request. AWS authorizes the request onlyif each part of your request is allowed by the policies.
To view a diagram of the authentication and access control process, see Understanding How IAM Worksin the IAM User Guide. For details about how AWS determines whether a request is allowed, see PolicyEvaluation Logic in the IAM User Guide.
Permissions RequiredTo use AWS RoboMaker or to manage authorization and access control for yourself or others, you musthave the correct permissions.
Permissions Required to Use the AWS RoboMaker ConsoleTo access the AWS RoboMaker console, you must have a minimum set of permissions that allows you tolist and view details about the AWS RoboMaker resources in your AWS account. If you create an identity-based permissions policy that is more restrictive than the minimum required permissions, the consolewon't function as intended for entities with that policy.
For full access to the AWS RoboMaker console, use the AWSRoboMakerFullAccess policy.
For read-only access to the AWS RoboMaker console, use the AWSRoboMakerReadOnlyAccess policy.
If an IAM user wants to create a simulation job, you need to grant iam:PassRole permission to thatuser. For more information about passing a role, see Granting a User Permissions to Pass a Role to anAWS Service.
For example, you can attach the following policy to a user. It provides permission to create a simulationjob:
55

AWS RoboMaker Developer GuidePermissions Required
{ "Version": "2012-10-17", "Statement": [ { "Effect": "Allow", "Action": "iam:PassRole", "Resource": "arn:aws:iam::123456789012:role/S3AndCloudWatchAccess" } ]}
You don't need to allow minimum console permissions for users that are making calls only to the AWSCLI or the AWS API. Instead, you need only the permissions that match the API operation you're trying toperform.
Permissions Required for Authentication ManagementTo manage your own credentials, such as your password, access keys, and multi-factor authentication(MFA) devices, your administrator must grant you the required permissions. To view the policy thatincludes these permissions, see Allow Users to Self-Manage Their Credentials (p. 69).
As an AWS administrator, you need full access to IAM so that you can create and manage users, groups,roles, and policies in IAM. You should use the AdministratorAccess AWS managed policy that includesfull access to all of AWS. This policy does not provide access to the AWS Billing and Cost Managementconsole or allow tasks that require root user credentials. For more information, see AWS Tasks ThatRequire AWS Account Root User Credentials in the AWS General Reference.
WarningOnly an administrator user should have full access to AWS. Anyone with this policy haspermission to fully manage authentication and access control, in addition to modifying everyresource in AWS. To learn how to create this user, see Create your IAM Admin User (p. 67).
Permissions Required for Access ControlIf your administrator provided you with IAM user credentials, they attached policies to your IAMuser to control what resources you can access. To view the policies attached to your user in the AWSManagement Console, you must have the following permissions:
{ "Version": "2012-10-17", "Statement": [ { "Sid": "ViewOwnUserInfo", "Effect": "Allow", "Action": [ "iam:GetUserPolicy", "iam:ListGroupsForUser", "iam:ListAttachedUserPolicies", "iam:ListUserPolicies", "iam:GetUser" ], "Resource": [ "arn:aws:iam::*:user/${aws:username}" ] }, { "Sid": "ListUsersViewGroupsAndPolicies", "Effect": "Allow", "Action": [ "iam:GetGroupPolicy",
56

AWS RoboMaker Developer GuideHow AWS RoboMaker Works with IAM
"iam:GetPolicyVersion", "iam:GetPolicy", "iam:ListAttachedGroupPolicies", "iam:ListGroupPolicies", "iam:ListPolicyVersions", "iam:ListPolicies", "iam:ListUsers" ], "Resource": "*" } ]}
If you need additional permissions, ask your administrator to update your policies to allow you to accessthe actions that you require.
Understanding How AWS RoboMaker Works with IAMServices can work with IAM in several ways:
• Actions – AWS RoboMaker supports using actions in a policy. This allows an administrator to controlwhether an entity can complete an operation in AWS RoboMaker. For example, to allow an entity toview a policy by performing the GetPolicy AWS API operation, an administrator must attach a policythat allows the iam:GetPolicy action.
• Resource-level permissions – AWS RoboMaker does not support resource-level permissions. Resource-level permissions allow you to use ARNs to specify individual resources in the policy. Because AWSRoboMaker does not support this feature, then you must choose All resources in the policy visualeditor. In a JSON policy document, you must use * in the Resource element.
• Resource-based policies – AWS RoboMaker does not support resource-based policies. Resource-basedpolicies allow you to attach a policy to a resource within the service. Resource-based policies include aPrincipal element to specify which IAM identities can access that resource.
• Authorization based on tags – AWS RoboMaker does not support authorization based tags. Thisfeature allows you to use resource tags in the condition of a policy.
• Temporary credentials – AWS RoboMaker supports temporary credentials. This feature allows you tosign in with federation, assume an IAM role, or to assume a cross-account role. You obtain temporarysecurity credentials by calling AWS STS API operations such as AssumeRole or GetFederationToken.
• Service-linked roles – AWS RoboMaker supports service roles. This feature allows a service to assumea service-linked role on your behalf. This role allows the service to access resources in other services tocomplete an action on your behalf. Service-linked roles appear in your IAM account, and are owned bythe service. An IAM administrator can view, but not edit the permissions for service-linked roles.
• Service roles – AWS RoboMaker supports service roles. This feature allows a service to assumea service role on your behalf. This role allows the service to access resources in other services tocomplete an action on your behalf. Service roles appear in your IAM account, and are owned by theaccount. This means that an IAM administrator can change the permissions for this role. However, thismight break the functionality of the service.
Troubleshooting Authentication and Access ControlUse the following information to help you diagnose and fix common issues that you might encounterwhen working with IAM.
Topics• I am not authorized to perform an action in AWS RoboMaker (p. 58)
• I'm an administrator and want to allow others to access AWS RoboMaker (p. 58)
57

AWS RoboMaker Developer GuideWhat is Authentication?
• I want to understand IAM without becoming an expert (p. 58)
I am not authorized to perform an action in AWS RoboMakerIf you receive an error in the AWS Management Console that tells you that you're not authorized toperform an action, then you must contact the administrator that provided you with your user name andpassword.
The following example error occurs when an IAM user named my-user-name tries to use the console toperform the CreateRobotApplication action, but does not have permissions.
User: arn:aws:iam::123456789012:user/my-user-name is not authorized to perform: aws-robomaker:CreateRobotApplication on resource: my-example-robot-application
For this example, ask your administrator to update your policies to allow you to access the my-example-robot-application resource using the aws-robomaker:CreateRobotApplication action.
I'm an administrator and want to allow others to access AWSRoboMakerTo allow others to access AWS RoboMaker you must create an IAM entity (user or role) for the person orapplication that needs access. They will use the credentials for that entity to access AWS. You must thenattach a policy to the entity that grants them the correct permissions in AWS RoboMaker.
To get started right away, see Getting Started with IAM (p. 66).
I want to understand IAM without becoming an expertTo learn more about IAM terms, concepts, and procedures, see the following pages:
• What is Authentication? (p. 58)
• What is Access Control? (p. 59)
• What are Policies? (p. 62)
What is Authentication?Authentication is how you sign in to AWS using your credentials.
NoteTo get started quickly, you can ignore this page. First, review the introductory information onAuthentication and Access Control for AWS RoboMaker (p. 54) and then see Getting Startedwith IAM (p. 66).
As a principal, you must be authenticated (signed in to AWS) using an entity (root user, IAM user, orIAM role) to send a request to AWS. An IAM user can have long-term credentials such as a user nameand password or a set of access keys. When you assume an IAM role, you are given temporary securitycredentials.
To authenticate from the AWS Management Console as a user, you must sign in with your user nameand password. To authenticate from the AWS CLI or AWS API, you must provide your access key andsecret key or temporary credentials. AWS provides SDK and CLI tools to cryptographically sign yourrequest using your credentials. If you don’t use AWS tools, you must sign the request yourself. Regardlessof the authentication method that you use, you might also be required to provide additional security
58

AWS RoboMaker Developer GuideWhat is Access Control?
information. For example, AWS recommends that you use multi-factor authentication (MFA) to increasethe security of your account.
As a principal, you can sign in to AWS using the following entities (users or roles):
• AWS account root user – When you first create an AWS account, you begin with a single sign-inidentity that has complete access to all AWS services and resources in the account. This identity iscalled the AWS account root user and is accessed by signing in with the email address and passwordthat you used to create the account. We strongly recommend that you do not use the root user foryour everyday tasks, even the administrative ones. Instead, adhere to the best practice of using theroot user only to create your first IAM user. Then securely lock away the root user credentials and usethem to perform only a few account and service management tasks.
• IAM user – An IAM user is an entity within your AWS account that has specific permissions. AWSRoboMaker supports Signature Version 4, a protocol for authenticating inbound API requests. For moreinformation about authenticating requests, see Signature Version 4 Signing Process in the AWS GeneralReference.
• IAM role – An IAM role is an IAM identity that you can create in your account that has specificpermissions. It is similar to an IAM user, but it is not associated with a specific person. An IAM roleenables you to obtain temporary access keys that can be used to access AWS services and resources.IAM roles with temporary credentials are useful in the following situations:• Federated user access – Instead of creating an IAM user, you can use existing user identities from
AWS Directory Service, your enterprise user directory, or a web identity provider. These are known asfederated users. AWS assigns a role to a federated user when access is requested through an identityprovider. For more information about federated users, see Federated Users and Roles in the IAM UserGuide.
• Temporary user permissions – An IAM user can assume a role to temporarily take on differentpermissions for a specific task.
• Cross-account access – You can use an IAM role to allow a trusted principal in a different account toaccess resources in your account. Roles are the primary way to grant cross-account access. However,with some AWS services, you can attach a policy directly to a resource (instead of using a role asa proxy). AWS RoboMaker does not support these resource-based policies. For more informationabout choosing whether to use a role or a resource-based policy to allow cross-account access, seeControlling Access to Principals in a Different Account (p. 61).
• AWS service access – You can use an IAM role in your account to grant an AWS service permissionsto access your account’s resources. For example, you can create a role that allows Amazon Redshiftto access an Amazon S3 bucket on your behalf and then load data from that bucket into an AmazonRedshift cluster. For more information, see Creating a Role to Delegate Permissions to an AWSService in the IAM User Guide.
• Applications running on Amazon EC2 – You can use an IAM role to manage temporary credentialsfor applications that are running on an EC2 instance and making AWS API requests. This is preferableto storing access keys within the EC2 instance. To assign an AWS role to an EC2 instance and makeit available to all of its applications, you create an instance profile that is attached to the instance.An instance profile contains the role and enables programs that are running on the EC2 instanceto get temporary credentials. For more information, see Using an IAM Role to Grant Permissions toApplications Running on Amazon EC2 Instances in the IAM User Guide.
What is Access Control?After you sign in (are authenticated) to AWS, your access to AWS resources and operations is controlledusing policies. Access control is also known as authorization.
NoteTo get started quickly, you can ignore this page. First, review the introductory information onAuthentication and Access Control for AWS RoboMaker (p. 54) and then see Getting Startedwith IAM (p. 66).
59

AWS RoboMaker Developer GuideWhat is Access Control?
During authorization, AWS uses values from the request context to check for policies that apply. Itthen uses the policies to determine whether to allow or deny the request. Most policies are storedin AWS as JSON documents and specify the permissions that are allowed or denied for principals.For more information about the structure and contents of JSON policy documents, see What arePolicies? (p. 62).
Policies let an administrator specify who has access to AWS resources, and what actions they canperform on those resources. Every IAM entity (user or role) starts with no permissions. In other words,by default, users can do nothing, not even view their own access keys. To give a user permission to dosomething, an administrator must attach a permissions policy to a user. Or they can add the user to agroup that has the intended permissions. When an administrator then give permissions to a group, allusers in that group get those permissions.
You might have valid credentials to authenticate your requests, but unless an administrator grants youpermissions you cannot create or access AWS RoboMaker resources. For example, you must have explicitpermissions to create an AWS RoboMaker robot application.
As an administrator, you can write a policy to control access to the following:
• AWS for Principals (p. 60) – Control what the person making the request (the principal) is allowedto do.
• IAM Identities (p. 60) – Control which IAM identities (groups, users, and roles) can be accessed andhow.
• IAM Policies (p. 61) – Control who can create, edit, and delete customer managed policies, and whocan attach and detach all managed policies.
• AWS Resources (p. 61) – Control who has access to resources using an identity-based policy or aresource-based policy.
• AWS Accounts (p. 61) – Control whether a request is allowed only for members of a specificaccount.
Controlling Access for PrincipalsPermissions policies control what you, as a principal, are allowed to do. An administrator must attach anidentity-based permissions policy to the identity (user, group, or role) that provides your permissions.Permissions policies allow or deny access to AWS. Administrators can also set a permissions boundaryfor an IAM entity (user or role) to define the maximum permissions that the entity can have. Permissionsboundaries are an advanced IAM feature. For more information about permissions boundaries, seePermissions Boundaries for IAM Identities in the IAM User Guide.
For more information and an example of how to control AWS access for principals, see Controlling Accessfor Principals in the IAM User Guide.
Controlling Access to IdentitiesAdministrators can control what you can do to an IAM identity (user, group, or role) by creating a policythat limits what can be done to an identity, or who can access it. Then attach that policy to the identitythat provides your permissions.
For example, an administrator might allow you to reset the password for three specific users. To do this,they attach a policy to your IAM user that allows you to reset the password for only yourself and userswith the ARN of the three specified users. This allows you to reset the password of your team membersbut not other IAM users.
For more information and an example of using a policy to control AWS access to identities, seeControlling Access to Identities in the IAM User Guide.
60

AWS RoboMaker Developer GuideWhat is Access Control?
Controlling Access to PoliciesAdministrators can control who can create, edit, and delete customer managed policies, and who canattach and detach all managed policies. When you review a policy, you can view the policy summarythat includes a summary of the access level for each service within that policy. AWS categorizes eachservice action into one of four access levels based on what each action does: List, Read, Write, orPermissions management. You can use these access levels to determine which actions to include inyour policies. For more information, see Understanding Access Level Summaries Within Policy Summariesin the IAM User Guide.
WarningYou should limit Permissions Management access level permissions in your account.Otherwise your account members can create policies for themselves with more permissions thanthey should have. Or they can create separate users with full access to AWS.
For more information and an example for how to control AWS access to policies, see Controlling Accessto Policies in the IAM User Guide.
Controlling Access to ResourcesAdministrators can control access to resources using an identity-based policy or a resource-based policy.In an identity-based policy, you attach the policy to an identity and specify what resources that identitycan access. In a resource-based policy, you attach a policy to the resource that you want to control. In thepolicy, you specify which principals can access that resource.
For more information, see Controlling Access to Resources in the IAM User Guide.
Resource Creators Do Not Automatically Have Permissions
All resources in an account are owned by the account, regardless of who created those resources. TheAWS account root user is the account owner, and therefore has permission to perform any action on anyresource in the account.
ImportantWe strongly recommend that you do not use the root user for your everyday tasks, even theadministrative ones. Instead, adhere to the best practice of using the root user only to createyour first IAM user. Then securely lock away the root user credentials and use them to performonly a few account and service management tasks. To view the tasks that require you to sign inas the root user, see AWS Tasks That Require Root User.
Entities (users or roles) in your account must be granted access to create a resource. But just becausethey create a resource does not mean they automatically have full access to that resource. You mustexplicitly grant permissions for each action. Additionally, you can revoke those permissions at any time,as long as you have access to manage user and role permissions.
Controlling Access to Principals in a Different AccountAdministrators can use AWS resource-based policies, IAM cross-account roles, or the AWS Organizationsservice to allow principals in another account to access resources in your account.
For some AWS services, you can grant cross-account access to your resources. To do this, you attach apolicy directly to the resource that you want to share, instead of using a role as a proxy. If the servicesupports this policy type, then the resource that you want to share must also support resource-basedpolicies. Unlike a user-based policy, a resource-based policy specifies who (in the form of a list of AWSaccount ID numbers) can access that resource. AWS RoboMaker does not support resource-based policies.
Cross-account access with a resource-based policy has some advantages over a role. With a resourcethat is accessed through a resource-based policy, the principal (person or application) still works in the
61
https://docs.aws.amazon.com/IAM/latest/UserGuide/access_controlling.html#access_controlling-policies

AWS RoboMaker Developer GuideWhat are Policies?
trusted account and does not have to give up his or her user permissions in place of the role permissions.In other words, the principal has access to resources in the trusted account and in the trusting accountat the same time. This is useful for tasks such as copying information from one account to another. Formore information about using cross-account roles, see Providing Access to an IAM User in Another AWSAccount That You Own in the IAM User Guide.
AWS Organizations offers policy-based management for multiple AWS accounts that you own. WithOrganizations, you can create groups of accounts, automate account creation, apply and manage policiesfor those groups. Organizations enables you to centrally manage policies across multiple accounts,without requiring custom scripts and manual processes. Using AWS Organizations, you can createService Control Policies (SCPs) that centrally control AWS service use across AWS accounts. For moreinformation, see What Is AWS Organizations? in the AWS Organizations User Guide.
What are Policies?You control access in AWS by creating policies and attaching them to IAM identities or AWS resources.
NoteTo get started quickly, you can ignore this page. First, review the introductory information onAuthentication and Access Control for AWS RoboMaker (p. 54) and then see Getting Startedwith IAM (p. 66).
A policy is an object in AWS that, when associated with an entity or resource, defines their permissions.AWS evaluates these policies when a principal, such as a user, makes a request. Permissions in thepolicies determine whether the request is allowed or denied. Most policies are stored in AWS as JSONdocuments.
IAM policies define permissions for an action regardless of the method that you use to perform theoperation. For example, if a policy allows the GetUser action, then a user with that policy can get userinformation from the AWS Management Console, the AWS CLI, or the AWS API. When you create an IAMuser, you can set up the user to allow console or programmatic access. The IAM user can sign in to theconsole using a user name and password. Or they can use access keys to work with the CLI or API.
The following policy types, listed in order of frequency, can affect whether a request is authorized. Formore details, see Policy Types in the IAM User Guide.
• Identity-based policies – You can attach managed and inline policies to IAM identities (users, groupsto which users belong, and roles).
• Resource-based policies – You can attach inline policies to resources in some AWS services. Themost common examples of resource-based policies are Amazon S3 bucket policies and IAM role trustpolicies. AWS RoboMaker does not support resource-based policies.
• Organizations SCPs – You can use an AWS Organizations service control policy (SCP) to apply apermissions boundary to an AWS Organizations organization or organizational unit (OU). Thosepermissions are applied to all entities within the member accounts.
• Access control lists (ACLs) – You can use ACLs to control what principals can access a resource. ACLsare similar to resource-based policies, although they are the only policy type that does not use theJSON policy document structure. AWS RoboMaker does not support ACLs.
These policies types can be categorized as permissions policies or permissions boundaries.
• Permissions policies – You can attach permissions policies to a resource in AWS to define thepermissions for that object. Within a single account, AWS evaluates all permissions policies together.Permissions policies are the most common policies. You can use the following policy types aspermissions policies:
• Identity-based policies – When you attach a managed or inline policy to an IAM user, group, or role,the policy defines the permissions for that entity.
62

AWS RoboMaker Developer GuideWhat are Policies?
• Resource-based policies – When you attach a JSON policy document to a resource, you define thepermissions for that resource. The service must support resource-based policies.
• Access control lists (ACLs) – When you attach an ACL to a resource, you define a list of principalswith permission to access that resource. The resource must support ACLs.
• Permissions boundaries – You can use policies to define the permissions boundary for an entity(user or role). A permissions boundary controls the maximum permissions that an entity canhave. Permissions boundaries are an advanced AWS feature. When more than one permissionsboundaries applies to a request, AWS evaluates each permissions boundary separately. You can apply apermissions boundary in the following situations:
• Organizations – You can use an AWS Organizations service control policy (SCP) to apply apermissions boundary to an AWS Organizations organization or organizational unit (OU).
• IAM users or roles – You can use a managed policy for a user or role's permissions boundary. Formore information, see Permissions Boundaries for IAM Entities in the IAM User Guide.
Topics
• Identity-Based Policies (p. 63)
• Resource-Based Policies (p. 63)
• Policy Access Level Classifications (p. 64)
Identity-Based Policies
You can attach policies to IAM identities. For example, you can do the following:
• Attach a permissions policy to a user or a group in your account – To grant a user permissions tocreate an AWS RoboMaker resource, such as a robot applications, you can attach a permissions policyto a user or a group to which the user belongs.
• Attach a permissions policy to a role (grant cross-account permissions) – You can attach anidentity-based permissions policy to an IAM role to grant cross-account permissions. For example,the administrator in account A can create a role to grant cross-account permissions to another AWSaccount (for example, account B) or an AWS service as follows:
1. Account A administrator creates an IAM role and attaches a permissions policy to the role thatgrants permissions on resources in account A.
2. Account A administrator attaches a trust policy to the role identifying account B as the principalwho can assume the role.
3. Account B administrator can then delegate permissions to assume the role to any users in account B.Doing this allows users in account B to create or access resources in account A. The principal in thetrust policy can also be an AWS service principal if you want to grant an AWS service permissions toassume the role.
For more information about using IAM to delegate permissions, see Access Management in the IAMUser Guide.
For more information about users, groups, roles, and permissions, see Identities (Users, Groups, andRoles) in the IAM User Guide.
Resource-Based Policies
Resource-based policies are JSON policy documents that you attach to a resource. These policiesallow you to specify what actions a specified principal can perform on that resource and under whatconditions. The most commonly-known resource-based policy is an Amazon S3 bucket. Resource-basedpolicies are inline policies that exist only on the resource. There are no managed resource-based policies.
63

AWS RoboMaker Developer GuideUsing Service-Linked Roles
Granting permissions to members of other AWS accounts using a resource-based policy has someadvantages over an IAM role. For more information, see How IAM Roles Differ from Resource-basedPolicies in the IAM User Guide.
AWS RoboMaker does not support resource-based policies.
Policy Access Level Classifications
In the IAM console, actions are grouped using the following access level classifications:
• List – Provide permission to list resources within the service to determine whether an object exists.Actions with this level of access can list objects but cannot see the contents of a resource. Mostactions with the List access level cannot be performed on a specific resource. When you create a policystatement with these actions, you must specify All resources ("*").
• Read – Provide permission to read but not edit the contents and attributes of resources in the service.For example, the Amazon S3 actions GetObject and GetBucketLocation have the Read accesslevel.
• Write – Provide permission to create, delete, or modify resources in the service. For example, theAmazon S3 actions CreateBucket, DeleteBucket and PutObject have the Write access level.
• Permissions management – Provide permission to grant or modify resource permissions in the service.For example, most IAM and AWS Organizations policy actions have the Permissions managementaccess level.
TipTo improve the security of your AWS account, restrict or regularly monitor policies thatinclude the Permissions management access level classification.
• Tagging – Provide permission to create, delete, or modify tags that are attached to a resource in theservice. For example, the Amazon EC2 CreateTags and DeleteTags actions have the Tagging accesslevel.
Using Service-Linked Roles for AWS RoboMakerAWS RoboMaker uses AWS Identity and Access Management (IAM) service-linked roles. A service-linkedrole is a unique type of IAM role that is linked directly to AWS RoboMaker. Service-linked roles arepredefined by AWS RoboMaker and include all the permissions that the service requires to call other AWSservices on your behalf.
A service-linked role makes setting up AWS RoboMaker easier because you don’t have to manually addthe necessary permissions. AWS RoboMaker defines the permissions of its service-linked roles, and unlessdefined otherwise, only AWS RoboMaker can assume its roles. The defined permissions include the trustpolicy and the permissions policy, and that permissions policy cannot be attached to any other IAMentity.
You can delete a service-linked role only after first deleting their related resources. This protects yourAWS RoboMaker resources because you can't inadvertently remove permission to access the resources.
For information about other services that support service-linked roles, see AWS Services That Work withIAM and look for the services that have Yes in the Service-Linked Role column. Choose a Yes with a linkto view the service-linked role documentation for that service.
Service-Linked Role Permissions for AWS RoboMaker
AWS RoboMaker uses the service-linked role named AWSServiceRoleForRoboMaker – Allows RoboMakerto access EC2, Greengrass, and Lambda resources on your behalf.
64

AWS RoboMaker Developer GuideUsing Service-Linked Roles
The AWSServiceRoleForRoboMaker service-linked role trusts the following services to assume the role:
• robomaker.amazonaws.com
The role permissions policy allows AWS RoboMaker to complete the following actions on the specifiedresources:
• Manage Amazon EC2 networking resources• Manage AWS IoT Greengrass deployments
You must configure permissions to allow an IAM entity (such as a user, group, or role) to create, edit, ordelete a service-linked role. For more information, see Service-Linked Role Permissions in the IAM UserGuide.
Creating a Service-Linked Role for AWS RoboMakerYou don't need to manually create a service-linked role. When you SimulationJob or DeploymentJob inthe AWS Management Console, the AWS CLI, or the AWS API, AWS RoboMaker creates the service-linkedrole for you.
If you delete this service-linked role, and then need to create it again, you can use the same process torecreate the role in your account. When you SimulationJob or DeploymentJob AWS RoboMaker createsthe service-linked role for you again.
You can also use the IAM console to create a service-linked role with the RoboMaker use case. In theAWS CLI or the AWS API, create a service-linked role with the robomaker.amazonaws.com servicename. For more information, see Creating a Service-Linked Role in the IAM User Guide. If you delete thisservice-linked role, you can use this same process to create the role again.
Editing a Service-Linked Role for AWS RoboMakerAWS RoboMaker does not allow you to edit the AWSServiceRoleForRoboMaker service-linked role. Afteryou create a service-linked role, you cannot change the name of the role because various entities mightreference the role. However, you can edit the description of the role using IAM. For more information, seeEditing a Service-Linked Role in the IAM User Guide.
Deleting a Service-Linked Role for AWS RoboMakerIf you no longer need to use a feature or service that requires a service-linked role, we recommendthat you delete that role. That way you don’t have an unused entity that is not actively monitoredor maintained. However, you must clean up the resources for your service-linked role before you canmanually delete it.
NoteIf the AWS RoboMaker service is using the role when you try to delete the resources, then thedeletion might fail. If that happens, wait for a few minutes and try the operation again.
To manually delete the service-linked role using IAM
Use the IAM console, the AWS CLI, or the AWS API to delete the AWSServiceRoleForRoboMaker service-linked role. For more information, see Deleting a Service-Linked Role in the IAM User Guide.
Supported Regions for AWS RoboMaker Service-Linked RolesAWS RoboMaker supports using service-linked roles in all of the regions where the service is available.For more information, see AWS Regions and Endpoints.
65

AWS RoboMaker Developer GuideGetting Started with IAM
AWS RoboMaker does not support using service-linked roles in every region where the service isavailable. You can use the AWSServiceRoleForRoboMaker role in the following regions.
Region name Region identity Support in AWSRoboMaker
US East (N. Virginia) us-east-1 Yes
US East (Ohio) us-east-2 Yes
US West (N. California) us-west-1 Yes
US West (Oregon) us-west-2 Yes
Asia Pacific (Mumbai) ap-south-1 Yes
Asia Pacific (Osaka-Local) ap-northeast-3 Yes
Asia Pacific (Seoul) ap-northeast-2 Yes
Asia Pacific (Singapore) ap-southeast-1 Yes
Asia Pacific (Sydney) ap-southeast-2 Yes
Asia Pacific (Tokyo) ap-northeast-1 Yes
Canada (Central) ca-central-1 Yes
EU (Frankfurt) eu-central-1 Yes
EU (Ireland) eu-west-1 Yes
EU (London) eu-west-2 Yes
EU (Paris) eu-west-3 Yes
South America (São Paulo) sa-east-1 Yes
AWS GovCloud (US) us-gov-west-1 No
Getting Started with IAMAWS Identity and Access Management (IAM) is an AWS service that allows you manage access to servicesand resources securely. IAM is a feature of your AWS account offered at no additional charge.
NoteBefore you start with IAM, review the introductory information on Authentication and AccessControl for AWS RoboMaker (p. 54).
When you first create an AWS account, you begin with a single sign-in identity that has complete accessto all AWS services and resources in the account. This identity is called the AWS account root user andis accessed by signing in with the email address and password that you used to create the account. Westrongly recommend that you do not use the root user for your everyday tasks, even the administrativeones. Instead, adhere to the best practice of using the root user only to create your first IAM user. Thensecurely lock away the root user credentials and use them to perform only a few account and servicemanagement tasks.
66

AWS RoboMaker Developer GuideGetting Started with IAM
Create your IAM Admin User
To create an IAM user for yourself and add the user to an Administrators group
1. Use your AWS account email address and password to sign in as the AWS account root user to theIAM console at https://console.aws.amazon.com/iam/.
NoteWe strongly recommend that you adhere to the best practice of using the AdministratorIAM user below and securely lock away the root user credentials. Sign in as the root useronly to perform a few account and service management tasks.
2. In the navigation pane of the console, choose Users, and then choose Add user.
3. For User name, type Administrator.
4. Select the check box next to AWS Management Console access, select Custom password, and thentype the new user's password in the text box. You can optionally select Require password reset toforce the user to create a new password the next time the user signs in.
5. Choose Next: Permissions.
6. On the Set permissions page, choose Add user to group.
7. Choose Create group.
8. In the Create group dialog box, for Group name type Administrators.
9. For Filter policies, select the check box for AWS managed - job function.
10. In the policy list, select the check box for AdministratorAccess. Then choose Create group.
11. Back in the list of groups, select the check box for your new group. Choose Refresh if necessary tosee the group in the list.
12. Choose Next: Tags to add metadata to the user by attaching tags as key-value pairs.
13. Choose Next: Review to see the list of group memberships to be added to the new user. When youare ready to proceed, choose Create user.
You can use this same process to create more groups and users, and to give your users access to yourAWS account resources. To learn about using policies to restrict users' permissions to specific AWSresources, go to Access Management and Example Policies.
Create Delegated Users for AWS RoboMakerTo support multiple users in your AWS account, you must delegate permission to allow other peopleto perform only the actions you want to allow. To do this, create an IAM group with the permissionsthose people need and then add IAM users to the necessary groups as you create them. You can use thisprocess to set up the groups, users, and permissions for your entire AWS account. This solution is bestused by small and medium organizations where an AWS administrator can manually manage the usersand groups. For large organizations, you can use custom IAM roles, federation, or single sign-on.
In the following task, you will create three users named arnav, carlos, and martha and attach apolicy that grants permission to create a robot application named my-example-robot-application,but only within the next 30 days. You can use the steps provided here to add users with differentpermissions.
To create a delegated user for someone else (console)
1. Sign in to the AWS Management Console and open the IAM console at https://console.aws.amazon.com/iam/.
2. In the navigation pane, choose Users and then choose Add user.
3. For User name, enter arnav.
67

AWS RoboMaker Developer GuideGetting Started with IAM
4. Choose Add another user and enter carlos for the second user. Then choose Add another userand enter martha for the third user.
5. Select the check box next to AWS Management Console access and select Autogeneratedpassword.
6. Clear the check box next to User must create a new password at next sign-in to allow the new userto reset their password after they sign in.
7. Choose Next: Permissions.8. Choose Attach existing policies directly. You will create a new managed policy for the users.9. Choose Create policy.
The Create policy wizard opens in a new tab or browser window.10. On the Visual editor tab, choose Choose a service. Then choose AWS RoboMaker. You can use the
search box at the top to limit the results in the list of services.
The Service section closes and the Actions section opens automatically.11. Choose the AWS RoboMaker actions that you want to allow. For example, to grants permission to
create a robot application, enter CreateRobotApplication in the Filter actions text box. Whenthe list of AWS RoboMaker actions is filtered, choose the check box next to CreateRobotApplication.
The AWS RoboMaker actions are grouped by access level classification to make it easy for you toquickly determine the level of access that each action provides. For more information, see PolicyAccess Level Classifications (p. 64).
12. If the actions that you selected in the previous steps do not support choosing specific resources,then All resources is selected for you. In that case, you cannot edit this section.
If you chose one or more actions that support resource-level permissions, then the visual editor liststhose resource types in the Resources section. Choose You chose actions that require the robotapplication resource type to choose whether you want to enter a specific robot application for yourpolicy.
13. If you want to allow the CreateRobotApplication action for all resources, choose All resources.
If you want to specify a resource, choose Add ARN. Specify the region and account ID (or account ID)(or choose Any), and then enter my-example-robot-application for the resource. Then chooseAdd.
14. Choose Specify request conditions (optional).15. Choose Add condition to grants permission to create a robot application within the next 7 days.
Assume that today's date is January 1, 2019.16. For Condition Key, choose aws:CurrentTime. This condition key checks the date and time that the
user makes the request. It returns true (and therefore allows the CreateRobotApplication actiononly if the date and time are within the specified range.
17. For Qualifier, leave the default value.18. To specify the start of the allowed date and time range, for Operator, choose DateGreaterThan.
Then for Value, enter 2019-01-01T00:00:00Z.19. Choose Add to save your condition.20. Choose Add another condition to specify the end date.21. Follow similar steps to specify the end of the allowed date and time range. For Condition
Key, choose aws:CurrentTime. For Operator, choose DateLessThan. For Value, enter2019-01-06T23:59:59Z, seven days after the first date. Then choose Add to save your condition.
22. (Optional) To see the JSON policy document for the policy you are creating, choose the JSON tab.You can switch between the Visual editor and JSON tabs any time. However, if you make changes orchoose Review policy in the Visual editor tab, IAM might restructure your policy to optimize it forthe visual editor. For more information, see Policy Restructuring in the IAM User Guide.
23. When you are finished, choose Review policy.
68

AWS RoboMaker Developer GuideGetting Started with IAM
24. On the Review policy page, for Name, enter CreateRobotApplicationPolicy and for theDescription, enter Policy to grants permission to create a robot application.Review the policy summary to make sure that you have granted the intended permissions, and thenchoose Create policy to save your new policy.
25. Return to the original tab or window, and refresh your list of policies.
26. In the search box, enter CreateRobotApplicationPolicy. Select the check box next to your newpolicy. Then choose Next Step.
27. Choose Next: Review to preview your new users. When you are ready to proceed, choose Createusers.
28. Download or copy the passwords for your new users and deliver them to the users securely.Separately, provide your users with a link to your IAM user console page and the user names you justcreated.
Allow Users to Self-Manage Their Credentials
You must have physical access to the hardware that will host the user's virtual MFA device in orderto configure MFA. For example, you might configure MFA for a user who will use a virtual MFA devicerunning on a smartphone. In that case, you must have the smartphone available in order to finish thewizard. Because of this, you might want to let users configure and manage their own virtual MFA devices.In that case, you must grant users the permissions to perform the necessary IAM actions.
To create a policy to allow credential self-management (console)
1. Sign in to the AWS Management Console and open the IAM console at https://console.aws.amazon.com/iam/.
2. In the navigation pane, choose Policies, and then choose Create policy.
3. Choose the JSON tab and copy the text from the following JSON policy document. Paste this textinto the JSON text box.
ImportantThis example policy does not allow users to reset their password while signing in. Newusers and users with an expired password might try to do so. You can allow this byadding iam:ChangePassword and iam:CreateLoginProfile to the statementBlockMostAccessUnlessSignedInWithMFA. However, IAM does not recommend this.
{ "Version": "2012-10-17", "Statement": [ { "Sid": "AllowAllUsersToListAccounts", "Effect": "Allow", "Action": [ "iam:ListAccountAliases", "iam:ListUsers", "iam:ListVirtualMFADevices", "iam:GetAccountPasswordPolicy", "iam:GetAccountSummary" ], "Resource": "*" }, { "Sid": "AllowIndividualUserToSeeAndManageOnlyTheirOwnAccountInformation", "Effect": "Allow", "Action": [ "iam:ChangePassword", "iam:CreateAccessKey", "iam:CreateLoginProfile",
69

AWS RoboMaker Developer GuideGetting Started with IAM
"iam:DeleteAccessKey", "iam:DeleteLoginProfile", "iam:GetLoginProfile", "iam:ListAccessKeys", "iam:UpdateAccessKey", "iam:UpdateLoginProfile", "iam:ListSigningCertificates", "iam:DeleteSigningCertificate", "iam:UpdateSigningCertificate", "iam:UploadSigningCertificate", "iam:ListSSHPublicKeys", "iam:GetSSHPublicKey", "iam:DeleteSSHPublicKey", "iam:UpdateSSHPublicKey", "iam:UploadSSHPublicKey" ], "Resource": "arn:aws:iam::*:user/${aws:username}" }, { "Sid": "AllowIndividualUserToViewAndManageTheirOwnMFA", "Effect": "Allow", "Action": [ "iam:CreateVirtualMFADevice", "iam:DeleteVirtualMFADevice", "iam:EnableMFADevice", "iam:ListMFADevices", "iam:ResyncMFADevice" ], "Resource": [ "arn:aws:iam::*:mfa/${aws:username}", "arn:aws:iam::*:user/${aws:username}" ] }, { "Sid": "AllowIndividualUserToDeactivateOnlyTheirOwnMFAOnlyWhenUsingMFA", "Effect": "Allow", "Action": [ "iam:DeactivateMFADevice" ], "Resource": [ "arn:aws:iam::*:mfa/${aws:username}", "arn:aws:iam::*:user/${aws:username}" ], "Condition": { "Bool": { "aws:MultiFactorAuthPresent": "true" } } }, { "Sid": "BlockMostAccessUnlessSignedInWithMFA", "Effect": "Deny", "NotAction": [ "iam:CreateVirtualMFADevice", "iam:DeleteVirtualMFADevice", "iam:ListVirtualMFADevices", "iam:EnableMFADevice", "iam:ResyncMFADevice", "iam:ListAccountAliases", "iam:ListUsers", "iam:ListSSHPublicKeys", "iam:ListAccessKeys", "iam:ListServiceSpecificCredentials", "iam:ListMFADevices", "iam:GetAccountSummary", "sts:GetSessionToken"
70

AWS RoboMaker Developer GuideGetting Started with IAM
], "Resource": "*", "Condition": { "BoolIfExists": { "aws:MultiFactorAuthPresent": "false" } } } ]}
What does this policy do?
• The AllowAllUsersToListAccounts statement enables the user to see basic informationabout the account and its users in the IAM console. These permissions must be in their ownstatement because they do not support or do not need to specify a specific resource ARN, andinstead specify "Resource" : "*".
• The AllowIndividualUserToSeeAndManageOnlyTheirOwnAccountInformation statementenables the user to manage his or her own user, password, access keys, signing certificates, SSHpublic keys, and MFA information in the IAM console. It also allows users to sign in for the firsttime in an administrator requires them to set a first-time password. The resource ARN limits theuse of these permissions to only the user's own IAM user entity.
• The AllowIndividualUserToViewAndManageTheirOwnMFA statement enables the user toview or manage his or her own MFA device. Notice that the resource ARNs in this statement allowaccess to only an MFA device or user that has the same name as the currently signed-in user. Userscan't create or alter any MFA device other than their own.
• The AllowIndividualUserToDeactivateOnlyTheirOwnMFAOnlyWhenUsingMFA statementallows the user to deactivate only his or her own MFA device, and only if the user signed in usingMFA. This prevents others with only the access keys (and not the MFA device) from deactivatingthe MFA device and accessing the account.
• The BlockMostAccessUnlessSignedInWithMFA statement uses a combination of "Deny" and"NotAction" to deny access to all but a few actions in IAM and other AWS services if the user isnot signed-in with MFA. For more information about the logic for this statement, see NotActionwith Deny in the IAM User Guide. If the user is signed-in with MFA, then the "Condition" testfails and the final "deny" statement has no effect and other policies or statements for the userdetermine the user's permissions. This statement ensures that when the user is not signed-inwith MFA, they can perform only the listed actions and only if another statement or policy allowsaccess to those actions.
The ...IfExists version of the Bool operator ensures that if theaws:MultiFactorAuthPresent key is missing, the condition returns true. This means that auser accessing an API with long-term credentials, such as an access key, is denied access to thenon-IAM API operations.
4. When you are finished, choose Review policy.5. On the Review page, type Force_MFA for the policy name. For the policy description, type This
policy allows users to manage their own passwords and MFA devices butnothing else unless they authenticate with MFA. Review the policy Summary to seethe permissions granted by your policy, and then choose Create policy to save your work.
The new policy appears in the list of managed policies and is ready to attach.
To attach the policy to a user (console)
1. In the navigation pane, choose Users.2. Choose the name (not the check box) of the user you want to edit.3. On the Permissions tab, and choose Add permissions.
71

AWS RoboMaker Developer GuideGetting Started with IAM
4. Choose Attach existing policies directly.
5. In the search box, enter Force, and then select the check box next to Force_MFA in the list. Thenchoose Next: Review.
6. Review your changes and choose Add permissions.
Enable MFA for Your IAM User
For increased security, we recommend that all IAM users configure multi-factor authentication (MFA)to help protect your AWS RoboMaker resources. MFA adds extra security because it requires users toprovide unique authentication from an AWS-supported MFA device in addition to their regular sign-incredentials. The most secure AWS MFA device is the U2F security key. If your company already has U2Fdevices, then we recommend that you enable those devices for AWS. Otherwise, you must purchase adevice for each of your users and wait for the hardware to arrive. For more information, see Enabling aU2F Security Key in the IAM User Guide.
If you don't already have a U2F device, you can get started quickly and at a low cost by enabling a virtualMFA device. This requires that you install a software app on an existing phone or other mobile device.The device generates a six-digit numeric code based upon a time-synchronized one-time passwordalgorithm. When the user signs in to AWS, they are prompted to enter a code from the device. Eachvirtual MFA device assigned to a user must be unique. A user cannot enter a code from another user'svirtual MFA device to authenticate. For a list of a few supported apps that you can use as virtual MFAdevices, see Multi-Factor Authentication.
NoteYou must have physical access to the mobile device that will host the user's virtual MFA device inorder to configure MFA for an IAM user.
To enable a virtual MFA device for an IAM user (console)
1. Sign in to the AWS Management Console and open the IAM console at https://console.aws.amazon.com/iam/.
2. In the navigation pane, choose Users.
3. In the User Name list, choose the name of the intended MFA user.
4. Choose the Security credentials tab. Next to Assigned MFA device, choose Manage.
5. In the Manage MFA Device wizard, choose Virtual MFA device, and then choose Continue.
IAM generates and displays configuration information for the virtual MFA device, including a QRcode graphic. The graphic is a representation of the "secret configuration key" that is available formanual entry on devices that do not support QR codes.
6. Open your virtual MFA app.
For a list of apps that you can use for hosting virtual MFA devices, see Multi-Factor Authentication. Ifthe virtual MFA app supports multiple accounts (multiple virtual MFA devices), choose the option tocreate a new account (a new virtual MFA device).
7. Determine whether the MFA app supports QR codes, and then do one of the following:
• From the wizard, choose Show QR code, and then use the app to scan the QR code. For example,you might choose the camera icon or choose an option similar to Scan code, and then use thedevice's camera to scan the code.
• In the Manage MFA Device wizard, choose Show secret key, and then enter the secret key intoyour MFA app.
When you are finished, the virtual MFA device starts generating one-time passwords.
72

AWS RoboMaker Developer GuideSecurity Compliance
8. In the Manage MFA Device wizard, in the MFA code 1 box, enter the one-time password thatcurrently appears in the virtual MFA device. Wait up to 30 seconds for the device to generate a newone-time password. Then enter the second one-time password into the MFA code 2 box. ChooseAssign MFA.
ImportantSubmit your request immediately after generating the codes. If you generate the codesand then wait too long to submit the request, the MFA device successfully associates withthe user but the MFA device is out of sync. This happens because time-based one-timepasswords (TOTP) expire after a short period of time. If this happens, you can resync thedevice. For more information, see Resynchronizing Virtual and Hardware MFA Devices in theIAM User Guide.
The virtual MFA device is now ready for use with AWS.
Security ComplianceThe AWS HIPAA Compliance program includes AWS RoboMaker as a HIPAA Eligible Service. The AWS PCIDSS Compliance program includes AWS RoboMaker as a PCI-compliant service.
For general information about AWS Cloud and HIPAA compliance, see the following:
• HIPAA Compliance• Architecting for HIPAA Security and Compliance on Amazon Web Services
73

AWS RoboMaker Developer GuideTroubleshooting Simulation Jobs
TroubleshootingTroubleshoot common problems you might encounter when developing robotics applications with AWSRoboMaker.
Topics• Troubleshooting Simulation Jobs (p. 74)
• Troubleshooting AWS RoboMaker Development Environments (p. 77)
• Troubleshooting Deployments (p. 77)
Troubleshooting Simulation JobsUse the information here to help you diagnose and fix permissions issues or other common issues thatyou might encounter when working with AWS RoboMaker simulation jobs.
My Simulation Job FailedIf your simulation job failed, see the following topics for some common solutions.
Did Your Robot Application Exit Abnormally?This is a general error indicating there was a problem setting up your robot application for simulation. Totroubleshoot, review the robot application logs for the simulation job in CloudWatch.
Logs can be accessed from the simulation job detail screen. Select Logs, and then select a log stream. Tolook for specific issues, use the filter. For example, "WARNING" or "ERROR".
Is Your Application Missing an .so File?If your robot application or simulation application crashed, it might be missing a dependent sharedobject (.so) file. Extract your application bundle in your environment and verify that the shared objectlibraries you need are in /usr/lib or /usr/local/lib. Make sure the dependency is added to yourpackage xml file.
Did You Use the ARN of your Role with the CLI?When you call create-simulation-job from the AWS CLI, use the full Amazon Resource Name (ARN) ofthe role, not just the role name.
Does Your Role Have a Trust Policy for AWS RoboMaker?If you are passing the full Amazon Resource Name (ARN) of the IAM role when you call create-simulation-job from the AWS CLI, your trust policy might have insufficient privileges. Make sure yourrole has the following trust policy defined:
{ "Version": "2012-10-17",
74

AWS RoboMaker Developer GuideMy Simulation Job Failed
"Statement": [ { "Effect": "Allow", "Principal": { "Service": "robomaker.amazonaws.com" }, "Action": "sts:AssumeRole" } ]}
See Modifying a Role for more information on adding a trust policy to an IAM role.
Does Your Role Have Permissions to Publish to Amazon S3?If you specify an output location (Amazon S3 bucket) for a simulation job, your role must have writepermissions to the bucket. Update your trust policy to include write permissions. The trust policybelow to adds read, list, and write permissions to an Amazon S3 bucket. Use the bucket to storerobot applications and simulation applications used to create applications in AWS RoboMaker and forsimulation job output:
{ "Action": "s3:ListBucket", "Resource": [ "my-bucket" ], "Effect": "Allow"},{ "Action": [ "s3:Get*", "s3:List*" ], "Resource": [ "my-bucket" ], "Effect": "Allow"},{ "Action": "s3:Put*", "Resource": [ "my-bucket" ], "Effect": "Allow"}
Does Your Role Have Permission to Publish to AmazonCloudWatch?Update the permissions policies of your IAM role with CloudWatch access:
{ "Effect": "Allow", "Action": [ "logs:CreateLogGroup", "logs:CreateLogStream", "logs:PutLogEvents", "logs:DescribeLogStreams" ], "Resource": "*"
75

AWS RoboMaker Developer GuideMy Simulation Job Failed
}
Does your Application Have a Mismatched ETag?The entity tag is a hash of the Amazon S3 object provided while creating the simulation. The ETagreflects changes only to the contents of an object, not its metadata. If you change the content of therobot application or simulation bundle in Amazon S3 before AWS RoboMaker has consumed it, there willbe a version mismatch.
To resolve this, create a new robot application or simulation application version and provide the keylocation for the updated application bundle. For more information, see Creating a Robot ApplicationVersion (p. 26) or Creating a Robot Application Version (p. 26).
Is Your Subnet ENI Limit Exceeded?AWS RoboMaker uses one elastic network interface (ENI) per concurrent simulation job in the subnet inwhich the simulation job is run. Each of these must be assigned an IP address. To resolve this: you can:
• Delete unused ENIs to free up IP addresses in the subnet. To delete an unused ENI, see Deleting aNetwork Interface.
• Request a service limit increase for ENIs in a specific AWS region.
Is the Launch Command Properly Configured?Depending on the complexity of your simulation, Gazebo might take a few minutes to launch. If AWSRoboMaker spends more than 10 minutes preparing the simulation job, there might be a problem withthe launch command.
Cancel the job and then create a new simulation job. If the problem persists, contact AWS Support.
Another possibility: one of the ROS nodes did not start up or experienced problems. Check thesimulation logs for errors. You can also use the terminal simulation too to connect and troubleshoot therunning simulation job.
Are Your Subnets in Zones AWS RoboMaker Supports?Provide subnets in two of the AWS Availability Zones supported by AWS RoboMaker. API response willcontain a list of supported AWS Availability Zones.
Are the launch file and package name correct?Use CloudWatch Logs to verify the package name and launch file used by the simulation job. Filter toroslaunch events, and then expand each event to look for issues similar to:
[launch_file.launch] is neither a launch file in package [package_name] nor is [package_name] a launch file name
Is the node package named correctly in the launch file?Use CloudWatch Logs to verify the node package name used by the simulation job. Filter to cannotlaunch node events, and then expand each event to look for issues similar to:
ERROR: cannot launch node of type [node_package_name/node_type]: node_package_name
76

AWS RoboMaker Developer GuideTroubleshooting AWS RoboMaker
Development Environments
Did you include an incorrect launch file?
Use CloudWatch Logs to check if the launch file was not found. Filter to roslaunch events, and thenexpand each event to look for issues similar to:
while processing directory/path/to/launch/launch_fileInvalid roslaunch XML syntax: [Errno 2] No such file or directory: 'directory/path/to/launch/launch_file'
Are your world file model references correct?
Use CloudWatch Logs to verify all of the models in your world file are correct. If a model could not belocated, you will see information like the following:
[Wrn] [ModelDatabase.cc:340] Getting models from[http://models.gazebosim.org/]. This may take a few seconds.[Wrn] [ModelDatabase.cc:212] Unable to connect to model database using [http://models.gazebosim.org//database.config]. Only locally installed models will be available.[Err] [ModelDatabase.cc:414] Unable to download model[model://model_name][Err] [SystemPaths.cc:429] File or path does not exist[""]Error [parser.cc:581] Unable to find uri[model://model_name]
Troubleshooting AWS RoboMaker DevelopmentEnvironments
Use the information here to help you diagnose and fix common issues that you might encounter whendeveloping applications in the AWS RoboMaker development environment.
There is a Problem with the Sample CodeAWS RoboMaker provides a number of sample robotics applications. These applications can be installedfrom the AWS Cloud9 IDE. This section identifies potential problems and common solutions.
Did the sample fail to install?
This can occur when the AWS Cloud9 operating system is running background updates when the IDE istrying to update dependencies for the newly downloaded repository. Wait a few minutes and then trydownloading the repository again.
Troubleshooting DeploymentsThis section provides more information about common issues encountered when deploying a robotapplication to a fleet.
My Deployment FailedSee the following topics for common solutions.
77

AWS RoboMaker Developer GuideMy Deployment Failed
Is your robot part of a fleet?A robot must be part of a fleet to receive a deployment. To check the status of your robots in the AWSRoboMaker console, expand Fleet management and then choose Robots. Robots that are registered to afleet will include the Fleet name.
78

AWS RoboMaker Developer GuideAWS RoboMaker Information in CloudTrail
Logging AWS RoboMaker API Callswith AWS CloudTrail
AWS RoboMaker is integrated with AWS CloudTrail, a service that provides a record of actions taken bya user, role, or an AWS service in AWS RoboMaker. CloudTrail captures all API calls for AWS RoboMakeras events. The calls captured include calls from the AWS RoboMaker console and code calls to the AWSRoboMaker API operations. If you create a trail, you can enable continuous delivery of CloudTrail eventsto an Amazon S3 bucket, including events for AWS RoboMaker. If you don't configure a trail, you can stillview the most recent events in the CloudTrail console in Event history. Using the information collectedby CloudTrail, you can determine the request that was made to AWS RoboMaker, the IP address fromwhich the request was made, who made the request, when it was made, and additional details.
To learn more about CloudTrail, see the AWS CloudTrail User Guide.
AWS RoboMaker Information in CloudTrailCloudTrail is enabled on your AWS account when you create the account. When activity occurs in AWSRoboMaker, that activity is recorded in a CloudTrail event along with other AWS service events in Eventhistory. You can view, search, and download recent events in your AWS account. For more information,see Viewing Events with CloudTrail Event History.
For an ongoing record of events in your AWS account, including events for AWS RoboMaker, create atrail. A trail enables CloudTrail to deliver log files to an Amazon S3 bucket. By default, when you createa trail in the console, the trail applies to all AWS Regions. The trail logs events from all Regions in theAWS partition and delivers the log files to the Amazon S3 bucket that you specify. Additionally, you canconfigure other AWS services to further analyze and act upon the event data collected in CloudTrail logs.For more information, see the following:
• Overview for Creating a Trail• CloudTrail Supported Services and Integrations• Configuring Amazon SNS Notifications for CloudTrail• Receiving CloudTrail Log Files from Multiple Regions and Receiving CloudTrail Log Files from Multiple
Accounts
All AWS RoboMaker actions are logged by CloudTrail and are documented in the AWS RoboMakerAPI Reference. For example, calls to the CreateSimulationJob, RegisterRobot andUpdateRobotApplication actions generate entries in the CloudTrail log files.
Every event or log entry contains information about who generated the request. The identityinformation helps you determine the following:
• Whether the request was made with root or AWS Identity and Access Management (IAM) usercredentials.
• Whether the request was made with temporary security credentials for a role or federated user.• Whether the request was made by another AWS service.
For more information, see the CloudTrail userIdentity Element.
79

AWS RoboMaker Developer GuideUnderstanding AWS RoboMaker Log File Entries
Understanding AWS RoboMaker Log File EntriesA trail is a configuration that enables delivery of events as log files to an Amazon S3 bucket that youspecify. CloudTrail log files contain one or more log entries. An event represents a single request fromany source and includes information about the requested action, the date and time of the action, requestparameters, and so on. CloudTrail log files aren't an ordered stack trace of the public API calls, so theydon't appear in any specific order.
The following example shows a CloudTrail log entry that demonstrates the DescribeRobot action.
{ "eventVersion": "1.05", "userIdentity": { "type": "IAMUser", "principalId": "my-principal-id", "arn": "my-arn", "accountId": "my-account-id", "accessKeyId": "my-access-key", "userName": "my-user-name" }, "eventTime": "2018-12-07T00:28:03Z", "eventSource": "robomaker.amazonaws.com", "eventName": "DescribeRobot", "awsRegion": "us-west-2", "sourceIPAddress": "my-ip-address", "userAgent": "aws-internal/3 aws-sdk-java/1.11.455 Linux/4.4.83-0.1.fm.327.54.326.metal1.x86_64 OpenJDK_64-Bit_Server_VM/25.192-b12 java/1.8.0_192,", "requestParameters": { "robot": "my-robot-arn" }, "responseElements": null, "requestID": "f54cdf8b-f9b6-11e8-8883-c3f04579eca3", "eventID": "affb0303-ff48-4f65-af8e-d7d19710bac3", "readOnly": true, "eventType": "AwsApiCall", "recipientAccountId": "my-recipient-account-id"}
80

AWS RoboMaker Developer GuideActions
API ReferenceThis section contains the API Reference documentation.
ActionsThe following actions are supported:
• BatchDescribeSimulationJob (p. 82)• CancelSimulationJob (p. 85)• CreateDeploymentJob (p. 87)• CreateFleet (p. 92)• CreateRobot (p. 95)• CreateRobotApplication (p. 98)• CreateRobotApplicationVersion (p. 102)• CreateSimulationApplication (p. 106)• CreateSimulationApplicationVersion (p. 110)• CreateSimulationJob (p. 114)• DeleteFleet (p. 121)• DeleteRobot (p. 123)• DeleteRobotApplication (p. 125)• DeleteSimulationApplication (p. 127)• DeregisterRobot (p. 129)• DescribeDeploymentJob (p. 132)• DescribeFleet (p. 136)• DescribeRobot (p. 139)• DescribeRobotApplication (p. 142)• DescribeSimulationApplication (p. 145)• DescribeSimulationJob (p. 149)• ListDeploymentJobs (p. 154)• ListFleets (p. 157)• ListRobotApplications (p. 160)• ListRobots (p. 163)• ListSimulationApplications (p. 166)• ListSimulationJobs (p. 169)• RegisterRobot (p. 172)• RestartSimulationJob (p. 175)• SyncDeploymentJob (p. 177)• UpdateRobotApplication (p. 182)• UpdateSimulationApplication (p. 186)
81

AWS RoboMaker Developer GuideBatchDescribeSimulationJob
BatchDescribeSimulationJobDescribes one or more simulation jobs.
Request Syntax
POST /batchDescribeSimulationJob HTTP/1.1Content-type: application/json
{ "jobs": [ "string" ]}
URI Request ParametersThe request does not use any URI parameters.
Request BodyThe request accepts the following data in JSON format.
jobs (p. 82)
A list of Amazon Resource Names (ARNs) of simulation jobs to describe.
Type: Array of strings
Array Members: Minimum number of 1 item. Maximum number of 100 items.
Length Constraints: Minimum length of 1. Maximum length of 1224.
Pattern: arn:.*
Required: Yes
Response Syntax
HTTP/1.1 200Content-type: application/json
{ "jobs": [ { "arn": "string", "clientRequestToken": "string", "failureBehavior": "string", "failureCode": "string", "iamRole": "string", "lastUpdatedAt": number, "maxJobDurationInSeconds": number, "name": "string", "outputLocation": { "s3Bucket": "string", "s3Prefix": "string" }, "robotApplications": [ { "application": "string",
82

AWS RoboMaker Developer GuideBatchDescribeSimulationJob
"applicationVersion": "string", "launchConfig": { "environmentVariables": { "string" : "string" }, "launchFile": "string", "packageName": "string" } } ], "simulationApplications": [ { "application": "string", "applicationVersion": "string", "launchConfig": { "environmentVariables": { "string" : "string" }, "launchFile": "string", "packageName": "string" } } ], "simulationTimeMillis": number, "status": "string", "vpcConfig": { "assignPublicIp": boolean, "securityGroups": [ "string" ], "subnets": [ "string" ], "vpcId": "string" } } ], "unprocessedJobs": [ "string" ]}
Response ElementsIf the action is successful, the service sends back an HTTP 200 response.
The following data is returned in JSON format by the service.
jobs (p. 82)
A list of simulation jobs.
Type: Array of SimulationJob (p. 213) objectsunprocessedJobs (p. 82)
A list of unprocessed simulation job Amazon Resource Names (ARNs).
Type: Array of strings
Array Members: Minimum number of 1 item. Maximum number of 100 items.
Length Constraints: Minimum length of 1. Maximum length of 1224.
Pattern: arn:.*
ErrorsFor information about the errors that are common to all actions, see Common Errors (p. 222).
83

AWS RoboMaker Developer GuideBatchDescribeSimulationJob
InternalServerException
AWS RoboMaker experienced a service issue. Try your call again.
HTTP Status Code: 500InvalidParameterException
A parameter specified in a request is not valid, is unsupported, or cannot be used. The returnedmessage provides an explanation of the error value.
HTTP Status Code: 400ResourceNotFoundException
The specified resource does not exist.
HTTP Status Code: 400ThrottlingException
AWS RoboMaker is temporarily unable to process the request. Try your call again.
HTTP Status Code: 400
See AlsoFor more information about using this API in one of the language-specific AWS SDKs, see the following:
• AWS Command Line Interface• AWS SDK for .NET• AWS SDK for C++• AWS SDK for Go• AWS SDK for Java• AWS SDK for JavaScript• AWS SDK for PHP V3• AWS SDK for Python• AWS SDK for Ruby V2
84

AWS RoboMaker Developer GuideCancelSimulationJob
CancelSimulationJobCancels the specified simulation job.
Request Syntax
POST /cancelSimulationJob HTTP/1.1Content-type: application/json
{ "job": "string"}
URI Request ParametersThe request does not use any URI parameters.
Request BodyThe request accepts the following data in JSON format.
job (p. 85)
The simulation job ARN to cancel.
Type: String
Length Constraints: Minimum length of 1. Maximum length of 1224.
Pattern: arn:.*
Required: Yes
Response Syntax
HTTP/1.1 200
Response ElementsIf the action is successful, the service sends back an HTTP 200 response with an empty HTTP body.
ErrorsFor information about the errors that are common to all actions, see Common Errors (p. 222).
InternalServerException
AWS RoboMaker experienced a service issue. Try your call again.
HTTP Status Code: 500InvalidParameterException
A parameter specified in a request is not valid, is unsupported, or cannot be used. The returnedmessage provides an explanation of the error value.
85

AWS RoboMaker Developer GuideCancelSimulationJob
HTTP Status Code: 400ResourceNotFoundException
The specified resource does not exist.
HTTP Status Code: 400ThrottlingException
AWS RoboMaker is temporarily unable to process the request. Try your call again.
HTTP Status Code: 400
See AlsoFor more information about using this API in one of the language-specific AWS SDKs, see the following:
• AWS Command Line Interface• AWS SDK for .NET• AWS SDK for C++• AWS SDK for Go• AWS SDK for Java• AWS SDK for JavaScript• AWS SDK for PHP V3• AWS SDK for Python• AWS SDK for Ruby V2
86

AWS RoboMaker Developer GuideCreateDeploymentJob
CreateDeploymentJobDeploys a specific version of a robot application to robots in a fleet.
The robot application must have a numbered applicationVersion for consistency reasons. To createa new version, use CreateRobotApplicationVersion or see Creating a Robot Application Version.
Request Syntax
POST /createDeploymentJob HTTP/1.1Content-type: application/json
{ "clientRequestToken": "string", "deploymentApplicationConfigs": [ { "application": "string", "applicationVersion": "string", "launchConfig": { "environmentVariables": { "string" : "string" }, "launchFile": "string", "packageName": "string", "postLaunchFile": "string", "preLaunchFile": "string" } } ], "deploymentConfig": { "concurrentDeploymentPercentage": number, "failureThresholdPercentage": number }, "fleet": "string"}
URI Request ParametersThe request does not use any URI parameters.
Request BodyThe request accepts the following data in JSON format.
clientRequestToken (p. 87)
Unique, case-sensitive identifier that you provide to ensure the idempotency of the request.
Type: String
Length Constraints: Minimum length of 1. Maximum length of 64.
Pattern: [a-zA-Z0-9_\-=]*
Required: YesdeploymentApplicationConfigs (p. 87)
The deployment application configuration.
Type: Array of DeploymentApplicationConfig (p. 191) objects
87

AWS RoboMaker Developer GuideCreateDeploymentJob
Array Members: Fixed number of 1 item.
Required: YesdeploymentConfig (p. 87)
The requested deployment configuration.
Type: DeploymentConfig (p. 192) object
Required: Nofleet (p. 87)
The Amazon Resource Name (ARN) of the fleet to deploy.
Type: String
Length Constraints: Minimum length of 1. Maximum length of 1224.
Pattern: arn:.*
Required: Yes
Response Syntax
HTTP/1.1 200Content-type: application/json
{ "arn": "string", "createdAt": number, "deploymentApplicationConfigs": [ { "application": "string", "applicationVersion": "string", "launchConfig": { "environmentVariables": { "string" : "string" }, "launchFile": "string", "packageName": "string", "postLaunchFile": "string", "preLaunchFile": "string" } } ], "deploymentConfig": { "concurrentDeploymentPercentage": number, "failureThresholdPercentage": number }, "failureCode": "string", "failureReason": "string", "fleet": "string", "status": "string"}
Response ElementsIf the action is successful, the service sends back an HTTP 200 response.
The following data is returned in JSON format by the service.
88
AWS RoboMaker Developer GuideCreateDeploymentJob
arn (p. 88)
The Amazon Resource Name (ARN) of the deployment job.
Type: String
Length Constraints: Minimum length of 1. Maximum length of 1224.
Pattern: arn:.*createdAt (p. 88)
The time, in milliseconds since the epoch, when the fleet was created.
Type: TimestampdeploymentApplicationConfigs (p. 88)
The deployment application configuration.
Type: Array of DeploymentApplicationConfig (p. 191) objects
Array Members: Fixed number of 1 item.deploymentConfig (p. 88)
The deployment configuration.
Type: DeploymentConfig (p. 192) objectfailureCode (p. 88)
The failure code of the simulation job if it failed:BadPermissionError
AWS Greengrass requires a service-level role permission to access other services. The role mustinclude the AWSGreengrassResourceAccessRolePolicy managed policy.
ExtractingBundleFailure
The robot application could not be extracted from the bundle.FailureThresholdBreached
The percentage of robots that could not be updated exceeded the percentage set for thedeployment.
GreengrassDeploymentFailed
The robot application could not be deployed to the robot.GreengrassGroupVersionDoesNotExist
The AWS Greengrass group or version associated with a robot is missing.InternalServerError
An internal error has occurred. Retry your request, but if the problem persists, contact us withdetails.
MissingRobotApplicationArchitecture
The robot application does not have a source that matches the architecture of the robot.MissingRobotDeploymentResource
One or more of the resources specified for the robot application are missing. For example, doesthe robot application have the correct launch package and launch file?
89

AWS RoboMaker Developer GuideCreateDeploymentJob
PostLaunchFileFailure
The post-launch script failed.PreLaunchFileFailure
The pre-launch script failed.ResourceNotFound
One or more deployment resources are missing. For example, do robot application sourcebundles still exist?
RobotDeploymentNoResponse
There is no response from the robot. It might not be powered on or connected to the internet.
Type: String
Valid Values: ResourceNotFound | FailureThresholdBreached |RobotDeploymentNoResponse | GreengrassDeploymentFailed |MissingRobotArchitecture | MissingRobotApplicationArchitecture |MissingRobotDeploymentResource | GreengrassGroupVersionDoesNotExist |ExtractingBundleFailure | PreLaunchFileFailure | PostLaunchFileFailure |BadPermissionError | InternalServerError
failureReason (p. 88)
The failure reason of the deployment job if it failed.
Type: Stringfleet (p. 88)
The target fleet for the deployment job.
Type: String
Length Constraints: Minimum length of 1. Maximum length of 1224.
Pattern: arn:.*status (p. 88)
The status of the deployment job.
Type: String
Valid Values: Pending | Preparing | InProgress | Failed | Succeeded
ErrorsFor information about the errors that are common to all actions, see Common Errors (p. 222).
ConcurrentDeploymentException
HTTP Status Code: 400IdempotentParameterMismatchException
The request uses the same client token as a previous, but non-identical request. Do not reuse a clienttoken with different requests, unless the requests are identical.
HTTP Status Code: 400
90

AWS RoboMaker Developer GuideCreateDeploymentJob
InternalServerException
AWS RoboMaker experienced a service issue. Try your call again.
HTTP Status Code: 500InvalidParameterException
A parameter specified in a request is not valid, is unsupported, or cannot be used. The returnedmessage provides an explanation of the error value.
HTTP Status Code: 400LimitExceededException
The requested resource exceeds the maximum number allowed, or the number of concurrent streamrequests exceeds the maximum number allowed.
HTTP Status Code: 400ResourceNotFoundException
The specified resource does not exist.
HTTP Status Code: 400ThrottlingException
AWS RoboMaker is temporarily unable to process the request. Try your call again.
HTTP Status Code: 400
See AlsoFor more information about using this API in one of the language-specific AWS SDKs, see the following:
• AWS Command Line Interface• AWS SDK for .NET• AWS SDK for C++• AWS SDK for Go• AWS SDK for Java• AWS SDK for JavaScript• AWS SDK for PHP V3• AWS SDK for Python• AWS SDK for Ruby V2
91

AWS RoboMaker Developer GuideCreateFleet
CreateFleetCreates a fleet, a logical group of robots running the same robot application.
Request Syntax
POST /createFleet HTTP/1.1Content-type: application/json
{ "name": "string"}
URI Request ParametersThe request does not use any URI parameters.
Request BodyThe request accepts the following data in JSON format.
name (p. 92)
The name of the fleet.
Type: String
Length Constraints: Minimum length of 1. Maximum length of 255.
Pattern: [a-zA-Z0-9_\-]*
Required: Yes
Response Syntax
HTTP/1.1 200Content-type: application/json
{ "arn": "string", "createdAt": number, "name": "string"}
Response ElementsIf the action is successful, the service sends back an HTTP 200 response.
The following data is returned in JSON format by the service.
arn (p. 92)
The Amazon Resource Name (ARN) of the fleet.
Type: String
92

AWS RoboMaker Developer GuideCreateFleet
Length Constraints: Minimum length of 1. Maximum length of 1224.
Pattern: arn:.*createdAt (p. 92)
The time, in milliseconds since the epoch, when the fleet was created.
Type: Timestampname (p. 92)
The name of the fleet.
Type: String
Length Constraints: Minimum length of 1. Maximum length of 255.
Pattern: [a-zA-Z0-9_\-]*
ErrorsFor information about the errors that are common to all actions, see Common Errors (p. 222).
InternalServerException
AWS RoboMaker experienced a service issue. Try your call again.
HTTP Status Code: 500InvalidParameterException
A parameter specified in a request is not valid, is unsupported, or cannot be used. The returnedmessage provides an explanation of the error value.
HTTP Status Code: 400LimitExceededException
The requested resource exceeds the maximum number allowed, or the number of concurrent streamrequests exceeds the maximum number allowed.
HTTP Status Code: 400ThrottlingException
AWS RoboMaker is temporarily unable to process the request. Try your call again.
HTTP Status Code: 400
See AlsoFor more information about using this API in one of the language-specific AWS SDKs, see the following:
• AWS Command Line Interface• AWS SDK for .NET• AWS SDK for C++• AWS SDK for Go• AWS SDK for Java• AWS SDK for JavaScript
93

AWS RoboMaker Developer GuideCreateFleet
• AWS SDK for PHP V3• AWS SDK for Python• AWS SDK for Ruby V2
94

AWS RoboMaker Developer GuideCreateRobot
CreateRobotCreates a robot.
Request Syntax
POST /createRobot HTTP/1.1Content-type: application/json
{ "architecture": "string", "greengrassGroupId": "string", "name": "string"}
URI Request ParametersThe request does not use any URI parameters.
Request BodyThe request accepts the following data in JSON format.
architecture (p. 95)
The target architecture of the robot.
Type: String
Valid Values: X86_64 | ARM64 | ARMHF
Required: YesgreengrassGroupId (p. 95)
The Greengrass group id.
Type: String
Length Constraints: Minimum length of 1. Maximum length of 1224.
Required: Yesname (p. 95)
The name for the robot.
Type: String
Length Constraints: Minimum length of 1. Maximum length of 255.
Pattern: [a-zA-Z0-9_\-]*
Required: Yes
Response Syntax
HTTP/1.1 200Content-type: application/json
95

AWS RoboMaker Developer GuideCreateRobot
{ "architecture": "string", "arn": "string", "createdAt": number, "greengrassGroupId": "string", "name": "string"}
Response ElementsIf the action is successful, the service sends back an HTTP 200 response.
The following data is returned in JSON format by the service.
architecture (p. 95)
The target architecture of the robot.
Type: String
Valid Values: X86_64 | ARM64 | ARMHFarn (p. 95)
The Amazon Resource Name (ARN) of the robot.
Type: String
Length Constraints: Minimum length of 1. Maximum length of 1224.
Pattern: arn:.*createdAt (p. 95)
The time, in milliseconds since the epoch, when the robot was created.
Type: TimestampgreengrassGroupId (p. 95)
The Amazon Resource Name (ARN) of the Greengrass group associated with the robot.
Type: String
Length Constraints: Minimum length of 1. Maximum length of 1224.name (p. 95)
The name of the robot.
Type: String
Length Constraints: Minimum length of 1. Maximum length of 255.
Pattern: [a-zA-Z0-9_\-]*
ErrorsFor information about the errors that are common to all actions, see Common Errors (p. 222).
InternalServerException
AWS RoboMaker experienced a service issue. Try your call again.
96

AWS RoboMaker Developer GuideCreateRobot
HTTP Status Code: 500InvalidParameterException
A parameter specified in a request is not valid, is unsupported, or cannot be used. The returnedmessage provides an explanation of the error value.
HTTP Status Code: 400LimitExceededException
The requested resource exceeds the maximum number allowed, or the number of concurrent streamrequests exceeds the maximum number allowed.
HTTP Status Code: 400ResourceAlreadyExistsException
The specified resource already exists
HTTP Status Code: 400ThrottlingException
AWS RoboMaker is temporarily unable to process the request. Try your call again.
HTTP Status Code: 400
See AlsoFor more information about using this API in one of the language-specific AWS SDKs, see the following:
• AWS Command Line Interface• AWS SDK for .NET• AWS SDK for C++• AWS SDK for Go• AWS SDK for Java• AWS SDK for JavaScript• AWS SDK for PHP V3• AWS SDK for Python• AWS SDK for Ruby V2
97

AWS RoboMaker Developer GuideCreateRobotApplication
CreateRobotApplicationCreates a robot application.
Request Syntax
POST /createRobotApplication HTTP/1.1Content-type: application/json
{ "name": "string", "robotSoftwareSuite": { "name": "string", "version": "string" }, "sources": [ { "architecture": "string", "s3Bucket": "string", "s3Key": "string" } ]}
URI Request ParametersThe request does not use any URI parameters.
Request BodyThe request accepts the following data in JSON format.
name (p. 98)
The name of the robot application.
Type: String
Length Constraints: Minimum length of 1. Maximum length of 255.
Pattern: [a-zA-Z0-9_\-]*
Required: Yes
robotSoftwareSuite (p. 98)
The robot software suite used by the robot application.
Type: RobotSoftwareSuite (p. 210) object
Required: Yes
sources (p. 98)
The sources of the robot application.
Type: Array of SourceConfig (p. 220) objects
Required: Yes
98

AWS RoboMaker Developer GuideCreateRobotApplication
Response Syntax
HTTP/1.1 200Content-type: application/json
{ "arn": "string", "lastUpdatedAt": number, "name": "string", "revisionId": "string", "robotSoftwareSuite": { "name": "string", "version": "string" }, "sources": [ { "architecture": "string", "etag": "string", "s3Bucket": "string", "s3Key": "string" } ], "version": "string"}
Response ElementsIf the action is successful, the service sends back an HTTP 200 response.
The following data is returned in JSON format by the service.
arn (p. 99)
The Amazon Resource Name (ARN) of the robot application.
Type: String
Length Constraints: Minimum length of 1. Maximum length of 1224.
Pattern: arn:.*lastUpdatedAt (p. 99)
The time, in milliseconds since the epoch, when the robot application was last updated.
Type: Timestampname (p. 99)
The name of the robot application.
Type: String
Length Constraints: Minimum length of 1. Maximum length of 255.
Pattern: [a-zA-Z0-9_\-]*revisionId (p. 99)
The revision id of the robot application.
Type: String
Length Constraints: Minimum length of 1. Maximum length of 40.
99

AWS RoboMaker Developer GuideCreateRobotApplication
Pattern: [a-zA-Z0-9_.\-]*robotSoftwareSuite (p. 99)
The robot software suite used by the robot application.
Type: RobotSoftwareSuite (p. 210) objectsources (p. 99)
The sources of the robot application.
Type: Array of Source (p. 219) objectsversion (p. 99)
The version of the robot application.
Type: String
Length Constraints: Minimum length of 1. Maximum length of 255.
Pattern: (\$LATEST)|[0-9]*
ErrorsFor information about the errors that are common to all actions, see Common Errors (p. 222).
IdempotentParameterMismatchException
The request uses the same client token as a previous, but non-identical request. Do not reuse a clienttoken with different requests, unless the requests are identical.
HTTP Status Code: 400InternalServerException
AWS RoboMaker experienced a service issue. Try your call again.
HTTP Status Code: 500InvalidParameterException
A parameter specified in a request is not valid, is unsupported, or cannot be used. The returnedmessage provides an explanation of the error value.
HTTP Status Code: 400LimitExceededException
The requested resource exceeds the maximum number allowed, or the number of concurrent streamrequests exceeds the maximum number allowed.
HTTP Status Code: 400ResourceAlreadyExistsException
The specified resource already exists
HTTP Status Code: 400ThrottlingException
AWS RoboMaker is temporarily unable to process the request. Try your call again.
HTTP Status Code: 400
100

AWS RoboMaker Developer GuideCreateRobotApplication
See AlsoFor more information about using this API in one of the language-specific AWS SDKs, see the following:
• AWS Command Line Interface• AWS SDK for .NET• AWS SDK for C++• AWS SDK for Go• AWS SDK for Java• AWS SDK for JavaScript• AWS SDK for PHP V3• AWS SDK for Python• AWS SDK for Ruby V2
101

AWS RoboMaker Developer GuideCreateRobotApplicationVersion
CreateRobotApplicationVersionCreates a version of a robot application.
Request Syntax
POST /createRobotApplicationVersion HTTP/1.1Content-type: application/json
{ "application": "string", "currentRevisionId": "string"}
URI Request ParametersThe request does not use any URI parameters.
Request BodyThe request accepts the following data in JSON format.
application (p. 102)
The application information for the robot application.
Type: String
Length Constraints: Minimum length of 1. Maximum length of 1224.
Pattern: arn:.*
Required: YescurrentRevisionId (p. 102)
The current revision id for the robot application. If you provide a value and it matches the latestrevision ID, a new version will be created.
Type: String
Length Constraints: Minimum length of 1. Maximum length of 40.
Pattern: [a-zA-Z0-9_.\-]*
Required: No
Response Syntax
HTTP/1.1 200Content-type: application/json
{ "arn": "string", "lastUpdatedAt": number, "name": "string", "revisionId": "string", "robotSoftwareSuite": {
102

AWS RoboMaker Developer GuideCreateRobotApplicationVersion
"name": "string", "version": "string" }, "sources": [ { "architecture": "string", "etag": "string", "s3Bucket": "string", "s3Key": "string" } ], "version": "string"}
Response ElementsIf the action is successful, the service sends back an HTTP 200 response.
The following data is returned in JSON format by the service.
arn (p. 102)
The Amazon Resource Name (ARN) of the robot application.
Type: String
Length Constraints: Minimum length of 1. Maximum length of 1224.
Pattern: arn:.*lastUpdatedAt (p. 102)
The time, in milliseconds since the epoch, when the robot application was last updated.
Type: Timestampname (p. 102)
The name of the robot application.
Type: String
Length Constraints: Minimum length of 1. Maximum length of 255.
Pattern: [a-zA-Z0-9_\-]*revisionId (p. 102)
The revision id of the robot application.
Type: String
Length Constraints: Minimum length of 1. Maximum length of 40.
Pattern: [a-zA-Z0-9_.\-]*robotSoftwareSuite (p. 102)
The robot software suite used by the robot application.
Type: RobotSoftwareSuite (p. 210) objectsources (p. 102)
The sources of the robot application.
103

AWS RoboMaker Developer GuideCreateRobotApplicationVersion
Type: Array of Source (p. 219) objectsversion (p. 102)
The version of the robot application.
Type: String
Length Constraints: Minimum length of 1. Maximum length of 255.
Pattern: (\$LATEST)|[0-9]*
ErrorsFor information about the errors that are common to all actions, see Common Errors (p. 222).
IdempotentParameterMismatchException
The request uses the same client token as a previous, but non-identical request. Do not reuse a clienttoken with different requests, unless the requests are identical.
HTTP Status Code: 400InternalServerException
AWS RoboMaker experienced a service issue. Try your call again.
HTTP Status Code: 500InvalidParameterException
A parameter specified in a request is not valid, is unsupported, or cannot be used. The returnedmessage provides an explanation of the error value.
HTTP Status Code: 400LimitExceededException
The requested resource exceeds the maximum number allowed, or the number of concurrent streamrequests exceeds the maximum number allowed.
HTTP Status Code: 400ThrottlingException
AWS RoboMaker is temporarily unable to process the request. Try your call again.
HTTP Status Code: 400
See AlsoFor more information about using this API in one of the language-specific AWS SDKs, see the following:
• AWS Command Line Interface• AWS SDK for .NET• AWS SDK for C++• AWS SDK for Go• AWS SDK for Java• AWS SDK for JavaScript• AWS SDK for PHP V3
104

AWS RoboMaker Developer GuideCreateRobotApplicationVersion
• AWS SDK for Python• AWS SDK for Ruby V2
105

AWS RoboMaker Developer GuideCreateSimulationApplication
CreateSimulationApplicationCreates a simulation application.
Request Syntax
POST /createSimulationApplication HTTP/1.1Content-type: application/json
{ "name": "string", "renderingEngine": { "name": "string", "version": "string" }, "robotSoftwareSuite": { "name": "string", "version": "string" }, "simulationSoftwareSuite": { "name": "string", "version": "string" }, "sources": [ { "architecture": "string", "s3Bucket": "string", "s3Key": "string" } ]}
URI Request ParametersThe request does not use any URI parameters.
Request BodyThe request accepts the following data in JSON format.
name (p. 106)
The name of the simulation application.
Type: String
Length Constraints: Minimum length of 1. Maximum length of 255.
Pattern: [a-zA-Z0-9_\-]*
Required: Yes
renderingEngine (p. 106)
The rendering engine for the simulation application.
Type: RenderingEngine (p. 203) object
Required: Yes
106

AWS RoboMaker Developer GuideCreateSimulationApplication
robotSoftwareSuite (p. 106)
The robot software suite of the simulation application.
Type: RobotSoftwareSuite (p. 210) object
Required: YessimulationSoftwareSuite (p. 106)
The simulation software suite used by the simulation application.
Type: SimulationSoftwareSuite (p. 218) object
Required: Yessources (p. 106)
The sources of the simulation application.
Type: Array of SourceConfig (p. 220) objects
Required: Yes
Response Syntax
HTTP/1.1 200Content-type: application/json
{ "arn": "string", "lastUpdatedAt": number, "name": "string", "renderingEngine": { "name": "string", "version": "string" }, "revisionId": "string", "robotSoftwareSuite": { "name": "string", "version": "string" }, "simulationSoftwareSuite": { "name": "string", "version": "string" }, "sources": [ { "architecture": "string", "etag": "string", "s3Bucket": "string", "s3Key": "string" } ], "version": "string"}
Response ElementsIf the action is successful, the service sends back an HTTP 200 response.
The following data is returned in JSON format by the service.
107

AWS RoboMaker Developer GuideCreateSimulationApplication
arn (p. 107)
The Amazon Resource Name (ARN) of the simulation application.
Type: String
Length Constraints: Minimum length of 1. Maximum length of 1224.
Pattern: arn:.*lastUpdatedAt (p. 107)
The time, in milliseconds since the epoch, when the simulation application was last updated.
Type: Timestampname (p. 107)
The name of the simulation application.
Type: String
Length Constraints: Minimum length of 1. Maximum length of 255.
Pattern: [a-zA-Z0-9_\-]*renderingEngine (p. 107)
The rendering engine for the simulation application.
Type: RenderingEngine (p. 203) objectrevisionId (p. 107)
The revision id of the simulation application.
Type: String
Length Constraints: Minimum length of 1. Maximum length of 40.
Pattern: [a-zA-Z0-9_.\-]*robotSoftwareSuite (p. 107)
Information about the robot software suite.
Type: RobotSoftwareSuite (p. 210) objectsimulationSoftwareSuite (p. 107)
The simulation software suite used by the simulation application.
Type: SimulationSoftwareSuite (p. 218) objectsources (p. 107)
The sources of the simulation application.
Type: Array of Source (p. 219) objectsversion (p. 107)
The version of the simulation application.
Type: String
Length Constraints: Minimum length of 1. Maximum length of 255.
108

AWS RoboMaker Developer GuideCreateSimulationApplication
Pattern: (\$LATEST)|[0-9]*
ErrorsFor information about the errors that are common to all actions, see Common Errors (p. 222).
IdempotentParameterMismatchException
The request uses the same client token as a previous, but non-identical request. Do not reuse a clienttoken with different requests, unless the requests are identical.
HTTP Status Code: 400InternalServerException
AWS RoboMaker experienced a service issue. Try your call again.
HTTP Status Code: 500InvalidParameterException
A parameter specified in a request is not valid, is unsupported, or cannot be used. The returnedmessage provides an explanation of the error value.
HTTP Status Code: 400LimitExceededException
The requested resource exceeds the maximum number allowed, or the number of concurrent streamrequests exceeds the maximum number allowed.
HTTP Status Code: 400ResourceAlreadyExistsException
The specified resource already exists
HTTP Status Code: 400ThrottlingException
AWS RoboMaker is temporarily unable to process the request. Try your call again.
HTTP Status Code: 400
See AlsoFor more information about using this API in one of the language-specific AWS SDKs, see the following:
• AWS Command Line Interface• AWS SDK for .NET• AWS SDK for C++• AWS SDK for Go• AWS SDK for Java• AWS SDK for JavaScript• AWS SDK for PHP V3• AWS SDK for Python• AWS SDK for Ruby V2
109

AWS RoboMaker Developer GuideCreateSimulationApplicationVersion
CreateSimulationApplicationVersionCreates a simulation application with a specific revision id.
Request Syntax
POST /createSimulationApplicationVersion HTTP/1.1Content-type: application/json
{ "application": "string", "currentRevisionId": "string"}
URI Request ParametersThe request does not use any URI parameters.
Request BodyThe request accepts the following data in JSON format.
application (p. 110)
The application information for the simulation application.
Type: String
Length Constraints: Minimum length of 1. Maximum length of 1224.
Pattern: arn:.*
Required: YescurrentRevisionId (p. 110)
The current revision id for the simulation application. If you provide a value and it matches the latestrevision ID, a new version will be created.
Type: String
Length Constraints: Minimum length of 1. Maximum length of 40.
Pattern: [a-zA-Z0-9_.\-]*
Required: No
Response Syntax
HTTP/1.1 200Content-type: application/json
{ "arn": "string", "lastUpdatedAt": number, "name": "string", "renderingEngine": { "name": "string",
110

AWS RoboMaker Developer GuideCreateSimulationApplicationVersion
"version": "string" }, "revisionId": "string", "robotSoftwareSuite": { "name": "string", "version": "string" }, "simulationSoftwareSuite": { "name": "string", "version": "string" }, "sources": [ { "architecture": "string", "etag": "string", "s3Bucket": "string", "s3Key": "string" } ], "version": "string"}
Response ElementsIf the action is successful, the service sends back an HTTP 200 response.
The following data is returned in JSON format by the service.
arn (p. 110)
The Amazon Resource Name (ARN) of the simulation application.
Type: String
Length Constraints: Minimum length of 1. Maximum length of 1224.
Pattern: arn:.*lastUpdatedAt (p. 110)
The time, in milliseconds since the epoch, when the simulation application was last updated.
Type: Timestampname (p. 110)
The name of the simulation application.
Type: String
Length Constraints: Minimum length of 1. Maximum length of 255.
Pattern: [a-zA-Z0-9_\-]*renderingEngine (p. 110)
The rendering engine for the simulation application.
Type: RenderingEngine (p. 203) objectrevisionId (p. 110)
The revision ID of the simulation application.
Type: String
111

AWS RoboMaker Developer GuideCreateSimulationApplicationVersion
Length Constraints: Minimum length of 1. Maximum length of 40.
Pattern: [a-zA-Z0-9_.\-]*robotSoftwareSuite (p. 110)
Information about the robot software suite.
Type: RobotSoftwareSuite (p. 210) objectsimulationSoftwareSuite (p. 110)
The simulation software suite used by the simulation application.
Type: SimulationSoftwareSuite (p. 218) objectsources (p. 110)
The sources of the simulation application.
Type: Array of Source (p. 219) objectsversion (p. 110)
The version of the simulation application.
Type: String
Length Constraints: Minimum length of 1. Maximum length of 255.
Pattern: (\$LATEST)|[0-9]*
ErrorsFor information about the errors that are common to all actions, see Common Errors (p. 222).
IdempotentParameterMismatchException
The request uses the same client token as a previous, but non-identical request. Do not reuse a clienttoken with different requests, unless the requests are identical.
HTTP Status Code: 400InternalServerException
AWS RoboMaker experienced a service issue. Try your call again.
HTTP Status Code: 500InvalidParameterException
A parameter specified in a request is not valid, is unsupported, or cannot be used. The returnedmessage provides an explanation of the error value.
HTTP Status Code: 400LimitExceededException
The requested resource exceeds the maximum number allowed, or the number of concurrent streamrequests exceeds the maximum number allowed.
HTTP Status Code: 400ThrottlingException
AWS RoboMaker is temporarily unable to process the request. Try your call again.
112

AWS RoboMaker Developer GuideCreateSimulationApplicationVersion
HTTP Status Code: 400
See AlsoFor more information about using this API in one of the language-specific AWS SDKs, see the following:
• AWS Command Line Interface• AWS SDK for .NET• AWS SDK for C++• AWS SDK for Go• AWS SDK for Java• AWS SDK for JavaScript• AWS SDK for PHP V3• AWS SDK for Python• AWS SDK for Ruby V2
113
https://docs.aws.amazon.com/goto/DotNetSDKV3/robomaker-2018-06-29/CreateSimulationApplicationVersion

AWS RoboMaker Developer GuideCreateSimulationJob
CreateSimulationJobCreates a simulation job.
Request Syntax
POST /createSimulationJob HTTP/1.1Content-type: application/json
{ "clientRequestToken": "string", "failureBehavior": "string", "iamRole": "string", "maxJobDurationInSeconds": number, "outputLocation": { "s3Bucket": "string", "s3Prefix": "string" }, "robotApplications": [ { "application": "string", "applicationVersion": "string", "launchConfig": { "environmentVariables": { "string" : "string" }, "launchFile": "string", "packageName": "string" } } ], "simulationApplications": [ { "application": "string", "applicationVersion": "string", "launchConfig": { "environmentVariables": { "string" : "string" }, "launchFile": "string", "packageName": "string" } } ], "vpcConfig": { "assignPublicIp": boolean, "securityGroups": [ "string" ], "subnets": [ "string" ] }}
URI Request ParametersThe request does not use any URI parameters.
Request BodyThe request accepts the following data in JSON format.
clientRequestToken (p. 114)
Unique, case-sensitive identifier that you provide to ensure the idempotency of the request.
114

AWS RoboMaker Developer GuideCreateSimulationJob
Type: String
Length Constraints: Minimum length of 1. Maximum length of 64.
Pattern: [a-zA-Z0-9_\-=]*
Required: NofailureBehavior (p. 114)
The failure behavior the simulation job.Continue
Restart the simulation job in the same host instance.Fail
Stop the simulation job and terminate the instance.
Type: String
Valid Values: Fail | Continue
Required: NoiamRole (p. 114)
The IAM role name that allows the simulation instance to call the AWS APIs that are specified in itsassociated policies on your behalf. This is how credentials are passed in to your simulation job.
Type: String
Length Constraints: Minimum length of 1. Maximum length of 255.
Pattern: arn:.*
Required: YesmaxJobDurationInSeconds (p. 114)
The maximum simulation job duration in seconds (up to 14 days or 1,209,600 seconds. WhenmaxJobDurationInSeconds is reached, the simulation job will status will transition toCompleted.
Type: Long
Required: YesoutputLocation (p. 114)
Location for output files generated by the simulation job.
Type: OutputLocation (p. 201) object
Required: NorobotApplications (p. 114)
The robot application to use in the simulation job.
Type: Array of RobotApplicationConfig (p. 206) objects
Array Members: Fixed number of 1 item.
Required: No
115

AWS RoboMaker Developer GuideCreateSimulationJob
simulationApplications (p. 114)
The simulation application to use in the simulation job.
Type: Array of SimulationApplicationConfig (p. 211) objects
Array Members: Fixed number of 1 item.
Required: NovpcConfig (p. 114)
If your simulation job accesses resources in a VPC, you provide this parameter identifying the list ofsecurity group IDs and subnet IDs. These must belong to the same VPC. You must provide at leastone security group and one subnet ID.
Type: VPCConfig (p. 221) object
Required: No
Response Syntax
HTTP/1.1 200Content-type: application/json
{ "arn": "string", "clientRequestToken": "string", "failureBehavior": "string", "failureCode": "string", "iamRole": "string", "lastUpdatedAt": number, "maxJobDurationInSeconds": number, "outputLocation": { "s3Bucket": "string", "s3Prefix": "string" }, "robotApplications": [ { "application": "string", "applicationVersion": "string", "launchConfig": { "environmentVariables": { "string" : "string" }, "launchFile": "string", "packageName": "string" } } ], "simulationApplications": [ { "application": "string", "applicationVersion": "string", "launchConfig": { "environmentVariables": { "string" : "string" }, "launchFile": "string", "packageName": "string" } } ],
116

AWS RoboMaker Developer GuideCreateSimulationJob
"simulationTimeMillis": number, "status": "string", "vpcConfig": { "assignPublicIp": boolean, "securityGroups": [ "string" ], "subnets": [ "string" ], "vpcId": "string" }}
Response ElementsIf the action is successful, the service sends back an HTTP 200 response.
The following data is returned in JSON format by the service.
arn (p. 116)
The Amazon Resource Name (ARN) of the simulation job.
Type: String
Length Constraints: Minimum length of 1. Maximum length of 1224.
Pattern: arn:.*clientRequestToken (p. 116)
Unique, case-sensitive identifier that you provide to ensure the idempotency of the request.
Type: String
Length Constraints: Minimum length of 1. Maximum length of 64.
Pattern: [a-zA-Z0-9_\-=]*failureBehavior (p. 116)
the failure behavior for the simulation job.
Type: String
Valid Values: Fail | ContinuefailureCode (p. 116)
The failure code of the simulation job if it failed:InternalServiceError
Internal service error.RobotApplicationCrash
Robot application exited abnormally.SimulationApplicationCrash
Simulation application exited abnormally.BadPermissionsRobotApplication
Robot application bundle could not be downloaded.BadPermissionsSimulationApplication
Simulation application bundle could not be downloaded.
117

AWS RoboMaker Developer GuideCreateSimulationJob
BadPermissionsS3Output
Unable to publish outputs to customer-provided S3 bucket.BadPermissionsCloudwatchLogs
Unable to publish logs to customer-provided CloudWatch Logs resource.SubnetIpLimitExceeded
Subnet IP limit exceeded.ENILimitExceeded
ENI limit exceeded.BadPermissionsUserCredentials
Unable to use the Role provided.InvalidBundleRobotApplication
Robot bundle cannot be extracted (invalid format, bundling error, or other issue).InvalidBundleSimulationApplication
Simulation bundle cannot be extracted (invalid format, bundling error, or other issue).RobotApplicationVersionMismatchedEtag
Etag for RobotApplication does not match value during version creation.SimulationApplicationVersionMismatchedEtag
Etag for SimulationApplication does not match value during version creation.
Type: String
Valid Values: InternalServiceError | RobotApplicationCrash |SimulationApplicationCrash | BadPermissionsRobotApplication |BadPermissionsSimulationApplication | BadPermissionsS3Output |BadPermissionsCloudwatchLogs | SubnetIpLimitExceeded | ENILimitExceeded| BadPermissionsUserCredentials | InvalidBundleRobotApplication |InvalidBundleSimulationApplication | RobotApplicationVersionMismatchedEtag |SimulationApplicationVersionMismatchedEtag
iamRole (p. 116)
The IAM role that allows the simulation job to call the AWS APIs that are specified in its associatedpolicies on your behalf.
Type: String
Length Constraints: Minimum length of 1. Maximum length of 255.
Pattern: arn:.*lastUpdatedAt (p. 116)
The time, in milliseconds since the epoch, when the simulation job was last updated.
Type: TimestampmaxJobDurationInSeconds (p. 116)
The maximum simulation job duration in seconds. The value must be 8 days (691,200 seconds) orless.
Type: Long
118

AWS RoboMaker Developer GuideCreateSimulationJob
outputLocation (p. 116)
Simulation job output files location.
Type: OutputLocation (p. 201) objectrobotApplications (p. 116)
The robot application used by the simulation job.
Type: Array of RobotApplicationConfig (p. 206) objects
Array Members: Fixed number of 1 item.simulationApplications (p. 116)
The simulation application used by the simulation job.
Type: Array of SimulationApplicationConfig (p. 211) objects
Array Members: Fixed number of 1 item.simulationTimeMillis (p. 116)
The simulation job execution duration in milliseconds.
Type: Longstatus (p. 116)
The status of the simulation job.
Type: String
Valid Values: Pending | Preparing | Running | Restarting | Completed | Failed |RunningFailed | Terminating | Terminated | Canceled
vpcConfig (p. 116)
Information about the vpc configuration.
Type: VPCConfigResponse (p. 222) object
ErrorsFor information about the errors that are common to all actions, see Common Errors (p. 222).
IdempotentParameterMismatchException
The request uses the same client token as a previous, but non-identical request. Do not reuse a clienttoken with different requests, unless the requests are identical.
HTTP Status Code: 400InternalServerException
AWS RoboMaker experienced a service issue. Try your call again.
HTTP Status Code: 500InvalidParameterException
A parameter specified in a request is not valid, is unsupported, or cannot be used. The returnedmessage provides an explanation of the error value.
119

AWS RoboMaker Developer GuideCreateSimulationJob
HTTP Status Code: 400LimitExceededException
The requested resource exceeds the maximum number allowed, or the number of concurrent streamrequests exceeds the maximum number allowed.
HTTP Status Code: 400ResourceNotFoundException
The specified resource does not exist.
HTTP Status Code: 400ThrottlingException
AWS RoboMaker is temporarily unable to process the request. Try your call again.
HTTP Status Code: 400
See AlsoFor more information about using this API in one of the language-specific AWS SDKs, see the following:
• AWS Command Line Interface• AWS SDK for .NET• AWS SDK for C++• AWS SDK for Go• AWS SDK for Java• AWS SDK for JavaScript• AWS SDK for PHP V3• AWS SDK for Python• AWS SDK for Ruby V2
120

AWS RoboMaker Developer GuideDeleteFleet
DeleteFleetDeletes a fleet.
Request Syntax
POST /deleteFleet HTTP/1.1Content-type: application/json
{ "fleet": "string"}
URI Request ParametersThe request does not use any URI parameters.
Request BodyThe request accepts the following data in JSON format.
fleet (p. 121)
The Amazon Resource Name (ARN) of the fleet.
Type: String
Length Constraints: Minimum length of 1. Maximum length of 1224.
Pattern: arn:.*
Required: Yes
Response Syntax
HTTP/1.1 200
Response ElementsIf the action is successful, the service sends back an HTTP 200 response with an empty HTTP body.
ErrorsFor information about the errors that are common to all actions, see Common Errors (p. 222).
InternalServerException
AWS RoboMaker experienced a service issue. Try your call again.
HTTP Status Code: 500InvalidParameterException
A parameter specified in a request is not valid, is unsupported, or cannot be used. The returnedmessage provides an explanation of the error value.
121

AWS RoboMaker Developer GuideDeleteFleet
HTTP Status Code: 400ThrottlingException
AWS RoboMaker is temporarily unable to process the request. Try your call again.
HTTP Status Code: 400
See AlsoFor more information about using this API in one of the language-specific AWS SDKs, see the following:
• AWS Command Line Interface• AWS SDK for .NET• AWS SDK for C++• AWS SDK for Go• AWS SDK for Java• AWS SDK for JavaScript• AWS SDK for PHP V3• AWS SDK for Python• AWS SDK for Ruby V2
122

AWS RoboMaker Developer GuideDeleteRobot
DeleteRobotDeletes a robot.
Request Syntax
POST /deleteRobot HTTP/1.1Content-type: application/json
{ "robot": "string"}
URI Request ParametersThe request does not use any URI parameters.
Request BodyThe request accepts the following data in JSON format.
robot (p. 123)
The Amazon Resource Name (ARN) of the robot.
Type: String
Length Constraints: Minimum length of 1. Maximum length of 1224.
Pattern: arn:.*
Required: Yes
Response Syntax
HTTP/1.1 200
Response ElementsIf the action is successful, the service sends back an HTTP 200 response with an empty HTTP body.
ErrorsFor information about the errors that are common to all actions, see Common Errors (p. 222).
InternalServerException
AWS RoboMaker experienced a service issue. Try your call again.
HTTP Status Code: 500InvalidParameterException
A parameter specified in a request is not valid, is unsupported, or cannot be used. The returnedmessage provides an explanation of the error value.
123

AWS RoboMaker Developer GuideDeleteRobot
HTTP Status Code: 400ThrottlingException
AWS RoboMaker is temporarily unable to process the request. Try your call again.
HTTP Status Code: 400
See AlsoFor more information about using this API in one of the language-specific AWS SDKs, see the following:
• AWS Command Line Interface• AWS SDK for .NET• AWS SDK for C++• AWS SDK for Go• AWS SDK for Java• AWS SDK for JavaScript• AWS SDK for PHP V3• AWS SDK for Python• AWS SDK for Ruby V2
124

AWS RoboMaker Developer GuideDeleteRobotApplication
DeleteRobotApplicationDeletes a robot application.
Request Syntax
POST /deleteRobotApplication HTTP/1.1Content-type: application/json
{ "application": "string", "applicationVersion": "string"}
URI Request ParametersThe request does not use any URI parameters.
Request BodyThe request accepts the following data in JSON format.
application (p. 125)
The Amazon Resource Name (ARN) of the the robot application.
Type: String
Length Constraints: Minimum length of 1. Maximum length of 1224.
Pattern: arn:.*
Required: YesapplicationVersion (p. 125)
The version of the robot application to delete.
Type: String
Length Constraints: Minimum length of 1. Maximum length of 255.
Pattern: (\$LATEST)|[0-9]*
Required: No
Response Syntax
HTTP/1.1 200
Response ElementsIf the action is successful, the service sends back an HTTP 200 response with an empty HTTP body.
ErrorsFor information about the errors that are common to all actions, see Common Errors (p. 222).
125

AWS RoboMaker Developer GuideDeleteRobotApplication
InternalServerException
AWS RoboMaker experienced a service issue. Try your call again.
HTTP Status Code: 500InvalidParameterException
A parameter specified in a request is not valid, is unsupported, or cannot be used. The returnedmessage provides an explanation of the error value.
HTTP Status Code: 400ThrottlingException
AWS RoboMaker is temporarily unable to process the request. Try your call again.
HTTP Status Code: 400
See AlsoFor more information about using this API in one of the language-specific AWS SDKs, see the following:
• AWS Command Line Interface• AWS SDK for .NET• AWS SDK for C++• AWS SDK for Go• AWS SDK for Java• AWS SDK for JavaScript• AWS SDK for PHP V3• AWS SDK for Python• AWS SDK for Ruby V2
126

AWS RoboMaker Developer GuideDeleteSimulationApplication
DeleteSimulationApplicationDeletes a simulation application.
Request Syntax
POST /deleteSimulationApplication HTTP/1.1Content-type: application/json
{ "application": "string", "applicationVersion": "string"}
URI Request ParametersThe request does not use any URI parameters.
Request BodyThe request accepts the following data in JSON format.
application (p. 127)
The application information for the simulation application to delete.
Type: String
Length Constraints: Minimum length of 1. Maximum length of 1224.
Pattern: arn:.*
Required: YesapplicationVersion (p. 127)
The version of the simulation application to delete.
Type: String
Length Constraints: Minimum length of 1. Maximum length of 255.
Pattern: (\$LATEST)|[0-9]*
Required: No
Response Syntax
HTTP/1.1 200
Response ElementsIf the action is successful, the service sends back an HTTP 200 response with an empty HTTP body.
ErrorsFor information about the errors that are common to all actions, see Common Errors (p. 222).
127

AWS RoboMaker Developer GuideDeleteSimulationApplication
InternalServerException
AWS RoboMaker experienced a service issue. Try your call again.
HTTP Status Code: 500InvalidParameterException
A parameter specified in a request is not valid, is unsupported, or cannot be used. The returnedmessage provides an explanation of the error value.
HTTP Status Code: 400ThrottlingException
AWS RoboMaker is temporarily unable to process the request. Try your call again.
HTTP Status Code: 400
See AlsoFor more information about using this API in one of the language-specific AWS SDKs, see the following:
• AWS Command Line Interface• AWS SDK for .NET• AWS SDK for C++• AWS SDK for Go• AWS SDK for Java• AWS SDK for JavaScript• AWS SDK for PHP V3• AWS SDK for Python• AWS SDK for Ruby V2
128

AWS RoboMaker Developer GuideDeregisterRobot
DeregisterRobotDeregisters a robot.
Request Syntax
POST /deregisterRobot HTTP/1.1Content-type: application/json
{ "fleet": "string", "robot": "string"}
URI Request ParametersThe request does not use any URI parameters.
Request BodyThe request accepts the following data in JSON format.
fleet (p. 129)
The Amazon Resource Name (ARN) of the fleet.
Type: String
Length Constraints: Minimum length of 1. Maximum length of 1224.
Pattern: arn:.*
Required: Yes
robot (p. 129)
The Amazon Resource Name (ARN) of the robot.
Type: String
Length Constraints: Minimum length of 1. Maximum length of 1224.
Pattern: arn:.*
Required: Yes
Response Syntax
HTTP/1.1 200Content-type: application/json
{ "fleet": "string", "robot": "string"}
129

AWS RoboMaker Developer GuideDeregisterRobot
Response ElementsIf the action is successful, the service sends back an HTTP 200 response.
The following data is returned in JSON format by the service.
fleet (p. 129)
The Amazon Resource Name (ARN) of the fleet.
Type: String
Length Constraints: Minimum length of 1. Maximum length of 1224.
Pattern: arn:.*robot (p. 129)
The Amazon Resource Name (ARN) of the robot.
Type: String
Length Constraints: Minimum length of 1. Maximum length of 1224.
Pattern: arn:.*
ErrorsFor information about the errors that are common to all actions, see Common Errors (p. 222).
InternalServerException
AWS RoboMaker experienced a service issue. Try your call again.
HTTP Status Code: 500InvalidParameterException
A parameter specified in a request is not valid, is unsupported, or cannot be used. The returnedmessage provides an explanation of the error value.
HTTP Status Code: 400ResourceNotFoundException
The specified resource does not exist.
HTTP Status Code: 400ThrottlingException
AWS RoboMaker is temporarily unable to process the request. Try your call again.
HTTP Status Code: 400
See AlsoFor more information about using this API in one of the language-specific AWS SDKs, see the following:
• AWS Command Line Interface• AWS SDK for .NET
130

AWS RoboMaker Developer GuideDeregisterRobot
• AWS SDK for C++• AWS SDK for Go• AWS SDK for Java• AWS SDK for JavaScript• AWS SDK for PHP V3• AWS SDK for Python• AWS SDK for Ruby V2
131

AWS RoboMaker Developer GuideDescribeDeploymentJob
DescribeDeploymentJobDescribes a deployment job. [Does it work regardless of deployment status, e.g. Failed?]
Request Syntax
POST /describeDeploymentJob HTTP/1.1Content-type: application/json
{ "job": "string"}
URI Request ParametersThe request does not use any URI parameters.
Request BodyThe request accepts the following data in JSON format.
job (p. 132)
The Amazon Resource Name (ARN) of the deployment job.
Type: String
Length Constraints: Minimum length of 1. Maximum length of 1224.
Pattern: arn:.*
Required: Yes
Response Syntax
HTTP/1.1 200Content-type: application/json
{ "arn": "string", "createdAt": number, "deploymentApplicationConfigs": [ { "application": "string", "applicationVersion": "string", "launchConfig": { "environmentVariables": { "string" : "string" }, "launchFile": "string", "packageName": "string", "postLaunchFile": "string", "preLaunchFile": "string" } } ], "deploymentConfig": {
132

AWS RoboMaker Developer GuideDescribeDeploymentJob
"concurrentDeploymentPercentage": number, "failureThresholdPercentage": number }, "failureCode": "string", "failureReason": "string", "fleet": "string", "robotDeploymentSummary": [ { "arn": "string", "deploymentFinishTime": number, "deploymentStartTime": number, "failureCode": "string", "failureReason": "string", "progressDetail": { "currentProgress": "string", "targetResource": "string" }, "status": "string" } ], "status": "string"}
Response ElementsIf the action is successful, the service sends back an HTTP 200 response.
The following data is returned in JSON format by the service.
arn (p. 132)
The Amazon Resource Name (ARN) of the deployment job.
Type: String
Length Constraints: Minimum length of 1. Maximum length of 1224.
Pattern: arn:.*createdAt (p. 132)
The time, in milliseconds since the epoch, when the deployment job was created.
Type: TimestampdeploymentApplicationConfigs (p. 132)
The deployment application configuration.
Type: Array of DeploymentApplicationConfig (p. 191) objects
Array Members: Fixed number of 1 item.deploymentConfig (p. 132)
The deployment configuration.
Type: DeploymentConfig (p. 192) objectfailureCode (p. 132)
The deployment job failure code.
Type: String
133

AWS RoboMaker Developer GuideDescribeDeploymentJob
Valid Values: ResourceNotFound | FailureThresholdBreached |RobotDeploymentNoResponse | GreengrassDeploymentFailed |MissingRobotArchitecture | MissingRobotApplicationArchitecture |MissingRobotDeploymentResource | GreengrassGroupVersionDoesNotExist |ExtractingBundleFailure | PreLaunchFileFailure | PostLaunchFileFailure |BadPermissionError | InternalServerError
failureReason (p. 132)
A short description of the reason why the deployment job failed.
Type: Stringfleet (p. 132)
The Amazon Resource Name (ARN) of the fleet.
Type: String
Length Constraints: Minimum length of 1. Maximum length of 1224.
Pattern: arn:.*robotDeploymentSummary (p. 132)
A list of robot deployment summaries.
Type: Array of RobotDeployment (p. 208) objectsstatus (p. 132)
The status of the deployment job.
Type: String
Valid Values: Pending | Preparing | InProgress | Failed | Succeeded
ErrorsFor information about the errors that are common to all actions, see Common Errors (p. 222).
InternalServerException
AWS RoboMaker experienced a service issue. Try your call again.
HTTP Status Code: 500InvalidParameterException
A parameter specified in a request is not valid, is unsupported, or cannot be used. The returnedmessage provides an explanation of the error value.
HTTP Status Code: 400ResourceNotFoundException
The specified resource does not exist.
HTTP Status Code: 400ThrottlingException
AWS RoboMaker is temporarily unable to process the request. Try your call again.
HTTP Status Code: 400
134

AWS RoboMaker Developer GuideDescribeDeploymentJob
See AlsoFor more information about using this API in one of the language-specific AWS SDKs, see the following:
• AWS Command Line Interface• AWS SDK for .NET• AWS SDK for C++• AWS SDK for Go• AWS SDK for Java• AWS SDK for JavaScript• AWS SDK for PHP V3• AWS SDK for Python• AWS SDK for Ruby V2
135

AWS RoboMaker Developer GuideDescribeFleet
DescribeFleetDescribes a fleet.
Request Syntax
POST /describeFleet HTTP/1.1Content-type: application/json
{ "fleet": "string"}
URI Request ParametersThe request does not use any URI parameters.
Request BodyThe request accepts the following data in JSON format.
fleet (p. 136)
The Amazon Resource Name (ARN) of the fleet.
Type: String
Length Constraints: Minimum length of 1. Maximum length of 1224.
Pattern: arn:.*
Required: Yes
Response Syntax
HTTP/1.1 200Content-type: application/json
{ "arn": "string", "createdAt": number, "lastDeploymentJob": "string", "lastDeploymentStatus": "string", "lastDeploymentTime": number, "name": "string", "robots": [ { "architecture": "string", "arn": "string", "createdAt": number, "fleetArn": "string", "greenGrassGroupId": "string", "lastDeploymentJob": "string", "lastDeploymentTime": number, "name": "string", "status": "string" } ]
136

AWS RoboMaker Developer GuideDescribeFleet
}
Response ElementsIf the action is successful, the service sends back an HTTP 200 response.
The following data is returned in JSON format by the service.
arn (p. 136)
The Amazon Resource Name (ARN) of the fleet.
Type: String
Length Constraints: Minimum length of 1. Maximum length of 1224.
Pattern: arn:.*createdAt (p. 136)
The time, in milliseconds since the epoch, when the fleet was created.
Type: TimestamplastDeploymentJob (p. 136)
The Amazon Resource Name (ARN) of the last deployment job.
Type: String
Length Constraints: Minimum length of 1. Maximum length of 1224.
Pattern: arn:.*lastDeploymentStatus (p. 136)
The status of the last deployment.
Type: String
Valid Values: Pending | Preparing | InProgress | Failed | SucceededlastDeploymentTime (p. 136)
The time of the last deployment.
Type: Timestampname (p. 136)
The name of the fleet.
Type: String
Length Constraints: Minimum length of 1. Maximum length of 255.
Pattern: [a-zA-Z0-9_\-]*robots (p. 136)
A list of robots.
Type: Array of Robot (p. 204) objects
Array Members: Minimum number of 0 items. Maximum number of 1000 items.
137

AWS RoboMaker Developer GuideDescribeFleet
ErrorsFor information about the errors that are common to all actions, see Common Errors (p. 222).
InternalServerException
AWS RoboMaker experienced a service issue. Try your call again.
HTTP Status Code: 500InvalidParameterException
A parameter specified in a request is not valid, is unsupported, or cannot be used. The returnedmessage provides an explanation of the error value.
HTTP Status Code: 400ResourceNotFoundException
The specified resource does not exist.
HTTP Status Code: 400ThrottlingException
AWS RoboMaker is temporarily unable to process the request. Try your call again.
HTTP Status Code: 400
See AlsoFor more information about using this API in one of the language-specific AWS SDKs, see the following:
• AWS Command Line Interface• AWS SDK for .NET• AWS SDK for C++• AWS SDK for Go• AWS SDK for Java• AWS SDK for JavaScript• AWS SDK for PHP V3• AWS SDK for Python• AWS SDK for Ruby V2
138
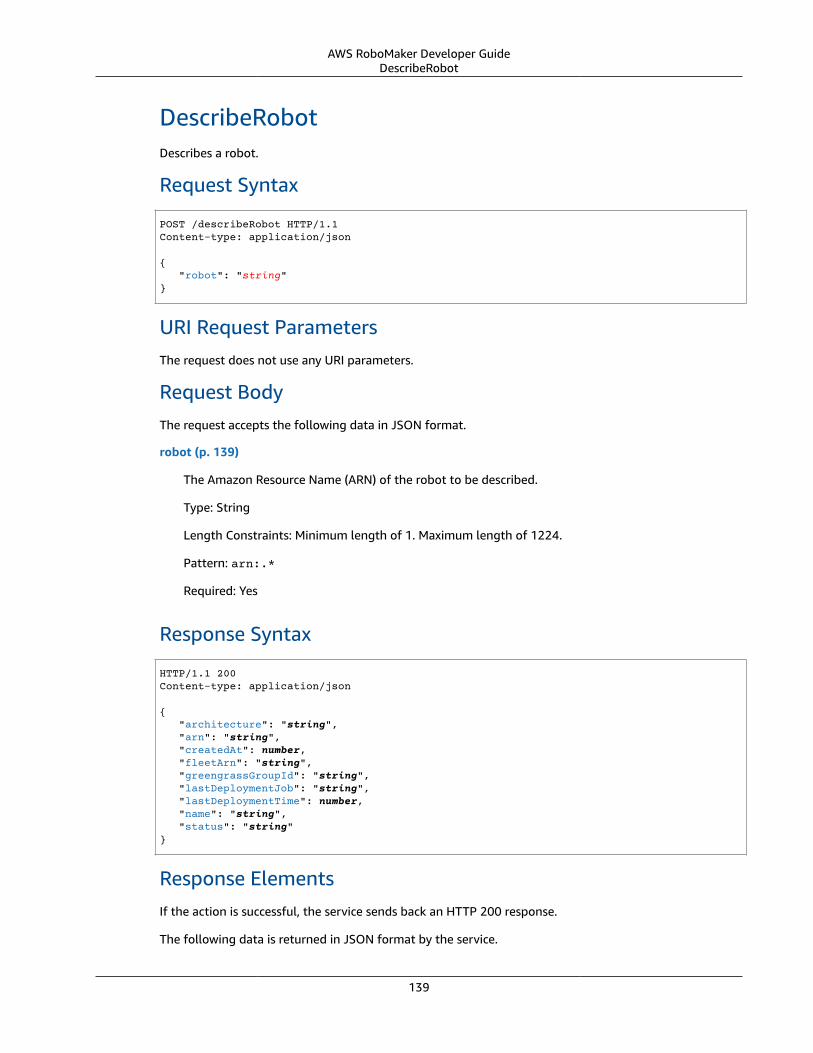
AWS RoboMaker Developer GuideDescribeRobot
DescribeRobotDescribes a robot.
Request Syntax
POST /describeRobot HTTP/1.1Content-type: application/json
{ "robot": "string"}
URI Request ParametersThe request does not use any URI parameters.
Request BodyThe request accepts the following data in JSON format.
robot (p. 139)
The Amazon Resource Name (ARN) of the robot to be described.
Type: String
Length Constraints: Minimum length of 1. Maximum length of 1224.
Pattern: arn:.*
Required: Yes
Response Syntax
HTTP/1.1 200Content-type: application/json
{ "architecture": "string", "arn": "string", "createdAt": number, "fleetArn": "string", "greengrassGroupId": "string", "lastDeploymentJob": "string", "lastDeploymentTime": number, "name": "string", "status": "string"}
Response ElementsIf the action is successful, the service sends back an HTTP 200 response.
The following data is returned in JSON format by the service.
139

AWS RoboMaker Developer GuideDescribeRobot
architecture (p. 139)
The target architecture of the robot application.
Type: String
Valid Values: X86_64 | ARM64 | ARMHFarn (p. 139)
The Amazon Resource Name (ARN) of the robot.
Type: String
Length Constraints: Minimum length of 1. Maximum length of 1224.
Pattern: arn:.*createdAt (p. 139)
The time, in milliseconds since the epoch, when the robot was created.
Type: TimestampfleetArn (p. 139)
The Amazon Resource Name (ARN) of the fleet.
Type: String
Length Constraints: Minimum length of 1. Maximum length of 1224.
Pattern: arn:.*greengrassGroupId (p. 139)
The Greengrass group id.
Type: String
Length Constraints: Minimum length of 1. Maximum length of 1224.lastDeploymentJob (p. 139)
The Amazon Resource Name (ARN) of the last deployment job.
Type: String
Length Constraints: Minimum length of 1. Maximum length of 1224.
Pattern: arn:.*lastDeploymentTime (p. 139)
The time of the last deployment job.
Type: Timestampname (p. 139)
The name of the robot.
Type: String
Length Constraints: Minimum length of 1. Maximum length of 255.
Pattern: [a-zA-Z0-9_\-]*
140

AWS RoboMaker Developer GuideDescribeRobot
status (p. 139)
The status of the fleet.
Type: String
Valid Values: Available | Registered | PendingNewDeployment | Deploying |Failed | InSync | NoResponse
ErrorsFor information about the errors that are common to all actions, see Common Errors (p. 222).
InternalServerException
AWS RoboMaker experienced a service issue. Try your call again.
HTTP Status Code: 500InvalidParameterException
A parameter specified in a request is not valid, is unsupported, or cannot be used. The returnedmessage provides an explanation of the error value.
HTTP Status Code: 400ResourceNotFoundException
The specified resource does not exist.
HTTP Status Code: 400ThrottlingException
AWS RoboMaker is temporarily unable to process the request. Try your call again.
HTTP Status Code: 400
See AlsoFor more information about using this API in one of the language-specific AWS SDKs, see the following:
• AWS Command Line Interface• AWS SDK for .NET• AWS SDK for C++• AWS SDK for Go• AWS SDK for Java• AWS SDK for JavaScript• AWS SDK for PHP V3• AWS SDK for Python• AWS SDK for Ruby V2
141

AWS RoboMaker Developer GuideDescribeRobotApplication
DescribeRobotApplicationDescribes a robot application.
Request Syntax
POST /describeRobotApplication HTTP/1.1Content-type: application/json
{ "application": "string", "applicationVersion": "string"}
URI Request ParametersThe request does not use any URI parameters.
Request BodyThe request accepts the following data in JSON format.
application (p. 142)
The Amazon Resource Name (ARN) of the robot application.
Type: String
Length Constraints: Minimum length of 1. Maximum length of 1224.
Pattern: arn:.*
Required: YesapplicationVersion (p. 142)
The version of the robot application to describe.
Type: String
Length Constraints: Minimum length of 1. Maximum length of 255.
Pattern: (\$LATEST)|[0-9]*
Required: No
Response Syntax
HTTP/1.1 200Content-type: application/json
{ "arn": "string", "lastUpdatedAt": number, "name": "string", "revisionId": "string", "robotSoftwareSuite": {
142

AWS RoboMaker Developer GuideDescribeRobotApplication
"name": "string", "version": "string" }, "sources": [ { "architecture": "string", "etag": "string", "s3Bucket": "string", "s3Key": "string" } ], "version": "string"}
Response ElementsIf the action is successful, the service sends back an HTTP 200 response.
The following data is returned in JSON format by the service.
arn (p. 142)
The Amazon Resource Name (ARN) of the robot application.
Type: String
Length Constraints: Minimum length of 1. Maximum length of 1224.
Pattern: arn:.*lastUpdatedAt (p. 142)
The time, in milliseconds since the epoch, when the robot application was last updated.
Type: Timestampname (p. 142)
The name of the robot application.
Type: String
Length Constraints: Minimum length of 1. Maximum length of 255.
Pattern: [a-zA-Z0-9_\-]*revisionId (p. 142)
The revision id of the robot application.
Type: String
Length Constraints: Minimum length of 1. Maximum length of 40.
Pattern: [a-zA-Z0-9_.\-]*robotSoftwareSuite (p. 142)
The robot software suite used by the robot application.
Type: RobotSoftwareSuite (p. 210) objectsources (p. 142)
The sources of the robot application.
143

AWS RoboMaker Developer GuideDescribeRobotApplication
Type: Array of Source (p. 219) objectsversion (p. 142)
The version of the robot application.
Type: String
Length Constraints: Minimum length of 1. Maximum length of 255.
Pattern: (\$LATEST)|[0-9]*
ErrorsFor information about the errors that are common to all actions, see Common Errors (p. 222).
InternalServerException
AWS RoboMaker experienced a service issue. Try your call again.
HTTP Status Code: 500InvalidParameterException
A parameter specified in a request is not valid, is unsupported, or cannot be used. The returnedmessage provides an explanation of the error value.
HTTP Status Code: 400ResourceNotFoundException
The specified resource does not exist.
HTTP Status Code: 400ThrottlingException
AWS RoboMaker is temporarily unable to process the request. Try your call again.
HTTP Status Code: 400
See AlsoFor more information about using this API in one of the language-specific AWS SDKs, see the following:
• AWS Command Line Interface• AWS SDK for .NET• AWS SDK for C++• AWS SDK for Go• AWS SDK for Java• AWS SDK for JavaScript• AWS SDK for PHP V3• AWS SDK for Python• AWS SDK for Ruby V2
144

AWS RoboMaker Developer GuideDescribeSimulationApplication
DescribeSimulationApplicationDescribes a simulation application.
Request Syntax
POST /describeSimulationApplication HTTP/1.1Content-type: application/json
{ "application": "string", "applicationVersion": "string"}
URI Request ParametersThe request does not use any URI parameters.
Request BodyThe request accepts the following data in JSON format.
application (p. 145)
The application information for the simulation application.
Type: String
Length Constraints: Minimum length of 1. Maximum length of 1224.
Pattern: arn:.*
Required: YesapplicationVersion (p. 145)
The version of the simulation application to describe.
Type: String
Length Constraints: Minimum length of 1. Maximum length of 255.
Pattern: (\$LATEST)|[0-9]*
Required: No
Response Syntax
HTTP/1.1 200Content-type: application/json
{ "arn": "string", "lastUpdatedAt": number, "name": "string", "renderingEngine": { "name": "string", "version": "string"
145

AWS RoboMaker Developer GuideDescribeSimulationApplication
}, "revisionId": "string", "robotSoftwareSuite": { "name": "string", "version": "string" }, "simulationSoftwareSuite": { "name": "string", "version": "string" }, "sources": [ { "architecture": "string", "etag": "string", "s3Bucket": "string", "s3Key": "string" } ], "version": "string"}
Response ElementsIf the action is successful, the service sends back an HTTP 200 response.
The following data is returned in JSON format by the service.
arn (p. 145)
The Amazon Resource Name (ARN) of the robot simulation application.
Type: String
Length Constraints: Minimum length of 1. Maximum length of 1224.
Pattern: arn:.*lastUpdatedAt (p. 145)
The time, in milliseconds since the epoch, when the simulation application was last updated.
Type: Timestampname (p. 145)
The name of the simulation application.
Type: String
Length Constraints: Minimum length of 1. Maximum length of 255.
Pattern: [a-zA-Z0-9_\-]*renderingEngine (p. 145)
The rendering engine for the simulation application.
Type: RenderingEngine (p. 203) objectrevisionId (p. 145)
The revision id of the simulation application.
Type: String
146

AWS RoboMaker Developer GuideDescribeSimulationApplication
Length Constraints: Minimum length of 1. Maximum length of 40.
Pattern: [a-zA-Z0-9_.\-]*robotSoftwareSuite (p. 145)
Information about the robot software suite.
Type: RobotSoftwareSuite (p. 210) objectsimulationSoftwareSuite (p. 145)
The simulation software suite used by the simulation application.
Type: SimulationSoftwareSuite (p. 218) objectsources (p. 145)
The sources of the simulation application.
Type: Array of Source (p. 219) objectsversion (p. 145)
The version of the simulation application.
Type: String
Length Constraints: Minimum length of 1. Maximum length of 255.
Pattern: (\$LATEST)|[0-9]*
ErrorsFor information about the errors that are common to all actions, see Common Errors (p. 222).
InternalServerException
AWS RoboMaker experienced a service issue. Try your call again.
HTTP Status Code: 500InvalidParameterException
A parameter specified in a request is not valid, is unsupported, or cannot be used. The returnedmessage provides an explanation of the error value.
HTTP Status Code: 400ResourceNotFoundException
The specified resource does not exist.
HTTP Status Code: 400ThrottlingException
AWS RoboMaker is temporarily unable to process the request. Try your call again.
HTTP Status Code: 400
See AlsoFor more information about using this API in one of the language-specific AWS SDKs, see the following:
147

AWS RoboMaker Developer GuideDescribeSimulationApplication
• AWS Command Line Interface• AWS SDK for .NET• AWS SDK for C++• AWS SDK for Go• AWS SDK for Java• AWS SDK for JavaScript• AWS SDK for PHP V3• AWS SDK for Python• AWS SDK for Ruby V2
148

AWS RoboMaker Developer GuideDescribeSimulationJob
DescribeSimulationJobDescribes a simulation job.
Request Syntax
POST /describeSimulationJob HTTP/1.1Content-type: application/json
{ "job": "string"}
URI Request ParametersThe request does not use any URI parameters.
Request BodyThe request accepts the following data in JSON format.
job (p. 149)
The Amazon Resource Name (ARN) of the simulation job to be described.
Type: String
Length Constraints: Minimum length of 1. Maximum length of 1224.
Pattern: arn:.*
Required: Yes
Response Syntax
HTTP/1.1 200Content-type: application/json
{ "arn": "string", "clientRequestToken": "string", "failureBehavior": "string", "failureCode": "string", "iamRole": "string", "lastUpdatedAt": number, "maxJobDurationInSeconds": number, "name": "string", "outputLocation": { "s3Bucket": "string", "s3Prefix": "string" }, "robotApplications": [ { "application": "string", "applicationVersion": "string", "launchConfig": { "environmentVariables": {
149

AWS RoboMaker Developer GuideDescribeSimulationJob
"string" : "string" }, "launchFile": "string", "packageName": "string" } } ], "simulationApplications": [ { "application": "string", "applicationVersion": "string", "launchConfig": { "environmentVariables": { "string" : "string" }, "launchFile": "string", "packageName": "string" } } ], "simulationTimeMillis": number, "status": "string", "vpcConfig": { "assignPublicIp": boolean, "securityGroups": [ "string" ], "subnets": [ "string" ], "vpcId": "string" }}
Response ElementsIf the action is successful, the service sends back an HTTP 200 response.
The following data is returned in JSON format by the service.
arn (p. 149)
The Amazon Resource Name (ARN) of the simulation job.
Type: String
Length Constraints: Minimum length of 1. Maximum length of 1224.
Pattern: arn:.*
clientRequestToken (p. 149)
Unique, case-sensitive identifier that you provide to ensure the idempotency of the request.
Type: String
Length Constraints: Minimum length of 1. Maximum length of 64.
Pattern: [a-zA-Z0-9_\-=]*
failureBehavior (p. 149)
The failure behavior for the simulation job.
Type: String
Valid Values: Fail | Continue
150

AWS RoboMaker Developer GuideDescribeSimulationJob
failureCode (p. 149)
The failure code of the simulation job if it failed:InternalServiceError
Internal service error.RobotApplicationCrash
Robot application exited abnormally.SimulationApplicationCrash
Simulation application exited abnormally.BadPermissionsRobotApplication
Robot application bundle could not be downloaded.BadPermissionsSimulationApplication
Simulation application bundle could not be downloaded.BadPermissionsS3Output
Unable to publish outputs to customer-provided S3 bucket.BadPermissionsCloudwatchLogs
Unable to publish logs to customer-provided CloudWatch Logs resource.SubnetIpLimitExceeded
Subnet IP limit exceeded.ENILimitExceeded
ENI limit exceeded.BadPermissionsUserCredentials
Unable to use the Role provided.InvalidBundleRobotApplication
Robot bundle cannot be extracted (invalid format, bundling error, or other issue).InvalidBundleSimulationApplication
Simulation bundle cannot be extracted (invalid format, bundling error, or other issue).RobotApplicationVersionMismatchedEtag
Etag for RobotApplication does not match value during version creation.SimulationApplicationVersionMismatchedEtag
Etag for SimulationApplication does not match value during version creation.
Type: String
Valid Values: InternalServiceError | RobotApplicationCrash |SimulationApplicationCrash | BadPermissionsRobotApplication |BadPermissionsSimulationApplication | BadPermissionsS3Output |BadPermissionsCloudwatchLogs | SubnetIpLimitExceeded | ENILimitExceeded| BadPermissionsUserCredentials | InvalidBundleRobotApplication |InvalidBundleSimulationApplication | RobotApplicationVersionMismatchedEtag |SimulationApplicationVersionMismatchedEtag
151

AWS RoboMaker Developer GuideDescribeSimulationJob
iamRole (p. 149)
The IAM role that allows the simulation instance to call the AWS APIs that are specified in itsassociated policies on your behalf.
Type: String
Length Constraints: Minimum length of 1. Maximum length of 255.
Pattern: arn:.*lastUpdatedAt (p. 149)
The time, in milliseconds since the epoch, when the simulation job was last updated.
Type: TimestampmaxJobDurationInSeconds (p. 149)
The maximum job duration in seconds. The value must be 8 days (691,200 seconds) or less.
Type: Longname (p. 149)
The name of the simulation job.
Type: String
Length Constraints: Minimum length of 1. Maximum length of 255.
Pattern: [a-zA-Z0-9_\-]*outputLocation (p. 149)
Location for output files generated by the simulation job.
Type: OutputLocation (p. 201) objectrobotApplications (p. 149)
A list of robot applications.
Type: Array of RobotApplicationConfig (p. 206) objects
Array Members: Fixed number of 1 item.simulationApplications (p. 149)
A list of simulation applications.
Type: Array of SimulationApplicationConfig (p. 211) objects
Array Members: Fixed number of 1 item.simulationTimeMillis (p. 149)
The simulation job execution duration in milliseconds.
Type: Longstatus (p. 149)
The status of the simulation job.
Type: String
152

AWS RoboMaker Developer GuideDescribeSimulationJob
Valid Values: Pending | Preparing | Running | Restarting | Completed | Failed |RunningFailed | Terminating | Terminated | Canceled
vpcConfig (p. 149)
The VPC configuration.
Type: VPCConfigResponse (p. 222) object
ErrorsFor information about the errors that are common to all actions, see Common Errors (p. 222).
InternalServerException
AWS RoboMaker experienced a service issue. Try your call again.
HTTP Status Code: 500InvalidParameterException
A parameter specified in a request is not valid, is unsupported, or cannot be used. The returnedmessage provides an explanation of the error value.
HTTP Status Code: 400ResourceNotFoundException
The specified resource does not exist.
HTTP Status Code: 400ThrottlingException
AWS RoboMaker is temporarily unable to process the request. Try your call again.
HTTP Status Code: 400
See AlsoFor more information about using this API in one of the language-specific AWS SDKs, see the following:
• AWS Command Line Interface• AWS SDK for .NET• AWS SDK for C++• AWS SDK for Go• AWS SDK for Java• AWS SDK for JavaScript• AWS SDK for PHP V3• AWS SDK for Python• AWS SDK for Ruby V2
153

AWS RoboMaker Developer GuideListDeploymentJobs
ListDeploymentJobsReturns a list of deployment jobs for a fleet. You can optionally provide filters to retrieve specificdeployment jobs.
Request Syntax
POST /listDeploymentJobs HTTP/1.1Content-type: application/json
{ "filters": [ { "name": "string", "values": [ "string" ] } ], "maxResults": number, "nextToken": "string"}
URI Request Parameters
The request does not use any URI parameters.
Request Body
The request accepts the following data in JSON format.
filters (p. 154)
Optional filters to limit results.
Type: Array of Filter (p. 197) objects
Array Members: Fixed number of 1 item.
Required: No
maxResults (p. 154)
The maximum number of deployment job results returned by ListDeploymentJobs in paginatedoutput. When this parameter is used, ListDeploymentJobs only returns maxResults resultsin a single page along with a nextToken response element. The remaining results of the initialrequest can be seen by sending another ListDeploymentJobs request with the returnednextToken value. This value can be between 1 and 100. If this parameter is not used, thenListDeploymentJobs returns up to 100 results and a nextToken value if applicable.
Type: Integer
Required: No
nextToken (p. 154)
The nextToken value returned from a previous paginated ListDeploymentJobs request wheremaxResults was used and the results exceeded the value of that parameter. Pagination continuesfrom the end of the previous results that returned the nextToken value.
154

AWS RoboMaker Developer GuideListDeploymentJobs
NoteThis token should be treated as an opaque identifier that is only used to retrieve the nextitems in a list and not for other programmatic purposes.
Type: String
Length Constraints: Minimum length of 1. Maximum length of 2048.
Pattern: [a-zA-Z0-9_.\-\/+=]*
Required: No
Response Syntax
HTTP/1.1 200Content-type: application/json
{ "deploymentJobs": [ { "arn": "string", "createdAt": number, "deploymentApplicationConfigs": [ { "application": "string", "applicationVersion": "string", "launchConfig": { "environmentVariables": { "string" : "string" }, "launchFile": "string", "packageName": "string", "postLaunchFile": "string", "preLaunchFile": "string" } } ], "deploymentConfig": { "concurrentDeploymentPercentage": number, "failureThresholdPercentage": number }, "failureCode": "string", "failureReason": "string", "fleet": "string", "status": "string" } ], "nextToken": "string"}
Response ElementsIf the action is successful, the service sends back an HTTP 200 response.
The following data is returned in JSON format by the service.
deploymentJobs (p. 155)
A list of deployment jobs that meet the criteria of the request.
Type: Array of DeploymentJob (p. 193) objects
155

AWS RoboMaker Developer GuideListDeploymentJobs
Array Members: Minimum number of 0 items. Maximum number of 200 items.nextToken (p. 155)
The nextToken value to include in a future ListDeploymentJobs request. When the results ofa ListDeploymentJobs request exceed maxResults, this value can be used to retrieve the nextpage of results. This value is null when there are no more results to return.
Type: String
Length Constraints: Minimum length of 1. Maximum length of 2048.
Pattern: [a-zA-Z0-9_.\-\/+=]*
ErrorsFor information about the errors that are common to all actions, see Common Errors (p. 222).
InternalServerException
AWS RoboMaker experienced a service issue. Try your call again.
HTTP Status Code: 500InvalidParameterException
A parameter specified in a request is not valid, is unsupported, or cannot be used. The returnedmessage provides an explanation of the error value.
HTTP Status Code: 400ResourceNotFoundException
The specified resource does not exist.
HTTP Status Code: 400ThrottlingException
AWS RoboMaker is temporarily unable to process the request. Try your call again.
HTTP Status Code: 400
See AlsoFor more information about using this API in one of the language-specific AWS SDKs, see the following:
• AWS Command Line Interface• AWS SDK for .NET• AWS SDK for C++• AWS SDK for Go• AWS SDK for Java• AWS SDK for JavaScript• AWS SDK for PHP V3• AWS SDK for Python• AWS SDK for Ruby V2
156

AWS RoboMaker Developer GuideListFleets
ListFleetsReturns a list of fleets. You can optionally provide filters to retrieve specific fleets.
Request Syntax
POST /listFleets HTTP/1.1Content-type: application/json
{ "filters": [ { "name": "string", "values": [ "string" ] } ], "maxResults": number, "nextToken": "string"}
URI Request ParametersThe request does not use any URI parameters.
Request BodyThe request accepts the following data in JSON format.
filters (p. 157)
Optional filters to limit results.
Type: Array of Filter (p. 197) objects
Array Members: Fixed number of 1 item.
Required: NomaxResults (p. 157)
The maximum number of deployment job results returned by ListFleets in paginated output.When this parameter is used, ListFleets only returns maxResults results in a single page alongwith a nextToken response element. The remaining results of the initial request can be seen bysending another ListFleets request with the returned nextToken value. This value can bebetween 1 and 100. If this parameter is not used, then ListFleets returns up to 100 results and anextToken value if applicable.
Type: Integer
Required: NonextToken (p. 157)
The nextToken value returned from a previous paginated ListFleets request where maxResultswas used and the results exceeded the value of that parameter. Pagination continues from the endof the previous results that returned the nextToken value.
NoteThis token should be treated as an opaque identifier that is only used to retrieve the nextitems in a list and not for other programmatic purposes.
157

AWS RoboMaker Developer GuideListFleets
Type: String
Length Constraints: Minimum length of 1. Maximum length of 2048.
Pattern: [a-zA-Z0-9_.\-\/+=]*
Required: No
Response Syntax
HTTP/1.1 200Content-type: application/json
{ "fleetDetails": [ { "arn": "string", "createdAt": number, "lastDeploymentJob": "string", "lastDeploymentStatus": "string", "lastDeploymentTime": number, "name": "string" } ], "nextToken": "string"}
Response ElementsIf the action is successful, the service sends back an HTTP 200 response.
The following data is returned in JSON format by the service.
fleetDetails (p. 158)
A list of fleet details meeting the request criteria.
Type: Array of Fleet (p. 198) objects
Array Members: Minimum number of 0 items. Maximum number of 200 items.nextToken (p. 158)
The nextToken value to include in a future ListDeploymentJobs request. When the results ofa ListFleets request exceed maxResults, this value can be used to retrieve the next page ofresults. This value is null when there are no more results to return.
Type: String
Length Constraints: Minimum length of 1. Maximum length of 2048.
Pattern: [a-zA-Z0-9_.\-\/+=]*
ErrorsFor information about the errors that are common to all actions, see Common Errors (p. 222).
InternalServerException
AWS RoboMaker experienced a service issue. Try your call again.
158

AWS RoboMaker Developer GuideListFleets
HTTP Status Code: 500InvalidParameterException
A parameter specified in a request is not valid, is unsupported, or cannot be used. The returnedmessage provides an explanation of the error value.
HTTP Status Code: 400ResourceNotFoundException
The specified resource does not exist.
HTTP Status Code: 400ThrottlingException
AWS RoboMaker is temporarily unable to process the request. Try your call again.
HTTP Status Code: 400
See AlsoFor more information about using this API in one of the language-specific AWS SDKs, see the following:
• AWS Command Line Interface• AWS SDK for .NET• AWS SDK for C++• AWS SDK for Go• AWS SDK for Java• AWS SDK for JavaScript• AWS SDK for PHP V3• AWS SDK for Python• AWS SDK for Ruby V2
159

AWS RoboMaker Developer GuideListRobotApplications
ListRobotApplicationsReturns a list of robot application. You can optionally provide filters to retrieve specific robotapplications.
Request Syntax
POST /listRobotApplications HTTP/1.1Content-type: application/json
{ "filters": [ { "name": "string", "values": [ "string" ] } ], "maxResults": number, "nextToken": "string", "versionQualifier": "string"}
URI Request ParametersThe request does not use any URI parameters.
Request BodyThe request accepts the following data in JSON format.
filters (p. 160)
Optional filters to limit results.
Type: Array of Filter (p. 197) objects
Array Members: Fixed number of 1 item.
Required: No
maxResults (p. 160)
The maximum number of deployment job results returned by ListRobotApplicationsin paginated output. When this parameter is used, ListRobotApplications only returnsmaxResults results in a single page along with a nextToken response element. The remainingresults of the initial request can be seen by sending another ListFleets request with the returnednextToken value. This value can be between 1 and 100. If this parameter is not used, thenListRobotApplications returns up to 100 results and a nextToken value if applicable.
Type: Integer
Required: No
nextToken (p. 160)
The nextToken value returned from a previous paginated ListRobotApplications requestwhere maxResults was used and the results exceeded the value of that parameter. Paginationcontinues from the end of the previous results that returned the nextToken value.
160

AWS RoboMaker Developer GuideListRobotApplications
NoteThis token should be treated as an opaque identifier that is only used to retrieve the nextitems in a list and not for other programmatic purposes.
Type: String
Length Constraints: Minimum length of 1. Maximum length of 2048.
Pattern: [a-zA-Z0-9_.\-\/+=]*
Required: NoversionQualifier (p. 160)
The version qualifier of the robot application.
Type: String
Pattern: ALL
Required: No
Response Syntax
HTTP/1.1 200Content-type: application/json
{ "nextToken": "string", "robotApplicationSummaries": [ { "arn": "string", "lastUpdatedAt": number, "name": "string", "version": "string" } ]}
Response ElementsIf the action is successful, the service sends back an HTTP 200 response.
The following data is returned in JSON format by the service.
nextToken (p. 161)
The nextToken value to include in a future ListRobotApplications request. When the resultsof a ListRobotApplications request exceed maxResults, this value can be used to retrieve thenext page of results. This value is null when there are no more results to return.
Type: String
Length Constraints: Minimum length of 1. Maximum length of 2048.
Pattern: [a-zA-Z0-9_.\-\/+=]*robotApplicationSummaries (p. 161)
A list of robot application summaries that meet the criteria of the request.
161

AWS RoboMaker Developer GuideListRobotApplications
Type: Array of RobotApplicationSummary (p. 207) objects
Array Members: Minimum number of 0 items. Maximum number of 100 items.
ErrorsFor information about the errors that are common to all actions, see Common Errors (p. 222).
InternalServerException
AWS RoboMaker experienced a service issue. Try your call again.
HTTP Status Code: 500InvalidParameterException
A parameter specified in a request is not valid, is unsupported, or cannot be used. The returnedmessage provides an explanation of the error value.
HTTP Status Code: 400ThrottlingException
AWS RoboMaker is temporarily unable to process the request. Try your call again.
HTTP Status Code: 400
See AlsoFor more information about using this API in one of the language-specific AWS SDKs, see the following:
• AWS Command Line Interface• AWS SDK for .NET• AWS SDK for C++• AWS SDK for Go• AWS SDK for Java• AWS SDK for JavaScript• AWS SDK for PHP V3• AWS SDK for Python• AWS SDK for Ruby V2
162

AWS RoboMaker Developer GuideListRobots
ListRobotsReturns a list of robots. You can optionally provide filters to retrieve specific robots.
Request Syntax
POST /listRobots HTTP/1.1Content-type: application/json
{ "filters": [ { "name": "string", "values": [ "string" ] } ], "maxResults": number, "nextToken": "string"}
URI Request ParametersThe request does not use any URI parameters.
Request BodyThe request accepts the following data in JSON format.
filters (p. 163)
Optional filters to limit results.
Type: Array of Filter (p. 197) objects
Array Members: Fixed number of 1 item.
Required: NomaxResults (p. 163)
The maximum number of deployment job results returned by ListRobots in paginated output.When this parameter is used, ListRobots only returns maxResults results in a single page alongwith a nextToken response element. The remaining results of the initial request can be seen bysending another ListFleets request with the returned nextToken value. This value can bebetween 1 and 100. If this parameter is not used, then ListRobots returns up to 100 results and anextToken value if applicable.
Type: Integer
Required: NonextToken (p. 163)
The nextToken value returned from a previous paginated ListRobots request where maxResultswas used and the results exceeded the value of that parameter. Pagination continues from the endof the previous results that returned the nextToken value.
NoteThis token should be treated as an opaque identifier that is only used to retrieve the nextitems in a list and not for other programmatic purposes.
163

AWS RoboMaker Developer GuideListRobots
Type: String
Length Constraints: Minimum length of 1. Maximum length of 2048.
Pattern: [a-zA-Z0-9_.\-\/+=]*
Required: No
Response Syntax
HTTP/1.1 200Content-type: application/json
{ "nextToken": "string", "robots": [ { "architecture": "string", "arn": "string", "createdAt": number, "fleetArn": "string", "greenGrassGroupId": "string", "lastDeploymentJob": "string", "lastDeploymentTime": number, "name": "string", "status": "string" } ]}
Response ElementsIf the action is successful, the service sends back an HTTP 200 response.
The following data is returned in JSON format by the service.
nextToken (p. 164)
The nextToken value to include in a future ListRobots request. When the results of a ListRobotrequest exceed maxResults, this value can be used to retrieve the next page of results. This value isnull when there are no more results to return.
Type: String
Length Constraints: Minimum length of 1. Maximum length of 2048.
Pattern: [a-zA-Z0-9_.\-\/+=]*robots (p. 164)
A list of robots that meet the criteria of the request.
Type: Array of Robot (p. 204) objects
Array Members: Minimum number of 0 items. Maximum number of 1000 items.
ErrorsFor information about the errors that are common to all actions, see Common Errors (p. 222).
164

AWS RoboMaker Developer GuideListRobots
InternalServerException
AWS RoboMaker experienced a service issue. Try your call again.
HTTP Status Code: 500InvalidParameterException
A parameter specified in a request is not valid, is unsupported, or cannot be used. The returnedmessage provides an explanation of the error value.
HTTP Status Code: 400ResourceNotFoundException
The specified resource does not exist.
HTTP Status Code: 400ThrottlingException
AWS RoboMaker is temporarily unable to process the request. Try your call again.
HTTP Status Code: 400
See AlsoFor more information about using this API in one of the language-specific AWS SDKs, see the following:
• AWS Command Line Interface• AWS SDK for .NET• AWS SDK for C++• AWS SDK for Go• AWS SDK for Java• AWS SDK for JavaScript• AWS SDK for PHP V3• AWS SDK for Python• AWS SDK for Ruby V2
165

AWS RoboMaker Developer GuideListSimulationApplications
ListSimulationApplicationsReturns a list of simulation applications. You can optionally provide filters to retrieve specific simulationapplications.
Request Syntax
POST /listSimulationApplications HTTP/1.1Content-type: application/json
{ "filters": [ { "name": "string", "values": [ "string" ] } ], "maxResults": number, "nextToken": "string", "versionQualifier": "string"}
URI Request ParametersThe request does not use any URI parameters.
Request BodyThe request accepts the following data in JSON format.
filters (p. 166)
Optional list of filters to limit results. The only valid filter name is name.
Type: Array of Filter (p. 197) objects
Array Members: Fixed number of 1 item.
Required: No
maxResults (p. 166)
The maximum number of deployment job results returned by ListSimulationApplicationsin paginated output. When this parameter is used, ListSimulationApplications only returnsmaxResults results in a single page along with a nextToken response element. The remainingresults of the initial request can be seen by sending another ListFleets request with the returnednextToken value. This value can be between 1 and 100. If this parameter is not used, thenListSimulationApplications returns up to 100 results and a nextToken value if applicable.
Type: Integer
Required: No
nextToken (p. 166)
The nextToken value returned from a previous paginated ListSimulationApplicationsrequest where maxResults was used and the results exceeded the value of that parameter.Pagination continues from the end of the previous results that returned the nextToken value.
166

AWS RoboMaker Developer GuideListSimulationApplications
NoteThis token should be treated as an opaque identifier that is only used to retrieve the nextitems in a list and not for other programmatic purposes.
Type: String
Length Constraints: Minimum length of 1. Maximum length of 2048.
Pattern: [a-zA-Z0-9_.\-\/+=]*
Required: NoversionQualifier (p. 166)
The version qualifier of the simulation application.
Type: String
Pattern: ALL
Required: No
Response Syntax
HTTP/1.1 200Content-type: application/json
{ "nextToken": "string", "simulationApplicationSummaries": [ { "arn": "string", "lastUpdatedAt": number, "name": "string", "version": "string" } ]}
Response ElementsIf the action is successful, the service sends back an HTTP 200 response.
The following data is returned in JSON format by the service.
nextToken (p. 167)
The nextToken value to include in a future ListSimulationApplications request. When theresults of a ListRobot request exceed maxResults, this value can be used to retrieve the nextpage of results. This value is null when there are no more results to return.
Type: String
Length Constraints: Minimum length of 1. Maximum length of 2048.
Pattern: [a-zA-Z0-9_.\-\/+=]*simulationApplicationSummaries (p. 167)
A list of simulation application summaries that meet the criteria of the request.
167

AWS RoboMaker Developer GuideListSimulationApplications
Type: Array of SimulationApplicationSummary (p. 212) objects
Array Members: Minimum number of 0 items. Maximum number of 100 items.
ErrorsFor information about the errors that are common to all actions, see Common Errors (p. 222).
InternalServerException
AWS RoboMaker experienced a service issue. Try your call again.
HTTP Status Code: 500InvalidParameterException
A parameter specified in a request is not valid, is unsupported, or cannot be used. The returnedmessage provides an explanation of the error value.
HTTP Status Code: 400ThrottlingException
AWS RoboMaker is temporarily unable to process the request. Try your call again.
HTTP Status Code: 400
See AlsoFor more information about using this API in one of the language-specific AWS SDKs, see the following:
• AWS Command Line Interface• AWS SDK for .NET• AWS SDK for C++• AWS SDK for Go• AWS SDK for Java• AWS SDK for JavaScript• AWS SDK for PHP V3• AWS SDK for Python• AWS SDK for Ruby V2
168

AWS RoboMaker Developer GuideListSimulationJobs
ListSimulationJobsReturns a list of simulation jobs. You can optionally provide filters to retrieve specific simulation jobs.
Request Syntax
POST /listSimulationJobs HTTP/1.1Content-type: application/json
{ "filters": [ { "name": "string", "values": [ "string" ] } ], "maxResults": number, "nextToken": "string"}
URI Request ParametersThe request does not use any URI parameters.
Request BodyThe request accepts the following data in JSON format.
filters (p. 169)
Optional filters to limit results.
Type: Array of Filter (p. 197) objects
Array Members: Fixed number of 1 item.
Required: NomaxResults (p. 169)
The maximum number of deployment job results returned by ListSimulationJobs in paginatedoutput. When this parameter is used, ListSimulationJobs only returns maxResults results in asingle page along with a nextToken response element. The remaining results of the initial requestcan be seen by sending another ListFleets request with the returned nextToken value. Thisvalue can be between 1 and 100. If this parameter is not used, then ListSimulationJobs returnsup to 100 results and a nextToken value if applicable.
Type: Integer
Required: NonextToken (p. 169)
The nextToken value returned from a previous paginated ListSimulationJobs request wheremaxResults was used and the results exceeded the value of that parameter. Pagination continuesfrom the end of the previous results that returned the nextToken value.
NoteThis token should be treated as an opaque identifier that is only used to retrieve the nextitems in a list and not for other programmatic purposes.
169

AWS RoboMaker Developer GuideListSimulationJobs
Type: String
Length Constraints: Minimum length of 1. Maximum length of 2048.
Pattern: [a-zA-Z0-9_.\-\/+=]*
Required: No
Response Syntax
HTTP/1.1 200Content-type: application/json
{ "nextToken": "string", "simulationJobSummaries": [ { "arn": "string", "lastUpdatedAt": number, "name": "string", "robotApplicationNames": [ "string" ], "simulationApplicationNames": [ "string" ], "status": "string" } ]}
Response ElementsIf the action is successful, the service sends back an HTTP 200 response.
The following data is returned in JSON format by the service.
nextToken (p. 170)
The nextToken value to include in a future ListSimulationJobs request. When the results of aListRobot request exceed maxResults, this value can be used to retrieve the next page of results.This value is null when there are no more results to return.
Type: String
Length Constraints: Minimum length of 1. Maximum length of 2048.
Pattern: [a-zA-Z0-9_.\-\/+=]*simulationJobSummaries (p. 170)
A list of simulation job summaries that meet the criteria of the request.
Type: Array of SimulationJobSummary (p. 216) objects
Array Members: Minimum number of 0 items. Maximum number of 100 items.
ErrorsFor information about the errors that are common to all actions, see Common Errors (p. 222).
InternalServerException
AWS RoboMaker experienced a service issue. Try your call again.
170

AWS RoboMaker Developer GuideListSimulationJobs
HTTP Status Code: 500InvalidParameterException
A parameter specified in a request is not valid, is unsupported, or cannot be used. The returnedmessage provides an explanation of the error value.
HTTP Status Code: 400ThrottlingException
AWS RoboMaker is temporarily unable to process the request. Try your call again.
HTTP Status Code: 400
See AlsoFor more information about using this API in one of the language-specific AWS SDKs, see the following:
• AWS Command Line Interface• AWS SDK for .NET• AWS SDK for C++• AWS SDK for Go• AWS SDK for Java• AWS SDK for JavaScript• AWS SDK for PHP V3• AWS SDK for Python• AWS SDK for Ruby V2
171

AWS RoboMaker Developer GuideRegisterRobot
RegisterRobotRegisters a robot with a fleet.
Request Syntax
POST /registerRobot HTTP/1.1Content-type: application/json
{ "fleet": "string", "robot": "string"}
URI Request ParametersThe request does not use any URI parameters.
Request BodyThe request accepts the following data in JSON format.
fleet (p. 172)
The Amazon Resource Name (ARN) of the fleet.
Type: String
Length Constraints: Minimum length of 1. Maximum length of 1224.
Pattern: arn:.*
Required: Yes
robot (p. 172)
The Amazon Resource Name (ARN) of the robot.
Type: String
Length Constraints: Minimum length of 1. Maximum length of 1224.
Pattern: arn:.*
Required: Yes
Response Syntax
HTTP/1.1 200Content-type: application/json
{ "fleet": "string", "robot": "string"}
172

AWS RoboMaker Developer GuideRegisterRobot
Response ElementsIf the action is successful, the service sends back an HTTP 200 response.
The following data is returned in JSON format by the service.
fleet (p. 172)
The Amazon Resource Name (ARN) of the fleet that the robot will join.
Type: String
Length Constraints: Minimum length of 1. Maximum length of 1224.
Pattern: arn:.*
robot (p. 172)
Information about the robot registration.
Type: String
Length Constraints: Minimum length of 1. Maximum length of 1224.
Pattern: arn:.*
ErrorsFor information about the errors that are common to all actions, see Common Errors (p. 222).
InternalServerException
AWS RoboMaker experienced a service issue. Try your call again.
HTTP Status Code: 500
InvalidParameterException
A parameter specified in a request is not valid, is unsupported, or cannot be used. The returnedmessage provides an explanation of the error value.
HTTP Status Code: 400
LimitExceededException
The requested resource exceeds the maximum number allowed, or the number of concurrent streamrequests exceeds the maximum number allowed.
HTTP Status Code: 400
ResourceNotFoundException
The specified resource does not exist.
HTTP Status Code: 400
ThrottlingException
AWS RoboMaker is temporarily unable to process the request. Try your call again.
HTTP Status Code: 400
173

AWS RoboMaker Developer GuideRegisterRobot
See AlsoFor more information about using this API in one of the language-specific AWS SDKs, see the following:
• AWS Command Line Interface• AWS SDK for .NET• AWS SDK for C++• AWS SDK for Go• AWS SDK for Java• AWS SDK for JavaScript• AWS SDK for PHP V3• AWS SDK for Python• AWS SDK for Ruby V2
174

AWS RoboMaker Developer GuideRestartSimulationJob
RestartSimulationJobRestarts a running simulation job.
Request Syntax
POST /restartSimulationJob HTTP/1.1Content-type: application/json
{ "job": "string"}
URI Request ParametersThe request does not use any URI parameters.
Request BodyThe request accepts the following data in JSON format.
job (p. 175)
The Amazon Resource Name (ARN) of the simulation job.
Type: String
Length Constraints: Minimum length of 1. Maximum length of 1224.
Pattern: arn:.*
Required: Yes
Response Syntax
HTTP/1.1 200
Response ElementsIf the action is successful, the service sends back an HTTP 200 response with an empty HTTP body.
ErrorsFor information about the errors that are common to all actions, see Common Errors (p. 222).
InternalServerException
AWS RoboMaker experienced a service issue. Try your call again.
HTTP Status Code: 500InvalidParameterException
A parameter specified in a request is not valid, is unsupported, or cannot be used. The returnedmessage provides an explanation of the error value.
175

AWS RoboMaker Developer GuideRestartSimulationJob
HTTP Status Code: 400LimitExceededException
The requested resource exceeds the maximum number allowed, or the number of concurrent streamrequests exceeds the maximum number allowed.
HTTP Status Code: 400ResourceNotFoundException
The specified resource does not exist.
HTTP Status Code: 400ThrottlingException
AWS RoboMaker is temporarily unable to process the request. Try your call again.
HTTP Status Code: 400
See AlsoFor more information about using this API in one of the language-specific AWS SDKs, see the following:
• AWS Command Line Interface• AWS SDK for .NET• AWS SDK for C++• AWS SDK for Go• AWS SDK for Java• AWS SDK for JavaScript• AWS SDK for PHP V3• AWS SDK for Python• AWS SDK for Ruby V2
176

AWS RoboMaker Developer GuideSyncDeploymentJob
SyncDeploymentJobSyncrhonizes robots in a fleet to the latest deployment. This is helpful if robots were added after adeployment.
Request Syntax
POST /syncDeploymentJob HTTP/1.1Content-type: application/json
{ "clientRequestToken": "string", "fleet": "string"}
URI Request ParametersThe request does not use any URI parameters.
Request BodyThe request accepts the following data in JSON format.
clientRequestToken (p. 177)
Unique, case-sensitive identifier that you provide to ensure the idempotency of the request.
Type: String
Length Constraints: Minimum length of 1. Maximum length of 64.
Pattern: [a-zA-Z0-9_\-=]*
Required: Yesfleet (p. 177)
The target fleet for the synchronization.
Type: String
Length Constraints: Minimum length of 1. Maximum length of 1224.
Pattern: arn:.*
Required: Yes
Response Syntax
HTTP/1.1 200Content-type: application/json
{ "arn": "string", "createdAt": number, "deploymentApplicationConfigs": [ { "application": "string",
177

AWS RoboMaker Developer GuideSyncDeploymentJob
"applicationVersion": "string", "launchConfig": { "environmentVariables": { "string" : "string" }, "launchFile": "string", "packageName": "string", "postLaunchFile": "string", "preLaunchFile": "string" } } ], "deploymentConfig": { "concurrentDeploymentPercentage": number, "failureThresholdPercentage": number }, "failureCode": "string", "failureReason": "string", "fleet": "string", "status": "string"}
Response ElementsIf the action is successful, the service sends back an HTTP 200 response.
The following data is returned in JSON format by the service.
arn (p. 177)
The Amazon Resource Name (ARN) of the synchronization request.
Type: String
Length Constraints: Minimum length of 1. Maximum length of 1224.
Pattern: arn:.*createdAt (p. 177)
The time, in milliseconds since the epoch, when the fleet was created.
Type: TimestampdeploymentApplicationConfigs (p. 177)
Information about the deployment application configurations.
Type: Array of DeploymentApplicationConfig (p. 191) objects
Array Members: Fixed number of 1 item.deploymentConfig (p. 177)
Information about the deployment configuration.
Type: DeploymentConfig (p. 192) objectfailureCode (p. 177)
The failure code if the job fails:InternalServiceError
Internal service error.
178

AWS RoboMaker Developer GuideSyncDeploymentJob
RobotApplicationCrash
Robot application exited abnormally.SimulationApplicationCrash
Simulation application exited abnormally.BadPermissionsRobotApplication
Robot application bundle could not be downloaded.BadPermissionsSimulationApplication
Simulation application bundle could not be downloaded.BadPermissionsS3Output
Unable to publish outputs to customer-provided S3 bucket.BadPermissionsCloudwatchLogs
Unable to publish logs to customer-provided CloudWatch Logs resource.SubnetIpLimitExceeded
Subnet IP limit exceeded.ENILimitExceeded
ENI limit exceeded.BadPermissionsUserCredentials
Unable to use the Role provided.InvalidBundleRobotApplication
Robot bundle cannot be extracted (invalid format, bundling error, or other issue).InvalidBundleSimulationApplication
Simulation bundle cannot be extracted (invalid format, bundling error, or other issue).RobotApplicationVersionMismatchedEtag
Etag for RobotApplication does not match value during version creation.SimulationApplicationVersionMismatchedEtag
Etag for SimulationApplication does not match value during version creation.
Type: String
Valid Values: ResourceNotFound | FailureThresholdBreached |RobotDeploymentNoResponse | GreengrassDeploymentFailed |MissingRobotArchitecture | MissingRobotApplicationArchitecture |MissingRobotDeploymentResource | GreengrassGroupVersionDoesNotExist |ExtractingBundleFailure | PreLaunchFileFailure | PostLaunchFileFailure |BadPermissionError | InternalServerError
failureReason (p. 177)
The failure reason if the job fails.
Type: Stringfleet (p. 177)
The Amazon Resource Name (ARN) of the fleet.
179

AWS RoboMaker Developer GuideSyncDeploymentJob
Type: String
Length Constraints: Minimum length of 1. Maximum length of 1224.
Pattern: arn:.*status (p. 177)
The status of the synchronization job.
Type: String
Valid Values: Pending | Preparing | InProgress | Failed | Succeeded
ErrorsFor information about the errors that are common to all actions, see Common Errors (p. 222).
ConcurrentDeploymentException
HTTP Status Code: 400IdempotentParameterMismatchException
The request uses the same client token as a previous, but non-identical request. Do not reuse a clienttoken with different requests, unless the requests are identical.
HTTP Status Code: 400InternalServerException
AWS RoboMaker experienced a service issue. Try your call again.
HTTP Status Code: 500InvalidParameterException
A parameter specified in a request is not valid, is unsupported, or cannot be used. The returnedmessage provides an explanation of the error value.
HTTP Status Code: 400LimitExceededException
The requested resource exceeds the maximum number allowed, or the number of concurrent streamrequests exceeds the maximum number allowed.
HTTP Status Code: 400ResourceNotFoundException
The specified resource does not exist.
HTTP Status Code: 400ThrottlingException
AWS RoboMaker is temporarily unable to process the request. Try your call again.
HTTP Status Code: 400
See AlsoFor more information about using this API in one of the language-specific AWS SDKs, see the following:
180

AWS RoboMaker Developer GuideSyncDeploymentJob
• AWS Command Line Interface• AWS SDK for .NET• AWS SDK for C++• AWS SDK for Go• AWS SDK for Java• AWS SDK for JavaScript• AWS SDK for PHP V3• AWS SDK for Python• AWS SDK for Ruby V2
181

AWS RoboMaker Developer GuideUpdateRobotApplication
UpdateRobotApplicationUpdates a robot application.
Request Syntax
POST /updateRobotApplication HTTP/1.1Content-type: application/json
{ "application": "string", "currentRevisionId": "string", "robotSoftwareSuite": { "name": "string", "version": "string" }, "sources": [ { "architecture": "string", "s3Bucket": "string", "s3Key": "string" } ]}
URI Request ParametersThe request does not use any URI parameters.
Request BodyThe request accepts the following data in JSON format.
application (p. 182)
The application information for the robot application.
Type: String
Length Constraints: Minimum length of 1. Maximum length of 1224.
Pattern: arn:.*
Required: YescurrentRevisionId (p. 182)
The revision id for the robot application.
Type: String
Length Constraints: Minimum length of 1. Maximum length of 40.
Pattern: [a-zA-Z0-9_.\-]*
Required: NorobotSoftwareSuite (p. 182)
The robot software suite used by the robot application.
182

AWS RoboMaker Developer GuideUpdateRobotApplication
Type: RobotSoftwareSuite (p. 210) object
Required: Yessources (p. 182)
The sources of the robot application.
Type: Array of SourceConfig (p. 220) objects
Required: Yes
Response Syntax
HTTP/1.1 200Content-type: application/json
{ "arn": "string", "lastUpdatedAt": number, "name": "string", "revisionId": "string", "robotSoftwareSuite": { "name": "string", "version": "string" }, "sources": [ { "architecture": "string", "etag": "string", "s3Bucket": "string", "s3Key": "string" } ], "version": "string"}
Response ElementsIf the action is successful, the service sends back an HTTP 200 response.
The following data is returned in JSON format by the service.
arn (p. 183)
The Amazon Resource Name (ARN) of the updated robot application.
Type: String
Length Constraints: Minimum length of 1. Maximum length of 1224.
Pattern: arn:.*lastUpdatedAt (p. 183)
The time, in milliseconds since the epoch, when the robot application was last updated.
Type: Timestampname (p. 183)
The name of the robot application.
183

AWS RoboMaker Developer GuideUpdateRobotApplication
Type: String
Length Constraints: Minimum length of 1. Maximum length of 255.
Pattern: [a-zA-Z0-9_\-]*revisionId (p. 183)
The revision id of the robot application.
Type: String
Length Constraints: Minimum length of 1. Maximum length of 40.
Pattern: [a-zA-Z0-9_.\-]*robotSoftwareSuite (p. 183)
The robot software suite used by the robot application.
Type: RobotSoftwareSuite (p. 210) objectsources (p. 183)
The sources of the robot application.
Type: Array of Source (p. 219) objectsversion (p. 183)
The version of the robot application.
Type: String
Length Constraints: Minimum length of 1. Maximum length of 255.
Pattern: (\$LATEST)|[0-9]*
ErrorsFor information about the errors that are common to all actions, see Common Errors (p. 222).
InternalServerException
AWS RoboMaker experienced a service issue. Try your call again.
HTTP Status Code: 500InvalidParameterException
A parameter specified in a request is not valid, is unsupported, or cannot be used. The returnedmessage provides an explanation of the error value.
HTTP Status Code: 400LimitExceededException
The requested resource exceeds the maximum number allowed, or the number of concurrent streamrequests exceeds the maximum number allowed.
HTTP Status Code: 400ResourceNotFoundException
The specified resource does not exist.
184

AWS RoboMaker Developer GuideUpdateRobotApplication
HTTP Status Code: 400ThrottlingException
AWS RoboMaker is temporarily unable to process the request. Try your call again.
HTTP Status Code: 400
See AlsoFor more information about using this API in one of the language-specific AWS SDKs, see the following:
• AWS Command Line Interface• AWS SDK for .NET• AWS SDK for C++• AWS SDK for Go• AWS SDK for Java• AWS SDK for JavaScript• AWS SDK for PHP V3• AWS SDK for Python• AWS SDK for Ruby V2
185

AWS RoboMaker Developer GuideUpdateSimulationApplication
UpdateSimulationApplicationUpdates a simulation application.
Request Syntax
POST /updateSimulationApplication HTTP/1.1Content-type: application/json
{ "application": "string", "currentRevisionId": "string", "renderingEngine": { "name": "string", "version": "string" }, "robotSoftwareSuite": { "name": "string", "version": "string" }, "simulationSoftwareSuite": { "name": "string", "version": "string" }, "sources": [ { "architecture": "string", "s3Bucket": "string", "s3Key": "string" } ]}
URI Request ParametersThe request does not use any URI parameters.
Request BodyThe request accepts the following data in JSON format.
application (p. 186)
The application information for the simulation application.
Type: String
Length Constraints: Minimum length of 1. Maximum length of 1224.
Pattern: arn:.*
Required: YescurrentRevisionId (p. 186)
The revision id for the robot application.
Type: String
Length Constraints: Minimum length of 1. Maximum length of 40.
186

AWS RoboMaker Developer GuideUpdateSimulationApplication
Pattern: [a-zA-Z0-9_.\-]*
Required: NorenderingEngine (p. 186)
The rendering engine for the simulation application.
Type: RenderingEngine (p. 203) object
Required: YesrobotSoftwareSuite (p. 186)
Information about the robot software suite.
Type: RobotSoftwareSuite (p. 210) object
Required: YessimulationSoftwareSuite (p. 186)
The simulation software suite used by the simulation application.
Type: SimulationSoftwareSuite (p. 218) object
Required: Yessources (p. 186)
The sources of the simulation application.
Type: Array of SourceConfig (p. 220) objects
Required: Yes
Response Syntax
HTTP/1.1 200Content-type: application/json
{ "arn": "string", "lastUpdatedAt": number, "name": "string", "renderingEngine": { "name": "string", "version": "string" }, "revisionId": "string", "robotSoftwareSuite": { "name": "string", "version": "string" }, "simulationSoftwareSuite": { "name": "string", "version": "string" }, "sources": [ { "architecture": "string", "etag": "string", "s3Bucket": "string", "s3Key": "string"
187

AWS RoboMaker Developer GuideUpdateSimulationApplication
} ], "version": "string"}
Response ElementsIf the action is successful, the service sends back an HTTP 200 response.
The following data is returned in JSON format by the service.
arn (p. 187)
The Amazon Resource Name (ARN) of the updated simulation application.
Type: String
Length Constraints: Minimum length of 1. Maximum length of 1224.
Pattern: arn:.*lastUpdatedAt (p. 187)
The time, in milliseconds since the epoch, when the simulation application was last updated.
Type: Timestampname (p. 187)
The name of the simulation application.
Type: String
Length Constraints: Minimum length of 1. Maximum length of 255.
Pattern: [a-zA-Z0-9_\-]*renderingEngine (p. 187)
The rendering engine for the simulation application.
Type: RenderingEngine (p. 203) objectrevisionId (p. 187)
The revision id of the simulation application.
Type: String
Length Constraints: Minimum length of 1. Maximum length of 40.
Pattern: [a-zA-Z0-9_.\-]*robotSoftwareSuite (p. 187)
Information about the robot software suite.
Type: RobotSoftwareSuite (p. 210) objectsimulationSoftwareSuite (p. 187)
The simulation software suite used by the simulation application.
Type: SimulationSoftwareSuite (p. 218) object
188

AWS RoboMaker Developer GuideUpdateSimulationApplication
sources (p. 187)
The sources of the simulation application.
Type: Array of Source (p. 219) objectsversion (p. 187)
The version of the robot application.
Type: String
Length Constraints: Minimum length of 1. Maximum length of 255.
Pattern: (\$LATEST)|[0-9]*
ErrorsFor information about the errors that are common to all actions, see Common Errors (p. 222).
InternalServerException
AWS RoboMaker experienced a service issue. Try your call again.
HTTP Status Code: 500InvalidParameterException
A parameter specified in a request is not valid, is unsupported, or cannot be used. The returnedmessage provides an explanation of the error value.
HTTP Status Code: 400LimitExceededException
The requested resource exceeds the maximum number allowed, or the number of concurrent streamrequests exceeds the maximum number allowed.
HTTP Status Code: 400ResourceNotFoundException
The specified resource does not exist.
HTTP Status Code: 400ThrottlingException
AWS RoboMaker is temporarily unable to process the request. Try your call again.
HTTP Status Code: 400
See AlsoFor more information about using this API in one of the language-specific AWS SDKs, see the following:
• AWS Command Line Interface• AWS SDK for .NET• AWS SDK for C++• AWS SDK for Go• AWS SDK for Java
189

AWS RoboMaker Developer GuideData Types
• AWS SDK for JavaScript• AWS SDK for PHP V3• AWS SDK for Python• AWS SDK for Ruby V2
Data TypesThe following data types are supported:
• DeploymentApplicationConfig (p. 191)• DeploymentConfig (p. 192)• DeploymentJob (p. 193)• DeploymentLaunchConfig (p. 195)• Filter (p. 197)• Fleet (p. 198)• LaunchConfig (p. 200)• OutputLocation (p. 201)• ProgressDetail (p. 202)• RenderingEngine (p. 203)• Robot (p. 204)• RobotApplicationConfig (p. 206)• RobotApplicationSummary (p. 207)• RobotDeployment (p. 208)• RobotSoftwareSuite (p. 210)• SimulationApplicationConfig (p. 211)• SimulationApplicationSummary (p. 212)• SimulationJob (p. 213)• SimulationJobSummary (p. 216)• SimulationSoftwareSuite (p. 218)• Source (p. 219)• SourceConfig (p. 220)• VPCConfig (p. 221)• VPCConfigResponse (p. 222)
190

AWS RoboMaker Developer GuideDeploymentApplicationConfig
DeploymentApplicationConfigInformation about a deployment application configuration.
Contentsapplication
The Amazon Resource Name (ARN) of the robot application.
Type: String
Length Constraints: Minimum length of 1. Maximum length of 1224.
Pattern: arn:.*
Required: YesapplicationVersion
The version of the application.
Type: String
Length Constraints: Minimum length of 1. Maximum length of 255.
Pattern: (\$LATEST)|[0-9]*
Required: YeslaunchConfig
The launch configuration.
Type: DeploymentLaunchConfig (p. 195) object
Required: Yes
See AlsoFor more information about using this API in one of the language-specific AWS SDKs, see the following:
• AWS SDK for C++• AWS SDK for Go• AWS SDK for Java• AWS SDK for Ruby V2
191

AWS RoboMaker Developer GuideDeploymentConfig
DeploymentConfigInformation about a deployment configuration.
ContentsconcurrentDeploymentPercentage
The percentage of robots receiving the deployment at the same time.
Type: Integer
Valid Range: Minimum value of 1. Maximum value of 100.
Required: NofailureThresholdPercentage
The percentage of deployments that need to fail before stopping deployment.
Type: Integer
Valid Range: Minimum value of 1. Maximum value of 100.
Required: No
See AlsoFor more information about using this API in one of the language-specific AWS SDKs, see the following:
• AWS SDK for C++• AWS SDK for Go• AWS SDK for Java• AWS SDK for Ruby V2
192

AWS RoboMaker Developer GuideDeploymentJob
DeploymentJobInformation about a deployment job.
Contentsarn
The Amazon Resource Name (ARN) of the deployment job.
Type: String
Length Constraints: Minimum length of 1. Maximum length of 1224.
Pattern: arn:.*
Required: NocreatedAt
The time, in milliseconds since the epoch, when the deployment job was created.
Type: Timestamp
Required: NodeploymentApplicationConfigs
The deployment application configuration.
Type: Array of DeploymentApplicationConfig (p. 191) objects
Array Members: Fixed number of 1 item.
Required: NodeploymentConfig
The deployment configuration.
Type: DeploymentConfig (p. 192) object
Required: NofailureCode
The deployment job failure code.
Type: String
Valid Values: ResourceNotFound | FailureThresholdBreached |RobotDeploymentNoResponse | GreengrassDeploymentFailed |MissingRobotArchitecture | MissingRobotApplicationArchitecture |MissingRobotDeploymentResource | GreengrassGroupVersionDoesNotExist |ExtractingBundleFailure | PreLaunchFileFailure | PostLaunchFileFailure |BadPermissionError | InternalServerError
Required: NofailureReason
A short description of the reason why the deployment job failed.
Type: String
193

AWS RoboMaker Developer GuideDeploymentJob
Required: Nofleet
The Amazon Resource Name (ARN) of the fleet.
Type: String
Length Constraints: Minimum length of 1. Maximum length of 1224.
Pattern: arn:.*
Required: Nostatus
The status of the deployment job.
Type: String
Valid Values: Pending | Preparing | InProgress | Failed | Succeeded
Required: No
See AlsoFor more information about using this API in one of the language-specific AWS SDKs, see the following:
• AWS SDK for C++• AWS SDK for Go• AWS SDK for Java• AWS SDK for Ruby V2
194

AWS RoboMaker Developer GuideDeploymentLaunchConfig
DeploymentLaunchConfigConfiguration information for a deployment launch.
ContentsenvironmentVariables
An array of key/value pairs specifying environment variables for the robot application
Type: String to string map
Key Length Constraints: Minimum length of 1. Maximum length of 1024.
Key Pattern: [A-Z_][A-Z0-9_]*
Value Length Constraints: Minimum length of 1. Maximum length of 1024.
Required: NolaunchFile
The launch file name.
Type: String
Required: YespackageName
The package name.
Type: String
Required: YespostLaunchFile
The deployment post-launch file. This file will be executed after the launch file.
Type: String
Required: NopreLaunchFile
The deployment pre-launch file. This file will be executed prior to the launch file.
Type: String
Required: No
See AlsoFor more information about using this API in one of the language-specific AWS SDKs, see the following:
• AWS SDK for C++• AWS SDK for Go• AWS SDK for Java• AWS SDK for Ruby V2
195

AWS RoboMaker Developer GuideDeploymentLaunchConfig
196

AWS RoboMaker Developer GuideFilter
FilterInformation about a filter.
Contentsname
The name of the filter.
Type: String
Length Constraints: Minimum length of 1. Maximum length of 255.
Pattern: [a-zA-Z0-9_\-]*
Required: Novalues
A list of values.
Type: Array of strings
Array Members: Fixed number of 1 item.
Length Constraints: Minimum length of 1. Maximum length of 255.
Pattern: [a-zA-Z0-9_\-]*
Required: No
See AlsoFor more information about using this API in one of the language-specific AWS SDKs, see the following:
• AWS SDK for C++• AWS SDK for Go• AWS SDK for Java• AWS SDK for Ruby V2
197

AWS RoboMaker Developer GuideFleet
FleetInformation about a fleet.
Contentsarn
The Amazon Resource Name (ARN) of the fleet.
Type: String
Length Constraints: Minimum length of 1. Maximum length of 1224.
Pattern: arn:.*
Required: NocreatedAt
The time, in milliseconds since the epoch, when the fleet was created.
Type: Timestamp
Required: NolastDeploymentJob
The Amazon Resource Name (ARN) of the last deployment job.
Type: String
Length Constraints: Minimum length of 1. Maximum length of 1224.
Pattern: arn:.*
Required: NolastDeploymentStatus
The status of the last fleet deployment.
Type: String
Valid Values: Pending | Preparing | InProgress | Failed | Succeeded
Required: NolastDeploymentTime
The time of the last deployment.
Type: Timestamp
Required: Noname
The name of the fleet.
Type: String
Length Constraints: Minimum length of 1. Maximum length of 255.
198

AWS RoboMaker Developer GuideFleet
Pattern: [a-zA-Z0-9_\-]*
Required: No
See AlsoFor more information about using this API in one of the language-specific AWS SDKs, see the following:
• AWS SDK for C++• AWS SDK for Go• AWS SDK for Java• AWS SDK for Ruby V2
199
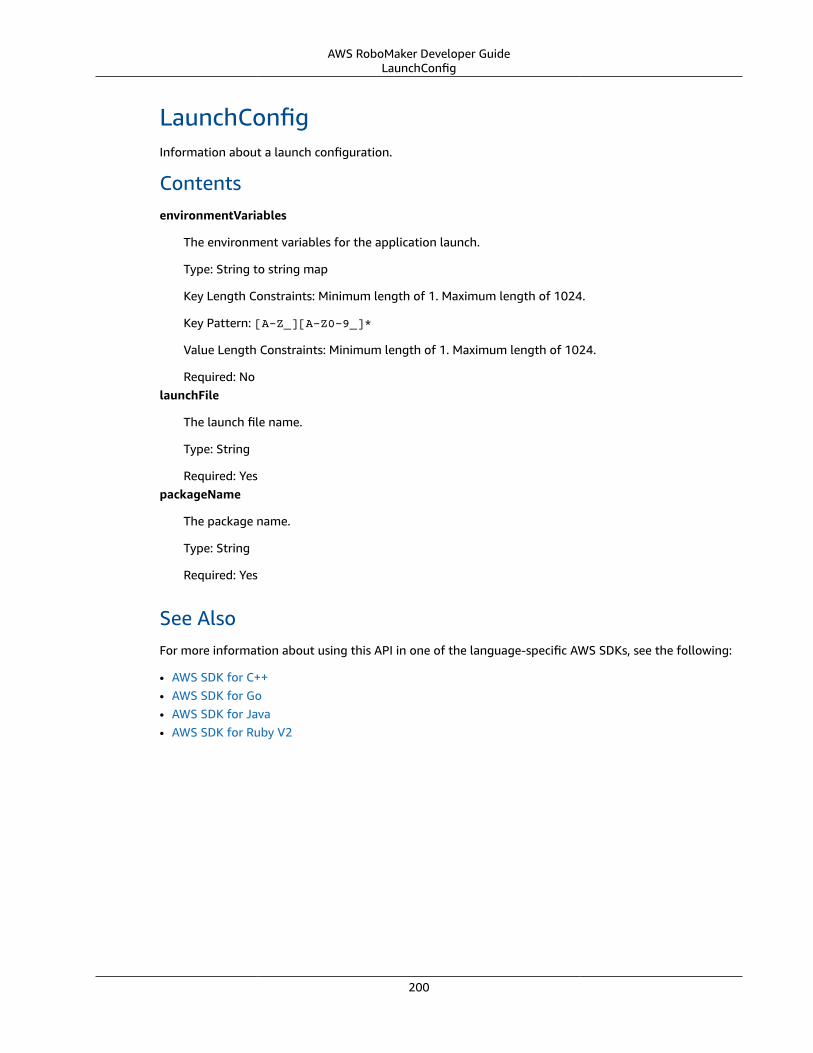
AWS RoboMaker Developer GuideLaunchConfig
LaunchConfigInformation about a launch configuration.
ContentsenvironmentVariables
The environment variables for the application launch.
Type: String to string map
Key Length Constraints: Minimum length of 1. Maximum length of 1024.
Key Pattern: [A-Z_][A-Z0-9_]*
Value Length Constraints: Minimum length of 1. Maximum length of 1024.
Required: NolaunchFile
The launch file name.
Type: String
Required: YespackageName
The package name.
Type: String
Required: Yes
See AlsoFor more information about using this API in one of the language-specific AWS SDKs, see the following:
• AWS SDK for C++• AWS SDK for Go• AWS SDK for Java• AWS SDK for Ruby V2
200

AWS RoboMaker Developer GuideOutputLocation
OutputLocationThe output location.
Contentss3Bucket
The S3 bucket for output.
Type: String
Length Constraints: Minimum length of 3. Maximum length of 63.
Pattern: [a-z0-9][a-z0-9\-]*[a-z0-9]
Required: Nos3Prefix
The S3 folder in the s3Bucket where output files will be placed.
Type: String
Length Constraints: Minimum length of 1. Maximum length of 1024.
Pattern: .*
Required: No
See AlsoFor more information about using this API in one of the language-specific AWS SDKs, see the following:
• AWS SDK for C++• AWS SDK for Go• AWS SDK for Java• AWS SDK for Ruby V2
201

AWS RoboMaker Developer GuideProgressDetail
ProgressDetailInformation about the progress of a deployment job.
ContentscurrentProgress
The current progress status.
Type: String
Required: NotargetResource
The Amazon Resource Name (ARN) of the deployment job.
Type: String
Required: No
See AlsoFor more information about using this API in one of the language-specific AWS SDKs, see the following:
• AWS SDK for C++• AWS SDK for Go• AWS SDK for Java• AWS SDK for Ruby V2
202

AWS RoboMaker Developer GuideRenderingEngine
RenderingEngineInformation about a rendering engine.
Contentsname
The name of the rendering engine.
Type: String
Valid Values: OGRE
Required: Noversion
The version of the rendering engine.
Type: String
Pattern: 1.x
Required: No
See AlsoFor more information about using this API in one of the language-specific AWS SDKs, see the following:
• AWS SDK for C++• AWS SDK for Go• AWS SDK for Java• AWS SDK for Ruby V2
203

AWS RoboMaker Developer GuideRobot
RobotInformation about a robot.
Contentsarchitecture
The architecture of the robot.
Type: String
Valid Values: X86_64 | ARM64 | ARMHF
Required: Noarn
The Amazon Resource Name (ARN) of the robot.
Type: String
Length Constraints: Minimum length of 1. Maximum length of 1224.
Pattern: arn:.*
Required: NocreatedAt
The time, in milliseconds since the epoch, when the robot was created.
Type: Timestamp
Required: NofleetArn
The Amazon Resource Name (ARN) of the fleet.
Type: String
Length Constraints: Minimum length of 1. Maximum length of 1224.
Pattern: arn:.*
Required: NogreenGrassGroupId
The Greengrass group associated with the robot.
Type: String
Length Constraints: Minimum length of 1. Maximum length of 1224.
Required: NolastDeploymentJob
The Amazon Resource Name (ARN) of the last deployment job.
Type: String
204

AWS RoboMaker Developer GuideRobot
Length Constraints: Minimum length of 1. Maximum length of 1224.
Pattern: arn:.*
Required: NolastDeploymentTime
The time of the last deployment.
Type: Timestamp
Required: Noname
The name of the robot.
Type: String
Length Constraints: Minimum length of 1. Maximum length of 255.
Pattern: [a-zA-Z0-9_\-]*
Required: Nostatus
The status of the robot.
Type: String
Valid Values: Available | Registered | PendingNewDeployment | Deploying |Failed | InSync | NoResponse
Required: No
See AlsoFor more information about using this API in one of the language-specific AWS SDKs, see the following:
• AWS SDK for C++• AWS SDK for Go• AWS SDK for Java• AWS SDK for Ruby V2
205

AWS RoboMaker Developer GuideRobotApplicationConfig
RobotApplicationConfigApplication configuration information for a robot.
Contentsapplication
The application information for the robot application.
Type: String
Length Constraints: Minimum length of 1. Maximum length of 1224.
Pattern: arn:.*
Required: YesapplicationVersion
The version of the robot application.
Type: String
Length Constraints: Minimum length of 1. Maximum length of 255.
Pattern: (\$LATEST)|[0-9]*
Required: NolaunchConfig
The launch configuration for the robot application.
Type: LaunchConfig (p. 200) object
Required: Yes
See AlsoFor more information about using this API in one of the language-specific AWS SDKs, see the following:
• AWS SDK for C++• AWS SDK for Go• AWS SDK for Java• AWS SDK for Ruby V2
206

AWS RoboMaker Developer GuideRobotApplicationSummary
RobotApplicationSummarySummary information for a robot application.
Contentsarn
The Amazon Resource Name (ARN) of the robot.
Type: String
Length Constraints: Minimum length of 1. Maximum length of 1224.
Pattern: arn:.*
Required: NolastUpdatedAt
The time, in milliseconds since the epoch, when the robot application was last updated.
Type: Timestamp
Required: Noname
The name of the robot application.
Type: String
Length Constraints: Minimum length of 1. Maximum length of 255.
Pattern: [a-zA-Z0-9_\-]*
Required: Noversion
The version of the robot application.
Type: String
Length Constraints: Minimum length of 1. Maximum length of 255.
Pattern: (\$LATEST)|[0-9]*
Required: No
See AlsoFor more information about using this API in one of the language-specific AWS SDKs, see the following:
• AWS SDK for C++• AWS SDK for Go• AWS SDK for Java• AWS SDK for Ruby V2
207

AWS RoboMaker Developer GuideRobotDeployment
RobotDeploymentInformation about a robot deployment.
Contentsarn
The robot deployment Amazon Resource Name (ARN).
Type: String
Length Constraints: Minimum length of 1. Maximum length of 1224.
Pattern: arn:.*
Required: NodeploymentFinishTime
The time, in milliseconds since the epoch, when the deployment finished.
Type: Timestamp
Required: NodeploymentStartTime
The time, in milliseconds since the epoch, when the deployment was started.
Type: Timestamp
Required: NofailureCode
The robot deployment failure code.
Type: String
Valid Values: ResourceNotFound | FailureThresholdBreached |RobotDeploymentNoResponse | GreengrassDeploymentFailed |MissingRobotArchitecture | MissingRobotApplicationArchitecture |MissingRobotDeploymentResource | GreengrassGroupVersionDoesNotExist |ExtractingBundleFailure | PreLaunchFileFailure | PostLaunchFileFailure |BadPermissionError | InternalServerError
Required: NofailureReason
A short description of the reason why the robot deployment failed.
Type: String
Required: NoprogressDetail
Information about how the deployment is progressing.
Type: ProgressDetail (p. 202) object
Required: No
208
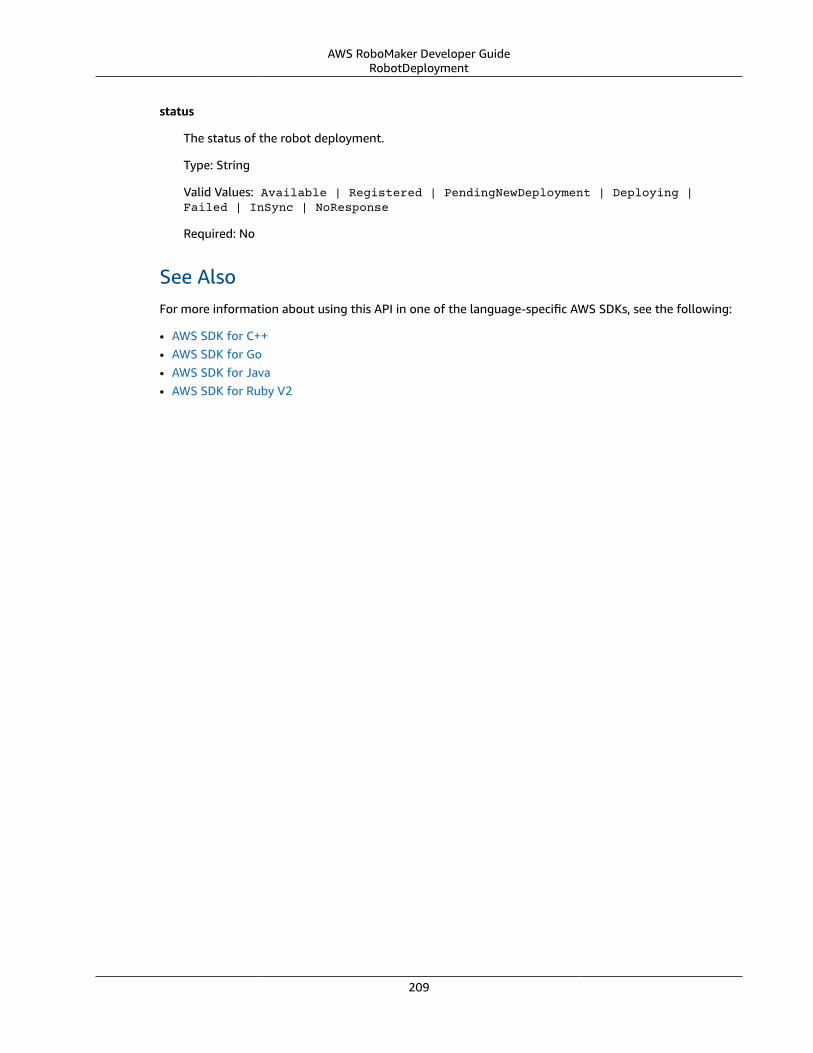
AWS RoboMaker Developer GuideRobotDeployment
status
The status of the robot deployment.
Type: String
Valid Values: Available | Registered | PendingNewDeployment | Deploying |Failed | InSync | NoResponse
Required: No
See AlsoFor more information about using this API in one of the language-specific AWS SDKs, see the following:
• AWS SDK for C++• AWS SDK for Go• AWS SDK for Java• AWS SDK for Ruby V2
209

AWS RoboMaker Developer GuideRobotSoftwareSuite
RobotSoftwareSuiteInformation about a robot software suite.
Contentsname
The name of the robot software suite.
Type: String
Valid Values: ROS
Required: Noversion
The version of the robot software suite.
Type: String
Valid Values: Kinetic
Required: No
See AlsoFor more information about using this API in one of the language-specific AWS SDKs, see the following:
• AWS SDK for C++• AWS SDK for Go• AWS SDK for Java• AWS SDK for Ruby V2
210

AWS RoboMaker Developer GuideSimulationApplicationConfig
SimulationApplicationConfigInformation about a simulation application configuration.
Contentsapplication
The application information for the simulation application.
Type: String
Length Constraints: Minimum length of 1. Maximum length of 1224.
Pattern: arn:.*
Required: YesapplicationVersion
The version of the simulation application.
Type: String
Length Constraints: Minimum length of 1. Maximum length of 255.
Pattern: (\$LATEST)|[0-9]*
Required: NolaunchConfig
The launch configuration for the simulation application.
Type: LaunchConfig (p. 200) object
Required: Yes
See AlsoFor more information about using this API in one of the language-specific AWS SDKs, see the following:
• AWS SDK for C++• AWS SDK for Go• AWS SDK for Java• AWS SDK for Ruby V2
211

AWS RoboMaker Developer GuideSimulationApplicationSummary
SimulationApplicationSummarySummary information for a simulation application.
Contentsarn
The Amazon Resource Name (ARN) of the simulation application.
Type: String
Length Constraints: Minimum length of 1. Maximum length of 1224.
Pattern: arn:.*
Required: NolastUpdatedAt
The time, in milliseconds since the epoch, when the simulation application was last updated.
Type: Timestamp
Required: Noname
The name of the simulation application.
Type: String
Length Constraints: Minimum length of 1. Maximum length of 255.
Pattern: [a-zA-Z0-9_\-]*
Required: Noversion
The version of the simulation application.
Type: String
Length Constraints: Minimum length of 1. Maximum length of 255.
Pattern: (\$LATEST)|[0-9]*
Required: No
See AlsoFor more information about using this API in one of the language-specific AWS SDKs, see the following:
• AWS SDK for C++• AWS SDK for Go• AWS SDK for Java• AWS SDK for Ruby V2
212

AWS RoboMaker Developer GuideSimulationJob
SimulationJobInformation about a simulation job.
Contentsarn
The Amazon Resource Name (ARN) of the simulation job.
Type: String
Length Constraints: Minimum length of 1. Maximum length of 1224.
Pattern: arn:.*
Required: NoclientRequestToken
A unique identifier for this SimulationJob request.
Type: String
Length Constraints: Minimum length of 1. Maximum length of 64.
Pattern: [a-zA-Z0-9_\-=]*
Required: NofailureBehavior
The failure behavior the simulation job.Continue
Restart the simulation job in the same host instance.Fail
Stop the simulation job and terminate the instance.
Type: String
Valid Values: Fail | Continue
Required: NofailureCode
The failure code of the simulation job if it failed.
Type: String
Valid Values: InternalServiceError | RobotApplicationCrash |SimulationApplicationCrash | BadPermissionsRobotApplication |BadPermissionsSimulationApplication | BadPermissionsS3Output |BadPermissionsCloudwatchLogs | SubnetIpLimitExceeded | ENILimitExceeded| BadPermissionsUserCredentials | InvalidBundleRobotApplication |InvalidBundleSimulationApplication | RobotApplicationVersionMismatchedEtag |SimulationApplicationVersionMismatchedEtag
Required: No
213

AWS RoboMaker Developer GuideSimulationJob
iamRole
The IAM role that allows the simulation instance to call the AWS APIs that are specified in itsassociated policies on your behalf. This is how credentials are passed in to your simulation job. Seehow to specify AWS security credentials for your application.
Type: String
Length Constraints: Minimum length of 1. Maximum length of 255.
Pattern: arn:.*
Required: NolastUpdatedAt
The time, in milliseconds since the epoch, when the simulation job was last updated.
Type: Timestamp
Required: NomaxJobDurationInSeconds
The maximum simulation job duration in seconds. The value must be 8 days (691,200 seconds) orless.
Type: Long
Required: Noname
The name of the simulation job.
Type: String
Length Constraints: Minimum length of 1. Maximum length of 255.
Pattern: [a-zA-Z0-9_\-]*
Required: NooutputLocation
Location for output files generated by the simulation job.
Type: OutputLocation (p. 201) object
Required: NorobotApplications
A list of robot applications.
Type: Array of RobotApplicationConfig (p. 206) objects
Array Members: Fixed number of 1 item.
Required: NosimulationApplications
A list of simulation applications.
Type: Array of SimulationApplicationConfig (p. 211) objects
214

AWS RoboMaker Developer GuideSimulationJob
Array Members: Fixed number of 1 item.
Required: NosimulationTimeMillis
The simulation job execution duration in milliseconds.
Type: Long
Required: Nostatus
Status of the simulation job.
Type: String
Valid Values: Pending | Preparing | Running | Restarting | Completed | Failed |RunningFailed | Terminating | Terminated | Canceled
Required: NovpcConfig
VPC configuration information.
Type: VPCConfigResponse (p. 222) object
Required: No
See AlsoFor more information about using this API in one of the language-specific AWS SDKs, see the following:
• AWS SDK for C++• AWS SDK for Go• AWS SDK for Java• AWS SDK for Ruby V2
215

AWS RoboMaker Developer GuideSimulationJobSummary
SimulationJobSummarySummary information for a simulation job.
Contentsarn
The Amazon Resource Name (ARN) of the simulation job.
Type: String
Length Constraints: Minimum length of 1. Maximum length of 1224.
Pattern: arn:.*
Required: NolastUpdatedAt
The time, in milliseconds since the epoch, when the simulation job was last updated.
Type: Timestamp
Required: Noname
The name of the simulation job.
Type: String
Length Constraints: Minimum length of 1. Maximum length of 255.
Pattern: [a-zA-Z0-9_\-]*
Required: NorobotApplicationNames
A list of simulation job robot application names.
Type: Array of strings
Array Members: Fixed number of 1 item.
Length Constraints: Minimum length of 1. Maximum length of 255.
Pattern: [a-zA-Z0-9_\-]*
Required: NosimulationApplicationNames
A list of simulation job simulation application names.
Type: Array of strings
Array Members: Fixed number of 1 item.
Length Constraints: Minimum length of 1. Maximum length of 255.
Pattern: [a-zA-Z0-9_\-]*
216

AWS RoboMaker Developer GuideSimulationJobSummary
Required: Nostatus
The status of the simulation job.
Type: String
Valid Values: Pending | Preparing | Running | Restarting | Completed | Failed |RunningFailed | Terminating | Terminated | Canceled
Required: No
See AlsoFor more information about using this API in one of the language-specific AWS SDKs, see the following:
• AWS SDK for C++• AWS SDK for Go• AWS SDK for Java• AWS SDK for Ruby V2
217
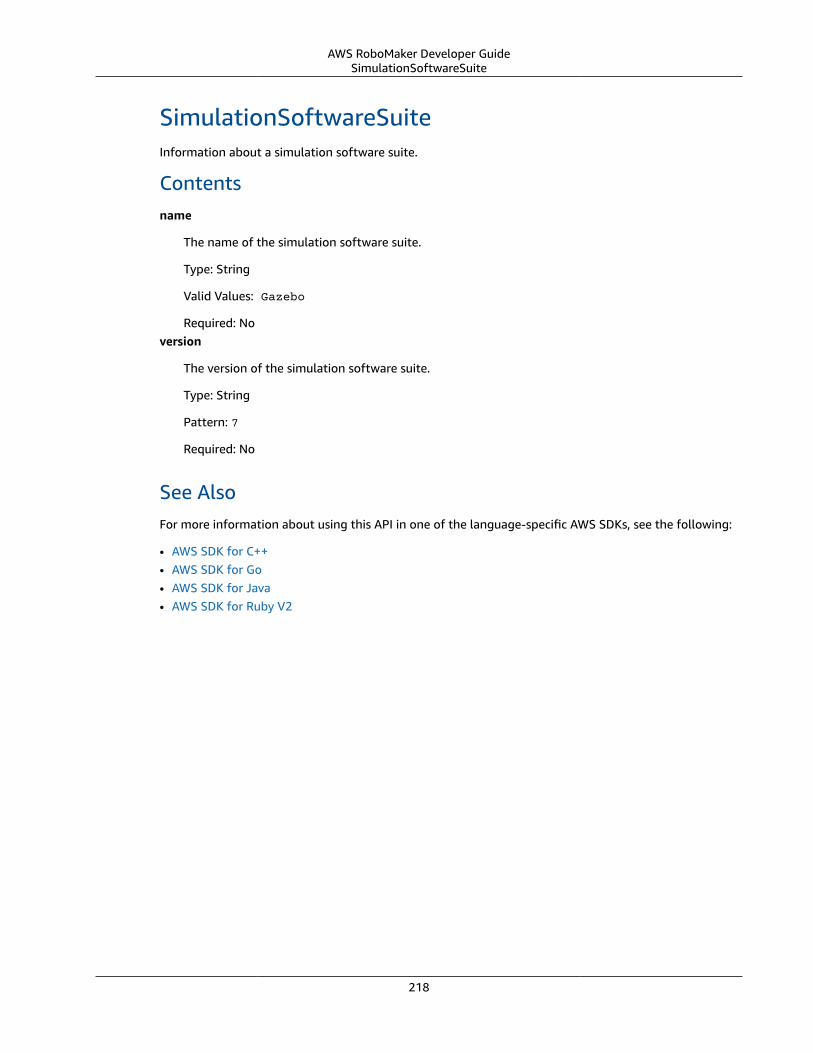
AWS RoboMaker Developer GuideSimulationSoftwareSuite
SimulationSoftwareSuiteInformation about a simulation software suite.
Contentsname
The name of the simulation software suite.
Type: String
Valid Values: Gazebo
Required: Noversion
The version of the simulation software suite.
Type: String
Pattern: 7
Required: No
See AlsoFor more information about using this API in one of the language-specific AWS SDKs, see the following:
• AWS SDK for C++• AWS SDK for Go• AWS SDK for Java• AWS SDK for Ruby V2
218

AWS RoboMaker Developer GuideSource
SourceInformation about a source.
Contentsarchitecture
The taget processor architecture for the application.
Type: String
Valid Values: X86_64 | ARM64 | ARMHF
Required: Noetag
A hash of the object specified by s3Bucket and s3Key.
Type: String
Required: Nos3Bucket
The s3 bucket name.
Type: String
Length Constraints: Minimum length of 3. Maximum length of 63.
Pattern: [a-z0-9][a-z0-9\-]*[a-z0-9]
Required: Nos3Key
The s3 object key.
Type: String
Length Constraints: Minimum length of 1. Maximum length of 1024.
Pattern: .*
Required: No
See AlsoFor more information about using this API in one of the language-specific AWS SDKs, see the following:
• AWS SDK for C++• AWS SDK for Go• AWS SDK for Java• AWS SDK for Ruby V2
219

AWS RoboMaker Developer GuideSourceConfig
SourceConfigInformation about a source configuration.
Contentsarchitecture
The target processor architecture for the application.
Type: String
Valid Values: X86_64 | ARM64 | ARMHF
Required: Nos3Bucket
The Amazon S3 bucket name.
Type: String
Length Constraints: Minimum length of 3. Maximum length of 63.
Pattern: [a-z0-9][a-z0-9\-]*[a-z0-9]
Required: Nos3Key
The s3 object key.
Type: String
Length Constraints: Minimum length of 1. Maximum length of 1024.
Pattern: .*
Required: No
See AlsoFor more information about using this API in one of the language-specific AWS SDKs, see the following:
• AWS SDK for C++• AWS SDK for Go• AWS SDK for Java• AWS SDK for Ruby V2
220

AWS RoboMaker Developer GuideVPCConfig
VPCConfigIf your simulation job accesses resources in a VPC, you provide this parameter identifying the list ofsecurity group IDs and subnet IDs. These must belong to the same VPC. You must provide at least onesecurity group and two subnet IDs.
ContentsassignPublicIp
A boolean indicating whether to assign a public IP address.
Type: Boolean
Required: NosecurityGroups
A list of one or more security groups IDs in your VPC.
Type: Array of strings
Array Members: Minimum number of 1 item. Maximum number of 5 items.
Required: Nosubnets
A list of one or more subnet IDs in your VPC.
Type: Array of strings
Array Members: Minimum number of 1 item. Maximum number of 16 items.
Required: Yes
See AlsoFor more information about using this API in one of the language-specific AWS SDKs, see the following:
• AWS SDK for C++• AWS SDK for Go• AWS SDK for Java• AWS SDK for Ruby V2
221

AWS RoboMaker Developer GuideVPCConfigResponse
VPCConfigResponseVPC configuration associated with your simulation job.
ContentsassignPublicIp
A boolean indicating if a public IP was assigned.
Type: Boolean
Required: NosecurityGroups
A list of security group IDs associated with the simulation job.
Type: Array of strings
Array Members: Minimum number of 1 item. Maximum number of 5 items.
Required: Nosubnets
A list of subnet IDs associated with the simulation job.
Type: Array of strings
Array Members: Minimum number of 1 item. Maximum number of 16 items.
Required: NovpcId
The VPC ID associated with your simulation job.
Type: String
Required: No
See AlsoFor more information about using this API in one of the language-specific AWS SDKs, see the following:
• AWS SDK for C++• AWS SDK for Go• AWS SDK for Java• AWS SDK for Ruby V2
Common ErrorsThis section lists the errors common to the API actions of all AWS services. For errors specific to an APIaction for this service, see the topic for that API action.
AccessDeniedException
You do not have sufficient access to perform this action.
222

AWS RoboMaker Developer GuideCommon Errors
HTTP Status Code: 400IncompleteSignature
The request signature does not conform to AWS standards.
HTTP Status Code: 400InternalFailure
The request processing has failed because of an unknown error, exception or failure.
HTTP Status Code: 500InvalidAction
The action or operation requested is invalid. Verify that the action is typed correctly.
HTTP Status Code: 400InvalidClientTokenId
The X.509 certificate or AWS access key ID provided does not exist in our records.
HTTP Status Code: 403InvalidParameterCombination
Parameters that must not be used together were used together.
HTTP Status Code: 400InvalidParameterValue
An invalid or out-of-range value was supplied for the input parameter.
HTTP Status Code: 400InvalidQueryParameter
The AWS query string is malformed or does not adhere to AWS standards.
HTTP Status Code: 400MalformedQueryString
The query string contains a syntax error.
HTTP Status Code: 404MissingAction
The request is missing an action or a required parameter.
HTTP Status Code: 400MissingAuthenticationToken
The request must contain either a valid (registered) AWS access key ID or X.509 certificate.
HTTP Status Code: 403MissingParameter
A required parameter for the specified action is not supplied.
HTTP Status Code: 400OptInRequired
The AWS access key ID needs a subscription for the service.
223

AWS RoboMaker Developer GuideCommon Parameters
HTTP Status Code: 403RequestExpired
The request reached the service more than 15 minutes after the date stamp on the request or morethan 15 minutes after the request expiration date (such as for pre-signed URLs), or the date stampon the request is more than 15 minutes in the future.
HTTP Status Code: 400ServiceUnavailable
The request has failed due to a temporary failure of the server.
HTTP Status Code: 503ThrottlingException
The request was denied due to request throttling.
HTTP Status Code: 400ValidationError
The input fails to satisfy the constraints specified by an AWS service.
HTTP Status Code: 400
Common ParametersThe following list contains the parameters that all actions use for signing Signature Version 4 requestswith a query string. Any action-specific parameters are listed in the topic for that action. For moreinformation about Signature Version 4, see Signature Version 4 Signing Process in the Amazon WebServices General Reference.
Action
The action to be performed.
Type: string
Required: YesVersion
The API version that the request is written for, expressed in the format YYYY-MM-DD.
Type: string
Required: YesX-Amz-Algorithm
The hash algorithm that you used to create the request signature.
Condition: Specify this parameter when you include authentication information in a query stringinstead of in the HTTP authorization header.
Type: string
Valid Values: AWS4-HMAC-SHA256
Required: Conditional
224

AWS RoboMaker Developer GuideCommon Parameters
X-Amz-Credential
The credential scope value, which is a string that includes your access key, the date, the region youare targeting, the service you are requesting, and a termination string ("aws4_request"). The value isexpressed in the following format: access_key/YYYYMMDD/region/service/aws4_request.
For more information, see Task 2: Create a String to Sign for Signature Version 4 in the Amazon WebServices General Reference.
Condition: Specify this parameter when you include authentication information in a query stringinstead of in the HTTP authorization header.
Type: string
Required: Conditional
X-Amz-Date
The date that is used to create the signature. The format must be ISO 8601 basic format(YYYYMMDD'T'HHMMSS'Z'). For example, the following date time is a valid X-Amz-Date value:20120325T120000Z.
Condition: X-Amz-Date is optional for all requests; it can be used to override the date used forsigning requests. If the Date header is specified in the ISO 8601 basic format, X-Amz-Date isnot required. When X-Amz-Date is used, it always overrides the value of the Date header. Formore information, see Handling Dates in Signature Version 4 in the Amazon Web Services GeneralReference.
Type: string
Required: Conditional
X-Amz-Security-Token
The temporary security token that was obtained through a call to AWS Security Token Service (AWSSTS). For a list of services that support temporary security credentials from AWS Security TokenService, go to AWS Services That Work with IAM in the IAM User Guide.
Condition: If you're using temporary security credentials from the AWS Security Token Service, youmust include the security token.
Type: string
Required: Conditional
X-Amz-Signature
Specifies the hex-encoded signature that was calculated from the string to sign and the derivedsigning key.
Condition: Specify this parameter when you include authentication information in a query stringinstead of in the HTTP authorization header.
Type: string
Required: Conditional
X-Amz-SignedHeaders
Specifies all the HTTP headers that were included as part of the canonical request. For moreinformation about specifying signed headers, see Task 1: Create a Canonical Request For SignatureVersion 4 in the Amazon Web Services General Reference.
225

AWS RoboMaker Developer GuideCommon Parameters
Condition: Specify this parameter when you include authentication information in a query stringinstead of in the HTTP authorization header.
Type: string
Required: Conditional
226

AWS RoboMaker Developer Guide
Document History for AWSRoboMaker
The following table describes the documentation for this release of AWS RoboMaker.
Change Description Date
New service and guide This is the initial release ofAWS RoboMaker and the AWSRoboMaker Developer Guide.
11/07/2018
227

AWS RoboMaker Developer Guide
AWS GlossaryFor the latest AWS terminology, see the AWS Glossary in the AWS General Reference.
228