Amazon Deep Learning Containers - Developer Guide
105
Amazon Deep Learning Containers Developer Guide
-
Upload
khangminh22 -
Category
Documents
-
view
4 -
download
0
Transcript of Amazon Deep Learning Containers - Developer Guide

Amazon DeepLearning Containers
Developer Guide

Amazon Deep Learning Containers Developer Guide
Amazon Deep Learning Containers: Developer Guide

Amazon Deep Learning Containers Developer Guide
Table of ContentsWhat are Amazon Deep Learning Containers? ... . . . . . . . . . . . . . . . . . . . . . . . . . . . . . . . . . . . . . . . . . . . . . . . . . . . . . . . . . . . . . . . . . . . . . . . . . . . . . . . . . . . . . 1
About this guide .... . . . . . . . . . . . . . . . . . . . . . . . . . . . . . . . . . . . . . . . . . . . . . . . . . . . . . . . . . . . . . . . . . . . . . . . . . . . . . . . . . . . . . . . . . . . . . . . . . . . . . . . . . . . . . . . . . . . . 1Python 2 Support ... . . . . . . . . . . . . . . . . . . . . . . . . . . . . . . . . . . . . . . . . . . . . . . . . . . . . . . . . . . . . . . . . . . . . . . . . . . . . . . . . . . . . . . . . . . . . . . . . . . . . . . . . . . . . . . . . . . . 1Prerequisites ... . . . . . . . . . . . . . . . . . . . . . . . . . . . . . . . . . . . . . . . . . . . . . . . . . . . . . . . . . . . . . . . . . . . . . . . . . . . . . . . . . . . . . . . . . . . . . . . . . . . . . . . . . . . . . . . . . . . . . . . . . . . 2
Getting Started With Deep Learning Containers ... . . . . . . . . . . . . . . . . . . . . . . . . . . . . . . . . . . . . . . . . . . . . . . . . . . . . . . . . . . . . . . . . . . . . . . . . . . . . . . . . . . 3Amazon EC2 Tutorials ... . . . . . . . . . . . . . . . . . . . . . . . . . . . . . . . . . . . . . . . . . . . . . . . . . . . . . . . . . . . . . . . . . . . . . . . . . . . . . . . . . . . . . . . . . . . . . . . . . . . . . . . . . . . . . . 3
Amazon EC2 setup .... . . . . . . . . . . . . . . . . . . . . . . . . . . . . . . . . . . . . . . . . . . . . . . . . . . . . . . . . . . . . . . . . . . . . . . . . . . . . . . . . . . . . . . . . . . . . . . . . . . . . . . . . . 3Training .... . . . . . . . . . . . . . . . . . . . . . . . . . . . . . . . . . . . . . . . . . . . . . . . . . . . . . . . . . . . . . . . . . . . . . . . . . . . . . . . . . . . . . . . . . . . . . . . . . . . . . . . . . . . . . . . . . . . . . . . . 4Inference .... . . . . . . . . . . . . . . . . . . . . . . . . . . . . . . . . . . . . . . . . . . . . . . . . . . . . . . . . . . . . . . . . . . . . . . . . . . . . . . . . . . . . . . . . . . . . . . . . . . . . . . . . . . . . . . . . . . . . . . . 7Custom Entrypoints ... . . . . . . . . . . . . . . . . . . . . . . . . . . . . . . . . . . . . . . . . . . . . . . . . . . . . . . . . . . . . . . . . . . . . . . . . . . . . . . . . . . . . . . . . . . . . . . . . . . . . . . . 13
Amazon ECS Tutorials ... . . . . . . . . . . . . . . . . . . . . . . . . . . . . . . . . . . . . . . . . . . . . . . . . . . . . . . . . . . . . . . . . . . . . . . . . . . . . . . . . . . . . . . . . . . . . . . . . . . . . . . . . . . . . 13Amazon ECS setup .... . . . . . . . . . . . . . . . . . . . . . . . . . . . . . . . . . . . . . . . . . . . . . . . . . . . . . . . . . . . . . . . . . . . . . . . . . . . . . . . . . . . . . . . . . . . . . . . . . . . . . . . 13Training .... . . . . . . . . . . . . . . . . . . . . . . . . . . . . . . . . . . . . . . . . . . . . . . . . . . . . . . . . . . . . . . . . . . . . . . . . . . . . . . . . . . . . . . . . . . . . . . . . . . . . . . . . . . . . . . . . . . . . . . . 16Inference .... . . . . . . . . . . . . . . . . . . . . . . . . . . . . . . . . . . . . . . . . . . . . . . . . . . . . . . . . . . . . . . . . . . . . . . . . . . . . . . . . . . . . . . . . . . . . . . . . . . . . . . . . . . . . . . . . . . . . . 24Custom Entrypoints ... . . . . . . . . . . . . . . . . . . . . . . . . . . . . . . . . . . . . . . . . . . . . . . . . . . . . . . . . . . . . . . . . . . . . . . . . . . . . . . . . . . . . . . . . . . . . . . . . . . . . . . . 36
Amazon EKS Tutorials ... . . . . . . . . . . . . . . . . . . . . . . . . . . . . . . . . . . . . . . . . . . . . . . . . . . . . . . . . . . . . . . . . . . . . . . . . . . . . . . . . . . . . . . . . . . . . . . . . . . . . . . . . . . . . 36Amazon EKS Setup .... . . . . . . . . . . . . . . . . . . . . . . . . . . . . . . . . . . . . . . . . . . . . . . . . . . . . . . . . . . . . . . . . . . . . . . . . . . . . . . . . . . . . . . . . . . . . . . . . . . . . . . . 36Training .... . . . . . . . . . . . . . . . . . . . . . . . . . . . . . . . . . . . . . . . . . . . . . . . . . . . . . . . . . . . . . . . . . . . . . . . . . . . . . . . . . . . . . . . . . . . . . . . . . . . . . . . . . . . . . . . . . . . . . . . 42Inference .... . . . . . . . . . . . . . . . . . . . . . . . . . . . . . . . . . . . . . . . . . . . . . . . . . . . . . . . . . . . . . . . . . . . . . . . . . . . . . . . . . . . . . . . . . . . . . . . . . . . . . . . . . . . . . . . . . . . . . 63Custom Entrypoints ... . . . . . . . . . . . . . . . . . . . . . . . . . . . . . . . . . . . . . . . . . . . . . . . . . . . . . . . . . . . . . . . . . . . . . . . . . . . . . . . . . . . . . . . . . . . . . . . . . . . . . . . 79Troubleshooting Amazon Deep Learning Containers on EKS .... . . . . . . . . . . . . . . . . . . . . . . . . . . . . . . . . . . . . . . . . . . . . . . . 80
Deep Learning Containers Images .... . . . . . . . . . . . . . . . . . . . . . . . . . . . . . . . . . . . . . . . . . . . . . . . . . . . . . . . . . . . . . . . . . . . . . . . . . . . . . . . . . . . . . . . . . . . . . . . . . . 83Deep Learning Containers Resources .... . . . . . . . . . . . . . . . . . . . . . . . . . . . . . . . . . . . . . . . . . . . . . . . . . . . . . . . . . . . . . . . . . . . . . . . . . . . . . . . . . . . . . . . . . . . . . . . 84
Building Custom Images .... . . . . . . . . . . . . . . . . . . . . . . . . . . . . . . . . . . . . . . . . . . . . . . . . . . . . . . . . . . . . . . . . . . . . . . . . . . . . . . . . . . . . . . . . . . . . . . . . . . . . . . . . 84How to Build Custom Images .... . . . . . . . . . . . . . . . . . . . . . . . . . . . . . . . . . . . . . . . . . . . . . . . . . . . . . . . . . . . . . . . . . . . . . . . . . . . . . . . . . . . . . . . . . 84
MKL Recommendations .... . . . . . . . . . . . . . . . . . . . . . . . . . . . . . . . . . . . . . . . . . . . . . . . . . . . . . . . . . . . . . . . . . . . . . . . . . . . . . . . . . . . . . . . . . . . . . . . . . . . . . . . . . 85MKL Recommendation for CPU containers ... . . . . . . . . . . . . . . . . . . . . . . . . . . . . . . . . . . . . . . . . . . . . . . . . . . . . . . . . . . . . . . . . . . . . . . . . 85
Security ... . . . . . . . . . . . . . . . . . . . . . . . . . . . . . . . . . . . . . . . . . . . . . . . . . . . . . . . . . . . . . . . . . . . . . . . . . . . . . . . . . . . . . . . . . . . . . . . . . . . . . . . . . . . . . . . . . . . . . . . . . . . . . . . . . . . . . . . . 90Data Protection .... . . . . . . . . . . . . . . . . . . . . . . . . . . . . . . . . . . . . . . . . . . . . . . . . . . . . . . . . . . . . . . . . . . . . . . . . . . . . . . . . . . . . . . . . . . . . . . . . . . . . . . . . . . . . . . . . . . . . 90Identity and Access Management .... . . . . . . . . . . . . . . . . . . . . . . . . . . . . . . . . . . . . . . . . . . . . . . . . . . . . . . . . . . . . . . . . . . . . . . . . . . . . . . . . . . . . . . . . . . . 91
Authenticating With Identities ... . . . . . . . . . . . . . . . . . . . . . . . . . . . . . . . . . . . . . . . . . . . . . . . . . . . . . . . . . . . . . . . . . . . . . . . . . . . . . . . . . . . . . . . . . 91Managing Access Using Policies ... . . . . . . . . . . . . . . . . . . . . . . . . . . . . . . . . . . . . . . . . . . . . . . . . . . . . . . . . . . . . . . . . . . . . . . . . . . . . . . . . . . . . . . . 93IAM with Amazon EMR .... . . . . . . . . . . . . . . . . . . . . . . . . . . . . . . . . . . . . . . . . . . . . . . . . . . . . . . . . . . . . . . . . . . . . . . . . . . . . . . . . . . . . . . . . . . . . . . . . . . 95
Logging and Monitoring .... . . . . . . . . . . . . . . . . . . . . . . . . . . . . . . . . . . . . . . . . . . . . . . . . . . . . . . . . . . . . . . . . . . . . . . . . . . . . . . . . . . . . . . . . . . . . . . . . . . . . . . . . 95Usage Tracking .... . . . . . . . . . . . . . . . . . . . . . . . . . . . . . . . . . . . . . . . . . . . . . . . . . . . . . . . . . . . . . . . . . . . . . . . . . . . . . . . . . . . . . . . . . . . . . . . . . . . . . . . . . . . . . 95
Compliance Validation .... . . . . . . . . . . . . . . . . . . . . . . . . . . . . . . . . . . . . . . . . . . . . . . . . . . . . . . . . . . . . . . . . . . . . . . . . . . . . . . . . . . . . . . . . . . . . . . . . . . . . . . . . . . 96Resilience .... . . . . . . . . . . . . . . . . . . . . . . . . . . . . . . . . . . . . . . . . . . . . . . . . . . . . . . . . . . . . . . . . . . . . . . . . . . . . . . . . . . . . . . . . . . . . . . . . . . . . . . . . . . . . . . . . . . . . . . . . . . . . 96Infrastructure Security ... . . . . . . . . . . . . . . . . . . . . . . . . . . . . . . . . . . . . . . . . . . . . . . . . . . . . . . . . . . . . . . . . . . . . . . . . . . . . . . . . . . . . . . . . . . . . . . . . . . . . . . . . . . . 96
Release Notes for Deep Learning Containers ... . . . . . . . . . . . . . . . . . . . . . . . . . . . . . . . . . . . . . . . . . . . . . . . . . . . . . . . . . . . . . . . . . . . . . . . . . . . . . . . . . . . . . 98Single-framework Deep Learning Containers ... . . . . . . . . . . . . . . . . . . . . . . . . . . . . . . . . . . . . . . . . . . . . . . . . . . . . . . . . . . . . . . . . . . . . . . . . . . . . . 98Graviton Deep Learning Containers ... . . . . . . . . . . . . . . . . . . . . . . . . . . . . . . . . . . . . . . . . . . . . . . . . . . . . . . . . . . . . . . . . . . . . . . . . . . . . . . . . . . . . . . . . . . 99Habana Deep Learning Containers ... . . . . . . . . . . . . . . . . . . . . . . . . . . . . . . . . . . . . . . . . . . . . . . . . . . . . . . . . . . . . . . . . . . . . . . . . . . . . . . . . . . . . . . . . . . . 99
Document History .... . . . . . . . . . . . . . . . . . . . . . . . . . . . . . . . . . . . . . . . . . . . . . . . . . . . . . . . . . . . . . . . . . . . . . . . . . . . . . . . . . . . . . . . . . . . . . . . . . . . . . . . . . . . . . . . . . . . . . . 101Amazon glossary .... . . . . . . . . . . . . . . . . . . . . . . . . . . . . . . . . . . . . . . . . . . . . . . . . . . . . . . . . . . . . . . . . . . . . . . . . . . . . . . . . . . . . . . . . . . . . . . . . . . . . . . . . . . . . . . . . . . . . . . . . 102
iii

Amazon Deep Learning Containers Developer GuideAbout this guide
What are Amazon Deep LearningContainers?
Welcome to the User Guide for the Amazon Deep Learning Containers.
Amazon Deep Learning Containers (Deep Learning Containers) are a set of Docker images for trainingand serving models in TensorFlow, TensorFlow 2, PyTorch, and Apache MXNet (Incubating). DeepLearning Containers provide optimized environments with TensorFlow and MXNet, Nvidia CUDA (for GPUinstances), and Intel MKL (for CPU instances) libraries and are available in the Amazon Elastic ContainerRegistry (Amazon ECR).
Amazon Deep Learning Containers | Amazon Web Services
About this guideThis guide helps you set up and use Amazon Deep Learning Containers. This guide also covers setting upDeep Learning Containers with Amazon EC2, Amazon ECS, Amazon EKS, and SageMaker. It covers severaluse cases that are common for deep learning, for both training and inference. This guide also providesseveral tutorials for each of the frameworks.
• To run training and inference on Deep Learning Containers for Amazon EC2 using MXNet, PyTorch,TensorFlow, and TensorFlow 2, see Amazon EC2 Tutorials (p. 3)
• To run training and inference on Deep Learning Containers for Amazon ECS using MXNet, PyTorch, andTensorFlow, see Amazon ECS tutorials (p. 13)
• Deep Learning Containers for Amazon EKS offer CPU, GPU, and distributed GPU-based training, aswell as CPU and GPU-based inference. To run training and inference on Deep Learning Containers forAmazon EKS using MXNet, PyTorch, and TensorFlow, see Amazon EKS Tutorials (p. 36)
• For an explanation of the Docker-based Deep Learning Containers images, the list of available images,and how to use them, see Deep Learning Containers Images (p. 83)
• For information on security in Deep Learning Containers, see Security in Amazon Deep LearningContainers (p. 90)
• For a list of the latest Deep Learning Containers release notes, see Release Notes for Deep LearningContainers (p. 98)
Python 2 SupportThe Python open source community has officially ended support for Python 2 on January 1, 2020.The TensorFlow and PyTorch community have announced that the TensorFlow 2.1 and PyTorch 1.4releases will be the last ones supporting Python 2. Previous releases of the Deep Learning Containersthat support Python 2 will continue to be available. However, we will provide updates to the Python 2Deep Learning Containers only if there are security fixes published by the open source community forthose versions. Deep Learning Containers releases with the next versions of the TensorFlow and PyTorchframeworks will not include the Python 2 environments.
1

Amazon Deep Learning Containers Developer GuidePrerequisites
PrerequisitesYou should be familiar with command line tools and basic Python to successfully run the Deep LearningContainers. Tutorials on how to use each framework are provided by the frameworks themselves.However, this guide shows you how to activate each one and find the appropriate tutorials to get started.
2

Amazon Deep Learning Containers Developer GuideAmazon EC2 Tutorials
Getting Started With Deep LearningContainers
The following sections describe how to use Deep Learning Containers to run sample code from eachof the frameworks on Amazon infrastructure. For information on using Deep Learning Containers withSageMaker, see the Use Your Own Algorithms or Models with SageMaker Documentation.
Topics• Amazon EC2 Tutorials (p. 3)
• Amazon ECS tutorials (p. 13)
• Amazon EKS Tutorials (p. 36)
Amazon EC2 TutorialsThis section shows how to run training and inference on Deep Learning Containers for EC2 using MXNet,PyTorch, TensorFlow, and TensorFlow 2.
Before starting the following tutorials, complete the steps in Amazon EC2 setup (p. 3).
Contents• Amazon EC2 setup (p. 3)
• Training (p. 4)
• Inference (p. 7)
• Custom Entrypoints (p. 13)
Amazon EC2 setupIn this section, you learn how to set up Amazon Deep Learning Containers with Amazon Elastic ComputeCloud.
Complete the following steps to configure your instance:
• Create an Amazon Identity and Access Management user or modify an existing user with the followingpolicies. You can search for them by name in the IAM console's policy tab.
• AmazonECS_FullAccess Policy
• AmazonEC2ContainerRegistryFullAccess
For more information about creating or editing an IAM user, see Adding and Removing IAM IdentityPermissions in the IAM user guide.
• Launch an Amazon Elastic Compute Cloud instance (CPU or GPU), preferably a Deep Learning BaseAMI. Other AMIs work, but require relevant GPU drivers.
• Connect to your instance by using SSH. For more information about connections, see TroubleshootingConnecting to Your Instance in the Amazon EC2 user guide..
• Ensure your Amazon CLI is up to date using the steps in Installing the current Amazon CLI Version.
3

Amazon Deep Learning Containers Developer GuideTraining
• In your instance, run aws configure and provide the credentials of your created user.• In your instance, run the following command to log in to the Amazon ECR repository where Deep
Learning Containers images are hosted.
aws ecr get-login-password --region us-east-1 | docker login --username AWS --password-stdin 763104351884.dkr.ecr.us-east-1.amazonaws.com
For a complete list of Amazon Deep Learning Containers, refer to Deep Learning ContainersImages (p. 83).
NoteMKL users: Read the Amazon Deep Learning Containers Intel Math Kernel Library (MKL)Recommendations (p. 85) to get the best training or inference performance.
Next stepsTo learn about training and inference on Amazon EC2 with Deep Learning Containers, see Amazon EC2Tutorials (p. 3).
TrainingThis section shows how to run training on Amazon Deep Learning Containers for Amazon EC2 usingApache MXNet (Incubating), PyTorch, TensorFlow, and TensorFlow 2.
For a complete list of Deep Learning Containers, refer to Deep Learning Containers Images (p. 83).
NoteMKL users: Read the Amazon Deep Learning Containers Intel Math Kernel Library (MKL)Recommendations (p. 85) to get the best training or inference performance.
Contents• TensorFlow training (p. 4)• Apache MXNet (Incubating) training (p. 5)• PyTorch training (p. 6)• Amazon S3 Plugin for PyTorch (p. 7)• Next steps (p. 7)
TensorFlow trainingAfter you log into your Amazon EC2 instance, you can run TensorFlow and TensorFlow 2 containers withthe following commands. You must use nvidia-docker for GPU images.
• For CPU-based training, run the following.
$ docker run -it <CPU training container>
• For GPU-based training, run the following.
$ nvidia-docker run -it <GPU training container>
The previous command runs the container in interactive mode and provides a shell prompt inside thecontainer. You can then run the following to import TensorFlow.
4

Amazon Deep Learning Containers Developer GuideTraining
$ python
>> import tensorflow
Press Ctrl+D to return to the bash prompt. Run the following to begin training:
git clone https://github.com/fchollet/keras.git
$ cd keras
$ python examples/mnist_cnn.py
Next steps
To learn inference on Amazon EC2 using TensorFlow with Deep Learning Containers, see TensorFlowInference (p. 8).
Apache MXNet (Incubating) trainingTo begin training with Apache MXNet (Incubating) from your Amazon EC2 instance, run the followingcommand to run the container:
• For CPU
$ docker run -it <CPU training container>
• For GPU
$ nvidia-docker run -it <GPU training container>
In the terminal of the container, run the following to begin training.
• For CPU
$ git clone -b v1.4.x https://github.com/apache/incubator-mxnet.gitpython incubator-mxnet/example/image-classification/train_mnist.py
• For GPU
$ git clone -b v1.4.x https://github.com/apache/incubator-mxnet.gitpython incubator-mxnet/example/image-classification/train_mnist.py --gpus 0
MXNet training with GluonCV
In the terminal of the container, run the following to begin training using GluonCV. GluonCV v0.6.0 isincluded in the Deep Learning Containers.
• For CPU
$ git clone -b v0.6.0 https://github.com/dmlc/gluon-cv.git
5

Amazon Deep Learning Containers Developer GuideTraining
python gluon-cv/scripts/classification/cifar/train_cifar10.py --model resnet18_v1b
• For GPU
$ git clone -b v0.6.0 https://github.com/dmlc/gluon-cv.gitpython gluon-cv/scripts/classification/cifar/train_cifar10.py --num-gpus 1 --model resnet18_v1b
Next steps
To learn inference on Amazon EC2 using MXNet with Deep Learning Containers, see Apache MXNet(Incubating) Inference (p. 10).
PyTorch trainingTo begin training with PyTorch from your Amazon EC2 instance, use the following commands to run thecontainer. You must use nvidia-docker for GPU images.
• For CPU
$ docker run -it <CPU training container>
• For GPU
$ nvidia-docker run -it <GPU training container>
• If you have docker-ce version 19.03 or later, you can use the --gpus flag with docker:
$ docker run -it --gpus <GPU training container>
Run the following to begin training.
• For CPU
$ git clone https://github.com/pytorch/examples.git$ python examples/mnist/main.py --no-cuda
• For GPU
$ git clone https://github.com/pytorch/examples.git$ python examples/mnist/main.py
PyTorch distributed GPU training with NVIDIA Apex
NVIDIA Apex is a PyTorch extension with utilities for mixed precision and distributed training. For moreinformation on the utilities offered with Apex, see the NVIDIA Apex website. Apex is currently supportedby Amazon EC2 instances in the following families:
To begin distributed training using NVIDIA Apex, run the following in the terminal of the GPU trainingcontainer. This example requires at least two GPUs on your Amazon EC2 instance to run paralleldistributed training.
$ git clone https://github.com/NVIDIA/apex.git && cd apex
6

Amazon Deep Learning Containers Developer GuideInference
$ python -m torch.distributed.launch --nproc_per_node=2 examples/simple/distributed/distributed_data_parallel.py
Amazon S3 Plugin for PyTorchDeep Learning Containers include a plugin that enables you to use data from an Amazon S3 bucket forPyTorch training.
1. To begin using the Amazon S3 plugin in Deep Learning Containers, check to make sure thatyour Amazon EC2 instance has full access to Amazon S3. Create an IAM role that grants AmazonS3 access to an Amazon EC2 instance and attach the role to your instance. You can use theAmazonS3FullAccess or AmazonS3ReadOnlyAccess policies.
2. Set up your AWS_REGION environment variable with the region of your choice.
export AWS_REGION=us-east-1
3. Use the following commands to run a container that is compatible with the Amazon S3 plugin. Youmust use nvidia-docker for GPU images.
• For CPU
docker run -it 763104351884.dkr.ecr.us-east-1.amazonaws.com/pytorch-training:1.8.1-cpu-py36-ubuntu18.04-v1.6
• For GPU
nvidia-docker run -it 763104351884.dkr.ecr.us-east-1.amazonaws.com/pytorch-training:1.8.1-gpu-py36-cu111-ubuntu18.04-v1.7
4. Run the following to test an example.
git clone https://github.com/aws/amazon-s3-plugin-for-pytorch.gitcd amazon-s3-plugin-for-pytorch/examplespython s3_cv_iterable_shuffle_example.py
For more information and additional examples, see the Amazon S3 Plugin for PyTorch repository.
Next stepsTo learn inference on Amazon EC2 using PyTorch with Deep Learning Containers, see PyTorch Inference (p. 12).
InferenceThis section shows how to run inference on Amazon Deep Learning Containers for Amazon ElasticCompute Cloud using Apache MXNet (Incubating), PyTorch, TensorFlow, and TensorFlow 2. You can alsouse Elastic Inference to run inference with Amazon Deep Learning Containers. For tutorials and moreinformation on Elastic Inference, see Using Amazon Deep Learning Containers with Elastic Inference onAmazon EC2.
For a complete list of Deep Learning Containers, refer to Deep Learning Containers Images (p. 83).
NoteMKL users: read the Amazon Deep Learning Containers Intel Math Kernel Library (MKL)Recommendations (p. 85) to get the best training or inference performance.
7

Amazon Deep Learning Containers Developer GuideInference
Contents• TensorFlow Inference (p. 8)• TensorFlow 2 Inference (p. 9)• Apache MXNet (Incubating) Inference (p. 10)• PyTorch Inference (p. 12)
TensorFlow InferenceTo demonstrate how to use Deep Learning Containers for inference, this example uses a simple half plustwo model with TensorFlow Serving. We recommend using the Deep Learning Base AMI for TensorFlow.After you log into your instance, run the following:
$ git clone -b r1.15 https://github.com/tensorflow/serving.git$ cd serving$ git checkout r1.15
Use the commands here to start TensorFlow Serving with the Deep Learning Containers for this model.Unlike the Deep Learning Containers for training, model serving starts immediately upon running thecontainer and runs as a background process.
• For CPU instances:
$ docker run -p 8500:8500 -p 8501:8501 --name tensorflow-inference --mount type=bind,source=$(pwd)/tensorflow_serving/servables/tensorflow/testdata/saved_model_half_plus_two_cpu,target=/models/saved_model_half_plus_two -e MODEL_NAME=saved_model_half_plus_two -d <cpu inference container>
For example:
$ docker run -p 8500:8500 -p 8501:8501 --name tensorflow-inference --mount type=bind,source=$(pwd)/tensorflow_serving/servables/tensorflow/testdata/saved_model_half_plus_two_cpu,target=/models/saved_model_half_plus_two -e MODEL_NAME=saved_model_half_plus_two -d 763104351884.dkr.ecr.us-east-1.amazonaws.com/tensorflow-inference:1.15.0-cpu-py36-ubuntu18.04
• For GPU instances:
$ nvidia-docker run -p 8500:8500 -p 8501:8501 --name tensorflow-inference --mount type=bind,source=$(pwd)/tensorflow_serving/servables/tensorflow/testdata/saved_model_half_plus_two_gpu,target=/models/saved_model_half_plus_two -e MODEL_NAME=saved_model_half_plus_two -d <gpu inference container>
For example:
$ nvidia-docker run -p 8500:8500 -p 8501:8501 --name tensorflow-inference --mount type=bind,source=$(pwd)/tensorflow_serving/servables/tensorflow/testdata/saved_model_half_plus_two_gpu,target=/models/saved_model_half_plus_two -e MODEL_NAME=saved_model_half_plus_two -d 763104351884.dkr.ecr.us-east-1.amazonaws.com/tensorflow-inference:1.15.0-gpu-py36-cu100-ubuntu18.04
• For Inf1 instances:
$ docker run -id --name tensorflow-inference -p 8500:8500 --device=/dev/neuron0 --cap-add IPC_LOCK --mount type=bind,source={model_path},target=/models/{model_name} -e MODEL_NAME={model_name} <neuron inference container>
8

Amazon Deep Learning Containers Developer GuideInference
For example:
$ docker run -id --name tensorflow-inference -p 8500:8500 --device=/dev/neuron0 --cap-add IPC_LOCK --mount type=bind,source={model_path},target=/models/{model_name} -e MODEL_NAME={model_name} 763104351884.dkr.ecr.us-west-2.amazonaws.com/tensorflow-inference-neuron:1.15.4-neuron-py37-ubuntu18.04-v1.1
Next, run inference with the Deep Learning Containers.
$ curl -d '{"instances": [1.0, 2.0, 5.0]}' -X POST http://127.0.0.1:8501/v1/models/saved_model_half_plus_two:predict
The output is similar to the following:
{ "predictions": [2.5, 3.0, 4.5 ]}
NoteIf you want to debug the container's output, you can attach to it using the container name, as inthe following command:
$ docker attach <your docker container name>
In this example you used tensorflow-inference.
TensorFlow 2 InferenceTo demonstrate how to use Deep Learning Containers for inference, this example uses a simple half plustwo model with TensorFlow 2 Serving. We recommend using the Deep Learning Base AMI for TensorFlow2. After you log into your instance run the following.
$ git clone -b r2.0 https://github.com/tensorflow/serving.git$ cd serving
Use the commands here to start TensorFlow Serving with the Deep Learning Containers for this model.Unlike the Deep Learning Containers for training, model serving starts immediately upon running thecontainer and runs as a background process.
• For CPU instances:
$ docker run -p 8500:8500 -p 8501:8501 --name tensorflow-inference --mount type=bind,source=$(pwd)/tensorflow_serving/servables/tensorflow/testdata/saved_model_half_plus_two_cpu,target=/models/saved_model_half_plus_two -e MODEL_NAME=saved_model_half_plus_two -d <cpu inference container>
For example:
$ docker run -p 8500:8500 -p 8501:8501 --name tensorflow-inference --mount type=bind,source=$(pwd)/tensorflow_serving/servables/tensorflow/testdata/saved_model_half_plus_two_cpu,target=/models/saved_model_half_plus_two -e MODEL_NAME=saved_model_half_plus_two -d 763104351884.dkr.ecr.us-east-1.amazonaws.com/tensorflow-inference:2.0.0-cpu-py36-ubuntu18.04
9

Amazon Deep Learning Containers Developer GuideInference
• For GPU instances:
$ nvidia-docker run -p 8500:8500 -p 8501:8501 --name tensorflow-inference --mount type=bind,source=$(pwd)/tensorflow_serving/servables/tensorflow/testdata/saved_model_half_plus_two_gpu,target=/models/saved_model_half_plus_two -e MODEL_NAME=saved_model_half_plus_two -d <gpu inference container>
For example:
$ nvidia-docker run -p 8500:8500 -p 8501:8501 --name tensorflow-inference --mount type=bind,source=$(pwd)/tensorflow_serving/servables/tensorflow/testdata/saved_model_half_plus_two_gpu,target=/models/saved_model_half_plus_two -e MODEL_NAME=saved_model_half_plus_two -d 763104351884.dkr.ecr.us-east-1.amazonaws.com/tensorflow-inference:2.0.0-gpu-py36-cu100-ubuntu18.04
NoteLoading the GPU model server may take some time.
Next, run inference with the Deep Learning Containers.
$ curl -d '{"instances": [1.0, 2.0, 5.0]}' -X POST http://127.0.0.1:8501/v1/models/saved_model_half_plus_two:predict
The output is similar to the following.
{ "predictions": [2.5, 3.0, 4.5 ]}
NoteTo debug the container's output, you can use the name to attach to it as shown in the followingcommand:
$ docker attach <your docker container name>
This example used tensorflow-inference.
Apache MXNet (Incubating) InferenceTo begin inference with Apache MXNet (Incubating), this example uses a pretrained model from a publicS3 bucket.
For CPU instances, run the following command.
$ docker run -it --name mms -p 80:8080 -p 8081:8081 <your container image id> \mxnet-model-server --start --mms-config /home/model-server/config.properties \--models squeezenet=https://s3.amazonaws.com/model-server/models/squeezenet_v1.1/squeezenet_v1.1.model
For GPU instances, run the following command:
$ nvidia-docker run -it --name mms -p 80:8080 -p 8081:8081 <your container image id> \mxnet-model-server --start --mms-config /home/model-server/config.properties \
10

Amazon Deep Learning Containers Developer GuideInference
--models squeezenet=https://s3.amazonaws.com/model-server/models/squeezenet_v1.1/squeezenet_v1.1.model
The configuration file is included in the container.
With your server started, you can now run inference from a different window by using the followingcommand.
$ curl -O https://s3.amazonaws.com/model-server/inputs/kitten.jpgcurl -X POST http://127.0.0.1/predictions/squeezenet -T kitten.jpg
After you are done using your container, you can remove it using the following command:
$ docker rm -f mms
MXNet Inference with GluonCV
To begin inference using GluonCV, this example uses a pretrained model from a public S3 bucket.
For CPU instances, run the following command.
$ docker run -it --name mms -p 80:8080 -p 8081:8081 <your container image id> \mxnet-model-server --start --mms-config /home/model-server/config.properties \--models gluoncv_yolo3=https://dlc-samples.s3.amazonaws.com/mxnet/gluon/gluoncv_yolo3.mar
For GPU instances, run the following command.
$ nvidia-docker run -it --name mms -p 80:8080 -p 8081:8081 <your container image id> \mxnet-model-server --start --mms-config /home/model-server/config.properties \--models gluoncv_yolo3=https://dlc-samples.s3.amazonaws.com/mxnet/gluon/gluoncv_yolo3.mar
The configuration file is included in the container.
With your server started, you can now run inference from a different window by using the followingcommand.
$ curl -O https://dlc-samples.s3.amazonaws.com/mxnet/gluon/dog.jpgcurl -X POST http://127.0.0.1/predictions/gluoncv_yolo3/predict -T dog.jpg
Your output should look like the following:
{ "bicycle": [ "[ 79.674225 87.403786 409.43515 323.12167 ]", "[ 98.69891 107.480446 200.0086 155.13412 ]" ], "car": [ "[336.61322 56.533463 499.30566 125.0233 ]" ], "dog": [ "[100.50538 156.50375 223.014 384.60873]" ]}
After you are done using your container, you can remove it using this command.
$ docker rm -f mms
11

Amazon Deep Learning Containers Developer GuideInference
PyTorch InferenceDeep Learning Containers with PyTorch version 1.6 and later use TorchServe for inference calls. DeepLearning Containers with PyTorch version 1.5 and earlier use mxnet-model-server for inference calls.
PyTorch 1.6 and later
To run inference with PyTorch, this example uses a model pretrained on Imagenet from a public S3bucket. Inference is served using TorchServe. For more information, see this blog on Deploying PyTorchinference with TorchServe.
For CPU instances:
$ docker run -itd --name torchserve -p 80:8080 -p 8081:8081 <your container image id> \torchserve --start --ts-config /home/model-server/config.properties \--models pytorch-densenet=https://torchserve.s3.amazonaws.com/mar_files/densenet161.mar
For GPU instances
$ nvidia-docker run -itd --name torchserve -p 80:8080 -p 8081:8081 <your container image id> \torchserve --start --ts-config /home/model-server/config.properties \--models pytorch-densenet=https://torchserve.s3.amazonaws.com/mar_files/densenet161.mar
If you have docker-ce version 19.03 or later, you can use the --gpus flag when you start Docker.
The configuration file is included in the container.
With your server started, you can now run inference from a different window by using the following.
$ curl -O https://s3.amazonaws.com/model-server/inputs/flower.jpgcurl -X POST http://127.0.0.1:80/predictions/pytorch-densenet -T flower.jpg
After you are done using your container, you can remove it using the following.
$ docker rm -f torchserve
PyTorch 1.5 and earlier
To run inference with PyTorch, this example uses a model pretrained on Imagenet from a public S3bucket. Similar to MXNet containers, inference is served using mxnet-model-server, which can supportany framework as the backend. For more information, see Model Server for Apache MXNet and this blogon Deploying PyTorch inference with MXNet Model Server.
For CPU instances:
$ docker run -itd --name mms -p 80:8080 -p 8081:8081 <your container image id> \mxnet-model-server --start --mms-config /home/model-server/config.properties \--models densenet=https://dlc-samples.s3.amazonaws.com/pytorch/multi-model-server/densenet/densenet.mar
For GPU instances
$ nvidia-docker run -itd --name mms -p 80:8080 -p 8081:8081 <your container image id> \mxnet-model-server --start --mms-config /home/model-server/config.properties \--models densenet=https://dlc-samples.s3.amazonaws.com/pytorch/multi-model-server/densenet/densenet.mar
12

Amazon Deep Learning Containers Developer GuideCustom Entrypoints
If you have docker-ce version 19.03 or later, you can use the --gpus flag when you start Docker.
The configuration file is included in the container.
With your server started, you can now run inference from a different window by using the following.
$ curl -O https://s3.amazonaws.com/model-server/inputs/flower.jpgcurl -X POST http://127.0.0.1/predictions/densenet -T flower.jpg
After you are done using your container, you can remove it using the following.
$ docker rm -f mms
Next steps
To learn about using custom entrypoints with Deep Learning Containers on Amazon ECS, see Customentrypoints (p. 36).
Custom EntrypointsFor some images, Deep Learning Containers uses a custom entrypoint script. If you want to use your ownentrypoint, you can override the entrypoint as follows.
• To specify a custom entrypoint script to run, use this command.
docker run --entrypoint=/path/to/custom_entrypoint_script -it <image> /bin/bash
• To set the entrypoint to be empty, use this command.
docker run --entrypoint="" <image> /bin/bash
Amazon ECS tutorialsThis section shows how to run training and inference on Amazon Deep Learning Containers for AmazonECS using MXNet, PyTorch, and TensorFlow.
Before starting the following tutorials, complete the steps in Amazon ECS setup (p. 13).
For a complete list of Deep Learning Containers, refer to Deep Learning Containers Images (p. 83).
NoteMKL users: Read the Amazon Deep Learning Containers Intel Math Kernel Library (MKL)Recommendations (p. 85) to get the best training or inference performance.
Contents• Amazon ECS setup (p. 13)• Training (p. 16)• Inference (p. 24)• Custom entrypoints (p. 36)
Amazon ECS setupThis topic shows how to setup Amazon Deep Learning Containers with Amazon Elastic Container Service.
13

Amazon Deep Learning Containers Developer GuideAmazon ECS setup
Contents
• Prerequisites (p. 14)
• Setting up Amazon ECS for Deep Learning Containers (p. 14)
PrerequisitesThis setup guide assumes that you have completed the following prerequisites:
• Install and configure the latest version of the Amazon CLI. For more information about installing orupgrading the Amazon CLI, see Installing the Amazon Command Line Interface.
• Complete the steps in Setting Up with Amazon ECS.
• One of the following is true:
• Your user has administrator access. For more information, see Setting Up with Amazon ECS.
• Your user has the IAM permissions to create a service role. For more information, see Creating a Roleto Delegate Permissions to an Amazon Service.
• A user with administrator access has manually created these IAM roles so that they're available onthe account to be used. For more information, see Amazon ECS Service Scheduler IAM Role andAmazon ECS Container Instance IAM Role in the Amazon Elastic Container Service Developer Guide.
• The Amazon CloudWatch Logs IAM policy is added to the Amazon ECS Container Instance IAM role,which allows Amazon ECS to send logs to Amazon CloudWatch. For more information, see CloudWatchLogs IAM Policy in the Amazon Elastic Container Service Developer Guide.
• Generate a key pair. For more information see Amazon EC2 Key Pairs.
• Create a new security group or update an existing security group to have the ports open for yourdesired inference server.
• For MXNet inference, ports 80 and 8081 open to TCP traffic.
• For TensorFlow inference, ports 8501 and 8500 open to TCP traffic.
For more information see Amazon EC2 Security Groups.
Setting up Amazon ECS for Deep Learning ContainersThis section explains how to set up Amazon ECS to use Deep Learning Containers.
ImportantIf your account has already created the Amazon ECS service-linked role, then that role is usedby default for your service unless you specify a role here. The service-linked role is required ifyour task definition uses the awsvpc network mode or if the service is configured to use anyof the following: Service discovery, an external deployment controller, multiple target groups,or Elastic Inference accelerators. If this is the case, you should not specify a role here. For moreinformation, see Using Service-Linked Roles for Amazon ECS in the Amazon ECS Developer Guide.
Run the following actions from your host.
1. Create an Amazon ECS cluster in the Region that contains the key pair and security group that youcreated previously.
aws ecs create-cluster --cluster-name ecs-ec2-training-inference --region us-east-1
2. Launch one or more Amazon EC2 instances into your cluster. For GPU-based work, refer to Workingwith GPUs on Amazon ECS in the Amazon ECS Developer Guide to inform your instance typeselection. If you select a GPU instance type, be sure to then choose the Amazon ECS GPU-optimizedAMI. For CPU-based work, you can use the Amazon Linux or Amazon Linux 2 ECS-optimized AMIs.
14

Amazon Deep Learning Containers Developer GuideAmazon ECS setup
For more information about compatible instance types and Amazon ECS-optimized AMI IDs, seeAmazon ECS-optimized AMIs. In this example, you launch one instance with a GPU-based AMI with100 GB of disk size in us-east-1.
a. Create a file named my_script.txt with the following contents. Reference the same clustername that you created in the previous step.
#!/bin/bashecho ECS_CLUSTER=ecs-ec2-training-inference >> /etc/ecs/ecs.config
b. (Optional) Create a file named my_mapping.txt with the following content, which changes thesize of the root volume after the instance is created.
[ { "DeviceName": "/dev/xvda", "Ebs": { "VolumeSize": 100 } }]
c. Launch an Amazon EC2 instance with the Amazon ECS-optimized AMI and attach it to thecluster. Use the security group ID and key pair name that you created and replace them inthe following command. To get the latest Amazon ECS-optimized AMI ID, see Amazon ECS-optimized AMIs in the Amazon Elastic Container Service Developer Guide.
aws ec2 run-instances --image-id ami-0dfdeb4b6d47a87a2 \ --count 1 \ --instance-type p2.8xlarge \ --key-name key-pair-1234 \ --security-group-ids sg-abcd1234 \ --iam-instance-profile Name="ecsInstanceRole" \ --user-data file://my_script.txt \ --block-device-mapping file://my_mapping.txt \ --region us-east-1
In the Amazon EC2 console, you can verify that this step was successful by the instance-idfrom the response.
You now have an Amazon ECS cluster with container instances running. Verify that the Amazon EC2instances are registered with the cluster with the following steps.
To verify that the Amazon EC2 instance is registered with the cluster
1. Open the Amazon ECS console at https://console.amazonaws.cn/ecs/.2. Select the cluster with your registered Amazon EC2 instances.3. On the Cluster page, choose ECS Instances.4. Verify that the Agent Connected value is True for the instance-id created in previous step. Also,
note the CPU available and memory available from the console as these values can be useful in thefollowing tutorials. It might take a few minutes to appear in the console.
Next steps
To learn about training and inference with Deep Learning Containers on Amazon ECS, see Amazon ECStutorials (p. 13).
15

Amazon Deep Learning Containers Developer GuideTraining
TrainingThis section shows how to run training on Amazon Deep Learning Containers for Amazon ElasticContainer Service using Apache MXNet (Incubating), PyTorch, TensorFlow, and TensorFlow 2.
For a complete list of Deep Learning Containers, refer to Deep Learning Containers Images (p. 83).
NoteMKL users: Read the Amazon Deep Learning Containers Intel Math Kernel Library (MKL)Recommendations (p. 85) to get the best training or inference performance.
ImportantIf your account has already created the Amazon ECS service-linked role, that role is used bydefault for your service unless you specify a role here. The service-linked role is requiredif your task definition uses the awsvpc network mode or if the service is configured to useservice discovery. The role is also required if the service uses an external deployment controller,multiple target groups, or Elastic Inference accelerators in which case you should not specify arole here. For more information, see Using Service-Linked Roles for Amazon ECS in the AmazonECS Developer Guide.
Contents• TensorFlow training (p. 16)• Apache MXNet (Incubating) training (p. 18)• PyTorch training (p. 20)• Amazon S3 Plugin for PyTorch (p. 22)• Next steps (p. 24)
TensorFlow trainingBefore you can run a task on your ECS cluster, you must register a task definition. Task definitionsare lists of containers grouped together. The following example uses a sample Docker image thatadds training scripts to Deep Learning Containers. You can use this script with either TensorFlow orTensorFlow 2. To use it with TensorFlow 2, change the Docker image to a TensorFlow 2 image.
1. Create a file named ecs-deep-learning-container-training-taskdef.json with thefollowing contents.
• For CPU
{ "requiresCompatibilities": [ "EC2" ], "containerDefinitions": [{ "command": [ "mkdir -p /test && cd /test && git clone https://github.com/fchollet/keras.git && chmod +x -R /test/ && python keras/examples/mnist_cnn.py" ], "entryPoint": [ "sh", "-c" ], "name": "tensorflow-training-container", "image": "763104351884.dkr.ecr.us-east-1.amazonaws.com/tensorflow-inference:1.15.2-cpu-py36-ubuntu18.04", "memory": 4000, "cpu": 256, "essential": true, "portMappings": [{
16

Amazon Deep Learning Containers Developer GuideTraining
"containerPort": 80, "protocol": "tcp" }], "logConfiguration": { "logDriver": "awslogs", "options": { "awslogs-group": "awslogs-tf-ecs", "awslogs-region": "us-east-1", "awslogs-stream-prefix": "tf", "awslogs-create-group": "true" } } }], "volumes": [], "networkMode": "bridge", "placementConstraints": [], "family": "TensorFlow"}
• For GPU
{ "requiresCompatibilities": [ "EC2" ], "containerDefinitions": [ { "command": [ "mkdir -p /test && cd /test && git clone https://github.com/fchollet/keras.git && chmod +x -R /test/ && python keras/examples/mnist_cnn.py" ], "entryPoint": [ "sh", "-c" ], "name": "tensorflow-training-container", "image": "763104351884.dkr.ecr.us-east-1.amazonaws.com/tensorflow-training:1.15.2-gpu-py37-cu100-ubuntu18.04", "memory": 6111, "cpu": 256, "resourceRequirements" : [{ "type" : "GPU", "value" : "1" }], "essential": true, "portMappings": [ { "containerPort": 80, "protocol": "tcp" } ], "logConfiguration": { "logDriver": "awslogs", "options": { "awslogs-group": "awslogs-tf-ecs", "awslogs-region": "us-east-1", "awslogs-stream-prefix": "tf", "awslogs-create-group": "true" } } } ], "volumes": [], "networkMode": "bridge", "placementConstraints": [],
17

Amazon Deep Learning Containers Developer GuideTraining
"family": "tensorflow-training" }
2. Register the task definition. Note the revision number in the output and use it in the next step.
aws ecs register-task-definition --cli-input-json file://ecs-deep-learning-container-training-taskdef.json
3. Create a task using the task definition. You need the revision number from the previous step and thename of the cluster you created during setup
aws ecs run-task --cluster ecs-ec2-training-inference --task-definition tf:1
4. Open the Amazon ECS console at https://console.amazonaws.cn/ecs/.5. Select the ecs-ec2-training-inference cluster.6. On the Cluster page, choose Tasks.7. After your task is in a RUNNING state, choose the task identifier.8. Under Containers, expand the container details.9. Under Log Configuration, choose View logs in CloudWatch. This takes you to the CloudWatch
console to view the training progress logs.
Next steps
To learn inference on Amazon ECS using TensorFlow with Deep Learning Containers, see TensorFlowinference (p. 25).
Apache MXNet (Incubating) trainingBefore you can run a task on your Amazon Elastic Container Service cluster, you must register a taskdefinition. Task definitions are lists of containers grouped together. The following example uses a sampleDocker image that adds training scripts to Deep Learning Containers.
1. Create a file named ecs-deep-learning-container-training-taskdef.json with thefollowing contents.
• For CPU
{ "requiresCompatibilities":[ "EC2" ], "containerDefinitions":[ { "command":[ "git clone -b 1.4 https://github.com/apache/incubator-mxnet.git && python /incubator-mxnet/example/image-classification/train_mnist.py" ], "entryPoint":[ "sh", "-c" ], "name":"mxnet-training", "image":"763104351884.dkr.ecr.us-east-1.amazonaws.com/mxnet-training:1.6.0-cpu-py36-ubuntu16.04", "memory":4000, "cpu":256, "essential":true, "portMappings":[
18

Amazon Deep Learning Containers Developer GuideTraining
{ "containerPort":80, "protocol":"tcp" } ], "logConfiguration":{ "logDriver":"awslogs", "options":{ "awslogs-group":"/ecs/mxnet-training-cpu", "awslogs-region":"us-east-1", "awslogs-stream-prefix":"mnist", "awslogs-create-group":"true" } } } ], "volumes":[
], "networkMode":"bridge", "placementConstraints":[
], "family":"mxnet"}
• For GPU
{ "requiresCompatibilities":[ "EC2" ], "containerDefinitions":[ { "command":[ "git clone -b 1.4 https://github.com/apache/incubator-mxnet.git && python /incubator-mxnet/example/image-classification/train_mnist.py --gpus 0" ], "entryPoint":[ "sh", "-c" ], "name":"mxnet-training", "image":"763104351884.dkr.ecr.us-east-1.amazonaws.com/mxnet-training:1.6.0-gpu-py36-cu101-ubuntu16.04", "memory":4000, "cpu":256, "resourceRequirements":[ { "type":"GPU", "value":"1" } ], "essential":true, "portMappings":[ { "containerPort":80, "protocol":"tcp" } ], "logConfiguration":{ "logDriver":"awslogs", "options":{ "awslogs-group":"/ecs/mxnet-training-gpu", "awslogs-region":"us-east-1",
19

Amazon Deep Learning Containers Developer GuideTraining
"awslogs-stream-prefix":"mnist", "awslogs-create-group":"true" } } } ], "volumes":[
], "networkMode":"bridge", "placementConstraints":[
], "family":"mxnet-training"}
2. Register the task definition. Note the revision number in the output and use it in the next step.
aws ecs register-task-definition --cli-input-json file://ecs-deep-learning-container-training-taskdef.json
3. Create a task using the task definition. You need the revision number from the previous step.
aws ecs run-task --cluster ecs-ec2-training-inference --task-definition mx:1
4. Open the Amazon ECS console at https://console.amazonaws.cn/ecs/.5. Select the ecs-ec2-training-inference cluster.6. On the Cluster page, choose Tasks.7. After your task is in a RUNNING state, choose the task identifier.8. Under Containers, expand the container details.9. Under Log Configuration, choose View logs in CloudWatch. This takes you to the CloudWatch
console to view the training progress logs.
Next steps
To learn inference on Amazon ECS using MXNet with Deep Learning Containers, see Apache MXNet(Incubating) inference (p. 29).
PyTorch trainingBefore you can run a task on your Amazon ECS cluster, you must register a task definition. Taskdefinitions are lists of containers grouped together. The following example uses a sample Docker imagethat adds training scripts to Deep Learning Containers.
1. Create a file named ecs-deep-learning-container-training-taskdef.json with thefollowing contents.
• For CPU
{ "requiresCompatibilities":[ "EC2" ], "containerDefinitions":[ { "command":[ "git clone https://github.com/pytorch/examples.git && python examples/mnist/main.py --no-cuda" ],
20

Amazon Deep Learning Containers Developer GuideTraining
"entryPoint":[ "sh", "-c" ], "name":"pytorch-training-container", "image":"763104351884.dkr.ecr.us-east-1.amazonaws.com/pytorch-training:1.5.1-cpu-py36-ubuntu16.04", "memory":4000, "cpu":256, "essential":true, "portMappings":[ { "containerPort":80, "protocol":"tcp" } ], "logConfiguration":{ "logDriver":"awslogs", "options":{ "awslogs-group":"/ecs/pytorch-training-cpu", "awslogs-region":"us-east-1", "awslogs-stream-prefix":"mnist", "awslogs-create-group":"true" } } } ], "volumes":[
], "networkMode":"bridge", "placementConstraints":[
], "family":"pytorch"}
• For GPU
{ "requiresCompatibilities": [ "EC2" ], "containerDefinitions": [ { "command": [ "git clone https://github.com/pytorch/examples.git && python examples/mnist/main.py" ], "entryPoint": [ "sh", "-c" ], "name": "pytorch-training-container", "image": "763104351884.dkr.ecr.us-east-1.amazonaws.com/pytorch-training:1.5.1-gpu-py36-cu101-ubuntu16.04", "memory": 6111, "cpu": 256, "resourceRequirements" : [{ "type" : "GPU", "value" : "1" }], "essential": true, "portMappings": [ {
21

Amazon Deep Learning Containers Developer GuideTraining
"containerPort": 80, "protocol": "tcp" } ], "logConfiguration": { "logDriver": "awslogs", "options": { "awslogs-group": "/ecs/pytorch-training-gpu", "awslogs-region": "us-east-1", "awslogs-stream-prefix": "mnist", "awslogs-create-group": "true" } } } ], "volumes": [], "networkMode": "bridge", "placementConstraints": [], "family": "pytorch-training" }
2. Register the task definition. Note the revision number in the output and use it in the next step.
aws ecs register-task-definition --cli-input-json file://ecs-deep-learning-container-training-taskdef.json
3. Create a task using the task definition. You need the revision identifier from the previous step.
aws ecs run-task --cluster ecs-ec2-training-inference --task-definition pytorch:1
4. Open the Amazon ECS console at https://console.amazonaws.cn/ecs/.5. Select the ecs-ec2-training-inference cluster.6. On the Cluster page, choose Tasks.7. After your task is in a RUNNING state, choose the task identifier.8. Under Containers, expand the container details.9. Under Log Configuration, choose View logs in CloudWatch. This takes you to the CloudWatch
console to view the training progress logs.
Amazon S3 Plugin for PyTorchDeep Learning Containers include a plugin that enables you to use data from an Amazon S3 bucket forPyTorch training.
1. To begin using the Amazon S3 plugin in Amazon ECS, set up your AWS_REGION environmentvariable with the region of your choice.
export AWS_REGION=us-east-1
2. Create a file named ecs-deep-learning-container-pytorch-s3-plugin-taskdef.jsonwith the following contents.
• For CPU
{ "requiresCompatibilities":[ "EC2" ], "containerDefinitions":[
22

Amazon Deep Learning Containers Developer GuideTraining
{ "command":[ "git clone https://github.com/aws/amazon-s3-plugin-for-pytorch.git && python amazon-s3-plugin-for-pytorch/examples/s3_imagenet_example.py" ], "entryPoint":[ "sh", "-c" ], "name":"pytorch-s3-plugin-container", "image":"763104351884.dkr.ecr.us-east-1.amazonaws.com/pytorch-training:1.8.1-cpu-py36-ubuntu18.04-v1.6", "memory":4000, "cpu":256, "essential":true, "portMappings":[ { "containerPort":80, "protocol":"tcp" } ], "logConfiguration":{ "logDriver":"awslogs", "options":{ "awslogs-group":"/ecs/pytorch-s3-plugin-cpu", "awslogs-region":"us-east-1", "awslogs-stream-prefix":"imagenet", "awslogs-create-group":"true" } } } ], "volumes":[
], "networkMode":"bridge", "placementConstraints":[
], "family":"pytorch-s3-plugin"}
• For GPU
{ "requiresCompatibilities": [ "EC2" ], "containerDefinitions": [ { "command": [ "git clone https://github.com/aws/amazon-s3-plugin-for-pytorch.git && python amazon-s3-plugin-for-pytorch/examples/s3_imagenet_example.py" ], "entryPoint": [ "sh", "-c" ], "name": "pytorch-s3-plugin-container", "image": "763104351884.dkr.ecr.us-east-1.amazonaws.com/pytorch-training:1.8.1-gpu-py36-cu111-ubuntu18.04-v1.7", "memory": 6111, "cpu": 256, "resourceRequirements" : [{ "type" : "GPU",
23

Amazon Deep Learning Containers Developer GuideInference
"value" : "1" }], "essential": true, "portMappings": [ { "containerPort": 80, "protocol": "tcp" } ], "logConfiguration": { "logDriver": "awslogs", "options": { "awslogs-group": "/ecs/pytorch-s3-plugin-gpu", "awslogs-region": "us-east-1", "awslogs-stream-prefix": "imagenet", "awslogs-create-group": "true" } } } ], "volumes": [], "networkMode": "bridge", "placementConstraints": [], "family": "pytorch-s3-plugin" }
3. Register the task definition. Note the revision number in the output and use it in the next step.
aws ecs register-task-definition --cli-input-json file://ecs-deep-learning-container-pytorch-s3-plugin-taskdef.json
4. Create a task using the task definition. You need the revision identifier from the previous step.
aws ecs run-task --cluster ecs-pytorch-s3-plugin --task-definition pytorch-s3-plugin:1
5. Open the Amazon ECS console at https://console.amazonaws.cn/ecs/.
6. Select the ecs-pytorch-s3-plugin cluster.
7. On the Cluster page, choose Tasks.
8. After your task is in a RUNNING state, choose the task identifier.
9. Under Containers, expand the container details.
10. Under Log Configuration, choose View logs in CloudWatch. This takes you to the CloudWatchconsole to view the Amazon S3 plugin example logs.
For more information and additional examples, see the Amazon S3 Plugin for PyTorch repository.
Next stepsTo learn inference on Amazon ECS using PyTorch with Deep Learning Containers, see PyTorchinference (p. 32).
InferenceThis section shows how to run inference on Amazon Deep Learning Containers for Amazon ElasticContainer Service (Amazon ECS) using Apache MXNet (Incubating), PyTorch, TensorFlow, and TensorFlow2. You can also use Elastic Inference to run inference with Amazon Deep Learning Containers. Fortutorials and more information on Elastic Inference, see Using Amazon Deep Learning Containers withElastic Inference on Amazon ECS.
24

Amazon Deep Learning Containers Developer GuideInference
For a complete list of Deep Learning Containers, see Deep Learning Containers Images (p. 83).
NoteMKL users: Read the Amazon Deep Learning Containers Intel Math Kernel Library (MKL)Recommendations (p. 85) to get the best training or inference performance.
ImportantIf your account has already created the Amazon ECS service-linked role, then that role is usedby default for your service unless you specify a role here. The service-linked role is required ifyour task definition uses the awsvpc network mode. The role is also required if the service isconfigured to use service discovery, an external deployment controller, multiple target groups,or Elastic Inference accelerators in which case you should not specify a role here. For moreinformation, see Using Service-Linked Roles for Amazon ECS in the Amazon ECS Developer Guide.
Contents
• TensorFlow inference (p. 25)
• Apache MXNet (Incubating) inference (p. 29)
• PyTorch inference (p. 32)
TensorFlow inference
The following examples use a sample Docker image that adds either CPU or GPU inference scripts toDeep Learning Containers from your host machine's command line.
CPU-based inference
Use the following example to run CPU-based inference.
1. Create a file named ecs-dlc-cpu-inference-taskdef.json with the following contents. Youcan use this with either TensorFlow or TensorFlow 2. To use it with TensorFlow 2, change the Dockerimage to a TensorFlow 2 image and clone the r2.0 serving repository branch instead of r1.15.
{ "requiresCompatibilities": [ "EC2" ], "containerDefinitions": [{ "command": [ "mkdir -p /test && cd /test && git clone -b r1.15 https://github.com/tensorflow/serving.git && tensorflow_model_server --port=8500 --rest_api_port=8501 --model_name=saved_model_half_plus_two --model_base_path=/test/serving/tensorflow_serving/servables/tensorflow/testdata/saved_model_half_plus_two_cpu" ], "entryPoint": [ "sh", "-c" ], "name": "tensorflow-inference-container", "image": "763104351884.dkr.ecr.us-east-1.amazonaws.com/tensorflow-inference:1.15.0-cpu-py36-ubuntu18.04", "memory": 8111, "cpu": 256, "essential": true, "portMappings": [{ "hostPort": 8500, "protocol": "tcp", "containerPort": 8500 }, {
25

Amazon Deep Learning Containers Developer GuideInference
"hostPort": 8501, "protocol": "tcp", "containerPort": 8501 }, { "containerPort": 80, "protocol": "tcp" } ], "logConfiguration": { "logDriver": "awslogs", "options": { "awslogs-group": "/ecs/tensorflow-inference-gpu", "awslogs-region": "us-east-1", "awslogs-stream-prefix": "half-plus-two", "awslogs-create-group": "true" } } }], "volumes": [], "networkMode": "bridge", "placementConstraints": [], "family": "tensorflow-inference"}
2. Register the task definition. Note the revision number in the output and use it in the next step.
aws ecs register-task-definition --cli-input-json file://ecs-dlc-cpu-inference-taskdef.json
3. Create an Amazon ECS service. When you specify the task definition, replace revision_id with therevision number of the task definition from the output of the previous step.
aws ecs create-service --cluster ecs-ec2-training-inference \ --service-name cli-ec2-inference-cpu \ --task-definition Ec2TFInference:revision_id \ --desired-count 1 \ --launch-type EC2 \ --scheduling-strategy="REPLICA" \ --region us-east-1
4. Verify the service and get the network endpoint by completing the following steps.
a. Open the Amazon ECS console at https://console.amazonaws.cn/ecs/.
b. Select the ecs-ec2-training-inference cluster.
c. On the Cluster page, choose Services and then cli-ec2-inference-cpu.
d. After your task is in a RUNNING state, choose the task identifier.
e. Under Containers, expand the container details.
f. Under Name and then Network Bindings, under External Link note the IP address for port8501 and use it in the next step.
g. Under Log Configuration, choose View logs in CloudWatch. This takes you to the CloudWatchconsole to view the training progress logs.
5. To run inference, use the following command. Replace the external IP address with the external linkIP address from the previous step.
curl -d '{"instances": [1.0, 2.0, 5.0]}' -X POST http://<External ip>:8501/v1/models/saved_model_half_plus_two:predict
The following is sample output.
26

Amazon Deep Learning Containers Developer GuideInference
{ "predictions": [2.5, 3.0, 4.5 ]}
ImportantIf you are unable to connect to the external IP address, be sure that your corporate firewallis not blocking non-standards ports, like 8501. You can try switching to a guest network toverify.
GPU-based inference
Use the following example to run GPU-based inference.
1. Create a file named ecs-dlc-gpu-inference-taskdef.json with the following contents. Youcan use this with either TensorFlow or TensorFlow 2. To use it with TensorFlow 2, change the Dockerimage to a TensorFlow 2 image and clone the r2.0 serving repository branch instead of r1.15.
{ "requiresCompatibilities": [ "EC2" ], "containerDefinitions": [{ "command": [ "mkdir -p /test && cd /test && git clone -b r1.15 https://github.com/tensorflow/serving.git && tensorflow_model_server --port=8500 --rest_api_port=8501 --model_name=saved_model_half_plus_two --model_base_path=/test/serving/tensorflow_serving/servables/tensorflow/testdata/saved_model_half_plus_two_gpu" ], "entryPoint": [ "sh", "-c" ], "name": "tensorflow-inference-container", "image": "763104351884.dkr.ecr.us-east-1.amazonaws.com/tensorflow-inference:1.15.0-gpu-py36-cu100-ubuntu18.04", "memory": 8111, "cpu": 256, "resourceRequirements": [{ "type": "GPU", "value": "1" }], "essential": true, "portMappings": [{ "hostPort": 8500, "protocol": "tcp", "containerPort": 8500 }, { "hostPort": 8501, "protocol": "tcp", "containerPort": 8501 }, { "containerPort": 80, "protocol": "tcp" } ], "logConfiguration": { "logDriver": "awslogs", "options": {
27

Amazon Deep Learning Containers Developer GuideInference
"awslogs-group": "/ecs/TFInference", "awslogs-region": "us-east-1", "awslogs-stream-prefix": "ecs", "awslogs-create-group": "true" } } }], "volumes": [], "networkMode": "bridge", "placementConstraints": [], "family": "TensorFlowInference"}
2. Register the task definition. Note the revision number in the output and use it in the next step.
aws ecs register-task-definition --cli-input-json file://ecs-dlc-gpu-inference-taskdef.json
3. Create an Amazon ECS service. When you specify the task definition, replace revision_id with therevision number of the task definition from the output of the previous step.
aws ecs create-service --cluster ecs-ec2-training-inference \ --service-name cli-ec2-inference-gpu \ --task-definition Ec2TFInference:revision_id \ --desired-count 1 \ --launch-type EC2 \ --scheduling-strategy="REPLICA" \ --region us-east-1
4. Verify the service and get the network endpoint by completing the following steps.
a. Open the Amazon ECS console at https://console.amazonaws.cn/ecs/.
b. Select the ecs-ec2-training-inference cluster.
c. On the Cluster page, choose Services and then cli-ec2-inference-cpu.
d. After your task is in a RUNNING state, choose the task identifier.
e. Under Containers, expand the container details.
f. Under Name and then Network Bindings, under External Link note the IP address for port8501 and use it in the next step.
g. Under Log Configuration, choose View logs in CloudWatch. This takes you to the CloudWatchconsole to view the training progress logs.
5. To run inference, use the following command. Replace the external IP address with the external linkIP address from the previous step.
curl -d '{"instances": [1.0, 2.0, 5.0]}' -X POST http://<External ip>:8501/v1/models/saved_model_half_plus_two:predict
The following is sample output.
{ "predictions": [2.5, 3.0, 4.5 ]}
ImportantIf you are unable to connect to the external IP address, be sure that your corporate firewallis not blocking non-standards ports, like 8501. You can try switching to a guest network toverify.
28

Amazon Deep Learning Containers Developer GuideInference
Apache MXNet (Incubating) inferenceBefore you can run a task on your Amazon ECS cluster, you must register a task definition. Taskdefinitions are lists of containers grouped together. The following examples use a sample Docker imagethat adds either CPU or GPU inference scripts to Deep Learning Containers from your host machine'scommand line.
CPU-based inference
Use the following task definition to run CPU-based inference.
1. Create a file named ecs-dlc-cpu-inference-taskdef.json with the following contents.
{ "requiresCompatibilities": [ "EC2" ], "containerDefinitions": [{ "command": [ "mxnet-model-server --start --mms-config /home/model-server/config.properties --models squeezenet=https://s3.amazonaws.com/model-server/models/squeezenet_v1.1/squeezenet_v1.1.model" ], "name": "mxnet-inference-container", "image": "763104351884.dkr.ecr.us-east-1.amazonaws.com/mxnet-inference:1.6.0-cpu-py36-ubuntu16.04", "memory": 8111, "cpu": 256, "essential": true, "portMappings": [{ "hostPort": 8081, "protocol": "tcp", "containerPort": 8081 }, { "hostPort": 80, "protocol": "tcp", "containerPort": 8080 } ], "logConfiguration": { "logDriver": "awslogs", "options": { "awslogs-group": "/ecs/mxnet-inference-cpu", "awslogs-region": "us-east-1", "awslogs-stream-prefix": "squeezenet", "awslogs-create-group": "true" } } }], "volumes": [], "networkMode": "bridge", "placementConstraints": [], "family": "mxnet-inference"}
2. Register the task definition. Note the revision number in the output and use it in the next step.
aws ecs register-task-definition --cli-input-json file://ecs-dlc-cpu-inference-taskdef.json
3. Create an Amazon ECS service. When you specify the task definition, replace revision_id with therevision number of the task definition from the output of the previous step.
29

Amazon Deep Learning Containers Developer GuideInference
aws ecs create-service --cluster ecs-ec2-training-inference \ --service-name cli-ec2-inference-cpu \ --task-definition Ec2TFInference:revision_id \ --desired-count 1 \ --launch-type EC2 \ --scheduling-strategy REPLICA \ --region us-east-1
4. Verify the service and get the endpoint.
a. Open the Amazon ECS console at https://console.amazonaws.cn/ecs/.
b. Select the ecs-ec2-training-inference cluster.
c. On the Cluster page, choose Services and then cli-ec2-inference-cpu.
d. After your task is in a RUNNING state, choose the task identifier.
e. Under Containers, expand the container details.
f. Under Name and then Network Bindings, under External Link note the IP address for port8081 and use it in the next step.
g. Under Log Configuration, choose View logs in CloudWatch. This takes you to the CloudWatchconsole to view the training progress logs.
5. To run inference, use the following command. Replace the external IP address with the externallink IP address from the previous step.
curl -O https://s3.amazonaws.com/model-server/inputs/kitten.jpgcurl -X POST http://<External ip>/predictions/squeezenet -T kitten.jpg
The following is sample output.
[ { "probability": 0.8582226634025574, "class": "n02124075 Egyptian cat" }, { "probability": 0.09160050004720688, "class": "n02123045 tabby, tabby cat" }, { "probability": 0.037487514317035675, "class": "n02123159 tiger cat" }, { "probability": 0.0061649843119084835, "class": "n02128385 leopard, Panthera pardus" }, { "probability": 0.003171598305925727, "class": "n02127052 lynx, catamount" }]
ImportantIf you are unable to connect to the external IP address, be sure that your corporate firewallis not blocking non-standards ports, like 8081. You can try switching to a guest network toverify.
30

Amazon Deep Learning Containers Developer GuideInference
GPU-based inference
Use the following task definition to run GPU-based inference.
{ "requiresCompatibilities": [ "EC2" ], "containerDefinitions": [{ "command": [ "mxnet-model-server --start --mms-config /home/model-server/config.properties --models squeezenet=https://s3.amazonaws.com/model-server/models/squeezenet_v1.1/squeezenet_v1.1.model" ], "name": "mxnet-inference-container", "image": "763104351884.dkr.ecr.us-east-1.amazonaws.com/mxnet-inference:1.6.0-gpu-py36-cu101-ubuntu16.04", "memory": 8111, "cpu": 256, "resourceRequirements": [{ "type": "GPU", "value": "1" }], "essential": true, "portMappings": [{ "hostPort": 8081, "protocol": "tcp", "containerPort": 8081 }, { "hostPort": 80, "protocol": "tcp", "containerPort": 8080 } ], "logConfiguration": { "logDriver": "awslogs", "options": { "awslogs-group": "/ecs/mxnet-inference-gpu", "awslogs-region": "us-east-1", "awslogs-stream-prefix": "squeezenet", "awslogs-create-group": "true" } } }], "volumes": [], "networkMode": "bridge", "placementConstraints": [], "family": "mxnet-inference"}
1. Use the following command to register the task definition. Note the output of the revision numberand use it in the next step.
aws ecs register-task-definition --cli-input-json file://<Task definition file>
2. To create the service, replace the revision_id with the output from the previous step in thefollowing command.
aws ecs create-service --cluster ecs-ec2-training-inference \ --service-name cli-ec2-inference-gpu \ --task-definition Ec2TFInference:<revision_id> \ --desired-count 1 \
31

Amazon Deep Learning Containers Developer GuideInference
--launch-type "EC2" \ --scheduling-strategy REPLICA \ --region us-east-1
3. Verify the service and get the endpoint.
a. Open the Amazon ECS console at https://console.amazonaws.cn/ecs/.
b. Select the ecs-ec2-training-inference cluster.
c. On the Cluster page, choose Services and then cli-ec2-inference-cpu.
d. After your task is in a RUNNING state, choose the task identifier.
e. Under Containers, expand the container details.
f. Under Name and then Network Bindings, under External Link note the IP address for port8081 and use it in the next step.
g. Under Log Configuration, choose View logs in CloudWatch. This takes you to the CloudWatchconsole to view the training progress logs.
4. To run inference, use the following command. Replace the external IP address with the externallink IP address from the previous step.
curl -O https://s3.amazonaws.com/model-server/inputs/kitten.jpgcurl -X POST http://<External ip>/predictions/squeezenet -T kitten.jpg
The following is sample output.
[ { "probability": 0.8582226634025574, "class": "n02124075 Egyptian cat" }, { "probability": 0.09160050004720688, "class": "n02123045 tabby, tabby cat" }, { "probability": 0.037487514317035675, "class": "n02123159 tiger cat" }, { "probability": 0.0061649843119084835, "class": "n02128385 leopard, Panthera pardus" }, { "probability": 0.003171598305925727, "class": "n02127052 lynx, catamount" }]
ImportantIf you are unable to connect to the external IP address, be sure that your corporate firewallis not blocking non-standards ports, like 8081. You can try switching to a guest network toverify.
PyTorch inference
Before you can run a task on your Amazon ECS cluster, you must register a task definition. Taskdefinitions are lists of containers grouped together. The following examples use a sample Docker imagethat adds either CPU or GPU inference scripts to Deep Learning Containers.
32

Amazon Deep Learning Containers Developer GuideInference
CPU-based inference
Use the following task definition to run CPU-based inference.
1. Create a file named ecs-dlc-cpu-inference-taskdef.json with the following contents.
{ "requiresCompatibilities": [ "EC2" ], "containerDefinitions": [{ "command": [ "mxnet-model-server --start --mms-config /home/model-server/config.properties --models densenet=https://dlc-samples.s3.amazonaws.com/pytorch/multi-model-server/densenet/densenet.mar" ], "name": "pytorch-inference-container", "image": "763104351884.dkr.ecr.us-east-1.amazonaws.com/pytorch-inference:1.3.1-cpu-py36-ubuntu16.04", "memory": 8111, "cpu": 256, "essential": true, "portMappings": [{ "hostPort": 8081, "protocol": "tcp", "containerPort": 8081 }, { "hostPort": 80, "protocol": "tcp", "containerPort": 8080 } ], "logConfiguration": { "logDriver": "awslogs", "options": { "awslogs-group": "/ecs/densenet-inference-cpu", "awslogs-region": "us-east-1", "awslogs-stream-prefix": "densenet", "awslogs-create-group": "true" } } }], "volumes": [], "networkMode": "bridge", "placementConstraints": [], "family": "pytorch-inference"}
2. Register the task definition. Note the revision number in the output and use it in the next step.
aws ecs register-task-definition --cli-input-json file://ecs-dlc-cpu-inference-taskdef.json
3. Create an Amazon ECS service. When you specify the task definition, replace revision_id with therevision number of the task definition from the output of the previous step.
aws ecs create-service --cluster ecs-ec2-training-inference \ --service-name cli-ec2-inference-cpu \ --task-definition Ec2PTInference:revision_id \ --desired-count 1 \ --launch-type EC2 \ --scheduling-strategy REPLICA \
33

Amazon Deep Learning Containers Developer GuideInference
--region us-east-1
4. Verify the service and get the network endpoint by completing the following steps.
a. Open the Amazon ECS console at https://console.amazonaws.cn/ecs/.
b. Select the ecs-ec2-training-inference cluster.
c. On the Cluster page, choose Services and then cli-ec2-inference-cpu.
d. After your task is in a RUNNING state, choose the task identifiter.
e. Under Containers, expand the container details.
f. Under Name and then Network Bindings, under External Link note the IP address for port8081 and use it in the next step.
g. Under Log Configuration, choose View logs in CloudWatch. This takes you to the CloudWatchconsole to view the training progress logs.
5. To run inference, use the following command. Replace the external IP address with the externallink IP address from the previous step.
curl -O https://s3.amazonaws.com/model-server/inputs/flower.jpgcurl -X POST http://<External ip>/predictions/densenet -T flower.jpg
ImportantIf you are unable to connect to the external IP address, be sure that your corporate firewallis not blocking non-standards ports, like 8081. You can try switching to a guest network toverify.
GPU-based inference
Use the following task definition to run GPU-based inference.
{ "requiresCompatibilities": [ "EC2" ], "containerDefinitions": [{ "command": [ "mxnet-model-server --start --mms-config /home/model-server/config.properties --models densenet=https://dlc-samples.s3.amazonaws.com/pytorch/multi-model-server/densenet/densenet.mar" ], "name": "pytorch-inference-container", "image": "763104351884.dkr.ecr.us-east-1.amazonaws.com/pytorch-inference:1.3.1-gpu-py36-cu101-ubuntu16.04", "memory": 8111, "cpu": 256, "essential": true, "portMappings": [{ "hostPort": 8081, "protocol": "tcp", "containerPort": 8081 }, { "hostPort": 80, "protocol": "tcp", "containerPort": 8080 } ], "logConfiguration": { "logDriver": "awslogs", "options": {
34

Amazon Deep Learning Containers Developer GuideInference
"awslogs-group": "/ecs/densenet-inference-cpu", "awslogs-region": "us-east-1", "awslogs-stream-prefix": "densenet", "awslogs-create-group": "true" } } }], "volumes": [], "networkMode": "bridge", "placementConstraints": [], "family": "pytorch-inference"}
1. Use the following command to register the task definition. Note the output of the revision numberand use it in the next step.
aws ecs register-task-definition --cli-input-json file://<Task definition file>
2. To create the service, replace the revision_id with the output from the previous step in thefollowing command.
aws ecs create-service --cluster ecs-ec2-training-inference \ --service-name cli-ec2-inference-gpu \ --task-definition Ec2PTInference:<revision_id> \ --desired-count 1 \ --launch-type "EC2" \ --scheduling-strategy REPLICA \ --region us-east-1
3. Verify the service and get the network endpoint by completing the following steps.
a. Open the Amazon ECS console at https://console.amazonaws.cn/ecs/.
b. Select the ecs-ec2-training-inference cluster.
c. On the Cluster page, choose Services and then cli-ec2-inference-cpu.
d. Once your task is in a RUNNING state, choose the task identifier.
e. Under Containers, expand the container details.
f. Under Name and then Network Bindings, under External Link note the IP address for port8081 and use it in the next step.
g. Under Log Configuration, choose View logs in CloudWatch. This takes you to the CloudWatchconsole to view the training progress logs.
4. To run inference, use the following command. Replace the external IP address with the externallink IP address from the previous step.
curl -O https://s3.amazonaws.com/model-server/inputs/flower.jpgcurl -X POST http://<External ip>/predictions/densenet -T flower.jpg
ImportantIf you are unable to connect to the external IP address, be sure that your corporate firewallis not blocking non-standards ports, like 8081. You can try switching to a guest network toverify.
Next steps
To learn about using Custom Entrypoints with Deep Learning Containers on Amazon ECS, see Customentrypoints (p. 36).
35

Amazon Deep Learning Containers Developer GuideCustom Entrypoints
Custom entrypointsFor some images, Deep Learning Containers use a custom entrypoint script. If you want to use your ownentrypoint, you can override the entrypoint as follows.
Modify the entryPoint parameter in the JSON file that includes your task definition. Include the filepath to your custom entry point script. An example is shown here.
"entryPoint":[ "sh", "-c", "/usr/local/bin/mxnet-model-server --start --foreground --mms-config /home/model-server/config.properties --models densenet=https://dlc-samples.s3.amazonaws.com/pytorch/multi-model-server/densenet/densenet.mar"],
Amazon EKS TutorialsThis section shows how to run training and inference on Amazon Deep Learning Containers for EKS usingMXNet, PyTorch, and TensorFlow. Some examples cover single node or multi-node training. Inferenceuses only single node configurations.
Before starting the following tutorials, complete the steps in Amazon EKS Setup (p. 36).
Contents• Amazon EKS Setup (p. 36)• Training (p. 42)• Inference (p. 63)• Custom Entrypoints (p. 79)• Troubleshooting Amazon Deep Learning Containers on EKS (p. 80)
Amazon EKS SetupThis guide explains how to setup a deep learning environment using Amazon Elastic Kubernetes Service(Amazon EKS) and Amazon Deep Learning Containers. Using Amazon EKS you can scale a production-ready environment for multiple-node training and inference with Kubernetes containers.
If you're not familiar with Kubernetes or Amazon EKS yet, that's okay. This guide and the related AmazonEKS documentation shows how to use the family of Kubernetes tools. This guide assumes that you'realready familiar with your deep learning framework's multiple-node implementations and how to set upan inference server outside of containers.
A deep learning container setup on Amazon EKS consists of one or more containers, forming a cluster.You can have dedicated cluster types, such as a cluster for training and a cluster for inference. You mightalso want different instance types for your clusters depending on the demands of your deep learningneural networks and models.
Contents• Custom Images (p. 37)• Licensing (p. 37)• Configure Security Settings (p. 37)• Gateway Node (p. 38)
36

Amazon Deep Learning Containers Developer GuideAmazon EKS Setup
• GPU Clusters (p. 39)• CPU Clusters (p. 40)• Habana Clusters (p. 40)• Test Your Clusters (p. 40)• Manage Your Clusters (p. 41)• Cleanup (p. 41)• Next steps (p. 42)
Custom ImagesCustom images are helpful if you want to load your own code or datasets and have them available oneach node in your cluster. Examples are provided that use custom images. You can try them out to getstarted without creating your own.
• Building Amazon Deep Learning Containers Custom Images (p. 84)
LicensingTo use GPU hardware, use an Amazon Machine Image that has the necessary GPU drivers. Werecommend using the Amazon EKS-optimized AMI with GPU support, which is used in subsequent stepsof this guide. This AMI includes non-Amazon software that requires an end user license agreement(EULA). You must subscribe to the EKS-optimized AMI in the Amazon Web Services Marketplace andaccept the EULA before you can use the AMI in your worker node groups.
ImportantTo subscribe to the AMI, visit the Amazon Marketplace.
Configure Security SettingsTo use Amazon EKS you must have a user account that has access to several security permissions. Theseare set with the Amazon Identity and Access Management (IAM) tool.
1. Create an IAM user or update an existing IAM user by following the steps in Creating an IAM user inyour Amazon account.
2. Get the credentials of this user.
a. Open the IAM console at https://console.amazonaws.cn/iam/.b. Under Users, select your user.c. Select Security Credentials.d. Select Create access key.e. Download the key pair or copy the information for use later.
3. Add the following policies to your IAM user. These policies provide the required access for AmazonEKS, IAM, and Amazon Elastic Compute Cloud (Amazon EC2).
a. Select Permissions.b. Select Add permissions.c. Select Create policy.d. From the Create policy window, select the JSON tab.e. Paste the following content.
{ "Version": "2012-10-17",
37

Amazon Deep Learning Containers Developer GuideAmazon EKS Setup
"Statement": [ { "Sid": "VisualEditor0", "Effect": "Allow", "Action": "eks:*", "Resource": "*" } ]}
f. Name the policy EKSFullAccess and create the policy.g. Navigate back to the Grant permissions window.h. Select Attach existing policies directly.i. Search for EKSFullAccess, and select the check box.j. Search for AWSCloudFormationFullAccess, and select the check box.k. Search for AmazonEC2FullAccess, and select the check box.l. Search for IAMFullAccess, and select the check box.m. Search AmazonEC2ContainerRegistryReadOnly, and select the check box.n. Search AmazonEKS_CNI_Policy, and select the check box.o. Search AmazonS3FullAccess, and select the check box.p. Accept the changes.
Gateway NodeTo setup an Amazon EKS cluster, use the open source tool, eksctl. We recommend that you use anAmazon EC2 instance with the Deep Learning Base AMI (Ubuntu) to allocate and control your cluster. Youcan run these tools locally on your computer or an Amazon EC2 instance that you already have running.However, to simplify this guide we assume you're using a Deep Learning Base AMI (DLAMI) with Ubuntu16.04. We refer to this as your gateway node.
Before you start, consider the location of your training data or where you want to run your cluster forresponding to inference requests. Typically your data and cluster for training or inference should be inthe same Region. Also, you spin up your gateway node in this same Region. You can follow this quick 10minute tutorial that guides you to launch a DLAMI to use as your gateway node.
1. Login to your gateway node.2. Install or upgrade Amazon CLI. To access the required new Kubernetes features, you must have the
latest version.
$ sudo pip install --upgrade awscli
3. Install eksctl by running the following commands. For more information about eksctl, see the eksctldocumentation.
$ curl --silent \--location "https://github.com/weaveworks/eksctl/releases/download/latest_release/eksctl_$(uname -s)_amd64.tar.gz" \| tar xz -C /tmp$ sudo mv /tmp/eksctl /usr/local/bin
4. Install kubectl by following the steps in the Installing kubectl guide.
NoteYou must use a kubectl version that is within one minor version difference of yourAmazon EKS cluster control plane version. For example, a 1.18 kubectl client works withKubernetes 1.17, 1.18 and 1.19 clusters.
38

Amazon Deep Learning Containers Developer GuideAmazon EKS Setup
5. Install aws-iam-authenticator by running the following commands. For more information onaws-iam-authenticator, see Installing aws-iam-authenticator.
$ curl -o aws-iam-authenticator https://amazon-eks.s3.us-west-2.amazonaws.com/1.19.6/2021-01-05/bin/linux/amd64/aws-iam-authenticator$ chmod +x aws-iam-authenticator$ cp ./aws-iam-authenticator $HOME/bin/aws-iam-authenticator && export PATH=$HOME/bin:$PATH
6. Run aws configure for the IAM user from the Security Configuration section. You are copyingthe IAM user's Amazon Access Key, then the Amazon Secret Access Key that you accessed in the IAMconsole and pasting these into the prompts from aws configure.
GPU Clusters1. Examine the following command to create a cluster using a p3.8xlarge instance type. You must make
the following modifications before you run it.
• name is what you will use to manage your cluster. You can change cluster-name to be whatevername you like as long as there are no spaces or special characters.
• eks-version is the Amazon EKS kubernetes version. For the supported Amazon EKS versions,see Available Amazon EKS Kubernetes versions.
• nodes is the number of instances you want in your cluster. In this example, we're starting withthree nodes.
• node-type refers to instance class. You can choose a different instance class if you already knowwhat kind will work best for your situation.
• timeout and *ssh-access * can be left alone.
• ssh-public-key is the name of the key that you want to use to login your worker nodes. Eitheruse a security key you already use or create a new one but be sure to swap out the ssh-public-key with a key that was allocated for the Region you used. Note: You only need to provide the keyname as seen in the 'key pairs' section of the Amazon EC2 Console.
• region is the Amazon EC2 Region where the cluster will be launched. If you plan to use trainingdata that resides in a specific Region (other than <us-east-1>) we recommend that you use thesame Region. The ssh-public-key must have access to launch instances in this Region.
NoteThe rest of this guide assumes <us-east-1> as the Region.
2. After you have made changes to the command, run it, and wait. It can take several minutes for asingle node cluster, and will take even longer if you chose to create a large cluster.
$ eksctl create cluster <cluster-name> \ --version <eks-version> \ --nodes 3 \ --node-type=<p3.8xlarge> \ --timeout=40m \ --ssh-access \ --ssh-public-key <key_pair_name> \ --region <us-east-1> \ --zones=us-east-1a,us-east-1b,us-east-1d \ --auto-kubeconfig
You should see something similar to the following output:
EKS cluster "training-1" in "us-east-1" region is ready
39
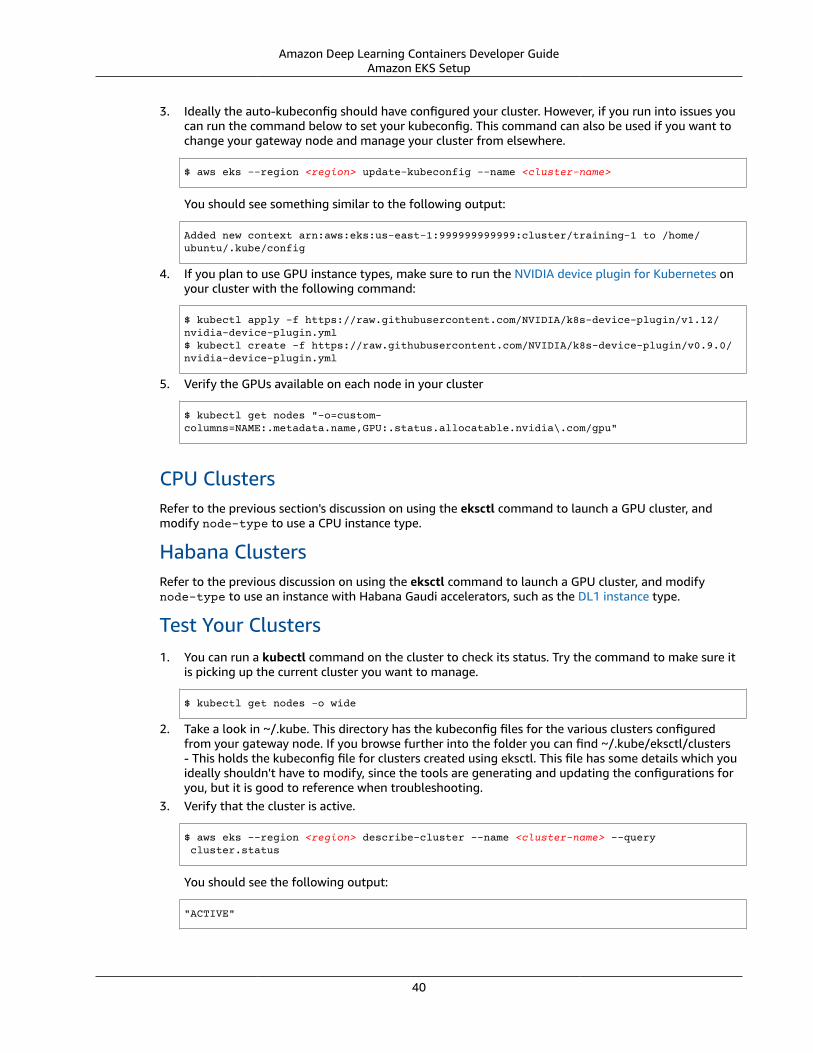
Amazon Deep Learning Containers Developer GuideAmazon EKS Setup
3. Ideally the auto-kubeconfig should have configured your cluster. However, if you run into issues youcan run the command below to set your kubeconfig. This command can also be used if you want tochange your gateway node and manage your cluster from elsewhere.
$ aws eks --region <region> update-kubeconfig --name <cluster-name>
You should see something similar to the following output:
Added new context arn:aws:eks:us-east-1:999999999999:cluster/training-1 to /home/ubuntu/.kube/config
4. If you plan to use GPU instance types, make sure to run the NVIDIA device plugin for Kubernetes onyour cluster with the following command:
$ kubectl apply -f https://raw.githubusercontent.com/NVIDIA/k8s-device-plugin/v1.12/nvidia-device-plugin.yml$ kubectl create -f https://raw.githubusercontent.com/NVIDIA/k8s-device-plugin/v0.9.0/nvidia-device-plugin.yml
5. Verify the GPUs available on each node in your cluster
$ kubectl get nodes "-o=custom-columns=NAME:.metadata.name,GPU:.status.allocatable.nvidia\.com/gpu"
CPU ClustersRefer to the previous section's discussion on using the eksctl command to launch a GPU cluster, andmodify node-type to use a CPU instance type.
Habana ClustersRefer to the previous discussion on using the eksctl command to launch a GPU cluster, and modifynode-type to use an instance with Habana Gaudi accelerators, such as the DL1 instance type.
Test Your Clusters1. You can run a kubectl command on the cluster to check its status. Try the command to make sure it
is picking up the current cluster you want to manage.
$ kubectl get nodes -o wide
2. Take a look in ~/.kube. This directory has the kubeconfig files for the various clusters configuredfrom your gateway node. If you browse further into the folder you can find ~/.kube/eksctl/clusters- This holds the kubeconfig file for clusters created using eksctl. This file has some details which youideally shouldn't have to modify, since the tools are generating and updating the configurations foryou, but it is good to reference when troubleshooting.
3. Verify that the cluster is active.
$ aws eks --region <region> describe-cluster --name <cluster-name> --query cluster.status
You should see the following output:
"ACTIVE"
40

Amazon Deep Learning Containers Developer GuideAmazon EKS Setup
4. Verify the kubectl context if you have multiple clusters set up from the same host instance.Sometimes it helps to make sure that the default context found by kubectl is set properly. Checkthis using the following command:
$ kubectl config get-contexts
5. If the context is not set as expected, fix this using the following command:
$ aws eks --region <region> update-kubeconfig --name <cluster-name>
Manage Your ClustersWhen you want to control or query a cluster you can address it by the configuration file using thekubeconfig parameter. This is useful when you have more than one cluster. For example, if you havea separate cluster called “training-gpu-1” you can call the get pods command on it by passing theconfiguration file as a parameter as follows:
$ kubectl --kubeconfig=/home/ubuntu/.kube/eksctl/clusters/training-gpu-1 get pods
It is useful to note that you can run this same command without the kubeconfig parameter and it willreport status on your current actively controlled cluster.
$ kubectl get pods
If you setup multiple clusters and they have yet to have the NVIDIA plugin installed, you can install it thisway:
$ kubectl --kubeconfig=/home/ubuntu/.kube/eksctl/clusters/training-gpu-1 create -f https://raw.githubusercontent.com/NVIDIA/k8s-device-plugin/v0.9.0/nvidia-device-plugin.yml
You also change the active cluster by updating the kubeconfig, passing the name of the cluster you wantto manage. The following command updates kubeconfig and removes the need to use the kubeconfigparameter.
$ aws eks —region us-east-1 update-kubeconfig —name training-gpu-1
If you follow all of the examples in this guide, you will frequently switch between active clusters. This isso you can orchestrate training or inference or use different frameworks running on different clusters.
CleanupWhen you're done using the cluster, delete it to avoid incurring additional costs.
$ eksctl delete cluster --name=<cluster-name>
To delete only a pod, run the following:
$ kubectl delete pods <name>
To reset the secret for access to the cluster, run the following:
$ kubectl delete secret ${SECRET} -n ${NAMESPACE} || true
41

Amazon Deep Learning Containers Developer GuideTraining
To delete a nodegroup attached to a cluster, run the following:
$ eksctl delete nodegroup --name <cluster_name>
To attach a nodegroup to a cluster, run the following:
$ eksctl create nodegroup --cluster <cluster-name> \ --node-ami <ami_id> \ --nodes <num_nodes> \ --node-type=<instance_type> \ --timeout=40m \ --ssh-access \ --ssh-public-key <key_pair_name> \ --region <us-east-1> \ --auto-kubeconfig
Next stepsTo learn about training and inference with Deep Learning Containers on Amazon EKS, see Amazon EKSTutorials (p. 36).
TrainingOnce you've created a cluster using the steps in Amazon EKS Setup (p. 36), you can use it to runtraining jobs. For training, you can use either a CPU, GPU, or distributed GPU example depending on thenodes in your cluster. The topics in the following sections show how to use Apache MXNet (Incubating),PyTorch, TensorFlow, and TensorFlow 2 training examples.
Contents• CPU Training (p. 42)• GPU Training (p. 48)• Distributed GPU Training (p. 53)
CPU TrainingThis section is for training on CPU-based containers.
For a complete list of Deep Learning Containers, see Deep Learning Containers Images (p. 83). For tipsabout the best configuration settings if you're using the Intel Math Kernel Library (MKL), see AmazonDeep Learning Containers Intel Math Kernel Library (MKL) Recommendations (p. 85).
Contents• Apache MXNet (Incubating) CPU training (p. 42)• TensorFlow CPU training (p. 44)• PyTorch CPU training (p. 45)• Amazon S3 Plugin for PyTorch (p. 47)• Next steps (p. 48)
Apache MXNet (Incubating) CPU training
This tutorial guides you on training with Apache MXNet (Incubating) on your single node CPU cluster.
42

Amazon Deep Learning Containers Developer GuideTraining
1. Create a pod file for your cluster. A pod file will provide the instructions about what the clustershould run. This pod file will download the MXNet repository and run an MNIST example. Open vi orvim and copy and past the following content. Save this file as mxnet.yaml.
apiVersion: v1kind: Podmetadata: name: mxnet-trainingspec: restartPolicy: OnFailure containers: - name: mxnet-training image: 763104351884.dkr.ecr.us-east-1.amazonaws.com/mxnet-inference:1.6.0-cpu-py36-ubuntu16.04 command: ["/bin/sh","-c"] args: ["git clone -b v1.4.x https://github.com/apache/incubator-mxnet.git && python ./incubator-mxnet/example/image-classification/train_mnist.py"]
2. Assign the pod file to the cluster using kubectl.
$ kubectl create -f mxnet.yaml
3. You should see the following output:
pod/mxnet-training created
4. Check the status. The name of the job "mxnet-training” was in the mxnet.yaml file. It will nowappear in the status. If you're running any other tests or have previously run something, it appears inthis list. Run this several times until you see the status change to “Running”.
$ kubectl get pods
You should see the following output:
NAME READY STATUS RESTARTS AGEmxnet-training 0/1 Running 8 19m
5. Check the logs to see the training output.
$ kubectl logs mxnet-training
You should see something similar to the following output:
Cloning into 'incubator-mxnet'...INFO:root:Epoch[0] Batch [0-100] Speed: 18437.78 samples/sec accuracy=0.777228INFO:root:Epoch[0] Batch [100-200] Speed: 16814.68 samples/sec accuracy=0.907188INFO:root:Epoch[0] Batch [200-300] Speed: 18855.48 samples/sec accuracy=0.926719INFO:root:Epoch[0] Batch [300-400] Speed: 20260.84 samples/sec accuracy=0.938438INFO:root:Epoch[0] Batch [400-500] Speed: 9062.62 samples/sec accuracy=0.938594INFO:root:Epoch[0] Batch [500-600] Speed: 10467.17 samples/sec accuracy=0.945000INFO:root:Epoch[0] Batch [600-700] Speed: 11082.03 samples/sec accuracy=0.954219INFO:root:Epoch[0] Batch [700-800] Speed: 11505.02 samples/sec accuracy=0.956875INFO:root:Epoch[0] Batch [800-900] Speed: 9072.26 samples/sec accuracy=0.955781INFO:root:Epoch[0] Train-accuracy=0.923424...
6. Check the logs to watch the training progress. You can also continue to check “get pods” to refreshthe status. When the status changes to “Completed”, the training job is done.
43

Amazon Deep Learning Containers Developer GuideTraining
Next steps
To learn CPU-based inference on Amazon EKS using MXNet with Deep Learning Containers, see ApacheMXNet (Incubating) CPU inference (p. 63).
TensorFlow CPU training
This tutorial guides you on training TensorFlow models on your single node CPU cluster.
1. Create a pod file for your cluster. A pod file will provide the instructions about what the clustershould run. This pod file will download Keras and run a Keras example. This example uses theTensorFlow framework. Open vi or vim and copy and paste the following content. Save this file astf.yaml. You can use this with either TensorFlow or TensorFlow 2. To use it with TensorFlow 2,change the Docker image to a TensorFlow 2 image.
apiVersion: v1kind: Podmetadata: name: tensorflow-trainingspec: restartPolicy: OnFailure containers: - name: tensorflow-training image: 763104351884.dkr.ecr.us-east-1.amazonaws.com/tensorflow-inference:1.15.2-cpu-py36-ubuntu18.04 command: ["/bin/sh","-c"] args: ["git clone https://github.com/fchollet/keras.git && python /keras/examples/mnist_cnn.py"]
2. Assign the pod file to the cluster using kubectl.
$ kubectl create -f tf.yaml
3. You should see the following output:
pod/tensorflow-training created
4. Check the status. The name of the job “tensorflow-training” was in the tf.yaml file. It will nowappear in the status. If you're running any other tests or have previously run something, it appears inthis list. Run this several times until you see the status change to “Running”.
$ kubectl get pods
You should see the following output:
NAME READY STATUS RESTARTS AGEtensorflow-training 0/1 Running 8 19m
5. Check the logs to see the training output.
$ kubectl logs tensorflow-training
You should see something similar to the following output:
Cloning into 'keras'...Using TensorFlow backend.Downloading data from https://s3.amazonaws.com/img-datasets/mnist.npz
44

Amazon Deep Learning Containers Developer GuideTraining
8192/11490434 [..............................] - ETA: 0s 6479872/11490434 [===============>..............] - ETA: 0s 8740864/11490434 [=====================>........] - ETA: 0s11493376/11490434 [==============================] - 0s 0us/stepx_train shape: (60000, 28, 28, 1)60000 train samples10000 test samplesTrain on 60000 samples, validate on 10000 samplesEpoch 1/122019-03-19 01:52:33.863598: I tensorflow/core/platform/cpu_feature_guard.cc:141] Your CPU supports instructions that this TensorFlow binary was not compiled to use: AVX512F2019-03-19 01:52:33.867616: I tensorflow/core/common_runtime/process_util.cc:69] Creating new thread pool with default inter op setting: 2. Tune using inter_op_parallelism_threads for best performance.
128/60000 [..............................] - ETA: 10:43 - loss: 2.3076 - acc: 0.0625 256/60000 [..............................] - ETA: 5:59 - loss: 2.2528 - acc: 0.1445 384/60000 [..............................] - ETA: 4:24 - loss: 2.2183 - acc: 0.1875 512/60000 [..............................] - ETA: 3:35 - loss: 2.1652 - acc: 0.1953 640/60000 [..............................] - ETA: 3:05 - loss: 2.1078 - acc: 0.2422 ...
6. You can check the logs to watch the training progress. You can also continue to check “get pods” torefresh the status. When the status changes to “Completed” you will know that the training job isdone.
Next steps
To learn CPU-based inference on Amazon EKS using TensorFlow with Deep Learning Containers, seeTensorFlow CPU inference (p. 65).
PyTorch CPU training
This tutorial guides you on training with PyTorch on your single node CPU cluster.
1. Create a pod file for your cluster. A pod file will provide the instructions about what the clustershould run. This pod file will download the PyTorch repository and run an MNIST example. Open vior vim, then copy and paste the following content. Save this file as pytorch.yaml.
apiVersion: v1kind: Podmetadata: name: pytorch-trainingspec: restartPolicy: OnFailure containers: - name: pytorch-training image: 763104351884.dkr.ecr.us-east-1.amazonaws.com/pytorch-training:1.5.1-cpu-py36-ubuntu16.04 command: - "/bin/sh" - "-c" args: - "git clone https://github.com/pytorch/examples.git && python examples/mnist/main.py --no-cuda" env: - name: OMP_NUM_THREADS value: "36" - name: KMP_AFFINITY value: "granularity=fine,verbose,compact,1,0" - name: KMP_BLOCKTIME
45

Amazon Deep Learning Containers Developer GuideTraining
value: "1"
2. Assign the pod file to the cluster using kubectl.
$ kubectl create -f pytorch.yaml
3. You should see the following output:
pod/pytorch-training created
4. Check the status. The name of the job "pytorch-training” was in the pytorch.yaml file. It will nowappear in the status. If you're running any other tests or have previously run something, it appears inthis list. Run this several times until you see the status change to “Running”.
$ kubectl get pods
You should see the following output:
NAME READY STATUS RESTARTS AGEpytorch-training 0/1 Running 8 19m
5. Check the logs to see the training output.
$ kubectl logs pytorch-training
You should see something similar to the following output:
Cloning into 'examples'...Downloading http://yann.lecun.com/exdb/mnist/train-images-idx3-ubyte.gz to ../data/MNIST/raw/train-images-idx3-ubyte.gz9920512it [00:00, 40133996.38it/s] Extracting ../data/MNIST/raw/train-images-idx3-ubyte.gz to ../data/MNIST/rawDownloading http://yann.lecun.com/exdb/mnist/train-labels-idx1-ubyte.gz to ../data/MNIST/raw/train-labels-idx1-ubyte.gzExtracting ../data/MNIST/raw/train-labels-idx1-ubyte.gz to ../data/MNIST/raw32768it [00:00, 831315.84it/s]Downloading http://yann.lecun.com/exdb/mnist/t10k-images-idx3-ubyte.gz to ../data/MNIST/raw/t10k-images-idx3-ubyte.gz1654784it [00:00, 13019129.43it/s] Extracting ../data/MNIST/raw/t10k-images-idx3-ubyte.gz to ../data/MNIST/rawDownloading http://yann.lecun.com/exdb/mnist/t10k-labels-idx1-ubyte.gz to ../data/MNIST/raw/t10k-labels-idx1-ubyte.gz8192it [00:00, 337197.38it/s]Extracting ../data/MNIST/raw/t10k-labels-idx1-ubyte.gz to ../data/MNIST/rawProcessing...Done!Train Epoch: 1 [0/60000 (0%)] Loss: 2.300039Train Epoch: 1 [640/60000 (1%)] Loss: 2.213470Train Epoch: 1 [1280/60000 (2%)] Loss: 2.170460Train Epoch: 1 [1920/60000 (3%)] Loss: 2.076699Train Epoch: 1 [2560/60000 (4%)] Loss: 1.868078Train Epoch: 1 [3200/60000 (5%)] Loss: 1.414199Train Epoch: 1 [3840/60000 (6%)] Loss: 1.000870
6. Check the logs to watch the training progress. You can also continue to check “get pods” to refreshthe status. When the status changes to “Completed” you will know that the training job is done.
See EKS Cleanup for information on cleaning up a cluster after you're done using it.
46

Amazon Deep Learning Containers Developer GuideTraining
Amazon S3 Plugin for PyTorch
Deep Learning Containers include a plugin that enables you to use data from an Amazon S3 bucket forPyTorch training.
1. To begin using the Amazon S3 plugin on Amazon EKS, check to make sure that your clusterinstances have full access to Amazon S3. Create an IAM role that grants Amazon S3 access to anAmazon EC2 instance and attach the role to your instance. You can use the AmazonS3FullAccess orAmazonS3ReadOnlyAccess policies.
2. Set up your AWS_REGION environment variable with the region of your choice.
export AWS_REGION=us-east-1
3. Create a pod file for your cluster. A pod file will provide the instructions about what the clustershould run. This pod file will use the PyTorch Amazon S3 plugin to access an example Amazon S3dataset.
NoteYour CPU cluster should use c5.12xlarge nodes or greater for this example.
Open vi or vim, then copy and paste the following content. Save this file as s3plugin.yaml.
apiVersion: v1kind: Podmetadata: name: pytorch-s3-pluginspec: restartPolicy: OnFailure containers: - name: pytorch-s3-plugin image: 763104351884.dkr.ecr.us-east-1.amazonaws.com/pytorch-training:1.8.1-cpu-py36-ubuntu18.04-v1.6 command: - "/bin/sh" - "-c" args: - "git clone https://github.com/aws/amazon-s3-plugin-for-pytorch.git && python amazon-s3-plugin-for-pytorch/examples/s3_imagenet_example.py" env: - name: OMP_NUM_THREADS value: "36" - name: KMP_AFFINITY value: "granularity=fine,verbose,compact,1,0" - name: KMP_BLOCKTIME value: "1"
4. Assign the pod file to the cluster using kubectl.
$ kubectl create -f s3plugin.yaml
5. Check the status. The name of the job pytorch-s3-plugin that was specified in thes3plugin.yaml file will now appear alongside the status information. You can run the followingcommand several times until you see the status change to “Running.”
$ kubectl get pods
You should see the following output:
NAME READY STATUS RESTARTS AGE
47

Amazon Deep Learning Containers Developer GuideTraining
pytorch-s3-plugin 0/1 Running 8 19m
6. Check the logs to see more details.
$ kubectl logs pytorch-s3-plugin
For more information, see the Amazon S3 Plugin for PyTorch repository.
Next steps
To learn CPU-based inference on Amazon EKS using PyTorch with Deep Learning Containers, see PyTorchCPU inference (p. 68).
GPU TrainingThis section is for training on GPU-based clusters.
For a complete list of Deep Learning Containers, refer to Deep Learning Containers Images (p. 83). Fortips about the best configuration settings if you're using the Intel Math Kernel Library (MKL), see AmazonDeep Learning Containers Intel Math Kernel Library (MKL) Recommendations (p. 85).
Contents• Apache MXNet (Incubating) GPU training (p. 48)• TensorFlow GPU training (p. 49)• PyTorch GPU training (p. 51)• Amazon S3 Plugin for PyTorch (p. 52)
Apache MXNet (Incubating) GPU training
This tutorial guides you on training with Apache MXNet (Incubating) on your single node GPU cluster.
1. Create a pod file for your cluster. A pod file will provide the instructions about what the clustershould run. This pod file will download the MXNet repository and run an MNIST example. Open vi orvim and copy and past the following content. Save this file as mxnet.yaml.
apiVersion: v1kind: Podmetadata: name: mxnet-trainingspec: restartPolicy: OnFailure containers: - name: mxnet-training image: 763104351884.dkr.ecr.us-east-1.amazonaws.com/mxnet-training:1.6.0-gpu-py36-cu101-ubuntu16.04 command: ["/bin/sh","-c"] args: ["git clone -b v1.4.x https://github.com/apache/incubator-mxnet.git && python ./incubator-mxnet/example/image-classification/train_mnist.py"]
2. Assign the pod file to the cluster using kubectl.
$ kubectl create -f mxnet.yaml
3. You should see the following output:
pod/mxnet-training created
48

Amazon Deep Learning Containers Developer GuideTraining
4. Check the status. The name of the job “tensorflow-training” was in the tf.yaml file. It will nowappear in the status. If you're running any other tests or have previously run something, it willappear in this list. Run this several times until you see the status change to “Running”.
$ kubectl get pods
You should see the following output:
NAME READY STATUS RESTARTS AGEmxnet-training 0/1 Running 8 19m
5. Check the logs to see the training output.
$ kubectl logs mxnet-training
You should see something similar to the following output:
Cloning into 'incubator-mxnet'...INFO:root:Epoch[0] Batch [0-100] Speed: 18437.78 samples/sec accuracy=0.777228INFO:root:Epoch[0] Batch [100-200] Speed: 16814.68 samples/sec accuracy=0.907188INFO:root:Epoch[0] Batch [200-300] Speed: 18855.48 samples/sec accuracy=0.926719INFO:root:Epoch[0] Batch [300-400] Speed: 20260.84 samples/sec accuracy=0.938438INFO:root:Epoch[0] Batch [400-500] Speed: 9062.62 samples/sec accuracy=0.938594INFO:root:Epoch[0] Batch [500-600] Speed: 10467.17 samples/sec accuracy=0.945000INFO:root:Epoch[0] Batch [600-700] Speed: 11082.03 samples/sec accuracy=0.954219INFO:root:Epoch[0] Batch [700-800] Speed: 11505.02 samples/sec accuracy=0.956875INFO:root:Epoch[0] Batch [800-900] Speed: 9072.26 samples/sec accuracy=0.955781INFO:root:Epoch[0] Train-accuracy=0.923424...
6. Check the logs to watch the training progress. You can also continue to check “get pods” to refreshthe status. When the status changes to “Completed”, the training job is done.
Next steps
To learn GPU-based inference on Amazon EKS using MXNet with Deep Learning Containers, see ApacheMXNet (Incubating) GPU inference (p. 71).
TensorFlow GPU training
This tutorial guides you on training TensorFlow models on your single node GPU cluster.
1. Create a pod file for your cluster. A pod file will provide the instructions about what the clustershould run. This pod file will download Keras and run a Keras example. This example uses theTensorFlow framework. Open vi or vim and copy and past the following content. Save this file astf.yaml. You can use this with either TensorFlow or TensorFlow 2. To use it with TensorFlow 2,change the Docker image to a TensorFlow 2 image.
apiVersion: v1kind: Podmetadata: name: tensorflow-trainingspec: restartPolicy: OnFailure containers: - name: tensorflow-training image: 763104351884.dkr.ecr.us-east-1.amazonaws.com/tensorflow-training:1.15.2-gpu-py37-cu100-ubuntu18.04
49

Amazon Deep Learning Containers Developer GuideTraining
command: ["/bin/sh","-c"] args: ["git clone https://github.com/fchollet/keras.git && python /keras/examples/mnist_cnn.py"] resources: limits: nvidia.com/gpu: 1
2. Assign the pod file to the cluster using kubectl.
$ kubectl create -f tf.yaml
3. You should see the following output:
pod/tensorflow-training created
4. Check the status. The name of the job “tensorflow-training” was in the tf.yaml file. It will nowappear in the status. If you're running any other tests or have previously run something, it appears inthis list. Run this several times until you see the status change to “Running”.
$ kubectl get pods
You should see the following output:
NAME READY STATUS RESTARTS AGEtensorflow-training 0/1 Running 8 19m
5. Check the logs to see the training output.
$ kubectl logs tensorflow-training
You should see something similar to the following output:
Cloning into 'keras'...Using TensorFlow backend.Downloading data from https://s3.amazonaws.com/img-datasets/mnist.npz
8192/11490434 [..............................] - ETA: 0s 6479872/11490434 [===============>..............] - ETA: 0s 8740864/11490434 [=====================>........] - ETA: 0s11493376/11490434 [==============================] - 0s 0us/stepx_train shape: (60000, 28, 28, 1)60000 train samples10000 test samplesTrain on 60000 samples, validate on 10000 samplesEpoch 1/122019-03-19 01:52:33.863598: I tensorflow/core/platform/cpu_feature_guard.cc:141] Your CPU supports instructions that this TensorFlow binary was not compiled to use: AVX512F2019-03-19 01:52:33.867616: I tensorflow/core/common_runtime/process_util.cc:69] Creating new thread pool with default inter op setting: 2. Tune using inter_op_parallelism_threads for best performance.
128/60000 [..............................] - ETA: 10:43 - loss: 2.3076 - acc: 0.0625 256/60000 [..............................] - ETA: 5:59 - loss: 2.2528 - acc: 0.1445 384/60000 [..............................] - ETA: 4:24 - loss: 2.2183 - acc: 0.1875 512/60000 [..............................] - ETA: 3:35 - loss: 2.1652 - acc: 0.1953 640/60000 [..............................] - ETA: 3:05 - loss: 2.1078 - acc: 0.2422 ...
6. Check the logs to watch the training progress. You can also continue to check “get pods” to refreshthe status. When the status changes to “Completed”, the training job is done.
50

Amazon Deep Learning Containers Developer GuideTraining
Next steps
To learn GPU-based inference on Amazon EKS using TensorFlow with Deep Learning Containers, seeTensorFlow GPU inference (p. 73).
PyTorch GPU training
This tutorial guides you on training with PyTorch on your single node GPU cluster.
1. Create a pod file for your cluster. A pod file will provide the instructions about what the clustershould run. This pod file will download the PyTorch repository and run an MNIST example. Open vior vim, then copy and paste the following content. Save this file as pytorch.yaml.
apiVersion: v1kind: Podmetadata: name: pytorch-trainingspec: restartPolicy: OnFailure containers: - name: pytorch-training image: 763104351884.dkr.ecr.us-east-1.amazonaws.com/pytorch-training:1.5.1-gpu-py36-cu101-ubuntu16.04 command: - "/bin/sh" - "-c" args: - "git clone https://github.com/pytorch/examples.git && python examples/mnist/main.py --no-cuda" env: - name: OMP_NUM_THREADS value: "36" - name: KMP_AFFINITY value: "granularity=fine,verbose,compact,1,0" - name: KMP_BLOCKTIME value: "1"
2. Assign the pod file to the cluster using kubectl.
$ kubectl create -f pytorch.yaml
3. You should see the following output:
pod/pytorch-training created
4. Check the status. The name of the job "pytorch-training” was in the pytorch.yaml file. It will nowappear in the status. If you're running any other tests or have previously run something, it appears inthis list. Run this several times until you see the status change to “Running”.
$ kubectl get pods
You should see the following output:
NAME READY STATUS RESTARTS AGEpytorch-training 0/1 Running 8 19m
5. Check the logs to see the training output.
$ kubectl logs pytorch-training
51

Amazon Deep Learning Containers Developer GuideTraining
You should see something similar to the following output:
Cloning into 'examples'...Downloading http://yann.lecun.com/exdb/mnist/train-images-idx3-ubyte.gz to ../data/MNIST/raw/train-images-idx3-ubyte.gz9920512it [00:00, 40133996.38it/s] Extracting ../data/MNIST/raw/train-images-idx3-ubyte.gz to ../data/MNIST/rawDownloading http://yann.lecun.com/exdb/mnist/train-labels-idx1-ubyte.gz to ../data/MNIST/raw/train-labels-idx1-ubyte.gzExtracting ../data/MNIST/raw/train-labels-idx1-ubyte.gz to ../data/MNIST/raw32768it [00:00, 831315.84it/s]Downloading http://yann.lecun.com/exdb/mnist/t10k-images-idx3-ubyte.gz to ../data/MNIST/raw/t10k-images-idx3-ubyte.gz1654784it [00:00, 13019129.43it/s] Extracting ../data/MNIST/raw/t10k-images-idx3-ubyte.gz to ../data/MNIST/rawDownloading http://yann.lecun.com/exdb/mnist/t10k-labels-idx1-ubyte.gz to ../data/MNIST/raw/t10k-labels-idx1-ubyte.gz8192it [00:00, 337197.38it/s]Extracting ../data/MNIST/raw/t10k-labels-idx1-ubyte.gz to ../data/MNIST/rawProcessing...Done!Train Epoch: 1 [0/60000 (0%)] Loss: 2.300039Train Epoch: 1 [640/60000 (1%)] Loss: 2.213470Train Epoch: 1 [1280/60000 (2%)] Loss: 2.170460Train Epoch: 1 [1920/60000 (3%)] Loss: 2.076699Train Epoch: 1 [2560/60000 (4%)] Loss: 1.868078Train Epoch: 1 [3200/60000 (5%)] Loss: 1.414199Train Epoch: 1 [3840/60000 (6%)] Loss: 1.000870
6. Check the logs to watch the training progress. You can also continue to check “get pods” to refreshthe status. When the status changes to “Completed", the training job is done.
See EKS Cleanup for information on cleaning up a cluster after you're done using it.
Next steps
To learn GPU-based inference on Amazon EKS using PyTorch with Deep Learning Containers, see PyTorchGPU inference (p. 77).
Amazon S3 Plugin for PyTorch
Deep Learning Containers include a plugin that enables you to use data from an Amazon S3 bucket forPyTorch training.
1. To begin using the Amazon S3 plugin on Amazon EKS, check to make sure that your clusterinstances have full access to Amazon S3. Create an IAM role that grants Amazon S3 access to anAmazon EC2 instance and attach the role to your instance. You can use the AmazonS3FullAccess orAmazonS3ReadOnlyAccess policies.
2. Set up your AWS_REGION environment variable with the region of your choice.
export AWS_REGION=us-east-1
3. Create a pod file for your cluster. A pod file will provide the instructions about what the clustershould run. This pod file will use the PyTorch Amazon S3 plugin to access an example Amazon S3dataset.
NoteYour GPU cluster should use p3.8xlarge nodes or greater for this example.
Open vi or vim, then copy and paste the following content. Save this file as s3plugin.yaml.
52

Amazon Deep Learning Containers Developer GuideTraining
apiVersion: v1kind: Podmetadata: name: pytorch-s3-pluginspec: restartPolicy: OnFailure containers: - name: pytorch-s3-plugin image: 763104351884.dkr.ecr.us-east-1.amazonaws.com/pytorch-training:1.8.1-gpu-py36-cu111-ubuntu18.04-v1.7 command: - "/bin/sh" - "-c" args: - "git clone https://github.com/aws/amazon-s3-plugin-for-pytorch.git && python amazon-s3-plugin-for-pytorch/examples/s3_imagenet_example.py" env: - name: OMP_NUM_THREADS value: "36" - name: KMP_AFFINITY value: "granularity=fine,verbose,compact,1,0" - name: KMP_BLOCKTIME value: "1"
4. Assign the pod file to the cluster using kubectl.
$ kubectl create -f s3plugin.yaml
5. Check the status. The name of the job pytorch-s3-plugin that was specified in thes3plugin.yaml file will now appear alongside the status information. You can run the followingcommand several times until you see the status change to “Running.”
$ kubectl get pods
You should see the following output:
NAME READY STATUS RESTARTS AGEpytorch-s3-plugin 0/1 Running 8 19m
6. Check the logs to see more details.
$ kubectl logs pytorch-s3-plugin
For more information, see the Amazon S3 Plugin for PyTorch repository.
Distributed GPU TrainingThis section is for running distributed training on multi-node GPU clusters.
For a complete list of Deep Learning Containers, refer to Deep Learning Containers Images (p. 83).
Contents• Set up your cluster for distributed training (p. 54)• Apache MXNet (Incubating) distributed GPU training (p. 54)• Apache MXNet (Incubating) with Horovod distributed GPU training (p. 54)• TensorFlow with Horovod distributed GPU training (p. 59)
53

Amazon Deep Learning Containers Developer GuideTraining
• PyTorch distributed GPU training (p. 61)• Amazon S3 Plugin for PyTorch (p. 62)
Set up your cluster for distributed training
To run distributed training on EKS, you need the following components installed on your cluster.
• The default installation of Kubeflow with required components, such as PyTorch operators, TensorFlowoperators, and the NVIDIA plugin.
• Apache MXNet and MPI operators.
Download and run the script to install the required components in the cluster.
$ wget -O install_kubeflow.sh https://raw.githubusercontent.com/aws/deep-learning-containers/master/test/dlc_tests/eks/eks_manifest_templates/kubeflow/install_kubeflow.sh$ chmod +x install_kubeflow.sh$ ./install_kubeflow.sh <EKS_CLUSTER_NAME> <AWS_REGION>
Apache MXNet (Incubating) distributed GPU training
This tutorial shows how to run distributed training with Apache MXNet (Incubating) on your multi-nodeGPU cluster using Parameter Server. To run MXNet distributed training on EKS, you use the KubernetesMXNet-operator named MXJob. It provides a custom resource that makes it easy to run distributedor non-distributed MXNet jobs (training and tuning) on Kubernetes. This operator is installed in theprevious setup step.
Using a Custom Resource Definition (CRD) gives users the ability to create and manage MX Jobs just likebuiltin K8s resources. Verify that the MXNet custom resource is installed.
$ kubectl get crd
The output should include mxjobs.kubeflow.org.
Running MNIST distributed training with parameter server example
Create a pod file(mx_job_dist.yaml) for your job according to the available cluster configuration and jobto run. There are 3 jobModes you need to specify: Scheduler, Server and Worker. You can specify howmany pods you want to spawn with the field replicas. The instance type of the Scheduler, Server, andWorker will be of the type specified at cluster creation.
• Scheduler: There is only one scheduler. The role of the scheduler is to set up the cluster. This includeswaiting for messages that each node has come up and which port the node is listening on. Thescheduler then lets all processes know about every other node in the cluster, so that they cancommunicate with each other.
• Server: There can be multiple servers which store the model’s parameters, and communicate withworkers. A server may or may not be co-located with the worker processes.
• Worker: A worker node actually performs training on a batch of training samples. Before processingeach batch, the workers pull weights from servers. The workers also send gradients to the serversafter each batch. Depending on the workload for training a model, it might not be a good idea to runmultiple worker processes on the same machine.
• Provide container image you want to use with the field image.• You can provide restartPolicy from one of the Always, OnFailure and Never. It determines whether
pods will be restarted when they exit or not.• Provide container image you want to use with the field image.
54

Amazon Deep Learning Containers Developer GuideTraining
1. To create a MXJob template, modify the following code block according to your requirements andsave it in a file named mx_job_dist.yaml.
apiVersion: "kubeflow.org/v1beta1"kind: "MXJob"metadata: name: <JOB_NAME>spec: jobMode: MXTrain mxReplicaSpecs: Scheduler: replicas: 1 restartPolicy: Never template: spec: containers: - name: mxnet image: 763104351884.dkr.ecr.us-east-1.amazonaws.com/aws-samples-mxnet-training:1.8.0-gpu-py37-cu110-ubuntu16.04-example Server: replicas: <NUM_SERVERS> restartPolicy: Never template: spec: containers: - name: mxnet image: 763104351884.dkr.ecr.us-east-1.amazonaws.com/aws-samples-mxnet-training:1.8.0-gpu-py37-cu110-ubuntu16.04-example Worker: replicas: <NUM_WORKERS> restartPolicy: Never template: spec: containers: - name: mxnet image: 763104351884.dkr.ecr.us-east-1.amazonaws.com/aws-samples-mxnet-training:1.8.0-gpu-py37-cu110-ubuntu16.04-example command: - "python" args: - "/incubator-mxnet/example/image-classification/train_mnist.py" - "--num-epochs" - <EPOCHS> - "--num-layers" - <LAYERS> - "--kv-store" - "dist_device_sync" - "--gpus" - <GPUS> resources: limits: nvidia.com/gpu: <GPU_LIMIT>
2. Run distributed training job with the pod file you just created.
$ # Create a job by defining MXJobkubectl create -f mx_job_dist.yaml
3. List the running jobs.
$ kubectl get mxjobs
55

Amazon Deep Learning Containers Developer GuideTraining
4. To get status of a running job, run the following. Replace the JOB variable with whatever the job'sname is.
$ JOB=<JOB_NAME>kubectl get mxjobs $JOB -o yaml
The output should be similar to the following:
apiVersion: kubeflow.org/v1beta1kind: MXJobmetadata: creationTimestamp: "2020-07-23T16:38:41Z" generation: 8 name: kubeflow-mxnet-gpu-dist-job-3910 namespace: mxnet-multi-node-training-3910 resourceVersion: "688398" selfLink: /apis/kubeflow.org/v1beta1/namespaces/mxnet-multi-node-training-3910/mxjobs/kubeflow-mxnet-gpu-dist-job-3910spec: cleanPodPolicy: All jobMode: MXTrain mxReplicaSpecs: Scheduler: replicas: 1 restartPolicy: Never template: metadata: creationTimestamp: null spec: containers: - image: 763104351884.dkr.ecr.us-east-1.amazonaws.com/aws-samples-mxnet-training:1.8.0-gpu-py37-cu110-ubuntu16.04-example name: mxnet ports: - containerPort: 9091 name: mxjob-port resources: {} Server: replicas: 2 restartPolicy: Never template: metadata: creationTimestamp: null spec: containers: - image: 763104351884.dkr.ecr.us-east-1.amazonaws.com/aws-samples-mxnet-training:1.8.0-gpu-py37-cu110-ubuntu16.04-example name: mxnet ports: - containerPort: 9091 name: mxjob-port resources: {} Worker: replicas: 3 restartPolicy: Never template: metadata: creationTimestamp: null spec: containers: - args: - /incubator-mxnet/example/image-classification/train_mnist.py - --num-epochs
56

Amazon Deep Learning Containers Developer GuideTraining
- "20" - --num-layers - "2" - --kv-store - dist_device_sync - --gpus - "0" command: - python image: 763104351884.dkr.ecr.us-east-1.amazonaws.com/aws-samples-mxnet-training:1.8.0-gpu-py37-cu110-ubuntu16.04-example name: mxnet ports: - containerPort: 9091 name: mxjob-port resources: limits: nvidia.com/gpu: "1"status: conditions: - lastTransitionTime: "2020-07-23T16:38:41Z" lastUpdateTime: "2020-07-23T16:38:41Z" message: MXJob kubeflow-mxnet-gpu-dist-job-3910 is created. reason: MXJobCreated status: "True" type: Created - lastTransitionTime: "2020-07-23T16:38:41Z" lastUpdateTime: "2020-07-23T16:40:50Z" message: MXJob kubeflow-mxnet-gpu-dist-job-3910 is running. reason: MXJobRunning status: "True" type: Running mxReplicaStatuses: Scheduler: active: 1 Server: active: 2 Worker: active: 3 startTime: "2020-07-23T16:40:50Z"
NoteStatus provides information about the state of the resources.Phase - Indicates the phase of a job and will be one of Creating, Running, CleanUp, Failed,or Done.State - Provides the overall status of the job and will be one of Running, Succeeded, orFailed.
5. If you want to delete a job, change directories to where you launched the job and run the following:
$ kubectl delete -f mx_job_dist.yaml
Apache MXNet (Incubating) with Horovod distributed GPU training
This tutorial shows how to setup distributed training of Apache MXNet (Incubating) models on yourmulti-node GPU cluster that uses Horovod. It uses an example image that already has a training scriptincluded, and it uses a 3-node cluster with node-type=p3.8xlarge. This tutorial runs the Horovodexample script for MXNet on an MNIST model.
1. Verify that the MPIJob custom resource is installed.
57

Amazon Deep Learning Containers Developer GuideTraining
$ kubectl get crd
The output should include mpijobs.kubeflow.org.
2. Create a MPI Job template and define the number of nodes (replicas) and number of GPUs eachnode has (gpusPerReplica). Modify the following code block according to your requirements andsave it in a file named mx-mnist-horovod-job.yaml.
apiVersion: kubeflow.org/v1alpha2kind: MPIJobmetadata: name: <JOB_NAME>spec: slotsPerWorker: 1 cleanPodPolicy: Running mpiReplicaSpecs: Launcher: replicas: 1 template: spec: containers: - image: 763104351884.dkr.ecr.us-east-1.amazonaws.com/aws-samples-mxnet-training:1.8.0-gpu-py37-cu110-ubuntu16.04-example name: <JOB_NAME> args: - --epochs - "10" - --lr - "0.001" command: - mpirun - -mca - btl_tcp_if_exclude - lo - -mca - pml - ob1 - -mca - btl - ^openib - --bind-to - none - -map-by - slot - -x - LD_LIBRARY_PATH - -x - PATH - -x - NCCL_SOCKET_IFNAME=eth0 - -x - NCCL_DEBUG=INFO - -x - MXNET_CUDNN_AUTOTUNE_DEFAULT=0 - python - /horovod/examples/mxnet_mnist.py Worker: replicas: <NUM_WORKERS> template: spec: containers: - image: 763104351884.dkr.ecr.us-east-1.amazonaws.com/aws-samples-mxnet-training:1.8.0-gpu-py37-cu110-ubuntu16.04-example
58

Amazon Deep Learning Containers Developer GuideTraining
name: mpi-worker resources: limits: nvidia.com/gpu: <GPUS>
3. Run the distributed training job with the pod file you just created.
$ kubectl create -f mx-mnist-horovod-job.yaml
4. Check the status. The name of the job appears in the status. If you're running any other tests orhave previously run something, it appears in this list. Run this several times until you see the statuschange to “Running”.
$ kubectl get pods -o wide
You should see something similar to the following output:
NAME READY STATUS RESTARTS AGE
mxnet-mnist-horovod-job-716-launcher-4wc7f 1/1 Running 0 31smxnet-mnist-horovod-job-716-worker-0 1/1 Running 0 31smxnet-mnist-horovod-job-716-worker-1 1/1 Running 0 31smxnet-mnist-horovod-job-716-worker-2 1/1 Running 0 31s
5. Based on the name of the launcher pod above, check the logs to see the training output.
$ kubectl logs -f --tail 10 <LAUNCHER_POD_NAME>
6. You can check the logs to watch the training progress. You can also continue to check “get pods” torefresh the status. When the status changes to “Completed” you will know that the training job isdone.
7. To clean up and rerun a job:
$ kubectl delete -f mx-mnist-horovod-job.yaml
Next steps
To learn GPU-based inference on Amazon EKS using MXNet with Deep Learning Containers, see ApacheMXNet (Incubating) GPU inference (p. 71).
TensorFlow with Horovod distributed GPU training
This tutorial shows how to setup distributed training of TensorFlow models on your multi-node GPUcluster that uses Horovod. It uses an example image that already has a training script included, and ituses a 3-node cluster with node-type=p3.16xlarge. You can use this tutorial with either TensorFlowor TensorFlow 2. To use it with TensorFlow 2, change the Docker image to a TensorFlow 2 image.
1. Verify that the MPIJob custom resource is installed.
$ kubectl get crd
The output should include mpijobs.kubeflow.org.
2. Create a MPI Job template and define the number of nodes (replicas) and number of GPUs eachnode has (gpusPerReplica). Modify the following code block according to your requirements andsave it in a file named tf-resnet50-horovod-job.yaml.
59

Amazon Deep Learning Containers Developer GuideTraining
apiVersion: kubeflow.org/v1alpha2kind: MPIJobmetadata: name: <JOB_NAME>spec: slotsPerWorker: 1 cleanPodPolicy: Running mpiReplicaSpecs: Launcher: replicas: 1 template: spec: containers: - image: 763104351884.dkr.ecr.us-east-1.amazonaws.com/aws-samples-tensorflow-training:1.15.5-gpu-py37-cu100-ubuntu18.04-example name: <JOB_NAME> command: - mpirun - -mca - btl_tcp_if_exclude - lo - -mca - pml - ob1 - -mca - btl - ^openib - --bind-to - none - -map-by - slot - -x - LD_LIBRARY_PATH - -x - PATH - -x - NCCL_SOCKET_IFNAME=eth0 - -x - NCCL_DEBUG=INFO - -x - MXNET_CUDNN_AUTOTUNE_DEFAULT=0 - python - /deep-learning-models/models/resnet/tensorflow/train_imagenet_resnet_hvd.py args: - --num_epochs - "10" - --synthetic Worker: replicas: <NUM_WORKERS> template: spec: containers: - image: 763104351884.dkr.ecr.us-east-1.amazonaws.com/aws-samples-tensorflow-training:1.15.5-gpu-py37-cu100-ubuntu18.04-example name: tensorflow-worker resources: limits: nvidia.com/gpu: <GPUS>
3. Run the distributed training job with the pod file you just created.
$ kubectl create -f tf-resnet50-horovod-job.yaml
60

Amazon Deep Learning Containers Developer GuideTraining
4. Check the status. The name of the job appears in the status. If you're running any other tests or havepreviously run other tests, they appear in this list. Run this several times until you see the statuschange to “Running”.
$ kubectl get pods -o wide
You should see something similar to the following output:
NAME READY STATUS RESTARTS AGE
tf-resnet50-horovod-job-1794-launcher-9wbsg 1/1 Running 0 31stf-resnet50-horovod-job-1794-worker-0 1/1 Running 0 31stf-resnet50-horovod-job-1794-worker-1 1/1 Running 0 31stf-resnet50-horovod-job-1794-worker-2 1/1 Running 0 31s
5. Based on the name of the launcher pod above, check the logs to see the training output.
$ kubectl logs -f --tail 10 <LAUNCHER_POD_NAME>
6. You can check the logs to watch the training progress. You can also continue to check “get pods” torefresh the status. When the status changes to “Completed” you will know that the training job isdone.
7. To clean up and rerun a job:
$ kubectl delete -f tf-resnet50-horovod-job.yaml
Next steps
To learn GPU-based inference on Amazon EKS using TensorFlow with Deep Learning Containers, seeTensorFlow GPU inference (p. 73).
PyTorch distributed GPU training
This tutorial will guide you on distributed training with PyTorch on your multi-node GPU cluster. It usesGloo as the backend.
1. Verify that the PyTorch custom resource is installed.
$ kubectl get crd
The output should include pytorchjobs.kubeflow.org.
2. Ensure that the NVIDIA plugin daemonset is running.
$ kubectl get daemonset -n kubeflow
The output should should look similar to the following.
NAME DESIRED CURRENT READY UP-TO-DATE AVAILABLE NODE SELECTOR AGEnvidia-device-plugin-daemonset 3 3 3 3 3 <none> 35h
3. Use the following text to create a gloo-based distributed data parallel job. Save it in a file nameddistributed.yaml.
61

Amazon Deep Learning Containers Developer GuideTraining
apiVersion: kubeflow.org/v1kind: PyTorchJobmetadata: name: "kubeflow-pytorch-gpu-dist-job"spec: pytorchReplicaSpecs: Master: replicas: 1 restartPolicy: OnFailure template: spec: containers: - name: "pytorch" image: "763104351884.dkr.ecr.us-east-1.amazonaws.com/aws-samples-pytorch-training:1.7.1-gpu-py36-cu110-ubuntu18.04-example" args: - "--backend" - "gloo" - "--epochs" - "5" Worker: replicas: 2 restartPolicy: OnFailure template: spec: containers: - name: "pytorch" image: "763104351884.dkr.ecr.us-east-1.amazonaws.com/aws-samples-pytorch-training:1.7.1-gpu-py36-cu110-ubuntu18.04-example" args: - "--backend" - "gloo" - "--epochs" - "5" resources: limits: nvidia.com/gpu: 1
4. Run a distributed training job with the pod file you just created.
$ kubectl create -f distributed.yaml
5. You can check the status of the job using the following:
$ kubectl logs kubeflow-pytorch-gpu-dist-job
To view logs continuously, use:
$ kubectl logs -f <pod>
See EKS Cleanup for information on cleaning up a cluster after you're done using it.
Amazon S3 Plugin for PyTorch
Deep Learning Containers include a plugin that enables you to use data from an Amazon S3 bucket forPyTorch training. See the Amazon EKS Amazon S3 Plugin for PyTorch GPU guide to get started.
For more information and additional examples, see the Amazon S3 Plugin for PyTorch repository.
See EKS Cleanup for information on cleaning up a cluster after you're done using it.
62

Amazon Deep Learning Containers Developer GuideInference
Next steps
To learn GPU-based inference on Amazon EKS using PyTorch with Deep Learning Containers, see PyTorchGPU inference (p. 77).
InferenceOnce you've created a cluster using the steps in Amazon EKS Setup (p. 36), you can use it to runinference jobs. For inference, you can use either a CPU or GPU example depending on the nodes inyour cluster. Inference supports only single node configurations. The following topics show how to runinference with Amazon Deep Learning Containers on EKS using Apache MXNet (Incubating), PyTorch,TensorFlow, and TensorFlow 2.
Contents
• CPU Inference (p. 63)
• GPU Inference (p. 70)
CPU InferenceThis section guides you on running inference on Deep Learning Containers for EKS CPU clusters usingApache MXNet (Incubating), PyTorch, TensorFlow, and TensorFlow 2.
For a complete list of Deep Learning Containers, see Available Deep Learning Containers Images.
NoteIf you're using MKL, see Amazon Deep Learning Containers Intel Math Kernel Library (MKL)Recommendations (p. 85) to get the best training or inference performance.
Contents
• Apache MXNet (Incubating) CPU inference (p. 63)
• TensorFlow CPU inference (p. 65)
• PyTorch CPU inference (p. 68)
Apache MXNet (Incubating) CPU inference
In this tutorial, you create a Kubernetes Service and a Deployment to run CPU inference with MXNet.The Kubernetes Service exposes a process and its ports. When you create a Kubernetes Service, you canspecify the kind of Service you want using ServiceTypes. The default ServiceType is ClusterIP.The Deployment is responsible for ensuring that a certain number of pods is always up and running.
1. Create the namespace. You may need to change the kubeconfig to point to the right cluster.Verify that you have setup a "training-cpu-1" or change this to your CPU cluster's config. For moreinformation on setting up your cluster, see Amazon EKS Setup (p. 36).
$ NAMESPACE=mx-inference; kubectl —kubeconfig=/home/ubuntu/.kube/eksctl/clusters/training-cpu-1 create namespace ${NAMESPACE}
2. (Optional step when using public models.) Set up your model at a network location that ismountable, like in Amazon S3. For information on how to upload a trained model to S3, seeTensorFlow CPU inference (p. 65). Apply the secret to your namespace. For more information onsecrets, see the Kubernetes Secrets documentation.
$ kubectl -n ${NAMESPACE} apply -f secret.yaml
63

Amazon Deep Learning Containers Developer GuideInference
3. Create a file named mx_inference.yamlwith the following content. This example file specifiesthe model, MXNet inference image used, and the location of the model. This example uses a publicmodel, so you don't need to modify it.
---kind: ServiceapiVersion: v1metadata: name: squeezenet-service labels: app: squeezenet-servicespec: ports: - port: 8080 targetPort: mms selector: app: squeezenet-service---kind: DeploymentapiVersion: apps/v1metadata: name: squeezenet-service labels: app: squeezenet-servicespec: replicas: 1 selector: matchLabels: app: squeezenet-service template: metadata: labels: app: squeezenet-service spec: containers: - name: squeezenet-service image: 763104351884.dkr.ecr.us-east-1.amazonaws.com/mxnet-inference:1.6.0-cpu-py36-ubuntu16.04 args: - mxnet-model-server - --start - --mms-config /home/model-server/config.properties - --models squeezenet=https://s3.amazonaws.com/model-server/model_archive_1.0/squeezenet_v1.1.mar ports: - name: mms containerPort: 8080 - name: mms-management containerPort: 8081 imagePullPolicy: IfNotPresent
4. Apply the configuration to a new pod in the previously defined namespace.
$ kubectl -n ${NAMESPACE} apply -f mx_inference.yaml
Your output should be similar to the following:
service/squeezenet-service createddeployment.apps/squeezenet-service created
5. Check the status of the pod.
64

Amazon Deep Learning Containers Developer GuideInference
$ kubectl get pods -n ${NAMESPACE}
Repeat the status check until you see the following "RUNNING" state:
NAME READY STATUS RESTARTS AGEsqueezenet-service-xvw1 1/1 Running 0 3m
6. To further describe the pod, run the following:
$ kubectl describe pod <pod_name> -n ${NAMESPACE}
7. Because the serviceType here is ClusterIP, you can forward the port from your container to your hostmachine using the following command:
$ kubectl port-forward -n ${NAMESPACE} `kubectl get pods -n ${NAMESPACE} --selector=app=squeezenet-service -o jsonpath='{.items[0].metadata.name}'` 8080:8080 &
8. Download an image of a kitten.
$ curl -O https://s3.amazonaws.com/model-server/inputs/kitten.jpg
9. Run inference on the model using the image of the kitten:
$ curl -X POST http://127.0.0.1:8080/predictions/squeezenet -T kitten.jpg
TensorFlow CPU inference
In this tutorial, you create a Kubernetes Service and a Deployment to run CPU inference with TensorFlow.The Kubernetes Service exposes a process and its ports. When you create a Kubernetes Service, you canspecify the kind of Service you want using ServiceTypes. The default ServiceType is ClusterIP.The Deployment is responsible for ensuring that a certain number of pods is always up and running.
1. Create the namespace. You may need to change the kubeconfig to point to the right cluster.Verify that you have setup a "training-cpu-1" or change this to your CPU cluster's config. For moreinformation on setting up your cluster, see Amazon EKS Setup (p. 36).
$ NAMESPACE=tf-inference; kubectl —kubeconfig=/home/ubuntu/.kube/eksctl/clusters/training-cpu-1 create namespace ${NAMESPACE}
2. Models served for inference can be retrieved in different ways, such as using shared volumes andAmazon S3. Because the Kubernetes Service requires access to Amazon S3 and Amazon ECR, youmust store your Amazon credentials as a Kubernetes secret. For the purpose of this example, use S3to store and fetch trained models.
Verify your Amazon credentials. They must have S3 write access.
$ cat ~/.aws/credentials
3. The output will be similar to the following:
$ [default]aws_access_key_id = YOURACCESSKEYIDaws_secret_access_key = YOURSECRETACCESSKEY
4. Encode the credentials using base64.
65

Amazon Deep Learning Containers Developer GuideInference
Encode the access key first.
$ echo -n 'YOURACCESSKEYID' | base64
Encode the secret access key next.
$ echo -n 'YOURSECRETACCESSKEY' | base64
Your output should look similar to the following:
$ echo -n 'YOURACCESSKEYID' | base64RkFLRUFXU0FDQ0VTU0tFWUlE$ echo -n 'YOURSECRETACCESSKEY' | base64RkFLRUFXU1NFQ1JFVEFDQ0VTU0tFWQ==
5. Create a file named secret.yaml with the following content in your home directory. This file isused to store the secret.
apiVersion: v1kind: Secretmetadata: name: aws-s3-secrettype: Opaquedata: AWS_ACCESS_KEY_ID: YOURACCESSKEYID AWS_SECRET_ACCESS_KEY: YOURSECRETACCESSKEY
6. Apply the secret to your namespace.
$ kubectl -n ${NAMESPACE} apply -f secret.yaml
7. Clone the tensorflow-serving repository.
$ git clone https://github.com/tensorflow/serving/$ cd serving/tensorflow_serving/servables/tensorflow/testdata/
8. Sync the pretrained saved_model_half_plus_two_cpu model to your S3 bucket.
$ aws s3 sync saved_model_half_plus_two_cpu s3://<your_s3_bucket>/saved_model_half_plus_two
9. Create a file named tf_inference.yaml with the following content. Update --model_base_path to use your S3 bucket. You can use this with either TensorFlow or TensorFlow 2.To use it with TensorFlow 2, change the Docker image to a TensorFlow 2 image.
--- kind: Service apiVersion: v1 metadata: name: half-plus-two labels: app: half-plus-two spec: ports: - name: http-tf-serving port: 8500 targetPort: 8500 - name: grpc-tf-serving
66

Amazon Deep Learning Containers Developer GuideInference
port: 9000 targetPort: 9000 selector: app: half-plus-two role: master type: ClusterIP --- kind: Deployment apiVersion: apps/v1 metadata: name: half-plus-two labels: app: half-plus-two role: master spec: replicas: 1 selector: matchLabels: app: half-plus-two role: master template: metadata: labels: app: half-plus-two role: master spec: containers: - name: half-plus-two image: 763104351884.dkr.ecr.us-east-1.amazonaws.com/tensorflow-inference:1.15.0-cpu-py36-ubuntu18.04 command: - /usr/bin/tensorflow_model_server args: - --port=9000 - --rest_api_port=8500 - --model_name=saved_model_half_plus_two - --model_base_path=s3://tensorflow-trained-models/saved_model_half_plus_two ports: - containerPort: 8500 - containerPort: 9000 imagePullPolicy: IfNotPresent env: - name: AWS_ACCESS_KEY_ID valueFrom: secretKeyRef: key: AWS_ACCESS_KEY_ID name: aws-s3-secret - name: AWS_SECRET_ACCESS_KEY valueFrom: secretKeyRef: key: AWS_SECRET_ACCESS_KEY name: aws-s3-secret - name: AWS_REGION value: us-east-1 - name: S3_USE_HTTPS value: "true" - name: S3_VERIFY_SSL value: "true" - name: S3_ENDPOINT value: s3.us-east-1.amazonaws.com
10. Apply the configuration to a new pod in the previously defined namespace.
$ kubectl -n ${NAMESPACE} apply -f tf_inference.yaml
67

Amazon Deep Learning Containers Developer GuideInference
Your output should be similar to the following:
service/half-plus-two createddeployment.apps/half-plus-two created
11. Check the status of the pod.
$ kubectl get pods -n ${NAMESPACE}
Repeat the status check until you see the following "RUNNING" state:
NAME READY STATUS RESTARTS AGEhalf-plus-two-vmwp9 1/1 Running 0 3m
12. To further describe the pod, you can run:
$ kubectl describe pod <pod_name> -n ${NAMESPACE}
13. Because the serviceType is ClusterIP, you can forward the port from your container to your hostmachine.
$ kubectl port-forward -n ${NAMESPACE} `kubectl get pods -n ${NAMESPACE} --selector=app=half-plus-two -o jsonpath='{.items[0].metadata.name}'` 8500:8500 &
14. Place the following json string in a file named half_plus_two_input.json
{"instances": [1.0, 2.0, 5.0]}
15. Run inference on the model.
$ curl -d @half_plus_two_input.json -X POST http://localhost:8500/v1/models/saved_model_half_plus_two_cpu:predict
Your output should look like the following:
{ "predictions": [2.5, 3.0, 4.5 ]}
PyTorch CPU inference
In this approach, you create a Kubernetes Service and a Deployment to run CPU inference with PyTorch.The Kubernetes Service exposes a process and its ports. When you create a Kubernetes Service, you canspecify the kind of Service you want using ServiceTypes. The default ServiceType is ClusterIP.The Deployment is responsible for ensuring that a certain number of pods is always up and running.
1. Create the namespace. You may need to change the kubeconfig to point to the right cluster.Verify that you have setup a "training-cpu-1" or change this to your CPU cluster's config. For moreinformation on setting up your cluster, see Amazon EKS Setup (p. 36).
$ NAMESPACE=pt-inference; kubectl create namespace ${NAMESPACE}
68

Amazon Deep Learning Containers Developer GuideInference
2. (Optional step when using public models.) Setup your model at a network location that ismountable, like in Amazon S3. For information on how to upload a trained model to S3, seeTensorFlow CPU inference (p. 65). Apply the secret to your namespace. For more information onsecrets, see the Kubernetes Secrets documentation.
$ kubectl -n ${NAMESPACE} apply -f secret.yaml
3. Create a file named pt_inference.yaml with the following content. This example file specifiesthe model, PyTorch inference image used, and the location of the model. This example uses a publicmodel, so you don't need to modify it.
---kind: ServiceapiVersion: v1metadata: name: densenet-service labels: app: densenet-servicespec: ports: - port: 8080 targetPort: mms selector: app: densenet-service---kind: DeploymentapiVersion: apps/v1metadata: name: densenet-service labels: app: densenet-servicespec: replicas: 1 selector: matchLabels: app: densenet-service template: metadata: labels: app: densenet-service spec: containers: - name: densenet-service image: 763104351884.dkr.ecr.us-east-1.amazonaws.com/pytorch-inference:1.3.1-cpu-py36-ubuntu16.04 args: - mxnet-model-server - --start - --mms-config /home/model-server/config.properties - --models densenet=https://dlc-samples.s3.amazonaws.com/pytorch/multi-model-server/densenet/densenet.mar ports: - name: mms containerPort: 8080 - name: mms-management containerPort: 8081 imagePullPolicy: IfNotPresent
4. Apply the configuration to a new pod in the previously defined namespace.
$ kubectl -n ${NAMESPACE} apply -f pt_inference.yaml
69

Amazon Deep Learning Containers Developer GuideInference
Your output should be similar to the following:
service/densenet-service createddeployment.apps/densenet-service created
5. Check the status of the pod and wait for the pod to be in “RUNNING” state:
$ kubectl get pods -n ${NAMESPACE} -w
Your output should be similar to the following:
NAME READY STATUS RESTARTS AGEdensenet-service-xvw1 1/1 Running 0 3m
6. To further describe the pod, run the following:
$ kubectl describe pod <pod_name> -n ${NAMESPACE}
7. Because the serviceType here is ClusterIP, you can forward the port from your container to your hostmachine.
$ kubectl port-forward -n ${NAMESPACE} `kubectl get pods -n ${NAMESPACE} --selector=app=densenet-service -o jsonpath='{.items[0].metadata.name}'` 8080:8080 &
8. With your server started, you can now run inference from a different window using the following:
$ curl -O https://s3.amazonaws.com/model-server/inputs/flower.jpgcurl -X POST http://127.0.0.1:8080/predictions/densenet -T flower.jpg
See EKS Cleanup for information on cleaning up a cluster after you're done using it.
Next steps
To learn about using Custom Entrypoints with Deep Learning Containers on Amazon EKS, see CustomEntrypoints (p. 79).
GPU Inference
This section shows how to run inference on Deep Learning Containers for EKS GPU clusters using ApacheMXNet (Incubating), PyTorch, TensorFlow, and TensorFlow 2.
For a complete list of Deep Learning Containers, see Available Deep Learning Containers Images.
NoteMKL users: read the Amazon Deep Learning Containers Intel Math Kernel Library (MKL)Recommendations (p. 85) to get the best training or inference performance.
Contents
• Apache MXNet (Incubating) GPU inference (p. 71)
• TensorFlow GPU inference (p. 73)
• PyTorch GPU inference (p. 77)
70

Amazon Deep Learning Containers Developer GuideInference
Apache MXNet (Incubating) GPU inference
In this approach, you create a Kubernetes Service and a Deployment. The Kubernetes Service exposesa process and its ports. When you create a Kubernetes Service, you can specify the kind of Service youwant using ServiceTypes. The default ServiceType is ClusterIP. The Deployment is responsible forensuring that a certain number of pods is always up and running.
1. For GPU-base inference, install the NVIDIA device plugin for Kubernetes:
$ kubectl apply -f https://raw.githubusercontent.com/NVIDIA/k8s-device-plugin/v1.12/nvidia-device-plugin.yml
2. Verify that the nvidia-device-plugin-daemonset is running correctly.
$ kubectl get daemonset -n kube-system
The output will be similar to the following:
NAME DESIRED CURRENT READY UP-TO-DATE AVAILABLE NODE SELECTOR AGEaws-node 3 3 3 3 3 <none> 6dkube-proxy 3 3 3 3 3 <none> 6dnvidia-device-plugin-daemonset 3 3 3 3 3 <none> 57s
3. Create the namespace. You might need to change the kubeconfig to point to the right cluster.Verify that you have setup a "training-gpu-1" or change this to your GPU cluster's config. For moreinformation on setting up your cluster, see Amazon EKS Setup (p. 36).
$ NAMESPACE=mx-inference; kubectl —kubeconfig=/home/ubuntu/.kube/eksctl/clusters/training-gpu-1 create namespace ${NAMESPACE}
4. (Optional step when using public models.) Setup your model at a network location that is mountablee.g., in S3. Refer to the steps to upload a trained model to S3 mentioned in the section Inferencewith TensorFlow. Apply the secret to your namespace. For more information on secrets, see theKubernetes Secrets documentation.
$ kubectl -n ${NAMESPACE} apply -f secret.yaml
5. Create the file mx_inference.yaml. Use the contents of the next code block as its content.
---kind: ServiceapiVersion: v1metadata: name: squeezenet-service labels: app: squeezenet-servicespec: ports: - port: 8080 targetPort: mms selector: app: squeezenet-service---kind: DeploymentapiVersion: apps/v1
71

Amazon Deep Learning Containers Developer GuideInference
metadata: name: squeezenet-service labels: app: squeezenet-servicespec: replicas: 1 selector: matchLabels: app: squeezenet-service template: metadata: labels: app: squeezenet-service spec: containers: - name: squeezenet-service image: 763104351884.dkr.ecr.us-east-1.amazonaws.com/mxnet-inference:1.6.0-gpu-py36-cu101-ubuntu16.04 args: - mxnet-model-server - --start - --mms-config /home/model-server/config.properties - --models squeezenet=https://s3.amazonaws.com/model-server/model_archive_1.0/squeezenet_v1.1.mar ports: - name: mms containerPort: 8080 - name: mms-management containerPort: 8081 imagePullPolicy: IfNotPresent resources: limits: cpu: 4 memory: 4Gi nvidia.com/gpu: 1 requests: cpu: "1" memory: 1Gi
6. Apply the configuration to a new pod in the previously defined namespace:
$ kubectl -n ${NAMESPACE} apply -f mx_inference.yaml
Your output should be similar to the following:
service/squeezenet-service createddeployment.apps/squeezenet-service created
7. Check status of the pod and wait for the pod to be in “RUNNING” state:
$ kubectl get pods -n ${NAMESPACE}
8. Repeat the check status step until you see the following "RUNNING" state:
NAME READY STATUS RESTARTS AGEsqueezenet-service-xvw1 1/1 Running 0 3m
9. To further describe the pod, you can run:
$ kubectl describe pod <pod_name> -n ${NAMESPACE}
72

Amazon Deep Learning Containers Developer GuideInference
10. Since the serviceType here is ClusterIP, you can forward the port from your container to your hostmachine (the ampersand runs this in the background):
$ kubectl port-forward -n ${NAMESPACE} `kubectl get pods -n ${NAMESPACE} --selector=app=squeezenet-service -o jsonpath='{.items[0].metadata.name}'` 8080:8080 &
11. Download an image of a kitten:
$ curl -O https://s3.amazonaws.com/model-server/inputs/kitten.jpg
12. Run inference on the model:
$ curl -X POST http://127.0.0.1:8080/predictions/squeezenet -T kitten.jpg
TensorFlow GPU inference
In this approach, you create a Kubernetes Service and a Deployment. The Kubernetes Service exposesa process and its ports. When you create a Kubernetes Service, you can specify the kind of Service youwant using ServiceTypes. The default ServiceType is ClusterIP. The Deployment is responsible forensuring that a certain number of pods is always up and running.
1. For GPU-base inference, install the NVIDIA device plugin for Kubernetes:
$ kubectl apply -f https://raw.githubusercontent.com/NVIDIA/k8s-device-plugin/v1.12/nvidia-device-plugin.yml
2. Verify that the nvidia-device-plugin-daemonset is running correctly.
$ kubectl get daemonset -n kube-system
The output will be similar to the following:
NAME DESIRED CURRENT READY UP-TO-DATE AVAILABLE NODE SELECTOR AGEaws-node 3 3 3 3 3 <none> 6dkube-proxy 3 3 3 3 3 <none> 6dnvidia-device-plugin-daemonset 3 3 3 3 3 <none> 57s
3. Create the namespace. You might need to change the kubeconfig to point to the right cluster.Verify that you have setup a "training-gpu-1" or change this to your GPU cluster's config. For moreinformation on setting up your cluster, see Amazon EKS Setup (p. 36).
$ NAMESPACE=tf-inference; kubectl —kubeconfig=/home/ubuntu/.kube/eksctl/clusters/training-gpu-1 create namespace ${NAMESPACE}
4. Models served for inference can be retrieved in different ways e.g., using shared volumes, S3 etc.Since the service will require access to S3 and ECR, you must store your Amazon credentials asa Kubernetes secret. For the purpose of this example, you will use S3 to store and fetch trainedmodels.
Check your Amazon credentials. These must have S3 write access.
$ cat ~/.aws/credentials
73

Amazon Deep Learning Containers Developer GuideInference
5. The output will be something similar to the following:
$ [default]aws_access_key_id = FAKEAWSACCESSKEYIDaws_secret_access_key = FAKEAWSSECRETACCESSKEY
6. Encode the credentials using base64. Encode the access key first.
$ echo -n 'FAKEAWSACCESSKEYID' | base64
Encode the secret access key next.
$ echo -n 'FAKEAWSSECRETACCESSKEYID' | base64
Your output should look similar to the following:
$ echo -n 'FAKEAWSACCESSKEYID' | base64RkFLRUFXU0FDQ0VTU0tFWUlE$ echo -n 'FAKEAWSSECRETACCESSKEY' | base64RkFLRUFXU1NFQ1JFVEFDQ0VTU0tFWQ==
7. Create a yaml file to store the secret. Save it as secret.yaml in your home directory.
apiVersion: v1kind: Secretmetadata: name: aws-s3-secrettype: Opaquedata: AWS_ACCESS_KEY_ID: RkFLRUFXU0FDQ0VTU0tFWUlE AWS_SECRET_ACCESS_KEY: RkFLRUFXU1NFQ1JFVEFDQ0VTU0tFWQ==
8. Apply the secret to your namespace:
$ kubectl -n ${NAMESPACE} apply -f secret.yaml
9. In this example, you will clone the tensorflow-serving repository and sync a pretrained model to anS3 bucket. The following sample names the bucket tensorflow-serving-models. It also syncs asaved model to an S3 bucket called saved_model_half_plus_two_gpu.
$ git clone https://github.com/tensorflow/serving/$ cd serving/tensorflow_serving/servables/tensorflow/testdata/
10. Sync the CPU model.
$ aws s3 sync saved_model_half_plus_two_gpu s3://<your_s3_bucket>/saved_model_half_plus_two_gpu
11. Create the file tf_inference.yaml. Use the contents of the next code block as its content, andupdate --model_base_path to use your S3 bucket. You can use this with either TensorFlow orTensorFlow 2. To use it with TensorFlow 2, change the Docker image to a TensorFlow 2 image.
--- kind: Service apiVersion: v1 metadata: name: half-plus-two labels:
74

Amazon Deep Learning Containers Developer GuideInference
app: half-plus-two spec: ports: - name: http-tf-serving port: 8500 targetPort: 8500 - name: grpc-tf-serving port: 9000 targetPort: 9000 selector: app: half-plus-two role: master type: ClusterIP--- kind: Deployment apiVersion: apps/v1 metadata: name: half-plus-two labels: app: half-plus-two role: master spec: replicas: 1 selector: matchLabels: app: half-plus-two role: master template: metadata: labels: app: half-plus-two role: master spec: containers: - name: half-plus-two image: 763104351884.dkr.ecr.us-east-1.amazonaws.com/tensorflow-inference:1.15.0-gpu-py36-cu100-ubuntu18.04 command: - /usr/bin/tensorflow_model_server args: - --port=9000 - --rest_api_port=8500 - --model_name=saved_model_half_plus_two_gpu - --model_base_path=s3://tensorflow-trained-models/saved_model_half_plus_two_gpu ports: - containerPort: 8500 - containerPort: 9000 imagePullPolicy: IfNotPresent env: - name: AWS_ACCESS_KEY_ID valueFrom: secretKeyRef: key: AWS_ACCESS_KEY_ID name: aws-s3-secret - name: AWS_SECRET_ACCESS_KEY valueFrom: secretKeyRef: key: AWS_SECRET_ACCESS_KEY name: aws-s3-secret - name: AWS_REGION value: us-east-1 - name: S3_USE_HTTPS value: "true" - name: S3_VERIFY_SSL value: "true"
75

Amazon Deep Learning Containers Developer GuideInference
- name: S3_ENDPOINT value: s3.us-east-1.amazonaws.com resources: limits: cpu: 4 memory: 4Gi nvidia.com/gpu: 1 requests: cpu: "1" memory: 1Gi
12. Apply the configuration to a new pod in the previously defined namespace:
$ kubectl -n ${NAMESPACE} apply -f tf_inference.yaml
Your output should be similar to the following:
service/half-plus-two createddeployment.apps/half-plus-two created
13. Check status of the pod and wait for the pod to be in “RUNNING” state:
$ kubectl get pods -n ${NAMESPACE}
14. Repeat the check status step until you see the following "RUNNING" state:
NAME READY STATUS RESTARTS AGEhalf-plus-two-vmwp9 1/1 Running 0 3m
15. To further describe the pod, you can run:
$ kubectl describe pod <pod_name> -n ${NAMESPACE}
16. Since the serviceType here is ClusterIP, you can forward the port from your container to your hostmachine (the ampersand runs this in the background):
$ kubectl port-forward -n ${NAMESPACE} `kubectl get pods -n ${NAMESPACE} --selector=app=half-plus-two -o jsonpath='{.items[0].metadata.name}'` 8500:8500 &
17. Place the following json string in a file called half_plus_two_input.json
{"instances": [1.0, 2.0, 5.0]}
18. Run inference on the model:
$ curl -d @half_plus_two_input.json -X POST http://localhost:8500/v1/models/saved_model_half_plus_two_cpu:predict
The expected output is as follows:
{ "predictions": [2.5, 3.0, 4.5 ]}
76

Amazon Deep Learning Containers Developer GuideInference
PyTorch GPU inference
In this approach, you create a Kubernetes Service and a Deployment. The Kubernetes Service exposesa process and its ports. When you create a Kubernetes Service, you can specify the kind of Service youwant using ServiceTypes. The default ServiceType is ClusterIP. The Deployment is responsible forensuring that a certain number of pods is always up and running.
1. For GPU-base inference, install the NVIDIA device plugin for Kubernetes.
$ kubectl apply -f https://raw.githubusercontent.com/NVIDIA/k8s-device-plugin/v1.12/nvidia-device-plugin.yml
2. Verify that the nvidia-device-plugin-daemonset is running correctly.
$ kubectl get daemonset -n kube-system
The output will be similar to the following.
NAME DESIRED CURRENT READY UP-TO-DATE AVAILABLE NODE SELECTOR AGEaws-node 3 3 3 3 3 <none> 6dkube-proxy 3 3 3 3 3 <none> 6dnvidia-device-plugin-daemonset 3 3 3 3 3 <none> 57s
3. Create the namespace.
$ NAMESPACE=pt-inference; kubectl create namespace ${NAMESPACE}
4. (Optional step when using public models.) Setup your model at a network location that is mountablee.g., in S3. Refer to the steps to upload a trained model to S3 mentioned in the section Inferencewith TensorFlow. Apply the secret to your namespace. For more information on secrets, see theKubernetes Secrets documentation.
$ kubectl -n ${NAMESPACE} apply -f secret.yaml
5. Create the file pt_inference.yaml. Use the contents of the next code block as its content.
---kind: ServiceapiVersion: v1metadata: name: densenet-service labels: app: densenet-servicespec: ports: - port: 8080 targetPort: mms selector: app: densenet-service---kind: DeploymentapiVersion: apps/v1metadata: name: densenet-service labels: app: densenet-service
77

Amazon Deep Learning Containers Developer GuideInference
spec: replicas: 1 selector: matchLabels: app: densenet-service template: metadata: labels: app: densenet-service spec: containers: - name: densenet-service image: "763104351884.dkr.ecr.us-east-1.amazonaws.com/pytorch-inference:1.3.1-gpu-py36-cu101-ubuntu16.04" args: - mxnet-model-server - --start - --mms-config /home/model-server/config.properties - --models densenet=https://dlc-samples.s3.amazonaws.com/pytorch/multi-model-server/densenet/densenet.mar ports: - name: mms containerPort: 8080 - name: mms-management containerPort: 8081 imagePullPolicy: IfNotPresent resources: limits: cpu: 4 memory: 4Gi nvidia.com/gpu: 1 requests: cpu: "1" memory: 1Gi
6. Apply the configuration to a new pod in the previously defined namespace.
$ kubectl -n ${NAMESPACE} apply -f pt_inference.yaml
Your output should be similar to the following:
service/densenet-service createddeployment.apps/densenet-service created
7. Check status of the pod and wait for the pod to be in “RUNNING” state.
$ kubectl get pods -n ${NAMESPACE}
Your output should be similar to the following:
NAME READY STATUS RESTARTS AGEdensenet-service-xvw1 1/1 Running 0 3m
8. To further describe the pod, you can run:
$ kubectl describe pod <pod_name> -n ${NAMESPACE}
9. Since the serviceType here is ClusterIP, you can forward the port from your container to your hostmachine (the ampersand runs this in the background).
78

Amazon Deep Learning Containers Developer GuideCustom Entrypoints
$ kubectl port-forward -n ${NAMESPACE} `kubectl get pods -n ${NAMESPACE} --selector=app=densenet-service -o jsonpath='{.items[0].metadata.name}'` 8080:8080 &
10. With your server started, you can now run inference from a different window.
$ curl -O https://s3.amazonaws.com/model-server/inputs/flower.jpgcurl -X POST http://127.0.0.1:8080/predictions/densenet -T flower.jpg
See EKS Cleanup for information on cleaning up a cluster after you're done using it.
Next steps
To learn about using Custom Entrypoints with Deep Learning Containers on Amazon EKS, see CustomEntrypoints (p. 79).
Custom EntrypointsFor some images, Amazon containers use a custom entrypoint script. If you want to use your ownentrypoint, you can override the entrypoint as follows.
Update the command parameter in your pod file. Replace the args parameters with your customentrypoint script.
---apiVersion: v1kind: Podmetadata: name: pytorch-multi-model-server-densenetspec: restartPolicy: OnFailure containers: - name: pytorch-multi-model-server-densenet image: 763104351884.dkr.ecr.us-east-1.amazonaws.com/pytorch-inference:1.2.0-cpu-py36-ubuntu16.04 command: - "/bin/sh" - "-c" args: - /usr/local/bin/mxnet-model-server - --start - --mms-config /home/model-server/config.properties - --models densenet="https://dlc-samples.s3.amazonaws.com/pytorch/multi-model-server/densenet/densenet.mar"
command is the Kubernetes field name for entrypoint. Refer to this table of Kubernetes field namesfor more information.
If the EKS cluster has expired IAM permissions to access the ECR repository holding the image, or you areusing kubectl from a different user than the one that created the cluster, you will receive the followingerror.
error: unable to recognize "job.yaml": Unauthorized
To address this issue, you need to refresh the IAM tokens. Run the following script.
set -ex
79

Amazon Deep Learning Containers Developer GuideTroubleshooting Amazon Deep Learning Containers on EKS
AWS_ACCOUNT=${AWS_ACCOUNT}AWS_REGION=us-east-1DOCKER_REGISTRY_SERVER=https://${AWS_ACCOUNT}.dkr.ecr.${AWS_REGION}.amazonaws.comDOCKER_USER=AWSDOCKER_PASSWORD=`aws ecr get-login --region ${AWS_REGION} --registry-ids ${AWS_ACCOUNT} | cut -d' ' -f6`kubectl delete secret aws-registry || truekubectl create secret docker-registry aws-registry \--docker-server=$DOCKER_REGISTRY_SERVER \--docker-username=$DOCKER_USER \--docker-password=$DOCKER_PASSWORDkubectl patch serviceaccount default -p '{"imagePullSecrets":[{"name":"aws-registry"}]}'
Append the following under spec in your pod file.
imagePullSecrets: - name: aws-registry
Troubleshooting Amazon Deep Learning Containerson EKSThe following are common errors that might be returned in the command line when using Amazon DeepLearning Containers on an Amazon EKS cluster. Each error is followed by a solution to the error.
TroubleshootingTopics
• Setup Errors (p. 80)• Usage Errors (p. 81)• Cleanup Errors (p. 81)
Setup Errors
The following errors might be returned when setting up Deep Learning Containers on your Amazon EKScluster.
• Error: registry kubeflow does not exist
$ ks pkg install kubeflow/tf-serving ERROR registry 'kubeflow' does not exist
To solve this error, run the following command.
ks registry add kubeflow github.com/google/kubefl ow/tree/master/kubeflow
• Error: context deadline exceeded
$ eksctl create cluster <args> [#] waiting for CloudFormation stack "eksctl-training-cluster-1-nodegroup-ng-8c4c94bc" to reach "CREATE_COMPLETE" status: RequestCanceled: waiter context canceled caused by: context deadline exceeded
To solve this error, verify that you have not exceeded capacity for your account. You can also try tocreate your cluster in a different region.
80

Amazon Deep Learning Containers Developer GuideTroubleshooting Amazon Deep Learning Containers on EKS
• Error: The connection to the server localhost:8080 was refused
$ kubectl get nodes The connection to the server localhost:8080 was refused - did you specify the right host or port?
To solve this error, copy the cluster to the Kubernetes configuration by running the following.
cp ~/.kube/eksctl/clusters/<cluster-name> ~/.kube/config
• Error: handle object: patching object from cluster: merging object with existing state:Unauthorized
$ ks apply default ERROR handle object: patching object from cluster: merging object with existing state: Unauthorized
This error is due to a concurrency issue that can occur when multiple users with different authorizationor credentials credentials try to start jobs on the same cluster. Verify that you are starting a job on thecorrect cluster.
• Error: Could not create app; directory '/home/ubuntu/kubeflow-tf-hvd' already exists
$ APP_NAME=kubeflow-tf-hvd; ks init ${APP_NAME}; cd ${APP_NAME} INFO Using context "arn:aws:eks:eu-west-1:999999999999:cluster/training-gpu-1" from kubeconfig file "/home/ubuntu/.kube/config" ERROR Could not create app; directory '/home/ubuntu/kubeflow-tf-hvd' already exists
You can safely ignore this warning. However, you may have additional cleanup to do inside that folder.To simplify cleanup, delete the folder.
Usage Errors
ssh: Could not resolve hostname openmpi-worker-1.openmpi.kubeflow-dist-train-tf: Name or service not known
If you see this error message while using the Amazon EKS cluster, run the NVIDIA device plugininstallation step again. Verify that you have targeted the right cluster by either passing in the specificconfig file or switching your active cluster to the targeted cluster.
Cleanup Errors
The following errors might be returned when cleaning up the resources of your Amazon EKS cluster.
• Error: the server doesn't have a resource type "namspace"
$ kubectl delete namespace ${NAMESPACE} error: the server doesn't have a resource type "namspace"
Verify the spelling of your namespace is correct.• Error: the server has asked for the client to provide credentials
$ ks delete default ERROR the server has asked for the client to provide credentials
81

Amazon Deep Learning Containers Developer GuideTroubleshooting Amazon Deep Learning Containers on EKS
To solve this error, verify that ~/.kube/config points to the correct cluster and that Amazoncredentials have been correctly configured using aws configure or by exporting Amazonenvironment variables.
• Error: finding app root from starting path: : unable to find ksonnet project
$ ks delete default ERROR finding app root from starting path: : unable to find ksonnet project
To solve this error, verify that you are in the directory created by the ksonnet app. This is the folderwhere ks init was run.
• Error: Error from server (NotFound): pods "openmpi-master" not found
$ kubectl logs -n ${NAMESPACE} -f ${COMPONENT}-master > results/benchmark_1.out Error from server (NotFound): pods "openmpi-master" not found
This error might be caused by trying to access resources after the context is deleted. Deleting thedefault context causes the corresponding resources to be deleted as well.
82

Amazon Deep Learning Containers Developer Guide
Deep Learning Containers ImagesAmazon Deep Learning Containers are available as Docker images in Amazon ECR. Each Docker image isbuilt for training or inference on a specific Deep Learning framework version, python version, with CPUor GPU support.
For the full list of available Deep Learning Containers and information on pulling them, see AvailableDeep Learning Containers Images.
Once you've selected your desired Deep Learning Containers image, continue with the one of thefollowing:
• To run training and inference on Deep Learning Containers for Amazon EC2 using MXNet, PyTorch,TensorFlow, and TensorFlow 2, see Amazon EC2 Tutorials (p. 3)
• To run training and inference on Deep Learning Containers for Amazon ECS using MXNet, PyTorch, andTensorFlow, see Amazon ECS tutorials (p. 13)
• Deep Learning Containers for Amazon EKS offer CPU, GPU, and distributed GPU-based training, aswell as CPU and GPU-based inference. To run training and inference on Deep Learning Containers forAmazon EKS using MXNet, PyTorch, and TensorFlow, see Amazon EKS Tutorials (p. 36)
• For information on security in Deep Learning Containers, see Security in Amazon Deep LearningContainers (p. 90)
• For a list of the latest Deep Learning Containers release notes, see Release Notes for Deep LearningContainers (p. 98)
83

Amazon Deep Learning Containers Developer GuideBuilding Custom Images
Deep Learning Containers ResourcesThe following topics describe additional Amazon Deep Learning Containers resources.
Contents
• Building Amazon Deep Learning Containers Custom Images (p. 84)
• Amazon Deep Learning Containers Intel Math Kernel Library (MKL) Recommendations (p. 85)
Building Amazon Deep Learning ContainersCustom Images
How to Build Custom ImagesWe can easily customize both training and inference with Deep Learning Containers to add customframeworks, libraries, and packages using Docker files.
Training with TensorFlowIn the following example Dockerfile, the resulting Docker image will have TensorFlow v1.15.2 optimizedfor GPUs and built to support Horovod and Python 3 for multi-node distributed training. It will also havethe Amazon samples GitHub repo which contains many deep learning model examples.
#Take base containerFROM 763104351884.dkr.ecr.us-east-1.amazonaws.com/tensorflow-training:1.15.2-gpu-py36-cu100-ubuntu18.04
# Add custom stack of codeRUN git clone https://github.com/aws-samples/deep-learning-models
Training with Apache MXNet (Incubating)In the following example Dockerfile, the resulting Docker image will have Apache MXNet (Incubating)v1.6.0 optimized for GPU inference built to support Horovod and Python 3. It will also have the MXNetGitHub repo which contains many deep learning model examples.
# Take the base MXNet ContainerFROM 763104351884.dkr.ecr.us-east-1.amazonaws.com/mxnet-training:1.6.0-gpu-py36-cu101-ubuntu16.04
# Add Custom stack of codeRUN git clone -b 1.6.0 https://github.com/apache/incubator-mxnet.git
ENTRYPOINT ["python", "/incubator-mxnet/example/image-classification/train_mnist.py"]
Build the Docker image, pointing to your personal Docker registry (usually your username), with theimage's custom name and custom tag.
84

Amazon Deep Learning Containers Developer GuideMKL Recommendations
docker build -f Dockerfile -t <registry>/<any name>:<any tag>
Push to your personal Docker Registry:
docker push <registry>/<any name>:<any tag>
You can use the following command to run the container:
docker run -it < name or tag>
ImportantYou may need to login to access to the Deep Learning Containers image repository. Specify yourregion in the following command:
aws ecr get-login-password --region us-east-1 | docker login --username AWS --password-stdin 763104351884.dkr.ecr.us-east-1.amazonaws.com
Amazon Deep Learning Containers Intel MathKernel Library (MKL) Recommendations
MKL Recommendation for CPU containersContents
• EC2 guide to set environment variables (p. 86)• ECS guide to set environment variables (p. 87)• EKS guide to set environment variables (p. 88)
The performance for training and inference workloads for a Deep Learning framework on CPU instancescan vary and depend on a variety of configuration settings. As an example, on Amazon EC2 c5.18xlargeinstances the number of physical cores is 36 while the number of logical cores is 72. MKL's configurationsettings for training and inference are influenced by these factors. By updating MKL's configuration tomatch your instance's capabilities, you may achieve performance improvements.
Consider the following examples using an Intel-MKL-optimized TensorFlow binary:
•A ResNet50v2 model, trained with TensorFlow and served for inference with TensorFlow Serving wasobserved to achieve 2x inference performance when the MKL settings were adjusted to match theinstance's number cores. The following settings were used on a c5.18xlarge instance.
export TENSORFLOW_INTER_OP_PARALLELISM=2# For an EC2 c5.18xlarge instance, number of logical cores = 72export TENSORFLOW_INTRA_OP_PARALLELISM=72# For an EC2 c5.18xlarge instance, number of physical cores = 36export OMP_NUM_THREADS=36export KMP_AFFINITY='granularity=fine,verbose,compact,1,0'# For an EC2 c5.18xlarge instance, number of physical cores / 4 = 36 /4 = 9
85

Amazon Deep Learning Containers Developer GuideMKL Recommendation for CPU containers
export TENSORFLOW_SESSION_PARALLELISM=9export KMP_BLOCKTIME=1export KMP_SETTINGS=0
•A ResNet50_v1.5 model, trained with TensorFlow on the ImageNet dataset and using a NHWC imageshape, the training throughput performance was observed to be around 9x faster. This is comparedto the binary without MKL optimizations and measured in terms of samples/second. The followingenvironment variables were used:
export TENSORFLOW_INTER_OP_PARALLELISM=0# For an EC2 c5.18xlarge instance, number of logical cores = 72export TENSORFLOW_INTRA_OP_PARALLELISM=72# For an EC2 c5.18xlarge instance, number of physical cores = 36export OMP_NUM_THREADS=36export KMP_AFFINITY='granularity=fine,verbose,compact,1,0'# For an EC2 c5.18xlarge instance, number of physical cores / 4 = 36 /4 = 9export KMP_BLOCKTIME=1export KMP_SETTINGS=0
The following links will help you learn how to use to tune Intel MKL and your Deep Learning framework'ssettings to optimize your deep learning workload:
•General best practices for Intel-optimized TensorFlow Serving
•TensorFlow performance
•Some Tips for improving Apache MXNet performance
•MXNet with Intel MKL-DNN - Performance Benchmarking
EC2 guide to set environment variables Refer to docker run documentation on how to set environment variables when creating acontainer: https://docs.docker.com/engine/reference/run/#env-environment-variables
The following is an example on setting en environment variable called OMP_NUM_THREADS for dockerrun.
ubuntu@ip-172-31-95-248:~$ docker run -e OMP_NUM_THREADS=36 -it --entrypoint "" 999999999999.dkr.ecr.us-east-1.amazonaws.com/beta-tensorflow-inference:1.13-py2-cpu-build bashroot@d437faf9b684:/# echo $OMP_NUM_THREADS36
In rare cases Intel MKL can have adverse effects. To disable MKL with TensorFlow, set the followingenvironment variables:
export TF_DISABLE_MKL=1export TF_DISABLE_POOL_ALLOCATOR=1
86

Amazon Deep Learning Containers Developer GuideMKL Recommendation for CPU containers
ECS guide to set environment variables To specify the environment variables for a container at runtime in ECS, you must editthe ECS task definition. Add the environment variables in the form of 'name' and 'value' key-pairs in containerDefinitions part of the task definition. The following is an example ofsetting OMP_NUM_THREADS and KMP_BLOCKTIME variables.
{ "requiresCompatibilities": [ "EC2" ], "containerDefinitions": [{ "command": [ "mkdir -p /test && cd /test && git clone -b r1.13 https://github.com/tensorflow/serving.git && tensorflow_model_server --port=8500 --rest_api_port=8501 --model_name=saved_model_half_plus_two_cpu --model_base_path=/test/serving/tensorflow_serving/servables/tensorflow/testdata/saved_model_half_plus_two_cpu" ], "entryPoint": [ "sh", "-c" ], "name": "EC2TFInference", "image": "999999999999.dkr.ecr.us-east-1.amazonaws.com/tf-inference:1.12-cpu-py3-ubuntu16.04", "memory": 8111, "cpu": 256, "essential": true, "environment": [{ "name": "OMP_NUM_THREADS", "value": "36" }, { "name": "KMP_BLOCKTIME", "value": 1 } ], "portMappings": [{ "hostPort": 8500, "protocol": "tcp", "containerPort": 8500 }, { "hostPort": 8501, "protocol": "tcp", "containerPort": 8501 }, { "containerPort": 80, "protocol": "tcp" } ], "logConfiguration": { "logDriver": "awslogs", "options": { "awslogs-group": "/ecs/TFInference", "awslogs-region": "us-west-2", "awslogs-stream-prefix": "ecs", "awslogs-create-group": "true" } } }], "volumes": [],
87

Amazon Deep Learning Containers Developer GuideMKL Recommendation for CPU containers
"networkMode": "bridge", "placementConstraints": [], "family": "Ec2TFInference"}
In rare cases Intel MKL can have adverse effects. To disable MKL with TensorFlow, set the followingenvironment variables:
{ "name": "TF_DISABLE_MKL", "value": 1 }, { "name": "TF_DISABLE_POOL_ALLOCATOR", "value": 1 }
EKS guide to set environment variablesTo specify the environment variables for the container at runtime, edit the raw manifests of yourEKS job (.yaml, .json) . The following snippet of a manifest shows the definition of a container, withname squeezenet-service. Along with other attributes such as args and ports, the environmentvariables are listed in the form of 'name' and 'value' key-pairs.
containers: - name: squeezenet-service image: 999999999999.dkr.ecr.us-east-1.amazonaws.com/beta-mxnet-inference:1.4.0-py3-gpu-build command: - mxnet-model-server args: - --start - --mms-config /home/model-server/config.properties - --models squeezenet=https://s3.amazonaws.com/model-server/models/squeezenet_v1.1/squeezenet_v1.1.model ports: - name: mms containerPort: 8080 - name: mms-management containerPort: 8081 imagePullPolicy: IfNotPresent env: - name: AWS_REGION value: us-east-1 - name: OMP_NUM_THREADS value: 36 - name: TENSORFLOW_INTER_OP_PARALLELISM value: 0 - name: KMP_AFFINITY value: 'granularity=fine,verbose,compact,1,0' - name: KMP_BLOCKTIME value: 1
In rare cases Intel MKL can have adverse effects. To disable MKL with TensorFlow, set the followingenvironment variables:
- name: TF_DISABLE_MKL value: 1- name: TF_DISABLE_POOL_ALLOCATOR
88

Amazon Deep Learning Containers Developer GuideMKL Recommendation for CPU containers
value: 1
89

Amazon Deep Learning Containers Developer GuideData Protection
Security in Amazon Deep LearningContainers
Cloud security at Amazon is the highest priority. As an Amazon customer, you benefit from a datacenter and network architecture that is built to meet the requirements of the most security-sensitiveorganizations.
Security is a shared responsibility between Amazon and you. The shared responsibility model describesthis as security of the cloud and security in the cloud:
• Security of the cloud – Amazon is responsible for protecting the infrastructure that runs Amazonservices in the Amazon Cloud. Amazon also provides you with services that you can use securely.Third-party auditors regularly test and verify the effectiveness of our security as part of the AmazonCompliance Programs. To learn about the compliance programs that apply to Deep LearningContainers, see Amazon Services in Scope by Compliance Program.
• Security in the cloud – Your responsibility is determined by the Amazon service that you use. You arealso responsible for other factors including the sensitivity of your data, your company’s requirements,and applicable laws and regulations.
This documentation helps you understand how to apply the shared responsibility model when usingDeep Learning Containers. The following topics show you how to configure Deep Learning Containers tomeet your security and compliance objectives. You also learn how to use other Amazon services that helpyou to monitor and secure your Deep Learning Containers resources.
For more information, see Security in Amazon EC2, Security in Amazon ECS, Security in Amazon EKS, andSecurity in Amazon SageMaker.
Topics• Data Protection in Amazon Deep Learning Containers (p. 90)• Identity and Access Management in Amazon Deep Learning Containers (p. 91)• Logging and Monitoring in Amazon Deep Learning Containers (p. 95)• Compliance Validation for Amazon Deep Learning Containers (p. 96)• Resilience in Amazon Deep Learning Containers (p. 96)• Infrastructure Security in Amazon Deep Learning Containers (p. 96)
Data Protection in Amazon Deep LearningContainers
The Amazon shared responsibility model applies to data protection in Amazon Deep LearningContainers. As described in this model, Amazon is responsible for protecting the global infrastructurethat runs all of the Amazon Web Services Cloud. You are responsible for maintaining control overyour content that is hosted on this infrastructure. This content includes the security configuration andmanagement tasks for the Amazon Web Services that you use. For more information about data privacy,see the Data Privacy FAQ.
For data protection purposes, we recommend that you protect Amazon Web Services account credentialsand set up individual user accounts with Amazon Identity and Access Management (IAM). That way each
90

Amazon Deep Learning Containers Developer GuideIdentity and Access Management
user is given only the permissions necessary to fulfill their job duties. We also recommend that yousecure your data in the following ways:
• Use multi-factor authentication (MFA) with each account.• Use SSL/TLS to communicate with Amazon resources. We recommend TLS 1.2 or later.• Set up API and user activity logging with Amazon CloudTrail.• Use Amazon encryption solutions, along with all default security controls within Amazon services.• Use advanced managed security services such as Amazon Macie, which assists in discovering and
securing personal data that is stored in Amazon S3.• If you require FIPS 140-2 validated cryptographic modules when accessing Amazon through a
command line interface or an API, use a FIPS endpoint. For more information about the available FIPSendpoints, see Federal Information Processing Standard (FIPS) 140-2.
We strongly recommend that you never put confidential or sensitive information, such as yourcustomers' email addresses, into tags or free-form fields such as a Name field. This includes when youwork with Deep Learning Containers or other Amazon services using the console, API, Amazon CLI, orAmazon SDKs. Any data that you enter into tags or free-form fields used for names may be used forbilling or diagnostic logs. If you provide a URL to an external server, we strongly recommend that you donot include credentials information in the URL to validate your request to that server.
Identity and Access Management in Amazon DeepLearning Containers
Amazon Identity and Access Management (IAM) is an Amazon Web Service that helps an administratorsecurely control access to Amazon resources. IAM administrators control who can be authenticated(signed in) and authorized (have permissions) to use Deep Learning Containers resources. IAM is anAmazon Web Service that you can use with no additional charge.
For more information on Identity and Access Management, see Identity and Access Management forAmazon EC2, Identity and Access Management for Amazon ECS, Identity and Access Management forAmazon EKS, and Identity and Access Management for Amazon SageMaker.
Topics• Authenticating With Identities (p. 91)• Managing Access Using Policies (p. 93)• IAM with Amazon EMR (p. 95)
Authenticating With IdentitiesAuthentication is how you sign in to Amazon using your identity credentials. For more information aboutsigning in using the Amazon Web Services Management Console, see Signing in to the Amazon WebServices Management Console as an IAM user or root user in the IAM User Guide.
You must be authenticated (signed in to Amazon) as the Amazon Web Services account root user, an IAMuser, or by assuming an IAM role. You can also use your company's single sign-on authentication or evensign in using Google or Facebook. In these cases, your administrator previously set up identity federationusing IAM roles. When you access Amazon using credentials from another company, you are assuming arole indirectly.
To sign in directly to the Amazon Web Services Management Console, use your password with your rootuser email address or your IAM user name. You can access Amazon programmatically using your root user
91

Amazon Deep Learning Containers Developer GuideAuthenticating With Identities
or IAM users access keys. Amazon provides SDK and command line tools to cryptographically sign yourrequest using your credentials. If you don't use Amazon tools, you must sign the request yourself. Dothis using Signature Version 4, a protocol for authenticating inbound API requests. For more informationabout authenticating requests, see Signature Version 4 signing process in the Amazon General Reference.
Regardless of the authentication method that you use, you might also be required to provide additionalsecurity information. For example, Amazon recommends that you use multi-factor authentication (MFA)to increase the security of your account. To learn more, see Using multi-factor authentication (MFA) inAmazon in the IAM User Guide.
Amazon Web Services account root userWhen you first create an Amazon Web Services account, you begin with a single sign-in identity thathas complete access to all Amazon Web Services and resources in the account. This identity is calledthe Amazon Web Services account root user and is accessed by signing in with the email address andpassword that you used to create the account. We strongly recommend that you do not use the root userfor your everyday tasks, even the administrative ones. Instead, adhere to the best practice of using theroot user only to create your first IAM user. Then securely lock away the root user credentials and usethem to perform only a few account and service management tasks.
IAM Users and GroupsAn IAM user is an identity within your Amazon Web Services account that has specific permissions fora single person or application. An IAM user can have long-term credentials such as a user name andpassword or a set of access keys. To learn how to generate access keys, see Managing access keys forIAM users in the IAM User Guide. When you generate access keys for an IAM user, make sure you viewand securely save the key pair. You cannot recover the secret access key in the future. Instead, you mustgenerate a new access key pair.
An IAM group is an identity that specifies a collection of IAM users. You can't sign in as a group. Youcan use groups to specify permissions for multiple users at a time. Groups make permissions easier tomanage for large sets of users. For example, you could have a group named IAMAdmins and give thatgroup permissions to administer IAM resources.
Users are different from roles. A user is uniquely associated with one person or application, but a roleis intended to be assumable by anyone who needs it. Users have permanent long-term credentials, butroles provide temporary credentials. To learn more, see When to create an IAM user (instead of a role) inthe IAM User Guide.
IAM RolesAn IAM role is an identity within your Amazon Web Services account that has specific permissions. It issimilar to an IAM user, but is not associated with a specific person. You can temporarily assume an IAMrole in the Amazon Web Services Management Console by switching roles. You can assume a role bycalling an Amazon CLI or Amazon API operation or by using a custom URL. For more information aboutmethods for using roles, see Using IAM roles in the IAM User Guide.
IAM roles with temporary credentials are useful in the following situations:
• Temporary IAM user permissions – An IAM user can assume an IAM role to temporarily take ondifferent permissions for a specific task.
• Federated user access – Instead of creating an IAM user, you can use existing identities from AmazonDirectory Service, your enterprise user directory, or a web identity provider. These are known asfederated users. Amazon assigns a role to a federated user when access is requested through anidentity provider. For more information about federated users, see Federated users and roles in theIAM User Guide.
92

Amazon Deep Learning Containers Developer GuideManaging Access Using Policies
• Cross-account access – You can use an IAM role to allow someone (a trusted principal) in a differentaccount to access resources in your account. Roles are the primary way to grant cross-account access.However, with some Amazon Web Services, you can attach a policy directly to a resource (instead ofusing a role as a proxy). To learn the difference between roles and resource-based policies for cross-account access, see How IAM roles differ from resource-based policies in the IAM User Guide.
• Cross-service access – Some Amazon Web Services use features in other Amazon Web Services. Forexample, when you make a call in a service, it's common for that service to run applications in AmazonEC2 or store objects in Amazon S3. A service might do this using the calling principal's permissions,using a service role, or using a service-linked role.• Principal permissions – When you use an IAM user or role to perform actions in Amazon, you
are considered a principal. Policies grant permissions to a principal. When you use some services,you might perform an action that then triggers another action in a different service. In this case,you must have permissions to perform both actions. To see whether an action requires additionaldependent actions in a policy, see in the Service Authorization Reference.
• Service role – A service role is an IAM role that a service assumes to perform actions on your behalf.An IAM administrator can create, modify, and delete a service role from within IAM. For moreinformation, see Creating a role to delegate permissions to an Amazon Web Service in the IAM UserGuide.
• Service-linked role – A service-linked role is a type of service role that is linked to an Amazon WebService. The service can assume the role to perform an action on your behalf. Service-linked rolesappear in your IAM account and are owned by the service. An IAM administrator can view, but notedit the permissions for service-linked roles.
• Applications running on Amazon EC2 – You can use an IAM role to manage temporary credentialsfor applications that are running on an EC2 instance and making Amazon CLI or Amazon API requests.This is preferable to storing access keys within the EC2 instance. To assign an Amazon role to an EC2instance and make it available to all of its applications, you create an instance profile that is attachedto the instance. An instance profile contains the role and enables programs that are running on theEC2 instance to get temporary credentials. For more information, see Using an IAM role to grantpermissions to applications running on Amazon EC2 instances in the IAM User Guide.
To learn whether to use IAM roles or IAM users, see When to create an IAM role (instead of a user) in theIAM User Guide.
Managing Access Using PoliciesYou control access in Amazon by creating policies and attaching them to IAM identities or Amazonresources. A policy is an object in Amazon that, when associated with an identity or resource, definestheir permissions. You can sign in as the root user or an IAM user, or you can assume an IAM role. Whenyou then make a request, Amazon evaluates the related identity-based or resource-based policies.Permissions in the policies determine whether the request is allowed or denied. Most policies are storedin Amazon as JSON documents. For more information about the structure and contents of JSON policydocuments, see Overview of JSON policies in the IAM User Guide.
Administrators can use Amazon JSON policies to specify who has access to what. That is, which principalcan perform actions on what resources, and under what conditions.
Every IAM entity (user or role) starts with no permissions. In other words, by default, users cando nothing, not even change their own password. To give a user permission to do something, anadministrator must attach a permissions policy to a user. Or the administrator can add the user to agroup that has the intended permissions. When an administrator gives permissions to a group, all usersin that group are granted those permissions.
IAM policies define permissions for an action regardless of the method that you use to perform theoperation. For example, suppose that you have a policy that allows the iam:GetRole action. A user withthat policy can get role information from the Amazon Web Services Management Console, the AmazonCLI, or the Amazon API.
93

Amazon Deep Learning Containers Developer GuideManaging Access Using Policies
Identity-Based PoliciesIdentity-based policies are JSON permissions policy documents that you can attach to an identity, suchas an IAM user, group of users, or role. These policies control what actions users and roles can perform,on which resources, and under what conditions. To learn how to create an identity-based policy, seeCreating IAM policies in the IAM User Guide.
Identity-based policies can be further categorized as inline policies or managed policies. Inline policies areembedded directly into a single user, group, or role. Managed policies are standalone policies that youcan attach to multiple users, groups, and roles in your Amazon Web Services account. Managed policiesinclude Amazon managed policies and customer managed policies. To learn how to choose between amanaged policy or an inline policy, see Choosing between managed policies and inline policies in the IAMUser Guide.
Resource-Based PoliciesResource-based policies are JSON policy documents that you attach to a resource. Examples of resource-based policies are IAM role trust policies and Amazon S3 bucket policies. In services that support resource-based policies, service administrators can use them to control access to a specific resource. For theresource where the policy is attached, the policy defines what actions a specified principal can performon that resource and under what conditions. You must specify a principal in a resource-based policy.Principals can include accounts, users, roles, federated users, or Amazon Web Services.
Resource-based policies are inline policies that are located in that service. You can't use Amazonmanaged policies from IAM in a resource-based policy.
Access Control Lists (ACLs)Access control lists (ACLs) control which principals (account members, users, or roles) have permissions toaccess a resource. ACLs are similar to resource-based policies, although they do not use the JSON policydocument format.
Amazon S3, Amazon WAF, and Amazon VPC are examples of services that support ACLs. To learn moreabout ACLs, see Access control list (ACL) overview in the Amazon Simple Storage Service Developer Guide.
Other Policy TypesAmazon supports additional, less-common policy types. These policy types can set the maximumpermissions granted to you by the more common policy types.
• Permissions boundaries – A permissions boundary is an advanced feature in which you set themaximum permissions that an identity-based policy can grant to an IAM entity (IAM user or role).You can set a permissions boundary for an entity. The resulting permissions are the intersection ofentity's identity-based policies and its permissions boundaries. Resource-based policies that specifythe user or role in the Principal field are not limited by the permissions boundary. An explicit denyin any of these policies overrides the allow. For more information about permissions boundaries, seePermissions boundaries for IAM entities in the IAM User Guide.
• Service control policies (SCPs) – SCPs are JSON policies that specify the maximum permissions for anorganization or organizational unit (OU) in Amazon Organizations. Amazon Organizations is a servicefor grouping and centrally managing multiple Amazon Web Services accounts that your business owns.If you enable all features in an organization, then you can apply service control policies (SCPs) to anyor all of your accounts. The SCP limits permissions for entities in member accounts, including eachAmazon Web Services account root user. For more information about Organizations and SCPs, see HowSCPs work in the Amazon Organizations User Guide.
• Session policies – Session policies are advanced policies that you pass as a parameter when youprogrammatically create a temporary session for a role or federated user. The resulting session'spermissions are the intersection of the user or role's identity-based policies and the session policies.
94

Amazon Deep Learning Containers Developer GuideIAM with Amazon EMR
Permissions can also come from a resource-based policy. An explicit deny in any of these policiesoverrides the allow. For more information, see Session policies in the IAM User Guide.
Multiple Policy TypesWhen multiple types of policies apply to a request, the resulting permissions are more complicated tounderstand. To learn how Amazon determines whether to allow a request when multiple policy types areinvolved, see Policy evaluation logic in the IAM User Guide.
IAM with Amazon EMRYou can use Amazon Identity and Access Management with Amazon EMR to define users, Amazonresources, groups, roles, and policies. You can also control which Amazon services these users and rolescan access.
For more information on using IAM with Amazon EMR, see Amazon Identity and Access Management forAmazon EMR.
Logging and Monitoring in Amazon Deep LearningContainers
Your Amazon Deep Learning Containers does not come with monitoring utilities. For information onmonitoring, see GPU Monitoring and Optimization, Monitoring Amazon EC2, Monitoring Amazon ECS,Monitoring Amazon EKS, and Monitoring Amazon SageMaker.
Usage TrackingThe following Deep Learning Containers include code that allows Amazon to collect the instance types,frameworks, framework versions, container types, and Python versions used for the containers. Noinformation on the commands used within the containers is collected or retained. No other informationabout the containers is collected or retained.
• TensorFlow 1.15• TensorFlow 2.0• TensorFlow 2.1• PyTorch 1.2• PyTorch 1.3.1• MXNet 1.6
To opt-out of usage tracking, use a custom entrypoint to disable the call for the following services:
• Amazon EC2 Custom Entrypoints• Amazon ECS Custom Entrypoints• Amazon EKS Custom Entrypoints
To opt out of usage tracking for TensorFlow (version >=1.15), PyTorch (version >= 1.5), and MXNet(version >= 1.6) containers, you also need to set the OPT_OUT_TRACKING environment variable.
OPT_OUT_TRACKING=true
95

Amazon Deep Learning Containers Developer GuideCompliance Validation
Compliance Validation for Amazon Deep LearningContainers
Third-party auditors assess the security and compliance of services as part of multiple Amazoncompliance programs. For information on the supported compliance programs, see ComplianceValidation for Amazon EC2, Compliance Validation for Amazon ECS, Compliance Validation for AmazonEKS, and Compliance Validation for Amazon SageMaker.
For a list of Amazon services in scope of specific compliance programs, see Amazon Services in Scope byCompliance Program. For general information, see Amazon Compliance Programs.
You can download third-party audit reports using Amazon Artifact. For more information, seeDownloading Reports in Amazon Artifact.
Your compliance responsibility when using Deep Learning Containers is determined by the sensitivity ofyour data, your company's compliance objectives, and applicable laws and regulations. Amazon providesthe following resources to help with compliance:
• Security and Compliance Quick Start GuidesSecurity and Compliance Quick Start Guides – Thesedeployment guides discuss architectural considerations and provide steps for deploying security- andcompliance-focused baseline environments on Amazon.
• Amazon Compliance Resources – This collection of workbooks and guides might apply to your industryand location.
• Evaluating Resources with Rules in the Amazon Config Developer Guide – The Amazon Config serviceassesses how well your resource configurations comply with internal practices, industry guidelines, andregulations.
• Amazon Security Hub – This Amazon service provides a comprehensive view of your security statewithin Amazon that helps you check your compliance with security industry standards and bestpractices.
Resilience in Amazon Deep Learning ContainersThe Amazon global infrastructure is built around Amazon Regions and Availability Zones. AmazonRegions provide multiple physically separated and isolated Availability Zones, which are connectedwith low-latency, high-throughput, and highly redundant networking. With Availability Zones, you candesign and operate applications and databases that automatically fail over between zones withoutinterruption. Availability Zones are more highly available, fault tolerant, and scalable than traditionalsingle or multiple data center infrastructures.
For more information about Amazon Regions and Availability Zones, see Amazon Global Infrastructure.
For information on features to help support your data resiliency and backup needs, see Resilience inAmazon EC2, Resilience in Amazon EKS, and Resilience in Amazon SageMaker.
Infrastructure Security in Amazon Deep LearningContainers
The infrastructure security of Amazon Deep Learning Containers is backed by Amazon EC2, AmazonECS, Amazon EKS, or SageMaker. For more information, see Infrastructure Security in Amazon EC2,
96

Amazon Deep Learning Containers Developer GuideInfrastructure Security
Infrastructure Security in Amazon ECS, Infrastructure Security in Amazon EKS, and Infrastructure Securityin Amazon SageMaker.
97

Amazon Deep Learning Containers Developer GuideSingle-framework Deep Learning Containers
Release Notes for Deep LearningContainers
Check the latest release notes for Amazon Deep Learning Containers built for specific machine learningframeworks, infrastructures, and Amazon services.
NoteStarting with MXNet 1.9, PyTorch 1.10, and Tensorflow 2.7, CPU and GPU Deep LearningContainers are released as either E3 or SageMaker images. E3 images are supported on AmazonEC2, Amazon ECS, and Amazon EKS, whereas SageMaker images are supported on AmazonSageMaker and contain additional packages to support SageMaker workloads.
Single-framework Deep Learning ContainersTensorFlow
• Amazon Deep Learning Containers for TensorFlow 2.9.0 (Inference on SageMaker): June 18, 2022• Amazon Deep Learning Containers for TensorFlow 2.9.0 (Inference on E3): June 18, 2022• Amazon Deep Learning Containers for TensorFlow 2.9.1 (Training on SageMaker): June 13, 2022• Amazon Deep Learning Containers for TensorFlow 2.9.0 (Training on E3): May 19, 2022• Amazon Deep Learning Containers for TensorFlow 2.8.0 (E3): March 22, 2022• Amazon Deep Learning Containers for TensorFlow 2.8.0 (SageMaker): March 22, 2022• Amazon Deep Learning Containers for TensorFlow 2.7.0 (E3): December 15, 2021• Amazon Deep Learning Containers for TensorFlow 2.7.0 (SageMaker): March 22, 2022• Amazon Deep Learning Containers for TensorFlow 2.6.0: September 24, 2021• Amazon Deep Learning Containers for TensorFlow 2.5.0: July 01, 2021• Amazon Deep Learning Containers for TensorFlow 2.4.1: March 15, 2021• Amazon Deep Learning Containers for TensorFlow 2.3.2: March 15, 2021• Amazon Deep Learning Containers for TensorFlow 2.2.2: March 15, 2021• Amazon Deep Learning Containers for TensorFlow 2.1.3: March 15, 2021• Amazon Deep Learning Containers for TensorFlow 2.0.4: March 15, 2021• Amazon Deep Learning Containers for TensorFlow 2.3.1 with CUDA 11.0: October 15, 2020• Amazon Deep Learning Containers with Elastic Inference for TensorFlow 2.0.0: August 31, 2020• Amazon Deep Learning Containers with Elastic Inference for TensorFlow 1.15.0: August 31, 2020• Amazon Deep Learning Containers for TensorFlow 2.3.0: August 7, 2020• Amazon Deep Learning Containers for TensorFlow 2.2.0 with CUDA 10.2: July 24, 2020• Amazon Deep Learning Containers for TensorFlow 2.2.0 with CUDA 10.1: July 20, 2020• Amazon Deep Learning Containers for Tensorflow 1.15.3 July 29, 2020• Amazon Deep Learning Containers for TensorFlow 2.1.1: June 25, 2020• Amazon Deep Learning Containers for TensorFlow 2.0.2: June 19, 2020• Amazon Deep Learning Containers for TensorFlow 2.2.0 with CUDA 10.1: May 20, 2020• Amazon Deep Learning Containers for Tensorflow 2.1.0: March 19, 2020• Amazon Deep Learning Containers for TensorFlow 2.0: February 26, 2020
98

Amazon Deep Learning Containers Developer GuideGraviton Deep Learning Containers
• Amazon Deep Learning Containers for TensorFlow 1.15 with python-3.7 support: May 6, 2020• Amazon Deep Learning Containers for Tensorflow 1.15.2 March 19, 2020
PyTorch
• Amazon Deep Learning Containers for PyTorch 1.12.0 (E3): July 01, 2022• Amazon Deep Learning Containers for PyTorch 1.11.0 (SageMaker): May 06, 2022• Amazon Deep Learning Containers for PyTorch 1.11.0 (E3): April 14, 2022• Amazon Deep Learning Containers for PyTorch 1.10.0 (E3): November 3, 2021• Amazon Deep Learning Containers for PyTorch 1.10.2 (SageMaker): April 14, 2022• Amazon Deep Learning Containers for PyTorch 1.9.0: August 30, 2021• Amazon Deep Learning Containers for PyTorch 1.8.0: March 16, 2021• Amazon Deep Learning Containers for PyTorch 1.7.1 with CUDA 11.0: March 15, 2021• Amazon Deep Learning Containers for PyTorch 1.6.0 with CUDA 11.0: December 9, 2020• Amazon Deep Learning Containers with Elastic Inference for PyTorch 1.3.1: August 31, 2020• Amazon Deep Learning Containers for PyTorch 1.6.0: August 3, 2020• Amazon Deep Learning Containers for PyTorch 1.5.1: June 19, 2020• Amazon Deep Learning Containers for PyTorch 1.4: June 06, 2020• Amazon Deep Learning Containers for PyTorch 1.5.0: May 05, 2020• Amazon Deep Learning Containers for PyTorch 1.4: April 03, 2020
Amazon MX powered by Apache MXNet
• Amazon Deep Learning Containers for MXNet 1.9.0 (E3): January 31, 2022• Amazon Deep Learning Containers for MXNet 1.9.0 (SageMaker): January 31, 2022• Amazon Deep Learning Containers for MXNet 1.8.0: December 01, 2020• Amazon Deep Learning Containers for MXNet 1.7.0: September 17, 2020• Amazon Deep Learning Containers with Elastic Inference for MXNet 1.5.1: August 31, 2020• Amazon Deep Learning Containers for MXNet 1.6.0: July 20, 2020• Amazon Deep Learning Containers for MXNet 1.6.0: April 03, 2020
Graviton Deep Learning ContainersTensorFlow
• Amazon Deep Learning Containers for Graviton TensorFlow 2.7.0 (E3): December 04, 2021
PyTorch
• Amazon Deep Learning Containers for Graviton PyTorch 1.10.0 (E3): December 04, 2021
Habana Deep Learning ContainersTensorFlow
• Amazon Deep Learning Containers for Habana SynapseAI 1.5.0 TensorFlow 2.9.1: July 25, 2022
99

Amazon Deep Learning Containers Developer GuideHabana Deep Learning Containers
• Amazon Deep Learning Containers for Habana SynapseAI 1.4.1 TensorFlow 2.8.0: June 23, 2022• Amazon Deep Learning Containers for Habana SynapseAI 1.3.0 TensorFlow 2.8.0: March 24, 2022• Amazon Deep Learning Containers for Habana SynapseAI 1.2.0 TensorFlow 2.7.0: February 15, 2022• Amazon Deep Learning Containers for Habana SynapseAI 0.15.4 TensorFlow 2.5.0: October 26, 2021
PyTorch
• Amazon Deep Learning Containers for Habana SynapseAI 1.5.0 PyTorch 1.11.0: July 25, 2022• Amazon Deep Learning Containers for Habana SynapseAI 1.4.1 PyTorch 1.10.2: June 23, 2022• Amazon Deep Learning Containers for Habana SynapseAI 1.3.0 PyTorch 1.10.1: March 24, 2022• Amazon Deep Learning Containers for Habana SynapseAI 1.2.0 PyTorch 1.10.0: February 15, 2022• Amazon Deep Learning Containers for Habana SynapseAI 0.15.4 PyTorch 1.7.1: October 26, 2021
100

Amazon Deep Learning Containers Developer Guide
Document History for Deep LearningContainers Developer Guide
The following table describes the documentation for this release of Deep Learning Containers.
• API version: latest• Latest documentation update: February 26, 2020
update-history-change update-history-description update-history-date
Apache MXNet withHorovod (p. 1)
Apache MXNet tutorial wasadded to the developer guide.
February 26, 2020
Deep Learning ContainersDeveloper Guide Launch (p. 1)
Deep Learning Containers setupand tutorials were added to thedeveloper guide.
February 17, 2020
101

Amazon Deep Learning Containers Developer Guide
Amazon glossaryFor the latest Amazon terminology, see the Amazon glossary in the Amazon General Reference.
102