
Talend Component Kit Developer Guide - ehcache
332
Talend Component Kit Developer Guide Table of Contents 1. Getting started with Talend Component Kit . . . . . . . . . . . . . . . . . . . . . . . . . . . . . . . . . . . . . . . . . 2 1.1. Talend Component Kit methodology . . . . . . . . . . . . . . . . . . . . . . . . . . . . . . . . . . . . . . . . . . . 3 1.2. Component types. . . . . . . . . . . . . . . . . . . . . . . . . . . . . . . . . . . . . . . . . . . . . . . . . . . . . . . . . . . . . 4 1.3. Next . . . . . . . . . . . . . . . . . . . . . . . . . . . . . . . . . . . . . . . . . . . . . . . . . . . . . . . . . . . . . . . . . . . . . . . . 5 1.4. Creating your first component . . . . . . . . . . . . . . . . . . . . . . . . . . . . . . . . . . . . . . . . . . . . . . . . 5 1.5. Record types . . . . . . . . . . . . . . . . . . . . . . . . . . . . . . . . . . . . . . . . . . . . . . . . . . . . . . . . . . . . . . . . 16 2. Setting up your environment . . . . . . . . . . . . . . . . . . . . . . . . . . . . . . . . . . . . . . . . . . . . . . . . . . . . 21 2.1. System prerequisites . . . . . . . . . . . . . . . . . . . . . . . . . . . . . . . . . . . . . . . . . . . . . . . . . . . . . . . . 21 2.2. Installing the Talend Component Kit IntelliJ plugin . . . . . . . . . . . . . . . . . . . . . . . . . . . . . 22 3. Generating a project . . . . . . . . . . . . . . . . . . . . . . . . . . . . . . . . . . . . . . . . . . . . . . . . . . . . . . . . . . . . 25 3.1. Generating a project using the Component Kit Starter . . . . . . . . . . . . . . . . . . . . . . . . . . 25 3.2. Generating a project using IntelliJ plugin . . . . . . . . . . . . . . . . . . . . . . . . . . . . . . . . . . . . . . 34 4. Implementing components . . . . . . . . . . . . . . . . . . . . . . . . . . . . . . . . . . . . . . . . . . . . . . . . . . . . . . 35 4.1. Registering components . . . . . . . . . . . . . . . . . . . . . . . . . . . . . . . . . . . . . . . . . . . . . . . . . . . . . 36 4.2. Defining datasets and datastores . . . . . . . . . . . . . . . . . . . . . . . . . . . . . . . . . . . . . . . . . . . . . 40 4.3. Defining an input component logic . . . . . . . . . . . . . . . . . . . . . . . . . . . . . . . . . . . . . . . . . . . 48 4.4. Defining a processor or an output component logic . . . . . . . . . . . . . . . . . . . . . . . . . . . . 50 4.5. Defining a standalone component logic . . . . . . . . . . . . . . . . . . . . . . . . . . . . . . . . . . . . . . . 57 4.6. Defining component layout and configuration . . . . . . . . . . . . . . . . . . . . . . . . . . . . . . . . . 58 4.7. Component execution logic . . . . . . . . . . . . . . . . . . . . . . . . . . . . . . . . . . . . . . . . . . . . . . . . . . 81 4.8. Internationalizing components . . . . . . . . . . . . . . . . . . . . . . . . . . . . . . . . . . . . . . . . . . . . . . . 83 4.9. Managing component versions and migration . . . . . . . . . . . . . . . . . . . . . . . . . . . . . . . . . 86 4.10. Masking sensitive data in your configuration . . . . . . . . . . . . . . . . . . . . . . . . . . . . . . . . . 88 4.11. Implementing batch processing . . . . . . . . . . . . . . . . . . . . . . . . . . . . . . . . . . . . . . . . . . . . . 89 4.12. Implementing streaming on a component . . . . . . . . . . . . . . . . . . . . . . . . . . . . . . . . . . . . 92 4.13. Building components with Maven . . . . . . . . . . . . . . . . . . . . . . . . . . . . . . . . . . . . . . . . . . . 95 4.14. Building components with Gradle . . . . . . . . . . . . . . . . . . . . . . . . . . . . . . . . . . . . . . . . . . 110 4.15. Wrapping a Beam I/O . . . . . . . . . . . . . . . . . . . . . . . . . . . . . . . . . . . . . . . . . . . . . . . . . . . . . 111 4.16. Talend Component Kit best practices . . . . . . . . . . . . . . . . . . . . . . . . . . . . . . . . . . . . . . . 116 4.17. Component Loading. . . . . . . . . . . . . . . . . . . . . . . . . . . . . . . . . . . . . . . . . . . . . . . . . . . . . . . 123 5. Testing components . . . . . . . . . . . . . . . . . . . . . . . . . . . . . . . . . . . . . . . . . . . . . . . . . . . . . . . . . . . . 133 5.1. Testing best practices . . . . . . . . . . . . . . . . . . . . . . . . . . . . . . . . . . . . . . . . . . . . . . . . . . . . . . . 133 | 1
-
Upload
khangminh22 -
Category
Documents
-
view
0 -
download
0
Transcript of Talend Component Kit Developer Guide - ehcache

Talend Component KitDeveloper Guide
Table of Contents1. Getting started with Talend Component Kit. . . . . . . . . . . . . . . . . . . . . . . . . . . . . . . . . . . . . . . . . 2
1.1. Talend Component Kit methodology . . . . . . . . . . . . . . . . . . . . . . . . . . . . . . . . . . . . . . . . . . . 3
1.2. Component types. . . . . . . . . . . . . . . . . . . . . . . . . . . . . . . . . . . . . . . . . . . . . . . . . . . . . . . . . . . . . 4
1.3. Next . . . . . . . . . . . . . . . . . . . . . . . . . . . . . . . . . . . . . . . . . . . . . . . . . . . . . . . . . . . . . . . . . . . . . . . . 5
1.4. Creating your first component . . . . . . . . . . . . . . . . . . . . . . . . . . . . . . . . . . . . . . . . . . . . . . . . 5
1.5. Record types. . . . . . . . . . . . . . . . . . . . . . . . . . . . . . . . . . . . . . . . . . . . . . . . . . . . . . . . . . . . . . . . 16
2. Setting up your environment . . . . . . . . . . . . . . . . . . . . . . . . . . . . . . . . . . . . . . . . . . . . . . . . . . . . 21
2.1. System prerequisites . . . . . . . . . . . . . . . . . . . . . . . . . . . . . . . . . . . . . . . . . . . . . . . . . . . . . . . . 21
2.2. Installing the Talend Component Kit IntelliJ plugin. . . . . . . . . . . . . . . . . . . . . . . . . . . . . 22
3. Generating a project . . . . . . . . . . . . . . . . . . . . . . . . . . . . . . . . . . . . . . . . . . . . . . . . . . . . . . . . . . . . 25
3.1. Generating a project using the Component Kit Starter . . . . . . . . . . . . . . . . . . . . . . . . . . 25
3.2. Generating a project using IntelliJ plugin. . . . . . . . . . . . . . . . . . . . . . . . . . . . . . . . . . . . . . 34
4. Implementing components . . . . . . . . . . . . . . . . . . . . . . . . . . . . . . . . . . . . . . . . . . . . . . . . . . . . . . 35
4.1. Registering components . . . . . . . . . . . . . . . . . . . . . . . . . . . . . . . . . . . . . . . . . . . . . . . . . . . . . 36
4.2. Defining datasets and datastores . . . . . . . . . . . . . . . . . . . . . . . . . . . . . . . . . . . . . . . . . . . . . 40
4.3. Defining an input component logic . . . . . . . . . . . . . . . . . . . . . . . . . . . . . . . . . . . . . . . . . . . 48
4.4. Defining a processor or an output component logic . . . . . . . . . . . . . . . . . . . . . . . . . . . . 50
4.5. Defining a standalone component logic . . . . . . . . . . . . . . . . . . . . . . . . . . . . . . . . . . . . . . . 57
4.6. Defining component layout and configuration . . . . . . . . . . . . . . . . . . . . . . . . . . . . . . . . . 58
4.7. Component execution logic . . . . . . . . . . . . . . . . . . . . . . . . . . . . . . . . . . . . . . . . . . . . . . . . . . 81
4.8. Internationalizing components. . . . . . . . . . . . . . . . . . . . . . . . . . . . . . . . . . . . . . . . . . . . . . . 83
4.9. Managing component versions and migration . . . . . . . . . . . . . . . . . . . . . . . . . . . . . . . . . 86
4.10. Masking sensitive data in your configuration . . . . . . . . . . . . . . . . . . . . . . . . . . . . . . . . . 88
4.11. Implementing batch processing . . . . . . . . . . . . . . . . . . . . . . . . . . . . . . . . . . . . . . . . . . . . . 89
4.12. Implementing streaming on a component . . . . . . . . . . . . . . . . . . . . . . . . . . . . . . . . . . . . 92
4.13. Building components with Maven . . . . . . . . . . . . . . . . . . . . . . . . . . . . . . . . . . . . . . . . . . . 95
4.14. Building components with Gradle . . . . . . . . . . . . . . . . . . . . . . . . . . . . . . . . . . . . . . . . . . 110
4.15. Wrapping a Beam I/O . . . . . . . . . . . . . . . . . . . . . . . . . . . . . . . . . . . . . . . . . . . . . . . . . . . . . 111
4.16. Talend Component Kit best practices . . . . . . . . . . . . . . . . . . . . . . . . . . . . . . . . . . . . . . . 116
4.17. Component Loading. . . . . . . . . . . . . . . . . . . . . . . . . . . . . . . . . . . . . . . . . . . . . . . . . . . . . . . 123
5. Testing components . . . . . . . . . . . . . . . . . . . . . . . . . . . . . . . . . . . . . . . . . . . . . . . . . . . . . . . . . . . . 133
5.1. Testing best practices. . . . . . . . . . . . . . . . . . . . . . . . . . . . . . . . . . . . . . . . . . . . . . . . . . . . . . . 133
| 1

1. Getting started with TalendComponent KitTalend Component Kit is a Java framework designed to simplify the development ofcomponents at two levels:
• The Runtime, that injects the specific component code into a job or pipeline. Theframework helps unifying as much as possible the code required to run in DataIntegration (DI) and BEAM environments.
5.2. component-runtime-testing . . . . . . . . . . . . . . . . . . . . . . . . . . . . . . . . . . . . . . . . . . . . . . . . . 135
5.3. Beam testing. . . . . . . . . . . . . . . . . . . . . . . . . . . . . . . . . . . . . . . . . . . . . . . . . . . . . . . . . . . . . . . 150
5.4. Testing on multiple environments . . . . . . . . . . . . . . . . . . . . . . . . . . . . . . . . . . . . . . . . . . . 150
5.5. Secrets/Passwords and Maven . . . . . . . . . . . . . . . . . . . . . . . . . . . . . . . . . . . . . . . . . . . . . . 154
5.6. Generating data. . . . . . . . . . . . . . . . . . . . . . . . . . . . . . . . . . . . . . . . . . . . . . . . . . . . . . . . . . . . 154
5.7. Creating a job pipeline . . . . . . . . . . . . . . . . . . . . . . . . . . . . . . . . . . . . . . . . . . . . . . . . . . . . . 155
6. Defining services . . . . . . . . . . . . . . . . . . . . . . . . . . . . . . . . . . . . . . . . . . . . . . . . . . . . . . . . . . . . . . 159
6.1. Built-in services. . . . . . . . . . . . . . . . . . . . . . . . . . . . . . . . . . . . . . . . . . . . . . . . . . . . . . . . . . . . 160
6.2. Internationalizing services. . . . . . . . . . . . . . . . . . . . . . . . . . . . . . . . . . . . . . . . . . . . . . . . . . 167
6.3. Providing actions for consumers . . . . . . . . . . . . . . . . . . . . . . . . . . . . . . . . . . . . . . . . . . . . 168
6.4. Services and interceptors . . . . . . . . . . . . . . . . . . . . . . . . . . . . . . . . . . . . . . . . . . . . . . . . . . . 174
6.5. Defining a custom API . . . . . . . . . . . . . . . . . . . . . . . . . . . . . . . . . . . . . . . . . . . . . . . . . . . . . . 176
7. Integrating components into Talend Studio . . . . . . . . . . . . . . . . . . . . . . . . . . . . . . . . . . . . . . 176
7.1. Version compatibility. . . . . . . . . . . . . . . . . . . . . . . . . . . . . . . . . . . . . . . . . . . . . . . . . . . . . . . 177
7.2. Iterating on component development with Talend Studio. . . . . . . . . . . . . . . . . . . . . . 178
7.3. Installing components using a CAR file. . . . . . . . . . . . . . . . . . . . . . . . . . . . . . . . . . . . . . . 185
7.4. From Javajet to Talend Component Kit . . . . . . . . . . . . . . . . . . . . . . . . . . . . . . . . . . . . . . . 186
8. Integrating components into Talend Cloud . . . . . . . . . . . . . . . . . . . . . . . . . . . . . . . . . . . . . . . 199
8.1. Component server and HTTP API . . . . . . . . . . . . . . . . . . . . . . . . . . . . . . . . . . . . . . . . . . . . 199
8.2. Component Server Vault Proxy . . . . . . . . . . . . . . . . . . . . . . . . . . . . . . . . . . . . . . . . . . . . . . 219
9. Tutorials . . . . . . . . . . . . . . . . . . . . . . . . . . . . . . . . . . . . . . . . . . . . . . . . . . . . . . . . . . . . . . . . . . . . . . 227
9.1. Creating your first component . . . . . . . . . . . . . . . . . . . . . . . . . . . . . . . . . . . . . . . . . . . . . . 227
9.2. Generating a project using the Component Kit Starter . . . . . . . . . . . . . . . . . . . . . . . . . 237
9.3. Talend Input component for Hazelcast . . . . . . . . . . . . . . . . . . . . . . . . . . . . . . . . . . . . . . . 246
9.4. Implementing an Output component for Hazelcast. . . . . . . . . . . . . . . . . . . . . . . . . . . . 297
9.5. Creating components for a REST API . . . . . . . . . . . . . . . . . . . . . . . . . . . . . . . . . . . . . . . . . 308
9.6. Testing a REST API . . . . . . . . . . . . . . . . . . . . . . . . . . . . . . . . . . . . . . . . . . . . . . . . . . . . . . . . . 315
9.7. Testing a component . . . . . . . . . . . . . . . . . . . . . . . . . . . . . . . . . . . . . . . . . . . . . . . . . . . . . . . 318
9.8. Testing in a Continuous Integration environment . . . . . . . . . . . . . . . . . . . . . . . . . . . . . 320
9.9. Handling component version migration. . . . . . . . . . . . . . . . . . . . . . . . . . . . . . . . . . . . . . 326
2 |

• The Graphical interface. The framework helps unifying the code required to renderthe component in a browser or in the Eclipse-based Talend Studio (SWT).
Most part of the development happens as a Maven or Gradle project and requires adedicated tool such as IntelliJ.
The Component Kit is made of:
• A Starter, that is a graphical interface allowing you to define the skeleton of yourdevelopment project.
• APIs to implement components UI and runtime.
• Development tools: Maven and Gradle wrappers, validation rules, packaging, Webpreview, etc.
• A testing kit based on JUnit 4 and 5.
By using this tooling in a development environment, you can start creating components asdescribed below.
1.1. Talend Component Kit methodologyDeveloping new components using the Component Kit framework includes:
1. Creating a project using the starter or the Talend IntelliJ plugin. This step allows tobuild the skeleton of the project. It consists in:
a. Defining the general configuration model for each component in your project.
b. Generating and downloading the project archive from the starter.
c. Compiling the project.
2. Importing the compiled project in your IDE. This step is not required if you havegenerated the project using the IntelliJ plugin.
3. Implementing the components, including:
a. Registering the components by specifying their metadata: family, categories,version, icon, type and name.
b. Defining the layout and configurable part of the components.
c. Defining the execution logic of the components, also called runtime.
4. Testing the components.
5. Deploying the components to Talend Studio or Cloud applications.
Optionally, you can use services. Services are predefined or user-defined configurationsthat can be reused in several components.
| 3

1.2. Component typesThere are four types of components, each type coming with its specificities, especially onthe runtime side.
• Input components: Retrieve the data to process from a defined source. An inputcomponent is made of:
◦ The execution logic of the component, represented by a Mapper or an Emitter class.
◦ The source logic of the component, represented by a Source class.
◦ The layout of the component and the configuration that the end-user will need toprovide when using the component, defined by a Configuration class. All inputcomponents must have a dataset specified in their configuration, and every datasetmust use a datastore.
• Processors: Process and transform the data. A processor is made of:
◦ The execution logic of the component, describing how to process each records orbatches of records it receives. It also describes how to pass records to its outputconnections. This logic is defined in a Processor class.
◦ The layout of the component and the configuration that the end-user will need toprovide when using the component, defined by a Configuration class.
• Output components: Send the processed data to a defined destination. An outputcomponent is made of:
◦ The execution logic of the component, describing how to process each records orbatches of records it receives. This logic is defined in an Output class. Unlikeprocessors, output components are the last components of the execution andreturn no data.
◦ The layout of the component and the configuration that the end-user will need to
4 |

provide when using the component, defined by a Configuration class. All inputcomponents must have a dataset specified in their configuration, and every datasetmust use a datastore.
• Standalone components: Make a call to the service or run a query on the database. Astandalone component is made of:
◦ The execution logic of the component, represented by a DriverRunner class.
◦ The layout of the component and the configuration that the end-user will need toprovide when using the component, defined by a Configuration class. All inputcomponents must have a datastore or dataset specified in their configuration, andevery dataset must use a datastore.
The following example shows the different classes of an input components in a multi-component development project:
1.3. Next• Setup your development environment
• Generate your first project and develop your first component
1.4. Creating your first componentThis tutorial walks you through the most common iteration steps to create a componentwith Talend Component Kit and to deploy it to Talend Open Studio.
The component created in this tutorial is a simple processor that reads data coming fromthe previous component in a job or pipeline and displays it in the console logs of theapplication, along with an additional information entered by the final user.
| 5

The component designed in this tutorial is a processor and does notrequire nor show any datastore and dataset configuration. Datasets anddatastores are required only for input and output components.
1.4.1. Prerequisites
To get your development environment ready and be able to follow this tutorial:
• Download and install a Java JDK 1.8 or greater.
• Download and install Talend Open Studio. For example, from Sourceforge.
• Download and install IntelliJ.
• Download the Talend Component Kit plugin for IntelliJ. The detailed installation stepsfor the plugin are available in this document.
1.4.2. Generate a component project
The first step in this tutorial is to generate a component skeleton using the Starterembedded in the Talend Component Kit plugin for IntelliJ.
1. Start IntelliJ and create a new project. In the available options, you should see TalendComponent.
6 |
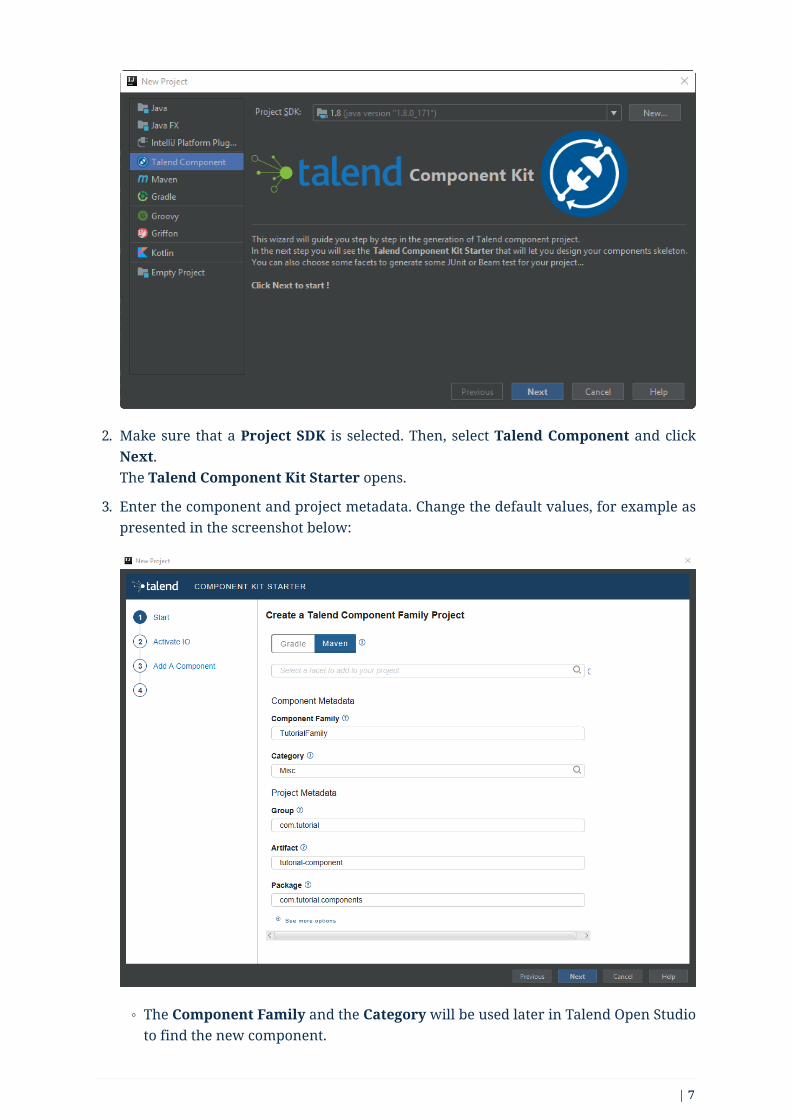
2. Make sure that a Project SDK is selected. Then, select Talend Component and clickNext.The Talend Component Kit Starter opens.
3. Enter the component and project metadata. Change the default values, for example aspresented in the screenshot below:
◦ The Component Family and the Category will be used later in Talend Open Studioto find the new component.
| 7

◦ Project metadata is mostly used to identify the project structure. A commonpractice is to replace 'company' in the default value by a value of your own, likeyour domain name.
4. Once the metadata is filled, select Add a component. A new screen is displayed in theTalend Component Kit Starter that lets you define the generic configuration of thecomponent. By default, new components are processors.
5. Enter a valid Java name for the component. For example, Logger.
6. Select Configuration Model and add a string type field named level. This input fieldwill be used in the component configuration for final users to enter additionalinformation to display in the logs.
7. In the Input(s) / Output(s) section, click the default MAIN input branch to access itsdetail, and make sure that the record model is set to Generic. Leave the Name of thebranch with its default MAIN value.
8 |

8. Repeat the same step for the default MAIN output branch.
Because the component is a processor, it has an output branch bydefault. A processor without any output branch is considered anoutput component. You can create output components when theActivate IO option is selected.
9. Click Next and check the name and location of the project, then click Finish togenerate the project in the IDE.
At this point, your component is technically already ready to be compiled and deployed toTalend Open Studio. But first, take a look at the generated project:
| 9

• Two classes based on the name and type of component defined in the TalendComponent Kit Starter have been generated:
◦ LoggerProcessor is where the component logic is defined
◦ LoggerProcessorConfiguration is where the component layout and configurablefields are defined, including the level string field that was defined earlier in theconfiguration model of the component.
• The package-info.java file contains the component metadata defined in the TalendComponent Kit Starter, such as family and category.
• You can notice as well that the elements in the tree structure are named after theproject metadata defined in the Talend Component Kit Starter.
These files are the starting point if you later need to edit the configuration, logic, andmetadata of the component.
There is more that you can do and configure with the Talend Component Kit Starter.This tutorial covers only the basics. You can find more information in this document.
1.4.3. Compile and deploy the component to Talend Open Studio
Without modifying the component code generated from the Starter, you can compile theproject and deploy the component to a local instance of Talend Open Studio.
The logic of the component is not yet implemented at that stage. Only the configurablepart specified in the Starter will be visible. This step is useful to confirm that the basicconfiguration of the component renders correctly.
Before starting to run any command, make sure that Talend Open Studio is not running.
1. From the component project in IntelliJ, open a Terminal and make sure that theselected directory is the root of the project. All commands shown in this tutorial are
10 |

performed from this location.
2. Compile the project by running the following command: mvnw clean install.The mvnw command refers to the Maven wrapper that is embedded in TalendComponent Kit. It allows to use the right version of Maven for your project withouthaving to install it manually beforehand. An equivalent wrapper is available forGradle.
3. Once the command is executed and you see BUILD SUCCESS in the terminal, deploythe component to your local instance of Talend Open Studio using the followingcommand:mvnw talend-component:deploy-in-studio -Dtalend.component.studioHome="<path to
Talend Open Studio home>".
Replace the path with your own value. If the path contains spaces (forexample, Program Files), enclose it with double quotes.
4. Make sure the build is successful.
| 11
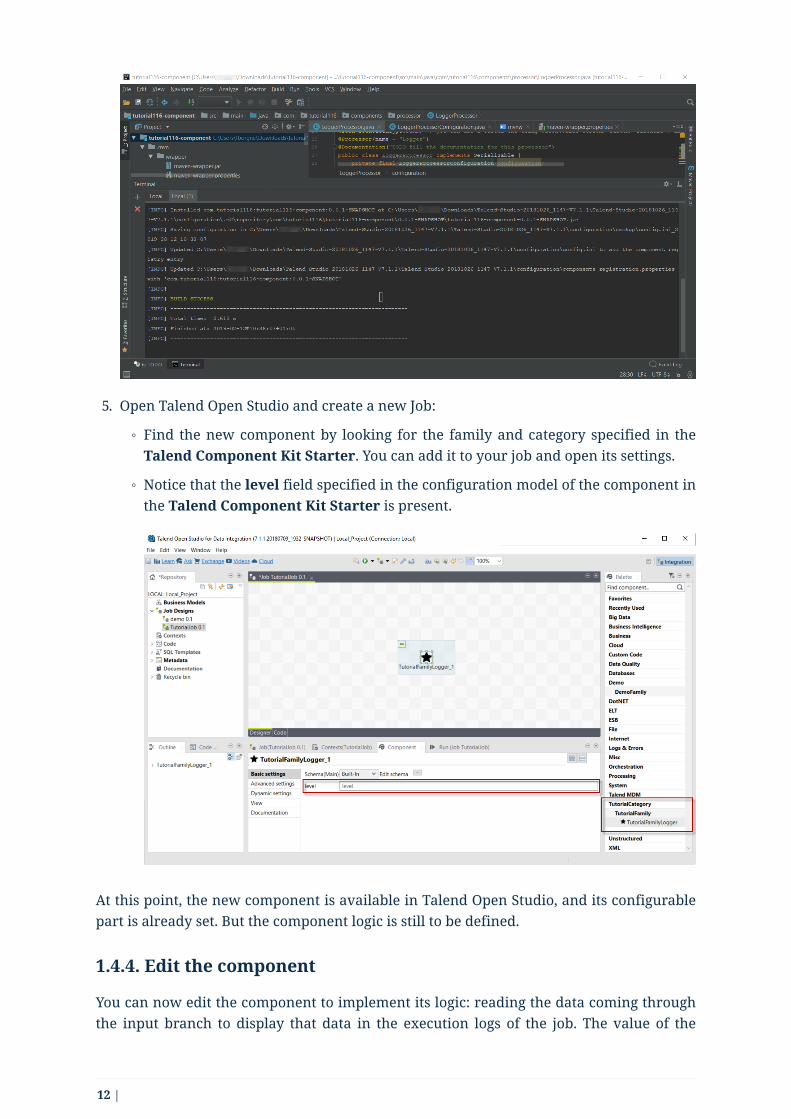
5. Open Talend Open Studio and create a new Job:
◦ Find the new component by looking for the family and category specified in theTalend Component Kit Starter. You can add it to your job and open its settings.
◦ Notice that the level field specified in the configuration model of the component inthe Talend Component Kit Starter is present.
At this point, the new component is available in Talend Open Studio, and its configurablepart is already set. But the component logic is still to be defined.
1.4.4. Edit the component
You can now edit the component to implement its logic: reading the data coming throughthe input branch to display that data in the execution logs of the job. The value of the
12 |

level field that final users can fill also needs to be changed to uppercase and displayed inthe logs.
1. Save the job created earlier and close Talend Open Studio.
2. Go back to the component development project in IntelliJ and open theLoggerProcessor class. This is the class where the component logic can be defined.
3. Look for the @ElementListener method. It is already present and references the defaultinput branch that was defined in the Talend Component Kit Starter, but it is notcomplete yet.
4. To be able to log the data in input to the console, add the following lines:
//Log read input to the console with uppercase level. System.out.println("["+configuration.getLevel().toUpperCase()+"]"+defaultInput);
The @ElementListener method now looks as follows:
@ElementListener public void onNext( @Input final Record defaultInput) { //Reads the input.
//Log read input to the console with uppercase level. System.out.println("["+configuration.getLevel().toUpperCase()+"]"+defaultInput); }
5. Open a Terminal again to compile the project and deploy the component again. To dothat, run successively the two following commands:
◦ mvnw clean install
◦ `mvnw talend-component:deploy-in-studio -Dtalend.component.studioHome="<path toTalend Open Studio home>"
The update of the component logic should now be deployed. After restarting Talend OpenStudio, you will be ready to build a job and use the component for the first time.
To learn the different possibilities and methods available to develop more complex logics,refer to this document.
If you want to avoid having to close and re-open Talend Open Studio every time you needto make an edit, you can enable the developer mode, as explained in this document.
| 13

1.4.5. Build a job with the component
As the component is now ready to be used, it is time to create a job and check that itbehaves as intended.
1. Open Talend Open Studio again and go to the job created earlier. The new componentis still there.
2. Add a tRowGenerator component and connect it to the logger.
3. Double-click the tRowGenerator to specify the data to generate:
◦ Add a first column named firstName and select theTalendDataGenerator.getFirstName() function.
◦ Add a second column named 'lastName' and select theTalendDataGenerator.getLastName() function.
◦ Set the Number of Rows for RowGenerator to 10.
4. Validate the tRowGenerator configuration.
5. Open the TutorialFamilyLogger component and set the level field to info.
14 |

6. Go to the Run tab of the job and run the job.The job is executed. You can observe in the console that each of the 10 generated rowsis logged, and that the info value entered in the logger is also displayed with eachrecord, in uppercase.
| 15

1.5. Record typesComponents are designed to manipulate data (access, read, create). Talend Component Kitcan handle several types of data, described in this document.
By design, the framework must run in DI (plain standalone Java program) and in Beampipelines.It is out of scope of the framework to handle the way the runtime serializes - if needed -the data.
For that reason, it is critical not to import serialization constraints to the stack. As anexample, this is one of the reasons why Record or JsonObject were preferred to AvroIndexedRecord.
Any serialization concern should either be hidden in the framework runtime (outside ofthe component developer scope) or in the runtime integration with the framework (forexample, Beam integration).
1.5.1. Record
Record is the default format. It offers many possibilities and can evolve depending on theTalend platform needs. Its structure is data-driven and exposes a schema that allows tobrowse it.
16 |
Projects generated from the Talend Component Kit Starter are by default designed tohandle this format of data.
Record is a Java interface but never implement it yourself to ensurecompatibility with the different Talend products. Follow the guidelinesbelow.
Creating a record
You can build records using the newRecordBuilder method of the RecordBuilderFactory (seehere).
For example:
public Record createRecord() { return factory.newRecordBuilder() .withString("name", "Gary") .withDateTime("date", ZonedDateTime.of(LocalDateTime.of(2011, 2,6, 8, 0), ZoneId.of("UTC"))) .build();}
In the example above, the schema is dynamically computed from the data. You can also doit using a pre-built schema, as follows:
public Record createRecord() { return factory.newRecordBuilder(myAlreadyBuiltSchemaWithSchemaBuilder) .withString("name", "Gary") .withDateTime("date", ZonedDateTime.of(LocalDateTime.of(2011, 2,6, 8, 0), ZoneId.of("UTC"))) .build();}
The example above uses a schema that was pre-built usingfactory.newSchemaBuilder(Schema.Type.RECORD).
When using a pre-built schema, the entries passed to the record builder are validated. Itmeans that if you pass a null value null or an entry type that does not match the providedschema, the record creation fails. It also fails if you try to add an entry which does notexist or if you did not set a not nullable entry.
Using a dynamic schema can be useful on the backend but can lead usersto more issues when creating a pipeline to process the data. Using a pre-built schema is more reliable for end-users.
| 17
Accessing and reading a record
You can access and read data by relying on the getSchema method, which provides youwith the available entries (columns) of a record. The Entry exposes the type of its value,which lets you access the value through the corresponding method. For example, theSchema.Type.STRING type implies using the getString method of the record.
For example:
public void print(final Record record) { final Schema schema = record.getSchema(); // log in the natural type schema.getEntries() .forEach(entry -> System.out.println(record.get(Object.class, entry.getName()))); // log only strings schema.getEntries().stream() .filter(e -> e.getType() == Schema.Type.STRING) .forEach(entry -> System.out.println(record.getString(entry.getName())));}
Supported data types
The Record format supports the following data types:
• String
• Boolean
• Int
• Long
• Float
• Double
• DateTime
• Array
• Bytes
• Record
A map can always be modelized as a list (array of records with key andvalue entries).
For example:
18 |

public Record create() { final Record address = factory.newRecordBuilder() .withString("street", "Prairie aux Ducs") .withString("city", "Nantes") .withString("country", "FRANCE") .build(); return factory.newRecordBuilder() .withBoolean("active", true) .withInt("age", 33) .withLong("duration", 123459) .withFloat("tolerance", 1.1f) .withDouble("balance", 12.58) .withString("name", "John Doe") .withDateTime("birth", ZonedDateTime.now()) .withRecord( factory.newEntryBuilder() .withName("address") .withType(Schema.Type.RECORD) .withComment("The user address") .withElementSchema(address.getSchema()) .build(), address) .withArray( factory.newEntryBuilder() .withName("permissions") .withType(Schema.Type.ARRAY) .withElementSchema(factory.newSchemaBuilder(Schema.Type.STRING).build()) .build(), asList("admin", "dev")) .build(); }
Example: discovering a schema
For example, you can use the API to provide the schema. The following method needs tobe implemented in a service.
Manually constructing the schema without any data:
| 19

@DiscoverSchemagetSchema(@Option MyDataset dataset) { return factory.newSchemaBuilder(Schema.Type.RECORD) .withEntry(factory.newEntryBuilder().withName("id").withType(Schema.Type.LONG).build()) .withEntry(factory.newEntryBuilder().withName("name").withType(Schema.Type.STRING).build()) .build();}
Returning the schema from an already built record:
@DiscoverSchemapublic Schema guessSchema(@Option MyDataset dataset, final MyDataLoaderServicemyCustomService) { return myCustomService.loadFirstData().getRecord().getSchema();}
MyDataset is the class that defines the dataset. Learn more about datasetsand datastores in this document.
Authorized characters in entry names
Entry names for Record and JsonObject types must comply with the following rules:
• The name must start with a letter or with _. If not, the invalid characters are ignoreduntil the first valid character.
• Following characters of the name must be a letter, a number, or . If not, the invalidcharacter is replaced with .
For example:
• 1foo becomes foo.
• f@o becomes f_o.
• 1234f5@o becomes ___f5_o.
• foo123 stays foo123.
Data types in arrays
Each array uses only one schema for all of its elements. If an array contains severalelements, they must be of the same data type.
For example, the following array is not correct as it contains a string and an object:
20 |

{"Value":[ {"value":"v1"}, {"value":[]} ]}
1.5.2. JsonObject
The runtime also supports JsonObject as input and output component type. You can relyon the JSON services (Jsonb, JsonBuilderFactory) to create new instances.
This format is close to the Record format, except that it does not natively support theDatetime type and has a unique Number type to represent Int, Long, Float and Doubletypes. It also does not provide entry metadata like nullable or comment, for example.
It also inherits the Record format limitations.
1.5.3. Pojo
The runtime also accepts any POJO as input and output component type. In this case, ituses JSON-B to treat it as a JsonObject.
2. Setting up your environmentBefore being able to develop components using Talend Component Kit, you need the rightsystem configuration and tools.
Although Talend Component Kit comes with some embedded tools, such as Maven andGradle wrappers, you still need to prepare your system. A Talend Component Kit pluginfor IntelliJ is also available and allows to design and generate your component projectright from IntelliJ.
• System requirements
• Installing the IntelliJ plugin
2.1. System prerequisitesIn order to use Talend Component Kit, you need the following tools installed on yourmachine:
• Java JDK 1.8.x. You can download it from Oracle website.
• Talend Open Studio to integrate your components.
• A Java Integrated Development Environment such as Eclipse or IntelliJ. IntelliJ isrecommended as a Talend Component Kit plugin is available.
| 21

• Optional: If you use IntelliJ, you can install the Talend Component Kit plugin forIntelliJ.
• Optional: A build tool:
◦ Apache Maven 3.5.4 is recommended to develop a component or the project itself.You can download it from Apache Maven website.
◦ You can also use Gradle, but at the moment certain features are not supported,such as validations.
It is optional to install a build tool independently since Maven andGradle wrappers are already available with Talend ComponentKit.
2.2. Installing the Talend Component Kit IntelliJpluginThe Talend Component Kit IntelliJ plugin is a plugin for the IntelliJ Java IDE. It addssupport for the Talend Component Kit project creation.
Main features:
• Project generation support.
• Internationalization completion for component configuration.
2.2.1. Installing the IntelliJ plugin
In the Intellij IDEA:
1. Go to File > Settings…
2. On the left panel, select Plugins.
3. Access the Marketplace tab.
4. Enter Talend in the search field and Select Talend Component Kit.
5. Select Install.
22 |

6. Click the Restart IDE button.
7. Confirm the IDEA restart to complete the installation.
| 23

The plugin is now installed on your IntelliJ IDEA. You can start using it.
2.2.2. About the internationalization completion
The plugin offers auto-completion for the configuration internationalization. The Talendcomponent configuration lets you setup translatable and user-friendly labels for yourconfiguration using a property file. Auto-completion in possible for the configuration keysand default values in the property file.
For example, you can internationalize a simple configuration class for a basicauthentication that you use in your component:
@Checkable("basicAuth")@DataStore("basicAuth")@GridLayout({ @GridLayout.Row({ "url" }), @GridLayout.Row({ "username", "password" }),})public class BasicAuthConfig implements Serializable {
@Option private String url;
@Option private String username;
@Option @Credential private String password;}
This configuration class contains three properties which you can attach a user-friendlylabel to.
For example, you can define a label like My server URL for the url option:
1. Locate or create a Messages.properties file in the project resources and add the label tothat file. The plugin automatically detects your configuration and provides you withkey completion in the property file.
24 |

2. Press Ctrl+Space to see the key suggestions.
3. Generating a projectThe first step when developing new components is to create a project that will contain theskeleton of your components and set you on the right track.
The project generation can be achieved using the Talend Component Kit Starter or theTalend Component Kit plugin for IntelliJ.
Through a user-friendly interface, you can define the main lines of your project and ofyour component(s), including their name, family, type, configuration model, and so on.
Once completed, all the information filled are used to generate a project that you will useas starting point to implement the logic and layout of your components, and to iterate onthem.
• Using the starter
• Using the IntelliJ plugin
Once your project is generated, you can start implementing the component logic.
3.1. Generating a project using the ComponentKit StarterThe Component Kit Starter lets you design your components configuration and generatesa ready-to-implement project structure.
The Starter is available on the web or as an IntelliJ plugin.
This tutorial shows you how to use the Component Kit Starter to generate newcomponents for MySQL databases. Before starting, make sure that you have correctlysetup your environment. See this section.
When defining a project using the Starter, do not refresh the page toavoid losing your configuration.
| 25

3.1.1. Configuring the project
Before being able to create components, you need to define the general settings of theproject:
1. Create a folder on your local machine to store the resource files of the component youwant to create. For example, C:/my_components.
2. Open the Starter in the web browser of your choice.
3. Select your build tool. This tutorial uses Maven, but you can select Gradle instead.
4. Add any facet you need. For example, add the Talend Component Kit Testing facet toyour project to automatically generate unit tests for the components created in theproject.
5. Enter the Component Family of the components you want to develop in the project.This name must be a valid java name and is recommended to be capitalized, forexample 'MySQL'.Once you have implemented your components in the Studio, this name is displayed inthe Palette to group all of the MySQL-related components you develop, and is also partof your component name.
6. Select the Category of the components you want to create in the current project. AsMySQL is a kind of database, select Databases in this tutorial.This Databases category is used and displayed as the parent family of the MySQLgroup in the Palette of the Studio.
7. Complete the project metadata by entering the Group, Artifact and Package.
8. By default, you can only create processors. If you need to create Input or Outputcomponents, select Activate IO. By doing this:
◦ Two new menu entries let you add datasets and datastores to your project, as theyare required for input and output components.
Input and Output components without dataset (itself containing adatastore) will not pass the validation step when building thecomponents. Learn more about datasets and datastores in thisdocument.
◦ An Input component and an Output component are automatically added to your
26 |

project and ready to be configured.
◦ Components added to the project using Add A Component can now be processors,input or output components.
3.1.2. Defining a Datastore
A datastore represents the data needed by an input or output component to connect to adatabase.
When building a component, the validateDataSet validation checks that each input oroutput (processor without output branch) component uses a dataset and that this datasethas a datastore.
You can define one or several datastores if you have selected the Activate IO step.
1. Select Datastore. The list of datastores opens. By default, a datastore is already openbut not configured. You can configure it or create a new one using Add newDatastore.
2. Specify the name of the datastore. Modify the default value to a meaningful name foryour project.This name must be a valid Java name as it will represent the datastore class in yourproject. It is a good practice to start it with an uppercase letter.
3. Edit the datastore configuration. Parameter names must be valid Java names. Uselower case as much as possible. A typical configuration includes connection details toa database:
◦ url
| 27

◦ username
◦ password.
4. Save the datastore configuration.
3.1.3. Defining a Dataset
A dataset represents the data coming from or sent to a database and needed by input andoutput components to operate.
The validateDataSet validation checks that each input or output (processor without outputbranch) component uses a dataset and that this dataset has a datastore.
You can define one or several datasets if you have selected the Activate IO step.
1. Select Dataset. The list of datasets opens. By default, a dataset is already open but notconfigured. You can configure it or create a new one using the Add new Datasetbutton.
2. Specify the name of the dataset. Modify the default value to a meaningful name foryour project.This name must be a valid Java name as it will represent the dataset class in yourproject. It is a good practice to start it with an uppercase letter.
3. Edit the dataset configuration. Parameter names must be valid Java names. Use lowercase as much as possible. A typical configuration includes details of the data toretrieve:
◦ Datastore to use (that contains the connection details to the database)
◦ table name
◦ data
4. Save the dataset configuration.
3.1.4. Creating an Input component
To create an input component, make sure you have selected Activate IO.
When clicking Add A Component in the Starter, a new step allows you to define a newcomponent in your project.The intent in this tutorial is to create an input component that connects to a MySQLdatabase, executes a SQL query and gets the result.
28 |
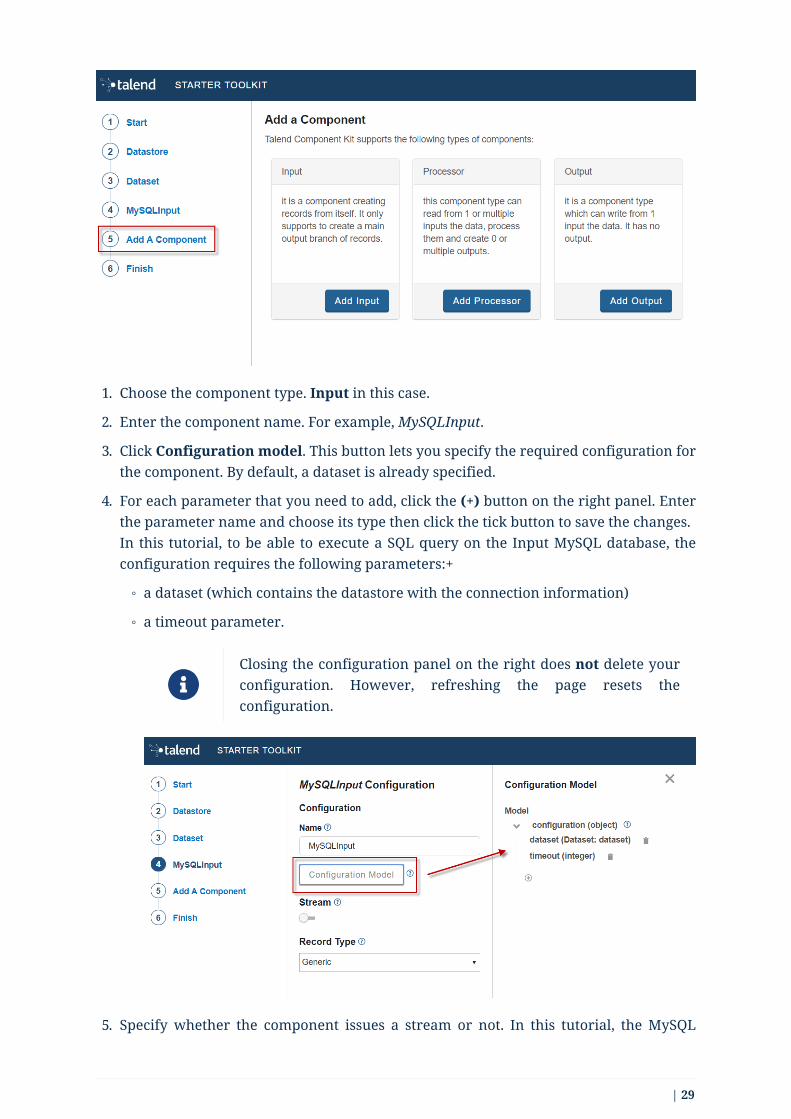
1. Choose the component type. Input in this case.
2. Enter the component name. For example, MySQLInput.
3. Click Configuration model. This button lets you specify the required configuration forthe component. By default, a dataset is already specified.
4. For each parameter that you need to add, click the (+) button on the right panel. Enterthe parameter name and choose its type then click the tick button to save the changes.In this tutorial, to be able to execute a SQL query on the Input MySQL database, theconfiguration requires the following parameters:+
◦ a dataset (which contains the datastore with the connection information)
◦ a timeout parameter.
Closing the configuration panel on the right does not delete yourconfiguration. However, refreshing the page resets theconfiguration.
5. Specify whether the component issues a stream or not. In this tutorial, the MySQL
| 29

input component created is an ordinary (non streaming) component. In this case,leave the Stream option disabled.
6. Select the Record Type generated by the component. In this tutorial, select Genericbecause the component is designed to generate records in the default Record format.You can also select Custom to define a POJO that represents your records.
Your input component is now defined. You can add another component or generate anddownload your project.
3.1.5. Creating a Processor component
When clicking Add A Component in the Starter, a new step allows you to define a newcomponent in your project. The intent in this tutorial is to create a simple processorcomponent that receives a record, logs it and returns it at it is.
If you did not select Activate IO, all new components you add to theproject are processors by default.If you selected Activate IO, you can choose the component type. In thiscase, to create a Processor component, you have to manually add at leastone output.
1. If required, choose the component type: Processor in this case.
2. Enter the component name. For example, RecordLogger, as the processor created inthis tutorial logs the records.
3. Specify the Configuration Model of the component. In this tutorial, the componentdoesn’t need any specific configuration. Skip this step.
4. Define the Input(s) of the component. For each input that you need to define, clickAdd Input. In this tutorial, only one input is needed to receive the record to log.
5. Click the input name to access its configuration. You can change the name of the inputand define its structure using a POJO. If you added several inputs, repeat this step foreach one of them.The input in this tutorial is a generic record. Enable the Generic option and clickSave.
30 |

6. Define the Output(s) of the component. For each output that you need to define, clickAdd Output. The first output must be named MAIN. In this tutorial, only one genericoutput is needed to return the received record.Outputs can be configured the same way as inputs (see previous steps).You can define a reject output connection by naming it REJECT. This naming is used byTalend applications to automatically set the connection type to Reject.
Your processor component is now defined. You can add another component or generateand download your project.
3.1.6. Creating an Output component
To create an output component, make sure you have selected Activate IO.
When clicking Add A Component in the Starter, a new step allows you to define a newcomponent in your project.The intent in this tutorial is to create an output component that receives a record andinserts it into a MySQL database table.
Output components are Processors without any output. In other words,the output is a processor that does not produce any records.
1. Choose the component type. Output in this case.
2. Enter the component name. For example, MySQLOutput.
3. Click Configuration Model. This button lets you specify the required configuration forthe component. By default, a dataset is already specified.
4. For each parameter that you need to add, click the (+) button on the right panel. Enterthe name and choose the type of the parameter, then click the tick button to save thechanges.In this tutorial, to be able to insert a record in the output MySQL database, theconfiguration requires the following parameters:+
◦ a dataset (which contains the datastore with the connection information)
◦ a timeout parameter.
| 31

Closing the configuration panel on the right does not delete yourconfiguration. However, refreshing the page resets theconfiguration.
5. Define the Input(s) of the component. For each input that you need to define, clickAdd Input. In this tutorial, only one input is needed.
6. Click the input name to access its configuration. You can change the name of the inputand define its structure using a POJO. If you added several inputs, repeat this step foreach one of them.The input in this tutorial is a generic record. Enable the Generic option and clickSave.
Do not create any output because the component does not produce anyrecord. This is the only difference between an output an a processorcomponent.
Your output component is now defined. You can add another component or generate anddownload your project.
3.1.7. Generating and downloading the final project
Once your project is configured and all the components you need are created, you cangenerate and download the final project. In this tutorial, the project was configured andthree components of different types (input, processor and output) have been defined.
1. Click Finish on the left panel. You are redirected to a page that summarizes theproject. On the left panel, you can also see all the components that you added to theproject.
2. Generate the project using one of the two options available:
◦ Download it locally as a ZIP file using the Download as ZIP button.
◦ Create a GitHub repository and push the project to it using the Create on Githubbutton.
32 |

In this tutorial, the project is downloaded to the local machine as a ZIP file.
3.1.8. Compiling and exploring the generated project files
Once the package is available on your machine, you can compile it using the build toolselected when configuring the project.
• In the tutorial, Maven is the build tool selected for the project.In the project directory, execute the mvn package command.If you don’t have Maven installed on your machine, you can use the Maven wrapperprovided in the generated project, by executing the ./mvnw package command.
• If you have created a Gradle project, you can compile it using the gradle build
command or using the Gradle wrapper: ./gradlew build.
The generated project code contains documentation that can guide and help youimplementing the component logic. Import the project to your favorite IDE to start theimplementation.
3.1.9. Generating a project using an OpenAPI JSON descriptor
The Component Kit Starter allows you to generate a component development project froman OpenAPI JSON descriptor.
1. Open the Starter in the web browser of your choice.
2. Enable the OpenAPI mode using the toggle in the header.
3. Go to the API menu.
4. Paste the OpenAPI JSON descriptor in the right part of the screen. All the describedendpoints are detected.
5. Unselect the endpoints that you do not want to use in the future components. Bydefault, all detected endpoints are selected.
| 33

6. Go to the Finish menu.
7. Download the project.
When exploring the project generated from an OpenAPI descriptor, you can notice thefollowing elements:
• sources
• the API dataset
• an HTTP client for the API
• a connection folder containing the component configuration. By default, theconfiguration is only made of a simple datastore with a baseUrl parameter.
3.2. Generating a project using IntelliJ pluginOnce the plugin installed, you can generate a component project.
1. Select File > New > Project.
2. In the New Project wizard, choose Talend Component and click Next.
The plugin loads the component starter and lets you design your components. Formore information about the Talend Component Kit starter, check this tutorial.
3. Once your project is configured, select Next, then click Finish.
The project is automatically imported into the IDEA using the build tool that you havechosen.
34 |

4. Implementing componentsOnce you have generated a project, you can start implementing the logic and layout ofyour components and iterate on it. Depending on the type of component you want tocreate, the logic implementation can differ. However, the layout and component metadataare defined the same way for all types of components in your project. The main steps are:
• Defining family and component metadata
• Defining an input component logic
• Defining a processor/output logic
• Defining a standalone component logic
• Defining component layout and configuration
In some cases, you will require specific implementations to handle more advanced cases,such as:
• Internationalizing a component
• Managing component versions
• Masking sensitive data
• Implementing batch processing
• Implementing streaming on a component
| 35
You can also make certain configurations reusable across your project by definingservices. Using your Java IDE along with a build tool supported by the framework, you canthen compile your components to test and deploy them to Talend Studio or other Talendapplications:
• Building components with Maven
• Building components with Gradle
• Wrapping a Beam I/O
In any case, follow these best practices to ensure the components you develop areoptimized.
You can also learn more about component loading and plugins here:
• Loading a component
4.1. Registering componentsBefore implementing a component logic and configuration, you need to specify the familyand the category it belongs to, the component type and name, as well as its name and afew other generic parameters. This set of metadata, and more particularly the family,categories and component type, is mandatory to recognize and load the component toTalend Studio or Cloud applications.
Some of these parameters are handled at the project generation using the starter, but canstill be accessed and updated later on.
4.1.1. Component family and categories
The family and category of a component is automatically written in the package-info.javafile of the component package, using the @Components annotation. By default, theseparameters are already configured in this file when you import your project in your IDE.Their value correspond to what was defined during the project definition with the starter.
Multiple components can share the same family and category value, but the family +name pair must be unique for the system.
A component can belong to one family only and to one or several categories. If notspecified, the category defaults to Misc.
The package-info.java file also defines the component family icon, which is different fromthe component icon. You can learn how to customize this icon in this section.
Here is a sample package-info.java:
36 |
@Components(name = "my_component_family", categories = "My Category")package org.talend.sdk.component.sample;
import org.talend.sdk.component.api.component.Components;
Another example with an existing component:
@Components(name = "Salesforce", categories = {"Business", "Cloud"})package org.talend.sdk.component.sample;
import org.talend.sdk.component.api.component.Components;
4.1.2. Component icon and version
Components can require metadata to be integrated in Talend Studio or Cloud platforms.Metadata is set on the component class and belongs to theorg.talend.sdk.component.api.component package.
When you generate your project and import it in your IDE, icon and version both comewith a default value.
• @Icon: Sets an icon key used to represent the component. You can use a custom keywith the custom() method but the icon may not be rendered properly. The icondefaults to Check.Replace it with a custom icon, as described in this section.
• @Version: Sets the component version. 1 by default.Learn how to manage different versions and migrations between your componentversions in this section.
For example:
@Version(1)@Icon(FILE_XML_O)@PartitionMapper(name = "jaxbInput")public class JaxbPartitionMapper implements Serializable { // ...}
Defining a custom icon for a component or component family
Every component family and component needs to have a representative icon.You have to define a custom icon as follows:
• For the component family the icon is defined in the package-info.java file.
| 37

• For the component itself, you need to declare the icon in the component class.
Custom icons must comply with the following requirements:
• Icons must be stored in the src/main/resources/icons folder of the project.
• Icon file names need to match one of the following patterns: IconName.svg orIconName_icon32.png. The latter will run in degraded mode in Talend Cloud. ReplaceIconName by the name of your choice.
• Icons must be squared, even for the SVG format.
@Icon(value = Icon.IconType.CUSTOM, custom = "IconName")
Note that SVG icons are not supported by Talend Studio and can causethe deployment of the component to fail.
If you aim at deploying a custom component to Talend Studio, specifyPNG icons or use the Maven (or Gradle) svg2png plugin to convert SVGicons to PNG. If you want a finer control over both images, you canprovide both in your component.
Ultimately, you can also remove SVG parameters from thetalend.component.server.icon.paths property in the HTTP serverconfiguration.
4.1.3. Component type and name
The component type is declared in the component class. When you import your projectgenerated from the starter in your IDE, the component type is already defined.
Input components can be:
• A partition mapper. @PartitionMapper is the default for input components.
• An emitter. @Emitter is a shortcut for @PartitionMapper when you don’t supportdistribution. It enforces an implicit partition mapper execution with an assessor sizeof 1 and a split returning itself.
Processor/Output components can be:
• A processor. @Processor is the default for output components. A method decoratedwith @Processor is considered as a producer factory.
• Combiners are not supported by the framework. Combiners allow to aggregate resultsin a single partition.
Standalone component can be only a driver runner.
The name of the component is defined there as well as a parameter of the component
38 |

type.
Once the component type is defined, you can start implementing its specific logic:
• Defining an input component
• Defining a processor or output component
• Defining an standalone component
Partition mapper example:
@PartitionMapper(name = "my_mapper")public class MyMapper {}
Emitter example:
@Emitter(name = "my_input")public class MyInput {}
Processor example:
@Processor(name = "my_processor")public class MyProcessor {}
Driver runner example:
@DriverRunner(name = "my_standalone")public class MyStandalone {}
4.1.4. Component extra metadatas
For any purpose, you can also add user defined metadatas to your component with the@Metadatas annotation.
Example:
| 39
@Processor(name = "my_processor")@Metadatas({ @Metadata(key = "user::value0", value = "myValue0"), @Metadata(key = "user::value1", value = "myValue1")})public class MyProcessor {}
You can also use a SPI implementingorg.talend.sdk.component.spi.component.ComponentMetadataEnricher.
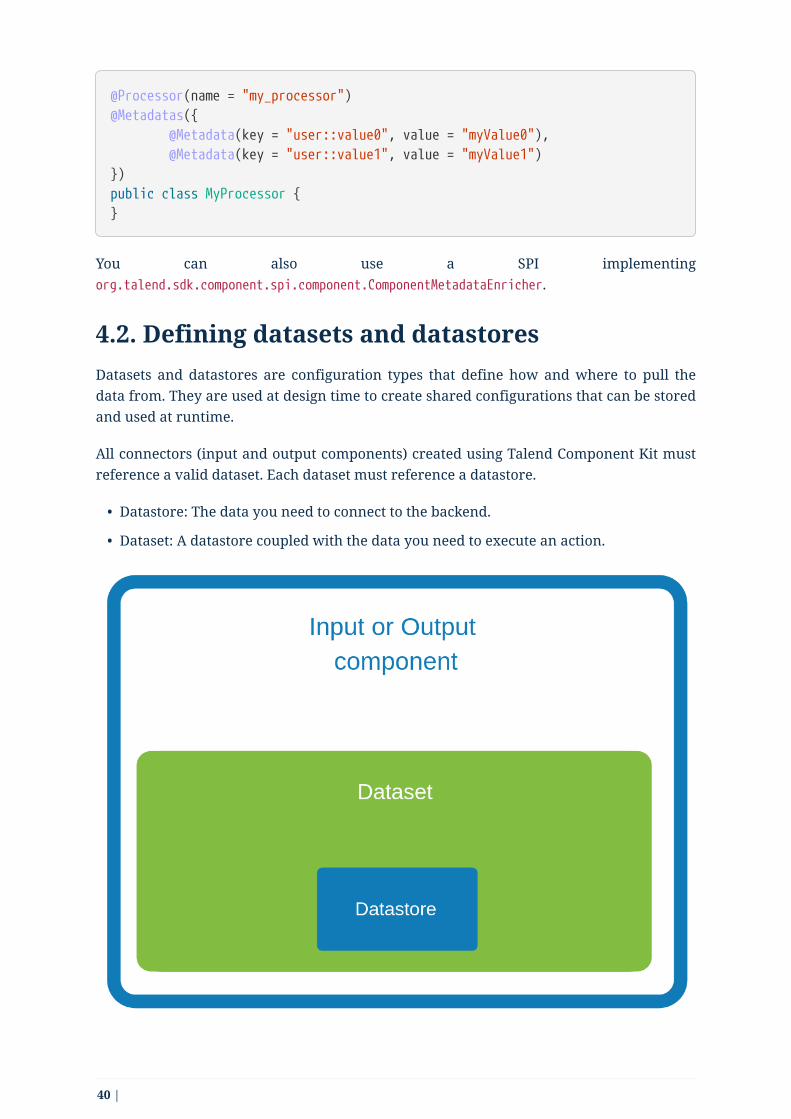
4.2. Defining datasets and datastoresDatasets and datastores are configuration types that define how and where to pull thedata from. They are used at design time to create shared configurations that can be storedand used at runtime.
All connectors (input and output components) created using Talend Component Kit mustreference a valid dataset. Each dataset must reference a datastore.
• Datastore: The data you need to connect to the backend.
• Dataset: A datastore coupled with the data you need to execute an action.
40 |

Make sure that:
• a datastore is used in each dataset.
• each dataset has a corresponding input component (mapper oremitter).
• This input component must be able to work with only the dataset partfilled by final users. Any other property implemented for thatcomponent must be optional.
These rules are enforced by the validateDataSet validation. If theconditions are not met, the component builds will fail.
4.2.1. Defining a datastore
A datastore defines the information required to connect to a data source. For example, itcan be made of:
• a URL
• a username
• a password.
You can specify a datastore and its context of use (in which dataset, etc.) from theComponent Kit Starter.
Make sure to modelize the data your components are designed to handlebefore defining datasets and datastores in the Component Kit Starter.
Once you generate and import the project into an IDE, you can find datastores under aspecific datastore node.
Example of datastore:
| 41

package com.mycomponent.components.datastore;
@DataStore("DatastoreA") ①@GridLayout({ ② // The generated component layout will display one configuration entry perline. // Customize it as much as needed. @GridLayout.Row({ "apiurl" }), @GridLayout.Row({ "username" }), @GridLayout.Row({ "password" })})@Documentation("A Datastore made of an API URL, a username, and a password.The password is marked as Credential.") ③public class DatastoreA implements Serializable { @Option @Documentation("") private String apiurl;
@Option @Documentation("") private String username;
@Option @Credential @Documentation("") private String password;
public String getApiurl() { return apiurl; }
public DatastoreA setApiurl(String apiurl) { this.apiurl = apiurl; return this; }
public String getUsername() { return Username; }
public DatastoreA setuUsername(String username) { this.username = username; return this; }
public String getPassword() { return password; }
public DatastoreA setPassword(String password) {
42 |

this.password = password; return this; }}
① Identifying the class as a datastore and naming it.
② Defining the layout of the datastore configuration.
③ Defining each element of the configuration: a URL, a username, and a password. Notethat the password is also marked as a credential.
4.2.2. Defining a dataset
A dataset represents the inbound data. It is generally made of:
• A datastore that defines the connection information needed to access the data.
• A query.
You can specify a dataset and its context of use (in which input and output component it isused) from the Component Kit Starter.
Make sure to modelize the data your components are designed to handlebefore defining datasets and datastores in the Component Kit Starter.
Once you generate and import the project into an IDE, you can find datasets under aspecific dataset node.
Example of dataset referencing the datastore shown above:
| 43
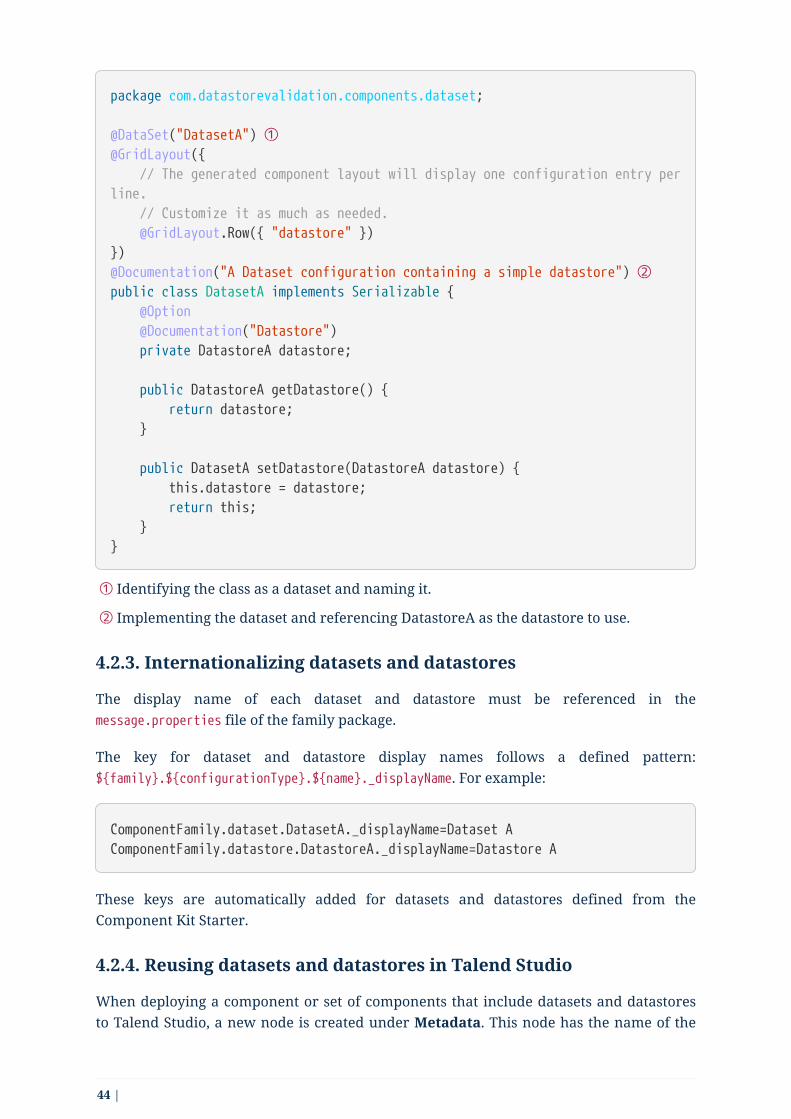
package com.datastorevalidation.components.dataset;
@DataSet("DatasetA") ①@GridLayout({ // The generated component layout will display one configuration entry perline. // Customize it as much as needed. @GridLayout.Row({ "datastore" })})@Documentation("A Dataset configuration containing a simple datastore") ②public class DatasetA implements Serializable { @Option @Documentation("Datastore") private DatastoreA datastore;
public DatastoreA getDatastore() { return datastore; }
public DatasetA setDatastore(DatastoreA datastore) { this.datastore = datastore; return this; }}
① Identifying the class as a dataset and naming it.
② Implementing the dataset and referencing DatastoreA as the datastore to use.
4.2.3. Internationalizing datasets and datastores
The display name of each dataset and datastore must be referenced in themessage.properties file of the family package.
The key for dataset and datastore display names follows a defined pattern:${family}.${configurationType}.${name}._displayName. For example:
ComponentFamily.dataset.DatasetA._displayName=Dataset AComponentFamily.datastore.DatastoreA._displayName=Datastore A
These keys are automatically added for datasets and datastores defined from theComponent Kit Starter.
4.2.4. Reusing datasets and datastores in Talend Studio
When deploying a component or set of components that include datasets and datastoresto Talend Studio, a new node is created under Metadata. This node has the name of the
44 |

component family that was deployed.
It allows users to create reusable configurations for datastores and datasets.
With predefined datasets and datastores, users can then quickly fill the componentconfiguration in their jobs. They can do so by selecting Repository as Property Type andby browsing to the predefined dataset or datastore.
4.2.5. How to create a reusable connection in Studio
Studio will generate connection and close components auto for reusing connectionfunction in input and output components, just need to do like this example:
| 45

@Servicepublic class SomeService {
@CreateConnection public Object createConn(@Option("configuration") SomeDataStore dataStore)throws ComponentException { Object connection = null; //get conn object by dataStore return conn; }
@CloseConnection public CloseConnectionObject closeConn() { return new CloseConnectionObject() {
public boolean close() throws ComponentException { Object connection = this.getConnection(); //do close action return true; }
}; }}
Then the runtime mapper and processor only need to use @Connection to get theconnection like this:
@Version(1)@Icon(value = Icon.IconType.CUSTOM, custom = "SomeInput")@PartitionMapper(name = "SomeInput")@Documentation("the doc")public class SomeInputMapper implements Serializable {
@Connection SomeConnection conn;
}
4.2.6. How does the component server interact with datasets anddatastores
The component server scans all configuration types and returns a configuration typeindex. This index can be used for the integration into the targeted platforms (Studio, webapplications, and so on).
46 |
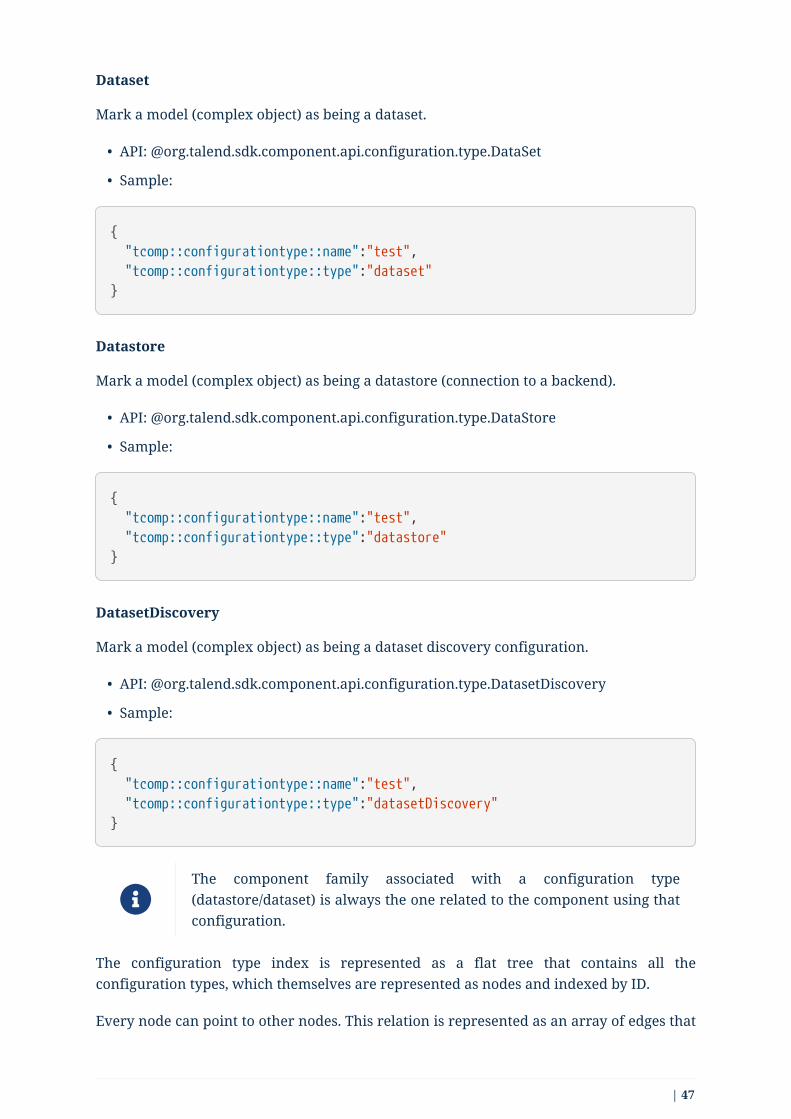
Dataset
Mark a model (complex object) as being a dataset.
• API: @org.talend.sdk.component.api.configuration.type.DataSet
• Sample:
{ "tcomp::configurationtype::name":"test", "tcomp::configurationtype::type":"dataset"}
Datastore
Mark a model (complex object) as being a datastore (connection to a backend).
• API: @org.talend.sdk.component.api.configuration.type.DataStore
• Sample:
{ "tcomp::configurationtype::name":"test", "tcomp::configurationtype::type":"datastore"}
DatasetDiscovery
Mark a model (complex object) as being a dataset discovery configuration.
• API: @org.talend.sdk.component.api.configuration.type.DatasetDiscovery
• Sample:
{ "tcomp::configurationtype::name":"test", "tcomp::configurationtype::type":"datasetDiscovery"}
The component family associated with a configuration type(datastore/dataset) is always the one related to the component using thatconfiguration.
The configuration type index is represented as a flat tree that contains all theconfiguration types, which themselves are represented as nodes and indexed by ID.
Every node can point to other nodes. This relation is represented as an array of edges that
| 47

provides the child IDs.
As an illustration, a configuration type index for the example above can be defined asfollows:
{nodes: { "idForDstore": { datastore:"datastore data", edges:[id:"idForDset"] }, "idForDset": { dataset:"dataset data" } }}
4.3. Defining an input component logicInput components are the components generally placed at the beginning of a Talend job.They are in charge of retrieving the data that will later be processed in the job.
An input component is primarily made of three distinct logics:
• The execution logic of the component itself, defined through a partition mapper.
• The configurable part of the component, defined through the mapper configuration.
• The source logic defined through a producer.
Before implementing the component logic and defining its layout and configurable fields,make sure you have specified its basic metadata, as detailed in this document.
4.3.1. Defining a partition mapper
What is a partition mapper
A Partition Mapper (PartitionMapper) is a component able to split itself to make theexecution more efficient.
This concept is borrowed from big data and useful in this context only (BEAM executions).The idea is to divide the work before executing it in order to reduce the overall executiontime.
The process is the following:
1. The size of the data you work on is estimated. This part can be heuristic and not veryprecise.
2. From that size, the execution engine (runner for Beam) requests the mapper to splititself in N mappers with a subset of the overall work.
3. The leaf (final) mapper is used as a Producer (actual reader) factory.
48 |

This kind of component must be Serializable to be distributable.
Implementing a partition mapper
A partition mapper requires three methods marked with specific annotations:
1. @Assessor for the evaluating method
2. @Split for the dividing method
3. @Emitter for the Producer factory
@Assessor
The Assessor method returns the estimated size of the data related to the component(depending its configuration). It must return a Number and must not take any parameter.
For example:
@Assessorpublic long estimateDataSetByteSize() { return ....;}
@Split
The Split method returns a collection of partition mappers and can take optionally a@PartitionSize long value as parameter, which is the requested size of the dataset per subpartition mapper.
For example:
@Splitpublic List<MyMapper> split(@PartitionSize final long desiredSize) { return ....;}
@Emitter
The Emitter method must not have any parameter and must return a producer. It uses thepartition mapper configuration to instantiate and configure the producer.
For example:
| 49

@Emitterpublic MyProducer create() { return ....;}
4.3.2. Defining the producer method
The Producer defines the source logic of an input component. It handles the interactionwith a physical source and produces input data for the processing flow.
A producer must have a @Producer method without any parameter. It is triggered by the@Emitter method of the partition mapper and can return any data. It is defined in the<component_name>Source.java file:
@Producerpublic MyData produces() { return ...;}
4.4. Defining a processor or an output componentlogicProcessors and output components are the components in charge of reading, processingand transforming data in a Talend job, as well as passing it to its required destination.
Before implementing the component logic and defining its layout and configurable fields,make sure you have specified its basic metadata, as detailed in this document.
4.4.1. Defining a processor
What is a processor
A Processor is a component that converts incoming data to a different model.
A processor must have a method decorated with @ElementListener taking an incomingdata and returning the processed data:
@ElementListenerpublic MyNewData map(final MyData data) { return ...;}
Processors must be Serializable because they are distributed components.
50 |

If you just need to access data on a map-based ruleset, you can use Record or JsonObject asparameter type.From there, Talend Component Kit wraps the data to allow you to access it as a map. Theparameter type is not enforced.This means that if you know you will get a SuperCustomDto, then you can use it asparameter type. But for generic components that are reusable in any chain, it is highlyencouraged to use Record until you have an evaluation language-based processor that hasits own way to access components.
For example:
@ElementListenerpublic MyNewData map(final Record incomingData) { String name = incomingData.getString("name"); int name = incomingData.getInt("age"); return ...;}
// equivalent to (using POJO subclassing)
public class Person { private String age; private int age;
// getters/setters}
@ElementListenerpublic MyNewData map(final Person person) { String name = person.getName(); int age = person.getAge(); return ...;}
A processor also supports @BeforeGroup and @AfterGroup methods, which must not haveany parameter and return void values. Any other result would be ignored. These methodsare used by the runtime to mark a chunk of the data in a way which is estimated good forthe execution flow size.
Because the size is estimated, the size of a group can vary. It is evenpossible to have groups of size 1.
It is recommended to batch records, for performance reasons:
| 51
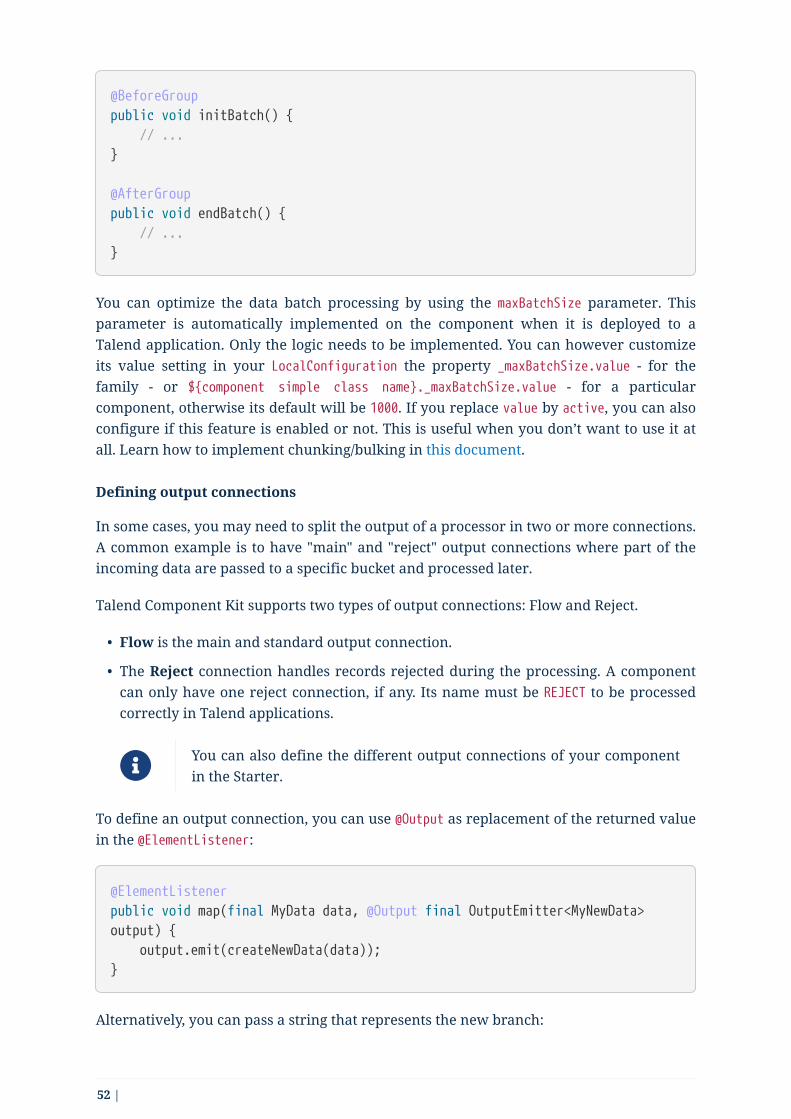
@BeforeGrouppublic void initBatch() { // ...}
@AfterGrouppublic void endBatch() { // ...}
You can optimize the data batch processing by using the maxBatchSize parameter. Thisparameter is automatically implemented on the component when it is deployed to aTalend application. Only the logic needs to be implemented. You can however customizeits value setting in your LocalConfiguration the property _maxBatchSize.value - for thefamily - or ${component simple class name}._maxBatchSize.value - for a particularcomponent, otherwise its default will be 1000. If you replace value by active, you can alsoconfigure if this feature is enabled or not. This is useful when you don’t want to use it atall. Learn how to implement chunking/bulking in this document.
Defining output connections
In some cases, you may need to split the output of a processor in two or more connections.A common example is to have "main" and "reject" output connections where part of theincoming data are passed to a specific bucket and processed later.
Talend Component Kit supports two types of output connections: Flow and Reject.
• Flow is the main and standard output connection.
• The Reject connection handles records rejected during the processing. A componentcan only have one reject connection, if any. Its name must be REJECT to be processedcorrectly in Talend applications.
You can also define the different output connections of your componentin the Starter.
To define an output connection, you can use @Output as replacement of the returned valuein the @ElementListener:
@ElementListenerpublic void map(final MyData data, @Output final OutputEmitter<MyNewData>output) { output.emit(createNewData(data));}
Alternatively, you can pass a string that represents the new branch:
52 |

@ElementListenerpublic void map(final MyData data, @Output final OutputEmitter<MyNewData> main, @Output("REJECT") final OutputEmitter<MyNewDataWithError>rejected) { if (isRejected(data)) { rejected.emit(createNewData(data)); } else { main.emit(createNewData(data)); }}
// or
@ElementListenerpublic MyNewData map(final MyData data, @Output("REJECT") final OutputEmitter<MyNewDataWithError>rejected) { if (isSuspicious(data)) { rejected.emit(createNewData(data)); return createNewData(data); // in this case the processing continuesbut notifies another channel } return createNewData(data);}
Defining multiple inputs
Having multiple inputs is similar to having multiple outputs, except that an OutputEmitterwrapper is not needed:
@ElementListenerpublic MyNewData map(@Input final MyData data, @Input("input2") final MyData2data2) { return createNewData(data1, data2);}
@Input takes the input name as parameter. If no name is set, it defaults to the "main(default)" input branch. It is recommended to use the default branch when possible and toavoid naming branches according to the component semantic.
Implementing batch processing
What is batch processing
Batch processing refers to the way execution environments process batches of datahandled by a component using a grouping mechanism.
| 53

By default, the execution environment of a component automatically decides how toprocess groups of records and estimates an optimal group size depending on the systemcapacity. With this default behavior, the size of each group could sometimes be optimizedfor the system to handle the load more effectively or to match business requirements.
For example, real-time or near real-time processing needs often imply processing smallerbatches of data, but more often. On the other hand, a one-time processing withoutbusiness contraints is more effectively handled with a batch size based on the systemcapacity.
Final users of a component developed with the Talend Component Kit that integrates thebatch processing logic described in this document can override this automatic size. To dothat, a maxBatchSize option is available in the component settings and allows to set themaximum size of each group of data to process.
A component processes batch data as follows:
• Case 1 - No maxBatchSize is specified in the component configuration. The executionenvironment estimates a group size of 4. Records are processed by groups of 4.
• Case 2 - The runtime estimates a group size of 4 but a maxBatchSize of 3 is specified inthe component configuration. The system adapts the group size to 3. Records areprocessed by groups of 3.
Processing schema (values are examples):
Batch processing implementation logic
Batch processing relies on the sequence of three methods: @BeforeGroup, @ElementListener,@AfterGroup, that you can customize to your needs as a component Developer.
The group size automatic estimation logic is automatically implementedwhen a component is deployed to a Talend application.
54 |

Each group is processed as follows until there is no record left:
1. The @BeforeGroup method resets a record buffer at the beginning of each group.
2. The records of the group are assessed one by one and placed in the buffer as follows:The @ElementListener method tests if the buffer size is greater or equal to the definedmaxBatchSize. If it is, the records are processed. If not, then the current record isbuffered.
3. The previous step happens for all records of the group. Then the @AfterGroup methodtests if the buffer is empty.
Group execution detail (values are examples):
You can define the following logic in the processor configuration:
| 55

import java.io.Serializable;import java.util.ArrayList;import java.util.Collection;
import javax.json.JsonObject;
import org.talend.sdk.component.api.processor.AfterGroup;import org.talend.sdk.component.api.processor.BeforeGroup;import org.talend.sdk.component.api.processor.ElementListener;import org.talend.sdk.component.api.processor.Processor;
@Processor(name = "BulkOutputDemo")public class BulkProcessor implements Serializable { private Collection<JsonObject> buffer;
@BeforeGroup public void begin() { buffer = new ArrayList<>(); }
@ElementListener public void bufferize(final JsonObject object) { buffer.add(object); }
@AfterGroup public void commit() { // saves buffered records at once (bulk) }}
You can also use the condensed syntax for this kind of processor:
@Processor(name = "BulkOutputDemo")public class BulkProcessor implements Serializable {
@AfterGroup public void commit(final Collection<Record> records) { // saves records }}
When writing tests for components, you can force the maxBatchSizeparameter value by setting it with the following syntax: <configurationprefix>.$maxBatchSize=10.
56 |

You can learn more about processors in this document.
Shortcut syntax for bulk output processors
For the case of output components (not emitting any data) using bulking you can pass thelist of records to the after group method:
@Processor(name = "DocOutput")public class DocOutput implements Serializable {
@AfterGroup public void onCommit(final Collection<Record> records) { // save records }}
4.4.2. Defining an output
What is an output
An Output is a Processor that does not return any data.
Conceptually, an output is a data listener. It matches the concept of processor. Being thelast component of the execution chain or returning no data makes your processor anoutput component:
@ElementListenerpublic void store(final MyData data) { // ...}
4.4.3. Defining a combiner
What is a combiner
Currently, Talend Component Kit does not allow you to define a Combiner. A combiner isthe symmetric part of a partition mapper. It allows to aggregate results in a singlepartition.
4.5. Defining a standalone component logicStandalone components are the components without input or output flows. They aredesigned to do actions without reading or processing any data. For example standalonecomponents can be used to create indexes in databases.
Before implementing the component logic and defining its layout and configurable fields,
| 57

make sure you have specified its basic metadata, as detailed in this document.
4.5.1. Defining a driver runner
What is a driver runner
A Driver Runner (DriverRunner) is a standalone component which doesn’t process orreturn any data.
A Driver runner must have a @RunAtDriver method without any parameter.
@RunAtDriverpublic void run() { ...;}
4.6. Defining component layout and configurationThe component configuration is defined in the <component_name>Configuration.java file ofthe package. It consists in defining the configurable part of the component that will bedisplayed in the UI.
To do that, you can specify parameters. When you import the project in your IDE, theparameters that you have specified in the starter are already present.
All input and output components must reference a dataset in theirconfiguration. Refer to Defining datasets and datastores.
4.6.1. Parameter name
Components are configured using their constructor parameters. All parameters can bemarked with the @Option property, which lets you give a name to them.
For the name to be correct, you must follow these guidelines:
• Use a valid Java name.
• Do not include any . character in it.
• Do not start the name with a $.
• Defining a name is optional. If you don’t set a specific name, it defaults to the bytecodename. This can require you to compile with a -parameter flag to avoid ending up withnames such as arg0, arg1, and so on.
Examples of option name:
58 |

Option name Valid
myName
my_name
my.name
$myName
4.6.2. Parameter types
Parameter types can be primitives or complex objects with fields decorated with @Optionexactly like method parameters.
It is recommended to use simple models which can be serialized in orderto ease serialized component implementations.
For example:
class FileFormat implements Serializable { @Option("type") private FileType type = FileType.CSV;
@Option("max-records") private int maxRecords = 1024;}
@PartitionMapper(name = "file-reader")public MyFileReader(@Option("file-path") final File file, @Option("file-format") final FileFormat format) { // ...}
Using this kind of API makes the configuration extensible and component-oriented, whichallows you to define all you need.
The instantiation of the parameters is done from the properties passed to the component.
Primitives
A primitive is a class which can be directly converted from a String to the expected type.
It includes all Java primitives, like the String type itself, but also all types with aorg.apache.xbean.propertyeditor.Converter:
• BigDecimal
• BigInteger
• File
| 59

• InetAddress
• ObjectName
• URI
• URL
• Pattern
• LocalDateTime
• ZonedDateTime
4.6.3. Mapping complex objects
The conversion from property to object uses the Dot notation.
For example, assuming the method parameter was configured with @Option("file"):
file.path = /home/user/input.csvfile.format = CSV
matches
public class FileOptions { @Option("path") private File path;
@Option("format") private Format format;}
List case
Lists rely on an indexed syntax to define their elements.
For example, assuming that the list parameter is named files and that the elements are ofthe FileOptions type, you can define a list of two elements as follows:
files[0].path = /home/user/input1.csvfiles[0].format = CSVfiles[1].path = /home/user/input2.xmlfiles[1].format = EXCEL
if you desire to override a config to truncate an array, use the indexlength, for example to truncate previous example to only CSV, you canset:
60 |

files[length] = 1
Map case
Similarly to the list case, the map uses .key[index] and .value[index] to represent its keysand values:
// Map<String, FileOptions>files.key[0] = first-filefiles.value[0].path = /home/user/input1.csvfiles.value[0].type = CSVfiles.key[1] = second-filefiles.value[1].path = /home/user/input2.xmlfiles.value[1].type = EXCEL
// Map<FileOptions, String>files.key[0].path = /home/user/input1.csvfiles.key[0].type = CSVfiles.value[0] = first-filefiles.key[1].path = /home/user/input2.xmlfiles.key[1].type = EXCELfiles.value[1] = second-file
Avoid using the Map type. Instead, prefer configuring your componentwith an object if this is possible.
4.6.4. Defining Constraints and validations on the configuration
You can use metadata to specify that a field is required or has a minimum size, and so on.This is done using the validation metadata in theorg.talend.sdk.component.api.configuration.constraint package:
MaxLength
Ensure the decorated option size is validated with a higher bound.
• API: @org.talend.sdk.component.api.configuration.constraint.Max
• Name: maxLength
• Parameter Type: double
• Supported Types: — java.lang.CharSequence
• Sample:
| 61

{ "validation::maxLength":"12.34"}
MinLength
Ensure the decorated option size is validated with a lower bound.
• API: @org.talend.sdk.component.api.configuration.constraint.Min
• Name: minLength
• Parameter Type: double
• Supported Types: — java.lang.CharSequence
• Sample:
{ "validation::minLength":"12.34"}
Pattern
Validate the decorated string with a javascript pattern (even into the Studio).
• API: @org.talend.sdk.component.api.configuration.constraint.Pattern
• Name: pattern
• Parameter Type: java.lang.string
• Supported Types: — java.lang.CharSequence
• Sample:
{ "validation::pattern":"test"}
Max
Ensure the decorated option size is validated with a higher bound.
• API: @org.talend.sdk.component.api.configuration.constraint.Max
• Name: max
• Parameter Type: double
• Supported Types: — java.lang.Number — int — short — byte — long — double — float
62 |
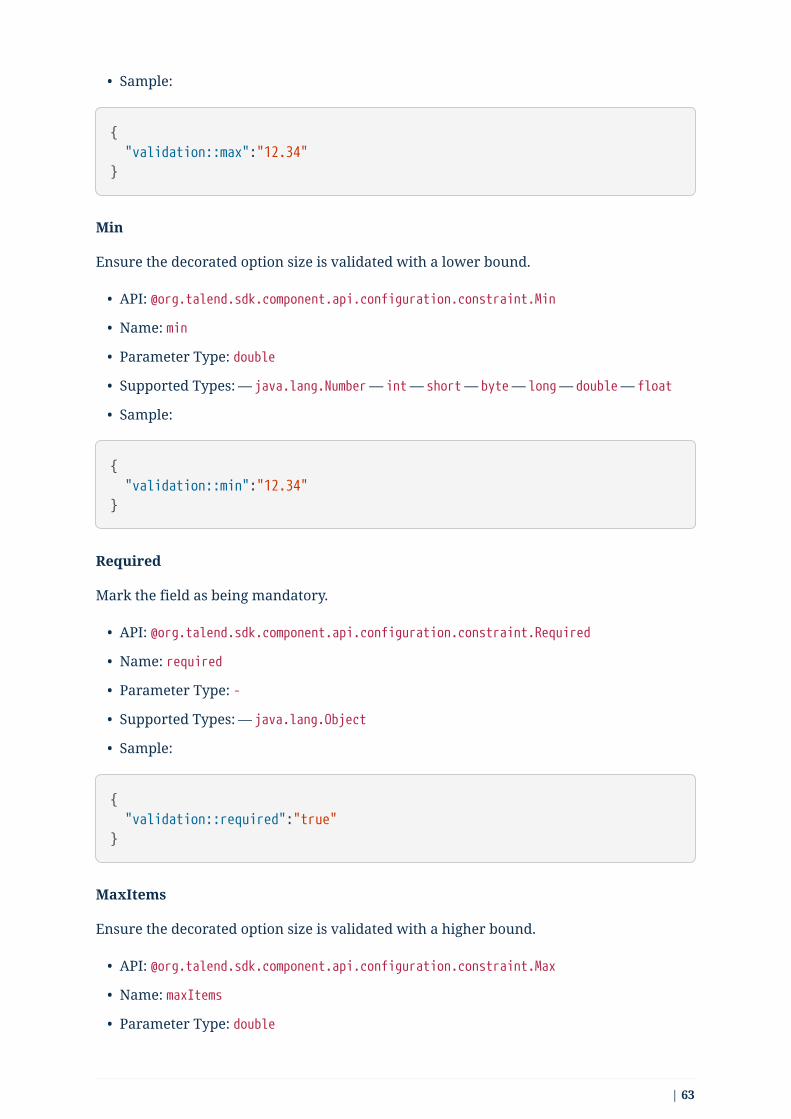
• Sample:
{ "validation::max":"12.34"}
Min
Ensure the decorated option size is validated with a lower bound.
• API: @org.talend.sdk.component.api.configuration.constraint.Min
• Name: min
• Parameter Type: double
• Supported Types: — java.lang.Number — int — short — byte — long — double — float
• Sample:
{ "validation::min":"12.34"}
Required
Mark the field as being mandatory.
• API: @org.talend.sdk.component.api.configuration.constraint.Required
• Name: required
• Parameter Type: -
• Supported Types: — java.lang.Object
• Sample:
{ "validation::required":"true"}
MaxItems
Ensure the decorated option size is validated with a higher bound.
• API: @org.talend.sdk.component.api.configuration.constraint.Max
• Name: maxItems
• Parameter Type: double
| 63

• Supported Types: — java.util.Collection
• Sample:
{ "validation::maxItems":"12.34"}
MinItems
Ensure the decorated option size is validated with a lower bound.
• API: @org.talend.sdk.component.api.configuration.constraint.Min
• Name: minItems
• Parameter Type: double
• Supported Types: — java.util.Collection
• Sample:
{ "validation::minItems":"12.34"}
UniqueItems
Ensure the elements of the collection must be distinct (kind of set).
• API: @org.talend.sdk.component.api.configuration.constraint.Uniques
• Name: uniqueItems
• Parameter Type: -
• Supported Types: — java.util.Collection
• Sample:
{ "validation::uniqueItems":"true"}
When using the programmatic API, metadata is prefixed by tcomp::. Thisprefix is stripped in the web for convenience, and the table above usesthe web keys.
Also note that these validations are executed before the runtime is started (when loadingthe component instance) and that the execution will fail if they don’t pass. If it breaks
64 |

your application, you can disable that validation on the JVM by setting the systemproperty talend.component.configuration.validation.skip to true.
4.6.5. Defining datasets and datastores
Datasets and datastores are configuration types that define how and where to pull thedata from. They are used at design time to create shared configurations that can be storedand used at runtime.
All connectors (input and output components) created using Talend Component Kit mustreference a valid dataset. Each dataset must reference a datastore.
• Datastore: The data you need to connect to the backend.
• Dataset: A datastore coupled with the data you need to execute an action.
| 65

Make sure that:
• a datastore is used in each dataset.
• each dataset has a corresponding input component (mapper oremitter).
• This input component must be able to work with only the dataset partfilled by final users. Any other property implemented for thatcomponent must be optional.
These rules are enforced by the validateDataSet validation. If theconditions are not met, the component builds will fail.
Defining a datastore
A datastore defines the information required to connect to a data source. For example, itcan be made of:
• a URL
• a username
• a password.
You can specify a datastore and its context of use (in which dataset, etc.) from theComponent Kit Starter.
Make sure to modelize the data your components are designed to handlebefore defining datasets and datastores in the Component Kit Starter.
Once you generate and import the project into an IDE, you can find datastores under aspecific datastore node.
Example of datastore:
66 |

package com.mycomponent.components.datastore;
@DataStore("DatastoreA") ①@GridLayout({ ② // The generated component layout will display one configuration entry perline. // Customize it as much as needed. @GridLayout.Row({ "apiurl" }), @GridLayout.Row({ "username" }), @GridLayout.Row({ "password" })})@Documentation("A Datastore made of an API URL, a username, and a password.The password is marked as Credential.") ③public class DatastoreA implements Serializable { @Option @Documentation("") private String apiurl;
@Option @Documentation("") private String username;
@Option @Credential @Documentation("") private String password;
public String getApiurl() { return apiurl; }
public DatastoreA setApiurl(String apiurl) { this.apiurl = apiurl; return this; }
public String getUsername() { return Username; }
public DatastoreA setuUsername(String username) { this.username = username; return this; }
public String getPassword() { return password; }
public DatastoreA setPassword(String password) {
| 67

this.password = password; return this; }}
① Identifying the class as a datastore and naming it.
② Defining the layout of the datastore configuration.
③ Defining each element of the configuration: a URL, a username, and a password. Notethat the password is also marked as a credential.
Defining a dataset
A dataset represents the inbound data. It is generally made of:
• A datastore that defines the connection information needed to access the data.
• A query.
You can specify a dataset and its context of use (in which input and output component it isused) from the Component Kit Starter.
Make sure to modelize the data your components are designed to handlebefore defining datasets and datastores in the Component Kit Starter.
Once you generate and import the project into an IDE, you can find datasets under aspecific dataset node.
Example of dataset referencing the datastore shown above:
68 |

package com.datastorevalidation.components.dataset;
@DataSet("DatasetA") ①@GridLayout({ // The generated component layout will display one configuration entry perline. // Customize it as much as needed. @GridLayout.Row({ "datastore" })})@Documentation("A Dataset configuration containing a simple datastore") ②public class DatasetA implements Serializable { @Option @Documentation("Datastore") private DatastoreA datastore;
public DatastoreA getDatastore() { return datastore; }
public DatasetA setDatastore(DatastoreA datastore) { this.datastore = datastore; return this; }}
① Identifying the class as a dataset and naming it.
② Implementing the dataset and referencing DatastoreA as the datastore to use.
Internationalizing datasets and datastores
The display name of each dataset and datastore must be referenced in themessage.properties file of the family package.
The key for dataset and datastore display names follows a defined pattern:${family}.${configurationType}.${name}._displayName. For example:
ComponentFamily.dataset.DatasetA._displayName=Dataset AComponentFamily.datastore.DatastoreA._displayName=Datastore A
These keys are automatically added for datasets and datastores defined from theComponent Kit Starter.
Reusing datasets and datastores in Talend Studio
When deploying a component or set of components that include datasets and datastoresto Talend Studio, a new node is created under Metadata. This node has the name of thecomponent family that was deployed.
| 69

It allows users to create reusable configurations for datastores and datasets.
With predefined datasets and datastores, users can then quickly fill the componentconfiguration in their jobs. They can do so by selecting Repository as Property Type andby browsing to the predefined dataset or datastore.
How to create a reusable connection in Studio
Studio will generate connection and close components auto for reusing connectionfunction in input and output components, just need to do like this example:
70 |

@Servicepublic class SomeService {
@CreateConnection public Object createConn(@Option("configuration") SomeDataStore dataStore)throws ComponentException { Object connection = null; //get conn object by dataStore return conn; }
@CloseConnection public CloseConnectionObject closeConn() { return new CloseConnectionObject() {
public boolean close() throws ComponentException { Object connection = this.getConnection(); //do close action return true; }
}; }}
Then the runtime mapper and processor only need to use @Connection to get theconnection like this:
@Version(1)@Icon(value = Icon.IconType.CUSTOM, custom = "SomeInput")@PartitionMapper(name = "SomeInput")@Documentation("the doc")public class SomeInputMapper implements Serializable {
@Connection SomeConnection conn;
}
How does the component server interact with datasets and datastores
The component server scans all configuration types and returns a configuration typeindex. This index can be used for the integration into the targeted platforms (Studio, webapplications, and so on).
| 71

Dataset
Mark a model (complex object) as being a dataset.
• API: @org.talend.sdk.component.api.configuration.type.DataSet
• Sample:
{ "tcomp::configurationtype::name":"test", "tcomp::configurationtype::type":"dataset"}
Datastore
Mark a model (complex object) as being a datastore (connection to a backend).
• API: @org.talend.sdk.component.api.configuration.type.DataStore
• Sample:
{ "tcomp::configurationtype::name":"test", "tcomp::configurationtype::type":"datastore"}
DatasetDiscovery
Mark a model (complex object) as being a dataset discovery configuration.
• API: @org.talend.sdk.component.api.configuration.type.DatasetDiscovery
• Sample:
{ "tcomp::configurationtype::name":"test", "tcomp::configurationtype::type":"datasetDiscovery"}
The component family associated with a configuration type(datastore/dataset) is always the one related to the component using thatconfiguration.
The configuration type index is represented as a flat tree that contains all theconfiguration types, which themselves are represented as nodes and indexed by ID.
Every node can point to other nodes. This relation is represented as an array of edges thatprovides the child IDs.
72 |

As an illustration, a configuration type index for the example above can be defined asfollows:
{nodes: { "idForDstore": { datastore:"datastore data", edges:[id:"idForDset"] }, "idForDset": { dataset:"dataset data" } }}
4.6.6. Defining links between properties
If you need to define a binding between properties, you can use a set of annotations:
ActiveIf
If the evaluation of the element at the location matches value then the element isconsidered active, otherwise it is deactivated.
• API: @org.talend.sdk.component.api.configuration.condition.ActiveIf
• Type: if
• Sample:
{ "condition::if::evaluationStrategy":"DEFAULT", "condition::if::negate":"false", "condition::if::target":"test", "condition::if::value":"value1,value2"}
ActiveIfs
Allows to set multiple visibility conditions on the same property.
• API: @org.talend.sdk.component.api.configuration.condition.ActiveIfs
• Type: ifs
• Sample:
| 73
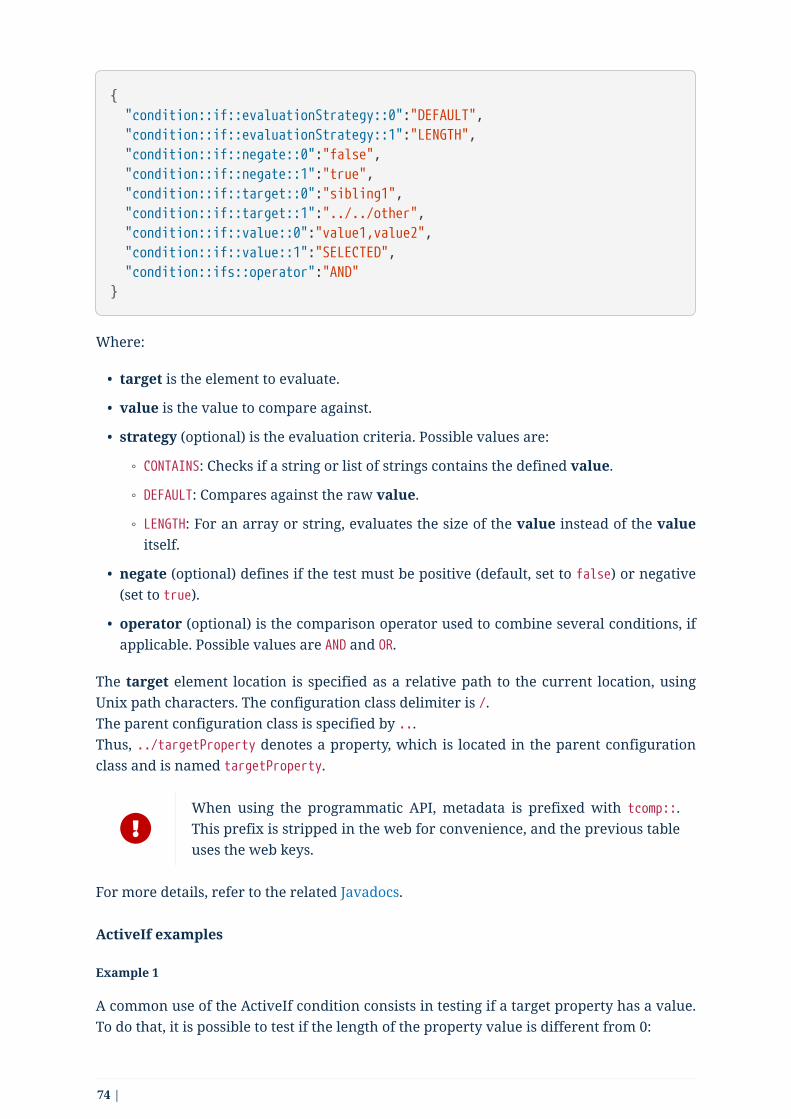
{ "condition::if::evaluationStrategy::0":"DEFAULT", "condition::if::evaluationStrategy::1":"LENGTH", "condition::if::negate::0":"false", "condition::if::negate::1":"true", "condition::if::target::0":"sibling1", "condition::if::target::1":"../../other", "condition::if::value::0":"value1,value2", "condition::if::value::1":"SELECTED", "condition::ifs::operator":"AND"}
Where:
• target is the element to evaluate.
• value is the value to compare against.
• strategy (optional) is the evaluation criteria. Possible values are:
◦ CONTAINS: Checks if a string or list of strings contains the defined value.
◦ DEFAULT: Compares against the raw value.
◦ LENGTH: For an array or string, evaluates the size of the value instead of the valueitself.
• negate (optional) defines if the test must be positive (default, set to false) or negative(set to true).
• operator (optional) is the comparison operator used to combine several conditions, ifapplicable. Possible values are AND and OR.
The target element location is specified as a relative path to the current location, usingUnix path characters. The configuration class delimiter is /.The parent configuration class is specified by ...Thus, ../targetProperty denotes a property, which is located in the parent configurationclass and is named targetProperty.
When using the programmatic API, metadata is prefixed with tcomp::.This prefix is stripped in the web for convenience, and the previous tableuses the web keys.
For more details, refer to the related Javadocs.
ActiveIf examples
Example 1
A common use of the ActiveIf condition consists in testing if a target property has a value.To do that, it is possible to test if the length of the property value is different from 0:
74 |

• target: foo - the path to the property to evaluate.
• strategy: LENGTH - the strategy consists here in testing the length of the property value.
• value: 0 - the length of the property value is compared to 0.
• negate: true - setting negate to true means that the strategy of the target must bedifferent from the value defined. In this case, the LENGTH of the value of the fooproperty must be different from 0.
{ "condition::if::target": "foo", "condition::if::value": "0", "condition::if::negate": "true", "condition::if::evaluationStrategy": "LENGTH",}
Example 2
The following example shows how to implement visibility conditions on several fieldsbased on several checkbox configurations:
• If the first checkbox is selected, an additional input field is displayed.
• if the second or the third checkbox is selected, an additional input field is displayed.
• if both second and third checkboxes are selected, an additional input field is displayed.
| 75

@GridLayout({ // the generated layout put one configuration entry per line, // customize it as much as needed @GridLayout.Row({ "checkbox1" }), @GridLayout.Row({ "checkbox2" }), @GridLayout.Row({ "checkbox3" }), @GridLayout.Row({ "configuration4" }), @GridLayout.Row({ "configuration5" }), @GridLayout.Row({ "configuration6" })})@Documentation("A sample configuration with different visibility conditioncases")public class ActiveifProcessorProcessorConfiguration implements Serializable { @Option @Documentation("") private boolean checkbox1;
@Option @Documentation("") private boolean checkbox2;
@Option @Documentation("") private boolean checkbox3;
@Option @ActiveIf(target = "checkbox1", value = "true") @Documentation("Active if checkbox1 is selected") private String configuration4;
@Option @ActiveIfs(operator = ActiveIfs.Operator.OR, value = { @ActiveIf(target = "checkbox2", value = "true"), @ActiveIf(target = "checkbox3", value = "true") }) @Documentation("Active if checkbox2 or checkbox 3 are selected") private String configuration5;
@Option @ActiveIfs(operator = ActiveIfs.Operator.AND, value = { @ActiveIf(target = "checkbox2", value = "true"), @ActiveIf(target = "checkbox3", value = "true") }) @Documentation("Active if checkbox2 and checkbox 3 are selected") private String configuration6; }
76 |

4.6.7. Adding hints about the rendering
In some cases, you may need to add metadata about the configuration to let the UI renderthat configuration properly.For example, a password value that must be hidden and not a simple clear input box. Forthese cases - if you want to change the UI rendering - you can use a particular set ofannotations:
@DefaultValue
Provide a default value the UI can use - only for primitive fields.
• API: @org.talend.sdk.component.api.configuration.ui.DefaultValue
Snippets
{ "ui::defaultvalue::value":"test"}
@OptionsOrder
Allows to sort a class properties.
• API: @org.talend.sdk.component.api.configuration.ui.OptionsOrder
Snippets
{ "ui::optionsorder::value":"value1,value2"}
@AutoLayout
Request the rendered to do what it thinks is best.
• API: @org.talend.sdk.component.api.configuration.ui.layout.AutoLayout
Snippets
{ "ui::autolayout":"true"}
| 77

@GridLayout
Advanced layout to place properties by row, this is exclusive with @OptionsOrder.
the logic to handle forms (gridlayout names) is to use the only layout ifthere is only one defined, else to check if there are Main and Advanced andif at least Main exists, use them, else use all available layouts.
• API: @org.talend.sdk.component.api.configuration.ui.layout.GridLayout
Snippets
{ "ui::gridlayout::value1::value":"first|second,third", "ui::gridlayout::value2::value":"first|second,third"}
@GridLayouts
Allow to configure multiple grid layouts on the same class, qualified with a classifier(name)
• API: @org.talend.sdk.component.api.configuration.ui.layout.GridLayouts
Snippets
{ "ui::gridlayout::Advanced::value":"another", "ui::gridlayout::Main::value":"first|second,third"}
@HorizontalLayout
Put on a configuration class it notifies the UI an horizontal layout is preferred.
• API: @org.talend.sdk.component.api.configuration.ui.layout.HorizontalLayout
Snippets
{ "ui::horizontallayout":"true"}
@VerticalLayout
Put on a configuration class it notifies the UI a vertical layout is preferred.
78 |

• API: @org.talend.sdk.component.api.configuration.ui.layout.VerticalLayout
Snippets
{ "ui::verticallayout":"true"}
@Code
Mark a field as being represented by some code widget (vs textarea for instance).
• API: @org.talend.sdk.component.api.configuration.ui.widget.Code
Snippets
{ "ui::code::value":"test"}
@Credential
Mark a field as being a credential. It is typically used to hide the value in the UI.
• API: @org.talend.sdk.component.api.configuration.ui.widget.Credential
Snippets
{ "ui::credential":"true"}
@DateTime
Mark a field as being a date. It supports and is implicit - which means you don’t need toput that annotation on the option - for java.time.ZonedDateTime, java.time.LocalDate andjava.time.LocalDateTime and is unspecified for other types.
• API: @org.talend.sdk.component.api.configuration.ui.widget.DateTime
Snippets
{ "ui::datetime":"time"}
| 79

{ "ui::datetime":"date"}
{ "ui::datetime":"datetime"}
{ "ui::datetime":"zoneddatetime"}
@Structure
Mark a List<String> or List<Object> field as being represented as the component dataselector.
• API: @org.talend.sdk.component.api.configuration.ui.widget.Structure
Snippets
{ "ui::structure::discoverSchema":"test", "ui::structure::type":"IN", "ui::structure::value":"test"}
@TextArea
Mark a field as being represented by a textarea(multiline text input).
• API: @org.talend.sdk.component.api.configuration.ui.widget.TextArea
Snippets
{ "ui::textarea":"true"}
When using the programmatic API, metadata is prefixed with tcomp::.This prefix is stripped in the web for convenience, and the previous tableuses the web keys.
80 |

You can also check this example about masking credentials.
Target support should cover org.talend.core.model.process.EParameterFieldType but youneed to ensure that the web renderer is able to handle the same widgets.
4.6.8. Implementation samples
You can find sample working components for each of the configuration cases below:
• ActiveIf: Add visibility conditions on some configurations.
• Checkbox: Add checkboxes or toggles to your component.
• Code: Allow users to enter their own code.
• Credential: Mark a configuration as sensitive data to avoid displaying it as plain text.
• Datastore: Add a button allowing to check the connection to a datastore.
• Datalist: Two ways of implementing a dropdown list with predefined choices.
• Integer: Add numeric fields to your component configuration.
• Min/Max: Specify a minimum or a maximum value for a numeric configuration.
• Multiselect: Add a list and allow users to select multiple elements of that list.
• Pattern: Enforce rules based on a specific a pattern to prevent users from enteringinvalid values.
• Required: Make a configuration mandatory.
• Suggestions: Suggest possible values in a field based on what the users are entering.
• Table: Add a table to your component configuration.
• Textarea: Add a text area for configurations expecting long texts or values.
• Input: Add a simple text input field to the component configuration
• Update: Provide a button allowing to fill a part of the component configuration basedon a service.
• Validation: Specify constraints to make sure that a URL is well formed.
4.7. Component execution logicEach type of component has its own execution logic. The same basic logic is applied to allcomponents of the same type, and is then extended to implement each componentspecificities. The project generated from the starter already contains the basic logic foreach component.
Talend Component Kit framework relies on several primitive components.
All components can use @PostConstruct and @PreDestroy annotations to initialize or releasesome underlying resource at the beginning and the end of a processing.
| 81

In distributed environments, class constructor are called on clustermanager nodes. Methods annotated with @PostConstruct and @PreDestroyare called on worker nodes. Thus, partition plan computation andpipeline tasks are performed on different nodes.
① The created task is a JAR file containing class information, which describes the pipeline(flow) that should be processed in cluster.
② During the partition plan computation step, the pipeline is analyzed and split intostages. The cluster manager node instantiates mappers/processors, gets estimated datasize using mappers, and splits created mappers according to the estimated data size.All instances are then serialized and sent to the worker node.
③ Serialized instances are received and deserialized. Methods annotated with@PostConstruct are called. After that, pipeline execution starts. The @BeforeGroupannotated method of the processor is called before processing the first element inchunk.After processing the number of records estimated as chunk size, the @AfterGroupannotated method of the processor is called. Chunk size is calculated depending on theenvironment the pipeline is processed by. Once the pipeline is processed, methodsannotated with @PreDestroy are called.
All the methods managed by the framework must be public. Privatemethods are ignored.
82 |

The framework is designed to be as declarative as possible but also tostay extensible by not using fixed interfaces or method signatures. Thisallows to incrementally add new features of the underlyingimplementations.
4.8. Internationalizing componentsIn common cases, you can store messages using a properties file in your component
| 83

module to use internationalization.
This properties file must be stored in the same package as the related components andnamed Messages. For example, org.talend.demo.MyComponent usesorg.talend.demo.Messages[locale].properties.
This file already exists when you import a project generated from the starter.
4.8.1. Default components keys
Out of the box components are internationalized using the same location logic for theresource bundle. The supported keys are:
Name Pattern Description
${family}._displayName Display name of the family
${family}.${category}._category Display name of the category ${category} inthe family ${family}.
${family}.${configurationType}.${name}._displayName
Display name of a configuration type(dataStore or dataSet). Important: this key isread from the family package (not the classpackage), to unify the localization of themetadata.
${family}.actions.${actionType}.${actionName}._displayName
Display name of an action of the family.Specifying it is optional and will default onthe action name if not set.
${family}.${component_name}._displayName
Display name of the component (used by theGUIs)
${property_path}._displayName Display name of the option.
${property_path}._documentation Equivalent to @Documentation("…") butsupporting internationalization (seeMaven/Gradle documentation goal/task).
${property_path}._placeholder Placeholder of the option.
${simple_class_name}.${property_name}._displayName
Display name of the option using its classname.
${simple_class_name}.${property_name}._documentation
See ${property_path}._documentation.
${simple_class_name}.${property_name}._placeholder
See ${property_path}._placeholder.
${enum_simple_class_name}.${enum_name}._displayName
Display name of the enum_name value of theenum_simple_class_name enumeration.
84 |

Name Pattern Description
${property_path orsimple_class_name}._gridlayout.${layout_name}._displayName
Display name of tab corresponding to thelayout (tab). Note that this requires the servertalend.component.server.gridlayout.translati
on.support option to be set to true and it is notyet supported by the Studio.
Example of configuration for a component named list and belonging to the memory family(@Emitter(family = "memory", name = "list")):
memory.list._displayName = Memory List
4.8.2. Internationalizing a configuration class
Configuration classes can be translated using the simple class name in the messagesproperties file. This is useful in case of common configurations shared by multiplecomponents.
For example, if you have a configuration class as follows :
public class MyConfig {
@Option private String host;
@Option private int port;}
You can give it a translatable display name by adding${simple_class_name}.${property_name}._displayName to Messages.properties under thesame package as the configuration class.
MyConfig.host._displayName = Server Host NameMyConfig.host._placeholder = Enter Server Host Name...
MyConfig.port._displayName = Server PortMyConfig.port._placeholder = Enter Server Port...
If you have a display name using the property path, it overrides thedisplay name defined using the simple class name. This rule also appliesto placeholders.
| 85

4.9. Managing component versions and migrationIf some changes impact the configuration, they can be managed through a migrationhandler at the component level (enabling trans-model migration support).
The @Version annotation supports a migrationHandler method which migrates theincoming configuration to the current model.
For example, if the filepath configuration entry from v1 changed to location in v2, youcan remap the value in your MigrationHandler implementation.
A best practice is to split migrations into services that you can inject in the migrationhandler (through constructor) rather than managing all migrations directly in thehandler. For example:
// full component code structure skipped for brievity, kept only migrationpart@Version(value = 3, migrationHandler = MyComponent.Migrations.class)public class MyComponent { // the component code...
private interface VersionConfigurationHandler { Map<String, String> migrate(Map<String, String> incomingData); }
public static class Migrations { private final List<VersionConfigurationHandler> handlers;
// VersionConfigurationHandler implementations are decorated with@Service public Migrations(final List<VersionConfigurationHandler> migrations){ this.handlers = migrations; this.handlers.sort(/*some custom logic*/); }
@Override public Map<String, String> migrate(int incomingVersion, Map<String,String> incomingData) { Map<String, String> out = incomingData; for (MigrationHandler handler : handlers) { out = handler.migrate(out); } } }}
86 |

What is important to notice in this snippet is the fact that you can organize yourmigrations the way that best fits your component.
If you need to apply migrations in a specific order, make sure that they are sorted.
Consider this API as a migration callback rather than a migration API.Adjust the migration code structure you need behind theMigrationHandler, based on your component requirements, using serviceinjection.
4.9.1. Difference between migrating a component configuration anda nested configuration
A nested configuration always migrates itself with any root prefix, whereas a componentconfiguration always roots the full configuration.For example, if your model is the following:
@Version// ...public class MyComponent implements Serializable { public MyComponent(@Option("configuration") final MyConfig config) { // ... }
// ...}
@DataStorepublic class MyConfig implements Serializable { @Option private MyDataStore datastore;}
@Version@DataStorepublic class MyDataStore implements Serializable { @Option private String url;}
Then the component will see the path configuration.datastore.url for the datastore urlwhereas the datastore will see the path url for the same property. You can see it asconfiguration types - @DataStore, @DataSet - being configured with an empty root path.
| 87

4.10. Masking sensitive data in yourconfigurationThis tutorial shows how to correctly mask the sensitive data of a componentconfiguration.
It is very common to define credentials when configuring a component. Most commoncases can include passwords, secrets, keys (it is also common to show them in plain textin a textarea), and tokens.
For example, this REST client configuration specifies that a username, a password and atoken are needed to connect to the REST API:
@Data // or getters/setters if you don't use lombok@GridLayout({ @GridLayout.Row({ "username", "password" }), @GridLayout.Row("token")})public class RestApiConfiguration implements Serializable {
@Option private String username;
@Option private String password;
@Option private String token;}
This configuration defines that these credentials are three simple String, represented asplain inputs, which causes severe security concerns:
• The password and token are clearly readable in all Talend user interfaces (Studio orWeb),
• The password and token are potentially stored in clear.
To avoid this behavior, you need to mark sensitive data as @Credential.
4.10.1. Marking sensitive data
Talend Component Kit provides you with the @Credential marker, that you can use on any@Option. This marker has two effects:
• It Replaces the default input widget by a password oriented widget
• It Requests the Studio or the Talend Cloud products to store the data as sensitive data
88 |

(as encrypted values).
In order to ensure that the password and token are never stored in clear or shown in thecode, add the @Credential marker to the sensitive data. For example:
@Data // or getters/setters if you don't use lombok@GridLayout({ @GridLayout.Row({ "username", "password" }), @GridLayout.Row("token")})public class RestApiConfiguration implements Serializable {
@Option private String username;
@Option @Credential private String password;
@Option @Credential private String token;}
Your password and token (or any other sensitive data that you need to mask) are notaccessible by error anymore.
4.11. Implementing batch processing
4.11.1. What is batch processing
Batch processing refers to the way execution environments process batches of datahandled by a component using a grouping mechanism.
By default, the execution environment of a component automatically decides how toprocess groups of records and estimates an optimal group size depending on the systemcapacity. With this default behavior, the size of each group could sometimes be optimizedfor the system to handle the load more effectively or to match business requirements.
For example, real-time or near real-time processing needs often imply processing smallerbatches of data, but more often. On the other hand, a one-time processing withoutbusiness contraints is more effectively handled with a batch size based on the systemcapacity.
Final users of a component developed with the Talend Component Kit that integrates thebatch processing logic described in this document can override this automatic size. To dothat, a maxBatchSize option is available in the component settings and allows to set the
| 89

maximum size of each group of data to process.
A component processes batch data as follows:
• Case 1 - No maxBatchSize is specified in the component configuration. The executionenvironment estimates a group size of 4. Records are processed by groups of 4.
• Case 2 - The runtime estimates a group size of 4 but a maxBatchSize of 3 is specified inthe component configuration. The system adapts the group size to 3. Records areprocessed by groups of 3.
Processing schema (values are examples):
4.11.2. Batch processing implementation logic
Batch processing relies on the sequence of three methods: @BeforeGroup, @ElementListener,@AfterGroup, that you can customize to your needs as a component Developer.
The group size automatic estimation logic is automatically implementedwhen a component is deployed to a Talend application.
Each group is processed as follows until there is no record left:
1. The @BeforeGroup method resets a record buffer at the beginning of each group.
2. The records of the group are assessed one by one and placed in the buffer as follows:The @ElementListener method tests if the buffer size is greater or equal to the definedmaxBatchSize. If it is, the records are processed. If not, then the current record isbuffered.
3. The previous step happens for all records of the group. Then the @AfterGroup methodtests if the buffer is empty.
Group execution detail (values are examples):
90 |

You can define the following logic in the processor configuration:
import java.io.Serializable;import java.util.ArrayList;import java.util.Collection;
import javax.json.JsonObject;
import org.talend.sdk.component.api.processor.AfterGroup;import org.talend.sdk.component.api.processor.BeforeGroup;import org.talend.sdk.component.api.processor.ElementListener;import org.talend.sdk.component.api.processor.Processor;
@Processor(name = "BulkOutputDemo")public class BulkProcessor implements Serializable { private Collection<JsonObject> buffer;
@BeforeGroup public void begin() { buffer = new ArrayList<>(); }
@ElementListener public void bufferize(final JsonObject object) { buffer.add(object); }
@AfterGroup public void commit() { // saves buffered records at once (bulk) }}
You can also use the condensed syntax for this kind of processor:
| 91

@Processor(name = "BulkOutputDemo")public class BulkProcessor implements Serializable {
@AfterGroup public void commit(final Collection<Record> records) { // saves records }}
When writing tests for components, you can force the maxBatchSizeparameter value by setting it with the following syntax: <configurationprefix>.$maxBatchSize=10.
You can learn more about processors in this document.
4.12. Implementing streaming on a componentBy default, input components are designed to receive a one-time batch of data to process.By enabling the streaming mode, you can instead set your component to process acontinuous incoming flow of data.
When streaming is enabled on an input component, the component tries to pull data fromits producer. When no data is pulled, it waits for a defined period of time before trying topull data again, and so on. This period of time between tries is defined by a strategy.
This document explains how to configure this strategy and the cases where it can fit yourneeds.
4.12.1. Choosing between batch and streaming
Before enabling streaming on your component, make sure that it fits the scope andrequirements of your project and that regular batch processing cannot be used instead.
Streaming is designed to help you dealing with real-time or near real-time data processingcases, and should be used only for such cases. Enabling streaming will impact theperformance when processing batches of data.
4.12.2. Enabling streaming from the Component Kit starter
You can enable streaming right from the design phase of the project by enabling theStream toggle in the basic configuration of your future component in the Component KitStarter.
Doing so adds a default streaming-ready configuration to your component whengenerating the project.This default configuration implements a constant pause duration of 500 ms between
92 |

retries, with no limit of retries.
4.12.3. Configuring streaming from the project
If streaming was not enabled at all during the project generation or if you need toimplement a more specific configuration, you can change the default settings according toyour needs:
1. Add the infinite=true parameter to your component class.
2. Define the number of retries allowed in the component family LocalConfiguration,using the talend.input.streaming.retry.maxRetries parameter. It is set by default toInteger.MAX_VALUE.
3. Define the pausing strategy between retries in the component familyLocalConfiguration, using the talend.input.streaming.retry.strategy parameter.Possible values are:
◦ constant (default). It sets a constant pause duration between retries.
◦ exponential. It sets an exponential backoff pause duration.
See the tables below for more details about each strategy.
| 93

Constant strategy
Parameter Description Defaultvalue
talend.input.streaming.retry.constant.timeout
Pause duration for the constantstrategy, in ms.
500
Exponential strategy
Parameter Description Default value
talend.input.streaming.retry.exponential.exponent
Exponent of the exponentialcalculation.
1.5
talend.input.streaming.retry.exponential.randomizationFactor
Randomization factor used inthe calculation.
0.5
talend.input.streaming.retry.exponential.maxDuration
Maximum pausing durationbetween two retries.
5*60*1000 (5minutes)
talend.input.streaming.retry.exponential.initialBackOff
Initial backoff value. 1000 (1second)
The values of these parameters are then used in the following calculations to determinethe exact pausing duration between two retries.
For more clarity in the formulas below, parameter names have beenreplaced with variables.
First, the current interval duration is calculated:
A = min(B xx E^I, F)
Where:
• A: currentIntervalMillis
• B: initialBackOff
• E: exponent
• I: current number of retries
• F: maxDuration
Then, from the current interval duration, the next interval duration is calculated:
D = min(F, A + ((R xx 2-1) xx C xx A))
Where:
• D: nextBackoffMillis
• F: maxDuration
94 |
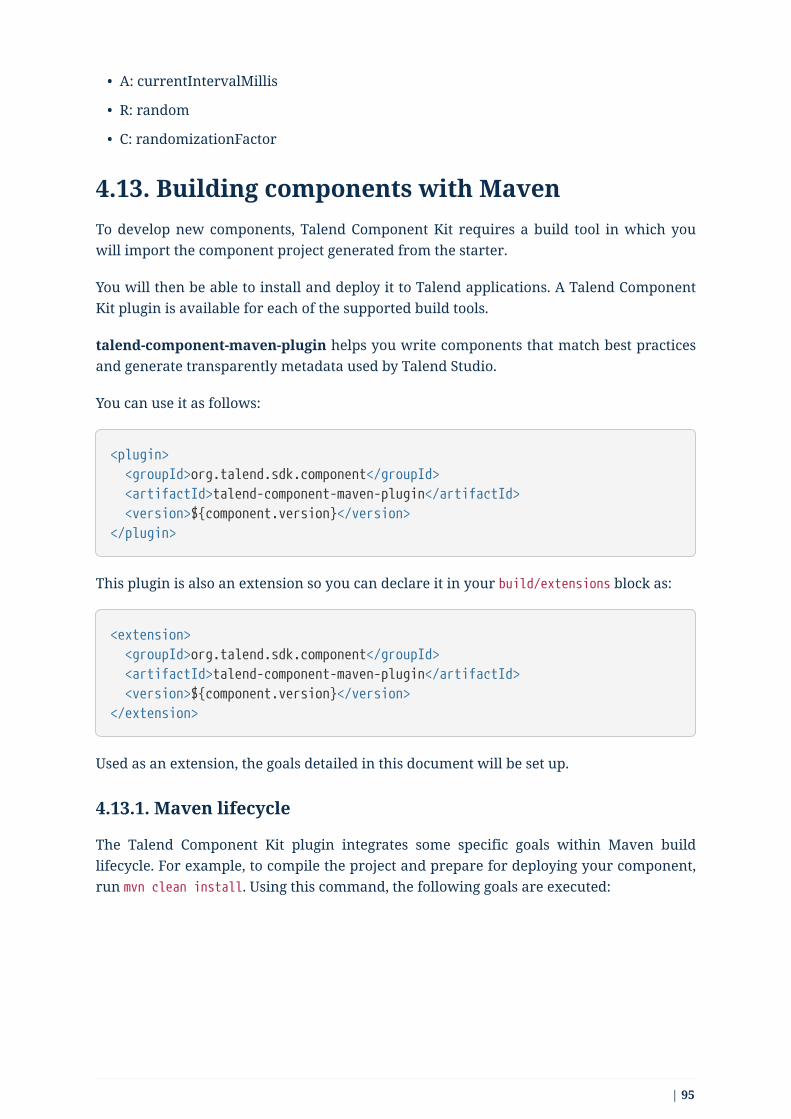
• A: currentIntervalMillis
• R: random
• C: randomizationFactor
4.13. Building components with MavenTo develop new components, Talend Component Kit requires a build tool in which youwill import the component project generated from the starter.
You will then be able to install and deploy it to Talend applications. A Talend ComponentKit plugin is available for each of the supported build tools.
talend-component-maven-plugin helps you write components that match best practicesand generate transparently metadata used by Talend Studio.
You can use it as follows:
<plugin> <groupId>org.talend.sdk.component</groupId> <artifactId>talend-component-maven-plugin</artifactId> <version>${component.version}</version></plugin>
This plugin is also an extension so you can declare it in your build/extensions block as:
<extension> <groupId>org.talend.sdk.component</groupId> <artifactId>talend-component-maven-plugin</artifactId> <version>${component.version}</version></extension>
Used as an extension, the goals detailed in this document will be set up.
4.13.1. Maven lifecycle
The Talend Component Kit plugin integrates some specific goals within Maven buildlifecycle. For example, to compile the project and prepare for deploying your component,run mvn clean install. Using this command, the following goals are executed:
| 95

The build is split into several phases. The different goals are executed in the order shownabove. Talend Component Kit uses default goals from the Maven build lifecycle and addsadditional goals to the building and packaging phases.
Goals added to the build by Talend Component Kit are detailed below. The default lifecycleis detailed in Maven documentation.
4.13.2. Talend Component Kit Maven goals
The Talend Component Kit plugin for Maven integrates several specific goals into Mavenbuild lifecycle.
To run specific goals individually, run the following command from the root of theproject, by adapting it with each goal name, parameters and values:
$ mvn talend-component:<name_of_the_goal>[:<execution id>]-D<param_user_property>=<param_value>
Dependencies
The first goal is a shortcut for the maven-dependency-plugin. It creates the TALEND-INF/dependencies.txt file with the compile and runtime dependencies, allowing thecomponent to use it at runtime:
96 |

<plugin> <groupId>org.talend.sdk.component</groupId> <artifactId>talend-component-maven-plugin</artifactId> <version>${component.version}</version> <executions> <execution> <id>talend-dependencies</id> <goals> <goal>dependencies</goal> </goals> </execution> </executions></plugin>
Scan
The scan-descriptor goal scans the current module and optionally other configuredfolders to precompute the list of interesting classes for the framework (components,services). It allows to save some bootstrap time when launching a job, which can be usefulin some execution cases:
<plugin> <groupId>org.talend.sdk.component</groupId> <artifactId>talend-component-maven-plugin</artifactId> <version>${component.version}</version> <executions> <execution> <id>talend-scan-descriptor</id> <goals> <goal>scan-descriptor</goal> </goals> </execution> </executions></plugin>
Configuration - excluding parameters used by default only:
Name Description User property Default
output Where to dump the scan result.Note: It is not supported to changethat value in the runtime.
talend.scan.output
${project.build.outputDirectory}/TALEND-INF/scanning.properties
| 97

Name Description User property Default
scannedDirectories
Explicit list of directories to scan. talend.scan.scannedDirectories
If not set,defaults to${project.build.outputDirectory}
scannedDependencies
Explicit list of dependencies toscan - set them in thegroupId:artifactId format. The listis appended to the file to scan.
talend.scan.scannedDependencies
-
SVG2PNG
The svg2png goal scans a directory - default to target/classes/icons - to find .svg files andcopy them in a PNG version size at 32x32px and named with the suffix _icon32.png toenable the studio to read it:
<plugin> <groupId>org.talend.sdk.component</groupId> <artifactId>talend-component-maven-plugin</artifactId> <version>${component.version}</version> <executions> <execution> <id>talend-svg2png</id> <goals> <goal>svg2png</goal> </goals> </execution> </executions></plugin>
Configuration:
Name Description User property Default
icons Where to scan for the SVG icons toconvert in PNG.
talend.icons.source
${project.build.outputDirectory}/icons
98 |

Name Description User property Default
workarounds By default the shape of the iconwill be enforce in the RGBchannels (in white) using the alphaas reference. This is useful forblack/white images using alpha toshape the picture because Eclipse -Talend Studio - caches icons usingRGB but not alpha channel,pictures not using alpha channelto draw their shape should disablethat workaround.
talend.icons.workaround
true
if you use that plugin, ensure to set it before the validate mojo otherwisevalidation can miss some png files.
Validating the component programming model
This goal helps you validate the common programming model of the component. Toactivate it, you can use following execution definition:
<plugin> <groupId>org.talend.sdk.component</groupId> <artifactId>talend-component-maven-plugin</artifactId> <version>${component.version}</version> <executions> <execution> <id>talend-component-validate</id> <goals> <goal>validate</goal> </goals> </execution> </executions></plugin>
It is bound to the process-classes phase by default. When executed, it performs severalvalidations that can be disabled by setting the corresponding flags to false in the<configuration> block of the execution:
Name Description User property Default
validateInternationalization
Validates that resource bundlesare presents and containcommonly used keys (for example,_displayName)
talend.validation.internationalization
true
| 99

Name Description User property Default
validateModel Ensures that components passvalidations of the ComponentManagerand Talend Component runtime
talend.validation.model
true
validateSerializable
Ensures that components areSerializable. This is a sanitycheck, the component is notactually serialized here. If youhave a doubt, make sure to test it.It also checks that any@Internationalized class is validand has its keys.
talend.validation.serializable
true
validateMetadata
Ensures that components have an@Icon and a @Version defined.
talend.validation.metadata
true
validateDataStore
Ensures that any @DataStoredefines a @HealthCheck and has aunique name.
talend.validation.datastore
true
validateDataSet Ensures that any @DataSet has aunique name. Also ensures thatthere is a source instantiable justfilling the dataset properties (allothers not being required). Finally,the validation checks that eachinput or output component uses adataset and that this dataset has adatastore.
talend.validation.dataset
true
validateComponent
Ensures that the nativeprogramming model is respected.You can disable it when usinganother programming model likeBeam.
talend.validation.component
true
validateActions Validates action signatures foractions not tolerating dynamicbinding (@HealthCheck,@DynamicValues, and so on). It isrecommended to keep it set totrue.
talend.validation.action
true
validateFamily Validates the family by verifyingthat the package containing the@Components has a @Icon propertydefined.
talend.validation.family
true
100 |

Name Description User property Default
validateDocumentation
Ensures that all components and@Option properties have adocumentation using the@Documentation property.
talend.validation.documentation
true
validateLayout Ensures that the layout isreferencing existing options andproperties.
talend.validation.layout
true
validateOptionNames
Ensures that the option names arecompliant with the framework. Itis highly recommended and saferto keep it set to true.
talend.validation.options
true
validateLocalConfiguration
Ensures that if any TALEND-INF/local-
configuration.properties existsthen keys start with the familyname.
talend.validation.localConfiguration
true
validateOutputConnection
Ensures that an output has onlyone input branch.
talend.validation.validateOutputConnection
true
validatePlaceholder
Ensures that string options have aplaceholder. It is highlyrecommended to turn thisproperty on.
talend.validation.placeholder
false
locale The locale used to validateinternationalization.
talend.validation.locale
root
Generating the component documentation
The asciidoc goal generates an Asciidoc file documenting your component from theconfiguration model (@Option) and the @Documentation property that you can add to optionsand to the component itself.
| 101

<plugin> <groupId>org.talend.sdk.component</groupId> <artifactId>talend-component-maven-plugin</artifactId> <version>${component.version}</version> <executions> <execution> <id>talend-component-documentation</id> <goals> <goal>asciidoc</goal> </goals> </execution> </executions></plugin>
Name Description User property Default
level Level of the root title. talend.documentation.level
2 (==)
output Output folder path. It isrecommended to keep it to thedefault value.
talend.documentation.output
${classes}/TALEND-INF/documentation.adoc
formats Map of the renderings to do. Keysare the format (pdf or html) andvalues the output paths.
talend.documentation.formats
-
attributes Asciidoctor attributes to use forthe rendering when formats is set.
talend.documentation.attributes
-
templateEngine Template engine configuration forthe rendering.
talend.documentation.templateEngine
-
templateDir Template directory for therendering.
talend.documentation.templateDir
-
title Document title. talend.documentation.title
${project.name}
version The component version. It defaultsto the pom version
talend.documentation.version
${project.version}
workDir The template directory for theAsciidoctor rendering - if 'formats'is set.
talend.documentation.workdDir
${project.build.directory}/talend-component/workdir
attachDocumentations
Allows to attach (and deploy) thedocumentations (.adoc, andformats keys) to the project.
talend.documentation.attach
true
102 |
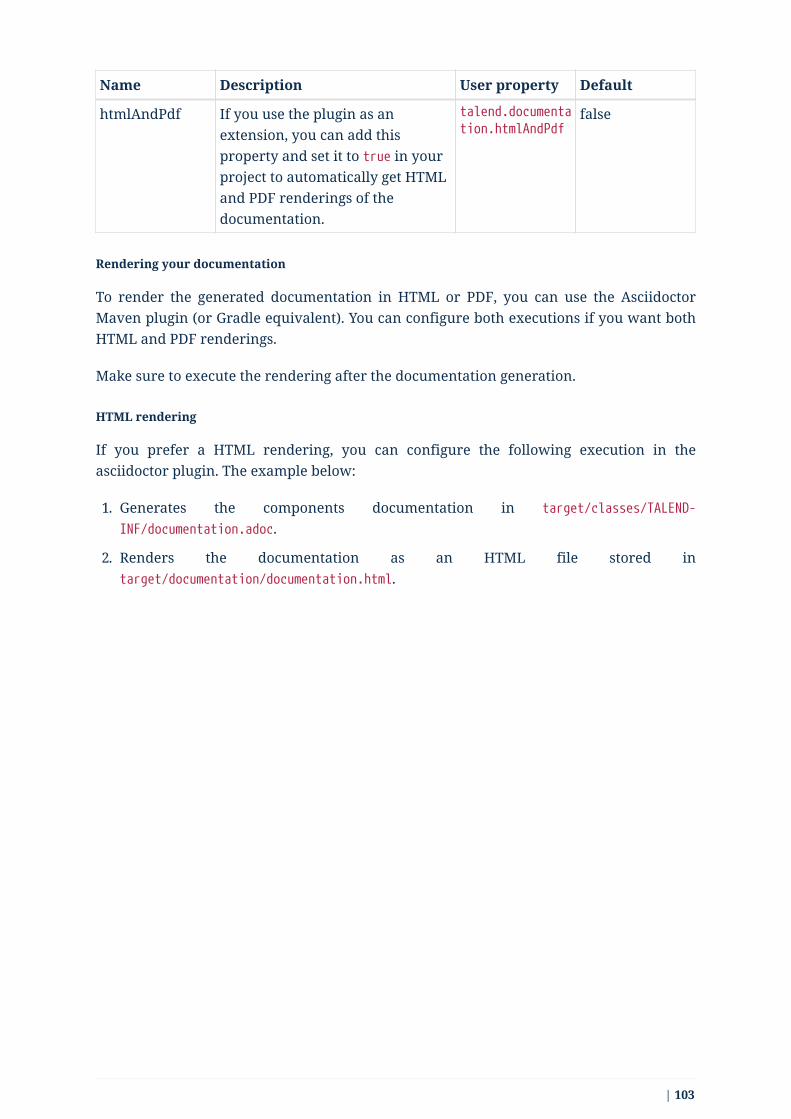
Name Description User property Default
htmlAndPdf If you use the plugin as anextension, you can add thisproperty and set it to true in yourproject to automatically get HTMLand PDF renderings of thedocumentation.
talend.documentation.htmlAndPdf
false
Rendering your documentation
To render the generated documentation in HTML or PDF, you can use the AsciidoctorMaven plugin (or Gradle equivalent). You can configure both executions if you want bothHTML and PDF renderings.
Make sure to execute the rendering after the documentation generation.
HTML rendering
If you prefer a HTML rendering, you can configure the following execution in theasciidoctor plugin. The example below:
1. Generates the components documentation in target/classes/TALEND-
INF/documentation.adoc.
2. Renders the documentation as an HTML file stored intarget/documentation/documentation.html.
| 103

<plugin> ① <groupId>org.talend.sdk.component</groupId> <artifactId>talend-component-maven-plugin</artifactId> <version>${talend-component-kit.version}</version> <executions> <execution> <id>documentation</id> <phase>prepare-package</phase> <goals> <goal>asciidoc</goal> </goals> </execution> </executions></plugin><plugin> ② <groupId>org.asciidoctor</groupId> <artifactId>asciidoctor-maven-plugin</artifactId> <version>1.5.7</version> <executions> <execution> <id>doc-html</id> <phase>prepare-package</phase> <goals> <goal>process-asciidoc</goal> </goals> <configuration> <sourceDirectory>${project.build.outputDirectory}/TALEND-INF</sourceDirectory> <sourceDocumentName>documentation.adoc</sourceDocumentName> <outputDirectory>${project.build.directory}/documentation</outputDirectory> <backend>html5</backend> </configuration> </execution> </executions></plugin>
PDF rendering
If you prefer a PDF rendering, you can configure the following execution in theasciidoctor plugin:
104 |

<plugin> <groupId>org.asciidoctor</groupId> <artifactId>asciidoctor-maven-plugin</artifactId> <version>1.5.7</version> <executions> <execution> <id>doc-html</id> <phase>prepare-package</phase> <goals> <goal>process-asciidoc</goal> </goals> <configuration> <sourceDirectory>${project.build.outputDirectory}/TALEND-INF</sourceDirectory> <sourceDocumentName>documentation.adoc</sourceDocumentName> <outputDirectory>${project.build.directory}/documentation</outputDirectory> <backend>pdf</backend> </configuration> </execution> </executions> <dependencies> <dependency> <groupId>org.asciidoctor</groupId> <artifactId>asciidoctorj-pdf</artifactId> <version>1.5.0-alpha.16</version> </dependency> </dependencies></plugin>
Including the documentation into a document
If you want to add some more content or a title, you can include the generated documentinto another document using Asciidoc include directive.
For example:
| 105

= Super ComponentsSuper Writer:toc::toclevels: 3:source-highlighter: prettify:numbered::icons: font:hide-uri-scheme::imagesdir: images
include::{generated_doc}/documentation.adoc[]
To be able to do that, you need to pass the generated_doc attribute to the plugin. Forexample:
<plugin> <groupId>org.asciidoctor</groupId> <artifactId>asciidoctor-maven-plugin</artifactId> <version>1.5.7</version> <executions> <execution> <id>doc-html</id> <phase>prepare-package</phase> <goals> <goal>process-asciidoc</goal> </goals> <configuration> <sourceDirectory>${project.basedir}/src/main/asciidoc</sourceDirectory> <sourceDocumentName>my-main-doc.adoc</sourceDocumentName> <outputDirectory>${project.build.directory}/documentation</outputDirectory> <backend>html5</backend> <attributes> <generated_adoc>${project.build.outputDirectory}/TALEND-INF</generated_adoc> </attributes> </configuration> </execution> </executions></plugin>
This is optional but allows to reuse Maven placeholders to pass paths, which can beconvenient in an automated build.
You can find more customization options on Asciidoctor website.
106 |

Testing a component web rendering
Testing the rendering of your component configuration into the Studio requires deployingthe component in Talend Studio. Refer to the Studio documentation.
In the case where you need to deploy your component into a Cloud (web) environment,you can test its web rendering by using the web goal of the plugin:
1. Run the mvn talend-component:web command.
2. Open the following URL in a web browser: localhost:8080.
3. Select the component form you want to see from the treeview on the left. The selectedform is displayed on the right.
Two parameters are available with the plugin:
• serverPort, which allows to change the default port (8080) of the embedded server. Itsassociated user property is talend.web.port.
• serverArguments, that you can use to pass Meecrowave options to the server. Learnmore about that configuration at openwebbeans.apache.org/meecrowave/meecrowave-core/cli.html.
Make sure to install the artifact before using this command because itreads the component JAR from the local Maven repository.
Finally, you can switch the lang of the component UI (documentation, form) usinglanguage query parameter in the webapp. For instance localhost:8080?language=fr.
Changing the UI bundle
If you built a custom UI (JS + CSS) bundle and want to test it in the web application, youcan configure it in the pom.xml file as follows:
<configuration> <uiConfiguration> <jsLocation>https://cdn.talend.com/myapp.min.js</jsLocation> <cssLocation>https://cdn.talend.com/myapp.min.css</cssLocation> </uiConfiguration></configuration>
This is an advanced feature designed for expert users. Use it withcaution.
Generating the component archive
Component ARchive (.car) is the way to bundle a component to share it in the Talendecosystem. It is an executable Java ARchive (.jar) containing a metadata file and a nested
| 107

Maven repository containing the component and its dependencies.
mvn talend-component:car
This command creates a .car file in your build directory. This file can be shared on Talendplatforms.
This command has some optional parameters:
Name Description User property Default
attach Specifies whether the componentarchive should be attached.
talend.car.attach
true
classifier The classifier to use if attach is setto true.
talend.car.classifier
component
metadata Additional custom metadata tobundle in the component archive.
- -
output Specifies the output path andname of the archive
talend.car.output
${project.build.directory}/${project.build.finalName}.car
packaging Specifies the packaging - ${project.packaging}
This CAR is executable and exposes the studio-deploy command which takes a TalendStudio home path as parameter. When executed, it installs the dependencies into theStudio and registers the component in your instance. For example:
# for a studiojava -jar mycomponent.car studio-deploy /path/to/my/studioorjava -jar mycomponent.car studio-deploy --location /path/to/my/studio
# for a m2 provisioningjava -jar mycomponent.car maven-deploy /path/to/.m2/repositoryorjava -jar mycomponent.car maven-deploy --location /path/to/.m2/repository
You can also upload the dependencies to your Nexus server using the following command:
java -jar mycomponent.car deploy-to-nexus --url <nexus url> --repo <repositoryname> --user <username> --pass <password> --threads <parallel threads number>--dir <temp directory>
108 |

In this command, Nexus URL and repository name are mandatory arguments. All otherarguments are optional. If arguments contain spaces or special symbols, you need toquote the whole value of the argument. For example:
--pass "Y0u will \ not G4iess i' ^"
Deploying to the Studio
The deploy-in-studio goal deploys the current component module into a local TalendStudio instance.
Table 1. Parameters
Name Description User property Default
studioHome Path to the Studiohome directory
talend.component.studioHome
-
studioM2 Path to the Studiomaven repository ifnot the default one
talend.component.studioM2
-
You can use the following command from the root folder of your project:
$ mvn talend-component:deploy-in-studio-Dtalend.component.studioHome="<studio_path>"
Help
The help goal displays help information on talend-component-maven-plugin. Call mvn
talend-component:help -Ddetail=true -Dgoal=<goal-name> to display the parameter detailsof a specific goal.
Table 2. Parameters
Name Description User property Default
detail Displays all settable properties foreach goal.
detail false
goal The name of the goal for which toshow help. If unspecified, all goalsare displayed.
goal -
indentSize Number of spaces per indentationlevel. This integer should bepositive.
indentSize 2
lineLength Maximum length of a display line.This integer should be positive.
lineLength 80
| 109

4.14. Building components with GradleTo develop new components, Talend Component Kit requires a build tool in which youwill import the component project generated from the starter. With this build tool, youwill also be able to implement the logic of your component and to install and deploy it toTalend applications. A Talend Component Kit plugin is available for each of the supportedbuild tools.
gradle-talend-component helps you write components that match the best practices. It isinspired from the Maven plugin and adds the ability to generate automatically thedependencies.txt file used by the SDK to build the component classpath. For moreinformation on the configuration, refer to the Maven properties matching the attributes.
By default, Gradle does not log information messages. To see messages, use --info in yourcommands. Refer to Gradle’s documentation to learn about log levels.
You can use it as follows:
buildscript { repositories { mavenLocal() mavenCentral() } dependencies { classpath "org.talend.sdk.component:gradle-talend-component:${talendComponentVersion}" }}
apply plugin: 'org.talend.sdk.component'apply plugin: 'java'
// optional customizationtalendComponentKit { // dependencies.txt generation, replaces maven-dependency-plugin dependenciesLocation = "TALEND-INF/dependencies.txt" boolean skipDependenciesFile = false;
// classpath for validation utilities sdkVersion = "${talendComponentVersion}" apiVersion = "${talendComponentApiVersion}"
// documentation skipDocumentation = false documentationOutput = new File(....) documentationLevel = 2 // first level will be == in the generated .adoc documentationTitle = 'My Component Family' // defaults to ${project.name} documentationAttributes = [:] // adoc attributes
110 |

documentationFormats = [:] // renderings to do documentationVersion = 1.1 // defaults to the .pom version
// validation skipValidation = false validateFamily = true validateSerializable = true validateInternationalization = true validateModel = true validateOptionNames = true validateMetadata = true validateComponent = true validateDataStore = true validateDataSet = true validateActions = true validateLocalConfiguration = true validateOutputConnection = true validateLayout = true validateDocumentation = true
// web serverArguments = [] serverPort = 8080
// car carAttach = true carClassifier = component // classifier to use if carAttach is set to true carOutput = new File(....) carMetadata = [:] // custom meta (string key-value pairs) carPackaging = ${project.packaging}
// deploy-in-studio studioHome = "C:\<pathToSutdio>"
// svg2png icons = 'resources/main/icons' useIconWorkarounds = true}
4.15. Wrapping a Beam I/O
4.15.1. Limitations
This part is limited to specific kinds of Beam PTransform:
• PTransform<PBegin, PCollection<?>> for inputs.
• PTransform<PCollection<?>, PDone> for outputs. Outputs must use a single (composite
| 111

or not) DoFn in their apply method.
4.15.2. Wrapping an input
To illustrate the input wrapping, this procedure uses the following input as a startingpoint (based on existing Beam inputs):
@AutoValuepublic abstract [static] class Read extends PTransform<PBegin, PCollection<String>> {
// config
@Override public PCollection<String> expand(final PBegin input) { return input.apply( org.apache.beam.sdk.io.Read.from(new BoundedElasticsearchSource(this,null))); }
// ... other transform methods}
To wrap the Read in a framework component, create a transform delegating to that Readwith at least a @PartitionMapper annotation and using @Option constructor injections toconfigure the component. Also make sure to follow the best practices and to specify @Iconand @Version.
@PartitionMapper(family = "myfamily", name = "myname")public class WrapRead extends PTransform<PBegin, PCollection<String>> { private PTransform<PBegin, PCollection<String>> delegate;
public WrapRead(@Option("dataset") final WrapReadDataSet dataset) { delegate = TheIO.read().withConfiguration(this.createConfigurationFrom(dataset)); }
@Override public PCollection<String> expand(final PBegin input) { return delegate.expand(input); }
// ... other methods like the mapping with the native configuration(createConfigurationFrom)}
112 |

4.15.3. Wrapping an output
To illustrate the output wrapping, this procedure uses the following output as a startingpoint (based on existing Beam outputs):
@AutoValuepublic abstract [static] class Write extends PTransform<PCollection<String>,PDone> {
// configuration withXXX(...)
@Override public PDone expand(final PCollection<String> input) { input.apply(ParDo.of(new WriteFn(this))); return PDone.in(input.getPipeline()); }
// other methods of the transform}
You can wrap this output exactly the same way you wrap an input, but using @Processorinstead of:
@Processor(family = "myfamily", name = "myname")public class WrapWrite extends PTransform<PCollection<String>, PDone> { private PTransform<PCollection<String>, PDone> delegate;
public WrapWrite(@Option("dataset") final WrapWriteDataSet dataset) { delegate = TheIO.write().withConfiguration(this.createConfigurationFrom(dataset)); }
@Override public PDone expand(final PCollection<String> input) { return delegate.expand(input); }
// ... other methods like the mapping with the native configuration(createConfigurationFrom)}
4.15.4. Tip
Note that the org.talend.sdk.component.runtime.beam.transform.DelegatingTransform classfully delegates the "expansion" to another transform. Therefore, you can extend it and
| 113

implement the configuration mapping:
@Processor(family = "beam", name = "file")public class BeamFileOutput extends DelegatingTransform<PCollection<String>,PDone> {
public BeamFileOutput(@Option("output") final String output) { super(TextIO.write() .withSuffix("test") .to(FileBasedSink.convertToFileResourceIfPossible(output))); }}
4.15.5. Advanced
In terms of classloading, when you write an I/O, the Beam SDK Java core stack is assumedas provided in Talend Component Kit runtime. This way, you don’t need to include it inthe compile scope, it would be ignored anyway.
Coder
If you need a JSonCoder, you can use theorg.talend.sdk.component.runtime.beam.factory.service.PluginCoderFactory service,which gives you access to the JSON-P and JSON-B coders.
There is also an Avro coder, which uses the FileContainer. It ensures it is self-containedfor IndexedRecord and it does not require—as the default Apache Beam AvroCoder—to setthe schema when creating a pipeline.It consumes more space and therefore is slightly slower, but it is fine for DoFn, since it doesnot rely on serialization in most cases. Seeorg.talend.sdk.component.runtime.beam.transform.avro.IndexedRecordCoder.
JsonObject to IndexedRecord
If your PCollection is made of JsonObject records, and you want to convert them toIndexedRecord, you can use the following PTransforms:
IndexedRecordToJson
converts an IndexedRecord to a JsonObject.
JsonToIndexedRecord
converts a JsonObject to an IndexedRecord.
SchemalessJsonToIndexedRecord
converts a JsonObject to an IndexedRecord with AVRO schema inference.
114 |

Record coder
There are two main provided coder for Record:
FullSerializationRecordCoder
it will unwrap the record as an Avro IndexedRecord and serialize it with its schema.This can indeed have a performance impact but, due to the structure of component, itwill not impact the runtime performance in general - except with direct runner -because the runners will optimize the pipeline accurately.
SchemaRegistryCoder
it will serialize the Avro IndexedRecord as well but it will ensure the schema is in theSchemaRegistry to be able to deserialize it when needed. This implementation is fasterbut the default implementation of the registry is "in memory" so will only work with asingle worker node. You can extend it using Java SPI mecanism to use a customdistributed implementation.
Sample
Sample input based on Beam Kafka:
@Version@Icon(Icon.IconType.KAFKA)@Emitter(name = "Input")@AllArgsConstructor@Documentation("Kafka Input")public class KafkaInput extends PTransform<PBegin, PCollection<Record>> { ①
private final InputConfiguration configuration;
private final RecordBuilderFactory builder;
private final PluginCoderFactory coderFactory;
private KafkaIO.Read<byte[], byte[]> delegate() { final KafkaIO.Read<byte[], byte[]> read = KafkaIO.<byte[], byte[]>read() .withBootstrapServers(configuration.getBootstrapServers()) .withTopics(configuration.getTopics().stream().map(InputConfiguration.Topic::getName).collect(toList())) .withKeyDeserializer(ByteArrayDeserializer.class).withValueDeserializer(ByteArrayDeserializer.class); if (configuration.getMaxResults() > 0) { return read.withMaxNumRecords(configuration.getMaxResults()); } return read; }
| 115
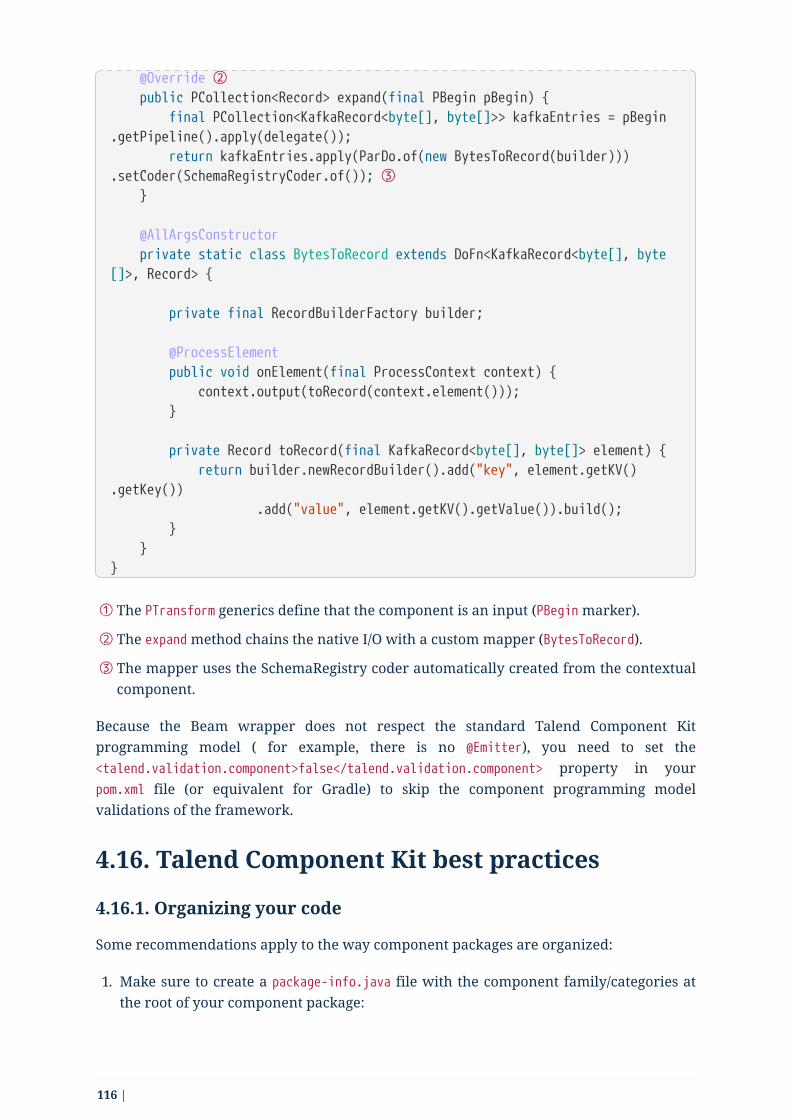
@Override ② public PCollection<Record> expand(final PBegin pBegin) { final PCollection<KafkaRecord<byte[], byte[]>> kafkaEntries = pBegin.getPipeline().apply(delegate()); return kafkaEntries.apply(ParDo.of(new BytesToRecord(builder))).setCoder(SchemaRegistryCoder.of()); ③ }
@AllArgsConstructor private static class BytesToRecord extends DoFn<KafkaRecord<byte[], byte[]>, Record> {
private final RecordBuilderFactory builder;
@ProcessElement public void onElement(final ProcessContext context) { context.output(toRecord(context.element())); }
private Record toRecord(final KafkaRecord<byte[], byte[]> element) { return builder.newRecordBuilder().add("key", element.getKV().getKey()) .add("value", element.getKV().getValue()).build(); } }}
① The PTransform generics define that the component is an input (PBegin marker).
② The expand method chains the native I/O with a custom mapper (BytesToRecord).
③ The mapper uses the SchemaRegistry coder automatically created from the contextualcomponent.
Because the Beam wrapper does not respect the standard Talend Component Kitprogramming model ( for example, there is no @Emitter), you need to set the<talend.validation.component>false</talend.validation.component> property in yourpom.xml file (or equivalent for Gradle) to skip the component programming modelvalidations of the framework.
4.16. Talend Component Kit best practices
4.16.1. Organizing your code
Some recommendations apply to the way component packages are organized:
1. Make sure to create a package-info.java file with the component family/categories atthe root of your component package:
116 |

@Components(family = "jdbc", categories = "Database")package org.talend.sdk.component.jdbc;
import org.talend.sdk.component.api.component.Components;
2. Create a package for the configuration.
3. Create a package for the actions.
4. Create a package for the component and one sub-package by type of component(input, output, processors, and so on).
4.16.2. Configuring components
Serializing your configuration
It is recommended to serialize your configuration in order to be able to pass it throughother components.
Input and output components
When building a new component, the first step is to identify the way it must beconfigured.
The two main concepts are:
1. The DataStore which is the way you can access the backend.
2. The DataSet which is the way you interact with the backend.
For example:
Example description DataStore DataSet
Accessing a relationaldatabase like MySQL
JDBC driver, URL, username,password
Query to execute, rowmapper, and so on.
Accessing a file system File pattern (or directory +file extension/prefix/…)
File format, buffer size, andso on.
It is common to have the dataset including the datastore, because both are required towork. However, it is recommended to replace this pattern by defining both dataset anddatastore in a higher level configuration model. For example:
| 117

@DataSetpublic class MyDataSet { // ...}
@DataStorepublic class MyDataStore { // ...}
public class MyComponentConfiguration { @Option private MyDataSet dataset;
@Option private MyDataStore datastore;}
About actions
Input and output components are particular because they can be linked to a set of actions.It is recommended to wire all the actions you can apply to ensure the consumers of yourcomponent can provide a rich experience to their users.
The most common actions are the following ones:
@Checkable (DataStore)
This action exposes a way to ensure the datastore/connection works.
Configuration example:
118 |

@DataStore@Checkablepublic class JdbcDataStore implements Serializable {
@Option private String driver;
@Option private String url;
@Option private String username;
@Option private String password;}
Action example:
@HealthCheckpublic HealthCheckStatus healthCheck(@Option("datastore") JdbcDataStoredatastore) { if (!doTest(dataStore)) { // often add an exception message mapping or equivalent return new HealthCheckStatus(Status.KO, "Test failed"); } return new HealthCheckStatus(Status.KO, e.getMessage());}
Limitations
Until the studio integration is complete, it is recommended to limit processors to oneinput.
Processor components
Configuring processor components is simpler than configuring input and outputcomponents because it is specific for each component. For example, a mapper takes themapping between the input and output models:
| 119

public class MappingConfiguration { @Option private Map<String, String> fieldsMapping;
@Option private boolean ignoreCase;
//...}
4.16.3. Handling UI interactions
It is recommended to provide as much information as possible to let the UI work with thedata during its edition.
Validations
Light validations
Light validations are all the validations you can execute on the client side. They are listedin the UI hint section.
Use light validations first before going with custom validations because they are moreefficient.
Custom validations
Custom validations enforce custom code to be executed, but are heavier to execute.
Prefer using light validations when possible.
Define an action with the parameters needed for the validation and link the option youwant to validate to this action. For example, to validate a dataset for a JDBC driver:
120 |

// ...public class JdbcDataStore implements Serializable {
@Option @Validable("driver") private String driver;
// ...}
@AsyncValidation("driver")public ValidationResult validateDriver(@Option("value") String driver) { if (findDriver(driver) != null) { return new ValidationResult(Status.OK, "Driver found"); } return new ValidationResult(Status.KO, "Driver not found");}
You can also define a Validable class and use it to validate a form by setting it on yourwhole configuration:
// Note: some parts of the API were removed for clarity
public class MyConfiguration {
// a lot of @Options}
public MyComponent { public MyComponent(@Validable("configuration") MyConfiguration config) { // ... }
//...}
@AsyncValidation("configuration")public ValidationResult validateDriver(@Option("value") MyConfigurationconfiguration) { if (isValid(configuration)) { return new ValidationResult(Status.OK, "Configuration valid"); } return new ValidationResult(Status.KO, "Driver not valid ${because ...}");}
| 121

The parameter binding of the validation method uses the same logic asthe component configuration injection. Therefore, the @Option methodspecifies the prefix to use to reference a parameter.It is recommended to use @Option("value") until you know exactly whyyou don’t use it. This way, the consumer can match the configurationmodel and just prefix it with value. to send the instance to validate.
Validations are triggers based on "events". If you mark part of a configuration as@Validable but this configuration is translated to a widget without any interaction, then novalidation will happen. The rule of thumb is to mark only primitives and simple types (listof primitives) as @Validable.
Completion
It can be handy and user-friendly to provide completion on some fields. For example, todefine completion for available drivers:
// ...public class JdbcDataStore implements Serializable {
@Option @Completable("driver") private String driver;
// ...}
@Completion("driver")public CompletionList findDrivers() { return new CompletionList(findDriverList());}
Component representation
Each component must have its own icon:
@Icon(Icon.IconType.DB_INPUT)@PartitionMapper(family = "jdbc", name = "input")public class JdbcPartitionMapper implements Serializable {}
You can use talend.surge.sh/icons/ to find the icon you want to use.
122 |

4.16.4. Enforcing versioning on components
It is recommended to enforce the version of your component, event though it is notmandatory for the first version.
@Version(1)@PartitionMapper(family = "jdbc", name = "input")public class JdbcPartitionMapper implements Serializable {}
If you break a configuration entry in a later version; make sure to:
1. Upgrade the version.
2. Support a migration of the configuration.
@Version(value = 2, migrationHandler = JdbcPartitionMapper.Migrations.class)@PartitionMapper(family = "jdbc", name = "input")public class JdbcPartitionMapper implements Serializable {
public static class Migrations implements MigrationHandler { // implement your migration }}
4.16.5. Testing components
Testing your components is critical. You can use unit and simple standalone JUnit tests,but it is also highly recommended to have Beam tests in order to make sure that yourcomponent works in Big Data.
4.17. Component LoadingTalend Component scanning is based on plugins. To make sure that plugins can bedeveloped in parallel and avoid conflicts, they need to be isolated (component or group ofcomponents in a single jar/plugin).
Multiple options are available:
• Graph classloading: this option allows you to link the plugins and dependenciestogether dynamically in any direction.For example, the graph classloading can be illustrated by OSGi containers.
• Tree classloading: a shared classloader inherited by plugin classloaders. However,plugin classloader classes are not seen by the shared classloader, nor by other plugins.
| 123

For example, the tree classloading is commonly used by Servlet containers whereplugins are web applications.
• Flat classpath: listed for completeness but rejected by design because it doesn’t complywith this requirement.
In order to avoid much complexity added by this layer, Talend Component Kit relies on atree classloading. The advantage is that you don’t need to define the relationship withother plugins/dependencies, because it is built-in.
Here is a representation of this solution:
The shared area contains Talend Component Kit API, which only contains by default theclasses shared by the plugins.
Then, each plugin is loaded with its own classloader and dependencies.
4.17.1. Packaging a plugin
This section explains the overall way to handle dependencies but theTalend Maven plugin provides a shortcut for that.
A plugin is a JAR file that was enriched with the list of its dependencies. By default, TalendComponent Kit runtime is able to read the output of maven-dependency-plugin in TALEND-INF/dependencies.txt. You just need to make sure that your component defines thefollowing plugin:
124 |

<plugin> <groupId>org.apache.maven.plugins</groupId> <artifactId>maven-dependency-plugin</artifactId> <version>3.0.2</version> <executions> <execution> <id>create-TALEND-INF/dependencies.txt</id> <phase>process-resources</phase> <goals> <goal>list</goal> </goals> <configuration> <outputFile>${project.build.outputDirectory}/TALEND-INF/dependencies.txt</outputFile> </configuration> </execution> </executions></plugin>
Once build, check the JAR file and look for the following lines:
$ unzip -p target/mycomponent-1.0.0-SNAPSHOT.jar TALEND-INF/dependencies.txt
The following files have been resolved: org.talend.sdk.component:component-api:jar:1.0.0-SNAPSHOT:provided org.apache.geronimo.specs:geronimo-annotation_1.3_spec:jar:1.0:provided org.superbiz:awesome-project:jar:1.2.3:compile junit:junit:jar:4.12:test org.hamcrest:hamcrest-core:jar:1.3:test
What is important to see is the scope related to the artifacts:
• The APIs (component-api and geronimo-annotation_1.3_spec) are provided becauseyou can consider them to be there when executing (they come with the framework).
• Your specific dependencies (awesome-project in the example above) are marked ascompile: they are included as needed dependencies by the framework (note that usingruntime works too).
• the other dependencies are ignored. For example, test dependencies.
4.17.2. Packaging an application
Even if a flat classpath deployment is possible, it is not recommended because it wouldthen reduce the capabilities of the components.
| 125

Dependencies
The way the framework resolves dependencies is based on a local Maven repositorylayout. As a quick reminder, it looks like:
.├── groupId1│ └── artifactId1│ ├── version1│ │ └── artifactId1-version1.jar│ └── version2│ └── artifactId1-version2.jar└── groupId2 └── artifactId2 └── version1 └── artifactId2-version1.jar
This is all the layout the framework uses. The logic converts t-uple {groupId, artifactId,version, type (jar)} to the path in the repository.
Talend Component Kit runtime has two ways to find an artifact:
• From the file system based on a configured Maven 2 repository.
• From a fat JAR (uber JAR) with a nested Maven repository under MAVEN-INF/repository.
The first option uses either ${user.home}/.m2/repository (default) or a specific pathconfigured when creating a ComponentManager. The nested repository option needs someconfiguration during the packaging to ensure the repository is correctly created.
Creating a nested Maven repository with maven-shade-plugin
To create the nested MAVEN-INF/repository repository, you can use the nested-maven-repository extension:
126 |

<plugin> <groupId>org.apache.maven.plugins</groupId> <artifactId>maven-shade-plugin</artifactId> <version>3.2.1</version> <executions> <execution> <phase>package</phase> <goals> <goal>shade</goal> </goals> <configuration> <transformers> <transformer implementation="org.talend.sdk.component.container.maven.shade.ContainerDependenciesTransformer"> <session>${session}</session> </transformer> </transformers> </configuration> </execution> </executions> <dependencies> <dependency> <groupId>org.talend.sdk.component</groupId> <artifactId>nested-maven-repository</artifactId> <version>${the.plugin.version}</version> </dependency> </dependencies></plugin>
Listing needed plugins
Plugins are usually programmatically registered. If you want to make some of themautomatically available, you need to generate a TALEND-INF/plugins.properties file thatmaps a plugin name to coordinates found with the Maven mechanism described above.
You can enrich maven-shade-plugin to do it:
| 127

<plugin> <groupId>org.apache.maven.plugins</groupId> <artifactId>maven-shade-plugin</artifactId> <version>3.2.1</version> <executions> <execution> <phase>package</phase> <goals> <goal>shade</goal> </goals> <configuration> <transformers> <transformer implementation="org.talend.sdk.component.container.maven.shade.PluginTransformer"> <session>${session}</session> </transformer> </transformers> </configuration> </execution> </executions> <dependencies> <dependency> <groupId>org.talend.sdk.component</groupId> <artifactId>nested-maven-repository</artifactId> <version>${the.plugin.version}</version> </dependency> </dependencies></plugin>
maven-shade-plugin extensions
Here is a final job/application bundle based on maven-shade-plugin:
<plugin> <groupId>org.apache.maven.plugins</groupId> <artifactId>maven-shade-plugin</artifactId> <version>3.2.1</version> <configuration> <createDependencyReducedPom>false</createDependencyReducedPom> <filters> <filter> <artifact><strong>:</strong></artifact> <excludes> <exclude>META-INF/<strong>.SF</exclude> <exclude>META-INF/</strong>.DSA</exclude> <exclude>META-INF/*.RSA</exclude> </excludes>
128 |
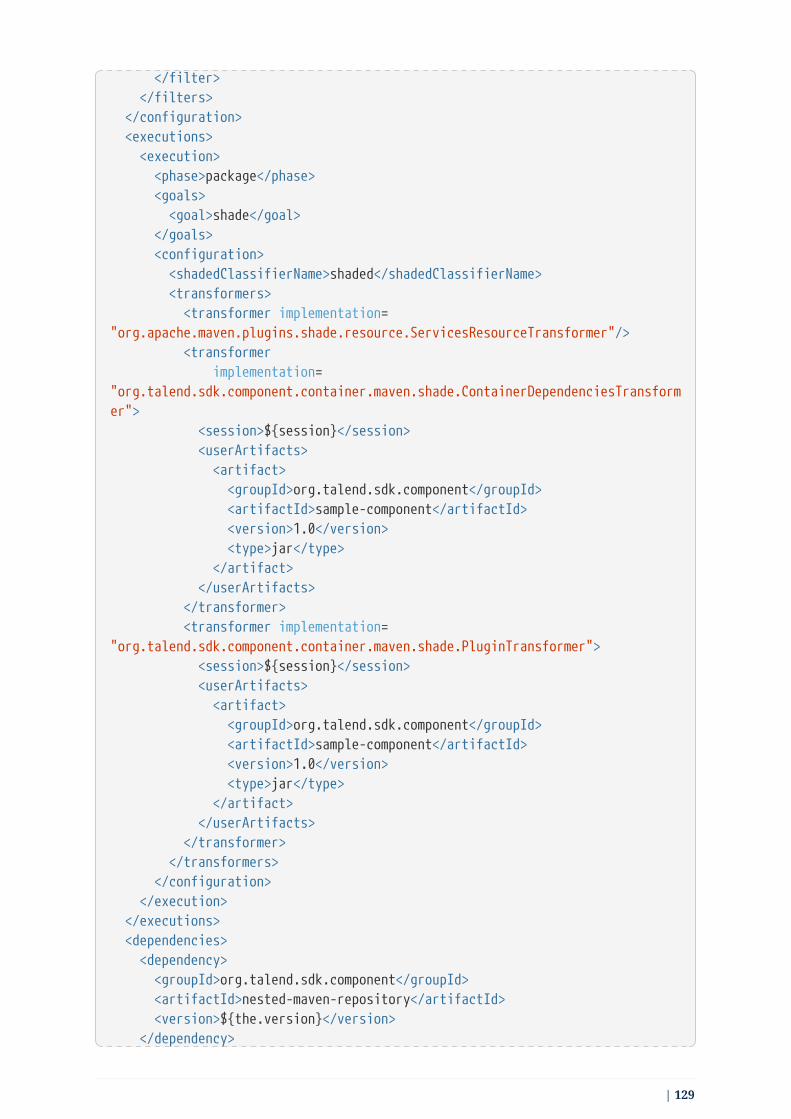
</filter> </filters> </configuration> <executions> <execution> <phase>package</phase> <goals> <goal>shade</goal> </goals> <configuration> <shadedClassifierName>shaded</shadedClassifierName> <transformers> <transformer implementation="org.apache.maven.plugins.shade.resource.ServicesResourceTransformer"/> <transformer implementation="org.talend.sdk.component.container.maven.shade.ContainerDependenciesTransformer"> <session>${session}</session> <userArtifacts> <artifact> <groupId>org.talend.sdk.component</groupId> <artifactId>sample-component</artifactId> <version>1.0</version> <type>jar</type> </artifact> </userArtifacts> </transformer> <transformer implementation="org.talend.sdk.component.container.maven.shade.PluginTransformer"> <session>${session}</session> <userArtifacts> <artifact> <groupId>org.talend.sdk.component</groupId> <artifactId>sample-component</artifactId> <version>1.0</version> <type>jar</type> </artifact> </userArtifacts> </transformer> </transformers> </configuration> </execution> </executions> <dependencies> <dependency> <groupId>org.talend.sdk.component</groupId> <artifactId>nested-maven-repository</artifactId> <version>${the.version}</version> </dependency>
| 129

</dependencies></plugin>
The configuration unrelated to transformers depends on yourapplication.
ContainerDependenciesTransformer embeds a Maven repository and PluginTransformer tocreate a file that lists (one per line) artifacts (representing plugins).
Both transformers share most of their configuration:
• session: must be set to ${session}. This is used to retrieve dependencies.
• scope: a comma-separated list of scopes to include in the artifact filtering (note that thedefault will rely on provided but you can replace it by compile, runtime,runtime+compile, runtime+system or test).
• include: a comma-separated list of artifacts to include in the artifact filtering.
• exclude: a comma-separated list of artifacts to exclude in the artifact filtering.
• userArtifacts: set of artifacts to include (groupId, artifactId, version, type - optional,file - optional for plugin transformer, scope - optional) which can be forced inline. Thisparameter is mainly useful for PluginTransformer.
• includeTransitiveDependencies: should transitive dependencies of the components beincluded. Set to true by default. It is active for userArtifacts.
• includeProjectComponentDependencies: should component project dependencies beincluded. Set to false by default. It is not needed when a job project uses isolation forcomponents.
With the component tooling, it is recommended to keep default locations.Also if you need to use project dependencies, you can need to refactoryour project structure to ensure component isolation.Talend Component Kit lets you handle that part but the recommendedpractice is to use userArtifacts for the components instead of project<dependencies>.
ContainerDependenciesTransformer
ContainerDependenciesTransformer specific configuration is as follows:
• repositoryBase: base repository location (MAVEN-INF/repository by default).
• ignoredPaths: a comma-separated list of folders not to create in the output JAR. This iscommon for folders already created by other transformers/build parts.
PluginTransformer
ContainerDependenciesTransformer specific configuration is the following one:
130 |

• pluginListResource: base repository location (default to TALEND-
INF/plugins.properties).
For example, if you want to list only the plugins you use, you can configure thistransformer as follows:
<transformer implementation="org.talend.sdk.component.container.maven.shade.PluginTransformer"> <session>${session}</session> <include>org.talend.sdk.component:component-x,org.talend.sdk.component:component-y,org.talend.sdk.component:component-z</include></transformer>
4.17.3. Component scanning rules and default exclusions
The framework uses two kind of filterings when scanning your component. One based onthe JAR content - the presence of TALEND-INF/dependencies.txt and one based on thepackage name. Make sure that your component definitions (including services) are in ascanned module if they are not registered manually usingComponentManager.instance().addPlugin(), and that the component package is notexcluded.
Package Scanning
Since the framework can be used in the case of fatjars or shades, and because it still usesscanning, it is important to ensure we don’t scan the whole classes for performancesreason.
Therefore, the following packages are ignored:
• avro.shaded
• com.codehale.metrics
• com.ctc.wstx
• com.datastax.driver
• com.fasterxml.jackson
• com.google.common
• com.google.thirdparty
• com.ibm.wsdl
• com.jcraft.jsch
• com.kenai
• com.sun.istack
| 131

• com.sun.xml
• com.talend.shaded
• com.thoughtworks
• io.jsonwebtoken
• io.netty
• io.swagger
• javax
• jnr
• junit
• net.sf.ehcache
• net.shibboleth
• org.aeonbits.owner
• org.apache
• org.bouncycastle
• org.codehaus
• org.cryptacular
• org.eclipse
• org.fusesource
• org.h2
• org.hamcrest
• org.hsqldb
• org.jasypt
• org.jboss
• org.joda
• org.jose4j
• org.junit
• org.jvnet
• org.metatype
• org.objectweb
• org.openejb
• org.opensaml
• org.slf4j
• org.swizzle
• org.terracotta
132 |

• org.tukaani
• org.yaml
• serp
it is not recommanded but possible to add in your plugin module aTALEND-INF/scanning.properties file with classloader.includes andclassloader.excludes entries to refine the scanning with custom rules. Insuch a case, exclusions win over inclusions.
5. Testing componentsDeveloping new components includes testing them in the required executionenvironments. Use the following articles to learn about the best practices and theavailable options to fully test your components.
• Component testing best practices
• Component testing kit
• Beam testing
• Testing in multiple environments
• Reusing Maven credentials
• Generating data for testing
• Simple/Test Pipeline API
• Beam Pipeline API
5.1. Testing best practicesThis section mainly concerns tools that can be used with JUnit. You can use most of thesebest practices with TestNG as well.
5.1.1. Parameterized tests
Parameterized tests are a great solution to repeat the same test multiple times. Thismethod of testing requires defining a test scenario (I test function F) and making theinput/output data dynamic.
JUnit 4
Here is a test example, which validates a connection URI using ConnectionService:
| 133

public class MyConnectionURITest { @Test public void checkMySQL() { assertTrue(new ConnectionService().isValid("jdbc:mysql://localhost:3306/mysql")); }
@Test public void checkOracle() { assertTrue(new ConnectionService().isValid("jdbc:oracle:thin:@//myhost:1521/oracle")); }}
The testing method is always the same. Only values are changing. It can therefore berewritten using JUnit Parameterized runner, as follows:
@RunWith(Parameterized.class) ①public class MyConnectionURITest {
@Parameterized.Parameters(name = "{0}") ② public static Iterable<String> uris() { ③ return asList( "jdbc:mysql://localhost:3306/mysql", "jdbc:oracle:thin:@//myhost:1521/oracle"); }
@Parameterized.Parameter ④ public String uri;
@Test public void isValid() { ⑤ assertNotNull(uri); }}
① Parameterized is the runner that understands @Parameters and how to use it. If needed,you can generate random data here.
② By default the name of the executed test is the index of the data. Here, it is customizedusing the first toString() parameter value to have something more readable.
③ The @Parameters method must be static and return an array or iterable of the data usedby the tests.
④ You can then inject the current data using the @Parameter annotation. It can take aparameter if you use an array of array instead of an iterable of object in@Parameterized. You can select which item you want to inject.
134 |

⑤ The @Test method is executed using the contextual data. In this sample, it gets executedtwice with the two specified URIs.
You don’t have to define a single @Test method. If you define multiplemethods, each of them is executed with all the data. For example, ifanother test is added to the previous example, four tests are executed - 2per data).
JUnit 5
With JUnit 5, parameterized tests are easier to use. The full documentation is available atjunit.org/junit5/docs/current/user-guide/#writing-tests-parameterized-tests.
The main difference with JUnit 4 is that you can also define inline that the test method is aparameterized test as well as the values to use:
@ParameterizedTest@ValueSource(strings = { "racecar", "radar", "able was I ere I saw elba" })void mytest(String currentValue) { // do test}
However, you can still use the previous behavior with a method binding configuration:
@ParameterizedTest@MethodSource("stringProvider")void mytest(String currentValue) { // do test}
static Stream<String> stringProvider() { return Stream.of("foo", "bar");}
This last option allows you to inject any type of value - not only primitives - which iscommon to define scenarios.
Add the junit-jupiter-params dependency to benefit from this feature.
5.2. component-runtime-testing
5.2.1. component-runtime-junit
component-runtime-junit is a test library that allows you to validate simple logic based onthe Talend Component Kit tooling.
| 135
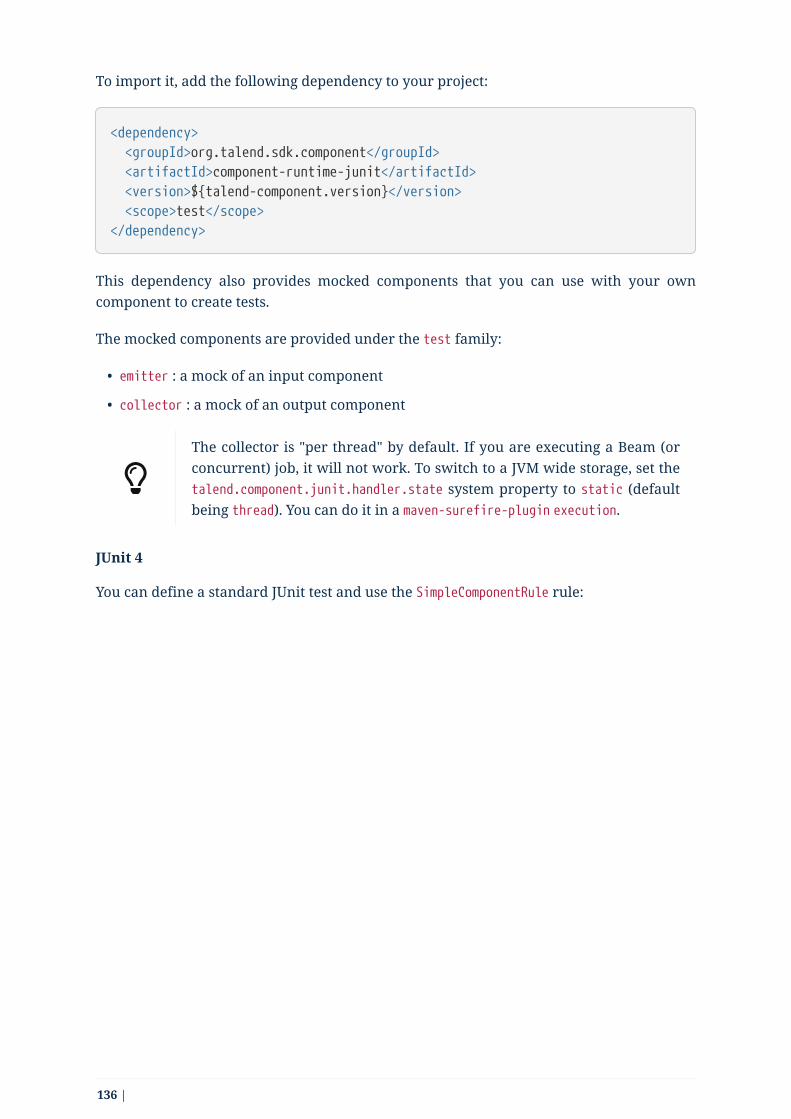
To import it, add the following dependency to your project:
<dependency> <groupId>org.talend.sdk.component</groupId> <artifactId>component-runtime-junit</artifactId> <version>${talend-component.version}</version> <scope>test</scope></dependency>
This dependency also provides mocked components that you can use with your owncomponent to create tests.
The mocked components are provided under the test family:
• emitter : a mock of an input component
• collector : a mock of an output component
The collector is "per thread" by default. If you are executing a Beam (orconcurrent) job, it will not work. To switch to a JVM wide storage, set thetalend.component.junit.handler.state system property to static (defaultbeing thread). You can do it in a maven-surefire-plugin execution.
JUnit 4
You can define a standard JUnit test and use the SimpleComponentRule rule:
136 |
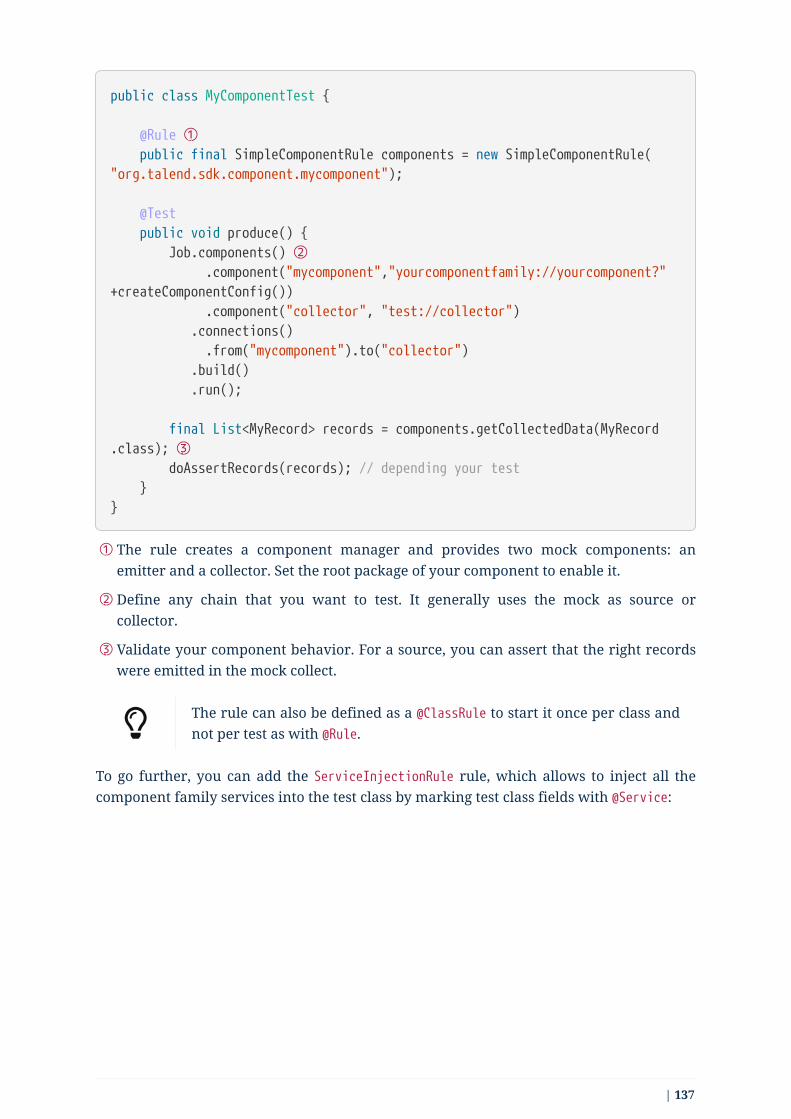
public class MyComponentTest {
@Rule ① public final SimpleComponentRule components = new SimpleComponentRule("org.talend.sdk.component.mycomponent");
@Test public void produce() { Job.components() ② .component("mycomponent","yourcomponentfamily://yourcomponent?"+createComponentConfig()) .component("collector", "test://collector") .connections() .from("mycomponent").to("collector") .build() .run();
final List<MyRecord> records = components.getCollectedData(MyRecord.class); ③ doAssertRecords(records); // depending your test }}
① The rule creates a component manager and provides two mock components: anemitter and a collector. Set the root package of your component to enable it.
② Define any chain that you want to test. It generally uses the mock as source orcollector.
③ Validate your component behavior. For a source, you can assert that the right recordswere emitted in the mock collect.
The rule can also be defined as a @ClassRule to start it once per class andnot per test as with @Rule.
To go further, you can add the ServiceInjectionRule rule, which allows to inject all thecomponent family services into the test class by marking test class fields with @Service:
| 137

public class SimpleComponentRuleTest {
@ClassRule public static final SimpleComponentRule COMPONENT_FACTORY = newSimpleComponentRule("...");
@Rule ① public final ServiceInjectionRule injections = new ServiceInjectionRule(COMPONENT_FACTORY, this); ②
@Service ③ private LocalConfiguration configuration;
@Service private Jsonb jsonb;
@Test public void test() { // ... }}
① The injection requires the test instance, so it must be a @Rule rather than a @ClassRule.
② The ComponentsController is passed to the rule, which for JUnit 4 is theSimpleComponentRule, as well as the test instance to inject services in.
③ All service fields are marked with @Service to let the rule inject them before the test isran.
JUnit 5
The JUnit 5 integration is very similar to JUnit 4, except that it uses the JUnit 5 extensionmechanism.
The entry point is the @WithComponents annotation that you add to your test class, andwhich takes the component package you want to test. You can use @Injected to inject aninstance of ComponentsHandler - which exposes the same utilities than the JUnit 4 rule - in atest class field :
138 |

@WithComponents("org.talend.sdk.component.junit.component") ①public class ComponentExtensionTest { @Injected ② private ComponentsHandler handler;
@Test public void manualMapper() { final Mapper mapper = handler.createMapper(Source.class, new Source.Config() {
{ values = asList("a", "b"); } }); assertFalse(mapper.isStream()); final Input input = mapper.create(); assertEquals("a", input.next()); assertEquals("b", input.next()); assertNull(input.next()); }}
① The annotation defines which components to register in the test context.
② The field allows to get the handler to be able to orchestrate the tests.
If you use JUnit 5 for the first time, keep in mind that the importschanged and that you need to use org.junit.jupiter.api.Test instead oforg.junit.Test. Some IDE versions and surefire versions can also requireyou to install either a plugin or a specific configuration.
As for JUnit 4, you can go further by injecting test class fields marked with @Service, butthere is no additional extension to specify in this case:
| 139

@WithComponents("...")class ComponentExtensionTest {
@Service ① private LocalConfiguration configuration;
@Service private Jsonb jsonb;
@Test void test() { // ... }}
① All service fields are marked with @Service to let the rule inject them before the test isran.
Streaming components
Streaming components have the issue to not stop by design. The Job DSL exposes twoproperties to help with that issue:
• streaming.maxRecords: enables to request a maximum number of records
• streaming.maxDurationMs: enables to request a maximum duration for the execution ofthe input
You can set them as properties on the job:
job.property("streaming.maxRecords", 5);
Mocking the output
Using the test://collector component as shown in the previous sample stores all recordsemitted by the chain (typically your source) in memory. You can then access them usingtheSimpleComponentRule.getCollectedData(type).
Note that this method filters by type. If you don’t need any specific type, you can useObject.class.
Mocking the input
The input mocking is symmetric to the output. In this case, you provide the data you wantto inject:
140 |
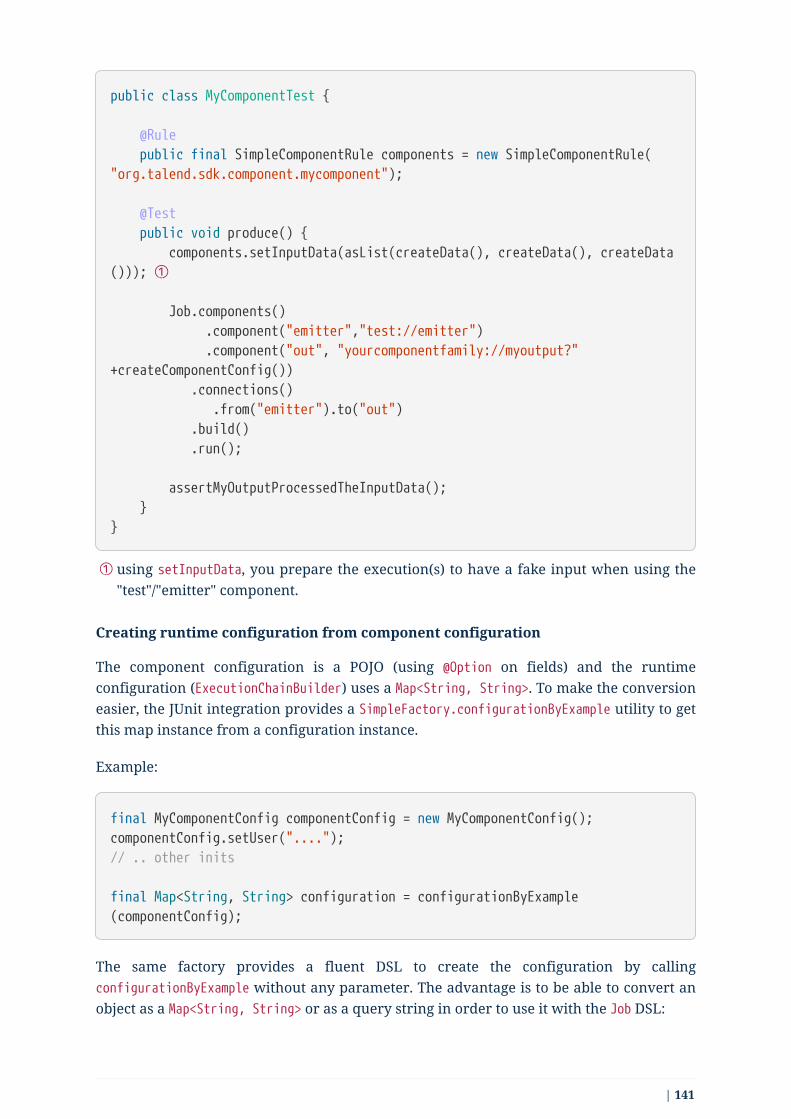
public class MyComponentTest {
@Rule public final SimpleComponentRule components = new SimpleComponentRule("org.talend.sdk.component.mycomponent");
@Test public void produce() { components.setInputData(asList(createData(), createData(), createData())); ①
Job.components() .component("emitter","test://emitter") .component("out", "yourcomponentfamily://myoutput?"+createComponentConfig()) .connections() .from("emitter").to("out") .build() .run();
assertMyOutputProcessedTheInputData(); }}
① using setInputData, you prepare the execution(s) to have a fake input when using the"test"/"emitter" component.
Creating runtime configuration from component configuration
The component configuration is a POJO (using @Option on fields) and the runtimeconfiguration (ExecutionChainBuilder) uses a Map<String, String>. To make the conversioneasier, the JUnit integration provides a SimpleFactory.configurationByExample utility to getthis map instance from a configuration instance.
Example:
final MyComponentConfig componentConfig = new MyComponentConfig();componentConfig.setUser("....");// .. other inits
final Map<String, String> configuration = configurationByExample(componentConfig);
The same factory provides a fluent DSL to create the configuration by callingconfigurationByExample without any parameter. The advantage is to be able to convert anobject as a Map<String, String> or as a query string in order to use it with the Job DSL:
| 141

final String uri = "family://component?" + configurationByExample().forInstance(componentConfig).configured().toQueryString();
It handles the encoding of the URI to ensure it is correctly done.
When writing tests for your components, you can force the maxBatchSizeparameter value by setting it with the following syntax:$configuration.$maxBatchSize=10.
Testing a Mapper
The SimpleComponentRule also allows to test a mapper unitarily. You can get an instancefrom a configuration and execute this instance to collect the output.
Example:
public class MapperTest {
@ClassRule public static final SimpleComponentRule COMPONENT_FACTORY = newSimpleComponentRule( "org.company.talend.component");
@Test public void mapper() { final Mapper mapper = COMPONENT_FACTORY.createMapper(MyMapper.class,new Source.Config() {{ values = asList("a", "b"); }}); assertEquals(asList("a", "b"), COMPONENT_FACTORY.collectAsList(String.class, mapper)); }}
Testing a Processor
As for a mapper, a processor is testable unitary. However, this case can be more complexin case of multiple inputs or outputs.
Example:
142 |

public class ProcessorTest {
@ClassRule public static final SimpleComponentRule COMPONENT_FACTORY = newSimpleComponentRule( "org.company.talend.component");
@Test public void processor() { final Processor processor = COMPONENT_FACTORY.createProcessor(Transform.class, null); final SimpleComponentRule.Outputs outputs = COMPONENT_FACTORY.collect(processor, new JoinInputFactory().withInput("__default__",asList(new Transform.Record("a"), new Transform.Record("bb"))) .withInput("second", asList(newTransform.Record("1"), new Transform.Record("2"))) ); assertEquals(2, outputs.size()); assertEquals(asList(2, 3), outputs.get(Integer.class, "size")); assertEquals(asList("a1", "bb2"), outputs.get(String.class, "value")); }}
The rule allows you to instantiate a Processor from your code, and then to collect theoutput from the inputs you pass in. There are two convenient implementations of theinput factory:
1. MainInputFactory for processors using only the default input.
2. JoinInputfactory with the withInput(branch, data) method for processors usingmultiple inputs. The first argument is the branch name and the second argument isthe data used by the branch.
If needed, you can also implement your own input representation usingorg.talend.sdk.component.junit.ControllableInputFactory.
5.2.2. component-runtime-testing-spark
The following artifact allows you to test against a Spark cluster:
| 143
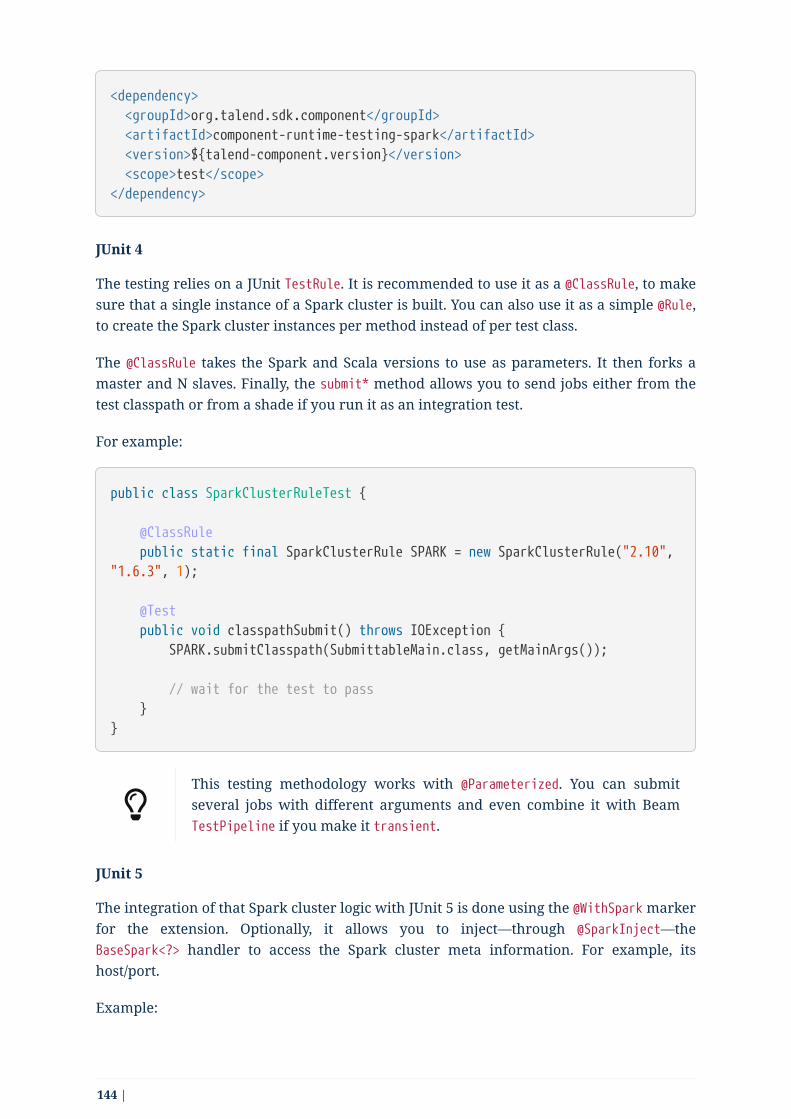
<dependency> <groupId>org.talend.sdk.component</groupId> <artifactId>component-runtime-testing-spark</artifactId> <version>${talend-component.version}</version> <scope>test</scope></dependency>
JUnit 4
The testing relies on a JUnit TestRule. It is recommended to use it as a @ClassRule, to makesure that a single instance of a Spark cluster is built. You can also use it as a simple @Rule,to create the Spark cluster instances per method instead of per test class.
The @ClassRule takes the Spark and Scala versions to use as parameters. It then forks amaster and N slaves. Finally, the submit* method allows you to send jobs either from thetest classpath or from a shade if you run it as an integration test.
For example:
public class SparkClusterRuleTest {
@ClassRule public static final SparkClusterRule SPARK = new SparkClusterRule("2.10","1.6.3", 1);
@Test public void classpathSubmit() throws IOException { SPARK.submitClasspath(SubmittableMain.class, getMainArgs());
// wait for the test to pass }}
This testing methodology works with @Parameterized. You can submitseveral jobs with different arguments and even combine it with BeamTestPipeline if you make it transient.
JUnit 5
The integration of that Spark cluster logic with JUnit 5 is done using the @WithSpark markerfor the extension. Optionally, it allows you to inject—through @SparkInject—theBaseSpark<?> handler to access the Spark cluster meta information. For example, itshost/port.
Example:
144 |

@WithSparkclass SparkExtensionTest {
@SparkInject private BaseSpark<?> spark;
@Test void classpathSubmit() throws IOException { final File out = new File(jarLocation(SparkClusterRuleTest.class).getParentFile(), "classpathSubmitJunit5.out"); if (out.exists()) { out.delete(); } spark.submitClasspath(SparkClusterRuleTest.SubmittableMain.class,spark.getSparkMaster(), out.getAbsolutePath());
await().atMost(5, MINUTES).until( () -> out.exists() ? Files.readAllLines(out.toPath()).stream().collect(joining("\n")).trim() : null, equalTo("b -> 1\na -> 1")); }}
Checking the job execution status
Currently, SparkClusterRule does not allow to know when a job execution is done, even byexposing and polling the web UI URL to check. The best solution at the moment is to makesure that the output of your job exists and contains the right value.
awaitability or any equivalent library can help you to implement such logic:
<dependency> <groupId>org.awaitility</groupId> <artifactId>awaitility</artifactId> <version>3.0.0</version> <scope>test</scope></dependency>
To wait until a file exists and check that its content (for example) is the expected one, youcan use the following logic:
| 145

await() .atMost(5, MINUTES) .until( () -> out.exists() ? Files.readAllLines(out.toPath()).stream().collect(joining("\n")).trim() : null, equalTo("the expected content of the file"));
5.2.3. component-runtime-http-junit
The HTTP JUnit module allows you to mock REST API very simply. The modulecoordinates are:
<dependency> <groupId>org.talend.sdk.component</groupId> <artifactId>component-runtime-http-junit</artifactId> <version>${talend-component.version}</version> <scope>test</scope></dependency>
This module uses Apache Johnzon and Netty. If you have any conflict (inparticular with Netty), you can add the shaded classifier to thedependency. This way, both dependencies are shaded, which avoidsconflicts with your component.
It supports both JUnit 4 and JUnit 5. The concept is the exact same one: the extension/ruleis able to serve precomputed responses saved in the classpath.
You can plug your own ResponseLocator to map a request to a response, but the defaultimplementation - which should be sufficient in most cases - looks intalend/testing/http/<class name>_<method name>.json. Note that you can also put it intalend/testing/http/<request path>.json.
JUnit 4
JUnit 4 setup is done through two rules:
• JUnit4HttpApi, which is starts the server.
• JUnit4HttpApiPerMethodConfigurator, which configures the server per test and alsohandles the capture mode.
If you don’t use the JUnit4HttpApiPerMethodConfigurator, the capturefeature is disabled and the per test mocking is not available.
146 |

Test example
public class MyRESTApiTest { @ClassRule public static final JUnit4HttpApi API = new JUnit4HttpApi();
@Rule public final JUnit4HttpApiPerMethodConfigurator configurator = newJUnit4HttpApiPerMethodConfigurator(API);
@Test public void direct() throws Exception { // ... do your requests }}
SSL
For tests using SSL-based services, you need to use activeSsl() on the JUnit4HttpApi rule.
You can access the client SSL socket factory through the API handler:
@ClassRulepublic static final JUnit4HttpApi API = new JUnit4HttpApi()<strong>.activeSsl()</strong>;
@Testpublic void test() throws Exception { final HttpsURLConnection connection = getHttpsConnection(); connection.setSSLSocketFactory(API.getSslContext().getSocketFactory()); // ....}
Query Parameters
Sometimes the query parameters are sensitive and you don’t want to store them whencapturing. In such cases, you can drop them from the captured data (.json) and the mockimplementation will be able to match the request ignoring the query parameters.
JUnit 5
JUnit 5 uses a JUnit 5 extension based on the HttpApi annotation that you can add to yourtest class. You can inject the test handler - which has some utilities for advanced cases -through @HttpApiInject:
| 147

@HttpApiclass JUnit5HttpApiTest { @HttpApiInject private HttpApiHandler<?> handler;
@Test void getProxy() throws Exception { // .... do your requests }}
The injection is optional and the @HttpApi annotation allows you toconfigure several test behaviors.
SSL
For tests using SSL-based services, you need to use @HttpApi(useSsl = true).
You can access the client SSL socket factory through the API handler:
@HttpApi*(useSsl = true)*class MyHttpsApiTest { @HttpApiInject private HttpApiHandler<?> handler;
@Test void test() throws Exception { final HttpsURLConnection connection = getHttpsConnection(); connection.setSSLSocketFactory(handler.getSslContext().getSocketFactory()); // .... }}
Capturing mode
The strength of this implementation is to run a small proxy server and to auto-configurethe JVM: http[s].proxyHost, http[s].proxyPort,HttpsURLConnection#defaultSSLSocketFactory and SSLContext#default are auto-configuredto work out-of-the-box with the proxy.
It allows you to keep the native and real URLs in your tests. For example, the followingtest is valid:
148 |
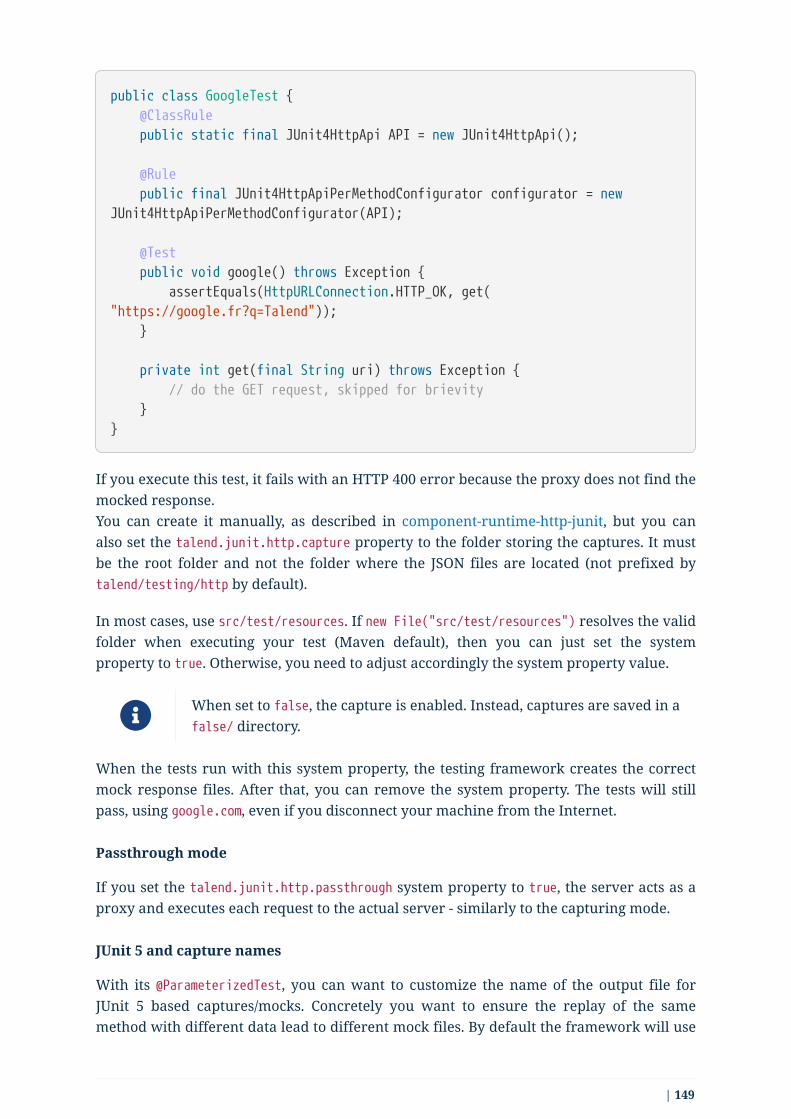
public class GoogleTest { @ClassRule public static final JUnit4HttpApi API = new JUnit4HttpApi();
@Rule public final JUnit4HttpApiPerMethodConfigurator configurator = newJUnit4HttpApiPerMethodConfigurator(API);
@Test public void google() throws Exception { assertEquals(HttpURLConnection.HTTP_OK, get("https://google.fr?q=Talend")); }
private int get(final String uri) throws Exception { // do the GET request, skipped for brievity }}
If you execute this test, it fails with an HTTP 400 error because the proxy does not find themocked response.You can create it manually, as described in component-runtime-http-junit, but you canalso set the talend.junit.http.capture property to the folder storing the captures. It mustbe the root folder and not the folder where the JSON files are located (not prefixed bytalend/testing/http by default).
In most cases, use src/test/resources. If new File("src/test/resources") resolves the validfolder when executing your test (Maven default), then you can just set the systemproperty to true. Otherwise, you need to adjust accordingly the system property value.
When set to false, the capture is enabled. Instead, captures are saved in afalse/ directory.
When the tests run with this system property, the testing framework creates the correctmock response files. After that, you can remove the system property. The tests will stillpass, using google.com, even if you disconnect your machine from the Internet.
Passthrough mode
If you set the talend.junit.http.passthrough system property to true, the server acts as aproxy and executes each request to the actual server - similarly to the capturing mode.
JUnit 5 and capture names
With its @ParameterizedTest, you can want to customize the name of the output file forJUnit 5 based captures/mocks. Concretely you want to ensure the replay of the samemethod with different data lead to different mock files. By default the framework will use
| 149

the display name of the test to specialize it but it is not always very friendly. If you wantsome more advanced control over the name you can use @HttpApiName("myCapture.json")on the test method. To parameterize the name using @HttpApiName, you can use theplaceholders ${class} and ${method} which represents the declaring class and methodname, and ${displayName} which represents the method name.
Here is an example to use the same capture file for all repeated test:
@HttpApiName("${class}_${method}")@RepeatedTest(5)void run() throws Exception { // ...}
And here, the same example but using different files for each repetition:
@HttpApiName("${class}_${method}_${displayName}")@RepeatedTest(5)void run() throws Exception { // ...}
5.3. Beam testingIf you want to make sure that your component works in Beam and don’t want to useSpark, you can try with the Direct Runner.
Check beam.apache.org/contribute/testing/ for more details.
5.4. Testing on multiple environmentsJUnit (4 or 5) already provides ways to parameterize tests and execute the same "testlogic" against several sets of data. However, it is not very convenient for testing multipleenvironments.
For example, with Beam, you can test your code against multiple runners. But it requiresresolving conflicts between runner dependencies, setting the correct classloaders, and soon.
To simplify such cases, the framework provides you a multi-environment support for yourtests, through the JUnit module, which works with both JUnit 4 and JUnit 5.
5.4.1. JUnit 4
150 |

@RunWith(MultiEnvironmentsRunner.class)@Environment(Env1.class)@Environment(Env2.class)public class TheTest { @Test public void test1() { // ... }}
The MultiEnvironmentsRunner executes the tests for each defined environments. With theexample above, it means that it runs test1 for Env1 and Env2.
By default, the JUnit4 runner is used to execute the tests in one environment, but you canuse @DelegateRunWith to use another runner.
5.4.2. JUnit 5
The multi-environment configuration with JUnit 5 is similar to JUnit 4:
@Environment(EnvironmentsExtensionTest.E1.class)@Environment(EnvironmentsExtensionTest.E2.class)class TheTest {
@EnvironmentalTest void test1() { // ... }}
The main differences are that no runner is used because they do not exist in JUnit 5, andthat you need to replace @Test by @EnvironmentalTest.
With JUnit5, tests are executed one after another for all environments,while tests are ran sequentially in each environments with JUnit 4. Forexample, this means that @BeforeAll and @AfterAll are executed once forall runners.
5.4.3. Provided environments
The provided environment sets the contextual classloader in order to load the relatedrunner of Apache Beam.
Package: org.talend.sdk.component.junit.environment.builtin.beam
| 151
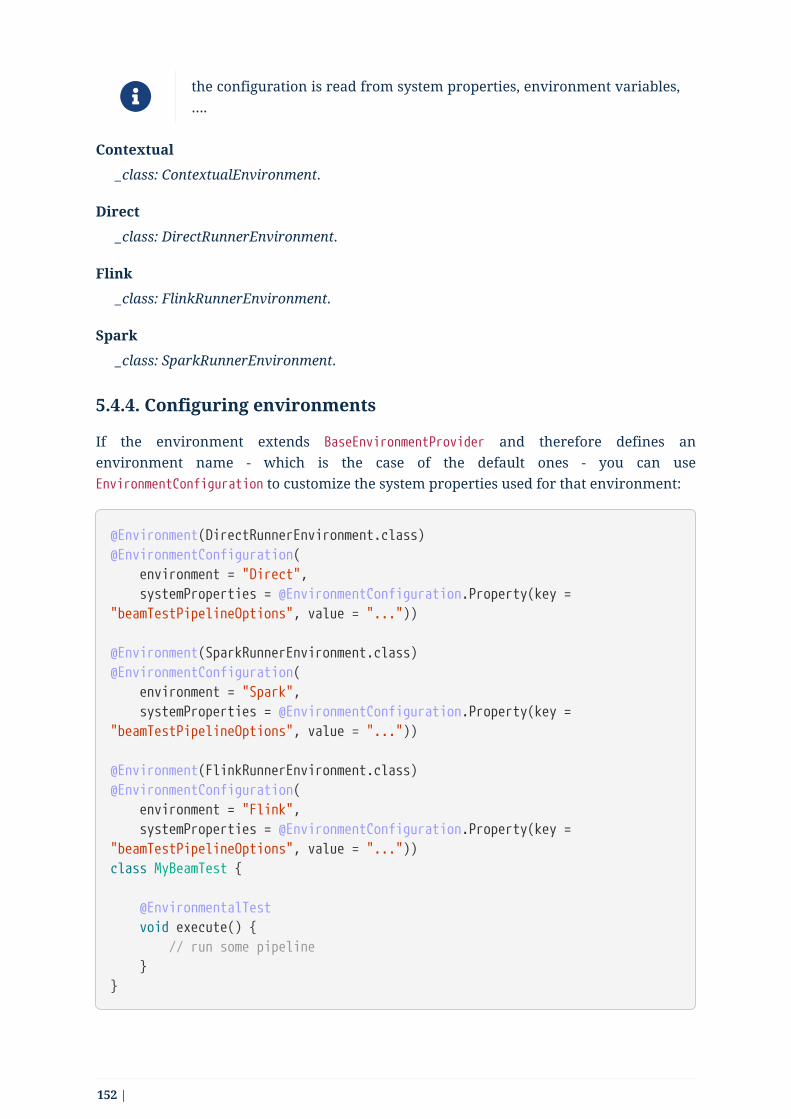
the configuration is read from system properties, environment variables,….
Contextual
_class: ContextualEnvironment.
Direct
_class: DirectRunnerEnvironment.
Flink
_class: FlinkRunnerEnvironment.
Spark
_class: SparkRunnerEnvironment.
5.4.4. Configuring environments
If the environment extends BaseEnvironmentProvider and therefore defines anenvironment name - which is the case of the default ones - you can useEnvironmentConfiguration to customize the system properties used for that environment:
@Environment(DirectRunnerEnvironment.class)@EnvironmentConfiguration( environment = "Direct", systemProperties = @EnvironmentConfiguration.Property(key ="beamTestPipelineOptions", value = "..."))
@Environment(SparkRunnerEnvironment.class)@EnvironmentConfiguration( environment = "Spark", systemProperties = @EnvironmentConfiguration.Property(key ="beamTestPipelineOptions", value = "..."))
@Environment(FlinkRunnerEnvironment.class)@EnvironmentConfiguration( environment = "Flink", systemProperties = @EnvironmentConfiguration.Property(key ="beamTestPipelineOptions", value = "..."))class MyBeamTest {
@EnvironmentalTest void execute() { // run some pipeline }}
152 |

If you set the <environment name>.skip system property to true, theenvironment-related executions are skipped.
Advanced usage
This usage assumes that Beam 2.4.0 or later is used.
The following dependencies bring the JUnit testing toolkit, the Beam integration and themulti-environment testing toolkit for JUnit into the test scope.
Dependencies:
<dependencies> <dependency> <groupId>org.talend.sdk.component</groupId> <artifactId>component-runtime-junit</artifactId> <scope>test</scope> </dependency> <dependency> <groupId>org.junit.jupiter</groupId> <artifactId>junit-jupiter-api</artifactId> <scope>test</scope> </dependency> <dependency> <groupId>org.jboss.shrinkwrap.resolver</groupId> <artifactId>shrinkwrap-resolver-impl-maven</artifactId> <version>3.1.4</version> <scope>test</scope> </dependency> <dependency> <groupId>org.talend.sdk.component</groupId> <artifactId>component-runtime-beam</artifactId> <scope>test</scope> </dependency></dependencies>
Using the fluent DSL to define jobs, you can write a test as follows:
Your job must be linear and each step must send a single value (no multi-input or multi-output).
| 153
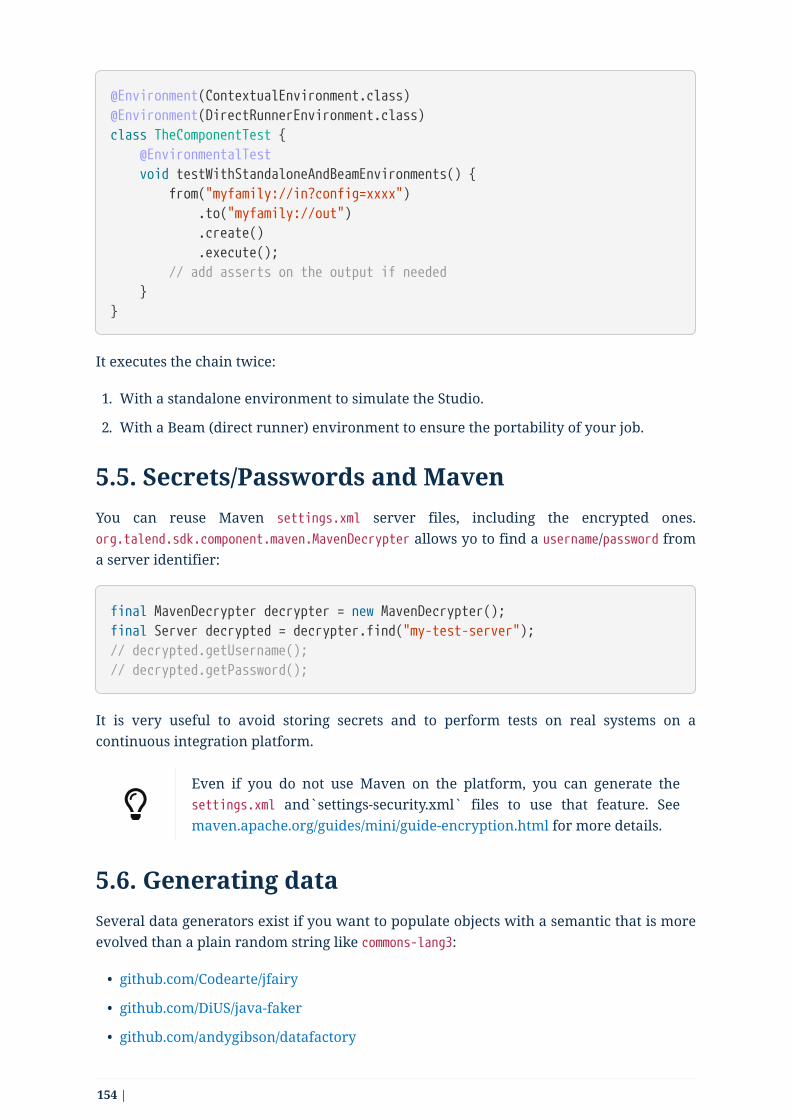
@Environment(ContextualEnvironment.class)@Environment(DirectRunnerEnvironment.class)class TheComponentTest { @EnvironmentalTest void testWithStandaloneAndBeamEnvironments() { from("myfamily://in?config=xxxx") .to("myfamily://out") .create() .execute(); // add asserts on the output if needed }}
It executes the chain twice:
1. With a standalone environment to simulate the Studio.
2. With a Beam (direct runner) environment to ensure the portability of your job.
5.5. Secrets/Passwords and MavenYou can reuse Maven settings.xml server files, including the encrypted ones.org.talend.sdk.component.maven.MavenDecrypter allows yo to find a username/password froma server identifier:
final MavenDecrypter decrypter = new MavenDecrypter();final Server decrypted = decrypter.find("my-test-server");// decrypted.getUsername();// decrypted.getPassword();
It is very useful to avoid storing secrets and to perform tests on real systems on acontinuous integration platform.
Even if you do not use Maven on the platform, you can generate thesettings.xml and`settings-security.xml` files to use that feature. Seemaven.apache.org/guides/mini/guide-encryption.html for more details.
5.6. Generating dataSeveral data generators exist if you want to populate objects with a semantic that is moreevolved than a plain random string like commons-lang3:
• github.com/Codearte/jfairy
• github.com/DiUS/java-faker
• github.com/andygibson/datafactory
154 |

• etc.
Even more advanced, the following generators allow to directly bind generic data on amodel. However, data quality is not always optimal:
• github.com/devopsfolks/podam
• github.com/benas/random-beans
• etc.
There are two main kinds of implementation:
• Implementations using a pattern and random generated data.
• Implementations using a set of precomputed data extrapolated to create new values.
Check your use case to know which one fits best.
An alternative to data generation can be to import real data and useTalend Studio to sanitize the data, by removing sensitive information andreplacing it with generated or anonymized data. Then you just need toinject that file into the system.
If you are using JUnit 5, you can have a look at glytching.github.io/junit-extensions/randomBeans.
5.7. Creating a job pipeline
5.7.1. Job Builder
The Job builder lets you create a job pipeline programmatically using Talend components(Producers and Processors). The job pipeline is an acyclic graph, allowing you to buildcomplex pipelines.
Let’s take a simple use case where two data sources (employee and salary) are formattedto CSV and the result is written to a file.
A job is defined based on components (nodes) and links (edges) to connect their branchestogether.
Every component is defined by a unique id and an URI that identify the component.
The URI follows the form [family]://[component][?version][&configuration], where:
• family is the name of the component family.
• component is the name of the component.
• version is the version of the component. It is represented in a key=value format. Thekey is __version and the value is a number.
| 155

• configuration is component configuration. It is represented in a key=value format.The key is the path of the configuration and the value is a `string' corresponding to theconfiguration value.
URI example:
job://csvFileGen?__version=1&path=/temp/result.csv&encoding=utf-8"
configuration parameters must be URI/URL encoded.
Job example:
Job.components() ① .component("employee","db://input") .component("salary", "db://input") .component("concat", "transform://concat?separator=;") .component("csv", "file://out?__version=2") .connections() ② .from("employee").to("concat", "string1") .from("salary").to("concat", "string2") .from("concat").to("csv") .build() ③ .run(); ④
① Defining all components used in the job pipeline.
② Defining the connections between the components to construct the job pipeline. Thelinks from/to use the component id and the default input/output branches.You can also connect a specific branch of a component, if it has multiple or namedinput/output branches, using the methods from(id, branchName) and to(id,
branchName).In the example above, the concat component has two inputs ("string1" and "string2").
③ Validating the job pipeline by asserting that:
• It has some starting components (components that don’t have a from connectionand that need to be of the producer type).
• There are no cyclic connections. The job pipeline needs to be an acyclic graph.
• All components used in the connections are already declared.
• Each connection is used only once. You cannot connect a component input/outputbranch twice.
④ Running the job pipeline.
In this version, the execution of the job is linear. Components are notexecuted in parallel even if some steps may be independents.
156 |

Environment/Runner
Depending on the configuration, you can select the environment which you execute yourjob in.
To select the environment, the logic is the following one:
1. If an org.talend.sdk.component.runtime.manager.chain.Job.ExecutorBuilder class ispassed through the job properties, then use it. The supported types are anExecutionBuilder instance, a Class or a String.
2. If an ExecutionBuilder SPI is present, use it. It is the case if component-runtime-beam ispresent in your classpath.
3. Else, use a local/standalone execution.
In the case of a Beam execution, you can customize the pipeline options using systemproperties. They have to be prefixed with talend.beam.job.. For example, to set the appNameoption, you need to use -Dtalend.beam.job.appName=mytest.
Key Provider
The job builder lets you set a key provider to join your data when a component hasmultiple inputs. The key provider can be set contextually to a component or globally tothe job.
Job.components() .component("employee","db://input") .property(GroupKeyProvider.class.getName(), (GroupKeyProvider) context -> context.getData().getString("id")) ① .component("salary", "db://input") .component("concat", "transform://concat?separator=;") .connections() .from("employee").to("concat", "string1") .from("salary").to("concat", "string2") .build() .property(GroupKeyProvider.class.getName(), ② (GroupKeyProvider) context -> context.getData().getString("employee_id")) .run();
① Defining a key provider for the data produced by the employee component.
② Defining a key provider for all data manipulated in the job.
If the incoming data has different IDs, you can provide a complex global key provider thatrelies on the context given by the component id and the branch name.
| 157

GroupKeyProvider keyProvider = context -> { if ("employee".equals(context.getComponentId())) { return context.getData().getString("id"); } return context.getData().getString("employee_id");};
5.7.2. Beam case
For Beam case, you need to rely on Beam pipeline definition and use the component-runtime-beam dependency, which provides Beam bridges.
Inputs and Outputs
org.talend.sdk.component.runtime.beam.TalendIO provides a way to convert a partitionmapper or a processor to an input or processor using the read or write methods.
public class Main { public static void main(final String[] args) { final ComponentManager manager = ComponentManager.instance() Pipeline pipeline = Pipeline.create(); //Create beam input from mapper and apply input to pipeline pipeline.apply(TalendIO.read(manager.findMapper(manager.findMapper("sample", "reader", 1, new HashMap<String, String>() {{ put("fileprefix", "input"); }}).get())) .apply(new ViewsMappingTransform(emptyMap(), "sample")) //prepare it for the output record format (see next part) //Create beam processor from talend processor and apply to pipeline .apply(TalendIO.write(manager.findProcessor("test", "writer",1, new HashMap<String, String>() {{ put("fileprefix", "output"); }}).get(), emptyMap()));
//... run pipeline }}
Processors
org.talend.sdk.component.runtime.beam.TalendFn provides the way to wrap a processor ina Beam PTransform and to integrate it into the pipeline.
158 |

public class Main { public static void main(final String[] args) { //Component manager and pipeline initialization...
//Create beam PTransform from processor and apply input to pipeline pipeline.apply(TalendFn.asFn(manager.findProcessor("sample", "mapper",1, emptyMap())).get())), emptyMap());
//... run pipeline }}
The multiple inputs and outputs are represented by a Map element in Beam case to avoidusing multiple inputs and outputs.
You can use ViewsMappingTransform or CoGroupByKeyResultMappingTransformto adapt the input/output format to the record format representing themultiple inputs/output, like Map<String, List<?>>, but materialized as aRecord. Input data must be of the Record type in this case.
Converting a Beam.io into a component I/O
For simple inputs and outputs, you can get an automatic and transparent conversion ofthe Beam.io into an I/O component, if you decorated your PTransform with@PartitionMapper or @Processor.
However, there are limitations:
• Inputs must implement PTransform<PBegin, PCollection<?>> and must be aBoundedSource.
• Outputs must implement PTransform<PCollection<?>, PDone> and register a DoFn on theinput PCollection.
For more information, see the How to wrap a Beam I/O page.
6. Defining servicesServices are configurations that can be reused across several classes. Talend ComponentKit comes with a predefined set of services that you can easily use.
You can still define your own services under the service node of your component project.By default, the Component Kit Starter generates a dedicated class in your project in whichyou can implement services.
• Built-in services
| 159

• Internationalizing a service
• Providing actions through a service
• Services and interceptors
• Defining a custom API
6.1. Built-in servicesThe framework provides built-in services that you can inject by type in components andactions.
6.1.1. Lisf of built-in services
Type Description
org.talend.sdk.component.api.service.cache.LocalCache
Provides a small abstraction to cache data that does notneed to be recomputed very often. Commonly used byactions for UI interactions.
org.talend.sdk.component.api.service.dependency.Resolver
Allows to resolve a dependency from its Mavencoordinates. It can either try to resolve a local file or(better) creates for you a preinitialized classloader.
javax.json.bind.Jsonb A JSON-B instance. If your model is static and you don’twant to handle the serialization manually using JSON-P,you can inject that instance.
javax.json.spi.JsonProvider A JSON-P instance. Prefer other JSON-P instances if youdon’t exactly know why you use this one.
javax.json.JsonBuilderFactory
A JSON-P instance. It is recommended to use this oneinstead of a custom one to optimize memory usage andspeed.
javax.json.JsonWriterFactory
A JSON-P instance. It is recommended to use this oneinstead of a custom one to optimize memory usage andspeed.
javax.json.JsonReaderFactory
A JSON-P instance. It is recommended to use this oneinstead of a custom one to optimize memory usage andspeed.
javax.json.stream.JsonParserFactory
A JSON-P instance. It is recommended to use this oneinstead of a custom one to optimize memory usage andspeed.
160 |

Type Description
javax.json.stream.JsonGeneratorFactory
A JSON-P instance. It is recommended to use this oneinstead of a custom one to optimize memory usage andspeed.
org.talend.sdk.component.api.service.dependency.Resolver
Allows to resolve files from Maven coordinates (likedependencies.txt for component). Note that it assumes thatthe files are available in the component Maven repository.
org.talend.sdk.component.api.service.injector.Injector
Utility to inject services in fields marked with @Service.
org.talend.sdk.component.api.service.factory.ObjectFactory
Allows to instantiate an object from its class name andproperties.
org.talend.sdk.component.api.service.record.RecordBuilderFactory
Allows to instantiate a record.
org.talend.sdk.component.api.service.record.RecordPointerFactory
Allows to instantiate a RecordPointer which enables toextract a data from a Record based on jsonpointerspecification.
org.talend.sdk.component.api.service.record.RecordService
Some utilities to create records from another one. It istypically what is used when you want to add an entry in arecord and passthrough the other ones. It also provides anice RecordVisitor API for advanced cases.
org.talend.sdk.component.api.service.configuration.LocalConfiguration
Represents the local configuration that can be used duringthe design.
It is not recommended to use it for the runtime becausethe local configuration is usually different and theinstances are distinct.
You can also use the local cache as an interceptor with@Cached
Every interface that extendsHttpClient and that containsmethods annotated with@Request
Lets you define an HTTP client in a declarative mannerusing an annotated interface.
See the Using HttpClient for more details.
| 161
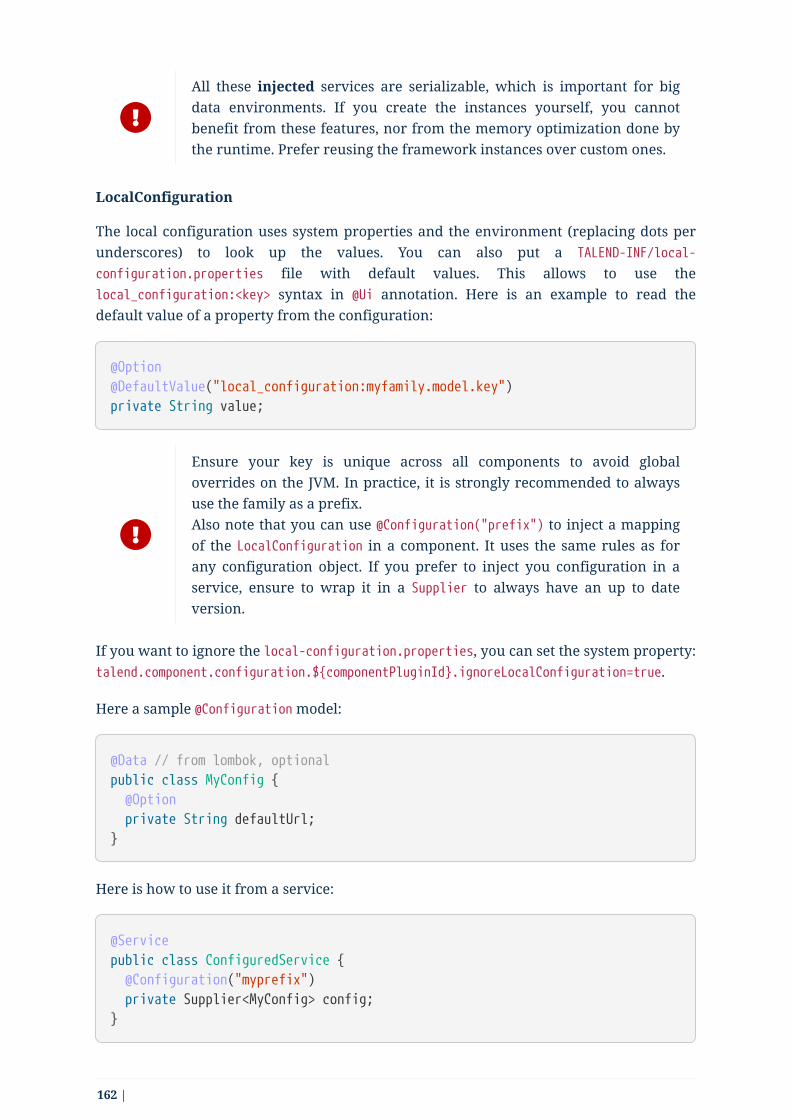
All these injected services are serializable, which is important for bigdata environments. If you create the instances yourself, you cannotbenefit from these features, nor from the memory optimization done bythe runtime. Prefer reusing the framework instances over custom ones.
LocalConfiguration
The local configuration uses system properties and the environment (replacing dots perunderscores) to look up the values. You can also put a TALEND-INF/local-
configuration.properties file with default values. This allows to use thelocal_configuration:<key> syntax in @Ui annotation. Here is an example to read thedefault value of a property from the configuration:
@Option@DefaultValue("local_configuration:myfamily.model.key")private String value;
Ensure your key is unique across all components to avoid globaloverrides on the JVM. In practice, it is strongly recommended to alwaysuse the family as a prefix.Also note that you can use @Configuration("prefix") to inject a mappingof the LocalConfiguration in a component. It uses the same rules as forany configuration object. If you prefer to inject you configuration in aservice, ensure to wrap it in a Supplier to always have an up to dateversion.
If you want to ignore the local-configuration.properties, you can set the system property:talend.component.configuration.${componentPluginId}.ignoreLocalConfiguration=true.
Here a sample @Configuration model:
@Data // from lombok, optionalpublic class MyConfig { @Option private String defaultUrl;}
Here is how to use it from a service:
@Servicepublic class ConfiguredService { @Configuration("myprefix") private Supplier<MyConfig> config;}
162 |

And finally, here is how to use it in a component:
@Servicepublic class ConfiguredComponent { public ConfiguredComponent(@Configuration("myprefix") final MyConfig config){ // ... }}
it is recommended to convert this configuration in a runtime model incomponents to avoid to transport more than desired during the jobdistribution.
6.1.2. Using HttpClient
You can access the API reference in the Javadocs.
The HttpClient usage is described in this section by using the REST API example below.Assuming that it requires a basic authentication header:
GET /api/records/{id} -
POST /api/records JSON payload to be created: {"id":"someid", "data":"some data"}
To create an HTTP client that is able to consume the REST API above, you need to definean interface that extends HttpClient.
The HttpClient interface lets you set the base for the HTTP address that the client will hit.
The base is the part of the address that needs to be added to the request path to hit theAPI. It is now possible, and recommended, to use @Base annotation.
Every method annotated with @Request in the interface defines an HTTP request. Everyrequest can have a @Codec parameter that allows to encode or decode the request/responsepayloads.
You can ignore the encoding/decoding for String and Void payloads.
| 163
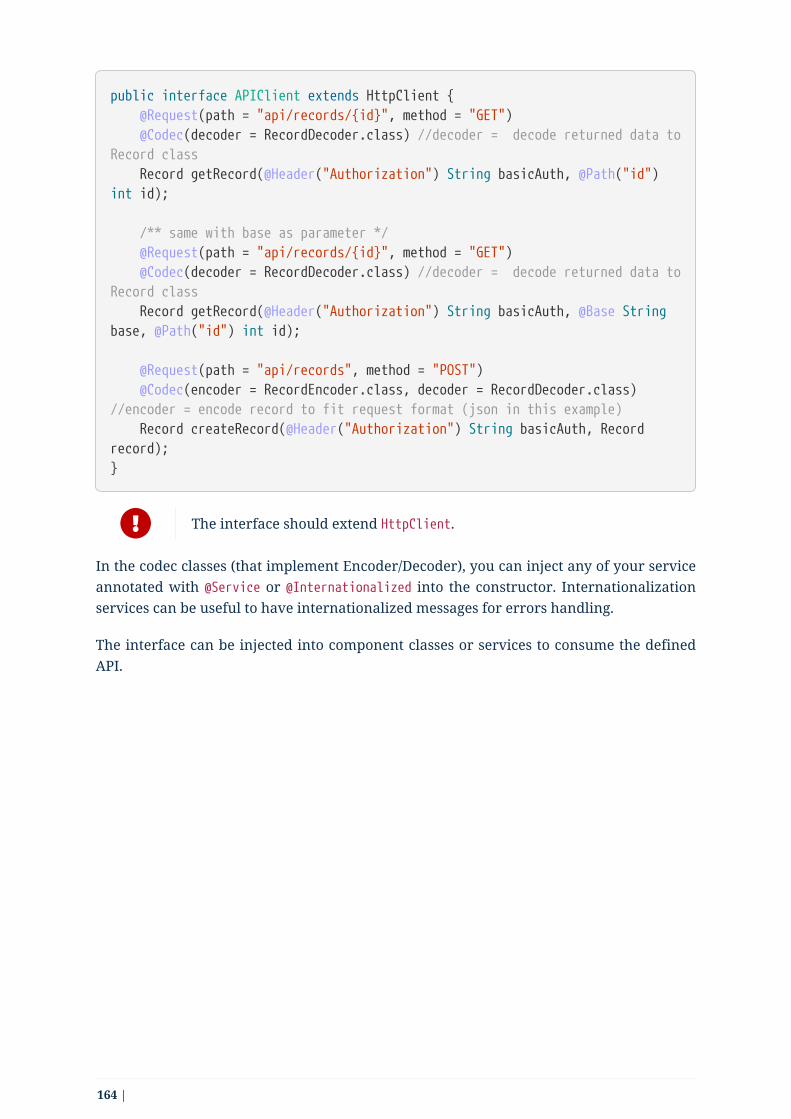
public interface APIClient extends HttpClient { @Request(path = "api/records/{id}", method = "GET") @Codec(decoder = RecordDecoder.class) //decoder = decode returned data toRecord class Record getRecord(@Header("Authorization") String basicAuth, @Path("id")int id);
/** same with base as parameter */ @Request(path = "api/records/{id}", method = "GET") @Codec(decoder = RecordDecoder.class) //decoder = decode returned data toRecord class Record getRecord(@Header("Authorization") String basicAuth, @Base Stringbase, @Path("id") int id);
@Request(path = "api/records", method = "POST") @Codec(encoder = RecordEncoder.class, decoder = RecordDecoder.class)//encoder = encode record to fit request format (json in this example) Record createRecord(@Header("Authorization") String basicAuth, Recordrecord);}
The interface should extend HttpClient.
In the codec classes (that implement Encoder/Decoder), you can inject any of your serviceannotated with @Service or @Internationalized into the constructor. Internationalizationservices can be useful to have internationalized messages for errors handling.
The interface can be injected into component classes or services to consume the definedAPI.
164 |
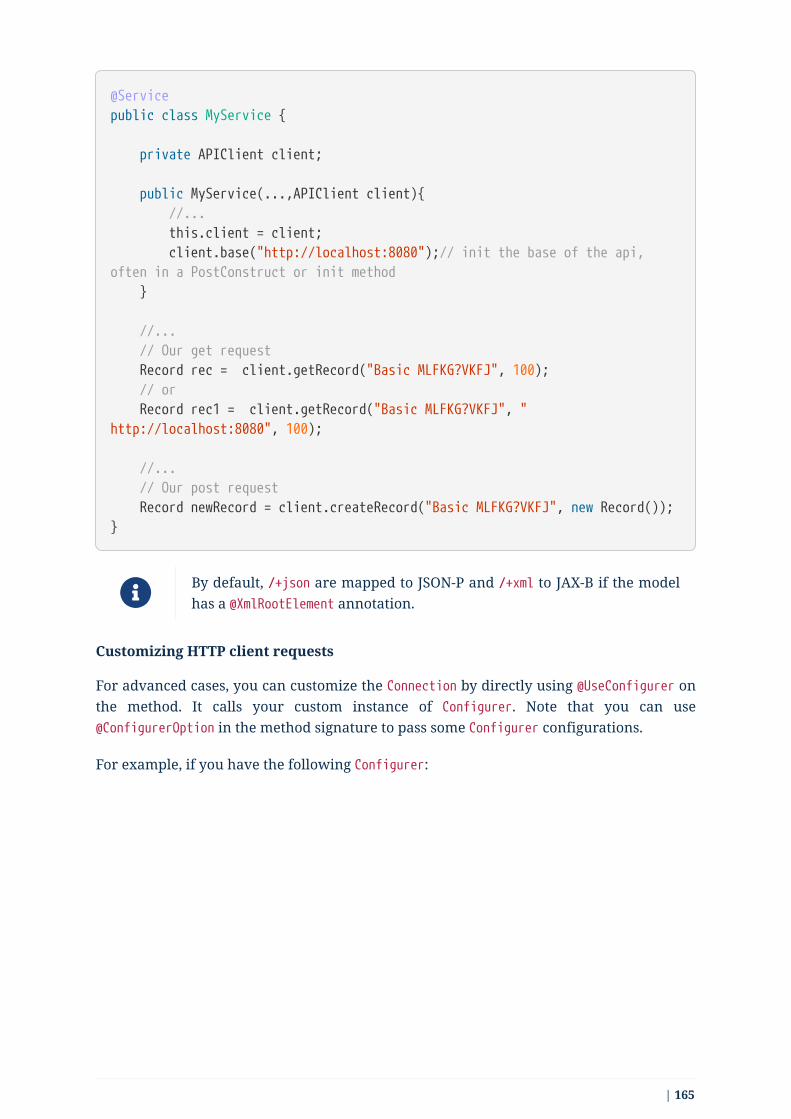
@Servicepublic class MyService {
private APIClient client;
public MyService(...,APIClient client){ //... this.client = client; client.base("http://localhost:8080");// init the base of the api,often in a PostConstruct or init method }
//... // Our get request Record rec = client.getRecord("Basic MLFKG?VKFJ", 100); // or Record rec1 = client.getRecord("Basic MLFKG?VKFJ", "http://localhost:8080", 100);
//... // Our post request Record newRecord = client.createRecord("Basic MLFKG?VKFJ", new Record());}
By default, /+json are mapped to JSON-P and /+xml to JAX-B if the modelhas a @XmlRootElement annotation.
Customizing HTTP client requests
For advanced cases, you can customize the Connection by directly using @UseConfigurer onthe method. It calls your custom instance of Configurer. Note that you can use@ConfigurerOption in the method signature to pass some Configurer configurations.
For example, if you have the following Configurer:
| 165

public class BasicConfigurer implements Configurer { @Override public void configure(final Connection connection, finalConfigurerConfiguration configuration) { final String user = configuration.get("username", String.class); final String pwd = configuration.get("password", String.class); connection.withHeader( "Authorization", Base64.getEncoder().encodeToString((user + ':' + pwd).getBytes(StandardCharsets.UTF_8))); }}
You can then set it on a method to automatically add the basic header with this kind ofAPI usage:
public interface APIClient extends HttpClient { @Request(path = "...") @UseConfigurer(BasicConfigurer.class) Record findRecord(@ConfigurerOption("username") String user,@ConfigurerOption("password") String pwd);}
Built-In configurer
The framework provides in the component-api an OAuth1.Configurer which can be used asan example of configurer implementation. It expects a single OAuth1.Configurationparameter to be passed to the request as a @ConfigurationOption.
Here is a sample showing how it can be used:
public interface OAuth1Client extends HttpClient { @Request(path = "/oauth1") @UseConfigurer(OAuth1.Configurer.class) String get(@ConfigurerOption("oauth1") final OAuth1.Configurationconfiguration);}
Big data streams
By default, the client loads in memory the payload. In case of big payloads, it can consumetoo much memory. For these cases, you can get the payload as an InputStream:
166 |

public interface APIClient extends HttpClient { @Request(path = "/big/http/data") InputStream getData();}
You can use the Response wrapper, or not.
6.2. Internationalizing servicesInternationalization requires following several best practices:
• Storing messages using ResourceBundle properties file in your component module.
• The location of the properties is in the same package than the related components andis named Messages. For example, org.talend.demo.MyComponent usesorg.talend.demo.Messages[locale].properties.
• Use the internationalization API for your own messages.
6.2.1. Internationalization API
The Internationalization API is the mechanism to use to internationalize your ownmessages in your own components.
The principle of the API is to design messages as methods returning String values and getback a template using a ResourceBundle named Messages and located in the same packagethan the interface that defines these methods.
To ensure your internationalization API is identified, you need to mark it with the@Internationalized annotation:
package org.superbiz;
@Internationalized ①public interface Translator {
String message();
String templatizedMessage(String arg0, int arg1); ②
String localized(String arg0, @Language Locale locale); ③
String localized(String arg0, @Language String locale); ④}
① @Internationalized allows to mark a class as an internationalized service.
| 167

② You can pass parameters. The message uses the MessageFormat syntax to be resolved,based on the ResourceBundle template.
③ You can use @Language on a Locale parameter to specify manually the locale to use. Notethat a single value is used (the first parameter tagged as such).
④ @Language also supports the String type.
The corresponding Messages.properties placed in the org/superbiz resource foldercontains the following:
org.superbiz.Translator.message = Some messageorg.superbiz.Translator.templatizedMessage = Some message with string {0} andwith number {1}org.superbiz.Translator.localized = Some other message with string {0}
# or the short version
Translator.message = Some messageTranslator.templatizedMessage = Some message with string {0} and with number{1}Translator.localized = Some other message with string {0}
6.3. Providing actions for consumersIn some cases you can need to add some actions that are not related to the runtime. Forexample, enabling users of the plugin/library to test if a connection works properly.
To do so, you need to define an @Action, which is a method with a name (representing theevent name), in a class decorated with @Service:
@Servicepublic class MyDbTester { @Action(family = "mycomp", "test") public Status doTest(final IncomingData data) { return ...; }}
Services are singleton. If you need some thread safety, make sure thatthey match that requirement. Services should not store any status eitherbecause they can be serialized at any time. Status are held by thecomponent.
Services can be used in components as well (matched by type). They allow to reuse someshared logic, like a client. Here is a sample with a service used to access files:
168 |

@Emitter(family = "sample", name = "reader")public class PersonReader implements Serializable { // attributes skipped to be concise
public PersonReader(@Option("file") final File file, final FileService service) { this.file = file; this.service = service; }
// use the service @PostConstruct public void open() throws FileNotFoundException { reader = service.createInput(file); }
}
The service is automatically passed to the constructor. It can be used as a bean. In thatcase, it is only necessary to call the service method.
6.3.1. Particular action types
Some common actions need a clear contract so they are defined as API first-class citizen.For example, this is the case for wizards or health checks. Here is the list of the availableactions:
Close Connection
Mark an action works for closing runtime connection, returning a close helper objectwhich do real close action. The functionality is for the Studio only, studio will use the closeobject to close connection for existed connection, and no effect for cloud platform.
• Type: close_connection
• API: @org.talend.sdk.component.api.service.connection.CloseConnection
• Returned type:org.talend.sdk.component.api.service.connection.CloseConnectionObject
• Sample:
{ "connection": "..."}
| 169

Create Connection
Mark an action works for creating runtime connection, returning a runtime connectionobject like jdbc connection if database family. Its parameter MUST be a datastore.Datastore is configuration type annotated with @DataStore. The functionality is for theStudio only, studio will use the runtime connection object when use existed connection,and no effect for cloud platform.
• Type: create_connection
• API: @org.talend.sdk.component.api.service.connection.CreateConnection
Discoverdataset
This class marks an action that explore a connection to retrieve potential datasets.
• Type: discoverdataset
• API: @org.talend.sdk.component.api.service.discovery.DiscoverDataset
• Returned type:org.talend.sdk.component.api.service.discovery.DiscoverDatasetResult
• Sample:
{ "datasetDescriptionList": "..."}
Dynamic Values
Mark a method as being useful to fill potential values of a string option for a propertydenoted by its value. You can link a field as being completable using @Proposable(value).The resolution of the completion action is then done through the component family andvalue of the action. The callback doesn’t take any parameter.
• Type: dynamic_values
• API: @org.talend.sdk.component.api.service.completion.DynamicValues
• Returned type: org.talend.sdk.component.api.service.completion.Values
• Sample:
170 |

{ "items":[ { "id":"value", "label":"label" } ]}
Healthcheck
This class marks an action doing a connection test
• Type: healthcheck
• API: @org.talend.sdk.component.api.service.healthcheck.HealthCheck
• Returned type: org.talend.sdk.component.api.service.healthcheck.HealthCheckStatus
• Sample:
{ "comment":"Something went wrong", "status":"KO"}
Schema
Mark an action as returning a discovered schema. Its parameter MUST be a dataset.Dataset is configuration type annotated with @DataSet. If component has multipledatasets, then dataset used as action parameter should have the same identifier as this@DiscoverSchema.
• Type: schema
• API: @org.talend.sdk.component.api.service.schema.DiscoverSchema
• Returned type: org.talend.sdk.component.api.record.Schema
• Sample:
| 171
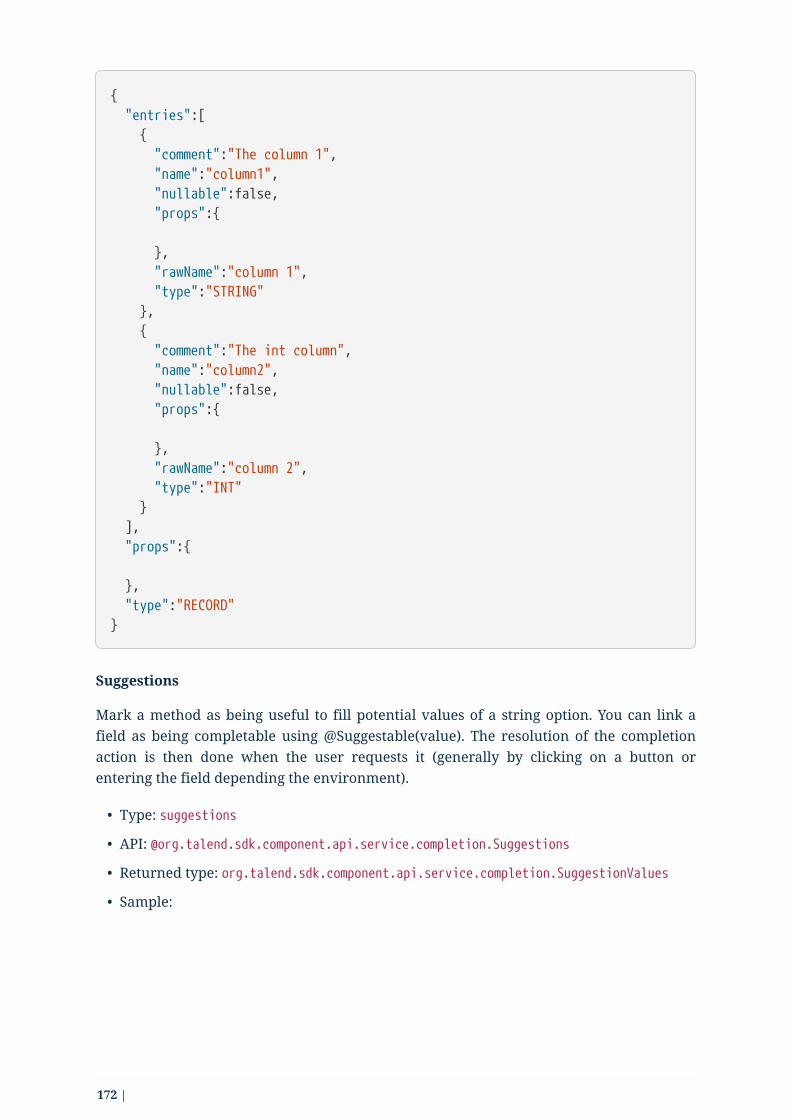
{ "entries":[ { "comment":"The column 1", "name":"column1", "nullable":false, "props":{
}, "rawName":"column 1", "type":"STRING" }, { "comment":"The int column", "name":"column2", "nullable":false, "props":{
}, "rawName":"column 2", "type":"INT" } ], "props":{
}, "type":"RECORD"}
Suggestions
Mark a method as being useful to fill potential values of a string option. You can link afield as being completable using @Suggestable(value). The resolution of the completionaction is then done when the user requests it (generally by clicking on a button orentering the field depending the environment).
• Type: suggestions
• API: @org.talend.sdk.component.api.service.completion.Suggestions
• Returned type: org.talend.sdk.component.api.service.completion.SuggestionValues
• Sample:
172 |

{ "cacheable":false, "items":[ { "id":"value", "label":"label" } ]}
Update
This class marks an action returning a new instance replacing part of aform/configuration.
• Type: update
• API: @org.talend.sdk.component.api.service.update.Update
User
Extension point for custom UI integrations and custom actions.
• Type: user
• API: @org.talend.sdk.component.api.service.Action
Validation
Mark a method as being used to validate a configuration.
this is a server validation so only use it if you can’t use other client sidevalidation to implement it.
• Type: validation
• API: @org.talend.sdk.component.api.service.asyncvalidation.AsyncValidation
• Returned type:org.talend.sdk.component.api.service.asyncvalidation.ValidationResult
• Sample:
{ "comment":"Something went wrong", "status":"KO"}
| 173
Built In Actions
These actions are provided - or not - by the application the UI runs within.
always ensure you don’t require this action in your component.
built_in_suggestable
Mark the decorated field as supporting suggestions, i.e. dynamically get a list of validvalues the user can use. It is however different from @Suggestable by looking up theimplementation in the current application and not the services. Finally, it is important tonote that it can do nothing in some environments too and that there is no guarantee thespecified action is supported.
• API: @org.talend.sdk.component.api.configuration.action.BuiltInSuggestable
6.3.2. Internationalization
Internationalization is supported through the injection of the $lang parameter, whichallows you to get the correct locale to use with an @Internationalized service:
public SuggestionValues findSuggestions(@Option("someParameter") final Stringparam, @Option("$lang") final String lang) { return ...;}
You can combine the $lang option with the @Internationalized and@Language parameters.
6.4. Services and interceptorsFor common concerns such as caching, auditing, and so on, you can use an interceptor-like API. It is enabled on services by the framework.
An interceptor defines an annotation marked with @Intercepts, which defines theimplementation of the interceptor (InterceptorHandler).
For example:
174 |

@Intercepts(LoggingHandler.class)@Target({ TYPE, METHOD })@Retention(RUNTIME)public @interface Logged { String value();}
The handler is created from its constructor and can take service injections (by type). Thefirst parameter, however, can be BiFunction<Method, Object[], Object>, which representsthe invocation chain if your interceptor can be used with others.
If you make a generic interceptor, pass the invoker as first parameter.Otherwise you cannot combine interceptors at all.
Here is an example of interceptor implementation for the @Logged API:
public class LoggingHandler implements InterceptorHandler { // injected private final BiFunction<Method, Object[], Object> invoker; private final SomeService service;
// internal private final ConcurrentMap<Method, String> loggerNames = newConcurrentHashMap<>();
public CacheHandler(final BiFunction<Method, Object[], Object> invoker,final SomeService service) { this.invoker = invoker; this.service = service; }
@Override public Object invoke(final Method method, final Object[] args) { final String name = loggerNames.computeIfAbsent(method, m ->findAnnotation(m, Logged.class).get().value()); service.getLogger(name).info("Invoking {}", method.getName()); return invoker.apply(method, args); }}
This implementation is compatible with interceptor chains because it takes the invoker asfirst constructor parameter and it also takes a service injection. Then, the implementationsimply does what is needed, which is logging the invoked method in this case.
The findAnnotation annotation, inherited from InterceptorHandler, is anutility method to find an annotation on a method or class (in this order).
| 175

6.5. Defining a custom APIIt is possible to extend the Component API for custom front features.
What is important here is to keep in mind that you should do it only if it targets notportable components (only used by the Studio or Beam).
It is recommended to create a custom xxxx-component-api module with the new set ofannotations.
6.5.1. Extending the UI
To extend the UI, add an annotation that can be put on @Option fields, and that isdecorated with @Ui. All its members are then put in the metadata of the parameter. Forexample:
@Ui@Target(TYPE)@Retention(RUNTIME)public @interface MyLayout {}
7. Integrating components into TalendStudioTo be able to see and use your newly developed components, you need to integrate themto the right application.
Currently, you can deploy your components to Talend Studio as part of your developmentprocess to iterate on them:
• Iterating on component development with Talend Studio
You can also share your components externally and install them using a componentarchive (.car) file.
• Sharing and installing components in Talend Studio
Check the versions of the framework that are compatible with your version of TalendStudio in this document.
If you were used to create custom components with the Javajet framework and want toget to know the new approach and main differences of the Component Kit framework,refer to this document.
176 |
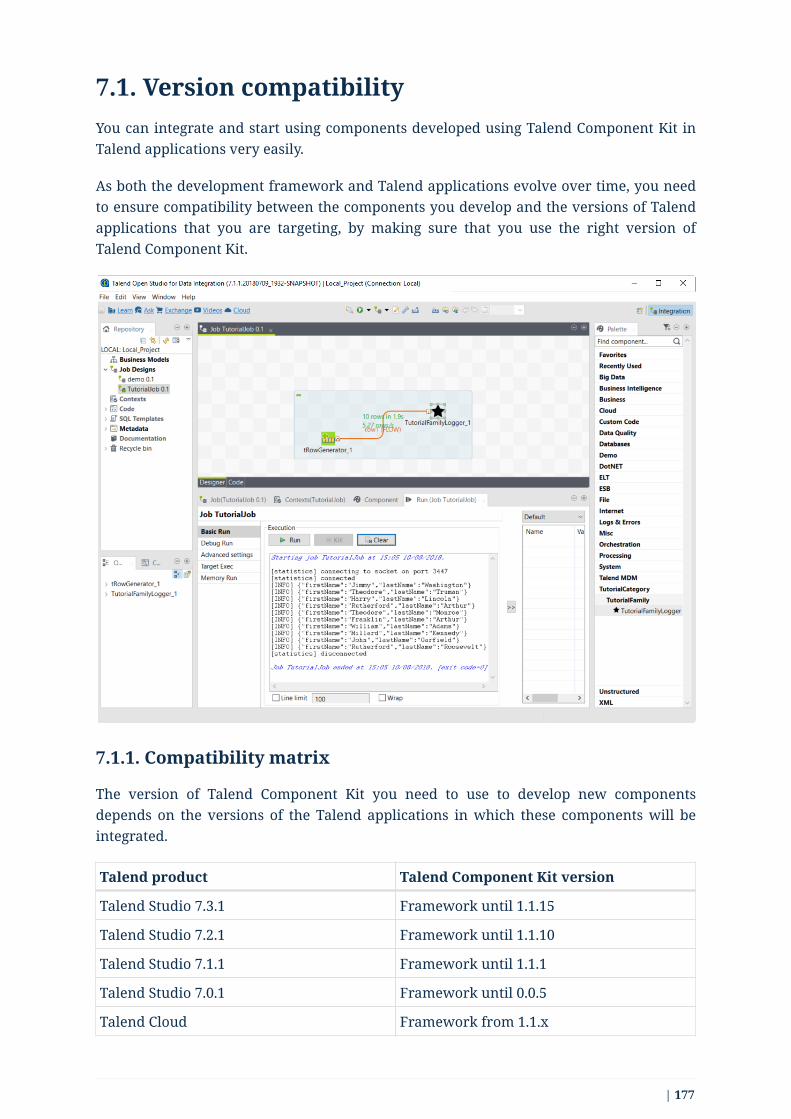
7.1. Version compatibilityYou can integrate and start using components developed using Talend Component Kit inTalend applications very easily.
As both the development framework and Talend applications evolve over time, you needto ensure compatibility between the components you develop and the versions of Talendapplications that you are targeting, by making sure that you use the right version ofTalend Component Kit.
7.1.1. Compatibility matrix
The version of Talend Component Kit you need to use to develop new componentsdepends on the versions of the Talend applications in which these components will beintegrated.
Talend product Talend Component Kit version
Talend Studio 7.3.1 Framework until 1.1.15
Talend Studio 7.2.1 Framework until 1.1.10
Talend Studio 7.1.1 Framework until 1.1.1
Talend Studio 7.0.1 Framework until 0.0.5
Talend Cloud Framework from 1.1.x
| 177

More recent versions of Talend Component Kit contain many fixes, improvements andfeatures that help developing your components. However, they can cause somecompatibility issues when deploying these components to older/different versions ofTalend Studio and Talend Cloud. Choose the version of Talend Component Kit that best fitsyour needs.
7.1.2. Changing the Talend Component Kit version of your project
Creating a project using the Component Kit Starter always uses the latest release of TalendComponent Kit.
However, you can manually change the version of Talend Component Kit directly in thegenerated project.
1. Go to your IDE and access the project root .pom file.
2. Look for the org.talend.sdk.component dependency nodes.
3. Replace the version in the relevant nodes with the version that you need to use foryour project.
You can use a Snapshot of the version under development using the-SNAPSHOT version and Sonatype snapshot repository.
7.2. Iterating on component development withTalend StudioIntegrate components you developed using Talend Component Kit to Talend Studio in afew steps. Also learn how to enable the developer and debugging modes to iterate on yourcomponent development.
178 |

7.2.1. Version compatibility
The version of Talend Component Kit you need to use to develop new componentsdepends on the version of Talend Studio in which components will be integrated.
Refer to this document to learn about compatibility between Talend Component Kit andthe different versions of Talend applications.
7.2.2. Installing the components
Learn how to build and deploy components to Talend Studio using Maven or GradleTalend Component Kit plugins.
This can be done using the deploy-in-studio goal from your development environment.
If you are unfamiliar with component development, you can also follow this example togo through the entire process, from creating a project to using your new component inTalend Studio.
7.2.3. Configuring the component server
The Studio integration relies on the Component Server, that the Studio uses to gather dataabout components created using Talend Component Kit.
You can change the default configuration of component server by modifying the
| 179

$STUDIO_HOME/configuration/config.ini file.
The following parameters are available:
Name Description Default
component.environment
Enables the developer mode when set to dev -
component.debounce.timeout
Specifies the timeout (in milliseconds)before calling listeners in components Textfields
750
component.kit.skip If set to true, the plugin is not enabled. It isuseful if you don’t have any componentdeveloped with the framework.
false
component.java.arguments
Component server additional options -
component.java.m2 Maven repository that the server uses toresolve components
Defaults to the globalStudio configuration
component.java.coordinates
A list of comma-separated GAV(groupId:artifactId:version) of componentsto register
-
component.java.registry
A properties file with values matchingcomponent GAV(groupId:artifactId:version) registered atstartup. Only use slashes (even onwindows) in the path.
-
component.java.port Sets the port to use for the server random
components.server.beam.active
Active, if set to true, Beam support(Experimental). It requires Beam SDK Javacore dependencies to be available.
false
component.server.jul.forceConsole
Adds a console handler to JUL to see logs inthe console. This can be helpful indevelopment because the formatting isclearer than the OSGi one inworkspace/.metadata/.log.
It uses thejava.util.logging.SimpleFormatter.format
property to define its format. By default, itis %1$tb %1$td, %1$tY %1$tl:%1$tM:%1$tS
%1$Tp %2$s%n%4$s: %5$s%6$s%n, but fordevelopment purposes [%4$s] %5$s%6$s%n issimpler and more readable.
false
180 |

Here is an example of a common developer configuration/config.ini file:
# use local .m2 instead of embedded studio onemaven.repository = global
# during development, see developer model partcomponent.environment = dev
# log into the console the component interactions - optionalcomponent.server.jul.forceConsole = truejava.util.logging.SimpleFormatter.format = [%4$s] %5$s%6$s%n
Enabling the developer mode
The developer mode is especially useful to iterate on your component development and toavoid closing and restarting Talend Studio every time you make a change to a component.It adds a Talend Component Kit button in the main toolbar:
When clicking this button, all components developed with the Talend Component Kitframework are reloaded. The cache is invalidated and the components refreshed.
You still need to add and remove the components to see the changes.
To enable it, simply set the component.environment parameter to dev in the config.iniconfiguration file of the component server.
7.2.4. Debugging your custom component in Talend Studio
Several methods allow you to debug custom components created with Talend ComponentKit in Talend Studio.
| 181

Debugging the runtime or the Guess schema option of a component
1. From your development tool, create a new Remote configuration, and copy theCommand line arguments for running remote JVM field. For example,-agentlib:jdwp=transport=dt_socket,server=y,suspend=n,address=*:5005, where:
◦ the suspend parameter of the -agentlib argument specifies whether you want tosuspend the debugged JVM until the debugger attaches to it. Possible values are n(no, default value) or y (yes).
◦ the address parameter of the -agentlib argument is the port used for the remoteconfiguration. Make sure this port is available.
2. Open Talend Studio.
3. Create a new Job that uses the component you want to debug or open an existing onethat already uses it.
4. Go to the Run tab of the Job and select Use specific JVM arguments.
5. Click New to add an argument.
6. In the popup window, paste the arguments copied from the IDE.
182 |

7. Enter the corresponding debug mode:
◦ To debug the runtime, run the Job and access the remote host configured in theIDE.
◦ To debug the Guess schema option, click the Guess schema action button of thecomponent and access the remote host configured in the IDE.
Debugging UI actions and validations
1. From your development tool, create a new Remote configuration, and copy theCommand line arguments for running remote JVM field. For example,-agentlib:jdwp=transport=dt_socket,server=y,suspend=n,address=*:5005, where:
◦ suspend defines whether you need to access the defined configuration to run theremote JVM. Possible values are n (no, default value) or y (yes).
◦ address is the port used for the remote configuration. Make sure this port isavailable.
| 183

2. Access the installation directory of your Talend Sutdio.
3. Open the .ini file corresponding to your Operating System. For example, TOS_DI-win-x86_64.ini.
4. Paste the arguments copied from the IDE in a new line of the file.
5. Go to Talend Studio to use the component, and access the host host configured in theIDE.
7.2.5. Random port when running concurrent studio instances
If you run multiple Studio instances automatically in parallel, you can run into someissues with the random port computation. For example on a CI platform. For that purpose,you can create the $HOME/.talend/locks/org.talend.sdk.component.studio-integration.lockfile.
Then, when a server starts, it acquires a lock on that file and prevents another server toget a port until it is started. It ensures that you can’t have two concurrent processesgetting the same port allocated.
However, it is highly unlikely to happen on a desktop. In that case, forcing a differentvalue through component.java.port in your config.ini file is a better solution for localinstallations.
184 |

7.3. Installing components using a CAR fileComponents built using Talend Component Kit can be shared as component archives(.car). These CAR files are executable files allowing to easily deploy the components itcontains to any compatible version of Talend Studio.
Component developers can generate .car files from their projects to share theircomponents and make them available for other users, as detailed in this document.
This document assumes that you have a component archive (.car) file and need to deployit to Talend Studio.
7.3.1. Deploying from the CAR file to Talend Studio
The component archive (.car) is executable and exposes the studio-deploy commandwhich takes a Talend Studio home path as parameter. When executed, it installs thedependencies into the Studio and registers the component in your instance. For example:
# for a studiojava -jar mycomponent.car studio-deploy /path/to/my/studioorjava -jar mycomponent.car studio-deploy --location /path/to/my/studio
# for a m2 provisioningjava -jar mycomponent.car maven-deploy /path/to/.m2/repositoryorjava -jar mycomponent.car maven-deploy --location /path/to/.m2/repository
You can also upload the dependencies to your Nexus server using the following command:
java -jar mycomponent.car deploy-to-nexus --url <nexus url> --repo <repositoryname> --user <username> --pass <password> --threads <parallel threads number>--dir <temp directory>
In this command, Nexus URL and repository name are mandatory arguments. All otherarguments are optional. If arguments contain spaces or special symbols, you need toquote the whole value of the argument. For example:
--pass "Y0u will \ not G4iess i' ^"
7.3.2. Deploying a component archive to a remote project fromTalend Studio
Talend Studio allows you to share components you have created using Talend Component
| 185

Kit to other users working on the same remote project.
Remote projects are available with Enterprise versions of Talend Studioonly. Also, note that this feature has been removed in Studio since 7.3release.
Make sure you are connected to a remote project and the artifact repository forcomponent sharing has been properly configured.
1. On the toolbar of the Studio main window, click or click File > Edit Project Propertiesfrom the menu bar to open the Project Settings dialog box.
2. In the tree view of the dialog box, select Repository Share to open the correspondingview.
3. Select the Propagate components update to Artifact Repository check box.
4. In the Repository ID field, specify the artifact repository configured for componentsharing, and then click Check connection to verify the connectivity.
5. Click Apply and Close to validate the settings and close the dialog box.
6. Create a folder named patches at the root of your Talend Studio installation directory,then copy the .car files of the components you want share to this folder.
7. Restart your Talend Studio and connect to the remote project.
The components are deployed automatically to the repository and available in the Palettefor other users when connected to a remote project with the same sharing repositoryconfiguration.
7.3.3. Troubleshooting
My custom component builds correctly but does not appear in Talend Studio, how tofix it? This issue can be caused by the icon specified in the component metadata.
• Make sure to specify a custom icon for the component and the component family.
• These custom icons must be in PNG format to be properly handled by Talend Studio.
• Remove SVG parameters from the talend.component.server.icon.paths property in theHTTP server configuration. Refer to this section.
Learn more about defining custom icons for components in this document.
7.4. From Javajet to Talend Component KitFrom the version 7.0 of Talend Studio, Talend Component Kit becomes the recommendedframework to use to develop components.
This framework is being introduced to ensure that newly developed components can bedeployed and executed both in on-premise/local and cloud/big data environments.
186 |

From that new approach comes the need to provide a complete yet unique andcompatible way of developing components.
With the Component Kit, custom components are entirely implemented in Java. To helpyou get started with a new custom component development project, a Starter is available.Using it, you will be able to generate the skeleton of your project. By importing thisskeleton in a development tool, you can then implement the components layout andexecution logic in Java.
7.4.1. Defining the component configuration
With the previous Javajet framework, metadata, widgets and configurable parts of acustom component were specified in XML. With the Component Kit, they are now definedin the <component_name><component_type>Configuration (for example,LoggerProcessorConfiguration) Java class of your development project.
Note that most of this configuration is transparent if you specified the ConfigurationModel of your components right before generating the project from the Starter.
Any undocumented feature or option is considered not supported by theComponent Kit framework.
You can find examples of output in Studio or Cloud environments in the Gallery.
Widgets
Input/Text
Javajet
<PARAMETER NAME="CONFIG" FIELD="TEXT" NUM_ROW="10"> <DEFAULT>""</DEFAULT></PARAMETER>
Component Kit
@OptionString config;
Password
Javajet
| 187

<PARAMETER NAME="PASSWORD" FIELD="PASSWORD" NUM_ROW="10" REQUIRED="true">
Component Kit
@Option@CredentialString password;
Textarea
Javajet
<PARAMETER NAME="QUERY" FIELD="MEMO" NUM_ROW="1"> <DEFAULT>""</DEFAULT></PARAMETER>
Component Kit
@Option@TextareaString query;
Integer
Javajet
<!-- There were no specific widget for number fields --><PARAMETER NAME="CONFIG" FIELD="TEXT" NUM_ROW="10"> <DEFAULT>""</DEFAULT></PARAMETER>
Component Kit
188 |

@Option@Documentation("This is a number")public Integer number;
Checkbox
Javajet
<PARAMETER NAME="PRETTY_FORMAT" FIELD="CHECK" NUM_ROW="10"> <DEFAULT>false</DEFAULT></PARAMETER>
Component Kit
@OptionBoolean pretty_format;
List
Javajet
<PARAMETER NAME="ACTION" FIELD="CLOSED_LIST" NUM_ROW="10"> <ITEMS DEFAULT="1"> <ITEM NAME="DELETE" VALUE="1" /> <ITEM NAME="INSERT" VALUE="2" /> <ITEM NAME="UPDATE" VALUE="3" /> </ITEMS></PARAMETER>
Component Kit
| 189
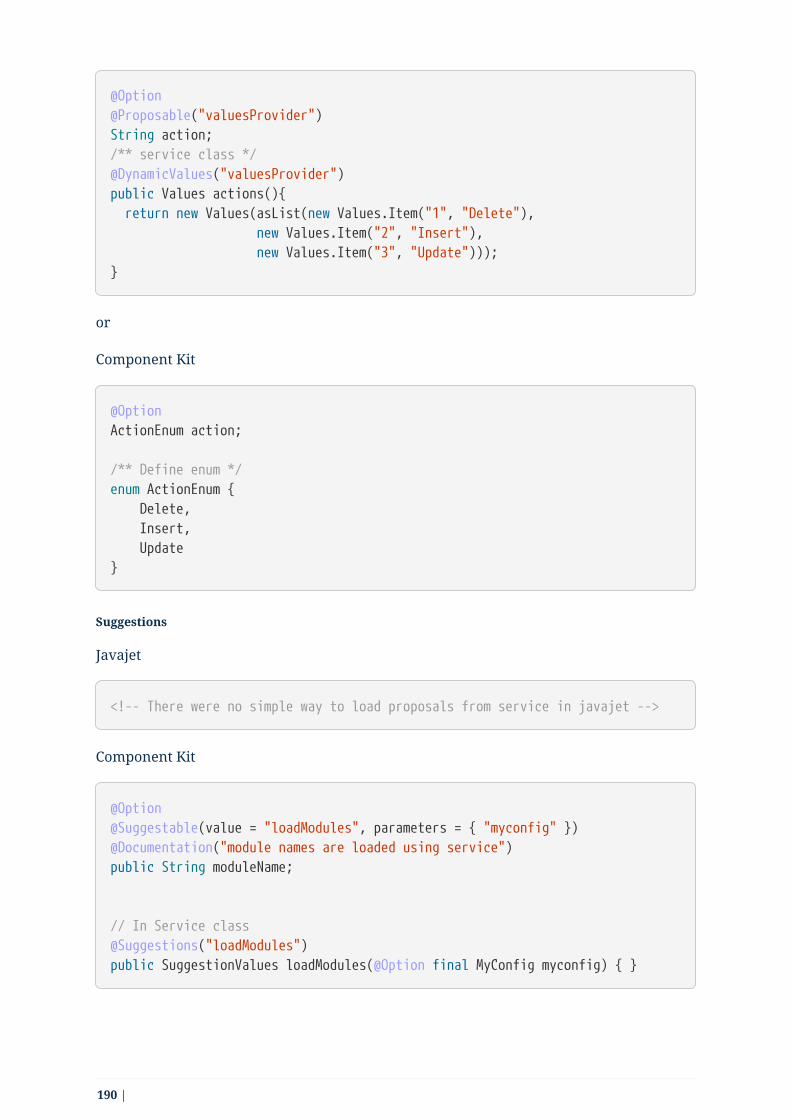
@Option@Proposable("valuesProvider")String action;/** service class */@DynamicValues("valuesProvider")public Values actions(){ return new Values(asList(new Values.Item("1", "Delete"), new Values.Item("2", "Insert"), new Values.Item("3", "Update")));}
or
Component Kit
@OptionActionEnum action;
/** Define enum */enum ActionEnum { Delete, Insert, Update}
Suggestions
Javajet
<!-- There were no simple way to load proposals from service in javajet -->
Component Kit
@Option@Suggestable(value = "loadModules", parameters = { "myconfig" })@Documentation("module names are loaded using service")public String moduleName;
// In Service class@Suggestions("loadModules")public SuggestionValues loadModules(@Option final MyConfig myconfig) { }
190 |
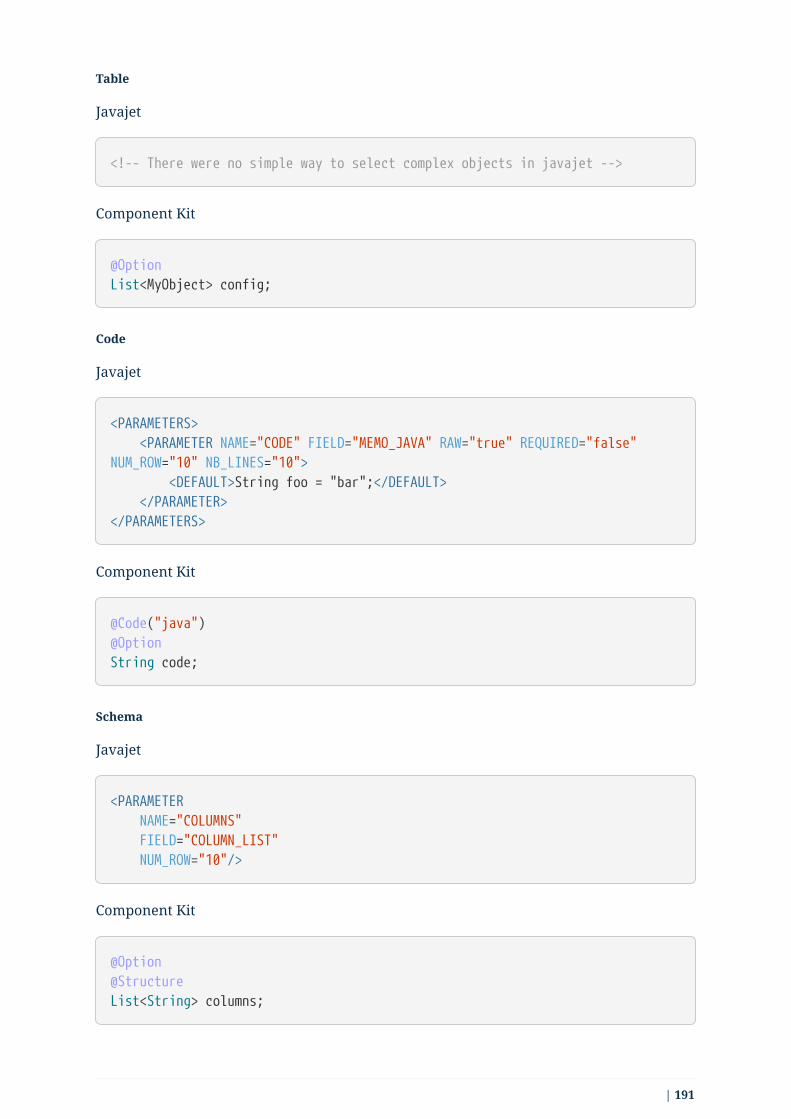
Table
Javajet
<!-- There were no simple way to select complex objects in javajet -->
Component Kit
@OptionList<MyObject> config;
Code
Javajet
<PARAMETERS> <PARAMETER NAME="CODE" FIELD="MEMO_JAVA" RAW="true" REQUIRED="false"NUM_ROW="10" NB_LINES="10"> <DEFAULT>String foo = "bar";</DEFAULT> </PARAMETER></PARAMETERS>
Component Kit
@Code("java")@OptionString code;
Schema
Javajet
<PARAMETER NAME="COLUMNS" FIELD="COLUMN_LIST" NUM_ROW="10"/>
Component Kit
@Option@StructureList<String> columns;
| 191

Validations
Property validation
Javajet
<!-- There were no url pattern validation in javajet -->
Component Kit
/** configuration class */@Option@Validable("url")String config;
/** service class */@AsyncValidation("url")ValidationResult doValidate(String url) {//validate the property}
Property validation with Pattern
Javajet
<!-- There were no regex validation in javajet -->
Component Kit
/** configuration class */@Option@Pattern("/^[a-zA-Z\\-]+$/")String username;
Data store validation
Javajet
<!-- There were no healthcheck javajet -->
Component Kit
192 |

@Datastore@Checkablepublic class config {/** config ...*/}
/** service class */@HealthCheckpublic HealthCheckStatus testConnection(){
//validate the connection}
Binding properties
ActiveIf
Javajet
<PARAMETER NAME="AUTH_TYPE" FIELD="CLOSED_LIST" NUM_ROW="10"> <ITEMS DEFAULT="NOAUTH"> <ITEM NAME="NOAUTH" VALUE="NOAUTH" /> <ITEM NAME="BASIC" VALUE="BASIC" /> <ITEM NAME="BASIC" VALUE="OAUTH2" /> </ITEMS></PARAMETER>
<PARAMETER NAME="LOGIN" FIELD="TEXT" NUM_ROW="20" SHOW_IF="AUTH_TYPE == 'BASIC'"> <DEFAULT>"login"</DEFAULT></PARAMETER>
<PARAMETER NAME="LOGIN" FIELD="PASSWORD" NUM_ROW="20" SHOW_IF="AUTH_TYPE='BASIC'"> <DEFAULT>"login"</DEFAULT></PARAMETER>
Component Kit
| 193

enum AuthorizationType { NoAuth, Basic, oauth2}
@Option@Required@Documentation("")private AuthorizationType type = AuthorizationType.NoAuth;
@Option@required@ActiveIf(target = "type", value = "Basic")@Documentation("Username for the basic authentication")private String login;
@Option@required@credential@ActiveIf(target = "type", value = "Basic")@Documentation("password for the basic authentication")private String password;
After Variables
Javajet
<RETURN NAME="NAME_1_OF_AFTER_VARIABLE" TYPE="id_Integer" AVAILABILITY="AFTER"/> <RETURN NAME="NAME_2_OF_AFTER_VARIABLE" TYPE="id_String" AVAILABILITY="AFTER"/>
Component Kit
194 |

importorg.talend.sdk.component.api.component.AfterVariables.AfterVariableContainer;import org.talend.sdk.component.api.component.AfterVariables.AfterVariable;
/*** Possible types:* Boolean.class, Byte.class, byte[].class, Character.class, Date.class,Double.class, Float.class,* BigDecimal.class, Integer.class, Long.class, Object.class, Short.class,String.class, List.class*/@AfterVariable(value = "NAME_1_OF_AFTER_VARIABLE", description = "Somedescription", type = Integer.class)@AfterVariable(value = "NAME_2_OF_AFTER_VARIABLE", description = "Customvariable description", type = String.class)class Emitter {
@AfterVariableContainer public Map<String, Object> afterVariables() { // .. code }
}
or
importorg.talend.sdk.component.api.component.AfterVariables.AfterVariableContainer;import org.talend.sdk.component.api.component.AfterVariables.AfterVariable;import org.talend.sdk.component.api.component.AfterVariables;
@AfterVariables({ @AfterVariable(value = "NAME_1_OF_AFTER_VARIABLE", description = "Somedescription", type = Integer.class), @AfterVariable(value = "NAME_2_OF_AFTER_VARIABLE", description = "Customvariable description", type = String.class)})class Emitter { @AfterVariableContainer public Map<String, Object> afterVariables() { // .. code }}
| 195

7.4.2. Defining the runtime
Previously, the execution of a custom component was described through several Javajetfiles:
• <component_name>_begin.javajet, containing the code required to initialize thecomponent.
• <component_name>_main.javajet, containing the code required to process each line ofthe incoming data.
• <component_name>_end.javajet, containing the code required to end the processingand go to the following step of the execution.
With the Component Kit, the entire execution flow of a component is described throughits main Java class <component_name><component_type> (for example, LoggerProcessor) andthrough services for reusable parts.
7.4.3. Component execution logic
Each type of component has its own execution logic. The same basic logic is applied to allcomponents of the same type, and is then extended to implement each componentspecificities. The project generated from the starter already contains the basic logic foreach component.
Talend Component Kit framework relies on several primitive components.
All components can use @PostConstruct and @PreDestroy annotations to initialize or releasesome underlying resource at the beginning and the end of a processing.
In distributed environments, class constructor are called on clustermanager nodes. Methods annotated with @PostConstruct and @PreDestroyare called on worker nodes. Thus, partition plan computation andpipeline tasks are performed on different nodes.
196 |

① The created task is a JAR file containing class information, which describes the pipeline(flow) that should be processed in cluster.
② During the partition plan computation step, the pipeline is analyzed and split intostages. The cluster manager node instantiates mappers/processors, gets estimated datasize using mappers, and splits created mappers according to the estimated data size.All instances are then serialized and sent to the worker node.
③ Serialized instances are received and deserialized. Methods annotated with@PostConstruct are called. After that, pipeline execution starts. The @BeforeGroupannotated method of the processor is called before processing the first element inchunk.After processing the number of records estimated as chunk size, the @AfterGroupannotated method of the processor is called. Chunk size is calculated depending on theenvironment the pipeline is processed by. Once the pipeline is processed, methodsannotated with @PreDestroy are called.
All the methods managed by the framework must be public. Privatemethods are ignored.
| 197

The framework is designed to be as declarative as possible but also tostay extensible by not using fixed interfaces or method signatures. Thisallows to incrementally add new features of the underlyingimplementations.
Main changes
To ensure that the Cloud-compatible approach of the Component Kit framework isrespected, some changes were introduced on the implementation side, including:
198 |

• The File mode is no longer supported. You can still work with URIs and remote storagesystems to use files. The file collection must be handled at the componentimplementation level.
• The input and output connections between two components can only be of the Flowor Reject types. Other types of connections are not supported.
• Every Output component must have a corresponding Input component and use adataset. All datasets must use a datastore.
7.4.4. Resources and examples
To get started with the Component Kit framework, you can go through the followingdocuments:
• Learn the basics about Talend Component Kit
• Create and deploy your first Component Kit component
• Learn about the Starter
• Start implementing components
• Integrate a component to Talend Studio
• Check some examples of components built with Talend Component Kit
8. Integrating components into TalendCloudLearn about the Component Server with the following articles:
• Component server and HTTP API
• Component Server Vault Proxy
8.1. Component server and HTTP API
8.1.1. HTTP API
The HTTP API intends to expose most Talend Component Kit features over HTTP. It is astandalone Java HTTP server.
The WebSocket protocol is activated for the endpoints. Endpoints thenuse /websocket/v1 as base instead of /api/v1. See WebSocket for moredetails.
Browse the API description using <a href="rest-openapi.pdf"><imgsrc="/home/jenkins/agent/workspace/component-runtime_build_master/target/checkout/documentation/src/main/antora/modules/ROOT/ass
| 199

ets/images/openapi/OpenAPI.svg" format="svg" alt="[OpenAPI</a>">] interface.
To make sure that the migration can be enabled, you need to set theversion the component was created with in the execution configurationthat you send to the server (component version is in component thedetail endpoint). To do that, use tcomp::component::version key.
Deprecated endpoints
Endpoints that are intended to disappear will be deprecated. A X-Talend-Warning headerwill be returned with a message as value.
WebSocket transport
You can connect yo any endpoint by:
1. Replacing /api with /websocket
2. Appending /<http method> to the URL
3. Formatting the request as:
SENDdestination: <endpoint after v1><headers>
<payload>^@
For example:
SENDdestination: /component/indexAccept: application/json
^@
The response is formatted as follows:
MESSAGEstatus: <http status code><headers>
<payload>^@
All endpoints are logged at startup. You can then find them in the logs ifyou have a doubt about which one to use.
200 |

If you don’t want to create a pool of connections per endpoint/verb, you can use the busendpoint: /websocket/v1/bus. This endpoint requires that you add the destinationMethodheader to each request with the verb value (GET by default):
SENDdestination: /component/indexdestinationMethod: GETAccept: application/json
^@
8.1.2. Server configuration
the configuration is read from system properties, environment variables,….
talend.component.server.cache.maxSize
Default value: 1000. Maximum items a cache can store, used for index endpoints.
talend.component.server.component.coordinates
A comma separated list of gav to locate the components
talend.component.server.component.documentation.translations
Default value: ${home}/documentations. A component translation repository. This iswhere you put your documentation translations. Their name must follow the patterndocumentation_${container-id}_language.adoc where ${container-id} is the componentjar name (without the extension and version, generally the artifactId).
talend.component.server.component.extend.dependencies
Default value: true. Should the component extensions add required dependencies.
talend.component.server.component.extension.maven.repository
If you deploy some extension, where they can create their dependencies if needed.
talend.component.server.component.extension.startup.timeout
Default value: 180000. Timeout for extension initialization at startup, since it ensuresthe startup wait extensions are ready and loaded it allows to control the latency itimplies.
talend.component.server.component.registry
A property file (or multiple comma separated) where the value is a gav of a componentto register(complementary with coordinates). Note that the path can end up with or.properties to take into account all properties in a folder.
| 201

talend.component.server.documentation.active
Default value: true. Should the /documentation endpoint be activated. Note that whencalled on localhost the doc is always available.
talend.component.server.environment.active
Default value: true. Should the /api/v1/environment endpoint be activated. It showssome internal versions and git commit which are not always desirable over the wire.
talend.component.server.gridlayout.translation.support
Default value: false. Should the components using a @GridLayout support tabtranslation. Studio does not suppot that feature yet so this is not enabled by default.
talend.component.server.icon.paths
Default value:icons/%s.svg,icons/svg/%s.svg,icons/%s_icon32.png,icons/png/%s_icon32.png. Thesepatterns are used to find the icons in the classpath(s).
talend.component.server.jaxrs.exceptionhandler.defaultMessage
Default value: false. If set it will replace any message for exceptions. Set to false to usethe actual exception message.
talend.component.server.lastUpdated.useStartTime
Default value: false. Should the lastUpdated timestamp value of /environment endpointbe updated with server start time.
talend.component.server.locale.mapping
Default value: en*=en fr*=fr zh*=zh_CN ja*=ja de*=de. For caching reasons the goal isto reduce the locales to the minimum required numbers. For instance we avoid fr andfr_FR which would lead to the same entries but x2 in terms of memory. This mappingenables that by whitelisting allowed locales, default being en. If the key ends with itmeans all string starting with the prefix will match. For instance fr will matchfr_FR but also fr_CA.
talend.component.server.maven.repository
The local maven repository used to locate components and their dependencies
talend.component.server.request.log
Default value: false. Should the all requests/responses be logged (debug purposes -only work when running with CXF).
talend.component.server.security.command.handler
Default value: securityNoopHandler. How to validate a command/request. Acceptedvalues: securityNoopHandler.
talend.component.server.security.connection.handler
Default value: securityNoopHandler. How to validate a connection. Accepted values:
202 |
securityNoopHandler.
talend.component.server.user.extensions.location
A folder available for the server - don’t forget to mount it in docker if you are using theimage - which accepts subfolders named as component plugin id (generally theartifactId or jar name without the version, ex: jdbc). Each family folder can contain:
• a user-configuration.properties file which will be merged with componentconfiguration system (see services). This properties file enables the functionuserJar(xxxx) to replace the jar named xxxx by its virtual gav(groupId:artifactId:version),
• a list of jars which will be merged with component family classpath
talend.component.server.user.extensions.provisioning.location
Default value: auto. Should the implicit artifacts be provisionned to a m2. If set to autoit tries to detect if there is a m2 to provision - recommended, if set to skip it is ignored,else it uses the value as a m2 path.
Configuration mechanism
The configuration uses Microprofile Config for most entries. It means it can be passedthrough system properties and environment variables (by replacing dots withunderscores and making the keys uppercase).
To configure a Docker image rather than a standalone instance, Docker Config and secretsintegration allows you to read the configuration from files. You can customize theconfiguration of these integrations through system properties.
Docker integration provides a secure: support to encrypt values and system properties,when required.
It is fully implemented using the Apache Geronimo Microprofile Config extensions.
8.1.3. HTTPS activation
Using the server ZIP (or Docker image), you can configure HTTPS by adding properties to_JAVA_OPTIONS. Assuming that you have a certificate in /opt/certificates/component.p12(don’t forget to add/mount it in the Docker image if you use it), you can activate it asfollows:
# use -e for Docker and `--https=8443` to set the port## this skips the http port binding and only binds https on the port 8443, andsetups the correct certificateexport _JAVA_OPTIONS="-Dskip-http=true -Dssl=true -Dhttps=8443 -Dkeystore-type=PKCS12 -Dkeystore-alias=talend -Dkeystore-password=talend -Dkeystore-file=/opt/certificates/component.p12"
| 203

8.1.4. Defining queries
You can define simple queries on the configuration types and components endpoints.These two endpoints support different parameters.
Queries on the configurationtype/index endpoint supports the following parameters:
• type
• id
• name
• metadata of the first configuration property as parameters.
Queries on the component/index endpoint supports the following parameters:
• plugin
• name
• id
• familyId
• metadata of the first configuration property as parameters.
In both cases, you can combine several conditions using OR and AND operators. If youcombine more than two conditions, note that they are evaluated in the order they arewritten.
Each supported parameter in a condition can be "equal to" (=) or "not equal to" (!=) adefined value (case-sensitive).
For example:
(metadata[configurationtype::type] = dataset) AND (plugin = jdbc-component) OR(name = input)
In this example, the query gets components that have a dataset and belong to the jdbc-component plugin, or components that are named input.
8.1.5. Web forms and REST API
The component-form library provides a way to build a component REST API facade that iscompatible with React form library.
for example:
@Path("tacokit-facade")@ApplicationScopedpublic class ComponentFacade {
204 |

private static final String[] EMPTY_ARRAY = new String[0];
@Inject private Client client;
@Inject private ActionService actionService;
@Inject private UiSpecService uiSpecService;
@Inject // assuming it is available in your app, use any client you want private WebTarget target;
@POST @Path("action") public void action(@Suspended final AsyncResponse response, @QueryParam("family") final String family, @QueryParam("type") final String type, @QueryParam("action") finalString action, final Map<String, Object> params) { client.action(family, type, action, params).handle((r, e) -> { if (e != null) { onException(response, e); } else { response.resume(actionService.map(type, r)); } return null; }); }
@GET @Path("index") public void getIndex(@Suspended final AsyncResponse response, @QueryParam("language") @DefaultValue("en") final String language){ target .path("component/index") .queryParam("language", language) .request(APPLICATION_JSON_TYPE) .rx() .get(ComponentIndices.class) .toCompletableFuture() .handle((index, e) -> { if (e != null) { onException(response, e); } else { index.getComponents().stream().flatMap(c -> c.getLinks().stream()).forEach( link -> link.setPath(link.getPath().replaceFirst(
| 205

"/component/", "/application/").replace( "/details?identifiers=", "/detail/"))); response.resume(index); } return null; }); }
@GET @Path("detail/{id}") public void getDetail(@Suspended final AsyncResponse response, @QueryParam("language") @DefaultValue("en") final String language,@PathParam("id") final String id) { target .path("component/details") .queryParam("language", language) .queryParam("identifiers", id) .request(APPLICATION_JSON_TYPE) .rx() .get(ComponentDetailList.class) .toCompletableFuture() .thenCompose(result -> uiSpecService.convert(result.getDetails().iterator().next())) .handle((result, e) -> { if (e != null) { onException(response, e); } else { response.resume(result); } return null; }); }
private void onException(final AsyncResponse response, final Throwable e){ final UiActionResult payload; final int status; if (WebException.class.isInstance(e)) { final WebException we = WebException.class.cast(e); status = we.getStatus(); payload = actionService.map(we); } else if (CompletionException.class.isInstance(e)) { final CompletionException actualException = CompletionException.class.cast(e); log.error(actualException.getMessage(), actualException); status = Response.Status.BAD_GATEWAY.getStatusCode(); payload = actionService.map(new WebException(actualException, -1,emptyMap())); } else { log.error(e.getMessage(), e);
206 |

status = Response.Status.BAD_GATEWAY.getStatusCode(); payload = actionService.map(new WebException(e, -1, emptyMap())); } response.resume(new WebApplicationException(Response.status(status).entity(payload).build())); }}
the Client can be created usingClientFactory.createDefault(System.getProperty("app.components.base",
"http://localhost:8080/api/v1")) and the service can be a simple newUiSpecService<>(). The factory uses JAX-RS if the API is available(assuming a JSON-B provider is registered). Otherwise, it tries to useSpring.
The conversion from the component model (REST API) to the uiSpec model is donethrough UiSpecService. It is based on the object model which is mapped to a UI model.Having a flat model in the component REST API allows to customize layers easily.
You can completely control the available components, tune the rendering by switching theuiSchema, and add or remove parts of the form. You can also add custom actions andbuttons for specific needs of the application.
The /migrate endpoint was not shown in the previous snippet but if youneed it, add it as well.
Using the UiSpec model without the tooling
<dependency> <groupId>org.talend.sdk.component</groupId> <artifactId>component-form-model</artifactId> <version>${talend-component-kit.version}</version></dependency>
This Maven dependency provides the UISpec model classes. You can use the Ui API (withor without the builders) to create UiSpec representations.
For Example:
| 207

final Ui form1 = ui() .withJsonSchema(JsonSchema.jsonSchemaFrom(Form1.class).build()) ① .withUiSchema(uiSchema() ② .withKey("multiSelectTag") .withRestricted(false) .withTitle("Simple multiSelectTag") .withDescription("This data list accepts values that are not in thelist of suggestions") .withWidget("multiSelectTag") .build()) .withProperties(myFormInstance) ③ .build();
final String json = jsonb.toJson(form1); ④
① The JsonSchema is extracted from reflection on the Form1 class. @JsonSchemaIgnore allowsto ignore a field and @JsonSchemaProperty allows to rename a property.
② A UiSchema is programmatically built using the builder API.
③ An instance of the form is passed to let the serializer extract its JSON model.
④ The Ui model, which can be used by UiSpec compatible front widgets, is serialized.
The model uses the JSON-B API to define the binding. Make sure to have animplementation in your classpath. To do that, add the following dependencies:
<dependency> <groupId>org.apache.geronimo.specs</groupId> <artifactId>geronimo-jsonb_1.0_spec</artifactId> <version>1.0</version></dependency><dependency> <groupId>org.apache.geronimo.specs</groupId> <artifactId>geronimo-json_1.1_spec</artifactId> <version>1.0</version></dependency><dependency> <groupId>org.apache.johnzon</groupId> <artifactId>johnzon-jsonb</artifactId> <version>${johnzon.version}</version> <!-- 1.1.5 for instance --></dependency>
Using the UiSpec for custom models
The following module enables you to define through annotations a uispec on your ownmodels:
208 |

<dependency> <groupId>org.talend.sdk.component</groupId> <artifactId>component-uispec-mapper</artifactId> <version>${talend-component-kit.version}</version></dependency>
this can’t be used in components and is only intended for webapplications.
org.talend.sdk.component.form.uispec.mapper.api.service.UiSpecMapper enables to createa Ui instance from a custom type annotated withorg.talend.sdk.component.form.uispec.mapper.api.model.View andorg.talend.sdk.component.form.uispec.mapper.api.model.View.Schema.
UiSpecMapper returns a Supplier and not directly an Ui because the ui-schema is re-evaluated when `get()̀ is called. This enables to update thetitle maps for example.
Here is an example:
| 209

@Datapublic abstract class BaseModel { @View.Skip private String id;
@View.Skip private Date created;
@View.Skip private Date updated;
@View.Schema(type = "hidden", readOnly = true) private long version;}
@Data@ToString(callSuper = true)@EqualsAndHashCode(callSuper = true)public class ComponentModel extends BaseModel { @View.Schema(length = 1024, required = true, position = 1, reference ="vendors") private String vendor;
@View.Schema(length = 2048, required = true, position = 2) private String name;
@View.Schema(length = 2048, required = true, position = 3) private String license;
@View.Schema(length = 2048, required = true, position = 4) private String sources;
@View.Schema(length = 2048, required = true, position = 5) private String bugtracker;
@View.Schema(length = 2048, required = true, position = 6) private String documentation;
@View.Schema(widget = "textarea", length = 8192, required = true, position= 7) private String description;
@View.Schema(widget = "textarea", length = 8192, position = 8) private String changelog;}
This API maps directly the UiSpec model (json schema and ui schema of Talend UIForm).
210 |

The default implementation of the mapper is available atorg.talend.sdk.component.form.uispec.mapper.impl.UiSpecMapperImpl.
Here is an example:
private UiSpecMapper mapper = new UiSpecMapperImpl(new Configuration(getTitleMapProviders()));
@GETpublic Ui getNewComponentModelForm() { return mapper.createFormFor(ComponentModel.class).get();}
@GET@Path("{id}")public Ui editComponentModelForm(final @PathParam("id") final String id) { final ComponentModel component = findComponent(id); final Ui spec = getNewComponentModelForm(); spec.setProperties(component); return spec;}
The getTitleMapProviders() method will generally lookup a set of TitleMapProviderinstances in your IoC context. This API is used to fill the titleMap of the form when areference identifier is set on the @Schema annotation.
JavaScript integration
component-kit.js is no more available (previous versions stay on NPM)and is replaced by @talend/react-containers. The previous import can bereplaced by import kit from '@talend/react-
containers/lib/ComponentForm/kit';.
Default JavaScript integration goes through the Talend UI Forms library and its Containerswrapper.
Documentation is now available on the previous link.
8.1.6. Logging
The logging uses Log4j2. You can specify a custom configuration by using the-Dlog4j.configurationFile system property or by adding a log4j2.xml file to the classpath.
Here are some common configurations:
• Console logging:
| 211
<?xml version="1.0"?><Configuration status="INFO"> <Appenders> <Console name="Console" target="SYSTEM_OUT"> <PatternLayout pattern="[%d{HH:mm:ss.SSS}][%highlight{%-5level}][%15.15t][%30.30logger] %msg%n"/> </Console> </Appenders> <Loggers> <Root level="INFO"> <AppenderRef ref="Console"/> </Root> </Loggers></Configuration>
Output messages look like:
[16:59:58.198][INFO ][ main][oyote.http11.Http11NioProtocol]Initializing ProtocolHandler ["http-nio-34763"]
• JSON logging:
<?xml version="1.0"?><Configuration status="INFO"> <Properties> <!-- DO NOT PUT logSource there, it is useless and slow --> <Property name="jsonLayout">{"severity":"%level","logMessage":"%encode{%message}{JSON}","logTimestamp":"%d{ISO8601}{UTC}","eventUUID":"%uuid{RANDOM}","@version":"1","logger.name":"%encode{%logger}{JSON}","host.name":"${hostName}","threadName":"%encode{%thread}{JSON}","stackTrace":"%encode{%xThrowable{full}}{JSON}"}%n</Property> </Properties> <Appenders> <Console name="Console" target="SYSTEM_OUT"> <PatternLayout pattern="${jsonLayout}"/> </Console> </Appenders> <Loggers> <Root level="INFO"> <AppenderRef ref="Console"/> </Root> </Loggers></Configuration>
Output messages look like:
212 |

{"severity":"INFO","logMessage":"Initializing ProtocolHandler [\"http-nio-46421\"]","logTimestamp":"2017-11-20T16:04:01,763","eventUUID":"8b998e17-7045-461c-8acb-c43f21d995ff","@version":"1","logger.name":"org.apache.coyote.http11.Http11NioProtocol","host.name":"TLND-RMANNIBUCAU","threadName":"main","stackTrace":""}
• Rolling file appender:
<?xml version="1.0"?><Configuration status="INFO"> <Appenders> <RollingRandomAccessFile name="File" fileName="${LOG_PATH}/application.log" filePattern="${LOG_PATH}/application-%d{yyyy-MM-dd}.log"> <PatternLayout pattern="[%d{HH:mm:ss.SSS}][%highlight{%-5level}][%15.15t][%30.30logger] %msg%n"/> <Policies> <SizeBasedTriggeringPolicy size="100 MB" /> <TimeBasedTriggeringPolicy interval="1" modulate="true"/> </Policies> </RollingRandomAccessFile> </Appenders> <Loggers> <Root level="INFO"> <AppenderRef ref="File"/> </Root> </Loggers></Configuration>
More details are available in the RollingFileAppender documentation.
You can compose previous layout (message format) and appenders(where logs are written).
8.1.7. Docker
The server image is deployed on Docker. Its version is suffixed with a timestamp to ensureimages are not overridden and can break your usage. You can check the available versionon Docker hub.
Run
You can run the docker image by executing this command :
$ sudo docker run -p 8080:8080 tacokit/component-starter
| 213

Configure
You can set the env variable _JAVA_OPTIONS to customize the server, by default it isinstalled in /opt/talend/component-kit.
Maven repository
The maven repository is the default one of the machine, you can change it setting thesystem property talend.component.server.maven.repository=/path/to/your/m2.
Deploy components to the server
If you want to deploy some components you can configure which ones in _JAVA_OPTIONS(see server doc online) and redirect your local m2:
$ docker run \ -p 8080:8080 \ -v ~/.m2:/root/.m2 \ -e _JAVA_OPTIONS="-Dtalend.component.server.component.coordinates=g:a:v,g2:a2:v2,..." \ component-server
Logging
The component server docker image comes with two log4j2 profiles: TEXT (default) andJSON. The logging profile can be changed by setting the environment variableLOGGING_LAYOUT to JSON.
Note that Component Server adds to these default Talend profiles the KAFKA profile. Withthis profile, all logs are sent to Kafka.
You can check the exact configuration in the component-
runtime/images/component-server-image/src/main/resources folder.
default or TEXT profile
The console logging is on at INFO level by default. You can customize it by setting theCONSOLE_LOG_LEVEL environment variable to DEBUG, INFO, WARN or to any other log levelsupported by log4j2.
Run docker image with console logging:
sudo docker run -p 8080:8080 \ -e CONSOLE_LOG_LEVEL=DEBUG \ component-server
214 |

JSON profile
The JSON profile does the following:
1. Logs on the console using the CONSOLE_LOG_LEVEL configuration as the default profile. Ituses the formatting shown below.
2. If the TRACING_KAFKA_URL environment variable is set, it logs the opentracing data onthe defined Kafka using the topic TRACING_KAFKA_TOPIC. This level can be customized bysetting the KAFKA_LOG_LEVEL environment variable (INFO by default).
Events are logged in the following format:
{ "eventUUID":"%uuid{RANDOM}", "correlationId":"%X{traceId}", "spanId":"%X{spanId}", "traceId":"%X{traceId}", "category":"components", "eventType":"LOGEvent", "severity":"%level", "logMessage":"%encode{%message}{JSON}", "logSource":{ "class.name":"%class", "file.name":"%file", "host.name":"%X{hostname}", "line.number":"%line", "logger.name":"%logger", "method.name":"%method", "process.id":"%pid" }, "service":"${env:LOG_SERVICE_NAME:-component-server}", "application":"${env:LOG_APP_NAME:-component-server}", "exportable":"${env:LOG_EXPORTABLE:-true}", "audit":"${env:LOG_AUDIT:-false}", "logTimestamp":"%d{ISO8601}{UTC}", "serverTimestamp":"%d{ISO8601}{UTC}", "customInfo":{ "threadName":"%encode{%thread}{JSON}", "stackTrace":"%encode{%xThrowable{full}}{JSON}" }}
KAFKA profile
This profile is very close to the JSON profile and also adds the LOG_KAFKA_TOPIC andLOG_KAFKA_URL configuration. The difference is that it logs the default logs on Kafka inaddition to the tracing logs.
| 215

OpenTracing
The component server uses Geronimo OpenTracing to monitor request.
The tracing can be activated by setting the TRACING_ON environment variable to true.
The tracing rate is configurable by setting the TRACING_SAMPLING_RATE environmentvariable. It accepts 0 (none) and 1 (all, default) as values to ensure the consistency of thereporting.
You can find all the details on the configuration inorg.talend.sdk.component.server.configuration.OpenTracingConfigSource.
Run docker image with tracing on:
sudo docker run -p 8080:8080 \ -e TRACING_ON=true \ tacokit/component-server
By default, Geronimo OpenTracing will log the spans in a Zipking format so you can usethe Kafka profile as explained before to wire it over any OpenTracing backend.
Building the docker image
You can register component server images in Docker using these instructions in thecorresponding image directory:
# ex: cd images/component-server-imagemvn clean compile jib:dockerBuild
Integrating components into the image
Docker Compose
Docker Compose allows you to deploy the server with components, by mounting thecomponent volume into the server image.
docker-compose.yml example:
216 |

version: '3.2'
services: component-server: healthcheck: timeout: 3s interval: 3s retries: 3 test: curl --fail http://localhost:1234/api/v1/environment image: tacokit/component-server:${COMPONENT_SERVER_IMAGE:-1.1.2_20181108161652} command: --http=1234 environment: - CONSOLE_LOG_LEVEL=INFO - _JAVA_OPTIONS= -Xmx1024m -Dtalend.component.server.component.registry=/opt/talend/connectors/component-registry.properties -Dtalend.component.server.maven.repository=/opt/talend/connectors ports: - 1234:1234/tcp volumes: - type: bind read_only: true source: ${CONNECTORS_REPOSITORY} target: /opt/talend/connectors volume: nocopy: true
If you want to mount it from another image, you can use this compose configuration:
| 217

version: '3.2'
services: component-server: healthcheck: timeout: 3s interval: 3s retries: 3 test: curl --fail http://localhost:1234/api/v1/environment image: tacokit/component-server:${COMPONENT_SERVER_IMAGE_VERSION} command: --http=1234 environment: - _JAVA_OPTIONS= -agentlib:jdwp=transport=dt_socket,server=y,suspend=n,address=5005 -Djava.library.path=/opt/talend/component-kit/work/sigar/sigar:/usr/lib/jvm/java-1.8-openjdk/jre/lib/amd64/server:/usr/lib/jvm/java-1.8-openjdk/jre/lib/amd64:/usr/lib/jvm/java-1.8-openjdk/jre/../lib/amd64:/usr/java/packages/lib/amd64:/usr/lib64:/lib64:/lib:/usr/lib -Xmx1024m -Dtalend.component.server.component.registry=/opt/talend/connectors/component-registry.properties -Dtalend.component.server.maven.repository=/opt/talend/connectors ports: - 1234:1234/tcp - 5005:5005/tcp volumes: - connectors:/opt/talend/connectors:ro
connectors: image: talend/connectors:${CONNECTORS_VERSION} environment: - CONNECTORS_SETUP_OPTS=setup --wait-for-end --component-jdbc-auto-download-drivers volumes: - connectors:/opt/talend/connectors:ro
volumes: connectors:
To run one of the previous compose examples, you can use docker-compose -f docker-compose.yml up.
218 |

Only use the configuration related to port 5005 (in ports and the -agentliboption in _JAVA_OPTIONS) to debug the server on port 5005. Don’t set it inproduction.
Adding extensions to the server
You can mount a volume in /opt/talend/component-kit/custom/ and the jars in that folderwhich will be deployed with the server. Since the server relies on CDI (ApacheOpenWebBeans) you can use that technology to enrich it, including JAX-RS endpoints,interceptors etc…or just libraries needing to be in the JVM.
8.2. Component Server Vault ProxyBrowse the API description using OpenAPI.
A Vault proxy dedicated to the component server allows to safely manage credentialencryption when operating in a Cloud environment.
The Vault Proxy only concerns data marked as @Credential in the componentconfiguration.
This Vault proxy:
• receives an encrypted payload containing sensitive data from the remote engine, via
| 219

HTTP.
• decrypts the data
• caches in memory the decrypted value of the data for performance reasons.
• sends unencrypted data to the component server using HTTPS. An SSL certificate canbe automatically generated and secures the data.
8.2.1. Vault proxy configuration
the configuration is read from system properties, environment variables,….
talend.vault.cache.client.certificate.acceptAny
Default value: false. Should any certificate be accepted - only for dev purposes.
talend.vault.cache.client.executor.server.core
Default value: 64. Thread pool core size for Component Server client.
talend.vault.cache.client.executor.server.keepAlive
Default value: 60000. Thread keep alive (in ms) for Component Server client threadpool.
talend.vault.cache.client.executor.server.max
Default value: 256. Thread pool max size for Component Server client.
talend.vault.cache.client.executor.vault.core
Default value: 64. Thread pool core size for Vault client.
talend.vault.cache.client.executor.vault.keepAlive
Default value: 60000. Thread keep alive (in ms) for Vault client thread pool.
talend.vault.cache.client.executor.vault.max
Default value: 256. Thread pool max size for Vault client.
talend.vault.cache.client.providers
JAX-RS fully qualified name of the provides (message body readers/writers) for vaultand component-server clients.
talend.vault.cache.client.server.authorization
The token to use to call component-server if any.
talend.vault.cache.client.server.certificate.keystore.location
Where the keystore to use to connect to Component Server is located.
talend.vault.cache.client.server.certificate.keystore.password
Default value: changeit. The keystore password for
220 |

talend.vault.cache.client.server.certificate.keystore.location.
talend.vault.cache.client.server.certificate.keystore.type
The keystore type fortalend.vault.cache.client.server.certificate.keystore.location.
talend.vault.cache.client.server.certificate.truststore.type
The truststore type fortalend.vault.cache.client.server.certificate.keystore.location.
talend.vault.cache.client.server.hostname.accepted
Default value: localhost,127.0.0.1,0:0:0:0:0:0:0:1. Valid hostnames for theComponent Server certificates (see java.net.ssl.HostnameVerifier).
talend.vault.cache.client.timeout.connect
Default value: 30000. HTTP connection timeout to vault server.
talend.vault.cache.client.timeout.read
Default value: 30000. HTTP read timeout to vault server.
talend.vault.cache.client.vault.certificate.keystore.location
Where the keystore to use to connect to vault is located.
talend.vault.cache.client.vault.certificate.keystore.password
Default value: changeit. The keystore password fortalend.vault.cache.client.vault.certificate.keystore.location.
talend.vault.cache.client.vault.certificate.keystore.type
The keystore type for talend.vault.cache.client.vault.certificate.keystore.location.
talend.vault.cache.client.vault.certificate.truststore.type
The truststore type fortalend.vault.cache.client.vault.certificate.keystore.location.
talend.vault.cache.client.vault.hostname.accepted
Default value: localhost,127.0.0.1,0:0:0:0:0:0:0:1. Valid hostnames for the Vaultcertificates (see java.net.ssl.HostnameVerifier).
talend.vault.cache.jcache.cache.expiry
Default value: 3600. JCache expiry for decrypted values (ms).
talend.vault.cache.jcache.cache.management
Default value: false. Should JCache MBeans be registered.
talend.vault.cache.jcache.cache.statistics
Default value: false. Should JCache statistics be enabled.
| 221

talend.vault.cache.jcache.manager.properties
Default value: `. JCache `CacheManager properties used to initialized the instance.
talend.vault.cache.jcache.manager.uri
Default value: geronimo://simple-jcache.properties. Configuration for JCache setup,default implementation is Geronimo Simple Cache.
talend.vault.cache.jcache.maxCacheSize
Default value: 100000. JCache max size per cache.
talend.vault.cache.jcache.refresh.period
Default value: 30000. How often (in ms) the Component Server should be checked toinvalidate the caches on the component parameters (to identify credentials).
talend.vault.cache.security.allowedIps
Default value: localhost,127.0.0.1,0:0:0:0:0:0:0:1. The IP or hosts allowed to call thatserver on /api/* if no token is passed.
talend.vault.cache.security.hostname.sanitizer
Default value: none. Enable to sanitize the hostname before testing them. Default tonone which is a noop. Supported values are docker (for<folder>_<service>_<number>.<folder>_<network> pattern) and weave (for<prefix>_dataset_<number>.<suffix> pattern).
talend.vault.cache.security.tokens
Default value: -. The tokens enabling a client to call this server without being inallowedIp whitelist.
talend.vault.cache.service.auth.cantDecipherStatusCode
Default value: 422. Status code sent when vault can’t decipher some values.
talend.vault.cache.service.auth.refreshDelayMargin
Default value: 600000. How often (in ms) to refresh the vault token.
talend.vault.cache.service.auth.refreshDelayOnFailure
Default value: 10000. How often (in ms) to refresh the vault token in case of anauthentication failure.
talend.vault.cache.service.decipher.skip.regex
Default value: vault\:v[0-9]+\:.*. The regex to whitelist ciphered keys, others will bepassthrough in the output without going to vault.
talend.vault.cache.talendComponentKit.url
Base URL to connect to Component Server
222 |

talend.vault.cache.vault.auth.endpoint
Default value: v1/auth/engines/login. The vault path to retrieve a token.
talend.vault.cache.vault.auth.roleId
Default value: -. The vault role identifier to use to log in (if token is not set). - means itis ignored.
talend.vault.cache.vault.auth.secretId
Default value: -. The vault secret identifier to use to log in (if token is not set). - meansit is ignored.
talend.vault.cache.vault.auth.token
Default value: -. The vault token to use to log in (will make roleId and secretIdignored). - means it is ignored.
talend.vault.cache.vault.decrypt.endpoint
Default value: v1/tenants-keyrings/decrypt/{x-talend-tenant-id}. The vault path todecrypt values. You can use the variable {x-talend-tenant-id} to replace by x-talend-tenant-id header value.
talend.vault.cache.vault.url
Base URL to connect to Vault.
Configuration mechanism
The configuration uses Microprofile Config for most entries. It means it can be passedthrough system properties and environment variables (by replacing dots withunderscores and making the keys uppercase).
To configure a Docker image rather than a standalone instance, Docker Config and secretsintegration allows you to read the configuration from files. You can customize theconfiguration of these integrations through system properties.
Docker integration provides a secure: support to encrypt values and system properties,when required.
It is fully implemented using the Apache Geronimo Microprofile Config extensions.
8.2.2. Adding the Vault Proxy to your Docker Compose
The YAML below is the recommended configuration to enable the Vault Proxy andComponent Server to communicate over HTTPS.
8.2.3. Docker Compose
version: '3.2'
| 223

services: component-server: ① healthcheck: timeout: 3s interval: 3s retries: 3 test: curl --fail http://localhost:8080/api/v1/environment image: tacokit/component-server:${COMPONENT_SERVER_IMAGE_VERSION:-1.1.6_20190208104207} environment: - _JAVA_OPTIONS= -Dtalend.component.server.filter.secured.tokens=vault-proxy ② -Dtalend.component.server.ssl.active=true ③ -Dtalend.component.server.ssl.keystore.location=/opt/talend/configuration/https.p12 ③ -Dtalend.component.server.ssl.keystore.type=PKCS12 ③ -Dtalend.component.server.component.registry=/opt/talend/connectors/component-registry.properties ④ -Dtalend.component.server.maven.repository=/opt/talend/connectors ④ volumes: - connectors:/opt/talend/connectors:ro ④ - vault-proxy-configuration:/opt/talend/configuration ③
component-server-vault-proxy: ⑤ healthcheck: timeout: 3s interval: 3s retries: 3 test: curl --fail http://localhost:8080/api/v1/proxy/environment image: tacokit/component-server-vault-proxy:${COMPONENT_SERVER_VAULT_PROXY_IMAGE_VERSION:-1.1.6_20190208104221} environment: - _JAVA_OPTIONS= -Dtalend.vault.cache.client.server.certificate.keystore.location=/opt/talend/configuration/https.p12 ⑥ -Dtalend.vault.cache.client.server.certificate.keystore.type=PKCS12 ⑥ -Dtalend.vault.cache.client.server.hostname.accepted=component-server⑥ -Dtalend.vault.cache.client.server.authorization=vault-proxy ⑦ -Dtalend.vault.cache.talendComponentKit.url=https://component-server:8080/api/v1 ⑦ -Dtalend.vault.cache.vault.url=http://vault:8200 ⑧ -Dtalend.vault.cache.vault.auth.roleId=myrole ⑧ -Dtalend.vault.cache.vault.decrypt.endpoint=v1/something/decrypt/00000001 ⑧
224 |

-Dtalend.vault.cache.security.allowedIps=${COMPONENT_SERVER_VAULT_PROXY_CLIENT_IP:-127.0.0.1} ⑨ ports: - 9090:8080/tcp links: ⑩ - "component-server:component-server" # - "vault:vault" volumes: - vault-proxy-configuration:/opt/talend/configuration:ro
connectors: ⑪ image: registry.datapwn.com/talend/connectors:${CONNECTORS_IMAGE_VERSION:-1.0.0_master_20190208091312} environment: - CONNECTORS_SETUP_OPTS=setup --wait-for-end volumes: - connectors:/opt/talend/connectors:ro
volumes: ⑫ connectors: vault-proxy-configuration:
① The standard Component Server entry.
② Ensures only a client with a particular token can call the server. It is similar to ashared secret and only allows to call the server in "remote" mode, since only the localmode is enabled by default.
③ Activates and configures the auto generation of a X.509 certificate which is used for theHTTPS connector on the server.
④ Binds the components to deploy into the server.
⑤ Definition of the Vault proxy service which handles the mediation between Vault andthe Component Server.
⑥ Since both servers are colocalized, the generated certificate is inherited from theComponent Server, which allows to create the client that connects to it.
⑦ Configuration of the base URL to connect to the server - see <10>.
⑧ Configuration of the vault connection and security information.
⑨ Ensuring that connecting from $COMPONENT_SERVER_VAULT_PROXY_CLIENT_IP to vault proxyis possible. Any other IP will be rejected.
⑩ Linking both services so they can communicate. It allows not to expose the ComponentServer port outside of its own container (no ports mapping in the Component Serverservice definition). Note that if your vault is a service, you can link it here as well.
⑪ Common component image service definition.
⑫ Volumes used by the services. The connectors has not changed but vault-proxy-
| 225

configuration was added for the automatic HTTPS configuration.
This setup enables the Vault Proxy and Component Server to communicate. You can nowuse the Vault Proxy as if it was the Component Server, by using localhost:9090 (or anyother host matching your deployment) instead of the Component Server directly.
8.2.4. Linking the Vault Proxy to the Component Server throughHTTPS
When the Vault Proxy is enabled, ensure you configure HTTPS on the Component Serverusing the following parameters:
talend.component.server.ssl.active
true or false. Indicates if the SSL protocol is enabled.
talend.component.server.ssl.password
Keystore password.
talend.component.server.ssl.keystore.location
Path to Keystore.
talend.component.server.ssl.keystore.alias
Private key/certificate alias.
talend.component.server.ssl.keystore.type
Keystore type.
talend.component.server.ssl.keystore.generation.force
true or false.
talend.component.server.ssl.keystore.generation.command
Specifies if a custom command is to be used to generate the certificate.
talend.component.server.ssl.keypair.algorithm
Encryption algorithm. RSA by default.
talend.component.server.ssl.certificate.dname
Distinguished name.
talend.component.server.ssl.keypair.size
Size of the key. 2048 by default.
talend.component.server.ssl.port
SSL port to use.
226 |

8.2.5. Adding extensions to the instance
You can mount a volume in /opt/talend/component-kit-vault-proxy/custom/ and the jars inthat folder which will be deployed with the server. Since the server relies on CDI (ApacheOpenWebBeans) you can use that technology to enrich it, including JAX-RS endpoints,interceptors etc…or just libraries needing to be in the JVM.
9. Tutorials
9.1. Creating your first componentThis tutorial walks you through the most common iteration steps to create a componentwith Talend Component Kit and to deploy it to Talend Open Studio.
The component created in this tutorial is a simple processor that reads data coming fromthe previous component in a job or pipeline and displays it in the console logs of theapplication, along with an additional information entered by the final user.
The component designed in this tutorial is a processor and does notrequire nor show any datastore and dataset configuration. Datasets anddatastores are required only for input and output components.
| 227

9.1.1. Prerequisites
To get your development environment ready and be able to follow this tutorial:
• Download and install a Java JDK 1.8 or greater.
• Download and install Talend Open Studio. For example, from Sourceforge.
• Download and install IntelliJ.
• Download the Talend Component Kit plugin for IntelliJ. The detailed installation stepsfor the plugin are available in this document.
9.1.2. Generate a component project
The first step in this tutorial is to generate a component skeleton using the Starterembedded in the Talend Component Kit plugin for IntelliJ.
1. Start IntelliJ and create a new project. In the available options, you should see TalendComponent.
2. Make sure that a Project SDK is selected. Then, select Talend Component and clickNext.The Talend Component Kit Starter opens.
3. Enter the component and project metadata. Change the default values, for example aspresented in the screenshot below:
228 |

◦ The Component Family and the Category will be used later in Talend Open Studioto find the new component.
◦ Project metadata is mostly used to identify the project structure. A commonpractice is to replace 'company' in the default value by a value of your own, likeyour domain name.
4. Once the metadata is filled, select Add a component. A new screen is displayed in theTalend Component Kit Starter that lets you define the generic configuration of thecomponent. By default, new components are processors.
5. Enter a valid Java name for the component. For example, Logger.
6. Select Configuration Model and add a string type field named level. This input fieldwill be used in the component configuration for final users to enter additionalinformation to display in the logs.
| 229

7. In the Input(s) / Output(s) section, click the default MAIN input branch to access itsdetail, and make sure that the record model is set to Generic. Leave the Name of thebranch with its default MAIN value.
230 |

8. Repeat the same step for the default MAIN output branch.
Because the component is a processor, it has an output branch bydefault. A processor without any output branch is considered anoutput component. You can create output components when theActivate IO option is selected.
9. Click Next and check the name and location of the project, then click Finish togenerate the project in the IDE.
At this point, your component is technically already ready to be compiled and deployed toTalend Open Studio. But first, take a look at the generated project:
• Two classes based on the name and type of component defined in the TalendComponent Kit Starter have been generated:
◦ LoggerProcessor is where the component logic is defined
◦ LoggerProcessorConfiguration is where the component layout and configurablefields are defined, including the level string field that was defined earlier in theconfiguration model of the component.
• The package-info.java file contains the component metadata defined in the TalendComponent Kit Starter, such as family and category.
• You can notice as well that the elements in the tree structure are named after theproject metadata defined in the Talend Component Kit Starter.
These files are the starting point if you later need to edit the configuration, logic, andmetadata of the component.
There is more that you can do and configure with the Talend Component Kit Starter.This tutorial covers only the basics. You can find more information in this document.
| 231
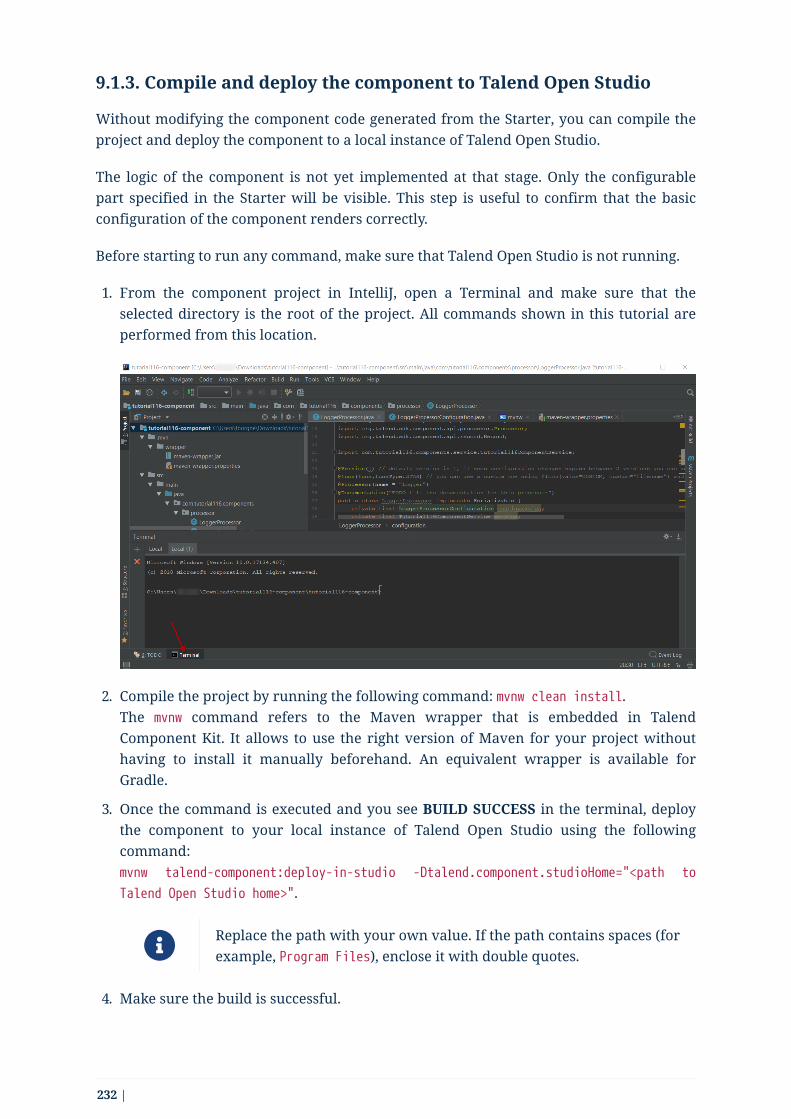
9.1.3. Compile and deploy the component to Talend Open Studio
Without modifying the component code generated from the Starter, you can compile theproject and deploy the component to a local instance of Talend Open Studio.
The logic of the component is not yet implemented at that stage. Only the configurablepart specified in the Starter will be visible. This step is useful to confirm that the basicconfiguration of the component renders correctly.
Before starting to run any command, make sure that Talend Open Studio is not running.
1. From the component project in IntelliJ, open a Terminal and make sure that theselected directory is the root of the project. All commands shown in this tutorial areperformed from this location.
2. Compile the project by running the following command: mvnw clean install.The mvnw command refers to the Maven wrapper that is embedded in TalendComponent Kit. It allows to use the right version of Maven for your project withouthaving to install it manually beforehand. An equivalent wrapper is available forGradle.
3. Once the command is executed and you see BUILD SUCCESS in the terminal, deploythe component to your local instance of Talend Open Studio using the followingcommand:mvnw talend-component:deploy-in-studio -Dtalend.component.studioHome="<path to
Talend Open Studio home>".
Replace the path with your own value. If the path contains spaces (forexample, Program Files), enclose it with double quotes.
4. Make sure the build is successful.
232 |

5. Open Talend Open Studio and create a new Job:
◦ Find the new component by looking for the family and category specified in theTalend Component Kit Starter. You can add it to your job and open its settings.
◦ Notice that the level field specified in the configuration model of the component inthe Talend Component Kit Starter is present.
At this point, the new component is available in Talend Open Studio, and its configurablepart is already set. But the component logic is still to be defined.
9.1.4. Edit the component
You can now edit the component to implement its logic: reading the data coming throughthe input branch to display that data in the execution logs of the job. The value of the
| 233
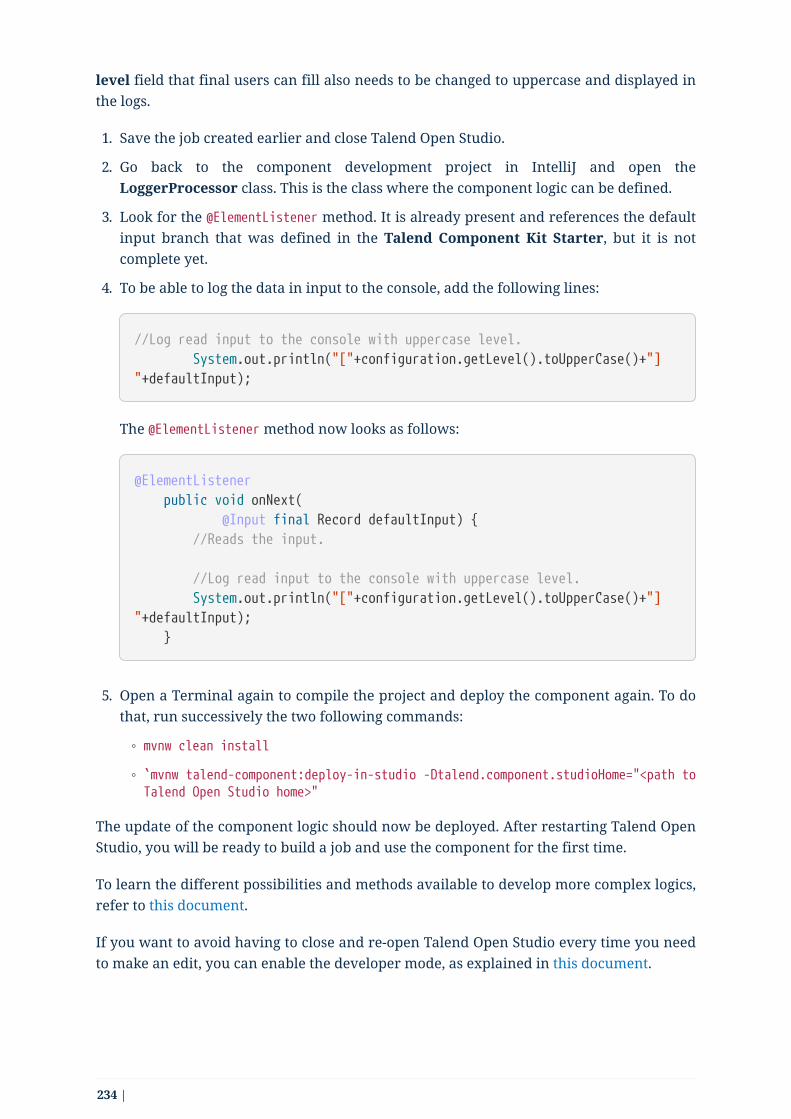
level field that final users can fill also needs to be changed to uppercase and displayed inthe logs.
1. Save the job created earlier and close Talend Open Studio.
2. Go back to the component development project in IntelliJ and open theLoggerProcessor class. This is the class where the component logic can be defined.
3. Look for the @ElementListener method. It is already present and references the defaultinput branch that was defined in the Talend Component Kit Starter, but it is notcomplete yet.
4. To be able to log the data in input to the console, add the following lines:
//Log read input to the console with uppercase level. System.out.println("["+configuration.getLevel().toUpperCase()+"]"+defaultInput);
The @ElementListener method now looks as follows:
@ElementListener public void onNext( @Input final Record defaultInput) { //Reads the input.
//Log read input to the console with uppercase level. System.out.println("["+configuration.getLevel().toUpperCase()+"]"+defaultInput); }
5. Open a Terminal again to compile the project and deploy the component again. To dothat, run successively the two following commands:
◦ mvnw clean install
◦ `mvnw talend-component:deploy-in-studio -Dtalend.component.studioHome="<path toTalend Open Studio home>"
The update of the component logic should now be deployed. After restarting Talend OpenStudio, you will be ready to build a job and use the component for the first time.
To learn the different possibilities and methods available to develop more complex logics,refer to this document.
If you want to avoid having to close and re-open Talend Open Studio every time you needto make an edit, you can enable the developer mode, as explained in this document.
234 |

9.1.5. Build a job with the component
As the component is now ready to be used, it is time to create a job and check that itbehaves as intended.
1. Open Talend Open Studio again and go to the job created earlier. The new componentis still there.
2. Add a tRowGenerator component and connect it to the logger.
3. Double-click the tRowGenerator to specify the data to generate:
◦ Add a first column named firstName and select theTalendDataGenerator.getFirstName() function.
◦ Add a second column named 'lastName' and select theTalendDataGenerator.getLastName() function.
◦ Set the Number of Rows for RowGenerator to 10.
4. Validate the tRowGenerator configuration.
5. Open the TutorialFamilyLogger component and set the level field to info.
| 235

6. Go to the Run tab of the job and run the job.The job is executed. You can observe in the console that each of the 10 generated rowsis logged, and that the info value entered in the logger is also displayed with eachrecord, in uppercase.
236 |

9.2. Generating a project using the ComponentKit StarterThe Component Kit Starter lets you design your components configuration and generatesa ready-to-implement project structure.
The Starter is available on the web or as an IntelliJ plugin.
This tutorial shows you how to use the Component Kit Starter to generate newcomponents for MySQL databases. Before starting, make sure that you have correctlysetup your environment. See this section.
When defining a project using the Starter, do not refresh the page toavoid losing your configuration.
9.2.1. Configuring the project
Before being able to create components, you need to define the general settings of theproject:
1. Create a folder on your local machine to store the resource files of the component youwant to create. For example, C:/my_components.
2. Open the Starter in the web browser of your choice.
| 237

3. Select your build tool. This tutorial uses Maven, but you can select Gradle instead.
4. Add any facet you need. For example, add the Talend Component Kit Testing facet toyour project to automatically generate unit tests for the components created in theproject.
5. Enter the Component Family of the components you want to develop in the project.This name must be a valid java name and is recommended to be capitalized, forexample 'MySQL'.Once you have implemented your components in the Studio, this name is displayed inthe Palette to group all of the MySQL-related components you develop, and is also partof your component name.
6. Select the Category of the components you want to create in the current project. AsMySQL is a kind of database, select Databases in this tutorial.This Databases category is used and displayed as the parent family of the MySQLgroup in the Palette of the Studio.
7. Complete the project metadata by entering the Group, Artifact and Package.
8. By default, you can only create processors. If you need to create Input or Outputcomponents, select Activate IO. By doing this:
◦ Two new menu entries let you add datasets and datastores to your project, as theyare required for input and output components.
Input and Output components without dataset (itself containing adatastore) will not pass the validation step when building thecomponents. Learn more about datasets and datastores in thisdocument.
◦ An Input component and an Output component are automatically added to yourproject and ready to be configured.
◦ Components added to the project using Add A Component can now be processors,input or output components.
238 |

9.2.2. Defining a Datastore
A datastore represents the data needed by an input or output component to connect to adatabase.
When building a component, the validateDataSet validation checks that each input oroutput (processor without output branch) component uses a dataset and that this datasethas a datastore.
You can define one or several datastores if you have selected the Activate IO step.
1. Select Datastore. The list of datastores opens. By default, a datastore is already openbut not configured. You can configure it or create a new one using Add newDatastore.
2. Specify the name of the datastore. Modify the default value to a meaningful name foryour project.This name must be a valid Java name as it will represent the datastore class in yourproject. It is a good practice to start it with an uppercase letter.
3. Edit the datastore configuration. Parameter names must be valid Java names. Uselower case as much as possible. A typical configuration includes connection details toa database:
◦ url
◦ username
◦ password.
4. Save the datastore configuration.
| 239

9.2.3. Defining a Dataset
A dataset represents the data coming from or sent to a database and needed by input andoutput components to operate.
The validateDataSet validation checks that each input or output (processor without outputbranch) component uses a dataset and that this dataset has a datastore.
You can define one or several datasets if you have selected the Activate IO step.
1. Select Dataset. The list of datasets opens. By default, a dataset is already open but notconfigured. You can configure it or create a new one using the Add new Datasetbutton.
2. Specify the name of the dataset. Modify the default value to a meaningful name foryour project.This name must be a valid Java name as it will represent the dataset class in yourproject. It is a good practice to start it with an uppercase letter.
3. Edit the dataset configuration. Parameter names must be valid Java names. Use lowercase as much as possible. A typical configuration includes details of the data toretrieve:
◦ Datastore to use (that contains the connection details to the database)
◦ table name
◦ data
4. Save the dataset configuration.
9.2.4. Creating an Input component
To create an input component, make sure you have selected Activate IO.
When clicking Add A Component in the Starter, a new step allows you to define a newcomponent in your project.The intent in this tutorial is to create an input component that connects to a MySQLdatabase, executes a SQL query and gets the result.
240 |
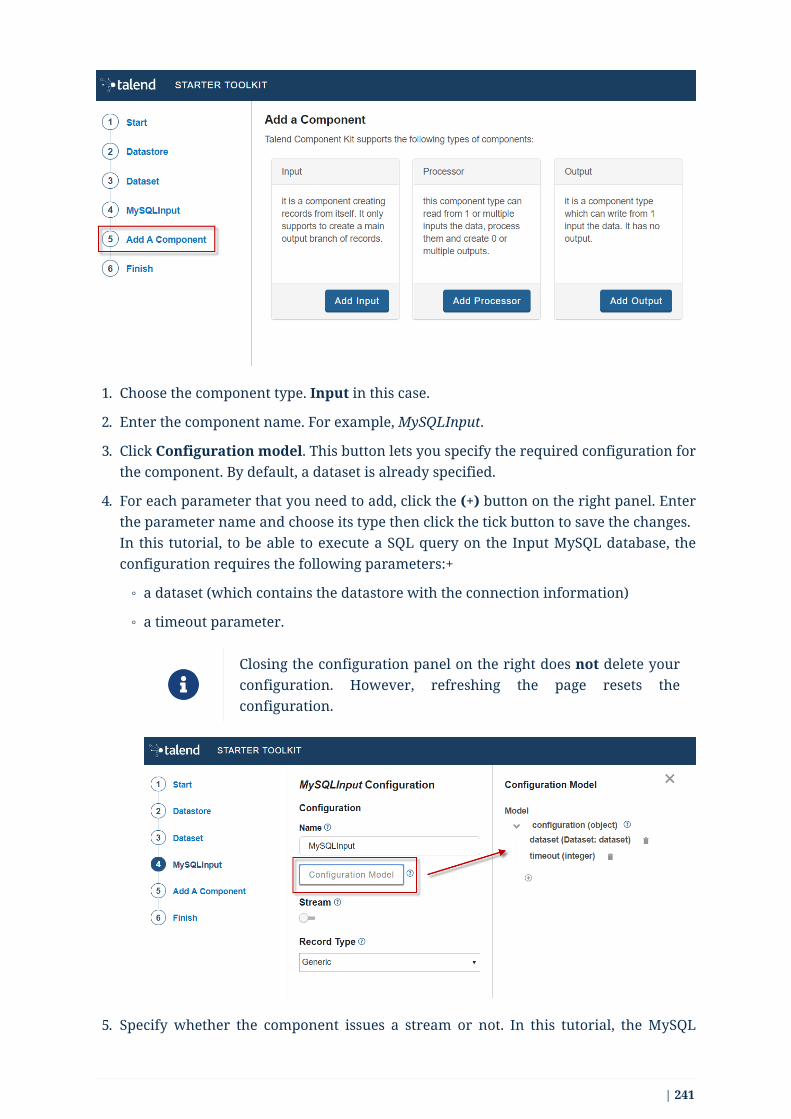
1. Choose the component type. Input in this case.
2. Enter the component name. For example, MySQLInput.
3. Click Configuration model. This button lets you specify the required configuration forthe component. By default, a dataset is already specified.
4. For each parameter that you need to add, click the (+) button on the right panel. Enterthe parameter name and choose its type then click the tick button to save the changes.In this tutorial, to be able to execute a SQL query on the Input MySQL database, theconfiguration requires the following parameters:+
◦ a dataset (which contains the datastore with the connection information)
◦ a timeout parameter.
Closing the configuration panel on the right does not delete yourconfiguration. However, refreshing the page resets theconfiguration.
5. Specify whether the component issues a stream or not. In this tutorial, the MySQL
| 241
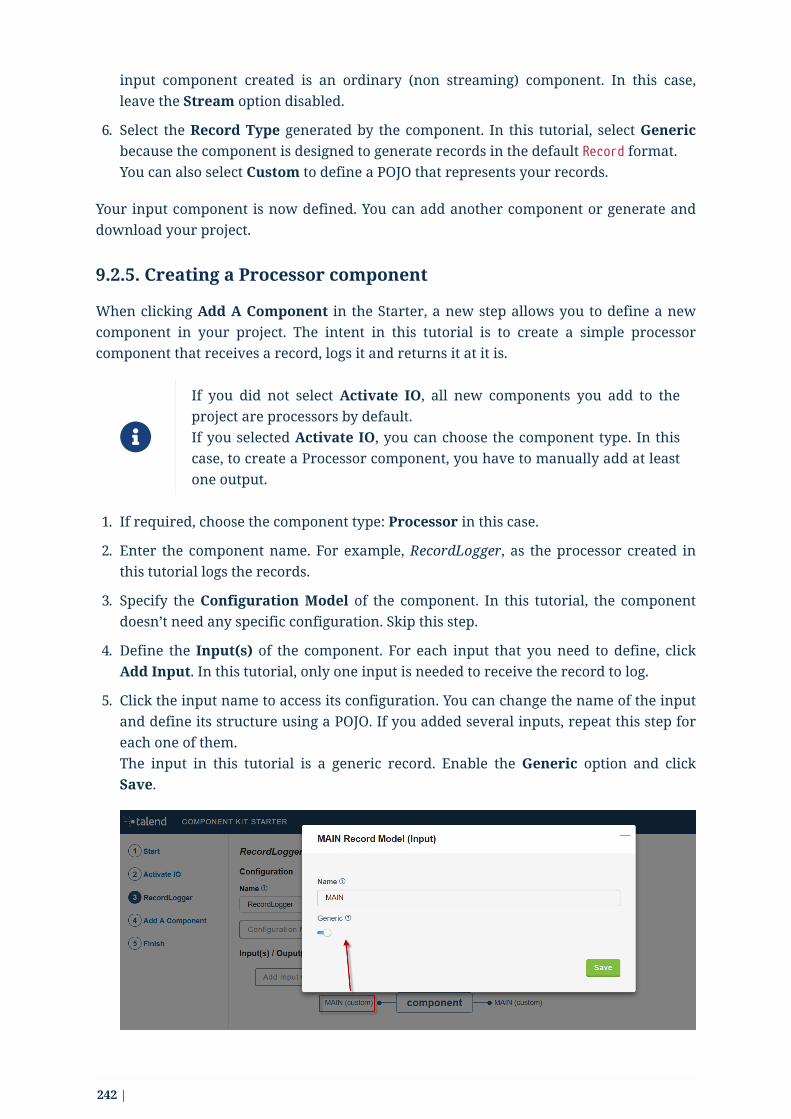
input component created is an ordinary (non streaming) component. In this case,leave the Stream option disabled.
6. Select the Record Type generated by the component. In this tutorial, select Genericbecause the component is designed to generate records in the default Record format.You can also select Custom to define a POJO that represents your records.
Your input component is now defined. You can add another component or generate anddownload your project.
9.2.5. Creating a Processor component
When clicking Add A Component in the Starter, a new step allows you to define a newcomponent in your project. The intent in this tutorial is to create a simple processorcomponent that receives a record, logs it and returns it at it is.
If you did not select Activate IO, all new components you add to theproject are processors by default.If you selected Activate IO, you can choose the component type. In thiscase, to create a Processor component, you have to manually add at leastone output.
1. If required, choose the component type: Processor in this case.
2. Enter the component name. For example, RecordLogger, as the processor created inthis tutorial logs the records.
3. Specify the Configuration Model of the component. In this tutorial, the componentdoesn’t need any specific configuration. Skip this step.
4. Define the Input(s) of the component. For each input that you need to define, clickAdd Input. In this tutorial, only one input is needed to receive the record to log.
5. Click the input name to access its configuration. You can change the name of the inputand define its structure using a POJO. If you added several inputs, repeat this step foreach one of them.The input in this tutorial is a generic record. Enable the Generic option and clickSave.
242 |
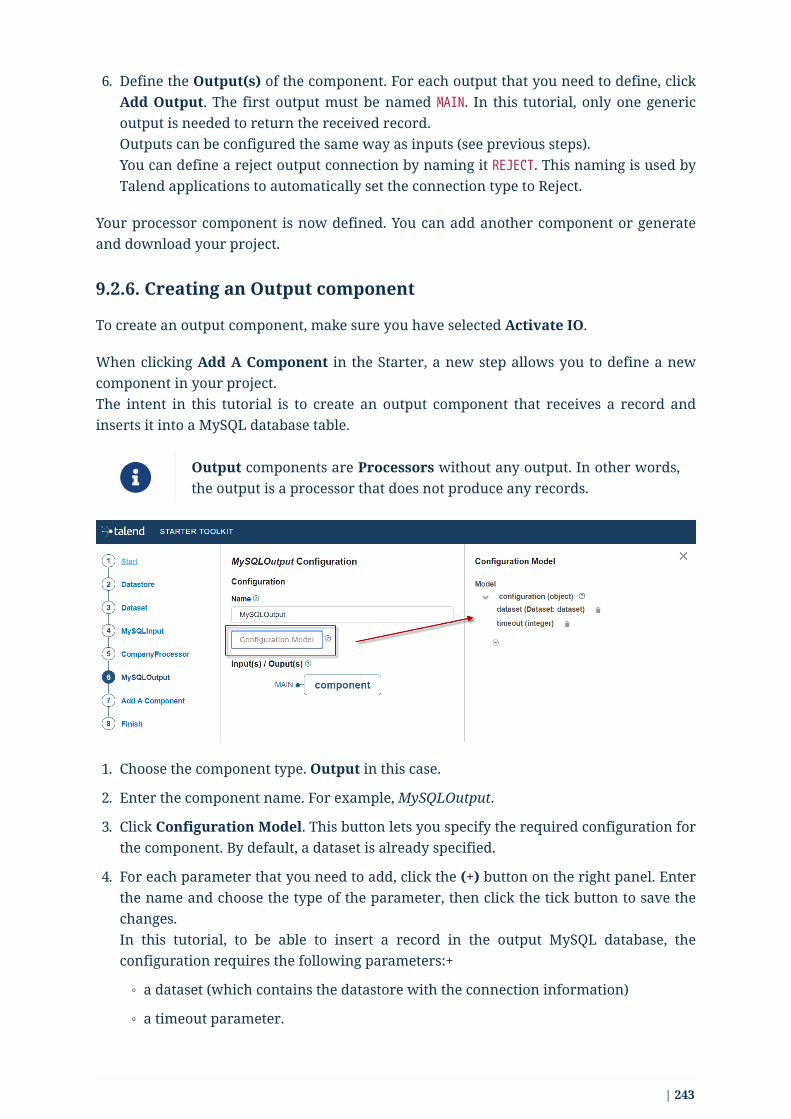
6. Define the Output(s) of the component. For each output that you need to define, clickAdd Output. The first output must be named MAIN. In this tutorial, only one genericoutput is needed to return the received record.Outputs can be configured the same way as inputs (see previous steps).You can define a reject output connection by naming it REJECT. This naming is used byTalend applications to automatically set the connection type to Reject.
Your processor component is now defined. You can add another component or generateand download your project.
9.2.6. Creating an Output component
To create an output component, make sure you have selected Activate IO.
When clicking Add A Component in the Starter, a new step allows you to define a newcomponent in your project.The intent in this tutorial is to create an output component that receives a record andinserts it into a MySQL database table.
Output components are Processors without any output. In other words,the output is a processor that does not produce any records.
1. Choose the component type. Output in this case.
2. Enter the component name. For example, MySQLOutput.
3. Click Configuration Model. This button lets you specify the required configuration forthe component. By default, a dataset is already specified.
4. For each parameter that you need to add, click the (+) button on the right panel. Enterthe name and choose the type of the parameter, then click the tick button to save thechanges.In this tutorial, to be able to insert a record in the output MySQL database, theconfiguration requires the following parameters:+
◦ a dataset (which contains the datastore with the connection information)
◦ a timeout parameter.
| 243

Closing the configuration panel on the right does not delete yourconfiguration. However, refreshing the page resets theconfiguration.
5. Define the Input(s) of the component. For each input that you need to define, clickAdd Input. In this tutorial, only one input is needed.
6. Click the input name to access its configuration. You can change the name of the inputand define its structure using a POJO. If you added several inputs, repeat this step foreach one of them.The input in this tutorial is a generic record. Enable the Generic option and clickSave.
Do not create any output because the component does not produce anyrecord. This is the only difference between an output an a processorcomponent.
Your output component is now defined. You can add another component or generate anddownload your project.
9.2.7. Generating and downloading the final project
Once your project is configured and all the components you need are created, you cangenerate and download the final project. In this tutorial, the project was configured andthree components of different types (input, processor and output) have been defined.
1. Click Finish on the left panel. You are redirected to a page that summarizes theproject. On the left panel, you can also see all the components that you added to theproject.
2. Generate the project using one of the two options available:
◦ Download it locally as a ZIP file using the Download as ZIP button.
◦ Create a GitHub repository and push the project to it using the Create on Githubbutton.
244 |

In this tutorial, the project is downloaded to the local machine as a ZIP file.
9.2.8. Compiling and exploring the generated project files
Once the package is available on your machine, you can compile it using the build toolselected when configuring the project.
• In the tutorial, Maven is the build tool selected for the project.In the project directory, execute the mvn package command.If you don’t have Maven installed on your machine, you can use the Maven wrapperprovided in the generated project, by executing the ./mvnw package command.
• If you have created a Gradle project, you can compile it using the gradle build
command or using the Gradle wrapper: ./gradlew build.
The generated project code contains documentation that can guide and help youimplementing the component logic. Import the project to your favorite IDE to start theimplementation.
9.2.9. Generating a project using an OpenAPI JSON descriptor
The Component Kit Starter allows you to generate a component development project froman OpenAPI JSON descriptor.
1. Open the Starter in the web browser of your choice.
2. Enable the OpenAPI mode using the toggle in the header.
3. Go to the API menu.
4. Paste the OpenAPI JSON descriptor in the right part of the screen. All the describedendpoints are detected.
5. Unselect the endpoints that you do not want to use in the future components. Bydefault, all detected endpoints are selected.
| 245

6. Go to the Finish menu.
7. Download the project.
When exploring the project generated from an OpenAPI descriptor, you can notice thefollowing elements:
• sources
• the API dataset
• an HTTP client for the API
• a connection folder containing the component configuration. By default, theconfiguration is only made of a simple datastore with a baseUrl parameter.
9.3. Talend Input component for HazelcastThis tutorial walks you through the creation, from scratch, of a complete Talend inputcomponent for Hazelcast using the Talend Component Kit (TCK) framework.
Hazelcast is an in-memory distributed system that can store data, which makes it a goodexample of input component for distributed systems. This is enough for you to get startedwith this tutorial, but you can find more information about it here: hazelcast.org/.
9.3.1. Creating the project
A TCK project is a simple Java project with specific configurations and dependencies. Youcan choose your preferred build tool from Maven or Gradle as TCK supports both. In thistutorial, Maven is used.
The first step consists in generating the project structure using Talend Starter Toolkit .
1. Go to starter-toolkit.talend.io/ and fill in the project information as shown in thescreenshots below, then click Finish and Download as ZIP.
image::tutorial_hazelcast_generateproject_1.png[]image::tutorial_hazelcast_generateproject_2.png[]
2. Extract the ZIP file into your workspace and import it to your preferred IDE. Thistutorial uses Intellij IDE, but you can use Eclipse or any other IDE that you arecomfortable with.
You can use the Starter Toolkit to define the full configuration of thecomponent, but in this tutorial some parts are configured manuallyto explain key concepts of TCK.
The generated pom.xml file of the project looks as follows:
<?xml version="1.0" encoding="UTF-8"?>
246 |

<project xmlns="http://maven.apache.org/POM/4.0.0" xmlns:xsi="http://www.w3.org/2001/XMLSchema-instance" xsi:schemaLocation=" http://maven.apache.org/POM/4.0.0 http://maven.apache.org/xsd/maven-4.0.0.xsd"> <modelVersion>4.0.0</modelVersion>
<groupId>org.talend.components.hazelcast</groupId> <artifactId>hazelcast-component</artifactId> <version>0.0.1-SNAPSHOT</version> <packaging>jar</packaging>
<name>Component Hazelcast</name> <description>A generated component project</description>
<properties> <project.build.sourceEncoding>UTF-8</project.build.sourceEncoding>
<!-- Set it to true if you want the documentation to be rendered as HTMLand PDF
You can also use it in the command line:-Dtalend.documentation.htmlAndPdf=true --> <talend.documentation.htmlAndPdf>false</talend.documentation.htmlAndPdf>
<!-- if you want to deploy into the Studio you can use the related goal:
mvn package talend-component:deploy-in-studio-Dtalend.component.studioHome=/path/to/studio
TIP: it is recommended to set this property into your settings.xml inan active by default profile. --> <talend.component.studioHome /> </properties>
<dependencies> <dependency> <groupId>org.talend.sdk.component</groupId> <artifactId>component-api</artifactId> <version>1.1.12</version> <scope>provided</scope> </dependency> </dependencies>
<build>
| 247

<extensions> <extension> <groupId>org.talend.sdk.component</groupId> <artifactId>talend-component-maven-plugin</artifactId> <version>1.1.12</version> </extension> </extensions>
<plugins> <plugin> <groupId>org.apache.maven.plugins</groupId> <artifactId>maven-compiler-plugin</artifactId> <version>3.8.1</version> <configuration> <source>1.8</source> <target>1.8</target> <forceJavacCompilerUse>true</forceJavacCompilerUse> <compilerId>javac</compilerId> <fork>true</fork> <compilerArgs> <arg>-parameters</arg> </compilerArgs> </configuration> </plugin> <plugin> <groupId>org.apache.maven.plugins</groupId> <artifactId>maven-surefire-plugin</artifactId> <version>3.0.0-M3</version> <configuration> <trimStackTrace>false</trimStackTrace> <runOrder>alphabetical</runOrder> </configuration> </plugin> </plugins> </build></project>
3. Change the name tag to a more relevant value, for example: <name>ComponentHazelcast</name>.
◦ The component-api dependency provides the necessary API to develop thecomponents.
◦ talend-component-maven-plugin provides build and validation tools for thecomponent development.
The Java compiler also needs a Talend specific configuration for the components towork correctly. The most important is the -parameters option that preserves theparameter names needed for introspection features that TCK relies on.
248 |

4. Download the mvn dependencies declared in the pom.xml file:
$ mvn clean compile
You should get a BUILD SUCCESS at this point:
[INFO] Scanning for projects...[INFO][INFO] -----< org.talend.components.hazelcast:talend-component-hazelcast>-----[INFO] Building Component :: Hazelcast 1.0.0-SNAPSHOT[INFO] --------------------------------[ jar]---------------------------------[INFO]
...
[INFO][INFO]------------------------------------------------------------------------[INFO] BUILD SUCCESS[INFO]------------------------------------------------------------------------[INFO] Total time: 1.311 s[INFO] Finished at: 2019-09-03T11:42:41+02:00[INFO]------------------------------------------------------------------------
5. Create the project structure:
$ mkdir -p src/main/java$ mkdir -p src/main/resources
6. Create the component Java packages.
Packages are mandatory in the component model and you cannot usethe default one (no package). It is recommended to create a uniquepackage per component to be able to reuse it as dependency in othercomponents, for example to guarantee isolation while writing unittests.
$ mkdir -p src/main/java/org/talend/components/hazelcast$ mkdir -p src/main/resources/org/talend/components/hazelcast
| 249

The project is now correctly set up. The next steps consist in registering the componentfamily and setting up some properties.
9.3.2. Registering the Hazelcast components family
Registering every component family allows the component server to properly load thecomponents and to ensure they are available in Talend Studio.
Creating the package-info.java file
The family registration happens via a package-info.java file that you have to create.
Move to the src/main/java/org/talend/components/hazelcast package and create a package-info.java file:
@Components(family = "Hazelcast", categories = "Databases")@Icon(value = Icon.IconType.CUSTOM, custom = "Hazelcast")package org.talend.components.hazelcast;
import org.talend.sdk.component.api.component.Components;import org.talend.sdk.component.api.component.Icon;
• @Components: Declares the family name and the categories to which the componentbelongs.
• @Icon: Defines the component family icon. This icon is visible in the Studio metadatatree.
Creating the internationalization file
Talend Component Kit supports internationalization (i18n) via Java properties files. Usingthese files, you can customize and translate the display name of properties such as thename of a component family or, as shown later in this tutorial, labels displayed in thecomponent configuration.
Go to src/main/resources/org/talend/components/hazelcast and create an i18nMessages.properties file as below:
# An i18n name for the component familyHazelcast._displayName=Hazelcast
Providing the family icon
You can define the component family icon in the package-info.java file. The icon imagemust exist in the resources/icons folder.
TCK supports both SVG and PNG formats for the icons.
250 |

1. Create the icons folder and add an icon image for the Hazelcast family.
$ mkdir -p /src/main/resources/icons
This tutorial uses the Hazelcast icon from the official GitHub repository that you canget from: avatars3.githubusercontent.com/u/1453152?s=200&v=4
2. Download the image and rename it to Hazelcast_icon32.png. The name syntax isimportant and should match <Icon id from the package-info>_icon.32.png.
The component registration is now complete. The next step consists in defining thecomponent configuration.
9.3.3. Defining the Hazelcast component configuration
All Input and Output (I/O) components follow a predefined model of configuration. Theconfiguration requires two parts:
• Datastore: Defines all properties that let the component connect to the targetedsystem.
• Dataset: Defines the data to be read or written from/to the targeted system.
Datastore
Connecting to the Hazelcast cluster requires the IP address, group name and password ofthe targeted cluster.
In the component, the datastore is represented by a simple POJO.
1. Create a HazelcastDatastore.java class file in thesrc/main/java/org/talend/components/hazelcast folder.
| 251

package org.talend.components.hazelcast;
import org.talend.sdk.component.api.configuration.Option;import org.talend.sdk.component.api.configuration.constraint.Required;import org.talend.sdk.component.api.configuration.type.DataStore;import org.talend.sdk.component.api.configuration.ui.layout.GridLayout;import org.talend.sdk.component.api.configuration.ui.widget.Credential;import org.talend.sdk.component.api.meta.Documentation;
import java.io.Serializable;
@GridLayout({ ① @GridLayout.Row("clusterIpAddress"), @GridLayout.Row({"groupName", "password"})})@DataStore("HazelcastDatastore") ②@Documentation("Hazelcast Datastore configuration") ③public class HazelcastDatastore implements Serializable {
@Option ④ @Required ⑤ @Documentation("The hazelcast cluster ip address") private String clusterIpAddress;
@Option @Documentation("cluster group name") private String groupName;
@Option @Credential ⑥ @Documentation("cluster password") private String password;
// Getters & Setters omitted for simplicity // You need to generate them}
① @GridLayout: define the UI layout of this configuration in a grid manner.
② @DataStore: mark this POJO as being a data store with the id HazelcastDatastore thatcan be used to reference the datastore in the i18n files or some services
③ @Documentation: document classes and properties. then TCK rely on those metadatato generate a documentation for the component.
④ @Option: mark class’s attributes as being a configuration entry.
⑤ @Required: mark a configuration as being required.
⑥ @Credential: mark an Option as being a sensible data that need to be encryptedbefore it’s stored.
252 |

2. Define the i18n properties of the datastore. In the Messages.properties file let add thefollowing lines:
#datastoreHazelcast.datastore.HazelcastDatastore._displayName=Hazelcast ConnectionHazelcastDatastore.clusterIpAddress._displayName=Cluster ip addressHazelcastDatastore.groupName._displayName=Group NameHazelcastDatastore.password._displayName=Password
The Hazelcast datastore is now defined.
Dataset
Hazelcast includes different types of datastores. You can manipulate maps, lists, sets,caches, locks, queues, topics and so on.
This tutorial focuses on maps but still applies to the other data structures.
Reading/writing from a map requires the map name.
1. Create the dataset class by creating a HazelcastDataset.java file insrc/main/java/org/talend/components/hazelcast.
| 253

package org.talend.components.hazelcast;
import org.talend.sdk.component.api.configuration.Option;import org.talend.sdk.component.api.configuration.type.DataSet;import org.talend.sdk.component.api.configuration.ui.layout.GridLayout;import org.talend.sdk.component.api.meta.Documentation;
import java.io.Serializable;
@GridLayout({ @GridLayout.Row("connection"), @GridLayout.Row("mapName")})@DataSet("HazelcastDataset")@Documentation("Hazelcast dataset")public class HazelcastDataset implements Serializable {
@Option @Documentation("Hazelcast connection") private HazelcastDatastore connection;
@Option @Documentation("Hazelcast map name") private String mapName;
// Getters & Setters omitted for simplicity // You need to generate them
}
The @Dataset annotation marks the class as a dataset. Note that it also references adatastore, as required by the components model.
2. Just how it was done for the datastore, define the i18n properties of the dataset. To dothat, add the following lines to the Messages.properties file.
#datasetHazelcast.dataset.HazelcastDataset._displayName=Hazelcast MapHazelcastDataset.connection._displayName=ConnectionHazelcastDataset.mapName._displayName=Map Name
The component configuration is now ready. The next step consists in creating the Sourcethat will read the data from the Hazelcast map.
254 |

Source
The Source is the class responsible for reading the data from the configured dataset.
A source gets the configuration instance injected by TCK at runtime and uses it to connectto the targeted system and read the data.
1. Create a new class as follows.
| 255

package org.talend.components.hazelcast;
import org.talend.sdk.component.api.component.Icon;import org.talend.sdk.component.api.component.Version;import org.talend.sdk.component.api.configuration.Option;import org.talend.sdk.component.api.input.Emitter;import org.talend.sdk.component.api.input.PartitionMapper;import org.talend.sdk.component.api.input.Producer;import org.talend.sdk.component.api.meta.Documentation;import org.talend.sdk.component.api.record.Record;
import javax.annotation.PostConstruct;import javax.annotation.PreDestroy;import java.io.IOException;import java.io.Serializable;
@Version@Icon(value = Icon.IconType.CUSTOM, custom = "Hazelcast") ①@Emitter(name = "Input") ②@Documentation("Hazelcast source")public class HazelcastSource implements Serializable {
private final HazelcastDataset dataset;
public HazelcastSource(@Option("configuration") final HazelcastDatasetconfiguration) { this.dataset = configuration; }
@PostConstruct public void init() throws IOException { //Here we can init connections }
@Producer public Record next() { // provide a record every time it is called. Returns null if thereis no more data return null; }
@PreDestroy public void release() { // clean and release any resources }}
① The Icon annotation defines the icon of the component. Here, it uses the same icon
256 |

as the family icon but you can use a different one.
② The class is annotated with @Emitter. It marks this class as being a source that willproduce records.The constructor of the source class lets TCK inject the required configuration to thesource. We can also inject some common services provided by TCK or otherservices that we can define in the component. We will see the service part later inthis tutorial.
③ The method annotated with @PostConstruct prepares resources or opens aconnection, for example.
④ The method annotated with @Producer retrieves the next record if any. The methodwill return null if no more record can be read.
⑤ The method annotated with @PreDestroy cleans any resource that was used oropened in the Source.
2. The source also needs i18n properties to provide a readable display name. Add thefollowing line to the Messages.properties file.
#SourceHazelcast.Input._displayName=Input
3. At this point, it is already possible to see the result in the Talend Component WebTester to check how the configuration looks like and validate the layout visually. To dothat, execute the following command in the project folder.
$ mvn clean install talend-component:web
This command starts the Component Web Tester and deploys the component there.
4. Access localhost:8080/.
| 257

[INFO][INFO] --- talend-component-maven-plugin:1.1.12:web (default-cli) @talend-component-hazelcast ---[16:46:52.361][INFO ][.WebServer_8080][oyote.http11.Http11NioProtocol]Initializing ProtocolHandler ["http-nio-8080"][16:46:52.372][INFO ][.WebServer_8080][.catalina.core.StandardService]Starting service [Tomcat][16:46:52.372][INFO ][.WebServer_8080][e.catalina.core.StandardEngine]Starting Servlet engine: [Apache Tomcat/9.0.22][16:46:52.378][INFO ][.WebServer_8080][oyote.http11.Http11NioProtocol]Starting ProtocolHandler ["http-nio-8080"][16:46:52.390][INFO ][.WebServer_8080][g.apache.meecrowave.Meecrowave]--------------- http://localhost:8080...[INFO]
You can now access the UI at http://localhost:8080
[INFO] Enter 'exit' to quit[INFO] Initializing classorg.talend.sdk.component.server.front.ComponentResourceImpl
The source is set up. It is now time to start creating some Hazelcast specific code toconnect to a cluster and read values for a map.
Source implementation for Hazelcast
1. Add the hazelcast-client Maven dependency to the pom.xml of the project, in the
258 |

dependencies node.
<dependency> <groupId>com.hazelcast</groupId> <artifactId>hazelcast-client</artifactId> <version>3.12.2</version> </dependency>
2. Add a Hazelcast instance to the @PostConstruct method.
a. Declare a HazelcastInstance attribute in the source class.
Any non-serializable attribute needs to be marked as transient toavoid serialization issues.
b. Implement the post construct method.
package org.talend.components.hazelcast;
import com.hazelcast.client.HazelcastClient;import com.hazelcast.client.config.ClientConfig;import com.hazelcast.client.config.ClientNetworkConfig;import com.hazelcast.core.HazelcastInstance;import org.talend.sdk.component.api.component.Icon;import org.talend.sdk.component.api.component.Version;import org.talend.sdk.component.api.configuration.Option;import org.talend.sdk.component.api.input.Emitter;import org.talend.sdk.component.api.input.Producer;import org.talend.sdk.component.api.meta.Documentation;import org.talend.sdk.component.api.record.Record;
import javax.annotation.PostConstruct;import javax.annotation.PreDestroy;import java.io.Serializable;
import static java.util.Collections.singletonList;
@Version@Emitter(name = "Input")@Icon(value = Icon.IconType.CUSTOM, custom = "Hazelcast")@Documentation("Hazelcast source")public class HazelcastSource implements Serializable {
private final HazelcastDataset dataset;
/** * Hazelcast instance is a client in a Hazelcast cluster */
| 259
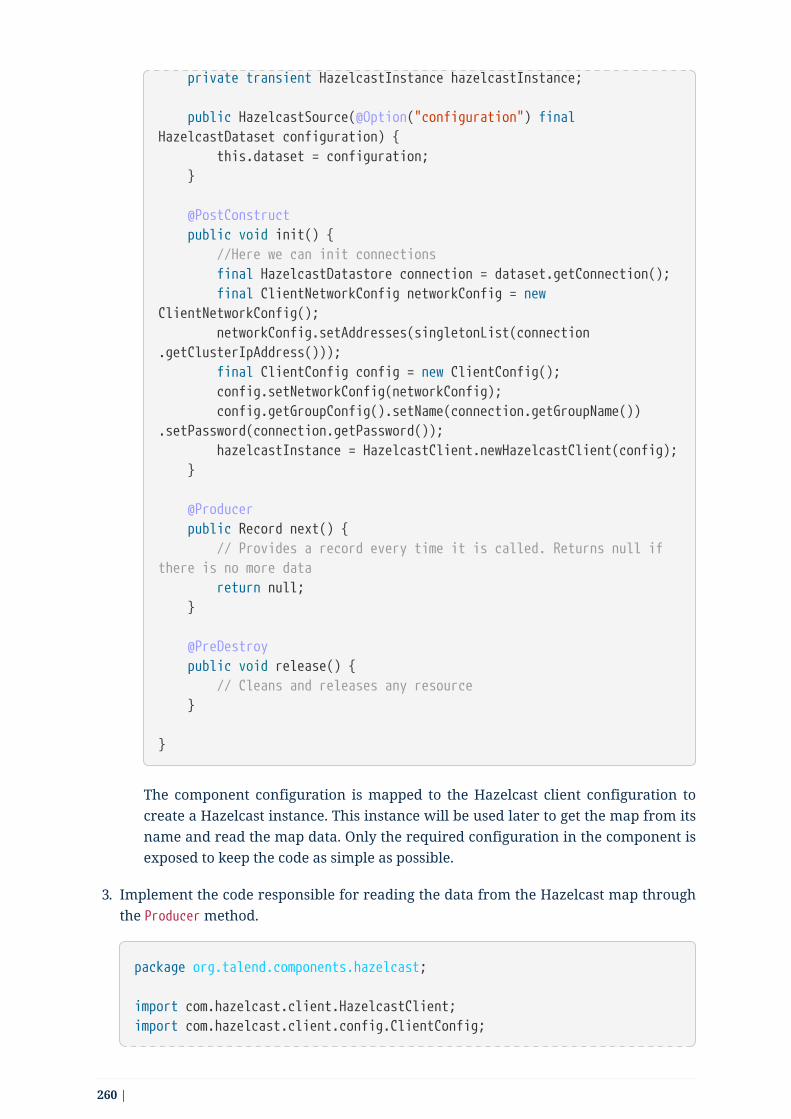
private transient HazelcastInstance hazelcastInstance;
public HazelcastSource(@Option("configuration") finalHazelcastDataset configuration) { this.dataset = configuration; }
@PostConstruct public void init() { //Here we can init connections final HazelcastDatastore connection = dataset.getConnection(); final ClientNetworkConfig networkConfig = newClientNetworkConfig(); networkConfig.setAddresses(singletonList(connection.getClusterIpAddress())); final ClientConfig config = new ClientConfig(); config.setNetworkConfig(networkConfig); config.getGroupConfig().setName(connection.getGroupName()).setPassword(connection.getPassword()); hazelcastInstance = HazelcastClient.newHazelcastClient(config); }
@Producer public Record next() { // Provides a record every time it is called. Returns null ifthere is no more data return null; }
@PreDestroy public void release() { // Cleans and releases any resource }
}
The component configuration is mapped to the Hazelcast client configuration tocreate a Hazelcast instance. This instance will be used later to get the map from itsname and read the map data. Only the required configuration in the component isexposed to keep the code as simple as possible.
3. Implement the code responsible for reading the data from the Hazelcast map throughthe Producer method.
package org.talend.components.hazelcast;
import com.hazelcast.client.HazelcastClient;import com.hazelcast.client.config.ClientConfig;
260 |

import com.hazelcast.client.config.ClientNetworkConfig;import com.hazelcast.core.HazelcastInstance;import com.hazelcast.core.IMap;import org.talend.sdk.component.api.component.Icon;import org.talend.sdk.component.api.component.Version;import org.talend.sdk.component.api.configuration.Option;import org.talend.sdk.component.api.input.Emitter;import org.talend.sdk.component.api.input.Producer;import org.talend.sdk.component.api.meta.Documentation;import org.talend.sdk.component.api.record.Record;import org.talend.sdk.component.api.service.record.RecordBuilderFactory;
import javax.annotation.PostConstruct;import javax.annotation.PreDestroy;import java.io.Serializable;import java.util.Iterator;import java.util.Map;
import static java.util.Collections.singletonList;
@Version@Emitter(name = "Input")@Icon(value = Icon.IconType.CUSTOM, custom = "Hazelcast")@Documentation("Hazelcast source")public class HazelcastSource implements Serializable {
private final HazelcastDataset dataset;
/** * Hazelcast instance is a client in a Hazelcast cluster */ private transient HazelcastInstance hazelcastInstance;
private transient Iterator<Map.Entry<String, String>> mapIterator;
private final RecordBuilderFactory recordBuilderFactory;
public HazelcastSource(@Option("configuration") final HazelcastDatasetconfiguration, final RecordBuilderFactory recordBuilderFactory) { this.dataset = configuration; this.recordBuilderFactory = recordBuilderFactory; }
@PostConstruct public void init() { //Here we can init connections final HazelcastDatastore connection = dataset.getConnection(); final ClientNetworkConfig networkConfig = new ClientNetworkConfig();
| 261

networkConfig.setAddresses(singletonList(connection.getClusterIpAddress())); final ClientConfig config = new ClientConfig(); config.setNetworkConfig(networkConfig); config.getGroupConfig().setName(connection.getGroupName()).setPassword(connection.getPassword()); hazelcastInstance = HazelcastClient.newHazelcastClient(config); }
@Producer public Record next() { // Provides a record every time it is called. Returns null ifthere is no more data if (mapIterator == null) { // Gets the Distributed Map from Cluster. IMap<String, String> map = hazelcastInstance.getMap(dataset.getMapName()); mapIterator = map.entrySet().iterator(); }
if (!mapIterator.hasNext()) { return null; }
final Map.Entry<String, String> entry = mapIterator.next(); return recordBuilderFactory.newRecordBuilder().withString(entry.getKey(), entry.getValue()).build(); }
@PreDestroy public void release() { // Cleans and releases any resource }}
The Producer implements the following logic:
◦ Check if the map iterator is already initialized. If not, get the map from its nameand initialize the map iterator. This is done in the @Producer method to ensure themap is initialized only if the next() method is called (lazy initialization). It alsoavoids the map initialization in the PostConstruct method as the Hazelcast map isnot serializable.
All the objects initialized in the PostConstruct method need to beserializable as the source can be serialized and sent to anotherworker in a distributed cluster.
◦ From the map, create an iterator on the map keys that will read from the map.
262 |

◦ Transform every key/value pair into a Talend Record with a "key, value" object onevery call to next().
The RecordBuilderFactory class used above is a built-in service inTCK injected via the Source constructor. This service is a factoryto create Talend Records.
◦ Now, the next() method will produce a Record every time it is called. The methodwill return "null" if there is no more data in the map.
4. Implement the @PreDestroy annotated method, responsible for releasing all resourcesused by the Source. The method needs to shut the Hazelcast client instance down torelease any connection between the component and the Hazelcast cluster.
package org.talend.components.hazelcast;
import com.hazelcast.client.HazelcastClient;import com.hazelcast.client.config.ClientConfig;import com.hazelcast.client.config.ClientNetworkConfig;import com.hazelcast.core.HazelcastInstance;import com.hazelcast.core.IMap;import org.talend.sdk.component.api.component.Icon;import org.talend.sdk.component.api.component.Version;import org.talend.sdk.component.api.configuration.Option;import org.talend.sdk.component.api.input.Emitter;import org.talend.sdk.component.api.input.Producer;import org.talend.sdk.component.api.meta.Documentation;import org.talend.sdk.component.api.record.Record;import org.talend.sdk.component.api.service.record.RecordBuilderFactory;
import javax.annotation.PostConstruct;import javax.annotation.PreDestroy;import java.io.Serializable;import java.util.Iterator;import java.util.Map;
import static java.util.Collections.singletonList;
@Version@Emitter(name = "Input")@Icon(value = Icon.IconType.CUSTOM, custom = "Hazelcast")@Documentation("Hazelcast source")public class HazelcastSource implements Serializable {
private final HazelcastDataset dataset;
/** * Hazelcast instance is a client in a Hazelcast cluster */
| 263

private transient HazelcastInstance hazelcastInstance;
private transient Iterator<Map.Entry<String, String>> mapIterator;
private final RecordBuilderFactory recordBuilderFactory;
public HazelcastSource(@Option("configuration") final HazelcastDatasetconfiguration, final RecordBuilderFactory recordBuilderFactory) { this.dataset = configuration; this.recordBuilderFactory = recordBuilderFactory; }
@PostConstruct public void init() { //Here we can init connections final HazelcastDatastore connection = dataset.getConnection(); final ClientNetworkConfig networkConfig = new ClientNetworkConfig(); networkConfig.setAddresses(singletonList(connection.getClusterIpAddress())); final ClientConfig config = new ClientConfig(); config.setNetworkConfig(networkConfig); config.getGroupConfig().setName(connection.getGroupName()).setPassword(connection.getPassword()); hazelcastInstance = HazelcastClient.newHazelcastClient(config); }
@Producer public Record next() { // Provides a record every time it is called. Returns null ifthere is no more data if (mapIterator == null) { // Get the Distributed Map from Cluster. IMap<String, String> map = hazelcastInstance.getMap(dataset.getMapName()); mapIterator = map.entrySet().iterator(); }
if (!mapIterator.hasNext()) { return null; }
final Map.Entry<String, String> entry = mapIterator.next(); return recordBuilderFactory.newRecordBuilder().withString(entry.getKey(), entry.getValue()).build(); }
@PreDestroy public void release() {
264 |

// Clean and release any resource if (hazelcastInstance != null) { hazelcastInstance.shutdown(); } }}
The Hazelcast Source is completed. The next section shows how to write a simple unit testto check that it works properly.
Testing the Source
TCK provides a set of APIs and tools that makes the testing straightforward.
The test of the Hazelcast Source consists in creating an embedded Hazelcast instance withonly one member and initializing it with some data, and then in creating a test Job to readthe data from it using the implemented Source.
1. Add the required Maven test dependencies to the project.
<dependency> <groupId>org.junit.jupiter</groupId> <artifactId>junit-jupiter</artifactId> <version>5.5.1</version> <scope>test</scope> </dependency> <dependency> <groupId>org.talend.sdk.component</groupId> <artifactId>component-runtime-junit</artifactId> <version>1.1.12</version> <scope>test</scope> </dependency>
2. Initialize a Hazelcast test instance and create a map with some test data. To do that,create the HazelcastSourceTest.java test class in the src/test/java folder. Create thefolder if it does not exist.
| 265

package org.talend.components.hazelcast;
import com.hazelcast.core.Hazelcast;import com.hazelcast.core.HazelcastInstance;import com.hazelcast.core.IMap;import org.junit.jupiter.api.AfterAll;import org.junit.jupiter.api.BeforeAll;import org.junit.jupiter.api.Test;
import static org.junit.jupiter.api.Assertions.assertEquals;
class HazelcastSourceTest {
private static final String MAP_NAME = "MY-DISTRIBUTED-MAP";
private static HazelcastInstance hazelcastInstance;
@BeforeAll static void init() { hazelcastInstance = Hazelcast.newHazelcastInstance(); IMap<String, String> map = hazelcastInstance.getMap(MAP_NAME); map.put("key1", "value1"); map.put("key2", "value2"); map.put("key3", "value3"); map.put("key4", "value4"); }
@Test void initTest() { IMap<String, String> map = hazelcastInstance.getMap(MAP_NAME); assertEquals(4, map.size()); }
@AfterAll static void shutdown() { hazelcastInstance.shutdown(); }
}
The above example creates a Hazelcast instance for the test and creates the MY-DISTRIBUTED-MAP map. The getMap creates the map if it does not already exist. Some keysand values uses in the test are added. Then, a simple test checks that the data iscorrectly initialized. Finally, the Hazelcast test instance is shut down.
3. Run the test and check in the logs that a Hazelcast cluster of one member has beencreated and that the test has passed.
266 |

$ mvn clean test
4. To be able to test components, TCK provides the @WithComponents annotation whichenables component testing. Add this annotation to the test. The annotation takes thecomponent Java package as a value parameter.
| 267

package org.talend.components.hazelcast;
import com.hazelcast.core.Hazelcast;import com.hazelcast.core.HazelcastInstance;import com.hazelcast.core.IMap;import org.junit.jupiter.api.AfterAll;import org.junit.jupiter.api.BeforeAll;import org.junit.jupiter.api.Test;import org.talend.sdk.component.junit5.WithComponents;
import static org.junit.jupiter.api.Assertions.assertEquals;
@WithComponents("org.talend.components.hazelcast")class HazelcastSourceTest {
private static final String MAP_NAME = "MY-DISTRIBUTED-MAP";
private static HazelcastInstance hazelcastInstance;
@BeforeAll static void init() { hazelcastInstance = Hazelcast.newHazelcastInstance(); IMap<String, String> map = hazelcastInstance.getMap(MAP_NAME); map.put("key1", "value1"); map.put("key2", "value2"); map.put("key3", "value3"); map.put("key4", "value4"); }
@Test void initTest() { IMap<String, String> map = hazelcastInstance.getMap(MAP_NAME); assertEquals(4, map.size()); }
@AfterAll static void shutdown() { hazelcastInstance.shutdown(); }
}
5. Create the test Job that configures the Hazelcast instance and link it to an output thatcollects the data produced by the Source.
package org.talend.components.hazelcast;
268 |

import com.hazelcast.core.Hazelcast;import com.hazelcast.core.HazelcastInstance;import com.hazelcast.core.IMap;import org.junit.jupiter.api.AfterAll;import org.junit.jupiter.api.BeforeAll;import org.junit.jupiter.api.Test;import org.talend.sdk.component.api.record.Record;import org.talend.sdk.component.junit.BaseComponentsHandler;import org.talend.sdk.component.junit5.Injected;import org.talend.sdk.component.junit5.WithComponents;import org.talend.sdk.component.runtime.manager.chain.Job;
import java.util.List;
import static org.junit.jupiter.api.Assertions.assertEquals;import staticorg.talend.sdk.component.junit.SimpleFactory.configurationByExample;
@WithComponents("org.talend.components.hazelcast")class HazelcastSourceTest {
private static final String MAP_NAME = "MY-DISTRIBUTED-MAP";
private static HazelcastInstance hazelcastInstance;
@Injected protected BaseComponentsHandler componentsHandler; ①
@BeforeAll static void init() { hazelcastInstance = Hazelcast.newHazelcastInstance(); IMap<String, String> map = hazelcastInstance.getMap(MAP_NAME); map.put("key1", "value1"); map.put("key2", "value2"); map.put("key3", "value3"); map.put("key4", "value4"); }
@Test void initTest() { IMap<String, String> map = hazelcastInstance.getMap(MAP_NAME); assertEquals(4, map.size()); }
@Test void sourceTest() { ② final HazelcastDatastore connection = new HazelcastDatastore(); connection.setClusterIpAddress(hazelcastInstance.getCluster().getMembers().iterator().next().getAddress().getHost()); connection.setGroupName(hazelcastInstance.getConfig()
| 269

.getGroupConfig().getName()); connection.setPassword(hazelcastInstance.getConfig().getGroupConfig().getPassword()); final HazelcastDataset dataset = new HazelcastDataset(); dataset.setConnection(connection); dataset.setMapName(MAP_NAME);
final String configUri = configurationByExample().forInstance(dataset).configured().toQueryString(); ③
Job.components() .component("Input", "Hazelcast://Input?" + configUri) .component("Output", "test://collector") .connections() .from("Input").to("Output") .build() .run();
List<Record> data = componentsHandler.getCollectedData(Record.class); assertEquals(4, data.size()); ④ }
@AfterAll static void shutdown() { hazelcastInstance.shutdown(); }}
① The componentsHandler attribute is injected to the test by TCK. This componenthandler gives access to the collected data.
② The sourceTest method instantiates the configuration of the Source and fills it withthe configuration of the Hazelcast test instance created before to let the Sourceconnect to it.The Job API provides a simple way to build a DAG (Directed Acyclic Graph) Jobusing Talend components and then runs it on a specific runner (standalone, Beamor Spark). This test starts using the default runner only, which is the standaloneone.
③ The configurationByExample() method creates the ByExample factory. It provides asimple way to convert the configuration instance to an URI configuration used withthe Job API to configure the component.
④ The job runs and checks that the collected data size is equal to the initialized testdata.
6. Execute the unit test and check that it passes, meaning that the Source is reading thedata correctly from Hazelcast.
270 |

$ mvn clean test
The Source is now completed and tested. The next section shows how to implement thePartition Mapper for the Source. In this case, the Partition Mapper will split the work(data reading) between the available cluster members to distribute the workload.
Partition Mapper
The Partition Mapper calculates the number of Sources that can be created and executedin parallel on the available workers of a distributed system. For Hazelcast, it correspondsto the cluster member count.
To fully illustrate this concept, this section also shows how to enhance the testenvironment to add more Hazelcast cluster members and initialize it with more data.
1. Instantiate more Hazelcast instances, as every Hazelcast instance corresponds to onemember in a cluster. In the test, it is reflected as follows:
package org.talend.components.hazelcast;
import com.hazelcast.core.Hazelcast;import com.hazelcast.core.HazelcastInstance;import com.hazelcast.core.IMap;import org.junit.jupiter.api.AfterAll;import org.junit.jupiter.api.BeforeAll;import org.junit.jupiter.api.Test;import org.talend.sdk.component.api.record.Record;import org.talend.sdk.component.junit.BaseComponentsHandler;import org.talend.sdk.component.junit5.Injected;import org.talend.sdk.component.junit5.WithComponents;import org.talend.sdk.component.runtime.manager.chain.Job;
import java.util.List;import java.util.UUID;import java.util.stream.Collectors;import java.util.stream.IntStream;
import static org.junit.jupiter.api.Assertions.assertEquals;import staticorg.talend.sdk.component.junit.SimpleFactory.configurationByExample;
@WithComponents("org.talend.components.hazelcast")class HazelcastSourceTest {
private static final String MAP_NAME = "MY-DISTRIBUTED-MAP";
private static final int CLUSTER_MEMBERS_COUNT = 2;
| 271

private static final int MAX_DATA_COUNT_BY_MEMBER = 50;
private static List<HazelcastInstance> hazelcastInstances;
@Injected protected BaseComponentsHandler componentsHandler;
@BeforeAll static void init() { hazelcastInstances = IntStream.range(0, CLUSTER_MEMBERS_COUNT) .mapToObj(i -> Hazelcast.newHazelcastInstance()) .collect(Collectors.toList()); //add some data hazelcastInstances.forEach(hz -> { final IMap<String, String> map = hz.getMap(MAP_NAME); IntStream.range(0, MAX_DATA_COUNT_BY_MEMBER) .forEach(i -> map.put(UUID.randomUUID().toString(),"value " + i)); }); }
@Test void initTest() { IMap<String, String> map = hazelcastInstances.get(0).getMap(MAP_NAME); assertEquals(CLUSTER_MEMBERS_COUNT * MAX_DATA_COUNT_BY_MEMBER,map.size()); }
@Test void sourceTest() { final HazelcastDatastore connection = new HazelcastDatastore(); HazelcastInstance hazelcastInstance = hazelcastInstances.get(0); connection.setClusterIpAddress( hazelcastInstance.getCluster().getMembers().iterator().next().getAddress().getHost()); connection.setGroupName(hazelcastInstance.getConfig().getGroupConfig().getName()); connection.setPassword(hazelcastInstance.getConfig().getGroupConfig().getPassword()); final HazelcastDataset dataset = new HazelcastDataset(); dataset.setConnection(connection); dataset.setMapName(MAP_NAME);
final String configUri = configurationByExample().forInstance(dataset).configured().toQueryString();
Job.components() .component("Input", "Hazelcast://Input?" + configUri)
272 |
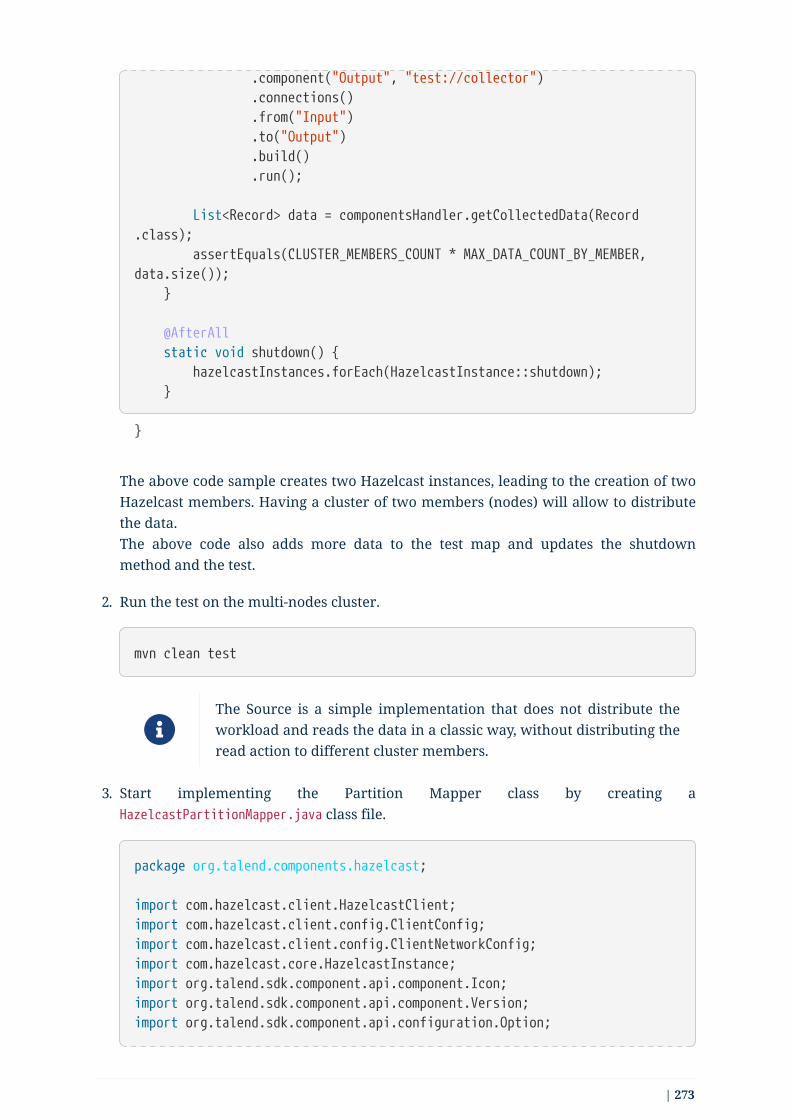
.component("Output", "test://collector") .connections() .from("Input") .to("Output") .build() .run();
List<Record> data = componentsHandler.getCollectedData(Record.class); assertEquals(CLUSTER_MEMBERS_COUNT * MAX_DATA_COUNT_BY_MEMBER,data.size()); }
@AfterAll static void shutdown() { hazelcastInstances.forEach(HazelcastInstance::shutdown); }
}
The above code sample creates two Hazelcast instances, leading to the creation of twoHazelcast members. Having a cluster of two members (nodes) will allow to distributethe data.The above code also adds more data to the test map and updates the shutdownmethod and the test.
2. Run the test on the multi-nodes cluster.
mvn clean test
The Source is a simple implementation that does not distribute theworkload and reads the data in a classic way, without distributing theread action to different cluster members.
3. Start implementing the Partition Mapper class by creating aHazelcastPartitionMapper.java class file.
package org.talend.components.hazelcast;
import com.hazelcast.client.HazelcastClient;import com.hazelcast.client.config.ClientConfig;import com.hazelcast.client.config.ClientNetworkConfig;import com.hazelcast.core.HazelcastInstance;import org.talend.sdk.component.api.component.Icon;import org.talend.sdk.component.api.component.Version;import org.talend.sdk.component.api.configuration.Option;
| 273

import org.talend.sdk.component.api.input.Assessor;import org.talend.sdk.component.api.input.Emitter;import org.talend.sdk.component.api.input.PartitionMapper;import org.talend.sdk.component.api.input.PartitionSize;import org.talend.sdk.component.api.input.Split;import org.talend.sdk.component.api.meta.Documentation;import org.talend.sdk.component.api.service.record.RecordBuilderFactory;
import javax.annotation.PostConstruct;import javax.annotation.PreDestroy;import java.util.List;import java.util.UUID;
import static java.util.Collections.singletonList;
@Version@PartitionMapper(name = "Input")@Icon(value = Icon.IconType.CUSTOM, custom = "Hazelcast")@Documentation("Hazelcast source")public class HazelcastPartitionMapper {
private final HazelcastDataset dataset;
/** * Hazelcast instance is a client in a Hazelcast cluster */ private transient HazelcastInstance hazelcastInstance;
private final RecordBuilderFactory recordBuilderFactory;
public HazelcastPartitionMapper(@Option("configuration") finalHazelcastDataset configuration, final RecordBuilderFactory recordBuilderFactory) { this.dataset = configuration; this.recordBuilderFactory = recordBuilderFactory; }
@PostConstruct public void init() { //Here we can init connections final HazelcastDatastore connection = dataset.getConnection(); final ClientNetworkConfig networkConfig = new ClientNetworkConfig(); networkConfig.setAddresses(singletonList(connection.getClusterIpAddress())); final ClientConfig config = new ClientConfig(); config.setNetworkConfig(networkConfig); config.getGroupConfig().setName(connection.getGroupName()).setPassword(connection.getPassword()); config.setInstanceName(getClass().getName()+"-"+ UUID.randomUUID(
274 |

).toString()); config.setClassLoader(Thread.currentThread().getContextClassLoader()); hazelcastInstance = HazelcastClient.newHazelcastClient(config); }
@Assessor public long estimateSize() { return 0; }
@Split public List<HazelcastPartitionMapper> split(@PartitionSize final longbundleSize) { return null; }
@Emitter public HazelcastSource createSource() { return null; }
@PreDestroy public void release() { if(hazelcastInstance != null) { hazelcastInstance.shutdown(); } }}
When coupling a Partition Mapper with a Source, the Partition Mapper becomesresponsible for injecting parameters and creating source instances. This way, all theattribute initialization part moves from the Source to the Partition Mapper class.
The configuration also sets an instance name to make it easy to find the client instancein the logs or while debugging.
The Partition Mapper class is composed of the following:
◦ constructor: Handles configuration and service injections
◦ Assessor: This annotation indicates that the method is responsible for assessing thedataset size. The underlying runner uses the estimated dataset size to compute theoptimal bundle size to distribute the workload efficiently.
◦ Split: This annotation indicates that the method is responsible for creatingPartition Mapper instances based on the bundle size requested by the underlyingrunner and the size of the dataset. It creates as much partitions as possible toparallelize and distribute the workload efficiently on the available workers(known as members in the Hazelcast case).
| 275

◦ Emitter: This annotation indicates that the method is responsible for creating theSource instance with an adapted configuration allowing to handle the amount ofrecords it will produce and the required services.I adapts the configuration to let the Source read only the requested bundle of data.
Assessor
The Assessor method computes the memory size of every member of the cluster.Implementing it requires submitting a calculation task to the members through aserializable task that is aware of the Hazelcast instance.
1. Create the serializable task.
package org.talend.components.hazelcast;
import com.hazelcast.core.HazelcastInstance;import com.hazelcast.core.HazelcastInstanceAware;
import java.io.Serializable;import java.util.concurrent.Callable;
public abstract class SerializableTask<T> implements Callable<T>,Serializable, HazelcastInstanceAware {
protected transient HazelcastInstance localInstance;
@Override public void setHazelcastInstance(final HazelcastInstancehazelcastInstance) { localInstance = hazelcastInstance; }}
The purpose of this class is to submit any task to the Hazelcast cluster.
2. Use the created task to estimate the dataset size in the Assessor method.
package org.talend.components.hazelcast;
import com.hazelcast.client.HazelcastClient;import com.hazelcast.client.config.ClientConfig;import com.hazelcast.client.config.ClientNetworkConfig;import com.hazelcast.core.HazelcastInstance;import com.hazelcast.core.IExecutorService;import org.talend.sdk.component.api.component.Icon;import org.talend.sdk.component.api.component.Version;import org.talend.sdk.component.api.configuration.Option;import org.talend.sdk.component.api.input.Assessor;
276 |

import org.talend.sdk.component.api.input.Emitter;import org.talend.sdk.component.api.input.PartitionMapper;import org.talend.sdk.component.api.input.PartitionSize;import org.talend.sdk.component.api.input.Split;import org.talend.sdk.component.api.meta.Documentation;import org.talend.sdk.component.api.service.record.RecordBuilderFactory;
import javax.annotation.PostConstruct;import javax.annotation.PreDestroy;import java.util.List;import java.util.UUID;import java.util.concurrent.ExecutionException;
import static java.util.Collections.singletonList;
@Version@PartitionMapper(name = "Input")@Icon(value = Icon.IconType.CUSTOM, custom = "Hazelcast")@Documentation("Hazelcast source")public class HazelcastPartitionMapper {
private final HazelcastDataset dataset;
/** * Hazelcast instance is a client in a Hazelcast cluster */ private transient HazelcastInstance hazelcastInstance;
private final RecordBuilderFactory recordBuilderFactory;
private transient IExecutorService executorService;
public HazelcastPartitionMapper(@Option("configuration") finalHazelcastDataset configuration, final RecordBuilderFactory recordBuilderFactory) { this.dataset = configuration; this.recordBuilderFactory = recordBuilderFactory; }
@PostConstruct public void init() { //Here we can init connections final HazelcastDatastore connection = dataset.getConnection(); final ClientNetworkConfig networkConfig = new ClientNetworkConfig(); networkConfig.setAddresses(singletonList(connection.getClusterIpAddress())); final ClientConfig config = new ClientConfig(); config.setNetworkConfig(networkConfig); config.getGroupConfig().setName(connection.getGroupName())
| 277

.setPassword(connection.getPassword()); config.setInstanceName(getClass().getName()+"-"+ UUID.randomUUID().toString()); config.setClassLoader(Thread.currentThread().getContextClassLoader()); hazelcastInstance = HazelcastClient.newHazelcastClient(config); }
@Assessor public long estimateSize() { return getExecutorService().submitToAllMembers(newSerializableTask<Long>() {
@Override public Long call() { return localInstance.getMap(dataset.getMapName()).getLocalMapStats().getHeapCost(); } }).values().stream().mapToLong(feature -> { try { return feature.get(); } catch (InterruptedException | ExecutionException e) { throw new IllegalStateException(e); } }).sum(); }
@Split public List<HazelcastPartitionMapper> split(@PartitionSize final longbundleSize) { return null; }
@Emitter public HazelcastSource createSource() { return null; }
@PreDestroy public void release() { if(hazelcastInstance != null) { hazelcastInstance.shutdown(); } }
private IExecutorService getExecutorService() { return executorService == null ? executorService = hazelcastInstance.getExecutorService("talend-executor-service") : executorService;
278 |

}}
The Assessor method calculates the memory size that the map occupies for allmembers.In Hazelcast, distributing a task to all members can be achieved using an executionservice initialized in the getExecutorService() method. The size of the map isrequested on every available member. By summing up the results, the total size of themap in the distributed cluster is computed.
Split
The Split method calculates the heap size of the map on every member of the cluster.Then, it calculates how many members a source can handle.
If a member contains less data than the requested bundle size, the method tries tocombine it with another member. That combination can only happen if the combineddata size is still less or equal to the requested bundle size.
The following code illustrates the logic described above.
package org.talend.components.hazelcast;
import com.hazelcast.client.HazelcastClient;import com.hazelcast.client.config.ClientConfig;import com.hazelcast.client.config.ClientNetworkConfig;import com.hazelcast.core.HazelcastInstance;import com.hazelcast.core.IExecutorService;import com.hazelcast.core.Member;import org.talend.sdk.component.api.component.Icon;import org.talend.sdk.component.api.component.Version;import org.talend.sdk.component.api.configuration.Option;import org.talend.sdk.component.api.input.Assessor;import org.talend.sdk.component.api.input.Emitter;import org.talend.sdk.component.api.input.PartitionMapper;import org.talend.sdk.component.api.input.PartitionSize;import org.talend.sdk.component.api.input.Split;import org.talend.sdk.component.api.meta.Documentation;import org.talend.sdk.component.api.service.record.RecordBuilderFactory;
import javax.annotation.PostConstruct;import javax.annotation.PreDestroy;import java.util.AbstractMap;import java.util.ArrayList;import java.util.Iterator;import java.util.List;import java.util.Map;import java.util.Objects;
| 279

import java.util.UUID;import java.util.concurrent.ExecutionException;
import static java.util.Collections.singletonList;import static java.util.Collections.synchronizedMap;import static java.util.stream.Collectors.toList;import static java.util.stream.Collectors.toMap;
@Version@PartitionMapper(name = "Input")@Icon(value = Icon.IconType.CUSTOM, custom = "Hazelcast")@Documentation("Hazelcast source")public class HazelcastPartitionMapper {
private final HazelcastDataset dataset;
/** * Hazelcast instance is a client in a Hazelcast cluster */ private transient HazelcastInstance hazelcastInstance;
private final RecordBuilderFactory recordBuilderFactory;
private transient IExecutorService executorService;
private List<String> members;
public HazelcastPartitionMapper(@Option("configuration") finalHazelcastDataset configuration, final RecordBuilderFactory recordBuilderFactory) { this.dataset = configuration; this.recordBuilderFactory = recordBuilderFactory; }
private HazelcastPartitionMapper(final HazelcastDataset configuration, final RecordBuilderFactory recordBuilderFactory, List<String>membersUUID) { this.dataset = configuration; this.recordBuilderFactory = recordBuilderFactory; this.members = membersUUID; }
@PostConstruct public void init() { //Here we can init connections final HazelcastDatastore connection = dataset.getConnection(); final ClientNetworkConfig networkConfig = new ClientNetworkConfig(); networkConfig.setAddresses(singletonList(connection.getClusterIpAddress())); final ClientConfig config = new ClientConfig();
280 |

config.setNetworkConfig(networkConfig); config.getGroupConfig().setName(connection.getGroupName()).setPassword(connection.getPassword()); config.setInstanceName(getClass().getName() + "-" + UUID.randomUUID().toString()); config.setClassLoader(Thread.currentThread().getContextClassLoader()); hazelcastInstance = HazelcastClient.newHazelcastClient(config); }
@Assessor public long estimateSize() { return executorService.submitToAllMembers( () -> hazelcastInstance.getMap(dataset.getMapName()).getLocalMapStats().getHeapCost()) .values() .stream() .mapToLong(feature -> { try { return feature.get(); } catch (InterruptedException | ExecutionException e) { throw new IllegalStateException(e); } }) .sum(); }
@Split public List<HazelcastPartitionMapper> split(@PartitionSize final longbundleSize) { final Map<String, Long> heapSizeByMember = getExecutorService().submitToAllMembers(new SerializableTask<Long>() {
@Override public Long call() { return localInstance.getMap(dataset.getMapName()).getLocalMapStats().getHeapCost(); } }).entrySet().stream().map(heapSizeMember -> { try { return new AbstractMap.SimpleEntry<>(heapSizeMember.getKey().getUuid(), heapSizeMember.getValue().get()); } catch (InterruptedException | ExecutionException e) { throw new IllegalStateException(e); } }).collect(toMap(AbstractMap.SimpleEntry::getKey, AbstractMap.SimpleEntry::getValue));
final List<HazelcastPartitionMapper> partitions = new ArrayList<>
| 281
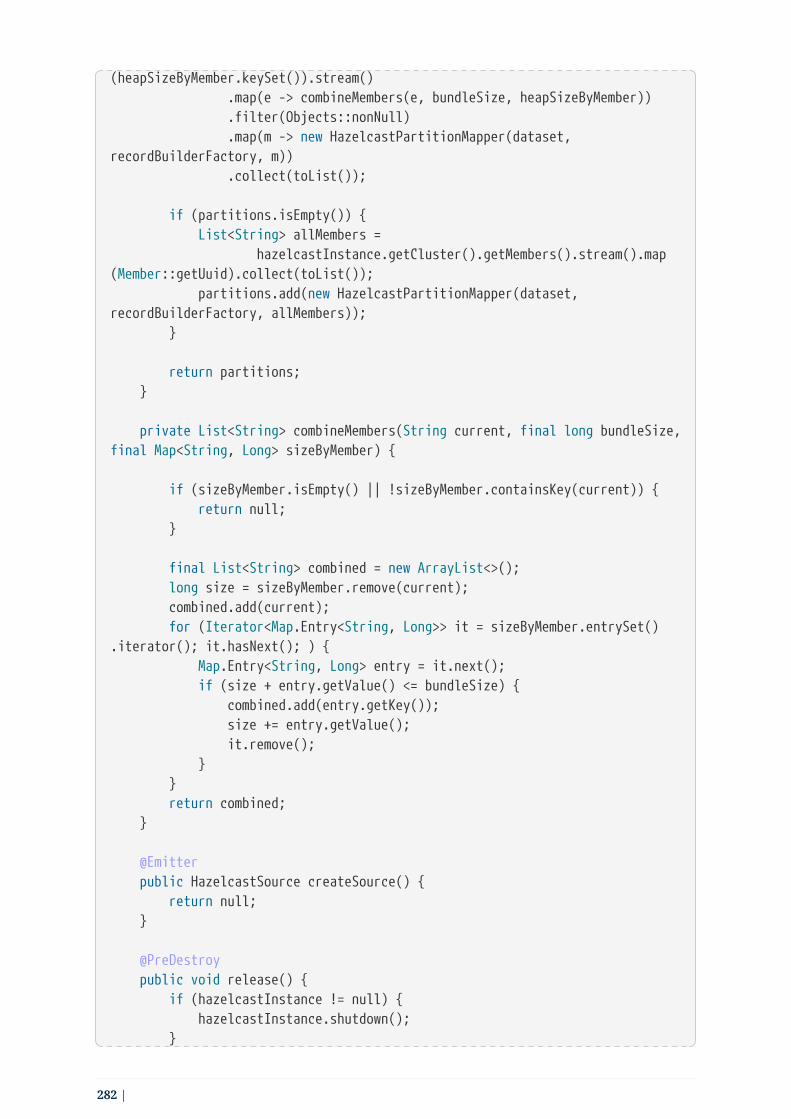
(heapSizeByMember.keySet()).stream() .map(e -> combineMembers(e, bundleSize, heapSizeByMember)) .filter(Objects::nonNull) .map(m -> new HazelcastPartitionMapper(dataset,recordBuilderFactory, m)) .collect(toList());
if (partitions.isEmpty()) { List<String> allMembers = hazelcastInstance.getCluster().getMembers().stream().map(Member::getUuid).collect(toList()); partitions.add(new HazelcastPartitionMapper(dataset,recordBuilderFactory, allMembers)); }
return partitions; }
private List<String> combineMembers(String current, final long bundleSize,final Map<String, Long> sizeByMember) {
if (sizeByMember.isEmpty() || !sizeByMember.containsKey(current)) { return null; }
final List<String> combined = new ArrayList<>(); long size = sizeByMember.remove(current); combined.add(current); for (Iterator<Map.Entry<String, Long>> it = sizeByMember.entrySet().iterator(); it.hasNext(); ) { Map.Entry<String, Long> entry = it.next(); if (size + entry.getValue() <= bundleSize) { combined.add(entry.getKey()); size += entry.getValue(); it.remove(); } } return combined; }
@Emitter public HazelcastSource createSource() { return null; }
@PreDestroy public void release() { if (hazelcastInstance != null) { hazelcastInstance.shutdown(); }
282 |
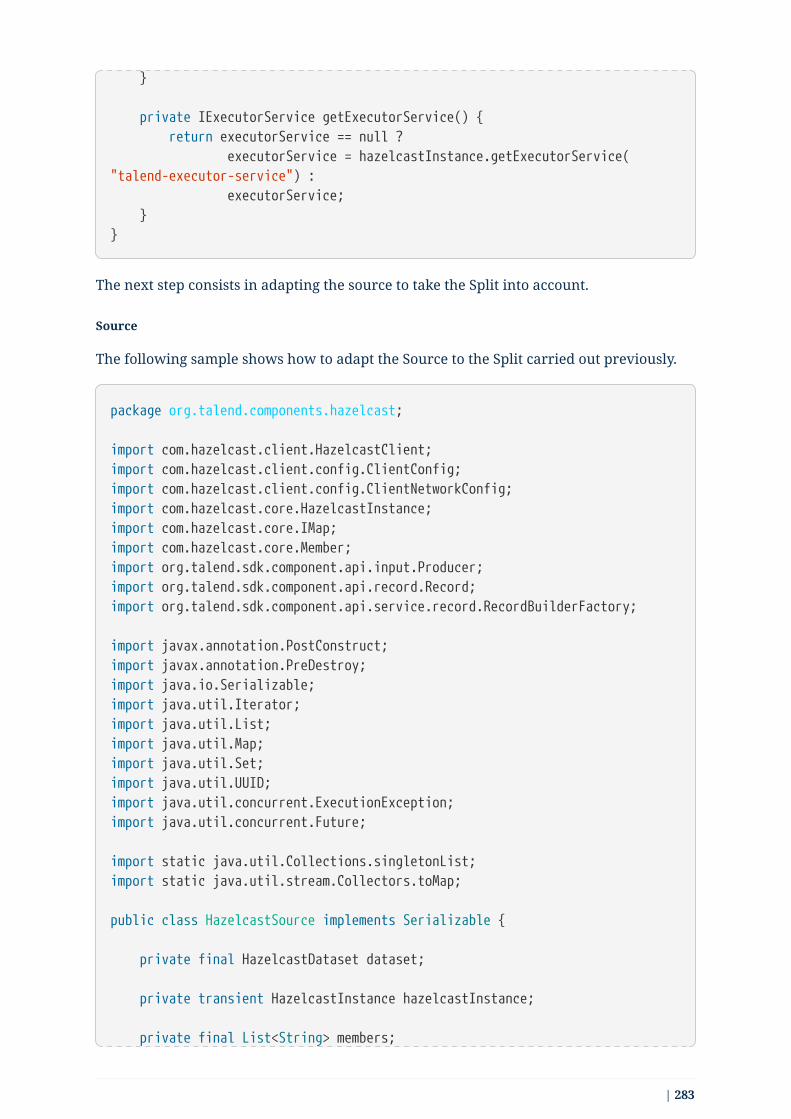
}
private IExecutorService getExecutorService() { return executorService == null ? executorService = hazelcastInstance.getExecutorService("talend-executor-service") : executorService; }}
The next step consists in adapting the source to take the Split into account.
Source
The following sample shows how to adapt the Source to the Split carried out previously.
package org.talend.components.hazelcast;
import com.hazelcast.client.HazelcastClient;import com.hazelcast.client.config.ClientConfig;import com.hazelcast.client.config.ClientNetworkConfig;import com.hazelcast.core.HazelcastInstance;import com.hazelcast.core.IMap;import com.hazelcast.core.Member;import org.talend.sdk.component.api.input.Producer;import org.talend.sdk.component.api.record.Record;import org.talend.sdk.component.api.service.record.RecordBuilderFactory;
import javax.annotation.PostConstruct;import javax.annotation.PreDestroy;import java.io.Serializable;import java.util.Iterator;import java.util.List;import java.util.Map;import java.util.Set;import java.util.UUID;import java.util.concurrent.ExecutionException;import java.util.concurrent.Future;
import static java.util.Collections.singletonList;import static java.util.stream.Collectors.toMap;
public class HazelcastSource implements Serializable {
private final HazelcastDataset dataset;
private transient HazelcastInstance hazelcastInstance;
private final List<String> members;
| 283
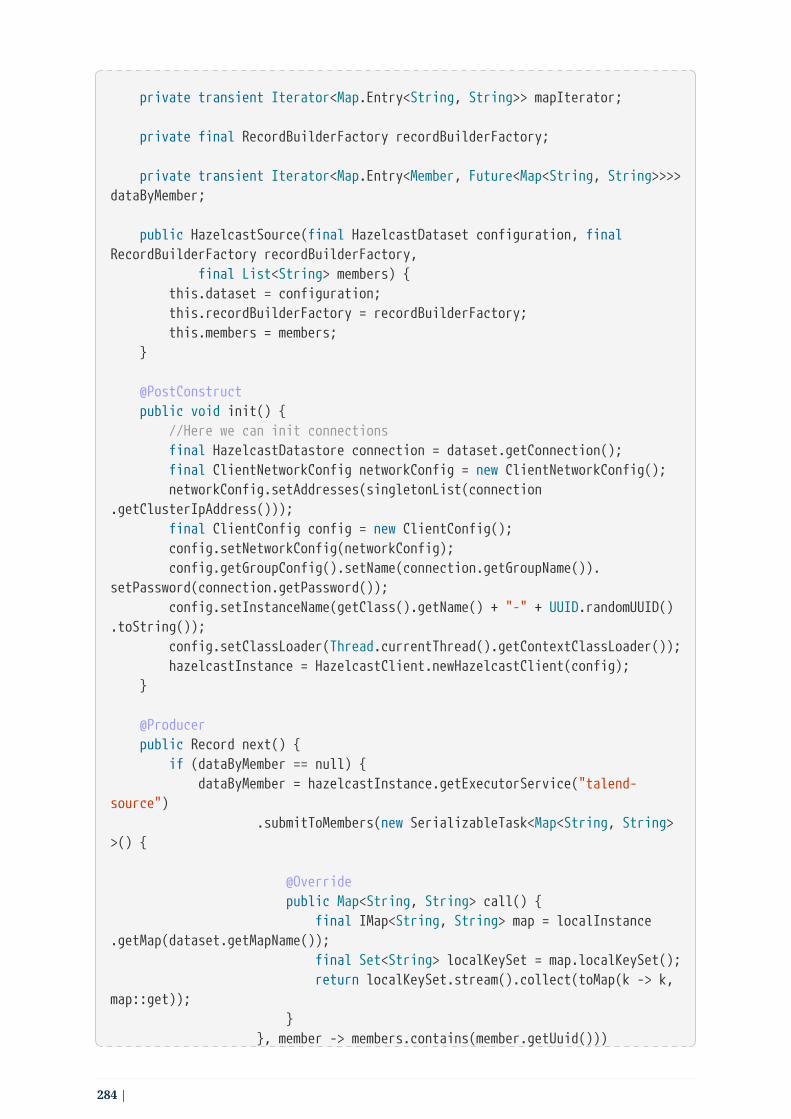
private transient Iterator<Map.Entry<String, String>> mapIterator;
private final RecordBuilderFactory recordBuilderFactory;
private transient Iterator<Map.Entry<Member, Future<Map<String, String>>>>dataByMember;
public HazelcastSource(final HazelcastDataset configuration, finalRecordBuilderFactory recordBuilderFactory, final List<String> members) { this.dataset = configuration; this.recordBuilderFactory = recordBuilderFactory; this.members = members; }
@PostConstruct public void init() { //Here we can init connections final HazelcastDatastore connection = dataset.getConnection(); final ClientNetworkConfig networkConfig = new ClientNetworkConfig(); networkConfig.setAddresses(singletonList(connection.getClusterIpAddress())); final ClientConfig config = new ClientConfig(); config.setNetworkConfig(networkConfig); config.getGroupConfig().setName(connection.getGroupName()).setPassword(connection.getPassword()); config.setInstanceName(getClass().getName() + "-" + UUID.randomUUID().toString()); config.setClassLoader(Thread.currentThread().getContextClassLoader()); hazelcastInstance = HazelcastClient.newHazelcastClient(config); }
@Producer public Record next() { if (dataByMember == null) { dataByMember = hazelcastInstance.getExecutorService("talend-source") .submitToMembers(new SerializableTask<Map<String, String>>() {
@Override public Map<String, String> call() { final IMap<String, String> map = localInstance.getMap(dataset.getMapName()); final Set<String> localKeySet = map.localKeySet(); return localKeySet.stream().collect(toMap(k -> k,map::get)); } }, member -> members.contains(member.getUuid()))
284 |

.entrySet() .iterator(); }
if (mapIterator != null && !mapIterator.hasNext() && !dataByMember.hasNext()) { return null; }
if (mapIterator == null || !mapIterator.hasNext()) { Map.Entry<Member, Future<Map<String, String>>> next =dataByMember.next(); try { mapIterator = next.getValue().get().entrySet().iterator(); } catch (InterruptedException | ExecutionException e) { throw new IllegalStateException(e); } }
Map.Entry<String, String> entry = mapIterator.next(); return recordBuilderFactory.newRecordBuilder().withString(entry.getKey(), entry.getValue()).build();
}
@PreDestroy public void release() { if (hazelcastInstance != null) { hazelcastInstance.shutdown(); } }}
The next method reads the data from the members received from the Partition Mapper.
A Big Data runner like Spark will get multiple Source instances. Every source instance willbe responsible for reading data from a specific set of members already calculated by thePartition Mapper.
The data is fetched only when the next method is called. This logic allows to stream thedata from members without loading it all into the memory.
Emitter
1. Implement the method annotated with @Emitter in the HazelcastPartitionMapper class.
package org.talend.components.hazelcast;
import com.hazelcast.client.HazelcastClient;
| 285

import com.hazelcast.client.config.ClientConfig;import com.hazelcast.client.config.ClientNetworkConfig;import com.hazelcast.core.HazelcastInstance;import com.hazelcast.core.IExecutorService;import com.hazelcast.core.Member;import org.talend.sdk.component.api.component.Icon;import org.talend.sdk.component.api.component.Version;import org.talend.sdk.component.api.configuration.Option;import org.talend.sdk.component.api.input.Assessor;import org.talend.sdk.component.api.input.Emitter;import org.talend.sdk.component.api.input.PartitionMapper;import org.talend.sdk.component.api.input.PartitionSize;import org.talend.sdk.component.api.input.Split;import org.talend.sdk.component.api.meta.Documentation;import org.talend.sdk.component.api.service.record.RecordBuilderFactory;
import javax.annotation.PostConstruct;import javax.annotation.PreDestroy;import java.io.Serializable;import java.util.AbstractMap;import java.util.ArrayList;import java.util.Iterator;import java.util.List;import java.util.Map;import java.util.Objects;import java.util.UUID;import java.util.concurrent.ExecutionException;
import static java.util.Collections.singletonList;import static java.util.stream.Collectors.toList;import static java.util.stream.Collectors.toMap;
@Version@PartitionMapper(name = "Input")@Icon(value = Icon.IconType.CUSTOM, custom = "Hazelcast")@Documentation("Hazelcast source")public class HazelcastPartitionMapper implements Serializable {
private final HazelcastDataset dataset;
/** * Hazelcast instance is a client in a Hazelcast cluster */ private transient HazelcastInstance hazelcastInstance;
private final RecordBuilderFactory recordBuilderFactory;
private transient IExecutorService executorService;
private List<String> members;
286 |
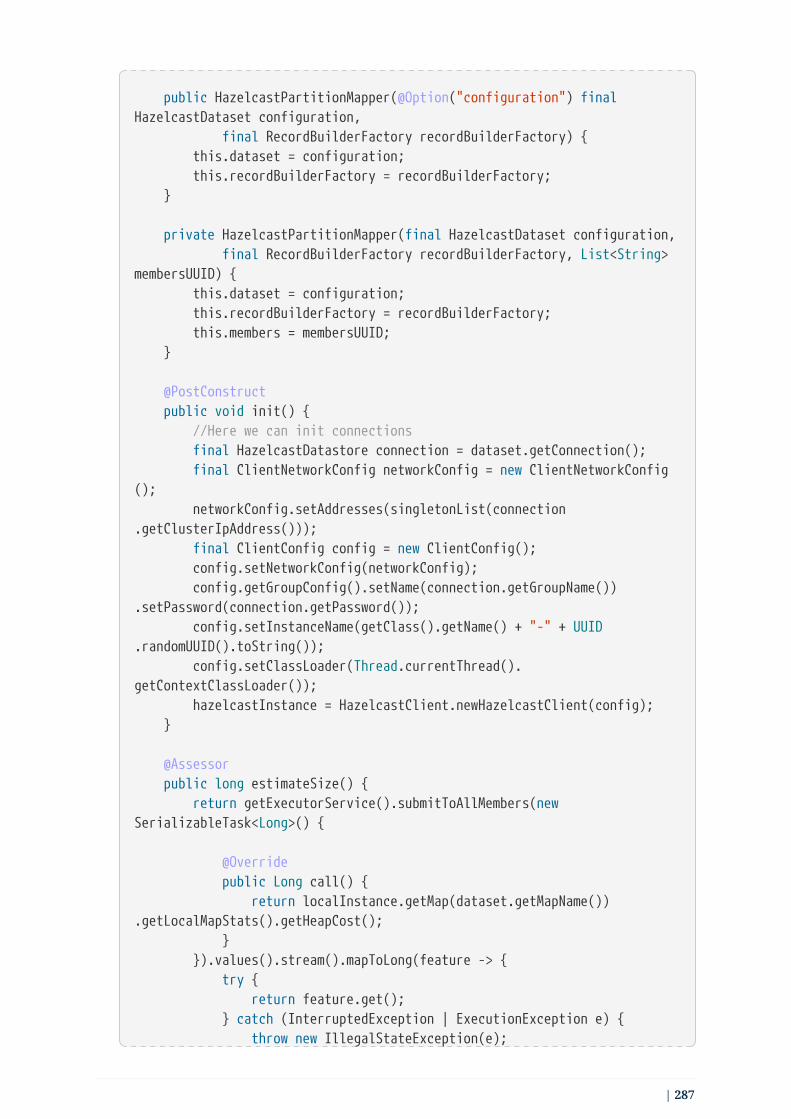
public HazelcastPartitionMapper(@Option("configuration") finalHazelcastDataset configuration, final RecordBuilderFactory recordBuilderFactory) { this.dataset = configuration; this.recordBuilderFactory = recordBuilderFactory; }
private HazelcastPartitionMapper(final HazelcastDataset configuration, final RecordBuilderFactory recordBuilderFactory, List<String>membersUUID) { this.dataset = configuration; this.recordBuilderFactory = recordBuilderFactory; this.members = membersUUID; }
@PostConstruct public void init() { //Here we can init connections final HazelcastDatastore connection = dataset.getConnection(); final ClientNetworkConfig networkConfig = new ClientNetworkConfig(); networkConfig.setAddresses(singletonList(connection.getClusterIpAddress())); final ClientConfig config = new ClientConfig(); config.setNetworkConfig(networkConfig); config.getGroupConfig().setName(connection.getGroupName()).setPassword(connection.getPassword()); config.setInstanceName(getClass().getName() + "-" + UUID.randomUUID().toString()); config.setClassLoader(Thread.currentThread().getContextClassLoader()); hazelcastInstance = HazelcastClient.newHazelcastClient(config); }
@Assessor public long estimateSize() { return getExecutorService().submitToAllMembers(newSerializableTask<Long>() {
@Override public Long call() { return localInstance.getMap(dataset.getMapName()).getLocalMapStats().getHeapCost(); } }).values().stream().mapToLong(feature -> { try { return feature.get(); } catch (InterruptedException | ExecutionException e) { throw new IllegalStateException(e);
| 287

} }).sum(); }
@Split public List<HazelcastPartitionMapper> split(@PartitionSize final longbundleSize) { final Map<String, Long> heapSizeByMember = getExecutorService().submitToAllMembers(newSerializableTask<Long>() {
@Override public Long call() { return localInstance.getMap(dataset.getMapName()).getLocalMapStats().getHeapCost(); } }).entrySet().stream().map(heapSizeMember -> { try { return new AbstractMap.SimpleEntry<>(heapSizeMember.getKey().getUuid(), heapSizeMember.getValue().get()); } catch (InterruptedException | ExecutionException e){ throw new IllegalStateException(e); } }).collect(toMap(AbstractMap.SimpleEntry::getKey,AbstractMap.SimpleEntry::getValue));
final List<HazelcastPartitionMapper> partitions = new ArrayList<>(heapSizeByMember.keySet()).stream() .map(e -> combineMembers(e, bundleSize, heapSizeByMember)) .filter(Objects::nonNull) .map(m -> new HazelcastPartitionMapper(dataset,recordBuilderFactory, m)) .collect(toList());
if (partitions.isEmpty()) { List<String> allMembers = hazelcastInstance.getCluster().getMembers().stream().map(Member::getUuid).collect(toList()); partitions.add(new HazelcastPartitionMapper(dataset,recordBuilderFactory, allMembers)); }
return partitions; }
private List<String> combineMembers(String current, final longbundleSize, final Map<String, Long> sizeByMember) {
288 |
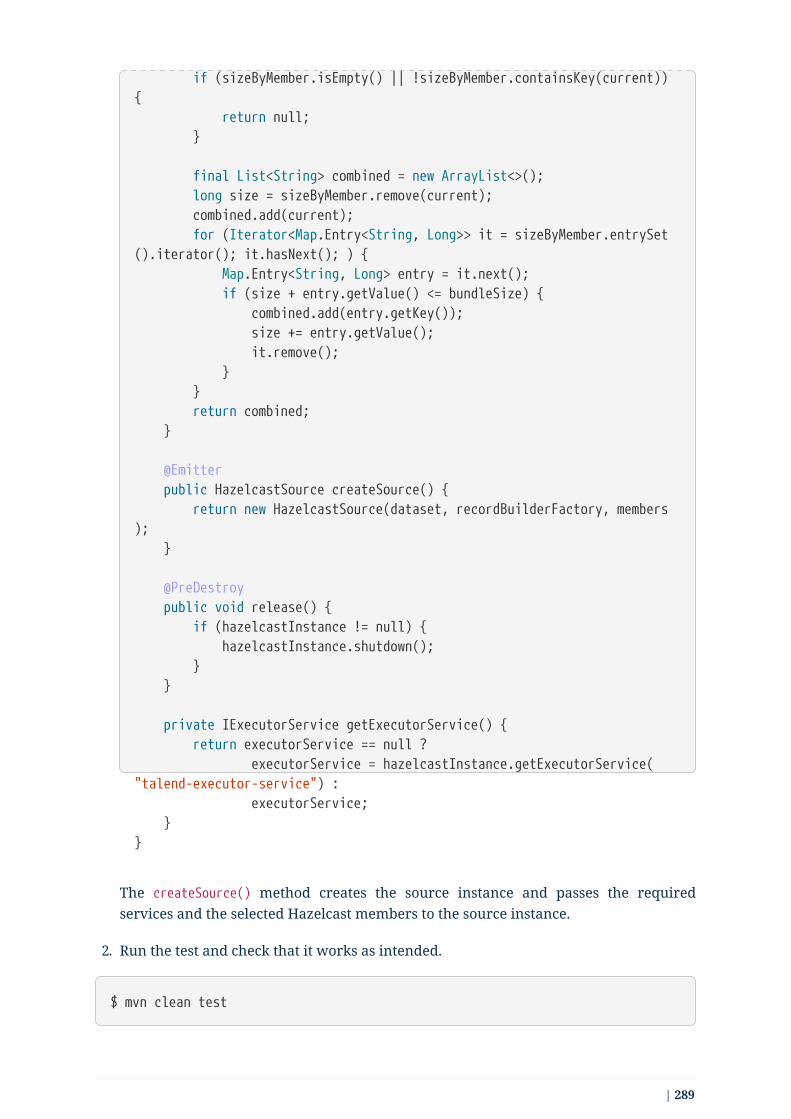
if (sizeByMember.isEmpty() || !sizeByMember.containsKey(current)){ return null; }
final List<String> combined = new ArrayList<>(); long size = sizeByMember.remove(current); combined.add(current); for (Iterator<Map.Entry<String, Long>> it = sizeByMember.entrySet().iterator(); it.hasNext(); ) { Map.Entry<String, Long> entry = it.next(); if (size + entry.getValue() <= bundleSize) { combined.add(entry.getKey()); size += entry.getValue(); it.remove(); } } return combined; }
@Emitter public HazelcastSource createSource() { return new HazelcastSource(dataset, recordBuilderFactory, members); }
@PreDestroy public void release() { if (hazelcastInstance != null) { hazelcastInstance.shutdown(); } }
private IExecutorService getExecutorService() { return executorService == null ? executorService = hazelcastInstance.getExecutorService("talend-executor-service") : executorService; }}
The createSource() method creates the source instance and passes the requiredservices and the selected Hazelcast members to the source instance.
2. Run the test and check that it works as intended.
$ mvn clean test
| 289

The component implementation is now done. It is able to read data and to distribute theworkload to available members in a Big Data execution environment.
9.3.4. Introducing TCK services
Refactor the component by introducing a service to make some pieces of code reusableand avoid code duplication.
1. Refactor the Hazelcast instance creation into a service.
package org.talend.components.hazelcast;
import com.hazelcast.client.HazelcastClient;import com.hazelcast.client.config.ClientConfig;import com.hazelcast.client.config.ClientNetworkConfig;import com.hazelcast.core.HazelcastInstance;import com.hazelcast.core.IExecutorService;import org.talend.sdk.component.api.service.Service;
import java.io.Serializable;import java.util.UUID;
import static java.util.Collections.singletonList;
@Servicepublic class HazelcastService implements Serializable {
private transient HazelcastInstance hazelcastInstance;
private transient IExecutorService executorService;
public HazelcastInstance getOrCreateIntance(final HazelcastDatastoreconnection) { if (hazelcastInstance == null || !hazelcastInstance.getLifecycleService().isRunning()) { final ClientNetworkConfig networkConfig = newClientNetworkConfig(); networkConfig.setAddresses(singletonList(connection.getClusterIpAddress())); final ClientConfig config = new ClientConfig(); config.setNetworkConfig(networkConfig); config.getGroupConfig().setName(connection.getGroupName()).setPassword(connection.getPassword()); config.setInstanceName(getClass().getName() + "-" + UUID.randomUUID().toString()); config.setClassLoader(Thread.currentThread().getContextClassLoader()); hazelcastInstance = HazelcastClient.newHazelcastClient(config);
290 |

} return hazelcastInstance; }
public void shutdownInstance() { if (hazelcastInstance != null) { hazelcastInstance.shutdown(); } }
public IExecutorService getExecutorService(final HazelcastDatastoreconnection) { return executorService == null ? executorService = getOrCreateIntance(connection).getExecutorService("talend-executor-service") : executorService; }}
2. Inject this service to the Partition Mapper to reuse it.
package org.talend.components.hazelcast;
import com.hazelcast.core.IExecutorService;import com.hazelcast.core.Member;import org.talend.sdk.component.api.component.Icon;import org.talend.sdk.component.api.component.Version;import org.talend.sdk.component.api.configuration.Option;import org.talend.sdk.component.api.input.Assessor;import org.talend.sdk.component.api.input.Emitter;import org.talend.sdk.component.api.input.PartitionMapper;import org.talend.sdk.component.api.input.PartitionSize;import org.talend.sdk.component.api.input.Split;import org.talend.sdk.component.api.meta.Documentation;import org.talend.sdk.component.api.service.record.RecordBuilderFactory;
import javax.annotation.PostConstruct;import javax.annotation.PreDestroy;import java.io.Serializable;import java.util.AbstractMap;import java.util.ArrayList;import java.util.Iterator;import java.util.List;import java.util.Map;import java.util.Objects;import java.util.concurrent.ExecutionException;
import static java.util.stream.Collectors.toList;
| 291

import static java.util.stream.Collectors.toMap;
@Version@PartitionMapper(name = "Input")@Icon(value = Icon.IconType.CUSTOM, custom = "Hazelcast")@Documentation("Hazelcast source")public class HazelcastPartitionMapper implements Serializable {
private final HazelcastDataset dataset;
private final RecordBuilderFactory recordBuilderFactory;
private transient IExecutorService executorService;
private List<String> members;
private final HazelcastService hazelcastService;
public HazelcastPartitionMapper(@Option("configuration") finalHazelcastDataset configuration, final RecordBuilderFactory recordBuilderFactory, finalHazelcastService hazelcastService) { this.dataset = configuration; this.recordBuilderFactory = recordBuilderFactory; this.hazelcastService = hazelcastService; }
private HazelcastPartitionMapper(final HazelcastDataset configuration, final RecordBuilderFactory recordBuilderFactory, List<String>membersUUID, final HazelcastService hazelcastService) { this.dataset = configuration; this.recordBuilderFactory = recordBuilderFactory; this.hazelcastService = hazelcastService; this.members = membersUUID;
}
@PostConstruct public void init() { // We initialize the hazelcast instance only on it first usage now }
@Assessor public long estimateSize() { return hazelcastService.getExecutorService(dataset.getConnection()) .submitToAllMembers(new SerializableTask<Long>() {
@Override
292 |

public Long call() { return localInstance.getMap(dataset.getMapName()).getLocalMapStats().getHeapCost(); } }) .values() .stream() .mapToLong(feature -> { try { return feature.get(); } catch (InterruptedException | ExecutionException e){ throw new IllegalStateException(e); } }) .sum(); }
@Split public List<HazelcastPartitionMapper> split(@PartitionSize final longbundleSize) { final Map<String, Long> heapSizeByMember = hazelcastService.getExecutorService(dataset.getConnection()) .submitToAllMembers(new SerializableTask<Long>() {
@Override public Long call() { return localInstance.getMap(dataset.getMapName()).getLocalMapStats().getHeapCost(); } }) .entrySet() .stream() .map(heapSizeMember -> { try { return new AbstractMap.SimpleEntry<>(heapSizeMember.getKey().getUuid(), heapSizeMember.getValue().get()); } catch (InterruptedException | ExecutionException e){ throw new IllegalStateException(e); } }) .collect(toMap(AbstractMap.SimpleEntry::getKey,AbstractMap.SimpleEntry::getValue));
final List<HazelcastPartitionMapper> partitions = new ArrayList<>(heapSizeByMember.keySet()).stream() .map(e -> combineMembers(e, bundleSize, heapSizeByMember)) .filter(Objects::nonNull)
| 293

.map(m -> new HazelcastPartitionMapper(dataset,recordBuilderFactory, m, hazelcastService)) .collect(toList());
if (partitions.isEmpty()) { List<String> allMembers = hazelcastService.getOrCreateIntance(dataset.getConnection()) .getCluster() .getMembers() .stream() .map(Member::getUuid) .collect(toList()); partitions.add(new HazelcastPartitionMapper(dataset,recordBuilderFactory, allMembers, hazelcastService)); }
return partitions; }
private List<String> combineMembers(String current, final longbundleSize, final Map<String, Long> sizeByMember) {
if (sizeByMember.isEmpty() || !sizeByMember.containsKey(current)){ return null; }
final List<String> combined = new ArrayList<>(); long size = sizeByMember.remove(current); combined.add(current); for (Iterator<Map.Entry<String, Long>> it = sizeByMember.entrySet().iterator(); it.hasNext(); ) { Map.Entry<String, Long> entry = it.next(); if (size + entry.getValue() <= bundleSize) { combined.add(entry.getKey()); size += entry.getValue(); it.remove(); } } return combined; }
@Emitter public HazelcastSource createSource() { return new HazelcastSource(dataset, recordBuilderFactory, members,hazelcastService); }
@PreDestroy public void release() {
294 |

hazelcastService.shutdownInstance(); }
}
3. Adapt the Source class to reuse the service.
package org.talend.components.hazelcast;
import com.hazelcast.core.IMap;import com.hazelcast.core.Member;import org.talend.sdk.component.api.input.Producer;import org.talend.sdk.component.api.record.Record;import org.talend.sdk.component.api.service.record.RecordBuilderFactory;
import javax.annotation.PostConstruct;import javax.annotation.PreDestroy;import java.io.Serializable;import java.util.Iterator;import java.util.List;import java.util.Map;import java.util.Set;import java.util.concurrent.ExecutionException;import java.util.concurrent.Future;
import static java.util.stream.Collectors.toMap;
public class HazelcastSource implements Serializable {
private final HazelcastDataset dataset;
private final List<String> members;
private transient Iterator<Map.Entry<String, String>> mapIterator;
private final RecordBuilderFactory recordBuilderFactory;
private transient Iterator<Map.Entry<Member, Future<Map<String,String>>>> dataByMember;
private final HazelcastService hazelcastService;
public HazelcastSource(final HazelcastDataset configuration, finalRecordBuilderFactory recordBuilderFactory, final List<String> members, final HazelcastServicehazelcastService) { this.dataset = configuration; this.recordBuilderFactory = recordBuilderFactory;
| 295

this.members = members; this.hazelcastService = hazelcastService; }
@PostConstruct public void init() { // We initialize the hazelcast instance only on it first usage now }
@Producer public Record next() { if (dataByMember == null) { dataByMember = hazelcastService.getOrCreateIntance(dataset.getConnection()) .getExecutorService("talend-source") .submitToMembers(new SerializableTask<Map<String,String>>() {
@Override public Map<String, String> call() { final IMap<String, String> map =localInstance.getMap(dataset.getMapName()); final Set<String> localKeySet = map.localKeySet(); return localKeySet.stream().collect(toMap(k ->k, map::get)); } }, member -> members.contains(member.getUuid())) .entrySet() .iterator(); }
if (mapIterator != null && !mapIterator.hasNext() && !dataByMember.hasNext()) { return null; }
if (mapIterator == null || !mapIterator.hasNext()) { Map.Entry<Member, Future<Map<String, String>>> next =dataByMember.next(); try { mapIterator = next.getValue().get().entrySet().iterator(); } catch (InterruptedException | ExecutionException e) { throw new IllegalStateException(e); } }
Map.Entry<String, String> entry = mapIterator.next(); return recordBuilderFactory.newRecordBuilder().withString(entry.getKey(), entry.getValue()).build();
296 |

}
@PreDestroy public void release() { hazelcastService.shutdownInstance(); }}
4. Run the test one last time to ensure everything still works as expected.
Thank you for following this tutorial. Use the logic and approach presented here to createany input component for any system.
9.4. Implementing an Output component forHazelcast
This tutorial is the continuation of Talend Input component for Hazelcasttutorial. We will not walk through the project creation again, So pleasestart from there before taking this one.
This tutorial shows how to create a complete working output component for Hazelcast
9.4.1. Defining the configurable part and the layout of thecomponent
As seen before, in Hazelcast there is multiple data source type. You can find queues,topics, cache, maps…
In this tutorials we will stick with the Map dataset and all what we will see here isapplicable to the other types.
Let’s assume that our Hazelcast output component will be responsible of inserting datainto a distributed Map. For that, we will need to know which attribute from the incomingdata is to be used as a key in the map. The value will be the hole record encoded into ajson format.
Bu that in mind, we can design our output configuration as: the same Datastore andDataset from the input component and an additional configuration that will define thekey attribute.
Let’s create our Output configuration class.
| 297

package org.talend.components.hazelcast;
import org.talend.sdk.component.api.configuration.Option;import org.talend.sdk.component.api.configuration.ui.layout.GridLayout;import org.talend.sdk.component.api.meta.Documentation;importjava.io.Serializable;
@GridLayout({ @GridLayout.Row("dataset"), @GridLayout.Row("key")})@Documentation("Hazelcast output configuration")public class HazelcastOutputConfig implements Serializable {
@Option @Documentation("the hazelcast dataset") private HazelcastDataset dataset;
@Option @Documentation("The key attribute") private String key;
// Getters & Setters omitted for simplicity // You need to generate them}
Let’s add the i18n properties of our configuration into the Messages.properties file
# Output configHazelcastOutputConfig.dataset._displayName=Hazelcast datasetHazelcastOutputConfig.key._displayName=Key attribute
9.4.2. Output Implementation
The skeleton of the output component looks as follows:
298 |

package org.talend.components.hazelcast;
import org.talend.sdk.component.api.component.Icon;import org.talend.sdk.component.api.component.Version;import org.talend.sdk.component.api.configuration.Option;import org.talend.sdk.component.api.processor.ElementListener;import org.talend.sdk.component.api.meta.Documentation;import org.talend.sdk.component.api.processor.Processor;import org.talend.sdk.component.api.record.Record;
import javax.annotation.PostConstruct;import javax.annotation.PreDestroy;import java.io.Serializable;
import static org.talend.sdk.component.api.component.Icon.IconType.CUSTOM;
@Version@Icon(custom = "Hazelcast", value = CUSTOM)@Processor(name = "Output")@Documentation("Hazelcast output component")public class HazelcastOutput implements Serializable {
public HazelcastOutput(@Option("configuration") finalHazelcastOutputConfig configuration) { }
@PostConstruct public void init() { }
@PreDestroy public void release() { }
@ElementListener public void onElement(final Record record) { }
}
• @Version annotation indicates the version of the component. It is used to migrate thecomponent configuration if needed.
• @Icon annotation indicates the icon of the component. Here, the icon is a custom iconthat needs to be bundled in the component JAR under resources/icons.
• @Processor annotation indicates that this class is the processor (output) and defines thename of the component.
| 299

• constructor of the processor is responsible for injecting the component configurationand services. Configuration parameters are annotated with @Option. The otherparameters are considered as services and are injected by the component framework.Services can be local (class annotated with @Service) or provided by the componentframework.
• The method annotated with @PostConstruct is executed once by instance and can beused for initialization.
• The method annotated with @PreDestroy is used to clean resources at the end of theexecution of the output.
• Data is passed to the method annotated with @ElementListener. That method isresponsible for handling the data output. You can define all the related logic in thismethod.
If you need to bulk write the updates accordingly to groups, seeProcessors and batch processing.
Now, we will need to add the display name of the Output to the i18n resources fileMessages.properties
#OutputHazelcast.Output._displayName=Output
Let’s implement all of those methods
Defining the constructor method
We will create the outpu contructor to inject the component configuration and someadditional local and built in services.
Built in services are services provided by TCK.
package org.talend.components.hazelcast;
import org.talend.sdk.component.api.component.Icon;import org.talend.sdk.component.api.component.Version;import org.talend.sdk.component.api.configuration.Option;import org.talend.sdk.component.api.processor.ElementListener;import org.talend.sdk.component.api.meta.Documentation;import org.talend.sdk.component.api.processor.Processor;import org.talend.sdk.component.api.record.Record;
import javax.annotation.PostConstruct;import javax.annotation.PreDestroy;import javax.json.bind.Jsonb;import java.io.Serializable;
300 |

import static org.talend.sdk.component.api.component.Icon.IconType.CUSTOM;
@Version@Icon(custom = "Hazelcast", value = CUSTOM)@Processor(name = "Output")@Documentation("Hazelcast output component")public class HazelcastOutput implements Serializable {
private final HazelcastOutputConfig configuration;
private final HazelcastService hazelcastService;
private final Jsonb jsonb;
public HazelcastOutput(@Option("configuration") finalHazelcastOutputConfig configuration, final HazelcastService hazelcastService, final Jsonb jsonb) { this.configuration = configuration; this.hazelcastService = hazelcastService; this.jsonb = jsonb; }
@PostConstruct public void init() { }
@PreDestroy public void release() { }
@ElementListener public void onElement(final Record record) { }
}
Here we find:
• configuration is the component configuration class
• hazelcastService is the service that we have implemented in the input componenttutorial. it will be responsible of creating a hazelcast client instance.
• jsonb is a built in service provided by tck to handle json object serialization anddeserialization. We will use it to convert the incoming record to json format beforeinseting them into the map.
| 301

Defining the PostConstruct method
Nothing to do in the post construct method. but we could for example initialize a hazlecast instance there. but we will do it in a lazy way on the first call in the @ElementListenermethod
Defining the PreDestroy method
package org.talend.components.hazelcast;
import org.talend.sdk.component.api.component.Icon;import org.talend.sdk.component.api.component.Version;import org.talend.sdk.component.api.configuration.Option;import org.talend.sdk.component.api.processor.ElementListener;import org.talend.sdk.component.api.meta.Documentation;import org.talend.sdk.component.api.processor.Processor;import org.talend.sdk.component.api.record.Record;
import javax.annotation.PostConstruct;import javax.annotation.PreDestroy;import javax.json.bind.Jsonb;import java.io.Serializable;
import static org.talend.sdk.component.api.component.Icon.IconType.CUSTOM;
@Version@Icon(custom = "Hazelcast", value = CUSTOM)@Processor(name = "Output")@Documentation("Hazelcast output component")public class HazelcastOutput implements Serializable {
private final HazelcastOutputConfig configuration;
private final HazelcastService hazelcastService;
private final Jsonb jsonb;
public HazelcastOutput(@Option("configuration") finalHazelcastOutputConfig configuration, final HazelcastService hazelcastService, final Jsonb jsonb) { this.configuration = configuration; this.hazelcastService = hazelcastService; this.jsonb = jsonb; }
@PostConstruct public void init() { //no-op }
302 |
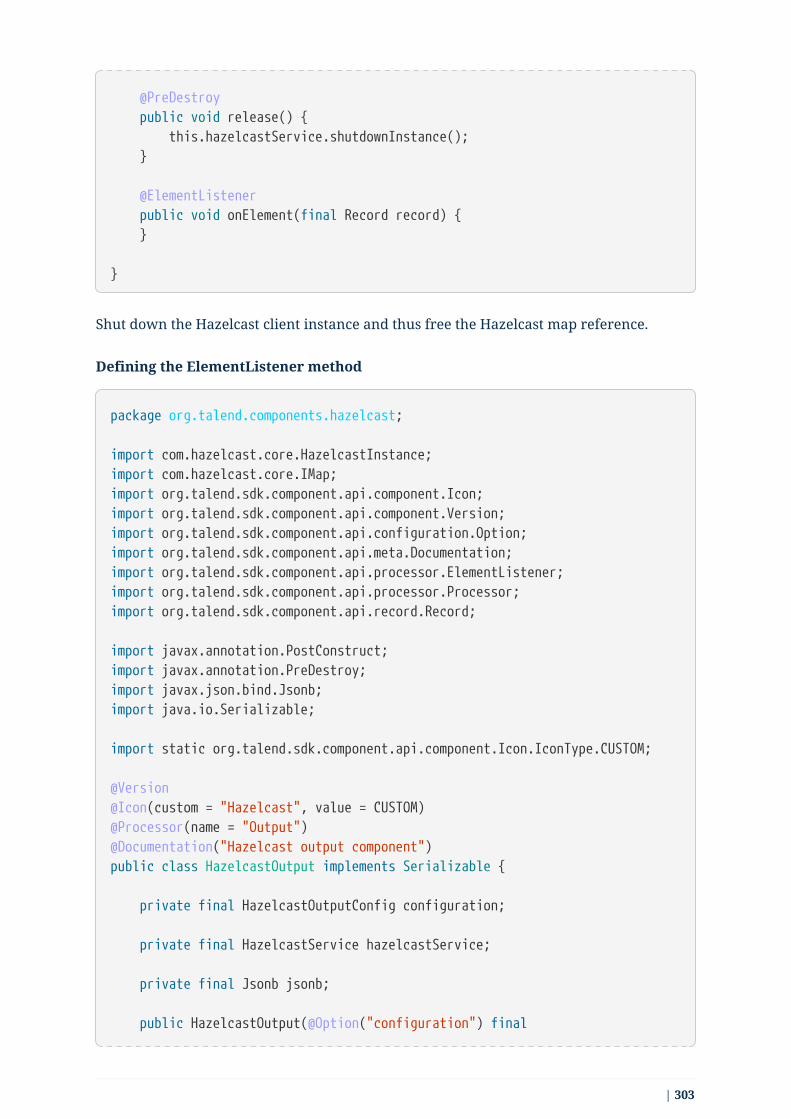
@PreDestroy public void release() { this.hazelcastService.shutdownInstance(); }
@ElementListener public void onElement(final Record record) { }
}
Shut down the Hazelcast client instance and thus free the Hazelcast map reference.
Defining the ElementListener method
package org.talend.components.hazelcast;
import com.hazelcast.core.HazelcastInstance;import com.hazelcast.core.IMap;import org.talend.sdk.component.api.component.Icon;import org.talend.sdk.component.api.component.Version;import org.talend.sdk.component.api.configuration.Option;import org.talend.sdk.component.api.meta.Documentation;import org.talend.sdk.component.api.processor.ElementListener;import org.talend.sdk.component.api.processor.Processor;import org.talend.sdk.component.api.record.Record;
import javax.annotation.PostConstruct;import javax.annotation.PreDestroy;import javax.json.bind.Jsonb;import java.io.Serializable;
import static org.talend.sdk.component.api.component.Icon.IconType.CUSTOM;
@Version@Icon(custom = "Hazelcast", value = CUSTOM)@Processor(name = "Output")@Documentation("Hazelcast output component")public class HazelcastOutput implements Serializable {
private final HazelcastOutputConfig configuration;
private final HazelcastService hazelcastService;
private final Jsonb jsonb;
public HazelcastOutput(@Option("configuration") final
| 303
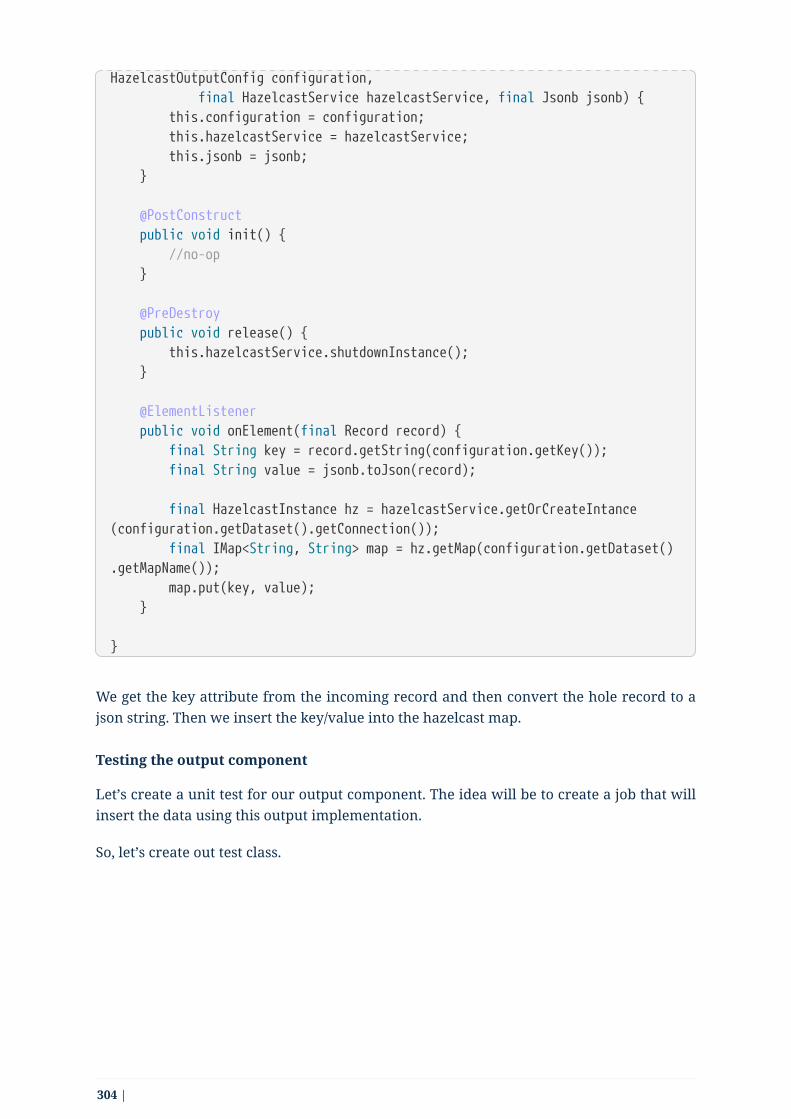
HazelcastOutputConfig configuration, final HazelcastService hazelcastService, final Jsonb jsonb) { this.configuration = configuration; this.hazelcastService = hazelcastService; this.jsonb = jsonb; }
@PostConstruct public void init() { //no-op }
@PreDestroy public void release() { this.hazelcastService.shutdownInstance(); }
@ElementListener public void onElement(final Record record) { final String key = record.getString(configuration.getKey()); final String value = jsonb.toJson(record);
final HazelcastInstance hz = hazelcastService.getOrCreateIntance(configuration.getDataset().getConnection()); final IMap<String, String> map = hz.getMap(configuration.getDataset().getMapName()); map.put(key, value); }
}
We get the key attribute from the incoming record and then convert the hole record to ajson string. Then we insert the key/value into the hazelcast map.
Testing the output component
Let’s create a unit test for our output component. The idea will be to create a job that willinsert the data using this output implementation.
So, let’s create out test class.
304 |
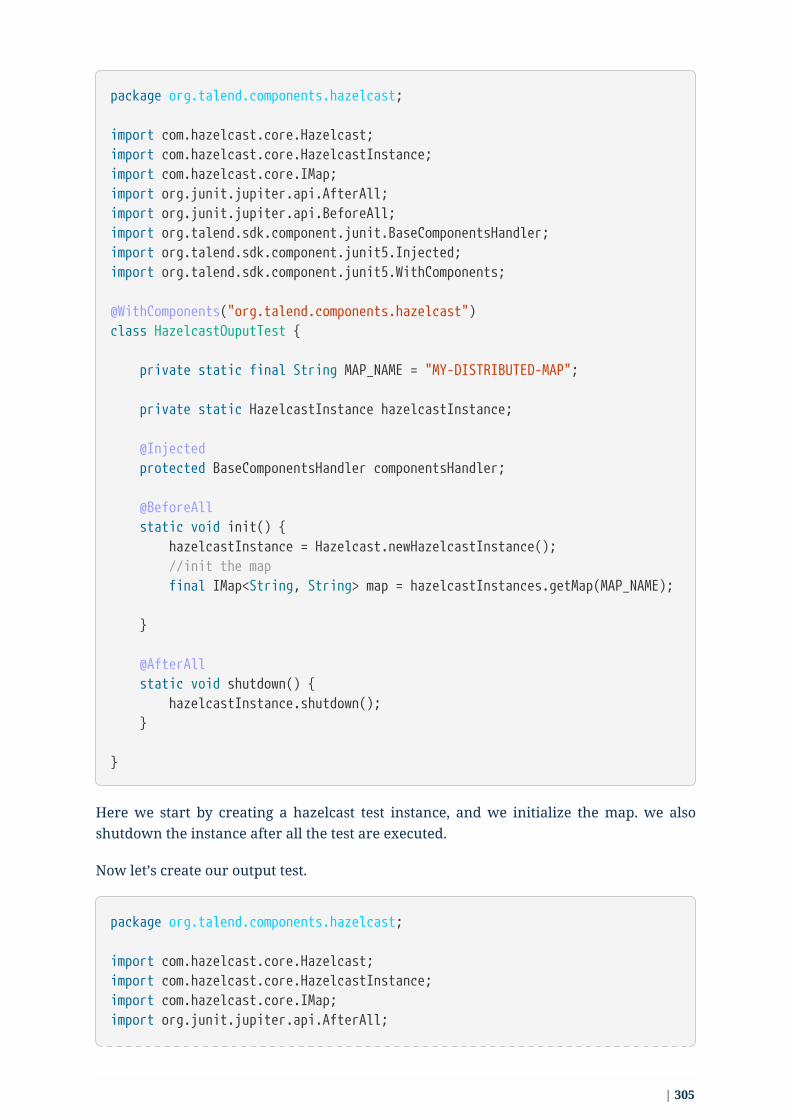
package org.talend.components.hazelcast;
import com.hazelcast.core.Hazelcast;import com.hazelcast.core.HazelcastInstance;import com.hazelcast.core.IMap;import org.junit.jupiter.api.AfterAll;import org.junit.jupiter.api.BeforeAll;import org.talend.sdk.component.junit.BaseComponentsHandler;import org.talend.sdk.component.junit5.Injected;import org.talend.sdk.component.junit5.WithComponents;
@WithComponents("org.talend.components.hazelcast")class HazelcastOuputTest {
private static final String MAP_NAME = "MY-DISTRIBUTED-MAP";
private static HazelcastInstance hazelcastInstance;
@Injected protected BaseComponentsHandler componentsHandler;
@BeforeAll static void init() { hazelcastInstance = Hazelcast.newHazelcastInstance(); //init the map final IMap<String, String> map = hazelcastInstances.getMap(MAP_NAME);
}
@AfterAll static void shutdown() { hazelcastInstance.shutdown(); }
}
Here we start by creating a hazelcast test instance, and we initialize the map. we alsoshutdown the instance after all the test are executed.
Now let’s create our output test.
package org.talend.components.hazelcast;
import com.hazelcast.core.Hazelcast;import com.hazelcast.core.HazelcastInstance;import com.hazelcast.core.IMap;import org.junit.jupiter.api.AfterAll;
| 305
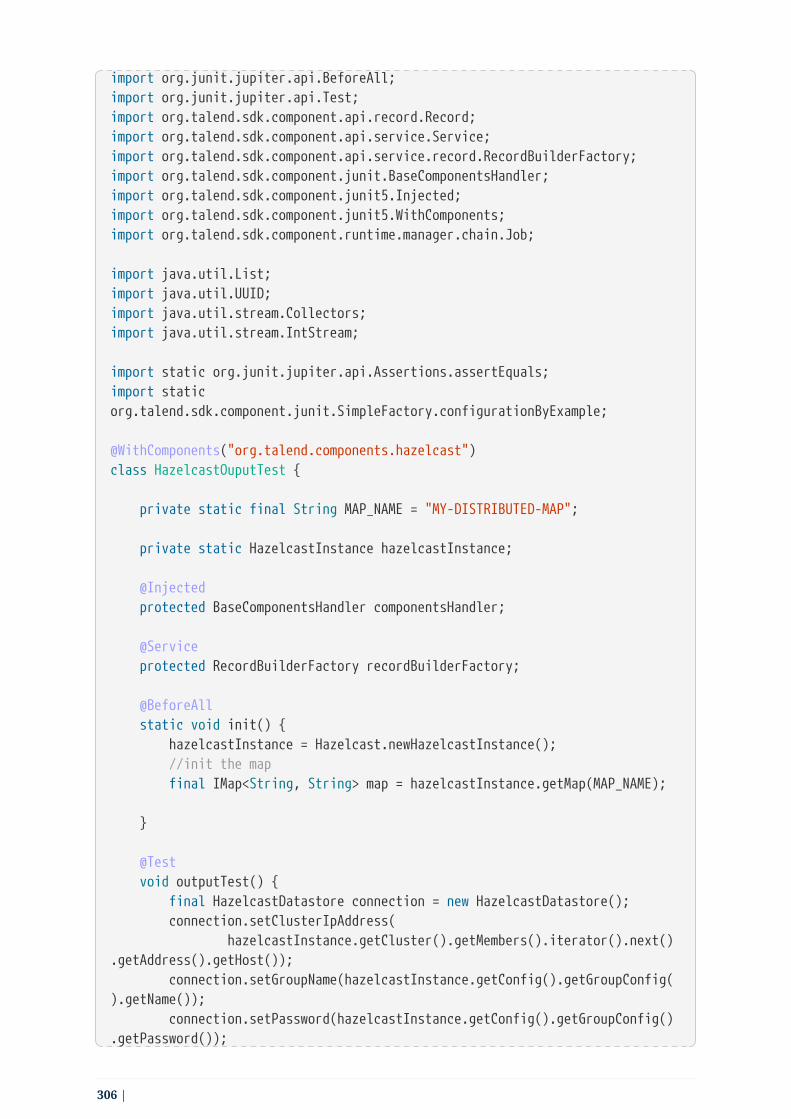
import org.junit.jupiter.api.BeforeAll;import org.junit.jupiter.api.Test;import org.talend.sdk.component.api.record.Record;import org.talend.sdk.component.api.service.Service;import org.talend.sdk.component.api.service.record.RecordBuilderFactory;import org.talend.sdk.component.junit.BaseComponentsHandler;import org.talend.sdk.component.junit5.Injected;import org.talend.sdk.component.junit5.WithComponents;import org.talend.sdk.component.runtime.manager.chain.Job;
import java.util.List;import java.util.UUID;import java.util.stream.Collectors;import java.util.stream.IntStream;
import static org.junit.jupiter.api.Assertions.assertEquals;import staticorg.talend.sdk.component.junit.SimpleFactory.configurationByExample;
@WithComponents("org.talend.components.hazelcast")class HazelcastOuputTest {
private static final String MAP_NAME = "MY-DISTRIBUTED-MAP";
private static HazelcastInstance hazelcastInstance;
@Injected protected BaseComponentsHandler componentsHandler;
@Service protected RecordBuilderFactory recordBuilderFactory;
@BeforeAll static void init() { hazelcastInstance = Hazelcast.newHazelcastInstance(); //init the map final IMap<String, String> map = hazelcastInstance.getMap(MAP_NAME);
}
@Test void outputTest() { final HazelcastDatastore connection = new HazelcastDatastore(); connection.setClusterIpAddress( hazelcastInstance.getCluster().getMembers().iterator().next().getAddress().getHost()); connection.setGroupName(hazelcastInstance.getConfig().getGroupConfig().getName()); connection.setPassword(hazelcastInstance.getConfig().getGroupConfig().getPassword());
306 |

final HazelcastDataset dataset = new HazelcastDataset(); dataset.setConnection(connection); dataset.setMapName(MAP_NAME);
HazelcastOutputConfig config = new HazelcastOutputConfig(); config.setDataset(dataset); config.setKey("id");
final String configUri = configurationByExample().forInstance(config).configured().toQueryString();
componentsHandler.setInputData(generateTestData(10)); Job.components() .component("Input", "test://emitter") .component("Output", "Hazelcast://Output?" + configUri) .connections() .from("Input") .to("Output") .build() .run();
final IMap<String, String> map = hazelcastInstance.getMap(MAP_NAME); assertEquals(10, map.size()); }
private List<Record> generateTestData(int count) { return IntStream.range(0, count) .mapToObj(i -> recordBuilderFactory.newRecordBuilder() .withString("id", UUID.randomUUID().toString()) .withString("val1", UUID.randomUUID().toString()) .withString("val2", UUID.randomUUID().toString()) .build()) .collect(Collectors.toList()); }
@AfterAll static void shutdown() { hazelcastInstance.shutdown(); }}
Here we start preparing the emitter test component provided bt TCK that we use in ourtest job to generate random data for our output. Then, we use the output component to fillthe hazelcast map.
By the end we test that the map contains the exact amount of data inserted by the job.
Run the test and check that it’s working.
| 307

$ mvn clean test
Congratulation you just finished your output component.
9.5. Creating components for a REST APIThis tutorial shows how to create components that consume a REST API.
The component developed as example in this tutorial is an input component that providesa search functionality for Zendesk using its Search API.Lombok is used to avoid writing getter, setter and constructor methods.
You can generate a project using the Talend Components Kit starter, as described in thistutorial.
9.5.1. Setting up the HTTP client
The input component relies on Zendesk Search API and requires an HTTP client toconsume it.
The Zendesk Search API takes the following parameters on the /api/v2/search.jsonendpoint.
• query : The search query.
• sort_by : The sorting type of the query result. Possible values are updated_at,created_at, priority, status, ticket_type, or relevance. It defaults to relevance.
• sort_order: The sorting order of the query result. Possible values are asc (forascending) or desc (for descending). It defaults to desc.
Talend Component Kit provides a built-in service to create an easy-to-use HTTP client in adeclarative manner, using Java annotations.
public interface SearchClient extends HttpClient { ①
@Request(path = "api/v2/search.json", method = "GET") ② Response<JsonObject> search(@Header("Authorization") String auth,③ ④ @Header("Content-Type") String contentType, ⑤ @Query("query") String query, ⑥ @Query("sort_by") String sortBy, @Query("sort_order") String sortOrder, @Query("page") Integer page );}
① The interface needs to extend org.talend.sdk.component.api.service.http.HttpClient
308 |
to be recognized as an HTTP client by the component framework. This interface alsoprovides the void base(String base) method, that allows to set the base URI for theHTTP request. In this tutorial, it is the Zendesk instance URL.
② The @Request annotation allows to define the HTTP request path and method (GET, POST,PUT, and so on).
③ The method return type and a header parameter are defined.The method return type is a JSON object: Response<JsonObject>. The Response objectallows to access the HTTP response status code, headers, error payload and theresponse body that are of the JsonObject type in this case.The response body is decoded according to the content type returned by the API. Thecomponent framework provides the codec to decode JSON content.If you want to consume specific content types, you need to specify your custom codecusing the @Codec annotation.
④ The Authorization HTTP request header allows to provide the authorization token.
⑤ Another HTTP request header defined to provide the content type.
⑥ Query parameters are defined using the @Query annotation that provides the parametername.
No additional implementation is needed for the interface, as it is provided by thecomponent framework, according to what is defined above.
This HTTP client can be injected into a mapper or a processor to performHTTP requests.
9.5.2. Configuring the component
This example uses the basic authentication that supported by the API.
Configuring basic authentication
The first step is to set up the configuration for the basic authentication. To be able toconsume the Search API, the Zendesk instance URL, the username and the password areneeded.
| 309
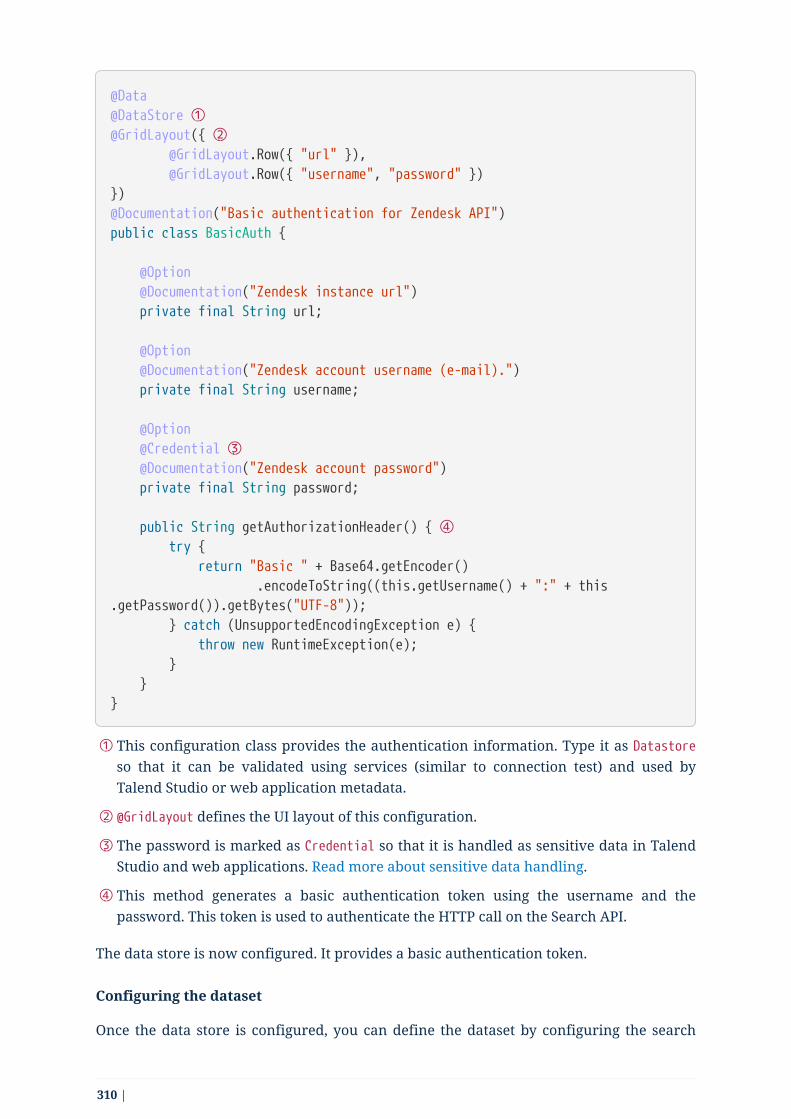
@Data@DataStore ①@GridLayout({ ② @GridLayout.Row({ "url" }), @GridLayout.Row({ "username", "password" })})@Documentation("Basic authentication for Zendesk API")public class BasicAuth {
@Option @Documentation("Zendesk instance url") private final String url;
@Option @Documentation("Zendesk account username (e-mail).") private final String username;
@Option @Credential ③ @Documentation("Zendesk account password") private final String password;
public String getAuthorizationHeader() { ④ try { return "Basic " + Base64.getEncoder() .encodeToString((this.getUsername() + ":" + this.getPassword()).getBytes("UTF-8")); } catch (UnsupportedEncodingException e) { throw new RuntimeException(e); } }}
① This configuration class provides the authentication information. Type it as Datastoreso that it can be validated using services (similar to connection test) and used byTalend Studio or web application metadata.
② @GridLayout defines the UI layout of this configuration.
③ The password is marked as Credential so that it is handled as sensitive data in TalendStudio and web applications. Read more about sensitive data handling.
④ This method generates a basic authentication token using the username and thepassword. This token is used to authenticate the HTTP call on the Search API.
The data store is now configured. It provides a basic authentication token.
Configuring the dataset
Once the data store is configured, you can define the dataset by configuring the search
310 |

query. It is that query that defines the records processed by the input component.
@Data@DataSet ①@GridLayout({ ② @GridLayout.Row({ "dataStore" }), @GridLayout.Row({ "query" }), @GridLayout.Row({ "sortBy", "sortOrder" })})@Documentation("Data set that defines a search query for Zendesk Search API.See API reference https://developer.zendesk.com/rest_api/docs/core/search")public class SearchQuery {
@Option @Documentation("Authentication information.") private final BasicAuth dataStore;
@Option @TextArea ③ @Documentation("Search query.") ④ private final String query;
@Option @DefaultValue("relevance") ⑤ @Documentation("One of updated_at, created_at, priority, status, orticket_type. Defaults to sorting by relevance") private final String sortBy;
@Option @DefaultValue("desc") @Documentation("One of asc or desc. Defaults to desc") private final String sortOrder;}
① The configuration class is marked as a DataSet. Read more about configuration types.
② @GridLayout defines the UI layout of this configuration.
③ A text area widget is bound to the Search query field. See all the available widgets.
④ The @Documentation annotation is used to document the component (configuration inthis scope). A Talend Component Kit Maven plugin can be used to generate thecomponent documentation with all the configuration description and the defaultvalues.
⑤ A default value is defined for sorting the query result.
Your component is configured. You can now create the component logic.
| 311

9.5.3. Defining the component mapper
Mappers defined with this tutorial don’t implement the split part becauseHTTP calls are not split on many workers in this case.
@Version@Icon(value = Icon.IconType.CUSTOM, custom = "zendesk")@PartitionMapper(name = "search")@Documentation("Search component for zendesk query")public class SearchMapper implements Serializable {
private final SearchQuery configuration; ① private final SearchClient searchClient; ②
public SearchMapper(@Option("configuration") final SearchQueryconfiguration, final SearchClient searchClient) { this.configuration = configuration; this.searchClient = searchClient; }
@PostConstruct public void init() { searchClient.base(configuration.getDataStore().getUrl()); ③ }
@Assessor public long estimateSize() { return 1L; }
@Split public List<SearchMapper> split(@PartitionSize final long bundles) { return Collections.singletonList(this); ④ }
@Emitter public SearchSource createWorker() { return new SearchSource(configuration, searchClient); ⑤ }}
① The component configuration that is injected by the component framework
② The HTTP client created earlier in this tutorial. It is also injected by the framework viathe mapper constructor.
③ The base URL of the HTTP client is defined using the configuration URL.
④ The mapper is returned in the split method because HTTP requests are not split.
312 |

⑤ A source is created to perform the HTTP request and return the search result.
9.5.4. Defining the component source
Once the component logic implemented, you can create the source in charge ofperforming the HTTP request to the search API and converting the result to JsonObjectrecords.
public class SearchSource implements Serializable {
private final SearchQuery config; ① private final SearchClient searchClient; ② private BufferizedProducerSupport<JsonValue> bufferedReader; ③
private transient int page = 0; private transient int previousPage = -1;
public SearchSource(final SearchQuery configuration, final SearchClientsearchClient) { this.config = configuration; this.searchClient = searchClient; }
@PostConstruct public void init() { ④ bufferedReader = new BufferizedProducerSupport<>(() -> { JsonObject result = null; if (previousPage == -1) { result = search(config.getDataStore().getAuthorizationHeader(), config.getQuery(), config.getSortBy(), config.getSortBy() == null ? null : config.getSortOrder(), null); } else if (previousPage != page) { result = search(config.getDataStore().getAuthorizationHeader(), config.getQuery(), config.getSortBy(), config.getSortBy() == null ? null : config.getSortOrder(), page); } if (result == null) { return null; } previousPage = page; String nextPage = result.getString("next_page", null); if (nextPage != null) { page++; }
| 313

return result.getJsonArray("results").iterator(); }); }
@Producer public JsonObject next() { ⑤ final JsonValue next = bufferedReader.next(); return next == null ? null : next.asJsonObject(); }
⑥ private JsonObject search(String auth, String query, String sortBy, StringsortOrder, Integer page) { final Response<JsonObject> response = searchClient.search(auth,"application/json", query, sortBy, sortOrder, page); if (response.status() == 200 && response.body().getInt("count") != 0){ return response.body(); }
final String mediaType = extractMediaType(response.headers()); if (mediaType != null && mediaType.contains("application/json")) { final JsonObject error = response.error(JsonObject.class); throw new RuntimeException(error.getString("error") + "\n" +error.getString("description")); } throw new RuntimeException(response.error(String.class)); }
⑦ private String extractMediaType(final Map<String, List<String>> headers) { final String contentType = headers == null || headers.isEmpty() || !headers.containsKey(HEADER_Content_Type) ? null : headers.get(HEADER_Content_Type).iterator().next();
if (contentType == null || contentType.isEmpty()) { return null; } // content-type contains charset and/or boundary return ((contentType.contains(";")) ? contentType.split(";")[0] :contentType).toLowerCase(ROOT); }}
① The component configuration injected from the component mapper.
② The HTTP client injected from the component mapper.
314 |

③ A utility used to buffer search results and iterate on them one after another.
④ The record buffer is initialized with the init by providing the logic to iterate on thesearch result. The logic consists in getting the first result page and converting theresult into JSON records. The buffer then retrieves the next result page, if needed, andso on.
⑤ The next method returns the next record from the buffer. When there is no record left,the buffer returns null.
⑥ In this method, the HTTP client is used to perform the HTTP request to the search API.Depending on the HTTP response status code, the results are retrieved or an error isthrown.
⑦ The extractMediaType method allows to extract the media type returned by the API.
You now have created a simple Talend component that consumes a REST API.
To learn how to test this component, refer to this tutorial.
9.6. Testing a REST APITesting code that consumes REST APIs can sometimes present many constraints: API ratelimit, authentication token and password sharing, API availability, sandbox expiration,API costs, and so on.
As a developer, it becomes critical to avoid those constraints and to be able to easily mockthe API response.
The component framework provides an API simulation tool that makes it easy to writeunit tests.
This tutorial shows how to use this tool in unit tests. As a starting point, the tutorial usesthe component that consumes Zendesk Search API and that was created in a previoustutorial. The goal is to add unit tests for it.
For this tutorial, four tickets that have the open status have been addedto the Zendesk test instance used in the tests.
To learn more about the testing methodology used in this tutorial, refer to ComponentJUnit testing.
9.6.1. Creating the unit test
Create a unit test that performs a real HTTP request to the Zendesk Search API instance.You can learn how to create a simple unit test in this tutorial.
| 315

public class SearchTest {
@ClassRule public static final SimpleComponentRule component = newSimpleComponentRule("component.package");
@Test public void searchQuery() { // Initiating the component test configuration ① BasicAuth basicAuth = new BasicAuth("https://instance.zendesk.com","username", "password"); final SearchQuery searchQuery = new SearchQuery(basicAuth,"type:ticket status:open", "created_at", "desc");
// We convert our configuration instance to URI configuration ② final String uriConfig = SimpleFactory.configurationByExample() .forInstance(searchQuery) .configured().toQueryString();
// We create our job test pipeline ③ Job.components() .component("search", "zendesk://search?" + uriConfig) .component("collector", "test://collector") .connections() .from("search").to("collector") .build() .run();
final List<JsonObject> res = component.getCollectedData(JsonObject.class); assertEquals(4, res.size()); }}
① Initiating:
• the authentication configuration using Zendesk instance URL and credentials.
• the search query configuration to get all the open ticket, ordered by creation dateand sorted in descending order.
② Converting the configuration to a URI format that will be used in the job test pipeline,using the SimpleFactory class provided by the component framework. Read more aboutjob pipeline.
③ Creating the job test pipeline. The pipeline executes the search component andredirects the result to the test collector component, that collects the search result. Thepipeline is then executed. Finally, the job result is retrieved to check that the fourtickets have been received. You can also check that the tickets have the open status.
316 |

The test is now complete and working. It performs a real HTTP request to the Zendeskinstance.
9.6.2. Transforming the unit test into a mocked test
As an alternative, you can use mock results to avoid performing HTTP requests every timeon the development environment. The real HTTP requests would, for example, only beperformed on an integration environment.
To transform the unit test into a mocked test that uses a mocked response of the ZendeskSearch API:
1. Add the two following JUnit rules provided by the component framework.
◦ JUnit4HttpApi: This rule starts a simulation server that acts as a proxy and catchesall the HTTP requests performed in the tests. This simulation server has two modes:
▪ capture : This mode forwards the captured HTTP request to the real serverand captures the response.
▪ simulation : this mode returns a mocked response from the responses alreadycaptured. This rule needs to be added as a class rule.
◦ JUnit4HttpApi: This rule has a reference to the first rule. Its role is to configure thesimulation server for every unit test. It passes the context of the running test to thesimulation server. This rule needs to be added as a simple (method) rule.
Example to run in a simulation mode:
public class SearchTest {
@ClassRule public static final SimpleComponentRule component = newSimpleComponentRule("component.package");
private final MavenDecrypter mavenDecrypter = new MavenDecrypter();
@ClassRule public static final JUnit4HttpApi API = new JUnit4HttpApi() ① .activeSsl(); ②
@Rule public final JUnit4HttpApiPerMethodConfigurator configurator = newJUnit4HttpApiPerMethodConfigurator(API); ③
@Test public void searchQuery() { // the exact same code as above }
| 317

① Creating and starting a simulation server for this test class.
② Activating SSL on the simulation server by calling the activeSsl() method. This step isrequired because the consumed API uses SSL.
③ Adding the simulation server configuration provider that provides the test context tothe simulation server.
2. Make the test run in capture mode to catch the real API responses that can be usedlater in the simulated mode.To do that, set a new talend.junit.http.capture environment variable to true. Thistells the simulation server to run in a capture mode.
The captured response is saved in the resources/talend.testing.http package in a JSONformat, then reused to perform the API simulation.
9.7. Testing a componentThis tutorial focuses on writing unit tests for the input component that was created in thisprevious tutorial.
This tutorial covers:
1. How to load components in a unit test.
2. How to create a job pipeline.
3. How to run the test in standalone mode.
The test class is as follows:
318 |

public class HazelcastMapperTest {
@ClassRule public static final SimpleComponentRule COMPONENTS = newSimpleComponentRule(HazelcastMapperTest.class .getPackage().getName()); ①
private static HazelcastInstance instance; ②
@BeforeClass public static void startInstanceWithData() { ③ instance = Hazelcast.newHazelcastInstance(); final IMap<Object, Object> map = instance.getMap(HazelcastMapperTest.class.getSimpleName()); IntStream.range(0, 100).forEach(i -> map.put("test_" + i, "value #" +i)); }
@AfterClass public static void stopInstance() { ④ instance.getLifecycleService().shutdown(); }
@Test public void run() { ⑤ Job.components() ⑥ .component("source", "Hazelcast://Input?configuration.mapName=" + HazelcastMapperTest.class.getSimpleName()) .component("output", "test://collector") .connections() .from("source").to("output") .build() .run();
final List<JsonObject> outputs = COMPONENTS.getCollectedData(JsonObject.class); ⑦ assertEquals(100, outputs.size()); }}
① SimpleComponentRule is a JUnit rule that lets you load your component from a package.This rule also provides some test components like emitter and collector. Learn moreabout JUnit in this section.
② Using an embedded Hazelcast instance to test the input component.
③ Creating an embedded Hazelcast instance and filling it with some test data. A map with
| 319

the name of the test class is created and data is added to it.
④ Cleaning up the instance after the end of the tests.
⑤ Defining the unit test. It first creates a job pipeline that uses our input component.
⑥ The pipeline builder Job is used to create a job. It contains two components: the inputcomponent and the test collector component. The input component is connected to thecollector component. Then the job is built and ran locally.
⑦ After the job has finished running. The COMPONENTS rule instance is used to get thecollected data from the collector component. Once this is done, it is possible to dosome assertion on the collected data.
9.8. Testing in a Continuous IntegrationenvironmentThis tutorial shows how to adapt the test configuration of the Zendesk search componentthat was done in this previous tutorial to make it work in a Continuous Integrationenvironment.
In the test, the Zendesk credentials are used directly in the code to perform a first captureof the API response. Then, fake credentials are used in the simulation mode because thereal API is not called anymore.
However, in some cases, you can require to continue calling the real API on a CI server oron a specific environment.
To do that, you can adapt the test to get the credentials depending on the execution mode(simulation/passthrough).
9.8.1. Setting up credentials
These instructions concern the CI server or on any environment that requires realcredentials.
This tutorial uses:
• A Maven server that supports password encryption as a credential provider.Encryption is optional but recommended.
• The MavenDecrypterRule test rule provided by the framework. This rule lets you getcredentials from Maven settings using a server ID.
To create encrypted server credentials for the Zendesk instance:
1. Create a master password using the command: mvn --encrypt-master-password
<password>.
2. Store this master password in the settings-security.xml file of the ~/.m2 folder.
320 |
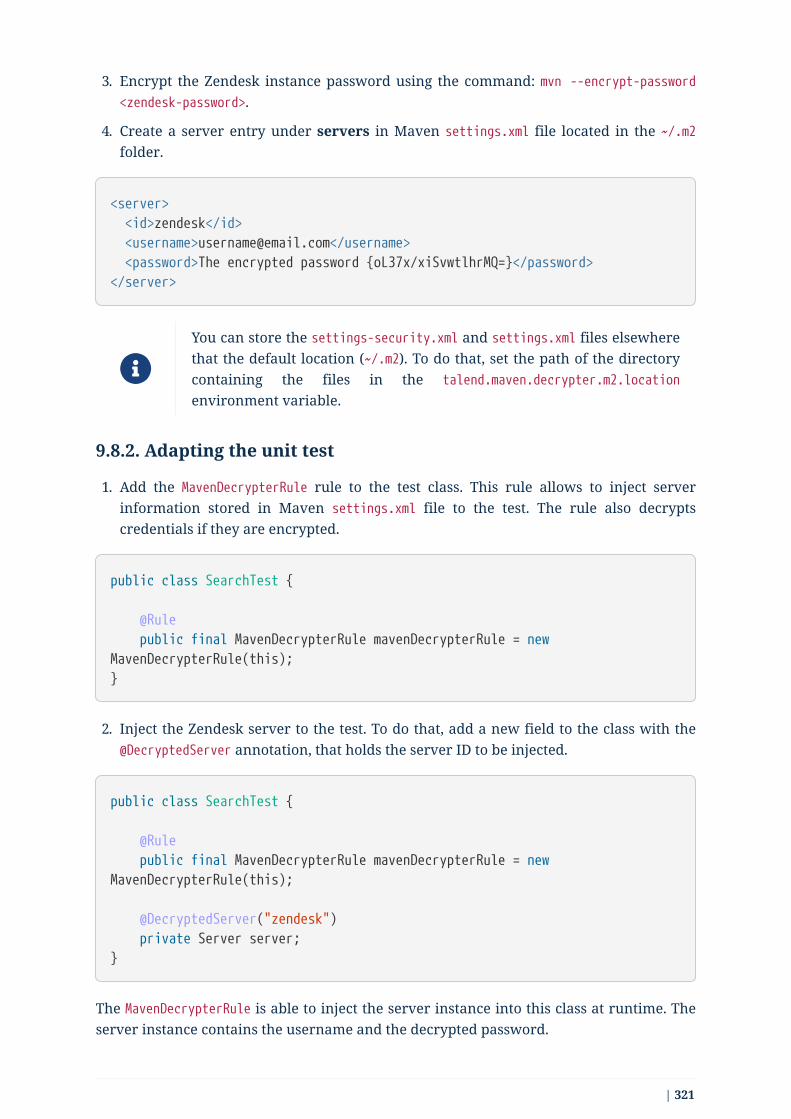
3. Encrypt the Zendesk instance password using the command: mvn --encrypt-password<zendesk-password>.
4. Create a server entry under servers in Maven settings.xml file located in the ~/.m2folder.
<server> <id>zendesk</id> <username>[email protected]</username> <password>The encrypted password {oL37x/xiSvwtlhrMQ=}</password></server>
You can store the settings-security.xml and settings.xml files elsewherethat the default location (~/.m2). To do that, set the path of the directorycontaining the files in the talend.maven.decrypter.m2.location
environment variable.
9.8.2. Adapting the unit test
1. Add the MavenDecrypterRule rule to the test class. This rule allows to inject serverinformation stored in Maven settings.xml file to the test. The rule also decryptscredentials if they are encrypted.
public class SearchTest {
@Rule public final MavenDecrypterRule mavenDecrypterRule = newMavenDecrypterRule(this);}
2. Inject the Zendesk server to the test. To do that, add a new field to the class with the@DecryptedServer annotation, that holds the server ID to be injected.
public class SearchTest {
@Rule public final MavenDecrypterRule mavenDecrypterRule = newMavenDecrypterRule(this);
@DecryptedServer("zendesk") private Server server;}
The MavenDecrypterRule is able to inject the server instance into this class at runtime. Theserver instance contains the username and the decrypted password.
| 321

3. Use the server instance in the test to get the real credentials in a secured manner.
BasicAuth basicAuth = new BasicAuth("https://instance.zendesk.com", server.getUsername(), server.getPassword());
Once modified, the complete test class looks as follows:
public class SearchTest {
@ClassRule public static final SimpleComponentRule component = newSimpleComponentRule("component.package");
private final MavenDecrypter mavenDecrypter = new MavenDecrypter();
@ClassRule public static final JUnit4HttpApi API = new JUnit4HttpApi() .activeSsl();
@Rule public final JUnit4HttpApiPerMethodConfigurator configurator = newJUnit4HttpApiPerMethodConfigurator(API);
@Rule public final MavenDecrypterRule mavenDecrypterRule = newMavenDecrypterRule(this);
@DecryptedServer("zendesk") private Server server;
@Test public void searchQuery() { // Initiating the component test configuration BasicAuth basicAuth = new BasicAuth("https://instance.zendesk.com",server.getUsername(), server.getPassword()); final SearchQuery searchQuery = new SearchQuery(basicAuth,"type:ticket status:open", "created_at", "desc");
// We convert our configuration instance to URI configuration final String uriConfig = SimpleFactory.configurationByExample() .forInstance(searchQuery) .configured().toQueryString();
// We create our job test pipeline Job.components() .component("search", "zendesk://search?" + uriConfig) .component("collector", "test://collector")
322 |

.connections() .from("search").to("collector") .build() .run();
final List<JsonObject> res = component.getCollectedData(JsonObject.class); assertEquals(4, res.size()); }}
This test will continue to work in simulation mode, because the API simulation proxy isactivated.
9.8.3. Setting up the CI server in passthrough mode
This tutorial shows how to set up a CI server in passthrough mode using Jenkins.
1. Log in to Jenkins.
2. Click New Item to create a new build job.
3. Enter an Item name (Job name) and choose the freestyle job. Then click OK.
| 323

4. In the Source Code Management section, enter your project repository URL. A GitHubrepository is used in this tutorial.
5. Specify the master branch as Branches to build.
6. In the Build section, click Add build step and choose Invoke top-level Maventargets.
324 |

7. Choose your Maven version and enter the Maven build command. In this case: cleaninstall. Then, click Save.
The -Dtalend.junit.http.passthrough=true option is part of the build command. Thisoption tells the API simulation proxy to run in passthrough mode. This way, all theHTTP requests made in the test are forwarded to the real API server.
The MavenDecrypterRule rule allows to get the real credentials.
You can configure the passthrough mode globally on your CI serverby setting the talend.junit.http.passthrough environment variable totrue.
8. Test the job by selecting Build now, and check that the job has built correctly.
| 325

Now your tests run in a simulation mode on your development environment and in apassthrough mode on your CI server.
9.9. Handling component version migrationTalend Component Kit provides a migration mechanism between two versions of acomponent to let you ensure backward compatibility.
For example, a new version of a component may have some new options that need to beremapped, set with a default value in the older versions, or disabled.
This tutorial shows how to create a migration handler for a component that needs to beupgraded from a version 1 to a version 2. The upgrade to the newer version includesadding new options to the component.
This tutorial assumes that you know the basics about component development and arefamiliar with component project generation and implementation.
9.9.1. Requirements
To follow this tutorial, you need:
• Java 8
• A Talend component development environment using Talend Component Kit. Refer tothis document.
• Have generated a project containing a simple processor component using the Talend
326 |
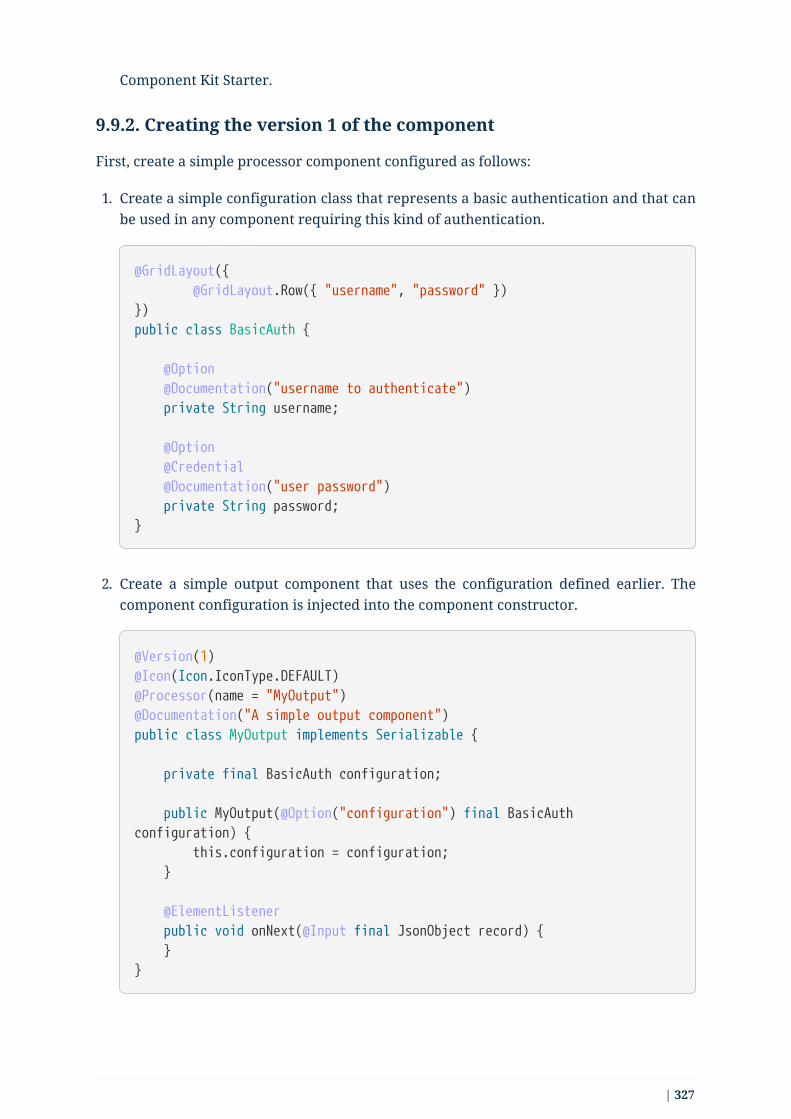
Component Kit Starter.
9.9.2. Creating the version 1 of the component
First, create a simple processor component configured as follows:
1. Create a simple configuration class that represents a basic authentication and that canbe used in any component requiring this kind of authentication.
@GridLayout({ @GridLayout.Row({ "username", "password" })})public class BasicAuth {
@Option @Documentation("username to authenticate") private String username;
@Option @Credential @Documentation("user password") private String password;}
2. Create a simple output component that uses the configuration defined earlier. Thecomponent configuration is injected into the component constructor.
@Version(1)@Icon(Icon.IconType.DEFAULT)@Processor(name = "MyOutput")@Documentation("A simple output component")public class MyOutput implements Serializable {
private final BasicAuth configuration;
public MyOutput(@Option("configuration") final BasicAuthconfiguration) { this.configuration = configuration; }
@ElementListener public void onNext(@Input final JsonObject record) { }}
| 327

The version of the configuration class corresponds to the componentversion.
By configuring these two classes, the first version of the component is ready to use asimple authentication mechanism.
Now, assuming that the component needs to support a new authentication modefollowing a new requirement, the next steps are:
• Creating a version 2 of the component that supports the new authentication mode.
• Handling migration from the first version to the new version.
9.9.3. Creating the version 2 of the component
The second version of the component needs to support a new authentication method andlet the user choose the authentication mode he wants to use using a dropdown list.
1. Add an Oauth2 authentication mode to the component in addition to the basic mode.For example:
@GridLayout({ @GridLayout.Row({ "clientId", "clientSecret" })})public class Oauth2 {
@Option @Documentation("client id to authenticate") private String clientId;
@Option @Credential @Documentation("client secret token") private String clientSecret;}
The options of the new authentication mode are now defined.
2. Wrap the configuration created above in a global configuration with the basicauthentication mode and add an enumeration to let the user choose the mode to use.For example, create an AuthenticationConfiguration class as follows:
328 |

@GridLayout({ @GridLayout.Row({ "authenticationMode" }), @GridLayout.Row({ "basic" }), @GridLayout.Row({ "oauth2" })})public class AuthenticationConfiguration {
@Option @Documentation("the authentication mode") private AuthMode authenticationMode = AuthMode.Oauth2; // we set thedefault value to the new mode
@Option @ActiveIf(target = "authenticationMode", value = {"Basic"}) @Documentation("basic authentication") private BasicAuth basic;
@Option @ActiveIf(target = "authenticationMode", value = {"Oauth2"}) @Documentation("oauth2 authentication") private Oauth2 oauth2;
/** * This enum holds the authentication mode supported by thisconfiguration */ public enum AuthMode { Basic, Oauth2; }}
Using the @ActiveIf annotation allows to activate the authenticationtype according to the selected authentication mode.
3. Edit the component to use the new configuration that supports an additionalauthentication mode. Also upgrade the component version from 1 to 2 as itsconfiguration has changed.
| 329

@Version(2) // upgrade the component version@Icon(Icon.IconType.DEFAULT)@Processor(name = "MyOutput")@Documentation("A simple output component")public class MyOutput implements Serializable {
private final AuthenticationConfiguration configuration; // use thenew configuration
public MyOutput(@Option("configuration") finalAuthenticationConfiguration configuration) { this.configuration = configuration; }
@ElementListener public void onNext(@Input final JsonObject record) { }}
The component now supports two authentication modes in its version 2. Once the newversion is ready, you can implement the migration handler that will take care of adaptingthe old configuration to the new one.
9.9.4. Handling the migration from the version 1 to the version 2
What can happen if an old configuration is passed to the new component version?
It simply fails, as the version 2 does not recognize the old version anymore. For thatreason, a migration handler that adapts the old configuration to the new one is required.It can be achieved by defining a migration handler class in the @Version annotation of thecomponent class.
An old configuration may already be persisted by an application thatintegrates the version 1 of the component (Studio or web application).
Declaring the migration handler
1. Add a migration handler class to the component version.
@Version(value = 2, migrationHandler = MyOutputMigrationHandler.class)
2. Create the migration handler class MyOutputMigrationHandler.
330 |

public class MyOutputMigrationHandler implements MigrationHandler{ ①
@Override public Map<String, String> migrate(final int incomingVersion, finalMap<String, String> incomingData) { ② // Here we will implement our migration logic to adapt theversion 1 of the component to the version 2 return incomingData; }}
① The migration handler class needs to implement the MigrationHandler interface.
② The MigrationHandler interface specifies the migrate method. This methodreferences:
◦ the incoming version, which is the version of the configuration that we aremigrating from
◦ a map (key, value) of the configuration, where the key is the configuration pathand the value is the value of the configuration.
Implementing the migration handler
You need to be familiar with the component configuration pathconstruction to better understand this part. Refer to Defining componentlayout and configuration.
As a reminder, the following changes were made since the version 1 of the component:
• The configuration BasicAuth from the version 1 is not the root configuration anymore,as it is under AuthenticationConfiguration.
• AuthenticationConfiguration is the new root configuration.
• The component supports a new authentication mode (Oauth2) which is the defaultmode in the version 2 of the component.
To migrate the old component version to the new version and to keep backwardcompatibility, you need to:
• Remap the old configuration to the new one.
• Give the adequate default values to some options.
In the case of this scenario, it means making all configurations based on the version 1 ofthe component have the authenticationMode set to basic by default and remapping the oldbasic authentication configuration to the new one.
| 331

public class MyOutputMigrationHandler implements MigrationHandler{
@Override public Map<String, String> migrate(final int incomingVersion, finalMap<String, String> incomingData) { if(incomingVersion == 1){ ① // remapping the old configuration ② String userName = incomingData.get("configuration.username"); String password = incomingData.get("configuration.password"); incomingData.put("configuration.basic.username", userName); incomingData.put("configuration.basic.password", password);
// setting default value for authenticationMode to Basic ③ incomingData.put("configuration.authenticationMode", "Basic"); }
return incomingData; ④ }}
① Safety check of the incoming data version to make sure to only apply the migrationlogic to the version 1.
② Mapping the old configuration to the new version structure. As the BasicAuth is nowunder the root configuration class, its path changes and becomesconfiguration.basic.*.
③ Setting a new default value to the authenticationMode as it needs to be set to Basic forconfiguration coming from version 1.
④ Returning the new configuration data.
if a configuration has been renamed between 2 component versions, youcan get the old configuration option from the configuration map by usingits old path and set its value using its new path.
You can now upgrade your component without losing backward compatibility.
332 |