Automation & Material Handling - LabVolt
51
Student Guide/Portfolio 37177-00 Edition 2 Level one Automation & Material Handling Ê>E1fèRÆ9ÄË 3037177000509
-
Upload
khangminh22 -
Category
Documents
-
view
3 -
download
0
Transcript of Automation & Material Handling - LabVolt
Student Guide/Portfolio
37177-00 Edition 2
Level one
Automation & Material Handling
Ê>E1fèRÆ9ÄË 3037177000509


SECOND EDITION
First Printing, September 2005
Copyright 2004 Lab-Volt Systems, Inc.
All rights reserved. No part of this publication may be reproduced, stored in a retrieval system, or transmitted in any form by any means, electronic, mechanical, photocopied, recorded, or otherwise, without prior written permission from Lab-Volt Systems, Inc. Information in this document is subject to change without notice and does not represent a commitment on the part of Lab-Volt Systems, Inc. The multimedia Tech-World software and other materials described in this document are furnished under a license agreement or a nondisclosure agreement. The software may be used or copied only in accordance with the terms of the agreement.
ISBN 0-86657-751-3 Lab-Volt® and Tech-World® are registered trademarks of Lab-Volt Systems, Inc. Windows™ and Works™ are trademarks of Microsoft Corp. Lab-Volt recognizes product names as trademarks or registered trademarks of their respective holders.

Lab-Volt License Agreement By using the software in this package, you are agreeing to become bound by the terms of this License Agreement, Limited Warranty, and Disclaimer. This License Agreement constitutes the complete agreement between you and Lab-Volt. If you do not agree to the terms of this agreement, do not use the software. Promptly return the Tech-World Manufacturing Resources on multimedia (CD-ROM) compact discs and all other materials that are part of Lab-Volt's multimedia Tech-World Manufacturing product within ten days to Lab-Volt for a full refund or credit. 1. License Grant. In consideration of payment of the license fee, which is part of the price you paid for this Lab-Volt product, Lab-Volt, as Licensor, grants to you, the Licensee, a nonexclusive, nontransferable license to use this copy of the CD-ROM software with the corresponding Tech-World Manufacturing CELLs. Lab-Volt reserves all rights not expressly granted to the Licensee. 2. Ownership. As the Licensee, you own the physical media on which the CD-ROM is originally or subsequently recorded or fixed, but Lab-Volt retains title to and ownership of the software programs recorded on the original compact disc and any subsequent copies of the CD-ROM, regardless of the form or media in or on which the original and other copies may exist. This license is not a sale of the original software program of Lab-Volt's CD-ROM or any portion or copy of it. 3. Copy Restrictions. The CD-ROM software and the accompanying materials are copyrighted and contain proprietary information and trade secrets of Lab-Volt. Unauthorized copying of the CD-ROM even if modified, merged, or included with other software or with written materials is expressly forbidden. You may be held legally responsible for any infringement of Lab-Volt's intellectual property rights that is caused or encouraged by your failure to abide by the terms of this agreement. You may make copies of the CD-ROM solely for backup purposes provided the copyright notice is reproduced in its entirety on the backup copy. 4. Permitted Uses. This CD-ROM, Student Guide/Portfolio, and all accompanying documentation is licensed to you, the Licensee, and may not be transferred to any third party for any length of time without the prior written consent of Lab-Volt. You may not modify, adapt, translate, reverse engineer, decompile, disassemble, or create derivative works based on the Lab-Volt product without the prior written permission of Lab-Volt. Written materials provided to you may not be modified, adapted, translated, or used to create derivative works without the prior written consent of Lab-Volt. 5. Termination. This agreement is effective until terminated. It will terminate automatically without notice from Lab-Volt if you fail to comply with any provisions contained herein. Upon termination you shall destroy the written materials, Lab-Volt's CD-ROM software, and all copies of them, in part or in whole, including modified copies, if any.
6. Registration. Lab-Volt may from time to time update the CD-ROM. Updates can be made available to you only if a properly signed registration card is filed with Lab-Volt or an authorized registration card recipient. 7. Miscellaneous. This agreement is governed by the laws of the State of New Jersey. Limited Warranty and Disclaimer This CD-ROM software has been designed to assure correct operation when used in the manner and within the limits described in this Student Guide/Portfolio. As a highly advanced software product, it is quite complex; thus, it is possible that if it is used in hardware configurations with characteristics other than those specified in this Student Guide/Portfolio or in environments with non-specified, unusual, or extensive other software products, problems may be encountered by a user. In such cases, Lab-Volt will make reasonable efforts to assist the user to properly operate the CD-ROM but without guaranteeing its proper performance in any hardware or software environment other than as described in this Student Guide/Portfolio. This CD-ROM software is warranted to conform to the descriptions of its functions and performance as outlined in this Student Guide/Portfolio. Upon proper notification and within a period of one year from the date of installation and/or customer acceptance, Lab-Volt, at its sole and exclusive option, will remedy any nonconformity or replace any defective compact disc free of charge. Any substantial revisions of this product, made for purposes of correcting software deficiencies within the warranty period, will be made available, also on a licensed basis, to registered owners free of charge. Warranty support for this product is limited, in all cases, to software errors. Errors caused by hardware malfunctions or the use of non-specified hardware or other software are not covered. LICENSOR MAKES NO OTHER WARRANTIES OF ANY KIND CONCERNING THIS PRODUCT, INCLUDING WARRANTIES OR MERCHANTABILITY OR OF FITNESS FOR A PARTICULAR PURPOSE. LICENSOR DISCLAIMS ALL OBLIGATIONS AND LIABILITIES ON THE PART OF LICENSOR FOR DAMAGES, INCLUDING BUT NOT LIMITED TO SPECIAL OR CONSEQUENTIAL DAMAGES ARISING OUT OF OR IN CONNECTION WITH THE USE OF THE SOFTWARE PRODUCT LICENSED UNDER THIS AGREEMENT. Questions concerning this agreement and warranty and all requests for product repairs should be directed to Lab-Volt field representative in your area. LAB-VOLT SYSTEMS, INC. P.O. Box 686 Farmingdale, NJ 07727 Attention: Program Development Phone: (732) 938-2000 or (800) LAB-VOLT Fax: (732) 774-8573 Technical Support: (800) 522-4436 Technical Support E-Mail: [email protected]

Table of Contents
i
Introduction ................................................................................................................ 1
Topic 1 – Introduction to Automation and Material Handling........................ 3 Activity 1 – Products: From Start to Finish............................................................. 3 Activity 2 – Career Discovery ................................................................................... 3
Topic 2 – Computers in Manufacturing................................................................. 5 Activity 1 – Computers Make Products? .................................................................. 5 Activity 2 – A Robotics System ................................................................................. 6
Data Sheet: 5200 Series Robot Installation Guide .............................................. 6 Activity 3 – Getting to Know the Robot.................................................................. 20
Data Sheet: Teach Menu Quick Reference......................................................... 20 Rubric .................................................................................................................. 21
Topic 3 – Programming and Automation............................................................ 23 Activity 1 – Robots Always Obey ............................................................................ 23 Activity 2 – Reprogramming ................................................................................... 23 Activity 3 – Go to the Computer ............................................................................. 23 Activity 4 – True Automation ................................................................................. 23
Rubric .................................................................................................................. 24
Topic 4 – Islands of Automation............................................................................ 25 Activity 1 – Automation Islands ............................................................................. 25 Activity 2 – Island Sizing ........................................................................................ 26
Data Sheet: Figuring the Robot’s Work Envelope ............................................. 26 Activity 3 – Other Robot Types............................................................................... 27 Activity 4 – Material Handling............................................................................... 27
Topic 5 – Island Control.......................................................................................... 29 Activity 1 – Overview of Controls ........................................................................... 29 Activity 2 – Control Devices and Methods ............................................................. 29 Activity 3 – Flexible Manufacturing Cells ............................................................. 29
Topic 6 – Interconnecting Automation Islands ................................................. 31 Activity 1 – Conveyor Systems ............................................................................... 31 Activity 2 – Functions of Automated Guided Vehicles .......................................... 31
Table of Contents
ii
Topic 7 – Controlling the Manufacturing Plant ................................................ 33 Activity 1 – Information Gathering for the PLC.................................................... 33
Data Sheet: Sensing Materials, Part A .............................................................. 33 Activity 1 – Information Gathering for the PLC.................................................... 34
Data Sheet: Sensing Distance, Part B................................................................ 34 Activity 2 – Discover PLCs...................................................................................... 35
Rubric .................................................................................................................. 36
Topic 8 – PLC in Command.................................................................................... 37 Activity 1 – PLC Logic............................................................................................. 37 Activity 2 – PLC Programming............................................................................... 38
Data Sheet: Ladsim Worksheet #1..................................................................... 38 Activity 2 – PLC Programming............................................................................... 39
Data Sheet: Ladsim Worksheet #2..................................................................... 39 Activity 2 – PLC Programming............................................................................... 40
Data Sheet: Ladsim Worksheet #3..................................................................... 40 Activity 2 – PLC Programming............................................................................... 41
Data Sheet: Ladsim Worksheet #4..................................................................... 41 Activity 2 – PLC Programming............................................................................... 42
Data Sheet: Ladsim Worksheet #5..................................................................... 42 Activity 2 – PLC Programming............................................................................... 43
Data Sheet: Ladsim Worksheet #6..................................................................... 43 Activity 3 – PLC Applications................................................................................. 44

Automation and Material Handling Introduction
1
INTRODUCTION
This Student Guide/Portfolio serves as a record of your progress through the multimedia presentation and CELL Guide activities. It includes data sheets and assessment forms. It is structured in the same way as the CELL Guide and the multimedia presentation. Each CELL is divided into topics and each topic consists of a series of activities. Either the multimedia presentation or the CELL Guide will direct you to the Student Guide/Portfolio. You will use the forms available to record your observations, track data, or summarize your experience. Your instructor completes the assessment forms where your performance is observed. Both the data sheets and the assessment forms are labeled according to the topics and activities to which they relate and appear in the corresponding places in your Student Guide/Portfolio. Ask your instructor about adding any additional materials to this guide that you complete during the topics. By keeping a record of your forms and collecting your own work, you create a portfolio that documents your progress through the topics and reviews what you have learned in applying the various technologies.

Automation and Material Handling Introduction
2
Automation and Material Handling Topic 1 - Introduction to Automation and Material Handling
3
TOPIC 1 – INTRODUCTION TO AUTOMATION AND MATERIAL HANDLING
Activity 1 – Products: From Start to Finish There are no data sheets required for this activity.
Activity 2 – Career Discovery There are no data sheets required for this activity.

Automation and Material Handling Topic 1 - Introduction to Automation and Material Handling
4

Automation and Material Handling Topic 2 – Computers in Manufacturing
5
TOPIC 2 – COMPUTERS IN MANUFACTURING
Activity 1 – Computers Make Products? There are no data sheets required for this activity.
Automation and Material Handling Topic 2 – Computers in Manufacturing
6
Activity 2 – A Robotics System Data Sheet: 5200 Series Robot Installation Guide Name Date Introduction Your installation booklet for the 5200 Series robotics system begins on the next page. You will be guided every step of the way. Since it is very likely that the cables and hoses have already been installed by your instructor or a classmate, you will verify that they are correct.
You will draw in connecting lines and label the parts on the drawings provided in your Student Guide/Portfolio. The graphics on your screen will guide you. Then you must check the equipment using your own drawings to verify that the connections have been correctly made. Remember that if you find an incorrect connection, tell your instructor before you do anything else. Finally, you will write the instructions for installing the cables and hoses.
Writing this installation booklet is a practical lesson in technical writing. It is a useful exercise because people in technical fields very often find themselves assigned chores requiring technical writing. You will first see a sample page and will be provided guidance along the way.

Automation and Material Handling Topic 2 – Computers in Manufacturing
7
The Controller and the Emergency Stop Box
(This is a sample page.)
Controller Power Cable Connection
Installation Procedures
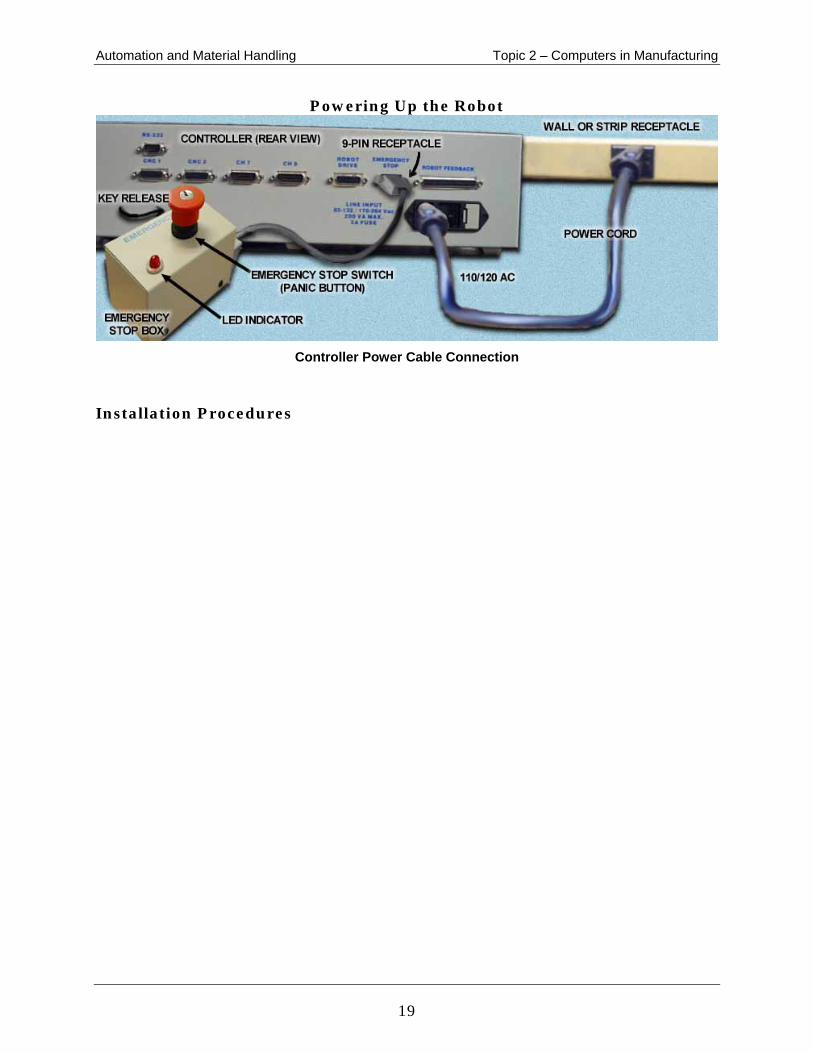
CAUTION: Never insert or remove any cable connections while the power cable is plugged in.
1. Make sure the power cable from the controller as shown in the graphic above is
NOT plugged in a wall or strip receptacle.
CAUTION: Make sure the panic button (emergency stop switch) is up (released). If it is down when the controller power cord is plugged in, you will get an error message. If it happens, turn the key in the box clockwise to release the button. You’ll have to press the Clear Error button on the pendant to get started.
2. Plug the cord from the emergency stop box into the controller as shown in the
graphic above.
Automation and Material Handling Topic 2 – Computers in Manufacturing
8
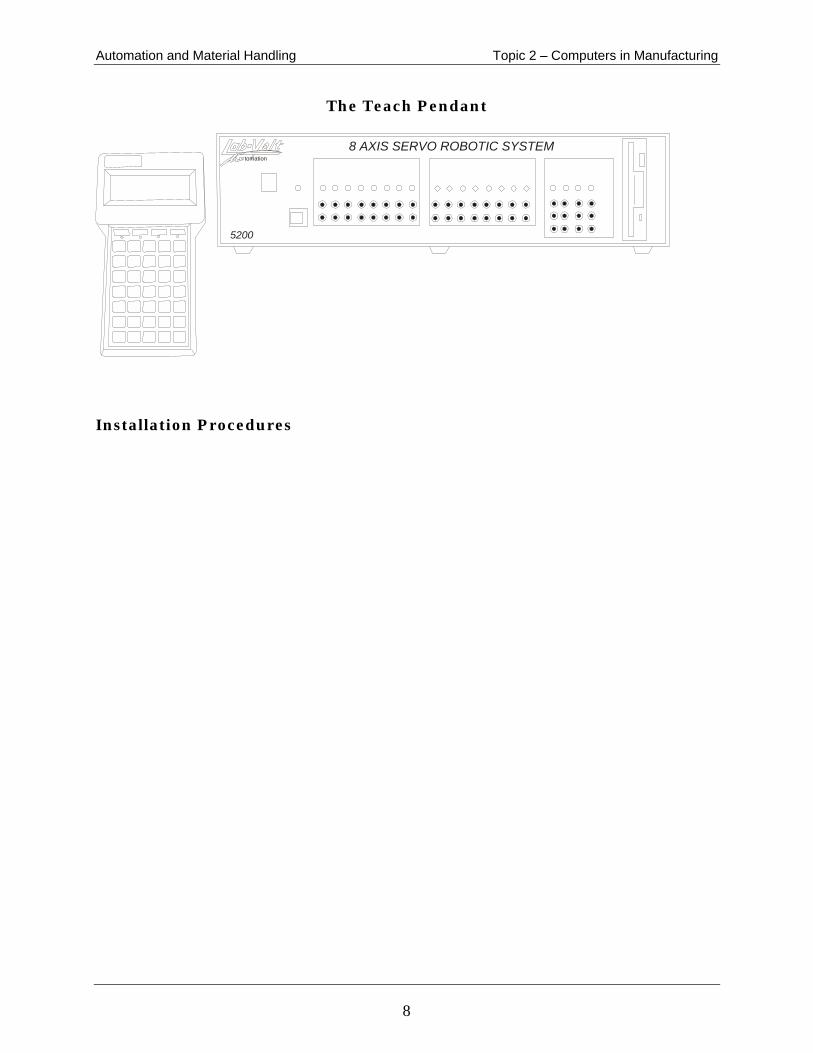
The Teach Pendant
Installation Procedures
tomation
8 AXIS SERVO ROBOTIC SYSTEM
5200

Automation and Material Handling Topic 2 – Computers in Manufacturing
9
The Linear Slide and the Controller
Installation Procedures
CNC1 CNC2 Ch2ROBOTDRIVE
EMERGENCYSTOP ROBOT FEEDBACK
LINE INPUT85-132 / 170-254 VAC
200 VA MAX.2A FUSE
Ch1
R1-232

Automation and Material Handling Topic 2 – Computers in Manufacturing
10
The Carousel and the Controller
Installation Procedures
CNC1 CNC2 Ch1 Ch2ROBOTDRIVE
EMERGENCYSTOP ROBOT FEEDBACK
LINE INPUT85-132 / 170-254 VAC
200 VA MAX.2A FUSE
R2-232
Automation and Material Handling Topic 2 – Computers in Manufacturing
11
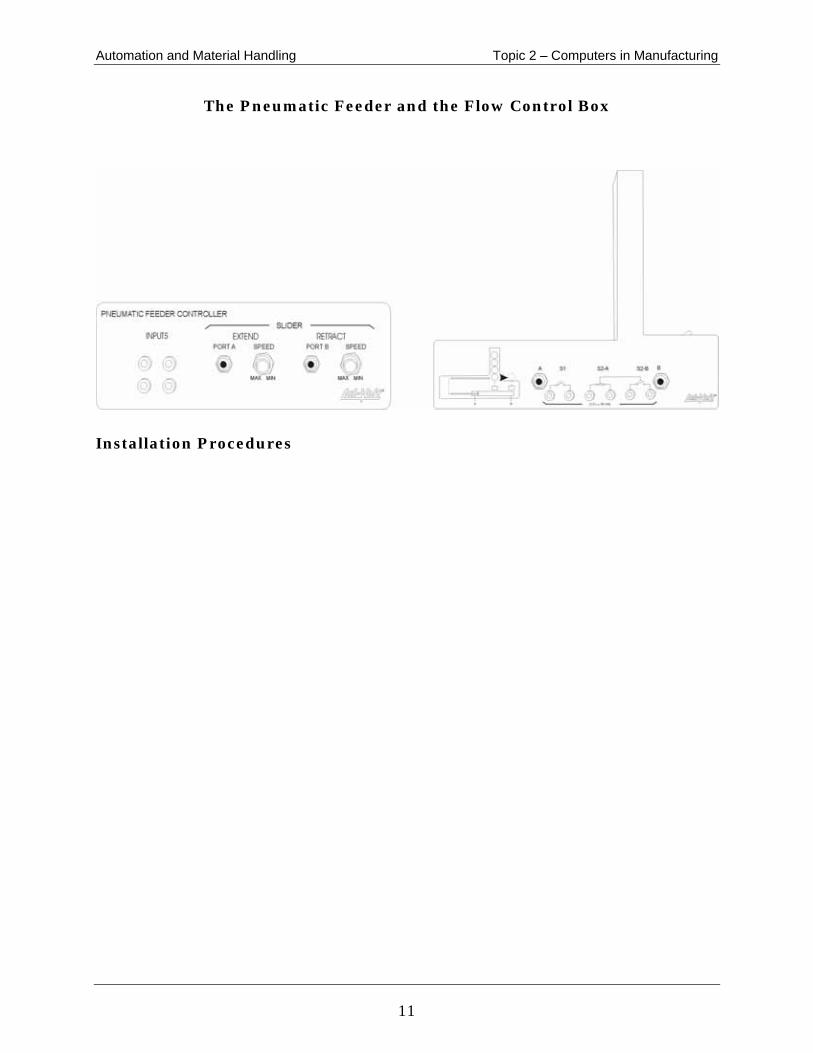
The Pneumatic Feeder and the Flow Control Box
Installation Procedures

Automation and Material Handling Topic 2 – Computers in Manufacturing
12
Additional Installation Procedures
Automation and Material Handling Topic 2 – Computers in Manufacturing
13
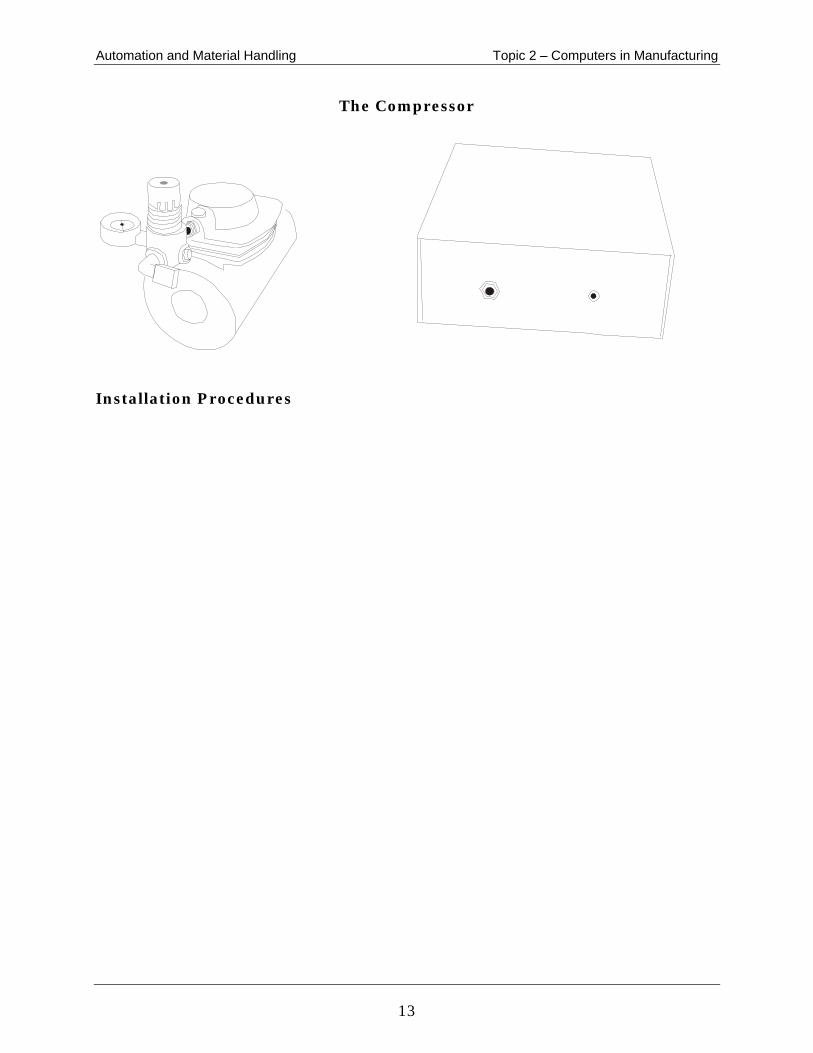
The Compressor
Installation Procedures
Automation and Material Handling Topic 2 – Computers in Manufacturing
14
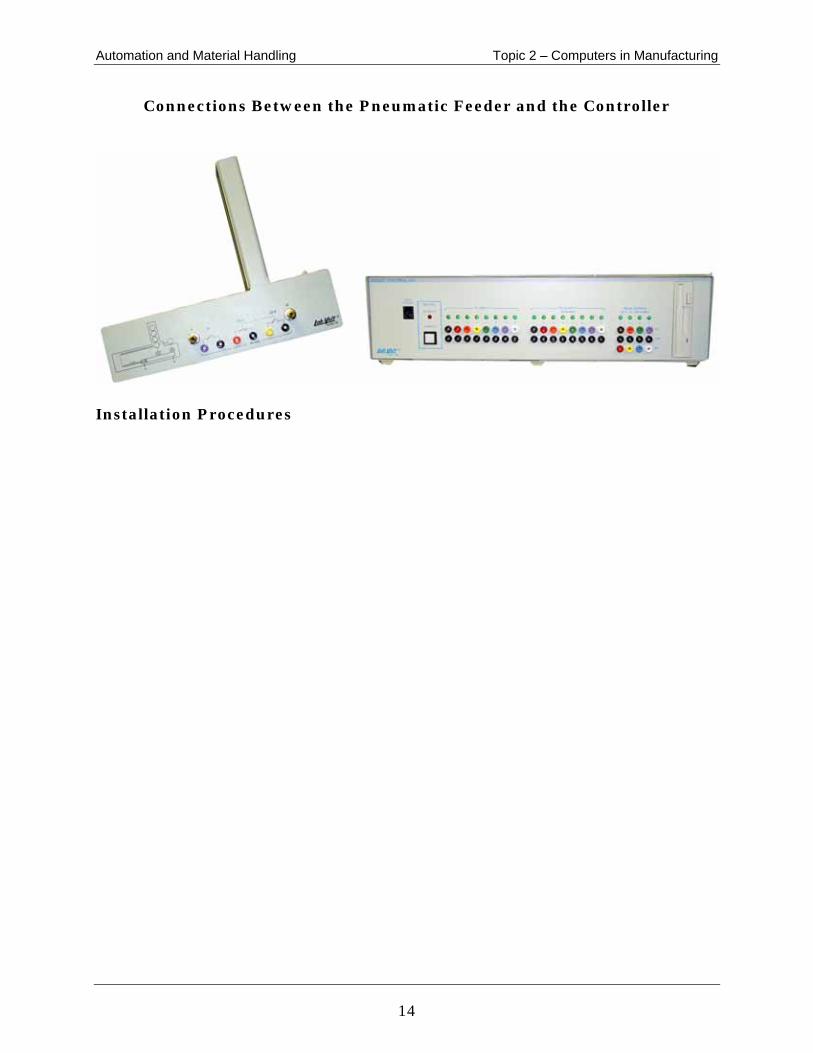
Connections Between the Pneumatic Feeder and the Controller
Installation Procedures

Automation and Material Handling Topic 2 – Computers in Manufacturing
15
The Conveyor and the Controller Installation Procedures
Automation and Material Handling Topic 2 – Computers in Manufacturing
16
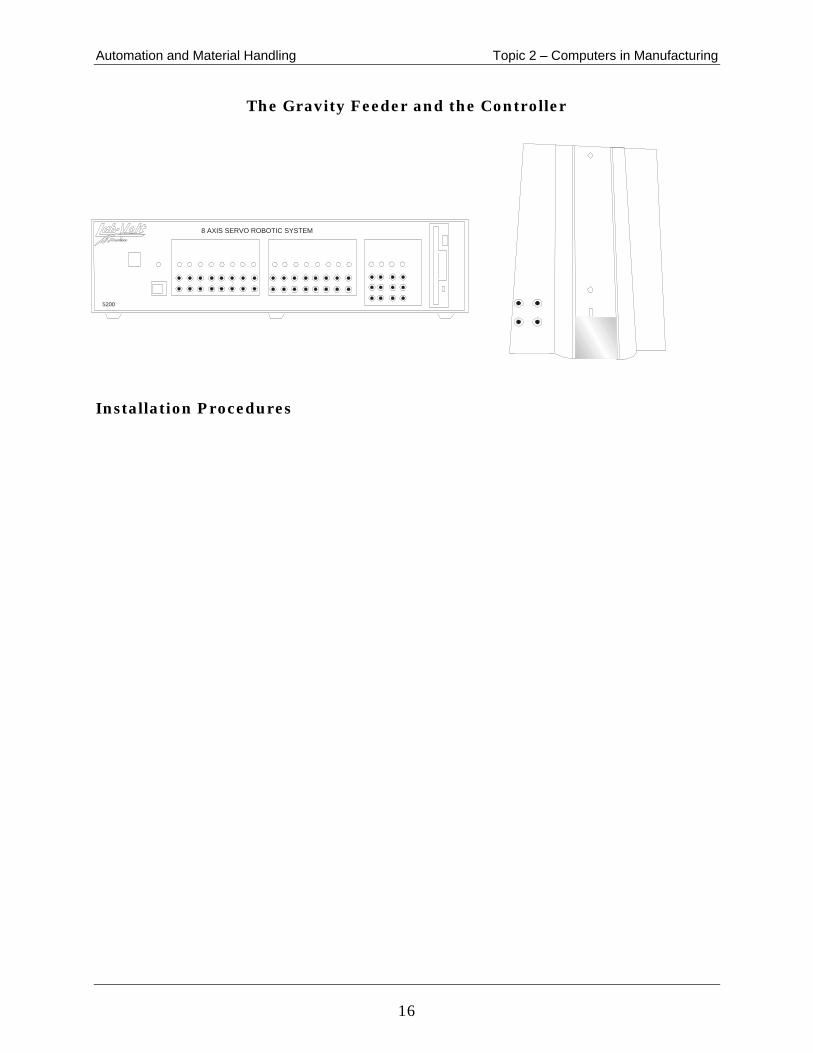
The Gravity Feeder and the Controller
Installation Procedures
tomation
8 AXIS SERVO ROBOTIC SYSTEM
5200

Automation and Material Handling Topic 2 – Computers in Manufacturing
17
Your Computer
Installation Procedures

Automation and Material Handling Topic 2 – Computers in Manufacturing
18
5200 Series Robot
Installation Procedures
Automation and Material Handling Topic 2 – Computers in Manufacturing
19
Powering Up the Robot
Controller Power Cable Connection
Installation Procedures

Automation and Material Handling Topic 2 – Computers in Manufacturing
20
Activity 3 – Getting to Know the Robot Data Sheet: Teach Menu Quick Reference This can be used as a quick reference for the Teach Menu found on the teach pendant. It is a summary of the more often used keys to operate the robot.
You can use the arrow key to select the action and press Enter or just press the specific key.
Teach Menu Shortcuts
Key Action Key Action
1 Open Gripper H Close Gripper
2 Rotate Wrist CW I Rotate Wrist CCW
J Raise Gripper (at wrist) 3 Lower Gripper (at wrist)
R Raise Forearm 4 Lower Forearm
5 Lower Upper Arm S Raise Upper Arm
T Rotate Base CW 6 Rotate Base CCW
7 Move Forward (CH 1)1 Z Move Backward (CH 1)2
8 Move Forward (CH 2)3 / Move Backward (CH 2)4
* Save Control
. Save Absolute Point
1 This refers to the device connected to channel 7 of the controller. 2 This refers to the device connected to channel 7 of the controller. 3 This refers to the device connected to channel 8 of the controller. 4 This refers to the device connected to channel 8 of the controller.

Automation and Material Handling Topic 2 – Computers in Manufacturing
21
Rubric A rubric represents an opportunity for you to show your instructor what you have learned in this topic. Notify your instructor when you have completed this topic. He or she will use this rubric checklist to review your work. You will connect or verify the connection of the cables from the controller to the robot, the linear slide, the carousel, the conveyor, the gravity feeder, the pneumatic feeder, and to a computer. This authentic assessment activity will receive a grade. It will also help your instructor determine whether you need additional practice before continuing with this CELL.
Note to instructor: Refer to the Instructor Guide for detailed scenario information.
Assessment Rubric
1 100 50 0 2 100 50 0 3 100 50 0 4 100 50 0 5 100 50 0 6 100 50 0

Automation and Material Handling Topic 2 – Computers in Manufacturing
22

Automation and Material Handling Topic 3 – Programming and Automation
23
TOPIC 3 – PROGRAMMING AND AUTOMATION
Activity 1 – Robots Always Obey There are no data sheets required for this activity. Activity 2 – Reprogramming There are no data sheets required for this activity. Activity 3 – Go to the Computer There are no data sheets required for this activity. Activity 4 – True Automation There are no data sheets required for this activity.

Automation and Material Handling Topic 3 – Programming and Automation
24
Rubric A rubric represents an opportunity for you to show your instructor what you have learned in this topic. Notify your instructor when you have completed this topic. He or she will use this rubric checklist to review your work. You will create a simple pick-and-place program. First you’ll perform a hard home. Then you’ll change speeds in making the program and save it to disk. This authentic assessment activity will receive a grade. It will also help your instructor determine whether you need additional practice before continuing with this CELL.
Note to instructor: Refer to the Instructor Guide for detailed scenario information.
Assessment Rubric
1 100 50 0 2 100 50 0 3 100 50 0 4 100 50 0

Automation and Material Handling Topic 4 - Islands of Automation
25
TOPIC 4 – ISLANDS OF AUTOMATION
Activity 1 – Automation Islands There are no data sheets required for this activity.

Automation and Material Handling Topic 4 – Islands of Automation
26
Activity 2 – Island Sizing Data Sheet: Figuring the Robot’s Work Envelope Name Date Area = πR2
π = 3.14 R (length of robot’s arm) = 28.5 inches R2 = _______ Area = ________ Work Envelope: Area X 320/360 (8/9) = _________

Automation and Material Handling Topic 4 – Islands of Automation
27
Activity 3 – Other Robot Types There are no data sheets required for this activity. Activity 4 – Material Handling There are no data sheets required for this activity.

Automation and Material Handling Topic 4 – Islands of Automation
28
Automation and Material Handling Topic 5 – Island Control
29
TOPIC 5 – ISLAND CONTROL
Activity 1 – Overview of Controls There are no data sheets required for this activity.
Activity 2 – Control Devices and Methods There are no data sheets required for this activity.
Activity 3 – Flexible Manufacturing Cells There are no data sheets required for this activity.

Automation and Material Handling Topic 4 – Islands of Automation
30
Automation and Material Handling Topic 6 – Interconnecting Automation Islands
31
TOPIC 6 – INTERCONNECTING AUTOMATION ISLANDS
Activity 1 – Conveyor Systems There are no data sheets required for this activity. Activity 2 – Functions of Automated Guided Vehicles There are no data sheets required for this activity.

Automation and Material Handling Topic 4 – Islands of Automation
32

Automation and Material Handling Topic 7 – Controlling the Manufacturing Plant
33
TOPIC 7 – CONTROLLING THE MANUFACTURING PLANT
Activity 1 – Information Gathering for the PLC Data Sheet: Sensing Materials, Part A Name Date
Table 1 – Sensing Material
Material Sensor 6374-A0
Sensor 6375-A0
Sensor 6376-A0
Sensor 6377-A0
Steel
Colored Plastic
Transparent Plastic
Retroreflector
No
No
NOTE: Enter Yes or No to record whether or not a sensor detects the materials listed in the table above.
Automation and Material Handling Topic 7 – Controlling the Manufacturing Plant
34
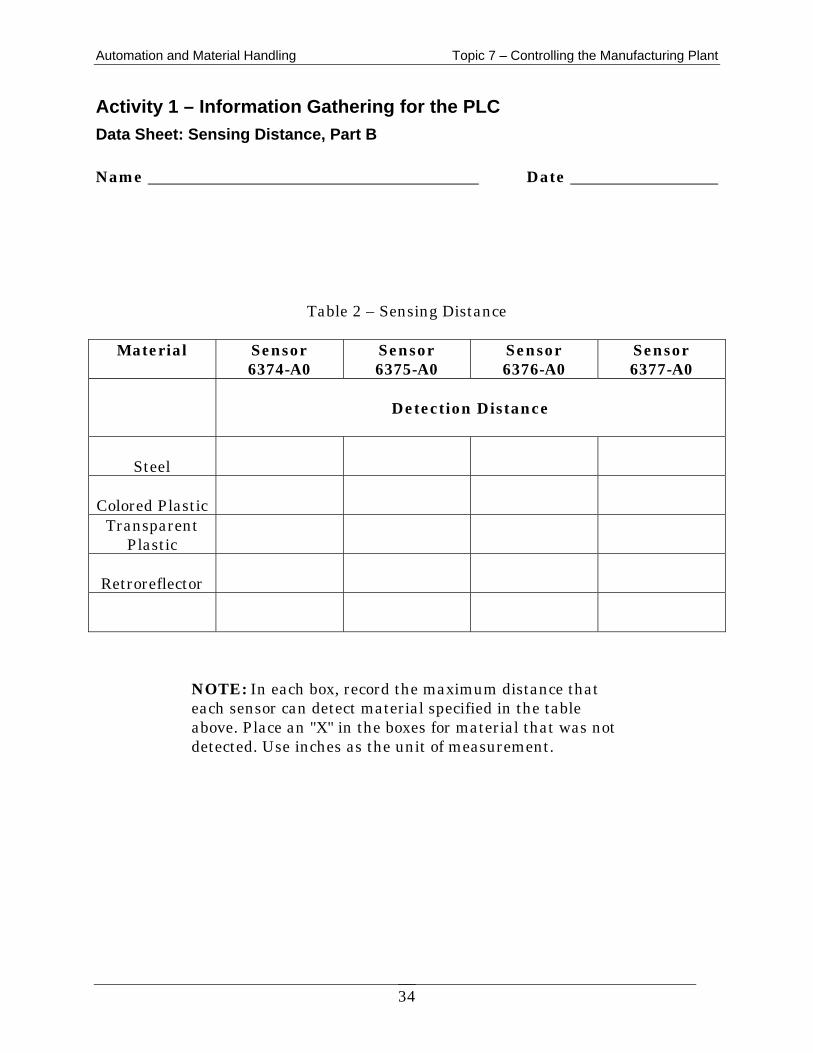
Activity 1 – Information Gathering for the PLC Data Sheet: Sensing Distance, Part B Name Date
Table 2 – Sensing Distance
Material Sensor 6374-A0
Sensor 6375-A0
Sensor 6376-A0
Sensor 6377-A0
Detection Distance
Steel
Colored Plastic
Transparent Plastic
Retroreflector
NOTE: In each box, record the maximum distance that each sensor can detect material specified in the table above. Place an "X" in the boxes for material that was not detected. Use inches as the unit of measurement.

Automation and Material Handling Topic 7 – Controlling the Manufacturing Plant
35
Activity 2 – Discover PLCs There are no data sheets required for this activity.
Automation and Material Handling Topic 7 – Controlling the Manufacturing Plant
36
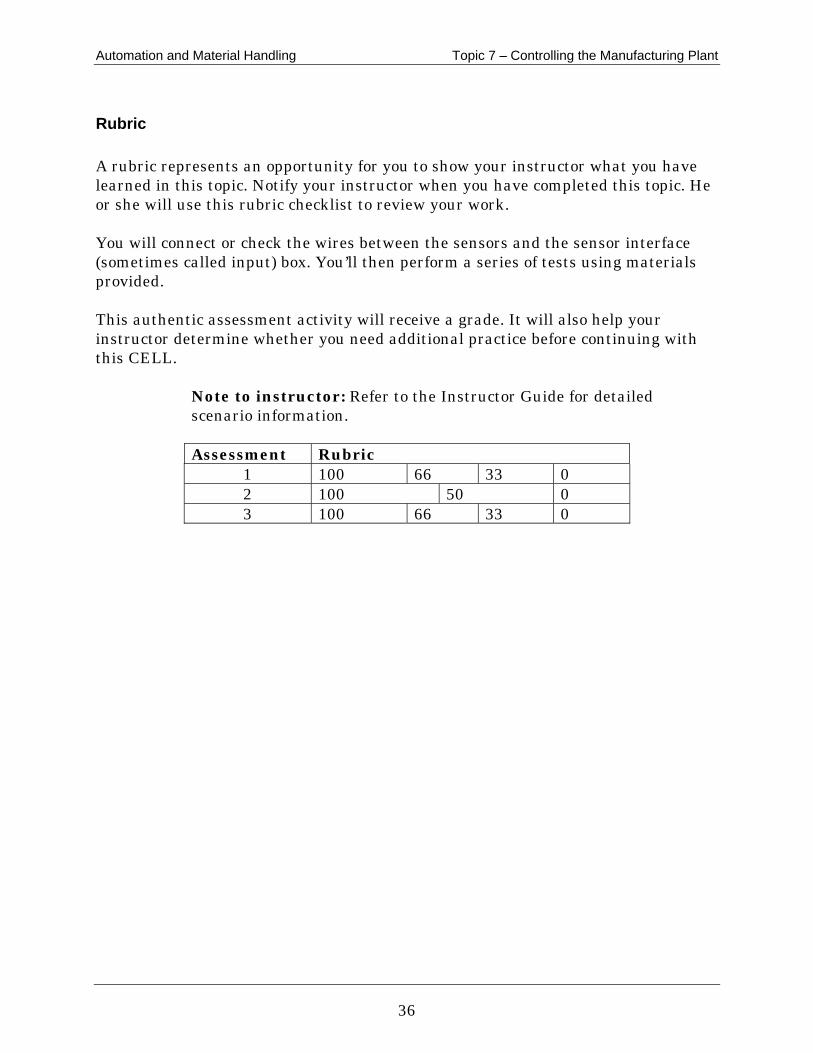
Rubric A rubric represents an opportunity for you to show your instructor what you have learned in this topic. Notify your instructor when you have completed this topic. He or she will use this rubric checklist to review your work. You will connect or check the wires between the sensors and the sensor interface (sometimes called input) box. You’ll then perform a series of tests using materials provided. This authentic assessment activity will receive a grade. It will also help your instructor determine whether you need additional practice before continuing with this CELL.
Note to instructor: Refer to the Instructor Guide for detailed scenario information.
Assessment Rubric
1 100 66 33 0 2 100 50 0 3 100 66 33 0

Automation and Material Handling Topic 8 – PLC in Command
37
TOPIC 8 – PLC IN COMMAND
Activity 1 – PLC Logic There are no data sheets required for this activity.
Automation and Material Handling Topic 8 – PLC in Command
38
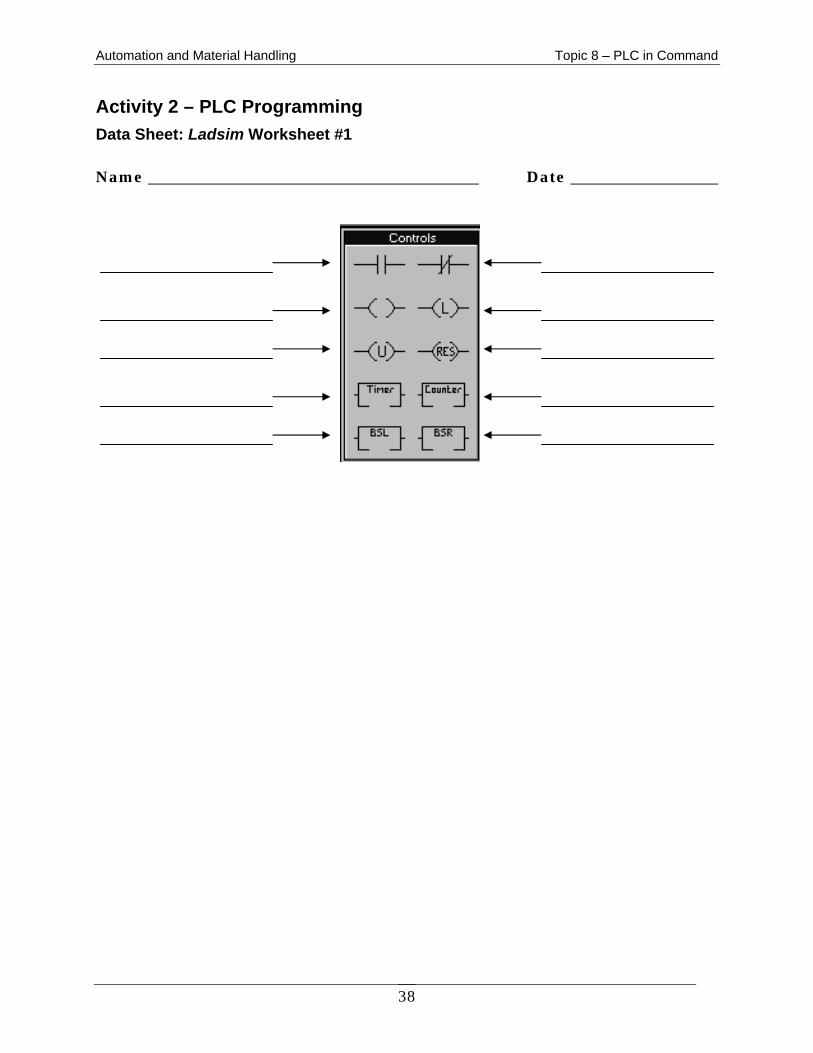
Activity 2 – PLC Programming Data Sheet: Ladsim Worksheet #1 Name Date

Automation and Material Handling Topic 8 – PLC in Command
39
Activity 2 – PLC Programming Data Sheet: Ladsim Worksheet #2 Name Date
File Edit Simulate Control Help

Automation and Material Handling Topic 8 – PLC in Command
40
Activity 2 – PLC Programming Data Sheet: Ladsim Worksheet #3 Name Date 1. There are 12 symbols for input devices, labeled IP0 to IP11, in the DEBUGGING
SIMULATOR window under INPUTS. In the space provided below draw what is shown in the box under each input device number.
2. Click on one of the input device symbols and draw, in the space provided, what is
shown. 3. Since these symbols look similar to the symbol used in the reference for an
electrical switch, which one represents a switch that is OFF? _____ _____ 4. Which one represents a switch that is ON? __________ 5. Is the contact highlighted? __________ 6. Is the output highlighted? __________ 7. Is the input device ON or OFF? __________ 8. Look at the OUTPUTS window in the DEBUGGING SIMULATOR window. Is
OP4, the output device, ON (red) or OFF (black)? ___________
A
B
Automation and Material Handling Topic 8 – PLC in Command
41
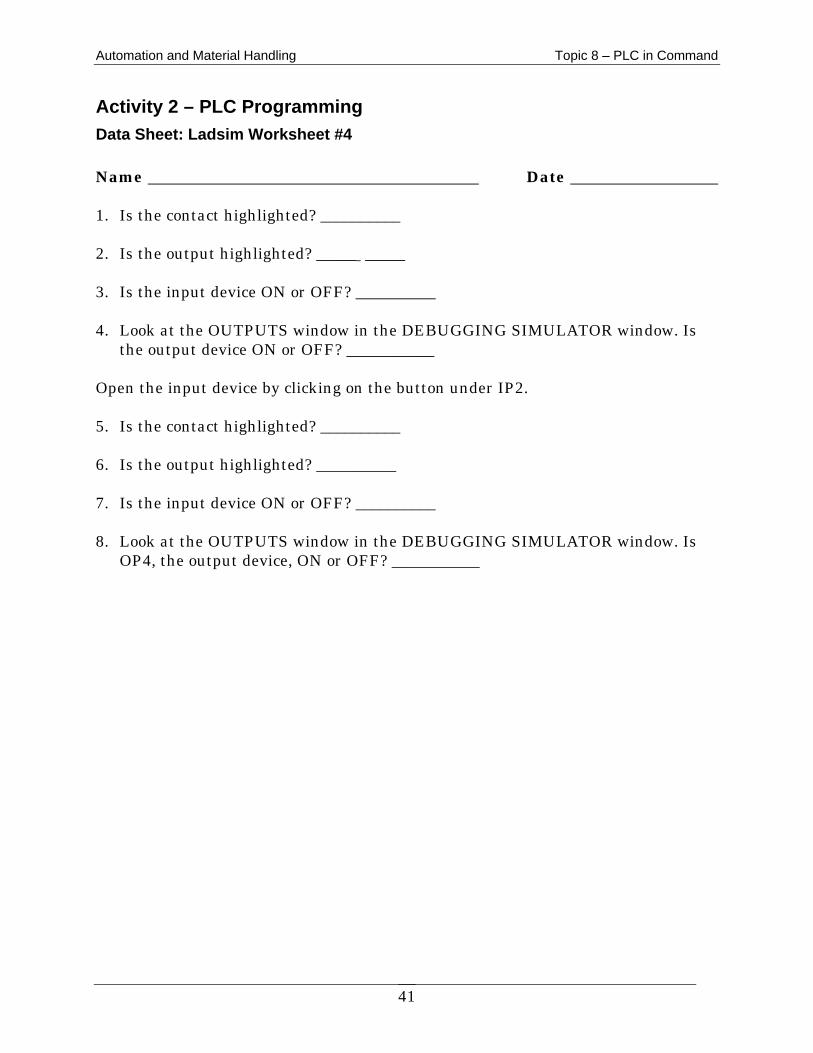
Activity 2 – PLC Programming Data Sheet: Ladsim Worksheet #4 Name Date 1. Is the contact highlighted? __________ 2. Is the output highlighted? _____ _____ 3. Is the input device ON or OFF? __________ 4. Look at the OUTPUTS window in the DEBUGGING SIMULATOR window. Is
the output device ON or OFF? ___________ Open the input device by clicking on the button under IP2. 5. Is the contact highlighted? __________ 6. Is the output highlighted? __________ 7. Is the input device ON or OFF? __________ 8. Look at the OUTPUTS window in the DEBUGGING SIMULATOR window. Is
OP4, the output device, ON or OFF? ___________

Automation and Material Handling Topic 8 – PLC in Command
42
Activity 2 – PLC Programming Data Sheet: Ladsim Worksheet #5 Name Date
Truth Table 1
IP2 IP3 OP4
Automation and Material Handling Topic 8 – PLC in Command
43
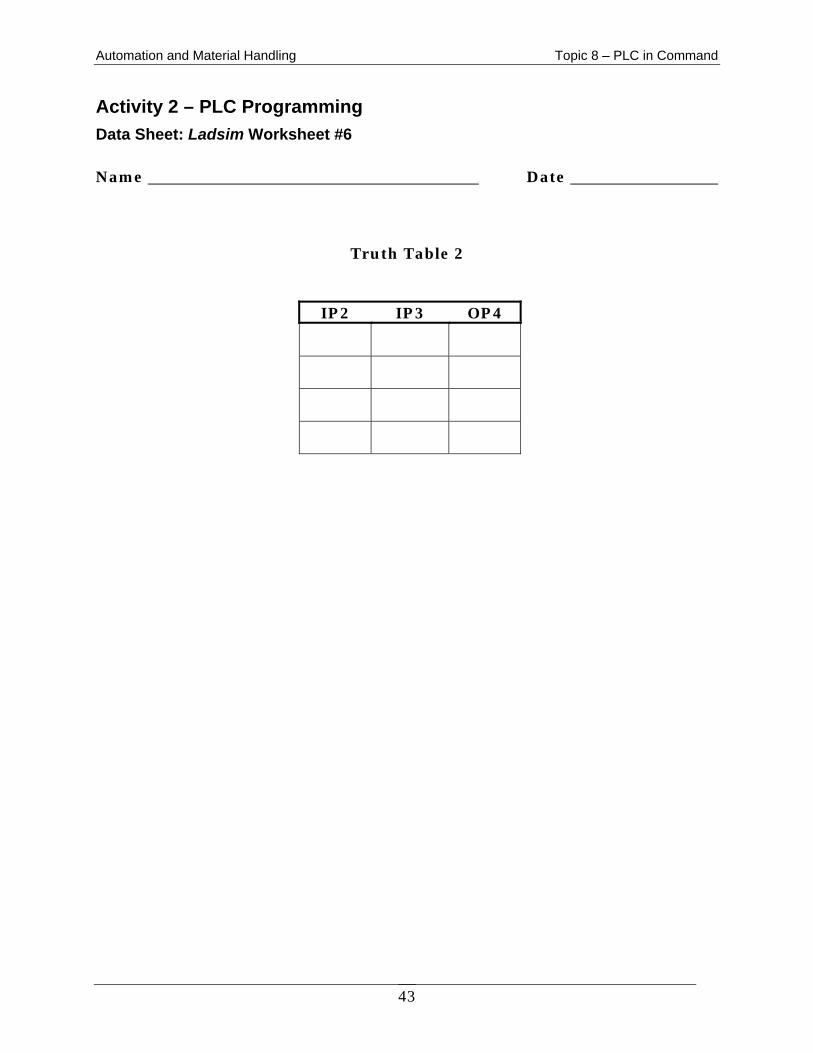
Activity 2 – PLC Programming Data Sheet: Ladsim Worksheet #6 Name Date
Truth Table 2
IP2 IP3 OP4

Automation and Material Handling Topic 8 – PLC in Command
44
Activity 3 – PLC Applications There are no data sheets required for this activity.