ARM 10.3 Installation Guide for E10
84
EPICOR ADVANCED REQUISITION MANAGEMENT ARM 10.3 Installation Guide for E10
-
Upload
khangminh22 -
Category
Documents
-
view
0 -
download
0
Transcript of ARM 10.3 Installation Guide for E10

EPICOR ADVANCED REQUISITION MANAGEMENT
ARM 103 Installation Guide for E10
Page 2 of 84
EPICOR ADVANCED REQUISITION MANAGEMENT
Table of Contents
Introduction 5
About this document 5
Document conventions 5
Installation requirements 6
System Requirements 7
Software Requirements 8
Hardware Requirements 9
Fresh Installation Checklist 10
Extended UD Table Maintenance 11
Install ARM - Automatically 17
Log on with Administrator rights 17
Run the ARM Setup Wizard 17
Default web address 25
Configure and Execute ARM Integration 30
Configuring the ARM Punch-Out API 35
Configuring ARM Notifications 36
Configuring ARM Reports 37
Upgrading ARM Checklist 38
Log on with Administrator rights 40
Before upgrading to ARM 103x 40
Uninstall BIL and install new version 41
Uninstall previous version of ARM 41
Uninstall previous version of ARM Integration Manager 41
Upgrade to the new version of ARM 42
Run the Upgrade Manager Utility 43
Managing User Logins Post Upgrade 45
Method 1 Specify host names (Preferred method if NTLM authentication is desired) 47
Method 2 Disable the loopback check (less-recommended method) 48
Configure and Execute ARM Integration (Upgrade) 49
Check Company data in the IM database (e7Imitation) 49
Page 3 of 84
EPICOR ADVANCED REQUISITION MANAGEMENT
Live and Test ARM environments 51
ARM Configuration 52
Buyer ID Mapping (E10 only) 52
Multi-Currency ARM 52
Notification Settings 53
Expense All Receipts 54
Company Settings 54
Company General Settings tab 55
Report Templates tab 58
Document Number Settings tab 60
Additional Company with different GL Structure 61
Epicor Settings 61
Epicor Configuration 62
Settings for Multi-Company 62
Site Costing 62
Product Tax Categories in Epicor 63
Ship Via setting 65
Epicor Part Configuration 65
Adding Locations to ItemsParts in Epicor 66
Epicor Supplier Price List (ARM Vendor Quotes) Configuration 66
Projects and Jobs in Epicor 67
Set a Default Buyer ID in E10 67
Configuring ARM Optional Components 68
Configure SSRS for ARM Reports 68
Configure Buyer Mapping ID 68
Configure Automatic Faxing (AutoFax) 69
Set up the Printer Driver 69
Troubleshooting 70
Any transfer order created in Epicor 10 will not integrate over into ARM 71
Known Issues with ARM Epicor Integration 72
Appendix 1 Increase Attachments Upload Limit 74
Appendix 2 Configure Multiple Instances of ARM Integration 77
Appendix 3 Configure Microsoft SQL Reporting Services 80
Page 4 of 84
EPICOR ADVANCED REQUISITION MANAGEMENT
Page 5 of 84
EPICOR ADVANCED REQUISITION MANAGEMENT
Introduction
Precise Advanced Requisition Management (ARM) is designed to formalise and streamline a companyrsquos
requisitioning process electronically using a web browser to extend and integrate with the Epicor
Purchasing module
The initial set up of ARM is a usually a combined effort involving a Consultant an on-site technical Database
Administrator and a Financial Officer of the organisation ARM settings are typically maintained by System
Administrators
About this document
This Installation Guide describes the steps for performing a first-time installation and an upgrade
Document conventions
The following message types alert you to information or conditions that may require special consideration
NOTE This information emphasises or supplements an important point or refers
to special cases or details that apply to specific versions or configurations
IMPORTANT NOTE This is information that is essential to the completion of a
task
TIP This information provides a useful hint shortcut or alternative way of doing
something
CAUTION This information advises you that failure to take or avoid a specified
action could result in loss of data
Page 6 of 84
EPICOR ADVANCED REQUISITION MANAGEMENT
Installation requirements
ARM is installed and configured by running the setup application on the ARM web server ARM installation
requires the following
bull Administrator access to the ARM web server
bull Network Administrator access to create groups and users on the domain Alternatively an existing
user account and password and user group must be used for ARM
bull Database Administrator access to the Microsoft SQL server on which Epicor is installed
bull Microsoft SQL reporting Services must be configured and running on the web server See this
section for further detail
bull An installation of BIL (Back Office Integration Layer)
bull An Installation of ARM itself
bull A valid ARM license file
Page 7 of 84
EPICOR ADVANCED REQUISITION MANAGEMENT
System Requirements
Server specifications and configuration should be scaled in relation to the number of users and expected
volume of transactions It is possible to install both the ARM application and database on the same server
but generally ARM performance will be enhanced by installing the web server (MS IIS) and the MS SQL
Server on different computers
The following diagram represents possible ARM infrastructure options (For Internet Explorer read Web
Browser Google Chrome recommended)
NOTE ARM will work with the following web browsers Google Chrome
(Recommended) Internet Explorer Mozilla Firefox and Apple Safari
Page 8 of 84
EPICOR ADVANCED REQUISITION MANAGEMENT
Software Requirements
NOTE
These are minimum requirements Please see the most recent Release Guide for
supported Operating Systems and Environments
Minimum Requirement Notes
Domain
Operating System Microsoft Windows Server
2008 R2 (or later) Active Directory Domain
Active Directory Domain is optional
Server
Microsoft Windows Server 2008 R2 SP1
(operating system)
The earliest version of Windows Server that Net 45
Framework will work with is Microsoft Windows Server
2008 R2
Microsoft Internet Information Server (IIS) 70
or later
To access ARM from remote locations you would either
need a publicly available web server in-house (ie you
would host your own website) or VPN access to your
network
Dot Net 45 framework ARM 101+ requires Dot Net 45 and ARM 102 SP4+
requires Dot Net 472 These Dot Net versions are only
compatible with Windows Server 2008 R2 or later Dot Net 472 framework
Microsoft SQL Reporting Services ARM 101 SP3 + uses SSRS SSRS is free with MS SQL
2008 It must be configured and the service must be
running before you can complete the ARM installation
Database Server
Microsoft Windows Server 2008 R2 SP1
(operating system) or later
Net 45 framework
Microsoft SQL Server 2008 R2 (database
management system)
Epicor Version 1005001 or later
The appropriate version of BIL applicable with the
version of ARM should be installed Each time a version
of ARM is released there will also be a compatible
version of BIL
Page 9 of 84
EPICOR ADVANCED REQUISITION MANAGEMENT
Faxing Software (Optional) Enterprise faxing application capable of polling a
nominated folder and reading and interpreting PCL
files This is only required if the Auto Faxing
functionality will be utilised in ARM
Clients
Web Browsers
Google Chrome (Recommended)
Microsoft Internet Explorer 9 or later
Mozilla Firefox
Apple Safari (on a Mac)
Hardware Requirements
Hardware Minimum Requirement
Web Server
CPU Intel Core i5 or equivalent
Hard Disk 500 MB free for application components
2 GB free for database
Memory 4 GB (8 GB recommended)
Clients
CPU Intel Core i3 or equivalent
Memory 4 GB (8 GB recommended)
Page 10 of 84
EPICOR ADVANCED REQUISITION MANAGEMENT
Fresh Installation Checklist
CHECKLIST First-time ARM Installation Tick or initial
when complete
A typical installation would require the following actions
bull Configure Epicor backend
bull Install and Configure BIL
bull Install ARM
bull Upload ARM License
bull Configure ARM Integration
STEP 1 Configure Epicor 10
a) Includes adding and configuring Extended UD Tables and Fields
See full instructions below
STEP 2 Run the BIL Installer and Configure BIL
a) Run the BILServicesSetup executable file
b) Configure BIL The Precise BIL Configuration Utility will automatically run when BIL is installed Click on the Add button to start the configuration
For details please refer to the Precise BIL for Epicor 10 Installation Guide
STEP 3 Install Epicor Precise ARM
a) Run the ARMSetup[version number]exe file
See full instructions below
STEP 4 Configure ARM Integration
a) Dashboardgt Integrationgt Configure b) Company Job Integration c) Company Mapping to ARM Integration Agent
See full instructions below
Page 11 of 84
EPICOR ADVANCED REQUISITION MANAGEMENT
Extended UD Table Maintenance
Epicor 10 does not have available fields in some tables for use by ARM therefore these fields need to be
created
NOTE
The BIL Installation process now automatically creates these UD fields if they are
absent from Epicor
Refer to the Precise BIL for Epicor10 Installation Guide for full details
This should be completed before synchronization between Epicor and ARM is started Below is a table with
the names of the fields and associated configuration followed by instructions on how to complete the set
up in Epicor 10
Table Field Data Type Used inby
APChkGrp PbsId String ndash x(100) POS
APInvDtl PbsLineID Integer ARM
APInvGrp PbsARMWorkflowGroup Boolean ARM
APInvGrp PbsARMApprovedGroup Boolean ARM
APInvHed PbsCompleted Boolean ARM
APInvHed PbsApprovalStatus Integer ARM
APInvHed PbsBusinessUnit String - x(8) ARM
APInvHed PbsDocumentType String - x(8) ARM
APInvHed PbsRevID Integer ARM
APInvHed PbsRowID Integer ARM
APInvHed PbsBatchNo String - x(8) ARM
BankGrp PbsId String - x(100) POS
BankGrp PbsCompleted Boolean POS
BankTran PbsId String - x(100) POS
Page 12 of 84
EPICOR ADVANCED REQUISITION MANAGEMENT
Table Field Data Type Used inby
CashGrp PbsId String - x(100) POS
CashHead PbsId String - x(100) POS
CashHead PbsCompleted Boolean POS
CheckHed PbsId String - x(100) POS
CheckHed PbsCompleted Boolean POS
Customer PbsId String - x(100) POS
GLJrnGrp PbsId String ndash x(100) Both ARM and POS
GLJrnHed PbsId String ndash x(100) Both ARM and POS
GLJrnHed PbsCompleted Boolean Both ARM and POS
InvcGrp PbsId String - x(100) POS
InvcHead PbsId String - x(100) POS
InvcHead PbsCompleted Boolean POS
JobMtl PbsId Integer ARM
OrderDtl PbsId Integer POS
OrderHed PbsId String - x(100) POS
OrderHed PbsStage String - x(100) POS
OrderHed PbsCustomerRef String - x(100) POS
OrderRel PbsDefaultTaxRemoved Boolean POS
OrderRel PbsTaxCalculated Boolean Both ARM and POS
Page 13 of 84
EPICOR ADVANCED REQUISITION MANAGEMENT
Table Field Data Type Used inby
Part PbsPartGroupLevel1 String - x(100) Both ARM and POS
Part PbsPartGroupLevel2 String - x(100) Both ARM and POS
Part PbsPartGroupLevel3 String - x(100) Both ARM and POS
PODetail PbsTaxCode String ndash x(100) Both ARM and POS
PODetail PbsId Integer ARM
PODetail PbsChangeOrderInProgress Boolean ARM
PODetail PbsBlanketMasterLineID Integer ARM
POHeader PbsId String ndash x(100) Both ARM and POS
POHeader PbsCrossReference String ndash x(100) Both ARM and POS
POHeader PbsIsPrePaid Boolean Both ARM and POS
POHeader PbsPaymentMethod String ndash x(100) Both ARM and POS
POHeader PbsPaymentReference String ndash x(100) Both ARM and POS
POHeader PbsCompletionIndex Integer ARM
POHeader PbsChangeOrderInProgress Boolean ARM
PORel PbsCostCode String ndash x(100) Both ARM and POS
PORel PbsId Integer ARM
RcvDtl PbsId Integer ARM
RcvHead PbsId String ndash x(100) ARM
RmaDisp PbsId String ndash x(100) POS
RmaDtl PbsId Integer POS
Page 14 of 84
EPICOR ADVANCED REQUISITION MANAGEMENT
Table Field Data Type Used inby
RmaHead PbsId String ndash x(100) POS
RmaHead PbsCompleted Boolean POS
RmaRcpt PbsId String ndash x(100) POS
ShipHead PbsId String ndash x(100) POS
ShipDtl PbsId Integer POS
TFOrdDtl PbsShippingComment String - x(100) Both ARM and POS
TFOrdHed PbsId String - x(100) Both ARM and POS
TFOrdHed PbsCrossReference String - x(100) Both ARM and POS
TFOrdHed PbsEntryPerson String - x(75) Both ARM and POS
TFShipHead PbsId String - x(100) Both ARM and POS
bull In Epicor navigate to System Setup gt System Maintenance gt Extended UD Table Maintenance
bull On the Extended User Defined Table Maintenance screen select File gt New gt New Table
bull Table Search dialogue is displayed
bull Using the details from the table above enter the Table name
bull Select the table from the list displayed
bull Select File gt New gt New Column from the menu
bull Enter the Column name (from the table above) Note If your backend is E100500+ Epicor will
change the column name you enter slightly it will add an underscore and c to the end of the name
so it will change to PbsId_c
bull Select the correct Data type
bull Enter the Format eg if Data Type from the table above is String-x(100) then the entries should be
as in this screen capture
Page 15 of 84
EPICOR ADVANCED REQUISITION MANAGEMENT
bull Click Save
bull Repeat this process until all the fields have been created and saved
bull Regenerate the Data Model On the Epicor Administration Console Console Root gt Database
Server Management gt Localhost gt right click the E10 server name and select Regenerate
DataModel Click OK to the message that indicates completion
Page 16 of 84
EPICOR ADVANCED REQUISITION MANAGEMENT
bull Close Epicor if you have it running Once the regeneration is complete expand the Server
Management section in the tree on the left click on the relevant Epicor database and then Stop
and Start the Application Pool from the options on the right-hand side NOTE This action will
terminate all Epicor user sessions
Page 17 of 84
EPICOR ADVANCED REQUISITION MANAGEMENT
Install ARM - Automatically
This section lists the steps required for a first-time installation of ARM 10
NOTE Users of Epicor 10 can perform a new installation of ARM 10 (ARM 10 is the first
version of ARM that is compatible with Epicor 10)
Log on with Administrator rights
Log on to the system with Administrator rights
NOTE If you are installing ARM on a system running Windows Server 2008 you must ensure that the administrator password is not blank Security settings in both Internet Information Server (IIS) and Internet Explorer require you to provide an administrator password
Run the ARM Setup Wizard
1 Start the ARM Setup Wizard by running ARMSetup[version number]exe The ARM Setup Wizard
begins by gathering settings for various ARM sections then it installs the ARM application
2 Click Next
3 On the Destination Folder page click Next to accept the default installation folder or click Change to select a different location
Page 18 of 84
EPICOR ADVANCED REQUISITION MANAGEMENT
NOTE Changing the location of the installation directory is optional and has no effect on the operation of ARM
4 Confirm the installation details on the ARM General Settings page and then click Next
Note - Intercompany GL (introduced in ARM 102 SP3) if enabled will allow expensing of requisition
lines to GL accounts in other companies within Epicor See the ARM 1023 Release Guide for further information here
- Non-inventory Mode (introduced in ARM 102 SP3) if enabled will allow operation with ARM when Epicor 10 is void of Inventory See the ARM 1023 Release Guide for further information here
Page 19 of 84
EPICOR ADVANCED REQUISITION MANAGEMENT
5 On the Credentials for Database Installation page enter the name of the Database Server or the IP address of your database server The Username and Password must belong to a user with permission to create new databases on this server This user can be either the current Windows user who has integrated authentication to log in to the database server or an SQL login
Page 20 of 84
EPICOR ADVANCED REQUISITION MANAGEMENT
6 On the Database settings page enter the ARM eBackOffice Company Database name and ARM
Identity Database names You can use the Default names or enter your own names for these
databases if you are doing a fresh installation if you are doing an upgrade enter the names of the
existing databases
Page 21 of 84
EPICOR ADVANCED REQUISITION MANAGEMENT
Note New Installations will see this next screen for creation of the Databases
7 The ARM Execution Settings page is displayed You can use either Windows or SQL Server
Authentication If you select Windows Integrated Authentication you will need the Domain name
Server name plus the Windows Username and Password combination If you are using SQL Server
Authentication you will need the SQL Server Username and Password combination The login
credentials used here must belong to a user who has permission to access databases on this server
See the screenshots below
Page 22 of 84
EPICOR ADVANCED REQUISITION MANAGEMENT
If you use the Windows authentication the Windows account must exist in SQL
Checkbox Information
Create default applicationrsquos Administrator account Tick this checkbox if you are installing ARM for
the first time or are upgrading from a version
prior to the 101x range
Run attachment migration after installation finish Scenario 1
Tick this checkbox if you are upgrading from an
ARM version prior to 101 SP3 (ie 100x
1011 1012) straight to 101 SP6 and above
Scenario 2
Tick this checkbox if you are using ARM 1013
and above and you want to relocate the
location where attachment files are stored
This new path will represent the value of the
Global Setting ldquoAttachment File Locationrdquo
8 The ARM Service Account Settings page is displayed Enter the details for a service account to run ARM agent tasks This is used for the ARM Task Agent service The IM Control Service Port is set to 17100 by default but this can be altered as required to suit your network requirements
Page 23 of 84
EPICOR ADVANCED REQUISITION MANAGEMENT
9 The ARM Report Service Settings page is displayed This is the connection to the Microsoft SQL Reporting Service The wizard automatically populates the Report Server location using the provided Database Server name The user specified here must have access to the SQL Reporting Services site This will usually be the same username and password used to configure the Microsoft SQL Reporting Services
Page 24 of 84
EPICOR ADVANCED REQUISITION MANAGEMENT
10 The pages displayed in the wizard up until now were gathering information for Installation Settings The ARM wizard is now ready to install ARM The Ready to install ARM page is displayed click Install to start the installation of ARM
The final pages are displayed
When you click Finish here the default web browser is opened to display the ARM Application Initialisation webpage
Page 25 of 84
EPICOR ADVANCED REQUISITION MANAGEMENT
Enter the ARM Administratorrsquos user details and click the Letrsquos go button
Default web address
httplocalhost8080armwebinitialisation
You can use the default Administrator Account for the initial logon to ARM It is armadmin and password
Page 26 of 84
EPICOR ADVANCED REQUISITION MANAGEMENT
Click on the Update License button when you are ready to upload the ARM License file Please contact your Precise Business Solutions consultant to acquire the license
Page 27 of 84
EPICOR ADVANCED REQUISITION MANAGEMENT
When you click the Update License button the Current License Information dashboard is displayed Click on the Browse button to locate the license file and select the file When an appropriate file has been selected the lsquoUploadrsquo button is enabled
Page 28 of 84
EPICOR ADVANCED REQUISITION MANAGEMENT
Click on the Upload button and enter the license key that was supplied with the license A message is displayed to say the upload was successful and the Current License Information is displayed on the page
Page 29 of 84
EPICOR ADVANCED REQUISITION MANAGEMENT
ARM installation is complete
Page 30 of 84
EPICOR ADVANCED REQUISITION MANAGEMENT
Configure and Execute ARM Integration
ARM Integration Manager is a suite of jobs that integrates data between Epicor and ARM See the
help files within ARM for the function of each job
1 Please consult the Epicor Configuration section now before proceeding with the initial integration 2 Configure the ARM Task Agent service to run under a user with appropriate permission
3 After uploading a valid license file to ARM go to Dashboardgt Integration Click the Configure button
4 Enter in the ARM Administrator credentials and click Save
Page 31 of 84
EPICOR ADVANCED REQUISITION MANAGEMENT
5 Click the Start button to load the default Agent Profile
6 Click the Start button on the Agent to begin initial integration
The Company job will run first by default as this data is required in Step 7
7 After the Company data has integrated into ARM from Epicor click the Company mapping button and map the Default Agent to the companycompanies Click Save
Page 32 of 84
EPICOR ADVANCED REQUISITION MANAGEMENT
8 The remaining Integration jobs will run automatically and integrate the initial data from Epicor You can view the ARM log with its integration activity by default in CinetpubARMARMLogsARM_IM1log
9 After integration is complete you can customise the Default Agent profile Click the Configure button on the agent
Page 33 of 84
EPICOR ADVANCED REQUISITION MANAGEMENT
10 Alter any of the settings as outlined below and click Save
bull BIL Services Settings BIL Host BIL Port and BIL Binding type (ie the BIL service computer name and port and the binding type to be used)
bull Job Poll Interval (seconds) ndash The frequency ARM checks for jobs to run If there are any jobs due for execution ARM will run those
bull Import Batch Size ndash The size of a batch when importing items and data from Epicor
Page 34 of 84
EPICOR ADVANCED REQUISITION MANAGEMENT
bull Error Retry Attempts ndash The number of times ARM Integration will re-try processing a record that failed integration Once the number has been reached the record is left alone in the system (but can be manually re-tried from the Agentrsquos Pending Records screen)
bull Purchase Order Buyer Filter ndash To prevent any Purchase Orders created in Epicor from integrating into ARM the value set here should be the value of a Buyer ID that has been created specifically in Epicor for ARM Purchase Orders Note the Epicor user specified in the BIL configuration utility must also be an Authorised User on the Buyer ID used here
bull These checkboxes instruct the Integration Manager to integrate the cross referencing of PO numbers
ARM and is going into Epicor Used when the PO is created in ARM If ticked the ARM PO will be assigned the Epicor generated number If unticked the ARM PO number will be used in both systems Epicor and is going into ARM (Enabled by default with installation) Used when the PO is created in Epicor If ticked the Epicor PO number is used in both systems If unticked ARM will assign its own PO number to any POs integrated from Epicor
11 Dashboardgt Global Settingsgt Email Integration Errors and Email Integration Errors To Enable and nominate an email or collection of email addresses to be automatically sent a notification for each transaction that generates an integration error The technical detail (error stack) will be attached as a TXT attachment to the email
Page 35 of 84
EPICOR ADVANCED REQUISITION MANAGEMENT
Configuring the ARM Punch-Out API To use the Punch-Out functionality the Precise Consultant doing this installation must liaise with a Vendorrsquos technical administrator to get all the details required to configure a connection to that specific Vendorrsquos Punch-Out website That is most of the details that are required to be entered on the Punch-Out details page The ARM Punch-Out page
ARM The user configuring Punch-Out requires the following permissions Maintain Punch-out and Launch Punch-out Please note that the Maintain Punch-out should only be assigned to a user(s) who will be doing the initial configuration of Punch-Out (or configuration of Punch-Out when connecting to any additional vendorrsquos Punch-Out websites) The Unique Name field is the name that will be used in the hyperlink on the Requisition page when the ARM User wants to go to a punch-out website
NOTE Please ensure that only a technical ARM Administrator has permission to
Maintain Punch-Outs as the data on the Punch-Out details page is very sensitive
and should therefore only be maintained by the ARM Administrator in conjunction
with a Precise Consultant
Page 36 of 84
EPICOR ADVANCED REQUISITION MANAGEMENT
Configuring ARM Notifications The ARM Task Agent Service enables users to configure times for email alerts to go out to ARM Approvers so that requisitions can be processed in a timely manner Navigate to Dashboardgt Scheduled Jobsgt [Module Name] = Requisition and click on the Remind Urgent Requisition Approval job Amend the settings contained in the Workflow Trigger and Workflow Actions sections in accordance with company policy
NOTE For Email Notifications to work properly Email settings and SMTP settings on Dashboardgt Global Settings page must also be configured
Page 37 of 84
EPICOR ADVANCED REQUISITION MANAGEMENT
Configuring ARM Reports Following initial installation of ARM the reports need to be copied to the SQL Report server Go to Dashboardgt Company Settings and for each company click the Clone Report Template button
Page 38 of 84
EPICOR ADVANCED REQUISITION MANAGEMENT
Upgrading ARM Checklist
CHECKLIST Upgrade ARM Installation Tick or initial
when complete
A typical Upgrade would require the following actions
bull Uninstall BIL
bull Uninstall ARM (Please read full instructions if your version of ARM is before ARM 100 SP6)
bull Configure Epicor backend
bull Install and Configure BIL
bull Install ARM 103x
bull Upload ARM License
STEP 1 Read the notes for Before Upgrading to ARM 103x
STEP 2 Uninstall BIL
a) Navigate to Start gt Control Panel gt Programs and Features gt Uninstall a
program (or similar for your operating system)
b) In the list of programs right-click on Epicor Precise BIL and select Uninstall
from the context menu
For further details please refer to the Precise BIL for Epicor 10 Installation
Guide
STEP 3 Uninstall ARM
a) Navigate to Start gt Control Panel gt Programs and Features gt Uninstall a
program (or similar for your operating system)
b) In the list of programs right-click on ARM and select Uninstall from the
context menu
STEP 4 Uninstall ARM Integration Manager (if this is present)
a) Navigate to Start gt Control Panel gt Programs and Features gt Uninstall a
program (or similar for your operating system)
b) In the list of programs right-click on ARMIntegrationManager and select
Uninstall from the context menu
STEP 5 Install and Configure the new version of BIL
a) Run the BILServicesSetup executable file
Page 39 of 84
EPICOR ADVANCED REQUISITION MANAGEMENT
b) Configure BIL The Precise BIL Configuration Utility will automatically run when BIL is installed Click on the Add button to start the configuration
For details please refer to the Precise BIL for Epicor 10 Installation Guide
STEP 6 Install the new version of ARM
bull Run the ARMSetup[version number]exe file
STEP 7 Run the Upgrade Manager Utility (if required please read notes)
bull Run the PBSARMUpgradeManager executable
Step 8 Configure and Execute ARM Integration
bull Dashboardgt Integration Execute a Full Synchronise on the Company and Location jobs
bull Refer to the ARM Integration article and confirm integration is running without any post-upgrade errors See the Integration logs for detail here
STEP 9 Check Company data in the IM database
bull See Company Data notes
STEP 10 Check Live and Test ARM environments
bull See Live and Test notes
Page 40 of 84
EPICOR ADVANCED REQUISITION MANAGEMENT
Log on with Administrator rights
Log on to the system with Administrator rights
NOTE If you are installing ARM on a system running Windows Server 2008 you must ensure that the administrator password is not blank Security settings in both Internet Information Server (IIS) and Internet Explorer require you to provide an administrator password
Before upgrading to ARM 103x
You must be running a minimum ARM 100 SP6 If you are on an earlier version of ARM you must upgrade
to 100 SP6 first then do a direct upgrade to ARM 103x
If you are upgrading from
a) ARM 1010
or
b) ARM 101 SP1 through to ARM 101 SP9
you can remove ARM 101 SP and run the ARM 103x installer
If you are on ARM 100 SP6 these are the steps to upgrade to ARM 103x
Note you do not have to remove ARM 1006 or any of its files
1 Configure SQL Reporting Services (SSRS)
2 Run the installer for ARM 103x
3 During installation tick both checkboxes to Run the Migration for Attachments and Create a
default ARM Administrator
4 Complete the Migration tool for attachments
5 Run the Upgrade Manager utility
Page 41 of 84
EPICOR ADVANCED REQUISITION MANAGEMENT
Uninstall BIL and install new version
If a new version of BIL is required please see the Precise BIL for Epicor10 Installation Guide for further
details
Uninstall previous version of ARM
NOTE As of ARM 103 SP2 performing an upgrade of ARM will no longer require removal of the ARM application from Windows Programs beforehand
This change permits any custom IIS configuration (including SSL certificates installed) to be retained and unaffected by the upgrade process
This change is applicable for upgrading ARM versions from 1032 and future versions
Upgrading environments with an ARM version prior to 1032 will still require the removal of ARM from the Windows system first
1 Navigate to Start gt Control Panel gt Programs gt Uninstall a program (or similar for your operating
system)
2 In the list of programs right-click on ARM and select Uninstall from the context menu
3 Follow the steps in the wizard to complete the removal of the previous version of ARM
Uninstall previous version of ARM Integration Manager
1 Navigate to Start gt Control Panel gt Programs gt Uninstall a program (or similar for your operating
system)
2 In the list of programs right-click on ARM Integration Manager and select Uninstall from the
context menu
Page 42 of 84
EPICOR ADVANCED REQUISITION MANAGEMENT
Upgrade to the new version of ARM
1 Navigate to the new version of ARM and double click the exe file to run the ARM Setup Wizard
2 Follow the steps in the wizard as for a fresh installation (the only difference here with an upgrade is the
databases will not have to be recreated) and include the Attachment Migration option if this applies
to you
If you tick the Run attachment migration checkbox the Attachment Configuration utility is automatically
started after ARM installation has completed
Page 43 of 84
EPICOR ADVANCED REQUISITION MANAGEMENT
3 If you have ticked the Run attachment migration after installation finish checkbox then the Attachment Configuration Utility will run The top section refers to the version you are upgrading from Enter the appropriate paths into the fields and then click the Save and Run button
4 Remember this tool needs to be run in the following scenarios
Scenario 1
Tick this checkbox if you are upgrading from an ARM version prior to 101 SP3 (ie 100x 1011
1012) straight to 101 SP7 and above
Scenario 2 Tick this checkbox if you are using ARM 1013 and above and you want to relocate the location where attachment files are stored This new path will represent the value of the Global Setting ldquoAttachment File Locationrdquo
Run the Upgrade Manager Utility
Note that this is different to the Attachment Migration above The Upgrade Manager is used to migrate all
data in ARM to the new Approvals Process because this was changed significantly in ARM 101 SP5
Please note the following when deciding if you need to run the Upgrade Manager utility
If you are upgrading from ARM versions 100 SP6 1010 ndash 101 SP4 you must run the Upgrade Manager to
migrate data so that it will be compatible with the enhanced approvals process
If you are upgrading from ARM 101 SP5 you do not need to run the Upgrade Manager to migrate your data
as it will already be compatible with the enhanced Approvals Process as this was first introduced in ARM
101 SP5
Page 44 of 84
EPICOR ADVANCED REQUISITION MANAGEMENT
The Upgrade Manager executable file is provided with ARM 103x The Upgrade Manager needs to be run
separately after the ARM installation The file PBSARMUpgradeManager is installed to this default
location CinetpubARMUpgradeManager
When executing this application set the correct Server name and ARM Database name A log file is
produced and stored in CinetpubARMUpgradeManagerLogs The log file should be examined for any
issues that may arise
After upgrading to ARM 103x and running the Upgrade Manager (if required) ARM users will be in the
position to progress any Requisitions (with any status) that were not fully processed before the upgrade
Page 45 of 84
EPICOR ADVANCED REQUISITION MANAGEMENT
Managing User Logins Post Upgrade
NOTE Due to the change in website technology upgrading to ARM 103x from 1006
will require Windows Authentication enabled within the ARM website This is to handle
the user logins from the previous version which will not work by default in the
upgraded version
It is recommended that this topic be discussed with the internal IT System
Administrator for their involvement with this process
1 Enable Windows Authentication on the ARM site
2 In IIS under the server node Feature Delegation set lsquoAuthentication ndash Windowsrsquo to ReadWrite
Page 46 of 84
EPICOR ADVANCED REQUISITION MANAGEMENT
Page 47 of 84
EPICOR ADVANCED REQUISITION MANAGEMENT
3 Use this URL to access ARM with Windows Authentication http[arm-server][port]arm
NOTE If you see an IIS error when visiting the above URL please refer to this
Microsoft KB (original link httpssupportmicrosoftcomen-uskb896861)
Details outlined below
Method 1 Specify host names (Preferred method if NTLM authentication is desired)
To specify the host names that are mapped to the loopback address and can connect to Web sites on your
computer follow these steps
1 Set the
DisableStrictNameChecking
registry entry to 1 For more information about how to do this click the following article number to
view the article in the Microsoft Knowledge Base
281308 Connecting to SMB share on a Windows 2000-based computer or a Windows Server 2003-
based computer may not work with an alias name
2 Click Start click Run type regedit and then click OK
3 In Registry Editor locate and then click the following registry key
4 HKEY_LOCAL_MACHINESYSTEMCurrentControlSetControlLsaMSV1_0
5 Right-click MSV1_0 point to New and then click Multi-String Value
6 Type BackConnectionHostNames and then press ENTER
7 Right-click BackConnectionHostNames and then click Modify
8 In the Value data box type the host name or the host names for the sites that are on the local
computer and then click OK
9 Quit Registry Editor and then restart the IISAdmin service
Page 48 of 84
EPICOR ADVANCED REQUISITION MANAGEMENT
Method 2 Disable the loopback check (less-recommended method)
The second method is to disable the loopback check by setting the DisableLoopbackCheck registry key
To set the DisableLoopbackCheck registry key follow these steps
1 Set the
DisableStrictNameChecking
registry entry to 1 For more information about how to do this click the following article number to
view the article in the Microsoft Knowledge Base
281308 Connecting to SMB share on a Windows 2000-based computer or a Windows Server 2003-
based computer may not work with an alias name
2 Click Start click Run type regedit and then click OK
3 In Registry Editor locate and then click the following registry key
4 HKEY_LOCAL_MACHINESYSTEMCurrentControlSetControlLsa
5 Right-click Lsa point to New and then click DWORD Value
6 Type DisableLoopbackCheck and then press ENTER
7 Right-click DisableLoopbackCheck and then click Modify
8 In the Value data box type 1 and then click OK
9 Quit Registry Editor and then restart your computer
Page 49 of 84
EPICOR ADVANCED REQUISITION MANAGEMENT
Configure and Execute ARM Integration (Upgrade)
IMPORTANT NOTE
For upgrade from ARM 9 SP8 to ARM 10+ The following procedure must be completed because ARM 10 on E10 is designed for multi-company installations and so all ARM objects must be qualified with their Epicor Company ID For example when a Catalogue search is done in ARM 10 you will notice that you are can now select a Company ID before running the search and only catalogue items within that specific Company ID will be returned Therefore please run a Full Synchronisation on the following ARM Integration Manager jobs Company and Location
1 Go to Dashboardgt Integration and click on the Agent profile to list all the integration jobs 2 Select and initiate a Full Synchronise action on both Company and Location jobs
Check Company data in the IM database (e7Imitation)
This is required to compensate for older versions of ARM that were not multi-company and therefore did
not require a Company identifier in the database More recent versions of ARM whether your organisation
is using multi-company or not require the Company ID to be in the database
1 Run this SQL query on the Integration Manager database by default this is the e7Imitation
database
select from e7Imitationcompany
This query may return one record which means there is only one Company presently If it returns
more than one record please do a full synchronisation of the Company job in Dashboardgt
Integration
Page 50 of 84
EPICOR ADVANCED REQUISITION MANAGEMENT
The ARM upgrade process is now complete
Page 51 of 84
EPICOR ADVANCED REQUISITION MANAGEMENT
Live and Test ARM environments
Please note that if you are running both Test and Live ARM environments they should be kept separate as
in separate dedicated machines for each environment
ARM should be on a separate server for the live environment Precise recommends that the Epicor Client
be installed on this server also because BIL and the DataSync service need the client binaries to access the
business objects
Page 52 of 84
EPICOR ADVANCED REQUISITION MANAGEMENT
ARM Configuration
Buyer ID Mapping (E10 only)
The Buyer mapping functionality allows ARM to populate a specific Epicor Buyer against Purchase Orders
A buyer can be populated by default from ARM Requisition Types (if these are enabled and in use in the
system) the default buyer configured on the Company (Dashboardgt Company Settings) or the Buyer
present on the Approval Root Node within an Approval Tree
This Buyer ID will be set on the Purchase Order that is created within Epicor
If you want resultant Epicor Purchase Orders to have a specific Buyer ID assigned to them some
configuration is required in both Epicor and ARM In Epicor each Buyer record that is to be integrated into
ARM must have the same Authorised User as is set in the BIL Configuration Utility ndash Epicor Connection
Information page These buyer records will be displayed in the Buyer Info area of ARM adjacent to the
Purchase Order Creator field in Approval Tree Maintenance as in the screen capture below
Also note that the PO Creation IM job and the Buyer IM job need to run on the same BIL Instance as each
other and the Epicor User Account used by the above BIL Instance needs to be configured as an
Authorised user for each Buyer record in Epicor
Multi-Currency ARM
If you are upgrading to ARM 101 SP3+ the multi-currency module may need some configuration before
commencing the use of ARM There are two screens to check for this Dashboard Currencies and
Dashboard Currencies Currencies Mapping
Dashboard Currencies displays a list of the most common ISO Codes If the particular ISO Code of a
currency you need to use is not displayed here then a new ISO Code can be added via the Create button
Once the ISO Code details have been saved they can be matched to an appropriate Currency Code on the
Page 53 of 84
EPICOR ADVANCED REQUISITION MANAGEMENT
Currencies Mapping page The new ISO Code is displayed in the dropdown list to the right of Maps To on
the mapping page
Dashboard Currencies Currencies Mapping page If the Currency code you require is not displayed in
the leftmost column under the relevant Company on the Mapping page it will need to be configured in
Epicor along with its associated effective exchange rates Once it has been fully configured in Epicor it will
be integrated to ARM and displayed under the relevant Company on Dashboard Currencies Currencies
Mapping It should then be mapped to an appropriate ISO Code on the Dashboard Currencies Mapping
page
Notification Settings
Use the Dashboard Scheduled Jobs section to configure notificationreminder emails for the various ARM
processes For notifications to work the SMTP settings and relevant Email settings must also be configured
Page 54 of 84
EPICOR ADVANCED REQUISITION MANAGEMENT
Expense All Receipts
If your organisation is utilising Expense All Receipts functionality then a Quantity Adjustment Reason Code
must be configured in ARM Dashboard Global Settings Quantity Adjustment Reason Code Please
note that the code added here must correspond to an Inv Adjustment Reason Code that already exists in
Epicor To find a list of Inv Adjustment Reason Codes in Epicor navigate to Material Management
Inventory Management Setup Reason Code Search the list of Reason Codes and choose one to add to
ARM
Company Settings
Select a Company from the list You are now on Dashboard Company Company Name
In the Company Logo section you can browse to a picture file and upload it so that it will be displayed in the
top left corner of your Purchase Orders
Page 55 of 84
EPICOR ADVANCED REQUISITION MANAGEMENT
Company General Settings tab
Report Printer
Click on the Edit button to put the setting in Edit mode When the setting is in Edit mode you can enter a
path to a specific printer into the appropriate field in the Value column Click on the Save button in the
Options column to save your changes
Default Report Locale
Click on the Edit button to put the setting in Edit mode When in Edit mode the relevant field in the Value
column becomes enabled Select an appropriate setting from the list displayed in the drop-down field
Click on the Save button in the Options column to save your changes
Supplier Email Contact Role Code
Click on the Edit button to put the setting in Edit mode When in Edit mode the relevant field in the Value
column becomes enabled Select the required Contact Role Code (or leave the setting to use the Primary
Contact information) to drive the default Supplier Contact email address used for sending out Purchase
Orders to suppliers This list is derived from Sales Managementgt Order Managementgt Setupgt Role Code
in Epicor
Document Type for AP Invoice
Click on the Edit button to put the setting in Edit mode When in Edit mode the relevant field in the Value
column becomes enabled Enter in the required Type ID value for attachment integration with AP This is
derived from System Managementgt Document Managementgt Document Type Maintenance in Epicor
Currently only File System Document storage types are supported Click on the Save button in the Options
column to save your changes
Page 56 of 84
EPICOR ADVANCED REQUISITION MANAGEMENT
Journal Code
Click on the Edit button to put the setting in Edit mode When in Edit mode the relevant field in the Value
column becomes enabled Enter in the Journal Code from Epicor (Financial Managementgt General
Ledgergt Setupgt Journal Code) to be used for any location driven expensing Click on the Save button in the
Options column to save your changes
Default Part Class
Click on the Edit button to put the setting in Edit mode When in Edit mode the relevant field in the Value
column becomes enabled Enter the default Inventory Group (Part Class) code to be used for integration of
Epicor parts without a value present in this field Click on the Save button in the Options column to save
your changes
Page 57 of 84
EPICOR ADVANCED REQUISITION MANAGEMENT
Default Tax Code
Click on the Edit button to put the setting in Edit mode When in Edit mode the relevant field in the Value
column becomes enabled Enter the default tax code to be used for Non-Catalogue lines entered into
Requisitions Click on the Save button in the Options column to save your changes
Quantity Adjustment Reason Code
Click on the Edit button to put the setting in Edit mode When in Edit mode the relevant field in the Value
column becomes enabled Enter the default reason code (from Epicor Material Managementgt Inventory
Managementgt Setupgt Reason Codegt Reason Type lsquoInv Adjustmentrsquo) to be used for creating inventory
adjustments on receiving Click on the Save button in the Options column to save your changes
Ship Via is Required for Purchase Orders
Click on the Edit button to put the setting in Edit mode When in Edit mode the relevant field in the Value
column becomes enabled Enter lsquoYesrsquo or lsquoNorsquo to specify whether Ship Via is required for Purchase Orders
Ship Via Rules
In Epicor
1 Ship Via defaults from the Vendor if specified on the Vendor
2 Ship Via defaults from the lsquoSystem Defaultrsquo record if one is not specified on the Vendor
3 Ship Via is always required so if points 1 and 2 do not result in a value the user must select
one
Page 58 of 84
EPICOR ADVANCED REQUISITION MANAGEMENT
Document Type for Purchase Order
Click on the Edit button to put the setting in Edit mode When in Edit mode the relevant field in the Value
column becomes enabled Enter in the required Type ID value for Purchase Order attachment integration
between ARM and Epicor This is derived from System Managementgt Document Managementgt
Document Type Maintenance in Epicor Currently only File System Document storage types are supported
Click on the Save button in the Options column to save your changes
CC Email Addresses for RFQ
Click on the Edit button to put the setting in Edit mode When in Edit mode the relevant field in the Value
column becomes enabled Enter the email addresss that will receive a carbon copy of the RFQ (Request
for Quote module) emails sent out to Suppliers
Tolerance Priority Level Setting
Click on the Edit button to put the setting in Edit mode When in Edit mode the relevant field in the Value
column becomes enabled Enter the ID of the Tolerance Priority Level to be assigned for use with the
company in selection Alternatively this ID is populated when a tolerance priority configuration is selected
and the lsquoAssign to Companyrsquo button activated (Dashboardgt Tolerance Settingsgt Tolerance Priority Levels)
Default Buyer
Click on the Edit button to put the setting in Edit mode When in Edit mode the relevant field in the Value
column becomes enabled Select from the drop list the default Buyer to be used for Purchase Orders (the
value will default to the Buyer field within the Requisition document and then carry the value through to
Purchase Order)
Enable Auto Purchase Order For New Vendor
Click on the Edit button to put the setting in Edit mode When switched ON all new Vendors created for
the company will have the lsquoAuto Purchase Orderrsquo setting set to TRUE by default
Report Templates tab
When you first install ARM you will see a message across the top of the report list and a Clone Report
Template button on the top menu You need to click the Clone Report Template button to integrate report
templates
Page 59 of 84
EPICOR ADVANCED REQUISITION MANAGEMENT
Once the cloning of the Report Templates has been completed you can click on the Edit button in the
Options column to put each Report setting into Edit mode When in Edit mode the relevant field in the
Path to Report Template column is enabled If you click on the Search button the Report Template Picker is
displayed select a different path if required
Page 60 of 84
EPICOR ADVANCED REQUISITION MANAGEMENT
Click on the Save button in the Options column to save your changes
Document Number Settings tab
The Last Document Number setting is used to set the number on the next Purchase or Transfer Order that
is created in ARM This setting should be used if there is any possibility of ARM PurchaseTransfer Order
numbers clashing with Epicor PurchaseTransfer Order numbers Eg If ARM is installed on a version of
Epicor where PurchaseTransfer Orders already exist in Epicor One way to achieve differentiation between
ARM and Epicor numbers is to set the Last Document number in ARM to a number that is significantly
higher than the last number that was created in Epicor
Page 61 of 84
EPICOR ADVANCED REQUISITION MANAGEMENT
Additional Company with different GL Structure
If an additional Epicor Company is required within ARM that has a different GL Account structure
implemented the steps to achieve this are as follows
1 Configure the additional company within the BIL Configuration Wizard For details please refer to
the Precise BIL for Epicor 10 Installation Guide
2 Restart the Precise BIL and ARM Task Agent services
3 Run a full synchronise within ARM Dashboardgt Integration on the Company job then undertake a
full synchronise for all integration jobs for the new company
4 Recycle the PreciseARM Application Pool in IIS Manager
Epicor Settings
The Dashboard Epicor Settings page is intended for use by ARM Administrator users only This section
contains Epicor settings for ARM Clients who have upgraded from Epicor 7 to Epicor 10 and who want to
retain these Epicor settings in those more recent versions These settings are not available through the
Epicor 10 User Interface Please contact Precise Support if you are unsure of changing these settings Each
setting has a range of values which must be carefully adhered to
Page 62 of 84
EPICOR ADVANCED REQUISITION MANAGEMENT
Epicor Configuration
Settings for Multi-Company
Please note that any ARM default settings will need to exist in each Epicor company for multi-company
ARM
Site Costing
ARM integration requires a default cost ID be configured in Epicor
Company Configurationgt Modulesgt All Modulesgt Generalgt Site Cost ID
Alternatively this setting is available under Site Maintenance
Page 63 of 84
EPICOR ADVANCED REQUISITION MANAGEMENT
Product Tax Categories in Epicor
If users of ARM want the Tax Code on the AP Invoice created from a miscellaneous PO (most ARM POs) to
be set based on a non-inventory Catalogue item defined in ARM the Product Tax Categories must be
configured in Epicor and then assigned to line items in ARM Requisitions When the Product Tax Category
has been defined in Epicor the TaxCode job in ARM Integration will integrate it In ARM the Product Tax
Category is displayed as the Tax Code
When a PO is created in ARM and integrated Epicor will use the Tax Rate associated with the Product Tax
Category to determine whether the line is Taxable ie does the Product Tax CategoryTax Code assigned in
ARM have a Tax Rate assigned to it in Epicor If so then the PO Line in Epicor will have the Taxable
checkbox set to Ticked The AP Invoice created from this PO will use the same tax code Note that this
solution will be applicable for both Catalogue and Non ndash Catalogue items added to Requisitions in ARM
Page 64 of 84
EPICOR ADVANCED REQUISITION MANAGEMENT
To configure the Product Tax Category in Epicor navigate to Financial Management gt Accounts Payable gt
Setup gt Product Tax Category Either create a new Product Tax Category or use an existing one Ensure
that Tax Rate gt Detail tab has a Tax Type and Rate Code configured See the following images
Page 65 of 84
EPICOR ADVANCED REQUISITION MANAGEMENT
Open the Tax Type with Tax Type Entry click on Rates gt Effective Rate gt Detail or List tabs to see what the
current rate is
Save any changes to Epicor Product Tax Category and the ARM Integration TaxCode job will integrate the
change
Ship Via setting
Default Ship Via must be configured in Epicor so that ARM Purchase Orders and Transfers can work
properly
See Epicor gt Material Management gt ShippingReceiving gt Setup gt Ship Via
Epicor Part Configuration
How to create a Part in Epicor so that it will be added to the Catalogue in ARM
Page 66 of 84
EPICOR ADVANCED REQUISITION MANAGEMENT
bull Epicor gt Material Management gt Inventory Management gt Setup gt Part
bull On the Part Maintenance screen select File gt New gt New Part
bull Enter a Part Number of up to 30 characters
bull Enter a Description
bull Select a Type
bull Select a UOM Class
bull Select a Part Class (which is the equivalent of a Category in ARM) otherwise ARM will use the default
Category defined when ARM Integration manager is configured
bull On the Accounting tab add a new GL Control record
bull Save the record
bull The item will now be integrated into ARM by the ARM Integration InventoryItem job and can be
located via the Catalogue Search in ARM
Note The item was created with only the default location Therefore it can only be requisitioned for
one location in ARM If the item needs to be requisitioned for other locations then those Locations
need to be set up in Epicor and the part configured for those
Adding Locations to ItemsParts in Epicor
bull Epicor gt Material Management gt Inventory Management gt Setup gt Part
bull Click on the Sites tab If the Location you want to add is at a different Site then select File gt New gt New
Site
bull On the Site gt Detail tab select the Site from the dropdown list
bull Select a Primary Warehouse and assign a default Bin to the warehouse
bull Save the configuration changes The ARM Integration InventoryItem job will integrate the changes to
ARM
bull If the Location you want to add is another Warehouse at the same location highlight the Site in the Part
tree on the left side of the Part Maintenance screen then select File gt New gt New Warehouse
bull Select the appropriate details and Save The ARM Integration InventoryItem job will integrate the
changes to ARM
Note 1 The item will now be in the ARM Catalogue However no vendor quotes (Epicor Supplier
Price Lists) have been created yet so no prices are displayed in ARM
Epicor Supplier Price List (ARM Vendor Quotes) Configuration
bull Epicor gt Material Management gt Purchase Management gt Setup gt Supplier Price List
bull On the Supplier Price List screen select a Supplier via the search
bull Select File gt New gt New Part
bull Search for a part to be added to this supplier price list
Page 67 of 84
EPICOR ADVANCED REQUISITION MANAGEMENT
bull Tick the Approved Supplier checkbox on the Detail page (so that the prices added here can be
displayed in ARM)
bull Add a Base Unit Price
bull Select the Supplier Parts tab and select File gt New gt New Supplier Part
bull Enter a reference in the Supplier Part field
bull Optionally quantity discounts can be configured on the Price Breaks tab
bull Save the record
bull This record will now be integrated into ARM as a Vendor Quote and is visible in ARM on the Catalogue
Details page for the Catalogue Item
Projects and Jobs in Epicor
Projects and their associated Jobs are configured in Epicor Project and Job data is then integrated into the IMe7Imitation database for reference use by ARM For a job to be integrated into ARM it must comply with the following minimum configuration in EPICOR
bull The job must not be closed if requisitions in ARM are to be associated with it
bull The job must have Part(s) assigned to it (Only ARM Requisition lines with these parts will be able to select this job)
bull The job must have a Demand Link (File gt New gt New Demand Link gt Made to Order)
bull Operations associated with the job (that are to be integrated into ARM) must be Sub-Contract
bull Materials associated with the job (that are to be integrated into ARM) must be ticked as lsquoPurchase Directrsquo in Epicor
bull Users of ARM can select a Job and associated Assembly Material or Operation data when creating a Requisition When the requisition is integrated into ARM the items ordered in the requisition are associated with the Purchase Order(s) in Epicor How Epicor Purchase Orders are associated with Epicor Jobs needs to be configured at each Epicor installation
bull Eventually Jobs must be manually closed in Epicor this cannot be achieved in ARM See Epicor documentation for further information about Jobs
Set a Default Buyer ID in E10
(For POs created in ARM when Buyer Mapping not enabled)
To ensure that only POs created in ARM are integrated back into ARM a buyer record in Epicor should be
set as the System Default in E10 for each company Epicor 10 gt Material Management gt Purchase
Management gt Setup gt Buyer
This means that any POs created in ARM will be assigned this Buyer ID when they are integrated to Epicor
and any subsequent updates to those POs will be also integrated from Epicor to ARM
Page 68 of 84
EPICOR ADVANCED REQUISITION MANAGEMENT
NOTE The Epicor user specified in the BIL Configuration Utility must also be an
Authorised User on the Buyer ID used here
Configuring ARM Optional Components
The optional AutoFax facility allows Purchase Orders (POs) to be faxed automatically to suppliers and to automate centralised PO printing
Configure SSRS for ARM Reports
ARM 101 introduced SQL Server Reporting Services (SSRS) This software is freely available if you are
running SQL Server All ARM requires is that the connection to SSRS is active and the associated service is
running See here for further detail
Note that the report templates the rdl files are stored in CinetpubARMClientContentreports and
values for associated settings are pre-configured ie if you look at Administration gt Settings gt Auto Email
Transfer Order Report you will see that the value Transferrdl is pre-populated for your convenience
Configure Buyer Mapping ID
(For POs created in ARM with Buyer Mapping Enabled)
This feature allows the Buyer ID for ARM POs to be specified in ARM To use the functionality Global
Settings gt Enable Buyer Mapping should be set to Yes The PO creator field on the root node of the Primary
Approval Tree will then have an additional setting Buyer Info where you can set which Buyer will be used
on the PO for each company
NOTE The Epicor user specified in the BIL Configuration Utility must also be an
Authorised User on the Buyer ID used here
Page 69 of 84
EPICOR ADVANCED REQUISITION MANAGEMENT
Configure Automatic Faxing (AutoFax)
The installation to support automatic faxing of Purchase Orders requires the PBS ARM Task Agent service to be installed and a printer driver to be set up
ARM polls the database for newly created Purchase Orders that are flagged for automatic faxing (see the User Guide for more information) ARM creates one file per Purchase Order in the directory specified within ARM The file format is controlled by the printer driver These files are then polled by the computerised fax software and faxed
By default the PBS ARM Task Agent service uses the built-in service account
TIP For configuration instructions and information about individual program settings refer to the ARM online Help (click Help on the top menu bar in ARM to view the Help files)
Set up the Printer Driver
Go to the Web server and install the printer driver
Ensure that the PBS ARM Task Agent service account has permission to access the printer
Make the new printer driver the default for this user and enter the name of the printer driver into the ARM Administration Settings Reports Auto Fax Service Printer field
NOTES
The PBS ARM Task Agent service polls the eBackOffice company table PBSPrintService10_PrintJob every minute for newly created Purchase Orders These are turned into documents using SSRS
The document is saved to the directory specified in the ARM Dashboard gt Global Settings gt Reports gt Auto Email Directory setting
Page 70 of 84
EPICOR ADVANCED REQUISITION MANAGEMENT
Troubleshooting
Issue Resolution
ARM WEBSITE WILL
NOT START
Check that the World Wide Web Publishing Service is running in Services
Reload the web page
httplocalhost8080armweb
PURCHASE ORDER JOB
FAILS with lsquoPurchase
Order Number
already usedrsquo error
This problem will occur when ARM is installed on an Epicor backend that already
has existing Purchase Orders in it To correct it take the following steps
In Epicor search for the last Purchase Order number that was created via Epicor
Take note of the last PO number created
In Dashboardgt Company Settings select the relevant Company gt Document
Number Settings tab ndash Purchase Order edit the value and enter an appropriate
number (at least one higher than the last one created in Epicor)
TRANSFER ORDER JOB
FAILS with lsquoTransfer
Order Number
already usedrsquo error
Same issue as with Purchase Order numbers
In Dashboardgt Company Settings select the relevant Company gt Document
Number Settings tab ndash Transfer Order edit the value and enter an appropriate
number (at least one higher than the last one created in Epicor)
Page 71 of 84
EPICOR ADVANCED REQUISITION MANAGEMENT
USER CANNOT ADD A
VENDOR FOR A NON-
CAT ITEM
The Role assigned to this user does not have the Edit Requisition Vendor
permission A user with Administrator privileges should amend the Role Set via
Dashboardgt Roles Select a Role locate the permission tick the checkbox and
apply
USER DOES NOT SEE
THE lsquoSET VENDORrsquo
OPTION UNDER MORE
The Role assigned to this user does not have the Edit Requisition Vendor
permission A user with Administrator privileges should amend the Role Set via
Dashboardgt Roles Select a Role locate the permission tick the checkbox and
apply
USER DOES NOT SEE
THE lsquoSET LOCATIONrsquo
BUTTON
The setting Line Level Locations is disabled A user with permissions to change
ARM Settings should enable this setting Set via Dashboardgt Global Settingsgt
Line Level Locations
TRANSFER ORDERS
CREATED IN EPICOR 10
Any transfer order created in Epicor 10 will not integrate over into ARM
However if the Transfer Order is created in ARM it will integrate into Epicor and
can be shipped andor received in Epicor All integration points after the creation
will integrate both ways
CATALOGUE
REQUISITIONER
CANNOT SEE SOME OR
ALL INVENTORY ITEMS
The user logged on needs to have Access All Vendor Groups enabled under
Dashboardgt Users
Select the User scroll to the User Information section and tick the checkbox
labelled Access All Vendor Groups
Page 72 of 84
EPICOR ADVANCED REQUISITION MANAGEMENT
Known Issues with ARM Epicor Integration
Issue Resolution
This section provides information about a number of known integration issues between ARM and Epicor
For detailed ARM configuration instructions and information about individual program settings refer to
the ARM online Help (click Help on the top menu bar in ARM to view Help)
PurchaseBlanket Orders
closed early have different
total amounts in ARM and
Epicor
If the PurchaseBlanket Order is closed early ie not all of the items are
received or not all of the money is spent on the Blanket Order and the
Purchase Order or Blanket Order is manually closed in ARM Epicor sets
the total of the corresponding Purchase Order in Epicor to the amount
that has been receivedspent whereas in ARM the total amount of the
PurchaseBlanket Order is not changed
Some GL account codes
default to the GL Control
Code
Each Inventory Item Location should have a GL Inventory Account and a
GL Transfer Account However since Epicor allows GL Accounts for a GL
Control to have empty Account Codes ARM has been modified to
ensure that there are no Inventory Item Locations without GL Accounts
Solution
No action is required on the part of the user ARM identifies instances of
empty account codes However you should be aware of the following
bull ARM applies Account Codes as follows
o If a Part has a valid (=non empty) GL Account for the GL
Account Context InventoryExpense ARM applies it
o If the GLAccount field is empty ARM takes the Part
Class of the selected Part If this has a valid GL Account
for the Account Context InventoryExpense ARM
applies this
o If there is still no valid code ARM takes the default
company inventory expense account and selects the GL
Control Code Default
(The default company inventory expense account can be
set viewed in the GL Control Maintenance using Type
Inventory COS and WIP under there look for the
Account Context Inventory)
Page 73 of 84
EPICOR ADVANCED REQUISITION MANAGEMENT
bull If a full sync of all the inventory items is done after ARM has
been installed there should therefore not be any inventory item
locations without GLAccounts This can be verified by executing
the following script on the IMe7Imitation database (after the
sync has finished)
select iicode from inventoryitemlocation iil
inner join InventoryItem ii on iiInventoryItemID =
iilInventoryItemID
where glinventoryaccount is null
The query should return no results If it does return some inventory
items you should set a GL account on those items in Epicor
Page 74 of 84
EPICOR ADVANCED REQUISITION MANAGEMENT
Appendix 1 Increase Attachments Upload Limit 1 Internet Information Services (IIS) has a maximum request size of 30 Mbs The implication for ARM is
that file sizes for the Attachments feature are limited to that size To enable users of ARM to upload
larger file sizes the following configuration must be completed on the ARM server Two settings need
to be changed in IIS Request Filtering ndash Maximum allowed content length and Configuration Editor ndash
maxRequestLength
2 Close ARM
3 Close the Browser that ARM was opened in
4 Open IIS To change Request Filtering ndash Maximum allowed content length Select ARM gt IIS gt Request
Filtering
Page 75 of 84
EPICOR ADVANCED REQUISITION MANAGEMENT
Edit the setting highlighted in the capture below
5 To change Configuration Editor ndash maxRequestLength Select arm gt Management gt Configuration
Editor
Page 76 of 84
EPICOR ADVANCED REQUISITION MANAGEMENT
6 Navigate to the path and setting highlighted below change the setting and then click the Apply button
7 Restart ARM
8 In ARM change the Setting Attachments Maximum File Size to the size you require within the limit you
have just configured above
9 The configuration is now complete and ARM can be used as normal
Page 77 of 84
EPICOR ADVANCED REQUISITION MANAGEMENT
Appendix 2 Configure Multiple Instances of ARM Integration ARM Integration (ARM Task Agent Service) automatically integrates data from ARM to Epicor and from
Epicor back to ARM In environments with high transaction volumes data integration can be sped up by
running multiple integration instances and assigning specific jobs to specific integration instances
NOTE You need to take Buyer Mapping into account If you are using this feature
the Global setting is Enable Buyer Mapping The PO Creation and Buyer integration
jobs need to run on the same BIL Instance as each other
Configure a new integration instance
1 Go to Dashboardgt Integration
2 Click the Pause button on the relevant Agent Profile
3 Click into the Agent to load the integration jobs
4 Click the configure icon on the first job you wish to set a new integration instance for Set the IM instance and BIL port values accordingly Note If you require the additional integration instance to use a separate BIL port also this must be pre-configured using the BIL Configuration Utility
Page 78 of 84
EPICOR ADVANCED REQUISITION MANAGEMENT
5 Click the Back button to return to the main Integration screen
Page 79 of 84
EPICOR ADVANCED REQUISITION MANAGEMENT
6 Click the Start button on the Agent
The jobs assigned to the new integration instances will continue to log their activity in the ARM log file but run in the background on a separate integration instance
NOTE ARM will log a single log file for each Integration Agent (and all the IM
instances held within its respective integration jobs) The location by default is
CinetpubARMARMLogs and each log file is entitled ARM_IMxlog
Page 80 of 84
EPICOR ADVANCED REQUISITION MANAGEMENT
Appendix 3 Configure Microsoft SQL Reporting Services Connect to Microsoft SQL Reporting services
If you need to change the server name ensure that the correct Report Server Database is also selected
Page 81 of 84
EPICOR ADVANCED REQUISITION MANAGEMENT
ARM 102 SP2 introduced support for HTTPS Ensure the checkbox for HTTPS is ticked during installation if
this is a business requirement
Page 82 of 84
EPICOR ADVANCED REQUISITION MANAGEMENT
Page 83 of 84
EPICOR ADVANCED REQUISITION MANAGEMENT
Ensure that the SQL Reporting Service is running
Page 84 of 84
EPICOR ADVANCED REQUISITION MANAGEMENT
Precise Business Solutions 1116 Hobart Street Mt Hawthorn WA 6016 Phone +61 8 9242 5933 Fax +61 8 9242 5934 wwwprecisebusinesscomau
Corporate Office 804 Las Cimas Parkway Austin TX 78746 USA Toll Free +18884482636 Phone +15123282300 Fax +15122785590 wwwepicorcom
Document Title ARM 103 Installation Guide for E10 Document Date November 2019
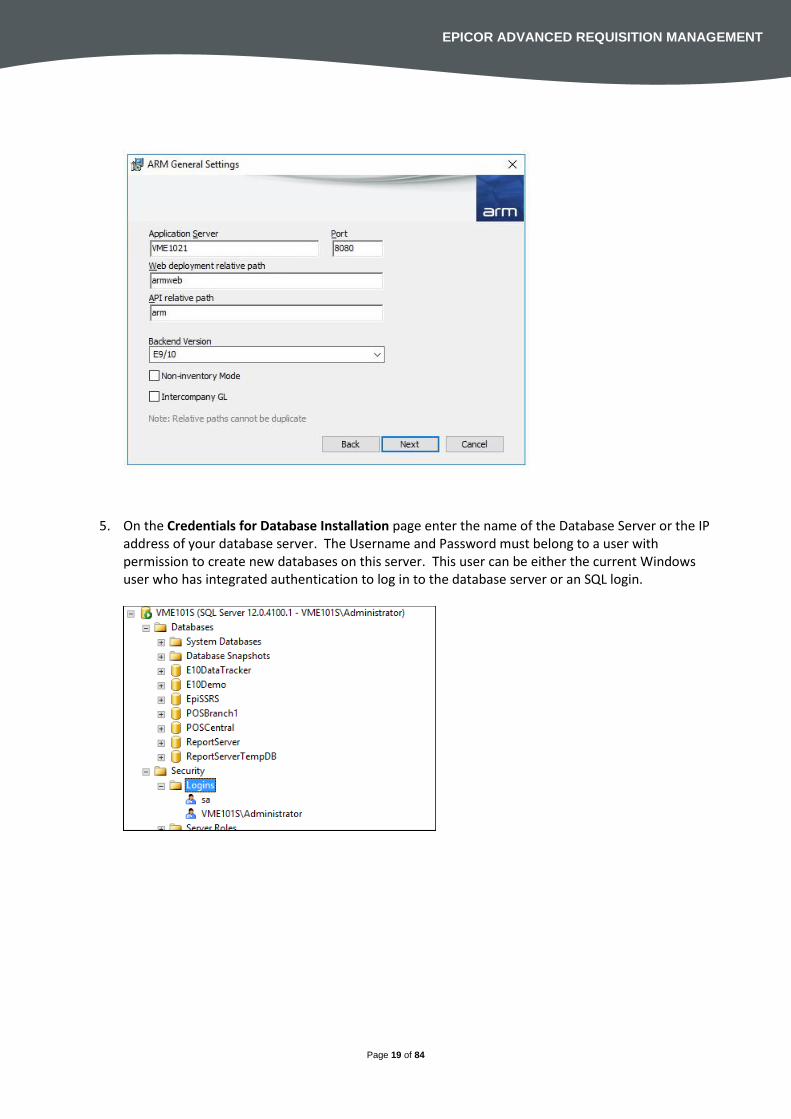
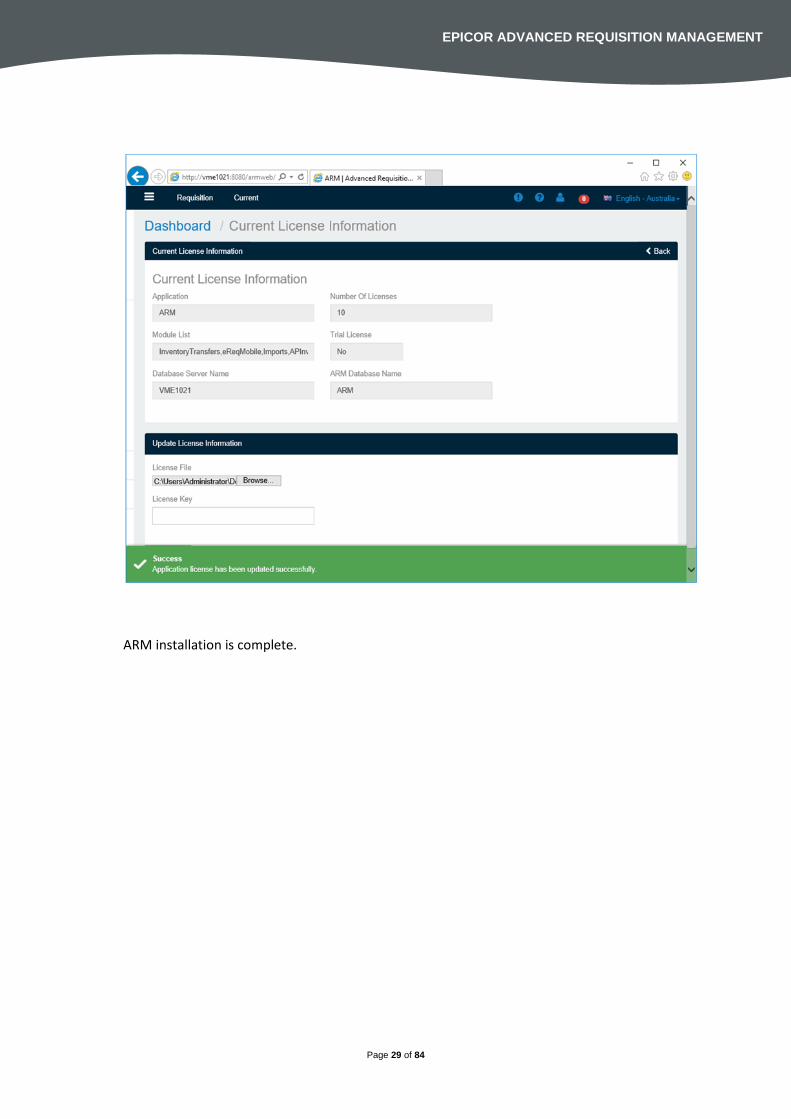
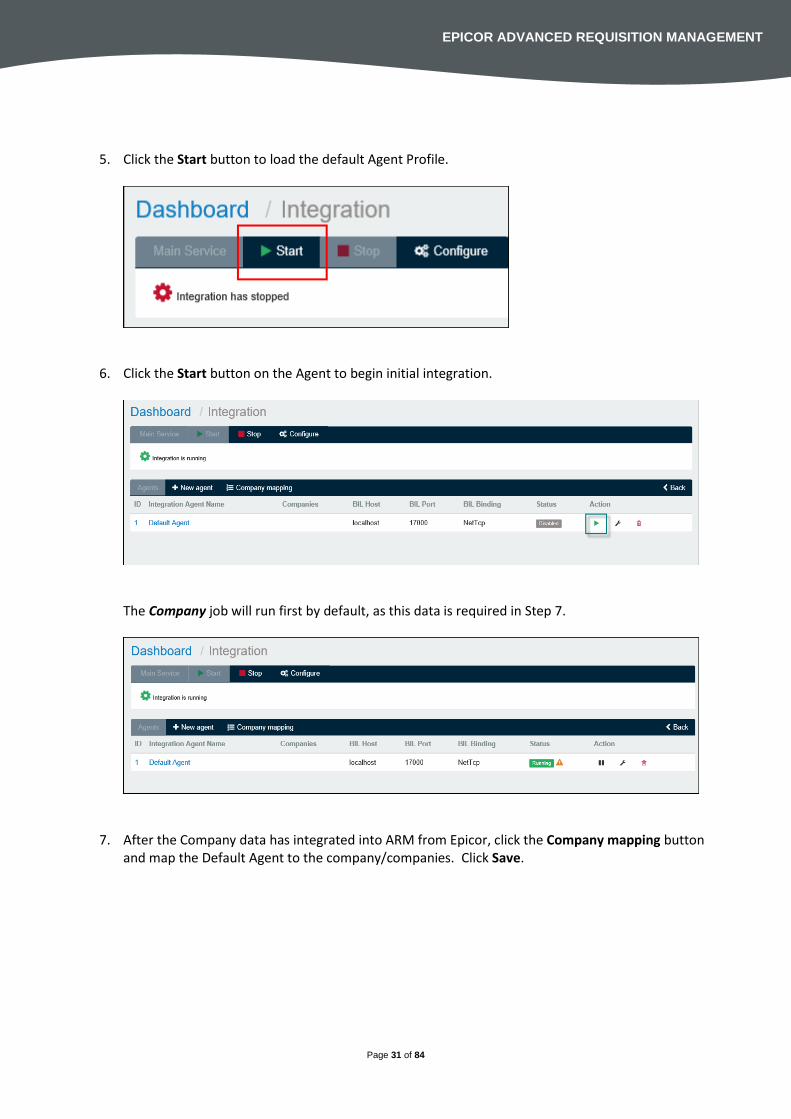
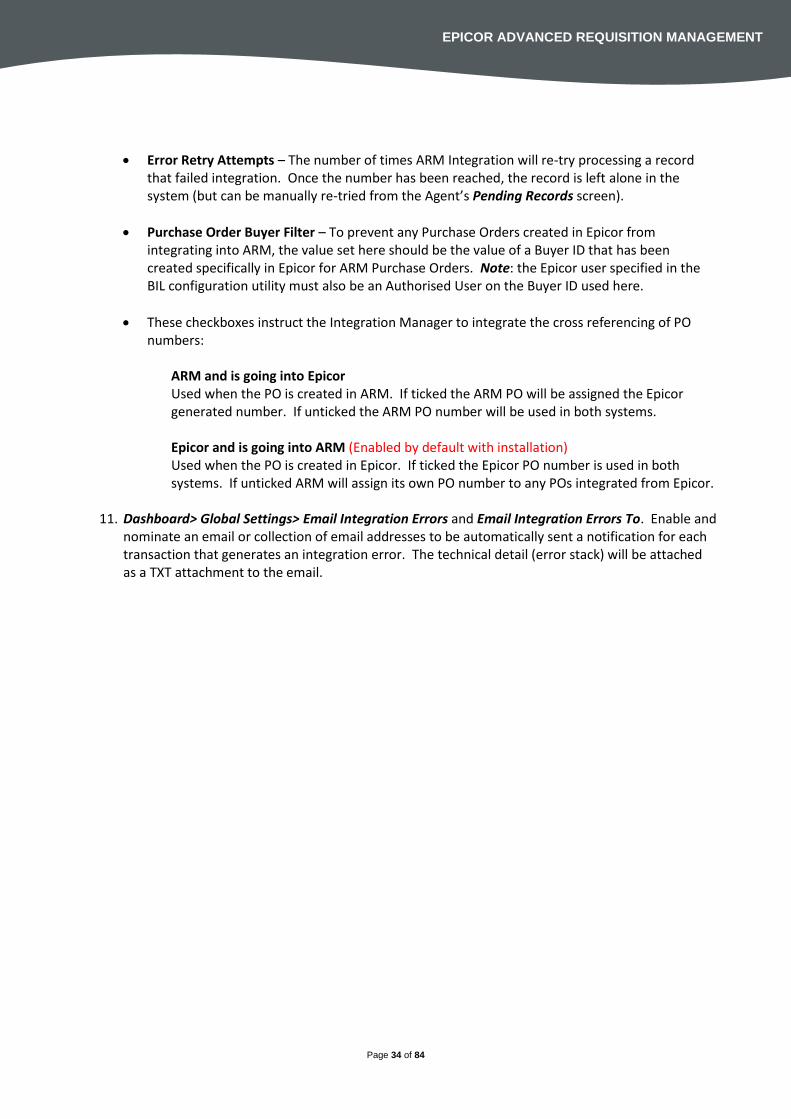
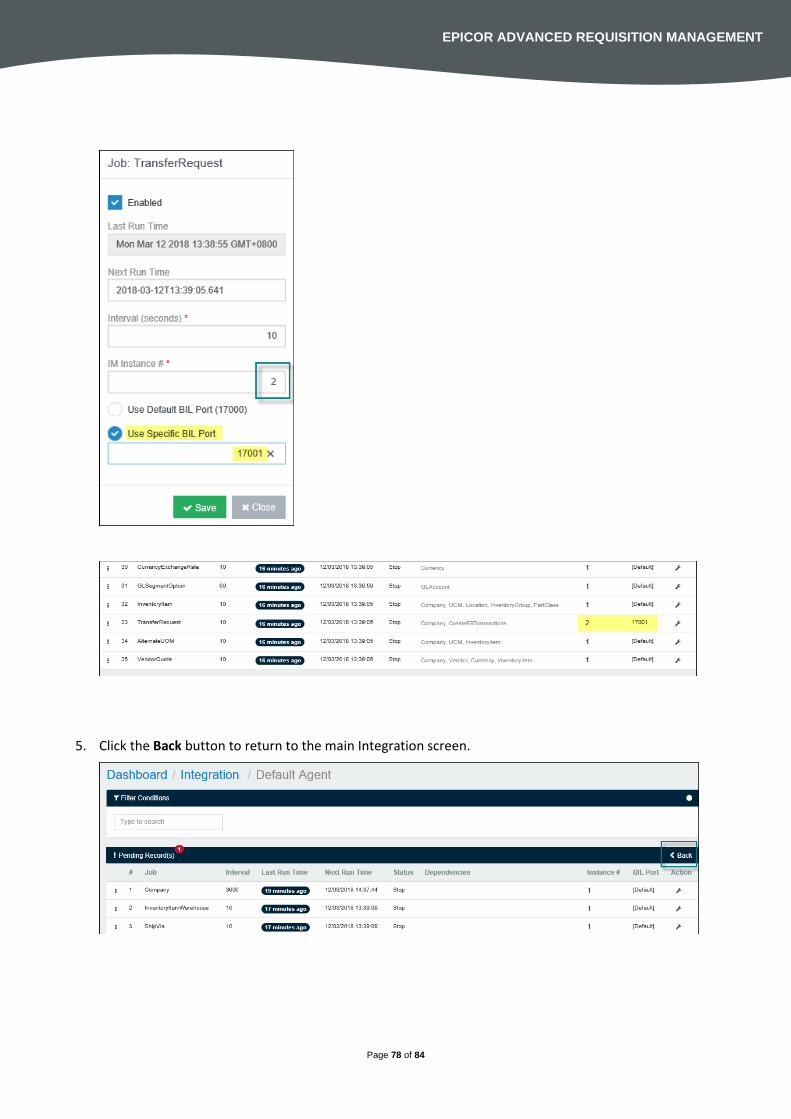
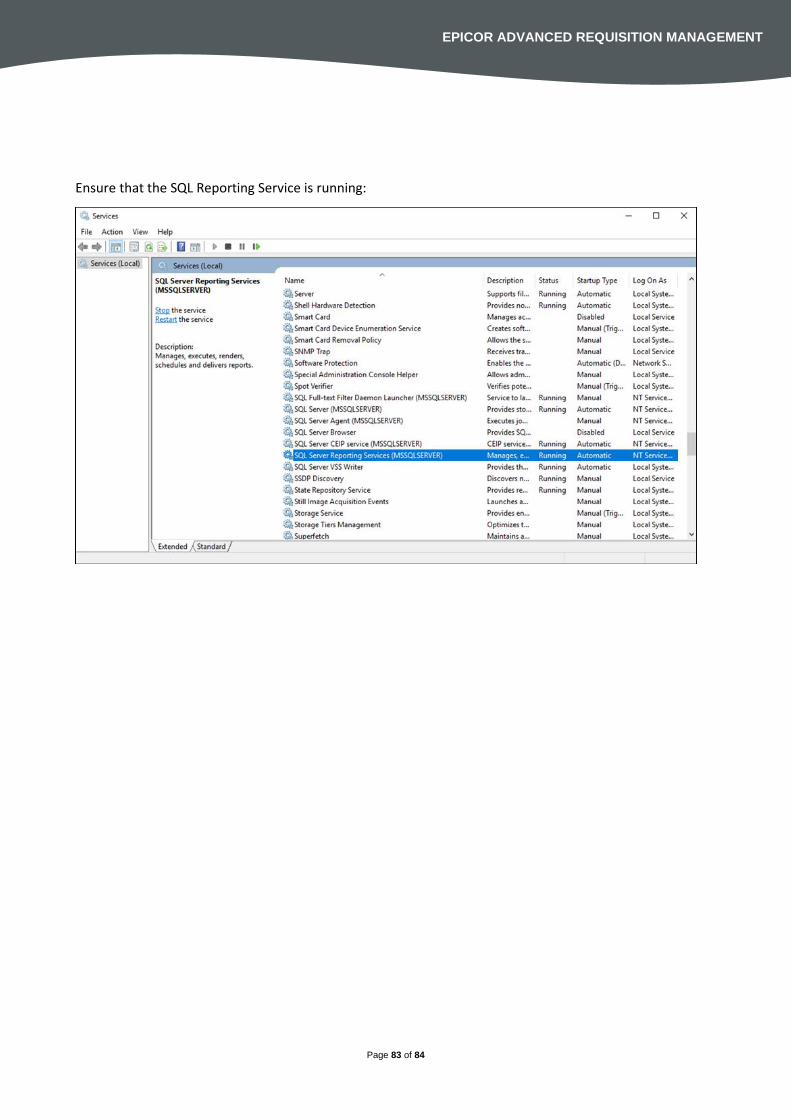