Access Control Lists, Cisco IOS XE Everest 16.5
210
Security Configuration Guide: Access Control Lists, Cisco IOS XE Everest 16.5 Americas Headquarters Cisco Systems, Inc. 170 West Tasman Drive San Jose, CA 95134-1706 USA http://www.cisco.com Tel: 408 526-4000 800 553-NETS (6387) Fax: 408 527-0883
-
Upload
khangminh22 -
Category
Documents
-
view
1 -
download
0
Transcript of Access Control Lists, Cisco IOS XE Everest 16.5
Security Configuration Guide: Access Control Lists, Cisco IOS XEEverest 16.5Americas HeadquartersCisco Systems, Inc.170 West Tasman DriveSan Jose, CA 95134-1706USAhttp://www.cisco.comTel: 408 526-4000
800 553-NETS (6387)Fax: 408 527-0883

THE SPECIFICATIONS AND INFORMATION REGARDING THE PRODUCTS IN THIS MANUAL ARE SUBJECT TO CHANGE WITHOUT NOTICE. ALL STATEMENTS,INFORMATION, AND RECOMMENDATIONS IN THIS MANUAL ARE BELIEVED TO BE ACCURATE BUT ARE PRESENTED WITHOUT WARRANTY OF ANY KIND,EXPRESS OR IMPLIED. USERS MUST TAKE FULL RESPONSIBILITY FOR THEIR APPLICATION OF ANY PRODUCTS.
THE SOFTWARE LICENSE AND LIMITED WARRANTY FOR THE ACCOMPANYING PRODUCT ARE SET FORTH IN THE INFORMATION PACKET THAT SHIPPED WITHTHE PRODUCT AND ARE INCORPORATED HEREIN BY THIS REFERENCE. IF YOU ARE UNABLE TO LOCATE THE SOFTWARE LICENSE OR LIMITED WARRANTY,CONTACT YOUR CISCO REPRESENTATIVE FOR A COPY.
The Cisco implementation of TCP header compression is an adaptation of a program developed by the University of California, Berkeley (UCB) as part of UCB's public domain version ofthe UNIX operating system. All rights reserved. Copyright © 1981, Regents of the University of California.
NOTWITHSTANDING ANY OTHERWARRANTY HEREIN, ALL DOCUMENT FILES AND SOFTWARE OF THESE SUPPLIERS ARE PROVIDED “AS IS" WITH ALL FAULTS.CISCO AND THE ABOVE-NAMED SUPPLIERS DISCLAIM ALL WARRANTIES, EXPRESSED OR IMPLIED, INCLUDING, WITHOUT LIMITATION, THOSE OFMERCHANTABILITY, FITNESS FOR A PARTICULAR PURPOSE AND NONINFRINGEMENT OR ARISING FROM A COURSE OF DEALING, USAGE, OR TRADE PRACTICE.
IN NO EVENT SHALL CISCO OR ITS SUPPLIERS BE LIABLE FOR ANY INDIRECT, SPECIAL, CONSEQUENTIAL, OR INCIDENTAL DAMAGES, INCLUDING, WITHOUTLIMITATION, LOST PROFITS OR LOSS OR DAMAGE TO DATA ARISING OUT OF THE USE OR INABILITY TO USE THIS MANUAL, EVEN IF CISCO OR ITS SUPPLIERSHAVE BEEN ADVISED OF THE POSSIBILITY OF SUCH DAMAGES.
Any Internet Protocol (IP) addresses and phone numbers used in this document are not intended to be actual addresses and phone numbers. Any examples, command display output, networktopology diagrams, and other figures included in the document are shown for illustrative purposes only. Any use of actual IP addresses or phone numbers in illustrative content is unintentionaland coincidental.
All printed copies and duplicate soft copies of this document are considered uncontrolled. See the current online version for the latest version.
Cisco has more than 200 offices worldwide. Addresses and phone numbers are listed on the Cisco website at www.cisco.com/go/offices.
Cisco and the Cisco logo are trademarks or registered trademarks of Cisco and/or its affiliates in the U.S. and other countries. To view a list of Cisco trademarks, go to this URL: www.cisco.comgo trademarks. Third-party trademarks mentioned are the property of their respective owners. The use of the word partner does not imply a partnership relationship between Cisco and anyother company. (1721R)
© 2019 Cisco Systems, Inc. All rights reserved.

C O N T E N T S
Read Me First 1C H A P T E R 1
IP Access List Overview 3C H A P T E R 2
Finding Feature Information 3
Information About IP Access Lists 3
Benefits of IP Access Lists 3
Border Routers and Firewall Routers Should Use Access Lists 4
Definition of an Access List 5
Access List Rules 5
Helpful Hints for Creating IP Access Lists 6
Named or Numbered Access Lists 7
Standard or Extended Access Lists 7
IP Packet Fields You Can Filter to Control Access 8
Wildcard Mask for Addresses in an Access List 8
Access List Sequence Numbers 9
Access List Logging 9
Alternative to Access List Logging 10
Additional IP Access List Features 10
RSP3 Porting Related Information 10
Where to Apply an Access List 11
Additional References 11
Feature Information for IP Access Lists 12
Creating an IP Access List and Applying It to an Interface 13C H A P T E R 3
Finding Feature Information 13
Restrictions for Creating an IP Access List and Applying It to an Interface 14
Security Configuration Guide: Access Control Lists, Cisco IOS XE Everest 16.5iii

Information About Creating an IP Access List and Applying It to an Interface 14
Helpful Hints for Creating IP Access Lists 14
Access List Remarks 15
Additional IP Access List Features 15
How to Create an IP Access List and Apply It to an Interface 15
Creating a Standard Access List to Filter on Source Address 16
Creating a Named Access List to Filter on Source Address 16
Creating a Numbered Access List to Filter on Source Address 18
Creating an Extended Access List 19
Creating a Named Extended Access List 20
Creating a Numbered Extended Access List 22
Applying an Access List to an Interface 24
Configuration Examples for Creating an IP Access List and Applying It to an Interface 25
Example: Filtering on Host Source Address 25
Example: Filtering on Subnet Source Address 25
Example: Filtering on Source and Destination Addresses and IP Protocols 25
Example: Filtering on Source Addresses Using a Numbered Access List 26
Example: Preventing Telnet Access to a Subnet 26
Example: Filtering on TCP and ICMP Using Port Numbers 26
Example: Allowing SMTP E-mail and Established TCP Connections 26
Example: Preventing Access to the Web by Filtering on Port Name 27
Example: Filtering on Source Address and Logging the Packets 27
Example: Limiting Debug Output 28
Additional References Creating an IP Access List and Applying It to an Interface 28
Feature Information for Creating an IP Access List and Applying It to an Interface 29
Creating an IP Access List to Filter IP Options, TCP Flags, Noncontiguous Ports 31C H A P T E R 4
Finding Feature Information 31
Prerequisites for Creating an IP Access List to Filter IP Options TCP Flags Noncontiguous Ports 31
Information About Creating an IP Access List to Filter IP Options, TCP Flags, Noncontiguous Ports32
IP Options 32
Benefits of Filtering IP Options 32
Benefits of Filtering on TCP Flags 32
Security Configuration Guide: Access Control Lists, Cisco IOS XE Everest 16.5iv
Contents

TCP Flags 33
Benefits of Using the Named ACL Support for Noncontiguous Ports on an Access Control EntryFeature 33
How Filtering on TTL Value Works 33
Benefits of Filtering on TTL Value 34
How to Create an IP Access List to Filter IP Options TCP Flags Noncontiguous Ports 35
Filtering Packets That Contain IP Options 35
What to Do Next 36
Filtering Packets That Contain TCP Flags 36
What to Do Next 38
Configuring an Access Control Entry with Noncontiguous Ports 39
Consolidating Access List Entries with Noncontiguous Ports into One Access List Entry 40
What To Do Next 42
Filtering Packets Based on TTL Value 42
Enabling Control Plane Policing to Filter on TTL Values 0 and 1 43
Configuration Examples for Filtering IP Options, TCP Flags, Noncontiguous Ports 46
Example: Filtering Packets That Contain IP Options 46
Example: Filtering Packets That Contain TCP Flags 46
Example: Creating an Access List Entry with Noncontiguous Ports 47
Example: Consolidating Some Existing Access List Entries into One Access List Entry withNoncontiguous Ports 47
Example: Filtering on TTL Value 48
Example: Control Plane Policing to Filter on TTL Values 0 and 1 48
Additional References 49
Feature Information for Creating an IP Access List to Filter 50
Configuring an FQDN ACL 51C H A P T E R 5
Finding Feature Information 51
Restrictions for Configuring FQDN ACL 51
Information About Configuring an FQDN ACL 52
Configuring an FQDN ACL 52
How to Configure FQDN ACL 52
Configuring an IP Access List 52
Configuring a Domain Name List 53
Security Configuration Guide: Access Control Lists, Cisco IOS XE Everest 16.5v
Contents

Mapping the FQDN ACL with a Domain Name 54
Monitoring an FQDN ACL 54
Configuration Examples for an FQDN ACL 55
Examples: FQDN ACL Configuration 55
Additional References for Configuring FQDN ACL 55
Feature Information for Configuring FQDN ACL 56
Refining an IP Access List 59C H A P T E R 6
Finding Feature Information 59
Information About Refining an IP Access List 59
Access List Sequence Numbers 59
Benefits of Access List Sequence Numbers 60
Sequence Numbering Behavior 60
Benefits of Time Ranges 60
Benefits Filtering Noninitial Fragments of Packets 61
Access List Processing of Fragments 61
How to Refine an IP Access List 62
Revising an Access List Using Sequence Numbers 63
Restricting an Access List Entry to a Time of Day or Week 65
What to Do Next 67
Configuration Examples for Refining an IP Access List 67
Example Resequencing Entries in an Access List 67
Example Adding an Entry with a Sequence Number 68
Example Adding an Entry with No Sequence Number 68
Example Time Ranges Applied to IP Access List Entries 69
Example Filtering IP Packet Fragments 69
Additional References 70
Feature Information for Refining an IP Access List 71
IP Named Access Control Lists 73C H A P T E R 7
Finding Feature Information 73
Information About IP Named Access Control Lists 73
Definition of an Access List 73
Named or Numbered Access Lists 74
Security Configuration Guide: Access Control Lists, Cisco IOS XE Everest 16.5vi
Contents

Benefits of IP Access Lists 75
Access List Rules 75
Helpful Hints for Creating IP Access Lists 76
Where to Apply an Access List 77
How to Configure IP Named Access Control Lists 77
Creating an IP Named Access List 77
Applying an Access List to an Interface 79
Configuration Examples for IP Named Access Control Lists 80
Example: Creating an IP Named Access Control List 80
Example: Applying the Access List to an Interface 80
Additional References for IP Named Access Control Lists 81
Feature Information for IP Named Access Control Lists 81
Commented IP Access List Entries 83C H A P T E R 8
Finding Feature Information 83
Information About Commented IP Access List Entries 83
Benefits of IP Access Lists 83
Access List Remarks 84
How to Configure Commented IP Access List Entries 85
Writing Remarks in a Named or Numbered Access List 85
Configuration Examples for Commented IP Access List Entries 86
Example: Writing Remarks in an IP Access List 86
Additional References for Commented IP Access List Entries 86
Feature Information for Commented IP Access List Entries 86
Standard IP Access List Logging 89C H A P T E R 9
Finding Feature Information 89
Restrictions for Standard IP Access List Logging 89
Information About Standard IP Access List Logging 90
Standard IP Access List Logging 90
How to Configure Standard IP Access List Logging 90
Creating a Standard IP Access List Using Numbers 90
Creating a Standard IP Access List Using Names 91
Configuration Examples for Standard IP Access List Logging 92
Security Configuration Guide: Access Control Lists, Cisco IOS XE Everest 16.5vii
Contents

Example: Creating a Standard IP Access List Using Numbers 92
Example: Creating a Standard IP Access List Using Names 92
Example: Limiting Debug Output 93
Additional References for Standard IP Access List Logging 93
Feature Information for Standard IP Access List Logging 94
IP Access List Entry Sequence Numbering 95C H A P T E R 1 0
Finding Feature Information 95
Restrictions for IP Access List Entry Sequence Numbering 95
Information About IP Access List Entry Sequence Numbering 96
Purpose of IP Access Lists 96
How an IP Access List Works 96
IP Access List Process and Rules 96
Helpful Hints for Creating IP Access Lists 97
Source and Destination Addresses 98
Wildcard Mask and Implicit Wildcard Mask 98
Transport Layer Information 98
Benefits IP Access List Entry Sequence Numbering 99
Sequence Numbering Behavior 99
How to Use Sequence Numbers in an IP Access List 100
Sequencing Access-List Entries and Revising the Access List 100
Configuration Examples for IP Access List Entry Sequence Numbering 103
Example: Resequencing Entries in an Access List 103
Example: Adding Entries with Sequence Numbers 104
Example: Entry Without Sequence Number 104
Additional References 105
Feature Information for IP Access List Entry Sequence Numbering 105
Configuring Lock-and-Key Security (Dynamic Access Lists) 107C H A P T E R 1 1
Prerequisites for Configuring Lock-and-Key 107
Information About Configuring Lock-and-Key Security (Dynamic Access Lists) 108
About Lock-and-Key 108
Benefits of Lock-and-Key 108
When to Use Lock-and-Key 108
Security Configuration Guide: Access Control Lists, Cisco IOS XE Everest 16.5viii
Contents

How Lock-and-Key Works 109
Compatibility with Releases Before Cisco IOS Release 11.1 109
Risk of Spoofing with Lock-and-Key 110
Router Performance Impacts with Lock-and-Key 110
Maintaining Lock-and-Key 110
Dynamic Access Lists 110
Lock-and-Key Authentication 111
The autocommand Command 112
How to Configure Lock-and-Key Security (Dynamic Access Lists) 113
Configuring Lock-and-Key 113
Verifying Lock-and-Key Configuration 115
Displaying Dynamic Access List Entries 115
Manually Deleting Dynamic Access List Entries 115
Configuration Examples for Lock-and-Key 116
Example Lock-and-Key with Local Authentication 116
Example Lock-and-Key with TACACS+ Authentication 116
ACL IP Options Selective Drop 119C H A P T E R 1 2
Finding Feature Information 119
Restrictions for ACL IP Options Selective Drop 119
Information About ACL IP Options Selective Drop 120
Using ACL IP Options Selective Drop 120
Benefits of Using ACL IP Options Selective Drop 120
How to Configure ACL IP Options Selective Drop 120
Configuring ACL IP Options Selective Drop 120
Configuration Examples for ACL IP Options Selective Drop 121
Example Configuring ACL IP Options Selective Drop 121
Example Verifying ACL IP Options Selective Drop 121
Additional References for IP Access List Entry Sequence Numbering 122
Feature Information for ACL IP Options Selective Drop 123
Displaying and Clearing IP Access List Data Using ACL Manageability 125C H A P T E R 1 3
Finding Feature Information 125
Information About Displaying and Clearing IP Access List Data Using ACL Manageability 126
Security Configuration Guide: Access Control Lists, Cisco IOS XE Everest 16.5ix
Contents

Benefits of ACL Manageability 126
Support for Interface-Level ACL Statistics 126
How to Display and Clear IP Access List Data 126
Displaying Global IP ACL Statistics 126
Displaying Interface-Level IP ACL Statistics 127
Clearing the Access List Counters 128
Configuration Examples for Displaying and Clearing IP Access List Data Using ACLManageability128
Example Displaying Global IP ACL Statistics 128
Example Displaying Input Statistics 129
Example Displaying Output Statistics 129
Example Displaying Input and Output Statistics 129
Example Clearing Global and Interface Statistics for an IP Access List 129
Example Clearing Global and Interface Statistics for All IP Access Lists 130
Additional References 130
Feature Information for Displaying IP Access List Information and Clearing Counters 131
ACL Syslog Correlation 133C H A P T E R 1 4
Finding Feature Information 133
Prerequisites for ACL Syslog Correlation 133
Information About ACL Syslog Correlation 134
ACL Syslog Correlation Tags 134
ACE Syslog Messages 134
How to Configure ACL Syslog Correlation 134
Enabling Hash Value Generation on a Device 134
Disabling Hash Value Generation on a Device 136
Configuring ACL Syslog Correlation Using a User-Defined Cookie 137
Configuring ACL Syslog Correlation Using a Hash Value 138
Changing the ACL Syslog Correlation Tag Value 140
Troubleshooting Tips 141
Configuration Examples for ACL Syslog Correlation 141
Example: Configuring ACL Syslog Correlation Using a User-Defined Cookie 141
Example: Configuring ACL Syslog Correlation using a Hash Value 142
Example: Changing the ACL Syslog Correlation Tag Value 142
Security Configuration Guide: Access Control Lists, Cisco IOS XE Everest 16.5x
Contents

Additional References for IPv6 IOS Firewall 142
Feature Information for ACL Syslog Correlation 143
IPv6 Access Control Lists 145C H A P T E R 1 5
RSP3 Porting Related Information 145
Finding Feature Information 145
Information About IPv6 Access Control Lists 146
Access Control Lists for IPv6 Traffic Filtering 146
IPv6 Packet Inspection 146
Access Class Filtering in IPv6 146
How to Configure IPv6 Access Control Lists 146
Configuring IPv6 Traffic Filtering 146
Creating and Configuring an IPv6 ACL for Traffic Filtering 146
Applying the IPv6 ACL to an Interface 148
Controlling Access to a vty 149
Creating an IPv6 ACL to Provide Access Class Filtering 149
Applying an IPv6 ACL to the Virtual Terminal Line 150
Configuration Examples for IPv6 Access Control Lists 151
Example: Verifying IPv6 ACL Configuration 151
Example: Creating and Applying an IPv6 ACL 151
Example: Controlling Access to a vty 152
Additional References 152
Feature Information for IPv6 Access Control Lists 152
IPv6 ACL Undetermined-Transport Support 155C H A P T E R 1 6
Finding Feature Information 155
Restrictions for IPv6 ACL Undetermined-Transport Support 155
Information about IPv6 ACL Undetermined-Transport Support 156
IPv6 ACL Undetermined-Transport 156
How to Configure IPv6 ACL Undetermined-Transport Support 156
Configuring IPv6 ACL Undetermined-Transport Support 156
Configuration Examples for IPv6 ACL Undetermined-Transport Support 157
Example: Example for IPv6 ACL Undetermined-Transport Support 157
Additional References for IPv6 ACL Undetermined-Transport Support 157
Security Configuration Guide: Access Control Lists, Cisco IOS XE Everest 16.5xi
Contents

Feature Information for ACL Template 158
Configuring Template ACLs 159C H A P T E R 1 7
Finding Feature Information 159
Prerequisites for Template ACLs 159
Restrictions for Template ACLs 160
Information About Configuring Template ACLs 160
Template ACL Feature Design 160
Multiple ACLs 161
VSA Cisco-AVPairs 162
RADIUS Attribute 242 162
How to Configure Template ACLs 163
Configuring the Maximum Size of Template ACLs 164
Troubleshooting Tips 164
Configuration Examples for Template ACLs 165
Example Maximum Size of Template ACLs 165
Example Showing ACL Template Summary Information 165
Example Showing ACL Template Tree Information 166
Additional References 166
Feature Information for ACL Template 166
IPv6 Template ACL 169C H A P T E R 1 8
Finding Feature Information 169
Information About IPv6 ACL—Template ACL 170
IPv6 Template ACL 170
How to Enable IPv6 ACL—Template ACL 170
Enabling IPv6 Template Processing 170
Configuration Examples for IPv6 ACL—Template ACL 171
Example: IPv6 Template ACL Processing 171
Additional References 172
Feature Information for IPv6 ACL—Template ACL 173
IPv4 ACL Chaining Support 175C H A P T E R 1 9
Finding Feature Information 175
Security Configuration Guide: Access Control Lists, Cisco IOS XE Everest 16.5xii
Contents
Restrictions for IPv4 ACL Chaining Support 175
Information About IPv4 ACL Chaining Support 176
ACL Chaining Overview 176
IPv4 ACL Chaining Support 176
How to Configure IPv4 ACL Chaining Support 176
Configuring an Interface to Accept Common ACL 177
Configuration Examples for IPv4 ACL Chaining Support 177
Example: Configuring an Interface to Accept a Common ACL 178
Additional References for IPv4 ACL Chaining Support 178
Feature Information for IPv4 ACL Chaining Support 179
IPv6 ACL Chaining with a Common ACL 181C H A P T E R 2 0
Finding Feature Information 181
Information About IPv6 ACL Chaining with a Common ACL 181
ACL Chaining Overview 181
IPv6 ACL Chaining with a Common ACL 182
How to Configure IPv6 ACL Chaining with a Common ACL 182
Configuring the IPv6 ACL to an Interface 182
Configuration Examples for IPv6 ACL Chaining with a Common ACL 183
Example: Configuring an Interface to Accept a Common ACL 184
Additional References for IPv6 ACL Chaining with a Common ACL 185
Feature Information for IPv6 ACL Chaining with a Common ACL 185
IPv6 ACL Extensions for Hop by Hop Filtering 187C H A P T E R 2 1
Finding Feature Information 187
Information About IPv6 ACL Extensions for Hop by Hop Filtering 187
ACLs and Traffic Forwarding 187
How to Configure IPv6 ACL Extensions for Hop by Hop Filtering 188
Configuring IPv6 ACL Extensions for Hop by Hop Filtering 188
Configuration Example for IPv6 ACL Extensions for Hop by Hop Filtering 189
Example: IPv6 ACL Extensions for Hop by Hop Filtering 189
Additional References 190
Feature Information for IPv6 ACL Extensions for Hop by Hop Filtering 191
Security Configuration Guide: Access Control Lists, Cisco IOS XE Everest 16.5xiii
Contents

Security (ACL) Enhancements 193C H A P T E R 2 2
Restrictions 193
Configuring Security (ACL) Enhancements 194
Feature Information for Security (ACL) Enhancements 194
Security Configuration Guide: Access Control Lists, Cisco IOS XE Everest 16.5xiv
Contents

C H A P T E R 1Read Me First
Important Information about Cisco IOS XE 16
Effective Cisco IOS XE Release 3.7.0E for Catalyst Switching and Cisco IOS XE Release 3.17S (for Accessand Edge Routing) the two releases evolve (merge) into a single version of converged release—the Cisco IOSXE 16—providing one release covering the extensive range of access and edge products in the Switching andRouting portfolio.
Feature Information
Use Cisco Feature Navigator to find information about feature support, platform support, and Cisco softwareimage support. An account on Cisco.com is not required.
Related References
• Cisco IOS Command References, All Releases
Obtaining Documentation and Submitting a Service Request
• To receive timely, relevant information from Cisco, sign up at Cisco Profile Manager.
• To get the business impact you’re looking for with the technologies that matter, visit Cisco Services.
• To submit a service request, visit Cisco Support.
• To discover and browse secure, validated enterprise-class apps, products, solutions and services, visitCisco Marketplace.
• To obtain general networking, training, and certification titles, visit Cisco Press.
• To find warranty information for a specific product or product family, access Cisco Warranty Finder.
Security Configuration Guide: Access Control Lists, Cisco IOS XE Everest 16.51

Security Configuration Guide: Access Control Lists, Cisco IOS XE Everest 16.52
Read Me First

C H A P T E R 2IP Access List Overview
Access control lists (ACLs) perform packet filtering to control which packets move through a network andto where. The packet filtering provides security by helping to limit the network traffic, restrict the access ofusers and devices to a network, and prevent the traffic from leaving a network. IP access lists reduce thechance of spoofing and denial-of-service attacks and allow dynamic, temporary user-access through a firewall.
IP access lists can also be used for purposes other than security, such as bandwidth control, restrict the contentof routing updates, redistribute routes, trigger dial-on-demand (DDR) calls, limit debug output, and identifyor classify traffic for quality of service (QoS) features. This module provides an overview of IP access lists.
• Finding Feature Information, on page 3• Information About IP Access Lists, on page 3• Additional References, on page 11• Feature Information for IP Access Lists, on page 12
Finding Feature InformationYour software release may not support all the features documented in this module. For the latest caveats andfeature information, see Bug Search Tool and the release notes for your platform and software release. Tofind information about the features documented in this module, and to see a list of the releases in which eachfeature is supported, see the feature information table.
Use Cisco Feature Navigator to find information about platform support and Cisco software image support.To access Cisco Feature Navigator, go to www.cisco.com/go/cfn. An account on Cisco.com is not required.
Information About IP Access Lists
Benefits of IP Access ListsAccess control lists (ACLs) perform packet filtering to control the flow of packets through a network. Packetfiltering can restrict the access of users and devices to a network, providing a measure of security. Accesslists can save network resources by reducing traffic. The benefits of using access lists are as follows:
• Authenticate incoming rsh and rcp requests—Access lists can simplify the identification of local users,remote hosts, and remote users in an authentication database that is configured to control access to a
Security Configuration Guide: Access Control Lists, Cisco IOS XE Everest 16.53

device. The authentication database enables Cisco software to receive incoming remote shell (rsh) andremote copy (rcp) protocol requests.
• Block unwanted traffic or users—Access lists can filter incoming or outgoing packets on an interface,thereby controlling access to a network based on source addresses, destination addresses, or userauthentication. You can also use access lists to determine the types of traffic that are forwarded or blockedat device interfaces. For example, you can use access lists to permit e-mail traffic to be routed througha network and to block all Telnet traffic from entering the network.
• Control access to vty—Access lists on an inbound vty (Telnet) can control who can access the lines toa device. Access lists on an outbound vty can control the destinations that the lines from a device canreach.
• Identify or classify traffic for QoS features—Access lists provide congestion avoidance by setting theIP precedence forWeighted RandomEarly Detection (WRED) and committed access rate (CAR). Accesslists also provide congestion management for class-based weighted fair queueing (CBWFQ), priorityqueueing, and custom queueing.
• Limit debug command output—Access lists can limit debug output based on an IP address or a protocol.
• Provide bandwidth control—Access lists on a slow link can prevent excess traffic on a network.
• Provide NAT control—Access lists can control which addresses are translated by Network AddressTranslation (NAT).
• Reduce the chance of DoS attacks—Access lists reduce the chance of denial-of-service (DoS) attacks.Specify IP source addresses to control traffic from hosts, networks, or users from accessing your network.Configure the TCP Intercept feature to can prevent servers from being floodedwith requests for connection.
• Restrict the content of routing updates—Access lists can control routing updates that are sent, received,or redistributed in networks.
• Trigger dial-on-demand calls—Access lists can enforce dial and disconnect criteria.
Border Routers and Firewall Routers Should Use Access ListsThere are many reasons to configure access lists; for example, you can use access lists to restrict contents ofrouting updates or to provide traffic flow control. One of the most important reasons to configure access listsis to provide a basic level of security for your network by controlling access to it. If you do not configureaccess lists on your router, all packets passing through the router could be allowed onto all parts of yournetwork.
An access list can allow one host to access a part of your network and prevent another host from accessingthe same area. In the figure below, by applying an appropriate access list to the interfaces of the router, HostA is allowed to access the Human Resources network and Host B is prevented from accessing the HumanResources network.
Access lists should be used in firewall routers, which are often positioned between your internal network andan external network such as the Internet. You can also use access lists on a router positioned between twoparts of your network, to control traffic entering or exiting a specific part of your internal network.
To provide some security benefits of access lists, you should at least configure access lists on borderrouters--routers located at the edges of your networks. Such an access list provides a basic buffer from theoutside network or from a less controlled area of your own network into a more sensitive area of your network.On these border routers, you should configure access lists for each network protocol configured on the router
Security Configuration Guide: Access Control Lists, Cisco IOS XE Everest 16.54
IP Access List OverviewBorder Routers and Firewall Routers Should Use Access Lists

interfaces. You can configure access lists so that inbound traffic or outbound traffic or both are filtered on aninterface.
Access lists are defined on a per-protocol basis. In other words, you should define access lists for everyprotocol enabled on an interface if you want to control traffic flow for that protocol.
Definition of an Access ListAccess control lists (ACLs) perform packet filtering to control the movement of packets through a network.Packet filtering provides security by limiting the access of traffic into a network, restricting user and deviceaccess to a network, and preventing traffic from leaving a network. IP access lists reduce the chance of spoofingand denial-of-service attacks, and allow dynamic, temporary user-access through a firewall.
IP access lists can also be used for purposes other than security, such as to control bandwidth, restrict thecontent of routing updates, redistribute routes, trigger dial-on-demand (DDR) calls, limit debug output, andidentify or classify traffic for quality of service (QoS) features.
An access list is a sequential list that consists of at least one permit statement and possibly one or more denystatements. In the case of IP access lists, these statements can apply to IP addresses, upper-layer IP protocols,or other fields in IP packets.
Access lists are identified and referenced by a name or a number. Access lists act as packet filters, filteringpackets based on the criteria defined in each access list.
After you configure an access list, for the access list to take effect, you must either apply the access list to aninterface (by using the ip access-group command), a vty (by using the access-class command), or referencethe access list by any command that accepts an access list. Multiple commands can reference the same accesslist.
In the following configuration, an IP access list named branchoffices is configured on Fast Ethernet interface0/1/0 and applied to incoming packets. Networks other than the ones specified by the source address and maskpair cannot access Fast Ethernet interface 0/1/0. The destinations for packets coming from sources on network172.16.7.0 are unrestricted. The destination for packets coming from sources on network 172.16.2.0 must be172.31.5.4.
ip access-list extended branchoffices10 permit 172.16.7.0 0.0.0.3 any20 permit 172.16.2.0 0.0.0.255 host 172.31.5.4!interface fastethernet 0/1/0ip access-group branchoffices in
Access List RulesThe following rules apply to access lists:
• Only one access list per interface, per protocol, and per direction is allowed.
• An access list must contain at least one permit statement or all packets are denied entry into the network.
• The order in which access list conditions or match criteria are configured is important. While decidingwhether to forward or block a packet, Cisco software tests the packet against each criteria statement inthe order in which these statements are created. After a match is found, no more criteria statements arechecked. The same permit or deny statements specified in a different order can result in a packet beingpassed under one circumstance and denied in another circumstance.
Security Configuration Guide: Access Control Lists, Cisco IOS XE Everest 16.55
IP Access List OverviewDefinition of an Access List

• If an access list is referenced by a name, but the access list does not exist, all packets pass. An interfaceor command with an empty access list applied to it permits all traffic into the network.
• Standard access lists and extended access lists cannot have the same name.
• Inbound access lists process packets before the packets are routed to an outbound interface. Inboundaccess lists that have filtering criteria that deny packet access to a network saves the overhead of routinglookup. Packets that are permitted access to a network based on the configured filtering criteria areprocessed for routing. For inbound access lists, when you configure a permit statement, packets areprocessed after they are received, and when you configure a deny statement, packets are discarded.
• Outbound access lists process packets before they leave the device. Incoming packets are routed to theoutbound interface and then processed by the outbound access list. For outbound access lists, when youconfigure a permit statement, packets are sent to the output buffer, and when you configure a denystatement, packets are discarded.
• An access list can control traffic arriving at a device or leaving a device, but not traffic originating at adevice.
Helpful Hints for Creating IP Access ListsThe following tips will help you avoid unintended consequences and help you create more efficient, usefulaccess lists.
• Create the access list before applying it to an interface (or elsewhere), because if you apply a nonexistentaccess list to an interface and then proceed to configure the access list, the first statement is put intoeffect, and the implicit deny statement that follows could cause you immediate access problems.
• Another reason to configure an access list before applying it is because an interface with an empty accesslist applied to it permits all traffic.
• All access lists need at least one permit statement; otherwise, all packets are denied and no traffic passes.
• Use the statement permit any any if you want to allow all other packets not already denied. Using thestatement permit any any in effect avoids denying all other packets with the implicit deny statement atthe end of an access list. Do not make your first access list entry permit any any because all traffic willget through; no packets will reach the subsequent testing. In fact, once you specify permit any any, alltraffic not already denied will get through.
• Although all access lists end with an implicit deny statement, we recommend use of an explicit denystatement (for example, deny ip any any). On most platforms, you can display the count of packetsdenied by issuing the show access-list command, thus finding out more information about who youraccess list is disallowing. Only packets denied by explicit deny statements are counted, which is whythe explicit deny statement will yield more complete data for you.
• While you are creating an access list or after it is created, you might want to delete an entry.
• You cannot delete an entry from a numbered access list; trying to do so will delete the entire accesslist. If you need to delete an entry, you need to delete the entire access list and start over.
• You can delete an entry from a named access list. Use the no permit or no deny command to deletethe appropriate entry.
• In order to make the purpose of individual statements more scannable and easily understood at a glance,you can write a helpful remark before or after any statement by using the remark command.
Security Configuration Guide: Access Control Lists, Cisco IOS XE Everest 16.56
IP Access List OverviewHelpful Hints for Creating IP Access Lists

• If you want to deny access to a particular host or network and find out if someone from that network orhost is attempting to gain access, include the log keyword with the corresponding deny statement so thatthe packets denied from that source are logged for you.
• This hint applies to the placement of your access list. When trying to save resources, remember that aninbound access list applies the filter conditions before the routing table lookup. An outbound access listapplies the filter conditions after the routing table lookup.
Named or Numbered Access ListsAll access lists must be identified by a name or a number. Named access lists are more convenient thannumbered access lists because you can specify a meaningful name that is easier to remember and associatewith a task. You can reorder statements in or add statements to a named access list.
Named access lists support the following features that are not supported by numbered access lists:
• IP options filtering
• Noncontiguous ports
• TCP flag filtering
• Deleting of entries with the no permit or no deny command
Not all commands that accept a numbered access list will accept a named access list. For example, vty usesonly numbered access lists.
Note
Standard or Extended Access ListsAll access lists are either standard or extended access lists. If you only intend to filter on a source address,the simpler standard access list is sufficient. For filtering on anything other than a source address, an extendedaccess list is necessary.
• Named access lists are specified as standard or extended based on the keyword standard or extendedin the ip access-list command syntax.
• Numbered access lists are specified as standard or extended based on their number in the access-listcommand syntax. Standard IP access lists are numbered 1 to 99 or 1300 to 1999; extended IP access listsare numbered 100 to 199 or 2000 to 2699. The range of standard IP access lists was initially only 1 to99, and was subsequently expanded with the range 1300 to 1999 (the intervening numbers were assignedto other protocols). The extended access list range was similarly expanded.
Standard Access Lists
Standard IP access lists test only source addresses of packets (except for two exceptions). Because standardaccess lists test source addresses, they are very efficient at blocking traffic close to a destination. There aretwo exceptions when the address in a standard access list is not a source address:
• On outbound VTY access lists, when someone is trying to telnet, the address in the access list entry isused as a destination address rather than a source address.
Security Configuration Guide: Access Control Lists, Cisco IOS XE Everest 16.57
IP Access List OverviewNamed or Numbered Access Lists

• When filtering routes, you are filtering the network being advertised to you rather than a source address.
Extended Access Lists
Extended access lists are good for blocking traffic anywhere. Extended access lists test source and destinationaddresses and other IP packet data, such as protocols, TCP or UDP port numbers, type of service (ToS),precedence, TCP flags, and IP options. Extended access lists can also provide capabilities that standard accesslists cannot, such as the following:
• Filtering IP Options
• Filtering TCP flags
• Filtering noninitial fragments of packets (see the module “Refining an IP Access List”)
Packets that are subject to an extended access list will not be autonomous switched.Note
IP Packet Fields You Can Filter to Control AccessYou can use an extended access list to filter on any of the following fields in an IP packet. Source addressand destination address are the two most frequently specified fields on which to base an access list:
• Source address--Specifies a source address to control packets coming from certain networking devicesor hosts.
• Destination address--Specifies a destination address to control packets being sent to certain networkingdevices or hosts.
• Protocol--Specifies an IP protocol indicated by the keyword eigrp, gre, icmp, igmp, ip, ipinip, nos,ospf, tcp, or udp, or indicated by an integer in the range from 0 to 255 (representing an Internet protocol).If you specify a transport layer protocol (icmp, igmp, tcp, or udp), the command has a specific syntax.
• Ports and non-contiguous ports--Specifies TCP or UDP ports by a port name or port number. Theport numbers can be noncontiguous port numbers. Port numbers can be useful to filter Telnet trafficor HTTP traffic, for example.
• TCP flags--Specifies that packets match any flag or all flags set in TCP packets. Filtering on specificTCP flags can help prevent false synchronization packets.
• IP options--Specifies IP options; one reason to filter on IP options is to prevent routers from beingsaturated with spurious packets containing them.
Wildcard Mask for Addresses in an Access ListAddress filtering uses wildcard masking to indicate to the software whether to check or ignore correspondingIP address bits when comparing the address bits in an access list entry to a packet being submitted to theaccess list. By carefully setting wildcard masks, you can specify one or more IP addresses for permit or denytests.
Security Configuration Guide: Access Control Lists, Cisco IOS XE Everest 16.58
IP Access List OverviewIP Packet Fields You Can Filter to Control Access

Wildcard masking for IP address bits uses the number 1 and the number 0 to specify how the software treatsthe corresponding IP address bits. A wildcard mask is sometimes referred to as an inverted mask because a1 and 0 mean the opposite of what they mean in a subnet (network) mask.
• A wildcard mask bit 0 means check the corresponding bit value; they must match.
• A wildcard mask bit 1 means ignore that corresponding bit value; they need not match.
If you do not supply a wildcard mask with a source or destination address in an access list statement, thesoftware assumes an implicit wildcard mask of 0.0.0.0, meaning all values must match.
Unlike subnet masks, which require contiguous bits indicating network and subnet to be ones, wildcard masksallow noncontiguous bits in the mask.
The table below shows examples of IP addresses and masks from an access list, along with the correspondingaddresses that are considered a match.
Table 1: Sample IP Addresses, Wildcard Masks, and Match Results
Match ResultsWildcard MaskAddress
All addresses will match the access list conditions.255.255.255.2550.0.0.0
Network 172.18.0.00.0.255.255172.18.0.0/16
Only host 172.18.5.2 matches0.0.0.0172.18.5.2/16
Only subnet 172.18.8.0/29 matches0.0.0.7172.18.8.0
Only subnet 172.18.8.8/29 matches0.0.0.7172.18.8.8
Only subnet 172.18.8.15/30 matches0.0.0.3172.18.8.15
Matches any even-numbered network in the range of10.1.2.0 to 10.1.254.0
0.0.252.255 (noncontiguous bits inmask)
10.1.2.0
Access List Sequence NumbersThe ability to apply sequence numbers to IP access list entries simplifies access list changes. Prior to the IPAccess List Entry Sequence Numbering feature, there was no way to specify the position of an entry withinan access list. If you wanted to insert an entry in the middle of an existing list, all of the entries after the desiredposition had to be removed, then the new entry was added, and then all the removed entries had to be reentered.This method was cumbersome and error prone.
This feature allows users to add sequence numbers to access list entries and resequence them. When you adda new entry, you specify the sequence number so that it is in a desired position in the access list. If necessary,entries currently in the access list can be resequenced to create room to insert the new entry.
Access List LoggingThe Cisco IOS software can provide logging messages about packets permitted or denied by a single standardor extended IP access list entry. That is, any packet that matches the entry will cause an informational loggingmessage about the packet to be sent to the console. The level of messages logged to the console is controlledby the logging console global configuration command.
Security Configuration Guide: Access Control Lists, Cisco IOS XE Everest 16.59
IP Access List OverviewAccess List Sequence Numbers

The first packet that triggers the access list entry causes an immediate loggingmessage, and subsequent packetsare collected over 5-minute intervals before they are displayed or logged. The logging message includes theaccess list number, whether the packet was permitted or denied, the source IP address of the packet, and thenumber of packets from that source permitted or denied in the prior 5-minute interval.
However, you can use the ip access-list log-update command to set the number of packets that, when matchan access list (and are permitted or denied), cause the system to generate a log message. You might want todo this to receive log messages more frequently than at 5-minute intervals.
If you set the number-of-matches argument to 1, a log message is sent right away, rather than caching it; everypacket that matches an access list causes a log message. A setting of 1 is not recommended because the volumeof log messages could overwhelm the system.
Caution
Even if you use the ip access-list log-update command, the 5-minute timer remains in effect, so each cacheis emptied at the end of 5 minutes, regardless of the count of messages in each cache. Regardless of when thelog message is sent, the cache is flushed and the count reset to 0 for that message the same way it is when athreshold is not specified.
The logging facility might drop some logging message packets if there are too many to be handled or if thereis more than one logging message to be handled in 1 second. This behavior prevents the router from crashingdue to too many logging packets. Therefore, the logging facility should not be used as a billing tool or anaccurate source of the number of matches to an access list.
Note
Alternative to Access List LoggingPackets matching an entry in an ACL with a log option are process switched. It is not recommended to usethe log option on ACLs, but rather use NetFlow export and match on a destination interface of Null0. This isdone in the CEF path. The destination interface of Null0 is set for any packet that is dropped by the ACL.
Additional IP Access List FeaturesBeyond the basic steps to create a standard or extended access list, you can enhance your access lists asmentioned below. Each of these methods is described completely in the module entitled “Refining an AccessList.”
• You can impose dates and times when permit or deny statements in an extended access list are in effect,making your access list more granular and specific to an absolute or periodic time period.
• After you create a named access list, you might want to add entries or change the order of the entries,known as resequencing an access list.
• You can achieve finer granularity when filtering packets by filtering on noninitial fragments of packets.
RSP3 Porting Related InformationOutbound Access List is not supported in RSP3.
Security Configuration Guide: Access Control Lists, Cisco IOS XE Everest 16.510
IP Access List OverviewAlternative to Access List Logging

Where to Apply an Access ListYou can apply access lists to the inbound or outbound interfaces of a device. Applying an access list to aninbound interface controls the traffic that enters the interface and applying an access list to an outboundinterface controls the traffic that exits the interface.
When software receives a packet at the inbound interface, the software checks the packet against the statementsthat are configured for the access list. If the access list permits packets, the software processes the packet.Applying access lists to filter incoming packets can save device resources because filtered packets are discardedbefore entering the device.
Access lists on outbound interfaces filter packets that are transmitted (sent) out of the interface. You can usethe TCP Access Control List (ACL) Splitting feature of the Rate-Based Satellite Control Protocol (RBSCP)on the outbound interface to control the type of packets that are subject to TCP acknowledgment (ACK)splitting on an outbound interface.
You can reference an access list by using a debug command to limit the amount of debug logs. For example,based on the filtering or matching criteria of the access list, debug logs can be limited to source or destinationaddresses or protocols.
You can use access lists to control routing updates, dial-on-demand (DDR), and quality of service (QoS)features.
Additional ReferencesRelated Documents
Document TitleRelated Topic
Cisco IOS Master Commands List, All ReleasesCisco IOS commands
Cisco IOS IP Addressing Services CommandReference
IP access list commands: complete command syntax,command mode, command history, defaults, usageguidelines, and examples
“Creating an IP Access List and Applying It to anInterface” module
Filtering on source address, destination address, orprotocol
“Creating an IP Access List to Filter IP Options, TCPFlags, or Noncontiguous Ports” module
Filtering on IP Options, TCP flags, noncontiguousports, or TTL
Standards
TitleStandards & RFCs
—None
Security Configuration Guide: Access Control Lists, Cisco IOS XE Everest 16.511
IP Access List OverviewWhere to Apply an Access List

MIBs
MIBs LinkMIB
To locate and download MIBs for selected platforms, Cisco IOS XE software releases, and featuresets, use Cisco MIB Locator found at the following URL:
http://www.cisco.com/go/mibs
None
Technical Assistance
LinkDescription
http://www.cisco.com/cisco/web/support/index.htmlTheCisco Support andDocumentationwebsite providesonline resources to download documentation, software,and tools. Use these resources to install and configurethe software and to troubleshoot and resolve technicalissues with Cisco products and technologies. Access tomost tools on the Cisco Support and Documentationwebsite requires a Cisco.com user ID and password.
Feature Information for IP Access ListsThe following table provides release information about the feature or features described in this module. Thistable lists only the software release that introduced support for a given feature in a given software releasetrain. Unless noted otherwise, subsequent releases of that software release train also support that feature.
Use Cisco Feature Navigator to find information about platform support and Cisco software image support.To access Cisco Feature Navigator, go to www.cisco.com/go/cfn. An account on Cisco.com is not required.
Table 2: Feature Information for IP Access Lists
Feature Configuration InformationReleasesFeature Name
In Cisco IOS XE Release 3.16, support was added for theCisco ASR 903 Router.
Cisco IOSXERelease 3.16ACL—IPProtocol
Security Configuration Guide: Access Control Lists, Cisco IOS XE Everest 16.512
IP Access List OverviewFeature Information for IP Access Lists

C H A P T E R 3Creating an IP Access List and Applying It to anInterface
IP access lists provide many benefits for securing a network and achieving nonsecurity goals, such asdetermining quality of service (QoS) factors or limiting debug command output. This module describes howto create standard, extended, named, and numbered IP access lists. An access list can be referenced by a nameor a number. Standard access lists filter on only the source address in IP packets. Extended access lists canfilter on source address, destination address, and other fields in an IP packet.
After you create an access list, you must apply it to something in order for it to have any effect. This moduledescribes how to apply an access list to an interface. However, there are many other uses for access lists,which are mentioned in this module and described in other modules and in other configuration guides forvarious technologies.
• Finding Feature Information, on page 13• Restrictions for Creating an IP Access List and Applying It to an Interface, on page 14• Information About Creating an IP Access List and Applying It to an Interface, on page 14• How to Create an IP Access List and Apply It to an Interface, on page 15• Configuration Examples for Creating an IP Access List and Applying It to an Interface, on page 25• Additional References Creating an IP Access List and Applying It to an Interface, on page 28• Feature Information for Creating an IP Access List and Applying It to an Interface, on page 29
Finding Feature InformationYour software release may not support all the features documented in this module. For the latest caveats andfeature information, see Bug Search Tool and the release notes for your platform and software release. Tofind information about the features documented in this module, and to see a list of the releases in which eachfeature is supported, see the feature information table.
Use Cisco Feature Navigator to find information about platform support and Cisco software image support.To access Cisco Feature Navigator, go to www.cisco.com/go/cfn. An account on Cisco.com is not required.
Security Configuration Guide: Access Control Lists, Cisco IOS XE Everest 16.513

Restrictions for Creating an IP Access List and Applying It toan Interface
The following restrictions apply when configuring IPv4 and IPv6 access control lists (ACLs)
• Application control engine (ACE)-specific counters are not supported.
• Layer 3 IPv4 and IPv6 ACLs are not supported on the same interface.
• MAC ACLs are not supported on Ethernet flow points (EFPs) or trunk EFP interfaces to which Layer 3IPv4 or IPv6 ACLs are applied.
• A maximum of 500 ACEs per ACL are supported.
• IPv4 and IPv6 ACLs are not currently supported on EFP interfaces. IPv4 and IPv6 ACLs are supportedon physical interfaces, bridge-domain interfaces, and port-channel interfaces.
• Layer 4 port-range functionality expands into Ternary Content-Addressable Memory (TCAM). IPv4ACL scale is limited to 1K TCAM, Layer 2 ACL scale is limited to 1K TCAM entries.
• ACL counters or statistics are not supported in Cisco ASR 900 RSP3 Module.
• Object-groups are not supported with IP ACLs.
• Outbound ACL is not supported in Cisco ASR 900 RSP3 Module.
Information About Creating an IP Access List and Applying Itto an Interface
Helpful Hints for Creating IP Access Lists• Create the access list before applying it to an interface (or elsewhere), because if you apply a nonexistentaccess list to an interface and then proceed to configure the access list, the first statement is put intoeffect, and the implicit deny statement that follows could cause immediate access problems.
• Another reason to configure an access list before applying it is because an interface with an empty accesslist applied to it permits all traffic.
• All access lists need at least one permit statement; otherwise, all packets are denied and no traffic passes.
• Organize your access list so that more specific references in a network or subnet appear before moregeneral ones.
• A packet will match the first ACE in the ACL. Thus, a permit ip any anywill match all packets, ignoringall subsequent ACES.
• Although all access lists end with an implicit deny statement, we recommend use of an explicit denystatement (for example, deny ip any any). On most platforms, you can display the count of packetsdenied by issuing the show access-list command, thus finding out more information about who your
Security Configuration Guide: Access Control Lists, Cisco IOS XE Everest 16.514
Creating an IP Access List and Applying It to an InterfaceRestrictions for Creating an IP Access List and Applying It to an Interface

access list is disallowing. Only packets denied by explicit deny statements are counted, which is whythe explicit deny statement will yield more complete data for you.
• While you are creating an access list or after it is created, you might want to delete an entry. You candelete an entry from a named access list. Use the no permit or no deny command to delete the appropriateentry.
• In order to make the purpose of individual statements more scannable and easily understood at a glance,you can write a helpful remark before or after any statement by using the remark command.
• If you want to deny access to a particular host or network and find out if someone from that network orhost is attempting to gain access, include the log keyword with the corresponding deny statement so thatthe packets denied from that source are logged for you.
• This hint applies to the placement of your access list. When trying to save resources, remember that aninbound access list applies the filter conditions before the routing table lookup. An outbound access listapplies the filter conditions after the routing table lookup.
Access List RemarksYou can include comments or remarks about entries in any IP access list. An access list remark is an optionalremark before or after an access list entry that describes the entry so that you do not have to interpret thepurpose of the entry. Each remark is limited to 100 characters in length.
The remark can go before or after a permit or deny statement. Be consistent about where you add remarks.Users may be confused if some remarks precede the associated permit or deny statements and some remarksfollow the associated statements.
The following is an example of a remark that describes function of the subsequent deny statement:
ip access-list extended telnettingremark Do not allow host1 subnet to telnet outdeny tcp host 172.16.2.88 any eq telnet
Additional IP Access List FeaturesBeyond the basic steps to create a standard or extended access list, you can enhance your access lists asmentioned below. Each of these methods is described completely in the Refining an IP Access List module.
• You can impose dates and times when permit or deny statements in an extended access list are in effect,making your access list more granular and specific to an absolute or periodic time period.
• After you create a named or numbered access list, you might want to add entries or change the order ofthe entries, known as resequencing an access list.
• You can achieve finer granularity when filtering packets by filtering on noninitial fragments of packets.
How to Create an IP Access List and Apply It to an InterfaceThis section describes the general ways to create a standard or extended access list using either a name or anumber. Access lists are very flexible; the tasks simply illustrate one permit command and one deny command
Security Configuration Guide: Access Control Lists, Cisco IOS XE Everest 16.515
Creating an IP Access List and Applying It to an InterfaceAccess List Remarks

to provide you the command syntax of each. Only you can determine how many permit and deny commandsyou need and their order.
The first two tasks in this module create an access list; you must apply the access list in order for it to function.If you want to apply the access list to an interface, perform the task “Applying the Access List to an Interface”.
Note
Creating a Standard Access List to Filter on Source AddressIf you want to filter on source address only, a standard access list is simple and sufficient. There are twoalternative types of standard access list: named and numbered. Named access lists allow you to identify youraccess lists with a more intuitive name rather than a number, and they also support more features than numberedaccess lists.
Creating a Named Access List to Filter on Source AddressUse a standard, named access list if you need to filter on source address only. This task illustrates one permitstatement and one deny statement, but the actual statements you use and their order depend on what you wantto filter or allow. Define your permit and deny statements in the order that achieves your filtering goals.
Step 1 enable
Example:
Device> enable
Enables privileged EXEC mode.
• Enter your password if prompted.
Step 2 configure terminal
Example:
Device# configure terminal
Enters global configuration mode.
Step 3 ip access-list standard name
Example:
Device(config)# ip access-list standard R&D
Defines a standard IP access list using a name and enters standard named access list configuration mode.
Step 4 remark remark
Example:
Device(config-std-nacl)# remark deny Sales network
(Optional) Adds a user-friendly comment about an access list entry.
Security Configuration Guide: Access Control Lists, Cisco IOS XE Everest 16.516
Creating an IP Access List and Applying It to an InterfaceCreating a Standard Access List to Filter on Source Address

• A remark can precede or follow an access list entry.
• In this example, the remark reminds the network administrator that the subsequent entry denies the Sales networkaccess to the interface (assuming this access list is later applied to an interface).
Step 5 deny {source [source-wildcard] | any} [log]
Example:
Device(config-std-nacl)# deny 172.16.0.0 0.0.255.255 log
(Optional) Denies the specified source based on a source address and wildcard mask.
• If the source-wildcard is omitted, a wildcard mask of 0.0.0.0 is assumed, meaning match on all bits of the sourceaddress.
• Optionally use the keyword any as a substitute for the source source-wildcard to specify the source and sourcewildcard of 0.0.0.0 255.255.255.255.
• In this example, all hosts on network 172.16.0.0 are denied passing the access list.
• Because this example explicitly denies a source address and the log keyword is specified, any packets from thatsource are logged when they are denied. This is a way to be notified that someone on a network or host is tryingto gain access.
Step 6 remark remark
Example:
Device(config-std-nacl)# remark Give access to Tester’s host
(Optional) Adds a user-friendly comment about an access list entry.
• A remark can precede or follow an access list entry.
• This remark reminds the network administrator that the subsequent entry allows the Tester’s host access to theinterface.
Step 7 permit {source [source-wildcard] | any} [log]
Example:
Device(config-std-nacl)# permit 172.18.5.22 0.0.0.0
Permits the specified source based on a source address and wildcard mask.
• Every access list needs at least one permit statement; it need not be the first entry.
• If the source-wildcard is omitted, a wildcard mask of 0.0.0.0 is assumed, meaning match on all bits of the sourceaddress.
• Optionally use the keyword any as a substitute for the source source-wildcard to specify the source and sourcewildcard of 0.0.0.0 255.255.255.255.
• In this example, host 172.18.5.22 is allowed to pass the access list.
Step 8 Repeat some combination of Steps 4 through 7 until you have specified the sources on which you want to base youraccess list.
Security Configuration Guide: Access Control Lists, Cisco IOS XE Everest 16.517
Creating an IP Access List and Applying It to an InterfaceCreating a Named Access List to Filter on Source Address

Remember that all sources not specifically permitted are denied by an implicit deny statement at the end of the accesslist.
Step 9 end
Example:
Device(config-std-nacl)# end
Exits standard named access list configuration mode and enters privileged EXEC mode.
Step 10 show ip access-list
Example:
Device# show ip access-list
(Optional) Displays the contents of all current IP access lists.
Creating a Numbered Access List to Filter on Source AddressConfigure a standard, numbered access list if you need to filter on source address only and you prefer not touse a named access list.
IP standard access lists are numbered 1 to 99 or 1300 to 1999. This task illustrates one permit statement andone deny statement, but the actual statements you use and their order depend on what you want to filter orallow. Define your permit and deny statements in the order that achieves your filtering goals.
Step 1 enable
Example:
Device> enable
Enables privileged EXEC mode.
• Enter your password if prompted.
Step 2 configure terminal
Example:
Device# configure terminal
Enters global configuration mode.
Step 3 access-list access-list-number permit {source [source-wildcard] | any} [log]
Example:
Device(config)# access-list 1 permit 172.16.5.22 0.0.0.0
Permits the specified source based on a source address and wildcard mask.
• Every access list needs at least one permit statement; it need not be the first entry.
Security Configuration Guide: Access Control Lists, Cisco IOS XE Everest 16.518
Creating an IP Access List and Applying It to an InterfaceCreating a Numbered Access List to Filter on Source Address

• Standard IP access lists are numbered 1 to 99 or 1300 to 1999.
• If the source-wildcard is omitted, a wildcard mask of 0.0.0.0 is assumed, meaning match on all bits of the sourceaddress.
• Optionally use the keyword any as a substitute for the source source-wildcard to specify the source and sourcewildcard of 0.0.0.0 255.255.255.255.
• In this example, host 172.16.5.22 is allowed to pass the access list.
Step 4 access-list access-list-number deny {source [source-wildcard] | any} [log]
Example:
Device(config)# access-list 1 deny 172.16.7.34 0.0.0.0
Denies the specified source based on a source address and wildcard mask.
• If the source-wildcard is omitted, a wildcard mask of 0.0.0.0 is assumed, meaning match on all bits of the sourceaddress.
• Optionally use the abbreviation any as a substitute for the source source-wildcard to specify the source and sourcewildcard of 0.0.0.0 255.255.255.255.
• In this example, host 172.16.7.34 is denied passing the access list.
Step 5 Repeat some combination of Steps 3 through 6 until you have specified the sources on which you want to base youraccess list.
Remember that all sources not specifically permitted are denied by an implicit deny statement at the end of the accesslist.
Step 6 end
Example:
Device(config)# end
Exits global configuration mode and enters privileged EXEC mode.
Step 7 show ip access-list
Example:
Device# show ip access-list
(Optional) Displays the contents of all current IP access lists.
Creating an Extended Access ListIf you want to filter on anything other than source address, you need to create an extended access list. Thereare two alternative types of extended access list: named and numbered. Named access lists allow you toidentify your access lists with a more intuitive name rather than a number, and they also support more features.
Security Configuration Guide: Access Control Lists, Cisco IOS XE Everest 16.519
Creating an IP Access List and Applying It to an InterfaceCreating an Extended Access List

For details on how to filter something other than source or destination address, see the syntax descriptions inthe command reference documentation.
Creating a Named Extended Access ListCreate a named extended access list if you want to filter the source and destination address or filter acombination of addresses and other IP fields.
SUMMARY STEPS
1. enable2. configure terminal3. ip access-list extended name4. deny protocol source [source-wildcard] destination [destination-wildcard] [option option-name]
[precedence precedence] [tos tos] [established] [log | log-input] [time-range time-range-name][fragments]
5. permit protocol source [source-wildcard] destination [destination-wildcard] [option option-name][precedence precedence] [tos tos] [established] [log | log-input] [time-range time-range-name][fragments]
6. Repeat some combination of Steps 4 through 7 until you have specified the fields and values on whichyou want to base your access list.
7. end8. show ip access-list
DETAILED STEPS
PurposeCommand or Action
Enables privileged EXEC mode.enableStep 1
Example: • Enter your password if prompted.
Device> enable
Enters global configuration mode.configure terminal
Example:
Step 2
Device# configure terminal
Defines an extended IP access list using a name and entersextended named access list configuration mode.
ip access-list extended name
Example:
Step 3
Device(config)# ip access-list extended acl1
(Optional) Denies any packet that matches all of theconditions specified in the statement.
deny protocol source [source-wildcard] destination[destination-wildcard] [option option-name] [precedence
Step 4
precedence] [tos tos] [established] [log | log-input][time-range time-range-name] [fragments] • If the source-wildcard or destination-wildcard is
omitted, a wildcard mask of 0.0.0.0 is assumed,Example: meaning match on all bits of the source or destination
address, respectively.
Security Configuration Guide: Access Control Lists, Cisco IOS XE Everest 16.520
Creating an IP Access List and Applying It to an InterfaceCreating a Named Extended Access List

PurposeCommand or Action
Device(config-ext-nacl)# deny ip 172.18.0.00.0.255.255 host 172.16.40.10 log
• Optionally use the keyword any as a substitute for thesource source-wildcard or destinationdestination-wildcard to specify the address andwildcard of 0.0.0.0 255.255.255.255.
• Optionally use the keyword host source to indicate asource and source wildcard of source 0.0.0.0 or theabbreviation host destination to indicate a destinationand destination wildcard of destination 0.0.0.0.
• In this example, packets from all sources are deniedaccess to the destination network 172.18.0.0. Loggingmessages about packets permitted or denied by theaccess list are sent to the facility configured by thelogging facility command (for example, console,terminal, or syslog). That is, any packet that matchesthe access list will cause an informational loggingmessage about the packet to be sent to the configuredfacility. The level of messages logged to the consoleis controlled by the logging console command.
Permits any packet that matches all of the conditionsspecified in the statement.
permit protocol source [source-wildcard] destination[destination-wildcard] [option option-name] [precedence
Step 5
precedence] [tos tos] [established] [log | log-input][time-range time-range-name] [fragments] • Every access list needs at least one permit statement.
Example: • If the source-wildcard or destination-wildcard isomitted, a wildcard mask of 0.0.0.0 is assumed,
Device(config-ext-nacl)# permit tcp any any meaning match on all bits of the source or destinationaddress, respectively.
• Optionally use the keyword any as a substitute for thesource source-wildcard or destinationdestination-wildcard to specify the address andwildcard of 0.0.0.0 255.255.255.255.
• In this example, TCP packets are allowed from anysource to any destination.
• Use the log-input keyword to include input interface,source MAC address, or virtual circuit in the loggingoutput.
Remember that all sources not specifically permitted aredenied by an implicit deny statement at the end of the accesslist.
Repeat some combination of Steps 4 through 7 until youhave specified the fields and values on which you want tobase your access list.
Step 6
Exits standard named access list configuration mode andenters privileged EXEC mode.
end
Example:
Step 7
Device(config-ext-nacl)# end
Security Configuration Guide: Access Control Lists, Cisco IOS XE Everest 16.521
Creating an IP Access List and Applying It to an InterfaceCreating a Named Extended Access List

PurposeCommand or Action
(Optional) Displays the contents of all current IP accesslists.
show ip access-list
Example:
Step 8
Device# show ip access-list
RSP3 Porting Related Information
ACL is not supported for fragmented packets.
Creating a Numbered Extended Access ListCreate a numbered extended access list if you want to filter on source and destination address, or a combinationof addresses and other IP fields, and you prefer not to use a name. Extended IP access lists are numbered 100to 199 or 2000 to 2699.
SUMMARY STEPS
1. enable2. configure terminal3. access-list access-list-number remark remark4. access-list access-list-number permit protocol {source [source-wildcard] | any} {destination
[destination-wildcard] | any} [precedence precedence] [tos tos] [established] [log | log-input] [time-rangetime-range-name] [fragments]
5. access-list access-list-number remark remark6. access-list access-list-number deny protocol {source [source-wildcard] | any} {destination
[destination-wildcard] | any} [precedence precedence] [tos tos] [established] [log | log-input] [time-rangetime-range-name] [fragments]
7. Repeat some combination of Steps 3 through 6 until you have specified the fields and values on whichyou want to base your access list.
8. end9. show ip access-list
DETAILED STEPS
PurposeCommand or Action
Enables privileged EXEC mode.enableStep 1
Example: • Enter your password if prompted.
Device> enable
Enters global configuration mode.configure terminal
Example:
Step 2
Device# configure terminal
(Optional) Adds a user-friendly comment about an accesslist entry.
access-list access-list-number remark remark
Example:
Step 3
Security Configuration Guide: Access Control Lists, Cisco IOS XE Everest 16.522
Creating an IP Access List and Applying It to an InterfaceRSP3 Porting Related Information

PurposeCommand or Action
Device(config)# access-list 107 remark allow Telnet• A remark of up to 100 characters can precede or followan access list entry.
packets from any source to network 172.69.0.0(headquarters)
Permits any packet that matches all of the conditionsspecified in the statement.
access-list access-list-number permit protocol {source[source-wildcard] | any} {destination [destination-wildcard]
Step 4
| any} [precedence precedence] [tos tos] [established] [log| log-input] [time-range time-range-name] [fragments] • Every access list needs at least one permit statement;
it need not be the first entry.Example:
• Extended IP access lists are numbered 100 to 199 or2000 to 2699.Device(config)# access-list 107 permit tcp any
172.69.0.0 0.0.255.255 eq telnet • If the source-wildcard or destination-wildcard isomitted, a wildcard mask of 0.0.0.0 is assumed,meaning match on all bits of the source or destinationaddress, respectively.
• Optionally use the keyword any as a substitute for thesource source-wildcard or destinationdestination-wildcard to specify the address andwildcard of 0.0.0.0 255.255.255.255.
• TCP and other protocols have additional syntaxavailable. See the access-list command in thecommand reference for complete syntax.
(Optional) Adds a user-friendly comment about an accesslist entry.
access-list access-list-number remark remark
Example:
Step 5
• A remark of up to 100 characters can precede or followan access list entry.Device(config)# access-list 107 remark deny all
other TCP packets
Denies any packet that matches all of the conditionsspecified in the statement.
access-list access-list-number deny protocol {source[source-wildcard] | any} {destination [destination-wildcard]
Step 6
| any} [precedence precedence] [tos tos] [established] [log| log-input] [time-range time-range-name] [fragments] • If the source-wildcard or destination-wildcard is
omitted, a wildcard mask of 0.0.0.0 is assumed,Example: meaning match on all bits of the source or destination
address, respectively.Device(config)# access-list 107 deny tcp any any
• Optionally use the keyword any as a substitute for thesource source-wildcard or destinationdestination-wildcard to specify the address andwildcard of 0.0.0.0 255.255.255.255.
Remember that all sources not specifically permitted aredenied by an implicit deny statement at the end of the accesslist.
Repeat some combination of Steps 3 through 6 until youhave specified the fields and values on which you want tobase your access list.
Step 7
Exits global configurationmode and enters privileged EXECmode.
end
Example:
Step 8
Security Configuration Guide: Access Control Lists, Cisco IOS XE Everest 16.523
Creating an IP Access List and Applying It to an InterfaceCreating a Numbered Extended Access List

PurposeCommand or Action
Device(config)# end
(Optional) Displays the contents of all current IP accesslists.
show ip access-list
Example:
Step 9
Device# show ip access-list
Applying an Access List to an Interface
SUMMARY STEPS
1. enable2. configure terminal3. interface type number4. ip access-group {access-list-number | access-list-name} {in | out}5. end
DETAILED STEPS
PurposeCommand or Action
Enables privileged EXEC mode.enableStep 1
Example: • Enter your password if prompted.Device> enable
Enters global configuration mode.configure terminal
Example:
Step 2
Device# configure terminal
Specifies an interface and enters interface configurationmode.
interface type number
Example:
Step 3
Applies the specified access list to the inbound interface.ip access-group {access-list-number | access-list-name}{in | out}
Step 4
• To filter source addresses, apply the access list to theinbound interface.Example:
Device(config-if)# ip access-group acl1 in
Exits interface configuration mode and returns to privilegedEXEC mode.
end
Example:
Step 5
Device(config-if)# end
Security Configuration Guide: Access Control Lists, Cisco IOS XE Everest 16.524
Creating an IP Access List and Applying It to an InterfaceApplying an Access List to an Interface

Configuration Examples for Creating an IP Access List andApplying It to an Interface
Example: Filtering on Host Source AddressIn the following example, the workstation belonging to user1 is allowed access to gigabitethernet 0/0/0, andthe workstation belonging to user2 is not allowed access:
interface gigabitethernet 0/0/0ip access-group workstations in!ip access-list standard workstationsremark Permit only user1 workstation throughpermit 172.16.2.88remark Do not allow user2 workstation throughdeny 172.16.3.13
Example: Filtering on Subnet Source AddressIn the following example, the user1 subnet is not allowed access to gigabitethernet interface 0/0/0, but theMain subnet is allowed access:
interface gigabitethernet 0/0/0ip access-group prevention in!ip access-list standard preventionremark Do not allow user1 subnet throughdeny 172.22.0.0 0.0.255.255remark Allow Main subnetpermit 172.25.0.0 0.0.255.255
Example: Filtering on Source and Destination Addresses and IP ProtocolsThe following configuration example shows an interface with two access lists, one applied to outgoing packetsand one applied to incoming packets. The standard access list named Internet-filter filters outgoing packetson source address. The only packets allowed out the interface must be from source 172.16.3.4.
The extended access list named marketing-group filters incoming packets. The access list permits Telnetpackets from any source to network 172.26.0.0 and denies all other TCP packets. It permits any ICMP packets.It denies UDP packets from any source to network 172.26.0 0 on port numbers less than 1024. Finally, theaccess list denies all other IP packets and performs logging of packets passed or denied by that entry.
interface gigabitethernet 0/0/0ip address 172.20.5.1 255.255.255.0ip access-group Internet-filter outip access-group marketing-group in!ip access-list standard Internet-filterpermit 172.16.3.4ip access-list extended marketing-grouppermit tcp any 172.26.0.0 0.0.255.255 eq telnet
Security Configuration Guide: Access Control Lists, Cisco IOS XE Everest 16.525
Creating an IP Access List and Applying It to an InterfaceConfiguration Examples for Creating an IP Access List and Applying It to an Interface

deny tcp any anypermit icmp any anydeny udp any 172.26.0.0 0.0.255.255 lt 1024deny ip any any
Example: Filtering on Source Addresses Using a Numbered Access ListIn the following example, network 10.0.0.0 is a Class A network whose second octet specifies a subnet; thatis, its subnet mask is 255.255.0.0. The third and fourth octets of a network 10.0.0.0 address specify a particularhost. Using access list 2, the Cisco IOS XE software would accept one address on subnet 48 and reject allothers on that subnet. The last line of the list shows that the software would accept addresses on all othernetwork 10.0.0.0 subnets.
interface gigabitethernet 0/0/0ip access-group 2 in!access-list 2 permit 10.48.0.3access-list 2 deny 10.48.0.0 0.0.255.255access-list 2 permit 10.0.0.0 0.255.255.255
Example: Preventing Telnet Access to a SubnetIn the following example, the user1 subnet is not allowed to telnet out of gigabitethernet interface 0/0/0:
interface gigabitethernet 0/0/0ip access-group telnetting out!ip access-list extended telnettingremark Do not allow user1 subnet to telnet outdeny tcp 172.20.0.0 0.0.255.255 any eq telnetremark Allow Top subnet to telnet outpermit tcp 172.33.0.0 0.0.255.255 any eq telnet
Example: Filtering on TCP and ICMP Using Port NumbersIn the following example, the first line of the extended access list named acl1 permits any incoming TCPconnections with destination ports greater than 1023. The second line permits incoming TCP connections tothe Simple Mail Transfer Protocol (SMTP) port of host 172.28.1.2. The last line permits incoming ICMPmessages for error feedback.
interface gigabitethernet 0/0/0ip access-group acl1 in!ip access-list extended acl1permit tcp any 172.28.0.0 0.0.255.255 gt 1023permit tcp any host 172.28.1.2 eq 25permit icmp any 172.28.0.0 255.255.255.255
Example: Allowing SMTP E-mail and Established TCP ConnectionsSuppose you have a network connected to the Internet, and you want any host on an Ethernet to be able toform TCP connections to any host on the Internet. However, you do not want IP hosts to be able to form TCPconnections to hosts on the gigabitethernet except to the mail (SMTP) port of a dedicated mail host.
Security Configuration Guide: Access Control Lists, Cisco IOS XE Everest 16.526
Creating an IP Access List and Applying It to an InterfaceExample: Filtering on Source Addresses Using a Numbered Access List

SMTP uses TCP port 25 on one end of the connection and a random port number on the other end. The sametwo port numbers are used throughout the life of the connection. Mail packets coming in from the Internetwill have a destination port of 25. Outbound packets will have the port numbers reversed. The fact that thesecure system behind the router always will accept mail connections on port 25 is what makes possible separatecontrol of incoming and outgoing services. The access list can be configured on either the outbound or inboundinterface.
In the following example, the gigabitethernet network is a Class B network with the address 172.18.0.0, andthe address of the mail host is 172.18.1.2. The established keyword is used only for the TCP protocol toindicate an established connection. A match occurs if the TCP datagram has the ACK or RST bits set, whichindicate that the packet belongs to an existing connection.
interface gigabitethernet 0/0/0ip access-group 102 in!access-list 102 permit tcp any 172.18.0.0 0.0.255.255 establishedaccess-list 102 permit tcp any host 172.18.1.2 eq 25
Example: Preventing Access to the Web by Filtering on Port NameIn the following example, the w1and w2 workstations are not allowed web access; other hosts on network172.20.0.0 are allowed web access:
interface gigabitethernet0/0/0ip access-group no-web out!ip access-list extended no-webremark Do not allow w1 to browse the webdeny host 172.20.3.85 any eq httpremark Do not allow w2 to browse the webdeny host 172.20.3.13 any eq httpremark Allow others on our network to browse the webpermit 172.20.0.0 0.0.255.255 any eq http
Example: Filtering on Source Address and Logging the PacketsThe following example defines access lists 1 and 2, both of which have logging enabled:
interface gigabitethernet 0/0/0ip address 172.16.1.1 255.0.0.0ip access-group 1 in
!access-list 1 permit 172.25.0.0 0.0.255.255 logaccess-list 1 deny 172.30.0.0 0.0.255.255 log!access-list 2 permit 172.27.3.4 logaccess-list 2 deny 172.17.0.0 0.0.255.255 log
If the interface receives 10 packets from 172.25.7.7 and 14 packets from 172.17.23.21, the first log will looklike the following:
list 1 permit 172.25.7.7 1 packetlist 2 deny 172.17.23.21 1 packet
Five minutes later, the console will receive the following log:
Security Configuration Guide: Access Control Lists, Cisco IOS XE Everest 16.527
Creating an IP Access List and Applying It to an InterfaceExample: Preventing Access to the Web by Filtering on Port Name

list 1 permit 172.25.7.7 9 packetslist 2 deny 172.17.23.21 13 packets
Example: Limiting Debug OutputThe following sample configuration uses an access list to limit the debug command output. Limiting thedebug output restricts the volume of data to what you are interested in, saving you time and resources.
Device(config)# ip access-list acl1Device(config-std-nacl)# remark Displays only advertisements for LDP peer in acl1Device(config-std-nacl)# permit host 10.0.0.44
Device# debug mpls ldp advertisements peer-acl acl1
tagcon: peer 10.0.0.44:0 (pp 0x60E105BC): advertise 172.17.0.33tagcon: peer 10.0.0.44:0 (pp 0x60E105BC): advertise 172.16.0.31tagcon: peer 10.0.0.44:0 (pp 0x60E105BC): advertise 172.22.0.33tagcon: peer 10.0.0.44:0 (pp 0x60E105BC): advertise 192.168.0.1tagcon: peer 10.0.0.44:0 (pp 0x60E105BC): advertise 192.168.0.3tagcon: peer 10.0.0.44:0 (pp 0x60E105BC): advertise 192.168.1.33
Additional References Creating an IP Access List and ApplyingIt to an Interface
Related Documents
Document TitleRelated Topic
Cisco IOS Master Command List, All ReleasesCisco IOS commands
• Cisco IOS Security Command Reference: CommandsA to C
• Cisco IOS Security Command Reference: CommandsD to L
• Cisco IOS Security Command Reference: CommandsM to R
• Cisco IOS Security Command Reference: CommandsS to Z
Security commands
Refining an IP Access List• Order of access list entries
• Access list entries based on time of day orweek
• Packets with noninitial fragments
Creating an IP Access List for FilteringFiltering on IP options, TCP flags, ornoncontiguous ports
Security Configuration Guide: Access Control Lists, Cisco IOS XE Everest 16.528
Creating an IP Access List and Applying It to an InterfaceExample: Limiting Debug Output

Document TitleRelated Topic
Understanding Access Control List LogginglControlling logging-related parameters
Standards and RFCs
TitleStandard/RFC
—No new or modified standards or RFCs are supported by this feature, and support for existing standardsor RFCs has not been modified by this feature.
Technical Assistance
LinkDescription
http://www.cisco.com/cisco/web/support/index.htmlTheCisco Support andDocumentationwebsite providesonline resources to download documentation, software,and tools. Use these resources to install and configurethe software and to troubleshoot and resolve technicalissues with Cisco products and technologies. Access tomost tools on the Cisco Support and Documentationwebsite requires a Cisco.com user ID and password.
Feature Information for Creating an IP Access List and ApplyingIt to an Interface
The following table provides release information about the feature or features described in this module. Thistable lists only the software release that introduced support for a given feature in a given software releasetrain. Unless noted otherwise, subsequent releases of that software release train also support that feature.
Use Cisco Feature Navigator to find information about platform support and Cisco software image support.To access Cisco Feature Navigator, go to www.cisco.com/go/cfn. An account on Cisco.com is not required.
Table 3: Feature Information for Creating IP Access Lists and Applying It to an Interface
Feature Configuration InformationReleasesFeature Name
In the Cisco IOS XE Release 3.5S, support wasadded for the Cisco ASR 903 Router.
Cisco IOS XE Release3.5S
ACL—Access Control ListSource and DestinationAddress Matching
In the Cisco IOS XE Release 3.5S, support wasadded for the Cisco ASR 903 Router.
Cisco IOS XE Release3.5S
ACL—ICMP Code
This feature was introduced on the Cisco ASR1000 Series Aggregation Services Routers.
No commands were introduced or modified forthis feature.
Cisco IOS XE Release2.1
ACL PerformanceEnhancement
Security Configuration Guide: Access Control Lists, Cisco IOS XE Everest 16.529
Creating an IP Access List and Applying It to an InterfaceFeature Information for Creating an IP Access List and Applying It to an Interface

Security Configuration Guide: Access Control Lists, Cisco IOS XE Everest 16.530
Creating an IP Access List and Applying It to an InterfaceFeature Information for Creating an IP Access List and Applying It to an Interface

C H A P T E R 4Creating an IP Access List to Filter IP Options,TCP Flags, Noncontiguous Ports
This module describes how to use an IP access list to filter IP packets that contain certain IP Options, TCPflags, noncontiguous ports.
• Finding Feature Information, on page 31• Prerequisites for Creating an IP Access List to Filter IP Options TCP Flags Noncontiguous Ports , onpage 31
• Information About Creating an IP Access List to Filter IP Options, TCP Flags, Noncontiguous Ports ,on page 32
• How to Create an IP Access List to Filter IP Options TCP Flags Noncontiguous Ports , on page 35• Configuration Examples for Filtering IP Options, TCP Flags, Noncontiguous Ports , on page 46• Additional References, on page 49• Feature Information for Creating an IP Access List to Filter, on page 50
Finding Feature InformationYour software release may not support all the features documented in this module. For the latest caveats andfeature information, see Bug Search Tool and the release notes for your platform and software release. Tofind information about the features documented in this module, and to see a list of the releases in which eachfeature is supported, see the feature information table.
Use Cisco Feature Navigator to find information about platform support and Cisco software image support.To access Cisco Feature Navigator, go to www.cisco.com/go/cfn. An account on Cisco.com is not required.
Prerequisites for Creating an IP Access List to Filter IP OptionsTCP Flags Noncontiguous Ports
Before you perform any of the tasks in this module, you should be familiar with the information in the followingmodules:
• “IP Access List Overview”
• “Creating an IP Access List and Applying It to an Interface”
Security Configuration Guide: Access Control Lists, Cisco IOS XE Everest 16.531

Information About Creating an IP Access List to Filter IP Options,TCP Flags, Noncontiguous Ports
IP OptionsIP uses four key mechanisms in providing its service: Type of Service, Time to Live, Options, and HeaderChecksum.
The Options, commonly referred to as IP Options, provide for control functions that are required in somesituations but unnecessary for the most common communications. IP Options include provisions for timestamps, security, and special routing.
IP Options may or may not appear in datagrams. They must be implemented by all IP modules (host andgateways). What is optional is their transmission in any particular datagram, not their implementation. Insome environments the security option may be required in all datagrams.
The option field is variable in length. There may be zero or more options. IP Options can have one of twoformats:
• Format 1: A single octet of option-type.
• Format 2: An option-type octet, an option-length octet, and the actual option-data octets.
The option-length octet counts the option-type octet, the option-length octet, and the option-data octets.
The option-type octet is viewed as having three fields: a 1-bit copied flag, a 2-bit option class, and a 5-bitoption number. These fields form an 8-bit value for the option type field. IP Options are commonly referredto by their 8-bit value.
For a complete list and description of IP Options, refer to RFC 791, Internet Protocol at the following URL:http://www.faqs.org/rfcs/rfc791.html
Benefits of Filtering IP Options• Filtering of packets that contain IP Options from the network relieves downstream devices and hosts ofthe load from options packets.
• This feature also minimizes load to the Route Processor (RP) for packets with IP Options that requireRP processing on distributed systems. Previously, the packets were always routed to or processed by theRP CPU. Filtering the packets prevents them from impacting the RP.
Benefits of Filtering on TCP FlagsThe ACL TCP Flags Filtering feature provides a flexible mechanism for filtering on TCP flags. Previously,an incoming packet was matched as long as any TCP flag in the packet matched a flag specified in the accesscontrol entry (ACE). This behavior allows for a security loophole, because packets with all flags set couldget past the access control list (ACL). The ACL TCP Flags Filtering feature allows you to select anycombination of flags on which to filter. The ability to match on a flag set and on a flag not set gives you agreater degree of control for filtering on TCP flags, thus enhancing security.
Security Configuration Guide: Access Control Lists, Cisco IOS XE Everest 16.532
Creating an IP Access List to Filter IP Options, TCP Flags, Noncontiguous PortsInformation About Creating an IP Access List to Filter IP Options, TCP Flags, Noncontiguous Ports

Because TCP packets can be sent as false synchronization packets that can be accepted by a listening port, itis recommended that administrators of firewall devices set up some filtering rules to drop false TCP packets.
The ACEs that make up an access list can be configured to detect and drop unauthorized TCP packets byallowing only the packets that have a very specific group of TCP flags set or not set. The ACL TCP FlagsFiltering feature provides a greater degree of packet-filtering control in the following ways:
• You can select any desired combination of TCP flags on which to filter TCP packets.
• You can configure ACEs to allow matching on a flag that is set, as well as on a flag that is not set.
TCP FlagsThe table below lists the TCP flags, which are further described in RFC 793, Transmission Control Protocol.
Table 4: TCP Flags
PurposeTCP Flag
Acknowledge flag—Indicates that the acknowledgment fieldof a segment specifies the next sequence number the senderof this segment is expecting to receive.
ACK
Finish flag—Used to clear connections.FIN
Push flag—Indicates the data in the call should beimmediately pushed through to the receiving user.
PSH
Reset flag—Indicates that the receiver should delete theconnection without further interaction.
RST
Synchronize flag—Used to establish connections.SYN
Urgent flag—Indicates that the urgent field is meaningfuland must be added to the segment sequence number.
URG
Benefits of Using the Named ACL Support for Noncontiguous Ports on anAccess Control Entry Feature
This feature greatly reduces the number of access control entries (ACEs) required in an access control list tohandle multiple entries for the same source address, destination address, and protocol. If you maintain largenumbers of ACEs, use this feature to consolidate existing groups of access list entries wherever it is possibleand when you create new access list entries. When you configure access list entries with noncontiguous ports,you will have fewer access list entries to maintain.
How Filtering on TTL Value WorksIP extended named and numbered access lists may filter on the TTL value of packets arriving at or leavingan interface. Packets with any possible TTL values 0 through 255 may be permitted or denied (filtered). Likefiltering on other fields, such as source or destination address, the ip access-group command specifies in orout, which makes the access list ingress or egress and applies it to incoming or outgoing packets, respectively.
Security Configuration Guide: Access Control Lists, Cisco IOS XE Everest 16.533
Creating an IP Access List to Filter IP Options, TCP Flags, Noncontiguous PortsTCP Flags

The TTL value is checked in conjunction with the specified protocol, application, and any other settings inthe access list entry, and all conditions must be met.
Special Handling for Packets with TTL Value of 0 or 1 Arriving at an Ingress Interface
The software switching paths—distributed Cisco Express Forwarding (dCEF), CEF, fast switching, andprocess switching—will usually permit or discard the packets based on the access list statements. However,when the TTL value of packets arriving at an ingress interface have a TTL of 0 or 1, special handling isrequired. The packets with a TTL value of 0 or 1 get sent to the process level before the ingress access list ischecked in CEF, dCEF, or the fast switching paths. The ingress access list is applied to packets with TTLvalues 2 through 255 and a permit or deny decision is made.
Packets with a TTL value of 0 or 1 are sent to the process level because they will never be forwarded out ofthe device; the process level must check whether each packet is destined for the device and whether an InternetControl Message Protocol (ICMP) TTL Expire message needs to be sent back. This means that even if anACL with TTL value 0 or 1 filtering is configured on the ingress interface with the intention to drop packetswith a TTL of 0 or 1, the dropping of the packets will not happen in the faster paths. It will instead happen inthe process level when the process applies the ACL. This is also true for hardware switching platforms. Packetswith TTL value of 0 or 1 are sent to the process level of the route processor (RP) or Multilayer Switch FeatureCard (MSFC).
On egress interfaces, access list filtering on TTL value works just like other access list features. The checkwill happen in the fastest switching path enabled in the device. This is because the faster switching pathshandle all the TTL values (0 through 255) equally on the egress interface.
Control Plane Policing for Filtering TTL Values 0 and 1
The special behavior for packets with a TTL value of 0 or 1 results in higher CPU usage for the device. If youare filtering on TTL value of 0 or 1, you should use control plane policing (CPP) to protect the CPU frombeing overwhelmed. In order to leverage CPP, you must configure an access list especially for filtering TTLvalues 0 and 1 and apply the access list through CPP. This access list will be a separate access list from anyother interface access lists. Because CPP works for the entire system, not just on individual interfaces, youwould need to configure only one such special access list for the entire device. This task is described in thesection "Enabling Control Plane Policing to Filter on TTL Values 0 and 1".
Benefits of Filtering on TTL Value• Filtering on time-to-live (TTL) value provides a way to control which packets are allowed to reach thedevice or are prevented from reaching the device. By looking at your network layout, you can choosewhether to accept or deny packets from a certain device based on howmany hops away it is. For example,in a small network, you can deny packets from a location more than three hops away. Filtering on TTLvalue allows you to validate if the traffic originated from a neighboring device. You can accept onlypackets that reach you in one hop, for example, by accepting only packets with a TTL value of one lessthan the initial TTL value of a particular protocol.
• Many control plane protocols communicate only with their neighbors, but receive packets from everyone.By applying an access list that filters on TTL to receiving routers, you can block unwanted packets.
• The Cisco software sends all packets with a TTL value of 0 or 1 to the process level. The device mustthen send an Internet Control Message Protocol (ICMP) TTL value expire message to the source. Byfiltering packets that have a TTL value of 0 through 2, you can reduce the load on the process level.
Security Configuration Guide: Access Control Lists, Cisco IOS XE Everest 16.534
Creating an IP Access List to Filter IP Options, TCP Flags, Noncontiguous PortsBenefits of Filtering on TTL Value

How to Create an IP Access List to Filter IP Options TCP FlagsNoncontiguous Ports
Filtering Packets That Contain IP OptionsComplete these steps to configure an access list to filter packets that contain IP options and to verify that theaccess list has been configured correctly.
• The ACL Support for Filtering IP Options feature can be used only with named, extended ACLs.• Resource Reservation Protocol (RSVP)Multiprotocol Label Switching Traffic Engineering (MPLS TE),Internet Group Management Protocol Version 2 (IGMPV2), and other protocols that use IP optionspackets may not function in drop or ignore mode if this feature is configured.
• On most Cisco devices, a packet with IP options is not switched in hardware, but requires control planesoftware processing (primarily because there is a need to process the options and rewrite the IP header),so all IP packets with IP options will be filtered and switched in software.
Note
Step 1 enable
Example:Device> enable
Enables privileged EXEC mode.
• Enter your password if prompted.
Step 2 configure terminal
Example:Device# configure terminal
Enters global configuration mode.
Step 3 ip access-list extended access-list-name
Example:Device(config)# ip access-list extended mylist1
Specifies the IP access list by name and enters named access list configuration mode.
Step 4 [sequence-number] deny protocol source source-wildcard destination destination-wildcard [option option-value][precedence precedence] [tos tos] [log] [time-range time-range-name] [fragments]
Example:Device(config-ext-nacl)# deny ip any any option traceroute
(Optional) Specifies a deny statement in named IP access list mode.
Security Configuration Guide: Access Control Lists, Cisco IOS XE Everest 16.535
Creating an IP Access List to Filter IP Options, TCP Flags, Noncontiguous PortsHow to Create an IP Access List to Filter IP Options TCP Flags Noncontiguous Ports

• This access list happens to use a denystatement first, but a permit statement could appear first, depending on theorder of statements you need.
• Use the option keyword and option-value argument to filter packets that contain a particular IP Option.
• In this example, any packet that contains the traceroute IP option will be filtered out.
• Use the no sequence-number form of this command to delete an entry.
Step 5 [sequence-number] permit protocol source source-wildcard destination destination-wildcard [option option-value][precedence precedence] [tos tos] [log] [time-range time-range-name] [fragments]
Example:Device(config-ext-nacl)# permit ip any any option security
Specifies a permit statement in named IP access list mode.
• In this example, any packet (not already filtered) that contains the security IP option will be permitted.
• Use the no sequence-number form of this command to delete an entry.
Step 6 Repeat Step 4 or Step 5 as necessary.
Allows you to revise the access list.
Step 7 end
Example:Device(config-ext-nacl)# end
(Optional) Exits named access list configuration mode and returns to privileged EXEC mode.
Step 8 show ip access-lists access-list-name
Example:Device# show ip access-lists mylist1
(Optional) Displays the contents of the IP access list.
What to Do NextApply the access list to an interface or reference it from a command that accepts an access list.
To effectively eliminate all packets that contain IP Options, we recommend that you configure the global ipoptions drop command.
Note
Filtering Packets That Contain TCP FlagsThis task configures an access list to filter packets that contain TCP flags and verifies that the access list hasbeen configured correctly.
Security Configuration Guide: Access Control Lists, Cisco IOS XE Everest 16.536
Creating an IP Access List to Filter IP Options, TCP Flags, Noncontiguous PortsWhat to Do Next

• TCP flag filtering can be used only with named, extended ACLs.• The ACL TCP Flags Filtering feature is supported only for Cisco ACLs.• Previously, the following command-line interface (CLI) format could be used to configure a TCPflag-checking mechanism:
permit tcp any any rst The following format that represents the same ACE can now be used: permit tcpany any match-any +rst Both the CLI formats are accepted; however, if the new keywordsmatch-all ormatch-any are chosen, they must be followed by the new flags that are prefixed with “+” or “-”. It is advisableto use only the old format or the new format in a single ACL. You cannot mix and match the old and newCLI formats.
Note
If a device having ACEs with the new syntax format is reloaded with a previous version of the Cisco softwarethat does not support the ACL TCP Flags Filtering feature, the ACEs will not be applied, leading to possiblesecurity loopholes.
Caution
Step 1 enable
Example:
Device> enable
Enables privileged EXEC mode.
• Enter your password if prompted.
Step 2 configure terminal
Example:
Device# configure terminal
Enters global configuration mode.
Step 3 ip access-list extended access-list-name
Example:
Device(config)# ip access-list extended kmd1
Specifies the IP access list by name and enters named access list configuration mode.
Step 4 [sequence-number] permit tcp source source-wildcard [operator [port]] destination destination-wildcard [operator[port]] [established|{match-any |match-all} {+ | -} flag-name] [precedence precedence] [tos tos] [log] [time-rangetime-range-name] [fragments]
Example:
Device(config-ext-nacl)# permit tcp any any match-any +rst
Specifies a permit statement in named IP access list mode.
Security Configuration Guide: Access Control Lists, Cisco IOS XE Everest 16.537
Creating an IP Access List to Filter IP Options, TCP Flags, Noncontiguous PortsFiltering Packets That Contain TCP Flags

• This access list happens to use a permitstatement first, but a deny statement could appear first, depending on theorder of statements you need.
• Use the TCP command syntax of the permitcommand.
• Any packet with the RST TCP header flag set will be matched and allowed to pass the named access list kmd1 inStep 3.
Step 5 [sequence-number] deny tcp source source-wildcard [operator [port]] destination destination-wildcard [operator [port]][established|{match-any |match-all} {+ | -} flag-name] [precedence precedence] [tos tos] [log] [time-rangetime-range-name] [fragments]
Example:
Device(config-ext-nacl)# deny tcp any any match-all -ack -fin
(Optional) Specifies a deny statement in named IP access list mode.
• This access list happens to use a permitstatement first, but a deny statement could appear first, depending on theorder of statements you need.
• Use the TCP command syntax of the denycommand.
• Any packet that does not have the ACK flag set, and also does not have the FIN flag set, will not be allowed to passthe named access list kmd1 in Step 3.
• See the deny(IP) command for additional command syntax to permit upper-layer protocols (ICMP, IGMP, TCP,and UDP).
Step 6 Repeat Step 4 or Step 5 as necessary, adding statements by sequence number where you planned. Use the nosequence-numbercommand to delete an entry.
Allows you to revise the access list.
Step 7 end
Example:
Device(config-ext-nacl)# end
(Optional) Exits the configuration mode and returns to privileged EXEC mode.
Step 8 show ip access-lists access-list-name
Example:
Device# show ip access-lists kmd1
(Optional) Displays the contents of the IP access list.
• Review the output to confirm that the access list includes the new entry.
What to Do NextApply the access list to an interface or reference it from a command that accepts an access list.
Security Configuration Guide: Access Control Lists, Cisco IOS XE Everest 16.538
Creating an IP Access List to Filter IP Options, TCP Flags, Noncontiguous PortsWhat to Do Next

Configuring an Access Control Entry with Noncontiguous PortsPerform this task to create access list entries that use noncontiguous TCP or UDP port numbers. Althoughthis task uses TCP ports, you could use the UDP syntax of the permit and deny commands to filternoncontiguous UDP ports.
Although this task uses a permit command first, use the permit and deny commands in the order that achievesyour filtering goals.
The ACL—Named ACL Support for Noncontiguous Ports on an Access Control Entry feature can be usedonly with named, extended ACLs.
Note
Step 1 enable
Example:Device> enable
Enables privileged EXEC mode.
• Enter your password if prompted.
Step 2 configure terminal
Example:Device# configure terminal
Enters global configuration mode.
Step 3 ip access-list extended access-list-name
Example:Device(config)# ip access-list extended acl-extd-1
Specifies the IP access list by name and enters named access list configuration mode.
Step 4 [sequence-number] permit tcp source source-wildcard [operator port [port]] destination destination-wildcard [operator[port]] [established {match-any |match-all} {+ | -} flag-name] [precedence precedence] [tos tos] [log] [time-rangetime-range-name] [fragments]
Example:Device(config-ext-nacl)# permit tcp any eq telnet ftp any eq 450 679
Specifies a permit statement in named IP access list configuration mode.
• Operators include lt (less than), gt (greater than), eq (equal), neq (not equal), and range (inclusive range).
• If the operator is positioned after the source and source-wildcard arguments, it must match the source port. If theoperator is positioned after the destination and destination-wildcard arguments, it must match the destination port.
• The range operator requires two port numbers. You can configure up to 10 ports after the eq and neqoperators. Allother operators require one port number.
• To filter UDP ports, use the UDP syntax of this command.
Security Configuration Guide: Access Control Lists, Cisco IOS XE Everest 16.539
Creating an IP Access List to Filter IP Options, TCP Flags, Noncontiguous PortsConfiguring an Access Control Entry with Noncontiguous Ports

Step 5 [sequence-number] deny tcp source source-wildcard [operator port [port]] destination destination-wildcard [operator[port]] [established {match-any |match-all} {+ | -} flag-name] [precedence precedence] [tos tos] [log] [time-rangetime-range-name] [fragments]
Example:Device(config-ext-nacl)# deny tcp any neq 45 565 632 any
(Optional) Specifies a deny statement in named access list configuration mode.
• Operators include lt (less than), gt (greater than), eq (equal), neq (not equal), and range (inclusive range).
• If the operator is positioned after the source and source-wildcard arguments, it must match the source port. If theoperator is positioned after the destination and destination-wildcard arguments, it must match the destination port.
• The range operator requires two port numbers. You can configure up to 10 ports after the eq and neqoperators. Allother operators require one port number.
• To filter UDP ports, use the UDP syntax of this command.
Step 6 Repeat Step 4 or Step 5 as necessary, adding statements by sequence number where you planned. Use the nosequence-number command to delete an entry.
Allows you to revise the access list.
Step 7 end
Example:Device(config-ext-nacl)# end
(Optional) Exits named access list configuration mode and returns to privileged EXEC mode.
Step 8 show ip access-lists access-list-name
Example:Device# show ip access-lists kmd1
(Optional) Displays the contents of the access list.
Consolidating Access List Entries with Noncontiguous Ports into One AccessList Entry
Perform this task to consolidate a group of access list entries with noncontiguous ports into one access listentry.
Although this task uses TCP ports, you could use the UDP syntax of the permit and deny commands to filternoncontiguous UDP ports.
Although this task uses a permit command first, use the permit and deny commands in the order that achievesyour filtering goals.
Step 1 enable
Example:
Security Configuration Guide: Access Control Lists, Cisco IOS XE Everest 16.540
Creating an IP Access List to Filter IP Options, TCP Flags, Noncontiguous PortsConsolidating Access List Entries with Noncontiguous Ports into One Access List Entry

Device> enable
Enables privileged EXEC mode.
• Enter your password if prompted.
Step 2 show ip access-lists access-list-name
Example:Device# show ip access-lists mylist1
(Optional) Displays the contents of the IP access list.
• Review the output to see if you can consolidate any access list entries.
Step 3 configure terminal
Example:Device# configure terminal
Enters global configuration mode.
Step 4 ip access-list extended access-list-name
Example:Device(config)# ip access-list extended mylist1
Specifies the IP access list by name and enters named access list configuration mode.
Step 5 no [sequence-number] permit protocol source source-wildcard destination destination-wildcard[option option-name][precedence precedence][tos tos] [log] [time-range time-range-name] [fragments]
Example:Device(config-ext-nacl)# no 10
Removes the redundant access list entry that can be consolidated.
• Repeat this step to remove entries to be consolidated because only the port numbers differ.
• After this step is repeated to remove the access list entries 20, 30, and 40, for example, those entries are removedbecause they will be consolidated into one permit statement.
• If a sequence-number is specified, the rest of the command syntax is optional.
Step 6 [sequence-number] permit protocol source source-wildcard[operator port[port]] destination destination-wildcard[operatorport[port]] [option option-name] [precedence precedence][tos tos] [log] [time-range time-range-name] [fragments]
Example:Device(config-ext-nacl)# permit tcp any neq 45 565 632 any eq 23 45 34 43
Specifies a permit statement in named access list configuration mode.
• In this instance, a group of access list entries with noncontiguous ports was consolidated into one permit statement.
• You can configure up to 10 ports after the eq and neq operators.
Step 7 Repeat Steps 5 and 6 as necessary, adding permit or deny statements to consolidate access list entries where possible.Use the no sequence-number command to delete an entry.
Security Configuration Guide: Access Control Lists, Cisco IOS XE Everest 16.541
Creating an IP Access List to Filter IP Options, TCP Flags, Noncontiguous PortsConsolidating Access List Entries with Noncontiguous Ports into One Access List Entry

Allows you to revise the access list.
Step 8 end
Example:Device(config-std-nacl)# end
(Optional) Exits named access list configuration mode and returns to privileged EXEC mode.
Step 9 show ip access-lists access-list-name
Example:Device# show ip access-lists mylist1
(Optional) Displays the contents of the access list.
What To Do NextApply the access list to an interface or reference it from a command that accepts an access list.
Filtering Packets Based on TTL ValueBecause access lists are very flexible, it is not possible to define only one combination of permit and denycommands to filter packets based on the TTL value. This task illustrates just one example that achieves TTLfiltering. Configure the appropriate permit and deny statements that will accomplish your filtering plan.
When the access list specifies the operation EQ or NEQ, depending on the Cisco software release in use onthe device, the access lists can specify up to ten TTL values. The number of TTL values can vary by the Ciscosoftware release.
Note
SUMMARY STEPS
1. enable2. configure terminal3. ip access-list extended access-list-name4. [sequence-number] permit protocol source source-wildcard destination destination-wildcard[option
option-name] [precedence precedence] [tos tos] [ttl operator value] [log] [time-range time-range-name][fragments]
5. Continue to add permit or deny statements to achieve the filtering you want.6. exit7. interface type number8. ip access-group access-list-name {in | out}
DETAILED STEPS
PurposeCommand or Action
Enables privileged EXEC mode.enableStep 1
Security Configuration Guide: Access Control Lists, Cisco IOS XE Everest 16.542
Creating an IP Access List to Filter IP Options, TCP Flags, Noncontiguous PortsWhat To Do Next

PurposeCommand or Action
Example: • Enter your password if prompted.
Device> enable
Enters global configuration mode.configure terminal
Example:
Step 2
Device# configure terminal
Defines an IP access list by name.ip access-list extended access-list-nameStep 3
Example: • An access list that filters on TTL value must be anextended access list.
Device(config)# ip access-list extended ttlfilter
Sets conditions to allow a packet to pass a named IP accesslist.
[sequence-number] permit protocol source source-wildcarddestination destination-wildcard[option option-name]
Step 4
[precedence precedence] [tos tos] [ttl operator value] [log][time-range time-range-name] [fragments] • Every access list must have at least one permit
statement.Example:
• This example permits packets from source 172.16.1.1to any destination with a TTL value less than 2.Device(config-ext-nacl)# permit ip host 172.16.1.1
any ttl lt 2
--Continue to add permit or deny statements to achieve thefiltering you want.
Step 5
Exits any configuration mode to the next highest mode inthe command-line interface (CLI) mode hierarchy.
exit
Example:
Step 6
Device(config-ext-nacl)# exit
Configures an interface type and enters interfaceconfiguration mode.
interface type number
Example:
Step 7
Device(config)# interface ethernet 0
Applies the access list to an interface.ip access-group access-list-name {in | out}
Example:
Step 8
Device(config-if)# ip access-group ttlfilter in
Enabling Control Plane Policing to Filter on TTL Values 0 and 1Perform this task to filter IP packets based on a TTL value of 0 or 1 and to protect the CPU from beingoverwhelmed. This task configures an access list for classification on TTL value 0 and 1, configures theModular QoS Command-Line Interface (CLI) (MQC), and applies a policy map to the control plane. Anypackets that pass the access list are dropped. This special access list is separate from any other interface accesslists.
Security Configuration Guide: Access Control Lists, Cisco IOS XE Everest 16.543
Creating an IP Access List to Filter IP Options, TCP Flags, Noncontiguous PortsEnabling Control Plane Policing to Filter on TTL Values 0 and 1

Because access lists are very flexible, it is not possible to define only one combination of permit and denycommands to filter packets based on the TTL value. This task illustrates just one example that achieves TTLfiltering. Configure the appropriate permit and deny statements that will accomplish your filtering plan.
SUMMARY STEPS
1. enable2. configure terminal3. ip access-list extended access-list-name4. [sequence-number] permit protocol source source-wildcard destination destination-wildcard ttl operator
value5. Continue to add permit or deny statements to achieve the filtering you want.6. exit7. class-map class-map-name [match-all |match-any]8. match access-group {access-group | name access-group-name}9. exit10. policy-map policy-map-name11. class {class-name | class-default}12. drop13. exit14. exit15. control-plane16. service-policy {input | output} policy-map-name
DETAILED STEPS
PurposeCommand or Action
Enables privileged EXEC mode.enableStep 1
Example: • Enter your password if prompted.
Device> enable
Enters global configuration mode.configure terminal
Example:
Step 2
Device# configure terminal
Defines an IP access list by name.ip access-list extended access-list-nameStep 3
Example: • An access list that filters on a TTL value must be anextended access list.
Device(config)# ip access-list extended ttlfilter
Sets conditions to allow a packet to pass a named IP accesslist.
[sequence-number] permit protocol sourcesource-wildcard destination destination-wildcard ttloperator value
Step 4
• Every access list must have at least one permitstatement.Example:
Security Configuration Guide: Access Control Lists, Cisco IOS XE Everest 16.544
Creating an IP Access List to Filter IP Options, TCP Flags, Noncontiguous PortsEnabling Control Plane Policing to Filter on TTL Values 0 and 1

PurposeCommand or Action
Device(config-ext-nacl)# permit ip host 172.16.1.1any ttl lt 2
• This example permits packets from source 172.16.1.1to any destination with a TTL value less than 2.
The packets that pass the access list will be dropped.Continue to add permit or deny statements to achieve thefiltering you want.
Step 5
Exits any configuration mode to the next highest mode inthe CLI mode hierarchy.
exit
Example:
Step 6
Device(config-ext-nacl)# exit
Creates a class map to be used for matching packets to aspecified class.
class-map class-map-name [match-all |match-any]
Example:
Step 7
Device(config)# class-map acl-filtering
Configures the match criteria for a class map on the basisof the specified access control list.
match access-group {access-group | nameaccess-group-name}
Example:
Step 8
Device(config-cmap)# match access-group namettlfilter
Exits any configuration mode to the next highest mode inthe CLI mode hierarchy.
exit
Example:
Step 9
Device(config-cmap)# exit
Creates or modifies a policy map that can be attached toone or more interface to specify a service policy.
policy-map policy-map-name
Example:
Step 10
Device(config)# policy-map acl-filter
Specifies the name of the class whose policy you want tocreate or change or to specify the default class (commonly
class {class-name | class-default}
Example:
Step 11
known as the class-default class) before you configure itspolicy.
Device(config-pmap)# class acl-filter-class
Configures a traffic class to discard packets belonging toa specific class.
drop
Example:
Step 12
Device(config-pmap-c)# drop
Exits any configuration mode to the next highest mode inthe CLI mode hierarchy.
exit
Example:
Step 13
Device(config-pmap-c)# exit
Security Configuration Guide: Access Control Lists, Cisco IOS XE Everest 16.545
Creating an IP Access List to Filter IP Options, TCP Flags, Noncontiguous PortsEnabling Control Plane Policing to Filter on TTL Values 0 and 1

PurposeCommand or Action
Exits any configuration mode to the next highest mode inthe CLI mode hierarchy.
exit
Example:
Step 14
Device(config-pmap)# exit
Associates or modifies attributes or parameters that areassociated with the control plane of the device.
control-plane
Example:
Step 15
Device(config)# control-plane
Attaches a policy map to a control plane for aggregatecontrol plane services.
service-policy {input | output} policy-map-name
Example:
Step 16
Device(config-cp)# service-policy input acl-filter
Configuration Examples for Filtering IP Options, TCP Flags,Noncontiguous Ports
Example: Filtering Packets That Contain IP OptionsThe following example shows an extended access list named mylist2 that contains access list entries (ACEs)that are configured to permit TCP packets only if they contain the IP Options that are specified in the ACEs:
ip access-list extended mylist210 permit ip any any option eool20 permit ip any any option record-route30 permit ip any any option zsu40 permit ip any any option mtup
The show access-list command has been entered to show how many packets were matched and thereforepermitted:
Device# show ip access-list mylist2Extended IP access list test10 permit ip any any option eool (1 match)20 permit ip any any option record-route (1 match)30 permit ip any any option zsu (1 match)40 permit ip any any option mtup (1 match)
Example: Filtering Packets That Contain TCP FlagsThe following access list allows TCP packets only if the TCP flags ACK and SYN are set and the FIN flagis not set:
ip access-list extended aaa
Security Configuration Guide: Access Control Lists, Cisco IOS XE Everest 16.546
Creating an IP Access List to Filter IP Options, TCP Flags, Noncontiguous PortsConfiguration Examples for Filtering IP Options, TCP Flags, Noncontiguous Ports

permit tcp any any match-all +ack +syn -finend
The show access-list command has been entered to display the ACL:
Device# show access-list aaa
Extended IP access list aaa10 permit tcp any any match-all +ack +syn -fin
Example: Creating an Access List Entry with Noncontiguous PortsThe following access list entry can be created because up to ten ports can be entered after the eq and neqoperators:
ip access-list extended aaapermit tcp any eq telnet ftp any eq 23 45 34end
Enter the show access-lists command to display the newly created access list entry.
Device# show access-lists aaa
Extended IP access list aaa10 permit tcp any eq telnet ftp any eq 23 45 34
Example: Consolidating Some Existing Access List Entries into One AccessList Entry with Noncontiguous Ports
The show access-lists command is used to display a group of access list entries for the access list named abc:
Device# show access-lists abcExtended IP access list abc10 permit tcp any eq telnet any eq 45020 permit tcp any eq telnet any eq 67930 permit tcp any eq ftp any eq 45040 permit tcp any eq ftp any eq 679
Because the entries are all for the same permit statement and simply show different ports, they can beconsolidated into one new access list entry. The following example shows the removal of the redundant accesslist entries and the creation of a new access list entry that consolidates the previously displayed group of accesslist entries:
ip access-list extended abcno 10no 20no 30no 40permit tcp any eq telnet ftp any eq 450 679end
When the show access-lists command is reentered, the consolidated access list entry is displayed:
Device# show access-lists abc
Security Configuration Guide: Access Control Lists, Cisco IOS XE Everest 16.547
Creating an IP Access List to Filter IP Options, TCP Flags, Noncontiguous PortsExample: Creating an Access List Entry with Noncontiguous Ports

Extended IP access list abc10 permit tcp any eq telnet ftp any eq 450 679
Example: Filtering on TTL ValueThe following access list filters IP packets containing type of service (ToS) level 3 with time-to-live (TTL)values 10 and 20. It also filters IP packets with a TTL greater than 154 and applies that rule to noninitialfragments. It permits IP packets with a precedence level of flash and a TTL value not equal to 1, and it sendslog messages about such packets to the console. All other packets are denied.
ip access-list extended incomingfilterdeny ip any any tos 3 ttl eq 10 20deny ip any any ttl gt 154 fragmentspermit ip any any precedence flash ttl neq 1 log!interface ethernet 0
ip access-group incomingfilter in
Example: Control Plane Policing to Filter on TTL Values 0 and 1The following example configures a traffic class called acl-filter-class for use in a policy map called acl-filter.An access list permits IP packets from any source having a time-to-live (TTL) value of 0 or 1. Any packetsmatching the access list are dropped. The policy map is attached to the control plane.
ip access-list extended ttlfilter
permit ip any any ttl eq 0 1
class-map acl-filter-class
match access-group name ttlfilter
policy-map acl-filter
class acl-filter-class
drop
control-plane
service-policy input acl-filter
Security Configuration Guide: Access Control Lists, Cisco IOS XE Everest 16.548
Creating an IP Access List to Filter IP Options, TCP Flags, Noncontiguous PortsExample: Filtering on TTL Value

Additional ReferencesRelated Documents
Document TitleRelated Topic
Cisco IOS Master Command List, All ReleasesCisco IOS commands
Cisco IOS Security Command ReferenceSecurity commands
“ACL IP Options Selective Drop”Configuring the device to drop or ignore packetscontaining IP Options by using the no ip optionscommand.
“IP Access List Overview”Overview information about access lists.
“Creating an IP Access List and Applying It to anInterface”
Information about creating an IP access list andapplying it to an interface
Cisco IOS Quality of Service Solutions CommandReference
QoS commands
RFCs
TitleRFC
Internet Protocol
http://www.faqs.org/rfcs/rfc791.html
RFC 791
Transmission Control ProtocolRFC 793
Traceroute Using an IP OptionRFC1393
Technical Assistance
LinkDescription
http://www.cisco.com/cisco/web/support/index.htmlTheCisco Support andDocumentationwebsite providesonline resources to download documentation, software,and tools. Use these resources to install and configurethe software and to troubleshoot and resolve technicalissues with Cisco products and technologies. Access tomost tools on the Cisco Support and Documentationwebsite requires a Cisco.com user ID and password.
Security Configuration Guide: Access Control Lists, Cisco IOS XE Everest 16.549
Creating an IP Access List to Filter IP Options, TCP Flags, Noncontiguous PortsAdditional References

Feature Information for Creating an IP Access List to FilterThe following table provides release information about the feature or features described in this module. Thistable lists only the software release that introduced support for a given feature in a given software releasetrain. Unless noted otherwise, subsequent releases of that software release train also support that feature.
Use Cisco Feature Navigator to find information about platform support and Cisco software image support.To access Cisco Feature Navigator, go to www.cisco.com/go/cfn. An account on Cisco.com is not required.
Table 5: Feature Information for Creating an IP Access List to Filter
Feature Configuration InformationReleasesFeature Name
This feature allows you to specify noncontiguous ports in a singleaccess control entry, which greatly reduces the number of entriesrequired in an access control list when several entries have the samesource address, destination address, and protocol, but differ only inthe ports.
12.3(7)T
12.2(25)S
ACL--Named ACLSupport forNoncontiguous Ports onan Access Control Entry
This feature allows you to filter packets having IP Options, in orderto prevent routers from becoming saturated with spurious packets.
In Cisco IOS Release 15.4(1)S, support was added for the Cisco ASR901S series routers.
12.3(4)T
12.2(25)S
15.2(2)S
15.4(1)S
ACL Support for FilteringIP Options
This feature provides a flexible mechanism for filtering on TCP flags.Before Cisco IOS Release 12.3(4)T, an incoming packet was matchedas long as any TCP flag in the packet matched a flag specified in theaccess control entry (ACE). This behavior allows for a securityloophole, because packets with all flags set could get past the accesscontrol list (ACL). The ACL TCP Flags Filtering feature allows youto select any combination of flags on which to filter. The ability tomatch on a flag set and on a flag not set gives you a greater degree ofcontrol for filtering on TCP flags, thus enhancing security.
12.3(4)T
12.2(25)S
ACL TCP Flags Filtering
Security Configuration Guide: Access Control Lists, Cisco IOS XE Everest 16.550
Creating an IP Access List to Filter IP Options, TCP Flags, Noncontiguous PortsFeature Information for Creating an IP Access List to Filter

C H A P T E R 5Configuring an FQDN ACL
This document describes how to configure an access control lists (ACL) using a fully qualified domain name(FQDN). The Configuring an FQDN ACL feature allows you to configure and apply an ACL to a wirelesssession based on the domain name system (DNS). The domain names are resolved to IP addresses, the IPaddresses are given to the client as part of the DNS response, and the FQDN is then mapped to an ACL basedon the IP address.
• Finding Feature Information, on page 51• Restrictions for Configuring FQDN ACL, on page 51• Information About Configuring an FQDN ACL, on page 52• How to Configure FQDN ACL, on page 52• Monitoring an FQDN ACL, on page 54• Configuration Examples for an FQDN ACL, on page 55• Additional References for Configuring FQDN ACL, on page 55• Feature Information for Configuring FQDN ACL, on page 56
Finding Feature InformationYour software release may not support all the features documented in this module. For the latest caveats andfeature information, see Bug Search Tool and the release notes for your platform and software release. Tofind information about the features documented in this module, and to see a list of the releases in which eachfeature is supported, see the feature information table.
Use Cisco Feature Navigator to find information about platform support and Cisco software image support.To access Cisco Feature Navigator, go to www.cisco.com/go/cfn. An account on Cisco.com is not required.
Restrictions for Configuring FQDN ACLThe Configuring FQDN ACL feature is supported only on IPv4 wireless sessions.
Security Configuration Guide: Access Control Lists, Cisco IOS XE Everest 16.551
Information About Configuring an FQDN ACL
Configuring an FQDN ACLWhen access control lists (ACLs) are configured using a fully qualified domain name (FQDN), ACLs can beapplied based on the destination domain name. The destination domain name is then resolved to an IP address,which is provided to the client as a part of the DNS response.
Guest users can log in using web authentication with a parameter map that consists of an FQDN ACL name.
Before you configure an FQDN ACL, complete the following tasks:
• Configure an IP access list.
• Configure an IP domain name list.
• Map an FQDN ACL with a domain name.
You can apply an access list to a specific domain by configuring the RADIUS server to send the fqdn-acl-nameAAA attribute to the controller. The operating system checks for the passthrough domain list and its mapping,and permits the FQDN. The FQDN ACL allows clients to access only configured domains withoutauthentication.
By default, an IP access list name is configured with the same name as the pass-through domain name. Tooverride the default name, you can use the access-session passthrou-access-group access-group-namepassthrou-domain-list domain-list-name command in global configuration mode.
Note
How to Configure FQDN ACL
Configuring an IP Access List
SUMMARY STEPS
1. configure terminal2. ip access-list extended name3. permit ip any any4. end
DETAILED STEPS
PurposeCommand or Action
Enters global configuration mode.configure terminal
Example:
Step 1
# configure terminal
Security Configuration Guide: Access Control Lists, Cisco IOS XE Everest 16.552
Configuring an FQDN ACLInformation About Configuring an FQDN ACL

PurposeCommand or Action
Creates the IP access list.ip access-list extended name
Example:
Step 2
(config)# ip access-list extended ABC
Specifies the domains to be allowed for the wireless client.The domains are specified in the domain name list.
permit ip any any
Example:
Step 3
(config-ext-nacl)# permit ip any any
Returns to privileged EXEC mode. Alternatively, you canalso press Ctrl-Z to exit global configuration mode.
end
Example:
Step 4
(config)# end
Configuring a Domain Name ListYou can configure a domain name list that contains a list of domain names that are allowed for DNS snoopingby the access point. The DNS domain list name string must be identical to the extended access list name.
SUMMARY STEPS
1. configure terminal2. passthrou-domain-list name3. match word4. end
DETAILED STEPS
PurposeCommand or Action
Enters global configuration mode.configure terminal
Example:
Step 1
# configure terminal
Configures a passthrough domain name list.passthrou-domain-list name
Example:
Step 2
(config)# passthrou-domain-list abc(config-fqdn-acl-domains)#
Configures a passthrough domain list. Adds a list ofwebsites that the client is allowed to query for access
match word
Example:
Step 3
without first being required to be authenticated through theRADIUS server.
(config-fqdn-acl-domains)# match play.google.com(config-fqdn-acl-domains)# match www.yahoo.com
Returns to privileged EXEC mode. Alternatively, you canalso press Ctrl-Z to exit global configuration mode.
end
Example:
Step 4
Security Configuration Guide: Access Control Lists, Cisco IOS XE Everest 16.553
Configuring an FQDN ACLConfiguring a Domain Name List

PurposeCommand or Action(config)# end
Mapping the FQDN ACL with a Domain Name
SUMMARY STEPS
1. configure terminal2. access-session passthrou-access-group access-group-name passthrou-domain-list domain-list-name3. parameter-map type webauth domain-list-name and login-auth-bypass fqdn-acl-name acl-name
domain-name domain-name
DETAILED STEPS
PurposeCommand or Action
Enters global configuration mode.configure terminal
Example:
Step 1
# configure terminal
Maps the FQDNACLAAA attribute namewith the domainname list. Use this commandwhen configuring central webauthentication.
access-session passthrou-access-group access-group-namepassthrou-domain-list domain-list-name
Example:
Step 2
(config)# access-session passthrou-access-groupabc passthrou-domain-list abc
Maps an FQDNACL name with the domain name list. Usethe command when configuring local authentication on thecontroller.
parameter-map type webauth domain-list-name andlogin-auth-bypass fqdn-acl-name acl-namedomain-namedomain-name
Step 3
Example: The RADIUS server can be configured to return an FQDNACL name as part of the authenticated user profile. The(config)# parameter-map type webauth abc
(config-params-parameter-map)# login-auth-bypassfqdn-acl-name abc domain-name abc
controller dynamically applies the FQDN ACL to the userif the FQDN ACL is defined on the controller.
Monitoring an FQDN ACLThe following commands can be used to monitor FQDN ACLs.
PurposeCommand
Displays the FQDN ACL information configured onthe interface.
show access-session interface interface-name details
Displays the FQDNACLmapped to the domain namelist.
show access-session fqdn fqdn-maps
Displays the domain names.show access-session fqdn list-domain domain-name
Security Configuration Guide: Access Control Lists, Cisco IOS XE Everest 16.554
Configuring an FQDN ACLMapping the FQDN ACL with a Domain Name

Displays the domains that are configured.show access-session fqdn passthru-domain-list
Configuration Examples for an FQDN ACL
Examples: FQDN ACL ConfigurationThis example shows how to create IP access list:
# config terminal(config)# ip access-list extended abc(config-ext-nacl)# permit ip any any(config-ext-nacl)# end# show ip access-list abc
This example shows how to configure domain name list:
# config terminal(config)# passthrou-domain-list abc(config-fqdn-acl-domains)# match play.google.com(config-fqdn-acl-domains)# end# show access-session fqdn fqdn-maps
This example shows how to map FQDN ACL with domain name using central web authentication:
# config terminal(config)# access-session passthrou-access-group abc passthrou-domain-list abc(config)# end# show access-session interface vlan 20
This example shows how to map FQDN ACL with domain name using local authentication:
# config terminal(config)# parameter-map type webauth abc(config-params-parameter-map)# login-auth-bypass fqdn-acl-name abc domain-name abc(config-params-parameter-map)# end# show access-session fqdn fqdn-maps
Additional References for Configuring FQDN ACLRelated Documents
Document TitleRelated Topic
Cisco IOS Master Command List, All ReleasesCisco IOS commands
Security Configuration Guide: Access Control Lists, Cisco IOS XE Everest 16.555
Configuring an FQDN ACLConfiguration Examples for an FQDN ACL

Document TitleRelated Topic
• Cisco IOS Security Command Reference:Commands A to C
• Cisco IOS Security Command Reference:Commands D to L
• Cisco IOS Security Command Reference:Commands M to R
• Cisco IOS Security Command Reference:Commands S to Z
Security commands
Security Configuration Guide: Access Control ListsACL configuration guide
Technical Assistance
LinkDescription
http://www.cisco.com/cisco/web/support/index.htmlThe Cisco Support and Documentation websiteprovides online resources to downloaddocumentation, software, and tools. Use theseresources to install and configure the software andto troubleshoot and resolve technical issues withCisco products and technologies. Access to mosttools on the Cisco Support and Documentationwebsite requires a Cisco.com user ID andpassword.
Feature Information for Configuring FQDN ACLThe following table provides release information about the feature or features described in this module. Thistable lists only the software release that introduced support for a given feature in a given software releasetrain. Unless noted otherwise, subsequent releases of that software release train also support that feature.
Use Cisco Feature Navigator to find information about platform support and Cisco software image support.To access Cisco Feature Navigator, go to www.cisco.com/go/cfn. An account on Cisco.com is not required.
Security Configuration Guide: Access Control Lists, Cisco IOS XE Everest 16.556
Configuring an FQDN ACLFeature Information for Configuring FQDN ACL

Table 6: Feature Information for Configuring FQDN ACL
Feature InformationReleasesFeature Name
The Configuring an FQDN ACLfeature allows you to configure andapply an access control lists (ACL)to a wireless session based on thedomain name system (DNS). Thedomain names are resolved to IPaddresses, where the IP addressesare given to the client as part of theDNS response; the FQDN is thenmapped to an ACL based on the IPaddress.
The following commands wereintroduced or modified: accesssession passthrou access group,login-auth-bypass,parameter-map type webauthglobal, pass throu domain listname, show access-session fqdn.
Configuring an FQDN ACL
Security Configuration Guide: Access Control Lists, Cisco IOS XE Everest 16.557
Configuring an FQDN ACLFeature Information for Configuring FQDN ACL

Security Configuration Guide: Access Control Lists, Cisco IOS XE Everest 16.558
Configuring an FQDN ACLFeature Information for Configuring FQDN ACL

C H A P T E R 6Refining an IP Access List
There are several ways to refine an access list while or after you create it. You can change the order of theentries in an access list or add entries to an access list. You can restrict access list entries to a certain time ofday or week, or achieve finer granularity when filtering packets by filtering noninitial fragments of packets.
• Finding Feature Information, on page 59• Information About Refining an IP Access List, on page 59• How to Refine an IP Access List, on page 62• Configuration Examples for Refining an IP Access List, on page 67• Additional References, on page 70• Feature Information for Refining an IP Access List, on page 71
Finding Feature InformationYour software release may not support all the features documented in this module. For the latest caveats andfeature information, see Bug Search Tool and the release notes for your platform and software release. Tofind information about the features documented in this module, and to see a list of the releases in which eachfeature is supported, see the feature information table.
Use Cisco Feature Navigator to find information about platform support and Cisco software image support.To access Cisco Feature Navigator, go to www.cisco.com/go/cfn. An account on Cisco.com is not required.
Information About Refining an IP Access List
Access List Sequence NumbersThe ability to apply sequence numbers to IP access list entries simplifies access list changes. Prior to the IPAccess List Entry Sequence Numbering feature, there was no way to specify the position of an entry withinan access list. If you wanted to insert an entry in the middle of an existing list, all of the entries after the desiredposition had to be removed, then the new entry was added, and then all the removed entries had to be reentered.This method was cumbersome and error prone.
Sequence numbers allow users to add access list entries and resequence them. When you add a new entry,you specify the sequence number so that it is in a desired position in the access list. If necessary, entriescurrently in the access list can be resequenced to create room to insert the new entry.
Security Configuration Guide: Access Control Lists, Cisco IOS XE Everest 16.559

Benefits of Access List Sequence NumbersAn access list sequence number is a number at the beginning of a permit or deny command in an access list.The sequence number determines the order that the entry appears in the access list. The ability to applysequence numbers to IP access list entries simplifies access list changes.
Prior to having sequence numbers, users could only add access list entries to the end of an access list; therefore,needing to add statements anywhere except the end of the list required reconfiguring the entire access list.There was no way to specify the position of an entry within an access list. If a user wanted to insert an entry(statement) in the middle of an existing list, all of the entries after the desired position had to be removed,then the new entry was added, and then all the removed entries had to be reentered. This method wascumbersome and error prone.
This feature allows users to add sequence numbers to access list entries and resequence them. When a useradds a new entry, the user chooses the sequence number so that it is in a desired position in the access list. Ifnecessary, entries currently in the access list can be resequenced to create room to insert the new entry.Sequence numbers make revising an access list much easier.
Sequence Numbering Behavior• For backward compatibility with previous releases, if entries with no sequence numbers are applied, thefirst entry is assigned a sequence number of 10, and successive entries are incremented by 10. Themaximum sequence number is 2147483647. If the generated sequence number exceeds this maximumnumber, the following message is displayed:
Exceeded maximum sequence number.
• If the user enters an entry without a sequence number, it is assigned a sequence number that is 10 greaterthan the last sequence number in that access list and is placed at the end of the list.
• If the user enters an entry that matches an already existing entry (except for the sequence number), thenno changes are made.
• If the user enters a sequence number that is already present, the following error message is generated:
Duplicate sequence number.
• If a new access list is entered from global configuration mode, then sequence numbers for that accesslist are generated automatically.
• Sequence numbers are not nvgened. That is, the sequence numbers themselves are not saved. In the eventthat the system is reloaded, the configured sequence numbers revert to the default sequence startingnumber and increment. The function is provided for backward compatibility with software releases thatdo not support sequence numbering.
• This feature works with named and numbered, standard and extended IP access lists.
Benefits of Time RangesBenefits and possible uses of time ranges include the following:
Security Configuration Guide: Access Control Lists, Cisco IOS XE Everest 16.560
Refining an IP Access ListBenefits of Access List Sequence Numbers

• The network administrator has more control over permitting or denying a user access to resources. Theseresources could be an application (identified by an IP address/mask pair and a port number), policyrouting, or an on-demand link (identified as interesting traffic to the dialer).
• Network administrators can set time-based security policy, including the following:
• Perimeter security using access lists• Data confidentiality with IP Security Protocol (IPsec)
• When provider access rates vary by time of day, it is possible to automatically reroute traffic costeffectively.
• Network administrators can control logging messages. Access list entries can log traffic at certain timesof the day, but not constantly. Therefore, administrators can simply deny access without needing toanalyze many logs generated during peak hours.
Benefits Filtering Noninitial Fragments of PacketsFilter noninitial fragments of packets with an extended access list if you want to block more of the traffic youintended to block, not just the initial fragment of such packets. You should first understand the followingconcepts.
If the fragmentskeyword is used in additional IP access list entries that deny fragments, the fragment controlfeature provides the following benefits:
Additional Security
You are able to block more of the traffic you intended to block, not just the initial fragment of such packets.The unwanted fragments no longer linger at the receiver until the reassembly timeout is reached because theyare blocked before being sent to the receiver. Blocking a greater portion of unwanted traffic improves securityand reduces the risk from potential hackers.
Reduced Cost
By blocking unwanted noninitial fragments of packets, you are not paying for traffic you intended to block.
Reduced Storage
By blocking unwanted noninitial fragments of packets from ever reaching the receiver, that destination doesnot have to store the fragments until the reassembly timeout period is reached.
Expected Behavior Is Achieved
The noninitial fragments will be handled in the same way as the initial fragment, which is what you wouldexpect. There are fewer unexpected policy routing results and fewer fragments of packets being routed whenthey should not be.
Access List Processing of FragmentsThe behavior of access list entries regarding the use or lack of use of the fragments keyword can be summarizedas follows:
Security Configuration Guide: Access Control Lists, Cisco IOS XE Everest 16.561
Refining an IP Access ListBenefits Filtering Noninitial Fragments of Packets
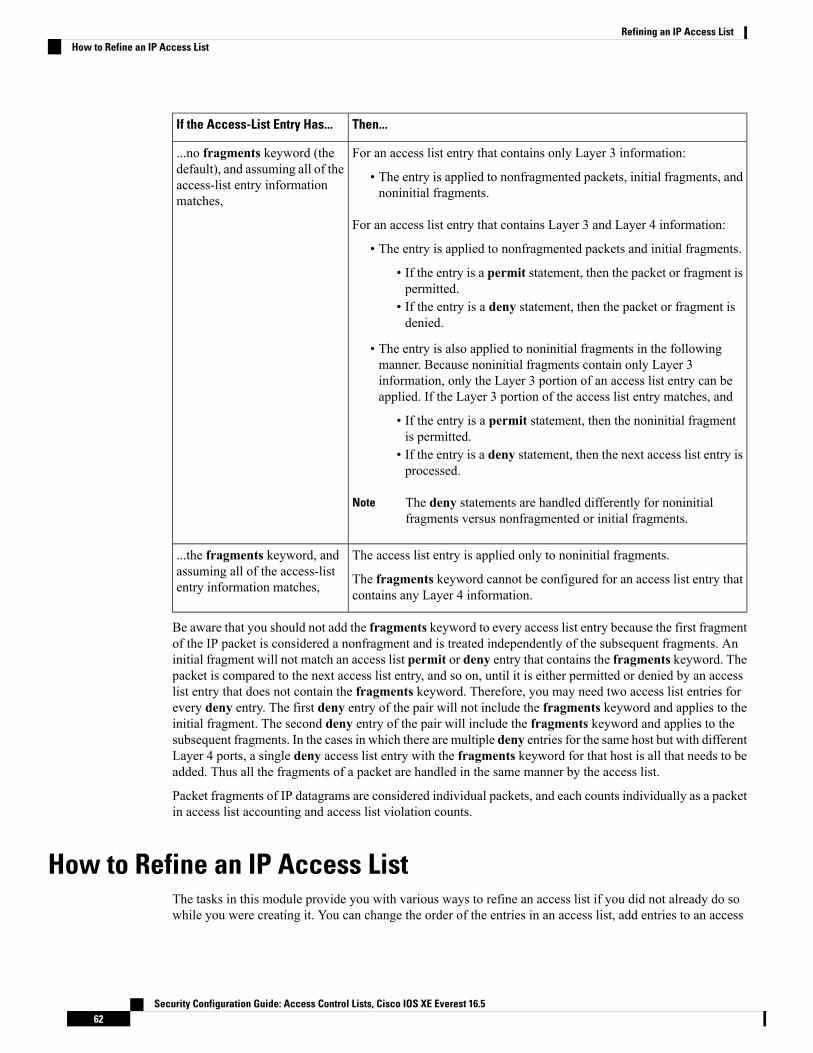
Then...If the Access-List Entry Has...
For an access list entry that contains only Layer 3 information:
• The entry is applied to nonfragmented packets, initial fragments, andnoninitial fragments.
For an access list entry that contains Layer 3 and Layer 4 information:
• The entry is applied to nonfragmented packets and initial fragments.
• If the entry is a permit statement, then the packet or fragment ispermitted.
• If the entry is a deny statement, then the packet or fragment isdenied.
• The entry is also applied to noninitial fragments in the followingmanner. Because noninitial fragments contain only Layer 3information, only the Layer 3 portion of an access list entry can beapplied. If the Layer 3 portion of the access list entry matches, and
• If the entry is a permit statement, then the noninitial fragmentis permitted.
• If the entry is a deny statement, then the next access list entry isprocessed.
The deny statements are handled differently for noninitialfragments versus nonfragmented or initial fragments.
Note
...no fragments keyword (thedefault), and assuming all of theaccess-list entry informationmatches,
The access list entry is applied only to noninitial fragments.
The fragments keyword cannot be configured for an access list entry thatcontains any Layer 4 information.
...the fragments keyword, andassuming all of the access-listentry information matches,
Be aware that you should not add the fragments keyword to every access list entry because the first fragmentof the IP packet is considered a nonfragment and is treated independently of the subsequent fragments. Aninitial fragment will not match an access list permit or deny entry that contains the fragments keyword. Thepacket is compared to the next access list entry, and so on, until it is either permitted or denied by an accesslist entry that does not contain the fragments keyword. Therefore, you may need two access list entries forevery deny entry. The first deny entry of the pair will not include the fragments keyword and applies to theinitial fragment. The second deny entry of the pair will include the fragments keyword and applies to thesubsequent fragments. In the cases in which there are multiple deny entries for the same host but with differentLayer 4 ports, a single deny access list entry with the fragments keyword for that host is all that needs to beadded. Thus all the fragments of a packet are handled in the same manner by the access list.
Packet fragments of IP datagrams are considered individual packets, and each counts individually as a packetin access list accounting and access list violation counts.
How to Refine an IP Access ListThe tasks in this module provide you with various ways to refine an access list if you did not already do sowhile you were creating it. You can change the order of the entries in an access list, add entries to an access
Security Configuration Guide: Access Control Lists, Cisco IOS XE Everest 16.562
Refining an IP Access ListHow to Refine an IP Access List

list, restrict access list entries to a certain time of day or week, or achieve finer granularity when filteringpackets by filtering on noninitial fragments of packets.
Revising an Access List Using Sequence NumbersPerform this task if you want to add entries to an existing access list, change the order of entries, or simplynumber the entries in an access list to accommodate future changes.
Remember that if you want to delete an entry from an access list, you can simply use the no deny or no permitform of the command, or the no sequence-number command if the statement already has a sequence number.
Note
• Access list sequence numbers do not support dynamic, reflexive, or firewall access lists.Note
SUMMARY STEPS
1. enable2. configure terminal3. ip access-list resequence access-list-name starting-sequence-number increment4. ip access-list {standard| extended} access-list-name5. Do one of the following:
• sequence-number permit source source-wildcard• sequence-number permit protocol source source-wildcard destination destination-wildcard[precedence precedence][tos tos] [log] [time-range time-range-name] [fragments]
6. Do one of the following:
• sequence-number deny source source-wildcard• sequence-number deny protocol source source-wildcard destination destination-wildcard[precedence precedence][tos tos] [log] [time-range time-range-name] [fragments]
7. Repeat Step 5 and Step 6 as necessary, adding statements by sequence number where you planned. Usethe no sequence-number command to delete an entry.
8. end9. show ip access-lists access-list-name
DETAILED STEPS
PurposeCommand or Action
Enables privileged EXEC mode.enableStep 1
Example: • Enter your password if prompted.
Router> enable
Security Configuration Guide: Access Control Lists, Cisco IOS XE Everest 16.563
Refining an IP Access ListRevising an Access List Using Sequence Numbers

PurposeCommand or Action
Enters global configuration mode.configure terminal
Example:
Step 2
Router# configure terminal
Resequences the specified IP access list using the startingsequence number and the increment of sequence numbers.
ip access-list resequence access-list-namestarting-sequence-number increment
Step 3
Example: • This example resequences an access list named kmd1.The starting sequence number is 100 and the incrementis 15.Router(config)# ip access-list resequence kmd1 100
15
Specifies the IP access list by name and enters named accesslist configuration mode.
ip access-list {standard| extended} access-list-name
Example:
Step 4
• If you specify standard, make sure you specifysubsequent permit and deny statements using thestandard access list syntax.
Router(config)# ip access-list standard xyz123
• If you specify extended, make sure you specifysubsequent permit and deny statements using theextended access list syntax.
Specifies a permit statement in named IP access list mode.Do one of the following:Step 5
• sequence-number permit source source-wildcard • This access list happens to use a permitstatement first,but a deny statement could appear first, depending onthe order of statements you need.
• sequence-number permit protocol sourcesource-wildcard destination destination-wildcard[precedence precedence][tos tos] [log] [time-rangetime-range-name] [fragments] • See the permit (IP) command for additional command
syntax to permit upper layer protocols (ICMP, IGMP,TCP, and UDP).Example:
Router(config-std-nacl)# 105 permit 10.5.5.50.0.0.255
• Use the no sequence-number command to delete anentry.
• As the prompt indicates, this access list was a standardaccess list. If you had specified extended in Step 4,the prompt for this step would beRouter(config-ext-nacl)# and you would use theextended permit command syntax.
(Optional) Specifies a deny statement in named IP accesslist mode.
Do one of the following:Step 6
• sequence-number deny source source-wildcard• This access list happens to use a permitstatement first,but a deny statement could appear first, depending onthe order of statements you need.
• sequence-number deny protocol sourcesource-wildcard destination destination-wildcard[precedence precedence][tos tos] [log] [time-rangetime-range-name] [fragments] • See the deny (IP) command for additional command
syntax to permit upper layer protocols (ICMP, IGMP,TCP, and UDP).
Example:
Security Configuration Guide: Access Control Lists, Cisco IOS XE Everest 16.564
Refining an IP Access ListRevising an Access List Using Sequence Numbers

PurposeCommand or Action
Router(config-std-nacl)# 110 deny 10.6.6.70.0.0.255
• Use the no sequence-number command to delete anentry.
• As the prompt indicates, this access list was a standardaccess list. If you had specified extended in Step 4,the prompt for this step would beRouter(config-ext-nacl)# and you would use theextended deny command syntax.
Allows you to revise the access list.Repeat Step 5 and Step 6 as necessary, adding statementsby sequence number where you planned. Use the nosequence-number command to delete an entry.
Step 7
(Optional) Exits the configuration mode and returns toprivileged EXEC mode.
end
Example:
Step 8
Router(config-std-nacl)# end
(Optional) Displays the contents of the IP access list.show ip access-lists access-list-nameStep 9
Example: • Review the output to see that the access list includesthe new entry.
Router# show ip access-lists xyz123
Examples
The following is sample output from the show ip access-lists command when the xyz123 access listis specified.
Router# show ip access-lists xyz123Standard IP access list xyz123100 permit 10.4.4.0, wildcard bits 0.0.0.255105 permit 10.5.5.5, wildcard bits 0.0.0.255115 permit 10.0.0.0, wildcard bits 0.0.0.255130 permit 10.5.5.0, wildcard bits 0.0.0.255145 permit 10.0.0.0, wildcard bits 0.0.0.255
Restricting an Access List Entry to a Time of Day or WeekBy default, access list statements are always in effect once they are applied. However, you can define thetimes of the day or week that permit or deny statements are in effect by defining a time range, and thenreferencing the time range by name in an individual access list statement. IP and Internetwork Packet Exchange(IPX) named or numbered extended access lists can use time ranges.
SUMMARY STEPS
1. enable2. configure terminal3. ip access-list extended name
Security Configuration Guide: Access Control Lists, Cisco IOS XE Everest 16.565
Refining an IP Access ListRestricting an Access List Entry to a Time of Day or Week

4. [sequence-number] deny protocol source[source-wildcard] [operator port[port]]destination[destination-wildcard] [operator port[port]]
5. [sequence-number] deny protocol source[source-wildcard][operator port[port]]destination[destination-wildcard] [operator port[port]] fragments
6. [sequence-number] permit protocol source[source-wildcard] [operator port[port]]destination[destination-wildcard] [operator port[port]]
7. Repeat some combination of Steps 4 through 6 until you have specified the values on which you want tobase your access list.
8. end9. show ip access-list
DETAILED STEPS
PurposeCommand or Action
Enables privileged EXEC mode.enableStep 1
Example: • Enter your password if prompted.
Router> enable
Enters global configuration mode.configure terminal
Example:
Step 2
Router# configure terminal
Defines an extended IP access list using a name and entersextended named access list configuration mode.
ip access-list extended name
Example:
Step 3
Router(config)# ip access-list extended rstrct4
(Optional) Denies any packet that matches all of theconditions specified in the statement.
[sequence-number] deny protocol source[source-wildcard][operator port[port]] destination[destination-wildcard][operator port[port]]
Step 4
• This statement will apply to nonfragmented packetsand initial fragments.Example:
Router(config-ext-nacl)# deny ip any 172.20.1.1
(Optional) Denies any packet that matches all of theconditions specified in the statement
[sequence-number] deny protocolsource[source-wildcard][operator port[port]]
Step 5
destination[destination-wildcard] [operator port[port]]fragments • This statement will apply to noninitial fragments.
Example:
Router(config-ext-nacl)# deny ip any 172.20.1.1fragments
Permits any packet that matches all of the conditionsspecified in the statement.
[sequence-number] permit protocolsource[source-wildcard] [operator port[port]]destination[destination-wildcard] [operator port[port]]
Step 6
• Every access list needs at least one permit statement.
Security Configuration Guide: Access Control Lists, Cisco IOS XE Everest 16.566
Refining an IP Access ListRestricting an Access List Entry to a Time of Day or Week
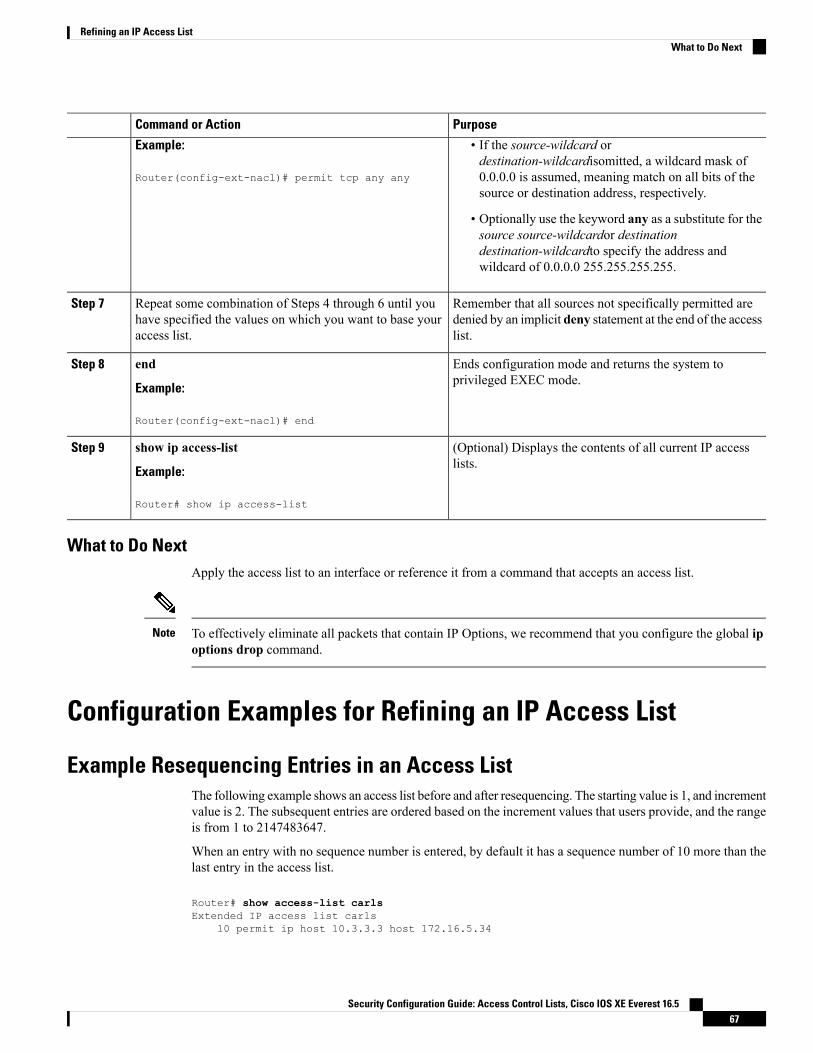
PurposeCommand or Action
Example: • If the source-wildcard ordestination-wildcardisomitted, a wildcard mask of
Router(config-ext-nacl)# permit tcp any any 0.0.0.0 is assumed, meaning match on all bits of thesource or destination address, respectively.
• Optionally use the keyword any as a substitute for thesource source-wildcardor destinationdestination-wildcardto specify the address andwildcard of 0.0.0.0 255.255.255.255.
Remember that all sources not specifically permitted aredenied by an implicit deny statement at the end of the accesslist.
Repeat some combination of Steps 4 through 6 until youhave specified the values on which you want to base youraccess list.
Step 7
Ends configuration mode and returns the system toprivileged EXEC mode.
end
Example:
Step 8
Router(config-ext-nacl)# end
(Optional) Displays the contents of all current IP accesslists.
show ip access-list
Example:
Step 9
Router# show ip access-list
What to Do NextApply the access list to an interface or reference it from a command that accepts an access list.
To effectively eliminate all packets that contain IP Options, we recommend that you configure the global ipoptions drop command.
Note
Configuration Examples for Refining an IP Access List
Example Resequencing Entries in an Access ListThe following example shows an access list before and after resequencing. The starting value is 1, and incrementvalue is 2. The subsequent entries are ordered based on the increment values that users provide, and the rangeis from 1 to 2147483647.
When an entry with no sequence number is entered, by default it has a sequence number of 10 more than thelast entry in the access list.
Router# show access-list carlsExtended IP access list carls
10 permit ip host 10.3.3.3 host 172.16.5.34
Security Configuration Guide: Access Control Lists, Cisco IOS XE Everest 16.567
Refining an IP Access ListWhat to Do Next

20 permit icmp any any30 permit tcp any host 10.3.3.340 permit ip host 10.4.4.4 any50 Dynamic test permit ip any any60 permit ip host 172.16.2.2 host 10.3.3.1270 permit ip host 10.3.3.3 any log80 permit tcp host 10.3.3.3 host 10.1.2.290 permit ip host 10.3.3.3 any100 permit ip any any
Router(config)# ip access-list extended carlsRouter(config)# ip access-list resequence carls 1 2Router(config)# endRouter# show access-list carlsExtended IP access list carls
1 permit ip host 10.3.3.3 host 172.16.5.343 permit icmp any any5 permit tcp any host 10.3.3.37 permit ip host 10.4.4.4 any9 Dynamic test permit ip any any11 permit ip host 172.16.2.2 host 10.3.3.1213 permit ip host 10.3.3.3 any log15 permit tcp host 10.3.3.3 host 10.1.2.217 permit ip host 10.3.3.3 any19 permit ip any any
Example Adding an Entry with a Sequence NumberIn the following example, an new entry (sequence number 15) is added to an access list:
Router# show ip access-listStandard IP access list tryon2 permit 10.4.4.2, wildcard bits 0.0.255.2555 permit 10.0.0.44, wildcard bits 0.0.0.25510 permit 10.0.0.1, wildcard bits 0.0.0.25520 permit 10.0.0.2, wildcard bits 0.0.0.255Router(config)# ip access-list standard tryonRouter(config-std-nacl)# 15 permit 10.5.5.5 0.0.0.255Router# show ip access-listStandard IP access list tryon2 permit 10.4.0.0, wildcard bits 0.0.255.2555 permit 10.0.0.0, wildcard bits 0.0.0.25510 permit 10.0.0.0, wildcard bits 0.0.0.25515 permit 10.5.5.0, wildcard bits 0.0.0.25520 permit 10.0.0.0, wildcard bits 0.0.0.255
Example Adding an Entry with No Sequence NumberThe following example shows how an entry with no specified sequence number is added to the end of anaccess list. When an entry is added without a sequence number, it is automatically given a sequence numberthat puts it at the end of the access list. Because the default increment is 10, the entry will have a sequencenumber 10 higher than the last entry in the existing access list.
Router(config)# ip access-list standard resourcesRouter(config-std-nacl)# permit 10.1.1.1 0.0.0.255Router(config-std-nacl)# permit 10.2.2.2 0.0.0.255Router(config-std-nacl)# permit 10.3.3.3 0.0.0.255Router# show access-listStandard IP access list resources
Security Configuration Guide: Access Control Lists, Cisco IOS XE Everest 16.568
Refining an IP Access ListExample Adding an Entry with a Sequence Number

10 permit 10.1.1.1, wildcard bits 0.0.0.25520 permit 10.2.2.2, wildcard bits 0.0.0.25530 permit 10.3.3.3, wildcard bits 0.0.0.255Router(config)# ip access-list standard resourcesRouter(config-std-nacl)# permit 10.4.4.4 0.0.0.255Router(config-std-nacl)# endRouter# show access-listStandard IP access list resources10 permit 10.1.1.1, wildcard bits 0.0.0.25520 permit 10.2.2.2, wildcard bits 0.0.0.25530 permit 10.3.3.3, wildcard bits 0.0.0.25540 permit 10.4.4.4, wildcard bits 0.0.0.255
Example Time Ranges Applied to IP Access List EntriesThe following example creates a time range called no-http, which extends from Monday to Friday from 8:00a.m. to 6:00 p.m. That time range is applied to the deny statement, thereby denying HTTP traffic on Mondaythrough Friday from 8:00 a.m. to 6:00 p.m.
The time range called udp-yes defines weekends from noon to 8:00 p.m. That time range is applied to thepermit statement, thereby allowing UDP traffic on Saturday and Sunday from noon to 8:00 p.m. only. Theaccess list containing both statements is applied to inbound packets on Fast Ethernet interface 0/0/0.
time-range no-httpperiodic weekdays 8:00 to 18:00!time-range udp-yesperiodic weekend 12:00 to 20:00!ip access-list extended strictdeny tcp any any eq http time-range no-httppermit udp any any time-range udp-yes!interface fastethernet 0/0/0ip access-group strict in
Example Filtering IP Packet FragmentsIn the following access list, the first statement will deny only noninitial fragments destined for host 172.16.1.1.The second statement will permit only the remaining nonfragmented and initial fragments that are destinedfor host 172.16.1.1 TCP port 80. The third statement will deny all other traffic. In order to block noninitialfragments for any TCP port, we must block noninitial fragments for all TCP ports, including port 80 for host172.16.1.1. That is, non-initial fragments will not contain Layer 4 port information, so, in order to block suchtraffic for a given port, we have to block fragments for all ports.
access-list 101 deny ip any host 172.16.1.1 fragmentsaccess-list 101 permit tcp any host 172.16.1.1 eq 80access-list 101 deny ip any any
Security Configuration Guide: Access Control Lists, Cisco IOS XE Everest 16.569
Refining an IP Access ListExample Time Ranges Applied to IP Access List Entries

Additional ReferencesRelated Documents
Document TitleRelated Topic
Cisco IOS Master Commands List, All ReleasesCisco IOS commands
The chapter “Performing Basic SystemManagement” in theCisco IOS XE Network Management Configuration Guide
Using the time-range command to establishtime ranges
Cisco IOS Network Management Command ReferenceNetwork management command descriptions
Standards
TitleStandard
--No new or modified standards are supported by this feature, and support for existing standards has notbeen modified by this feature.
MIBs
MIBs LinkMIB
To locate and downloadMIBs for selected platforms, CiscoIOS XE software releases, and feature sets, use Cisco MIBLocator found at the following URL:
http://www.cisco.com/go/mibs
No new or modifiedMIBs are supported by thisfeature, and support for existing MIBs has notbeen modified by this feature.
RFCs
TitleRFC
--No new or modified RFCs are supported by this feature, and support for existing RFCs has not beenmodified by this feature.
Technical Assistance
LinkDescription
http://www.cisco.com/cisco/web/support/index.htmlTheCisco Support andDocumentationwebsite providesonline resources to download documentation, software,and tools. Use these resources to install and configurethe software and to troubleshoot and resolve technicalissues with Cisco products and technologies. Access tomost tools on the Cisco Support and Documentationwebsite requires a Cisco.com user ID and password.
Security Configuration Guide: Access Control Lists, Cisco IOS XE Everest 16.570
Refining an IP Access ListAdditional References

Feature Information for Refining an IP Access ListThe following table provides release information about the feature or features described in this module. Thistable lists only the software release that introduced support for a given feature in a given software releasetrain. Unless noted otherwise, subsequent releases of that software release train also support that feature.
Use Cisco Feature Navigator to find information about platform support and Cisco software image support.To access Cisco Feature Navigator, go to www.cisco.com/go/cfn. An account on Cisco.com is not required.
Table 7: Feature Information for Refining an IP Access List
Feature Configuration InformationReleasesFeature Name
This feature was introduced on Cisco ASR 1000 SeriesAggregation Services Routers.
No commands were introduced or modified for thisfeature.
Cisco IOS XE Release2.1
Time-Based Access Lists
Security Configuration Guide: Access Control Lists, Cisco IOS XE Everest 16.571
Refining an IP Access ListFeature Information for Refining an IP Access List

Security Configuration Guide: Access Control Lists, Cisco IOS XE Everest 16.572
Refining an IP Access ListFeature Information for Refining an IP Access List

C H A P T E R 7IP Named Access Control Lists
Access control lists (ACLs) perform packet filtering to control the movement of packets through a network.Packet filtering provides security by limiting the access of traffic into a network, restricting user and deviceaccess to a network, and preventing traffic from leaving a network. IP access lists reduce the chance of spoofingand denial-of-service attacks, and allow dynamic, temporary user-access through a firewall.
The IP NamedAccess Control Lists feature gives network administrators the option of using names to identifytheir access lists.
This module describes IP named access lists and how to configure them.
• Finding Feature Information, on page 73• Information About IP Named Access Control Lists, on page 73• How to Configure IP Named Access Control Lists, on page 77• Configuration Examples for IP Named Access Control Lists, on page 80• Additional References for IP Named Access Control Lists, on page 81• Feature Information for IP Named Access Control Lists, on page 81
Finding Feature InformationYour software release may not support all the features documented in this module. For the latest caveats andfeature information, see Bug Search Tool and the release notes for your platform and software release. Tofind information about the features documented in this module, and to see a list of the releases in which eachfeature is supported, see the feature information table.
Use Cisco Feature Navigator to find information about platform support and Cisco software image support.To access Cisco Feature Navigator, go to www.cisco.com/go/cfn. An account on Cisco.com is not required.
Information About IP Named Access Control Lists
Definition of an Access ListAccess control lists (ACLs) perform packet filtering to control the movement of packets through a network.Packet filtering provides security by limiting the access of traffic into a network, restricting user and deviceaccess to a network, and preventing traffic from leaving a network. IP access lists reduce the chance of spoofingand denial-of-service attacks, and allow dynamic, temporary user-access through a firewall.
Security Configuration Guide: Access Control Lists, Cisco IOS XE Everest 16.573

IP access lists can also be used for purposes other than security, such as to control bandwidth, restrict thecontent of routing updates, redistribute routes, trigger dial-on-demand (DDR) calls, limit debug output, andidentify or classify traffic for quality of service (QoS) features.
An access list is a sequential list that consists of at least one permit statement and possibly one or more denystatements. In the case of IP access lists, these statements can apply to IP addresses, upper-layer IP protocols,or other fields in IP packets.
Access lists are identified and referenced by a name or a number. Access lists act as packet filters, filteringpackets based on the criteria defined in each access list.
After you configure an access list, for the access list to take effect, you must either apply the access list to aninterface (by using the ip access-group command), a vty (by using the access-class command), or referencethe access list by any command that accepts an access list. Multiple commands can reference the same accesslist.
In the following configuration, an IP access list named branchoffices is configured on Fast Ethernet interface0/1/0 and applied to incoming packets. Networks other than the ones specified by the source address and maskpair cannot access Fast Ethernet interface 0/1/0. The destinations for packets coming from sources on network172.16.7.0 are unrestricted. The destination for packets coming from sources on network 172.16.2.0 must be172.31.5.4.
ip access-list extended branchoffices10 permit 172.16.7.0 0.0.0.3 any20 permit 172.16.2.0 0.0.0.255 host 172.31.5.4!interface fastethernet 0/1/0ip access-group branchoffices in
Named or Numbered Access ListsAll access lists must be identified by a name or a number. Named access lists are more convenient thannumbered access lists because you can specify a meaningful name that is easier to remember and associatewith a task. You can reorder statements in or add statements to a named access list.
Named access lists support the following features that are not supported by numbered access lists:
• IP options filtering
• Noncontiguous ports
• TCP flag filtering
• Deleting of entries with the no permit or no deny command
Not all commands that accept a numbered access list will accept a named access list. For example, vty usesonly numbered access lists.
Note
Security Configuration Guide: Access Control Lists, Cisco IOS XE Everest 16.574
IP Named Access Control ListsNamed or Numbered Access Lists

Benefits of IP Access ListsAccess control lists (ACLs) perform packet filtering to control the flow of packets through a network. Packetfiltering can restrict the access of users and devices to a network, providing a measure of security. Accesslists can save network resources by reducing traffic. The benefits of using access lists are as follows:
• Authenticate incoming rsh and rcp requests—Access lists can simplify the identification of local users,remote hosts, and remote users in an authentication database that is configured to control access to adevice. The authentication database enables Cisco software to receive incoming remote shell (rsh) andremote copy (rcp) protocol requests.
• Block unwanted traffic or users—Access lists can filter incoming or outgoing packets on an interface,thereby controlling access to a network based on source addresses, destination addresses, or userauthentication. You can also use access lists to determine the types of traffic that are forwarded or blockedat device interfaces. For example, you can use access lists to permit e-mail traffic to be routed througha network and to block all Telnet traffic from entering the network.
• Control access to vty—Access lists on an inbound vty (Telnet) can control who can access the lines toa device. Access lists on an outbound vty can control the destinations that the lines from a device canreach.
• Identify or classify traffic for QoS features—Access lists provide congestion avoidance by setting theIP precedence forWeighted RandomEarly Detection (WRED) and committed access rate (CAR). Accesslists also provide congestion management for class-based weighted fair queueing (CBWFQ), priorityqueueing, and custom queueing.
• Limit debug command output—Access lists can limit debug output based on an IP address or a protocol.
• Provide bandwidth control—Access lists on a slow link can prevent excess traffic on a network.
• Provide NAT control—Access lists can control which addresses are translated by Network AddressTranslation (NAT).
• Reduce the chance of DoS attacks—Access lists reduce the chance of denial-of-service (DoS) attacks.Specify IP source addresses to control traffic from hosts, networks, or users from accessing your network.Configure the TCP Intercept feature to can prevent servers from being floodedwith requests for connection.
• Restrict the content of routing updates—Access lists can control routing updates that are sent, received,or redistributed in networks.
• Trigger dial-on-demand calls—Access lists can enforce dial and disconnect criteria.
Access List RulesThe following rules apply to access lists:
• Only one access list per interface, per protocol, and per direction is allowed.
• An access list must contain at least one permit statement or all packets are denied entry into the network.
• The order in which access list conditions or match criteria are configured is important. While decidingwhether to forward or block a packet, Cisco software tests the packet against each criteria statement inthe order in which these statements are created. After a match is found, no more criteria statements arechecked. The same permit or deny statements specified in a different order can result in a packet beingpassed under one circumstance and denied in another circumstance.
Security Configuration Guide: Access Control Lists, Cisco IOS XE Everest 16.575
IP Named Access Control ListsBenefits of IP Access Lists

• If an access list is referenced by a name, but the access list does not exist, all packets pass. An interfaceor command with an empty access list applied to it permits all traffic into the network.
• Standard access lists and extended access lists cannot have the same name.
• Inbound access lists process packets before the packets are routed to an outbound interface. Inboundaccess lists that have filtering criteria that deny packet access to a network saves the overhead of routinglookup. Packets that are permitted access to a network based on the configured filtering criteria areprocessed for routing. For inbound access lists, when you configure a permit statement, packets areprocessed after they are received, and when you configure a deny statement, packets are discarded.
• Outbound access lists process packets before they leave the device. Incoming packets are routed to theoutbound interface and then processed by the outbound access list. For outbound access lists, when youconfigure a permit statement, packets are sent to the output buffer, and when you configure a denystatement, packets are discarded.
• An access list can control traffic arriving at a device or leaving a device, but not traffic originating at adevice.
Helpful Hints for Creating IP Access ListsThe following tips will help you avoid unintended consequences and help you create more efficient, usefulaccess lists.
• Create the access list before applying it to an interface (or elsewhere), because if you apply a nonexistentaccess list to an interface and then proceed to configure the access list, the first statement is put intoeffect, and the implicit deny statement that follows could cause you immediate access problems.
• Another reason to configure an access list before applying it is because an interface with an empty accesslist applied to it permits all traffic.
• All access lists need at least one permit statement; otherwise, all packets are denied and no traffic passes.
• Because the software stops testing conditions after it encounters the first match (to either a permit ordeny statement), you will reduce processing time and resources if you put the statements that packetsare most likely to match at the beginning of the access list. Place more frequently occurring conditionsbefore less frequent conditions.
• Organize your access list so that more specific references in a network or subnet appear before moregeneral ones.
• Use the statement permit any any if you want to allow all other packets not already denied. Using thestatement permit any any in effect avoids denying all other packets with the implicit deny statement atthe end of an access list. Do not make your first access list entry permit any any because all traffic willget through; no packets will reach the subsequent testing. In fact, once you specify permit any any, alltraffic not already denied will get through.
• Although all access lists end with an implicit deny statement, we recommend use of an explicit denystatement (for example, deny ip any any). On most platforms, you can display the count of packetsdenied by issuing the show access-listcommand, thus finding out more information about who youraccess list is disallowing. Only packets denied by explicit deny statements are counted, which is whythe explicit deny statement will yield more complete data for you.
• While you are creating an access list or after it is created, you might want to delete an entry.
Security Configuration Guide: Access Control Lists, Cisco IOS XE Everest 16.576
IP Named Access Control ListsHelpful Hints for Creating IP Access Lists

You cannot delete an entry from a numbered access list; trying to do so will delete the entire accesslist. If you need to delete an entry, you need to delete the entire access list and start over.
•
• You can delete an entry from a named access list. Use the no permitor no deny command to deletethe appropriate entry.
• In order to make the purpose of individual statements more scannable and easily understood at a glance,you can write a helpful remark before or after any statement by using the remark command.
• If you want to deny access to a particular host or network and find out if someone from that network orhost is attempting to gain access, include the log keyword with the corresponding deny statement so thatthe packets denied from that source are logged for you.
• This hint applies to the placement of your access list. When trying to save resources, remember that aninbound access list applies the filter conditions before the routing table lookup. An outbound access listapplies the filter conditions after the routing table lookup.
Where to Apply an Access ListYou can apply access lists to the inbound or outbound interfaces of a device. Applying an access list to aninbound interface controls the traffic that enters the interface and applying an access list to an outboundinterface controls the traffic that exits the interface.
When software receives a packet at the inbound interface, the software checks the packet against the statementsthat are configured for the access list. If the access list permits packets, the software processes the packet.Applying access lists to filter incoming packets can save device resources because filtered packets are discardedbefore entering the device.
Access lists on outbound interfaces filter packets that are transmitted (sent) out of the interface. You can usethe TCP Access Control List (ACL) Splitting feature of the Rate-Based Satellite Control Protocol (RBSCP)on the outbound interface to control the type of packets that are subject to TCP acknowledgment (ACK)splitting on an outbound interface.
You can reference an access list by using a debug command to limit the amount of debug logs. For example,based on the filtering or matching criteria of the access list, debug logs can be limited to source or destinationaddresses or protocols.
You can use access lists to control routing updates, dial-on-demand (DDR), and quality of service (QoS)features.
How to Configure IP Named Access Control Lists
Creating an IP Named Access ListYou can create an IP named access list to filter source addresses and destination addresses or a combinationof addresses and other IP fields. Named access lists allow you to identify your access lists with an intuitivename.
SUMMARY STEPS
1. enable2. configure terminal
Security Configuration Guide: Access Control Lists, Cisco IOS XE Everest 16.577
IP Named Access Control ListsWhere to Apply an Access List

3. ip access-list extended name4. remark remark5. deny protocol [source source-wildcard] {any | host {address | name} {destination [destination-wildcard]
{any | host {address | name} [log]6. remark remark7. permit protocol [source source-wildcard] {any | host {address | name} {destination
[destination-wildcard] {any | host {address | name} [log]8. Repeat Steps 4 through 7 to specify more statements for your access list.9. end10. show ip access-lists
DETAILED STEPS
PurposeCommand or Action
Enables privileged EXEC mode.enable
Example:
Step 1
• Enter your password if prompted.Device> enable
Enters global configuration mode.configure terminal
Example:
Step 2
Device# configure terminal
Defines an extended IP access list using a name and entersextended named access list configuration mode.
ip access-list extended name
Example:
Step 3
Device(config)# ip access-list extended acl1
(Optional) Adds a description for an access list statement.remark remark
Example:
Step 4
• A remark can precede or follow an IP access list entry.Device(config-ext-nacl)# remark protect server bydenying sales access to the acl1 network • In this example, the remark command reminds the
network administrator that the deny commandconfigured in Step 5 denies the Sales network accessto the interface.
(Optional) Denies all packets that match all conditionsspecified by the remark.
deny protocol [source source-wildcard] {any | host{address | name} {destination [destination-wildcard] {any| host {address | name} [log]
Step 5
Example:Device(config-ext-nacl)# deny ip 192.0.2.00.0.255.255 host 192.0.2.10 log
(Optional) Adds a description for an access list statement.remark remark
Example:
Step 6
• A remark can precede or follow an IP access list entry.Device(config-ext-nacl)# remark allow TCP fromany source to any destination
Security Configuration Guide: Access Control Lists, Cisco IOS XE Everest 16.578
IP Named Access Control ListsCreating an IP Named Access List

PurposeCommand or Action
Permits all packets that match all conditions specified bythe statement.
permit protocol [source source-wildcard] {any | host{address | name} {destination [destination-wildcard] {any| host {address | name} [log]
Step 7
Example:Device(config-ext-nacl)# permit tcp any any
Repeat Steps 4 through 7 to specify more statements foryour access list.
Step 8 All source addresses that are not specificallypermitted by a statement are denied by animplicit deny statement at the end of the accesslist.
Note
Exits extended named access list configuration mode andreturns to privileged EXEC mode.
end
Example:
Step 9
Device(config-ext-nacl)# end
Displays the contents of all current IP access lists.show ip access-lists
Example:
Step 10
Device# show ip access-lists
Example:
The following is sample output from the show ip access-lists command:Device# show ip access-lists acl1
Extended IP access list acl1permit tcp any 192.0.2.0 255.255.255.255 eq telnetdeny tcp any anydeny udp any 192.0.2.0 255.255.255.255 lt 1024deny ip any any log
Applying an Access List to an Interface
SUMMARY STEPS
1. enable2. configure terminal3. interface type number4. ip access-group {access-list-number | access-list-name} {in | out}5. end
DETAILED STEPS
PurposeCommand or Action
Enables privileged EXEC mode.enableStep 1
Security Configuration Guide: Access Control Lists, Cisco IOS XE Everest 16.579
IP Named Access Control ListsApplying an Access List to an Interface

PurposeCommand or Action
Example: • Enter your password if prompted.Device> enable
Enters global configuration mode.configure terminal
Example:
Step 2
Device# configure terminal
Specifies an interface and enters interface configurationmode.
interface type number
Example:
Step 3
Applies the specified access list to the inbound interface.ip access-group {access-list-number | access-list-name}{in | out}
Step 4
• To filter source addresses, apply the access list to theinbound interface.Example:
Device(config-if)# ip access-group acl1 in
Exits interface configuration mode and returns to privilegedEXEC mode.
end
Example:
Step 5
Device(config-if)# end
Configuration Examples for IP Named Access Control Lists
Example: Creating an IP Named Access Control ListDevice# configure terminalDevice(config)# ip access-list extended acl1Device(config-ext-nacl)# remark protect server by denying sales access to the acl1 networkDevice(config-ext-nacl)# deny ip 192.0.2.0 0.0.255.255 host 192.0.2.10 logDevice(config-ext-nacl)# remark allow TCP from any source to any destinationDevice(config-ext-nacl)# permit tcp any any
Example: Applying the Access List to an InterfaceDevice# configure terminal
Device(config-if)# ip access-group acl1 in
Security Configuration Guide: Access Control Lists, Cisco IOS XE Everest 16.580
IP Named Access Control ListsConfiguration Examples for IP Named Access Control Lists

Additional References for IP Named Access Control ListsRelated Documents
Document TitleRelated Topic
Cisco IOS Master Command List, All ReleasesCisco IOS commands
• Cisco IOS Security Command Reference: Commands A to C
• Cisco IOS Security Command Reference: Commands D to L
• Cisco IOS Security Command Reference: Commands M to R
• Cisco IOS Security Command Reference: Commands S to Z
Security commands
Technical Assistance
LinkDescription
http://www.cisco.com/cisco/web/support/index.htmlTheCisco Support andDocumentationwebsite providesonline resources to download documentation, software,and tools. Use these resources to install and configurethe software and to troubleshoot and resolve technicalissues with Cisco products and technologies. Access tomost tools on the Cisco Support and Documentationwebsite requires a Cisco.com user ID and password.
Feature Information for IP Named Access Control ListsThe following table provides release information about the feature or features described in this module. Thistable lists only the software release that introduced support for a given feature in a given software releasetrain. Unless noted otherwise, subsequent releases of that software release train also support that feature.
Use Cisco Feature Navigator to find information about platform support and Cisco software image support.To access Cisco Feature Navigator, go to www.cisco.com/go/cfn. An account on Cisco.com is not required.
Table 8: Feature Information for IP Named Access Control Lists
Feature InformationReleasesFeature Name
Access control lists (ACLs) perform packet filtering tocontrol the movement of packets through a network. Packetfiltering provides security by limiting traffic into a network,restricting user and device access to a network, andpreventing traffic from leaving a network. IP access listsreduce the chance of spoofing and denial-of-service attacks,and allow dynamic, temporary user-access through a firewall.
IP Named AccessControl Lists
Security Configuration Guide: Access Control Lists, Cisco IOS XE Everest 16.581
IP Named Access Control ListsAdditional References for IP Named Access Control Lists

Security Configuration Guide: Access Control Lists, Cisco IOS XE Everest 16.582
IP Named Access Control ListsFeature Information for IP Named Access Control Lists

C H A P T E R 8Commented IP Access List Entries
The Commented IP Access List Entries feature allows you to include comments or remarks about deny orpermit conditions in any IP access list. These remarks make access lists easier for network administrators tounderstand. Each remark is limited to 100 characters in length.
This module provides information about the Commented IP Access List Entries feature.
• Finding Feature Information, on page 83• Information About Commented IP Access List Entries, on page 83• How to Configure Commented IP Access List Entries, on page 85• Configuration Examples for Commented IP Access List Entries, on page 86• Additional References for Commented IP Access List Entries, on page 86• Feature Information for Commented IP Access List Entries, on page 86
Finding Feature InformationYour software release may not support all the features documented in this module. For the latest caveats andfeature information, see Bug Search Tool and the release notes for your platform and software release. Tofind information about the features documented in this module, and to see a list of the releases in which eachfeature is supported, see the feature information table.
Use Cisco Feature Navigator to find information about platform support and Cisco software image support.To access Cisco Feature Navigator, go to www.cisco.com/go/cfn. An account on Cisco.com is not required.
Information About Commented IP Access List Entries
Benefits of IP Access ListsAccess control lists (ACLs) perform packet filtering to control the flow of packets through a network. Packetfiltering can restrict the access of users and devices to a network, providing a measure of security. Accesslists can save network resources by reducing traffic. The benefits of using access lists are as follows:
• Authenticate incoming rsh and rcp requests—Access lists can simplify the identification of local users,remote hosts, and remote users in an authentication database that is configured to control access to adevice. The authentication database enables Cisco software to receive incoming remote shell (rsh) andremote copy (rcp) protocol requests.
Security Configuration Guide: Access Control Lists, Cisco IOS XE Everest 16.583

• Block unwanted traffic or users—Access lists can filter incoming or outgoing packets on an interface,thereby controlling access to a network based on source addresses, destination addresses, or userauthentication. You can also use access lists to determine the types of traffic that are forwarded or blockedat device interfaces. For example, you can use access lists to permit e-mail traffic to be routed througha network and to block all Telnet traffic from entering the network.
• Control access to vty—Access lists on an inbound vty (Telnet) can control who can access the lines toa device. Access lists on an outbound vty can control the destinations that the lines from a device canreach.
• Identify or classify traffic for QoS features—Access lists provide congestion avoidance by setting theIP precedence forWeighted RandomEarly Detection (WRED) and committed access rate (CAR). Accesslists also provide congestion management for class-based weighted fair queueing (CBWFQ), priorityqueueing, and custom queueing.
• Limit debug command output—Access lists can limit debug output based on an IP address or a protocol.
• Provide bandwidth control—Access lists on a slow link can prevent excess traffic on a network.
• Provide NAT control—Access lists can control which addresses are translated by Network AddressTranslation (NAT).
• Reduce the chance of DoS attacks—Access lists reduce the chance of denial-of-service (DoS) attacks.Specify IP source addresses to control traffic from hosts, networks, or users from accessing your network.Configure the TCP Intercept feature to can prevent servers from being floodedwith requests for connection.
• Restrict the content of routing updates—Access lists can control routing updates that are sent, received,or redistributed in networks.
• Trigger dial-on-demand calls—Access lists can enforce dial and disconnect criteria.
Access List RemarksYou can include comments or remarks about entries in any IP access list. An access list remark is an optionalremark before or after an access list entry that describes the entry so that you do not have to interpret thepurpose of the entry. Each remark is limited to 100 characters in length.
The remark can go before or after a permit or deny statement. Be consistent about where you add remarks.Users may be confused if some remarks precede the associated permit or deny statements and some remarksfollow the associated statements.
The following is an example of a remark that describes function of the subsequent deny statement:
ip access-list extended telnettingremark Do not allow host1 subnet to telnet outdeny tcp host 172.16.2.88 any eq telnet
Security Configuration Guide: Access Control Lists, Cisco IOS XE Everest 16.584
Commented IP Access List EntriesAccess List Remarks

How to Configure Commented IP Access List Entries
Writing Remarks in a Named or Numbered Access ListYou can use a named or numbered access list configuration. You must apply the access list to an interface orterminal line after the access list is created for the configuration to work.
SUMMARY STEPS
1. enable2. configure terminal3. ip access-list {standard | extended} {name | number}4. remark remark5. deny protocol host host-address any eq port6. end
DETAILED STEPS
PurposeCommand or Action
Enables privileged EXEC mode.enable
Example:
Step 1
• Enter your password if prompted.Device> enable
Enters global configuration mode.configure terminal
Example:
Step 2
Device# configure terminal
Identifies the access list by a name or number and entersextended named access list configuration mode.
ip access-list {standard | extended} {name | number}
Example:
Step 3
Device(config)# ip access-list extended telnetting
Adds a remark for an entry in a named IP access list.remark remark
Example:
Step 4
• The remark indicates the purpose of the permit ordeny statement.Device(config-ext-nacl)# remark Do not allow host1
subnet to telnet out
Sets conditions in a named IP access list that denies packets.deny protocol host host-address any eq port
Example:
Step 5
Device(config-ext-nacl)# deny tcp host 172.16.2.88any eq telnet
Exits extended named access list configuration mode andenters privileged EXEC mode.
end
Example:
Step 6
Device(config-ext-nacl)# end
Security Configuration Guide: Access Control Lists, Cisco IOS XE Everest 16.585
Commented IP Access List EntriesHow to Configure Commented IP Access List Entries

Configuration Examples for Commented IP Access List Entries
Example: Writing Remarks in an IP Access ListDevice# configure terminalDevice(config)# ip access-list extended telnettingDevice(config-ext-nacl)# remark Do not allow host1 subnet to telnet outDevice(config-ext-nacl)# deny tcp host 172.16.2.88 any eq telnetDevice(config-ext-nacl)# end
Additional References for Commented IP Access List EntriesRelated Documents
Document TitleRelated Topic
Cisco IOS Master Command List, All ReleasesCisco IOS commands
• Cisco IOS Security Command Reference: Commands A to C
• Cisco IOS Security Command Reference: Commands D to L
• Cisco IOS Security Command Reference: Commands M to R
• Cisco IOS Security Command Reference: Commands S to Z
Security commands
Technical Assistance
LinkDescription
http://www.cisco.com/cisco/web/support/index.htmlTheCisco Support andDocumentationwebsite providesonline resources to download documentation, software,and tools. Use these resources to install and configurethe software and to troubleshoot and resolve technicalissues with Cisco products and technologies. Access tomost tools on the Cisco Support and Documentationwebsite requires a Cisco.com user ID and password.
Feature Information for Commented IP Access List EntriesThe following table provides release information about the feature or features described in this module. Thistable lists only the software release that introduced support for a given feature in a given software releasetrain. Unless noted otherwise, subsequent releases of that software release train also support that feature.
Use Cisco Feature Navigator to find information about platform support and Cisco software image support.To access Cisco Feature Navigator, go to www.cisco.com/go/cfn. An account on Cisco.com is not required.
Security Configuration Guide: Access Control Lists, Cisco IOS XE Everest 16.586
Commented IP Access List EntriesConfiguration Examples for Commented IP Access List Entries

Table 9: Feature Information for Commented IP Access List Entries
Feature InformationReleasesFeature Name
The Commented IP Access List Entries feature allows youto include comments or remarks about deny or permitconditions in any IP access list. These remarksmake accesslists easier for network administrators to understand. Eachremark is limited to 100 characters in length.
The following command was introduced or modified:remark.
Commented IP AccessList Entries
Security Configuration Guide: Access Control Lists, Cisco IOS XE Everest 16.587
Commented IP Access List EntriesFeature Information for Commented IP Access List Entries

Security Configuration Guide: Access Control Lists, Cisco IOS XE Everest 16.588
Commented IP Access List EntriesFeature Information for Commented IP Access List Entries

C H A P T E R 9Standard IP Access List Logging
The Standard IP Access List Logging feature provides the ability to log messages about packets that arepermitted or denied by a standard IP access list. Any packet that matches the access list logs an informationmessage about the packet at the device console.
This module provides information about standard IP access list logging.
• Finding Feature Information, on page 89• Restrictions for Standard IP Access List Logging, on page 89• Information About Standard IP Access List Logging, on page 90• How to Configure Standard IP Access List Logging, on page 90• Configuration Examples for Standard IP Access List Logging, on page 92• Additional References for Standard IP Access List Logging, on page 93• Feature Information for Standard IP Access List Logging, on page 94
Finding Feature InformationYour software release may not support all the features documented in this module. For the latest caveats andfeature information, see Bug Search Tool and the release notes for your platform and software release. Tofind information about the features documented in this module, and to see a list of the releases in which eachfeature is supported, see the feature information table.
Use Cisco Feature Navigator to find information about platform support and Cisco software image support.To access Cisco Feature Navigator, go to www.cisco.com/go/cfn. An account on Cisco.com is not required.
Restrictions for Standard IP Access List LoggingIP access list logging is supported only for routed interfaces or router access control lists (ACLs).
Security Configuration Guide: Access Control Lists, Cisco IOS XE Everest 16.589

Information About Standard IP Access List Logging
Standard IP Access List LoggingThe Standard IP Access List Logging feature provides the ability to log messages about packets that arepermitted or denied by a standard IP access list. Any packet that matches the access list causes an informationlog message about the packet to be sent to the device console. The log level of messages that are printed tothe device console is controlled by the logging console command.
The first packet that the access list inspects triggers the access list to log a message at the device console.Subsequent packets are collected over 5-minute intervals before they are displayed or logged. Log messagesinclude information about the access list number, the source IP address of packets, the number of packetsfrom the same source that were permitted or denied in the previous 5-minute interval, and whether a packetwas permitted or denied. You can also monitor the number of packets that are permitted or denied by aparticular access list, including the source address of each packet.
How to Configure Standard IP Access List Logging
Creating a Standard IP Access List Using Numbers
SUMMARY STEPS
1. enable2. configure terminal3. access-list access-list-number {deny | permit} host address [log]4. access-list access-list-number {deny | permit} any [log]5. interface type number6. ip access-group access-list-number {in | out}7. end
DETAILED STEPS
PurposeCommand or Action
Enables privileged EXEC mode.enable
Example:
Step 1
• Enter your password if prompted.Device> enable
Enters global configuration mode.configure terminal
Example:
Step 2
Device# configure terminal
Defines a standard numbered IP access list using a sourceaddress and wildcard, and configures the logging of
access-list access-list-number {deny | permit} host address[log]
Step 3
Security Configuration Guide: Access Control Lists, Cisco IOS XE Everest 16.590
Standard IP Access List LoggingInformation About Standard IP Access List Logging

PurposeCommand or Action
informational messages about packets that match the accesslist entry at the device console.
Example:Device(config)# access-list 1 permit host 10.1.1.1log
Defines a standard numbered IP access list by using anabbreviation for the source and source mask 0.0.0.0255.255.255.255.
access-list access-list-number {deny | permit} any [log]
Example:Device(config)# access-list 1 permit any log
Step 4
Configures an interface and enters interface configurationmode.
interface type number
Example:
Step 5
Applies the specified numbered access list to the incomingor outgoing interface.
ip access-group access-list-number {in | out}
Example:
Step 6
• When you filter based on source addresses, youtypically apply the access list to an incoming interface.
Device(config-if)# ip access-group 1 in
Exits interface configuration mode and enters privilegedEXEC mode.
end
Example:
Step 7
Device(config-if)# end
Creating a Standard IP Access List Using Names
SUMMARY STEPS
1. enable2. configure terminal3. ip access-list standard name4. {deny | permit} {host address | any} log5. exit6. interface type number7. ip access-group access-list-name {in | out}8. end
DETAILED STEPS
PurposeCommand or Action
Enables privileged EXEC mode.enable
Example:
Step 1
• Enter your password if prompted.Device> enable
Enters global configuration mode.configure terminal
Example:
Step 2
Device# configure terminal
Security Configuration Guide: Access Control Lists, Cisco IOS XE Everest 16.591
Standard IP Access List LoggingCreating a Standard IP Access List Using Names

PurposeCommand or Action
Defines a standard IP access list and enters standard namedaccess list configuration mode.
ip access-list standard name
Example:
Step 3
Device(config)# ip access-list standard acl1
Sets conditions in a named IP access list that will denypackets from entering a network or permit packets to enter
{deny | permit} {host address | any} log
Example:
Step 4
a network, and configures the logging of informationalDevice(config-std-nacl)# permit host 10.1.1.1 log messages about packets that match the access list entry at
the device console.
Exits standard named access list configuration mode andenters global configuration mode.
exit
Example:
Step 5
Device(config-std-nacl)# exit
Configures an interface and enters interface configurationmode.
interface type number
Example:
Step 6
Applies the specified access list to the incoming or outgoinginterface.
ip access-group access-list-name {in | out}
Example:
Step 7
• When you filter based on source addresses, youtypically apply the access list to an incoming interface.
Device(config-if)# ip access-group acl1 in
Exits interface configuration mode and enters privilegedEXEC mode.
end
Example:
Step 8
Device(config-if)# end
Configuration Examples for Standard IP Access List Logging
Example: Creating a Standard IP Access List Using NumbersDevice# configure terminalDevice(config)# access-list 1 permit host 10.1.1.1 logDevice(config)# access-list 1 permit any log
Device(config-if)# ip access-group 1 in
Example: Creating a Standard IP Access List Using NamesDevice# configure terminalDevice(config)# ip access-list standard acl1Device(config-std-nacl)# permit host 10.1.1.1 logDevice(config-std-nacl)# exit
Device(config-if)# ip access-group acl1 in
Security Configuration Guide: Access Control Lists, Cisco IOS XE Everest 16.592
Standard IP Access List LoggingConfiguration Examples for Standard IP Access List Logging

Example: Limiting Debug OutputThe following sample configuration uses an access list to limit the debug command output. Limiting thedebug output restricts the volume of data to what you are interested in, saving you time and resources.
Device(config)# ip access-list acl1Device(config-std-nacl)# remark Displays only advertisements for LDP peer in acl1Device(config-std-nacl)# permit host 10.0.0.44
Device# debug mpls ldp advertisements peer-acl acl1
tagcon: peer 10.0.0.44:0 (pp 0x60E105BC): advertise 172.17.0.33tagcon: peer 10.0.0.44:0 (pp 0x60E105BC): advertise 172.16.0.31tagcon: peer 10.0.0.44:0 (pp 0x60E105BC): advertise 172.22.0.33tagcon: peer 10.0.0.44:0 (pp 0x60E105BC): advertise 192.168.0.1tagcon: peer 10.0.0.44:0 (pp 0x60E105BC): advertise 192.168.0.3tagcon: peer 10.0.0.44:0 (pp 0x60E105BC): advertise 192.168.1.33
Additional References for Standard IP Access List LoggingRelated Documents
Document TitleRelated Topic
Cisco IOS Master Commands List, All ReleasesCisco IOS commands
• Cisco IOS Security Command Reference: Commands A to C
• Cisco IOS Security Command Reference: Commands D to L
• Cisco IOS Security Command Reference: Commands M to R
• Cisco IOS Security Command Reference: Commands S to Z
Security commands
Technical Assistance
LinkDescription
http://www.cisco.com/cisco/web/support/index.htmlTheCisco Support andDocumentationwebsite providesonline resources to download documentation, software,and tools. Use these resources to install and configurethe software and to troubleshoot and resolve technicalissues with Cisco products and technologies. Access tomost tools on the Cisco Support and Documentationwebsite requires a Cisco.com user ID and password.
Security Configuration Guide: Access Control Lists, Cisco IOS XE Everest 16.593
Standard IP Access List LoggingExample: Limiting Debug Output
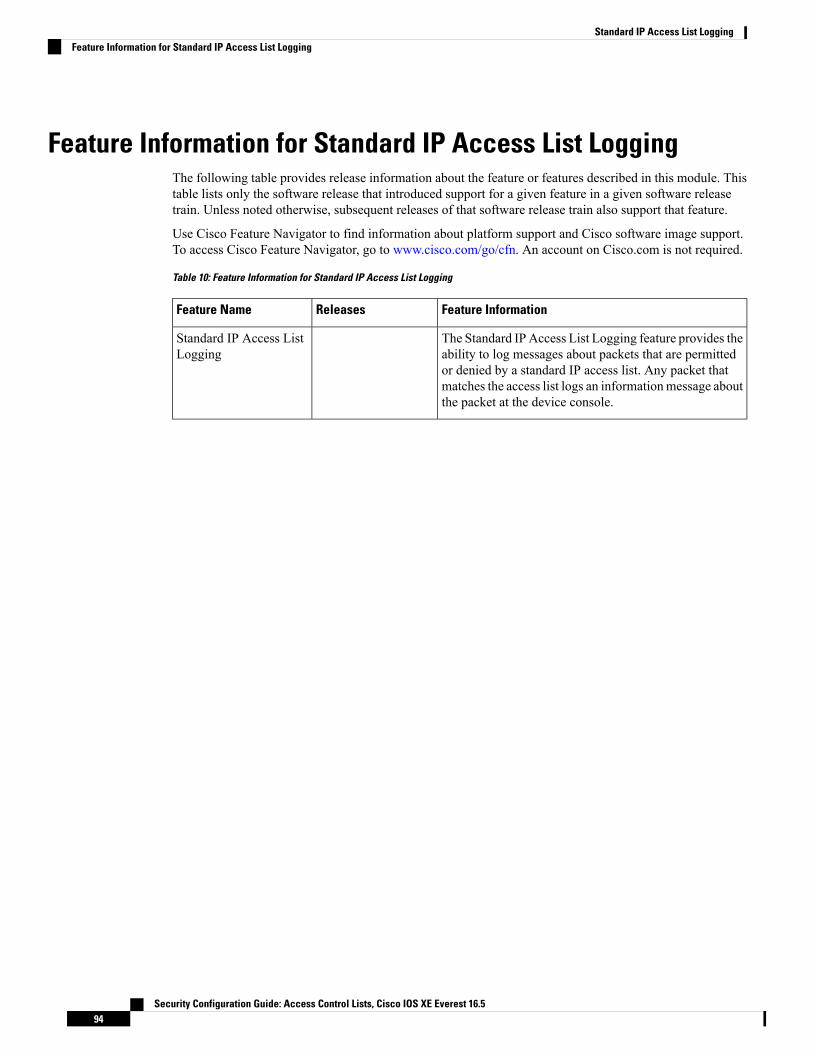
Feature Information for Standard IP Access List LoggingThe following table provides release information about the feature or features described in this module. Thistable lists only the software release that introduced support for a given feature in a given software releasetrain. Unless noted otherwise, subsequent releases of that software release train also support that feature.
Use Cisco Feature Navigator to find information about platform support and Cisco software image support.To access Cisco Feature Navigator, go to www.cisco.com/go/cfn. An account on Cisco.com is not required.
Table 10: Feature Information for Standard IP Access List Logging
Feature InformationReleasesFeature Name
The Standard IP Access List Logging feature provides theability to log messages about packets that are permittedor denied by a standard IP access list. Any packet thatmatches the access list logs an informationmessage aboutthe packet at the device console.
Standard IP Access ListLogging
Security Configuration Guide: Access Control Lists, Cisco IOS XE Everest 16.594
Standard IP Access List LoggingFeature Information for Standard IP Access List Logging

C H A P T E R 10IP Access List Entry Sequence Numbering
The IP Access List Entry Sequence Numbering feature allows you to apply sequence numbers to permit ordeny statements as well as reorder, add, or remove such statements from a named IP access list. The IP AccessList Entry Sequence Numbering feature makes revising IP access lists much easier. Prior to this feature, youcould add access list entries to the end of an access list only; therefore, needing to add statements anywhereexcept at the end of a named IP access list required reconfiguring the entire access list.
• Finding Feature Information, on page 95• Restrictions for IP Access List Entry Sequence Numbering, on page 95• Information About IP Access List Entry Sequence Numbering, on page 96• How to Use Sequence Numbers in an IP Access List, on page 100• Configuration Examples for IP Access List Entry Sequence Numbering, on page 103• Additional References, on page 105• Feature Information for IP Access List Entry Sequence Numbering, on page 105
Finding Feature InformationYour software release may not support all the features documented in this module. For the latest caveats andfeature information, see Bug Search Tool and the release notes for your platform and software release. Tofind information about the features documented in this module, and to see a list of the releases in which eachfeature is supported, see the feature information table.
Use Cisco Feature Navigator to find information about platform support and Cisco software image support.To access Cisco Feature Navigator, go to www.cisco.com/go/cfn. An account on Cisco.com is not required.
Restrictions for IP Access List Entry Sequence Numbering• This feature does not support dynamic, reflexive, or firewall access lists.
• This feature does not support old-style numbered access lists, which existed before named access lists.Keep in mind that you can name an access list with a number, so numbers are allowed when they areentered in the standard or extended named access list (NACL) configuration mode.
Security Configuration Guide: Access Control Lists, Cisco IOS XE Everest 16.595

Information About IP Access List Entry Sequence Numbering
Purpose of IP Access ListsAccess lists perform packet filtering to control which packets move through the network and where. Suchcontrol can help limit network traffic and restrict the access of users and devices to the network. Access listshave many uses, and therefore many commands accept a reference to an access list in their command syntax.Access lists can be used to do the following:
• Filter incoming packets on an interface.
• Filter outgoing packets on an interface.
• Restrict the contents of routing updates.
• Limit debug output based on an address or protocol.
• Control virtual terminal line access.
• Identify or classify traffic for advanced features, such as congestion avoidance, congestion management,and priority and custom queuing.
• Trigger dial-on-demand routing (DDR) calls.
How an IP Access List WorksAn access list is a sequential list consisting of a permit statement and a deny statement that apply to IP addressesand possibly upper-layer IP protocols. The access list has a name by which it is referenced. Many softwarecommands accept an access list as part of their syntax.
An access list can be configured and named, but it is not in effect until the access list is referenced by acommand that accepts an access list. Multiple commands can reference the same access list. An access listcan control traffic arriving at the device or leaving the device, but not traffic originating at the device.
IP Access List Process and Rules• The software tests the source or destination address or the protocol of each packet being filtered againstthe conditions in the access list, one condition (permit or deny statement) at a time.
• If a packet does not match an access list statement, the packet is then tested against the next statementin the list.
• If a packet and an access list statement match, the rest of the statements in the list are skipped and thepacket is permitted or denied as specified in the matched statement. The first entry that the packet matchesdetermines whether the software permits or denies the packet. That is, after the first match, no subsequententries are considered.
• If the access list denies the address or protocol, the software discards the packet and returns an InternetControl Message Protocol (ICMP) Host Unreachable message.
Security Configuration Guide: Access Control Lists, Cisco IOS XE Everest 16.596
IP Access List Entry Sequence NumberingInformation About IP Access List Entry Sequence Numbering

• If no conditions match, the packet is dropped. This is because each access list ends with an unwritten orimplicit deny statement. That is, if the packet has not been permitted by the time it was tested againsteach statement, it is denied.
• Because the software stops testing conditions after the first match, the order of the conditions is critical.The same permit or deny statements specified in a different order could result in a packet being passedunder one circumstance and denied in another circumstance.
• If an access list is referenced by name in a command, but the access list does not exist, all packets pass.
• Only one access list per interface, per protocol, per direction is allowed.
• Inbound access lists process packets arriving at the device. Incoming packets are processed before beingrouted to an outbound interface. An inbound access list is efficient because it saves the overhead ofrouting lookups if the packet is to be discarded because it is denied by the filtering tests. If the packet ispermitted by the tests, it is then processed for routing. For inbound lists, permitmeans continue to processthe packet after receiving it on an inbound interface; deny means discard the packet.
• Outbound access lists process packets before they leave the device. Incoming packets are routed to theoutbound interface and then processed through the outbound access list. For outbound lists, permitmeanssend it to the output buffer; deny means discard the packet.
Helpful Hints for Creating IP Access ListsThe following tips will help you avoid unintended consequences and help you create more efficient, usefulaccess lists.
• Create the access list before applying it to an interface (or elsewhere), because if you apply a nonexistentaccess list to an interface and then proceed to configure the access list, the first statement is put intoeffect, and the implicit deny statement that follows could cause you immediate access problems.
• Another reason to configure an access list before applying it is because an interface with an empty accesslist applied to it permits all traffic.
• All access lists need at least one permit statement; otherwise, all packets are denied and no traffic passes.
• Because the software stops testing conditions after it encounters the first match (to either a permit ordeny statement), you will reduce processing time and resources if you put the statements that packetsare most likely to match at the beginning of the access list. Place more frequently occurring conditionsbefore less frequent conditions.
• Organize your access list so that more specific references in a network or subnet appear before moregeneral ones.
• Use the statement permit any any if you want to allow all other packets not already denied. Using thestatement permit any any in effect avoids denying all other packets with the implicit deny statement atthe end of an access list. Do not make your first access list entry permit any any because all traffic willget through; no packets will reach the subsequent testing. In fact, once you specify permit any any, alltraffic not already denied will get through.
• Although all access lists end with an implicit deny statement, we recommend use of an explicit denystatement (for example, deny ip any any). On most platforms, you can display the count of packetsdenied by issuing the show access-listcommand, thus finding out more information about who youraccess list is disallowing. Only packets denied by explicit deny statements are counted, which is whythe explicit deny statement will yield more complete data for you.
Security Configuration Guide: Access Control Lists, Cisco IOS XE Everest 16.597
IP Access List Entry Sequence NumberingHelpful Hints for Creating IP Access Lists

• While you are creating an access list or after it is created, you might want to delete an entry.
• You cannot delete an entry from a numbered access list; trying to do so will delete the entire accesslist. If you need to delete an entry, you need to delete the entire access list and start over.
• You can delete an entry from a named access list. Use the no permitor no deny command to deletethe appropriate entry.
• In order to make the purpose of individual statements more scannable and easily understood at a glance,you can write a helpful remark before or after any statement by using the remark command.
• If you want to deny access to a particular host or network and find out if someone from that network orhost is attempting to gain access, include the log keyword with the corresponding deny statement so thatthe packets denied from that source are logged for you.
• This hint applies to the placement of your access list. When trying to save resources, remember that aninbound access list applies the filter conditions before the routing table lookup. An outbound access listapplies the filter conditions after the routing table lookup.
Source and Destination AddressesSource and destination address fields in an IP packet are two typical fields on which to base an access list.Specify source addresses to control the packets being sent from certain networking devices or hosts. Specifydestination addresses to control the packets being sent to certain networking devices or hosts.
Wildcard Mask and Implicit Wildcard MaskWhen comparing the address bits in an access list entry to a packet being submitted to the access list, addressfiltering uses wildcard masking to determine whether to check or ignore the corresponding IP address bits.By carefully setting wildcard masks, an administrator can select one or more IP addresses for permit or denytests.
Wildcard masking for IP address bits uses the number 1 and the number 0 to specify how the software treatsthe corresponding IP address bits. A wildcard mask is sometimes referred to as an inverted mask because a1 and 0 mean the opposite of what they mean in a subnet (network) mask.
• A wildcard mask bit 0 means check the corresponding bit value.
• A wildcard mask bit 1 means ignore that corresponding bit value.
If you do not supply a wildcard mask with a source or destination address in an access list statement, thesoftware assumes a default wildcard mask of 0.0.0.0.
Unlike subnet masks, which require contiguous bits indicating network and subnet to be ones, wildcard masksallow noncontiguous bits in the mask.
Transport Layer InformationYou can filter packets based on transport layer information, such as whether the packet is a TCP, UDP, InternetControl Message Protocol (ICMP) or Internet Group Management Protocol (IGMP) packet.
Security Configuration Guide: Access Control Lists, Cisco IOS XE Everest 16.598
IP Access List Entry Sequence NumberingSource and Destination Addresses

Benefits IP Access List Entry Sequence NumberingThe ability to apply sequence numbers to IP access list entries simplifies access list changes. Prior to the IPAccess List Entry Sequence Numbering feature, there was no way to specify the position of an entry withinan access list. If you wanted to insert an entry (statement) in the middle of an existing list, all of the entriesafter the desired position had to be removed. Then, once you added the new entry, you needed to reenter allof the entries you removed earlier. This method was cumbersome and error prone.
The IP Access List Entry Sequence Numbering feature allows you to add sequence numbers to access listentries and resequence them. When you add a new entry, you can choose the sequence number so that theentry is in a desired position in the access list. If necessary, entries currently in the access list can be resequenced(reordered) to create room to insert the new entry.
Sequence Numbering Behavior• For backward compatibility with previous releases, if entries with no sequence numbers are applied, thefirst entry is assigned a sequence number of 10, and successive entries are incremented by 10. Themaximum sequence number is 2147483647. If the generated sequence number exceeds this maximumnumber, the following message is displayed:
Exceeded maximum sequence number.
• If you enter an entry without a sequence number, it is assigned a sequence number that is 10 greater thanthe last sequence number in that access list and is placed at the end of the list.
• If you enter an entry that matches an already existing entry (except for the sequence number), then nochanges are made.
• If you enter a sequence number that is already present, the following error message is generated:
Duplicate sequence number.
• If a new access list is entered from global configuration mode, then sequence numbers for that accesslist are generated automatically.
• Distributed support is provided so that the sequence numbers of entries in the Route Processor (RP) andline card (LC) are always synchronized.
• Sequence numbers are not nvgened. That is, the sequence numbers themselves are not saved. In the eventthat the system is reloaded, the configured sequence numbers revert to the default sequence startingnumber and increment from that number. The function is provided for backward compatibility withsoftware releases that do not support sequence numbering.
• The IP Access List Entry Sequence Numbering feature works with named standard and extended IPaccess lists. Because the name of an access list can be designated as a number, numbers are acceptable.
Security Configuration Guide: Access Control Lists, Cisco IOS XE Everest 16.599
IP Access List Entry Sequence NumberingBenefits IP Access List Entry Sequence Numbering

How to Use Sequence Numbers in an IP Access List
Sequencing Access-List Entries and Revising the Access ListThis task shows how to assign sequence numbers to entries in a named IP access list and how to add or deletean entry to or from an access list. When completing this task, keep the following points in mind:
• Resequencing the access list entries is optional. The resequencing step in this task is shown as requiredbecause that is one purpose of this feature and this task demonstrates that functionality.
• In the following procedure, the permit command is shown in Step 5 and the deny command is shownin Step 6. However, that order can be reversed. Use the order that suits the need of your configuration.
SUMMARY STEPS
1. enable2. configure terminal3. ip access-list resequence access-list-name starting-sequence-number increment4. ip access-list {standard| extended} access-list-name5. Do one of the following:
• sequence-number permit source source-wildcard• sequence-number permit protocol source source-wildcard destination destination-wildcard[precedence precedence][tos tos] [log] [time-range time-range-name] [fragments]
6. Do one of the following:
• sequence-number deny source source-wildcard• sequence-number deny protocol source source-wildcard destination destination-wildcard[precedence precedence][tos tos] [log] [time-range time-range-name] [fragments]
7. Do one of the following:
• sequence-number permit source source-wildcard• sequence-number permit protocol source source-wildcard destination destination-wildcard[precedence precedence][tos tos] [log] [time-range time-range-name] [fragments]
8. Do one of the following:
• sequence-number deny source source-wildcard• sequence-number deny protocol source source-wildcard destination destination-wildcard[precedence precedence][tos tos] [log] [time-range time-range-name] [fragments]
9. Repeat Step 5 and/or Step 6 to add sequence number statements, as applicable.10. end11. show ip access-lists access-list-name
Security Configuration Guide: Access Control Lists, Cisco IOS XE Everest 16.5100
IP Access List Entry Sequence NumberingHow to Use Sequence Numbers in an IP Access List

DETAILED STEPS
PurposeCommand or Action
Enables privileged EXEC mode. Enter your password ifprompted.
enable
Example:
Step 1
Device> enable
Enters global configuration mode.configure terminal
Example:
Step 2
Device# configure terminal
Resequences the specified IP access list using the startingsequence number and the increment of sequence numbers.
ip access-list resequence access-list-namestarting-sequence-number increment
Example:
Step 3
Device(config)# ip access-list resequence kmd1100 15
Specifies the IP access list by name and enters namedaccess list configuration mode.
ip access-list {standard| extended} access-list-name
Example:
Step 4
• If you specify standard, make sure you subsequentlyspecify permit and/or deny statements using thestandard access list syntax.
Device(config)# ip access-list standard kmd1
• If you specify extended, make sure you subsequentlyspecify permit and/or deny statements using theextended access list syntax.
Specifies a permit statement in named IP access list mode.Do one of the following:Step 5
• sequence-number permit source source-wildcard • This access list happens to use a permit statementfirst, but a deny statement could appear first,depending on the order of statements you need.
• sequence-number permit protocol sourcesource-wildcard destination destination-wildcard[precedence precedence][tos tos] [log] [time-rangetime-range-name] [fragments] • As the prompt indicates, this access list was a standard
access list. If you had specified extended in Step 4,the prompt for this step would beExample:Device(config-ext-nacl) and you would use theextended permit command syntax.Device(config-std-nacl)# 105 permit 10.5.5.5 0.0.0
255
(Optional) Specifies a deny statement in named IP accesslist mode.
Do one of the following:Step 6
• sequence-number deny source source-wildcard• This access list uses a permit statement first, but adeny statement could appear first, depending on theorder of statements you need.
• sequence-number deny protocol sourcesource-wildcard destination destination-wildcard[precedence precedence][tos tos] [log] [time-rangetime-range-name] [fragments] • As the prompt indicates, this access list was a standard
access list. If you had specified extended in Step 4,Example:
Security Configuration Guide: Access Control Lists, Cisco IOS XE Everest 16.5101
IP Access List Entry Sequence NumberingSequencing Access-List Entries and Revising the Access List

PurposeCommand or Action
Device(config-std-nacl)# 105 deny 10.6.6.7 0.0.0255
the prompt for this step would beDevice(config-ext-nacl) and you would use theextended deny command syntax.
Specifies a permit statement in named IP access list mode.Do one of the following:Step 7
• sequence-number permit source source-wildcard • This access list happens to use a permitstatementfirst, but a deny statement could appear first,depending on the order of statements you need.
• sequence-number permit protocol sourcesource-wildcard destination destination-wildcard[precedence precedence][tos tos] [log] [time-rangetime-range-name] [fragments] • See the permit (IP) command for additional command
syntax to permit upper layer protocols (ICMP, IGMP,TCP, and UDP).Example:
Device(config-ext-nacl)# 150 permit tcp any anylog
• Use the no sequence-number command to delete anentry.
(Optional) Specifies a deny statement in named IP accesslist mode.
Do one of the following:Step 8
• sequence-number deny source source-wildcard• This access list happens to use a permitstatementfirst, but a deny statement could appear first,depending on the order of statements you need.
• sequence-number deny protocol sourcesource-wildcard destination destination-wildcard[precedence precedence][tos tos] [log] [time-rangetime-range-name] [fragments] • See the deny (IP) command for additional command
syntax to permit upper layer protocols (ICMP, IGMP,TCP, and UDP).
Example:
Device(config-ext-nacl)# 150 deny tcp any any log• Use the no sequence-number command to delete anentry.
Allows you to revise the access list.Repeat Step 5 and/or Step 6 to add sequence numberstatements, as applicable.
Step 9
(Optional) Exits the configuration mode and returns toprivileged EXEC mode.
end
Example:
Step 10
Device(config-std-nacl)# end
(Optional) Displays the contents of the IP access list.show ip access-lists access-list-name
Example:
Step 11
Device# show ip access-lists kmd1
Examples
Review the output of the show ip access-lists command to see that the access list includes the newentries:
Device# show ip access-lists kmd1
Security Configuration Guide: Access Control Lists, Cisco IOS XE Everest 16.5102
IP Access List Entry Sequence NumberingSequencing Access-List Entries and Revising the Access List

Standard IP access list kmd1100 permit 10.4.4.0, wildcard bits 0.0.0.255105 permit 10.5.5.0, wildcard bits 0.0.0.255115 permit 10.0.0.0, wildcard bits 0.0.0.255130 permit 10.5.5.0, wildcard bits 0.0.0.255145 permit 10.0.0.0, wildcard bits 0.0.0.255
Configuration Examples for IP Access List Entry SequenceNumbering
Example: Resequencing Entries in an Access ListThe following example shows access list resequencing. The starting value is 1, and increment value is 2. Thesubsequent entries are ordered based on the increment values specified, and the range is from 1 to 2147483647.
When an entry with no sequence number is entered, by default the entry has a sequence number of 10 morethan the last entry in the access list.
Device# show access-list 150
Extended IP access list 15010 permit ip host 10.3.3.3 host 172.16.5.3420 permit icmp any any30 permit tcp any host 10.3.3.340 permit ip host 10.4.4.4 any50 Dynamic test permit ip any any60 permit ip host 172.16.2.2 host 10.3.3.1270 permit ip host 10.3.3.3 any log80 permit tcp host 10.3.3.3 host 10.1.2.290 permit ip host 10.3.3.3 any100 permit ip any any
Device(config)# ip access-list extended 150Device(config)# ip access-list resequence 150 1 2Device(config)# exit
Device# show access-list 150
Extended IP access list 1501 permit ip host 10.3.3.3 host 172.16.5.343 permit icmp any any10 permit tcp any any eq 22 log5 permit tcp any host 10.3.3.37 permit ip host 10.4.4.4 any9 Dynamic test permit ip any any11 permit ip host 172.16.2.2 host 10.3.3.1213 permit ip host 10.3.3.3 any log15 permit tcp host 10.3.3.3 host 10.1.2.217 permit ip host 10.3.3.3 any19 permit ip any any
Security Configuration Guide: Access Control Lists, Cisco IOS XE Everest 16.5103
IP Access List Entry Sequence NumberingConfiguration Examples for IP Access List Entry Sequence Numbering

Example: Adding Entries with Sequence NumbersIn the following example, an new entry is added to a specified access list:
Device# show ip access-list
Standard IP access list tryon2 permit 10.4.4.2, wildcard bits 0.0.255.2555 permit 10.0.0.44, wildcard bits 0.0.0.25510 permit 10.0.0.1, wildcard bits 0.0.0.25520 permit 10.0.0.2, wildcard bits 0.0.0.255
Device(config)# ip access-list standard tryonDevice(config-std-nacl)# 15 permit 10.5.5.5 0.0.0.255Device(config-std-nacl)# exitDevice(config)# exitDevice# show ip access-list
Standard IP access list tryon2 permit 10.4.0.0, wildcard bits 0.0.255.2555 permit 10.0.0.0, wildcard bits 0.0.0.25510 permit 10.0.0.0, wildcard bits 0.0.0.25515 permit 10.5.5.0, wildcard bits 0.0.0.25520 permit 10.0.0.0, wildcard bits 0.0.0.255
Example: Entry Without Sequence NumberThe following example shows how an entry with no specified sequence number is added to the end of anaccess list. When an entry is added without a sequence number, it is automatically given a sequence numberthat puts it at the end of the access list. Because the default increment is 10, the entry will have a sequencenumber 10 higher than the last entry in the existing access list.
Device(config)# ip access-list standard 1Device(config-std-nacl)# permit 10.1.1.1 0.0.0.255Device(config-std-nacl)# permit 10.2.2.2 0.0.0.255Device(config-std-nacl)# permit 10.3.3.3 0.0.0.255Device(config-std-nacl)## exitDevice# show access-list
Standard IP access list 110 permit 0.0.0.0, wildcard bits 0.0.0.25520 permit 0.0.0.0, wildcard bits 0.0.0.25530 permit 0.0.0.0, wildcard bits 0.0.0.255
Device(config)# ip access-list standard 1Device(config-std-nacl)# permit 10.4.4.4 0.0.0.255Device(config-std-nacl)# endDevice(config-std-nacl)## exitDevice# show access-list
Standard IP access list 110 permit 0.0.0.0, wildcard bits 0.0.0.25520 permit 0.0.0.0, wildcard bits 0.0.0.25530 permit 0.0.0.0, wildcard bits 0.0.0.25540 permit 0.0.0.0, wildcard bits 0.0.0.255
Security Configuration Guide: Access Control Lists, Cisco IOS XE Everest 16.5104
IP Access List Entry Sequence NumberingExample: Adding Entries with Sequence Numbers

Additional ReferencesRelated Documents
Document TitleRelated Topic
Cisco IOS Master Command List, All ReleasesCisco IOS commands
Cisco IOS Security Command ReferenceIP access list commands
“Creating an IP Access List and Applying It to an Interface”Configuring IP access lists
Technical Assistance
LinkDescription
http://www.cisco.com/cisco/web/support/index.htmlTheCisco Support andDocumentationwebsite providesonline resources to download documentation, software,and tools. Use these resources to install and configurethe software and to troubleshoot and resolve technicalissues with Cisco products and technologies. Access tomost tools on the Cisco Support and Documentationwebsite requires a Cisco.com user ID and password.
Feature Information for IP Access List Entry SequenceNumbering
The following table provides release information about the feature or features described in this module. Thistable lists only the software release that introduced support for a given feature in a given software releasetrain. Unless noted otherwise, subsequent releases of that software release train also support that feature.
Use Cisco Feature Navigator to find information about platform support and Cisco software image support.To access Cisco Feature Navigator, go to www.cisco.com/go/cfn. An account on Cisco.com is not required.
Security Configuration Guide: Access Control Lists, Cisco IOS XE Everest 16.5105
IP Access List Entry Sequence NumberingAdditional References

Table 11: Feature Information for IP Access List Entry Sequence Numbering
Feature InformationReleasesFeature Name
Users can apply sequence numbers to permit or deny statements and alsoreorder, add, or remove such statements from a named IP access list. Thisfeature makes revising IP access lists much easier. Prior to this feature,users could add access list entries to the end of an access list only; thereforeneeding to add statements anywhere except the end required reconfiguringthe access list entirely.
In , , support was added for the Cisco Catalyst 3850 Series Switches.
The following commands were introduced or modified: deny (IP), ipaccess-list resequence deny (IP), permit (IP).
IP Access List EntrySequence Numbering
Security Configuration Guide: Access Control Lists, Cisco IOS XE Everest 16.5106
IP Access List Entry Sequence NumberingFeature Information for IP Access List Entry Sequence Numbering

C H A P T E R 11Configuring Lock-and-Key Security (DynamicAccess Lists)
Feature History
ModificationRelease
For information about feature support in Cisco IOS software, use Cisco Feature Navigator.CiscoIOS
This chapter describes how to configure lock-and-key security at your router. Lock-and-key is a traffic filteringsecurity feature available for the IP protocol.
For a complete description of lock-and-key commands, refer to the Cisco IOS Security Command Reference. To locate documentation of other commands that appear in this chapter, use the command reference masterindex or search online.
To identify the hardware platform or software image information associated with a feature, use the FeatureNavigator on Cisco.com to search for information about the feature or refer to the software release notes fora specific release.
• Prerequisites for Configuring Lock-and-Key, on page 107• Information About Configuring Lock-and-Key Security (Dynamic Access Lists), on page 108• How to Configure Lock-and-Key Security (Dynamic Access Lists), on page 113• Configuration Examples for Lock-and-Key, on page 116
Prerequisites for Configuring Lock-and-KeyLock-and-key uses IP extended access lists. You must have a solid understanding of how access lists are usedto filter traffic, before you attempt to configure lock-and-key. Access lists are described in the chapter “AccessControl Lists: Overview and Guidelines.”
Lock-and-key employs user authentication and authorization as implemented in Cisco’s authentication,authorization, and accounting (AAA) paradigm.Youmust understand how to configureAAAuser authenticationand authorization before you configure lock-and-key. User authentication and authorization is explained inthe “Authentication, Authorization, and Accounting (AAA)” part of this document.
Lock-and-key uses the autocommand command, which you should understand. This command is describedin the Cisco IOSTerminal Services Command Reference.
Security Configuration Guide: Access Control Lists, Cisco IOS XE Everest 16.5107

InformationAboutConfiguringLock-and-KeySecurity(DynamicAccess Lists)
About Lock-and-KeyLock-and-key is a traffic filtering security feature that dynamically filters IP protocol traffic. Lock-and-keyis configured using IP dynamic extended access lists. Lock-and-key can be used in conjunction with otherstandard access lists and static extended access lists.
When lock-and-key is configured, designated users whose IP traffic is normally blocked at a router can gaintemporary access through the router. When triggered, lock-and-key reconfigures the interface’s existing IPaccess list to permit designated users to reach their designated host(s). Afterwards, lock-and-key reconfiguresthe interface back to its original state.
For a user to gain access to a host through a router with lock-and-key configured, the user must first open aTelnet session to the router. When a user initiates a standard Telnet session to the router, lock-and-keyautomatically attempts to authenticate the user. If the user is authenticated, they will then gain temporaryaccess through the router and be able to reach their destination host.
Benefits of Lock-and-KeyLock-and-key provides the same benefits as standard and static extended access lists (these benefits arediscussed in the chapter “Access Control Lists: Overview and Guidelines”). However, lock-and-key also hasthe following security benefits over standard and static extended access lists:
• Lock-and-key uses a challenge mechanism to authenticate individual users.
• Lock-and-key provides simpler management in large internetworks.
• In many cases, lock-and-key reduces the amount of router processing required for access lists.
• Lock-and-key reduces the opportunity for network break-ins by network hackers.
With lock-and-key, you can specify which users are permitted access to which source and destination hosts.These users must pass a user authentication process before they are permitted access to their designated hosts.Lock-and-key creates dynamic user access through a firewall, without compromising other configured securityrestrictions.
When to Use Lock-and-KeyTwo examples of when you might use lock-and-key follow:
• When you want a specific remote user (or group of remote users) to be able to access a host within yournetwork, connecting from their remote hosts via the Internet. Lock-and-key authenticates the user, thenpermits limited access through your firewall router for the individual’s host or subnet, for a finite periodof time.
• When you want a subset of hosts on a local network to access a host on a remote network protected bya firewall. With lock-and-key, you can enable access to the remote host only for the desired set of local
Security Configuration Guide: Access Control Lists, Cisco IOS XE Everest 16.5108
Configuring Lock-and-Key Security (Dynamic Access Lists)Information About Configuring Lock-and-Key Security (Dynamic Access Lists)

user’s hosts. Lock-and-key require the users to authenticate through a TACACS+ server, or other securityserver, before allowing their hosts to access the remote hosts.
How Lock-and-Key WorksThe following process describes the lock-and-key access operation:
1. A user opens a Telnet session to a border (firewall) router configured for lock-and-key. The user connectsvia the virtual terminal port on the router.
2. The Cisco IOS software receives the Telnet packet, opens a Telnet session, prompts for a password, andperforms a user authentication process. The user must pass authentication before access through the routeris allowed. The authentication process can be done by the router or by a central access security serversuch as a TACACS+ or RADIUS server.
3. When the user passes authentication, they are logged out of the Telnet session, and the software createsa temporary entry in the dynamic access list. (Per your configuration, this temporary entry can limit therange of networks to which the user is given temporary access.)
4. The user exchanges data through the firewall.
5. The software deletes the temporary access list entry when a configured timeout is reached, or when thesystem administrator manually clears it. The configured timeout can either be an idle timeout or an absolutetimeout.
The temporary access list entry is not automatically deleted when the user terminates a session. The temporaryaccess list entry remains until a configured timeout is reached or until it is cleared by the system administrator.
Note
Compatibility with Releases Before Cisco IOS Release 11.1Enhancements to the access-list command are used for lock-and-key. These enhancements are backwardcompatible--if you migrate from a release before Cisco IOS Release 11.1 to a newer release, your access listswill be automatically converted to reflect the enhancements. However, if you try to use lock-and-key with arelease before Cisco IOS Release 11.1, you might encounter problems as described in the following cautionparagraph:
Cisco IOS releases before Release 11.1 are not upwardly compatible with the lock-and-key access listenhancements. Therefore, if you save an access list with software older than Release 11.1, and then use thissoftware, the resulting access list will not be interpreted correctly. This could cause you severe securityproblems. You must save your old configuration files with Cisco IOS Release 11.1 or later software beforebooting an image with these files.
Caution
Security Configuration Guide: Access Control Lists, Cisco IOS XE Everest 16.5109
Configuring Lock-and-Key Security (Dynamic Access Lists)How Lock-and-Key Works

Risk of Spoofing with Lock-and-Key
Lock-and-key access allows an external event (a Telnet session) to place an opening in the firewall. Whilethis opening exists, the router is susceptible to source address spoofing.
Caution
When lock-and-key is triggered, it creates a dynamic opening in the firewall by temporarily reconfiguring aninterface to allow user access. While this opening exists, another host might spoof the authenticated user’saddress to gain access behind the firewall. Lock-and-key does not cause the address spoofing problem; theproblem is only identified here as a concern to the user. Spoofing is a problem inherent to all access lists, andlock-and-key does not specifically address this problem.
To prevent spoofing, configure encryption so that traffic from the remote host is encrypted at a secured remoterouter, and decrypted locally at the router interface providing lock-and-key. You want to ensure that all trafficusing lock-and-key will be encrypted when entering the router; this way no hackers can spoof the sourceaddress, because they will be unable to duplicate the encryption or to be authenticated as is a required part ofthe encryption setup process.
Router Performance Impacts with Lock-and-KeyWhen lock-and-key is configured, router performance can be affected in the following ways:
• When lock-and-key is triggered, the dynamic access list forces an access list rebuild on the siliconswitching engine (SSE). This causes the SSE switching path to slow down momentarily.
• Dynamic access lists require the idle timeout facility (even if the timeout is left to default) and thereforecannot be SSE switched. These entries must be handled in the protocol fast-switching path.
• When remote users trigger lock-and-key at a border router, additional access list entries are created onthe border router interface. The interface’s access list will grow and shrink dynamically. Entries aredynamically removed from the list after either the idle-timeout or max-timeout period expires. Largeaccess lists can degrade packet switching performance, so if you notice performance problems, youshould look at the border router configuration to see if you should remove temporary access list entriesgenerated by lock-and-key.
Maintaining Lock-and-KeyWhen lock-and-key is in use, dynamic access lists will dynamically grow and shrink as entries are added anddeleted. You need to make sure that entries are being deleted in a timely way, because while entries exist, therisk of a spoofing attack is present. Also, the more entries there are, the bigger the router performance impactwill be.
If you do not have an idle or absolute timeout configured, entries will remain in the dynamic access list untilyou manually remove them. If this is the case, make sure that you are extremely vigilant about removingentries.
Dynamic Access ListsUse the following guidelines for configuring dynamic access lists:
Security Configuration Guide: Access Control Lists, Cisco IOS XE Everest 16.5110
Configuring Lock-and-Key Security (Dynamic Access Lists)Risk of Spoofing with Lock-and-Key

• Do not create more than one dynamic access list for any one access list. The software only refers to thefirst dynamic access list defined.
• Do not assign the same dynamic-name to another access list. Doing so instructs the software to reuse theexisting list. All named entries must be globally unique within the configuration.
• Assign attributes to the dynamic access list in the same way you assign attributes for a static access list.The temporary access list entries inherit the attributes assigned to this list.
• Configure Telnet as the protocol so that users must open a Telnet session into the router to be authenticatedbefore they can gain access through the router.
• Either define an idle timeout now with the timeout keyword in the access-enable command in theautocommand command, or define an absolute timeout value later with the access-list command. Youmust define either an idle timeout or an absolute timeout--otherwise, the temporary access list entry willremain configured indefinitely on the interface (even after the user has terminated their session) until theentry is removed manually by an administrator. (You could configure both idle and absolute timeouts ifyou wish.)
• If you configure an idle timeout, the idle timeout value should be equal to the WAN idle timeout value.
• If you configure both idle and absolute timeouts, the idle timeout value must be less than the absolutetimeout value.
• If you realize that a job will run past the ACL’s absolute timer, use the access-list dynamic-extendcommand to extend the absolute timer of the dynamic ACL by six minutes. This command allows youto open a new Telnet session into the router to re-authentication yourself using lock-and-key.
• The only values replaced in the temporary entry are the source or destination address, depending whetherthe access list was in the input access list or output access list. All other attributes, such as port, areinherited from the main dynamic access list.
• Each addition to the dynamic list is always put at the beginning of the dynamic list. You cannot specifythe order of temporary access list entries.
• Temporary access list entries are never written to NVRAM.
• To manually clear or to display dynamic access lists, refer to the section “Maintaining Lock-and-Key”later in this chapter.
Lock-and-Key AuthenticationThere are three possible methods to configure an authentication query process. These three methods aredescribed in this section.
Cisco recommends that you use the TACACS+ server for your authentication query process. TACACS+provides authentication, authorization, and accounting services. It also provides protocol support, protocolspecification, and a centralized security database. Using a TACACS+ server is described in the next section,“Method 1--Configuring a Security Server.”
Note
Security Configuration Guide: Access Control Lists, Cisco IOS XE Everest 16.5111
Configuring Lock-and-Key Security (Dynamic Access Lists)Lock-and-Key Authentication

Use a network access security server such as TACACS+ server. This method requires additional configurationsteps on the TACACS+ server but allows for stricter authentication queries and more sophisticated trackingcapabilities.
Router(config-line)# login tacacs
Use the username command. This method is more effective because authentication is determined on a userbasis.
Router(config)# username
name{nopassword|password{mutual-password|encryption-type
encryption-password}}
Use the password and login commands. This method is less effective because the password is configured forthe port, not for the user. Therefore, any user who knows the password can authenticate successfully.
Router(config-line)# password
passwordRouter(config-line)# login local
The autocommand CommandThe autocommand command configures the system to automatically execute a specified privileged EXECcommand when a user connects to a particular line. Use the following guidelines for configuring theautocommand command:
• If you use a TACACS+ server to authenticate the user, you should configure the autocommand commandon the TACACS+ server as a per-user autocommand. If you use local authentication, use theautocommand command on the line.
• Configure all virtual terminal (VTY) ports with the same autocommand command. Omitting anautocommand command on a VTY port allows a random host to gain privileged EXEC mode accessto the router and does not create a temporary access list entry in the dynamic access list.
• If you do not define an idle timeout with the autocommand access-enable command, you must definean absolute timeout with the access-list command. You must define either an idle timeout or an absolutetimeout--otherwise, the temporary access list entry will remain configured indefinitely on the interface(even after the user has terminated the session) until the entry is removed manually by an administrator.(You could configure both idle and absolute timeouts if you wish.)
• If you configure both idle and absolute timeouts, the absolute timeout value must be greater than the idletimeout value.
Security Configuration Guide: Access Control Lists, Cisco IOS XE Everest 16.5112
Configuring Lock-and-Key Security (Dynamic Access Lists)The autocommand Command

How to Configure Lock-and-Key Security (Dynamic AccessLists)
Configuring Lock-and-KeyTo configure lock-and-key, use the following commands beginning in global configuration mode. Whilecompleting these steps, be sure to follow the guidelines listed in the “Lock-and-Key Configuration Guidelines”section of this chapter.
SUMMARY STEPS
1. Router(config)# access-list access-list-number [dynamic dynamic-name [timeout minutes]] {deny |permit} telnet source source-wildcard destination destination-wildcard[precedence precedence] [tostos] [established] [log]
2. Router(config)# access-list dynamic-extend3. Router(config)# interface type number4. Router(config-if)# ip access-group access-list-number5. Router(config-if)# exit6. Router(config)# line vty line-number [ending-line-number]7. Do one of the following:
• Router(config-line)# login tacacs•• Router(config-line)# password password
8. Do one of the following:
• Router(config-line)# autocommand access-enable [host] [timeout minutes]•• Router# access-enable [host] [timeout minutes]
DETAILED STEPS
PurposeCommand or Action
Configures a dynamic access list, which serves as a templateand placeholder for temporary access list entries.
Router(config)# access-list access-list-number [dynamicdynamic-name [timeout minutes]] {deny | permit} telnetsource source-wildcard destination
Step 1
destination-wildcard[precedence precedence] [tos tos][established] [log]
(Optional) Extends the absolute timer of the dynamic ACLby six minutes when you open another Telnet session into
Router(config)# access-list dynamic-extendStep 2
the router to re-authenticate yourself using lock-and-key.Use this command if your job will run past the ACL’sabsolute timer.
Security Configuration Guide: Access Control Lists, Cisco IOS XE Everest 16.5113
Configuring Lock-and-Key Security (Dynamic Access Lists)How to Configure Lock-and-Key Security (Dynamic Access Lists)
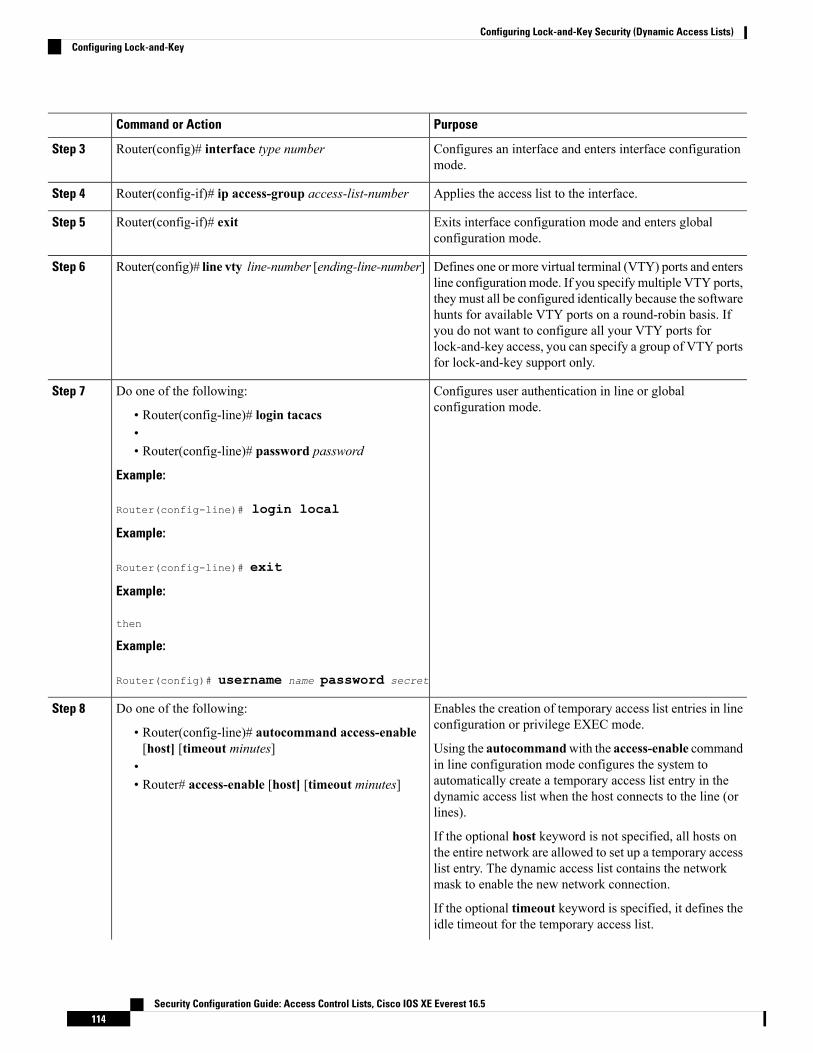
PurposeCommand or Action
Configures an interface and enters interface configurationmode.
Router(config)# interface type numberStep 3
Applies the access list to the interface.Router(config-if)# ip access-group access-list-numberStep 4
Exits interface configuration mode and enters globalconfiguration mode.
Router(config-if)# exitStep 5
Defines one or more virtual terminal (VTY) ports and entersline configurationmode. If you specify multiple VTY ports,
Router(config)# line vty line-number [ending-line-number]Step 6
they must all be configured identically because the softwarehunts for available VTY ports on a round-robin basis. Ifyou do not want to configure all your VTY ports forlock-and-key access, you can specify a group of VTY portsfor lock-and-key support only.
Configures user authentication in line or globalconfiguration mode.
Do one of the following:Step 7
• Router(config-line)# login tacacs•• Router(config-line)# password password
Example:
Router(config-line)# login local
Example:
Router(config-line)# exit
Example:
then
Example:
Router(config)# username name password secret
Enables the creation of temporary access list entries in lineconfiguration or privilege EXEC mode.
Do one of the following:Step 8
• Router(config-line)# autocommand access-enable[host] [timeout minutes] Using the autocommandwith the access-enable command
in line configuration mode configures the system to•automatically create a temporary access list entry in the• Router# access-enable [host] [timeout minutes]dynamic access list when the host connects to the line (orlines).
If the optional host keyword is not specified, all hosts onthe entire network are allowed to set up a temporary accesslist entry. The dynamic access list contains the networkmask to enable the new network connection.
If the optional timeout keyword is specified, it defines theidle timeout for the temporary access list.
Security Configuration Guide: Access Control Lists, Cisco IOS XE Everest 16.5114
Configuring Lock-and-Key Security (Dynamic Access Lists)Configuring Lock-and-Key
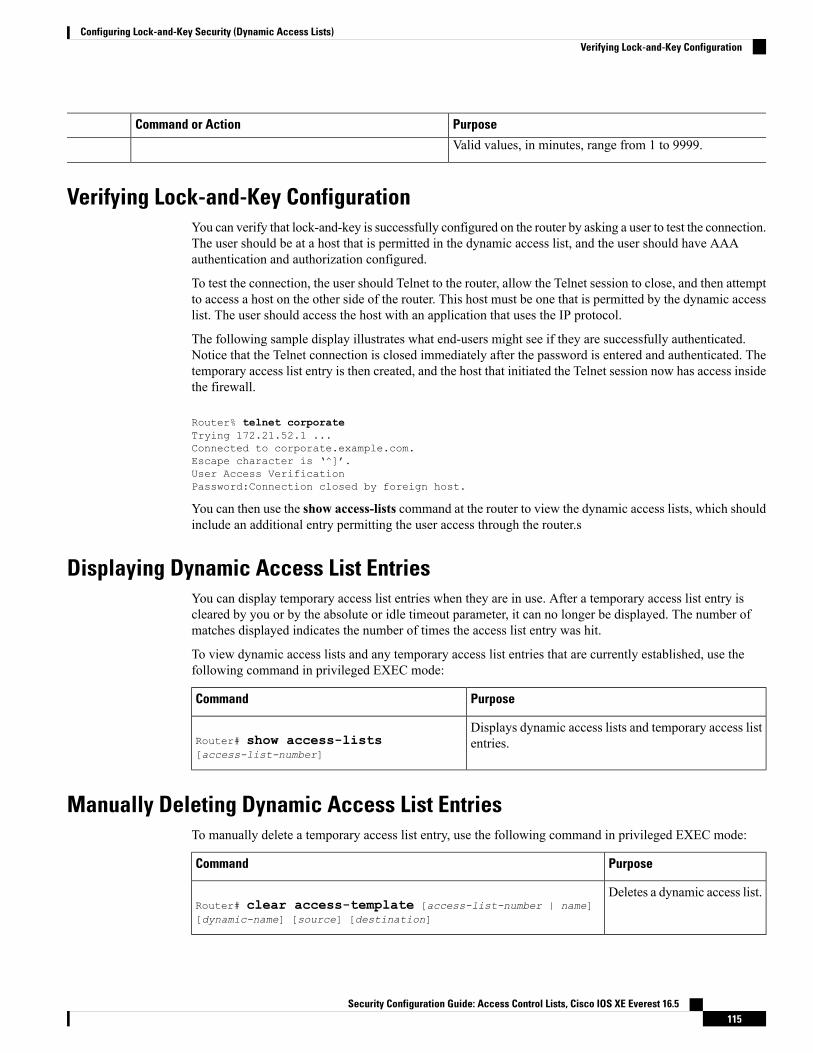
PurposeCommand or Action
Valid values, in minutes, range from 1 to 9999.
Verifying Lock-and-Key ConfigurationYou can verify that lock-and-key is successfully configured on the router by asking a user to test the connection.The user should be at a host that is permitted in the dynamic access list, and the user should have AAAauthentication and authorization configured.
To test the connection, the user should Telnet to the router, allow the Telnet session to close, and then attemptto access a host on the other side of the router. This host must be one that is permitted by the dynamic accesslist. The user should access the host with an application that uses the IP protocol.
The following sample display illustrates what end-users might see if they are successfully authenticated.Notice that the Telnet connection is closed immediately after the password is entered and authenticated. Thetemporary access list entry is then created, and the host that initiated the Telnet session now has access insidethe firewall.
Router% telnet corporateTrying 172.21.52.1 ...Connected to corporate.example.com.Escape character is ‘^]’.User Access VerificationPassword:Connection closed by foreign host.
You can then use the show access-lists command at the router to view the dynamic access lists, which shouldinclude an additional entry permitting the user access through the router.s
Displaying Dynamic Access List EntriesYou can display temporary access list entries when they are in use. After a temporary access list entry iscleared by you or by the absolute or idle timeout parameter, it can no longer be displayed. The number ofmatches displayed indicates the number of times the access list entry was hit.
To view dynamic access lists and any temporary access list entries that are currently established, use thefollowing command in privileged EXEC mode:
PurposeCommand
Displays dynamic access lists and temporary access listentries.Router# show access-lists
[access-list-number]
Manually Deleting Dynamic Access List EntriesTo manually delete a temporary access list entry, use the following command in privileged EXEC mode:
PurposeCommand
Deletes a dynamic access list.Router# clear access-template [access-list-number | name][dynamic-name] [source] [destination]
Security Configuration Guide: Access Control Lists, Cisco IOS XE Everest 16.5115
Configuring Lock-and-Key Security (Dynamic Access Lists)Verifying Lock-and-Key Configuration

Configuration Examples for Lock-and-Key
Example Lock-and-Key with Local AuthenticationThis example shows how to configure lock-and-key access, with authentication occurring locally at the router.Lock-and-key is configured on the Ethernet 0 interface.
interface ethernet0ip address 172.18.23.9 255.255.255.0ip access-group 101 inaccess-list 101 permit tcp any host 172.18.21.2 eq telnetaccess-list 101 dynamic mytestlist timeout 120 permit ip any anyline vty 0login localautocommand access-enable timeout 5
The first access-list entry allows only Telnet into the router. The second access-list entry is always ignoreduntil lock-and-key is triggered.
In the access-list command, the timeout is the absolute timeout. In this example, the lifetime of the mytestlistACL is 120 minutes; that is, when a user logs in and enable the access-enable command, a dynamic ACL iscreated for 120 minutes (the maximum absolute time). The session is closed after 120 minutes, whether ornot anyone is using it.
In the access-enablecommand, the timeout is the idle timeout. In this example, each time the user logs in orauthenticates there is a 5-minute session. If there is no activity, the session closes in 5 minutes and the userhas to reauthenticate. If the user uses the connection, the absolute time takes affect and the session closes in120 minutes.
After a user opens a Telnet session into the router, the router will attempt to authenticate the user. Ifauthentication is successful, the autocommand executes and the Telnet session terminates. The autocommandcreates a temporary inbound access list entry at the Ethernet 0 interface, based on the second access-list entry(mytestlist). If there is no activity, this temporary entry will expire after 5 minutes, as specified by the timeout.
Example Lock-and-Key with TACACS+ AuthenticationCisco recommends that you use a TACACS+ server for authentication, as shown in the example.
The following example shows how to configure lock-and-key access, with authentication on a TACACS+server. Lock-and-key access is configured on the BRI0 interface. Four VTY ports are defined with the password“password1”.
aaa authentication login default group tacacs+ enableaaa accounting exec stop-only group tacacs+aaa accounting network stop-only group tacacs+enable password ciscotac!isdn switch-type basic-dms100!interface ethernet0ip address 172.18.23.9 255.255.255.0!interface BRI0ip address 172.18.21.1 255.255.255.0
Security Configuration Guide: Access Control Lists, Cisco IOS XE Everest 16.5116
Configuring Lock-and-Key Security (Dynamic Access Lists)Configuration Examples for Lock-and-Key

encapsulation pppdialer idle-timeout 3600dialer wait-for-carrier-time 100dialer map ip 172.18.21.2 name dialermapnamedialer-group 1isdn spid1 2036333715291isdn spid2 2036339371566ppp authentication chapip access-group 102 in!access-list 102 permit tcp any host 172.18.21.2 eq telnetaccess-list 102 dynamic testlist timeout 5 permit ip any any!!ip route 172.18.250.0 255.255.255.0 172.18.21.2priority-list 1 interface BRI0 hightacacs-server host 172.18.23.21tacacs-server host 172.18.23.14tacacs-server key test1tftp-server rom alias all!dialer-list 1 protocol ip permit!line con 0password password1line aux 0line VTY 0 4autocommand access-enable timeout 5password password1!
Security Configuration Guide: Access Control Lists, Cisco IOS XE Everest 16.5117
Configuring Lock-and-Key Security (Dynamic Access Lists)Example Lock-and-Key with TACACS+ Authentication

Security Configuration Guide: Access Control Lists, Cisco IOS XE Everest 16.5118
Configuring Lock-and-Key Security (Dynamic Access Lists)Example Lock-and-Key with TACACS+ Authentication

C H A P T E R 12ACL IP Options Selective Drop
The ACL IP Options Selective Drop feature allows Cisco routers to filter packets containing IP options or tomitigate the effects of IP options on a router or downstream routers by dropping these packets or ignoring theprocessing of the IP options.
• Finding Feature Information, on page 119• Restrictions for ACL IP Options Selective Drop, on page 119• Information About ACL IP Options Selective Drop, on page 120• How to Configure ACL IP Options Selective Drop, on page 120• Configuration Examples for ACL IP Options Selective Drop, on page 121• Additional References for IP Access List Entry Sequence Numbering, on page 122• Feature Information for ACL IP Options Selective Drop, on page 123
Finding Feature InformationYour software release may not support all the features documented in this module. For the latest caveats andfeature information, see Bug Search Tool and the release notes for your platform and software release. Tofind information about the features documented in this module, and to see a list of the releases in which eachfeature is supported, see the feature information table.
Use Cisco Feature Navigator to find information about platform support and Cisco software image support.To access Cisco Feature Navigator, go to www.cisco.com/go/cfn. An account on Cisco.com is not required.
Restrictions for ACL IP Options Selective DropResource Reservation Protocol (RSVP) (Multiprotocol Label Switching traffic engineering [MPLS TE]),Internet Group Management Protocol Version 2 (IGMPv2), and other protocols that use IP options packetsmay not function in drop or ignore modes.
Security Configuration Guide: Access Control Lists, Cisco IOS XE Everest 16.5119

Information About ACL IP Options Selective Drop
Using ACL IP Options Selective DropThe ACL IP Options Selective Drop feature allows a router to filter IP options packets, thereby mitigatingthe effects of these packets on a router and downstream routers, and perform the following actions:
• Drop all IP options packets that it receives and prevent options from going deeper into the network.
• Ignore IP options packets destined for the router and treat them as if they had no IP options.
For many users, dropping the packets is the best solution. However, in environments in which some IP optionsmay be legitimate, reducing the load that the packets present on the routers is sufficient. Therefore, users mayprefer to skip options processing on the router and forward the packet as though it were pure IP.
Benefits of Using ACL IP Options Selective Drop• Drop mode filters packets from the network and relieves downstream routers and hosts of the load fromoptions packets.
• Drop mode minimizes loads to the Route Processor (RP) for options that require RP processing ondistributed systems. Previously, the packets were always routed to or processed by the RP CPU. Now,the ignore and drop forms prevent the packets from impacting the RP performance.
How to Configure ACL IP Options Selective Drop
Configuring ACL IP Options Selective DropThis section describes how to configure the ACL IP Options Selective Drop feature.
SUMMARY STEPS
1. enable2. configure terminal3. ip options {drop | ignore}4. exit5. show ip traffic
DETAILED STEPS
PurposeCommand or Action
Enables privileged EXEC mode.enableStep 1
Example: • Enter your password if prompted.
Router> enable
Security Configuration Guide: Access Control Lists, Cisco IOS XE Everest 16.5120
ACL IP Options Selective DropInformation About ACL IP Options Selective Drop

PurposeCommand or Action
Enters global configuration mode.configure terminal
Example:
Step 2
Router# configure terminal
Drops or ignores IP options packets that are sent to therouter.
ip options {drop | ignore}
Example:
Step 3
Router(config)# ip options drop
Returns to privileged EXEC mode.exit
Example:
Step 4
Router(config)# exit
(Optional) Displays statistics about IP traffic.show ip traffic
Example:
Step 5
Router# show ip traffic
Configuration Examples for ACL IP Options Selective Drop
Example Configuring ACL IP Options Selective DropThe following example shows how to configure the router (and downstream routers) to drop all options packetsthat enter the network:
Router(config)# ip options drop% Warning:RSVP and other protocols that use IP Options packets may not function in drop orignore modes.end
Example Verifying ACL IP Options Selective DropThe following sample output is displayed after using the ip options drop command:
Router# show ip trafficIP statistics:Rcvd: 428 total, 323 local destination
0 format errors, 0 checksum errors, 0 bad hop count0 unknown protocol, 0 not a gateway0 security failures, 0 bad options, 0 with options
Opts: 0 end, 0 nop, 0 basic security, 0 loose source route0 timestamp, 0 extended security, 0 record route0 stream ID, 0 strict source route, 0 alert, 0 cipso, 0 ump0 other, 30 ignored
Frags: 0 reassembled, 0 timeouts, 0 couldn't reassemble
Security Configuration Guide: Access Control Lists, Cisco IOS XE Everest 16.5121
ACL IP Options Selective DropConfiguration Examples for ACL IP Options Selective Drop

0 fragmented, 0 fragments, 0 couldn't fragmentBcast: 0 received, 0 sentMcast: 323 received, 809 sentSent: 809 generated, 591 forwardedDrop: 0 encapsulation failed, 0 unresolved, 0 no adjacency
0 no route, 0 unicast RPF, 0 forced drop, 0 unsupported-addr0 options denied, 0 source IP address zero
Additional References for IP Access List Entry SequenceNumbering
The following sections provide references related to IP access lists.
Related Documents
Document TitleRelated Topic
"Creating an IP Access List and Applying It to an Interface"Configuring IP access lists
Cisco IOS Master Command List, All ReleasesCisco IOS commands
• Cisco IOS Security Command Reference: Commands Ato C
• Cisco IOS Security Command Reference: Commands Dto L
• Cisco IOS Security Command Reference: CommandsMto R
• Cisco IOS Security Command Reference: Commands Sto Z
IP access list commands
Technical Assistance
LinkDescription
http://www.cisco.com/techsupportThe Cisco Support website provides extensive online resources, includingdocumentation and tools for troubleshooting and resolving technical issueswith Cisco products and technologies.
To receive security and technical information about your products, youcan subscribe to various services, such as the Product Alert Tool (accessedfrom Field Notices), the Cisco Technical Services Newsletter, and ReallySimple Syndication (RSS) Feeds.
Access to most tools on the Cisco Support website requires a Cisco.comuser ID and password.
Security Configuration Guide: Access Control Lists, Cisco IOS XE Everest 16.5122
ACL IP Options Selective DropAdditional References for IP Access List Entry Sequence Numbering

Feature Information for ACL IP Options Selective DropThe following table provides release information about the feature or features described in this module. Thistable lists only the software release that introduced support for a given feature in a given software releasetrain. Unless noted otherwise, subsequent releases of that software release train also support that feature.
Use Cisco Feature Navigator to find information about platform support and Cisco software image support.To access Cisco Feature Navigator, go to www.cisco.com/go/cfn. An account on Cisco.com is not required.
Table 12: Feature Information for ACL IP Options Selective Drop
Feature InformationReleasesFeature Name
The ACL IP Options Selective Drop feature allows Cisco routersto filter packets containing IP options or to mitigate the effectsof IP options on a router or downstream routers by droppingthese packets or ignoring the processing of the IP options.
This feature was introduced on Cisco ASR 1000 SeriesAggregation Services Routers.
The following command was introduced: ip options.
Cisco IOS XERelease 2.1
ACL IP OptionsSelective Drop
Security Configuration Guide: Access Control Lists, Cisco IOS XE Everest 16.5123
ACL IP Options Selective DropFeature Information for ACL IP Options Selective Drop

Security Configuration Guide: Access Control Lists, Cisco IOS XE Everest 16.5124
ACL IP Options Selective DropFeature Information for ACL IP Options Selective Drop

C H A P T E R 13Displaying and Clearing IP Access List DataUsing ACL Manageability
This module describes how to display the entries in an IP access list and the number of packets that havematched each entry. Users can get these statistics globally, or per interface and per incoming or outgoingtraffic direction, by using the ACL Manageability feature. Viewing details of incoming and outgoing trafficpatterns on various interfaces of a network device can help secure devices against attacks coming in on aparticular interface. This module also describes how to clear counters so that the count of packets matchingan access list entry will restart from zero.
• Finding Feature Information, on page 125• Information About Displaying and Clearing IP Access List Data Using ACLManageability, on page 126• How to Display and Clear IP Access List Data, on page 126• Configuration Examples for Displaying and Clearing IP Access List Data Using ACL Manageability,on page 128
• Additional References, on page 130• Feature Information for Displaying IP Access List Information and Clearing Counters, on page 131
Finding Feature InformationYour software release may not support all the features documented in this module. For the latest caveats andfeature information, see Bug Search Tool and the release notes for your platform and software release. Tofind information about the features documented in this module, and to see a list of the releases in which eachfeature is supported, see the feature information table.
Use Cisco Feature Navigator to find information about platform support and Cisco software image support.To access Cisco Feature Navigator, go to www.cisco.com/go/cfn. An account on Cisco.com is not required.
Security Configuration Guide: Access Control Lists, Cisco IOS XE Everest 16.5125
Information About Displaying and Clearing IP Access List DataUsing ACL Manageability
Benefits of ACL ManageabilityPrior to Cisco IOS Release 12.4(6)T, the ACL infrastructure in Cisco IOS software maintained only globalstatistics for each ACE in an ACL.With this method, if an ACL is applied to multiple interfaces, the maintainedACE statistics are the sum of incoming and outgoing packet matches (hits) on all the interfaces on which thatACL is applied.
However, if ACE statistics are maintained per interface and per incoming or outgoing traffic direction, userscan view specific details of incoming and outgoing traffic patterns and the effectiveness of ACEs on thevarious interfaces of a network device. This type of information is useful for securing devices against attackscoming in on a particular interface.
Support for Interface-Level ACL StatisticsWith Cisco IOS Release 12.4(6)T, the ACL infrastructure in Cisco IOS software is now extended to supportthe maintenance, display, and clearing of ACE statistics per interface and per incoming or outgoing trafficdirection for ACLs. This support is often referred to as “support for interface-level statistics.”
If the same access-group ACL is also used by other features, the maintained interface statistics are not updatedwhen a packet match is detected by the other features. In this case, the sum of all the interface level statisticsthat are maintained for an ACL may not add up to the global statistics for that ACL.
Note
How to Display and Clear IP Access List DataThis section contains the following procedures for displaying IP access lists and the counts of packets thatmatch (hit) each list, and for clearing IP access list counters.
Alternatively, if you want to deny access to a particular host or network and find out if someone from thatnetwork or host is attempting to gain access, include the log keyword with the corresponding deny statementso that the packets denied from that source are logged for you. For more information, see the “IP Access ListLogging” section of the “IP Access List Overview.”
Note
Displaying Global IP ACL StatisticsPerform this task to display all IP access lists on the router and counts of packets that have matched.
Security Configuration Guide: Access Control Lists, Cisco IOS XE Everest 16.5126
Displaying and Clearing IP Access List Data Using ACL ManageabilityInformation About Displaying and Clearing IP Access List Data Using ACL Manageability

SUMMARY STEPS
1. enable2. show ip access-list [access-list-number | access-list-name]
DETAILED STEPS
PurposeCommand or Action
Enables privileged EXEC mode.enableStep 1
Example: • Enter your password if prompted.
Router> enable
Displays IP access list information.show ip access-list [access-list-number | access-list-name]Step 2
Example: • This example displays statistics for all interfaces thatuse the access list named “limited.”
Router# show ip access-list limited
Displaying Interface-Level IP ACL StatisticsThis section describes how to display IP ACE statistics per interface and per incoming or outgoing trafficdirection for ACLs. This feature is known as ACL Manageability.
• ACL Manageability supports:
• Only nondistributed software switched platforms.• Standard and extended statically configured ACLs, and Threat Mitigation Service (TMS) dynamicACEs.
• ACL Manageability does not support:
• Reflexive and user-configured dynamic ACLs and dynamic ACE blocks, such as Firewall andAuthentication Proxy.
• Virtual-template and virtual-access interfaces.
>
Note
SUMMARY STEPS
1. enable2. show ip access-list interface interface-name [in| out]
DETAILED STEPS
PurposeCommand or Action
Enables privileged EXEC mode.enableStep 1
Example: • Enter your password if prompted.
Security Configuration Guide: Access Control Lists, Cisco IOS XE Everest 16.5127
Displaying and Clearing IP Access List Data Using ACL ManageabilityDisplaying Interface-Level IP ACL Statistics

PurposeCommand or Action
Router> enable
Displays IP access list information.show ip access-list interface interface-name [in| out]Step 2
Example: • This example displays statistics about traffic cominginto the FastEthernet interface.
Router# show ip access-list interface FastEthernet0/0 in • To display debugging information about ACL
interface-level statistics, use the debug ip access-listintstats command.
Clearing the Access List CountersThe system counts how many packets match (hit) each line of an access list; the counters are displayed by theshow access-lists EXEC command. Perform this task to clear the counters of an access list. You might dothis if you are trying to determine a more recent count of packets that match an access list, starting from zero.
SUMMARY STEPS
1. enable2. clear ip access-list counters {access-list-number | access-list-name}
DETAILED STEPS
PurposeCommand or Action
Enables privileged EXEC mode.enableStep 1
Example: • Enter your password if prompted.
Router> enable
Clears IP access list counters.clear ip access-list counters {access-list-number |access-list-name}
Step 2
Example:
Router# clear access-list counters corpmark
Configuration Examples for Displaying and Clearing IP AccessList Data Using ACL Manageability
Example Displaying Global IP ACL StatisticsThe following example displays global statistics for ACL 150:
Security Configuration Guide: Access Control Lists, Cisco IOS XE Everest 16.5128
Displaying and Clearing IP Access List Data Using ACL ManageabilityClearing the Access List Counters

Router# show ip access-list 150
Extended IP access list 15010 permit ip host 10.1.1.1 any (3 matches)30 permit ip host 10.2.2.2 any (27 matches)
Example Displaying Input StatisticsThe following example displays statistics on incoming packets gathered from the FastEthernet interface 0/1,associated with access list 150 (ACL number):
Router#show ip access-list interface FastEthernet 0/1 inExtended IP access list 150 in
10 permit ip host 10.1.1.1 any (3 matches)30 permit ip host 10.2.2.2 any (12 matches)
Example Displaying Output StatisticsThe following example displays statistics on outgoing packets gathered from the FastEthernet interface 0/0:
Router#show ip access-list interface FastEthernet 0/0 outExtended IP access list myacl out
5 deny ip any 10.1.0.0 0.0.255.25510 permit udp any any eq snmp (6 matches)
Example Displaying Input and Output Statistics
If no direction is specified, any input and output ACLs applied to that interface are displayed.Note
The following example displays input and output statistics gathered from the FastEthernet interface 0/0:
Router#show ip access-list interface FastEthernet 0/0Extended IP access list 150 in
10 permit ip host 10.1.1.1 any30 permit ip host 10.2.2.2 any (15 matches)
Extended IP access list myacl out5 deny ip any 10.1.0.0 0.0.255.25510 permit udp any any eq snmp (6 matches)
Example Clearing Global and Interface Statistics for an IP Access ListThe following example clears global and interface statistics for IP ACL 150:
Router#clear ip access-list counters 150
Security Configuration Guide: Access Control Lists, Cisco IOS XE Everest 16.5129
Displaying and Clearing IP Access List Data Using ACL ManageabilityExample Displaying Input Statistics

Example Clearing Global and Interface Statistics for All IP Access ListsThe following example clears global and interface statistics for all IP ACLs:
Router#clear ip access-list counters
Additional ReferencesRelated Documents
Document TitleRelated Topic
Cisco IOSMaster Commands List, All ReleasesCisco IOS commands
Cisco IOS Security Command ReferenceSecurity commands
Standards
TitleStandard
--No new or modified standards are supported by this feature.
MIBs
MIBs LinkMIB
To locate and download MIBs for selected platforms, Cisco IOSreleases, and feature sets, use Cisco MIB Locator found at thefollowing URL:
http://www.cisco.com/go/mibs
No new or modified MIBs aresupported by this feature.
RFCs
TitleRFC
--No new or modified standards are supported by this feature, and support for existing standards has notbeen modified by this feature.
Security Configuration Guide: Access Control Lists, Cisco IOS XE Everest 16.5130
Displaying and Clearing IP Access List Data Using ACL ManageabilityExample Clearing Global and Interface Statistics for All IP Access Lists

Technical Assistance
LinkDescription
http://www.cisco.com/cisco/web/support/index.htmlTheCisco Support andDocumentationwebsite providesonline resources to download documentation, software,and tools. Use these resources to install and configurethe software and to troubleshoot and resolve technicalissues with Cisco products and technologies. Access tomost tools on the Cisco Support and Documentationwebsite requires a Cisco.com user ID and password.
Feature Information for Displaying IP Access List Informationand Clearing Counters
The following table provides release information about the feature or features described in this module. Thistable lists only the software release that introduced support for a given feature in a given software releasetrain. Unless noted otherwise, subsequent releases of that software release train also support that feature.
Use Cisco Feature Navigator to find information about platform support and Cisco software image support.To access Cisco Feature Navigator, go to www.cisco.com/go/cfn. An account on Cisco.com is not required.
Table 13: Feature Information for Displaying and Clearing IP Access List Data Using ACL Manageability
Feature InformationReleasesFeature Name
The ACLManageability feature enables users to display andclear Access Control Entry (ACE) statistics per interfaceand per incoming or outgoing traffic direction for accesscontrol lists (ACLs).
Cisco IOS XE Release3.9S
ACLManageability
Security Configuration Guide: Access Control Lists, Cisco IOS XE Everest 16.5131
Displaying and Clearing IP Access List Data Using ACL ManageabilityFeature Information for Displaying IP Access List Information and Clearing Counters

Security Configuration Guide: Access Control Lists, Cisco IOS XE Everest 16.5132
Displaying and Clearing IP Access List Data Using ACL ManageabilityFeature Information for Displaying IP Access List Information and Clearing Counters

C H A P T E R 14ACL Syslog Correlation
The Access Control List (ACL) Syslog Correlation feature appends a tag (either a user-defined cookie or adevice-generated MD5 hash value) to access control entry (ACE) syslog entries. This tag uniquely identifiesthe ACE , within the ACL, that generated the syslog entry.
• Finding Feature Information, on page 133• Prerequisites for ACL Syslog Correlation, on page 133• Information About ACL Syslog Correlation, on page 134• How to Configure ACL Syslog Correlation, on page 134• Configuration Examples for ACL Syslog Correlation, on page 141• Additional References for IPv6 IOS Firewall, on page 142• Feature Information for ACL Syslog Correlation, on page 143
Finding Feature InformationYour software release may not support all the features documented in this module. For the latest caveats andfeature information, see Bug Search Tool and the release notes for your platform and software release. Tofind information about the features documented in this module, and to see a list of the releases in which eachfeature is supported, see the feature information table.
Use Cisco Feature Navigator to find information about platform support and Cisco software image support.To access Cisco Feature Navigator, go to www.cisco.com/go/cfn. An account on Cisco.com is not required.
Prerequisites for ACL Syslog CorrelationBefore you configure the ACL Syslog Correlation feature, youmust understand the concepts in the "IP AccessList Overview" module.
The ACL Syslog Correlation feature appends a user-defined cookie or a device-generated hash value to ACEmessages in the syslog. These values are only appended to ACE messages when the log option is enabled forthe ACE.
Security Configuration Guide: Access Control Lists, Cisco IOS XE Everest 16.5133

Information About ACL Syslog Correlation
ACL Syslog Correlation TagsThe ACL Syslog Correlation feature appends a tag (either a user-defined cookie or a device-generated MD5hash value) to access control entry (ACE) syslog entries. This tag uniquely identifies an ACE that generatedthe syslog entry.
Network management software can use the tag to identify which ACE generated a specific syslog event. Forexample, network administrators can select an ACE rule in the network management application and can thenview the corresponding syslog events for that ACE rule.
To append a tag to the syslog message, the ACE that generates the syslog event must have the log optionenabled. The system appends only one type of tag (either a user-defined cookie or a device-generated MD5hash value) to each message.
To specify a user-defined cookie tag, the user must enter the cookie value when configuring the ACE logoption. The cookie must be in alpha-numeric form, it cannot be greater than 64 characters, and it cannot startwith hex-decimal notation (such as 0x).
To specify a device-generated MD5 hash value tag, the hash-generation mechanism must be enabled on thedevice and the user must not enter a cookie value while configuring the ACE log option.
ACE Syslog MessagesWhen a packet is matched against an access control entry (ACE) in an ACL, the system checks whether thelog option is enabled for that event. If the log option is enabled and the ACL Syslog Correlation feature isconfigured on the device, the system attaches the tag to the syslog message. The tag is displayed at the endof the syslog message, in addition to the standard information.
The following is a sample syslog message showing a user-defined cookie tag:
Jun 5 12:55:44.359: %SEC-6-IPACCESSLOGP: list logacl permitted tcp 192.168.16.1(38402) ->192.168.16.2(23), 1 packet [User_permiited_ACE]
The following is a sample syslog message showing a hash value tag:
Jun 5 12:55:44.359: %SEC-6-IPACCESSLOGP: list logacl permitted tcp 192.168.16.1(38402) ->192.168.16.2(23), 1 packet [0x723E6E12]
How to Configure ACL Syslog Correlation
Enabling Hash Value Generation on a DevicePerform this task to configure the device to generate an MD5 hash value for each log-enabled access controlentry (ACE) in the system that is not configured with a user-defined cookie.
Security Configuration Guide: Access Control Lists, Cisco IOS XE Everest 16.5134
ACL Syslog CorrelationInformation About ACL Syslog Correlation

When the hash value generation setting is enabled, the system checks all existing ACEs and generates a hashvalue for each ACE that requires one. When the hash value generation setting is disabled, all previouslygenerated hash values are removed from the system.
SUMMARY STEPS
1. enable2. configure terminal3. ip access-list logging hash-generation4. end5. Do one of the following:
• show ip access-list access-list-number• show ip access-list access-list-name
DETAILED STEPS
PurposeCommand or Action
Enables privileged EXEC mode.enableStep 1
Example: • Enter your password if prompted.
Device> enable
Enters global configuration mode.configure terminal
Example:
Step 2
Device# configure terminal
Enables hash value generation on the device.ip access-list logging hash-generationStep 3
Example: • If an ACE exists that is log enabled, and requires ahash value, the device automatically generates thevalue and displays the value on the console.Device(config)# ip access-list logging
hash-generation
(Optional) Exits global configuration mode and returns toprivileged EXEC mode.
end
Example:
Step 4
Device(config)# end
(Optional) Displays the contents of the numbered or namedIP access list.
Do one of the following:Step 5
• show ip access-list access-list-number• Review the output to confirm that the access list for alog-enabled ACE includes the generated hash value.
• show ip access-list access-list-name
Example:
Device# show ip access-list 101
Example:
Device# show ip access-list acl
Security Configuration Guide: Access Control Lists, Cisco IOS XE Everest 16.5135
ACL Syslog CorrelationEnabling Hash Value Generation on a Device

Disabling Hash Value Generation on a DevicePerform this task to disable hash value generation on the device. When the hash value generation setting isdisabled, all previously generated hash values are removed from the system.
SUMMARY STEPS
1. enable2. configure terminal3. no ip access-list logging hash-generation4. end5. Do one of the following:
• show ip access-list access-list-number• show ip access-list access-list-name
DETAILED STEPS
PurposeCommand or Action
Enables privileged EXEC mode.enableStep 1
Example: • Enter your password if prompted.
Device> enable
Enters global configuration mode.configure terminal
Example:
Step 2
Device# configure terminal
Disables hash value generation on the device.no ip access-list logging hash-generationStep 3
Example: • The system removes any previously created hashvalues from the system.
Device(config)# no ip access-list logginghash-generation
(Optional) Exits global configuration mode and returns toprivileged EXEC mode.
end
Example:
Step 4
Device(config)# end
(Optional) Displays the contents of the IP access list.Do one of the following:Step 5
• show ip access-list access-list-number • Review the output to confirm that the access list for alog-enabledACE does not have a generated hash value.• show ip access-list access-list-name
Example:
Device# show ip access-list 101
Example:
Security Configuration Guide: Access Control Lists, Cisco IOS XE Everest 16.5136
ACL Syslog CorrelationDisabling Hash Value Generation on a Device

PurposeCommand or Action
Device# show ip access-list acl
Configuring ACL Syslog Correlation Using a User-Defined CookiePerform this task to configure the ACL Syslog Correlation feature on a device for a specific access list, usinga user-defined cookie as the syslog message tag.
The example in this section shows how to configure the ACL Syslog Correlation feature using a user-definedcookie for a numbered access list. However, you can configure the ACL Syslog Correlation feature using auser-defined cookie for both numbered and named access lists, and for both standard and extended accesslists.
The following restrictions apply when choosing the user-defined cookie value:
• The maximum number of characters is 64.
• The cookie cannot start with hexadecimal notation (such as 0x).
• The cookie cannot be the same as, or a subset of, the following keywords: reflect, fragment, time-range.For example, reflect and ref are not valid values. However, the cookie can start with the keywords. Forexample, reflectedACE and fragment_33 are valid values
• The cookie must contains only alphanumeric characters.
>
Note
SUMMARY STEPS
1. enable2. configure terminal3. access-list access-list-number permit protocol source destination log word4. end5. show ip access-list access-list-number
DETAILED STEPS
PurposeCommand or Action
Enables privileged EXEC mode.enableStep 1
Example: • Enter your password if prompted.
Device> enable
Enters global configuration mode.configure terminal
Example:
Step 2
Device# configure terminal
Security Configuration Guide: Access Control Lists, Cisco IOS XE Everest 16.5137
ACL Syslog CorrelationConfiguring ACL Syslog Correlation Using a User-Defined Cookie

PurposeCommand or Action
Defines an extended IP access list and a user-defined cookievalue.
access-list access-list-number permit protocol sourcedestination log word
Step 3
Example: • Enter the cookie value as the wordargument.
Device(config)# access-list 101 permit tcp host10.1.1.1 host 10.1.1.2 log UserDefinedValue
(Optional) Exits global configuration mode and returns toprivileged EXEC mode.
end
Example:
Step 4
Device(config)# end
(Optional) Displays the contents of the IP access list.show ip access-list access-list-numberStep 5
Example: • Review the output to confirm that the access listincludes the user-defined cookie value.
Device# show ip access-list 101
Examples
The following is sample output from the show ip access-list command for an access list with auser-defined cookie value.
Device# show ip access-list101Extended IP access list 10130 permit tcp host 10.1.1.1 host 10.1.1.2 log (tag = UserDefinedValue)
Configuring ACL Syslog Correlation Using a Hash ValuePerform this task to configure the ACL Syslog Correlation feature on a device for a specific access list, usinga device-generated hash value as the syslog message tag.
The steps in this section shows how to configure the ACL Syslog Correlation feature using a device-generatedhash value for a numbered access list. However, you can configure the ACL Syslog Correlation feature usinga device-generated hash value for both numbered and named access lists, and for both standard and extendedaccess lists.
SUMMARY STEPS
1. enable2. configure terminal3. ip access-list logging hash-generation4. access-list access-list-number permit protocol source destination log5. end6. show ip access-list access-list-number
Security Configuration Guide: Access Control Lists, Cisco IOS XE Everest 16.5138
ACL Syslog CorrelationConfiguring ACL Syslog Correlation Using a Hash Value

DETAILED STEPS
PurposeCommand or Action
Enables privileged EXEC mode.enableStep 1
Example: • Enter your password if prompted.
Device> enable
Enters global configuration mode.configure terminal
Example:
Step 2
Device# configure terminal
Enables hash value generation on the device.ip access-list logging hash-generationStep 3
Example: • If an ACE exists that is log enabled, and requires ahash value, the device automatically generates thevalue and displays the value on the console.Device(config)# ip access-list logging
hash-generation
Defines an extended IP access list.access-list access-list-number permit protocol sourcedestination log
Step 4
• Enable the log option for the access list, but do notspecify a cookie value.Example:
Device(config)# access-list 102 permit tcp host10.1.1.1 host 10.1.1.2 log
• The device automatically generates a hash value forthe newly defined access list.
(Optional) Exits global configuration mode and returns toprivileged EXEC mode.
end
Example:
Step 5
Device(config)# end
(Optional) Displays the contents of the IP access list.show ip access-list access-list-numberStep 6
Example: • Review the output to confirm that the access listincludes the router-generated hash value.
Device# show ip access-list 102
Examples
The following is sample output from the show ip access-list command for an access list with adevice-generated hash value.
Device# show ip access-list102Extended IP access list 10210 permit tcp host 10.1.1.1 host 10.1.1.2 log (hash = 0x7F9CF6B9)
Security Configuration Guide: Access Control Lists, Cisco IOS XE Everest 16.5139
ACL Syslog CorrelationConfiguring ACL Syslog Correlation Using a Hash Value

Changing the ACL Syslog Correlation Tag ValuePerform this task to change the value of the user-defined cookie or replace a device-generated hash value witha user-defined cookie.
The steps in this section shows how to change the ACL Syslog Correlation tag value on a numbered accesslist. However, you can change the ACL Syslog Correlation tag value for both numbered and named accesslists, and for both standard and extended access lists.
SUMMARY STEPS
1. enable2. show access-list3. configure terminal4. access-list access-list-number permit protocol source destination log word5. end6. show ip access-list access-list-number
DETAILED STEPS
PurposeCommand or Action
Enables privileged EXEC mode.enableStep 1
Example: • Enter your password if prompted.
Device> enable
(Optional) Displays the contents of the access list.show access-list
Example:
Step 2
Device(config)# show access-list
Enters global configuration mode.configure terminal
Example:
Step 3
Device# configure terminal
Modifies the cookie or changes the hash value to a cookie.access-list access-list-number permit protocol sourcedestination log word
Step 4
• You must enter the entire access list configurationcommand, replacing the previous tag value with thenew tag value.
Example:
Device(config)# access-list 101 permit tcp host10.1.1.1 host 10.1.1.2 log NewUDV
Example:
OR
Example:
Example:
Security Configuration Guide: Access Control Lists, Cisco IOS XE Everest 16.5140
ACL Syslog CorrelationChanging the ACL Syslog Correlation Tag Value

PurposeCommand or Action
Device(config)# access-list 101 permit tcp any anylog replacehash
(Optional) Exits global configuration mode and returns toprivileged EXEC mode.
end
Example:
Step 5
Device(config)# end
(Optional) Displays the contents of the IP access list.show ip access-list access-list-numberStep 6
Example: • Review the output to confirm the changes.
Device# show ip access-list 101
Troubleshooting TipsUse the debug ip access-list hash-generation command to display access list debug information. The followingis an example of the debug command output:
Device# debug ip access-list hash-generationSyslog hash code generation debugging is onDevice# show debugIP ACL:Syslog hash code generation debugging is onDevice# no debug ip access-list hash-generation
Syslog hash code generation debugging is offDevice# show debugDevice#
Configuration Examples for ACL Syslog Correlation
Example: Configuring ACL Syslog Correlation Using a User-Defined CookieThe following example shows how to configure the ACL Syslog Correlation feature on a device using auser-defined cookie.
Device#Device# debug ip access-list hash-generationSyslog MD5 hash code generation debugging is onDevice# configure terminalEnter configuration commands, one per line. End with CNTL/Z.Device(config)# access-list 33 permit 10.10.10.6 log cook_33_stdDevice(config)# do show ip access 33Standard IP access list 3310 permit 10.10.10.6 log (tag = cook_33_std)Device(config)# end
Security Configuration Guide: Access Control Lists, Cisco IOS XE Everest 16.5141
ACL Syslog CorrelationTroubleshooting Tips

Example: Configuring ACL Syslog Correlation using a Hash ValueThe following examples shows how to configure the ACL Syslog Correlation feature on a device using adevice-generated hash value.
Device# debug ip access-list hash-generationSyslog MD5 hash code generation debugging is onDevice# configure terminalEnter configuration commands, one per line. End with CNTL/Z.Device(config)# access-list 33 permit 10.10.10.7 logDevice(config)#*Nov 7 13:51:23.615: %IPACL-HASHGEN: Hash Input: 33 standard permit 10.10.10.7Hash Output: 0xCE87F535Device(config)#do show ip access 33
Standard IP access list 3310 permit 10.10.10.6 log (tag = cook_33_std)20 permit 10.10.10.7 log (hash = 0xCE87F535)
Example: Changing the ACL Syslog Correlation Tag ValueThe following example shows how to replace an existing access list user-defined cookie with a new cookievalue, and how to replace a device-generated hash value with a user-defined cookie value.
Device# configure terminalEnter configuration commands, one per line. End with CNTL/Z.Device(config)# do show ip access-list 101Extended IP access list 101
10 permit tcp host 10.1.1.1 host 10.1.1.2 log (tag = MyCookie)20 permit tcp any any log (hash = 0x75F078B9)
Device(config)# access-list 101 permit tcp host 10.1.1.1 host 10.1.1.2 log NewUDVDevice(config)# do show access-listExtended IP access list 101
10 permit tcp host 10.1.1.1 host 10.1.1.2 log (tag = NewUDV)20 permit tcp any any log (hash = 0x75F078B9)
Device(config)# access-list 101 permit tcp any any log replacehashDevice(config)# do show access-listExtended IP access list 101
10 permit tcp host 10.1.1.1 host 10.1.1.2 log (tag = NewUDV)20 permit tcp any any log (tag = replacehash)
Additional References for IPv6 IOS FirewallRelated Documents
Document TitleRelated Topic
Cisco IOS Master Command List, All ReleasesCisco IOS commands
Security Configuration Guide: Access Control Lists, Cisco IOS XE Everest 16.5142
ACL Syslog CorrelationExample: Configuring ACL Syslog Correlation using a Hash Value

Document TitleRelated Topic
• Cisco IOS Security Command Reference:Commands A to C
• Cisco IOS Security Command Reference:Commands D to L
• Cisco IOS Security Command Reference:Commands M to R
• Cisco IOS Security Command Reference:Commands S to Z
Security commands
Cisco IOS IPv6 Command ReferenceIPv6 commands
IPv6 Configuration GuideIPv6 addressing and connectivity
Cisco IOS IPv6 Feature MappingCisco IOS IPv6 features
Standards and RFCs
TitleStandard/RFC
IPv6RFCs
RFCs forIPv6
Technical Assistance
LinkDescription
http://www.cisco.com/cisco/web/support/index.htmlTheCisco Support andDocumentationwebsite providesonline resources to download documentation, software,and tools. Use these resources to install and configurethe software and to troubleshoot and resolve technicalissues with Cisco products and technologies. Access tomost tools on the Cisco Support and Documentationwebsite requires a Cisco.com user ID and password.
Feature Information for ACL Syslog CorrelationThe following table provides release information about the feature or features described in this module. Thistable lists only the software release that introduced support for a given feature in a given software releasetrain. Unless noted otherwise, subsequent releases of that software release train also support that feature.
Use Cisco Feature Navigator to find information about platform support and Cisco software image support.To access Cisco Feature Navigator, go to www.cisco.com/go/cfn. An account on Cisco.com is not required.
Security Configuration Guide: Access Control Lists, Cisco IOS XE Everest 16.5143
ACL Syslog CorrelationFeature Information for ACL Syslog Correlation
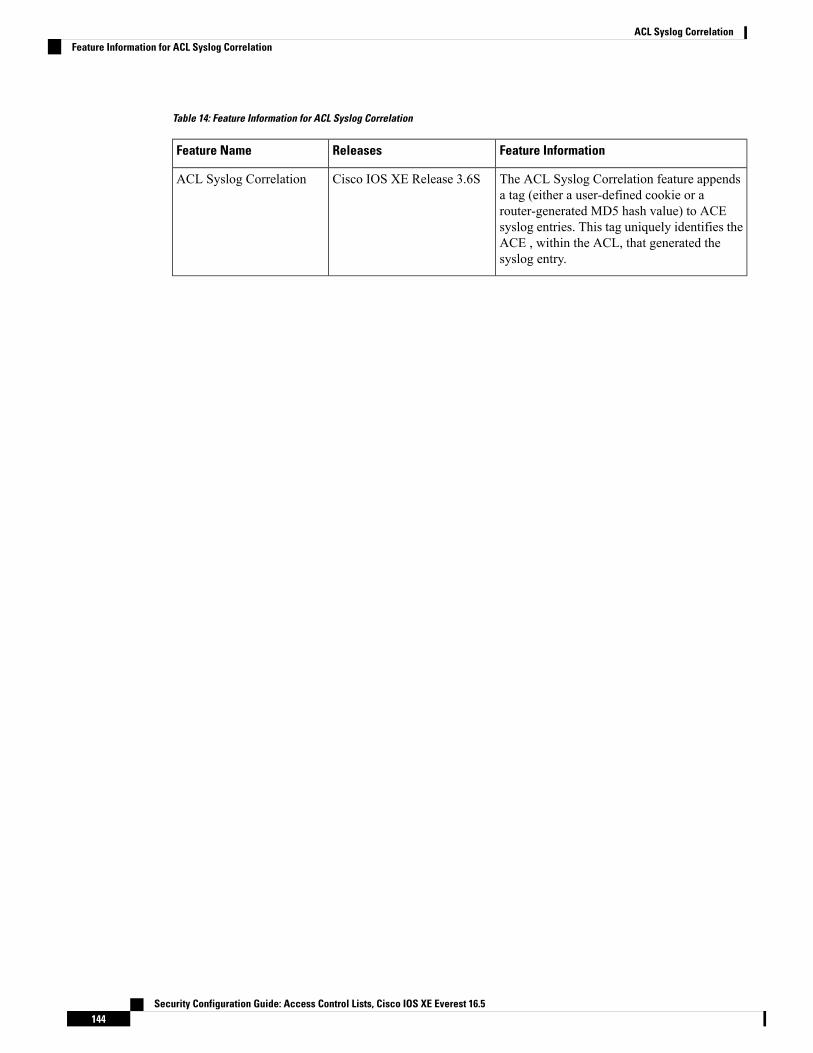
Table 14: Feature Information for ACL Syslog Correlation
Feature InformationReleasesFeature Name
The ACL Syslog Correlation feature appendsa tag (either a user-defined cookie or arouter-generated MD5 hash value) to ACEsyslog entries. This tag uniquely identifies theACE , within the ACL, that generated thesyslog entry.
Cisco IOS XE Release 3.6SACL Syslog Correlation
Security Configuration Guide: Access Control Lists, Cisco IOS XE Everest 16.5144
ACL Syslog CorrelationFeature Information for ACL Syslog Correlation

C H A P T E R 15IPv6 Access Control Lists
Access lists determine what traffic is blocked and what traffic is forwarded at device interfaces and allowfiltering of traffic based on source and destination addresses, and inbound and outbound traffic to a specificinterface. Standard IPv6 ACL functionality was extended to support traffic filtering based on IPv6 optionheaders and optional, upper-layer protocol type information for finer granularity of control. Standard IPv6ACL functionality was extended to support traffic filtering based on IPv6 option headers and optional,upper-layer protocol type information for finer granularity of control.
This module describes how to configure IPv6 traffic filtering and to control access to virtual terminal lines.
• RSP3 Porting Related Information, on page 145• Finding Feature Information, on page 145• Information About IPv6 Access Control Lists, on page 146• How to Configure IPv6 Access Control Lists, on page 146• Configuration Examples for IPv6 Access Control Lists, on page 151• Additional References, on page 152• Feature Information for IPv6 Access Control Lists, on page 152
RSP3 Porting Related InformationIPv6 ACL is not supported on RSP3
Finding Feature InformationYour software release may not support all the features documented in this module. For the latest caveats andfeature information, see Bug Search Tool and the release notes for your platform and software release. Tofind information about the features documented in this module, and to see a list of the releases in which eachfeature is supported, see the feature information table.
Use Cisco Feature Navigator to find information about platform support and Cisco software image support.To access Cisco Feature Navigator, go to www.cisco.com/go/cfn. An account on Cisco.com is not required.
Security Configuration Guide: Access Control Lists, Cisco IOS XE Everest 16.5145

Information About IPv6 Access Control Lists
Access Control Lists for IPv6 Traffic FilteringThe standard ACL functionality in IPv6 is similar to standard ACLs in IPv4. Access lists determine whattraffic is blocked and what traffic is forwarded at device interfaces and allow filtering based on source anddestination addresses, inbound and outbound to a specific interface. Each access list has an implicit denystatement at the end. IPv6 ACLs are defined and their deny and permit conditions are set using the ipv6access-listcommand with the deny and permit keywords in global configuration mode.
IPv6 extended ACLs augments standard IPv6 ACL functionality to support traffic filtering based on IPv6option headers and optional, upper-layer protocol type information for finer granularity of control (functionalitysimilar to extended ACLs in IPv4).
IPv6 Packet InspectionThe following header fields are used for IPv6 inspection: traffic class, flow label, payload length, next header,hop limit, and source or destination IP address. For further information on and descriptions of the IPv6 headerfields, see RFC 2474.
Access Class Filtering in IPv6Filtering incoming and outgoing connections to and from the device based on an IPv6 ACL is performedusing the ipv6 access-class command in line configuration mode. The ipv6 access-class command is similarto the access-class command, except the IPv6 ACLs are defined by a name. If the IPv6 ACL is applied toinbound traffic, the source address in the ACL is matched against the incoming connection source addressand the destination address in the ACL is matched against the local device address on the interface. If theIPv6 ACL is applied to outbound traffic, the source address in the ACL is matched against the local deviceaddress on the interface and the destination address in the ACL is matched against the outgoing connectionsource address. We recommend that identical restrictions are set on all the virtual terminal lines because auser can attempt to connect to any of them.
How to Configure IPv6 Access Control Lists
Configuring IPv6 Traffic Filtering
Creating and Configuring an IPv6 ACL for Traffic Filtering
IPv6 ACLs on the Cisco ASR 1000 platform do not contain implicit permit rules. The IPv6 neighbor discoveryprocess uses the IPv6 network-layer service; therefore, to enable IPv6 neighbor discovery, you must add IPv6ACLs to allow IPv6 neighbor discovery packets to be sent and received on an interface. In IPv4, the AddressResolution Protocol (ARP), which is equivalent to the IPv6 neighbor discovery process, uses a separatedata-link-layer protocol; therefore, by default IPv4 ACLs implicitly allowARP packets to be sent and receivedon an interface.
Note
Security Configuration Guide: Access Control Lists, Cisco IOS XE Everest 16.5146
IPv6 Access Control ListsInformation About IPv6 Access Control Lists

SUMMARY STEPS
1. enable2. configure terminal3. ipv6 access-list access-list-name4. Do one of the following:
• permit protocol {source-ipv6-prefix/prefix-length | any | host source-ipv6-address} [operator[port-number]] {destination-ipv6-prefix / prefix-length | any | host destination-ipv6-address} [operator[port-number]] [dest-option-type [doh-number | doh-type]] [dscp value] [flow-label value][fragments] [log] [log-input] [mobility] [mobility-type [mh-number | mh-type]] [routing][routing-type routing-number] [sequence value] [time-range name]
• deny protocol {source-ipv6-prefix/prefix-length | any | host source-ipv6-address} [operatorport-number]] {destination-ipv6-prefix/prefix-length | any | host destination-ipv6-address} [operator[port-number]] [dest-option-type [doh-number | doh-type] ] [dscp value] [flow-label value][fragments] [log] [log-input] [mobility] [mobility-type [mh-number | mh-type]] [routing][routing-type routing-number] [sequence value] [time-range name] [undetermined-transport
DETAILED STEPS
PurposeCommand or Action
Enables privileged EXEC mode.enableStep 1
Example: • Enter your password if prompted.
Device> enable
Enters global configuration mode.configure terminal
Example:
Step 2
Device# configure terminal
Defines an IPv6 ACL, and enters IPv6 access listconfiguration mode.
ipv6 access-list access-list-name
Example:
Step 3
• The access-list nameargument specifies the name ofthe IPv6ACL. IPv6ACL names cannot contain a spaceor quotation mark, or begin with a numeral.
Device(config)# ipv6 access-list inbound
Specifies permit or deny conditions for an IPv6 ACL.Do one of the following:Step 4
• permit protocol {source-ipv6-prefix/prefix-length |any | host source-ipv6-address} [operator[port-number]] {destination-ipv6-prefix / prefix-length| any | host destination-ipv6-address} [operator[port-number]] [dest-option-type [doh-number |doh-type]] [dscp value] [flow-label value] [fragments][log] [log-input] [mobility] [mobility-type[mh-number | mh-type]] [routing] [routing-typerouting-number] [sequence value] [time-range name]
• deny protocol {source-ipv6-prefix/prefix-length |any | host source-ipv6-address} [operator
Security Configuration Guide: Access Control Lists, Cisco IOS XE Everest 16.5147
IPv6 Access Control ListsCreating and Configuring an IPv6 ACL for Traffic Filtering

PurposeCommand or Action
port-number]] {destination-ipv6-prefix/prefix-length| any | host destination-ipv6-address} [operator[port-number]] [dest-option-type [doh-number |doh-type] ] [dscp value] [flow-label value][fragments] [log] [log-input] [mobility][mobility-type [mh-number | mh-type]] [routing][routing-type routing-number] [sequence value][time-range name] [undetermined-transport
Example:
Device(config-ipv6-acl)# permit tcp2001:DB8:0300:0201::/32 eq telnet any
Example:
Device(config-ipv6-acl)# deny tcp host2001:DB8:1::1 any log-input
Applying the IPv6 ACL to an Interface
SUMMARY STEPS
1. enable2. configure terminal3. interface type number4. ipv6 traffic-filter access-list-name {in| out}
DETAILED STEPS
PurposeCommand or Action
Enables privileged EXEC mode.enableStep 1
Example: • Enter your password if prompted.
Device> enable
Enters global configuration mode.configure terminal
Example:
Step 2
Device# configure terminal
Specifies the interface type and number, and enters interfaceconfiguration mode.
interface type number
Example:
Step 3
Device(config)# interface gigabitethernet 0/0/0
Applies the specified IPv6 access list to the interfacespecified in the previous step.
ipv6 traffic-filter access-list-name {in| out}
Example:
Step 4
Security Configuration Guide: Access Control Lists, Cisco IOS XE Everest 16.5148
IPv6 Access Control ListsApplying the IPv6 ACL to an Interface

PurposeCommand or Action
Device(config-if)# ipv6 traffic-filter inbound in
Controlling Access to a vty
Creating an IPv6 ACL to Provide Access Class Filtering
SUMMARY STEPS
1. enable2. configure terminal3. ipv6 access-list access-list-name4. Do one of the following:
• permit protocol {source-ipv6-prefix/prefix-length | any | host source-ipv6-address} [operator[port-number]] {destination-ipv6-prefix / prefix-length | any | host destination-ipv6-address} [operator[port-number]] [dest-option-type [doh-number | doh-type]] [dscp value] [flow-label value][fragments] [log] [log-input] [mobility] [mobility-type [mh-number | mh-type]] [routing][routing-type routing-number] [sequence value] [time-range name
• deny protocol {source-ipv6-prefix/prefix-length | any | host source-ipv6-address} [operatorport-number]] {destination-ipv6-prefix/prefix-length | any | host destination-ipv6-address} [operator[port-number]] [dest-option-type [doh-number | doh-type]] [dscp value] [flow-label value][fragments] [log] [log-input] [mobility] [mobility-type [mh-number | mh-type]] [routing][routing-type routing-number] [sequence value] [time-range name] [undetermined-transport
DETAILED STEPS
PurposeCommand or Action
Enables privileged EXEC mode.enableStep 1
Example: • Enter your password if prompted.
Device> enable
Enters global configuration mode.configure terminal
Example:
Step 2
Device# configure terminal
Defines an IPv6 ACL, and enters IPv6 access listconfiguration mode.
ipv6 access-list access-list-name
Example:
Step 3
Device(config)# ipv6 access-list cisco
Specifies permit or deny conditions for an IPv6 ACL.Do one of the following:Step 4
• permit protocol {source-ipv6-prefix/prefix-length |any | host source-ipv6-address} [operator
Security Configuration Guide: Access Control Lists, Cisco IOS XE Everest 16.5149
IPv6 Access Control ListsControlling Access to a vty

PurposeCommand or Action
[port-number]] {destination-ipv6-prefix / prefix-length| any | host destination-ipv6-address} [operator[port-number]] [dest-option-type [doh-number |doh-type]] [dscp value] [flow-label value] [fragments][log] [log-input] [mobility] [mobility-type[mh-number | mh-type]] [routing] [routing-typerouting-number] [sequence value] [time-range name
• deny protocol {source-ipv6-prefix/prefix-length | any| host source-ipv6-address} [operator port-number]]{destination-ipv6-prefix/prefix-length | any | hostdestination-ipv6-address} [operator [port-number]][dest-option-type [doh-number | doh-type]] [dscpvalue] [flow-label value] [fragments] [log] [log-input][mobility] [mobility-type [mh-number | mh-type]][routing] [routing-type routing-number] [sequencevalue] [time-range name] [undetermined-transport
Example:
Device(config-ipv6-acl)# permit ipv6 host2001:DB8:0:4::32 any
Example:
Device(config-ipv6-acl)# deny ipv6 host2001:DB8:0:6::6 any
Applying an IPv6 ACL to the Virtual Terminal Line
SUMMARY STEPS
1. enable2. configure terminal3. line [aux| console| tty| vty] line-number[ending-line-number]4. ipv6 access-class ipv6-access-list-name {in| out}
DETAILED STEPS
PurposeCommand or Action
Enables privileged EXEC mode.enableStep 1
Example: • Enter your password if prompted.
Device> enable
Enters global configuration mode.configure terminal
Example:
Step 2
Device# configure terminal
Security Configuration Guide: Access Control Lists, Cisco IOS XE Everest 16.5150
IPv6 Access Control ListsApplying an IPv6 ACL to the Virtual Terminal Line

PurposeCommand or Action
Identifies a specific line for configuration and enters lineconfiguration mode.
line [aux| console| tty| vty]line-number[ending-line-number]
Step 3
Example: • In this example, the vty keyword is used to specify thevirtual terminal lines for remote console access.
Device(config)# line vty 0 4
Filters incoming and outgoing connections to and from thedevice based on an IPv6 ACL.
ipv6 access-class ipv6-access-list-name {in| out}
Example:
Step 4
Device(config-line)# ipv6 access-class cisco in
Configuration Examples for IPv6 Access Control Lists
Example: Verifying IPv6 ACL Configuration
In this example, the show ipv6 access-list command is used to verify that IPv6 ACLs are configuredcorrectly:Device> show ipv6 access-list
IPv6 access list inboundpermit tcp any any eq bgp (8 matches) sequence 10permit tcp any any eq telnet (15 matches) sequence 20permit udp any any sequence 30
IPv6 access list Virtual-Access2.1#427819008151 (per-user)permit tcp host 2001:DB8:1::32 eq bgp host 2001:DB8:2::32 eq 11000 sequence 1permit tcp host 2001:DB8:1::32 eq telnet host 2001:DB8:2::32 eq 11001 sequence 2
Example: Creating and Applying an IPv6 ACLThe following example shows how to restrict HTTP access to certain hours during the day and log any activityoutside of the permitted hours:
Device# configure terminalDevice(config)# time-range lunchtimeDevice(config-time-range)# periodic weekdays 12:00 to 13:00Device(config-time-range)# exitDevice(config)# ipv6 access-list INBOUNDDevice(config-ipv6-acl)# permit tcp any any eq www time-range lunchtimeDevice(config-ipv6-acl)# deny tcp any any eq www log-inputDevice(config-ipv6-acl)# permit tcp 2001:DB8::/32 anyDevice(config-ipv6-acl)# permit udp 2001:DB8::/32 anyDevice(config-ipv6-acl)# end
Security Configuration Guide: Access Control Lists, Cisco IOS XE Everest 16.5151
IPv6 Access Control ListsConfiguration Examples for IPv6 Access Control Lists

Example: Controlling Access to a vtyIn the following example, incoming connections to the virtual terminal lines 0 to 4 are filtered based on theIPv6 access list named acl1:
ipv6 access-list acl1permit ipv6 host 2001:DB8:0:4::2/32 any!line vty 0 4ipv6 access-class acl1 in
Additional ReferencesRelated Documents
Document TitleRelated Topic
Cisco IOS Master Command List, All ReleasesCisco IOS commands
Cisco IOS Security Command ReferenceIP access list commands
“Creating an IP Access List and Applying It to an Interface”Configuring IP access lists
Technical Assistance
LinkDescription
http://www.cisco.com/cisco/web/support/index.htmlTheCisco Support andDocumentationwebsite providesonline resources to download documentation, software,and tools. Use these resources to install and configurethe software and to troubleshoot and resolve technicalissues with Cisco products and technologies. Access tomost tools on the Cisco Support and Documentationwebsite requires a Cisco.com user ID and password.
Feature Information for IPv6 Access Control ListsThe following table provides release information about the feature or features described in this module. Thistable lists only the software release that introduced support for a given feature in a given software releasetrain. Unless noted otherwise, subsequent releases of that software release train also support that feature.
Use Cisco Feature Navigator to find information about platform support and Cisco software image support.To access Cisco Feature Navigator, go to www.cisco.com/go/cfn. An account on Cisco.com is not required.
Security Configuration Guide: Access Control Lists, Cisco IOS XE Everest 16.5152
IPv6 Access Control ListsExample: Controlling Access to a vty

Table 15: Feature Information for IPv6 Access Control Lists
Feature InformationReleasesFeature Name
Standard IPv6 ACL functionalitywas extended to support trafficfiltering based on IPv6 optionheaders and optional, upper-layerprotocol type information for finergranularity of control.
Cisco IOS XE Release 2.1IPv6 Services: Extended AccessControl Lists
Security Configuration Guide: Access Control Lists, Cisco IOS XE Everest 16.5153
IPv6 Access Control ListsFeature Information for IPv6 Access Control Lists

Security Configuration Guide: Access Control Lists, Cisco IOS XE Everest 16.5154
IPv6 Access Control ListsFeature Information for IPv6 Access Control Lists

C H A P T E R 16IPv6 ACL Undetermined-Transport Support
The IPv6 ACL Undetermined-Transport Support feature helps in dropping misconfigured packets where thecomplete upper layer header is not present.
• Finding Feature Information, on page 155• Restrictions for IPv6 ACL Undetermined-Transport Support, on page 155• Information about IPv6 ACL Undetermined-Transport Support, on page 156• How to Configure IPv6 ACL Undetermined-Transport Support, on page 156• Configuration Examples for IPv6 ACL Undetermined-Transport Support, on page 157• Additional References for IPv6 ACL Undetermined-Transport Support, on page 157• Feature Information for ACL Template, on page 158
Finding Feature InformationYour software release may not support all the features documented in this module. For the latest caveats andfeature information, see Bug Search Tool and the release notes for your platform and software release. Tofind information about the features documented in this module, and to see a list of the releases in which eachfeature is supported, see the feature information table.
Use Cisco Feature Navigator to find information about platform support and Cisco software image support.To access Cisco Feature Navigator, go to www.cisco.com/go/cfn. An account on Cisco.com is not required.
Restrictions for IPv6 ACL Undetermined-Transport Support• The undetermined-transport option is supported only for Cisco Application Control Engines (ACE) withdeny action and IPv6 protocol.
• Undetermined transport is not applied on nonfirst fragment packets.
Security Configuration Guide: Access Control Lists, Cisco IOS XE Everest 16.5155

Information about IPv6 ACL Undetermined-Transport Support
IPv6 ACL Undetermined-TransportUnintended misconfigurations by users or malicious attacks on the network may cause operational problemsfor hosts on the network.
Upper layer header is placed at the end of Extended Header (EH) chain in IPv6 packet, as it described in RFC2460. If the complete upper layer header is not present in the IPv6 packet, then the router cannot process thepacket. These packets may be misconfigured, corrupted, or malicious packets.
You may choose to drop these packets using IPv6 ACL with undetermined-transport option.
How to Configure IPv6 ACL Undetermined-Transport Support
Configuring IPv6 ACL Undetermined-Transport Support
SUMMARY STEPS
1. enable2. configure terminal3. ipv6 access-list acl-name4. deny ipv6 {src-addr | any} {dest-addr | any} [undetermined-transport]5. end
DETAILED STEPS
PurposeCommand or Action
Enables privileged EXEC mode.enableStep 1
Example: • Enter your password if prompted.
Device> enable
Enters global configuration mode.configure terminal
Example:
Step 2
Device# configure terminal
Configures IPv6 access list.ipv6 access-list acl-name
Example:
Step 3
Device(config)# ipv6 access-list acl1
Security Configuration Guide: Access Control Lists, Cisco IOS XE Everest 16.5156
IPv6 ACL Undetermined-Transport SupportInformation about IPv6 ACL Undetermined-Transport Support

PurposeCommand or Action
Sets deny condition for an IPv6 access list as underminedtransport.
deny ipv6 {src-addr | any} {dest-addr | any}[undetermined-transport]
Example:
Step 4
Device(config-ipv6-acl)# deny ipv62001:DB8:0300:0201::/32 2001:DB8:1:1::/64undetermined-transport
Returns to privileged EXEC mode.end
Example:
Step 5
Device(config-ipv6-acl)# end
Configuration Examples for IPv6 ACL Undetermined-TransportSupport
Example: Example for IPv6 ACL Undetermined-Transport SupportDevice> enableDevice# configure terminalDevice(config)# ipv6 access-list acl1Device(config-ipv6-acl)# deny ipv6 2001:DB8:0300:0201::/32 2001:DB8:1:1::/64undetermined-transportDevice(config-ipv6-acl)# end
Additional References for IPv6 ACL Undetermined-TransportSupport
Related Documents
Document TitleRelated Topic
Cisco IOS Master Command List, All ReleasesCisco IOS commands
Cisco IOS Security Command ReferenceIP access list commands
“Creating an IP Access List and Applying It to an Interface”Configuring IP access lists
Security Configuration Guide: Access Control Lists, Cisco IOS XE Everest 16.5157
IPv6 ACL Undetermined-Transport SupportConfiguration Examples for IPv6 ACL Undetermined-Transport Support

Standards and RFCs
TitleStandards/RFCs
Internet Protocol, Version 6 (IPv6) SpecificationRFC 2460
Technical Assistance
LinkDescription
http://www.cisco.com/cisco/web/support/index.htmlTheCisco Support andDocumentationwebsite providesonline resources to download documentation, software,and tools. Use these resources to install and configurethe software and to troubleshoot and resolve technicalissues with Cisco products and technologies. Access tomost tools on the Cisco Support and Documentationwebsite requires a Cisco.com user ID and password.
Feature Information for ACL TemplateThe following table provides release information about the feature or features described in this module. Thistable lists only the software release that introduced support for a given feature in a given software releasetrain. Unless noted otherwise, subsequent releases of that software release train also support that feature.
Use Cisco Feature Navigator to find information about platform support and Cisco software image support.To access Cisco Feature Navigator, go to www.cisco.com/go/cfn. An account on Cisco.com is not required.
Table 16: Feature Information for ACL Template
Feature InformationReleasesFeature Name
The IPv6 ACL Undetermined-Transport Supportfeature helps in droppingmisconfigured packets, wherethe complete upper layer header is not present.
No commands were introduced or modified.
Cisco IOS XERelease3.15
IPv6 ACLUndetermined-TransportSupport
Security Configuration Guide: Access Control Lists, Cisco IOS XE Everest 16.5158
IPv6 ACL Undetermined-Transport SupportFeature Information for ACL Template

C H A P T E R 17Configuring Template ACLs
When user profiles are configured using RADIUS Attribute 242 or vendor-specific attribute (VSA)Cisco-AVPairs, similar per-user access control lists (ACLs) may be replaced by a single template ACL. Thatis, one ACL represents many similar ACLs. By using template ACLs, you can increase the total number ofper-user ACLs while minimizing the memory and Ternary Content Addressable Memory (TCAM) resourcesneeded to support the ACLs.
In networks where each subscriber has its own ACL, it is common for the ACL to be the same for each userexcept for the user’s IP address. The Template ACLs feature groups ACLs with many common access controlelements (ACEs) into a single ACL that saves system resources.
• Finding Feature Information, on page 159• Prerequisites for Template ACLs, on page 159• Restrictions for Template ACLs, on page 160• Information About Configuring Template ACLs, on page 160• How to Configure Template ACLs, on page 163• Configuration Examples for Template ACLs, on page 165• Additional References, on page 166• Feature Information for ACL Template, on page 166
Finding Feature InformationYour software release may not support all the features documented in this module. For the latest caveats andfeature information, see Bug Search Tool and the release notes for your platform and software release. Tofind information about the features documented in this module, and to see a list of the releases in which eachfeature is supported, see the feature information table.
Use Cisco Feature Navigator to find information about platform support and Cisco software image support.To access Cisco Feature Navigator, go to www.cisco.com/go/cfn. An account on Cisco.com is not required.
Prerequisites for Template ACLs• Cisco ASR 1000 series routers
• Cisco IOS XE Release 2.4 or a later release
Security Configuration Guide: Access Control Lists, Cisco IOS XE Everest 16.5159

Restrictions for Template ACLsTemplate ACLs are activated only for per-user ACLs configured through RADIUS Attribute 242 or VSACisco-AVPairs (ip:inacl/outacl). No other ACL types are processed by the Template ACL feature.
Template ACL functionality is available only for IPv4 ACLs.
Template ACL functionality is not available for the following types of per-user ACLs:
• Time-based ACLs
• Dynamic ACLs
• Evaluate ACLs
• Reflexive ACLs
• ACLs configured on ISG IP sessions
• IPv6 ACLs
Disabling the Template ACL Feature
When the Template ACL feature is disabled, the system replaces all existing template ACL instances withACLs. If the system does not have enough resources (in particular TCAM resources) to setup the requirednumber of ACLs, the system generates an error message, and the request to disable the Template ACLs featurefails.
Information About Configuring Template ACLs
Template ACL Feature DesignWhen the service provider uses AAA servers to configure individual ACLs for each authorized session usingwith RADIUS attribute 242 or VSA Cisco-AVPairs, the number of sessions can easily exceed the maximumACL number allowed by the system.
In networks where each subscriber has an ACL, it is common for the ACL to be the same for each user exceptfor the user’s IP address. Template ACLs alleviate this problem by grouping ACLs with many common ACEsinto a single ACL that compiles faster and saves system resources.
The Template ACL feature is enabled by default, and ACLs set up using the RADIUS attribute 242 or VSACisco-AVPairs are considered for template status.
When the Template ACL feature is enabled, the system scans and evaluates all configured per-session ACLsand then creates all required template ACLs.
Disabling Template ACLs
When the Template ACL feature is disabled, the system replaces all existing template ACL instances withACLs. If the system does not have enough resources (in particular TCAM resources) to setup the requirednumber of ACLs, the system generates an error message, and the request to disable the Template ACL featurefails.
Security Configuration Guide: Access Control Lists, Cisco IOS XE Everest 16.5160
Configuring Template ACLsRestrictions for Template ACLs

Therefore, before you disable the Template ACL feature, use the show access-list template summarycommand to view the number of template ACLs in the system and ascertain if this number exceeds the systemlimitations.
When the template ACL feature is disabled, no new ACLS are considered for templating.
Multiple ACLsWhen the Template ACL feature is enabled, the system can identify when two per-user ACLS are similar,and the system consolidates the two per-user ACLs into one template ACL.
For example, the following example shows two ACLs for two separate users:
ip access-list extended Virtual-Access1.1#1 (PeerIP: 10.1.1.1)permit igmp any host 10.1.1.1permit icmp host 10.1.1.1 anydeny ip host 10.31.66.36 host 10.1.1.1deny tcp host 10.1.1.1 host 10.31.66.36permit udp any host 10.1.1.1permit udp host 10.1.1.1 anypermit udp any host 192.168.2.1permit udp any host 192.168.222.1permit icmp host 10.55.15.4 host 192.168.2.1permit udp 10.22.11.0 0.0.0.255 host 192.168.211.2permit tcp any host 192.168.222.1permit ip host 10.55.15.4 host 192.168.2.1permit tcp 10.22.11.0 0.0.0.255 host 192.168.211.2ip access-list extended Virtual-Access1.1#2 (PeerIP: 10.13.11.2)permit igmp any host 10.13.11.2permit icmp host 10.13.11.2 anydeny ip host 10.31.66.36 host 10.13.11.2deny tcp host 10.13.11.2 host 10.31.66.36permit udp any host 10.13.11.2permit udp host 10.13.11.2 anypermit udp any host 192.168.2.1permit udp any host 192.168.222.1permit icmp host 10.55.15.4 host 192.168.2.1permit udp 10.22.11.0 0.0.0.255 host 192.168.211.2permit tcp any host 192.168.222.1permit ip host 10.55.15.4 host 192.168.2.1permit tcp 10.22.11.0 0.0.0.255 host 192.168.211.2
With the Template ACL feature is enabled, the system recognizes that these two ACLs are similar, and createsa template ACL as follows:
ip access-list extended Template_1permit igmp any host <PeerIP>permit icmp host <PeerIP> anydeny ip host 10.31.66.36 host <PeerIP>deny tcp host <PeerIP> 10.31.66.36permit udp any host <PeerIP>permit udp host <PeerIP> anypermit udp any host 192.168.2.1permit udp any host 192.168.222.1permit icmp host 10.55.15.4 host 192.168.2.1permit udp 10.22.11.0 0.0.0.255 host 192.168.211.2permit tcp any host 192.168.222.1permit ip host 10.55.15.4 host 192.168.2.1permit tcp 10.22.11.0 0.0.0.255 host 192.168.211.2
In this example, the peer IP address is associated as follows:
Security Configuration Guide: Access Control Lists, Cisco IOS XE Everest 16.5161
Configuring Template ACLsMultiple ACLs

• Virtual-Access1.1#1 10.1.1.1
• Virtual-Access1.1#2 10.13.11.2
The two ACLs are consolidated into one template ACL and are referenced as follows:
Virtual-Access1.1#1 maps to Template_1(10.1.1.1)
Virtual-Access1.1#2 maps to Template_1(10.13.11.2)
VSA Cisco-AVPairsTemplate ACL processing occurs for ACLs that are configured using Cisco-AVPairs. Only AVPairs that aredefined using the ACL number are considered for the templating process.
To be considered for templating, AVPairs for incoming ACLs must conform to the following format:
ip:inacl#number={standard-access-control-list | extended-access-control-list}
For example: ip:inacl#10=deny ip any 10.13.16.0 0.0.0.255
To be considered for templating, AVPairs for outgoing ACLs must conform to the following format:
ip:outacl#number={standard-access-control-list | extended-access-control-list}
For example: ip:outacl#200=permit ip any any
For more information on Cisco-AVPairs, see the Cisco Vendor-Specific AVPair Attributes section of theCisco IOS ISG RADIUS CoA Interface Guide.
RADIUS Attribute 242Template ACL processing occurs for ACLs that are configured using RADIUS attribute 242. Attribute 242has the following format for an IP data filter:
Ascend-Data-Filter = “ip <dir> <action> [dstip <dest_ipaddr\subnet_mask>] [srcp <src_ipaddr\subnet_mask>][<proto> [dstport <cmp> <value>] [srcport <cmp> <value>] [<est>]]”
The table below describes the elements in an attribute 242 entry for an IP data filter.
Table 17: IP Data Filter Syntax Elements
DescriptionElement
Specifies an IP filter.ip
Specifies the filter direction. Possible values are in (filtering packets coming into the router) orout (filtering packets going out of the router).
<dir>
Specifies the action the router should take with a packet that matches the filter. Possible valuesare forward or drop.
<action>
Enables destination-IP-address filtering. Applies to packets whose destination address matchesthe value of <dest_ipaddr>. If a subnet mask portion of the address is present, the router comparesonly the masked bits. If you set <dest_ipaddr> to 0.0.0.0, or if this keyword is not present, thefilter matches all IP packets.
dstip<dest_ipaddr\subnet_mask>
Security Configuration Guide: Access Control Lists, Cisco IOS XE Everest 16.5162
Configuring Template ACLsVSA Cisco-AVPairs

DescriptionElement
Enables source-IP-address filtering. Applies to packets whose source address matches the valueof <src_ipaddr>. If a subnet mask portion of the address is present, the router compares only themasked bits. If you set <src_ipaddr> to 0.0.0.0, or if this keyword is not present, the filter matchesall IP packets.
srcp<src_ipaddr\subnet_mask>
Specifies a protocol specified as a name or a number. Applies to packets whose protocol fieldmatches this value. Possible names and numbers are icmp (1), tcp (6), udp (17), and ospf (89).If you set this value to zero (0), the filter matches any protocol.
<proto>
Enables destination-port filtering. This keyword is valid only when <proto> is set to tcp (6) orudp (17). If you do not specify a destination port, the filter matches any port.
<cmp> defines how to compare the specified <value> to the actual destination port. This valuecan be <, =, >, or !.
<value> can be a name or a number. Possible names and numbers are ftp-data (20), ftp (21),telnet (23), nameserver (42), domain (53), tftp (69), gopher (70), finger (79), www (80),kerberos (88), hostname (101), nntp (119), ntp (123), exec (512), login (513), cmd (514), andtalk (517).
dstport <cmp> <value>
Enables source-port filtering. This keyword is valid only when <proto> is set to tcp(6)or udp(17). If you do not specify a source port, the filter matches any port.
<cmp> defines how to compare the specified <value> to the actual destination port. This valuecan be <, =, >, or !.
<value> can be a name or a number. Possible names and numbers are ftp-data (20), ftp (21),telnet(23), nameserver(42), domain(53), tftp(69), gopher(70), finger(79),www(80), kerberos(88), hostname (101), nntp (119), ntp(123), exec (512), login (513), cmd (514), and talk (517).
srcport <cmp> <value>
When set to 1, specifies that the filter matches a packet only if a TCP session is already established.This argument is valid only when <proto> is set to tcp (6).
<est>
"RADIUS Attribute 242 IP Data Filter Entries" shows four attribute 242 IP data filter entries.
RADIUS Attribute 242 IP Data Filter Entries
Ascend-Data-Filter=”ip in drop”Ascend-Data-Filter=”ip out forward tcp”Ascend-Data-Filter=”ip out forward tcp dstip 10.0.200.3/16 srcip 10.0.200.25/16dstport!=telnet”Ascend-Data-Filter=”ip out forward tcp dstip 10.0.200.3/16 srcip 10.0.200.25/16 icmp”
How to Configure Template ACLsIf ACLs are configured using RADIUS Attribute 242 or VSA Cisco-AVPairs, template ACLs are enabled bydefault.
Security Configuration Guide: Access Control Lists, Cisco IOS XE Everest 16.5163
Configuring Template ACLsHow to Configure Template ACLs

Configuring the Maximum Size of Template ACLsBy default, template ACL status is limited to ACLs with 100 or fewer rules. However, you can set this limitto a lower number. To set the maximum number of rules that an ACL may have in order to be considered asa template ACL, perform the steps in this section:
SUMMARY STEPS
1. enable2. configure terminal3. access-list template number4. exit5. show access-list template summary
DETAILED STEPS
PurposeCommand or Action
Enables privileged EXEC mode.enableStep 1
Example: • Enter your password if prompted.
Router> enable
Enters global configuration mode.configure terminal
Example:
Step 2
Router# configure terminal
Enables template ACL processing.access-list template numberStep 3
Example: Only ACLs with the specified number of rules (or fewerrules) will be considered for template status.
Router(config)# access-list template 50
Exits global configuration mode.exit
Example:
Step 4
Router(config)# exit
(Optional) Displays summary information about templateACLs.
show access-list template summary
Example:
Step 5
Router# show access-list template summary
Troubleshooting TipsThe following commands can be used to troubleshoot the Template ACL feature:
• show access-list template
• show platform hardware qfp active classification class-group-manager class-group client acl all
Security Configuration Guide: Access Control Lists, Cisco IOS XE Everest 16.5164
Configuring Template ACLsConfiguring the Maximum Size of Template ACLs

• show platform hardware qfp active feature acl {control | node acl-node-id}
• show platform software access-list
Configuration Examples for Template ACLs
Example Maximum Size of Template ACLsThe following example shows how to set the maximum number of rules that an ACL may have in order tobe considered for template status to 50. Only ACLs whose number of rules is the same as or smaller than 50are considered for template status.
Router> enable
Router# configure terminal
Router(config)# access-list template 50Router(config)# exit
Example Showing ACL Template Summary InformationThe following example shows how to view summary information for all ACLs in the system. The output fromthe command includes the following information:
• Maximum number of rules per template ACL
• Number of discovered active templates
• Number of ACLs replaced by those templates
• Number of elements in the Red-Black tree
Router# show access-list template summaryMaximum rules per template ACL = 100Templates active = 9Number of ACLs those templates represent = 14769Number of tree elements = 13
Red-Black Tree Elements
The number of tree elements is the number of elements in the Red-Black tree. Each template has 1 uniqueentry in the Red-Black tree. The system calculates a cyclic redundancy check (CRC) over each ACL maskingout the peer IP address and puts the CRC into the Red-Black tree. For example:
Your system has 9 templates (representing 14769 ACLs), and 13 tree elements. If each template has only 1unique entry in the Red-Black tree, then the additional 4 tree elements means that your system contains 4per-user ACLs that are not templated.
Security Configuration Guide: Access Control Lists, Cisco IOS XE Everest 16.5165
Configuring Template ACLsConfiguration Examples for Template ACLs

Example Showing ACL Template Tree InformationThe following example shows how to view Red-Black tree information for all ACLs in the system.
The output from the command includes the following information:
• Name of the ACL on the Red-Black tree
• The original CRC32 value
• Number of users of the ACL
• Calculated CRC32 value
Router# show access-list template treeACL name OrigCRC Count CalcCRC4Temp_1073741891108 59DAB725 98 59DAB725
Additional ReferencesRelated Documents
Document TitleRelated Topic
Cisco IOS Master Command List, All ReleasesCisco IOS commands
Cisco IOS Security Command ReferenceIP access list commands
“Creating an IP Access List and Applying It to an Interface”Configuring IP access lists
Technical Assistance
LinkDescription
http://www.cisco.com/cisco/web/support/index.htmlTheCisco Support andDocumentationwebsite providesonline resources to download documentation, software,and tools. Use these resources to install and configurethe software and to troubleshoot and resolve technicalissues with Cisco products and technologies. Access tomost tools on the Cisco Support and Documentationwebsite requires a Cisco.com user ID and password.
Feature Information for ACL TemplateThe following table provides release information about the feature or features described in this module. Thistable lists only the software release that introduced support for a given feature in a given software releasetrain. Unless noted otherwise, subsequent releases of that software release train also support that feature.
Use Cisco Feature Navigator to find information about platform support and Cisco software image support.To access Cisco Feature Navigator, go to www.cisco.com/go/cfn. An account on Cisco.com is not required.
Security Configuration Guide: Access Control Lists, Cisco IOS XE Everest 16.5166
Configuring Template ACLsExample Showing ACL Template Tree Information
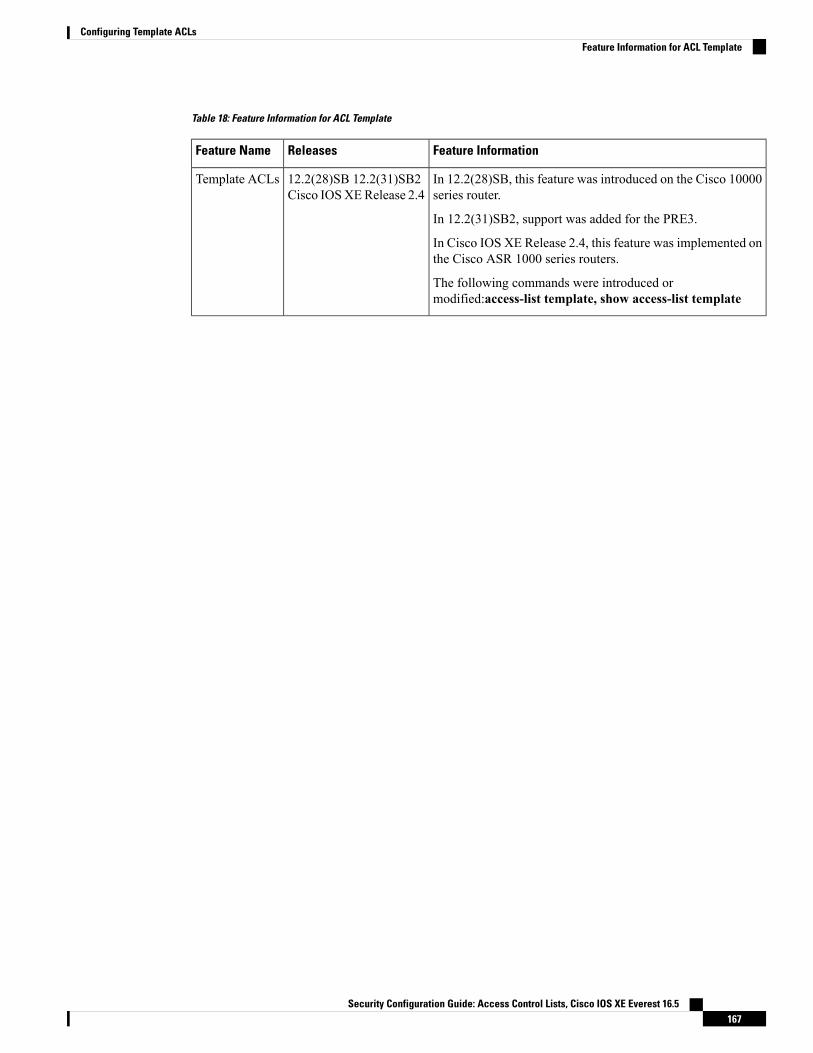
Table 18: Feature Information for ACL Template
Feature InformationReleasesFeature Name
In 12.2(28)SB, this feature was introduced on the Cisco 10000series router.
In 12.2(31)SB2, support was added for the PRE3.
In Cisco IOS XE Release 2.4, this feature was implemented onthe Cisco ASR 1000 series routers.
The following commands were introduced ormodified:access-list template, show access-list template
12.2(28)SB 12.2(31)SB2Cisco IOSXERelease 2.4
Template ACLs
Security Configuration Guide: Access Control Lists, Cisco IOS XE Everest 16.5167
Configuring Template ACLsFeature Information for ACL Template

Security Configuration Guide: Access Control Lists, Cisco IOS XE Everest 16.5168
Configuring Template ACLsFeature Information for ACL Template

C H A P T E R 18IPv6 Template ACL
When user profiles are configured using vendor-specific attribute (VSA) Cisco AV-pairs, similar per-userIPv6 ACLs may be replaced by a single template ACL. That is, one ACL represents many similar ACLs. Byusing IPv6 template ACLs, you can increase the total number of per-user ACLs while minimizing the memoryand Ternary Content Addressable Memory (TCAM) resources needed to support the ACLs.
The IPv6 Template ACL feature can create templates using the following ACL fields:
• IPv6 source and destination addresses
• TCP and UDP, including all associated ports (0 through 65535)
• ICMP neighbor discovery advertisements and solicitations
• IPv6 DSCP with specified DSCP values
ACL names are dynamically generated by this feature; for example:
• 6Temp_#152875854573--Example of a dynamically generated template name for a template ACL parent
• Virtual-Access2.32135#152875854573--Example of a child ACL or an ACL that has not yet been madepart of a template.
• Finding Feature Information, on page 169• Information About IPv6 ACL—Template ACL, on page 170• How to Enable IPv6 ACL—Template ACL, on page 170• Configuration Examples for IPv6 ACL—Template ACL, on page 171• Additional References, on page 172• Feature Information for IPv6 ACL—Template ACL, on page 173
Finding Feature InformationYour software release may not support all the features documented in this module. For the latest caveats andfeature information, see Bug Search Tool and the release notes for your platform and software release. Tofind information about the features documented in this module, and to see a list of the releases in which eachfeature is supported, see the feature information table.
Use Cisco Feature Navigator to find information about platform support and Cisco software image support.To access Cisco Feature Navigator, go to www.cisco.com/go/cfn. An account on Cisco.com is not required.
Security Configuration Guide: Access Control Lists, Cisco IOS XE Everest 16.5169

Information About IPv6 ACL—Template ACL
IPv6 Template ACLWhen user profiles are configured using vendor-specific attribute (VSA) Cisco AV-pairs, similar per-userIPv6 ACLs may be replaced by a single template ACL. That is, one ACL represents many similar ACLs. Byusing IPv6 template ACLs, you can increase the total number of per-user ACLs while minimizing the memoryand Ternary Content Addressable Memory (TCAM) resources needed to support the ACLs.
The IPv6 Template ACL feature can create templates using the following ACL fields:
• IPv6 source and destination addresses
• TCP and UDP, including all associated ports (0 through 65535)
• ICMP neighbor discovery advertisements and solicitations
• IPv6 DSCP with specified DSCP values
ACL names are dynamically generated by this feature; for example:
• 6Temp_#152875854573--Example of a dynamically generated template name for a template ACL parent
• Virtual-Access2.32135#152875854573--Example of a child ACL or an ACL that has not yet been madepart of a template.
How to Enable IPv6 ACL—Template ACL
Enabling IPv6 Template Processing
SUMMARY STEPS
1. enable2. configure terminal3. access-list template [number-of-rules]4. exit5. show access-list template {summary | aclname | exceed number | tree}
DETAILED STEPS
PurposeCommand or Action
Enables privileged EXEC mode.enableStep 1
Example: • Enter your password if prompted.
Router> enable
Security Configuration Guide: Access Control Lists, Cisco IOS XE Everest 16.5170
IPv6 Template ACLInformation About IPv6 ACL—Template ACL

PurposeCommand or Action
Enters global configuration mode.configure terminal
Example:
Step 2
Router# configure terminal
Enables template ACL processing.access-list template [number-of-rules]Step 3
Example: • The example in this task specifies that ACLs with 50or fewer rules will be considered for template ACLstatus.Router(config)# access-list template 50
• The number-of-rules argument default is 100.
Exits global configuration mode and places the router inprivileged EXEC mode.
exit
Example:
Step 4
Router(config)# exit
Displays information about ACL templates.show access-list template {summary | aclname | exceednumber | tree}
Step 5
Example:
Router# show access-list template summary
Configuration Examples for IPv6 ACL—Template ACL
Example: IPv6 Template ACL ProcessingIn this example, the contents of ACL1 and ACL2 are the same, but the names are different:
ipv6 access-list extended ACL1 (PeerIP: 2001:1::1/64)permit igmp any 2003:1::1/64permit icmp 2002:5::B/64 anypermit udp any host 2004:1::5permit udp any host 2002:2BC::apermit icmp host 2001:BC::7 host 2003:3::7ipv6 access-list extended ACL2 (PeerIP: 2007:2::7/64)permit igmp any 2003:1::1/64permit icmp 2002:5::B/64 anypermit udp any host 2004:1::5permit udp any host 2002:2BC::apermit icmp host 2001:BC::7 host 2003:3::7
The template for these ACLs is as follows:
ipv6 access-list extended Template_1permit igmp any 2003:1::1/64permit icmp 2002:5::B/64 anypermit udp any host 2004:1::5
Security Configuration Guide: Access Control Lists, Cisco IOS XE Everest 16.5171
IPv6 Template ACLConfiguration Examples for IPv6 ACL—Template ACL

permit udp any host 2002:2BC::apermit icmp host 2001:BC::7 host 2003:3::7
Additional ReferencesRelated Documents
Document TitleRelated Topic
IPv6 Configuration GuideIPv6 addressing and connectivity
Cisco IOS Master Commands List,All Releases
Cisco IOS commands
Cisco IOS IPv6 CommandReference
IPv6 commands
Cisco IOS IPv6 Feature MappingCisco IOS IPv6 features
Standards and RFCs
TitleStandard/RFC
IPv6RFCs
RFCs forIPv6
MIBs
MIBs LinkMIB
To locate and download MIBs for selected platforms, Cisco IOS releases, and feature sets, use CiscoMIB Locator found at the following URL:
http://www.cisco.com/go/mibs
Technical Assistance
LinkDescription
http://www.cisco.com/cisco/web/support/index.htmlTheCisco Support andDocumentationwebsite providesonline resources to download documentation, software,and tools. Use these resources to install and configurethe software and to troubleshoot and resolve technicalissues with Cisco products and technologies. Access tomost tools on the Cisco Support and Documentationwebsite requires a Cisco.com user ID and password.
Security Configuration Guide: Access Control Lists, Cisco IOS XE Everest 16.5172
IPv6 Template ACLAdditional References

Feature Information for IPv6 ACL—Template ACLTable 19: Feature Information for IPv6 ACL—Template ACL
Feature InformationReleasesFeature Name
This feature allows similar per-userIPv6 ACLs to be replaced by asingle template ACL.
The following commands wereintroduced or modified: access-listtemplate, show access-listtemplate.
Cisco IOS XE Release 3.2SIPv6 ACL—Template ACL
Security Configuration Guide: Access Control Lists, Cisco IOS XE Everest 16.5173
IPv6 Template ACLFeature Information for IPv6 ACL—Template ACL

Security Configuration Guide: Access Control Lists, Cisco IOS XE Everest 16.5174
IPv6 Template ACLFeature Information for IPv6 ACL—Template ACL

C H A P T E R 19IPv4 ACL Chaining Support
ACL Chaining, also known as Multi-Access Control List, allows you to split access control lists (ACLs). Thismodule describes how with the IPv4 ACL Chaining Support feature, you can explicitly split ACLs intocommon and user-specific ACLs and bind both ACLs to a target for traffic filtering on a device. In this way,the common ACLs in Ternary Content Addressable Memory (TCAM) are shared by multiple targets, therebyreducing the resource usage.
• Finding Feature Information, on page 175• Restrictions for IPv4 ACL Chaining Support, on page 175• Information About IPv4 ACL Chaining Support, on page 176• How to Configure IPv4 ACL Chaining Support, on page 176• Configuration Examples for IPv4 ACL Chaining Support, on page 177• Additional References for IPv4 ACL Chaining Support, on page 178• Feature Information for IPv4 ACL Chaining Support, on page 179
Finding Feature InformationYour software release may not support all the features documented in this module. For the latest caveats andfeature information, see Bug Search Tool and the release notes for your platform and software release. Tofind information about the features documented in this module, and to see a list of the releases in which eachfeature is supported, see the feature information table.
Use Cisco Feature Navigator to find information about platform support and Cisco software image support.To access Cisco Feature Navigator, go to www.cisco.com/go/cfn. An account on Cisco.com is not required.
Restrictions for IPv4 ACL Chaining Support• A single access control List (ACL) cannot be used for both common and regular ACLs for the sametarget in the same direction.
• ACL chaining applies to only security ACLs. It is not supported for feature policies, such as Quality ofService (QoS), Firewall Services Module (FW) and Policy Based Routing (PBR).
• Per-target statistics are not supported for common ACLs.
Security Configuration Guide: Access Control Lists, Cisco IOS XE Everest 16.5175

Information About IPv4 ACL Chaining Support
ACL Chaining OverviewThe packet filter process supports only a single Access control list (ACL) to be applied per direction and perprotocol on an interface. This leads to manageability and scalability issues if there are common ACL entriesneeded on many interfaces. Duplicate Access control entries (ACEs) are configured for all those interfaces,and any modification to the common ACEs needs to be performed for all ACLs.
A typical ACL on the edge box for an Internet Service Provider (ISP) has two sets of ACEs:
• Common ISP specific ACEs
• Customer/interface specific ACEs
The purpose of these address blocks is to deny access to ISP's protected infrastructure networks andanti-spoofing protection by allowing only customer source address blocks. This results in configuring uniqueACL per interface and most of the ACEs being common across all ACLs on a device. ACL provisioning andmodification is very cumbersome, hence, any changes to the ACE impacts every target.
IPv4 ACL Chaining SupportIPv4 ACL Chaining Support allows you to split the Access control list (ACL) into common andcustomer-specific ACLs and attach both ACLs to a common session. In this way, only one copy of the commonACL is attached to Ternary Content Addressable Memory (TCAM) and shared by all users, thereby makingit easier to maintain the common ACEs.
The IPv4 ACL Chaining feature allows two IPV4 ACLs to be active on an interface per direction:
• Common
• Regular
• Common and Regular
If you configure both common and regular ACLs on an interface, the common ACL is considered over aregular ACL.
Note
How to Configure IPv4 ACL Chaining SupportACL chaining is supported by extending the ip traffic filter command.
The ip traffic filter command is not additive. When you use this command, it replaces earlier instances ofthe command.
For more information, refer to the IPv6 ACL Chaining with a Common ACL section in the SecurityConfiguration Guide: Access Control Lists Configuration Guide.
Security Configuration Guide: Access Control Lists, Cisco IOS XE Everest 16.5176
IPv4 ACL Chaining SupportInformation About IPv4 ACL Chaining Support

Configuring an Interface to Accept Common ACLPerform this task to configure the interface to accept a common Access control list (ACL) along with aninterface-specific ACL:
SUMMARY STEPS
1. enable2. configure terminal3. interface type number}4. ip access-group {common {common-access-list-name {regular-access-list | acl}}{in | out}}5. end
DETAILED STEPS
PurposeCommand or Action
Enables privileged EXEC mode. Enter your password ifprompted.
enable
Example:
Step 1
Device> enable
Enters global configuration mode.configure terminal
Example:
Step 2
Device# configure terminal
Configures an interface (in this case a gigabitethernetinterface) and enters the interface configuration mode.
interface type number}
Example:
Step 3
Device(config)# interface gigabitethernet 0/0/0
Configures the interface to accept a common ACL alongwith the interface-specific ACL.
ip access-group {common {common-access-list-name{regular-access-list | acl}}{in | out}}
Example:
Step 4
Device(config)# ipv4 access-group common acl-p acl1in
(Optional) Exits the configuration mode and returns toprivileged EXEC mode.
end
Example:
Step 5
Device(config-if)# end
Configuration Examples for IPv4 ACL Chaining SupportThis section provides configuration examples of Common Access Control List (ACL).
Security Configuration Guide: Access Control Lists, Cisco IOS XE Everest 16.5177
IPv4 ACL Chaining SupportConfiguring an Interface to Accept Common ACL

Example: Configuring an Interface to Accept a Common ACL
This example shows how to replace an Access Control List (ACL) configured on the interface withoutexplicitly deleting the ACL:interface gigabitethernet 0/0/0ipv4 access-group common C_acl ACL1 inendreplace interface acl ACL1 by ACL2interface gigabitethernet 0/0/0ipv4 access-group common C_acl ACL2 inend
This example shows how commonACL cannot be replaced on interfaces without deleting it explicitlyfrom the interface:interface gigabitethernet 0/0/0ipv4 access-group common C_acl1 ACL1 inendchange the common acl to C_acl2interface gigabitethernet 0/0/0no ipv4 access-group common C_acl1 ACL1 inendinterface gigabitethernet 0/0/0ipv4 access-group common C_acl2 ACL1 inend
When reconfiguring a common ACL, you must ensure that no other interface on the line card isattached to the common ACL.
Note
If both common ACL and interface ACL are attached to an interface and only one of the above isreconfigured on the interface, then the other is removed automatically.
Note
This example shows how the interface ACL is removed:interface gigabitethernet 0/0/0ipv4 access-group common C_acl1 ACL1 inend
Additional References for IPv4 ACL Chaining SupportRelated Documents
Document TitleRelated Topic
IPv6 ACL ChainingSupport
Security Configuration Guide: Access Control Lists, Cisco IOS XE Everest 16.5178
IPv4 ACL Chaining SupportExample: Configuring an Interface to Accept a Common ACL

Document TitleRelated Topic
Cisco IOS Master Command List, All ReleasesCisco IOS commands
• Cisco IOS Security Command Reference: Commands Ato C
• Cisco IOS Security Command Reference: Commands Dto L
• Cisco IOS Security Command Reference: CommandsMto R
• Cisco IOS Security Command Reference: Commands Sto Z
Security commands
Technical Assistance
LinkDescription
http://www.cisco.com/supportThe Cisco Support website provides extensive online resources, includingdocumentation and tools for troubleshooting and resolving technical issueswith Cisco products and technologies.
To receive security and technical information about your products, you cansubscribe to various services, such as the Product Alert Tool (accessed fromField Notices), the Cisco Technical Services Newsletter, and Really SimpleSyndication (RSS) Feeds.
Access to most tools on the Cisco Support website requires a Cisco.com userID and password.
Feature Information for IPv4 ACL Chaining SupportThe following table provides release information about the feature or features described in this module. Thistable lists only the software release that introduced support for a given feature in a given software releasetrain. Unless noted otherwise, subsequent releases of that software release train also support that feature.
Use Cisco Feature Navigator to find information about platform support and Cisco software image support.To access Cisco Feature Navigator, go to www.cisco.com/go/cfn. An account on Cisco.com is not required.
Security Configuration Guide: Access Control Lists, Cisco IOS XE Everest 16.5179
IPv4 ACL Chaining SupportFeature Information for IPv4 ACL Chaining Support

Table 20: Feature Information for IPv4 ACL Chaining Support
Feature InformationReleasesFeature Name
The IPv4 ACL Chaining Supportfeature describes how you canexplicitly split Access control lists(ACLs) into common anduser-specific ACLs and bind bothACLs to a session for trafficfiltering on a device. In this way,the common ACLs in TernaryContent Addressable Memory(TCAM) are shared by multipletargets, thereby reducing theresource usage.
The following commands wereintroduced or modified: ipaccess-group command.
Cisco IOS XE Release 3.11S
Cisco IOS XE Release 3.6E
IPv4 ACL Chaining Support
Security Configuration Guide: Access Control Lists, Cisco IOS XE Everest 16.5180
IPv4 ACL Chaining SupportFeature Information for IPv4 ACL Chaining Support

C H A P T E R 20IPv6 ACL Chaining with a Common ACL
ACL Chaining, also known as Multi-Access Control List (ACL), allows you to split ACLs. This documentdescribes how with the IPv6 ACL Chaining Support feature, you can explicitly split ACLs into common anduser-specific ACLs and bind both ACLs to a target for traffic filtering on a device. In this way, the commonACLs in Ternary Content Addressable Memory (TCAM) are shared by multiple targets, thereby reducing theresource usage.
• Finding Feature Information, on page 181• Information About IPv6 ACL Chaining with a Common ACL, on page 181• How to Configure IPv6 ACL Chaining with a Common ACL, on page 182• Configuration Examples for IPv6 ACL Chaining with a Common ACL, on page 183• Additional References for IPv6 ACL Chaining with a Common ACL, on page 185• Feature Information for IPv6 ACL Chaining with a Common ACL, on page 185
Finding Feature InformationYour software release may not support all the features documented in this module. For the latest caveats andfeature information, see Bug Search Tool and the release notes for your platform and software release. Tofind information about the features documented in this module, and to see a list of the releases in which eachfeature is supported, see the feature information table.
Use Cisco Feature Navigator to find information about platform support and Cisco software image support.To access Cisco Feature Navigator, go to www.cisco.com/go/cfn. An account on Cisco.com is not required.
Information About IPv6 ACL Chaining with a Common ACL
ACL Chaining OverviewThe packet filter process supports only a single Access control list (ACL) to be applied per direction and perprotocol on an interface. This leads to manageability and scalability issues if there are common ACL entriesneeded on many interfaces. Duplicate Access control entries (ACEs) are configured for all those interfaces,and any modification to the common ACEs needs to be performed for all ACLs.
A typical ACL on the edge box for an Internet Service Provider (ISP) has two sets of ACEs:
• Common ISP specific ACEs
Security Configuration Guide: Access Control Lists, Cisco IOS XE Everest 16.5181

• Customer/interface specific ACEs
The purpose of these address blocks is to deny access to ISP's protected infrastructure networks andanti-spoofing protection by allowing only customer source address blocks. This results in configuring uniqueACL per interface and most of the ACEs being common across all ACLs on a device. ACL provisioning andmodification is very cumbersome, hence, any changes to the ACE impacts every target.
IPv6 ACL Chaining with a Common ACLWith IPv6 ACL Chaining, you can configure a traffic filter with the following:
• Common ACL
• Specific ACL
• Common and Specific ACL
Each Access control list (ACL) is matched in a sequence. For example, if you have specified both the ACLs- a common and a specific ACL, the packet is first matched against the common ACL; if a match is not found,it is then matched against the specific ACL.
Any IPv6 ACL may be configured on a traffic filter as a common or specific ACL. However, the same ACLcannot be specified on the same traffic filter as both common and specific.
Note
How to Configure IPv6 ACL Chaining with a Common ACLBefore you begin
IPv6 ACL chaining is configured on an interface using an extension of the existing IPv6 traffic-filter command:ipv6 traffic-filter [common common-acl] [specific-acl] [ in | out]
You may choose to configure either of the following:Note
• Only a common ACL. For example: ipv6 traffic-filter common common-acl• Only a specific ACL. For example: ipv6 traffic-filter common-acl• Both ACLs. For example: ipv6 traffic-filter common common-acl specific-acl
The ipv6 traffic-filter command is not additive. When you use the command, it replaces earlier instances ofthe command. For example, the command sequence: ipv6 traffic-filter [common common-acl] [specific-acl]in ipv6 traffic-filter [specific-acl] in binds a common ACL to the traffic filter, removes the common ACLand then binds a specific ACL.
Configuring the IPv6 ACL to an InterfacePerform this task to configure the interface to accept a common access control list (ACL) along with aninterface-specific ACL:
Security Configuration Guide: Access Control Lists, Cisco IOS XE Everest 16.5182
IPv6 ACL Chaining with a Common ACLIPv6 ACL Chaining with a Common ACL

SUMMARY STEPS
1. enable2. configure terminal3. interface type number}4. ipv6 traffic filter {common-access-list-name {in | out}}5. end
DETAILED STEPS
PurposeCommand or Action
Enables privileged EXEC mode. Enter your password ifprompted.
enable
Example:
Step 1
Device> enable
Enters global configuration mode.configure terminal
Example:
Step 2
Device# configure terminal
Specifies the interface type and number, and enters interfaceconfiguration mode.
interface type number}
Example:
Step 3
Device(config)# interface gigabitethernet 0/0/0
Applies the specified IPv6 access list to the interfacespecified in the previous step.
ipv6 traffic filter {common-access-list-name {in | out}}
Example:
Step 4
Device(config)# ipv6 traffic-filter outbound out
(Optional) Exits the configuration mode and returns toprivileged EXEC mode.
end
Example:
Step 5
Device(config-if)# end
Configuration Examples for IPv6 ACL Chaining with a CommonACL
You may configure the following combinations in no particular order:
• A common ACL, for example: ipv6 traffic-filter common common-acl in• A specific ACL, for example: ipv6 traffic-filter specific-acl in• Both ACLs, for example: ipv6 traffic-filter common common-acl specific-acl in
Security Configuration Guide: Access Control Lists, Cisco IOS XE Everest 16.5183
IPv6 ACL Chaining with a Common ACLConfiguration Examples for IPv6 ACL Chaining with a Common ACL

Example: Configuring an Interface to Accept a Common ACL
This example shows how to replace an access control list (ACL) configured on the interface withoutexplicitly deleting the ACL:interface gigabitethernet 0/0/0ipv6 access-group common C_acl ACL1 inendreplace interface acl ACL1 by ACL2interface gigabitethernet 0/0/0ipv6 access-group common C_acl ACL2 inend
This example shows how to delete a common ACL from an interface. A common ACL cannot bereplaced on interfaces without deleting it explicitly from the interface.interface gigabitethernet 0/0/0ipv6 access-group common C_acl1 ACL1 inendchange the common acl to C_acl2interface gigabitethernet 0/0/0no ipv6 access-group common C_acl1 ACL1 inendinterface gigabitethernet 0/0/0ipv6 access-group common C_acl2 ACL1 inend
When reconfiguring a common ACL, you must ensure that no other interface on the line card isattached to the common ACL.
Note
If both common ACL and interface ACL are attached to an interface and only one of the above isreconfigured on the interface, then the other is removed automatically.
Note
This example shows how to remove the interface ACL:interface gigabitethernet 0/0/0ipv6 access-group common C_acl1 ACL1 inend
Security Configuration Guide: Access Control Lists, Cisco IOS XE Everest 16.5184
IPv6 ACL Chaining with a Common ACLExample: Configuring an Interface to Accept a Common ACL

Additional References for IPv6 ACL Chaining with a CommonACL
Related Documents
Document TitleRelated Topic
Security Configuration Guide: Access Control Lists, Cisco IOS XE Release 3SIPv4 ACL ChainingSupport
Cisco IOS Master Commands List, All ReleasesCisco IOS commands
• Cisco IOS Security Command Reference: Commands A to C
• Cisco IOS Security Command Reference: Commands D to L
• Cisco IOS Security Command Reference: Commands M to R
• Cisco IOS Security Command Reference: Commands S to Z
Security commands
Technical Assistance
LinkDescription
http://www.cisco.com/supportThe Cisco Support website provides extensive online resources, includingdocumentation and tools for troubleshooting and resolving technical issueswith Cisco products and technologies.
To receive security and technical information about your products, you cansubscribe to various services, such as the Product Alert Tool (accessed fromField Notices), the Cisco Technical Services Newsletter, and Really SimpleSyndication (RSS) Feeds.
Access to most tools on the Cisco Support website requires a Cisco.com userID and password.
Feature Information for IPv6 ACL Chaining with a Common ACLThe following table provides release information about the feature or features described in this module. Thistable lists only the software release that introduced support for a given feature in a given software releasetrain. Unless noted otherwise, subsequent releases of that software release train also support that feature.
Use Cisco Feature Navigator to find information about platform support and Cisco software image support.To access Cisco Feature Navigator, go to www.cisco.com/go/cfn. An account on Cisco.com is not required.
Security Configuration Guide: Access Control Lists, Cisco IOS XE Everest 16.5185
IPv6 ACL Chaining with a Common ACLAdditional References for IPv6 ACL Chaining with a Common ACL

Table 21: Feature Information for IPv6 ACL Chaining with a Common ACL
Feature InformationReleasesFeature Name
The ACL Chaining feature, alsoknown as Multi-ACLs, allows youto explicitly split IPv6 traffic filteraccess control lists (ACLs) intocommon and per-session ACLs. Inthis way, the common accesscontrol entries (ACEs) that are usedreduces resource usage of eachACL entry per session in theTernary Content AddressableMemory (TCAM).
The following commands wereintroduced or modified: ipaccess-group common.
Cisco IOS XE Release 3.11S
Cisco IOS XE Release 3.6E
IPv6 ACL Chaining with aCommon ACL
Security Configuration Guide: Access Control Lists, Cisco IOS XE Everest 16.5186
IPv6 ACL Chaining with a Common ACLFeature Information for IPv6 ACL Chaining with a Common ACL

C H A P T E R 21IPv6 ACL Extensions for Hop by Hop Filtering
The IPv6 ACL Extensions for Hop by Hop Filtering feature allows you to control IPv6 traffic that mightcontain hop-by-hop extension headers. You can configure an access control list (ACL) to deny all hop-by-hoptraffic or to selectively permit traffic based on protocol.
• Finding Feature Information, on page 187• Information About IPv6 ACL Extensions for Hop by Hop Filtering, on page 187• How to Configure IPv6 ACL Extensions for Hop by Hop Filtering, on page 188• Configuration Example for IPv6 ACL Extensions for Hop by Hop Filtering, on page 189• Additional References, on page 190• Feature Information for IPv6 ACL Extensions for Hop by Hop Filtering, on page 191
Finding Feature InformationYour software release may not support all the features documented in this module. For the latest caveats andfeature information, see Bug Search Tool and the release notes for your platform and software release. Tofind information about the features documented in this module, and to see a list of the releases in which eachfeature is supported, see the feature information table.
Use Cisco Feature Navigator to find information about platform support and Cisco software image support.To access Cisco Feature Navigator, go to www.cisco.com/go/cfn. An account on Cisco.com is not required.
Information About IPv6 ACL Extensions for Hop by Hop Filtering
ACLs and Traffic ForwardingIPv6 access control lists (ACLs) determine what traffic is blocked and what traffic is forwarded at deviceinterfaces. ACLs allow filtering based on source and destination addresses, inbound and outbound to a specificinterface. Use the ipv6 access-list command to define an IPv6 ACL, and the deny and permit commandsto configure its conditions.
The IPv6 ACL Extensions for Hop by Hop Filtering feature implements RFC 2460 to support traffic filteringin any upper-layer protocol type.
Security Configuration Guide: Access Control Lists, Cisco IOS XE Everest 16.5187

How to Configure IPv6 ACL Extensions for Hop by Hop Filtering
Configuring IPv6 ACL Extensions for Hop by Hop Filtering
SUMMARY STEPS
1. enable2. configure terminal3. ipv6 access-list access-list-name4. permit protocol {source-ipv6-prefix/prefix-length | any | host source-ipv6-address | auth} [operator
[port-number]] {destination-ipv6-prefix/prefix-length | any | host destination-ipv6-address | auth} [operator[port-number]] [dest-option-type [header-number | header-type]] [dscp value] [flow-label value][fragments] [hbh] [log] [log-input] [mobility] [mobility-type [mh-number | mh-type]] [reflect name[timeout value]] [routing] [routing-type routing-number] [sequence value] [time-range name]
5. deny protocol {source-ipv6-prefix/prefix-length | any | host source-ipv6-address | auth} [operator[port-number]] {destination-ipv6-prefix/prefix-length | any | host destination-ipv6-address | auth}[operator [port-number]] [dest-option-type [header-number | header-type]] [dscp value] [flow-labelvalue] [fragments] [hbh] [log] [log-input] [mobility] [mobility-type [mh-number |mh-type]] [routing][routing-type routing-number] [sequence value] [time-range name] [undetermined-transport]
6. end
DETAILED STEPS
PurposeCommand or Action
Enables privileged EXEC mode.enableStep 1
Example: • Enter your password if prompted.Device> enable
Enters global configuration mode.configure terminal
Example:
Step 2
Device# configure terminal
Defines an IPv6 ACL and enters IPv6 access listconfiguration mode.
ipv6 access-list access-list-name
Example:
Step 3
Device(config)# ipv6 access-list hbh-acl
Sets permit conditions for the IPv6 ACL.permit protocol {source-ipv6-prefix/prefix-length | any |host source-ipv6-address | auth} [operator [port-number]]
Step 4
{destination-ipv6-prefix/prefix-length | any | hostdestination-ipv6-address | auth} [operator [port-number]][dest-option-type [header-number | header-type]] [dscpvalue] [flow-label value] [fragments] [hbh] [log][log-input] [mobility] [mobility-type [mh-number |mh-type]] [reflect name [timeout value]] [routing]
Security Configuration Guide: Access Control Lists, Cisco IOS XE Everest 16.5188
IPv6 ACL Extensions for Hop by Hop FilteringHow to Configure IPv6 ACL Extensions for Hop by Hop Filtering

PurposeCommand or Action
[routing-type routing-number] [sequence value][time-range name]
Example:Device(config-ipv6-acl)# permit icmp any anydest-option-type
Sets deny conditions for the IPv6 ACL.deny protocol {source-ipv6-prefix/prefix-length | any |host source-ipv6-address | auth} [operator [port-number]]
Step 5
{destination-ipv6-prefix/prefix-length | any | hostdestination-ipv6-address | auth} [operator [port-number]][dest-option-type [header-number | header-type]] [dscpvalue] [flow-label value] [fragments] [hbh] [log][log-input] [mobility] [mobility-type [mh-number |mh-type]] [routing] [routing-type routing-number][sequence value] [time-range name][undetermined-transport]
Example:Device(config-ipv6-acl)# deny icmp any anydest-option-type
Returns to privileged EXEC configuration mode.end
Example:
Step 6
Device (config-ipv6-acl)# end
Configuration Example for IPv6 ACL Extensions for Hop by HopFiltering
Example: IPv6 ACL Extensions for Hop by Hop Filtering
Device(config)# ipv6 access-list hbh_aclDevice(config-ipv6-acl)# permit tcp any any hbhDevice(config-ipv6-acl)# permit tcp any anyDevice(config-ipv6-acl)# permit udp any anyDevice(config-ipv6-acl)# permit udp any any hbhDevice(config-ipv6-acl)# permit hbh any anyDevice(config-ipv6-acl)# permit any anyDevice(config-ipv6-acl)# hardware statisticsDevice(config-ipv6-acl)# exit
! Assign an IP address and add the ACL on the interface.
Device(config)# interface FastEthernet3/1Device(config-if)# ipv6 address 1001::1/64Device(config-if)# ipv6 traffic-filter hbh_acl inDevice(config-if)# exitDevice(config)# exit
Security Configuration Guide: Access Control Lists, Cisco IOS XE Everest 16.5189
IPv6 ACL Extensions for Hop by Hop FilteringConfiguration Example for IPv6 ACL Extensions for Hop by Hop Filtering

Device# clear countersClear "show interface" counters on all interfaces [confirm]Device#
! Verify the configurations.
Device# show running-config interface FastEthernet3/1
Building configuration...
Current configuration : 114 bytes!interface FastEthernet3/1no switchportipv6 address 1001::1/64ipv6 traffic-filter hbh_aclend
Additional ReferencesRelated Documents
Document TitleRelated Topic
IPv6 Configuration GuideIPv6 addressing and connectivity
Cisco IOS Master Commands List,All Releases
Cisco IOS commands
Cisco IOS IPv6 CommandReference
IPv6 commands
Cisco IOS IPv6 Feature MappingCisco IOS IPv6 features
Standards and RFCs
TitleStandard/RFC
IPv6RFCs
RFCs forIPv6
MIBs
MIBs LinkMIB
To locate and download MIBs for selected platforms, Cisco IOS releases, and feature sets, use CiscoMIB Locator found at the following URL:
http://www.cisco.com/go/mibs
Security Configuration Guide: Access Control Lists, Cisco IOS XE Everest 16.5190
IPv6 ACL Extensions for Hop by Hop FilteringAdditional References

Technical Assistance
LinkDescription
http://www.cisco.com/cisco/web/support/index.htmlTheCisco Support andDocumentationwebsite providesonline resources to download documentation, software,and tools. Use these resources to install and configurethe software and to troubleshoot and resolve technicalissues with Cisco products and technologies. Access tomost tools on the Cisco Support and Documentationwebsite requires a Cisco.com user ID and password.
Feature Information for IPv6 ACL Extensions for Hop by HopFiltering
The following table provides release information about the feature or features described in this module. Thistable lists only the software release that introduced support for a given feature in a given software releasetrain. Unless noted otherwise, subsequent releases of that software release train also support that feature.
Use Cisco Feature Navigator to find information about platform support and Cisco software image support.To access Cisco Feature Navigator, go to www.cisco.com/go/cfn. An account on Cisco.com is not required.
Table 22: Feature Information for IPv6 ACL Extensions for Hop by Hop Filtering
Feature InformationReleasesFeature Name
Allows you to control IPv6 trafficthat might contain hop-by-hopextension headers.
The following commands wereintroduced or modified: deny(IPv6), permit (IPv6).
Cisco IOS Release XE 3.4S
Cisco IOS Release XE 3.5S
Cisco IOS Release XE 3.6S
Cisco IOS Release XE 3.3SG
IPv6 ACL Extensions for Hop byHop Filtering
Security Configuration Guide: Access Control Lists, Cisco IOS XE Everest 16.5191
IPv6 ACL Extensions for Hop by Hop FilteringFeature Information for IPv6 ACL Extensions for Hop by Hop Filtering

Security Configuration Guide: Access Control Lists, Cisco IOS XE Everest 16.5192
IPv6 ACL Extensions for Hop by Hop FilteringFeature Information for IPv6 ACL Extensions for Hop by Hop Filtering

C H A P T E R 22Security (ACL) Enhancements
The Security (ACL) enhancements features provides you the option to restrict the number of ACLs or acesor both that can be configured on a box. Restricting the number of ACLs or aces on a box enables you toprevent depletion or over usage of tcam space which can adversely affect the performance of a box.
• Restrictions , on page 193• Configuring Security (ACL) Enhancements, on page 194• Feature Information for Security (ACL) Enhancements, on page 194
Restrictions• The acl-ace-limit set is per ACL and is applicable to all the ACLs on the box.
• The acl-limit and acl-ace-limit are mutually exclusive to global-ace-limit. You cannot configureglobal-ace-limit when acl-limit and acl-ace-limt are configured and vice-versa.
The limit that will be set cannot be less than the existing number of ACLs/aces in the box.
• The ACL-limit or acl-ace-limit or global-ace-limit set will be applicable to the ACLs/aces createdinternally while device booting up.
• The ACLwith object group ace (ogace) expansion is not supported in this release, based on the customerrequirements this can be investigated further. Each ogace is counted as one ace.
• The ACL-limit or acl-ace-limit or global-ace-limit set is applicable to all static and dynamically createdACLs except for template ACLs.
• The configurable ACL-limit or acl-ace-limit or global-ace-limit doesn’t guarantee that the tcam spacewill never be overused or depleted. You must know the exact limit configurable that can be supportedon the box from prior testing in the lab.
• The assumption is that all the ACLs configured on the box will be applied to the interface, which affectsthe tcam space.
• When the box reaches max ACL-limit or acl-ace-limit or global-ace-limit configurable, and if any clienttries to create a dynamic ACL/aces then the request is rejected with the syslog error message. It is up toyou to handle the failure accordingly.
Security Configuration Guide: Access Control Lists, Cisco IOS XE Everest 16.5193

Configuring Security (ACL) EnhancementsTo configure ACL and ACE limits for V4 and V6:enableconfigure terminalaccess-list acl-limit 10access-list acl-ace-limit 12access-list global-ace-limit 14end
The acl-limit and acl-ace-limit are mutually exclusive to global-ace-limit.Note
Important Notes
• The max ACL limit range configurable is 1 to 216.
• The max ace limit range per ACL configurable is 1 to 232.
• The max global ace limit range configurable is 1 to 232.
• The acl-ace-limit set is applicable to all the ACLs that are already configured and will be configured.
Verifying Security (ACL) Enhancements Configuration
You can use the show access-list acl-limit command to display the number of ACLs and ACEs that areconfigured.Device# show access-list acl-limitMax ACLs configurable: 50Number of ACLs configured: 10
Max aces/ACL configurable: 10
Max aces configurable: 100Number of aces configured: 67
Feature Information for Security (ACL) EnhancementsThe following table provides release information about the feature or features described in this module. Thistable lists only the software release that introduced support for a given feature in a given software releasetrain. Unless noted otherwise, subsequent releases of that software release train also support that feature.
Use Cisco Feature Navigator to find information about platform support and Cisco software image support.To access Cisco Feature Navigator, go to www.cisco.com/go/cfn. An account on Cisco.com is not required.
Security Configuration Guide: Access Control Lists, Cisco IOS XE Everest 16.5194
Security (ACL) EnhancementsConfiguring Security (ACL) Enhancements

Table 23: Feature Information for Security (ACL) Enhancements
Feature InformationReleasesFeature Name
The Security (ACL) enhancementsfeatures provides you the option torestrict the number of ACLs or acesor both that can be configured on abox. Restricting the number ofACLs or aces on a box enables youto prevent depletion or over usageof tcam space which can adverselyaffect the performance of a box.
The following commands wereintroduced or modified:
acl-ace-limit,acl-limit,global-ace-limit.
Cisco IOS XE Everest 16.4.1Security (ACL) Enhancements
Security Configuration Guide: Access Control Lists, Cisco IOS XE Everest 16.5195
Security (ACL) EnhancementsFeature Information for Security (ACL) Enhancements

Security Configuration Guide: Access Control Lists, Cisco IOS XE Everest 16.5196
Security (ACL) EnhancementsFeature Information for Security (ACL) Enhancements