12 Editing – text change ____ - Word Macro Tools
91
12 Editing – text change ____ As you are reading the text, you do lots of minor editing actions: adding a comma, hyphenating two words, switching the order of words two (sic) etc. So, if you ‘watch’ yourself at work, you’ll see which of these actions you do most frequently, and therefore which, if speeded up, could (a) save you a little bit of time (and little bits all add up), and more importantly (b) enable you to make those minor changes automatically without taking your attention off the meaning of the text that you are reading; you’re then less likely to make that classic mistake of missing the second of two closely adjacent mistakes in the text. For these macros to be of most use, they have to be assigned to keystrokes, which means having to remember them. So that means (a) choosing keystrokes that you find memorable and/or (b) only assigning macros to things that you will use regularly. However, if you start by using just a few of these ‘mini -macros’, you will become confident with them, and then you can add some more, and gradually you will build up your speed and effectiveness in using them. Change case of next letter (This macro gets a mention in video: youtu.be/_ijsRqUR1fE ) This macro changes the case of the letter to the right of the cursor. If you were to put the cursor to the left of the ‘c’ of ‘changes’ and run the macro repeatedly, you would get: C|hanges CH|anges CHA|nges CHAN|ges etc. Now go back to the ‘C’ and do it again, and you’d get: c|HANges ch|ANges cha|Nges chan|ges. If you assign this macro to a suitable key shortcut, you can even hold the key down and auto-repeat if necessary. Sub ToggleNextCharCase() You could use this simpler, and more ‘obvious’ format of macro: Sub ToggleNextCharCase2() ' Version 28.09.09 ' Change case of the next character/selection Selection.MoveRight Unit:=wdCharacter, Count:=1, Extend:=wdExtend Selection.Range.Case = wdToggleCase Selection.MoveRight Unit:=wdCharacter, Count:=1 End Sub However, when you are using track changes, Word does not track these case changes! So there’s a version of the macro that includes both of the above with an option at the beginning so that you can use the same keystroke but, by changing the first line of the macro, you decide whether to have track changes showing (trackIt = True) or not showing (trackIt = False). In fact, this version also has another feature: if no text is selected then, as before, it changes the case of the next character; however, if some text is selected, it changes it all to lowercase or uppercase. This means that the one macro can do more than one job.
-
Upload
khangminh22 -
Category
Documents
-
view
0 -
download
0
Transcript of 12 Editing – text change ____ - Word Macro Tools

12 Editing – text change ____ As you are reading the text, you do lots of minor editing actions: adding a comma, hyphenating two words, switching
the order of words two (sic) etc. So, if you ‘watch’ yourself at work, you’ll see which of these actions you do most
frequently, and therefore which, if speeded up, could (a) save you a little bit of time (and little bits all add up), and
more importantly (b) enable you to make those minor changes automatically without taking your attention off the
meaning of the text that you are reading; you’re then less likely to make that classic mistake of missing the second of
two closely adjacent mistakes in the text.
For these macros to be of most use, they have to be assigned to keystrokes, which means having to remember them.
So that means (a) choosing keystrokes that you find memorable and/or (b) only assigning macros to things that you
will use regularly. However, if you start by using just a few of these ‘mini-macros’, you will become confident with
them, and then you can add some more, and gradually you will build up your speed and effectiveness in using them.
Change case of next letter (This macro gets a mention in video: youtu.be/_ijsRqUR1fE )
This macro changes the case of the letter to the right of the cursor. If you were to put the cursor to the left of the ‘c’ of
‘changes’ and run the macro repeatedly, you would get:
C|hanges
CH|anges
CHA|nges
CHAN|ges
etc.
Now go back to the ‘C’ and do it again, and you’d get:
c|HANges
ch|ANges
cha|Nges
chan|ges.
If you assign this macro to a suitable key shortcut, you can even hold the key down and auto-repeat if necessary.
Sub ToggleNextCharCase()
You could use this simpler, and more ‘obvious’ format of macro:
Sub ToggleNextCharCase2()
' Version 28.09.09
' Change case of the next character/selection
Selection.MoveRight Unit:=wdCharacter, Count:=1, Extend:=wdExtend
Selection.Range.Case = wdToggleCase
Selection.MoveRight Unit:=wdCharacter, Count:=1
End Sub
However, when you are using track changes, Word does not track these case changes!
So there’s a version of the macro that includes both of the above with an option at the beginning so that you can use
the same keystroke but, by changing the first line of the macro, you decide whether to have track changes showing
(trackIt = True) or not showing (trackIt = False).
In fact, this version also has another feature: if no text is selected then, as before, it changes the case of the next
character; however, if some text is selected, it changes it all to lowercase or uppercase. This means that the one macro
can do more than one job.
What’s more, it tries to do it ‘intelligently’; that is, it looks to see how much of the selected area is already
uppercase/lowercase and decides on the basis of a ‘vote’, which way to case it: i.e if most of it is in lowercase, it
assumes you want the whole thing uppercase, and vice versa.
But if it gets it wrong, all you do is run the macro a second time and it reverses the case.
Sub CaseNextChar()
Change case of initial letter of next word (This macro gets a mention in video: youtu.be/_ijsRqUR1fE )
This changes the case of the first character of the following word. If this is assigned to a keystroke, you can quickly
and easily change a line of text to all initial caps. (See also the TitleCapper macro.)
The simple way to change case would be to use Word’s case-change command:
Selection.Range.Case = wdToggleCase
but this does not generate a track change, so the macro, as written, makes the change by deleting the initial letter and
then typing in a letter of the opposite case (as in the previous macro) – this will now show up on track changes. If you
have a job where there are lots of case changes and you don’t want to show them, you can change the initial line of the
macro to ‘trackit = False’.
As with the previous macro, if an area of text is selected, it changes all of the text to initial capitals or lowercase.
Sub CaseNextWord()
This new version is more intuitive for some: You click in the word whose case needs changing, and when the case has
been changed, it jumps right one word, just in case you want to change the next word too.
Sub CaseThisWord()
And if you’re a really, really sad macromaniac, here’s a macro which switches the case of the initial letter – not of the
next word but the next-but-one word. Ctrl-Alt-S for me switches the initial of the next word and so, ‘stretching a bit
further to the right’, Ctrl-Alt-D changes the next-but-one word.
Sub CaseSecondNextWord()
Change case of initial letter of the paragraph I have one client who constantly has lists where you:
• Have one line
• And another line
• Then another line
• And all have a blessed initial capital!
The macro below allows you to put the cursor (anywhere) on the first line, run it, and it changes (toggles) the case of
the first character of that line, but then it moves down a paragraph so that you are then ready to run it again to change
the next item, and again, and again – click, click, click, click, and all four are changed.

Sub CaseNextPara()
Paragraph to start lowercase and end with semicolon This is for those clients who want every item in a bulleted list to start with a lowercase character and end with a
semicolon. As with the previous macro, it does the job on one line and jumps down a line ready to do the same on that
line. OK, on the last line you only want to lowercase the initial letter but not add the semicolon, so you have to use
CaseNextPara instead. And then you go back a line and add you ‘ and’ after the semicolon.
The following macro does the whole list at one go!
Sub SemicolonEndPara()
Semicolonising a list (+ lowercase start letter) You have a bulleted list (either auto-bulleted or with editable bullets), and you want to make sure that (a) every item
starts with a lowercase character, and (b) that every item ends with a semicolon, but (c) the final item has a full stop,
and (d) the penultimate item has ‘; and’ (this last is optional).
This macro does it all. Place the cursor on the first line of the list and run the macro – job done!
Because it ‘shoots’ through the bullets so quickly, I’ve added a ‘safety catch’ (pun intended). After having done 10
bullet points, it asks whether you want to continue. This is just in case you encounter a list that is, say, actually in
Normal or Body Text style, in which case it would keep going until it found a paragraph that was not in that style. OK,
you can Ctrl-Z your way back, but it would be a bit of a pain. (You can change the frequency of these checks using the
checkLength = 10 line.
If you don’t want the ‘ and’, then use addAnd = False.
Sub ListLowercaseSemicolon()
Semicolonising a list For some applications, you might not want to force all the initial letters of every item to lowercase. This version just
does the semicolonising and the (optional) and-ing.
Sub ListSemicolon()
Lowercasing a list and no punctuation (Video: youtu.be/AYgsFmFA7gU)
For some applications, you might want to force the initial letters of each item to lowercase and also remove the
punctuation on the end of each item. This macro does this a line at a time. It also tries to work out if it’s the last item
in the list, in which case you might want to keep the full stop on the last item.
Doing it a line at a time can sometimes be helpful where some items begin with a proper noun or an acronym. If so,
for that line you just delete the punctuation manually and run the macro on the following item.
You can decide not to track these changes, even if track changes are switched on. This is set by the line at the
beginning of the macro:
trackThis = True
Just change it to False.

Sub ListLowercaseNoPunct()
Uppercasing a list and no punctuation Ditto to the above macro, but uppercasing the first letter of each item.
Sub ListUppercaseNoPunct()
Adding full point to ends of bullet items One publisher I work for insists that all figure and table captions should have a full point, whether the text forms a
sentence or not. This macro looks for a specific tag (<Cap>, but you can change it) and, if necessary, adds a full point
(period).
Sub FullPointOnBullets()
Type, delete or switch ‘the’/‘a’/‘an’ (‘The’/‘A’/‘An’) (This macro gets a mention in video: youtu.be/mVBJ1jjQwdk )
This sounds a bit odd, but it’s for those occasions where your author is from a language that doesn’t have definite and
indefinite articles (e.g. Chinese and E. European). This macro aims to deal with cases where an article needs adding,
deleting or switching a/the or vice versa.
1) Place the cursor anywhere within a word and a ‘the’ is added in front of it. (Don’t worry about capitalisation
because the macro will change, say, ‘previous sentence. Next sentence starts here...’ into: ‘previous sentence. The next
sentence starts here...’
2) If you click in a word that already has an article ‘the’/‘a’/‘an’ then it switches between definite and indefinite.
3) If you want to delete an article, click in the article to be deleted – the macro again sorts out the capitalisation.
4) If you want to add a/an/A/An in front of a word, you can either use the next macro, TypeA, or if you select the
word instead of just clicking in it, then this macro knows to adds an indefinite article. You can decide which you find
more intuitive – remember a new keystroke or remember to double-click the word.
(I use Alt-T for TypeThat, and Alt-E for this macro, as I think of it as typing ‘thE’. So then between keys E and T is
R, so I use Alt-R for TypeA.)
Sub ArticleChanger()
Type ‘a’ (or ‘A’), ‘an’ (or ‘An’) (This macro gets a mention in video: youtu.be/mVBJ1jjQwdk )
By the same token here’s a macro for a/an/A/An.
Sub TypeA()
Type ‘that’ (Video: https://youtu.be/hqPVJSZsFDk)
For those occasions where your author leaves out ‘that’ a lot of times, just aim the cursor into the word after which
‘that’ needs adding, and run the macro.

Sub TypeThat()
Type ‘the’ (Video: https://youtu.be/hqPVJSZsFDk)
For those occasions where your author leaves out ‘the’ a lot of times, or indeed includes ‘the’ where it’s not needed
just aim the cursor somewhere in the word that needs to have ‘the’ in front of it, and run the macro and ‘the’ will be
added – but if the words is at the beginning of a sentence, then ‘The’ will be added, and the following word will be
down-cased.
Conversely, if ‘The’ starts a sentence and needs removing it, click in it, and the macro will remove it and up-case the
following word.
Sub TypeThe()
(Now replaced by ArticleChanger)
Add accents to characters The issue here is when the text you’re given doesn’t have any of the required accents – e.g. ‘garcon’, ‘elan’, ‘a la’ –
and it’s not possible to correct all the words by global find and replace. This means that the accents have to be added
as you actually read the text. So to enable you to keep your focus on the wording, you want to be able to add accents
quickly and easily. OK, so try this.
Here’s your text (please forgive my Google-French!):
Vous avez un elan tres a la mode. Ou sont les garcons?
So you place the cursor somewhere in front of ‘elan’ and run CharToAcute; the macro moves along the line until it
finds the ‘e’ and changes it to ‘é’.
Then put the cursor in front of ‘tres’ and run CharToGrave; in fact, if you run CharToGrave twice – click, click – it
does both ‘très’ and ‘à la’. (I’ll come back to ‘Ou’ in a minute.). Then in front of ‘garcons’, and run
CharToVariousAccents to get ‘garçons’.
I suggest you use keystrokes that are memorable to you, say Alt-[ for acute and Alt-] for grave and maybe Alt-V for
CharToVariousAccents. Whatever!
The macros also work with capitals; and CharToVariousAccents does both ‘ç’ and ‘ñ’ and capitals., so it also works
for ‘los niños’ for Spanish. Hopefully, you get the idea.
And there’s a macro for umlauts and one for circumflexes.
Now, coming back to ‘Ou’, with the CharToGrave macro as it stands, you would have to put the cursor, exactly
between the ‘O’ and the ‘u’, which slows the process down. That’s because the macro is set up to give graves for all
five vowels. It uses these lines:
myChars = "aeiouAEIOU"
myAccents = "àèìòùÀÈÌÒÙ"
But for French, you could slim that down (I think!) to:
myChars = "aeuAEU"
myAccents = "àèùÀÈÙ"
Is that right? I don’t think French uses ‘ì’ and ‘ò’, does it?

Anyway, it’s up to you to tailor the macro. The point is, if I reduce myChars and myAccents, as I’ve suggested, I
could just point the cursor somewhere in front of ‘Ou’.
Hopefully the macros are simple enough for you to fiddle around with the selection of accents they provide, to suit
your own language use. And if there are other accents you want, you can create other macros using exactly the same
pattern.
Sub CharToAcute()
Sub CharToGrave()
Sub CharToCircumflex()
Sub CharToUmlaut()
Sub CharToVariousAccents()
Add a macron to the next vowel (A macro kindly provided by Christopher Goj from New Zealand)
If you are processing Maori texts. you might have trouble with your macrons! The Maori language uses macrons
liberally, which usually get lost if the text has been OCRed. So as you read, this ‘macron macro’ will allow you to add
a macron to the next vowel.
Sub CharToMacron()
Add (real) bullets to a list
If you want to add real bullets to the items in a list, just click somewhere in the first paragraph and shift-click
somewhere in the final paragraph, and the macro will do the rest.
As it stands, the bullet is put into Wingdings 2 font, but If you just want it in the same for, make
funnyFont = ""
and if you prefer a tab after the bullet, there’s an alternative line given in the macro:
mySeparator = Chr(9)
Sub ListBulleter()
Reducing all-capitals to initial cap If you have a load of headings in ALL CAPITAL LETTERS where you want to selectively reduce the words to
Lowercase With Initial Caps, these two macros might speed you up. The first one searches the text for a run of four
capital letters, and the second one selects the current word and changes its capitalisation to lowercase with an initial
capital, and then it jumps straight to the next run of four capital letters.
What is the logic? Set the first macro to, say, Ctrl-Alt-I (for ‘initial’), and the second one to Alt-I. Then to use the
macros, you start with a heading and use Alt-I repeatedly to change each of the words in the title to initial capital. But
if it finishes a heading and then the next word it finds is an acronym in the middle of a paragraph (NATO, say), you
probably want to leave it in full capitals, so you press Ctrl-Alt-I, which will make no change and simply jump you to
the next word in full capitals. So, you hold the Alt and click the <I>, but then hold down Ctrl to indicate ‘don’t change
this one – jump to the next’.

Sub InitialNext()
Sub InitialCapOnly()
Lowercase this phrase throughout You’re working on a big file, and there are lots of Special Phrases where the author has used Unnecessary Initial
Uppercase Characters. This macro allows you to select one and, at a click, globally F&R them down to lowercase.
Unnecessary Initial Uppercase Characters do, I realise, sometimes come at the start of a sentence, so the macro has an
option to highlight all the changes, so that you can keep an eye out for such an occurrence. However, if you would like
me to extend this macro so that it checks whether the phrase is indeed at the start of a sentence and, if so, uppercase
the the initial letter, I’ll happily do so – do just ask me.
Sub LowercaseGlobal()
Select current word (Video: https://youtu.be/hqPVJSZsFDk)
I find this deceptively simple macro very useful. (But it takes ages to explain why!)
Example: The cat ‘sat’ on the mat.
If you double-click the word ‘cat’ in the above, Word selects the word ‘cat’ and the following space (no problem), but
if you double-click the word ‘sat’, Word selects the word and the apostrophe and the following space. (Don’t ask me
why Microsoft did it that way!)
So, if you just want to select the actual word ‘sat’, click in the word and run the macro (using a keystroke, of course,
for speed).
Now, consider the following sentence (which obviously needs editing):
The cat on the mat sat.
Clearly, you want to select ‘sat’, and move it back between ‘cat’ and ‘on’. To be more precise, you want to select
‘<space>sat’. So, put the cursor in ‘sat’ and click the macro twice: once and it selects ‘sat’, twice and it selects the
space as well – somewhat quicker than trying to do it by drag-select with the mouse.
Now, each subsequent time you click the macro, it adds another word to the selection – plus its preceding space. So, as
a silly but illustrative example, you could have put the cursor somewhere in ‘mat’, and clicked four times to select
‘<space>on the mat’, and then moved those three words after ‘sat’.
Sub SelectWord()
Select current sentence/paragraph/page The second of these four is the most useful for me. Click somewhere in the sentence, run SelectSentence, and then you
can copy/cut/paste/highlight/italicise/etc the sentence. I said ‘paste’ deliberately. For example, if the author has given
you an alternative version of a sentence, you can copy the new sentence and then click somewhere in the old sentence,
select the sentence with the SelectSentence macro, click Ctrl-V, and the new sentence totally replaces the old one’.
At the request of an editor, I’ve extended the actions of SelectSentence. It first selects the sentence around the cursor,
then if you run it again, it adds the sentence to the right to the selection, then the next to the right, etc.
However, if the rightmost sentence is the final sentence in the para, it adds the previous sentence to the selection. And
then if that hits the start of the sentence, it then extends the selection into the sentences of the following paragraph.

Then the other two, SelectWord and SelectCurrentPage, do the same for the current word and the current paragraph.
OK, you can double-click a word or double-click a paragraph, but some people prefer a keystroke to a mouse click.
Also, if you double-click a word that has a curly quote following, the curly close quote also gets selected, but the
macro selects just the word.
I’m not sure why one would want to select a page, but someone on the CE-L mailing list wanted one, so you can now,
at a keystroke, also select a page.
Sub SelectWord()
Sub SelectSentence()
Sub SelectParagraph()
Sub SelectCurrentPage()
Select whole words Someone wanted to be able to do a quick rough selection of some words (as indicated earlier in this sentence by the
use of grey highlighting), and then run a macro to round the selection to the very beginning of the first word and the
end of the final word.
(In case you’re wondering about the two ‘funny’ lines in the middle, you might have noticed that Word’s idea of what
constitutes a ‘word’ is a little idiosyncratic. For example, if you double-click on ‘word’ in this sentence, you end up
with the selection as indicated by the highlight, but if you double-click on this “word” here, it selects correctly. So the
two clever lines, which Howard Silcock told me about, ‘pull back’ the selection past the space and then past the single
close quote.)
Sub SelectTheseWords()
Delete this word (Video: https://youtu.be/hqPVJSZsFDk)
Place the cursor anywhere in a word, and run this macro to delete that word.
However, it’s a bit more intelligent than that! It tries to work out what you think of as the current “word”, not what
Word thinks of as a “word”!
It also works with Word’s Dictate facility: it deletes the last word(s) that Dictate just typed in for you, and that you
didn’t mean to say!
Sub DeleteOneWord()
Delete the rest of the sentence This macro deletes from the end of the current word to the end of the sentence.
N.B. At the request of fiction editors, it also changes the punctuation of quoted text, thus:
“This is a test,” Lisa said. Then she went for a cup of tea.
becomes
“This is a test.” Then she went for a cup of tea.

Sub DeleteRestOfSentence()
Delete the rest of the line This macro deletes from the beginning of the current word to the end of the line (paragraph).
Sub DeleteRestOfLine()
Remove final character of a word (This macro gets a mention in video: youtu.be/FVt2ggFXf4A )
Use this, say, to take the ‘s’ off ‘bugs’, or twice to take the ‘er’ off ‘bother’. This will only remove the final alphabetic
character, not the punctuation, so in ‘He caught an insect (bugs) yesterday.’, it will again take the ‘s’ off ‘bugs’.
Sub FinalCharDelete()
Remove punctuation at end of a word (This macro gets a mention in video: youtu.be/FVt2ggFXf4A )
Use this to delete the comma or quote mark or whatever non-alpha character follows a word. However, if the word
also starts with an open quote, it will remove that too. So, in ‘He caught some (other) insects or ‘bugs’ yesterday.’ if
you click in ‘other’, it will take both parentheses off, and if in ‘bugs’, it will take the quotes off.
(You can also use it just to remove the final character of a word, e.g. to take off the rogue ‘s’ in ‘insectss’: ‘He caught
some (other) insectss or ‘bugs’ yesterday.’
Sub PunctuationOffRight()
Remove punctuation from both ends of a word This and the macro ‘Single quotes round a word’ below form a useful pair, when assigned to suitable keyboard
shortcuts.
Place the cursor somewhere within a word, and this macro will remove whatever punctuation is currently around that
word, e.g. double quotes.
Sub PunctOffBothEnds()
Remove the punctuation nearest the cursor This macro will remove the spurious character nearest to the cursor. However, it ignores ordinary parentheses and
square brackets, choosing other characters instead. As set, it ignores alpha characters, numeric characters, () and [], but
you can adjust these, if you wish:
ignoreThese = " )(][/0123456789"
Sub PunctuationOffNearHere()
Single quotes round a word Place the cursor anywhere within a word and this macro will add single quotes around that word.

For German users, change to useGermanQuotes = True. That will give you, e.g. ‚quotes‘.
Sub ScareQuoteAdd()
Double quotes to single quotes Place the cursor inside a pair of double quotes, run the macro, and it changes them to single quotes. (It will beep at
you if it can’t find either an open or a close double quote.)
Sub DoubleQuotesSingleTopical()
Single quotes to double quotes Place the cursor inside a pair of double quotes, run the macro, and it changes them to double quotes. (It will beep at
you if it can’t find either an open or a close single quote.)
Sub SingleQuotesDoubleTopical()
Non-curly quotes The following two macros will type single and double quotes respectively, at the current cursor position, but without
turning curly, i.e. ' and " – might y useful when editing program listings, such as all these macros!
Sub NonCurlyApostrophe()
Sub NonCurlyQuote()
If you also want ‘proper’ single and double primes characters – ′ and ″ – i.e. Unicode numbers 8242 and 8243 – the
best way to do that is to assign keystrokes to each of those characters using Insert–>Symbol–>Shortcut Key.
However, you might find that Word tries to be ‘helpful’ and changes the font of the prime to something other than the
font of the existing text. If so these macros will type them in your choice of font.
Sub SinglePrime()
Sub DoublePrime()
Typing text into quotes for notes to publisher (Difficult to know what heading to use!)
(Video: youtu.be/2hrfWRyDx18)
This is where I’m telling the publisher that I need changes making to the various figures, e.g.
4.6 – Change ‘Incident x-ray’ to ‘Incident X-ray’ (×2) .
4.10 – Change ‘100mm’ to ‘100 mm’ (×3) and ‘150mm’ to ‘150 mm’.
4.17 – Change ‘256x256’ to ‘256×256’ and ‘512x512’ to ‘512×512’ and ‘1024x1024’ to ‘1024×1024’.
My typing speed isn’t good, so I type into the quotes the text that needs changing, and then copy it to the ‘to’ text. All
very repetitive, so macros can help hugely:
I start with sets of blank lines such as:
4.5 – Change ‘’ to ‘’ and ‘’ to ‘’ and ‘’ to ‘’ and ‘’ to ‘’ and ‘’ to ‘’.
4.10 – Change ‘’ to ‘’ and ‘’ to ‘’ and ‘’ to ‘’ and ‘’ to ‘’ and ‘’ to ‘’.
4.15 – Change ‘’ to ‘’ and ‘’ to ‘’ and ‘’ to ‘’ and ‘’ to ‘’ and ‘’ to ‘’.
4.20 – Change ‘’ to ‘’ and ‘’ to ‘’ and ‘’ to ‘’ and ‘’ to ‘’ and ‘’ to ‘’.
and then copy the whole paragraph for the ‘nearest number’ item (e.g. for 4.17 I’d use 4.15), and use
NumberIncrement or NumberDecrement to get the right number.
Then I click MoveToNextQuote and type into the first pair of quotes.
Then QuoteCopier copies that same text into the next pair of quotes, i.e. after the word, ‘to’. And if there are several
of these same changes, I click TypeTimesX, which adds the ‘(×2)’, but it moves the cursor back to the number, ready
to use NumberIncrement to increase it, if necessary.
Then another click of MoveToNextQuote, and I deal with the next change needed for that figure.
Finally, when there are no more for that figure, I use DeleteSentenceAfterQuote to delete the rest of the sentence.
(If you watch the video, you’ll see how this speeds it all up – it sounds very laborious when you have to explain it like
this!)
Sub QuoteCopier()
Sub MoveToNextQuote()
Sub TypeTimesX()
Sub DeleteSentenceAfterQuote()
Transpose (swap) adjacent letters (Video: youtu.be/P-6VdmT2BbE)
(This macro gets a mention in video: youtu.be/FVt2ggFXf4A )
Place the cursor between the two characters to be transposed and run the macro – you don’t have to select anything.
Sub SwapCharacters()
Transpose the punctuation characters that follow If you’ve got, say:
“Please follow me”, the waiter said.
and you want to switch the comma and the close quote, it’s fiddly to place the cursor between the two punctuation
marks, so this macro allows you to place the cursor somewhere to the left of the marks. It moves the cursor along the
line until it finds a non-space, non-alphabetic character, and then calls the SwapCharacters macro.
Sub SwapPunctuation()
Transpose (swap) two previous letters (Video: youtu.be/P-6VdmT2BbE)
Another macro, a slight variation of the one above, switches the two characters before the cursor. So, to correct ‘Pual’,
you would place the cursor after the ‘a’. and it would switch the ‘u’ and the ‘a’. So what’s the point of that?!

It can save hassle in one particular situation. Suppose you have ‘The force at this point, F2 is greater than...’, and you
want to add the missing comma after the ‘F2’. The trouble is, if you just type the comma after the subscript ‘2’, you
get ‘... point, F2, is ...’. Here it is, a bit bigger... ‘point, F2, is’ i.e. the comma is subscripted too.
So I type the comma one space to the right: ‘... point, F2 ,is ...’, and then run the SwapPreviousCharacters macro.
Sub SwapPreviousCharacters()
Transpose (swap) words (Video: youtu.be/P-6VdmT2BbE)
(This macro gets a mention in video: youtu.be/FVt2ggFXf4A )
Put the cursor either at the beginning of, or somewhere in middle of, the first word and run the macro.
By the way, it takes account of following punctuation: i.e.:
By the way, it takes account of punctuation following: i.e.:
– see what I mean! :-)
(This latest version doesn’t just swap the words, but it takes the formatting with it, e.g. “Water H2O is.” can be
swapped to “Water is H2O.”)
Sub SwapWords()
And while we’re swapping words around, see how long it takes you (using cut-and-paste, select and drag, or by
retyping) to change ‘too much effort and time’ into ‘too much time and effort’. Now just place the cursor anywhere in
the first word and try using this macro:
Sub SwapThreeWords()
Turn current word into a plural (This macro gets a mention in video: youtu.be/_ijsRqUR1fE )
This macro looks at the current word word and tries to make a viable plural out of it, i.e. add ‘s’ or ‘es’ or change ‘y’
to ‘ies’.
Sub Pluralise()
Abbreviation swap (This macro gets a mention in video: youtu.be/FVt2ggFXf4A )
This is for those occasions where the author will insist on writing things like
a PH (pleckstrin homology) region
when what you want is
a pleckstrin homology (PH) region
Simply place the cursor in ‘PH’ and run the macro.
It works the other way too: just put the cursor in ‘British’ and run the macro and it will change
the British Broadcasting Corporation (BBC) challenges ...
into
the BBC (British Broadcasting Corporation) challenges ...
If you have “pre-edited” documents that use tags of the form:
<termDef>space shuttle main engine</termDef> (<abbrev>SSME</abbrev>)
You’ll be pleased to hear that this macro has an option:
addPreEditCodes = True
This means that, at a stroke, you can change “SSME (space shuttle main engine)” into the form above – well, not with
the blue codes, but you could add those after you had finished by using a FRedit list:
<termDef>|^&
</termDef>|^&
<abbrev>|^&
</abbrev>|^&
Sub AbbrSwap()
Making common punctuation changes (1) (Video: https://youtu.be/eSAlHMlRr8A)
After many years of using the punctuation change macros below, I realised that I could probably speed things up. So I
“watched myself working” and decided which changes I was doing most frequently. I put all those into one single
macro, instead of having to use a whole range of different macros.
I decided that comma <=> full stop was the most common, and then second was colon <=> semicolon, and finally I
thought it would be useful to add single <=> double quotes, even though that doesn’t need a case change for the
capital letter of the following word.
But also, I remembered that it was a nuisance if the following word was a proper noun, so you didn’t want to
lowercase it when switching to comma.
So here’s the logic of this macro:
It looks along the line for the first punctuation mark it can find (unlike the macros below, there’s no need to place the
cursor in the word immediately before the punctuation mark). Then the scheme of what it changes to what is as set out
in the first line of the macro:
mySwaps = ".|, ,|. ;|: :|; ?|! !|?"
As you can see, I also included ! <=> ?, although I may well not use it.
(What it doesn’t do is dashes, but I’ll look into adding that if someone asks.)
For capitalisation, when the macro changes a punctuation mark that might also need a case change [i.e. ,.;:], it
leaves the mark selected, and if you do want to change the capitalisation, then simply run the macro a second time.
Seeing that one of these marks [,.;:] is selected, it does the capitalisation change for you.
Because the mark zips along the line to the next mark, for swapping quotation marks, this means that you can
probably just press the shortcut key again and again, to do a series of swaps. And there’s no need to jump the cursor
past apostrophes because the macro automatically ignores them.
If you’re punctuating dialogue in fiction work and have issues with the quotation marks getting in the way, you can
change the second line of the macro to:
doQuoteSwap = False
But I’ve presented that as the second macro below:
Sub PunctuationSwap()

Sub PunctuationSwapInDialogue()
Change punctuation between words (2) (Video: youtu.be/FVt2ggFXf4A and youtu.be/PB0hXA_1tRo)
(Fiction editors might like these macros.)
If you have a break between words using a comma, a colon, a semicolon etc or even a dash (spaced or unspaced), and
you want it to be a sentence break, simply place the cursor in the word before the break, and (with my key shortcut)
press Ctrl-Alt-<FullStop>. The macro removes the punctuation, adds a full point (period) and, if necessary, changes
the first letter of the next word to uppercase.
Similarly, if you want the words to be separated by a comma (or a colon, or a semicolon or a dash, or a question mark
or an exclamation mark) use the appropriate macro linked to a suitable keystroke – in my case Ctrl-Alt-, or Ctrl-Alt-:
(i.e. Ctrl-Alt-Shift-;) or Ctrl-Alt-; or Ctrl-Alt-= or Ctrl-Alt-? or Ctrl-Alt-!.
It now also copes if there’s an open quote in the way. So it changes
he said, “you know...
into
he said. “You know...
or into
he said: “you know...
or whatever.
And I decided that for some jobs, you might like to follow a colon with an uppercase character, not a lowercase one,
so the Colon macro has the option at the beginning: useUppercase = False which you can change to True if
you want uppercase.
The only macro that needs any further explanation is the Dash macro, which is currently set up for a spaced en dash. If
you want it to give you an unspaced em dash, change the text in the first lines of the macro:
' Spaced en dash
' newBit = " " & ChrW(8211) & " "
' OR Unspaced em dash
newBit = ChrW(8212)
Either that or you can have two separate macros, one for each. I don’t bother as I use unspaced em dashes so rarely.
STOP PRESS: Someone pointed out that it would be helpful if the Comma macro also performed the function of
CommaAdd, i.e. if there is no punctuation at all after a word, the Comma now adds a comma.
STOP PRESS 2: And now all the other macros in this set do exactly the same
STOP PRESS 3: Someone pointed out that if you want to change to a comma (or a semicolon or a colon) in, say:
he said. “Paul knows...
or something like:
it ends. America now...

then you don’t want to lowercase the next character. Sorted! In such a case, don’t just click in ‘said’ or ‘ends’, but
rather double-click it. The macro first then checks to see if any text is selected and, if it is, it does not change the case
of the next word.
STOP PRESS 4: Someone wanted FullPoint to also delete a conjunction, i.e. make this change:
...end of this sentence and the beginning of the next...
into
...end of this sentence. The beginning of the next...
So with the latest version of FullPoint, if you double-click the conjunction, to select it, the macro will then delete it
and then make it a sentence break.
Sub FullPoint()
Sub Period()
Sub Comma()
Sub Semicolon()
Sub Colon()
Sub Dash()
Sub QuestionMark()
Sub ExclamationMark()
Change punctuation between words in dialogue (Video: youtu.be/PB0hXA_1tRo)
(Fiction editors might like this macro.)
You might want to change the punctuation between words, as above, but in a dialogue, so you want to preserve the
quotation mark:
“Blah, blah.” He said.
to
“Blah, blah,” he said.
In which case the following pair of macros will give you the full point (period) and the comma.
These macros have one extra feature over the previous set of macros. If you just put the cursor somewhere in the word
before the punctuation mark, then they work as normal, changing the punctuation mark and, if necessary, correcting
the case of the initial letter of the following word. However, if you actually select some or all of the previous word
(e.g. just double-click it), it does not change the case of the following word. This would be useful for, say:
“Blah, blah.” John said.
if you want to change to a comma.
If you also want macros for exclamation mark and question mark, just create a new macro based on
FullPointInDialogue and change the line newBit = ". " to newBit = "! " or "? ".
If you also want macros for colon, and semicolon, just create a new macro based on CommaInDialogue and change
the line newBit = ", " to newBit = ": " or "; ".

Sub FullPointInDialogue()
Sub CommaInDialogue()
Changes proper noun to personal pronoun (Video: youtu.be/PB0hXA_1tRo)
This macro changes proper nouns to a personal pronouns (John −> he, Jane −> she), but it is used selectively. When
you run it, it looks along the line to find the next proper noun, deletes it and types ‘she’. But if you then type Ctrl-Z, it
changes to ‘he’.
That’s the way it works if the macro is set to sheHasPriority = True, but if you change that to False then it
types ‘he’, and if you do a Ctrl-Z, it turns to ‘she’.
This is nothing to do with sexism; if your story has mainly male characters or mainly female characters, you can
decide which way round you want to work it: ‘he’ or ‘she’ first.
Sub ProperToPronoun()
Numbers (figures) to text (Video: youtu.be/FVt2ggFXf4A)
If your text occasionally uses numerals 1 to 9 instead of words ‘one’ to ‘nine’ (or ‘57’ for ‘fifty-seven’, for that
matter!), just place the cursor somewhere on the line in front of one of these rogue numerals and run the macro. Each
time you run it, it jumps to the next group of numerals and changes the number to text, so – click, click, click, and
three consecutive numbers are changed into text, just like that!
N.B. If you use this for three-digit numbers or more, note that it uses US wording, so ‘385’ becomes ‘three hundred
eighty-five’, and not ‘three hundred and eighty-five’. (But there’s a UK version below.)
And there’s a version that some of the US folks wanted, which takes account of spaces, commas and hard spaces
being in the number – e.g. it will correctly change 23,456 or 45 678 into words.
Basic version
Sub NumberToText()
Version that copes with commas and spaces
Sub NumberToText2()
The versions above are the US-based macro, in that for ‘123456’ you get ‘one hundred twenty-three thousand four
hundred fifty-six’, and not ‘one hundred and twenty-three thousand, four hundred and fifty-six’ (i.e. it doesn’t give
you the ‘and’s or the comma).
So the two macros below are UK versions.
Sub NumberToTextUK()
Sub NumberToTextUK2()
There is now a German equivalent. It is a simple macro that will work only for the numbers 1 to 12, but you can
probably work out how to make it work for bigger numbers, although the job is a bit laborious, depending how far you
want to go. (The other macro, remember, work for up to 6 digit numbers.)

Sub ZifferWort()
The above macro is now redundant! I suddenly realised that I could use MultiSwitch to determine whether 1, 2, 3 etc
were changed to one, two, three etc, or eins, zwei, drei, etc or un, deux, trois, etc. So the new macro looks along the
line until finds a one- or two-digit number, and then jumps into MultiSwitch.
So in your zzSwitchList you add a list of numbers:
1
eins
2
zwei
3
drei
4
vier
5
fünf
etc.
or maybe
1
un
2
deux
3
trois
4
quatre
etc
And all it would take to change languages would be to move one of these strings of alternates up to the top of your
zzSwitchList.
Sub NumberToTextMultiSwitch()
Convert numbers (text) to figures (1–10) This is for number ‘one’ to ‘nine’ (or optionally ‘ten’) to figures ‘1’ to ‘9’ (or ‘10’). It searches through the text until it
finds the number and types it as a figure instead. (Use Ctrl-Z if you change your mind.)
Sub NumberToFigure()
Convert the next number (text) to figures (1–100) This looks along the line for the next word that looks like part of a number and converts it to figures.
Sub TextToNumber()

Adjust numbering – increment and decrement (Video: youtu.be/AYgsFmFA7gU)
I had a 100,000-word book with 500 notes, and the notes were hard-wired, i.e. not automatically numbered. At the last
minute, the author said, ‘Can you just [just?!] delete notes 24 and 29, please?’
Fun, eh?! No worries I wrote on paper what changes were needed:
1−>23 OK
delete note 24
25 −> 28 decrease by 1
delete note 29
30 −> decrease by 2
I have the two macros below (I put them on F2 and F3); each jumps forwards along the line to the next number and
increments (or decrements) it. So if I see 26 coming up, I click F2 once, and that makes it 25, but if it’s 32, I click F2
twice, and it becomes 30.
They also work with dates: click in 1978 and click F3 and it becomes 1979.
In fact, it works from the cursor onwards, so if I’ve got a ‘funny’ number like ‘0084’, if I put the cursor just before the
‘8’, and click F3, I get ‘0085’. But if I just clicked anywhere in front of it, the ‘0084’ would become just ‘85’.
Also, if you just have a numbered list:
1) Blah one
2) Blah again
3) Blah another
4) Blah last
5) Blah-de-blah
and you need to add or remove an item and hence have to do some renumbering, then these macros will speed up the
renumbering.
But then maybe you’re correcting numbers which need a bigger jump. No worries. At the beginning of the
NumberIncrement (NumberDecrement) macro is a line saying:
jump = 1
(jump = -1)
If you need to change by 4, say, then you can change it to 4 (−4).
Suppose you need to renumber figure numbers, or equation numbers, say in chapter 14. OK, then search for ‘14.’ so
that you can then alternately run FindFwd (which jumps forward to the next find, i.e. the next ‘14.’) and then press F3
(assuming it’s an increment you want).
However, if you have a lot of these to do (and this feature was added when I found a pair of repeated equation
numbers near the beginning of a chapter of over 100 equations plus 60+ citations!), you can change a line at the
beginning of the macro that currently says:
goNext = False
from False to True. Then every time you press F3, it increments the number and jumps to the next find.
The downside of this is that you’ll forget to change it back to False, when you finish. Then, next time you try to use
the NumberIncrement macro, the number is decremented, but the cursor flies off to somewhere else in the text!

If your memory is bad, like mine, you could instead create a macro:
Sub IncJump()
Call NumberIncrement
Call FindFwd
End Sub
Finally, I’ve also added an option to this macro such that, if it can’t find a number close to the cursor (within 20
characters, as set), it assumes that you want to do a letter increment instead (see the macros below). You can switch
this facility off with:
doLettersToo = False
Sub NumberIncrement()
Sub NumberDecrement()
Adjust lettering – increment and decrement Extending the idea of the previous macro, if you had a lettered list:
a) Blah one
b) Blah again
d) Blah another
e) Blah last
f) Blah-de-blah
and you wanted to add an extra item after (a), you’d need to ‘renumber’ (b) to (e). Put the cursor in front of each in
turn and run LetterIncrement. (Similarly if you want to delete an item.)
Another use: If you have a Greek letter, and you want to change it, you can use these two macros to move up and
down through the alphabet, rather than re-entering the Greek characters from scratch. (It only works if you know your
Greek alphabet, of course!)
Sub LetterIncrement()
Sub LetterDecrement()
Change ampersand to and Following the same sort of theme as converting numbers to text, if you see an ampersand (‘&’) coming up, just run
this macro and it will jump to the ‘&’ and change it to ‘and’. My keystroke for this is easy to remember: Ctrl-Alt-
Shift-&.
(This facility is also covered by CharacterSwitch, but the advantage of having a separate macro is that the cursor can
be placed in any word in front of the symbol. For CharacterSwitch, you have to place the cursor exactly in front of the
symbol.)
Sub Ampersand()
Change percent symbol to words In exactly the same vein, if you see a percent symbol (‘%’) coming up, just run this macro and it will jump to the ‘%’
and change it to ‘ per cent’. My keystroke for this is yes, you’ve guessed it: Ctrl-Alt-Shift-%.
And, of course, if you’re working on a US-spelling document, rather than UK one, it uses ‘percent’ rather than ‘per
cent’.
(This facility is also covered by CharacterSwitch, but the advantage of having a separate macro is that the cursor can
be placed in any word in front of the symbol. For CharacterSwitch, you have to place the cursor exactly in front of the
symbol.)
Sub PerCent()
Change ‘e’ to ‘e’-acute Here’s one from Sarah Patey...
This macro looks for the next ‘e’ on the line and changes it to an e-acute, ‘é’. (And I’m sure yóu can modify this for
any other letter-change you want.)
Sub AcuteAdd()
Change ‘to do’ into ‘for doing’ – and vice versa (This macro gets a mention in video: youtu.be/_ijsRqUR1fE )
(This macro also(!) gets a mention in video: youtu.be/mVBJ1jjQwdk )
Yesterday it was a Spanish author, and today it’s Chinese, and on both of them, I was for ever having to change, say,
‘to place’ or ‘places’ into ‘for placing’, or ‘for picking’ or ‘to pick’, so this now automated to an extent.
1) Click in the verb, and it will do its best to switch between do/doing, changing/change, etc.
2) Click in the preposition, and of/for will be changed to ‘to’. If it’s ‘to’ the if you double-click it before running the
macro, you’ll get ‘for’, but if it’s not selected, you’ll get ‘of’.
It will cope with some words with nn, rr, ll, tt, pp, but don’t expect it to handle hop/hope/hoping/hopping!
Sub VerbChanger()
Change ‘filling’ into ‘filled’ – and vice versa This is similar to the previous macro, but it tries to convert between present and past participles – not an easy task in
English as there are so many different ways of doing it, spelling-wise. If you use it, you’ll get used to what works and
what doesn’t, hopefully. Plus you can actually add to the list of spelling variants listed in the macros.
Click in the participle, and it will do its best to switch to the alternate participle.
The list of changes looks like this, and you can perhaps add to it:
Case "ed": Selection.TypeText "ing"
Case "lt": Selection.TypeText "lling"
Case "nt": Selection.TypeText "ning"
Case "an": Selection.TypeText "inning"
Case "un": Selection.TypeText "inning"
Thinking about it, I’m wondering if there are just too many words it will get wrong, but have a play and let me know
what you think!
On the upside, when it has made its attempt to change the participle it spellchecks the result and beeps if it has created
a spelling error.
Sub ParticipleChanger()
Change future tense into present perfect (Dutch) (Video: https://youtu.be/L3wBj6PcTZs)
This macro was requested by Dutch colleagues, who wanted to be able to change the future tense to the present
perfect.
I don’t speak Dutch (despite having visited the Netherlands 20+ times in the past 30 years) but my colleagues gave me
a list of words that had to be changed and I delivered two macros: one works just in the current sentence (just click
somewhere within the sentence) and the other goes through the whole document.
It works with two verbs, worden and zijn. Here are some examples:
Verb = worden
Before: Het uiteindelijke rapport zal in papier overhandigd worden aan de opdrachtgevers.
After: Het uiteindelijke rapport wordt in papier overhandigd aan de opdrachtgevers.
Before: Dan zal er informatie worden verworven.
After: Dan wordt er informatie verworven.
Before: Daarnaast zullen door middel van deze interviews de visies van de (expert)wijkagenten ten aanzien van
bestuursrechtelijke maatregelen in kaart gebracht worden.
After: Daarnaast worden door middel van deze interviews de visie van de (expert)wijkagenten ten aanzien van
bestuursrechtelijke maatregelen in kaart gebracht.
Verb = zijn
Before: Indien de burger namelijk last heeft van bepaalde (criminele) gedragingen door bijvoorbeeld overlast, zal de
drempel om dit te melden bij de wijkagent lager zijn in het geval van een goede vertrouwensband tussen burger en
wijkagent.
After: Indien de burger namelijk last heeft van bepaalde (criminele) gedragingen door bijvoorbeeld overlast, is de
drempel om dit te melden bij de wijkagent lager in het geval van een goede vertrouwensband tussen burger en
wijkagent.
Before: Wanneer de resultaten zullen zijn verworven.
After: Wanneer de resultaten zijn verworven.
Sub VerbChangerNL()
Sub VerbChangerNLglobal()
Single/double curly quote (This macro gets a mention in video: youtu.be/FVt2ggFXf4A )
I’ve revamped the SingleQuote (and DoubleQuote) macro so that you can use the same macro to change any old
quotation mark into a single (double) curly quote.
So, SingleQuote now looks along the line from the cursor to the first quote it can find and turns it into a curly single
quote. When I say ‘quote’, it can be single, double, open or closed, curly or non-curly, or even the funny German(?)
open quotes ‘„’ and ‘‚’ (it might look like a comma, but it’s not, honest!) or the French «, », ‹ and ›. However, it
checks the context to work out whether it should replace it with an open or a closed quote.
So, if there’s more than one consecutive quote that needs to become single and curly, it’s just click, click, click
(however many there are).
And similarly, obviously, for double quote. So all you have to remember is, say, Ctrl-Alt-Shift-' forces the next quote
along the line to a single, and Ctrl-Alt-Shift-" forces the upcoming quote to a double quote.

But the DoubleQuote has another trick up its sleeve: it checks to see whether the ‘quote’ that it has found is in fact an
apostrophe, in which case it ignores it and moves on to find the next quote mark. So, if you have
‘OK, I’m ready if you’re ready.’
it would, after just two clicks of the macro, become
“OK, I’m ready if you’re ready.”
because it skips past the two apostrophes.
Sub PunctuationToSingleQuote()
Sub PunctuationToDoubleQuote()
Switch UK curly quotes on and off If you sometimes need to have curly quotes on, and sometimes prefer to use non-curly quotes, this macros switches
the facility on and off.
Sub CurlyQuotesToggle()
Single/double curly German-style quote (Video: https://youtu.be/L3wBj6PcTZs)
As the title says! i.e. „Hello there!“ and ‚Hello there!‘
(I’ve tried to get the correct open/close quote in a range of different punctuation situations, but if it puts in the wrong
sense of quotation mark, or if it beeps at you and does nothing, please send me a sample of text where it goes wrong.
Thanks.)
Sub PunctuationToDoubleQuoteDE()
Sub PunctuationToSingleQuoteDE()
Single/double curly French-style quote (Video: https://youtu.be/L3wBj6PcTZs)
As the title says! i.e. «Hello there!» and ‹Hello there!›
(I’ve tried to get the correct open/close quote in a range of different punctuation situations, but if it puts in the wrong
sense of quotation mark, or if it beeps at you and does nothing, please send me a sample of text where it goes wrong.
Thanks.)
Sub PunctuationToDoubleQuoteFR()
Sub PunctuationToSingleQuoteFR()
Or you might prefer to have separate specific macros for the open and close for each of single and double quotes.
Sub PunctuationToDoubleOpenGuillemet()

Sub PunctuationToDoubleCloseGuillemet()
Sub PunctuationToSingleOpenGuillemet()
Sub PunctuationToSingleCloseGuillemet()
Single/double prime Ditto for single (double) prime.
Sub PunctuationToSinglePrime()
PunctuationToDoublePrime()
Letter ‘x’ to times/multiply character Ditto for multiply character.
Sub PunctuationToMultiplySign()
Next space to hard (non-breaking/fixed) space Ditto for hard (non-breaking/fixed) space.
Sub PunctuationToHardSpace()
Change double quotes to guillemets This provides a global change for double quotes to guillemets. Although the macro just consists of four F&Rs
(open/close double quotes with and without a rogue space), you can’t just put them in a FRedit list because the auto
smart quotes has to be off, or it won’t work. However, if you want this in a FRedit list, you can just use:
DoMacro|QuotesToGuillemets
Sub QuotesToGuillemets()
Add quotes to a phrase (These macros get a mention in video: youtu.be/_ijsRqUR1fE )
To add quotes to a phrase, click somewhere in the first word, shift-click somewhere in the final word, and run the
macro. It will find the beginning of the first word, add the open quote, find the final word, sort out if the final
character is a space and type in the close quote accordingly. To add quotes round a word, just click somewhere in the
word.
Sub AddQuotesDouble()
Sub AddQuotesSingle()
Add parentheses round the current word/phrase (This macro gets a mention in video: youtu.be/_ijsRqUR1fE )
This macro adds parentheses round the current word or phrase. Just click somewhere in the word and run the macro.
Or for a phrase, select roughly from somewhere in the first word to somewhere in the final word, e.g. “I want to
parenthesise this phrase, please.” would give: “I want to (parenthesise this phrase), please.”
You could make customised versions of this macro (N.B. with (slightly) different names) by changing the two lines:
Selection.TypeText Text:=")"
and
Selection.TypeText Text:="("
So you could add, instead, say angle brackets ">" and "<". (Note that it types in the close item first, then the open
item.) You could even add, say, tags "<\code>" and "<code>".
Sub ParenthesesAdd()
Add ‘things’ round the current word/phrase This is an expanded version of the previous macro: not only does it add your specified punctuation/tags etc, but it can
also delete specified punctuation that might already be there. It’s up to you to decide exactly which punctuation marks
you want deleting, and obviously, you can make multiple copies of the macro (N.B. with (slightly) different names),
each set up so that it adds different ‘things’ rounds the text and deletes a different set of punctuation marks (or not).
This is set up with:
deleteThese = "()[].,"
' And the various quotation marks
deleteThese = deleteThese & """'" & ChrW(8220) & ChrW(8221) & ChrW(8216) &
ChrW(8217)
Just click somewhere in the word and run the macro. Or for a phrase, select roughly from somewhere in the first word
to somewhere in the final word, e.g. “I want to parenthesise this phrase, please.” would give: “I want to (parenthesise
this phrase), please.”
Sub AddTextRoundText()
Delete pairs of parentheses, quote marks or commas This macro was born when I had a document with lots of pairs of parentheses that I had to delete, but it has grown into
a macro that can delete pairs of all sorts of characters. Specifically, it looks for and deletes [], {}, <>, (), “”, ‘’ or even
pairs of parenthetical commas!
So how does the macro know what to look for? For a start you give it a clue what to do by placing the cursor a few
characters in front of the first of the pair (where ‘few’ is defined by numChars = 20 at the beginning of the macro).
The macro looks for the above special characters in the order specified in the macro (which you can change, if you
wish). So if it can’t find [, it looks for {, then for <, etc.
This is useful because, if you have a lot of pairs to delete, you can probably arrange things so that you can just keep
running macro by clicking the keystroke, without having to reposition the cursor. So, for example, I’ve placed the
comma at the end of the priority list so that if the text has, say, parentheses in it, it will delete those, rather than the
commas. For some applications, you might need to extend the ‘range’ of the macro by setting, say, numChars = 50
or whatever.
If it can’t find a matching pair for the open-whatever-character it’s looking for, it beeps at you. The range over which
it looks for the match is set by numWords = 50 at the beginning of the macro.
Sub ParenthesesEtcPairDelete()

Change quotes on a phrase – double to single This macro allows you to choose a specific phrase, and changes the curly quotes on this phrase from double to single.
Sub DoubleQuotesToSingle()
Add a comma (This macro gets a mention in video: youtu.be/FVt2ggFXf4A )
(Video of CommaAddPrevious: youtu.be/AqREu_iJ2Yg)
As I often find myself adding commas, I have a macro so that I just put the cursor somewhere in the word and run the
macro. This then jumps to the end of the word and adds said comma.
I’ve recently made it a bit more intelligent. If the word is in italic or bold, it types in the comma but then checks the
following word to see if it too is in italic/bold. If it’s not then it goes back and makes the comma roman.
(That said, working for a client in Spain, their convention was that the punctuation should keep the same format as the
word it follows, as I’ve just illustrated. So I’ve added an option at the beginning of the macro.)
Sub CommaAdd()
Someone asked if it would be possible to add a comma outside the close quote marks on UK files and inside the quote
marks on US files. Here it is:
Sub CommaAddUSUK()
And this version is useful if you’re doing something like finding all the ‘and’s and checking to see if you ought to add
a comma before it. So search for ‘and’ and the next, and the next. Then, if one of them needs a comma adding before
it, just run this macro instead of having to move back a word and then using the ordinary CommAdd.
Sub CommaAddPrevious()
Hyphenate If two words need hyphenating, place the cursor somewhere in the first word and press (in my case) Ctrl-Alt-W.
Sub Hyphenate()
Hyphen to dash (This macro gets a mention in video: youtu.be/FVt2ggFXf4A )
This assumes that two words (or numbers) have a hyphen between them, and it should be a dash, e.g. ‘take the
London-Manchester road’ or ‘in 30-60 minutes’ time’. Just put the cursor in the word before it, and run the macro.
The macro is currently set for an en dash, but if you want in em dash, you use the other macro.
Or if it just says ‘take the London Manchester road’, as long as you place the cursor in ‘London’, it will find the next
space and make that a dash.
(PPS: I’ve also now added a space into the search pattern, so one press and you get an em dash between the two
words, and two presses and it’s an en dash – or vice versa if you change the priority at the beginning of the macro.
Then then third press will give you a hyphen, although PunctuationToHyphen goes straight to a hyphen.)
Sub PunctuationToEmDash()
Sub PunctuationToEnDash()
And for a non-breaking dash (em or en)...
Sub PunctuationToNonBreakingEmDash()
Sub PunctuationToNonBreakingEnDash()
Punctuation to comma
Similar to the macro above but it changes the next punctuation mark to a comma.
Sub PunctuationToComma()
Punctuation to full point (period)
Similar to the macro above but it changes the next punctuation mark to a full point (period).
Sub PunctuationToFullPoint()
Hyphen to minus sign (This macro gets a mention in video: youtu.be/FVt2ggFXf4A )
Similar to the macro above but it changes the next ‘hyphen-like character’ to a proper Unicode minus sign.
Sub PunctuationToMinus()
Hyphen/dash/hard space to space (This macro gets a mention in video: youtu.be/FVt2ggFXf4A )
This is used where two words (or numbers) have a hyphen/dash/hard space between them, and it should be a space,
e.g. ‘a finely-tuned argument’. Just put the cursor somewhere before it, on that line, and run the macro.
Sub PunctuationToSpace()
Dash or (hard) space to hyphen (This macro gets a mention in video: youtu.be/_ijsRqUR1fE )
This is used where two words (or numbers) have a dash/hard space/space between them, and it should be a hyphen,
e.g. ‘a well tuned viola’. Just put the cursor somewhere in ‘well’, and run the macro.
Sub PunctuationToHyphen()
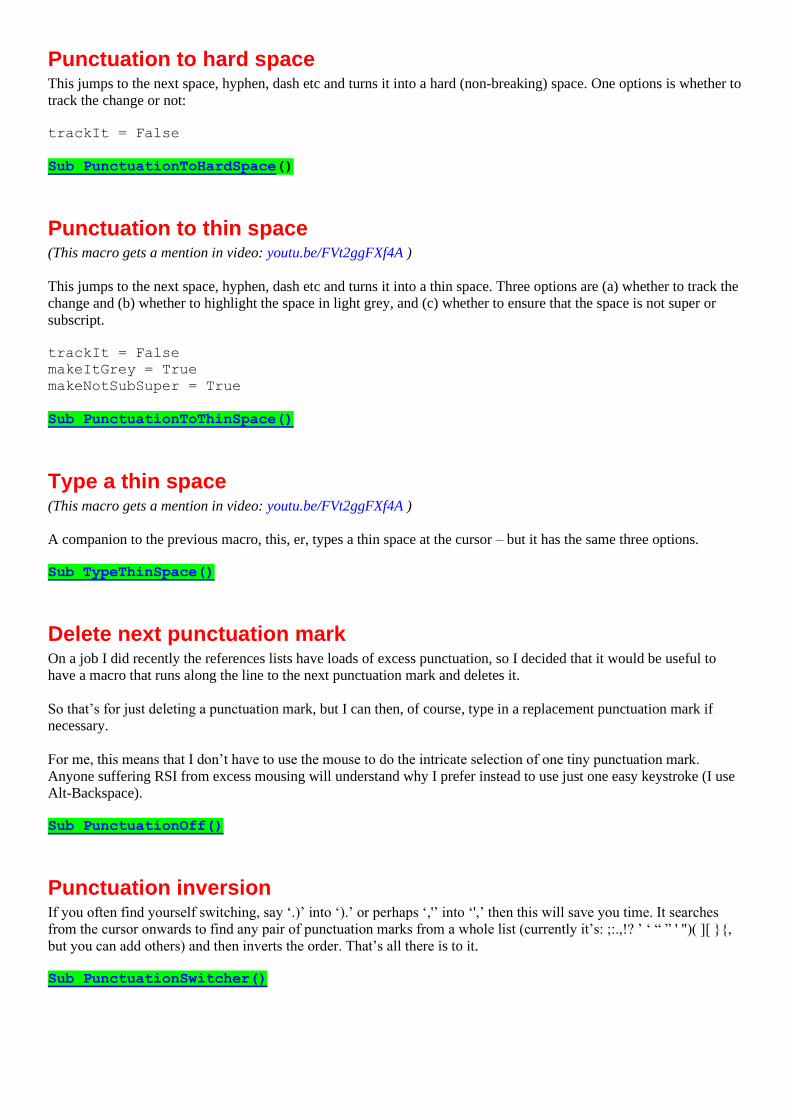
Punctuation to hard space This jumps to the next space, hyphen, dash etc and turns it into a hard (non-breaking) space. One options is whether to
track the change or not:
trackIt = False
Sub PunctuationToHardSpace()
Punctuation to thin space (This macro gets a mention in video: youtu.be/FVt2ggFXf4A )
This jumps to the next space, hyphen, dash etc and turns it into a thin space. Three options are (a) whether to track the
change and (b) whether to highlight the space in light grey, and (c) whether to ensure that the space is not super or
subscript.
trackIt = False
makeItGrey = True
makeNotSubSuper = True
Sub PunctuationToThinSpace()
Type a thin space (This macro gets a mention in video: youtu.be/FVt2ggFXf4A )
A companion to the previous macro, this, er, types a thin space at the cursor – but it has the same three options.
Sub TypeThinSpace()
Delete next punctuation mark On a job I did recently the references lists have loads of excess punctuation, so I decided that it would be useful to
have a macro that runs along the line to the next punctuation mark and deletes it.
So that’s for just deleting a punctuation mark, but I can then, of course, type in a replacement punctuation mark if
necessary.
For me, this means that I don’t have to use the mouse to do the intricate selection of one tiny punctuation mark.
Anyone suffering RSI from excess mousing will understand why I prefer instead to use just one easy keystroke (I use
Alt-Backspace).
Sub PunctuationOff()
Punctuation inversion If you often find yourself switching, say ‘.)’ into ‘).’ or perhaps ‘,'’ into ‘',’ then this will save you time. It searches
from the cursor onwards to find any pair of punctuation marks from a whole list (currently it’s: ;:.,!? ’ ‘ “ ” ' ")( ][ }{,
but you can add others) and then inverts the order. That’s all there is to it.
Sub PunctuationSwitcher()
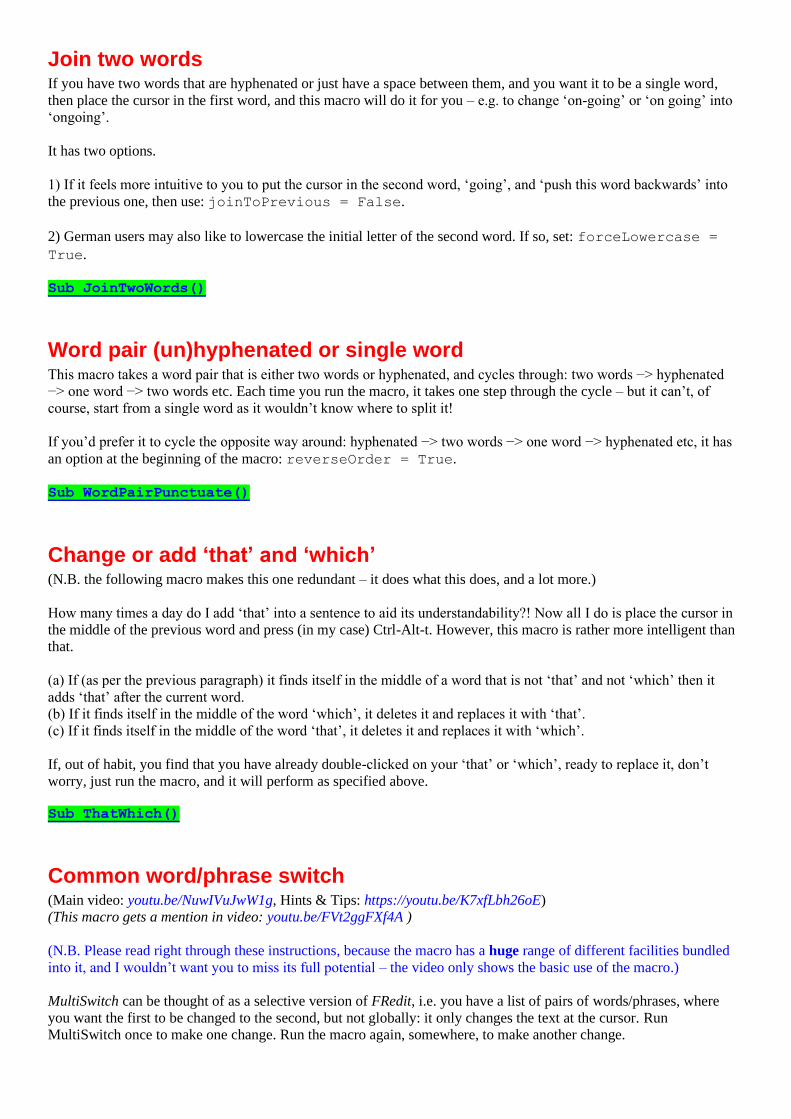
Join two words If you have two words that are hyphenated or just have a space between them, and you want it to be a single word,
then place the cursor in the first word, and this macro will do it for you – e.g. to change ‘on-going’ or ‘on going’ into
‘ongoing’.
It has two options.
1) If it feels more intuitive to you to put the cursor in the second word, ‘going’, and ‘push this word backwards’ into
the previous one, then use: joinToPrevious = False.
2) German users may also like to lowercase the initial letter of the second word. If so, set: forceLowercase =
True.
Sub JoinTwoWords()
Word pair (un)hyphenated or single word This macro takes a word pair that is either two words or hyphenated, and cycles through: two words −> hyphenated
−> one word −> two words etc. Each time you run the macro, it takes one step through the cycle – but it can’t, of
course, start from a single word as it wouldn’t know where to split it!
If you’d prefer it to cycle the opposite way around: hyphenated −> two words −> one word −> hyphenated etc, it has
an option at the beginning of the macro: reverseOrder = True.
Sub WordPairPunctuate()
Change or add ‘that’ and ‘which’ (N.B. the following macro makes this one redundant – it does what this does, and a lot more.)
How many times a day do I add ‘that’ into a sentence to aid its understandability?! Now all I do is place the cursor in
the middle of the previous word and press (in my case) Ctrl-Alt-t. However, this macro is rather more intelligent than
that.
(a) If (as per the previous paragraph) it finds itself in the middle of a word that is not ‘that’ and not ‘which’ then it
adds ‘that’ after the current word.
(b) If it finds itself in the middle of the word ‘which’, it deletes it and replaces it with ‘that’.
(c) If it finds itself in the middle of the word ‘that’, it deletes it and replaces it with ‘which’.
If, out of habit, you find that you have already double-clicked on your ‘that’ or ‘which’, ready to replace it, don’t
worry, just run the macro, and it will perform as specified above.
Sub ThatWhich()
Common word/phrase switch (Main video: youtu.be/NuwIVuJwW1g, Hints & Tips: https://youtu.be/K7xfLbh26oE)
(This macro gets a mention in video: youtu.be/FVt2ggFXf4A )
(N.B. Please read right through these instructions, because the macro has a huge range of different facilities bundled
into it, and I wouldn’t want you to miss its full potential – the video only shows the basic use of the macro.)
MultiSwitch can be thought of as a selective version of FRedit, i.e. you have a list of pairs of words/phrases, where
you want the first to be changed to the second, but not globally: it only changes the text at the cursor. Run
MultiSwitch once to make one change. Run the macro again, somewhere, to make another change.
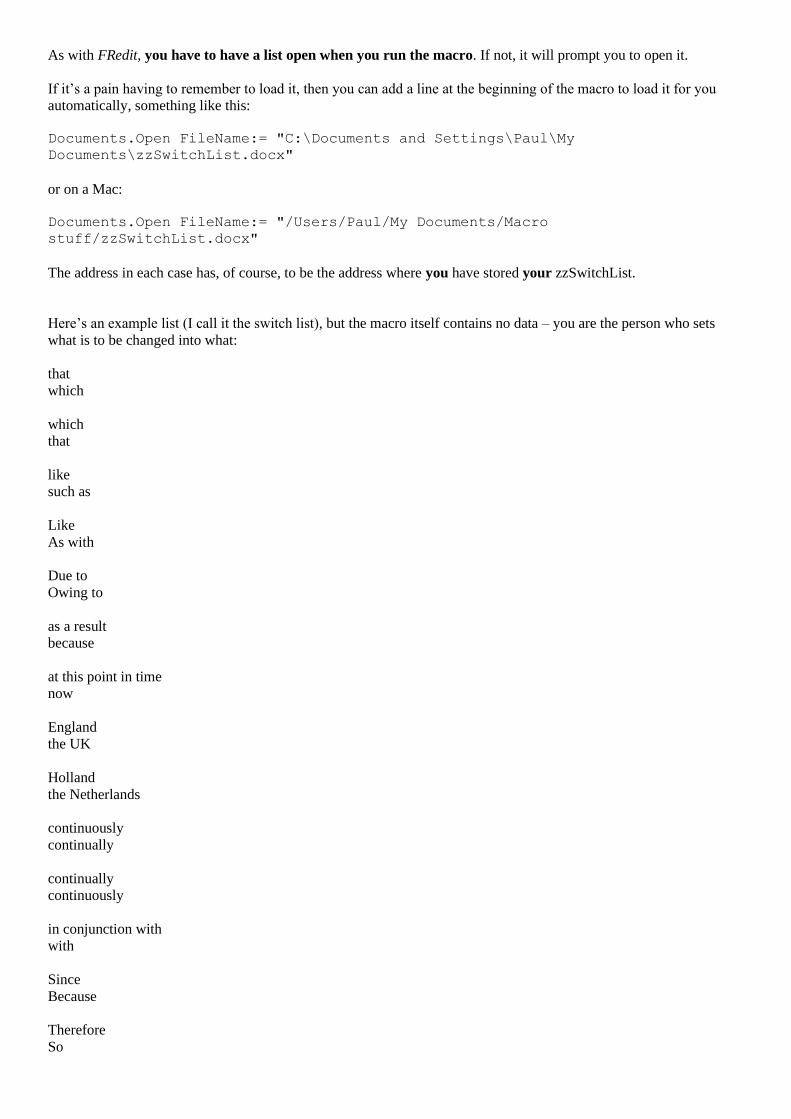
As with FRedit, you have to have a list open when you run the macro. If not, it will prompt you to open it.
If it’s a pain having to remember to load it, then you can add a line at the beginning of the macro to load it for you
automatically, something like this:
Documents.Open FileName:= "C:\Documents and Settings\Paul\My
Documents\zzSwitchList.docx"
or on a Mac:
Documents.Open FileName:= "/Users/Paul/My Documents/Macro
stuff/zzSwitchList.docx"
The address in each case has, of course, to be the address where you have stored your zzSwitchList.
Here’s an example list (I call it the switch list), but the macro itself contains no data – you are the person who sets
what is to be changed into what:
that
which
which
that
like
such as
Like
As with
Due to
Owing to
as a result
because
at this point in time
now
England
the UK
Holland
the Netherlands
continuously
continually
continually
continuously
in conjunction with
with
Since
Because
Therefore
So
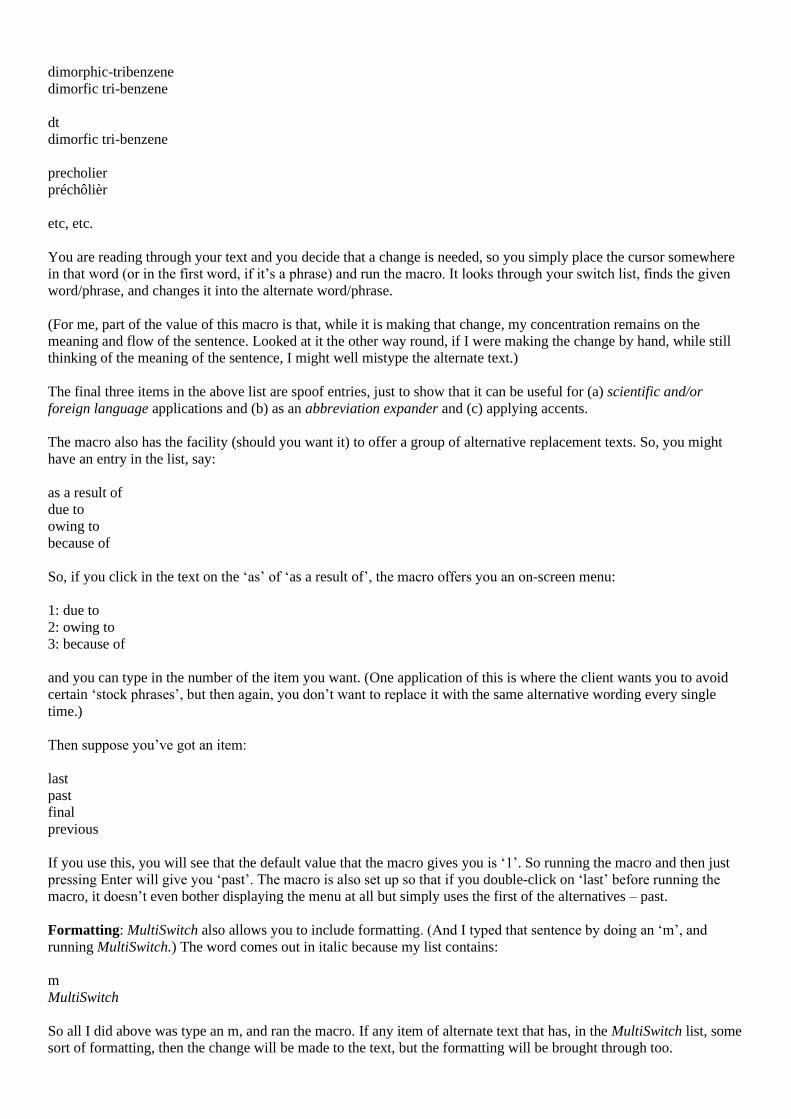
dimorphic-tribenzene
dimorfic tri-benzene
dt
dimorfic tri-benzene
precholier
préchôlièr
etc, etc.
You are reading through your text and you decide that a change is needed, so you simply place the cursor somewhere
in that word (or in the first word, if it’s a phrase) and run the macro. It looks through your switch list, finds the given
word/phrase, and changes it into the alternate word/phrase.
(For me, part of the value of this macro is that, while it is making that change, my concentration remains on the
meaning and flow of the sentence. Looked at it the other way round, if I were making the change by hand, while still
thinking of the meaning of the sentence, I might well mistype the alternate text.)
The final three items in the above list are spoof entries, just to show that it can be useful for (a) scientific and/or
foreign language applications and (b) as an abbreviation expander and (c) applying accents.
The macro also has the facility (should you want it) to offer a group of alternative replacement texts. So, you might
have an entry in the list, say:
as a result of
due to
owing to
because of
So, if you click in the text on the ‘as’ of ‘as a result of’, the macro offers you an on-screen menu:
1: due to
2: owing to
3: because of
and you can type in the number of the item you want. (One application of this is where the client wants you to avoid
certain ‘stock phrases’, but then again, you don’t want to replace it with the same alternative wording every single
time.)
Then suppose you’ve got an item:
last
past
final
previous
If you use this, you will see that the default value that the macro gives you is ‘1’. So running the macro and then just
pressing Enter will give you ‘past’. The macro is also set up so that if you double-click on ‘last’ before running the
macro, it doesn’t even bother displaying the menu at all but simply uses the first of the alternatives – past.
Formatting: MultiSwitch also allows you to include formatting. (And I typed that sentence by doing an ‘m’, and
running MultiSwitch.) The word comes out in italic because my list contains:
m
MultiSwitch
So all I did above was type an m, and ran the macro. If any item of alternate text that has, in the MultiSwitch list, some
sort of formatting, then the change will be made to the text, but the formatting will be brought through too.
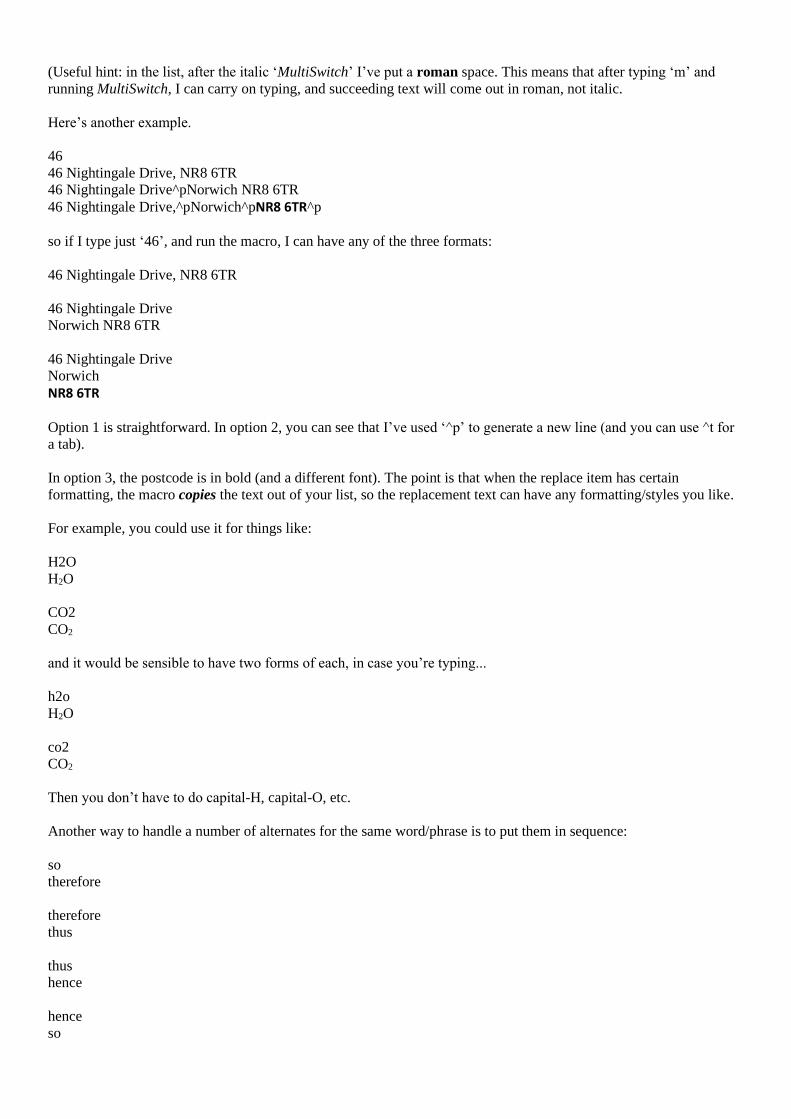
(Useful hint: in the list, after the italic ‘MultiSwitch’ I’ve put a roman space. This means that after typing ‘m’ and
running MultiSwitch, I can carry on typing, and succeeding text will come out in roman, not italic.
Here’s another example.
46
46 Nightingale Drive, NR8 6TR
46 Nightingale Drive^pNorwich NR8 6TR
46 Nightingale Drive,^pNorwich^pNR8 6TR^p
so if I type just ‘46’, and run the macro, I can have any of the three formats:
46 Nightingale Drive, NR8 6TR
46 Nightingale Drive
Norwich NR8 6TR
46 Nightingale Drive
Norwich
NR8 6TR
Option 1 is straightforward. In option 2, you can see that I’ve used ‘^p’ to generate a new line (and you can use ^t for
a tab).
In option 3, the postcode is in bold (and a different font). The point is that when the replace item has certain
formatting, the macro copies the text out of your list, so the replacement text can have any formatting/styles you like.
For example, you could use it for things like:
H2O
H2O
CO2
CO2
and it would be sensible to have two forms of each, in case you’re typing...
h2o
H2O
co2
CO2
Then you don’t have to do capital-H, capital-O, etc.
Another way to handle a number of alternates for the same word/phrase is to put them in sequence:
so
therefore
therefore
thus
thus
hence
hence
so
so you can cycle through them by, in my case, repeatedly clicking Ctrl-Q.
In jobs where you’re using track changes, there might be some specific changes that you don’t want tracked. So, as
with FRedit and others of my macros, if you apply a single strikethrough to the alternate text, the macro knows not to
track it.
Fig.
Figure
I used this one, because I didn’t want ‘Fig. 3.2 shows blah...’ at the beginning of a sentence, but I didn’t want to track
the change.
Another feature is that if you’ve got things like ‘degrees’, ‘per cent’ etc, the macro can delete the preceding space. So,
for example, ‘10 degrees’ needs to become ‘10°’ and not ‘10 °’. You do this by adding an exclamation mark:
degrees
!°
percent
!%
per cent
!%
per annum
!/year
If the macro can’t find an alternate in your list, it beeps at you to indicate that the particular word/phrase is not actually
in your list.
General hint: I find it best to keep my alternates list in at least vaguely alphabetic order. That way I can keep track
more easily of the different words I’ve got in there. That said, I do tend to add temporasry items – for specific jobs – at
the top of the list.
But after you’ve run MultiSwitch, the cursor is left at the point in the list where it found the alternate. This means that
it’s easy to make changes to the items in the list while you think about it.
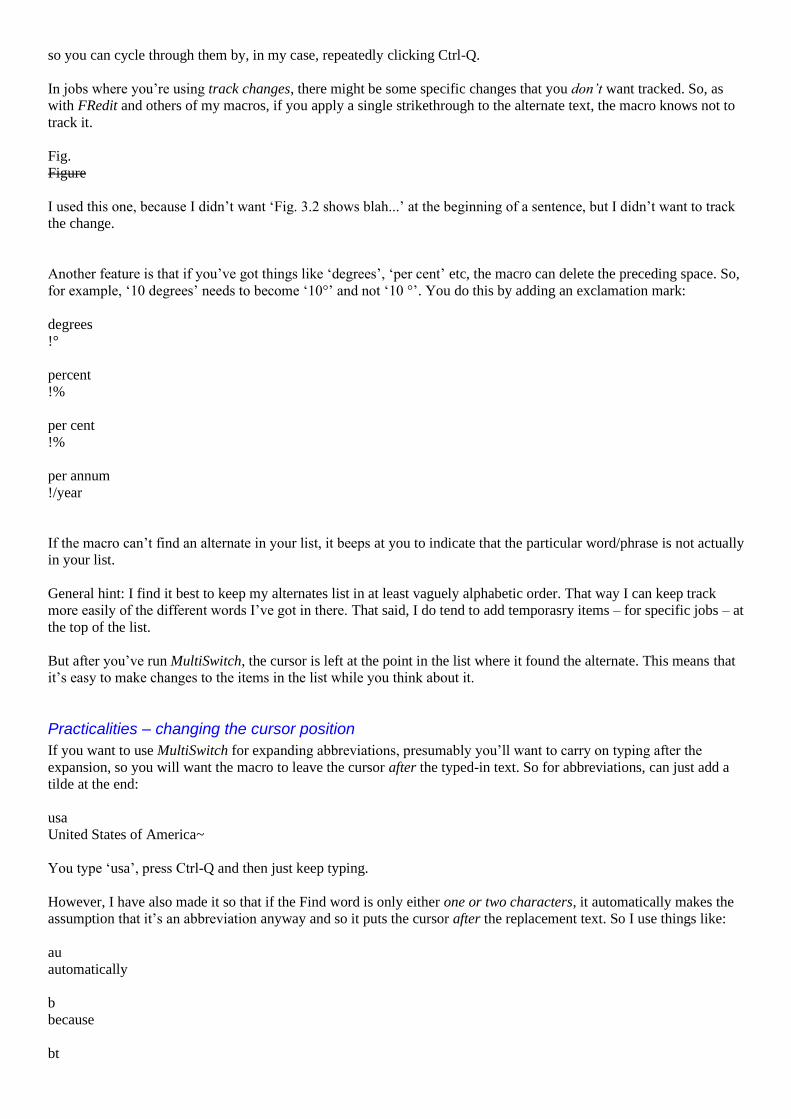
Practicalities – changing the cursor position
If you want to use MultiSwitch for expanding abbreviations, presumably you’ll want to carry on typing after the
expansion, so you will want the macro to leave the cursor after the typed-in text. So for abbreviations, can just add a
tilde at the end:
usa
United States of America~
You type ‘usa’, press Ctrl-Q and then just keep typing.
However, I have also made it so that if the Find word is only either one or two characters, it automatically makes the
assumption that it’s an abbreviation anyway and so it puts the cursor after the replacement text. So I use things like:
au
automatically
b
because
bt
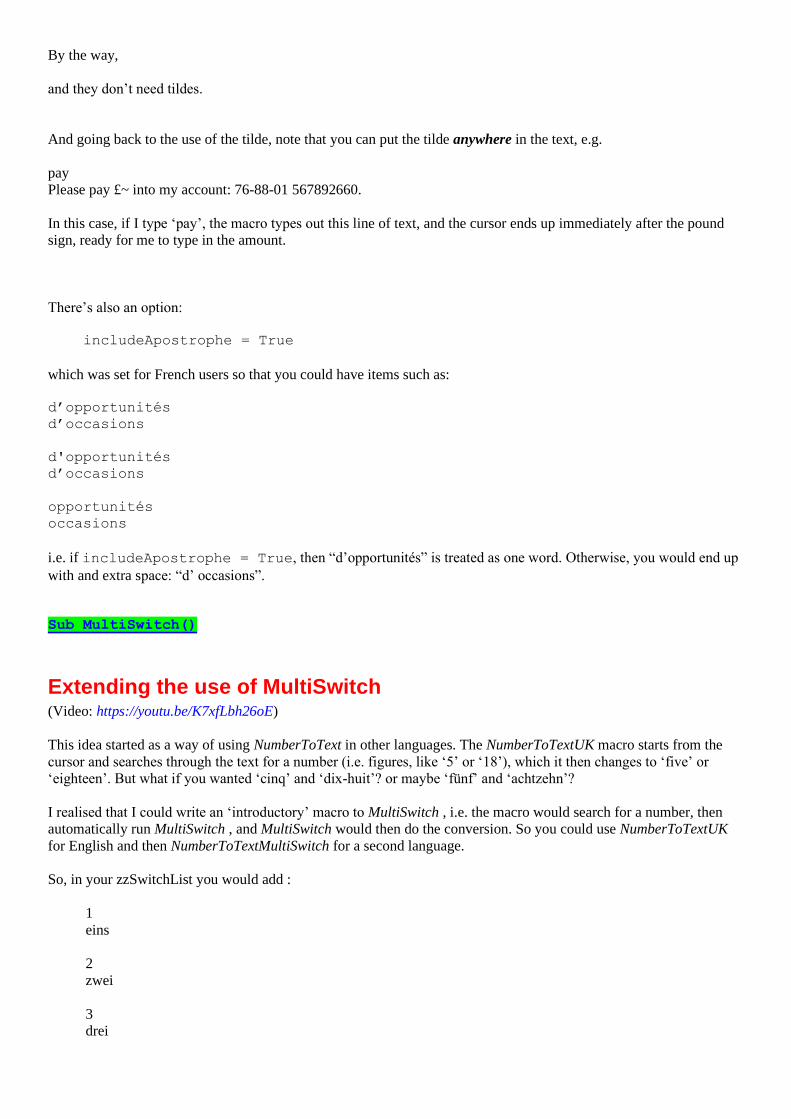
By the way,
and they don’t need tildes.
And going back to the use of the tilde, note that you can put the tilde anywhere in the text, e.g.
pay
Please pay £~ into my account: 76-88-01 567892660.
In this case, if I type ‘pay’, the macro types out this line of text, and the cursor ends up immediately after the pound
sign, ready for me to type in the amount.
There’s also an option:
includeApostrophe = True
which was set for French users so that you could have items such as:
d’opportunités
d’occasions
d'opportunités
d’occasions
opportunités
occasions
i.e. if includeApostrophe = True, then “d’opportunités” is treated as one word. Otherwise, you would end up
with and extra space: “d’ occasions”.
Sub MultiSwitch()
Extending the use of MultiSwitch (Video: https://youtu.be/K7xfLbh26oE)
This idea started as a way of using NumberToText in other languages. The NumberToTextUK macro starts from the
cursor and searches through the text for a number (i.e. figures, like ‘5’ or ‘18’), which it then changes to ‘five’ or
‘eighteen’. But what if you wanted ‘cinq’ and ‘dix-huit’? or maybe ‘fünf’ and ‘achtzehn’?
I realised that I could write an ‘introductory’ macro to MultiSwitch , i.e. the macro would search for a number, then
automatically run MultiSwitch , and MultiSwitch would then do the conversion. So you could use NumberToTextUK
for English and then NumberToTextMultiSwitch for a second language.
So, in your zzSwitchList you would add :
1
eins
2
zwei
3
drei
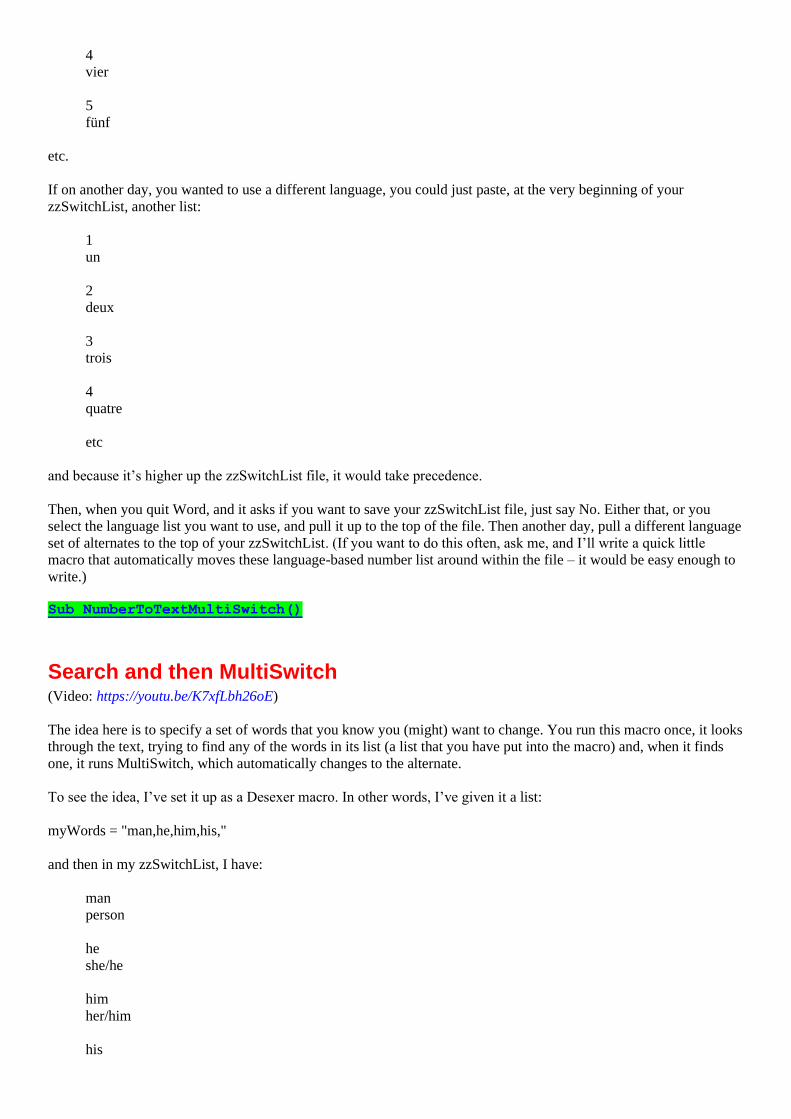
4
vier
5
fünf
etc.
If on another day, you wanted to use a different language, you could just paste, at the very beginning of your
zzSwitchList, another list:
1
un
2
deux
3
trois
4
quatre
etc
and because it’s higher up the zzSwitchList file, it would take precedence.
Then, when you quit Word, and it asks if you want to save your zzSwitchList file, just say No. Either that, or you
select the language list you want to use, and pull it up to the top of the file. Then another day, pull a different language
set of alternates to the top of your zzSwitchList. (If you want to do this often, ask me, and I’ll write a quick little
macro that automatically moves these language-based number list around within the file – it would be easy enough to
write.)
Sub NumberToTextMultiSwitch()
Search and then MultiSwitch (Video: https://youtu.be/K7xfLbh26oE)
The idea here is to specify a set of words that you know you (might) want to change. You run this macro once, it looks
through the text, trying to find any of the words in its list (a list that you have put into the macro) and, when it finds
one, it runs MultiSwitch, which automatically changes to the alternate.
To see the idea, I’ve set it up as a Desexer macro. In other words, I’ve given it a list:
myWords = "man,he,him,his,"
and then in my zzSwitchList, I have:
man
person
he
she/he
him
her/him
his
her/his
Or indeed, I could have:
man
person
he
she/he
they
him
her/him
them
his
her/his
their
That would mean that MultiSwitch would offer me, for ‘he’, a choice of either ‘she/he’ or ‘they’. OK, this might not be
what you want, but it’s just a proof of concept, and as it’s a context-free macro, you can put in whatever words you
want in the list, and then in your zzSwitchList file.
Sub SearchThenMultiSwitch()
Search and then change to alternate This is an idea similar to SearchThenMultiSwitch, but you can use it where the alternates are different from what you
usually use in MultiSwitch, i.e. different from what is in your zzSwitchList file.
(Probably easier is to keep an alternative zzSwitchList file somewhere, and load that when you need to do this
particular job. But I’ve written the macro now, so I’m not going to throw it away!)
Same idea: run the macro, and it checks all the words until it finds one that is in its list (a list that you supply) and then
it finds the alternate – again from your list – and changes it.
These find and replace words are specified as per the following example, which is set up as a TenseChanger – present
to simple past:
myWords = "am:was, are:were, is:was, have:had, has:had, can:could,"
myWords = myWords & ",does:did, do:did, goes:went, go:went,"
The spaces are ignored by the macro; it’s the commas and colons you have to be careful to get in the right order.
If you wanted to, you could make this TenseChanger work either way round, by adding a second set to the first:
myWords = "am:was, are:were, is:was, have:had, has:had, can:could,"
myWords = myWords & ",does:did, do:did, goes:went, go:went," myWords = myWords & "was:am, were:are, was:is, had:have, had:has, could:can,"
myWords = myWords & ",did:does, did:do, went:goes, went:go,"
Drat! No, that doesn’t work, does it?! Well the macro works, but the English is wrong! It’s OK that we use
‘have−>had’ and ‘has−>had’, but of course if it’s ‘had’, should it go to ‘has’ or ‘have’ – you don’t know without the
context.
Still, this is another content-free macro; it’s up to you to decide how to use it for your own work.
Sub SearchThenChange()

Load text from a menu into the clipboard
This is just a trick I use when I want to save myself typing time in applications other than Word. MultiSwitch is fine
for saving typing time in Word, but the idea of this macro is to load up the clipboard with odd bits of information,
such as my home address, email address, username/password, etc. Then I can go to the application in question and
paste in the contents of the clipboard.
When you run the macro, it puts up a menu such as:
e - email
n - Paul Beverley
a - Address
u - UserName
p - Password
You then press your selected letter and the clipboard is loaded.
You set up your own menu items at the start of the macro:
m = m & "e - email [email protected]|"
m = m & "n - Paul Beverley =Paul Beverley|"
m = m & "a - Address =46 Nightingale Drive, Norwich NR8 6TR|"
m = m & "u - UserName =PaulBeverley66|"
m = m & "p - Password =Collywobble_543|"
Sub ClipboardLoader()
Multiple clipboard (https://youtu.be/CqG0v77vPkA and https://youtu.be/uSW26P5ylu0)
Sub ClipStore()
Sub ClipPaste()
Sub ClipPasteTextOnly()
Sub ClipPaste_1()
Quick word switch The previous macro (MultiSwitch) takes the word/phrase at the cursor, looks through your switch-words list and
replaces it. By contrast, this one, WordSwitch, only works on finding single words but you don’t have to put the cursor
actually in the word – just somewhere on the line in front of it. What’s more, WordSwitch incorporates the
functionality of the NumberToText macro. So if the first ‘word’ that it finds is a number, say ‘42’, it will convert it to
‘forty-two’.
Practicalities
The list for this and the previous macro can be held in the same Word file, so it’s very easy to add and subtract
words/phrases for use by the two macros. There’s a sample list below (between the dotted lines), and as you can see, it
can include all sorts of text comments in any style. The only thing the macros use is the text on any line containing a
‘>’ (used by WordSwitch) or any line containing an ‘@’ (used by MultiSwitch):
------------------------------------------------------------------------------------------------------------------------

Quick-find changes (WordSwitch)
one>1
two>2
three>3
four>4
five>5
six>6
seven>7
eight>8
nine>9
ten>10
eleven>11
twelve>12
thirteen>13
fourteen>14
fifteen>15
sixteen>16
seventeen>17
eighteen>18
nineteen>19
twenty>20
One>1
Two>2
Three>3
Four>4
Five>5
Six>6
Seven>7
Eight>8
Nine>9
Ten>10
Eleven>11
Twelve>12
Thirteen>13
Fourteen>14
Fifteen>15
Sixteen>16
Seventeen>17
Eighteen>18
Nineteen>19
Twenty>20
At-the-cursor changes (MultiSwitch)
that@which
which@that
last@past
past@final
like@such as
such as@as with
Like@As with
than@from
to@from
ad hoc@occasionally
England@the UK
Holland@the Netherlands
Continuously@Continually
Continually@Continuously
Continuous@Continual
Continual@Continuous
continuously@continually
continually@continuously
continuous@continual
continual@continuous
Due@Owing
due@owing
however@but
as@because
an@one
etc, etc
------------------------------------------------------------------------------------------------------------------------
More practicalities
The macro, currently, checks the first 30 words counting from the cursor and, if it doesn’t find a match, it beeps at
you. The number of words, and whether or not it beeps is set in the first few lines of the macro.
The special character that is used as a ‘delimiter’ in the switch-words list, to mark the find and replace words, is also
set near the beginning of the macro. Currently it’s set as ‘>’ sign.
Sub WordSwitch()
Quick character switch This is similar to the WordSwitch macro above, but it searches only for individual characters.
Practicalities
Once again, the same switch-word list file can be used. The special delimiting character, this time, is ‘_’, the underline
character.
------------------------------------------------------------------------------------------------------------------------
Quick-find character changes
._,
;_,
,_:
:_;
for -iz- to -is- changes
z_s
Z_S
em dash to en dash
^+_^=
en dash to hyphen
^=_-
hyphen to em dash
-_^+
&_and
%_ per cent
and this autochanges to ‘percent’ if lang = US
Quick-find word changes (WordSwitch)
one>1
two>2
three>3
four>4
five>5
six>6
seven>7

eight>8
nine>9
ten>10
US>USA
and this one also does numbers to words
At-the-cursor changes (MultiSwitch)
that@which
which@that
last@past
past@final
like@such as
such as@as with
Like@As with
etc, etc
------------------------------------------------------------------------------------------------------------------------
Sub CharacterSwitch()
Quick character switch(2) I was using the CharacterSwitch macro above for punctuation characters, mainly, but someone asked if it could be
used for accents, say changing é to è. The answer is yes, but functionally it doesn’t work too well with my desired use
for changing punctuation.
The reason is that you can see punctuation marks way ahead along the line and so just put the cursor anywhere
vaguely before the punctuation mark in question. However, with accents, you need to put the cursor up much closer to
the character you want to change; otherwise you might ‘catch’ the wrong letter.
No worries! You just create an almost identical macro, calling it, say, CharacterSwitch2, and just change the special
delimiting character to, say, ‘\’ – the backslash. OK, it means another keystroke to remember, but you can think of the
previous one as a punctuation changer, and this one as an accent changer – it’s entirely flexible, so you can arrange
things to suit the way you work.
So below is my SwitchList file as it is now. Note that, by having a complete set of the various a’s, you can loop round
them all, coming back to the unaccented a, and then start again – click, click, click, repeatedly running the macro.
------------------------------------------------------------------------------------------------------------------------
Quick-find character changes
._,
;_,
,_:
:_;
em dash to en dash
^+_^=
en dash to hyphen
^=_-
hyphen to em dash
-_^+
&_and
%_ per cent
and this autochanges to ‘percent’ if lang = US
Quick-find character changes 2
a\à
à\â
â\á
á\a
e\é
é\è
è\ê
ê\e
Quick-find word changes
one>1
two>2
three>3
four>4
five>5
six>6
seven>7
eight>8
nine>9
ten>10
US>USA
and this one also does numbers to words
At-the-cursor changes
that@which
which@that
last@past
past@final
like@such as
such as@as with
Like@As with
etc, etc
------------------------------------------------------------------------------------------------------------------------
Sub CharacterSwitch2()
' Version 03.01.11
' Scripted character switching
' Alt-#
specChar = "\"
listName = "zzSwitchList"
myDir = "C:\Documents and Settings\Paul\My Documents\"
etc
etc
etc
Centre text If you, like me, prefer to use a keypress to centre some text then this macro may provide a convenient form. It
switches the line of text where the cursor is to centred text, but if the text is already centred, it puts it back to left
aligned, i.e. it switches the centring on and off.
Sub CentreText()
Bulleted list item to initial uppercase [While this may not be exactly what you want to do, it should give you a template which you can edit to do something
similar.]
This macro finds <bullet><tab> and forces the next character to uppercase. If you assign the macro to a keystroke, you
can auto-repeat it down a list.
Sub ListUcase()
Or, if you’re feeling brave, you can do the whole text in one go:
Sub ListUcaseAll()
As it stands, it works from the current cursor position down to the end, but if you want it to do the whole text,
regardless of where the cursor is, remove the ‘ ' ‘ from the .Wrap wdFindContinue line.
Auto-bulleted list item to initial lowercase [While this may not be exactly what you want to do, it should give you a template which you can edit to do something
similar.]
This macro allows you to select an auto-bulleted (or auto-numbered) list, and it will lowercase the initial letter of each
item.
If no text is selected, it will lowercase the initial letter of every single paragraph in the whole document! But it does
warn you, just in case you forgot to select an area of text.
Sub AutoListLcaseAll()
If you only want to lowercase the initial letter of one line of your list at a time, then this will do that. Just put the
cursor somewhere on the first line and run the macro as many times as you like.
Sub AutoListLcaseOne()
Highlight all lists If you want to go through a text looking at all the lists and doing things to them, it might be helpful to highlight them
all so that you don’t miss any. This macro adds a green (or whatever you prefer) highlight to every line longer than 10
characters (minLength) and shorter than 150 characters (maxLength).
Sub ListHighlighter()
Highlight all paragraphs of a range of word lengths This macro was originally created for someone who wanted to highlight abstracts in a document that were over-length,
i.e. had more than the specified maximum allowable number of words.
However, I made it more generally applicable: it highlights all paragraphs of a given range of word lengths. (N.B. The
previous macro dealt with the number of characters.)
You can specify the minimum number of words and the maximum number, and the macro highlights paragraphs with
more than the minimum and less than or equal to the maximum. The values are set at the beginning of the macro as:
myMinWords = 50
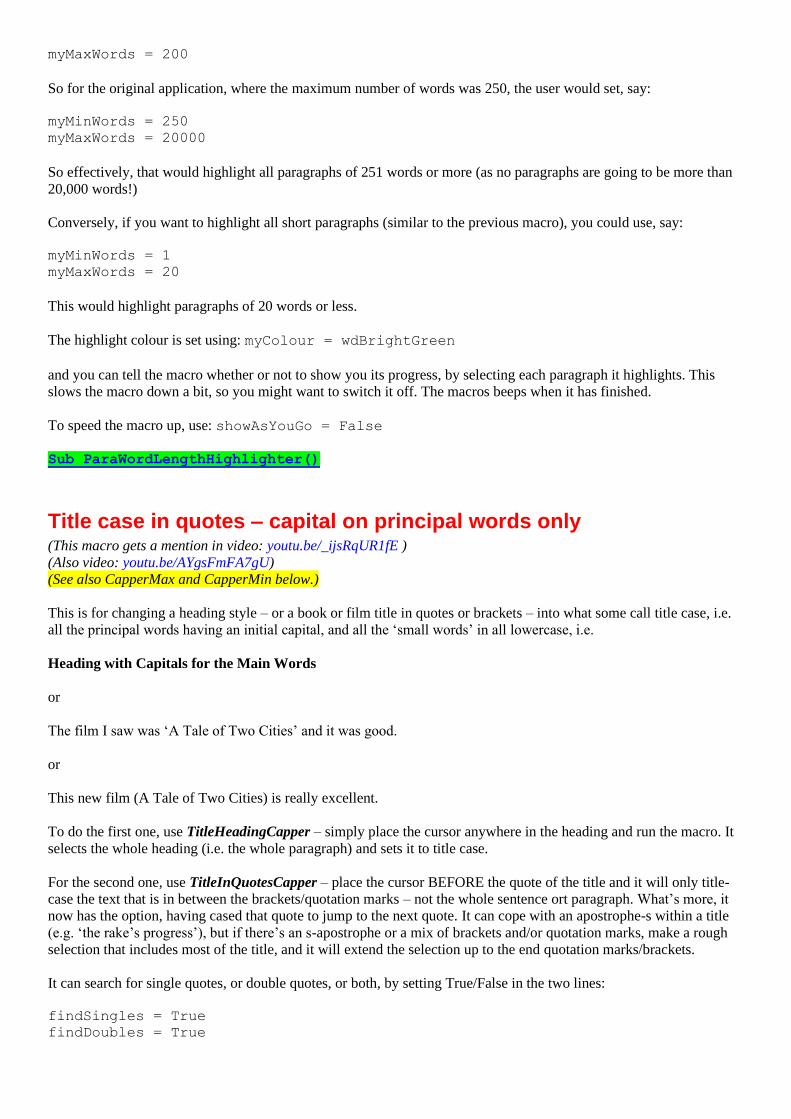
myMaxWords = 200
So for the original application, where the maximum number of words was 250, the user would set, say:
myMinWords = 250
myMaxWords = 20000
So effectively, that would highlight all paragraphs of 251 words or more (as no paragraphs are going to be more than
20,000 words!)
Conversely, if you want to highlight all short paragraphs (similar to the previous macro), you could use, say:
myMinWords = 1
myMaxWords = 20
This would highlight paragraphs of 20 words or less.
The highlight colour is set using: myColour = wdBrightGreen
and you can tell the macro whether or not to show you its progress, by selecting each paragraph it highlights. This
slows the macro down a bit, so you might want to switch it off. The macros beeps when it has finished.
To speed the macro up, use: showAsYouGo = False
Sub ParaWordLengthHighlighter()
Title case in quotes – capital on principal words only (This macro gets a mention in video: youtu.be/_ijsRqUR1fE )
(Also video: youtu.be/AYgsFmFA7gU)
(See also CapperMax and CapperMin below.)
This is for changing a heading style – or a book or film title in quotes or brackets – into what some call title case, i.e.
all the principal words having an initial capital, and all the ‘small words’ in all lowercase, i.e.
Heading with Capitals for the Main Words
or
The film I saw was ‘A Tale of Two Cities’ and it was good.
or
This new film (A Tale of Two Cities) is really excellent.
To do the first one, use TitleHeadingCapper – simply place the cursor anywhere in the heading and run the macro. It
selects the whole heading (i.e. the whole paragraph) and sets it to title case.
For the second one, use TitleInQuotesCapper – place the cursor BEFORE the quote of the title and it will only title-
case the text that is in between the brackets/quotation marks – not the whole sentence ort paragraph. What’s more, it
now has the option, having cased that quote to jump to the next quote. It can cope with an apostrophe-s within a title
(e.g. ‘the rake’s progress’), but if there’s an s-apostrophe or a mix of brackets and/or quotation marks, make a rough
selection that includes most of the title, and it will extend the selection up to the end quotation marks/brackets.
It can search for single quotes, or double quotes, or both, by setting True/False in the two lines:
findSingles = True
findDoubles = True
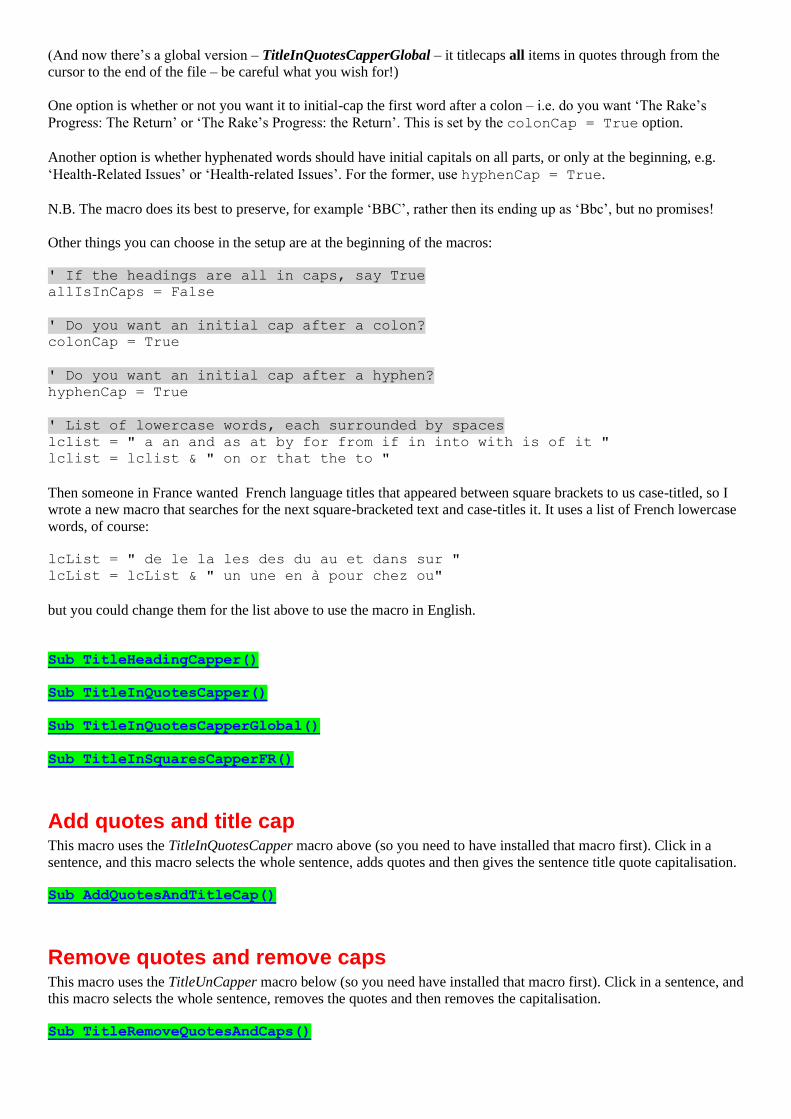
(And now there’s a global version – TitleInQuotesCapperGlobal – it titlecaps all items in quotes through from the
cursor to the end of the file – be careful what you wish for!)
One option is whether or not you want it to initial-cap the first word after a colon – i.e. do you want ‘The Rake’s
Progress: The Return’ or ‘The Rake’s Progress: the Return’. This is set by the colonCap = True option.
Another option is whether hyphenated words should have initial capitals on all parts, or only at the beginning, e.g.
‘Health-Related Issues’ or ‘Health-related Issues’. For the former, use hyphenCap = True.
N.B. The macro does its best to preserve, for example ‘BBC’, rather then its ending up as ‘Bbc’, but no promises!
Other things you can choose in the setup are at the beginning of the macros:
' If the headings are all in caps, say True
allIsInCaps = False
' Do you want an initial cap after a colon?
colonCap = True
' Do you want an initial cap after a hyphen?
hyphenCap = True
' List of lowercase words, each surrounded by spaces
lclist = " a an and as at by for from if in into with is of it "
lclist = lclist & " on or that the to "
Then someone in France wanted French language titles that appeared between square brackets to us case-titled, so I
wrote a new macro that searches for the next square-bracketed text and case-titles it. It uses a list of French lowercase
words, of course:
lcList = " de le la les des du au et dans sur "
lcList = lcList & " un une en à pour chez ou"
but you could change them for the list above to use the macro in English.
Sub TitleHeadingCapper()
Sub TitleInQuotesCapper()
Sub TitleInQuotesCapperGlobal()
Sub TitleInSquaresCapperFR()
Add quotes and title cap This macro uses the TitleInQuotesCapper macro above (so you need to have installed that macro first). Click in a
sentence, and this macro selects the whole sentence, adds quotes and then gives the sentence title quote capitalisation.
Sub AddQuotesAndTitleCap()
Remove quotes and remove caps This macro uses the TitleUnCapper macro below (so you need have installed that macro first). Click in a sentence, and
this macro selects the whole sentence, removes the quotes and then removes the capitalisation.
Sub TitleRemoveQuotesAndCaps()
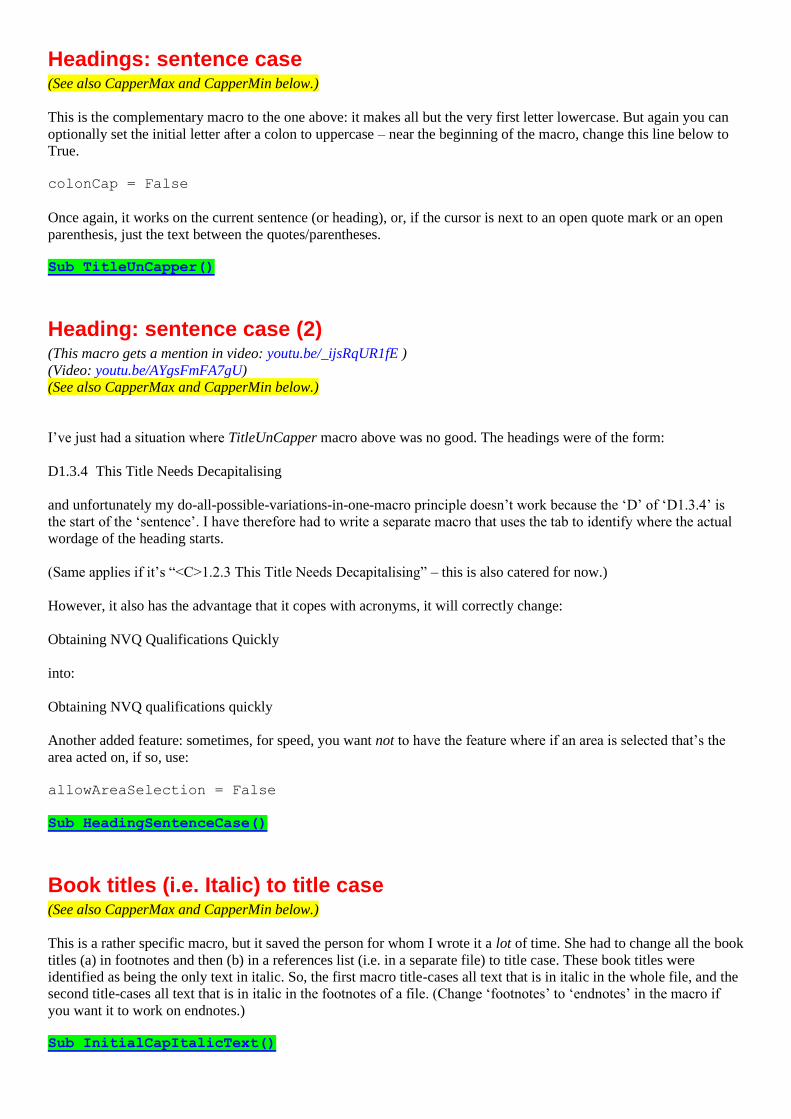
Headings: sentence case (See also CapperMax and CapperMin below.)
This is the complementary macro to the one above: it makes all but the very first letter lowercase. But again you can
optionally set the initial letter after a colon to uppercase – near the beginning of the macro, change this line below to
True.
colonCap = False
Once again, it works on the current sentence (or heading), or, if the cursor is next to an open quote mark or an open
parenthesis, just the text between the quotes/parentheses.
Sub TitleUnCapper()
Heading: sentence case (2) (This macro gets a mention in video: youtu.be/_ijsRqUR1fE )
(Video: youtu.be/AYgsFmFA7gU)
(See also CapperMax and CapperMin below.)
I’ve just had a situation where TitleUnCapper macro above was no good. The headings were of the form:
D1.3.4 This Title Needs Decapitalising
and unfortunately my do-all-possible-variations-in-one-macro principle doesn’t work because the ‘D’ of ‘D1.3.4’ is
the start of the ‘sentence’. I have therefore had to write a separate macro that uses the tab to identify where the actual
wordage of the heading starts.
(Same applies if it’s “<C>1.2.3 This Title Needs Decapitalising” – this is also catered for now.)
However, it also has the advantage that it copes with acronyms, it will correctly change:
Obtaining NVQ Qualifications Quickly
into:
Obtaining NVQ qualifications quickly
Another added feature: sometimes, for speed, you want not to have the feature where if an area is selected that’s the
area acted on, if so, use:
allowAreaSelection = False
Sub HeadingSentenceCase()
Book titles (i.e. Italic) to title case (See also CapperMax and CapperMin below.)
This is a rather specific macro, but it saved the person for whom I wrote it a lot of time. She had to change all the book
titles (a) in footnotes and then (b) in a references list (i.e. in a separate file) to title case. These book titles were
identified as being the only text in italic. So, the first macro title-cases all text that is in italic in the whole file, and the
second title-cases all text that is in italic in the footnotes of a file. (Change ‘footnotes’ to ‘endnotes’ in the macro if
you want it to work on endnotes.)
Sub InitialCapItalicText()
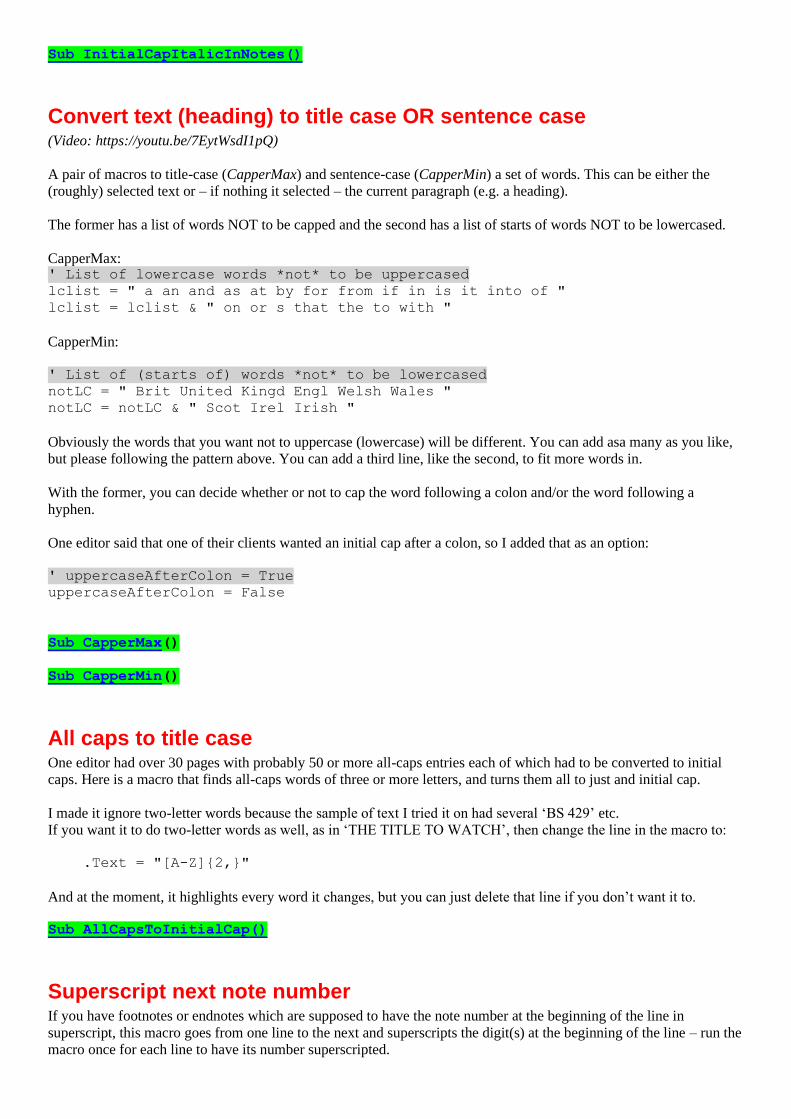
Sub InitialCapItalicInNotes()
Convert text (heading) to title case OR sentence case (Video: https://youtu.be/7EytWsdI1pQ)
A pair of macros to title-case (CapperMax) and sentence-case (CapperMin) a set of words. This can be either the
(roughly) selected text or – if nothing it selected – the current paragraph (e.g. a heading).
The former has a list of words NOT to be capped and the second has a list of starts of words NOT to be lowercased.
CapperMax: ' List of lowercase words *not* to be uppercased
lclist = " a an and as at by for from if in is it into of "
lclist = lclist & " on or s that the to with "
CapperMin:
' List of (starts of) words *not* to be lowercased
notLC = " Brit United Kingd Engl Welsh Wales "
notLC = notLC & " Scot Irel Irish "
Obviously the words that you want not to uppercase (lowercase) will be different. You can add asa many as you like,
but please following the pattern above. You can add a third line, like the second, to fit more words in.
With the former, you can decide whether or not to cap the word following a colon and/or the word following a
hyphen.
One editor said that one of their clients wanted an initial cap after a colon, so I added that as an option:
' uppercaseAfterColon = True
uppercaseAfterColon = False
Sub CapperMax()
Sub CapperMin()
All caps to title case One editor had over 30 pages with probably 50 or more all-caps entries each of which had to be converted to initial
caps. Here is a macro that finds all-caps words of three or more letters, and turns them all to just and initial cap.
I made it ignore two-letter words because the sample of text I tried it on had several ‘BS 429’ etc.
If you want it to do two-letter words as well, as in ‘THE TITLE TO WATCH’, then change the line in the macro to:
.Text = "[A-Z]{2,}"
And at the moment, it highlights every word it changes, but you can just delete that line if you don’t want it to.
Sub AllCapsToInitialCap()
Superscript next note number If you have footnotes or endnotes which are supposed to have the note number at the beginning of the line in
superscript, this macro goes from one line to the next and superscripts the digit(s) at the beginning of the line – run the
macro once for each line to have its number superscripted.

Sub SuperscriptNoteNumber()
Apply/remove italic/bold These two macros apply italic/bold to the current selection. OK, so what’s wrong with using Ctrl-I and Ctrl-B? Well,
if you double-click a word, it selects the space following the word as well. I generally don’t want the space to be
italic/bold. Also, double-clicking a word that is followed by a single quote (be it straight or curly) also selects the
quote, and I don’t want the quote mark to be italic/bold either.
So these macros first pull back the selection away from the space and/or the quote before applying the italic/bold.
Also, if nothing is selected, these macros inch forward by one character, italicising or boldising.
Sub Italiciser()
Sub Boldiser()
In one job I was forever removing the bold from short or long pieces of text, so it seemed helpful to have a macro that
would remove the bold quickly and easily (and removed it without tracking the change).
If no text is selected, it assumes that you want to unbold the current line. Having done so, it moves down a line, in
case you want to run it again for the next line. If some text is selected, however, it removes the bold from just that bit
of text.
Sub BoldKill()
And here’s the same thing for italic...
Sub ItalicKill()
Removing styles and attributes from text I’ve long been unhappy with removing formatting by using Word’s Ctrl-Space action – which runs the ResetChar
function, so I’ve written a more ‘intelligent’ version – by which I mean that (a) it works differently, depending on
what area of text is selected and (b) you can set, in the macro itself, which features do/don’t get ‘normalised’ (i.e.
removed).
1) If no text is selected, it normalises the whole of the current paragraph.
2) If parts of more than one paragraph are selected, it normalises all of those paragraphs, i.e. you don’t need to
accurately select whole paragraphs, but just select roughly.
3) If an area of text within one paragraph is selected, it only normalises the selected text and does not change the
paragraph style.
Also, you can optionally decide whether the macro should remove highlighting and colour:
removeHighlight = True
removeColour = True
If a part paragraph is selected – i.e. (3) above – the features that are normalised are set by (at the beginning of the
macro):
resetAllFormat = False
' which, if true, makes these redundant
resetBoldItalic = True
resetFontName = True

resetFontSize = True
resetSubSuper = True
i.e. the first option, if True, removes all character formatting (leaving the paragraph style unchanged), but you
might, say, want to retain the font size, or not change the font name – your choice.
Sub NormaliseText()
Italicising variables in an equation (1) Suppose you have an equation:
Zpq = x2 + y2 – q3/(Gmax – Gmin)
and you want to italicise the variables but not, of course, the numbers or the operators. No problem, watch:
Zpq = x2 + y2 – q3/(Gmax – Gmin)
That took me six clicks, i.e. I put the cursor at the beginning of the line and ran the macro six times.
But then you spot that, if you’re being posh, the ‘max’ and ‘min’ should have been roman. Two mouse clicks plus
running the macro twice more, gives:
Zpq = x2 + y2 – q3/(Gmax – Gmin)
i.e. I put the cursor in front of each of ‘max’ and ‘min’, and the macro unitalicised them.
I’ve added three extra features. If, rather than just clicking somewhere in the text, you select some text, it simply
(un)italicises the selected text.
Secondly, I found that with, say ‘Cs, Ci, and Dapp (t0)’, I got on a roll and ended up with ‘Cs, Ci, and Dapp (t0)’, so I got
the macro to check if the ‘variable’ was ‘and’, and if so just do nothing and move on.
If you don’t (or do) want these changes tracked, the first line of the macro decides:
doTrack = False
I have found that this macro can “run away with itself” when working inside a table. I’ve therefore set a limit so that,
after a certain number of characters it stops, so that you don’t have to undo (a character at a time!) all the rogue
italicisations it has done.
maxChars = 10
Sub ItaliciseVariable()
Italicising variables in an equation (2) A variation on the theme is ItaliciseOneVariable, which is similar, but it has two modes of working.
(1) Similar to ItaliciseVariable, it runs along the line until it finds an alpha character (i.e. a variable) and but it only
italicises that one single character, so it can be used more selectively than the previous macro; use multiple clicks of
the macro if there are a couple of variables near each other.
(2) More powerfully, if you select some text then it italicises it all at one go, but only the variables, of course, not the
numbers or the maths symbols.
So with this equation:

Zpq = x2 + y2 – q3/(Gmax – Gmin)
it would take three clicks of the macro to italicise the first term; another four macro clicks and the ‘x’, ‘y’, ‘q’, and ‘G’
are done. Then put the cursor somewhere near the minus sign and click the macro again to do the second ‘G’.
However, if you select from the ‘Z’ to the ‘q’, one macro click sorts that out, then a second click and the macro runs
along and gets the first ‘G’, and as before move the cursor and catch the second ‘G’.
Sub ItaliciseOneVariable()
Romanise an existing italic This macro looks along the line until it finds a bunch of italic characters, and unitalicises them.
Sub Romanise()
Romanise italic/bold punctuation (I’ve added a bold-to-roman version.)
This macro looks through the whole document to finds any italic punctuation that is not in the middle of an area of
italic text, and unitalicises it. The aim is to catch, say, “the x, y, and z axes...” where the commas are italic and should
be roman.
Currently it works for comma, semicolon, colon and full point (period). However, this is set in the macro and can be
changed.
Any punctuation that has been romanised will be highlighted, so when you’re reading through, you can check if it’s
done the right thing and you can also get it to highlight the punctuation that it has checked but not changed. For no
highlighting of unchanged punctuation, use:
' stayItalicColour = wdYellow
stayItalicColour = wdNoHighlight
and to highlight it, change this to:
stayItalicColour = wdYellow
' stayItalicColour = wdNoHighlight
Sub PunctuationItalicOff()
Sub PunctuationBoldOff()
Make a phrase italic (Video: youtu.be/P-6VdmT2BbE)
This was asked for, if I remember rightly, by someone having to italicise a load of book titles in a long references list.
So, click somewhere in the first word of a title and run the macro. It selects up to, but not including, the next
punctuation mark, and italicises it.
So in the list below, just click anywhere in each of the words that I’ve highlighted (just so you can see them – nothing
to do with the macro)...
Kabata-Pendias A, and Pendias H (2001) Trace Elements in Soils and Plants (METHA). CRC Press, Boca
Raton. 413pp.

Kisić, I (2014) Effects of soil contamination on the selection of remediation methods. In Guarina-
Medjimurec, N. (ed.) Handbook of research on advancements in environmental engineering. IGI Global,
660pp.
Knüppel J (2012) Land treatment of dredged material including Mechanical Treatment and Dewatering of
Harbor sediments (Third ed.). HPA.
and you will end up with:
Kabata-Pendias A, and Pendias H (2001) Trace Elements in Soils and Plants (METHA). CRC Press, Boca
Raton. 413pp.
Kisić, I (2014) Effects of soil contamination on the selection of remediation methods. In Guarina-
Medjimurec, N. (ed.) Handbook of research on advancements in environmental engineering. IGI Global,
660pp.
Knüppel J (2012) Land treatment of dredged material including Mechanical Treatment and Dewatering of
Harbor sediments (Third ed.). HPA.
You will notice that, in the last one, it has not italicised the ‘)’. That’s because the macro saw the full stop on ‘Ed.’
But no worries, just move the cursor one place to the right and run the macro again, and it will italicise the ‘)’! On a
long references list, this has got to save a lot of time – and tedium, right?!
If there’s a job where you also want to italicise the punctuation mark, then at the start of the macro, you’ve got:
andThePunctuation = False
so change it to True.
And if you want to italicise phrases that occur inside parentheses, you’ve got:
includeParens = True
so change that to False.
Sub ItalicisePhrase()
Italicise biological binomial species names This macro, ItalicBinomial, can turn:
Cyperus papyrus subspecies madagascariensis
Cyperus papyrus subsp. madagascariensis
Cyperus papyrus ssp. madagascariensis
Bazzania decrescens var. ambahatrae
B. decrescens var. ambahatra
into
Cyperus papyrus subspecies madagascariensis
Cyperus papyrus subsp. madagascariensis
Cyperus papyrus ssp. madagascariensis
Bazzania decrescens var. ambahatrae
B. decrescens var. ambahatrae
in five clicks of the keystroke.
So, when you find a binomial as you’re reading through the text, simply click in the first word and run the macro.
The macro will then search out the very next initial capital letter, just in case there’s another binomial nearby.
However, if this is more of a hindrance than a help, simply change the line:
jumpNext = True
to
jumpNext = False
In fact, also, if the ‘subsp’ or ‘var’ is in italic, it reverts it to roman.
Sub ItalicBinomial()
Make italic text more easily visible This macro was created for a job where the author (on his own admission) overused italic: almost every other word
was italicised for stress. So this macro uses underlining to make the italic characters more visible. So the above
sentence then becomes:
This macro was created for a job where the author (on his own admission) overused italic: almost every
other word was italicised for stress.
I could then take all the italic off a paragraph, which is quickly done, leaving:
This macro was created for a job where the author (on his own admission) overused italic: almost every
other word was italicised for stress.
Then as I read the paragraph, I can decide which of the words really do need to be italic, if any.
What’s more, the macro is very useful for something like the example given for the previous macro:
the x, y, and z axes...
which becomes:
the x, y, and z axes...
So I can see immediately that the commas are italic – which is otherwise not that easy to see with the naked eye.
Each time you run the macro, it first removes all the underlining in the whole document, then adds it to the (now
reduced) characters that are still in italic.
Sub UnderlineOnlyItalic()
Applying funny underlines (Video: youtu.be/P-6VdmT2BbE)
Words allows you to use ordinary underlines, but all sorts of different funny underlines. This macro allows you to
change the style of the underlines in either a selected area of text or all of the bits of underlined text in the whole of the
file.
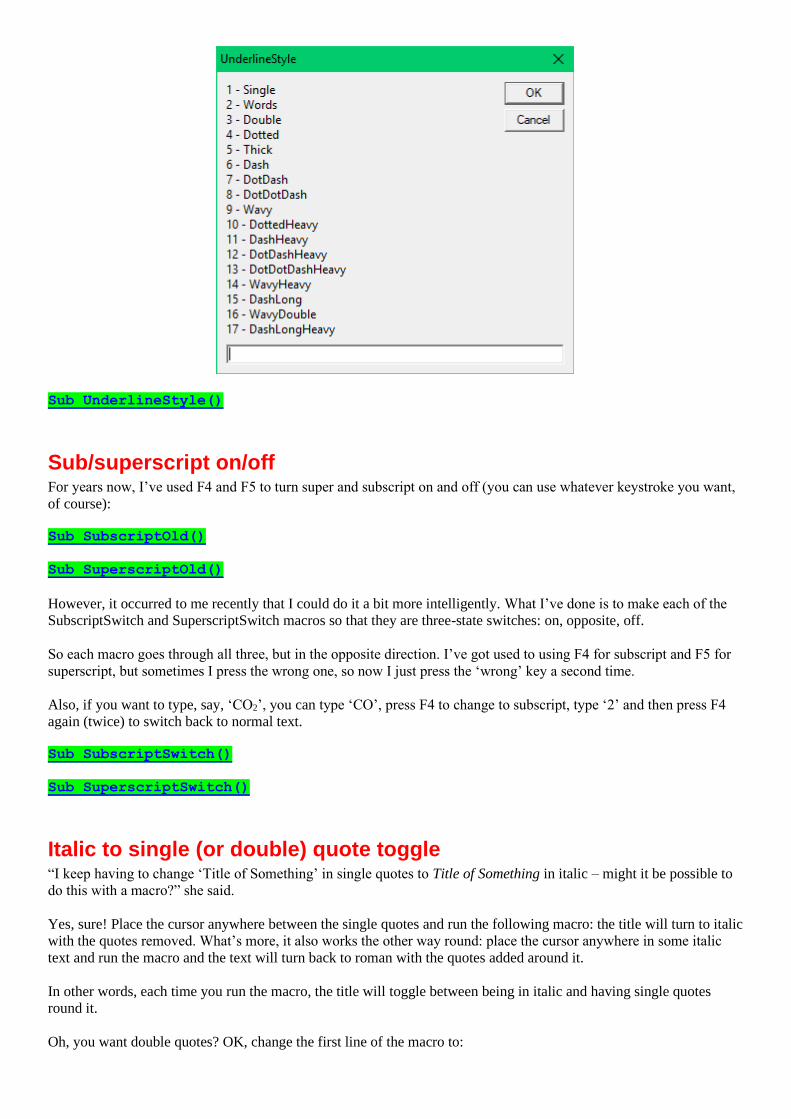
Sub UnderlineStyle()
Sub/superscript on/off For years now, I’ve used F4 and F5 to turn super and subscript on and off (you can use whatever keystroke you want,
of course):
Sub SubscriptOld()
Sub SuperscriptOld()
However, it occurred to me recently that I could do it a bit more intelligently. What I’ve done is to make each of the
SubscriptSwitch and SuperscriptSwitch macros so that they are three-state switches: on, opposite, off.
So each macro goes through all three, but in the opposite direction. I’ve got used to using F4 for subscript and F5 for
superscript, but sometimes I press the wrong one, so now I just press the ‘wrong’ key a second time.
Also, if you want to type, say, ‘CO2’, you can type ‘CO’, press F4 to change to subscript, type ‘2’ and then press F4
again (twice) to switch back to normal text.
Sub SubscriptSwitch()
Sub SuperscriptSwitch()
Italic to single (or double) quote toggle “I keep having to change ‘Title of Something’ in single quotes to Title of Something in italic – might it be possible to
do this with a macro?” she said.
Yes, sure! Place the cursor anywhere between the single quotes and run the following macro: the title will turn to italic
with the quotes removed. What’s more, it also works the other way round: place the cursor anywhere in some italic
text and run the macro and the text will turn back to roman with the quotes added around it.
In other words, each time you run the macro, the title will toggle between being in italic and having single quotes
round it.
Oh, you want double quotes? OK, change the first line of the macro to:

useSingle = False
Sub ItalicQuoteToggle()
Applying an attribute to some text Here’s a macro that applying an attribute (here double-underline) to ‘some text’.
If the cursor is in a table, the macro applies the attribute to the current cell (or column or row, if you prefer – adjust the
macro accordingly), but, if not...
If some text is selected, it applies it to that, but, if not...
It applies it to the current paragraph (or, if you prefer, sentence or word – adjust accordingly).
Sub ApplyAttribute()
Select highlighted text This macro allows you to place the cursor anywhere in the middle of an area of text that is highlighted in a particular
colour. Running the macro then selects the whole of that piece of highlighted text.
You can use this macro just to select the highlighted area, but when the area is selected, you might as well do
something with it – in my case, I wanted to italicise (or unitalicise – it toggles italic on/off ) the text and then remove
the highlight. You can no doubt adjust the last few lines of the macro to do to the text whatever you want.
Sub SelectHighlightedText()
Paste as unformatted text (This macro gets a mention in video: youtu.be/_ijsRqUR1fE )
When you copy some text and paste it somewhere else, it sometimes screws up the formatting. What you need to do is
to paste what is on the clipboard as pure text so that it takes on the formatting of the destination text.
Install this macro and give it the keyboard shortcut, say, Ctrl-Alt-V. Then, if you paste some text and realise there’s a
problem with mismatched formatting, you just Ctrl-Z to undo the paste, and then Ctrl-Alt-V to re-paste it as text.*
Sub PasteUnformatted()
Another example where this tiny macro is really useful is when the author has used some odd combination of changes
in font size, font style etc to achieve a ‘clever’ effect. Returning it to ‘proper’ text is easy: make a selection of the text
– a few characters either side of the rogue characters will do – and do Ctrl-X then Ctrl-Alt-V.
Another facility I’ve discovered makes this facility even more useful:
Sub PasteWithEmphasis()
What happens now on my computer is as follows: I copy something and paste it into a new file, but I see that it’s
bringing too much formatting with it from the original, so I do a Ctrl-Z to undo the first paste and then I have two
options:
(a) The complete, radical, ‘paste as pure text’, introduced above, so that it simply takes up the format of the text into
which it is inserted.
(b) A much more intelligent paste where it takes the basic style of the local text but it does at least bring with it the
bold, italic, small caps, super/subscript etc that had been applied in the original file. So that means that H2O and stress
and 60AD would come through intact, but in the style of the paragraph into which they are pasted.
Getting pure text from PDFs and websites The above two macros are OK when copying and pasting within Word, but if you copy something from other
applications, such as PDFs or websites then getting the text out can sometimes be more problematic; the above macros
may work, but if not, the following macro may well help.
It assumes that the clipboard is loaded with goodness-knows-what, from goodness-knows-where, but that it includes
some text. If so, when you run it, it should paste into your document just the pure text out of whatever-it-was.
What it does is to open a new document, paste the who-knows-what in there wholesale. Then it copies it again, closes
the new file, goes back into the original file and pastes just the text. Yes, I know, in theory it shouldn’t make any
difference, but sometimes it does – pasting just the text out of something copied from a Word file often succeeds
where pasting what has been copied directly out of a PDF or webpage doesn’t.
N.B. If there’s lots of data on the clipboard, Word my take several seconds, maybe even minutes, to process it. Please
be patient and don’t start clicking on the Word file to get it to respond to you. If you really want to give up, press Ctrl-
Break to stop the macro.
(If your keyboard doesn’t have a Break key, you can still stop a macro mid-program. If you run the macro with the
VBA window open and visible on screen, then you can use the stop ‘■’ icon to stop the macro running. STOP PRESS!
I’ve just discovered that, while a macro is running, yes, don’t move the mouse, but you can use the keyboard – press
Alt-F11, VBA will then open, and you can press pause ‘||’ or stop ‘■’.)
(And you could try it with the PasteWithEmphasis function I discovered recently. I haven’t tried it yet.)
Sub ClipToText()
Sub ClipToTextWithEmphasis()
Text from PDFs
However, when text is exported from a PDF there are sometimes two problems:
(a) Some words areruntogether and you couldn’t easilyseparate them.
(b) Ligatures come out as different letters, perhaps capital V and capital W.
I’m pleased to say that (for my current job only) I have solved both problems.
(a) is sometimes solved (or reduced, at least) by saying to the client, ‘The lo-res PDFs you sent aren’t good enough
quality. Please would you send me hi-res PDFs?’
The text scraped out of the new file still has afew joinedup words, but nothing that a quick spellcheck won’t sort out.
(b) is solved courtesy of FRedit and a bit of patient working out of the necessary wildcard F&Rs.
(Interestingly, in the PDF for which I generated this list, all the ‘fl’s did actually came out as ‘fl’. It was only the ‘fi’
and the ‘ff’ that were converted to W and V respectively!)
So here’s the list I used:
~W([bcdfgjklmnpqstvwxz])|fi\1
~V([bcdfgjklmnpqstvwxz])|ff\1
~([a-z])W|\1fi
~([a-z])V|\1ff
~Wr([!io])|fir\1
While this has worked for this particular job, another job might have slightly different issues and require a slightly
different FRedit list. What I suggest is that you examine where the problems lie, try a list something like this, start to
spellcheck the resultant file and see what hasn’t worked. Then refine the list and try again.
Copy and paste styles There’s no need for any macros for this, although you can if you prefer:
Sub StyleCopy()
Sub StylePaste()
However, the CopyFormat and PasteFormat commands can be assigned to keystrokes directly. All you need to do is to
use the Customize Keyboard dialogue box (call it up with my CustomKeys macro!) and select ‘All Commands’ in the
left-hand list and then, in the right-hand list, find CopyFormat (there are a lot of commands, but pressing the ‘c’ key
will at least get you to the beginning of the p’s, then pressing ‘d’ takes you to the beginning of the d’s, i.e. the end of
the c’s) and assign a keystroke to it. And then do the same for the PasteFormat command.
Unify the style of a paragraph or selection (Video: https://youtu.be/hqPVJSZsFDk)
If the attributes/formatting (italic, bold, colour, highlight etc) have got a bit mixed up – perhaps through sections of
text having been copied from elsewhere – then these two macros apply the same formatting to a section of text.
If some text is selected, it reads the style at one end of the selection, and applies it to the whole of the selected text.
One macro copies the format forwards, and the other copies it backwards.
If no text is selected, the macro reads the format at the cursor, and then applies it from there to the beginning of the
current paragraph or from there to the end of the paragraph.
(I find this a useful way to clear URLs back to the normal font etc.)
Sub UnifyFormatForwards()
Sub UnifyFormatBackwards()
Copy to and paste from the spike I’ve never really been able to get my head around the spike, so I’ve implemented my own version which I find more
intuitive (you may not!) as it’s a bit more like the way the clipboard works. It has three functions:
1) Copy the selected text to the spike
2) Cut the selected text to the spike
3) Paste the whole contents of the spike
So the way my system works is that you can copy and/or cut a number of items of text to the spike. You then navigate
to wherever you want it all to be placed and paste the spike. They come out in the order in which they were put onto
the spike.
Unlike with the clipboard, when you paste the spike, the spike is then emptied. In other words, if there’s something on
the clipboard, you can paste it repeatedly, but with the spike, you paste it once and it’s gone from the spike.
Sub SpikeCopy()
Sub SpikeCut()
Sub SpikePaste()
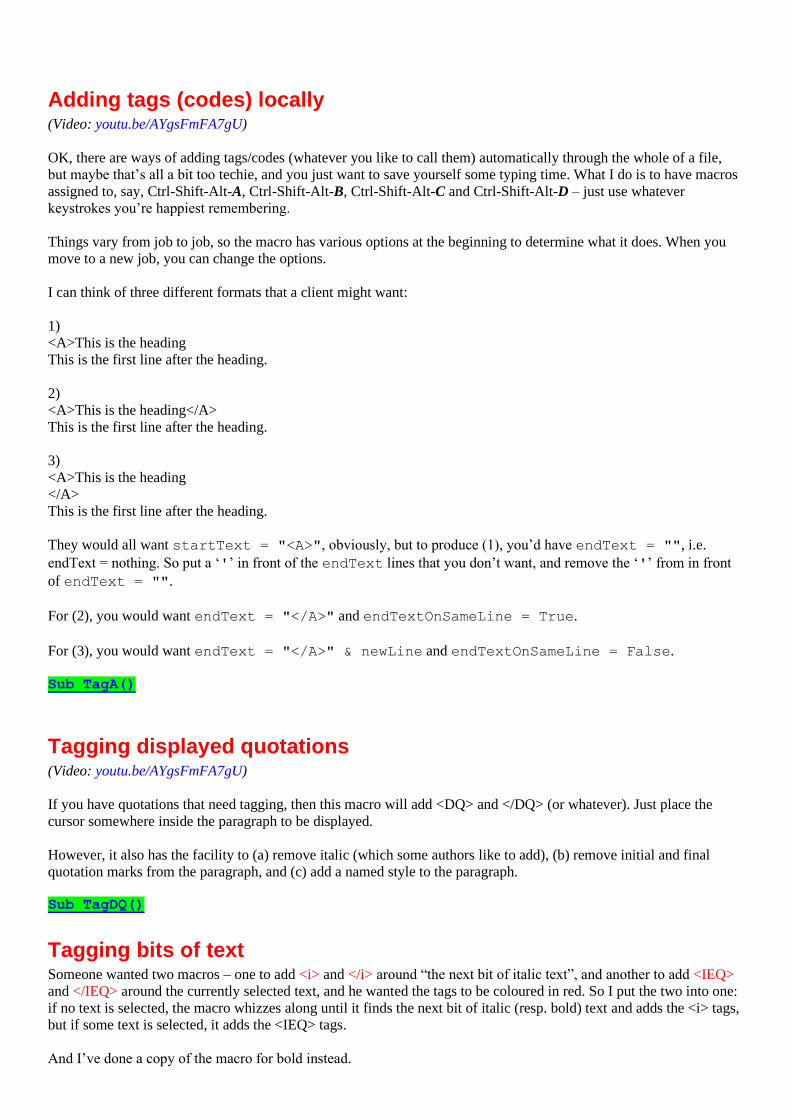
Adding tags (codes) locally (Video: youtu.be/AYgsFmFA7gU)
OK, there are ways of adding tags/codes (whatever you like to call them) automatically through the whole of a file,
but maybe that’s all a bit too techie, and you just want to save yourself some typing time. What I do is to have macros
assigned to, say, Ctrl-Shift-Alt-A, Ctrl-Shift-Alt-B, Ctrl-Shift-Alt-C and Ctrl-Shift-Alt-D – just use whatever
keystrokes you’re happiest remembering.
Things vary from job to job, so the macro has various options at the beginning to determine what it does. When you
move to a new job, you can change the options.
I can think of three different formats that a client might want:
1)
<A>This is the heading
This is the first line after the heading.
2)
<A>This is the heading</A>
This is the first line after the heading.
3)
<A>This is the heading
</A>
This is the first line after the heading.
They would all want startText = "<A>", obviously, but to produce (1), you’d have endText = "", i.e.
endText = nothing. So put a ‘'’ in front of the endText lines that you don’t want, and remove the ‘'’ from in front
of endText = "".
For (2), you would want endText = "</A>" and endTextOnSameLine = True.
For (3), you would want endText = "</A>" & newLine and endTextOnSameLine = False.
Sub TagA()
Tagging displayed quotations (Video: youtu.be/AYgsFmFA7gU)
If you have quotations that need tagging, then this macro will add <DQ> and </DQ> (or whatever). Just place the
cursor somewhere inside the paragraph to be displayed.
However, it also has the facility to (a) remove italic (which some authors like to add), (b) remove initial and final
quotation marks from the paragraph, and (c) add a named style to the paragraph.
Sub TagDQ()
Tagging bits of text Someone wanted two macros – one to add <i> and </i> around “the next bit of italic text”, and another to add <IEQ>
and </IEQ> around the currently selected text, and he wanted the tags to be coloured in red. So I put the two into one:
if no text is selected, the macro whizzes along until it finds the next bit of italic (resp. bold) text and adds the <i> tags,
but if some text is selected, it adds the <IEQ> tags.
And I’ve done a copy of the macro for bold instead.

The actual text of the tags is set up at the beginning of the macro:
tagTextSelected = "<IEQ></IEQ>"
tagTextItalic = "<i></i>"
Sub TagSelectedOrItalic()
Sub TagSelectedOrBold()
Tagging lists If you’ve got lists to tag, this macro should tag any kind of list: lettered, numbered or bulleted, whether it’s an
automatic list or a list created with a style, or just a manually lettered, numbered or bulleted list. Just place the cursor
on the first item of the list and run the macro (and while you do so, I’ll cross my fingers), and it will work out which
type of list it is and (should) tag it accordingly.
You should end up with...
<NL>1. This is the first line.
2. Second line
3. Third line
4. Fourth line
5. Fifth line</NL>
or...
<BL>• This is the first line.
• Second line
• Third line
• Fourth line
• Fifth line</BL>
or...
<LL>a. This is the first line.
b. Second line
c. Third line
d. Fourth line
e. Fifth line</LL>
As with the previous macros, you can customise the codes it uses, and the positioning of the final tag.
There’s sure to be some permutation or combination of list creation that I haven’t thought of. So if it fails to tag your
list properly, please send me a sample list, and I’ll try to add the necessary extra bits to the macro.
Sub TagList()
Tagging captions This macro goes through the whole file, adding a tag <Cap> or whatever, to all the figure captions, table captions and
box captions. And it also checks to see if the caption has a full point (period) at the end (if wanted – not all clients do).
Sub FigTabBoxTagger()
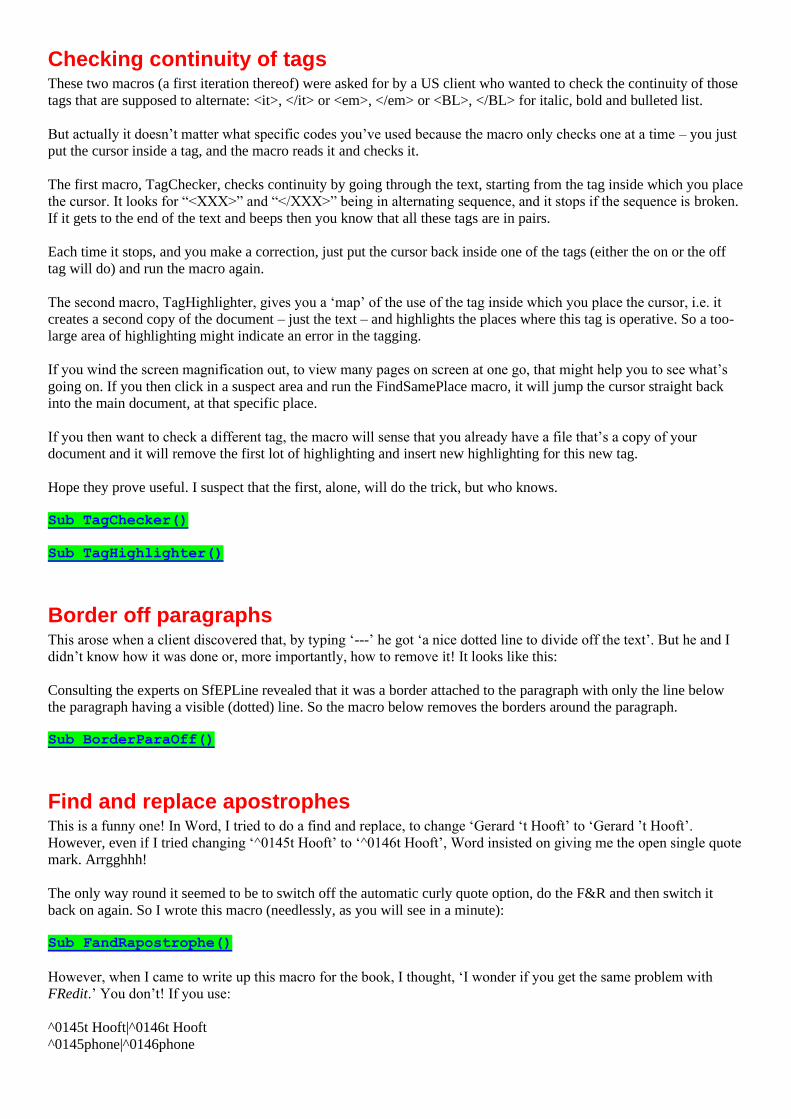
Checking continuity of tags These two macros (a first iteration thereof) were asked for by a US client who wanted to check the continuity of those
tags that are supposed to alternate: <it>, </it> or <em>, </em> or <BL>, </BL> for italic, bold and bulleted list.
But actually it doesn’t matter what specific codes you’ve used because the macro only checks one at a time – you just
put the cursor inside a tag, and the macro reads it and checks it.
The first macro, TagChecker, checks continuity by going through the text, starting from the tag inside which you place
the cursor. It looks for “<XXX>” and “</XXX>” being in alternating sequence, and it stops if the sequence is broken.
If it gets to the end of the text and beeps then you know that all these tags are in pairs.
Each time it stops, and you make a correction, just put the cursor back inside one of the tags (either the on or the off
tag will do) and run the macro again.
The second macro, TagHighlighter, gives you a ‘map’ of the use of the tag inside which you place the cursor, i.e. it
creates a second copy of the document – just the text – and highlights the places where this tag is operative. So a too-
large area of highlighting might indicate an error in the tagging.
If you wind the screen magnification out, to view many pages on screen at one go, that might help you to see what’s
going on. If you then click in a suspect area and run the FindSamePlace macro, it will jump the cursor straight back
into the main document, at that specific place.
If you then want to check a different tag, the macro will sense that you already have a file that’s a copy of your
document and it will remove the first lot of highlighting and insert new highlighting for this new tag.
Hope they prove useful. I suspect that the first, alone, will do the trick, but who knows.
Sub TagChecker()
Sub TagHighlighter()
Border off paragraphs This arose when a client discovered that, by typing ‘---’ he got ‘a nice dotted line to divide off the text’. But he and I
didn’t know how it was done or, more importantly, how to remove it! It looks like this:
Consulting the experts on SfEPLine revealed that it was a border attached to the paragraph with only the line below
the paragraph having a visible (dotted) line. So the macro below removes the borders around the paragraph.
Sub BorderParaOff()
Find and replace apostrophes This is a funny one! In Word, I tried to do a find and replace, to change ‘Gerard ‘t Hooft’ to ‘Gerard ’t Hooft’.
However, even if I tried changing ‘^0145t Hooft’ to ‘^0146t Hooft’, Word insisted on giving me the open single quote
mark. Arrgghhh!
The only way round it seemed to be to switch off the automatic curly quote option, do the F&R and then switch it
back on again. So I wrote this macro (needlessly, as you will see in a minute):
Sub FandRapostrophe()
However, when I came to write up this macro for the book, I thought, ‘I wonder if you get the same problem with
FRedit.’ You don’t! If you use:
^0145t Hooft|^0146t Hooft
^0145phone|^0146phone

it works perfectly, ignoring the auto curly quotes feature. Sorted! :-)
Inserting special characters (accents) To insert ‘funny’ characters into the text, Word provides the Insert Symbol window. But do you have the same
problem as me? If I want an accented character, say an ‘à’, I call up the Symbol window, then spend ages scrolling up
and down, trying to find the section where these symbols occur.
Not any more. This macro types an accented character (any old character) into the text, and selects it. Then, when it
calls up the Insert Symbol window, it goes straight to the accented characters section so that I can select the one I want
straight away. On clicking ‘Insert’, my selected character replaces the one that the macro inserted.
Sub AccentPicker()
Inserting special characters (Greek) Here’s the same macro but for Greek characters.
Sub GreekPicker()
Inserting special characters (scientific) And here’s the same macro but for scientific characters such as ≈, ≡, ≈, ≤, →, ⅔, ∞, which are all near to each other on
the Insert Symbol dialogue box.
Sub SciMarkPicker()
Move date within reference (Video: youtu.be/C1pIYOjKXXI)
This macro assumes that the reference is of the form:
Bloggs, Leon. The Hungry Soul: Eating and the Perfecting of Our Nature.
Chicago: University of Chicago Press, 1999.
and should be changed to:
Bloggs, Leon. (1999) The Hungry Soul: Eating and the Perfecting of Our Nature.
Chicago: University of Chicago Press.
Place the cursor in the first reference, run the macro, and it will stop when it hits either a blank line or the end of the
file. It highlights and/or colours every reference it has not changed, so a highlighted and/or coloured reference means
that it couldn’t find a date at the end of it.
You can choose your highlight colour and/or font colour by setting the lines at the beginning of the macro
accordingly.
Sub ReferenceDateShift()
Add dates to reference citations (Video: youtu.be/C1pIYOjKXXI)

In the job for which the previous macro was written, the author had cited the references by name only, and not
bothered to add the date. So with this macro, you again place the cursor on the first reference in the list. It then picks
up the name and date of each reference, goes to the top of the file, finds the first occurrence of that name and adds the
date in brackets. So, for:
Bloggs, Leon (1999). The Hungry Soul: Eating and the Perfecting of Our Nature.
Chicago: University of Chicago Press.
If the text says, ‘The view of Bloggs is that eating is a good thing’, it then becomes ‘The view of Bloggs (1999) is that
eating is a good thing.’ It highlights the name and added date which is useful if you decide it’s in the wrong place and
want to move it. (By changing the first four lines of the macro, you can change the colour of the highlighting and/or
use coloured font.)
But this is only works, of course, if Bloggs only has one cited reference. But then if there are two, and the author just
says, ‘Bloggs shows...’ then you’ve got to raise an author query anyway. You’ll just get: ‘The view of Bloggs (2007)
(1999) is that eating is a good thing.’ at the first occurrence of Bloggs’s name.
The macro is a bit intelligent too. If the citation it finds is ‘(Brown: 81–82)’, it doesn’t just change it to ‘(Brown
(2010): 81–82)’ but rather ‘(Brown 2010: 81–82)’.
Sub ReferenceNameFinder()
List all references in the notes (for converting to short title) (Video: youtu.be/C1pIYOjKXXI)
The idea here is to create a separate file with an alphabetic list of all the references in the footnotes, e.g.
1 See explanation in J Smith, Ask Me to Dinner (London: Peter, 1998) 164.
It picks out all the text looking like “J Smith, Ask Me to Dinner (London: Peter, 1998) 164.” and creates a list of them.
You can then use that list to help you see what need to be made into short title form (sorry, I’ve never used short titles,
so I don’t know quite what you do, but having a list of all the references is reputedly useful.)
(At this point, you might want to make use of FindSamePlace, to jump back and forth between the main text and the
references list. Oh, bother! I’ve just tried it, and while FindSamePlace allows you to jump from the footnotes out to
the refs list, but it can’t manage to jump you back again because it only looks in the main text, and not the footnotes. If
you want that feature, please ask, and I’ll add it to FindSamePlace. 19.05.13)
Anyway, can you see a problem? What about, say,
HLA Smith, The Concept of Fish, 2nd ed, edited by C Brown and J Round (Oxford: Clarendon Press, 1997) vi.”?
Unfortunately, it will split this into two ‘references’ because it has found two ‘authors’:
C Brown and J Round (Oxford: Clarendon Press, 1997) vi.
HLA Smith, The Concept of Fish, 2nd ed, edited by
OK, so when you run the macro, it asks if you want to do a test run. On the first run, you say ‘Yes’, and you’ll be able
to see that the above reference has been split, so now you go back to this reference in the notes and ‘blank off’ the
editors’ names by making them a different font colour:
HLA Smith, The Concept of Fish, 2nd ed, edited by C Brown and J Round (Oxford: Clarendon Press, 1997) vi.
If you run a test again, you’ll see that it has not highlighted Brown. (The highlighting is the sign that it is going to be
the start of a new, separate reference.)
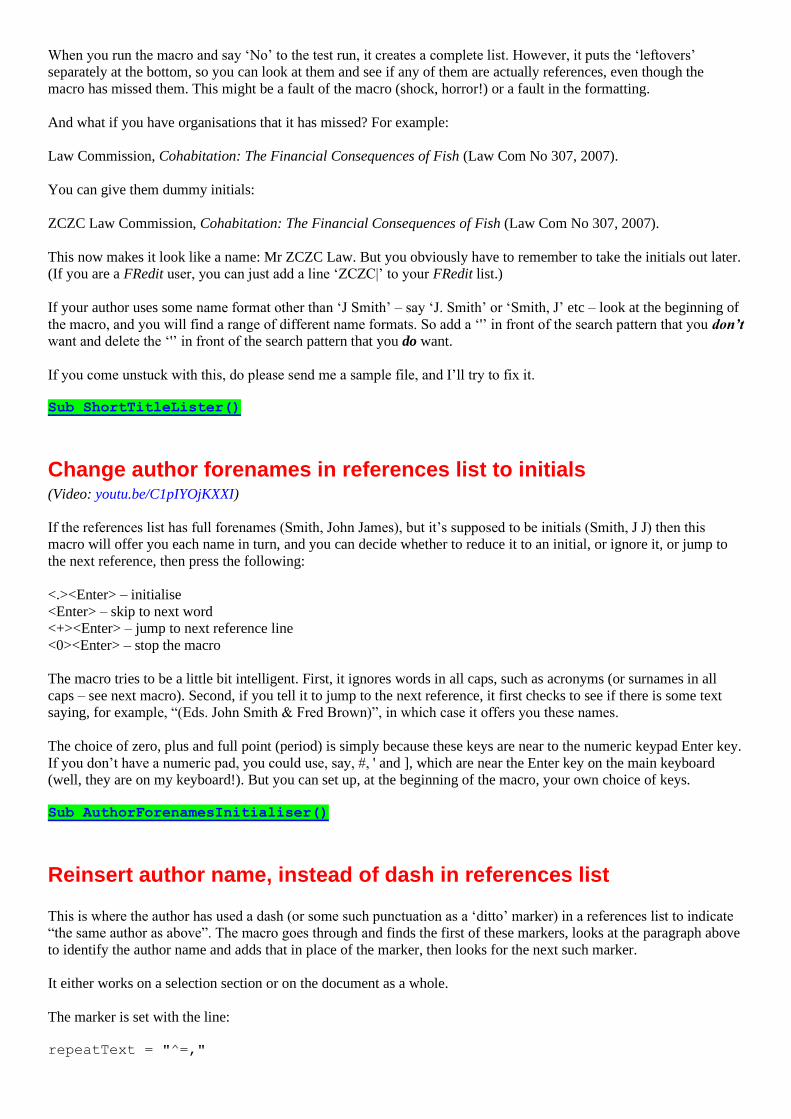
When you run the macro and say ‘No’ to the test run, it creates a complete list. However, it puts the ‘leftovers’
separately at the bottom, so you can look at them and see if any of them are actually references, even though the
macro has missed them. This might be a fault of the macro (shock, horror!) or a fault in the formatting.
And what if you have organisations that it has missed? For example:
Law Commission, Cohabitation: The Financial Consequences of Fish (Law Com No 307, 2007).
You can give them dummy initials:
ZCZC Law Commission, Cohabitation: The Financial Consequences of Fish (Law Com No 307, 2007).
This now makes it look like a name: Mr ZCZC Law. But you obviously have to remember to take the initials out later.
(If you are a FRedit user, you can just add a line ‘ZCZC|’ to your FRedit list.)
If your author uses some name format other than ‘J Smith’ – say ‘J. Smith’ or ‘Smith, J’ etc – look at the beginning of
the macro, and you will find a range of different name formats. So add a ‘'’ in front of the search pattern that you don’t
want and delete the ‘'’ in front of the search pattern that you do want.
If you come unstuck with this, do please send me a sample file, and I’ll try to fix it.
Sub ShortTitleLister()
Change author forenames in references list to initials (Video: youtu.be/C1pIYOjKXXI)
If the references list has full forenames (Smith, John James), but it’s supposed to be initials (Smith, J J) then this
macro will offer you each name in turn, and you can decide whether to reduce it to an initial, or ignore it, or jump to
the next reference, then press the following:
<.><Enter> – initialise
<Enter> – skip to next word
<+><Enter> – jump to next reference line
<0><Enter> – stop the macro
The macro tries to be a little bit intelligent. First, it ignores words in all caps, such as acronyms (or surnames in all
caps – see next macro). Second, if you tell it to jump to the next reference, it first checks to see if there is some text
saying, for example, “(Eds. John Smith & Fred Brown)”, in which case it offers you these names.
The choice of zero, plus and full point (period) is simply because these keys are near to the numeric keypad Enter key.
If you don’t have a numeric pad, you could use, say, #, ' and ], which are near the Enter key on the main keyboard
(well, they are on my keyboard!). But you can set up, at the beginning of the macro, your own choice of keys.
Sub AuthorForenamesInitialiser()
Reinsert author name, instead of dash in references list
This is where the author has used a dash (or some such punctuation as a ‘ditto’ marker) in a references list to indicate
“the same author as above”. The macro goes through and finds the first of these markers, looks at the paragraph above
to identify the author name and adds that in place of the marker, then looks for the next such marker.
It either works on a selection section or on the document as a whole.
The marker is set with the line:
repeatText = "^=,"

So in that case, it would be looking for an en dash followed by a comma.
As it stands, the macro looks for the second comma in the actual reference to define the name. This might not be what
you need. In that case let me know what your references list looks like, and I’ll work out the logic needed in the macro
to define the end of the ‘name’ of the reference.
So it would work for
Beverley, P.E., “The book wot I wrote”, Archive Publications, Norwich 2020.
(which is the format of the references being edited by the requester of this macro) but I’d have to alter the macro if it
were:
Beverley, P.E. (2020) “The book wot I wrote”, Archive Publications, Norwich.
I just altered it!
Sub AuthorNameReinsert()
Sub AuthorNameReinsertParens()
Check/change author/date formatting in references list (Video: youtu.be/C1pIYOjKXXI)
(This macro won’t work if the surnames are all uppercase, so you’ll need to downcase them first – see the next
macro.)
Place the cursor in the first reference to be checked and run the macro. It will then check through that reference and
succeeding references, correcting the formatting of the author names and dates, as necessary, according to the
formatting options that you have set up beforehand.
It deals with, for example, whether or not initials are spaced, and/or have a full point (period), whether initials are
before or after the surname, using ‘&’ ‘and’ or neither, and whether you have commas and/or full points (periods) here
there and wherever.
It was originally set up for Harvard type references, e.g.
Monaco, J.L. & Lawrence, W.T. (2003) Acute wound healing an overview. Clinics in Plastic Surgery 30, 1-12.
Review.
But it will now also cope with numbered references:
[62]. Monaco, J.L. & Lawrence, W.T. (2003) Acute wound healing an overview. Clinics in Plastic Surgery 30, 1-12.
Review.
And also references where the date is near the end:
65. Cheng A, Lakhiani C, Saint-Cyr M. Treatment of capsular contracture using complete implant coverage by
acellular dermal matrix: a novel technique. Plastic and reconstructive surgery. 2013;132(3):519-29.
In this case, it also allows you to add the date after the names:
65. Cheng A, Lakhiani C, Saint-Cyr M. (2013) Treatment of capsular...

These options are set up at the beginning of the macro, so you have to edit the options according to the options needed
for the job you are doing. (If you have to change options a lot, you can have two different sets of options by selecting
either optionSet = 1 or optionSet = 2 at the beginning of the macro.)
If the macro finds something that looks odd, or it doesn’t know how to format, it will stop and ask. You can decide
what to do with it.
The options at the beginning of the macro also include the possibility of getting the macro to generate a file showing
which (if any) of the name/date texts it has changed. You can then check to see if it’s done them correctly. If it’s the
macro that’s at fault, please tell me. Once you have gained confidence in the macro’s ability to do the job properly,
you might decide to switch the change list facility off.
It copes with things like “Brown, P. and Green, H. (Eds.) (2003)”, and if it sees, say, “Brown, P. and Green, H.,
Editors. (2003)” it will at first think that the “Editors” is another surname (but with no initials). However, if the
uninitialed ‘surname’, starts with “Ed”, then it will replace it with the optional edText or edsText (singular or
plural) as listed in the options lists in the macro.
I’m afraid that it can’t cope with multi-word surnames such as ‘von Trapp’ or ‘de la Mare’, so if it finds these it stops
and asks you whether to continue, highlight the reference or stop.
You can add to the list of words that might signify a multi-word surname:
avoidWords = "de la den der du ten van von"
This is case insensitive, so it will catch both ‘von Trapp’ and ‘Von Trapp’.
Also, there’s now an option to highlight any reference that has five or more authors. This was added because Wiley’s
content guidelines say that references with five or more authors, should be listed with only the first three authors’
names, and then ‘et al.’
And having highlighted them, you can then go through afterwards with the macro, EtAlElision (below), which will
delete the unwanted author names beyond a certain specified number.
One of the options at the beginning of the macro (in the sections marked as Case 1 and Case 2) you can specify
whether or not the ‘et al(.)’ is in italic or not. Currently it says:
etalItalic = True
Change to False if you want it in roman.
Sub AuthorDateFormatter()
Convert uppercase surnames to initial capital (This and the following two macros seem to describe macros that do the same thing! Oh, it seems that this one aims to
be global, through the whole list, while the other two are selective. Your choice. ☺)
If the surnames in a references list are in all uppercase, then AuthorDateFormatter won’t work. This macro converts
the surnames to initial capital only. Short Chinese surnames such as Hu and Lo are a challenge (i.e. they appear as HU
and LO!), so the macro assumes that two-letter words are initials, and doesn’t change them.
However, if you also have Arabic names, starting Al and El, these too will be unchanged, so I’ve added a list at the
beginning of the macro:
LCnames = "AL,EL"
and these names will be changed to initial capital by the macro. Yes, AL and EL could be initials, so you might like to
have the option to change them or not. This is set by:

stopToCheck = True
Then you answer Yes or No, accordingly.
OK, I accept that ‘SMITH, ABC’ is going be turned into ‘Smith, Abc’, but you can’t have everything! Well, I could
probably program more into the macro, to check for the position of the comma, but there are so many alternative
formats for references lists that I’d really rather not, if you don’t mind; there are other things that could better occupy
my time. :-)
Sub AuthorInitialCapitalReferences()
Lowercase author surnames in references list (Video: youtu.be/C1pIYOjKXXI)
This macro starts from the current cursor position and goes down through the text to the end of the file. It looks for,
e.g. “SMITH, J.” and converts it to “Smith, J.”
However, there may well be other words (e.g. acronyms) that need to stay in uppercase, so the macro offers you each
word in turn, and you can click ‘.’ and Enter to do the lowercasing, or just Enter to skip to the next uppercase item;
clicking ‘0’ (zero) and Enter stops the macro. This is useful in case you accidentally lowercase an acronym; then Ctrl-
Z is your friend!
. Enter – lowercase
Enter – skip to next all-caps word
0 Enter – stop the macro
The choice of zero and full point (period) is simply because these keys are near to the numeric keypad Enter key. If
you don’t have a numeric pad, you could use, say, # and ], two keys that are near the Enter key on the main keyboard
(well, they are on my keyboard!). But you can set up, at the beginning of the macro, your own choice of keys.
Sub AuthorsNotAllCaps()
If you’re feeling brave, here’s a version that tries to be a bit more intelligent, but strips right through from the cursor.
to the end of the file. You might want to adjust the wildcard find it uses to locate what it thinks is an uppercase
surname.
Sub AuthorCaseChange()
Reduce the number of authors in a references list to three (Video: youtu.be/C1pIYOjKXXI)
The idea is that you first use AuthorDateFormatter to check the reference list; it helpfully highlights all the references
that have more authors than the specified number.
You can then go to the first of these too-long references and run EtAlElision. It chops the reference down to just three
author names and adds the ‘et al’ (spelt and/or italic, as you wish).
It then looks down the rest of the list, and every time it finds a highlighted reference, it chops it down to size too.
However, if you have not used AuthorDateFormatter, you can use this macro on a one-reference-at-a-time basis.
Change the line at the beginning to:
doJustOne = True

Sub EtAlElision()
Reduce multi-author citation to ‘Bloggs et al.’ (Video: youtu.be/C1pIYOjKXXI)
This macro works on the citation, not the reference. It changes, say, “(Bloggs, Brown and Green, 2005)” to “(Bloggs
et al., 2005)”. Just click in ‘Bloggs’ and run the macro.
If your ‘et al’s have to be italic, change the first line of the macro to:
isItalic = True
N.B. When you try this macro, it may not work for the particular punctuation (or punctuations) that your author has
used, so let me know what the punctuation is, and I’ll fiddle it to suit your job.
Sub EtAlCitationElision()
Highlight all multi-author citations in text (Video: youtu.be/C1pIYOjKXXI)
This is a companion to the above macro. It looks through the whole text for citations such as “(Bloggs, Brown and
Green, 2005)” and highlights them. Then as you read the text, they are brought to your attention, and you can use
EtAlCitationElision to change to ‘Bloggs et al.’.
N.B. Again, when you try this macro, it may not work for the particular punctuation (or punctuations) that your author
has used, so let me know what the punctuation is, and I’ll fiddle it to suit your job.
Sub HighlightMultiAuthorCitations()
Change author name order in references list (Video: youtu.be/C1pIYOjKXXI)
(I’ve put two macros in here, neither of which is fully functional, but if this is something you would like to do, please
send me a sample references list, and I’ll get one or other of them working for you.)
If you have a references list (or a set of footnotes/endnotes) where the name is in the wrong order, the aim of these two
macros is to reverse, F. Bloggs or Fred Bloggs, to Bloggs, F. or Bloggs, Fred. And the other macro aims to do the
opposite switch of name order.
Sub AuthorNameSwap()
Sub SwapNames()
Move date (year) to end of line in references list (Video: youtu.be/C1pIYOjKXXI)
Yesterday someone said...
My bibliography is currently in the format:
Courtneidge, R., 1930. I Was an Actor Once. London: Hutchinson.
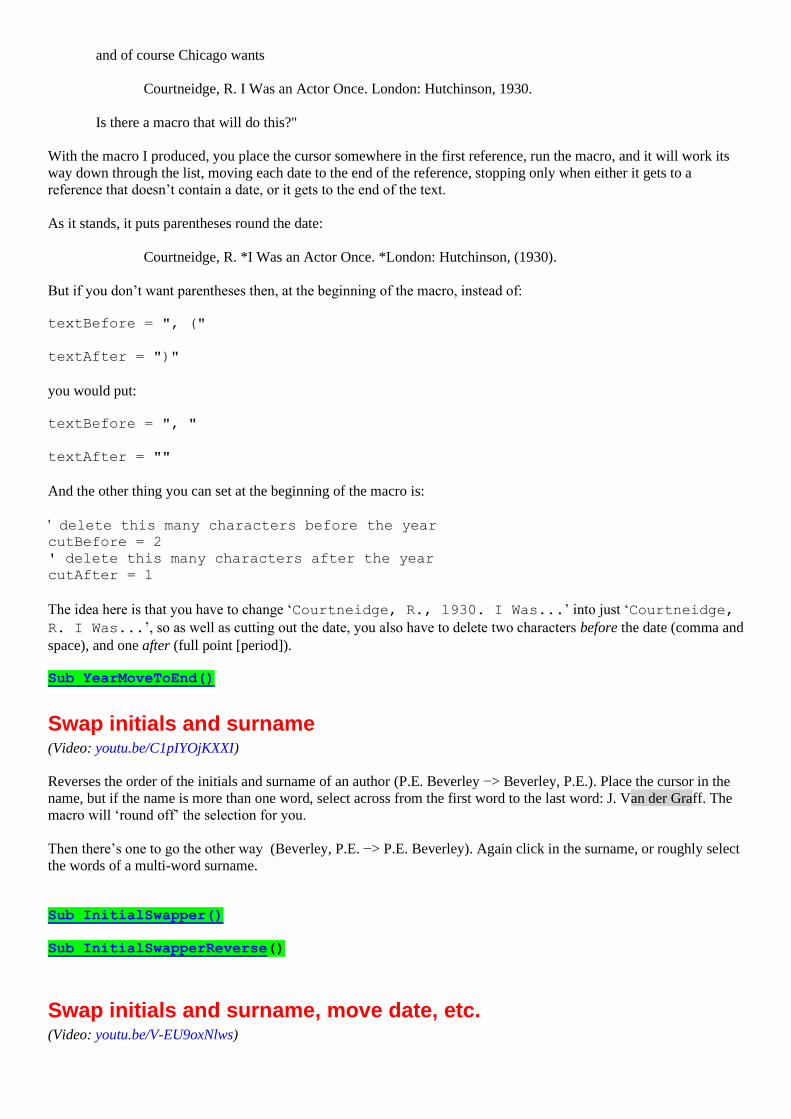
and of course Chicago wants
Courtneidge, R. I Was an Actor Once. London: Hutchinson, 1930.
Is there a macro that will do this?"
With the macro I produced, you place the cursor somewhere in the first reference, run the macro, and it will work its
way down through the list, moving each date to the end of the reference, stopping only when either it gets to a
reference that doesn’t contain a date, or it gets to the end of the text.
As it stands, it puts parentheses round the date:
Courtneidge, R. *I Was an Actor Once. *London: Hutchinson, (1930).
But if you don’t want parentheses then, at the beginning of the macro, instead of:
textBefore = ", ("
textAfter = ")"
you would put:
textBefore = ", "
textAfter = ""
And the other thing you can set at the beginning of the macro is:
' delete this many characters before the year cutBefore = 2
' delete this many characters after the year
cutAfter = 1
The idea here is that you have to change ‘Courtneidge, R., 1930. I Was...’ into just ‘Courtneidge,
R. I Was...’, so as well as cutting out the date, you also have to delete two characters before the date (comma and
space), and one after (full point [period]).
Sub YearMoveToEnd()
Swap initials and surname (Video: youtu.be/C1pIYOjKXXI)
Reverses the order of the initials and surname of an author (P.E. Beverley −> Beverley, P.E.). Place the cursor in the
name, but if the name is more than one word, select across from the first word to the last word: J. Van der Graff. The
macro will ‘round off’ the selection for you.
Then there’s one to go the other way (Beverley, P.E. −> P.E. Beverley). Again click in the surname, or roughly select
the words of a multi-word surname.
Sub InitialSwapper()
Sub InitialSwapperReverse()
Swap initials and surname, move date, etc. (Video: youtu.be/V-EU9oxNlws)
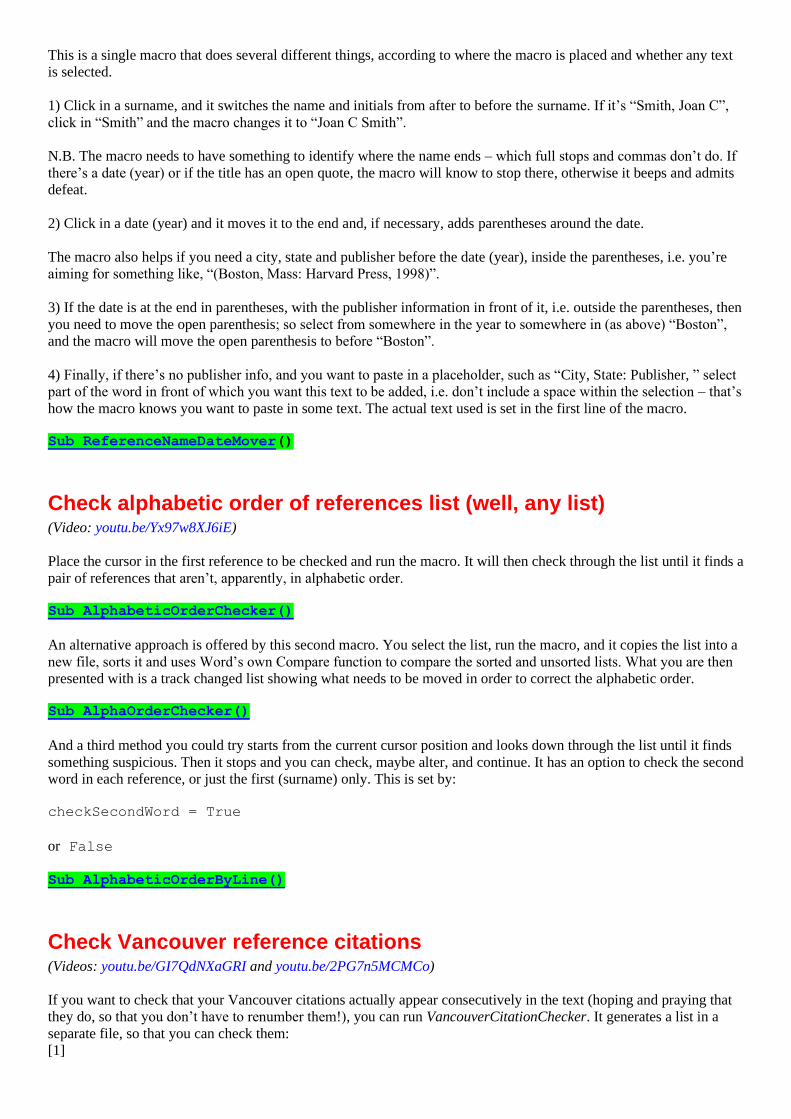
This is a single macro that does several different things, according to where the macro is placed and whether any text
is selected.
1) Click in a surname, and it switches the name and initials from after to before the surname. If it’s “Smith, Joan C”,
click in “Smith” and the macro changes it to “Joan C Smith”.
N.B. The macro needs to have something to identify where the name ends – which full stops and commas don’t do. If
there’s a date (year) or if the title has an open quote, the macro will know to stop there, otherwise it beeps and admits
defeat.
2) Click in a date (year) and it moves it to the end and, if necessary, adds parentheses around the date.
The macro also helps if you need a city, state and publisher before the date (year), inside the parentheses, i.e. you’re
aiming for something like, “(Boston, Mass: Harvard Press, 1998)”.
3) If the date is at the end in parentheses, with the publisher information in front of it, i.e. outside the parentheses, then
you need to move the open parenthesis; so select from somewhere in the year to somewhere in (as above) “Boston”,
and the macro will move the open parenthesis to before “Boston”.
4) Finally, if there’s no publisher info, and you want to paste in a placeholder, such as “City, State: Publisher, ” select
part of the word in front of which you want this text to be added, i.e. don’t include a space within the selection – that’s
how the macro knows you want to paste in some text. The actual text used is set in the first line of the macro.
Sub ReferenceNameDateMover()
Check alphabetic order of references list (well, any list) (Video: youtu.be/Yx97w8XJ6iE)
Place the cursor in the first reference to be checked and run the macro. It will then check through the list until it finds a
pair of references that aren’t, apparently, in alphabetic order.
Sub AlphabeticOrderChecker()
An alternative approach is offered by this second macro. You select the list, run the macro, and it copies the list into a
new file, sorts it and uses Word’s own Compare function to compare the sorted and unsorted lists. What you are then
presented with is a track changed list showing what needs to be moved in order to correct the alphabetic order.
Sub AlphaOrderChecker()
And a third method you could try starts from the current cursor position and looks down through the list until it finds
something suspicious. Then it stops and you can check, maybe alter, and continue. It has an option to check the second
word in each reference, or just the first (surname) only. This is set by:
checkSecondWord = True
or False
Sub AlphabeticOrderByLine()
Check Vancouver reference citations (Videos: youtu.be/GI7QdNXaGRI and youtu.be/2PG7n5MCMCo)
If you want to check that your Vancouver citations actually appear consecutively in the text (hoping and praying that
they do, so that you don’t have to renumber them!), you can run VancouverCitationChecker. It generates a list in a
separate file, so that you can check them:
[1]
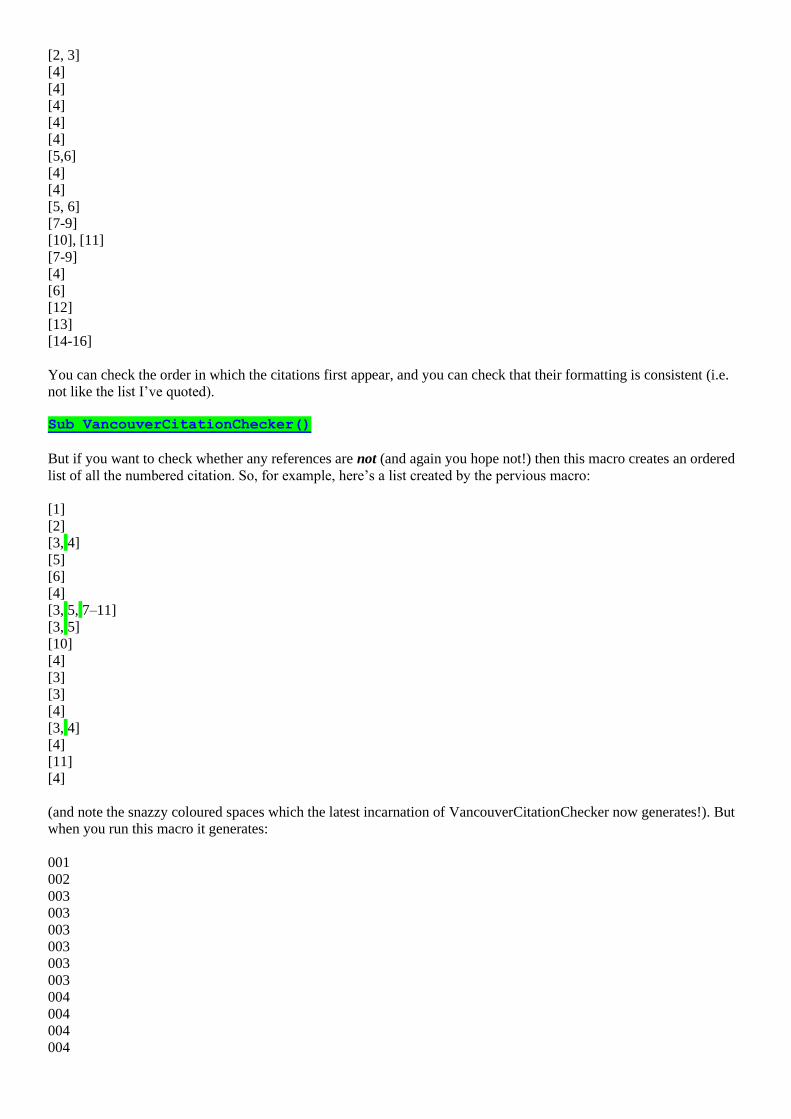
[2, 3]
[4]
[4]
[4]
[4]
[4]
[5,6]
[4]
[4]
[5, 6]
[7-9]
[10], [11]
[7-9]
[4]
[6]
[12]
[13]
[14-16]
You can check the order in which the citations first appear, and you can check that their formatting is consistent (i.e.
not like the list I’ve quoted).
Sub VancouverCitationChecker()
But if you want to check whether any references are not (and again you hope not!) then this macro creates an ordered
list of all the numbered citation. So, for example, here’s a list created by the pervious macro:
[1]
[2]
[3, 4]
[5]
[6]
[4]
[3, 5, 7–11]
[3, 5]
[10]
[4]
[3]
[3]
[4]
[3, 4]
[4]
[11]
[4]
(and note the snazzy coloured spaces which the latest incarnation of VancouverCitationChecker now generates!). But
when you run this macro it generates:
001
002
003
003
003
003
003
003
004
004
004
004
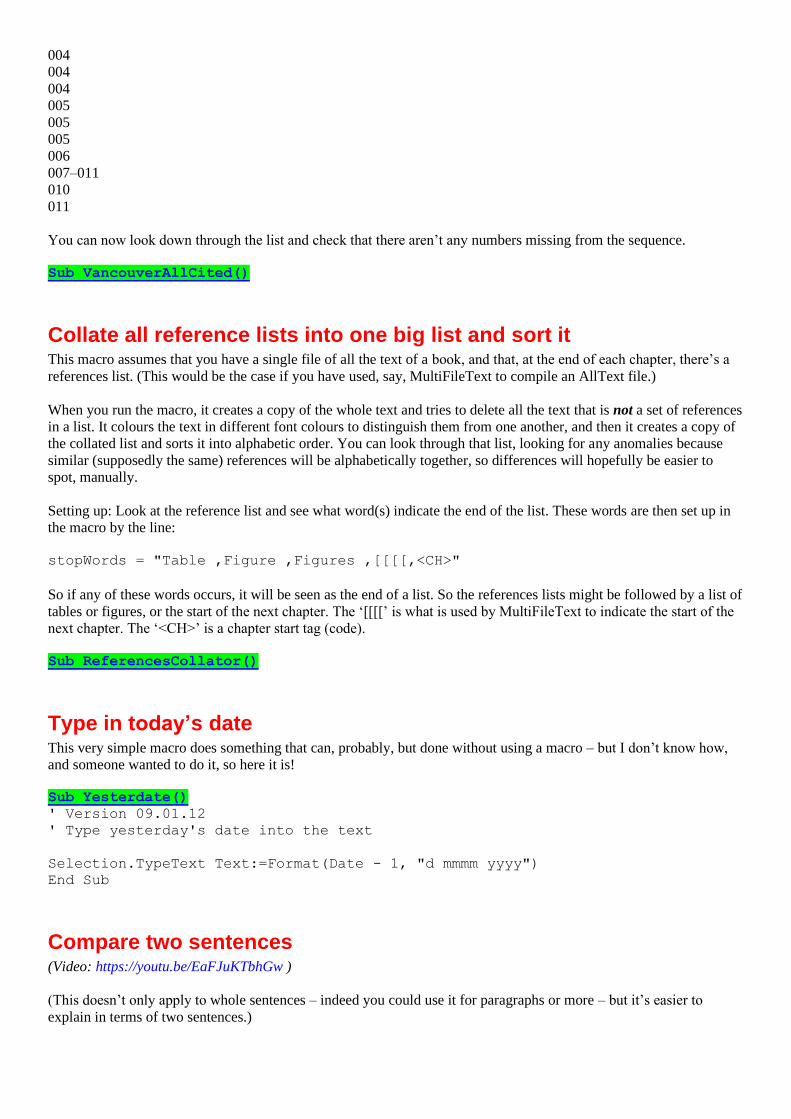
004
004
004
005
005
005
006
007–011
010
011
You can now look down through the list and check that there aren’t any numbers missing from the sequence.
Sub VancouverAllCited()
Collate all reference lists into one big list and sort it This macro assumes that you have a single file of all the text of a book, and that, at the end of each chapter, there’s a
references list. (This would be the case if you have used, say, MultiFileText to compile an AllText file.)
When you run the macro, it creates a copy of the whole text and tries to delete all the text that is not a set of references
in a list. It colours the text in different font colours to distinguish them from one another, and then it creates a copy of
the collated list and sorts it into alphabetic order. You can look through that list, looking for any anomalies because
similar (supposedly the same) references will be alphabetically together, so differences will hopefully be easier to
spot, manually.
Setting up: Look at the reference list and see what word(s) indicate the end of the list. These words are then set up in
the macro by the line:
stopWords = "Table ,Figure ,Figures ,[[[[,<CH>"
So if any of these words occurs, it will be seen as the end of a list. So the references lists might be followed by a list of
tables or figures, or the start of the next chapter. The ‘[[[[’ is what is used by MultiFileText to indicate the start of the
next chapter. The ‘<CH>’ is a chapter start tag (code).
Sub ReferencesCollator()
Type in today’s date This very simple macro does something that can, probably, but done without using a macro – but I don’t know how,
and someone wanted to do it, so here it is!
Sub Yesterdate()
' Version 09.01.12
' Type yesterday's date into the text
Selection.TypeText Text:=Format(Date - 1, "d mmmm yyyy")
End Sub
Compare two sentences (Video: https://youtu.be/EaFJuKTbhGw )
(This doesn’t only apply to whole sentences – indeed you could use it for paragraphs or more – but it’s easier to
explain in terms of two sentences.)
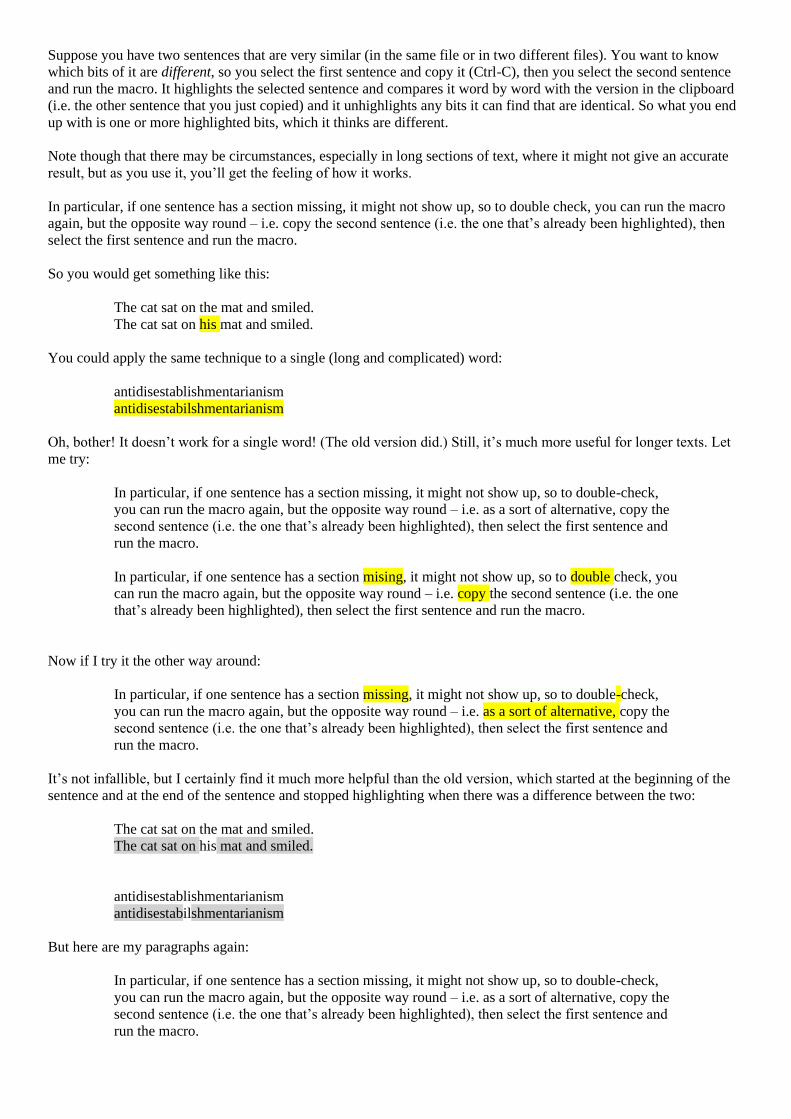
Suppose you have two sentences that are very similar (in the same file or in two different files). You want to know
which bits of it are different, so you select the first sentence and copy it (Ctrl-C), then you select the second sentence
and run the macro. It highlights the selected sentence and compares it word by word with the version in the clipboard
(i.e. the other sentence that you just copied) and it unhighlights any bits it can find that are identical. So what you end
up with is one or more highlighted bits, which it thinks are different.
Note though that there may be circumstances, especially in long sections of text, where it might not give an accurate
result, but as you use it, you’ll get the feeling of how it works.
In particular, if one sentence has a section missing, it might not show up, so to double check, you can run the macro
again, but the opposite way round – i.e. copy the second sentence (i.e. the one that’s already been highlighted), then
select the first sentence and run the macro.
So you would get something like this:
The cat sat on the mat and smiled.
The cat sat on his mat and smiled.
You could apply the same technique to a single (long and complicated) word:
antidisestablishmentarianism
antidisestabilshmentarianism
Oh, bother! It doesn’t work for a single word! (The old version did.) Still, it’s much more useful for longer texts. Let
me try:
In particular, if one sentence has a section missing, it might not show up, so to double-check,
you can run the macro again, but the opposite way round – i.e. as a sort of alternative, copy the
second sentence (i.e. the one that’s already been highlighted), then select the first sentence and
run the macro.
In particular, if one sentence has a section mising, it might not show up, so to double check, you
can run the macro again, but the opposite way round – i.e. copy the second sentence (i.e. the one
that’s already been highlighted), then select the first sentence and run the macro.
Now if I try it the other way around:
In particular, if one sentence has a section missing, it might not show up, so to double-check,
you can run the macro again, but the opposite way round – i.e. as a sort of alternative, copy the
second sentence (i.e. the one that’s already been highlighted), then select the first sentence and
run the macro.
It’s not infallible, but I certainly find it much more helpful than the old version, which started at the beginning of the
sentence and at the end of the sentence and stopped highlighting when there was a difference between the two:
The cat sat on the mat and smiled.
The cat sat on his mat and smiled.
antidisestablishmentarianism
antidisestabilshmentarianism
But here are my paragraphs again:
In particular, if one sentence has a section missing, it might not show up, so to double-check,
you can run the macro again, but the opposite way round – i.e. as a sort of alternative, copy the
second sentence (i.e. the one that’s already been highlighted), then select the first sentence and
run the macro.

In particular, if one sentence has a section mising, it might not show up, so to double check, you
can run the macro again, but the opposite way round – i.e. copy the second sentence (i.e. the one
that’s already been highlighted), then select the first sentence and run the macro.
and the other way:
In particular, if one sentence has a section missing, it might not show up, so to double-check,
you can run the macro again, but the opposite way round – i.e. as a sort of alternative, copy the
second sentence (i.e. the one that’s already been highlighted), then select the first sentence and
run the macro.
Still, you can take your pick as I’ve renamed the old version and key it in the book.
Hint: The macro SelectSentence is a very useful complement to this macro, i.e. click somewhere in the first sentence,
and run SelectSentence; Ctrl-C; click somewhere in the second sentence, and run SelectSentence; then run
CompareTexts.
Sub CompareTexts()
Sub CompareTextsOLD()
Setting space before/after paragraph to specific values If you have lots of manual spacing of paragraphs to do – altering the space before and/or space after paragraphs, you
can do it from the icons on the QAT, but if you want to use keystrokes instead, and if you want flexibility in terms of
the values used, here’s an idea. As it stands, each of these two macros reads the current value of the space, and
changes it to the next value in the list at the head of the macro. Currently, it’s set to:
myValues = "0,3,6,9,12,0"
So if the space is 0, it increases to 3, and the next time you run it (i.e. click the appropriate keystroke again), it goes to
6, then 9, then 12, then back to 0.
But if you set it to:
myValues = "6,9,6"
then regardless of the initial value of the space, it will switch to one or other of 6 or 9, and then alternate between
them.
So you can set it however you want it for your particular job.
N.B. This won’t do what you think:
myValues = "0,6,9,6,0"
i.e. it will not do 0−>6−>9−>6−>0; rather, it will do 0−>6−>9−>6−>9−>6. Can you see why? The macro only knows
what the value is now, so if it’s currently 6, it will always change it to 9.
And if you just want to use the macro to set the value to something specific, just use, for example:
myValues = "6"
(To apply this to a single paragraph, just put the cursor somewhere in the paragraph. Or you can apply it to multiple
paragraphs, though there’s no need to exactly select whole paragraphs.)
Sub SpaceBeforeSelector()
Sub SpaceAfterSelector()

Reading and setting indents I had a huge job where the paragraphs had had their indents changed piecemeal – left indent, right indent and hanging
indent. And many of the changes were –“just a little bit this way or just a little bit that way”.
So I knocked up a couple of macros: one to read the numerical values of the three indents, and another to set them.
Obviously, for the IndentsSet macro, you’ll have to type in the indent values you want for the particular job, and you
might need two or three copies of the setting macro (each with different names, of course, e.g. IndentsSet1,
IndentsSet2, IndentsSet3), for different types of indentation.
Sub IndentsMeasure()
Sub IndentsSet()
Setting indents to specific values Using a similar technique as for SpaceBeforeSelector, you can now set the first indent, hanging indent and right indent
to a selection of different values of your choice.
(Again, to apply this to a single paragraph, just put the cursor somewhere in the paragraph. Or you can apply it to
multiple paragraphs, though there’s no need to exactly select whole paragraphs.)
Sub IndentLeftSelector()
Sub IndentFirstSelector()
Sub IndentRightSelector()
Formatting current paragraph as displayed text This macro removes quotes from the current paragraph and romanises and trims trailing spaces.
Sub DisplayedTextFormat()
Pulling lines of text into paragraphs (Video: youtu.be/FTdyBWm4AzY)
I had a file of 149,000 words that came out of a PDF and that was in short lines each of which had a newline at the
end, i.e. they were paragraphs – 17,700 of them. Here’s an example of what I mean:
I had a file of 149,000 words that
came out of a PDF and that was in
short lines each of which had a
newline at the end, i.e. they were
paragraphs – 17,700 of them,
So, how was I to convert it to the original paragraphs? If the actual paragraphs, as opposed to the individual lines, had
had double newlines, it would have been easy; it would need just a three-line FRedit list:
^p^p|zczc
^p|^32
zczc|^p^p
1. Change double newlines to a silly marker text.
2. Change all the rest of the newlines into spaces.

3. Replace the silly marker text items with double newlines
Unfortunately, there were no blank lines between paragraphs – each had only a single newline. Problem!
I could, of course, look through the whole book, typing <Enter> after every paragraph, and then run the FRedit list
above. However, as I now know, the book has 1300 paragraphs – so that was going to take really rather a long time!
How could I reduce the time?
Idea:
~([.\?\!])^13|\1^p^p
^p^p|zczc
^p|^32
zczc|^p^p
That first line finds any line that ends with a full stop, a question mark or an exclamation mark (i.e. is the end of a
sentence) and adds a second newline.
There may well be some sentences, within the middle of a paragraph, whose full stop/question mark/exclamation mark
just happens to come at the end of a line, in which case the paragraph would be split at the end of that sentence, thus
shortening some of the paragraph. But I decided that as I read through the book, if any train of thought had obviously
been split, I’d be able to detect it.
But I then realised I had a more serious problem: that file contained quotes that were in short lines – a bit like poetry.
My global approach would turn each of these quotes into paragraphs!
Back to the drawing board!
What I did in the end was to use the global F&R:
~([.\?\!])^13|\1^p^p
to split lines at (hopefully) paragraph ends, and then I wrote a macro equivalent of:
^p^p|zczc
^p|^32
zczc|^p^p
that worked only on the selected text (called LinesToParagraphs). What I then had to do was to put the cursor in the
first line of a text-only paragraph (i.e. not a quote) and then scroll down through the text until I came to a quote. I then
used <shift-click> to select all that of that section of non-quote text and run the macro.
Then I clicked somewhere in the first line of non-quote text and scrolled down to the line before the next quote. Slow,
but a lot faster than any alternative I could think of.
Sub LinesToParagraphs()
Format numbers – at cursor or in a selection Place the cursor in a number and run the macro and it will automatically format it. Or selection an area of text, e.g. a
whole table of numbers, and they will all be formatted.
But format in what sense? First, it deals with the commas needed , and then, if there’s a decimal part of the number it
rounds it to the number of digits required. This is specified in the two lines:
decimalFormat = "###,###,###,0.00"
nonDecimalFormat = "###,###,###,0"

This is using a built-in function of Word for formatting numbers. However, is adds commas in four-digit numbers.
You can avoid this by using the option below. And also, I’ve added a function so that, instead of commas, it can use
either non-breaking spaces or thin spaces:
fourDigitComma = False
commaReplacement = ""
' commaReplacement = ChrW(8201) ' thin space
' commaReplacement = ChrW(160) ' non-breaking space
Just un-comment (remove the apostrophe) from the relevant line to implement this function.
Sub FormatNumbers()
Selectively delete Oxford commas When you run this macro, it hunts for the next Oxford comma and asks if you want to delete it. If you just press
<Enter>, it deletes it and moves to the next one. If you type “.” and then press <Enter> it simply jumps to the next
Oxford comma.
It will stop at the end of the file, but if you want to drop out of the macro before you reach the end, simply type “0”
and then press <Enter>.
(I’m lying; actually, if you enter ANY character other than “.” it will drop out.)
At the beginning of the macro it has: myDelete = ""
myJumpNext = "."
So if you want the macro to use different keys for any reason, you can change these two lines.
Sub OxfordCommaSelectiveDelete()
Switching the ruler display on and off There might be some keystroke within word to do this but, if so, I can’t find it. So here’s a macro you can use and
therefore assign to a keystroke.
Sub RulersShow()
Add ‘However’ at start of a sentence This macro adds ‘However’, followed by a comma, at the start of the sentence. It will also delete a lowercase
‘however’ if there is one later in the sentence.
You have to place the cursor after the first word of the sentence in which you want to insert ‘However’ at the
beginning. Then it doesn’t matter where the lowercase ‘however’ is, or even if there isn’t one there at all yet, the
macro inserts ‘However,’ at the beginning and lowercases the first letter of the following word.
If there was already a ‘however’ somewhere in the sentence, the macro will delete a comma that was following it (if
there was one), but it doesn’t delete a comma that precedes it. So you still have to deal with any remaining stray
commas in the sentence.
Sub However()
Set a current word(s) to small caps This macro simply changes the selected text into small caps. For just a single word you don’t even have to select it;
you can just leave the cursor somewhere in the word and run the macro, and it will change the whole word to small
caps.
If you have, say, a title that has upper case first letter and you want to keep that as it is, while you change the rest of
the word to small caps, then just select that part of the word that needs small-casing, i.e. all but the initial capital.
Sub SmallCapWord()
Replicate the edit you just made This macro replicates an edit you have just made throughout the entire document, i.e. makes it a global edit. It is set up
to change an ordinary space to a thin space, and a spaced hyphen to a spaced en rule. Being global, this is a macro to
be used with caution – be careful to select exactly what you want replicated, otherwise it could make changes that you
don’t want.
The good thing is that the macro highlights the changes it has made (set to yellow but could be changed), so you know
where to look to spot any errors.
To be more specific:
(a) it might be that you have an ordinary space between a digit and an abbreviated SI unit (e.g. 10 km), in several
places throughout the document, and you want to change all those instances to a thin space: you have to make
your edit in the first occurrence and then select the thin space with the following abbreviation. You then run
ReplicateThisEdit and it will make the same change throughout the document. Don’t just select the thin space,
or the macro will change every single space in the document to a thin space! So if you have different SI units
then you will have to edit one of each (6 mA, 9 N, 13 MPa, etc) and run the macro once for each.
(b) or you could use is if you have a lot of spaced hyphens and you want to change each one to a spaced en rule; if
so, you make the edit and highlight the en rule together with the space each side of it, then run
ReplicateThisEdit. (Don’t only select the en rule without the spaces, because all hyphens throughout the
document will be changed to en rules!
If you have other characters for which it would be useful to do global changes, and you are willing to ‘fiddle’ with the
macro, you could add one or more lines like these:
' thin spaces for spaces
If InStr(myReplace, ChrW(8201)) > 0 Then myFind = Replace(myReplace,
ChrW(8201), " ")
' en dashes for hyphen
If InStr(myReplace, ChrW(8211)) > 0 Then myFind = Replace(myReplace,
ChrW(8211), "-")
(You need to know the unicode numbers for the special symbols, such as en dash (= 8211), but the WhatChar macro
will tell you what it is.)
Sub ReplicateThisEdit()
Move selected text to start of sentence This macro takes whatever text you have selected and moves it to the beginning of the sentence. It changes the case
appropriately of the new first letter and the old first letter of the sentence.
For this to work properly, you have to select the space preceding the first word you want to move, otherwise the macro
will uppercase the second letter of the new first word! You can select one or several words and the macro does as
described, so long as you remember to select the space preceding the word(s). However, if you just leave the cursor in
the middle of a word and run the macro, then it moves the word the cursor is in, together with the following word –
both to the start of the sentence. If you put the cursor between two words and run the macro, it will move the two
words following the cursor to the start of the sentence.

Sub MoveToStart()
13 Editing – information ____ Under this heading, I’ve grouped together macros that provide useful information about the bit of text you are working
on.
Identifying the next character (video: https://youtu.be/LAoxTjckzEE)
(Thanks to Marcela Robaina, there is now a Spanish-language version of this: Chirimbolos!)
Can you tell what each of these characters is: l|I1°º? Difficult, isn’t it?
The differences are more obvious if I increase the font size: l|I1°º but in Century Gothic it’s hard: l|I1°º
Similarly, can you tell the difference between − and –? If you put them between angle brackets you get a clue:
>−< and >–<
The first one is a proper minus sign, and the second is an en dash. The maths symbols are designed so as to line up
horizontally: >−+=<.
The WhatChar macro looks at the character to the right of the cursor and tells you what each character is. So it will
tell you for each of l|I1°º that they are a lowercase l (el), a vertical bar (vertical bar), an uppercase I (eye) and a
number one, then a proper degree symbol, a masculine ordinal (as used in Nº6) and a superscripted ‘o’.
And while I was at it, I decided that it might as well give us more information about the character, so it also tells you if
the character is super- or subscripted, and also what font it’s in (but only if it’s in a font other than the font used by
Normal style.
What’s more, it gives the Unicode number in hexadecimal as well as in decimal. So what?! Well, for example, a
Unicode Greek beta (β) is displayed as ‘Unicode: 946 (Hex 3B2)’. This is useful because if you type ‘3B2’ (or ‘3b2’)
followed by an Alt-X, it turns into a beta character. (But watch out, because the ‘B’ can look a bit like an ‘8’,
depending on the screen font used, and its size on screen.)

If you get some of the old Symbol font characters and want to replace them with proper Unicode characters, I know of
no way to find and replace them using Word’s F&R. However, you can do so with FRedit. Here’s an example – –
and if you use WhatChar, you get:
If you now click <ctrl-V> you get:
<&HF062>|
which is the start of a FRedit item. Just add a proper Unicode β:
<&HF062>|β
and when you run FRedit, all those nasty Symbol fonts betas will be changed to Unicode.
(The FRedit library, which comes with FRedit, has several of these set up for you already.)
Now with added voice! I've added the possibility of using voice so that it speaks the character, and then you don’t need to clear the on-screen
prompt window, giving you all the gory details; I find this speeds up the process . However, if you want those details,
just select the character and run the macro again.
So to enable voice, you need to change to:
useVoice = True
and you also have to ‘uncomment’ the line at the beginning of the macro:
' Set speech = New SpVoice
i.e. delete the apostrophe.
If you try this and Word complains: “Compile error: User-define type not defined” then you need to enable voice on
your copy of Word (available from Word 2010 onwards, I think):

In VBA, click on Tools–References and find “Microsoft Speech Object Library”, tick the box and click OK. On my
computer there are two lines saying “Microsoft Speech Object Library”, so make sure you tick the one that says
‘sapi.dll’ at the end, and not the one saying ‘sapi_one’.
Sub WhatChar()
Sub Chirimbolos()
Show any ‘funny’ codes in the text (Video: youtu.be/_fWD4sXNg5s)
[investigate, strange characters]
The idea here is that if you suspect that the text has ‘funny’ codes in it, just place the cursor ahead of where you think
the funny characters might be, and run the macro. It looks through the words, one at a time, and if it finds anything
‘funny’, it stops and indicates what it has found.
Now, ‘funny’ is initially defined as any ASCII code less than 32, or greater than 255 (i.e. Unicode). However, that
includes things like end of paragraph (13) and tab (9), so you can decide whether to show those sorts of things by
appropriate True/False settings in the first few lines.
You can also decide whether or not to show the Unicode numbers or not. And, since dashes are usually displayed as
Unicode numbers, there’s an option not to show dashes even if you are showing Unicode numbers.
If you make the first line of the macro:
showEverything = True
then it will show everything. Then if you want to be selective, you can change this back to False and select the
True/False appropriately for each feature, as mentioned above.
(Anecdote: The genesis of this macro was when I had a problem where the right-hand end of each line containing a
note marker that was raised by about 3 pt, and no one seemed able to solve it. This macro revealed the following: in
the place where it said, say ‘blah, blah.6 Wibble wibble...’ what was actually there was ‘blah.[21][21][2][21][21]
Wibble’, i.e. there was the expected ASCII [2] for the note marker (highlighted above), but it had some [21]s either
side of it. These are apparently ‘closing field braces’. This was apparently some sort of debris remaining after the file
had been multiply edited by various contributors. With a global F&R, I found ^21 and replaced it by nothing, and this
solved the problem.)
Sub TextProbe()
Spellcheck a single word (Video: youtu.be/W-JX3P1hZF8)
This macro speeds up the process of spellchecking a single word. There’s no need to select the word; just place the
cursor anywhere in the word and press whatever key combination you have assigned to the macro. If the word is
correctly spelt, the computer beeps, but if it is incorrect, it opens the spelling dialogue box for you to correct the
spelling.
If the beep annoys you, remove the line that says beep; you will know that the spelling check has been run because
the cursor jumps to the start of the word.
Another small timesaver is that, unlike using F7, after it has done the spellchecking and found that the work is OK, it
does not then ask if you want to spellcheck the rest of the document.
The macro comes in three ‘flavours’, one that spellchecks in UK English, one in US English, and the third in whatever
the current language of the document is.

And now a fourth: spellcheck the word in the other language, i.e. if the current language is UK, check it in US, and
vice versa.
Sub SpellcheckWordUK()
Sub SpellcheckWordUS()
Sub SpellcheckWordCurrent()
Sub SpellcheckWordUSUK()
Spellcheck with language warning How many times have I started a spellcheck and then, in the middle somewhere, it throws up, say, ‘flavour’ as a
spelling error. Drat! I hadn’t noticed that the language set for the document is US English.
This macro checks the current language and, if it’s UK English, it just carries on with the spellcheck as normal, but if
it’s US English, it beeps at me first, and then does the spellcheck.
So, all you do is to allocate this macro to the F7 key, so that everything work as as normal, apart from the warning
beep for US language files.
Sub Spellcheck()
This next version is, perhaps more useful. What happens is that if it’s all in US English, it’ll just beep at you, but if
there’s a mix of languages, it will throw up a warning message.
Sub SpellcheckWarn()
Spellcheck and auto change This macro checks the spelling of the word at the cursor. If it’s OK, it beeps and moves on. If it’s not a correct
spelling, it replaces the word with the first alternative that Word offers. However, if there are no alternative spellings
offered, it highlights the word instead. (Remember that, for either change, you can just use Ctrl-Z to undo it.)
Sub SpellWordChange()
(This macro gets a mention in video: youtu.be/FVt2ggFXf4A )
Another similar macro is SpellingSuggest which simply changes the spelling of the word at the cursor to Word’s
suggested replacement. This macro doubles for use with FRedit – see above in the Pre-editing Tools section.
Sub SpellingSuggest()
Delete all spelling errors in a file (Video: youtu.be/AqREu_iJ2Yg)
I can’t remember why, but someone wanted to delete all the incorrectly spelt words from a file. That’s what this macro
does!
(Now updated, on request from the user, so that if an area of text is selected, it only works on that part of the text, not
the whole of the document.)
Sub DeleteAllSpellingErrors()

Show (or not) spelling errors in a file You may, like me, not like having all those red wiggly lines under words in your text. In which case, it’s nice to be
able to switch them on and off quickly and easily. That’s just what this macro does.
Sub SpellingShowToggle()
Count this word/phrase (video: https://youtu.be/LAoxTjckzEE)
This macro allows you to select some text, and it will tell you how many times that word/phrase occurs in the whole
text (now including the footnotes and endnotes).
Not only does it do a straight count, but it also does a case-sensitive count, a count for italic/bold/bold-italic versions
thereof and even a whole-word count.
So, for this document, if you select ‘et al’, it gives you:
All: 24
Case sensitive: 24
Italic: 4
Bold: 2
Wholewords (case sensitive): 22
i.e. it finds things like ‘my pet alligator’, and knows they are not proper ‘et al’s.
If you don’t select a word or phrase, it will assume that you want to search on the word at the cursor.
The ‘phrase’ can even include newlines, so you could, for example, count the number of times a word occurs at the
start of a line.
If you don’t want the facility to count the different bold/italic variations, they can be switched off in the first line of
the macro, and if you don’t want it to spend time doing a whole-word count (which on a long document with
foot/endnotes can take some time), that can be switched off in the second line of the macro.
However, in this latest version, I’ve added a feature whereby you can set the maximum time that you’re willing to
wait for an answer (maxTime = 0.5 means half a second), so if the macro has time within that limit, it will do
more and more of the different counts. If it ran out of time, it will tell you so.
Sub CountPhrase()
Count hyphen/space/single word (Video: https://youtu.be/hqPVJSZsFDk, Later video: https://youtu.be/LAoxTjckzEE)
The idea here is that if you get a word such as ‘bore hole’ (or ‘bore-hole’ or ‘borehole’) and you want to find out what
the author has used predominantly, you just select the double-word version (‘bore-hole’ or ‘bore hole’), and run this
macro. It will count the numbers of each variant.
However, you don’t actually need to select any text; just put the cursor in the first word, and it will beep at you and
ask you to confirm that the first word is ‘bore’ – just press Enter. But if you click in ‘borehole’, it will say, “First
word? borehole”, and you then delete ‘hole’ and press Enter.
(One thing that might trip you up, however, is if the file has track changes in it. If, for example, ‘bore-hole’ has been
changed to ‘borehole’, but with track changes switched on, the hyphen will still be seen by Word’s F&R function, and
so it will count it as ‘bore-hole’ and not ‘borehole’.)

Sub HyphenSpaceWordCount()
Count words remaining (video: https://youtu.be/LAoxTjckzEE)
This macro counts the number of words from the current cursor position, down to the end of the document, to give
you a feel of how much more reading there is to do!
There’s a simple version:
Sub CountRemainderSimple()
' Version 25.04.16
' Count words below the cursor
wordsTotal = ActiveDocument.Content.Words.Count
Selection.End = ActiveDocument.Content.End
wordsLeft = Selection.range.Words.Count
Selection.Collapse wdCollapseStart
perCent = Int(1000 * (wordsLeft / wordsTotal)) / 10
MsgBox (perCent & "% left. (Very roughly " & _
Int(0.0007 * wordsLeft) & " thousand words)")
End Sub
Unfortunately, the method used to do the count (Words.Count) treats even items of punctuation as ‘words’, so it
only gives a very rough indication.
MS Word also has some statistics functions which give a much more accurate count of the number of words (the same
as displayed on the status bar at the bottom of the window). However, these statistics refuse to work if the file has bits
of text that have been set to different languages.
So, when using this more complicated macro, if it finds multiple languages, it asks you if you want to standardise to
either UK or US English. If you need to preserve the multiple language settings, then you can’t use this macro, but if
you say ‘Yes’ when it asks if it’s OK to set the language, then it gives an accurate word count.
I like CountRemainder to display as ‘23.5’, rather than ‘23,521’ because I ‘think’ in thousands of words, but if you
prefer the latter, alternative display format then there’s now an option at the beginning of the macro:
' altDisplay = True
altDisplay = False
Sub CountRemainderSimple()
Sub CountRemainder()
Count italic text One reader has a job involving an nth edition update of a book where they put all the new text in italic. Payment is on
the basis of one rate for repeated text and a higher rate for new text. So the idea is to count the number of characters in
italic and then the rest are roman.
However, you need to take account of the fact that there may be text in footnotes, endnotes and textboxes. These are
also counted.
Sub ItalicCount()
Count words within sections If you want to know how many words there are in each section of a document, you can use the style of the section
heading – say, Heading 1 and this macro will count the words between one section heading and the next.
It counts them all and then creates a new document, listing the section titles and the number of words in each. For
example (I’ve scraped a bit of the text around here, and put it in a separate file, to generate...):
Before first heading 33
Count words that are highlighted 56
Count words within sections 69
Copy paragraphs that contain highlighted (and coloured) text 55
Highlighting words not in vocabulary list 108
The first line is the count of the words at the head of the document, before the very first Heading 1 item in the
document. If it’s a big document of a number of chapters then you might change the first line of the macro from:
myStyle1 = "Heading 1"
to, say:
myStyle1 = "Chapter title"
If you want to count the text between both of two headings, then use, say:
myStyle1 = "Heading 1"
myStyle2 = "Heading 2"
And if you use two style, and want the first style to be in bold in the list, use:
doBold = True
Sub CountSectionWords()
Count pages within chapters If you want to know how many pages there are in each chapter of a document, you can use the style of the chapter
heading – say, Heading 1 – and this macro will count them.
Sub CountChapterPages()
List all the italic words (Video: youtu.be/AqREu_iJ2Yg)
This macro first uses the macro, CopyTextSimple (assuming you have it loaded in your computer), to create a new file
with a copy of all the words in the file. Then it simply deletes all the non-italic text, so you’re left with a list of all the
italic words and phrases.
I wrote it because an author wanted me to make suggestions for words to put in his glossary. Fortunately, he had used
italic to highlight all new words as they appeared, so it was very easy. Once the list was created, I used SortIt to sort it
into alphabetic order, then DuplicatesRemove to leave a unique list of words and phrases. (Oh, I could have used
SortAndRemoveDups, which does the two jobs in one!)
Sub ItalicWordList()
Multifile word counting (Mac users! Visual Basic on Macs has ‘interesting’ file handling. Mac users say that this macro seems to work OK
provided that the filenames are short, say, less than 18 characters.)
This macro looks at the files within a particular folder and loads all the .doc, .docx and .rtf files, one by one, and
counts the total number of words.
As with my other multifile macros, the macro gets you to identify the folder containing the files by bringing up the
Open File window. Navigate to the required folder and click Cancel. The macro then asks whether you want to work
on all the Word files in that folder. If you say ‘Yes’, it uses the complete list of files that it has created and works
through them all one by one.
If you say you don’t want to work on all the files, the macro just stops. The list will look then something like this:
C:\Program Files\VirtualAcorn\VirtualRPC-SA\HardDisc4\MyFiles2\WIP
Macro Jobs.doc
Roman cats.doc
Stats.docx
The point is that you can then edit this list, either deleting files you don’t want included, or putting a vertical bar (‘|’)
in front of any you want it to ignore.
If you now run the macro again, it recognises that this Word document is a file list and so it proceeds to work through
the listed (and not ignored) files, opening each one and counting the contents.
Now we need to think about the actual counting – it’s not straightforward!
As you may be aware, Word’s word counting is – shall we say – ‘idiosyncratic’, in that different ways of counting
give you different answers. This macro therefore (a) does the count using the ‘readability statistics’ and (b) conditions
the file by getting rid of all the punctuation in an appropriate way and then counting the number of words with the
Words.Count command. For example, ‘can’t’ and ‘whole-hearted’ are treated as single words, whereas ‘either/or’
is treated as two words.
The macro also copies the text out of all the textboxes, plus the text of the foot/endnotes, and counts that too (by each
of the two methods). This it refers to as ‘extra’ text.
It then presents you with a complete listing of all the files, showing the ‘number of words’ according to the two
methods – which it refers to as ‘(stats)’ for ‘stats’ and ‘(count)’ for counted – for the main text, the ‘extra’ text and the
whole of the text in each file.
I’ve tested a range of files, looking at the ‘stats’ value, the ‘counted’ figure and the values given by <Alt-W>. The
conclusion I’ve come to is that it’s impossible to say which is the ‘correct’ value (or least inaccurate). Apart from
anything else, is ‘1996’ a ‘word’? Is ‘1996-98’ one word or two? Is ‘i.e.’ a word? Try this: open a new document, type
‘i.e.’ a few times, or ‘1996’ and confirm that each is indeed treated as one word. Now, copy this current paragraph and
paste it into your new document. Note the word count and then try deleting either ‘i.e.’ or ‘1996’. When I tried it,
sometimes the word count dropped by one, but at other times it remained unchanged.
Also, what about section numbers: ‘1.3.4 Title of this subsection’, or whatever?
At the beginning of the macro, you can select to use either stats, or count or both.
useStats = True
useBoth = True
If the files contain equations – either MathType or Equation Editor – then it counts those too. You can disable this
feature by using:
countEquations = False
Sub MultiFileCount()
Totalling words from various places Someone asked on SfEPLine about adding up the number of words in quotes. Just for fun, I knocked up a macro that
allows you to marks bits of text and it will add them to a list, totalling them as it goes, so you end up with something
like:
89 p.5 – So wrote Hugh
119 p.14 – It sounds like
18 p.176 – Ordering is utterly
114 p.176 – Similarly: in
87 p.177 – Author: You
29 p.178 – Macrostate indifference is
51 p.179 – Dominance lemma:
82 p.97 - 89
=====
507
It doesn’t total the numbers; it just adds in the next item that you’ve selected, giving the number of words selected, the
page number and the first three (or whatever number you choose) words of the selection.
If you add something in error, you can simply Ctrl-Z it off the list to take you back to where you were before you
added it.
There’s no need for you to create a totals file as it adds one if one doesn’t exist already.
Sub WordTotaller()
Check the column totals I just needed to check lots of figures in tables such as:
Number Per cent
4 1.7
45 18.7
103 42.7
72 29.9
13 5.4
4 1.7
241 100
Now in each table, the figure at the bottom of each column should be equal to the total of the figures above. So if you
put the cursor in the first cell of the column, it adds up the figures until it drops off the bottom and then checks back to
see that the final figure was indeed the total of the other.
Because there are likely to be rounding errors, I have allowed the user to set an accuracy:
allowErrorPercent = 0.01
so if the error is less than 0.01%, the macro just beeps to tell you it’s OK, but if the error is more than that it tells you
what it thinks the total should be, and you can act accordingly – raise an author query or whatever.
The okChars line allows some of the cells to contain things like en and em dashes, and also full points (periods)
without thinking that it has reached the end of the column.
If a box has a zero value, then as long as it has a hyphen or dash or an actual zero then it carries on looking for the end
of the column of figures. However, if a cell is completely blank, it assumes that it has reached the end of the column.

Sub ColumnTotal()
What is the full filename? For some macros, you need to put into the macro the address of some file that it uses. To make this easier, open the
Word file in question, and run this macro. It copies the full filename, so you can then go back to the macro and paste
the filename in wherever it is needed.
Sub FullFileNameCopy()
Get information from Google etc (Video: youtu.be/RYggCNcK-h8, Later video: https://youtu.be/LAoxTjckzEE)
N.B. With most of these macros, if you select nothing, it will launch the current word; if you do a rough
selection of a range of words, it will try to round off the selection to include the first and last words in the
range.
I discovered that it is possible to launch a URL from within a macro, so I realised that if I selected a word or phrase, I
could look it up straight away on Google. What’s more, I could have a second version of the macro that puts quotes
around the selected phrase before sending it off to be Googled. Then I thought – yes, and with Wikipedia. Then I
thought – yes, and with OUP’s online dictionary, etc, etc.
For GoogleFetch: Click in a word (or select some text), but there’s no need to select exact whole words; the macro
will expand to the nearest word end, e.g.
London marathon
will send “London marathon” to Google.
Ditto for GoogleFetchQuotes, etc.
Currently GoogleFetch is set to Google UK. Simply replace the text in between the quotation marks in the fourth line:
mySite = "http://www.google.co.uk/search?q="
Here are some country-specific URLs:
Australia: http://www.google.com.au/search?q=
Canada: http://www.google.ca/search?q=
India: http://www.google.co.in/search?q=
Ireland: http://www.google.ie/search?q=
New Zealand: http://www.google.co.nz/search?q=
South Africa: http://www.google.co.za/search?q=
US: http://www.google.com/search?q=
For Google Scholar: https://scholar.google.com/scholar?q=
There are also now some German versions (and now Dutch ones below).
For GoogleMaps: Click in a word (or select some text), run GoogleMapFetch, and the word/text will be launched to
GM. If you want to go from home to Hull, type “hHull” and run the macro. Or to go from my work address to
Timbuktu, type “wTimbuktu” and run the macro. Or type and select “hull to timbuktu”, or “hull/timbuktu” to prepare
for that epic journey! The postcode for ‘h’ and ‘w’ are set at the beginning of the macro.
For NgramFetch: Click in a word (or select some text), run NgramFetch, and the word/text will be launched to
Ngram. If you want to compare two (or more) words/phrases, separate them with commas:

compared to, compared with
There’s no need to select exact whole words; the macro will expand to the nearest word end:
compared to, compared with
The Year start and Year end of the display is set at the beginning of the macro:
yearStart = "1800"
' yearStart = ""
yearEnd = "2000"
' yearEnd = ""
If you want to search up to the current year, use:
yearEnd = ""
Also added, a fetch macro for the Maori dictionary, Te Aka.
Sub GoogleFetch()
Sub GoogleFetchDE()
Sub GoogleFetchQuotes()
Sub GoogleScholarFetch()
Sub GoogleFetchQuotesDE()
Sub GoogleFetchUS()
Sub GoogleFetchQuotesUS()
Sub GoogleFetchCA()
Sub GoogleFetchQuotesCA()
Sub TeAkaFetch()
Sub NgramFetch()
Sub OUPFetch()
Google Maps Sub GoogleMapFetch()
for wikipedia.com Sub WikiFetch()
for thesaurus.com Sub ThesaurusFetch()
for openthesaurus.de Sub ThesaurusFetchDE()

for dictionary.com Sub DictionaryFetch()
for duden.de Sub DictionaryFetchDE()
for the Australian Macquarie dictionary
Sub MacquarieFetch()
Spanish medical dictionary Sub DTMEfetch()
Spanish language dictionary Sub RAEfetch()
Bible verses Sub BibleGatewayFetch()
Sub BibleHubFetch()
With these two macros, you can carefully select the reference, but if you just place the cursor in the (abbreviation of
the) name of the book they do their best to select the numbers and punctuation before and after the name, e.g. with
“1 Cor 13:8”, click in “Cor” and it should pick it up OK. If you find that with the particular punctuation you try it with
it doesn’t work, please let me know, and I’ll try to fix it.
Sadly, I can’t get the latter macro to work fully. After the webpage comes up, you will need to click Ctrl-V and press
Enter to complete the fetch. However, it does have the advantage that you can select, say “greatest of these is love”,
and it will find 1 Cor 13:13, whereas the Gateway doesn’t offer that possibility. (Mind you, GoogleFetch finds 1 Cor
13:13, anyway!)
(And, based on an idea from Rob Worth...)
If your document has different texts in different languages, then as long as those bits of text are set to the relevant
language, then this macro sends the current word off to different dictuionaries, depending on the language set.
Which dictionary is used for each given language is set within the macro:
Select Case myLanguage
Case wdEnglishUS
mySite = "https://www.merriam-webster.com/dictionary/"
Case wdEnglishAUS
mySite = "https://www.macquariedictionary.com.au/features/word/search/"
Case wdGerman
mySite = "https://www.duden.de/suchen/dudenonline/"
Case wdFrench
mySite = "https://www.collinsdictionary.com/dictionary/french-english/"
Case Else
mySite = "https://www.lexico.com/definition/"
End Select
If you want to add extra languages, you will need to follow this same pattern. If you can’t work out what to do for any
given language, just get in touch.
Sub DictionaryFetchByLanguage()
for PubMed Sub PubMedFetch()
for OneLook

Sub OneLookFetch()
for Merriam Webster Sub MerriamFetch()
And if you have subscriber access to Merriam-Webster unabridged, you can use:
Sub MerriamFetch2()
And for Merriam-Webster legal, you can use:
Sub MerriamLegalFetch()
and for the Dictionary.Law website:
Sub LawDictionaryFetch()
British Library catalogue website:
Sub BLcatalogueFetch()
When my son moved to Paris, I tried to get my O-level French back from the dead, so I’ve started using Google
Translate. (Quand mon fils a déménagé à Paris, j’ai essayé d’obtenir mon français O-level de la mort, donc j’ai
commencé à utiliser Google Translate.)
This macro looks at either the currently selected text, or, if there’s nothing selected, the current paragraph, and
delivers it to Google Translate. However, before it does so, it spellchecks the first word of the text and, if it’s a
spelling error in both UK and US English, it assumes that it’s in French, and translates it to English.
Google Translate offers French and Spanish (and many other languages), so if you want the latter, at the beginning of
the macro use:
myLanguage = "es"
Sub GoogleTranslate()
Some Dutch colleagues asked for Netherlands-related versions, so here you go:
Sub WikiFetchNL()
Sub GoogleFetchNL()
Sub GoogleFetchQuotesNL()
Sub ThesaurusFetchNL()
Sub DictionaryFetchNL()
Sub GroeneBoekjeFetch()
Fetch from multiple dictionaries
Select a word (or just click in it) and run this macro to look up the word on three different dictionary websites: it is set
for dictionary.com, oxforddictionaries.com (Lexico) and collinsdictionary.com, but you could change the options at
the beginning of the macro if you have another go-to site that you want to use.
Sub DictionaryMultipleFetch()

Using Google to search a specific site Google has a command that allows you to search one specific site, so if you want to find out, say, about the courses on
creative writing that UEA runs, you can type into Google:
creative writing site:uea.ac.uk
So if you have a site you often want to search, you can put it into this macro.
At the beginning of the macro is:
' mySite = "wordmacrotools.com"
' mySite = "archivepub.co.uk"
mySite = "uea.ac.uk"
As it stands, I would just type ‘creative writing’, select it, and run the macro.
So, if you use mySite = "wordmacrotools.com" then all our macros will be searchable.
Sub GoogleSSFetch()
Launch successive URLs from the text This macro allows you to launch a URL from a Word file into your browser – just click to the left of the URL and run
the macro. But if you select a bit of text just before the URL, e.g. double-click the word prior to the start of the URL,
it will launch that URL, but also the next few URLs that occur in the text.
When you run the macro, it will ask you how many URLs to launch, but a default number will be offered. This is set
at the beginning of the macro, so you can change it:
numberOfURLs = 10
Note that if the file contains hyperlinked URLs, because these may be invisible, the macro will first select the text
from the cursor to the end of the file, create a new file, copy this selected text to the new file and then turn all the URL
links into visible URL text.
So to save time, you can use this new file to launch the next set of, say, ten URLs.
The macro has the option to highlight all the URLs as it sends them to the browser, so you can tell which URLs you
have already tested.
highlightURL = True
myHighlight = wdGray25
If the browser says there’s an error in the URL, the macro will report this back to you. It will select the recalcitrant
URL, so you can try copying it and pasting it manually into the browser; the browser will then tell you what error was
generated – usually it’s: Error 404: File Not Found.
However, look carefully at the selected text. While developing the macro, one URL was as shown below, and the
selection was as per the grey highlight:
www.communityservices.nd.gov/uploads%5Cresources%5Cstrawbale.pdf
I therefore realised that the macro was failing to allow “%” to be a recognised character in the URL, so I added “%”
into this line (the “%” is highlighted, so you can find it):
acceptableChars = "/a-zA-Z0-9.,;:=&#\?\(\)\[\]_+\-%" _
& ChrW(8211) & ChrW(8212)

Now, if you discover a URL with a “funny” characters that the macro doesn’t recognise, please add it into that line,
after the “%”. But also, please tell me what the character is, so that I can add it into the published version of the
macro. Thanks!
Sub URLlauncher()
Turn URL or email address into a live link Click anywhere in a URL or email address and run this macro. It selects (only) the URL or email address, and creates
it as a hyperlink.
Sub URLlink()
URLs to active links This macro finds all the URLs in the current file and makes them active links, i.e. clickable.
Sub URLlinker()
Reduce the text extent of an active link If the text before was:
This is explained in Post-Brexit Funding for Nations, Regions and Local Areas.
If you now select “Post-Brexit” and run the macro, it becomes:
This is explained in Post-Brexit Funding for Nations, Regions and Local Areas.
Or if you had selected “Nations”, it would have given you:
This is explained in Post-Brexit Funding for Nations, Regions and Local Areas.
Sub URLshrinker()
Unlink all the URLs This macro unlinks all the URLs in the selection of the whole file. If the link is, for example, Free macros, where the
URL is hidden, then it converts this to:
...for example, Free macros (http://www.archivepub.co.uk/macros.html) , where the URLis...
but the wording is no longer a clickable link.
But if the link is just the URL then just the URL is there as text.
There’s an option for making the text bold (which someone wanted), and you can remove the “http://” or “https://”
part of the URL when displayed, viz. use:
remove1 = "http://"
remove2 = "https://"
Sub URLunlinker()

Email addresses to active links This macro finds all the email addresses in the current file and makes them active links, i.e. clickable.
Sub EmailLinker()
Show all formatting or just paragraph marks The heading says it all: I reckon it’s sometimes useful to be able to see the paragraph marks (especially if you suspect
that there are some line breaks around), but putting all the formatting marks on is a bit too much – for me, it makes the
text too difficult to read. This macro lets you toggle between showing all the formatting marks, just the paragraph
marks and no marks at all.
If you want it to show both paragraph marks and tabs, change the first line to:
tabsToo = True
Sub ShowFormatting()
Show various formatting marks and hide highlighting This is similar to the previous macro, but you can select, from a list, which format marks you want to show, and you
also have the option of hiding the highlighting. All you have to be able to do is add up! You get this menu:
1 = show paragraphs
2 = show spaces
4 = show tabs
8 = don't show highlighting
16 = show hyphens
32 = show bookmarks
So, if you just want spaces and paragraph marks, it’s 3 (2 + 1), and if you just want to show optional hyphens and tabs,
it’s 20. If you want to be able to see the text more clearly, you can choose not to display the highlights, by adding 8 to
your number. If you want them all, to save you adding them all up, just enter 99.
To return the display to normal (no formatting marks, and highlighting showing) either type 0 (zero) or just press
<Enter>.
I was getting frustrated that I (almost) always want option 7 (but sometimes 1), so I’ve also added a feature so that I
can specify a couple of favourite options.
myFavouriteOption_1 = 7
myFavouriteKey_1 = "/"
myFavouriteOption_2 = 1
myFavouriteKey_2 = "#"
I happen to use <Alt-/> to run the macro, so I’ve chosen the slash key to give my normal option (7) and the hash key
for 1. So it’s just <Alt-/></><Enter> to switch on and <Alt-/><Enter> to switch off, or <Alt-/><#><Enter> when I
only want to display the paragraph markers. You can, of course, choose different keys and different favourite options.
Sub ShowFormattingMenu()
Show all text in a different font size (Video: youtu.be/P-6VdmT2BbE)

This is useful where you suspect that some parts of a section of text might be in a slightly different font size. It’s quite
difficult to tell sometimes, especially on things like punctuation.
Select the suspect section of text and the macro will assume that the correct size is that of the first word of the selected
text. So, did you spot the rogue font sizes in the paragraph above? Here they are:
This is useful where you suspect that some parts of a section of text might be in a slightly
different font size. It’s quite difficult to tell sometimes, especially on things like punctuation.
Sub HighlightNotThisSize()