
ZBrushCoreMini Getting Started Guide - gymvr.cz
22
ZBrushCoreMini Starting Guide 1 ZBrushCoreMini Getting Started Guide TM ®
-
Upload
khangminh22 -
Category
Documents
-
view
2 -
download
0
Transcript of ZBrushCoreMini Getting Started Guide - gymvr.cz
ZBrushCoreMini Starting Guide
1
ZBrushCoreMini Getting Started GuideTM
®
ZBrushCoreMini Starting Guide
2
Welcome to ZBrushCoreMini
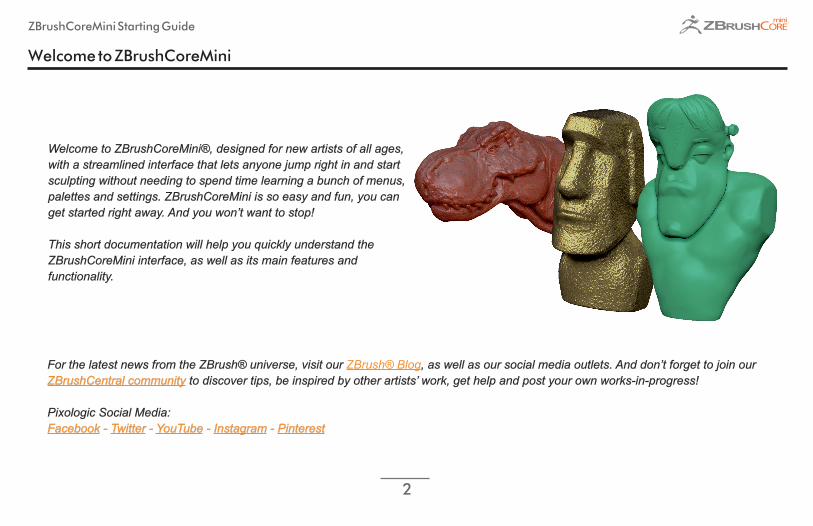
Welcome to ZBrushCoreMini®, designed for new artists of all ages, Welcome to ZBrushCoreMini®, designed for new artists of all ages, with a streamlined interface that lets anyone jump right in and start with a streamlined interface that lets anyone jump right in and start sculpting without needing to spend time learning a bunch of menus, sculpting without needing to spend time learning a bunch of menus, palettes and settings. ZBrushCoreMini is so easy and fun, you can palettes and settings. ZBrushCoreMini is so easy and fun, you can get started right away. And you won’t want to stop!get started right away. And you won’t want to stop!
This short documentation will help you quickly understand the This short documentation will help you quickly understand the ZBrushCoreMini interface, as well as its main features and ZBrushCoreMini interface, as well as its main features and functionality.functionality.
For the latest news from the ZBrush® universe, visit our For the latest news from the ZBrush® universe, visit our ZBrush® Blog, as well as our social media outlets. And don’t forget to join our , as well as our social media outlets. And don’t forget to join our ZBrushCentral communityZBrushCentral community to discover tips, be inspired by other artists’ work, get help and post your own works-in-progress! to discover tips, be inspired by other artists’ work, get help and post your own works-in-progress! Pixologic Social Media:Pixologic Social Media:FacebookFacebook - - TwitterTwitter - - YouTubeYouTube - - InstagramInstagram - - PinterestPinterest

ZBrushCoreMini Starting Guide
3
Sculptris Pro
At the heart of ZBrushCoreMini is SculptrisPro, a unique feature that behind-the-scenes drives the amazing sculpting brushes.
When sculpting a 3D mesh the number of polygons is what determines how much detail your model can have - if your mesh only has a few polygons then you won’t be able to add much detail. Sculptris Pro means you don’t need to worry about this - it automatically adds or removes polygons as you sculpt, so you can concentrate on your model and add as much detail as you want!
ZBrushCoreMini Starting Guide
4
Getting Started
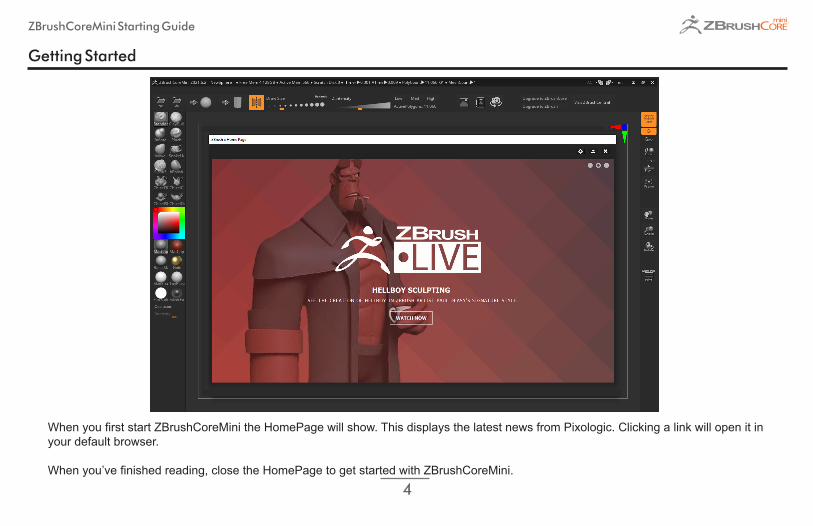
When you first start ZBrushCoreMini the HomePage will show. This displays the latest news from Pixologic. Clicking a link will open it in your default browser.
When you’ve finished reading, close the HomePage to get started with ZBrushCoreMini.
ZBrushCoreMini Starting Guide
5
Interface
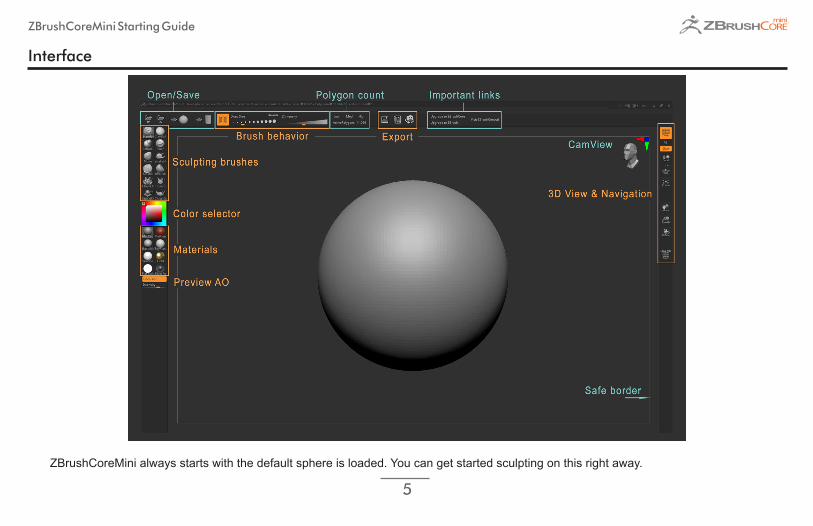
ZBrushCoreMini always starts with the default sphere is loaded. You can get started sculpting on this right away.

ZBrushCoreMini Starting Guide
6
Sculpting Brushes
With the Sculpting Brushes you can apply many different effects as you sculpt, allowing you to create the look and feel you are after.
The Standard brush is the default sculpting brush. It creates a smooth finish.
The Clay Buildup brush is more like modeling with actual clay. Use it to quickly block out a form.
The Inflate brush will inflate the mesh, a bit like blowing up a balloon.
The Pinch brush pinches the mesh together. This is good for creating folds.
Use the Move brush to change the shape your model in dramatic ways. Note that Sculptris Pro does not operate for the Move brush.
The SnakeHook brush is ideal for pulling out arms and legs or even for creating hair.
The Slash3 brush carves into the mesh. This is good for creating cracks and wrinkles.
The hPolish brush polishes the surface so that it resembles metal. It is good for adding hard surface details.
ZBrushCoreMini Starting Guide
7
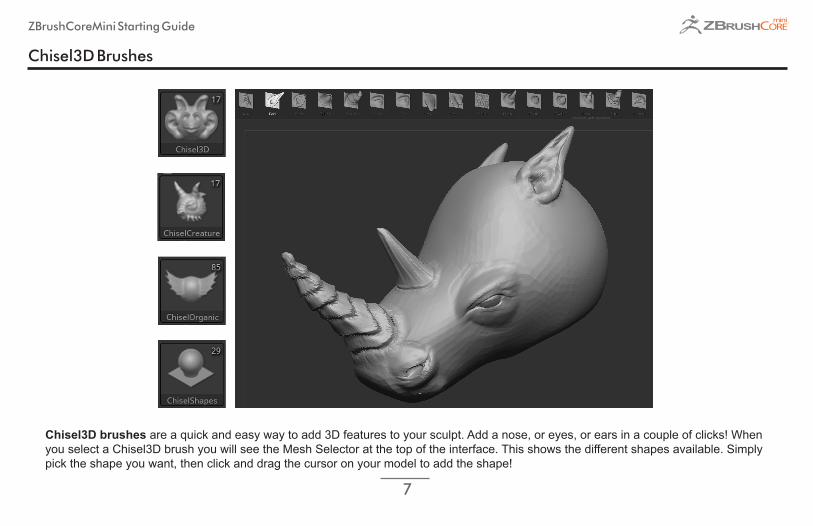
Chisel3D Brushes
Chisel3D brushes are a quick and easy way to add 3D features to your sculpt. Add a nose, or eyes, or ears in a couple of clicks! When you select a Chisel3D brush you will see the Mesh Selector at the top of the interface. This shows the different shapes available. Simply pick the shape you want, then click and drag the cursor on your model to add the shape!
ZBrushCoreMini Starting Guide
8
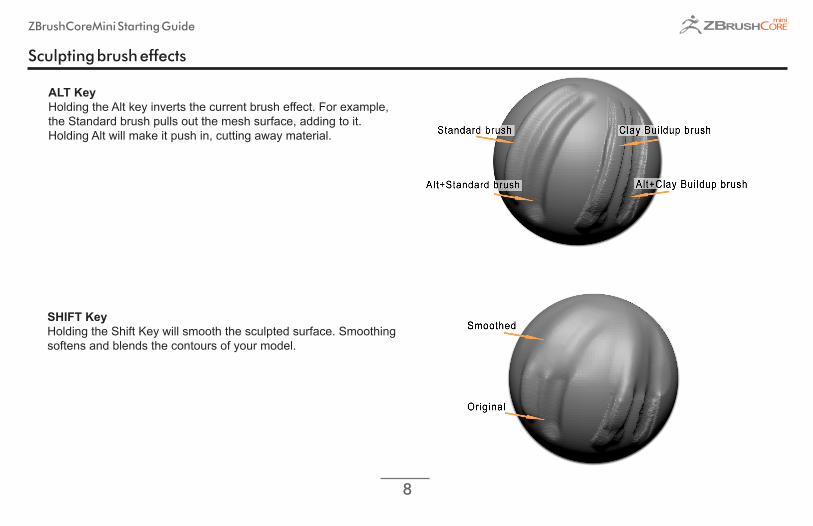
Sculpting brush effects
ALT Key Holding the Alt key inverts the current brush effect. For example, the Standard brush pulls out the mesh surface, adding to it. Holding Alt will make it push in, cutting away material.
SHIFT KeyHolding the Shift Key will smooth the sculpted surface. Smoothing softens and blends the contours of your model.
ZBrushCoreMini Starting Guide
9
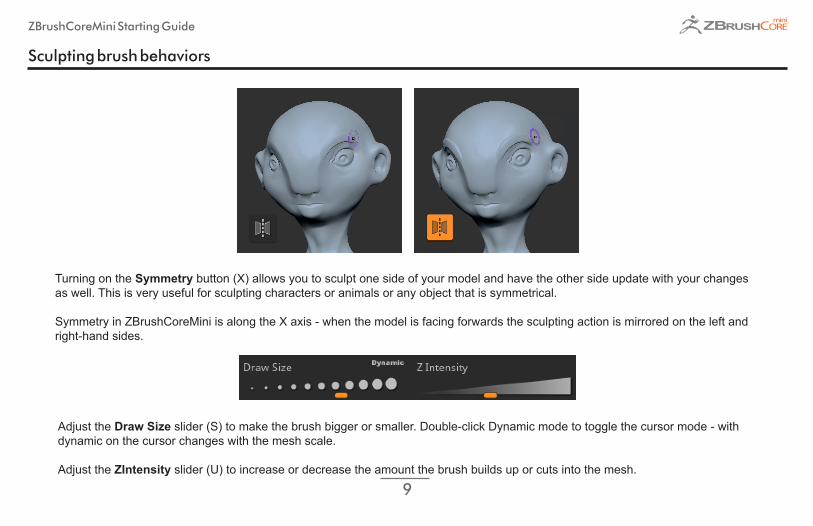
Sculpting brush behaviors
Turning on the Symmetry button (X) allows you to sculpt one side of your model and have the other side update with your changes as well. This is very useful for sculpting characters or animals or any object that is symmetrical.
Symmetry in ZBrushCoreMini is along the X axis - when the model is facing forwards the sculpting action is mirrored on the left and right-hand sides.
Adjust the Draw Size slider (S) to make the brush bigger or smaller. Double-click Dynamic mode to toggle the cursor mode - with dynamic on the cursor changes with the mesh scale.
Adjust the ZIntensity slider (U) to increase or decrease the amount the brush builds up or cuts into the mesh.

ZBrushCoreMini Starting Guide
10
Navigation
The Navigation buttons are on the right side of the interface. Click+drag inside a button to move, zoom (scale) or rotate the model.
ZBrushCoreMini also has two alternate methods of navigation using hotkeys:
Right-Click Navigation
Move – Alt+Right-click & drag (can be over the model)Scale – Ctrl+Right-click & drag (can be over the model)Rotate – Right-click & drag (can be over the model)
Classic ZBrush Navigation
Free Rotate – Click & drag BackgroundMove – Alt+Click & drag BackgroundConstrain to 90-degree rotation – Click+drag while holding ShiftScale – Alt+Click, Release Alt, drag BackgroundRotate around Z-axis – Shift, Click, release Shift, drag
ZBrushCoreMini Starting Guide
11
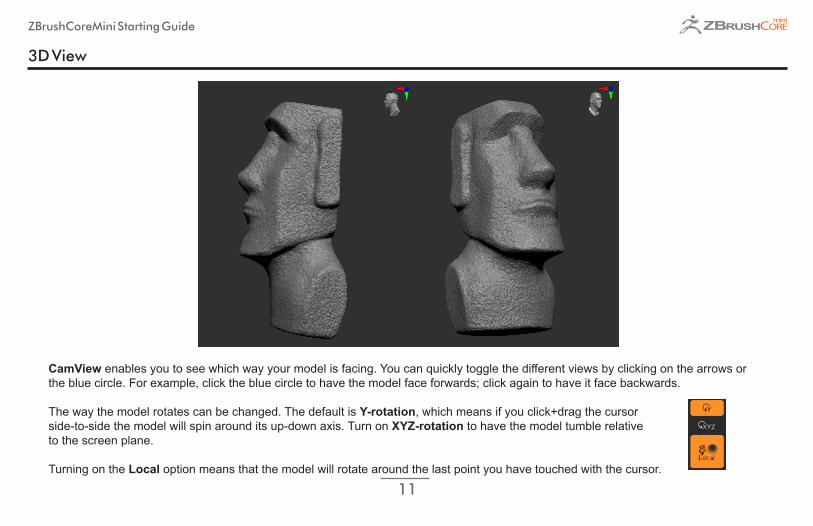
3D View
CamView enables you to see which way your model is facing. You can quickly toggle the different views by clicking on the arrows or the blue circle. For example, click the blue circle to have the model face forwards; click again to have it face backwards.
The way the model rotates can be changed. The default is Y-rotation, which means if you click+drag the cursorside-to-side the model will spin around its up-down axis. Turn on XYZ-rotation to have the model tumble relative to the screen plane.
Turning on the Local option means that the model will rotate around the last point you have touched with the cursor.
ZBrushCoreMini Starting Guide
12
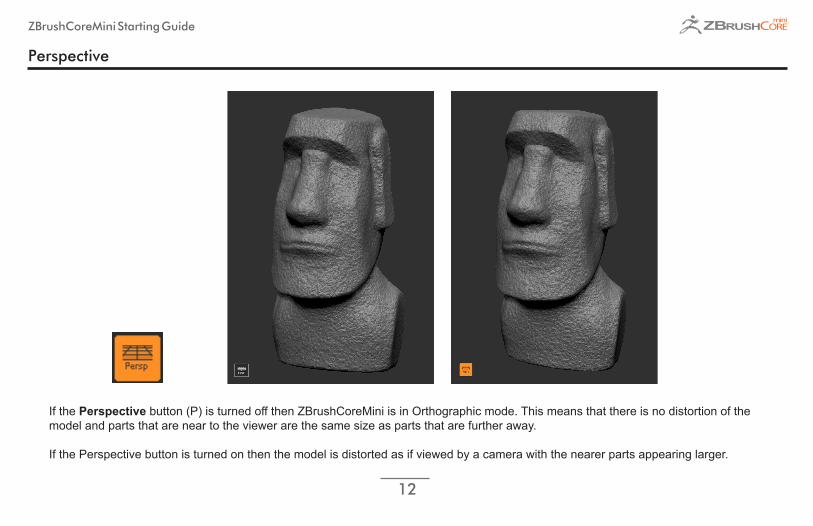
Perspective
If the Perspective button (P) is turned off then ZBrushCoreMini is in Orthographic mode. This means that there is no distortion of the model and parts that are near to the viewer are the same size as parts that are further away. If the Perspective button is turned on then the model is distorted as if viewed by a camera with the nearer parts appearing larger.
ZBrushCoreMini Starting Guide
13
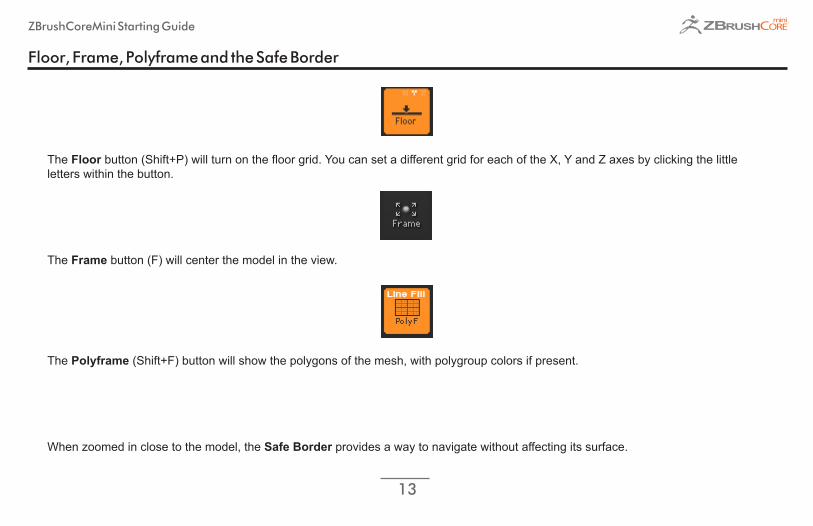
Floor, Frame, Polyframe and the Safe Border
The Floor button (Shift+P) will turn on the floor grid. You can set a different grid for each of the X, Y and Z axes by clicking the little letters within the button.
The Frame button (F) will center the model in the view.
The Polyframe (Shift+F) button will show the polygons of the mesh, with polygroup colors if present.
When zoomed in close to the model, the Safe Border provides a way to navigate without affecting its surface.
ZBrushCoreMini Starting Guide
14
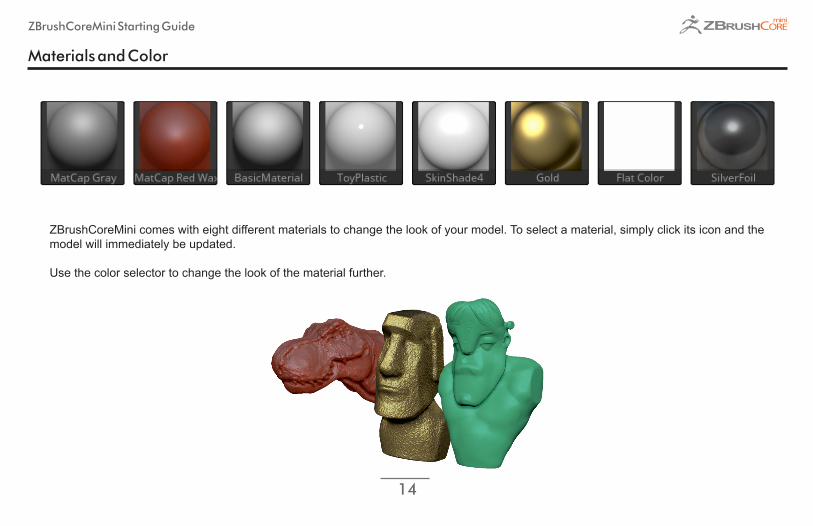
Materials and Color
ZBrushCoreMini comes with eight different materials to change the look of your model. To select a material, simply click its icon and the model will immediately be updated.
Use the color selector to change the look of the material further.
ZBrushCoreMini Starting Guide
15
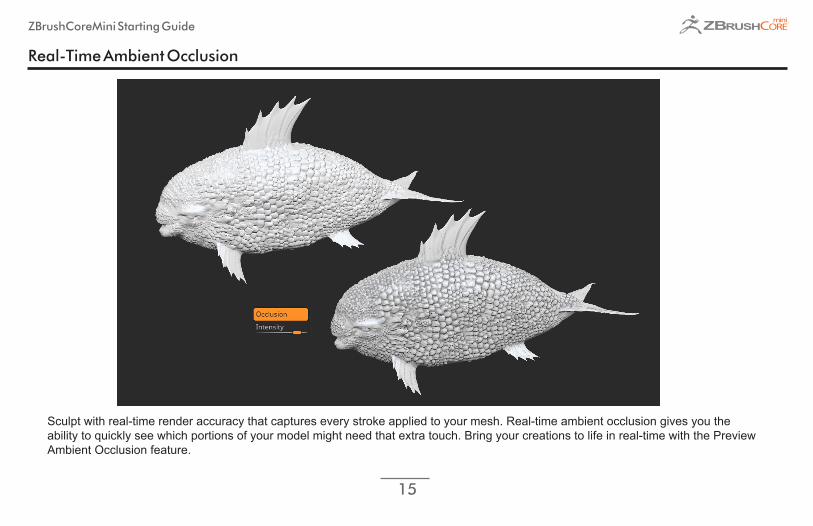
Real-Time Ambient Occlusion
Sculpt with real-time render accuracy that captures every stroke applied to your mesh. Real-time ambient occlusion gives you the ability to quickly see which portions of your model might need that extra touch. Bring your creations to life in real-time with the Preview Ambient Occlusion feature.
ZBrushCoreMini Starting Guide
16
Saving and loading projects
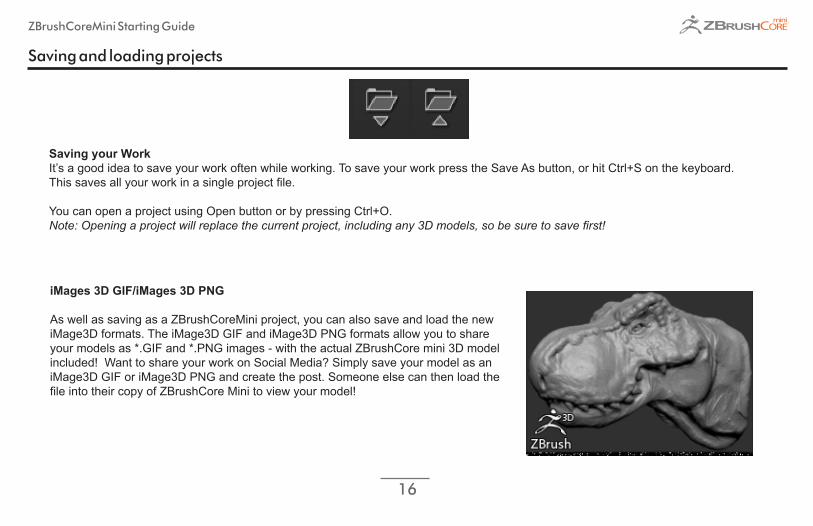
Saving your Work It’s a good idea to save your work often while working. To save your work press the Save As button, or hit Ctrl+S on the keyboard. This saves all your work in a single project file.
You can open a project using Open button or by pressing Ctrl+O. Note: Opening a project will replace the current project, including any 3D models, so be sure to save first!
iMages 3D GIF/iMages 3D PNG
As well as saving as a ZBrushCoreMini project, you can also save and load the new iMage3D formats. The iMage3D GIF and iMage3D PNG formats allow you to share your models as *.GIF and *.PNG images - with the actual ZBrushCore mini 3D model included! Want to share your work on Social Media? Simply save your model as an iMage3D GIF or iMage3D PNG and create the post. Someone else can then load the file into their copy of ZBrushCore Mini to view your model!
ZBrushCoreMini Starting Guide
17
Base Meshes
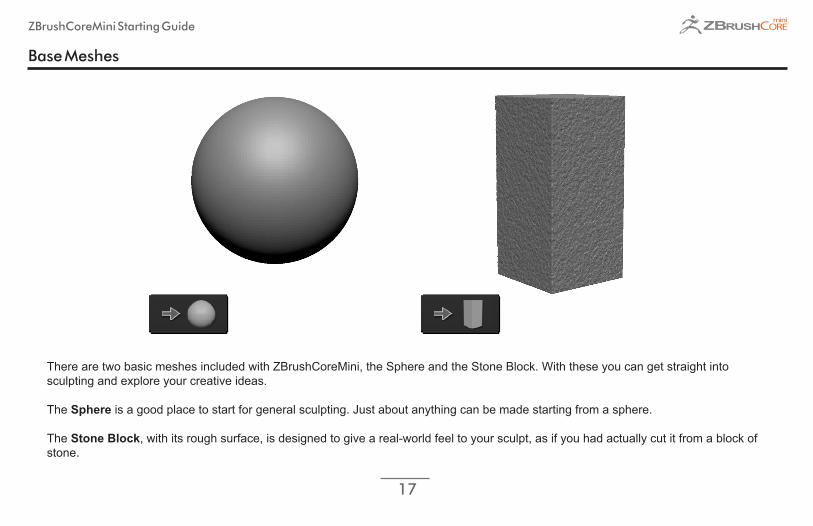
There are two basic meshes included with ZBrushCoreMini, the Sphere and the Stone Block. With these you can get straight into sculpting and explore your creative ideas.
The Sphere is a good place to start for general sculpting. Just about anything can be made starting from a sphere.
The Stone Block, with its rough surface, is designed to give a real-world feel to your sculpt, as if you had actually cut it from a block of stone.
ZBrushCoreMini Starting Guide
18
Reducing Polygon Count
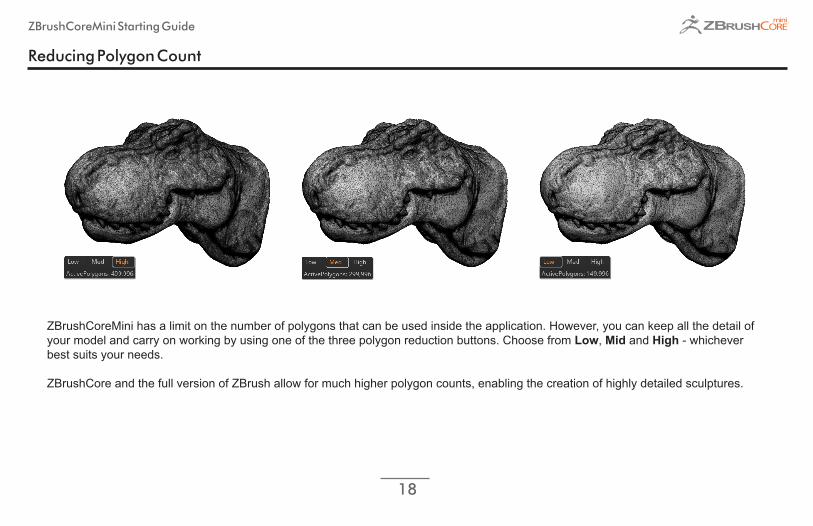
ZBrushCoreMini has a limit on the number of polygons that can be used inside the application. However, you can keep all the detail of your model and carry on working by using one of the three polygon reduction buttons. Choose from Low, Mid and High - whichever best suits your needs.
ZBrushCore and the full version of ZBrush allow for much higher polygon counts, enabling the creation of highly detailed sculptures.
ZBrushCoreMini Starting Guide
19
Exporting a 2D image
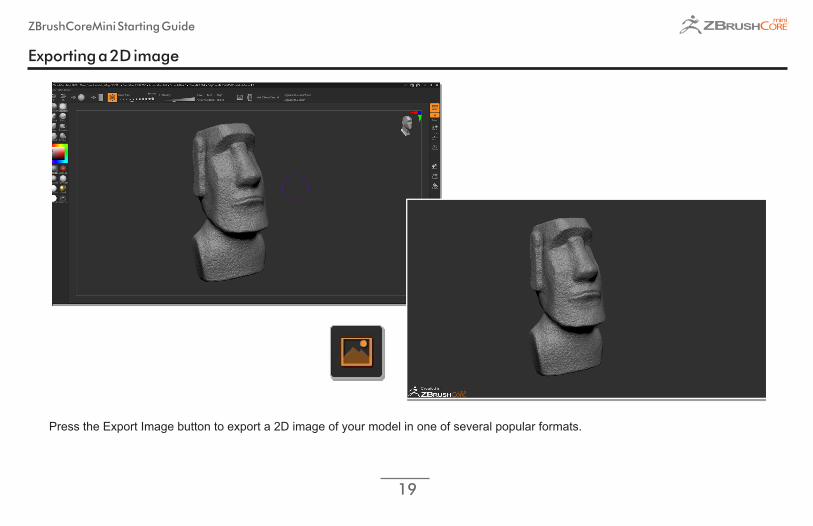
Press the Export Image button to export a 2D image of your model in one of several popular formats.
ZBrushCoreMini Starting Guide
20
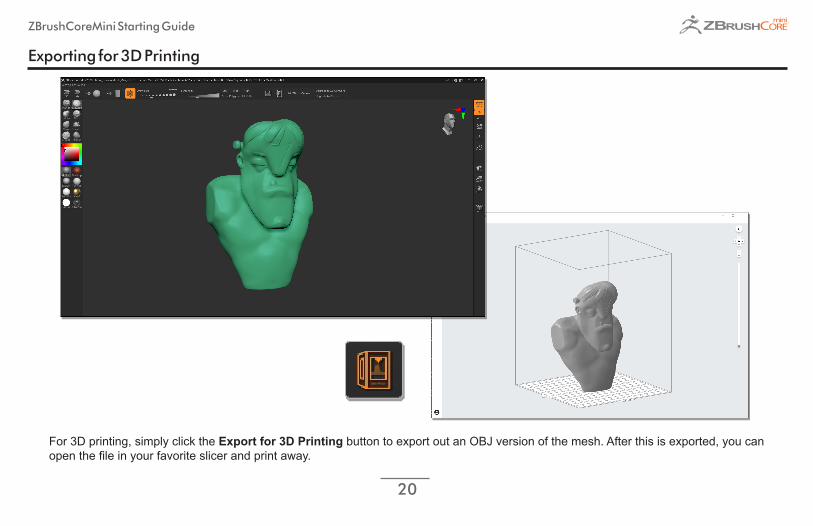
Exporting for 3D Printing
For 3D printing, simply click the Export for 3D Printing button to export out an OBJ version of the mesh. After this is exported, you can open the file in your favorite slicer and print away.
ZBrushCoreMini Starting Guide
21
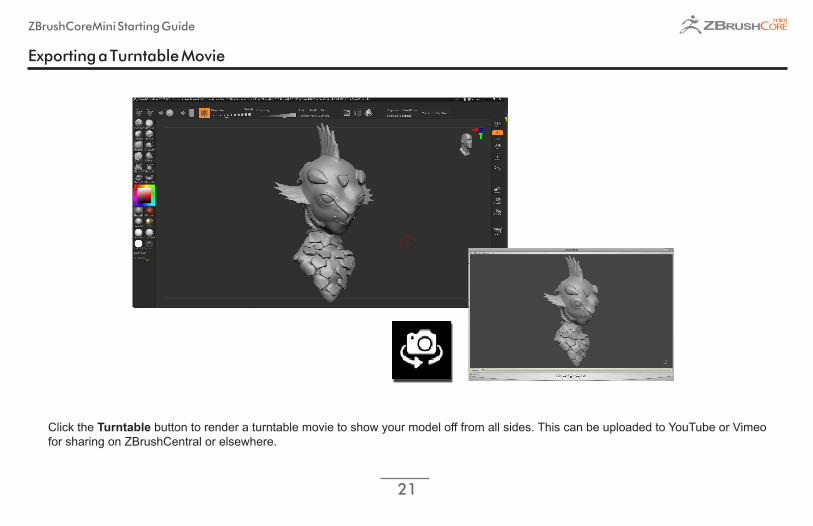
Exporting a Turntable Movie
Click the Turntable button to render a turntable movie to show your model off from all sides. This can be uploaded to YouTube or Vimeo for sharing on ZBrushCentral or elsewhere.
ZBrushCoreMini Starting Guide
22
3DConnexion Support
ZBrushCoreMini Starting Guide - version 2.00
This documentation has been written by Marcus Burgess, Joseph Drust and Matthew Yetter.
ZBrushCoreMini Models in the illustrations by Joseph Drust, Daisuke Narukawa and Marcus Burgess.
For all documentation questions and enquiries, please contact us at [email protected].
© 2021 Pixologic, Inc. All rights reserved, Pixologic and the Pixologic logo, ZBrush, and the ZBrush logo are registered trademarks of Pixologic, Inc. All other trademarks are the property of their respective owners.
Navigate in a way that frees you from a keyboard. Using 3DConnexion’s Spacemouse line gives you the ability to navigate with just a slight touch of the controller cap. Rotate and zoom at the same time or pivot around your point of interest without breaking your sculpting stride.


![PIPEPHASE Getting Started Guide[1] - baixardoc](https://static.fdokumen.com/doc/165x107/6315b7d1aca2b42b580df6a1/pipephase-getting-started-guide1-baixardoc.jpg)