your own - distro - Linux Format
8
34 LXF176 November 2013 www.linuxformat.com Tired of the run-of-the-mill stuff on Distrowatch? Why not heed Mayank Sharma and create the perfect operating system for you? A few issues ago, [LXF171, 50 Distros Tested], we looked at the best Linux distributions for all kinds of users. There were distros that were designed with ease of use in mind, some focused on productivity, while others catered to specialised use cases, such as security and privacy conscious users. But we can guarantee that there wasn’t a distro designed specifically and entirely for you! While most Linux users make do with one of the mainstream distros out there, there’s always something or the other that’s missing. That’s because the major distros have to take into account the whims and fancies of the thousands of users in their community. There’s a lot of brainstorming behind every change; and every application addition or removal is hotly debated. At the end of it you get a distribution that meets about 80% of your requirements. After you’ve installed the distro, you set about making it your own – by removing apps and drivers that you don’t need and adding the ones you do. You’ll also probably change the factory-fitted artwork that says more about the distro vendor than you. Sure that’s one way to go about it. You tweak and customise the distro to suit your requirements. But wouldn’t it be really great if you just create your very own, custom Linux distribution? In this feature we’ll show you tools that you can use to create a custom flavour of your favourite Linux distro. Want a cool distro to hang out with? Maybe you might want to strip out all the excess power tools and plug in your favourite games, or have a distro full of programming tools, IDEs and documentation. Now traditional wisdom says that creating your own Linux system is a rather difficult thing to do and shouldn’t be attempted by anyone other than Linux veterans. We begin the feature with graphical point- and-click tools. Yes, you read that right. All it takes is a couple of clicks to craft your very own flavour of Linux that you can pass to friends and family. We’ve got tools that’ll help you create and distribute customised spins based on Ubuntu, Fedora and OpenSUSE – the three mainstream Linux distributions that house thousands of open source software in their online repositories. Later on, we’ll look at tools for the intrepid users familiar with the command line, as well as system admins who want to save time rolling out identical machines. You can keep your customised distros for your own use or hand it out to your friends or even host it on the web and watch as word spreads and your distro rises up the charts on DistroWatch. “We’ve got tools that’ll help you create and distribute custom spins.” BUILD YOUR OWN DISTRO
-
Upload
khangminh22 -
Category
Documents
-
view
5 -
download
0
Transcript of your own - distro - Linux Format

34 LXF176 November 2013 www.linuxformat.com
Tired of the run-of-the-mill stuff on Distrowatch? Why not heed Mayank Sharma and create the perfect operating system for you?
A few issues ago, [LXF171, 50 Distros Tested], we looked at the best Linux distributions for all kinds of users. There were
distros that were designed with ease of use in mind, some focused on productivity, while others catered to specialised use cases, such as security and privacy conscious users. But we can guarantee that there wasn’t a distro designed specifically and entirely for you!
While most Linux users make do with one of the mainstream distros out there, there’s always something or the other that’s missing. That’s because the major distros have to take into account the whims and fancies of the thousands of users in their community. There’s a lot of brainstorming behind every change; and every application addition or removal is hotly debated.
At the end of it you get a distribution that meets about 80% of your requirements. After you’ve installed the distro, you set about
making it your own – by removing apps and drivers that you don’t need and adding the ones you do. You’ll also probably change the factory-fitted artwork that says more about the distro vendor than you.
Sure that’s one way to go about it. You tweak and customise the distro to suit your requirements. But wouldn’t it be really great if you just create your very own, custom Linux distribution?
In this feature we’ll show you tools that you can use to create a custom flavour of your favourite Linux distro. Want a cool distro to hang out with? Maybe you might want to strip out all the excess power tools and plug in your favourite games, or have a distro full of programming tools, IDEs and documentation.
Now traditional wisdom says that creating your own Linux system is a rather difficult thing to do and shouldn’t be attempted by anyone other than Linux veterans.
We begin the feature with graphical point-and-click tools. Yes, you read that right. All it takes is a couple of clicks to craft your very own flavour of Linux that you can pass to friends and family. We’ve got tools that’ll help you create and distribute customised spins
based on Ubuntu, Fedora and OpenSUSE – the three mainstream Linux distributions that house thousands of open source software in their online repositories.
Later on, we’ll look at tools for the intrepid users familiar with the
command line, as well as system admins who want to save time rolling out identical machines. You can keep your customised distros for your own use or hand it out to your friends or even host it on the web and watch as word spreads and your distro rises up the charts on DistroWatch.
“We’ve got tools that’ll help you create and distribute custom spins.”
Buildyour owndistro

No habla inglés? Don’t sweat! With the Ubuntu Customization Kit app, tastefully abbreviated to UCK, you can create Ubuntu editions in your own
language. All you need is an ISO image of the Ubuntu edition you want to localise, about 5GB of hard disk space under your /home partition, and an internet connection to download the language packs, besides UCK itself.
Begin by grabbing the UCK Deb installer from its website (http://sourceforge.net/projects/uck) and installing it with the Ubuntu Software Centre. If you prefer the command line, you can install it with:dpkg --install uck_2.4.7-0ubuntu1_all.deb
However, the tool has some additional dependencies, and if Dpkg can’t find them on your machine, you can download them withsudo apt-get -f install
Besides the dependencies it installs, you’ll also need the libfribidi-bin package otherwise you’ll get the ‘failed to build gfxboot theme’ error.
UCK is designed as a wizard, so as soon as you start the app, it’ll display a welcome message and take you to the wizard. In the first step you select the language packs that will be available in your distro. The next step involves picking languages that will be available at boot. As the tool warns, the choice of languages available at boot varies from one Ubuntu release to another.
In the third step, the tool lists all the languages you have selected in the previous two screens and asks you to select one of them as the default language of your distro. Next, you’re asked to select the desktop environment for your distro. UCK needs this info to download the localised strings for the desktop in your distro.
Next, you need to point it to the ISO image of the Ubuntu distro you want to customise. Unlike some other tools, UCK doesn’t offer to download the image itself, so make sure you have downloaded it already. Remember that you’ll need an image that’s compatible with your machine’s architecture. So if you’re on a 32-bit machine, you’ll need the i386 image and not the x86-64 one. However, users of 64-bit OSes can also customise a 32-bit image.
After prompting you for a name for your new localised distro, UCK gives you the option to manually customise your new distro. If you choose to do so, at some point in the future, UCK will let you run a package manager to alter the list of apps inside the distro, and can launch a terminal to tweak files. Since Ubuntu doesn’t include a chroot-aware graphical package manager, the package manager option will fail. You can still however install and remove packages from the console by using apt-get.
More customisationsIn the final couple of steps in the UCK wizard, you get the option to delete all Windows-related files from your distro, and generate a hybrid ISO image that you can burn on a CD or copy to a USB. UCK will then unpack the ISO under the ~/tmp directory, and then download the language packs. When it’s done, you’ll get the options to manually customise the distro if you’ve selected the option earlier. At this point, you can also copy files into your new distro. All you need to do is copy them (with the cp command) to the appropriate directory under the root of the customised distro, which is ~/tmp/remaster-root. Underneath, it has the same directory structure as a regular Ubuntu distro.
Once you’re done, UCK will build your new localised Ubuntu distro and point you to its ISO. Eso es todo amigo! UCK works best for creating localised spins of Ubuntu. But if
If you know your way around Ubuntu’s filesystem, you can customise your distro to the hilt.
Simple web-based toolsCreating a custom distro is such a trivial task these days that you can actually create one from your browser! While they save you the effort of installing any software, these online tools don’t offer the same flexibility that you get with offline tools like Ubuntu Builder.
One such tool is the Debian Live Builder (http://live-build-cgi.debian.net). This is a free web service that’s maintained on a ‘best effort basis’. The web builder is hosted by the Live Systems project, which produces the tools
that are, in turn, used for producing official Debian live images.
Using the online tool you can build hybrid ISO images that you can transfer to USB disks, as well as basic netboot images without the X server. The Standard options also let you specify the desktop environment. Additionally, you get lots of advanced options. For more details about these options refer to the documentation for the Debian Live project (http://bit.ly/17pdmrj).
When your customised Debian Live system is ready, a download link will be emailed to you.
Then there’s Porteus online builder (http://build.porteus.org). Porteus is a portable distro based on Slackware. The web interface enables you to select the desktop for your customised distro and some common software, such as web browsers, word processors, VoIP clients, and proprietary video card drivers from Nvidia and AMD. Optionally, you can influence advanced boot parameters.
Spin a localised Ubuntu distroThe tools to make custom distros in your preferred language.
www.tuxradar.com November 2013 LXF176 35

you want to further customise the distro by adding (or removing) apps or replace Unity with another desktop environment, you need to use Ubuntu-Builder. To install it you’ll first need to add its PPA. Fire up a terminal and enter:$ sudo add-apt-repository ppa:f-muriana/ubuntu-builder$ sudo apt-get update$ sudo apt-get install ubuntu-builder
After it’s installed, at least on newer versions of Ubuntu, you will need to launch the tool from the command line with root privileges, because Ubuntu-Builder creates a working directory under /home:$ sudo /usr/bin/ubuntu-builder.gambas
Using Ubuntu Builder is fairly straightforward. You can use the Get Ubuntu pulldown to download an ISO image of the Ubuntu version you want to download. If you have an ISO
image already you can point to it using the Select ISO pull-down option.
After it’s mounted your ISO, click on the
Settings icon. In the window that opens, you can add basic information about your custom distro, such as its name, version number and a link to its online release notes.
If you switch to the Advanced tab in this window, you get options to set a default language for your distro and remove
other languages to save space. If you select the options to make a bootable USB live system or burn the ISO image to an optical drive, Ubuntu Builder will automatically launch the applications to perform these tasks after creating your custom distro.
In the main Ubuntu Builder menu, you can select the graphical desktop you want in your custom distro. Remember that selecting a desktop environment from this menu will not remove the default Unity desktop, but rather install your selection beside it. Also, in our experience, it’s best to use the package manager to install a new desktop meta package rather than these presets.
Use the Synaptic option to launch the graphical package manager. The console option will launch a terminal into your distro where you can add packages via apt-get. See the box below (CLI Tricks to Customise Ubuntu), for a list of useful packages that are worth installing to make Ubuntu more usable).
The Ubuntu Builder also has buttons that will enable you to add custom repositories. You can also add custom Deb packages from your disk into your distribution and the builder will auto-resolve dependencies that are required from the configured repositories.
One interesting feature of the tool is that it lets you customise the Ubuntu installer as well. The Ubiquity option launches the Ubiquity editor which enables you to edit the text of every slideshow screen that’s shown while Ubuntu is being installed.
When you’re done customising your distro, click the Build button to create the ISO image of your distro. Once it’s done, you can use the Try option to test your custom distro with the Qemu virtual machine emulator.
Create Fedora-based live CDs Ubuntu isn’t the only distro that gives you the tools to create a customised version. If you prefer RPM packages instead of Debs, you can assemble a customised distro based on Fedora, using command-line tools bundled in the livecd-creator package.
Unlike UCK and Ubuntu Builder, the Fedora tools don’t require an ISO image of a stock Fedora release. Instead the tool fetches all packages you need in your custom Fedora distro from the internet.
We don’t actually speak Russian, but thanks to UCK we can create a localised spin for our comrades.
“The secret sauce behind Fedora distros are kickstart files.”
CLI tricks to customise UbuntuHere are some ideas to make your customised Ubuntu distro more usable.
You can install plugins to handle multimedia in various formats with:sudo apt-get install ubuntu-restricted-extras
and remove the controversial Amazon shopping lens with:sudo apt-get remove unity-lens-shopping
Don’t like Unity? Give users a choice by installing another desktop like Gnome 3 with:sudo apt-get install gnome-shell
After it’s downloaded and installed, make sure your custom Ubuntu boots Gnome 3 instead of Unity with: /usr/lib/lightdm/lightdm-set-defaults -s
gnome-shellYou can also add a new user using the user-
setup command, which launches a wizard to set up a new user. The lightdm screen will list this user instead of the live user.
If you want to put application shortcuts on the desktop first create the Desktop/ directory under your custom distro with:mkdir -p /etc/skel/Desktop
You can now move application shortcuts from the host distro:cp /usr/share/applications/firefox.desktop /etc/
skel/Desktopcp /usr/share/applications/libreoffice-writer.
desktop /etc/skel/Desktopchmod +x firefox.desktop chmod +x libreoffice-writer.desktop
If you want to change the default wallpaper, open the /usr/share/glib-2.0/schemas/10_
ubuntu-settings.gschema.override file and change the picture-uri parameter to point to the image you wish to use as the background, such as:picture-uri=’file:///usr/share/backgrounds/
Brother_typewriter_by_awdean1.jpg’ Similarly, you can change the theme and
icons by editing the gtk-theme and icon-theme parameters under the [org.gnome.desktop.interface] section, such as:gtk-theme=”Radiance” icon-theme=”HighContrast”
For these changes to be reflected in your custom distro, make sure you compile the modified schemas with:glib-compile-schemas /usr/share/glib-2.0/
schemas
36 LXF176 November 2013 www.linuxformat.com
Build your own distro

The secret sauce behind custom Fedora distros are kickstart files. A kickstart file is a simple text file, which contains a list of items, such as package names. The livecd-creator tools reads a kickstart file and builds your distro as per the instructions in it. In fact, when you install Fedora, the Anaconda installer also creates a kickstart file (/root/anaconda-ks.cfg) based on the options that you select during installation.
To help you get started, you can download the kickstart files for several official Fedora spins by downloading the spin-kickstart package, along with the livecd-tools:$ su -c “yum install livecd-tools spin-kickstarts”
This will install the livecd-creator tool that will build your custom distro and place several kickstart files under the /usr/share/spin-kickstarts directory. You can open and edit any kickstart file in a text editor. To get a hang of what goes in a kickstarter file, open one and refer to the Fedora documentation (http://bit.ly/14c1XJ7) to understand the various options.
Or, if you’re lazy sort, you can just install the Kickstart Configurator tool, which lets you create a kickstart file using a graphical user interface. Install the app with:su -c “yum install system-config-kickstart”
Using kickstart filesThe two parts of the kickstart file that you should pay close attention to are the software section, which begins with %packages and the post-installation section, which begins with %post. The software section lists the apps that will be installed in your distro. This is best configured with the graphical Kickstart Configurator tool.
The %post section is where you specify commands that will run in the build environment before the ISO image is created. It’s useful for carrying out customisations like adding a user, configuring the network or specifying applications that will launch automatically. For example, the following will add the nameserver 10.10.10.10 to /etc/resolv.conf:%post # add nameserverecho “nameserver 10.10.10.10” >> /etc/resolv.confecho “10.10.10.10 server.local server” >> /etc/
You can modify the Syslinux splash image and install a graphical desktop from the Extras menu.
resolv.conf%end
To autostart the Gedit text editor, you will need to place a shortcut to the app in the ~/.config/autostart folder in your customised distro:%post# autolaunch gedit mkdir -p /etc/skel/.config/autostartcp /usr/share/applications/synapse.desktop /etc/skel/.config/autostart/%end
You can also use the --nochroot switch with %post if you wish to run commands outside the chroot environment of your custom distro. The most common use for this is to copy files from the host distro to your new distro, such as:%post --nochroot# copy the configuration file for SSHcp $INSTALL_ROOT/etc/sshd_config $LIVE_ROOT/etc/sshd_config%end
Also make sure you define a Fedora repository in the kickstart file. To use the same repository as the host system, add the following line to the kickstart file:repo --name=fedora --mirrorlist=http://mirrors.fedoraproject.org/mirrorlist?repo=fedora-$releasever&arch=$basearch
You can also grab packages from another repository for another architecture besides the host one. For example, to grab packages from Fedora 18 repository for the i386 architecture, use:repo --name=fedora --mirrorlist=http://mirrors.fedoraproject.org/mirrorlist?repo=fedora-18&arch=i386
When you’re finished, save the custom kickstart file, say under ~/custom-kickstarts/My-Remix.ks.
Now fire up a terminal, switch to the root user (su -) and ask the livecd-creator tool to build your custom distro:# livecd-creator --config=/home/bodhi/custom-kickstarts/My-Remix.ks --fslabel=My-Remix --cache=/var/cache/live --verbose
When the machine has stopped whirrring and the messages have all scrolled by, your custom Fedora distro will be available under your home directory.
Turn the page to learn how to get a custom distribution based on OpenSUSE, using the SUSE Studio web app. For more customisation options through the command line and how to install Arch Linux jump to page 40 (Remaster a Working Install).
If you prefer you can launch a wizard that will guide you through the process of creating your custom distro.
www.tuxradar.com November 2013 LXF176 37
Build your own distro

If we were to rank Linux customisation tools by the power they give the normal user, OpenSUSE would win hands down. Its SUSE Studio tool is the most comprehensive
solution for creating a customised distro: with it you can create desktops, servers, and even virtual appliances, and in addition to adding software and files, you can even customise the artwork to brand your distro.
Best of all, SUSE Studio doesn’t require you to be running OpenSUSE or install any software. It’s a Ruby on Rails web application that runs in a web browser! After you’re done building your custom distro, you can even test it from the web browser without downloading anything.
To get started, head on over to www.susestudio.com. You can sign in with any OpenID provider or register an account with the service.
Before you start, remember that SUSE Studio refers to custom distros you create with the system as an ‘appliance’ irrespective of whether it’s designed for real physical hardware or virtual machine. Once you’re signed in, click the Create New Appliance under Actions in the upper-left corner.
Set up the distroYou can base your distro on various Novell-supported ones, including the current version (OpenSUSE 12.3), as well as various editions of their commercial SUSE Linux Enterprise server. To use the latter you’ll need to buy a licence.
For most purposes you’ll opt for the OpenSUSE base. You’ll then have to select a template that will determine what
type of system you want to create. The choices here include a Just enough OS (JeOS) template for a minimalistic system, a text-only template for building servers, and templates for a Gnome 3, or KDE 4 desktop. This step is rounded off by selecting the processor architecture for the distro and giving it a name.
You’re now at the main screen of your appliance, which has two panes. The right-hand side of the screen has a set of tabs that you can switch through to configure your appliance. On the left you are shown a summary of the software included in your appliance.
Pick your softwareSwitch to the Software tab to add software to your appliance. You can choose software from three sources. The primary source is the group of official distro repositories that provide software based on the base template. You can also add external repositories either from the OpenSUSE Build Service or a third-party. Finally, you can upload an RPM or bunch multiple RPMs in a compressed archive.
After you’ve configured the sources, you can scroll down the page and search for software and add them to your distro. So, for example, if you wanted to add LibreOffice to your system, search for it using the search bar. You can get details about the software by clicking on its
Deploy prefabricated custom serversSuppose you are a sysadmin who has to roll out a bunch of identical machines with similar configurations and the same software. The www.instalinux.com service is an online service like SUSE Studio, but instead of full-fledged OpenSUSE-based distros, it churns out small ISOs that are designed to prepare ready-to-use Linux machines by automatically fetching packages and installing them
The web service is powered by the SystemDesigner CGI scripts from the Linux
Common Operating Environment project (http://linuxcoe.sourceforge.net). Although it isn’t actively maintained, you can still create working systems based on server distros, such as CentOS and Scientific Linux.
The system takes you through the steps involved in installing a distro, such as selecting a keyboard layout, timezone, password for the root user, package selection and the disk partitioning scheme. Once you’ve answered the questions, it creates a preseed installer for
Debian-based distributions or a kickstart file for Red Hat-based distros and puts it on a small (about 30MB) CD.
However, because it isn’t actively maintained, the installation disks that are made for CentOS and Scientific Linux need to have their final configuration files tweaked to point to the correct URL for downloading packages. But once you have the disc, pop it in the CD and depending on your package selection your machine will be up and running soon.
Build distros onlineMake a custom distro using web tool, SUSE Studio.
SUSE Studio is designed to be easy to use and offers enough flexibility to cater to both new and advanced users.
SUSE Studio will enable you to, optionally, upload single files or zipped archives to your custom distro.
38 LXF176 November 2013 www.linuxformat.com
Build your own distro

name in the search results. To add a piece of software, click on the +Add button, which will auto-resolve dependencies and update the software information in the left pane.
When you are done adding software, switch to the Configuration tab. The tab has several buttons to configure different aspects of your distro. From the General section you can configure the network, enable the firewall and open ports for the SSH and HTTP ports, and add users and groups. To add your logo and a custom wallpaper switch to the Personalise section. SUSE Studio will use these and show a preview of how your appliance will look at the Grub boot loader screen, while booting and at the login screen.
If you are setting up a server and will be using a MySQL or PostgreSQL database, head to the Server section from where you can add data from an existing database by uploading its SQL dump and adding users and defining their permissions. Similarly, if you are setting up a desktop distro, switch to the Desktop section, where you can automatically log in any user that you have added and define programs that you want to auto-start when they log into their desktop.
The Appliance and Scripts sections are designed for advanced users. The Appliance section comes in handy if you want your custom distro to serve as a virtual appliance. The Scripts section will run custom scripts to execute actions like removing temporary files, or loading custom kernel modules, either immediately after creating your distro, or when the distro boots.
Build and shareOnce you’ve completed configuring your custom distro, head to the Build tab to turn it into a usable distribution. SUSE Studio can make your distro available in several formats. Besides the Live ISO image for the optical media, there are Live images for USB and images for virtually every virtualisation software available, including KVM, VirtualBox, VMware, Xen, and OVF etc.
Two options are the Preload ISO and Preload USB images. These come in handy if you are planning to do installations of your distro on physical machines and don’t need the live environment. These disk images are wrapped in a simple bootable installer and you only need to point them to a target hard disk for installation. These formats are ideal for deploying servers.
SUSE Studio also gives each custom distro a version number in the format. This is useful if you plan to
update your custom distro regularly by adding new software, or changing configuration in any other way. The website will keep track of all your builds and every subsequent build will automatically generate a changelog that’ll list all the changes since the last version.
Initially the service will only build the distro in the default format you’ve selected. If you’ve selected additional formats as well, click on the Build additional button to get images in the other formats.
After the image has been built, you can test it before downloading, using the Testdrive link. This will launch a flash-based VNC session and boot your distro inside the web browser itself. The service also has instructions for connecting to the test drive via a regular desktop VNC client or through an SSH connection. When you’re satisfied, you can download your custom distro or share it with other SUSE Studio users by publishing it in the SUSE gallery.
SUSE Studio is a wonderful tool for creating customised distros. Users new to Linux can use it and so can experienced system administrators. The web-based tool has very low bandwidth requirements. Packages are downloaded at the SUSE Studio servers and you only really need an internet connection to download the image of your final distro. Interruptions don’t hamper the distro creation process and you can stop and resume the process at any stage. SUSE Studio also gives you get lots of customisation options to influence the software in your distro, add users, and personalise it with your own logo and wallpaper.
SUSE Studio definitely gives you more customisation options than UCK and Ubuntu Builder and is far easier to use than Fedora’s livecd-tools. However it might be an overkill for creating simple distros.
www.jopux.org hosts a wide range of appliances from basic workstations to analytics servers.
You can use appliances in SUSE Studio’s gallery as a good starting point for your custom OS.
Sessions via the Testdrive link are restricted to one hour to save resources.
www.tuxradar.com November 2013 LXF176 39
Build your own distro

In this feature, we’ve shown you tools that will customise Ubuntu, Fedora, and OpenSUSE to different degrees. The point-and-click tools are convenient to use but don’t
offer the same amount of customisation that you get with command-line tools, and no matter how proficient you are with Linux, it’ll take some doing to make your custom distro look and behave like the one you’re using. Wouldn’t it be nice, then, if you could just turn the distro you’re currently running into a live one that you can pass on to family and friends?
Many distros, such as Linux Mint, PCLinuxOS, Damn Small Linux and Mepis include a remaster script, specifically for this purpose. The remaster scripts included in these distros will go through your installed distro and spit out a live image with the exact same contents.
These scripts save you the trouble of fetching software from the internet or working in a chroot environment to edit configuration files. Just set up the distro you want, remove
any unnecessary files and then create a remaster that you can then redistribute.
If you want a truly distro agnostic
way to create a live CD, then grab the Linux Live Kit (www.linux-live.org). This project produces a set of scripts that will go through your installed distribution and produce a live version. Download the script’s tarball from the web and extract it into /tmp. You might also want to rename the extracted directory to something like linux-live-kit.
The extracted directory has a hidden file named .config. Open the file in your text editor and change the value of the LIVEKITNAME variable to the name of your distro, such as maggie-20072013.
If you scroll down the file, you’ll notice the vmlinuz variable points to /boot/vmlinuz. Various scripts in the kit expect the kernel at this location. In case your distro doesn’t keep the kernel in this location, create a symbolic link to the real kernel such as:ln -s /boot/vmlinuz-3.8.0-25-generic /boot/vmlinuz.
If there are certain files in your home directory that you don’t want to include in the live version, first create a variable
called USER that points to your username, by adding the following line to the configuration file:USER=$(whoami)
Now point to the files that shouldn’t be included with the EXCLUDE parameter, such as: EXCLUDE = “/etc/fstab /home/$USER/Music /home/$USER/Download”
Also, unless you replace the bootlogo.png file under the bootfiles/ directory, you’ll get a very ugly splash image on the boot screen.
Then head to the tools/ directory and run the ./isolinux.bin.update script, which will patch and update the other components to match the name of your custom live kit. Before executing this script make sure that you are connected to the Internet because the script will fetch the syslinux package from www.kernel.org.
When it’s done updating the components, simply run the ./build script and go prepare a cup of tea. The script will take some time depending on the size of your file system and the crunching power of your computer.
After it’s finished, you’ll have an ISO file and a TAR archive under the /tmp directory. The ISO file is meant for optical media. To make a bootable USB, extract the contents of the TAR archive to a USB device, change to the boot/ directory and run the ./bootinst.sh script.
Set up Arch LinuxIf you want a truly customised distro, you should set up Arch Linux. While most distros provide a pre-packaged set of tools, apps, and configuration, Arch lets you design your installation from the grounds up. This means that you get to decide everything that goes into your system. Heck, it doesn’t even add any user by default except the root user!
This DIY approach is an integral part of the Arch philosophy. It also makes Arch a wonderful distro for the truly obsessed customisers. Arch is a rolling release that can be bought up to date with a single command, and Pacman, its package manager, is one of the best tools for the job.
To install Arch download the Arch install ISO from its website (www.archlinux.org). The single ISO image will work on both 32-bit and 64-bit machines. Unlike most other distros, the Arch install CD only contains a bare minimum environment and you’ll have to fetch all packages from the internet, including the bootloader.
Arch Linux’s live install CD will drop you to a root shell, which means the first order of business is to partition your hard disk and make space for Arch. The install CD includes the Gdisk tools for partitioning disks using the new GUID Partition table standard as well as Fdisk if you want to use the older MBR table.
After partitioning your disk, you’ll have to format them. First mark the swap partition, sda5:# mkswap /dev/sda5# swapon /dev/sda5
Then you will need to format the root partition, which is
Remaster a working installWhip your favourite distro into shape – or give Arch a whirl.
“If you want a truly customised distro, you should setup Arch.”
Remember to remove unnecessary files with a tool like Sweeper before making install into a custom distro.
40 LXF176 November 2013 www.linuxformat.com
Build your own distro
You’ll now have to create an initial ramdisk environment, which will load kernel modules and set up the environment before handing over the control of init. Arch uses the mkinitcpio script for this purpose. Experienced users would want to edit the /etc/mkinitcpio.conf file before creating the ram disk with:# mkinitcpio -p linux
The last step in setting up our basic Arch system is installing and configuring a bootloader. Arch supports the Grub and Syslinux bootloaders. In this tutorial we’ll set up the lightweight Syslinux bootloader, but you can setup Grub by following instructions that can be found on the Arch wiki (https://wiki.archlinux.org).
First, grab the Syslinux bootloader as well as the gptfdisk package to modify our GUID Partiton Table with: # pacman -S syslinux gptfdisk
Then install the bootloader and mark the Arch partition as bootable with:# syslinux-install_update -i -a -m
Finally, edit the /boot/syslinux/syslinux.cfg file to point to the Arch Linux partition. Oh, and before you log out of the chroot environment don’t forget to set a password for the root user with passwd.
Press Ctrl+D to exit the chroot environment and unmount the Arch partition with umount /mnt. That’s the end of the install process. You can now restart your computer and boot into your shiny new Arch installation.
Post install customisationsArch uses the Systemd system and service manager. So it’s a good idea to spend some time learning the basics of the systemctl command, which interacts with Systemd.
The installed base system only has a CLI. Before you can install a desktop environment you’ll need to install drivers for your video hardware. Use Pacman to search for a list of open source video drivers in Arch’s repos with:# pacman -Ss xf86-video | less
And install the one that matches your hardware. You can also download and install proprietary Nvidia driver with:# pacman -S nvidia
You can then use Pacman and begin to install components such as your preferred desktop environment, an office suite and a web browser etc. You can also set up a user with the useradd command.
When you’ve set up your custom system, you can use the Archiso set of Bash scripts to generate live CD/USB images of your installed system. Using the scripts you can carry a bootable version of your custom Arch install with all your apps on a flash drive. The package is well documented on the Arch wiki with step-by-step instructions.
Now you’re all set to cook your very own flavour of Linux. Using your preferred tools (on and offline) covered in this feature you can roll a simple distro for your personal use, or pique the interest of family and friends with a localised version, or even host it on the internet and nurture a community around it. Who knows – if you produce something absolutely brilliant your custom distribution might find its way into the LXFDVD! LXF
sda7, using the ext4 filesystem:# mkfs -t ext4 /dev/sda7
Unless you are well versed with the command-line disk partitioning and formatting tools, it’s best if you prepare your disk using external tools like Gparted.
Once you have prepared a root partition for Arch Linux, mount it on /mnt:# mount /dev/sda7 /mnt
If you have separate partitions for /home and /boot, mount them as well in appropriate directories such as to /mnt/home, and /mnt/boot.
Configuring the network shouldn’t be an issue if your network has a router that hands out IP address via DHCP, as the Arch install CD has a DHCP service already enabled. If you don’t use DHCP, you’ll have to manually setup an IP address. Arch can assist you with various tools, such as netctl and wifi-menu to setup the Wi-Fi network.
Now edit the file that lists Arch mirrors to select a preferred mirror for downloading packages: # nano /etc/pacman.d/mirrorlist
When you’re done, use Arch’s pacstrap script to download and install the core packages:# pacstrap /mnt base
Once the core packages have been downloaded generate an fstab file to define how the storage devices will be mounted:# genfstab -p /mnt >> /mnt/etc/fstab
You’ll now have to chroot into the installed base to configure the other components of the Arch installation. Arch Linux wraps the standard chroot command inside a custom script called arch-chroot. # arch-chroot /mnt
Congratulations, you’re now inside your new Arch installation. You’ll now have to set your hostname by mentioning it in the /etc/hostname file. Also symlink /etc/localtime to your timezone listed under /usr/share/zoneinfo, such as:# ln -s /usr/share/zoneinfo/GB /etc/localtime
Then open the /etc/locale.gen file and uncomment the locale you wish to use, such as en_GB.UTF8 UTF8. A locale defines a user’s language, country and other related parameters. Now you’ll need to set the keyboard mapping with:# localectl set-keymap uk
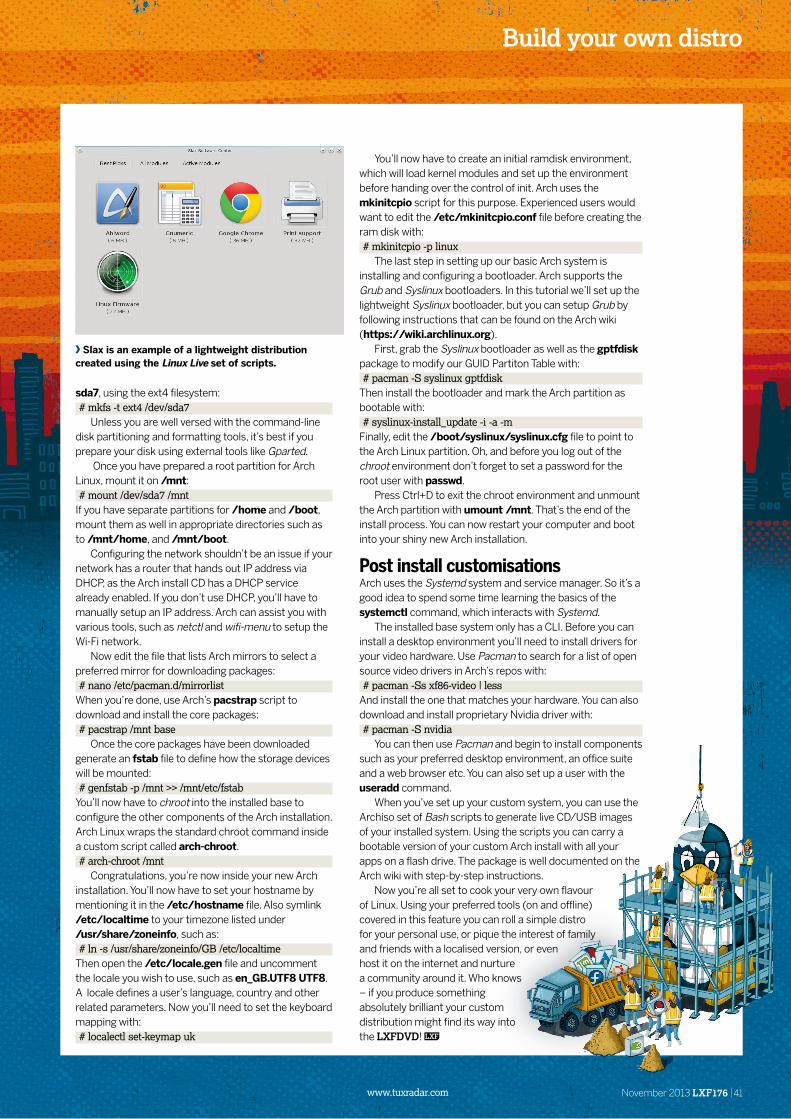
Slax is an example of a lightweight distribution created using the Linux Live set of scripts.
www.tuxradar.com November 2013 LXF176 41
Build your own distro