User manual premium labeller - contact Auszeichnungssysteme
23
User manual premium labeller
-
Upload
khangminh22 -
Category
Documents
-
view
0 -
download
0
Transcript of User manual premium labeller - contact Auszeichnungssysteme

User manualpremium labeller

2 3User Manual – Labeller Last change: 08/03/2018
Contents1 Product function .................................................... 4
1.1 Function ................................................................ 41.2 Use ........................................................................... 41.3 Structure ............................................................... 4
2 About this manual ................................................ 102.1 Target group ...................................................... 102.2 Purpose of manual ........................................ 102.3 Explanation of symbols ................................ 102.4 Manual retention ............................................. 10
3 General safety ........................................................ 123.1 Warnings .............................................................. 123.2 Intended use ..................................................... 143.3 Foreseeable misuse ....................................... 143.4 Obligations of operating company ...... 143.5 Obligations of user ......................................... 14
4 Product design ....................................................... 164.1 EU declaration of conformity .................... 164.2 Transport............................................................... 164.3 Storage ................................................................. 164.4 Dimensions and weight ............................... 184.5 Assembly .............................................................. 18
5 Using product .......................................................... 205.1 Setting price code .......................................... 205.2 Labelling .............................................................. 225.3 Troubleshooting ................................................ 245.4 Disposal ................................................................ 24
6 Product care ............................................................ 266.1 Cleaning .............................................................. 266.2 Replacing parts ............................................... 266.3 Changing ink roll ............................................. 286.4 Changing label roll ........................................ 326.5 Changing cliché-slide .................................. 38
7 Consumables and accessories .................... 417.1 Label rolls ............................................................. 417.2 Ink rolls ................................................................... 417.3 Cliché-slides ....................................................... 43
Links:
Label roll change for contact premium label-ler:
https://www.youtube.com/watch?v=V-
4gI-duMbbQ
Ink roll change for contact premium labeller:
https://www.youtube.com/watch?v=XDf-
p9v76WwQ
Further information can be found at:
http://www.contact-online.de/en/service/
brochures/
4 5User Manual – Labeller Last change: 08/03/2018
1 Product function
1.1 FunctionThe labeller prints and dispenses labels.
1.2 UseThe labeller is designed for one-handed opera-tion.
Use only genuine contact label rolls and genuine contact ink rolls. This will prevent malfunctions and damage to the labeller; see Chapter "7 Consumables and accessories" on page 41.
1.3 StructureClosed labeller
Figure 1 9
2 4
7 68 5
1 3 3
Labeller closed – side view
1. Handle-grip2. Printhead3. Pointer4. Adjustment knob5. Closed front plate6. Printhead housing7. Cap8. Closed bottom9. Grip
6 7User Manual – Labeller Last change: 08/03/2018
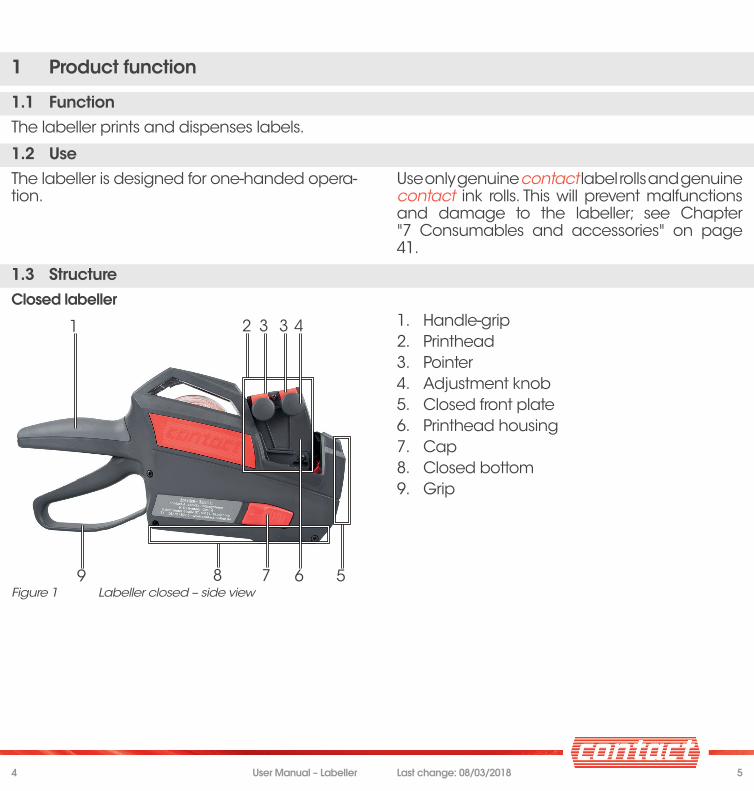
Figure 2
4321
Labeller closed – bottom
1. Transportation wheel2. Guide pulley3. Guide pins4. Applicator roller
Figure 3
1 3 42
Labeller closed – printhead
1. Opening of pointer2. Pointer3. Adjustment knob4. Cliché-slide in cliché-slot (optional acces-
sory)

8 9User Manual – Labeller Last change: 08/03/2018
Open labeller
Figure 4
21
4 3Labeller open – front plate
1. Guide pin, ribbed holding surface2. Ink roll3. Notch4. Swivel arm
Figure 5
21 3
Labeller open – bottom
1. Bottom is open2. Inserted label roll (label material)3. Applicator roller
10 11User Manual – Labeller Last change: 08/03/2018
2 About this manual
2.1 Target groupUsers of the labeller must be at least 16 years old.
The labeller is intended for use in the commer-cial sector only.
2.2 Purpose of manualThis manual will help you use the labeller safely and effi ciently.
Read through the manual carefully before using the labeller.
2.3 Explanation of symbols
Safety-relevant informationCAUTION Indicates a potentially dangerous
situation which can lead to minor or moderate injuries.
NOTICE Indicates a situation which can lead to material damage.
indicates further information/notes/tips.
Actions1. Action step (numbered) Intermediate result Final result
Enumerations Level 1
• Level 2
2.4 Manual retentionKeep this manual in a safe place. Make the manual available to all users of the labeller.
If the labeller is sold on, pass on the manual to the new owner.

12 13User Manual – Labeller Last change: 08/03/2018
3 General safety
3.1 Warnings
CAUTIONRisk of injuries due to broken parts. Never unscrew the labeller. If you suspect a fault, return the labeller to the manufacturer. Use the original packaging. Broken parts may cause injury.Risk of crushing to fi ngers/skin due to lack of attention. Move the adjustment knob using your thumb and index fi nger. Otherwise you may suffer pinching injuries to your skin.Close the bottom/front plate with the palm of your hand. Otherwise you may suffer pinching injuries to your fi ngers/skin.Risk of cuts at the tear-off edge. Take care when removing and inserting the label roll. At the bottom of the labeller is a jagged tear-off plate on which you could injure yourself.Risk of foot injuries due to the labeller falling. Always wear closed footwear when using the labeller. Avoid working in bare feet/sandals.Pain or other signs of fatigue may occur if the device is used for long periods. Take suffi ciently long breaks when working with the labeller.Risk of toxic/combustible vapours in the event of high ambient temperatures. Do not place the labeller and the consumables (labels and ink rolls) on hot surfaces.
NOTICERisk of damage to the labeller due to improper cleaning. Do not use corrosive cleaning agents. Use only water and a soft cloth for cleaning. Risk of damage to the labeller due to improper handling. Never remoisten the ink rolls. If there is no longer suffi cient ink in the ink rolls, change the ink rolls; see Chapter "6.3 Changing ink roll" on page 28.Excessive temperatures may affect handling and the results of the labelling. Where possible, use the labeller and consumables (labels and ink rolls) at room temperature. Store the labeller and consumables at room temperature. Incor-rect storage can have an adverse effect on the use of consumables. Contact the manufac-turer if you intend to use and store the labeller at other temperatures (e.g. low-temperature applications).Fouling caused by ink possible. Take care when handling the ink roll. Contact the manufacturer for further information or specifi cations relating to the ink rolls. Ink in the ink rolls can stain.
14 15User Manual – Labeller Last change: 08/03/2018
3.2 Intended useThe labeller is designed for printing and dispensing labels. Use only genuine contact ink rolls for printing the labels.
Use only genuine contact label rolls in the intended size. The label size depends on the labeller variant; see Chapter "4.4 Dimensions and weight" on page 18.
3.3 Foreseeable misuseUse of the labeller for purposes other than or in addition to those described under "Intended use" is deemed improper.
This applies in particular to using the labeller with incorrectly sized labels, incorrectly sized printhead, incorrectly sized bottom, etc.
3.4 Obligations of operating companyThe labeller is intended for use in the commercial sector. The operating company must observe the legal obligations regarding occupational safety.The operating company must
ensure that the manual is available to the user of the labeller at all times and
obtain a replacement manual from the manufacturer if the original manual becomes illegible or is lost.
The operating company must ensure that all persons who use the labeller
are at least 16 years old, are familiar with the regulations
concerning occupational safety and accident prevention,
have been instructed in how to use the labeller and
have understood the safety instructions and safety rules given in this manual.
3.5 Obligations of userThe labeller may only be used by persons who
perform their work reliably, have read and understood this manual
and
do not exhibit slowed reactions, e.g. caused by drugs, alcohol or medication.
16 17User Manual – Labeller Last change: 08/03/2018
4 Product design
4.1 EU declaration of conformity
Manufacturer K-D Hermann GmbHHainbrunner Strasse 9769434 HirschhornD-Germany
Representative Martin Hermann, Managing DirectorProduct Labeller - premium
For printing and dispensing labels.Fulfi ls the requirements of the directives EU Machinery Directive 2006/42/EUFulfi ls the harmonized standards EN ISO 12100-1-2:2003
EN ISO 14121-1:2007 EN 614-1:2006+A1:2009 EN 1005-3:2002+A1:2008 EN 1005-5:2007-05 EN 1010-1:2004+A1:2010
4.2 TransportThe manufacturer itself does not deliver the product.
The product is shipped by a transport service provider.
4.3 Storage
NOTICE Excessive temperatures may affect handling and the results of the labelling. Where possible, use the labeller and consumables (labels and ink rolls) at room temperature. Store the labeller and consumables at room tempera-ture. Incorrect storage can have an adverse effect on the use of consumables. Contact the manufacturer if you intend to use and store the labeller at other temperatures (e.g. low-tem-perature applications).
Store the labeller in its original box.
Temperature min. [°C] 16Temperature max. [°C] 23Humidity [% rel. humidity] 40 ... 70
Contact the manufacturer for further infor-mation or specifi cations relating to the ink rolls and label rolls.
18 19User Manual – Labeller Last change: 08/03/2018
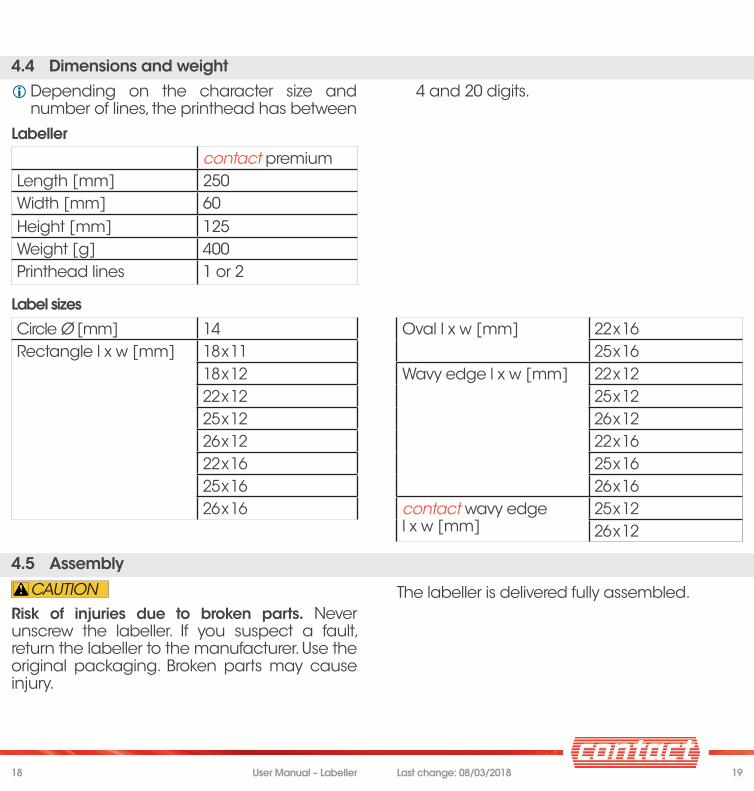
4.4 Dimensions and weight Depending on the character size and number of lines, the printhead has between
4 and 20 digits.
Labeller
contact premiumLength [mm] 250Width [mm] 60Height [mm] 125Weight [g] 400Printhead lines 1 or 2
Label sizes
Circle Ø [mm] 14 Oval l x w [mm] 22 x 16Rectangle l x w [mm] 18 x 11 25 x 16
18 x 12 Wavy edge l x w [mm] 22 x 1222 x 12 25 x 1225 x 12 26 x 1226 x 12 22 x 1622 x 16 25 x 1625 x 16 26 x 1626 x 16 contact wavy edge
l x w [mm]25 x 1226 x 12
4.5 Assembly
CAUTIONRisk of injuries due to broken parts. Never unscrew the labeller. If you suspect a fault, return the labeller to the manufacturer. Use the original packaging. Broken parts may cause injury.
The labeller is delivered fully assembled.
20 21User Manual – Labeller Last change: 08/03/2018
5 Using product
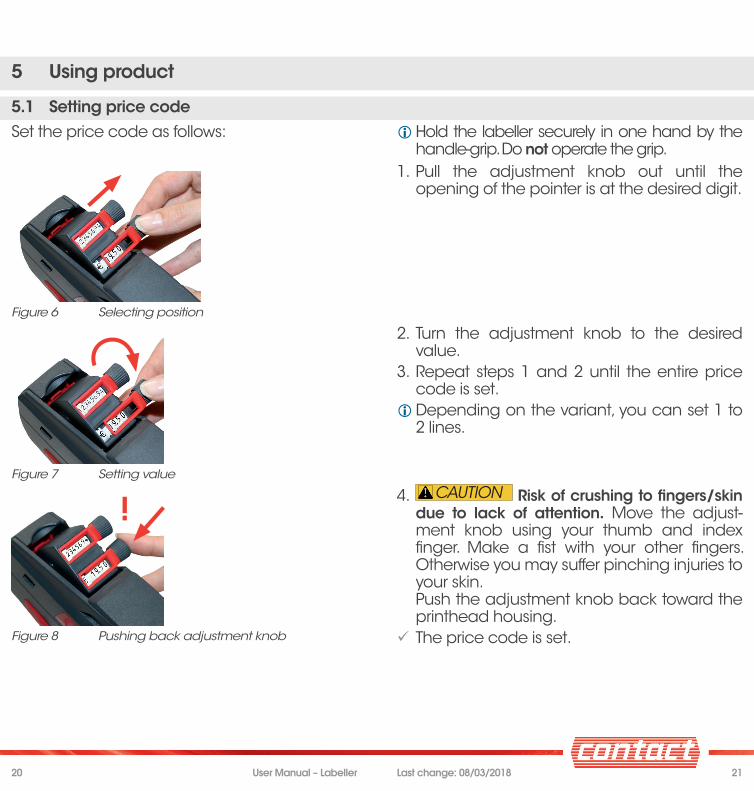
5.1 Setting price codeSet the price code as follows: Hold the labeller securely in one hand by the
handle-grip. Do not operate the grip.
Figure 6 Selecting position
1. Pull the adjustment knob out until the opening of the pointer is at the desired digit.
Figure 7 Setting value
2. Turn the adjustment knob to the desired value.
3. Repeat steps 1 and 2 until the entire price code is set. Depending on the variant, you can set 1 to 2 lines.
Figure 8
!
Pushing back adjustment knob
4. CAUTION Risk of crushing to fi ngers/skin due to lack of attention. Move the adjust-ment knob using your thumb and index fi nger. Make a fi st with your other fi ngers. Otherwise you may suffer pinching injuries to your skin.Push the adjustment knob back toward the printhead housing.
The price code is set.
22 23User Manual – Labeller Last change: 08/03/2018
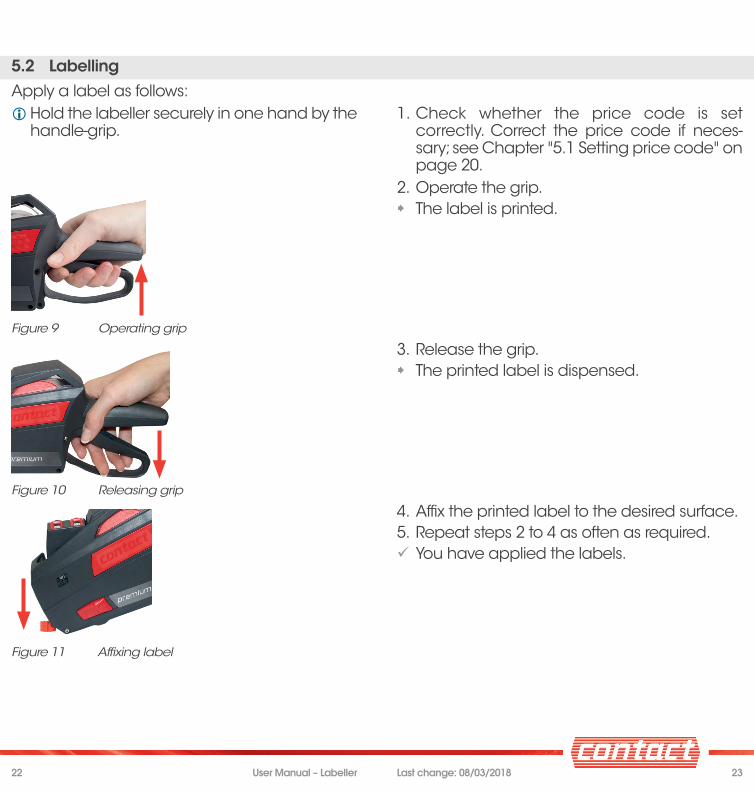
5.2 LabellingApply a label as follows:
Hold the labeller securely in one hand by the handle-grip.
1. Check whether the price code is set correctly. Correct the price code if neces-sary; see Chapter "5.1 Setting price code" on page 20.
Figure 9 Operating grip
2. Operate the grip. The label is printed.
Figure 10 Releasing grip
3. Release the grip. The printed label is dispensed.
Figure 11 Affi xing label
4. Affi x the printed label to the desired surface.5. Repeat steps 2 to 4 as often as required.
You have applied the labels.

24 25User Manual – Labeller Last change: 08/03/2018
5.3 Troubleshooting
Printing in wrong positionIf the label print is not at the intended position, remove and then reinsert the label roll; see Chapter "6.4 Changing label roll" on page 32. Follow the instructions precisely.
Print not clearly legibleInsert a new ink roll; see Chapter "6.3 Changing ink roll" on page 28.
Cliché-print at wrong positionIf the cliché-print is not at the intended position, remove and then reinsert the cliché-slide; see Chapter "6.5 Changing cliché-slide" on page 38. Follow the instructions precisely.
Other problemsContact the manufacturer.
5.4 DisposalThe packaging consists of plastic and cardboard. Separate the components and take them both for proper recycling.The labeller consists of plastic and metal. Take the labeller for proper recycling.
Contact the manufacturer for information about the materials used. Notes about proper disposal can be obtained from your local authority.

26 27User Manual – Labeller Last change: 08/03/2018
6 Product care
6.1 Cleaning If you suspect a fault, return the labeller to the manufacturer. Use the original packaging.
1. Check the labeller for damage before using it.
2. NOTICE Risk of damage to the labeller due to improper cleaning. Do not use corrosive cleaning agents. Use only water and a soft cloth for cleaning. After you have fi nished using the labeller, clean it with a soft, damp cloth.
6.2 Replacing parts Defective parts must be replaced by the manufacturer only.
Return the labeller to the manufacturer. Use the original packaging.

28 29User Manual – Labeller Last change: 08/03/2018
6.3 Changing ink rollRemoving ink rollRemove the ink roll as follows:
Hold the labeller securely in one hand by the handle-grip. Do not operate the grip.
Figure 12 Opening front plate
1. Pull the front plate off the labeller with the aid of the notch. To do so, use the thumb of your free hand.
Fold the front plate downward. Hold the front plate so that your index fi nger and thumb can grip the sides of the swivel arm. You should hold the labeller at the side.
Figure 13 Removing ink roll
2. NOTICE Fouling caused by ink possible. Take care when handling the ink roll. Contact the manufacturer for further information or specifi cations relating to the ink rolls. Ink in the ink rolls can stain.Grip the ink roll by the ribbed holding surfaces. To do so, use the thumb and index fi nger of your free hand.
3. Remove the ink roll from the swivel arm. The ink roll has been removed.

30 31User Manual – Labeller Last change: 08/03/2018
Inserting new ink rollInsert the new ink roll as follows:
Requirement: Front plate is open1. Open the packaging of the new ink roll (e.g.
remove the cardboard from the blister).
Hold the front plate so that your index fi nger and thumb can grip the sides of the swivel arm.
Figure 14 Removing ink roll from packaging
2. Remove the new ink roll by the ribbed holding surfaces. To do so, use the thumb and index fi nger of your free hand.
Figure 15 Inserting ink roll
3. Insert the guide pins of the new ink roll into the swivel arm. When doing so, pay attention to the position of the ink roll: parallel to the swivel arm.
4. Push the guide pins into the slot of the swivel arm until the guide pins engage.
The ink roll must then be able to turn only and otherwise not move.
Figure 16 Closing the front plate
5. CAUTION Risk of crushing to fi ngers/skin due to lack of attention. Close the bottom/front plate with the palm of your hand. Other-wise you may suffer pinching injuries to your fi ngers/skin.Push the front plate toward the housing. To do so, place the palm of your hand against the outside of the front plate.
The front plate closes with a "click". The ink roll is inserted.

32 33User Manual – Labeller Last change: 08/03/2018
6.4 Changing label rollRemoving label rollRemove the label roll as follows:
Hold the labeller securely in one hand by the handle-grip. Do not operate the grip. The bottom must be pointing toward you.
1. CAUTION Risk of cuts at the tear-off edge. Take care when removing the label roll. At the bottom of the labeller is a jagged tear-off plate on which you could injure yourself.Cut through the backing paper at the bottom of the labeller.
2. Operate the grip several times.3. Remove the residual backing paper strip.
Figure 17 Opening bottom
4. Slide the 2 red caps at the side toward the grip. To do so, use the thumb and index fi nger of your free hand.
The bottom opens.5. Fold out the bottom completely.
Figure 18 Removing label roll
6. Remove the label roll. To do so, turn the labeller so that the label roll can fall out.
The label roll is removed.

34 35User Manual – Labeller Last change: 08/03/2018
Making new label roll ready for use:Make the label roll ready for use as follows:1. Unroll the label roll far enough so that any
label residue and adhesive residue can be removed.
2. Tear off the length of label roll which has label residues and adhesive residues.
If you are using an already started label roll, skip steps 1 and 2.
The label roll is ready for use.
Inserting label roll:Insert the label roll as follows:
Requirement: Bottom is open Hold the labeller securely in one hand by the handle-grip. Do not operate the grip.
Figure 19 Inserting label roll
1. Insert the label roll the right way round: The backing paper must be visible. A 10-centimetre long strip must project
beyond the applicator roller.
2. CAUTION Risk of crushing to fi ngers/skin due to lack of attention. Close the bottom/front plate with the palm of your hand. Other-wise you may suffer pinching injuries to your fi ngers/skin.Close the bottom with the palm of your hand.
The bottom closes with a "click".
Figure 20 Backing paper behind guide pins
3. Thread the backing paper behind the guide pins on the bottom.

36 37User Manual – Labeller Last change: 08/03/2018
Figure 21 Backing paper between guide pulley and transportation wheel
4. Push the end of the backing paper between the white guide pulley and the transporta-tion wheel.
5. Operate the grip several times until the label roll is pulled taut.
The label roll is drawn in. The label roll is inserted.

38 39User Manual – Labeller Last change: 08/03/2018
6.5 Changing cliché-slide The cliché-slide is an optional accessory. This point is only relevant if a cliché-slide is
present.Removing cliché-slideRemove the cliché-slide as follows:
Figure 22 Push the cliché-slide forward
1. Gently push the cliché-slide with the thumb and index fi nger of your free hand forwards to the printhead.
Figure 23 Pulling out cliché-slide
2. Pull the cliché-slide upward out of the labeller. The cliché-slide is removed.
Inserting cliché-slideInsert the cliché-slide as follows:
Figure 24 Positioning and inserting cliché-slide
1. Position the cliché-slide in the cliché-slot provided. The smooth side of the cliché-slide must point toward the grip.
2. Insert the cliché-slide into the labeller until the cliché-slide engages. The cliché-slide must not be pushed forward.
The cliché-slide engages with a "click". The cliché-slide is inserted.
40 41User Manual – Labeller Last change: 08/03/2018
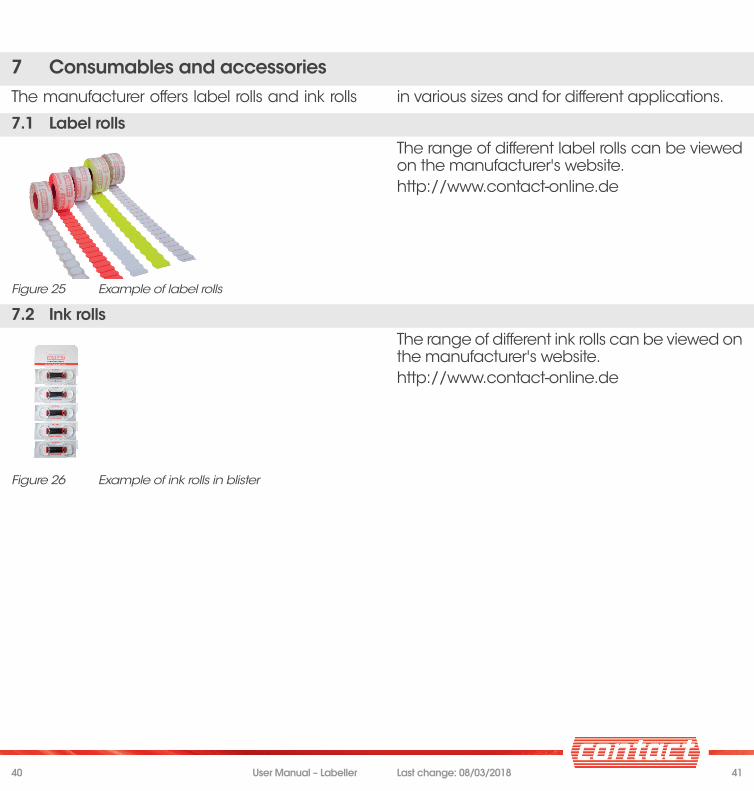
7 Consumables and accessoriesThe manufacturer offers label rolls and ink rolls in various sizes and for different applications.
7.1 Label rolls
Figure 25 Example of label rolls
The range of different label rolls can be viewed on the manufacturer's website.http://www.contact-online.de
7.2 Ink rolls
Figure 26 Example of ink rolls in blister
The range of different ink rolls can be viewed on the manufacturer's website. http://www.contact-online.de

42 43User Manual – Labeller Last change: 08/03/2018
7.3 Cliché-slides
Figure 27 Example of cliché-slide
Contact the manufacturer to order a custom-made cliché-slide.The cliché-slide is used to additionally print fi xed words or texts on the label.
Figure 28
1
Example of a cliché-print
1. Example of cliché-print "Mandarinen".

Telefon: +49 62 72 / 9 22 - 3 00Telefax: +49 62 72 / 9 22 - 4 99
K-D Hermann GmbHcontact AuszeichnungssystemeHainbrunner Straße 97D-69434 Hirschhorn