User Guide - IBM
122
IBM Application Discovery for IBM Z Build V5.1.0 User Guide IBM SC27-8970-06
-
Upload
khangminh22 -
Category
Documents
-
view
0 -
download
0
Transcript of User Guide - IBM

IBM Application Discovery for IBM Z BuildV5.1.0
User Guide
IBM
SC27-8970-06


Contents
Chapter 1. Accessibility Features for IBM Application Discovery for IBM Z...............1
Chapter 2. Introduction......................................................................................... 3IBM AD High-Level Architecture Overview .................................................................................................3Supported Source Components.................................................................................................................. 4About This Guide..........................................................................................................................................4Terms And Conventions............................................................................................................................... 5
Chapter 3. Installation...........................................................................................7
Chapter 4. IBM AD Build Client...............................................................................9Projects, Folders & Files.............................................................................................................................. 9Tasks.............................................................................................................................................................9
Starting IBM AD Build Client................................................................................................................ 10Creating a Project................................................................................................................................. 10Adjusting Settings.................................................................................................................................12Adding Files to Project Folders............................................................................................................ 16Building Projects...................................................................................................................................23Updating Projects................................................................................................................................. 25Synchronize Mainframe Members....................................................................................................... 25ChangeMan – IBM AD Validation Process........................................................................................... 26Display Build Results............................................................................................................................27Schedule Periodic Updates for Projects.............................................................................................. 27CICS CSD Information Handling.......................................................................................................... 30Extensibility.......................................................................................................................................... 32Configuring the PL/I Preprocessor.......................................................................................................38Preparing repository using DDL scripts for Db2 on z/OS projects...................................................... 40
Chapter 5. IBM AD Build Client Reference............................................................ 43Main Screen................................................................................................................................................43
Main Menu............................................................................................................................................ 43Main Screen Toolbar.............................................................................................................................45
Project Tab................................................................................................................................................. 45Tab Icons Summary..............................................................................................................................46Right Click / Shortcut Menus................................................................................................................46Output Pane..........................................................................................................................................48
Working with IBM AD Build Client Windows............................................................................................. 49Viewing Source Programs.................................................................................................................... 49Building Decisions................................................................................................................................ 49Using the Editor.................................................................................................................................... 52Using the Settings Option.....................................................................................................................53The Options Window............................................................................................................................ 55The Properties Window........................................................................................................................ 55
Chapter 6. IBM AD Build Configuration................................................................. 57Viewing Project Information......................................................................................................................57Deleting a Project.......................................................................................................................................58Renaming a Project.................................................................................................................................... 58Associating a z/OS Access Point to a Project............................................................................................ 58Recreate a Repository................................................................................................................................59
iii

Upgrade a Repository................................................................................................................................ 59Stop the Mainframe Import....................................................................................................................... 60Configuring the z/OS Connection.............................................................................................................. 60Bringing Operational Information............................................................................................................. 69
Retrieve Operational Information........................................................................................................69Bringing data from mainframe libraries (PDS Libraries, Endevor, Librarian, Natural)............................. 73
Retrieving Source Code Information................................................................................................... 74Bringing Data From Mainframe Using ChangeMan® ZMF..........................................................................76
Retrieving ChangeMan® Information................................................................................................... 76The zOS Tab................................................................................................................................................77
Creating a z/OS Connection................................................................................................................. 78z/OS Connection Data Path.................................................................................................................. 79Path for the Retrieved Members.......................................................................................................... 79Members Synchronization Settings..................................................................................................... 79The Advanced Options......................................................................................................................... 80
Automatic Messaging.................................................................................................................................80Appendix 1 - API Extensibility Tutorial................................................................. 81
API Extensibility Sample Files...................................................................................................................81Setting Up a Build with Sample Files........................................................................................................ 82Extending from Sample Files to Your Projects..........................................................................................84
Appendix 2 - Log Files Location............................................................................ 87IBM AD Build Configuration.......................................................................................................................87IBM AD Build Client................................................................................................................................... 87Synchronize Members Process Log Files.................................................................................................. 88
Detailed Log Files Location.................................................................................................................. 88Appendix 3 - Synchronize Members Configuration File Examples.......................... 89Appendix 4 - Extensibility JSON/Configuration File Examples...............................93
Preprocessing Extensibility Examples...................................................................................................... 93API/Macro Call Extensibility Examples .................................................................................................... 96JCL Call Extensibility Examples.............................................................................................................. 107Dependency Extensibility Examples.......................................................................................................111
Documentation Notices for IBM Application Discovery for IBM Z......................... 115Trademarks.............................................................................................................................................. 116
iv

Chapter 1. Accessibility Features for IBM ApplicationDiscovery for IBM Z
Accessibility features assist users who have a disability, such as restricted mobility or limited vision, touse information technology content successfully.
Overview
IBM® Application Discovery for IBM Z® includes the following major accessibility features:
• Keyboard-only operation• Operations that use a screen reader
IBM Application Discovery for IBM Z uses the latest W3C Standard, WAI-ARIA 1.0 (www.w3.org/TR/wai-aria/), to ensure compliance with US Section 508 (www.access-board.gov/guidelines-and-standards/communications-and-it/about-the-section-508-standards/section-508-standards) and Web ContentAccessibility Guidelines (WCAG) 2.0 (www.w3.org/TR/WCAG20/). To take advantage of accessibilityfeatures, use the latest release of your screen reader and the latest web browser that is supported by IBMApplication Discovery for IBM Z.
The IBM Application Discovery for IBM Z online product documentation in IBM Knowledge Center isenabled for accessibility. The accessibility features of IBM Knowledge Center are described in theAccessibility section of the IBM Knowledge Center help (https://www.ibm.com/support/knowledgecenter/en/about/releasenotes.html).
Keyboard navigation
This product uses standard navigation keys.
Interface information
For alternative installation using Command Line Installation (CLI), refer to section Alternative Installationfor ADDI Using CLI in IBM AD Installation and Configuration Guide.
The IBM Application Discovery for IBM Z user interfaces do not have content that flashes 2 - 55 times persecond.
The IBM Application Discovery for IBM Z web user interface relies on cascading style sheets to rendercontent properly and to provide a usable experience. The application provides an equivalent way for low-vision users to use system display settings, including high-contrast mode. You can control font size byusing the device or web browser settings.
The IBM Application Discovery for IBM Z web user interface includes WAI-ARIA navigational landmarksthat you can use to quickly navigate to functional areas in the application.
Related accessibility information
In addition to standard IBM help desk and support websites, IBM has a TTY telephone service for use bydeaf or hard of hearing customers to access sales and support services:
TTY service800-IBM-3383 (800-426-3383)(within North America)
For more information about the commitment that IBM has to accessibility, see IBM Accessibility(www.ibm.com/able).
© Copyright IBM Corp. 2010, 2019 1

2 IBM Application Discovery for IBM Z Build V5.1.0: User Guide

Chapter 2. Introduction
IBM Application Discovery for IBM Z (AD) Build Client is an application-oriented ConfigurationManagement database (CMDB) that automates application understanding and technical documentationfor use in all application management activities. Synchronizing with your source configurationmanagement system, it contains a full inventory of your application components and their details. IBM ADBuild Client is an indispensable tool for support activities and a precursor to undertaking enhancementsand modifications. It is designed for use by all technical staff, having management components fortransparency into application metrics.
IBM AD High-Level Architecture OverviewThe following diagram illustrates IBM Application Discovery for IBM Z high-level architecture and therelationships among the different components of the suite.
Figure 1: IBM AD high-level architecture
Following is a brief description of the relationships among the different components of IBM AD.
IBM AD Configuration Server ensures the consistency of the installation parameters throughout aninstallation and allows the system administrator to manage user access to workspaces.
IBM AD Build - uses data from mainframe systems to build projects.
IBM AD Build - uses project sources that are brought from z/OS®. Performs a compilation/build processand stores the analysis data to the repository.
IBM AD Validation Service - works with ChangeMan SCM only. Provides coding rule enforcement viasynchronization with ChangeMan and upon member staging.
© Copyright IBM Corp. 2010, 2019 3

IBM AD GraphDB Service - starts the OrientDB server so that IBM AD Analyze can connect to OrientDBrepository and use the data found there to generate the graphs.
IBM AD Batch Server - imports data from the relational database repository into the GraphDB (OrientDB)repository. It also automates processes such as report generation and indexing. Manages several criticalclients' configurations such as the creation of the annotations database and the reports configuration,which must be performed before starting IBM AD Analyze Client.
IBM AD Analyze - analyzes mainframe projects (from IBM AD Build) and other types of projects (Java™,C, etc.) and displays the results of the analysis in graphs, in reports, or in Usage analyses.
IBM AD Analyze Client - runs as a plug-in on Eclipse or IDz and provides project analysis via graphsreports and usage views. When the analyzed application sources are coming from Endevor, it allowsviewing source code per user based on Endevor permissions that are checked via z/OS Explorer/CARMAinterface.
IBM AD Web Service - collects the data that is provided by Web Service Metrics component andprepares it for delivery.
Web Service Metrics - component generates input data for IBM AD Web Service.
IBM AD REST API - provides IBM AD data for IBM ADI Business Rule Discovery (BRD).
Supported Source ComponentsThe standard edition of IBM AD Build Client supports the following source components:
• OS - z/OS/OS-390, VSE, Fujitsu AIM/VME, SMART AS/400• Languages - COBOL dialects (Cobol II, VSE Cobol, Cobol 400®, Fujitsu Cobol and so on), Natural, PL/I,
ADS/O, CL, Assembler, Ads• Databases - Db2®, Adabas, IMS/DB, AIM/DB, IDMS, DB/400, Relational, Datacom• Transaction Monitor - CICS®, IMS/DC• Mapping Types - BMS, MFS, NLM, DDS, ADS Map• Batch Components - JCL, Proc, Cntrl• File types - ISAM, VSAM
About This GuideThe objective is to provide the information that is needed to use IBM AD Build Client, and to understandthe capabilities.
Note: For instructions on how to install IBM AD Build Client, see IBM AD Installation and ConfigurationGuide.
A description of the following sequence of steps and procedures that are typically followed to set up andanalyze a system, are described as follows.
1. Setup
• Create a project.• Add files to the project.• Update project resources.
2. Analysis
• Collect information on an application (called a ‘Build’) and store the results in the repository.• Make and integrate the current version of a project resource into the built project.• Search in project for a specific project resource.
4 IBM Application Discovery for IBM Z Build V5.1.0: User Guide

Terms And ConventionsThe following terms and conventions are used:
• Commands are printed as shown.• Chapter references are indicated as shown. For page numbers, refer to the Table of Contents.• File references are printed as shown.• Button names and options/functions within a dialog box are printed as shown.
Introduction 5

6 IBM Application Discovery for IBM Z Build V5.1.0: User Guide

Chapter 3. Installation
IBM AD Connect for Mainframe is a vital component of IBM AD Build Client. This component brings datafrom the mainframe system. For details on how to install this component, see IBM AD Connect forMainframe Configuration Guide.
IBM AD Build Client uses a relational database as a repository for storing data. If you want to view thisdata, you need the relational database. The tables and fields in the repository are described in detail inIBM Application Discovery for IBM Z Repository document.
Note: The IBM Application Discovery for IBM Z Repository document is provided uponrequest by IBM Support.
© Copyright IBM Corp. 2010, 2019 7

8 IBM Application Discovery for IBM Z Build V5.1.0: User Guide

Chapter 4. IBM AD Build Client
Following is an overview of the use of IBM AD Build Client. It introduces the concepts and capabilities ofthe product and describes the typical sequence of tasks to be followed for setting up a project andundertaking the analysis. Since the objective is to provide a general picture of the use of IBM AD BuildClient, not all the capabilities, alternatives, and options available at each stage are describedexhaustively. A detailed reference for all aspects of IBM AD Build Client is presented in Chapter 5, “IBMAD Build Client Reference,” on page 43.
Projects, Folders & FilesOrganizational entities for working with IBM AD Build Client include projects, folders, and source files. Aproject corresponds to an application.
A project contains a number of folders, where each folder refers to a specific type of source file that isused by the application. The default folders for a project are determined by the project definition atcreation time. For example, a Cobol project has by default folders for COBOL, Copy, BMS, JCL, andConfiguration source files. A Natural project has by default folders for Natural programs, Natural Include,Natural Maps and Data Area. Each folder contains a list of the files of the corresponding type that are usedby the original application. These files are also used by IBM AD Build Client.
Although for each IBM AD Build Client project folder a physical folder is created automatically under theproject folder on the disk, any file can be added through IBM AD Build Client to the project folder withouthaving to physically copy it to the corresponding folder on the disk. The physical folders are created onlyat the default location where IBM AD Build Client looks for files when you add files to the project folders.Files in an IBM AD Build Client project folder are references to the original source files somewhere on thedisk or on a remote network drive and not physical copies of them.
Note: Starting with the 5.0.4 release, additional folders of specific type can be manually added to aproject, if the Extensibility feature(s) have been enabled.
TasksWorking with IBM AD Build Client usually includes the following tasks:
Task Explanation
1. Starting IBM AD Build Client
2. Starting IBM AD Build Configuration Define the database connection parameters (ifapplicable).
3. Create Project Create a project by specifying the project name,project type (single or multi-app), location,environment, languages, DB type, and Map typeand the relational database server name.
4. Project Settings Adjust the project settings.
5. Project Files Add files to the project.
6. (Re)build Build the project.
Tasks 2, 3, 4 and 5 are set up and organizational steps. Their purpose is to define the source material tobe analyzed. Step 6 (Build) creates and populates the repository, which is the basis for the Analysis stepin IBM AD Analyze.
© Copyright IBM Corp. 2010, 2019 9

The following sections describe the typical tasks that are run in IBM AD Build Client. In many cases, youhave alternative ways for activating the same IBM AD Build Client functions (main menu, menus,keyboard shortcuts, and the main screen toolbar). In Tasks, references are mostly made to the mainmenu commands. The alternatives are described in Chapter 5, “IBM AD Build Client Reference,” on page43.
Starting IBM AD Build ClientWhen IBM AD Build Client is started, the main screen appears. All activity takes place within this screen.It is empty until a new project is created or an existing one loaded.
Creating a Project
About this task
IBM AD Build projects correspond to independent applications. An IBM AD Build project can containreferences to all application source files or to part of them. The source files are organized into folders thatare category lists for the different kinds of files that make up the project/application. For example,program (such as COBOL) source, copy, and BMS files are listed in the project’s Program, Copy, and BMSfolders. Standard folders are defined and included in the project by default. However, you can define newfolders if necessary.
Creating an IBM AD Build project creates a project folder on the computer or on a network drive. You canspecify the location for this folder.
To create a new project, follow these steps.
Procedure
1. Select File > New > New Project. The New Project window appears.
10 IBM Application Discovery for IBM Z Build V5.1.0: User Guide

Note: The options available in the New Project window depend on the version of the purchasedapplication.
2. Enter the name of the new project in the Project Name text box.3. The Path field displays the default projects path. To select a different path, click Browse and select
an alternative location.4. The Environment, Project Languages, DB Types, and Map Types sections present the default options.5. From the Project DB Type list, select one of the following database types:
• Microsoft SQL Server• IBM Db2 for z/OS
Note: A new Db2 database and schema can be created by using DB2_CreateObjects.sql DDLscript. The database can be attached by using Attach to database option where the database nameand schema need to be introduced manually. For more information, see “Creating Db2 DatabaseUsing DDL Script” on page 40.
6. CCS Environment field: if in IBM AD Configuration Server only one environment was defined, thisfield displays the name of that environment. If several environments were defined in IBM ADConfiguration Server, click the arrow button to display a list of available environments and selectone. For details on environments, see IBM AD Configuration Server User Guide.
7. Server Name field: this field displays the name of the relational database server that was associatedto the selected environment in IBM AD Configuration Server.
8. Click Next. The Project Folders dialog box appears for selecting and defining project folders. Thisscreen presents different folder names, depending on the environment selected.
9. To accept the default folders without entering the Project Folders screen at all, click Finish insteadof Next.
10. Select folders by moving them from the All Folders to the Selected Folder lists, by using >, or clearthem using <. Default All Folders and Selected Folder lists are provided. The content of these lists
IBM AD Build Client 11

depends on the project type that is selected in the previous step. For an existing project, you canselect Project > New Folder to open a dialog box for adding more folders.
11. Click Finish. The new project is created and displayed as a tree in the Project pane (left side of thewindow).
12. Additionally, after a project is created, the Business Rules Discovery (BRD) feature can be enabled.For more information, see Enabling Business Rules Discovery in IBM AD Configuration Server UserGuide.
Adjusting SettingsFrom the Settings window, the following actions can be performed.
1. From the Search Paths Order window, modify the default search paths, add several search paths for aresource type, and set the order in which these paths are accessed.
When resources such as COBOL, Natural, PL/I are built in IBM AD Build Client, the correspondinginclude/copybook, control, proc, and macro files are searched, according to the defaultextensions in the default project folders.
2. Generate a log file under each project folder during the build process. This procedure takes up moredisk space but allows a detailed inspection of the build process if an error occurs. Keep this optioncleared. If you are requested to activate it, a password is supplied by the IBM AD support team.
3. Determine whether a file or all the files from a project folder is included or not in the analysis (Build).For the Include folders (Natural Include, Cobol Include, Assembler Include), use Settingsto override the default extensions for these files. More parameters are available for each resourcetype.
12 IBM Application Discovery for IBM Z Build V5.1.0: User Guide

4. Set up an IMS DB Environment for COBOL programs that use EXEC DLI commands and DL/I calls.
A corresponding IMS DB Environment needs to be set up for the programs that access IMS databasesand/or IMS transactions.
IBM AD Build Client analyzes COBOL programs that use EXEC DLI commands and DL/I calls. Allprograms that access IMS databases and/or IMS transactions need to have a corresponding PSB,therefore an appropriate environment needs to be set up at the folder's project level.
To set up an IMS DB Environment, follow these steps:
a. Select Show the project tree check box and expand the project tree.b. Select zOS Cobol folder and choose the appropriate IMS DB Environment as in the following
image.
IBM AD Build Client 13

Note: The None option is selected by default.
For more information about the difference between the environments, go to the PCBs and PSB topicin the IBM IMS documentation.
5. Select the Using EXEC DLI (IMS related) check box to analyze COBOL programs with EXEC DLIcommands that are present in the project.
14 IBM Application Discovery for IBM Z Build V5.1.0: User Guide

When Using EXEC DLI (IMS related) check box is selected, two builds are triggered, increasing thebuild operation time.
The second build is triggered when program "A" calls subprogram "B", where "A" is the main COBOLprogram that has a corresponding PSB, and "B" is the subprogram that contains the EXEC DLIcommands.
Note: As a result, a message is shown in the output window, informing that Building programs relatedto IMS EXEC DLI in subprograms.
During the first build, a IMSExecDliInSubprograms.txt file is generated automatically and has thefollowing format:
<called program name "B">, <parameter number 1>, <OffsetStart1>, <OffsetLength1>, <LinkageSectionVariable1>, <PCBNumber>
The generated file is used to resolve the parameters that are parsed from the main COBOL program "A"to the subprogram "B".
Examples of the generated IMSExecDliInSubprograms.txt file:
• When a program name is called together with the parameters and their positions, where -1represents the PCB number
B,4,1,2,VAR1-PCB-NUM,-1
• When a program name is called together with the PCB number, where -1 represents the parametersand their positions
B,-1,-1,-1,,11
6. Enable the Extensibility features:
IBM AD Build Client 15

• Enable API/Macro handling by using a configuration file.• Enable handling of before and after preprocessed source code.
For more information, see “Using the Settings Option” on page 53.
Adding Files to Project FoldersAfter you create the project and its folders, the files to be analyzed must be added to the appropriateproject folders. Following are the project folders and the sources that can be placed in each one of them.
Note: Project folders depend on the type of selected project at project creation time. Therefore, for someprojects, some of the following folders are not available.
The project folders that are created, differ according to the environment selected as shown in thefollowing table:
Environment Folders- Description
z/OS • Natural - Natural programs• Natural Include - Natural include files.• Natural Map - Natural map definitions.• Natural DDM - Natural DDM files.• Data area - Natural data area that includes Local Data Area, Parameter Data
Area, and Global Data Area.• Cobol IDMS - Cobol IDMS files.• DT Cobol pre-compiled - Pre-compiled data type Cobol files.• DT Cobol- Data Type Cobol files.• z/OS Cobol - simple Cobol files.• Cobol Include - COBOL copybooks and include files.• Cobol IDMS Record - Cobol IDMS Record files.• PL1 - PL/I programs.• PL1 Include - PL/I copybooks and include files.• PL1 IDMS Record - PL/I IDMS record files.
16 IBM Application Discovery for IBM Z Build V5.1.0: User Guide

Environment Folders- Description
• ADS Process- ADS Process files.• ADS Dialog - N/A.• ADS Map - N/A.• BMS - BMS assembler definitions (relevant only for CICS projects).• JCL - JCL Jobstream files.• JCL Include - JCL Include files.• JCL Control files - JCL Control files.• JCL Procs - JCL procedure files.• AAuto Scheduling - A-AUTO Scheduling programs.• AAuto Scheduling - A-AUTO Dataset Flag Report.• Schema - IDMS schema• Subschema - IDMS Sub-schema.• PSB - IMS PSB files.• DBD - IMS DBD files.• Assembler - Assembler files.• Assembler Macro - Assembler macros.• Assembler Include - "Assembler include" files.• MQ - MQ configuration files.• Configuration - CSD files.• Configuration - IMS/T PGM• Configuration - PGM Aliases.• IMS MAP - MFS files (relevant for IMS projects only).• PreProc Before - User's original sources.• PreProc MetaData - Files that map the before files with after files.• PreProc Config - Files containing mappings between the folders of the
before, meta and after files.• API Config - Files containing configurations for the API calls.
Fujitsu VME • Cobol VME- COBOL VME programs.• Cobol Include- COBOL copybooks and include files.• SCL- System Control Language files.• DDCL- Data Dictionary Control Language.
SMART AS/400 • Cobol AS 400 Smart - Cobol AS 400 Smart programs.• Cobol Include - COBOL copybooks and include files.• AAuto Scheduling - A-AUTO Scheduling programs.• AAuto Scheduling - A-AUTO Dataset Flag Report.• CL- CL Programs.• Screens - DDS screens.• Printer files - DDS printer files.• Delete Reports - XML containing information about sources that are deleted
from the AS/400.• Object Listing - XML containing text names from the CDD repository.
IBM AD Build Client 17

Environment Folders- Description
• Logical View definition - XML describing logical views information.• Datasets Definition - XML describing data sets information.• Table Definition - XML describing table information.• Scheduling Information - XML describing batch scheduling information.• Batch Processes Information - XML describing batch processes
information.• Assembler - Assembler files.• Assembler Macro - Assembler macros.• Assembler Include - Assembler_include files.
Some environment files are not added directly to one of the project folders. Instead, they are put underthe project directory on the hard disk. The project directory is the location where the project was created,specified in the path field at project creation time. Following is a list of these environment files.Files under the project directory on the hard disk
Control filesThese files can be placed by default into the CTRL directory that is automatically created underthe project directory. Control files must not have any extension in order for IBM AD Build Client tolocate them. In case you have several control files with the same name that are taken fromdifferent libraries and used by the JCL files according to the search order, create a directory underthe project directory for each library. For example, if two control files with the same name that aretaken from two libraries LIB1.MYCTRL and LIB2.MYCTRL, create two directories that are namedLIB1.MYCTRL and LIB2.MYCTRL under the default CTRL directory and place each procedure inthe corresponding directory. The IBM AD Build Client JCL compiler searches for the right folderaccording to the search order specified in the JCL.
Note: This procedure is needed only if you have two control files with the same name, in whichcase they cannot be both put in the default directory CTRL.
The Control files (or the PARM files) are the source members referenced in DD cards in the formatof DSN=MY.PDS.NAME(CTRLMMBR). These Control files may contain SORT parameters, or SYSINdata, or Db2 command (if in SYSTSIN card for Db2 invocation programs), all depending on the stepthey are used in and the DD card name.
The JCL include files are files that are included in the JCL source using the INCLUDE command,e.g.//LABEL001 INCLUDE MEMBER=INCFILE1INCFILE1 is the JCL include member. Usually thesewill have list of DD cards commonly used together in many JCL sources, and put into one sharedfile to simplify maintenance in case you want to add/remove/change a DD card. They can alsocontain full steps.
DDCL filesDDCL files contain Data Dictionary Control Language (DDCL) statements. IBM AD Build Clientparses these files and automatically generates the Cobol data structures that correspond to theCOPY DDS statements in the Cobol programs. The IBM AD Build Client parser generatescopybook files for each COPY DDS statement and stores them on disk in a separate DDCLIncludes folder in the project folder. The COBOL compiler uses these COPY BOOK files.
Note: This DDCL Includes folder is not visible in the Project tab.
Procedure files (also known as PROCS)These files, which are referenced from JCL files, can be placed by default into the SYS1.PROCLIBdirectory that is automatically created under the project directory. Procedure files must not haveany extension in order for IBM AD Build Client to locate them. In case you have several procedurefiles with the same name that come from different libraries and used by the JCL files according tothe search order, create a directory under the project directory for each library. For example, if twoprocedure files with the same name that are taken from two libraries LIB1.MYPROC and
18 IBM Application Discovery for IBM Z Build V5.1.0: User Guide

LIB2.MYPROC, create two directories that are named LIB1.MYPROC and LIB2.MYPROC underthe project directory and place each procedure file in the corresponding directory. The IBM ADBuild Client JCL compiler searches for the right folder according to the search order specified inthe JCL.
Note: This procedure is needed only if you have two procedure files or include files with the samename, in which case they cannot be both put in the default directory SYS1.PROCLIB.
PSB filesThese files, used only by the IMS application, must be placed in a directory that is named PSBunder the project directory. This directory is not created automatically and therefore must becreated if needed.
The AAuto scheduling folderThis folder can host two types of files: AAuto scheduling files and AAuto Dataset Flagreport files.
Before you run the build process, make sure to set the correct type for the AAuto DatasetFlag report file: In the Project pane, right-click on the Dataset flag report file that isloaded in the AAuto Scheduling folder of the project and select Properties. In the FileProperties window, verify that the Type is set to AAuto Dataset Flag Report. (the file typeverification can be done either when the file is loaded in the project or at a later moment, butbefore the build step is run).
The CICS CSD configuration fileA CICS administrator can use the LIST command of CICS utility DFHCSDUP to extract CSDinformation into a report. The report can be stored under the Configuration virtual folder andcan be added to a build project as a CSD type of file. The build process parses the CSDconfiguration file and stores the information into the MFCICS tables.The name of the CSD configuration file must have maximum eight characters, because the filename is used as the CICS region name. For more information, see chapter “CICS CSD InformationHandling” on page 30.
The IMS transaction mapping fileThis configuration file is used to map between IMS transactions and programs. The file must beplaced under the Configuration virtual folder in the project. The type of the file must be IMS/TPGM. See the following example of mapping configurations in an IMS transaction mapping file:
TRANSACTION(TRAN1) PROGRAM(PROG1) IMS-TMTRANSACTION(TRAN2) PROGRAM(PROG2) IMS-TM
The Pgm_Aliases fileThis configuration file for aliases is used to specify external alias names coming from outside thesource files. The file will be added in the Configuration virtual folder, in the project, with typePGM Aliases. The configuration file for aliases is a comma separated file, having the followingformat:
* - a commented line starts with '*'<optional disambiguation file path>, <procedure/program name defined in file>, <alias name 2>, <alias name 3>
In case the alias name is not configured with a file path, the file format is as following:
<program/procedure defined in file>, <alias name 1>, <alias name 2>* procedure name in case of PLI/I file
PGM Aliases (Configuration) Files Example:
* this is a commented line\\shared-resoures-dir\Projects\Pgm_Alias_002\PL1\PLI1, PLI1, PLI01, PLI001\\shared-resoures-dir\Projects\Pgm_Alias_002\PL1\PLI1_1, PLI01, PLI_1, PLI_01, PLI1PLI2, PLI002, PLI0002PLI3, PLI03
Note:
IBM AD Build Client 19

• These program aliases, <program/procedure defined in file>, <alias name 2>, <alias name 3>,can be declared in any order, provided <program/procedure defined in file> exists among thealiases names. Example: if only <alias name 2>, <alias name 3> are present and <alias name 3>is called, while <alias name 2> is not found as a program/procedure definition in any source file,then <alias name 3> will not be replaced with <alias 2> in the call.
• The first item <optional disambiguation file path> which is the fully-qualified-name of the file, isoptional and only needed when the same alias name refers to actually different programs: in theexample above, the same program alias name PLI01 refers to two different programs, defined intwo different files. If only one fully-qualified-file-names of the two will be present or the twolines meant to be told apart have no alias name in common, the fully qualified file name wouldnot make any difference.
• If disambiguation between two alias groups is needed, the fully-qualified-file-name of a PL/I filemust be added in the 1st position, as it shows in Project > Properties. Example: if the file wasadded with a network path, the same syntax must be used into the PGM Aliases file.
• After adding new alias name(s) into the PGM Aliases configuration file, it is recommended to(re)compile both the configuration and the PL/I files, where <procedure/program name definedin file> exists, in this order. Example: configuration file > PL/I file.
Note: When (re)building the entire project, the configuration file is build first by default.
Important: Currently, the external alias names feature is only available for PL/I programs.
The PgmModuleMap fileThis file is used to map between load module and the first program that is called in the module(relevant only for batch applications). By default, IBM AD Build Client assumes the module nameand the name of first program that is called are identical. In case they are not identical, a mappingmust be described in the PgmModuleMap.txt file, which must be placed under the projectdirectory. Following is an example of the file content:OKC82 OKC8201OKC75 OKC7501OJC07 OJC0701
On the left side, the module name is specified and on the right side, the first program name isspecified.
The PSBmap fileThis file is used to link the program and the PSB file names (the format contains: PgmName,PgmType, PSBFileName).
If CBLTDLI and PLITDLI (IMS related) are used, IBM AD Build Client assumes the program nameand the name of the PSB file are identical. In case they are not identical, a PSBmap.txt file needsto be created and configured to describe the mapping between the program name and the nameof the PSB file.
If EXEC DLI (IMS related) is used, IBM AD Build Client assumes the program includes theschedule command EXEC DLI SCHD PSB. In case that the EXEC DLI SCHD PSB command is notpresent in the program, a PSBmap.txt file needs to be created and configured to describe themapping between the program name and the name of the PSB file.
Important: The PSBmap.txt file needs to be placed in the root of the project's directory, to<Project Path>\<ProjectName>\ folder. The ProjectName folder was created when theproject was initially defined in IBM AD Build Client. It is located, by default, directly under theDefault project path filled in IBM AD Configuration Server > Install Configurations > IBM ADDiscovery Build Client.
Following is an example of the file content:EDADL3M,Cobol,EDADL3PEDADM2M,Cobol,EDADM2PEDADM4M,PL1,EDADM4PEDADN2M,PL1,EDADN2P
On the left side, the program name is specified, in the middle the program type (Cobol or PL1) isspecified, and on the right side, the PSB file name is specified. For Cobol programs, in case the
20 IBM Application Discovery for IBM Z Build V5.1.0: User Guide

PROGRAM-ID and the file name are not identical, PROGRAM-ID name is used to map (link) theCobol program with the PSB file name.
The SCL folderSCL files are placed in the SCL folder, which is automatically created when a VME project iscreated. SCL files are specific for VME environment. IBM AD Build Client parses the SCL sourcefiles for these job control programs to understand the relationships between application code andassets in the VME environment (such as files). Therefore, IBM AD Build Client recognizes anddeals with all the syntax and semantics of the SCL language.
To add files to a folder, follow these steps:
1. In the Project tab, click the folder name, and then select Project > Add Files. Alternatively, right-clickthe folder name and choose Add Files. A file selection window opens.
2. Locate the files (they can be on any drive and directory) and select them individually or in groups (byusing the Windows SHIFT key or CTRL key mechanism).
3. Click OK to add the selected files to the project. The names of the files appear in the expanded filestructure in the project tree.
4. Repeat the Add Files procedure to add all necessary files to each of the project folders.5. If you need to add a long list of files, you can use the option Add All Files from Folder. Selecting this
option presents you with the following window:
Note: Make sure that the folder path is correct; click OK to add all the files from that folder to thecorresponding project folder.
6. To save the programs, files, and projects in their current states, select File / Save All.
Note: It is possible that the process of adding files can take a long time during which you cannot usethe application. If you need to use the application, you can run the Add files process in thebackground. To make the Add files operation to run in the background, follow these steps:
a. Click Start, select Run then type cmd to open the command window.b. Go to the folder where your IBM AD Build Client is installed and locate theIBMApplicationDiscoveryBuildClient.exe file. Drag theIBMApplicationDiscoveryBuildClient.exe file into the command window then enter “/?”and press ENTER. A window is displayed containing detailed instructions about how to make aspecific process to run in the background.
Adding Files From Mainframe Library
About this task
To add files from the mainframe library to your project, some preliminary steps need to be taken in theIBM AD Build Configuration. See “Creating a z/OS Connection” on page 78 for more details.
IBM AD Build Client 21

Procedure
1. In your Project tab select the folder where you want to import files from the mainframe library thenright-click to display the menu and from it select Add Files from Mainframe to display the followingwindow.
2. A list of imported libraries is displayed. Select the libraries from which you want to import resourcesthen click Next: the Member Files from Mainframe Selected Libraries window is displayed.
Note: Only libraries that contain at least one member are displayed.3. A list of members that are identified within the imported libraries is displayed. For each resource the
following data is displayed:
• The type of the resource (Assembler Macro CICS map BMS, Cobol Program).• The source (z/OS).• The name of the library where it was found.
4. Select the files that you want to add to your project and click Finish. The selected files are added in thecurrent folder of your project: Their respective names indicate their source – z/OS, and the name of thelibrary from where they are imported and their original name.
Adding Files From ChangeMan ZMF Packages
About this task
To add files from the mainframe by using ChangeMan ZMF Packages, some preliminary steps need to betaken in the IBM AD Build Configuration. For more information, see “Creating a z/OS Connection” onpage 78 and “Configuring the z/OS Connection” on page 60.
Procedure
1. In your Project tab, select the folder where you want to import files from the mainframe then right-click to display the menu and from it select Add Files from Mainframe to display the followingwindow.
2. Select Add by Packages (ChangeMan) then click OK to display the Add Files from MainframeLibraries window. A list of imported packages is displayed.
22 IBM Application Discovery for IBM Z Build V5.1.0: User Guide

Note: Only libraries that contain at least one member are displayed.3. Select the package from which you want to import resources then click Next: the Member Files from
Mainframe Selected Libraries is displayed. A list of members that are identified within the importedpackage is displayed. For each resource, the following data is displayed.
• The method that is used for import (SRC - ChangeMan).• The source (z/OS).• The name of the package where it was found.
4. Select the files that you want to add to your project and click Finish. The selected files are added in thecurrent folder of your project: Their respective names indicate their source – z/OS, and the name of thepackage from where they are imported and their original name.
Building Projects
About this task
A “build” is the process where IBM AD Build Client reads project sources, places the results in the projectrepository, and generates the data that is needed to display the graphical representation of theapplications’ internal and external program relationships.
The build process can be ran on individual programs in the project, on a batch of selected files and foldersor globally on all the resources in the project. Generally, you make a global build, but if, for example, asingle source file is changed, a build on that file alone would be appropriate. In that case, only themodified program is analyzed and the project repository is updated accordingly.
Procedure
1. To build a project, follow the steps bellow.a) Select Build / Build Project to start the build process. A warning message alerts you to the fact
that this operation erases the database. Click Yes to start the build process.b) As each file is processed, its name and accompanying notes and messages, including error
notifications, are displayed in the Message panec) On completion of the build, you can double-click any of these messages to open the corresponding
source file at the appropriate line.2. To build a single program or a folder, follow these steps:
a) In the Project pane, expand the project tree so that the required source program or folder is visible.Click the program icon or the folder to select it then right-click and select Build.
b) The IBM AD Build Client Message window displays the file name and log messages that arecreated during the build process. Information about the file and its internal relationships is createdand placed into the repository.
3. To build a batch of selected files, follow these steps:a) 1. In the Project pane, expand the project tree so that the required source programs and folders
are visible. Click the programs and folders that you want to include in the build process then right-click and from the menu, select Build.
b) 2. Alternatively, for large batches of files you can create a *.txt file that contains the list ofresource files that you want to build and then use the Build Imposed Selection option from theproject node menu to load that file.
IBM AD Build Client 23

c) Browse to the location of the *.txt file then click Load to load its contents. The *.txt file mustcontain the FULL PATH to each resource file on a separate line. Extra syntax indications for the*.txt file are also available. After the file is loaded, the resource files list is displayed. Click OK tostart the build process. The Messages window displays the file names and log messages that arecreated during the build process. Information about the files and their relationships is created andplaced into the repository.
4. To update the project after several sources are changed:a) When several sources are changed, the easiest way to update the project repository is to use the
Make option. Run Make by selecting Build / Make Project or by pressing F7. Make works in thefollowing way: for each source, IBM AD Build Client compares the last modified date with the dateon the disk and decides whether an update is necessary for the source. This step is calledverification.
b) 2. A Build is ran only for the sources that are chosen in the verification step.c) 3. A summary of the updated sources is displayed in the Message pane.
5. To update files from mainframe library: to make sure that you have the current version of the resourcesthat are brought to your project from mainframe use Update Modified Mainframe Members functionfrom the project menu or select Update Modified Mainframe Members from Build menu.
6. To build only the updated resources – Make: to make a build exclusively with the modified resourcesuse Make option. Click Make from the toolbar, alternatively you can select Make from Build menu.
Note: If you start a Build on a project where other users logged in, a warning message appearsindicating which users are connected to the project. You need to confirm the operation.
If another user activates a Build while you are logged in to a project a warning message appears urgingyou to close the project and wait for a notification that is sent to all users when the build process iscompleted. During the Build process, the project is locked and cannot be accessed by any user. Afterthe Build is successfully completed, a notification is sent to all users logged in to the project.
It is possible that the Make process might take a long time during which you cannot use theapplication. If you need to use the application, you can run the Make process in the background. Toforce the Make operation to run in the background, follow the steps:
a. Click Start, select Run then type cmd followed by ENTER to open the command window.b. Go to the folder where your IBM AD Build Client is installed and locateIBMApplicationDiscoveryBuildClient.exe file. Drag theIBMApplicationDiscoveryBuildClient.exe file into the command window then enter /? andpress ENTER. A window is displayed containing detailed instructions about how to make a specificprocess to run in the background. To make the Add files operation to run in the background, followthe displayed steps.
24 IBM Application Discovery for IBM Z Build V5.1.0: User Guide

Updating Projects
About this task
You can update a project in two ways: manually or automatically. The process of manually updating aproject is described as follows. For details on the automatic process, see “Schedule Periodic Updates forProjects” on page 27. If you want to update the project manually, this procedure takes only two stepsfrom the project menu only.
Procedure
1. Update Modified Mainframe Members.This action checks for all project members that originated from the mainframe, if a new version of theirsource is available.
All sources that are brought from the mainframe have data about their mainframe origin and lastupdate time, which is stored in the IBM AD repository for the project.
For sources that were brought from Endevor, this action checks against Endevor if a new version for thefile is available, since the last retrieval date. If a new version for the file is available, the member isbrought to the mapped virtual folder that matches the Endevor library.
For PDS members, IBM AD Build Client checks the file dates on the mainframe against the last updatedate from IBM AD repository. If the member on the mainframe is newer, it gets updated on the PCfolder that matches the PDS name.
2. MakeThis action effectively updates the IBM AD repository with the information relevant to the modifiedsources, and keeps it up to date with the code in the sources on the mainframe.
Make builds a small subset of the whole project, as an incremental build step after which the fullproject repository is up to date with the minimal effort needed.
This action starts with checking all the project members on the PC disk folders against their lastrecorded update dates on the last build time that is stored in the IBM AD repository for the project.
If a file on the disk is newer than the information recorded in the database, then the file is part of theProject Make process that is an incremental build. If the newly updated files are programs or jobs,then they are added to the list of components that must be added to the programs/Jobs to be built inthe Make process.
If the newly updated files are copybooks, then IBM AD Build checks in the repository for all programsthat copy these files, and these programs are added to the programs to be built in the Make process.
If the new updated files are JCL PROCs, or JCL Include Files, or JCL Control files (PARMLIB files) thenIBM AD Build checks in the repository for all JCL Jobs that use these files, and these Jobs are addedto the programs to be built in the Make process.
After this stage, IBM AD Build runs a build for the programs and Jobs that must be updated accordingto the previous steps, and after these components are built a summary of the number of updatedcomponents appears on the Make log.
The Make log, just like any Build log, is saved to the disk under the project folder, with the Make datetime. This method allows viewing past Make results and updated components at any time.
You do not need to do anything on IBM AD Build Configuration for this update of Endevor and PDSmembers.
For the CA7 manual update, the way to start the CA7 Data retrieval is by using the IBM AD BuildConfiguration, by using Querry Environment > CA-7 Workload Automation option.
Synchronize Mainframe MembersThe Synchronize Mainframe Members feature allows the user to specify whether IBM AD Build mustupdate against specific libraries, where to add/remove the related members in/from the project (that is,
IBM AD Build Client 25

which virtual folder to use) and also which type of members IBM AD Build must used when you addmembers. The basic assumption is that the specified libraries do not contain members that do not need tobe added even though they are there.
The Synchronize Members action is run by using a configuration file that specifies what members of whattype to be brought into which mapped virtual folder of the project. When you run Synchronize Memberson a project, only the members that belong to libraries specified in the configuration file for this particularproject is synchronized.
The Synchronize Members feature is activated from IBM AD Build Configuration. For more information,see “Members Synchronization Settings” on page 79.
For details on the syntax of the configuration file and an example, see “Appendix 3 - SynchronizeMembers Configuration File Examples” on page 89.
After the members’ synchronization process is finished, use Make to ensure that the analyses you ran aredone on the current version of the mainframe sources (updated, added, or removed).
ChangeMan – IBM AD Validation ProcessThis feature is relevant only for ChangeMan users and has as must have prerequisites: IBM AD ValidationServer and IBM AD Connect for Mainframe.
To have this feature up and running, IBM AD Validation Server must be installed and configured. Areference to it is found in the IBM AD Installation and Configuration Guide.
The validation process works as follows.
1. Compile a member in Serena (Cobol Program, Assembler Program for example).2. IBM AD Validation Service receives an indication that a certain program, part of a package within an
application is compiled.3. IBM AD Validation Service triggers IBM AD Build Client in background mode for the following actions:
Synchronize and Build selection.4. The Synchronization process is described as follows.
a. If the compiled member is part of a simple package on Serena, then entire package is synchronized,all members part of the package is downloaded / updated on disk, and the compiled member isadded in a project as configured for the Validation Process.
b. If the compiled member is part of a participating package on Serena, then the member’s package issynchronized together with all the other participating packages part of the same complex/superpackage. Only the member that is compiled in Serena, is added to the project. The other membersare just saved on disk.
5. Build Selection Process. As a prerequisite for this step, the include baseline libraries must exist in thecentral location for Mainframe Library Members. An important component for the Build Selection isthe include search paths creation. The paths for the include folders are generated in two ways basedon the member’s location in Serena (in a simple package or in a participating one).
a. If the compiled member is part of a simple package, after it is synchronized and added to theproject, the include paths are generated in the following order:
1) The location of the package on disk.2) The location of the baseline’s include folders.
Note: After the include paths are generated, Build Selection starts on the member and the relevantinformation is stored in the repository.
b. If the compiled member is part of a complex package, after it is synchronized and added to theproject, the include paths are generated in the following order:
1) The location of the member’s package.2) The location of the participating packages (in the order they are defined in Serena as part of a
complex/super package).
26 IBM Application Discovery for IBM Z Build V5.1.0: User Guide

3) The location of the baseline’s include folder(s).
Note: After the include paths are generated, Build Selection starts on the member and the relevantinformation is stored in the repository.
6. After the build selection process finishes, IBM AD Validation Service starts to generate Rules Basedreports for the program that was previously staged. IBM AD Validation Service is configured to havedifferent weights for the rules, each rule that is infringed has a value that is defined by the user in theIBM AD Validation Service configuration.
7. Return of the max weight value to ChangeMan. After the report is generated and the maximum weightvalue is calculated, it is returned to the mainframe agents that further pass this information as follows:
• To ChangeMan in user option 0401.• In the user’s terminal as a message (where user is the one that initially staged the Cobol Program in
ChangeMan). The messages sent to the terminal can be configured in IBM AD Validation Server in theCompletionCodeVsMessage.txt configuration file (Refer to IBM AD Installation andConfiguration Guide for details); For the situation when there’s a weight that is not configured in theprevious configuration file, then the user sees in the terminal the message error in flow and IBMAD Validation Server logs must be investigated for further details.
8. Default max weight values and return codes that are currently supported by IBM AD Validation processand IBM AD Connect for Mainframe when you send the information to ChangeMan:
• 0 - converted to VPAS and sent to Serena in user option 0401.• 4 - converted to VWRG and sent to Serena in user option 0401.• 8 – converted to VFAL and sent to Serena in user option 0401.
Any other values (except 99) – converted to NA and sent to Serena in user option 0401.
Return Code 99 – converted to DISS and sent to Serena in user option 0401. This code is a specialreturn code that is sent only for the situation when something went wrong in the Validation Processflow (such as synchronize failed, build selection that failed, or the report cannot be generated).
Display Build ResultsOn completion of the build process, you can view the information that was collected and stored in the IBMAD Build Client project repository. Functions that can be accessed at this stage include viewing theapplication’s source files. For more information, see “Viewing Source Programs” on page 49.
Schedule Periodic Updates for ProjectsMake sure that you schedule periodic updates so that you have the current version of your resourcesavailable and built into your project. These periodic updates must consist of two operations:
• Updating the modified mainframe members.• Make – building the modified resources.
Log files are generated for each update process and rewritten every time that a new update is run. Adetailed description of how to run these operations is described in the following chapters.
Updating Files from the Mainframe Library
About this task
This procedure covers the steps that are required for updating files from the mainframe library.
Procedure
1. Click Start, select Run then type cmd to open the command window.2. Go to the folder where your IBM AD Build Client is installed and locate theIBMApplicationDiscoveryBuildClient.exe file.
IBM AD Build Client 27

3. Drag IBMApplicationDiscoveryBuildClient.exe file into the command window then type /?and press ENTER. A window is displayed containing detailed information about how to make a specificprocess that runs in the background. An example of the command for updating mainframe members.
C:\Program Files\IBM Application Discovery Build Client\Bin\Release\IBMApplicationDiscoveryBuildClient.exe /umm1 <Project>
Note: An automatic updates script can be used to keep all relevant members up-to-date. For moreinformation, see “Best Practices and Recommendations” on page 28.
4. A log file is generated for each update process and placed at the location set for the mainframemembers with the Path for Retrieved Members option. The name of the log file isSumarizeGetMFMemberSources.log.
Note: Log files are rewritten every time that a new update is run.
Updating the Project After Several Sources Have Changed
About this task
This procedure covers the steps that are required for updating the project after several sources arechanged.
Procedure
1. Click Start, select Run then type cmd to open the command window.2. Go to the folder where your IBM AD Build Client is installed and locateIBMApplicationDiscoveryBuildClient.exe file.
3. Drag the IBMApplicationDiscoveryBuildClient.exe file into the command window thentype /? and press ENTER. A window is displayed containing detailed information about how to make aspecific process runs in the background. An example of the command for updating the project.
C:\Program Files\IBM Application Discovery Build Client\Bin\Release\IBMApplicationDiscoveryBuildClient.exe /m1 <Project> /m2 y /m3 n
Note: An automatic updates script can be used to update the project. For more information, see “BestPractices and Recommendations” on page 28.
4. A log file is generated for each update process and placed in the project folder. The log file name isprojectname.txt.
Note: Log files are rewritten every time that a new update is run.
Best Practices and Recommendations
Include the following commands in a *.bat file to set up an automatic updates script:
<IBM AD Build Client Installation Path>\IBMApplicationDiscoveryBuildClient.exe /umm1 <Project P1>timeout /T 15 /NOBREAK >> nul<IBM AD Build Client Installation Path>\IBMApplicationDiscoveryBuildClient.exe /m1 <Project P1> /m2 y /m3 ntimeout /T 15 /NOBREAK >> nul
<IBM AD Build Client Installation Path>\IBMApplicationDiscoveryBuildClient.exe /umm1 <Project P2>timeout /T 15 /NOBREAK >> nul<IBM AD Build Client Installation Path>\IBMApplicationDiscoveryBuildClient.exe /m1 <Project P2> /m2 y /m3 ntimeout /T 15 /NOBREAK >> nul
Important: It is mandatory to add the timeout command between each IBM AD Build Client invocation inbatch mode, this command adds a delay of 15 seconds before the next invocation starts.
28 IBM Application Discovery for IBM Z Build V5.1.0: User Guide

Setting up Automatic Updates with Windows® 7 Scheduler
About this task
The Windows Scheduler can be used to run automatic, periodic updates to make sure that the resourcesyou are working on are always up-to-date.
Procedure
1. To set up the automatic updates in Windows 7 Scheduler, select Start > Control Panel >Administrative Tools > Task Scheduler: the following window is displayed. If you’re prompted for anadministrator password or confirmation type the password or provide the confirmation.
2. Select the Action menu then click the Create Basic Task. Type a name for the task and an optionaldescription then click Next.
3. Do one of the following actions.
• To select a schedule based on the calendar, click Daily, Weekly, Monthly, or One time, click Next;specify the schedule that you want to use, and then click Next.
• To select a schedule based on common recurring events, click When the computer starts or WhenI log on, and then click Next.
• To select a schedule based on specific events, click When a specific event is logged, then clickNext. Specify the event log and other information by using the menu lists, and then click Next.
IBM AD Build Client 29

4. To schedule a program to start automatically, click Start a program, and then click Next.
5. Click Browse to find the program you want to start, and then click Next. Click Finish.
Note: The *.bat file present in “Best Practices and Recommendations” on page 28 can be used in thescheduler.
CICS CSD Information HandlingOnline programs that run under CICS require access to external data sources, such as files, tables, andqueues, cannot rely on jobs to perform the mapping to physical data source entities. CICS provides a wayto define such mapping and saves the mapping information in the CICS System Definition (CSD) file.
To obtain CICS CSD information, the user can choose either of the following two methods:
• Using IBM AD Connect for Mainframe• Using an exported CSD report
It is recommended to choose only one method to obtain CSD information in a project. For example, if theCSD information is obtained by using IBM AD Connect for Mainframe, and afterward the user decides touse an exported CSD report, the previous CSD information is automatically deleted. For more information,see “Deleting data from the repository” on page 32.
30 IBM Application Discovery for IBM Z Build V5.1.0: User Guide

Using IBM AD Connect for Mainframe
When IBM AD Connect for Mainframe is used, the obtained CSD information is stored in the followingMFCICS tables: MFCICSFile, MFCICSGroup, MFCICSGroupVsEntity, MFCICSGroupVsEntityLinks,MFCICSInfo, MFCICSInfoFiles, MFCICSList, MFCICSListVsGroup, MFCICSMap, MFCICSProgram,MFCICSTransaction, and MFCICSTransactionPerformance.
The information from the MFCICS tables, of the related database, is shown in graphs, reports, and usagesin IBM AD Analyze.
Using an exported CSD report
When a CICS administrator wants to use an exported CSD report, a CICS utility, called DFHCSDUP, is usedto extract information out of CSD. The result is a report that is generated by the LIST command of theDFHCSDUP utility.
The CICS administrator needs to carefully decide which parameters are used when the DFHCSDUP utilityis invoked. The format is as follows:
.-All--------------------. >>-LIst--+------------------------+--+---------+--------------->< +-Group--(--groupname--)-+ +-Objects-+ '-LIst--(--listname--)---' '-Sigsumm-'
In some cases, a CICS application uses a specific LIST. It is recommended to have a single application ina specific project and to use the appropriate list name when you run the utility. For example, LISTLIST(listname) is preferred instead of LIST ALL OBJECTS.
When the user specifies LIST ALL, the CSD report is parsed to save all the lists in the repository. In thiscase conflicts can occur. For more information, see “Conflict resolutions” on page 32.
The report is added to an AD project as a CSD type of file. The build process parses the file and stores theinformation in the MFCICS tables.
CSD report parser
The CSD report parser collects the following information:
• CICS region name.
When an exported CSD report is used to obtain CSD information, the CICS region name represents thename of the report file. The region name is specified in the CICSName column of the MFCICSInfo table.
• The list of the CICS LIST components.• The list of the CICS GROUP components and their relationship to the parent LIST.• The list of the following CICS items:
– Files– Map sets– Programs– Transactions
Important:
• If a group is not related to any list, it means that the group is not included in the group lists, specified bythe CICS system initialization parameter GRPLIST, that CICS installs at cold start. This Orphan Group isexcluded from the parsing and the resources contained by this group are not saved in the repository.
• The parser saves the first mapping relation encountered and ignores the others, when transaction ismapped to multiple programs.
After parsing the CSD report, the following information is used in IBM AD Analyze:
• The mapping between transaction and programs. The values are stored in the MFCICSTransaction table.
IBM AD Build Client 31

Important: Only programs referred (that exists or are used) in the current IBM AD Build Client projectare taken into account, in the mapping relation.
The mapping is used/visible in analysis like:
– Program/Transaction Callgraph– Program Flow– Backward/Forward Call Chains reports– Explore project as CICS Transaction, Resource Type
• The mapping between CICS files and their related dataset names, similar as dataset mapping in batchapplications. The values are stored in the MFCICSFile table.
Important: Only files used in existing programs in the current IBM AD Build Clientproject are taken intoaccount, in the mapping relation.
The mapping is used/visible in analysis like:
– Dataset Record Structure report– Dataset Usage in Programs– Explore project as dataset, Resource Type
Deleting data from the repository
Deleting information from a previous region when querying a new one ensures the repository that hasinformation from a single region each time. Whenever an exported CSD report or IBM AD Connect forMainframe is used to import data all previous data from the repository is deleted. The user needs toconsider that:
• All lists, inside the report, are considered for the name resolution.• The region name is the CSD report file name.
Conflict resolutions
Multiple lists
There is the case when a transaction name is mapped to a program, in one list, and to another program, inanother list. The CSD parser saves the information that is found in the first list and ignores the othermappings, from the other lists.
Multiple regions
In the context of an application analysis, do not store information from multiple regions in the samerepository. The user is advised not to use more than one CSD report per project. It is not recommended touse the CSD report and retrieving operation information from IBM AD Connect for Mainframe in the sameproject. The IBM AD Build Client keeps the information from a single CICS region, based on the last IBMAD Connect for Mainframe action or CSD report parsing. The region is imported either by IBM ADConnect for Mainframe or by the CSD report.
Extensibility
Preprocessing Extensibility
In-house support preprocessors allow customers to view their familiar source code before preprocessing,while having AD parse the unfamiliar source code after preprocessing. Language preprocessors (alsoknown as precompilers) are used to convert non-standard COBOL (for example) or non-COBOL codeembedded in COBOL, into a form that the compiler can process. A non-integrated preprocessor takes as
32 IBM Application Discovery for IBM Z Build V5.1.0: User Guide

input a source file (defined as before files) reads and parses it then produces a modified source file(defined as after files) which is then passed as input to the COBOL compiler.
Note: The preprocessing extensibility feature allows IBM AD users that have their own COBOLpreprocessor to see in the AD analysis the unprocessed sources.
IBM AD Build Client can analyze COBOL, PL/I and ASM applications that use preprocessors.
In order to access the Preprocessing Extensibility feature, there is an option on the interface after theproject creation, named Enable handling of before and after preprocessed source code that will createthe following required folders.
• New folder for before files named PreProc Before.• New folder for metadata files named PreProc MetaData.• New folder for config files named PreProc Config.
To enable the Preprocessing feature, right click on folder tree > select Settings > click Extensibilitytab. For more details, see “Adjusting Settings” on page 12.
The folders are added as an option after the project is created, so those users not using preprocessing willnot get confused.
Additional to the files above, after files must also be added. The after files will be added in the foldercorresponding to their type (such as Cobol, PL/I, Assembler).
Before Files
These files represent the user's original resources.
Metadata Files
The metadata files map the before files with after files. These files must have the same name as the filesto be compiled and the extension specified in the configuration file. The metadata file will have a JSONformat. For details on the syntax of the JSON file and an example, please see “Preprocessing ExtensibilityExamples” on page 93.
The following elements from the JSON file, are explained below:info
Contains information about the json format.version
Version of the format.metadata
An array that contains metadata elements for the before/after file pair.pathType
Specifies whether the before, after, and copybook paths are set in mainframe format or local PC/network paths. Valid values for this attribute are MF (for mainframe path format) and PC (for local/network path format).
beforePathPath to the original file, before the preprocessing process.
afterPathPath to the expanded file, after the preprocessing process.
Tip: The beforePath and afterPath can be specified either in local/network path format or inmainframe format. For the mainframe format, only the PDS format is supported: libray_name(member_name). If the users use Changeman or Endevor to retrieve the sources, local network pathsare required to be specified in the beforePath and afterPath values.
diffResolutionAn array containing lines/columns mappings between the beforePath and afterPath, mappingestablished by the preprocessor.
IBM AD Build Client 33

beforePosThe corresponding position in the original file.
afterPosThe corresponding position in the expanded file. A position is defined with the following attributes:
• startLine - start line of the position.• endLine - end line of the position.
If lines from a copybook exist in an after file, the following elements must be added in the correspondingmetadata file:type
Specifies if the lines in the after file are from a copybook. This element is required only when the linesin the after file are from a copybook; the only supported value is INCLUDE.
pathSpecifies the path of the copybook that the lines come from. It can be specified in the local path ormainframe format.
includeStmtPosContains the following two elements that specify the include command position.includeStmtPath
Specifies the path of the before file that includes the copybook.includeStmtLine
Specifies the line number of the include command in the before file.
Note: The file will be added in the PreProc MetaData separate virtual folder under the project, so it canbe updated from the mainframe if required. For more details about metadata files, see sectionExtensibility preprocessing JSON schema in appendix 3.
Metadata Files - Error Cases Behavior
The format and content validation will be performed at build start on the corresponding after file.
• If the JSON validation fails, the build on the file is stopped and the data in the database is cleared.• If the beforePath or afterPath values in the JSON file do not exist on the disk, the build on the file is
stopped and the data in the database is cleared.
Configuration Files
The configuration file will contain mappings between the folders of the before, meta and after files and theextensions for each type. When compiling a file from folder X, a search is initiated for a metadata file inthe meta folder corresponding to folder X. The metadata file must have the same name as the file beingcompiled and the extension specified in the configuration file.
Important:
1. The file will be added in the PreProc Config separate virtual folder under the project, so it can beupdated from the mainframe if required.
2. The paths in the configuration file must be specified in local/network format, not mainframe format.3. Lines in the configuration file can be commented by adding * at line start.
For details on the syntax of the configuration file and examples, please see “Preprocessing ExtensibilityExamples” on page 93.
Configuration Files - Error Cases Behavior
• Configuration file format related errors.
The configuration file format will be validated at build start:
1. If the configuration file format is incorrect, the build will not be started nor will affect the data in thedatabase.
34 IBM Application Discovery for IBM Z Build V5.1.0: User Guide
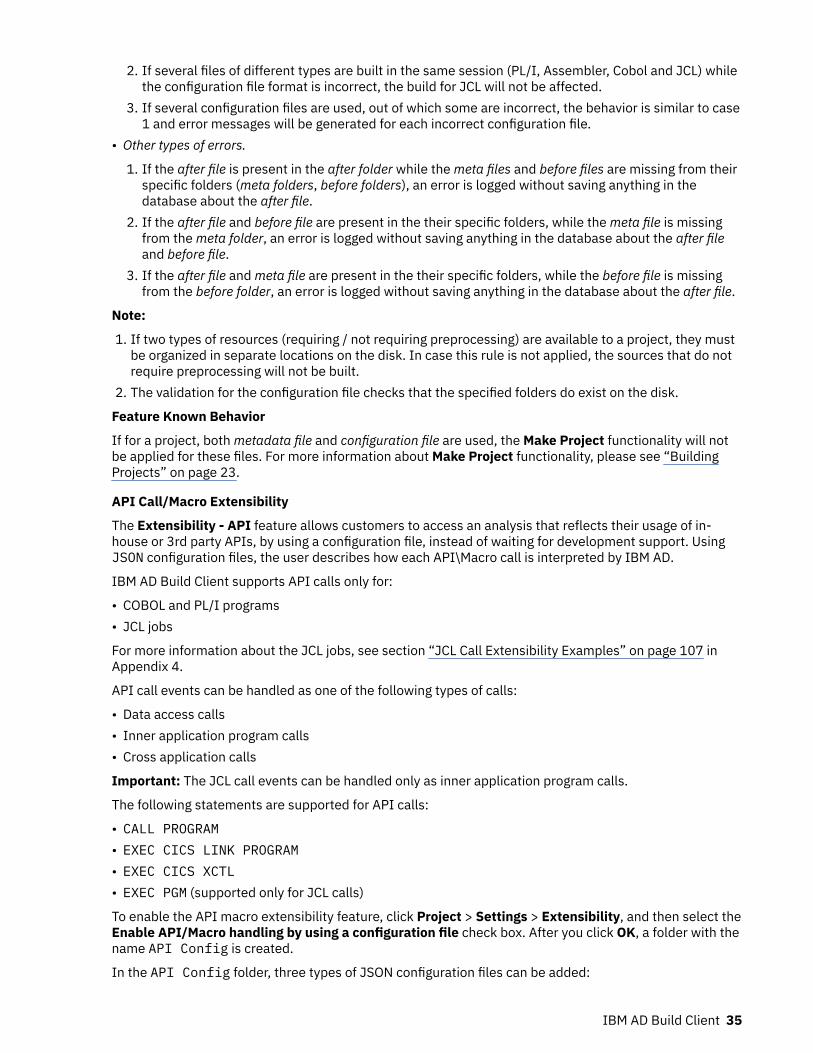
2. If several files of different types are built in the same session (PL/I, Assembler, Cobol and JCL) whilethe configuration file format is incorrect, the build for JCL will not be affected.
3. If several configuration files are used, out of which some are incorrect, the behavior is similar to case1 and error messages will be generated for each incorrect configuration file.
• Other types of errors.
1. If the after file is present in the after folder while the meta files and before files are missing from theirspecific folders (meta folders, before folders), an error is logged without saving anything in thedatabase about the after file.
2. If the after file and before file are present in the their specific folders, while the meta file is missingfrom the meta folder, an error is logged without saving anything in the database about the after fileand before file.
3. If the after file and meta file are present in the their specific folders, while the before file is missingfrom the before folder, an error is logged without saving anything in the database about the after file.
Note:
1. If two types of resources (requiring / not requiring preprocessing) are available to a project, they mustbe organized in separate locations on the disk. In case this rule is not applied, the sources that do notrequire preprocessing will not be built.
2. The validation for the configuration file checks that the specified folders do exist on the disk.
Feature Known Behavior
If for a project, both metadata file and configuration file are used, the Make Project functionality will notbe applied for these files. For more information about Make Project functionality, please see “BuildingProjects” on page 23.
API Call/Macro Extensibility
The Extensibility - API feature allows customers to access an analysis that reflects their usage of in-house or 3rd party APIs, by using a configuration file, instead of waiting for development support. UsingJSON configuration files, the user describes how each API\Macro call is interpreted by IBM AD.
IBM AD Build Client supports API calls only for:
• COBOL and PL/I programs• JCL jobs
For more information about the JCL jobs, see section “JCL Call Extensibility Examples” on page 107 inAppendix 4.
API call events can be handled as one of the following types of calls:
• Data access calls• Inner application program calls• Cross application calls
Important: The JCL call events can be handled only as inner application program calls.
The following statements are supported for API calls:
• CALL PROGRAM• EXEC CICS LINK PROGRAM• EXEC CICS XCTL• EXEC PGM (supported only for JCL calls)
To enable the API macro extensibility feature, click Project > Settings > Extensibility, and then select theEnable API/Macro handling by using a configuration file check box. After you click OK, a folder with thename API Config is created.
In the API Config folder, three types of JSON configuration files can be added:
IBM AD Build Client 35

API ConfigSpecifies the API calls to be analyzed, the API call parameters, and for which one of theseparameters, the values are needed.
User Exits ConfigContains a list of API calls and the path to a user exit.
The user exit is a JSON file or a utility that you must create. It contains new resolutions for the APIcalls. For more information about the user exit JSON files, see section “API/Macro Call ExtensibilityExamples ” on page 96 in Appendix 4.
API DependencyAllows the user to specify a new type of API extension that can be triggered regardless of any sourcecode. Using dependency, a mapping between programs and generic transactions can be defined. Formore information about the API Dependency, see section “Dependency Extensibility Examples” onpage 111 in Appendix 4.
The resolution of the API calls is made by using a module that is called the API Resolver, which uses theUser Exists Config JSON configuration file.
Note:
• After each compilation, a JVME_Post_Compiler.log file is created in directory C:\Users\User_Name\AD\comp\log.
• The API Config configuration file is validated before each build event and in case errors are found, anerror message is displayed and the build stops.
The folder is added as an option after the project is created, so users that do not use the API Macrofeature will not get confused.
Annotations
Starting with IBM AD V5.1.0 release, the API Resolver can add annotations on resolutions. Theannotations are present in the resolution.json file. For more information, see “JCL Call ExtensibilityExamples” on page 107 and “Dependency Extensibility Examples” on page 111.
Note: Make sure that Annotations Database configurations from IBM® AD Configuration Server are set.For more information, see Configuring the Annotations Database chapter in IBM® AD Configuration ServerUser Guide.
Examples of annotations that are added by using the "annText" and "annKeyword" parameters:
• "annText": "ANNOTATION2" - specifies the text that users want to add as annotation.• "annKeyword" : "API_RESOLUTION" - specifies the annotation keyword used by the user to
identify specific annotations.
Error Cases Behavior
For any project that contains COBOL sources, before any Build, Build Selection or Make processes, theconfiguration file validation starts automatically. You can also manually start the validationsequence, by right click JSON file > Validate.
1. If the JSON file is valid, the following message is displayed:Validation of the configuration file from 'API Config' folder has succeeded.
2. If the user tries to upload more than one API Config type file, the following error message isdisplayed:Only one configuration file of each type can exist in "API Config" folder.
3. If the JSON file is not valid, an error message is displayed. The error message varies, depending on theerror type:
a. If an empty JSON file is added to the project, the error message is:Error parsing data for API Configuration file. Reason: The configuration file from 'API Config' folder is empty.
36 IBM Application Discovery for IBM Z Build V5.1.0: User Guide

b. If the JSON file has a syntactical error in its structure (ex: a missing bracket, an extra comma, andso on) the following error message is displayed :Error parsing data for API Configuration file. Reason: At line (line number), column (column number)
Note: Depending on the syntactical error, Reason can be: not a value, not an array, not an object,not a pair, no colon in pair, not a string.
c. If one of the keys of the JSON file or their values are incorrect, the following error message isdisplayed:Error parsing data for API Configuration file. Reason: Key '%s' is invalid or has invalid value.
d. If any mandatory key is missing for the JSON file or its value is unsupported, the following errormessage is displayed:Error parsing data for API Configuration file. Reason: Key '%s' does not exist or has unsupported value.
e. If the Api/Macro feature is enabled, but no JSON file is added to the project, the following errormessage is displayed:Error parsing data for API Configuration file. Reason: The configuration file from 'API Config' folder is missing.
f. If the user sets same values for more than one apiKey, the following error message is displayed:Error parsing data for API Configuration file. Reason: The key has a duplicated value.
Note: Same behavior occurs for setting same values for more than one Program "Name" orParameters "label".
g. If an error that is not covered by the previously documented situations is encountered, thefollowing default error message is displayed:Unknown error type.
Running API Resolver from CLI
API Resolver can be run as a standalone component by running the JVME_Post_Compiler.jar incommand line. JVME_Post_Compiler.jar can be located under AD Build install folder in \Bin\Release\.
The parameters for the command line are:
Explanation
ccsEnvId <ccsEnvId> Environment id (mandatory or set java system property -DccsEnvId=<ENVID>)
ccsHost <ccsHost> Configuration server host (mandatory or set java system property -DccsHost=<HOST>)
ccsPort <ccsPort> Configuration server PORT (mandatory or set java system property-DccsPort=<PORT>)
projectName <projectName> Project name (mandatory).
languageId <languageId> Language id, for API Resolver the value for languageId is 1000(mandatory).
standalone Run in stand alone mode (mandatory).
log4jConfigPath <log4jConfigPath> Log4j config file path.
ueConfig <ueConfig> Path to User Exit config file.
Example:
java -jar JVME_Post_Compiler.jar --standalone --languageId 1000 --projectName ITLandScape --ueConfig C:/Projects --ccsHost 127.0.0.1 --ccsPort 2181 --ccsEnvId bcc8c45d-7f08-4c4d-b970-f838c476bff1
IBM AD Build Client 37

Configuring the PL/I Preprocessor
Before you beginMake sure that IBM® AD Build Client is up and running, and a project is available and can be used.
About this task
When working with the PL/I Preprocessor, you can configure parsing options, which drive the waypreprocessing is executed, environment variables, encoding, the default library, and other settings. ThePL/I Preprocessor configuration options are specified in the PL1PreprocessorInfo.ini file. The filefollows the general format of .ini files where options are specified as key=value. You can access and editthe file from IBM® AD Build Client.
Procedure
1. Click Project > Settings and select Show the project tree.2. Select PL1 from the list and click Edit Preprocessor Settings.
The PL1PreprocessorInfo.ini file is displayed in your default text editor.3. Specify the configuration options to customize the PL/I preprocessor. See “PL/I Preprocessor
Configuration File” on page 38 for details about the configuration options you can set and for anexample of the PL/I Preprocessor configuration file.
PL/I Preprocessor Configuration File
PL1PreprocessorInfo.ini is the PL/I Preprocessor configuration file, which specifies parsing options,environment variables, and other settings that the user sets when working with the PL/I Preprocessor.
The configuration file is generated when a project is created, and is located in the<ProjectRootDirectory>\ConfigurationExt\ folder.
The file follows the general format of .ini files where options are specified as key=value.
Sections and groups
Sections denote groups of options that override the options in the previous levels. Sections can behierarchical, names of the groups must be separated by /.
Groups are the virtual folders that are created in the project's structure in IBM® AD Build Client.
Parsing Options
The parsing options drive the way preprocessing is executed. The parsing options are described asfollows:
• opts.blank.chars=<character set>
Specifies the characters that can be used by the preprocessor. By default, space, tab, newline are blankcharacters.
• opts.margins=<true/false>
Specifies whether the files can have special margins. If the option is set to true, you must specify boththe left and right margins.
• opts.margins.left=<natural number>
Specifies the left side margin of the files to process, as a column number. Any text to the left ofopts.margins.left is ignored. This option must be specified if opts.margins=true.
• opts.margins.right=<natural number>
38 IBM Application Discovery for IBM Z Build V5.1.0: User Guide

Specifies the right side margin of the files to process, as a column number. Any text to the right ofopts.margins.right is ignored. This option must be specified if opts.margins=true.
• opts.stringDelim=<character set>
Specifies the characters that can be used in text as string delimiters instead of the default ".• opts.or.chars=<character set>
Specifies the characters that can be used as the OR operator in preprocessor directives.
Note: opts.or.chars is also used by the concatenation symbol. For example, if ! is used as the ORoperator, then concatenation symbol is !!.
• opts.not.chars=<character set>
Specifies the characters that can be used as the NOT operator in preprocessor directives.• opts.extra.lower=<character set>
Specifies the extra lowercase characters that can be used in preprocessor identifiers.• opts.extra.upper=<character set>
Specifies the extra uppercase characters that can be used in preprocessor identifiers.
Note: opts.extra.lower and opts.extra.upper must have the same length. Characters arematched based on their position.
• opts.include=<non-spaced set of characters>
Specifies a custom include directive.
Note: <character set> is a set of characters that are surrounded by any of the following pairs ofseparators: {} () >< `` .. ~~ || ++ == __.
• opts.library.extensions=<comma-separated list of names>
Specifies the extensions of the PL/I includes that are used by the user. For example, if the includeshave .pli or .inc extension, these mentioned extensions are written in theopts.library.extensions option.
• opts.caseInsensitive=<true/false>
When the option is set to true (default), the compiler option CASE(UPPER) is implemented. When it isset to false, the compiler option CASE(ASIS) is implemented.
Other settings
• source.encoding=<valid encoding>
Specifies the encoding that is used to parse files. The default is UTF-8. Valid encoding names are listedin List of supported encodings.
• default.library=SYSLIB
Specifies the default library that the PL/I preprocessor looks for includes.• internal.include.flat.layout=<true/false>
When the option is set to true, it forces the preprocessor to ignore the library in an include directive.
Environment variables do not have a predefined value. Subsequently, a value can be assigned to one ofthese variables. A variable has the following format:
vars.VARIABLENAME='value'
IBM AD Build Client 39

Configuration file example
[PL1]source.encoding=UTF-8opts.include=++INCopts.stringDelim={"}opts.extra.lower={@\#$}opts.extra.upper={@\#$}opts.margins.right=72opts.margins.left=1opts.margins=truevars.MODE=BATCH[PL1/Subfolder1]opts.include=--TSTopts.stringDelim={%}vars.MODE=CICS[PL1/Subfolder1/Subfolder2]opts.margins.right=20opts.margins.left=7
The example configuration file contains folders in hierarchy. If [PL1/Subfolder1] and [PL1/Subfolder1/Subfolder2] options are used, the actual options are compiled based on hierarchy,overwriting the parsing options present in [PL1]:
opts.include=--TSTopts.stringDelim={%}vars.MODE=CICSopts.margins.right=20opts.margins.left=7
Preparing repository using DDL scripts for Db2 on z/OS projects
Creating Db2 Database Using DDL Script
About this task
A Data Definition Language (DDL) script can be used to create a Db2 database. TheDB2_CreateObjects.sql DDL script is located in the <IBM ADDI Installation Folder>\IBMApplication Discovery Build Client\Bin\Release\DBScripts folder.
Procedure
1. Go to <IBM ADDI Installation Folder>\IBM Application Discovery Build Client\Bin\Release\DBScripts and open DB2_CreateObjects.sql by using a text editor.
2. Locate and set the following parameters in the entire script.
• CREATE DATABASE <enter an appropriate name for the database>• SET CURRENT SCHEMA = 'enter an appropriate name for the schema'• SET CURRENT PATH = 'enter an appropriate name for the path'• SET CURRENT FUNCTION PATH = 'enter an appropriate name for the functionpath'
Note: The names of the database, schema, path, and function path must have a maximum length of 8characters. Special characters cannot be used.
3. Run the script.4. After you create a Db2 database and schema, you can attach it to a new created project. For more
information, see “Creating a Project” on page 10.
ResultsThe desired Db2 database is created.
40 IBM Application Discovery for IBM Z Build V5.1.0: User Guide

Deleting Db2 Database Using DDL Script
About this task
A Data Definition Language (DDL) script can be used to delete a Db2 database. TheDB2_DeleteObjects.sql DDL script is located in the <IBM ADDI Installation Folder>\IBMApplication Discovery Build Client\Bin\Release\DBScripts folder.
Procedure
1. Go to <IBM ADDI Installation Folder>\IBM Application Discovery Build Client\Bin\Release\DBScripts and open DB2_DeleteObjects.sql by using a text editor.
2. Locate and set the following parameters in the entire script.
• SET CURRENT SCHEMA = 'enter the name of the schema'• SET CURRENT PATH = 'enter the name of the path'• SET CURRENT FUNCTION PATH = 'enter the name of the function path'
3. Run the script.
ResultsThe desired Db2 database is deleted.
Creating Annotations Database Using DDL Script
About this task
A Data Definition Language (DDL) script can be used to create Annotations database. TheDB2_CreateAnnotationDB.sql DDL script is located in the <IBM ADDI Installation Folder>\IBM Application Discovery Build Client\Bin\Release\DBScripts folder.
Procedure
1. Go to <IBM ADDI Installation Folder>\IBM Application Discovery Build Client\Bin\Release\ and open DB2_CreateObjects.sql by using a text editor.
2. Locate and set the following parameters in the entire script.
• CREATE DATABASE <enter an appropriate name for the database>• SET CURRENT SCHEMA = 'enter an appropriate name for the schema'• SET CURRENT PATH = 'enter an appropriate name for the path'• SET CURRENT FUNCTION PATH = 'enter an appropriate name for the functionpath'
Note: The default name of the database, schema, path, and function path is EZANNOT. The defaultname can be changed and can have a maximum length of 8 characters. Special characters cannot beused.
3. Run the script.4. After you create the Annotations database, you must add the related information in IBM Application
Discovery Configuration Server, under Environment > Configurations > Annotations Database. Formore information, see Configuring the Annotations Database.
ResultsThe desired Annotations Database is created.
IBM AD Build Client 41

42 IBM Application Discovery for IBM Z Build V5.1.0: User Guide

Chapter 5. IBM AD Build Client Reference
Following chapters contain detailed information about all aspects of IBM AD Build Client application. Itdescribes the IBM AD Build Client main screen, the menus, and toolbar options. Furthermore, it containsa complete description of all the IBM AD Build Client operations.
Main ScreenThe main screen that opens when the program is started contains the following elements:
• Title Bar.• Menu Bar.• Status Bar.• The Project pane on the left between the toolbar and the status bar.• The Display area on the right between the toolbar and the status bar.• The Output pane across the width of the screen under the Project pane and Display area.
Main MenuIBM AD Build Client operations are controlled by choosing commands on the main menu and menus,clicking icons on the toolbar, and keyboard shortcuts. The Main Menu commands are summarized in thefollowing table. Equivalent keyboard shortcuts, when available, are also listed.
File Keyboardshortcut
Description
New Text File CTRL+N Creates and opens a new text file.
New Project Creates and opens a new project.
Open CTRL+O Opens the Windows Open dialog box, from which any file can beselected and opened.
Close Closes the active window.
Open Project Selects and opens an existing IBM AD Build project.
Save Project Saves the current project.
Close Project Closes the current project.
Save CTRL+S Saves the active window.
Save As Saves the active window under a new name.
Save All Saves all components of the project.
Print Setup Opens the Windows Print Setup dialog box.
Recent Files Lists the last six files opened.
Recent Projects Lists the last six projects opened.
Exit Exits IBM AD Build.
© Copyright IBM Corp. 2010, 2019 43

Edit Keyboardshortcut
Description
Paste CTRL+V Pastes the clipboard text to the cursor position.
Find CTRL+F Finds the string that is specified in the Find command.
Find next F3 Finds the next occurrence of the string that is specified in theprevious Find command.
Go To Go To Places the cursor at the beginning of the specified line number.
View Keyboardshortcut
Description
Toolbar Toggles on/off the toolbar.
Status Bar Toggles on/off the status bar.
Project ALT+0 Toggles on/off the project pane.
Output ALT+2 Toggles on/off the output pane.
Options Opens Options dialog box where you can specify the outputparameters.
Project Keyboardshortcut
Description
Add Files Adds files to a folder in the active project.
New Folder Create a folder in the active project and allows specifying the typesof files it contains.
Settings Opens the Settings window.
Build Keyboardshortcut
Description
Make Project F7 Similar to Build Project, but it creates a build operation oncomponents of the project that are modified since the last build wasran.
Build File Builds the current file.
Build Project CTRL+B Builds all files in the active projects.
Stop Build Stops the current build.
Decisions Opens the Decisions window.
Window Keyboardshortcut
Description
Cascade Arranges windows one behind the other in the display area.
TileHorizontally
Displays all windows, arranged horizontally.
Tile Vertically Displays all windows, arranged vertically.
Arrange Icons This option is not currently available.
44 IBM Application Discovery for IBM Z Build V5.1.0: User Guide

Help Keyboardshortcut
Description
About IBMApplicationDiscovery Build
Provides the current IBM AD Build version and information on howto access technical support.
Main Screen ToolbarThe main screen toolbar icons enable frequently used menu commands to be run without having tobrowse through the menu hierarchy. A brief explanation of each is presented in the following table.
Icon Function Menu Bar/ keyboard shortcutEquivalent
Explanation
New File File / New / Text File Ctrl+N Creates a text file and opens it.
Save File Save File Saves the current file.
Save All File / Save All Saves the current state of the project andfiles.
Previous Window N/A Displays the previous window
Next Window N/A N/A
Print File / Print Ctrl+P Prints the selected/displayed file.
New Project File / New / New Project Creates a project.
Open Project File / Open Project Opens an existing project.
Check Project N/A Checks the active selected project for errors.
Build Files Build / Rebuild File (Re)Builds the currently selected files.
Build Project Build / Rebuild Active Project (Re)Builds the active project.
Stop Build/Check Build / Stop Build / Check Stops the current build/check process.
Make Project Build / Make Project Similar to Build, runs a build operation onlyon project parts, which are updated since thelast Build was run.
Project TabThe Project tab displays tree hierarchy of objects in the project. The tree can be expanded or collapsed byclicking the + or - signs to the left of each node. The type of each branch is identified by an icon and a textlabel. In most cases, a node corresponds to a specific line of code in one of the project files and double-clicking the node causes the source file to be displayed in an edit window with the corresponding codeline highlighted. Right-clicking a node causes a menu to open, which usually contains commands fordisplaying the code (similar to the double-clicking the node), for expanding or collapsing the branchrepresented by the node, or viewing properties of the object.
The Project tab contains the following nodes under the main project node:
IBM AD Build Client Reference 45

Node Name Icon Description
File TypeFolder Node
Each file type folder represents a logical container for source files of thecorresponding type that are included in the project. The files list is displayedwhen the node is expanded.
COBOL Node Opens the COBOL source file.
Include (Copy)Node
Opens the Include (Copybook) file
BMS Node Opens the BMS file.
JCL Node Opens the JCL file.
ConfigurationNode
Opens a configuration file.
Tab Icons SummaryThe following table summarizes the icons that are used in the Project pane:
Icon Explanation
Project
Folder (file type)
Program file
Include file
BMS screen
JCL
Configuration file
Schema (closed)
Schema (opened)
Natural Map file
Copy file
Screen file
Printer file
Object listing / Datasets definition Table definition / Scheduling information / Batch Processesinformation
Right Click / Shortcut MenusWhen you right-click in different locations in IBM AD Build Client, different menus are available. Thesemenus are described in the following sections.
46 IBM Application Discovery for IBM Z Build V5.1.0: User Guide

Note: The menus might not appear exactly as described here.
Project Tab Shortcut Menu
The project tab right-click menu contains the following options:
Menu Options Explanation
Add Files Adds files to the folder.
Add All Filesfrom Folder
Adds all files from the selected folder. For details on how to make this operation that isrun in the background see “Adding Files to Project Folders” on page 16.
Delete All Filesfrom thisVirtual Folder
Deletes all the files from the current virtual folder.
Add Files fromMainframeLibrary
Adds files to the folder from the mainframe library. Mainframe libraries are available ifIBM AD Connect for Mainframe was used previously, by using the IBM AD BuildConfiguration (z/OS), to scan source libraries on the mainframe. For more information,see “Adding Files From Mainframe Library” on page 21 in Tasks and “Bringing datafrom mainframe libraries (PDS Libraries, Endevor, Librarian, Natural)” on page 73 inz/OS tab from IBM AD Build Configuration.
New Folder Creates a folder in the active project. The new folder can have one file type only, whichis the same or a subset of the parent folder.
Build Builds the selected files and folders.
Delete Deletes the selected folder (only folders, which are not the default ones that arecreated at project creation time can be deleted).
Settings... Opens the Settings window, focusing on the folder’s settings.
Expand Expands the folder.
Collapse Collapses the folder.
Properties Displays folder properties.
Project Node Shortcut Menu
The project node right-click menu contains the following options:
Menu Option Explanation
Check Checks for components that are referenced in the project source code, but missing fromthe project definition. This option is used to ensure project completeness.
Build (Re)Builds the project.
Build imposedselection
Builds the selected resources and folders.
Make Similar to Build Project, but only performs a build operation on components of theproject, which are modified since the last build was run.
Update APIResolution
This option allows the user to run the resolving mechanism of API calls in case thatJSON resolutions, present in the User Exists Config JSON configuration file, have beenmodified.
UpdateModifiedMainframeMembers/
Updates the resources that are brought in the project from the mainframe and that arechanged since the last build. If Enable Members Synchronization option is selected,Update Modified Mainframe Members changes into Synchronize Members. For more
IBM AD Build Client Reference 47

Menu Option Explanation
SynchronizeMembers
information, see “Updating Projects” on page 25 and “Synchronize MainframeMembers” on page 25.
New Folder Defines a new folder, all file types are available for a folder under the project root node.
Delete Deletes the selected file. When this option is selected, a confirmation message appearsasking you to confirm or cancel the delete operation.
Settings... Opens Settings window, focusing on the whole project settings.
Expand Expands the project tree.
Collapse Collapses the project tree.
ViewRepository
This option is not currently available.
Search in Tab(Ctrl+Q)
Searches within the current tab for the specified string.
Search in Tabnext
Not available in the current version.
Properties Displays project properties.
White Space Shortcut Menu
The White Space menu appears when you right-click anywhere in the white space of the Project pane.
Note: The project tree needs to be collapsed to display the menu.
The white space right-click menu contains the following options:
Menu Options Explanation
Docking View Docks/undocks the pane.
HideWorkspace /Hide Window
Hides the Project pane. Use View / Project or Alt-0 to display it again.
Editing Shortcut Menu
The Editing menu contains standard editing commands (Undo, Cut, Copy, Paste) and appears when youright-click from within a text file (program).
Output PaneIBM AD Build Client displays progress and error messages in the Output pane. By default, the pane isdocked across the entire width of the IBM AD Build Client main window. It can be undocked by double-clicking its window border, and docked again by dragging it down. The Docking View toggle option is alsoavailable on the menu. Double-clicking the name of a resource from the Output pane opens the resourcein the Editor.
Output Pane Shortcut Menu
Menu Option Explanation
Copy Copies the selected text in the output pane to the clipboard.
Clear Clears the Output pane.
Hide Hides (closes) the Output pane. Use View / Output or ALT+2 to open it again.
48 IBM Application Discovery for IBM Z Build V5.1.0: User Guide

Menu Option Explanation
Docking View Switches the window between docked and undocked states. In the docked state, thewindow is positioned along the entire width of the window (or it is minimized if thestatus bar is hidden). When the window is undocked, it behaves as a standard Windowswindow.
Save OutputFile
Saves the current contents of the Output pane to a file. The standard Windows Save Asdialog box opens for specifying the name and location of the file to be saved.
Go to Error When an error message in the Output pane is highlighted (by clicking it), this menuopens the corresponding source file in an Editor window at the statement that causedthe error. The file can also be opened by double-clicking the error message directly.
Working with IBM AD Build Client WindowsA number of special purpose windows facilitate user interaction. Some of these windows are initiallydocked to the borders of the display area, but they can be undocked and moved, resized, and hidden(closed). Window names are not shown on docked windows.
Many of the windows have menus that are opened by placing the mouse cursor over the window andright-clicking. In some cases, different menus appear, depending on the exact position of the cursor in thewindow.
The following IBM AD Build Client windows are described in the following sections:
• Decisions• Editor• Settings• Properties.
Viewing Source Programs
About this task
To view the source code for a particular entity, follow these steps:
Procedure
1. Right-click the entity to open a menu, as described in “Right Click / Shortcut Menus” on page 46.2. Select View Source. An Editor window opens containing the source listing of the entity.
Building Decisions
About this task
IBM AD Build Client’s Decisions mechanism let you to overcome syntax problems that might occur atbuild time in some source dialects. No permanent changes are made to the original code files. Instead,the change information is stored in the repository, so that when an analysis process requires a source file,in effect a temporary internal copy of the file with the modifications is used.
Decisions are essentially specifications for Find and Replace operations that can be applied locally (at aparticular location in a specified file) or globally (throughout the application). This method allows forincreased flexibility as decisions can be targeted to specific files.
A decision might be implemented for any number of reasons, for example:
• The effects of modifying transactions can be studied.• Build errors can be corrected.
IBM AD Build Client Reference 49

• Unsupported COBOL features can be replaced by alternative code.
To define a decision, follow these steps:
Procedure
1. Click Build / Decisions to open the Decisions window. If decisions are defined previously, they arelisted in the window, otherwise the window is empty.
2. In the Decision pane at the upper right part of the window, click the text Click to Add New Decision(the Decision column) to create a new decision. This pane contains two columns and a row for eachdecision. When you click Click to Add New Decision, a new row is added for the new decision.Overwrite Click to Add New Decision with a name for the decision, and then click in the Replacementfield and select TOKEN or PATTERN from the list menu box.
The replacement type refers to the method that is used for search and replace operations. In thisaspect, IBM AD Build Client follows COBOL copy that replaces the rules. In PATTERN search, thesearch string is replaced wherever it appears, while for TOKEN only complete words are replaced. Forexample, if the string OLD TEXT is to be replaced by the string SOME NEW TEXT using PATTERNsearch, a part of the string BOLD TEXT would be replaced by SOME NEW TEXT resulting in BSOMENEW TEXT.
For TOKEN searches, the string to be replaced must contain one word only and only complete wordsare replaced. Thus, if OLD is to be replaced by NEW, under TOKEN search the word BOLD would notbe replaced. For TOKEN search, the string OLD TEXT would be disregarded since it comprises twotokens.
After the replacement mode is selected, a tree diagram of the project will appear in the left pane of thewindow (see the next image). If necessary, expand the tree.
50 IBM Application Discovery for IBM Z Build V5.1.0: User Guide

3. Enter a description of the decision in the Description text entry box, the string (or token) to bereplaced in the Original String box, and the replacement string in the Replace with box.
4. Expand the project tree in the left pane to show its folders and files. Set the check boxes of the filesthat are to be included in the Search and replace operation. Some folders do not support decisions andtherefore, their respective check boxes are disabled. (In the example shown before, the replacementsare to be made in all the sources).
5. Click the check boxes next to the file name that is to accept the decision. A check mark appears. Thedecision is now attached to the checked file. Repeat for all the files or folders to which the decision isto be attached.
Additional Decisions
Each decision is represented by a row in the Decision pane, and have its own description, original string,replacement string, and program tree that specifies the files to which the decision is to be applied.
Information including the date of the last modification to the decision and the user name of the personwho made the modification is displayed.
When you click a row to select it, the information in the other controls of the window changes. Thefollowing figure shows the decision information for two decisions.
IBM AD Build Client Reference 51

Deleting a Decision
After you define the decisions, they remain active until they are deleted or until all check boxes in theproject tree for the decision are cleared. In other words, if a decision is not associated with any files (allcheck boxes in the project tree for that decision are cleared), then the replacement it defines is notimplemented, but the decision is still available for later use. To permanently delete a decision, select itand click DELETE on your keyboard.
Applying Decisions
After you define or modify decisions, the project (or the files that are affected by the decisions) must berebuilt.
Note: A source opened in the text editor does not show applied decisions, since these decisions areapplied only at build time on a temporary copy of the source code.
Using the Editor
About this task
IBM AD Build Client includes an integrated text editor that can be used to view files.
To open a file in the Editor, follow these steps:
Procedure
1. Main Menu > File/Open to open the standard Windows Open File dialog box. Any file can be openedin this way, including files unrelated to IBM AD Build Client activities.
2. Double-Click Source File Icons. In the tree diagram of the Project pane, double-clicking an icon thatrepresents a source code file or statement causes the corresponding file to open in an Editor window,often with the appropriate statement highlighted.
52 IBM Application Discovery for IBM Z Build V5.1.0: User Guide

3. Shortcut Menus. Most menusmenus that are associated with program/statement icons in the Projectpane have a View Source option.
4. • Double-Clicking Compilation Error messages in the Output Pane. If errors occur during a build, theyare listed in the Output pane. Double-clicking the error notification causes the corresponding sourcefile to be opened in an editor window with the erroneous statement highlighted.
Using the Settings Option
About this task
Use the Settings option to change the default search paths that are used for the build operation toexclude program components from the build analysis, to set custom component extensions, and to selectdifferent analysis parameters according to the resource type.
To open the Settings window for a resource, follow these steps:
Procedure
1. To open the Settings window for a resource, follow these steps:
a. On the Project tree diagram, right-click the component that you want to exclude from the analysis.b. In the menu that opens, select Settings. In the Settings window select Show the project tree. The
project tree is displayed showing the selected resource (you can select several resources ifneeded).
c. If you select Exclude File(s) from Build, the selected files are excluded from subsequent builds.The parameter can be set for any individual file in the project, for a set of files within a folder or foran entire project folder, by selecting the folder node in the tree.
Note: The options that are shown in the Settings window depend on the type of resource selected.2. To open the Settings window for a project, follow these steps:
a. Select the Project node in the Project pane.b. Go to Project, then select Settings to display the Settings window as in the following image.
IBM AD Build Client Reference 53

In the General tab of the Settings window, after the Show the project tree check box is selected, thefollowing check boxes, fields, or options are available:
Project /Folder
Check Box / Field /Option
What it does
Project node Activate LOG file Creates a log file of errors/warnings. This check box ispassword that is protected for administrator use only.
Search Paths area Displays the default search paths that are used during theBuild operation. Allows the user to change the default searchpaths if needed. When you click Explore, the Search PathsOrder window is displayed. Use the available buttons toeither create an entry, to delete the selected entry, or tochange the position of the selected entry in the list. The buildoperation is run in the order set in this window.
All foldernodes,individualresources
Exclude files frombuild
Excludes the select files or folder from build operation.
Natural Indent size Determines the column number where the text must start (inthe source code).
Natural Compiler Mode-Structured mode/Report mode
Sets either the Structured or the Report mode for thecompiler.
54 IBM Application Discovery for IBM Z Build V5.1.0: User Guide

Project /Folder
Check Box / Field /Option
What it does
All includefolders
(Cobol, Natural)Include Extensionsor Default extensions
Allows the user to enter custom include extensions or usethe default ones.
Data Area (inNaturalprojects)
Data Area fileformat- Format 1 orFormat 2
Allows the user to select either Format 1 or Format 2 for theData Area resources’ processing. The option that is selectedby default is Format 2.
PL1 PL1 Line Settings-Line Offset, Free Textformat.
Allows the user to select the column number where the textmust start (in the source code) or choose the Free TextFormat option.
From the Settings window, an IMS DB Environment can be set up for COBOL programs that use EXECDLI commands and DL/I calls. Fore more information, see step 4 from Adjusting Settings section.
From the Settings window, select the Using EXEC DLI (IMS related) check box to analyze COBOLprograms with EXEC DLI commands that are present in the project. Fore more information, see step 5from Adjusting Settings section.
The following check boxes are available in the Extensibility tab from the Settings window:
• Enable API/Macro handling by using a configuration file.• Enable handling of before and after preprocessed source code.
The Options WindowThis function from the View menu opens Options dialog box where you can specify the outputparameters.
Specify the maximum number of output lines, whether warning messages must be displayed in theOutput pane and if the build results must be automatically saved then click OK to apply the options.
The Properties WindowThe Properties window displays information about the files in a project. The window can be opened fromthe menu of the items in the tree of the Project pane only. The labels and title of the window differ slightlyaccording to the object type.
IBM AD Build Client Reference 55

56 IBM Application Discovery for IBM Z Build V5.1.0: User Guide

Chapter 6. IBM AD Build Configuration
You can perform the following actions in IBM AD Build using the Configuration Tool:
• View existing projects.• Delete a project.• Rename a project.• Re-create a repository.• Upgrade a repository.• Display the users who are currently using a project.• Create and configure a z/OS connection to a remote computer.
To open IBM AD Build Configuration, click Start > Programs > IBM Application Discovery Build Client> IBM Application Discovery Build Configuration.
Viewing Project Information
About this task
To view project information, follow these steps:
Procedure
1. In the IBM Application Discovery Build Configuration window - right-click on the project and chooseProject Information.
2. A window is displayed showing the Project Path, Project Database Connection String, ProjectCreation Information, and Authentication Information.
3. If you are working in multi-user mode, under each project a list of users who are currently logged in isdisplayed.
© Copyright IBM Corp. 2010, 2019 57

Deleting a Project
About this task
Deleting a project can be done in two ways:
Procedure
In the IBM Application Discovery Build Configuration window.a) Select the project to be deleted from the list of projects.b) Right-click to display the menu and select Delete Project.c) You are asked to confirm the deletion request.d) If other users are logged in to the project, a warning message appears listing all the users who are
connected to the project.
Renaming a Project
About this task
To rename a project, goto the IBM Application Discovery Build Configuration window and follow thesesteps:
Procedure
1. Select the project to be renamed.2. Right-click to display the menu, select Rename project.3. A window is displayed waiting you to confirm the operation.4. The project with the new name is displayed in the projects list.
Associating a z/OS Access Point to a Project
About this task
Note: For details on how to define a z/OS node, see “Creating a z/OS Connection” on page 78.
To associate a z/OS source to a project, follow these steps:
Procedure
1. Goto the IBM Application Discovery Build Configuration window.2. 1. Select the project to which you want to associate a z/OS.3. Right-click to display the menu and select Associate z/OS. The Associate z/OS instance-to-project
window is displayed.
A list of z/OS access points that are defined is presented and you can select the one(s) you want toassociate to your project. After you select at least one z/OS node from the list, click OK to return to theinitial Projects tab. The selected z/OS node is displayed under your project.
If you are working in multi-user mode and other users are logged in to the project, a warning messageinforms the other users about the operation about to be run.
58 IBM Application Discovery for IBM Z Build V5.1.0: User Guide

Recreate a Repository
About this task
To re-create a repository in case the current repository was deleted or got corrupted, follow these steps:
Note: Recreate Repository is not available for projects that are attached to an existing Db2 on z/OSdatabase when they are created.
Procedure
1. From IBM AD Build Configuration window, right-click the selected project and choose RecreateRepository.
2. A warning message appears, waiting for you to confirm the recreation. After you confirm therecreation, the repository is re-created, and a full build can be done by using an IBM ApplicationDiscovery Build Client to allow analysis for the project.
3. If other users are logged in to the project, a warning message informs the other users about theoperation about to be run.
Upgrade a Repository
About this task
If other users are logged in to the project, a warning message informs the other users about the operationabout to be run.
Procedure
1. To upgrade the repository for a single project, follow these steps:a) In the IBM Application Discovery Build Configuration window, right-click the selected project and
choose Upgrade repository if available.b) A warning message appears, waiting for you to confirm the upgrade. After you confirm, the
repository is upgraded to the current version.c) A warning message appears, waiting for you to confirm the upgrade. After you confirm, the
repository is upgraded to the current version.2. To upgrade the repository for a list of projects, follow these steps:
a) First, create a text file by specifying the list of projects to be included in the repository upgradeoperation.
Important: Each project name must appear on a separate line in the text file.b) Open the command prompt and enter the following command:
C:\Program Files\IBM Application Discovery Build Client\Bin\Release\IBMApplicationDiscoveryBuildClient.exe"/ ru <fully qualified LOG file name> <fully qualified projects file name>
Where,
• <fully qualified LOG file name> is, the log file that is created detailing the results of the upgradeoperation.
• <fully qualified projects file name> contains the file name with the projects to be upgraded, oneper line.
If <fully qualified projects file name> is not present, all projects are upgraded.
Tip: This operation runs in the background.
IBM AD Build Configuration 59

Stop the Mainframe ImportThis function is used to cancel the library scanning, query environment and get files operations.
If other users are logged in to the project, a warning message informs the other users about the operationabout to be run.
Configuring the z/OS Connection
About this task
You can use this option to specify different settings for the z/OS Connection and the names of thelibraries that contain the resources you want to import in your project. You can enter all the data that youconsider relevant in a dedicated tab, for each type of resource.
Important: Authentication with proper credentials through Carma/Endevor is enforced before one canread/obtain any source file, regardless of method used for obtaining these sources:
1. By downloading from mainframe (Endevor)2. Otherwise provided. These sources can only be viewed if they are shared over the network. Read only
access is required.
Procedure
1. Goto IBM Application Discovery Build Configuration, Projects tab and select the project then thecorresponding z/OS node, then right-click to display the menu. Select Configure connection todisplay the following window.
2. Complete the settings or the names of the libraries that contain the resources you want, according tothe type of resource you need to import.
60 IBM Application Discovery for IBM Z Build V5.1.0: User Guide

3. To add a library, enter its name in the corresponding field, then click Add. The name of the newlibrary is displayed in the library list. Use the Update, Edit, and Remove to modify the list of librariesor the name of an existing library.
4. Next, select the CICS information tab to enter the CICS information library details.
Existing CICS information libraries are listed in the central part of the tab.
• To add aCICS information library, enter the details in the corresponding fields then clickAdd. Thenew library is displayed in the list in the central part of the screen.
• To edit the details of an existing library, select it from the list and click Edit. The correspondingdetails are displayed. Make the changes then click Update.
• To remove a library from the list, select it then click Remove.5. Next, select the ENDEVOR Info tab to display it as in the following image:
IBM AD Build Configuration 61

Fill the available fields with the required data then click Add. The parameters file is added to the listin the central part of the tab.
• To edit the details of an existing parameters file, select it from the list and click Edit. Thecorresponding details are displayed. Make the changes then click Update.
• To remove a parameters file from the list, select it then click Remove.
Important: From the Types list field, click Browse and select the TypesList.txt file containingall Endevor supported file types that can be imported into the project. Make sure that you haveaccess to the location where the TypesList.txt file is stored.
6. Next, select the DB2 and MQ tab to display it as in the following image:
62 IBM Application Discovery for IBM Z Build V5.1.0: User Guide

Enter the corresponding DB2 and MQ subsystem names in the associated fields and thecorresponding DB2 version.
When configuring DB2 on IBM AD Build Client, there are associated configurations that must beperformed on the mainframe. Fore more information, see Db2 Checklist in Appendix 5.
7. Next, select the Natural and Adabas tab to display it as in the following image.
IBM AD Build Configuration 63

Complete the required settings information for the Natural and Adabas libraries. Use the priorprocedure to add, edit, update, and remove libraries.
8. Next, select the IMS Information tab to display it as in the following image:
Complete the required settings for the IMS libraries.
64 IBM Application Discovery for IBM Z Build V5.1.0: User Guide

9. Select the Librarian tab to display it as in the following image:
Add the names of the required libraries and use Add, Edit, Update, and Remove to manage theselibraries.
10. Select the ChangeMan ZMF tab to display it as in the following image:
IBM AD Build Configuration 65

Complete the name of the IBM ParmLib library and then enter the number of the ChangeMan ZMFSubsystem.
In the Applications field, click to add an application name to the list. Click to remove the
selected application from the list. Use and to change the position of the selectedapplication in the applications list.
Note: If no Applications are mentioned, the members are scanned/retrieved only from packages.
When configuring ChangeMan ZMF on IBM AD Build Client, there are associated configurations thatmust be performed on the mainframe. Fore more information, see ChangeMan® ZMF Checklist inAppendix 5.
11. Select the Tivoli Workload Scheduler tab to display it as in the following image:
66 IBM Application Discovery for IBM Z Build V5.1.0: User Guide

Complete the Subsystem name of the TWS controller. After you finish, click Save.12. Select the CA-7 Workload Automation tab to display it as in the following image. Select a retrieval
mode, and specify values in the fields.If the settings in the CA-7 Workload Automation pane are changed, run a full import, instead of anupdate, to assure the consistency of the information in the repository with the one from themainframe.
IBM AD Build Configuration 67

Library nameThe name of the library where the INIT deck is located.
Member nameThe name of the INIT deck member that lists all the libraries, in which CA-7 must look for to findand submit jobs.
In the CA-7 documentation, the INIT deck is sometimes referred to as the CA-7 Initialization file.To find this library (PDS) and member combination for your system, refer to the JCL for theCA7ONL procedure at your site. It is referenced in this JCL by DD name UCC7IN.
Note: If you do not have access to this JCL, ask your CA-7 administrator for the information.
In memoryThe default retrieval mode. It uses CA Common Communications Interface (CAICCI) to get jobinformation. The results are retrieved directly from CA-7 into the memory address space of theagents and transferred back to IBM AD Build.
Via datasetThe alternative retrieval mode. It uses Batch Terminal Interface (BTI) to get job information. Theresults are delivered by CA-7 into a data set. Then the agents read the data and transfer it back toIBM AD Build.
Instance nameThe CA-7 instance name.
User nameThe name of the user under which the agents are running.
Library nameThe name of the library that contains the AD skeleton. This library is a member that is deliveredas part of the installation if the CA-7 access through BTI is required.
68 IBM Application Discovery for IBM Z Build V5.1.0: User Guide

Skeleton nameThe name of the AD skeleton that is used for accessing CA-7 through BTI. This skeleton issubmitted by the agents. The job uses the BTI interface to get the information back to the dataset.
Note:
• This field is available only if the Via dataset retrieve mode is selected.• The value in this field is used when Full CA-7 import is selected when you retrieve operational
information.
Job name prefixesThe name prefixes of the jobs to be retrieved. Separate multiple job name prefixes by commas. Ifthis value is not specified, all the jobs with a name that starts with any of the following charactersare to be retrieved:
A-Z # @ £
Note: This field is available only if the In memory retrieve mode is selected.
Skeleton name for updateThe name of the AD skeleton that is used for accessing CA-7 through BTI. This skeleton issubmitted by the agents. The job uses the BTI interface to get the information back to the dataset.
Note: The value in this field is used when Update CA-7 information with the differences sincethe last import is selected when you retrieve operational information.
Bringing Operational Information
About this task
To retrieve operational information, follow these steps:
Procedure
1. Configure the z/OS connection (for details see “Configuring the z/OS Connection” on page 60)2. Retrieve operational information.
Retrieve Operational InformationNote: Before you retrieve operational information, you must configure the z/OS connection. If youassociate the z/OS connection to a project only but you do not configure it, you cannot retrieve the data.For more information, see topic “Configuring the z/OS Connection” on page 60.
Go to IBM Application Discovery Build Configuration, select the Projects tab, select the project, selectthe z/OS node, right-click to display the menu, and select the Retrieve Operational Information option todisplay the following window.
IBM AD Build Configuration 69

Note: If you do not configure the z/OS connection for the selected task, a warning message is presented,indicating the entries for which the configuration is missing.
A list of available tasks is presented grouped by categories: You can choose to Retrieve schedulersinformation, Retrieve TP monitor information, Retrieve Database information, or Retrieve otherinformation. Make the selections then click OK to run Query Operational Information.
Note: The available options depend on the type of project you create.
Following is a list of entities/objects for which Connect for mainframe brings information:
• Adabas
The Connect for mainframe gives information about a total of three entities:
1. Adabas Database.2. Adabas File.3. Adabas Field.
The information refers to physical allocations, defined files that include file fields.• CA Workload Automation CA 7 Edition
The Connect for mainframe gives information about a total of two entities:
1. CA 7 Jobs.2. Datasets.
The information refers to triggering and dependencies.
The following two options are provided for CA-7 Workload Automation:Full CA-7 import
Removes the existing information that is stored in the repository, and then imports the informationfrom the mainframe into the repository as configured.
Update CA-7 information with the differences since the last importImport only the changes from the mainframe into the repository as configured.
Note: A full import must be run before an update. Otherwise, the update will not have the correctresults.
70 IBM Application Discovery for IBM Z Build V5.1.0: User Guide

For more information about the CA-7 configuration in AD Connect for Mainframe, see IBM AD Connectfor Mainframe Configuration Guide.
• CSD (CICS)
The Connect for mainframe gives information about a total of seven entities:
1. CICS Region2. CICS Group3. CICS List4. CICS File5. CICS Map6. CICS Program7. CICS Transaction
The information refers to all CICS regions, including defined programs\transactions\maps\files,hierarchy of groups and lists, and performance information for transactions such as Elapsed time, IOcount, and DB2® count.
• DB/2
Connect for mainframe brings information about a total of 14 entities:
1. Db2 Database.2. Db2 Table.3. Db2 Column.4. Db2 Index.5. Db2 Key.6. Db2 Package.7. Db2 Package List.8. Db2 Plan.9. Db2 Storage Group.
10. Db2 Stored Procedure.11. Db2 Table Space.12. Db2 Trigger.13. Db2 View.14. Db2 Volume.
The information refers to all databases, tables, columns, table spaces, triggers, views, plans storagegroups.
• Devices and Physical files
The Connect for mainframe gives information about the following entities:
1. Physical files2. Devices
The information refers to all devices connected to the LPAR, and all physical data sets on disk devices.• Hardware
The Connect for mainframe gives information about a one entity:
1. CPU• IMS
The Connect for mainframe gives information about a total of three entities:
1. IMS Database.
IBM AD Build Configuration 71

2. IMS Transaction.3. IMS Program.
The information refers to databases, programs, and transactions of IMS.• LPAR and SYSPLEX
The Connect for mainframe gives information about a total of two entities:
1. LPAR Information.2. Sysplex Information.
The information refers to LPARS, SYSPLEXS, the relationships, and links to other entities (CPU, installedsoftware)
• MQ Series
The Connect for mainframe gives information about a total of three entities:
1. Queue Manager2. Queue3. Channel
The information refers to Queue Managers, Queues, and Channels.• Predict
The Connect for mainframe gives information about a total of two entities:
1. Predict file.2. Predict field.
The information refers to predict files and fields.• SMF
The Connect for Mainframe gives information about a total of three entities:
1. SMF JCL information.2. SMF JCL Step information.3. SMF JCL Step IO.
The information refers to scheduled jobs, including total CPU consumption, IO count, and CPU count persteps, and used physical files.
• Tivoli® Workload Scheduler
The Connect for mainframe gives information about a total of two entities:
1. TWS Applications.2. TWS Jobs.
The information refers to TWS defined applications, jobs, and their dependencies.
Before you retrieve the information, a confirmation window is displayed. Click Yes to start the selectedquery operation.
After the operation is finished, 2 log files are generated: One containing the errors (if applicable), theother detailing the operations undertaken. These log files are stored in the following location: projectname/zOS/logs/zOS name.
Retrieve operational information in the background
IBM AD Build Client provides an option to retrieve operational information in the background. To force theretrieve operation information to run in the background, follow the steps:
72 IBM Application Discovery for IBM Z Build V5.1.0: User Guide

1. Click Start, select Run then type cmd followed by ENTER to open the command window.2. Go to the folder where your IBM AD Build Client is installed and locateIBMApplicationDiscoveryBuildConfiguration.exe.
3. Drag IBMApplicationDiscoveryBuildConfiguration.exe file into the command window thentype /? and press ENTER. A window is displayed containing detailed instructions about how to retrieveoperational information in the background. In the command prompt enter the following command:
C:\Program Files\IBM Application Discovery Build Client\Bin\Release\IBMApplicationDiscoveryBuildConfiguration.exe /ba <fully qualified file name>
The <fully qualified file name> points to an INI file that contains information about actions that areexecuted in headless mode.
A sample for the configuration INI file is found in C:\Program Files\IBM ApplicationDiscovery Build Client\Bin\Release\Samples\BuildConfigurationBASample.ini. Youcan use the sample INI file or create a new configuration file.
The format of <fully qualified file name> is as follows:
[OperationalInformation];CA7IMPORT=[<ProjectName1>, <zOSConnectionName1>],[<ProjectName2>, <zOSConnectionName2>]...;CA7UPDATE=[<ProjectName1>, <zOSConnectionName1>],[<ProjectName2>, <zOSConnectionName2>]...;TWS=[<ProjectName1>, <zOSConnectionName1>],[<ProjectName2>, <zOSConnectionName2>]...;CSD=[<ProjectName1>, <zOSConnectionName1>],[<ProjectName2>, <zOSConnectionName2>]...;IMS=[<ProjectName1>, <zOSConnectionName1>],[<ProjectName2>, <zOSConnectionName2>]...;Adabas=[<ProjectName1>, <zOSConnectionName1>],[<ProjectName2>, <zOSConnectionName2>]...;DB2=[<ProjectName1>, <zOSConnectionName1>],[<ProjectName2>, <zOSConnectionName2>]...;Predict=[<ProjectName1>, <zOSConnectionName1>],[<ProjectName2>, <zOSConnectionName2>]...;SMF=[<ProjectName1>, <zOSConnectionName1>],[<ProjectName2>, <zOSConnectionName2>]...;MQ=[<ProjectName1>, <zOSConnectionName1>],[<ProjectName2>, <zOSConnectionName2>]...
Attention: In order for the operational information to be taken into account, the comment tag ;must be removed.
Predefined values for <Operational task>:
• Schedulers information: CA7IMPORT, CA7UPDATE, TWS• TP monitor information: CSD, IMS• Databases information: ADABAS, DB2, Predict• Other information: MQ, SMF
4. A log file is generated in C:\Program Files\IBM Application Discovery Build Client\Bin\Release\Log folder. The name of the log file is ADBuildConfiguration_datetime.log.
Bringing data from mainframe libraries (PDS Libraries, Endevor, Librarian,Natural)
1. Associate a z/OS connection to project (for details see “Associating a z/OS Access Point to a Project”on page 58).
2. Configure the z/OS connection (for details see “Configuring the z/OS Connection” on page 60).3. Query the environment.4. Scan files.5. Scan libraries.
Following is the detailed description of the steps 3-5.
Note: IBM AD Connect for Mainframe uses z/OS Unicode services to convert character data from one codepage to another. There are two settings that tell IBM AD Connect for Mainframe which code page to usefor the host and the client:
IBM AD Build Configuration 73

1. HOST CODE PAGE2. CLIENT CODE PAGE
Each variable is a five digit number, denoted by a Coded Character Set Identifier (CCSID) and establishedby the Character Data Representation Architecture (CDRA). Usually the CCSID is the same as the codepage number used in the informal use. In case there is a doubt in using the correct CCSID, see z/OSUnicode Services User’s Guide and Reference, Appendix A. Description of CCSIDs.
Retrieving Source Code Information
About this task
Warning: Before you retrieve the source code information, you must configure the z/OSconnection. If you associate the z/OS connection to a project only but you do not configure it, thenyou cannot retrieve the data.
This step reads the contents of the sources (either auto-discovered or manually added) configured aspresented in “Configuring the z/OS Connection” on page 60.
Goto IBM Application Discovery Build Configuration, select Projects tab, then select the project, thenselect the z/OS node, and then right-click to display the menu.
Note: You can run this operation on several projects simultaneously through several z/OS connections.Select all the z/OS connections that you want to use (several connections that are defined for the sameproject or for different projects) then right-click to display the menu and select the scanning operationthat you want to apply. If the scan operation cannot be completed on one or more of the selected z/OSconnections, a warning message is displayed but the scanning operation continues for the rest of theselected connections. Also, for each z/OS connection a dialog box offers the possibility of individuallyselecting the libraries to be scanned.
Procedure
1. Select the Retrieve Source Code Information option to display the following window:
If libraries are found on the remote computer, a list of libraries that are automatically discovered arepresented.
74 IBM Application Discovery for IBM Z Build V5.1.0: User Guide

2. To scan the libraries added manually, select the Manual Selection option. The list is updated topresent only those libraries. Select the libraries that you want to include in the scanning process, thenpress Scan. Alternatively, you can manually add a library to the list.
Note: The Delete option becomes available if you select a manually added library.
For PDS Libraries and members, Connect for mainframe brings information about a total of threeentities:
a. Source Libraryb. Source Memberc. User
The information refers to libraries and members within the libraries, including member creation date,modification date, users who modified members. After you selec Scan Endevor libraries, the scanningwindow displays a list of libraries that are selected for the scanning operation.
The Connect for mainframe brings information about the following CA Endevor entities:
a. Endevor members.b. Endevor Systems.c. Endevor Subsystems.d. Endevor Environments.e. Endevor Stages.f. Endevor Types.
The information refers to System, Subsystem, Environment, Stage, and type.3. If the Scan Librarian Libraries option is selected, the scanning window is displayed.
4. If the Scan Natural Libraries option is selected, the scanning window is displayed.
IBM AD Build Configuration 75

From the list, select the Natural libraries that you want to scan, then click Proceed. Alternatively, youcan use the Add new libraries field to add new libraries to the list of existing ones.
The Connect for mainframe brings information about the following Natural entities:
a. Natural Libraryb. Natural Member
The information refers to last update date, version, user name.5. Before scanning, a confirmation window is displayed: Click Yes to start scanning the selected libraries.
Note: After the operation is finished, 2 log files are generated: One containing the errors (if applicable)the other detailing the operations that are undertaken. These log files are stored in projectname/zOS/logs/zOS name.
6. Repeat the procedure to scan all the libraries.
Bringing Data From Mainframe Using ChangeMan® ZMF1. Associate a z/OS connection to project (for details see “Associating a z/OS Access Point to a Project”
on page 58)2. Configure the z/OS connection (for details see “Configuring the z/OS Connection” on page 60)3. Retrieve ChangeMan information.
Following is the description of the step 3.
Retrieving ChangeMan® Information
Procedure
1. In the IBM Application Discovery Build Configuration, select the project and then right-click todisplay the corresponding menu. Click Retrieve source code information.
76 IBM Application Discovery for IBM Z Build V5.1.0: User Guide
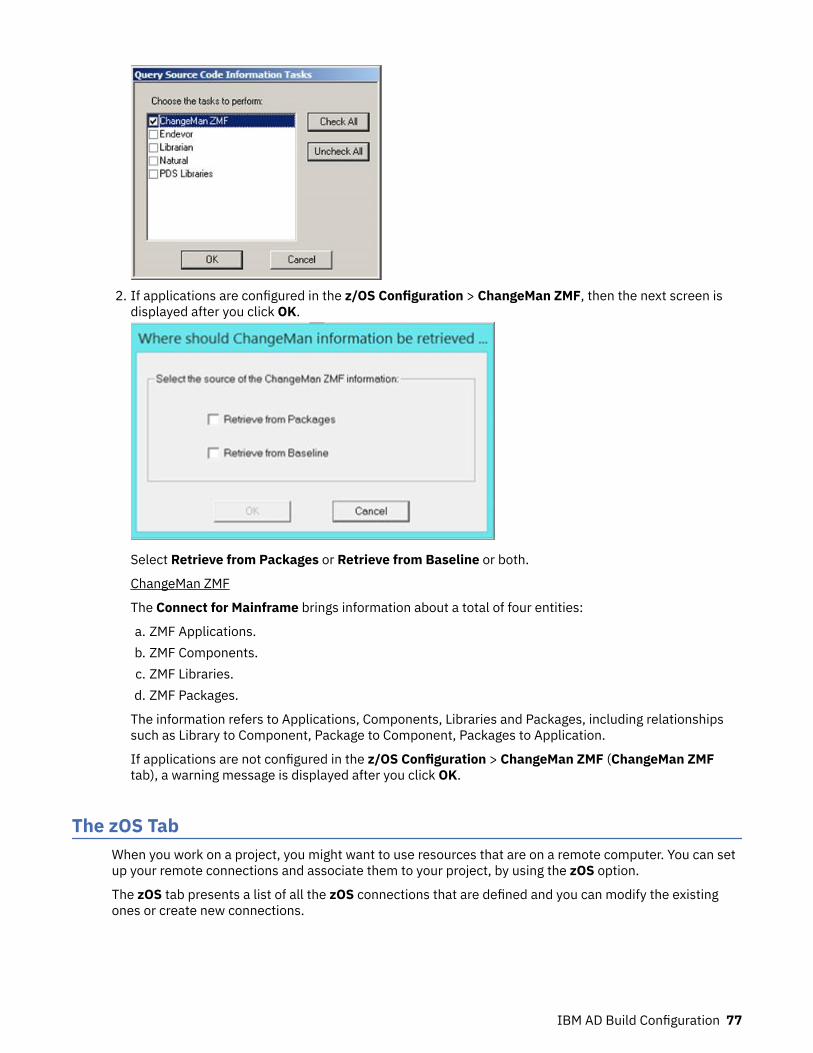
2. If applications are configured in the z/OS Configuration > ChangeMan ZMF, then the next screen isdisplayed after you click OK.
Select Retrieve from Packages or Retrieve from Baseline or both.
ChangeMan ZMF
The Connect for Mainframe brings information about a total of four entities:
a. ZMF Applications.b. ZMF Components.c. ZMF Libraries.d. ZMF Packages.
The information refers to Applications, Components, Libraries and Packages, including relationshipssuch as Library to Component, Package to Component, Packages to Application.
If applications are not configured in the z/OS Configuration > ChangeMan ZMF (ChangeMan ZMFtab), a warning message is displayed after you click OK.
The zOS TabWhen you work on a project, you might want to use resources that are on a remote computer. You can setup your remote connections and associate them to your project, by using the zOS option.
The zOS tab presents a list of all the zOS connections that are defined and you can modify the existingones or create new connections.
IBM AD Build Configuration 77
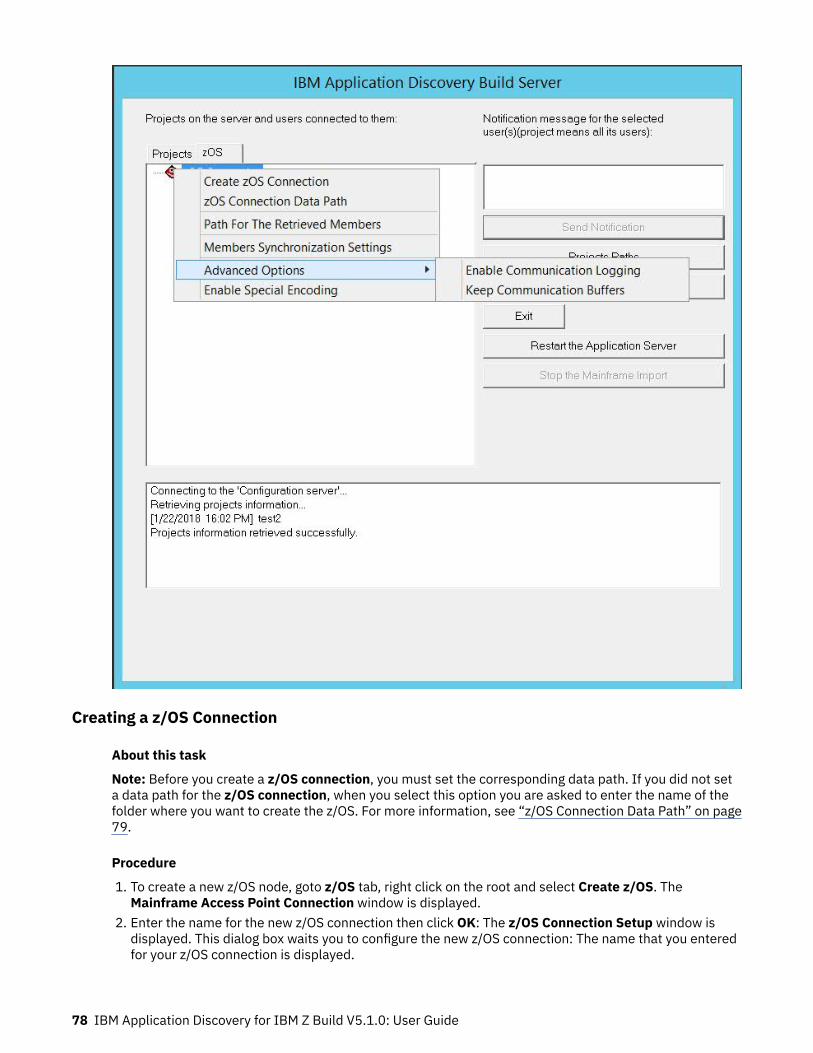
Creating a z/OS Connection
About this task
Note: Before you create a z/OS connection, you must set the corresponding data path. If you did not seta data path for the z/OS connection, when you select this option you are asked to enter the name of thefolder where you want to create the z/OS. For more information, see “z/OS Connection Data Path” on page79.
Procedure
1. To create a new z/OS node, goto z/OS tab, right click on the root and select Create z/OS. TheMainframe Access Point Connection window is displayed.
2. Enter the name for the new z/OS connection then click OK: The z/OS Connection Setup window isdisplayed. This dialog box waits you to configure the new z/OS connection: The name that you enteredfor your z/OS connection is displayed.
78 IBM Application Discovery for IBM Z Build V5.1.0: User Guide
3. Enter the host IP or host name and the port number in the corresponding fields then click TestConnection to check the connection to the new Mainframe access point defined. If the parameters youentered are correct, a confirmation window is displayed.
z/OS Connection Data PathUse this option to display the path to the folder where the configuration file is stored and to modify it ifnecessary.
Goto z/OS tab, then select the root and then right-click to display the menu. Click z/OS Connection DataPath. The current path is presented. If you want to change the current path, click Yes to display astandard Browse window and select a new path.
Note: The z/OS Connection Data Path is a shared path (on the AD Build Configuration machine) withread/write access rights for all AD Build Configuration / AD Build Client users.
Path for the Retrieved Members
About this task
Use this option to specify the path to the folder where the members that are retrieved from the mainframeare stored. A log file for the Update mainframe members operation is stored in the same location.
Procedure
1. Goto z/OS tab, then select the root, and then right-click to display the menu.2. Click Path for the retrieved members.3. A window is displayed showing the current path. If you want to change the current path, click Yes to
display a standard Browse window and select a new path.
Note: The path for the retrieved members is a shared path (on the AD Build Configuration machined)with read/write access rights for all AD Build Client users that may download members from amainframe system and also for AD Analyze Client ones.
Members Synchronization Settings
About this task
Use this function to enable the Members Synchronization feature.
Procedure
1. In the z/OS tab of IBM AD Build Configuration, right-click on the z/OS node. From the menu, selectMembers Synchronization Settings.
2. In the window that is displayed, select Enable Members Synchronization to activate the feature. Youcan run the members’ synchronization operation only by using a configuration file. The configurationfile is intended to instruct IBM AD Build Client on whether it needs to update against specific libraries,where to add/remove the related members in/from the project (that is, which virtual folder to use) andalso which type of members IBM AD Build Client must use when you add members.
3. After you press OK, the selected configuration file is verified. Make sure the message Theconfiguration file is valid! is displayed in the output window of IBM AD Build Configuration. If theconfiguration file is not validated review the instructions in “Appendix 3 - Synchronize MembersConfiguration File Examples” on page 89, correct the file and try loading it again.
The configuration file is a text file, in comma-separated format, where the details of thesynchronization process are specified. The following parameters must be set:
• Project name• Library type
IBM AD Build Configuration 79

• Library name• The name of the mapped virtual folder• Members type• The z/OS connection name.
An example of a configuration file and details about the syntax are available in “Appendix 3 -Synchronize Members Configuration File Examples” on page 89.
The Advanced OptionsYou can decide whether the communication logs and buffers are saved for later use and inspection, byusing the advanced options for the z/OS connection root.
Automatic MessagingWhen multiple users are connected to the same project and one user changes the folder structure of theproject or attempts one of the following operations: Delete project, Associate z/OS, Recreaterepository, Upgrade repository, Restart Application Server, all the other users receive an automaticnotification.
80 IBM Application Discovery for IBM Z Build V5.1.0: User Guide

Appendix 1 - API Extensibility Tutorial
This tutorial shows you how the analysis of an API call is supported by the extensibility feature withsample files. You can also learn how to enable API call analysis for your own projects.
API Extensibility Sample Files
To help you get started with the API extensibility feature, the following sample files are provided in the ADinstallation package:COBOL program files
The sample COBOL programs that contain API calls. You can find the program files in the Cobolfolder.SQLCALL1.cbl
The main COBOL program. The SQLCALL1 program calls the SQLGET program to perform callsbased on program IDs 1, 2, 3, and 4.
SQLGET.cblThe API program that performs a call to retrieve the program name of a specific programaccording to the program ID. The information that the SQLGET program needs to determine thecalled program is stored in a database table.
Java utility filesThe sample Java utilities that are used to resolve the API call in sample programs SQLCALL1 andSQLGET. You can find the utility files in the \Java User Exit\src\com\ibm\ez\resolver\utility folder.ResolveCallUtility.java
The Java utility that is used as a user exit to resolve the API call. This utility performs the followingactions:
1. Parsing the input JSON file that is automatically generated at run time. For the schema of theinput JSON file, see the \Input and Output JSON Schema\utility-input-schema.json file.
2. Using the SqlDataAccess utility to retrieve data.3. Generating the output JSON file that contain the resolution of the API call. For the schema of
the output JSON file, see the \Input and Output JSON Schema\utility-output-schema.json file.
4. Storing the input and output JSON files.
SqlDataAccess.javaThe Java utility that is used to retrieve data from an SQL server according to the program ID. Adatabase that is named DynamicCallPgms and a table that is named ProgramToCall are used. Thefollowing image shows the values in the ProgramToCall table:
JAR filesThe sample JAR files that are used to resolve the API call in sample programs SQLCALL1 and SQLGET:sqljdbc42.jar and json-simple-1.1.1.jar.
© Copyright IBM Corp. 2010, 2019 81

Build.batThe sample file that can be used to compile sample Java utilities ResolveCallUtility andSqlDataAccess. You can find the file in the Java User Exit folder.
API extensibility configuration filesThe sample JSON files that are used to configure the API extensibility settings. Two types of theconfiguration files are required to enable the API extensibility feature: API Config and User ExitsConfig. You can find the configuration files in the AD Extensibility JSONs folder.Api_Config.json
The sample API Config configuration file that specifies the API program name, which is SQLGET,and the following two parameters that are required:programKey
The value that is passed to the SQLGET program at run time through the PGM-TOCALL-IDvariable to resolve the called program.
dataThe value that is passed to the SQLGET program at run time through the PGM-DATA variable toresolve the called program.
ue-config.jsonThe User Exits Config configuration file that specifies the following user-exit-related settings:
• The ResolveCallUtility Java utility, which is used as a user exit to resolve the API call.• The class path of the sqljdbc42.jar and json-simple-1.1.1.jar JAR files.• The ### notation that is replaced with a dynamically generated input JSON file name for each
call at run time.• The path to store the automatically generated input JSON files. The input files are parsed and
stored by the ResolveCallUtility utility. This setting is optional and for debug purposes.• The path to store the output JSON files that are generated by the ResolveCallUtility utility.
Input JSON filesThe sample input files that are automatically generated at run time, and parsed by the sample Javautility ResolveCallUtility to retrieve the program IDs. You can find the input files in the Input andOutput JSON samples folder.
Output JSON filesThe sample output files that are generated by the sample Java utility ResolveCallUtility to specify thecalled program names. You can find the output files in the Input and Output JSON samplesfolder.
Schema JSON filesThe files that describe the schemas of the sample input and output JSON files. You can find theschema files in the Input and Output JSON Schema folder.
Setting Up a Build with Sample Files
The API call analysis is supported by the AD extensibility feature. You can try out the feature by setting upa build with the API extensibility sample files. For more information about the sample files, see topic “APIExtensibility Sample Files” on page 81.
Procedure
1. Create an AD project, and add the sample program files SQLCALL1.cbl and SQLGET.cbl into theproject.
• For more information about creating a project, see topic “Creating a Project” on page 10.
82 IBM Application Discovery for IBM Z Build V5.1.0: User Guide

• For more information about adding files into a project, see topic “Adding Files to Project Folders” onpage 16.
2. Enable the API extensibility feature. After the API extensibility feature is enabled, the API Configvirtual folder is added into the project. This folder is used to store the extensibility configuration files.
a. Click Project > Settings > Extensibility.b. In the Extensibility pane, select the "Enable API/Macro handling by using a configuration file"
check box.
c. Click OK.3. Add the following two sample files into the API Config virtual folder of the project. The files are the
API extensibility configuration files.
• Api_Config.json• ue-config.json
4. Modify the paths in the ue-config.json file according to your settings.
• Modify the class path of the sample JAR files according to your local environment.• Specify a path to store the input JSON files. This setting is optional and for debug purposes.• Specify a path to store the output JSON files.
5. Build the project. For more information about building an AD project, see topic “Building Projects” onpage 23.
With the API extensibility feature enabled, after a project build is completed, the following callgraph isgenerated for the SQLCALL1 program. In addition to the standard output log file, an extensibility log file isgenerated by the build process and stored in the <User folder name>\AD\comp\log folder.
Appendix 1 - API Extensibility Tutorial 83

Without the API extensibility feature enabled, after a project build is completed, the following callgraph isgenerated for the SQLCALL1 program:
Extending from Sample Files to Your Projects
To support API call analysis for your own projects, you must create a user exit and API extensibilityconfiguration files. The API extensibility sample files are provided as examples. Follow the steps in topic“Setting Up a Build with Sample Files” on page 82 to set up, but replace the sample files with your ownproject files. For more information about the sample files, see topic “API Extensibility Sample Files” onpage 81.
Creating a user exit
The following functions must be implemented in your user exit:
• Reading and parsing an input JSON file.• Resolving the API call by using the input JSON file and any additional metadata that is needed.
84 IBM Application Discovery for IBM Z Build V5.1.0: User Guide
• Returning an output JSON file that specifies the resolution.
Creating API extensibility configuration files
Two types of the configuration files are required to enable the API extensibility feature: API Config andUser Exits Config.API Config
Specifies the API calls to be analyzed, the API call parameters, and for which one of theseparameters, the values are needed.
User Exits ConfigContains a list of API calls and the path to your user exit.
Appendix 1 - API Extensibility Tutorial 85

86 IBM Application Discovery for IBM Z Build V5.1.0: User Guide
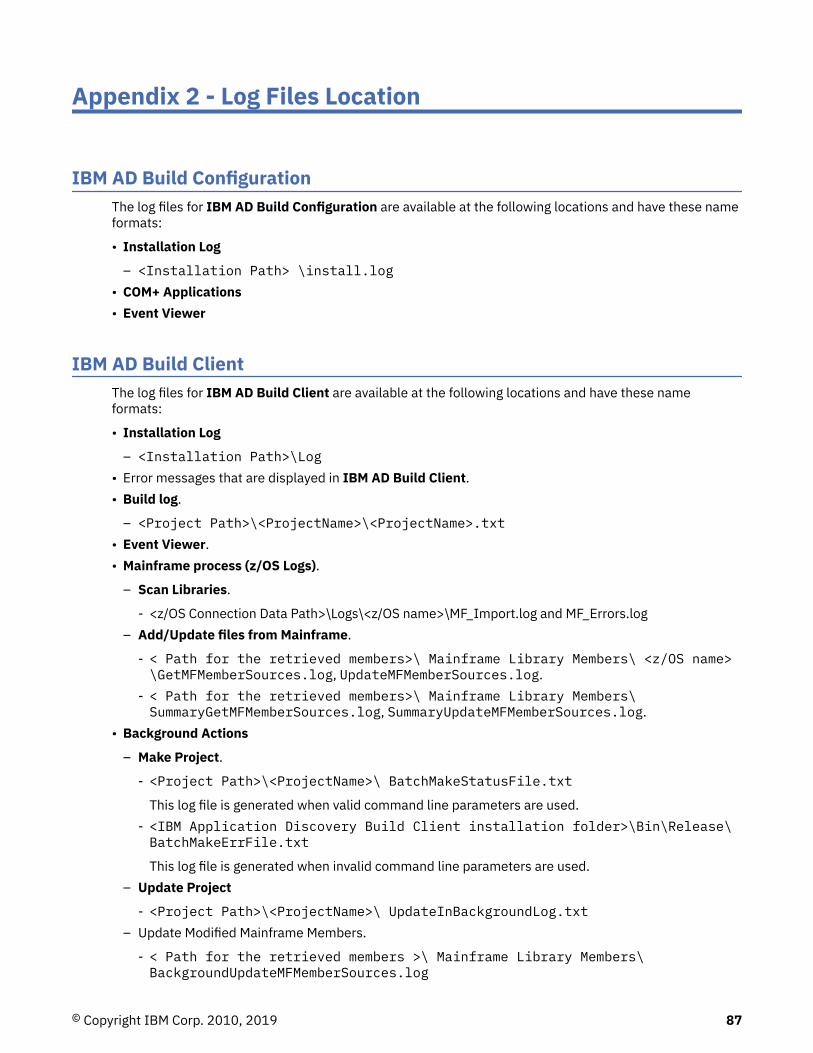
Appendix 2 - Log Files Location
IBM AD Build ConfigurationThe log files for IBM AD Build Configuration are available at the following locations and have these nameformats:
• Installation Log
– <Installation Path> \install.log• COM+ Applications• Event Viewer
IBM AD Build ClientThe log files for IBM AD Build Client are available at the following locations and have these nameformats:
• Installation Log
– <Installation Path>\Log• Error messages that are displayed in IBM AD Build Client.• Build log.
– <Project Path>\<ProjectName>\<ProjectName>.txt• Event Viewer.• Mainframe process (z/OS Logs).
– Scan Libraries.
- <z/OS Connection Data Path>\Logs\<z/OS name>\MF_Import.log and MF_Errors.log– Add/Update files from Mainframe.
- < Path for the retrieved members>\ Mainframe Library Members\ <z/OS name>\GetMFMemberSources.log, UpdateMFMemberSources.log.
- < Path for the retrieved members>\ Mainframe Library Members\SummaryGetMFMemberSources.log, SummaryUpdateMFMemberSources.log.
• Background Actions
– Make Project.
- <Project Path>\<ProjectName>\ BatchMakeStatusFile.txt
This log file is generated when valid command line parameters are used.- <IBM Application Discovery Build Client installation folder>\Bin\Release\BatchMakeErrFile.txt
This log file is generated when invalid command line parameters are used.– Update Project
- <Project Path>\<ProjectName>\ UpdateInBackgroundLog.txt– Update Modified Mainframe Members.
- < Path for the retrieved members >\ Mainframe Library Members\BackgroundUpdateMFMemberSources.log
© Copyright IBM Corp. 2010, 2019 87

Synchronize Members Process Log FilesThe following log files are generated:
• <Project Folder>\ Synchronize\SynchronizeMembersProgress_<timestamp>.log
This log records the actual progress of the process (parsing the configuration file, validating theconfiguration file). This method is useful when the process is run in background.
• <Project Folder>\ Synchronize\SynchronizeMembersSummary_<timestamp>.log
This log is generated at the end of the process and records the modified, added, and deleted memberfiles.
• <Project Folder>\ Synchronize\SynchronizeMembersExtendedInfo_<timestamp>.log
This log is generated at the end of the process and consolidates detailed log files. See “Detailed LogFiles Location” on page 88 for the source logs.
Detailed Log Files LocationThe log files are available at the following locations:
• Scan libraries - <Project Folder>\<z/OS>\<Logs>\<z/OS name>\MF_Import_<timestamp>.log.
• Scan libraries - <Project Folder>\<z/OS>\<Logs>\<z/OS name>\MF_Errors_<timestamp>.log.
• Update mainframe members - <Path For The Retrieved Members>\Mainframe LibraryMembers\SummaryUpdateMFMemberSources_<timestamp>.log.
• Update mainframe members - <Path For The Retrieved Members>\Mainframe LibraryMembers\<z/OS name>\UpdateMFMemberSources_<timestamp>.log.
• Update mainframe members - <Path For The Retrieved Members>\Mainframe LibraryMembers\<z/OS name>\BackgroundUpdateMFMemberSources_<timestamp>.log.
• Add/Remove files from project - <Project Folder>\UpdateInBackgroundLog_<timestamp>.txt.
• Configuration file validation - <Project Folder>\Synchronize\ConfigFileValidation_<timestamp>.log.
88 IBM Application Discovery for IBM Z Build V5.1.0: User Guide

Appendix 3 - Synchronize Members Configuration FileExamples
The configuration file is intended to instruct IBM AD Build Client on whether it needs to update againstspecific libraries, where to add/remove the related members in/from the project (that is, which virtualfolder to use) and also which type of members IBM AD Build Client must use when you add members.The basic assumption is that the specified libraries do not contain members that do not have to be addedeven though they are there.
The configuration file must contain the following parameters:
<Project name>, <Library type >, <Library name>, <Mapped virtual folder>, <Members type >, <z/OS> ,Application
Project nameThe name of the project that needs to be synchronized with the mainframe system.
Library typeThe type of the library from which members are added.
Library nameThe name of the library against which the synchronization takes place.
Mapped virtual folderThe name of the project folder where the members are added/updated/deleted.
Members typeThe type of the members that are synchronized. The allowed types are presented in the Membertypes names table.
z/OSThe name of the connection to the mainframe system, as defined in the zOS tab of the IBMApplication Discovery Build Configuration window. For more information, see “The zOS Tab” onpage 77.
ApplicationThe name of the application as defined for ChangeMan ZMF in zOS Configuration screen.
Following are some examples for configuration files, based on Library types.
Note: Each line in the configuration file must contain a unique <Project name>, <Library type >, <Libraryname>, <Mapped virtual folder>, <z/OS> tuple. If not, the configuration file is invalidated. Also, if thesynchronization process runs for more than one Library/Project, a unique line must be added for eachproject that needs synchronization.
To comment a line in the configuration file, add * at the beginning of that line.
PDS Library- <PROJECT>, PDS(MVS™), ITLS.COBOL.II, z/OS Cobol, COBOL_MVS, zOSCONN
Endevor- <PROJECT>, Endevor, SMPLTEST.EZLPROJ.EZLCOMP.COBOL.T, z/OS Cobol, COBOL_MVS,zOSCONN
ChangeMan Baseline- <PROJECT>, CHANGEMAN_BASELINE, EZL.SERENA.SYNC.EZLX.COB, z/OS Cobol,COBOL_MVS, zOSCONN, EZLX
ChangeMan Package- <PROJECT>, CHANGEMAN_PACKAGE, EZLX000020, z/OS Cobol, COBOL_MVS,zOSCONN
Available library types- PDS(MVS), Endevor, PDS(MVS)_CONTROLM, NATURAL, LIBRARIAN,CHANGEMAN_BASELINE, CHANGEMAN_PACKAGE.
Member types names:
© Copyright IBM Corp. 2010, 2019 89

Virtual Folder FileTypeName
AAuto Scheduling AAUTO_SCHEDULING
AAuto Scheduling AAUTO_DS_FLAG_REPORT
ADS Dialog ADS_DIALOG
ADS Map ADS_MAP
ADS Process ADS
Assembler ASSEMBLER
Assembler Include ASSEMBLER_INCLUDE
Assembler Macro ASM_MACRO
Batch Processesinformation
XML_SCHDL_INFO
BMS BMS
CL CL
Cobol AIM COBOL_FUJITSU_AIM
Cobol AS400Smart
COBOL_AS400_SMART
Cobol IDMS COBOL_IDMS
Cobol IDMS Record COBOL_IDMS_RECORD
Cobol Include COPY
Configuration CSD
Configuration IMST_PGM
Configuration JCL_PGM
Configuration PGM_ALIAS
Data Area LDA
Datasets Definition XML_DATASET_DEF
DBD DBD
Delete Reports XML_DELETE_REPORT
IMS Map MFS
JCL JCL
JCL Control files JCL_CTRL
JCL Include JCL_INCLUDE
JCL Processes JCL_PROCLIB
Log LOG
Logical ViewDefinition
XML_LOGICAL_FILE_DEF
MQ MQ_CONFIG
Natural NATURAL
90 IBM Application Discovery for IBM Z Build V5.1.0: User Guide

Virtual Folder FileTypeName
Natural Include NATURALINCLUDE
Natural Map NATURALMAP
Object Listing XML_OBJECT_LISTING
PL1 PL1
PL1 IDMS Record PL1_IDMS_RECORD
PL1 Include PL1_INCLUDE
Printer Files DDS_PRINT_FILES
PSB PCB
SchedulingInformation
XML_BATCH_SCHDL_MAP
Schema SCHEMA
Screens DDS_SCREEN_DEF
Subschema SUBSCHEMA
Table Definition XML_TABLE_DEF
zOS Cobol COBOL_MVS
PreProc Before EXTENS_PREPROC_BEFORE
PreProc MetaData EXTENS_PREPROC_META
PreProc Config EXTENS_PREPROC_CONFIG
Validation configuration files examples.
ProjectMapping.txt
This file is the configuration file for defining the Project Name, Serena Application Name, and theSubsystem that is used for the validation process. Valid means that the format is correct and the Projectdoes exist.
<Project Name>, <Serena Application Name>, <Subsystem> (comma separated values)
IncludesOrder.txt
This file is the configuration file for defining the Baseline Libraries types and the order, of Cobol Includeslocations. This configuration file is used later on while you set up the path for the Cobol Include folders.
<type>,<type1>,….<typen>
Note: It is EXTREMELY important to add the types in the order in which the include files must be lookedafter.
FoldersMapping.txt
This file is the configuration file for defining a mapping between a Logical Folder of the project and thetype of a member that is part of the validation process. This configuration file is used during the validationstage of the Synchronize Members process.
<Member Type>,<Logical folder>
ServicePort.txt
Appendix 3 - Synchronize Members Configuration File Examples 91

This file is the configuration file for defining the Service’s port. If you use a firewall, make sure that theport is added as an exception.
<Port Number>
92 IBM Application Discovery for IBM Z Build V5.1.0: User Guide

Appendix 4 - Extensibility JSON/Configuration FileExamples
Schema JSON files and examples of creating configuration JSON files are provided in this appendix.
Preprocessing Extensibility ExamplesExamples are provided to show how metadata JSON files and configuration files must be created tointegrate their business-specific cases in the analysis.
The following use case is for the situation when a user uses the %Call using CICS XCTL and#Copybook macros in a before file.
Before file example: PREPROC.bef
IDENTIFICATION DIVISION. PROGRAM-ID. PREPROC. DATA DIVISION. WORKING-STORAGE SECTION. 01 FIRST-NAME PIC X(09). 01 COMMAREA-FOR-PROG2 PIC X(09). PROCEDURE DIVISION. MOVE 'TEST-NAME' TO FIRST-NAME. CALL 'PROG1' USING FIRST-NAME. %Call using CICS XCTL #Copybook
After file example: PREPROC.cbl
IDENTIFICATION DIVISION. PROGRAM-ID. PREPROC. DATA DIVISION. WORKING-STORAGE SECTION. 01 FIRST-NAME PIC X(09). 01 COMMAREA-FOR-PROG2 PIC X(09). PROCEDURE DIVISION. MOVE 'TEST-NAME' TO FIRST-NAME. CALL 'PROG1' USING FIRST-NAME. EXEC CICS XCTL PROGRAM('PROG2') COMMAREA(COMMAREA-FOR-PROG2) LENGTH(38) END-EXEC. CALL 'PROG3' USING FIRST-NAME.
The following lines in the after file are from Copybook:
CALL 'PROG3' USING FIRST-NAME.
JSON file used for mapping: PREPROC.meta
{ "info": { "version":"1.0.0" }, "metadata": [
© Copyright IBM Corp. 2010, 2019 93

{ "pathType": "PC", "beforePath":"C\\BeforeFolder\\PREPROC.bef", "afterPath":" C\\AfterFolder \\PREPROC.cbl",
"diffResolution": [ { "afterPos": { "startLine": 1,
"endLine": 10
},
"beforePos": { "startLine": 1,
"endLine": 10 }
},
{ "afterPos": { "startLine": 11,
"endLine": 13
},
"beforePos": { "startLine": 11,
"endLine": 11 }
}, { "afterPos": { "startLine": 14,
"endLine": 15
},
"beforePos": { "startLine": 1,
"endLine": 2 }, "type": "INCLUDE", "path": "C\\CopybooksFolder\\Copybook", "includeStmtPos": {
"includeStmtPath": " C\\BeforeFolder\\PREPROC.bef", "includeStmtLine": 12
}
}
] } ]}
94 IBM Application Discovery for IBM Z Build V5.1.0: User Guide

Configuration file exampleThe configuration file contains the information of the mappings between before files, metadata files, afterfiles, and the extensions for each type of the files:
"C\BeforeFolder1\" | "C\MetaFolder1\" | " C\AfterFolder1\" | ".bef" | ".meta" | ".cbl""C\BeforeFolder2\" | "C\MetaFolder2\" | "C\AfterFolder2\" | ".cbl" | ".meta" | ".after""C\BeforeFolder3\" | "C\MetaFolder3\" | "C\AfterFolder3\" | ".cbl" | ".meta" | ".after"
Extensibility preprocessing JSON schema{ "$schema": "http://json-schema.org/draft-06/schema#", "title": "AD Extensibility preprocessing definition file", "type": "object",
"properties": { "info": { "type": "object", "properties": { "version": { "type": "string", "description": "Version of the preprocessing metadata format", "pattern": "^[0-9]+\\.[0-9]+\\.[0-9]+\\." } }, "required": [ "version" ], "additionalProperties": false },
"metadata": { "type": "array", "items": { "type": "object", "properties": { "pathType": { "type": "string", "description": "Format of the before and after file paths: local or mainframe", "enum": [ "PC", "MF" ] }, "beforePath": { "type": "string", "description": "Path of the original source", "minLength": 1 }, "afterPath": { "type": "string", "description": "Path of the preprocessed source", "minLength": 1 }, "diffResolution": { "type": "array", "description": "Ordered list of correspondences between lines in the after file and lines in the before file", "items": { "oneOf": [ { "$ref": "#/definitions/diffResolutionType1" }, { "$ref": "#/definitions/diffResolutionType2" } ] } } },
"required": [ "pathType", "beforePath", "afterPath", "diffResolution" ], "additionalProperties": false } } },
"required": [ "info", "metadata" ],
"definitions": { "position": { "type": "object", "description": "Interval of lines in the source file", "properties": { "startLine": { "type": "integer", "description": "Starting line of the interval", "minimum": 1 }, "endLine": { "type": "integer", "description": "Ending line of the interval", "minimum": 1
} },
Appendix 4 - Extensibility JSON/Configuration File Examples 95
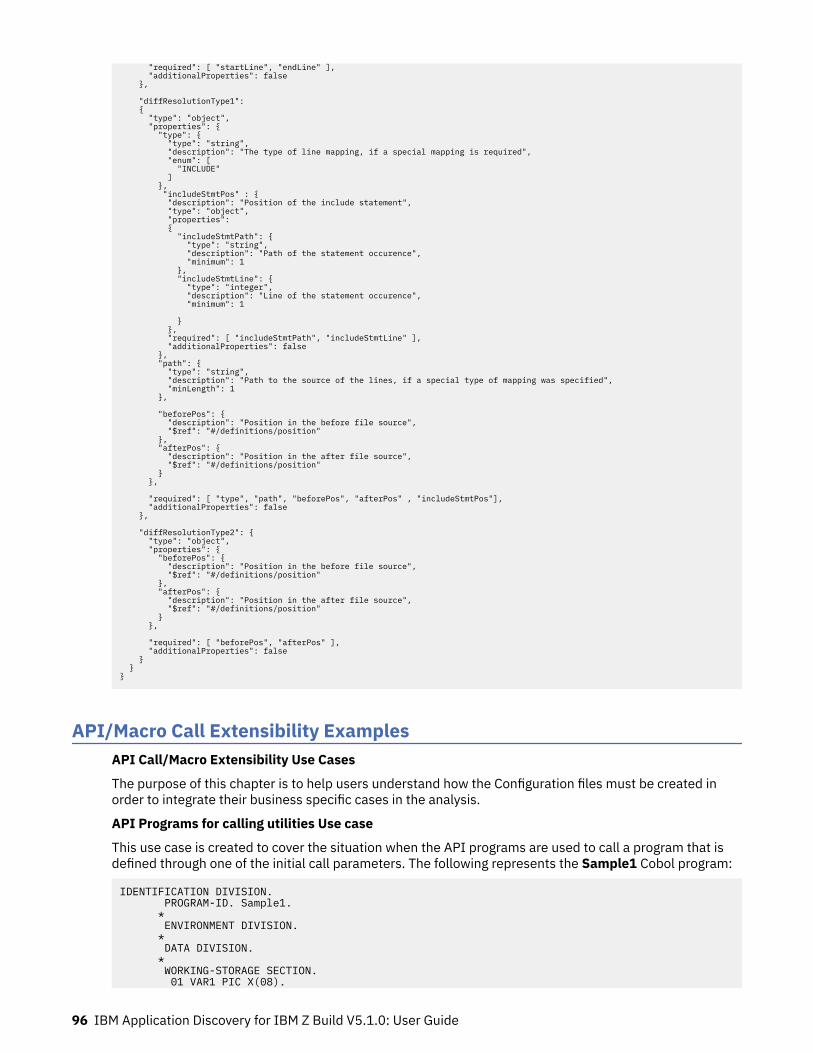
"required": [ "startLine", "endLine" ], "additionalProperties": false }, "diffResolutionType1": { "type": "object", "properties": { "type": { "type": "string", "description": "The type of line mapping, if a special mapping is required", "enum": [ "INCLUDE" ] }, "includeStmtPos" : { "description": "Position of the include statement", "type": "object", "properties": { "includeStmtPath": { "type": "string", "description": "Path of the statement occurence", "minimum": 1 }, "includeStmtLine": { "type": "integer", "description": "Line of the statement occurence", "minimum": 1
} }, "required": [ "includeStmtPath", "includeStmtLine" ], "additionalProperties": false }, "path": { "type": "string", "description": "Path to the source of the lines, if a special type of mapping was specified", "minLength": 1 }, "beforePos": { "description": "Position in the before file source", "$ref": "#/definitions/position" }, "afterPos": { "description": "Position in the after file source", "$ref": "#/definitions/position" } },
"required": [ "type", "path", "beforePos", "afterPos" , "includeStmtPos"], "additionalProperties": false },
"diffResolutionType2": { "type": "object", "properties": { "beforePos": { "description": "Position in the before file source", "$ref": "#/definitions/position" }, "afterPos": { "description": "Position in the after file source", "$ref": "#/definitions/position" } },
"required": [ "beforePos", "afterPos" ], "additionalProperties": false } }}
API/Macro Call Extensibility ExamplesAPI Call/Macro Extensibility Use Cases
The purpose of this chapter is to help users understand how the Configuration files must be created inorder to integrate their business specific cases in the analysis.
API Programs for calling utilities Use case
This use case is created to cover the situation when the API programs are used to call a program that isdefined through one of the initial call parameters. The following represents the Sample1 Cobol program:
IDENTIFICATION DIVISION. PROGRAM-ID. Sample1. * ENVIRONMENT DIVISION. * DATA DIVISION. * WORKING-STORAGE SECTION. 01 VAR1 PIC X(08).
96 IBM Application Discovery for IBM Z Build V5.1.0: User Guide

01 VAR2 PIC X(08). 01 VAR3 PIC X(08). 01 VAR4 PIC X(08). 01 X PIC X(08). PROCEDURE DIVISION. MOVE 'VALUE1' TO VAR1 MOVE 'VALUE2' TO VAR2 CALL 'API1' USING VAR1, VAR2, VAR3, VAR4.
The Sample1 Cobol program contains a call to a specific API program named API1.
In case a call to the API1 program has to be interpreted as a call to the value of the first call parameter( VALUE1) , the following Configuration Files containing the rules for the new resolution are to be used.
Note: The API_Config.json file specifies that the fist parameter has to be saved with its value while forthe rest of parameters there is no need for their values.
{ "info": { "version":"5.0.4.1" }, "extensions": [ { "apiKey": "a1", "name": "API1", "type": "call", "parameters": [ { "position":1, "label": "program", "resolve": true }, { "position":2, "label": "accessType", "resolve": false }, { "position":3, "label": "outputVariable", "resolve": false }, { "position":4, "label": "inputVariable", "resolve": false } ] } ]}
The ue-config.json file specifies the type of user exit file (for v5.0.4, only .Json file is supported) andthe path where the user exit file is located.
{ "schemaVersion":"1.0.1", "documentVersion":"1.0.1", "ueConfig" :[ {"name": "uejson", "type":"file-json", "location":"location/of/the/file/which/contains/the/resolution.json", "appliesTo":["a1"] }]}
The resolution.json file specifies that the API1 call is replaced with a call to a Cobol program, it'sname is resolved in the first parameter and parameters 2, 3 and 4 are only referred.
{ "schemaVersion": "1.0.1",
Appendix 4 - Extensibility JSON/Configuration File Examples 97

"documentVersion": "1.0.1", "entries": [{ "input": { "apiKey": "a1", "apiText": "API1", "params": [{ "paramKey": "program", "paramMode": "byValue" }, { "paramKey": "accessType", "paramMode": "byRef" }, { "paramKey": "outputVariable", "paramMode": "byRef" }, { "paramKey": "inputVariable", "paramMode": "byRef" } ] }, "resolutions": [{ "action": "call", "target": { "resourceType": "CobolProgram", "paramKey": "program", "paramMode": "byValue", "read": true }, "resources": [{ "resourceType": "Variable", "paramKey": "accessType", "paramMode": "byRef", "read": true }, { "resourceType": "Variable", "paramKey": "outputVariable", "paramMode": "byRef", "read": true }, { "resourceType": "Variable", "paramKey": "inputVariable", "paramMode": "byRef", "read": true } ] }] }]}
API Programs for Data Access Use Case
This use case is created to cover the situation when the API programs are used to perform SQL Select andSQL Delete on specified fields from TABLE1 and TABLE2 SQL tables defined in the Cobol program. Thefollowing represents the Sample2 Cobol program.
IDENTIFICATION DIVISION. PROGRAM-ID. Sample2. * ENVIRONMENT DIVISION. * DATA DIVISION. WORKING-STORAGE SECTION. EXEC SQL DECLARE TABLE1 TABLE ( COL11 CHAR(7), COL12 CHAR(10) )END-EXEC. EXEC SQL DECLARE TABLE2 TABLE ( COL21 CHAR(7), COL22 CHAR(10) )END-EXEC.
01 VALUE1-DATA. 03 VALUE1-DATA PIC S9(9).
98 IBM Application Discovery for IBM Z Build V5.1.0: User Guide

01 VALUE2-DATA. 03 VALUE2-DATA PIC S9(9). 01 FIRST-PARAM. 03 ACCESS-ID PIC S9(9). PROCEDURE DIVISION. MOVE 'VALUE1' TO ACCESS-ID MOVE 'AAAAAA' TO VALUE1-DATA CALL 'API2' USING FIRST-PARAM VALUE1-DATA. MOVE 'VALUE2' TO ACCESS-ID MOVE 'AAAAAA' TO VALUE2-DATA CALL 'API2' USING FIRST-PARAM VALUE2-DATA.
The first call to the API2 program has to be interpreted as an SQL Select performed on fields COL11 andCOL12 from TABLE1 SQL table. This action is specified by the value of the second API call parameterVALUE1.
The second call to the API2 program has to be interpreted as an SQL Delete performed on fields fromTABLE SQL table. This action is specified by the value of the second API call parameter VALUE2.
The second call to the API2 program has to be interpreted as an SQL Delete performed on fields fromTABLE SQL table. This action is specified by the value of the second API call parameter VALUE2.
{ "info": { "version":"5.0.4.1" }, "extensions": [ { "apiKey":"a1", "name":"API2", "type": "call", "parameters": [ { "position":1, "label": "p1", "resolve": true, "locator":{ "offset":1, "length":9 } }, { "position":2, "label": "p2", "resolve": true, "locator":{ "offset":1, "length":9 } }, { "position":2, "label": "p3", "resolve": false }, { "position":2, "label": "p4", "resolve": false } ] } ]}
The ue-config.json file specifies the type of user exit file (for v5.0.4, only .Json file is supported)and the path where the user exit file is located.
{ "schemaVersion":"1.0.1",
Appendix 4 - Extensibility JSON/Configuration File Examples 99

"documentVersion":"1.0.1", "ueConfig" :[ {"name": "uejson", "type":"file-json", "location":"location from disk/resolution.json", "appliesTo":["a1"] }]}
The resolution.json file specifies:
• if VALUE1 is found in parameter values the API2 call will become a SQL Select on COL11 and COL12fields from TABLE1 SQL Table.
• if VALUE2 is found in parameter values the API2 call will become a SQL Delete on COL21 field fromTABLE2 SQL Table.
{ "schemaVersion": "1.0.1", "documentVersion": "1.0.1", "entries": [{ "input": { "apiKey": "a1", "apiText": "API2", "params": [ { "value": "VALUE1" }, { "paramKey": "p2", "paramMode": "byRef" }, { "paramKey": "p3", "paramMode": "byRef" }, { "paramKey": "p4", "paramMode": "byRef" } ] }, "resolutions": [ { "action": "SQLSelect", "resources": [ { "resourceType": "SQLTable", "value": "TABLE1", "read": true } ], "clauses": [ { "clause": "into", "from": { "resourceType": "SQLField", "qualifiers": [ "TABLE1" ], "value": "COL11", "read": true }, "to": { "resourceType": "Variable", "paramKey": "p2", "paramMode": "byRef", "read": false } }, { "clause": "into", "from": { "resourceType": "SQLField", "qualifiers": [ "TABLE1"
100 IBM Application Discovery for IBM Z Build V5.1.0: User Guide

], "value": "COL12", "read": true }, "to": { "resourceType": "Variable", "paramKey": "p3", "paramMode": "byRef", "read": false } }, { "clause": "where", "from": { "resourceType": "SQLField", "qualifiers": [ "TABLE1" ], "value": "COL11", "read": false }, "to":{ "resourceType": "Variable", "paramKey": "p4", "paramMode": "byRef", "read": true } } ] }]},{ "input": { "apiKey": "a1", "apiText": "API2", "params": [ { "value": "VALUE2" }, { "paramKey": "p2", "paramMode": "byRef" }, { "paramKey": "p3", "paramMode": "byRef" }, { "paramKey": "p4", "paramMode": "byRef" } ] }, "resolutions": [ { "action": "SQLDelete", "resources": [ { "resourceType": "SQLTable", "value": "TABLE2", "read": true } ], "clauses": [ { "clause": "where", "from": { "resourceType": "SQLField", "qualifiers": [ "TABLE2" ], "value": "COL21", "read": false }, "to":{ "resourceType": "Variable", "paramKey": "p4", "paramMode": "byRef", "read": false } }]
Appendix 4 - Extensibility JSON/Configuration File Examples 101

}]}]}.
The following json schemas might help you create the configurations files.
Schema for API_Config.json{ "$schema": "http://json-schema.org/draft-04/schema#", "title": "AD Extensebility extensions definition file", "type": "object", "properties": { "info": { "type": "object", "properties": { "version": { "type": "string", "description": "The extension file version", "pattern": "^[0-9]+\\.[0-9]+\\.[0-9]+" } }, "required": [ "version" ] }, "extensions": { "type": "array", "minItems": 1, "items": { "$ref": "#/definitions/Extension" } } }, "required": [ "info", "extensions" ], "definitions": { "Extension": { "oneOf": [ { "$ref": "#/definitions/ExtensionType1" }, { "$ref": "#/definitions/ExtensionType2" }, { "$ref": "#/definitions/ExtensionType3" } ] }, "LocatorType1": { "type": "object", "description": "Locator specifying the parameter value from a record's child", "properties": { "name": { "type": "string", "description": "Name of the record child from which to take the parameter value", "minLength": 1 } }, "required": [ "name" ], "additionalProperties": false }, "LocatorType2": { "type": "object", "description": "Locator specifying the parameter value by offset and length", "properties": { "offset": { "type": "integer", "description": "Starting offset for the value", "minimum": 0 }, "length": { "type": "integer", "description": "Length of the value to be read", "minimum": 0 } }, "required": [ "offset", "length" ], "additionalProperties": false }, "ExtensionType1": { "type": "object", "properties": { "apiKey": { "type": "string", "minLength": 1 }, "name": { "type": "string", "minLength": 1 }, "type": { "type": "string", "enum": [ "call" ], "description": "Extension for call statements",
102 IBM Application Discovery for IBM Z Build V5.1.0: User Guide

"minLength": 1 }, "parameters": { "type": "array", "minItems": 1, "items": { "$ref": "#/definitions/ParameterType1" } } }, "required": [ "apiKey", "name", "type", "parameters" ], "additionalProperties": false }, "ExtensionType2": { "type": "object", "properties": { "apiKey": { "type": "string", "minLength": 1 }, "name": { "type": "string", "minLength": 1 }, "type": { "type": "string", "enum": [ "cics" ], "description": "Extension for cics statements", "minLength": 1 }, "parameters": { "type": "array", "minItems": 1, "items": { "$ref": "#/definitions/ParameterType2" } } }, "required": [ "apiKey", "name", "type", "parameters" ], "additionalProperties": false }, "ExtensionType3": { "type": "object", "properties": { "apiKey": { "type": "string", "minLength": 1 }, "name": { "type": "string", "minLength": 1 }, "type": { "type": "string", "enum": [ "JclPgmCall" ], "description": "Extension for JCL call statements", "minLength": 1 }, "parameters": { "type": "array", "minItems": 1, "items": { "$ref": "#/definitions/ParameterType3" } } }, "required": [ "apiKey", "name", "type", "parameters" ], "additionalProperties": false }, "ParameterType1": { "type": "object", "description": "Parameter for call statements", "properties": { "position": { "type": "integer", "description": "Position of the parameter in the call", "minimum": 1 }, "label": { "type": "string", "description": "Identifier for the parameter", "minLength": 1 }, "resolve": { "type": "boolean", "description": "Specify whether to determine the values of the parameter or not", "default": true
Appendix 4 - Extensibility JSON/Configuration File Examples 103

}, "optional": { "type": "boolean", "description": "Specify whether the parameter is optional or not", "default": false }, "locator": { "oneOf": [ { "$ref": "#/definitions/LocatorType1" }, { "$ref": "#/definitions/LocatorType2" } ] } }, "required": [ "position", "label", "resolve" ], "additionalProperties": false }, "ParameterType2": { "type": "object", "description": "Parameter for CICS statements", "properties": { "name": { "type": "string", "description": "Name of the parameter in the CICS statement", "minLength": 1 }, "label": { "type": "string", "description": "Identifier for the parameter", "minLength": 1 }, "resolve": { "type": "boolean", "description": "Specify whether to determine the values of the parameter or not", "default": true }, "optional": { "type": "boolean", "description": "Specify whether the parameter is optional or not", "default": false }, "locator": { "oneOf": [ { "$ref": "#/definitions/LocatorType1" }, { "$ref": "#/definitions/LocatorType2" } ] } }, "required": [ "name", "label", "resolve" ], "additionalProperties": false },
"ParameterType3": { "type": "object", "description": "Parameter for JCL calls", "properties": { "name": { "type": "string", "description": "Name of the parameter in the JCL call", "minLength": 1 }, "label": { "type": "string", "description": "Identifier for the parameter", "minLength": 1 }, "optional": { "type": "boolean", "description": "Specify whether the parameter is optional or not", "default": false } }, "required": [ "name", "label" ], "additionalProperties": false } }}
Schema for ue-config.json{ "$schema": "http://json-schema.org/draft-04/schema#", "version": "1.0.1", "type": "object", "description": "An ordered list of user exits", "properties": { "schemaVersion": { "description": "This json schema version",
104 IBM Application Discovery for IBM Z Build V5.1.0: User Guide

"$ref": "#/definitions/versionDef" }, "documentVersion": { "description": "The user exit json file version", "$ref": "#/definitions/versionDef" }, "ueConfig": { "type": "array", "description": "An array which contains user exit configurations", "items": { "type": "object", "description": "An user exit configuration object.", "properties": { "name": { "type": "string", "description": "A name for this user exit configuration." }, "type": { "type": "string", "description": "The user exit type", "enum": [ "file-json", "utility", "dependency-file-json", "dependency-utility", "jcl-file-json", "jcl-utility" ] }, "location": { "type": "string", "description": "The path of the file containing the resolutions (applies for file-json type only)." }, "appliesTo": { "type": "array", "description": "An array of API (defined in API config json) to which this user-exit is applied.", "items": { "type": "string", "description": "An extensibility API key as defined in the API config json file." }, "minItems": 1, "uniqueItems": true }, "command": { "type": "array", "description": "An array of strings used to call an external utility in order to obtain the user exit resolutions.", "items": { "type": "string" } } }, "required": [ "name", "type", "appliesTo" ], "uniqueItems": true } } }, "required": [ "ueConfig", "schemaVersion", "documentVersion" ], "definitions": { "versionDef": { "type": "string", "description": "Schema/Document versioning pattern", "pattern": "^[0-9]{1,3}\\.[0-9]{1,3}(\\.[0-9]{1,3})?$" } }}
Schema for resolution.json{ "$schema": "http://json-schema.org/draft-04/schema#", "version": "1.0.2", "type": "object", "description": "The json schema for a file-json based AD resolutions.", "properties": { "schemaVersion": { "description": "This json schema version.", "$ref": "#/definitions/versionDef" }, "documentVersion": { "description": "The user exit json file version.", "$ref": "#/definitions/versionDef" }, "entries": { "type": "array", "description": "An array containing the user exit content.", "items": { "type": "object", "description": "A user exit content object.", "properties": { "resolutions": { "type": "array", "description": "An array which contains the user exit resolution objects.", "items": { "anyOf": [ { "$ref": "#/definitions/localResolutionDef" }, { "$ref": "#/definitions/externalResolutionDef" }, { "$ref": "#/definitions/callLocalResolutionDef" }, { "$ref": "#/definitions/callExternalResolutionDef" } ] } }, "input": { "type": "object", "description": "An object which contains the inputs for the user exit.", "properties": { "apiKey": { "type": "string", "description": "The parameter key as defined in the API config json." }, "apiText": { "type": "string", "description": "The name of the API program as defined in the API config json."
Appendix 4 - Extensibility JSON/Configuration File Examples 105

}, "params": { "type": "array", "description": "An array of 'value' objects definitions. The number and the order of the items MUST be the same with the number and the order of the parameters defined in the API config json", "items": { "anyOf": [ { "$ref": "#/definitions/paramValue" }, { "$ref": "#/definitions/directValue" }, { "$ref": "#/definitions/optionalValue" } ] } } }, "required": [ "apiKey", "params" ], "additionalProperties": false } }, "additionalProperties": false, "required": [ "resolutions", "input" ] } } }, "required": [ "entries", "schemaVersion", "documentVersion" ], "definitions": { "versionDef": { "type": "string", "description": "A schema/document versioning pattern.", "pattern": "^[0-9]{1,3}\\.[0-9]{1,3}(\\.[0-9]{1,3})?$" }, "externalActionsDef": { "description": "", "type": "string", "enum": [ "CICSStart", "CICSReturn", "IMSStartTransaction" ] }, "localActionsDef": { "description": "", "type": "string", "enum": [ "CICSStart", "CICSReturn", "SQLSelect", "SQLInsert", "SQLDelete", "SQLUpdate", "FileRead", "FileWrite", "FileRewrite", "FileDelete", "CICSFileRead", "CICSFileWrite", "CICSFileRewrite", "CICSFileDelete", "CICSSendMap", "CICSReceiveMap", "IMSSendMap", "IMSReceiveMap", "IMSStartTransaction", "IMSDBRead", "IMSDBReadNext", "IMSDBInsert", "IMSDBDelete", "IMSDBUpdate" ] }, "paramValue": { "type": "object", "description": "A generic 'value' object which allows the user exit to define values for the resolution or the input values with references to the paramKey.", "properties": { "paramKey": { "type": "string", "description": "The parameter key as defined in the API config json file." }, "paramMode": { "type": "string", "description": "A marker which defines how the parameter value is read by the resolver.", "enum": [ "byValue", "byRef" ] } }, "additionalProperties": false, "required": [ "paramKey", "paramMode" ] }, "directValue": { "type": "object", "description": "A generic 'value' object which allows the user exit to define values for the resolution or the input values without referering to a specific paramKey.", "properties": { "value": { "type": "string", "description": "The value for this 'value' object." } }, "additionalProperties": false, "required": [ "value" ] }, "optionalValue": { "type": "object", "description": "A generic 'value' object which allows the user exit to define values for the input values which will be ignored by the AD Resolver", "properties": { "ignore": { "type": "boolean",
106 IBM Application Discovery for IBM Z Build V5.1.0: User Guide

"description": "If true the 'value' object MUST be ignored by the AD Resolver." } }, "additionalProperties": false, "required": [ "ignore" ] }, "resourceTypeDef": { "type": "object", "description": "An object which will contain a resource type definition for resolutions.", "properties": { "read": { "type": "boolean", "description": "A marker for the resource behavior (true: the resource is read, false - the resource is written.)" }, "resourceType": { "type": "string", "description": "The resource type", "enum": [ "CobolProgram", "PL/1Program", "Variable", "CICSTran", "SQLTable", "SQLField", "File", "CICSMap", "IMSMessageDescriptor", "IMSTransaction", "IMSDBSegment" ] }, "paramKey": { "type": "string", "description": "The parameter key as defined in the API config json file." }, "paramMode": { "type": "string", "description": "A marker which defines how the parameter value is read by the resolver.", "enum": [ "byValue", "byRef" ] }, "qualifiers": { "type": "array", "description": "An array of strings. The strings will be used to qualify the resource.", "items": { "type": "string", "description": "A string qualifier." } }, "value": { "type": "string", "description": "A string value for the resource type." }, "annText": { "type": "string", "description": "A string which defines the text of the annotation." }, "annKeyword": { "type": "string", "description": "A string which defines the key of the annotation." } }, "additionalProperties": false }, "clausesDef": { "type": "array", "description": "An array containing SQL statements related options.", "items": { "type": "object", "description": "", "properties": { "clause": { "type": "string", "description": "The relationship ...
JCL Call Extensibility Examples
JCL Call Extensibility Use Case
The purpose of this chapter is to help users understand how the Configuration files must be created inorder to integrate their business-specific cases in the analysis.
This use case is created to cover the situation when a JCL Call to an API program is translated into calls toother programs, based on the parameter value received by the API program. The following represents theJOBSAMPLE JCL job:
//JOBSAMPLE JOB ,'DAIICHI LIFE SUPPORT',// CLASS=C,// MSGCLASS=P,// COND=(4,LT),// REGION=4096K//STP010 EXEC PGM=APIJCL//DDOUT1 DD DSN=PJ.ABC.DATASET1,// UNIT=(MTLIB,,DEFER),// DISP=(NEW,KEEP),// DCB=TRTCH=C,// LABEL=(,SL),// VOL=SER=DXXXXX
Appendix 4 - Extensibility JSON/Configuration File Examples 107

//APIPARAM DD *1111 ABC --TEST-- VALUE//
The JOBSAMPLE JCL job contains a call to a specific API program named APIJCL.
To resolve the Call to "APIJCL", the JCL_Config.json file specifies that it is necessary to resolve thevalue of the APIPARAM parameter.
Note: This JSON contains as parameters the corresponding name of the JCL DD card used in the JCL Call.
{ "info": { "version": "5.0.3" }, "extensions": [ { "apiKey":"a1", "name": "APIJCL", "type": "JclPgmCall",
"parameters": [ { "name": "APIPARAM", "label": "param1" } ] } ]}
The ue-config.json file specifies the type of user exit file and the path where the user exit file for acertain API is located.
{ "schemaVersion":"1.0.1", "documentVersion":"1.0.1", "ueConfig" :[ {"name": "uejson", "type":"jcl-file-json", "location":"D:/EZSourceBuildProjects/API_JCL_PROJECTS/DOC_JCL_DEP/API Config/Resolutions/resolutionJCL.json", "appliesTo":["a1"] }]}
The resolutionJCL.json file specifies that, if the value of the received parameter is "1111 ABC--TEST--VALUE", the JCL Call to "APIJCL" is replaced with calls to PROGRAM1 and PROGRAM2 COBOLprograms.
Note:
• The values of the parameters present in the resolutionJCL.json file must be identical to the valuesof the corresponding DD cards in the JCL, considering a maximum of 71 characters on the line.
• The values of the DD cards can come either inline DD * or from a controlled file DD DSN=<file path>.
The following annotations are present in the resolutionJCL.json file:
• For PROGRAM1 - annotation "annText": "ANNOTATION1" and annotation keyword"annKeyword" : "API_RESOLUTION".
• For PROGRAM2 - annotation "annText": "ANNOTATION2" and annotation keyword"annKeyword" : "API_RESOLUTION".
{ "schemaVersion": "1.0", "documentVersion": "1.0", "entries": [{ "input": { "apiKey": "a1",
108 IBM Application Discovery for IBM Z Build V5.1.0: User Guide

"apiText": "APIJCL", "params": [{ "value": "1111 ABC--TEST--VALUE" } ] }, "resolutions": [{ "action": "call", "target": { "resourceType": "CobolProgram", "value": "PROGRAM1", "read": true }, "annText": "ANNOTATION1", "annKeyword" : "API_RESOLUTION" }, { "action": "call", "target": { "resourceType": "CobolProgram", "value": "PROGRAM2", "read": true }, "annText": "ANNOTATION2", "annKeyword" : "API_RESOLUTION" }] } ]}
JSON Schemas
The API_Config.json schema, present in “API/Macro Call Extensibility Examples ” on page 96introduces a new API type "type":"JclPgmCall".
The ue-config.json schema, present in “API/Macro Call Extensibility Examples ” on page 96introduces a new API type "type":"jcl-file-json".
Schema for JCL resolutionJCL.json{ "$schema": "http://json-schema.org/draft-04/schema#", "version": "1.0.0", "type": "object", "description": "The json schema for a jcl-json based AD resolutions.", "properties": { "schemaVersion": { "description": "This json schema version.", "$ref": "#/definitions/versionDef" }, "documentVersion": { "description": "The user exit json file version.", "$ref": "#/definitions/versionDef" }, "entries": { "type": "array", "description": "An array containing the user exit content.", "items": { "type": "object", "description": "A user exit content object.", "properties": { "resolutions": { "type": "array", "description": "An array which contains the user exit resolution objects.", "items": { "$ref": "#/definitions/callLocalResolutionDef" } }, "input": { "type": "object", "description": "An object which contains the inputs for the user exit.", "properties": { "apiKey": { "type": "string", "description": "The parameter key as defined in the JCLAPI config json." }, "apiText": { "type": "string", "description": "The name of the API program as defined in the JCLAPI config json." }, "params": { "type": "array", "description": "An array of 'value' objects definitions. The number and the order of the items MUST be the same with the number and the order of the parameters defined in the API config json", "items": { "anyOf": [ { "$ref": "#/definitions/paramValue" }, { "$ref": "#/definitions/directValue" } ] } } }, "required": [ "apiKey", "params"
Appendix 4 - Extensibility JSON/Configuration File Examples 109

], "additionalProperties": false } }, "additionalProperties": false, "required": [ "resolutions", "input" ] } } }, "required": [ "entries", "schemaVersion", "documentVersion" ], "definitions": { "versionDef": { "type": "string", "description": "A schema/document versioning pattern.", "pattern": "^[0-9]{1,3}\\.[0-9]{1,3}(\\.[0-9]{1,3})?$" }, "paramValue": { "type": "object", "description": "A generic 'value' object which allows the user exit to define values for the resolution or the input values with references to the paramKey.", "properties": { "paramKey": { "type": "string", "description": "The parameter key as defined in the API config json file." }, "paramMode": { "type": "string", "description": "A marker which defines how the parameter value is read by the resolver.", "enum": [ "byValue", "byRef" ] } }, "additionalProperties": false, "required": [ "paramKey", "paramMode" ] }, "directValue": { "type": "object", "description": "A generic 'value' object which allows the user exit to define values for the resolution or the input values without referering to a specific paramKey.", "properties": { "value": { "type": "string", "description": "The value for this 'value' object." } }, "additionalProperties": false, "required": [ "value" ] }, "resourceTypeDef": { "type": "object", "description": "An object which will contain a resource type definition for resolutions.", "properties": { "read": { "type": "boolean", "description": "A marker for the resource behavior (true: the resource is read, false - the resource is written.)" }, "resourceType": { "type": "string", "description": "The resource type", "enum": [ "CobolProgram", "PL/1Program" ] }, "paramKey": { "type": "string", "description": "The parameter key as defined in the JCLAPI config json file." }, "paramMode": { "type": "string", "description": "A marker which defines how the parameter value is read by the resolver.", "enum": [ "byValue", "byRef" ] }, "qualifiers": { "type": "array", "description": "An array of strings. The strings will be used to qualify the resource.", "items": { "type": "string", "description": "A string qualifier." } }, "value": { "type": "string", "description": "A string value for the resource type." } }, "additionalProperties": false }, "targetDef": { "description": "The targeted resource (if any). Will be deprecated in the next versions.", "$ref": "#/definitions/resourceTypeDef" }, "callLocalResolutionDef": { "properties": { "action": { "enum": [ "call" ] }, "target": { "$ref": "#/definitions/targetDef" }, "annText": { "type": "string", "description": "A string which defines the key of the annotation." }, "annKeyword": { "type": "string", "description": "A string which defines the text of the annotation." } }, "additionalProperties": false, "required": [ "action",
110 IBM Application Discovery for IBM Z Build V5.1.0: User Guide

"target" ] } }}
Dependency Extensibility Examples
Dependency Extensibility Use Case
The purpose of this chapter is to help users understand how the Configuration files must be created inorder to integrate their business specific cases in the analysis.
This use case is created to cover the situation when a user creates mappings between transactions andprograms.
The API_Dependency.json file specifies the APIs that return mappings between resources.
Note: Each API has a name and label. The APIs for dependencies have the attribute"type":"post_build".
{ "info": { "version":"5.1.0" }, "extensions": [ { "apiKey":"a2", "name":"MAPPING_TRAN", "type":"post_build" } ]}
The ue-config.json file specifies the type of user exit file and the path where the user exit file for acertain dependency API is located.
{ "schemaVersion":"1.0.1", "documentVersion":"1.0.1", "ueConfig" :[ {"name": "uejson", "type":"dependency-file-json", "location":"D:/EZSourceBuildProjects/API_JCL_PROJECTS/DOC_JCL_DEP/API Config/Resolutions/resolutionDEP.json", "appliesTo":["a2"] }]}
The resolutionDEP.json file contains the mapping of resources returned by the "MAPPING_TRAN"API. In this specific case the mappings are as follows:
• Transaction "TRAN1" to program "PROGRAM1"• Transaction "TRAN2" to program "PROGRAM2"
The following annotations are present in the resolutionDEP.json file:
• For PROGRAM1 - annotation "annText": "ANNOTATION3" and annotation keyword"annKeyword" : "API_RESOLUTION".
• For PROGRAM2 - annotation "annText": "ANNOTATION4" and annotation keyword"annKeyword" : "API_RESOLUTION".
Appendix 4 - Extensibility JSON/Configuration File Examples 111

The AD analysis shows the links between above mentioned resources.
{ "schemaVersion": "1.0.0", "documentVersion": "1.0.0", "entries": [{ "input": { "apiKey": "a2", "apiText": "MAPPING_TRAN" }, "resolutions": [{ "action": "dependency", "source": { "resourceType": "GenericTransaction", "value": "TRAN1" }, "target": { "resourceType": "CobolProgram", "value": "PROGRAM1", "annText": "ANNOTATION3", "annKeyword" : "API_RESOLUTION" } },{ "action": "dependency", "source": { "resourceType": "GenericTransaction", "value": "TRAN2" }, "target": { "resourceType": "CobolProgram", "value": "PROGRAM2", "annText": "ANNOTATION4", "annKeyword" : "API_RESOLUTION" } } ] }]}
JSON Schemas
Schema for Dependency API_Dependency.json
A new configuration file is introduced. The API for dependency has a new type of attribute "type":"post_build".
{ "$schema": "http://json-schema.org/draft-04/schema#", "title": "AD Extensibility dependencies definition file", "type": "object", "properties": { "info": { "type": "object", "properties": { "version": { "type": "string", "description": "The extension file version", "pattern": "^[0-9]+\\.[0-9]+\\.[0-9]+" } }, "required": [ "version" ] }, "extensions": { "type": "array", "minItems": 1, "items": { "$ref": "#/definitions/Extension" } } }, "required": [ "info", "extensions" ], "definitions": { "Extension": { "type": "object", "properties": { "apiKey": { "type": "string", "minLength": 1 }, "name": { "type": "string", "minLength": 1 }, "type": { "type": "string", "enum": [ "post_build" ], "description": "Extension for dependencies", "minLength": 1
112 IBM Application Discovery for IBM Z Build V5.1.0: User Guide

} }, "required": [ "apiKey", "name", "type" ], "additionalProperties": false } }}}
The ue-config.json schema, present in the “API/Macro Call Extensibility Examples ” on page 96introduces a new API type "type":"dependency-file-json".
Schema for Dependency resolution.json{ "$schema": "http://json-schema.org/draft-04/schema#", "version": "1.0.0", "type": "object", "description": "The json schema for a file-json based AD dependency resolutions.", "properties": { "schemaVersion": { "description": "This json schema version.", "$ref": "#/definitions/versionDef" }, "documentVersion": { "description": "The user exit dependency json file version.", "$ref": "#/definitions/versionDef" }, "entries": { "type": "array", "description": "An array containing the user exit dependency content.", "items": { "type": "object", "description": "A user exit dependency content object.", "properties": { "input": { "type": "object", "description": "An object which contains the inputs for the user exit dependency.", "properties": { "apiKey": { "type": "string", "description": "The parameter key as defined in the API config json." }, "apiText": { "type": "string", "description": "The name of the API_NOT_SOURCE as defined in the API config json." } }, "required": [ "apiKey" ], "additionalProperties": false }, "resolutions": { "type": "array", "description": "An array which contains the user exit resolution objects.", "properties": { "action": { "type": "string", "description" : "The name of the action, expect dependency.", "enum": [ "dependency" ] }, "source": { "$ref": "#/definitions/sourceDef" }, "target": { "$ref": "#/definitions/targetDef" } } } }, "additionalProperties": false, "required": [ "resolutions", "input" ] } } }, "required": [ "entries", "schemaVersion", "documentVersion" ], "definitions": { "versionDef": { "type": "string", "description": "A schema/document versioning pattern.", "pattern": "^[0-9]{1,3}\\.[0-9]{1,3}(\\.[0-9]{1,3})?$" }, "sourceDef": { "properties": { "resourceType": { "type": "string", "description": "A string which defines the source type of the resource from depedency relation." }, "value": { "type": "string", "description": "A string which defines the source name of the resource from depedency relation." } } }, "targetDef": { "properties": { "resourceType": { "type": "string", "description": "A string which defines the target type of the resource from depedency relation." }, "value": { "type": "string", "description": "A string which defines the target name of the resource from depedency relation." }, "annText": { "type": "string", "description": "A string which defines the key of the annotation." }, "annKeyword": { "type": "string", "description": "A string which defines the text of the annotation."
Appendix 4 - Extensibility JSON/Configuration File Examples 113

} } } }}
114 IBM Application Discovery for IBM Z Build V5.1.0: User Guide

Documentation Notices for IBM Application Discovery forIBM Z
This edition applies to version 5.1.0 of IBM Application Discovery for IBM Z with the corresponding fixpacks.© Copyright International Business Machines Corporation 2010, 2019. US Government Users RestrictedRights - Use, duplication or disclosure restricted by GSA ADP Schedule Contract with IBM Corp.
This information was developed for products and services offered in the US. This material might beavailable from IBM in other languages. However, you may be required to own a copy of the product orproduct version in that language in order to access it.
IBM may not offer the products, services, or features discussed in this document in other countries.Consult your local IBM representative for information on the products and services currently available inyour area. Any reference to an IBM product, program, or service is not intended to state or imply that onlythat IBM product, program, or service may be used. Any functionally equivalent product, program, orservice that does not infringe any IBM intellectual property right may be used instead. However, it is theuser's responsibility to evaluate and verify the operation of any non-IBM product, program, or service.IBM may have patents or pending patent applications covering subject matter described in this document.The furnishing of this document does not grant you any license to these patents. You can send licenseinquiries, in writing, to:IBM Director of LicensingIBM CorporationNorth Castle Drive, MD-NC119Armonk, NY 10504-1785US
For license inquiries regarding double-byte character set (DBCS) information, contact the IBM IntellectualProperty Department in your country or send inquiries, in writing, to:Intellectual Property LicensingLegal and Intellectual PropertyLawIBM Japan Ltd.19-21, Nihonbashi-Hakozakicho, Chuo-kuTokyo 103-8510, Japan
INTERNATIONAL BUSINESS MACHINES CORPORATION PROVIDES THIS PUBLICATION "AS IS"WITHOUT WARRANTY OF ANY KIND, EITHER EXPRESS OR IMPLIED, INCLUDING, BUT NOT LIMITED TO,THE IMPLIED WARRANTIES OF NON-INFRINGEMENT, MERCHANTABILITY OR FITNESS FOR APARTICULAR PURPOSE. Some jurisdictions do not allow disclaimer of express or implied warranties incertain transactions, therefore, this statement may not apply to you.
This information could include technical inaccuracies or typographical errors. Changes are periodicallymade to the information herein; these changes will be incorporated in new editions of the publication.IBM may make improvements and/or changes in the product(s) and/or the program(s) described in thispublication at any time without notice.
Any references in this information to non-IBM websites are provided for convenience only and do not inany manner serve as an endorsement of those websites. The materials at those websites are not part ofthe materials for this IBM product and use of those websites is at your own risk.
IBM may use or distribute any of the information you provide in any way it believes appropriate withoutincurring any obligation to you.
Licensees of this program who wish to have information about it for the purpose of enabling: (i) theexchange of information between independently created programs and other programs (including thisone) and (ii) the mutual use of the information which has been exchanged, should contact:IBM Director of LicensingIBM CorporationNorth Castle Drive, MD-NC119
© Copyright IBM Corp. 2010, 2019 115
Armonk, NY 10504-1785US
Such information may be available, subject to appropriate terms and conditions, including in some cases,payment of a fee.
The licensed program described in this document and all licensed material available for it are provided byIBM under terms of the IBM Customer Agreement, IBM International Program License Agreement or anyequivalent agreement between us.
Information concerning non-IBM products was obtained from the suppliers of those products, theirpublished announcements or other publicly available sources. IBM has not tested those products andcannot confirm the accuracy of performance, compatibility or any other claims related to non-IBMproducts. Questions on the capabilities of non-IBM products should be addressed to the suppliers ofthose products.
Statements regarding IBM's future direction or intent are subject to change or withdrawal without notice,and represent goals and objectives only.
All IBM prices shown are IBM's suggested retail prices, are current and are subject to change withoutnotice. Dealer prices may vary. This information is for planning purposes only.
The information herein is subject to change before the products described become available.
This information contains examples of data and reports used in daily business operations. To illustratethem as completely as possible, the examples include the names of individuals, companies, brands, andproducts. All of these names are fictitious and any similarity to actual people or business enterprises isentirely coincidental.
COPYRIGHT LICENSE: This information contains sample application programs in source language, whichillustrate programming techniques on various operating platforms. You may copy, modify, and distributethese sample programs in any form without payment to IBM, for the purposes of developing, using,marketing or distributing application programs conforming to the application programming interface forthe operating platform for which the sample programs are written. These examples have not beenthoroughly tested under all conditions. IBM, therefore, cannot guarantee or imply reliability, serviceability,or function of these programs. The sample programs are provided "AS IS", without warranty of any kind.IBM shall not be liable for any damages arising out of your use of the sample programs.
Each copy or any portion of these sample programs or any derivative work must include a copyright noticeas follows: © (your company name) (year). Portions of this code are derived from IBM Corp. SamplePrograms. © Copyright IBM Corp. _enter the year or years_.
TrademarksIBM, the IBM logo, and ibm.com® are trademarks or registered trademarks of International BusinessMachines Corp., registered in many jurisdictions worldwide. Other product and service names might betrademarks of IBM or other companies. A current list of IBM trademarks is available on the web Copyrightand trademark information.
116 IBM Application Discovery for IBM Z Build V5.1.0: User Guide


IBM®
SC27-8970-06