Untitled - The Boston Printmakers
183
-
Upload
khangminh22 -
Category
Documents
-
view
0 -
download
0
Transcript of Untitled - The Boston Printmakers


1
thINK (think ink) The Boston Printmakers Members Show Traveled to eleven venues from 2010 – 2013 Premiere Opening: May 15-July 3, 2010 at Zullo Gallery in Medfield, Massachusetts Sigmund Abeles New York, NY Deadly Dancers, Intaglio 16 x 20 As a content-driven artist, technical means of working follows the intention for my imagery. The genesis of “Deadly Dancers” is a film called The Permanent Revolution by NYC filmmaker Manfred Kirchheimer. Aware of my Anti-Vietnam War prints in the sixties, Manny approached me to work on camera. I said the footage may be compared to Milos Forman’s film Goya's Ghosts. He persisted for me to develop a new plate, tackling the fear and madness of war, until I agreed. For the first time I used the Internet. I drew from my computer screen and developed multi-figured composition of contemporary young men willing to blow themselves up to kill innocents—a new level of madness in our world. The white-garbed, suicide-belted bombers also resemble the KKK, who actually attempted to burn a cross in my Mom's yard in the mid-fifties. Manny desired as many intaglio techniques as possible, so this plate has etched lines, aquatint, drypoint and engraved lines—I threw the kitchen sink at the plate. Has anti-war art ever stopped killing? I work out of conviction, via intuition and compulsion. (“Deadly Dancers” was printed by R. E. Townsend, Inc., Georgetown, Massachusetts)

2
Linda Adato New Rochelle, NY Under the Overpass, Color Etching, Aquatint and Soft Ground 17 x 15 “Under the Overpass” is a color etching using aquatint and soft ground techniques on zinc (etched with nitric), Graphic Chemical inks and Faust midnight blue printed on white BFK Rives as an edition of 50. I was attracted to the geometry of the girders and darkness under the overpass, contrasting with the softness of the trees and curve of the building. Using two plates I etched the first plate in line and aquatint. After offsetting the first line image onto the second plate, I used lift ground to etch the trees and figures; then with soft ground, with a tight woven fabric etched the building. I inked the key plate in black, then “a la poupee”, inked midnight blue and raw umber. I inked the second plate (printed first) with burnt sienna, adding cadmium yellow to midnight blue for the green. Figures inked in black.

3
Val Akula Cambridge, MA Waking up in New York, linoleum with hand coloring 25 x 28 Although I work in a variety of mediums, relief printmaking is my primary form of expression. The majority of my prints are created from carved linoleum blocks. Depending on the size of the block, some pieces take up to several months to carve. I do all my printing by hand, without a press, which entails applying pressure with a spoon to the back of the print as it lies on the inked block. This is a slow and physical process, but it offers me greater control over the final image. My prints are generally smaller in size because of this approach to my printing, with a more modest number in each edition. Waking up in New York is a linoleum block print. It was printed on Rives Lightweight paper and then colored by hand using watercolors and colored pencils.

4
Jan Arabas Melrose, MA Ancestry of the Birds, Monotype with Chine Colle on Found Paper 18 x 22 I wanted to work with the idea of ancestry and I used the birds in my aviary as my subject. I made monotypes of the current residents of the aviary, and imagined their parents and grandparents, that inhabited the same space over the past twenty years. I drew the more recent birds with more detail, and printed cognates or ghost prints for the oldest generation. Then I used the chine colle process--a way of gluing papers together --to layer the monotypes and a found paper that I love, waxy, with images of plants. I wanted to finish with something reminiscent of an ancestor scroll. I begin by rolling out Akua Intaglio inks. I use charged, ink laden brayers, a sort of rubber roller-- to draw images on plexiglas plates. When the brayer is loaded with ink it can make all sorts of thin and thick shapes, such as feathers. With less ink, the brayer makes translucent marks. It can also pull ink away to lighten ink already on the plate. For example, it could create a highlight along the back of a birds body or the top of its beak. I print with a Takach etching press, onto Hahnemuhle and Okawara papers. Finally, I glue (chine colle) the papers together with archival white glue--PVA glue. This piece also incorporates a found paper, red, with a pattern of fantastic plants.

5
Michael Arike Mamaroneck, NY Neighbors, Color Aquatint 14.25 x 12.25 The key plate has the drawing etched on it, and the tones aquatinted. I then print the key plate in Charbonnel Prussian Blue placing it in a template (I use illustration board sprayed with crystal clear) with shape of the plate cut out, and enough space around it for a sheet of paper 11x15” centered on the plate. I run it through the press leaving the paper and template caught under the roller. Remove the key plate and replace it with a clean plate, then run it back through leaving the image offset onto the plate. Put it into acid for 10 seconds. When you clean off the ink the image will show, and you can proceed to put an aquatint ground on it. You then stop out the areas that will not get the next color, according to the intensity of the color you want. Use the same process for the third plate. When all are finished you are ready to print. Print the lightest color first, Process Yellow for my print, then Magenta, and lastly the key plate in Prussian Blue.

6
Debra Arter Damariscotta, ME Tangled, Monotype with Chine Colle 13.5 x 13 1. Attend counseling with husband for 13 months. Get in touch with “issues”. 2. Bevel styrene plates. I used one large and one small square. Make matrix for positioning plate on press bed. Tear paper to appropriate size for work. 3. Cut out paper image of black holes. Apply 3M repositionable mounting adhesive to back side of imagery. 4. Use Akua color intaglio inks, graphite pencil and water soluble crayons to create image on front of small plate. I used brushes and scraping tools as well and Akua Blending Medium to loosen inks for painting. Print on dry Arches 88 paper with etching press. 5. Ink larger plate with Akua ink (yellow ochre) mixed with translucent medium using brayer. I used Q-tips removed some ink too. Place chine collé image face down on plate. Position over first image and print again. 6. Repeat four times until one print finally has the essence of what I was trying to achieve in the first place.

7
June August North Hampton, NH Tokyo Christmas, Moku Hanga 17 x 23 Japanese woodblock, moku hanga, on handmade paper PLATE MAKING Put image on rice paper. Glue image to wood. Carve wood with Japanese tools. PRINTING Grind pigment with rice paste, animal glue to make ink. Brush this waterbase ink onto wood. Place Japanese paper on top of woodblock. Rub back of paper with bamboo barren.

8
Carolyn Autry Perrysburg, OH Yeux Derriere des Voiles, Line etching and Aquatint 17.5 x 20.5 In this work of 2008--"Yeux derriere des voiles" (Translation: Eyes behind veils)--I have employed the traditional printmaking processes of line etching and aquatint which are my favored techniques. With a copperplate covered with an acid resistant ground, lines are drawn with a needle-like instrument to expose the copper--lines which later become grooves below the plate surface when submerged in acid. The areas of lineless value are created by fine particles of aquatint--fused temporarily by heat to the plate--which when exposed to the acid create dot-like depressions. When the copperplate image is completed, ink is forced into the recesses created by both techniques and the untouched surface is wiped clean of it. A mechanical press then pushes the ink remaining onto a dampened sheet of paper producing the image you see here.

9
Peggy Badenhausen Cambridge, MA Rondeau, 9, Monotype 18 x18 INGREDIENTS 2 plates each 18 x I8 –1 Baltic birch, 1 plexiglas Charbonnel etching ink metallic oil paint oil stick transparent base stencils, tape PRINTING Mix ink and apply to birch plate using 20" roller Using a brush dipped in solvent, draw on the inked plate. Place plate on press bed with mulberry paper Print using cardboard "blanket" Draw on plexi with oil stick Print Ink stencils & tape, place on Plexiglas, having marked on the reverse of plate where they fit into the composition.

10
Charles Barth Cedar Rapids, IA El Sando sin Mascara, Intaglio 16 x12 Plate making Bevel the edges of 2 zinc plates (for red & blue), 1 plexiglass plate (for yellow) Degrease the plates with alcohol. Cover one plate (key plate, blue) with asphaltum. Draw image with etching needle and bite in nitric acid (4 to 1) for 20 minutes. Ink, with black ink, print and transfer ink while fresh to the second zinc plate (red). Bite the second plate for 5 seconds in nitric acid to establish the image. Build up images on both zinc plates with asphaltum, aquatint for various tones and bite in acid for various times depending on the amount of color density that is desired on each plate. Use plexiglass for yellow (yellow ink oxidizes and turns brown on zinc). Place plexiglass over the key plate (blue) and use an etching needle (drypoint technique) to develop the image. Printing Print the plates in this order: yellow, red, blue. When the plates are printed the result will be a spectrum of colors.

11
Sandra Beard Sacramento, CA Color Chase, Salt Grain Intaglio and Monotype 24 x18 "Color Chase" is a salt grain etching with monotype uses two small plexi plates, one larger zinc plate Plate Preparation Cover zinc plate with hard ground Make image with salt (any salt), shake dust out of salt first Move plate to a hot surface (low heat), approx. 20 seconds, until salt turns color Wash salt off after the plate cools Put the plate in acid to bite as you would any prepared intaglio plate Printing A roller was used to roll inkover all three plates and made ready for printing. Layer, plates, damp paper, blankets and roll through the press Paper was air dryed

12
Grace Bentley-Scheck Narragansett, RI Let Flowers Bloom, Collagraph with Silk Aquatint 14 x 11.5 PLATE MAKING Make drawing on tracing paper. Cut mat board with beveled edges. Create low bas relief of shapes transferred from drawing and adhered to mat board. Adhere silk organza to plate surface using a 1:1 acrylic/ water solution. Tape surface of plate. Cut shapes from tape and paint exposed areas with 1:1 acrylic solution, Repeat multilple times cutting new shapes each time. Proof plate. Paint freely with acrylic solution, full strength acrylic, or gesso. Create textures with modeling paste PRINTING Soak paper for at least I5 minutes. Apply umber etching ink with a cardboard scraper to" house". Wipe with cheesecloth. Apply burnt sienna ink to shell. Wipe. Apply red-orange ink to lily. Wipe. Relief ink lower part of lily with transparent yellow ink. Clean edges of plate. Blot paper. Place inked plate on bed of etching press. Place damp paper on top. Run through press with foam/felt blankets

13
Vivian Berman Lexington, MA Phantom Trees #1, Collagraph / Monotype 20 x16 The image came from the bleak winter cold and memories of a warmer time. In the order of printing [3 times through the press or more for the trees]: 1. The background color was rolled onto a plexi-plate using a brayer with a diameter large enough to cover the plate in one roll. 2. The lower green area and the hillside on the horizon were printed next in intaglio [inked and wiped] from a piece of fabric lining material glued to a plexi-plate. 3. The trees were cut from file folder paper, first sealed with acrylic spray and rolled up in the different colors and printed one over the other. Sometimes I used the tree plate twice printing the ghost image. I use a Whelan Press and the rubber and felt blankets provided.

14
Holly Berry Waldoboro, ME Worker Bee, Multi-block Linocut 17 x 15 "Worker Bee": As a beekeeper and relief printmaker I set out to do a linoleum block print portrait of a bee. This multi-block colored print was made by hand burnishing oil base relief ink from individually inked blocks onto rag paper with a wooden spoon. * Simple line drawing transferred, in reverse, with carbon paper, onto battleship linoleum. * Cut away linoleum, in areas NOT to be printed, with gouges and x-acto knife. Finished “key block” served as guide for color. * Printed “key block” image onto tracing paper then with colored pencils made color choices. * Printed the “key block” onto clear acetate with water base ink, offset print wet acetate image onto several pieces of fresh linoleum, one block per color. * Cut individual color blocks. * Used acetate “key block” print to register each color block. * Edition printed in layers of inked blocks, sequencing colors from light to dark with some overprinting on final key block print.

15
Julianne Biehl Dallas, TX Rocky Mountain Memories #81, Dream Lake Trail, Monotype 15.25 x 15 My series of monotypes of the Rocky Mountain trails reflect my physical and visual involvement with the scenery as I hike. I start out with what I see and then interpret it through my emotional involvement with the trail, rocks, trees, scents, time of day... There is an energy in the timeless quality of rhythm that pulsates with my heartbeat as I interact with this magic environment. I use the three-plate monotype process in much the same one as one uses color intaglio, planning and layering the colors to reproduce the energy of the moment. It is my hope that the viewer can experience this feeling vicariously through the vibrant colors and rhythms that I chose to translate the emotions I feel. To me the most satisfying aspects of this process are the immediacy of relating the “in moment experience” and the delight when I pull the print.

16
Doug Billings Wichita, KS Wichita Melodrama “P”, Lithograph 12.25 x16.25 This is an example of my current theme called “Wichita Melodrama.” A series of lithographs comprised of metaphysical & psychological images; which use the city of Wichita, Kansas as the subject. This is my first image in this series that uses a pronto polyester lithographic plate. The image was created digitally using digital photographs combined with images created using the graphics software Corel Draw. The finished image was transferred to the pronto plate using a laser printer and then traditionally hand-printed onto arches paper. My future objective is to combine this technology with my traditional multi-color drop stone lithographs; creating images that will employ the best aspects of both techniques.

17
Helen Citron Boodman Lexington, MA Reprise, Intaglio 18 x 19 I have always loved cities: New York, San Francisco and especially Pittsburgh. This image portrays the skyline as it is reflected from the water ar sunset. "Reprise" is an intaglio print made on an etching press in an edition of 10, 3 of which are in public collections. Recipe: Etching press, soft blankets, 2 plates (one thin cardboard; one masonite), sheets of dampned all-rag German Etching paper 1. Apply yellow, oil based etching ink onto the cardboard plate using a large roller. Place onto press facing up; cover with dampened paper, roll through press 2. Ink red and black etching ink into the crevices of the masonite plate which contains the image made with built up tape and modeling paste, wipe with tarletan 3. Block-wipe the high spots of the inked plate to remove ink 4. Place the second plate onto press facing up; place the paper from the previous printing of yellow ink on top and pass through press to complete an impression of "Reprise" Each successive printing requires indentical inking and is not a copy but an original intaglio print.

18
Blair Boudreau Framingham, MA On a Corner in Tokyo, Intaglio 16 x 19 Bevel edges of zinc plate. Degrease with sprinkle of whiting mixed with ammonia to make thin paste. Rinse and dry plate. With soft brush apply hard ground to cover plate including beveled edges. Dry. Sketch design into ground with pointed tool (exposing plate below). Etch in bath of 12 to 1 nitric acid. With hard ground, paint areas of plate that will not be aquatinted. Spray uncovered areas with a mist of black spray paint enamel. Immerse in acid bath in stages (longer for denser blacks). Intermittently cover areas with hard ground for shades of grey between stages. Apply Renaissance Black etching ink to clean plate, spread with scraper. Remove as much excess ink as possible, wipe with tarletan. Polish plate with phone book paper. Place soaked printing paper (1 hour) on top of inked plate (face up). Add sheet of newsprint, cover with felt blankets and run through press.

19
Prilla Smith Brackett Boston, MA Dreamscape #45, Water Based Monoprint Watercolor, Color Pencil on Paper 10.75 x 10.5 Dreamscape #46: content and method My work explores the intermingling of the domestic with the natural, by incorporating semi-transparent furniture from another era with forest imagery. I’m interested in narrative uncertainty, and the power of imagination and memory. I am a painter who makes monoprints with water-based Aqua intaglio inks on Hannemuhle paper. With a theme and variations approach, I mix up the 4 drypoint forest and 6-8 furniture plates, and play with the color and layers of color, aiming for a dreamlike quality. Beginning with my own snapshots and Photoshop to come up with images, I make many small plates. I chose drypoint on plexi to get enough detail into these small images. Then I add texture via carborundum plates, followed by monotype layer(s), for more color subtlety. Each piece goes through the press many times. Finally I add watercolor and color pencil, until the image is “done.”

20
Martha Jane Bradford Brookline, MA Hephaistia, Digital Collage / Inkjet Print on Canvas “Hephaistia” – digital collage/inkjet print on canvas/presented as a hanging scroll Recipe Sections of digital drawings Epson Canvas & 4000 Ultrachrome Ink Varnish Glue Dowels Paint Filament Collage. Print, varnish, & glue. Paint dowels. Hang.

21
Elaine Breiger New York, NY For Stacy, Monoprint Collage 18 x 17.75 "For Stacey" is a monoprint collage printed on Arches Cover etching paper in 2006. Create image, working with 3-d modeling/animation program. Transfer to Photoshop for film output. Expose and develop on pre-sensitized photo plates for traditional etching processes. Etch in 12-1 nitric acid. With jigsaw, cut plate into various shapes. Create composition. Ink cutout plates (surface roll) Place registration guide beneath plexiglas on press. Assemble metal sections on press for printing. Make additional prints for collage use. From these, select sections (tearing, cutting) and overlay on first print with glue. Result: a unique print combining 3 technologies -- high tech (computers), low tech (time-honored etching) and no tech (glue).

22
Mary Brodbeck Kalamazoo, MI Patina, Woodblock Print 18 x 22 The Traditional Japanese Approach & Technique to Color Woodblock Printmaking The traditional Japanese approach to color woodblock printmaking is to create images based upon color, composition and design. (By comparison, Western approaches are based much more upon mark-making.) Each color woodblock print is carefully planned in advance before any carving begins. The multiple colors are drawn out onto separate blocks and are printed one at a time. Techniques specific to the Japanese process include the use of brushed-on water-based pigments, kento registration (groves cut into each block for the print paper to set into), and a handheld baren as burnisher. Because of the use of water-based pigments (water color paints), the ink actually gets imbedded in to the paper after it is burnished, rather than remaining on the surface as with oil based inks. The transparency of the inks allows the paper to shine though, creating a luminous effect.

23
Selma Swartz Bromberg Weston, MA Bridge, Solar Etching 13 x 16 Concept: This image is based on a pencil drawing of rock formations in Capital Reef National Park Development of a solarplate: Creating the transparency: -Scan image into the computer -Manipulate in photoshop to create more contrast -Print image onto inkjet transparency. Making the plate: -Place transparency onto photosensitive plate -Place glass on top creating a tight seal -Place ultra violet light box on top. Turn on and expose for one minute. -Remove plate and place in warm water bath -Wash out exposed areas for one minute -Dry plate and harden in light box for fifteen minutes Printing the solar plate: -Apply sepia ink to plate with cardboard -Wipe with tarleton and newsprint -Soak Somerset paper for ten minutes. Damp dry paper between towels -Place plate on etching press. Put paper on top, and felt blanket over all. -Turn press wheel and print. -Dry print between blotters

24
Myrna Brooks Bercovitch Montreal, QC Rencontre de M&M I, Monotype and Collagraph 18 x 26 This print is from series “Borrowing from the Masters” Artists are thought-generators, transformers, conduits, and amplifiers. They transmit ideas to unsuspecting viewers. It is my goal to perpetrate images that excite yet create reminiscence to engage the mind. We artists borrow images, or techniques, or manipulation of media from one another. It is stimulating and almost customary. The Masters have given us a legacy to learn from. Artists can use information in subtle ways so as the viewer is almost unaware; or their loan can be quite blatant. I believe that being transparent in my approach gives permission to expand, change, and rearrange as if I was playing directly with the Master himself. This piece borrows technically from Matisse using spraypaint, and shapes from his collages and figure painting as collagraph and solar plates.
25
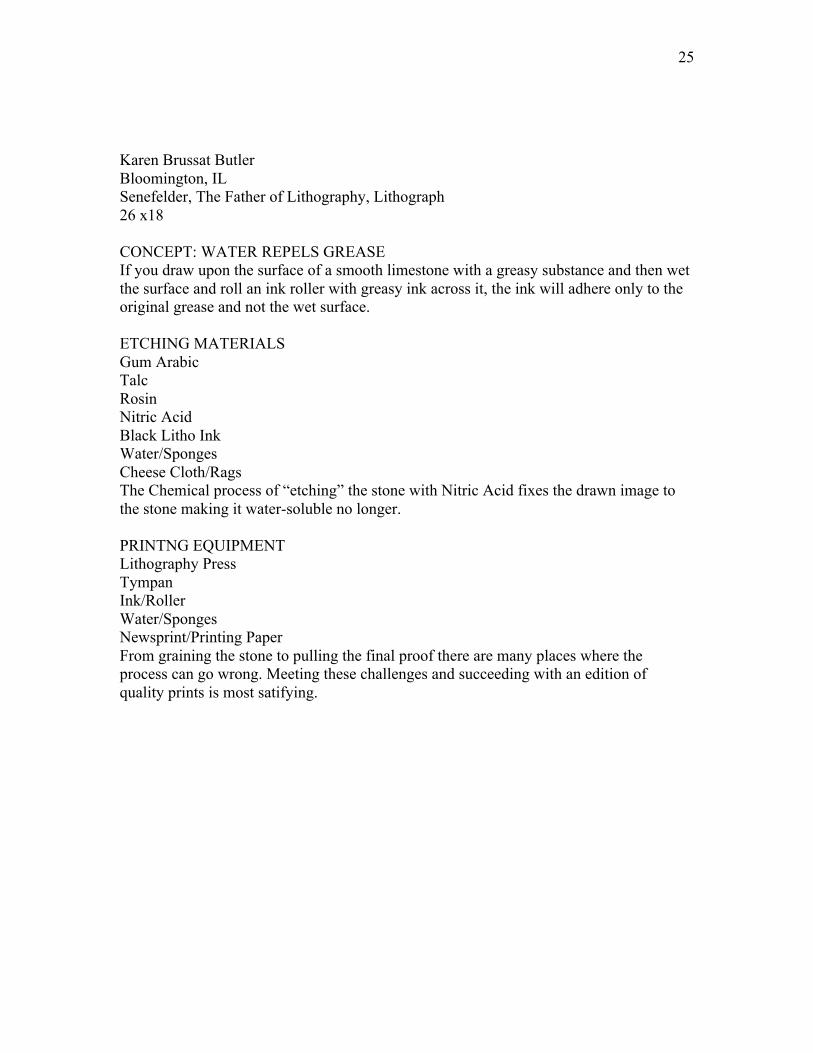
Karen Brussat Butler Bloomington, IL Senefelder, The Father of Lithography, Lithograph 26 x18 CONCEPT: WATER REPELS GREASE If you draw upon the surface of a smooth limestone with a greasy substance and then wet the surface and roll an ink roller with greasy ink across it, the ink will adhere only to the original grease and not the wet surface. ETCHING MATERIALS Gum Arabic Talc Rosin Nitric Acid Black Litho Ink Water/Sponges Cheese Cloth/Rags The Chemical process of “etching” the stone with Nitric Acid fixes the drawn image to the stone making it water-soluble no longer. PRINTNG EQUIPMENT Lithography Press Tympan Ink/Roller Water/Sponges Newsprint/Printing Paper From graining the stone to pulling the final proof there are many places where the process can go wrong. Meeting these challenges and succeeding with an edition of quality prints is most satifying.

26
Deborah Bryan Johnson City, TN Detritus: Leaf on Barbed Wire, Intaglio with Chine Colle 13 x 15.5 6 x 8.5” copper plate 2B pencil drawing asphaltum hardground rosin aquatint light blue Unryu, 7 x 9.5” Kitikata, 4 x 5” Magnani Pescia, cream or white, 11 x 15” mylar film zen shofu wheat paste, diluted to Southern gravy consistency Polish plate, bevel edges, degrease, and apply asphaltum hardground. Heat on 200-degree hotplate, let cool. Transfer pencil drawing to plate, and needle plate for line etch in ferric chloride for 10 minutes (faint lines) to 60 minutes (bold lines). Clean plate and apply rosin aquatint, fuse, and etch for tonal areas, 30 seconds (lightest grays) to 20 minutes (black). Proof, sand with 400 grit sandpaper and oil, and re-etch tonal areas as needed. To Print: Apply wheat paste to one side of Unryu and Kitikata with small foam roller, let dry. Place plate, image side up onto glue side up Unryu, cut around perimeter, then remove additional eighth inch. Use Mylar to make template of leaf, cut leaf from Kitikata. Soak Magnani Pescia 30 minutes, ink plate, and then layer inked plate, Kitikata leaf, blue Unryu, Magnani Pescia paper on the press bed. Print, dry, and sign.

27
David Bumbeck Middlebury, VT Enchantment, Etching, Aquating & Engraving 16 x 21 Time means nothing in our aesthetic heritage since the dawn of history. My eclectic visual vocabulary blossoms from luminary qualities of the arts and culture. "Enchantment" was originally a collage of Xerox copies from Raphael, Currier and Ives, and other sources transferred to zinc and selectively etched through a photoground surface. On this foundation, I worked for weeks overlaying etched lines, open bite, aquatint and engraving to develop the overall composition. Careful scraping and burnishing completed the plate. Its shape was enhanced by three blind embossments from sculpted copper plates. I printed the ensemble on Arches Cover Stock in an edition of 80 in 1998. The plates have been destroyed.

28
James Butler Bloomington, IL Imprint, Snow Angel, Lithograph 17.75 x 22.25 This lithograph,"Imprint/Snow Angel" is from my Embedded series of prints, drawings and paintings. In this piece I was interested in a bridge between my still life work and figuration. Depicting a presence without the figure actually being there has been part of my work for years. This print also refers to an act of impressing into a surface, one definition of a print. In this case, the snow angel was made by our daughter who was seven years old at the time. It is a traditional drawing on a lithographic limestone using special crayons that I make. It was printed by hand using a leather roller.

29
Walter Buttrick Norwalk, CT Bamboo, 8 Color Reduction Linocut 18 x18 “Bamboo” was created as an 8 color reduction linocut, a technique which utilizes a single linoleum block that is progressively carved away for each additional color. This process is often referred to as “suicide printing” because the total run must be printed and a single mistake on a color down will ruin the entire edition. Color progression is typically lightest to darkest. For this print, transparency medium was blended with the oil based inks used to develop subtle color gradations and increased depth of color. Additionally, some of the random cutting marks were allowed to print to add to the desired achievement of a painterly effect. An etching press and a registration chase constructed from Masonite were used in the production of this print, however, equally intense results can be achieved by hand rubbing.

30
Jennifer Caine Hadlyme, CT Shallows #15, Etching 15.5 x13.5 ETCH Apply ball hard ground to zinc or copper plate. Draw into wax ground, exposing metal: use etching needle and non-traditional/experimental drawing tools. Place plate in bath of acid (in ventilated acid hood). Remove plate from acid after desired depth is achieved. Clean thoroughly with thinner and denatured alcohol. PRINT Cover plate with etching ink. Wipe with tarlatan, first using straight perpendicular strokes and then in a circular motion. Use hand, newsprint, or taffeta for final wiping, to achieve desired "plate tone". Print on dampened paper using etching press. DEVELOP IMAGE Rework by scraping select areas to erase marks, and repeating the drawing/etching process as desired. When image is complete, print on Rives BFK and dry flat under weight

31
Kathleen Cammarata Lowell, MA Scape 1, Monotype and Pen and Ink 18 x 26 Monoprint is a single print pulled off a Plexiglas plate. To make this particular monoprint I first cut shapes out of drafting film (Mylar). Each shape was inked black and a layer of various fabrics was positioned on the wet ink. The mylar and fabric were sent through the press. The fabric was removed, leaving a pattern on the inked shapes. These pieces were repositioned on a Plexiglas plate and printed on cream BFK paper. Small details were added by hand with a pen.

32
Jon Cartledge East Hampton, MA Paradisaea decora, Reduction Screenprint 24 x 18 This process was taught to me by Kim Tester at the 1998 Mid-American Print Conference in Cincinnati, Ohio. 1. Block out your screen, leaving the area where you want to create your image clear. 2. Mix your inks. Have small bucket of water, sponge, paper towels, hairdryer, and squeegee at the ready. 3. Place paper down, and pull the first color (it is best to work light to dark). 4. Clean the screen with sponge and water. Wipe down with damp paper towel. 5. Using a Crayola crayon, block out areas where you want the color you just pulled to appear in your final image. 6. Blow hairdryer on screen for three seconds. This will melt the crayon into the screen. Do not overuse the hairdryer- it can melt out the crayon altogether. 7. Pull next color. Repeat process as necessary. Keep in mind this is an imperfect resist. Color may start to bleed though blocked out areas, unless you reapply crayon from time to time. Red and orange crayons work best for the process.

33
Judith Heller Cassell Rochester, NH The Receiving Room, White Ground Etching 20.75 x 16.5 "The Receiving Room" is a white ground etching. White ground is a paste (that is somewhat acid resistant) composed of linseed oil, titanium white oil paint and powdered detergent. Using the ground, an image is painted on a metal plate. After the plate dries, it is bathed in acid. When the desired effect is achieved (timing is crucial) the plate is removed, cleaned, inked, wiped, and placed image side up on an etching press. Damp paper is placed over the plate and both are covered with felt blankets before being rolled though the press. The pressure of the rollers forces the inked image onto the paper. I enjoy the painterly technique and the surprizes that always surface when printed.

34
Charles Cave Julian, PA Romance, Wood Engraving 11.75 x 9.5 This untitled print is a wood engraving printed in relief and will comprise one page of the graphic novel "Rust Belt Romance."

35
Dorothy Chabay-Dempsey Duncanville, TX And Yet Another Line, Intaglio with Chine Colle 23 x14.5 Walk with a camera in hand, looking down for textures and patterns… “What's this, a funny piece of seaweed on this California beach?” Snap, print, enlarge, copy and flip, trace onto a hardground-covered copper plate, scratch, scratch with needle, dip, dip, dip into the ferric chloride and then clean off the hardground. Ink with alizarin crimson, place on the press bed, cover with dampened and dusted with wheat paste piece of goldenrod Lama Li, cover with larger piece of blue Lama Li paper, similarly prepared, cover with soaked and blotted white 250gsm BFK and run through the press. Voila! A print. Dry thoroughly in blotters before removing. (The seaweed doesn't recognize itself because it's now something new.)

36
Liz Chalfin Florence, MA Drive-In, Aquatint 16 x 12 "Drive-In" is an aquatint etching printed on Hahnemuhle Copperplate, 300 gsm warm white paper as an edition size of 10 made in 2009. Plate Making Degrease a copper plate. Spray on an aquatint ground of Z*Acryl Hardground Emulsion using an airbrush. Dry the ground with heat. Etch the plate in Ferric Chloride in a vertical etching tank for 20 minutes. Remove from etchant, rinse and strip ground in solution of sodium carbonate and water. Draw the image into the plate by scraping and burnishing down the darks to create lighter values. Proof and continue scraping, burnishing, sanding. Printing Ink up the warmed plate with Daniel Smith Creamy French Black etching ink. Wipe with tarletan. Place plate on etching press bed face up. Cover plate with dampened, blotted Hahnemuhle copperplate paper. Cover with two thin wool blankets. Run the whole lot through the etching press. Remove the paper and set to dry. Repeat.

37
Ann Chernow Westport, CT Spring, Lithograph 16 x14 Because of an auto accident, I’ve been unable to work on large lithographs. Instead, while recovering, I sit at my studio table drawing on small (12 x 9) lithographic stones which my printer delivers, then picks them up for editioning. “Spring”is typical of the dozens of small works I’ve completed during the past year. All images are derived from rubber stamps transferred to a stone by using a small linocut roller with Charbonnel Black RSR. I alter each image with extensive drawing on the stone using Korn’s #3 lithography pencil, emery boards and a single edge razor to delete areas, achieve varied tones, effect very thin lines and define the outer shape of the image. The traditional lithography printing process follows. “Spring”was printed with Charbonnel Black RSR on Arches in an edition of 9.

38
Ann Conner Wilmington, NC Rosewood 3, Woodcut 18x18 "Rosewood 3" is a woodcut published in 2008. Working in woodcut is always a challenge as the grain of the wood is so captivating. My woodcuts are, in many ways, a response to this. I like carving into the natural flat wood, or mechanically clean surface of linoleum, however using high-tech power carver, or laser engraving blocks. Relief is the oldest form of printmaking, and it continues to have relevance for me. Steps: 1) select wood type based upon visual grain characteristics, in this case special order rift cut straight grain oak veneer over MDF board (medium density fiberboard) for stabilization to ensure block flatness in carving and printing; 2) pencil trace image onto block’s surface using template; 3) carve image with Automach power chisel; 4) collaborate with Leslie Miller, The Grenfell Press, NYC, to proof woodblock (Rosewood 1–6) in different inks; 5) edition block in 15 impressions printed by Brad Ewing.

39
Christiane Corcelle-Lippeveld Belmont, MA Porte-Bonheur, Carborundum Collagraph 24 x18 PLATE MAKING Bevel the edges of the Plexiglas plate. Degrease the plate with alcohol. Mix the ratio 2 tps. of matte medium with 1 tps of carborundum # 120 in a container with a spoon to make a paste. Apply on plate with soft bristle brush. To erase paste from the plate use alcohol with rag/Q-tips. Let the plate dry completely. PRINTING Apply Black Charbonnel etching ink with cardboard scraper. Wipe with tarletan, then with telephone book pages to polish clean areas. Clean the edges of the plate with rags. Soak paper for 3 minutes Bloat the paper. Place inked plate face up on the bed of an etching press. Lay the dampened paper on top. Run through the press with foam/felt blanket. Let the print dry between blotters under board. Clean plate well with mineral oil.

40
Deborah Cornell Lincoln, MA Scara Conversazione, Inkjet and Woodcut 17.5 x 21.5 I am interested in the conversation between intangible ideals of nature and tangible actuality, and how science and technology now condition this cultural dialogue. In this print, these voices occur in imagery and also technically by combining traditional forms (made of ink) with digital forms (made of pixels). I made an intaglio photoetching of Leonardo’s drawing and then digitized it, with an xray of arthritic hands. Printed over all is a delicate woodgrain in translucent copper ink, which re-asserts a layer of tactility.

41
Marc Cote Framingham, MA Colossus, Woodcut 26 x 17 “Colossus” is a reductive and jigsaw-cut color woodcut made in 2010. Ingredients: Ripped pine board, oil-based ink, mulberry paper In this print, I utilized a block of pine that had a fragile vein cutting through it. Ripping the block of wood at its weak point, I was left with an open, jagged negative space. Challenged by this non-rectangular format, I carved a figure whose contour coincided with the break. Using traditional chisels as well as power tools (circular saw, drill with wire brush, drill with rotary rasp), I allowed the various marks to inform the figure’s character. Employing reductive carving techniques, I printed this woodcut on a hydraulic press. The “Colossus” is a reference to the ancient Rhodian statue of the sun god Helios. In my print, a lumbering behemoth is depicted from below, giant hand hanging far below his tiny head. He gazes expectantly into the sky behind him.

42
Renee Covalucci Concord, MA Summer Song: Poppy, Reduction Woodcut 24 x 17 What better way to express nature than by using natural materials? After many years printing color woodcuts, I discovered the natural grain to be a powerful and unparalleled element when compared to what I would create using a knife. I seek soft woods with grain, from which I can envision creating the natural elements of my subject. “Summer Song: Poppy” was made using the reduction process and it involved two printings of green and red inks, which I did simultaneously by selectively rolling onto the single block. This was followed by a layer of red that covered the whole surface of the block and a layer of blue used to neutralize the background and darken the foliage. The black center of the poppy was printed last and it intentionally contains little evidence of wood grain as a way to contrast and compliment the papery quality of the petals.

43
Cathie Crawford Peoria, IL Resonant Reflection II, Color Reduction Woodcut 18 x 24 "Resonant Reflection II" is a color reduction woodcut made in 2010. My printing matrix, one piece of ¼” luan mahogany, was “reduced” (cut away) in numerous stages to produce a multicolored relief print on Natsume rice paper. I applied oil based relief ink to the surface of the wood with brayers and litho roller, frequently using “rainbow” (blended) rolls of multiple colors. Using Mylar stencils, I worked reductively within given shapes within the image. After six runs with stencils, some wood was cut away using Japanese gouges. After the first color of a shape was printed, all areas which were to remain this color in the finished image were cut away. The block was inked and printed in the next color depositing ink over the first color except in the newly cut areas. This process was repeated until the image was complete. Forty-seven colors were printed in sixteen “runs” through the press to capture the ambiguity of the resonant reflections in my water garden.

44
Kevin Cummins Chester Springs, PA Bench, Etching / Aquatint 10 x 12 A drawing is made. The drawing is put on Mylar and placed on top of a zinc plate coated painted asphaltum (a coating that resists nitric acid). It is run through the etching press, which results in the drawing being transferred to the coated plate. With a burnishing tool, I scratch the asphaltum off the areas of the plate that will be gray or black in the image, leaving the plate exposed in these areas. The plate is then lightly sprayed with enamel spray paint. The plate is put in nitric acid, which will eat away the exposed areas of the plate and leave little pockets between the spray paint particles. The pockets will hold ink (called an aquatint). The longer the plate is in the acid, the deeper the pockets and the more ink the pockets will hold, the darker that area of the print will be.

45
David Curcio Watertown, MA You Can Hide, Etching/Hand coloring/Thread 15.5 x 15.75 I try to merge traditional printmaking with simpler methods of mark making to create images that are both decorative and deeply personal. While I am a great admirer of folk art, my own training in printmaking is extremely formal. Stitching and embroidering is a means by which I can strive for the purity and simplicity of the self taught art I admire without (I hope) being disingenuous. In creating the current body of work, I inevitably became more comfortable with the humble, direct techniques that were at first so alien to me. In response to this growing confidence, I forced myself further into deeply personal subject matter as a way of remaining just outside of my comfort zone, all the while keeping the general focus on the decorative aspects of each piece in an attempt to maintain a seductive “surface appeal.”

46
Michael David Boston, MA Small Street, Monotype 23 x18 “Small Street” is a monotype printed in 2003. My monotype technique is fairly simple and straightforward. I work on a zinc plate with etching ink that has been mixed with plate oil. I usually work in a subtractive method by first covering the plate with a thin roll of ink and then wiping away the ink with tools such as Q-tips and rags. The paper is usually a soft-white Arches that is dampened before passing thru the press. Although my images appear to be based on observation or photographs, they are not. I prefer to work from my imagination and memory.

47
Nancy Davison York, ME Summer Night, Hand Colored Aquatint Etching 18 x 22 "Summer Night" is printed by the artist on Rives Heavyweight paper with mixture of Graphic Chemical Thalo Blue and 545 Dark Brown etching inks and hand-colored with Winsor Newton watercolors. Cherry Rosin Aquatint: creating tone on an etching plate. Shake a layer of cherry rosin powder evenly over an etched zinc plate. Heat the plate to fuse the powder to the zinc to create a sandpaper finish of grains of rosin. Acid will eat around the grains but not under them creating a rough, pitted surface that will hold greater and lesser amounts of ink. Block the white areas in the image from the bite of the acid with liquid hard ground. Immerse the plate in a vat of 12:1 nitric acid for fifteen seconds. Remove the plate from the acid, rinse and dry it. Block the next lightest areas and immerse the plate for another fifteen seconds. Repeat this process of sequentially blocking areas of the plate from the action of the acid until the total etch of 15 minutes is reached. The areas of the plate that were exposed to the acid the longest have the deepest pits between the rosin grains. The deepest pits hold the most ink and print the darkest.

48
Raymond DeCicco Orlando, FL Indian Summer Mazama, 14 Color Siligraphy 26 x18 "Indian Summer Mazama" is a Siligraphy print (waterless lithography print) on an aluminum plate, 14 colors using 5 plates Plate Making: Draw with any water-based medium such as watercolor pencils, tempera, tusche, etc.· No etching needed. Common silicone caulking is thinned with mineral spirits (6 to 4 ratio) and a thin film applied over the drawn image, and is quickly heat cured (250 degrees for 10 minutes). Wash out the image with water. Other mediums can be easily used like Sharpie pens, copier toners and spray paints, in which case you wash the image out using simple solvents. Images drawn with traditional lithographic materials can easily be converted to waterless . Print: Modify inks as necessary. Since there is no need for the use of water or gum apply inks as you wish. Proof.

49
Roberta Delaney Sherborn, MA Night Sky, Engraving 12 x11 “Night Sky” is an engraving on copper. This falls under the broad category of an intaglio print that includes etchings. Different from etching, engraving does not involve any acid. The engraving is cut into the plate with a hand held tool called a burin. The tip of the burin cuts a deep line into the copper; this line holds the ink. Another engraving tool—a roulette, made the soft tones in the sky in this image. This hand tool has a ball on the end with raised textures that is rolled directly on the plate to raise a burr. I chose this technique because it is direct and I wished to be surrounded by the landscape. Printed later is Boston, this series of small engravings allows me to share a quiet experience with many.

50
Clara Dennison Holliston, MA Trust Me Beyond My Forms, Monotype 17 x 21 "Trust me beyond My Forms" is part of a series of monotype prints using black ink and color pencils that was made in 2006. Materials and Tools: Beveled Plexiglas Plate Brayer Oil Based Printing Inks and Extender Quality Etching Paper (Rives) 100% Cotton Cloth and Tarlatan Colored Pencils Process: First step is to cut and soak the paper. Then with the brayer I cover the plate evenly with Ink. I begin subtracting the ink with the rags, then add more ink and subtract, and so on. This method gives me interesting painterly results that I can later work with. I then blot my paper and transfer the print through my etching press. After the print dries I rework the surface with color pencils. Working with my imagination I highlight areas that are significant to the image. Final step is a transparent glaze. I am inspired by nature and places I have visited. My work explores both what can be seen and what needs to be imagined.

51
Michael DiCerbo New York, NY Urban Scope, Etching, Aquatint, Drypoint, and Hand Coloring 16 x 20 The concrete, steel and glass of New York City are sources of my inspiration. I try to turn my sense of urban grandeur into geometry of forms, patterns of light and dark that allude to the soaring architecture of New York skyscrapers. My prints are a combination of etching, aquatint and drypoint. For the last decade or so I start out with a clear piece of contact paper on a piece of copper. I remove pieces of the contact paper and get basic shapes of the buildings. I then do a spray paint aquatint of the exposed copper. I reinforce the composition with line etching and drypoint. In this print the last step was hand coloring with water color after the etching ink was dry.

52
James Dormer Fort Collins, CO 17 KM Da Arezzoi I, Drill Point 12 x16 Over the past several years many of my intaglio prints have been made using the drill point process. As the name implies, drill point utilizes an electric power tool with carbide or diamond points to cut into the copper or plexiglass, creating gouges with drypoint-like burrs on the edges. One of the earliest American printmakers to use this process was Bernard Childs (1910-1985), who created dynamic, abstract images with an electric power tool. From my earliest prints, I have been intrigued by the immediate, gestural, surprising marks that are afforded with this process. My images are generally printed on Rives BFK paper using a black intaglio ink that I make in my studio. Wiping is by tarlatan and hand. “17 KM Da Arezzo” I was created with a Foredom Power Tool and represents aspects of automatism, nature, memory and the subconscious.

53
Jessica Dunne San Francisco, CA Bicycle DE III, Spitbite Aquatint 13.5 x 14.5 SPIT-BITE AQUATINT Clean a copper plate until your wrist hurts. Apply a fairly heavy coating of aquatint to the plate and roast—or broil—to perfection. You may use a gas wand, paint dryer or oven. Be sure the rosin looks like worms and not dots. Block out white areas with a Sharpie pen or litho crayon. Paint on acid (ferric chloride or ‘seasoned’ 50/50 nitric) onto the plate. For a rich black, the acid must be on the plate for a total of one hour. Rinse the plate every fifteen minutes with soy sauce and/or salted vinegar and reapply acid. Refresh your white areas regularly. When the rosin looks at the edge of breaking down, and is smooth to the touch, thoroughly clean the plate and print the image on Hahnemuhle Copperplate paper, using a good etching press and impossible amounts of pressure.

54
Tom Edwards Killingworth, CT Alleyscape 10-1, Etching Counterproofs - Monoprint 23 x18 Printing Procedure: - The paper is cut into useable sizes and dampboxed for 24 hours prior to printing. - The four plates have been previously etched and reworked over a period of 30 years. - “Alleyscape” is inked and wiped with the ink applied primarily to the right and left sides and the bottom portion. The center is not inked in order to allow for the addition of images from other plates. - The plate is then printed directly on the first Murillo sheet. - “Easter” is inked and wiped and printed on a Murillo sheet trimmed to the size of the plate. The print is then “torn” to the size and shape needed to fill the center of the “Alleyscape” image and counterproofed onto the “Alleyscape” print. Portions of Riverbank and “Three Houses” are inked, printed, torn, and counterproofed onto the “Alleyscape” image to form a new composition. Small miscellaneous fragments are then added to the image in the same way to complete the print. Results: The final printed image resulting from this process is a unique monoprint. Repeating the process with the same plates and procedure will produce a completely different (albeit similar) print. I find that the controlled integration of additional combined layers into the fabric of resolved image produces new and surprising spaces and places.

55
Carlyn Ekstrom Watertown, MA Night Blooming Cereus, Trace Monotype, Monotype and Stencils 18.5 x18 "Night Blooming Cereus" is a trace monotype with monotype and stencils made with Akua Inks on Rives BFK 250g white in 2010. PLATE MAKING Use a clean Lexan plate Mix up Akua ink stiffened with magnesium carbonate; roll onto Lexan plate Cut a few stencils out of oaktag PRINTING Place print paper on top of plate Draw desired image on back of print paper or on tracing paper over print back Peel off print from plate Wipe away ink on plate to make “whites” using trace monotype lines as guide Paint or roll on resist (transparent base mixed with blending medium) in areas you want to retain “white” and roll over plate with another color Place print or clean paper on plate and put through etching press Ink up stencils and place on plate; put print through press again and again until print satisfies your aesthetic

56
Barbara Elam Denison, TX Splash, Relief Intaglio Monoprint 26 x 18 "Splash" is a relief/intaglio print Materials: mat board exacto knife gloss and mat acrylic medium fine sand or carborundum Brushes Method: The greatest thing about this technique is it does not involve chemicals or expensive materials. The plate is mat board cut to size, then Coated on both sides and edges with matt medium for waterproofing and durability. Lines can be incised or cut to create textures or an image. More textures may be added with carborundum or sand. Gloss medium may be used to create lighter values. Apply ink with a roller or piece of mat board. Wipe as necessary. Clean the plate with vegetable oil. It can be editioned. Splash was relief rolled, wiped and printed in three layers of red, yellow and blue; registered each time on the plate.

57
Willoughby Elliott Fairhaven, MA West Island Tree, Screen Print 11 x 11.5 Screen Print is a stenciling process of printmaking. Ink is pushed with a tool called a squeegee through a fabric that has been stretched tightly to a frame, and onto a variety of surfaces. Silkscreen or Serigraphy are the most common names known to the public. The fabric most used today is polyester. My print was created by simplifying and flattening one of my landscape photos in Adobe Photoshop into simple, flat layers of visual information. Water-based acrylic ink was mixed to harmonize with the simplified stencils, not the photograph. The individual layers were burned onto screens coated with direct photo emulsion using an ultra violet light source. Each individual color was printed and superimposed on the next to produce the image.

58
Marty Epp-Carter Simpsonville, SC Origins, Intaglio 16.5 x 18 Ingredients: 1 previously used copper plate with indentations created with a brick. Hard ground Etching needle Stop out varnish (Careful! Toxic!) Aquatint box, rosin and hot plate Begin with: Focused motivation driven by a concern regarding the current intersection of humankind and consumerism with nature and the environment. Concentrate this motivation into a two and a half year MFA program culminating in a thesis show. Process: Apply aquatint to entire plate. Coat plate with hard ground. Use etching needle to write story of humankind (backwards and right to left) across foreground of plate. Write with no prior planning, let words flow in a stream-of-consciousness way. Along horizon line, create an environment that depicts an apocalyptic aftermath of buildings, burned trees and smoke, with no sign of life, only signs of destruction. Develop these images with both line etch and aquatint values.

59
Aline Feldman Columbia, MD Perspectives, White Line Woodcut 26 x 18 White-line woodcut technique is used for “Perspectives Revealed.” This technique is based on the classical Japanese way of doing woodcuts. The paper used is often Okinawa or Torinoko: no press is used—only the use of hand burnishing. My carving tools consist of knives & gouges of various sizes. I use 2nd grade pine blocks. Once carved, watercolor is applied to each shape several times (one shape at a time) with a brush. The paper is lowered on the block & rubbed with a baren to transfer the image to the paper. The various shapes of the woodcuts are described by the carved line, which appears as a white line on the finished print adding texture and luminosity. The whiteline separates the colored shapes- as in mosaic. This is a time & labor-intensive method. The use of non-traditional tools and overprinting sometimes characterizes my work. The color choices and forms make the work uniquely mine and combine various views of the land & cityscape.

60
Linda Fillhardt Santa Fe, NM Tumbling Tumbleweed #3, Solar Etching, Solar Relief, Collage, Watercolor 16 x 22 "Tumbling Tumbleweed #3" is a Solar Etching/Solar Relief/Collage/Watercolor process on Rives BFK White, 250gsm and Ogura Lace Paper, natural, and uses Carbonnel and Graphic Chemical tint base extender and inks made in 2008. Plates: Solar Etched Plate Solar Relief Plate Acrylic plate Printing process: - Take 2 pieces of BFK: - Roll acrylic plate with gold tinted ink. Dampen BFK and print. Let dry. - Ink Solar etched plate with dark brown ink. Redampen BFK and print. Let dry. - Tint Ogura Lace Paper with peach watercolor. Let dry. - Roll dark red ink on the relief plate and print using the tinted lace paper. - Collage the lace paper on one of the two BFK prints. Cut the two prints to the same size and collage them onto a larger piece of BFK running them through the press to adhere using Scotch positionable mounting adhesive.

61
Craig Fisher Toledo, OH Surface Tension, Aquatint with Chine Colle & Inkjet 18 x 24 "Surface Tension" is one of host of prints, which come out my interest in elements that always fascinates us children such as the tactical and mysterious space between nature’s liquid membranes. I wanted to push the print to capture the swirling antipathy of liquids on a bubble. To do this in colored intaglio could be done, but I have been having success with chine collé printing and I wanted to push complexity into the image by arranging precut elements. My original planned edition of 12 shrunk to 8 after many misaligned prints were appearing. I discovered that the chine collé paper components had a tendency to curl slightly with the grain of the sheet, which added to the challenge of registration. By rolling the components carefully contrary to the grain, I could get them to lay better. I have been working on 18”x 24” sheets of copper, which stretch my ability to use my 13” x 19” Japanese inkjet paper. I have been using Kozo Shi Light from Digital Art Supplies Inc. for some of my Chine Collé pieces with some success

62
Carol Strause FitzSimonds Portsmouth, RI Dog Day Afternoon, Solar Plate Aquatint, Chine Colle 15 x 15.75 "Dog Day Afternoon" is a Solar Plate Aquatint with Chine Collé. "Dog Day Afternoon" was inspired by a series of drawings I had done of children. Wanting the rich range of blacks in my drawing to translate into print, I selected Solar Plate Aquatint as primary technique. Solarplate printing is earth friendly using a UV light sensitive gel coating on steel and water to create the plate. Working from my drawing using a digital camera, computer and inkjet printer, I created a transparency film then manually manipulated areas with paint. I placed the film image side down on the solar plate, exposed to sunlight thus hardening areas of the gel without image. Next to create the tonal areas; the plate needed a second timed exposure using a film dot screen. Then I scrubbed the plate with a soft brush in a water bath to remove any non-hardened gel. The final step was a 15-minute exposure to sunlight to harden the entire plate for printing. Printing: I printed this plate as I would a copper etching. Papers used Sekishu and Somerset Texture.

63
Liza Folman Brookline, MA Illuminated Knode, Multiple-Plate Color Intaglio 23 x 18 "Illuminated Knock" is a multiple-plate color intaglio printed on Magnani Pescia Soft White, 300gsm in 2006. PLATEMAKING: Bevel three same-sized copper plates. Develop ideas for image and color separation in watercolor. Draw contour version of image to scale on trace vellum. Transfer contour lines onto each plate using soft ground. All plate biting in Ferric Chloride. Aquatint all three plates; step-bite them to achieve full value range as needed. Proof all three plates (see below) and then continue to rework plates (using various intaglio techniques as needed for additions and subtractions) through a series of states and color proofs to develop and refine the image and color relationships. PRINTING: Soak paper in cold water for at least 20 minutes. Apply various colors and mixtures of Charbonnel etching inks to each plate with a plastic scraper. Wipe each plate with a correspondingly colored tarlatan, then taffeta and/or hand wipe, lightly retouch the plate with the tarlatan at the end. When more than one color is applied to a plate, each color is applied and wiped before applying the next color (there are 5 colors on these 3 plates), Clean edges of each plate, place plate template on press bed. Blot paper. Place first plate carefully face up on template (which will insure image registration). Lay damp paper on top, with protective tissue on top of paper. Run through press with felt blankets, letting paper end remain caught under the press roller. Remove first plate, place second plate face up, using template for registration and roll through press as above. Repeat with third plate. Remove print from press after final plate and dry between blotters under boards. Clean all three plates before re-inking.

64
Robert Franzini Morehead, KY Child, Relief Etching 17 x14 Ink Resist Relief Etching The genesis of this technique was tied to my experience with monotype. I pursued the idea that an image, developed so directly and spontaneously on the copper plate, could undergo a transposition to become part of the plate itself. In this method, intaglio printing ink functions as both drawing material and acid resist. Printing ink, in contrast to acid resists such as asphaltum and rosin, is more malleable and does not dry quickly, thereby providing ample time to develop an image. When properly dried, the ink is a superb acid resist. The image is drawn onto a copper plate with ink; the ink is hardened and transformed into an effective acid resist, and the image bitten into the plate by deep etching in dutch mordant. The result is a relief etching that can be inked with a hard brayer and printed using an intaglio press.

65
Stephen Fredericks New York, NY Heather (Winter), Soft Ground Etching with Surface Roll 18 x 21 "Heather (Winter)" is a soft ground etching with a surface roll printed on Somerset Brilliant White paper, 300gm in 2010. PLATE MAKING and PRINTING Routine plate preparation for a soft ground etching is the same as in hard ground etching accept that the ground applied to the surface remains ‘soft’ or pliable after application to the plate. In the case of Heather, a Charbonnel soft ground was applied to a warm plate with a rubber roller and placed on the press where an actual sprig of heather – dried and prepared in advance - was laid upon it. After layering lightly oiled wax paper over the plate and heather - using traditional etching blankets - the preparation was run thru the press under a pressure not unlike that for printing a damp 300 gram paper. This process caused the heather to displace the ground below exposing the copper plate for etching the impression. The plate was bitten in ferric chloride as in the normal etching manner for a total of approximately 40 minutes. After inking the plate in a traditional intaglio fashion, a proof was taken to remove a portion of the ink in the plate. Then the plate surface was rolled up will ink, and another proof taken of the ‘ghost’ and the fresh surface roll.

66
Ron Fundingsland Bayfield, CO “Cluck”, Aquatint, Etching 15.75 x 25.5 Copper Plate Preparation and Etching: Beveled edges of four 7 x 6" copper plates, two for chicken image. Drawings transferred to plates coated with hardground, outlines etched. After stopping out, all four plates aquatinted and etched. Complete plate with necessary line etching, roulette and burnishing. Printing Three key plates inked with Graphic Chemical Bone Black etching ink and wiped. Color plate for chicken image inked in red and yellow and wiped. On the press bed, left and right plates aligned with color plate in the center. Registration marked. Soaked and blotted placed paper over plates, paper hinged with tape and run through press. Left and right plates left in place, center color plate replaced with black key plate. Hinged paper placed over plates and run through press in opposite direction. Printed paper removed from press bed to dry flat.

67
Donald Furst Wilmington, NC In the Light, Mezzotint 18 x 14 Preparing the ground Bevel plate edges and corners with file. Burnish plate edges smooth with oil and burnisher. Rock 16-gauge engraver’s copper plate with 85-gauge rocker with passes going in two dozen different directions. Plate work Transfer guide drawing of major shapes onto plate with carbon paper. Scrape away burr gently to retain near-blacks; scrape more directions and more times to reduce the burr for lighter values. Use agate burnisher to polish areas intended to print as bright lights. Printing Damp box Somerset Satin paper overnight. Mix reddish-black ink with Graphic Chemical Etching Stiff Black, Alizarin Crimson, and transparent base. Ink plate with brayer on hotplate set to 150 degrees. Start wiping on hotplate with darkest tarlatan, finish off the hotplate with medium and light tarlatans. Wipe plate edges with white tarlatan wrapped around finger. Print in Charles Brand etching press with two woven wool pusher blankets. Wait one week, then spray paper with water mister and place prints between blotters to flatten.

68
Beth Ganz New York, NY Brambles, Photogravure 5.75 x 17.25 Photogravure is a very labor intensive, multi-step process that yields a true continuous tone photograph etched in copper. Once the plate is made the printing process is much the same as for any intaglio plate. For this image I used Charbonnel 70313 Black ink, with a few drops of Charbonnel Light Plate Oil. Warm the plate and wipe with a fine soft tarlatan, finish by hand wiping. Brambles is printed on Tiepolo by Fabriano. Photogravure evolved as a result of experimentation during the 19th century with photography, in a search for permanence and reproductilibity. For a recipe or more specifically, directions for making a photogravure plate, I suggest the book, “Copper Plate Photogravure, Demystifying the Process” by David Morrish and Marlene MacCallum. You can see a step-by-step demonstration on Paul Taylor’s site, www.renaissancepress.com. For more information please also refer to www.photogravure.com and home.earthlink.net/~lotharosterburg.

69
Randy Garber Somerville, MA Illuminate/Evacuate, Multi-Plate Etching With Relief Roll 18 x 26 Recipe for "Illuminate/Excavate", a multi-plate etching: 1. Make 6 plate intaglio etching plates using photo etch, hard ground, drypoint 2. Selectively open bite 2 plates to obtain irregular shapes 3. Cut circular plates 4. Whip up Aqua Kolor Inks and Mag-up for stiffening relief roll 5. Relief roll two irregular plates with 3 colors 6. A la poupee’ wipe small, “manuscript” plate with 3 colors 7. Selectively wipe background plate leaving place for #5. 8. Print with 5 different passes through press. 9. Run through Print Dryer and enjoy…..

70
Alex Gerasev Revere, MA Rest, Linocut 25 x 14 After I decide on a subject, I decide what size I am going to do. Then I get a piece of linoleum that size and draw right on it with brush and ink. Then, I just start carving with linoleum carving tools. Whatever I carve stays white. I like a lot of detail, so it is a slow process. I have been called a termite because I can work all day and end up with a one-inch pile of dust. I never go back into my blocks once I begin printing. What I carve the first time is how the print stays. There is a lot of fantasy in my work, but it is all based in reality. The images I create may look surreal or fantastic, but the basic story of every piece I create is a true one and is something I have seen or lived. After that, well…

71
Ruth Ginsberg-Place Brookline, MA In a Triangular Mode, Monotype Woodcut with Collage 18 x 23.25 The black “key” plate I used for “In a Triangular Mode” is a woodcut. It was printed twice: first right side up and then upside down. It was printed on top of a multicolor ground composed of images I had pre-printed, then cut up, glued, and collaged into a pattern that pleased me. You could call these five or six steps, depending on how you slice and dice it. This is a unique print but part of a series comprised of “riffs” on this theme. I love jazz music, listen to it when I work and thought the title of the piece should have a jazzy feel. The collage and visual breakups contribute to this mood.

72
Raymond Gloeckler Portage, WI We Welcome Your Money, Woodcut 25.25 x 18 "The Woodcut" Without pretense Black and white Tool and block There is no place to hide It has been said that all you need to make a print is a jackknife and woodblock. It takes more than that of course. Still, there are few encumbrances. The woodcut needs little more. Ink, paper and burnisher complete the inventory. The woodcut is an upfront medium. Straightforward. Every cut, stipple, nick, scratch, every slip of the tool; it all shows. What you do is what you get. Amidst our culture of excess and media-hype, the woodcut provides a refreshing clarity too often abandoned for showy, highly technical, more seductive media. It offers a centerpoint, a reality that is rock solid, deep-rooted, enduring—what is, is. My woodcuts employ whimsical and satirical imagery. Often birds and animals are personified; exhibit human-like character. The works are essentially humanist, though sometimes religious in nature.

73
Eric Goldberg Mansfield, CT Travel in Mind, Etching/Aquatint/Hand Color PLATEMAKING * Bevel edges of copperplate * Polish copperplate * Apply liquid ground - (32 oz. liquid asphaltum, 24 oz. gum turpentine, 4 oz. babyoil) * Heat plate (with good ventilation) let cool to room temperature * Transfer drawn image and draw with china marker on surface * Create line drawing using etching needle * Etch in ferric chloride using vertical tank * Clean plate and re-apply new hard ground * Add pattern, cross-hatch and stipple marks to create values * Etch plate and proof the etching * Clean plate and re-apply new hard ground * Add more marks, cross-hatch and stipple * Etch plate and proof the etching * Continue process until all desired values are achieved * Clean and degrease plate * Stop-out all surfaces to remain white (using stop-out varnish and brush) * Apply aquatint (using stop-out varnish with airbrush) * Etch and make final proof PRINTING * Apply mixture of Vine Black and Midnight Black ink (Graphic Chemical and Ink) using cardboard scraper * Wipe with tarletan, sheets of newspaper and hand wipe * Clean edges with cloth * Place plate face-up on etching press bed * Lay dampened paper on plate (pre-soaked until limp and then blottered) * Run through press with felt blankets * Dry paper to bone-dry, using a series of blotters and weights * Apply watercolors to prints and allow to dry

74
Marsha Goldberg Highland Park, NJ Blockprint, #8, woodblock monoprint 15 x 20.5 This piece, "Blockprint #8", is one of a series I made using children’s blocks. At the time I had young children at home, and I was working with woodblock printmaking in more and less traditional ways. I used oil-based relief ink and mixed the colors with transparent extender. The same block is used throughout in this piece, utilizing different sides of the block and changing the orientation. I first printed the red twice and the blue twice; then overprinted one red with translucent white and the other with translucent black, doing the same for the blue shapes. As is often true of printmaking, there were surprises. I came to enjoy the indentations in the block’s surfaces, the result of play. Those marks, which resisted inking, reveal the lower layer of ink and interact with each other. There is also a color interaction resulting from the translucency of the layers.

75
Jane Goldman Somerville, MA Realm of the Hungry Ghosts, Watercolor Monotype 26 x18 “Realm of the Hungry Ghosts I” is a Watercolor Monotype printed in two layers on 300 lb. Arches Hot Press Watercolor paper in 2007 Technique: A. Overall image. B. Line drawing of hand and alms bowl. Paint image with transparent watercolor on toothed Mylar. Preserve the white of the paper for whites. Let dry completely. Run Mylar through press to transfer onto damp paper. Let completely dry. Working directly on image, add final layer of watercolor (transparent, opaque and metallic.) Desired Results: Fresh capture of pigment suspended in water. When offset in this way, the pigment sits up on paper surface, instead of sinking in as in conventional direct application. The washy translucent effect support the symbolic subject matter.

76
Leslie Golomb Pittsburgh, PA Preaching to the Birds, Photogravure 12.75 x 12 "Preaching to the Birds," 2009 is a photogravure printed by Lothar Osterburg Good cooks go to extreme measures to obtain the perfect meal. They travel the world, order meals from master chefs and dream of re-creating the experience in their own kitchen. More often than not to obtain that perfect meal again, requires going back to the master chef. I am a good printmaker and for this series of work I hungered after the best. Only the best printmaking method and the best printmaker would satisfy me. I made an educated choice to order my meal from one of the best master printers. But unlike the good cook who orders their meal from the master chef I created part of the recipe (the image). Ansel Adams said something to the affect that photogravure is the purest form of photography, but went on to say, and I quote, “I do not recommend it to anyone.” Henceforth I present, "Preaching to the Birds."

77
Victor Gomez Miami, FL Untitled, Oil Monoprint 21 x 21 I am etcher, serigrapher and painter, but in the last 20 years I am doing monoprints as my way of expression. For me monoprinting provides the opportunity to express myself in two different languages: The Graphic voice and the voice of the Painting. For me using these two ways of expression, I produce an image superior to the two techniques separately. This media offers me the freedom and freshness that neither Painting and Printmaking by themselves can do it. I am very accomplished with this technique and have won prizes in top-ranking international prints competitons in Europe, Asia, United States and the Caribbean. My tools are: A Charles Brand Press, oil, Acrylic plate, and Rives BFK Paper 250 grams acid free. I work with rolls, rags, combs, pencils, brushes and any kind of instrument which can build up a good texture...even my hands.

78
Sergio Gonzalez-Tornero Mahopac, NY SRAANA, Drypoint 17 x 21 Clamp a zinc plate onto a stout table. With the point of a sharp scraper, carve intersecting furrows in all directions, and with the edge of the scraper, make corrections, and burnish the surfaces around the scraped areas. This is a most satisfying direct action, akin to sculpture, aiming at the creation of an abstract form with an implied three-dimensionality. Ink the plate with cadmium red printer’s ink (wear gloves, it is a beautiful color, but toxic) and print, passing through the press twice to achieve a luminous image with a transcendental ambition. Let the spirit guide you, in my case it is “SRAANA”, a spirit of one of the First Nations of the Northwest Coast, the Haida, on whose culture I base some of my recent work.
79
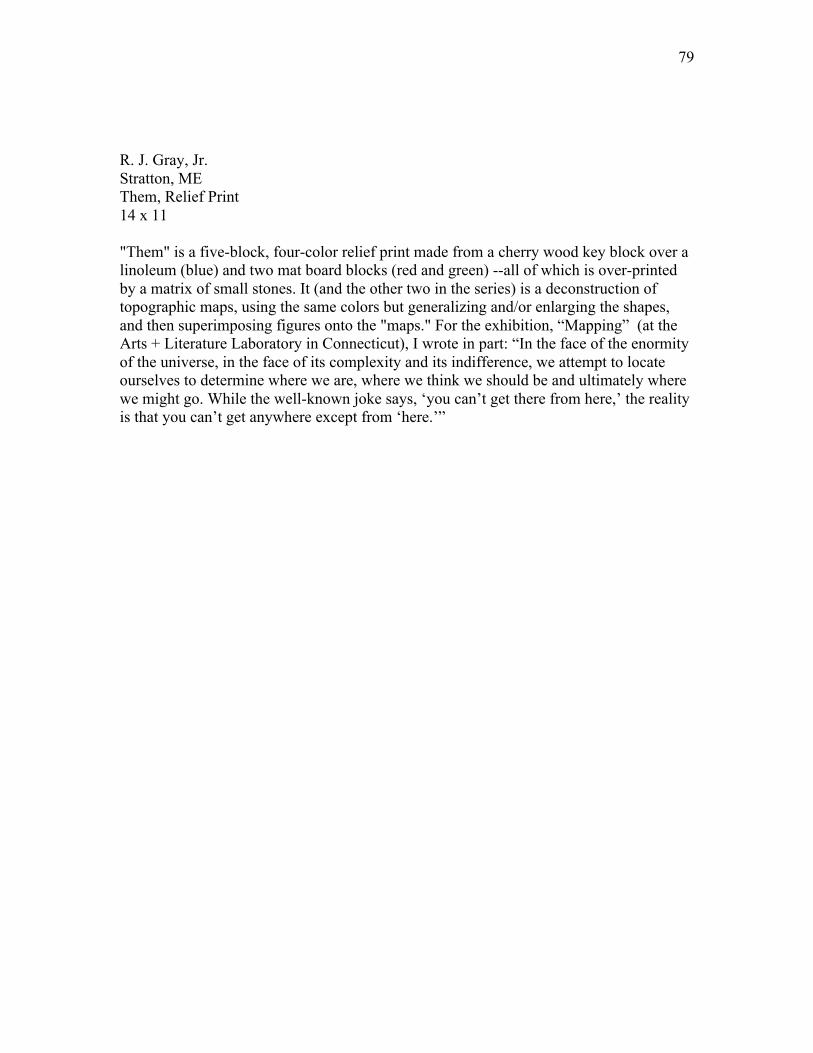
R. J. Gray, Jr. Stratton, ME Them, Relief Print 14 x 11 "Them" is a five-block, four-color relief print made from a cherry wood key block over a linoleum (blue) and two mat board blocks (red and green) --all of which is over-printed by a matrix of small stones. It (and the other two in the series) is a deconstruction of topographic maps, using the same colors but generalizing and/or enlarging the shapes, and then superimposing figures onto the "maps." For the exhibition, “Mapping” (at the Arts + Literature Laboratory in Connecticut), I wrote in part: “In the face of the enormity of the universe, in the face of its complexity and its indifference, we attempt to locate ourselves to determine where we are, where we think we should be and ultimately where we might go. While the well-known joke says, ‘you can’t get there from here,’ the reality is that you can’t get anywhere except from ‘here.’”

80
Dirk Hagner San Juan Capistrano, CA The Secondaries Devour the Primaries, Drypoint, Relief, Monotype 21 x 16 "The Secondaries Devour the Primaries" is made using drypoint, relief, letterpress, monotype printed on recto and verso on Chinese calligraphy practice paper and was made in 2010. Plates: Plastic plate for drypoint Etched linoleum for color relief Polymer for letterpress Plastic plate for monotype Inks: Akua etching ink Graphic Chemical relief inks Printing: Drypoint first, followed by relief, followed by letterpress, some of it on verso. Finally a transparent white is printed as monotype over the face.

81
Nona Hershey Somerville, MA Day Dream, Etching and Aquatint 16 x 18.5 "Day Dream" is an etching/aquatint printed on Hahnemuhle white paper in 2010. PLATE MAKING Cover the plate with Hard Ground leaving 2 oval shapes exposed. Draw lines with an etching needle. Etch the plate for 45 minutes. Cover the lines and inner oval shape with hard ground. Etch (open bite) the outer oval shape for an additional 4 1/2 hours. Apply rosin aquatint to cleaned plate. Stop-out peripheral border. Draw white-line image with Sharpie permanent marker as the acid resist. Spit-bite the cloud image with ferric chloride. Stop-out the cloud image. Bite the "inner"oval (previously open-bit, now aquatinted) for 20 minutes. Clean and bevel plate, Proof. Burnish out some scratches. Re-aquatint the plate and spit-bite some additional tones in the clouds with ferric chloride. Clean the plate with Soy Solve and alcohol. Ink the plate with Charbonnel black ink 55985. Wipe with tarletan and hand wipe. Wipe periphery with tissue paper and magnesium powder to eliminate plate tone. Print the plate.

82
Alison Hildreth Portland, ME Dead Ends, Etching and Woodblock/Chine Colle 18 x 22.75 I start with shaped, etched copper plates. The first two are printed as intaglios and run through the press. The third is rolled as a relief and printed. I mixed the ink with a lot of transparent base for these three plates. The forth step is a spoon rubbed woodcut on the right hand side of the print. The next spoon rubbed woodcut is a brown shape, which defines the sixth step which is a woodcut of the black outline of the fortress. The last wood block printed in red is registered to fall inside the black block. I printed on senka-shi Japanese paper, which I ran through the press as a chine collé onto Rives BFK. I use transparent base to build up layers, which are held together by a “matrix,” in this case a woodcut. The black fortress imposed on the other transparent layers reinforces the idea of dominance.

83
Yuji Hiratsuka Corvallis, OR Hybrid Tulips, Intaglio with Chine Colle 24 x 16 My personal technique using chine collé with traditional and innovative etching methods is as follows. To start out with, I create the first tones on a copper plate by using etching, drypoint, aquatint, softground or roulette and pull my first color impressions. From these first impressions, I work back into the plate with a scraper, burnisher and emery paper to enhance the lights and accent the motif. I then go on to the second color. I usually print on the paper that best suits my work, this is a thin Japanese washi paper known as Owara mulberry paper. With continuous alterations to the plate, I print a sequence of colors: black, yellow, red and blue that requires passing the same plate through the press four times for each design and color change. Finally, I apply glue to the back of the washi paper after completing the above mentioned process (CMYK* printing) and pass it through the press with a dry heavier rag paper (BFK Rives, Arches or Somerset, etc.) beneath.

84
Judy Bergman Hochberg Canton, MA Deborah, Polymer Plate Photogravure from Painting with Light Photo 14.75 x 18.5 “Deborah” is a polymer plate photogravure from a painting with light photograph made with 4 -Toyobo Printight polymer plates and Daniel Smith Process etching Inks, (cyan, magenta, yellow and black) in 2009. Step one–Image: Camera on tripod, set to bulb. Shot photograph in darkened room while moving a flashlight over subject for illumination. Step Two –Transparencies: Adjusted image in Photoshop, converted toCMYK. Printed out four color separations on transparent film. Step Three –Plates: Used stochastic (aquatint) screen to expose polymer plates for 1Slu in NuArc Light Exposure Unit. Tested for correct exposure time, then exposed transparencies to plates in NuArc Unit. Developed plates in warm water for 60 seconds, rinsed in cold water, blotted dry. Hair dryer starts hardening process. Hardened plates by exposing for 220 lu. Allowed to cure overnight before printing. Step Four –Printing: Wiped each plate with appropriate color ink. Placed yellow plate face up on etching press with damp paper over it and ran through press. Turned print face up, put cyan plate face down on print. Lined up plate marks for registration. Ran through press. Printed magenta and black plates in same manner to create final four-color print.

85
Suzanne Hodes Waltham, MA Genomic Grid #2, Monotype 18 x 22 "Genomic Grid #2” The theme is the Human Genome. The coding of biological information, as revealed in the map of the human genome, controls much of our character and destiny. I have used images of chemical bonds, cells, chromosomes, and an electrocardiogram record. I applied charbonnel etching ink with 2, 3 and 6 inch rollers to a thin plexiglass plate. Some light transparent yellow was left on my plate from the transfer print Genomic Grid #1 (done without a press by drawing in pencil on the back of the Japanese paper that was placed on top of my inked plate). The linear forms of chromosomes were drawn into the darker red and black areas using the sharpened end of a brush. Some lighter scratched areas are ghost images left from the first print. I place the inked plate on the press bed ,use a sheet of Japanese paper, cover with a blotter and 3 felts and print.

86
Frances Hodsdon Jefferson, ME MO4, Monotype 16 x 18.5 “M04” is a 2006 monotype image printed on artist-made Kozo in 2006. Using a non-watersoluble marker make a line drawing on the back of a plexiglas plate 9 x I2". • Roll a thin layer of etching ink on the front side of the plate. • Using Q-tips remove ink to develop the image. • By spritzing place a dampened sheet of artist-made Kozo paper 8-1/2"x 11" on top of the plate. • On top of Kozo place a sheet of interfacing and roll all with a marble roller carefully. • Remove interfacing and allow the plate to dry overnight. • The next day peel the Kozo paper from the Plexiglas plate and the image is embedded in the paper. • Flatten between blotters if necessary. • My mould and deckle makes a 8-1/2"xl1" paper.

87
Jim Horn Dorchester, MA Comm.Ave.Green Line, Inkjet Print 18 x 21 IMAGE MAKING Original image is a digital photograph Image shot with Nikon D200 and 200mm telephoto lens for spatial compression Image processed in Photoshop with Dry brush, Smart Blur and Custom Filter Foundry filters PRINTING Printed on an Epson 9800 printer with custom Gretag Macbeth Eye One profile matching the Epson K2 inkset to Epson Ultrasmooth Fine Art Paper.

88
Lisa Houck Boston, MA Family of Three, Etching / Aquatint 10 x 10 In this etching entitled "Family of Three," I worked on a zinc plate. I used nitric acid to “bite” lines and textures into the plate. One of the textures used in etching is called aquatint. For aquatint I scattered grains of rosin onto the plate, and then melted the rosin over a hotplate. When the plate with the rosin was placed in the acid, it was etched around each grain, creating a pattern of dots on the plate. To print an etching, ink is rubbed into these lines and textures, and the excess ink is wiped off of the plate. The film of ink left on the plate often leaves a “plate tone” on the paper. I chose etching as the medium for this artwork because I like the roughness and tactile quality of metal that is eaten away by the acid. I was able to create beautiful blacks and subtle tonalities that cannot be achieved with other techniques.

89
Bror Hultgren Ipswitch, MA With Thanks to Madam Jack, Monoprint 22 x 18 “With Thanks to Madam Jack” is a monoprint on handmade Paper made in 2009 Paper: Hand made paper cast from bleached flax pulp, purposefully distressed. Graphite lines with hand printed marks. Rubber stamps carved from Sanford Magic Rub and Papermate Pink Pearl erasers. Applied by hand Ink: Black Charbonnel, Daniel Smith Raw Sienna and Cadmium Yellow etching inks

90
Su-Li Hung New York, NY Palm Leaf, Woodcut 28 x 24 “I grew up in Taiwan, where palm trees are very common. I am always fascinated to see the elegant palm leaves swing in the wind. I made a few sketches of a single palm leaf. I got my ideas together, then I drew with pencil on Pine wood, cutting out the spaces between the leaf. I emphasized the tip of the leaf, while hinting at the movement of the wind.”

91
Linda Hunsaker Santa Fe, NM Homage to Hitchcock, Monotype 16 x 20 “Homage to Hitchcock,” from the series: “The Picture Show” is a monotype image that was printed on handmade Italian printmaking paper in 2009. PLATE MAKING: Use copper plate with beveled edges (6 x 9"). Roll black water-based relief ink evenly on plate surface. Using soft cloth wipe away lighter areas (working dark to light). Cut out stencils (for figures) using stiff paper or card stock. Roll ink on stencils and place them on the plate. PRINTING: Slightly dampen paper. Run plate (with paper and felt blankets on top) through etching press. Dry paper. Hand color small areas of print with prismacolor pencil. NOTE: Monotype was the technique of choice for this print because it conveys a feeling of dreaminess and mystery that expresses the idea the artist was seeking.

92
Anita Hunt Colrain, MA Strange Reflection 2, Drypoint and Roulette 11 x 10.5 ingredients: polished copper plate diamond point scribe #120 dot pattern roulette scraper, steel wool, sandpaper Charbonnell #5591 black ink Hahnemuhle Copperplate paper I selected several photographs of my favorite swamp to use as references for this project, the ones with sticks and stumps and hummock configurations that resembled strange creatures and suggested things of unknown substance lurking below the surface of the water. Reflections in water offer up plenty of opportunities to walk that edge between representation and abstraction that I so enjoy. I chose drypoint for its directness (it is essentially drawing on copper) and for the beauty of the velvety tones. Adding the roulette ground at the top of the image gave me the chance to also work subtractively by scraping back the lights, creating an interesting counterpoint to the drawn linear elements and a nice variety of edges.

93
Sidney Hurwitz Newton Center, MA Paint Factory, Etching / Aquatint 18 x 23 The “Paint Factory” was made by first covering the zinc plate with an adhesive, opaque white, acid-resistant paper. A line drawing of the image was done in pencil with many alterations. Then each line was cut through with a pointed blade. The plate was immersed into a nitric acid bath (12-1 ratio) for a lengthy bite. The plate was removed and the acid resistant covering peeled off, revealing a line etching. A box aquatint was then applied to the plate and, in a series of progressive bites, values were established through stages of stopping out—first the whites and progressively to the blacks. In this case a total of six acid bites were necessary. In some areas burnishing and scraping were used to correct the values.

94
Paul Inglis Brighton, MA @ 6th & 31 St., Solar Etching 3.375 x 11.375 This is a solar etching printed Stonehenge cream paper. Making the plate: Photocopy drawing onto transparency. If desired manipulate image by adding and subtracting. Place aquatint screen face to face with solar plate in a contact frame and expose in sunlight for 1.5 minutes. ** Replace aquatint screen with transparency (drawing) and expose for an additional 1.5 minutes. UV light will harden exposed areas of the plate while areas beneath opaque lines of drawing will remain soluble. Gently scrub plate in tray of water. Soluble areas will wash away creating grooves and lines similar to an etched metal plate. Proceed with normal intaglio inking and wiping of plate using graphic chemical vine black ink. Edition printed on Conrad model E15 etching press. ** Refer to book “Printmaking in the Sun” by Dan Welden and Pauline Muir for extensive instruction, materials, and specifics.

95
Constance Jacobson Boston, MA Small Gyri, Solar Plate 13 x 13 This print is part of my “Greymatter" brain series. The technique reflects a simple, fluid approach which supports the concept of mood change and the mutable nature of memory. Plate preparation: - Pre-expose Solar plate with stochastic screen using Nuarc overhead exposure unit. Cover plate until ready to use. - Mix powdered graphite with #3 burnt plate oil. - Roll mixture onto Solar plate smoothly, medium thickness. - Create image by drawing with eye dropper and mineral spirits. Let sit a few minutes in dimly lit area until mineral spirits have evaporated. - Expose plate in exposure unit (on top of the glass) - Remove image with baby oil and soft cloth. - Develop plate in tepid water 1 minute. Carefully blot and blow dry. - Harden plate in exposure unit. Cover plate and let sit overnight to cure. Printing: - Mix powdered graphite and Charbonnel 55985 as printing ink. - Apply ink with small roller. - Wipe plate with tarlaton in normal etching fashion. Do a final paper wipe. - Apply surface roll with very transparent raw sienna ink. - Print on Magnani Pescia Soft White paper.

96
Joel Janowitz Cambridge, MA Beach Stairway a/b, Monotype 18 x 26 I used viscosity printing to create the monotype “Beach Stairway a/b.” Painting the light green of the water and foreground with a very loose, oily ink, I then rolled stickier inks over these areas. The sticky ink slid over the slippery surface of the oily ink and adhered only where I had not painted -- the stairway railing and the foreground sand. Crispness of edges, a blend of colors suggesting movement, and an emphasis on negative shapes are all characteristic of this process. Wonderful surprises resulted from the complex interactions amongst the inks.

97
Zoltan Janvary Reno, NV Travel Notes, Engraving, Pencil, Watercolor 16 x 20 For this series I used the ancient engraving technique, which is my primary technique for printmaking. I generally engrave on red copper plates and specially designed tools usually called burins. I have several sizes of burins, each type specialized for different depths and widths of lines. I apply gesso paint to the copper plate and then directly draw the sketch onto the surface with pencil. When the drawing or sketch is complete, I cut the main lines using a medium sized burin. Before I add details, I clean the gesso from the plate and work on the bare plate with my burins adding more and more cross-hatching lines in order to tone up the plate. From time to time, I check the process with a test print in order to reach the desired lines or tones. After the print is done, I use ink, watercolor or sometimes color pencil to add a little more contrast to my images.

98
Marjorie Javan Lexington, MA Evolution, Intaglio 14.5 x 15.5 Ingredients: zinc plate nitric acid bath wax crayons hard & soft rollers intaglio inks flash or burnt plate oil The initial linear etch was drawn through a conventional hard ground and bitten with nitric acid. The ground was then removed and subsequent layers were bitten using wax crayons as an acid resist. The plate was printed using a viscosity method where varying the thicknesses (viscosities) of the ink with plate or flash oil cause them to repel each other when rolled in layers on the plate. The plate was first inked and wiped in the traditional manner. The remaining two colors were thinned with flash oil. The thinner (low viscosity) color was rolled over the plate surface using a hard roller. A stiffer (higher viscosity) color was then rolled over the plate using a soft roller to ink the deepest bitten areas. The plate was then printed with one pass through the press.

99
Susan Jaworski-Stranc Lowell, MA Antique Milk Bottles II, Strawberry, Reduction Linoleum 18 x 18 "Antique Milk Bottles II, Strawberry" is a reduction linoleum printed on Rives BFK, white in 2009 Materials: 12 inch square Styrofoam, .25 inch thick 12 inch square linoleum mounted on block Double-sided tape Litho inks, oil based Transparent base ink Lino-cutters, brayers Image making: 1. Using a brayer, ink linoleum block with dark brown ink. 2. Place printing paper onto inked block. Burnish the back of paper with a wooden spoon until the ink has been offset onto paper. 3. Place double-side tape on the back of Styrofoam and adhere to the cleaned linoleum block. Roll white ink on the Styrofoam surface. Repeat step 2. Let print dry. 4. Remove the taped Styrofoam from the linoleum. Using linoleum cutters, remove areas of linoleum so to expose areas where the previous two colors are located in the original design. Ink the linoleum with a mixture of pink and transparent ink. Repeat step 2. Let print dry. 5. Using linoleum cutters, remove more of the linoleum in the area where the previously printed color, pink, is located in the original design. Ink the linoleum surface with burnt sienna. Repeat step 2. Let print dry. Repeat step 5 for the color green substituting the words ‘burnt sienna’ for ‘pink’ and ‘green’ for ‘burnt sienna’. Repeat step 2. Let print dry. Using linoleum cutters, remove areas of linoleum where green is located in original design. With very little surface of the linoleum remaining, the two colors, black and blue, can be inked and printed simultaneously. Repeat step 2. Let print dry. IMPORTANT: Each step has to be repeated twenty times* so in the end, a small edition of sixteen prints will be created. * Note: a small number of prints will be thrown away because of deficiencies which occurred during the printing process.

100
Peter Jogo State College, PA Song of Route 14, Mezzotint 10.75 x 11 For me, the mezzotint medium is the “metal” version of pastel….complete control over subtle gradations of value and color. Song of Route 14 is a color landscape done with four steel plates. Information for the image was gleaned from a half-dozen photos. Each plate is initially grounded using a one-hundred dots per inch rocker. Once the key (black) plate has been scraped and burnished to satisfaction, it is inked and printed. Using a simple registration system, the key image is then offset printed onto each of the pre-grounded color plates. This gives a good guide for working up the supporting color plates in relation to the key plate…and to each other. Lots of proofing and re-working of all plates ensues until the piece is considered finished. The plates are printed in succession - wet into wet and light to dark (e.g. yellow, red-orange, blue-gray, black).

101
Brian Johnson Austin, TX ... the part of ourselves that would hold us back ..., Relief Engraving 19 x 22 The layers of noise found in digital video transmissions, inspire my black & white relief prints. Some originate from direct photographs of scrambled, television images where others depict an invented collage space. In this particular image, a human face serendipitously merges with the noise of a fragmented HD signal. After digitally manipulating the image, a copy of if it is chemically transferred to a high impact styrene plate. The process of carving the plate further transforms each image and reveals its abstract nature. The hand made and invented pixels and lines become inseparable from the disguised and deteriorated figures they depict. It becomes a metaphor for getting lost in the noise of everyday life, and how we relate to others and ourselves. I enjoy the delightful contrast of seeing a human image made into a digital abstraction using an ancient process of mark making.

102
Lynne Johnson Bolton, MA Levels of Alternative Fuel - 2, Polymer Plate Etching 17.5 x 14.5 "Lines of Alternative Fuel" is a polymer plate etching n Somerset Warm White printed in 2010. Image: *Take many digital photos of a snowbound cornfield and import them into Photoshop. *Choose an image, convert it to black and white, manipulate the image for contrast, cropping, & sizing, while eliminating and augmenting the image. *Print out the image and draw on the print-out to further enhance it. *Scan the print-out back into Photoshop and further manipulate it, then print out a transparency. Plate making and printing: *Place an aquatint screen face down onto a small piece of photo-sensitive polymer plate and expose it to UV light in an exposure unit. *Place the positive transparency face down onto the same plate, choose an exposure time, and expose it again. *Develop the test plate for one minute in luke warm tap water, gently moving the water, wipe off the plate surface gently with fingers, rinse, then blot the surface and blow dry it. *Expose the plate surface to UV light to harden the plate. *Print the plate intaglio, wiping the surface clean and leaving the ink in the recessed image areas. *Compare the resulting test image to the transparency to judge the appropriateness of the exposure time. A second and third test plate with different exposure times may be necessary until a satisfactory time is determined. *Finally a polymer plate the full image size is first exposed with the aquatint screen, then with the positive image transparency. *After hardening the plate it is left for 24 hours or more before printing.

103
Catherine Kernan Somerville, MA Pines of Pan, Intaglio and Relief 20.5 x 18 "Pines of Pan" was made in 2010 This image is based on a pen and ink drawing done in Greece. To translate the image into a print, I began with a marker drawing on copper. The plate was etched for about eight hours to create a relief contour. Part way through the etching process, I surface rolled the plate with oil based ink to reinforce the marker and to give some tonal texture. Printed with Akua Inks, the blue was wiped intaglio below the surface, and the ochre was surface rolled.

104
Brian Kreydatus Williamsburg, VA Second Thanksgiving, Etching 18 x 21 “Second Thanksgiving” started as a hard-ground etching on a copper plate. I drew the turkey directly on the plate from observation after Thanksgiving dinner. I initially etched the plate at five different time intervals to give a wide variety to the weight of the etched lines. I added my two year old daughter’s head above the edge of the table. I like the implied narrative of these two polar opposites and how the edge of the table divides them horizontally into two different but inter-connected worlds. Once all the narrative elements were in place, I pushed the plate through many states of etching, drypoint, roulette, burnishing, and scraping. As is typical of my working practice, I worked on-and-off on this plate for about a year. The final image was printed on Murillo paper with a brown ink made with Gamblin Portland Black and Graphic Chemical Indian Red etching ink.

105
Shaurya Kumar Bowling Green, OH Dancer at the Temple, Photoploymer Intaglio Print 22.5 x 16.75 While the new digital technology revolutionizes every aspect of the society, it leads us into a world often defined as a “Post - ” society: Post - Historic, - Religious, - Civilized, - Industrial, - Capitalist and - Modern; with extreme emphasis on constant, rapid and invisible change. My works are based on the analysis of this random transformation, which the virtual world constantly goes through and are created while working on codes at the binary level, behind the façade of the image interface itself. The information stored in magnetic and optical devices was thus manipulated, sometimes changing just one bit. This change – mostly random, destroyed and reconstructed, broke and distorted the data imitating the unpredictability and change that it would undergo – with disaster or age. I used a photomechanical process—made a digital negative from a digital file on a photo-sensitive polymer plate—that was printed as a traditional intaglio on Rives BFK paper. List of Ingredients XV132 binary editing software Adobe Photoshop CS4 Silkjet Film Epson 4880 medium format printer AmerGraph V28 Exposure Unit KM Photopolymer Plate Rives BFK paper Charbonnel Concentrated Black R.S.R ink Takach Intaglio printing press

106
Danguole Rita Kuolas Cohasset, MA Nightfall, Woodblock Print 25 x 16 "Nightfall" is a woodblock print, printed from 4 blocks on Kitakata paper in 2009. Intent: Carve and print image using line and texture Create depth by overprinting multiple blocks Block preparation: Tone woodblocks (Shina plywood) with drawing ink Draw image on woodblocks, then shellac Carve out negative spaces with carving tools Shellac again Printing: Roll out Daniel Smith relief oil based ink (black) Roll ink onto blocks #1 and #2 with brayer Place blocks on press bed (Whelan) Lay dry paper on top Run through press with foam blanket Remove paper Lay new sheet of paper on top without re-inking Run through press to get ghost image Ink blocks #3 and #4 and place on press bed Place ghost print (grey) face down on inked blocks Run through press

107
Anthony Lazorko Mesilla, NM Going Home, Color Woodcut 17.5 x 23.5 The focus of my work has been to depict something about the American experience, no matter how ordinary. I endeavor to create woodcut prints for pictorial and narrative qualities; and at times I am more interested in the technical challenges. Color, composition and tactile surfaces all need to marry with the content. Visual images should evoke the "at onceness" experience that speak to all of us. The print titled “Going Home” reflects my keen interest in night settings and the challenge of evoking this setting with wood. I made many photo studies from a quiet overpass on Interstate 10 north of El Paso. Once at the overpass, I watched a brilliant red sunset and experienced an "Ah-Hah!" moment. I knew from that moment where I was to take the image. I use ink from Graphic Chemical, mixing Windsor Newton oil to find the right color. The prints are pressed onto Hosho paper and printed with a Whelan Press, configured to letterpress printing.

108
Melody Knight Leary Norwich, CT Laced, Collagraph & Photopolymer Intaglio 16 x 24 Basically, an original print is a hand made image or design created on a matrix, which is a surface such as wood, metal, or stone and then transferred onto paper using a printing press or hand pressure to create the impression. For my print entitled Laced, I used two different surfaces to create my image. The large plate is a collagraph, which is composed of various materials adhered to a cardboard surface in a collage-like manner. The small insert with the figure is a photopolymer intaglio plate created by adhering a light sensitive photopolymer film (in this case ImagON) to the surface of a piece of copper. My image was created on a transparent sheet of film, placed over the copper plate, exposed to ultraviolet light and then processed in a bath of soda ash and water. Etching ink (in this case Akua) was applied to the surface of both plates to fill in the recessed areas. In an intaglio print, the ink lies below the surface of the plate and is transferred to the paper under pressure. Next, the excess ink was carefully wiped off of the high surface areas leaving the low areas filled with ink. I rolled a surface color over the collagraph plate using a brayer. This deposited ink on the high areas of the plate and enhanced the textural surface detail. The small copper plate was carefully wiped with phone book pages to remove surface ink and leave the recessed areas intact. The collagraph plate was placed on the bed of the printing press and then the smaller plate was carefully placed into position on top of the larger plate. A sheet of dampened paper was placed over the inked surfaces, felt blankets were laid down and the entire assembly was rolled through the press. To complete my print, I punched holes in the image to accommodate a length of ribbon and applied a couple of metal eyelets. Finally, a watercolor wash was added to highlight areas. Laced is a limited edition, which means that a specific number of prints have been pulled from the plate. The idea for the image came from an old girdle that I had found in a consignment shop. A woman stands demurely with her fingers laced before her tummy and her tummy laced behind her fingers. Oh the things we women do to “fit” in. Think.

109
Hiroko Lee Waltham, MA Buddha & I, Mixed Media: Drypoint, collage, woodcut 18.5 x 16 "Buddha and I" is a Mixed-media print using drypoint, collage, woodcut made in 2003 Recipe: 1. On the back side of a lithoplate, draw the image using sharp metal pen to create the drypoint. Ink using black etching ink and wipe away leaving only the image line inked. Print on Rives white paper, cut the image, and collage it on to another Rives white paper. 2. Burn the surface of a 3-ply pine woodblock using torch light and sand the surface leaving only the grain of the wood. Roll black relief ink over the grain and print on loose tarletan. Dry overnight. 3. Layer the printed tarlean over the collaged paper and glue around the edges using Nori paste Dry overnight.

110
Martin Levine Coram, NY Tribeca, Aquatint with Chine Colle 19 x 14 “Tribeca” is an Aquatint Etching with Chiné Colle printed with Bone Black ink on Shiro Gampi paper with a Lana Gravure backing sheet. These meticulously drawn aquatint etchings typically take 6-9 months to complete, due to my concern for detail, and intense involvement with each technical aspect of the medium. I draw from a composite of my photographs and on-site sketches, and for further amplification, work with an 8X jeweler’s loop, leaving no detail insignificant. The full range of tonality is achieved by dipping a rosin coated copper plate into acid 50-60 times. May images are intentionally devoid of humans, allowing the viewer exclusivity by minimizing any distractions. Unlike the limitations of a camera or the naked eye, every object near and far is rendered in extreme focus, allowing for more clarity and heightened observation. A fascination with exaggerated perspective, unusual vantage points and elongated shadows, continue to characterize my images.

111
Shirley Levy Albuquerque, NM A la Derecha, Pilos de Europa - Early Morning, Photogravure & Monotype 11 x 14 “A la Derecha, Picas de Europa-early morning” is a photogravure & monotype image printed on paper Lana Gravure 250gr white paper in 2008. PHOTOGRAVURE PLATE—Apply Akua Intaglio ink with cardboard scraper. Wipe with tarletan, then telephone book pages. Clean edges of plate with Q-tip moistened with saliva. On bed of etching press, place inked plate face up on a matrix showing outline of plate and paper Lay DRY paper on top. Run through press. Clean plate with mineral oil. MONOTYPE PLATE—“Duralar" plate by Grafix, .15” thick Cut to size of intaglio image on dry paper. Smooth edges. Bevel not needed. Outline image and shapes within on tracing paper LAY under rigid plexi BACKWARDS. Tape Ouralar over image at corners. Apply Akua Monotype Ink with rollers, brushes, etc. Subtract with Q-tips, brushes, etc. Lay DRY paper with printed image on press bed. Place inked plate onto printed image. Run through press. Clean plate, etc. with liquid soap & water. REPEAT monoprint ink process as often as desired until image is what you want. I use colors with lots of transparency and enjoy slowly building to final image. AIR DRY.

112
Evan Lindquist Jonesboro, AR Observer: Witness, Engraving 18 x 16 "Observer:Witness" is a burin engraving that was made in 1992. PRELIMINARY IDEA I observed illogical, unbelievably embarrassing actions by a public official and drew my self-portrait in stunned disbelief as a witness to official's public actions. I used a flexible pointed pen for flowing calligraphic lines. THE PLATE 16 gauge engraver's copper. Sharpen the burin and cut the lines into surface of copper plate. PRINT THE PLATE Soak paper in water, stack under blotters. Mix 3 parts Graphic Chemical #2275 Frankfort Black ink to 1 part Sureset compound until string of ink breaks at 6 inches (150mm) or less. Squeegee ink into all lines cut into plate. Coat entire surface. Wipe ink from surface of plate with large pieces of wadded-up tarlatan. Print on damp sheet of paper in etching press using 2 woven felt blankets.

113
Gerald Marcus New York, NY Egg Man, Intaglio 18 x 16 Plate Making: Bevel copper plate and clean with Simple Green Heat plate and apply ball ground (hard) Spread ground with brayer and allow to cool Biting the Plate: Put plate face down in a tray of ferric chloride; prop up one edge with a dowel Remove plate from tray and clean with cold water Remove ground with Gamsol Print proofs Heat plate and melt rosin granules for aquatint Stop out areas to print white and bite as above Stop out light grey areas and bite again for darker tone Remove rosin with alcohol Add drypoint for accents Printing: Thin Gamblin Portland Black with 00 plate oil Warm plate slightly and apply ink with a piece of matboard Wipe with tarlatan and phonebook paper Print!

114
Andrea M. Martens Vassalboro, ME Untitled, Tracking Series #10, Digital Print and Drypoint 14.5 x 15.5 In my current work I explore issues of psychological space and confinement, primarily using a combination of digital and traditional printmaking techniques. Ingredients: Copper plate Digital file/image Adobe Photoshop Rives BFK paper Etching needle and scraper Charbonnel etching ink Etching press Inkjet digital printer Printing: Manipulate digital file and size in Photoshop Print on Rives BFK using Inkjet printer Soak paper and prepare etching plate Draw image on plate using needle and scraper Ink and wipe plate Run plate and damp paper through press Clean plate and work area Sign, date, and title work once it is dry

115
Michelle Martin Tulsa, OK Queen Bee, Color Etching with Hand Sewing 14 x 18 "Queen Bee" is a 4 color etching, with hand sewing printed on Rives BFK heavy, gray paper. PLATE MAKING 1.) Cut 4 copper plates; bake rosin aquatint on plate. 2.) Draw key image (black) on 1st plate, using litho crayon resist. 3.) Etch plate as desired in ferric chloride solution. 4.) Pull proof of key image, then off-set image onto other plates. 5.) Draw and etch color plates. 6.) Clean rosin off plates with alcohol; let dry. PRINTING 1.) Tear and soak paper. Trace template and tape to press bed. 2.) Ink all 4 plates in desired colors, and set aside. 3.) Place plate with lightest color on the press first; run through the press until plate clears the roller, but paper is still "trapped" under roller. 4.) Lift up paper, and take first plate off press and clean template. Place second plate on the press, and repeat process with each plate until completely printed. 5.) Allow print to dry under blotters overnight. 6.) Hand sew print to new sheet of paper.

116
Nancy McIntyre Alexandria, VA Sink, silkscreen 18.5 x 15 “Sink” is a silkscreen edition of 60 printed on Arches 88 paper using 43 layers of acrylic screenprinting inks. DO AHEAD: Take photographs SILKSCREEN PROCESS: 1. Draw or paint full-scale “master drawing,” planning what colors to print where. (I use mostly transparent inks, so one color printed over another will make a combined color.) 2. Clamp screen in place, with master drawing underneath. Make painted stencil, by blocking out every place you do not want to print your first color. Liquid screen block-out can be supplemented with drawing, rubbing and resist techniques. 3. Use “three-point registration” to set paper in exact same place each time. 4. Pull squeegee, pressing thick ink through screen onto paper. For edition of 50-60, print first color onto about 100 sheets of paper to allow for mistakes. 5. Repeat, for all planned layers of color. (I often blend colors as I print, by laying down inks side-by-side and fading them together with the squeegee.) 6. As print evolves, new ideas will emerge. Continue adding colors until happy.

117
Stephen McMillan Bellingham, WA January Snow, Aquatint 26 x 18 This aquatint was drawn freehand from a photograph that I took near my home in Bellingham, WA. It was etched onto an 18 x 12 copper plate. I used a series 7 watercolor brush to paint asphaltum thinned with mineral spirits onto the plate. The asphaltum is used to block various areas of the plate from the acid as the image is etched into the copper. I start by painting out the lightest tone and then dip the plate in a hydrochloric acid mix. I progressively paint and etch, each time increasing the etch time. For this print I dropped and melted two separate aquatints onto the plate. The first was a dense, coarse grain aquatint. It created the visible texture in the snow and background. I did 6 etches over this aquatint. 4 of these etches were creep-etches, that is, the plate was gradually lowered into the acid bath to create a gradated tonal passage in the image. The second aquatint was fine grained and was used to add detail and darker tones to the image. I did 4 etches, including 2 creep etches, over this aquatint.

118
Fethi Meghelli New Haven, CT Boat People, Intaglio, Type, Mixed Media, Collage 24 x 18, Intaglio-type is a non-toxic technique that can be used in a multitude of ways. I have chosen this particular one because it suits my desire to draw. I draw an image using a china marker on a transparency. I then transfer it to a copper plate with a photosensitive film, using a light source. The plate is then etched in a sodium carbonate solution. Finally, the etched plate is ready to be inked and printed in an intaglio manner. My image is produced by recycling details of previous prints and other materials collaged onto a black sheet of paper. The contrast obtained allows for a strong statement about the tragedies of war. This image is part of my "War Series."

119
Ron Mier Santa Fe, NM Variation on Two plates 3B, 2 Plate Linocut 11 x 13 "Variation on Two Plates 3B" is a print from a suite of linocuts incorporating the use of two linoleum plates. Drawings are first made directly on the linoleum plates, then each are carved for the relief print. Variation on Two Plates 1B through 4B all use the same two linoleum plates. The unique images are accomplished by varying the order in which the plates are printed onto the paper and the color of the ink. This results in a dynamic final print with the emboss of a relief print and a satisfying dimensional characteristic.

120
Peter Milton Santa Monica, CA Dress Rehearsal, 2009, Digital Print 18 x 26 Formerly an etcher/engraver, I am now more a collagist who stumbled upon the computer as the most effective tool of assemblage. The digital print then becomes the only way the image can be seen in the "real" world. This gives the digital print the genuine status of an original, rather than that of a reproduction. A computer can give me as many as 400 layers; all are worked on and transformed to varying degree. I developed this way of working in layers as a etcher in the late 60's, combining drawings on transparent sheets of Mylar, (then) transferring the assemblage to copper to etch and finally extensively engrave to produce the final image. Recently, I turned to the computer for its potential for greater complexity and the thrill of an entirely new experience. One real debate with computer work could be its loss of palpable touch. I cast about for possible credible textural equivalents in the new medium.

121
Wayne Miyamoto Hilo, HI Kami Figure, Mountain and Sea, Intaglio with Chine Colle 20 x 16 In intaglio printmaking, form and space, color, light, and visual rhythms are developed through the etching process on metal plates. During printing the ink is removed from the topmost surfaces and left in the crevices and grooves below the surface of the plate. The printing paper retrieves the ink from the crevices and grooves when it is pressed into the metal plate during printing. • prepare the zinc or copper plate with hard ground • draw through the hard ground, stopping out as necessary, and etch • repeat several times • print a state proof • apply soft-ground textures, open-bite, sugar-lift, and/or aquatint as necessary • repeat if necessary • print a state proof • work the surface with hand tools and machine tools • print a state proof • re-etch with different grounds as necessary • print a state proof • rework until the image is complete

122
Theresa Monaco Stoneham, MA Jacob, Solar Etching 14.5 x 12.5 The print, “Jacob” is a solar print. The drawing was scanned into the computer and printed on a transparency using an ink jet printer. The transparency was exposed to a Toyobo Printing Photopolymer Plate using UV light. It was developed in water and printed in the traditional way on Lana Cover Classic paper on an etching press.

123
Gordon Mortensen Pebble Peach, CA Whaler's Cove, Reduction Woodcut 17.5 x 15 Prepare a tonal image on basswood with pen and India in and seal block with shellac. The relief reduction woodcut process uses one block for all colors. Before applying the first color, all areas intended as the paper color are carved from the basswood. I often print a part of the surface by rolling ink through cut areas of a stencil and protecting other areas during the first press run. A stencil allows me to print more than one color at a time. Open areas of the stencil are inked and transferred from the block to paper, this is repeated on each sheet of paper in the numbered edition. After completing the first press run, the areas that are to remain the color(s) just printed are carved from the block and will not print again. This process of printing and cutting continues until most of the block is removed and the printed image emerges on the paper. Whaler’s Cove has 36 colors and took 30 press runs to complete.

124
R. Bruce Muirhead III Clinton, NY The Songstress, Intaglio 16 x 18 An intaglio technique in which acid is used to incise lines or tones into a metal plate. The specific techniques can include aquatint, lift grounds, soft ground, hard ground, and the like. In general, a metal plate is covered with an acid-resistant ground (a wax-based coating). The image is drawn through the ground using a sharp tool that breaks through the ground to the metal plate surface. The plate is immersed in a weak acid bath. The acid attacks the plate through the open lines of the drawn image. The longer the image lines are exposed to the acid, the deeper the lines become, the more ink the lines hold and the darker those lines will print. (Definition: 60 Years of North American Prints, The Boston Printmakers)

125
James G. Mundie Philadelphia, PA Thoracopagus Twins (Musée Dupuytren), Woodcut 14 x 11 • 1 pine block (plank grain) • 2 gouges • handful of single-edged razor blades • 1 photocopy of a sketch from a Parisian anatomy museum, applied in Japanese hanshita manner • wood glue • 1 brayer • 1 dollop of Graphic Chemical black woodblock ink • 1 dash of plate oil • 1 bamboo spoon • 50 sheets of Japanese kitakata, torn to size This woodcut began with a trip to Musée Dupuytren, an anatomy museum in Paris. I made several drawings there, of which this image of conjoined twins was one. Later, I photocopied the original drawing, scaling it down slightly for the pine woodblock I had chosen. I then coated the surface of the block with diluted wood glue, and gently pressed the photocopy face-down onto the block. After the glue had dried, I lightly moistened the paper and removed layers of excess pulp by gently rubbing with my finger. Eventually, the image became clear enough to begin cutting away the non-print areas. My chosen cutting tools for many years have been single-edged razor blades for fine work and gouges for clearing wide areas. Once the cutting was finished, I rolled up the block with black ink, laid down the paper, and applied pressure by hand with a bamboo spoon.

126
Michelle Murillo Dallas, TX Destino: Buenes Aires II, Photo Etching 17.375 x 13.25 “Destino: Buenos Aires II” is a photoetching made in 2008 using photopositives, copperplates, photosensitive film and intaglio inks. PLATE MAKING Create a 2 color image on Photoshop. Print photopositives on clear film on Epson 7800. Let the photopositives dry. Apply photo sensitive film to plates with squeegee. Expose photopositives to plate using exposure unit. Place plates in bath of developer. Gently agitate until developed, rinse under water. Let plates dry and cure. PRINTING Mix inks to desired color. Apply intaglio ink with squeegee. Wipe with tarleton, clean bevels. Place inked plate face up on press bed. Place damp BFK on top of plate. Run through the press, repeat inking process with second plate. Register second plate to print. Run through the press. Stretch prints on board, let dry.

127
Carolyn Muskat Somerville, MA Root Systems V, Lithograph 11 x14 “Root Systems V” is a lithographic print, created by the layering of 5 different Pronto plates. I drew directly onto the plates, and registered them using a punch system to ensure the alignment. The first run or layer was drawn onto a plate using a permanent marker. The remaining runs were drawn on four separate plates using a ball point pen to build up the surface and tones. Because Pronto plates are translucent, I could lay one plate on top of another to see where I had already created tones. The plates were printed onto cream Rives Heavyweight paper using transparent color mixes: yellow, olive green, pale red, pale purple gray, orange, and a gray. I often mix Pronto plates with other lithographic bases (stone, plate) or other media, but this print is solely from the Pronto plates. This work is part of an ongoing series based on roots, the ground and the layers that make up our world.

128
Miki Nagano Ridgewood, NJ Shimmering Refrain, Monotype 21 x 17 "Shimmering Refrain" is a monotype made with formica board, tarlatan, Charbonnel etching inks, plate oil, and oil sticks printed onto Arches 140lb Watercolor Cold Press in 2009 PLATE MAKING Draw the image on the paper. Put this paper under the plexiglas on top of the etching press and use as a guide. Cut the Formica board into the circle shape. Bevel the edges. Cut the tarlatan into the shapes. INKING Mix black, blue, white and yellow etching ink. Add the plate oil for thinning the ink. Using a roller, put ink evenly on the circle plate. Draw the line with a cardboard edge. Repeat this inking until the texture is right. Using the oil sticks, draw the image on the shaped tarlatans. PRINTING Put the plate on the press and print on a proof paper with felt blankets. Remove the proof paper from the plate carefully. Put inked tarlatan on the plate. Lay the dampened paper on top. Run through the press. Let the print dray between blotters under heavy boards.

129
Candy Nartonis Boston, MA Water II, Lithograph and Monotype 12 x 15 Development to completion: 1. Idea: Develop a series concerned with this planet’s available drinking water and environment. 2. Development: Represent fragments of man’s attempts to save and to use water for various uses. 3. Techniques used in this print: Monotype and plate lithograph. 4. Layer 1: First layer created by rolling out a thin transparent layer of litho ink on the plate bed, then a light spritzing of lithotine to break up the ink. Wait until the lithotine evaporates. Print. The varied surface references rock surfaces and land forms. 5. Layer 2: Aluminum plate: loosely brushed tusche creating a map of Lake Powell. Select a portion of the large plate for this particular monoprint. 6. Printing: Printed on new Revere Silk by Legion.

130
Thomas Nawrocki Columbus, MS Opulent Dreams, Mezzotint 18.25 x 18 “OPULENT DREAMS” is the culmination in a series of miniature mezzotint prints. Every composition reveals, by its unique strength, how it would resolve itself as it follows the tendencies of its internal forces. I am interpreting nature in its purest, abstract state - constructing a rhythm of pictorial lyricism utilizing land and sky forms as my inspiration. I place great emphasis on edge and the interrelationship of form and value in maintaining a harmony of visual balance. No object may be viewed in isolation, but absorbs its surroundings, just as it contributes to the total composition. The 16-gage mezzotint plate is the surface upon which burnished shapes and engraved - drypoint lines are incised. Dark brown and cadmium red-dark etching ink was used on German Copperplate Deluxe paper to create the imagery. For me the mezzotint alone holds the potential of lush deep low-key values and soft sensitive middle tones.

131
Lynn Newcomb Worcester, VT Arboretum, Drypoint 16 x 22.5 A print in the tradition of Rembrandt and Degas Ingredients: Industrial copper A drypoint needle Charbonnel 55981, for its ability to really "hang" onto the drypoint line Recipe: Only rag wipe the plate, leaving maximum drag....some intentional rag marks are visible in this proof. It is here that a trained eye with regard to the plate is necessary. For this reason this type of plate is usually printed by the artist, who is in every sense of the word, the printmaker.

132
Takayo Noda New York, NY Portrait, Intaglio / Collage 21 x 18 $600.00 PLATE MAKING First plate: Zinc plate and sand paper to give the texture. Second plate: Magnesium, the pencil drawing is transferred photographically on the plate. Bevel the edges of the plates. Clean the plates with baby-powder, alcohol and water. PRINTING First plate: Apply ink on the plate with a roller. Clean the edges of the plate. Soak papers for three minutes. Remove excess moisture between blotters. Place inked plate face up on the bed of an etching press. Lay the dampened paper on the plate. Place two blankets on the paper. Run through the press and remove the print Place a sand paper face up on the bed. Place the print just printed on the sand paper. Place a cardboard and two blankets on. Run through the press. Dry the prints between blotters. Second plate: Apply ink on the plate and wipe the ink with tarlatan and newsprint. Repeat the process. Clean the plates with mineral oil. COLLAGE: Paste the print from the first plate on the museum board. Cut out the selected shapes from the print from the second plate. Paste the cut out shapes on the print from the first plate.

133
Marian L. O'Connell Middletown, RI Dandelion 1/1, Monoprint / Etching 12.5 x 12.25 My digital photograph of a dandelion was downloaded onto my computer. Using Photoshop and drawing I created my image and printed it onto transparency film. This film was again corrected using opaque markers and a razor blade before laying it on top of a Solarplate and exposing it to ultraviolet light. I developed this plate in water and then inked it ala poupee (applying two or more colors on an intaglio plate with small dabbers) and ran it through the press onto Sekishu rice paper. When the rice paper was dry, a process called chine collé, glue was applied to the rice paper and laid on top of a thicker piece of Somerset paper and ran through the press again to adhere the two papers together. The final enhancement was the addition of watercolors to the final monoprint.

134
Ky Ober Arlington, VA Thicket, Pronto Plate Lithograph Monoprint 22 x 18 Plate Making: Image is created by manipulating a digital photograph in Photoshop and printed directly on to pronto plate through a computer printer. Printing: Plate is secured by placing it on a wet, smooth surface. Plate is coated with gum arabic and massaged with slightly dampened sponge, then sponged clean with water. Plate is then inked with Handschy litho ink using a roller in the usual lithographic printing technique alternating rolling of ink and sponging to keep plate from drying. Pronto plate can be printed on a litho or etching press. Inked plate is placed face down on Rives BFK and run through the press. (Pronto plate can be printed either face down, or face up for easier registration. ) The plate is then re-inked, turned 180 degrees and re-printed. Image is then over-printed with three layers of yellow from a monotype surface (Plexi). Each layer is varied by wiping, adding transparent base, laketine and additional color

135
Debra Olin Somerville, MA T-Shirt with Amulets, Monoprint/Drypoint/Pronto Plate/Collage 18 x 21 "T-Shirt with Amulets" is a monoprint made with drypoint, pronto plate and collage on Okawara Paper Monoprint – § roll ink on plate, lay down T-shirt, put down paper, run through press
§ lay down inked lace fabric on paper with T-shirt image , run through press
Drypoint – § Draw image on tracing paper, reverse paper, lay down very thin lexan and tape to
drawing § Cut drawing into plexi with exacto blade
§ Scrape ink over drypoint plate with cardboard square, wipe with tarlatan
§ Lay on T-shirt/lace paper, lay down plate, print
§ Pronto plate –
§ Photocopy image in reverse onto pronto plate
§ Sponge water on surface to adhere plate while working.
§ Cover and massage plate with gum Arabic, sponge clean
§ Roll out ink, sponge, roll out ink, sponge, repeat until ink covers black area on pronto
plate, print, cut out images and glue onto print.

136
Elizabeth Jayne Peak Arlington, VA Aerial View Looking South East 2009, Etching 17.25 x 15.5 First, be sure all three plates are the same size then begin by tracing watercolor (painted on sight) same size as etching. Transfer tracing to etching plate. Make line etching on blue plate. Aquatint values into blue plate. Print. Transfer wet print onto Red plate. Oxidize red plate in weak acid. Clean red plate and aquatint red plate. Print blue and red together and offset onto yellow plate. Oxidize yellow plate, clean and aquatint. Printing inks are all Charbonnel at full strength except the yellow, which is cut, with Lake White Transparent. The colors are Prussian Blue, Jaune Primevere and Laque de Garance. I use a warm hot plate for wiping and fairly stiff tarlatan. The paper is soaked for ten minutes and blotted twice. For registration: I use newsprint marked with the blue plate with the top of the plate oriented to the roller. The paper is longer on top to trap it under the roller so that I can switch plates for subsequent colors.

137
Sheila Pitt Tucson, AZ Breathing is an Issue, Polymer Plate Etching 17 x 15 Plate making: After a catastrophic accident that left me a quadriplegic, I thought I would never make prints again. With limited use of my left hand there was no way to cut wood, the medium I had done most of my life. “Breathing Is An Issue” is a polymer intaglio plate printed as an etching printed on Rives BFK paper in 2010. Using a Wacom tablet, my computer and Photoshop, I am able to draw. I do all the drawing and image making. My assistant then etches the image using a polymer plate. Printing: Bone black etching ink printed in traditional etching style Note: This series is a visual diary, which documents my slow but steady recovery using techniques I had never imagined before my accident.

138
Linda Plotkin New York, NY Voices 2, Monotype 18 x 18 This monotype, "Voices 2", is part of a group of works inspired by the blending of voices in Renaissance choral music. The idea arises out of the correspondence between musical harmony and color harmony, where elements cohere, while still maintaining their individual character. The layering of the three primary colors creates the other hues of the spectrum in various combinations. Variations depend on density and transparency, and the forms express other aspects of music, such as rhythm, texture, and resonance. The “recipe” part of the work includes the use of Hanco litho inks and Arches 88 paper, a paper with the maximum brilliance of white, to best reflect the intensity of the colors.

139
Ellen Jean Price Oxford, OH Part, Paper Plate Lithograph 24 x 16.5 I have embraced this combination of low-tech processes for the evocative quality of the space, tone and surface in relation to my source material: cropped images from family photographs. Kitakata is first printed in a transparent color from a collagraph (gesso on matboard) plate. The collagraph plate is wiped as intaglio to bring up texture but primarily functions as a relief surface and ink is rolled on. Paper is dampened by misting. In “paper lithography,” the plate is the photocopy, with the back painted with shellac. Process: Pour a small amount of gum arabic onto the photocopy and rub in. With a wet sponge, wipe down the gum gently, rinse sponge and wipe off gum. Keeping the photocopy damp, roll on etching ink mixed with approximately one-tenth miracle gel or Setswell. Repeat a few times, keeping the surface damp by sponging or misting. The white part of the photo copy will attract some ink. When the image is inked to the desired consistency, print on dampened (misted) paper, Kitakata 30gsm was used in this work.

140
Florence Putterman Selingsgrove, PA Garden of Eden Series, Etching with Water and Color Monotype 13 x 25 A Monotype image can only be printed once. The process of monoprinting I use combines a watercolor and an etching plate. With each print a watercolor on Mylar must be repainted before reprinting. Once a monoprint has been printed and the Mylar removed from the press, the etching plate is placed on the press. For the etching plate, I select a drawing, transfer it to a copper plate, etch in Ferric Chloride and proof to insure proper qualities. The preprinted monoprint is registered on top of the etching plate and passed through the press. An outstanding aspect using this watercolor monotype techniques is that you can take sheets of rolled-up Mylar with you on trips and paint on location. The paintings can dry and be printed at a later time. Once dry they can be enriched with more paint, with watercolor pencils on either the Mylar or the final printed impression.

141
Scott Reed Oakland, ME Cluster Molecule at McGraw Hill, Intaglio 14.75 x 16.375 This plate belonged to one of my students who graduated over ten years ago. One day recently, I liked its size and so began making it "my" plate. I began by scraping. I then etched my imagery over the new surface. Next a repetitive and thus contrasting soft-ground was added to the background. To finish it up, using various circles and spray paint, I stage bit over the soft ground in a combination of open bite and aquatint. The formation of the circles reminded me of atomic/molecular structure. The figure in the middle did not. He looked like he was from McGraw Hill. And so the title combines the two worlds in a way that is pleasing to me and hopefully to you too.

142
Dennis Revitzky Honeoye Falls, NY Desert Dream IV, Linocut Monoprint 24 x 18 The linocut monoprint may be printed in conjunction with an edition of the same image, or just as a series of various monoprints. I choose to create a monoprint when I want to explore colors and special effects with the linocut image. PROCESS: 1. After the image has been drawn on the linoleum, cut away all areas that will be white areas in the monoprint. Linoleum and paper must be registered for accurate subsequent printing. 2. Apply selected colors of ink (usually light colors rolled on with a brayer), to the linoleum and print it. Textural effects may be created by wiping inked areas with brush or crumpled paper towels if desired. 3. If a black and white edition is to be made, cut away remaining white areas and print the edition. 4. Clean the linoleum plate, and apply selected light and/or dark colors for the second registered printing of the monoprint. 5. Cut away the last areas of the image. Select the final colors (often dark), register plate and paper, and print to complete the monoprint.

143
Rosalyn Richards Lewisburg, PA Nerves, Etching 20 x16 My print “Nerves” is part of a group of three prints dealing with the energies of the body as the subject. With “Nerves” I used a Lazertran photocopy transfer method to create a subtle image of neurons as a background field. I added another copper plate to the image in order to deepen the space, to enhance the color relationships, and to create a dialogue between the hand drawn lines and the more photographic element. I have sought to create a visual atmosphere with this piece and free the lines from the representation of forms. There is a specific energy to each mark and line that can create a sense of fluidity and open-endedness, leading the viewer to multiple interpretations of the imagery.

144
P. J. Rogers Akron, OH Layers of Time (in the Garden) #1, Archival Pigment Inkjet Print 18 x 21 This piece is made up of twelve layers of images which have been adjusted many times. I have been developing a digital technique to bring together the look and feel of etching and woodcut, the traditional techniques I have worked with as a printmaker. I have used the functions of Photoshop software to develop the work from images I have collected. When drawing images I realize how difficult it is to catch that special moment as light, atmosphere and object constantly change. I wish to express change and movement and that time is made out of the overlapping of many little moments. I am looking for the moment when the light and atmosphere come together in a perfect balance and you are lifted out of yourself. I feel a spiritual connection to nature and intend the work to be universal and specific at the same time.

145
Rob Roy Leominster, MA Oil Storage Tanks #18, Iris Print 12 x 12 “Oil Storage Tanks if-j 8” is an Iris print on 310 gm William Turner made in 2009 Step 1: Platemaking and Printing Bevel the edge of a plexiglas plate. Degrease the plate with alcohol. Draw image using black etching ink and various size brushes. Erase unwanted image using turp with paper towels and Q-tips. Clean the edges of plate with paper towels Soak Reeves BFK paper for 5 minutes. Blot paper. Place plate with the drawn image on the bed of an etching press. Lay dampened print paper on top of the plate. Run plate and paper through the press with 3 felt blankets. Let print dry. Clean plate with mineral oil. Step 2: Computer Imaging Take a high resolution digital photograph of the monotype printed in Step 1 Load photograph onto a computer. Add color using Photoshop. Print the resulting image with an Iris printer.

146
Eleanor Rubin West Newton, MA Falling into Herself, Woodcut Unique Impression 20 x 16.75 This image is one of several variations printed from a single woodblock. The dark area was overprinted on top of a lighter print, (ghost), that was printed in the reverse orientation, (upside down). The leaf-like shape just off center, was created with a stencil. The stencil prevented dark ink from printing in the area of the large wing, so that the lines of the underlying ghost impression are clearly visible in this area. The intended effect is one of metamorphosis challenging stability . Plate making: The wood is shina, a fine-grained plywood from Hokkaido. The block is 1/4” thick. The artist used Japanese woodcut gauges to cut the block. Printing: An etching press and felt blankets were used. The paper was not dampened. Oil-based black printing ink was used. The stencil was cut with mat knife from non-porous paper.

147
Masaaki Sato New York, NY Newsstand No 61-AB, Solarplate Etching and Hand Color 18 x 26 "Newsstand No. 61-AB" is a solarplate etching, hand colored Concept I try to depict the culture behind “language” or “letters” in a microcosms of "Newsstand". I change the words and images on the cover of magazines to express what I have been thinking. The technique of Solaplate etching 1. A printmaker draws on a transparency by pen, ink, brush, pencil. 2. The transparency is placed face-to-face with the solarplate and exposed in the sun. UV light penetrates clear areas of the transparency and hardens the polymer, while areas beneath the opaque lines of the drawing remain soluble. 3. The plate is scrubbed in tap water and the soluble areas are washed away. 4. Once processed, the plate has grooves and lines similar to an etched plate. 5. Print same as you would an etching plate

148
Susan Schmidt Cambridge, MA Reasons to go on..., Pronto Plate with Chine Colle 15.5 x 14 "Reasons to go on…" is a pronto plate with Chine collé printed on Rives BFK in 2008. Start with an acrylic wash drawing on drafting film. Scan the drawing and print it onto a Pronto Plate. Proof the plate until it looks like the wash drawing. Create a digital file with the silhouette of a girl, sized to the plate. Cut out the head and save the background shape for a chine collé. Roll up the plate. Coat the background shape with YES glue and lay face down on plate. Print. The background shape will adhere to the printing paper rather than the plate, creating the silhouette.

149
Marsha Schweitzer Los Angeles, CA Mantle of Memory, Photo Etching 19 x 14 Wishing to incorporate a 1939 photograph of my maternal family, I made a collage of that photograph and one of myself, drew into it until satisfied and made a disc which I took to John Greco of Josephine Press in Santa Monica, California, to have the etching plate fabricated. A 16 gage Revere Hydro-Coat pre-sensitized zinc plate was cut to the size of the film positive made from the disc, in half tones at 130 dpi. The film and plate were placed in a vacuum frame, emulsion sides touching, and exposed for 13 minutes with a 1,000 watt spot metal halite bulb. The plate was developed for 1 minute in Revere Hydro-Coat developer, descummed, rinsed in warm water to cure, then etched in a 1/7 solution of nitric acid for 6 minutes. I printed the plate intaglio with sepia ink, in an edition of 15, onto Arches Cover paper.

150
Thomas Seawell Commerce, TX Dancing, Digital and Screen Print 17 x 16 The print "Dancing" was first thought of as a ceramic wall piece and, since I also work with ceramic sculpture, it was created as such. Then, having recently becoming interested in digitally printed imagery, I carefully photographed the ceramic piece and had it printed digitally onto the papers that I usually use for screen printing and other printmaking methods. I did the layout for the digital part and participated in the actual printing. Once I had the digital prints I created a series of hand cut and drawn stencils and concluded the edition by hand printing (pulling the squeegee) a number of colors of lines, shapes, and shades as in my usual way of working in my studio.

151
John Paulus Semple North Pomfret, VT Self Portrait at 79, Etching 15 x 12 PLATE MAKING: I use a copper plate and bevel the edges. I apply my ground hard or soft with a roller. My etching is done with iron perchlorate. PRINTING: I always use Graphic Chemical dark brown ink. My papers are either Rives, Arches or Graphic Chemical's heavyweight and they are printed on a press. My best prints come from Rives heavyweight.

152
Sarah Shallbetter Somerville, MA Untitled (Boston Ballet Series), Carborundum Collograph and Drypoint 11.5 x 11 This print, made in 2007, is a carborundum collagraph with drypoint on steel and Lexan plates printed on Hahnemuhle bright white paper. PLATE MAKING Plate 1: Cut steel plate to desired size and bevel all edges with metal filer. Degrease plate with alcohol. Mix a ratio 2 tbsp. of liquid medium and 2 tbsp. of carborundum #220 grit in small container with a spoon to make a paste. Apply on plate with #8, round brush. Let plate dry completely. Plate 2: Measure and cut Lexan plate to exact size as steel plate. Lay on top of steel plate with applied image. Use drypoint needle to make marks as needed. PRINTING Cut paper to required size and put in water bath for 20-30 minute soak. Mix Charbonnel etching ink to desired color. Apply to steel and Lexan plates with plastic scraper. Wipe steel plate with tarleton, then with telephone book pages or silk fabric to polish clean areas. Use Q-tips for smaller areas. Gently wipe Lexan plate with telephone book pages or silk fabric. Clean the edges of the plates with rag. Take paper out of water bath and bloat. Check pressure of press bed by doing a test with scrap paper and extra plate. Place inked steel plate face up on bed of an etching press. Lay dampened paper on top and place a sheet of newsprint on top. Run through press with blankets. Let press stop just at edge of paper after it has gone through press. Then, lift paper, remove steel plate and insert Lexan plate. Tighten press by a touch and run through press a second time. Let print dry between blotters under weight of boards. Clean plates with mineral spirits.

153
Liz Shepherd Cambridge, MA Immigrants #1, Intaglio 18 x 21.5 Immigrants is a photo polymer etching printed on BFK Rives White paper. It was made using a Toyobo plate from Anderson and Vreeland. Ingredients: 1 Toyobo plate Bone black ink 1 image printed on Stiff black ink Pictorico film positive Transparency base 1 sheet BFK Rives Paper Tarlatan Place Toyobo plate together with the Pictorico film positive in a UV light exposure unit. Expose for 25 seconds. Wash out plate in tray of water for 10 seconds without agitating water, then brush the plate lightly for 25 seconds. Rinse under running water briefly. Return plate to water bath and brush the plate for an additional 35 seconds. Quickly blot the plate on newsprint. Then dry it with a hair dryer for at least 3 to 5 minutes. Let the plate cure in the sun until hard. It will change color from blue to green when cured. Ink, wipe and print the plate as per usual intaglio process

154
Anne Silber Brighton, MA Two Peonies, Serigraph 21.5 x 14 My works are limited edition serigraphs, hand-printed by me in small editions. They are printed on Lenox 100 paper, using hand-cut lacquer film stencils and oil-based inks. Most of my images require between ten and twenty stencils, each “traced” with a stencil knife, cutting the translucent film over the master pencil sketch visible underneath. I mix my inks from a palette of colors, and use a large amount of transparent base to thin the colors down so that they resemble (oil-based) watercolors. In many of my still lifes I enjoy working with light and shadows, and reflective and translucent surfaces such as glass or ceramics. I chose the serigraph “Two Peonies” for this exhibit to show how the layering of transparent and slightly opaque inks can be used to create such illusions.

155
Annie Silverman Somerville, MA Leaves, Lotus Pods, and Humminbirds, Multiple Plate Woodcut, Monotype, Polyester Plate Lithography 24 x 17.75 “Leaves, Lotus Pods, and Humminbirds” is a Multiple Plate woodcut, with monotype and polyester plate lithography in 2007 Carving and printing woodblocks links me to a tradition of printmaking that stretches around the world, and connects me, through my hands, to carvers and printers throughout time. This print has a background layer created by inking a wooden board and printing it as a monotype. Woodblocks: One plate of cardinal vine leaves, grown in my garden. The leaves were enlarged on a photocopy machine, transferred to wood with oil of wintergreen, and carved with Japanese woodcarving tools. Lotus pods and lattice leaves were taken from the New Century Dictionary, enlarged, copied, transferred, and carved and printed in the same manner. The hummingbird images were printed from Pronto plates, a form of polyester plate lithography. The images were from The LIVING WORLD, from 1891.

156
Richard Sloat New York, NY Uroboros, Etching and Engraving 18 x 24 "Uroboros" is an ancient symbol of a dragon or snake holding its tail in its mouth, it embodies thoughts of cyclical eternity. I started this print, in 1999, as an etching of The Ramble in Central Park calling it “Rambling”. My method is one of process where I will continue developing the print till there is nothing more to say. So the first state of the this etching was re-etched and additional engraved lines were added through subsequent states . I saw the image of the uroboros and brought it out through this process, and by state eight (S VIII) had changed the title to “Uroboros”. One beauty of an etching is that one can continue work on a piece , and still see its earlier manifestations. It is seen now it is in state thirteen (S XIII) completed in 2006. The reason I thought to bring it out now is that I have started to rework the plate and latter this year S XIV will be printed. The process continues.

157
Julie Brown Smith Monterey, CA What is Happening Will Become Memories, Linocut 14 x16 "What is happening will become memories", a hand-pulled linocut relief printed on Mulberry paper as an edition of 30 with 3 artist proofs was made in 2008. BLOCK CARVING PROCESS Choose a linoleum block. Make a drawing the exact size of the block. Trace drawing using a #3 pencil. Place drawing face down on block (in reverse). Using a pen, inscribe outline, pressing hard, onto block. (Graphite of drawing transfers onto block.) After transferring every detail onto block, remove paper. Redraw on block, filling in dark areas completely. Carve away all white areas with linoleum cutters. PRINTING Squeeze a line of water-based linoleum printing ink onto one end of glass plate. With a rubber roller, roll out ink in both directions until correct consistency is achieved, not too thin or too thick. Roll ink onto block in both directions. Place block on paper, turn block and paper over, and rub paper with a silver spoon. Pull print from block and hang to dry. Clean glass, block, and roller with water and dry carefully.

158
Ephraim Steinberg Richmond, VA Wheel 2, Screen Print 12 x 14 "Wheel 2", is a screenprint printed on 100lb vellum bristol paper in 2009. In the photo dark room, a color slide was processed to make cmyk negatives onto black and white film. The black negative was used to make a series of positives on high contrast film (Kodalith). The exposures went from overexposed ones, which became the shadow areas in the print, to underexposed ones, which became the highlight areas. A screen printing frame with 240 mesh polyester mesh was coated with Ulano QTX photo emulsion. The positives were then exposed to make the stencils for the print. These were printed with black and colored acrylic water based ink mixed with extender base to give a transparent effect. The opacity of the black ink was increased as the print went from the shadow area to the highlight area. The colored areas were printed after the first black was printed.

159
Stephanie Stigliano Malden, MA Water Lily Pods, Intaglio 12 x 14 The inspiration for this three-color copper plate etching came from time spent kayaking on Lake Damariscotta in Maine. I collected water lilies and other plant material. After working on pencil drawings in the studio, I coated the copper plates with hard ground and drew through the ground to reveal the copper. I etched using Ferric Chloride. After the initial line drawing, I developed lights and darks by applying a spray paint aquatint for a soft, even tone. Then I blocked out the lights and etched successive times to develop darks. Finally, I scraped and burnished the plate to smooth the transition areas and drew directly into the plate with a steel needle, dry point, to define some darker areas. When I finished with the plate, I experimented with color ink combinations and printed on white Rives BFK with Akua Kolor inks. The image was worked through eight states.

160
Donald Stoltenberg Brewster, MA Warship, Collagraph intaglio 19 x 16 This image is the result of my preoccupation with industrial forms, structures and light to produce a dynamic mood. The term collagraph refers to the method of constructing a printing plate, which is inked, wiped and printed like an etching. The plate base is 1/8 inch masonite onto which organza fabric is laminated with acrylic medium. If inked, wiped and printed, this would produce an even, dark tone. Further applications of acrylic liquid and paste progressively fill the texture of the fabric and can make lighter tones all the way to white. The paste is used for textures and lines in the print. The “Warship” plate was inked with yellow at the top, grading to red in the middle and blue-black at the bottom. These oil-based colors were blended using a tarlatan wiping of the plate. Highlights we created by using a paper wipe just before printing.

161
Henrieke Strecker Center Sandwich, NH Snow Woman, Chine Colle Solar Plate Etching 16 x 19 PAPERMAKING Self-made Kozo paper (cooked and hand-beaten mulberry bark into pulp) PLATEMAKING Make a digital negative. Contact printing via UV-light source (sun) with Nontoxic Solar Plate. Dissolve the unexposed portions of the plate with water. Make second exposure and dry plate in an oven to harden the emulsion. PRINTING Soak paper for 15 minutes. Alternate layers of wet and dry paper in a stack, and protect in plastic overnight. Apply Charbonnel ink with cardboard scraper. Wipe with tarlatan, then with telephone book pages to polish the clean areas. Clean the edges of the plate with rags. Place inked plate, face up with Kozo paper (Chine Collé), on top on the bed of the etching press. Lay the dampened Arches Platine paper on top. Run through the press with felt blankets. Let the print dry between sheets of tissue paper and boards. Clean plate with vegetable oil.

162
Kristen Struebing-Beazley Boston, MA Big Foot: One Plate, Three Realizations, 1. Photo Etching 2. Relief Roll 3. Open Bite 26 x14.5 I chose these three prints as examples of production from a single zinc etching plate which confirmed my belief that a well worked plate "never stops giving" until it is destroyed. The size of this photo etching was determined by a standard photo film dimension of 8 x 10". The viewer can see the progression by studying both the solitary foot and the deeply gnarled roots of an ancient live oak tree upon which my photographed foot rests. I normally ink one etched plate two ways. Traditional intaglio inking gives the positive image while a relief roll over the plate surface gives the negative image. Both are seen here. The third image was obtained by brushing stop out areas with liquid asphaltum between long acid bites in order to create deep crevasses, ragged plate edges and even holes. I found an acid attack to be a great way to accentuate the texture of the tree roots as well as detailing toe nails and aging the human foot. The plate, uninked, can also provide a layered embossment.

163
Evan Summer Kutztown, PA Bee, Etching, Drypoint 20.5x18 “Bee” is an intaglio print made using etching and drypoint techniques on a copper plate and is printed on Gray Murillo paper Plate Making—A preliminary drawing is done based on both the actual specimen and photos of it. The image is transferred from tracing paper to the grounded plate. The image is then created on the copper plate using successive steps of etching and drypoint. Printing—The paper is soaked for at least a half hour. Ink mixture applied with a cardboard dauber and wiped with tarlatan. The inked plate is placed face up on the press bed and then the blotted paper is placed on top of the plate. Three felts are positioned on top of the paper and it is run through the press. The prints are dried on top of blotters, then, between blotters.

164
Marsha Sweet Cleveland, OH Divine, Wood Engraving 14 x 11 “Divine” is a wood engraved block that was printed on Rives BFK white and hand-colored in 1997 MATRIX PREPARATION Sand shine off type-high end-grain boxwood block with very fine glasspaper. Darken block with a wash of medium value colored ink. Draw image on block with black india ink and white gouache. Place the block on a leather sandbag and rotate it when cutting. Cut the block with assorted wood engravers’ burins. Rub french talc into the cuts to observe progression of cutting. PRINTING Roll-up block with fine film of black oil-based ink using a hard rubber brayer. Place inked block face up on the bed of an etching press. Support the press roller with type-high wood strips at the edges of the bed. Place dampened paper over the block. Add felt blankets and pull the print in one pass. Dry prints on wall by securing with pushpins. Clean block with mineral spirits.

165
Lois Tarlow Newton, MA Notes from an Ancient Entomologist, Solar Etching 16.5 x 13 "Notes from an Ancient Entomologist" combines my interest in insects and ancient calligraphy. In fact, to me they look similar. I drew the image with a croquille pen on rice paper, scanned it, and printed it on a transparent film. I ‘aged’ the image by lightly rubbing it with a flat litho crayon. On a board a little larger than the image, I placed a foam pad. Next, a photo-sensitized steel plate covered with an aquatint screen. Then, a piece of heavy glass. I firmly clamped the ‘sandwich’ together, and exposed it to the sun for 85 seconds. I quickly replaced the aquatint screen with the image film, clamped all layers together, and re-exposed it for another 85 seconds. To etch the plate, I thoroughly washed it under water with a mushroom brush, dried it, hardened it in the sun, inked it, and printed it. Voila, a solar plate etching!

166
Mary Teichman Holyoke, MA No Exit, Color Etching 24.25 x 18 Four copper plates—beveled, Ferric Chloride solution, Hardground, Softground, Asphaltum, Etching Needles, Textured fabric scraps, Rosin Powder, Scrapers, Burnishers, Burins, Alchohol, Kerosene, Pencils, Tracing paper, Paper towels, Charbonnel etching ink, Alizaron Crimson, Prussian Blue and Chrome Yelloe powdered pigments, Burnt plate oil, Tarleten rags, Old phone book pages, Q-tips, Saunders Watercolor Paper. TECHINQUES: Line etching, Aquatint, Softground, Engraving Printing: Four copper plates, one for each primary color: yellow, red, blue and black. The plates are printed directly on top of the previuos color, wet on wet, producing secoddary colors as well as browns and grays. The ink is pressed under great pressure from the inked plated into the fibers of the dampened paper, producing rich, dense colors and textures that are unique to this medium. More painterly than many other printmaking proceses, each plate has a full and subtle range of values from light to dark and when overlapped the diversity of color is virtually limitless.

167
John Thompson Waltham, MA Untitled, Woodcut 22 x 18 This woodcut continues my exploration of moments of an intimate landscape, observing the many layers. Perhaps the viewing is from the top to the bottom of a pond. This might encompass reflections and ripples, stray leaves and sticks partially submerged, plants growing in different depths, currents moving silt, and finally reaching deep enough to touch bottom. While these images are in a sense landscapes, putting a more equal emphasis on each layer than exists in nature, moves the images into abstraction. For this monoprint I started by planning, drawing in ink, and carving ten separate woodblocks. These blocks were printed and overprinted onto a Chinese paper using oil-based printing inks, hand brayers and a French Tool Press. Each print in this series passes through the press up to a dozen times. The Chinese paper with the printed surface was cine-colled onto a sheet of Rives-BFK.

168
Caroline M. Thorington Bethesda, MD Contemplating Betelgeuse, Lithography, Chine Colle, and Digital Writing 18 x 21 “Contemplating Betelgeuse”, is a lithograph about puns and contemplation. The imagery is full of fireflies and dung beetles, a glass of juice and a young woman gazing at Orion – all of which might be seen on a summer’s night. The simple script of background writing adds a reflective note to the print. Bound together, they recall the essence of summer. It is for the viewer to discover the puns and contemplate them or to only see the objects and enjoy them. The techniques used to create “Contemplating Betelgeuse” span several Centuries of printmaking knowledge. They are: Lithography (tusche water washes, razor blades and litho crayon), Chine Collé and Digital Writing. Lithography, literally “stone writing”, is a 19th Century technique. Chine Collé, the oldest, is a form of collage used in printmaking. Digital Writing is a new form of technology that uses a 21st Century computer and ten digits.

169
Arthur Thrall Milwaukee, WI Finale, Engraving 15 x 18 "Finale" is a black & white engraving on a zinc plate printed on 140# Somerset texture paper in 2009. Prepare plate Bevel four edges of 8 x 11 zinc plate with metal file Create image to emphasize musical rhythms (in reverse) Engrave lines with burin and various engraving tools Add notes & words by tapping metal music punches on plate Create gray shapes with scraping tool Burnish or smooth out rough edges or burrs on engraved lines Prepare paper Take sheet(s) of white Somerset paper Soak for about an hour in water-filled tray Blot excess water with separate sheets of blotting paper Ink plate Thin out ink with plate oil on a glass surface Apply bone black etching ink with a card applicator to plate Use tarlatan pad to spread ink and make sure all lines are inked Wipe surface and edges with clean tarlatan Print plate Set roller pressure on Dickerson Motorized Press Place and position inked plate face up on press bed Position dampened paper on inked plate Cover with three felt blankets Run through press and place print between blotter sheets to dry Clean plate with mineral spirits

170
Bob Tomolillo Lynn, MA China Moon, Lithograph / Digital 12 x 12 The main drawing was executed on a Bavarian Iimestone, processed and printed. A proof was taken of the black and white image and crop marks were set up on the paper for the color registration. The black and white print was digitally scanned and a file was created. Using an Addesso pad with a digital pen and Photoshop techniques the background colors were added. Several trial proofs were needed to ensure proper color saturation on the coated digital paper. The entire edition of the background color was printed with a digital printer. The digital backqround print was then registered on the stone and over printed with the original drawing using a Fuchs and Lang litho press. The print is a commentary on the U.S. and China relationship

171
April Vollmer New York, NY Buds Transformed, Japanese Woodcut 16 x 20 "Buds Transformed" was made using 4 blocks of Shina 5-ply plywood and is printed on Awagami kozo Japanese paper in 2010. Block Making Transfer digital sketch to four blocks, including the kento registration marks. Do the color separations for each color in your head while cutting: green flowers, blue shadow, blue detail and yellow stamens. Proof, and correct cutting for the single stem of flowers. Printing Apply chromium oxide and hansa yellow pigment dispersion to the first block, print four times, rotating the paper in the kento registration notches each time, to create a radiating, partially overlapping image of four stems. Do the same for each successive block, using pthalo blue, quinacridone violet and midori yellow. For some blocks, only apply color to some portions. Use plain water to bleed out some of the colors to create "bokashi" gradation printing. Print using a baren, and keep the paper damp while printing. Stack finished prints between newsprint and dry under weight. View under raking light.

172
Sylvia Solochek Walters Oakland, CA Untitled (Woodpeckers), Woodcut 12 x 20 “Untitled (Woodpeckers”) is a one-off proof, a combination single block and reductive woodcut, with acetate stencils. The image is a trial impression made to test the development of the birds for another larger print. Once completed, the birds were positioned on a partial proof of floral material from still another older block. My blocks are printed by hand with a wooden spoon. Stencils hinged to the block are used to define almost every color, and, simultaneously, to protect the rest of the paper from excessive ink layers. After each color is printed, the corresponding area of the block is removed until the image is completely printed and the block is almost entirely destroyed. I would have liked to submit the editioned print in which the woodpeckers appear for BP’s 2010 member show, “thINK,” but it did not satisfy the exhibition size requirements.

173
Carol Wax Peekskill, NY Writer’s Blocks, Color Mezzotint and Engraving 18 x 16 Mezzotint is a form of engraving but, unlike burin or line engraving, tonal images are created deductively. It's similar to drawing by blackening white paper with charcoal and creating an image by erasing the charcoal. In mezzotint, a copper plate (that would normally print white) is made to print black by roughening the surface using a tool with a serrated blade called a rocker. Systematically rocking in many directions pricks up thousands of tiny copper burrs, creating a field of burrs that hold ink and print as a velvety black tone. To make the image, the burred ground is incrementally scraped away or burnished down. The more burr is removed or squashed, the less ink is held and the lighter the shade of grey will print. Removing the ground entirely produces white. The ability to achieve dramatic chiaroscuro lighting effects through the mezzotint engraving process drew me to the medium. RECIPE I. Bevel edges of a copper plate 2. To create ground, use mezzotint rocker (any gauge) to rock in 24 to 36 directions over plate surface 3. Transfer image to rocked plate by tracing over carbon paper 4. Sharpen scraper and selectively shave down ground or use burnisher to squash ground in increments to create grey tones 5. Remove ground completely and polish to obtain white 6. Repeat process on separate plates if several colors are required 7. To print, roll etching ink onto plate 8. Wipe off excess ink with tarlatan, then Wipe with palm of hand or fingertips 9. Clean plate edges 10. Place plate on bed of rolling press I I. Place dampened paper over plate 12. Cover paper with woolen felts 13. Run through press 14. For color: repeat inking and wiping separate plate(s) and print in registration with first plate (Note: For multiple plates, print key plate last.) 15. Slowly peel paper off plate, place between blotters to dry for at least 24 hours

174
Deborah Weiss Ridgefield, CT Structure +Nature Squared (study), Woodcut 18.75 x 18 NATURE + STRUCTURE SQUARED (THE GREEN PRINT PORTFOLIO) 1 Block all shina plywood 1 Sheet sustainable paper Environmentally conscious ink CREATE an original woodblock that not only inspires the appreciation of a natural plant form but is also printed using sustainable inks and paper. USE inks that are made from natural gum and soy binders, which emit no fumes and do not require harmful solvents. PRINT on papers made from Nepal’s daphne bush grown in managed forest, harvested by hand using no machinery or chemicals, dried in the sun and brought down from the mountains by animal and man power. TRANSLATE a plant form onto a woodblock which will yield a recognizable yet altered image. This is done by deconstructing the established image and printing only segments of it’s recognizable silhouette. INCLUDE the image in a portfolio and share the images at www.greenprintportfolio.com

175
Art Werger Athens, OH Distraction, Color Mezzotint 26 x 18 “Distraction" is a combination mezzotint and aquatint (etching) made from three plates. While the work done on the plates is quite time consuming, the printing is relatively straightforward, being printed in basic yellow, then magenta and finally cyan. The darkest tones are achieved through the combination of all three plates. As to the platework, Wikipedia explains, "Mezzotint achieves tonality by roughening the plate with thousands of little dots made by a metal tool with small teeth, called a "rocker." In printing, the tiny pits in the plate hold the ink when the face of the plate is wiped clean."* The yellow plate is achieved through etching and aquatint.

176
Jeanne Williamson Natick, MA Walls from Fences Series #5, mixed media on fabric Jeanne Williamson’s “Walls from Fences Series #5” was created on fabric. Using fabric paint, she monoprinted the texture of an orange construction fence on a white piece of cotton fabric. She handstamped the one inch black squares on the fabric using hand cut rubber erasers. After the paint was dry, she handpainted inside the squares of the print of the construction fence, sometimes painting on the front side of the fabric, and sometimes on the back side of the fabric. The lines of the printed construction fence were stitched to highlight the grids. The fabric was then coated with watered down matt medium to stiffen it and to create a more “paper-like” appearance. The final touch, a small amount of acrylic paint, was dotted inside the small squares at the intersection of the stitched lines. Ingredients: 100% cotton fabric fabric paint acrylic paint thread matt medium

177
Ellen Wineberg Watertown, MA Prototypes 7, Digital Prints on Sewn Canvas on Paper with Stencil 18 x 26 Small digital photographic prints on rice paper Machine stitched onto canvas pieces Collaged to hand stenciled paper A composition of miniature prototypes of actual handmade totebags. For the large bags, my digital photos are printed backwards with a Canon i960 desktop printer onto tee-shirt transfer sheets. Then they are ironed onto plain white fabric to be sewn as pockets or patches to the real handmade totes made by Lisa Dudley, my collaborator in New York.

178
Casey Wise West Bloomfield, MI Night Conch, Mezzotint 15 x 14.75 “Night Conch” stems from my adolescent years growing up on the shores of Lake Huron. The printing process is called a mezzotint which falls under the category of intaglio printmaking. The image was done on a copper plate and printed on Copperplate paper with Graphic Chemicals Vine Black Ink. The plate has a burr raised on its surface with an eighty-five gauge rocker. This creates a dense rough surface that will hold an abundance of ink. If printed at this stage, a dense black image would appear. Next, the image is traced onto the surface of the plate. The image is created by scraping and burnishing the burr off of the surface of the plate. The more of the burr that is removed, the lighter the value will be when printed. The process is much like creating a charcoal drawing when working from dark to light.

179
Nina Wishnok Natick, MA Close Up, Reach Out, Monoprint (Drypoint + Woodblock + Chine Colle) 16.5 x 16 "Close Up, Reach Out" is a monoprint (with drypoint, woodblock, chine collé) was made in 2005. Ingredients: - 7.75” x 7.5” plexiglass plate - carved woodblocks (3 separate blocks) - rice paper, Rives BFK - ink Started with ghost-print of large woodblock on rice paper; then printed onto this sheet several more times, using multiple woodblocks to layer images. Placement of paper on woodblock for each pass through the press was largely random. Incised plexi plate with dental tool and sandpaper, and laid over woodblock-printed sheet to determine placement/cropping. Printed sheet was torn down to size of plexi plate and back was coated lightly with glue. Plexi plate was inked and wiped, then placed face-up on press bed. 7.75” x 7.5” woodblock print was placed face-down onto plate, dampened sheet of Rives BFK was placed over both, and all was run through the press with felt blankets.

180
Amy N. Worthen Des Moines, IA Le Viaggio Della “Chiaretta” (The Voyage of the Chiaretta), engraving, drypoint, roulette 16 x 21.75 My engraving of shop windows that line Piazza San Marco in Venice recounts a sailing trip I took to Croatia on the “Chiaretta,” Venetian friends’ two-masted schooner. I filled the San Marco shops in my engraving with boats and places I drew during this trip. This is a burin engraving with drypoint and roulette. I make a soft graphite drawing of my image on tracing paper; coat a copper engraving plate with white wax; place the drawing face-down on the waxed plate and send it through the press so that the graphite transfers to the plate. I drypoint the outlines of the drawing with an etching needle, then remove the wax. I engrave the lines with burins, and I use a very tiny 19th-century roulette and burnisher to create the tonal areas. I printed the plate with gold metallic lithography ink mixed with black etching ink on Magnani Incisione.

181
Joyce Zavorskas Orleans, MA Paradoxical Evidence, Etching/aquatint 18 x 15 CONCEPT I used an old tarnished copper plate that had been forgotten in a drawer for 25 years. I had just the day before completed a delicate 3-plate color etching/aquatint/drypoint requiring exact registration, so this odd plate was not carefully planned. This was to be an experimental plate, to test the limits of non-toxic etching procedures. I had etched complex multiple-plate aquatint plates in the traditional acid techniques for decades, and decided to try something more random, to allow for quirks and oddities beyond my control. The resulting print relates to my recent focus on the uncertainties and rhythmic oddities of natural forms, echoing the social and political unrest across the globe. PLATE MAKING Bevel old plate Open bite in ferric chloride 42 baume full strength for 20 minutes to remove tarnish Degrease the plate with a Bon Ami and water paste made, or soy sauce straight from the bottle. Rinse and dry plate with paper towels, then hair dryer. Apply airbrush aquatint using Z-Acryl Polymer Hard Ground Emulsion in ventilated airbrush booth. Etch plate in four stages, blocking out with Z-Acryl Stop-out, for a total of 80 minutes. Dip in vinegar bath to prevent oxidation, rinse immediately, dry with rag and hair dryer. PRINTING Soak paper 1 hour, blot in bath towel, place on top of inked plate on press bed. Apply Black Gamblin etching ink, wipe with tarlatan on the hotplate, then delicately hand wipe; clean edges with soft rag. Print with American French Tool 36x60” etching press, firm pressure, two felts only.

182
Malgorzata Zurakowska Lexington, MA Apocalypse - Angel of Prey, Mezzotint 26 x 18 The magic of mezzotint starts with a meditative process. First, for hours one listens to the mantric sound of a moving rocker: spiky tool, which gradually changes the mirror polished copperplate into a velvety surface. Then follow endless hours as the image is forced from a profound darkness, bringing it to life, by adding more and more light. If light is becoming too dazzling, some already burnished areas have to be re-rocked and pushed back to the darkness... and the process of pulling out light starts all over. There is no one recipe for the perfect image. Before the delicate balance between light and shadow is achieved, every possible tool is brought into action: burnishers, scrapers, burins, even rockers are used as drawing tools. Still, no matter how the process is mastered, every decision is a “miracle of becoming”. Light emerging from darkness, evoking the all-permeating blueprint of creation – that’s the magic of mezzotint.