"A Germ so Tiny": Margarete Susman's Messianism of Small Steps
Upload
khangminh22Category
view
1download
0
Tiny Tag Data logger – Use of
Barbara Wilson
Immunisation Coordinator
Public Health Unit – Albury
2013
Data Loggers:
TinyTag Data Logger
TinyTag Data Logger – Use of
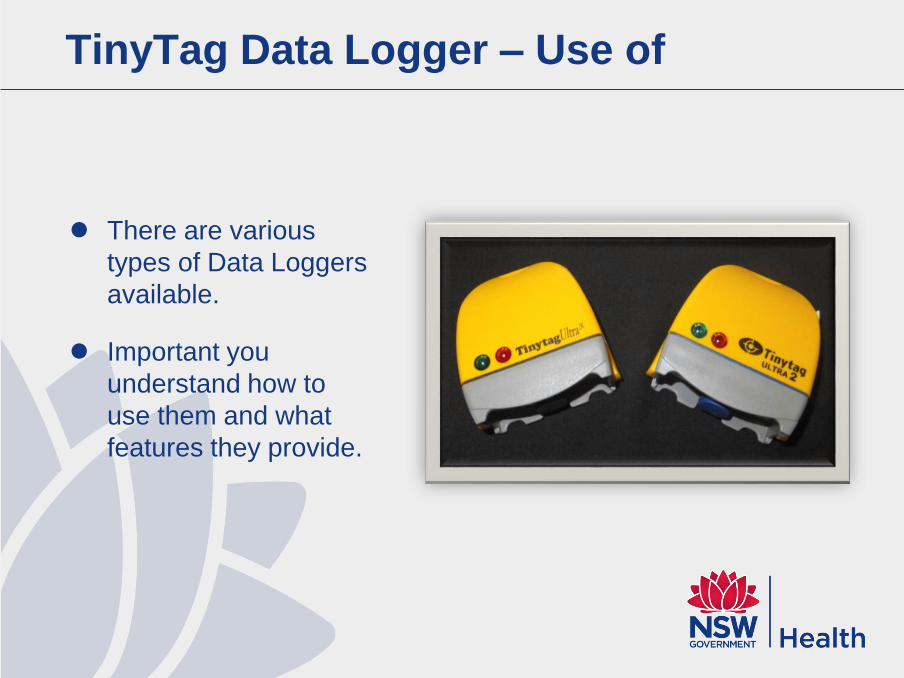
There are various
types of Data Loggers
available.
Important you
understand how to
use them and what
features they provide.
TinyTag Data Logger – Use of
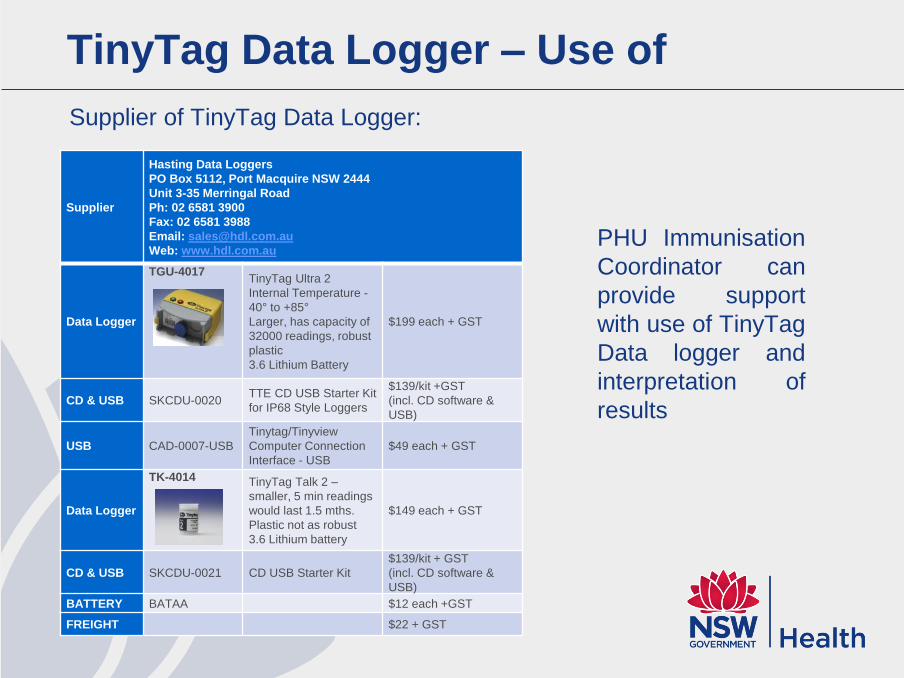
PHU Immunisation
Coordinator can
provide support
with use of TinyTag
Data logger and
interpretation of
results
Supplier
Hasting Data Loggers
PO Box 5112, Port Macquire NSW 2444
Unit 3-35 Merringal Road
Ph: 02 6581 3900
Fax: 02 6581 3988
Email: [email protected]
Web: www.hdl.com.au
Data Logger
TGU-4017TinyTag Ultra 2
Internal Temperature -
40° to +85°
Larger, has capacity of
32000 readings, robust
plastic
3.6 Lithium Battery
$199 each + GST
CD & USB SKCDU-0020TTE CD USB Starter Kit
for IP68 Style Loggers
$139/kit +GST
(incl. CD software &
USB)
USB CAD-0007-USB
Tinytag/Tinyview
Computer Connection
Interface - USB
$49 each + GST
Data Logger
TK-4014 TinyTag Talk 2 –
smaller, 5 min readings
would last 1.5 mths.
Plastic not as robust
3.6 Lithium battery
$149 each + GST
CD & USB SKCDU-0021 CD USB Starter Kit
$139/kit + GST
(incl. CD software &
USB)
BATTERY BATAA $12 each +GST
FREIGHT $22 + GST
Supplier of TinyTag Data Logger:
How to preform a
Data download from:
TinyTag Data Logger

TinyTag Data Logger – Use of
Collect TinyTag Data Logger:
Remove the data logger from
the fridge and record on the
Daily Temperature chart.
Documentation of ‘time’ Data
logger removed on Daily
Temperature Chart/graph
correlates with any temperature
increase on the Data Logger
reading
TinyTag Data Logger – Use of
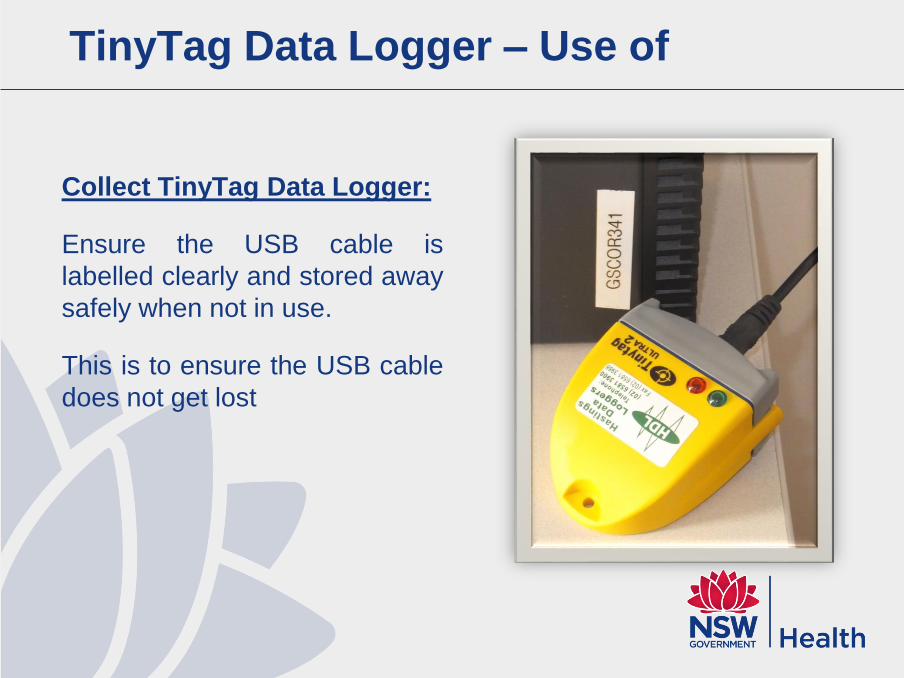
Collect TinyTag Data Logger:
Ensure the USB cable is
labelled clearly and stored away
safely when not in use.
This is to ensure the USB cable
does not get lost
TinyTag Data Logger – Use of
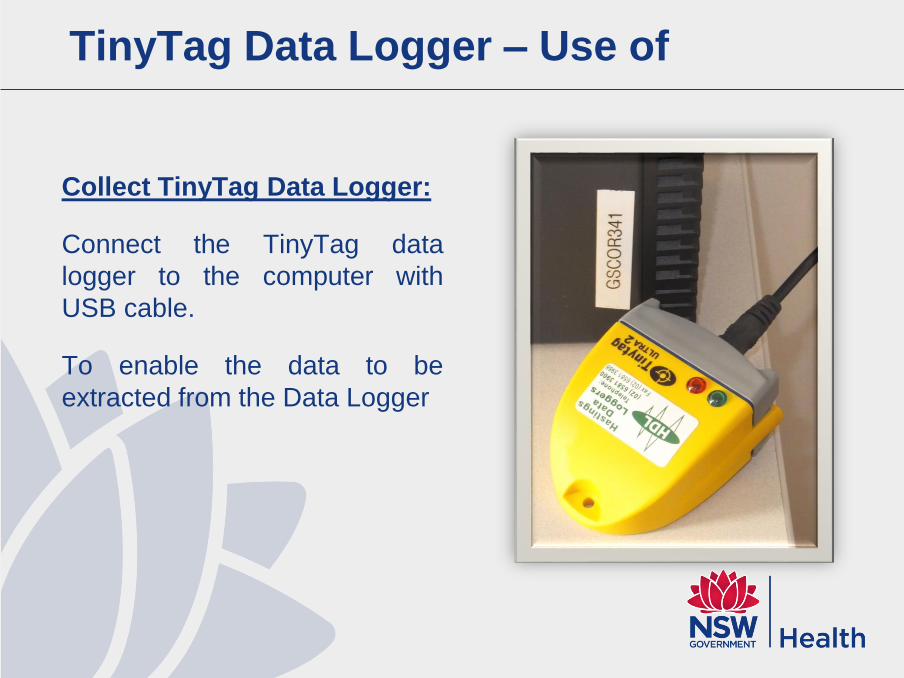
Collect TinyTag Data Logger:
Connect the TinyTag data
logger to the computer with
USB cable.
To enable the data to be
extracted from the Data Logger
TinyTag Data Logger – Use of
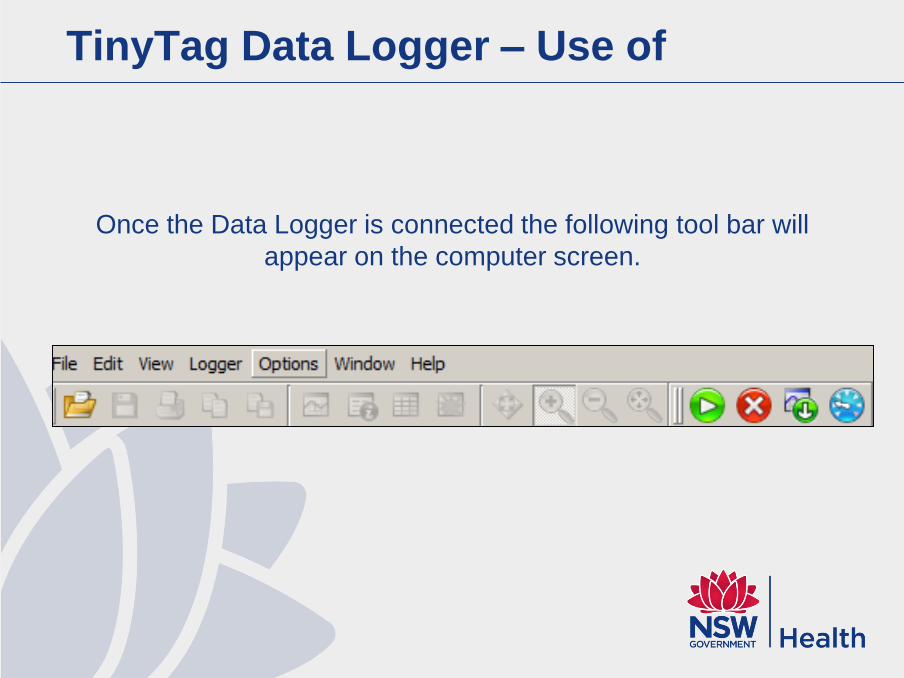
Once the Data Logger is connected the following tool bar will
appear on the computer screen.
TinyTag Data Logger – Use of
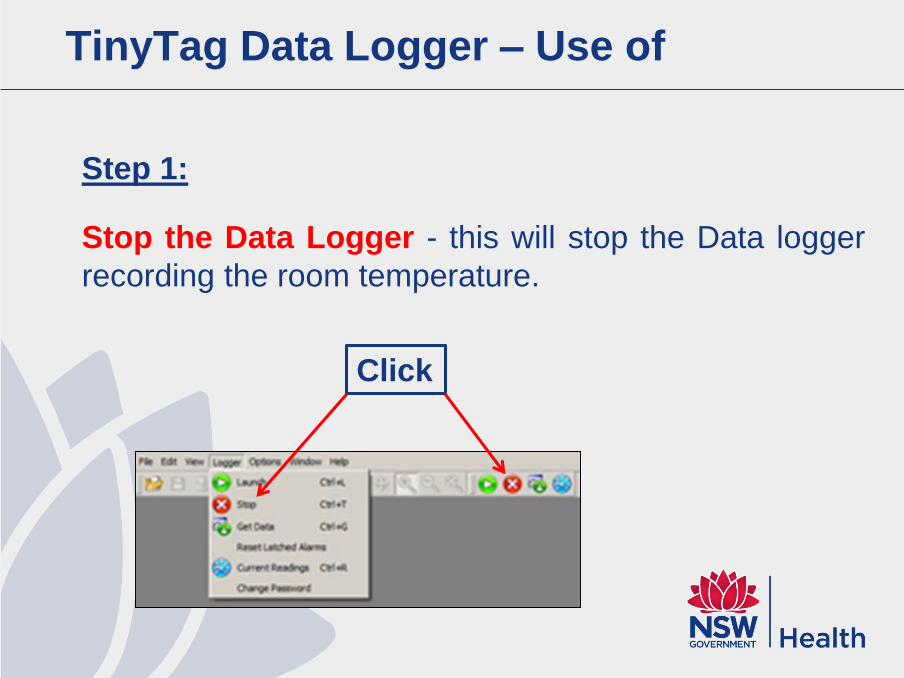
Step 1:
Stop the Data Logger - this will stop the Data logger
recording the room temperature.
Click
TinyTag Data Logger – Use of
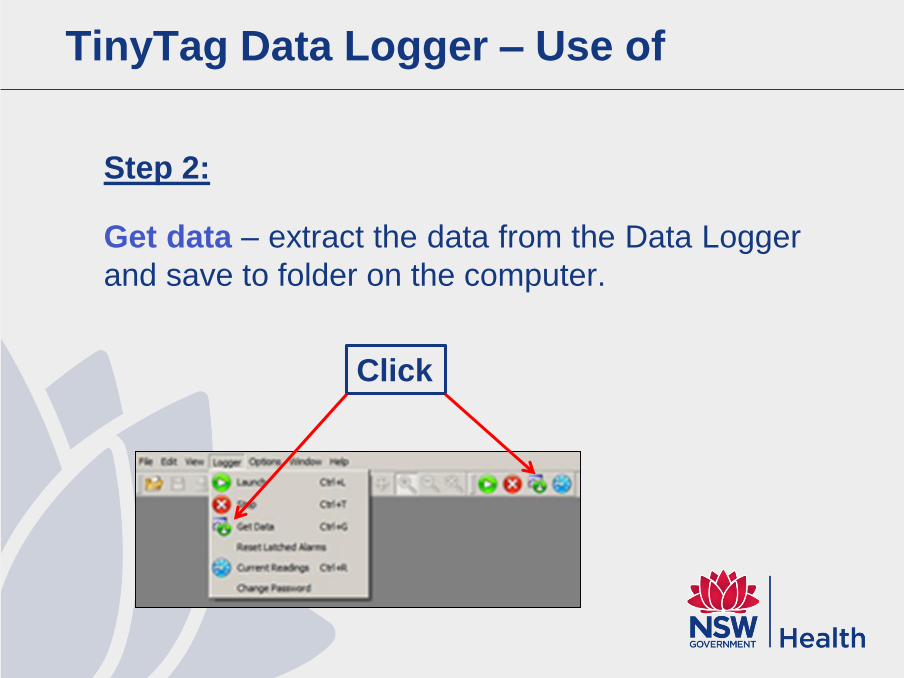
Step 2:
Get data – extract the data from the Data Logger
and save to folder on the computer.
Click
TinyTag Data Logger – Use of
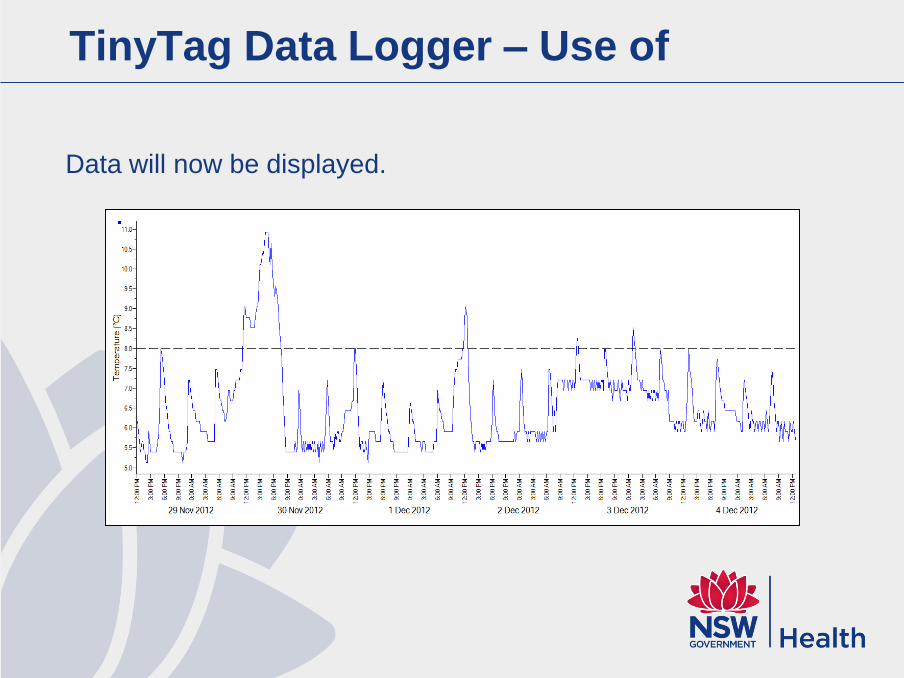
Data will now be displayed.
TinyTag Data Logger – Use of
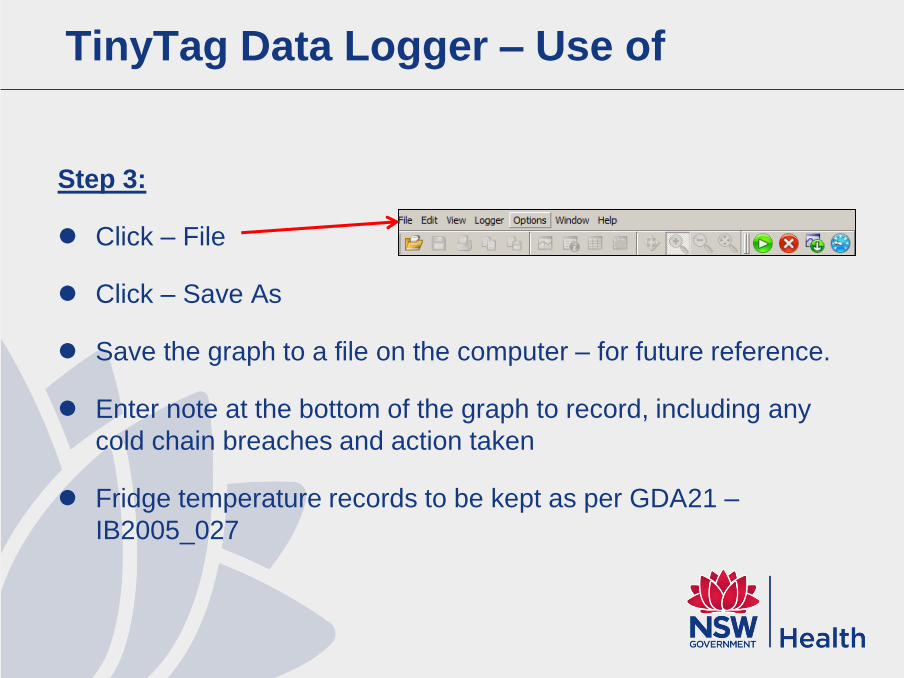
Step 3:
Click – File
Click – Save As
Save the graph to a file on the computer – for future reference.
Enter note at the bottom of the graph to record, including any
cold chain breaches and action taken
Fridge temperature records to be kept as per GDA21 –
IB2005_027
TinyTag Data Logger – Use of
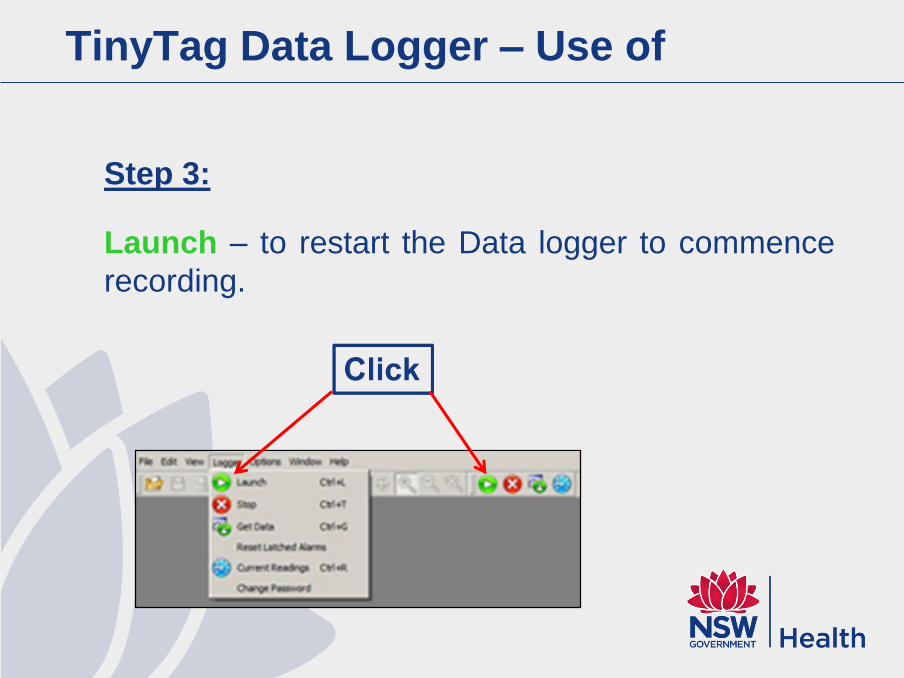
Step 3:
Launch – to restart the Data logger to commence
recording.
TinyTag Data Logger – Use of
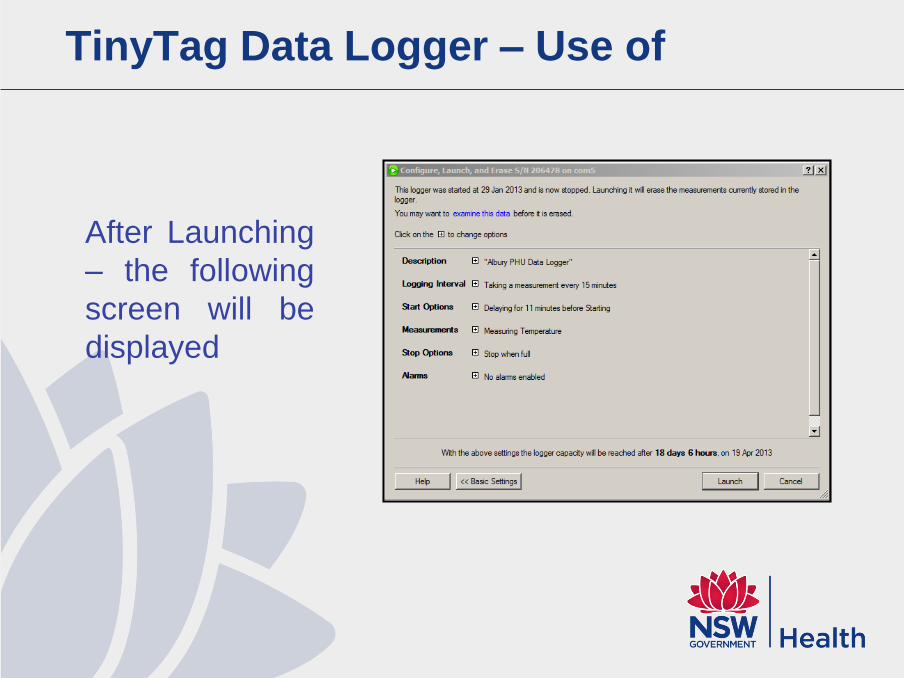
After Launching
– the following
screen will be
displayed
TinyTag Data Logger – Use of
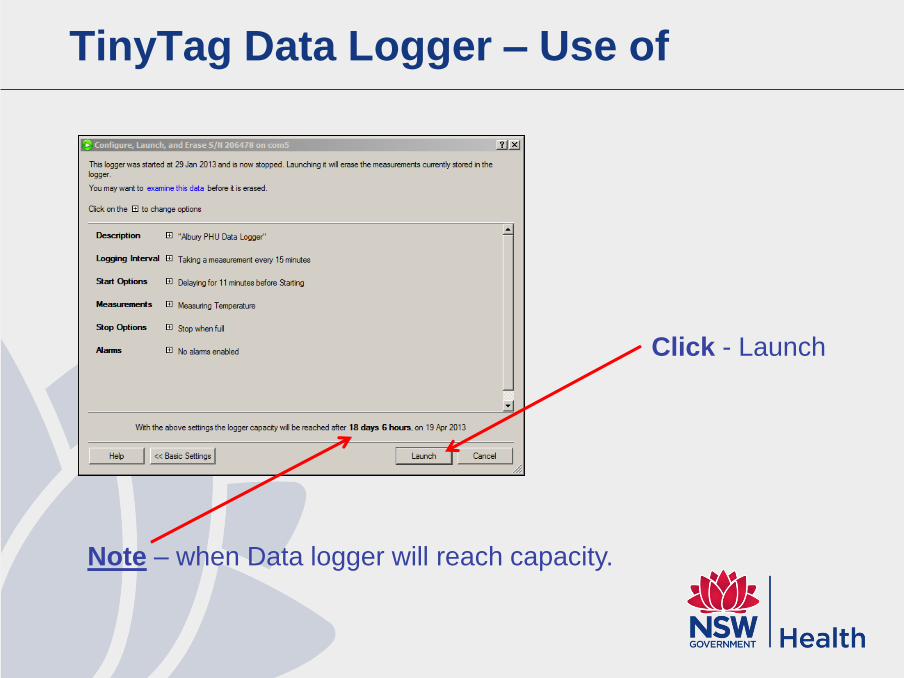
Click - Launch
Note – when Data logger will reach capacity.
Change the settings
of:
TinyTag Data Logger
TinyTag Data Logger – Use of
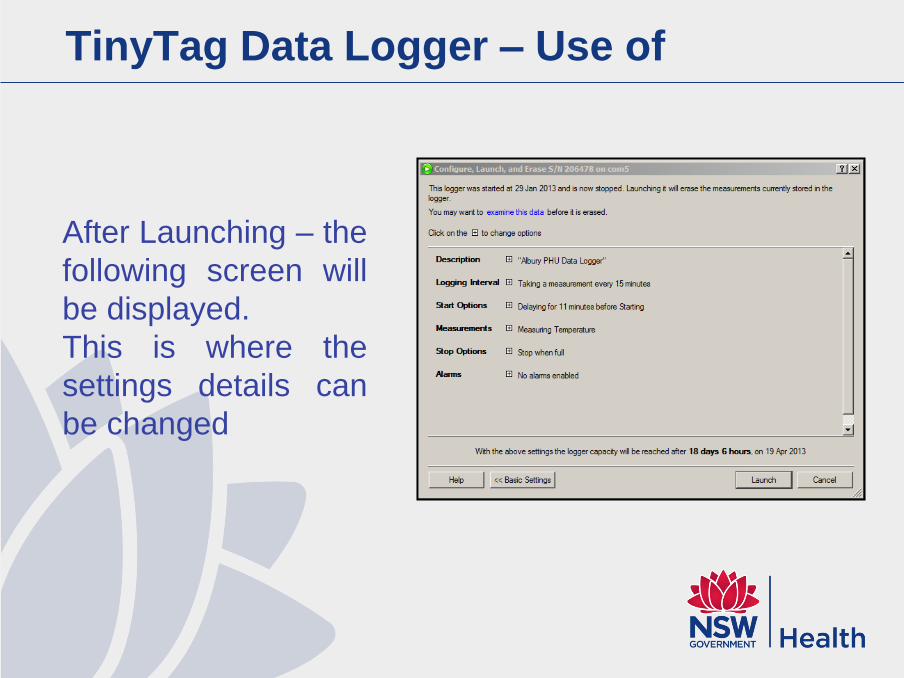
After Launching – the
following screen will
be displayed.
This is where the
settings details can
be changed
TinyTag Data Logger – Use of
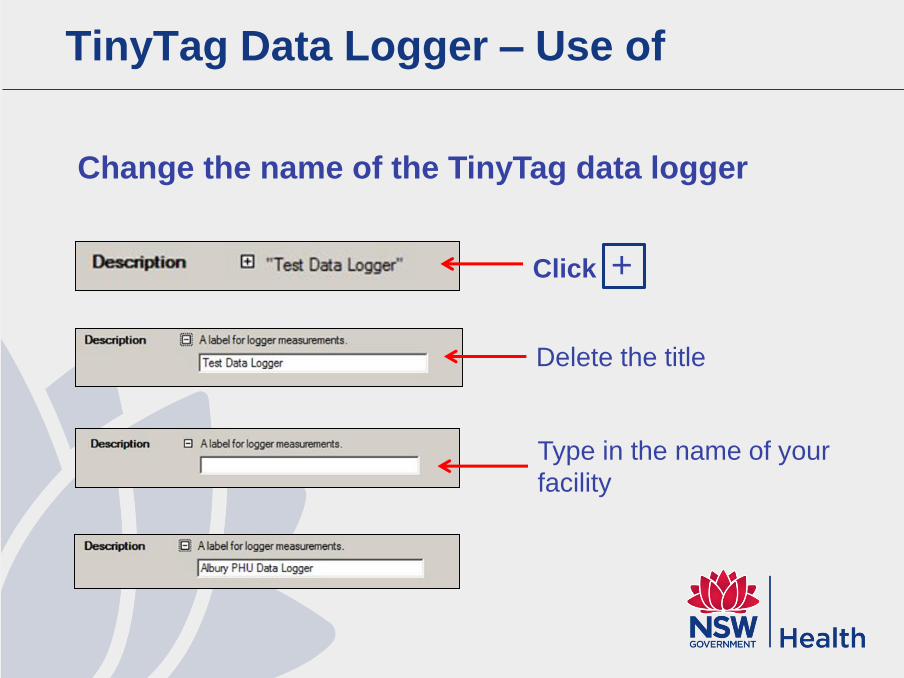
Change the name of the TinyTag data logger
Type in the name of your
facility
Click +
Delete the title
TinyTag Data Logger – Use of
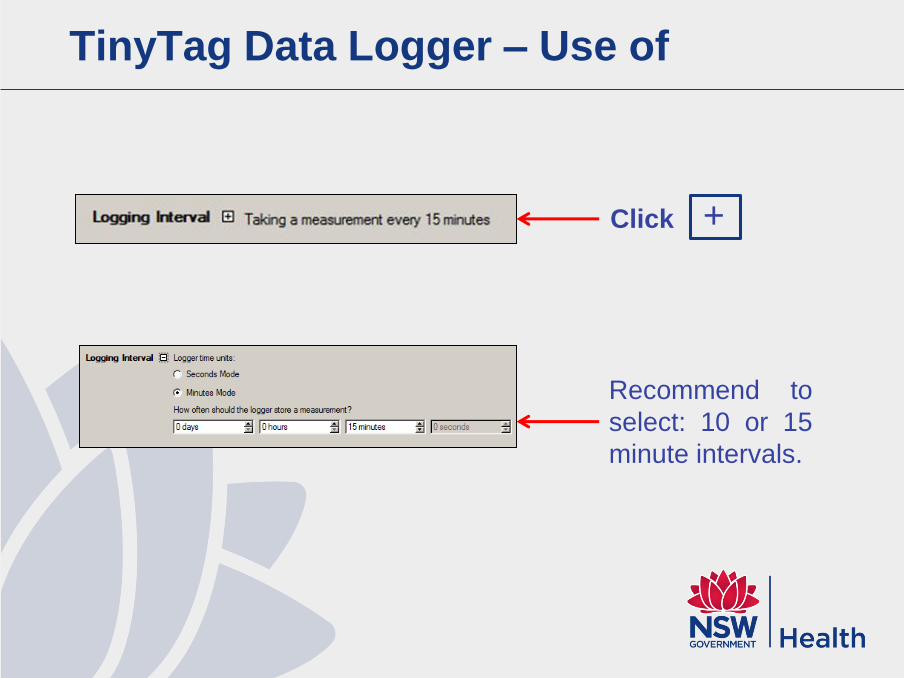
Click +
Recommend to
select: 10 or 15
minute intervals.
TinyTag Data Logger – Use of
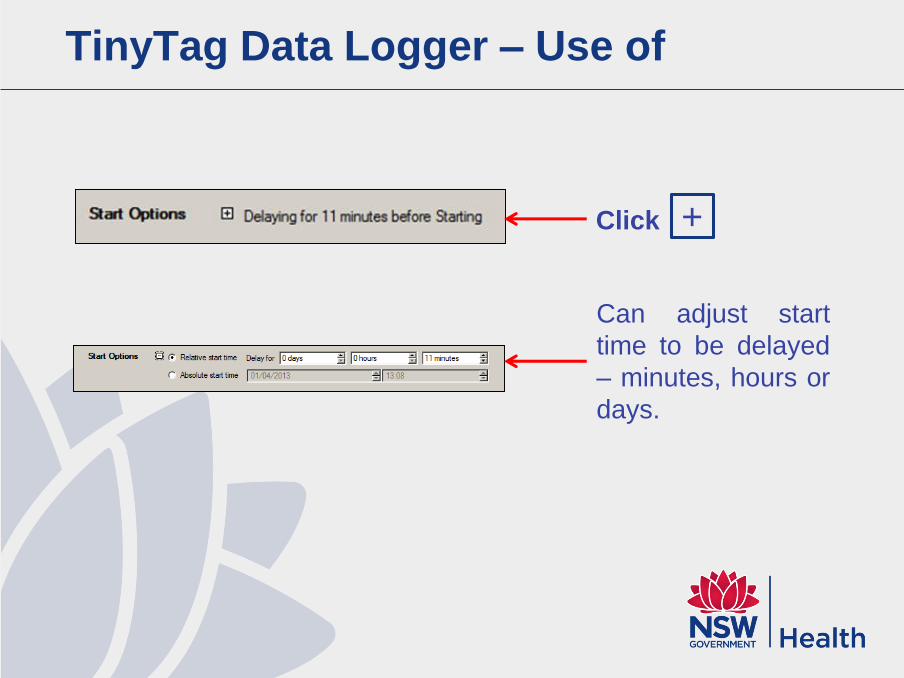
Click +
Can adjust start
time to be delayed
– minutes, hours or
days.
TinyTag Data Logger – Use of
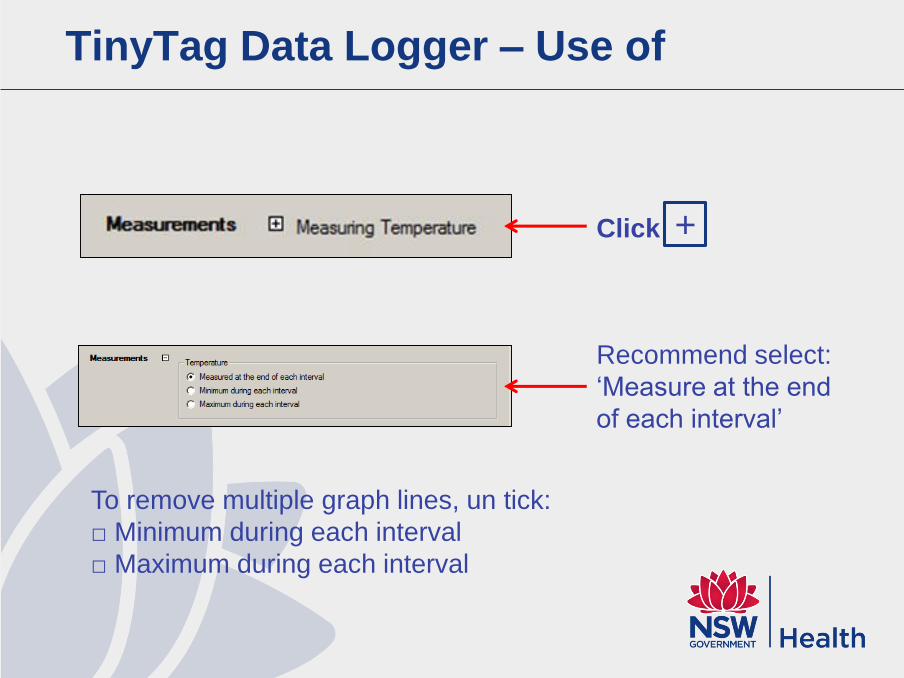
Click +
Recommend select:
‘Measure at the end
of each interval’
To remove multiple graph lines, un tick:
□ Minimum during each interval
□ Maximum during each interval
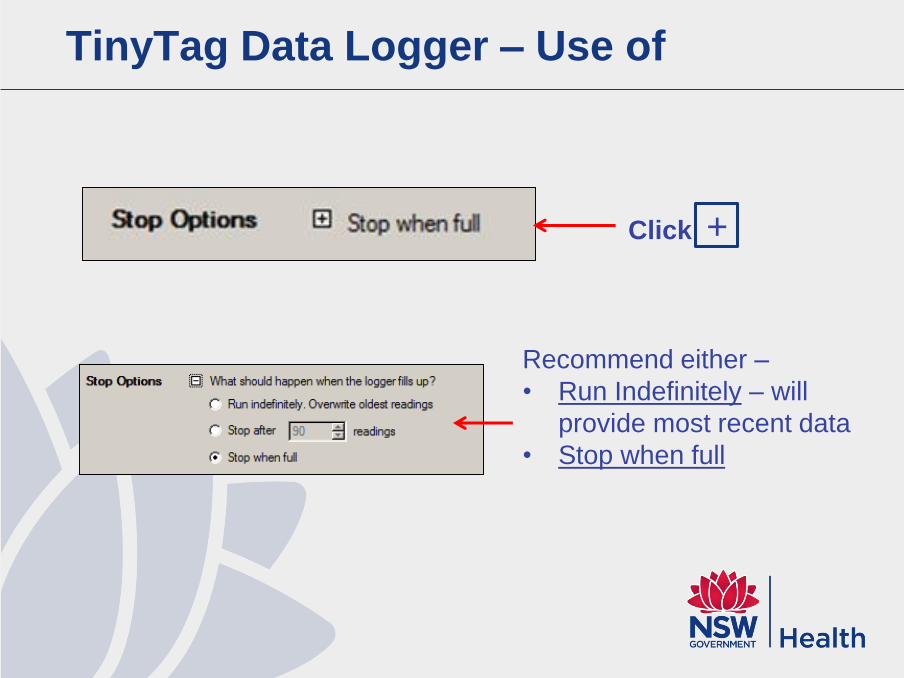
TinyTag Data Logger – Use of
Click +
Recommend either –
• Run Indefinitely – will
provide most recent data
• Stop when full
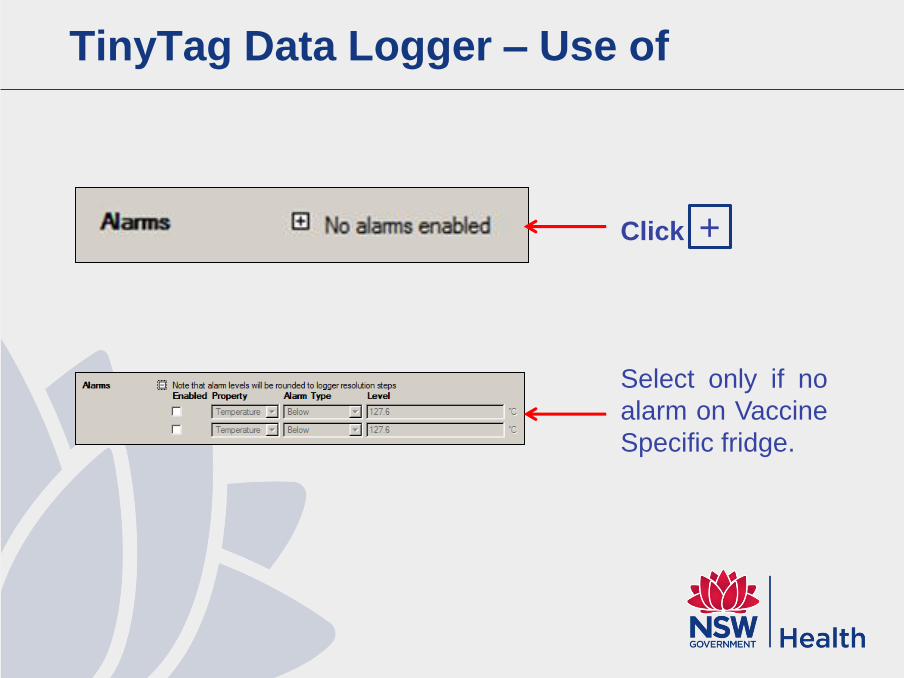
TinyTag Data Logger – Use of
Click +
Select only if no
alarm on Vaccine
Specific fridge.
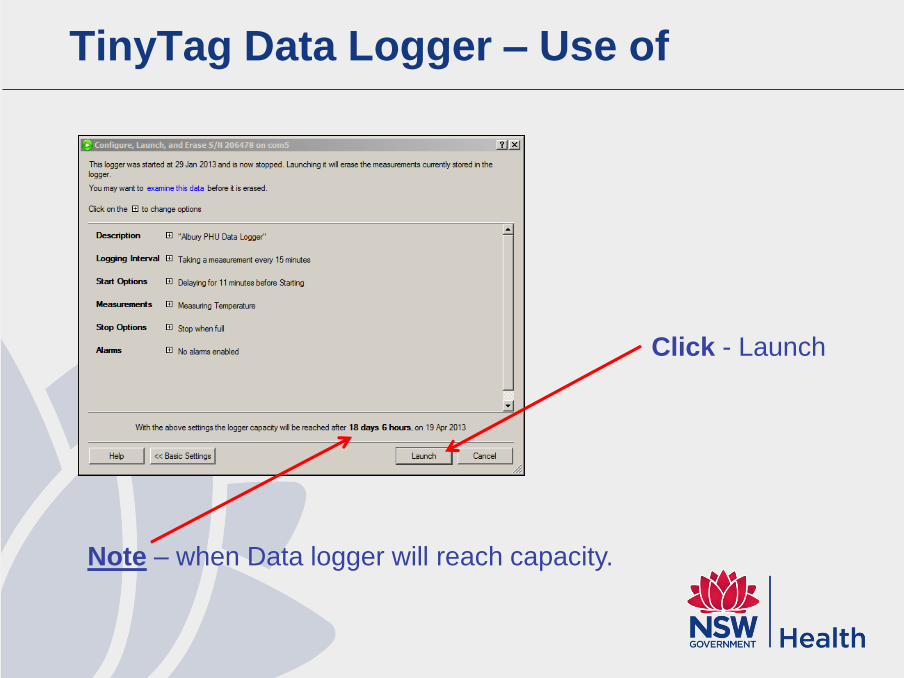
TinyTag Data Logger – Use of
Click - Launch
Note – when Data logger will reach capacity.
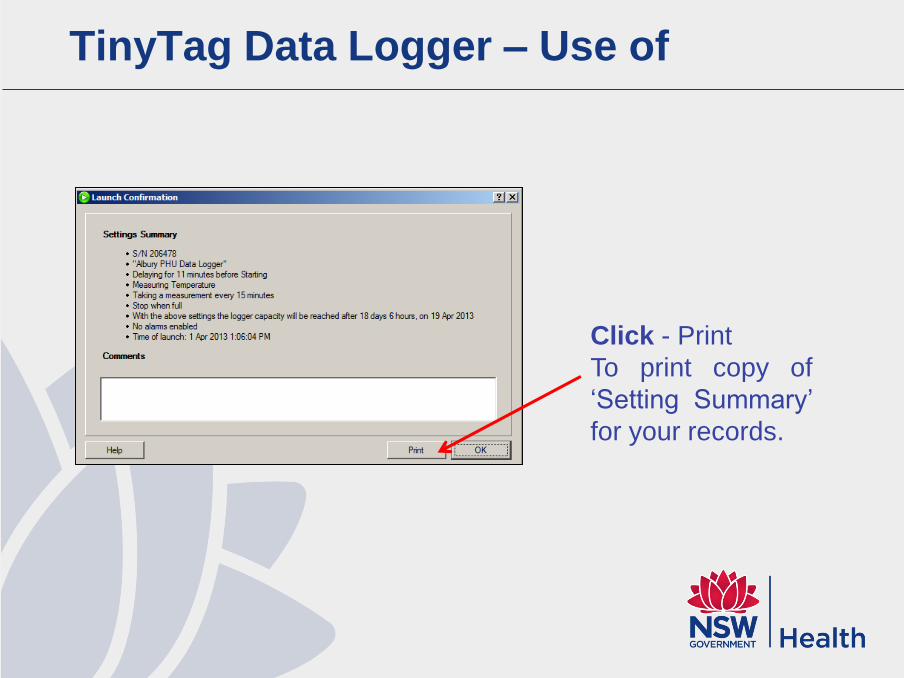
TinyTag Data Logger – Use of
Click - Print
To print copy of
‘Setting Summary’
for your records.
Features of the
TinyTag Data Logger -
Tool bar
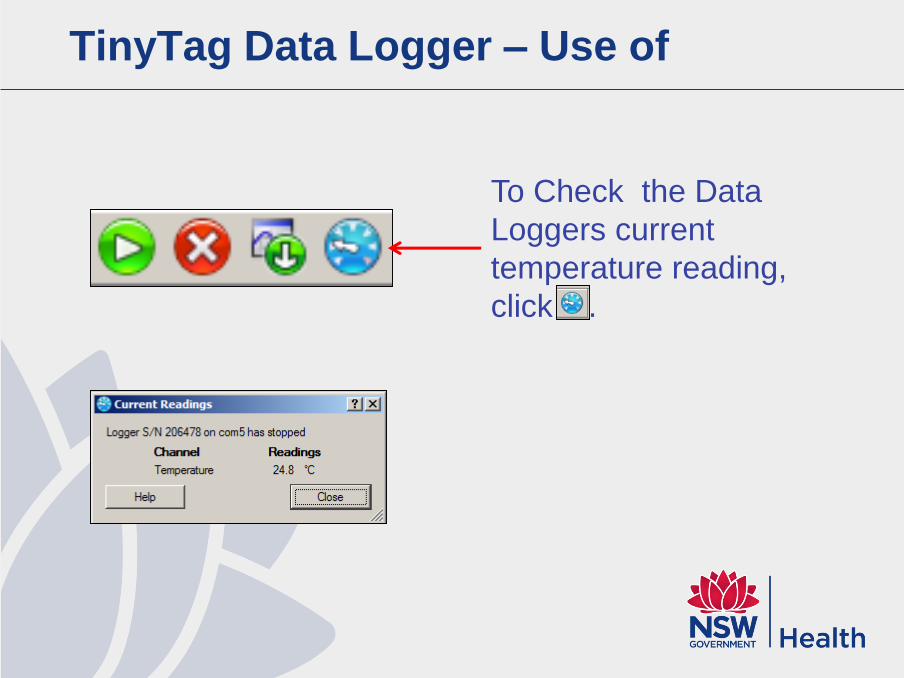
TinyTag Data Logger – Use of
To Check the Data
Loggers current
temperature reading,
click .

TinyTag Data Logger – Use of
Click
‘Information Table’ -
summary of the data
logger.
‘Information Table’
– displays any
temperatures
<2°C or > 8°C
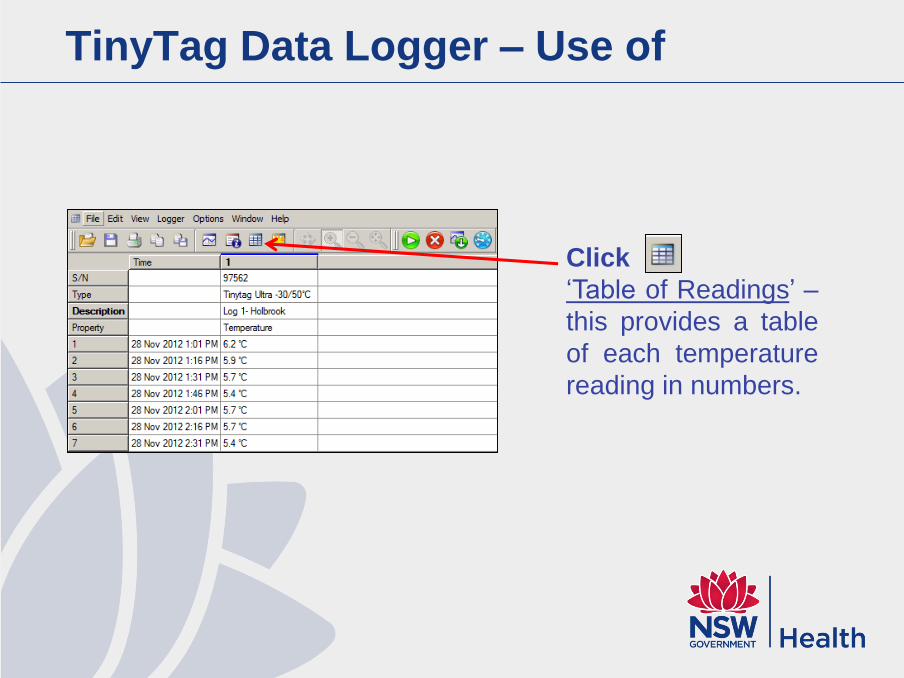
TinyTag Data Logger – Use of
Click
‘Table of Readings’ –
this provides a table
of each temperature
reading in numbers.
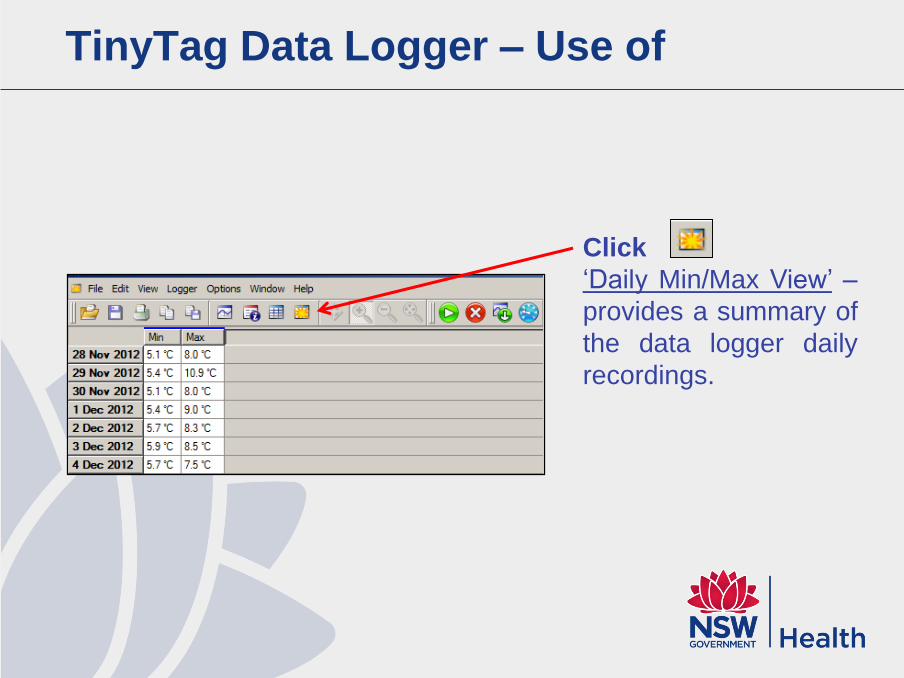
TinyTag Data Logger – Use of
Click
‘Daily Min/Max View’ –
provides a summary of
the data logger daily
recordings.

TinyTag Data Logger – Use of
Click to move
the Graph Up or
Down and Left or
Right
TinyTag Data Logger – Use of
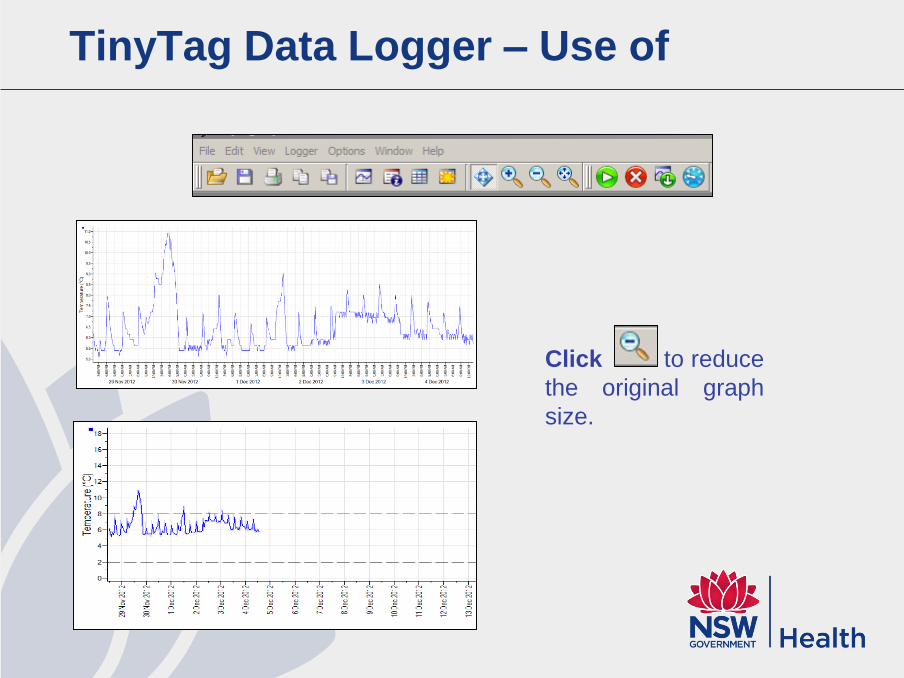
Click to reduce
the original graph
size.
TinyTag Data Logger – Use of
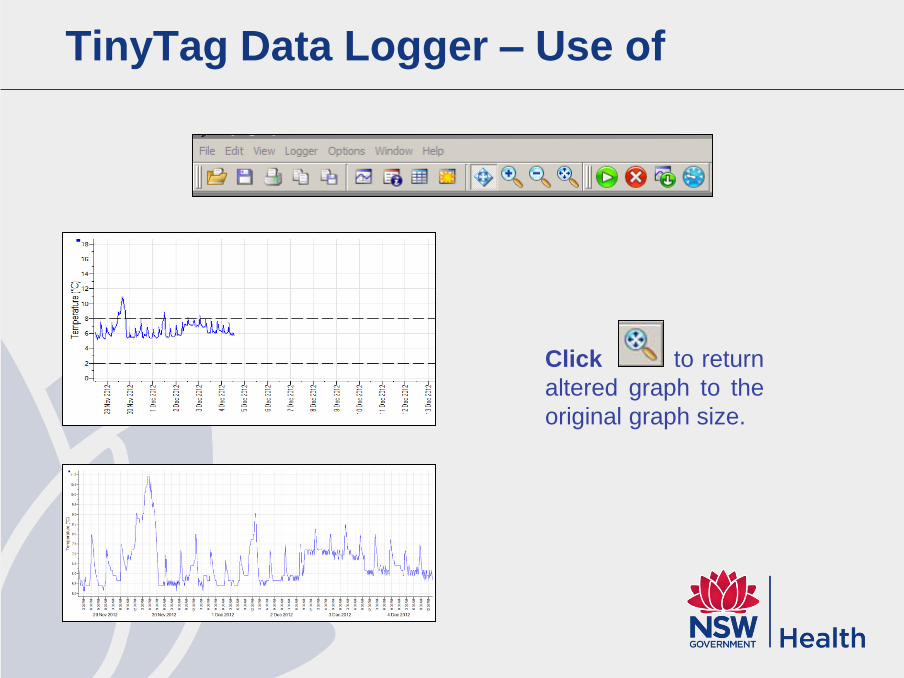
Click to return
altered graph to the
original graph size.
TinyTag Data Logger – Use of
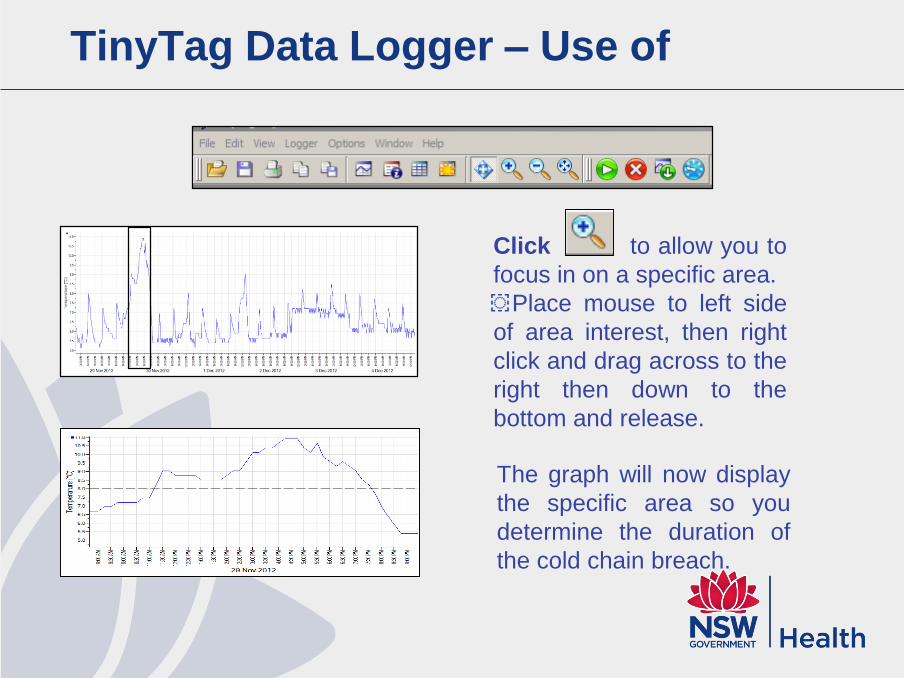
Click to allow you to
focus in on a specific area.
͏͏ Place mouse to left side
of area interest, then right
click and drag across to the
right then down to the
bottom and release.
The graph will now display
the specific area so you
determine the duration of
the cold chain breach.
TinyTag Data Logger – Use
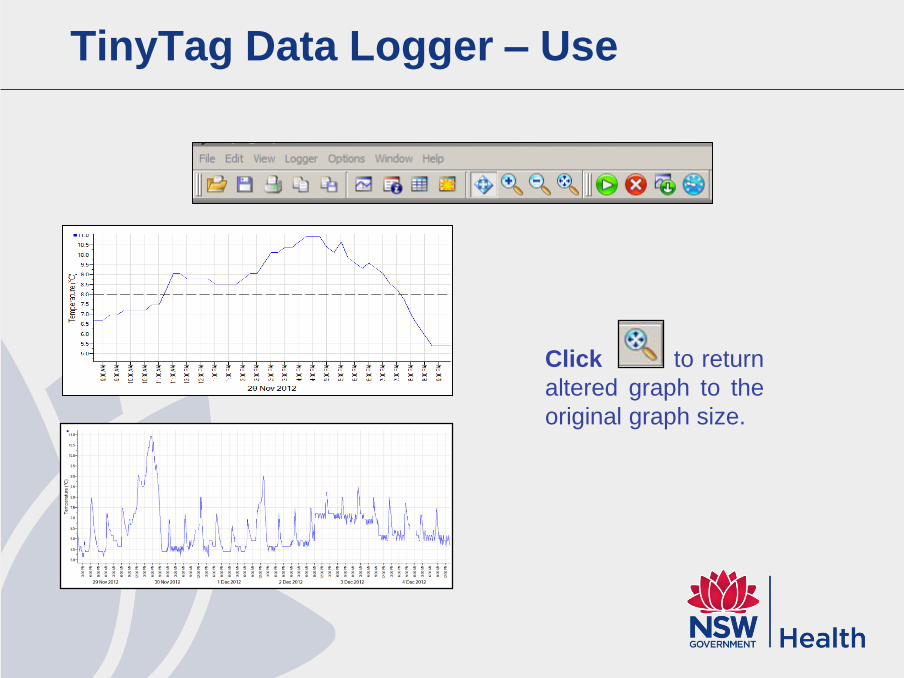
Click to return
altered graph to the
original graph size.
Features of TinyTag Data
Logger –
‘Options’ icon
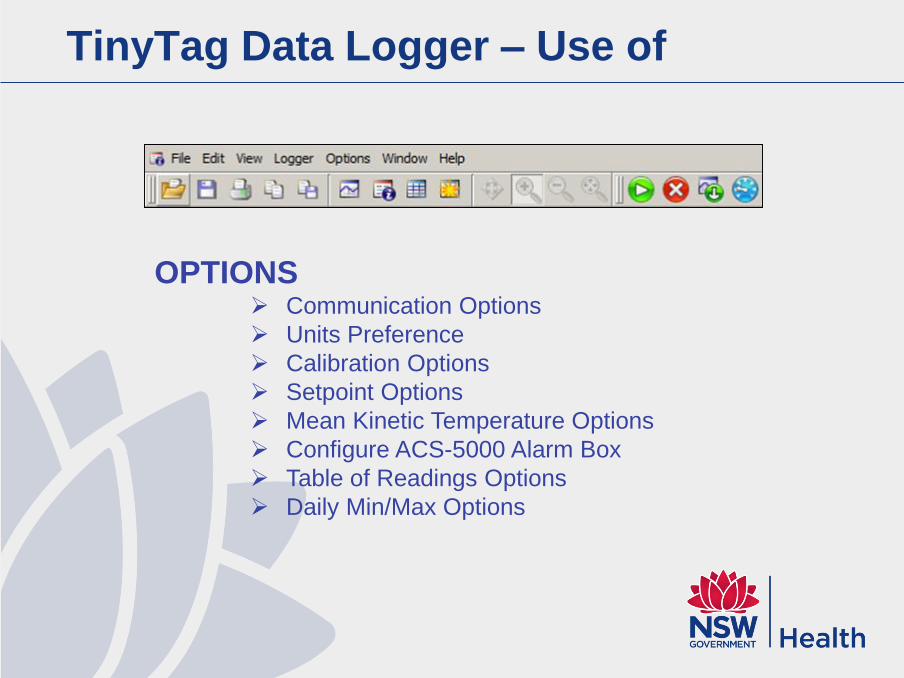
TinyTag Data Logger – Use of
OPTIONS Communication Options
Units Preference
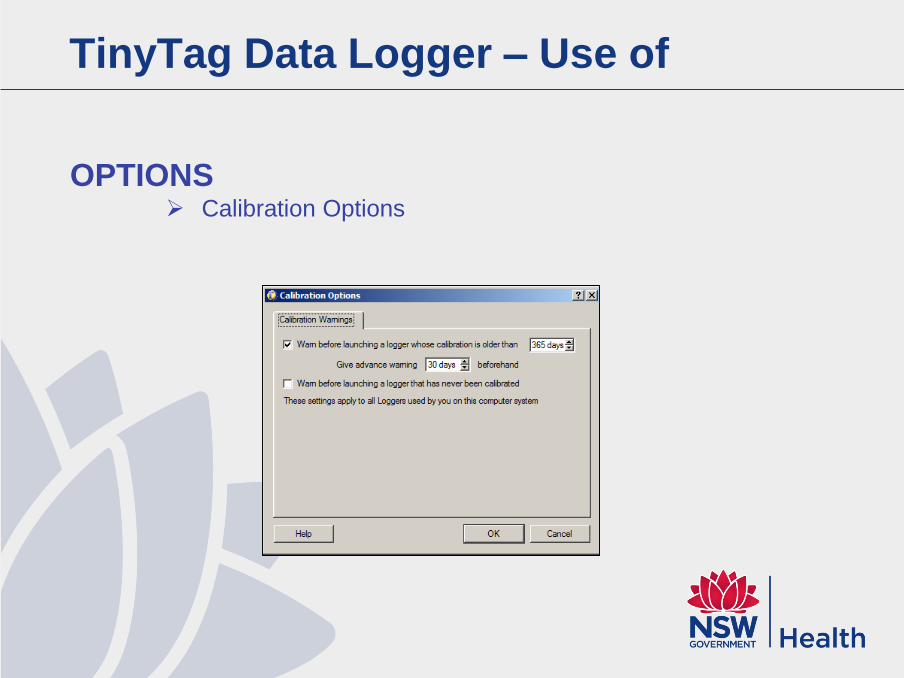
Calibration Options
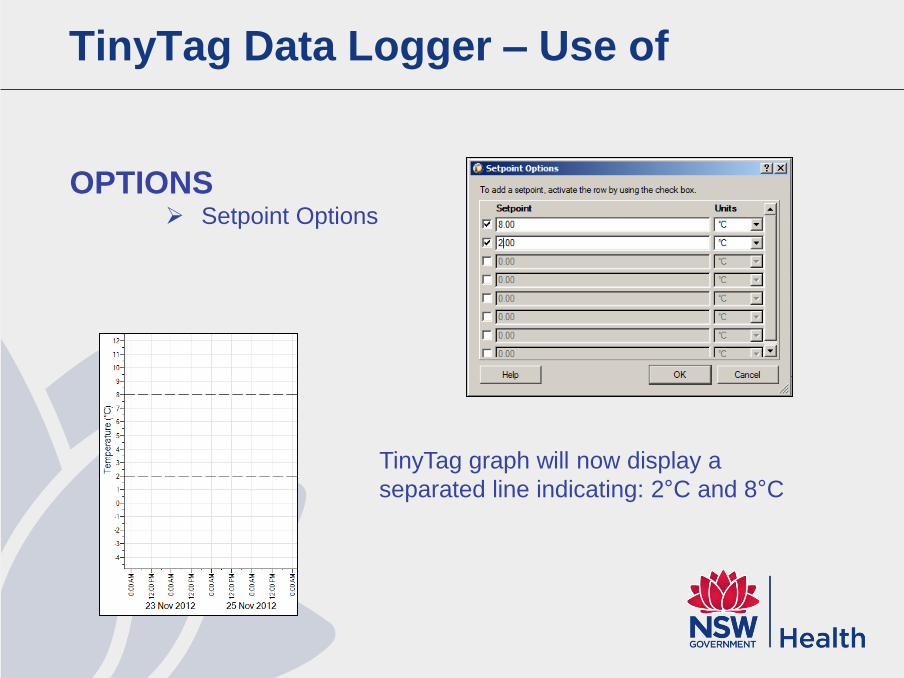
Setpoint Options
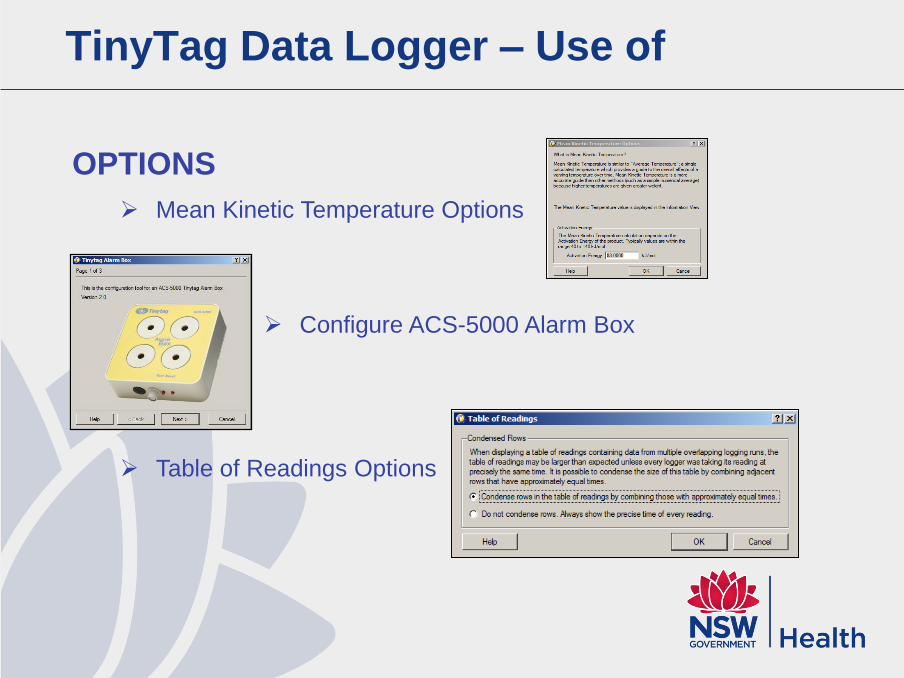
Mean Kinetic Temperature Options
Configure ACS-5000 Alarm Box
Table of Readings Options
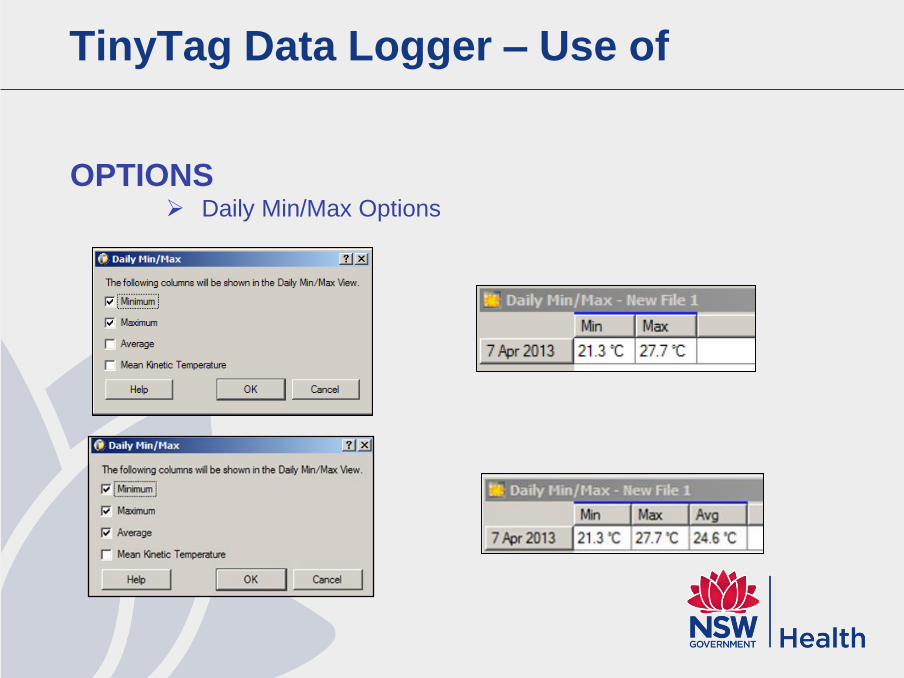
Daily Min/Max Options
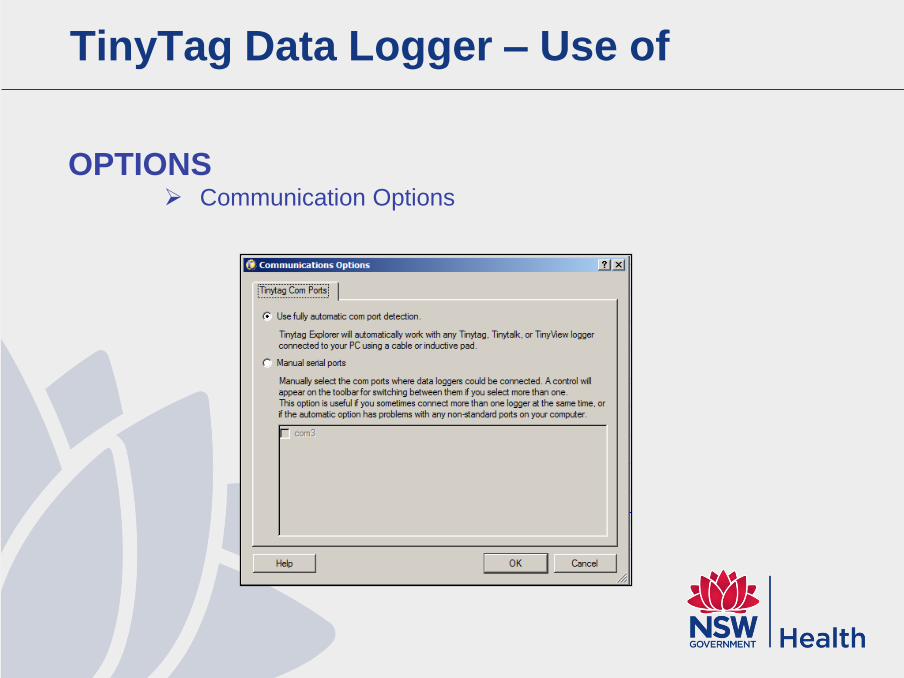
TinyTag Data Logger – Use of
OPTIONS Communication Options
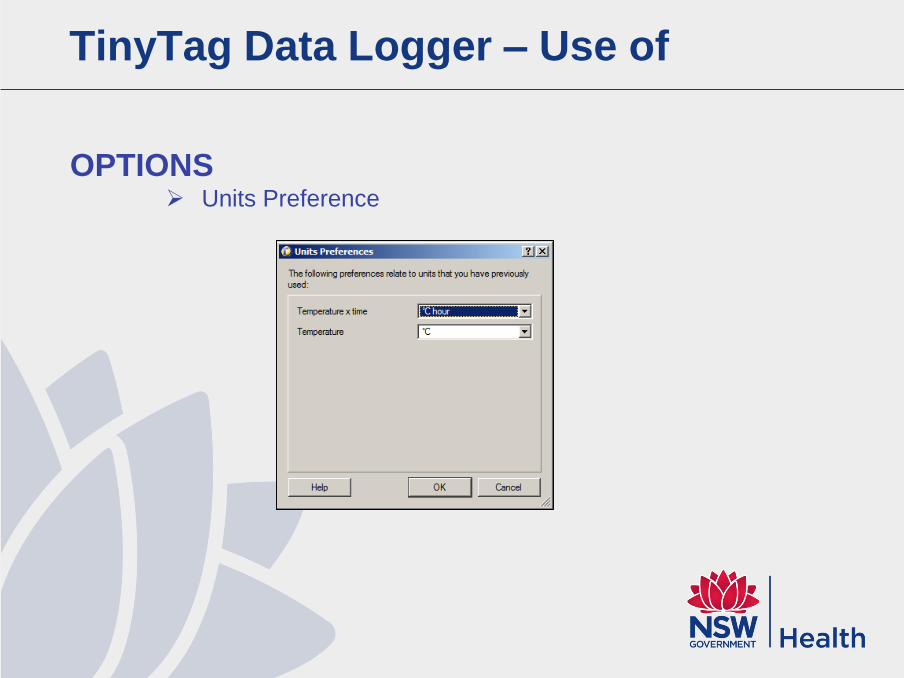
TinyTag Data Logger – Use of
OPTIONS Units Preference
TinyTag Data Logger – Use of
OPTIONS Calibration Options
TinyTag Data Logger – Use of
OPTIONS Setpoint Options
TinyTag graph will now display a
separated line indicating: 2°C and 8°C
TinyTag Data Logger – Use of
OPTIONS
Mean Kinetic Temperature Options
Configure ACS-5000 Alarm Box
Table of Readings Options
TinyTag Data Logger – Use of
OPTIONS Daily Min/Max Options
Features of TinyTag Data
Logger –
‘View’ icon
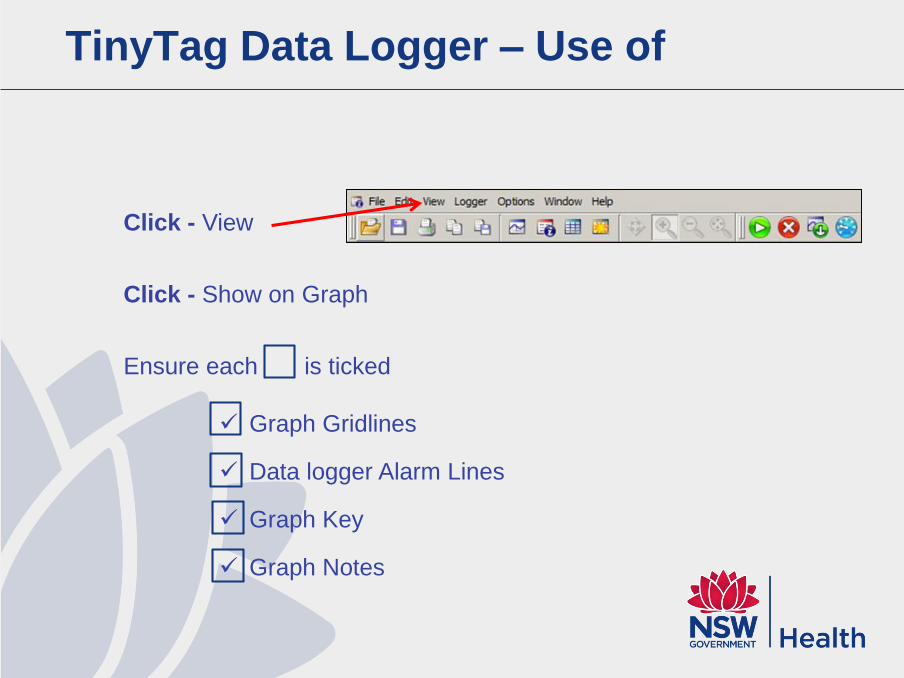
TinyTag Data Logger – Use of
Click - View
Click - Show on Graph
Ensure each is ticked
Graph Gridlines
Data logger Alarm Lines
Graph Key
Graph Notes
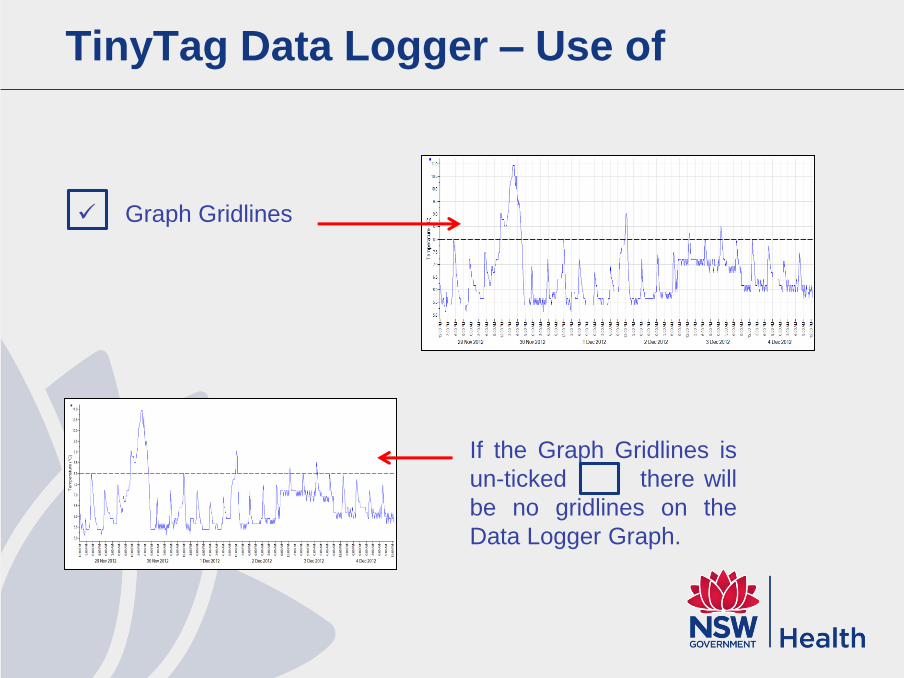
TinyTag Data Logger – Use of
Graph Gridlines
If the Graph Gridlines is
un-ticked there will
be no gridlines on the
Data Logger Graph.
TinyTag Data Logger – Use of
Data logger Alarm Lines
• This which provide lines on the graph if the alarm is activated.
• Only required if the Vaccine specific fridge does not have an
alarm
TinyTag Data Logger – Use of
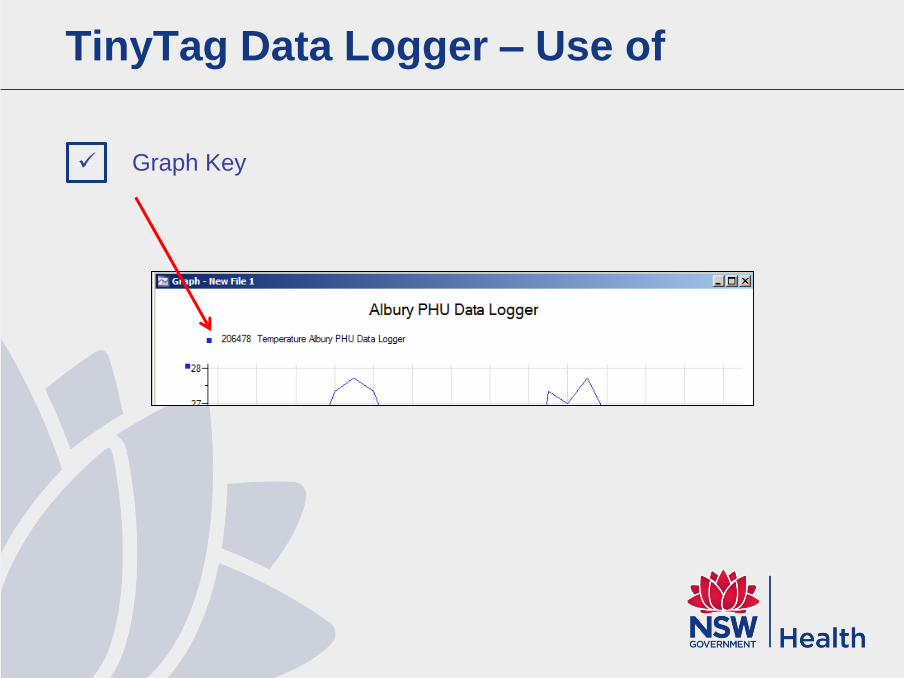
Graph Key
TinyTag Data Logger – Use of
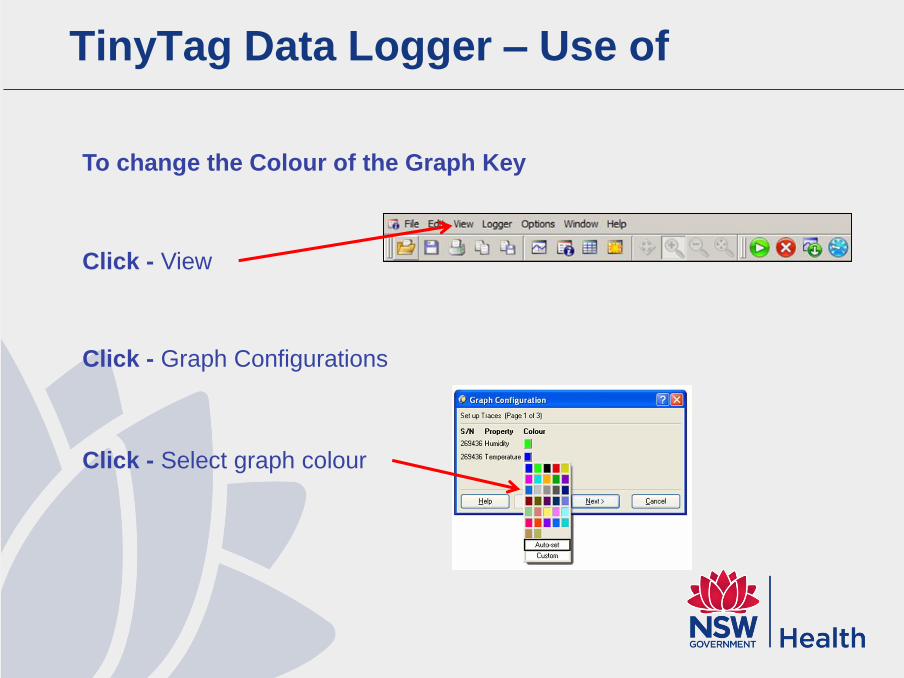
Click - View
Click - Graph Configurations
Click - Select graph colour
To change the Colour of the Graph Key
TinyTag Data Logger – Use of
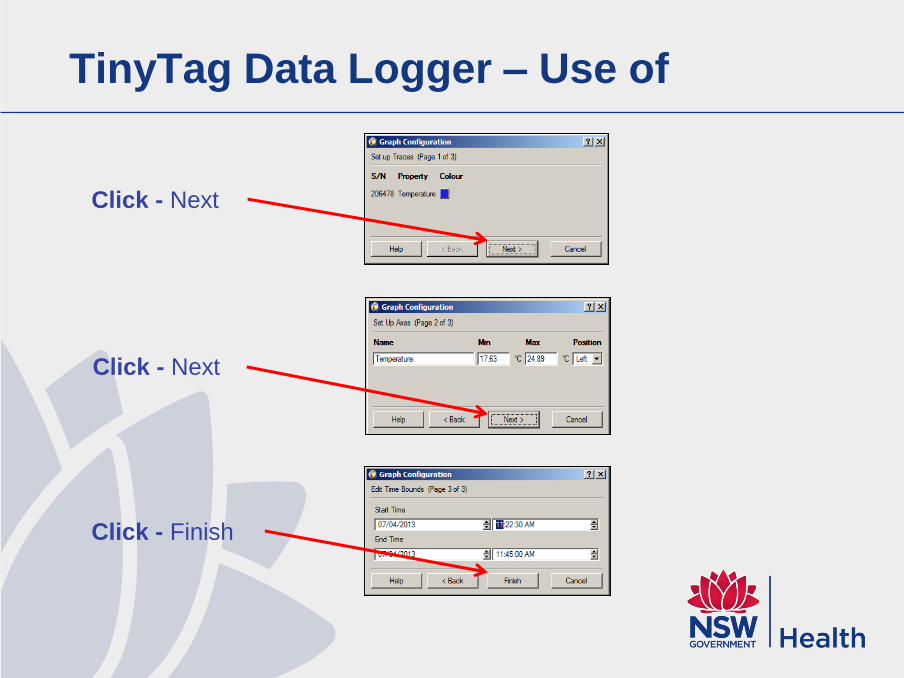
Click - Next
Click - Next
Click - Finish
TinyTag Data Logger – Use of
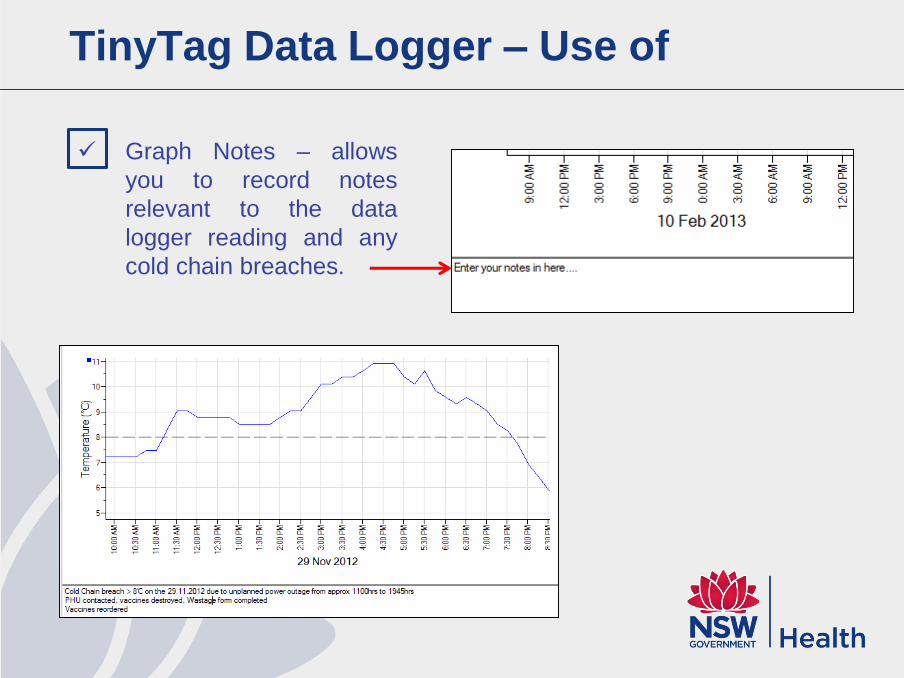
Graph Notes – allows
you to record notes
relevant to the data
logger reading and any
cold chain breaches.
TinyTag Data Logger – Use of
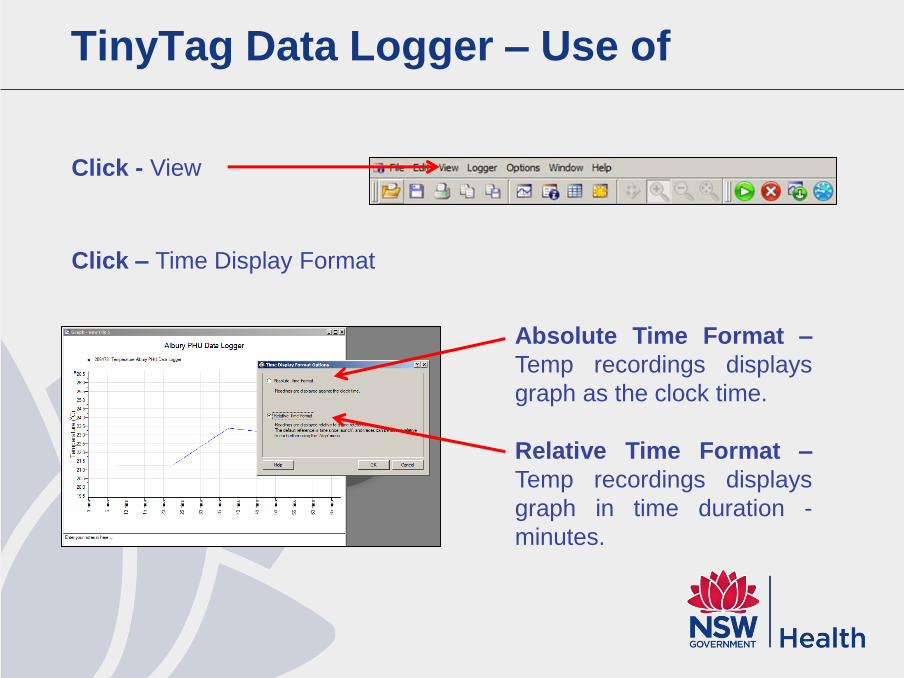
Click - View
Click – Time Display Format
Absolute Time Format –
Temp recordings displays
graph as the clock time.
Relative Time Format –
Temp recordings displays
graph in time duration -
minutes.
Reference:
TinyTag Data Logger guidelines
TinyTag Data Logger – Use of
Copyright © 2022 FDOKUMEN