Thermakraft Covertek 403 Roof Underlay - Wade Construction
294
Jackie Robinson Architecture SPECIFICATION APPENDIX Towngate Building Facelift 44 Heuheu Street Taupo Issued for Consent 2023
-
Upload
khangminh22 -
Category
Documents
-
view
1 -
download
0
Transcript of Thermakraft Covertek 403 Roof Underlay - Wade Construction

Jackie Robinson Architecture
S P E C I F I C A T I O N A P P E N D I X
Towngate Building Facelift44 Heuheu StreetTaupo
Issued for Consent
2023

Thermakraft Covertek 403 Roof Underlay
4 CERTIFICATE HOLDER DETAILS ISSUED LAST UPDATE RECERTIFICATION 6 PRODUCT CERTIFICATION BODY
Thermakraft Limited 11 Turin Place, East Tamaki Auckland.
[email protected] Tel: +64 9 2733727
www.thermakraft.co.nz
29/06/2016 21/12/2020 01/07/2022 Global-Mark Pty Ltd 57 Willis Street, Wellington, 6011
[email protected] +64 9 889 0622
www.global-mark.co.nz
5 SIGNATURE
Herve Michoux, Global Mark Managing Director The complaints process for this certificate can be found here:
https://www.global-mark.com.au/?s=complaint
This certificate is issued by an independent certification body accredited by JAS-ANZ, the product certification accreditation body appointed by the Chief Executive of the Ministry of Business, Innovation and Employment under the Building Act 2004. 1
This certificate may only be reproduced in its entirety. It is advised to check that this certificate is currently valid and not withdrawn or suspended by referring to the Register of Product Certificates on the Building Performance website http://www.building.govt.nz. CERTIFICATE V1.4
KEY INFORMATION CERTIFICATE: GM-CM30069 RevD
1 SUMMARY OF DESCRIPTION OF BUILDING METHOD OR PRODUCT
Thermakraft Covertek 403 Roof Underlay is a synthetic, fire retardant, absorbent, breathable building underlay for use under roof claddings. The product consists of a micro-porous water resistant film ultrasonically bonded between two layers of non woven spun-bonded polyolefin. Thermakraft Covertek 403 Roof Underlay is coloured white on the top and bottom faces with green Covertek 403 branding on the exposed face.
2 SUMMARY OF INTENDED USE OF BUILDING METHOD OR PRODUCT
Thermakraft Covertek 403 Roof Underlay has been assessed for use as a roof underlay.
3 BUILDING CODE PROVISIONS
Clause B2 DURABILITY: Performance B2.3.1(a), not less than 50 years, B2.3.1(b), 15 years and B2.3.2. Thermakraft Covertek 403 Roof Underlay meets these requirements.
Clause C3 FIRE AFFECTING AREAS BEYOND THE FIRE SOURCE: Performance C3.4 (c) Thermakraft Covertek 403 Roof Underlay meets this requirement.
Clause E2 EXTERNAL MOISTURE: Performance E2.3.2. When used as part of the roof cladding system, Thermakraft Covertek 403 Roof Underlay will contribute to meeting this requirement.
Clause F2 HAZARDOUS BUILDING MATERIALS: Performance F2.3.1. Thermakraft Covertek 403 Roof Underlay meets this requirement and will not present a health hazard to people.
7 CONDITIONS AND LIMITATIONS OF USE
1. Thermakraft Covertek 403 Roof Underlay has been assessed for use as a roof underlay on buildings within the following scope:
the scope limitations of NZBC Acceptable Solution E2/AS1, (Amendment 9, 27 June 2019) Paragraph 1.1 with regards to building height and floor plan area; and,
with either a. masonry tile roof cladding; or, b. with metal tile roof cladding or c. profiled metal roof cladding; and,
situated in NZS 3604-2011 Wind Zones up to, and including Extra High. 2. Thermakraft Covertek 403 Roof Underlay must not be exposed to the weather or ultra violet light for a total of more than 7 days before being covered by the roof cladding.

Thermakraft Covertek 403 Roof Underlay
This certificate is issued by an independent certification body accredited by JAS-ANZ, the product certification accreditation body appointed by the Chief Executive of the Ministry of Business, Innovation and Employment under the Building Act 2004. 2
This certificate may only be reproduced in its entirety. It is advised to check that this certificate is currently valid and not withdrawn or suspended by referring to the Register of Product Certificates on the Building Performance website http://www.building.govt.nz. The purpose of construction site audits is to confirm the practicability of installing the product; and to confirm the appropriateness and accuracy of installation instructions. In issuing this certificate, Global-Mark has relied on the independent expert and/or laboratory advise or reports. In placing the CodeMark mark on the product/system, the certificate holder makes a declaration of compliance with the certification standard(s) and confirms that the product is identical to the product certified herein.
CERTIFICATE V1.4
3. At pitches 10° and above, Thermakraft Covertek 403 Roof Underlay can be installed vertically or horizontally. Thermakraft Covertek 403 Roof Underlay must span no greater than 300 mm in one direction between supports. The product support must be corrosion resistant material.
4. Timber and steel roof framing must be provided in accordance with the requirements of the NZBC and the roof cladding manufacturer. 5. Separation or protection must be provided to Thermakraft Covertek 403 Roof Underlay from heat sources such as fire places, heating appliances, flues and chimneys. 6. Thermakraft Covertek 403 Roof Underlay must only be used under masonry tile roof cladding; or, metal tile roof cladding or profiled metal roof cladding that meet the requirements of the NZBC, 7. Thermakraft Covertek 403 Roof Underlay shall be used and installed in accordance with all relevant technical information relating to the products use, including information contained within
Thermakraft - Product data Sheet - Covertek 403 Non self-supporting Roof and wall underlay (Issue 5, November 2020) and Thermakraft - Installation Guide - Covertek 403 Non self-supporting Roof and wall underlay (issue 2, November 2020) and the BRANZ Appraisal No. 917 (2020) Thermakraft Covertek 403 Roof and wallUnderlay (refer to www.branz.co.nz).
8 HEALTH AND SAFETY INFORMATION
Standard industry safety practices and manufacturer safety requirement as detailed in the technical literature including the applicable SDS must be observed at all times. When fixing the product in windy conditions, care must be taken due to the large sail area created.
9 SUPPORTING INFORMATION ABOUT DESCRIPTION
Thermakraft Covertek 403 Roof Underlay is supplied in rolls 1.350 m wide x 18.6 m, 37.0 m and 55.0 m long. The product is printed with the Thermakraft Covertek 403 logo repeated along the length of the roll. The rolls are wrapped in clear polythene film. Accessories used with Thermakraft Covertek 403 Roof Underlay which are supplied by the installer are:
Fixings - stainless steel staples, clouts, screws or proprietary underlay fixings, or other temporary fixings to attach the roof underlay to the framing.
Roof underlay support - polypropylene strap, or minimum 0.9 mm diameter galvanised steel wire mesh where required to support the roof underlay in accordance with NZBC Acceptable Solution E2/AS1, (Amendment 9, 27 June 2019), Paragraph 8.1.5.1. (Note: The mesh must be galvanised in accordance with AS/NZS 4534-2006.).
Refer to Table 1 and Table 2 for the material properties of Thermakraft Covertek 403 Roof Underlay.
Table 1: NZBC E2/AS1 (Amendment 9, 27 June 2019) Table 23 Requirements
Roof Underlay Properties Property Performance Requirement Results
Absorbency ≥ 150 g/m2 Pass
Vapour Resistance ≤ 7 MN s/g Pass
Water Resistance ≥ 100 mm Pass
pH of Extract ≥ 5.5 and ≤ 8 Pass

Thermakraft Covertek 403 Roof Underlay
This certificate is issued by an independent certification body accredited by JAS-ANZ, the product certification accreditation body appointed by the Chief Executive of the Ministry of Business, Innovation and Employment under the Building Act 2004. 3
This certificate may only be reproduced in its entirety. It is advised to check that this certificate is currently valid and not withdrawn or suspended by referring to the Register of Product Certificates on the Building Performance website http://www.building.govt.nz. The purpose of construction site audits is to confirm the practicability of installing the product; and to confirm the appropriateness and accuracy of installation instructions. In issuing this certificate, Global-Mark has relied on the independent expert and/or laboratory advise or reports. In placing the CodeMark mark on the product/system, the certificate holder makes a declaration of compliance with the certification standard(s) and confirms that the product is identical to the product certified herein.
CERTIFICATE V1.4
Shrinkage ≤ 0.5% Pass
Table 2: Mechanical Properties (Average)
Roof Underlay Properties Machine direction Cross direction
Edge tear 217 N 104N
Tensile strength 4.57 kN/m 2.63 kN/m
Thermakraft Covertek 403 Roof Underlay has an AS 1530 Part 2 – 1993 (including Amendment 1) flammability index of not greater than 5 and therefore meets the requirements of NZBC Acceptable
Solutions C/AS2 (27 June 2019), Paragraph 4.17.8 b), for the surface finish requirements of suspended flexible fabric used as an underlay to exterior cladding that is exposed to view in occupied spaces. It
may therefore be used with no restrictions in all buildings.
10 SUPPORTING INFORMATION ABOUT INTENDED USE
Thermakraft Covertek 403 Roof Underlay is intended for use as an alternative to conventional kraft paper roof underlays, which are fixed over timber or steel framed roofs in order to limit the entry of
wind into the roof cavity, and to assist in the moisture management of the roof cladding system. Thermakraft Covertek 403 Roof Underlay is suitable for use under roof claddings on buildings as a roof
underlay as called up in NZBC Acceptable Solution E2/AS1, (Amendment 9, 27 June 2019) Table 23
The material also provides a degree of temporary weather protection during early construction. However, the product will not make the roof weathertight and some wetting of the underlying structure is
always possible before the roof cladding is installed. Hence, the entire building must be closed in and made weatherproof before moisture sensitive materials such as ceiling linings and insulation materials
are installed.
11 SUPPORTING INFORMATION ABOUT CONDITIONS AND LIMITATIONS OF USE
For roof pitches less than 10°, Thermakraft recommends the use of Covertek 407 Roof Underlay.
Part 7 of NZBC Acceptable Solutions C/AS2 (27 June 2019 ) and NZBC Verification Method C/VM1 (Amendment 4 (1 January 2017) provide methods for separation and protection of combustible materials
from heat sources.
Thermakraft Covertek 403 Roof Underlay, when installed in accordance with Thermakraft - Product data Sheet - Covertek 403 Non self-supporting Roof and wall underlay (Issue 5, November 2020) and
Thermakraft - Installation Guide - Covertek 403 Non self-supporting Roof and wall underlay (Issue 2, November 2020) will assist in the total cladding system’s compliance with NZBC Clause E2 .
Thermakraft Covertek 403 Roof Underlay must be fixed at maximum 300 mm centres to all framing members with large-head clouts 20 mm long, 6-8 mm stainless steel staples, self drilling screws or

Thermakraft Covertek 403 Roof Underlay
This certificate is issued by an independent certification body accredited by JAS-ANZ, the product certification accreditation body appointed by the Chief Executive of the Ministry of Business, Innovation and Employment under the Building Act 2004. 4
This certificate may only be reproduced in its entirety. It is advised to check that this certificate is currently valid and not withdrawn or suspended by referring to the Register of Product Certificates on the Building Performance website http://www.building.govt.nz. The purpose of construction site audits is to confirm the practicability of installing the product; and to confirm the appropriateness and accuracy of installation instructions. In issuing this certificate, Global-Mark has relied on the independent expert and/or laboratory advise or reports. In placing the CodeMark mark on the product/system, the certificate holder makes a declaration of compliance with the certification standard(s) and confirms that the product is identical to the product certified herein.
CERTIFICATE V1.4
proprietary underlay fixings. The membrane must be pulled taut over the framing before fixing.
Thermakraft Covertek 403 Roof Underlay may be run vertically or horizontally at roof pitches greater than 10°. It must extend from the ridge and overhang the fascia board by no more than 20 mm.
Vertical laps must be no less than 150 mm wide. Horizontal laps must also be no less than 150 mm, with the direction of the lap ensuring that water is shed to the outer face of the underlay. End laps must
be made over framing and be no less than 150 mm wide. To assist with achieving the correct lap dimension, Thermakraft Covertek 403 Roof Underlay has a 150 mm lap line printed continuously along the
top face.
Any damaged areas of Thermakraft Covertek 403 Roof Underlay, such as tears, holes or gaps around service penetrations, must be repaired. Damaged areas can be repaired by covering with new material
lapping the damaged area by at least 150 mm and taping, or by taping small tears.
12 BASIS FOR CERTIFICATION
The certification decision is based independent technical review(s) of engineering opinion(s) and other documented evidence(s), factory audit(s) and site review(s)
13 SUPPORTING DOCUMENTATION FOR CERTIFICATION
Ref Author Title Date and/or revision
1 BRANZ Thermakraft Covertek 403 Roof and wall Underlay - BRANZ Appraisal No. 917 (2020) 27/11/2020
2 * BRANZ BRANZ Appraisals Means of Compliance – Basis of Appraisal - Thermakraft Covertek 403 Roof and Wall Underlay BRANZ Appraisal No.
917 (2020)
TV11588-010 dated 12/11/20
3 Thermakraft Product data Sheet - Covertek 403 Non self-supporting Roof and wall underlay Issue 5, November 2020
4 Thermakraft Installation Guide - Covertek 403 Non self-supporting Roof and wall underlay Issue 2, November 2020
5 Thermakraft Safety Data CT407/CT405/CT403 Version 1.0 dated 17/09/20
* This document was provided commercial in confidence and is not publicly available.
14 CONDITIONS RELATING TO NOTIFICATION
(a) the certificate holder notifies the product certification body in writing of any intended change to any of the following particulars:
(i) the name, address, or contact details of the certificate holder:
(ii) any address of a location where a certified product is produced or manufactured:
(b) the certificate holder notifies the product certification body in writing of any intended change, modification, or alteration to any of the following:
(i) the certified building method or product:
(ii) the method of its production or manufacture:
(iii) the product quality plan prepared in respect of the certified building method or product:

Thermakraft Covertek 403 Roof Underlay
This certificate is issued by an independent certification body accredited by JAS-ANZ, the product certification accreditation body appointed by the Chief Executive of the Ministry of Business, Innovation and Employment under the Building Act 2004. 5
This certificate may only be reproduced in its entirety. It is advised to check that this certificate is currently valid and not withdrawn or suspended by referring to the Register of Product Certificates on the Building Performance website http://www.building.govt.nz. The purpose of construction site audits is to confirm the practicability of installing the product; and to confirm the appropriateness and accuracy of installation instructions. In issuing this certificate, Global-Mark has relied on the independent expert and/or laboratory advise or reports. In placing the CodeMark mark on the product/system, the certificate holder makes a declaration of compliance with the certification standard(s) and confirms that the product is identical to the product certified herein.
CERTIFICATE V1.4
(iv) the application or installation instructions for the certified building method or product:
(v) any documentation relating to the use and maintenance of the certified building method or product:
(c) if the certificate holder has any reason to suspect that the certified building method or product does not comply with the Building Code, the certificate holder notifies the product certification body in
writing of the reason for that suspicion:
(d) if the certificate holder or the product certification body finds that a certified building method or product that has been released on the market does not comply with the Building Code, the certificate
holder discloses that fact in disclosure statements published in a form that is acceptable to the product certification body and to the chief executive:
(e) if the certificate is suspended or revoked, the certificate holder—
(i) notifies all customers to whom the building method or product is regularly supplied; and
(ii) immediately ceases using the certificate, the mark of conformity, and any reference to the number of the certificate.
End of the document

Product1.1 Supercourse 500 is a single layer black polyethylene, embossed on both faces to produce a small
diamond pattern. It is for use as a general damp-proof course (DPC), and also as a concealed flashing for masonry veneer cladding.
Scope2.1 Supercourse 500 has been appraised for use as a damp-proof course for separating timber, wood-
based products and metal from concrete, masonry or clay brick in accordance with NZS 3604.
2.2 Supercourse 500 has also been appraised for use as a damp-proof course and flashing in masonry veneer walls in accordance with NZBC Acceptable Solution E2/AS1.
Building RegulationsNew Zealand Building Code (NZBC)
3.1 In the opinion of BRANZ, Supercourse 500 Damp-Proof Course and Concealed Flashing, if used, designed, installed and maintained in accordance with the statements and conditions of this Appraisal, will meet, or contribute to meeting the following provisions of the NZBC:
Clause B2 DURABILITY: Performance B2.3.1 (a), not less than 50 years and B2.3.2. Supercourse 500 meets these requirements. See Paragraph 8.1.
Clause E2 EXTERNAL MOISTURE: Performance E2.3.2 and E2.3.3. When used as a flashing as part of a masonry veneer cladding system, Supercourse 500 will contribute to meeting the requirements of E2.3.2. When used as a DPC, Supercourse 500 will meet the requirements of E2.3.3. See Paragraphs 11.1 and 11.2.
Clause F2 HAZARDOUS BUILDING MATERIALS: Performance F2.3.1. Supercourse 500 meets this requirement and will not present a health hazard to people.
3.2 This is an Appraisal of an Alternative Solution DPC in terms of the New Zealand Building Code compliance. This is also an Appraisal of an Acceptable Solution flashing when used behind masonry veneer in accordance with NZBC Acceptable Solution E2/AS1.
BRANZ AppraisalsTechnical Assessments of products for building and construction.
Thermakraft LimitedPO Box 58 112GreenmountAuckland
Tel: 09 273 3727
Fax: 09 273 3726
Free phone: 0800 806 595
www.thermakraft.co.nz
BRANZ1222 Moonshine Rd,RD1, Porirua 5381Private Bag 50 908Porirua 5240, New ZealandTel: 04 237 1170branz.co.nz
SUPERCOURSE 500 DAMP-PROOF COURSE AND CONCEALED FLASHING
Pg 1 Readers are advised to check the validity of this Appraisal by referring to the Valid Appraisals listing on the BRANZ website, or by contacting BRANZ.
Appraisal No. 329 (2016)
This Appraisal replaces BRANZ Appraisal No. 329 (2005)
Amended 23 February 2017
Appraisal No. 329 [2016]

Readers are advised to check the validity of this Appraisal by referring to the Valid Appraisals listing on the BRANZ website, or by contacting BRANZ.
BRANZ Appraisal Appraisal No. 329 (2016) 22 December 2016
SUPERCOURSE 500 DAMP-PROOF COURSE AND CONCEALED FLASHING
Pg 2
Technical Specification4.1 Supercourse 500 is 0.5 mm thick, extruded polyethylene film. It consists of a single layer of
black polyethylene, embossed on both faces to produce a small diamond pattern. The total thickness of the product after embossing is 0.75 mm. Supercourse 500 is supplied in rolls 30 m long and is available in widths of 50, 75, 90, 100, 150, 200, 250, 300 and 1000 mm. Other widths are available upon request.
4.2 Each roll is labelled with the product name, dimensions, standards reference, and manufacturer’s information.
Handling and Storage5.1 Handling and storage of the product, whether on or off site, is under the control of the installer.
The rolls must be protected from damage and weather and must be stored under cover, in clean, dry conditions.
Technical Literature6.1 Refer to the Appraisals listings on the BRANZ website for details of the current Technical Literature
for Supercourse 500. The Technical Literature must be read in conjunction with this Appraisal. All aspects of design, use, installation and maintenance contained in the Technical Literature and within the scope of this Certificate must be followed.
Design InformationGeneral 7.1 Supercourse 500 exceeds the vapour resistance requirements of NZBC Acceptable Solution
E2/AS1, Table 23 for DPC’s and is a suitable moisture impermeable alternative to bituminous DPC’s.
7.2 Supercourse 500 is intended for use as a DPC separating timber, wood-based products and metal from concrete or masonry elements, or where required, timber jack studs or bearers from concrete or timber piles, e.g. where required by NZS 3604, Paragraph 2.3.3 and Figure 6.3. When used as a DPC, the roll width selected must enable the Supercourse 500 to extend at least 6 mm beyond each face of the timber in accordance with the requirements of NZS 3604, Paragraph 2.3.3 (b).
7.3 Supercourse 500 is also intended for use as a flashing material with masonry veneer in accordance with NZBC Acceptable Solution E2/AS1, Paragraph 9.2.4 and also as a DPC in accordance with NZBC Acceptable Solution E2/AS1, Paragraph 9.2.5.
Timber Treatment
7.4 Supercourse 500 when used as a DPC or flashing, is suitable for use in contact with timber treated with light organic solvent preservative (LOSP) or water-based timber preservatives. The solvent from the timber treatment must be allowed to evaporate (generally at least one week) prior to the installation of Supercourse 500.
Exposure Zone Fixing Selection
7.5 Where Supercourse 500 is used as a flashing behind masonry veneer, fixings shall be hot dip galvanised clouts in Exposure Zones B and C and stainless steel clouts in Exposure Zone D.
DurabilityServiceable Life
8.1 Supercourse 500 is expected to have a serviceable life in excess of 50 years when it is installed in accordance with the requirements of this Appraisal and the Technical Literature, provided it is not exposed to the weather or ultra-violet (UV) light for a total of more than 30 days, and is never exposed to chemicals, or solvents that will degrade polyethylene.
Appraisal No. 329 [2016]

Readers are advised to check the validity of this Appraisal by referring to the Valid Appraisals listing on the BRANZ website, or by contacting BRANZ.
Pg 3
Control of Internal Fire and Smoke Spread9.1 Damp-proof courses and flashings are exempt from the surface finish requirements of NZBC
Acceptable Solutions C/AS1 – C/AS6 by NZBC Acceptable Solution C/AS1, Paragraph 4.2.2 e), and NZBC Acceptable Solutions C/AS2 – C/AS6, Paragraph 4.17.6 e).
Prevention of Fire Occurring10.1 Separation or protection must be provided to Supercourse 500 from heat sources such as fire
places, heating appliances, flues and chimneys. Part 7 of NZBC Acceptable Solutions C/AS1 – C/AS6 and NZBC Verification Method C/VM1 provide methods for separation and protection of combustible materials from heat sources.
External Moisture 11.1 Supercourse 500, when installed as a flashing in accordance with the Technical Literature and
this Appraisal, will assist in the masonry veneer cladding system meeting the performance requirements of Clause E2.3.2.
11.2 Supercourse 500 when used as a DPC in accordance with this Appraisal, prevents walls, floors and structural elements in contact with the ground from absorbing or transmitting moisture in quantities that could cause undue dampness or damage to building elements to meet the performance requirements of Clause E2.3.3
Installation Information Installation Skill Level Requirements12.1 Installation must always be carried out in accordance with the Technical Literature and this
Appraisal, by competent tradespersons with an understanding of DPC and flashing installation.
Supercourse 500 InstallationGeneral
13.1 Strips of Supercourse 500 may be cut to length with a sharp knife.
DPC Installation
13.2 The surfaces to be separated must be smooth and flat, free from projections such as small stones or sharp ridges that may puncture the membrane when pressure is applied.
13.3 When used to separate timber and wood-based products from concrete or masonry, Supercourse 500 should be temporarily held in place with small hot-dip galvanised clouts or zinc plated staples. The strip of DPC must be wide enough to fully protect the width of the material in contact with the concrete or masonry. Refer also to Paragraph 7.2.
13.4 When used under timber plates fixed over concrete floor slabs and foundation walls, a small slit should be made in the material before pushing down over the bolts or fixings. Alternatively, a small hole can be formed by gently tapping the product resting on top of the bolt until a puncture is formed.
Flashing Installation
13.5 Supercourse 500 must be fixed in place to framing members at maximum 300 mm centres with small hot-dip galvanised clouts.
13.6 Horizontal and vertical joints must be no less than 75 mm wide, with the direction of the lap ensuring that water is shed to the outer face of the flashing.
13.7 At the sill/jamb junction, the jamb flashing must overlap the sill flashing.
SUPERCOURSE 500 DAMP-PROOF COURSE AND CONCEALED FLASHING
BRANZ Appraisal Appraisal No. 329 (2016) 22 December 2016
Appraisal No. 329 [2016]

Readers are advised to check the validity of this Appraisal by referring to the Valid Appraisals listing on the BRANZ website, or by contacting BRANZ.
Pg 4
Basis of AppraisalThe following is a summary of the technical investigations carried out:
Tests14.1 The following tests have been carried out on Supercourse 500 by Amdel Ltd, a NATA Certified
laboratory: Water permeability, thickness, mass per unit area, pigment, impact resistance, and labelling, all in accordance with AS/NZS 2904 and AS/NZS 4347. The test results have been reviewed by BRANZ experts and found to be satisfactory.
Other Investigations15.1 Durability and weathertightness opinions were given by BRANZ technical experts.
15.2 The practicability of installation has been assessed by BRANZ and found to be satisfactory.
15.3 The Technical Literature, including installation instructions, has been examined by BRANZ and found to be satisfactory.
Quality16.1 The manufacture of Supercourse 500 has been examined by BRANZ, and details of the methods
adopted for quality control and the quality of the materials used, have been obtained.
16.2 The quality management system of the Supercourse 500 manufacturer, Cromford Pty Ltd, has been assessed and registered as meeting the requirements of ISO 9001: 2008 by ApprovalMark International, Certificate Number QMS 27839.
16.3 The quality of supply to the market is the responsibility of Thermakraft Limited.
16.4 Building designers are responsible for the design of the building, and for the incorporation of Supercourse 500 into their design in accordance with the instructions of Thermakraft Limited.
16.5 Quality of installation is the responsibility of the installer in accordance with the instructions of Thermakraft Limited.
Sources of Information ¬ AS/NZS 2904: 1995 Damp-proof courses and flashings.
¬ AS/NZS 4347 Damp-proof courses and flashings - Methods of test.
¬ NZS 3604: 2011 Timber Framed Buildings.
¬ NZS 4229: 2013 Concrete masonry buildings not requiring specific engineering design.
¬ Acceptable Solutions and Verification Methods for New Zealand Building Code External Moisture Clause E2, Ministry of Business, Innovation and Employment, Third Edition July 2005 (Amendment 7, 01 January 2017).
¬ Ministry of Business, Innovation and Employment Record of Amendments for Compliance Documents and Handbooks.
¬ The Building Regulations 1992.
AmendmentsAmendment No. 1, dated 23 February 2017.This Appraisal has been amended to update the Appraisal Holder.
SUPERCOURSE 500 DAMP-PROOF COURSE AND CONCEALED FLASHING
BRANZ Appraisal Appraisal No. 329 (2016) 22 December 2016
Appraisal No. 329 [2016]

Readers are advised to check the validity of this Appraisal by referring to the Valid Appraisals listing on the BRANZ website, or by contacting BRANZ.
In the opinion of BRANZ, Supercourse 500 Damp-Proof Course and Concealed Flashing is fit for purpose and will comply with the Building Code to the extent specified in this Appraisal provided it is used, designed, installed and maintained as set out in this Appraisal.
The Appraisal is issued only to Thermakraft Limited, and is valid until further notice, subject to the Conditions of Appraisal.
Conditions of Appraisal
1. This Appraisal:
a) relates only to the product as described herein;
b) must be read, considered and used in full together with the Technical Literature;
c) does not address any Legislation, Regulations, Codes or Standards, not specifically named herein;
d) is copyright of BRANZ.
2. Thermakraft Limited:
a) continues to have the product reviewed by BRANZ;
b) shall notify BRANZ of any changes in product specification or quality assurance measures prior to the product being marketed;
c) abides by the BRANZ Appraisals Services Terms and Conditions.
d) Warrants that the product and the manufacturing process for the product are maintained at or above the standards, levels and quality assessed and found satisfactory by BRANZ pursuant to BRANZ’s Appraisal of the product.
3. BRANZ makes no representation or warranty as to:
a) the nature of individual examples of, batches of, or individual installations of the product, including methods and workmanship;
b) the presence or absence of any patent or similar rights subsisting in the product or any other product;
c) any guarantee or warranty offered by Thermakraft Limited.
4. Any reference in this Appraisal to any other publication shall be read as a reference to the version of the publication specified in this Appraisal.
5. BRANZ provides no certification, guarantee, indemnity or warranty, to Thermakraft Limited or any third party.
For BRANZ
Chelydra PercyChief Executive
Date of Issue: 22 December 2016
Pg 5
SUPERCOURSE 500 DAMP-PROOF COURSE AND CONCEALED FLASHING
BRANZ Appraisal Appraisal No. 329 (2016) 22 December 2016
Appraisal No. 329 [2016]

Product 1.1 Thermakraft Aluband Window Flashing Tape in conjunction with the Thermakraft Corner Moulded
Piece is a flexible flashing tape system for use around framed joinery openings as a secondary weather resistant barrier.
1.2 The system is installed into and around the framed joinery opening over the wall underlay and exposed frame to cover both the face and edge of the opening framing. Thermakraft Aluband Window Flashing Tape is also used at joinery heads to seal flashing upstands to the wall underlay.
Scope 2.1 Thermakraft Aluband Window Flashing Tape has been appraised as a flexible flashing system for
use around window and door joinery openings for buildings within the following scope:
¬ constructed with timber framing in accordance with the scope limitations of NZBC Acceptable Solution E2/AS1, Paragraph 1.1; or,
¬ constructed with steel framing subject to specific engineering design with building height and floor plan area scope limitations in accordance with NZBC Acceptable Solution E2/AS1; and,
¬ with a risk score of 0-20, calculated in accordance with NZBC Acceptable Solution E2/AS1, Table 2; and,
¬ with wall cladding systems complying with NZBC Acceptable Solution E2/AS1 or a valid BRANZ Appraisal that specifies a flexible flashing system; and,
¬ with flexible wall underlays compatible with the flashing tape and complying with the NZBC; and,
¬ situated in NZS 3604 Wind Zones up to, and including, Extra High (refer to Paragraph 7.3).
Building RegulationsNew Zealand Building Code (NZBC)
3.1 In the opinion of BRANZ, Thermakraft Aluband Window Flashing Tape, if designed, used, installed and maintained in accordance with the statements and conditions of this Appraisal, will meet or contribute to meeting the following provisions of the NZBC:
Clause B2 DURABILITY: Performance B2.3.1 (b), 15 years and B2.3.2. Thermakraft Aluband Window Flashing Tape meets these requirements. See Paragraphs 8.1 and 8.2.
Clause E2 EXTERNAL MOISTURE: Performance E2.3.2. Thermakraft Aluband Window Flashing Tape contributes to meeting this requirement. See Paragraphs 7.1 - 7.4 and 11.1.
Clause F2 HAZARDOUS BUILDING MATERIALS: Performance F2.3.1. Thermakraft Aluband Window Flashing Tape meets this requirement and will not present a health hazard to people.
BRANZ AppraisalsTechnical Assessments of products for building and construction.
Thermakraft LimitedPO Box 58 112GreenmountAuckland
Tel: 09 273 3727
Fax: 09 273 3726
Free phone: 0800 806 595
www.thermakraft.co.nz
BRANZ1222 Moonshine Rd,RD1, Porirua 5381Private Bag 50 908Porirua 5240, New ZealandTel: 04 237 1170branz.co.nz
THERMAKRAFT ALUBAND WINDOW FLASHING TAPE
Pg 1 Readers are advised to check the validity of this Appraisal by referring to the Valid Appraisals listing on the BRANZ website, or by contacting BRANZ.
Appraisal No. 878 (2019)
This Appraisal replaces BRANZ Appraisal No. 878 (2014)
Appraisal No. 878 [2019]

Readers are advised to check the validity of this Appraisal by referring to the Valid Appraisals listing on the BRANZ website, or by contacting BRANZ.
BRANZ Appraisal Appraisal No. 878 (2019) 18 December 2019
THERMAKRAFT ALUBAND WINDOW FLASHING TAPE
Pg 2
Appraisal No. 878 [2019]
Technical Specification 4.1 System components and accessories supplied by Thermakraft Limited are:
¬ Thermakraft Aluband Window Flashing Tape is a polymeric faced, bituminous modified, self-adhesive tape with a release backing paper. The tape is supplied in rolls 200, 150 and 75 mm wide x 25 m long. The rolls are wrapped in clear polythene film.
¬ The Thermakraft Corner Moulded Piece is made from inert polyethylene and is coloured orange. It is used in conjunction with the Thermakraft Aluband Window Flashing Tape and building underlays as part of the Thermakraft Aluband Window Flashing Tape system.
¬ The Thermakraft Tool is used to ensure proper adhesion of the Thermakraft Aluband Window Flashing Tape and to achieve a tight fit into corners.
4.2 Accessories used with the system which are supplied by the installer are:
¬ Thermakraft Corner Moulded Piece fixings - staples, clouts or other temporary fixings to attach the corner mould to the framing prior to the installation of the Thermakraft Aluband Window Flashing Tape.
¬ Scotch® Super 77™ Multipurpose Adhesive is a clear spray primer.
Handling and Storage5.1 Handling and storage of all materials supplied by Thermakraft Limited, whether on or off site, is
under the control of the installer. Thermakraft Aluband Window Flashing Tape and accessories must be protected from damage and weather. Rolls must be stored under cover, in clean, dry conditions away from direct exposure to sunlight.
Technical Literature 6.1 Refer to the Appraisals listing on the BRANZ website for details of the current Technical Literature
for Thermakraft Aluband Window Flashing Tape. The Technical Literature must be read in conjunction with this Appraisal. All aspects of design, use, installation and maintenance contained in the Technical Literature and within the scope of this Appraisal must be followed.
Design Information General7.1 Thermakraft Aluband Window Flashing Tape meets the requirements of AC148: 2001 which is
an alternative solution to the version of AC148 referenced by NZBC Acceptable Solution E2/AS1 Paragraph 9.1.5 (b). The installation method for Thermakraft Aluband Window Flashing Tape is an alternative solution to the installation method shown within NZBC Acceptable Solution E2/AS1, Figures 72A and 72B.
7.2 The use of flexible flashing systems around window and door joinery openings is critical to assist the overall weathertightness performance of window and door joinery installations.
7.3 Thermakraft Aluband Window Flashing Tape is suitable for use over flexible wall underlays compatible with the flashing tape in NZS 3604 Wind Zones up to and including Extra High. In the Extra High Wind Zone, the flexible underlay must be installed over a rigid underlay complying with NZBC Acceptable Solution E2/AS1, Table 23.
7.4 Thermakraft Aluband Window Flashing Tape is designed to prevent air leakage and water penetration around window and door openings at framing junctions (e.g. at the sill trimmer and opening stud junction), and to keep any water that gets past the cladding, or through the joinery, from direct contact with the framing timber.
7.5 Thermakraft Aluband Window Flashing Tape is not designed to overcome poor detailing and workmanship of the window or door joinery installation. The system must not be considered in isolation, but be considered as part of the wall cladding system. Thermakraft Aluband Window Flashing Tape is designed to be used in conjunction with air seals and joinery flashing systems, not as a substitute.

Readers are advised to check the validity of this Appraisal by referring to the Valid Appraisals listing on the BRANZ website, or by contacting BRANZ.
BRANZ Appraisal Appraisal No. 878 (2019) 18 December 2019
THERMAKRAFT ALUBAND WINDOW FLASHING TAPE
Pg 3
Appraisal No. 878 [2019]
7.6 When Thermakraft Aluband Window Flashing Tape is used in conjunction with LOSP (light organic solvent preservative) treated timber, the solvent from the timber treatment must be allowed to evaporate (generally at least one week) prior to the installation of the system.
Durability 8.1 Assessment of durability to meet the NZBC is based on difficulty of access and replacement, and
the ability to detect failure of Thermakraft Aluband Window Flashing Tape both during normal use and maintenance of the building.
Serviceable Life
8.2 Provided it is not exposed to the weather or ultra-violet light for a total of more than 42 days, and provided the exterior cladding is maintained in accordance with the cladding manufacturer’s in-structions and the cladding remains weather resistant, Thermakraft Aluband Window Flashing Tape is expected to have a serviceable life equal to that of the cladding.
Maintenance9.1 No maintenance is required for Thermakraft Aluband Window Flashing Tape. Regular checks, at
least annually, must be made of the junctions between the joinery and wall cladding to ensure that they are maintained weathertight and that the primary means of weather resistance for the junction e.g. flashing, sealant, etc continues to perform its function, to ensure that water will not penetrate the cladding.
Prevention of Fire Occurring10.1 Separation or protection must be provided to Thermakraft Aluband Window Flashing Tape from
heat sources such as fireplaces, heating appliances and chimneys. Part 7 of NZBC Acceptable Solution C/AS1 and C/AS2, and NZBC Verification Method C/VM1 provide methods for separation and protection of combustible materials from heat sources.
External Moisture 11.1 Where a cladding manufacturer specifies the use of generic flashing tapes around window and
door joinery openings at framing junctions as part of their system, or they specify the use of flexible flashing tapes that comply with NZBC E2/AS1, Paragraph 9.1.5 (b), Thermakraft Aluband Window Flashing Tape may be used.
Installation Information Installation Skill Level Requirements 12.1 All design and building work must be carried out in accordance with the Thermakraft Aluband
Window Flashing Tape Technical Literature and this Appraisal by competent and experienced tradespersons conversant with flashing tapes. Where the work involves Restricted Building Work (RBW) this must be completed by, or under the supervision of, a Licensed Building Practitioner (LBP) with the relevant License class.
General 13.1 The selected wall underlay must be installed in accordance with the manufacturer’s instructions,
and must completely cover the joinery opening. The underlay is then cut on a 45° angle away from each corner of the opening so the flaps can be folded into the opening and secured to the interior face of the timber framing.
13.2 Fit a Thermakraft Corner Moulded Piece into each of the bottom corners to create a seal at the corner junction. The corner piece must be fixed to the framing with staples or clouts.

Readers are advised to check the validity of this Appraisal by referring to the Valid Appraisals listing on the BRANZ website, or by contacting BRANZ.
BRANZ Appraisal Appraisal No. 878 (2019) 18 December 2019
THERMAKRAFT ALUBAND WINDOW FLASHING TAPE
Pg 4
Appraisal No. 878 [2019]
13.3 Before the Thermakraft Aluband Window Flashing Tape is applied, the substrate surfaces must be clean, dry and free from any surface contaminants such as dust and grease that may cause loss of adhesion. When installing Thermakraft Aluband Window Flashing Tape on difficult to bond substrates, Scotch® Super 77™ Spray Adhesive may be used. Ensure that the wall underlay/substrate is dry and free of dirt before applying the spray adhesive. Apply a light spray/coating of the spray adhesive onto the underlay/substrate. Wait for a minute to allow the spray adhesive to become tacky. When tacky to the touch apply the flashing tape in the normal manner.
13.4 A length of Thermakraft Aluband Window Flashing Tape must be cut to the length of the sill plus 400 mm. The tape is installed flush with the interior face of the opening and is applied along the entire length of the sill and 200 mm up each jamb. The overhanging tape is cut at the corner of the opening to allow the tape to be folded onto the face of the building underlay. The Thermakraft Tool must be used to ensure that adequate adhesion of the tape is achieved and that the tape is installed tight into the sill/jamb junction.
13.5 A 400 mm length of Thermakraft Aluband Window Flashing Tape must be installed 200 mm down the jamb and 200 mm along the lintel at each of the top corners of the window or door joinery opening. A 75 mm wide x 100 mm long sealing tape ‘butterfly’ must be installed at 45° across the corner of the head/jamb junction overlapping the corner by 3 mm to create a seal at the corner junction.
13.6 Thermakraft Aluband Window Flashing Tape must not be stretched. To avoid wastage, the tape can be lapped 100 mm minimum onto itself without reducing the performance of the Thermakraft Aluband Window Flashing Tape system.
13.7 If the Thermakraft Aluband Window Flashing Tape is exposed to the weather or UV light for more than 42 days, then it must be replaced with new material.
Installation Temperature
13.8 Thermakraft Aluband Window Flashing Tape must not be installed at temperatures of less than 5°C.
Inspections
13.9 The Technical Literature must be referred to during the inspection of Thermakraft Aluband Window Flashing Tape installations.
Basis of Appraisal The following is a summary of the technical investigations carried out:
Tests 14.1 Testing of Thermakraft Aluband Window Flashing Tape has been completed by BRANZ to the
requirements of ICC Evaluation Service Acceptance Criteria for Flashing Materials AC148:2001. The adhesion of Thermakraft Aluband Window Flashing Tape to black bituminous Kraft building paper complying with the requirements of NZBC Acceptable Solution E2/AS1, Table 23 and selected other synthetic wall underlays has been tested and found to be satisfactory.
Other Investigations15.1 An assessment was made of the durability of Thermakraft Aluband Window Flashing Tape by BRANZ
technical experts.
15.2 Site inspections were carried out by BRANZ to examine the practicability of installation.
15.3 The Technical Literature has been reviewed by BRANZ and found to be satisfactory.

Readers are advised to check the validity of this Appraisal by referring to the Valid Appraisals listing on the BRANZ website, or by contacting BRANZ.
BRANZ Appraisal Appraisal No. 878 (2019) 18 December 2019
THERMAKRAFT ALUBAND WINDOW FLASHING TAPE
Pg 5
Appraisal No. 878 [2019]
Quality16.1 The manufacture of Thermakraft Aluband Window Flashing Tape has not been examined by BRANZ,
but details of the quality and composition of the materials used were obtained and found to be satisfactory.
16.2 The quality of supply to the market is the responsibility of Thermakraft Limited.
16.3 Designers are responsible for the building design, and building contractors are responsible for the quality of installation of framing systems and wall underlays in accordance with the instructions of the designer.
16.4 The quality of installation, handling and storage on site is the responsibility of the installer in accordance with the instructions of Thermakraft Limited.
Sources of Information ¬ ICC Evaluation Service, Inc, AC148 Acceptable Criteria for Flexible Flashing Materials, July 2001.
¬ NZS 3604: 2011 Timber-framed buildings.
¬ Ministry of Business, Innovation and Employment Record of amendments - Acceptable Solutions, Verification Methods and handbooks.
¬ The Building Regulations 1992.

Readers are advised to check the validity of this Appraisal by referring to the Valid Appraisals listing on the BRANZ website, or by contacting BRANZ.
BRANZ Appraisal Appraisal No. 878 (2019) 18 December 2019
THERMAKRAFT ALUBAND WINDOW FLASHING TAPE
Pg 6
Appraisal No. 878 [2019]
In the opinion of BRANZ, Thermakraft Aluband Window Flashing Tape is fit for purpose and will comply with the Building Code to the extent specified in this Appraisal provided it is used, designed, installed and maintained as set out in this Appraisal.
The Appraisal is issued only to Thermakraft Limited, and is valid until further notice, subject to the Conditions of Appraisal.
Conditions of Appraisal
1. This Appraisal:
a) relates only to the product as described herein;
b) must be read, considered and used in full together with the Technical Literature;
c) does not address any Legislation, Regulations, Codes or Standards, not specifically named herein;
d) is copyright of BRANZ.
2. Thermakraft Limited:
a) continues to have the product reviewed by BRANZ;
b) shall notify BRANZ of any changes in product specification or quality assurance measures prior to the product being marketed;
c) abides by the BRANZ Appraisals Services Terms and Conditions;
d) warrants that the product and the manufacturing process for the product are maintained at or above the standards, levels and quality assessed and found satisfactory by BRANZ pursuant to BRANZ’s Appraisal of the product.
3. BRANZ makes no representation or warranty as to:
a) the nature of individual examples of, batches of, or individual installations of the product, including methods and workmanship;
b) the presence or absence of any patent or similar rights subsisting in the product or any other product;
c) any guarantee or warranty offered by Thermakraft Limited.
4. Any reference in this Appraisal to any other publication shall be read as a reference to the version of the publication specified in this Appraisal.
5. BRANZ provides no certification, guarantee, indemnity or warranty, to Thermakraft Limited or any third party.
For BRANZ
Chelydra PercyChief Executive
Date of Issue:
18 December 2019

Product1.1 The Eldorado Stone™ Veneer and Hard as Rocks Application System is a cavity-based external wall
cladding system for residential and light commercial type buildings where domestic construction techniques are used.
1.2 The system consists of a cast stone veneer cladding designed to imitate the look of natural stone. The stone veneer elements are manufactured from lightweight aggregates, Portland cement and iron oxide pigments, and are cast to mimic different types of stone. Fibre cement backing sheets are fixed over timber battens to form a 20 mm cavity. The stone veneer and mortar are mechanically anchored through to the structural wall framing by stainless steel anchor ties and screws.
1.3 The system incorporates a primary and secondary means of weather resistance (first and second line of defence) against water penetration by separating the cladding from the external wall framing with a nominal 20 mm drained cavity.
Scope2.1 The Eldorado Stone™ Veneer and Hard as Rocks Application System has been appraised as an
external wall cladding system for buildings within the following scope:
¬ the scope limitations of NZBC Acceptable Solution E2/AS1, Paragraph 1.1; and,
¬ constructed with timber framing complying with the NZBC; and,
¬ with a risk score of 0-20, calculated in accordance with NZBC Acceptable Solution E2/AS1, Table 2; and,
¬ situated in NZS 3604 Wind Zones up to, and including, Extra High.
2.2 The Eldorado Stone™ Veneer and Hard as Rocks Application System has also been appraised for weathertightness and structural wind loading when used as an external wall cladding for buildings within the following scope:
¬ the scope limitations of NZBC Acceptable Solution E2/AS1, Paragraph 1.1 with regards to floor area and building height; and
¬ constructed with timber framing complying with the NZBC; and,
¬ situated in specific design wind pressures up to a maximum design differential ultimate limit state (ULS) of 2.5 kPa.
2.3 The Eldorado Stone™ Veneer and Hard as Rocks Application System must only be installed on vertical surfaces (except for sills which must have a minimum 10º slope and be waterproofed in accordance with the Technical Literature).
2.4 The system is appraised for use with aluminium window and door joinery that is installed with vertical jambs and horizontal heads and sills. (The Appraisal of Eldorado Stone™ Veneer and Hard as Rocks Application System relies on the joinery meeting the requirements of NZS 4211 for the relevant Wind Zone or design wind pressure.)
BRANZ AppraisalsTechnical Assessments of products for building and construction.
Hard as Rocks LtdPO Box 1703Taupo 1351
Freephone: 0800 353 672
Phone: 07 378 3929
Web: www.hardasrocks.co.nz
BRANZ1222 Moonshine Rd,RD1, Porirua 5381Private Bag 50 908Porirua 5240, New ZealandTel: 04 237 1170branz.co.nz
ELDORADO STONE™ VENEER AND HARD AS ROCKS APPLICATION SYSTEM
Pg 1 Readers are advised to check the validity of this Appraisal by referring to the Valid Appraisals listing on the BRANZ website, or by contacting BRANZ.
Appraisal No. 789 (2012)
Amended 03 September 2013
Appraisal No. 789 [2012]

Readers are advised to check the validity of this Appraisal by referring to the Valid Appraisals listing on the BRANZ website, or by contacting BRANZ.
BRANZ Appraisal Appraisal No. 789 (2012) 04 September 2012
ELDORADO STONE™ VENEER AND HARD AS ROCKS APPLICATION SYSTEM
Pg 2
2.5 Installation of components and accessories supplied by Hard as Rocks Ltd and licensed applicators must be carried out only by Hard as Rocks Ltd licensed applicators.
Building RegulationsNew Zealand Building Code (NZBC)
3.1 In the opinion of BRANZ, the Eldorado Stone™ Veneer and Hard as Rocks Application System if designed, used, installed and maintained in accordance with the statements and conditions of this Appraisal, will meet the following provisions of the NZBC:
Clause B1 STRUCTURE: Performance B1.3.1, B1.3.2 and B1.3.4. The Eldorado Stone™ Veneer and Hard as Rocks Application System meets the requirements for loads arising from self-weight, earthquake, wind, impact and creep [i.e. B1.3.3 (a), (f),(h), (j) and (q)]. See Paragraphs 10.1 – 10.5.
Clause B2 DURABILITY: Performance B2.3.1 (b), 15 years, and B2.3.2. The Eldorado Stone™ Veneer and Hard as Rocks Application System meets these requirements. See Paragraphs 11.1 and 11.2.
Clause E2 EXTERNAL MOISTURE: Performance E2.3.2. The Eldorado Stone™ Veneer and Hard as Rocks Application System meets this requirement. See Paragraphs 15.1 – 15.5.
Clause F2 HAZARDOUS BUILDING MATERIALS: Performance F2.3.1. The Eldorado Stone™ Veneer and Hard as Rocks Application System meets this requirement and will not present a health hazard to people.
3.2 This is an Appraisal of an Alternative Solution in terms of New Zealand Building Code compliance.
Technical Specification4.1 System components and accessories supplied by Hard as Rocks Ltd are as follows:
Stone
¬ Eldorado Stone™ Veneer elements are cast from moulds originating from natural stone and made from Portland cement, lightweight aggregates and oxide pigments forming a variety of stone styles. Styles of cast stone available are listed in the Technical Literature.
Anchor Ties and Screws
¬ Anchor Ties are approximately 60 mm long by 20 mm wide formed from Grade 304 stainless steel strip. They are pre-punched with a 5 mm diameter hole for the screw. Screws are square drive 12 gauge x 65 mm long Grade 304 stainless steel.
Sealer and Mortar
¬ StoneTite™ Sealer is a Styrene/Butadiene co-polymer latex adhesive used as a slurry mix with Portland cement for sealing the fibre-cement substrate. It is also used as a mortar additive in StoneTite™ mortar.
¬ StoneTite™ mortar is a pre-bagged mix of fine washed sand and Portland cement. It is supplied in 25 kg bags and one bag is mixed on site with 3.0 l of clean drinking water mixed with 600 ml of StoneTite™ Additive. It is trowel applied to the fibre cement as the mortar coat in an 8-10 mm thick layer, followed by the embedment of the stone.
4.2 System accessories used with the system which are supplied by the building contractor are:
¬ Flexible wall underlay – building paper complying with NZBC Acceptable Solution E2/AS1, Table 23, or breather-type membranes covered by a valid BRANZ Appraisal for use as wall underlays.
¬ Rigid wall underlay – Plywood or fibre cement sheet complying with NZBC Acceptable Solution E2/AS1, Table 23, or rigid sheathing covered by a valid BRANZ Appraisal for use as rigid air barrier systems.
¬ Flexible sill and jamb tapes – flexible flashing tapes complying with NZBC Acceptable Solution E2/AS1, Paragraph 4.3.11, or flexible flashing tapes covered by a valid BRANZ Appraisal for use around window and door joinery openings.
¬ Cavity battens – nominal 50 mm wide by 20 mm thick (minimum finished size of 45 mm wide by 18 mm thick) timber treated to Hazard Class H3.1.
Appraisal No. 789 [2012]

Readers are advised to check the validity of this Appraisal by referring to the Valid Appraisals listing on the BRANZ website, or by contacting BRANZ.
BRANZ Appraisal Appraisal No. 789 (2012) 04 September 2012
ELDORADO STONE™ VENEER AND HARD AS ROCKS APPLICATION SYSTEM
Pg 3
¬ Cavity batten fixings – 30 x 2.5 mm hot-dip galvanised flat head nails.
¬ Cavity vent strip – PVC, aluminium or stainless steel, punched with 3-5 mm holes or slots complying with NZBC Acceptable Solution E2/AS1, Paragraph 9.1.8.3.
¬ Fibre cement sheet – 7.5 or 9.0 mm thick fibre cement sheet complying with AS/NZS 2908.2 in accordance with NZBC Acceptable Solution E2/AS1, Paragraph 9.7.2.
¬ Joinery head flashings – as supplied by the joinery manufacturer or contractor.
¬ Window and door trim cavity air seal – air seals complying with NZBC Acceptable Solution E2/AS1, Paragraph 9.1.6, or self expanding, moisture cure polyurethane foam air seals covered by a valid BRANZ Appraisal for use around window, door and other wall penetration openings.
¬ Flexible sealant – sealant complying with NZBC Acceptable Solution E2/AS1, or sealant covered by a valid BRANZ Appraisal for use as a weather sealing sealant for exterior use.
Handling and Storage5.1 Handling and storage of all materials supplied by Hard as Rocks Ltd or its licensed applicators,
whether on or off site, are under the control of Hard as Rocks Ltd licensed applicators. Dry storage must be provided on site for the Eldorado Stone™ Veneer elements. Bags of StoneTite™ mortar mix and StoneTite™ sealer must be stored under cover. Liquid components must be stored in frost-free conditions.
5.2 Handling and storage of all materials supplied by the building contractor, whether on or off site, are under the control of the building contractor. Materials must be handled and stored in accordance with the relevant manufacturer’s instructions.
Technical Literature6.1 Refer to the Appraisals listing on the BRANZ website for details of the current Technical Literature for
the Eldorado Stone™ Veneer and Hard as Rocks Application System. The Technical Literature must be read in conjunction with this Appraisal. All aspects of design, use, installation and maintenance contained in the Technical Literature and within the scope of this Appraisal must be followed.
Design InformationFramingTimber Treatment
7.1 Timber wall framing behind the Eldorado Stone™ Veneer and Hard as Rocks Application System must be treated as required by NZBC Acceptable Solution B2/AS1.
Timber Framing
7.2 Timber framing must comply with NZS 3604 or be to a specific design in accordance with NZS 3603 and AS/NZS 1170. Where specific design is required, the framing must be of at least equivalent stiffness to the framing provisions of NZS 3604. In all cases studs must be at maximum 400 mm centres. Dwangs must be fitted flush between the studs at maximum 800 mm centres.
7.3 For specifically designed timber framed buildings situated in Wind Zones above NZS 3604 defined Extra High, there must be a minimum timber framing size of 90 x 45 mm, and a minimum timber grade of MSG8.
7.4 Timber framing must have a maximum moisture content of 24% at the time of the cladding application. (If the Eldorado™ Stone and Hard as Rocks Application System is fixed to framing with a moisture content of greater than 24% problems may occur at a later date due to excessive timber shrinkage.)
Appraisal No. 789 [2012]

Readers are advised to check the validity of this Appraisal by referring to the Valid Appraisals listing on the BRANZ website, or by contacting BRANZ.
BRANZ Appraisal Appraisal No. 789 (2012) 04 September 2012
ELDORADO STONE™ VENEER AND HARD AS ROCKS APPLICATION SYSTEM
Pg 4
General8.1 When Eldorado Stone™ Veneer and Hard as Rocks Application System is used for specifically
designed buildings up to design differential 2.5 kPa ULS wind pressure, only the weathertightness aspects of the cladding and maximum framing and fixing centres are within the scope of this Appraisal. All other aspects of the building need to be specifically designed and are outside the scope of this Appraisal.
8.2 Punchings in the cavity vent strip must provide a minimum ventilation opening area of 1000 mm2 per lineal metre of wall in accordance with the requirements of NZBC Acceptable Solution E2/AS1, Paragraph 9.1.8.3 (b).
8.3 The ground clearance to finished floor levels as set out in NZS 3604 must be adhered to at all times. At ground level, paved surfaces, such as footpaths, must be kept clear of the bottom edge of the cladding system by a minimum of 100 mm, and unpaved surfaces by 175 mm in accordance with the requirements of NZBC Acceptable Solution E2/AS1, Table 18.
8.4 At balcony, deck or roof/wall junctions, the bottom edge of the stone veneer must be kept clear of any adjacent surface, or above the top surface of any adjacent roof flashing by a minimum of 35 mm in accordance with the requirements of NZBC Acceptable Solution E2/AS1, Paragraph 9.1.3.
8.5 All external walls of buildings must have barriers to airflow in the form of interior linings with all joints stopped for Wind Zones up to and including Very High, and rigid underlays for buildings in the Extra High Wind Zone and specifically designed buildings up to 2.5 kPa design differential ULS wind pressure. Unlined gables and walls must incorporate a rigid sheathing or an air barrier which meet the requirements of NZBC Acceptable Solution E2/AS1, Table 23. For attached garages, wall underlays must be selected in accordance with NZBC Acceptable Solution E2/AS1, Paragraph 9.1.3.4. Where rigid underlays are used, the screw fixing lengths must be increased by a minimum of the thickness of the underlay.
8.6 Where penetrations through the stone veneer are wider than the cavity batten spacing, allowance must be made for airflow between adjacent cavities. A minimum 10 mm gap must be left between the bottom of the vertical cavity batten and the flashing to the opening.
8.7 Where the system abuts other cladding systems, designers must detail the junction to meet their own requirements and the performance requirements of the NZBC. The Technical Literature provides some guidance. Details not included within the Technical Literature have not been assessed and are outside the scope of this Appraisal.
Control Joints9.1 Control joints where Eldorado Stone™ Veneer and Hard as Rocks Application System is used must
be constructed in accordance with the Technical Literature and be provided as follows:
¬ Horizontal control joints – at maximum 5.4 m centres and at inter-storey floor levels.
¬ Vertical control joints – at maximum 5.4 m centres; aligned with any control joint in the structural framing, or where the system abuts different cladding types.
(Note: Horizontal and vertical control joints must be located over structural supports. The Technical Literature provides some guidance for the design of vertical control joints where the system abuts different cladding types. Details not included within the Technical Literature are outside the scope of this Appraisal and are the responsibility of the designer – see Paragraph 8.7.)
Inter-storey Junctions
9.2 Inter-storey drained joints must be constructed in accordance with the Technical Literature. Inter-storey joints must be provided to limit continuous cavities to the lesser of 2-storeys or 7 metres in height, in accordance with the requirements of NZBC Acceptable Solution E2/AS1, Paragraph 9.1.9.4 (b).
Appraisal No. 789 [2012]

Readers are advised to check the validity of this Appraisal by referring to the Valid Appraisals listing on the BRANZ website, or by contacting BRANZ.
BRANZ Appraisal Appraisal No. 789 (2012) 04 September 2012
ELDORADO STONE™ VENEER AND HARD AS ROCKS APPLICATION SYSTEM
Pg 5
StructureMass
10.1 The mass of Eldorado Stone™ Veneer and Hard as Rocks Application System (including the weight of the fibre cement sheet and mortar) is, in the case of the heaviest stone veneer profile, less than 80 kg/m2, therefore it is considered a medium weight wall cladding in terms of NZS 3604.
Impact Resistance
10.2 The system has adequate resistance to impact loads likely to be encountered in normal residential use. The likelihood of impact damage to the system when used in light commercial situations should be considered at the design stage, and appropriate protection such as the installation of bollards and barriers should be considered for vulnerable areas.
Wind Zones
10.3 The Eldorado Stone™ Veneer and Hard as Rocks Application System is suitable for use in all Wind Zones of NZS 3604, up to, and including ‘Extra High’ where buildings are within the scope as detailed in Paragraph 2.1, or up to a differential design ULS wind pressure of 2.5 kPa where buildings are specifically designed. See Paragraph 10.5 for anchor tie spacings.
Earthquake Zones
10.4 The Eldorado Stone™ Veneer and Hard as Rocks Application System is suitable for use in all Earthquake Zones of NZS 3604.
Anchor Tie Spacing
10.5 Determine the Anchor Tie spacing for the relevant Wind Zone from Table 1. Determine the Anchor Tie spacing for the relevant Earthquake Zone from Table 2. The lowest Anchor Tie spacing must be used for the building design.
Table 1.
Wind Zone Vertical Anchor Tie Spacing (mm)
Wind ZoneWithin
1200 mm of building cornerMore than 1200 mm from
building corner
Low 400 400Medium 400 400
High 300 400Very High 200 300Extra High 180 200
Specific Design 2.5 kPa 180 180
Note: The maximum horizontal Anchor Tie spacing to studs is 400 mm.
Table 2.
Earthquake Zone Vertical Anchor Tie Spacing (mm)
Earthquake ZoneSingle Storey
3 m maximum
Building Height
10 m maximumZone 1 400 300Zone 2 400 225Zone 3 250 150Zone 4 200 120
Note: The maximum horizontal Anchor Tie spacing to studs is 400 mm.
Appraisal No. 789 [2012]

Readers are advised to check the validity of this Appraisal by referring to the Valid Appraisals listing on the BRANZ website, or by contacting BRANZ.
BRANZ Appraisal Appraisal No. 789 (2012) 04 September 2012
ELDORADO STONE™ VENEER AND HARD AS ROCKS APPLICATION SYSTEM
Pg 6
Durability11.1 The Eldorado Stone™ Veneer and Hard as Rocks Application System meets the performance
requirements of NZBC Clause B2.3.1 (b), 15 years for the stone veneer cladding system.
Serviceable Life
11.2 Eldorado Stone™ Veneer and Hard as Rocks Application System is expected to have a serviceable life in excess of 35 years provided the system is maintained in accordance with this Appraisal.
Maintenance12.1 Regular maintenance is essential to ensure the performance requirements of the NZBC are
continually met, and to ensure the maximum serviceability of the system.
12.2 Regular cleaning (at least annually) is required to remove grime, dirt and organic growth and to maximise the life and appearance of the stone veneer finish. Grime may be removed by brushing with a soft bristle brush, warm water and detergent.
12.3 Annual inspections must be made to ensure that all aspects of the Eldorado Stone™ Veneer and Hard as Rocks Application System, including flashings and any sealed joints remain in a weatherproof condition. Any cracks, damaged areas or areas showing signs of deterioration, must be repaired immediately. Eldorado Stone™ Veneer and Hard as Rocks Application System must be repaired in accordance with the instructions of Hard as Rocks Ltd.
12.4 Minimum ground clearances as set out in this Appraisal and the Technical Literature must be maintained at all times during the life of the system. (Failure to adhere to the minimum ground clearances given in this Appraisal and the Technical Literature will adversely affect the long term durability of the Eldorado Stone™ Veneer and Hard as Rocks Application System.)
Control of External Fire Spread13.1 The Eldorado Stone™ Veneer and Hard as Rocks Application System is suitable for use on buildings
with an SH Risk Group classification, a building height of ≤ 10 m and at a distance of ≥ 1.0 m to the relevant boundary. Refer to NZBC Acceptable Solutions C/AS2 – C/AS6, Paragraph 5.8.1 for the specific exterior surface finishes requirements for other building Risk Groups.
(Note: The scope of this Appraisal limits building heights to 10 m in accordance with the limitations of NZBC Acceptable Solution E2/AS1, Paragraph 1.1 (a). The building heights referenced in Paragraph 12.1 above are as defined in the Definitions Sections of NZBC Clauses C1 - C6 Protection from Fire.)
Prevention of Fire Occurring14.1 Separation or protection must be provided to Eldorado Stone™ Veneer and Hard as Rocks
Application System from heat sources such as fire places, heating appliances, flues and chimneys. Part 7 of NZBC Acceptable Solutions C/AS1 – C/AS6 and NZBC Verification Method C/VM1 provide methods for separation and protection of combustible materials from heat sources.
External Moisture15.1 Eldorado Stone™ Veneer and Hard as Rocks Application System when installed in accordance with
this Appraisal and the Technical Literature prevents the penetration of moisture that could cause undue dampness or damage to building elements.
15.2 The cavity must be sealed off from the roof and sub-floor space to meet the performance requirements of NZBC Clause E2.3.5.
15.3 Eldorado Stone™ Veneer and Hard as Rocks Application System allows excess moisture present at the completion of construction to be dissipated without permanent damage to building elements to meet the performance requirements of NZBC Clause E2.3.6.
Appraisal No. 789 [2012]
Readers are advised to check the validity of this Appraisal by referring to the Valid Appraisals listing on the BRANZ website, or by contacting BRANZ.
BRANZ Appraisal Appraisal No. 789 (2012) 04 September 2012
ELDORADO STONE™ VENEER AND HARD AS ROCKS APPLICATION SYSTEM
Pg 7
15.4 The details given in the Technical Literature for weather sealing are based on the design principle of having a first and second line of defence against moisture entry for all joints, penetrations and junctions. The ingress of moisture must be excluded by detailing joinery and wall interfaces as shown in the Technical Literature. Weathertightness details that are developed by the designer are outside the scope of this Appraisal and are the responsibility of the designer for compliance with the NZBC.
15.5 The use of Eldorado Stone™ Veneer and Hard as Rocks Application System where there is a designed cavity drainage path for moisture that penetrates the cladding, does not reduce the requirement for junctions, penetrations, etc, to remain weather resistant.
Internal Moisture16.1 Buildings must be constructed with an adequate combination of thermal resistance and ventilation,
and space temperature must be provided to all habitable spaces, bathrooms, laundries and other spaces where moisture may be generated or may accumulate.
Water Vapour
16.2 Eldorado Stone™ Veneer and Hard as Rocks Application System is not a barrier to the passage of water vapour, and when correctly installed will not create or increase the risk of moisture damage resulting from condensation.
Installation InformationInstallation Skill Level Requirements17.1 Installation and finishing of the components of Eldorado Stone™ Veneer and Hard as Rocks
Application System supplied by Hard as Rocks Ltd and its licensed applicators must be completed only by Hard as Rocks licensed applicators.
17.2 Installation of the accessories supplied by the building contractor must be completed by tradespersons with an understanding of cavity construction, in accordance with instructions given within Eldorado Stone™ Veneer and Hard as Rocks Application System Technical Literature and this Appraisal.
System InstallationBuilding Underlay and Flexible Sill and Jamb Tape Installation
18.1 The selected wall underlay and flexible sill and jamb tape system must be installed by the building contractor in accordance with the underlay and tape manufacturer’s instructions prior to the installation of the cavity battens and the rest of Eldorado Stone™ Veneer and Hard as Rocks Application System. Flexible wall underlay must be installed horizontally and be continuous around corners. Underlay must be lapped 75 mm minimum at horizontal joints and 150 mm minimum over studs at vertical joints. Generic rigid sheathing materials must be installed in accordance with NZBC Acceptable Solution E2/AS1 and be overlaid with a flexible wall underlay. Proprietary systems shall be installed in accordance with the manufacturer’s instructions. Particular attention must be paid to the installation of the building underlay and sill and jamb tapes around window and door openings, to ensure a continuous seal is achieved and all exposed wall framing in the opening is protected.
Aluminium Joinery Installation
18.2 Aluminium joinery must be installed by the building contractor in accordance with the Technical Literature. A 7.5 – 10 mm nominal gap must be left between the joinery reveal and the wall framing so a PEF rod and air seal can be installed after the joinery has been secured in place.
18.3 The system must be installed in accordance with the Technical Literature by Hard as Rocks licensed applicators
18.4 Eldorado Stone™ Veneer and Hard as Rocks Application System must only be applied when the air and substrate temperature is within the range of +5°C to +30°C.
Appraisal No. 789 [2012]

Readers are advised to check the validity of this Appraisal by referring to the Valid Appraisals listing on the BRANZ website, or by contacting BRANZ.
Pg 8
Finishing
18.5 Hard as Rocks Ltd Installation Instructions must be followed at all times for finishing of mortar work. Excess mortar must be removed carefully with a soft brush when the mortar is partially dry (after approximately 1 hour). The quality of final pointing and mortar work are pivotal to the final aesthetic look of the stone veneer.
Inspections
18.6 The Technical Literature must be referred to during the inspection of Eldorado Stone™ Veneer and Hard as Rocks Application System installations.
Health and Safety19.1 Cutting of Eldorado™ Stone elements must be carried out in well ventilated areas, and a dust mask
and eye protection must be worn.
19.2 When power tools are used for cutting, grinding or forming holes, health and safety measures must be observed because of the amount of dust generated.
19.3 Safe use and handling procedures for the components that make up Eldorado Stone™ Veneer and Hard as Rocks Application System are provided in the relevant manufacturer’s Technical Literature.
Basis of AppraisalThe following is a summary of the technical investigations carried out:
Tests20.1 The following testing has been undertaken by BRANZ:
¬ BRANZ expert opinion on NZBC E2 code compliance for Eldorado Stone™ Veneer and Hard as Rocks Application System was based on evaluation of all details within the scope and as stated within this Appraisal and testing of the Eldorado Stone™ Veneer and Hard as Rocks Application System to E2/VM1 (as contained within NZBC Clause E2, Amendment 4). The testing assessed the performance of the window head, jamb and sill details, meter box head, jamb and sill details, vertical and horizontal control joints, internal and external corners, and pipe penetration. In addition to the weathertightness test, the details contained within the Technical Literature have been reviewed, and an opinion has been given by BRANZ technical experts that the system will meet the performance levels of Acceptable Solution E2/AS1 for drained cavity claddings.
¬ Wind face load and fastener pull-out testing for Eldorado Stone™ Veneer and Hard as Rocks Application System. BRANZ determined design wind suction pressures, and by comparing these pressures with the NZS 3604 design wind speeds and AS/NZS 1170 pressure coefficients, the fixing requirements were determined for timber walls.
¬ In-plane shear testing of Eldorado Stone™ Veneer and Hard as Rocks Application System was carried out to determine the system’s ability to resist self-weight.
¬ A racking test was completed to examine the performance of Eldorado Stone™ Veneer and Hard as Rocks Application System where the system was subjected to both serviceability level and ultimate level seismic racking deflections, taken to be ±8 mm and ±36 mm respectively. The stone veneer system did not crack or show signs of damage.
Other Investigations21.1 Structural and durability opinions have been provided by BRANZ technical experts.
21.2 Site visits of Eldorado Stone™ Veneer and Hard as Rocks Application System installations have been carried out by BRANZ to assess the practicability of installation, and to examine completed installations.
21.3 The Technical Literature for Eldorado Stone™ Veneer and Hard as Rocks Application System has been examined by BRANZ and found to be satisfactory.
BRANZ Appraisal Appraisal No. 789 (2012) 04 September 2012
ELDORADO STONE™ VENEER AND HARD AS ROCKS APPLICATION SYSTEM
Appraisal No. 789 [2012]

Readers are advised to check the validity of this Appraisal by referring to the Valid Appraisals listing on the BRANZ website, or by contacting BRANZ.
Pg 9
Quality 22.1 The manufacture of the cast veneer stone elements has not been examined by BRANZ, however
methods adopted for quality control, and details regarding the quality and composition of the materials used were obtained by BRANZ and found to be satisfactory.
22.2 The quality of materials, components and accessories supplied by Hard as Rocks Ltd is the responsibility of Hard as Rocks Ltd.
22.3 Quality on-site is the responsibility of Hard as Rocks Ltd licensed applicators.
22.4 Designers are responsible for the building design, and building contractors are responsible for the quality of installation of framing systems and joinery, wall underlays, flashing tapes, air seals, cavity battens and fibre cement sheets in accordance with the instructions of Hard as Rocks Ltd.
22.5 Building owners are responsible for the maintenance of Eldorado Stone™ Veneer and Hard as Rocks Application System installations in accordance with the instructions of Hard as Rocks Ltd.
Sources of Information ¬ AS/NZS 1170: 2002 Structural design actions.
¬ NZS 3602: 2003 Timber and wood-based products for use in building.
¬ NZS 3603: 1993 Timber Structures Standard.
¬ NZS 3604: 2011 Timber-framed buildings.
¬ NZS 4211: 2008 Specification for performance of windows.
¬ Compliance Document for New Zealand Building Code External Moisture Clause E2, Department of Building and Housing, Third Edition July 2005 (Amendment 5, 1 August 2011).
¬ Ministry of Business, Innovation and Employment Record of Amendments for Compliance Documents and Handbooks.
¬ The Building Regulations 1992.
AmendmentsAmendment No. 1, dated 3 September 2013.This Appraisal has been amended to update clause changes as required by the introduction of NZBC Fire Clauses C1 – C6 Protection from Fire and A3 Building Importance Levels.
BRANZ Appraisal Appraisal No. 789 (2012) 04 September 2012
ELDORADO STONE™ VENEER AND HARD AS ROCKS APPLICATION SYSTEM
Appraisal No. 789 [2012]

Readers are advised to check the validity of this Appraisal by referring to the Valid Appraisals listing on the BRANZ website, or by contacting BRANZ.
In the opinion of BRANZ, Eldorado Stone™ Veneer and Hard as Rocks Application System is fit for purpose and will comply with the Building Code to the extent specified in this Appraisal provided it is used, designed, installed and maintained as set out in this Appraisal.
The Appraisal is issued only to Hard as Rocks Ltd, and is valid until further notice, subject to the Conditions of Appraisal.
Conditions of Appraisal
1. This Appraisal:
a) relates only to the product as described herein;
b) must be read, considered and used in full together with the Technical Literature;
c) does not address any Legislation, Regulations, Codes or Standards, not specifically named herein;
d) is copyright of BRANZ.
2. Hard as Rocks Ltd:
a) continues to have the product reviewed by BRANZ;
b) shall notify BRANZ of any changes in product specification or quality assurance measures prior to the product being marketed;
c) abides by the BRANZ Appraisals Services Terms and Conditions.
d) Warrants that the product and the manufacturing process for the product are maintained at or above the standards, levels and quality assessed and found satisfactory by BRANZ pursuant to BRANZ’s Appraisal of the product.
3. BRANZ makes no representation or warranty as to:
a) the nature of individual examples of, batches of, or individual installations of the product, including methods and workmanship;
b) the presence or absence of any patent or similar rights subsisting in the product or any other product;
c) any guarantee or warranty offered by Hard as Rocks Ltd.
4. Any reference in this Appraisal to any other publication shall be read as a reference to the version of the publication specified in this Appraisal.
5. BRANZ provides no certification, guarantee, indemnity or warranty, to Hard as Rocks Ltd or any third party.
For BRANZ
Pieter BurghoutChief Executive
Date of Issue: 04 September 2012
Pg 10
BRANZ Appraisal Appraisal No. 789 (2012) 04 September 2012
ELDORADO STONE™ VENEER AND HARD AS ROCKS APPLICATION SYSTEM
Appraisal No. 789 [2012]

30 Cameron Road, Tauranga, 3110 | PO Box 9100, Greerton, Tauranga
Asbestos Refurbishment Survey Report
Towngate Building Corner Ruapehu and Her Hey Streets
Taupo
On behalf of
PLANS4U
Project Number: Survey Date: Issue Date:
A-00459 06/03/2020 to 10/03/2020 10/03/2020

Towngate Building A-00459 Page 2 of 28
CONTENTS
1.0 INTRODUCTION AND SITE INFORMATION ............................................. 3
1.2 Scope of the Survey ............................................................................................................................... 3
2.0 EXECUTIVE SUMMARY .......................................................................... 4
2.1 Summary of Asbestos Locations: .......................................................................................................... 4
2.2 No Access Areas: ................................................................................................................................... 5
3.0 METHODOLOGY .................................................................................... 6
3.1 Survey Extent and Limitations ............................................................................................................... 6
3.2 Material Assessment Score ................................................................................................................... 6
APPENDIX 1: SURVEY RESULTS ....................................................................... 8
APPENDIX 2: ASBESTOS REGISTER ................................................................ 20
APPENDIX 3: NON ASBESTOS REGISTER ....................................................... 22
APPENDIX 4: DRAWINGS .............................................................................. 24
APPENDIX 5: CERTIFICATES OF ANALYSIS ..................................................... 26

Towngate Building A-00459 Page 3 of 28
1.0 INTRODUCTION AND SITE INFORMATION
Client Site Address
PLANS4U
1946 State Highway 1
Contact:
Towngate Building
Corner Ruapehu and Her Hey Streets
Taupo
Surveyor Quality Check Terry O'Keeffe
Terry O’Keeffe
1.2 Scope of the Survey
The scope of this survey was to locate and identify asbestos containing materials within the structures
and scope defined by the client. This report is designed to be kept as a record of assessment of the
extent and characteristics of the asbestos found and is based on information made available on
06/03/2020 to 10/03/2020.
This Asbestos Refurbishment Survey of Towngate Building was carried on 06/03/2020 to 10/03/2020.
The methodology used for the assessment of the asbestos containing materials identified in this report
has been provided by Asbestos: The Survey Guide - Second Edition (2012) issued by the Health and
Safety Executive (UK).
During the course of the survey, 5 samples were taken and analysed.

Towngate Building A-00459 Page 4 of 28
2.0 EXECUTIVE SUMMARY
An Asbestos Refurbishment Survey was carried out at Towngate Building, Corner Ruapehu and Her
Hey Streets, , Taupo on 06/03/2020 to 10/03/2020.
Strongly recommend the texture in the store room of trade aid to be removed and any other store
rooms of shops where the texture is getting damaged. The texture will pose a health risk to anyone
who is disturbing it.
2.1 Summary of Asbestos Locations:
The following table details the locations that were found to contain asbestos or presumed to contain
asbestos, together with a brief recommendation. The asbestos containing materials (ACMs) identified
during the survey have been assessed using a material assessment (see Appendix 1 – Survey Results)
and this has been used to categorise each one according to its potential to release fibres. This ranges
from high, medium, low and very low risks and these have been itemised in the below table.
Towngate Building
Floor Area / Room Material Description Sample No. Material
Risk
Ground Floor 003 / Textured ceiling easy by you
Textured ceiling - Textured Coating S003 Very Low (3)
Manage & Re-Inspect - All trades staff are to be made aware that this contains Asbestos. If Any future removal is to be done a Class A asbestos Removal company is to be used.
Ground Floor 005 / Textured Ceiling Ripcurl
Textured ceiling - Textured Coating X003 Low (6)
- All trades staff are to be made aware that this contains Asbestos. If Any future removal is to be done a Class A asbestos Removal company is to be used.
Ground Floor 006 / Textured ceiling
Trade aid textured ceiling - Textured Coating
X003 Low (6)
Manage & Re-Inspect - The ceiling above the suspended ceiling in the shop is in good condition. The ceiling in the store room is getting damaged by staff every time they stack items higher causing it to rub on the texture and become friable, the store room should be sorted out.
All trades staff are to be made aware that this contains Asbestos. If Any future removal is to be done a Class A asbestos Removal company is to be used.
Ground Floor 007 / Textured ceiling classic mobiles
Textured ceiling - Textured Coating X003 Medium (7)
Manage & Re-Inspect - All trades staff are to be made aware that this contains Asbestos. If Any future removal is to be done a Class A asbestos Removal company is to be used.
Ground Floor 010 / Cladding around stairwell above roof
Cladding - Cement Product SP Low (6)
- Test this when access is available
Ground Floor 011 / Cladding around main entrance
Cladding - Cement Product SP Low (6)
- Test this cladding when access becomes available

Towngate Building A-00459 Page 5 of 28
Towngate Building
Floor Area / Room Material Description Sample No. Material
Risk
1st Floor 008 / Soffits Soffits - Cement Product SP Low (6)
Manage & Re-Inspect - Any future removal or refurbishment carted out where the soffits are to be removed will need to be done by a class B asbestos removal company.
2.2 No Access Areas:
The following table details the areas that were not accessed during the survey. These areas should be
presumed to contain asbestos until proven otherwise.
Floor Area Area Description Reason for No Access
All areas within scope of survey were accessed

Towngate Building A-00459 Page 6 of 28
3.0 METHODOLOGY
3.1 Survey Extent and Limitations
The survey has been undertaken with all due care and diligence using staff with suitable and sufficient
experience. There remains, however, the possibility that there may be concealed asbestos containing
materials within the fabric of the building which were not located and identified. These concealed
areas of asbestos may only become apparent during further investigation (intrusive investigation or
invasive works). Asbestos Consultants NZ Ltd therefore cannot fully guarantee that all ACMs have
been located and identified. Reference must be made to the No Access Areas table which describes
the areas which were not accessed.
All areas at the site which have not been accessed should be presumed to contain asbestos until
further investigation and sampling proves otherwise.
3.2 Material Assessment Score
Each of the parameters given below are assessed during material risk assessment.
Sample Variable Score Examples
Product type
(or debris
from product)
1 (Low) Composites (plastics, resins, mastics, roofing felts, vinyl floor tiles, paints, decorative finishes, cement etc.)
2 (Medium) AIB, textiles, gaskets, ropes, paper etc.
3 (High) Lagging, spray coatings, loose asbestos etc.
Surface
Treatment
0 (None) Non-friable composite asbestos/encapsulated cement.
1 (Low) Enclosed sprays/lagging/board or bare cement.
2 (Medium) Bare AIB or encapsulated lagging/spray.
3 (High) Unsealed lagging/spray/loose asbestos.
Condition / Extent of Damage
0 (Good) Good condition: no visible damage
1 (Low) Few scratches/marks, broken edges etc.
2 (Medium) Significant breakage of non-friable materials or several areas of damage to friable material.
3 (High) High damage/visible debris.
Asbestos Type
0 No asbestos detected.
1 Chrysotile.
2 Amphibole asbestos excluding Crocidolite.
3 Crocidolite.
Source: Health and Safety Executive (HSE), UK: Asbestos: The Survey Guide Second Edition (2012)

Towngate Building A-00459 Page 7 of 28
The Material Assessment score is calculated by adding the parameters above. The potential for releasing fibres is detailed below.
Material Assessment Score Fibre Release Potential
10 or higher High
7 – 9 Medium
5 – 6 Low
4 or lower Very Low
The material assessment looks at the type and condition of the ACM and the ease with which it will
release fibres if disturbed. It does not take into account occupancy or activities within the area,
including periodic maintenance works.
The following is a list of the different asbestos types:
Name Description
Chrysotile White Asbestos
Amosite Brown Asbestos
Crocidolite Blue Asbestos
Tremolite Fibrous forms of these minerals may be found very occasionally during
sample analysis and should be considered as hazardous as Amosite and
Crocidolite
Anthophyllite
Actinolite

Towngate Building A-00459 Page 8 of 28
APPENDIX 1: SURVEY RESULTS

Towngate Building A-00459 Page 9 of 28 S = Sampled; SP = Strongly Presumed; P = Presumed; X = Cross Reference (Same as another)
SURVEY RESULT SHEETS
Building: Towngate Building Floor: Ground Floor
Location ID: 001 Location: Exterior North and West wall
Sample Number S001 Extent: 118m²
Item / Position Cladding Material: Cement Product
MATERIAL ASSESSMENT
Product Type N/A N/A Material Score
Condition N/A N/A N/A
Surface Treatment N/A N/A Risk
Asbestos Type NAD N/A N/A
Main Photo Close Up Photo
Recommendation: No action required
Comments: NAD
Composite Sample Taken

Towngate Building A-00459 Page 10 of 28 S = Sampled; SP = Strongly Presumed; P = Presumed; X = Cross Reference (Same as another)
SURVEY RESULT SHEETS
Building: Towngate Building Floor: Ground Floor
Location ID: 002 Location: Soffits in streetons covered car park
Sample Number S002 Extent: 60m²
Item / Position Soffits Material: Cement Product
MATERIAL ASSESSMENT
Product Type N/A N/A Material Score
Condition N/A N/A N/A
Surface Treatment N/A N/A Risk
Asbestos Type NAD N/A N/A
Main Photo Close Up Photo
Recommendation: No action required
Comments: NAD
Composite Sample Taken

Towngate Building A-00459 Page 11 of 28 S = Sampled; SP = Strongly Presumed; P = Presumed; X = Cross Reference (Same as another)
SURVEY RESULT SHEETS
Building: Towngate Building Floor: Ground Floor
Location ID: 003 Location: Textured ceiling easy by you
Sample Number S003 Extent: 80m²
Item / Position Textured ceiling Material: Textured Coating
MATERIAL ASSESSMENT
Product Type Asbestos reinforced composites etc. 1 Material Score
Condition Good 0 3
Surface Treatment Sealed 1 Risk
Asbestos Type Chrysotile 1 Very Low
Main Photo Close Up Photo
Recommendation: Manage & Re-Inspect - All trades staff are to be made aware that this contains Asbestos. If Any future removal is to be done a Class A asbestos Removal company is to be used.
Comments: This is in the store room and above the suspended ceiling.
Composite sample

Towngate Building A-00459 Page 12 of 28 S = Sampled; SP = Strongly Presumed; P = Presumed; X = Cross Reference (Same as another)
SURVEY RESULT SHEETS
Building: Towngate Building Floor: Ground Floor
Location ID: 004 Location: Loading bay/Toilets behind shops
Sample Number S004 Extent: 40m²
Item / Position Textured ceiling Material: Textured Coating
MATERIAL ASSESSMENT
Product Type N/A N/A Material Score
Condition N/A N/A N/A
Surface Treatment N/A N/A Risk
Asbestos Type NAD N/A N/A
Main Photo Close Up Photo
Recommendation: No action required
Comments: This texture is soft and a different looking texture to the rest of the building.
Composite Sample Taken

Towngate Building A-00459 Page 13 of 28 S = Sampled; SP = Strongly Presumed; P = Presumed; X = Cross Reference (Same as another)
SURVEY RESULT SHEETS
Building: Towngate Building Floor: Ground Floor
Location ID: 005 Location: Textured Ceiling Ripcurl
Sample Number X003 Extent: 250m²
Item / Position Textured ceiling Material: Textured Coating
MATERIAL ASSESSMENT
Product Type Asbestos reinforced composites etc. 1 Material Score
Condition High 3 6
Surface Treatment Sealed 1 Risk
Asbestos Type Chrysotile 1 Low
Main Photo Close Up Photo
Recommendation: - All trades staff are to be made aware that this contains Asbestos. If Any future removal is to be done a Class A asbestos Removal company is to be used.
Comments: Throughout the storeroom and above suspended ceiling in main shop
Composite sample taken

Towngate Building A-00459 Page 14 of 28 S = Sampled; SP = Strongly Presumed; P = Presumed; X = Cross Reference (Same as another)
SURVEY RESULT SHEETS
Building: Towngate Building Floor: Ground Floor
Location ID: 006 Location: Textured ceiling
Sample Number X003 Extent: 80m²
Item / Position Trade aid textured ceiling Material: Textured Coating
MATERIAL ASSESSMENT
Product Type Asbestos reinforced composites etc. 1 Material Score
Condition High 3 6
Surface Treatment Sealed 1 Risk
Asbestos Type Chrysotile 1 Low
Main Photo Close Up Photo
Recommendation:
Manage & Re-Inspect - The ceiling above the suspended ceiling in the shop is in good condition. The ceiling in the store room is getting damaged by staff every time they stack items higher causing it to rub on the texture and become friable, the store room should be sorted out.
All trades staff are to be made aware that this contains Asbestos. If Any future removal is to be done a Class A asbestos Removal company is to be used.
Comments: This product is easily crumbled when staff stack items to the ceiling in the store room.
Composite sample taken.

Towngate Building A-00459 Page 15 of 28 S = Sampled; SP = Strongly Presumed; P = Presumed; X = Cross Reference (Same as another)
SURVEY RESULT SHEETS
Building: Towngate Building Floor: Ground Floor
Location ID: 007 Location: Textured ceiling classic mobiles
Sample Number X003 Extent: 80m²
Item / Position Textured ceiling Material: Textured Coating
MATERIAL ASSESSMENT
Product Type Asbestos reinforced composites etc. 1 Material Score
Condition High 3 7
Surface Treatment Partially Unsealed 2 Risk
Asbestos Type Chrysotile 1 Medium
Main Photo Close Up Photo
Recommendation: Manage & Re-Inspect - All trades staff are to be made aware that this contains Asbestos. If Any future removal is to be done a Class A asbestos Removal company is to be used.
Comments: The ceiling is in good condition.
Composite Sample Taken

Towngate Building A-00459 Page 16 of 28 S = Sampled; SP = Strongly Presumed; P = Presumed; X = Cross Reference (Same as another)
SURVEY RESULT SHEETS
Building: Towngate Building Floor: Ground Floor
Location ID: 010 Location: Cladding around stairwell above roof
Sample Number SP Extent: 6m²
Item / Position Cladding Material: Cement Product
MATERIAL ASSESSMENT
Product Type Asbestos reinforced composites etc. 1 Material Score
Condition Good 0 6
Surface Treatment Partially Unsealed 2 Risk
Asbestos Type Presumed Asbestos 3 Low
Main Photo Close Up Photo
Recommendation: - Test this when access is available
Comments: No access, will come back when there is a scaffold system onsite. From our photos this looks exactly like the other cladding on the building that does not contain asbestos

Towngate Building A-00459 Page 17 of 28 S = Sampled; SP = Strongly Presumed; P = Presumed; X = Cross Reference (Same as another)
SURVEY RESULT SHEETS
Building: Towngate Building Floor: Ground Floor
Location ID: 011 Location: Cladding around main entrance
Sample Number SP Extent: 20m²
Item / Position Cladding Material: Cement Product
MATERIAL ASSESSMENT
Product Type Asbestos reinforced composites etc. 1 Material Score
Condition Good 0 6
Surface Treatment Partially Unsealed 2 Risk
Asbestos Type Presumed Asbestos 3 Low
Main Photo Close Up Photo
Recommendation: - Test this cladding when access becomes available
Comments: No access, will get access when a scaffold system is in place, looking at our photo's it looks exactly like the rest of the cladding we have tested which does not contain asbestos
We were unable to access this area

Towngate Building A-00459 Page 18 of 28 S = Sampled; SP = Strongly Presumed; P = Presumed; X = Cross Reference (Same as another)
SURVEY RESULT SHEETS
Building: Towngate Building Floor: 1st Floor
Location ID: 008 Location: Soffits
Sample Number SP Extent: 60lm
Item / Position Soffits Material: Cement Product
MATERIAL ASSESSMENT
Product Type Asbestos reinforced composites etc. 1 Material Score
Condition Good 0 6
Surface Treatment Partially Unsealed 2 Risk
Asbestos Type Presumed Asbestos 3 Low
Main Photo Close Up Photo
Recommendation: Manage & Re-Inspect - Any future removal or refurbishment carted out where the soffits are to be removed will need to be done by a class B asbestos removal company.
Comments: The soffits are in good condition and well painted.
No sample taken as this is a known asbestos product

Towngate Building A-00459 Page 19 of 28 S = Sampled; SP = Strongly Presumed; P = Presumed; X = Cross Reference (Same as another)
SURVEY RESULT SHEETS
Building: Towngate Building Floor: 1st Floor
Location ID: 009 Location: Exterior cladding inside and outside pasard
Sample Number S005 Extent: m²
Item / Position Cladding Material: Cement Product
MATERIAL ASSESSMENT
Product Type N/A N/A Material Score
Condition N/A N/A N/A
Surface Treatment N/A N/A Risk
Asbestos Type NAD N/A N/A
Main Photo Close Up Photo
Recommendation: No action required
Comments: This is in good condition.
Composite Sample Taken

Towngate Building A-00459 Page 20 of 28
APPENDIX 2: ASBESTOS REGISTER

Towngate Building A-00459 Page 21 of 28
Towngate Building
Floor Area / Room Description Extent Sample Number
Condition/ Extent of Deterioration
Surface Treatment Asbestos Type Material Score
Ground Floor 003 / Textured ceiling easy by you
Textured ceiling - Textured Coating 80m² S003 Good Sealed Chrysotile 3
Manage & Re-Inspect - All trades staff are to be made aware that this contains Asbestos. If Any future removal is to be done a Class A asbestos Removal company is to be used.
Ground Floor 005 / Textured Ceiling Ripcurl
Textured ceiling - Textured Coating 250m² X003 High Sealed Chrysotile 6
- All trades staff are to be made aware that this contains Asbestos. If Any future removal is to be done a Class A asbestos Removal company is to be used.
Ground Floor 006 / Textured ceiling Trade aid textured ceiling - Textured Coating
80m² X003 High Sealed Chrysotile 6
Manage & Re-Inspect - The ceiling above the suspended ceiling in the shop is in good condition. The ceiling in the store room is getting damaged by staff every time they stack items higher causing it to rub on the texture and become friable, the store room should be sorted out.
All trades staff are to be made aware that this contains Asbestos. If Any future removal is to be done a Class A asbestos Removal company is to be used.
Ground Floor 007 / Textured ceiling classic mobiles
Textured ceiling - Textured Coating 80m² X003 High Partially Unsealed Chrysotile 7
Manage & Re-Inspect - All trades staff are to be made aware that this contains Asbestos. If Any future removal is to be done a Class A asbestos Removal company is to be used.
Ground Floor 010 / Cladding around stairwell above roof
Cladding - Cement Product 6m² SP Good Partially Unsealed Presumed Asbestos
6
- Test this when access is available
Ground Floor 011 / Cladding around main entrance
Cladding - Cement Product 20m² SP Good Partially Unsealed Presumed Asbestos
6
- Test this cladding when access becomes available
1st Floor 008 / Soffits Soffits - Cement Product 60lm SP Good Partially Unsealed Presumed Asbestos
6
Manage & Re-Inspect - Any future removal or refurbishment carted out where the soffits are to be removed will need to be done by a class B asbestos removal company.

Towngate Building A-00459 Page 22 of 28
APPENDIX 3: NON ASBESTOS REGISTER

Towngate Building A-00459 Page 23 of 28
Towngate Building
Floor Area / Room Item Material
Ground Floor 001 / Exterior North and West wall Cladding Cement Product - S001 (NAD)
Ground Floor 002 / Soffits in streetons covered car park
Soffits Cement Product - S002 (NAD)
Ground Floor 004 / Loading bay/Toilets behind shops
Textured ceiling Textured Coating - S004 (NAD)
1st Floor 009 / Exterior cladding inside and outside pasard
Cladding Cement Product - S005 (NAD)

Towngate Building A-00459 Page 24 of 28
APPENDIX 4: DRAWINGS

Towngate Building A-00459 Page 25 of 28
No drawings are available

Towngate Building A-00459 Page 26 of 28
APPENDIX 5: CERTIFICATES OF ANALYSIS

Towngate Building A-00459 Page 27 of 28

Towngate Building A-00459 Page 28 of 28
END OF REPORT
ASBESTOS CONSULTANTS NZ LTD
30 CAMERON ROAD
TAURANGA, 3110
NEW ZEALAND

The plan should be made available to the PCBU, Site Manager, Supervisor in control of the workplace and workers © 2020 Independent Safety Solutions BOP Ltd - All rights Reserved
ASBESTOS ELIMINATORS LTD
ASBESTOS REMOVAL CONTROL PLAN (ARCP)
Version 1 Updated: 17 July 2020 Review Date: 01 August 2021
Prepared by: __________________________________ Date: ______________________
Asbestos Removal Licence Holder (PCBU): _____________________________________________
Licence Number: _________________________________________________________________
Asbestos Removal Licence Holder details: _____________________________________________
Phone ______________________________________________________________________
Email ______________________________________________________________________
For ACM removal at (address) ______________________________________________________
_______________________________________________________________________________
_______________________________________________________________________________
On Behalf of PCBU who commissioned asbestos removal (client)
_______________________________________________________________________________
_______________________________________________________________________________
_______________________________________________________________________________
Colin Parr 16/02/2021
Colin Parr
RB17060098
Asbestos Eliminators Ltd
0274996023
44 Heuheu Street
Taupo
Wade Construction Ltd

The plan should be made available to the PCBU, Site Manager, Supervisor in control of the workplace and workers © 2020 Independent Safety Solutions BOP Ltd - All rights Reserved
Contents:
1. Identification
a. ACM Survey, Details and Assessment
b. Worksafe NZ Notification Details
2. Preparation
a. Consultation
b. Responsibilities
c. Methodology of Removal
d. Control of Non-Asbestos Hazards
e. Emergency Procedure - Asbestos
f. Removal Boundaries, Signage and Barriers
g. Electrical and Lighting Installations
h. Personal Protective Equipment Required
i. Air Monitoring
j. Training
k. Health Monitoring
3. Tools and Equipment
a. Equipment Used
b. Enclosures
4. Decontamination Facilities
a. Decontamination Methodology
b. Other Control Methods
c. Decontamination of Equipment
5. Waste Disposal
a. Methodology for disposing Asbestos Waste
6. Sign Off
a. Workers
b. Supervisor
ATTACHMENTS TO BE SUPPLIED:
1. Asbestos Removal Licence
2. Certificate of Competence (Training Records for Licence)
3. Copy of ACM Survey Report
4. Copy of Clearance Report/Certificate

The plan should be made available to the PCBU, Site Manager, Supervisor in control of the workplace and workers © 2020 Independent Safety Solutions BOP Ltd - All rights Reserved
1. Identification
1a. ACM Survey, Details and Assessment
Survey Report Type Required:
Demolition Survey
Refurbishment Survey Management Survey
Obtained Survey Report: Yes No
Location on site: Estimated Volume or Area (M2)
Asbestos Material Type Pipe Mastic Insulation Meter Boards
Bitumen Cement Product Flooring Textured Ceiling
Lagging Eaves Roof Tiles Fencing
Ceiling Tiles Wall Cladding Soil Gable Ends
Other:
Asbestos Condition Good Extensive Damage
Minor Damage Significant Weathering
Painted Unsealed Fire Damage Slightly Weathered
Suspected Type Chrysotile (White)
Amosite (Brown) Crocidolite (Blue)
Other….
Describe Condition:
Other Restricted Work
WorkSafe NZ Notified
Friable Class A
Non-Friable Class B
1b. Worksafe NZ Notification Details Person Responsible for Notification: Date Notification Sent: Notification from Worksafe NZ confirmation attached at the end of the ACRP
Yes No
152 m2
Colin Parr
To be done later

The plan should be made available to the PCBU, Site Manager, Supervisor in control of the workplace and workers © 2020 Independent Safety Solutions BOP Ltd - All rights Reserved
2.Preperation 2a. Consultation Information supplied by Owner, Occupier or Client Yes No Site Drawing to include: Asbestos
Removal Area Entrances/Exits Waste Storage Decontamination
Area Emergency
Equipment Signage Barriers –
isolate area Monitoring Points
(Indicate All Areas for the Removal)
To be done onsite

The plan should be made available to the PCBU, Site Manager, Supervisor in control of the workplace and workers © 2020 Independent Safety Solutions BOP Ltd - All rights Reserved
2b. Responsibilities Nominated Supervisor: Contact: DUTIES FOR PCBUS COMMISSIONING ASBESTOS REMOVAL The PCBU that commissions an asbestos removal must:
make sure the asbestos removal work is carried out by a licensed asbestos removalist who is licensed for that type of work
limit access to the asbestos removal area make sure clearance inspections are conducted make sure air monitoring is conducted where work requiring a Class A licence is being carried out. The workplace PCBU who knows licensed asbestos removal work is being carried out at the workplace must:
- make sure people at the workplace are informed about the asbestos removal and provide them with appropriate information (eg tenants, workers, others as applicable)
- take reasonable steps to make sure people in the immediate vicinity are informed about the asbestos removal (eg neighbours, the public)
- limit access to the asbestos work area SUPERVISOR RESPONSIBILITIES: When licensed asbestos removal work is being carried out at a workplace, it must be supervised by a supervisor. The supervisor must be a nominated supervisor under an asbestos removal licence of the appropriate type for the work. CLASS A SUPERVISION - If the asbestos removal work requires a Class A licence, the nominated supervisor must be present at the asbestos removal area whenever the work is being carried out. CLASS B SUPERVISION - If the asbestos removal work requires a Class B licence, the nominated supervisor may decide whether they need to be present at any particular time. They must still be in the vicinity and readily available, and the work still needs to be effectively supervised.
The decision about whether to be present should consider factors such as:
the workers’ competence and experience the work being carried out and the risks involved what might go wrong, and the ability of the workers to immediately recognise and remedy this how the supervisor can be contacted and be readily available to return to the removal area
Other Supervisor Responsibilities:
performing the pre-removal set up performing the actual removal or maintenance work and final clearing operation ensuring that all necessary measures are taken to suppress the airborne concentration of dust and other airborne
contaminants to the lowest practicable level ensuring that hazardous fibres and hazardous material(s) do not contaminate adjacent areas arranging for, and assess results of air monitoring where appropriate ensuring that all workers under their supervision are adequately trained in the safe working practices ensuring that the asbestos maintenance or removal is adequately supervised ensuring that the correct plant and equipment is available and used properly ensuring that PPE is used and maintained in good condition ensuring that the asbestos removal area is kept clean and that waste is quickly and properly disposed of ensuring
that personal hygiene procedures are continually observed and maintaining copies of all records
Worker Responsibilities:
ensuring the do not operate any plant or equipment they are not trained or authorised to use complying with the PCBU and / or workplace controller's health and safety rules ensuring they wear all necessary PPE and clothing ensuring they comply with and participate in the employer's hazard management regime and ensuring they do not report for duty under the influence of alcohol or other impairment substance (s)
Cameron
027 3459891

The plan should be made available to the PCBU, Site Manager, Supervisor in control of the workplace and workers © 2020 Independent Safety Solutions BOP Ltd - All rights Reserved
2c. Methodology of Removal Step by Step Method
Cover scaffolding and ground in work area with plastic, spray cladding with pva glue and water mixture, remove nails and remove sheet whole where possible, re-spray sheets both sides and move to load area to be double wrapped in 200 mu plastic, vacuum clean timber framing, spray with pva mixture, clean and remove plastic, vacuum clean ground in work area and loading area, check site is clear of asbestos,

The plan should be made available to the PCBU, Site Manager, Supervisor in control of the workplace and workers © 2020 Independent Safety Solutions BOP Ltd - All rights Reserved
Continued…………

The plan should be made available to the PCBU, Site Manager, Supervisor in control of the workplace and workers © 2020 Independent Safety Solutions BOP Ltd - All rights Reserved
Risk Matrix Consequence
1
Insignificant
2
Minor
3
Moderate
4
Major
5
Catastrophic
Like
lihood
Likelihood
Descriptor Chance of
Event Indicative
Frequency
No
Treatment Injury
Environmental
Release contained
in controls
First Aid
Environmental
release cleaned
up internally
Medical
Treatment
Environmental release cleaned
up with
specialist
assistance
Serious Injury
Environmental release with
short term negative
effects
Single/Multiple Fatalities
Environmental release with
detrimental long
term effects
5
Almost
Certain
The event is
expected to
occur in most
circumstances
≤ 3 Monthly Medium
(8)
High
(13)
Very High
(20)
Very high
(23)
Very High
(25)
4
Likely
The event will
occur in most
situations ≤ 6 Monthly
Low
(6)
Medium
(11)
High
(17)
Very High
(21)
Very High
(24)
3
Possible
The event
should occur
at some time ≤ 1 Yearly
Low
(4)
Medium
(9)
High
(12)
Very High
(18)
Very high
(22)
2
Unlikely
The event
could occur at
some time ≤ 2 Yearly
Low
(2)
Low
(5)
Medium
(10)
High
(15)
Very High
(19)
1
Rare
The event may
occur but only
in exceptional
circumstances
> 2 Yearly Low
(1)
Low
(3)
Low
(7)
High
(14)
High
(16)

The plan should be made available to the PCBU, Site Manager, Supervisor in control of the workplace and workers © 2020 Independent Safety Solutions BOP Ltd - All rights Reserved
2d. CONTROL OF NON-ASBESTOS HAZARDS - The following risks have been identified during the planning
stages of the asbestos or ACM removal
RISKS INITIAL RISK
RATING
CONTROLS
RESIDUAL RISK
RATING
Heavy sheets when removing and carrying
9 2 men to lift sheets when removing to loading area 2
falling from scaffolding 15 only work within the handrails do not over stretch 2
Heat stress from overalls and mask
8 only work for 2 hour periods, drink lots of water 1

The plan should be made available to the PCBU, Site Manager, Supervisor in control of the workplace and workers © 2020 Independent Safety Solutions BOP Ltd - All rights Reserved
2d. CONTROL OF ASBESTOS RELATED HAZARDS - The following risks have been identified during the
planning stages of the asbestos or ACM removal
RISKS INITIAL RISK
RATING
CONTROLS
RESIDUAL RISK
RATING
asbestos dust when moving around site
18 spray with pva mixture, keep wet when moving to loading area.
4

The plan should be made available to the PCBU, Site Manager, Supervisor in control of the workplace and workers © 2020 Independent Safety Solutions BOP Ltd - All rights Reserved
2e. Emergency Procedure – Asbestos In the case of an uncontrolled release of asbestos fibres into the workplace you must ensure that all persons are kept away from the affected area. An adequate assessment is required and an emergency action plan should be followed. Immediately clear the area of all personnel and isolate the area, such as a single room, by closing all the doors. Turn off air conditioning/warm air systems if possible. Prohibit access to the area. Inform Site Supervisor who will take control of the situation The Site Supervisor will assess the situation, access the area with appropriate personal protective equipment and
decide on a further course of action SUBSEQUENT ACTIONS FOLLOWING: Relay information on potential exposure to all persons who may have been affected by the uncontrolled release. The Site Supervisor will organise the necessary remedial work Keep the area clear of anyone not involved in the remedial action until air monitoring has confirmed that fibre
counts are at acceptable levels Following an assessment, the incident should be recorded on the Incident Reporting Form Site Supervisor will gather information, make notifications to relevant parties such as Work Safe NZ and develop
actions in response to the incident Additional Controls to manage the Emergency: IN THE EVENT OF AN INJURY STAY CALM - 3 BLASTS ON A CAR HORN WILL OCCUR
Shut down all plant & equipment Provide first aid provided scene is safe DIAL 111 and Provide Site Address Identify the services you need (Fire, Police, Ambulance) Have someone meet the emergency services
IN THE EVENT OF AN EMERGENCY - 3 BLASTS ON A CAR HORN WILL OCCUR
Shut down all plant & equipment Seek shelter (if earthquake) Evacuate site
Proceed to assembly point for the site and REMAIN there, so ALL Personnel can be ACCOUNTED FOR.
DO NOT RETURN to the site until the Site Supervisor has given the OFFICIAL CLEARANCE. TRAINED FIRST AIDERS ON SITE
TRAINED FIRST AIDERS ON SITE
SITE SUPERVISOR - PERSON IN CHARGE
EMERGENCY TELEPHONE NUMBERS: Dial 111 for: FIRE, AMBULANCE, POLICE
HOSPITAL: POISON CENTRE:
0800 764 766
WORKSAFE: 0800 030 040 POWER: (Customer Service)
0800 87 87 87
CIVIL DEFENCE: 24HRS FAULTS:
0800 87 87 87
keep asbestos wet all times.
Cameron Parr
William Brown
Cameron Parr

The plan should be made available to the PCBU, Site Manager, Supervisor in control of the workplace and workers © 2020 Independent Safety Solutions BOP Ltd - All rights Reserved
2f. Removal Boundaries, Signage and Barriers
Asbestos Warning Signs
Safety Tapes & Cones
Security Fencing to prevent unauthorised access Spotters to prevent unauthorised Access
Description: Examples of Signage:
2g. Electrical
If there is a risk of electrical injury we will follow the hierarchy of controls in Section 7.9 of the Guidelines for the Management and Removal of Asbestos, 3rd Edition. Any electrical removal or installation will be carried out by a qualified electrician and if electrical installations cannot be removed they will then be tagged and locked out appropriately for the duration of our works. Any electrical equipment we will be using on site will comply with AS/NZS 3012:2003 and will be tagged at 3 monthly intervals
2h. Personal Protective Equipment Required
Half-face respirators Full-face respirators Full-face powered air-purifying respirators Full-face respirators (air-line)
Minimum P2 Minimum P3
Other……
Disposable overalls (Class 5/6) Non-disposable overalls Workers clean shaven Fit checks conducted Safety Boots Disposable Gloves Disposable foot coverings
Workers have received the appropriate training for PPE and RPE use? Yes No
Workers have received information about the health risks of licenced asbestos removal work and health monitoring requirements?
Yes No
Additional Information:

The plan should be made available to the PCBU, Site Manager, Supervisor in control of the workplace and workers © 2020 Independent Safety Solutions BOP Ltd - All rights Reserved
2i. Air Monitoring
A Clearance Report/Certificate will be issued by an independent licensed asbestos assessor, there will be no admittance into the building by any unauthorised persons until this clearance has been received, the full report is available once issued in Appendix 5. Is Air Monitoring required?
Yes No
If NO air monitoring will be required, provide reason?
If YES, provide A Clearance Report/Certificate which will be issued by an independent licensed asbestos assessor. There will be no admittance into the building by any unauthorised persons until this clearance has been received, the full report is available once issued in the ARCP. Additional Air monitoring may be required when: Conducting Class A asbestos removal work it is not clear whether new or existing control
measures are effective there is evidence the control measures have
deteriorated as a result of poor maintenance modifications or changes in safe work methods have
occurred that may adversely affect worker exposure there has been an uncontrolled disturbance of
asbestos at the workplace
Clearance Procedures for Works
Clearance needed No Clearance Needed Air Monitoring Swab Tests Visual Inspection Soil Test Background Monitoring Other …………………………………….
Description: Details of Competent Person or Assessor
Assessor Name: Assessor Number: Assessor Expiry:
2j. Training
All workers will have training in the following: Training in the correct safe working procedures of all plant and equipment. Training in the correct safe methods of asbestos removal. Training in the health aspects and hazards associated with asbestos removal, including the storage, safe
handling, transportation and disposal of such materials. Training in the work practices to be followed in undertaking hazardous material removal. Training in the use, the care, and the maintenance of personal protective clothing and equipment required to
safely complete asbestos work. A minimum of two years practical training under the supervision of a recognised and competent asbestos
contractor If adequate training has not been achieved close supervision will be applied by the removal supervisor
2k. Health Monitoring
Annual Health Monitoring will be undertaken for all workers in compliance with the Health and Safety at Work Act 2015 and applicable regulations. All records will be kept for the minimum time relating to Asbestos Work.
B class Removal
Under 10 m2
Terry O'keeffe AA18010016 30/03/2023

The plan should be made available to the PCBU, Site Manager, Supervisor in control of the workplace and workers © 2020 Independent Safety Solutions BOP Ltd - All rights Reserved
3. TOOLS AND EQUIPMENT 3a. Equipment Used
Asbestos marked bags Hand tools Micron polythene (Type) Industrial HEPA Vacuum
Battery operated low pressure back pack sprayer Wet wipes PVA spray Negative Pressure Unit (NPU)
All Tools and Equipment used in removal work are inspected prior to work commencing?
Yes No
All Tools and Equipment used in removing asbestos or ACM are inspected and cleaned following all removal work?
Yes No
All Tools and Equipment used in removing asbestos or ACM are inspected and cleaned at least once every seven days when in continuous use?
Yes No
VACUUM CLEANER DETAILS MAKE MODEL NEXT TEST DATE KER STAR KV50 16055647 ________________ KER STAR KV10 160L580404 ________________
KV50 17C60261 ________________
KV50 15653257 ________________
KER STAR KV10 19K71924A ________________
HZQ 200 134400210 ________________
3b. Enclosures
Complete Enclosure of the work area will be required
Yes No
Smoke Test to be conducted:
Yes No
Smoke Test Completed by:
Frequency of Testing:
NPU required?
Yes No
NEGATIVE PRESSURE UNIT MAKE MODEL RATING NEXT TEST DATE ARE NZ AMS1500 25258 2400 ________________ ARE NZ AMS1500 25263 2400 ________________
ARE NZ AMS2000 B-15703 2700 ________________
ARE NZ AMS500 24436 861 ________________

The plan should be made available to the PCBU, Site Manager, Supervisor in control of the workplace and workers © 2020 Independent Safety Solutions BOP Ltd - All rights Reserved
4. Decontamination Facilities
4a. Decontamination Methodology
ACM Removal Decontamination Methods
Wet Dry Wet Wiping
Describe the decontamination facilities that will be interconnected or used with the enclosure (include decontamination of tools, plant or equipment, reusable PPE, people, removable area, contained waste)
The following additional controls will be put in place to contain asbestos within the designated asbestos work area:
4b. Other Control Methods
No power tools (hammer, pinch bar/scraper/knife/other)
Seal air vents/windows/entrances/openings No unnecessary breakage
Full enclosure (friable) Negative air unit/decontamination unit (friable) Glove bag (friable) Clean up debris throughout removal
No Enclosure, hand tools to be wet wipe and stored in plastic bags.

The plan should be made available to the PCBU, Site Manager, Supervisor in control of the workplace and workers © 2020 Independent Safety Solutions BOP Ltd - All rights Reserved
Sheets removed in whole (if practical) Scaffolding Scissor lift/elevated mobile platform
HEPA vacuum Wet wipe Other: (specify):
4c. Decontamination of Equipment Asbestos and ACM Removal Decontamination Methods
Stage 1. Decontamination Process Respiratory Protection Equipment must be worn during stage 1 While in enclosure - remove any visible asbestos dust/residue from protective clothing/coveralls/footwear using
an asbestos vacuum cleaner and then wiping down with damp cloths and place in disposal bag. Do not reuse or re-soak damp cloths – then place cloths into disposal plastic bags (200 migron thick) Take disposable 2nd pair of coveralls off and place into disposal bags Seal all plastic bags with duct tape/goose necked and place into a second plastic bag Seal this second plastic bag and label/mark as ‘Asbestos Waste’ Use damp rags to wipe external surfaces of the disposal bags to remove any dust before it is removed from the
asbestos removal work area
Stage 2. Describe Transit Route from Asbestos Removal Area
Stage 3. Trailer Decontamination Unit Process
Hot Water Shower with waste water treatment – remove remaining clothing and RPE Continue to 2nd Shower Unit Change in Dressing Area
Additional Information:
Dispose of asbestos waste at the appropriate waste facility
Area to wash boots and remove overalls, keep mask on.
area for removal of mask and washing of hands, mask and face.

The plan should be made available to the PCBU, Site Manager, Supervisor in control of the workplace and workers © 2020 Independent Safety Solutions BOP Ltd - All rights Reserved
Equipment Decontamination Method Wet Dry Wet Wiping
Double Bagged and Tagged Disposed
Personal Decontamination Wet Wiped Vacuum Water/PVA Spray
5. Waste Disposal
5a. Methodology for disposing Asbestos Waste
Double bagged/twisted/taped/goose necked Labelled Double Wrapped 200 migron plastic Double Lined Trailer
Registered Landfill PVA spray then dispose as asbestos waste Other (specify):
Any Dockets from Registered Landfill will be kept and supplied as requested as proof of disposal
Description: A Registered Worksafe NZ Landfill Flemings Landfill Tirohia
Other …
6. SIGN OFF 6a. Workers Name Date Start time Finish Time

The plan should be made available to the PCBU, Site Manager, Supervisor in control of the workplace and workers © 2020 Independent Safety Solutions BOP Ltd - All rights Reserved
5b. Supervisor
Name Date
I DECLARE THE INFORMATION CONTAINED WITHIN THE ASBESTOS REMOVAL CONTROL PLAN IS ACCURATE TO THE BEST OF MY KNOWLEDGE.

Accessibility Assessment Report Design
TOWNGATE BUILDING CNR RUAPEHU & HEU HEU STREETS
TAUPO
BUILDING CONSENT – REV 1
12 January 2021
JOB NUMBER: 20-1238

Accessibility Assessment Report
TOWNGATE BUILDING
CNR RUAPEHU & HEU HEU STREETS
TAUPO
Prepared for: Jackie Robinson Date: 12-01-2021
Project status: Building Consent Issue Project no: 20-1238 Revision: 1
Prepared by:
David O’Donnell Fire Technical Manager GIFireE, MNZFBI
BCD Group Ltd
Reviewed by:
Peter Dunkin Fire Engineering Manager MIFireE, FNZFBI
BCD Group Ltd
Reviewed and approved for release by:
Peter Dunkin Fire Engineering Manager MIFireE, FNZFBI
BCD Group Ltd
DISCLAIMER This report has been prepared for our client and relates only to the proposal described therein and it is not to be used for any other project. No responsibility is accepted by BCD Group Limited or its directors, servants, agents, staff or employees for the accuracy
of information provided by third parties and/or the use of any part of this report in any other context or for any other purpose.

\\bcdfs01\projects\20-1238 towngate\100 bcd fire\production files\accessible report (01)\21-01-12 accessbility report (1) - 20-1238.docx 3
CONTENTS
1. REGULATORY AND COMPLIANCE FRAMEWORK 4
2. DOCUMENTATION 5
3. BUILDING / PROJECT SCOPE 5
3.1 Building location 5
3.3 Proposed works 5
3.4 Accessibility scope 5
4. APPROACHABILITY 6
4.1 Car parks 6
4.2 Accessible route 6
5. ACCESSIBILITY 7
5.1 Entrance 7
6. USABILITY 8
6.1 Door controls 8
APPENDIX A – ACCESSIBLE PLAN(S) I
Issue Date Authors Status / Comments
Issue 1 12/01/2021 DOD/ PD / PD Building Consent Issue

\\bcdfs01\projects\20-1238 towngate\100 bcd fire\production files\accessible report (01)\21-01-12 accessbility report (1) - 20-1238.docx 4
1. REGULATORY AND COMPLIANCE FRAMEWORK The purpose of this report is to demonstrate that the building will comply with New Zealand Building Code clause D1 Access Routes as required by the following provisions of the Building Act 2004 and Amendments.
Section 17: All building work to comply with the building code All building work must comply with the building code to the extent required by this Act, whether or not a building consent is required in respect of that building work.
Section 112: Alterations to existing buildings
(1) A building consent authority must not grant a building consent for the alteration of an existing building, or part of an existing building, unless the building consent authority is satisfied that, after the alteration-
(a) the building will comply, as nearly as is reasonably practicable, with the provisions of the building code that relate to –
(i) means of escape from fire; and
(ii) access and facilities for persons with disabilities (if this is a requirement in terms of section 118); and
(b) the building will, -
(i) if it complied with the other provisions of the building code immediately before the building work began, continue to comply with those provisions; or
(ii) if it did not comply with the other provisions of the building code immediately before the building work began, continue to comply at least to the same extent as it did then comply.
(2) Despite subsection (1), a territorial authority may, by written notice to the owner of a building, allow the alteration of an existing building, or part of an existing building, without the building complying with provisions of the building code specified by the territorial authority if the territorial authority is satisfied that, -
(a) If the building were required to comply with the relevant provisions of the building code, the alteration would not take place; and
(b) the alteration will result in improvements to attributes of the building that relate to –
(i) means of escape from fire; or
(ii) access and facilities for persons with disabilities; and
(c) the improvements referred to in paragraph (b) outweigh any detriment that is likely to arise as a result of the building not complying with the relevant provisions of the building code.
Section 118: Access and facilities for persons with disabilities to and within buildings
(1) If provision is being made for the construction or alteration of any building to which members of the public are to be admitted, whether for free or on payment of a charge, reasonable and adequate provision by way of access, parking provisions, and sanitary facilities must be made for persons with disabilities who may be expected to -
(a) Visit or work in that building; and
(b) Carry out normal activities and process in that building. This report demonstrates compliance with The New Zealand Building Code Access Routes Clauses by using the following Approved Documents: - C/AS2 Buildings other than Risk Group SH (Amendment 1, 22nd October 2019) – where applicable to
accessibility - D1/AS1 Access routes (Amendment 6, 1 January 2017) - F8/AS1 Signs (Amendment 4, 1 January 2017) – where applicable to accessibility - G1/AS1 Personal Hygiene (Amendment 6, 10 October 2011) – where applicable to accessibility - NZS NZS 4121:2001

\\bcdfs01\projects\20-1238 towngate\100 bcd fire\production files\accessible report (01)\21-01-12 accessbility report (1) - 20-1238.docx 5
2. DOCUMENTATION
The accessibility design issues detailed in this report are the minimum required to satisfy the requirements of the Building Code. Unless specifically stated, this report does not address matters in addition to the Building Act. This report deals specifically with the requirements of this project and this client. It is not intended for any other purpose or to be used by any other parties. The following drawings / documentation has been reviewed in the compiling of this accessibility report.
Author Title Sheets Revision Date
Jackie Robinson Architectural Designer Set of plans 1 - 13 - 18/08/2020
A site visit was carried out by David O’Donnell for BCD Group Limited on the 16th December 2020.
3. BUILDING / PROJECT SCOPE
3.1 Building location
The site is located on the corner of Ruapehu & Heu Heu Streets, Taupo.
3.3 Proposed works
The proposal is to carry out external recladding works including new window joinery to the upper floor area of the
existing building.
3.4 Accessibility scope
Where compliance with the requirements of the Building Act (D1 Access Routes) is not fully demonstrated through using the Acceptable Solution D1/AS1, compliance must be shown to be ‘as nearly as is reasonably practicable’ (ANARP). This report utilizes assessment tables (GAP assessment) to benchmark the current buildings existing accessible features against the Acceptable Solution D1/AS1 and NZS 4121 to demonstrate the level of compliance with the New Zealand Building Code clause D1 Access Routes. The GAP assessment will identify areas of non-compliance and actions that will be taken to improve compliance.

\\bcdfs01\projects\20-1238 towngate\100 bcd fire\production files\accessible report (01)\21-01-12 accessbility report (1) - 20-1238.docx 6
4. APPROACHABILITY
4.1 Car parks
Feature / Question Requirements of NZS 4121
Current Status Compliant Required Action
Accessible car parks: Are the correct number of car parks provided?
1-20 parks, provide not less than 1 accessible space or 21-50 parks, provide not less than 2 accessible spaces.
Accessible parking is not provided
No An public accessible carparking space is to be provided close to the accessible entrance.
4.2 Accessible route Feature / Question Requirements of
NZS 4121 Current Status Compliant Required Action
Accessible routes: Is an accessible route identifiable from the street / car park?
The accessible route shall extend from the street boundary or car park to those areas within the building required to be accessible to people with disabilities to carry out normal functions and processes within the building
Accessible route is provided from public car parking to the building via the public footpath system.
Yes No action required
Is adequate signage provided?
Accessible signage shall be provided for: - Accessible car parks - Accessible entrances - Accessible routes
through the building - Accessible toilet
facilities
No accessible signage is provided as no accessible facilities are provided within the building.
Yes The main entrances to the building tenancies are the only means of entry for staff and the public and are considered compliant to ANARP.
Is the accessible route free from obstructions and projections?
Minor projections: - All above 1600mm
project < 200mm into access route
- Those < 800mm above floor level project < 100mm into access route
Major projections: - Have clear width of
access route between the face of projections and designed to minimize risk of injury by impact
- No window or door swing obstructions on accessible route
Complies Yes No action required
Footpaths: Are footpaths a minimum width of 1200mm
Footpaths shall be a minimum width of 1200mm
A minimum clear width of 1200mm is achieved with the existing footpath
Yes No action required

\\bcdfs01\projects\20-1238 towngate\100 bcd fire\production files\accessible report (01)\21-01-12 accessbility report (1) - 20-1238.docx 7
5. ACCESSIBILITY
5.1 Entrance Direct access shall be provided to the main entrance of a building, or to the internal space served by the main entrance via the accessible route.
Feature / Question Requirements of NZS 4121
Current Status Compliant Required Action
Is the main entrance on an accessible route?
The accessible entrance shall have a level approach space (1200mm x 1200mm) both sides. Threshold has no upstand > 20mm.
Varying degrees of compliance are provided into each tenancy of the building.
No The entrances to each tenancy are existing. As each tenancy undergoes changes the accessible entrances shall be upgraded to ANARP. The accessible threshold to the ‘You Travel/ Fudge It’ tenancy is approximately 30mm and shall be upgraded in the future to ANARP.
Corridors and doorways: Are there accessible routes extending from the accessible entry to all spaces that are required to be accessible?
Doorways: - Are to have a clear
open width of 760mm (1200mm minimum clear approach space)
Door: - Swing allows 1200mm
clear space in corridor and lobby spaces.
Corridors: - Corridors or lobby on
the accessible route are to have 1200mm minimum width
Complies to ANARP
Yes No action required
Doors: Are doors compliant
760mm clear open width. No less than 300mm from wall to edge of door
The entrance doors to each tenancy within the building have a minimum 760mm clear opening width.
Yes No action required
Public facilities: Are public facilities compliant?
Where public counters or desks are provided in reception areas at least one should be accessible, for both the public and staff using it.
An accessible counter is provided in the Strettons tenancy to ANARP
Yes No action required
Stairs: Are accessible stairs required?
In all buildings where there is more than one floor a minimum of one accessible stair opening off an accessible route shall be provided whether or not lifts are installed
The main entrance stair to the upper floor meets compliance as an accessible stair to ANARP as: - The stair is existing. - Handrails are
provided each side of the stair.
Yes
No action required

\\bcdfs01\projects\20-1238 towngate\100 bcd fire\production files\accessible report (01)\21-01-12 accessbility report (1) - 20-1238.docx 8
Feature / Question Requirements of NZS 4121
Current Status Compliant Required Action
- Contrasting nosings are provided.
The rear stair meets the requirement of a common stair to ANARP
Yes
No action required
Lift: Is a lift required?
In buildings that are two storey and the gross floor area is >400m2.
An existing 1200mm x 1255mm lift is provided in the building. The door opening is 810mm.
No
The lift is existing and meets the requirements of an accessible lift to ANARP.
6. USABILITY
6.1 Door controls Controls and operating mechanisms installed along accessible routes and in usable spaces shall comply with the following:
Feature / Question Requirements of NZS 4121
Current Status Compliant Required Action
Are door controls compliant?
Door controls: - Doors to be operable
with one hand - Handles to be fixed
between 900mm and 1200mm above floor level
- Handles to be lever action with end turned towards the door
- Door closers to have a minimum tension required to bring door to closed position
Complies Yes No action required
Toilet facilities: Are accessible toilet facilities compliant?
Minimum dimensions of space to be 1900mm x 1600mm. Fixtures and fittings must allow and not restrict 1500mm turning circle
No accessible facilities provided on the ground or upper floor
No Accessible toilet facilities are to be provided on the ground and upper floor levels of the building. When any major internal building works are to occur within the building, a unisex accessible toilet is to be provided at that time.
Toilet doors: Are toilet facility doors compliant?
If doors are hinged they should swing outwards unless the space is sufficiently large to provide turning radius of 1500mm, sliding doors are also acceptable.
No accessible facilities provided on the ground or upper floor
No See note above

\\bcdfs01\projects\20-1238 towngate\100 bcd fire\production files\accessible report (01)\21-01-12 accessbility report (1) - 20-1238.docx 9
Feature / Question Requirements of NZS 4121
Current Status Compliant Required Action
Doors to have 760mm minimum clear opening (with 1200mm clear space in any lobby between door swing arc)
See note above

\\bcdfs01\projects\20-1238 towngate\100 bcd fire\production files\accessible report (01)\21-01-12 accessbility report (1) - 20-1238.docx Appendix A
APP
END
IX A
– A
CC
ESSI
BLE
PLA
N(S
)

Pr in ted:4
Project :
S H E E T T I T L E : SHEETExis t ing Ground F loor P lan
Sca le :
D rawn :
PHONE: (07) 378 20670274 822 038
Jackie RobinsonArchitectural Designer Towng ate Bui ld ing
Corner Heuheu & Ruapehu Streets
NOTES:
Job # 180018/08/2020
Pre l iminary Only
A
A
B
B
C
C
D
D
E
E
F
F
G
G
H
H
J
J
11
22
33
44
55
K
K
m o b i l e s h o p
r i p c u r l
tra
de
aid
e
PG
G W
rig
hts
on
ma
ss
ag
e
y o u t r a v e l
w c
se
rvic
ew c
wc
sto
re
s t o r e
sto
re
o f f i c e
4 5 0 s t e p
45
0 s
tep
f o y e r
l i f t
A8
B9
B9
C10
C10
D11
D11
1 :1 0 0
These drawings support the fire design and are to be read inconjunction with the fire report. They do not show all of therequired fire safety systems & features and are notconstruction drawings.
Reference Number:
Date:
Title:
20-1238
12/01/2021
Ground floor plan
Legend
Accessible Route
AR
AR
AR
AR
AR AR
AR
AR
AR
AR
AR
AR
AR
AR
AR
ARAR
AR
AR
AR
AR
AR
AR
AR
AR
AR
AR AR
AR
AR
AR
AR
AR
AR
AR
ARARARAR
AR
AR
AR
AR
AR
AR
AR
AR
AR
AR
AR
AR
AR
AR
AR AR AR AR AR AR
AR
AR
AR AR
AR
AR
AR
AR
AR
AR
AR
AR
AR
AR
AR

Pr in ted:6
Project :
S H E E T T I T L E : SHEETProposed F i rs t F loor P lan
Sca le :
D rawn :
PHONE: (07) 378 20670274 822 038
Jackie RobinsonArchitectural Designer Towng ate Bui ld ing
Corner Heuheu & Ruapehu Streets
NOTES:
Job # 180018/08/2020
Pre l iminary Only
W107,600 x 2,730
W04
1,50
0 x
4,76
0W
031,
500
x 4,
930
W02
1,50
0 x
4,93
0W
011,
500
x 4,
930
W14
1,50
0 x
1,80
0W
1560
0 x
2,00
0W
1660
0 x
2,00
0W
1760
0 x
2,00
0W
181,
500
x 1,
800
W111,500 x 3,150
W131,500 x 3,990
W121,500 x 3,250
W051,500 x 2,950
W061,500 x 3,220
W071,500 x 3,220
W091,500 x 3,150
A
A
B
B
C
C
D
D
E
E
F
F
G
G
H
H
J
J
11
22
33
44
55
K
K
15,405 3,120 21,992
4,35
0
4,89
9
3,739
1,40
04,
850
1,20
05,
050
1,20
05,
050
1,20
05,
050
750
1,560 4,086 1,200 3,372 1,200 3,268 854 2,850 854 7,840 1,200 3,345 1,200 3,039 1,560
600
600
90 3,928
A8
A8
B9
B9
C10
C10
D11
D11
Exist ing parapet to remain
Line of roof framing above
New framing to exist ingconcrete columns
New Composi te screening
Internal patit ionwal ls removed
New part i t ion wall
Existing part i t ion wallscut back from external
joinery & laminatedglass panels instal led
Ful l height glass panel
Glass entry roof
250U B 21 supportedby 200U B 17
New Composi te screeningNew Composi te screening
Co lumn-03
Column-02Eldorado Stone veneerCo lumn-01
Eldorado Stone veneer Entry Column Entry Column
1,200 Co lumn
1,200 Co lumn
1,200 Co lumn
1,200 Co lumn1,200 Co lumn1,200 Co lumn 1,200 Co lumn1,200 Co lumn
exist ing wal l f raming
new wal l f raming
L e g e n d
removed wal l f raming
31
0U
B3
7
25
0U
B2
1
25
0U
B2
1
25
0U
B2
1
25
0U
B2
1
25
0U
B2
1
25
0U
B2
1
25
0U
B2
1
3 1 0 U B 3 7
3 1 0 U B 3 7
3 1 0 U B 3 7
2 5 0 N F B 2 5
25
0U
B2
1
2 5 0 N F B 2 5
k i t c h e n /s ta f f m e n s w o m e n s
o f f i c e s p a c e
o f f i c eo f f i c e o f f i c e o f f i c e o f f i c e o f f i c e o f f i c e o f f i c e
o f f i c e
o f f i c e
o f f i c e
o f f i c e
o f f i c e s p a c e
s t o r es t o r e
s t o r e
s t o r e
s t a i r s
l i ft
s t o r e
sc
ree
n-0
1
s c r e e n - 0 2 s c r e e n - 0 3
sc
ree
n-0
4s
cre
en
-05
S c r e e n L e g e n d
01 - 10 @ 90 x 25 15 @ 40 x 30Leng th -8 ,20002 - 12 @ 90 x 25 15 @ 40 x 30Leng th -2 ,10003 - 12 @ 90 x 25 15 @ 40 x 30Leng th -2 ,10004 - 10 @ 90 x 25 15 @ 40 x 30Leng th -2 ,10005- 4 @ 90 x 25 6 @ 40 x 30Leng th -2 ,10006 4 @ 90 x 25 6 @ 40 x 30Leng th -2 ,100
f o y e r
o f f i c e
s t a i r s
sc
ree
n-0
6
1 :1 0 0
These drawings support the fire design and are to be read inconjunction with the fire report. They do not show all of therequired fire safety systems & features and are notconstruction drawings.
Reference Number:
Date:
Title:
20-1238
12/01/2021
Upper floor plan
Legend
AR Accessible Route
AR
AR
AR
ARAR
AR
AR
AR
ARAR
AR
AR
AR
AR
ARARARARARARARARARARARARARAR
AR
AR
AR
AR
AR
AR
AR
AR
AR
AR
AR
AR
AR
AR
AR
AR
AR
AR
AR
ARARARARARARARAR
AR
AR
AR
AR AR AR AR AR AR AR
AR
AR
AR
AR
AR
AR
AR
AR
AR AR AR AR AR AR
AR
AR
AR
AR
AR
AR
AR
AR AR AR AR AR AR AR AR AR AR AR AR AR
AR

TOWNGATE BUILDING REDEVELOPMENT EML SUBMISSION 29 OCTOBER 2020

EMERGENCY LIGHTING PRODUCER STATEMENT: Towngate Building
PRODUCER STATEMENT (PS1)
ISSUED BY enhance light_for architecture
TO Jackie Robinson Architecture
IN RESPECT OF EMERGENCY LIGHTING
AT Towngate Building, Cnr Heu heu and Ruapehu Streets, Taupo
29 October 2020
Enhance light_for architecture has undertaken to Jackie Robinson Architecture to design emergency lighting in accordance with a contract titled Towngate Building, Cnr Heu heu and Ruapehu Streets, Taupo
We confirm that we have reviewed the Fire Engineering Design prepared by BCD Group and referenced below:
Fire Engineering Design, Job Number:20-1238, Alterations to an existing building (Recladding) cnr Ruapehu & Heu heu Streets, Taupo. Towngate Building. Revision Type – Rev 2. Dated 13 October 2020.
It was ascertained by the designer that the only areas in need of emergency and emergency exit lighting were the main entrance and stairwell, and the subdividing escape route from the Ripcurl tenancy.
The enclosed is designed to meet the minimum requirement of (a) 1 lux in exitways, and (b) 1 lux at every change in level in an escape route, and (c) 0.2 lux everywhere else as stipulated in the Building Code, Acceptable Solution F6/AS1 for all escape routes from the point where the initial open path travel distance exceeds 20 metres. Please find enclosed calculated plan for your reference.
I, Aaron Brown. A duly authorised representative of enhance light_for architecture believe on reasonable grounds that enhance light_for architecture has designed emergency lighting in accordance with the associated fire report and the requirements of the New Zealand Building Code, Clause F6, Visibilty in Escape Routes – Third Edition and Clause F8, Signs.
All specified luminaires comply with the requirements of AS/NZS 2293.1:20 Section 2.2 Duration of Operation and hence fulfil the requirements of the risk groups as stipulated in the fire report for the project.
Inspection, Maintenance and reporting procedures to be carried out in accordance to AS/NZS 2293.2:1995 – Emergency evacuation lighting for buildings, Part 2: Inspection and maintenance – as per New Zealand Building Code Clause F6: 1.8. by and Independent Qualified Person.
Kind regards Aaron Brown BDes (Hons) PG Cert Eng (Lighting) Registration Number: 2628 (Auckland)
Lighting Engineer Enhance light_for architecture A division of Electrical Supply Corp 4-8 Mainstreet Place Te Rapa Hamilton

JOB NUMBER SHEET NUMBER REV
PROJECT TITLE SHEET TITLECLIENT DESIGNED BY COMPANY
REV DATE BY REASON
BDES(HONS), PG CERT ENG (LIGHTING))AARON BROWN 29/10/2020TOWNGATE BUILDING
CORNER HEUHEU &RUAPEHU STREETSTAUPO 0397
EMERGENCYLIGHTINGREQUIREMENTS
L001EM
SCALE 1 : 150 @ A3
routes exceeding the initial 20 meters of escape paths and a minimum of 1 luxfor change in levels, stairs, ramps and exit ways. All exit lighting to meet F8 of NZBC,and egress lighting to comply with F6 of NZBC.Emergency Lighting system designed & to be installed as per AS 2293: Part 1 - 2005and in conjunction with the compliance method detailed in the fire report.Inspection, maintenance and reporting procedures shall be performed as detailedin AS/NZS 2293 part 2- 1995.
Please check this is the latest design before placing order.Emergency lighting calculations are for a minimum of 0.2 lux for all escape
On Failure of normal supply to any final sub circuit supplying general lighting shallcause each emergency luminaire to be switched on automatically with the help ofcircuit/phase sensing relay. Please refer to the wiring diagram in AS 2293 Part 1: 2005.ALL EXIT LIGHTS TO BE RUNNING MAINTAINED & REMAIN INTERNALLY ILLUMINATEDAT ALL TIMES WHEN THE BUILDING IS IN USE.The design and the luminaires chosen are based solely on the information made availableby the client without an inspection of the building, full specifications or plans.
Luminaire ScheduleSymbol
Calculation SummaryLabel CalcType UnitsQty Label Total Lamp Lumens LLF Description Avg Max Min Min/Avg Min/MaxCORRIDOR_Floor Illuminance Lux 2.12 5.5 0.0 0.00 0.00ENTRANCE_Floor Illuminance Lux 3.60 5.5 1.3 0.36 0.24RIP_CURL_OFFICE_Floor Illuminance Lux 3.51 5.6 1.4 0.40 0.25SERVICE_Floor Illuminance
4
Lux 2.66 5.7
E1 N.A. 1.000 ECOSPITFIRE - ENHANCE STANILITE RECESSED EMERGENCY LUMINAIRE WITH LITHIUM BATTERY
0.6 0.23 0.11STAIRS_Top_Total Illuminance 20.0 2.0 0.29 0.10
5 E2 N.A. 1.000 ECOEXIT1BOX - ENHANCE STANILITE UNIVERSAL MOUNTED EMERGENCY EXIT LUMINAIRE 1 E3 N.A. 1.000 FL26LEDWP - ENHANCE FOS HELIOS 2 X 6W SURFACE MOUNTED TWIN SPOT NON-MAINTAINED EMERGENCY SPOTLIGHT - MOUNTED ON WALL JUST BELOW CEILING
Lux 6.86
W05
400
x 5,
200
W04800 x 700
W04800 x 1,400
W03800 x 1,400
W013,240 x 2,730
ABCDEFGHJ
1
2
3
4
5
K
A12
B13
C14
New glass entry door unit
New Cemintel Steppe Sheet cladding to existing timber framing
Fire-rated truss formed bulk head (Hatched) replacing existing glass roof
New 200 x 45 hySPAN Bulk-Head beam fixed at both ends with upside-down B58 or 2/B177 with M12 bolts chemsets. 50sq x 5mm washers to timber connections
New glass roof above
retail
wc
serv
ice
wc
wc
stor
e
store
stor
e
office
450 step
450
step
foyer
lift
retail retail retail
retail
retail
E2
E2
E2
E1
E1
E1
E1
E2
E2
E3
0.0 0.0 0.0 0.0 0.0 0.0 0.0 0.0 0.0 2.0 2.1
0.0 0.0 0.0 0.0 0.0 0.0 0.0 0.0 0.0 2.6 2.7
3.3 3.4
4.1 4.1
4.8 4.8
5.4 5.4
5.4 5.5
0.2 0.2 4.9 5.0
0.2 3.8 4.2 4.2
2.8 3.2 3.4 3.5
2.3 2.6 2.7 2.8
1.9 2.1 2.2 2.2
6.5 6.1
7.0 6.2
4.9 4.4
4.3 3.9
7.5 6.4
7.8 6.6
7.8 6.8
7.4 6.7
6.9 6.5
6.5 6.2
6.0 5.7
5.5 5.1
2.6 3.1 3.2 3.2 3.2 2.8
2.0 2.2 2.3 2.3 2.3 2.0
3.7 4.3
4.3 5.1
5.1 6.0
6.3 7.3
7.6 8.7
8.9 10.7
14.3 19.8
15.7 20.0
13.8 18.6
10.3 14.2
6.0 5.9
2.4 2.7 2.9 3.0 2.9 2.6
2.9 3.3 3.6 3.7 3.5 3.1
3.4 3.9 4.3 4.3 4.1 3.7
3.8 4.5 5.0 5.0 4.6 4.1
4.0 4.8 5.5 5.5 5.0 4.3
4.0 4.7 5.4 5.5 4.9 4.2
3.7 4.3 4.8 4.8 4.4 3.9
3.2 3.6 4.0 4.0 3.7 3.3
2.6 2.9 3.1 3.2 3.0 2.7
2.4 2.3 2.1
1.9 1.8 1.7
1.4 1.4 1.3
2.4 2.7 2.9 2.8 2.7 2.4 2.1 1.8 1.4
3.0 3.4 3.6 3.6 3.4 3.0 2.5 2.1 1.7
3.5 4.0 4.3 4.3 4.0 3.6 2.9 2.4 1.9
4.0 4.6 5.1 5.0 4.6 4.0 3.3 2.6 2.1
4.3 5.0 5.6 5.6 5.0 4.2 3.5 2.8 2.1
4.2 4.9 5.5 5.5 4.9 4.2 3.5 2.7 2.1
4.1 4.8 5.4 5.3 4.8 4.2
4.3 5.0 5.7 5.7 5.0 4.3
4.1 4.8 5.3 5.3 4.8 4.1
3.6 4.2 4.5 4.5 4.2 3.7
3.1 3.4 3.7 3.7 3.5 3.1
2.5 2.7 2.9 2.9 2.7 2.5
1.9 2.1 2.2 2.2 2.1 1.9
1.5 1.6 1.7 1.7 1.6 1.5
1.2 1.2 1.3 1.3 1.2 1.2
0.9 1.0 1.0 1.0 1.0 0.9
0.7 0.7 0.8 0.8 0.7 0.7
0.6 0.6 0.6 0.6 0.6 0.6
1
1

TEST
94mm Standard(Ceiling cutout 70mm)
145mm Adaptor(Ceiling cutout 140mm)
— TECH N I C A L DATA S H EE T
Stanilite®Economy Spitfire® LED recessed non-maintained
RangeEconomy range
Product groupSpitfire LED
Features• Superior photometric classification• LED technology 100,000 hours plus lamp life• Low power consumption and LED light source for
reduced operation and maintenance costs• High temperature rated Lithium iron phosphate
battery• Spring fixing design allows for different ceiling
thickness (1mm-20mm)• White adaptors included to convert standard
94mm lamp head to 145mm diameter• Non-maintained operation• Ingress protection IP20• Insulation class II• SAA tested and approved
Catalogue no. Description
Standard products
ECOSPITFIRE Economy Spitfire LED recessed
Spare parts
03-01226 Battery LiFePO4 6.4V 1.5Ah
Dimensions
Lamp head Ceiling cutout
94mm standard 70mm
145mm adaptor 140mm
Weight
Model Weight
Standard 1.0kg
Construction
Part Construction
Lamp head White polycarbonate
Type E1

9A
KK
1070
46
A9
06
8 -
E -
Ju
n 2
019
—We reserve the right to make technical changes or modify the contents of this document without prior notice. With regard to purchase orders, the agreed particulars shall prevail. ABB does not accept any responsibility whatsoever for potential errors or possible lack of information in this document.
We reserve all rights in this document and in the subject matter and illustrations contained therein. Any reproduction, disclosure to third parties or utilisation of its contents – in whole or in parts – is forbidden without prior written consent of ABB.Copyright © 2019 ABBAll rights reserved
—ABB Australia Pty LimitedPhone: 1800 60 20 20E-mail: [email protected]
www.stanilite.com.au
Light source
Model Light source
Standard 3W
Power consumption
Model Power consumption
Standard 1.0W average
Note: Preliminary results
Photometrics
Model Class Classification
Standard C0 D40
C90 D40
Note: − Designed to comply with AS2293 and meet relevant Australian EMC standards
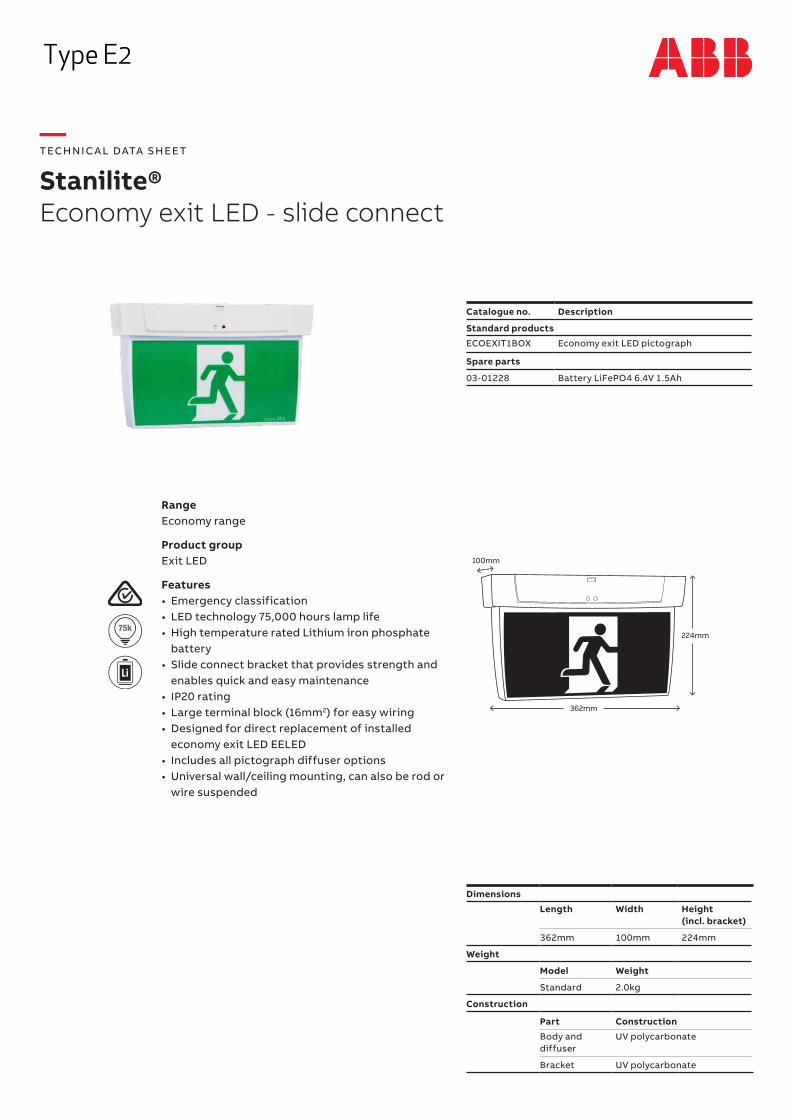
224mm
362mm
100mm
— TECH N I C A L DATA S H EE T
Stanilite®Economy exit LED - slide connect
RangeEconomy range
Product groupExit LED
Features• Emergency classification• LED technology 75,000 hours lamp life• High temperature rated Lithium iron phosphate
battery• Slide connect bracket that provides strength and
enables quick and easy maintenance• IP20 rating• Large terminal block (16mm2) for easy wiring• Designed for direct replacement of installed
economy exit LED EELED• Includes all pictograph diffuser options• Universal wall/ceiling mounting, can also be rod or
wire suspended
Catalogue no. Description
Standard products
ECOEXIT1BOX Economy exit LED pictograph
Spare parts
03-01228 Battery LiFePO4 6.4V 1.5Ah
Dimensions
Length Width Height (incl. bracket)
362mm 100mm 224mm
Weight
Model Weight
Standard 2.0kg
Construction
Part Construction
Body and diffuser
UV polycarbonate
Bracket UV polycarbonate
Type E2

9A
KK
1070
46
A9
069
- B
- J
un
20
19
—We reserve the right to make technical changes or modify the contents of this document without prior notice. With regard to purchase orders, the agreed particulars shall prevail. ABB does not accept any responsibility whatsoever for potential errors or possible lack of information in this document.
We reserve all rights in this document and in the subject matter and illustrations contained therein. Any reproduction, disclosure to third parties or utilisation of its contents – in whole or in parts – is forbidden without prior written consent of ABB.Copyright © 2019 ABBAll rights reserved
—ABB Australia Pty LimitedPhone: 1800 60 20 20E-mail: [email protected]
www.stanilite.com.au
Light source
Model Light source
Standard Multiple LED strip
Power consumption
Model Power consumption
Standard 6.5W
Note: Preliminary results
Photometrics
Model Class Classification
Standard C0 D2.5
C90 E2.5
Note: Preliminary results
Note: − Designed to comply with AS2293 and meet relevant Australian EMC standards

PO BOX 816, Hamilton 32404-8 Mainstreet PlaceHamilton 3200
[email protected]+64 7 849 91190800 350 000
Sales Rep:
Contact:
HELIOS
IP65 Non Maintained Emergency Twin Flood-Unit
Code PowerDelivered Lumens
Body ColourCutout
mmDimensions mm
Weight kg
FL26LEDWP 2x6W 340 White N/A H 287 x L 290 x D 67 2.3
Light Quality
Lifetime: 30,000 hrs
Beam Angle: 120˚
Battery Specifications
Battery: Nickel Cadmium
Voltage/Ah: 3.6V 6Ah Rechargeable
Charge Time: 16 hrs
Physical Features
IP Rating: IP65
Body: Polycarbonate, white
Dimensions mm: H 287 x L 290 x D 67
Operating Temperature: 0˚C - 40˚C
Operation: Non-Maintained
Installation: Wall / Surface
Power Supply: AC200-240V, 50/60Hz
IP65H
DL
1YEAR
WARRANTY
WARRANTY
The Helios flood-unit is a versatile non-maintained surface mount emergency fitting, designed for Commercial and Industrial applications were a light source is required to identify egress routes over larger areas. The Helios flood-unit is tested to comply with AS/NZ 2293 and relevant EMC standards. An IES file is available for project specification.
Notes:

TOWNGATE BUILDING LEVEL 1 EXTERIOR REDEVELOPMENT LIGHTING CONCEPT SUBMISSION 28 OCTOBER 2020

JOB NUMBER SHEET NUMBER REV
PROJECT TITLE SHEET TITLECLIENT DESIGNED BY COMPANY
REV DATE BY REASON
BDES(HONS), PG CERT ENG (LIGHTING))AARON BROWN 28/10/2020
SCALE 1 : 250 @ A3TOWNGATE BUILDINGCORNER HEUHEU &RUAPEHU STREETSTAUPO L0010397
EXTERIOR LIGHTINGCONCEPT STUDY
Luminaire ScheduleSymbol Qty Label Total Lamp Lumens LLF Description
11 A 960 0.800 5160-A-3-901-01 - ENHANCE UNILAMP MIRA MINI 6.4W WALL MOUNTED DOWNLIGHT IN BLACK FINISH WITH 18DEG OPTIC 3000K - MOUNTED AT TOP OF FABRICATED COLUMN3 B 3600 0.800 8032-B-3-549-01 - ENHANCE UNILAMP SIRIUS 1200 CC WALL WASHER IN BLACK FINISH WITH 25DEG OPTIC 3000K - MOUNTED ABOVE SOFFIT AT BASE OF VENEERED COLUMN TO UPLIGHT2 C 3600 0.800 5101-9-3-873-01 - ENHANCE UNILAMP MAXI CORE WALL MOUNTED UP/DOWN IN BLACK FINISH 3000K - MOUNTED @ 4000MM ABOVE GROUND
W04
1,50
0 x
4,76
0W
031,
500
x 4,
930
W02
1,50
0 x
4,93
0W
011,
500
x 4,
930
W14
1,50
0 x
1,80
0W
1560
0 x
2,00
0W
1660
0 x
2,00
0W
1760
0 x
2,00
0W
181,
500
x 1,
800
W111,500 x 3,150
W131,500 x 3,990
W121,500 x 3,250
W051,500 x 2,950
W061,500 x 3,220
W071,500 x 3,220
W091,500 x 3,150
A
A
B
B
C
C
D
D
E
E
F
F
G
G
H
H
J
J
11
22
33
44
55
K
K
15,405 3,120 21,992
4,35
0
4,89
9
3,739
1,40
04,
850
1,20
05,
050
1,20
05,
050
1,20
05,
050
750
1,560 4,086 1,200 3,372 1,200 3,268 854 2,850 854 7,840 1,200 3,345 1,200 3,039 1,560
600
600
90 3,928
A8
B9
B9
C10
C10
D11
D11
Existing parapet to remain
Line of roof framing above
New framing to existing concrete columns
New Composite screening
Internal patition walls removed
New partition wall
Existing partition walls cut back from external joinery & laminated glass panels installed
Full height glass panel
Glass entry roof
250UB21 supported by 200UB17
New Composite screeningNew Composite screening
Column-03
Eldorado Stone veneerColumn-02
Column-01Eldorado Stone veneer Entry Column Entry Column
1,200 Column
1,200 Column
1,200 Column
1,200 Column1,200 Column1,200 Column 1,200 Column1,200 Column
310U
B37
250U
B21
250U
B21
250U
B21
250U
B21
250U
B21
250U
B21
250U
B21
310UB37
310UB37
310UB37
250NFB25
250U
B21
250NFB25
kitchen/staff mens womens
office space
officeoffice office office office office office office
office
office
office
office
office space
storestore
store
store
stairs
liftstore
scre
en-0
1
screen-02 screen-03
scre
en-0
4sc
reen
-05
foyer
office
stairs
scre
en-0
6
A A A A A A A
A
A
A
A
B
B
BC C

Socket:
Kelvin:
Lumen:
Beam:
Watt:
Lamp Type:
Ordering Code:
Product Name:
Application Type:
Remarks:
Date:
Location:
Project:
WALL UP-DOWNLIGHT
Mini MIRA Square - Wall Downlight
5160-A-3-901-XX
LED
N/A
6.4 W
18°
3000 K
Project Data
960 lm
Product Image
Dimension
Light Distribution
Approve by:
Last Revised On: 10-Jun-2019
MIRA
*Due to the constancy of product development,
we reserver the right to alter all specification
without prior notice.
Unilamp Co., Ltd.
461 Ramintra Road, Kannayao, Bangkok 10230 Thailand
Tel: +66(0)2 943 2420-1, +66(0)2 946 4170-1
Fax: +66(0)2 943 0894, +66(0)2 943 2419
www.unilamp.co.th
Type A

Specification
IEC Standard IEC 60598-1 General Requirement
IEC 60598-2-1 Fixed Luminaires
Protection IP66 Class I
IK Rating Protection against mechanical impact IK08 on body
Luminaires Body Housing High-pressure Die Cast Aluminium alloy body and components.
Coating Process Nano Ceramic surface conversion, resistant to corrosive environment. Luminiare primarily coated with epoxy resin and top coated with UV
stabilized polyester powder and cured in digital temperature controlled chamber at 200°C.
Diffuser Impact resistant safety tempered glass cover. Able to withstand the temperature up to 250°C.
Reflector High performance metallized reflector.
Gasket Post-cured treated silicone gasket. Temperature and weather resistant. Working temperature -40°C to +200°C.
External screws External screws are in stainless steel with protection grease.
Cable Entry Cable entry protected by weather proof TPE grommet and to be used with H05RN-F/ H07RN-F cable with 6-13mm. diameter.
LED High efficiency LED module in COB technology. Assembled on MCPCB and mounted on to heat conductive material
The whole systems tested to be operated under maximum ambient environment up to +40°C.
Driver High quality constant current LED driver. Conform to safety standard and electromagnetic compatibility standard.
Internal wire Tinned copper conductor with silicone insulated internal wire. IMQ approved. Working temperature -40°C to +180°C.
Terminal Block/ Connector Terminal block in GFR PA6.6 for cable with cross section up to 2.5 sqmm. VDE approved.
Class1 luminaire provided with the earth connection.
Caution Installation work has to be carried on according to the enclosed installation manual.
BlackColor (replace the last 2 digits of ordering code with 01)
Graphite (replace the last 2 digits of ordering code with 02)
Dark Gray (replace the last 2 digits of ordering code with 03)
Aluminium Silver (replace the last 2 digits of ordering code with 04)
White (replace the last 2 digits of ordering code with 06)
Last Revised On: 10-Jun-2019
MIRA
*Due to the constancy of product development,
we reserver the right to alter all specification
without prior notice.
Unilamp Co., Ltd.
461 Ramintra Road, Kannayao, Bangkok 10230 Thailand
Tel: +66(0)2 943 2420-1, +66(0)2 946 4170-1
Fax: +66(0)2 943 0894, +66(0)2 943 2419
www.unilamp.co.th

Socket:
Kelvin:
Lumen:
Beam:
Watt:
Lamp Type:
Ordering Code:
Product Name:
Application Type:
Remarks:
Date:
Location:
Project:
SURFACE WASHER & FLOOD LIGHT
SIRIUS 1200 - CC Wall Washer
8032-B-3-549-XX
LED
N/A
29 W
25°
3000 K
Project Data
3600 lm
Product Image
Dimension
Light Distribution
Approve by:
Last Revised On: 21-Oct-2020
SIRIUS
*Due to the constancy of product development,
we reserver the right to alter all specification
without prior notice.
Unilamp Co., Ltd.
461 Ramintra Road, Kannayao, Bangkok 10230 Thailand
Tel: +66(0)2 943 2420-1, +66(0)2 946 4170-1
Fax: +66(0)2 943 0894, +66(0)2 943 2419
www.unilamp.co.th
Type B

Specification
IEC Standard IEC 60598-1 General Requirement
IEC 60598-2-1 Fixed Luminaires
Protection IP67 Class I
IK Rating Protection against mechanical impact IK10 on body and IK07 on optical part.
Luminaires Body Housing Extruded Aluminium S6063 alloy body with low copper content.
Coating Process Nano Ceramic surface conversion, resistant to corrosive environment. Luminiare primarily coated with epoxy resin and top coated with UV
stabilized polyester powder and cured in digital temperature controlled chamber at 200°C.
Diffuser Impact resistant safety tempered glass cover. Able to withstand the temperature up to 250°C.
Glass flushes to the front cover, no accumulation of dust and water.
Lens Molded PC lens from renowned manufacturers in various light distribution patterns.
Adjustable Optic Wall mount with adjustable arms.
Gasket Post-cured treated silicone gasket. Temperature and weather resistant. Working temperature -40°C to +200°C.
External screws External screws are in stainless steel with protection grease.
Cable Entry Cable entry protected by M20 cable gland. To be used with H05RN-F/ H07RN-F cable with 7-13mm. diameter.
LED High efficiency LED module utilized chips from world renowned manufacturer. Assembled on MCPCB and mounted on to heat conductive
material.
The whole systems tested to be operated under maximum ambient environment up to +40°C.
Driver High quality constant current LED driver. Conform to safety standard and electromagnetic compatibility standard.
Internal wire Tinned copper conductor with silicone insulated internal wire. IMQ approved. Working temperature -40°C to +180°C.
Terminal Block/ Connector Terminal block in GFR PA6.6 for cable with cross section up to 2.5 sqmm. VDE approved.
Class1 luminaire provided with the earth connection.
Pre-wired cable Pre-wired with 3x1.0 sqmm. H07RN-F neoprene cable. IMQ approved.
Equipped with anti-humidity kit.
Caution Installation work has to be carried on according to the enclosed installation manual.
BlackColor (replace the last 2 digits of ordering code with 01)
Graphite (replace the last 2 digits of ordering code with 02)
Dark Gray (replace the last 2 digits of ordering code with 03)
Aluminium Silver (replace the last 2 digits of ordering code with 04)
White (replace the last 2 digits of ordering code with 06)
Last Revised On: 21-Oct-2020
SIRIUS
*Due to the constancy of product development,
we reserver the right to alter all specification
without prior notice.
Unilamp Co., Ltd.
461 Ramintra Road, Kannayao, Bangkok 10230 Thailand
Tel: +66(0)2 943 2420-1, +66(0)2 946 4170-1
Fax: +66(0)2 943 0894, +66(0)2 943 2419
www.unilamp.co.th

Accessories
IP68 Water Tight Connecting Device, 3 Pole, Cable Diameter 5.0 - 9.5mm.
Ordering Code: 0411-0-9-
000-00
Ordering Code: 0412-0-9-
000-00IP68 Water Tight Connecting Device with Distribution block, 3 pole, 1 input, 2 outputs, Cable Diameter 5.0 - 9.5mm.
Softening Filter (pre-assembled from factory)
Color Filter Red (pre-assembled from factory)
Ordering Code: 0419-0-9-
000-00
Ordering Code: 0420-0-9-
000-81
Color Filter Green (pre-assembled from factory)
Color Filter Blue (pre-assembled from factory)
Honey Comb Louver (pre-assembled from factory)
Glare Shield Louver for Bi-Symmetric
Ordering Code: 0420-0-9-
000-84
Ordering Code: 0420-0-9-
000-83
Ordering Code: 0421-0-9-
000-00
Ordering Code: 0441-0-9-
000-00
Ordering Code: 0432-0-9-
000-XX
Wall Brackets L 250mm
Last Revised On: 21-Oct-2020
SIRIUS
*Due to the constancy of product development,
we reserver the right to alter all specification
without prior notice.
Unilamp Co., Ltd.
461 Ramintra Road, Kannayao, Bangkok 10230 Thailand
Tel: +66(0)2 943 2420-1, +66(0)2 946 4170-1
Fax: +66(0)2 943 0894, +66(0)2 943 2419
www.unilamp.co.th

Socket:
Kelvin:
Lumen:
Beam:
Watt:
Lamp Type:
Ordering Code:
Product Name:
Application Type:
Remarks:
Date:
Location:
Project:
WALL UP-DOWNLIGHT
Maxi CORE - Wall Up/Downlight
5101-9-3-873-XX
LED
N/A
2x20 W
Asymmetric
3000 K
Project Data
2x1800 lm
Product Image
Dimension
Light Distribution
Approve by:
Last Revised On: 20-Aug-2019
CORE
*Due to the constancy of product development,
we reserver the right to alter all specification
without prior notice.
Unilamp Co., Ltd.
461 Ramintra Road, Kannayao, Bangkok 10230 Thailand
Tel: +66(0)2 943 2420-1, +66(0)2 946 4170-1
Fax: +66(0)2 943 0894, +66(0)2 943 2419
www.unilamp.co.th
Type C

Specification
IEC Standard IEC 60598-1 General Requirement
IEC 60598-2-1 Fixed Luminaires
Protection IP65 Class I
IK Rating Protection against mechanical impact IK10 on body and optical part.
Luminaires Body Housing High-pressure Die Cast Aluminium alloy body and components.
Extruded Aluminium S6063 alloy body with low copper content.
Coating Process Nano Ceramic surface conversion, resistant to corrosive environment. Luminiare primarily coated with epoxy resin and top coated with UV
stabilized polyester powder and cured in digital temperature controlled chamber at 200°C.
Diffuser Impact resistant safety tempered glass cover. Able to withstand the temperature up to 250°C.
Glass flushes to the front cover, no accumulation of dust and water.
Reflector High performance metallized reflector
Gasket Post-cured treated silicone gasket. Temperature and weather resistant. Working temperature -40°C to +200°C.
External screws External screws are in stainless steel with protection grease
Cable Entry Cable entry protected by weather proof grommet. To be used with H05RN-F/ H07RN-F cable with 6-13mm. diameter.
LED High quality AC LED module. Conform to safety standard and electromagnetic compatibility standard.
The whole systems tested to be operated under maximum ambient environment up to +40°C.
Internal wire Tinned copper conductor with silicone insulated internal wire. IMQ approved. Working temperature -40°C to +180°C
Terminal Block/ Connector Terminal block in GFR PA6.6 for cable with cross section up to 2.5 sqmm. VDE approved.
Class1 luminaire provided with the earth connection.
Caution Installation work has to be carried on according to the enclosed installation manual.
BlackColor (replace the last 2 digits of ordering code with 01)
Graphite (replace the last 2 digits of ordering code with 02)
Dark Gray (replace the last 2 digits of ordering code with 03)
Aluminium Silver (replace the last 2 digits of ordering code with 04)
White (replace the last 2 digits of ordering code with 06)
Last Revised On: 20-Aug-2019
CORE
*Due to the constancy of product development,
we reserver the right to alter all specification
without prior notice.
Unilamp Co., Ltd.
461 Ramintra Road, Kannayao, Bangkok 10230 Thailand
Tel: +66(0)2 943 2420-1, +66(0)2 946 4170-1
Fax: +66(0)2 943 0894, +66(0)2 943 2419
www.unilamp.co.th

A
J
I
H
G
F
E
DC
B
K
L
AREAS LIGHT LEVEL
A 440 luxB 810C 760D 320E 420F 1084G 1400H 907I 1050J 1000K 540L 872
This installation complies with NZBCG8 - Artificial Light
NZBC G8.3 illuminance at floor level shall be no less than 20 lux
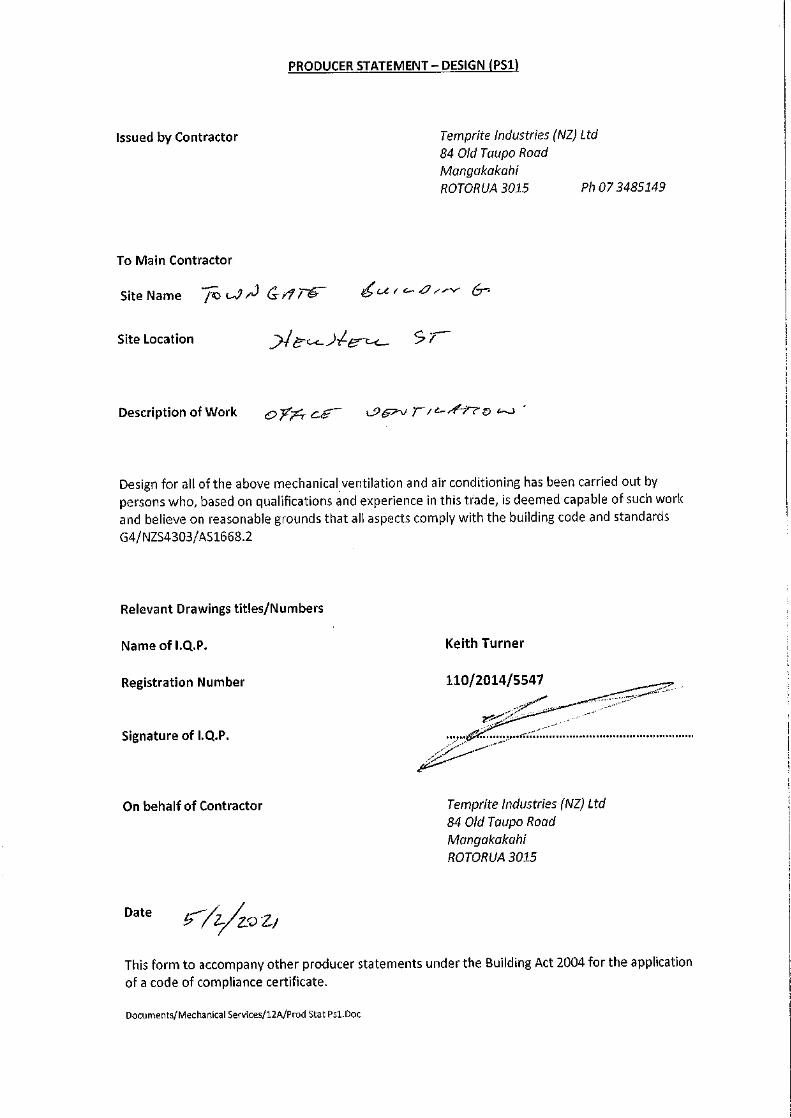


Towngate building
44 Heuheu Street
Taupo
Office areas fan schedule
FA1 Fantech Gamma CE454.S Roof Mounted
FA2 Fantech Vent MajorVM150 Ceiling Mounted
FA3 Fantech Gamma CE314.S Roof mounted


Vibration Isolation
Suggested Upstand Methods Dimensions
Dimensions continued overleaf
Minivent SeriesMV.. A B C
112210 260 30
132
202/S
350 410 55204/S252/S254/S
302/S350 410 55304/S
306/S
354/S400 500 95
356/S
Alpha & Beta SeriesAD../AE.. A B C
31.D/V/S400 500 95
35.D/V/S
40.D/V/S510 610 90
45.D/V/S
50.D/V/S670 770 90
56.D/V/S
63.D/V/S780 980 85
71.D/V
80.D/V 900 1100 85
New Generation SeriesRDE/S..RVE/SS. A B C
0314/6 400 500 80
0404/6 510 610 80
0504/6 670 770 80
0564/6 670 770 80
0634/6/8 780 980 80
0714/6/8 780 980 80
0804/6/8 880 1080 85
1004/6/8 1080 1280 85
1254/6/8 1370 1570 85
continued...
Gamma SeriesCD../CE.. A B C
192-254 260 310 50
284-316 310 410 75
354-408 400 500 75
454-568 620 720 75
634-711 710 810 75

Suggested Upstand Methods - Dimensions
Installation TipsEnsure that upstands are flat and true.Fix a sealing strip of neoprene to the top of the upstand to prevent air leakage.Fit an electrical compression gland to the roof cowl in an appropriate location and pass the electric cable through as the roof cowl is fitted.Ensure the electric cable is not pinched prior to securing the cowl to the upstand.The roof cowl should be secured with roofing screws through the side skirt midway through the skirt.Inlet ductwork should be free from obstructions.Avoid sharp bends at or close to the inlet.
Heritage SeriesCHD..CHE.. A B C
314/6 310 410 50
354/6400 500 50
404/6
454/6620 720 60504/6
564/6/8
634/6/8710 810 60
716/8
High Capacity & Smoke SpillHC../SS.. A B C
050..570 770 80
056..
063..780 980 80
071..
080.. 900 1100 80
100.. 1080 1280 80
125.. 1280 1480 80
140.. 1480 1680 80
160.. 1680 1880 80
180. 1880 2080 80
Alpha Relief Air Vents
A B C
MRV1 210 260 30
MRV2 350 410 55
RV1 400 500 95
RV2 510 610 85
RV3 670 770 85
RV4 780 980 85
RV5 900 1100 85
RV6 1100 1360 85
Beta-Vent CowlsA B C
RVV1 400 500 95
RVV2 510 610 85
RVV3 670 770 85
RVV4 780 980 85
RVV5 900 1100 85
RVV6 1100 1300 85
Lo-Vent CowlsA B C
LVV3 980 780 80
LVV4 1030 830 80
LVV5 1080 880 80
LVV6 1280 1080 80
GL Gamma SeriesCD..VGLCE..VGL A B C
314/6 310 410 50
354/6 400 500 50
404/6/8 400 500 50
454/6/8 620 720 60
504/6/8 620 720 60
564/6/8 620 720 60
634/6/8 710 810 60
716/8/1 710 810 60
GE SeriesCGD..CGE.. A B C
35.520 620 60
40.
45.740 935 6050.
56.
63.800 1000 60
71.
Maximum Mounting Angle
Minivent Series 30°Alpha & Beta Series 30°New Generation Series 30°Gamma Series 30°Heritage Series 15°High Capacity & Smoke Spill 5° or horizontal upstandGamma Supply Series 30°Alpha Relief Air Vents 30°Beta-Vent Cowls 30°Lo-Vent Cowls 30°GL Gamma Series 30°GE Series 0° horizontal upstand
Vertical Discharge Roof Units -ensure the unit is installed so thatthe hinge is parallel to the roofslope.
Gamma Supply Series
CD../CE.. A B C
31.S 480 580 50
35.S590 690 50
40.S
45.S740 840 50
50.S
56.S 805 905 50
63.S1040 1140 50
71.S
Part No. : INST-ROOFMOUNT 08/12

Part No. : INST-ROOFMOUNT 08/12

M-2 INSTALLATION, MAINTENANCE & WIRING DIAGRAMS
INSTALLATION & MAINTENANCE
© FANTECH 2008
M
GENERAL INSTRUCTIONS
OFF-LOADINGDuring off-loading inspect fans for damage. If the casings, cowls or impellers aredamaged, notify your local Fantech distributor immediately.
Fantech cannot be held responsible for any loss or damage incurred to goods duringtransport, off-loading or on site.
SITE STORAGEThe fans must be stored in a clean, dry, protected and vibration-free area. The fanimpellers should be rotated daily to prevent bearing damage. Failing to follow theseinstructions may void the warranty.
MAINTENANCEInstall fans and accessories to allow service access for maintenance and for thereplacement of assemblies and component parts, without disturbance of other items ofplant and building elements.
Most motors are fitted with sealed-for-life bearings which are maintenance-free. It isrecommended that fans be inspected initially at 3-monthly intervals, to clean the bladesand motor and to check for tightness of fastenings.
Where fans are used for kitchen exhaust or other applications where the aircontains high amounts of dust, residue and other contaminants, fans shouldbe cleaned and maintained at more frequent intervals appropriate for theapplication.
Motor overloads/contactors should also be inspected to ensure correct operation.
Should external lubricators be fitted, please refer to LUBRICATION INSTRUCTIONSin the ‘Installation and Maintenance’ instructions included with each fan.
If the fans are belt driven, check pulley alignment and belt tension before starting the fan.Belt tension must be checked 2 - 4 weeks after start-up.
MOTORSAll standard motors are suitable for operation in air temperatures between -20°C and+40°C. If higher temperatures are required, contact your local Fantech supplier.
Standard motors are not suitable for handling saturated air containing water dropletsor for some corrosive fumes. For severe applications, special motors and finishes maybe required. Customers are requested to discuss these applications with our salesengineers to ensure a fan suitable for the application is selected. WARNING - Failure to do so could void warranty.
ELECTRICAL
SUPPLYRead the fan data label to determine the number of phases and amperage drawn bythe unit. Check that the available supply is suitable.
EARTHINGAll fans must be earthed in accordance with AS/NZS3000:2007 and local supply regulations.
WIRINGWiring must be in accordance with AS/NZS3000:2007 and local supply regulations.Wiring diagrams are provided with all fans. Wiring diagrams are shown on pages M-6/9.
PROTECTIONFuses in the circuit should be regarded as protecting the wiring only against short circuit,they are not suitable for overload protection. Fuses must be able to carry starting loadsand these can be taken as a minimum of six times the running current for 25 seconds.
All three-phase motors must be provided with differential action, single-phasing protectionand overload current protection. Failure to provide single-phasing protection will void warranty.
Inst Maint & Wiring.qxd 5/03/2008 10:02 AM Page 2

© FANTECH 2008 M-3INSTALLATION, MAINTENANCE & WIRING DIAGRAMS
INSTALLATION & MAINTENANCE
M
Motors fitted with thermistor or thermostatic protection should have these wired into thestarting contactors’ control circuit to interrupt motor power supply on windingtemperature rise.
Wires marked ‘TK’ are for internal thermal contacts which can be wired directly into thecontactor controller circuit. Alternatively, thermal protection devices can be installed intothe control circuit therefore negating the need to use the ‘TK’ contacts. Failure toconnect thermal protection devices will void warranty.
DIRECTION OF ROTATIONThe correct rotation and direction of air flow is shown on each individualfan. If backward-curved centrifugal fans rotate in the wrong direction, themotor may overload and the motor warranty will be void.
To change the direction of rotation on three-phase motors, interchangeany two supply leads. All single-phase motors will rotate in the correctdirection when correctly connected.
STARTINGAll fans are suitable for direct-on-line starting by switch or automatically by contactor upto and including 5.5kW. The number of starts should be limited to no more than four perhour or, in the case of motors of less than 1kW, no more than eight starts per hour. Thiswould be subject to local supply regulations.
Check List
check power supplycheck fan is free to rotatecheck overloads are fittedensure ductwork is free of debrischeck rotation of fancheck the motor amperage draw does not exceed nameplate rating
SAFETYRotating fan impellers can be a danger to personnel.
The following precautions must be taken:-
electrically isolate the fan motor prior to undertaking any work.regularly check impeller fasteners for tightness.where fans are accessible to personnel or directly exposed to habitable areas,it is the responsibility of the installers to ensure that fans will have guards which comply with the latest Australian Standard AS4024.1 safeguarding of machinery.prior to fan start-up, ensure loose debris will not be sucked into the fan. All ductwork should be clean.
INSTALLATION INSTRUCTIONSImportant Notes:
With all horizontally mounted axial fans it is preferable that the fan is installedwith the motor mounted on top of the motor plate. ie. not suspended under themotor plate.
For outside installations, IP66 rated conduit and fittings must be used.
To obtain rated performance, the following recommendations should be followed:-
Duct Mounted Fans - General
inlet and outlet ductwork should be free from obstructions.duct transitions should be a maximum of 60° inlet/15° outlet.avoid sharp bends on inlet or outlet.do not use ductwork smaller in area than the fan.flexible duct connections should be taut.ductwork connections should be well aligned.inlet cones must be fitted to free inlet applications.ensure that the fan orientation is correct for the required air flow direction.
Rotation
Backward Curved
Impeller, 6-12 Blades
Forward Curved
Impeller, 30-60 Blades
Axial Flow
Impeller
RotationRotation Air
FlowAir
Flow
AirFlow
Multiflow
Impeller
Rotation
Inst Maint & Wiring.qxd 5/03/2008 10:02 AM Page 3

M-4 INSTALLATION, MAINTENANCE & WIRING DIAGRAMS
INSTALLATION & MAINTENANCE
© FANTECH 2008
M
Belt-Driven Product
pulleys must be correctly aligned.belts must be correctly aligned and tensioned.tension must be checked 2-4 weeks after start-up.
Roof Ventilators
ensure that upstands are flat and true.maximum angle of upstand or curb 30°fix a sealing strip of neoprene to the top of the upstand to prevent air leakage.fit an electrical compression gland to the roof cowl in an appropriate location and pass the electric cable through as the roof cowl is fitted.ensure the electric cable is not pinched prior to securing the cowl to the upstand.the roof cowl should be secured with roofing screws through the side skirt midway through the skirt.inlet ductwork should be free from obstructions.avoid sharp bends at the inlet.vertical discharge axial roof units: ensure the damper flap hinge points down the slope of the roof.
LUBRICATION INSTRUCTIONSMost Fantech products are fitted with sealed-for-life pre-lubricated bearings which donot require maintenance for the life of the fan.
Should your fan be fitted with grease nipples, the following instructions should befollowed:-
RECOMMENDEDLUBRICATION INTERVALS
RECOMMENDED GREASESWherever possible the grease used should be identical to the original. When differentgreases are mixed, even if they are both suitable for the conditions, incompatibility canoccur and result in rapid bearing failure.
In the absence of specific instructions supplied with the fan the following greasesshould be used. STANDARD FANS Shell Alvania R3 or compatible lithium-based greasesuitable for 130°C continuous operation. SMOKE SPILL and high temp motors must usethe grease stated on the motor to maintain the Smoke Spill approval.
PROCEDUREIf the grease lines are not extended to the outside of the case the fan must beelectrically isolated for safety before work commences.
Clean the grease nipples with a clean cloth.
Introduce the new grease to all points while the fan is rotating until the old grease ispurged from the grease relief port normally located at the bottom of the bearinghousing. If it is required to manually rotate the impeller, the fan must be electricallyisolated to prevent accidental startup.
WARNINGINCOMPATIBLE GREASE, EXCESSIVE GREASE OR INCORRECT GREASE RELIEFCAN CAUSE DAMAGE TO THE MOTOR.
Motor Frame 48 rev/sec 24 rev/sec 16 rev/sec 12 rev/sec
160 4000 8000 12000 20000
180-200 3000 7000 12000 16000
225-250 2000 6000 10000 13000
280 1000 5000 8000 13000
315 1000 3500 8000 10000
Maximum interval 12 months.These times are a guide only and will depend on the motor manufacturer and actual running conditions.
Working Hours
Inst Maint & Wiring.qxd 5/03/2008 10:02 AM Page 4

Fire Engineering Design
ALTERATIONS TO AN EXISTING BUILDING(RECLADING)CNR RUAPEHU & HEU HEU STREETSTAUPO
TOWNGATE BUILDING
REVISION TYPE – REV 213 October 2020
JOB NUMBER: 20-1238

Fire Engineering Design
ALTERATIONS TO AN EXISTING BUILDING CNR RUAPEHU & HEU HEU STREETS, TAUPO
Prepared for: Jackie Robinson Date: 13-10-2020Project status: Building Consent Project no: 20-1238 Revision: 2
Prepared by:
David O’DonnellFire Technical ManagerGIFireE, MNZFBIBCD Group Ltd
Reviewed by:
Peter DunkinFire Engineering ManagerMIFireE, FNZFBIBCD Group Ltd
Reviewed and approved for release by:
Peter DunkinFire Engineering ManagerMIFireE, FNZFBIBCD Group Ltd
DISCLAIMERThis report has been prepared for our client and relates only to the proposal described therein and it is not to be used for any other project. No responsibility is accepted by BCD Group Limited or its directors, servants, agents, staff or employees for the accuracy of information provided by third parties and/or the use of any part of this report in any other context or for any other purpose.

\\bcdfs01\projects\20-1238 towngate\100 bcd fire\production files\issue 2\20-09-24, fire report (02), 20-1238.docx 3
CONTENTS
1. Executive Summary 42. Regulatory and Compliance Framework 53. Documentation 64. Building / Project Scope 75. Building Score Sheet 96. Section 112 Assessment 107. Part 1 General 108. Part 2 Firecells, Fire Safety Systems & Fire Resistance Ratings 109. Part 3 Means of Escape 1110. Part 4 Control of Internal Fire & Smoke Spread 1211. Part 5 Control of External Fire Spread 1512. Part 6 Firefighting 1613. Part 7 Prevention of Fire Occuring 1714. F6 / AS1 Visibility in Escape Routes 1715. Construction Monitoring 1716. Fire Compliance Schedule Items 1817. Fire and Emergency New Zealand 19APPENDIX A – Fire Engineering Plan(s) A
Issue Date Authors Status / Comments
Issue 1 08/10/2020 DOD/ PD/ PD Building Consent Issue
Issue 2 13/10/2020 DOD/ PD/PD Amend Part 5 East and west walls
Please note: The latest issue amendments are highlighted throughout this report in BLUE, any changes to the plans have a Blue cloud around them

\\bcdfs01\projects\20-1238 towngate\100 bcd fire\production files\issue 2\20-09-24, fire report (02), 20-1238.docx 4
1. EXECUTIVE SUMMARY
BCD Group Limited has been engaged to provide fire engineering design services for the proposed alterations to the existing Towngate building on the corner of Ruapehu & Heu Heu Streets, Taupo.
The fire engineering design documentation details the requirements to the extent required by Section 17 & 112 of the Building Act. The documentation includes assessing existing building features / systems, as required by Section 112 on an ‘as nearly as is reasonably practicable (ANARP) basis.
This executive summary details key required works resulting from the fire engineering design documentation. It is the readers’ responsibility to ensure that the documentation is reviewed in its entirety to avoid omission of any fire safety requirements detailed in this report.
ProjectThe proposal is to carry out external recladding works to the existing building including new window joinery to the upper floor area.
Building use- The Building Use is CL & WL.- The Risk Groups are CA & WB.
Fire safety systems - An existing Type 2 manual fire alarm system is installed in the building installed to NZS 4512. The fire alarm system
is unaffected by the proposed alterations.
Means of escape and access into and within the building- Existing doors have not been affected by the proposed alterations. They are considered to comply to the same
extent as before the alterations occurred. - The existing rear stair on the upper floor area was previously designed as a protected path (smoke separation).
Reinstate the latching mechanisms to the door sets leading into the stair lobby area. - Install additional EXIT signs to the escape routes via the back of house from the Rip Curl tenancy. Installation to
meet the requirements of F8 Signs.
Internal fire separations- The existing mid-floor and its supporting elements are concrete which achieves a 60 minute FRR. - The existing stairs are fire separated from the ground floor spaces by existing fire rated construction. - Extend the fire rated mid-floor system at the front of the retail shops on the ground floor to prevent the passage of
fire and smoke to the upper floor area. A 60/60/60 FRR is required.
External fire separations- The north and west walls of the building are to be lined to achieve a 120 minute FRR (one way). The windows can
remain (see fire plans).
Firefighting- Hardstand access is provided for the attending fire appliance within 20m of the building.
Lighting for emergency- An existing emergency lighting system is installed in the building to NZBC F6 Visibility in Escape Routes. The
existing system has not been affected by the proposed recladding works.

\\bcdfs01\projects\20-1238 towngate\100 bcd fire\production files\issue 2\20-09-24, fire report (02), 20-1238.docx 5
2. REGULATORY AND COMPLIANCE FRAMEWORK
The purpose of this report is to demonstrate that following the proposed alterations the building will comply to as nearly as is reasonably practicable with New Zealand Building Code clauses C2 to C6 for Protection from Fire as required by the following provisions of the Building Act 2004 and Amendments.
Section 17: All building work to comply with the building code All building work must comply with the building code to the extent required by this Act, whether or not a building consent is required in respect of that building work.
Section 112: Alterations to existing buildings(1) A building consent authority must not grant a building consent for the alteration of an existing building,
or part of an existing building, unless the building consent authority is satisfied that, after the alteration-(a) the building will comply, as nearly as is reasonably practicable, with the provisions of the building
code that relate to – (i) means of escape from fire; and(ii) access and facilities for persons with disabilities (if this is a requirement in terms of section
118); and(b) the building will, -
(i) if it complied with the other provisions of the building code immediately before the building work began, continue to comply with those provisions; or
(ii) if it did not comply with the other provisions of the building code immediately before the building work began, continue to comply at least to the same extent as it did then comply.
(2) Despite subsection (1), a territorial authority may, by written notice to the owner of a building, allow the alteration of an existing building, or part of an existing building, without the building complying with provisions of the building code specified by the territorial authority if the territorial authority is satisfied that, - (a) If the building were required to comply with the relevant provisions of the building code, the
alteration would not take place; and(b) the alteration will result in improvements to attributes of the building that relate to –
(i) means of escape from fire; or(ii) access and facilities for persons with disabilities; and
(c) the improvements referred to in paragraph (b) outweigh any detriment that is likely to arise as a result of the building not complying with the relevant provisions of the building code.
This report has not considered the provisions under section 118 of the Building Act as it will be assessed under separate cover.
This report demonstrates compliance with The New Zealand Building Code Fire Safety Clauses by using the following Approved Documents:- C/AS2 Buildings other than Risk Group SH (Amendment 1, 22nd October 2019)- D1/AS1 Access routes (Amendment 6, 1 January 2017) – for means of escape from fire only- F6/AS1 Visibility in escape routes (Amendment 4, 1 January 2017)- F7/AS1 Warning Systems (10 April 2012)- F8/AS1 Signs (Amendment 4, 1 January 2017)
The alterations are assessed as for a new building in terms of compliance with the building code, while the rest of the building is assessed for means of escape in accordance with section 112 of the Building Act 2004.
Sections 75 - 79 of the Fire and Emergency New Zealand Act 2017 will apply to this building due to the number of occupants and number of employees in the building. An evacuation scheme is to be implemented to meet the provisions of the Fire Safety and Evacuation of Buildings Regulations 2018. This is to be discussed directly with Fire and Emergency New Zealand (FENZ).
Matters concerning the storage and use of petroleum products at this site fall under the Health and Safety at Work Act (HSWA). This report does not address anything in this regard and it is recommended that the services of a suitably qualified HSWA expert be engaged.

\\bcdfs01\projects\20-1238 towngate\100 bcd fire\production files\issue 2\20-09-24, fire report (02), 20-1238.docx 6
Compliance ScheduleThere are specified systems identified in this report that are required to be recorded on a Compliance Schedule. Please refer to page 18 of this report.
Fire and Emergency New Zealand (FENZ)In accordance with Section 46(1) of the Building Act 2004 certain applications for Building Consent must be provided to FENZ for review.- As the building works subject to this report do not fit within the criteria under Clause(s) 1 and 2 as listed in the DBH
Gazette Notice No. 49 effective 7 May 2012, this application is NOT required to be forwarded to FENZ.- Please refer to page 19 of this report.
3. DOCUMENTATION
The fire design issues detailed in this report are the minimum required to satisfy the requirements of the Building Code. Unless specifically stated, this report does not address matters in addition to the Building Act such as owners and / or tenants’ property and contents protection. The owner is advised to check the acceptability of the provisions of this report with the property insurer.
This report deals specifically with the requirements of this project and this client. It is not intended for any other purpose or to be used by any other parties.
This report is a performance document intended to be used by the Architects / Designers and other consultants in implementing their detailed design and preparing their working drawings and specifications. The consultants whose documentation is required to incorporate the requirements of this report are expected to have read this report, understood the implications as it affects their scope of work and have incorporated the relevant fire safety requirements, including incorporating a Fire Engineering Design plans into their drawings and specifications.
The following drawings / documentation has been reviewed in the compiling of this fire engineering design report. To ensure that the specific fire safety requirements are clearly identified, it is recommended that “Fire Engineering Design” drawings be included in the building consent submission set.
Author Title Sheets Revision Date
Jackie Robinson Architectural Designer Set of plans 1 - 13 - 18/08/2020
Fire design reports by Fire Designs Limited, Reference No. 1100019 (Issue 1) dated 27 January 2011 and Reference No. 1300038 dated 19th February 2013 have been referenced.
A site visit was carried out by David O’Donnell for BCD Group Limited on the 20th August 2020.

\\bcdfs01\projects\20-1238 towngate\100 bcd fire\production files\issue 2\20-09-24, fire report (02), 20-1238.docx 7
4. BUILDING / PROJECT SCOPE
Building locationThe site is located on the corner of Ruapehu & Heu Heu Streets, Taupo.
Existing building The existing building is a two level building comprising of multiple retail tenancies on the ground floor and professional offices on the upper floor. The primary method of construction is concrete block and timber framed walls with selected external wall cladding.Internal partitions are a combination of concrete block and timber framed with plasterboard wall linings and suspended ceiling systems.
The following tenancies are located in the building:Ground floor
- You Travel- Easy to you (Massage).- Vacant tenancy- Trade Aid- Rip Curl- Classic Mobile
Upper floor- Strettons
Building use / risk groupUnder Schedule 2 of the Building (Specified Systems, Change of Use, and Earthquake-prone Buildings) Regulations 2005 the building is designed as a CL/ WM/ IA Building Use.
The applicable Risk Groups are as follows (C/AS2, Table 1.1):- CA Public use and educational facilities- WB Business, commercial and low-level storage- VP Vehicle storage and parking
\\bcdfs01\projects\20-1238 towngate\100 bcd fire\production files\issue 2\20-09-24, fire report (02), 20-1238.docx 8
The primary risk group shall be that one within the firecell that has the most onerous fire safety requirements.The primary risk group for this building is CA for the ground floor and WB for the upper floor.
In accordance with NZBC Clause A3, this building is classified as Importance Level 2:- Buildings posing normal risk to human life or the environment, or a normal economic cost, should the building fail.
Existing specified systemsThe building has a current Building Warrant of Fitness.The following specified systems as set out in the Compliance Schedule Handbook are installed in the building:- SS2 Automatic or manual emergency warning systems for fire or other dangers- SS3 Electromagnetic or automatic doors or windows- SS4 Emergency lighting systems- SS8 Lifts, escalators, travellators, or other systems for moving people or goods within buildings- SS9 Mechanical ventilation or air conditioning systems- SS14 Emergency power systems for, or signs relating to, a system or feature specified in any of SS1 - SS13- SS15 Other fire safety systems or features (systems for communicating information intended to facilitate
evacuation, final exits, fire separations, signs)
Proposed worksThe proposal is to carry out external recladding works to the existing building. It is also proposed to install new window joinery to the upper floor area.

\\bcdfs01\projects\20-1238 towngate\100 bcd fire\production files\issue 2\20-09-24, fire report (02), 20-1238.docx 9
5. BUILDING SCORE SHEET
Guidance for BCAs when requesting information about means of escape from fire for existing buildings.
BUILDING SCORE SHEET
Key Factors Points Score
Building Age
Approved from 1 June 2001 onwards 0
Approved between 1 January 1993 and 31 May 2001 1
Approved on or before 31 December 1992 3 3
Information held on the building by the BCA or TA(Score one of these only and choose the most comprehensive assessment)
For buildings approved from 1 June 2001: no consents made 0
Full building assessment on file dated 1 June 2001 or later 2 2
Full building assessment on file dated on or before 31 May 2001 4
One or more partial building assessments on file 6
No assessment on file for building additions or alterations 8
Like
lihoo
d of
exi
stin
g bu
ildin
g co
mpl
ying
Unable to determine history of building 8
Extent of the proposed building work
Minor 0
Moderate 3 3
Exte
nt o
f pro
pose
d w
ork
Significant 6
Building importance level
Level 1 0
Level 2 4 4
Level 3 8
Level 4 and Level 5 12
Pote
ntia
l con
sequ
ence
s of
not
co
mpl
ying
Additional points for building Level 1, 2 or 3 with sleeping facilities 4
TOTAL SCORE TO USE WITH TABLE 1 12

\\bcdfs01\projects\20-1238 towngate\100 bcd fire\production files\issue 2\20-09-24, fire report (02), 20-1238.docx 10
6. SECTION 112 ASSESSMENT
Where compliance with the requirements of the Building Act for alterations is not fully demonstrated through using this Acceptable Solution, the level of assessment required shall be agreed with the building consent authority or territorial authority.
To assist the relevant authority, we have referred to “Guidance requesting information about means of escape from fire for existing buildings” 1Dec 2013.
As this report has determined the building score at 12, which is within the score of 12 – 19, we have compiled this report as a ‘gap assessment’ using the appropriate Acceptable Solution C/AS2’.
7. PART 1 GENERAL
1.4 Calculating occupant loadsThe proposed recladding works to the building has not changed the occupant load within the building.
Details from previous fire reports details that each small tenancy on the ground floor is designed for <20 people with the Rip Curl tenancy designed for <50 people. Therefore, the ground floor tenancy spaces are designed for 130 people.
The Strettons tenancy on the upper floor is designed for 100 people.
8. PART 2 FIRECELLS, FIRE SAFETY SYSTEMS & FIRE RESISTANCE RATINGS
2.2 Fire safety systems
Table 2.2 Fire safety systemsActivity CA WB
Escape height 0m <4.0m
Occupant load 130 100
Alarm type See note1 See note1
Other precautions See note2 See note2
Notes:1. Fire alarm system
An existing Type 2 manual fire alarm system is installed in the building installed to NZS 4512.- The existing fire alarm indicator panel is located in a position close to the FENZ attendance point.- A direct connection to FENZ is not required if a phone is available at all times for “111” calls.- The fire alarm system will also satisfy the requirements of the Fire Safety and Evacuation of Buildings Regulations
2018 as an evacuation warning signal.
The proposed recladding works has not affected the existing fire alarm system installed in the building.
2. Fire hydrant system (Type 18)A fire hydrant system is not required as the hose run distance from a parked appliance is < 75m.
2.3 Fire resistance ratings (FRR)Life Rating = 60 minutes Applies to this building consentProperty Rating = 120 Applies to this building consent
1 Ministry of Business, Innovation & Employment. December 2013, Version 1

\\bcdfs01\projects\20-1238 towngate\100 bcd fire\production files\issue 2\20-09-24, fire report (02), 20-1238.docx 11
9. PART 3 MEANS OF ESCAPE
3.2 Number of escape routesThe means of escape from the existing tenancies has not been affected by the proposed external recladding works.
Ground floor A single designated means of escape is provided from each small retail tenancy via the main entrance door.
Two escape routes are to be provided from the Rip Curl tenancy due to distances of travel from the tenancy.
Clearly indicate the escape route from the Rip Curl tenancy via the back of house with appropriate illuminated EXIT signage. Installation is to be in accordance with F8.
Upper floorTwo designated means of escape are provided via:- The main entrance stair leading to Heu Heu Street.- The rear stair leading to the service alley.
3.3 Height and width of escape routesHeight requirements for escape routes are to be:- 2100mm across the full width.- Isolated ceiling fittings not exceeding 200mm diameter shall not project downwards > 100mm.- Doors into or within an escape route shall have a minimum clear height of 1955mm.
Escape routes not on an accessible route and used by ≥ 50 people, the escape routes must have a minimum width of 850mm for horizontal travel and 1000mm for vertical travel.
Escape routes not on an accessible route and used by < 50 people, the escape routes must have a minimum width of 700mm for horizontal travel and 850mm for vertical travel.
The existing stairs are designed as accessible stairs.
3.4 Length of escape routesTable 3.2 Travel distances on escape routes
Dead End Open Path1 Total Open Path1
Floor Area Risk GroupPermitted Actual2 Permitted Actual2
Ground You Travel WB 25 16 60 n/a
Easy to you CA 20 16 50 n/a
Vacant tenancy CA 20 <20 50 n/a
Trade Aid CA 20 18 50 n/a
Rip Curl CA 20 14 50 45
Upper Office WB 25 15 60 <60
Notes:1. The lengths of the escape routes are shown in metres.
2. The distances of travel are the worst case from each area to a safe place outside or to a safe path.
3.10 Control of exitway activities3.10.1 The safe path shall not be used for any storage of goods, combustibles, solid waste or solid waste containers.
3.10.3 Lifts The lift is part of the upper floor firecell – OK.

\\bcdfs01\projects\20-1238 towngate\100 bcd fire\production files\issue 2\20-09-24, fire report (02), 20-1238.docx 12
3.13 Single escape routesA single means of escape is acceptable from the ground floor tenancies as the occupant load is < 50 people, the dead-end distance is within the permitted limits and the escape height is < 10m.
3.15 Doors subdividing escape routesExisting doors subdividing the escape routes are installed with simple fastenings that can be readily operated from the direction of escape and are not capable of being locked from the inside with a key or other security device preventing escape.
The existing automatic sliding door at the entrance to the fail-safe device.
Doors subdividing escape routes capable of being used by > 50 people are to swing in the direction of escape.
Doors subdividing escape routes capable of being used by ≤ 50 people may swing in either direction.
3.15.6 Vision panels are installed in the doors leading into the rear stair on the upper floor – OK.
3.16 SignsAll escape routes shall have signs complying with NZBC F8/AS1.
Install illuminated EXIT signs to cover the escape route via the back of house to the final exit from the Rip Curl tenancy. Design and installation of the illuminated signs is to be in accordance with AS 2293.1:2018.
Exit signs to be sized to comply with 16, 24 or 32m viewing distances (F8/AS1, Table 4 & 5).
The existing doors leading into the rear stair lobby are designated as smoke control doors and have signs stating “Smoke Control Door, Please Keep Closed”.
10. PART 4 CONTROL OF INTERNAL FIRE & SMOKE SPREAD
4.1 FirecellsThe building is designed as two firecells, the ground and the upper floor levels.The firecell separation (Life Rating) is to achieve a minimum of 60/60/60 FRR.
4.1.2 VP Storage:a) Within the car park firecell, where the car park spaces and other areas of that firecell are unit titled, it is permitted to
have the car park spaces and an associated storage area (limited to plan area of 3.0m2 and maximum height of 3.0m) unseparated from adjacent titles, and
b) Within the car park firecell, other spaces (such as a ticket office, a gate booth or a storeroom not greater than 10m2) are permitted, when they are necessary for the operation of the car park
4.2 Glazing in fire and smoke separationsAn existing window is installed in a wall area leading into the rear stair on the upper floor. This window is deemed to comply to the same extent as before the alterations occurred.
4.3 Internal structural stability during firePrimary elements located entirely within a firecell and providing support to fire separations required to be fire rated shall provide sufficient structural stability to avoid premature failure under design dead loads, design live loads and any additional load caused by fire.
Engineers calculations may be required to verify that the walls required to provide a fire rating are designed for stability under fire conditions.

\\bcdfs01\projects\20-1238 towngate\100 bcd fire\production files\issue 2\20-09-24, fire report (02), 20-1238.docx 13
4.4 Fire stoppingAll new penetrations and any existing penetrations that can be viewed without invasive inspections, are to comply with the following:- Passive firestopping of all penetrations into fire rated walls and floors are to use a material that has been tested to
AS1530.4:2005 or AS4072.1:2005 as fit for purpose with the substrate. The passive fire protection is to achieve the equivalent integrity and insulation values of the fire rated element.
- A fire stop for a penetration is not required to have an insulation rating if means are provided to keep combustible materials at 300mm away from the penetration and the fire stop to prevent ignition.
- All passive fire penetrations are to be identified with an individual label that is permanently fixed on or adjacent to the penetration, identifying the system. The label shall contain the Fire Resistance Rating, date of installation, product used, installers name and company details. A register of all penetrations with plans identifying the penetration locations is to be kept by the building owner and able to be accessed by the IQP. Any fire stopping system that requires regular testing is to be highlighted.
Notes:1. There has been very limited testing of fire stopping products over the wide range of construction materials available.
Please check that the substrate / construction method you are using has been tested for the fire stopping / passive fire project that is proposed for the penetration.
2. It has been identified that fire stopping of penetrations in plasterboard ceilings of < 26mm thick is a concern. Please check with a specialist passive fire applicator or direct with passive fire suppliers for a product that is fit for purpose.
3. We recommend coordinating with a passive fire professional to identify passive fire products suitable for the proposed construction substrates and penetrations as non-tested systems cannot be included in a PS3 or PS4.
4. We recommend engaging a specialist applicator to apply the fire stopping to the penetrations.
4.5 Firecell construction4.5.5 Junctions of fire separationsWhere fire separations meet other fire separations or fire rated parts of external walls, they shall either be bonded together or have the junction fire stopped over its full length. The external cladding cavity gap should be fire stopped in line with the horizontal or vertical fire separations.
4.5.6 FRR of JunctionsWhere one fire separation is a wall and the other a floor, the wall / floor junction shall be constructed with the FRR required for the higher rated element.
4.5.8: FRR of CeilingLarge roof or ceiling spaces may be constructed as separate firecells above more than one occupied firecell provided that the ceiling is a fire separation rated from below. In this situation, vertical fire separations in the firecell below need terminate only at the ceiling.
The ceilings of the ground floor retail tenancies facing Heu Heu Street are to achieve a 60/60/60 FRR from below. All penetrations within the ceilings are to be appropriately fire stopped.
4.5.9: Sealing of gaps To avoid the passage of smoke through fire separations and smoke separations, gaps shall be sealed with fire resistant materials complying with AS 1530.4 in their intended application if they are located: a) In smoke separations, and between fire separations and smoke separations, or b) Around glazing in smoke separations, or c) Between fire separations and unrated parts of external walls, or d) Between smoke separations and unrated parts of external walls.
4.9 ExitwaysThe rear stair was previously designed as a protected path, smoke separated from adjacent spaces by smoke separations.
This escape route has not been affected by the proposed recladding works and is deemed to comply to the same extent as before the alterations occurred.

\\bcdfs01\projects\20-1238 towngate\100 bcd fire\production files\issue 2\20-09-24, fire report (02), 20-1238.docx 14
4.13 Floors4.13.1 Full FloorsThe mid-floor is concrete and considered to achieve a 60 minute FRR.
The proposed extension of the mid-floor system is to continue out to the outside edge of the new building line. This is achieved by lining the ceilings of the ground floor ceilings to Gib Board Spec GBUC60 (2 x layers of 13mm Fyreline).
The walls separating the main entrance stair from the ground floor spaces are concrete block which achieves a 60 minute FRR.
4.16 Closures in fire and smoke separationsThe existing door leading into the rear stair on the ground floor corridor is an existing fire door.The existing door at the rear of the You Travel tenancy is an existing fire door.
The existing doors leading into the stair lobby on the upper floor are part of the protected path that is to be smoke/ fire separated from the adjacent upper floor spaces. During the inspection it was noted that these doors (x4) leading into the stair lobby area had the door latching mechanisms removed (Figure 1). The latching mechanisms are to be reinstated to the door sets.
Figure 1
4.17 Interior surface finishes, floor coverings and suspended flexible fabrics4.17.1 Surface finishes for walls and ceilingsExisting surface finishes are generally painted finishes on paper faced plasterboard wall and ceiling linings. These surface finishes are deemed to comply with the appropriate SFI, SDI values that correspond to the Group No. 2-S.
All new surface finishes are to comply with the group numbers prescribed below (G/N stated or lower).
Table 4.3 & 4.4 Surface finishesSpace Surface1 Group No2
Public / crowd areas Wall & ceiling linings 2S
Staffrooms, offices Wall & ceiling linings 3
All other occupied spaces Wall & ceiling linings 3
Notes:1. Where timber wall and or ceiling linings are used, take care to ensure the surface coating meets the above
requirements, as generally paint and standard clear finishes do not comply to < G3.
2. Product group numbers shall be confirmed via material data sheets submitted as part of the building consent information.

\\bcdfs01\projects\20-1238 towngate\100 bcd fire\production files\issue 2\20-09-24, fire report (02), 20-1238.docx 15
4.17.4 FlooringExisting floor coverings are a combination of hard wearing carpet and linoleum which are deemed to comply.
All new floor coverings are to comply with the critical radiant flux rating as prescribed below (C.R.F as stated or greater).
Table 4.5 Critical radiant flux requirements for flooringSpace Minimum Critical Radiant Flux1
Firecells accommodating > 50 people ≥ 2.2kW/m2
All other occupied spaces ≥ 1.2kW/m2
Note:1. Shall be confirmed via material data sheets submitted as part of the building consent information.
4.17.6 Exceptions to surface finish requirementsSurface finish requirements do not apply to:a) Small areas of non-conforming product within a firecell with a total aggregate surface area not > 5.0m2
b) Electrical switches, outlets, cover plates and similar small discontinuous areasc) Pipes and cables used to distribute power or servicesd) Handrails and general decorative trim of any material such as architraves, skirtings and window components,
including reveals, provided these do not exceed 5% of the surface area of the wall or ceiling they are part ofe) Damp-proof courses, seals, caulking, flashings, thermal breaks and ground moisture barriersf) Timber joinery and structural timber building elements constructed from solid wood, glulam or laminated veneer
lumber. This includes heavy timber columns, beams, portals and shear walls not more than 3.0m wide, but does not include exposed timber panels or permanent formwork on the underside of floor / ceiling systems
g) Individual doorsetsh) Continuous areas of permanently installed openable wall partitions having a surface area of not more than 25% of
the divided room floor area or 5.0m2, whichever is less.
4.17.8 Suspended flexible fabricsWhen tested to AS 1530 Part 2:- Suspended flexible fabrics shall have a flammability index of no greater than 12.
11. PART 5 CONTROL OF EXTERNAL FIRE SPREAD
5.3 FRRs of external wallsThe walls identified in Section 5.5 require a minimum of 120/120/120 FRR excluding the doors and windows. Primary and secondary elements required to be fire rated shall provide sufficient structural stability to avoid premature failure under design dead loads, design live loads and any additional load caused by fire.Refer to the fire plans at the rear of this report.
5.5 Table method for external wallsThe Table below is for the wall areas undergoing alterations/ recladding.All other walls are existing with no proposed building works occurring.
Table 5.2 Minimum percentage of unprotected area for external walls – Ground floor% unprotected area Max UPA (m2)
Wall Width of firecell Angle Distance to Boundary
(m) Permitted Actual Permitted Actual
West1 <10m 900 0m + 6.0m Service lane 45% 0% 31m2 n/a
Note:1. West wall at 6.0m to the boundary (service lane):
Area of wall: 3m H x 8m W = 24m2
45% permitted unprotected area = 11m2 (Table 5.2/3)
The wall is to be 100% fire rated – OK.

\\bcdfs01\projects\20-1238 towngate\100 bcd fire\production files\issue 2\20-09-24, fire report (02), 20-1238.docx 16
Table 5.2 Minimum percentage of unprotected area for external walls – Upper floor% unprotected area Max UPA (m2)
Wall Width of firecell Angle Distance to Boundary
(m) Permitted Actual Permitted Actual
North2 <10m 900 6.0m 45% 21% 31m2 5m2
South >10m 900 0m Plus Heu Heu St 100% 100% n/a n/a
West3 >10m 900 0m + 6.0m Service lane 45% 25% 31m2 9m2
East >10m 900 0m Plus Ruapehu St 100% 100% n/a n/a
Notes:2. North wall at 6.0m to the boundary:
Area of wall: 4m H x 6m W = 24m2
45% permitted unprotected area = 24m2 (Table 5.2/3)The wall is to be 100% fire rated.Check the total unprotected areas, (2 windows): (1.8 x 1.5)(2.7m2) + (1.5 x 1.5) (2.25m2) = 5m2 – or 21% unprotected
Check maximum permitted individual unprotected opening = 5m2 (Table 5.3/3)Actual largest unprotected opening (2 windows) 5m2 – OK.
3. West wall at 6.0m to other side of service lane:Area of wall: 4m H x 20m W = 80m2
45% permitted unprotected area = 36m2 (Table 5.2/3)The wall is to be 100% fire rated.Check the total unprotected areas, (5 windows): (2 x (1.5 x 1.8)) (3 x (0.6 x 2.0)) = 9m2 – or 25% unprotected
Check maximum permitted individual unprotected opening = 31m2 (Table 5.3/3)Actual largest unprotected opening (5 windows) 9m2 – OK.
5.6 Horizontal fire spread from roofs and open sided buildings5.6.6 and 5.6.7 Open sided buildingsThe existing carpark area on the ground floor is considered to meet the requirements of an open sided building as 2 sides are completely open
5.8 Exterior surface finishesWalls > 1m from boundary & < 10m building heightThe requirements for exterior surface finishes do not apply as the proposed external walls are > 1m from the boundary and < 10m in height.
12. PART 6 FIREFIGHTING
6.1 FENZ vehicular accessFire appliance access is provided to within 20m of the front of the building for firefighting purposes.
6.2 Information for firefightersThe existing fire alarm indicator panel is installed in the building to NZS 4512.
6.2.2 If hazardous substances are present in the building, warning signage in accordance with NZBC F8 shall be displayed.

\\bcdfs01\projects\20-1238 towngate\100 bcd fire\production files\issue 2\20-09-24, fire report (02), 20-1238.docx 17
13. PART 7 PREVENTION OF FIRE OCCURING
7.4 DownlightsRecessed luminaires shall be installed with clearances from building elements (including insulation) of 100mm.
14. F6 / AS1 VISIBILITY IN ESCAPE ROUTES
Lighting for emergencyAn existing emergency lighting system is installed in the building to meet the requirements of NZBC F6 Visibility in Escape Routes.
The proposed alterations to the building do not affect the existing system. The existing system is considered to comply to the same extent as before the alterations occurred.
15. CONSTRUCTION MONITORING
We have reviewed the requirements for construction monitoring. Construction monitoring ensures that the building work is correctly interpreted and implemented in accordance with the design documentation.
Documentation to be provided by the contractors relating to the fire design includes:- Exit signage Producer Statement PS3 Construction Electrical- Fire stopping: Producer Statement PS3 Construction
BCD Group Limited is not currently engaged to carry out fire engineering construction monitoring of the proposed works.

\\bcdfs01\projects\20-1238 towngate\100 bcd fire\production files\issue 2\20-09-24, fire report (02), 20-1238.docx 18
16. FIRE COMPLIANCE SCHEDULE ITEMS
As there are Specified Systems in the building, compliance schedule details are required to be supplied to Council as part of the building consent application. It is the responsibility of the person lodging the building consent to complete the relevant Council forms relating to Specified Systems.
BCD Group Limited has provided information below to assist in the completing of the relevant Council forms. The information below only covers Specified Systems that are affected by this Fire Engineering Design. This information is superseded by the completed Council forms. If assistance is required in completing the relevant Council forms, please contact the system provider or IQP.
SS Specified System Maintenance / Inspections
Frequency Status
2 Automatic or manual emergency warning systems for fire or other dangersType: 2 manual fire alarm systemLocation: As shown on approved plan by the Fire Alarm agent.
NZS 4512:1997 Monthly and annual inspections by IQP
Existing
3/1 Type: Automatic doorsLocation: As shown on plans and door schedule.
NZS 4239:1993 Daily inspections by owner Monthly inspections by owner or IQPAnnual inspections by IQP
Existing
4 Emergency lighting systemsincluding Illuminated EXIT signageLocation: As shown on emergency lighting plan.
AS/NZS 2293:1995 Six monthly and annual inspections by IQP
Existing
8/1 Passenger carrying liftsLocation: As shown on approved plan accepted by BCA.
NZS 4332:1997 Six monthly and annual inspections by IQP
Existing
9 Mechanical ventilation or air conditioning systemsLocation: As shown on approved plan accepted by BCA.
AS/NZS 1668.2:2002, Three monthly and annual inspections by IQP.
Existing
14/2 Signs relating to specified systemsType: Manual call point signs Automatic Door Signage Lift SignageLocation: As shown on approved plan accepted by BCA.
NZS 4512
NZBC F8.3.3 – 01/01/2017
Monthly and annual inspections by IQPAnnual inspections by IQP
Existing
15/2 Final exitsType: Exit Doors Location: Refer to Fire Plans
NZBC C4.5 – 10/04/2012 Monthly inspections by owner or IQPAnnual inspections by IQP
Existing
15/3 Fire separationsType: Walls, Doors, FloorsLocation: Refer to Fire Plans
NZS/BS 476.22:1987, Monthly inspections by owner or IQPAnnual inspections by IQP
Existing and Modified
15/4 Signs for communicating information intended to facilitate evacuationType: EXIT Signs Directional signsLocation: Refer to Fire Plans
NZBC F8.3.3 – 01/01/2017 Monthly inspections by owner or IQPAnnual inspections by IQP
Existing and Modified

\\bcdfs01\projects\20-1238 towngate\100 bcd fire\production files\issue 2\20-09-24, fire report (02), 20-1238.docx 19
17. FIRE AND EMERGENCY NEW ZEALAND
In accordance with Section 46(1) of the Building Act 2004 certain applications for Building Consent must be provided to Fire and Emergency NZ for review.
1 Section 75 of Fire and Emergency New Zealand Act 2017 Yes No
1(a) 100 or more people present?
1(b) Employment facilities for > 10 people?
1(c) Accommodation for > 5 people?
1(d) Storage or processing of hazardous materials?
1(e) Early childcare facilities?
1(f) Nursing, medical or geriatric care provided?
1(g) Specialised care for people with disabilities?
1(h) Accommodation for people in lawful detention?
Evacuation Scheme required in terms of FENZ Act (Section 1 triggered) No
2 Building Act 2004 Yes No
(a) Compliance by means other than clauses
(i) C1 – C6
(ii) D1/AS1
(iii) F6/AS1
(iv) F8/AS1
Section (a) triggered? No
(b) Modification or waiver of clauses
(i) C1 – C6
(ii) D1/AS1
(iii) F6/AS1
(iv) F8/AS1
Section (b) triggered? No
(c) Fire safety system affected (except minor)
Section (c) triggered? No
Section 46 Building Act triggered? No
DBH Gazette Notice No 49 dated 3 May 2012
Are there at least two triggers (must include Section 1) NoIs the Building Consent Authority required to forward a copy of this application to FENZ for comment on matters relating to means of escape from fire, and the requirements for firefighting? No

\\bcdfs01\projects\20-1238 towngate\100 bcd fire\production files\issue 2\20-09-24, fire report (02), 20-1238.docx A
APP
END
IX A
– F
ire
Engi
neer
ing
Pla
n(s)

Pr in ted:2
Project :
S H E E T T I T L E : SHEETProposed E leva t ions
Sca le :
D rawn :
PHONE: (07) 378 20670274 822 038
Jackie RobinsonArchitectural Designer Towng ate Bui ld ing
Corner Heuheu & Ruapehu Streets
NOTES:
Job # 180018/08/2020
Pre l iminary Only
1 2 3 4 5New roof
New Cemintel Steppe Sheet c ladding to exist ing parapet
Co lumn-02Eldorado Stone
veneer
New Furturewood Composi te screening
New Cemintel Quarry Sheet c ladding to new wal l
Co lumn-03
J H G F E D C B AK
7,50
0
2,850
Column-02Eldorado Stone veneer
Co lumn-01Eldorado Stone veneer Parapet-01 Parapet-02
New Furturewood Composi te screening
New Cemintel Quarry Sheet c ladding to new wal l
New Cemintel Steppe Sheet c ladding to exist ing t imber framing & New co lumns
1 :1 0 0
S o u t h
W e s t
C l a d d i n g A r e aR u e p e h u :P a r a p e t 4 1 . 3 9 s q m W a l l 2 6 . 6 7
H e u H e u :P a r a p e t 0 1 - 2 3 . 7 6 s q m 0 2 - 2 9 . 6 6 s q mW a l l 0 1 - 3 0 . 4 6 s q m 0 2 - 3 5 . 0 7 s q m
C o l u m n s :1 . 2 c o l u m n 6 . 4 8 s q mE n t r y 4 . 8 6 s q mC o l m n - 0 1 1 3 . 0 7 s q mC o l u m n - 0 2 1 7 . 3 2 s q mC o l u m n - 0 3 4 . 8 6 s q m
P r o p o s e d E l e v a t i o n s
These drawings support the fire design and are to be read inconjunction with the fire report. They do not show all of therequired fire safety systems & features and are notconstruction drawings.
Reference Number:
Date:
Title:
20-1238
13/10/2020
Elevation plan

Pr in ted:3
Project :
S H E E T T I T L E : SHEETProposed E levat ion
Sca le :
D rawn :
PHONE: (07) 378 20670274 822 038
Jackie RobinsonArchitectural Designer Towng ate Bui ld ing
Corner Heuheu & Ruapehu Streets
NOTES:
Job # 180018/08/2020
Pre l iminary Only
F G H J K
New Cemintel Steppe Sheet c ladding to exist ing t imber f raming
New Cemintel Quarry Sheet c ladding to new wal l
5 4 3 2 1
New Cemintel Quarry Sheet c ladding to new wal l
New Cemintel Steppe Sheet c ladding to exist ing t imber f raming
New Cemintel Steppe Sheet c ladding to exist ing parapet
P r o p o s e d E l e v a t i o n s
N o r t h
E a s t
1 :1 0 0
These drawings support the fire design and are to be read inconjunction with the fire report. They do not show all of therequired fire safety systems & features and are notconstruction drawings.
Reference Number:
Date:
Title:
20-1238
13/10/2020
Elevation plan
Legend
120/120/120 FRR (one way)

Pr in ted:4
Project :
S H E E T T I T L E : SHEETExis t ing Ground F loor P lan
Sca le :
D rawn :
PHONE: (07) 378 20670274 822 038
Jackie RobinsonArchitectural Designer Towng ate Bui ld ing
Corner Heuheu & Ruapehu Streets
NOTES:
Job # 180018/08/2020
Pre l iminary Only
A
A
B
B
C
C
D
D
E
E
F
F
G
G
H
H
J
J
11
22
33
44
55
K
K
m o b i l e s h o p
r i p c u r l
tra
de
aid
e
PG
G W
rig
hts
on
ma
ss
ag
e
y o u t r a v e l
w c
se
rvic
ew c
wc
sto
re
s t o r e
sto
re
o f f i c e
4 5 0 s t e p
45
0 s
tep
f o y e r
l i f t
A8
B9
B9
C10
C10
D11
D11
1 :1 0 0
Vac
ant T
enan
cy
Install additional EXIT signageto doors and openings
subdividing escape route fromRipcurl tenancy
ERERERERERERER
ER
ER
ER
ER
ER
ER
ER
ERER
ERER
ER
ER
ER
ER
ER ER ER ER ER
ER
ER
ER
ER
ER
ER
ER
ER
ER
ER
ER
ER
ER
ER
ER
ER
ER
ER
ER
ER
ER
ERERERERER
ER
ER
ER
ER
ER
ER
ER
ER
ER
ER
ER
ER
ER
ER
ER
ER
ER
ER
ER
ER
ER
ER
ER
ER
ER
ER ER ER ER ER ER ER ER
ER
ER
ER
ER
ER
ER
ER
ER
ER
ER
ER
ER
ER
ER
ER
ER
ER
ER
ER
ER
ER
ER
ER
ER ER ER ER ER ER ER ER ER ER ER ER ER ER ER ER ER ER ER ER
ER
ER
ER
ER
ER ER ER ER ER ER ER ER
ERERERER
ER
ER
ER
ER
ERERERERERER
ERERERERERERERERERER
ER
ER
ER
ER
ER
ER
ER
ER
ER
ER
ER
ER
ER
ER
ER
ER
ER
ER
ER
ER
ER
ER
ER
ER
ER
ER
ER
ER
ER
ER
ER
ER
ER
ER
ER
ERERERERERERERERERER
ER
ER
ERERERERERERERERER
ER
ER
ER
ERERERER
ER
ER
ER
ER
ERERERER
ER
ER
ER
ER
ER
ER
ER
ER
ER
ER
ER
ER
ER
120
120
120
120
120
60/60/60 FRR to mid-floor ceiling systemto prevent fire spread from ground floor
tenancies to upper floor firecell.
These drawings support the fire design and are to be read inconjunction with the fire report. They do not show all of therequired fire safety systems & features and are notconstruction drawings.
Reference Number:
Date:
Title:
20-1238
13/10/2020
Ground floor plan
Legend
60/60/60 FRR to extended mid-floor ceiling12
0 120/120/120 FRR (one way)
ER
ER
Dead End Open Path
Existing EXIT sign
Existing fire wall
ER
ER Total Open Path

Pr in ted:6
Project :
S H E E T T I T L E : SHEETProposed F i rs t F loor P lan
Sca le :
D rawn :
PHONE: (07) 378 20670274 822 038
Jackie RobinsonArchitectural Designer Towng ate Bui ld ing
Corner Heuheu & Ruapehu Streets
NOTES:
Job # 180018/08/2020
Pre l iminary Only
W107,600 x 2,730
W04
1,50
0 x
4,76
0W
031,
500
x 4,
930
W02
1,50
0 x
4,93
0W
011,
500
x 4,
930
W14
1,50
0 x
1,80
0W
1560
0 x
2,00
0W
1660
0 x
2,00
0W
1760
0 x
2,00
0W
181,
500
x 1,
800
W111,500 x 3,150
W131,500 x 3,990
W121,500 x 3,250
W051,500 x 2,950
W061,500 x 3,220
W071,500 x 3,220
W091,500 x 3,150
A
A
B
B
C
C
D
D
E
E
F
F
G
G
H
H
J
J
11
22
33
44
55
K
K
15,405 3,120 21,992
4,35
0
4,89
9
3,739
1,40
04,
850
1,20
05,
050
1,20
05,
050
1,20
05,
050
750
1,560 4,086 1,200 3,372 1,200 3,268 854 2,850 854 7,840 1,200 3,345 1,200 3,039 1,560
600
600
90 3,928
A8
A8
B9
B9
C10
C10
D11
D11
Exist ing parapet to remain
Line of roof framing above
New framing to exist ingconcrete columns
New Composi te screening
Internal patit ionwal ls removed
New part i t ion wall
Existing part i t ion wallscut back from external
joinery & laminatedglass panels instal led
Ful l height glass panel
Glass entry roof
250U B 21 supportedby 200U B 17
New Composi te screeningNew Composi te screening
Co lumn-03
Column-02Eldorado Stone veneerCo lumn-01
Eldorado Stone veneer Entry Column Entry Column
1,200 Co lumn
1,200 Co lumn
1,200 Co lumn
1,200 Co lumn1,200 Co lumn1,200 Co lumn 1,200 Co lumn1,200 Co lumn
exist ing wal l f raming
new wal l f raming
L e g e n d
removed wal l f raming
31
0U
B3
7
25
0U
B2
1
25
0U
B2
1
25
0U
B2
1
25
0U
B2
1
25
0U
B2
1
25
0U
B2
1
25
0U
B2
1
3 1 0 U B 3 7
3 1 0 U B 3 7
3 1 0 U B 3 7
2 5 0 N F B 2 5
25
0U
B2
1
2 5 0 N F B 2 5
k i t c h e n /s ta f f m e n s w o m e n s
o f f i c e s p a c e
o f f i c eo f f i c e o f f i c e o f f i c e o f f i c e o f f i c e o f f i c e o f f i c e
o f f i c e
o f f i c e
o f f i c e
o f f i c e
o f f i c e s p a c e
s t o r es t o r e
s t o r e
s t o r e
s t a i r s
l i ft
s t o r e
sc
ree
n-0
1
s c r e e n - 0 2 s c r e e n - 0 3
sc
ree
n-0
4s
cre
en
-05
S c r e e n L e g e n d
01 - 10 @ 90 x 25 15 @ 40 x 30Leng th -8 ,20002 - 12 @ 90 x 25 15 @ 40 x 30Leng th -2 ,10003 - 12 @ 90 x 25 15 @ 40 x 30Leng th -2 ,10004 - 10 @ 90 x 25 15 @ 40 x 30Leng th -2 ,10005- 4 @ 90 x 25 6 @ 40 x 30Leng th -2 ,10006 4 @ 90 x 25 6 @ 40 x 30Leng th -2 ,100
f o y e r
o f f i c e
s t a i r s
sc
ree
n-0
6
1 :1 0 0
ERERERER
ER
ER
ER
ERERERERERERERERERERERERERERERERERERERERERER
ER
ER
ER
ER
ER
ER
ER
ER
ER
ER
ER
ER
ER
ERERERERERERERERERERERERERERERERERERERERERERERER
ER
ER
ER
ER
ER
ER
ER
ER
ER
ER
ER
ER
ER
ER
ER
ER
ER
ERER
ER
ER
ER
ER
ER
ER
ER
ER
ERERERERERERERERERERERER
ER
ER
ER
ER
ER
ER
ER ER
ER
ER
ER
ER
ER
ER
ER ER ER
ER
ER
ER
ER
ER
ER
D.E.O.P 26mT.O.P 60m
120
120
120
120
120
120
120
120
120
120
120
120
120 120 120
These drawings support the fire design and are to be read inconjunction with the fire report. They do not show all of therequired fire safety systems & features and are notconstruction drawings.
Reference Number:
Date:
Title:
20-1238
13/10/2020
Upper floor plan
Legend
120 120/120/120 FRR (one way)
ER
ER
Dead End Open Path
Existing illuminated EXIT sign
SS Smoke separations
ER
ER Total Open Path
SS
SS
SS
SS
SS SS SS SS SS
SS SS SS
SSSS SS SS
SS
SS
SS
SS
SS
SS
SS
SS
SS
SS
Reinstate latchingdevices to door sets

DB Consulting Engineers Limited
Job Reference :
Prepared By: Graham Byrne
Reviewed by: Barry Smith
Engineering Manager
Derek Booth
Chartered Professional Engineer
Client :
Version Date Initials
1.00 11/02/2021 GB
Details
PS1 Issue
Wild Stag Limited
Producer Statement
Engineering Design‐PS1
Proposed cladding replacement
at the existing Towngate Building
44 Heuheu Street, Taupo
Peer
Reviewed
130728.09
Structural Engineer MEngNZ

Building Code Clause(s) ………B1 …………..
TO:………………………
TO BE SUPPLIED TO:
IN RESPECT OF:
AT:
Town/City: LOT
1
2
3
services in respect of the requirements of Clause(s)……........ B1 ..........……...….of the Building Code for:
All or Part only (as specified in the attachment to this statement), of the proposed building work.
The design carried out by us has been prepared in accordance with:
…......130728.09……………….and numbered
together with the specification, and other documents set out in the schedule attached to this statement.
On behalf of the Design Firm, and subject to:
(i) Site verification of the following design assumptions:
(ii) All proprietary products meeting their performance specification requirements;
CM1 CM2 CM3 CM4Normal Local Authority inspections will be adequate construction monitoring on this project.
I, …………Derek Booth..………..……….…… am: CPEng …..…15472.………#
(Name of Design Professional)
I am a Member of Engineering New Zealand and hold the following qualifications:………B.S.c Hons Engineering……………
Date……..… 11/02/2021 ………………
PRODUCER STATEMENT PS1 October 2013
.Taupo District Council ………………………………………………………………………………………………………………
..Proposed cladding replacement at the existing Towngate Building ……………………………
……………....44 Heuheu Street, Taupo …………………………………………………………………………………………………………………………………………
Alternative solution as per the attached schedule………….………..………………………………
We have been engaged by the owner/developer referred to above to provide:
(Building Consent Authority)
(Description of Building Work)
(Address)
Taupo (Address)
New cladding structural support
Part Section 14 Block XVII Town of Taupo
(Extent of Engagement)
PRODUCER STATEMENT – PS1 – DESIGN
ISSUED BY:.................. DB Consulting Engineers Limited(Design Firm)
(Owner/Developer)Wild Stag Limited …………………………………………………………………………………………………………………………………………………
Note: This statement shall only be relied upon by the Building Consent Authority named above. Liability under this statement accrues to the Design Firm only. The total maximum amount of damages payable arising from this statement and all other statements provided to the Building Consent Authority in relation to this building work, whether in contract, tort or otherwise (including negligence), is limited to the sum of $200,000*.
This form is to accompany Form 2 of the Building (Forms) Regulations 2004 for the application of a Building Consent.THIS FORM AND ITS CONDITIONS ARE COPYRIGHT TO ACENZ, ENGINEERING NEW ZEALAND AND NZIA
…...…… (signature)…………………………..…...……..……………………………….………..…
Compliance Documents issued by the Ministry of Business, Innovation & Employment.. B1/VM1 ..or
(Engineering Categories)
The Design Firm issuing this statement holds a current policy of Professional Indemnity Insurance no less than $200,000*.
SIGNED BY …………Derek Booth…ON BEHALF OF DB Consulting Engineers Limited… (Design Firm)
(verification method / acceptable solution)
I believe on reasonable grounds that a) the building, if constructed in accordance with the drawings, specifications, and other documents provided or listed in the attached schedule, will comply with the relevant provisions of the Building Code and that b), the persons who have undertaken the design have the necessary competency to do so. I also recommend the following level of construction monitoring/observation:
CM5
Not applicable
………….01‐06 …………………………………….
The proposed building work covered by this producer statement is described on the drawings titled:
X
X
X
Check on existing canopy beam

Form 2A
Memorandum from licensed building practitioner: Certificate of design workSection 45 and Section 30C, Building Act 2004
Please fill in the form as fully and correctly as possible.
If there is insufficient room on the form for the requested details, please continue on another sheet and attach
the additional sheet(s) to this form
THE BUILDING
Taupo
Postcode: 3330
THE OWNER
Wild Stag Limited
79 Whakaroa Road
Kinloch
Kinloch 3385
027 3296350
BASIS FOR PROVIDING THIS MEMORANDUM
( )
( )
( )
(√)
IDENTIFICATION OF DESIGN WORK THAT IS RESTRICTED BUILDING WORK (RBW)
I Derek Booth supervised the following design work that is restricted building work
Design work that is restricted building work Description Carried out/ supervised
Reference to plans and specifications
Tick (√)if included
I am providing this memorandum in my role as the: Please tick the option that applies (√)
sole designer of all of the RBW design outlined in this memorandum – I carried out all of the RBW design myself – no other person will be providing any additional memoranda for the project
lead designer who carried out some of the RBW design myself but also supervised other designers – this memorandum covers their RBW design work as well as mine, and no other person will be providing any additional memoranda for the project
lead designer for all but specific elements of RBW – this memorandum only covers the RBW design work that I carried out or supervised and the other designers will provide their own memoranda relating to their specific RBW design
specialist designer who carried out specific elements of RBW design work as outlined in this memorandum – other designers will be providing a memorandum covering the remaining RBW design work
PRIMARY STRUCTURE: B1
[If appropriate, provide details of the restricted building work]
[Specify whether you carried out this design work or supervised someone else carrying out this design work]
[If appropriate, specify references]Cross ( X) if excluded
44 Heuheu Street
Taupo
Street address:
Suburb:
Name(s):
Mailing address:
Town/City
Suburb:
Town/City:
Phone number :
PO Box/Private Bag:
Postcode:
Email address:

All RBW Design work relating to B1
(X)( ) Carried out
(X)Foundations and subfloor framing
Primary Structure
( ) Carried out
( ) Supervised
(X)
(X)
Walls
Roof
( ) Carried out
( ) Supervised
( ) Carried out
( ) Supervised
( ) Carried out
( ) Supervised
( ) Carried out
( ) Supervised
( ) Carried out
(√) Supervised
( ) Carried out
(√) Supervised
( ) Carried out
(√) Supervised
( ) Carried out
( ) Supervised
Check on existing cladding supports and new members
Existing building bracing check and lateral restraint of new
cladding
New cladding weights and fixings
EXTERNAL MOISTURE MANAGEMENT SYSTEMS: E2
(√)
(x)
Other
(√)
(√)
Columns and beams
Bracing
please refer to DFR no.130728.09
please refer to DFR no.130728.09
please refer to DFR no.130728.09
( ) Supervised
( ) Carried out
( ) Supervised
( ) Carried out
Damp proofing
Roof cladding or roof cladding system
Ventilation system (for example, subfloor or cavity)
Wall cladding or wall cladding system
( ) Supervised
(x)
(x)
(x)
(x)
(x)
FIRE SAFETY SYSTEMS: C1 - C6
Waterproofing
Other
Emergency warning systems, evacuation and fire service operation systems, suppression or control systems, or other
( ) Carried out
( ) Supervised
( ) Carried out
(x)
( ) Supervised
All RBW Design work relating to E2
(x)( ) Carried out
( ) Supervised

Note: continue on another page if necessary.
WAIVERS AND MODIFICATIONS
( ) Yes ( √ ) No
Note: continue on another page if necessary.
ISSUED BY:
Name: LBP or registration number: 15472
( ) Design LBP ( )Registeredarchitect
( √ )
Mailing address: PO Box 1123
Street address : 96 Titraupenga Street
Suburb: Taupo Town/City: Taupo
PO Box 1123 Postcode: 3330
0800 23 22 66 Mobile: 021 2880017
After Hours 021 2880017 Fax : 07 378 2800
Email address: [email protected] Website:
DECLARATION
I
Date:
DB Consulting Engineers Ltd.
Clause
11/02/2021
Waiver/modification required
If Yes, provide details of the waivers or modifications below:
(a) complies with the building code clauses identified on this form
Signature:
Derek Booth [name of practitioner ] , LBP,State that I have applied the skill and care reasonably required of a competent design professional in carrying out or supervising the Restricted Building Work described on this form and that based on this I also state that the RBW:
Chartered professional engineer
The practitioner is a:
Design Entity or Company (optional)
PO Box/ Private Bag:
Phone Number
[List relevant clause numbers of building
code][Specify nature of waiver or modification of building code]
Note: The design of fire safety systems is only restricted building work when it involves small-to-medium apartment buildings
Waivers or modifications of the building code are required?
www.dbce.nz
Derek Booth

Job Number: 130728.09
Date: 11/02/2021
Element of Design
Demolition of on site buildings or later
demolition of design elements
Traffic management
Environmental
Hazardous substances
Foundations
Structural Steel & Lightweight Cold rolled
Steel Construction
Timber Construction
Masonry Construction
Concrete
Precast Elements
Modular Construction On Site
Site Specific Hazard:
DB Consulting Engineers Limited
Risk Register44 Heuheu Street, Taupo
Note: The following hazards were identified by the engineer at the time of design. This does not constitute a complete listing of hazards on site. All PCBU and workers are expected to be more familiar with their work processes and
the hazards present on the worksite.
Crane Machinery Rig/Vehicle movements, Collapse,
Scaffolding Collapse,Falling Debris, Heavy hand held
equipment, Vibration, Working at height, Slips trips
and falls. Noise, electrical connections.
N/A N/A
Material movements, Heavy lifting, drilling, working
at height off scaffolds, scaffolding collapse, Dust,
chemical burns, chemical exposure to coatings, cut,
pinch, crush hazards.
N/A N/A
Projecting reinforcement, tripping, chemical burns,
dust, high pressure equipment mixing .N/A N/A
Falls from height, manual handling, Hot work‐cutting
and welding on site, harmful substances,
operational/vehicle movements, overhead power
lines, scaffolding collapse. Drilling or shot firing on
Site
Combat Risk at Source: develop a method of works or procedures
such as a construction methodology, Isolate the hazard, adapt tools
or equipment to reduce the risk, substitue the hazardModerate
None None
Prop failure, overturning , heavy lifting. N/A N/A
Site Specific Risk Management:
Material Movements, Nail Guns, hand tools, hand
arm vibration,lifting, scaffolding collapse, saw
cutting, pinch/crush hazards.Moderate
Combat Risk at Source: develop a method of works or procedures
such as a construction methodology, Isolate the hazard, adapt tools
or equipment to reduce the risk, substitue the hazard
Any building constructed before 2000 is assumed to
contain asbestos unless prooved otherwise. An
asbestos assessor with a valid license must be
engaged if demolitions are planned or an existing
structure has been damaged. Similar actions are
required for other potentially harmful airborne
fibres or chemicals like paints , insulations, dust or
fumes.
ModerateCombat Risk at Source: develop a method of works or procedures
such as a construction methodology, Isolate the hazard, adapt tools
or equipment to reduce the risk, substitue the hazard
Falls/slips into excavations, collapsing earthworks,
projecting reinforcement, tripping, trenches
collapsing, location of underground services,
asbestos soil management ,operational rig/vehicle
movements/Noise
N/A N/A
Possible Hazards Level of risk Level of Risk Management Action Required and suggested actions
Crane Machinery Rig/Vehicle movements, Collapse,
Scaffolding Collapse,Falling Debris, Heavy hand held
equipment, Vibration, Working at height, Slips trips
and falls. Noise, electrical connections.
N/A N/A
ModerateCombat Risk at Source: develop a method of works or procedures
such as a construction methodology, Isolate the hazard, adapt tools
or equipment to reduce the risk, substitue the hazard
Safe access and egress, including for people with
disability, Traffic management, Loading bays and
ramps, Safe crossings,Exclusion zones,Site security,
Lay of work area
Ventilation, Noise control, Floor surfaces, slopes,
space for occupants, temperature control‐ cold,
heat, air movement, lightingN/A N/A

Job Number: 130728.09
Date: 11/02/2021
(a) Half‐yearly
‐ Veranda steelwork
‐ Steel carpark structure (beams, columns, braces etc.)
‐ Deck and balcony steelwork
‐ Exposed façade steelwork, both primary and secondary
structure
‐ Sub‐ground floor mild‐steel structures such as beams.
(b) 5‐yearly
(c) 10‐yearly ‐
‐
‐
(d) 25‐yearly ‐
‐
‐
Following seismic
shaking > SLS1 event
‐
DB Consulting Engineers Limited
Inspect all exposed, external reinforced concrete for signs of spalling. Repair as
required.
Inspections and repair as per b), c) and d) above.
Inspect/replace sealant that encloses structural mild‐steel components and/or timber
with mild‐steel fixings. This will typically include sealants around the perimeter of
precast panels. Note that 10 years is the expected useful life for many sealants.
This schedule of ongoing inspection and maintenance of structural elements shall be included with the O&M manuals and
provided to the Owner/Body Corporate and building managers.
Structural Maintenance Schedule
Inspect and repair sealant that encloses structural mild‐steel components and/or timber with mild‐
steel fixings.
Check exposed timber fixings for corrosion, repair as required.
Check all exposed steelwork that is not in a fully interior environment for signs of
corrosion. Repair protective coatings as required.
Wash down all exposed steelwork that is not in a fully interior
environment including:
Inspect samples of structural steel that is hidden from view but not enclosed within a
vapour barrier, and repair protective coatings as necessary. A typical example is a
veranda with built‐in steelwork. (Such steelwork should typically have duplex
protective coatings). Inspection may typically require removal of claddings and/or the
drilling of holes for borescope access. Repair as required.
Inspect all exposed, external timber. Repair as required.

Job Number: 130728.09
Date: 11/02/2021
To the Building Official, (Taupo District Council)
at
Reinforced Concrete B2/AS1
Structural Timber B2/AS1
Mild steel structure Alternative Solution
Yours faithfully,
Graham Byrne
For and on behalf of
DB Consulting Engineers Limited
DB Consulting Engineers Limited
Material Means of Compliance Details
Concrete cover to reinforcing has been selected in accordance with
NZS3101, Part 1, Section 3
Timber treatment has been selected in accordance with Table 1A of
B2/AS1
Compliance with Building Code Clause B2 – DurabilityThe purpose of this letter is to demonstrate how compliance with Clause B2 (Durability) of the Building Code will be achieved for the
above project. We can confirm that for specifically designed structural elements that are included within our design documentation:
Protection for mild steel has been specified in accordance with SNZ TS
3404 – Durability requirements for steel structures and components and
AS/NZS2312 – Guide to the protection of structural steel against
atmospheric corrosion by the use of protective coatings. This guide
works on a time to first maintenance basis and assumes on‐going
maintenance. Refer to the attached maintenance plan (optional but
recommended).
44 Heuheu Street, TaupoProposed cladding replacement

Job Number: 130728.09
Date: 11/02/2021
List of InspectionsNo.
1
2
3
4
5
Inspection Notes‐
‐
‐
‐
‐
‐
‐
Upon removal of cladding Before installation of the new cladding support
DB Consulting Engineers Limited
Internal beams and
connections
External beam and
connections
Schedule of inspections for44 Heuheu Street, Taupo
Item of inspection Timeframe
While all connections are clearly visible, pre‐line and prior to any building that prevents
remediation work being carried out.
While all connections are clearly visible, pre‐line and prior to any building that prevents
remediation work being carried out.
Refer to the building consent. The local authority may require engineering inspections and a PS4.
The above schedule does not necessarily represent the actual number of inspections to be undertaken. The number of inspections will depend on the
construction method, sequence of the works and whether or not unforeseen conditions or difficulties are encountered on site.
The above items of inspections are the minimum required to enable DBCE to issue a PS4‐Producer Statement Construction Review for the specific engineering
design items.
The above items of inspection do not cover work constructed in accordance with NZS3604:2011, for which inspections are to be undertaken by the Building
Consent Authority.
If Engineering inspections are required and DBCE are unavailable to attend, site inspections can be carried out by another qualified engineer.
A copy of this inspection schedule is to be held on site during the works, and the Contractor/Builder is to provide reasonable and safe access to enable works
to be inspected according to the schedule.
Upon removal of the
existing concrete structure
Before concrete treatment occurs
The level of construction monitoring recommended in this report is the engineers opinion. The local authority will make the final decision.

Drawings

Sheet No.
Scale:
Job Number:
Job Title:
Issue:
Drawing Title:
Sheet Size:
CONSULTING ENGINEERSdbcon.co.nz
Drawn By:Designer: Date:
Facade & Roof Upgrade
130728.09 01
A2
Towngate Building
44 Heuheu Street. Taupo
General Notes & Site Layout
NTS
11.02.2021M.S.
A
G.B.
6 100-(200)
FILLET
GENERAL BUTT
SINGLE BEVEL BUTT
SINGLE VEE BUTT
Weld All RoundSymbol
Miss, Unwelded Lengthor Space between Welds
Arrow PointingAt Joint
Reference Line
Weld SizeAcross the Throat
Site WeldSymbol
Hit Welded LengthElements in this area
remain 'as shown'when tail & arrow
are reversed
SQUARE BUTT
SINGLE 'U' BUTT
STUD
SURFACING
PLUG or SLOT
SINGLE 'J' BUTT
BEAD
Basic Welding Symbols
Basic Weld Symbol'This Side of Joint' (Arrow Side).A Fillet Weld in this case.
Basic Weld Symbol'Other Side of Joint'(Opposite to Arrow Side).A Fillet Weld in this case.
Welding Symbol Legend as per NZS 1554.1:2014
FOUNDATIONS1. The contractor is to ensure that all excavations are kept 'dry' and freeof excess water at all times.2. All foundations to be taken down to solid natural ground unless notedotherwise.3. The ground at the bottom of the foundations or at the level shown isto be capable or sustaining a net design of 100 kPa (300 kPa ultimate). Ifthe ground at the level shown is not adequate the foundations are to betaken deeper using weak mix concrete to a level to the satisfaction ofthe Engineer and Local Authority.4. No excavation shoud be left open overnight. If, between excavatingand pouring of the concrete the bottom has softened, a further 75mmmust be removed from the trench bottom, or more until a firm base isachieved.5. Foundation concrete to be 20 MPa grade at 28 days with a mincement content of 250 kg/m³ and a max free water/cement ratio of 0.66. Ground floor slab concrete to be 20 MPa grade at 28 days with a mincement content of 250 kg/m³ and a max free water/cement ration of 0.67. Max aggregate size to be 20mm well graded, through out unless notedotherwise. (e.g. column casings)8. The Contractor shall obtain approval for his method of concrete curingand for any additives to be used in the mix.9. It is the Contractors sole responsibility for ascertaining safe disposal ofany off-site excavated spoil. No claim resulting from abnormal tiprequirements will be entertained.10. Sub grade below Slab Base Course to be a suitable materialcompacted to 95% of max dry density determined by test NZS 4402 orequivalent.
GENERAL NOTES1. This set of drawings is to be read in conjunction with all relevantArchitects, Engineers and Specialists drawings and details.2. All figured dimensions to be taken in preference to scaleddimensions, all levels are in metres and dimensions in millimetres.3. Any discrepancies between this drawing and other information is tobe brought to the attention of the Engineer prior to thecommencement of works on site.4. The Main Contractor shall be responsible for the setting out andaccuracy of all dimensions.5. The Contractor is to ensure the stability and structural integrity ofany existing property at all times during works and is to be responsiblefor all propping and shoring as required.6. The contractor can obtain approval of an alternative to anyproprietary product noted in the drawings or specifications.7. Unless noted otherwise all materials and workmanship shall becarried out in accordance with current Codes of Practice.
TIMBER1. All timber framing to be a minimum of MSG8 to NZS 3603. Species, gradeand service moisture content to NZS 3602 treated to NZS 36402. All timber used in domestic housing to be in accordance with NZS 3604including all tying down and fixing etc.3. Rafter roofs to be designed in accordance with NZS 3604 to include allneccesary bracing.4. Specialist timber supplied such as LVL and Glulam timber etc to be inaccordance with relevant and current Standards both Australian and NewZealand5. All nails, bolts, screws, bracing straps and connectors to be in accordancewith NZS 3604.6. Limit holes and notches, checks and half housing to those allowablein NZS 3604.7. Durability of Structural Timber to be in accordance with Table 1A ofB2/AS1
CONCRETE1. All concrete work to be supplied and constructed in accordancewith NZS 3101, 3104 and 3109.2. Concrete Covers have been selected in accordance with NZS 3101,Part 1, Section 3
BLOCKWORK1. All blockwork to be supplied and constructed in accordance withNZS 4229 or NZS 4230.
REINFORCEMENT1. All bars to be 300E / 500E grade and to comply to AS/NZS 4671, and their use inaccordance with NZS 3109.2. Cover to all reinforcement to be 75mm min to all faces in ground conditions,30mm elsewhere, or as shown.3. No bars to be cut or bent on site without prior permission from the Engineerunless noted otherwise on drawing. Any cutting or bending to be carried out usingproper tools to avoid notching and be in accordance with NZS 3109Do not rebend or reheat bars.4. All bars to be adequately supported and to have suitable approved proprietaryspacer blocks and protection when ends exposed.5. Wire Fabric to be in accordance with AS/NZS 46716. All reinforcement to kept clean and free of rust, mill scale and any othercontamination that may reduce bonding capacity.7. Tying wire to be Mild drawn steel not less than 1.2mm diameter8. Minimum Laps to reinforcement as follows:-
Bar 300E 500E10 = 400mm 650mm12 = 500mm 750mm16 = 650mm 1000mm20 = 800mm 1250mm25 = 1000mm 1600mm32 = 1200mm 2000mmMesh = 450mm end, 250 side unless noted otherwise.
STEELWORK1. All steelwork to be grade 250 / 300 / 350 plus and prepared andfabricated in accordance with NZS 3404 as appropriate.2. All steelwork to be shot blasted and thoroughly cleaned of all dirt, rustand millscale and painted with zinc rich primer to seperate specification.3. Faces of steelwork within cavity to receive two coats of bitumasticpaint in addition. Applies to columns and beams.4. After erection of steelwork all areas of damaged paintwork to betouched up using enriched primer. This includes sections that have beenwelded on site.5. All bolts nuts and washers to be 8.8 Grade High Strength Steel to AS1252. Grade 4.6 Bolts nuts and washers to be mild steel to AS 1111.6. All bolts to have at least one washer which is twice the size of the boltdiameter.7. All bolts to project at least 2 threads beyond nut.8. Welding:
All welded connections to be metal arc welded and comply withAS 1554. Exposed welds to be ground flush and neatly finished.
All butt welds shall be full penetration.Welding of hollow sections shall have internal sections or backing
plates as necessary.Minimum size of all welds to be 6mm fillet weld.
9. All holes to be drilled or punched and not gas cut.7. The Steelwork Fabricator is to submit all fabrication drawings anddetails to the Engineer and Architect for approval prior to fabrication.8. The Steelwork Fabricator shall be responsible for all final connectiondetails.9. For all fire protection and cladding to steelwork see Architects detailsand requirements.10. All cold formed sections, purlins/girts etc to be in accordance withAS 1538 and shall have a minimum yield strength of 450 MPa.11. All hollow sections to be sealed with 3mm plate, seal welded.12. All structural plates to be 6mm thick minimum.13. All holding down bolts or other fixings to have a minimum yieldstress of 250 MPa.14. All dry pack mortar to be 30 MPa minimum.15. Durability of Structural Steel shall be maintained as per SNZ TS3404:2018
SITE AERIAL LAYOUTSCALE: N.T.S.
SITE INSPECTIONS are ESSENTIALwhere a PS4 is required
Rev. Status
1 2
A
3 4 5 6 - -
-
- -Sheet #
- - -A A A A A -
- -
-

HJK G F ABCDE
G.F.L.
F.F.L.
Frame Elevation - Gridline '1' on Heuheu StreetSCALE 1:100
1 2 3 4 5
G.F.L.
F.F.L.
Frame Elevation - Gridline 'A' on Ruapheu StreetSCALE 1:100
Sheet No.
Scale:
Job Number:
Job Title:
Issue:
Drawing Title:
Sheet Size:
CONSULTING ENGINEERSdbcon.co.nz
Drawn By:Designer: Date:
Facade & Roof Upgrade
130728.09 02
A2
Towngate Building
44 Heuheu Street. Taupo
Existing Elevations
As Noted
11.02.2021M.S.
A
G.B.
Existing concretestructure to be removedabove top of Parapet.
Existing 150 Thk.concrete panel
125 SHS Post
Existin
g 310UB
Existing PFC
Existing Purlinsat 1.2m crs.
Existing TimberFraming
Exist
ing
75 S
HSEx
istin
g 89
SHS
Existing 200 UB
Existing 150 PFC Concrete Beam Concrete Beam Concrete Beam Concrete Beam Concrete Beam Concrete Beam
Conc
rete
Colu
mn
Conc
rete
Colu
mn
Conc
rete
Colu
mn
Conc
rete
Colu
mn
Conc
rete
Colu
mn
Conc
rete
Colu
mn
Conc
rete
Colu
mn
Conc
rete
Colu
mn
Existin
g 310UB
Existin
g 310UB
Existin
g PFC
Existin
g PFC
Existing 230 PFC
Existing Purlinsat 1.2m crs.
Existing Purlinsat 1.2m crs.
Existing 150 Thk.concrete panel
Existing 150 Thk.concrete panel
Existing 150 Thk.concrete panel
Existing 150 Thk.concrete panel
Existing 150 Thk.concrete panel
Existing PFC Existing PFC Existing PFC
Existing Purlinsat 1.2m crs. Existing Purlins
at 1.2m crs.
Existing 150 Thk.concrete panel
Existing 150 Thk.concrete panel
Existing 150 Thk.concrete panel
Existing 150 Thk.concrete panel
Existing PFC Existing PFC Existing PFC
Existing timberframing
*Make good the existing concretewhich has been retained followingdemolitions. Treat exposed reinforcedconcrete with Sika FerroGard or similar.
*Make good the existing concretewhich has been retained followingdemolitions. Treat exposed reinforcedconcrete with Sika FerroGard or similar.
Existing timberframing
Existing concretestructure to be removedabove top of Parapet.
Existing timber framing
Existing timber framing Existing structure

HJK G F DE
1
Existing 250 UB
Existing Purlins ExistingFraming
Existin
g 200 UB
New
89x
6.0
SHS
Existin
g 150 PFC
with tim
ber packe
rsExisting230 PFC
Existing Purlins
SCALE 1:25-
1SECTION
A-
Heuheu Street
10mm platewelded to SHS.
10mm platewelded toSHS.
10mm platewelded toSHS.
0.55mm x 27mm G550 Z275Galvanised Steel Multi-Braceto framing front face
Existing timber extensionto steel purlin.
4- CT160 Bktsper crossing
Existing 90x45vertical studs
Provide 1- B350 bracket atjunction between each existingstud and existing purlin.
Eldoradostonecladding
Roof
6
3030
10.0 Thk Baseplate
predrilled for 2-M12
Gr.8.8 Bolts
230
10
0
35
SCALE 1:10-
5SECTION
K
1
1560
600
100
90
J
SCALE 1:20-
4SECTION
Existing 89 SHSNew89 SHS
Existing200UB
Pre-fab. timbercladding box
10.0 Thk. Plates,refer to Detail A
Exist
ing
PFC
Eldorado Stoneveneer cladding
0.55mm x 27mm G550Z275 Galvanised SteelMulti-Brace to framingfront face
6
89x6
.0 S
HS
100x80x10.0mmPlate predrilledfor 1/ M12Gr.8.8 Bolt
Pre-fabricatedtimber claddingbox.
SCALE 1:10-
ADETAIL
SCALE 1:20-
2SECTION
K
1
Eldorado stone veneer cladding
600
90
J
Exist
ing
Purli
n
Exist
ing
Purli
n
ExistingParapetBox Gutter
Cemintel Steppe Cladding
Existing 230 PFC
Existing TimberEaves Beam
B350 Bkt. at eachvertical stud
4- CT160 Bktsper crossing
0.55mm x 27mm G550Z275 Galvanised SteelMulti-Brace to framingfront face
0.55mm x 27mm G550 Z275Galvanised Steel Multi-Brace toframing front face
SCALE 1:20-
3SECTION
ExistingPurlin Existing
230 PFC
Existing150 PFC
New89x6.0 SHS
10.0 Thk Plate
predrilled for
2-M12 Gr.8.8 Bolts
170
6
Staggered M12bolts @ 600 crsto fix timberpackers to PFC's
5
-
New 89x5 SHSbetween PFCs
SCALE 1:20-
6SECTION
Existin
g purlin
Existin
g purlin
0.55mm x 27mm G550Z275 Galvanised SteelMulti-Brace to framingfront face
4- CT160 Bktsper crossing
4- CT160 Bktsper crossing
Sheet No.
Scale:
Job Number:
Job Title:
Issue:
Drawing Title:
Sheet Size:
CONSULTING ENGINEERS
dbcon.co.nz
Drawn By:Designer: Date:
Facade & Roof Upgrade
Floor on Gridline '1' & Details
130728.09 03
A2
Towngate Building
44 Heuheu Street. Taupo
Proposed Elevation of First
As Noted
11.02.2021M.S.
A
G.B.
F.F.L.
Existing 200 UBExisting PFC
Exist
ing
89 S
HS
Existing 75 SHS
Existing 150 PFC withnew timber packer
bolted at every 600mmN
ew 8
9x6.
0 SH
S
New
89x
6.0
SHS
4
-
3
-
1
-
Fix 2/ 90x45 SG8timber to the concretepanel with 2/ M12Trubolt stud anchors.Min. 90mm embedment.
Existing 230 PFC
11
04
10
04
7
04
11
04
10
04
Exist
ing
300m
msq
Con
c. C
olum
n
Gridline 1 (K-D) Heuheu Street ElevationSCALE 1:50
1
-
Futurewood compositecladding 30kg/m²
9
04
8
04
12
-
12
-
6
-
2
-
90x45 SG8
0.55mm x 27mmG550 Z275 GalvanisedSteel Multi-Brace
5
-
5
-
Pre-fabricated timbercladding boxes will beconstructed off site andfixed to the structuralelements shown .
Exist
ing
300m
msq
Con
c. C
olum
n
Exist
ing
300m
msq
Con
c. C
olum
n
Exist
ing
300m
msq
Con
c. C
olum
n
Exist
ing
300m
msq
Con
c. C
olum
n
Make good the existing concrete which hasretained following demolitions. Treat exposedreinforced concrete with Sika FerroGard orsimilar and re-concrete exposed surfaces tocreate a smooth surface.
Existing concrete beam
2/ 90x45 SG8 Timberswell nailed to Timberwindow framing
2/ 90x45 SG8 Timberswell nailed to Timberwindow framing
Weld 10mm plate tothe existing SHS forcladding connection.Similar to detail A.
Fix 2/ 90x45 SG8timber to the concretepanel with 2/ M12Trubolt stud anchors.Min. 90mm embedment.
Fix 2/ 90x45 SG8timber to the concretepanel with 2/ M12Trubolt stud anchors.Min. 90mm embedment.
0.55mm x 27mmG550 Z275 GalvanisedSteel Multi-Brace
90x45 SG8 at400mm centresmaximum
Eldorado Stone Cladding 60kg/m² Cemintel Steppe Cladding 10kg/m²
17
05
Existing 230 PFC
Existingverticalstuds.
Existing TimberEaves Beam
89x6.0 SHSbetween PFC's
89x6.0 SHSbetween PFC's
10mm platewelded tonew SHS.
10mm platewelded tonew SHS.
89x6 SHS
Existing timberframing
B350 brackets ateach vertical stud.
Top ofconcrete
Top ofconcrete
Provide 2- Ø3.15mm nails @ 200mm crsbetween pre-fabricated timber box andnew timber beam.
Screen 2 Screen 7
19
06

1
Existing 300 sqConc. Column
GridsG, D, C and B
Existing 150Thk. Conc. Panel
Double Timber Platefixed with M12TruBolts @ 400 crs.55
0
1200
600
50 150
SCALE 1:2003/05
11SECTION
Cemintel SteppeSheet CladdingSystem
Pre-fabricatedTimber Cladding Box
Timber Frame fixedwith M12 Coach
Screws @ 600 crs0.55mm x 27mm G550Z275 Galvanised SteelMulti-Brace to framingfront face
1
Existin
g 300 sq
Conc. Column
GridsG, D, C and B
550
600
50 150
See Architects Drawingsfor Window StudDetails
Double Timber Platenailed to new framingwith 1- Ø3.15 Nails@ 300 crs
Pre-fabricatedTimber Cladding Box
1200Cemintel SteppeSheet CladdingSystem
SCALE 1:2003/05
10SECTION
Timber Frame fixedwith M12 Coach
Screws @ 600 crs0.55mm x 27mm G550Z275 Galvanised SteelMulti-Brace to framingfront face
1
Existing 250 UB
Existing PurlinsExistingFraming
Existin
g
230 PFC
Existing Purlins
SCALE 1:2503
7SECTIONHeuheu Street
WIndowopening
0.55mm x 27mm G550 Z275Galvanised Steel Multi-Brace toexisting framing front face.
Existing timber extensionto steel purlin.
Provide 4- CT160 Bkts at junctionbetween the existing purlins andexisting eaves beam.
Existin
g
concre
te
beam
Existing timbermember fixed tothe underside ofthe existingconcrete beam
Provide 1- B350 bracket atjunction between each existingstud and existing purlin.
Existingconcretepanel
Existing 90x45vertical studs
Cemintel Steppe Cladding
Roof
1
Existing 300 sqConc. Column
550
600
50 150
Pre-fabricatedTimber Cladding Box
1200
SCALE 1:2003
9SECTION
H
Existing200UB
New89 SHS
See ArchitectsDrawings for WindowStud Details
10.0 Thk. Plates,refer to Detail A
on Sht 03
1- M12 CoachScrews @ 600 crs.
Cemintel SteppeSheet CladdingSystem
Double Timber Plate nailedto new framing with1- Ø3.15 Nails @ 300 crs
0.55mm x 27mm G550Z275 Galvanised SteelMulti-Brace to framingfront face
SCALE 1:2003
8SECTION
1
Existing 300 sqConc. Column
550
600
Pre-fabricatedTimber Cladding Box
1200
1- M12 CoachScrews @ 600 crs.
H
Existing200UB
New89 SHS
10.0 Thk. Plates,refer to Detail A
on Sht 03
Existing 150Thk. Conc. Panel
Double Timber Platefixed with M12TruBolts.
Cemintel SteppeSheet CladdingSystem
0.55mm x 27mm G550Z275 Galvanised SteelMulti-Brace to framingfront face
1
G, D, C and B
600
300
SCALE 1:20-
13SECTION
Exist
ing
Purli
n
Exist
ing
Purli
n
Existin
g 300 sq
Conc. Column
B350 Bkt. at eachvertical stud
Existing timber
0.55mm x 27mm G550 Z275Galvanised Steel Multi-Braceto framing front face
ABCD
1
Existin
g 300 sq
Conc. Column
SCALE 1:2003/05
12SECTION
F/E
Pre-fabricated timbercladding box.
854
450
0.55mm x 27mm G550Z275 Galvanised SteelMulti-Brace to framingfront face
See Architects Drawingsfor Window StudDetails
1- M12 CoachScrews @ 600 crs.
Double Timber Plate nailedbetween timber plate & lintelwith Ø3.15 Nails @ 200 crs
Cemintel SteppeSheet CladdingSystem
Sheet No.
Scale:
Job Number:
Job Title:
Issue:
Drawing Title:
Sheet Size:
CONSULTING ENGINEERS
dbcon.co.nz
Drawn By:Designer: Date:
Facade & Roof Upgrade
Gridline '1' Details
130728.09 04
A2
Towngate Building
44 Heuheu Street. Taupo
Proposed First Floor on
As noted
11.02.2021M.S.
A
G.B.
13
-
11
04
10
04
11
04
10
04
7
04
11
04
10
04
7
04
14
05
15
05
Exist
ing
300m
msq
Con
c. C
olum
n
2/ 90x45 SG8 Timberswell nailed to Timberwindow framing
Gridline 1 (D-A) Heuheu Street ElevationSCALE 1:50
Existing125 SHS Post
Existing 230 PFC
Exist
ing
300m
m sq
Conc
. Col
umn
Exist
ing
300m
m sq
Conc
. Col
umnFix 2/ 90x45 SG8
timber to the concretepanel with 2/ M12Trubolt stud anchors.Min. 90mm embedment.
Exist
ing
300m
msq
Con
c. C
olum
n Fix 2/ 90x45 SG8timber to the concretepanel with 2/ M12Trubolt stud anchors.Min. 90mm embedment.
Fix 2/ 90x45 SG8timber to the concretepanel with 2/ M12Trubolt stud anchors.Min. 90mm embedment.
Futurewood compositecladding screen 30kg/m²
Cemintel SteppeCladding 10kg/m²
Eldorado Stone Cladding 60kg/m²
17
05
2/ 90x45 SG8 Timberswell nailed to Timberwindow framing
Top ofconcrete
Top ofconcrete
Top ofconcrete
Screen 3
XX
04
19
06

G.F.L.
F.F.L.
Gridline 'A' Ruapehu Street ElevationSCALE 1:50
1 2
3 4 5
A
Existing PFC
ExistingPurlins
ExistingPFC
Double Timber Platefixed with M12TruBolts @ 600 crs.Stagger Tru-bolts.
Existing300sqColumn
SCALE 1:20-
16SECTION
Provide 1- B350 bracket atjunction between each existingstud and existing purlin.
Existing 90x45vertical studs
Exist
ing
timbe
r str
uctu
re
A
1
Existing 300 sqConc. Column
Pre-fabricatedTimber Cladding Box
Cemintel Steppe SheetCladding System over apre-fab timber cladding box
SCALE 1:20-
14SECTION
Double Timber Platefixed with M12TruBolts @ 600 crs.
1- M12 CoachScrews @ 600 crs.
0.55mm x 27mm G550 Z275Galvanised Steel Multi-Braceto framing front face
A
1
Existing 300 sqConc. Column
Pre-fabricatedTimber Cladding Box
Cemintel Steppe SheetCladding System over apre-fab timber cladding box
SCALE 1:20-
15SECTIONDouble Timber Platefixed with M12TruBolts @ 600 crs.
1- M12 CoachScrews @ 600 crs.
1- M12 Coach Screws@ 600 crs.
1- M12 Coach Screws@ 600 crs.
See Architects Drawingsfor Window StudDetails
See Architects Drawingsfor Window StudDetails
Double Timber Plate nailedbetween timber plate & lintelwith Ø3.15 Nails @ 200 crs
Double Timber Plate nailedbetween timber plate & lintelwith Ø3.15 Nails @ 200 crs
0.55mm x 27mm G550Z275 Galvanised SteelMulti-Brace to framingfront face
1
ExistingPurlins
CemintelSteppe
Cladding
Galvanised35x3.0 SHSScreen Framing.Fully welded
VerticalScreeningTimber Boards
0.55mm x 27mm G550Z275 Galvanised SteelMulti-Brace to framingfront face.
Timber beam onHeuheu street.PFC on Ruapehustreet.
Existing 90x45vertical studs
Provide 1- B350 bracketat junction betweeneach existing stud andexisting purlin.
Provide 4- CT160 Bkts atjunction between theexisting purlins andexisting eaves beam.
Windowopening
3mm fillet weldbetween top SHS andsteel angle.
2No. GalvanisedB350 bracket at studand angle junction.
150x90x8 UA200mm long ateach existing studlocation.
12mm galvanisedrod with 3mm filletweld to SHS.
6mm x 100mm square platewith 2/ M12 Galv. Tru-boltsinto existing concrete panel.
Concretepanel
All externalsteelwork shallHDG390 galv.
Sheet No.
Scale:
Job Number:
Job Title:
Issue:
Drawing Title:
Sheet Size:
CONSULTING ENGINEERS
dbcon.co.nz
Drawn By:Designer: Date:
Facade & Roof Upgrade
First Floor on Gridline 'A'
130728.09 05
A2
Towngate Building
44 Heuheu Street. Taupo
Proposed Elevations
NTS
11.02.2021M.S.
A
G.B.
18
-
Existing310 UB
Existin
g PFC
Existin
g PFCExisting
230 PFC
11
04
10
04
07
04
11
04
10
04
11
04
10
04
07
04
16
-
Existing310 UB
Existing310 UB
14
05
15
05
Fix 2/ 90x45 SG8timber to the concretepanel with 2/ M12Trubolt stud anchors.Min. 90mm embedment.
Cemintel Steppe Cladding 10kg/m²Eldorado Stone Cladding 60kg/m²
Futurewood compositecladding screen 30kg/m²
17
-
17
-
Futurewood compositecladding screen 30kg/m²
Fix 2/ 90x45 SG8timber to the concretepanel with 2/ M12Trubolt stud anchors.Min. 90mm embedment.
Fix 2/ 90x45 SG8timber to the concretepanel with 2/ M12Trubolt stud anchors.Min. 90mm embedment.
Fix 2/ 90x45 SG8timber to the concretepanel with 2/ M12Trubolt stud anchors.Min. 90mm embedment.
SCALE 1:20 -17SECTION
SCALE 1:10 -18SECTION
Galvanised35x3.0 SHSScreen Framefully welded.
Screen 4
2No. B350 bracketat stud and anglejunction. Run M12bolts throughbottom plate.
Existing90x45 studs
0.55mm x 27mm G550 Z275Galvanised Steel Multi-Braceto framing front face.
150x90x8 UA200mm long ateach existingstud location.
Screen 5 Screen 6
19
06

1
Existing 300 sqConc. Column
50 150
F EExisting 300 sqConc. Column
300
2850
Existing 150Thk. Conc. Panel
86 86
Existing 150Thk. Conc. Panel
35 SHS welded frame
2678
Existing 150Thk. Conc. Panel
Ø12mm Galv.Rods
100 sq x 6.0mm plate with2/ M12 Galv. Tru-boltsinto existing concrete panel.
All external steelworkto HDG390 galvanised
1
Existing 250 UB
Existing Purlins
ExistingFraming
Existing Purlins
SCALE 1:25 0419SECTION
0.55mm x 27mm G550 Z275Galvanised Steel Multi-Brace toexisting framing front face.
Existing timberextension to steelpurlin.
Provide 4- CT160 Bkts at junctionbetween the existing purlins andexisting eaves beam.
Existin
g
concre
te
beam
Provide 1- B350 bracket atjunction between each existingstud and existing purlin.
Existingconcretepanel
Existing 90x45vertical studs
CemintelSteppe
Cladding
Exist
ing
timbe
r str
uctu
re
WIndowopening
Provide 2- B350 brackets atjunction between each existingstud and the new top plate tostrenghten this area
New 90x45vertical studs
Provide 2- B350 brackets atjunction between new studs andthe existing bottom plate tostrenghten this area
1200
Provide 2- B350 brackets atjunction between new studs andthe existing bottom plate tostrenghten this area
0.55mm x 27mm G550 Z275Galvanised Steel Multi-Brace toexisting framing front face.
Provide 2- B350 brackets atjunction between each existingstud and the new top plate tostrenghten this area
New 90x45vertical studs
F E2850
86 86
35 x 3.0 SHS
Existing ParapetStructure
Existing ParapetStructure
3600
2678
==
==
35 x 3.0 SHS
35 x 3.0 SHS
35 x 3.0 SHS
35 x 3.0 SHS
6.0 Thk. Endcap predrilledfor 2/ M12 Chemset
Anchor each end intoexisting concrete columns.
200 PFC Beam
35 x
3.0
SHS
35 x
3.0
SHSGalvanised 35 x 3.0 SHS
Support Frame to be 3.0fully fillet welded
Exist
ing
300
sq. C
onc.
Col
umn
Exist
ing
300
sq. C
onc.
Col
umn
Existing 300 sq Conc. Columnto be trimmed to match top
of Parapet Structure
Top of existing150 Thk. Conc. Wall
All external steelworkto HDG390 galvanised
1
Existing 300 sqConc. Column
50 150
Existing 300 sqConc. Column
60
2850
Existing 150Thk. Conc. Panel
86 86
Existing 150Thk. Conc. Panel
35 SHS welded frame
2678
F E
200 PFC Beam35 x 3.0 SHS Stand-offs
Ø12mm Galv. rodswith 3mm fillet weldto SHS.
100 sq x 6.0mm plate with2/ M12 Galv. Tru-boltsinto existing concrete panel.
300
200 PFC Beam with 6.0 Thk.Endcap predrilled for2/ M12 Chemset Anchorseach end into existingconcrete columns.
Exist
ing
300
sq. C
onc.
Col
umn
35 x
3.0
SHS
35 x 3.0 SHS (stand-offs)
Sheet No.
Scale:
Job Number:
Job Title:
Issue:
Drawing Title:
Sheet Size:
CONSULTING ENGINEERSdbcon.co.nz
Drawn By:Designer: Date:
Facade & Roof Upgrade
130728.09 06
A2
Towngate Building
44 Heuheu Street. Taupo
Screen #7 & Cladding Details
As Noted
11.02.2021M.S.
A
G.B.
20-
21-
SCALE 1:20 -20SECTION
SCALE 1:20 -21SECTION
22-
SCALE 1:20 -22SECTION
23-
SCALE 1:25 -23SECTION
SCREEN #7 ELEVATIONSCALE 1:20
*Galvanised steel beam and connections

Printed:
9
Project:
SHEET TITLE: SHEETProposed Fi rs t F loor Plan
Scale:
Drawn:
PHONE: (07) 378 2067
0274 822 038
Jackie Robinson
Architecture To w n g a te B u i l d in g F a c e l i f t4 4 H e u h e u S t r e e t , Ta u p o
NOTES:
Job # 2023
29/01 /202 1
U P D AT E D P R E L I M I N A R Yo n A 2 s h e e t s
W2
41
,50
0 x
4,7
87
W2
51
,50
0 x
4,9
88
W2
61
,50
0 x
4,9
88
W2
71
,50
0 x
4,9
88
W0
51,5
00
x 5
,95
0
W061,500 x 2,760
W07800 x 1,800
W08800 x 1,800
W09800 x 1,800
W1
61
,50
0 x
1,8
00
W1
56
00
x 2
,000
W1
46
00
x 2
,000
W1
36
00
x 2
,000
W1
21
,50
0 x
1,8
00
W191,500 x 3,206
W171,500 x 4,022
W181,500 x 3,310
W231,500 x 2,976
W221,500 x 3,289
W211,500 x 3,310
W201,500 x 3,206
W111,500 x 1,500
W101,500 x 1,800
A
A
B
B
C
C
D
D
E
E
F
F
G
G
H
H
J
J
11
22
33
44
55
K
K
40,567
4,8
49
3,739
1,4
00
4,8
50
1,2
00
5,0
50
1,2
00
5,0
50
1,2
00
5,0
50
75
0
1,560 4,086 1,200 3,372 1,200 3,268 823 2,912 823 7,840 1,200 3,345 1,200 3,039 1,560
55
0
600
310 310
10
0
100
100
31
55
0
10
0
A12
A12
B13
B13
C14
C14
D15
D15
Existing parapet to remain
Line of new parapet c ladd ing above
New light weight steel framing toframed exist ing concrete co lumns
New Composi te screening
250UB21 suppor ted by200 UB1 7
New Composi te sc reen ingNew Composi te sc reen ing
Column-03
Column-02Eldorado Stone veneer
Entry Column Entry Column
1,200 Co lumn
1,200 Co lumn
1,200 Co lumn
1,200 Co lumn1,200 Column1,200 Co lumn 1,200 Co lumn1,200 Co lumn
Exis ting concre te co lumns
Line of new parapet c ladding aboveLine of new parapet c ladding above
NOTE:Ground floor & first floor west walls2/13mm Fireline Gib Board
exist ing wall framing
new wall framing
L e g e n d
removed wa ll framing
31
0U
B3
7
25
0U
B2
1
25
0U
B2
1
25
0U
B2
1
25
0U
B2
1
25
0U
B2
1
25
0U
B2
1
25
0U
B2
1
3 1 0 U B 3 7
3 1 0 U B 3 7
3 1 0 U B 3 7
2 5 0 N F B 2 5
25
0U
B2
1
2 5 0 N F B 2 5
ki tc h en /s ta f fm e n s
w o m e n s
o f f ic e sp ac e
o f f ice
of f ic e o f f ice of f ice of f ice o f f ice of f ic e o f f ice
o f f ice
o f f ice
o f f ice
o f f ice
o f f ic e s p a c e
s to r e
sto re
s to r e
sto re
sta ir s
li ft
s t o r e
sc
re
en
-0
1
s c r e e n - 0 2 s c r e e n - 0 3
sc
re
en
-0
4s
cre
en
-0
5
S c r e e n L e g e n d
01 - 10 @ 90 x 25 15 @ 40 x 30Length-8 ,28902 - 12 @ 90 x 25 15 @ 40 x 30Length-2 ,70003 - 12 @ 90 x 25 15 @ 40 x 30Length-2 ,70004 - 10 @ 90 x 25 15 @ 40 x 30Length-2 ,70005- 4 @ 90 x 25 6 @ 40 x 30Length-2 ,70006 4 @ 90 x 25 6 @ 40 x 30Length-2 ,70007- 10 @ 90 x 25 13 @ 40 x 30Length-3 ,600
fo ye r
of f ice
sta i rs
sc
re
en
-0
6
ex
istin
g
ex
istin
g
ex
is
tin
g
ex
istin
g
ex
istin
g
ex
istin
g
ex
istin
g
ex
istin
g
ex
istin
g
e x i s t i n g
e x i s t i n g
e x i s t i n g
e x i s t i n g
e x i s t i n g
N O T E :W01 & 02 L inte l
240 x 90 with 'G' f ixing
N O T E :Except fo r W01 &02, No new l intelrequ ired to newwindows as they
are within exis tingopen ings
e x i s tp a r a p e t
e x i s tp a r a p e t
colu
mn
to w
all
e n t r ys c r e e n 0 7
E n t r y C a n o p y S c r e e n
60 @ 90 x 25 40 @ 40 x 30Length- 1 ,280
Column-0 1Eldorado Stone veneer
1 : 1 0 0
Existing 250UB has been checked to take additional loading from the new vertical timber slats.

Design Features Report
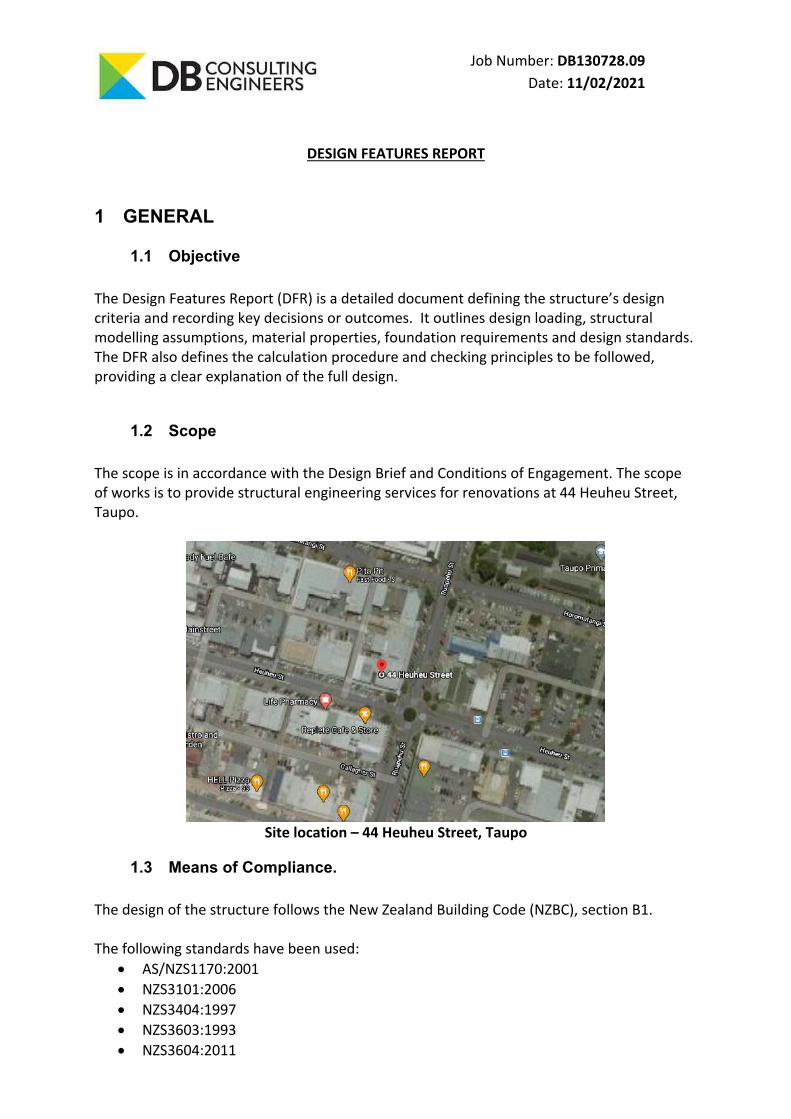
DESIGN FEATURES REPORT
Job Number: DB130728.09
Date: 11/02/2021
1 GENERAL
1.1 Objective
The Design Features Report (DFR) is a detailed document defining the structure’s design criteria and recording key decisions or outcomes. It outlines design loading, structural modelling assumptions, material properties, foundation requirements and design standards. The DFR also defines the calculation procedure and checking principles to be followed, providing a clear explanation of the full design.
1.2 Scope
The scope is in accordance with the Design Brief and Conditions of Engagement. The scope of works is to provide structural engineering services for renovations at 44 Heuheu Street, Taupo.
Site location – 44 Heuheu Street, Taupo
1.3 Means of Compliance.
The design of the structure follows the New Zealand Building Code (NZBC), section B1. The following standards have been used:
AS/NZS1170:2001
NZS3101:2006
NZS3404:1997
NZS3603:1993
NZS3604:2011

DESIGN FEATURES REPORT
Job Number: DB130728.09
Date: 11/02/2021
2 THE STRUCTURE
2.1 General
Proposed renovations include replacing the current cladding and glazing on the Heuheu and Ruapheu Street front elevations. The cladding and parapet are currently supported with timber elements connected to the concrete frame of the main building. Following the removal of the existing cladding and glazing, the existing connections between the timber and main structure will need to be strengthened to support the new cladding weight. The condition of the existing timber and main structure has been checked and verified with the available council drawings on site.
Proposed elevation – 44 Heuheu Street, Taupo
An area of concrete above the existing entrance on Heuheu Street will also be removed as part of the facelift to the building. This will have no effect on the existing structural integrity apart from reducing seismic weights in this area. The existing entrance canopy will also support new vertical timber slats as indicated in the attached drawings.

DESIGN FEATURES REPORT
Job Number: DB130728.09
Date: 11/02/2021
3 DESIGN LOADS
3.1 General
For the purposes of consideration of loading, this Importance Level 2 structure has been designed in accordance with AS/NZS 1170.0:2002.
For ULS condition:o Importance level 2o 50year design lifeo 1/500 year for Wind Designo 1/500 year for Earthquake Design
For SLS1 condition:o Importance level 2o 50year design lifeo 1/25 year for Wind Designo 1/25 year for Earthquake Design
Table 3.3‐ NZS1170.0

DESIGN FEATURES REPORT
Job Number: DB130728.09
Date: 11/02/2021
3.2 Load Combinations
Loading combination shall be in accordance with NZS 1170‐0
Ultimate Limit States for Stability
Ed=0.9G
Ed = 1.35G
Ed=1.2G+1.5Q
Ed=1.2G+Wu+ΨcQ
Ed = 0.9G+Wu
Ed= G+Eu+ΨEQ
Ed=1.2G+Su+ΨcQ (if applicable)
Ultimate Limit States for Strength
Ed = 1.35G
Ed=1.2G+1.5Q
Ed=1.2G+Wu+ΨcQ
Ed = 0.9G + Wu
Ed= G+Eu+ΨEQ
Ed=1.2G+Su+ΨcQ (if applicable)

DESIGN FEATURES REPORT
Job Number: DB130728.09
Date: 11/02/2021
Serviceability Limit States One or a combination of the following with appropriate short‐term and long‐term values from above.
G
ΨsQ
ΨlQ
Ws
Es
3.3 Applied Vertical Loads
3.3.1 Dead loads
Applied dead loads for the cladding structures are taken from a range of 0.10kPA to 0.60kPA depending on the cladding type.
3.3.2 Imposed loads
An imposed action of 0.25kPA on the roof is provided to cover situations not covered elsewhere in the loading Standards, such as stacking of materials for maintenance or for local accumulations of hail.
3.4 Wind Loads
In accordance with AS/NZS 1170.2:2002.

DESIGN FEATURES REPORT
Job Number: DB130728.09
Date: 11/02/2021
3.4.1 Applied wind loadings to structure

DESIGN FEATURES REPORT
Job Number: DB130728.09
Date: 11/02/2021

DESIGN FEATURES REPORT
Job Number: DB130728.09
Date: 11/02/2021
3.4.2 Glazing
Wind loads for glazing to be in accordance with the NZ Building Code and NZS 4223:1985, Code of practice for glazing in buildings.
3.5 Snow and Ice Loads
The structure is in Cambridge, and the elevation is 65m above sea level. Snow and ice are/are not significant loads for this structure.
3.6 Seismic Loads
3.6.1 Seismic Analysis
The seismic analysis has been completed in accordance with AS/NZS 1170.5:2002, using the equivalent method as the building is less than 10m tall NZS1170.5 (6.1.3.1.)
3.6.2 Seismic Weights
The ULS live load in an Earthquake is ΨEQ, where ΨE=0 for non‐floor type roofs. No allowance for ice has been provided.
3.6.3 Accidental Eccentricity
Accidental eccentricity of loading from centre of mass to be +0.1B, where B is the dimension of the building orthogonal to the direction of the loading being considered.
3.6.4 Seismic Coefficients
Design Spectra are in accordance with AS/NZS 1170.5:2002 for site subsoil class D providing a spectral shape factor of 3 and a Zone factor of 0.28 for Taupo.
For the purposes of the analysis, the project x and y directions are considered to be the project east and north directions respectively.

DESIGN FEATURES REPORT
Job Number: DB130728.09
Date: 11/02/2021

DESIGN FEATURES REPORT
Job Number: DB130728.09
Date: 11/02/2021
3.6.5 Period of vibrations
Where the equivalent static method of analysis is used, the largest translational period in the direction under consideration, T1, may be calculated using the Rayleigh Method.
3.6.6 P-Delta Effects
Maximum value of the stability coefficient is .01 from above, P‐Delta effects for ULS are not required.

DESIGN FEATURES REPORT
Job Number: DB130728.09
Date: 11/02/2021
3.6.7 Parts and Portions
All parts and portions are designed in accordance with AS/NZS1170.5:2002 section 8.
Seismic coefficient for new cladding. Used for connection calculations.
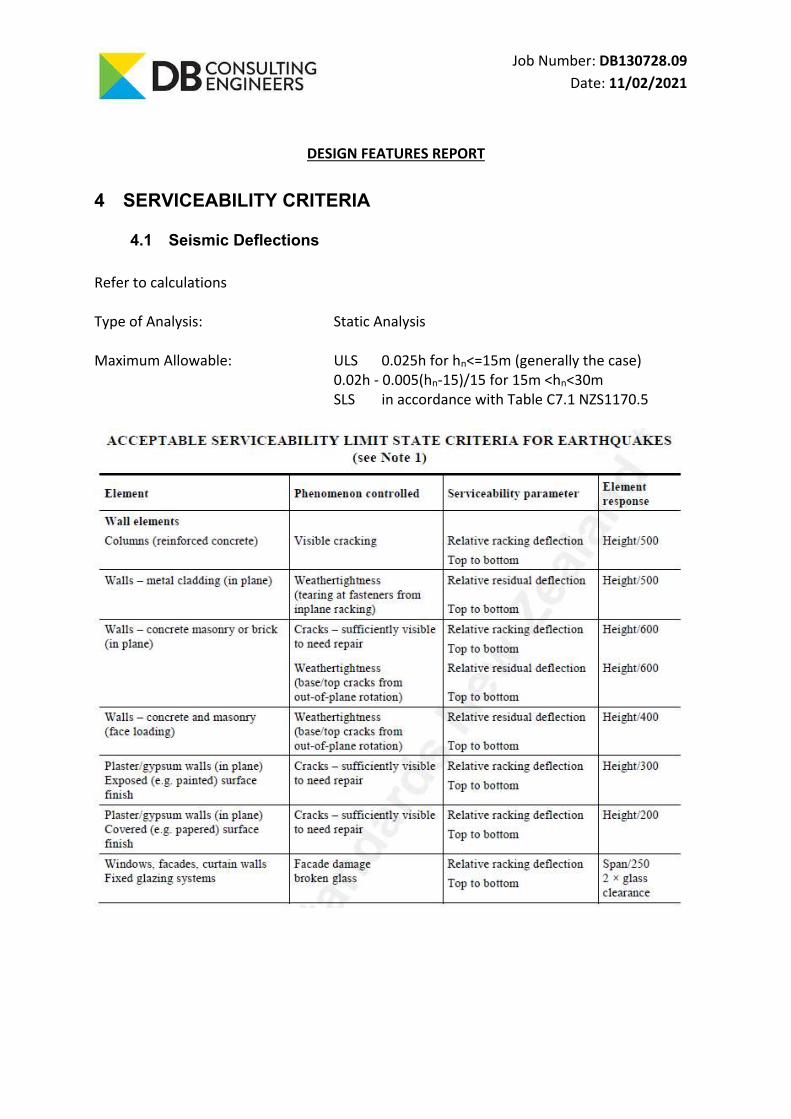
DESIGN FEATURES REPORT
Job Number: DB130728.09
Date: 11/02/2021
4 SERVICEABILITY CRITERIA
4.1 Seismic Deflections
Refer to calculations
Type of Analysis: Static Analysis
Maximum Allowable: ULS 0.025h for hn<=15m (generally the case) 0.02h ‐ 0.005(hn‐15)/15 for 15m <hn<30m SLS in accordance with Table C7.1 NZS1170.5

DESIGN FEATURES REPORT
Job Number: DB130728.09
Date: 11/02/2021
Allowable steel frame deflections follow recommendations from steel construction New Zealand set out below.

DESIGN FEATURES REPORT
Job Number: DB130728.09
Date: 11/02/2021
4.2 Wind Deflections
Particular elements are designed to the recommended serviceability deflection limits of AS/NZS 1170.0:2002, Table C1. Allowable steel frame deflections follow recommendations from steel construction New Zealand set out above.

DESIGN FEATURES REPORT
Job Number: DB130728.09
Date: 11/02/2021
4.3 Gravity Deflections
Particular elements are designed to the recommended serviceability deflection limits of AS/NZS 1170.0:2002, Table C1.
4.4 Design Life for Durability
4.4.1 Design Life
Foundations: 50 yrs. Superstructure: 50 yrs. Note: non‐structural elements and cladding specification are not covered by this design features report.
4.4.2 Durability Provisions
The designed structural elements that were included in the design documentation comply with the applicable verification methods:
Material Means of Compliance
Details
Reinforced concrete
B1/VM1 Compliance with cover and concrete quality requirements for B1/VM1 are in accordance with NZS3101:2006
Structural timber B1/VM1 The timber has been specified in accordance with NZS3604:2004. The quality of timber treatment is dependent on the QA systems of manufacturers,

DESIGN FEATURES REPORT
Job Number: DB130728.09
Date: 11/02/2021
4.4.3 Summary of Surface Treatments
The table below summarises the surface treatments for the structural steel elements covered by this design features report.
Table: Schedule of Surface Treatments for Structural Steel elements
Element Design Life
Exposure Category
Surface Treatment in accordance with NZS/AS 2312
Time to first major maintenance
Exposed exterior Structural Steelwork to structure ‐ Portal Rafters
50 Medium Metal Spray Zinc 150 microns NZS 2312 ‐ TZ150
25+
Canopy structures unpainted and painted
50 Medium Hot Dipped Galvanised (after fabrication) 85 microns NZS 2312 ‐ HDG600 Alternative + decorative paint* system HDG + 80 microns NZS2312 ‐ HDG600P2 (*paint system by architect)
25+
Interior Structural Steelwork
50 Low Painted – Zinc Primer with 2 coats Acrylic Latex.
15‐25
suppliers and the onsite contractors and sub‐contractors. Refer to the contractor’s PS3 and QA records where available.
Mild steel structure
B1/VM1 Protective coatings have been specified in accordance with AS/NZS 2312:2014 and SNZ TS 3404:2018. . The quality of mild steel protective coatings is dependent on: Steel preparation Quality and production consistency of the
coating products QA of the application and curing QA of the handling, protection and repair
Refer to: Contractor’s and sub‐contractor’s PS3s and QA
records where available Third‐party inspection and rest results On‐going maintenance plan (attached)

DESIGN FEATURES REPORT
Job Number: DB130728.09
Date: 11/02/2021
4.4.4 Maintenance Requirements of Surface Treatments
This schedule of ongoing inspection and maintenance of structural elements shall be included with the O&M manuals and provided to the Owner/Body Corporate and building managers.
Inspection/Maintenance timeframe and item
(a) Half‐yearly Wash down all exposed steelwork that is not in a fully interior environment including:
Veranda steelwork
Steel carpark structure (beams, columns, braces etc)
Deck and balcony steelwork
Exposed façade steelwork, both primary and secondary structure
Sub‐ground floor mild‐steel structures such as beams.
(b) 5‐yearly Inspect and repair sealant that encloses structural mild‐steel components and/or timber with mild‐steel fixings.
(c) 10‐yearly Check exposed timber fixings for corrosion, repair as required.
Inspect/replace sealant that encloses structural mild‐steel components and/or timber with mild‐steel fixings. This will typically include sealants around the perimeter of precast panels. Note that 10 years is the expected useful life for many sealants.
Check all exposed steelwork that is not in a fully interior environment for signs of corrosion. Repair protective coatings as required.
(d) 25‐yearly Inspect samples of structural steel that is hidden from view but not enclosed within a vapour barrier and repair protective coatings as necessary. A typical example is a veranda with built‐in steelwork. (Such steelwork should typically have duplex protective coatings). Inspection may typically require removal of claddings and/or the drilling of holes for borescope access. Repair as required.
Inspect all exposed, external timber. Repair as required.
Inspect all exposed, external reinforced concrete for signs of spalling. Repair as required.
Following seismic shaking > SLS1 event
Inspections and repair as per b), c) and d) above.
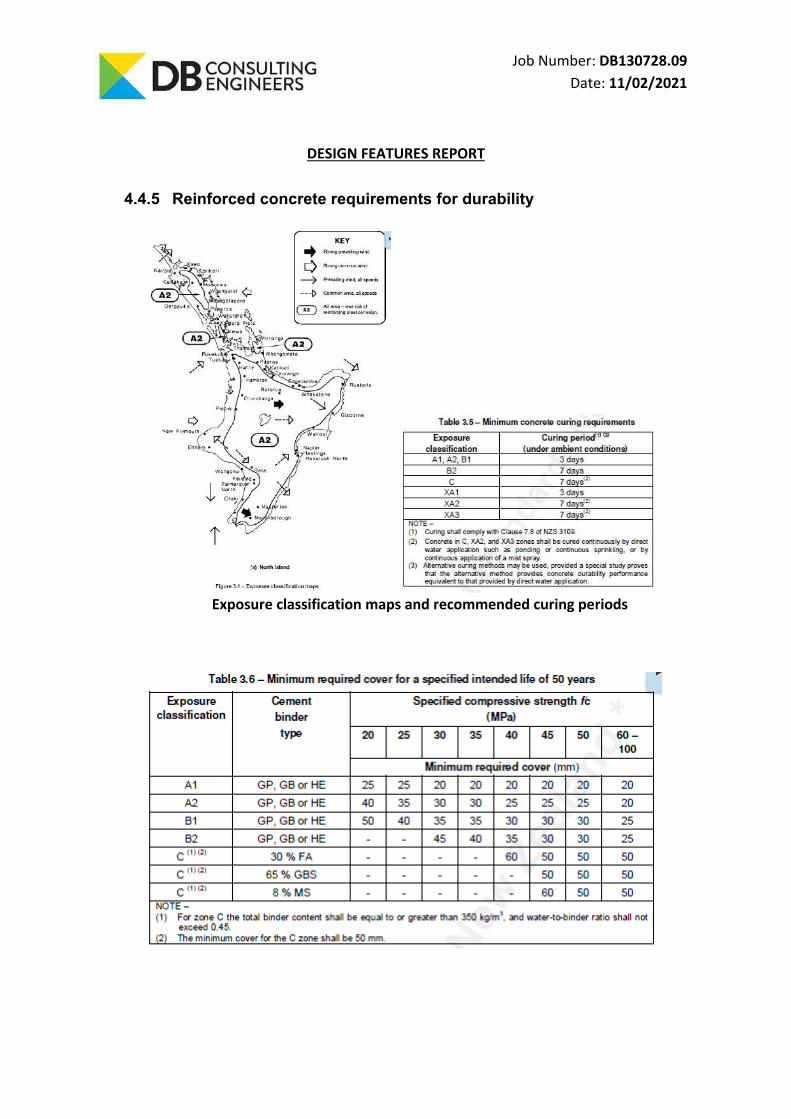
DESIGN FEATURES REPORT
Job Number: DB130728.09
Date: 11/02/2021
4.4.5 Reinforced concrete requirements for durability
Exposure classification maps and recommended curing periods

DESIGN FEATURES REPORT
Job Number: DB130728.09
Date: 11/02/2021
5 DRAWING AND SPECIFICATION NOTES The purpose of this section is to ensure that the design requirements are included in the drawings or the specification.
5.1 Floors
5.1.1 Design Loads
Refer to Section 3 DESIGN LOADS, section 4.3 Gravity Deflections .
5.1.2 Propping Requirements
The temporary propping and handling of all precast and insitu concrete and structural steel capacity including roof trusses shall be in accordance with the specification. Generally, this will be the Contractor’s responsibility to ensure compliance with the Building Code and all health and safety regulations.
5.2 Material Properties (Typical)
5.2.1 Concrete Strengths
Foundations: 20 MPa Ground Floor: 30 MPa Walls 40 MPa
5.2.2 Reinforcing Steel
Slab Reinforcement 500 MPa Concrete wall reinforcement 500 MPa

DESIGN FEATURES REPORT
Job Number: DB130728.09
Date: 11/02/2021
5.2.3 Structural Steel
Rolled Steel Sections: 300MPa – Grade 300 L0 to AS 3679.1
Steel Plate General 250 MPa – Grade HA250 to AS1594
Steel Plate (special) 300 MPa – Grade 300 MOD
CHS Hollow Sections AS 1163 ‐ 350MPa – grade
RHS Hollow Sections: AS 1163 ‐ 350MPa – grade
Bolt Grades: Grade 4.6 mild steel and grade 8.8 high strength
5.2.4 Structural Timber
Roof Framing MSG 8/H1.2
Roof sarking plywood CD/H3
Beams / Lintels MSG 8/H1.2
Floor Framing MSG 8/H1.2
5.2.5 Timber Connections
In roof space Galvanised
Exterior exposed Grade 304 Stainless
Interior, enclosed mild steel

DESIGN FEATURES REPORT
Job Number: DB130728.09
Date: 11/02/2021
6 CONSTRUCTION MONITORING
The design is based on the verification of specific design aspects of the construction by a suitably qualified Chartered Professional Engineer in accordance with EngNZ.
6.1 Inspection Requirements
The following schedule of inspections is to be met to meet the required level of Construction Monitoring, and to ensure the intent of the design is met:
Upon removal of the existing cladding and parapet to inspect the
existing structure condition
Inspection of new connections to the existing timber indicated on the
DBCE structural drawings.
Upon removal of the concrete structure and after any exposed
reinforcement has been treated

DESIGN FEATURES REPORT
Job Number: DB130728.09
Date: 11/02/2021
7 STRUCTURAL CALCULATIONS
7.1 Façade renovations
The new cladding systems will increase the dead loads and therefore the seismic weight of the existing structure. This design considers the effect on the existing structure and the new connections.

DESIGN FEATURES REPORT
Job Number: DB130728.09
Date: 11/02/2021
New B350 brackets will be installed at the existing junction of the existing beam and vertical studs increases capacity of this connection by 4kN/m run.
Each CT160 bracket increases shear capacity at this location by 6kN.
Nail timber plate onto window studs. Then coach screw between pre-assembled timber and plate.

DESIGN FEATURES REPORT
Job Number: DB130728.09
Date: 11/02/2021
Tru-bolt onto concrete panel. Then coach screw between pre-assembled timber and plate.
Strap bracing is provided along all elevations to provide in-plane lateral capacity.
Strap bracing is provided along all elevations to provide in-plane lateral capacity.

Job ref Project
Date Title
K‐F 1.80 17.00 35 1071.00
0.60 16.00 35 336.00
E‐A 1.80 20.50 35 1291.50
0.60 19.50 35 409.50
1‐5 1.80 26.00 35 1638.00
0.60 25.00 35 525.00
Total existing removed 5271
Total proposed 9025
Total net 3754
130728.09 44 Heuheu Street Taupo
2/10/2020 Existing Cladding weight
Grid Height Width Weight kg/m² Total kg

Job ref Project
Date Title
K 8.30 1.30 80 863.20
4.40 1.60 80 563.20
3.00 0.60 80 144.00
1.80 2.00 35 126.00
1.80 0.60 35 37.80
H 2.70 2.40 35 226.80
1.80 1.40 35 88.20
3.50 2.00 35 245.00
3.50 0.60 35 73.50
G 2.70 2.40 35 226.80
1.80 1.40 35 88.20
3.20 2.00 35 224.00
3.20 0.60 35 67.20
F 2.70 2.00 35 189.00
1.80 1.00 35 63.00
1.60 2.00 35 112.00
1.60 0.60 35 33.60
E 2.70 2.00 35 189.00
1.80 1.00 35 63.00
1.60 2.00 35 112.00
1.60 0.60 35 33.60
D 2.70 2.40 35 226.80
1.80 1.40 35 88.20
3.20 2.00 35 224.00
3.20 0.60 35 67.20
C 2.70 2.40 35 226.80
1.80 1.40 35 88.20
3.20 2.00 35 224.00
3.20 0.60 35 67.20
B 2.70 2.40 35 226.80
1.80 1.40 35 88.20
3.20 2.00 35 224.00
3.20 0.60 35 67.20
A 2.70 2.70 80 583.20
1.80 1.60 80 230.40
1.60 2.00 35 112.00
1.60 0.60 35 33.60
Total 6547
130728.09 44 Heuheu Street, Taupo
2/10/2020New cladding weight on Heuheu
Street
Grid Height Width Weight kg/m² Total kg

Job ref Project
Date Title
1 3.80 1.50 80 456.00
2.00 0.60 80 96.00
2.40 1.80 35 151.20
2.40 0.60 35 50.40
2 2.10 2.40 35 176.40
1.80 1.40 35 88.20
2.40 1.80 35 151.20
2.40 0.60 35 50.40
3 2.10 2.40 35 176.40
1.80 1.40 35 88.20
2.40 1.80 35 151.20
2.40 0.60 35 50.40
4 2.10 2.40 35 176.40
1.80 1.40 35 88.20
2.40 1.80 35 151.20
2.40 0.60 35 50.40
5 2.10 1.75 35 128.63
1.80 1.00 35 63.00
1.60 1.80 35 100.80
1.60 0.60 35 33.60
Total 2478
Grid Height Width Weight kg/m² Total kg
44 Heuheu Street, Taupo
New cladding weight on Ruapheu Street
2/10/2020
130728.09

Pr in ted:2
Project :
S H E E T T I T L E : SHEETProposed E leva t ions
Sca le :
D rawn :
PHONE: (07) 378 20670274 822 038
Jackie RobinsonArchitectural Designer Towng ate Bui ld ing
Corner Heuheu & Ruapehu Streets
NOTES:
Job # 180017/09/2020
P r e l i m i n a r y O n l yP r i c i n g O n l y
1 2 3 4 5New feature entry over exist ing roof
New Cemintel Steppe Sheet c ladding to exist ing parapet
Co lumn-02Eldorado Stoneveneerto match
Riocurl corner
New Futurewood Composi te screening
New Cemintel Quarry Sheet c ladding to new wal l
Co lumn-03
Exist ing canopy
J H G F E D C B AK
3,20
0
2,850
10,1
84N
ew O
/A H
eigh
t
Co lumn-02Eldorado Stone veneer
to match cladding belowon S/E corner
Co lumn-01Eldorado Stone veneer tomatch cladding below Parapet-01 Parapet-02
New Futurewood Composi te screening
New Cemintel Quarry Sheet c ladding to new wal l
New Cemintel Steppe Sheet c ladding to exist ing t imber framing & New co lumns
New Glass Roof to Entry
New double glazed joinery to f irst f loor
New glass entry wal l
New entry door unit
Exist ing canopy
1 :1 0 0
S o u t h
W e s t
C l a d d i n g A r e aR u e p e h u :P a r a p e t 4 1 . 3 9 s q m W a l l 2 6 . 6 7
H e u H e u :P a r a p e t 0 1 - 2 3 . 7 6 s q m 0 2 - 2 9 . 6 6 s q mW a l l 0 1 - 3 0 . 4 6 s q m 0 2 - 3 5 . 0 7 s q m
C o l u m n s :1 . 2 c o l u m n 6 . 4 8 s q mE n t r y 4 . 8 6 s q mC o l m n - 0 1 1 3 . 0 7 s q mC o l u m n - 0 2 1 7 . 3 2 s q mC o l u m n - 0 3 4 . 8 6 s q m
P r o p o s e d E l e v a t i o n s
Each cladding box=176kg 176kg x 1.36 =2.4kN Earthquake ULS. 8xM12 Tru-bolt connections provided.
Cladding box=129kg 129kg x 1.36 =1.75kN Earthquake ULS. 8xM12 Tru-bolt connections provided.
Upper cladding weight =940kg 940kg x 1.36=12.8kN Earthquake ULS = 0.5kN/m Existing connections will be enhanced using standard Bowmac brackets
Stone cladding weight =552kg 552kg x 1.36=7.5kN earthquake ULS.
Stone cladding weight =707kg 707kg x 1.36=9.61kN earthquake ULS
Stone cladding weight =815kg 815kg x 1.36=11.1kN earthquake ULS.
Upper cladding weight =2085kg 2085kg x 1.36=20.85kN Earthquake ULS = 0.67kN/m Existing connections will be enhanced using standard Bowmac brackets
Upper cladding weight =2085kg 2085kg x 1.36=20.85kN Earthquake ULS = 0.67kN/m Existing connections will be enhanced using standard Bowmac brackets
Not required anymore
Not required anymore

Pr in ted:3
Project :
S H E E T T I T L E : SHEETProposed E levat ion
Sca le :
D rawn :
PHONE: (07) 378 20670274 822 038
Jackie RobinsonArchitectural Designer Towng ate Bui ld ing
Corner Heuheu & Ruapehu Streets
NOTES:
Job # 180017/09/2020
P r e l i m i n a r y O n l yP r i c i n g O n l y
F G H J K
New Cemintel Steppe Sheet c ladding to exist ing t imber f raming
Exist ing block wall to be re-painted
New Cemintel Quarry Sheet c ladding to new wal l
New double glazed joinery to replace exist ing
5 4 3 2 1
New Cemintel Quarry Sheet c ladding to new wal l
New Cemintel Steppe Sheet c ladding to exist ing t imber f raming
New Cemintel Steppe Sheet c ladding to exist ing parapet
New Futurewood Composi te screening
Co lumn-01Eldorado Stone veneerto match cladding belowS /E corner
New double glazed aluminium joinery
Exist ing canopy
New double glazed joinery to replace exist ing
P r o p o s e d E l e v a t i o n s
N o r t h
E a s t
1 :1 0 0
Stone cladding weight =863kg 863kg x 1.36=12N earthquake ULS.
Not required anymore

Project Job ref
Drawing ref calculations by revision sheet no1.00
Element Date
Design of Bolted Joints (Perpendicular Load) V1.00 Author : Neil S. P.
Applied Load, N* or V* = 1.00 kN
Classification of Species for Joint Design = J5
Number of Bolts in Joints n = 1.00Load Duration Factor K1 = 0.60
Factor for Green Timber K12 = 1.00
Multiple Bolts K13 = 1.00
Qkp for Bolt in single shear, lesser of Section 4.4.4 NSZ 3603Qkp1 = K11 x fpj x da
Qkp2 = 0.50 x be x fpj x da
Where :Factor K11 = 14.90 Bolts in
Bolt Bearing Stress fpj = 12.90 MpaBolt Diameter da = 12 mm
Effective Timber Thickness be = 45 mm
Strength Reduction factor Φ = 0.80Qkp1 = 7.99 kN
Qkp2 = 3.48 kN
Therefore QSk = 3.48 kN
Nominal Strength of Joint Qn = 2.09
Strength Capacity of Joint ΦQn = 1.67 kN > 1.00 kN OK!!
Utilisation Ratio = 0.60
Single Shear
Therefore Use 1/M12 Bolts
Bolted connection to timber 45mm Oct-20
44 Heuheu Street Taupo 130728.09
GB

Project Job ref
Drawing ref calculations by revision sheet no1.00
Element Date
Design of Bolted Joints (Perpendicular Load) V1.00 Author : Neil S. P.
Applied Load, N* or V* = 1.00 kN
Classification of Species for Joint Design = J5
Number of Bolts in Joints n = 1.00Load Duration Factor K1 = 0.60
Factor for Green Timber K12 = 1.00
Multiple Bolts K13 = 1.00
Qkp for Bolt in single shear, lesser of Section 4.4.4 NSZ 3603Qkp1 = K11 x fpj x da
Qkp2 = 0.50 x be x fpj x da
Where :Factor K11 = 14.90 Bolts in
Bolt Bearing Stress fpj = 12.90 MpaBolt Diameter da = 12 mm
Effective Timber Thickness be = 90 mm
Strength Reduction factor Φ = 0.80Qkp1 = 7.99 kN
Qkp2 = 6.97 kN
Therefore QSk = 6.97 kN
Nominal Strength of Joint Qn = 4.18
Strength Capacity of Joint ΦQn = 3.34 kN > 1.00 kN OK!!
Utilisation Ratio = 0.30
Single Shear
Therefore Use 1/M12 Bolts
Bolted connection to timber 90mm Oct-20
44 Heuheu Street Taupo 130728.09
GB

Project Job ref
Drawing ref calculations by revision sheet no
1.00
Element Date
Design of Connection using Coach Screw V1.00
Applied Load, N* or V* = 1.00 kN
Classification of Species for Joint Design = J5
Number of Coach Screws in a Joint n = 1.00Load Duration Factor K1 = 0.60 Load Duration Factor
K12 = 1.00 Table 4.14
K13 = 1.00
Where :Factor K11 = 14.90
Bearing Stress fpj = 12.90 Mpa Diameter of Coach Screw da = 12 mm Qkp1 = K11 x fpj x da1.5
Effective Timber Thickness be = 45 mm Qkp2 = 0.50 x be x fpj x da
Φ = 0.70Qkp1 = 3.48 kN Qkp2 = 7.99 kN
Therefore QSk = 3.48 kN
Nominal Strength of Joint Qn = 2.09 kN
Capacity Strength of Joint ΦQn = 1.46 kN > 1.00 kN OK!!
Utilisation Ratio = 0.68
Demand Widthdrawal Force = 1.00 kN
Penetration of Thread = 45.00 mmQk = 118 NQkl = 5.31 kN
Nominal Widthdrawal Strength Qn = 3.19 kN
Capacity Widthdrawal Strength ΦQn = 2.23 kN > 1.00 kN OK!!
Utilisation Ratio = 0.45
0800 23 2266
Therefore Use 1/M12 Coach Screws
44 Heuheu Street Taupo 130728.09
GB
Coach screw connection Oct-20

Chemical Anchoring - ChemSet Anchor Stud Design CalculatorEuropean Technical Approval ETA‐10/0309
8.8 Anchor Size db = M 12
n = 1 ‐
a = 150 mm
e = 150 mm
f'c = 20 MPa
C or N N ‐
h = 100 mm
db = 12 mm
e1 = 10000 mm
I or E I row
D or W D ‐
bm = 128 mm
Grade = 8.8 Gr
t = 16 mm Typ Gr 8.8 Thr'd Rod M12 x 136 mm long
Le = 116 mm
N* = 10 kN
V* = 15 kN Drill dh = 14 0.56
α = 0 ° Fixture df = 15 0.6
‐40˚C to +40˚C ‐ 0.8
φNurc = 27.7 kN
φNus = 54.0 kN
φVurc = 22.5 kN
φVus = 33.5 kN
dh = 14 mm
φNur = 27.7 kN
N*/φNur = 0.36 < 1
φVur = 22.5 kN
V*/φVur = 0.67 < 1
1.03 < 1.2
db 8 10 12 16 20 24 30 36
dh 10 12 14 18 24 26 32 N/A
Ab 37 58 84 157 245 353 561 N/A
fy 640 640 640 640 640 640 640 N/A
φNus 23.4 37.1 54.0 100.5 156.8 225.9 359.0 N/A
φVus 14.5 23.0 33.5 62.3 97.2 140.1 222.6 N/A
ec 35 40 50 65 80 100 120 N/A
ac 50 60 75 100 120 145 180 N/A
em & am 25 30 35 50 60 75 90 N/A
10.5
11.9
13.2 13.2
16.2 16.2
19.3 19.3 19.3
22.3 22.6 22.6
23.4 26.1 26.1 26.1
23.4 31.6 31.6 31.6
23.4 37.1 37.5 37.5
23.4 37.1 41.6 41.6 41.6
23.4 37.1 45.8 45.8 45.8 45.8
23.4 37.1 50.1 50.1 50.1 50.1
23.4 37.1 54.0 54.6 54.6 54.6
23.4 37.1 54.0 59.2 59.2 59.2 59.2
23.4 37.1 54.0 73.8 73.8 73.8 73.8
23.4 37.1 54.0 84.1 84.1 84.1 84.1 N/A
23.4 37.1 54.0 100.4 100.4 100.4 100.4 N/A
23.4 37.1 54.0 100.5 135.6 135.6 135.6 N/A
23.4 37.1 54.0 100.5 148.1 148.1 148.1 N/A
Chemical Anchoring ‐ ChemSet Anchor Stud Design Calculator V040614b
Company Name:‐
DBCE
Design Identification:‐
GB
Date:‐
MIN. CRITERIA for a,e & h ‐ O.K.
350
160
170
180
190
220
Absolute Minimum edge dist. & anc'r spac.
150
Red.Char. Ult. Steel Tensile Capacity
Edge distance for no conc.cone reduction
Red.Char. Ult. Steel Shear capacity
60
65
70
13. Fixture Thickness (t)
14. Effective Length (Le)
Des. Red. Ult. CONC. Tensile Capacity
15. Design Tensile Load‐per anchor (N*)
16. Design Shear Load‐per anchor (V*)
17. Direction of Shear design load (α)
Drill hole diameter
Anchor Stud Yield Strength
Tension Design Check
Design Red. Ult. Shear Capacity
Anchor Size
Combined Check ‐ N*/φNur + V*/φVur =
Design Red. Ult. Tensile Capacity
COMBINED TENSION SHEAR O.K.
Des. Red. Ult. CONC. Shear Capacity
Red. Char. Ult. STEEL Shear Capacity
Drill hole diameter
TENSION O.K.
Shear Design Check
Stressed Area
Red. Char. Ult. STEEL Tensile Capacity
18. Service Temperature (˚C)
Project Details
Elevation View - Generic Dimensions in (mm)
Anchor Loaded
ChemSet™ Anchor Stud "Specification"EPCON™ C8
"Specification"
Project Name:‐
Towngate
Project Site Address:‐
44 Heuheu Street
Plan View - Generic Dimensions in (mm)
29.10.20
C8‐450
Direction of Shear
Design Load - αConcrete Tension φ =
Concrete Shear φ =
Capacity Reduction FactorsHole Diameters (mm)
Steel Tension/Shear φ =
Non‐Cracked
Anchor Type: Threaded Rod ‐ Gr
Input Description (Strength Limit State Design)
5. Cracked Conc. (C) or Non‐Cracked (N)
Input Data (per anchor)
7. Anchor Stud size (db) ‐ M8 → M36
8. Concrete Edge Distance Corner (e1)
2. Anchor Spacing (a)
3. Concrete Edge Distance (e)
4. Concrete Cylinder Strength (f'c)
1. Number of anchors (n)
Concrete ‐ EPCON™ C8
330
The design engineer should ensure the structural element is capable of supporting these loads. Refer to Ramset™ Specifiers Anchoring Resource Book ANZ for more information or explanation of Tech. Data.
ITW Australia Pty. Ltd. ABN 63 004 235 063 trading as Ramset™ . © Copyright 2015
6. Effective Depth (h>6xdh)
DESIGN O.K.
9. Internal to a row (I) or end of row (E)
10. Dry Hole (D) or Wet hole (W)
11. Min Concrete Sub'te Thickness (bm)
12. Anchor Stud Grade (5.8, 8.8, 316 SS)
Output Data (per anchor)
Output Description (Strength Limit State Design)
240
270
100
110
125
140
DC04058 RAM0115
SHEAR O.K.
Anchor spacing for no conc.cone reduction
Metric
(mm)
(mm²)
(MPa)
(kN)
(kN)
(mm)
(mm)
(mm)
(mm)
(mm)
Design Reduced Ultimate tensile capacity φNur (kN per anchor)
Based on edge distance (ec) and anchor spacing (ac) for no conc.cone reductionEffective Depth - h
(mm)
(mm)
(mm)
(mm)
80
90
(mm)
(mm)
(mm)
(mm)
(mm)
(mm)
(mm)
(mm)
(mm)
(mm)
(mm)
(mm)
(mm)
"I"
"E" Anchor end of a row
Anchor internal to a row
α = 0˚‐ towards edgeα = 180˚ ‐ away from edge
10000 150 150 10000
t = 16
h = 100
bm = 128
10000
e = ∞
e = 150
1000015015010000

G1
G
F
E
D
C
B
A
A0
0
XYY
Z
X
Z
ETABS 2016 16.2.1 30/09/2020
Overall without panel.EDB 3-D ViewExisting elevation Heuheu street

HG1
G
F
E
D
C
B
A
A0
0
1
2
3
-5.3
922
1.54
43
-5.2
659
1.9
293
-7.1
091
1.81
83
3.3
048
-0.9
188
-7.3
276
0.96
37
3.68
24
-0.1
637
4.6732
-5.855
2.6972
-6.555
2.7565
-4.9651
4.0034
-0.4796
2.3372
-0.3686
2.34
-7.1118
2.9703
0.3283
-12.
0725
7.80
74
-12.
893
5.94
-11.
8191
6.99
57
-22.
6726
1.98
68
-3.7
511
2.42
51
-19
.84 8
6
14.8
6
8.7645
-9.8
586
-3.8846
-3.1074
2.3423
-2.6273
1.5367
-2.8539
1.6527
-0.7487
0.3926
-0.647
0.2475
-2.3969
1.1236
3.8115
-6.7
706
4.07
25
-5.5
892
2.8
793
-5.7
734
3.0
141
-5.8
477
2.94
84
-6.0
80
7
3.03
47
3.44
37
-4.6
98
5
ETABS 2016 16.2.1 30/09/2020
Existing without roof diaphragm.EDB 3-D View Moment 3-3 Diagram (U:G+UQ+EQXN-N) [kN-m]

-14.3 -13.2 -12.1 -11.0 -9.9 -8.8 -7.7 -6.6 -5.5 -4.4 -3.3 -2.2 -1.1 0.0
G
F
E
D
C
B
A
A0
0
1
2
XYY
Z
X
Z
ETABS 2016 16.2.1 30/09/2020
Overall without panel.EDB 3-D View - Displacements (U:G+UQ+EQXP-N-NL) Step 11/11 [mm]
3mm ULS deflection across the building with concrete panel in place.
Existing elevation Heuheu street

DESIGN FEATURES REPORT
Job Number: DB130728.09
Date: 11/02/2021
7.2 Existing canopy structure
The existing 250UB steel beams over the entrance will need to take the new loading from the proposed timber slats. See the below check on the beam.

DESIGN FEATURES REPORT
Job Number: DB130728.09
Date: 11/02/2021
8 PROPRIETRAY SYSTEMS

DESIGN FEATURES REPORT
Job Number: DB130728.09
Date: 11/02/2021

DESIGN FEATURES REPORT
Job Number: DB130728.09
Date: 11/02/2021

Supplied by:Supplied by:
CLICK
x 2
2600 mm
900 mm
5 mm
4,68 m2
918 WHITE 914 WASHINGTON 868 LIGHT CEMENT 917 BOSTON
911 CHICAGO 915 ORLANDO 922 TAMPA 916 DENVER
032 MYSTIC DARK GREY869 DARK CEMENT 923 ATLANTA
PROTECTIVE PU TOP LAYER
REALISTICALLY PRINTED MULTICOLOURED FILM
INTERMEDIATE HIGH-QUALITY STABILITY LAYER
RCB® RIGID CORE BOARD TECHNOLOGY
Our tiles are manufactured using the revolutionary RCB® technology. RCB® stands for Rigid Core Board. This unique and patented technology ensures that the boards are extremely stable, water-resistant and safe. The ideal base for tiles that you will enjoy for a long
time.
UNIQUE RCB TECHNOLOGY
Quickly into the shower!
With Dumawall XL, you can install a new waterproof wall in less than an hour. Our XL panels ensure fast installation. Ideal for showers.
Glue the wall panels, finish with silicone and done!
Dumawall XL, a small effort for great comfort.
YOU CAN GLUE DIRECTLY ONTO OLD TILES.
WH PROFFINISHING TRIM U
W02CLICK FINISHING TRIM
W06START TRIM
W03UNIVERSAL CORNER
W04INSIDE CORNER
W05L-TRIM OUTSIDE CORNER
Aluminium accessories
EASY CONNECTION TONGUE AND GROOVEOur panels are available in a width of 90 cm, but thanks to our tongue and groove system they can easily be fitted together. It will allow you to span any required width.
Get the look of Ceramic Tiles without the cost of installation.Get the look of Ceramic Tiles without the cost of installation.
Strong & LightweightCompared to Ceramic tiles.
Hygienic Easy maintenance.
UV ResistantColour fast.
Easy Fix Using DumaFix adhesive.
100% Waterproof Ideal for wet areas.
Easy Connect Tongue & groove installation.
Easy Size Easy to transport.
Easy CoverCovers old walls.
CleanNo more dirty grouting.
Features & BenefitsAccessories
www.dumawall.co.nz
Description Size
Aluminium Start Trim 2600mm
Aluminium Finishing Trim 2600mm
Aluminium Universe Corner 2600mm
Alumiunium Inside Corner 2600mm
Aluminium Outside Corner 2600mm
Aluminium Click Finishing Trim 2600mm
DumaFix Glue 290ml
Finishing Trim U
Universal CornerStart Trim DumaFix Glue
Click Finishing Trim Inside CornerL-Trim Outside Corner
www.dumawall.co.nzNOTE: Uncontrolled in printed format.

The do-it-yourself Tile Installing DumaWall is quick and easy, where there is now no need to work with complicated grout lines, tools and costs associated with Ceramic tiles. DumaWall tiles provides the look of Ceramic tiles, features an interlocking tongue and groove system and can be easily cut on site with circular skillsaw or jigsaw, providing the ideal home handyman solution at minimal costs compared to a professional tiler.
Easy to glue with DumaFix DumaFix is a high-quality, quick hardening adhesive based on an MS polymer. DumaFix is suitable for fixing and installing DumaWall+ tiles, DumaWall XL panels and trims on basically any surface (porous and non-porous surfaces).
911Chicago
847Nero
915Orlando
918White Denver
916Mystic Dark Grey032
Calacutta
848Light Cement
868
DumaWall+ 375mm x 650mm x 5mm 1.95m2 x8 Tiles per packColours available:
911Chicago
915Orlando
918White Denver
916Mystic Dark Grey032
Light Cement
868
DumaWall XL 2600mm x 900mm x 5mm 4.68m2 x2 Panels per packColours available:
DumaWall is a lightweight, easy to install waterproof wall tile. Produced with the revolutionary patented RCB® (Rigid Core Board) technology and featuring an interlocking tongue and groove system, DumaWall is durable, 100% recyclable, obtains a PassTM and meets New Zealand Building Code. DumaWall+ comes in a handy tile size of 375mm x 650mm and DumaWall XL is available in 2600mm x 900mm, making shower walls and large areas quick and simple to cover. Both DumaWall+ and DumaWall XL come in a range of contemporary colours that suit a variety of interior spaces.
Typical ApplicationsBathrooms/Shower WallsKitchensLaundryFeature WallsChanging RoomsVanity/Mirror Surrounds

Supplied by:
• All the information is given and based on good building practice and are not a complete statement of all relevant data. As the installation of Dumwall is influenced by and relies on factors outside the control of PSP Limited, PSP Limited assumes no responsibility for the installation of Dumwall and their suitability to satisfy relevant Building Codes and Regulations,
• Our products are produced with the greatest possible care. However, no guarantee can be given with regards to small differences in look and colour in different production runs and batches. Therefore, installations in one room have to be carried out with products with the same production date. The date is stated on the label of the packaging box. Differences in look and colour once the product is installed with different production dates will not be accepted. Labels stating production dates will need to be provided.
• Wear protective gear during installation; safety goggles, mask, gloves, ear protection and steel cap boots. • Always work in a well-ventilated area.
General For the Dumawall XL PASS Scope & Limitations information please visit www.dumawall.co.nz
Typical applications include:
• Private residences: bathroom, kitchen, laundry room, garage, basement, bedroom and living room.• Professional applications: office space, sporting halls, shop areas, bathrooms, kitchen and laundry.• Prefab houses: caravans, mobile homes and boats.
The panels are particularly well suited for use in damp areas.
The panels may NOT be installed:
• Outdoors, on account of possible discolouration and the possibility that the product becomes brittle, unless explicitly stated or shown otherwise on the package insert.
• In spaces with a temperature in excess of 60°C or lower than -10°C, for example in a sauna or refrigerated area.• On walls where the contact temperature may be above 60°C, e.g. on a chimney flue, by a stove or radiators, • In poorly ventilated areas.• In areas where there is an abnormally high concentration of sulphur (H2S).
Acclimatisation and inspection
• Lay the panels flat during transport. • The panels should be laid flat for 48 hours in the area in which they will be installed with a minimum distance of 50 cm from the walls to adapt to the
environmental conditions in the area. The ideal temperature before and during installation is approximately 20°C. • Before installation, check each panel carefully in adequate lighting for scratches, dents, damage, difference in colour and any other deviations to the
standard quality. A panel that is installed even though it shows faults is excluded from our warranty. • If Dumawall is being considered for a sunroom or in a similar space, please pay attention to the combined effect of intense exposure to sunlight and
increased temperature. The panels should not be exposed to temperatures higher than 60°C.
Preparation
• Ensure the timber support (nog/dwang/batten/stud) faces are straight, in alignment and flush• Studs and nogs need to be at 450mm for Dumawall 900mm panels.• Ensure all support surfaces to be bonded are clean and dry (maximum moisture content: 18%)• It is also recommended to provide the open spaces in the framework behind the panels to allow for some air circulation. • With an even base a strong adhesive may be used. The Dumawall XL panels may be glued directly onto existing tiling without removing it. This method is only
suitable for dry surfaces free from dust and grease. For damp and uneven walls we recommend the use of support timber framing. • For panels, use an MS-polymer based adhesive Sika MS123 or equalivent (estimate 1x tube per 2m2). Always check that the adhesive is suitable for use on
INSTALLATION INSTRUCTIONS
Decortaive Wall Panels; virtually seamless joins without the cost.

the surface on which the Dumawall XL panels are going to be applied to. Take into account that the Dumawall XL panels will expand and contract in the event of major changes in temperature, provide 1mm per metre of Dumawall XL on either side. Visit https://nzl.sika.com/en/home.html and follow the Sika MS123 Application Guide.
• The Dumawall XL panels may be cut or shortened easily using a handsaw, table saw, portable circular saw or a sabre jig saw. Please take the necessary precautions when handling sharp tooling.
• Make allowances for the water supply by measuring and drilling the appropriate size hole. • In advance and where possible, install support trims on the sides and base of the wall.
Installation
• A continuous bead of adhesive is recommended. Do not apply adhesive in blobs or spots. • Recommended double sided foam tape - Gator Double Sided Foam Tape 12mm x 2mm x 30mtr or Danco 6620.• For fixing on existing wall lining apply adhesive at 300mm centres and double sided tape at 400mm centres (estimate 1x tube per 2m2).• For fixing on timber framing apply adhesive to horizontal framing and double sided tape to vertical framing. Double sided tape is used in conjunction with
adhesives to provide temporary support during adhesive cure. This removes necessity of bracing the panels. The panels must be supported on the floor (do not affix in a floating manner). Installation without double sided tape to both plasterboard, other substrates types, and direct to timber and metal framing requires the positioning of timber supports to hold panels against wall while adhesive cures.
• For installation in a shower area, around a bath or other very damp places, a line of silicon must always be provided in the connection between the panels themselves and between the panels and support trims to ensure a completely waterproof joint. Thus also apply a silicon line between the panel and the edge of the shower or the bath. PSP Limited guarantees that the panels themselves are waterproof. Waterproofing each joint between the panels is the installer’s responsibility and consequently PSP Limited will not be held liable for any damage caused to the wall/building structure.
• Use either Sika MS123, Sikasil NG, Gorrilla Kitchen & Bathroom, Gorrilla MS Sealant. Follow Manufacturers guidelines.• Position the next panel next to it and apply a line of silicone between the joints for a completely waterproof connection. Ensure the panels are level and applied
so that the following row fits in parallel. Also use silicone around the cut-out sections and drilled holes (refer figure 1).• Tap the full surface using a rubber hammer (and protective block) and check with a level (refer figure 2).
Finishing and maintenance
• Do not attach heavy accessories like coat hooks, light fittings, mirrors, etc. directly to the panels but drill holes through the panels and use suitable screws and plugs to attach the accessories securely in the wall behind (illustration 6). Put an extra support behind the panels.
• You can thoroughly clean the panels using a soft, non-abrasive cleaning agent. Do not use abrasives, aggressive substances or chloride-based cleaning products.
• This product is made from PVC and is 100% recyclable. PVC does not contain any hazardous substances.
10mm
max20cm Lo
1 552A A B
B
10mm
max20cm Lo
1 552A A B
B
10mm
max20cm Lo
1 552A A B
B
www.dumawall.co.nz
Cleaning
Dumawall panels can be cleaned and polished to their original condition by using any typical household, non-abrasive cleaning agent. Normally, you only need a damp cloth to clean the panels thoroughly. Do not use abrasive, aggressive substances or cleaning products based on chloride. We do not recommend using solvents. Adhesive residue or pen marks are best removed using isopropyl alcohol. Please test a non-conspicuous area first before a full clean of the surface.

The purpose of construction site audits is to confirm the practicability of installing the product; and to confirm the appropriateness and accuracy of installation instructions. In issuing this certificate, Global-Mark has relied on the independent expert and/or laboratory advise or reports. This certificate is issued by Global-Mark Pty Limited, an independent certification body accredited by the product certification accreditation body (JAS- ANZ) appointed by the Chief Executive of the Ministry of Business Innovation and Employment under the Building Act 2004. The Ministry of Business Innovation and Employment does not in any way warrant, guarantee, or represent that the building method or product the subject of this certificate conforms with the New Zealand Building Code, nor accept any liability arising out of the use of the building method or product. The Ministry of Business Innovation and Employment disclaims, to the extent permitted by law, all liability (including negligence) for claims of losses, expenses, damages, and costs arising as a result of the use of the building method(s) or product(s) referred to in this certificate. This Certificate may only be reproduced in its entirety. It is advised to check that this Certificate of Conformity is currently valid and not withdrawn, suspended or superseded by a later issue by referring to the Ministry of Business Innovation and Employment website, http://www.mbie.govt.nz/ New Zealand Building Code (NZBC) references the Building Code in force at the time of issuing the product certificate.
www.jas-anz.org/register
CERTIFICATE OF CONFORMITY This product Certificate is issued under Section 269 of the Building Act 2004 for:
Cemintel Territory Wall Cladding System Page 1 of 2
CodeMark Certification Body
1/4/2019 1/4/2022 30041 Rev G
Global-Mark Pty Ltd, Suite .07, 32 Delhi Road, North Ryde NSW 2113, Australia www.Global-Mark.com.au
Herve Michoux Managing Director
Date of Issue Last Update Date of next re-certification
Certificate Number
Product Description 1. The Cemintel Territory wall cladding system comprises a range of pre-finished, cement-bonded, fibrous wood particle
panels and proprietary installation componentry as follows:
back flashings, finished with a continuous sealant, ● panel clips,
pre-formed external corner, ● ventilated vermin proof starter strip,
corner trim, ● eave trim,
backing strip, ● spacers.
2. The panels dimensions are 3,030 mm by 455 mm with a nominal thickness of 16 mm. Panels are pre-finished using a durable multi-layer paint process and a Nichiguard stain resistant coating.
3. Panels are tongue and groove profiled along longest edges and fit together to form a waterproof joint. Joints at the ends of the panels are aligned for each panel course and are finished with sealant.
4. The panels are secured with the panel clip, which is installed over a wall underlay or rigid air barrier. The system is
installed over either timber frames, steel frames or masonry structure.
Product purpose and use The Cemintel Territory wall cladding system has been assessed for use as an external wall cladding system on buildings:
Within the scope limitations of the New Zealand Building Code (NZBC) Acceptable Solution E2/AS1, Paragraph 1.1 with
regards to building height and floor plan area, for buildings situated in Wind Zones up to and including Extra High, as defined
in NZS3604:2011, constructed with:
o Timber frame in accordance with NZS 3604:2011; or
o Steel frame in accordance with NZS3404:2009 Part 1 and NASH Standard - Residential and Low-Rise Steel Framing
Part 1: Design Criteria:2005; or
o Masonry structures in accordance with NZS4229:2013; or,
In any Timber, Steel framed or masonry building that has been subject to Specific Engineering Design by a qualified
engineer up to a ULS Design Wind Pressure of +6.0 / -6.0 kPa for horizontal installation and +2.6 / -3.3 kPa for vertical
installation; and,
With Aluminium window and door joinery that meets the requirements of NZS 4211:2008 and is installed with vertical jambs
and horizontal heads and sills; and,
In exposure Zones B, C and D as defined in NZS3604:2011. Microclimatic Conditions (refer NZS3604:2011 paragraph 4.2.4)
are outside the scope of this certificate; and,
Within 1 metre of the relevant boundary (subject to other fire related code compliance requirements).
The use of the Cemintel Territory wall cladding system with panel installation other than vertical or horizontal, on non-vertical
surfaces (e.g. parapet capping) is outside the scope of this certificate.
The Cemintel Territory wall cladding system is not designed to have tiles or other materials applied to the face of panels.
Certificate holder CSR Cemintel Pty Ltd,
Triniti 3, 39 Delhi Road, North Ryde, NSW 2113, Australia, Tel: +61 2 9235 8000, www.csr.com.au and;
NZ Brick Distributors Limited Partnership,
1/99 Sawyers Arms Road, Papanui, Christchurch 8052, New Zealand, Tel: +64 3 354 0200, www.cemintel.co.nz

The purpose of construction site audits is to confirm the practicability of installing the product; and to confirm the appropriateness and accuracy of installation instructions. In issuing this certificate, Global-Mark has relied on the independent expert and/or laboratory advise or reports. This certificate is issued by Global-Mark Pty Limited, an independent certification body accredited by the product certification accreditation body (JAS- ANZ) appointed by the Chief Executive of the Ministry of Business Innovation and Employment under the Building Act 2004. The Ministry of Business Innovation and Employment does not in any way warrant, guarantee, or represent that the building method or product the subject of this certificate conforms with the New Zealand Building Code, nor accept any liability arising out of the use of the building method or product. The Ministry of Business Innovation and Employment disclaims, to the extent permitted by law, all liability (including negligence) for claims of losses, expenses, damages, and costs arising as a result of the use of the building method(s) or product(s) referred to in this certificate. This Certificate may only be reproduced in its entirety. It is advised to check that this Certificate of Conformity is currently valid and not withdrawn, suspended or superseded by a later issue by referring to the Ministry of Business Innovation and Employment website, http://www.mbie.govt.nz/ New Zealand Building Code (NZBC) references the Building Code in force at the time of issuing the product certificate.
CERTIFICATE OF CONFORMITY This product Certificate is issued under Section 269 of the Building Act 2004 for:
Cemintel Territory Wall Cladding System Page 2 of 2
www.jas-anz.org/register
Compliance with the New Zealand Building Code (NZBC):
The Cemintel Territory wall cladding system if designed, used, installed and maintained in accordance with the scope of this Certificate and either the Cemintel New Zealand Design & Installation Guide – Territory Series External Horizontal Installation (FCNZ503 March 2019) or Cemintel New Zealand Design & Installation Guide – Territory Series External Vertical Installation (FCNZ523 March 2019) as applicable for the direction of installation (collectively referenced as “Cemintel New Zealand Design & Installation Guide – Territory Series”) will meet the following provisions of the NZBC:
Clause B1 STRUCTURE: Performance B1.3.1, B1.3.2, and B1.3.4 (b), (c), (d) and (e) for the relevant physical conditions of B1.3.3 (a), (f), (h), (j) and (q). The Cemintel Territory wall cladding system meets these requirements.
Clause B2 DURABILITY: Performance B2.3.1 (b) no less than 15 years. The Cemintel Territory wall cladding system meets this requirement.
Clause C2- C6 PROTECTION FROM FIRE: C3.5 and C3.7 (b) and (c). The Cemintel Territory wall cladding system meets this requirement.
Clause E2 EXTERNAL MOISTURE: Performance E2.3.2 and E2.3.7. The Cemintel Territory wall cladding system meets this requirement.
Clause F2 HAZARDOUS BUILDING MATERIALS: Performance F2.3.1. The Cemintel Territory wall cladding system meets this requirement.
Subject to the following conditions and limitations:
The Cemintel Territory wall cladding system must be installed and maintained in accordance with Cemintel New Zealand
Design & Installation Guide – Territory Series.
CSR Cemintel Pty Ltd will notify Global-Mark Pty Ltd in accordance with Regulation 15 of the Building (Product
Certification) Regulations 2008.
Design Conditions:
Product specification and incorporation of the Cemintel Territory wall cladding system into a building design shall be
carried out by a Designer / Architect / Engineer who:
o is a Licensed Building Practitioner (LBP) qualified to design the buildings covered under the scope of use of this
product; and,
o has ready access to the relevant technical specifications, NZBC, Standards, details and other information related to
the cladding method, including the Cemintel New Zealand Design & Installation Guide – Territory Series.
Where Cemintel Territory wall cladding system is used on an existing building the designer must be satisfied that the
building work will meet the NZBC and the conditions of this certificate.
Product Installation Conditions:
Installation shall be carried out by tradespersons with experience in weatherboard external wall cladding installation and
who either are or are being supervised by a Licensed Building Practitioner (LBP) holding a Carpentry class license.
Installation shall be undertaken in accordance with all relevant technical information including the Cemintel New Zealand
Design & Installation Guide – Territory Series.
End of document

Fire Performance of Cemintel Territory™ Panels

1300 236 468 376 VICTORIA STREET, WETHERILL PARK, NSW, 2164
COMPLIANCE FOR NON-COMBUSTIBLE MATERIALSTERRITORY™ – MAY 2018
Cemintel Territory has been tested to ‘AS5113: 2016 – Fire propagation testing and
classification of external walls of buildings’, and subject to Opinion Report EWFA
54309700.4, has a positive result across the range.
Cemintel® is an Australian owned company and part of the iconic CSR Building
Products Pty Ltd, manufacturing and supplying cement panels and building
systems used for external facades, internal linings, ceilings and flooring in
commercial and residential applications.
The following information is provided in regards to Cemintel Territory™ and its non-
combustible attributes:
• Cemintel Territory are cement bonded, fibrous wood particle panels.
• Cemintel Territory is a pressed cladding product.
• Cemintel Territory is manufactured in Japan to Japanese Industrial
Standard JIS A 5422 (fibre reinforced cement sidings) and has been tested
in accordance with Australian and New Zealand Standard for cellulose-
cement flat sheet product AS/NZS 2908.2
• In accordance with the standard characteristic type tests required by
AS/NZS 2908.2:2000, Cemintel Territory has a classification of Type A
Category 3 (fibre cement) sheet.
• Cemintel Territory may be used where non-combustible materials are
required by the Building Code of Australia (BCA) according to the National
Construction Code (NCC) Volume 1 Section C1.9 and Volume 2
Section 3.7.1.2.
• Cemintel fibre cement products have been assessed by Exova (WFRA
45759) in accordance with AS/NZS 3837 (‘Method test for heat and
smoke release for materials and products using an oxygen consumption
calorimeter’) and have been classified to conform to Group 1 (highest and
best result possible) with an average specific extinction area far lower than
the permissible 250m²/kg, as referenced in specification C1.10 of the BCA
Test Report FNK 10457.
For further information on Cemintel Territory, please refer to Compliance Certificate,
Certificate of Physical Properties and Codemark Certificate attached.
*Awaiting update of Codemark Certificate to reflect new status.

1300 236 468 376 VICTORIA STREET, WETHERILL PARK, NSW, 2164
COMPLIANCE CERTIFICATE TERRITORY™ – MAY 2018
CERTIFICATE OF PHYSICAL PROPERTIES – TERRITORY™ – JANUARY 2018
Territory panels are manufactured in Japan to the Japanese Industrial Standard
JIS A 5422 (fibre reinforced cement sidings) and have been classified as Type A
Category 3 (fibre cement) sheet under AS/NZS 2908.2:2000.
Characteristic Type Tests have been conducted for Territory in accordance with
AS/NZS 2908.2:2000 including:
• Bending Strength
• Water Permeability
• Frost Resistance (Freeze – Thaw test)
• Warm Water
• Heat – Rain
• Soak – Dry
• Dimensional and Geometrical
Characteristics
• Apparent Density
These tests have been conducted by Cemintel’s Research & Development
Technical Team. Detailed Technical Specifications for Territory panels can be
downloaded at www.cemintel.com.au/technical/technical-data-sheets/
PANEL – STRENGTH & MOISTURE RELATED PROPERTIES
Physical Property Result Relevant Standard
Modulus of Rupture (Wet) > 7 Mpa ASTM C 1186
Modulus of Elasticity (Wet) 2.2 - 3.35 Gpa EN 12467
Density (Oven Dry) 1191Kg/m3 (average) ASTM C 1186
WATER VAPOR DIFFUSION
Water Tightness (24hrs) No water droplet ASTM C 1186
Water Absorption (Saturated – 48hrs) 13.9% (average) ASTM C 1186
Moisture Content (EMC) 7-9% ASTM C 1186
Moisture Movement 0.07% (average) ASTM C 1186
NB/ The above test results relate to coated panels unless otherwise specified (ie edges are sealed for testing to reflect the characteristic of sheets as delivered & in accordance with installation instructions). In-house testing as per ASTM C 1186.

1300 236 468 376 VICTORIA STREET, WETHERILL PARK, NSW, 2164
CERTIFICATE OF PHYSICAL PROPERTIES TERRITORY™ – MAY 2018
PANEL – OTHER DURABILITY/WEATHER RESISTANCE INDICATORS
Test Result Relevant Standard
Heat Rain PASSED (25 Cycles) ASTM C 1186
Freeze Thaw PASSED (50 Cycles) ASTM C 1186
Warm Water Resistance PASSED (56 days) ASTM C 1186
Soak Dry PASSED (50 Cycles) EN 12467
PANEL – FIRE RESISTANCE, THERMAL & ACOUSTIC PROPERTIES
Characteristic Result Relevant Standard
FIRE RESISTANCE
Combustibility Assessed as suitable for use in applications where non-combustible materials are specified by the Deemed to Satisfy Provisions. Assessment report 2013/277.3R1.0
Group Number 1 AS/NZ 3837
Average Specific Extinction Area <250 AS/NZ 3837
E.F.H.I Flame spread index = 0 Smoke developed = 0
ASTM E84
THERMAL CONDUCTIVITY
Thermal Conductivity (λ-Factor) 0.26 W/mk (average) JIS A 1412
Thermal Expansion Co-efficient N/A

Scop
e of
cer
tific
atio
n: T
he C
odeM
ark
Sche
me
is a
build
ing
prod
uct c
ertif
icat
ion
sche
me.
The
rule
s of t
he S
chem
e ar
e av
aila
ble
at th
e AB
CB w
ebsit
e w
ww
.abc
b.go
v.au
. Thi
s Cer
tific
ate
of C
onfo
rmity
is to
con
firm
that
the
rele
vant
re
quire
men
ts o
f the
Bui
ldin
g Co
de o
f Aus
tral
ia (B
CA) a
s cla
imed
aga
inst
hav
e be
en m
et. T
he re
spon
sibili
ty fo
r the
pro
duct
per
form
ance
and
its f
itnes
s for
the
inte
nded
use
rem
ain
with
the
cert
ifica
te h
olde
r. Th
e ce
rtifi
catio
n is
not
tran
sfer
rabl
e to
a m
anuf
actu
rer n
ot li
sted
on
Appe
ndix
A o
f thi
s cer
tific
ate.
Di
scla
imer
: The
Sch
eme
Ow
ner,
Sche
me
Adm
inist
rato
r and
Sch
eme
Accr
edita
tion
Body
do
not m
ake
any
repr
esen
tatio
ns, w
arra
ntie
s or g
uara
ntee
s, a
nd a
ccep
t no
lega
l lia
bilit
y w
hats
oeve
r aris
ing
from
or c
onne
cted
to, t
he a
ccur
acy,
re
liabi
lity,
cur
renc
y or
com
plet
enes
s of a
ny m
ater
ial c
onta
ined
with
in th
is ce
rtifi
cate
; and
the
Sche
me
Ow
ner,
Sche
me
Adm
inist
rato
r and
Sch
eme
Accr
edita
tion
Body
disc
laim
to th
e ex
tent
per
mitt
ed b
y la
w, a
ll lia
bilit
y (in
clud
ing
negl
igen
ce) f
or c
laim
s of l
osse
s, e
xpen
ses,
dam
ages
and
cos
ts a
risin
g as
a re
sult
of th
e us
e of
the
prod
uct(
s) re
ferr
ed to
in th
is ce
rtifi
cate
. Th
e pu
rpos
e of
Glo
bal-M
ark
cons
truc
tion
site
aud
its is
to c
onfir
m th
e pr
actic
abili
ty o
f ins
talli
ng th
e pr
oduc
t; an
d to
con
firm
the
appr
opria
tene
ss a
nd a
ccur
acy
of in
stal
latio
n in
stru
ctio
ns
In p
laci
ng th
e Co
deM
ark
mar
k on
the
prod
uct/
syst
em, t
he c
ertif
icat
e ho
lder
mak
es a
dec
lara
tion
of c
ompl
ianc
e w
ith th
e ce
rtifi
catio
n st
anda
rd(s
) and
con
firm
s tha
t the
pro
duct
is id
entic
al to
the
prod
uct c
ertif
ied
here
in.
In is
suin
g th
is Ce
rtifi
cate
of A
ppro
val G
loba
l-Mar
k ha
s rel
ied
on th
e ex
pert
ise
of e
xter
nal b
odie
s (la
bora
torie
s, a
nd te
chni
cal e
xper
ts).
Herv
e M
icho
ux,
Glob
al-M
ark
Man
agin
g Di
rect
or
Pete
r Gar
dner
,
Unr
estr
icte
d Bu
ildin
g Ce
rtifi
er
Date
of i
ssue
: 14
/09/
2014
Date
of e
xpiry
: 14
/09/
2020
Cert
ifica
te n
umbe
r: CM
3004
8 Re
v4
This
cert
ifica
te is
onl
y va
lid w
hen
repr
oduc
ed in
its e
ntire
ty.
Page
1 o
f 6
Glob
al-M
ark
Pty
Ltd,
Su
ite 4
.07,
32
Delh
i Ro
ad, N
orth
Ryd
e
NSW
211
3,
Aust
ralia
Tel:
+61
(0)2
988
6 02
22 -
ww
w.G
loba
l-M
ark.
com
.au
Cert
ifica
te H
olde
r:
CSR
Build
ing
Prod
ucts
Pt
y Lt
d Tr
initi
3
39 D
elhi
Roa
d N
orth
Ryd
e N
SW
2113
Au
stra
lia
Tel:
+ 61
2 9
235
8000
w
ww
.csr
.com
.au
Cert
ifica
te n
umbe
r: CM
3004
8 Re
v4
THIS
TO
CER
TIFY
THA
T
CSR
Cem
inte
l Ter
ritor
y Se
ries W
all C
ladd
ing
Syst
em
Type
and
/or u
se o
f pro
duct
:
CSR
Cem
inte
l Ter
ritor
y Se
ries i
s an
exte
rnal
wal
l cla
ddin
g sy
stem
des
igne
d fo
r use
with
all
build
ing
type
s, su
bjec
t to
limita
tions
det
aile
d w
ithin
this
cert
ifica
te a
nd sy
stem
/ pr
ojec
t sp
ecifi
c lim
itatio
ns.
Desc
riptio
n of
pro
duct
:
CSR
Cem
inte
l Ter
ritor
y Se
ries p
anel
s are
455
mm
wid
e, 3
,030
mm
long
and
16
mm
no
min
al th
ickn
ess.
CSR
Cem
inte
l Ter
ritor
y Se
ries p
anel
s are
ava
ilabl
e in
diff
erin
g te
xtur
es a
nd c
olou
rs.
Pa
nels
may
be
inst
alle
d in
hor
izont
al o
r ver
tical
orie
ntat
ion.
Th
e co
nstr
uctio
n sy
stem
com
pone
nts a
re d
escr
ibed
in:
oCe
min
tel T
errit
ory
Serie
s Des
ign
and
Inst
alla
tion
Guid
e fo
r Ext
erna
l Hor
izont
al
Inst
alla
tion,
dat
ed 0
6/20
17o
Cem
inte
l Ter
ritor
y Se
ries D
esig
n an
d In
stal
latio
n Gu
ide
for E
xter
nal V
ertic
alIn
stal
latio
n, d
ated
06/
2017
COM
PLIE
S W
ITH
THE
FO
LLO
WIN
G B
CA P
ROVI
SIO
NS
AND
STAT
E O
R TE
RRIT
ORY
VAR
IATI
ON
(S)
BCA
2016
Vo
lum
e O
ne
Volu
me
Two
Perf
orm
ance
Req
uire
men
t(s)
BP
1.1
Stru
ctur
al P
rovi
sions
P2
.1.1
St
ruct
ural
stab
ility
and
resis
tanc
e to
act
ions
FP1.
4 Da
mp
and
Wea
ther
proo
fing
P2.2
.2
Wea
ther
proo
fing
GP5
.1
Cons
truc
tion
in B
ushf
ire P
rone
Are
as
P2.3
.4
Bush
fire
area
s

Cert
ifica
te n
umbe
r: CM
3004
8 Re
v4
This
cert
ifica
te is
onl
y va
lid w
hen
repr
oduc
ed in
its e
ntire
ty.
Page
2 o
f 6
JP
1 En
ergy
Use
P2
.6.1
Bu
ildin
g Fa
bric
Deem
ed-t
o-Sa
tisfy
Pro
visi
on(s
): Sp
ec A
2.3
Fire
Res
istan
ce o
f Bui
ldin
g El
emen
ts
Sp
ec A
2.4
Fire
Haz
ard
Prop
ertie
s – G
roup
1 M
ater
ial
Sp
ec C
1.1
Fire
-Res
istin
g Co
nstr
uctio
n 3.
7.1.
5 Fi
re S
afet
y –
Cons
truc
tion
of E
xter
nal W
alls
C1
.12
Non
-Com
bust
ible
Mat
eria
l
Stat
e or
terr
itory
var
iatio
n(s)
: N
SW G
P5.1
Co
nstr
uctio
n in
Bus
hfire
Pro
ne A
reas
TA
S P2
.3.4
Co
nstr
uctio
n in
Bus
hfire
Pro
ne A
reas
Q
LD G
P5.1
Co
nstr
uctio
n in
Bus
hfire
Pro
ne A
reas
N
SW P
2.6.
1 Bu
ildin
g Fa
bric
TA
S G
P5.1
Co
nstr
uctio
n in
Bus
hfire
Pro
ne A
reas
N
T Pa
rt 2
.6
Repl
aced
by
BCA2
009
Part
2.6
N
SW JP
1 En
ergy
Use
VI
C P2
.6.1
Bu
ildin
g Fa
bric
N
T &
QLD
Se
ctio
n J
Repl
aced
by
BCA2
009
Sect
ion
J
SUBJ
ECT
TO T
HE F
OLL
OW
ING
LIM
ITAT
ION
S AN
D CO
NDI
TIO
NS
AND
THE
PRO
DUCT
TEC
HNIC
AL D
ATA
IN A
PPEN
DIX
A AN
D EV
ALU
ATIO
N S
TATE
MEN
TS IN
APP
ENDI
X B
Lim
itatio
ns a
nd co
nditi
ons:
Bu
ildin
g cl
assi
ficat
ion/
s:
Vol 1
BP1
.1
The
wal
l sys
tem
as d
escr
ibed
has
max
imum
des
ign
win
d lo
ad li
mits
doc
umen
ted
with
in th
e re
leva
nt D
esig
n &
Inst
alla
tion
Guid
es.
For b
oth
horiz
onta
l and
ver
tical
pan
el o
rient
atio
n, w
ind
load
lim
its, c
onst
ruct
ion
deta
il an
d fix
ing
mus
t fol
low
the
rele
vant
det
ails
cont
aine
d w
ithin
the
engi
neer
ing
deta
il se
ctio
ns o
f the
rele
vant
Des
ign
& In
stal
latio
n Gu
ides
.
2, 3
, 4, 5
, 6, 7
, 8 &
9
Vol 2
P2.
1.1
Whe
n pa
nels
are
inst
alle
d in
a v
ertic
al o
rient
atio
n, th
e w
all s
yste
m is
lim
ited
to a
pplic
atio
ns in
non
-cyc
loni
c re
gion
s.
For b
oth
horiz
onta
l and
ver
tical
pan
el o
rient
atio
n, w
ind
load
lim
its, c
onst
ruct
ion
deta
il an
d fix
ing
mus
t fol
low
the
rele
vant
det
ails
cont
aine
d w
ithin
the
engi
neer
ing
deta
il se
ctio
ns o
f the
rele
vant
Des
ign
& In
stal
latio
n Gu
ides
.
1 &
10
Vol 1
BP1
.1 (b
) (v)
(vi)
and
(ix)
&
Vol 2
P2.
1.1
(b) (
v) (v
i) an
d (ix
) Sn
ow, l
iqui
d pr
essu
re a
nd e
arth
pre
ssur
e ac
tions
are
exc
lude
d.
1, 2
, 3, 4
, 5, 6
, 7, 8
, 9 &
10
Vol 1
BP1
.4
&
Vol 2
P2.
1.2
Com
plia
nce
for f
lood
haz
ard
area
s is e
xclu
ded.
1,
2, 3
, 4, 5
, 6, 7
, 8, 9
& 1
0
Vol 1
FP1
.4
&
Vol 2
P2.
2.2
The
syst
em is
cap
able
of r
emai
ning
wea
ther
proo
f up
to a
serv
icea
bilit
y w
ind
load
of ±
3.72
kPa
with
a ri
gid
air b
arrie
r or ±
1.5k
Pa
with
a fl
exib
le w
all m
embr
ane.
1, 2
, 3, 4
, 5, 6
, 7, 8
, 9 &
10

Cert
ifica
te n
umbe
r: CM
3004
8 Re
v4
This
cert
ifica
te is
onl
y va
lid w
hen
repr
oduc
ed in
its e
ntire
ty.
Page
3 o
f 6
Vol 1
FP1
.7
&
Vol 2
P2.
4.1
Com
plia
nce
for u
se in
wet
are
as is
exc
lude
d.
1, 2
, 3, 4
, 5, 6
, 7, 8
, 9 &
10
Vol 1
GP5
.1
&
Vol 2
P2.
3.4
Incl
udin
g re
spec
tive
NSW
, QLD
& T
AS v
aria
tions
: – C
onst
ruct
ion
in B
ushf
ire P
rone
Are
as, u
p to
BAL
40.
1, 2
, 3, 4
, 5, 6
, 7, 8
, 9 &
10
Vol 1
JP1
&
Vo
l 2 P
2.6.
1 In
sula
tion
in a
ccor
danc
e w
ith e
nerg
y ef
ficie
ncy
& b
uild
ing
fabr
ic re
quire
men
ts.
1, 2
, 3, 4
, 5, 6
, 7, 8
, 9 &
10
Vol 1
Spe
c C1
.1
&
Vol 2
Par
t 3.7
.1
Fyrc
hek
MR
requ
ired
bene
ath
clad
ding
mat
eria
l to
achi
eve
exte
rnal
wal
l FRL
s as o
utlin
ed in
tabl
es 6
.16,
6.1
7, 6
.18
& 6
.19
in:
CSR
Cem
inte
l Des
ign
& In
stal
latio
n Gu
ide
– Te
rrito
ry S
erie
s – E
xter
nal H
orizo
ntal
inst
alla
tion,
dat
ed 0
6/20
17, a
nd/o
r Fy
rche
k M
R re
quire
d be
neat
h cl
addi
ng m
ater
ial t
o ac
hiev
e ex
tern
al w
all F
RLs a
s out
lined
in ta
bles
6.1
3, 6
.14,
6.1
5 &
6.1
6 in
: CS
R Ce
min
tel D
esig
n &
Inst
alla
tion
Guid
e –
Terr
itory
Ser
ies –
Ext
erna
l Ver
tical
inst
alla
tion,
dat
ed 0
6/20
17.
1, 2
, 3, 4
, 5, 6
, 7, 8
, 9 &
10
Vol1
C1.
12
Non
-com
bust
ibili
ty re
late
s to
clad
ding
mat
eria
l onl
y.
2, 3
, 4, 5
, 6, 7
, 8 &
9
Vol 1
NSW
JP1
&
Vol 2
NSW
P2.
6.1
Insu
latio
n in
acc
orda
nce
with
NSW
BAS
IX.
1, 2
, 4 &
10
Vol 1
NSW
JP1
Insu
latio
n in
acc
orda
nce
with
ene
rgy
effic
ienc
y re
quire
men
ts.
3, 5
, 6, 7
, 8 &
9
Vol 1
NT
& Q
LD S
ectio
n J
Insu
latio
n in
acc
orda
nce
with
ene
rgy
effic
ienc
y re
quire
men
ts o
f BCA
200
9 Se
ctio
n J.
2, 3
, 4, 5
, 6, 7
, 8 &
9
Vol 2
NT
Part
2.6
In
sula
tion
in a
ccor
danc
e w
ith b
uild
ing
fabr
ic re
quire
men
ts o
f BCA
200
9 Pa
rt 2
.6.
1 &
10
Vol 2
VIC
P2.
6.1
Insu
latio
n in
acc
orda
nce
with
bui
ldin
g fa
bric
requ
irem
ents
. 1
& 1
0
Gen
eral
Co
mpl
ianc
e, w
here
pan
els a
re e
xpos
ed to
tem
pera
ture
ove
r 50 C
, is e
xclu
ded,
for e
xam
ple
arou
nd c
him
neys
and
fire
plac
es.
1, 2
, 3, 4
, 5, 6
, 7, 8
, 9 &
10
Gen
eral
In
tern
al li
ning
s to
be d
esig
ned
and
spec
ified
in a
ccor
danc
e w
ith in
tern
al li
ning
s man
ufac
ture
r’s g
uide
lines
or b
y a
suita
bly
qual
ified
bu
ildin
g pr
ofes
siona
l.
1, 2
, 3, 4
, 5, 6
, 7, 8
, 9 &
10
Gen
eral
Th
e w
all s
yste
m sh
all b
e de
signe
d an
d sp
ecifi
ed b
y a
suita
bly
qual
ified
des
ign
prof
essio
nal a
nd in
stal
led
by su
itabl
y qu
alifi
ed a
nd
trai
ned
build
ing
prof
essio
nals.
Th
e de
sign
and
inst
alla
tion
of th
e w
all s
yste
m sh
all b
e co
nduc
ted
in a
ccor
danc
e w
ith e
ither
:
1, 2
, 3, 4
, 5, 6
, 7, 8
, 9 &
10
Cert
ifica
te n
umbe
r: CM
3004
8 Re
v4
This
cert
ifica
te is
onl
y va
lid w
hen
repr
oduc
ed in
its e
ntire
ty.
Page
4 o
f 6
oCS
R Ce
min
tel D
esig
n &
Inst
alla
tion
Guid
e –
Terr
itory
Ser
ies –
Ext
erna
l Hor
izont
al in
stal
latio
n, d
ated
06/
2017
, and
/or
oCS
R Ce
min
tel D
esig
n &
Inst
alla
tion
Guid
e –
Terr
itory
Ser
ies –
Ext
erna
l Ver
tical
inst
alla
tion,
dat
ed 0
6/20
17
APPE
NDI
X A
– PR
ODU
CT T
ECHN
ICAL
DAT
A A1
Typ
e an
d in
tend
ed u
se o
f pro
duct
CS
R Ce
min
tel T
errit
ory
Serie
s is a
n ex
tern
al w
all c
ladd
ing
syst
em d
esig
ned
for u
se w
ith a
ll bu
ildin
g ty
pes.
A2 D
escr
iptio
n of
pro
duct
CS
R Ce
min
tel T
errit
ory
Serie
s is a
n ex
tern
al w
all c
ladd
ing
syst
em c
onsis
ting
of c
emen
t-bo
nded
fibr
ous w
ood
part
icle
pan
els f
or a
ttac
hmen
t to
stru
ctur
al fr
amin
g of
tim
ber o
r ste
el o
r to
a m
ason
ry w
all.
A3 P
rodu
ct sp
ecifi
catio
n Re
fer t
o ite
ms 1
& 2
list
ed in
B2:
o
CSR
Cem
inte
l Des
ign
and
Inst
alla
tion
Guid
e –
Terr
itory
Ser
ies –
Ext
erna
l Hor
izont
al In
stal
latio
n, d
ated
06/
2017
oCS
R Ce
min
tel D
esig
n an
d In
stal
latio
n Gu
ide
– Te
rrito
ry S
erie
s – E
xter
nal V
ertic
al In
stal
latio
n, d
ated
06/
2017
A4 M
anuf
actu
rer a
nd m
anuf
actu
ring
plan
t(s)
CS
R Ce
min
tel
376
Vict
oria
Str
eet
Wet
heri
ll Pa
rk N
SW 2
164
A5 In
stal
latio
n re
quire
men
ts
Refe
r to
item
s 1 &
2 li
sted
in B
2:
oCS
R Ce
min
tel D
esig
n an
d In
stal
latio
n Gu
ide
– Te
rrito
ry S
erie
s – E
xter
nal H
orizo
ntal
Inst
alla
tion,
dat
ed 0
6/20
17o
CSR
Cem
inte
l Des
ign
and
Inst
alla
tion
Guid
e –
Terr
itory
Ser
ies –
Ext
erna
l Ver
tical
Inst
alla
tion,
dat
ed 0
6/20
17
A6 O
ther
rele
vant
tech
nica
l dat
a Re
fer t
o ite
ms 1
& 2
list
ed in
B2:
o
CSR
Cem
inte
l Des
ign
and
Inst
alla
tion
Guid
e –
Terr
itory
Ser
ies –
Ext
erna
l Hor
izont
al In
stal
latio
n, d
ated
06/
2017
oCS
R Ce
min
tel D
esig
n an
d In
stal
latio
n Gu
ide
– Te
rrito
ry S
erie
s – E
xter
nal V
ertic
al In
stal
latio
n, d
ated
06/
2017
And
any
refe
renc
ed d
ocum
ents
with
in th
e ab
ove.

Cert
ifica
te n
umbe
r: CM
3004
8 Re
v4
This
cert
ifica
te is
onl
y va
lid w
hen
repr
oduc
ed in
its e
ntire
ty.
Page
5 o
f 6
APPE
NDI
X B
– EV
ALU
ATIO
N S
TATE
MEN
TS
B1 E
valu
atio
n m
etho
ds
The
follo
win
g as
sess
men
t met
hods
hav
e be
en u
sed
to d
eter
min
e co
mpl
ianc
e w
ith N
CC 2
016:
Co
de C
laus
e As
sess
men
t Met
hod(
s)
Evid
ence
of s
uita
bilit
y Ev
iden
ce re
fere
nce
in B
2 N
CC V
olum
e O
ne B
P1.1
Co
mbi
natio
n of
A0.
5 (a
)(b) a
nd (c
) Co
mbi
natio
n of
A2.
2 a(
i) a(
vi) a
nd b
(i) –
Tes
t rep
ort,
expe
rt ju
dgem
ent &
cer
tific
ate
Item
s 3, 4
, 5, 6
, 7 &
8
NCC
Vol
ume
Two:
P2.
1.1
Com
bina
tion
of 1
.0.5
((a)(b
) and
(c)
Com
bina
tion
of 1
.2.2
a(i)
a(v
i) b(
i) –
Test
repo
rt, e
xper
t jud
gem
ent &
cer
tific
ate
Item
s 3, 4
, 5, 6
, 7 &
8
NCC
Vol
ume
One
FP1
.4
Com
bina
tion
of A
0.5
(a)(b
) and
(c)
Com
bina
tion
of A
2.2
a(i)
and
a(vi
) – T
est r
epor
t & e
xper
t jud
gem
ent
Item
s 15,
16,
17,
18
& 1
9 N
CC V
olum
e Tw
o: P
2.2.
2 Co
mbi
natio
n of
1.0
.5 (a
)(b) a
nd (c
) Co
mbi
natio
n of
1.2
. 2 a
(i) a
nd a
(vi)
– Te
st re
port
& e
xper
t jud
gem
ent
Item
s 15,
16,
17,
18
& 1
9 N
CC V
olum
e O
ne G
P5.1
Co
mbi
natio
n of
A0.
5(a)
and
(c)
Com
bina
tion
of A
2.2
a(i)
and
a(iii
) – T
est r
epor
t & c
ertif
icat
e Ite
ms 9
& 1
4 N
CC V
olum
e Tw
o: P
2.3.
4 Co
mbi
natio
n of
1.0
.5(a
) and
(c)
Com
bina
tion
of 1
.2.2
a(i)
and
a(iii
) – T
est r
epor
t & c
ertif
icat
e Ite
ms 9
& 1
4 N
CC V
olum
e O
ne JP
1 Co
mbi
natio
n of
A0.
5(a)
and
(b)
Com
bina
tion
of A
2.2
a(i)
a(vi
) and
A2.
2b (i
i) –
Test
repo
rt, c
ertif
icat
e &
cal
cula
tion
Item
s 20,
21,
22,
23
& 2
4 N
CC V
olum
e Tw
o: P
2.6.
1 Co
mbi
natio
n of
1.0
.5(a
) and
(b)
Com
bina
tion
of 1
.2.2
a(i)
a(v
i) an
d 1.
2.2b
(ii) –
Tes
t rep
ort,
cert
ifica
te &
cal
cula
tion
Item
s 20,
21,
22,
23
& 2
4 N
CC V
olum
e O
ne S
pec
A2.4
A0
.5 (b
) A2
.2 a
(i) –
Tes
t rep
ort
Item
s 12
& 1
3 N
CC V
olum
e O
ne C
1.12
A0
.5 (c
) Co
mbi
natio
n of
A2.
2 a(
vi) a
nd a
(i) –
Exp
ert j
udge
men
t & te
st re
port
Ite
ms 1
0 &
11
B2 R
epor
ts /
Evi
denc
e Th
e fo
llow
ing
repo
rts h
ave
been
use
d as
evi
denc
e to
det
erm
ine
com
plia
nce
with
NCC
201
6:
Auth
or
Refe
renc
e Da
te
Desc
riptio
n Ty
pe o
f Evi
denc
e 1.
CSR
- Ju
n-17
Ce
min
tel T
errit
ory
Serie
s D&
I Gui
de H
orizo
ntal
inst
all
Refe
renc
ed
2.
CS
R -
Jun-
17
Cem
inte
l Ter
ritor
y Se
ries D
&I G
uide
Ver
tical
inst
all
Refe
renc
ed
3.
Da
vid
Bene
ke
2012
-32-
LO12
6 Fe
b-17
St
ruct
ural
eng
inee
r’s c
ertif
icat
e A2
.2 (a
) (iii
) & 1
.2.2
(a) (
iii)
4.
Ja
mes
Coo
k U
ni
TS10
44
Aug-
17
Stru
ctur
al te
st re
port
A2
.2 (a
) (i)
& 1
.2.2
(a) (
i) 5.
Ian
Benn
ie &
Ass
oc
2016
-066
-S2
Nov
-16
Wea
ther
tight
ness
test
repo
rt
A2.2
(a) (
i) &
1.2
.2 (a
) (i)
6.
Ia
n Be
nnie
& A
ssoc
20
16-0
66-S
3 N
ov-1
6 W
eath
ertig
htne
ss te
st re
port
A2
.2 (a
) (i)
& 1
.2.2
(a) (
i) 7.
Qua
sar
Q09
1027
02-1
2 Ju
l-12
Stru
ctur
al a
naly
sis re
port
A2
.2 (a
) (iii
) & 1
.2.2
(a) (
iii)
8.
Q
uasa
r Q
1109
1701
-0
Sep-
11
Stru
ctur
al a
naly
sis re
port
A2
.2 (a
) (iii
) & 1
.2.2
(a) (
iii)
9.
BR
ANZ
FAR4
628
Oct
-16
Fire
Ass
essm
ent R
epor
t A2
.2 (a
) (iii
) & 1
.2.2
(a) (
iii)
10.
SG
A 27
7.3
R1.1
Ju
n-17
Co
mbu
stib
ility
ass
essm
ent r
epor
t A2
.2 (a
) (iii
) & 1
.2.2
(a) (
iii)
11.
CS
IRO
FN
K104
57
Mar
-12
Fire
Tes
t Rep
ort
A2.2
(a) (
i) &
1.2
.2 (a
) (i)
12.
BR
ANZ
FAR2
303
Dec-
15
Fire
Ass
essm
ent R
epor
t A2
.2 (a
) (iii
) & 1
.2.2
(a) (
iii)
13.
BR
ANZ
FAR2
357
Jul-1
7 Fi
re A
sses
smen
t Rep
ort
A2.2
(a) (
iii) &
1.2
.2 (a
) (iii
) 14
.
EXO
VA
2593
800
Feb-
12
Fire
Ass
essm
ent R
epor
t A2
.2 (a
) (i)
& 1
.2.2
(a) (
i) 15
.
Ian
Benn
ie &
Ass
oc
2016
-066
-S1
Nov
-16
Wea
ther
pro
ofin
g te
st re
port
A2
.2 (a
) (i)
& 1
.2.2
(a) (
i)

Cert
ifica
te n
umbe
r: CM
3004
8 Re
v4
This
cert
ifica
te is
onl
y va
lid w
hen
repr
oduc
ed in
its e
ntire
ty.
Page
6 o
f 6
Appe
ndix
B2,
con
t’d
Auth
or
Refe
renc
e Da
te
Desc
riptio
n Ty
pe o
f Evi
denc
e 16
.AE
COM
M
- Ju
l-16
Wea
ther
pro
ofin
g as
sess
men
t A2
.2 (a
) (vi
) & 1
.2.2
(a) (
vi)
17.
BRAN
Z DC
2314
-DU
01
Nov
-12
Wea
ther
pro
ofin
g te
st re
port
A2
.2 (a
) (i)
& 1
.2.2
(a) (
i) 18
.BR
ANZ
DC25
68
May
-15
Wea
ther
pro
ofin
g te
st re
port
A2
.2 (a
) (i)
& 1
.2.2
(a) (
i) 19
.CS
IRO
DT
F104
5 Fe
b-16
W
eath
er p
roof
ing
test
repo
rt
A2.2
(a) (
i) &
1.2
.2 (a
) (i)
20.
CSR
TC90
6 M
ar-1
3 Th
erm
al te
st re
port
A2
.2 (a
) (i)
& 1
.2.2
(a) (
i) 21
.CS
R -
Jul-1
3 Th
erm
al a
sses
smen
t cal
cula
tions
A2
.2 (b
) (ii)
& 1
.2.2
(b) (
ii)
22.
CSR
- Ju
l-13
Ther
mal
ass
essm
ent c
alcu
latio
ns
A2.2
(b) (
ii) &
1.2
.2 (b
) (ii)
23
.CS
R -
Jul-1
3 Th
erm
al a
sses
smen
t cal
cula
tions
A2
.2 (b
) (ii)
& 1
.2.2
(b) (
ii)
24.
CSR
- Ju
l-13
Ther
mal
ass
essm
ent c
alcu
latio
ns
A2.2
(b) (
ii) &
1.2
.2 (b
) (ii)
End
of C
ertif
icat
e

376 Victoria StWetherill Park NSW 2164
1300 236 [email protected]
cemintel.com.au
05/
2018
Disclaimer: Information presented in this document is supplied in good faith and to the best of our knowledge, was accurate at the time of preparation. The provision of this information should not be construed as a recommendation to use any of our products in violation of any patent rights or in breach of any statute or regulation. Users are advised to make their own determination as to the suitability of this information in relation to their particular purpose or specific circumstances. Since the information contained is in this document may be applied under conditions beyond our control, no responsibility can be accepted by Cemintel or its staff or any loss or damage caused by any person acting or refraining from action as a result of misuse of this information.
NEW ZEALAND DESIGN AND INSTALLATION GUIDE
TERRITORY SERIESExternal Horizontal Installation (with Designer Series® fixing system)
FCNZ503 March 2019

TERRITORY™ – External Horizontal Installation (with Designer Series fixing system)1
Introduction
TABLE OF CONTENTS
Cemintel’s Territory™ cavity walling system combines a prefinished panel with a simple installation system that can be used externally or internally for residential and commercial buildings.
This Design and Installation Guide recommends good building practice methodology and has been prepared as a general guide of design considerations, system engineering information and installation procedures for common external horizontal applications. It assumes that the user has an intermediate knowledge level of building design and construction. In no way does it replace the services of the building professionals required to design projects, nor is it an exhaustive guide of all possible scenarios. It is the responsibility of the architect, designer and
various engineering parties to ensure that the details in this Design and Installation Guide are appropriate for the intended application.
Territory can be installed either horizontally or vertically, externally or internally. This guide refers to external horizontal installations only as components differ depending on the installation.
Refer to the ‘Design and Installation Guide for Cemintel® Territory External Vertical Installation’ or the ‘Design and Installation Guide for Cemintel Territory Internal Installation’ for instructions regarding these applications.
01 INTRODUCTION
01 INTRODUCTION 1
Introduction 1
02 PRODUCT OVERVIEW 2
Panel Information 3
Colour Palette 4
03 SYSTEM OVERVIEW 5
Applications 7
Benefits of the Cemintel Territory System 7
Product Specifications/System Solutions 7
04 DESIGN + AESTHETIC CONSIDERATIONS 8
General 9
Control Joints 10
Structural 11
Weatherproofing 11
Wall Wrap/Sarking Moisture Management 12
Insulation and Energy Efficiency 13
Extreme Climate Conditions 13
Other Design Considerations 14
05 COMPONENTS + ACCESSORIES 15
06 SYSTEM ENGINEERING 19
Design, Detailing and Performance
Responsibilities 20
Span Tables / Wind Loads 21
Masonry Substrates 23
07 INSTALLATION 24
Prior to Installation 25
Installation Set-Out 26
Steel Framing 28
Masonry Framing 30
Installation for Timber and Steel Framing 33
Installation for Masonry 35
08 CONSTRUCTION DRAWINGS + DETAILS 36
09 SAFETY, HANDLING + GENERAL CARE 55
Health, Safety and PPE 56
Handling & General Care 56
10 WARRANTY, CLEANING + MAINTENANCE 57
Warranty 58
Wash Down Process 58
Inspection, Repair and Maintenance 58

TERRITORY™ – External Horizontal Installation (with Designer Series fixing system) 2
PRODUCT OVERVIEW

TERRITORY™ – External Horizontal Installation (with Designer Series fixing system)3
02 PRODUCT OVERVIEW
Panel Information
Cemintel Territory panels are cement bonded fibrous wood particle products that are pressed with a surface texture. They are cut to a standard length of 3030mm with an effective cover width of 455mm and 16mm nominal thickness. The horizontal edges of the panel are machined with a complementary tongue and groove profile. A compressible sealing strip is bonded onto the tongue which enables the panels to fit neatly together to form a weather resistant joint.
The panels have been pre-finished using a durable multi-layered paint process to simulate a range of textured finishes, for example, timber, concrete, stone or render. They are ready-to-install and are highly durable.
Panels have a special NichiGuard® self cleaning coating* applied during the manufacturing process to Japanese standards. Panels include Platinum Coating technology to protect against UV damage and colour fade.
There is a range of colour matched accessories including pre-formed external corner profiles, joint sealants and touch up paint kits to speed installation and enhance the project finish and appearance.
An alternative aluminium corner can also be used for a more contemporary aesthetic.
*Note: not all panels have NichiGuard self cleaning coating – check Technical Data Sheet.
6.5mm
6.4mm
8.6mm
10mm
8.1mm
4.2mm
470mm
3.9mm
4.9mm
Prepared byFC CDS Drawings Draft V1 | Modified: January 24, 2017 12:02 PMPage #.1
455mm
FIGURE 2.01

TERRITORY™ – External Horizontal Installation (with Designer Series fixing system) 4
02PRODUCT OVERVIEW
NZ Stocked Colour Palette
Indent Only Colour Palette
Steppe
Tundra
Canyon
Ripple
Shade
River Bed Steppe
Alpine Montane
Woodlands Savanna
Smoked Limed Whitewash
Savanna
Cloud Mist Haze
Woodlands
Teak Ebony
Gravel Sandstone
Sand Pebble
River Bed
Silt
Quarry
As Territory is a prefinished product, product images may vary from the actual product in regard to colour and surface finish. Panels should be inspected by the owner prior to installation to ensure they meet aesthetic requirements.
Indent only products require additional lead times and have minimum order quantities.
ConcreteUrban Grey

TERRITORY™ – External Horizontal Installation (with Designer Series fixing system)5
SYSTEM OVERVIEW

TERRITORY™ – External Horizontal Installation (with Designer Series fixing system) 6
03SYSTEM OVERVIEW
Territory Panel
Stud framing (double studs at all vertical sheet joints)Building
wrap
Starter Strip
Mask, prime and fill all vertical panel joints with colour matched joint Sealant
��Joint Backing Strip at all vertical joints�
Pre-formed Corner�
�
�
Corner Clips and Clip Flashing
�
Panel Clip and Clip Flashing at 600mm max. cts
�
�
Designer Series clips, together with spacer strips, base starter strips and head vents/eaves trims, create a 15mm cavity behind the Territory panels which allows air flow, ventilation and drainage. This prevents moisture build up and reduces the risk of moisture penetration, allowing the building shell to dry out, creating a healthier, more breathable building.
Aluminium corners can be used as an alternative to the pre-formed corners shown above.
FIGURE 3.01 Cemintel Territory panels are installed with the unique Designer Series clip system – providing a ventilated cavity.

TERRITORY™ – External Horizontal Installation (with Designer Series fixing system)7
03 SYSTEM OVERVIEW
Cemintel Territory is suitable for all building classes, however, site environmental factors such as wind pressures and corrosivity zones need to be taken into account to determine its suitability for a particular environment.
Codemark Certificate of Conformity No. GM-CM30041 has been obtained for installation to timber, steel and masonry frames. The Certificate confirms compliance with NZ Building Code clauses relating to structure, weather resistance, bushfire construction and thermal resistance.
When installed horizontally, the panels and system have been tested to withstand wind pressures up to 6kPa.
Applications
Benefits of the Cemintel Territory System
Product Specifications/System Solutions
Dimensional/Geometrical Characteristic
Specification Manufacturing Tolerance
Relevant Standard
Panel Width470mm (overall width)455mm (effective coverage)
+ / - 1mm JIS A 5422
Panel Length 3030mm + / - 1mm JIS A 5422
Panel Thickness 16mm + / - 1.2mm JIS A 5422
Panel Weight (EMC)Between 24.6kg and 30kg per panel. Weight varies depending on finish. (Note: 2 panels per pack)
Fire Safety Cladding Type Type AC/VM2 Appendix 2/ISO 5660
Weatherproofing
Has passed testing for Wind zones up to and including Extra High and a serviceability wind pressure of +3.72 kPa. (Rigid Air Barrier recommended for pressures above 1.5 kPa and Extra High Wind zones)
AS/NZS 4284 & E2/VM1
Wind loadSuitable for use in Wind zones up to and including Extra High and for ultimate wind load of +/- 6.0 kPa.
AS/NZS 1170.2 & NZS 3604
A technical Data Sheet can be downloaded from cemintel.co.nz
• Low maintenance.
• No requirement for additional painting costs.
• Potential to speed up the construction process.
• Large format lightweight panels are designed to be fixed to industry standard timber or steel stud structural frames.
• Can also be fixed to masonry.
• Ventilated cavity system allows air flow and drainage.
• Panels are easy to cut for openings eg. around windows and meter boxes.
• Fire Resistance – has been assessed as a Type A cladding.
• Durable and weather resistant;
- Provides effective protection against wind, rain and temperature extremes, mould and mildew
- Panels will not rot, swell or warp when correctly installed and maintained
• Suitable for Sea Spray Zone D.
30041GM-CM 30041

TERRITORY™ – External Horizontal Installation (with Designer Series fixing system) 8
04DESIGN + AESTHETIC CONSIDERATIONS
DESIGN + AESTHETIC CONSIDERATIONS

TERRITORY™ – External Horizontal Installation (with Designer Series fixing system)9
04 DESIGN + AESTHETIC CONSIDERATIONS
This section outlines some important areas for consideration in determining whether Cemintel Territory is suitable for the required application. The following points are not exhaustive. It is the responsibility of the Architect/building designer to ensure the design conforms to NZBC requirements and other relevant building standards that may exist for the location. This guide should be read in conjunction with the NZBC.
Face FixingsCemintel Territory is installed largely as a concealed fixing system. The panels are held in place by clips that are screwed to the frame. However, in some places, for example, around openings where clips cannot be fixed, face fixed nails or screws are used. A colour matched touch up paint is available to cover the nails or screws in this instance. Further, depending on wind loads, there may be a requirement for extra face fixings (refer to Fig 4.01). Do NOT use sealant on nail heads.
FIGURE 4.01 Typical Territory System Cross Sectional
Detail where Face fixing is required – Elevation
Window & Door OpeningsCemintel Territory is compatible with industry standard aluminium and timber framed windows. Aluminium windows MUST NOT have sill drain holes that can direct water into the wall cavity.
With the cavity created by the clip system, particular attention needs to be given to the set out of windows and doors.
The depth of the window needs to be taken into account in the design of the building frame so that the front face of the panel is properly aligned with the window and that the flashing is installed correctly.
A nominal space of 31mm needs to be allowed for a flush finish – taking into account the 15mm cavity (created through the use of the starter strip, clips and spacers) and 16mm panel thickness. This needs to be included in drawings for any project.
If using a rigid air barrier, the thickness of this also needs to be accounted for to achieve a flush finish when determining window set out and reveal depths.
Refer to window detail drawing options in ‘Construction Drawings and Details’ section of this guide.
Eaves JunctionOptions are provided to ensure air circulation through the cavity. A proprietary foam ‘L Form Vent’ can be concealed behind a traditional timber trim. Alternatively, a coloured metal Eave Trim is available with matching external corner pieces. It is not recommended that air be vented into the roof space.
CornersThe system offers the choice of either pre-formed matching corners or metal corners. In many cases the metal corners are considered easier to install. Note that metal corners are recommended when installing onto masonry.
Territory Panel
Integral compressible sealing element
Territory Spacer and Territory Nail (when required)
Territory Spacer fixed with galvanised clout
Territory Panel Clip
Panel tongue and groove profiles
Nominal cover 455mm
200mm nom.
Territory Screw
16mm nominal 15mm nominal
Clip flashing
Clip flashing
CoverageA Cemintel Territory panel has a nominal width coverage of 455mm.
Note that the recommended minimum cut panel size is 100mm in length and 200mm in height. Anything under this will most likely result in cracking. All cut panels must have exposed edges sealed to protect against moisture penetration.
Panel Coverage Calculator.
Territory Panel Rows (Height)
Coverage for Full Panels (mm nominal)
1 4552 9103 13654 18205 22756 27307 31858 36409 4095

TERRITORY™ – External Horizontal Installation (with Designer Series fixing system) 10
04DESIGN + AESTHETIC CONSIDERATIONS
Full Panel Full Panel
Full Panel Full Panel
Alternative locations
Full Panel
Sealant Filled Panel Joint
LEGEND
PLAN VIEW
Pre-formed External Corner
ELEVATION
Alternative locations
Vertical frame shrinkage issues must be addressed
External Corner Trim shown
HorizontalControl Joint
FIGURE 4.02 Typical layout of vertical and horizontal panel joints.
Movement Control Joints
Control joints provided in the panel layout should be aligned with any movement control joints provided in the framing. For example, a horizontal control joint of approximately 20-30mm may be required at every storey junction (Refer to Fig 4.02).
When undertaking building additions, a movement control joint must be installed at the junction of the existing framing and new framing. The cladding systems must be discontinuous at this joint. Refer to ‘Construction Drawings and Details’ section.
When setting out panels, design consideration should be given to the location of joints to ensure that minimum panel lengths and widths are met.
Horizontal Control Joints
Where frame shrinkage may be a concern, Cemintel NZ recommends creating a horizontal break in the panelling at the first floor level or by incorporating a verandah or awning or other design element to create discontinuous panelling.
Vertical Control Joints
Vertical sealant filled control joints are required at the end of each panel (at a maximum 3030mm spacings = full length panel), at junctions with pre-formed corners, and at other wall junctions. No additional vertical control joints are required.
Vertical joints in panels must be aligned and extend for the full height of continuous panelling, although additional joints may be placed over openings for ease of installation. As the joints are expressed and sealant filled, consideration to the positioning of joints is important for aesthetic reasons. Placing joints at sides or above openings, or the use of full height windows can reduce the visual impact of joints.
A vertical control joint must also be installed when a masonry wall adjoins framed construction, and at the junction of framed additions to existing buildings, to allow for differential movement. Refer to ‘Construction Drawings and Details’ section.
Control Joints

TERRITORY™ – External Horizontal Installation (with Designer Series fixing system)11
04 DESIGN + AESTHETIC CONSIDERATIONS
Windload
Wind loads have been calculated in accordance with AS/NZS1170.2 and for wind zones described in NZS 3604. Span tables are provided for timber framing and steel framing, suitable for all New Zealand wind zones and wind pressures of up to 6kPa.
The tables assume that an interior lining is in place so that only exterior pressures are applied to the cladding. The interior linings must be designed for the appropriate pressures. Contact Cemintel NZ for information on buildings requiring specific design.
Framing and Substrate Options
Cemintel Territory can be fixed to timber or steel framing as well as to masonry substrates.
For timber and steel framing, the minimum requirement shall be in accordance with the following standards:
• NZS 3604 – Timber Framed Buildings.• NZS 3404 – Steel Structures.• AS/NZS4600 – Cold Formed Steel Structures.
The Territory horizontal installation has been evaluated for use in all New Zealand wind zones up to and including Extra High in accordance with NZS3604, and for wind pressures up to 6kPa for projects outside the scope of NZS3604.
It is critical that the frame is true and plumb. Industry best practice for frame tolerance is 5mm misalignment over 3000mm.
Note: depending on the chosen panel layout, double studs may be required in some locations. Refer to ‘System Engineering’ section.
Masonry Installation
Masonry structures are potentially more likely to be out of plumb. This guide provides a fixing solution for masonry however, the top hat has limited ability to allow for variation in the surface plane. Careful assessment should be undertaken to determine if this solution is appropriate for the specific situation.
Span tables are located in ‘System Engineering’ section.
Structural Bracing
Cemintel Territory panels are indirectly attached to the structural framing using clips and spacers. As a consequence, they are not designed to provide wall bracing.
Bracing must be provided in the structural framing with methods such as sheet or strap bracing. Where sheet bracing is used, the entire wall framing to be clad with Territory panels must be sheeted to maintain a uniform fixing plane. Note: window setout will be affected.
If the building requires a rigid air barrier for weatherproofing purposes (ie higher wind load areas), it is possible to use 6mm fibre cement sheeting as part of the bracing system. Contact Cemintel NZ for options.
Thermal Break
A thermal break with a minimum R-value of R0.25 is required where Cemintel Territory is fixed to steel framing of walls enclosing habitable or usable spaces. The thermal break is applied to the face of the frame to ensure that the performance of the wall complies to Acceptable Solution E3/AS1 Internal Moisture as condensation control.
Structural

TERRITORY™ – External Horizontal Installation (with Designer Series fixing system) 12
04DESIGN + AESTHETIC CONSIDERATIONS
Wall Wrap for Moisture Management
All buildings require an air barrier to be installed. This may be wall wrap, fibre cement, ply wood or masonry. Installation of fibre cement is detailed in the Cemintel Air Barrier Design and Installation Guide. Masonry substrates must be sealed to act as an air barrier for an effective waterproofing system. For residential buildings in wind zones Low to Very High, wall wrap may generally be used (install as per manufacturer's requirements).
Installation of a wall wrap is required over the structural frame before the panels are fixed. Where the building is in an Extra High wind zone or required to withstand wind loads in excess of 1.5kPa, a rigid air barrier is required in lieu of wall wrap. To ensure occupant comfort and protection of the building frame, the following factors should be considered during the selection of the correct wall wrap:
Building wrap (flexible underlay) is an integral part of the Territory system, and must be combined with a rigid wall underlay in wind zone Extra High. Wind forces can produce lower air pressures within buildings than on the outside, assisting to force water through gaps in the building envelope such as around penetrations and joints, even at low wind speeds.
The system incorporates a drained cavity, similar to brick veneer construction. This is highly effective at removing condensation and any incidental moisture from the cavity, thereby ensuring that the components within the cavity can dry out. The underlay must be installed in accordance with the Acceptable Solution E2/AS1.
Condensation is a complex problem, and can occur under a variety of conditions, not just cold weather. Literature on this subject is available from CSIRO/BRANZ/ASHRAE/ABCBand should be consulted when building in areas where condensation is likely to occur.
Weatherproofing• The Territory range has been weather tested to E2/VM1 to successfully withstand water ingress for Wind Zones
up to and including Extra High. For Extra High wind zones a Rigid Air Barrier is required.
• The Territory range has been weather tested to AS/NZS 4284 to successfully withstand water ingress for serviceability wind loads of up to +3.72kPa and -3.72kPa and to withstand ultimate wind loads of +6kPa and -6kPa. A specific air barrier is required and options are available with wall wraps/sarking (ultimate wind load up to 1.5kPa) and with a rigid air barrier. Refer to ‘System Engineering’ Section and Cemintel’s Design and Installation Guide for Rigid Air Barrier for further information.
• Windows must be a front draining style and have appropriate flashing to prevent moisture ingress.
• It is important to seal any exposed cut edges to protect against moisture penetration into the panel.

TERRITORY™ – External Horizontal Installation (with Designer Series fixing system)13
04 DESIGN + AESTHETIC CONSIDERATIONS
Insulation and Energy EfficiencyThermal insulation values for walls must be calculated in order to meet the energy efficiency requirements of NZBC Clause H1.
Calculation tools are available (BRANZ) based on the methods of NZS 4218 for the total insulation values for walls, based on the climate zone (as shown in Appendix B of NZS 4218) and the construction R-values of the building wall elements. Construction
R-values should be calculated in accordance with NZS 4214 Methods of determining the total thermal resistance of parts of buildings.
Further information can be found in Acceptable Solution H1/AS1 and the BRANZ House Insulation Guide.
Solar Reflectance/Absorptance
In some states, it is a requirement to provide solar values for coloured product.
Cemintel Territory has been tested by the University of New South Wales to determine Solar Absorption and Reflectance as required by the NZBC. The products have been tested to ASTM E 903-96 ‘Standard Test Method for Solar Absorptance, Reflectance and Transmittance of Materials Using Integrating Spheres’.
Current values are included in the Technical Data Sheet.
Corrosive Zones
Consideration of corrosivity zones should be taken into account. While Territory panels are not susceptible to corrosion, consideration needs to be made regarding the impact of climate conditions on system components such as fasteners, clips and metal framing, for example.
Corrosivity zones are described in NZS 3604, with further information available in AS/NZS 2728 and E2/AS1. It is recommended that the building designer assess the site in accordance with the standards and local conditions to determine suitability of the system.
The Territory system may be used in zones B, C and D except for fixing to masonry which is limited to zones
B & C. The System is not suitable for use in Zone E or in industrial and geothermal areas where the environment may be acidic with a pH of less than 5.
In all zones, all walls which are protected by soffits above must be washed down twice per year, to remove salt and debris buildup, particularly around window/door openings.
Temperature Extremes
Territory panels are not warranted for use in freezing conditions in which panels are in contact with snow or extremely hot temperatures (above 50°C).
Extreme Climate Conditions
Other Design Considerations
Penetrations
Penetrations in the Territory panels must be neatly cut using appropriate tools such as a saw, drill or hole saw.
Penetrations should be prepared with a clearance of 8-10mm all around and the gap must be fully sealed with sealant.
Elements that cross the cavity must not allow water to transfer to the building wrap, for example, by angling them down to the cladding.
Rennovations and Additions
When undertaking building renovations, remove all cladding and wall wrap/sarking and insulation from the original wall framing. Ensure the condition of the

TERRITORY™ – External Horizontal Installation (with Designer Series fixing system) 14
04DESIGN + AESTHETIC CONSIDERATIONS
framing is in accordance with current requirements and is as true and as plumb as possible (within accepted industry tolerance of 5mm misalignment over 3000mm).
Install additional framing as required, insulation, air barrier and flashing.
When undertaking building additions, a movement control joint must be installed at the junction of the current framing and new framing. The current and new framing and cladding systems must be discontinuous at this control joint.
Limitations
The Territory system is NOT suitable for the following applications: Panels with non-vertical face (e.g. Parapet Capping); wet areas such as bathrooms and water features; exposure to temperatures over 50ºC; non-vented parapet cladding; contact with standing snow or ice.
Do NOT apply tiles or other materials to the face of the panels.
Fire Safety Requirements
All cladding for buildings over 7m high requires a fire test in accordance with ISO 5660. Territory panels have been tested by BRANZ to achieve a ‘Type A’ Cladding Type. This allows Territory panels to be installed on buildings above 7m to achieve fire safety requirements. Cemintel NZ also recommend installing horizontal cavity barriers to reduce the risk of fire spread via the facade. Cavity barriers must not block water drainage or air flow paths.
It is the responsibility of the building designer, architect or engineer to meet these requirements.
Territory QUARRY Urban Grey
Note that the Territory QUARRY Urban Grey panel has “dimples” across the surface to replicate the look of formwork and these need to be considered in the design phase. Extra product may need to be ordered accordingly. The Territory QUARRY Concrete has the same colour/finish but has a flat profile (ie no “dimples”).
3030
993855855855855399
455
2.77
2.77

TERRITORY™ – External Horizontal Installation (with Designer Series fixing system)15
COMPONENTS + ACCESSORIES

TERRITORY™ – External Horizontal Installation (with Designer Series fixing system) 16
05COMPONENTS + ACCESSORIESNote: Codes can change from time to time. Refer to the website for the current list of components prior to ordering.
Product Name - NZ Stocked range Panel (2 Pk)
Touch-Up Paint* Primer
Colour Matched Joint
Sealant – 500mL
Pre-formed External Corner #
SAVANNA Cloud 16mm 455X3030 128082 159034 128124 185414 128088
SAVANNA Haze 16mm 455X3030 128084 159035 128124 185415 128111
SAVANNA Mist 16mm 455X3030 129143 159036 128124 185416 131101
QUARRY Urban Grey 16mm 455X3030 128087 159040 128124 185541 128114
QUARRY Concrete 16mm 455X3030 151949 159040 128124 185541 128114
WOODLANDS Teak 16mm 455X3030 140795 159051 128124 185542 140798
WOODLANDS Ebony 16mm 455X3030 140797 159052 128124 185544 140800
RIVERBED Gravel 16mm 455X3030 193545 193592 128124 193574 193552
RIVERBED Sandstone 16mm 455x3030 193548 193595 128124 185419 193571
STEPPE Alpine 16mm 455X3030 186443 186454 128124 186466 186483
STEPPE Montane 16mm 455X3030 186442 186455 128124 185544 186482
Cemintel Territory Panels and Colour Matched Accessories
Product Name - Indent Only Range Panel (2 Pk)
Touch-Up Paint* Primer
Colour Matched Joint
Sealant – 500mL
Pre-formed External Corner #
SAVANNA Shade 16mm 455X3030 129144 159037 128124 185417 131102
WOODLANDS Smoked 16mm 455X3030 186444 186456 128124 186470 186484
WOODLANDS Limed 16mm 455X3030 186446 186458 186527 186469 186486
WOODLANDS Whitewash 16mm 455X3030 186445 186457 128124 186467 186485
RIVERBED Sand 16mm 455X3030 186449 186461 128124 186469 186489
RIVERBED Silt 16mm 455X3030 186450 186462 128124 185415 186490
RIVERBED Pebble 16mm 455X3030 186451 186463 128124 186470 186501
STEPPE Tundra 16mm 455X3030 186452 186464 186527 186467 186502
CANYON Ripple 16mm 455X3030 186453 186465 128124 186469 186503
* Touch-Up Paint – use for nail heads, cut edges at window heads and other visible blemishes. If 304 nail heads require coating, use a primer for bare steel such as Dulux All Metal Primer prior to coating with the appropriate colour matched paint.
#Pre-formed External Corners are manufactured to match panels. Internal measurement – 70mm x 70mm. Coverage nominal 86mm x 86mm x 455mm.
Accessories Description Size Quantity Product Code
Screws for timber framing – used to fix starter strip, clips and other components. Stainless steel 410 grade and clear coated.
35mm 250 per pack
128145
Screws for timber framing – for fixing components over materials such as rigidair barrier or bracing sheet. Galvanised steel, Cat5 ArmaGalv.
63mm 250 per pack
186524
Nails for timber framing – for fixing Territory panels at soffit line and other locations where required. Ribbed shank, flat head, stainless steel 304 grade. Pre-drill panels for all nails.
75mm 115 per pack
128147
Screws for steel framing – for fixing starter strip, clips and other components.Cat5 ArmaGalv, 8g, self-drilling, button head, Phillips drive.
40mm 250 per pack
165681
Screws for steel framing – for face fixing Territory panels at soffit line and otherspecified locations. Cat5 ArmaGalv, self-drilling, CSK self-embedding head, Phillips drive. Suitable for 0.75mm BMT steel framing.
75mm 100 per pack
165683
Screws for masonry framing – for fixing start strip, clips and other components onto Rondo H515 Top Hats. Class 3, 8g, self-drilling, wafer head, Phillips drive
12mm 100 per pack
By Others
Screws for masonry framing – for face fixing panels at soffit line and otherlocations where required onto Rondo H515 Top Hats. Cat5 ArmaGalv, self-drilling, CSKself-embedding head, Square drive. Also used for fixing panel to metal corner.=
45mm 100 per pack
186526
Fasteners – to fix backing strip and other components to framing.• For fixing to timber framing – galvanised clout, 40 x 1.6mm• For fixing to steel framing – button head screws, class 3, 6g x 40mm self-drilling, Phillips drive• For fixing to H515 Top Hat – button head screws 8g, self-drilling, Phillips drive, 12mm for fixing
starter strip and clip
By Others
Other Accessories/Tools
6.5mm
6.4mm
6.5mm
10mm
8.1mm
4.2mm
470mm
3.9mm
4.9mm
Prepared byFC CDS Drawings Draft V1 | Modified: January 24, 2017 12:02 PMPage #.1
6.5mm
6.4mm
6.5mm
10mm
8.1mm
4.2mm
470mm
3.9mm
4.9mm
Prepared byFC CDS Drawings Draft V1 | Modified: January 24, 2017 12:02 PMPage #.1
6.5mm
6.4mm
6.5mm
10mm
8.1mm
4.2mm
470mm
3.9mm
4.9mm
Prepared byFC CDS Drawings Draft V1 | Modified: January 24, 2017 12:02 PMPage #.1

TERRITORY™ – External Horizontal Installation (with Designer Series fixing system)17
05 COMPONENTS + ACCESSORIESNote: Codes can change from time to time. Refer to the website for the current list of components prior to ordering.
Accessories Description Size Quantity Product Code
Horizontal Base Starter Strip – Steel profile used at the base to locate the first row of panels. Manufactured from 1.2mm BMT steel with Galvalume AZ150 corrosion resistant coating.
85mm x 15mm x 3000mm
1 each 139869
Horizontal Starter Strip – steel profile used at the base to locate the first row of panels. Provides 15mm offset from face of studs. Manufactured from 1.2BMT steel with Galvalume AZ150 corrosion resistant coating.
3030mm 1 each 128137
Horizontal Panel Clip – fixed to the framing to retain the tongue and groove edges of panels. Manufactured from SuperDyma corrosion resistant coated steel.
72mm x 45mm x 15mm
50 per pack 128138
Horizontal Panel Clip Flashing – Used behind each Panel Clip. Galvalume AZ150 corrosion resistant coating.
70mm x 56mm
Pack of 200 128143
Corner Clip – fixed to the framing to retain the tongue and groove edges of the pre-formed external corner. Manufactured from SuperDyma corrosion resistant coated sheet.
45mm x 45mm x 15mm
24 per pack 128139
Corner Clip Flashing – Used behind each Corner Clip. Galvalume AZ150 corrosion resistant coating.
45mm x 56mm
Pack of 100 128144
50mm Horizontal Spacer – for packing between framing and panels at eaves and other locations wherever face fixing is required. Manufactured in extruded plastic.
15mm x 50mm
x 1200mm
1 each 128136
Steel Top Hat – for framing on masonry substrate. Rondo H515. Manufactured from galvanised (Z275) 1.15mm BMT steel. Requires screws 8G, self-drilling, button head, Phillips drive 12mm for fixing starter strip and short [and long] clips to H515 Top Hat. Suitable for corrosion zones B & C only
80mm x 15mm with
500mm face 0.91 kg/m
By others
Eaves Trim – Provides an attractive finish at eaves junction and provides cavity ventilation. Powder coated finish on 1.0mm Aluminium.
60 x 26 x 3030mm
1 eachWhiteBlack
BronzeChampagne
192873192859192857192860
Eaves Trim External Corner – provides joint at external eaves trim corner. Powder coated finish on 1.0mm Aluminium.
100mm x 100mm
Pack of 4WhiteBlack
BronzeChampagne
1928778192874192872192876
Eaves Trim Internal Corner – provides joint at internal eaves trim corner. Powder coated finish on 1.0mm Aluminium.
Pack of 4WhiteBlack
BronzeChampagne
192879192875192873192877
Soffit Trim – provides finish at soffit edge as well as cavity ventilation and cavity closure below battens. Powder coated finish on 0.35mm BMT steel with Galvalume AZ150 corrosion resistant coating.
3030mm 1 eachWhite 159421
Soffit Trim External Corner – provides joint at soffit trim corner. Powder coated finish on 0.35mm BMT steel with Galvalume AZ150 corrosion resistant coating.
White 159422
3030mm
Fixing holes
Drainage holes
22.5mm
85mm

TERRITORY™ – External Horizontal Installation (with Designer Series fixing system) 18
05COMPONENTS + ACCESSORIESNote: Codes can change from time to time. Refer to the website for the current list of components prior to ordering.
Soffit Trim Internal Corner – provides joint at soffit trim corner. Powder coated finish on 0.35mm BMT steel with Galvalume AZ150 corrosion resistant coating.
135206 Pack of 2White 159423
Joint Backing Strip Double Flange – used at vertical joints to fill cavity and provide a backing for sealant. Manufactured in 0.3mm BMT steel with Galvalume AZ150 corrosion resistant and bond breaker coating. Forms 10mm wide express joint.
135208 1 each 128134
Joint Backing Strip Single Flange – used at vertical internal corner joints and at openings to fill cavity and provide a backing for sealant. Manufactured in 0.3mm BMT steel with Galvalume AZ150 corrosion resistant and bond breaker coating.
135207 1 each 128135
Internal Corner Flashing 128140
Cavity Closure – UPVC profile used above windows, doors and similar openings as a vermin barrier.
50mm x 15mm x
3000mm
1 each 128142
90mm Vertical Spacer – for use with metal corners. 15mm x 90mm
x 2000mm
1 each 140818
External aluminium corner trim – anodised aluminium extrusion used to dress and finish external corners.
60mm x 65mm x 3030mm
1 each BronzeSilverPearl
128115128117128116
L-Form Cavity Vent – used at parapet, soffits and horizontal control joints to provide air flow while maintaining vermin proofing. Has self-adhesive EPDM tape for fixing into flashing/capping and compressible foam filler attached internally.
1200mm 1 each 134770
Cemintel Edge Sealer – for sealing panel edges after on-site cutting. 200ml 1 each 186529
Territory Putty – Putty required to patch exposed fixings on Smartfit Windows or fill holes in Territory panels.
330mL 1 each 176474
Product Description Size Quantity Product Code
Cemintel Power Saw Blade – specifically designed for cutting pre-finished cement based sheets. Ideal for use with dustless circular saws fitted with vacuum extraction systems. 15000 RPM max.
125mm 1 154461
Makita Plunge Saw Kit (1300W) includes 1400mm guide rail and bonus 165mm fibre cement saw blade – excellent for cutting cement based sheets
165mm 1 Supplied by others
Makita 165mm Fibre Cement Saw Blade – ideal for use with the Makita Plunge saw and other 165mm circular saws fitted with vacuum extraction systems
165mmx20x4T 1 Supplied by others
FESTOOL DSC-AGP 125 – Diamond Blade Cutting and Grinding Tool. Used to provide neat and accurate bevelled edges
125mm 1 Supplied by others
FESTOOL TS 55 EBQ Plunge Cut Saw – with 1400mm Guide Rail. Precise plunge cuts in materials up to 55mm thick.
160mm 1 Supplied by others
FESTOOL Diamond Tipped Blade for TS 55 – for cutting all fibre cement sheet products
160mm 1 Supplied by others
Tools

TERRITORY™ – External Horizontal Installation (with Designer Series fixing system)19
SYSTEM ENGINEERING

TERRITORY™ – External Horizontal Installation (with Designer Series fixing system) 20
06SYSTEM ENGINEERING
Cemintel engages independent testing laboratories to test and report on the performance of a wall in accordance with the relevant New Zealand Standards. Consultants use these reports as the basis for opinions (estimates of laboratory performance) they issue for variations to the tested system. Using their experience, the consultant will make judgments about on-site installed performance of various walls. The performance levels of walls documented in this guide are either what is reported in a test or the documented opinion of consultants. Performance in projects is typically the responsibility of:
Project Consultants (Structural, Fire, Acoustic, Etc.)
These consultants are typically responsible for the following:
• Opinions on expected laboratory performance of wall configurations that vary from actual test configuration, such as substitution products and components.
• Judgements about expected field performance using laboratory test reports and practical experience.
• Design, specification and certification of structural, fire, acoustic, durability, weather tightness and any other required performance criteria for individual projects.
This involves the design and selection of building elements, such as wall and floors and their integration into the building considering the following:
• Interface of different building elements and to the structure / substrate.
• Wall and floor junctions.
• Penetrations.
• Flashing design.
• Room / building geometry.
• Acoustic and water penetration field-testing.
Project Certifier and/or Builder
These professionals are typically responsible for:
• Identifying the performance requirements for the project in accordance with the NZBC and clearly communicating this to the relevant parties.
• Applicability of any performance characteristics supplied by Cemintel NZ including test and opinions for the project.
• The project consultant’s responsibilities detailed above if they are not appointed.
Cemintel NZ, does not provide consulting services. Cemintel NZ, only provides information that has been prepared by others and therefore shall not be considered experts in the field.
Any party using the information contained in this guide or supplied by Cemintel NZ in the course of a project must satisfy themselves that it is true, current and appropriate for the application, consequently accepting responsibility for its use.
It is the responsibility of the architectural designer and engineering parties to ensure that the details in this design guide are appropriate for the intended application.
The recommendations in this guide are formulated along the lines of good building practice, but are not intended to be an exhaustive statement of all relevant data.
Cemintel NZ is not responsible for the performance of constructed walls, including field performance, and does not interpret or make judgements about performance requirements in the NZBC.
Design, Detailing And Performance Responsibilities

TERRITORY™ – External Horizontal Installation (with Designer Series fixing system)21
06 SYSTEM ENGINEERING
Span Tables / Wind Loads
TABLE 6.01 Fixing Requirements for Timber Framing – Based on Wind Category
Wind Category
Maximum Stud Spacing
CORNER ZONESMinimum Fixing Requirements
GENERAL ZONESMinimum Fixing Requirements
Low 600mm cts 600mm cts
Medium 600mm cts 600mm cts
High 600mm cts 600mm cts
Very High 600mm cts 600mm cts
Extra High 600mm cts 600mm cts
Designed Wind Pressure (Ultimate)(kPa)
Minimum Fixing Requirements
0 - 2.5 600mm cts
2.5 - 3.4 450mm cts
3.4 - 5.0 300mm cts
Note: Design wind pressures apply to both negative and positive pressures.
NOTE: Table based on external pressures only, with internal linings designed to resist internal pressures. Approved fasteners must be used. General Zone: Areas greater than 1200mm from an external building corner. Corner Zone: Areas less than 1200mm from an external building corner.
TABLE 6.02 Fixing Requirements for Timber Framing – Based on Wind Pressures
TABLE 6.03 Fixing Requirements for Steel Framing - Based on Wind Category – Studs at 600mm max. centres
Wind Category
PANEL ZONE – Minimum Fixing Requirements for areas greater than 1200mm from an External Building Corner
Steel Frame Metal Thickness
0.5mm 0.75mm 1.2mm
Low Clip @ 600 cts Clip @ 600 cts Clip @ 600 cts
Medium Clip @ 600 cts Clip @ 600 cts Clip @ 600 cts
High Clip @ 600 cts Clip @ 600 cts Clip @ 600 cts
Very High Clip @ 600 cts Clip @ 600 cts Clip @ 600 cts
Extra High Clip @ 600 cts + 1 Face Screw Clip @ 600 cts Clip @ 600 cts
Wind Category
CORNER ZONE – Minimum Fixing Requirements for areas greater than 1200mm from an External Building Corner
Steel Frame Metal Thickness
0.5mm 0.75mm 1.2mm
Low Clip @ 600 cts Clip @ 600 cts Clip @ 600 cts
Medium Clip @ 600 cts Clip @ 600 cts Clip @ 600 cts
High Clip @ 600 cts + 1 Face Screw Clip @ 600 cts Clip @ 600 cts
Very High Clip @ 600 cts + 1 Face Screw Clip @ 600 cts Clip @ 600 cts
Extra High Clip @ 600 cts + 1 Face Screw Clip @ 600 cts + 1 Face Screw Clip @ 600 cts
Note: System performance relies on the use of approved fasteners. Table based on external pressures only, with internal linings designed to resist internal pressures. Where face fixing is required, fasteners are to be placed at the same spacings as indicated for clips.
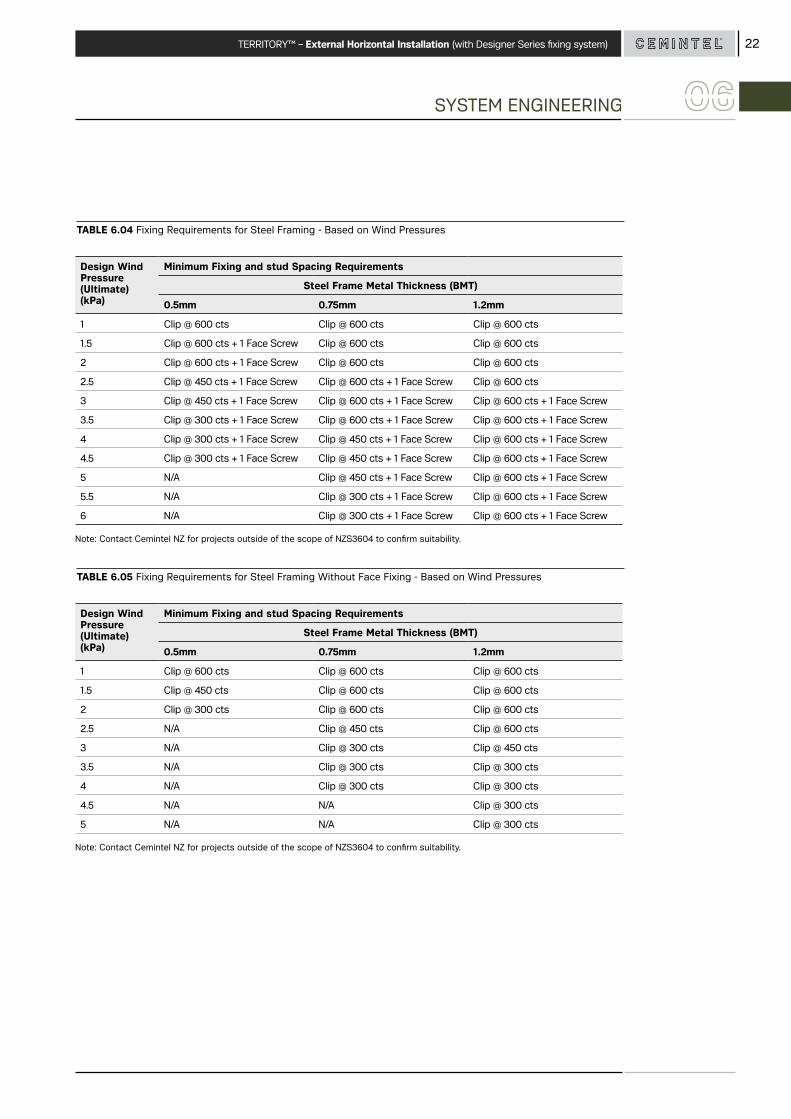
TERRITORY™ – External Horizontal Installation (with Designer Series fixing system) 22
06SYSTEM ENGINEERING
Design Wind Pressure (Ultimate) (kPa)
Minimum Fixing and stud Spacing Requirements
Steel Frame Metal Thickness (BMT)
0.5mm 0.75mm 1.2mm
1 Clip @ 600 cts Clip @ 600 cts Clip @ 600 cts
1.5 Clip @ 600 cts + 1 Face Screw Clip @ 600 cts Clip @ 600 cts
2 Clip @ 600 cts + 1 Face Screw Clip @ 600 cts Clip @ 600 cts
2.5 Clip @ 450 cts + 1 Face Screw Clip @ 600 cts + 1 Face Screw Clip @ 600 cts
3 Clip @ 450 cts + 1 Face Screw Clip @ 600 cts + 1 Face Screw Clip @ 600 cts + 1 Face Screw
3.5 Clip @ 300 cts + 1 Face Screw Clip @ 600 cts + 1 Face Screw Clip @ 600 cts + 1 Face Screw
4 Clip @ 300 cts + 1 Face Screw Clip @ 450 cts + 1 Face Screw Clip @ 600 cts + 1 Face Screw
4.5 Clip @ 300 cts + 1 Face Screw Clip @ 450 cts + 1 Face Screw Clip @ 600 cts + 1 Face Screw
5 N/A Clip @ 450 cts + 1 Face Screw Clip @ 600 cts + 1 Face Screw
5.5 N/A Clip @ 300 cts + 1 Face Screw Clip @ 600 cts + 1 Face Screw
6 N/A Clip @ 300 cts + 1 Face Screw Clip @ 600 cts + 1 Face Screw
Note: Contact Cemintel NZ for projects outside of the scope of NZS3604 to confirm suitability.
Design Wind Pressure (Ultimate) (kPa)
Minimum Fixing and stud Spacing Requirements
Steel Frame Metal Thickness (BMT)
0.5mm 0.75mm 1.2mm
1 Clip @ 600 cts Clip @ 600 cts Clip @ 600 cts
1.5 Clip @ 450 cts Clip @ 600 cts Clip @ 600 cts
2 Clip @ 300 cts Clip @ 600 cts Clip @ 600 cts
2.5 N/A Clip @ 450 cts Clip @ 600 cts
3 N/A Clip @ 300 cts Clip @ 450 cts
3.5 N/A Clip @ 300 cts Clip @ 300 cts
4 N/A Clip @ 300 cts Clip @ 300 cts
4.5 N/A N/A Clip @ 300 cts
5 N/A N/A Clip @ 300 cts
Note: Contact Cemintel NZ for projects outside of the scope of NZS3604 to confirm suitability.
TABLE 6.04 Fixing Requirements for Steel Framing - Based on Wind Pressures
TABLE 6.05 Fixing Requirements for Steel Framing Without Face Fixing - Based on Wind Pressures

TERRITORY™ – External Horizontal Installation (with Designer Series fixing system)23
06 SYSTEM ENGINEERING
Masonry Substrates
Wind Category
Maximum Top Hat Spacing
CORNER ZONEMinimum Fixing Requirements
GENERAL ZONEMinimum Fixing Requirements
Low 600mm cts 600mm cts
Medium 600mm cts 600mm cts
High 600mm cts 600mm cts
Very High 600mm cts 600mm cts
Extra High 600mm cts 600mm cts
Design Wind Pressure (Ultimate) (kPa)
Minimum Fixing Requirements (Top Hats & Clip)
1 Clip @ 600mm cts
1.5 Clip @ 600mm cts
2 Clip @ 600mm cts
2.5 Clip @ 600mm cts
3 Clip @ 300mm cts
3.5 Clip @ 300mm cts
4 Clip @ 300mm cts
4.5 Clip @ 300mm cts
5 Clip @ 300mm cts
NOTE: Contact Cemintel NZ for projects outside of the scope of NZS3604 to confirm suitability.
Design Wind Pressure (Ultimate) (kPa)
Minimum Fixing Requirements (Top Hats & Clip)
1 Clip @ 600mm cts
1.5 Clip @ 600mm cts
2 Clip @ 600mm cts
2.5 Clip @ 600mm cts
3 Clip @ 600 cts + 1 Face Screw
3.5 Clip @ 600 cts + 1 Face Screw
4 Clip @ 600 cts + 1 Face Screw
4.5 Clip @ 600 cts + 1 Face Screw
5 Clip @ 600 cts + 1 Face Screw
5.5 Clip @ 600 cts + 1 Face Screw
6 Clip @ 600 cts + 1 Face Screw
NOTE: Contact Cemintel NZ for projects outside of the scope of NZS3604 to confirm suitability.
NOTE: Table based on external pressures only. Approved fasteners must be used. General Zone: Areas greater than 1200mm from an external building corner. Corner Zone: Areas less than 1200mm from an external building corner.
Masonry wall must be structural and constructed from brick, concrete or concrete block in accordance with the relevant building codes. It is important the wall is plumb and true. Note the H515 Top Hat has limited ability for variations across the plane of the surface. Masonry fasteners must be designed by the project engineer.
TABLE 6.06 Fixing Requirements for Masonry – Based on Wind Category
TABLE 6.07 Fixing Requirements for Masonry Without Face Fixing – Based on Wind Pressure
TABLE 6.08 Fixing Requirements for Masonry – Based on Wind Pressure

TERRITORY™ – External Horizontal Installation (with Designer Series fixing system) 24
INSTALLATION

TERRITORY™ – External Horizontal Installation (with Designer Series fixing system)25
07 INSTALLATION
CHECKLIST – Prior to Installation The following pre-install checklist may assist to ensure you have the best possible outcome when using Cemintel Territory.
Ensure substrate is straight and plumb. Pack studs to straighten if necessary (timber frames as per NZS3604, steel frames as per NZS3404 or AS/NZS 4600 industry best practice for frame tolerance is 5mm misalignment over 3000mm.
Ensure studs are correctly located and of the appropriate thickness.
Confirm bracing is in place. Where sheet bracing is used behind panels, the entire wall area needs to be braced or bracing sheet packers fixed to the frame to ensure a uniform fixing plane.
Remove any concrete that may foul the cladding line, particularly at steps in slabs and isolated columns.
Ensure there is adequate ground clearance to the bottom edge of the Territory panels as per regulatory requirements.
Confirm your panel layout to determine the location of joints and identify where additional studs are required at all short edge joints and internal and external corners.
– If using pre-formed corners, studs need to be located to allow fastening of corner clips to support the corners.
– Additional studs or blocking may be required for support and fixing of Territory joint backing strips at corners and junctions.
– To allow for replacement of panels, a vertical break is recommended every 7 metres.
Flashings, membranes and air barrier should be correctly installed, overlapped and taped at joints, prior to fixing panels. In the case of fixing to masonry, the top hats should be installed correctly. (Wall wrap is not required when installing over masonry.)
Install windows so that the back of the front face of the window (or any other protrusions including doors or meter boxes) will be flush with the face of the panels.
Where there is no space to use a mounting clip along the bottom and top edge of the window, tack a horizontal green spacer to provide a firm surface for the cladding panel to mantain its position.
Fit Head flashings over windows, doors and other penetrations.
Confirm the chosen eaves/soffit details and prepare accordingly.
Consider the need for structural support for fixtures such as pergolas and decking. No loads may be carried by the cladding.
Confirm membranes and flashings for deck areas have been installed in accordance with manufacturers’ specifications.
Arrange for a pre-cladding inspection by the appropriate local building authority if required.
Check quality and quantity of panels and components
before installing. If there is any
sign of damage or visible defects
in panels, or the colour/
finish is not in keeping with the owners aesthetic
requirements DO NOT INSTALL. Contact Cemintel
NZ to address any issues.

TERRITORY™ – External Horizontal Installation (with Designer Series fixing system) 26
07INSTALLATION
Timber Framing
Installation Set-Out
Timber framing must be in accordance with NZS3604 – Residential Timber-Framed Construction.
Standard framing techniques are appropriate for the horizontal panel system with the addition of double studs at all vertical panel joints to allow for fixing clips each side of the panel joint.
Double studs at panel joints
Stud Framing (90mm shown)
Territory Pre-formed Corner
Territory Joint Backing strip – Double FlangedPrimer and Colour Matched Sealant in all vertical panel joints
600 max. 600 max.
1516 10553030 max. (Full Panel)
8610
3040 max.
All dimensions nominal (mm)
FIGURE 7.01 Typical Framing Set-Out with 90mm Timber Framing and Territory Pre-formed Corners – Plan View
Double studs at panel joints
Stud Framing (70mm shown)
Territory Pre-formed Corner
Joint Backing strip – Double FlangedPrimer and Colour Matched Sealant in all vertical panel joints
600 max. 600 max.
1516 10553030 max. (Full Panel)
3040 max. 8610
All dimensions nominal (mm)
FIGURE 7.02 Typical Framing Set-Out with 70mm Timber Framing and Territory Pre-formed Corners – Plan View
Territory PanelTerritory Nails at 600mm max. cts
Territory Nails at 600mm max. cts
Territory Panel Clip
Territory Coloured External Corner Trim
Territory Spacer Strip
Territory Screw
Stud framing
Optional Aluminium corner

TERRITORY™ – External Horizontal Installation (with Designer Series fixing system)27
07 INSTALLATION
Territory Panel
Integral compressible sealing element
Territory Spacer and Territory Nail (when required)
Territory Spacer fixed with galvanised clout
Territory Panel Clip
Panel tongue and groove profiles
Nominal cover 455mm
200mm nom.
Territory Screw
16mm nominal 15mm nominal
Clip flashing
Clip flashing
FIGURE 7.03 Typical Territory System Cross Section for Timber Framing – Elevation
FIGURE 7.04 Typical Territory System Cross Section for Timber Framing for when face fixing is required – Elevation
Stud framing (90mm shown)
All measurements nominal
16mm
455mm
470mm(paneloverall)
22.5mm
9mm41mm
455mm
41mm
Foundation/slab
Cut top panel 21-25mm short to allow for installation into Eaves Trim
20 – 35mm Panel edge fixing distance for timber framing (pre-drill panels for nails)
9mm

TERRITORY™ – External Horizontal Installation (with Designer Series fixing system) 28
07INSTALLATION
Steel FramingSteel framing must be in accordance with AS/NZ4600 or NZS 3404.
Double studs at panel joints
Stud Framing (90mm shown)
Pre-formed Corner
Joint Backing strip – Double Flanged
Primer and Colour Matched Sealant in all vertical panel joints
600 max. 600 max.
1516 10553030 max. (Full Panel)
8610
3040 max.
All dimensions nominal (mm)
Thermal break
Thermal break
FIGURE 7.05 Typical Framing Set-Out with 90mm Steel Framing and Territory Pre-formed Corners – Plan View
Double studs at panel joints
Stud Framing (75mm shown)
Pre-formed Corner
Joint Backing strip – Double Flanged
Primer and Colour Matched Sealant in all vertical panel joints
600 max. 600 max.
1516 10553030 max. (Full Panel)
3040 max. 8610
All dimensions nominal (mm)
Thermal break
Thermal break
FIGURE 7.06 Typical Framing Set-Out with 75mm Steel Framing and Territory Pre-formed Corners – Plan View
Territory screw at 600mm max. cts
Territory Panel Clip
Territory Panel
steel framing
Air Barrier
Territory Coloured External Corner Trim
Territory Spacer Strip
Territory Screw at 600mm max. cts Optional Aluminium corner

TERRITORY™ – External Horizontal Installation (with Designer Series fixing system)29
07 INSTALLATION
Stud framing (90mm shown)
All measurements nominal
455mm
470mm(paneloverall)
9mm41mm
455mm
41mm
Foundation/slab
Cut top panel 21-25mm short to allow for installation into Eaves Trim
Thermal break
9mm
30 – 40mm Panel edge fixing distance for steel framing
Territory Panel
16mm nominal
Integral compressible sealing element
Territory Spacer and Territory Screw or nail (when required)
Territory Spacer fixed with button head screw or nail
Territory Panel Clip
Panel tongue and groove profiles
Nominal cover 455mm
200mm nom.
Clip flashing
Clip flashing
Territory Screw
15mm nominal
Thermal break
FIGURE 7.07 Typical Territory System Cross Section for Steel Framing – Elevation
FIGURE 7.08 Typical Territory System Cross Sectional Detail for Steel Framing where Face Fixing is required – Elevation

TERRITORY™ – External Horizontal Installation (with Designer Series fixing system) 30
07INSTALLATION
FIGURE 7.09 Typical Set-Out with H515 Top Hat Framing and Territory Aluminium Corners – Plan View
Masonry Framing
300mm horizontal Rondo H515 Top Hat at all sheet joints
Rondo H515 Top Hat reversed
Corner Clip and Clip Flashing fixed with 20mm Screw
Panel Clip fixed with 20mm Screw
Coloured External Corner Trim120mm max.
Joint Backing strip – Double Flanged
Primer and Colour Matched Sealant in all vertical panel joints
Rondo H515 vertical Top Hats fixed to masonry
600 max. 600 max.
3030 max. (Full Panel)10
All dimensions nominal (mm)

TERRITORY™ – External Horizontal Installation (with Designer Series fixing system)31
07 INSTALLATION
FIGURE 7.10 Typical Masonry Territory System Cross Section – Elevation
FIGURE 7.11 Typical Territory System Cross Sectional Detail for Masonry substrate where face fixing is required – Elevation
Masonry Framing
All measurements nominal
455mm
470mm(paneloverall)
9mm41mm
455mm
41mm
Foundation/slab
Cut top panel 21-25mm short to allow for installation into Eaves Trim
50mm nom.
9mm
30 – 40mm Panel edge fixing distance
Masonry Wall
Territory Panel
16mm nominal
Integral compressible sealing element
Territory Spacer and Territory Screw (when required)
Territory Spacer fixed with button head screw
Territory Panel
Panel tongue and groove profiles
Nominal cover 455mm
200mm nom.
Territory Screw
15mm nominal

TERRITORY™ – External Horizontal Installation (with Designer Series fixing system) 32
07INSTALLATION
FIGURE 7.12 Masonry Overview Detail
150mm max.
Extend starter strip 30mm beyond corner of masonry wall to pickup adjacent panels and aluminium corner trim
300mm max.
600mm max. 600mm max. 600mm max. 600mm max. 600mm max.
Rondo H515 Top Hat reversed at corners
Corner of masonry wall
Rondo H515 Top Hat
Rondo H515 Top Hat
Rondo H515 Top Hat
Wall opening
Rondo H515 Top Hat reversed at sides of openings
Rondo H515 Top Hat reversed at sides of openings
Rondo H515 Top Hats at sealant filled joints (refer to alternative methods in this guide)
600mm max.
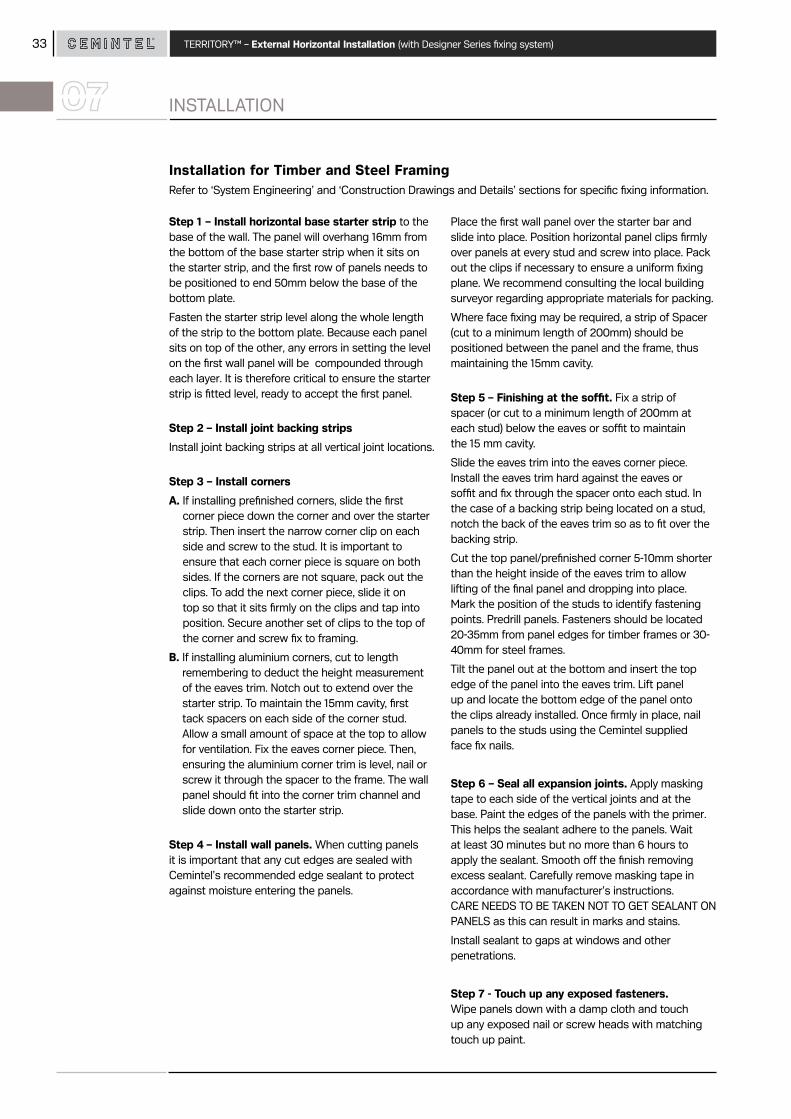
TERRITORY™ – External Horizontal Installation (with Designer Series fixing system)33
07 INSTALLATION
Installation for Timber and Steel FramingRefer to ‘System Engineering’ and ‘Construction Drawings and Details’ sections for specific fixing information.
Step 1 – Install horizontal base starter strip to the base of the wall. The panel will overhang 16mm from the bottom of the base starter strip when it sits on the starter strip, and the first row of panels needs to be positioned to end 50mm below the base of the bottom plate.
Fasten the starter strip level along the whole length of the strip to the bottom plate. Because each panel sits on top of the other, any errors in setting the level on the first wall panel will be compounded through each layer. It is therefore critical to ensure the starter strip is fitted level, ready to accept the first panel.
Step 2 – Install joint backing strips
Install joint backing strips at all vertical joint locations.
Step 3 – Install corners
A. If installing prefinished corners, slide the first corner piece down the corner and over the starter strip. Then insert the narrow corner clip on each side and screw to the stud. It is important to ensure that each corner piece is square on both sides. If the corners are not square, pack out the clips. To add the next corner piece, slide it on top so that it sits firmly on the clips and tap into position. Secure another set of clips to the top of the corner and screw fix to framing.
B. If installing aluminium corners, cut to length remembering to deduct the height measurement of the eaves trim. Notch out to extend over the starter strip. To maintain the 15mm cavity, first tack spacers on each side of the corner stud.Allow a small amount of space at the top to allow for ventilation. Fix the eaves corner piece. Then, ensuring the aluminium corner trim is level, nail or screw it through the spacer to the frame. The wall panel should fit into the corner trim channel and slide down onto the starter strip.
Step 4 – Install wall panels. When cutting panels it is important that any cut edges are sealed with Cemintel’s recommended edge sealant to protect against moisture entering the panels.
Place the first wall panel over the starter bar and slide into place. Position horizontal panel clips firmly over panels at every stud and screw into place. Pack out the clips if necessary to ensure a uniform fixing plane. We recommend consulting the local building surveyor regarding appropriate materials for packing.
Where face fixing may be required, a strip of Spacer (cut to a minimum length of 200mm) should be positioned between the panel and the frame, thus maintaining the 15mm cavity.
Step 5 – Finishing at the soffit. Fix a strip of spacer (or cut to a minimum length of 200mm at each stud) below the eaves or soffit to maintain the 15 mm cavity.
Slide the eaves trim into the eaves corner piece. Install the eaves trim hard against the eaves or soffit and fix through the spacer onto each stud. In the case of a backing strip being located on a stud, notch the back of the eaves trim so as to fit over the backing strip.
Cut the top panel/prefinished corner 5-10mm shorter than the height inside of the eaves trim to allow lifting of the final panel and dropping into place. Mark the position of the studs to identify fastening points. Predrill panels. Fasteners should be located 20-35mm from panel edges for timber frames or 30-40mm for steel frames.
Tilt the panel out at the bottom and insert the top edge of the panel into the eaves trim. Lift panel up and locate the bottom edge of the panel onto the clips already installed. Once firmly in place, nail panels to the studs using the Cemintel supplied face fix nails.
Step 6 – Seal all expansion joints. Apply masking tape to each side of the vertical joints and at the base. Paint the edges of the panels with the primer. This helps the sealant adhere to the panels. Wait at least 30 minutes but no more than 6 hours to apply the sealant. Smooth off the finish removing excess sealant. Carefully remove masking tape in accordance with manufacturer’s instructions. CARE NEEDS TO BE TAKEN NOT TO GET SEALANT ON PANELS as this can result in marks and stains.
Install sealant to gaps at windows and other penetrations.
Step 7 - Touch up any exposed fasteners. Wipe panels down with a damp cloth and touch up any exposed nail or screw heads with matching touch up paint.

TERRITORY™ – External Horizontal Installation (with Designer Series fixing system) 34
07INSTALLATION
1 Install building wrap. 2 Install Starter Strip and screw fix at 250mm max. centres. 3 Install Joint Backing Strip at joint location. 4 Install Preformed Corner and firmly tap corner onto the starter strip. 5 Install Corner Clips with Clip Flashing, firmly tap into
place and screw fix to framing. 6 Adjust joint backing strip and fix to framing. 7 Install Panel and firmly tap into place. 8 Install Panel Clips with Clip Flashing, firmly tap into place and fastener fix to framing. Repeat step 1 to step 8 for adjacent panels and rows.
9 Fastener fix Spacer Strip on each stud. (If additional face fixing is required, install 50mm sections of spacer strip at fixing locations). 10 Install Eaves Trim hard against eaves sheet and fix through spacer with fastener at each stud. Notch the back of the eaves trim to allow for the Joint Backing Strip. 11 Tilt Panel out at the bottom, insert top into Eaves Trim, lift panel up and locate bottom of panel onto Clips. 12 Pre-drill holes through panels for nails. 13 Face fix panel with fastener through Eaves Trim at each stud and 20-35mm from panel edges.
1
2
3
4
57
8
6
9
11
10
1213

TERRITORY™ – External Horizontal Installation (with Designer Series fixing system)35
07 INSTALLATION
Installation for Masonry Refer to ‘System Engineering’ and ‘Construction Drawings and Details’ sections for specific fixing information.
Note that masonry structures are potentially more likely to be out of plumb. The Top Hat installation detailed in this Guide only allows for a small variation in the surface plane and industry best practice for frame tolerances of 5mm misalignment over 3000mm should be followed. Careful assessment should be undertaken to determine if this solution is appropriate for the specific situation.
Metal corners are recommended when installing onto masonry.
Step 1 – Install H515 Top Hats vertically at maximum 600mm centres. To account for minimum edge distance of masonry fixings, install Top Hats in reverse at corners and openings.
Step 2 – Install the starter strip to the base of the wall, screw fixing at each Top Hat. Make allowance for 16mm panel overhang. Ensure 10-15mm clearance between base flashing and bottom edge of panel. Starter strip needs to be extended 30mm beyond the end of the wall to accommodate the cavity (H515 and clips).
Step 3 – Install joint backing strips. Install joint backing strips at all vertical joint locations.
Step 4 – Install wall panels. Cut panel as required and seal any cut edges with Cemintel edge sealer. Install first panel, firmly tapping panel onto the starter strip. Check level and ensure a uniform fixing plane. Install panel clips to the edge of the panel, firmly tap into place and screw fix at each H515 Top Hat.
Where face fixing may be required, a strip of Spacer (cut to a minimum length of 200mm) is to be positioned between the panel and the Top Hat frame, thus maintaining the 15mm ventilated cavity.
Fasteners should be located 30-40mm from panel edge.
Repeat the above steps for additional rows of panels.
Step 5 – Finishing at the soffit. Fastener fix a strip of spacer on each H515 Top Hat below the Eave or Soffit to maintain the 15mm cavity. Slide the eaves trim into the eaves corner piece. Install the eaves trim hard against eave or soffit and fix through the spacer at each H515 Top Hat. In the case of a backing strip, notch the back of the Eave Trim so as to fit over the backing strip.
Cut the top panel/prefinished corner 5-10mm shorter than the height inside of the eaves trim to allow lifting of the final panel and dropping into place. Tilt the panel out at the bottom and insert the top edge of the panel into the eave trim. Lift panel up and locate the bottom edge of the panel onto the clips already installed. Once firmly in place, face fix the top of the panel with fasteners through the spacer strips at each Top Hat, 30-40mm from panel edges.
Step 6 – Install metal external corners. Once panels are installed along one wall, slide aluminium corner into position and fix using 45mm screw. Proceed to install panels along adjacent wall. Note that when cutting corners to length remember to deduct the height measurement of the eave trim.
Step 7 – Seal all expansion joints. Apply masking tape to each side of the vertical joints and at the base. Paint the edges of the panels with the primer. This helps the sealant adhere to the panels. Wait at least 30 minutes but no more than 6 hours to apply the colour matched sealant. Smooth off the finish removing excess sealant. Carefully remove masking tape in accordance with manufacturer’s instructions. CARE NEEDS TO BE TAKEN NOT TO GET SEALANT ON PANELS as this can result in marks and stains.
Install sealant to gaps at windows and other penetrations.
Step 8 – Touch up any exposed fasteners. Apply a metal primer and touch up paint to all visible fastener heads.

TERRITORY™ – External Horizontal Installation (with Designer Series fixing system) 36
CONSTRUCTION DRAWINGS + DETAILS

TERRITORY™ – External Horizontal Installation (with Designer Series fixing system)37
08 CONSTRUCTION DRAWINGS AND DETAILSNote: Drawings are interchangeable for timber or steel substrates with the exception of the fasteners.
Drawings Index
SECTION DESCRIPTION FIGUREREFERENCE
PAGE NUMBER
Base Details Base Detail – 90mm Framing 8.01 39
Base Detail – 70mm Framing 8.02 39
Alternate Base Fixing Detail 8.03 39
Soffit Details Soffit Detail – With Coloured Eaves Trim – Elevation 8.04 40
Alternative Sofft Detail – With Timber Trim – Elevation 8.05 40
Soffit Detail – With Soffit Trim – Elevation 8.06 40
Corner Details External Corner Detail – With Preformed Corner – Plan View 8.07 41
External Corner Detail – With Coloured External Corner Trim – Plan View 8.08 41
Internal Corner Detail – With Backing Strip and Colour Matched Sealant – Plan View
8.09 41
Obtuse Angle Corner Detail – With Metal Flashing and Colour Matched Sealant – Plan View
8.10 41
Junction Details Horizontal Control Joint 8.11 42
Junction at Soffit and External Roofing 8.12 42
Junction with Soffit and External Roofing 8.13 42
Junction with External Pitched Soffit 8.14 42
Window Details Typical Window Head, Sill and Jamb Detail 8.15 43
Typical Window Head - Front Elevation 8.16 43
Smartfit Window Head, Sill and Jamb Detail 8.17 44
Typical Commercial Window Head, Sill and Jamb Detail 8.18 44
Garage Door and Meter Box Details
Typical Garage Door Jamb Detail 8.19 45
Typical Garage Door Head Detail 8.20 45
Typical Penetration 8.21 45
Typical Power Meter Box Installation – Elevation 8.22 46

TERRITORY™ – External Horizontal Installation (with Designer Series fixing system) 38
08CONSTRUCTION DRAWINGS AND DETAILSNote: Drawings are interchangeable for timber or steel substrates with the exception of the fasteners.
SECTION DESCRIPTION FIGUREREFERENCE
PAGE NUMBER
Additional Junction Details
Vertical Junction Between Horizontal Territory Panel and Vertical Territory Panel
8.23 47
Internal Corner Junction Panel to Brick Veneer 8.24 47
Abutment Panel to Brick Veneer 8.25 47
External Corner Junction Panel to Brick Veneer 8.26 48
Internal Corner Junction Panel/Bond Wall 8.27 48
External Corner Junction Panel/ Weatherboard 8.28 48
Internal Corner Junction Panel/Weatherboard 8.29 48
Vertical Abutment Panel/Weatherboard 8.30 49
Typical Junction with In-line Masonry Wall – Plan View 8.31 49
Second Storey Junction with Brick Veneer or Masonry Wall – Cantilevered Framing
8.32 49
Typical Junction with Offset Masonry Wall – Plan View 8.33 49
Typical Junction with Fibre Cement Cladding System – Plan View 8.34 50
Second Storey Junction with Masonry or Brick Veneer – In-line Framing 8.35 50
Typical Balcony Rail 8.36 50
Two Sided Parapet – Elevation 8.37 50
Base, Soffit and Corner Details
Typical Base Detail – Elevation 8.38 51
Typical Internal Corner Detail – Elevation 8.39 51
Typical Soffit Detail – Elevation 8.40 51
Typical External Corner Detail with Metal Corner Trim – Elevation 8.41 51
Typical Horizontal Control Joint – Elevation 8.42 52
Typical Sealant Filled Vertical Joint Detail – Plan 8.43 52
Alternative Sealant Filled Vertical Joint Detail – Plan 8.44 52
Typical Parapet Detail – Elevation 8.45 52
Masonry Details Typical Domestic Window Head, Sill and Jamb Detail 8.46 53
Typical Commercial Window Head, Sill and Jamb Detail 8.47 53
Typical Power Meter Box Installation – Elevation 8.48 54

TERRITORY™ – External Horizontal Installation (with Designer Series fixing system)39
08 CONSTRUCTION DRAWINGS AND DETAILSNote: Drawings are interchangeable for timber or steel substrates with the exception of the fasteners.
FIGURE 8.01 Base Detail – 90mm Framing Shown
FIGURE 8.02 Base Detail – 70mm Framing Shown
FIGURE 8.03 Alternate Base Fixing Detail
Base Details
Territory Panel
Stud framing (90mm shown)
Building Wrap
Starter Strip
Screw at 250mm max. cts
Clearance to regulatory requirements
Dampcourse
Concrete slab50mm minimum
Framing
Vertical Panel Starter Strip (for square edge panel) screw fixed to framing at 250mm max. centres
50mm minimum
Nail fixing halfway up panel at 600mm max. horizontal centres
Nail fixing of panel at 600mm max. horizontal centres
Spacer
Spacer (200mm nom. length)
Pre-paint exposed cut edges
Clearance to regulatory requirements
Stud framing (70mm shown)
Foundation
Dampcourse
Floor Joist or Blocking
Territory Panel
Building Wrap
Starter Strip
Screw at 250mm max. cts
Clearance to regulatory requirements
50mm minimum

TERRITORY™ – External Horizontal Installation (with Designer Series fixing system) 40
08CONSTRUCTION DRAWINGS AND DETAILSNote: Drawings are interchangeable for timber or steel substrates with the exception of the fasteners.
FIGURE 8.04 Soffit Detail – With Coloured Eaves Trim – Elevation FIGURE 8.06 Soffit Detail
FIGURE 8.05 Alternative Sofft Detail – With Timber Trim – Elevation
Panel
Stud framing
20-35mm timber frame
Building Wrap
Nails at 600mm max. cts with Touch-up Paint on heads
Cavity ventilation
Eaves Trim
NOTE: Notch the back of Coloured Eaves Trim at intersections with Joint Backing Strip
Panel trimmed 19-21mm short
Spacer
Soffit liner
Framing
Flashing over building wrap and taped
Cavity closerSoffit Sheet
Panel cut at bottom to suit, pre paint cut edge
Nails at 600mm max. cts with Touch-up Paint on heads
Spacers and Nails at half height of first panel above soffit at 600mm max. horizontal cts with Touch-up Paint on heads
20-35mm
Stud framing
Building Wrap
Note: 30mm minimumcover of panel
Trim
Spacer
12mm min.
Soffit sheet
Nails at 600mm max. cts with Touch-up Paint on visible heads
L Form Cavity Vent
10mm gap at the face of the panel to allow venting
20-35mm timber frame
Cavity ventilation
Soffit Details
At eaves line the Territory Panel system must be provided with cavity ventilation. Panels are trimmed to appropriate height and face fixed through the Spacer into the framing. Refer to the following detail options.

TERRITORY™ – External Horizontal Installation (with Designer Series fixing system)41
08 CONSTRUCTION DRAWINGS AND DETAILSNote: Drawings are interchangeable for timber or steel substrates with the exception of the fasteners.
FIGURE 8.07 External Corner Detail – With Preformed Corner – Plan View
FIGURE 8.09 Internal Corner Detail – With Backing Strip and Colour Matched Sealant – Plan View
Corner Details
FIGURE 8.08 External Corner Detail – With Coloured External Corner Trim – Plan View
FIGURE 8.10 Obtuse Angle Corner Detail – With Metal Flashing and Colour Matched Sealant – Plan View
Additional studs may be required at corners to allow for fixing Panel Clips and other components.
Territory Panel10mm
Backing Strip – Double Flanged
Colour Matched Sealant
Panel Clip and Clip Flashing fixed with Screw
Preformed External Corner
Corner Clip and Clip Flashing fixed with Screw
Stud framingBuilding Wrap
Panel
10mm
Panel Clip and Clip Flashing fixed with Screw
Colour Matched Sealant
Internal Corner Backing
Backing Strip – Single Flange
Stud framing
56mm min.
Additional Stud for Clip fixing
Building Wrap
Panel
120mm max.
Fix Corner Trim and Spacer with nails at 600mm max. vertical centres
Coloured External Corner Trim
Stud framingBuilding Wrap
Panel Clip and Clip Flashing fixed with Screw
Panel
Colour Matched Sealant
Backing rod or Bond Breaker
Metal flashing (by others)
Spacer StripStud framing
Stud framing
Blocking to suit
Building Wrap
Spacer and Nails at top, bottom and mid height of each panel with Touch-up Paint on heads
20-35mm timber frame
*Backing Rod or Bond Breaker supplied by others

TERRITORY™ – External Horizontal Installation (with Designer Series fixing system) 42
08CONSTRUCTION DRAWINGS AND DETAILSNote: Drawings are interchangeable for timber or steel substrates with the exception of the fasteners.
FIGURE 8.11 Horizontal Control Joint FIGURE 8.13 Junction with Soffit and External Roofing
Junction Details
FIGURE 8.12 Junction at Soffit and External Roofing FIGURE 8.14 Junction with External Pitched Soffit
Upper Storey Floor Joist or Blocking
Building Wrap over Flashing and Tape
Starter Strip fixed at 250mm max. cts with Screws
Panel
10-15mm gap
5mm
Panel
Clip and Clip Flashing fixed to stud with Screw
50 x 15mm Spacer
Metal Flashing(by others)
CAUTION:Vertical shrinkage of framing must be addressed
Stud Framing
Roof Framing
Spacer Strip
Panel
35mm min. drainage gap
Panel trimmed 19-21mm short
Eaves Trim20–35mmtimber frame
Ceiling sheet
Nails at 600mm max. cts with Touch-up Paint on heads
Nails at 600mm max. cts with Touch-up Paint on heads
Spacers and Nails at half height of first panel above soffit at 600mm max. horizontal cts with Touch-up Paint on heads
20-35mm timber frame
PVC cavity closer
Spacer Strip
Metal Flashing (by others)
Pre-paintcut edge
Roof Sheet/Tiles
Flashing tape over flashing and building wrap
Stud Framing
Roof Framing
Fibre Cement ceiling sheet
Starter Strip
Spacer Strip
L Form Cavity Vent
Note: 30mm minimum cover
Panel
Roof Sheet/Tiles
Metal Flashing(by others)
35mm min. drainage gap
Flashing Tape over flashing and building wrap
Panel fixed with Nails at 600mm max. cts
10 –15mm
Screw at 250mm max. cts
12mm min.20-35mm timber frame
20-35mm timber frame
Flashing by others
Stud framing
Soffit framing
Building Wrap
50mm
35mm
Spacer
Soffit sheet
Nails at 600mm max. cts with Touch-up Paint on visible heads
L Form Cavity Vent

TERRITORY™ – External Horizontal Installation (with Designer Series fixing system)43
08 CONSTRUCTION DRAWINGS AND DETAILSNote: Drawings are interchangeable for timber or steel substrates with the exception of the fasteners.
FIGURE 8.15 Typical Window Head, Sill and Jamb Detail FIGURE 8.16 Typical Window Head - Front Elevation
Window Details
20-35mm timber frame
20-35mm timber frame
Panel
StudStud
Window frame
Building wrap full depth of framing at openings
Packing
Flashing tape over metal head flashingOptional jamb flashing for best practice
Air seal
Jamb
Panel Clip and Clip Flashing fixed with Screw
31mm nom.
Stud framing (90mm)
Tape at corners of opening
Spacer and Nails at 600mm max. cts
Pre-paint cut edge
PVC cavity closer
Flashing tape over metal flashing
15mm nom.
16mm nom.
Flashing tape at corners of opening (turned up, out and down 50mm min.)
Flashing tape at corners of opening (turned up, out and down 50mm min.)
Building wrap
Window frame
Sill support bar (for windows greater the 600mm wide only, notch panel to suit sill bar)
Window support and frame fixed to framing
Head
Sill
8-10mm clearance and no fixings
Stud framing (90mm)
Building Wrap
Air seal
Air seal
5mm min. gap
Metal flashing with stop-ends (by others)
10mm min. cover
Spacer and Nails at 600mm max. cts
8mm min. cover
50mm min. tape lap
50mm min. tape lap
Flashing tape
Metal Flashing
PVC Cavity Closer
Flashing stop-end
Window frame
Spacer and Nails at 600mm max. cts
Backing Strip - double flanged
Additional jack stud behind panel joint
Building Wrap
Colour Matched Sealant
Territory Panel

TERRITORY™ – External Horizontal Installation (with Designer Series fixing system) 44
08CONSTRUCTION DRAWINGS AND DETAILSNote: Drawings are interchangeable for timber or steel substrates with the exception of the fasteners.
FIGURE 8.17 Smartfit Window Head, Sill and Jamb Detail FIGURE 8.18 Typical Commercial Window Head, Sill and Jamb Detail
20x5mm notch
Notch panel to suit
Pre-paint packer to suit
Territory Panel
Territory Panel
Spacer and nail at 600mm centres
Spacer and nail at 600mm centres
35mm
Tape window frame to building wrap
Smartfit Territory Window
Smartfit Territory Window
Apply Territory Putty and Touch-up Paint
35mm
Stud framing (90mm)
Stud framing (90mm)
Flashing tape at corners of opening (turned up, out and down 50mm min.)
Panel Clip and Clip Flashing fixed with Screw
Smartfit scriber cap
Scriber to suitLine of head flashing above
15x5mm notch in panel
Stud Stud
Stud framing (90mm)
Territory Panel

TERRITORY™ – External Horizontal Installation (with Designer Series fixing system)45
08 CONSTRUCTION DRAWINGS AND DETAILSNote: Drawings are interchangeable for timber or steel substrates with the exception of the fasteners.
FIGURE 8.19 Typical Garage Door Jamb Detail
FIGURE 8.21 Typical Penetration
FIGURE 8.20 Typical Garage Door Head Detail
Garage Door and Meter Box Details
Stud Framing (90mm)
Stud Stud
Air seal
Backing Strip Single Flange
Packing
10mm
Panel Clip and Clip Flashing fixed with Screw
Colour Matched Sealant
Flashing tape over building wrap at corners of opening
Building Wrap
Territory Panel
Flashing over wall wrap and tape
35mm max.
10-15mm min. gap
Air Seal 8-10mmclearanceand no fixings
Pre paint cut edges
Continuous Spacer and Nailsat 600mm max. centres
10mm min. cover
NOTE: Vertical sealant filled joints must be provided at sides of opening
Metal flashing with stop ends and 35mm min. upstand (supplied by others)
Vertical Starter Strip for square edge panel screw fixed at 250mm max. cts
Flashing tape at corners of opening (turned up, out and down 50mm min.)
PanelFrame
Clip and Clip Flashing screw fixed to stud
Tape over Building Wrap and penetration to all sides
Building Wrap
Backing rod* and sealant to all sides of drain
Penetration to be angled down to drain outwards

TERRITORY™ – External Horizontal Installation (with Designer Series fixing system) 46
08CONSTRUCTION DRAWINGS AND DETAILSNote: Drawings are interchangeable for timber or steel substrates with the exception of the fasteners.
FIGURE 8.22 Typical Power Meter Box Installation – Elevation
Packing and fixings for meter box
5mm gap with airseal on all sides
90x45x200mm block for clip fixing
NOTES: • Building wrap, flashing tape and air seals not shown in this elevation for clarity.• Face fixing required for openings greater than 600mm width.
Flashing tape at corners of opening (turned up, out and down 50mm min.)
Meter box fixed to structural framing
Stud framing (90mm)
Flashing tape over metal flashing*
Metal angle fixed and sealed to meter box*
10mm gaps with bond breaker and Colour Matched Sealant
Angle to 3 sides fixed and sealed to meter box
10mm gaps with bond breaker and Colour Matched Sealant
Panel Clip and Clip Flashing
Panel
10mm min. cover10-15mm min. gapPre-paint cut edges20-35mm
timber framing
Flashing stop-end with 10mm min. upstand (seal all gaps between stop ends, flashing, angle and panel)
Spacer
PVC cavity closer
Metal flashing (15° min. slope and 35mm min. upstand) fixed and sealed to angle*

TERRITORY™ – External Horizontal Installation (with Designer Series fixing system)47
08 CONSTRUCTION DRAWINGS AND DETAILSNote: Drawings are interchangeable for timber or steel substrates with the exception of the fasteners.
FIGURE 8.23 Vertical Junction Between Horizontal Territory Panel and Vertical Territory Panel
FIGURE 8.24 Internal Corner Junction Panel to Brick Veneer FIGURE 8.25 Abutment Panel to Brick Veneer
Additional Junction Details
Timber frame
Studs located for support and fixing
Timber frame
Vertical Territory Panel
Building WrapHorizontal Territory Panel
Vertical Spacer 15 x 90mm continuous for full height of wall
100mm max. Vertical Backing Strip - double flanged
Colour Matched Sealant
Building Wrap
Territory Panel system to be installed at the completion of all brick workPanel
Flexible Adhesive Sealant betweenpanel and brick
Sealant on 10mm PF rod*
Timber Scriber*
Additional framing as required
Additional framing as required
MS Sealant*
Panel Clip and Clip Flashing fixed with Screw
PVC Back Flashing*
BrickVeneer
50mm
35-40mm8
Panel
Additionalstud for clip fixing if required
MS Sealant*
50mm
50mm
Building Wrap
Panel Clip fixed with Screw
Timber Scriber*
Flexible AdhesiveSealant between panel and brick
Territory Panel system to be installed at the completion of all brick work
PVC Back Flashing*
BrickVeneer
*Supplied by others*Supplied by others

TERRITORY™ – External Horizontal Installation (with Designer Series fixing system) 48
08CONSTRUCTION DRAWINGS AND DETAILSNote: Drawings are interchangeable for timber or steel substrates with the exception of the fasteners.
100mm max.
Clip and Clip Flashing screw fixed
Territory Panel trimmed to suit
Joint Backing Strip - Single Flange
Corner extrusion*
Polyethylene DPC Flashing stapled to framing (100mm min. cover on each face)*
Building wrap
Stud Framing
Colour Matched Sealant
TimberWeatherboards*
Cavity Battens*
FIGURE 8.26 External Corner Junction Panel to Brick Veneer
FIGURE 8.28 External Corner Junction Panel/ Weatherboard
FIGURE 8.27 Internal Corner Junction Panel/Bond Wall
FIGURE 8.29 Internal Corner Junction Panel/Weatherboard
*Supplied by others
*Supplied by others
*Supplied by others
*Supplied by others
Territory Panel trimmed to suit
Clip and Clip Flashing screw fixedBuilding Wrap
140x45 timberframed wall
20 Series Stack Bond Wall
DPC*
Joint Backing Strip – Double Flange
25 x 10mm chase into concrete
Colour Matched Sealant
50mm cover
Building Wrap
Additional framing for clip fixing (as required) Territory Panel
trimmed to suit
Scriber*
Cavity Batten*
2x3109 Inseal Foam strips*
Backing rod* and flexible sealant*
Clip and Clip Flashing fixed with screw
InternalCorner Flashing*
TimberWeatherboards*

TERRITORY™ – External Horizontal Installation (with Designer Series fixing system)49
08 CONSTRUCTION DRAWINGS AND DETAILSNote: Drawings are interchangeable for timber or steel substrates with the exception of the fasteners.
FIGURE 8.30 Vertical Abutment Panel/Weatherboard
FIGURE 8.32 Second Storey Junction with Brick Veneer or Masonry Wall – Cantilevered Framing
FIGURE 8.31 Typical Junction with In-line Masonry Wall – Plan View
FIGURE 8.33 Typical Junction with Offset Masonry Wall – Plan View
*Supplied by others
*Supplied by others
*Supplied by others
Building Wrap
Territory Panel trimmed to suit
Scriber*
Cavity Battens*
Clip and Clip Flashing screw fixed
70x35mm exterior grade timber moulding*
TimberWeatherboards*
150mm max.
Flashing* with 50mm min. cover each side
Panel10mm
Colour Matched Sealant
Backing Strip – Double Flange (chase slot in wall)Clip and Clip
Flashing fixed with Screw
Dampcourse6mm gap and packing
15-20mm gap with Rondo P35 Control Joint
Plasterboard
Stud framing
CAUTION:Vertical shrinkage of framing must be addressed
20mm min.
Panel
Metal Flashing*
Brick or masonry wall
Building Wrap
Upper Storey Floor Joist or Blocking
Flashing* over Building Wrap
Flashing Tape
Starter Strip fixed at 250mm max. cts with Screws
10 –15mm gap
Panel10mm20mm
min.Continuous sealant *
Flashing (by others) fixed to structure over continuous sealant
Dampcourse6mm gap and packing
15-20mm gap with Rondo P35 Control Joint
Plasterboard
Stud framing
Clip and Clip Flashing fixed with Screw

TERRITORY™ – External Horizontal Installation (with Designer Series fixing system) 50
08CONSTRUCTION DRAWINGS AND DETAILSNote: Drawings are interchangeable for timber or steel substrates with the exception of the fasteners.
FIGURE 8.34 Typical Junction with Fibre Cement Cladding System – Plan View
FIGURE 8.36 Typical Balcony Rail
FIGURE 8.35 Second Storey Junction with Masonry or Brick Veneer – In-line Framing
FIGURE 8.37 Two Sided Parapet – Elevation
*Supplied by others
10 –15mm gap
Panel
Metal Flashing (by others)
Brick or masonry wall
Building Wrap
Upper Storey Floor Joist or Blocking
Flashing over Building Wrap
Flashing Tape
CAUTION:Vertical shrinkage of framing must be addressed
Starter Strip fixed at 250mm max. cts with Screws
Concrete balcony
Tiled balcony
Spacer fixed to frame
Building Wrap
H515 vertical Top Hat
Spacer
Flashing taped to Building Wrap
Tape Building Wrap to Eaves Trim
Timber frame
Angle fixed to Top Hat (supplied by others)
Eaves Soffit Trim
Spacer
L-form Cavity Vent continuous for wall length
Spacer fixed to frame
Territory Panel
Territory Panel
Hand rail capping
Waterproof membrane
Clearance to regulatory requirements
Clip and Clip Flashing fixed with Screw
Concrete Slabupstand
Stud framing
Parapet Capping (by others)
Building Wrap
Building Wrap
Territory Panel
Panel
Starter Strip
L-form Cavity Vent continuous for wall length
Spacer
Clip and Clip Flashing fixed with Screw
Clip and Clip Flashing fixed with Screw
Panel
10mm
Colour Matched Sealant *
Backing Strip – Double Flange
Cladding material
Finishing Trim fixed to framing (by others)
Bond breaker tape and sealant
Dampcourse
Building Wrap Building Wrap
Gap and packing
15-20mm gap with Rondo P35 Control Joint
Plasterboard
Stud framing

TERRITORY™ – External Horizontal Installation (with Designer Series fixing system)51
08 CONSTRUCTION DRAWINGS AND DETAILSNote: Drawings are interchangeable for timber or steel substrates with the exception of the fasteners.
Panel
Masonry Wall
Rondo H515 Top Hat
PVC Cavity Closer
Dampcourse
Spacer
Concrete slab
Extended Starter Strip fixed to top hat with 12mm screw
Clearance to regulatory requirements
50mm min.
Edge distance to engineer’s specifications
46mm
15mm15mm
Masonry fixing and edge distance to engineer’s specification
120mm max.
Masonry wall
Panel
Fix External Corner Trim with 45mm screws at 1200mm vertical centres
Corner Clip fixed with 12mm screw
Corner Clip fixed with 12mm screw
Rondo H515 Top Hat reversed
46mm
15mm15mm
Backing Strip – Single Flange
Colour Matched Sealant
Masonry fixing and edge distance to engineer’s specification
Rondo H515 Top Hat
46mm
Panel Clip
Masonry wall
Panel
15mm15mm
FIGURE 8.38 Typical Base Detail – Elevation
FIGURE 8.40 Typical Soffit Detail – Elevation
FIGURE 8.39 Typical Internal Corner Detail – Elevation
FIGURE 8.41 Typical External Corner Detail with Metal Corner Trim – Elevation
NOTE: Notch the back of Coloured Eaves Trim at intersections with Joint Backing Strip
Panel
Masonry wall
30-40mm
Rondo H515 Top Hat fixed to masonry
Screws at each Top Hat with touch-up paint on heads
Cavity ventilation
Eaves Trim
Panel trimmed 19-21mm short
Spacer 15x50mm
Soffit lining
Base, Soffit and Corner Details

TERRITORY™ – External Horizontal Installation (with Designer Series fixing system) 52
08CONSTRUCTION DRAWINGS AND DETAILSNote: Drawings are interchangeable for timber or steel substrates with the exception of the fasteners.
Panel
Panel trimmed at top to suit
Spacer and Screw
PVC Cavity Closer
NOTE: All measurements nominal
Continuous bead of sealant behind flashing
20mm gap
455mmnom.panel cover
9mm41mm
Masonry
Rondo H515 Top Hat at 600mm max. horizontal cts fixed to concrete as per project engineer’s specifications
Panel Clip fixed to Top Hat with 20mm screw
Starter Strip fixed to Top Hat
Top Hat Rondo H515 at 600mm max. horizontal cts fixed to concrete as per project engineer’s specifications
Metal flashing (by others)
5mm
46mm
15mm15mm
Masonry fixing Panel
Colour match sealant Backing Strip
Rondo H515 Top Hat 300mm length
Panel Clip
Masonry wall
Masonry fixing (staggered)
PanelColour Matched Sealant
Backing Strip
Rondo H515 Top Hat
Panel Clip
Masonry wall
Spacer (50 x 200mm min.) and Screw at each Top Hat with touch-up paint on heads
Panel
L-form Cavity Vent continuous for wall length Parapet Capping
(by others)Exterior grade timber packing (5° min. slope)
Panel Clip
Rondo H515 Top Hat Masonry fixings to
project engineer’s specifications
Masonry wall Masonry
roof
20mm min.
12mm
Fixing from edge of panel 30 – 40mm
FIGURE 8.42 Typical Horizontal Control Joint – Elevation FIGURE 8.43 Typical Sealant Filled Vertical Joint Detail – Plan
FIGURE 8.44 Alternative Sealant Filled Vertical Joint Detail – Plan
FIGURE 8.45 Typical Parapet Detail – Elevation

TERRITORY™ – External Horizontal Installation (with Designer Series fixing system)53
08 CONSTRUCTION DRAWINGS AND DETAILSNote: Drawings are interchangeable for timber or steel substrates with the exception of the fasteners.
FIGURE 8.46 Typical Domestic Window Head, Sill and Jamb Detail FIGURE 8.47 Typical Commercial Window Head, Sill and Jamb Detail
Masonary Windows Details
Panel
Stud
Corner Panel Clip fixed with 12mm Screw
Window reveal
Head flashing
Packer (by installer)
Jamb
Air seal
Optional damp-proof course for best practice
Spacer 15x50mm
Spacer 15x50mm
Back-to-back PVC Cavity Closers
MasonryLintel
31mm nom.
Window Reveal
Flashing
Packer if required (by installer)
Air seal
Air seal
10-15mm gap
Clearance to window manufacturer’s requirements
Masonry
Masonry
Rondo H515 Top Hat fixed to masonry
Rondo H515 Top Hat fixed to masonry
Rondo H515 Top Hat reversed, fixed to masonry
Pre-paint cut edge
No packing
Panels screws fixed at each Top Hat
Panels fixed at each Top Hat
30-40mm
30-40mm
Metal Flashing (by installer) turn up stop-ends
Continuous bead of sealant behind flashing
Head
Sill Sill support bar (for windows greater the 600mm wide only)
*Supplied by others
Packer (by installer)
Packer (by installer)
Cover heads with sealant
Sill
Head
Backing rod and sealant*
Masonrywall
Masonry Lintel
Spacer 15X50mm
Spacer 15x50mm
Panel
Rondo H515 vertical Top Hats fixed to masonry
Flashing fixed to masonry
Pre-paint cut edge
30–40mm
10–15mm
Panel screw fixed at each top hat (with touch-up paint on heads)
Panel screw fixed at each top hat (with touch-up paint on heads)
Metal Flashing (by installer) turn up stop-ends
Rondo H515 vertical Top Hats fixed to masonry
30–40mm
Backing rod and sealant*
Back-to-back PVC Cavity Closers
Continuous bead of sealant behind flashing
Backing Strip – single flange and Colour Matched Sealant
Aluminium jamb flashing
Masonry wall
Jamb
Corner Clip fixed with 12mm Screw
10mm max. gap with backing rod and sealant*
Packing and fixing (when required)
Rondo H515 vertical Top Hat reversed fixed to masonry
Head flashing over

TERRITORY™ – External Horizontal Installation (with Designer Series fixing system) 54
08CONSTRUCTION DRAWINGS AND DETAILSNote: Drawings are interchangeable for timber or steel substrates with the exception of the fasteners.
FIGURE 8.48 Typical Power Meter Box Installation – Elevation
Meter box fixed to structural masonry
Meter box fixed to masonry
Masonry wall
Trim Backing Strip to butt neatly
Backing Strip – Single Flange fixed to framing
Backing Strip – Single Flange fixed to framing
Spacer 15x50mm
Spacer 15x50mm
Colour Matched Sealant
Colour Matched Sealant
10mm
Panel Clip
Panel

TERRITORY™ – External Horizontal Installation (with Designer Series fixing system)55
SAFETY, HANDLING + GENERAL CARE

TERRITORY™ – External Horizontal Installation (with Designer Series fixing system) 56
09SAFETY, HANDLING + GENERAL CARE
Health, Safety and Personal Protection Equipment (PPE)
Panels contain silicas that are harmful if inhaled. Protective clothing and breathing equipment should be worn when cutting products. When cutting, drilling or grinding Territory panels using power tools, always ensure the work area is properly ventilated. An approved dust mask (AS/
NZS1715 and AS/NZS1716) and safety glass (AS/NZS1337) must be worn. Cemintel NZ recommends using a dust extraction system. Hearing protection should also be worn.
Safety Data Sheet information is available at cemintel.co.nz
Storage
All Territory panels must be stacked flat, clear of the ground and supported at 300mm maximum centres on a level platform. Panels must be kept dry, preferably stored inside the building. Panels must be dry prior to fixing, hence if it is necessary to store outside, the product must be protected from the weather.
Handling
Territory panels and corners are pre-finished products and must be treated with care during handling so as to avoid damage to edges, ends and pre-finished surface. Panels should be carried horizontally on edge by two people.
As the Territory range is a pre-finished product, consideration should be given to the activity of other tradespeople. It is highly recommended that installation of Territory should always be held off until the process of brick cleaning has been completed so as to avoid damage.
Cutting
Panels should be cut from the back using a power saw. Cemintel NZ recommends using the Makita Plunge Saw or FESTO TS 55 EBQ Plunge Cut Saw with guide rail and appropriate blade. All exposed cut edges such as the window heads and roof junctions must be sealed with Cemintel edge sealer. Refer to ‘Components’ table for appropriate materials. Do NOT cut with a wet saw.
Mitreing of Panels
It is not recommended to mitre panels as this can cause delamination of the face.
Face Fixing of Panels
At face fixing points, all panels must be supported by a Spacer Strip of 200mm minimum length. Panels must be pre-drilled to accept nails. Use a 2.5mm drill bit and drill from the front. Nail/screw heads should finish flush with the panel surface. All visible nail/screw heads should be neatly covered with primer and colour-matched painted used sparingly. Do NOT use sealant on nail heads.
Penetrations
Penetrations in panels may be cut or drilled prior to installation. Cut from the back or drill from the front. Cut penetrations oversize by 8-10mm all around. Mask, prime and fill gaps with sealant in accordance with recommended methods and products.
Bevelled Edges
The top edge of panels at window sill level may require bevelling. Cemintel NZ recommends using the FESTO DSC-AGP 125 Diamond Blade Cutting & Grinding Tool.
Recommended Safe Working Practices
Cutting Outdoors 1. Position cutting station so wind will blow dust away from the user or others in the working area.
2. Use a dust reducing plunge saw equipped with a dust extraction system.
Sanding/Drilling/Other Machining When sanding, drilling or machining, you should always wear a P1 or P2 dust mask and warn others in the immediate area.
Important Reminders 1. NEVER use a power saw indoors.2. NEVER use a saw blade that is not purpose-made for cutting fibre cement
products.3. NEVER dry sweep.4. ALWAYS follow tool manufacturers’ safety recommendations.5. ALWAYS maintain tools in a clean condition.
Handling & General Care

TERRITORY™ – External Horizontal Installation (with Designer Series fixing system)57
WARRANTY, CLEANING + MAINTENANCE

TERRITORY™ – External Horizontal Installation (with Designer Series fixing system) 58
10WARRANTY, CLEANING + MAINTENANCE
WarrantyThe Cemintel Territory panels have a product warranty of 15 years.
The full Cemintel Territory product warranty is available for download at cemintel.co.nz
Wash DownWhen cleaning panels, use no more than 700psi (50kg/cm2) of water pressure at 3 to 3.5m distance from the face. Water pressure should be applied downward to avoid forcing water into tongue and groove joints.
Use neutral detergent with a soft brush when removing dirty spots from a panel. When diluting the neutral detergent, follow the manufacturer’s instructions, and use the weakest solution possible.
Graffiti ProtectionFor walls requiring anti-graffiti protection, Cemintel NZ recommends the application of Wattyl® Poly U-400 Anti-Graffiti Clear. Please refer to Wattyl® for coating instructions and the warranty conditions of this product.
RecoatingIf recoating in an alternative colour is desired, Cemintel NZ recommends the use of 1 coat of Wattyl® Aquaprep Primer Sealer Undercoat and 2 coats of Wattyl® Solagard®.
Prior to any recoating, panels should be washed down, as per the maintenance instructions, and
the coating should be applied as per Wattyl® instructions.
Cemintel NZ recommends that only Territory Savanna is suitable for recoating with an alternative colour.
Inspection, Repair and MaintenanceThe durability of the Cemintel Territory range can be enhanced by periodic inspection and maintenance. Inspections should include examination of the coatings, flashings and seals. Any cracked or damaged finish or seals which would allow water ingress must be repaired immediately by resealing the affected area, or by removing the panel and replacing sealant. Any damaged flashings, sheets or sealant must be replaced as for new work.
Regularly inspect panel surfaces and follow wash-down procedures when required. Small blemishes can be repaired using touch-up paint or other approved paint.
Ensure ventilation and drainage gaps between panels and flashings are clear of any debris.
It is recommended storing additional panels in case any panels are damaged in the future. Any small chips can be painted over with touch up paint which both hides the underlying panel colour and seals the panel to prevent moisture ingress.
If a whole panel needs to be replaced, the panels which sit above it will need to be removed one by one from the heading, and then reassembled with joints resealed.

Our Offices
Auckland 956 Great South RoadPenrose, Auckland
Tauranga 15 Hynds RoadGreerton, Tauranga
Hamilton 59 Vickery StreetTe Rapa, Hamilton
Christchurch 1/99 Sawyers Arms RoadPapanui, Christchurch
cemintel.co.nz 0800 274 257
For Design and Technical Support: 0800 667 887
Disclaimer: Information presented in this document is supplied in good faith and to the best of our knowledge, was accurate at the time of preparation. Products are subject to natural variation as part of the manufacturing process. Product images may vary from actual product in regard to colour and surface finish. The provision of this information should not be construed as a recommendation to use any of our products in violation of any patent rights or in breach of any statute or regulation. Users are advised to make their own determination as to the suitability of this information in relation to their particular purpose or specific circumstances. Since the information contained in this document may be applied under conditions beyond our control, no responsibility can be accepted by Cemintel, or its staff for any loss or damage caused by any person acting or refraining from action as a result of misuse of this information. 10
/20
17

futurewood.nz
Futurewood Composite Cladding

Futurewood Decorative Cladding Features• Cut to length*
• Low maintenance, fully finished and ready to install
• No need for sanding, filling, painting or staining
• Termite resistant
• No splinters, cupping, warping, splitting, twisting or rotting
• Mould and mildew resistant due to low water absorption
• Matching Futurewood Fencing and Decking available
Available Sizes
• 30mm x 40mm decorative cladding
• 70mm x 15mm decorative cladding/screening
• 60mm x 40mm decorative cladding
• 90mm x 25mm decorative cladding
• 90mm x 40mm decorative cladding
• 140mm x 35mm decorative cladding/seating/walkways
Why use wood, when you can use Futurewood.
* Terms and Conditions apply.** Please note colours soften after initial weathering and retain their look following this. Colours shown are a printed representation only.
Colour samples are available on request.
W futurewood.nz T 0800 88 88 42E [email protected]
Distributed by IPS123 Diana Drive Glenfield, Auckland
Colour OptionsFuturewood Fencing comes in a range of 7 traditional and contemporary colours.**
Slate Grey Ash Grey Chocolate Walnut Salt Bush Sandstone Mahogany
100% Replacement
Warranty
Cost-EffectiveEco-Friendly100% Recycled Low Maintenance
10years
Futurewood is an eco-friendly, 100% recycled alternative to hardwood timber products. Made from recycled HDPE, rice husks and hardwood timber, Futurewood offers the illusion of a well-finished timber board, but is a wood plastic composite.
As well as being environmentally sustainable, Futurewood is also a low-maintenance alternative to timber. It does not require oiling, staining or painting, and will not rot, splinter or lose its colour.

September 2013
EnviroSlat® Fixing& Handling Guidelines
Storage
It is important to ensure that EnviroSlat is not exposed to direct sunlight or excessive temperatures while
stored in packs in order to reduce excessive heat build-up. EnviroSlat must be stored flat and dry and off the
ground; Standard 5.4 metre long packs of EnviroSlat require a minimum of seven gluts (supports) under the
pack or be placed on an appropriate length custom length pallet for proper storage.
Working with EnviroSlat
EnviroSlat will expand or contract in length with rising or falling temperatures. All boards should be
conditioned before cutting so that they are at an even temperature. Boards are best cut in the shade before
they are exposed to radiant heat and in ambient temperatures under 30 degrees Celsius (in the morning).
When cutting lengths of EnviroSlat you should take in to account the temperature of the conditioned boards
and allow for expansion or contraction of the boards based on the likely temperature fluctuations over the
year at the site. You should allow for some expansion between boards that are butted together or where
boards are butted against a post or other structure. We recommend a minimum 5mm gap between the end of
an EnviroSlat board and any frame, fixed surface or another board. EnviroSlat will expand by approximately
7-9mm (3-4.5mm at each end)over a board length of 5400mm based on a temperature increase of 40 degrees
Celsius. The surface of EnviroSlat could be as much as 25 degrees Celsius warmer than the ambient
temperature when subjected to continuous direct sunlight. Therefore the board could reach a surface
temperature of up to 65 degrees Celsius on a day when the ambient temperature reaches 40 degrees Celsius.
Fencing/Screening Construction
EnviroSlat is designed to be fixed directly to posts that are fixed in/on the ground. The posts can be
made of timber, steel or aluminium and need to be of a suitable cross section and strength to hold the
intended fence size/weight.
Futurewood provides a range of 2400mm long black powdered coated aluminium fence posts in either
30mm x 30mm, 50mm x 50mm or 65mm x 65mm as well as a 30mm x 16mm x 1800mm “U” channel
specifically designed for use with the 70mm x 15mm EnviroSlat boards.
The maximum span for continuously fixing EnviroSlat boards is 900mm between support posts
in order to minimize flexing caused by thermal expansion/contraction of the boards. For single
spans the maximum distance between support posts is 600mm.
Spacing between slats comes down to personal preference and the amount of privacy, shade and air
flow that is required.

September 2013
Fixing - Decorative Cladding
EnviroSlat decorative cladding boards can be fixed with 10 gauge countersunk screws inserted through
the front face of the board. It is recommended that you pre drill and pre countersink all the holes for
the screws. All holes should be 1-2mm larger than the shank of the screw but not too large so that they
are still hidden under the head of the screw. Do not over tighten the screw and ensure that it does not
bury in to the surface of the EnviroSlat board. Screws should be positioned a minimum of 25mm from
any profile edge for the 70mm x 15mm profile and 15mm for the edge for 40mm x 30mm profile to
avoid any risk of the boards splitting.
Fixing – Fencing/Screening
EnviroSlat boards can be fixed with screws inserted through the front face of the board (front fix)
where the screw head will be visible. Button head, wafer head or countersunk screws in either 8 or 10
gauge should be used to front fix EnviroSlat boards. When front fixing it is recommended that you pre
drill all the holes for the screws. If using countersunk screws both the hole and the countersink need to
be pre-drilled. All holes should be 1-2mm larger than the shank of the screw but not too large so that
they are still hidden under the head of the screw. Do not over tighten the screw and ensure that it does
not bury in to the surface of the EnviroSlat board. Screws should be positioned a minimum of 25mm
from any profile edge for the 70mm x 15mm profile and 15mm for the edge for the 40mm x 30mm
profile to avoid any risk of the boards splitting. When using the Futurewood aluminium “U” channel to
hide the ends of the boards, screws can be fixed from the rear through the “U” channel. The “U”
channel should be pre-drilled and the board is fixed with an 8 gauge x 10mm -15mm long coarse
threaded button or wafer head wood screw. The “U” channel has a feint screw line on one face so that
the screws can be lined up evenly from board to board. Take care to make sure that the “U” channel is
fixed so that the face with the screw line is on the back side of the fence/screen.
All screws should be plated or made from stainless steel or brass
If coloured screws are required we recommend pre-painting your screws before installation
EnviroSlat profiles should be fixed with one screw at each support point
Nailing is not recommended for securing EnviroSlat
Colour & Surface Finishing
The colour of your EnviroSlat board will weather in the first 4-12 weeks of exposure to the elements. After
the initial weathering process the colour will be maintained over many years with only very slight changes
year on year. The manufacturing process does allow for a very slight variation in colour from board to board
and batch to batch of material. Slight colour change may also occur over time as part of the natural
weathering effect.
Rough edges on cut ends can be removed using a fine abrasive paper.
Cleaning
EnviroSlat should be washed down periodically with a strong solution of household detergent (“Handy
Andy” works well) in order to clean off accumulated dirt/grime.
Fixing details and specifications may change without notice.
For further information email [email protected]
Industrial Plastic Shapes Ltd
Tel: 0800 88 88 42 Fax 09 442 4053
www.futurewoodnz.co.nz
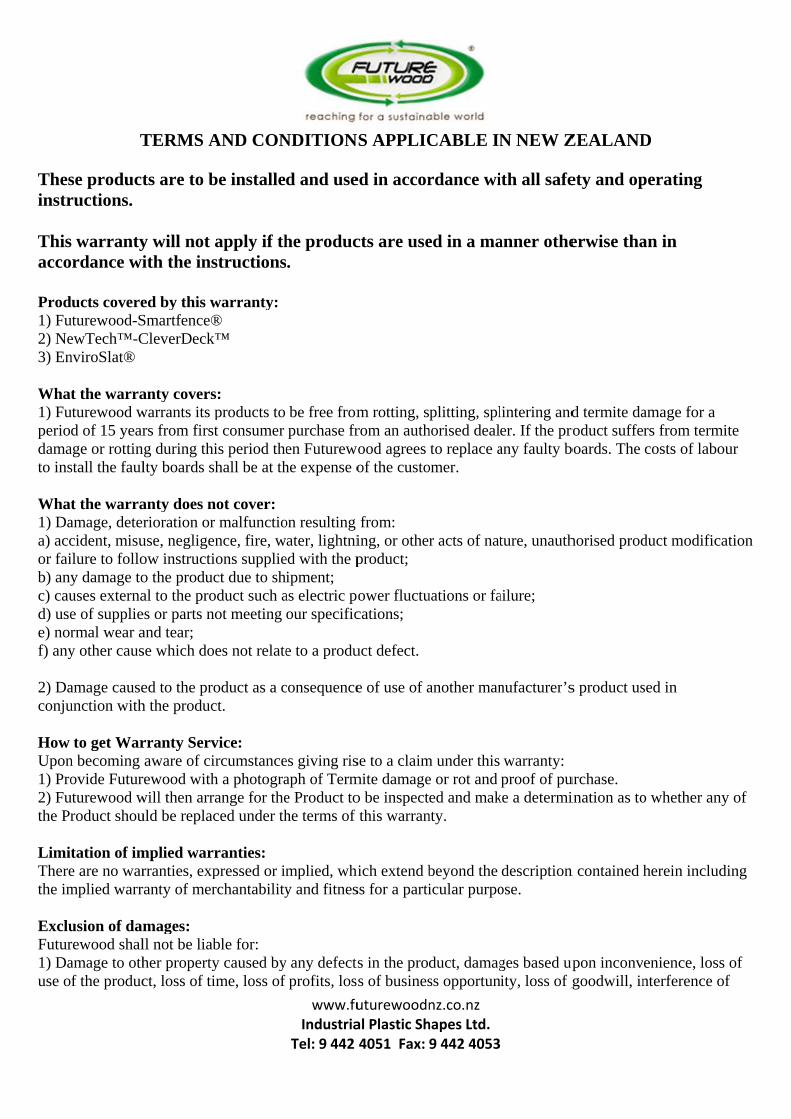
Thesinstr Thisacco Prod1) Fu2) Ne3) En What1) Fuperioddamato ins What1) Daa) accor faib) anyc) caud) usee) norf) any 2) Daconju How Upon1) Pro2) Futhe Pr LimitTherethe im ExcluFutur1) Dause o
T
se productructions.
warrantyrdance wi
ucts covereuturewood-SewTech™-CnviroSlat®
t the warrauturewood wd of 15 year
age or rottinstall the faul
t the warraamage, detercident, misulure to folloy damage touses externae of suppliermal wear ay other caus
amage causeunction with
to get Warn becoming ovide Futur
uturewood wroduct shou
tation of ime are no warmplied warr
usion of damrewood shalamage to othf the produc
TERMS A
ts are to b
y will not ith the ins
ed by this wSmartfence®CleverDeck
anty coverswarrants its prs from first
ng during thilty boards s
anty does nrioration or
use, negligeow instructio the producal to the proes or parts nand tear; se which do
ed to the proh the produc
rranty Servaware of ci
rewood withwill then arruld be replac
mplied warrrranties, expranty of mer
mages: ll not be liabher propertyct, loss of ti
AND CON
be installe
apply if thstructions
warranty: ® ™
s: products to t consumer is period thehall be at th
not cover: r malfunctionce, fire, w
ions suppliect due to sh
oduct such aot meeting
es not relate
oduct as a cct.
vice: ircumstanceh a photograange for theced under th
ranties: pressed or imrchantability
ble for: y caused byime, loss of
www.fuIndustria
Tel: 9 442
NDITION
d and use
he produc.
be free frompurchase fren Futurewhe expense o
on resulting ater, lightni
ed with the pipment;
as electric pour specific
e to a produ
consequence
es giving risaph of Terme Product tohe terms of
mplied, whiy and fitnes
y any defectsf profits, los
uturewoodnal Plastic Sh4051 Fax:
S APPLIC
ed in accor
cts are use
m rotting, srom an authood agrees of the custo
from: ing, or otheproduct;
ower fluctucations;
uct defect.
e of use of a
se to a claimmite damageo be inspectthis warran
ich extend bss for a parti
s in the pros of busines
nz.co.nz hapes Ltd. 9 442 4053
CABLE IN
rdance wi
ed in a ma
plitting, splhorised dealto replace a
omer.
r acts of nat
uations or fa
another man
m under this e or rot and ed and mak
nty.
beyond the icular purpo
duct, damagss opportun
N NEW Z
ith all safe
anner othe
lintering ander. If the proany faulty b
ture, unauth
ailure;
nufacturer’s
warranty: proof of pu
ke a determi
descriptionose.
ges based upity, loss of g
ZEALAND
ety and op
erwise tha
d termite daroduct suffeboards. The
horised prod
s product us
urchase. ination as to
n contained h
upon inconvgoodwill, in
D
perating
an in
amage for ars from termcosts of lab
duct modific
sed in
o whether an
herein inclu
enience, losnterference
a mite bour
cation
ny of
uding
ss of of

busin EffecThis wmay aright Goodlegisl
ness relation
ctive law: warranty is also have otor remedy w
ds Act, Conslation.
nships, or ot
subject to tther rights.. which the psumer Guar
ther comme
the laws of NNothing in
purchaser orrantees Act,
www.fuIndustria
Tel: 9 442
rcial loss, e
New Zealann this warranr ultimate us Fair Tradin
uturewoodnal Plastic Sh4051 Fax:
even if advis
nd. This wanty limits orser of the prng Act or an
nz.co.nz hapes Ltd. 9 442 4053
sed of the p
arranty giver restricts, oroduct may ny other rel
ossibility of
es you specior is intendehave pursuevant and a
f such dama
ific legal riged to derogauant to New applicable N
age.
ghts, and yoate from, anZealand Sa
New Zealand
ou ny ale of d

Product1.1 Watergate Plus is a fire retardant, flexible synthetic wall underlay for use under direct fixed and
non-direct fixed wall cladding on timber and steel framed buildings. The product is manufactured from coated, non-woven polyolefin and is coloured white.
ScopeFlexible Wall Underlay
2.1 Watergate Plus has been appraised for use as a flexible wall underlay for buildings within the following scope:
¬ the scope limitations of NZBC Acceptable Solution E2/AS1, Paragraph 1.1 for timber framed buildings; or,
¬ the scope limitations of NASH Building Envelope Solutions, Paragraph 1.1 for steel framed buildings; and,
¬ with direct fixed absorbent and non-absorbent wall claddings; or,
¬ with absorbent and non-absorbent wall claddings installed over an 18 mm minimum drained cavity; or,
¬ with masonry veneer in accordance with NZBC Acceptable Solution E2/AS1 for timber framed buildings or to NASH Building Envelope Solutions for steel framed buildings; and,
¬ situated in NZS 3604 Wind Zones up to and including Very High.
Use over Rigid Wall Underlay
2.2 Watergate Plus has been appraised for use as a flexible wall underlay over rigid wall underlays on buildings within the following scope:
¬ the scope limitations of NZBC Acceptable Solution E2/AS1, Paragraph 1.1 for timber framed buildings; or,
¬ the scope limitations of NASH Building Envelope Solutions Paragraph 1.1 for steel framed buildings; and,
¬ with absorbent and non-absorbent wall claddings installed over an 18 mm minimum drained cavity; and,
¬ with masonry veneer in accordance with NZBC Acceptable Solution E2/AS1 for timber framed buildings or NASH Building Envelope Solutions for steel framed buildings; and,
¬ situated in NZS 3604 and NASH Standard Part 2 Wind Zones up to and including Extra High.
WATERGATE PLUS WALL UNDERLAY
Pg 1 Readers are advised to check the validity of this Appraisal by referring to the Valid Appraisals listing on the BRANZ website, or by contacting BRANZ.
Appraisal No. 695 (2017)
Amended 26 February 2020
This Appraisal replaces BRANZ Appraisal No. 695 (2010)
Appraisal No. 695 [2017]
BRANZ AppraisalsTechnical Assessments of products for building and construction.
Thermakraft LimitedPO Box 58 112GreenmountAuckland
Tel: 09 273 3727
Fax: 09 273 3726
Free phone: 0800 806 595
www.thermakraft.co.nz
BRANZ1222 Moonshine Rd,RD1, Porirua 5381Private Bag 50 908Porirua 5240, New ZealandTel: 04 237 1170branz.co.nz

Readers are advised to check the validity of this Appraisal by referring to the Valid Appraisals listing on the BRANZ website, or by contacting BRANZ.
BRANZ Appraisal Appraisal No. 695 (2017) 21 September 2017
WATERGATE PLUS WALL UNDERLAY
Pg 2
Specific Design
2.3 Watergate Plus has also been appraised for use on buildings subject to specific weathertightness design. Building designers are responsible for the building design and for the incorporation of Watergate Plus into their design in accordance with the declared properties and the instructions of Thermakraft Limited.
Building RegulationsNew Zealand Building Code (NZBC)
3.1 In the opinion of BRANZ, Watergate Plus, if used, designed, installed and maintained in accordance with the statements and conditions of this Appraisal, will meet, or contribute to meeting the following provisions of the NZBC:
Clause B2 DURABILITY: Performance B2.3.1 (a), not less than 50 years, B2.3.1 (b), 15 years and B2.3.2. Watergate Plus meets these requirements. See Paragraphs 9.1 and 9.2.
Clause C3 FIRE AFFECTING AREAS BEYOND THE FIRE SOURCE: Performance C3.4 (c). Watergate Plus meets this requirement. See Paragraph 10.1.
Clause E2 EXTERNAL MOISTURE: Performance E2.3.2. When used as part of the cladding system, Watergate Plus will contribute to meeting this requirement. See Paragraphs 12.1 and 12.2.
Clause F2 HAZARDOUS BUILDING MATERIALS: Performance F2.3.1. Watergate Plus meets this requirement and will not present a health hazard to people.
Technical Specification4.1 Watergate Plus is a white, 105 g/m2 non-woven, microporous polyolefin fabric underlay.
4.2 The product is supplied in rolls 1.370 m wide x 54.8 and 30 m long, 2.740 m wide x 30 and 18.5 m long and 3 m wide x 30 m long. The product is printed with the Watergate Plus logo repeated along the length of the roll and can also be co-branded with custom printing. The rolls are wrapped in clear polythene film.
Accessories
4.3 Accessories used with Watergate Plus which are supplied by the installer are:
¬ Fixings - staples, clouts, screws or proprietary underlay fixings, or other temporary fixings to attach the wall underlay to the framing.
¬ Wall underlay restraint (timber frame) - polypropylene strap, 75 mm galvanised mesh or galvanised wire, or vertical cavity battens where required to restrain the wall underlay in accordance with NZBC Acceptable Solution E2/AS1, Paragraph 9.1.8.5.
¬ Wall underlay restraint (steel frame) - polypropylene strap, 75 mm galvanised mesh or galvanised wire, or vertical cavity battens where required to restrain the wall underlay in accordance with NASH Building Envelope Solutions, Paragraph 9.1.9.5. Thermal break sheathing installed in accordance with NASH Building Envelope Solutions Paragraph 11.4.3.2.
Handling and Storage5.1 Handling and storage of the product, whether on or off site, is under the control of the installer.
The rolls must be protected from damage and weather. They must be stored on end, under cover, in clean, dry conditions and must not be crushed.
Technical Literature6.1 Refer to the Appraisals listing on the BRANZ website for details of the current Technical Literature
for Watergate Plus. The Technical Literature must be read in conjunction with this Appraisal. All aspects of design, use, installation and maintenance contained in the Technical Literature and within the scope of this Appraisal must be followed.
Appraisal No. 695 [2017]

Readers are advised to check the validity of this Appraisal by referring to the Valid Appraisals listing on the BRANZ website, or by contacting BRANZ.
Pg 3
Design Information7.1 Watergate Plus is intended for use as an alternative to conventional building papers which are fixed
over timber or steel framed walls in order to limit the entry of wind into building cavities, and to act as a secondary barrier to wind-driven rain. Refer to Table 1 for material properties.
7.2 The material also provides a degree of temporary weather protection during early construction. However, the product will not make the building weathertight and some wetting of the underlying structure is always possible before the building is closed in. Hence, the building must be closed-in and made weatherproof before moisture sensitive materials such as wall or ceiling linings and insulation materials are installed.
7.3 Watergate Plus must not be exposed to the weather or ultra violet light for a total of more than 60 days before being covered by the wall cladding.
7.4 Watergate Plus is suitable for use as an air barrier where walls are not lined, such as attic spaces at gable ends, in accordance with NZBC Acceptable Solution E2/AS1 or NASH Building Envelope Solutions, Paragraph 9.1.4 (c).
7.5 In cavity installations where the cavity battens are installed at greater than 450 mm centres, the wall underlay must be restrained between the battens to prevent the underlay bulging into the cavity space when bulk insulation is installed in the wall frame cavity. Refer to NZBC Acceptable Solution E2/AS1, Paragraph 9.1.8.5 for timber frame or NASH Building Envelope Solutions, Paragraph 9.1.9.5 for steel frame. Wall underlay restraint options include polypropylene strap, 75 mm galvanised mesh or galvanised wire, or vertical cavity battens or thermal break sheathing (steel frame only).
Table 1: Material Properties
NZS 2295 PropertyProperty Performance
Requirement Actual Property Performance
Absorbency ≥ 100 g/m2 Pass
Vapour Resistance ≤ 7 MN s/g Pass
Water Resistance ≥ 20 mm Pass
pH of Extract ≥ 6.0 and ≤ 9.0 Pass
Shrinkage ≤ 0.5% Pass
Mechanical Edge tear and tensile strength Edge tear (Average):
Machine direction = 77 N
Cross direction = 56 N
Tensile strength (Average):
Machine direction = 2.5 kN/m
Cross direction = 1.8 kN/m
Air Barrier Air resistance: ≥ 0.1 MN s/m3 Pass. Watergate Plus can be used as an air barrier.
Claddings
7.6 Watergate Plus is suitable for use under wall claddings as a wall underlay as called up in NZBC Acceptable Solution E2/AS1, Table 23 on timber framed buildings and NASH Building Envelope Solutions Table 23 a steel framed buildings, including non-absorbent wall claddings such as vinyl and metal-based weatherboards in direct fixed situations.
BRANZ Appraisal Appraisal No. 695 (2017) 21 September 2017
WATERGATE PLUS WALL UNDERLAY
Appraisal No. 695 [2017]

Readers are advised to check the validity of this Appraisal by referring to the Valid Appraisals listing on the BRANZ website, or by contacting BRANZ.
Pg 4
Stucco Plaster
7.7 Watergate Plus is suitable for use as a non-rigid backing material for stucco plaster in accordance with the requirements of NZBC Acceptable Solution E2/AS1, Paragraph 9.3.5.1 for timber framing or NASH Building Envelope Solutions Paragraph 9.3.5.1 for steel framing. The underlay must be supported with 75 mm galvanised mesh or plastic tape or wire at 150 mm centres run across the cavity battens to limit deflection to a maximum of 5 mm.
7.8 Watergate Plus may also be used as a slip layer over rigid backings for stucco plaster in accordance with the requirements of NZBC Acceptable Solution E2/AS1, Paragraph 9.3.3.1 (b) for timber framing or NASH Building Envelope Solutions Paragraph 9.3.3.1 b) for steel framing.
Structure 8.1 Watergate Plus is suitable for use in all Wind Zones of NZS 3604 and NASH Standard Part 2 up to,
and including, Very High when used as a stand-alone flexible wall underlay, and all Wind Zones of NZS 3604 up to, and including, Extra High when used as an overlay for rigid wall underlays.
Durability9.1 Watergate Plus meets code compliance with NZBC Clause B2.3.1 (a), not less than 50 years for wall
underlays used where the cladding durability requirement or expected serviceable life is not less than 50 years, e.g. behind masonry veneer, and code compliance with NZBC Clause B2.3.1 (b), 15 years for wall underlays used where the cladding durability requirement is 15 years.
Serviceable Life
9.2 Provided it is not exposed to the weather or ultra-violet light for a total of more than 60 days, and provided the exterior cladding is maintained in accordance with the cladding manufacturer’s instructions and the cladding remains weather resistant, Watergate Plus is expected to have a serviceable life equal to that of the cladding.
Control of Internal Fire and Smoke Spread10.1 Watergate Plus has an AS 1530 Part 2 flammability index of not greater than 5 and therefore meets
the requirements of NZBC Acceptable Solutions C/AS2, Paragraph 4.17.8 (b), for the surface finish requirements of suspended flexible fabric used as an underlay to exterior cladding that is exposed to view in occupied spaces.
Prevention of Fire Occurring11.1 Separation or protection must be provided to Watergate Plus from heat sources such as fire places,
heating appliances, flues and chimneys. Part 7 of NZBC Acceptable Solutions C/AS1, C/AS2 and NZBC Verification Method C/VM1 provide methods for separation and protection of combustible materials from heat sources.
External Moisture 12.1 Watergate Plus must be used behind claddings that meet the requirements of the NZBC, such
as those covered by NZBC Acceptable Solution E2/AS1 or NASH Building Envelope Solutions, or claddings covered by a valid BRANZ Appraisal.
12.2 Watergate Plus, when installed in accordance with the Technical Literature and this Appraisal will assist in the total cladding systems compliance with NZBC Clause E2.
BRANZ Appraisal Appraisal No. 695 (2017) 21 September 2017
WATERGATE PLUS WALL UNDERLAY
Appraisal No. 695 [2017]

Readers are advised to check the validity of this Appraisal by referring to the Valid Appraisals listing on the BRANZ website, or by contacting BRANZ.
Pg 5
Installation Information Installation Skill Level Requirements13.1 All design and building work must be carried out in accordance with the Watergate Plus Wall
Underlay Technical Literature and this Appraisal by competent and experienced tradespersons conversant with wall underlays. Where the work involves Restricted Building Work (RBW) this must be completed by, or under the supervision of, a Licensed Building Practitioner (LBP) with the relevant Licence Class.
Underlay Installation 14.1 Watergate Plus must be fixed to all framing members at maximum 300 mm centres with large-
head clouts 20 mm long, 6-8 mm staples, self drilling screws or proprietary underlay fixings. The underlay must be pulled taut over the framing before fixing.
14.2 Watergate Plus must be run horizontally and must extend from the upper-side of the top plate to the under-side of the bearers or wall plates supporting ground floor joists, or below bottom plates on concrete slabs. Horizontal laps must be no less than 150 mm wide, with the direction of the lap ensuring that water is shed to the outer face of the membrane. End laps must be made over framing and be no less than 150 mm wide.
14.3 The wall underlay should be run over openings and these left covered until windows and doors are ready to be installed. Openings are formed in the underlay by cutting on a 45 degree diagonal from each corner of the penetration. The flaps of the cut underlay must be folded inside the opening and stapled to the penetration framing. Excess underlay may be cut off flush with the internal face of the wall frame.
14.4 Watergate Plus can be added as a second layer over head flashings in accordance with the requirements of NZBC Acceptable Solution E2/AS1, Paragraph 9.1.10.3 for timber frames or NASH Building Envelope Solutions Paragraph 9.1.11.3 for steel framing.
14.5 When fixing the product in windy conditions, care must be taken due to the large sail area created by wide roll widths.
14.6 Any damaged areas of Watergate Plus, such as tears, holes or gaps around service penetrations, must be repaired. Damaged areas can be repaired by covering with new material lapping the damaged area by at least 150 mm and taping, or by taping small tears.
Inspections
14.7 The Technical Literature must be referred to during the inspection of Watergate Plus installations.
Basis of AppraisalThe following is a summary of the technical investigations carried out:
Tests15.1 The following tests have been carried out on Watergate Plus in accordance with NZBC Acceptable
Solution E2/AS1, Table 23: tensile strength, edge-tear resistance and resistance to water vapour transmission in accordance with AS/NZS 4200.1, shrinkage in accordance with AS/NZS 4201.3, resistance to water penetration in accordance with AS/NZS 4201.4, surface water absorbency in accordance with AS/NZS 4201.6, pH of extract in accordance with AS/NZS 1301.421s and air resistance to BS 6538.3. A range of these tests were completed before and after Watergate Plus was exposed to ultra-violet light.
15.2 The flammability Index of Watergate Plus has been evaluated in accordance with AS/NZS 1530.2.
BRANZ Appraisal Appraisal No. 695 (2017) 21 September 2017
WATERGATE PLUS WALL UNDERLAY
Appraisal No. 695 [2017]

Readers are advised to check the validity of this Appraisal by referring to the Valid Appraisals listing on the BRANZ website, or by contacting BRANZ.
Pg 6
Other Investigations16.1 A durability opinion has been given by BRANZ technical experts.
16.2 An evaluation of the expected performance of Watergate Plus in direct contact with metal wall cladding has been completed by BRANZ.
16.3 The practicability of installation of Watergate Plus has been assessed by BRANZ and found to be satisfactory.
16.4 The Technical Literature, including installation instructions, has been examined by BRANZ and found to be satisfactory.
Quality17.1 The manufacture of Watergate Plus has not been examined by BRANZ, but details of the methods
adopted for quality control and the quality of the materials used, have been obtained and found to be satisfactory.
17.2 The quality of supply to the market is the responsibility of Thermakraft Limited.
17.3 Building designers are responsible for the design of the building, and for the incorporation of the wall underlay into their design in accordance with the instructions of Thermakraft Limited.
17.4 Quality of installation is the responsibility of the installer in accordance with the instructions of Thermakraft Limited.
Sources of Information ¬ AS 1530.2: 1993 Test for flammability of materials.
¬ AS/NZS 1301.421s: 1998 Determination of the pH value of aqueous extracts of paper, board and pulp - Cold extraction method.
¬ AS/NZS 4200.1: 1994 Pliable building membranes and underlays - Materials.
¬ AS/NZS 4201.1: 1994 Pliable building membranes and underlays - Methods of test – Resistance to dry delamination.
¬ AS/NZS 4201.2: 1994 Pliable building membranes and underlays - Methods of test – Resistance to wet delamination.
¬ AS/NZS 4201.3: 1994 Pliable building membranes and underlays - Methods of test – Shrinkage.
¬ AS/NZS 4201.4: 1994 Pliable building membranes and underlays - Methods of test – Resistance to water penetration.
¬ AS/NZS 4201.6: 1994 Pliable building membranes and underlays - Methods of test – Surface water absorbency.
¬ BS 6538.3: 1987 Method for determination of air permeance using the Garley apparatus.
¬ NZS 2295: 2006 Pliable, permeable building underlays
¬ NZS 3604: 2011 Timber-framed buildings.
¬ NASH Building Envelope Solutions: 2019 Light steel framed buildings.
¬ NASH Standard Part Two: 2019 Light Steel Framed Buildings
¬ Ministry of Business, Innovation and Employment Record of Amendments - Acceptable Solutions, Verification Methods and Handbooks.
¬ The Building Regulations 1992.
BRANZ Appraisal Appraisal No. 695 (2017) 21 September 2017
WATERGATE PLUS WALL UNDERLAY
Appraisal No. 695 [2017]

Readers are advised to check the validity of this Appraisal by referring to the Valid Appraisals listing on the BRANZ website, or by contacting BRANZ.
Amendments Amendment No 1, dated 30 November 2018
This Appraisal has been amended to change the Appraisal name to Watergate 295 Synthetic Underlay and to update Table 1.
Amendment No 2, dated 15 February 2019
This Appraisal has been amended to change the Appraisal name to Watergate Plus Wall Underlay
Amendment No 3, dated 26 February 2020
This Appraisal has been amended to change the Appraisal name to Watergate Plus, include roll size of 3.0 m x 30 m, update Table 1 and update NZBC referenced documents.
Pg 7
BRANZ Appraisal Appraisal No. 695 (2017) 21 September 2017
WATERGATE PLUS WALL UNDERLAY
Appraisal No. 695 [2017]

Readers are advised to check the validity of this Appraisal by referring to the Valid Appraisals listing on the BRANZ website, or by contacting BRANZ.
In the opinion of BRANZ, Watergate Plus Wall Underlay is fit for purpose and will comply with the Building Code to the extent specified in this Appraisal provided it is used, designed, installed and maintained as set out in this Appraisal.
The Appraisal is issued only to Thermakraft Limited, and is valid until further notice, subject to the Conditions of Appraisal.
Conditions of Appraisal
1. This Appraisal:
a) relates only to the product as described herein;
b) must be read, considered and used in full together with the Technical Literature;
c) does not address any Legislation, Regulations, Codes or Standards, not specifically named herein;
d) is copyright of BRANZ.
2. Thermakraft Limited:
a) continues to have the product reviewed by BRANZ;
b) shall notify BRANZ of any changes in product specification or quality assurance measures prior to the product being marketed;
c) abides by the BRANZ Appraisals Services Terms and Conditions.
d) Warrants that the product and the manufacturing process for the product are maintained at or above the standards, levels and quality assessed and found satisfactory by BRANZ pursuant to BRANZ’s Appraisal of the product.
3. BRANZ makes no representation or warranty as to:
a) the nature of individual examples of, batches of, or individual installations of the product, including methods and workmanship;
b) the presence or absence of any patent or similar rights subsisting in the product or any other product;
c) any guarantee or warranty offered by Thermakraft Limited.
4. Any reference in this Appraisal to any other publication shall be read as a reference to the version of the publication specified in this Appraisal.
5. BRANZ provides no certification, guarantee, indemnity or warranty, to Thermakraft Limited or any third party.
For BRANZ
Chelydra PercyChief Executive
Date of Issue: 21 September 2017
Pg 8
BRANZ Appraisal Appraisal No. 695 (2017) 21 September 2017
WATERGATE PLUS WALL UNDERLAY
Appraisal No. 695 [2017]