Teaching Composites Manufacturing Through Tooling - Asee ...
14
Paper ID #24940 Teaching Composites Manufacturing Through Tooling Ms. Nikki Larson, Western Washington University After receiving my bachelor degree in Mechanical Engineering from Bradley University, I started working for Boeing. While at Boeing I worked to receive my master’s degree in Mechanical Engineering with an emphasis in Materials and Manufacturing. After leaving Boeing I spent several years in equipment research and development at Starbucks Coffee Company. From there I decided my heart lied in teaching and left Starbucks to teach Materials Science Technology at Edmonds Community College. I eventually moved to Western Washington University where I have been faculty in the Plastics and Composites Engineering Program for the past 13 years. My research interests are in composite manufacturing. David Frye, Western Washington University David has worked for Western Washington University in their Plastics and Composites Engineering (PCE) program for five years. As the PCE Lab Technician he helps develop curriculum and teaches many of the lab portions of courses that the program offers. David is a graduate of the University of Washington with a B.S. in Environmental Science. c American Society for Engineering Education, 2019
-
Upload
khangminh22 -
Category
Documents
-
view
0 -
download
0
Transcript of Teaching Composites Manufacturing Through Tooling - Asee ...
Paper ID #24940
Teaching Composites Manufacturing Through Tooling
Ms. Nikki Larson, Western Washington University
After receiving my bachelor degree in Mechanical Engineering from Bradley University, I started workingfor Boeing. While at Boeing I worked to receive my master’s degree in Mechanical Engineering withan emphasis in Materials and Manufacturing. After leaving Boeing I spent several years in equipmentresearch and development at Starbucks Coffee Company.
From there I decided my heart lied in teaching and left Starbucks to teach Materials Science Technology atEdmonds Community College. I eventually moved to Western Washington University where I have beenfaculty in the Plastics and Composites Engineering Program for the past 13 years. My research interestsare in composite manufacturing.
David Frye, Western Washington University
David has worked for Western Washington University in their Plastics and Composites Engineering (PCE)program for five years. As the PCE Lab Technician he helps develop curriculum and teaches many of thelab portions of courses that the program offers. David is a graduate of the University of Washington witha B.S. in Environmental Science.
c©American Society for Engineering Education, 2019
Teaching Composites Manufacturing Through Tooling
Western Washington University
Abstract: Teaching an introductory composites course can be a challenge.
Variables such as material selection, tooling, processing, and configuration can
make the task seem daunting to both the student and the instructor. This paper
outlines a new way of looking at an introduction to composites course through the
eyes of tooling. Tooling is often the last thing that is considered when designing
and manufacturing a product. Having the tooling be chosen first and then
designing a product around it leads the students to discover the importance of it
on the quality of the product as well as what manufacturing methods are
appropriate for both the tooling and the product. Turning the tooling technique
into the driving factor also allows for new innovations in composite tool
manufacturing to be examined and tested by the students and shared with the
class.
Introduction:
Western Washington University has a unique Plastics and Composites Engineering (PCE)
program that focuses not only on materials science, chemistry, and characterization, but in
manufacturing as well. The PCE program offers theory and hands-on courses in traditional
thermoplastic and composite processing techniques such as injection molding, extrusion,
compression molding, autoclaving, and hand lay-up, as well as courses in compounding,
materials characterization, and testing. The program is unique in that students are expected to
understand the theory behind the materials, manufacturing, and testing processes and also be able
to use that theory in the lab to manufacture, troubleshoot, test, and analyze tooling, parts, and
materials [1].
PCE 372 is an introductory course into room temperature curing composite materials,
manufacturing, and testing. Previously students would learn the basics of hand lay-up and resin
infusion independently of tooling considerations. The students were given only one option,
polyurethane foam. This led to a gap in learning and, instead of considering tooling at the
beginning of a project, it was often left as an afterthought. Even then tooling was only a minor
consideration as most students chose to use the method they were presented with in lab and not
branch out to other methods that might have been more appropriate for their application.
Previous Course Content:
Since 2012 the content of the Introduction to Composites (PCE 372) course consisted of lecture
topics, a prescribed laboratory exercise, and two projects. The lecture content covered a large
variety of topics but had its focus in room temperature materials and processes. An Advanced
Composites course was (and is) also part of the curriculum and focused more on classical
lamination theory and elevated temperature materials and manufacturing process.
The prerequisite for the introductory course is an introduction to polymers and processing that
mainly focused on the basics of polymer chemistry and thermoplastic materials. The goal of the
introductory composites course is to enable the students to understand the basics of composite
materials and manufacturing including the vocabulary, matrix materials, including in-depth
discussions of thermosets that cure at room temperature, with an overview of metal, ceramic,
thermoplastic, and thermoset matrices that cure at elevated temperatures, fiber materials, and
manufacturing processes such as vacuum bagging, resin infusion, RTM, pultrusion, compression
molding, and filament winding. Topics on machining of composites and tooling are also
covered.
The prescribed laboratory exercise was to make two flat panels, one using vacuum bagging and
one without, using the same lay-up sequence and materials. Once completed, tensile and flexural
bars were then cut from the pates and tested to determine the impact that the manufacturing
method had on material properties [2].
Once the prescribed laboratory exercise was completed, students began to work on the first of
two projects. The first project was referred to as the mini project. The goal of the mini project
was to have the students receive instruction and hands on experience with foam shaping, creating
a splash, and using gel coat. Students also gained first-hand knowledge on the impact of draft
angles and tool surface finish on their part. The thought was that, once the students had gained
this experience they would be more effective in the second project, named the major project.
This project was to create a part of their choosing while selecting and justifying the materials and
manufacturing methods to do so [3], [4].
Unfortunately, the mini project had unintended consequences. First, it only gave the students
hands-on experience with one tooling method (male foam tooling) and students were found to be
spending an immense amount of time on non-value-added activities such as sanding and foam
shaping. Second, instruction for each step (foam shaping, using surfacing agents, spraying gel
coat, manufacturing a splash, and tool repair) required the use of precious lecture time for the
demonstrations. Finally, the mini-project did not always help students when it came time for
them to create tooling and parts for their major project as many of them did not want to create a
part from a male foam tool.
Why Change? Why Focus on Tooling?:
As the faculty and staff teaching this course began to brainstorm how to remove some of the
repetition in the projects, tooling became a main source of discussion. If the tool isn’t correct
than the part will never be. According to a tool design engineer at Janicki Industries, “a poorly
designed tool transfers a cost and quality burden into every part associated [with it], even if
intended for single usage [5].”
New composites tooling methods such as using dissolvable materials and additive manufacturing
have recently become commonplace in industry [6], [7], [8] and the students needed to have
knowledge and experience using them. Shaping foam and making a splash were no longer
enough. By focusing on tooling the students can determine what the best types of manufacturing
methods, parts, and materials to use are for a given method. Likewise, it also prompts students
to consider available tooling methods from the start of the design process.
Lab Component Changes:
Staff and faculty worked together to brainstorm the most appropriate tooling and manufacturing
methods for students to work with. The initial prescribed laboratory component of making two
flat panels using two manufacturing methods was modified slightly to exchange the non-bagged
lay-up with one using resin infusion. This gave the students a broader manufacturing base in
which to draw from. The two projects (the mini project and the major project) were eliminated
and a new project was created to ensure tooling considerations were made up front in the design
process.
At the beginning of the quarter students were allowed to choose which tooling method they
would like to work with in their team. A variety of options were presented including using 3D
printed molds, dissolvable molds, existing parts, and soft (foam/wood) tooling. Students could
also choose between creating male or female tools. Students were required to perform research
on their tooling method and to propose how they would manufacture the tooling, what types of
parts are most commonly made from this tooling method, the materials they would use for their

parts, and how they were going to manufacture them. Teams also received individual instruction
on processes such as envelope bagging and spraying gel coat as needed.
Lecture Component Changes:
Since the student teams were all using different tooling methods, the faculty led lecture on
tooling types was no longer needed. Instead each team gave a presentation to the class about the
specifics of their tooling methods including manufacturing, materials, design, cost, and
challenges of the method.
The Project: First Offering:
Mechanics of the Project:
The first time this new project was tested the class consisted of 36 students. Teams of four were
created using nine different tooling methods. Students were free to pick both their team and their
tooling method from a list given to them on the first day. Deliverables during the quarter were a
functional tool, a minimum of two parts with either varying materials or manufacturing
processes, a presentation about the tooling method, and a final report detailing each step of the
project along with rationale and lessons learned.
Available Tooling Methods:
For each of the tooling methods the students were given an envelope of 12” x 12” unless special
permission was given by the lab technician or the instructor. All tools except the ceramic
mandrel and dissolvable tooling must have vacuum integrity, be stiff enough not to deform under
vacuum, have no sharp edges or corners that might puncture a vacuum bag, and have an
appropriately sized flange in which to adhere sealant tape. Since the ceramic mandrel and the
dissolvable tooling are typically used to define the inside of a part, envelope bagging could be
used instead. The nine tooling methods made available to the students were:
1. Female Tool Foam
Students were given high density polyurethane foam that they could shape by hand or
with the aid of a CNC router
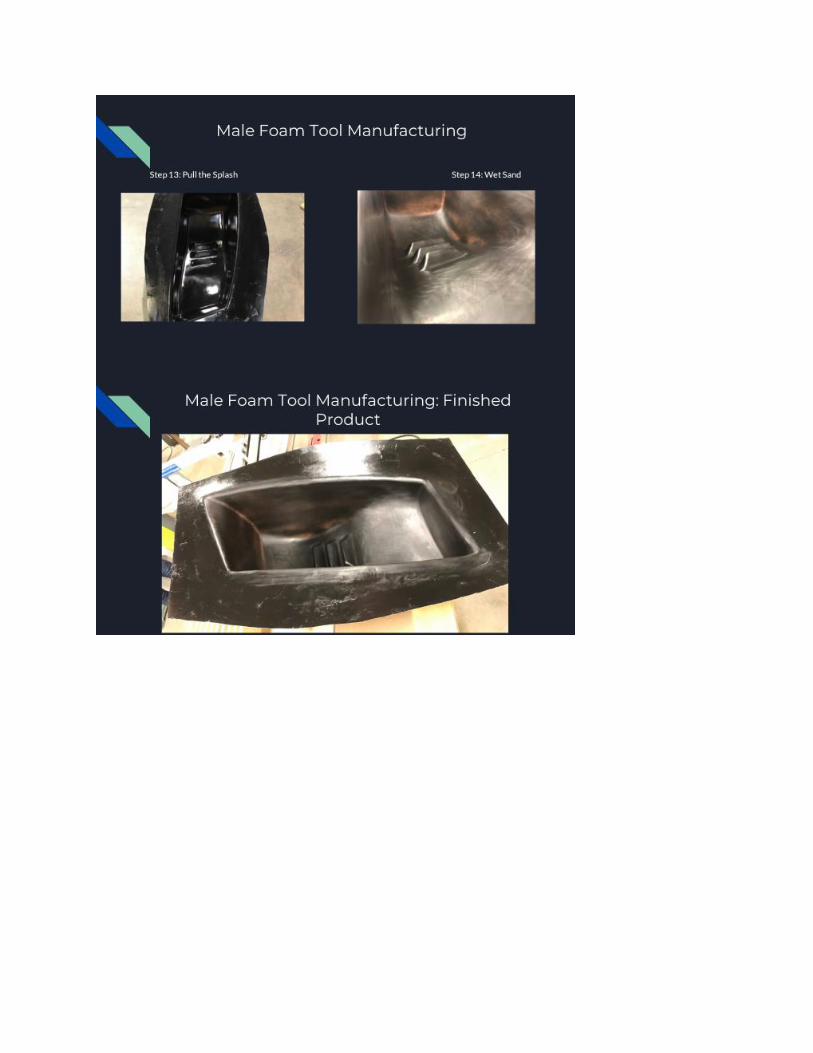
2. Male Tool Foam
Students were given high density polyurethane foam to shape by hand or with the use of a
CNC router. Students had the opportunity to either make a female splash from the male
plug or use it directly as a male mold
3. Soluble Ceramic Mandrel
Students were given Aquapour [9] to create a male dissolvable system. The students had
several options (3D printing, plaster, wood, plastic, etc) on how to create the mold
necessary to cast the ceramic material. The casting, still in its mold, was then cured in an
oven. Once cured, the mold was removed and the ceramic mandrel remained for students
to lay up on.
4. Existing Part Male
With this method students were encouraged to find an existing part that they would like
to replicate. Like with the male foam tool students were given the option to create a
splash from the existing part or lay-up directly on the existing part itself.
5. Existing Part Female
As with the existing part male approach, students were again encouraged to find a part
that they would like to replicate.
6. 3D Printed Tool Dissolvable
For all of the 3D printed tooling students had access to LulzBot Fused Filament
Fabrication (FFF) Taz 5 printers [10]. For the dissolvable tooling the students were able
to print with PVA filament which dissolves in water.
7. 3D Printed Tool Male
8. 3D Printed Tool Female
For both 3D printed male and female tooling students were given the choice to use either
HIPS or PLA. Students were also able to either print one part or several smaller parts and
assemble them together to create their tools.
9. Construction/Board Press
WWU has a ski press that is available for trained students to use. With this press the
students must create tooling made from MDF that’s either shaped by hand or with the
help of a CNC router. Although there is a template for how to assemble the critical
components such as the tip/tail and rocker, students are free to create the custom features
they desire.
Images of select tools and the manufacturing thereof are found in Appendix A.
Demonstrations:
In the previous version of the course faculty and staff gave many demonstrations on subjects
such as foam shaping, gel coating, using a thixotrope, making a plug, making a splash, bagging a
hand lay-up and how to create a part using resin infustion. All of these demonstrations were
necessary since the students were only allowed to use foam for their tooling. Since the change to
a variety of tooling methods, the faculty and staff gave more team-specific demonstrations for
each of their needs. Students were still required, however, to attend demos on vacuum bagging
and resin infustion since they still have an initial laboratory activity of performing a basic lay-up.
All students are invited to the additional demonstrations but were no longer required to attend as
they were before.
Meetings:
For the first offering students were asked to sign up for a tooling method on the first day of class.
A week or so later each team would have the first of four meetings with the faculty and staff
member. Each meeting had a specific purpose, was held outside of normal class time, and was
short (only 15 minutes each) so the team needed to come prepared. The first of the meetings was
to go over the research that the team had done on their tooling method. In this meeting teams
reviewed the manufacturing methods and parts that were common to their tool type so that they
could create tooling that was appropriate for the process that they were going to use. The second
meeting occurred during the tool manufacturing phase of the project to help teams with any
issues they might be having. At this meeting teams were also required to present what
manufacturing methods that they were going to use to create their parts. By the third meeting the
teams’ tooling must have been completed and so this meeting focused on creating parts. Teams
were required to come prepared with a bill of materials for creating their parts (either two
manufacturing methods or two different part configurations were required). The fourth meeting
occurred while the teams were manufacturing their parts. This final meeting was intended to
check in with the teams to answer any questions or concerns that they had.
Presentations & Assessment:
Each team was required to give a 20 minute presentation on their tooling method to the class.
This presentation took the place of the traditional lecture that was typically performed by the
faculty member. Students gave suggestions as to how to best work with the method and
considerations to include early in the process. They also presented where these methods were
used in industry and what types of parts and manufacturing quantities are appropriate for the
methods. Since each team only focused on their one tooling method, assessment was added to
the final exam to test how well the rest of the class grasped each concept that was presented.
Outcomes:
At the end of the course students were given a survey to express what they liked and what
needed improvement in the new project. 30 of the 36 students completed this survey. Each of
the students surveyed felt that this project was a successful way to learn a new composite tooling
method. Overall the class felt that the changes were beneficial and each of the tooling methods
were appropriate and important to learn about; however, they did offer some critical feedback.
Students felt that choosing a tooling method on the first day was a hindrance since the vast
majority of them had no information or experience with any of the methods. Instead they
suggested that the methods be made available to the class prior to signing up for a method to
allow students to perform some basic, preliminary research.
As far as the tooling methods were concerned, most of the students liked the variety of types but
most also greatly underestimated the time it would take to create these tools. This was especially
true of the students that were 3D printing. Students believed that these methods would be the
simplest as they could just load a CAD file into the printer and all would be well. Students
quickly learned that prints often fail, especially when the parts being printed are large and
intricate. Students also failed to consider that the surface finish of a FFF printed part may not be
as clean and smooth as it needed to be to serve as a composite tool.
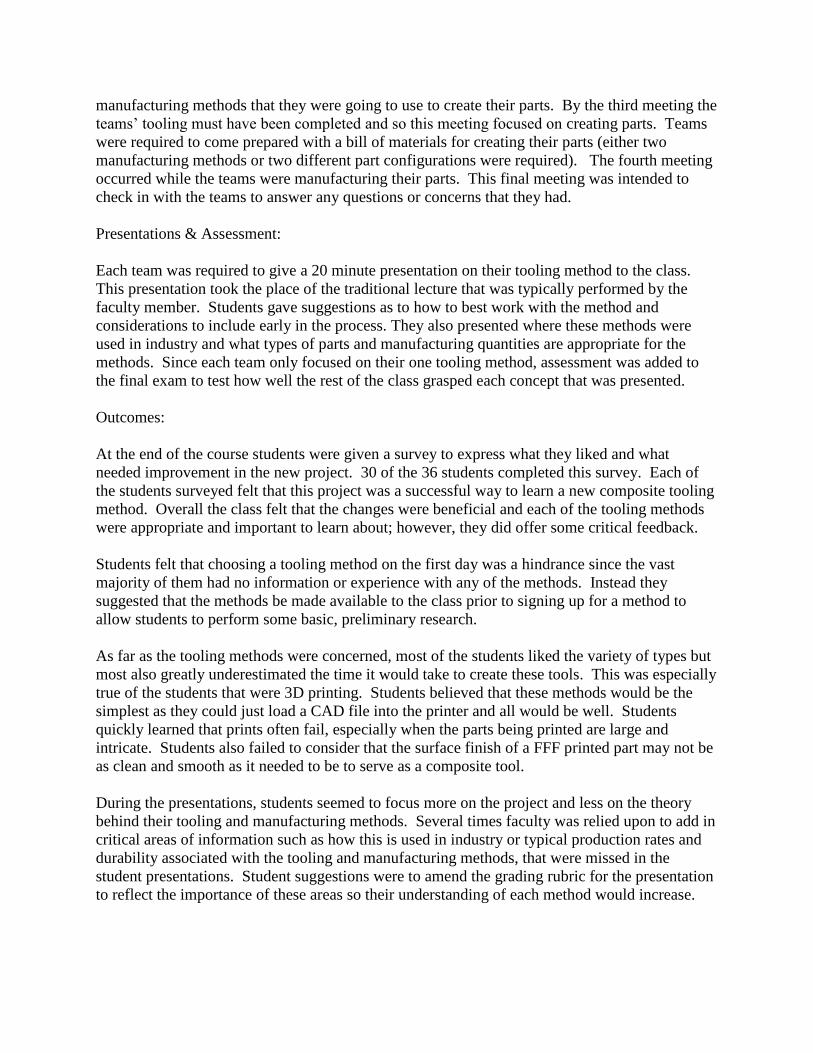
During the presentations, students seemed to focus more on the project and less on the theory
behind their tooling and manufacturing methods. Several times faculty was relied upon to add in
critical areas of information such as how this is used in industry or typical production rates and
durability associated with the tooling and manufacturing methods, that were missed in the
student presentations. Student suggestions were to amend the grading rubric for the presentation
to reflect the importance of these areas so their understanding of each method would increase.
Although the students appreciated the support and the use of gateways to keep their projects on
track, they felt that four meetings were a bit excessive. They recommended that the meetings be
reduced to three.
The Project: Second Offering:
The second offering of the course was much smaller, with only 20 students. Because of this, the
number of tooling choices was reduced from nine to five. Students still worked in groups of
four.
Lessons Learned and Changes:
As mentioned earlier, the first time that the new project was used there was little introduction to
the tooling methods and the students chose their method rather blindly. To address this concern,
the second offering of the class included a very brief outline of each method’s pros and cons.
The time frame from when the students chose their method was also changed from immediately
on the first day to the second week of the quarter so students could spend a little time before
committing to a method to research them a bit more.
Small changes to the project such as creating a more robust rubric for assessment and reducing
the number of outside meetings from four to three were also implemented. Faculty and staff also
made it a point to remind the students that, even if they believed that their method was going to
be less complicated to make, that they start early just in case something goes wrong. Information
was relayed regarding previous class’ experience in creating the 3D printed tooling to encourage
them to be proactive.
At the end of this course students were given the same survey as the previous quarter. All 20
students replied. Again, all of them felt that the project was a successful way to learn a new
composites tooling method. Student feedback from this class suggested some minor changes to
project meeting times during the quarter and continued refinement of the grading rubrics.
Again, assessment of student learning was included in the final exam for the course. Students
performed well on the related questions and were able to demonstrate knowledge and
applications of tooling methods that were not their primary area.
Conclusions:
Although class materials and projects are always evolving, this project structure has shown to
enhance student learning and recognition of the importance of incorporating tooling
considerations into the design process at the beginning of a project. Students overwhelmingly
feel that this approach has helped them to understand the basics of the relationship between parts,
materials, manufacturing, and tooling.
References
[1] 2018-2019 University Catalog, Western Washington University, Bellingham, WA, 2018.
Accessed on Dec. 19, 2018. [Online]. Available:
https://catalog.wwu.edu/index.php?catoid=14
[2] PCE 372: Lab 1 – Vacuum Bagging, Western Washington University, Bellingham, WA,
2018.
[3] Mini Individual Project for PCE 372 W15, Western Washington University, Bellingham,
WA, 2015
[4] Project for PCE 372- Intro to Composites, Western Washington University, Bellingham,
WA, 2015
[5] Bridge, Andy, “Proper Tooling Design Matters,” Composites Manufacturing Magazine,
Nov. 2, 2015. Accessed on Nov. 20, 2018. [Online]. Available:
http://compositesmanufacturingmagazine.com/2015/11/proper-tooling-design-matters/
[6] Introduction to Additive Manufacturing for Composites, enabling a new era of design
optimization, complexity, and functionality for composite structures, Stratasys. Accessed
on Nov. 20, 2018. [Online]. Available: https://energygroup.it/getattachment/dd11d248-
7452-4b60-a6b4-c075ab2dc697/Come-progettare-per-il-Direct-Digital-
Manufacturin.aspx
[7] Dahl, David, “Additive Manufacturing Solutions for Composite Tooling,” Tooling
Technologies for Composites, Short Course, SAMPE, Oct. 2017.
[8] Wing, Zachary N., “Washout Tooling: Review and Best Practices,” Tooling Technologies
for Composites, Short Course, SAMPE, Oct. 2017.
[9] Advanced Ceramics Manufacturing, “Aquapour,” Advanced Ceramics Manufacturing,
Accessed Dec. 19, 2018. [Online]. Available:
http://www.acmtucson.com/acm_products/aquapour/
[10] LulzBot, “LulzBot Taz 5,” LulzBot, Accessed Dec. 19, 2018. [Online]. Available:
https://www.lulzbot.com/store/printers/lulzbot-taz-5
[11] Mellinger, A., Ward, E., Kyger, H., Renda, W., Jones, B., Shelby, C., Majocha, J., and
Hooper, M., “FSAE Sidepod Composites Project,” Western Washington University,
Bellingham, WA, 2018
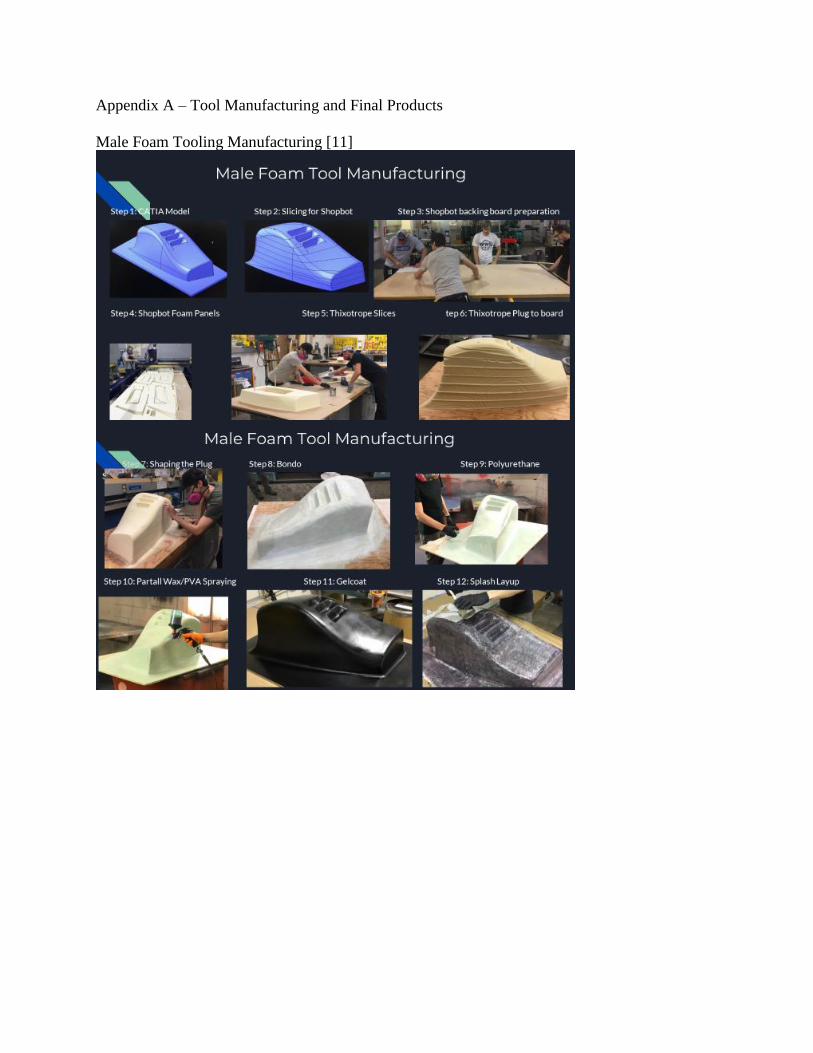
Appendix A – Tool Manufacturing and Final Products
Male Foam Tooling Manufacturing [11]
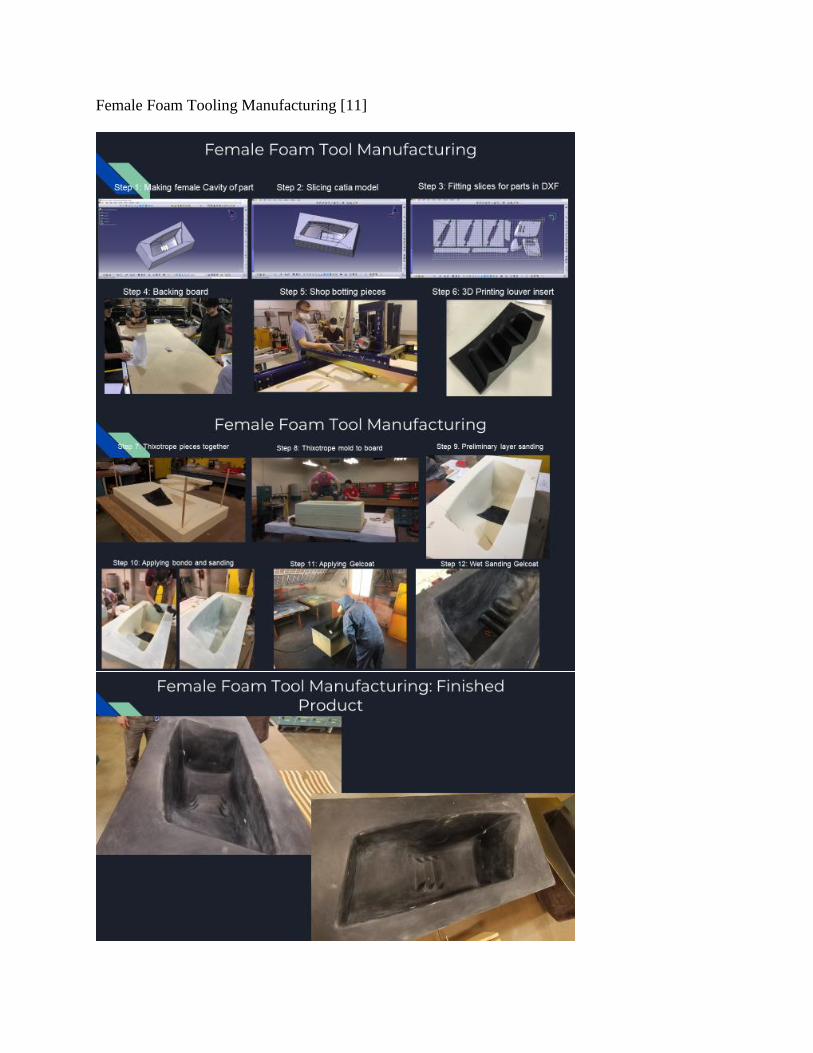
Female Foam Tooling Manufacturing [11]

3D printed Male Tooling
3D printed Dissolvable Tooling (made with PVA)
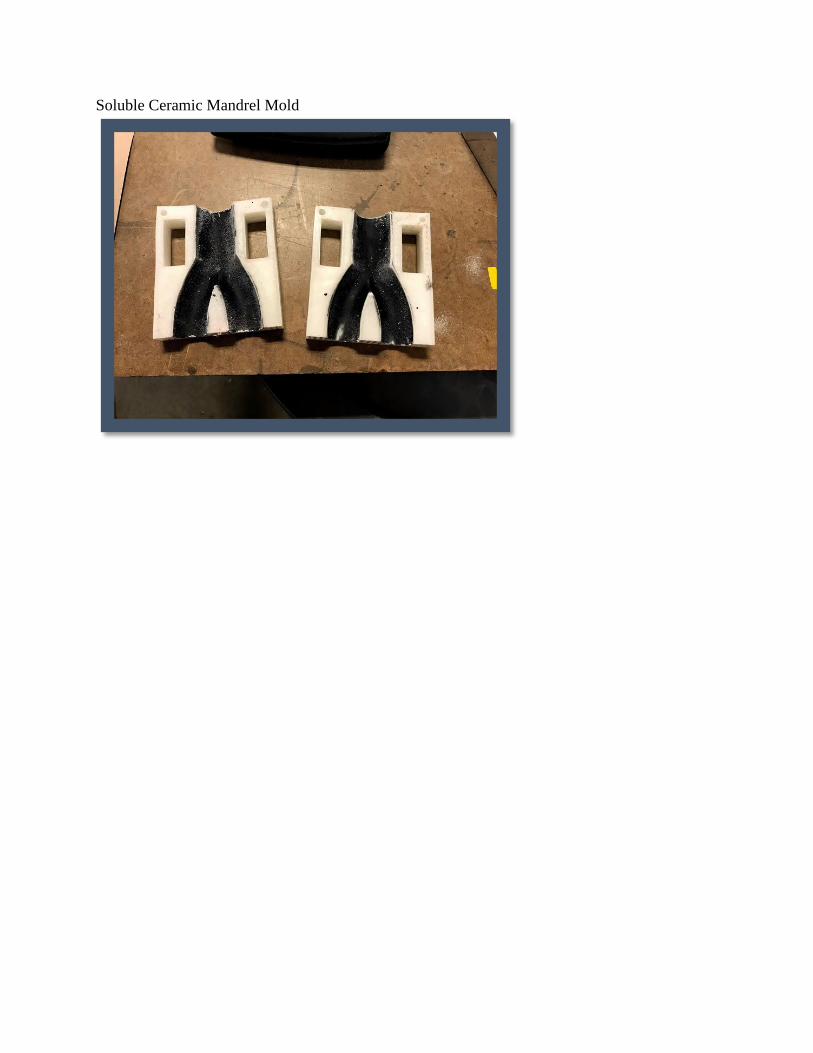
Soluble Ceramic Mandrel Mold