Software Vulnerability Manager (On-Premises Edition)
24
Software Vulnerability Manager (On-Premises Edition) Red Hat 7 Installation Guide
-
Upload
khangminh22 -
Category
Documents
-
view
6 -
download
0
Transcript of Software Vulnerability Manager (On-Premises Edition)

Software Vulnerability Manager (On-Premises Edition)Red Hat 7 Installation Guide

Legal Information
Copyright NoticeCopyright © 2022 Flexera
This publication contains proprietary and confidential information and creative works owned by Flexera and its licensors, if any. Any use, copying, publication, distribution, display, modification, or transmission of such publication in whole or in part in any form or by any means without the prior express written permission of Flexera is strictly prohibited. Except where expressly provided by Flexera in writing, possession of this publication shall not be construed to confer any license or rights under any Flexera intellectual property rights, whether by estoppel, implication, or otherwise.
All copies of the technology and related information, if allowed by Flexera, must display this notice of copyright and ownership in full.
Intellectual PropertyFor a list of trademarks and patents that are owned by Flexera, see https://www.flexera.com/legal/intellectual-property.html. All other brand and product names mentioned in Flexera products, product documentation, and marketing materials are the trademarks and registered trademarks of their respective owners.
Restricted Rights LegendThe Software is commercial computer software. If the user or licensee of the Software is an agency, department, or other entity of the United States Government, the use, duplication, reproduction, release, modification, disclosure, or transfer of the Software, or any related documentation of any kind, including technical data and manuals, is restricted by a license agreement or by the terms of this Agreement in accordance with Federal Acquisition Regulation 12.212 for civilian purposes and Defense Federal Acquisition Regulation Supplement 227.7202 for military purposes. The Software was developed fully at private expense. All other use is prohibited.
Book Name: Software Vulnerability Manager (On-Premises Edition) Red Hat 7 Installation Guide
Part Number: SVMOPE-APRIL2022-IGRH00
Product Release Date: April 2022
Software Vulnerability Manager (On-Premises Edition) Red Hat 7 Installation Guide SVMOPE-APRIL2022-IGRH00 3
Contents
1 Software Vulnerability Manager (On-Premises Edition) Red Hat 7 Installation Guide . . . . . . . . . . . . . 5Product Support Resources . . . . . . . . . . . . . . . . . . . . . . . . . . . . . . . . . . . . . . . . . . . . . . . . . . . . . . . . . . . . . . . . . . . . . . . . . . . . . . . . . . 6
Contact Us . . . . . . . . . . . . . . . . . . . . . . . . . . . . . . . . . . . . . . . . . . . . . . . . . . . . . . . . . . . . . . . . . . . . . . . . . . . . . . . . . . . . . . . . . . . . . . . . . 7
2 Introduction . . . . . . . . . . . . . . . . . . . . . . . . . . . . . . . . . . . . . . . . . . . . . . . . . . . . . . . . . . . . . . . . . . . . . . . . . . . 9Security . . . . . . . . . . . . . . . . . . . . . . . . . . . . . . . . . . . . . . . . . . . . . . . . . . . . . . . . . . . . . . . . . . . . . . . . . . . . . . . . . . . . . . . . . . . . . . . . . . . 9
Red Hat Enterprise Linux 7 . . . . . . . . . . . . . . . . . . . . . . . . . . . . . . . . . . . . . . . . . . . . . . . . . . . . . . . . . . . . . . . . . . . . . . . . . . . . . . . . . . . 9
Minimum System Requirements . . . . . . . . . . . . . . . . . . . . . . . . . . . . . . . . . . . . . . . . . . . . . . . . . . . . . . . . . . . . . . . . . . . . . . . . . . . . . 10Processor. . . . . . . . . . . . . . . . . . . . . . . . . . . . . . . . . . . . . . . . . . . . . . . . . . . . . . . . . . . . . . . . . . . . . . . . . . . . . . . . . . . . . . . . . . . . . . . . . . . . . . . . . . 10Memory . . . . . . . . . . . . . . . . . . . . . . . . . . . . . . . . . . . . . . . . . . . . . . . . . . . . . . . . . . . . . . . . . . . . . . . . . . . . . . . . . . . . . . . . . . . . . . . . . . . . . . . . . . . 10Storage. . . . . . . . . . . . . . . . . . . . . . . . . . . . . . . . . . . . . . . . . . . . . . . . . . . . . . . . . . . . . . . . . . . . . . . . . . . . . . . . . . . . . . . . . . . . . . . . . . . . . . . . . . . . 11Backups . . . . . . . . . . . . . . . . . . . . . . . . . . . . . . . . . . . . . . . . . . . . . . . . . . . . . . . . . . . . . . . . . . . . . . . . . . . . . . . . . . . . . . . . . . . . . . . . . . . . . . . . . . . 11General. . . . . . . . . . . . . . . . . . . . . . . . . . . . . . . . . . . . . . . . . . . . . . . . . . . . . . . . . . . . . . . . . . . . . . . . . . . . . . . . . . . . . . . . . . . . . . . . . . . . . . . . . . . . 11
3 Software Installation . . . . . . . . . . . . . . . . . . . . . . . . . . . . . . . . . . . . . . . . . . . . . . . . . . . . . . . . . . . . . . . . . . 13Configuration of Red Hat Enterprise Linux (RHEL) . . . . . . . . . . . . . . . . . . . . . . . . . . . . . . . . . . . . . . . . . . . . . . . . . . . . . . . . . . . . . . 13
Installing Software Vulnerability Manager On-Premises Edition . . . . . . . . . . . . . . . . . . . . . . . . . . . . . . . . . . . . . . . . . . . . . . . . . . 14RHEL 7 . . . . . . . . . . . . . . . . . . . . . . . . . . . . . . . . . . . . . . . . . . . . . . . . . . . . . . . . . . . . . . . . . . . . . . . . . . . . . . . . . . . . . . . . . . . . . . . . . . . . . . . . . . . . 14
Installing the System Center Plugin and Daemon . . . . . . . . . . . . . . . . . . . . . . . . . . . . . . . . . . . . . . . . . . . . . . . . . . . . . . . . . . . . . . . 15
Uninstalling Software Vulnerability Manager On-Premises Edition. . . . . . . . . . . . . . . . . . . . . . . . . . . . . . . . . . . . . . . . . . . . . . . . 15
Hardening . . . . . . . . . . . . . . . . . . . . . . . . . . . . . . . . . . . . . . . . . . . . . . . . . . . . . . . . . . . . . . . . . . . . . . . . . . . . . . . . . . . . . . . . . . . . . . . . 16RHEL 7 . . . . . . . . . . . . . . . . . . . . . . . . . . . . . . . . . . . . . . . . . . . . . . . . . . . . . . . . . . . . . . . . . . . . . . . . . . . . . . . . . . . . . . . . . . . . . . . . . . . . . . . . . . . . 16
Mail Relay . . . . . . . . . . . . . . . . . . . . . . . . . . . . . . . . . . . . . . . . . . . . . . . . . . . . . . . . . . . . . . . . . . . . . . . . . . . . . . . . . . . . . . . . . . . . . . . . 16
Upgrading to the Latest Version of Software Vulnerability Manager On-Premises Edition . . . . . . . . . . . . . . . . . . . . . . . . . . . . 16
4 SSL and LDAP Support . . . . . . . . . . . . . . . . . . . . . . . . . . . . . . . . . . . . . . . . . . . . . . . . . . . . . . . . . . . . . . . . . 17Import/Create an SSL Certificate. . . . . . . . . . . . . . . . . . . . . . . . . . . . . . . . . . . . . . . . . . . . . . . . . . . . . . . . . . . . . . . . . . . . . . . . . . . . . 17
Import Your Own SSL Certificate . . . . . . . . . . . . . . . . . . . . . . . . . . . . . . . . . . . . . . . . . . . . . . . . . . . . . . . . . . . . . . . . . . . . . . . . . . . . . . . . . . . . . 17

Contents
4 SVMOPE-APRIL2022-IGRH00 Software Vulnerability Manager (On-Premises Edition) Red Hat 7 Installation Guide
Create a Self-Signed SSL Certificate . . . . . . . . . . . . . . . . . . . . . . . . . . . . . . . . . . . . . . . . . . . . . . . . . . . . . . . . . . . . . . . . . . . . . . . . . . . . . . . . . . 18
Configure Apache (httpd) to Use SSL . . . . . . . . . . . . . . . . . . . . . . . . . . . . . . . . . . . . . . . . . . . . . . . . . . . . . . . . . . . . . . . . . . . . . . . . . 18RHEL 7 . . . . . . . . . . . . . . . . . . . . . . . . . . . . . . . . . . . . . . . . . . . . . . . . . . . . . . . . . . . . . . . . . . . . . . . . . . . . . . . . . . . . . . . . . . . . . . . . . . . . . . . . . . . . 18
Disable Ordinary HTTP . . . . . . . . . . . . . . . . . . . . . . . . . . . . . . . . . . . . . . . . . . . . . . . . . . . . . . . . . . . . . . . . . . . . . . . . . . . . . . . . . . . . . 20
LDAP Support . . . . . . . . . . . . . . . . . . . . . . . . . . . . . . . . . . . . . . . . . . . . . . . . . . . . . . . . . . . . . . . . . . . . . . . . . . . . . . . . . . . . . . . . . . . . . 20
5 Synchronization Process and Dual Mode Installation . . . . . . . . . . . . . . . . . . . . . . . . . . . . . . . . . . . . . . . 21Setting the Synchronization Process for Certificate Verification . . . . . . . . . . . . . . . . . . . . . . . . . . . . . . . . . . . . . . . . . . . . . . . . . . 21
Installing the Software Vulnerability Manager On-Premises Edition in Dual Mode . . . . . . . . . . . . . . . . . . . . . . . . . . . . . . . . . . . 22
6 Software Vulnerability Manager (On-Premises Edition Red Hat 7) Installation Guide Changelog . . 23

1
Software Vulnerability Manager (On-Premises Edition) Red Hat 7 Installation Guide SVMOPE-APRIL2022-IGRH00 5
Software Vulnerability Manager(On-Premises Edition) Red Hat 7
Installation Guide
Important • Red Hat Enterprise Linux (RHEL) 6 will be discontinued for the Software Vulnerability Manager On-Premises Edition system.
Flexera’s Software Vulnerability Manager is a Vulnerability and Patch Management Software Solution that completes and targets the Patch Management process. It combines Vulnerability Intelligence, Vulnerability Scanning, and Patch Creation with Patch Deployment Tool Integration to enable targeted, reliable, and cost-efficient Patch Management.
Software Vulnerability Manager On-Premises Edition enables these services on a local server. It only connects to Flexera for vulnerability updates.
This document describes the recommended method for installing Software Vulnerability Manager On-Premises Edition. It may be possible to install the software on operating systems and configurations other than those described. However, these have not been tested and are not supported by Flexera.
Flexera recommends using Red Hat Enterprise Linux and hardware that is natively supported by Red Hat. All major hardware manufacturers ship Linux friendly hardware.
The steps described in this document must be completed in the order in which they are displayed. If certain steps are omitted, or done in the wrong order, it may cause the system to become exposed to various security or functionality issues.
Table 1-1 • Software Vulnerability Manager (On-Premises Edition) Red Hat 7 Installation Guide Help Navigation Table
Topic Content
Introduction This section provides an overview of the following:
• Security
• Red Hat Enterprise Linux 7
• Minimum System Requirements

Chapter 1 Software Vulnerability Manager (On-Premises Edition) Red Hat 7 Installation GuideProduct Support Resources
6 SVMOPE-APRIL2022-IGRH00 Software Vulnerability Manager (On-Premises Edition) Red Hat 7 Installation Guide
Product Support ResourcesThe following resources are available to assist you with using this product:
• Flexera Product Documentation
• Flexera Community
• Flexera Learning Center
• Flexera Support
Software Installation This section describes the following software that you will be required to install:
• Configuration of Red Hat Enterprise Linux (RHEL)
• Installing Software Vulnerability Manager On-Premises Edition
• Installing the System Center Plugin and Daemon
• Uninstalling Software Vulnerability Manager On-Premises Edition
• Hardening
• Mail Relay
• Upgrading to the Latest Version of Software Vulnerability Manager On-Premises Edition
SSL and LDAP Support If you want to configure the Software Vulnerability Manager On-Premises Edition to use SSL connections for the CSI Agents, CSI Plugin, Daemon and SC2012 Plugin you need to:
1. Import/Create an SSL Certificate
2. Configure Apache (httpd) to Use SSL
3. Disable Ordinary HTTP (Recommended)
This section also describes how to configure LDAP Support.
Synchronization Process and Dual Mode Installation
This section describes the following:
• Setting the Synchronization Process for Certificate Verification
• Installing the Software Vulnerability Manager On-Premises Edition in Dual Mode
Software Vulnerability Manager (On-Premises Edition Red Hat 7) Installation Guide Changelog
This section includes a table that summarizes the changes made to the Software Vulnerability Manager (On-Premises Edition) Red Hat 7 Installation Guide.
Table 1-1 • Software Vulnerability Manager (On-Premises Edition) Red Hat 7 Installation Guide Help Navigation Table
Topic Content
Chapter 1 Software Vulnerability Manager (On-Premises Edition) Red Hat 7 Installation GuideContact Us
Software Vulnerability Manager (On-Premises Edition) Red Hat 7 Installation Guide SVMOPE-APRIL2022-IGRH00 7
Flexera Product DocumentationYou can find documentation for all Flexera products on the Flexera Product Documentation site:
https://docs.flexera.com
Flexera CommunityOn the Flexera Community site, you can quickly find answers to your questions by searching content from other customers, product experts, and thought leaders. You can also post questions on discussion forums for experts to answer. For each of Flexera’s product solutions, you can access forums, blog posts, and knowledge base articles.
https://community.flexera.com
Flexera Learning CenterFlexera offers a variety of training courses—both instructor-led and online—to help you understand how to quickly get the most out of your Flexera products. The Flexera Learning Center offers free, self-guided, online training classes. You can also choose to participate in structured classroom training delivered as public classes. You can find a complete list of both online content and public instructor-led training in the Learning Center.
https://learn.flexera.com
Flexera SupportFor customers who have purchased a maintenance contract for their product(s), you can submit a support case or check the status of an existing case by making selections on the Get Support menu of the Flexera Community.
https://community.flexera.com
Contact UsFlexera is headquartered in Itasca, Illinois, and has offices worldwide. To contact us or to learn more about our products, visit our website at:
http://www.flexera.com
You can also follow us on social media:
• YouTube

Chapter 1 Software Vulnerability Manager (On-Premises Edition) Red Hat 7 Installation GuideContact Us
8 SVMOPE-APRIL2022-IGRH00 Software Vulnerability Manager (On-Premises Edition) Red Hat 7 Installation Guide

2
Software Vulnerability Manager (On-Premises Edition) Red Hat 7 Installation Guide SVMOPE-APRIL2022-IGRH00 9
Introduction
This section provides an overview of the following:
• Security
• Red Hat Enterprise Linux 7
• Minimum System Requirements
SecuritySoftware Vulnerability Manager On-Premises Edition has been designed to withstand external attacks attempting to exploit SQL-injection, file inclusion, cross-site scripting and other web application vulnerabilities.
For security reasons, Flexera only supports installations running on dedicated systems.
Red Hat Enterprise Linux 7
Important • Red Hat Enterprise Linux (RHEL) 6 will be discontinued for the Software Vulnerability Manager On-Premises Edition system.
Red Hat Enterprise Linux (RHEL) 7 is enterprise-class operating system that have a set of unique features that can help administer the system on a day-to-day basis. They also feature security enhancements such as SELinux and integrated buffer-overflow protection.
Red Hat Enterprise Linux (RHEL) 7 is the only operating system officially supported by Flexera for the Software Vulnerability Manager On-Premises Edition system. You should also be aware that Red Hat Enterprise Linux is a commercial Linux distribution and is therefore subject to an annual fee for receiving updates.

Chapter 2 IntroductionMinimum System Requirements
10 SVMOPE-APRIL2022-IGRH00 Software Vulnerability Manager (On-Premises Edition) Red Hat 7 Installation Guide
Important • Ensure that you are installing Software Vulnerability Manager on a base install of RHEL, and nothing else. If, for example, you have applied your own security settings to the RHEL installation prior to the Software Vulnerability Manager installation, this can prevent Software Vulnerability Manager from installing correctly.
Minimum System RequirementsDepending on your specific requirements Software Vulnerability Manager On-Premises Edition can usually be installed on standard hardware, enterprise class hardware, or in a virtual environment.
This section describes the following minimum Software Vulnerability Manager On-Premises Edition system requirements:
• Processor
• Memory
• Storage
• Backups
• General
Note • The System Requirements given below are for reference only and may vary depending upon your environment and requirements.
Note • Single Sign-On (SSO) will be supported only with the PHP7 rpm.
ProcessorSoftware Vulnerability Manager On-Premises Edition requires the following processor:
• Xeon Quad Core processor, 2.66 GHz, or similar
MemoryIf you require a complete scan of your entire environment, the general guidelines for sizing of physical/virtual hardware are as follows:
Table 2-1 • 4GB memory + the RAM and Swap Space requirements
Amount of RAM in the System Recommended Amount of Swap Space
16GB of RAM or more (1000 hosts) A minimum of 6GB of swap space
16GB to 64GB of RAM (7000 hosts) A minimum of 12GB of swap space
64GB to 256GB of RAM (31000 hosts) A minimum of 24GB of swap space

Chapter 2 IntroductionMinimum System Requirements
Software Vulnerability Manager (On-Premises Edition) Red Hat 7 Installation Guide SVMOPE-APRIL2022-IGRH00 11
StorageFlexera recommends that Software Vulnerability Manager On-Premises Edition system is installed on storage that is failure tolerant in the first or second level. If you do not use a failure tolerant hardware RAID, it is recommended that you define a software RAID-1 during installation. Please ensure that your RAID hardware is compatible with your Red Hat version.
Flexera recommends the following partitioning best practice:
• The root partition “/” should be at least 100GB.
• The boot partition “/boot” should be at least 100MB.
• The swap partition is based on the amount of RAM that currently is available.
Alternatively, you can use the layout that Red Hat Enterprise Linux installation suggests.
Important • Configure the correct host name and network interfaces during installation.
• Select Customize software packages to be installed and remove this selection from all application groups. Failure to do so will install additional unrequired software.
• Ensure that you have adequate disk space for the MYSQL/MariaDB databases (by default stored in /var/lib/mysql).
BackupsSoftware Vulnerability Manager On-Premises Edition automatically creates backup files of the databases on a regular basis. The backups are stored in /usr/local/Secunia/csi/backup as compressed files. The backups are not rotated, so the system administrator must take care of the old backups as they are not automatically deleted. You should also back up config.ini and any other file you may change.
Important • Ensure you back up these files to remote backup systems.
GeneralThe following versions of My SQL and Maria DB are supported:
• MariaDB 5.5.x from the official RHEL 7/CentOS 7 repository with the RHEL 7 RPM
• MySQL 5.7.x from official repository at mysql.com
• MariaDB 10.3.x from official repository at mariadb.org
For PHP 7 version of On-Premises rpm:
• RHEL 7: httpd-2.4.x, php-7.2.x, mariadb 5.3/mysql 5.7
The following version of PHP from the php.net is supported:
• php-7.2.x

Chapter 2 IntroductionMinimum System Requirements
12 SVMOPE-APRIL2022-IGRH00 Software Vulnerability Manager (On-Premises Edition) Red Hat 7 Installation Guide

3
Software Vulnerability Manager (On-Premises Edition) Red Hat 7 Installation Guide SVMOPE-APRIL2022-IGRH00 13
Software Installation
This section describes the following software that you will be required to install:
• Configuration of Red Hat Enterprise Linux (RHEL)
• Installing Software Vulnerability Manager On-Premises Edition
• Installing the System Center Plugin and Daemon
• Uninstalling Software Vulnerability Manager On-Premises Edition
• Hardening
• Mail Relay
• Upgrading to the Latest Version of Software Vulnerability Manager On-Premises Edition
Configuration of Red Hat Enterprise Linux (RHEL)Log in as root and register the system with the Red Hat Network using the following command:
subscription-manager register --auto-attach
Important • Registering with the Red Hat Network requires a valid Red Hat Subscription Management (RHSM) account. See https://access.redhat.com/management/ for more information about obtaining access.
Log in to the Red Hat Network at https://rhn.redhat.com and ensure that your system is subscribed to the workstation and server channels.
To update the system, use the command:
yum update
Chapter 3 Software InstallationInstalling Software Vulnerability Manager On-Premises Edition
14 SVMOPE-APRIL2022-IGRH00 Software Vulnerability Manager (On-Premises Edition) Red Hat 7 Installation Guide
Installing Software Vulnerability Manager On-Premises Edition
If you are upgrading from a previous version of Software Vulnerability Manager On-Premises Edition, refer to Upgrading to the Latest Version of Software Vulnerability Manager On-Premises Edition.
Important • The system uses the Apache web server, the MySQL database server, MariaDB server (RHEL 7), and the PHP engine. Hence, you must first install the required dependencies as shown in the below section.
• RHEL 7
RHEL 7PHP 5.4 and MariaDB 5.5yum install curl httpd mariadb-server ntp perl-Compress-Zlib php php-gd php-ldap php-mysql php-xml rpm-build policycoreutils-python haproxy
PHP 7.2 and MariaDB 10.3By default, RHEL 7 comes with PHP 5.4 and MariaDB 5.5. To add PHP 7.2 and MariaDB 10.3 repo follow the steps:rpm -Uvh https://dl.fedoraproject.org/pub/epel/epel-release-latest-7.noarch.rpmrpm -Uvh http://rpms.remirepo.net/enterprise/remi-release-7.rpmyum -y install yum-utilsyum-config-manager --enable remi-php72curl -sS https://downloads.mariadb.com/MariaDB/mariadb_repo_setup | sudo bash -s -- --mariadb-server-version="mariadb-10.3"yum -y updateyum clean all
Above steps will add PHP 7.2 and MariaDB 10.3 repo
yum -y install curl httpd MariaDB-server MariaDB-client ntp perl-Compress-Zlib php php-gd php-ldap php-mysqlnd php-pecl-zip php-xml rpm-build policycoreutils-python haproxy yum-cron
Software Vulnerability Manager Software InstallationYou can now install Software Vulnerability Manager using the command:
rpm -i csi-X.x.x.x.x86_64.rpm
After Software Vulnerability Manager is installed, run the command:
cd /usr/local/Secunia/csi/install
Disable the sample SSL file and restart httpd to reflect your changes using the commands:
echo "" > /etc/httpd/conf.d/ssl.confsystemctl restart httpd.service
You can then execute the installer using the command:
./installationProcess.sh

Chapter 3 Software InstallationInstalling the System Center Plugin and Daemon
Software Vulnerability Manager (On-Premises Edition) Red Hat 7 Installation Guide SVMOPE-APRIL2022-IGRH00 15
When the installationProcess.sh is run, it will stop the httpd service, go through the installation/upgrade process, and Software Vulnerability Manager will be unavailable to Agents. Once the installation/upgrade process is complete, it will start the httpd service again.
If you answered yes to using SSL (HTTPS) during the installation, it is necessary to configure the firewall to accept incoming traffic on port 443 by issuing the following commands:
firewall-cmd --zone=public --add-service=https --permanentfirewall-cmd --reload
For further information regarding the setup of SSL, refer to SSL and LDAP Support.
If you answered no to using SSL (HTTPS) during the installation, it is necessary to configure the firewall to accept incoming traffic on port 80 by issuing the following commands:
firewall-cmd --zone=public --add-service=http --permanentfirewall-cmd –-reload
The installer prints out information on every step taken. You can customize your installation to specifically fit your Enterprise requirements.
Important • Software Vulnerability Manager Services and Cronjobs now run as a new csi7 user instead of as root. A csi7 user is created by the Application during installation/upgrade, and Software Vulnerability Manager Daemons and Cronjobs will run as the csi7 user instead of as root.
Important • If you want to access the database as a user other than “root”, you should create the user prior to the installation and enter that username and password in the configuration. The MySQL user needs to have all privileges, including the GRANT privilege, although the server administration privilege is not required.
Installing the System Center Plugin and DaemonOnce the Software Vulnerability Manager installation has completed, you can download the System Center Plugin and Daemon setup files from the locations shown below (dependent on your server’s hostname):
• SC2012 Plugin Setup—http(s)://hostname/sc2012
• Secunia Daemon Setup—http(s)://hostname/daemon
Uninstalling Software Vulnerability Manager On-Premises Edition
To uninstall the Software Vulnerability Manager rpm, run the command:
rpm -e csi
Chapter 3 Software InstallationHardening
16 SVMOPE-APRIL2022-IGRH00 Software Vulnerability Manager (On-Premises Edition) Red Hat 7 Installation Guide
HardeningTo keep the system safe, some hardening is required.
• RHEL 7
RHEL 7To keep the system safe, some hardening is required. For information regarding using firewalls with RHEL 7, refer to:
https://access.redhat.com/documentation/en-US/Red_Hat_Enterprise_Linux/7/html/Security_Guide/sec-Using_Firewalls.html#sec-Using_iptables
Mail RelayTo configure Postfix for relaying emails through smtp.example.com, run the command:
postconf -e 'relayhost = smtp.example.com'
For more configuration options, see:
man postconf
After changing the configuration, postfix needs to be reloaded with this command:
postfix reload
Upgrading to the Latest Version of Software Vulnerability Manager On-Premises Edition
To upgrade from a previous version of Software Vulnerability Manager On-Premises Edition to the latest version (where X.x.x.x.x refers to the Software Vulnerability Manager On-Premises Edition version number that you have just downloaded and are now upgrading to), run the command:
rpm -Uvh csi-X.x.x.x-x.x86_64.rpm
After Software Vulnerability Manager is installed, run the command:
cd /usr/local/Secunia/csi/install
You can then execute the installer by running the command:
./installationProcess.sh
This installation will be automatically configured with your previous Software Vulnerability Manager installation settings.

4
Software Vulnerability Manager (On-Premises Edition) Red Hat 7 Installation Guide SVMOPE-APRIL2022-IGRH00 17
SSL and LDAP Support
If you want to configure the Software Vulnerability Manager On-Premises Edition to use SSL connections for the CSI Agents, CSI Plugin, Daemon and SC2012 Plugin, you need to perform the following tasks:
• Import/Create an SSL Certificate
• Configure Apache (httpd) to Use SSL
• Disable Ordinary HTTP
This section also describes how to configure LDAP Support.
Import/Create an SSL CertificateFor SSL certificates, you will need to:
• Import Your Own SSL Certificate
• Create a Self-Signed SSL Certificate
Import Your Own SSL CertificateIf you are using your own certificate authority (CA) or you have purchased a certificate to sign the SSL connection you need to import this certificate on the Software Vulnerability Manager RHEL server.
Task To import your own SSL certificate:
1. Copy your PFX file to Software Vulnerability Manager.
2. Extract the private key:
openssl pkcs12 -in csi.pfx -nocerts -out csi.key
3. Remove the password from your key, so httpd will start without prompting for it:

Chapter 4 SSL and LDAP SupportConfigure Apache (httpd) to Use SSL
18 SVMOPE-APRIL2022-IGRH00 Software Vulnerability Manager (On-Premises Edition) Red Hat 7 Installation Guide
mv csi.key csi.key.secureopenssl rsa -in csi.key.secure -out csi.key
4. Generate the public certificate:
openssl pkcs12 -in csi.pfx -clcerts -nokeys -out csi.crt
5. Copy the files to the proper locations:
cp csi.key /etc/pki/tls/private/cp csi.crt /etc/pki/tls/certs/
Create a Self-Signed SSL CertificateIf you do not have a local CA, you can create a self-signed certificate. An example implementation is shown below:
Task To create a self-signed SSL certificate:
1. Generate your private key:
openssl genrsa -des3 -out csi.key 1024
2. Generate a Certificate Signing Request (CSR). Fill in the questions with the appropriate values – remember Common Name (CN) should match the hostname of your server:
openssl req -new -key csi.key -out csi.csr
3. Sign your certificate:
openssl x509 -req -days 365 -in csi.csr -signkey csi.key -out csi.crt
4. Remove password from your key, so httpd will start without prompting for it:
mv csi.key csi.key.secureopenssl rsa -in csi.key.secure -out csi.key
5. Copy the files to the proper locations:
cp csi.key /etc/pki/tls/private/cp csi.crt /etc/pki/tls/certs/
Configure Apache (httpd) to Use SSLTo use SSL you should ensure that you have mod_ssl installed for:
• RHEL 7
RHEL 7To use SSL you should ensure that you have mod_ssl installed. If not, run the following command:
yum install mod_ssl
AND
Chapter 4 SSL and LDAP SupportConfigure Apache (httpd) to Use SSL
Software Vulnerability Manager (On-Premises Edition) Red Hat 7 Installation Guide SVMOPE-APRIL2022-IGRH00 19
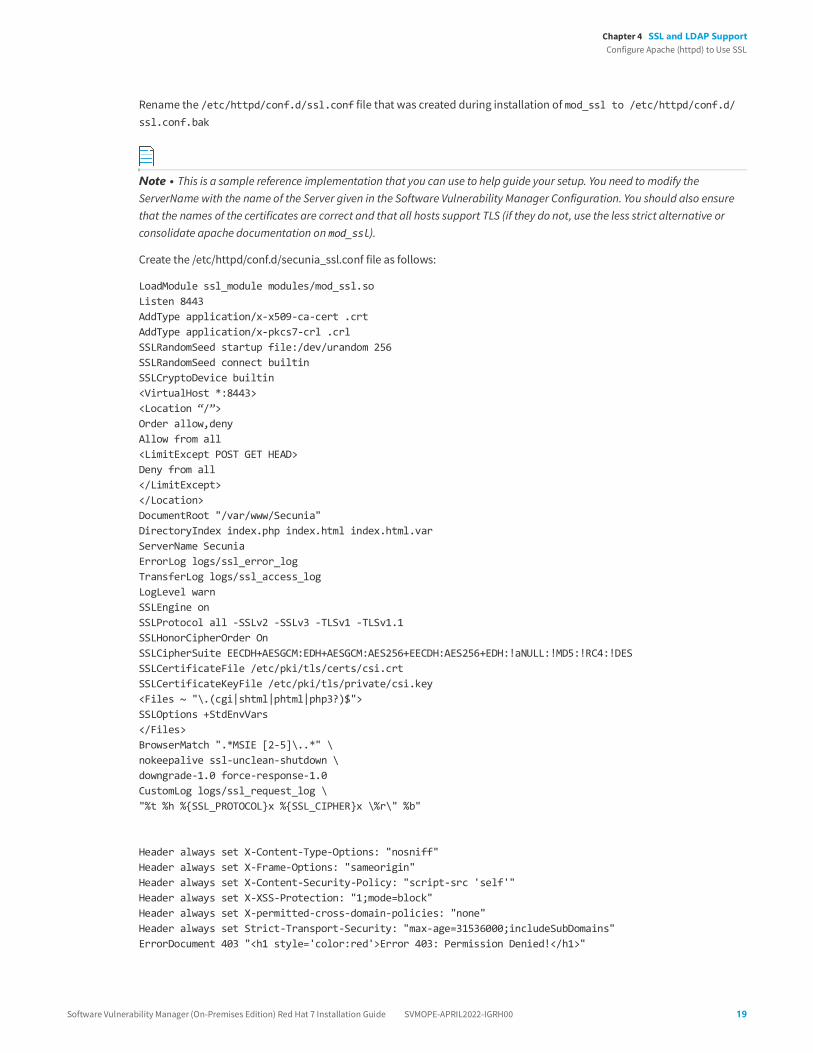
Rename the /etc/httpd/conf.d/ssl.conf file that was created during installation of mod_ssl to /etc/httpd/conf.d/ssl.conf.bak
Note • This is a sample reference implementation that you can use to help guide your setup. You need to modify the ServerName with the name of the Server given in the Software Vulnerability Manager Configuration. You should also ensure that the names of the certificates are correct and that all hosts support TLS (if they do not, use the less strict alternative or consolidate apache documentation on mod_ssl).
Create the /etc/httpd/conf.d/secunia_ssl.conf file as follows:
LoadModule ssl_module modules/mod_ssl.soListen 8443AddType application/x-x509-ca-cert .crtAddType application/x-pkcs7-crl .crlSSLRandomSeed startup file:/dev/urandom 256SSLRandomSeed connect builtinSSLCryptoDevice builtin<VirtualHost *:8443><Location “/”>Order allow,denyAllow from all<LimitExcept POST GET HEAD>Deny from all</LimitExcept></Location>DocumentRoot "/var/www/Secunia"DirectoryIndex index.php index.html index.html.varServerName SecuniaErrorLog logs/ssl_error_logTransferLog logs/ssl_access_logLogLevel warnSSLEngine onSSLProtocol all -SSLv2 -SSLv3 -TLSv1 -TLSv1.1SSLHonorCipherOrder OnSSLCipherSuite EECDH+AESGCM:EDH+AESGCM:AES256+EECDH:AES256+EDH:!aNULL:!MD5:!RC4:!DESSSLCertificateFile /etc/pki/tls/certs/csi.crtSSLCertificateKeyFile /etc/pki/tls/private/csi.key<Files ~ "\.(cgi|shtml|phtml|php3?)$">SSLOptions +StdEnvVars</Files>BrowserMatch ".*MSIE [2-5]\..*" \nokeepalive ssl-unclean-shutdown \downgrade-1.0 force-response-1.0CustomLog logs/ssl_request_log \"%t %h %{SSL_PROTOCOL}x %{SSL_CIPHER}x \%r\" %b"
Header always set X-Content-Type-Options: "nosniff"Header always set X-Frame-Options: "sameorigin"Header always set X-Content-Security-Policy: "script-src 'self'"Header always set X-XSS-Protection: "1;mode=block"Header always set X-permitted-cross-domain-policies: "none"Header always set Strict-Transport-Security: "max-age=31536000;includeSubDomains"ErrorDocument 403 "<h1 style='color:red'>Error 403: Permission Denied!</h1>"

Chapter 4 SSL and LDAP SupportDisable Ordinary HTTP
20 SVMOPE-APRIL2022-IGRH00 Software Vulnerability Manager (On-Premises Edition) Red Hat 7 Installation Guide
ErrorDocument 404 "<h1 style='color:red'>Error 404: Not found!</h1>"</VirtualHost>
Ensure the ports used to access the application are allowed through the firewall:firewall-cmd --zone=public --add-port=443/tcp --permanent firewall-cmd --reload
You should then run the installation script sh /usr/local/Secunia/csi/install/installationProcess.sh again.
Important • You must answer the installation routine questions as follows:
“Will you use SSL?”: Y“Do you want CSI Agents to use a different port?”: Y“What port do you want use?”: 443“Ready to perform the database schema upgrade?”: YSC2012 plugin “Would you like to go through the configuration process?”“Will you use SSL?”: Y
Disable Ordinary HTTPTo disable ordinary non-encrypted HTTP, simply delete or move /etc/httpd/conf.d/secunia-csi-httpd.conf:
mv /etc/httpd/conf.d/secunia-csi-httpd.conf /tmp/secunia-csi-httpd.conf.obsolete
And then restart httpd to reflect the changes:
RHEL 7
systemctl restart httpd.servicesystemctl restart haproxy.service
LDAP SupportDuring the installation process you will be prompted to configure LDAP support. If you are not ready to configure LDAP yet, you can answer no to the prompt and setup LDAP at a later time by running the ldapconfig script located at /usr/local/Secunia/csi/install/ldapconfig.sh.
Before configuring LDAP support you will need the following:
• The LDAP URI for your LDAP server
• The LDAP UID attribute that the usernames will be compared to
• The Bind DN for user-lookups or alternatively, existing support for anonymous bind lookups
• The Base DN for the point in the directory where user-lookups will be made
• The Base DN must contain at least one user account
To use LDAPS, you will need to specify the LDAP URI as opposed to specifying only the LDAP server’s hostname or IP address.
• Example: ldaps://server_ip:389

5
Software Vulnerability Manager (On-Premises Edition) Red Hat 7 Installation Guide SVMOPE-APRIL2022-IGRH00 21
Synchronization Process and DualMode Installation
This section describes the following:
• Setting the Synchronization Process for Certificate Verification
• Installing the Software Vulnerability Manager On-Premises Edition in Dual Mode
Setting the Synchronization Process for Certificate Verification
To alter the way curl verifies the certificate of the server providing the vuln_track database updates, the SYNC_SSL_VERIFY_HOST constant can be used.
The constant needs to be an integer with the only possible values of 0, 1 or 2. Any other value will result in defaulting to 2.
Note • The usage of value 1 is depreciated by CURL for security reasons.
Use:
• 0 to disable certificate checking
• 1 to check the existence of a common name in the SSL peer certificate
• 2 to check the existence of a common name and also verify that it matches the hostname provided
It is recommended that this setting is not altered unless necessary, as setting it to a lower value than 2 will decrease the security.
The constant should be configured in the file /usr/local/Secunia/config.ini. A new line must be added:
SYNC_SSL_VERIFY_HOST = 2
Chapter 5 Synchronization Process and Dual Mode InstallationInstalling the Software Vulnerability Manager On-Premises Edition in Dual Mode
22 SVMOPE-APRIL2022-IGRH00 Software Vulnerability Manager (On-Premises Edition) Red Hat 7 Installation Guide
Installing the Software Vulnerability Manager On-Premises Edition in Dual Mode
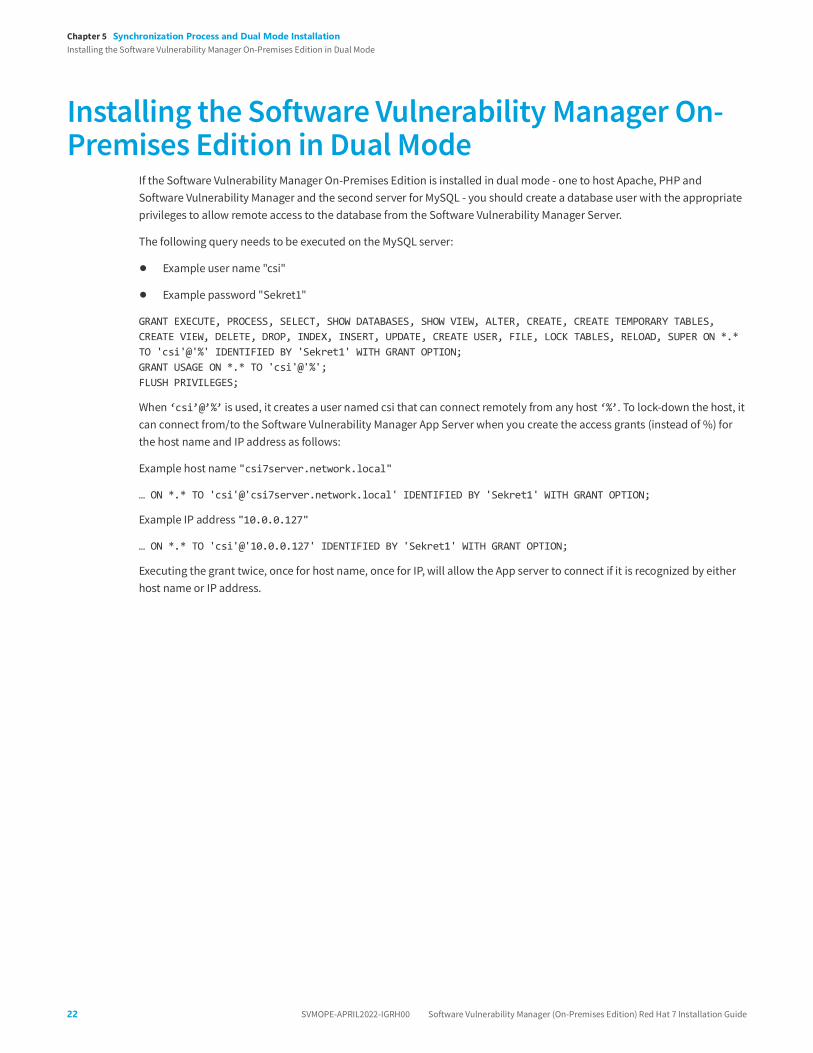
If the Software Vulnerability Manager On-Premises Edition is installed in dual mode - one to host Apache, PHP and Software Vulnerability Manager and the second server for MySQL - you should create a database user with the appropriate privileges to allow remote access to the database from the Software Vulnerability Manager Server.
The following query needs to be executed on the MySQL server:
• Example user name "csi"
• Example password "Sekret1"
GRANT EXECUTE, PROCESS, SELECT, SHOW DATABASES, SHOW VIEW, ALTER, CREATE, CREATE TEMPORARY TABLES, CREATE VIEW, DELETE, DROP, INDEX, INSERT, UPDATE, CREATE USER, FILE, LOCK TABLES, RELOAD, SUPER ON *.* TO 'csi'@'%' IDENTIFIED BY 'Sekret1' WITH GRANT OPTION;GRANT USAGE ON *.* TO 'csi'@'%';FLUSH PRIVILEGES;
When ‘csi’@’%’ is used, it creates a user named csi that can connect remotely from any host ‘%’. To lock-down the host, it can connect from/to the Software Vulnerability Manager App Server when you create the access grants (instead of %) for the host name and IP address as follows:
Example host name "csi7server.network.local"
… ON *.* TO 'csi'@'csi7server.network.local' IDENTIFIED BY 'Sekret1' WITH GRANT OPTION;
Example IP address "10.0.0.127"
… ON *.* TO 'csi'@'10.0.0.127' IDENTIFIED BY 'Sekret1' WITH GRANT OPTION;
Executing the grant twice, once for host name, once for IP, will allow the App server to connect if it is recognized by either host name or IP address.

6
Software Vulnerability Manager (On-Premises Edition) Red Hat 7 Installation Guide SVMOPE-APRIL2022-IGRH00 23
Software Vulnerability Manager(On-Premises Edition Red Hat 7)
Installation Guide Changelog
The table below summarizes the changes made to the Software Vulnerability Manager (On-Premises Edition) Red Hat 7 Installation Guide.
Table 6-1 • Software Vulnerability Manager (On-Premises Edition) Red Hat 7 Installation Guide Changelog
Release Date Summary of Changes
December 2017 1. Added changelog
2. Updated the security settings in Configure Apache (httpd) to use SSL for RHEL 6 and RHEL 7
3. In the section “Upgrading to the Latest Version of Corporate Software Inspector On-Premises Edition”:
• Corrected the statement “where X.x.x.x.x refers to the Corporate Software Inspector On-Premises Edition version number you currently have installed” to “where X.x.x.x.x refers to the Corporate Software Inspector On-Premises Edition version number that you have just downloaded and are now upgrading to”
• Corrected the command rpm -U csi-X.x.x.x-x.x86_64.rpm to rpm -Uvh csi-X.x.x.x-x.x86_64.rpm

Chapter 6 Software Vulnerability Manager (On-Premises Edition Red Hat 7) Installation Guide Changelog
24 SVMOPE-APRIL2022-IGRH00 Software Vulnerability Manager (On-Premises Edition) Red Hat 7 Installation Guide
January 2018 1. In the Import Your Own SSL Certificate section, replaced all cert_name and certificate.crt references with csi.
2. In the Configure Apache (httpd) to use SSL for RHEL 6 and RHEL 7 sections:
• Added the following code to create the /etc/httpd/conf.d/secunia_ssl.conf:
<Location>Order allow,denyAllow from all<LimitExcept POST GET HEAD>Deny from all</LimitExcept></Location>
• Corrected the following: SSLCertificateFile /etc/pki/tls/certs/csi.crt and SSLCertificateKeyFile /etc/pki/tls/private/csi.key.
March 2018 Changed product year to 2018.
May 2018 Changed product name from Corporate Software Inspector 2018 to Software Vulnerability Manager 2018.
June 2018 In Configure Apache (httpd) to use SSL for RHEL 6 and RHEL 7:
• Added a double quote before "%t %h %{SSL_PROTOCOL}x %{SSL_CIPHER}x \%r\" %b"
• Added “AND rename the /etc/httpd/conf.d/ssl.conf file that was created during installation of mod_ssl to /etc/httpd/conf.d/ssl.conf.bak” after “To use SSL you should ensure that you have mod_ssl installed. If not, run the following command: yum install mod_ssl”
August 2018 1. Corrected hyperlink format in RHEL 7.
2. Updated PDF cover per Flexera branding.
3. Updated Online Help, Release Notes, and Contacting Us links with https.
October 2018 Updated the max-age value from “2592000” to “31536000” for RHEL 6 and RHEL 7.
November 2018 Updated release note and product feedback links.
July 2019 1. Updated the supported version of My SQL, Maria DB, PHP and Apache
2. Updated the Header set to Header always set to RHEL 7 command
August 2020 1. Discontinued RHEL 6 RPM support
2. Added PHP 7.2 Installation steps
3. Updating LAMP stack from PHP 5.4 to PHP 7.2
Table 6-1 • Software Vulnerability Manager (On-Premises Edition) Red Hat 7 Installation Guide Changelog (cont.)
Release Date Summary of Changes


![Mission Manager[1]](https://static.fdokumen.com/doc/165x107/6313fe215cba183dbf075a68/mission-manager1.jpg)