Science of Me Educator Guide
61
Science of Me Educator Guide
-
Upload
khangminh22 -
Category
Documents
-
view
1 -
download
0
Transcript of Science of Me Educator Guide

Science of MeEducator Guide

Science of Me / Introduction 2
AcknowledgementsAuthors: Rachel Castro-Diephouse, Tara Cox, Jessica McDermott, Julia Skolnik, Andrea Foster, Jayatri Das
Designers: Kelli Cavanaugh, Barbara Chotiner
Sponsor: This program is made possible with the generous support of GSK, and the contributions of their dedicated team.
Host Organizations: Thank you to the many organizations who host and support GSK Science in the Summer™ programs across the country. GSK Science in the Summer™ reaches thousands of children each summer thanks to your ongoing commitment and invaluable contributions.
Table of ContentsNote to Educators ............................................... 3
Introduction ........................................................ 4
Session 1: Your Power Plant ............................. 5
Session 2: Your Delivery System .................... 15
Session 3: Your Command Center ................. 31
Session 4: Your Blueprint ............................... 41
Master Materials List ........................................ 51
Printable Resources ......................................... 52

Science of Me / Introduction 3
We encourage you to ask the students open-ended questions and to find as many opportunities as possible for the students to be active participants instead of passive listeners. If the students have an interest in a particular subject that relates to the overall topic, feel free to extend the activity and discussion as you feel comfortable. If you are not knowledgeable about a particular subject in which the students are interested, encourage the group to find more information together. Look for age-appropriate books about the topic or visit a reputable website for additional information that you can share with the group.
Important Safety Notice
GSK has adopted a set of mandatory safety standards for its programs, one of which requires that eye protection be worn in all laboratories. Therefore, GSK Science in the SummerTM provides program participants with safety glasses. A goggle icon will appear next to each activity that requires the use of safety glasses. Please enforce student use of safety glasses when noted in this guide. Where the goggle icon does not appear, wearing them is optional. Use your discretion.
Closed-toed shoes are also required for all sessions.
Note to EducatorsThe goal of GSK Science in the SummerTM is to increase student interest and appreciation for science by providing memorable, engaging experiences. Your focus during these sessions should be on creating moments of excitement and positive feelings about science for students, rather than having them master content. To accomplish this, we encourage you to adapt the sessions and activities to meet the interest and needs of your students.
While each of the program’s four sessions builds on the themes of the sessions before it, you can differentiate the activities within each session to meet the capabilities and interests of your group. If students are excited about a particular activity and wish to extend it, encourage them to do so, even if it means skipping another activity.
The times listed for each activity are estimates to help you with planning and time management. Level 1 students (grades 2–3) tend to need more time to complete the activities than Level 2 students (grades 4–6). Please adjust these times as needed for your group of students.
Your focus during these sessions should be on creating moments of excitement and positive feelings about science for students, rather than having them master content.
Science of Me / Introduction 4
Introduction
The Science of Me program invites children to explore both the biological systems that make humans fundamentally alike, and the elements that interact to create a unique individual. The sessions encourage students to explore these questions:
▶ How do your body’s systems work together to make you, you? ▶ How are humans alike, and what makes us different?
This curriculum is intended to be presented in four one-hour sessions. Each session is designed to serve a group of approximately sixteen children at the same level—either Level 1 (grades 2–3) or Level 2 (grades 4–6)— but materials can be modified to accommodate slightly larger or smaller groups.
The program is designed with the following structure, which can be adapted based on the needs and interests of your group:
Session 1: Your Power Plant (60 minutes) Explore how the digestive system breaks down food to provide the body with energy and nutrients.
Session 2: Your Delivery System (60 minutes) Explore how the heart and blood vessels deliver energy and nutrients by pumping blood throughout the body.
Session 3: Your Command Center (60 minutes) Explore how the brain sends and receives signals to connect and coordinate the rest of the body’s systems.
Session 4: Your Blueprint (60 minutes) Explore how a person’s DNA and experiences interact to create individual characteristics.

Science of Me / Session 1: Your Power Plant 5
How does your digestive system power your body?
RECOMMENDED SCHEDULE:
Introduction 10 minutes
We’ve Got Guts! 15 minutes
Hands-on Digestion 15 minutes
Starch Spit Test 15 minutes
Reflection 5 minutes
PREPARATION
We’ve Got Guts: For each pair of students, cut a length of stockinette and mark an “intestine” ribbon (see activity guide on p 7).
Hands-on Digestion: Cut off the toe seams from knee-high stockings to create open tubes (see activity guide on p 9).
Starch Spit Test: Prepare the dilute iodine mixture and place in dropper bottles (see activity guide on p 12).
Science of MeSession 1: Your Power Plant
MATERIALS FOR SESSION 1:
• Safety poster
• Safety goggles (1 per student)
• Career cards: food chemist and registered dietitian
• Science skills stickers
• Student Science of Me notebooks (1 per student)
• Internal organs apron
• Cotton stockinette (10-in. length per pair of students)
• Wooden craft balls (1 per pair of students)
• Ribbon “intestine” rolls, (1 per pair of students)
• Small cups, 2–4 oz. (3 per student)
• Water
• Rice squares cereal (approx. 1.5 cup per group of 2–3 students)
• Quart-size zipper bags (1 per group of 2–3 students)
• Scissors (1 per group of 2–3 students)
• Nylon knee-high stockings (1 per group of 2–3 students)
• Wide bowls (1 per group of 2–3 students)
• Disposable gloves (1 pair per student)
• Cornstarch (approx. 1 spoonful per student)
• Plastic spoons (1 per student)
• Iodine dropper bottles (1 per group of 2–3 students)
• Pipettes (1 per student)
• (Optional) bananas
• (Optional) additional foods (sugar, potatoes, graham crackers, etc.)

Science of Me / Session 1: Your Power Plant 6
Engage
Introduce yourself and welcome students. Orient them to their surroundings and establish rules appropriate to your space.
1. Introduce yourself and your host organization. Explain that this program is called GSK Science in the SummerTM, and it is made possible by two organizations: GSK, where many scientists work to make medicines and products for people’s health, and The Franklin Institute, which is a science museum in Philadelphia, PA.
2. Explain that the goal of the program is to have fun learning about science together, and to learn about science jobs that they could think about doing when they get older.
Safety First
3. Talk to the students about the importance of following laboratory safety rules and directions.
4. Distribute safety goggles to the students and show them how to vent them. Demonstrate how to adjust the straps to fit comfortably. Label the goggles with students’ names or initials to identify them.
5. Remind the students that during some of the activities, the safety goggles will need to be over their eyes for protection. Explain that you will tell them when goggles must be worn. Throughout this guide, look for the goggle icon to note the times when goggles are required.
6. Explain that scientists use many senses to make observations, except one: they should not taste substances even when they may look like food because the substances could be harmful or even poisonous.
7. Discuss the requirement for closed-toed shoes and remind them not to wear sandals or flip-flops during the program.
Explore
1. Introduce the session by explaining that together you will be finding out about what makes you, you. First you will to start with the question:
▶ What are you actually made of?
▶ Where does your body get the materials it needs to grow and build itself, and the energy to keep everything running?
2. Ask the group to discuss what they know about food and eating:
▶ Why do we need to eat? What kinds of things are in food that our bodies need?
▶ What happens to food after you put it in your mouth? Where does it go?
3. Introduce the food chemist and dietitian careers and explain the descriptions of what they do (as written on the cards). Briefly describe how they connect to digestion and nutrition.
▶ Have you ever seen or heard of someone who does a job like this?
▶ What do you think someone with this job might do in a day?
MATERIALS
• Safety poster
• Safety goggles (1 per student)
• Career cards: food chemist and registered dietitian
INTRODUCTION Time: 10 minutes
Summary: Students learn about the program and safety guidelines, as well as the theme and highlighted careers of the first session.

Science of Me / Session 1: Your Power Plant 7
4. Explain that the next activities will help them think like food scientists by finding out more about how our bodies turn food into energy.
5. During the activities that follow, look for opportunities to connect students’ actions or ideas with the careers, for example:
▶ A dietitian might study how much water is in food to know if a person is getting enough liquid (Hands-on Digestion).
▶ A food chemist might do a chemical test to see how much starch is in something (Starch Spit Test).
Prepare
Once prepared, the ribbons and stockinette tubes can be used for multiple sessions.
1. Cut the stockinette into 10-inch pieces. Make one for each pair of students.
2. Unroll the ribbons. Use different colored markers to highlight the distances at 1 ft., 10 ft., 20 ft., 22 ft., and 27 ft. Roll them back up.
3. Wear the organ apron during the activity, without the organs attached. Add them sequentially during the activity as they are referenced.
Engage
Introduce the activity:
We just talked about how your digestive system turns the food you eat into the energy your body needs. Now let’s learn a bit more about how that process works.
▶ Where does food go in our bodies first?
▶ Where does it go after that?
▶ What other parts of our bodies have you heard of that might help us digest our food?
Explore
1. Divide the group into pairs and ask the pairs to line up along one end of the room. (This will assist with unrolling the ribbons later on.)
2. Introduce the word esophagus and explain that it helps food travel from your mouth, after you swallow, to your stomach. Put on the organs apron and use it to illustrate where the esophagus is.
3. Divide students into pairs and give each pair the stockinette tube as a model of an esophagus. Then give them the wooden balls. This represents a bite of food.
MATERIALS
• Internal organs apron
• 1-in. diameter cotton stockinette (10-in. length per pair of students)
• 1-in. diameter wooden craft balls (1 per pair of students)
• 1-in. diameter wired ribbon, (27 ft. per pair of students)
• Colored permanent marker
• Ruler or measuring tape
WE’VE GOT GUTS!Time: 15–20 minutes
Summary: Students explore the parts of the digestive tract through a large-scale model.

Science of Me / Session 1: Your Power Plant 8
4. Invite one student from each pair to hold the tube while the other places the ball in the tube. Encourage them to make a loud “gulp!” as they put the ball in to represent swallowing.
5. The ball shouldn’t go anywhere at first. Ask the students for different ideas about how they could get it to go down the tube. (If needed, suggest ideas like pushing it down with your finger or shaking it up and down.)
▶ Could you push food down your real throat with your finger?
▶ What would it feel like if you had to jump up and down to get food into your stomach?
▶ How else could your esophagus do it?
6. Explain that all the parts of the digestive system have muscles that squeeze the food along. Ask students to show how this works by squeezing the ball through the stockinette tube until it drops out. Invite the group to chant something silly like “E-soph-a-gus!” or “Go, esophagus, go!” as they squeeze.
▶ The food made it down the esophagus! Where does it go next?
7. Use the organs apron to point out the stomach. Explain that the stomach mixes the food around with chemicals to break it down into smaller and smaller pieces. Invite one student from each pair to hold the ball between cupped hands and shake it (like shaking dice) to represent the stomach churning. Ask the group to make up a “stomach dance move” to do while the stomach is churning.
▶ The food is all broken up. Now what happens?
8. Use the apron to introduce the intestines. Explain that their job is to get all the nutrients, or good chemicals, out of that mixed-up food mess and into your body. They have a big job to do, so the intestines are actually quite big. Encourage students to make predictions about their intestines before demonstrating.
▶ How big do you think your intestines really are?
▶ If you stretched them out across this room, how far do you think they would reach?
9. Distribute a roll of ribbon to each pair. Invite the “stomach” partner to hold one end of the ribbon while the second partner holds the roll. Ask the second partner to take the “food” ball in their other hand and begin walking slowly away, unrolling the ribbon as they go. Invite the group to chant something like “in-TEST-ines di-GEST-ing!” as they walk.
10. Ask the students to stop when they reach the 22 ft. marker. This is the length of a human small intestine.
▶ Is it longer or shorter than you predicted?
▶ Do you think we’re done digesting yet? Why or why not?
11. Explain that most of the nutrients are out of the food at this point, but there is still a lot of water inside that your body needs. That was the small intestine; now the food moves into the large intestine. Ask the students to continue walking until they get to the end of the ribbon.
▶ Which one was longer: the small or the large intestine?
▶ Why else might it be called “large” if it is not longer?
▶ How long is the whole intestine compared to what you predicted?
12. If students are wondering, you may choose to share that any food that is left over after the large intestine gets packaged up as waste that is removed… in the bathroom!
Adapt and Extend
If space is limited, you could do this activity as a whole-group demonstration instead of a partner activity. Ask one or two students to help with the “esophagus” and “stomach” portions, and have the rest of the group help to hold the intestine ribbon and pass the “food” ball along as it is unrolled.

Science of Me / Session 1: Your Power Plant 9
Background
The organs of the digestive tract work together to break down food and release the nutrients and energy the body needs.
• Mouth: Your teeth and tongue begin the process by crushing food and increasing its surface area. Saliva contains chemicals that begin acting on the surface of the food to break it down.
• Esophagus: When you swallow, the tongue pushes a bit of mushed-up food into the opening of your esophagus at the back of your throat. The esophagus is like a stretchy pipe about one inch wide and 10 inches long. Muscles in the walls of the esophagus contract in a wave-like pattern to slowly squeeze the food down the tube and into the stomach. This takes about 2–3 seconds.
• Stomach: Your stomach is a stretchy sack shaped like the letter J. Its job is to store the food you’ve eaten and break it down into a liquid mixture. Strong muscles in the stomach’s walls act like a mixer, mashing the food together into smaller pieces. Enzymes and acids in the stomach help to break down the food, as well as kill harmful bacteria that might be in the eaten food.
• Small intestine: The small intestine is a long tube, 1½–2 inches wide, that is packed in beneath your stomach. An adult’s small intestine is 20–25 feet long. The small intestine breaks down the food mixture even further so your body can absorb all the vitamins, minerals, proteins, carbohydrates, and fats. The pancreas, liver, and gallbladder supply enzymes to help with the breakdown. The nutrients go into your bloodstream, and any leftover parts the body can’t use continue to the large intestine.
• Large intestine: The large intestine, also called the colon, is wider than the small intestine (3–4 inches) and about five feet long. The colon is where the body gets its last chance to absorb the water and some minerals into the blood. As more and more water is removed, the remaining waste eventually compacts into a solid and is excreted as feces (also called stool, bowel movement, poop, etc.)
Prepare
1. Cut off the toe portion of each stocking to create an open tube.
2. If using bananas, cut each banana into quarters. Including banana helps create a more convincing food mixture, but the model will work with rice cereal alone if bananas aren’t available.
3. Safety note: Check for allergies to rice (and banana, if used). Students will not eat these ingredients but will touch them. Take any necessary precautions or omit the activity if necessary.
MATERIALS
• Gloves (1 pair per student)
• Small cups, approx. 4-oz. (2 per group of 2–3 students)
• Water (approx. ¼-cup per group)
• Rice squares cereal (approx. 30 pieces per group)
• Quart-size ziplock bags (1 per group)
• Scissors (1 per group)
• Knee-high nylon stocking (1 per group)
• Wide bowls (1 per group)
• (Optional) bananas ( ¼-banana per group)
HANDS-ON DIGESTIONTime: 15 minutes
Summary: Students will create a model to observe food at different stages of digestion.

Science of Me / Session 1: Your Power Plant 10
Engage
Introduce the activity:
We’ve seen what some of the different parts of the digestive system are, but what really happens to food as it goes through them?
▶ What do you think happens to the food to break it down and get out the energy and nutrients we need?
▶ What do you think food looks like while it’s being digested?
We can’t see inside our stomachs, so let’s make a model that we can see!
Explore
1. Divide the class into groups of 2–3 students and distribute materials to each group. Explain that students will be using some real food to model what happens when it is digested. Invite students to look at the materials provided.
▶ How do you think we could use these materials to make something like a digestive system?
▶ What part of the digestive system do you think the stocking tube will represent? What about the plastic bag?
2. Invite groups to put 25–30 pieces of rice square cereal (and a peeled piece of banana, if using) in the zipper bag and seal it. Encourage them to crush up the cereal through the bag.
▶ What’s the very first step in breaking down food? Where does it go first?
▶ If this crushing step is like chewing, what part of the body do you think the plastic bag is acting like?
3. Ask groups to add approximately ¼-cup water into the bag. Explain that this will act like chemicals in the stomach.
4. Demonstrate how to set the bag down and carefully squeeze the air out of the top before sealing the bag again.
▶ If we’ve added the chemicals, what body part is the plastic bag acting as now?
5. Invite students to take turns kneading the mixture in the bag with their hands, taking care not to be so rough that they create holes in the bag or pop open the seal. Encourage them to continue taking turns until they think the food is as broken up as it can be (at least several minutes.) You could encourage students to repeat the “stomach dance move” they used in the “We’ve Got Guts” activity while waiting their turn to knead.
6. When everyone’s mixture is well churned, ask the group what part of the digestive system should come next.
▶ The stomach’s work is done! Where should the food go now?
▶ What do you think we will use to act like the intestine? What makes you think so?
7. Ask students to lay the stocking tube across their bowl so that the middle of the stocking is in the bottom of the bowl and the ends go up over the sides. Demonstrate this as needed.
8. Instruct students to put on their gloves before the next step. This is where the process starts to get messy!
9. Demonstrate how to hold the bag full of food mixture at an angle, tipping the contents to one corner, and carefully cut a small hole in the empty corner of the bag.

Science of Me / Session 1: Your Power Plant 11
10. Encourage students to work together to pour the mixture through the hole into one end of the stocking, leaving the stocking resting in the bowl. (Do not pick up the stocking yet). Then ask them to grab each end of the stocking, pinching both sides closed, and pick it up, holding the long stocking like a “U” over the bowl (see photos below).
▶ What do you notice?
▶ What parts of the food are coming out, and what parts are staying in?
▶ What part of the digestion process do you think this is like?
11. Invite students to gently squeeze the lower portion of the stocking to remove as much water as possible.
▶ What does it feel like?
▶ How is it changing as you squeeze it?
12. Invite students to squeeze the contents toward one end of the stocking until most of the remaining food is concentrated at the bottom end. Ask them to squeeze the contents out the end of the stocking into a cup.
▶ What do you notice about what’s left in your cup?
▶ How does it look different from the food you started with?
▶ What part of the digestion were we doing when we squeezed the leftovers out into the cup?
Background
Digestion involves multiple different mechanisms, but they all function to break down food in one way or another. Some, like chewing or the stomach’s churning, produce physical changes—simply breaking the food into smaller chunks. Others, like the enzymes in saliva and the acids in the stomach, produce chemical changes by altering or breaking down individual food molecules into more useful pieces.
In this activity, crushing the dry cereal in the bag simulates the mechanical action of chewing, and the plastic bag acts as the mouth. When the water is added, the bag then acts as the stomach. (This model doesn’t include a representation of the esophagus.) The water represents the gastric juices that both add liquid and break down the food with acid and enzymes into a liquid slush. The stocking simulates the small and large intestines. Like the intestines, the stocking is porous, allowing liquid and some substances through, while other parts of the food remain inside. Students should notice that the liquid that comes out of the stocking is not colorless, like plain water, because some parts of the food have been carried along with it. Squeezing the food remains from the stocking into the cup plays the role of the muscles at the intestine’s opening (the anus), which contract to expel the waste.
Science of Me / Session 1: Your Power Plant 12
Prepare
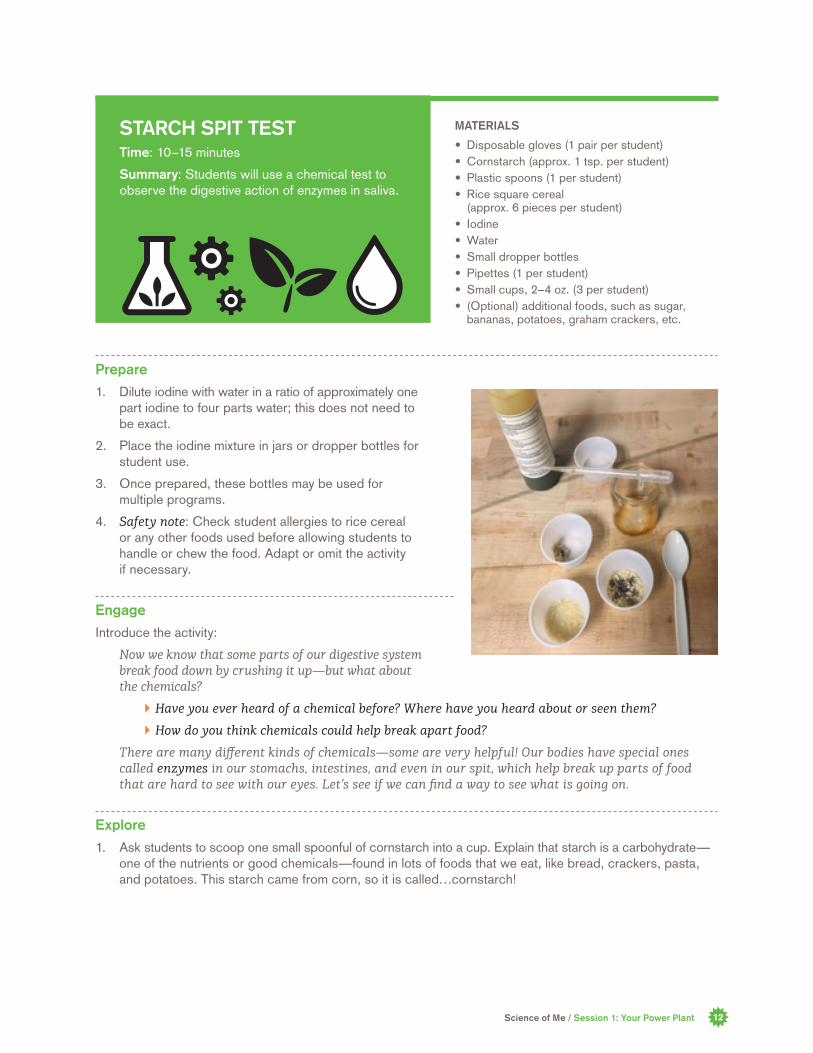
1. Dilute iodine with water in a ratio of approximately one part iodine to four parts water; this does not need to be exact.
2. Place the iodine mixture in jars or dropper bottles for student use.
3. Once prepared, these bottles may be used for multiple programs.
4. Safety note: Check student allergies to rice cereal or any other foods used before allowing students to handle or chew the food. Adapt or omit the activity if necessary.
Engage
Introduce the activity:
Now we know that some parts of our digestive system break food down by crushing it up—but what about the chemicals?
▶ Have you ever heard of a chemical before? Where have you heard about or seen them?
▶ How do you think chemicals could help break apart food?
There are many different kinds of chemicals—some are very helpful! Our bodies have special ones called enzymes in our stomachs, intestines, and even in our spit, which help break up parts of food that are hard to see with our eyes. Let’s see if we can find a way to see what is going on.
Explore
1. Ask students to scoop one small spoonful of cornstarch into a cup. Explain that starch is a carbohydrate—one of the nutrients or good chemicals—found in lots of foods that we eat, like bread, crackers, pasta, and potatoes. This starch came from corn, so it is called…cornstarch!
STARCH SPIT TESTTime: 10–15 minutes
Summary: Students will use a chemical test to observe the digestive action of enzymes in saliva.
MATERIALS • Disposable gloves (1 pair per student)• Cornstarch (approx. 1 tsp. per student)• Plastic spoons (1 per student)• Rice square cereal (approx. 6 pieces per student)• Iodine• Water• Small dropper bottles• Pipettes (1 per student)• Small cups, 2–4 oz. (3 per student)• (Optional) additional foods, such as sugar, bananas, potatoes, graham crackers, etc.
Science of Me / Session 1: Your Power Plant 13
2. Explain that iodine is a chemical that helps us detect if something has starch in it. Invite them to squeeze a few drops of iodine from the dropper bottle onto the cornstarch and observe.
▶ What do you notice?
▶ What color is the iodine by itself?
▶ What happens when you add it to the cornstarch? Why do you think that happened?
3. Introduce the rice cereal.
▶ Do you think this cereal has starch in it? Why or why not?
▶ How could we test it and find out?
4. Encourage the group to test it for starch by first using their fingers to crush a few pieces of cereal in a second cup. Next, ask them to add a pipette-full of water and swirl the cup gently to mix it. Note: Younger students may need to practice filling and slowly emptying the pipette into the water container a few times before adding water to their cups.
5. Invite students to drop a few drops of iodine on the mixture and observe.
▶ What do you notice?
▶ Do you think the cereal has starch in it? How can you tell?
6. Ask students to think about what happens when we chew food.
▶ How is chewing in your mouth like what you did with your fingers? How is it different?
▶ What do you think would happen if we chewed the cereal and then tested it?
7. Invite students to chew a few pieces of cereal without swallowing it until it gets mushy, and then spit it into the third cup. Add a pipette-full of water as before, allow the mixture to sit for a minute or two, and then add the iodine.
▶ What do you notice? How does the color compare to the plain cereal?
▶ Is one closer to the color of the iodine on the cornstarch?
▶ What do you think a lighter color means?
8. Observe the colors again a few minutes later.
▶ Has anything changed?
▶ What do you think it means if the color changes?
▶ What do you think it means if there is less starch? Where did the starch go?
Adapt and Extend
• Students generally enjoy the “ick” factor of spitting out chewed food, but you could use the following alternative method if it seems preferable. Ask students to crush a few cereal squares in a cup and add water as in the first test. Then have them spit several times into the cup and swirl the cup around to mix it up.
• If you have extra time, you could encourage students to try testing the rice cereal using whatever methods they suggest, before guiding them towards crushing it and adding water. You could also test other foods for starch, such as potatoes, bananas, or bread.
• If time is limited, you could shorten the activity by having students prepare the crushed cereal and the chewed-with-saliva cereal at the same time, rather than one after the other.

Science of Me / Session 1: Your Power Plant 14
Background
Before food can be turned into energy to be used by cells inside the body, it must get broken down both physically and chemically. Both processes turn each bite of food into smaller and smaller pieces. Chemical digestion happens all along the digestive tract starting with enzymes in saliva, acids and enzymes in the stomach, and many more enzymes (provided by the liver, pancreas, and gallbladder) in the intestines. This process chemically alters food by breaking it down into macronutrients, or simple molecules that can be absorbed out of the digestive system and into the bloodstream.
Some of the major products of digestion are carbohydrates, fat, and protein. These are all long, chainlike molecules called polymers, but each is made from different types of smaller molecule building blocks. Chemical digestion breaks carbohydrates into sugars, fat polymers into fatty acids, and proteins into amino acids. Sugars and fatty acids are what the body uses to make energy for cells. Sugars are absorbed into the bloodstream more quickly than other molecules and require less energy to break down, so they are a good source of quick and easy energy. Fatty acids are absorbed more slowly and require more energy to break down, so they get stored in the body for energy over longer periods. Amino acids are rarely used for energy, and instead get used by cells to create new cells or structures within cells.
Starches are a type of carbohydrate. Our saliva contains an enzyme called amylase, which begins digesting starches by breaking them down into their component sugars. The process can’t be seen by the human eye, but this activity uses a chemical indicator to make the process visible. Iodine, which is usually a yellowish color, reacts with starches to produce a deep blue-black compound but does not react with sugars. Initially the chewed food mixture turns black or purple because of the starches in the cereal. As the enzymes break down the starch into sugar, the purple color fades, indicating that less starch is present.
Engage and Explore
1. Encourage students to use the science skills stickers to reflect on the skills they used during the activities and connect them to the highlighted careers. Point out some of the skills listed on the stickers and discuss as a group.
▶ What did you do today that might be like what a dietitian does?
▶ Did you use a science tool? Did you try something again?
▶ How do you think a food chemist might do those things?
2. Invite students to choose two science skills they used and put the appropriate stickers in the reflection section of their notebooks. If time allows, encourage them to write or draw a reflection about the session’s activities to complement the stickers.
3. Collect the notebooks for use in future sessions. Students will take them home at the end of the program.
MATERIALS
• Science skills stickers
• Student Science of Me notebooks
REFLECTIONTime: 5 minutes
Summary: Students will connect the session’s activities with science skills and careers.

Science of Me / Session 2: Your Delivery System 15
MATERIALS:
• Career cards: cardiologist and medical technician
• Student Science of Me notebooks
• Science skills stickers
• Bean bags
• Body part signs (see Printable Resources on p. 52)
• Masking tape
• Yarn
• Preserved sheep hearts
• Dissection trays
• Disposable gloves (1 pair per student)
• Safety goggles
• Chenille stems
• Disinfectant wipes (for cleaning trays and scalpel)
• Simulated blood mixtures (3 100-ml bottles)
• Simulated blood sample tubes (1 per student + 4 reference samples)
• Salad spinner centrifuges (1 per 4 students)
• Masking or duct tape
• (Optional) Dissection probes
• (Optional) Dissection scalpel
Science of MeSession 2: Your Delivery System
How does your circulatory system deliver oxygen and nutrients to keep your body running?
RECOMMENDED SCHEDULE:
Introduction 5 minutes
Heart Relay 10 minutes
Sheep Heart Exploration 20 minutes
Blood Detectives 20 minutes
Reflection 5 minutes
PREPARATION
Heart Relay: Determine which game variation you will play (see activity guide on p. 17). Clear an open area and set up the space accordingly.
Sheep Heart Exploration: Prepare the sheep hearts (see activity guide on p. 20).
Blood Detectives: Prepare the salad-spinner centrifuges and the three simulated blood solutions (see activity guide on p. 26).

Science of Me / Session 2: Your Delivery System 16
Engage
Introduce the session:
In Session 1 we found out what why we need to eat food—it gets broken down to make energy and give nutrients to our bodies.
▶ What happens to those nutrients after that?
▶ How do they get where they need to go?
Explore
1. Ask students if they have ever felt or heard their heartbeat, and/or invite them to find their pulse by placing two fingers on their wrist or neck. Demonstrate for younger students as needed.
▶ What does it sound or feel like?
▶ What do you know about what your heart does?
▶ Why do you think blood is important?
2. Introduce the cardiologist and medical technician careers and explain the descriptions of what they do (as written on the cards). Briefly describe how their jobs relate to the heart and blood circulation.
▶ Have you ever seen or do you know someone who does a job like this?
▶ What things do you think someone with this job might do in a day?
3. Explain that the next activities will help the students think like cardiologists and medical technicians and find out more about how our heart and blood work.
4. During the activities that follow, look for opportunities to connect students’ actions or ideas with the careers, for example:
▶ A cardiologist might test someone’s heart to see if the different parts are working properly (Sheep Heart Exploration).
▶ A medical technician might test someone’s blood to see if it has the right amount of red blood cells (Blood Detectives).
MATERIALS
Career cards: cardiologist and medical technicianINTRODUCTION Time: 5 minutes
Summary: Students discuss the role of the heart and blood in delivering nutrients to the body and learn about the careers of cardiologist and medical technician.

Science of Me / Session 2: Your Delivery System 17
Prepare
Note: This game can be adapted to a variety of locations, class sizes, and age levels. Guidelines for playing the game and some possible variations are listed below; choose the method that best suits your group and space or adapt as needed.
1. If needed, print out a copy of the body part signs (see Printable Resources on p. 52)
2. Clear an open area of the room for game play, and mark a location in the play area for each body part using the Body Part signs.
3. Body part locations should be at least several feet apart and in roughly the arrangement of the human body: place the “head” sign at one end of the space, the “heart” and “lungs” somewhere in the middle of the space, one “hand” at each side edge, and two “feet” at the end of the space opposite the head. (See Set-Up Options below for variations on setting up the space.)
4. Place the beanbags in a pile near the “lung” sign.
5. (Optional) Cut three-foot pieces of yarn and secure them to each body part sign so students can wear them around their necks during the activity.
Engage
Invite everyone to take a big deep breath.
▶ Why do we need to breathe?
▶ What’s in the air that’s so important for us?
▶ How does it get to the parts of the body that need it?
Use the internal organs apron to illustrate where the heart and lungs are. Explain that when we breathe, oxygen from the air goes into our lungs, and our blood cells help carry it from the lungs to the rest of the body. This game will help us see how the heart helps oxygen get where it needs to go.
Explore
1. Introduce the group to game area and point out the body part signs. Invite the group to imagine that the game area is a person’s body. Explain that some students will act as different parts of the person’s body, and others will be blood cells bringing oxygen to the body parts so they can do their jobs.
2. Explain that blood can’t just travel straight from one body part to another. It has to travel through blood vessels, which are passageways through the body, like the way cars travel on roads. Blood vessels always go to and from the heart. Model the path the relay will take as you talk through each step:
▶ If you are a blood cell trying to bring oxygen to the head, you first have to go from wherever you are to the heart (walk from the starting line to the “heart” sign).
Materials
• Internal organs apron
• Beanbags (1 per student)
• Body part signs: heart, lungs, head, hands (x 2), feet (x2)
• (Optional) masking tape
• (Optional) yarn
HEART RELAY Time: 10–15 minutes
Summary: Students play the role of red blood cells in a game that illustrates how oxygen is transported from the lungs to the rest of the body.

Science of Me / Session 2: Your Delivery System 18
▶ The heart pumps you to the lungs, where you can pick up some oxygen (walk to the “lung” sign, take a big, deep breath, and pick up a beanbag).
▶ You can’t go straight up to the head—you have to go back to the heart first (walk back to the “heart”).
▶ Now the heart pumps you out to wherever in the body you are going (walk to “head” and drop the beanbag).
▶ Once you’ve delivered the oxygen, you can’t just go to your next place right away—you have to go back through the heart again! (walk to “heart” sign and then back to starting point).
3. Assign one student to each body part station. Invite them to hold their signs so that they are visible to the rest of the group.
4. Introduce the rules of the relay as follows, or adapt for the variation you have chosen. (See Relay Options below for alternatives). Ask the rest of the group to line up at the starting point, outside the “body” space. Explain that their goal is to deliver all the “oxygen” (beanbags) to the five body parts (head, two hands, and two feet), making sure that each body part gets an equal amount. To deliver the oxygen, each student in line must do the following, in order:
▶ Run and give a high-five to the “heart” person.
▶ Run to the lungs.
▶ Take a big, deep breath and pick up an “oxygen” (bean bag).
▶ Run back to the “heart” and high-five.
▶ Choose a body part, run to it, and put down the bean bag.
▶ Return to the “heart” and high-five.
▶ Return to the starting line and high-five the next person in line to signal them to start.
5. If desired, repeat the relay, switching roles so everyone has a chance to be both a body part and a blood cell.
6. Discuss the group’s experience:
▶ What was fun about this game, and what was challenging? Did anything surprise you?
▶ What was it like being a body part? What about being a blood cell?
▶ How do you think this game is similar to what actually happens in your body, and what is different?
Adapt and Extend
Set-up Options
• If desired, tape lengths of yarn to the body part signs so students can wear them around their necks like a signboard instead of holding them.
• If you have a small group, you could assign all students to be blood cells and tape the body part signs on chairs, walls, or the floor rather than having students hold them. Have students tap the sign with a hand or foot in place of giving a high-five.
• If you have a large group, you could add more body part roles by making signs for other body parts like elbows, knees, stomach, etc.
• If desired, mark out “blood vessel” paths with masking tape from the heart to each other body part. Students must stay on these lines as they run from one location to the next. This may be helpful for younger students.
• If your space is limited, you could place all the body parts together in a single location, or simply have one student represent “body” rather than five separate body parts.
Science of Me / Session 2: Your Delivery System 19
Relay Options
• Discuss the way the heart pumps faster or slower based on how much oxygen is needed. If the “person” starts jogging, will the body need more oxygen or less? Change the relay to show this; for example, instead of waiting for a complete circuit, allow the next person in line to begin as soon as the person in front of them has reached the lungs. How does this change the flow of the game? What are the challenges?
• Designate one person (teacher or student) to be the “brain” and give commands that change the play such as speeding up, slowing down, or directing to a particular body part (“The heart’s beating slower now—walk instead of running… Now she’s thinking hard--send that oxygen to the brain!” etc.)
• For Level 2 students, discuss the idea that blood also carries carbon dioxide away from the body to the lungs, where it is breathed out. Choose another type of object (pompoms, cotton balls, etc.) as “carbon dioxide” and put several at each body part (head, hands, and feet). Whenever a student delivers an “oxygen” (beanbag) to a body part, they must also pick up a “carbon dioxide” and carry it back to the lungs before leaving the body.
Extension Activity
Ask students to take their pulse rates before beginning the relay and after finishing a circuit. How do the rates compare? Invite them to model the difference by moving through the relay path faster or slower to correspond to the different rates.
Background
Every cell in your body needs oxygen to work properly. Oxygen (O2) is a key ingredient in turning sugar into energy to power the cell. When you breathe in, your lungs absorb oxygen from the air. One of the most important jobs of the circulatory system is to keep that oxygen constantly moving to the body parts that need it. The cell’s energy-producing process also creates carbon dioxide (CO2) as a waste product. Another job of the blood is to carry carbon dioxide away from the body to the lungs, where it is removed as you breathe out.
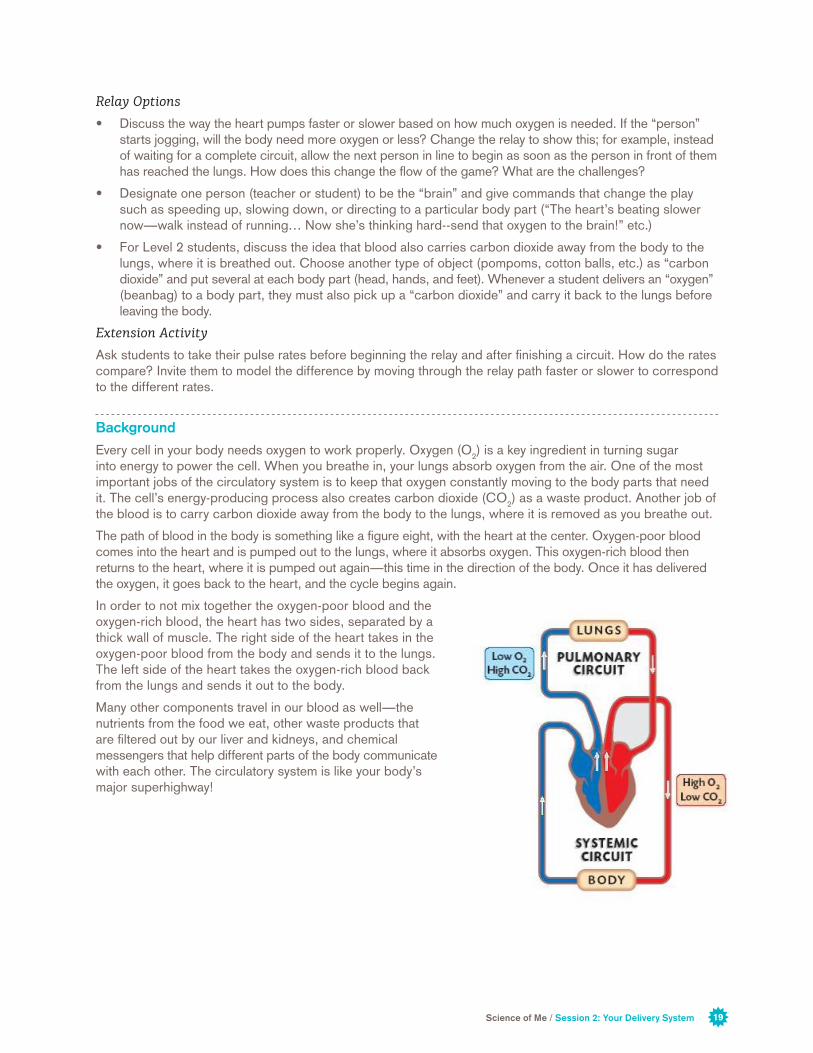
The path of blood in the body is something like a figure eight, with the heart at the center. Oxygen-poor blood comes into the heart and is pumped out to the lungs, where it absorbs oxygen. This oxygen-rich blood then returns to the heart, where it is pumped out again—this time in the direction of the body. Once it has delivered the oxygen, it goes back to the heart, and the cycle begins again.
In order to not mix together the oxygen-poor blood and the oxygen-rich blood, the heart has two sides, separated by a thick wall of muscle. The right side of the heart takes in the oxygen-poor blood from the body and sends it to the lungs. The left side of the heart takes the oxygen-rich blood back from the lungs and sends it out to the body.
Many other components travel in our blood as well—the nutrients from the food we eat, other waste products that are filtered out by our liver and kidneys, and chemical messengers that help different parts of the body communicate with each other. The circulatory system is like your body’s major superhighway!

Science of Me / Session 2: Your Delivery System 20
Prepare
This activity works best as a small-group exploration using one heart for every four students, but it may be done as a whole-class demonstration if necessary.
1. Wearing gloves, remove hearts from packaging and squeeze gently to remove excess preserving liquid. Place each heart in a separate dissection tray.
2. Use the scalpel to cut one heart in half. Identify the front and back of the heart by looking for the diagonal line of fat (front) and the T-shaped lines of fat (back) on the outside of the heart (see photos below). Starting at the apex (tip) of the heart, cut down the left and right sides to separate the front from the back. You will also need to cut through the thick muscle wall in the center to separate them completely.
3. Safety note: The scalpel should NOT be handled by students. Make sure it is secured in a safe location out of reach of students whenever you are not using it.
4. Note: Preserved hearts can be re-used for up to several days after removing from packaging, but will begin to dry out the longer they are exposed to air. Place hearts in a ziplock bag or airtight container as soon as possible after using. Before re-use, check the hearts and discard any that are dried out.
Engage
Introduce the activity:
We’ve been talking about how your heart pumps blood to the rest of your body.
▶ Do you know where your heart is in your body?
▶ What do you think a heart looks like?
▶ What parts do you think it needs to have to do its job?
It’s hard to look at people’s hearts without special instruments, so instead we’re going to look at hearts that came from a different animal—a sheep. They are around the same size as human hearts and have all the same parts, so we can use them to learn about what our own hearts look like.
If asked, you can explain that these hearts came from sheep who died, and the hearts were donated for scientists to study.
MATERIALS
• Preserved sheep hearts (1 per group of 4 students)
• Dissection trays (1 per group)
• Safety goggles
• Disposable gloves
• Chenille stems (1 per group)
• Disinfectant wipes (for cleaning trays and scalpel)
• Dissection scalpel
• (Optional) Dissection probes (1 per group)
SHEEP HEART EXPLORATIONTime: 15–25 minutes
Summary: Students will explore the structures of a preserved sheep heart and discover the path blood takes as it travels through the heart.

Science of Me / Session 2: Your Delivery System 21
Explore
1. Remind students of proper safety procedures and ask them to put on their safety goggles and disposable gloves. Divide the group into teams of four students.
2. Distribute a tray and heart to each team. Invite students to explore the hearts and make observations. Encourage them to “really get to know” their hearts by picking them up, turning them over, and looking closely, but NOT tasting or smelling.
3. As groups explore, ask questions to encourage them to go further or notice additional details:
▶ Do the white and tan parts feel the same or different?
▶ What do you think those different colored parts could be?
▶ How many openings can you find? Do any of them connect to each other?
▶ Do the lines down the front remind you of anything you’ve seen before?
▶ Can you find where they start and end?
4. After a few minutes, ask teams to switch specimens with another team, or pair teams together and invite them to compare their two specimens.
▶ What do you notice about this new heart?
▶ What is the same about them, and what is different?
5. Bring the whole group back together and ask each team to report about some of the things they noticed. As appropriate, discuss the following parts of the heart:
Muscle—tan, stringy tissue; most of the heart
Fat—yellowish-white, squishy tissue
Openings—depending on how the heart was removed from the sheep, as few as four or as many as eight
Major blood vessels—tubes like hoses to carry blood to and from the heart
Heart’s blood vessels—branching lines across the surface
Orientation—the top is where the openings are; point is at the bottom
6. Remind the group that the heart’s job is to pump blood, so it needs places for the blood to enter and leave. Distribute the chenille stems and/or probes and challenge teams to discover the paths blood can take through the heart by pushing the chenille stem through the heart’s tubes. As needed, demonstrate how to thread the chenille stem into an opening and push gently through to see where it comes out.
▶ If blood enters through this opening, where does it come out?
▶ Do all the openings go to the same place? How can you tell?
7. Show the class the dissected heart and invite them to make observations and comparisons. Use a chenille stem or probe (or your finger) to illustrate how the outside openings connect with the inner chambers.
▶ What do you notice on the inside of the heart?
▶ How does this connect to your predictions about where the blood goes in and comes out?
Adapt and Extend
For students in Level 2, add the following ideas to the discussion:
• The heart has two separate sides because it pumps blood in two directions (remember the Heart Relay?) and needs to prevent the two types of blood (oxygen-poor and oxygen-rich) from mixing together.
• Each section of the heart has four basic parts: a tube (or tubes) coming in, a top chamber, a bottom chamber, and a tube leading out.

Science of Me / Session 2: Your Delivery System 22
Background
The goal of this activity is not necessarily for students to learn the names and locations of anatomical structures in the heart. Instead the goal is for them to explore, make observations, and notice that the heart has basic parts related to its function, such as muscle to squeeze the blood out, and openings or tubes to carry the blood to and from the heart. The following information is provided for your own understanding.
Sheep and human hearts are very similar, with all the same structures in the same arrangement and only minor differences in size. An adult sheep’s heart is approximately the same size as a human child’s heart; adult human hearts are slightly larger.
The heart is mostly made of muscle, which relaxes to let the heart fill with blood and contracts to squeeze it out. Several large veins carry blood into the heart, and two main arteries carry the blood away. (A good way to remember the difference is that veins carry the blood in, and arteries carry blood away.)
The heart has two sides separated by a thick wall of muscle. The right side takes in low-oxygen blood from the body and sends it to the lungs. The left side takes in high-oxygen blood from the lungs and sends it out to the body. (Note: The sides are named based on their orientation when they are inside the animal or person. If you are looking at the heart from the front, they are reversed—the left side of the sheep heart is on your right and vice versa.)
Each half of the heart has two chambers: an upper, balloon-like chamber (atrium) where blood collects, and a lower, stronger chamber (ventricle) that squeezes the blood out. Each half also has two valves that act like doors to control how blood moves through the heart: one between the atrium and ventricle and a second between the ventricle and the artery. The “lub-dub” sound of a heartbeat is caused by these sets of valves snapping closed—first the upper ones and then the lower ones.
Structures and features (see photos below):
• Muscle The heart is made of a unique kind of muscle tissue that can be constantly in use throughout a person’s life without tiring.
• Fat Fat is stored around the outside of the heart to serve as protective cushioning and also as an emergency energy supply.
• Atria (singular: atrium) These are the top chambers on each side of the heart. They have a thin wall of muscle and tend to look like deflated balloons when empty of blood.
• Ventricles These are the bottom chambers of each side of the heart. They make up most of the structure of the heart because they have thick walls of muscle to help pump the blood out of the heart. The left ventricle has a thicker muscle wall because it pumps blood to the entire body, while the right ventricle pumps only to the lungs nearby.
• Veins The major veins collect blood from smaller veins throughout the body or lungs and bring it into the heart. They connect to each atrium from the back of the heart. The vena cava brings blood from the body into the right side of the heart. The pulmonary vein brings blood from the lungs into the left side. Depending on how the heart was removed from the sheep, you may see one or two round openings on each side of the back of the heart from branches of these veins, or just a single opening directly into the atrium.

Science of Me / Session 2: Your Delivery System 23
• Arteries The major arteries carry blood out to the lungs and to the body. They exit from the top and front of the heart. They also have thicker, stiffer walls than the veins to withstand the pressure of the heart’s pumping. The pulmonary artery sends blood from the right ventricle to the lungs. It is generally visible on the upper front of the heart, angling from the right side to the left. The aorta delivers blood from the left ventricle to the body. It comes out directly in the center top of the heart and is usually the largest and easiest-to-identify of the blood vessels. It divides just above the heart into separate branches for the head, arms, and lower body. Depending on the heart, you may see two or three smaller branch openings rather than a single large one.
• Coronary arteries These are the small arteries which deliver blood to the heart muscle itself. You can see them as darker lines within the fatty lines that cross the outside of the heart.
• Septum This is the thick wall of muscle inside the heart that separates the left and right ventricles.
• Valves The valves help to control how blood flows through the heart. They are flaps of tissue that are pulled open by the heart muscle when it contracts and snap shut when it relaxes. The valves between the atria and ventricles are easiest to see; they will appear as thin, yellowish flaps attached to the inside of the heart by long, stringy cords.
For a video tutorial on sheep heart structures, see: https://youtu.be/-vsHgj1f0XE

Science of Me / Session 2: Your Delivery System 24
Right atrium
Coronary artery
Right ventricle
Pulmonary artery
Left atrium
Left ventricle
FRONT
BACK
Pulmonary vein
Left atrium
Right atrium
Vena cava (vein)
Right ventricleLeft ventricle
Coronary artery
Aorta (artery)

Science of Me / Session 2: Your Delivery System 25
Septum
Valves
Left ventricle
Right ventricle
BEGINNING DISSECTION INSIDE (PARTIALLY CUT)
Aorta
Front half
Left ventricle
Back half
Right ventricle
INSIDE (FULLY CUT)

Science of Me / Session 2: Your Delivery System 26
Prepare:
Once assembled, the centrifuges and sample tubes can be used for multiple sessions.
Centrifuges:
• Use hot glue to attach a foam disc securely to the bottom center of the salad spinner.
• Use an empty centrifuge tube to create four evenly-spaced holes in the foam (see photo). Push the tube through the foam at an angle until the bottom of the tube reaches the bottom of the foam. Remove the tube and test that it slides easily into and out of the hole.
• Four tubes should be able rest at an angle in the holes with their caps touching or nearly touching.
Simulated Blood:
• Prepare three types of simulated blood in the bottles and label them “healthy,” “low,” and “high”:
▶ Healthy: 40 ml vegetable oil; 20 ml water; 30 ml corn syrup; 30 drops food coloring
▶ Low: 60 ml vegetable oil; 13 ml water; 17 ml corn syrup; 40 drops food coloring
▶ High: 20 ml vegetable oil; 32 ml water; 28 ml corn syrup; 30 drops food coloring
• Shake well to mix. Add a few extra drops of food coloring if necessary to make the color roughly the same for each sample.
MATERIALS:
• Vegetable oil
• Corn syrup
• Red food coloring
• (3) 100-ml bottles with lids
• 50-ml graduated cylinder
• 15-ml centrifuge tubes with lids (1 per student, plus 4–5 extra)
• Salad spinners (1 per 4 students)
• Foam discs (1 per 4 students)
• Hot glue gun
• Masking or duct tape
• Student Science of Me notebooks
• (Optional) stopwatch or timer
BLOOD DETECTIVESTime: 15–20 minutes
Summary: Students discuss the components of blood, use a salad-spinner centrifuge to separate the components of a simulated blood sample, and compare the sample to a standard to determine if the sample is healthy or not.

Science of Me / Session 2: Your Delivery System 27
Sample Tubes:
• Shake a bottle of simulated blood mixture well. Add 10 ml of the mixture to a centrifuge tube and screw the cap tightly closed. Shake the bottle again before filling each additional tube to ensure the compo-nents remain mixed.
• Make six sample tubes of each type of simulated blood, or as many as needed to have one sample per student. Mix up the tubes so they are not grouped by type and use a small piece of tape to label each lid with a number (1–18, etc.) to help students keep track of which sample is theirs.
• Prepare four or five additional tubes from the “healthy” mixture to use as reference samples. Use masking tape to label the reference samples “healthy”.
• Note: This mixture begins to separate on its own after 2–3 minutes. The students’ unknown samples will need to be shaken shortly before use to ensure they are fully mixed. The “healthy” reference samples should remain unmixed for comparison.
Engage:
Introduce the activity:
We know that blood is important for carrying important things your body needs to the parts that need them.
▶ What things have we talked about in our sessions so far that might be carried in your blood?
▶ What comes from the food in your stomach that might need to get to the rest of the body?
▶ What comes from your lungs when you breathe?
▶ What else can you think of that might need to be carried in your blood?
Your blood has different parts to do those different jobs—and the amounts of each of those parts is important! Too much of one thing in your blood, or not enough of another, can cause problems and keep you from being healthy.
The parts of blood are all mixed up together. How can we tell if someone’s blood has the right balance? Medical technicians who test people’s blood use a special tool called a centrifuge to separate blood and look at the different parts. We’re going to see what it’s like to separate blood and find out if it is healthy.
Explore:
1. Show the group one of the shaken-up tubes of simulated blood and one of the (not shaken-up) “healthy” reference tubes. Explain that they are not real blood but are designed to look and act like blood. Invite students to make observations about them.
▶ What do you notice about the “blood” in these tubes?
▶ How do they look the same or different?
▶ What colors do you see?
2. Explain that the first tube is what blood usually looks like—all mixed together. The second tube has been separated to show the different parts. Explain how the layers in the tube correspond to the different parts of blood:
▶ The red layer is like the red blood cells—the parts that carry oxygen from the lungs
▶ The yellowish layer is like the plasma—the liquid that carries most other nutrients
▶ The thin cloudy layer in between (if visible) is like the white blood cells—parts that look for bad germs and fight them off
3. Ask the group to notice the balance of the layers in the reference tube.
▶ How much of the tube is red blood cells? How much is plasma?
Explain that this is what healthy blood should look like—about half red blood cells and half plasma.

Science of Me / Session 2: Your Delivery System 28
4. Introduce the salad spinner and invite students to make observations about it.
▶ Have you ever seen one of these before?
▶ What do you think it does?
5. Divide the group into teams of four and give each group a salad spinner. Invite them to explore the spinners and make observations about how they work.
6. Explain that in this activity the spinners will be their centrifuges—tools scientists use to separate different parts of a mixture by spinning them. Emphasize that it is important to use science tools like this carefully. Invite them to practice spinning moderately but not too fast and to stop the spinners by taking their hands off and letting it stop on its own. (Stopping the spinners too abruptly can re-mix the samples.)
7. Shake each of the numbered samples well (but not the “healthy” reference samples) immediately before distributing them.
8. Give each student a numbered sample tube. Explain that this is a mystery sample from a patient—their job is to be the medical technician and find out if the blood is healthy or maybe has problems.
▶ What does it look like right now?
9. Invite students to place their tubes into the holes in the foam base of the centrifuge with the caps leaning toward the center. Note: the centrifuge works best if it has four tubes in it to stay properly balanced. If a group has less than four people, add one or two of the reference samples or extra tubes filled with water instead.
10. Assign roles to each person in the group:
▶ Checkers—Check that tubes are pushed down in the holes and everything is steady; put the lid on.
▶ Holders—Hold the centrifuge steady.
▶ Spinners—Crank the handle.
▶ Stoppers—Make sure the centrifuge stops on its own and remove the lid when fully stopped.
11. Prepare a timer or other method to count approximately 60 seconds. (It doesn’t need to be precise). Invite the Checkers to give a final check and put on the lid. Remind the Spinners to begin spinning when you say start and to let go when you say “stop” or “hands off.”
12. When the spinning time is finished, ask the Spinners to stop spinning the centrifuge and encourage the Stoppers to watch until they have stopped on their own. Invite the Stoppers to remove the lids and let students to remove their tubes. Encourage them to observe their samples.
▶ What do you notice?
▶ How does it look different than it did before you put it in?
▶ How does your sample compare to others in your group?
13. Distribute an unshaken “healthy” reference sample to each group and invite students to compare their sample with the “healthy” sample. Do they think their sample is healthy? Why or why not? If not, what does it have too much or too little of? Encourage them to record their results on the appropriate page of their Science of Me notebooks.
14. (Optional) Have students group themselves by type (healthy/too much/too little) and compare samples.How are the samples of each type alike and different?
15. Discuss one or more of the following depending on the questions and interest of your group:
▶ How does a centrifuge work to separate the parts of blood?
▶ What kind of problem might a person have if they had too few red blood cells? What about too little plasma?
▶ What parts of blood can we not see or test in this model?

Science of Me / Session 2: Your Delivery System 29
Adapt and Extend
• For Level 1 students, you might simplify the discussion of blood components by omitting the white blood cells and by referring to the plasma as “water and other nutrients.”
• For Level 2 students, you might introduce additional components such as white blood cells, sugars, etc. in discussing the blood model. You could also name and discuss blood-related conditions such as anemia.
Background
Approximate makeup of blood:
▶ 50% water
▶ 40–45% red blood cells
▶ 4% proteins
▶ 1% sugars
▶ 1% white blood cells and platelets
Red blood cells carry oxygen. Iron is a key component in the parts of red blood cells that carry the oxygen. White blood cells are part of the body’s immune system that recognize and disable foreign bodies such as bacteria or viruses. Platelets help blood to thicken and clot at the site of an injury to stop the bleeding. The proteins are a variety of enzymes and chemical messengers. Together, the proteins, sugars, and water are called the plasma.
Hematocrit is a measure of the percentage of red blood cells in the blood. The average healthy hematocrit is 42-54% for men and 36-46% for women. Low hematocrit can be a sign of health problems like anemia (not enough iron in the blood) or malnutrition. High hematocrit can indicate dehydration or other problems such as congenital heart disease or polycythemia (producing too many red blood cells).
A centrifuge separates mixtures by spinning them rapidly. The separation is based on density. As the mixture is spinning, denser components move further toward the outside (away from the center of rotation) and less dense components stay closer to the center. In the case of blood, red blood cells are the most dense, so they move to the bottom of the tube (which is pointed toward the outside of the centrifuge). The white blood cells and platelets have similar densities, so they form a layer together in the middle, and the plasma remains on the top.
Centrifugation works to separate some types of mix-tures, but it will not separate components that have similar densities or that are fully dissolved in each other. For example, it does not separate the white blood cells from the platelets, or the proteins and nutrients from the water in the plasma.

Science of Me / Session 2: Your Delivery System 30
Engage and Explore
1. Encourage students to use the science skills stickers to reflect on the skills they used during the activities and connect them to the highlighted careers. Point out some of the skills listed on the stickers and discuss as a group.
▶ What did you do today that might be like what a cardiologist does?
▶ Did you use a science tool? Did you observe something?
▶ How do you think a medical technician might do those things?
2. Invite students to choose two science skills they used and put the appropriate stickers in the reflection section of their notebooks. If time allows, encourage them to write or draw a reflection about the session’s activities to complement the stickers.
3. Collect the notebooks for use in future sessions.
MATERIALS
• Science skills stickers
• Student Science of Me notebooks
REFLECTIONTime: 5 minutes
Summary: Students will connect the session’s activities with science skills and careers.

Science of Me / Session 3: Your Command Center 31
MATERIALS:
• Career cards: neuroscientist and occupational therapist
• Science skills stickers
• Student Science of Me notebooks (1 per student)
• Copy of ambiguous images (see Printable Resources on p. 52)
• Mystery boxes (1 per group of 3–4 students)
• Tape
• Flashlights (1 per group of 3–4 students)
• Batteries
• Chopsticks (1 per group of 3–4 students)
• Small dry-erase boards
• Dry-erase markers
• (Optional) smartphone or mp3 player
• (Optional) external speakers
Science of MeSession 3: Your Command Center
How does your brain help you make sense of your experiences?
PREPARATION
Mystery Boxes: Prepare the mystery boxes in advance (see activity guide on p 36). Check that flashlights work and replace batteries as needed.
RECOMMENDED SCHEDULE:
Introduction 5 minutes
Mixed Messages 10 minutes
Mystery Boxes 25 minutes
Sending Signals 15 minutes
Reflection 5 minutes
Science of Me / Session 3: Your Command Center 32
Engage
Introduce the session:
We’ve learned about how your body turns food into energy, and how your heart and blood deliver everything your body needs to keep running. Now we’re going to learn about the part of your body that is in charge of all the other parts. What part could that be? Your brain!
Explore
1. Work together to brainstorm a list of different tasks the brain does. Ask questions that encourage the group to think about both conscious and unconscious functions:
▶ What do you think your brain is doing while you are watching TV?
▶ What do you think your brain does while you are asleep?
▶ What does your body need to do to stay alive? How does it know when to do those things?
2. Choose an example action, such as walking up the stairs, and ask questions to help the group think about some of the different brain functions involved. Highlight the idea that the brain needs to take in information from the senses, make decisions based on that information, and then send messages to the rest of the body:
▶ First you need to know where to step. How do you know where the stairs are? (Eyes send message to brain)
▶ Now you need to lift your leg. How does it know what to do? (Brain decides how high and sends message to leg)
▶ How can you tell if your foot made it onto the step? (Foot sends “touch” message to brain)
▶ Now you need to straighten your leg. How does it know what to do? (Brain sends message to leg)
3. Introduce the neuroscientist and occupational therapist careers and explain the descriptions of what they do (as written on the cards). Briefly describe how they connect to the brain.
▶ Have you ever seen or do you know someone who does a job like this?
▶ What things do you think someone with this job might do in a day?
4. During the activities that follow, look for opportunities to connect students’ actions or ideas with the careers, for example:
▶ A neuroscientist might study how signals travel from one part of the brain to another (Sending Signals).
▶ An occupational therapist might develop or use tools to help people see, hear, or move better (Mystery Boxes).
MATERIALS
• Career cards: neuroscientist and occupational therapist
• (Optional) chart paper and markers
INTRODUCTION Time: 5 minutes
Summary: Students will discuss the role of the brain as the body’s command center and learn about two brain-related careers.

Science of Me / Session 3: Your Command Center 33
Prepare
If you have the capability to play audio, find and cue up a recording of the “Yanny/Laurel” sound. A good one with adjustable frequencies can be found here: https://www.nytimes.com/interactive/2018/05/16/upshot/audio-clip-yanny-laurel-debate.html
Engage
Introduce the activity:
We’ve heard that one of the brain’s jobs is to receive information from the world around us.
▶ What kinds of information does it get?
▶ What senses do we have that help us get that information?
▶ What parts of our bodies do we use for each?
▶ What do our brains do with all that information?
Let’s challenge our brains to make sense of the information from our senses!
Explore
Choose any or all of the challenges below depending on time, materials, and the age of your students.
Pretzel Hands 1. Divide students into pairs. Invite one student from each pair to make “pretzel hands” and demonstrate as
they follow along: cross your hands in front of your body, interlace your fingers and flip your hands inward and up, so that your fingers are pointing towards your face (see photo).
2. Ask the other student to point at any finger on their partner’s hands, without touching it, and challenge the partner to raise the finger that was pointed to. Invite them to test a few different fingers before switching roles.
▶ What sense(s) were you using to decide which finger to lift?
▶ What was it like to try it? Did it surprise you?
▶ Why do you think it was so hard?
3. Ask the group to try again, but this time invite the partner to touch the finger instead of just pointing to it.
▶ What was it like to lift your finger now?
▶ What sense(s) were you using this time?
MATERIALS
• Copy of ambiguous images: duck-rabbit and old-young woman (see Printable Resources, p. 52)
• (Optional) smartphone or mp3 player, internet access, and audio clip of an ambiguous sound (Yanny/Laurel)
• (Optional) external speakers
MIXED MESSAGESTime: 10–15 minutes
Summary: Students will experience ambiguous or conflicting sensory information and discuss the brain’s role in interpreting what we experience.

Science of Me / Session 3: Your Command Center 34
4. Allow the partners to switch roles, so the other student has a chance to try twisting their fingers and trying to lift them.
5. Discuss the role our brains play in making sense of the information we get from our senses.
▶ What happens if the brain gets different messages from different parts of the body?
Ambiguous Sounds1. Explain that you will play a sound and invite students to listen closely. Play the audio clip of Yanny/Laurel..
▶ What word did you hear?
▶ Did anyone hear something different?
2. Designate one side of the room as “Yanny” and the other as “Laurel.” Invite students to move to the side of the room that best matches what they heard. (Adapt the names based on students’ responses. If they report hearing “Laura” or “Annie” or another option, use those words instead.)
3. Adjust the audio slider bar all the way to the Yanny end and play the clip again.
▶ Do you still hear the same thing, or does it sound different?
▶ Does anyone want to move to a different side of the room?
4. Move the audio slider to the “Laurel” end and repeat.
5. Play the original sound again (slider bar in the center). Discuss the brain’s role in interpreting information that is ambiguous—in the middle between two different things.
▶ What do you think is happening? Why do you think people hear different things?
▶ If something we hear is unclear or “in the middle,” what do you think our brains do to decide?
Ambiguous Images1. Show students the duck-rabbit image.
▶ What do you think this picture looks like?
▶ Does anyone think it could be something else?
2. Designate one side of the room for “duck” and one side for “rabbit” (or other designations based on what students report seeing). Invite students to move to the side of the room that matches what they see.
▶ Did everyone agree on what it was?
▶ Why do you think that happened?
Note: If students all report seeing the same thing, suggest the other option.
▶ What if I told you this might be a rabbit? Who thinks it could look like a rabbit?
3. Discuss the features that make the image ambiguous.
▶ What parts make it look like a rabbit?
▶ What parts make it look like a duck?
4. Repeat with the young woman-old woman image, or other ambiguous images if time allows.
5. Discuss how our brains make sense of information by fitting it into patterns we’ve seen before.
▶ Why do you think some people first saw a duck, while others saw a rabbit?
▶ Can you see both the duck and the rabbit? Is one easier or harder for you?
▶ Can you think of other times when you thought you saw one thing, but it turned out to be something else?

Science of Me / Session 3: Your Command Center 35
Adapt and Extend
• The McGurk effect describes how our perception of sounds is influenced by what we see. Play one or both of these videos for the class: https://youtu.be/PWGeUztTkRA; https://youtu.be/KiuO_Z2_AD4
▶ What does it sound like the person is saying? How does it change through the video?
▶ Invite students to close their eyes and just listen as you play the video again.
▶ How is it different to listen with your eyes closed?
▶ How do you think the pictures in the video make a difference in what you hear?
• Another popular recent ambiguous image is the “blue dress/gold dress”. Show the class an image of the dress, such as: https://www.nytimes.com/2015/02/28/business/a-simple-question-about-a-dress-and-the-world-weighs-in.html. Ask them what color they think the dress is and invite them to sort themselves to different sides of the room depending on which color they think it is. Explain how people’s brains make guesses about the lighting in the picture to make sense of the color. Dim, yellowish indoor lighting would make a blue and black dress look like this picture, so people whose brains assume indoor light might interpret the dress as blue. Bright daylight would make a white and gold dress look like the picture, so people whose brains assume bright light might interpret the dress as gold.
• Explore variables that might change how you interpret ambiguous images. Does it matter if the image is slanted, sideways, or upside-down? Does lighting or shadow make a difference? Invite students to generate ideas and test whether they change the group’s perception of the images. For an added challenge in the session or at home, invite students to draw their own ambiguous image that can appear as two things depending on these factors.
Background
The information that comes to your brain from your senses is raw data—color, movement, different sound frequencies. Your brain makes sense of the information by continuously looking for patterns, comparing to previous experiences, and filling in the gaps to create our experience of the world. Because we each have different experiences, the patterns our brains use to interpret the world are slightly different. Most of the time these processes work consistently and efficiently. However, illusions and challenges like the ones in this activity highlight the interpretation that happens when our brains receive conflicting, incomplete, or unclear information.
Pretzel Hands: Your brain has learned the pattern that the hand you see on your left is the same as the hand you feel on the left side. When you see someone pointing to a finger on the left, your brain sends a signal to lift the left-hand finger—but in the “pretzel hands” position, the hands are reversed, so the left hand is actually on the right! With practice your brain can adjust to the new pattern and begin to make faster and better decisions, but it is difficult for most people at first. Touching the finger makes the process much easier, because it allows you to feel which finger to move, rather than having to first interpret what you see.
Ambiguous Sounds: Your brain constantly sorts through the collection of sounds you hear to determine which parts are words. When the information is ambiguous or contradictory, your brain has to make a decision about what words you are hearing. In this recording, the word “laurel” includes some extra, higher-frequency pitches because of the recording and replaying process. People whose brains emphasize the higher frequency (or listen on speakers that amplify those frequencies) will tend to interpret it as “yanny.” People whose brains are less attuned to the higher frequencies or whose speakers don’t amplify them will tend to interpret it as the original word “laurel.” Changing the frequencies of the recording by using the slide bar makes the cues clearer, so more people tend to agree on one interpretation or the other.
Ambiguous images: These images contain information that can be interpreted in more than one way depending on the pattern your brain uses. Is that long, slender shape a rabbit’s ear or a duck’s bill? Your brain must put together other clues from the context, compare it to other shapes and patterns you know, nd make a decision. When there aren’t many other clues, or the shape doesn’t quite fit either pattern, your brain may make a different decision than another person’s—or you may be able to shift your perspective back and forth and interpret it either way.

Science of Me / Session 3: Your Command Center 36
Prepare
Mystery boxes:
Prepare one box per group of students. Assemble the boxes at least one day in advance of the first session to allow any glue to dry. Once prepared, the boxes can be used for multiple sessions.
1. Cut a small (approximately ½-inch diameter) hole in one side of the box.
2. Select several objects and place them inside the box; some may be taped or glued to the box while others are loose.
3. You can adapt the difficulty of the boxes for different age groups by changing what is in the box. For Level 1 students, having one or two simple objects inside the box works well. For Level 2 students, you might attach objects to all sides of the box, or consider taping yarn or cardboard pieces across the box to create obstacles for the movement of smaller objects.
4. Close the boxes and seal with tape to prevent students from opening them.
Flashlights:
Check that each flashlight works and replace batteries as needed.
Engage
Introduce the activity:
We’ve learned that our brains get information from our different senses and put it together to figure out what we’re seeing or hearing or doing. But what if we don’t get all the information at once?
▶ Can you think of a time when you heard a sound and knew where it was coming from, even though you couldn’t see it? How did you know what it was?
▶ What about a time when you knew what something was just by touching it, or just by smelling it?
▶ Have you ever thought you recognized a sound or a smell, but turned out to be wrong?
Let’s see if we can find out more about how our senses and memories work together to help us figure out what’s going on.
MYSTERY BOXESTime: 15–20 minutes
Summary: Students will explore how their brains combine sensory information with memory and experience as they try to determine the contents of a mystery box.
MATERIALS
• Student Science of Me notebooks
• Various objects (cups, spools, balls, utensils, blocks, tubes, yarn)
• Cardboard boxes (1 per every 3–4 students)
• Tape
• Flashlights
• Batteries
• Chopsticks or small dowels
• Small dry-erase boards
• Dry-erase markers

Science of Me / Session 3: Your Command Center 37
Explore
1. Divide the group into teams of 3–4 and introduce the boxes. Explain that each has a mystery object (or objects) inside. Each group’s job is to see what they can figure out about what is inside without opening the box. Explain that they will be able to pick up the box and move it or shake it, but not open it.
▶ Which of our senses do you think we’ll be able to use to find out what is in the box?
▶ Which senses can’t we use?
2. Distribute one box to each group and pass out the dry-erase boards. Encourage the students to work together to write down or draw what they think is inside. As they work, ask guiding questions like:
▶ What other senses could you use to find out more?
▶ What makes you think it is a _____? (Is it the sound? The weight? The smell?)
3. Encourage students to make connections between what they actually observe with their senses and the memories that help them infer what the information means.
▶ What did you hear or feel that makes you think it is round?
▶ How did you know that sound means something is rolling?
▶ Where have you heard a sound like that before?
4. After groups have explored their boxes for several minutes, explain that you will provide some tools to help them get more information with their senses. Distribute a chopstick to each group and invite them to explore their boxes further. Encourage students to revise their drawings of the object based on their new observations.
▶ How could you use the chopstick to find out more about what is inside?
▶ What new things did you discover?
▶ What does the object remind you of now? What makes you think that?
5. Distribute a flashlight to each group.
▶ Which of your senses can this tool help you use?
▶ What did you learn about the mystery object with the help of the flashlight?
▶ What do you think is in the box now? How can you tell?
6. Encourage students to sketch their final ideas or predictions about the object(s) in the box on the appropriate page in their notebooks.
7. Invite groups to open the lid, and lead a discussion about what things they were able to find out about their boxes.
▶ How did your senses work together to help you figure out what was in the box?
▶ Which senses make it easiest to figure out what something is?
▶ How did your memories help you decide what the object could be?
Adapt and Extend
• If time permits, rotate the boxes and let groups explore and predict the contents of each of the different boxes. How are they different? Which objects are the hardest to figure out?
• Provide materials for students to create their own mystery boxes to take home or to exchange with other students in the group.

Science of Me / Session 3: Your Command Center 38
Background
Your brain combines information from all of your senses to form your experience of the world. Although humans usually rely heavily on sight for recognizing places and objects, our memories are episodic—the information from all of our senses is connected together as part of the memory. This means that when your brain receives one piece of information, such as the sound of rubber hitting pavement, it triggers memories of times when you heard the sound before and helps you understand that someone nearby is bouncing a basketball on the sidewalk—even though you can’t see them doing it.
When our senses are limited, we can use tools to help us gather more information. Lights are tools that help us see when there isn’t enough natural light; telescopes and microscopes help us see things that are too far away or too small to see; sensors detect trace chemicals that we aren’t able to taste or smell. We also use tools to make up for places where our senses might be damaged or missing; this is called assistive technology. Eyeglasses or contacts improve impaired vision; hearing aids and cochlear implants help people with hearing difficulties; prosthetic limbs can restore the ability to touch and manipulate objects.
Engage
Introduce the activity:
We just used many different senses to get information about the objects in the mystery boxes.
▶ How does your brain “know” what color your eyes saw, or how big the object was inside?
▶ How does your brain connect the shape you saw with your memories to remember what the object was?
▶ When you decided to pick up the box, how did your arms know what to do?
In order for all the different parts of your brain and body to work together, messages have to travel back and forth between them. Special cells called neurons connect together to pass messages inside your brain and to different parts of the body. Let’s play a game to find out more about how this works.
MATERIALS
NoneSENDING SIGNALSTime: 10–15 minutes
Summary: Students will play a game to model how the brain sends and receives signals to and from the body.

Science of Me / Session 3: Your Command Center 39
Explore
1. Ask students to think about a time when they hurt themselves.
▶ What happened? What did it feel like?
▶ What did you do once you were hurt?
For example, if you stub your toe, your brain gets information from your toe, decides that it is pain and you should do something, and sends a message for your body to sit down or rub the toe to help it feel better.
2. Tell students that they will be acting out how messages travel back and forth in the brain and body. Divide the group into teams of six or eight students.
3. Ask each group to stand in a line, about an arm’s-length apart. Explain that each group will be the pathway between the brain and the body.
4. Designate one student at the end of each line to be the “brain” and the student on the opposite end to be the “body.”
5. Explain to the “body” students that their body has just stubbed its toe. Ask the “body” student what message they want to send to the brain, for example, something like “Toe hurts!”
6. To begin passing the message, invite the “body” student to tap the shoulder of the person next to them and say the message aloud. That person then taps the shoulder of the next person and repeats the message, and so on, until the last person taps the shoulder of the “brain” and repeats the message.
7. Once the message has reached the “brain,” ask the “brain” student what message they would like to send back to the body, for example, something like “say OW!” Encourage the “brain” to start the message back to the body by tapping the next person’s shoulder and saying the message aloud.
8. When the “body” student receives the message, ask them to physically act out or say whatever the message told them to do (such as saying “OW!”).
9. Rotate the roles in each line so that new students play the “brain” and “body” and repeat the exercise one or more times. Encourage groups to think of different scenarios they could simulate, such as scratching an itch or reacting to a loud noise.
10. After the game, invite students to reflect on the process of sending messages through the body.
▶ What was it like to be sending signals back and forth like your brain does?
▶ What messages do you think your brain is sending and receiving right now?
▶ What about when you were doing Pretzel Hands? What about during the mystery box activity?
Adapt and Extend
• Make the exercise more relay-like by giving each group a ball or beanbag to pass rather than tapping shoulders. Once groups have practiced the process, see which group can pass a message up and back the fastest. Consider using a stopwatch to record a group’s time, and see if they can get faster with practice. Discuss how real pathways in the brain get faster and stronger with practice by comparing their ability to walk to a baby that has just learned.
• Expand the activity by inviting groups to think of multiple message steps for each scenario. For example, after getting the message “say OW!”, the body could respond with “still hurts” and the brain could send the message “rub the toe” or “sit down.” Encourage groups to be creative with the story and see how many back-and-forth messages they can send before the situation is resolved.
• As an added challenge for Level 2 students, model a scenario in which the brain communicates with two different body parts, such as seeing a cookie and reaching out to grab it. Ask students to stand in a V shape with the “brain” student at the tip; the student at one end of the V plays the “eyes” and the student at the opposite end is the “arm.” The “eye” sends a message to the “brain” about what it sees, and the “brain” sends a message to the “arm” telling it what to do about what the eye sees.

Science of Me / Session 3: Your Command Center 40
Background
The nervous system is responsible for sending messages back and forth between the brain and the body. Specialized cells, called neurons, connect with each other in complex networks to pass electrical signals from different parts of the body to the brain, between different regions of the brain, and from the brain back out to the rest of the body.
Some neurons are connected to receptors in your skin, eyes, nose, and ears to send information to the brain about what your senses are detecting. Other neurons connect to your muscles and send signals from the brain that contract or relax the muscles to move your body. Networks of neurons within your brain connect with these other neurons in ways that allow you to interpret the world, form memories, make decisions, and act on them. There are even networks of neurons that control the functions you don’t think about, like breathing, body temperature, and sleep cycles.
While this activity illustrates the basic idea that signals between brain and body travel by passing from one neuron to the next, the connections between actual neurons are much more complicated. A single neuron might receive and send signals from thousands of other neurons, instead of just two.
Engage and Explore
1. Encourage students to use the science skills stickers to reflect on the skills they used during the activities and connect them to the highlighted careers. Point out some of the skills listed on the stickers and discuss as a group.
▶ What did you do today that might be like what a neuroscientist does?
▶ Did you make an observation? Did you try something again?
▶ How do you think an occupational therapist might do those things?
2. Invite students to choose two science skills they used and put the appropriate stickers in the reflection section of their notebooks. If time allows, encourage them to write or draw a reflection to about this session’s activities to complement the stickers.
3. Collect the notebooks for use in future sessions.
MATERIALS
• Science skills stickers
• Student Science of Me notebooks
REFLECTIONTime: 5 minutes
Summary: Students will connect the session’s activities with science skills and careers.

Science of Me / Session 4: Your Blueprint 41
Science of MeSession 4: Your Blueprint
PREPARATION & SET-UP
Discovering DNA: Freeze the ice pack and refrigerate the rubbing alcohol overnight or for several hours until thoroughly chilled. Prepare the wheat germ liquid and alcohol dropper bottles 30 minutes before the activity (see activity guide on p.44).
How do your DNA and your environment interact to make you an individual?
RECOMMENDED SCHEDULE:
Introduction 5 minutes
Blobs and Lines 10 minutes
Discovering DNA 15 minutes
This is Me or Fingerprint Detectives 20 minutes
Reflection 10 minutes
MATERIALS:
• Career cards: genetic counselor and forensic scientist
• Science skills stickers
• Student Science of Me notebooks
• Ice pack
• Raw wheat germ
• Hot water
• Meat tenderizer
• Liquid dishwashing or hand soap
• Plastic spoons (1 per student)
• Isopropyl alcohol or ethyl alcohol (91%)
• Plastic cups (1 per 3–4 students)
• Dropper bottles (1 per 3–4 students)
• 1.5 ml microcentrifuge tubes (1 per student)
• 1 ml pipettes (1 per student)
• Yarn
• Scissors
• Crayons or markers
• Construction paper and/or additional art materials
• Fingerprinting inkpads (1 per 3–4 students)
• Disposable nitrile gloves, white
• Magnifying glasses (1 per student)
• Chart paper and markers
• (Optional) pencils, clear office tape, and index cards or small pieces of blank paper

Science of Me / Session 4: Your Blueprint 42
Engage
Introduce the session:
So far, we’ve talked about parts of ourselves that are the same for all of us—we all have stomachs and hearts and brains. But there are many things about us that are different.
▶ What are some things that can be different between people?
▶ How do you think your body knows what to look like or how to grow?
Explore
1. Ask the group to think about a time when they made or built something by following instructions.
▶ What were the instructions like? Pictures or words? Written down or said out loud?
▶ Did you ever do something differently than the instructions said? Or change it afterwards?
2. Explain that people (and all living things) have something inside them called DNA that gives instructions for how the body should look and grow, and everyone’s DNA instructions are a little bit different.
3. Introduce the genetic counselor and forensic scientist careers and explain the descriptions of what they do (as written on the cards). Briefly describe how their jobs relate to DNA.
▶ Have you ever seen or do you know someone who does a job like this?
▶ What things do you think someone with this job might do in a day?
4. Explain that the next activities will help the students think like genetic counselors and forensic scientists to find out more about how our DNA—and other factors—help make us who we are.
5. During the activities that follow, look for opportunities to connect students’ actions or ideas with the careers, for example:
▶ A genetic counselor might study a person’s DNA to check if the person has health problems caused by their DNA (Discovering DNA).
▶ A forensic scientist might examine fingerprints and try to figure out who they belong to (Fingerprint Detectives).
MATERIALS
Career cards: genetic counselor and forensic scientist
INTRODUCTION Time: 5 minutes
Summary: Students discuss the role of DNA in determining a person’s characteristics and learn about the careers of genetic counselor and forensic scientist.

Science of Me / Session 4: Your Blueprint 43
Engage
Ask the group to think about the characteristics people use to describe themselves and others.
▶ If someone asked you to describe yourself, what would you say?
▶ What are some traits or characteristics we use to describe how people are alike or different?
Explore
1. Ask the group to generate a list of traits and write them on the chart paper or board. Encourage students to think of traits that are physical (hair color, height, eye color) and those that are not (favorite color, likes sports, plays an instrument).
2. Choose from the list one of the traits that has several distinct categories (such as eye color or favorite color) and challenge the group to sort themselves into “blobs” by that trait. In other words, they must figure out how to group themselves so that all the brown-eyed people stand together in one cluster, the blue-eyed people in another, and so on.
3. Choose a different trait that falls across a spectrum rather than distinct categories (such as height, or how much you like sports). Challenge the group to arrange themselves in a line from one extreme to the other, for example, from the person who likes sports the most to the one who likes sports the least.
4. Repeat with two or three other traits. Invite the group to help you choose which traits to use and whether to organize into blobs or a line.
5. Discuss with the group:
▶ What did you notice about trying to sort ourselves by different traits?
▶ Were some traits harder to sort than others?
▶ Which traits do you think you’re born with and can’t change?
▶ Which ones happen because of how you grew up?
▶ Which ones might change over time?
Background
The characteristics that we use to identify ourselves vary from physical features such as eye color or face shape to traits that are harder to see, such as food preferences or personality traits. Some of these characteristics, particularly physical ones like eye or hair color, are determined by our DNA and are very difficult to change. Others, such as preferences for a particular color or hobby, are primarily shaped by our experience—what we were exposed to and the associations we have as a result.
MATERIALS
• Chart paper, blackboard, or whiteboard
• Marker
BLOBS AND LINESTime: 10–15 minutes
Summary: Students will play a game to explore different traits that distinguish individuals and discuss that people are born with some traits and gain others through experience.

Science of Me / Session 4: Your Blueprint 44
However, many of the characteristics come from the interaction between our DNA and our environment. Height, for example, is partly determined by the DNA we inherit from our parents, but it can be influenced by factors like nutrition. Skill at a sport might be slightly affected by how well your body shape is suited to the movements but is even more dependent on how much you practice and who coaches you. In many cases, your DNA may give you a predisposition to a particular trait, but whether or how strongly it develops depends on your environment and experiences. Researchers are still studying the ways that our DNA and our environment interact. For most human characteristics, we do not yet fully understand the exact roles our DNA and our experiences each play in shaping the outcomes.
Prepare
1. Several hours or the night before before the activity, put the ice pack in the freezer and the alcohol in the refrigerator.
2. 30 minutes before the activity:
Prepare the wheat germ liquid:
In a clean plastic cup or container add 1 cup hot water, 2 spoonfuls of wheat germ, 1 spoonful of meat tenderizer, and a large squirt of soap (about 2 teaspoons). Stir well and distribute evenly into 3–4 plastic cups for student use. Let the mixture in the cups settle for 15 minutes.
Prepare the dropper bottles of alcohol:
Fill the dropper bottles with chilled alcohol. Place the bottles on the ice pack until just before students use them to keep the alcohol chilled.
3. (Optional): Pre-cut 30-inch lengths of yarn for the necklaces.
DISCOVERING DNA Time: 15–25 minutes
Summary: Students will isolate DNA from wheat germ and make DNA tube necklaces to take home.
MATERIALS
• Ice pack, freezer, and/or small cooler with ice
• Raw wheat germ (not processed)
• Hot water
• Meat tenderizer
• Liquid dishwashing or hand soap
• Plastic spoon
• Isopropyl alcohol or ethyl alcohol (91%)
• Plastic cups (3–4)
• Dropper bottles (1 per 3–4 students)
• 1.5 ml microcentrifuge tubes
• 1 ml pipettes (1 per student)
• Yarn
• Scissors

Science of Me / Session 4: Your Blueprint 45
Engage
Introduce the activity:
▶ How do the different parts of your body know what to do and how to grow?
All living things have something inside called DNA, which is like their plan or instructions. People have it, animals have it, plants have it, even bacteria have it!
Today we’re going to try to find some DNA and take it home with us! We’re going to look for DNA in the wheat plant, to help us understand what our own DNA would look like.
Display some dry wheat germ. Explain that it is part of the wheat plant.
▶ What do you think we might do to try to get the DNA out?
Explore
1. Remind students of safety procedures and ask them to put on their safety goggles.
2. Distribute the cups of wheat germ liquid and ask students to observe the contents.
▶ What do you notice?
▶ What do you see in the bottom?
▶ What does the liquid look like?
3. Explain that the wheat germ is part of the seed of the wheat plant, and the soapy liquid is helping to break it up to get at the DNA inside it.
4. Demonstrate how to use a pipette to take a sample of the wheat germ liquid and add it to a microcentrifuge tube. Distribute the microcentrifuge tubes and pipettes and invite students to fill their tubes about halfway with the liquid. Note: Younger students may need to practice filling and slowly emptying the pipette into the cup a few times before adding the liquid to their tubes.
5. Distribute the alcohol bottles. Demonstrate for students how to carefully add alcohol to fill the tube almost all the way to the top, and then snap the lid shut.
▶ What does the liquid in your tube look like?
6. Demonstrate how to hold the tube between thumb and forefinger and gently rock the tube upside-down and then back up. Invite students to do this 4–5 times with their own tubes and observe them again.
▶ What does the liquid look like now?
▶ Can you see anything forming in the tube? What does it look like?
▶ What do you think it is? What makes you think so?
7. Discuss students’ results: The whitish solid is wheat DNA, now all clumped together and separated from the rest of the wheat liquid to make it visible.
8. Distribute the lengths of yarn or assist students in cutting their own. Invite students to carefully reopen the cap, lay the yarn across the hinge of the cap, and snap it shut again. Encourage them to tie the ends of the string to make a necklace and wear their discovered DNA with pride!
Adapt and Extend
• If time and your group’s abilities allow, students could work in teams to prepare their own wheat germ liquid before the extraction activity. Divide the recipe amounts above by the number of teams and allow each team to prepare their own cup. Invite the group to think about what the different ingredients might be doing to help get the DNA out of the wheat germ. Leave the liquid to settle while doing another activity, then return to finish extracting the DNA and making the necklaces.

Science of Me / Session 4: Your Blueprint 46
• For Level 2 students, include the following ideas in the discussion:
▶ Living things are made up of cells. Each cell contains a copy of the living thing’s DNA “blueprint” which tells the body how to grow and develop.
▶ DNA is like a long string made from four types of smaller building blocks. The pattern of those four blocks is the “code” that gives instructions to the cells.
Background
Genes are a set of instructions that give living things the information they need to grow and do their jobs. They are made of a chemical called DNA, which stands for deoxyribonucleic acid. DNA is a long chain made up of four smaller molecules called nucleotides. In the same way that the letters of our alphabet can be arranged in many different ways to create words and sentences, the pattern of these nucleotides in the DNA carries the genetic information that acts like the organism’s “blueprint.” This includes everything from the basic processes that keep cells running to traits like eye color or nose shape. A copy of the organism’s DNA is found in the nucleus of each of its cells. Segments of DNA form genes, which can be expressed (turned on) or not depending on stimuli in our environment. This explains why our environment and experience can shape how we grow and develop.
Extracting DNA from cells requires first breaking up the cells and then separating the DNA from the other leftover parts of the cell. The soap used in preparing the wheat germ liquid breaks up the fatty outer membranes of the cells (just as it breaks up grease on hands or dishes). The meat tenderizer contains enzymes that help break up proteins to untangle the DNA from other parts of the cell. At this point, the DNA is floating freely but still dissolved in the water with everything else. Adding the alcohol encourages the DNA to separate from the water and clump together.
Prepare
Have a handwashing station or wet wipes available to wash ink from students’ fingers after fingerprinting.
Engage
Introduce the activity:
Thinking about the parts of ourselves we’ve talked about in these sessions:
▶ What are some traits that are the same for all of us?
▶ Which traits make each of us different?
▶ Which ones do you think especially make you, you?
We’re going to look at one thing that makes each of us unique: our fingerprints. Then you’ll create a work of art to show what makes you a one-of-a-kind person.
MATERIALS
• Student Science of Me notebooks
• Crayons or markers
• Art materials, such as construction paper, yarn, scissors, glue
• Fingerprinting inkpads (1 per 3–4 students)
• Magnifying glasses (1 per student)
• (Optional) wet wipes
• (Optional) butcher paper
THIS IS ME(Recommended for Level 1 students)
Time: 15–20 minutes
Summary: Students will explore features that make them individuals as they examine their fingerprints and create a piece of artwork illustrating some of their traits.

Science of Me / Session 4: Your Blueprint 47
Explore
1. Invite students to carefully examine the pads of their fingers and compare them with a partner.
▶ What do you notice about your fingerprint pattern?
▶ Are all your fingers the same?
▶ How are yours similar to or different from your partner’s?
2. Help students locate the hand outlines in their notebooks. Distribute the inkpads and demonstrate how to take a fingerprint by gently rolling your finger from one side to the other on the inkpad to cover the whole pad of the finger with ink. Then press your finger on the page and lift up without rolling or smudging.
3. Invite students to take a fingerprint from each finger and put it on or near the appropriate finger of the hand outline.
4. Encourage students to use the magnifying glasses to examine their printed fingerprints more closely and compare them with their partner’s.
▶ How do they compare to the pattern on your fingers?
▶ Do you see any new details? Are there any parts that are harder to see?
5. Explain the basic types of fingerprint pattern—arch, loop, whorl, and mixed/combination (see the “Fingerprint Detectives” activity for examples). Draw simple versions of each shape on chart paper to illustrate. Ask the students to identify which shapes they see in their fingerprints.
6. Distribute the art materials and help students locate the “This is Me” person outline in their notebooks. Ask students to think about the question, “What else makes me unique—one of a kind?”
7. Encourage students to use the art materials to add elements inside or around the person outline to showcase what is unique about them. Encourage them to connect their ideas to the topics of each session. For example, they might include a brain, heart, and digestive system, as well as related traits that are unique to them.
▶ What’s your favorite kind of food to get energy from?
▶ What activities do you like to do that get your heart pumping faster?
▶ What do you like to do that works your brain—read books, play board games?
▶ How could you show those on or near your person?
8. If time allows, invite students to share their artwork with the whole group or with a partner and talk about the features they represented.
▶ What features on your person do you have in common with someone else in the group?
▶ What is different between them?
9. Note: For security purposes, be sure that any materials containing both a student’s name and their fingerprints are either sent home with the student or destroyed.
Adapt and Extend
Create life-size outlines to use instead of those in the notebooks by tracing outlines of students’ own bodies on lengths of butcher paper. Ask students to lie still on a length of paper with legs together and arms slightly out from the body while a partner traces around their body with a crayon or marker. Then they can decorate the outlines with traits and preferences that make them unique.
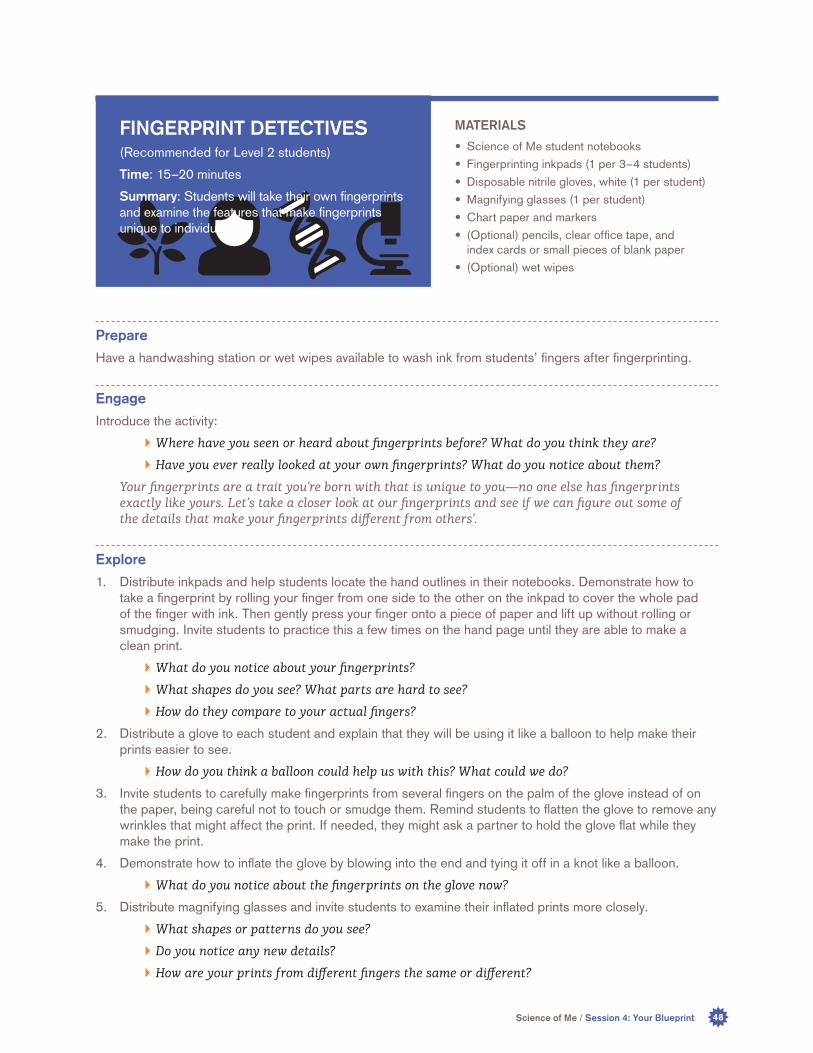
Science of Me / Session 4: Your Blueprint 48
Prepare
Have a handwashing station or wet wipes available to wash ink from students’ fingers after fingerprinting.
Engage
Introduce the activity:
▶ Where have you seen or heard about fingerprints before? What do you think they are?
▶ Have you ever really looked at your own fingerprints? What do you notice about them?
Your fingerprints are a trait you’re born with that is unique to you—no one else has fingerprints exactly like yours. Let’s take a closer look at our fingerprints and see if we can figure out some of the details that make your fingerprints different from others’.
Explore
1. Distribute inkpads and help students locate the hand outlines in their notebooks. Demonstrate how to take a fingerprint by rolling your finger from one side to the other on the inkpad to cover the whole pad of the finger with ink. Then gently press your finger onto a piece of paper and lift up without rolling or smudging. Invite students to practice this a few times on the hand page until they are able to make a clean print.
▶ What do you notice about your fingerprints?
▶ What shapes do you see? What parts are hard to see?
▶ How do they compare to your actual fingers?
2. Distribute a glove to each student and explain that they will be using it like a balloon to help make their prints easier to see.
▶ How do you think a balloon could help us with this? What could we do?
3. Invite students to carefully make fingerprints from several fingers on the palm of the glove instead of on the paper, being careful not to touch or smudge them. Remind students to flatten the glove to remove any wrinkles that might affect the print. If needed, they might ask a partner to hold the glove flat while they make the print.
4. Demonstrate how to inflate the glove by blowing into the end and tying it off in a knot like a balloon.
▶ What do you notice about the fingerprints on the glove now?
5. Distribute magnifying glasses and invite students to examine their inflated prints more closely.
▶ What shapes or patterns do you see?
▶ Do you notice any new details?
▶ How are your prints from different fingers the same or different?
MATERIALS
• Science of Me student notebooks
• Fingerprinting inkpads (1 per 3–4 students)
• Disposable nitrile gloves, white (1 per student)
• Magnifying glasses (1 per student)
• Chart paper and markers
• (Optional) pencils, clear office tape, and index cards or small pieces of blank paper
• (Optional) wet wipes
FINGERPRINT DETECTIVES(Recommended for Level 2 students)
Time: 15–20 minutes
Summary: Students will take their own fingerprints and examine the features that make fingerprints unique to individuals.

Science of Me / Session 4: Your Blueprint 49
6. Bring the group back together and ask students to share the shapes and patterns they saw. As they come up in the discussion, mention the basic types of fingerprint pattern—arch, loop, whorl, and mixed/combination. Draw simple versions of each shape on chart paper to illustrate.
7. Challenge the group to sort themselves into groups based on which type of fingerprint they have (or which one they have the most of).
8. Encourage students in each type group to examine each other’s prints and look for similarities and differences in the group.
▶ Can you tell what make your prints different from everyone else in your group?
▶ If you had to find your own prints again, what would you look for?
9. (Optional) Tally the number of students in each of the groups. Which fingerprint type is most common?
10. Note: For security purposes, be sure that any materials containing both a student’s name and their fingerprints are either sent home with the student or destroyed.
Adapt and Extend
Graphite Printing: Try fingerprinting with a pencil instead of ink. Ask students to color a one-inch square area of paper with pencil, leaving no uncolored space and covering it thickly. Invite them to roll a finger back and forth across the pencil area, press a piece of clear tape over the “inked” finger, and carefully peel the tape away, leaving the graphite print on the tape. They can then place the piece of tape on a white piece of paper and examine the print.
▶ How does the graphite print compare to the ink and glove method?
▶ Which one would you choose for fingerprinting? Why?
Fingerprint Identification: Ask each student to make a thumbprint (from the same thumb) on two separate index cards or small pieces of blank paper. Divide the group into teams of 3–5 students. Ask each student in the group to keep one of their cards and place the other in the center of the group. Shuffle the center cards and choose one at random. Challenge the group to identify who the mystery print belongs to by comparing the unknown print to those the group members are still holding.
Background
Fingerprints are ridges of skin that form as a baby grows inside the womb. While their purpose is not completely clear, they may help provide to provide friction for gripping or increase touch sensitivity. We have ridged areas on our palms, toes, and the soles of our feet as well.
Fingerprint patterns are controlled by both genetic factors and environment. Studies suggest that genes may determine the general size, shape, and spacing, but individual differences seem to be caused by the environment in the womb. In other words, while the pattern type (arch, whorl, or loop) is often the same between parents and children, the details will differ. This means that fingerprints are unique to the individual. Even identical twins, who share the same DNA, will have different fingerprints.
Fingerprints generally stay the same throughout a person’s life. They may stretch or grow as the person does, but the pattern remains consistent. However, other experiences, such as injuries that leave scars or medical conditions that damage the skin, can alter or wear away a person’s fingerprints.

Science of Me / Session 4: Your Blueprint 50
Engage and Explore
1. Encourage students to use the science skills stickers to reflect on the skills they used during the activities and connect them to the highlighted careers. Point out some of the skills listed on the stickers and discuss as a group.
▶ What did you do today that might be like what a forensic scientist does?
▶ Did you ask a question? Did you make a prediction?
▶ How do you think a genetic counselor might do those things?
2. Invite students to choose two science skills they used and put the appropriate stickers in the reflection section of their notebooks. If time allows, encourage them to write or draw a reflection about the session’s activities to complement the stickers.
3. Encourage students to take home their Science of Me notebooks to continue exploring these ideas at home.
Concluding the Program
1. Invite students to share their favorite activity or moment from the four sessions.
▶ Which part of these activities did you like best?
▶ Which science skills did you most like using?
2. Encourage the group to continue thinking about the Science of Me and the science careers they explored in the program throughout their summer and into the school year.
3. Share details of any family events planned in conjunction with GSK Science in the SummerTM, including dates, registration, and flyers.
4. Thank GSK, The Franklin Institute, and your host site for offering the program. If time permits, encourage students to draw a picture or write a thank-you note to share what they enjoyed and learned through the program.
REFLECTIONTime: 5 minutes
Summary: Students will connect the session’s activities with science skills and careers.
MATERIALS
• Science skills stickers
• Student Science of Me notebooks

Science of Me / Materials List 51
• Safety poster
• Safety goggles
• Career cards
• Science skills stickers
• Student Science of Me notebooks
• Sharpened pencils (1 per student)
• Internal organs apron
• Cotton stockinette tubes (1 per pair of students)
• Wooden craft balls (1 per pair of students)
• Rolls of “intestine” ribbon, (1 per pair of students)
• Small cups, 2–4 oz. (4 per student)
• Rice squares cereal (approx. 1.5 cup per group of 2–3 students)
• Quart-size ziplock bags (1 per group of 2–3 students)
• Scissors (1 per group of 2–3 students)
• Nylon knee-high stockings (1 per group of 2–3 students)
• Wide bowls (1 per group of 2–3 students)
• Disposable gloves (2 pairs per student)
• Cornstarch (approx. 1 spoonful per student)
• Plastic spoons (2 per student)
• Iodine dropper bottles (1 per group of 2–3 students)
• Pipettes (2 per student)
• Bean bags (20)
• Body part signs: heart, lungs, head, hands (x 2), feet (x2)
• Masking tape
• Yarn
• Preserved sheep hearts (1 per group of 4 students)
• Dissection trays (1 per group of 2–3 students)
• Chenille stems (1 per group of 2–3 students)
• Dissection probes (1 per group of 2–3 students)
• Dissection scalpel
• Disinfectant wipes
• Simulated blood mixture (3 100-ml bottles)
• Simulated blood sample tubes (1 per student + 4 reference samples)
• Salad spinner centrifuge (1 per 4 students)
• Ambiguous images: duck-rabbit, young-old woman
• Mystery boxes (1 per group of 3–4 students)
• Flashlights (1 per group of 3–4 students)
• Replacement batteries (for flashlights)
• Chopsticks (1 per group of 3–4 students)
• Small dry-erase boards (1 per student)
• Dry-erase markers (1 per student)
• Ice pack
• Raw wheat germ
• Meat tenderizer
• Liquid dishwashing or hand soap
• Isopropyl alcohol or ethyl alcohol (91%)
• Plastic cups, 8 oz. (1 per 3–4 students)
• Microcentrifuge tubes (1 per student)
• Crayons or markers
• Construction paper and/or additional art materials
• Fingerprinting inkpads (1 per 3–4 students)
• Disposable nitrile gloves, white (1 per student)
• Magnifying glasses (1 per student)
• Chart paper and markers
Master Materials List

Science of Me / Printable Resources 52
Body Part Signs:• Heart
• Lungs
• Head
• Left hand
• Right hand
• Left foot
• Right foot
Ambiguous Images:• Duck-rabbit
• Young-old woman
PRINTABLE RESOURCESPrintable Resources
Heart

Lungs

Head

hand

hand

foot

foot