Ruby on rails tutorial-preview
100
Transcript of Ruby on rails tutorial-preview


2

Ruby on Rails Tutorial
Learn Web Development with Rails
Michael Hartl

ii

Contents
1 From zero to deploy 1
1.1 Introduction . . . . . . . . . . . . . . . . . . . . . . . . . . . 4
1.1.1 Prerequisites . . . . . . . . . . . . . . . . . . . . . . 5
1.1.2 Conventions in this book . . . . . . . . . . . . . . . . 7
1.2 Up and running . . . . . . . . . . . . . . . . . . . . . . . . . 9
1.2.1 Development environment . . . . . . . . . . . . . . . 10
1.2.2 Installing Rails . . . . . . . . . . . . . . . . . . . . . 12
1.3 The first application . . . . . . . . . . . . . . . . . . . . . . . 15
1.3.1 Bundler . . . . . . . . . . . . . . . . . . . . . . . . . 20
1.3.2 rails server . . . . . . . . . . . . . . . . . . . . 24
1.3.3 Model-View-Controller (MVC) . . . . . . . . . . . . 25
1.3.4 Hello, world! . . . . . . . . . . . . . . . . . . . . . . 31
1.4 Version control with Git . . . . . . . . . . . . . . . . . . . . . 34
1.4.1 Installation and setup . . . . . . . . . . . . . . . . . . 36
1.4.2 What good does Git do you? . . . . . . . . . . . . . . 39
1.4.3 Bitbucket . . . . . . . . . . . . . . . . . . . . . . . . 40
1.4.4 Branch, edit, commit, merge . . . . . . . . . . . . . . 44
1.5 Deploying . . . . . . . . . . . . . . . . . . . . . . . . . . . . 50
1.5.1 Heroku setup . . . . . . . . . . . . . . . . . . . . . . 51
1.5.2 Heroku deployment, step one . . . . . . . . . . . . . 54
1.5.3 Heroku deployment, step two . . . . . . . . . . . . . 54
1.5.4 Heroku commands . . . . . . . . . . . . . . . . . . . 54
1.6 Conclusion . . . . . . . . . . . . . . . . . . . . . . . . . . . 56
1.6.1 What we learned in this chapter . . . . . . . . . . . . 57
iii
iv CONTENTS
1.7 Exercises . . . . . . . . . . . . . . . . . . . . . . . . . . . . 57
2 A toy app 61
2.1 Planning the application . . . . . . . . . . . . . . . . . . . . 62
2.1.1 A toy model for users . . . . . . . . . . . . . . . . . . 65
2.1.2 A toy model for microposts . . . . . . . . . . . . . . 65
2.2 The Users resource . . . . . . . . . . . . . . . . . . . . . . . 66
2.2.1 A user tour . . . . . . . . . . . . . . . . . . . . . . . 69
2.2.2 MVC in action . . . . . . . . . . . . . . . . . . . . . 76
2.2.3 Weaknesses of this Users resource . . . . . . . . . . . 84
2.3 The Microposts resource . . . . . . . . . . . . . . . . . . . . 84
2.3.1 A micropost microtour . . . . . . . . . . . . . . . . . 85
2.3.2 Putting the micro in microposts . . . . . . . . . . . . 90
2.3.3 A user has_many microposts . . . . . . . . . . . . . 90
2.3.4 Inheritance hierarchies . . . . . . . . . . . . . . . . . 93
2.3.5 Deploying the toy app . . . . . . . . . . . . . . . . . 96
2.4 Conclusion . . . . . . . . . . . . . . . . . . . . . . . . . . . 97
2.4.1 What we learned in this chapter . . . . . . . . . . . . 99
2.5 Exercises . . . . . . . . . . . . . . . . . . . . . . . . . . . . 99
3 Mostly static pages 103
3.1 Sample app setup . . . . . . . . . . . . . . . . . . . . . . . . 104
3.2 Static pages . . . . . . . . . . . . . . . . . . . . . . . . . . . 108
3.2.1 Generated static pages . . . . . . . . . . . . . . . . . 108
3.2.2 Custom static pages . . . . . . . . . . . . . . . . . . 118
3.3 Getting started with testing . . . . . . . . . . . . . . . . . . . 121
3.3.1 Our first test . . . . . . . . . . . . . . . . . . . . . . 123
3.3.2 Red . . . . . . . . . . . . . . . . . . . . . . . . . . . 125
3.3.3 Green . . . . . . . . . . . . . . . . . . . . . . . . . . 126
3.3.4 Refactor . . . . . . . . . . . . . . . . . . . . . . . . . 130
3.4 Slightly dynamic pages . . . . . . . . . . . . . . . . . . . . . 130
3.4.1 Testing titles (Red) . . . . . . . . . . . . . . . . . . . 131
3.4.2 Adding page titles (Green) . . . . . . . . . . . . . . . 133
3.4.3 Layouts and embedded Ruby (Refactor) . . . . . . . . 136

CONTENTS v
3.4.4 Setting the root route . . . . . . . . . . . . . . . . . . 142
3.5 Conclusion . . . . . . . . . . . . . . . . . . . . . . . . . . . 143
3.5.1 What we learned in this chapter . . . . . . . . . . . . 145
3.6 Exercises . . . . . . . . . . . . . . . . . . . . . . . . . . . . 146
3.7 Advanced testing setup . . . . . . . . . . . . . . . . . . . . . 148
3.7.1 MiniTest reporters . . . . . . . . . . . . . . . . . . . 149
3.7.2 Backtrace silencer . . . . . . . . . . . . . . . . . . . 150
3.7.3 Automated tests with Guard . . . . . . . . . . . . . . 150
4 Rails-flavored Ruby 159
4.1 Motivation . . . . . . . . . . . . . . . . . . . . . . . . . . . . 159
4.2 Strings and methods . . . . . . . . . . . . . . . . . . . . . . . 164
4.2.1 Comments . . . . . . . . . . . . . . . . . . . . . . . 165
4.2.2 Strings . . . . . . . . . . . . . . . . . . . . . . . . . 166
4.2.3 Objects and message passing . . . . . . . . . . . . . . 169
4.2.4 Method definitions . . . . . . . . . . . . . . . . . . . 172
4.2.5 Back to the title helper . . . . . . . . . . . . . . . . . 174
4.3 Other data structures . . . . . . . . . . . . . . . . . . . . . . 175
4.3.1 Arrays and ranges . . . . . . . . . . . . . . . . . . . 175
4.3.2 Blocks . . . . . . . . . . . . . . . . . . . . . . . . . 179
4.3.3 Hashes and symbols . . . . . . . . . . . . . . . . . . 182
4.3.4 CSS revisited . . . . . . . . . . . . . . . . . . . . . . 187
4.4 Ruby classes . . . . . . . . . . . . . . . . . . . . . . . . . . . 189
4.4.1 Constructors . . . . . . . . . . . . . . . . . . . . . . 189
4.4.2 Class inheritance . . . . . . . . . . . . . . . . . . . . 191
4.4.3 Modifying built-in classes . . . . . . . . . . . . . . . 195
4.4.4 A controller class . . . . . . . . . . . . . . . . . . . . 196
4.4.5 A user class . . . . . . . . . . . . . . . . . . . . . . . 197
4.5 Conclusion . . . . . . . . . . . . . . . . . . . . . . . . . . . 201
4.5.1 What we learned in this chapter . . . . . . . . . . . . 202
4.6 Exercises . . . . . . . . . . . . . . . . . . . . . . . . . . . . 202
5 Filling in the layout 205
5.1 Adding some structure . . . . . . . . . . . . . . . . . . . . . 206
vi CONTENTS
5.1.1 Site navigation . . . . . . . . . . . . . . . . . . . . . 206
5.1.2 Bootstrap and custom CSS . . . . . . . . . . . . . . . 215
5.1.3 Partials . . . . . . . . . . . . . . . . . . . . . . . . . 223
5.2 Sass and the asset pipeline . . . . . . . . . . . . . . . . . . . 228
5.2.1 The asset pipeline . . . . . . . . . . . . . . . . . . . . 228
5.2.2 Syntactically awesome stylesheets . . . . . . . . . . . 233
5.3 Layout links . . . . . . . . . . . . . . . . . . . . . . . . . . . 240
5.3.1 Contact page . . . . . . . . . . . . . . . . . . . . . . 241
5.3.2 Rails routes . . . . . . . . . . . . . . . . . . . . . . . 243
5.3.3 Using named routes . . . . . . . . . . . . . . . . . . . 245
5.3.4 Layout link tests . . . . . . . . . . . . . . . . . . . . 248
5.4 User signup: A first step . . . . . . . . . . . . . . . . . . . . 251
5.4.1 Users controller . . . . . . . . . . . . . . . . . . . . . 251
5.4.2 Signup URL . . . . . . . . . . . . . . . . . . . . . . 252
5.5 Conclusion . . . . . . . . . . . . . . . . . . . . . . . . . . . 255
5.5.1 What we learned in this chapter . . . . . . . . . . . . 255
5.6 Exercises . . . . . . . . . . . . . . . . . . . . . . . . . . . . 257
6 Modeling users 259
6.1 User model . . . . . . . . . . . . . . . . . . . . . . . . . . . 260
6.1.1 Database migrations . . . . . . . . . . . . . . . . . . 262
6.1.2 The model file . . . . . . . . . . . . . . . . . . . . . 268
6.1.3 Creating user objects . . . . . . . . . . . . . . . . . . 268
6.1.4 Finding user objects . . . . . . . . . . . . . . . . . . 272
6.1.5 Updating user objects . . . . . . . . . . . . . . . . . . 274
6.2 User validations . . . . . . . . . . . . . . . . . . . . . . . . . 275
6.2.1 A validity test . . . . . . . . . . . . . . . . . . . . . . 276
6.2.2 Validating presence . . . . . . . . . . . . . . . . . . . 277
6.2.3 Length validation . . . . . . . . . . . . . . . . . . . . 281
6.2.4 Format validation . . . . . . . . . . . . . . . . . . . . 283
6.2.5 Uniqueness validation . . . . . . . . . . . . . . . . . 288
6.3 Adding a secure password . . . . . . . . . . . . . . . . . . . 296
6.3.1 A hashed password . . . . . . . . . . . . . . . . . . . 297
6.3.2 User has secure password . . . . . . . . . . . . . . . 300

CONTENTS vii
6.3.3 Minimum password length . . . . . . . . . . . . . . . 301
6.3.4 Creating and authenticating a user . . . . . . . . . . . 303
6.4 Conclusion . . . . . . . . . . . . . . . . . . . . . . . . . . . 306
6.4.1 What we learned in this chapter . . . . . . . . . . . . 307
6.5 Exercises . . . . . . . . . . . . . . . . . . . . . . . . . . . . 308
7 Sign up 311
7.1 Showing users . . . . . . . . . . . . . . . . . . . . . . . . . . 311
7.1.1 Debug and Rails environments . . . . . . . . . . . . . 312
7.1.2 A Users resource . . . . . . . . . . . . . . . . . . . . 318
7.1.3 Debugger . . . . . . . . . . . . . . . . . . . . . . . . 324
7.1.4 A Gravatar image and a sidebar . . . . . . . . . . . . 327
7.2 Signup form . . . . . . . . . . . . . . . . . . . . . . . . . . . 332
7.2.1 Using form_for . . . . . . . . . . . . . . . . . . . 336
7.2.2 Signup form HTML . . . . . . . . . . . . . . . . . . 339
7.3 Unsuccessful signups . . . . . . . . . . . . . . . . . . . . . . 343
7.3.1 A working form . . . . . . . . . . . . . . . . . . . . . 343
7.3.2 Strong parameters . . . . . . . . . . . . . . . . . . . 349
7.3.3 Signup error messages . . . . . . . . . . . . . . . . . 351
7.3.4 A test for invalid submission . . . . . . . . . . . . . . 356
7.4 Successful signups . . . . . . . . . . . . . . . . . . . . . . . 360
7.4.1 The finished signup form . . . . . . . . . . . . . . . . 362
7.4.2 The flash . . . . . . . . . . . . . . . . . . . . . . . . 363
7.4.3 The first signup . . . . . . . . . . . . . . . . . . . . . 366
7.4.4 A test for valid submission . . . . . . . . . . . . . . . 370
7.5 Professional-grade deployment . . . . . . . . . . . . . . . . . 371
7.5.1 SSL in production . . . . . . . . . . . . . . . . . . . 372
7.5.2 Unicorn in production . . . . . . . . . . . . . . . . . 373
7.5.3 Ruby version number . . . . . . . . . . . . . . . . . . 375
7.6 Conclusion . . . . . . . . . . . . . . . . . . . . . . . . . . . 377
7.6.1 What we learned in this chapter . . . . . . . . . . . . 377
7.7 Exercises . . . . . . . . . . . . . . . . . . . . . . . . . . . . 378

viii CONTENTS
8 Log in, log out 383
8.1 Sessions . . . . . . . . . . . . . . . . . . . . . . . . . . . . . 384
8.1.1 Sessions controller . . . . . . . . . . . . . . . . . . . 385
8.1.2 Login form . . . . . . . . . . . . . . . . . . . . . . . 387
8.1.3 Finding and authenticating a user . . . . . . . . . . . 392
8.1.4 Rendering with a flash message . . . . . . . . . . . . 396
8.1.5 A flash test . . . . . . . . . . . . . . . . . . . . . . . 399
8.2 Logging in . . . . . . . . . . . . . . . . . . . . . . . . . . . . 401
8.2.1 The log_in method . . . . . . . . . . . . . . . . . . 402
8.2.2 Current user . . . . . . . . . . . . . . . . . . . . . . . 404
8.2.3 Changing the layout links . . . . . . . . . . . . . . . 409
8.2.4 Testing layout changes . . . . . . . . . . . . . . . . . 415
8.2.5 Login upon signup . . . . . . . . . . . . . . . . . . . 420
8.3 Logging out . . . . . . . . . . . . . . . . . . . . . . . . . . . 422
8.4 Remember me . . . . . . . . . . . . . . . . . . . . . . . . . . 425
8.4.1 Remember token and digest . . . . . . . . . . . . . . 426
8.4.2 Login with remembering . . . . . . . . . . . . . . . . 431
8.4.3 Forgetting users . . . . . . . . . . . . . . . . . . . . . 440
8.4.4 Two subtle bugs . . . . . . . . . . . . . . . . . . . . 442
8.4.5 “Remember me” checkbox . . . . . . . . . . . . . . . 447
8.4.6 Remember tests . . . . . . . . . . . . . . . . . . . . . 454
8.5 Conclusion . . . . . . . . . . . . . . . . . . . . . . . . . . . 462
8.5.1 What we learned in this chapter . . . . . . . . . . . . 463
8.6 Exercises . . . . . . . . . . . . . . . . . . . . . . . . . . . . 464
9 Updating, showing, and deleting users 469
9.1 Updating users . . . . . . . . . . . . . . . . . . . . . . . . . 469
9.1.1 Edit form . . . . . . . . . . . . . . . . . . . . . . . . 470
9.1.2 Unsuccessful edits . . . . . . . . . . . . . . . . . . . 476
9.1.3 Testing unsuccessful edits . . . . . . . . . . . . . . . 477
9.1.4 Successful edits (with TDD) . . . . . . . . . . . . . . 480
9.2 Authorization . . . . . . . . . . . . . . . . . . . . . . . . . . 483
9.2.1 Requiring logged-in users . . . . . . . . . . . . . . . 486
9.2.2 Requiring the right user . . . . . . . . . . . . . . . . 491
CONTENTS ix
9.2.3 Friendly forwarding . . . . . . . . . . . . . . . . . . 496
9.3 Showing all users . . . . . . . . . . . . . . . . . . . . . . . . 501
9.3.1 Users index . . . . . . . . . . . . . . . . . . . . . . . 501
9.3.2 Sample users . . . . . . . . . . . . . . . . . . . . . . 507
9.3.3 Pagination . . . . . . . . . . . . . . . . . . . . . . . 508
9.3.4 Users index test . . . . . . . . . . . . . . . . . . . . . 512
9.3.5 Partial refactoring . . . . . . . . . . . . . . . . . . . . 516
9.4 Deleting users . . . . . . . . . . . . . . . . . . . . . . . . . . 518
9.4.1 Administrative users . . . . . . . . . . . . . . . . . . 518
9.4.2 The destroy action . . . . . . . . . . . . . . . . . . 523
9.4.3 User destroy tests . . . . . . . . . . . . . . . . . . . . 526
9.5 Conclusion . . . . . . . . . . . . . . . . . . . . . . . . . . . 529
9.5.1 What we learned in this chapter . . . . . . . . . . . . 530
9.6 Exercises . . . . . . . . . . . . . . . . . . . . . . . . . . . . 532
10 Account activation and password reset 535
10.1 Account activation . . . . . . . . . . . . . . . . . . . . . . . 536
10.1.1 Account activations resource . . . . . . . . . . . . . . 537
10.1.2 Account activation mailer method . . . . . . . . . . . 544
10.1.3 Activating the account . . . . . . . . . . . . . . . . . 558
10.1.4 Activation test and refactoring . . . . . . . . . . . . . 566
10.2 Password reset . . . . . . . . . . . . . . . . . . . . . . . . . . 572
10.2.1 Password resets resource . . . . . . . . . . . . . . . . 576
10.2.2 Password resets controller and form . . . . . . . . . . 580
10.2.3 Password reset mailer method . . . . . . . . . . . . . 586
10.2.4 Resetting the password . . . . . . . . . . . . . . . . . 593
10.2.5 Password reset test . . . . . . . . . . . . . . . . . . . 599
10.3 Email in production . . . . . . . . . . . . . . . . . . . . . . . 604
10.4 Conclusion . . . . . . . . . . . . . . . . . . . . . . . . . . . 606
10.4.1 What we learned in this chapter . . . . . . . . . . . . 608
10.5 Exercises . . . . . . . . . . . . . . . . . . . . . . . . . . . . 608
10.6 Proof of expiration comparison . . . . . . . . . . . . . . . . . 611

x CONTENTS
11 User microposts 613
11.1 A Micropost model . . . . . . . . . . . . . . . . . . . . . . . 613
11.1.1 The basic model . . . . . . . . . . . . . . . . . . . . 614
11.1.2 Micropost validations . . . . . . . . . . . . . . . . . . 616
11.1.3 User/Micropost associations . . . . . . . . . . . . . . 619
11.1.4 Micropost refinements . . . . . . . . . . . . . . . . . 623
11.2 Showing microposts . . . . . . . . . . . . . . . . . . . . . . . 628
11.2.1 Rendering microposts . . . . . . . . . . . . . . . . . 628
11.2.2 Sample microposts . . . . . . . . . . . . . . . . . . . 633
11.2.3 Profile micropost tests . . . . . . . . . . . . . . . . . 638
11.3 Manipulating microposts . . . . . . . . . . . . . . . . . . . . 645
11.3.1 Micropost access control . . . . . . . . . . . . . . . . 646
11.3.2 Creating microposts . . . . . . . . . . . . . . . . . . 648
11.3.3 A proto-feed . . . . . . . . . . . . . . . . . . . . . . 656
11.3.4 Destroying microposts . . . . . . . . . . . . . . . . . 665
11.3.5 Micropost tests . . . . . . . . . . . . . . . . . . . . . 668
11.4 Micropost images . . . . . . . . . . . . . . . . . . . . . . . . 672
11.4.1 Basic image upload . . . . . . . . . . . . . . . . . . . 673
11.4.2 Image validation . . . . . . . . . . . . . . . . . . . . 679
11.4.3 Image resizing . . . . . . . . . . . . . . . . . . . . . 682
11.4.4 Image upload in production . . . . . . . . . . . . . . 684
11.5 Conclusion . . . . . . . . . . . . . . . . . . . . . . . . . . . 688
11.5.1 What we learned in this chapter . . . . . . . . . . . . 690
11.6 Exercises . . . . . . . . . . . . . . . . . . . . . . . . . . . . 691
12 Following users 697
12.1 The Relationship model . . . . . . . . . . . . . . . . . . . . . 698
12.1.1 A problem with the data model (and a solution) . . . . 698
12.1.2 User/relationship associations . . . . . . . . . . . . . 707
12.1.3 Relationship validations . . . . . . . . . . . . . . . . 709
12.1.4 Followed users . . . . . . . . . . . . . . . . . . . . . 711
12.1.5 Followers . . . . . . . . . . . . . . . . . . . . . . . . 715
12.2 A web interface for following users . . . . . . . . . . . . . . 717
12.2.1 Sample following data . . . . . . . . . . . . . . . . . 717
CONTENTS xi
12.2.2 Stats and a follow form . . . . . . . . . . . . . . . . . 71912.2.3 Following and followers pages . . . . . . . . . . . . . 73012.2.4 A working follow button the standard way . . . . . . . 74012.2.5 A working follow button with Ajax . . . . . . . . . . 74212.2.6 Following tests . . . . . . . . . . . . . . . . . . . . . 749
12.3 The status feed . . . . . . . . . . . . . . . . . . . . . . . . . 75112.3.1 Motivation and strategy . . . . . . . . . . . . . . . . . 75212.3.2 A first feed implementation . . . . . . . . . . . . . . 75412.3.3 Subselects . . . . . . . . . . . . . . . . . . . . . . . . 758
12.4 Conclusion . . . . . . . . . . . . . . . . . . . . . . . . . . . 76412.4.1 Guide to further resources . . . . . . . . . . . . . . . 76412.4.2 What we learned in this chapter . . . . . . . . . . . . 765
12.5 Exercises . . . . . . . . . . . . . . . . . . . . . . . . . . . . 766

xii CONTENTS

Foreword
My former company (CD Baby) was one of the first to loudly switch to Rubyon Rails, and then even more loudly switch back to PHP (Google me to readabout the drama). This book by Michael Hartl came so highly recommendedthat I had to try it, and the Ruby on Rails Tutorial is what I used to switch backto Rails again.
Though I’ve worked my way through many Rails books, this is the one thatfinally made me “get” it. Everything is done very much “the Rails way”—away that felt very unnatural to me before, but now after doing this book finallyfeels natural. This is also the only Rails book that does test-driven developmentthe entire time, an approach highly recommended by the experts but which hasnever been so clearly demonstrated before. Finally, by including Git, GitHub,and Heroku in the demo examples, the author really gives you a feel for whatit’s like to do a real-world project. The tutorial’s code examples are not inisolation.
The linear narrative is such a great format. Personally, I powered throughthe Rails Tutorial in three long days,1 doing all the examples and challenges atthe end of each chapter. Do it from start to finish, without jumping around, andyou’ll get the ultimate benefit.
Enjoy!
Derek Sivers (sivers.org)Founder, CD Baby
1This is not typical! Getting through the entire book usually takes much longer than three days.
xiii

xiv CONTENTS
Acknowledgments
The Ruby on Rails Tutorial owes a lot to my previous Rails book, RailsSpace,and hence to my coauthor Aurelius Prochazka. I’d like to thank Aure bothfor the work he did on that book and for his support of this one. I’d also liketo thank Debra Williams Cauley, my editor on both RailsSpace and the Ruby
on Rails Tutorial; as long as she keeps taking me to baseball games, I’ll keepwriting books for her.
I’d like to acknowledge a long list of Rubyists who have taught and in-spired me over the years: David Heinemeier Hansson, Yehuda Katz, CarlLerche, Jeremy Kemper, Xavier Noria, Ryan Bates, Geoffrey Grosenbach, Pe-ter Cooper, Matt Aimonetti, Mark Bates, Gregg Pollack, Wayne E. Seguin,Amy Hoy, Dave Chelimsky, Pat Maddox, Tom Preston-Werner, Chris Wan-strath, Chad Fowler, Josh Susser, Obie Fernandez, Ian McFarland, Steven Bris-tol, Pratik Naik, Sarah Mei, Sarah Allen, Wolfram Arnold, Alex Chaffee, GilesBowkett, Evan Dorn, Long Nguyen, James Lindenbaum, Adam Wiggins,Tikhon Bernstam, Ron Evans, Wyatt Greene, Miles Forrest, the good peopleat Pivotal Labs, the Heroku gang, the thoughtbot guys, and the GitHub crew.Finally, many, many readers—far too many to list—have contributed a hugenumber of bug reports and suggestions during the writing of this book, and Igratefully acknowledge their help in making it as good as it can be.
xv

xvi CONTENTS

About the author
Michael Hartl is the author of the Ruby on Rails Tutorial, one of the lead-ing introductions to web development, and is a cofounder of the Softcoverself-publishing platform. His prior experience includes writing and developingRailsSpace, an extremely obsolete Rails tutorial book, and developing Insoshi,a once-popular and now-obsolete social networking platform in Ruby on Rails.In 2011, Michael received a Ruby Hero Award for his contributions to the Rubycommunity. He is a graduate of Harvard College, has a Ph.D. in Physics fromCaltech, and is an alumnus of the Y Combinator entrepreneur program.
xvii

xviii CONTENTS

Copyright and license
Ruby on Rails Tutorial: Learn Web Development with Rails. Copyright © 2014by Michael Hartl. All source code in the Ruby on Rails Tutorial is availablejointly under the MIT License and the Beerware License.
The MIT License
Copyright (c) 2014 Michael Hartl
Permission is hereby granted, free of charge, to any person obtaining a copy
of this software and associated documentation files (the "Software"), to deal
in the Software without restriction, including without limitation the rights
to use, copy, modify, merge, publish, distribute, sublicense, and/or sell
copies of the Software, and to permit persons to whom the Software is
furnished to do so, subject to the following conditions:
The above copyright notice and this permission notice shall be included in
all copies or substantial portions of the Software.
THE SOFTWARE IS PROVIDED "AS IS", WITHOUT WARRANTY OF ANY KIND, EXPRESS OR
IMPLIED, INCLUDING BUT NOT LIMITED TO THE WARRANTIES OF MERCHANTABILITY,
FITNESS FOR A PARTICULAR PURPOSE AND NONINFRINGEMENT. IN NO EVENT SHALL THE
AUTHORS OR COPYRIGHT HOLDERS BE LIABLE FOR ANY CLAIM, DAMAGES OR OTHER
LIABILITY, WHETHER IN AN ACTION OF CONTRACT, TORT OR OTHERWISE, ARISING FROM,
OUT OF OR IN CONNECTION WITH THE SOFTWARE OR THE USE OR OTHER DEALINGS IN
THE SOFTWARE.
/*
* ----------------------------------------------------------------------------
* "THE BEERWARE LICENSE" (Revision 43):
* Michael Hartl wrote this code. As long as you retain this notice you
* can do whatever you want with this stuff. If we meet some day, and you think
* this stuff is worth it, you can buy me a beer in return.
* ----------------------------------------------------------------------------
*/
xix

xx CONTENTS
Chapter 1
From zero to deploy
Welcome to Ruby on Rails Tutorial: Learn Web Development with Rails. Thepurpose of this book is to teach you how to develop custom web applications,and our tool of choice is the popular Ruby on Rails web framework. If you arenew to the subject, the Ruby on Rails Tutorial will give you a thorough intro-duction to web application development, including a basic grounding in Ruby,Rails, HTML & CSS, databases, version control, testing, and deployment—sufficient to launch you on a career as a web developer or technology en-trepreneur. On the other hand, if you already know web development, thisbook will quickly teach you the essentials of the Rails framework, includingMVC and REST, generators, migrations, routing, and embedded Ruby. In ei-ther case, when you finish the Ruby on Rails Tutorial you will be in a positionto benefit from the many more advanced books, blogs, and screencasts that arepart of the thriving programming educational ecosystem.1
The Ruby on Rails Tutorial takes an integrated approach to web develop-ment by building three example applications of increasing sophistication, start-ing with a minimal hello app (Section 1.3), a slightly more capable toy app(Chapter 2), and a real sample app (Chapter 3 through Chapter 12). As im-plied by their generic names, the applications developed in the Ruby on Rails
Tutorial are not specific to any particular kind of website; although the final
1The most up-to-date version of the Ruby on Rails Tutorial can be found on the book’s website at
http://www.railstutorial.org/. If you are reading this book offline, be sure to check the online version of the
Rails Tutorial book at http://www.railstutorial.org/book for the latest updates.
1

2 CHAPTER 1. FROM ZERO TO DEPLOY
sample application will bear more than a passing resemblance to a certain pop-ular social microblogging site (a site which, coincidentally, was also originallywritten in Rails), the emphasis throughout the tutorial is on general principles,so you will have a solid foundation no matter what kinds of web applicationsyou want to build.
One common question is how much background is necessary to learn webdevelopment using the Ruby on Rails Tutorial. As discussed in more depth inSection 1.1.1, web development is a challenging subject, especially for com-plete beginners. Although the tutorial was originally designed for readers withsome prior programming or web-development experience, in fact it has found asignificant audience among beginning developers. In acknowledgment of this,the present third edition of the Rails Tutorial has taken several important stepstoward lowering the barrier to getting started with Rails (Box 1.1).
Box 1.1. Lowering the barrier
This third edition of the Ruby on Rails Tutorial aims to lower the barrier togetting started with Rails in a number of ways:
• Use of a standard development environment in the cloud (Section 1.2),which sidesteps many of the problems associated with installing and con-figuring a new system
• Use of the Rails “default stack”, including the built-in MiniTest testingframework
• Elimination of many external dependencies (RSpec, Cucumber, Capybara,Factory Girl)
• A lighter-weight and more flexible approach to testing
• Deferral or elimination of more complex configuration options (Spork,RubyTest)

3
• Less emphasis on features specific to any given version of Rails, with greateremphasis on general principles of web development
It is my hope that these changes will make the third edition of the Ruby on Rails
Tutorial accessible to an even broader audience than previous versions.
In this first chapter, we’ll get started with Ruby on Rails by installing allthe necessary software and by setting up our development environment (Sec-tion 1.2). We’ll then create our first Rails application, called hello_app. TheRails Tutorial emphasizes good software development practices, so immedi-ately after creating our fresh new Rails project we’ll put it under version con-trol with Git (Section 1.4). And, believe it or not, in this chapter we’ll even putour first app on the wider web by deploying it to production (Section 1.5).
In Chapter 2, we’ll make a second project, whose purpose is to demonstratethe basic workings of a Rails application. To get up and running quickly, we’llbuild this toy app (called toy_app) using scaffolding (Box 1.2) to generatecode; because this code is both ugly and complex, Chapter 2 will focus oninteracting with the toy app through its URIs (often called URLs)2 using a webbrowser.
The rest of the tutorial focuses on developing a single large real sample
application (called sample_app), writing all the code from scratch. We’lldevelop the sample app using a combination of mockups, test-driven develop-
ment (TDD), and integration tests. We’ll get started in Chapter 3 by creatingstatic pages and then add a little dynamic content. We’ll take a quick detourin Chapter 4 to learn a little about the Ruby language underlying Rails. Then,in Chapter 5 through Chapter 10, we’ll complete the foundation for the sampleapplication by making a site layout, a user data model, and a full registrationand authentication system (including account activation and password resets).Finally, in Chapter 11 and Chapter 12 we’ll add microblogging and social fea-tures to make a working example site.
2URI stands for Uniform Resource Identifier, while the slightly less general URL stands for Uniform Resource
Locator. In practice, the URL is usually equivalent to “the thing you see in the address bar of your browser”.
4 CHAPTER 1. FROM ZERO TO DEPLOY
Box 1.2. Scaffolding: Quicker, easier, more seductive
From the beginning, Rails has benefited from a palpable sense of excitement,starting with the famous 15-minute weblog video by Rails creator David Heine-meier Hansson. That video and its successors are a great way to get a taste ofRails’ power, and I recommend watching them. But be warned: they accomplishtheir amazing fifteen-minute feat using a feature called scaffolding, which reliesheavily on generated code, magically created by the Rails generate scaffold
command.When writing a Ruby on Rails tutorial, it is tempting to rely on the scaffold-
ing approach—it’s quicker, easier, more seductive. But the complexity and sheeramount of code in the scaffolding can be utterly overwhelming to a beginning Railsdeveloper; you may be able to use it, but you probably won’t understand it. Fol-lowing the scaffolding approach risks turning you into a virtuoso script generatorwith little (and brittle) actual knowledge of Rails.
In the Ruby on Rails Tutorial, we’ll take the (nearly) polar opposite approach:although Chapter 2 will develop a small toy app using scaffolding, the core of theRails Tutorial is the sample app, which we’ll start writing in Chapter 3. At eachstage of developing the sample application, we will write small, bite-sized piecesof code—simple enough to understand, yet novel enough to be challenging. Thecumulative effect will be a deeper, more flexible knowledge of Rails, giving you agood background for writing nearly any type of web application.
1.1 Introduction
Ruby on Rails (or just “Rails” for short) is a web development framework writ-ten in the Ruby programming language. Since its debut in 2004, Ruby on Railshas rapidly become one of the most powerful and popular tools for buildingdynamic web applications. Rails is used by companies as diverse as Airbnb,Basecamp, Disney, GitHub, Hulu, Kickstarter, Shopify, Twitter, and the Yel-

1.1. INTRODUCTION 5
low Pages. There are also many web development shops that specialize inRails, such as ENTP, thoughtbot, Pivotal Labs, Hashrocket, and HappyFun-Corp, plus innumerable independent consultants, trainers, and contractors.
What makes Rails so great? First of all, Ruby on Rails is 100% open-source, available under the permissive MIT License, and as a result it alsocosts nothing to download or use. Rails also owes much of its success to itselegant and compact design; by exploiting the malleability of the underlyingRuby language, Rails effectively creates a domain-specific language for writingweb applications. As a result, many common web programming tasks—suchas generating HTML, making data models, and routing URLs—are easy withRails, and the resulting application code is concise and readable.
Rails also adapts rapidly to new developments in web technology andframework design. For example, Rails was one of the first frameworks to fullydigest and implement the REST architectural style for structuring web applica-tions (which we’ll be learning about throughout this tutorial). And when otherframeworks develop successful new techniques, Rails creator David Heine-meier Hansson and the Rails core team don’t hesitate to incorporate their ideas.Perhaps the most dramatic example is the merger of Rails and Merb, a rivalRuby web framework, so that Rails now benefits from Merb’s modular design,stable API, and improved performance.
Finally, Rails benefits from an unusually enthusiastic and diverse commu-nity. The results include hundreds of open-source contributors, well-attendedconferences, a huge number of gems (self-contained solutions to specific prob-lems such as pagination and image upload), a rich variety of informative blogs,and a cornucopia of discussion forums and IRC channels. The large numberof Rails programmers also makes it easier to handle the inevitable applicationerrors: the “Google the error message” algorithm nearly always produces arelevant blog post or discussion-forum thread.
1.1.1 Prerequisites
There are no formal prerequisites to this book—the Ruby on Rails Tutorial
contains integrated tutorials not only for Rails, but also for the underlying Rubylanguage, the default Rails testing framework (MiniTest), the Unix command

6 CHAPTER 1. FROM ZERO TO DEPLOY
line, HTML, CSS, a small amount of JavaScript, and even a little SQL. That’sa lot of material to absorb, though, and I generally recommend having someHTML and programming background before starting this tutorial. That said, asurprising number of beginners have used the Ruby on Rails Tutorial to learnweb development from scratch, so even if you have limited experience I suggestgiving it a try. If you feel overwhelmed, you can always go back and start withone of the resources listed below. Another strategy recommended by multiplereaders is simply to do the tutorial twice; you may be surprised at how muchyou learned the first time (and how much easier it is the second time through).
One common question when learning Rails is whether to learn Ruby first.The answer depends on your personal learning style and how much program-ming experience you already have. If you prefer to learn everything system-atically from the ground up, or if you have never programmed before, thenlearning Ruby first might work well for you, and in this case I recommendLearn to Program by Chris Pine and Beginning Ruby by Peter Cooper. On theother hand, many beginning Rails developers are excited about making web
applications, and would rather not wait to finish a whole book on Ruby be-fore ever writing a single web page. In this case, I recommend following theshort interactive tutorial at Try Ruby3 to get a general overview before startingwith the Rails Tutorial. If you still find this tutorial too difficult, you might trystarting with Learn Ruby on Rails by Daniel Kehoe or One Month Rails, bothof which are geared more toward complete beginners than the Ruby on Rails
Tutorial.
At the end of this tutorial, no matter where you started, you should be readyfor the many more intermediate-to-advanced Rails resources out there. Hereare some I particularly recommend:
• Code School: Good interactive online programming courses
• The Turing School of Software & Design: a full-time, 27-week trainingprogram in Denver, Colorado, with a $500 discount for Rails Tutorialreaders using the code RAILSTUTORIAL500
3http://tryruby.org/

1.1. INTRODUCTION 7
• Tealeaf Academy: a good online Rails development bootcamp (includesadvanced material)
• Thinkful: an online class at about the level of this tutorial
• RailsCasts by Ryan Bates: Excellent (mostly free) Rails screencasts
• RailsApps: A large variety of detailed topic-specific Rails projects andtutorials
• Rails Guides: Topical and up-to-date Rails references
1.1.2 Conventions in this book
The conventions in this book are mostly self-explanatory. In this section, I’llmention some that may not be.
Many examples in this book use command-line commands. For simplicity,all command line examples use a Unix-style command line prompt (a dollarsign), as follows:
$ echo "hello, world"
hello, world
As mentioned in Section 1.2, I recommend that users of all operating systems(especially Windows) use a cloud development environment (Section 1.2.1),which comes with a built-in Unix (Linux) command line. This is particularlyuseful because Rails comes with many commands that can be run at the com-mand line. For example, in Section 1.3.2 we’ll run a local development webserver with the rails server command:
$ rails server
As with the command-line prompt, the Rails Tutorial uses the Unix conven-tion for directory separators (i.e., a forward slash /). For example, the sampleapplication production.rb configuration file appears as follows:

8 CHAPTER 1. FROM ZERO TO DEPLOY
config/environments/production.rb
This file path should be understood as being relative to the application’s rootdirectory, which will vary by system; on the cloud IDE (Section 1.2.1), it lookslike this:
/home/ubuntu/workspace/sample_app/
Thus, the full path to production.rb is
/home/ubuntu/workspace/sample_app/config/environments/production.rb
For brevity, I will typically omit the application path and write just config/-environments/production.rb.
The Rails Tutorial often shows output from various programs (shell com-mands, version control status, Ruby programs, etc.). Because of the innumer-able small differences between different computer systems, the output you seemay not always agree exactly with what is shown in the text, but this is notcause for concern. In addition, some commands may produce errors depend-ing on your system; rather than attempt the Sisyphean task of documenting allsuch errors in this tutorial, I will delegate to the “Google the error message”algorithm, which among other things is good practice for real-life software de-velopment. If you run into any problems while following the tutorial, I suggestconsulting the resources listed in the Rails Tutorial help section.4
Because the Rails Tutorial covers testing of Rails applications, it is oftenhelpful to know if a particular piece of code causes the test suite to fail (indi-cated by the color red) or pass (indicated by the color green). For convenience,code resulting in a failing test is thus indicated with RED, while code resultingin a passing test is indicated with GREEN.
Each chapter in the tutorial includes exercises, the completion of which isoptional but recommended. In order to keep the main discussion independent of
4http://www.railstutorial.org/#help

1.2. UP AND RUNNING 9
the exercises, the solutions are not generally incorporated into subsequent codelistings. In the rare circumstance that an exercise solution is used subsequently,it is explicitly solved in the main text.
Finally, for convenience the Ruby on Rails Tutorial adopts two conventionsdesigned to make the many code samples easier to understand. First, somecode listings include one or more highlighted lines, as seen below:
class User < ActiveRecord::Base
validates :name, presence: true
validates :email, presence: true
end
Such highlighted lines typically indicate the most important new code in thegiven sample, and often (though not always) represent the difference betweenthe present code listing and previous listings. Second, for brevity and simplicitymany of the book’s code listings include vertical dots, as follows:
class User < ActiveRecord::Base
.
.
.
has_secure_password
end
These dots represent omitted code and should not be copied literally.
1.2 Up and running
Even for experienced Rails developers, installing Ruby, Rails, and all the as-sociated supporting software can be an exercise in frustration. Compoundingthe problem is the multiplicity of environments: different operating systems,version numbers, preferences in text editor and integrated development envi-ronment (IDE), etc. Users who already have a development environment in-stalled on their local machine are welcome to use their preferred setup, but
10 CHAPTER 1. FROM ZERO TO DEPLOY
(as mentioned in Box 1.1) new users are encouraged to sidestep such installa-tion and configuration issues by using a cloud integrated development environ-
ment. The cloud IDE runs inside an ordinary web browser and hence worksthe same across different platforms, which is especially useful for operatingsystems (such as Windows) on which Rails development has historically beendifficult. If, despite the challenges involved, you would still prefer to completethe Ruby on Rails Tutorial using a local development environment, I recom-mend following the instructions at InstallRails.com.5
1.2.1 Development environment
Considering various idiosyncratic customizations, there are probably as manydevelopment environments as there are Rails programmers. To avoid this com-plexity, the Ruby on Rails Tutorial standardizes on the excellent cloud develop-ment environment Cloud9. In particular, for this third edition I am pleased topartner with Cloud9 to offer a development environment specifically tailoredto the needs of this tutorial. The resulting Rails Tutorial Cloud9 workspacecomes pre-configured with most of the software needed for professional-gradeRails development, including Ruby, RubyGems, Git. (Indeed, the only bigpiece of software we’ll install separately is Rails itself, and this is intentional(Section 1.2.2).) The cloud IDE also includes the three essential componentsneeded to develop web applications: a text editor, a filesystem navigator, and acommand-line terminal (Figure 1.1). Among other features, the cloud IDE texteditor supports the “Find in Files” global search that I consider essential to nav-igating any large Ruby or Rails project.6 Finally, even if you decide not to usethe cloud IDE exclusively in real life (and I certainly recommend learning othertools as well), it provides an excellent introduction to the general capabilitiesof text editors and other development tools.
Here are the steps for getting started with the cloud development environ-ment:
5Even then, Windows users should be warned that the Rails installer recommended by InstallRails is often out
of date, and is likely to be incompatible with the present tutorial.6For example, to find the definition of a function called foo, you can do a global search for “def foo”.

1.2. UP AND RUNNING 11
Figure 1.1: The anatomy of the cloud IDE.

12 CHAPTER 1. FROM ZERO TO DEPLOY
1. Sign up for a free account at Cloud97
2. Click on “Go to your Dashboard”
3. Select “Create New Workspace”
4. As shown in Figure 1.2, create a workspace called “rails-tutorial” (not
“rails_tutorial”), set it to “Private to the people I invite”, and select theicon for the Rails Tutorial (not the icon for Ruby on Rails)
5. Click “Create”
6. After Cloud9 has finished provisioning the workspace, select it and click“Start editing”
Because using two spaces for indentation is a near-universal convention inRuby, I also recommend changing the editor to use two spaces instead of thedefault four. As shown in Figure 1.3, you can do this by clicking the gearicon in the upper right and then selecting “Code Editor (Ace)” to edit the “SoftTabs” setting. (Note that this takes effect immediately; you don’t need to clicka “Save” button.)
1.2.2 Installing Rails
The development environment from Section 1.2.1 includes all the software weneed to get started except for Rails itself.8 To install Rails, we’ll use the gemcommand provided by the RubyGems package manager, which involves typingthe command shown in Listing 1.1 into your command-line terminal. (If de-veloping on your local system, this means using a regular terminal window; ifusing the cloud IDE, this means using the command-line area shown in Fig-ure 1.1.)
7https://c9.io/web/sign-up/free8At present, Cloud9 includes an older version of Rails that is incompatible with the present tutorial, which is
one reason why it’s so important to install it ourselves.

1.2. UP AND RUNNING 13
Figure 1.2: Creating a new workspace at Cloud9.

14 CHAPTER 1. FROM ZERO TO DEPLOY
Figure 1.3: Setting Cloud9 to use two spaces for indentation.
1.3. THE FIRST APPLICATION 15
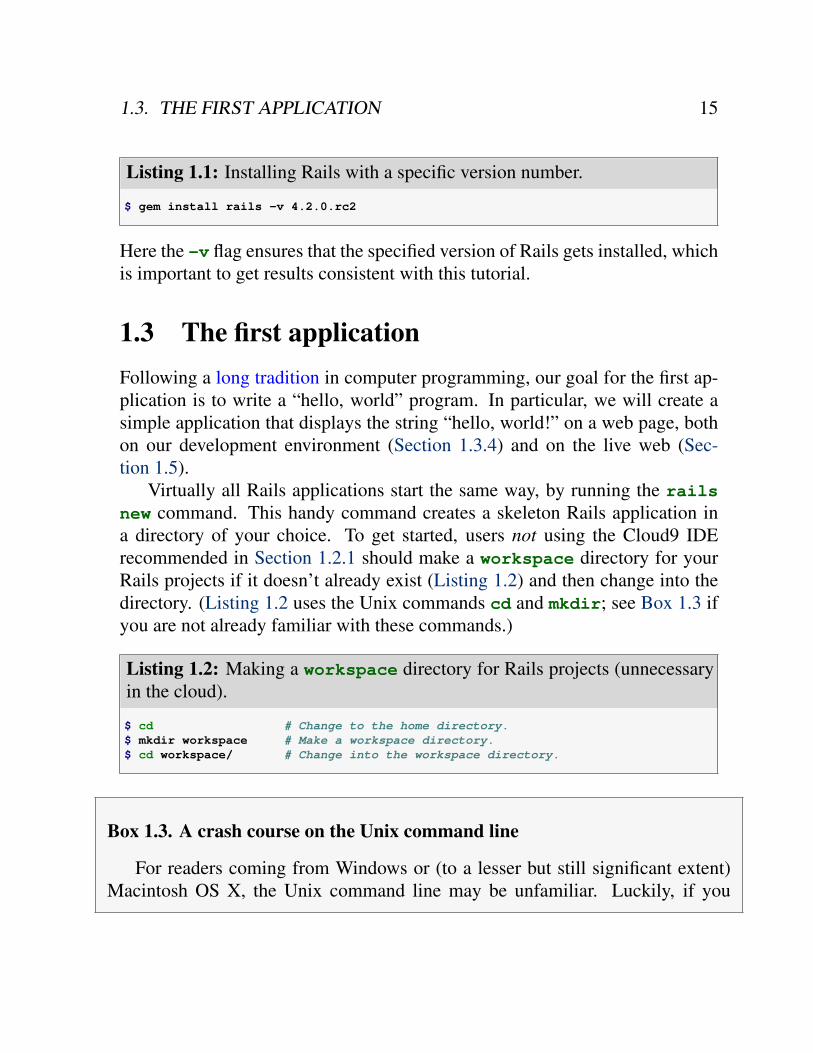
Listing 1.1: Installing Rails with a specific version number.
$ gem install rails -v 4.2.0.rc2
Here the -v flag ensures that the specified version of Rails gets installed, whichis important to get results consistent with this tutorial.
1.3 The first application
Following a long tradition in computer programming, our goal for the first ap-plication is to write a “hello, world” program. In particular, we will create asimple application that displays the string “hello, world!” on a web page, bothon our development environment (Section 1.3.4) and on the live web (Sec-tion 1.5).
Virtually all Rails applications start the same way, by running the rails
new command. This handy command creates a skeleton Rails application ina directory of your choice. To get started, users not using the Cloud9 IDErecommended in Section 1.2.1 should make a workspace directory for yourRails projects if it doesn’t already exist (Listing 1.2) and then change into thedirectory. (Listing 1.2 uses the Unix commands cd and mkdir; see Box 1.3 ifyou are not already familiar with these commands.)
Listing 1.2: Making a workspace directory for Rails projects (unnecessaryin the cloud).
$ cd # Change to the home directory.
$ mkdir workspace # Make a workspace directory.
$ cd workspace/ # Change into the workspace directory.
Box 1.3. A crash course on the Unix command line
For readers coming from Windows or (to a lesser but still significant extent)Macintosh OS X, the Unix command line may be unfamiliar. Luckily, if you

16 CHAPTER 1. FROM ZERO TO DEPLOY
Description Command Example
list contents ls $ ls -l
make directory mkdir <dirname> $ mkdir workspace
change directory cd <dirname> $ cd workspace/
cd one directory up $ cd ..
cd to home directory $ cd ~ or just $ cd
cd to path incl. home dir $ cd ~/workspace/
move file (rename) mv <source> <target> $ mv README.rdoc README.md
copy file cp <source> <target> $ cp README.rdoc README.md
remove file rm <file> $ rm README.rdoc
remove empty directory rmdir <directory> $ rmdir workspace/
remove nonempty directory rm -rf <directory> $ rm -rf tmp/
concatenate & display file contents cat <file> $ cat ~/.ssh/id_rsa.pub
Table 1.1: Some common Unix commands.
are using the recommended cloud environment, you automatically have access toa Unix (Linux) command line running a standard shell command-line interfaceknown as Bash.
The basic idea of the command line is simple: by issuing short commands,users can perform a large number of operations, such as creating directories(mkdir), moving and copying files (mv and cp), and navigating the filesystemby changing directories (cd). Although the command line may seem primitive tousers mainly familiar with graphical user interfaces (GUIs), appearances are de-ceiving: the command line is one of the most powerful tools in the developer’stoolbox. Indeed, you will rarely see the desktop of an experienced developer with-out several open terminal windows running command-line shells.
The general subject is deep, but for the purposes of this tutorial we will needonly a few of the most common Unix command-line commands, as summarizedin Table 1.1. For a more in-depth treatment of the Unix command line, see Con-
quering the Command Line by Mark Bates (available as a free online version andas ebooks and screencasts).
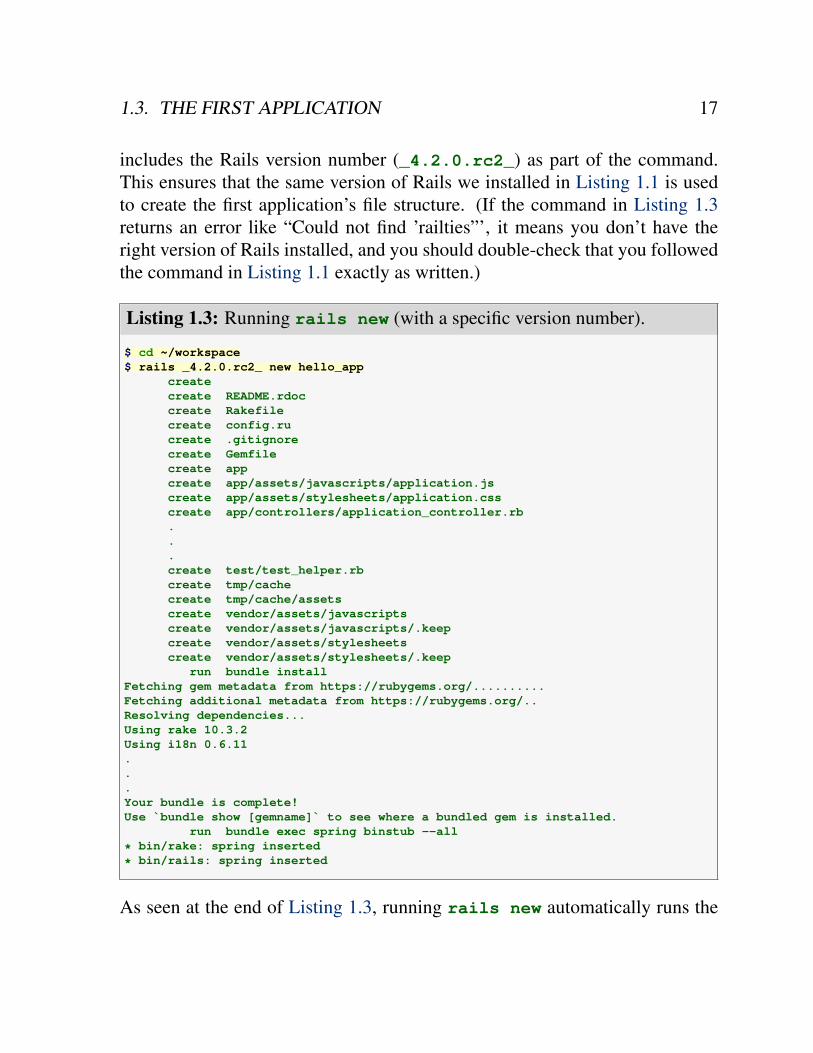
The next step on both local systems and the cloud IDE is to create the firstapplication using the command in Listing 1.3. Note that Listing 1.3 explicitly
1.3. THE FIRST APPLICATION 17
includes the Rails version number (_4.2.0.rc2_) as part of the command.This ensures that the same version of Rails we installed in Listing 1.1 is usedto create the first application’s file structure. (If the command in Listing 1.3returns an error like “Could not find ’railties”’, it means you don’t have theright version of Rails installed, and you should double-check that you followedthe command in Listing 1.1 exactly as written.)
Listing 1.3: Running rails new (with a specific version number).
$ cd ~/workspace
$ rails _4.2.0.rc2_ new hello_app
create
create README.rdoc
create Rakefile
create config.ru
create .gitignore
create Gemfile
create app
create app/assets/javascripts/application.js
create app/assets/stylesheets/application.css
create app/controllers/application_controller.rb
.
.
.
create test/test_helper.rb
create tmp/cache
create tmp/cache/assets
create vendor/assets/javascripts
create vendor/assets/javascripts/.keep
create vendor/assets/stylesheets
create vendor/assets/stylesheets/.keep
run bundle install
Fetching gem metadata from https://rubygems.org/..........
Fetching additional metadata from https://rubygems.org/..
Resolving dependencies...
Using rake 10.3.2
Using i18n 0.6.11
.
.
.
Your bundle is complete!
Use `bundle show [gemname]` to see where a bundled gem is installed.
run bundle exec spring binstub --all
* bin/rake: spring inserted
* bin/rails: spring inserted
As seen at the end of Listing 1.3, running rails new automatically runs the

18 CHAPTER 1. FROM ZERO TO DEPLOY
File/Directory Purpose
app/ Core application (app) code, including models, views, controllers, and helpers
app/assets Applications assets such as cascading style sheets (CSS), JavaScript files, and images
bin/ Binary executable files
config/ Application configuration
db/ Database files
doc/ Documentation for the application
lib/ Library modules
lib/assets Library assets such as cascading style sheets (CSS), JavaScript files, and images
log/ Application log files
public/ Data accessible to the public (e.g., via web browsers), such as error pages
bin/rails A program for generating code, opening console sessions, or starting a local server
test/ Application tests
tmp/ Temporary files
vendor/ Third-party code such as plugins and gems
vendor/assets Third-party assets such as cascading style sheets (CSS), JavaScript files, and images
README.rdoc A brief description of the application
Rakefile Utility tasks available via the rake command
Gemfile Gem requirements for this app
Gemfile.lock A list of gems used to ensure that all copies of the app use the same gem versions
config.ru A configuration file for Rack middleware
.gitignore Patterns for files that should be ignored by Git
Table 1.2: A summary of the default Rails directory structure.
bundle install command after the file creation is done. We’ll discuss whatthis means in more detail starting in Section 1.3.1.
Notice how many files and directories the rails command creates. Thisstandard directory and file structure (Figure 1.4) is one of the many advantagesof Rails; it immediately gets you from zero to a functional (if minimal) ap-plication. Moreover, since the structure is common to all Rails apps, you canimmediately get your bearings when looking at someone else’s code. A sum-mary of the default Rails files appears in Table 1.2; we’ll learn about most ofthese files and directories throughout the rest of this book. In particular, start-ing in Section 5.2.1 we’ll discuss the app/assets directory, part of the asset
pipeline that makes it easier than ever to organize and deploy assets such ascascading style sheets and JavaScript files.
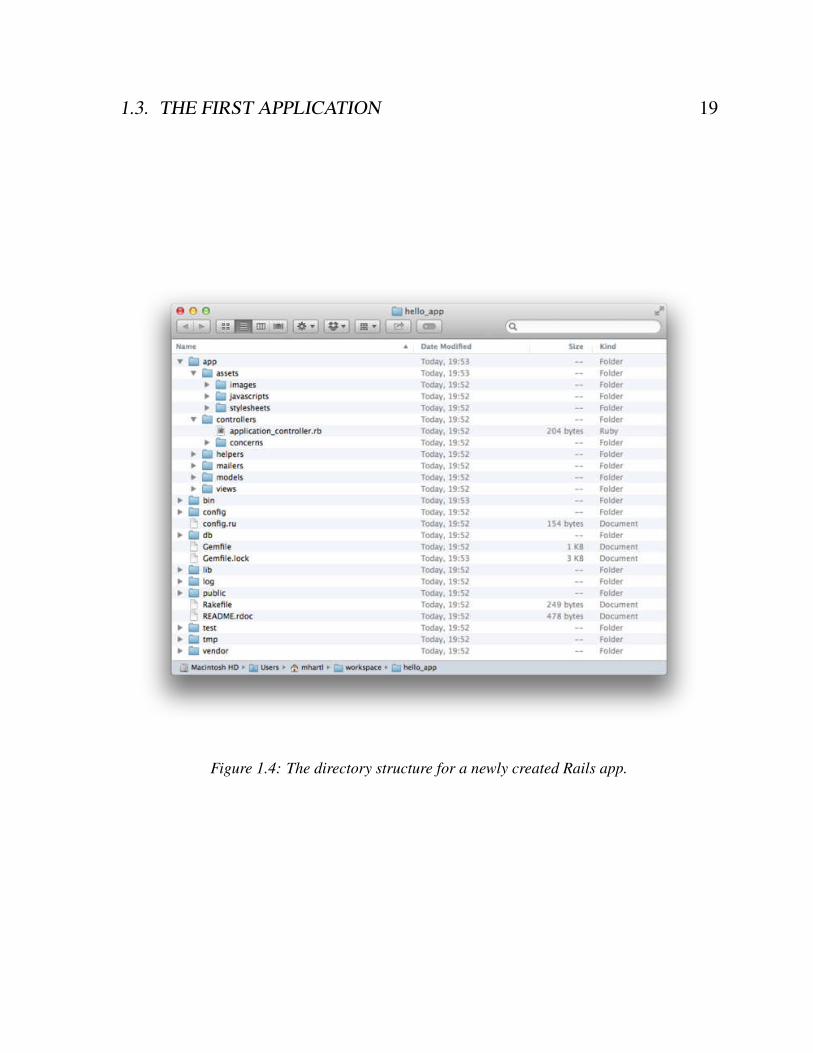
1.3. THE FIRST APPLICATION 19
Figure 1.4: The directory structure for a newly created Rails app.

20 CHAPTER 1. FROM ZERO TO DEPLOY
1.3.1 Bundler
After creating a new Rails application, the next step is to use Bundler to in-stall and include the gems needed by the app. As noted briefly in Section 1.3,Bundler is run automatically (via bundle install) by the rails command,but in this section we’ll make some changes to the default application gemsand run Bundler again. This involves opening the Gemfile with a text editor.(With the cloud IDE, this involves clicking the arrow in the file navigator toopen the sample app directory and double-clicking the Gemfile icon.) Al-though the exact version numbers and details may differ slightly, the resultsshould look something like Figure 1.5 and Listing 1.4. (The code in this file isRuby, but don’t worry at this point about the syntax; Chapter 4 will cover Rubyin more depth.) If the files and directories don’t appear as shown in Figure 1.5,click on the file navigator’s gear icon and select “Refresh File Tree”. (As ageneral rule, you should refresh the file tree any time files or directories don’tappear as expected.)
Listing 1.4: The default Gemfile in the hello_app directory.
source 'https://rubygems.org'
# Bundle edge Rails instead: gem 'rails', github: 'rails/rails'
gem 'rails', '4.2.0.rc2'
# Use sqlite3 as the database for Active Record
gem 'sqlite3'
# Use SCSS for stylesheets
gem 'sass-rails', '~> 5.0.0.beta1'
# Use Uglifier as compressor for JavaScript assets
gem 'uglifier', '>= 1.3.0'
# Use CoffeeScript for .js.coffee assets and views
gem 'coffee-rails', '~> 4.0.0'
# See https://github.com/sstephenson/execjs#readme for more supported runtimes
# gem 'therubyracer', platforms: :ruby
# Use jquery as the JavaScript library
gem 'jquery-rails'
# Turbolinks makes following links in your web application faster. Read more:
# https://github.com/rails/turbolinks
gem 'turbolinks'
# Build JSON APIs with ease. Read more: https://github.com/rails/jbuilder
gem 'jbuilder', '~> 2.0'
# bundle exec rake doc:rails generates the API under doc/api.

1.3. THE FIRST APPLICATION 21
Figure 1.5: The default Gemfile open in a text editor.

22 CHAPTER 1. FROM ZERO TO DEPLOY
gem 'sdoc', '~> 0.4.0', group: :doc
# Use ActiveModel has_secure_password
# gem 'bcrypt', '~> 3.1.7'
# Use Unicorn as the app server
# gem 'unicorn'
# Use Capistrano for deployment
# gem 'capistrano-rails', group: :development
group :development, :test do
# Call 'debugger' anywhere in the code to stop execution and get a
# debugger console
gem 'byebug'
# Access an IRB console on exceptions page and /console in development
gem 'web-console', '~> 2.0.0.beta2'
# Spring speeds up development by keeping your application running in the
# background. Read more: https://github.com/rails/spring
gem 'spring'
end
Many of these lines are commented out with the hash symbol #; they are thereto show you some commonly needed gems and to give examples of the Bundlersyntax. For now, we won’t need any gems other than the defaults.
Unless you specify a version number to the gem command, Bundler willautomatically install the latest requested version of the gem. This is the case,for example, in the code
gem 'sqlite3'
There are also two common ways to specify a gem version range, which allowsus to exert some control over the version used by Rails. The first looks likethis:
gem 'uglifier', '>= 1.3.0'
This installs the latest version of the uglifier gem (which handles file com-pression for the asset pipeline) as long as it’s greater than or equal to ver-

1.3. THE FIRST APPLICATION 23
sion 1.3.0—even if it’s, say, version 7.2. The second method looks likethis:
gem 'coffee-rails', '~> 4.0.0'
This installs the gem coffee-rails as long as it’s newer than version 4.0.0and not newer than 4.1. In other words, the >= notation always installs thelatest gem, whereas the ~> 4.0.0 notation only installs updated gems repre-senting minor point releases (e.g., from 4.0.0 to 4.0.1), but not major pointreleases (e.g., from 4.0 to 4.1). Unfortunately, experience shows that evenminor point releases can break things, so for the Ruby on Rails Tutorial we’llerr on the side of caution by including exact version numbers for all gems. Youare welcome to use the most up-to-date version of any gem, including usingthe ~> construction in the Gemfile (which I generally recommend for moreadvanced users), but be warned that this may cause the tutorial to act unpre-dictably.
Converting the Gemfile in Listing 1.4 to use exact gem versions resultsin the code shown in Listing 1.5. Note that we’ve also taken this opportunityto arrange for the sqlite3 gem to be included only in a development ortest environment (Section 7.1.1), which prevents potential conflicts with thedatabase used by Heroku (Section 1.5).
Listing 1.5: A Gemfile with an explicit version for each Ruby gem.
source 'https://rubygems.org'
gem 'rails', '4.2.0.rc2'
gem 'sass-rails', '5.0.0.beta1'
gem 'uglifier', '2.5.3'
gem 'coffee-rails', '4.1.0'
gem 'jquery-rails', '4.0.0.beta2'
gem 'turbolinks', '2.3.0'
gem 'jbuilder', '2.2.3'
gem 'sdoc', '0.4.0', group: :doc
group :development, :test do
gem 'sqlite3', '1.3.9'
gem 'byebug', '3.4.0'
gem 'web-console', '2.0.0.beta3'

24 CHAPTER 1. FROM ZERO TO DEPLOY
gem 'spring', '1.1.3'
end
Once you’ve placed the contents of Listing 1.5 into the application’s Gem-file, install the gems using bundle install:9
$ cd hello_app/
$ bundle install
Fetching source index for https://rubygems.org/
.
.
.
The bundle install command might take a few moments, but when it’sdone our application will be ready to run.
1.3.2 rails server
Thanks to running rails new in Section 1.3 and bundle install in Sec-tion 1.3.1, we already have an application we can run—but how? Happily, Railscomes with a command-line program, or script, that runs a local web server toassist us in developing our application. The exact command depends on theenvironment you’re using: on a local system, you just run rails server
(Listing 1.6), whereas on Cloud9 you need to supply an additional IP bind-
ing address and port number to tell the Rails server the address it can use tomake the application visible to the outside world (Listing 1.7).10 (Cloud9 usesthe special environment variables $IP and $PORT to assign the IP address andport number dynamically. If you want to see the values of these variables, typeecho $IP or echo $PORT at the command line.)
9As noted in Table 3.1, you can even leave off install, as the bundle command by itself is an alias for
bundle install.10Normally, websites run on port 80, but this usually requires special privileges, so it’s conventional to use a
less restricted higher-numbered port for the development server.

1.3. THE FIRST APPLICATION 25
Listing 1.6: Running the Rails server on a local machine.
$ cd ~/workspace/hello_app/
$ rails server
=> Booting WEBrick
=> Rails application starting on http://localhost:3000
=> Run `rails server -h` for more startup options
=> Ctrl-C to shutdown server
Listing 1.7: Running the Rails server on the cloud IDE.
$ cd ~/workspace/hello_app/
$ rails server -b $IP -p $PORT
=> Booting WEBrick
=> Rails application starting on http://0.0.0.0:8080
=> Run `rails server -h` for more startup options
=> Ctrl-C to shutdown server
Whichever option you choose, I recommend running the rails server
command in a second terminal tab so that you can still issue commands in thefirst tab, as shown in Figure 1.6 and Figure 1.7. (If you already started a serverin your first tab, press Ctrl-C to shut it down.)11 On a local server, point yourbrowser at the address http://localhost:3000/; on the cloud IDE, go to Shareand click on the Application address to open it (Figure 1.8). In either case, theresult should look something like Figure 1.9.
To see information about the first application, click on the link “About yourapplication’s environment”. Although exact version numbers may differ, theresult should look something like Figure 1.10. Of course, we don’t need thedefault Rails page in the long run, but it’s nice to see it working for now. We’llremove the default page (and replace it with a custom home page) in Sec-tion 1.3.4.
11It’s really “Ctrl-c”—there’s no need to hold down the Shift key to get a capital “C”—but for some reason it’s
always written as “Ctrl-C”.

26 CHAPTER 1. FROM ZERO TO DEPLOY
Figure 1.6: Opening a new terminal tab.

1.3. THE FIRST APPLICATION 27
Figure 1.7: Running the Rails server in a separate tab.

28 CHAPTER 1. FROM ZERO TO DEPLOY
Figure 1.8: Sharing the local server running on the cloud workspace.

1.3. THE FIRST APPLICATION 29
Figure 1.9: The default Rails page served by rails server.

30 CHAPTER 1. FROM ZERO TO DEPLOY
Figure 1.10: The default page with the application’s environment.

1.3. THE FIRST APPLICATION 31
1.3.3 Model-View-Controller (MVC)
Even at this early stage, it’s helpful to get a high-level overview of how Railsapplications work (Figure 1.11). You might have noticed that the standard Railsapplication structure (Figure 1.4) has an application directory called app/ withthree subdirectories: models, views, and controllers. This is a hint thatRails follows the model-view-controller (MVC) architectural pattern, whichenforces a separation between “domain logic” (also called “business logic”)from the input and presentation logic associated with a graphical user interface(GUI). In the case of web applications, the “domain logic” typically consists ofdata models for things like users, articles, and products, and the GUI is just aweb page in a web browser.
When interacting with a Rails application, a browser sends a request, whichis received by a web server and passed on to a Rails controller, which is incharge of what to do next. In some cases, the controller will immediately rendera view, which is a template that gets converted to HTML and sent back to thebrowser. More commonly for dynamic sites, the controller interacts with amodel, which is a Ruby object that represents an element of the site (such as auser) and is in charge of communicating with the database. After invoking themodel, the controller then renders the view and returns the complete web pageto the browser as HTML.
If this discussion seems a bit abstract right now, worry not; we’ll refer backto this section frequently. Section 1.3.4 shows a first tentative application ofMVC, while Section 2.2.2 includes a more detailed discussion of MVC in thecontext of the toy app. Finally, the sample app will use all aspects of MVC;we’ll cover controllers and views starting in Section 3.2, models starting inSection 6.1, and we’ll see all three working together in Section 7.1.2.
1.3.4 Hello, world!
As a first application of the MVC framework, we’ll make a wafer-thin changeto the first app by adding a controller action to render the string “hello, world!”.(We’ll learn more about controller actions starting in Section 2.2.2.) The resultwill be to replace the default Rails page from Figure 1.9 with the “hello, world”

32 CHAPTER 1. FROM ZERO TO DEPLOY
Controller Model
View
Database
Figure 1.11: A schematic representation of the model-view-controller (MVC) architecture.

1.3. THE FIRST APPLICATION 33
page that is the goal of this section.
As implied by their name, controller actions are defined inside controllers.We’ll call our action hello and place it in the Application controller. Indeed,at this point the Application controller is the only controller we have, whichyou can verify by running
$ ls app/controllers/*_controller.rb
to view the current controllers. (We’ll start creating our own controllers inChapter 2.) Listing 1.8 shows the resulting definition of hello, which usesthe render function to return the text “hello, world!”. (Don’t worry about theRuby syntax right now; it will be covered in more depth in Chapter 4.)
Listing 1.8: Adding a hello action to the Application controller.app/controllers/application_controller.rb
class ApplicationController < ActionController::Base
# Prevent CSRF attacks by raising an exception.
# For APIs, you may want to use :null_session instead.
protect_from_forgery with: :exception
def hello
render text: "hello, world!"
end
end
Having defined an action that returns the desired string, we need to tellRails to use that action instead of the default page in Figure 1.10. To do this,we’ll edit the Rails router, which sits in front of the controller in Figure 1.11and determines where to send requests that come in from the browser. (I’veomitted the router from Figure 1.11 for simplicity, but we’ll discuss the routerin more detail starting in Section 2.2.2.) In particular, we want to change thedefault page, the root route, which determines the page that is served on theroot URL. Because it’s the URL for an address like http://www.example.com/(where nothing comes after the final forward slash), the root URL is often re-ferred to as / (“slash”) for short.
34 CHAPTER 1. FROM ZERO TO DEPLOY
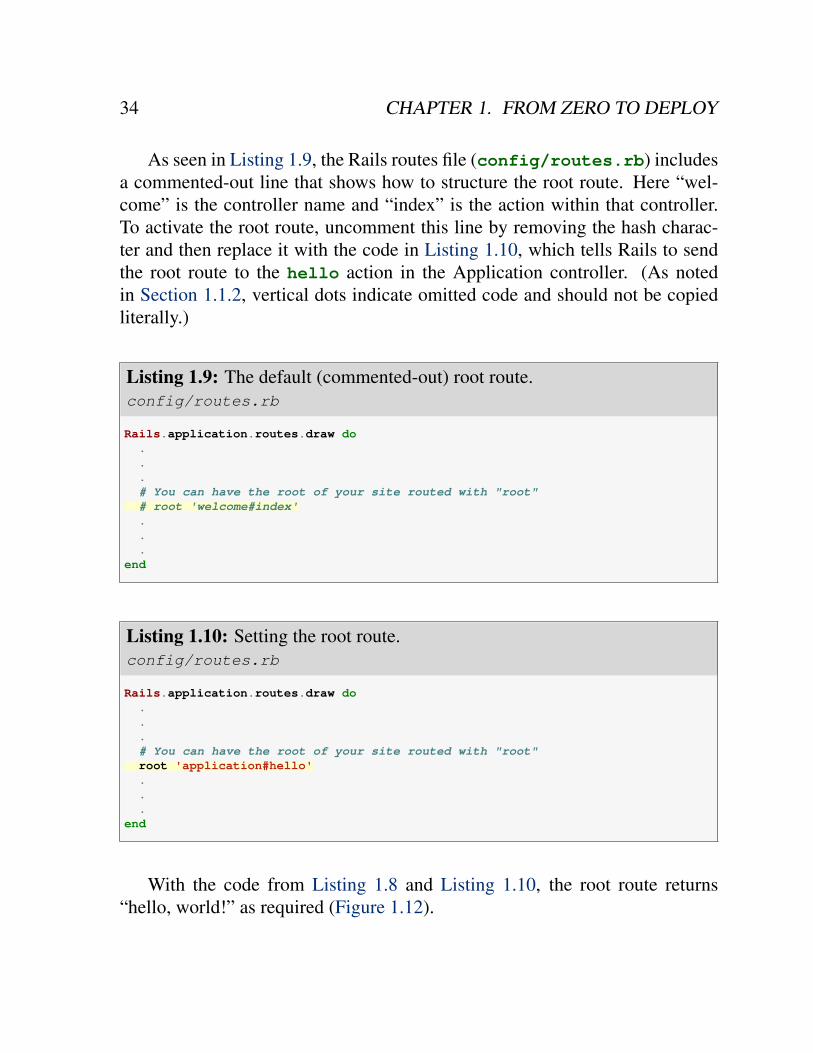
As seen in Listing 1.9, the Rails routes file (config/routes.rb) includesa commented-out line that shows how to structure the root route. Here “wel-come” is the controller name and “index” is the action within that controller.To activate the root route, uncomment this line by removing the hash charac-ter and then replace it with the code in Listing 1.10, which tells Rails to sendthe root route to the hello action in the Application controller. (As notedin Section 1.1.2, vertical dots indicate omitted code and should not be copiedliterally.)
Listing 1.9: The default (commented-out) root route.config/routes.rb
Rails.application.routes.draw do
.
.
.
# You can have the root of your site routed with "root"
# root 'welcome#index'
.
.
.
end
Listing 1.10: Setting the root route.config/routes.rb
Rails.application.routes.draw do
.
.
.
# You can have the root of your site routed with "root"
root 'application#hello'
.
.
.
end
With the code from Listing 1.8 and Listing 1.10, the root route returns“hello, world!” as required (Figure 1.12).

1.3. THE FIRST APPLICATION 35
Figure 1.12: Viewing “hello, world!” in the browser.

36 CHAPTER 1. FROM ZERO TO DEPLOY
1.4 Version control with Git
Now that we have a fresh and working Rails application, we’ll take a momentfor a step that, while technically optional, would be viewed by experienced soft-ware developers as practically essential: placing our application source codeunder version control. Version control systems allow us to track changes toour project’s code, collaborate more easily, and roll back any inadvertent er-rors (such as accidentally deleting files). Knowing how to use a version controlsystem is a required skill for every professional-grade software developer.
There are many options for version control, but the Rails community haslargely standardized on Git, a distributed version control system originally de-veloped by Linus Torvalds to host the Linux kernel. Git is a large subject, andwe’ll only be scratching the surface in this book, but there are many good freeresources online; I especially recommend Pro Git by Scott Chacon. Puttingyour source code under version control with Git is strongly recommended, notonly because it’s nearly a universal practice in the Rails world, but also becauseit will allow you to back up and share your code more easily (Section 1.4.3) anddeploy your application right here in the first chapter (Section 1.5).
1.4.1 Installation and setup
The cloud IDE recommended in Section 1.2.1 includes Git by default, so noinstallation is necessary in this case. Otherwise, InstallRails.com (Section 1.2)includes instructions for installing Git on your system.
First-time system setup
Before using Git, you should perform a set of one-time setup steps. These aresystem setups, meaning you only have to do them once per computer:
$ git config --global user.name "Your Name"
$ git config --global user.email [email protected]
$ git config --global push.default matching
$ git config --global alias.co checkout
1.4. VERSION CONTROL WITH GIT 37
Note that the name and email address you use in your Git configuration willbe available in any repositories you make public. (Only the first two linesabove are strictly necessary. The third line is included only to ensure forward-compatibility with an upcoming release of Git. The optional fourth line isincluded so that you can use co in place of the more verbose checkout com-mand. For maximum compatibility with systems that don’t have co configured,this tutorial will use the full checkout command, but in real life I nearly al-ways use git co.)
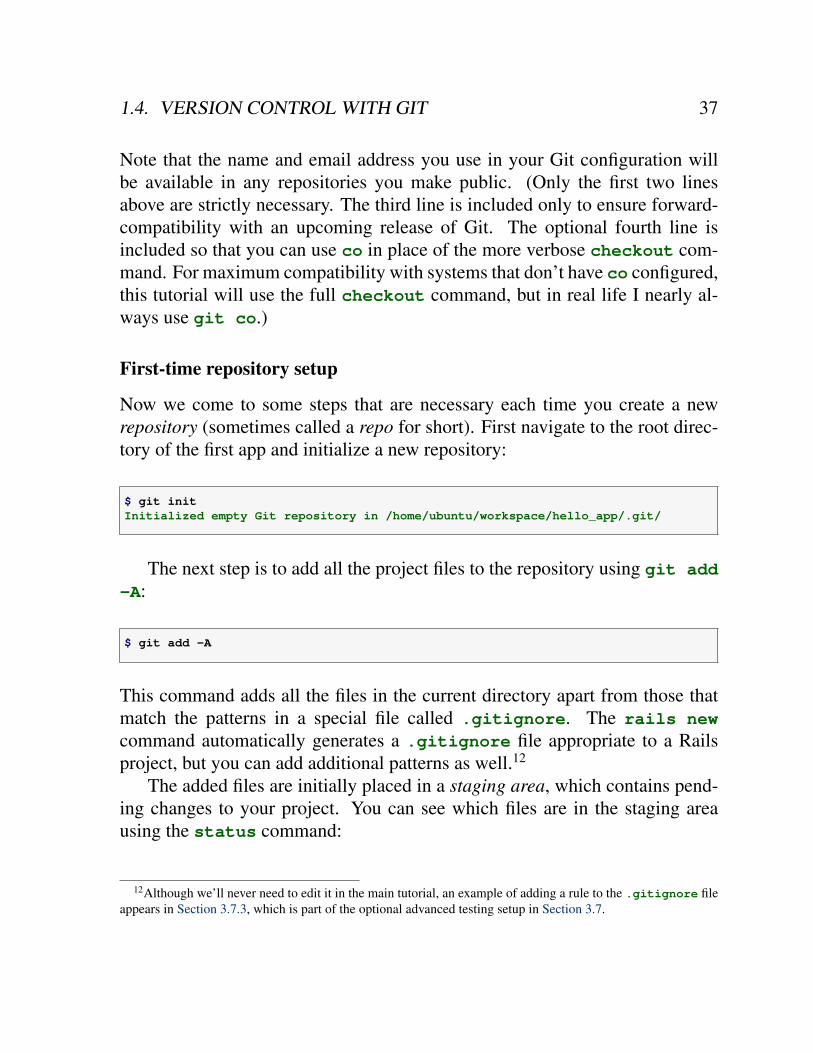
First-time repository setup
Now we come to some steps that are necessary each time you create a newrepository (sometimes called a repo for short). First navigate to the root direc-tory of the first app and initialize a new repository:
$ git init
Initialized empty Git repository in /home/ubuntu/workspace/hello_app/.git/
The next step is to add all the project files to the repository using git add
-A:
$ git add -A
This command adds all the files in the current directory apart from those thatmatch the patterns in a special file called .gitignore. The rails new
command automatically generates a .gitignore file appropriate to a Railsproject, but you can add additional patterns as well.12
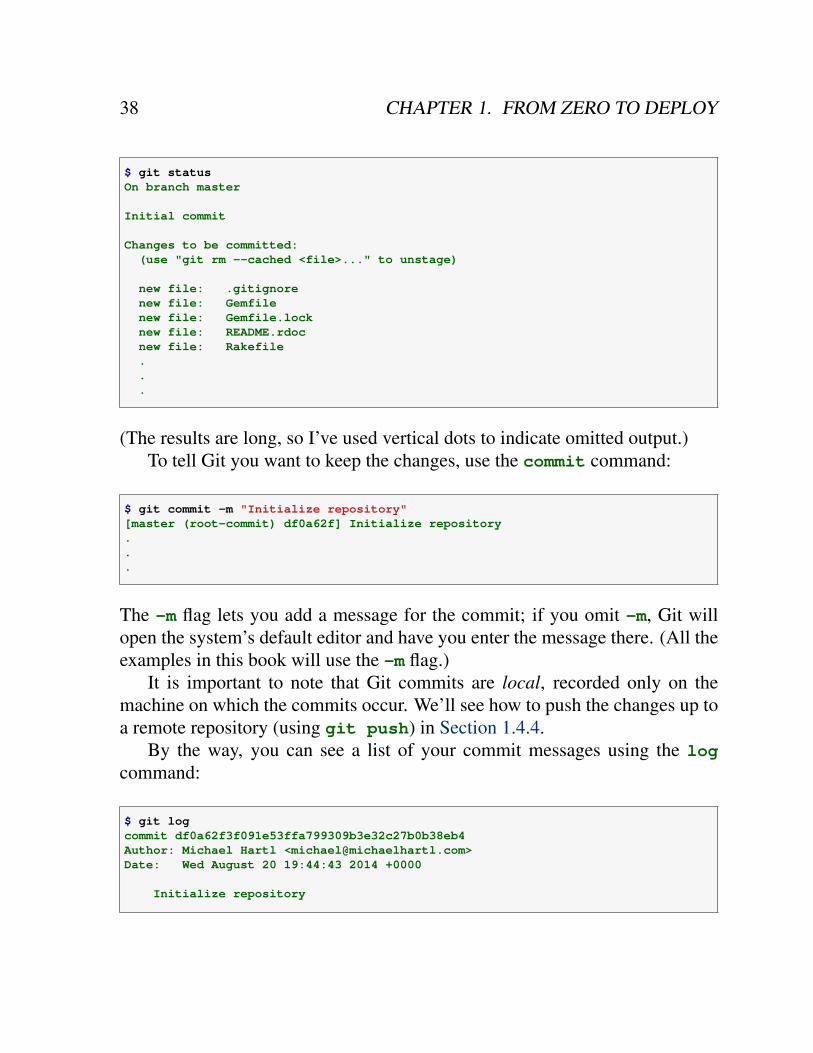
The added files are initially placed in a staging area, which contains pend-ing changes to your project. You can see which files are in the staging areausing the status command:
12Although we’ll never need to edit it in the main tutorial, an example of adding a rule to the .gitignore file
appears in Section 3.7.3, which is part of the optional advanced testing setup in Section 3.7.
38 CHAPTER 1. FROM ZERO TO DEPLOY
$ git status
On branch master
Initial commit
Changes to be committed:
(use "git rm --cached <file>..." to unstage)
new file: .gitignore
new file: Gemfile
new file: Gemfile.lock
new file: README.rdoc
new file: Rakefile
.
.
.
(The results are long, so I’ve used vertical dots to indicate omitted output.)To tell Git you want to keep the changes, use the commit command:
$ git commit -m "Initialize repository"
[master (root-commit) df0a62f] Initialize repository
.
.
.
The -m flag lets you add a message for the commit; if you omit -m, Git willopen the system’s default editor and have you enter the message there. (All theexamples in this book will use the -m flag.)
It is important to note that Git commits are local, recorded only on themachine on which the commits occur. We’ll see how to push the changes up toa remote repository (using git push) in Section 1.4.4.
By the way, you can see a list of your commit messages using the log
command:
$ git log
commit df0a62f3f091e53ffa799309b3e32c27b0b38eb4
Author: Michael Hartl <[email protected]>
Date: Wed August 20 19:44:43 2014 +0000
Initialize repository
1.4. VERSION CONTROL WITH GIT 39
Depending on the length of your repository’s log history, you may have to typeq to quit.
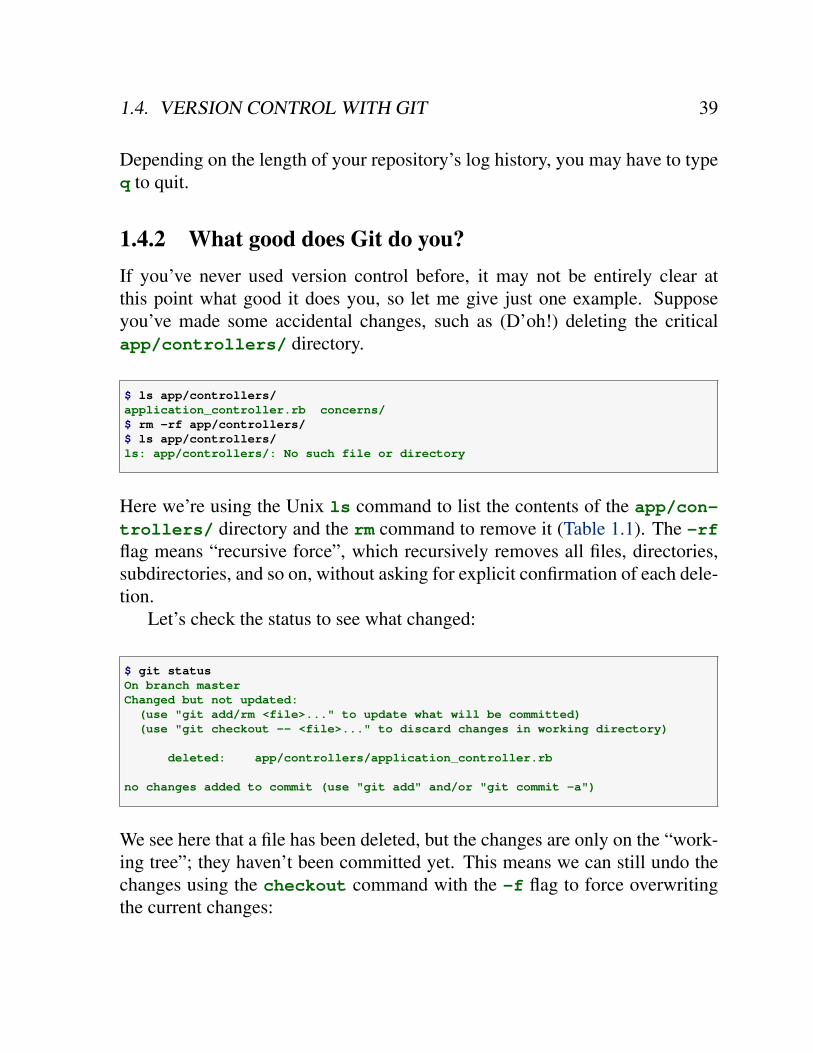
1.4.2 What good does Git do you?
If you’ve never used version control before, it may not be entirely clear atthis point what good it does you, so let me give just one example. Supposeyou’ve made some accidental changes, such as (D’oh!) deleting the criticalapp/controllers/ directory.
$ ls app/controllers/
application_controller.rb concerns/
$ rm -rf app/controllers/
$ ls app/controllers/
ls: app/controllers/: No such file or directory
Here we’re using the Unix ls command to list the contents of the app/con-trollers/ directory and the rm command to remove it (Table 1.1). The -rfflag means “recursive force”, which recursively removes all files, directories,subdirectories, and so on, without asking for explicit confirmation of each dele-tion.
Let’s check the status to see what changed:
$ git status
On branch master
Changed but not updated:
(use "git add/rm <file>..." to update what will be committed)
(use "git checkout -- <file>..." to discard changes in working directory)
deleted: app/controllers/application_controller.rb
no changes added to commit (use "git add" and/or "git commit -a")
We see here that a file has been deleted, but the changes are only on the “work-ing tree”; they haven’t been committed yet. This means we can still undo thechanges using the checkout command with the -f flag to force overwritingthe current changes:

40 CHAPTER 1. FROM ZERO TO DEPLOY
$ git checkout -f
$ git status
# On branch master
nothing to commit (working directory clean)
$ ls app/controllers/
application_controller.rb concerns/
The missing files and directories are back. That’s a relief!
1.4.3 Bitbucket
Now that we’ve put our project under version control with Git, it’s time to pushour code up to Bitbucket, a site optimized for hosting and sharing Git reposi-tories. (Previous editions of this tutorial used GitHub instead; see Box 1.4 tolearn the reasons for the switch.) Putting a copy of your Git repository at Bit-bucket serves two purposes: it’s a full backup of your code (including the fullhistory of commits), and it makes any future collaboration much easier.
Box 1.4. GitHub and Bitbucket
By far the two most popular sites for hosting Git repositories are GitHub andBitbucket. The two services share many similarities: both sites allow for Git repos-itory hosting and collaboration, as well as offering convenient ways to browse andsearch repositories. The important differences (from the perspective of this tu-torial) are that GitHub offers unlimited free repositories (with collaboration) foropen-source repositories while charging for private repos, whereas Bitbucket al-lows unlimited free private repos while charging for more than a certain numberof collaborators. Which service you use for a particular repo thus depends on yourspecific needs.
Previous editions of this book used GitHub because of its emphasis on sup-porting open-source code, but growing concerns about security have led me torecommend that all web application repositories be private by default. The issueis that web application repositories might contain potentially sensitive information

1.4. VERSION CONTROL WITH GIT 41
such as cryptographic keys and passwords, which could be used to compromisethe security of a site running the code. It is possible, of course, to arrange for thisinformation to be handled securely (by having Git ignore it, for example), but thisis error-prone and requires significant expertise.
As it happens, the sample application created in this tutorial is safe for expo-sure on the web, but it is dangerous to rely on this fact in general. Thus, to be assecure as possible, we will err on the side of caution and use private repositoriesby default. Since GitHub charges for private repositories while Bitbucket offers anunlimited number for free, for our purposes Bitbucket is a better fit than GitHub.
Getting started with Bitbucket is simple:
1. Sign up for a Bitbucket account if you don’t already have one.
2. Copy your public key to your clipboard. As indicated in Listing 1.11,users of the cloud IDE can view their public key using the cat command,which can then be selected and copied. If you’re using your own systemand see no output when running the command in Listing 1.11, follow theinstructions on how to install a public key on your Bitbucket account.
3. Add your public key to Bitbucket by clicking on the avatar image inthe upper right and selecting “Manage account” and then “SSH keys”(Figure 1.13).
Listing 1.11: Printing the public key using cat.
$ cat ~/.ssh/id_rsa.pub
Once you’ve added your public key, click on “Create” to create a new repos-itory, as shown in Figure 1.14. When filling in the information for the project,take care to leave the box next to “This is a private repository.” checked. Afterclicking “Create repository”, follow the instructions under “Command line > Ihave an existing project”, which should look something like Listing 1.12. (If

42 CHAPTER 1. FROM ZERO TO DEPLOY
Figure 1.13: Adding the SSH public key.
1.4. VERSION CONTROL WITH GIT 43
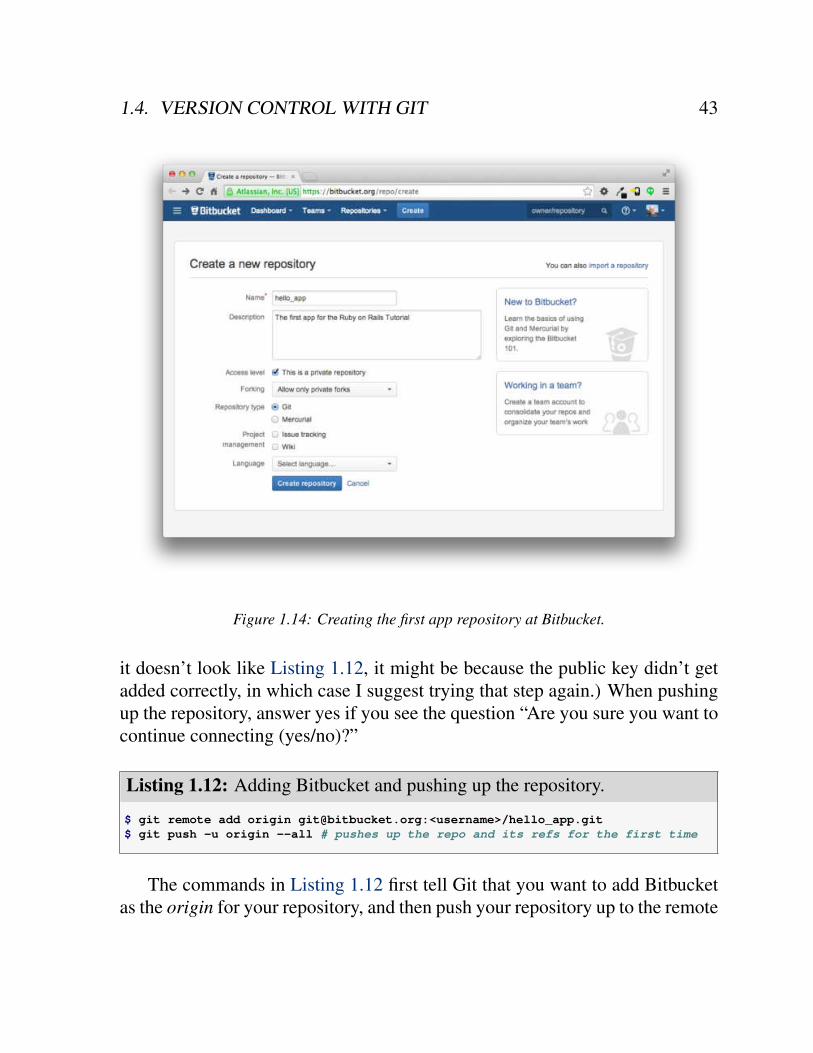
Figure 1.14: Creating the first app repository at Bitbucket.
it doesn’t look like Listing 1.12, it might be because the public key didn’t getadded correctly, in which case I suggest trying that step again.) When pushingup the repository, answer yes if you see the question “Are you sure you want tocontinue connecting (yes/no)?”
Listing 1.12: Adding Bitbucket and pushing up the repository.
$ git remote add origin [email protected]:<username>/hello_app.git
$ git push -u origin --all # pushes up the repo and its refs for the first time
The commands in Listing 1.12 first tell Git that you want to add Bitbucketas the origin for your repository, and then push your repository up to the remote
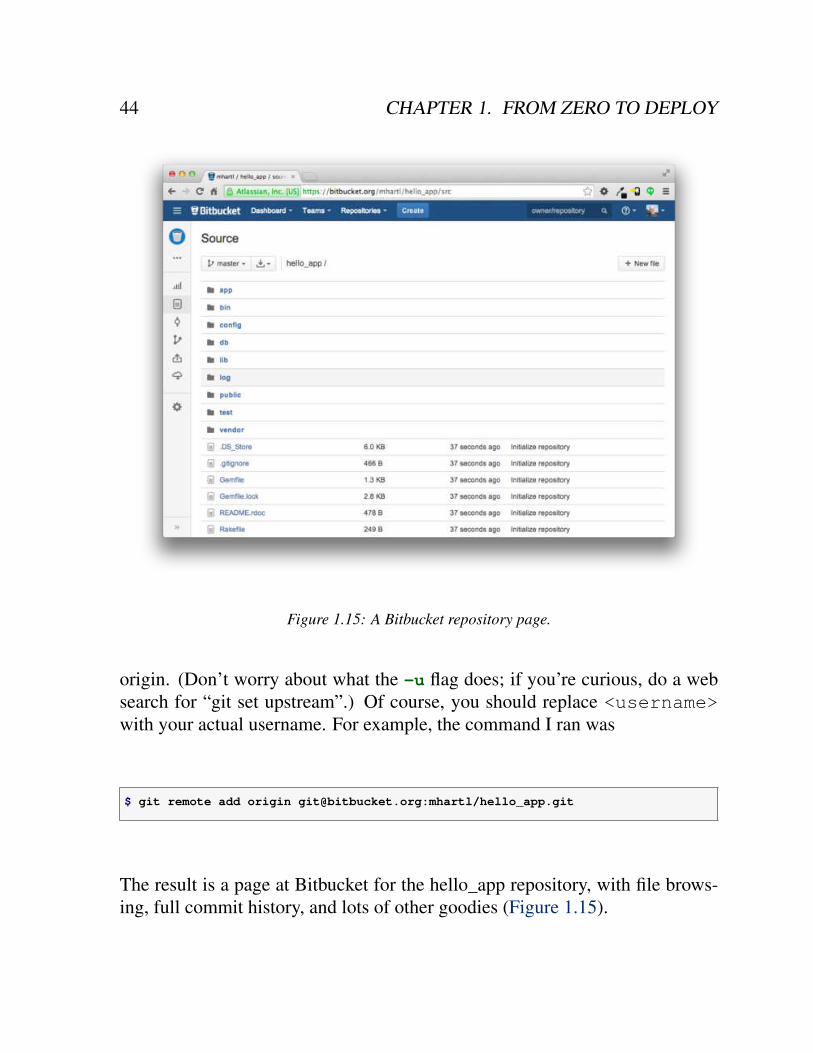
44 CHAPTER 1. FROM ZERO TO DEPLOY
Figure 1.15: A Bitbucket repository page.
origin. (Don’t worry about what the -u flag does; if you’re curious, do a websearch for “git set upstream”.) Of course, you should replace <username>with your actual username. For example, the command I ran was
$ git remote add origin [email protected]:mhartl/hello_app.git
The result is a page at Bitbucket for the hello_app repository, with file brows-ing, full commit history, and lots of other goodies (Figure 1.15).
1.4. VERSION CONTROL WITH GIT 45
1.4.4 Branch, edit, commit, merge
If you’ve followed the steps in Section 1.4.3, you might notice that Bitbucketdidn’t automatically detect the README.rdoc file from our repository, insteadcomplaining on the main repository page that there is no README present(Figure 1.16). This is an indication that the rdoc format isn’t common enoughfor Bitbucket to support it automatically, and indeed I and virtually every otherdeveloper I know prefer to use Markdown instead. In this section, we’ll changethe README.rdoc file to README.md, while taking the opportunity to addsome Rails Tutorial–specific content to the README file. In the process,we’ll see a first example of the branch, edit, commit, merge workflow that Irecommend using with Git.13
Branch
Git is incredibly good at making branches, which are effectively copies of arepository where we can make (possibly experimental) changes without modi-fying the parent files. In most cases, the parent repository is the master branch,and we can create a new topic branch by using checkout with the -b flag:
$ git checkout -b modify-README
Switched to a new branch 'modify-README'
$ git branch
master
* modify-README
Here the second command, git branch, just lists all the local branches,and the asterisk * identifies which branch we’re currently on. Note that gitcheckout -b modify-README both creates a new branch and switches toit, as indicated by the asterisk in front of the modify-README branch. (If youset up the co alias in Section 1.4, you can use git co -b modify-README
instead.)The full value of branching only becomes clear when working on a project
with multiple developers,14 but branches are helpful even for a single-developer
13For a convenient way to visualize Git repositories, take a look at Atlassian’s SourceTree app.14See the chapter Git Branching in Pro Git for details.

46 CHAPTER 1. FROM ZERO TO DEPLOY
Figure 1.16: Bitbucket’s message for a missing README.

1.4. VERSION CONTROL WITH GIT 47
tutorial such as this one. In particular, the master branch is insulated from anychanges we make to the topic branch, so even if we really screw things upwe can always abandon the changes by checking out the master branch anddeleting the topic branch. We’ll see how to do this at the end of the section.
By the way, for a change as small as this one I wouldn’t normally botherwith a new branch, but in the present context it’s a prime opportunity to startpracticing good habits.
Edit
After creating the topic branch, we’ll edit it to make it a little more descriptive.I prefer the Markdown markup language to the default RDoc for this purpose,and if you use the file extension .md then Bitbucket will automatically format itnicely for you. So, first we’ll use Git’s version of the Unix mv (move) commandto change the name:
$ git mv README.rdoc README.md
Then fill README.md with the contents of Listing 1.13.
Listing 1.13: The new README file, README.md.
# Ruby on Rails Tutorial: "hello, world!"
This is the first application for the
[*Ruby on Rails Tutorial*](http://www.railstutorial.org/)
by [Michael Hartl](http://www.michaelhartl.com/).
Commit
With the changes made, we can take a look at the status of our branch:
$ git status
On branch modify-README
Changes to be committed:

48 CHAPTER 1. FROM ZERO TO DEPLOY
(use "git reset HEAD <file>..." to unstage)
renamed: README.rdoc -> README.md
Changes not staged for commit:
(use "git add <file>..." to update what will be committed)
(use "git checkout -- <file>..." to discard changes in working directory)
modified: README.md
At this point, we could use git add -A as in Section 1.4.1, but git commit
provides the -a flag as a shortcut for the (very common) case of committingall modifications to existing files (or files created using git mv, which don’tcount as new files to Git):
$ git commit -a -m "Improve the README file"
2 files changed, 5 insertions(+), 243 deletions(-)
delete mode 100644 README.rdoc
create mode 100644 README.md
Be careful about using the -a flag improperly; if you have added any new filesto the project since the last commit, you still have to tell Git about them usinggit add -A first.
Note that we write the commit message in the present tense (and, tech-nically speaking, the imperative mood). Git models commits as a series ofpatches, and in this context it makes sense to describe what each commit does,rather than what it did. Moreover, this usage matches up with the commitmessages generated by Git commands themselves. See the article “Shiny newcommit styles” for more information.
Merge
Now that we’ve finished making our changes, we’re ready to merge the resultsback into our master branch:

1.4. VERSION CONTROL WITH GIT 49
$ git checkout master
Switched to branch 'master'
$ git merge modify-README
Updating 34f06b7..2c92bef
Fast forward
README.rdoc | 243 --------------------------------------------------
README.md | 5 +
2 files changed, 5 insertions(+), 243 deletions(-)
delete mode 100644 README.rdoc
create mode 100644 README.md
Note that the Git output frequently includes things like 34f06b7, which arerelated to Git’s internal representation of repositories. Your exact results willdiffer in these details, but otherwise should essentially match the output shownabove.
After you’ve merged in the changes, you can tidy up your branches bydeleting the topic branch using git branch -d if you’re done with it:
$ git branch -d modify-README
Deleted branch modify-README (was 2c92bef).
This step is optional, and in fact it’s quite common to leave the topic branchintact. This way you can switch back and forth between the topic and masterbranches, merging in changes every time you reach a natural stopping point.
As mentioned above, it’s also possible to abandon your topic branchchanges, in this case with git branch -D:
# For illustration only; don't do this unless you mess up a branch
$ git checkout -b topic-branch
$ <really screw up the branch>
$ git add -A
$ git commit -a -m "Major screw up"
$ git checkout master
$ git branch -D topic-branch
Unlike the -d flag, the -D flag will delete the branch even though we haven’tmerged in the changes.
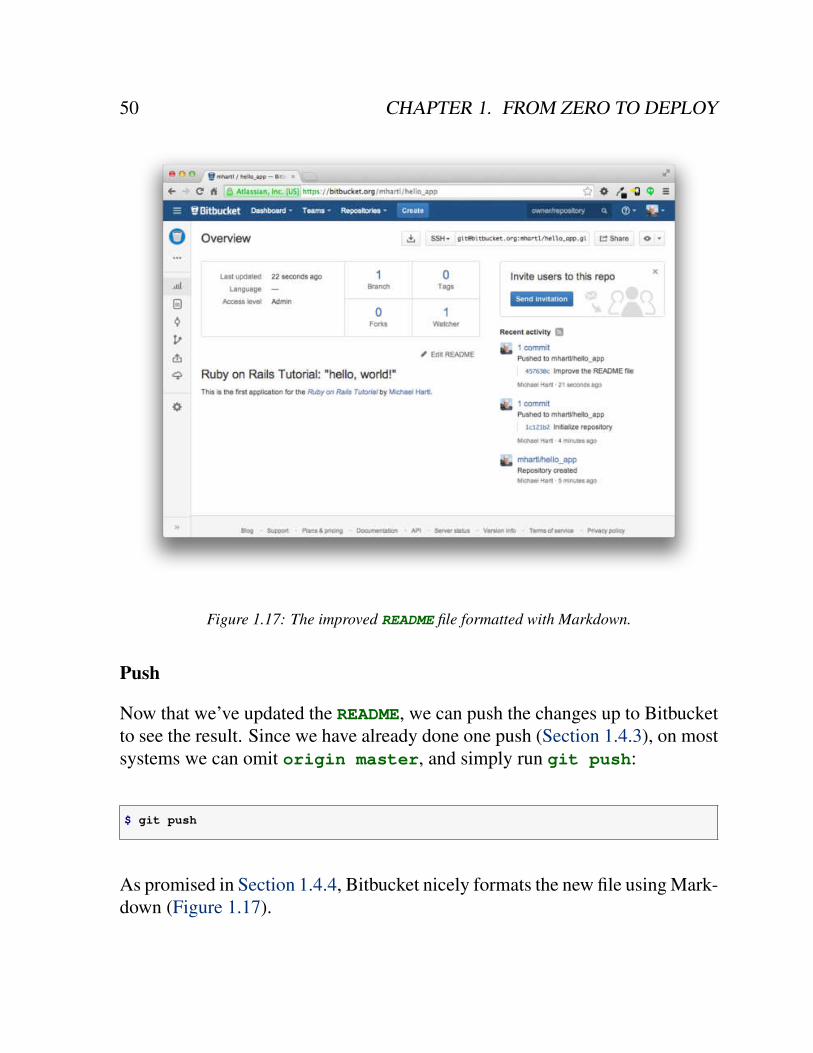
50 CHAPTER 1. FROM ZERO TO DEPLOY
Figure 1.17: The improved README file formatted with Markdown.
Push
Now that we’ve updated the README, we can push the changes up to Bitbucketto see the result. Since we have already done one push (Section 1.4.3), on mostsystems we can omit origin master, and simply run git push:
$ git push
As promised in Section 1.4.4, Bitbucket nicely formats the new file using Mark-down (Figure 1.17).

1.5. DEPLOYING 51
1.5 Deploying
Even at this early stage, we’re already going to deploy our (nearly empty) Railsapplication to production. This step is optional, but deploying early and of-ten allows us to catch any deployment problems early in our development cy-cle. The alternative—deploying only after laborious effort sealed away in adevelopment environment—often leads to terrible integration headaches whenlaunch time comes.15
Deploying Rails applications used to be a pain, but the Rails deploymentecosystem has matured rapidly in the past few years, and now there are severalgreat options. These include shared hosts or virtual private servers runningPhusion Passenger (a module for the Apache and Nginx16 web servers), full-service deployment companies such as Engine Yard and Rails Machine, andcloud deployment services such as Engine Yard Cloud, Ninefold, and Heroku.
My favorite Rails deployment option is Heroku, which is a hosted plat-form built specifically for deploying Rails and other web applications. Herokumakes deploying Rails applications ridiculously easy—as long as your sourcecode is under version control with Git. (This is yet another reason to follow theGit setup steps in Section 1.4 if you haven’t already.) The rest of this sectionis dedicated to deploying our first application to Heroku. Some of the ideasare fairly advanced, so don’t worry about understanding all the details; what’simportant is that by the end of the process we’ll have deployed our applicationto the live web.
1.5.1 Heroku setup
Heroku uses the PostgreSQL database (pronounced “post-gres-cue-ell”, andoften called “Postgres” for short), which means that we need to add the pg gemin the production environment to allow Rails to talk to Postgres:17
15Though it shouldn’t matter for the example applications in the Rails Tutorial, if you’re worried about acci-
dentally making your app public too soon there are several options; see Section 1.5.4 for one.16Pronounced “Engine X”.17Generally speaking, it’s a good idea for the development and production environments to match as closely as
possible, which includes using the same database, but for the purposes of this tutorial we’ll always use SQLite
locally and PostgreSQL in production. See Section 3.1 for more information.
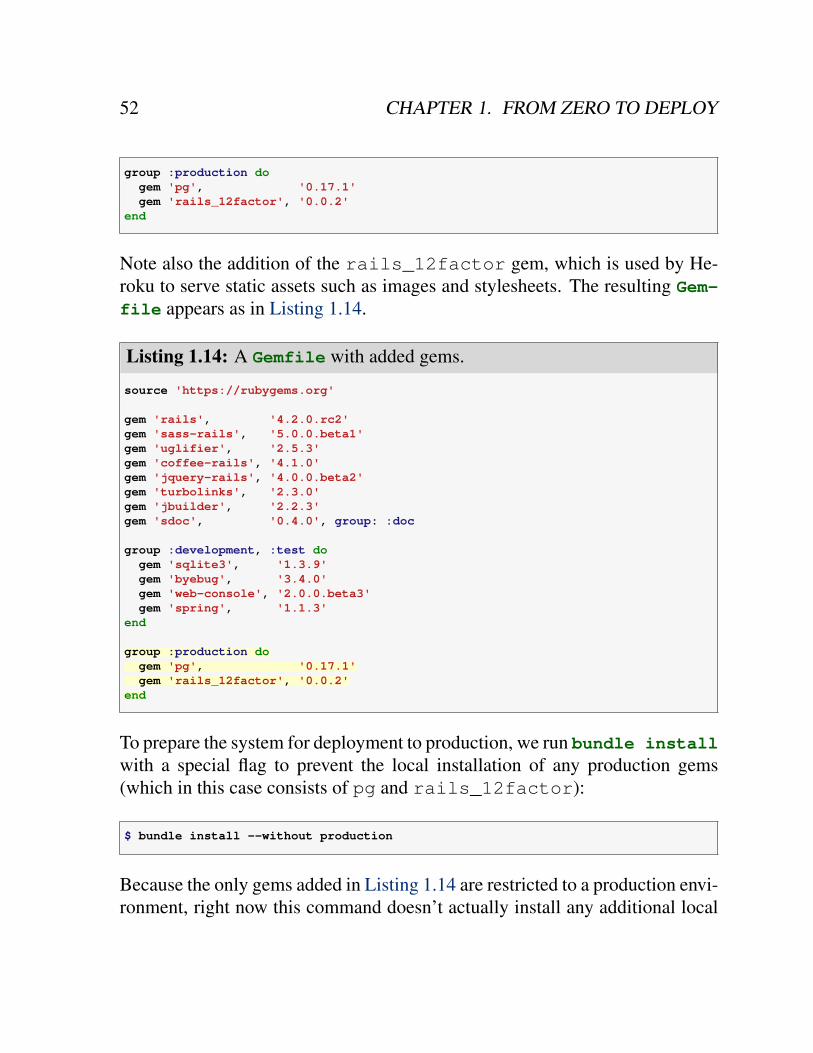
52 CHAPTER 1. FROM ZERO TO DEPLOY
group :production do
gem 'pg', '0.17.1'
gem 'rails_12factor', '0.0.2'
end
Note also the addition of the rails_12factor gem, which is used by He-roku to serve static assets such as images and stylesheets. The resulting Gem-
file appears as in Listing 1.14.
Listing 1.14: A Gemfile with added gems.
source 'https://rubygems.org'
gem 'rails', '4.2.0.rc2'
gem 'sass-rails', '5.0.0.beta1'
gem 'uglifier', '2.5.3'
gem 'coffee-rails', '4.1.0'
gem 'jquery-rails', '4.0.0.beta2'
gem 'turbolinks', '2.3.0'
gem 'jbuilder', '2.2.3'
gem 'sdoc', '0.4.0', group: :doc
group :development, :test do
gem 'sqlite3', '1.3.9'
gem 'byebug', '3.4.0'
gem 'web-console', '2.0.0.beta3'
gem 'spring', '1.1.3'
end
group :production do
gem 'pg', '0.17.1'
gem 'rails_12factor', '0.0.2'
end
To prepare the system for deployment to production, we run bundle install
with a special flag to prevent the local installation of any production gems(which in this case consists of pg and rails_12factor):
$ bundle install --without production
Because the only gems added in Listing 1.14 are restricted to a production envi-ronment, right now this command doesn’t actually install any additional local

1.5. DEPLOYING 53
gems, but it’s needed to update Gemfile.lock with the pg and rails_-
12factor gems. We can commit the resulting change as follows:
$ git commit -a -m "Update Gemfile.lock for Heroku"
Next we have to create and configure a new Heroku account. The first stepis to sign up for Heroku. Then check to see if your system already has theHeroku command-line client installed:
$ heroku version
Those using the cloud IDE should see the Heroku version number, indicatingthat the heroku CLI is available, but on other systems it may be necessary toinstall it using the Heroku Toolbelt.18
Once you’ve verified that the Heroku command-line interface is installed,use the heroku command to log in and add your SSH key:
$ heroku login
$ heroku keys:add
Finally, use the heroku create command to create a place on the Herokuservers for the sample app to live (Listing 1.15).
Listing 1.15: Creating a new application at Heroku.
$ heroku create
Creating damp-fortress-5769... done, stack is cedar
http://damp-fortress-5769.herokuapp.com/ | [email protected]:damp-fortress-5769.git
Git remote heroku added
The heroku command creates a new subdomain just for our application, avail-able for immediate viewing. There’s nothing there yet, though, so let’s get busydeploying.
18https://toolbelt.heroku.com/

54 CHAPTER 1. FROM ZERO TO DEPLOY
1.5.2 Heroku deployment, step one
To deploy the application, the first step is to use Git to push the master branchup to Heroku:
$ git push heroku master
(You may see some warning messages, which you should ignore for now. We’lldiscuss them further in Section 7.5.)
1.5.3 Heroku deployment, step two
There is no step two! We’re already done. To see your newly deployed ap-plication, visit the address that you saw when you ran heroku create (i.e.,Listing 1.15). (If you’re working on your local machine instead of the cloudIDE, you can also use heroku open.) The result appears in Figure 1.18. Thepage is identical to Figure 1.12, but now it’s running in a production environ-ment on the live web.
1.5.4 Heroku commands
There are many Heroku commands, and we’ll barely scratch the surface in thisbook. Let’s take a minute to show just one of them by renaming the applicationas follows:
$ heroku rename rails-tutorial-hello
Don’t use this name yourself; it’s already taken by me! In fact, you probablyshouldn’t bother with this step right now; using the default address supplied byHeroku is fine. But if you do want to rename your application, you can arrangefor it to be reasonably secure by using a random or obscure subdomain, suchas the following:

1.5. DEPLOYING 55
Figure 1.18: The first Rails Tutorial application running on Heroku.

56 CHAPTER 1. FROM ZERO TO DEPLOY
hwpcbmze.herokuapp.com
seyjhflo.herokuapp.com
jhyicevg.herokuapp.com
With a random subdomain like this, someone could visit your site only if yougave them the address. (By the way, as a preview of Ruby’s compact awesome-ness, here’s the code I used to generate the random subdomains:
('a'..'z').to_a.shuffle[0..7].join
Pretty sweet.)In addition to supporting subdomains, Heroku also supports custom do-
mains. (In fact, the Ruby on Rails Tutorial site lives at Heroku; if you’re read-ing this book online, you’re looking at a Heroku-hosted site right now!) See theHeroku documentation for more information about custom domains and otherHeroku topics.
1.6 Conclusion
We’ve come a long way in this chapter: installation, development environmentsetup, version control, and deployment. In the next chapter, we’ll build on thefoundation from Chapter 1 to make a database-backed toy app, which will giveus our first real taste of what Rails can do.
If you’d like to share your progress at this point, feel free to send a tweet orFacebook status update with something like this:
I’m learning Ruby on Rails with the @railstutorial!http://www.railstutorial.org/
I also recommend signing up for the Rails Tutorial email list19, which willensure that you receive priority updates (and exclusive coupon codes) regardingthe Ruby on Rails Tutorial.
19http://www.railstutorial.org/#email
1.7. EXERCISES 57
1.6.1 What we learned in this chapter
• Ruby on Rails is a web development framework written in the Ruby pro-gramming language.
• Installing Rails, generating an application, and editing the resulting filesis easy using a pre-configured cloud environment.
• Rails comes with a command-line command called rails that can gen-erate new applications (rails new) and run local servers (rails ser-
ver).
• We added a controller action and modified the root route to create a“hello, world” application.
• We protected against data loss while enabling collaboration by placingour application source code under version control with Git and pushingthe resulting code to a private repository at Bitbucket.
• We deployed our application to a production environment using Heroku.
1.7 Exercises
Note: The Solutions Manual for Exercises, with solutions to every exercise inthe Ruby on Rails Tutorial book, is included for free with every purchase atwww.railstutorial.org.
1. Change the content of the hello action in Listing 1.8 to read “hola,mundo!” instead of “hello, world!”. Extra credit: Show that Rails sup-ports non-ASCII characters by including an inverted exclamation point,as in “¡Hola, mundo!” (Figure 1.19).20
20Your editor may display a message like “invalid multibyte character”, but this is not a cause for concern. You
can Google the error message if you want to learn how to make it go away.

58 CHAPTER 1. FROM ZERO TO DEPLOY
Figure 1.19: Changing the root route to return “¡Hola, mundo!”.
2. By following the example of the hello action in Listing 1.8, add a sec-ond action called goodbye that renders the text “goodbye, world!”. Editthe routes file from Listing 1.10 so that the root route goes to goodbye
instead of to hello (Figure 1.20).

1.7. EXERCISES 59
Figure 1.20: Changing the root route to return “goodbye, world!”.

60 CHAPTER 1. FROM ZERO TO DEPLOY

Chapter 2
A toy app
In this chapter, we’ll develop a toy demo application to show off some of thepower of Rails. The purpose is to get a high-level overview of Ruby on Railsprogramming (and web development in general) by rapidly generating an appli-cation using scaffold generators, which create a large amount of functionalityautomatically. As discussed in Box 1.2, the rest of the book will take the oppo-site approach, developing a full sample application incrementally and explain-ing each new concept as it arises, but for a quick overview (and some instantgratification) there is no substitute for scaffolding. The resulting toy app willallow us to interact with it through its URLs, giving us insight into the struc-ture of a Rails application, including a first example of the REST architecture
favored by Rails.
As with the forthcoming sample application, the toy app will consist ofusers and their associated microposts (thus constituting a minimalist Twitter-style app). The functionality will be utterly under-developed, and many of thesteps will seem like magic, but worry not: the full sample app will develop asimilar application from the ground up starting in Chapter 3, and I will provideplentiful forward-references to later material. In the mean time, have patienceand a little faith—the whole point of this tutorial is to take you beyond this su-perficial, scaffold-driven approach to achieve a deeper understanding of Rails.
61

62 CHAPTER 2. A TOY APP
2.1 Planning the application
In this section, we’ll outline our plans for the toy application. As in Section 1.3,we’ll start by generating the application skeleton using the rails new com-mand with a specific Rails version number:
$ cd ~/workspace
$ rails _4.2.0.rc2_ new toy_app
$ cd toy_app/
If the command above returns an error like “Could not find ’railties”’, it meansyou dont have the right version of Rails installed, and you should double-checkthat you followed the command in Listing 1.1 exactly as written. (If you’reusing the cloud IDE as recommended in Section 1.2.1, note that this secondapp can be created in the same workspace as the first. It is not necessary tocreate a new workspace. In order to get the files to appear, you may need toclick the gear icon in the file navigator area and select “Refresh File Tree”.)
Next, we’ll use a text editor to update the Gemfile needed by Bundler withthe contents of Listing 2.1.
Listing 2.1: A Gemfile for the toy app.
source 'https://rubygems.org'
gem 'rails', '4.2.0.rc2'
gem 'sass-rails', '5.0.0.beta1'
gem 'uglifier', '2.5.3'
gem 'coffee-rails', '4.1.0'
gem 'jquery-rails', '4.0.0.beta2'
gem 'turbolinks', '2.3.0'
gem 'jbuilder', '2.2.3'
gem 'sdoc', '0.4.0', group: :doc
group :development, :test do
gem 'sqlite3', '1.3.9'
gem 'byebug', '3.4.0'
gem 'web-console', '2.0.0.beta3'
gem 'spring', '1.1.3'
end
group :production do

2.1. PLANNING THE APPLICATION 63
gem 'pg', '0.17.1'
gem 'rails_12factor', '0.0.2'
end
Note that Listing 2.1 is identical to Listing 1.14.As in Section 1.5.1, we’ll install the local gems while suppressing the in-
stallation of production gems using the --without production option:
$ bundle install --without production
Finally, we’ll put the toy app under version control with Git:
$ git init
$ git add -A
$ git commit -m "Initialize repository"
You should also create a new repository by clicking on the “Create” button atBitbucket (Figure 2.1), and then push up to the remote repository:
$ git remote add origin [email protected]:<username>/toy_app.git
$ git push -u origin --all # pushes up the repo and its refs for the first time
Finally, it’s never too early to deploy, which I suggest doing by followingthe same “hello, world!” steps in Listing 1.8 and Listing 1.9.1 Then commit thechanges and push up to Heroku:
$ git commit -am "Add hello"
$ heroku create
$ git push heroku master
(As in Section 1.5, you may see some warning messages, which you shouldignore for now. We’ll eliminate them in Section 7.5.) Apart from the addressof the Heroku app, the result should be the same as in Figure 1.18.
1The main reason for this is that the default Rails page typically breaks at Heroku, which makes it hard to tell
if the deployment was successful or not.

64 CHAPTER 2. A TOY APP
Figure 2.1: Creating the toy app repository at Bitbucket.

2.1. PLANNING THE APPLICATION 65
email string
id
name string
integer
users
Figure 2.2: The data model for users.
Now we’re ready to start making the app itself. The typical first step whenmaking a web application is to create a data model, which is a representationof the structures needed by our application. In our case, the toy app will bea microblog, with only users and short (micro)posts. Thus, we’ll begin witha model for users of the app (Section 2.1.1), and then we’ll add a model formicroposts (Section 2.1.2).
2.1.1 A toy model for users
There are as many choices for a user data model as there are different registra-tion forms on the web; we’ll go with a distinctly minimalist approach. Usersof our toy app will have a unique integer identifier called id, a publiclyviewable name (of type string), and an email address (also a string) thatwill double as a username. A summary of the data model for users appears inFigure 2.2.
As we’ll see starting in Section 6.1.1, the label users in Figure 2.2 cor-responds to a table in a database, and the id, name, and email attributes arecolumns in that table.
2.1.2 A toy model for microposts
The core of the micropost data model is even simpler than the one for users:a micropost has only an id and a content field for the micropost’s text (of

66 CHAPTER 2. A TOY APP
user_id integer
id
content text
integer
microposts
Figure 2.3: The data model for microposts.
type text).2 There’s an additional complication, though: we want to associate
each micropost with a particular user. We’ll accomplish this by recording theuser_id of the owner of the post. The results are shown in Figure 2.3.
We’ll see in Section 2.3.3 (and more fully in Chapter 11) how this user_idattribute allows us to succinctly express the notion that a user potentially hasmany associated microposts.
2.2 The Users resource
In this section, we’ll implement the users data model in Section 2.1.1, alongwith a web interface to that model. The combination will constitute a Users re-
source, which will allow us to think of users as objects that can be created, read,updated, and deleted through the web via the HTTP protocol. As promised inthe introduction, our Users resource will be created by a scaffold generator pro-gram, which comes standard with each Rails project. I urge you not to look tooclosely at the generated code; at this stage, it will only serve to confuse you.
Rails scaffolding is generated by passing the scaffold command to therails generate script. The argument of the scaffold command is thesingular version of the resource name (in this case, User), together with op-
2Because microposts are short by design, the string type is actually big enough to contain them, but using
text better expresses our intent, while also giving us greater flexibility should we ever wish to relax the length
constraint.

2.2. THE USERS RESOURCE 67
tional parameters for the data model’s attributes:3
$ rails generate scaffold User name:string email:string
invoke active_record
create db/migrate/20140821011110_create_users.rb
create app/models/user.rb
invoke test_unit
create test/models/user_test.rb
create test/fixtures/users.yml
invoke resource_route
route resources :users
invoke scaffold_controller
create app/controllers/users_controller.rb
invoke erb
create app/views/users
create app/views/users/index.html.erb
create app/views/users/edit.html.erb
create app/views/users/show.html.erb
create app/views/users/new.html.erb
create app/views/users/_form.html.erb
invoke test_unit
create test/controllers/users_controller_test.rb
invoke helper
create app/helpers/users_helper.rb
invoke test_unit
create test/helpers/users_helper_test.rb
invoke jbuilder
create app/views/users/index.json.jbuilder
create app/views/users/show.json.jbuilder
invoke assets
invoke coffee
create app/assets/javascripts/users.js.coffee
invoke scss
create app/assets/stylesheets/users.css.scss
invoke scss
create app/assets/stylesheets/scaffolds.css.scss
By including name:string and email:string, we have arranged for theUser model to have the form shown in Figure 2.2. (Note that there is no needto include a parameter for id; it is created automatically by Rails for use as theprimary key in the database.)
To proceed with the toy application, we first need to migrate the databaseusing Rake (Box 2.1):
3The name of the scaffold follows the convention of models, which are singular, rather than resources and
controllers, which are plural. Thus, we have User instead of Users.

68 CHAPTER 2. A TOY APP
$ bundle exec rake db:migrate
== CreateUsers: migrating ====================================================
-- create_table(:users)
-> 0.0017s
== CreateUsers: migrated (0.0018s) ===========================================
This simply updates the database with our new users data model. (We’lllearn more about database migrations starting in Section 6.1.1.) Note that, inorder to ensure that the command uses the version of Rake corresponding toour Gemfile, we need to run rake using bundle exec. On many systems,including the cloud IDE, you can omit bundle exec, but it is necessary onsome systems, so I’ll include it for completeness.
With that, we can run the local web server in a separate tab (Figure 1.7) asfollows:4
$ rails server -b $IP -p $PORT # Use only `rails server` if running locally
Now the toy application should be available on the local server as describedin Section 1.3.2. (If you’re using the cloud IDE, be sure to open the resultingdevelopment server in a new browser tab, not inside the IDE itself.)
Box 2.1. Rake
In the Unix tradition, the make utility has played an important role in buildingexecutable programs from source code; many a computer hacker has committed tomuscle memory the line
$ ./configure && make && sudo make install
commonly used to compile code on Unix systems (including Linux and MacOS X).
4The rails script is designed so that you don’t need to use bundle exec.

2.2. THE USERS RESOURCE 69
Rake is Ruby make, a make-like language written in Ruby. Rails uses Rakeextensively, especially for the innumerable little administrative tasks necessarywhen developing database-backed web applications. The rake db:migrate
command is probably the most common, but there are many others; you can see alist of database tasks using -T db:
$ bundle exec rake -T db
To see all the Rake tasks available, run
$ bundle exec rake -T
The list is likely to be overwhelming, but don’t worry, you don’t have to know all(or even most) of these commands. By the end of the Rails Tutorial, you’ll knowall the most important ones.
2.2.1 A user tour
If we visit the root URL at / (read “slash”, as noted in Section 1.3.4), we getthe same default Rails page shown in Figure 1.9, but in generating the Usersresource scaffolding we have also created a large number of pages for manipu-lating users. For example, the page for listing all users is at /users, and the pagefor making a new user is at /users/new. The rest of this section is dedicatedto taking a whirlwind tour through these user pages. As we proceed, it mayhelp to refer to Table 2.1, which shows the correspondence between pages andURLs.
We start with the page to show all the users in our application, calledindex; as you might expect, initially there are no users at all (Figure 2.4).
To make a new user, we visit the new page, as shown in Figure 2.5. (Sincethe http://0.0.0.0:3000 or cloud IDE part of the address is implicit whenever weare developing locally, I’ll omit it from now on.) In Chapter 7, this will becomethe user signup page.

70 CHAPTER 2. A TOY APP
URL Action Purpose
/users index page to list all users
/users/1 show page to show user with id 1
/users/new new page to make a new user
/users/1/edit edit page to edit user with id 1
Table 2.1: The correspondence between pages and URLs for the Users resource.
Figure 2.4: The initial index page for the Users resource (/users).
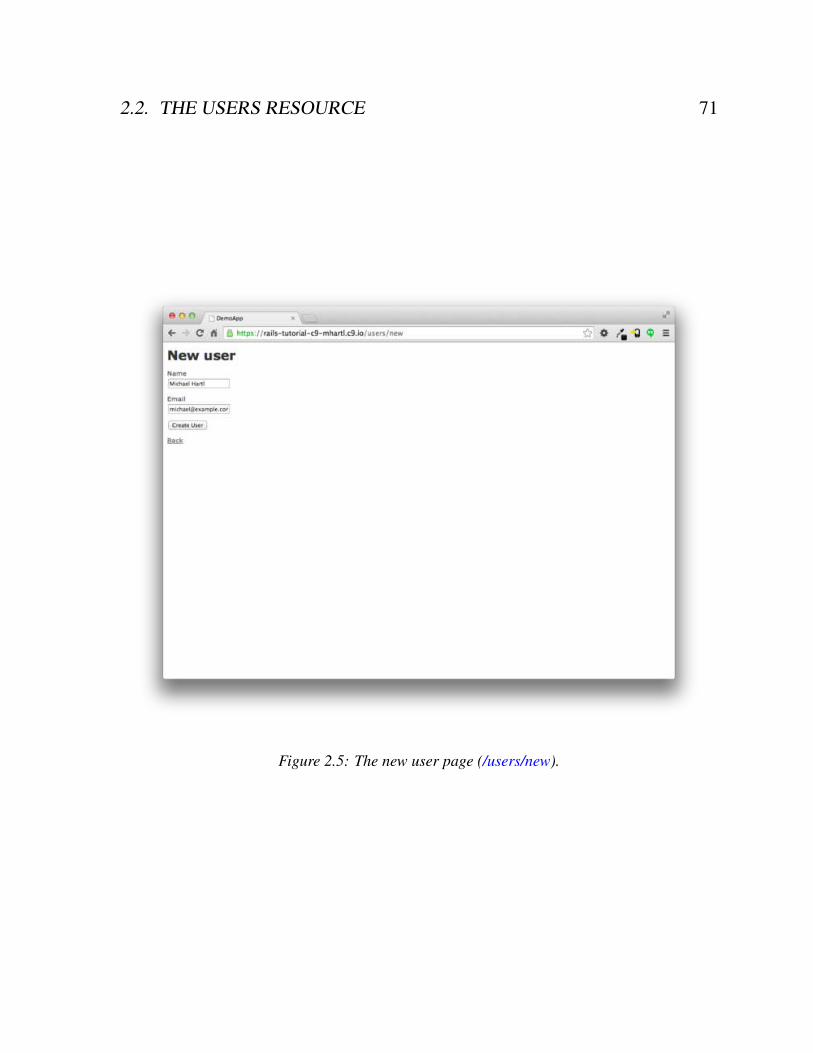
2.2. THE USERS RESOURCE 71
Figure 2.5: The new user page (/users/new).

72 CHAPTER 2. A TOY APP
Figure 2.6: The page to show a user (/users/1).
We can create a user by entering name and email values in the text fields andthen clicking the Create User button. The result is the user show page, as seenin Figure 2.6. (The green welcome message is accomplished using the flash,which we’ll learn about in Section 7.4.2.) Note that the URL is /users/1; as youmight suspect, the number 1 is simply the user’s id attribute from Figure 2.2.In Section 7.1, this page will become the user’s profile.
To change a user’s information, we visit the edit page (Figure 2.7). Bymodifying the user information and clicking the Update User button, we ar-range to change the information for the user in the toy application (Figure 2.8).(As we’ll see in detail starting in Chapter 6, this user data is stored in a databaseback-end.) We’ll add user edit/update functionality to the sample application

2.2. THE USERS RESOURCE 73
Figure 2.7: The user edit page (/users/1/edit).
in Section 9.1.
Now we’ll create a second user by revisiting the new page and submittinga second set of user information; the resulting user index is shown in Fig-ure 2.9. Section 7.1 will develop the user index into a more polished page forshowing all users.
Having shown how to create, show, and edit users, we come finally to de-stroying them (Figure 2.10). You should verify that clicking on the link inFigure 2.10 destroys the second user, yielding an index page with only oneuser. (If it doesn’t work, be sure that JavaScript is enabled in your browser;Rails uses JavaScript to issue the request needed to destroy a user.) Section 9.4adds user deletion to the sample app, taking care to restrict its use to a special
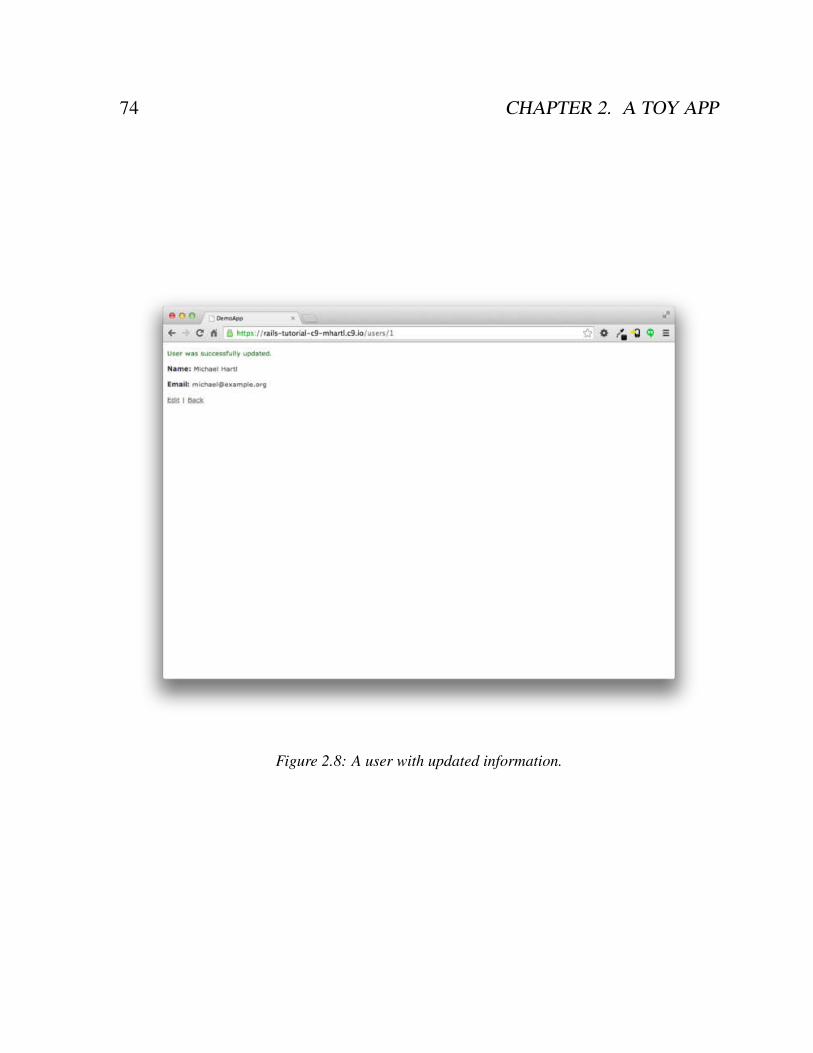
74 CHAPTER 2. A TOY APP
Figure 2.8: A user with updated information.

2.2. THE USERS RESOURCE 75
Figure 2.9: The user index page (/users) with a second user.
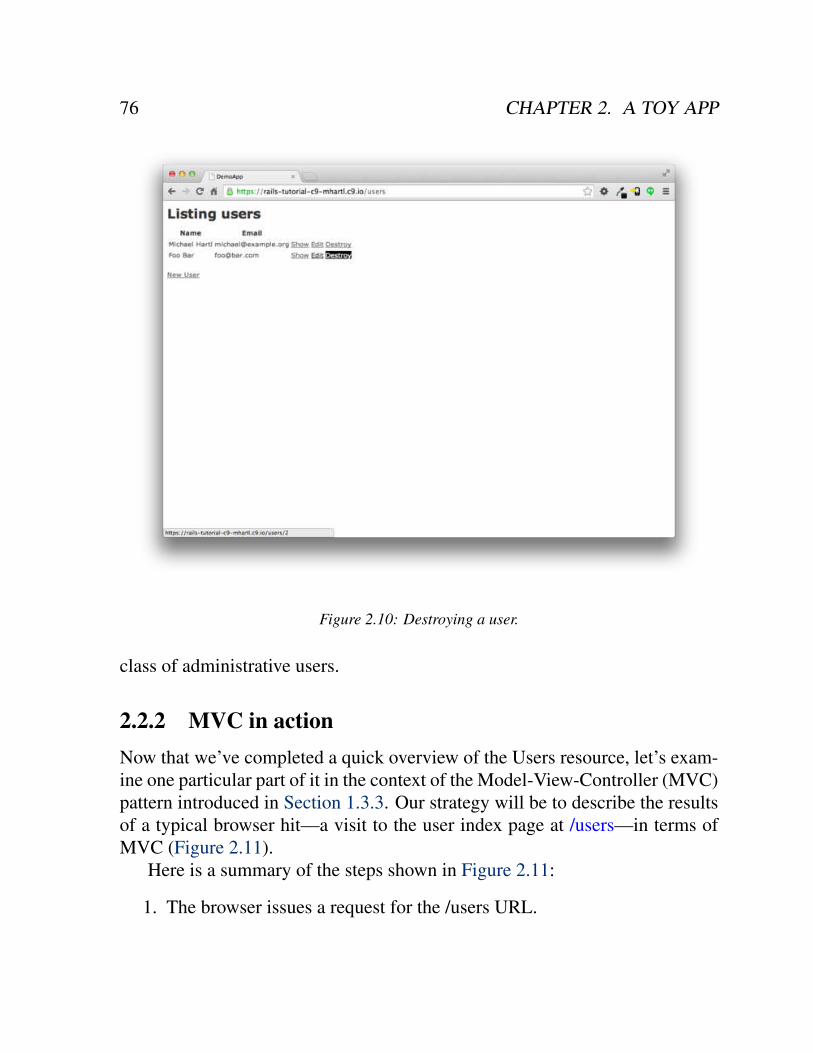
76 CHAPTER 2. A TOY APP
Figure 2.10: Destroying a user.
class of administrative users.
2.2.2 MVC in action
Now that we’ve completed a quick overview of the Users resource, let’s exam-ine one particular part of it in the context of the Model-View-Controller (MVC)pattern introduced in Section 1.3.3. Our strategy will be to describe the resultsof a typical browser hit—a visit to the user index page at /users—in terms ofMVC (Figure 2.11).
Here is a summary of the steps shown in Figure 2.11:
1. The browser issues a request for the /users URL.

2.2. THE USERS RESOURCE 77
Controller
(users_controller.rb)
Rails
router
Model
(user.rb)
View
(index.html.erb)
index
@users HTML
HTML
User.all
/users1
2
7
4
3
6
5
Database8
Figure 2.11: A detailed diagram of MVC in Rails.

78 CHAPTER 2. A TOY APP
2. Rails routes /users to the index action in the Users controller.
3. The index action asks the User model to retrieve all users (User.all).
4. The User model pulls all the users from the database.
5. The User model returns the list of users to the controller.
6. The controller captures the users in the @users variable, which is passedto the index view.
7. The view uses embedded Ruby to render the page as HTML.
8. The controller passes the HTML back to the browser.5
Now let’s take a look at the above steps in more detail. We start with arequest issued from the browser—i.e., the result of typing a URL in the addressbar or clicking on a link (Step 1 in Figure 2.11). This request hits the Rails
router (Step 2), which dispatches to the proper controller action based on theURL (and, as we’ll see in Box 3.2, the type of request). The code to create themapping of user URLs to controller actions for the Users resource appears inListing 2.2; this code effectively sets up the table of URL/action pairs seen inTable 2.1. (The strange notation :users is a symbol, which we’ll learn aboutin Section 4.3.3.)
Listing 2.2: The Rails routes, with a rule for the Users resource.config/routes.rb
Rails.application.routes.draw do
resources :users
.
.
.
end
5Some references indicate that the view returns the HTML directly to the browser (via a web server such as
Apache or Nginx). Regardless of the implementation details, I prefer to think of the controller as a central hub
through which all the application’s information flows.