Retail Security Manager User Guide Release 12.0 May 2006
23
Oracle ® Retail Security Manager User Guide Release 12.0 May 2006
-
Upload
khangminh22 -
Category
Documents
-
view
0 -
download
0
Transcript of Retail Security Manager User Guide Release 12.0 May 2006
Oracle® Retail Security Manager User Guide
Release 12.0 May 2006
Copyright © 2006, Oracle. All rights reserved.
The Programs (which include both the software and documentation) contain proprietary information; they are provided under a license agreement containing restrictions on use and disclosure and are also protected by copyright, patent, and other intellectual and industrial property laws. Reverse engineering, disassembly, or decompilation of the Programs, except to the extent required to obtain interoperability with other independently created software or as specified by law, is prohibited.
The information contained in this document is subject to change without notice. If you find any problems in the documentation, please report them to us in writing. This document is not warranted to be error-free. Except as may be expressly permitted in your license agreement for these Programs, no part of these Programs may be reproduced or transmitted in any form or by any means, electronic or mechanical, for any purpose.
If the Programs are delivered to the United States Government or anyone licensing or using the Programs on behalf of the United States Government, the following notice is applicable:
U.S. GOVERNMENT RIGHTS Programs, software, databases, and related documentation and technical data delivered to U.S. Government customers are "commercial computer software" or "commercial technical data" pursuant to the applicable Federal Acquisition Regulation and agency-specific supplemental regulations. As such, use, duplication, disclosure, modification, and adaptation of the Programs, including documentation and technical data, shall be subject to the licensing restrictions set forth in the applicable Oracle license agreement, and, to the extent applicable, the additional rights set forth in FAR 52.227-19, Commercial Computer Software—Restricted Rights (June 1987). Oracle Corporation, 500 Oracle Parkway, Redwood City, CA 94065
The Programs are not intended for use in any nuclear, aviation, mass transit, medical, or other inherently dangerous applications. It shall be the licensee's responsibility to take all appropriate fail-safe, backup, redundancy and other measures to ensure the safe use of such applications if the Programs are used for such purposes, and we disclaim liability for any damages caused by such use of the Programs.
Oracle, JD Edwards, PeopleSoft, and Siebel are registered trademarks of Oracle Corporation and/or its affiliates. Other names may be trademarks of their respective owners.
The Programs may provide links to Web sites and access to content, products, and services from third parties. Oracle is not responsible for the availability of, or any content provided on, third-party Web sites. You bear all risks associated with the use of such content. If you choose to purchase any products or services from a third party, the relationship is directly between you and the third party. Oracle is not responsible for: (a) the quality of third-party products or services; or (b) fulfilling any of the terms of the agreement with the third party, including delivery of products or services and warranty obligations related to purchased products or services. Oracle is not responsible for any loss or damage of any sort that you may incur from dealing with any third party.
User Guide iii
Contents Preface...................................................................................................... v
Audience ....................................................................................................................................v Related Documents ....................................................................................................................v Customer Support ......................................................................................................................v
1 Log in to Oracle Retail Security Manager.......................................... 1
2 Using RSM............................................................................................ 3 User Administration...................................................................................................................3
Assign Users to a Role........................................................................................................3 Add Roles to a User ............................................................................................................5 Remove Roles from a User.................................................................................................6
Role Administration...................................................................................................................7 Create a Role ......................................................................................................................7 Edit a Role ..........................................................................................................................8 Maintain Roles....................................................................................................................9 Add Users to a Role............................................................................................................9 Remove Users from a Role.................................................................................................9 Add Data Permissions to a Role .......................................................................................10 Delete a Data Permission from a Role ..............................................................................12 Add Workflow Permissions to a Role ..............................................................................12 Delete a Workflow and Associated Action from Role......................................................14
Navigate Within a Window .....................................................................................................15 Use a Drop-Down List......................................................................................................15 Sort and Select Information ..............................................................................................15
Index ....................................................................................................... 50H17

User Guide v
Preface Oracle Retail Security Manager gives you a single point of security management for the applications you use. Users with like functions are grouped together into roles. The roles are then assigned the types of permissions needed for each workflow and data within an application.
Audience The audience for this document is the Oracle Retail Security Manager users.
Related Documents You can find more information about this product in these resources: Oracle Retail Security Manager Installation Guide Oracle Retail Security Manager Release Notes Oracle Retail Security Manager Operations Guide Oracle Retail Security Manager Online Help Oracle Retail Security Manager Data Model
Customer Support https://metalink.oracle.com
When contacting Customer Support, please provide: Product version and program/module name. Functional and technical description of the problem (include business impact). Detailed step-by-step instructions to recreate. Exact error message received. Screen shots of each step you take.

User Guide 1
1 Log in to Oracle Retail Security Manager
To access the Oracle Retail Security Manager application:
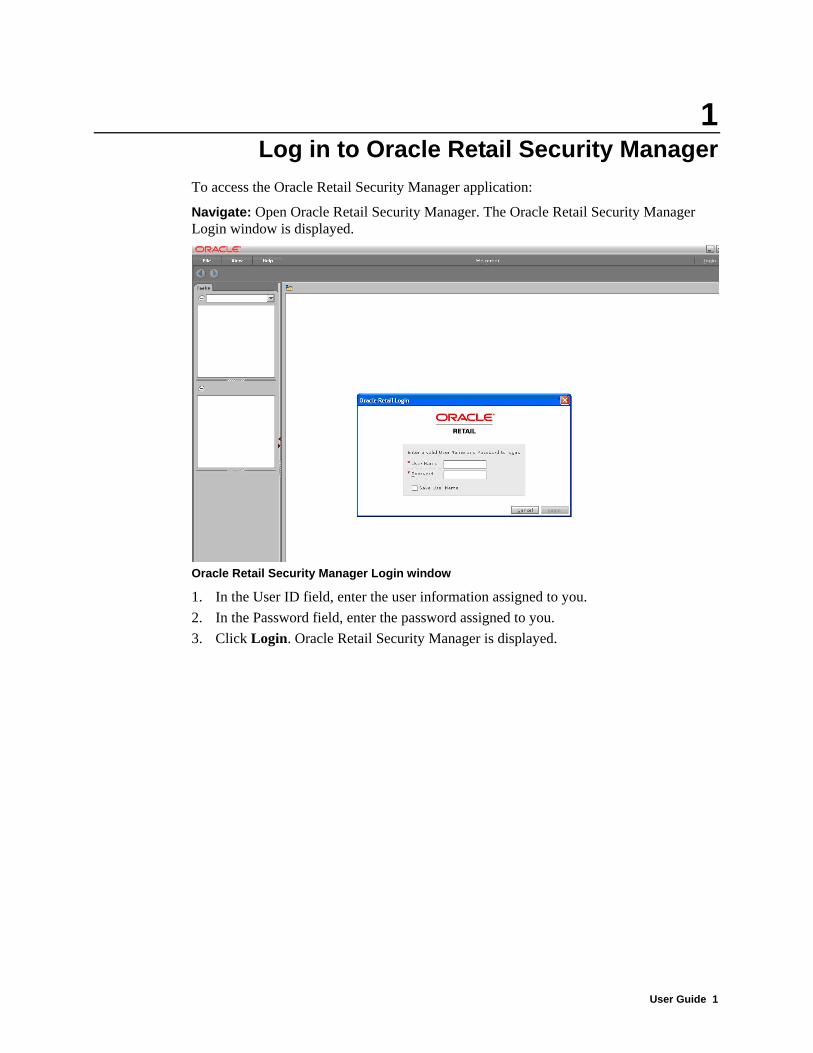
Navigate: Open Oracle Retail Security Manager. The Oracle Retail Security Manager Login window is displayed.
Oracle Retail Security Manager Login window
1. In the User ID field, enter the user information assigned to you. 2. In the Password field, enter the password assigned to you. 3. Click Login. Oracle Retail Security Manager is displayed.

User Guide 3
2 Using RSM
This section describes how to navigate within RSM: • Log in to Oracle Retail Security Manager • Navigate within a window • Sort columns and select information
User Administration
Assign Users to a Role Users are not created in RSM. Rather, RSM looks up users that exist in a Lightweight Directory Access Protocol (LDAP) compliant directory service. From the LDAP compliant directory, RSM retrieves the user information. You can then assign roles to a user.
Note: For additional information on RSM and LDAP compliant directories, please see the RSM Operations Guide.
Using RSM
4
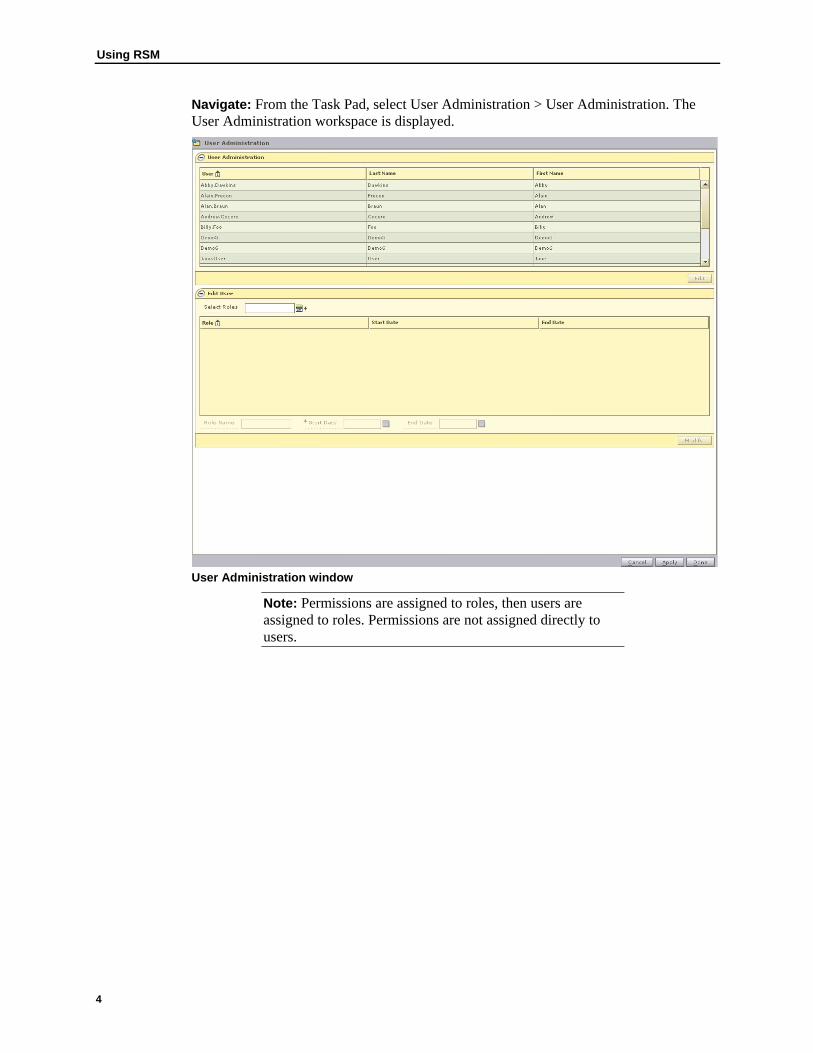
Navigate: From the Task Pad, select User Administration > User Administration. The User Administration workspace is displayed.
User Administration window
Note: Permissions are assigned to roles, then users are assigned to roles. Permissions are not assigned directly to users.
Oracle Retail Security Manager 12.0
User Guide 5
Add Roles to a User Note: Permissions are assigned to roles, then users are assigned to roles. Permissions are not assigned directly to users.
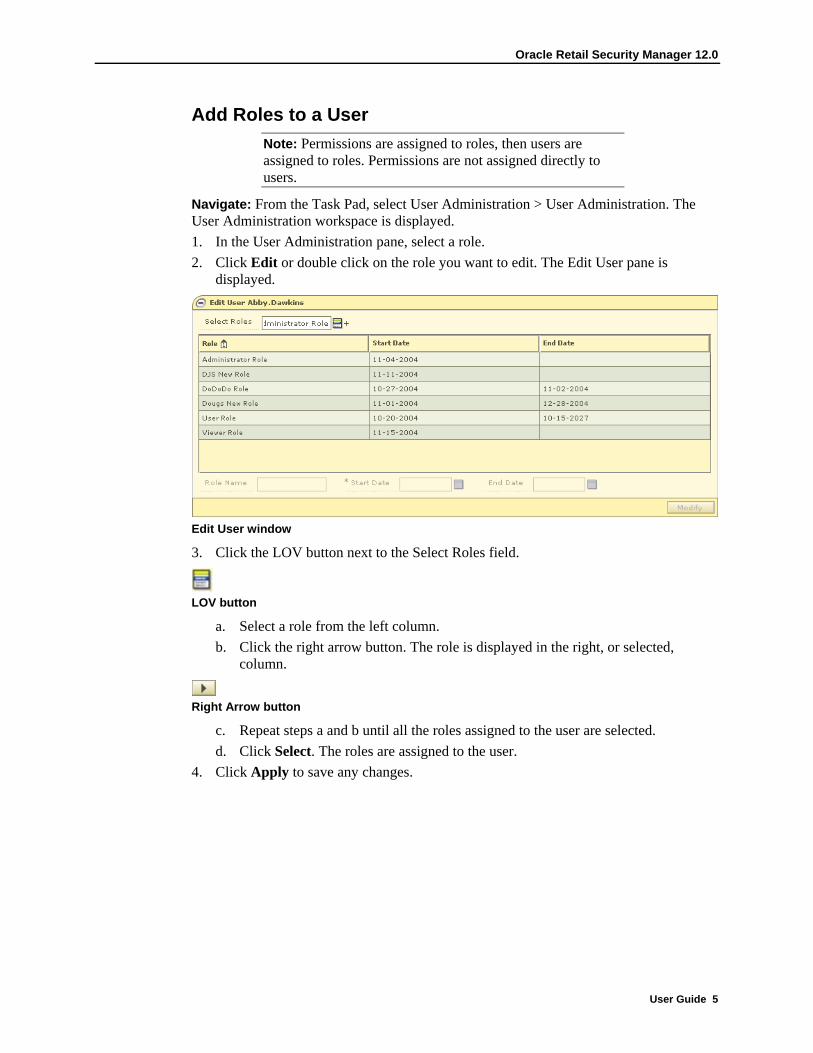
Navigate: From the Task Pad, select User Administration > User Administration. The User Administration workspace is displayed. 1. In the User Administration pane, select a role. 2. Click Edit or double click on the role you want to edit. The Edit User pane is
displayed.
Edit User window
3. Click the LOV button next to the Select Roles field.
LOV button
a. Select a role from the left column. b. Click the right arrow button. The role is displayed in the right, or selected,
column.
Right Arrow button
c. Repeat steps a and b until all the roles assigned to the user are selected. d. Click Select. The roles are assigned to the user.
4. Click Apply to save any changes.
Using RSM
6
Remove Roles from a User Navigate: From the Task Pad, select User Administration > User Administration. The User Administration workspace is displayed.
Note: Permissions are assigned to roles, then users are assigned to roles. Permissions are not assigned directly to users.
1. In the User Administration window, select a role. 2. Click Edit or double click on the role you want to edit. The Edit User pane is
displayed. 3. Click the LOV button next to the Select Roles field.
a. Select a role to remove from the right, or selected, column. b. Click the left arrow button. The role is displayed in the left, or available, column. c. Click Select. The user is removed from the role.
4. Click Apply. The changes to the user are saved. Or Click Done. The changes to the user are saved and the workspace is closed.
Oracle Retail Security Manager 12.0
User Guide 7
Role Administration
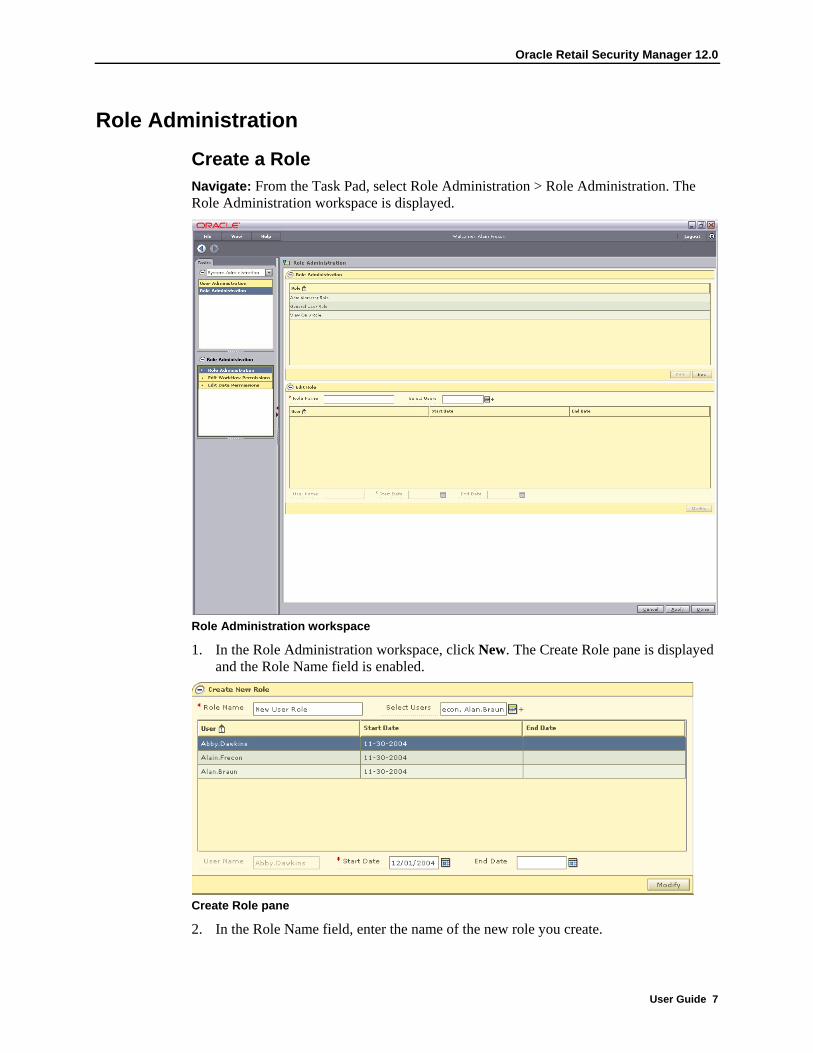
Create a Role Navigate: From the Task Pad, select Role Administration > Role Administration. The Role Administration workspace is displayed.
Role Administration workspace
1. In the Role Administration workspace, click New. The Create Role pane is displayed and the Role Name field is enabled.
Create Role pane
2. In the Role Name field, enter the name of the new role you create.
Using RSM
8
3. Click the LOV button next to the Select Users field. a. Select a user from the left column. b. Click the right arrow button. The user is displayed in the right, or selected,
column. c. Repeat steps a and b until all the users assigned to the role are selected. d. Click Select. The user names appear in the table.
4. Modify the end date of a user. e. Select a user name from the table. f. Enter a different start date in the Start Date field, or click the LOV button and
select a date if it should be later than today. g. Enter an end date in the End Date field, or click the LOV button and select a
date. This field may be left blank. 5. Click Modify. The role is added to the list of roles. 6. Click Apply. The new role is saved.
Edit a Role Navigate: From the Task Pad, select Role Administration > Role Administration. The Role Administration workspace is displayed. 1. In the Role Administration pane, select a role. 2. Click Edit or double click on the role you want to edit. 3. In the Role Name field, edit the name of the role as necessary.
Save Changes to a Role • Click Apply. The changes to the role are saved. Or • Click Done. The changes to the role are saved and the workspace is closed.
Oracle Retail Security Manager 12.0
User Guide 9
Maintain Roles A role is a way of grouping workflows and actions for the functionality in each application supported by RSM. When you create a role, you assign a name to a role. Each role can be used to give different levels of permissions to like users. After you create the role, you can define the workflows for a role, define the data permissions for a role, and assign users to a role.
Note: Permissions are assigned to roles, then users are assigned to roles. Permissions are not assigned directly to users.
Add Users to a Role Navigate: From the Task Pad, select Role Administration > Role Administration. The Role Administration workspace is displayed. 1. Click the LOV button next to the Select Users field.
a. Select a user to add from the left, or available, column. b. Click the right arrow button. The user is displayed in the right, or selected,
column. 2. Click Select. The users are added to the role.
Remove Users from a Role Navigate: From the Task Pad, select Role Administration > Role Administration. The Role Administration workspace is displayed. 1. Click the LOV button next to the Select Users field.
a. Select a user to remove from the right, or selected, column. b. Click the left arrow button. The user is displayed in the left, or available, column.
2. Click Select. The users are removed from the role.
Using RSM
10
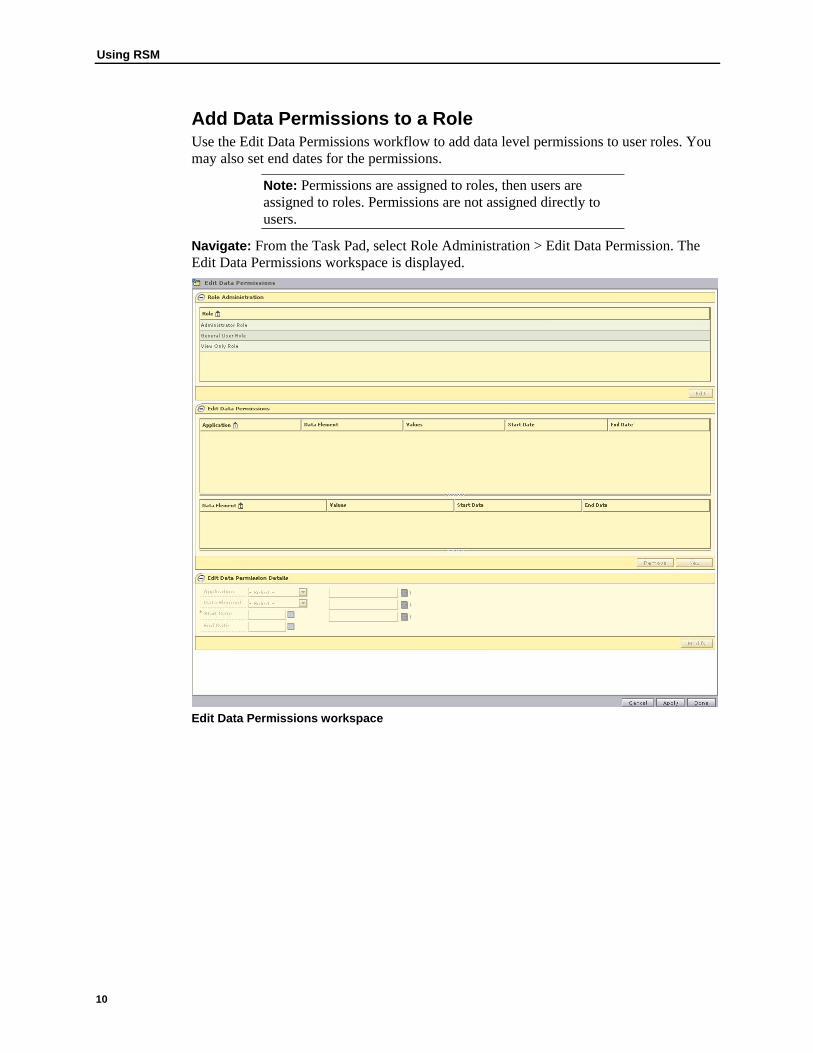
Add Data Permissions to a Role Use the Edit Data Permissions workflow to add data level permissions to user roles. You may also set end dates for the permissions.
Note: Permissions are assigned to roles, then users are assigned to roles. Permissions are not assigned directly to users.
Navigate: From the Task Pad, select Role Administration > Edit Data Permission. The Edit Data Permissions workspace is displayed.
Edit Data Permissions workspace

Oracle Retail Security Manager 12.0
User Guide 11
1. In the Role area, select a role. 2. Click Edit or double click on the role you want to edit. Information is displayed on
the Edit Data Permission pane.
Edit Data Permissions pane
3. Click New. The Edit Data Permission Details pane is enabled.
Edit Data Permissions Details pane
4. Select an application from the Application drop-down. 5. Select an element from the Data Element drop-down. 6. Enter a date in the Start Date field, or click the LOV button and select a date. 7. Enter a date in the End Date field, or click the LOV button and select a date.
Note: The End Date field may be left blank.
8. Enter information in the rest of the enabled fields as required. 9. Click Apply. Your changes are saved and displayed in the view area. 10. Delete a Data Permission from a Role
Using RSM
12
Delete a Data Permission from a Role Navigate: From the Task Pad, select Role Administration > Edit Data Permission. The Edit Data Permissions workspace is displayed. 1. In the Role area, select a role. 2. Click Edit or double click on the role you want to edit. Information is displayed on
the Edit Data Permission pane. 3. Select the application from the Application table. 4. Select the data permission you wish to remove from the Data Element table. 5. Click Remove. The data permission is removed from the list. 6. Click Apply. Your changes are saved and displayed in the view area.
Add Workflow Permissions to a Role A workflow is a secured task or group of tasks that exist in an application. An action is the type of ability that users associated with a role have access to in an application's work flow. Once the role, workflow, and action are associated, users assigned to the role can complete their work. Each application associated with RSM provides a list of workflows and actions that a user assigned to the appropriate role can access through RSM. There are six types of actions that may be assigned to a role and workflow: • Access: Users associated with the role have access to the application, but are not
allowed see any secured information within a workflow. Users must have access to an application in order to have any of the other permission types.
Note: This action is the lowest level of permission a user associated with a role can have. You must assign Access to a role before any of the other permissions are available.
• Edit: Users associated with the role are allowed to create, update, and save any changes to a workflow.
• View: Users associated with the role are allowed to see to all secured information in a workflow, but not make any changes to the data in the workflow.
• Approve: Users associated with the role are allowed to change the status of a workflow to Approved.
• Submit: Users associated with the role are allowed to change the status of a workflow from Worksheet to Submitted.
• Emergency: Users associated with the role are granted special access that goes beyond normal day-to-day access to functionality. This allows users to bypass normal delays in processing.
Note: Permissions are assigned to roles, then users are assigned to roles. Permissions are not assigned directly to users.
Oracle Retail Security Manager 12.0
User Guide 13
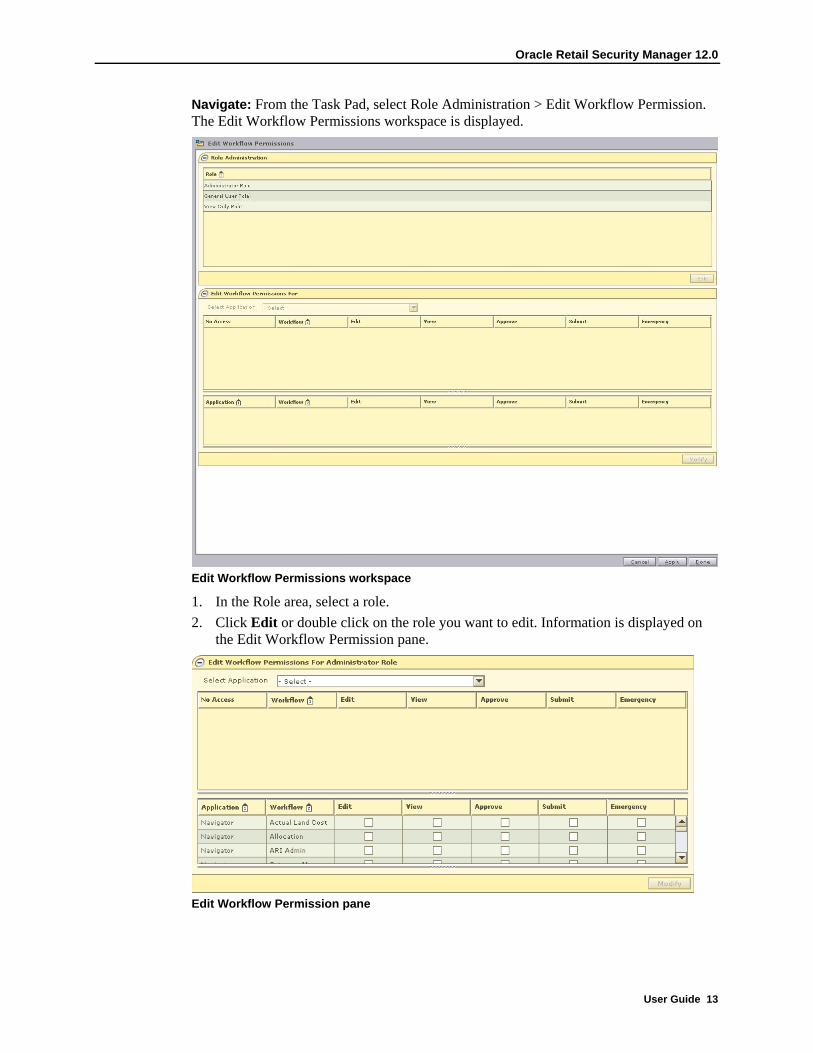
Navigate: From the Task Pad, select Role Administration > Edit Workflow Permission. The Edit Workflow Permissions workspace is displayed.
Edit Workflow Permissions workspace
1. In the Role area, select a role. 2. Click Edit or double click on the role you want to edit. Information is displayed on
the Edit Workflow Permission pane.
Edit Workflow Permission pane
Using RSM
14
3. Select the application with the workflows you want to add to the role from the Select Workflows drop-down. Workflows for the application are displayed below.
4. Select the check boxes for each type of action you want to assign to the role.
Note: You must assign the Access action for the other assigned actions to be available to users in the role.
5. Click Apply. Your changes are saved and displayed in the view area. 6. Delete a Workflow and Associated Action from a Role
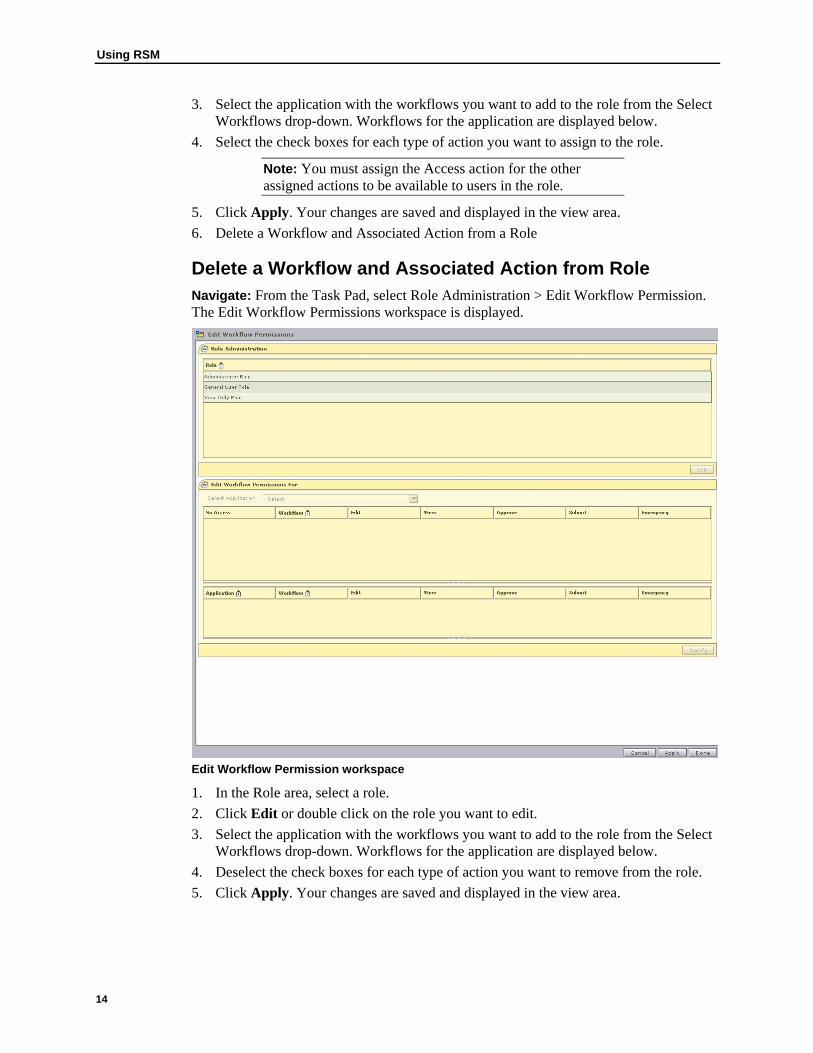
Delete a Workflow and Associated Action from Role Navigate: From the Task Pad, select Role Administration > Edit Workflow Permission. The Edit Workflow Permissions workspace is displayed.
Edit Workflow Permission workspace
1. In the Role area, select a role. 2. Click Edit or double click on the role you want to edit. 3. Select the application with the workflows you want to add to the role from the Select
Workflows drop-down. Workflows for the application are displayed below. 4. Deselect the check boxes for each type of action you want to remove from the role. 5. Click Apply. Your changes are saved and displayed in the view area.
Oracle Retail Security Manager 12.0
User Guide 15
Navigate Within a Window
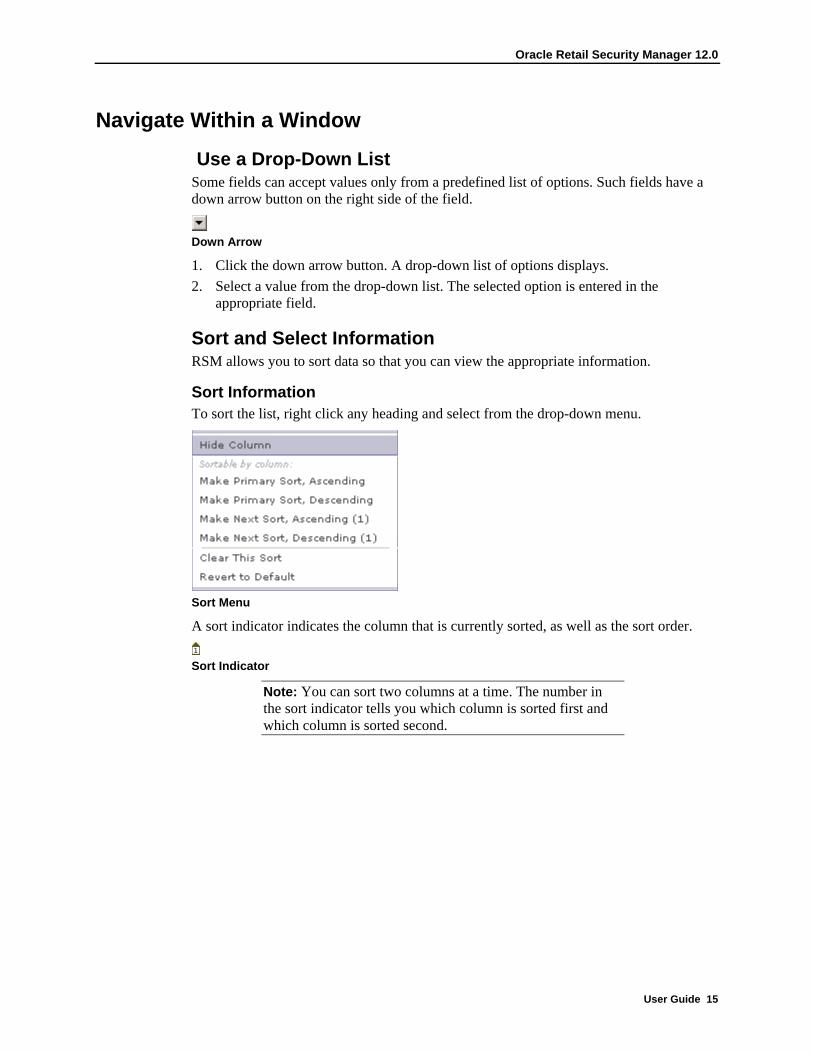
Use a Drop-Down List Some fields can accept values only from a predefined list of options. Such fields have a down arrow button on the right side of the field.
Down Arrow
1. Click the down arrow button. A drop-down list of options displays. 2. Select a value from the drop-down list. The selected option is entered in the
appropriate field.
Sort and Select Information RSM allows you to sort data so that you can view the appropriate information.
Sort Information To sort the list, right click any heading and select from the drop-down menu.
Sort Menu
A sort indicator indicates the column that is currently sorted, as well as the sort order.
Sort Indicator
Note: You can sort two columns at a time. The number in the sort indicator tells you which column is sorted first and which column is sorted second.
Using RSM
16
Select Information Multi-select functionality allows you to select multiple rows in a table by using the Shift and Control keys. This is so users can perform a single action on multiple rows. The functionality is analogous to the select functionality of other Windows applications.
Select Continuous Information
1. Click on a row. 2. Press Shift and click on another row to select all the rows in between, inclusively.
Select Non-Continuous Information
1. Click on a row. 2. Control click on rows to select or deselect the individual rows clicked on (depending
on whether they are currently selected) while leaving the other selected rows still selected.
User Guide 17
Index A Add Data Permissions................... 10 Add Roles to a User ........................ 5 Add Users to a Role ........................ 9 Add Workflow Permissions to Role
................................................... 12 Assign Users to a Role.................... 3 C Create .............................................. 9 D Data Permissions..................... 10, 12 Define............................................ 12 Delete Workflow Permission........ 14 E Edit a Role....................................... 8 Edit Data Permissions ............. 10, 12 P Permissions ............................. 10, 12
R Remove Roles from a User ............. 6 Remove Users from a Role ............. 9 Role Administration.......... 7, 8, 9, 10 Roles ......................... 3, 5, 6, 8, 9, 12 RSM
Use .............................................. 3 S Select Information......................... 15 Sort Information............................ 15 U Use a Drop-Down List .................. 15 User Administration................ 3, 5, 6 Users ................................... 3, 5, 6, 9 Using RSM...................................... 3 W Workflow ................................ 12, 14


![Mission Manager[1]](https://static.fdokumen.com/doc/165x107/6313fe215cba183dbf075a68/mission-manager1.jpg)