Red Hat Ceph Storage 3 Ceph File System Guide
71
Red Hat Ceph Storage 3 Ceph File System Guide Configuring and Mounting Ceph File Systems Last Updated: 2021-05-05
-
Upload
khangminh22 -
Category
Documents
-
view
1 -
download
0
Transcript of Red Hat Ceph Storage 3 Ceph File System Guide

Red Hat Ceph Storage 3
Ceph File System Guide
Configuring and Mounting Ceph File Systems
Last Updated: 2021-05-05


Red Hat Ceph Storage 3 Ceph File System Guide
Configuring and Mounting Ceph File Systems

Legal Notice
Copyright © 2021 Red Hat, Inc.
The text of and illustrations in this document are licensed by Red Hat under a Creative CommonsAttribution–Share Alike 3.0 Unported license ("CC-BY-SA"). An explanation of CC-BY-SA isavailable athttp://creativecommons.org/licenses/by-sa/3.0/. In accordance with CC-BY-SA, if you distribute this document or an adaptation of it, you mustprovide the URL for the original version.
Red Hat, as the licensor of this document, waives the right to enforce, and agrees not to assert,Section 4d of CC-BY-SA to the fullest extent permitted by applicable law.
Red Hat, Red Hat Enterprise Linux, the Shadowman logo, the Red Hat logo, JBoss, OpenShift,Fedora, the Infinity logo, and RHCE are trademarks of Red Hat, Inc., registered in the United Statesand other countries.
Linux ® is the registered trademark of Linus Torvalds in the United States and other countries.
Java ® is a registered trademark of Oracle and/or its affiliates.
XFS ® is a trademark of Silicon Graphics International Corp. or its subsidiaries in the United Statesand/or other countries.
MySQL ® is a registered trademark of MySQL AB in the United States, the European Union andother countries.
Node.js ® is an official trademark of Joyent. Red Hat is not formally related to or endorsed by theofficial Joyent Node.js open source or commercial project.
The OpenStack ® Word Mark and OpenStack logo are either registered trademarks/service marksor trademarks/service marks of the OpenStack Foundation, in the United States and othercountries and are used with the OpenStack Foundation's permission. We are not affiliated with,endorsed or sponsored by the OpenStack Foundation, or the OpenStack community.
All other trademarks are the property of their respective owners.
Abstract
This guide describes how to configure the Ceph Metadata Server (MDS) and how to create, mountand work the Ceph File System (CephFS).

. . . . . . . . . . . . . . . . . . . . . . . . . . . . . . . . . . . . . . . . . . . . . . . . . . . . . . . . . . . . . . . . . . . . . . . . . . . . . . . . . . . . . . . . . . . . . . . . . . . . . . . . . . . . . . . . . . . . . . . . . . . . . . . . . . . . . . . . . . . . . . . . . . . . . . . . . . . . . . . . . . . . . . . . . . . . . . . . . . . . . . . . . . . . . . . . . . . . . . . . . . . . . . . . . . . . . . . . . . . . . . . . . . . . . . . . . . . . . . . . . . . . . . . . . . . . . . . . . . . . . . . . . . . . . . . . . . . . . . . .
. . . . . . . . . . . . . . . . . . . . . . . . . . . . . . . . . . . . . . . . . . . . . . . . . . . . . . . . . . . . . . . . . . . . . . . . . . . . . . . . . . . . . . . . . . . . . . . . . . . . . . . . . . . . . . . . . . . . . . . . . . . . . . . . . . . . . . . . . . . . . . . . . . . . . . . . . . . . . . . . . . . . . . . . . . . . . . . . . . . . . . . . . . . . . . . . . . . . . . . . . . . . . . . . . . . . . . . . . . . . . . . . . . . . . . . . . . . . . . . . . . . . . . . . . . . . . . . . . . . . . . . . . . . . . . . . . . . . . . . .
. . . . . . . . . . . . . . . . . . . . . . . . . . . . . . . . . . . . . . . . . . . . . . . . . . . . . . . . . . . . . . . . . . . . . . . . . . . . . . . . . . . . . . . . . . . . . . . . . . . . . . . . . . . . . . . . . . . . . . . . . . . . . . . . . . . . . . . . . . . . . . . . . . . . . . . . . . . . . . . . . . . . . . . . . . . . . . . . . . . . . . . . . . . . . . . . . . . . . . . . . . . . . . . . . . . . . . . . . . . . . . . . . . . . . . . . . . . . . . . . . . . . . . . . . . . . . . . . . . . . . . . . . . . . . . . . . . . . . . . .
Table of Contents
CHAPTER 1. INTRODUCTION TO CEPH FILE SYSTEM1.1. ABOUT THE CEPH FILE SYSTEM
The Ceph File System Components1.2. MAIN CEPHFS FEATURES1.3. CEPHFS LIMITATIONS1.4. DIFFERENCES FROM POSIX COMPLIANCE IN THE CEPH FILE SYSTEM1.5. ADDITIONAL RESOURCES
CHAPTER 2. CONFIGURING METADATA SERVER DAEMONS2.1. PREREQUISITES2.2. STATES OF METADATA SERVER DAEMONS
What Happens When the Active MDS Daemon Fails2.3. EXPLANATION OF RANKS IN METADATA SERVER CONFIGURATION
Rank States2.4. TYPES OF STANDBY CONFIGURATION
PrerequisitesConfiguration Parameters
Standby ReplayStandby for NameStandby for RankStandby for FSCID
2.5. CONFIGURING STANDBY METADATA SERVER DAEMONSProcedureAdditional Resources
2.6. CONFIGURING MULTIPLE ACTIVE METADATA SERVER DAEMONSProcedureAdditional Resources
2.7. DECREASING THE NUMBER OF ACTIVE MDS DAEMONSPrerequisitesProcedureAdditional Resources
2.8. UNDERSTANDING MDS CACHE SIZE LIMITSAdditional Resources
2.9. ADDITIONAL RESOURCES
CHAPTER 3. DEPLOYING CEPH FILE SYSTEMS3.1. PREREQUISITES3.2. CREATING THE CEPH FILE SYSTEMS
PrerequisitesProcedureAdditional Resources
3.3. CREATING CEPH FILE SYSTEM CLIENT USERSProcedureAdditional Resources
3.4. MOUNTING THE CEPH FILE SYSTEM AS A KERNEL CLIENT3.4.1. Prerequisites3.4.2. Manually Mounting the Ceph File System as a kernel Client
Additional Resources3.4.3. Automatically Mounting the Ceph File System as a kernel Client
PrerequisitesProcedure
5556788
999
101010101010111111111111
1212121313131415151516
17171717181919192121212223232323
Table of Contents
1

. . . . . . . . . . . . . . . . . . . . . . . . . . . . . . . . . . . . . . . . . . . . . . . . . . . . . . . . . . . . . . . . . . . . . . . . . . . . . . . . . . . . . . . . . . . . . . . . . . . . . . . . . . . . . . . . . . . . . . . . . . . . . . . . . . . . . . . . . . . . . . . . . . . . . . . . . . . . . . . . . . . . . . . . . . . . . . . . . . . . . . . . . . . . . . . . . . . . . . . . . . . . . . . . . . . . . . . . . . . . . . . . . . . . . . . . . . . . . . . . . . . . . . . . . . . . . . . . . . . . . . . . . . . . . . . . . . . . . . . .
. . . . . . . . . . . . . . . . . . . . . . . . . . . . . . . . . . . . . . . . . . . . . . . . . . . . . . . . . . . . . . . . . . . . . . . . . . . . . . . . . . . . . . . . . . . . . . . . . . . . . . . . . . . . . . . . . . . . . . . . . . . . . . . . . . . . . . . . . . . . . . . . . . . . . . . . . . . . . . . . . . . . . . . . . . . . . . . . . . . . . . . . . . . . . . . . . . . . . . . . . . . . . . . . . . . . . . . . . . . . . . . . . . . . . . . . . . . . . . . . . . . . . . . . . . . . . . . . . . . . . . . . . . . . . . . . . . . . . . . .
. . . . . . . . . . . . . . . . . . . . . . . . . . . . . . . . . . . . . . . . . . . . . . . . . . . . . . . . . . . . . . . . . . . . . . . . . . . . . . . . . . . . . . . . . . . . . . . . . . . . . . . . . . . . . . . . . . . . . . . . . . . . . . . . . . . . . . . . . . . . . . . . . . . . . . . . . . . . . . . . . . . . . . . . . . . . . . . . . . . . . . . . . . . . . . . . . . . . . . . . . . . . . . . . . . . . . . . . . . . . . . . . . . . . . . . . . . . . . . . . . . . . . . . . . . . . . . . . . . . . . . . . . . . . . . . . . . . . . . . .
3.5. MOUNTING THE CEPH FILE SYSTEM AS A FUSE CLIENT3.5.1. Prerequisites3.5.2. Manually Mounting the Ceph File System as a FUSE Client
PrerequisitesProcedureAdditional Resources
3.5.3. Automatically Mounting the Ceph File System as a FUSE ClientPrerequisitesProcedure
3.6. CREATING CEPH FILE SYSTEMS WITH ERASURE CODING
CHAPTER 4. ADMINISTERING CEPH FILE SYSTEMS4.1. PREREQUISITES4.2. MAPPING DIRECTORY TREES TO MDS RANKS
PrerequisitesProcedureAdditional Resources
4.3. DISASSOCIATING DIRECTORY TREES FROM MDS RANKSPrerequisitesProcedureAdditional Resources
4.4. WORKING WITH FILE AND DIRECTORY LAYOUTS4.4.1. Prerequisites4.4.2. Understanding File and Directory Layouts
Layouts Inheritance4.4.3. Setting File and Directory Layouts
ProcedureAdditional Resources
4.4.4. Viewing File and Directory LayoutsProcedureAdditional Resources
4.4.5. Removing Directory LayoutsProcedureAdditional Resources
4.5. ADDING DATA POOLSProcedure
4.6. WORKING WITH CEPH FILE SYSTEM QUOTAS4.6.1. Prerequisites4.6.2. Ceph File System quotas4.6.3. Viewing quotas4.6.4. Setting quotas4.6.5. Removing quotas4.6.6. Additional Resources
4.7. REMOVING CEPH FILE SYSTEMS
CHAPTER 5. UNMOUNTING CEPH FILE SYSTEMS5.1. UNMOUNTING CEPH FILE SYSTEMS MOUNTED AS KERNEL CLIENTS
ProcedureAdditional Resources
5.2. UNMOUNTING CEPH FILE SYSTEMS MOUNTED AS FUSE CLIENTSProcedureAdditional Resources
APPENDIX A. TROUBLESHOOTING
24242525252626262626
303030303031313131313131313232333333333434343535353636363737383939
42424242424242
43
Red Hat Ceph Storage 3 Ceph File System Guide
2

. . . . . . . . . . . . . . . . . . . . . . . . . . . . . . . . . . . . . . . . . . . . . . . . . . . . . . . . . . . . . . . . . . . . . . . . . . . . . . . . . . . . . . . . . . . . . . . . . . . . . . . . . . . . . . . . . . . . . . . . . . . . . . . . . . . . . . . . . . . . . . . . . . . . . . . . . . . . . . . . . . . . . . . . . . . . . . . . . . . . . . . . . . . . . . . . . . . . . . . . . . . . . . . . . . . . . . . . . . . . . . . . . . . . . . . . . . . . . . . . . . . . . . . . . . . . . . . . . . . . . . . . . . . . . . . . . . . . . . . .
A.1. CEPHFS HEALTH MESSAGES
APPENDIX B. CONFIGURATION REFERENCEB.1. MDS CONFIGURATION REFERENCEB.2. JOURNALER CONFIGURATION REFERENCEB.3. FUSE CLIENT CONFIGURATION REFERENCE
Developer Options
43
45455961
66
Table of Contents
3

Red Hat Ceph Storage 3 Ceph File System Guide
4

CHAPTER 1. INTRODUCTION TO CEPH FILE SYSTEMThis chapter explains what the Ceph File System (CephFS) is and how it works.
1.1. ABOUT THE CEPH FILE SYSTEM
The Ceph File System (CephFS) is a file system compatible with POSIX standards that provides a fileaccess to a Ceph Storage Cluster.
The CephFS requires at least one Metadata Server (MDS) daemon (ceph-mds) to run. The MDSdaemon manages metadata related to files stored on the Ceph File System and also coordinates accessto the shared Ceph Storage Cluster.
CephFS uses the POSIX semantics wherever possible. For example, in contrast to many other commonnetwork file systems like NFS, CephFS maintains strong cache coherency across clients. The goal is forprocesses using the file system to behave the same when they are on different hosts as when they areon the same host. However, in some cases, CephFS diverges from the strict POSIX semantics. Fordetails, see Section 1.4, “Differences from POSIX Compliance in the Ceph File System” .
The Ceph File System ComponentsThis picture shows various layers of the Ceph File System.
The bottom layer represents the underlying core cluster that includes:
OSDs (ceph-osd) where the Ceph File System data and metadata are stored
Metadata Servers (ceph-mds) that manages Ceph File System metadata
Monitors (ceph-mon) that manages the master copy of the cluster map
The Ceph Storage Cluster Protocol layer represents the Ceph native librados library for interactingwith the core cluster.
The CephFS library layer includes the CephFS libcephfs library that works on top of librados andrepresents the Ceph File System.
The upper layer represents two types of clients that can access the Ceph File Systems.
CHAPTER 1. INTRODUCTION TO CEPH FILE SYSTEM
5

This picture shows in more detail how the Ceph File System components interact with each other.
The Ceph File System has the following primary components:
Clients represent the entities performing I/O operations on behalf of applications using CephFS(ceph-fuse for FUSE clients and kcephfs for kernel clients). Clients send metadata requests toactive MDS. In return, the client learns of file metadata and can begin safely caching bothmetadata and file data.
Metadata Servers serves metadata to clients, caches hot metadata to reduce requests to thebacking metadata pool store, manages client caches to maintain cache coherency, replicateshot metadata between active MDS, and coalesces metadata mutations to a compact journalwith regular flushes to the backing metadata pool.
1.2. MAIN CEPHFS FEATURES
The Ceph File System introduces the following features and enhancements:
Scalability
The Ceph File System is highly scalable due to horizontal scaling of metadata servers and direct clientreads and writes with individual OSD nodes.
Shared File System
The Ceph File System is a shared file system so multiple clients can work on the same file system atonce.
High Availability
The Ceph File System provides a cluster of Ceph Metadata Servers (MDS). One is active and othersare in standby mode. If the active MDS terminates unexpectedly, one of the standby MDS becomesactive. As a result, client mounts continue working through a server failure. This behavior makes theCeph File System highly available. In addition, you can configure multiple active metadata servers.See Section 2.6, “Configuring Multiple Active Metadata Server Daemons” for details.
Red Hat Ceph Storage 3 Ceph File System Guide
6

Configurable File and Directory Layouts
The Ceph File System allows users to configure file and directory layouts to use multiple pools, poolnamespaces, and file striping modes across objects. See Section 4.4, “Working with File andDirectory Layouts” for details.
POSIX Access Control Lists (ACL)
The Ceph File System supports the POSIX Access Control Lists (ACL). ACL are enabled by defaultwith the Ceph File Systems mounted as kernel clients with kernel version kernel-3.10.0-327.18.2.el7.To use ACL with the Ceph File Systems mounted as FUSE clients, you must enabled them. SeeSection 1.3, “CephFS Limitations” for details.
Client Quotas
The Ceph File System FUSE client supports setting quotas on any directory in a system. The quotacan restrict the number of bytes or the number of files stored beneath that point in the directoryhierarchy. Client quotas are enabled by default.
1.3. CEPHFS LIMITATIONS
Access Control Lists (ACL) support in FUSE clients
To use the ACL feature with the Ceph File System mounted as a FUSE client, you must enable it. Todo so, add the following options to the Ceph configuration file:
[client]
client_acl_type=posix_acl
Then restart the Ceph client.
Snapshots
Creating snapshots is not enabled by default because this feature is still experimental and it cancause the MDS or client nodes to terminate unexpectedly.If you understand the risks and still wish to enable snapshots, use:
ceph mds set allow_new_snaps true --yes-i-really-mean-it
Multiple Ceph File Systems
By default, creation of multiple Ceph File Systems in one cluster is disabled. An attempt to create anadditional Ceph File System fails with the following error:
Error EINVAL: Creation of multiple filesystems is disabled.
Creating multiple Ceph File Systems in one cluster is not fully supported yet and can cause the MDSor client nodes to terminate unexpectedly.
If you understand the risks and still wish to enable multiple Ceph file systems, use:
ceph fs flag set enable_multiple true --yes-i-really-mean-it
1.4. DIFFERENCES FROM POSIX COMPLIANCE IN THE CEPH FILE
CHAPTER 1. INTRODUCTION TO CEPH FILE SYSTEM
7
1.4. DIFFERENCES FROM POSIX COMPLIANCE IN THE CEPH FILESYSTEM
This section lists situations where the Ceph File System (CephFS) diverges from the strict POSIXsemantics.
If a client’s attempt to write a file fails, the write operations are not necessarily atomic. That is,the client might call the write() system call on a file opened with the O_SYNC flag with an 8MBbuffer and then terminates unexpectedly and the write operation can be only partially applied.Almost all file systems, even local file systems, have this behavior.
In situations when the write operations occur simultaneously, a write operation that exceedsobject boundaries is not necessarily atomic. For example, writer A writes "aa|aa" and writer Bwrites "bb|bb" simultaneously (where "|" is the object boundary) and "aa|bb" is written ratherthan the proper "aa|aa" or "bb|bb".
POSIX includes the telldir() and seekdir() system calls that allow you to obtain the currentdirectory offset and seek back to it. Because CephFS can fragment directories at any time, it isdifficult to return a stable integer offset for a directory. As such, calling the seekdir() systemcall to a non-zero offset might often work but is not guaranteed to do so. Calling seekdir() tooffset 0 will always work. This is an equivalent to the rewinddir() system call.
Sparse files propagate incorrectly to the st_blocks field of the stat() system call. BecauseCephFS does not explicitly track which parts of a file are allocated or written, the st_blocks fieldis always populated by the file size divided by the block size. This behavior causes utilities, suchas du, to overestimate consumed space.
When the mmap() system call maps a file into memory on multiple hosts, write operations arenot coherently propagated to caches of other hosts. That is, if a page is cached on host A, andthen updated on host B, host A page is not coherently invalidated.
CephFS clients present a hidden .snap directory that is used to access, create, delete, andrename snapshots. Although this directory is excluded from the readdir() system call, anyprocess that tries to create a file or directory with the same name returns an error. You canchange the name of this hidden directory at mount time with the -o snapdirname=.<new_name> option or by using the client_snapdir configuration option.
1.5. ADDITIONAL RESOURCES
If you want to use NFS Ganesha as an interface to the Ceph File System with Red HatOpenStack Platform, see the CephFS with NFS-Ganesha deployment section in the CephFS viaNFS Back End Guide for the Shared File System Service for instructions on how to deploy suchan environment.
Red Hat Ceph Storage 3 Ceph File System Guide
8

CHAPTER 2. CONFIGURING METADATA SERVER DAEMONSThis chapter explains how to configure Ceph Metadata Server (MDS) daemons.
To understand different states of MDS daemons, see Section 2.2, “States of Metadata ServerDaemons”.
To understand what a "rank" mean in MDS configuration, see Section 2.3, “Explanation of Ranksin Metadata Server Configuration”.
To learn about various configuration types of standby MDS daemons, see Section 2.4, “Types ofStandby Configuration”.
To configure standby MDS daemons, see Section 2.5, “Configuring Standby Metadata ServerDaemons”.
To configure multiple active MDS daemons, see Section 2.6, “Configuring Multiple ActiveMetadata Server Daemons”.
To decrease the number of active MDS daemons, see Section 2.7, “Decreasing the Number ofActive MDS Daemons”.
To learn about MDS cache size limits, see Section 2.8, “Understanding MDS Cache Size Limits” .
NOTE
Starting with Red Hat Ceph Storage 3.2, the ceph-mds and ceph-fuse daemons can runwith SELinux in enforcing mode.
2.1. PREREQUISITES
Deploy a Ceph Storage Cluster if you do not have one. For details, see the Installation Guide forRed Hat Enterprise Linux or Ubuntu.
Install Ceph Metadata Server daemons (ceph-mds). For details, see the Installation Guide forRed Hat Enterprise Linux or Ubuntu.
2.2. STATES OF METADATA SERVER DAEMONS
This section explains two different modes of Metadata Server (MDS) daemons and how a daemon inone mode starts operating in the other mode.
The MDS daemons can be:
Active
Standby
The active MDS daemon manages the metadata for files and directories stored on the Ceph FileSystem. The standby MDS daemons serves as backup daemons and become active when an activeMDS daemon becomes unresponsive.
By default, a Ceph File System uses only one active MDS daemon. However, you can configure the filesystem to use multiple active MDS daemons to scale metadata performance for larger workloads. Theactive MDS daemons will share the metadata workload with one another dynamically when metadata
CHAPTER 2. CONFIGURING METADATA SERVER DAEMONS
9

load patterns change. Typically, systems with many clients benefit from multiple active MDS daemons.Note that systems with multiple active MDS daemons still require standby MDS daemons to remainhighly available.
What Happens When the Active MDS Daemon FailsWhen the active MDS becomes unresponsive, a Monitor will wait the number of seconds specified by themds_beacon_grace option. Then the Monitor marks the MDS daemon as laggy and one of thestandby daemons becomes active depending on the configuration.
To change the value of mds_beacon_grace, add this option to the Ceph configuration file and specifythe new value.
2.3. EXPLANATION OF RANKS IN METADATA SERVERCONFIGURATION
Each Ceph File System has a number of ranks, one by default, which starts at zero.
Ranks define the way how the metadata workload is shared between multiple Metadata Server (MDS)daemons. The number of ranks is the maximum number of MDS daemons that can be active at one time.Each MDS daemon handles a subset of the Ceph File System metadata that is assigned to that rank.
Each MDS daemon initially starts without a rank. The Monitor assigns a rank to the daemon. An MDSdaemon can only hold one rank at a time. Daemons only lose ranks when they are stopped.
The max_mds setting controls how many ranks will be created.
The actual number of ranks in the Ceph File System is only increased if a spare daemon is available toaccept the new rank.
Rank StatesRanks can be:
Up - A rank that is assigned to an MDS daemon.
Failed - A rank that is not associated with any MDS daemon.
Damaged - A rank that is damaged; its metadata is corrupted or missing. Damaged ranks willnot be assigned to any MDS daemons until the operators fixes the problem and uses the ceph mds repaired command on the damaged rank.
2.4. TYPES OF STANDBY CONFIGURATION
This section describes various types of standby daemons configuration.
Prerequisites
Familiarize yourself with the meaning of rank in Ceph File System context. See Section 2.3,“Explanation of Ranks in Metadata Server Configuration” for details.
Configuration ParametersBy default, all Metadata Server daemons that do not hold a rank are standby daemons for any activedaemon. However, you can configure how the MDS daemons behave in standby mode by using thefollowing parameters in the Ceph configuration file.
mds_standby_replay (Standby Replay)
Red Hat Ceph Storage 3 Ceph File System Guide
10

mds_standby_for_name (Standby for Name)
mds_standby_for_rank (Standby for Rank)
mds_standby_for_fscid (Standby for FSCID)
You can set these parameters in the Ceph configuration file on the host where the MDS daemon runs asopposed to the one on the Monitor node. The MDS daemon loads these settings when it starts andsends them to the Monitor node.
Standby ReplayWhen the mds_standby_replay option is set to true for a daemon, this daemon will continuously readthe metadata journal of a rank associated with another MDS daemon (the up rank). This behavior givesthe standby replay daemon a more recent metadata cache and makes the failover process faster if thedaemon serving the rank fails.
An up rank can only have one standby replay daemon assigned to it. If two daemons are both set to bestandby replay then one of them becomes a normal non-replay standby daemon.
If the mon_force_standby_active option is set to false, a standby replay daemon is only used as astandby for the rank that it is following. If another rank fails, the standby replay daemon will not be usedas a replacement, even if no other standby daemons are available. By default, mon_force_standby_active is set to true.
Standby for NameEach daemon has a static name that is set by the administrator when configuring the daemon for thefirst time. Usually, the host name of the host where the daemon runs is used as the daemon name.
When setting the mds_standby_for_name option, the standby daemon only takes over a failed rank ifthe name of the daemon that previously held the rank matches the given name.
Standby for RankSet the mds_standby_for_rank option to configure the standby daemon to only take over thespecified rank. If another rank fails, this daemon will not replace it.
If you have multiple file systems, use this option in conjunction with the mds_standby_for_fscid optionto specify which file system rank you target.
Standby for FSCIDThe File System Cluster ID (FSCID) is an integer ID specific to a Ceph File System.
If the mds_standby_for_fscid option is used in conjunction with mds_standby_for_rank it onlyspecifies which file system rank is referred to.
If mds_standby_for_rank is not set, then setting mds_standby_for_fscid causes the standby daemonto target any rank in the specified FSCID. Use mds_standby_for_fscid if you want to use the standbydaemon for any rank, but only within a particular file system.
2.5. CONFIGURING STANDBY METADATA SERVER DAEMONS
This section describes how to configure Metadata Sever (MDS) daemons in standby mode to bettermanage a failure of the active MDS daemon.
Procedure
Edit the Ceph configuration file. You can edit the main Ceph configuration file present on allnodes, or you can use different configuration files on each MDS node that contain just
CHAPTER 2. CONFIGURING METADATA SERVER DAEMONS
11

configuration related to that node. Use parameters described in Section 2.4, “Types of StandbyConfiguration”.
For example, to configure two MDS daemons a and b acting, as a pair, where whichever onehas not currently assigned a rank will be the standby replay follower of the other:
[mds.a] mds_standby_replay = true mds_standby_for_rank = 0
[mds.b] mds_standby_replay = true mds_standby_for_rank = 0
For example, to configure four MDS daemons (a, b, c, and d) on two Ceph File Systems,where each File System has a pair of daemons:
[mds.a] mds_standby_for_fscid = 1
[mds.b] mds_standby_for_fscid = 1
[mds.c] mds_standby_for_fscid = 2
[mds.d] mds_standby_for_fscid = 2
Additional Resources
Section 2.2, “States of Metadata Server Daemons”
2.6. CONFIGURING MULTIPLE ACTIVE METADATA SERVER DAEMONS
This section describes how to configure multiple active Metadata Server (MDS) daemons to scalemetadata performance for large systems.
IMPORTANT
Do not convert all standby MDS daemons to active ones. A Ceph File System requires atleast one standby MDS daemon to remain highly available.
IMPORTANT
The scrubbing process is not currently supported when multiple active MDS daemons areconfigured.
Procedure
1. On a node with administration capabilities, set the max_mds parameter to the desired numberof active MDS daemons. Note that Ceph only increases the actual number of ranks in the CephFile Systems if a spare MDS daemon is available to take the new rank.
Red Hat Ceph Storage 3 Ceph File System Guide
12

ceph fs set <name> max_mds <number>
For example, to increase the number of active MDS daemons to two in the Ceph File Systemcalled cephfs:
[root@monitor ~]# ceph fs set cephfs max_mds 2
2. Verify the number of active MDS daemons.
ceph fs status <name>
Specify the name of the Ceph File System, for example:
[root@monitor ~]# ceph fs status cephfscephfs - 0 clients======+------+--------+-------+---------------+-------+-------+| Rank | State | MDS | Activity | dns | inos |+------+--------+-------+---------------+-------+-------+| 0 | active | node1 | Reqs: 0 /s | 10 | 12 || 1 | active | node2 | Reqs: 0 /s | 10 | 12 |+------+--------+-------+---------------+-------+-------++-----------------+----------+-------+-------+| Pool | type | used | avail |+-----------------+----------+-------+-------+| cephfs_metadata | metadata | 4638 | 26.7G || cephfs_data | data | 0 | 26.7G |+-----------------+----------+-------+-------+
+-------------+| Standby MDS |+-------------+| node3 |+-------------+
Additional Resources
Section 2.2, “States of Metadata Server Daemons”
Section 2.7, “Decreasing the Number of Active MDS Daemons”
2.7. DECREASING THE NUMBER OF ACTIVE MDS DAEMONS
This section describes how to decrease the number of active MDS daemons.
Prerequisites
The rank that you will remove must be active first, meaning that you must have the samenumber of MDS daemons as specified by the max_mds parameter.
ceph fs status <name>
Specify the name of the Ceph File System, for example:
CHAPTER 2. CONFIGURING METADATA SERVER DAEMONS
13

[root@monitor ~]# ceph fs status cephfscephfs - 0 clients======+------+--------+-------+---------------+-------+-------+| Rank | State | MDS | Activity | dns | inos |+------+--------+-------+---------------+-------+-------+| 0 | active | node1 | Reqs: 0 /s | 10 | 12 || 1 | active | node2 | Reqs: 0 /s | 10 | 12 |+------+--------+-------+---------------+-------+-------++-----------------+----------+-------+-------+| Pool | type | used | avail |+-----------------+----------+-------+-------+| cephfs_metadata | metadata | 4638 | 26.7G || cephfs_data | data | 0 | 26.7G |+-----------------+----------+-------+-------+
+-------------+| Standby MDS |+-------------+| node3 |+-------------+
Procedure
1. On a node with administration capabilities, change the max_mds parameter to the desirednumber of active MDS daemons.
ceph fs set <name> max_mds <number>
For example, to decrease the number of active MDS daemons to one in the Ceph File Systemcalled cephfs:
[root@monitor ~]# ceph fs set cephfs max_mds 1
2. Deactivate the active MDS daemon:
ceph mds deactivate <role>
Replace <role> with "name of the Ceph File System:rank", "FSID:rank", or just rank. For example,to deactivate the MDS daemon with rank 1 on the Ceph File System named cephfs:
[root@monitor ~]# ceph mds deactivate cephfs:1telling mds.1:1 127.0.0.1:6800/3187061458 to deactivate
3. Verify the number of active MDS daemons.
ceph fs status <name>
Specify the name of the Ceph File System, for example:
[root@monitor ~]# ceph fs status cephfscephfs - 0 clients======
Red Hat Ceph Storage 3 Ceph File System Guide
14

+------+--------+-------+---------------+-------+-------+| Rank | State | MDS | Activity | dns | inos |+------+--------+-------+---------------+-------+-------+| 0 | active | node1 | Reqs: 0 /s | 10 | 12 |+------+--------+-------+---------------+-------+-------++-----------------+----------+-------+-------+| Pool | type | used | avail |+-----------------+----------+-------+-------+| cephfs_metadata | metadata | 4638 | 26.7G || cephfs_data | data | 0 | 26.7G |+-----------------+----------+-------+-------+
+-------------+| Standby MDS |+-------------+| node3 || node2 |+-------------+
Additional Resources
Section 2.2, “States of Metadata Server Daemons”
Section 2.6, “Configuring Multiple Active Metadata Server Daemons”
2.8. UNDERSTANDING MDS CACHE SIZE LIMITS
This section describes ways to limit MDS cache size.
You can limit the size of the Metadata Server (MDS) cache by:
A memory limit: A new behavior introduced in the Red Hat Ceph Storage 3. Use the mds_cache_memory_limit parameters. Red Hat recommends to use memory limits instead ofinode count limits.
Inode count: Use the mds_cache_size parameter. By default, limiting the MDS cache by inodecount is disabled.
In addition, you can specify a cache reservation by using the mds_cache_reservation parameter forMDS operations. The cache reservation is limited as a percentage of the memory or inode limit and isset to 5% by default. The intent of this parameter is to have the MDS maintain an extra reserve ofmemory for its cache for new metadata operations to use. As a consequence, the MDS should in generaloperate below its memory limit because it will recall old state from clients in order to drop unusedmetadata in its cache.
The mds_cache_reservation parameter replaces the mds_health_cache_threshold in all situationsexcept when MDS nodes sends a health alert to the Monitors indicating the cache is too large. Bydefault, mds_health_cache_threshold is 150% of the maximum cache size.
Be aware that the cache limit is not a hard limit. Potential bugs in the CephFS client or MDS ormisbehaving applications might cause the MDS to exceed its cache size. The mds_health_cache_threshold configures the cluster health warning message so that operators caninvestigate why the MDS cannot shrink its cache.
Additional Resources
CHAPTER 2. CONFIGURING METADATA SERVER DAEMONS
15

MDS Configuration Reference
2.9. ADDITIONAL RESOURCES
The Installation Guide for Red Hat Enterprise Linux
The Installation Guide for Ubuntu
Red Hat Ceph Storage 3 Ceph File System Guide
16

CHAPTER 3. DEPLOYING CEPH FILE SYSTEMSThis chapter describes how to create and mount Ceph File Systems.
To deploy a Ceph File System:
1. Create a Ceph file system on a Monitor node. See Section 3.2, “Creating the Ceph FileSystems” for details.
2. Create a client user with the correct access rights and permissions and make its key available onthe node where the Ceph File System will be mounted. See Section 3.3, “Creating Ceph FileSystem Client Users” for details.
3. Mount CephFS on a dedicated node. Choose one of the following methods:
a. Mounting CephFS as a kernel client. See Section 3.4, “Mounting the Ceph File System as akernel client”
b. Mounting CephFS as a FUSE client. See Section 3.5, “Mounting the Ceph File System as aFUSE Client”
3.1. PREREQUISITES
Deploy a Ceph Storage Cluster if you do not have one. For details, see the Installation Guide forRed Hat Enterprise Linux or Ubuntu.
Install and configure Ceph Metadata Server daemons (ceph-mds). For details, see the theInstallation Guide for Red Hat Enterprise Linux or Ubuntu and Chapter 2, Configuring MetadataServer Daemons.
3.2. CREATING THE CEPH FILE SYSTEMS
This section describes how to create a Ceph File System on a Monitor node.
IMPORTANT
By default, you can create only one Ceph File System in the Ceph Storage Cluster. SeeSection 1.3, “CephFS Limitations” for details.
Prerequisites
Deploy a Ceph Storage Cluster if you do not have one. For details, see the Installation Guide forRed Hat Enterprise Linux or the Installation Guide for Ubuntu .
Install and configure Ceph Metadata Server daemons (ceph-mds). For details, see InstallingMetadata Servers in the Installation Guide for Red Hat Enterprise Linux or the Installation Guidefor Ubuntu.
Install ceph-common package.
On Red Hat Enterprise Linux:
# yum install ceph-common
On Ubuntu:
CHAPTER 3. DEPLOYING CEPH FILE SYSTEMS
17

$ sudo apt-get install ceph-common
NOTE
To enable the repo and install ceph-common package on the defined client nodes, seeInstalling the Ceph Client Role in the Installation Guide for Red Hat Enterprise Linux or theInstallation Guide for Ubuntu .
ProcedureUse the following commands from a Monitor host and as the root user.
1. Create two pools, one for storing data and one for storing metadata:
ceph osd pool create <name> <pg_num>
Specify the pool name and the number of placement groups (PGs), for example:
[root@monitor ~]# ceph osd pool create cephfs-data 64[root@monitor ~]# ceph osd pool create cephfs-metadata 64
Typically, the metadata pool can start with a conservative number of PGs as it will generally havefar fewer objects than the data pool. It is possible to increase the number of PGs if needed.Recommended metadata pool sizes range from 64 PGs to 512 PGs. Size the data poolproportional to the number and sizes of files you expect in the file system.
IMPORTANT
For the metadata pool, consider using
A higher replication level because any data loss to this pool can make thewhole file system inaccessible
Storage with lower latency such as Solid-state Drive (SSD) disks because thisdirectly affects the observed latency of file system operations on clients
2. Create the Ceph File System:
ceph fs new <name> <metadata-pool> <data-pool>
Specify the name of the Ceph File System, the metadata and data pool, for example:
[root@monitor ~]# ceph fs new cephfs cephfs-metadata cephfs-data
3. Verify that one or more MDSs enter to the active state based on you configuration.
ceph fs status <name>
Specify the name of the Ceph File System, for example:
[root@monitor ~]# ceph fs status cephfscephfs - 0 clients======
Red Hat Ceph Storage 3 Ceph File System Guide
18

+------+--------+-------+---------------+-------+-------+| Rank | State | MDS | Activity | dns | inos |+------+--------+-------+---------------+-------+-------+| 0 | active | node1 | Reqs: 0 /s | 10 | 12 |+------+--------+-------+---------------+-------+-------++-----------------+----------+-------+-------+| Pool | type | used | avail |+-----------------+----------+-------+-------+| cephfs_metadata | metadata | 4638 | 26.7G || cephfs_data | data | 0 | 26.7G |+-----------------+----------+-------+-------+
+-------------+| Standby MDS |+-------------+| node3 || node2 |+-------------+----
Additional Resources
The Enabling the Red Hat Ceph Storage Repositories section in Red Hat Ceph Storage 3Installation Guide for Red Hat Enterprise Linux
The Enabling the Red Hat Ceph Storage Repositories Red Hat Ceph Storage 3 Installation Guidefor Ubuntu
The Pools chapter in the Storage Strategies guide for Red Hat Ceph Storage 3
3.3. CREATING CEPH FILE SYSTEM CLIENT USERS
Red Hat Ceph Storage 3 uses cephx for authentication, which is enabled by default. To use cephx withCeph File System, create a user with the correct authorization capabilities on a Monitor node and makeits key available on the node where the Ceph File System will be mounted.
To make the key available for use with the kernel client, create a secret file on the client node with thekey inside it. To make the key available for the File System in User Space (FUSE) client, copy the keyringto the client node.
Procedure
1. On a Monitor host, create a client user.
ceph auth get-or-create client.<id> <capabilities>
Specify the client ID and desired capabilities.
To restrict the client to only write to and read from a particular pool in the cluster:
ceph auth get-or-create client.1 mon 'allow r' mds 'allow rw' osd 'allow rw pool=<pool>'
For example, to restrict the client to only write to and read from the data pool:
[root@monitor ~]# ceph auth get-or-create client.1 mon 'allow r' mds 'allow rw' osd 'allow rw pool=data'
CHAPTER 3. DEPLOYING CEPH FILE SYSTEMS
19

To prevent the client from modifying the pool that is used for files and directories:
[root@monitor ~]# ceph auth get-or-create client.1 mon 'allow r' mds 'allow r' osd 'allow r pool=<pool>'
For example, to prevent the client from modifying data pool:
[root@monitor ~]# ceph auth get-or-create client.1 mon 'allow r' mds 'allow r' osd 'allow r pool=data'
NOTE
Do not create capabilities for the metadata pool, as Ceph File System clientsdo not have access to it.
2. Verify the created key:
ceph auth get client.<id>
For example:
[root@monitor ~]# ceph auth get client.1
3. If you plan to use the kernel client, create a secret file using the key retrieved from the previousstep.On the client node, copy the string after key = into /etc/ceph/ceph.client.<id>.secret:
For example, if the client ID is 1 add a single line to /etc/ceph/ceph.client.1.secret with the key:
[root@client ~]# cat /etc/ceph/ceph.client.1.secretAQBSdFhcGZFUDRAAcKhG9Cl2HPiDMMRv4DC43A==
IMPORTANT
Do not include the space in between key = and the string or else mounting willnot work.
4. If you plan to use the File System in User Space (FUSE) client, copy the keyring to the client.
a. On the Monitor node, export the keyring to a file:
# ceph auth get client.<id> -o ceph.client.<id>.keyring
For example, if the client ID is 1:
[root@monitor ~]# ceph auth get client.1 -o ceph.client.1.keyringexported keyring for client.1
b. Copy the client keyring from the Monitor node to the /etc/ceph/ directory on the clientnode:
Red Hat Ceph Storage 3 Ceph File System Guide
20

scp root@<monitor>:/root/ceph.client.1.keyring /etc/ceph/ceph.client.1.keyring
Replace <monitor> with the Monitor host name or IP, for example:
[root@client ~]# scp [email protected]:/root/ceph.client.1.keyring /etc/ceph/ceph.client.1.keyring
5. Set the appropriate permissions for the keyring file.
chmod 644 <keyring>
Specify the path to the keyring, for example:
[root@client ~]# chmod 644 /etc/ceph/ceph.client.1.keyring
Additional Resources
The User Management chapter in the Administration Guide for Red Hat Ceph Storage 3
3.4. MOUNTING THE CEPH FILE SYSTEM AS A KERNEL CLIENT
You can mount the Ceph File System as a kernel client:
Manually by using the mount command-line utility
Automatically by adding an entry to the /etc/fstab file
IMPORTANT
Clients on Linux distributions aside from Red Hat Enterprise Linux are permitted but notsupported. If issues are found in the MDS or other parts of the cluster when using theseclients, Red Hat will address them, but if the cause is found to be on the client side, theissue will have to be addressed by the kernel vendor.
3.4.1. Prerequisites
On the client node, enable the Red Hat Ceph Storage 3 Tools repository:
On Red Hat Enterprise Linux, use:
[root@client ~]# subscription-manager repos --enable=rhel-7-server-rhceph-3-tools-rpms
On Ubuntu, use:
[user@client ~]$ sudo bash -c 'umask 0077; echo deb https://customername:[email protected]/3-updates/Tools $(lsb_release -sc) main | tee /etc/apt/sources.list.d/Tools.list'[user@client ~]$ sudo bash -c 'wget -O - https://www.redhat.com/security/fd431d51.txt | apt-key add -'[user@client ~]$ sudo apt-get update
On the destination client node, create a new etc/ceph directory:
CHAPTER 3. DEPLOYING CEPH FILE SYSTEMS
21

[root@client ~]# mkdir /etc/ceph
Copy the Ceph configuration file from a Monitor node to the destination client node.
scp root@<monitor>:/etc/ceph/ceph.conf /etc/ceph/ceph.conf
Replace <monitor> with the Monitor host name or IP address, for example:
[root@client ~]# scp [email protected]:/etc/ceph/ceph.conf /etc/ceph/ceph.conf
Set the correct owner and group on the ceph.conf file:
[root@client ~]# chown ceph:ceph /etc/ceph/ceph.conf
Set the appropriate permissions for the configuration file:
[root@client ~]# chmod 644 /etc/ceph/ceph.conf
3.4.2. Manually Mounting the Ceph File System as a kernel Client
To manually mount the Ceph File System as a kernel client, use the mount utility.
Prerequisites
A Ceph File System is created.
The ceph-common package is installed.
Procedure
1. Create a mount directory:
mkdir -p <mount-point>
For example:
[root@client]# mkdir -p /mnt/cephfs
2. Mount the Ceph File System. To specify multiple Monitor addresses, either separate them withcommas in the mount command, or configure a DNS server so that a single host name resolvesto multiple IP addresses and pass that host name to the mount command. Set the user nameand path to the secret file.
mount -t ceph <monitor1-host-name>:6789,<monitor2-host-name>:6789,<monitor3-host-name>:6789:/ <mount-point> -o name=<user-name>,secretfile=<path>
For example:
[root@client ~]# mount -t ceph mon1:6789,mon2:6789,mon3:6789:/ /mnt/cephfs -o name=1,secretfile=/etc/ceph/ceph.client.1.secret
3. Verify that the file system is successfully mounted:
Red Hat Ceph Storage 3 Ceph File System Guide
22

stat -f <mount-point>
For example:
[root@client ~]# stat -f /mnt/cephfs
Additional Resources
The mount(8) manual page
The DNS Servers chapter in the Networking Guide for Red Hat Enterprise Linux 7
The User Management chapter in the Administration Guide for Red Hat Ceph Storage 3
3.4.3. Automatically Mounting the Ceph File System as a kernel Client
To automatically mount a Ceph File System on start, edit the /etc/fstab file.
Prerequisites
Consider to mount the file system manually first. See Section 3.4.2, “Manually Mounting theCeph File System as a kernel Client” for details.
If you want to use the secretefile= mounting option, install the ceph-common package.
Procedure
1. On the client host, create a new directory for mounting the Ceph File System.
mkdir -p <mount-point>
For example:
[root@client ~]# mkdir -p /mnt/cephfs
2. Edit the /etc/fstab file as follows:
#DEVICE PATH TYPE OPTIONS<host-name>:<port>:/, <mount-point> ceph _netdev,<host-name>:<port>:/, [name=<user-name>,<host-name>:<port>:/, secret=<key>| secretfile=<file>, [<mount-options>]
In the first column, set the Monitor host names and their ports. Another way to specify multipleMonitor addresses is to configure a DNS server so that a single host name resolves to multipleIP addresses.
Set the mount point in the second column and the type to ceph in the third column.
Set the user name and secret file in the fourth column using the name and secretfile options,respectively.
Set the _netdev option to ensure that the file system is mounted after the networking
CHAPTER 3. DEPLOYING CEPH FILE SYSTEMS
23

Set the _netdev option to ensure that the file system is mounted after the networkingsubsystem to prevent networking issues. If you do not need access time information set noatime to increase performance.
For example:
#DEVICE PATH TYPE OPTIONSmon1:6789:/, /mnt/cephfs ceph _netdev, name=admin,mon2:6789:/, secretfile=mon3:6789:/ /home/secret.key, noatime 00
The file system will be mounted on the next boot.
3.5. MOUNTING THE CEPH FILE SYSTEM AS A FUSE CLIENT
You can mount the Ceph File System as a File System in User Space (FUSE) client:
Manually by using the ceph-fuse command-line utility
Automatically by adding an entry to the /etc/fstab file
3.5.1. Prerequisites
On the client node, enable the Red Hat Ceph Storage 3 Tools repository:
On Red Hat Enterprise Linux, use:
[root@client ~]# subscription-manager repos --enable=rhel-7-server-rhceph-3-tools-rpms
On Ubuntu, use:
[user@client ~]$ sudo bash -c 'umask 0077; echo deb https://customername:[email protected]/3-updates/Tools $(lsb_release -sc) main | tee /etc/apt/sources.list.d/Tools.list'[user@client ~]$ sudo bash -c 'wget -O - https://www.redhat.com/security/fd431d51.txt | apt-key add -'[user@client ~]$ sudo apt-get update
Copy the client keyring to the client node. See Section 3.3, “Creating Ceph File System ClientUsers” for details.
Copy the Ceph configuration file from a Monitor node to the client node.
scp root@<monitor>:/etc/ceph/ceph.conf /etc/ceph/ceph.conf
Replace <monitor> with the Monitor host name or IP, for example:
[root@client ~]# scp [email protected]:/ceph.conf /etc/ceph/ceph.conf
Set the appropriate permissions for the configuration file.
[root@client ~]# chmod 644 /etc/ceph/ceph.conf
Red Hat Ceph Storage 3 Ceph File System Guide
24

3.5.2. Manually Mounting the Ceph File System as a FUSE Client
To mount a Ceph File System as a File System in User Space (FUSE) client, use the ceph-fuse utility.
Prerequisites
On the node where the Ceph File System will be mounted, install the ceph-fuse package.
On Red Hat Enterprise Linux, use:
[root@client ~]# yum install ceph-fuse
On Ubuntu, use:
[user@client ~]$ sudo apt-get install ceph-fuse
Procedure
1. Create a directory to serve as a mount point. Note that if you used the path option with MDScapabilities, the mount point must be within what is specified by path.
mkdir <mount-point>
For example:
[root@client ~]# mkdir /mnt/mycephfs
2. Use the ceph-fuse utility to mount the Ceph File System.
ceph-fuse -n client.<client-name> <mount-point>
For example:
[root@client ~]# ceph-fuse -n client.1 /mnt/mycephfs
If you do not use the default name and location of the user keyring, that is /etc/ceph/ceph.client.<client-name/id>.keyring, use the --keyring option to specify thepath to the user keyring, for example:
[root@client ~]# ceph-fuse -n client.1 --keyring=/etc/ceph/client.1.keyring /mnt/mycephfs
If you restricted the client to a only mount and work within a certain directory, use the -roption to instruct the client to treat that path as its root:
ceph-fuse -n client.<client-name/id> <mount-point> -r <path>
For example, to instruct the client with ID 1 to treat the /home/cephfs/ directory as its root:
[root@client ~]# ceph-fuse -n client.1 /mnt/cephfs -r /home/cephfs
3. Verify that the file system is successfully mounted:
stat -f <mount-point>
CHAPTER 3. DEPLOYING CEPH FILE SYSTEMS
25

For example:
[user@client ~]$ stat -f /mnt/cephfs
Additional Resources
The ceph-fuse(8) manual page *
The User Management chapter in the Administration Guide for Red Hat Ceph Storage 3
3.5.3. Automatically Mounting the Ceph File System as a FUSE Client
To automatically mount a Ceph File System on start, edit the /etc/fstab file.
Prerequisites
Consider to mount the file system manually first. See Section 3.4.2, “Manually Mounting theCeph File System as a kernel Client” for details.
Procedure
1. On the client host, create a new directory for mounting the Ceph File System.
mkdir -p <mount-point>
For example:
[root@client ~]# mkdir -p /mnt/cephfs
2. Edit the etc/fstab file as follows:
#DEVICE PATH TYPE OPTIONSnone <mount-point> fuse.ceph _netdev ceph.id=<user-id> [,ceph.conf=<path>], defaults 0 0
Specify the use ID, for example admin, not client-admin, and the mount point. Use the confoption if you store the Ceph configuration file somewhere else than in the default location. Inaddition, specify required mount options. Consider to use the _netdev option that ensures thatthe file system is mounted after the networking subsystem to prevent networking issues. Forexample:
#DEVICE PATH TYPE OPTIONSnone /mnt/ceph fuse.ceph _netdev ceph.id=admin, ceph.conf=/etc/ceph/cluster.conf, defaults 0 0
The file system will be mounted on the next boot.
3.6. CREATING CEPH FILE SYSTEMS WITH ERASURE CODING
By default, Ceph uses replicated pools for data pools. You can also add an additional erasure-coded
Red Hat Ceph Storage 3 Ceph File System Guide
26

data pool, if needed. Ceph File Systems (CephFS) backed by erasure-coded pools use less overallstorage compared to Ceph File Systems backed by replicated pools. While erasure-coded pools use lessoverall storage, they also use more memory and processor resources than replicated pools.
IMPORTANT
Ceph File Systems on erasure-coded pools are a Technology Preview. For moreinformation see Erasure Coding with Overwrites (Technology Preview) .
IMPORTANT
Ceph File Systems on erasure-coded pools require pools using the BlueStore objectstore. For more information see Erasure Coding with Overwrites (Technology Preview) .
IMPORTANT
Red Hat recommends to use the replicated pool as the default data pool.
Prerequisites
A running Red Hat Ceph Storage Cluster.
Pools using BlueStore OSDs.
Procedure
1. Create an erasure-coded data pool for Ceph File System:
ceph osd pool create $DATA_POOL $PG_NUM erasure
For example, to create an erasure-coded pool named cephfs-data-ec with 64 placementgroups:
[root@monitor ~]# ceph osd pool create cephfs-data-ec 64 erasure
2. Create a replicated metadata pool for Ceph File System:
ceph osd pool create $METADATA_POOL $PG_NUM
For example, to create a pool named cephfs-metadata with 64 placement groups:
[root@monitor ~]# ceph osd pool create cephfs-metadata 64
3. Enable overwrites on the erasure-coded pool:
ceph osd pool set $DATA_POOL allow_ec_overwrites true
For example, to enable overwrites on an erasure-coded pool named cephfs-data-ec:
[root@monitor ~]# ceph osd pool set cephfs-data-ec allow_ec_overwrites true
4. Create the Ceph File System:
CHAPTER 3. DEPLOYING CEPH FILE SYSTEMS
27
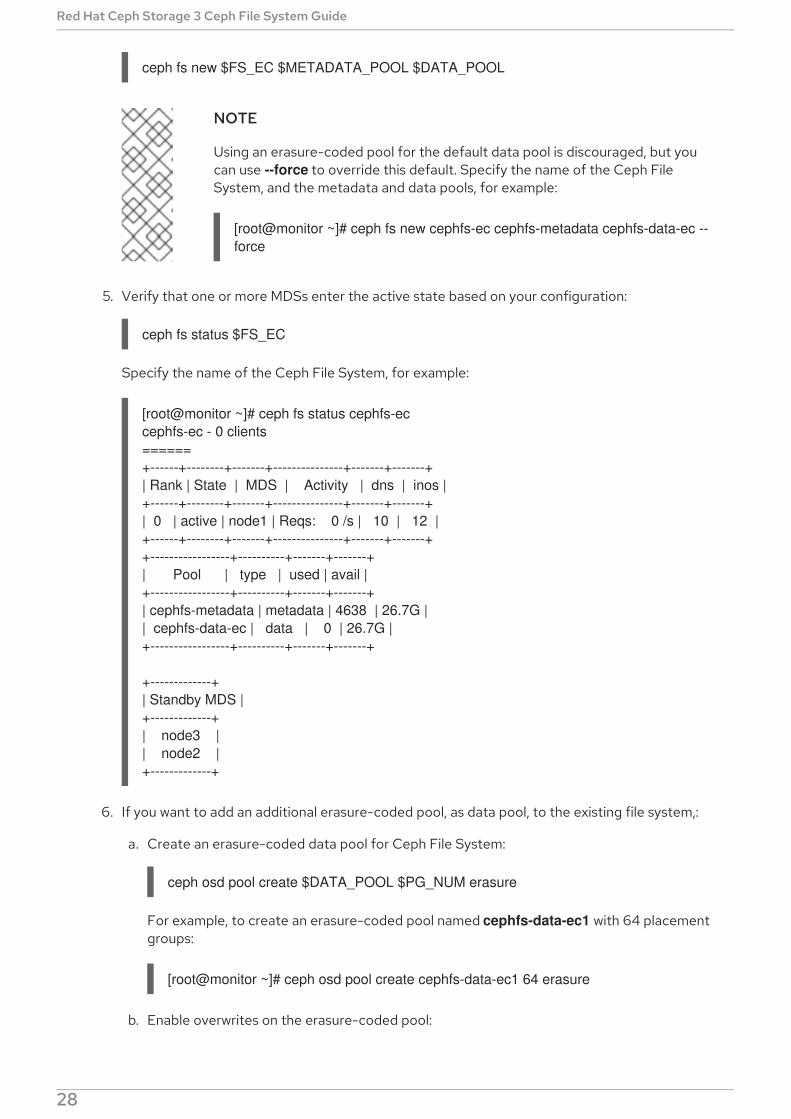
ceph fs new $FS_EC $METADATA_POOL $DATA_POOL
NOTE
Using an erasure-coded pool for the default data pool is discouraged, but youcan use --force to override this default. Specify the name of the Ceph FileSystem, and the metadata and data pools, for example:
[root@monitor ~]# ceph fs new cephfs-ec cephfs-metadata cephfs-data-ec --force
5. Verify that one or more MDSs enter the active state based on your configuration:
ceph fs status $FS_EC
Specify the name of the Ceph File System, for example:
[root@monitor ~]# ceph fs status cephfs-eccephfs-ec - 0 clients======+------+--------+-------+---------------+-------+-------+| Rank | State | MDS | Activity | dns | inos |+------+--------+-------+---------------+-------+-------+| 0 | active | node1 | Reqs: 0 /s | 10 | 12 |+------+--------+-------+---------------+-------+-------++-----------------+----------+-------+-------+| Pool | type | used | avail |+-----------------+----------+-------+-------+| cephfs-metadata | metadata | 4638 | 26.7G || cephfs-data-ec | data | 0 | 26.7G |+-----------------+----------+-------+-------+
+-------------+| Standby MDS |+-------------+| node3 || node2 |+-------------+
6. If you want to add an additional erasure-coded pool, as data pool, to the existing file system,:
a. Create an erasure-coded data pool for Ceph File System:
ceph osd pool create $DATA_POOL $PG_NUM erasure
For example, to create an erasure-coded pool named cephfs-data-ec1 with 64 placementgroups:
[root@monitor ~]# ceph osd pool create cephfs-data-ec1 64 erasure
b. Enable overwrites on the erasure-coded pool:
Red Hat Ceph Storage 3 Ceph File System Guide
28

ceph osd pool set $DATA_POOL allow_ec_overwrites true
For example, to enable overwrites on an erasure-coded pool named cephfs-data-ec1:
[root@monitor ~]# ceph osd pool set cephfs-data-ec1 allow_ec_overwrites true
c. Add the newly created pool to an existing Ceph File System:
ceph fs add_data_pool $FS_EC $DATA_POOL
For example, to add an erasure-coded pool named cephfs-data-ec1:
[root@monitor ~]# ceph fs add_data_pool cephfs-ec cephfs-data-ec1
d. Verify that one or more MDSs enter the active state based on your configuration.
ceph fs status $FS_EC
Specify the name of the Ceph File System, for example:
[root@monitor ~]# ceph fs status cephfs-eccephfs-ec - 0 clients======+------+--------+-------+---------------+-------+-------+| Rank | State | MDS | Activity | dns | inos |+------+--------+-------+---------------+-------+-------+| 0 | active | node1 | Reqs: 0 /s | 10 | 12 |+------+--------+-------+---------------+-------+-------++-----------------+----------+-------+-------+| Pool | type | used | avail |+-----------------+----------+-------+-------+| cephfs-metadata | metadata | 4638 | 26.7G || cephfs-data-ec | data | 0 | 26.7G || cephfs-data-ec1| data | 0 | 26.7G |+-----------------+----------+-------+-------+
+-------------+| Standby MDS |+-------------+| node3 || node2 |+-------------+
Additional Resources
See the Erasure-Coded Pools section in the Red Hat Ceph Storage Storage Strategies Guidefor more information.
See the Erasure Coding with Overwrites section in the Red Hat Ceph Storage Storage StrategiesGuide for more information.
CHAPTER 3. DEPLOYING CEPH FILE SYSTEMS
29

CHAPTER 4. ADMINISTERING CEPH FILE SYSTEMSThis chapter describes common Ceph File System administrative tasks.
To map a directory to a particular MDS rank, see Section 4.2, “Mapping Directory Trees to MDSRanks”.
To disassociate a directory from a MDS rank, see Section 4.3, “Disassociating Directory Treesfrom MDS Ranks”.
To work with files and directory layouts, see Section 4.4, “Working with File and DirectoryLayouts”.
To add a new data pool, see Section 4.5, “Adding Data Pools” .
To work with quotas, see Section 4.6, “Working with Ceph File System quotas” .
To remove a Ceph File System, see Section 4.7, “Removing Ceph File Systems” .
4.1. PREREQUISITES
Deploy a Ceph Storage Cluster if you do not have one. For details, see the Installation Guide forRed Hat Enterprise Linux or Ubuntu.
Install and configure Ceph Metadata Server daemons (ceph-mds). For details, see theInstallation Guide for Red Hat Enterprise Linux or Ubuntu Chapter 2, Configuring MetadataServer Daemons.
Create and mount the Ceph File System. For details, see Chapter 3, Deploying Ceph FileSystems.
4.2. MAPPING DIRECTORY TREES TO MDS RANKS
This section describes how to map a directory and its subdirectories to a particular active MetadataServer (MDS) rank so that its metadata is only managed by the MDS daemon holding that rank. Thisapproach enables you to evenly spread application load or limit impact of users' metadata requests tothe entire cluster.
IMPORTANT
Note that an internal balancer already dynamically spreads the application load.Therefore, map directory trees to ranks only for certain carefully chosen applications. Inaddition, when a directory is mapped to a rank, the balancer cannot split it. Consequently,a large number of operations within the mapped directory can overload the rank and theMDS daemon that manages it.
Prerequisites
Configure multiple active MDS daemons. See Section 2.6, “Configuring Multiple ActiveMetadata Server Daemons” for details.
Ensure that the attr package is installed on the client node with mounted Ceph File System.
Procedure
Set the ceph.dir.pin extended attribute on a directory.
Red Hat Ceph Storage 3 Ceph File System Guide
30

Set the ceph.dir.pin extended attribute on a directory.
setfattr -n ceph.dir.pin -v <rank> <directory>
For example, to assign the /home/ceph-user/ directory all of its subdirectories to rank 2:
[user@client ~]$ setfattr -n ceph.dir.pin -v 2 /home/ceph-user
Additional Resources
Section 4.3, “Disassociating Directory Trees from MDS Ranks”
4.3. DISASSOCIATING DIRECTORY TREES FROM MDS RANKS
This section describes how to disassociate a directory from a particular active Metadata Server (MDS)rank.
Prerequisites
Ensure that the attr package is installed on the client node with mounted Ceph File System.
Procedure
Set the ceph.dir.pin extended attribute to -1 on a directory.
setfattr -n ceph.dir.pin -v -1 <directory>
For example, to disassociate the /home/ceph-user/ directory from a MDS rank:
[user@client ~]$ serfattr -n ceph.dir.pin -v -1 /home/ceph-user
Note that any separately mapped subdirectories of /home/ceph-user/ are not affected.
Additional Resources
Section 4.2, “Mapping Directory Trees to MDS Ranks”
4.4. WORKING WITH FILE AND DIRECTORY LAYOUTS
This section describes how to:
Understand file and directory layouts
Set the layouts
View the layouts
Remove the directory layouts
4.4.1. Prerequisites
Make sure that the attr package is installed.
4.4.2. Understanding File and Directory Layouts
CHAPTER 4. ADMINISTERING CEPH FILE SYSTEMS
31

This section explains what file and directory layouts are in the context for the Ceph File System.
A layout of a file or directory controls how its content is mapped to Ceph RADOS objects. The directorylayouts serves primarily for setting an inherited layout for new files in that directory. See LayoutsInheritance for more details.
To view and set a file or directory layout, use virtual extended attributes or extended file attributes(xattrs). The name of the layout attributes depends on whether a file is a regular file or a directory:
Regular files layout attributes are called ceph.file.layout
Directories layout attributes are called ceph.dir.layout
The File and Directory Layout Fields table lists available layout fields that you can set on files anddirectories.
Table 4.1. File and Directory Layout Fields
Field Description Type
pool ID or name of the pool to store file’s data objects.Note that the pool must part of the set of data poolsof the Ceph file system. See Section 4.5, “AddingData Pools” for details.
string
pool_namespace Namespace to write objects to. Empty by default,that means the default namespace is used.
string
stripe_unit The size in bytes of a block of data used in the RAID0 distribution of a file. All stripe units for a file haveequal size. The last stripe unit is typically incomplete.That means it represents the data at the end of thefile as well as unused space beyond it up to the endof the fixed stripe unit size.
integer
stripe_count The number of consecutive stripe units thatconstitute a RAID 0 “stripe” of file data.
integer
object_size Size of RADOS objects in bytes in which file data arechunked.
integer
Layouts InheritanceFiles inherit the layout of their parent directory when you create them. However, subsequent changes tothe parent directory layout do not affect children. If a directory does not have any layouts set, filesinherit the layout from the closest directory with layout in the directory structure.
4.4.3. Setting File and Directory Layouts
Use the setfattr command to set layout fields on a file or directory.
IMPORTANT
Red Hat Ceph Storage 3 Ceph File System Guide
32

IMPORTANT
When you modify the layout fields of a file, the file must be empty, otherwise an erroroccurs.
Procedure
To modify layout fields on a file or directory:
setfattr -n ceph.<type>.layout.<field> -v <value> <path>
Replace:
<type> with file or dir
<field> with the name of the field, see the File and Directory Layouts Fields table for details.
<value> with the new value of the field
<path> with the path to the file or directory
For example, to set the stripe_unit field to 1048576 on the test file:
$ setfattr -n ceph.file.layout.stripe_unit -v 1048576 test
Additional Resources
The setfattr(1) manual page
4.4.4. Viewing File and Directory Layouts
This section describes how to use the getfattr command to view layout fields on a file or directory.
Procedure
To view layout fields on a file or directory as a single string:
getfattr -n ceph.<type>.layout <path>
Replace * <path> with the path to the file or directory * <type> with file or dir
For example, to view file layouts on the /home/test/ file:
$ getfattr -n ceph.dir.layout /home/testceph.dir.layout="stripe_unit=4194304 stripe_count=2 object_size=4194304 pool=cephfs_data"
NOTE
Directories do not have an explicit layout until you set it (see Section 4.4.3,“Setting File and Directory Layouts”). Consequently, an attempt to view thelayout fails if you never modified the layout.
To view individual layout fields on a file or directory:
CHAPTER 4. ADMINISTERING CEPH FILE SYSTEMS
33

getfattr -n ceph.<type>.layout.<field> <path>
Replace:
<type> with file or dir
<field> with the name of the field, see the File and Directory Layouts Fields table for details.
<path> with the path to the file or directory
For example, to view the pool field of the test file:
$ getfattr -n ceph.file.layout.pool testceph.file.layout.pool="cephfs_data"
NOTE
When viewing the pool field, the pool is usually indicated by its name. However,when you just created the pool, it can be indicated by its ID.
Additional Resources
The getfattr(1) manual page
4.4.5. Removing Directory Layouts
This section describes how to use the setfattr command to remove layouts from a directory.
NOTE
When you set a file layout, you cannot change or remove it.
Procedure
To remove a layout from a directory:
setfattr -x ceph.dir.layout <path>
Replace:
<path> with the path to the directory
For example:
$ setfattr -x ceph.dir.layout /home/cephfs
To remove the pool_namespace field:
$ setfattr -x ceph.dir.layout.pool_namespace <directory>
Replace:
<path> with the path to the directory
Red Hat Ceph Storage 3 Ceph File System Guide
34

For example:
$ setfattr -x ceph.dir.layout.pool_namespace /home/cephfs
NOTE
The pool_namespace field is the only field you can remove separately.
Additional Resources
The setfattr(1) manual page
4.5. ADDING DATA POOLS
The Ceph File System (CephFS) supports adding more than one pool to be used for storing data. Thiscan be useful for:
Storing log data on reduced redundancy pools
Storing user home directories on an SSD or NVMe pool
Basic data segregation.
Before using another data pool in the Ceph File System, you must add it as described in this section.
By default, for storing file data, CephFS uses the initial data pool that was specified during its creation.To use a secondary data pool, you must also configure a part of the file system hierarchy to store filedata in that pool (and optionally, within a namespace of that pool) using file and directory layouts. SeeSection 4.4, “Working with File and Directory Layouts” for details.
ProcedureUse the following commands from a Monitor host and as the root user.
1. Create a new data pool.
ceph osd pool create <name> <pg_num>
Replace:
<name> with the name of the pool
<pg_num> with the number of placement groups (PGs)
For example:
[root@monitor]# ceph osd pool create cephfs_data_ssd 64pool 'cephfs_data_ssd' created
2. Add the newly created pool under the control of the Metadata Servers.
ceph mds add_data_pool <name>
Replace:
CHAPTER 4. ADMINISTERING CEPH FILE SYSTEMS
35

<name> with the name of the pool
For example:
[root@monitor]# ceph mds add_data_pool cephfs_data_ssdadded data pool 6 to fsmap
3. Verify that the pool was successfully added:
[root@monitor]# ceph fs lsname: cephfs, metadata pool: cephfs_metadata, data pools: [cephfs_data cephfs_data_ssd]
4. If you use the cephx authentication, make sure that clients can access the new pool. SeeSection 3.3, “Creating Ceph File System Client Users” for details.
4.6. WORKING WITH CEPH FILE SYSTEM QUOTAS
As a storage administrator, you can view, set, and remove quotas on any directory in the file system. Youcan place quota restrictions on the number of bytes or the number of files within the directory.
4.6.1. Prerequisites
Make sure that the attr package is installed.
4.6.2. Ceph File System quotas
This section describes the properties of quotas and their limitations in CephFS.
Understanding quota limitations
CephFS quotas rely on the cooperation of the client mounting the file system to stop writingdata when it reaches the configured limit. However, quotas alone cannot prevent an adversarial,untrusted client from filling the file system.
Once processes that write data to the file system reach the configured limit, a short period oftime elapses between when the amount of data reaches the quota limit, and when the processesstop writing data. The time period generally measures in the tenths of seconds. However,processes continue to write data during that time. The amount of additional data that theprocesses write depends on the amount of time elapsed before they stop.
Linux kernel clients version 4.17 and higher use the userspace client, libcephfs and ceph-fuse tosupport CephFS quotas. However, those kernel clients only support quotas on mimic+ clusters.Kernel clients, even recent versions, cannot manage quotas on older storage clusters, even ifthey can set the quotas’ extended attributes.
When using path-based access restrictions, be sure to configure the quota on the directory towhich the client is restricted, or to a directory nested beneath it. If the client has restrictedaccess to a specific path based on the MDS capability, and the quota is configured on anancestor directory that the client cannot access, the client will not enforce the quota. Forexample, if the client cannot access the /home/ directory and the quota is configured on /home/, the client cannot enforce that quota on the directory /home/user/.
Snapshot file data that has been deleted or changed does not count towards the quota. Seealso: http://tracker.ceph.com/issues/24284
Red Hat Ceph Storage 3 Ceph File System Guide
36

4.6.3. Viewing quotas
This section describes how to use the getfattr command and the ceph.quota extended attributes toview the quota settings for a directory.
NOTE
If the attributes appear on a directory inode, then that directory has a configured quota. Ifthe attributes do not appear on the inode, then the directory does not have a quota set,although its parent directory might have a quota configured. If the value of the extendedattribute is 0, the quota is not set.
Prerequisites
Make sure that the attr package is installed.
Procedure
1. To view CephFS quotas.
a. Using a byte-limit quota:
Syntax
getfattr -n ceph.quota.max_bytes DIRECTORY
Example
[root@fs ~]# getfattr -n ceph.quota.max_bytes /cephfs/
b. Using a file-limit quota:
Syntax
getfattr -n ceph.quota.max_files DIRECTORY
Example
[root@fs ~]# getfattr -n ceph.quota.max_files /cephfs/
Additional Resources
See the getfattr(1) manual page for more information.
4.6.4. Setting quotas
This section describes how to use the setfattr command and the ceph.quota extended attributes to setthe quota for a directory.
Prerequisites
Make sure that the attr package is installed.
CHAPTER 4. ADMINISTERING CEPH FILE SYSTEMS
37

Procedure
1. To set CephFS quotas.
a. Using a byte-limit quota:
Syntax
setfattr -n ceph.quota.max_bytes -v 100000000 /some/dir
Example
[root@fs ~]# setfattr -n ceph.quota.max_bytes -v 100000000 /cephfs/
In this example, 100000000 bytes equals 100 MB.
b. Using a file-limit quota:
Syntax
setfattr -n ceph.quota.max_files -v 10000 /some/dir
Example
[root@fs ~]# setfattr -n ceph.quota.max_files -v 10000 /cephfs/
In this example, 10000 equals 10,000 files.
Additional Resources
See the setfattr(1) manual page for more information.
4.6.5. Removing quotas
This section describes how to use the setfattr command and the ceph.quota extended attributes toremove a quota from a directory.
Prerequisites
Make sure that the attr package is installed.
Procedure
1. To remove CephFS quotas.
a. Using a byte-limit quota:
Syntax
setfattr -n ceph.quota.max_bytes -v 0 DIRECTORY
Example
Red Hat Ceph Storage 3 Ceph File System Guide
38

[root@fs ~]# setfattr -n ceph.quota.max_bytes -v 0 /cephfs/
b. Using a file-limit quota:
Syntax
setfattr -n ceph.quota.max_files -v 0 DIRECTORY
Example
[root@fs ~]# setfattr -n ceph.quota.max_files -v 0 /cephfs/
Additional Resources
See the setfattr(1) manual page for more information.
4.6.6. Additional Resources
See the getfattr(1) manual page for more information.
See the setfattr(1) manual page for more information.
4.7. REMOVING CEPH FILE SYSTEMS
As a storage administrator, you can remove a Ceph File System (CephFS). Before doing so, considerbacking up all the data and verifying that all clients have unmounted the file system locally.
WARNING
This operation is destructive and will make the data stored on the Ceph File Systempermanently inaccessible.
Prerequisites
Back up your data.
Access as the root user to a Ceph Monitor node.
Procedure
1. Mark the cluster down.
ceph fs set name cluster_down true
Replace:
name with the name of the Ceph File System you want to remove
CHAPTER 4. ADMINISTERING CEPH FILE SYSTEMS
39

For example:
[root@monitor]# ceph fs set cephfs cluster_down truemarked down
2. Display the status of the Ceph File System.
ceph fs status
For example:
[root@monitor]# ceph fs statuscephfs - 0 clients======+------+--------+-------+---------------+-------+-------+| Rank | State | MDS | Activity | dns | inos |+------+--------+-------+---------------+-------+-------+| 0 | active | ceph4 | Reqs: 0 /s | 10 | 12 |+------+--------+-------+---------------+-------+-------++-----------------+----------+-------+-------+| Pool | type | used | avail |+-----------------+----------+-------+-------+| cephfs_metadata | metadata | 2246 | 975G || cephfs_data | data | 0 | 975G |+-----------------+----------+-------+-------+
3. Fail all MDS ranks shown in the status.
# ceph mds fail rank
Replace:
rank with the rank of the MDS daemons to fail
For example:
[root@monitor]# ceph mds fail 0
4. Remove the Ceph File System.
ceph fs rm name --yes-i-really-mean-it
Replace:
name with the name of the Ceph File System you want to remove
For example:
[root@monitor]# ceph fs rm cephfs --yes-i-really-mean-it
5. Verify that the file system has been successfully removed.
[root@monitor]# ceph fs ls
6. Optional. Remove data and metadata pools associated with the removed file system. See the
Red Hat Ceph Storage 3 Ceph File System Guide
40

6. Optional. Remove data and metadata pools associated with the removed file system. See theDelete a pool section in the Red Hat Ceph Storage 3 Storage Strategies Guide .
CHAPTER 4. ADMINISTERING CEPH FILE SYSTEMS
41

CHAPTER 5. UNMOUNTING CEPH FILE SYSTEMSThis chapter describes how to unmount Ceph File System mounted as kernel or File System in UserSpace (FUSE) clients.
5.1. UNMOUNTING CEPH FILE SYSTEMS MOUNTED AS KERNELCLIENTS
This section shows how to unmount a Ceph File System that is mounted as a kernel client.
Procedure
To unmount a Ceph File System mounted as a kernel client:
umount <mount-point>
Specify the mount point where the file system is mounted:
[root@client ~]# umount /mnt/cephfs
Additional Resources
The umount(8) manual page
5.2. UNMOUNTING CEPH FILE SYSTEMS MOUNTED AS FUSE CLIENTS
This section shows how to unmount a Ceph File System that is mounted as a File System in User Space(FUSE) client.
Procedure
To unmount a Ceph File System mounted in FUSE:
fusermount -u <mount-point>
Specify the mount point where the file system is mounted
[root@client ~]# fusermount -u /mnt/cephfs
Additional Resources
The ceph-fuse(8) manual page
Red Hat Ceph Storage 3 Ceph File System Guide
42

APPENDIX A. TROUBLESHOOTING
A.1. CEPHFS HEALTH MESSAGES
Cluster health checks
The Ceph monitor daemons generate health messages in response to certain states of the MDScluster. Below is the list of the cluster health messages and their explanation.
mds rank(s) <ranks> have failed
One or more MDS ranks are not currently assigned to any MDS daemon. The cluster will notrecover until a suitable replacement daemon starts.
mds rank(s) <ranks> are damaged
One or more MDS ranks has encountered severe damage to its stored metadata, and cannot startagain until the metadata is repaired.
mds cluster is degraded
One or more MDS ranks are not currently up and running, clients might pause metadata I/O untilthis situation is resolved. This includes ranks being failed or damaged, and additionally includesranks which are running on an MDS but are not in the active state yet, for example ranks in the replay state.
mds <names> are laggy
The MDS daemons are supposed to send beacon messages to the monitor in an interval specifiedby the mds_beacon_interval option (default is 4 seconds). If an MDS daemon fails to send amessage within the time specified by the mds_beacon_grace option (default is 15 seconds), theCeph monitor marks the MDS daemon as laggy and automatically replaces it with a standbydaemon if any is available.
Daemon-reported health checks
The MDS daemons can identify a variety of unwanted conditions, and return them in the output ofthe ceph status command. This conditions have human readable messages, and additionally aunique code starting MDS_HEALTH which appears in JSON output. Below is the list of the daemonmessages, their codes and explanation.
"Behind on trimming…"
Code: MDS_HEALTH_TRIMCephFS maintains a metadata journal that is divided into log segments. The length of journal (innumber of segments) is controlled by the mds_log_max_segments setting. When the number ofsegments exceeds that setting, the MDS starts writing back metadata so that it can remove(trim) the oldest segments. If this process is too slow, or a software bug is preventing trimming,then this health message appears. The threshold for this message to appear is for the number ofsegments to be double mds_log_max_segments.
"Client <name> failing to respond to capability release"
Code: MDS_HEALTH_CLIENT_LATE_RELEASE,MDS_HEALTH_CLIENT_LATE_RELEASE_MANYCephFS clients are issued capabilities by the MDS. The capabilities work like locks. Sometimes,for example when another client needs access, the MDS requests clients to release theircapabilities. If the client is unresponsive, it might fail to do so promptly or fail to do so at all. Thismessage appears if a client has taken a longer time to comply than the time specified by the mds_revoke_cap_timeout option (default is 60 seconds).
"Client <name> failing to respond to cache pressure"
APPENDIX A. TROUBLESHOOTING
43

Code: MDS_HEALTH_CLIENT_RECALL, MDS_HEALTH_CLIENT_RECALL_MANYClients maintain a metadata cache. Items, such as inodes, in the client cache are also pinned in theMDS cache. When the MDS needs to shrink its cache to stay within its own cache size limits, theMDS sends messages to clients to shrink their caches too. If a client is unresponsive, it can preventthe MDS from properly staying within its cache size and the MDS might eventually run out ofmemory and terminate unexpectedly. This message appears if a client has taken more time tocomply than the time specified by the mds_recall_state_timeout option (default is 60 seconds).See Section 2.8, “Understanding MDS Cache Size Limits” for details.
"Client name failing to advance its oldest client/flush tid"
Code: MDS_HEALTH_CLIENT_OLDEST_TID, MDS_HEALTH_CLIENT_OLDEST_TID_MANYThe CephFS protocol for communicating between clients and MDS servers uses a field calledoldest tid to inform the MDS of which client requests are fully complete so that the MDS canforget about them. If an unresponsive client is failing to advance this field, the MDS might beprevented from properly cleaning up resources used by client requests. This message appears if aclient have more requests than the number specified by the max_completed_requests option(default is 100000) that are complete on the MDS side but have not yet been accounted for inthe client’s oldest tid value.
"Metadata damage detected"
Code: MDS_HEALTH_DAMAGECorrupt or missing metadata was encountered when reading from the metadata pool. Thismessage indicates that the damage was sufficiently isolated for the MDS to continue operating,although client accesses to the damaged subtree return I/O errors. Use the damage lsadministration socket command to view details on the damage. This message appears as soon asany damage is encountered.
"MDS in read-only mode"
Code: MDS_HEALTH_READ_ONLYThe MDS has entered into read-only mode and will return the EROFS error codes to clientoperations that attempt to modify any metadata. The MDS enters into read-only mode:
If it encounters a write error while writing to the metadata pool.
If the administrator forces the MDS to enter into read-only mode by using the force_readonly administration socket command.
"<N> slow requests are blocked"
Code: MDS_HEALTH_SLOW_REQUESTOne or more client requests have not been completed promptly, indicating that the MDS is eitherrunning very slowly, or encountering a bug. Use the ops administration socket command to listoutstanding metadata operations. This message appears if any client requests have taken longertime than the value specified by the mds_op_complaint_time option (default is 30 seconds).
""Too many inodes in cache"
Code: MDS_HEALTH_CACHE_OVERSIZEDThe MDS has failed to trim its cache to comply with the limit set by the administrator. If the MDScache becomes too large, the daemon might exhaust available memory and terminateunexpectedly. This message appears if the MDS cache size is 50% greater than its limit (bydefault). See Section 2.8, “Understanding MDS Cache Size Limits” for details.
Red Hat Ceph Storage 3 Ceph File System Guide
44

APPENDIX B. CONFIGURATION REFERENCE
B.1. MDS CONFIGURATION REFERENCE
mon force standby active
Description
If set to true, monitors force MDS in standby replay mode to be active. Set under the [mon] or [global] section in the Ceph configuration file.
Type
Boolean
Default
true
max mds
Description
The number of active MDS daemons during cluster creation. Set under the [mon] or [global]section in the Ceph configuration file.
Type
32-bit Integer
Default
1
mds max file size
Description
The maximum allowed file size to set when creating a new file system.
Type
64-bit Integer Unsigned
Default
1ULL << 40
mds cache memory limit
Description
The memory limit the MDS enforces for its cache. Red Hat recommends to use this parameterinstead of the mds cache size parameter.
Type
64-bit Integer Unsigned
Default
1073741824
mds cache reservation
Description
The cache reservation (memory or inodes) for the MDS cache to maintain. The value is apercentage of the maximum cache configured. Once the MDS begins dipping into its reservation,it recalls client state until its cache size shrinks to restore the reservation.
APPENDIX B. CONFIGURATION REFERENCE
45

Type
Float
Default
0.05
mds cache size
Description
The number of inodes to cache. A value of 0 indicates an unlimited number. Red Hat recommendsto use the mds_cache_memory_limit to limit the amount of memory the MDS cache uses.
Type
32-bit Integer
Default
0
mds cache mid
Description
The insertion point for new items in the cache LRU (from the top).
Type
Float
Default
0.7
mds dir commit ratio
Description
The fraction of directory contains erroneous information before Ceph commits using a full update(instead of partial update).
Type
Float
Default
0.5
mds dir max commit size
Description
The maximum size of a directory update before Ceph breaks the directory into smallertransactions (in MB).
Type
32-bit Integer
Default
90
mds decay halflife
Description
The half-life of MDS cache temperature.
Type
Red Hat Ceph Storage 3 Ceph File System Guide
46

Float
Default
5
mds beacon interval
Description
The frequency (in seconds) of beacon messages sent to the monitor.
Type
Float
Default
4
mds beacon grace
Description
The interval without beacons before Ceph declares an MDS laggy (and possibly replace it).
Type
Float
Default
15
mds blacklist interval
Description
The blacklist duration for failed MDS daemons in the OSD map.
Type
Float
Default
24.0*60.0
mds session timeout
Description
The interval (in seconds) of client inactivity before Ceph times out capabilities and leases.
Type
Float
Default
60
mds session autoclose
Description
The interval (in seconds) before Ceph closes a laggy client’s session.
Type
Float
Default
300
APPENDIX B. CONFIGURATION REFERENCE
47

mds reconnect timeout
Description
The interval (in seconds) to wait for clients to reconnect during MDS restart.
Type
Float
Default
45
mds tick interval
Description
How frequently the MDS performs internal periodic tasks.
Type
Float
Default
5
mds dirstat min interval
Description
The minimum interval (in seconds) to try to avoid propagating recursive statistics up the tree.
Type
Float
Default
1
mds scatter nudge interval
Description
How quickly changes in directory statistics propagate up.
Type
Float
Default
5
mds client prealloc inos
Description
The number of inode numbers to preallocate per client session.
Type
32-bit Integer
Default
1000
mds early reply
Description
Determines whether the MDS allows clients to see request results before they commit to the
Red Hat Ceph Storage 3 Ceph File System Guide
48

Determines whether the MDS allows clients to see request results before they commit to thejournal.
Type
Boolean
Default
true
mds use tmap
Description
Use trivialmap for directory updates.
Type
Boolean
Default
true
mds default dir hash
Description
The function to use for hashing files across directory fragments.
Type
32-bit Integer
Default
2 (that is, rjenkins)
mds log
Description
Set to true if the MDS should journal metadata updates (disabled for benchmarking only).
Type
Boolean
Default
true
mds log skip corrupt events
Description
Determines whether the MDS tries to skip corrupt journal events during journal replay.
Type
Boolean
Default
false
mds log max events
Description
The maximum events in the journal before Ceph initiates trimming. Set to -1 to disable limits.
Type
APPENDIX B. CONFIGURATION REFERENCE
49

32-bit Integer
Default
-1
mds log max segments
Description
The maximum number of segments (objects) in the journal before Ceph initiates trimming. Set to -1 to disable limits.
Type
32-bit Integer
Default
30
mds log max expiring
Description
The maximum number of segments to expire in parallels.
Type
32-bit Integer
Default
20
mds log eopen size
Description
The maximum number of inodes in an EOpen event.
Type
32-bit Integer
Default
100
mds bal sample interval
Description
Determines how frequently to sample directory temperature (for fragmentation decisions).
Type
Float
Default
3
mds bal replicate threshold
Description
The maximum temperature before Ceph attempts to replicate metadata to other nodes.
Type
Float
Default
Red Hat Ceph Storage 3 Ceph File System Guide
50

8000
mds bal unreplicate threshold
Description
The minimum temperature before Ceph stops replicating metadata to other nodes.
Type
Float
Default
0
mds bal frag
Description
Determines whether the MDS will fragment directories.
Type
Boolean
Default
false
mds bal split size
Description
The maximum directory size before the MDS will split a directory fragment into smaller bits.
Type
32-bit Integer
Default
10000
mds bal split rd
Description
The maximum directory read temperature before Ceph splits a directory fragment.
Type
Float
Default
25000
mds bal split wr
Description
The maximum directory write temperature before Ceph splits a directory fragment.
Type
Float
Default
10000
mds bal split bits
APPENDIX B. CONFIGURATION REFERENCE
51

Description
The number of bits by which to split a directory fragment.
Type
32-bit Integer
Default
3
mds bal merge size
Description
The minimum directory size before Ceph tries to merge adjacent directory fragments.
Type
32-bit Integer
Default
50
mds bal merge rd
Description
The minimum read temperature before Ceph merges adjacent directory fragments.
Type
Float
Default
1000
mds bal merge wr
Description
The minimum write temperature before Ceph merges adjacent directory fragments.
Type
Float
Default
1000
mds bal interval
Description
The frequency (in seconds) of workload exchanges between MDS nodes.
Type
32-bit Integer
Default
10
mds bal fragment interval
Description
The frequency (in seconds) of adjusting directory fragmentation.
Type
Red Hat Ceph Storage 3 Ceph File System Guide
52

32-bit Integer
Default
5
mds bal idle threshold
Description
The minimum temperature before Ceph migrates a subtree back to its parent.
Type
Float
Default
0
mds bal max
Description
The number of iterations to run balancer before Ceph stops. Used for testing purposes only.
Type
32-bit Integer
Default
-1
mds bal max until
Description
The number of seconds to run balancer before Ceph stops. Used for testing purposes only.
Type
32-bit Integer
Default
-1
mds bal mode
Description
The method for calculating MDS load:
1 = Hybrid.
2 = Request rate and latency.
3 = CPU load.
Type
32-bit Integer
Default
0
mds bal min rebalance
Description
APPENDIX B. CONFIGURATION REFERENCE
53

The minimum subtree temperature before Ceph migrates.
Type
Float
Default
0.1
mds bal min start
Description
The minimum subtree temperature before Ceph searches a subtree.
Type
Float
Default
0.2
mds bal need min
Description
The minimum fraction of target subtree size to accept.
Type
Float
Default
0.8
mds bal need max
Description
The maximum fraction of target subtree size to accept.
Type
Float
Default
1.2
mds bal midchunk
Description
Ceph will migrate any subtree that is larger than this fraction of the target subtree size.
Type
Float
Default
0.3
mds bal minchunk
Description
Ceph will ignore any subtree that is smaller than this fraction of the target subtree size.
Type
Float
Red Hat Ceph Storage 3 Ceph File System Guide
54
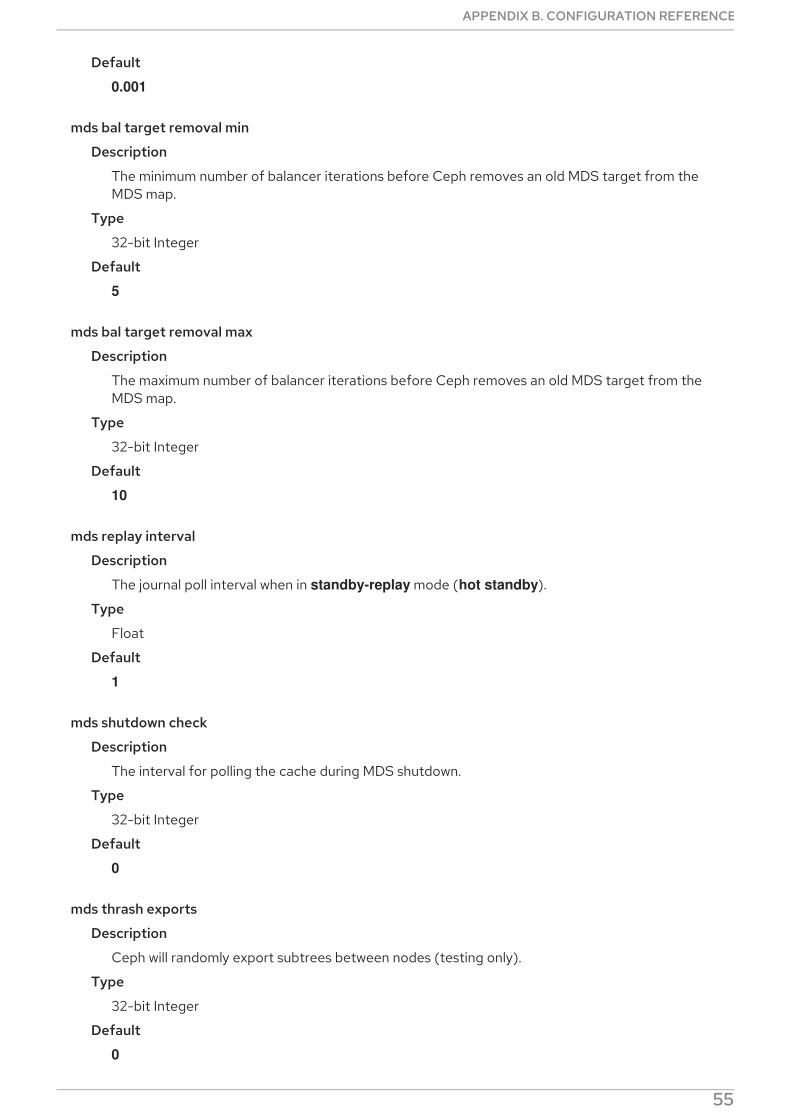
Default
0.001
mds bal target removal min
Description
The minimum number of balancer iterations before Ceph removes an old MDS target from theMDS map.
Type
32-bit Integer
Default
5
mds bal target removal max
Description
The maximum number of balancer iterations before Ceph removes an old MDS target from theMDS map.
Type
32-bit Integer
Default
10
mds replay interval
Description
The journal poll interval when in standby-replay mode (hot standby).
Type
Float
Default
1
mds shutdown check
Description
The interval for polling the cache during MDS shutdown.
Type
32-bit Integer
Default
0
mds thrash exports
Description
Ceph will randomly export subtrees between nodes (testing only).
Type
32-bit Integer
Default
0
APPENDIX B. CONFIGURATION REFERENCE
55

mds thrash fragments
Description
Ceph will randomly fragment or merge directories.
Type
32-bit Integer
Default
0
mds dump cache on map
Description
Ceph will dump the MDS cache contents to a file on each MDS map.
Type
Boolean
Default
false
mds dump cache after rejoin
Description
Ceph will dump MDS cache contents to a file after rejoining the cache during recovery.
Type
Boolean
Default
false
mds verify scatter
Description
Ceph will assert that various scatter/gather invariants are true (for developers only).
Type
Boolean
Default
false
mds debug scatterstat
Description
Ceph will assert that various recursive statistics invariants are true (for developers only).
Type
Boolean
Default
false
mds debug frag
Description
Ceph will verify directory fragmentation invariants when convenient (for developers only).
Red Hat Ceph Storage 3 Ceph File System Guide
56

Type
Boolean
Default
false
mds debug auth pins
Description
The debug authentication pin invariants (for developers only).
Type
Boolean
Default
false
mds debug subtrees
Description
The debug subtree invariants (for developers only).
Type
Boolean
Default
false
mds kill mdstable at
Description
Ceph will inject MDS failure in MDS Table code (for developers only).
Type
32-bit Integer
Default
0
mds kill export at
Description
Ceph will inject MDS failure in the subtree export code (for developers only).
Type
32-bit Integer
Default
0
mds kill import at
Description
Ceph will inject MDS failure in the subtree import code (for developers only).
Type
32-bit Integer
Default
APPENDIX B. CONFIGURATION REFERENCE
57

0
mds kill link at
Description
Ceph will inject MDS failure in hard link code (for developers only).
Type
32-bit Integer
Default
0
mds kill rename at
Description
Ceph will inject MDS failure in the rename code (for developers only).
Type
32-bit Integer
Default
0
mds wipe sessions
Description
Ceph will delete all client sessions on startup (for testing only).
Type
Boolean
Default
0
mds wipe ino prealloc
Description
Ceph will delete inode preallocation metadata on startup (for testing only).
Type
Boolean
Default
0
mds skip ino
Description
The number of inode numbers to skip on startup (for testing only).
Type
32-bit Integer
Default
0
mds standby for name
Red Hat Ceph Storage 3 Ceph File System Guide
58

Description
The MDS daemon will standby for another MDS daemon of the name specified in this setting.
Type
String
Default
N/A
mds standby for rank
Description
An instance of the MDS daemon will be standby for another MDS daemon instance of this rank.
Type
32-bit Integer
Default
-1
mds standby replay
Description
Determines whether the MDS daemon polls and replays the log of an active MDS (hot standby).
Type
Boolean
Default
false
B.2. JOURNALER CONFIGURATION REFERENCE
journaler allow split entries
Description
Allow an entry to span a stripe boundary.
Type
Boolean
Required
No
Default
true
journaler write head interval
Description
How frequently to update the journal head object.
Type
Integer
Required
No
APPENDIX B. CONFIGURATION REFERENCE
59

Default
15
journaler prefetch periods
Description
How many stripe periods to read ahead on journal replay.
Type
Integer
Required
No
Default
10
journal prezero periods
Description
How many stripe periods to zero ahead of write position.
Type
Integer
Required
No
Default
10
journaler batch interval
Description
Maximum additional latency in seconds to incur artificially.
Type
Double
Required
No
Default
.001
journaler batch max
Description
Maximum bytes that will be delayed flushing.
Type
64-bit Unsigned Integer
Required
No
Default
0
Red Hat Ceph Storage 3 Ceph File System Guide
60

B.3. FUSE CLIENT CONFIGURATION REFERENCE
This section lists configuration options for CephFS FUSE clients. Set them in the Ceph configuration fileunder the [client] section.
client_acl_type
Description
Set the ACL type. Currently, only possible value is posix_acl to enable POSIX ACL, or an emptystring. This option only takes effect when fuse_default_permissions is set to false.
Type
String
Default
"" (no ACL enforcement)
client_cache_mid
Description
Set the client cache midpoint. The midpoint splits the least recently used lists into a hot and warmlist.
Type
Float
Default
0.75
client_cache size
Description
Set the number of inodes that the client keeps in the metadata cache.
Type
Integer
Default
16384 (16 MB)
client_caps_release_delay
Description
Set the delay between capability releases in seconds. The delay sets how many seconds a clientwaits to release capabilities that it no longer needs in case the capabilities are needed for anotheruser-space operation.
Type
Integer
Default
5 (seconds)
client_debug_force_sync_read
Description
If set to true, clients read data directly from OSDs instead of using a local page cache.
Type
APPENDIX B. CONFIGURATION REFERENCE
61

Boolean
Default
false
client_dirsize_rbytes
Description
If set to true, use the recursive size of a directory (that is, total of all descendants).
Type
Boolean
Default
true
client_max_inline_size
Description
Set the maximum size of inlined data stored in a file inode rather than in a separate data object inRADOS. This setting only applies if the inline_data flag is set on the MDS map.
Type
Integer
Default
4096
client_metadata
Description
Comma-delimited strings for client metadata sent to each MDS, in addition to the automaticallygenerated version, host name, and other metadata.
Type
String
Default
"" (no additional metadata)
client_mount_gid
Description
Set the group ID of CephFS mount.
Type
Integer
Default
-1
client_mount_timeout
Description
Set the timeout for CephFS mount in seconds. If the storage cluster is not using CephFS, thisvalue refers to the number of seconds that a Ceph Monitor node attempts to communicate withother Ceph Monitor nodes in the storage cluster. If the Ceph Monitor node cannot reach the
Red Hat Ceph Storage 3 Ceph File System Guide
62

other nodes, it times out after the defined number of seconds. In addition, any active libvirt/librados operations time out at the same time. Setting the timeout value allowsapplications to fail after the specified time interval, instead of blocking other operations.
Type
Float
Default
300.0
client_mount_uid
Description
Set the user ID of CephFS mount.
Type
Integer
Default
-1
client_mountpoint
Description
An alternative to the -r option of the ceph-fuse command. See
Type
String
Default
/
client_oc
Description
Enable object caching.
Type
Boolean
Default
true
client_oc_max_dirty
Description
Set the maximum number of dirty bytes in the object cache.
Type
Integer
Default
104857600 (100MB)
client_oc_max_dirty_age
Description
Set the maximum age in seconds of dirty data in the object cache before writeback.
Type
APPENDIX B. CONFIGURATION REFERENCE
63

Float
Default
5.0 (seconds)
client_oc_max_objects
Description
Set the maximum number of objects in the object cache.
Type
Integer
Default
1000
client_oc_size
Description
Set how many bytes of data will the client cache.
Type
Integer
Default
209715200 (200 MB)
client_oc_target_dirty
Description
Set the target size of dirty data. Red Hat recommends to keep this number low.
Type
Integer
Default
8388608 (8MB)
client_permissions
Description
Check client permissions on all I/O operations.
Type
Boolean
Default
true
client_quota_df
Description
Report root directory quota for the statfs operation.
Type
Boolean
Default
true
Red Hat Ceph Storage 3 Ceph File System Guide
64

client_readahead_max_bytes
Description
Set the maximum number of bytes that the kernel reads ahead for future read operations.Overridden by the client_readahead_max_periods setting.
Type
Integer
Default
0 (unlimited)
client_readahead_max_periods
Description
Set the number of file layout periods (object size * number of stripes) that the kernel readsahead. Overrides the client_readahead_max_bytes setting.
Type
Integer
Default
4
client_readahead_min
Description
Set the minimum number bytes that the kernel reads ahead.
Type
Integer
Default
131072 (128KB)
client_snapdir
Description
Set the snapshot directory name.
Type
String
Default
".snap"
client_tick_interval
Description
Set the interval in seconds between capability renewal and other upkeep.
Type
Float
Default
1.0
client_use_random_mds
Description
APPENDIX B. CONFIGURATION REFERENCE
65

Choose random MDS for each request.
Type
Boolean
Default
false
fuse_default_permissions
Description
When set to false, the ceph-fuse utility checks does its own permissions checking, instead ofrelying on the permissions enforcement in FUSE. Set to false together with the client acl type=posix_acl option to enable POSIX ACL.
Type
Boolean
Default
true
Developer Options
IMPORTANT
These options are internal. They are listed here only to complete the list of options.
client_debug_getattr_caps
Description
Check if the reply from the MDS contains required capabilities.
Type
Boolean
Default
false
client_debug_inject_tick_delay
Description
Add artificial delay between client ticks.
Type
Integer
Default
0
client_inject_fixed_oldest_tid
Description, Type
Boolean
Default
false
Red Hat Ceph Storage 3 Ceph File System Guide
66

client_inject_release_failure
Description, Type
Boolean
Default
false
client_trace
Description
The path to the trace file for all file operations. The output is designed to be used by the Cephsynthetic client. See the ceph-syn(8) manual page for details.
Type
String
Default
"" (disabled)
APPENDIX B. CONFIGURATION REFERENCE
67