
Raspberry for remote services - Ing. Albrecht Weinert
64
Albrecht Weinert Raspberry for remote services A b s t r a c t and I n t r o d u c t i o n This technical report is about installing and using Raspberry Pi machines as little distributed servers especially for embedded process control applications. Fig. 1: The Raspi Zoo Target machines are Raspberry Pi3s, and quite seldom Figure 1's Pi1s. The Pi's operating system will mostly be Raspbian Jessy lite, as long as some problems with Stretch are virulent, nevertheless using some Stretch repos for updates and installations. Raspbian is a Debian derivative as is Ubuntu. Raspbian, by itself, is no real time OS. Nevertheless, obeying some caveats, the lite variant may well be used in applications where latencies of 200 µs (or above) are tolerable. With careful C programming we can implement PLC like applications with 1 ms as fastest cycle based on Raspian lite. Motivation and goals One might use a Raspberry 3 as a little low performance PC, nevertheless well outperforming last century's early PCs. Usually a Raspberry will be configured as a device for special purposes, often embedded. Then monitor, keyboard and mouse will hardly be present except for tough mainten- ance jobs and very first start of a freshly installed OS to configure remote and network access.
-
Upload
khangminh22 -
Category
Documents
-
view
1 -
download
0
Transcript of Raspberry for remote services - Ing. Albrecht Weinert
Albrecht Weinert
Raspberry for remote services
A b s t r a c t and I n t r o d u c t i o n
This technical report is about installing and using Raspberry Pi machines as little distributed servers especially for embedded process control applications.
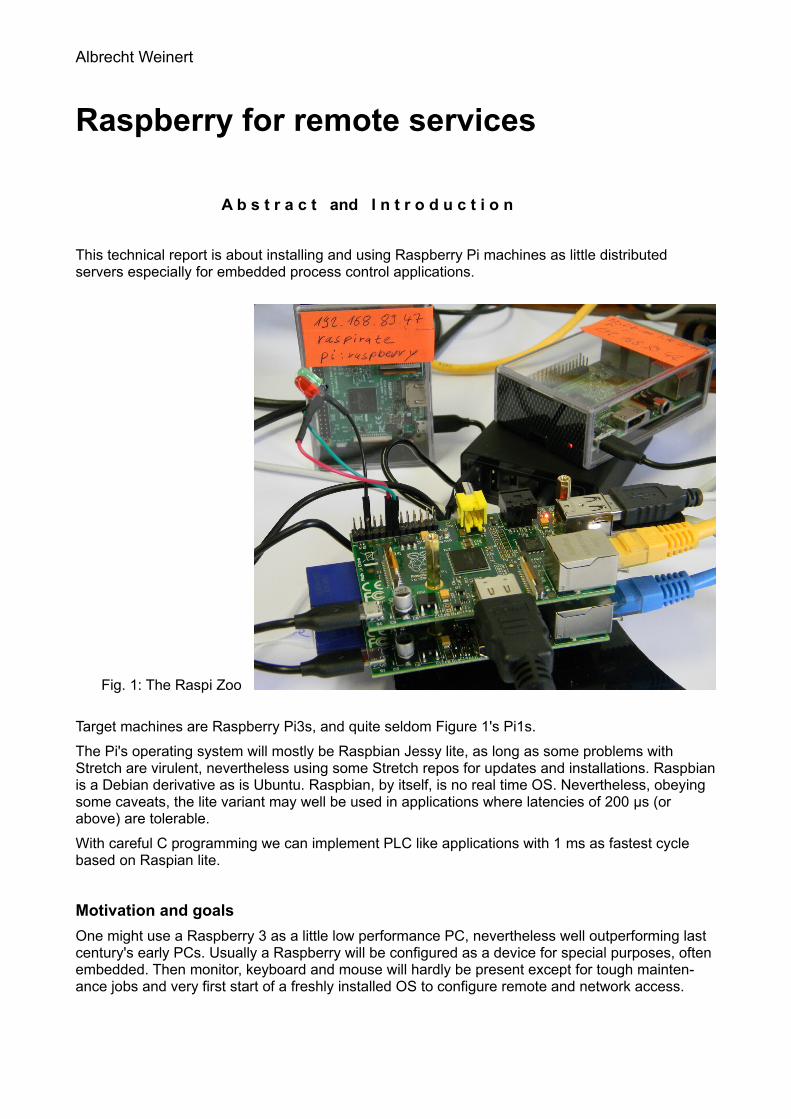
Fig. 1: The Raspi Zoo
Target machines are Raspberry Pi3s, and quite seldom Figure 1's Pi1s.
The Pi's operating system will mostly be Raspbian Jessy lite, as long as some problems with Stretch are virulent, nevertheless using some Stretch repos for updates and installations. Raspbianis a Debian derivative as is Ubuntu. Raspbian, by itself, is no real time OS. Nevertheless, obeying some caveats, the lite variant may well be used in applications where latencies of 200 µs (or above) are tolerable.
With careful C programming we can implement PLC like applications with 1 ms as fastest cycle based on Raspian lite.
Motivation and goals
One might use a Raspberry 3 as a little low performance PC, nevertheless well outperforming last century's early PCs. Usually a Raspberry will be configured as a device for special purposes, often embedded. Then monitor, keyboard and mouse will hardly be present except for tough mainten-ance jobs and very first start of a freshly installed OS to configure remote and network access.
Raspberry for remote services 2 Albrecht Weinert
Following that route we will have a headless server or device that
● boots quickly and robustly at power on
● starts all its applications and/or services automatically
● runs 24/7
● fits, connects and re-connects robustly in its LAN and/or WLAN
● connects to process I/O via GPIO, SPI, RS232/445, private LAN, 1-wire or other
● provides administrative access remotely via ssl/ssh/putty
● provides access to files via ftp (FileZilla, WinSCP)
● and having a decent comfortable cross platform working environment, best on a Windows workstation using Eclipse and GCC tools.
Looking up those points we find us quite near the properties we must have in a “real” server; com-pare the Fujitsu Siemens RAID examples in [29] (notwithstanding the latter being a 1000 times heavier). Hence, some solutions and procedures may look astonishingly alike.
On the content
In Part I we describe the basic installation and commissioning with Raspberries.
Here we get the common knowledge and procedures and tools almost always needed when working with these (little) systems.
Part II deals with some use cases and real applications
Main points are using (process) IO and implementing automatically starting, unattended running applications respectively services. We look at hardware interfaces, Web HMI, GPIO libraries, timing, latencies, threading and cyclic tasks, using little exemplary applications.
Using names
Names and addresses used here (and in [27..31]) are not fictitious. This helps bringing examples, really working and proven, of commands, files, outputs etc. – without errors introduced by obfuscating. Of course, you'll have to adapt IP addresses, names numbers etc. to your environ-ment and needs, even when this will not always be explicitly mentioned.
For References and Abbreviations please see the Appendix (page 61)., Refer to [29] for some Linux and server basics, abbreviations and else, also used here.
Prof. Dr.-Ing. Albrecht Weinert is founder and director of weinert-automation.
He developed safety critical and highly available automation systems with Siemens AG and was Professor of Computer Science at Bochum University of Applied Sciences.
Rev. 39b 22.08.2019 Photos by A. Weinert
Part I 3 Albrecht Weinert
Table of Content
A b s t r a c t and I n t r o d u c t i o n ............................................................................................1
Motivation and goals ......................................................................................................................1
On the content ................................................................................................................................2
P A R T I ........................................................................................................................................ 5
Basic installation .............................................................................................................................5
Preparing the SD-card .................................................................................................................5
Raspbian .....................................................................................................................................5
First commissioning .....................................................................................................................6
Setting the host name ..................................................................................................................7
Enable WLAN – or disable it ...........................................................................................................7
Force IPv4 ...................................................................................................................................9
Configuring putty ............................................................................................................................9
Enabling file access ......................................................................................................................10
Using SSHFS (not recommended) ............................................................................................10
SFTP – FileZilla .........................................................................................................................10
SFTP – WinSCP ........................................................................................................................12
Transferring to non-home............................................................................................................12
SD-card: save and restore – and clone ........................................................................................13
The size problem .......................................................................................................................14
The too clever dd problem .........................................................................................................14
Part I's results ...............................................................................................................................15
P A R T I I ....................................................................................................................................16
Using the GPIOs ..........................................................................................................................16
An application as service ..............................................................................................................20
rc.local .......................................................................................................................................20
cron ........................................................................................................................................... 20
Mimic a service – start stop restart enable disable ....................................................................21
Cross-compile C for Raspberry from a powerful workstation ........................................................23
Eclipse – step zero .....................................................................................................................24
Eclipse – make project ...............................................................................................................25
Eclipse – troubles and hints ........................................................................................................25
Making a library .........................................................................................................................27
Starting with GPIO – a look at wiringPi, bcm2835 and a derivative ..............................................28
wiringPi – resume ......................................................................................................................29
bcm2835 – resume ....................................................................................................................29
bcm2835 – improvements due (?) – resume .............................................................................30
Raspberry for remote services 4 Albrecht Weinert
The pigpio library ..........................................................................................................................30
Process IO hardware ....................................................................................................................32
LEDs and buttons – direct IO .....................................................................................................33
Speakers and beepers ..............................................................................................................33
Relays ....................................................................................................................................... 35
Power transistors .......................................................................................................................36
piXtend ......................................................................................................................................36
piXtend pure ..............................................................................................................................37
Communication hardware – RS485 ...........................................................................................37
PoE – power over Ethernet ..........................................................................................................40
Communication ............................................................................................................................40
Modbus .....................................................................................................................................40
libmodbus ..................................................................................................................................41
MQTT ........................................................................................................................................ 45
MOSQUITTO .............................................................................................................................45
libmosquitto ...............................................................................................................................46
1-wire ........................................................................................................................................... 47
Real time ......................................................................................................................................48
Absolute timing ..........................................................................................................................48
Latency and accuracy ................................................................................................................49
Cycles and threads ....................................................................................................................50
Threading and synchronizing .......................................................................................................50
Co-operating applications .............................................................................................................51
Shared memory .........................................................................................................................51
Semaphore sets ........................................................................................................................52
Watchdog .....................................................................................................................................53
Web interface ...............................................................................................................................54
Apache 2.4 .................................................................................................................................54
Installation .................................................................................................................................54
Installing PHP7 (not used in the end) ........................................................................................55
Apache 2.4 configuration ...........................................................................................................55
GCI programs ............................................................................................................................56
Data exchange with AJAX & JSON ...........................................................................................58
Getting Web data – cURL .............................................................................................................58
The result – and where we are .....................................................................................................60
A p p e n d i x ..............................................................................................................................61
Miscellaneous commands ............................................................................................................61
Abbreviations ................................................................................................................................62
References ...................................................................................................................................64
Part I 5 Albrecht Weinert
P A R T I
Basic installation
The OS images mostly used are● NOOBS only for those who don't know what distribution to chose● Raspbian “lite”, i.e. no graphics, and (almost never) the not lite variant.
For servers and process control with real time requirements we strongly recommend the "lite” variant having no GUI nor graphical tools. Standard Linuxes call that a “server distribution”.
Preparing the SD-card
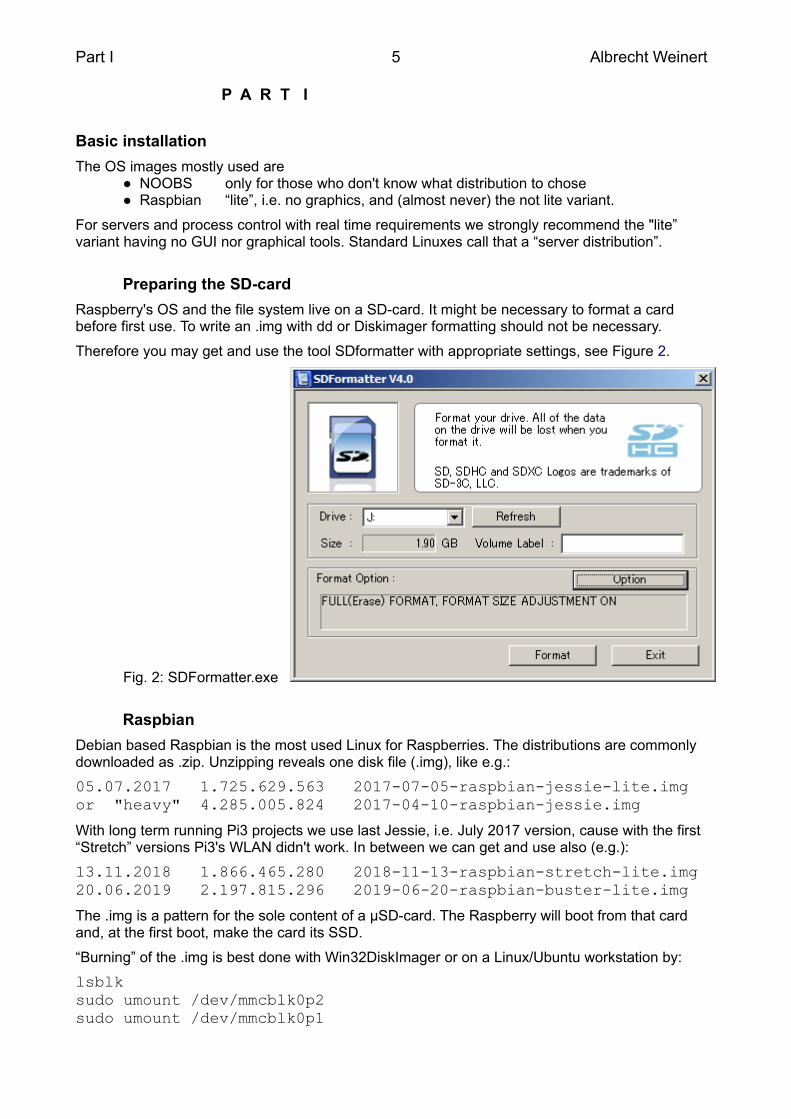
Raspberry's OS and the file system live on a SD-card. It might be necessary to format a card before first use. To write an .img with dd or Diskimager formatting should not be necessary.
Therefore you may get and use the tool SDformatter with appropriate settings, see Figure 2.
Fig. 2: SDFormatter.exe
Raspbian
Debian based Raspbian is the most used Linux for Raspberries. The distributions are commonly downloaded as .zip. Unzipping reveals one disk file (.img), like e.g.:
05.07.2017 1.725.629.563 2017-07-05-raspbian-jessie-lite.imgor "heavy" 4.285.005.824 2017-04-10-raspbian-jessie.img
With long term running Pi3 projects we use last Jessie, i.e. July 2017 version, cause with the first “Stretch” versions Pi3's WLAN didn't work. In between we can get and use also (e.g.):
13.11.2018 1.866.465.280 2018-11-13-raspbian-stretch-lite.img20.06.2019 2.197.815.296 2019-06-20-raspbian-buster-lite.img
The .img is a pattern for the sole content of a µSD-card. The Raspberry will boot from that card and, at the first boot, make the card its SSD.
“Burning” of the .img is best done with Win32DiskImager or on a Linux/Ubuntu workstation by:
lsblksudo umount /dev/mmcblk0p2sudo umount /dev/mmcblk0p1
Raspberry for remote services 6 Albrecht Weinert
cd ~/Downloads/
sudo dd of=/dev/mmcblk0 if=2017-04-10-raspbian-jessie-lite.img bs=4M
sudo umount /dev/mmcblk0
Insert the [µ]SD; the first command (lsblk) reveals the often dazzling names given to the SD-card and its partitions.. Be very sure to recognise the [µ]SD card!
With the next commands un-mount all partitions (p1 …) if any; do not un-mount the device. From where you unzipped the .img to, use the dd command to burn the .img.
Using Windows (best Win32DiskImager), you get a simple drive letter.
Notes:● a dd or Diskimager write will destroy all former content. Be really sure to have the right device on Linux respectively the correct drive (letter) on Windows!● Be patient. Burning may run some minutes (up to 2 per GB) and dd gives no feedback.● If dd ends immediately, something went wrong (check the return code, if in doubt).
Prepare headless access from start
If you want headless access after installation you must do this on the PC while having the [µ]SD-card mounted: Add a file named ssh (no extension, no content) on the SD card's root directory. This enables putty and ssh via LAN and avoids the keyboard layout horror; see note *) below. You need a DHCP server on your (W)LAN.
If you want this headless access from start via WLAN, too, try this: Put a file named wpa_supplicant.conf on the SD card's /boot/ directory with this content:
country=DEctrl_interface=DIR=/var/run/wpa_supplicant GROUP=netdevupdate_config=1network={ ssid=wlan-name psk=passwort or output of wpa_passphrase wlan-name key_mgmt=WPA-PSK}
This will work since Stretch and for Buster. But n.b.: Have no blanks around = and have Unix-text-format (LF only) when preparing this file on a Windows workstation.
With or without preparing headless access, un-mount the device, remove the [µ]SD-card, put it in the target Raspberry.
Note on (semi) automating the burning: On Windows' mostly pure graphical tools the .img burning may hardly be (batch) automated. And if the tools have a command line there's still the “drive letter surprise” effect. On the other hand, Linux/Ubuntu is hardly better. Here you have the funny device and partition name surprise.
First commissioning
These are first steps to bring in a new OS with a freshly prepared [µ]SD card. Here we almost always need local as well as [W]LAN access to the Raspberry. So ● take the not powered target Raspberry and put the card in ● get the little machine to mouse, keyboard, LAN and HDMI monitor *) ● and, as last step, connect power (usually by USB 5V 2A).
When all went well, you'll be prompted to log-in. Pre-defined user is “pi”, password is “raspberry”. As most images are US with no real installer – keyboard layout and much else is utterly wrong.

Part I 7 Albrecht Weinert
As a first consequence, the standard login will fail, while pi:rasberrz will succeed. If pi:rasberrz and pi:raspberry both fail, someone had the prudence to change the public first log-in of a public image.Note: When making a “public” name:password never use any keys that are misplaced on US keyboards nor special ones on German or French. And never rely on the existence of the numeric pad.Note *): All that monitor and keyboard (layout) hassle can be avoided by headless installation.
After taking the login hurdle search the - (minus) or use the numeric keyboard to enter
raspbi-config
To use this tool, you need space, cursor keys and tab. Here the keyboard bug should not be a problem. Otherwise you're lost.
Now use raspi-config to
● set your locale ● the keyboard layout (not needed when only headless access is used) ● the time zone ● your country's WiFi settings ● and enable ssl (found in interface options, essential for remote access!) x do not enable using all the rest of the µSD as disk (NOOBS would do that without order) ● change the (host) name (this may not really work with raspi-config) ● enable serial interface, but not as console (if you wish to use it for devices)
With working (W)LAN and in a network with a DHCP server you should see the Raspberry's usableIP address(es) by: ifconfig
If the machine met the same DHCP server before, the address(es) should stay the same. In a control network, do order the DHCP server to give your controllers fixed stable addresses.
With ssl you may get a remote shell via ssh or putty. Using putty on Windows instead of Ubuntu gives superb clipboard support that sooner or later will get essential for any remote work.
Tip 1: Do not chose "predictable" interface names if the question arises. You'll get the opposite.Tip 2: Use your locale, encoding etc. but switch the output of the OS and the applications back to English, the Rasbpian default language, by
export LC_ALL=C # (put in ~/.bashrc to have it after reboot)
Setting the host name
When having more than one Raspberry in the [W]LAN you must give each one an unique name.
With Raspbian changing the host name must be done in three places: by both editing /etc/hostname as well as /etc/hosts and by the hostname command:
sudo nano /etc/hostnamesudo hostname theNewNamesudo nano /etc/hosts # correct / set 127.0.1.1 entry here
raspi-config may do only the first step, leading to schizophrenic effects and error messages.Note: With the last Jessie and with Stretch this problem is gone.
Enable WLAN – or disable it
The Pi3 has WLAN on board (Pi1 has not). The build in WLAN's only disadvantage is the antenna being fixed to the board. Encasements with good protection and shielding will render it unusable. While LAN (with DHCP) is working out of the box, WLAN will require some settings. This is best done by command line, as well described in [53]. On the other hand, when having prepared headless WLAN access above, no further action may be needed.
A most useful command – even when not wanting to use WLAN – is listing visible WLANs by:
sudo iwlist wlan0 scan
Raspberry for remote services 8 Albrecht Weinert
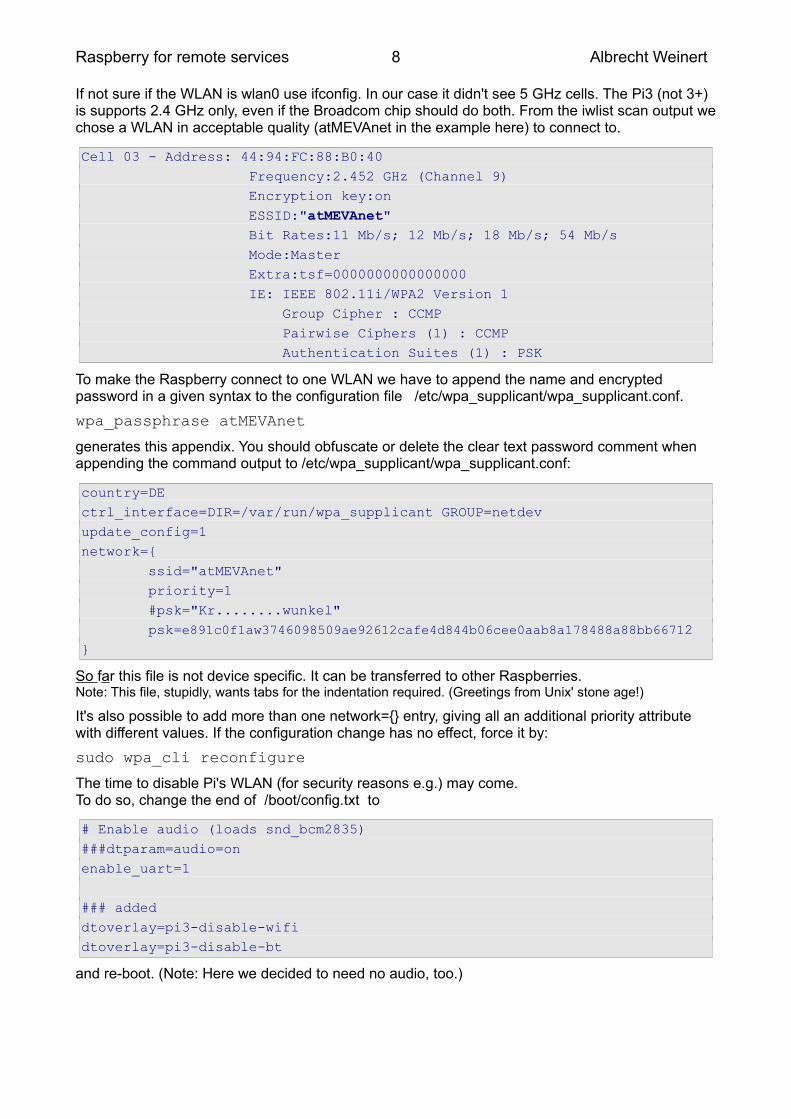
If not sure if the WLAN is wlan0 use ifconfig. In our case it didn't see 5 GHz cells. The Pi3 (not 3+) is supports 2.4 GHz only, even if the Broadcom chip should do both. From the iwlist scan output wechose a WLAN in acceptable quality (atMEVAnet in the example here) to connect to.
Cell 03 - Address: 44:94:FC:88:B0:40 Frequency:2.452 GHz (Channel 9) Encryption key:on ESSID:"atMEVAnet" Bit Rates:11 Mb/s; 12 Mb/s; 18 Mb/s; 54 Mb/s Mode:Master Extra:tsf=0000000000000000 IE: IEEE 802.11i/WPA2 Version 1 Group Cipher : CCMP Pairwise Ciphers (1) : CCMP Authentication Suites (1) : PSK
To make the Raspberry connect to one WLAN we have to append the name and encrypted password in a given syntax to the configuration file /etc/wpa_supplicant/wpa_supplicant.conf.
wpa_passphrase atMEVAnet
generates this appendix. You should obfuscate or delete the clear text password comment when appending the command output to /etc/wpa_supplicant/wpa_supplicant.conf:
country=DEctrl_interface=DIR=/var/run/wpa_supplicant GROUP=netdevupdate_config=1network={ ssid="atMEVAnet" priority=1 #psk="Kr........wunkel" psk=e891c0f1aw3746098509ae92612cafe4d844b06cee0aab8a178488a88bb66712}
So far this file is not device specific. It can be transferred to other Raspberries.Note: This file, stupidly, wants tabs for the indentation required. (Greetings from Unix' stone age!)
It's also possible to add more than one network={} entry, giving all an additional priority attribute with different values. If the configuration change has no effect, force it by:
sudo wpa_cli reconfigure
The time to disable Pi's WLAN (for security reasons e.g.) may come. To do so, change the end of /boot/config.txt to
# Enable audio (loads snd_bcm2835)###dtparam=audio=onenable_uart=1
### addeddtoverlay=pi3-disable-wifidtoverlay=pi3-disable-bt
and re-boot. (Note: Here we decided to need no audio, too.)
Part I 9 Albrecht Weinert
Force IPv4
Even when all your LAN addresses are IPv4, you may notice wlan0 using IPv6 only, even when theaccess points live in the same LAN and the DHCH server distributes IPv4 to all. Add the line
net.ipv6.conf.all.disable_ipv6=1
to /etc/sysctl.conf.
Now it's a good time to “Make consistent and comparable directory listings”; Appendix page 61. And, when at it, you may install the pigpio library (page 30) and libmodbus (page 41).
Configuring putty
With ssl enabled, from a workstation or laptop in the same network connect to your Raspberry with ssh using putty(.exe). And making a good putty configuration is well worth the trouble.
Start with nice and readable colours, think about font, window title as well as on clipboard+mouse behaviour. When satisfied give the configuration a recognisable name, like e.g. rasp61. Best use the Raspberry's unique hostname. When needing multiple accesses (LAN and WL AN) you'll need extra names; as the configurations are connection specific. To re-use the configuration command
putty -load rasp61 -l pi
Change the “-l pi” (meaning log-in as user pi) when wanting another user account to log-in or omit the “-l name” option to interactively entering the user.
Make an icon with the command in case of needing this concrete connection regularly.After having spared no efforts in making a good configuration for this one Raspberry connection wewant to reuse the settings, mutatis mutandis, for other machines. You may use the putty GUI by
a) load, b) modify c) save and/or open.
To make putty configurations cross workstation borders, on Linux/Ubuntu find those configurations as just text files of the configuration name in the (hidden) directory
~/.putty/sessions/
Copy the pattern (file) you like best to a new name and edit it according to the new purpose. Look for host names respectively IP addresses and window titles, lest being in for some confusion.
On Windows putty.exe holds configurations in the registry. To re-use those configurations, the place to look for is
[HKEY_CURRENT_USER\Software\SimonTatham\PuTTY\Sessions\theSession]
Once you have a nice pattern you want to reuse do regedit.exe
and navigate to
[HKEY_CURRENT_USER\Software\SimonTatham\PuTTY\Sessions\]
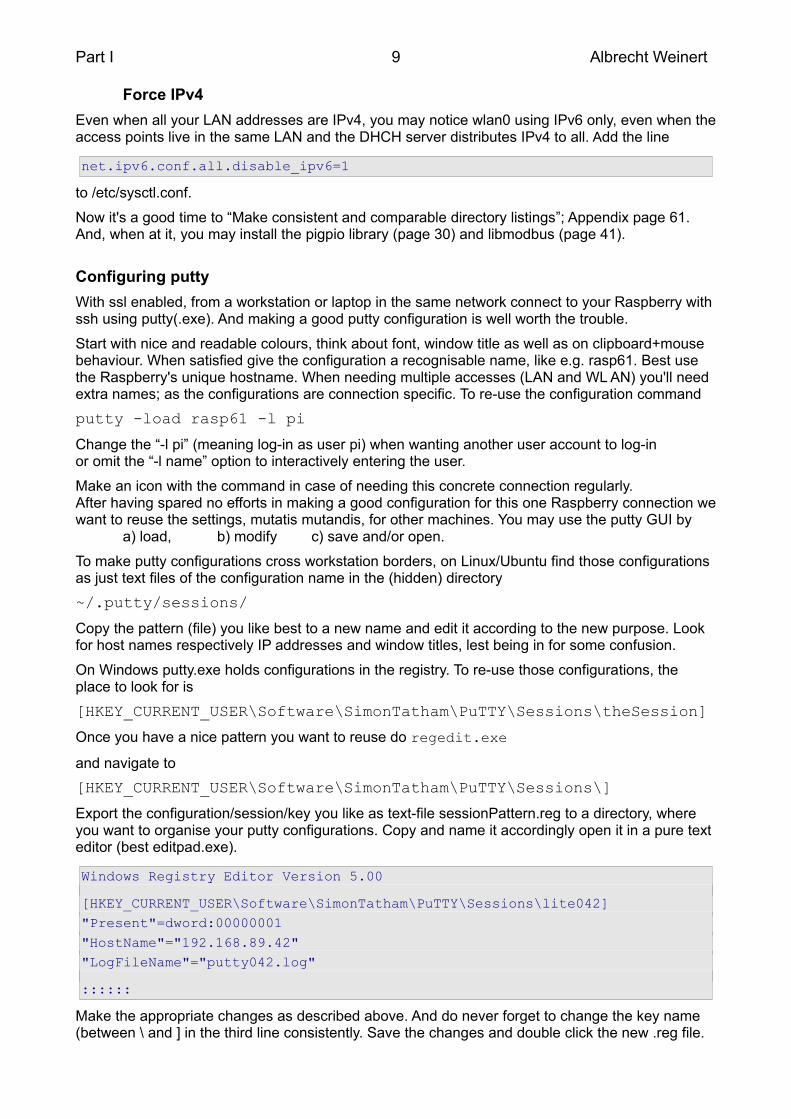
Export the configuration/session/key you like as text-file sessionPattern.reg to a directory, where you want to organise your putty configurations. Copy and name it accordingly open it in a pure text editor (best editpad.exe).
Windows Registry Editor Version 5.00
[HKEY_CURRENT_USER\Software\SimonTatham\PuTTY\Sessions\lite042]"Present"=dword:00000001"HostName"="192.168.89.42""LogFileName"="putty042.log"
::::::
Make the appropriate changes as described above. And do never forget to change the key name (between \ and ] in the third line consistently. Save the changes and double click the new .reg file.
Raspberry for remote services 10 Albrecht Weinert
As with the Linux files the .reg text files may be transferred to your other cross development machines (without editing).
Enabling file access
For administrative and programming work remote file access from full grown Linux/Ubuntu or Windows workstations is essential. Accessing headless / GUI-less systems that way, you'll get decent editors and (on Windows) an operational clipboard handling worth the name.
Most Linux distributions for Raspberry, like Raspbian, will not have a FTP server. But almost all willhave SSH. This offers remote file access by protocol sftp. SSHFS, FileZilla and WinSCP *) can handle that as clients. Hence, no FTP server installation on Raspbian will be needed.Note *: Windows' ftp.exe can't – but on Windows you may have the excellent WinSCP.
Using SSHFS (not recommended)
On the Ubuntu laptop (e.g.) and on other Raspberries you may use the SSHFS client plus directories to mount your Pies' file systems on:
mkdir -p ~/Fhpis/61 # example empty directory as mount pointsudo apt-get update && sudo apt-get upgradesudo apt-get install sshfs # geting fuse libfuse ...
Thus having sshfs on your Ubuntu WS or other on another Pi, you may connect and mount by:
sshfs [email protected]: ~/Fhpis/61 # accept host's key for ever
Now you can list (ls) the directory used for mount (~/Fhpis/61 in our example) or work on it in the explorer.
Note 1: One only sees the user's home directory tree remotely in the mount. Editing /etc/fuse.conf to allow the sshfs's “-o allow_root” option is of no avail as the root password is disabled in Raspbian.
Note 2: The sshfs client software seems not to be made with focus on robustness. When loosing the connection (weak WLAN e.g.) open explorers and shells on the Ubuntu grind to halt.
Note 3: To make the behaviour criticised in note 2 worse, there is no proper way to disconnect or un-mount a sshfs connection, neither by sshfs nor by fuse. Not even “sudo umount ...” worked.
Hence with sshfs your PC keeps being tight to the Raspberries with and all risks until reboot. Well:
ps aux | grep sshfssudo kill -9 PIDshownByPs
killed all connections, but made all mount points (sub-directories concerned) unusable until re-boot.
Due to these sshfs flaws, better use FileZilla for graphical access – on all platforms.
For command-line and automated batch processing use WinSCP ([55]), see the chapter “SFTP – WinSCP” (page 12). WinSCP is simply the best and no Linux equivalent is found so far.
SFTP – FileZilla
You really should have FileZilla on your Ubuntu and Windows workstations. You may even have FileZilla on a graphical Raspbian.On Linuxes install it by:
sudo apt-get update ## *) sudo apt-get upgradesudo apt-get install filezilla
Note *): If you get questions (about “stable” e.g.) without a chance to say yes use apt update instead of the usual apt-get update.
Part I 11 Albrecht Weinert
Now set up FileZilla as client:
filezilla &
Open FileZilla, go to site manager, make a new site and name it accordingly, say “raspi61”.
In general setting do: host = 192.168.89.61; protocol: sfpt; login: normal, pi, raspberry.In “advanced” tick “bypass proxy”, when your workstation and Pies share a local network.
That's it. Connect should work.
For every other Pi just copy and modify IP and name. Enjoy ● disconnect and re-connect working perfectly ● comfortable view/modify integration with text editor set (best Editpad on Windows) ● see and explore all files from root (/) on, not just /home/pi/
The last point allows to comfortably view /etc/apt/sources.list (with Editpad on Windows) and copy its content without ado by clipboard.
Modifications in the editor on the (automatic) local copy will be possible, but in FilleZilla's mirroring the changes back will fail for files with root:root permissions only. But we always can see, work on, copy, use clipboard etc. on multiple windows in an comfortable environment.
One workaround for modifying system files is opening a putty connection in parallel with FileZilla and transfer system files to be comfortably worked on to and (sudo) from a user working directory.

Raspberry for remote services 12 Albrecht Weinert
SFTP – WinSCP
WinSCP is one of the best FTP client programs – not for giving us the n + 21st graphical FTP but as powerful command line program and for its automated batch processing capabilities.
To install it, download the .zip file of a portable build, unpack it and move the three files
19.04.2017 14:44 282.960 WinSCP.com ; console, only, recommended19.04.2017 14:44 18.905.808 WinSCP.exe.. ; console and GUI29.05.2017 18:40 14.497 WinSCP.ini
to a path directory (C:\util\ in our case).
WinSCP.com
will get put you to the command line client. Play with it starting with 'help', 'open', 'close' and 'exit'. Some find WinSCP a bit bitchy on first encounter. If so, don't give up – once you master it you won't miss it any more.
winscp.com /script=progTransWin
will transfer two programs from the actual directory to a (Raspberry Pi) target machine by the WinSCP script progTransWin. Scripts can be parametrised and in the end used in a generalised transfer recipe in a (Eclipse) C make project; see the downloadable examples given in Part II.
# transfer two programs to the target machine# Copyright 2017 Albrecht Weinert weinert-automation.de# $Revision: 2 $ ($Date: 2017-05-29 18:37:55 +0200 (Mo, 29 Mai 2017) $)open sftp://pi:[email protected] binoption batch continueoption confirm offput rdGnBlinkBlink -preservetime -permissions=775put rdGnSimpleBlink -preservetime -permissions=755exit
Listing 1: WinSCP script “progTransWin”for batch transfer of two programs (see Part II).
Note: Looking at the Part II example's enhanced script and the make file you'll notice again that we found no Linux/Ubuntu equivalent. No free FTP command line tool for Linux with WinSCP's flexibility, features and professional quality seems to exits. We tend to blame our incapacity to search for such Linux programs. On the other hand we even found expert comments saying WinSCP is keeping them with Windows.What we got as nearest to WinSCP's elegance – and have often used for automated FTP transfers from Linux servers in the past – is LFTP. On the other hand recurring fingerprint/certificate refusals withsftp:// and parametrising with make variables may drive you nuts – all this a no topic with WinSCP.
Transferring to non-home
Consider the automated (i.e. scripted and parametrised) file transfers with WinSCP shown in Part II(in the demo project). Extending the automated application deployment to the target Raspberry a bit further leads to the deployment of (updated) libraries and hence to scripted writing to non home/non user pi's directories like e.g. /usr/local/lib/ for libraries.
Playing with WinSCP as pi:raspberry we can see, list etc. those directories (or at least a part or them) but can't write. And we can't remote sudo in WinSCP.com.
To enable WinSCP remote transferring to non home/pi directories is to give root a password and enable root to ssh log-in. Then we can
winscp.com root:[email protected]
Part I 13 Albrecht Weinert
from command-line or within a script. To enable this do:
sudo passwd rootsudo nano /etc/ssh/sshd_config
At the entry PermitRootLogin exchange the setting without-password by yes.Note: The usual setting “without-password” is misleading. It does not allow root log-in without password; it forbids log-in even if you have one.Note 2: Giving root a password to log in has security implications. Consider which networks your Raspberry is in and which influence it has on others or process IO.Note 3: The scheme works with other (non root) name:password, too, when having the necessary rightson target directories and files.
SD-card: save and restore – and clone
For the basic installation we prepared the [µ]SD card with an installation image downloaded from atrusted source on an Ubuntu PC/laptop by the dd tool:
sudo dd of=/dev/mmcblk0 if=2017-04-10-raspbian-jessie-lite.img bs=4M
This copies a disc image (from the .img file) to the target card.
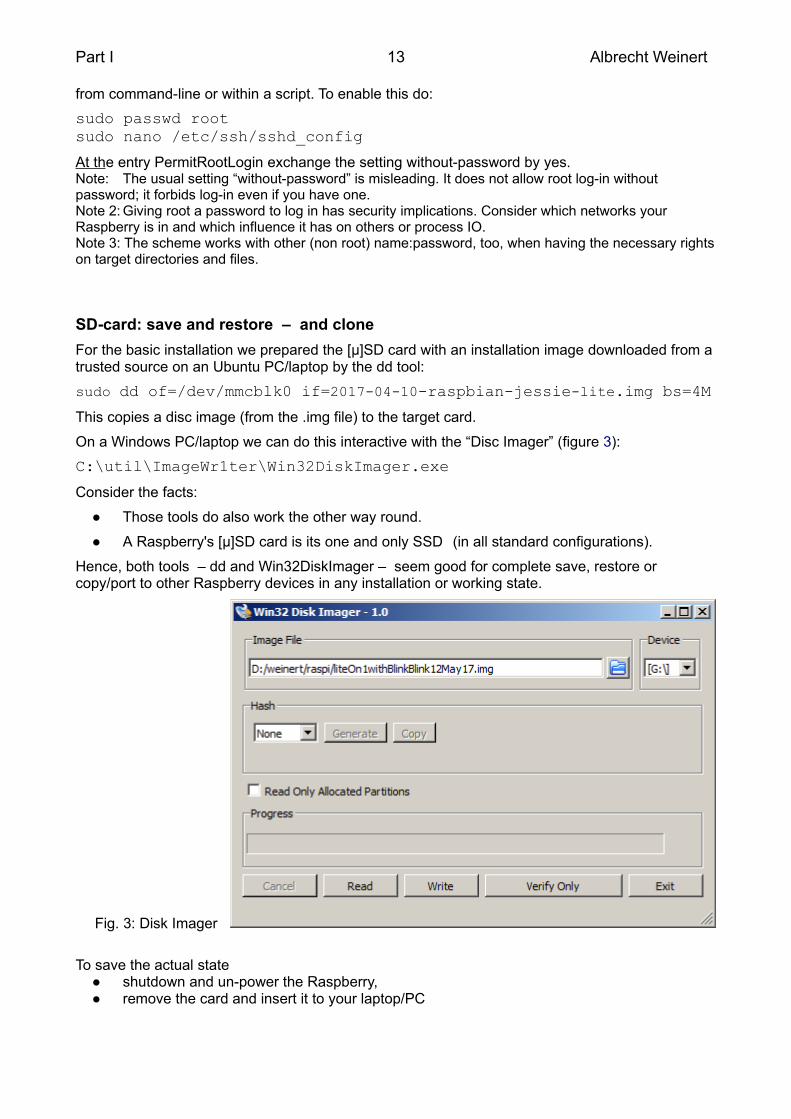
On a Windows PC/laptop we can do this interactive with the “Disc Imager” (figure 3):
C:\util\ImageWr1ter\Win32DiskImager.exe
Consider the facts:
● Those tools do also work the other way round.
● A Raspberry's [µ]SD card is its one and only SSD (in all standard configurations).
Hence, both tools – dd and Win32DiskImager – seem good for complete save, restore or copy/port to other Raspberry devices in any installation or working state.
Fig. 3: Disk Imager
To save the actual state ● shutdown and un-power the Raspberry, ● remove the card and insert it to your laptop/PC
Raspberry for remote services 14 Albrecht Weinert
To save as .img file with Win32DiskImager chose a target file and click “Read”, see figure 3. This file may not exist, just chose an appropriate name.
To write the saved image to another SD-card, one of the same size as the original should work.A bigger one is always usable, and has to be used if Win32DiskImager complains on size.
Warning: When hitting the size problem and ticking “write anyway” Win32DiskImager crashes.And that brings the drive used (G: in fig. 3) in an unusable and not removable state.
Two caveats for Win32DiskImager: ● Do not go ahead when getting complains on the operation planned. Click exit. ● Be extremely careful with “Write”.
Double check the drive letter. Win32DiskImager can kill your system.
For the size problem as such Win32DiskImager is not to be blamed. Using dd with the same cards on an Ubuntu laptop finishes the read and write operations (taking ages) without crashing but complaining on the non fitting size afterwards. The card then will start to boot in the Raspberry but will grind to a halt on root sector errors. Doubling the SD-card size does the job – as with Windows.And reducing the -bs size is of no avail.
Note: On the Ubuntu laptop recognising a SD-card – both directly or, cause of not fitting slot, via an USB adapter – seems sheer luck. The device may neither appear in lsblk nor fdisk. In the USB case the command lsusb sometimes may trigger the recognition.
The following commands should save the current state of a Raspberry in an .img file. When putting the card in an USB adapter it may appear as sdb when having luck or when the lsusb triggering works:
sudo fdisk -llsusb sudo fdisk -lsudo dd of=~/FHpis/61/Noob4lite41b_may17.img if=/dev/sdb bs=4Msudo dd if=~/FHpis/61/Noob4lite41b_may17.img of=/dev/mmcblk0 bs=4M
The write command to µSD (mmcblk0) comes to an end without complains with larger cards. In willfail with “fitting” size in exactly the same cases when the Win32DiskImager would complain.
The size problem
The root cause of the “size problem” most probably is no two [µ]SD-cards having the same size. By “use all rest of card as drive” in raspi-config this deficiency is made virulent. This setting should just be omitted.
The too clever dd problem
When cloning a µSD-card with dd, the obvious way is via an .img file with two dd commands with interchanged 'if=' and 'of='; example:
sudo dd of=~/FHpis/61/Noob4lite41b_may17.img if=/dev/mmcblk0 bs=4M# remove source card, insert destination cardsudo dd if=~/FHpis/61/Noob4lite41b_may17.img of=/dev/mmcblk0 bs=4M
Especially when + using two cards of same size and type and + getting no complains and seeing an .img file of fitting size produced … –
then one intuitively expects a one to one / bit by bit clone. But. alas, dd more than often does not do this. In theworst case it "thinks in files" and omits some.
It seems dd just is not an imager: dd is trying too cleverly to consider partitions files and rights. Inall such bad cases where dd failed – sometimes in a quite perfidious way – and with the same cards and devices we never had problems with Win32DiskImager on Windows (7 professional).

Part I 15 Albrecht Weinert
Part I's results
We can install a usable OS and and tools on Raspberries. Having provided all basic tools and having set up communication we can administer Pis with some comfort remotely from both Ubuntu and Windows. And we can save and restore the current state of our ”little servers”, sometimes a bitspoiled by the “size problem”.
Comparing Raspian lite=GUI-less with with the GUI variant we see with the GUI variant
▼ 39+ more services/processes running immediately after reboot
▼ 2..5 s delay when typing on putty after a short pause. On a GUI-less/lite we always saw an immediate reaction as we type.
And when it comes to even modest real time requirements (see page 48) with PLC like cyclic 1 ms tasks (threads) we experience no problems with Pi3 and lite, while the GUI variant reproducibly always and totally fails in latencies and many other aspects:
▼ The GUI variant showed just slightly worse latency results (sometimes max. latency above 200µs compared to always below 200µs on lite).
This seems not so bad, but ▼ loads (ping etc.) having no measurable effect on lite significantly increase
the latency on the GUI variant. And the latency literally “explodes” by just moving the mouse.
Hence we must state the GUI making the Raspberry/Raspbian unsuitable for embedded/realtime/ server work. This resembles our experiences in the large with “real” servers ([29]).
Part II is ordered as for a beginner's path: ● get simple process output to work ● get to know some IO libraries and approaches ● making process control programs lock resources / inhibit double start ● making process control programs start automatically / as services ● switch from local compile and build to ● fully grown (C C++) cross platform development with Eclipse, SVN (or GIT) and all the comfort a full grown workstation can yield. ● extending the range of sensors and actuators usable with a Pi ● exploring (open, standard) protocols for distribution.
When reading PART II one may take appropriate short cuts and omit the points already done and understood as well as libraries or approaches one won't use anyway.
Raspberry for remote services 16 Albrecht Weinert
P A R T I I
Using the GPIOs
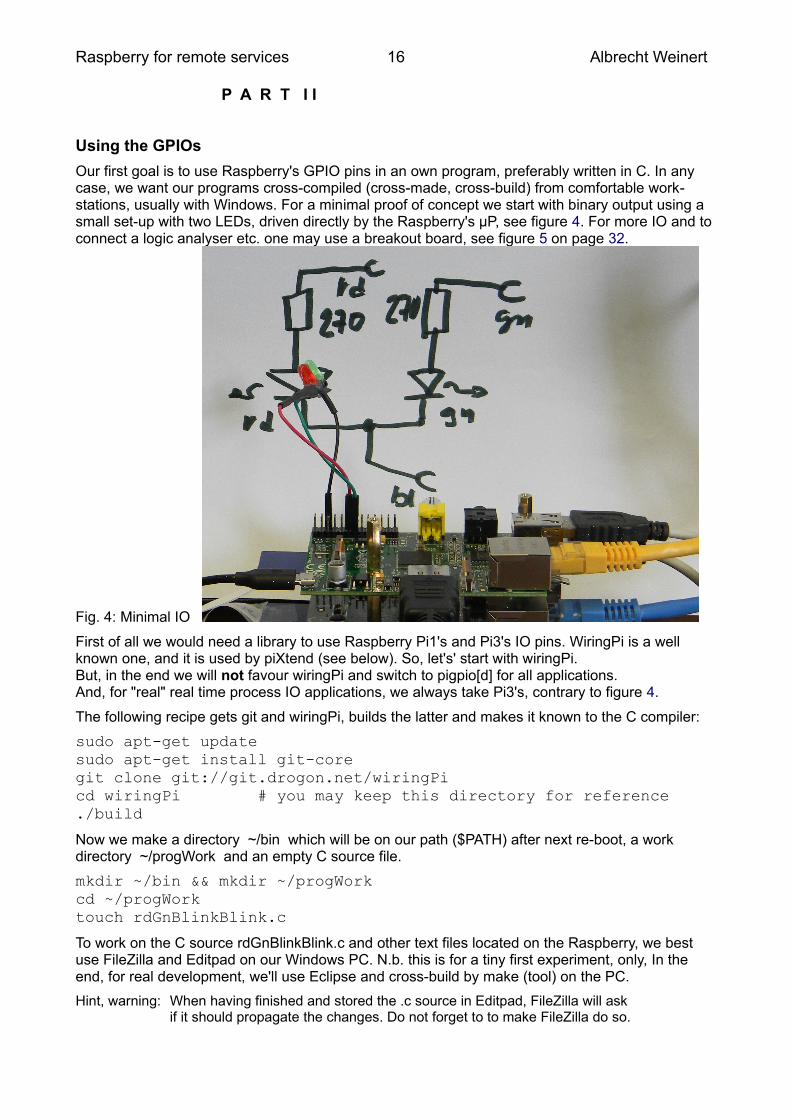
Our first goal is to use Raspberry's GPIO pins in an own program, preferably written in C. In any case, we want our programs cross-compiled (cross-made, cross-build) from comfortable work-stations, usually with Windows. For a minimal proof of concept we start with binary output using a small set-up with two LEDs, driven directly by the Raspberry's µP, see figure 4. For more IO and to connect a logic analyser etc. one may use a breakout board, see figure 5 on page 32.
Fig. 4: Minimal IO
First of all we would need a library to use Raspberry Pi1's and Pi3's IO pins. WiringPi is a well known one, and it is used by piXtend (see below). So, let's' start with wiringPi.But, in the end we will not favour wiringPi and switch to pigpio[d] for all applications.And, for "real" real time process IO applications, we always take Pi3's, contrary to figure 4.
The following recipe gets git and wiringPi, builds the latter and makes it known to the C compiler:
sudo apt-get updatesudo apt-get install git-coregit clone git://git.drogon.net/wiringPicd wiringPi # you may keep this directory for reference./build
Now we make a directory ~/bin which will be on our path ($PATH) after next re-boot, a work directory ~/progWork and an empty C source file.
mkdir ~/bin && mkdir ~/progWorkcd ~/progWorktouch rdGnBlinkBlink.c
To work on the C source rdGnBlinkBlink.c and other text files located on the Raspberry, we best use FileZilla and Editpad on our Windows PC. N.b. this is for a tiny first experiment, only, In the end, for real development, we'll use Eclipse and cross-build by make (tool) on the PC.
Hint, warning: When having finished and stored the .c source in Editpad, FileZilla will askif it should propagate the changes. Do not forget to to make FileZilla do so.

Part II 17 Albrecht Weinert
// A first program for Raspberry's GPIO pins// Rev. 0.7 17.05.2017 Copyright (c) Albrecht Weinert// weinert-automation.de a-weinert.de// It uses two pins as output assuming two LEDs connected to as H=on// wiringPI[0] (GPIO17/17): red// wiringPI[2] (GPIO21/27): green
// This program forces application singleton and may be used as service
// Compile on Pi by: g++ rdGnBlinkBlink.c -o rdGnBlinkBlink -lwiringPi
#include <wiringPi.h> // pinMode, digitalWrite#include <stdio.h> // perror#include <unistd.h> // close#include <fcntl.h> // O_RDWR#include <sys/file.h> // flock#include <signal.h> // signal SIGTERM#include <stdlib.h> // atexit
int lockFd;// The following file must exist for this program to start work// Make the lock file by: touch /home/pi/bin/.lockRdGrBlinkBlink
char const * const fileSpec = "/home/pi/bin/.lockRdGrBlinkBlink";
// So, deleting this file inhibits the start even by cron etc.
static void onSign(int s){ if (s == SIGINT) exit(0); // cntl C terminates normally exit(s);} // onSign(int)
static void onExit(void){ pinMode(0, INPUT); // release red LED pin pinMode(2, INPUT); // green LED pin flock(lockFd, LOCK_UN); close(lockFd);} // onExit()
int main(){ if ((lockFd = open(fileSpec, O_RDWR, 0666)) < 0) { perror("can't open lock file (must exist)"); return 97; } // can't open lock file (must exist)
if (flock(lockFd, LOCK_EX | LOCK_NB) < 0) { perror("can't lock lock file (other instance running)"); close (lockFd); return 98; } // can't lock lock file
if (wiringPiSetup() == -1) { // initialise wiringPi (this is essentiel) perror("can't initialise IO handling (wiringPi)"); flock(lockFd, LOCK_UN); close(lockFd);
Raspberry for remote services 18 Albrecht Weinert
return 99; } // can't initialise wiringPi
atexit(onExit); // register exit hook signal(SIGTERM, onSign); // signal hook signal(SIGABRT, onSign); signal(SIGINT, onSign); signal(SIGQUIT, onSign);
pinMode(0, OUTPUT); // red LED pin as output pinMode(2, OUTPUT); // green output
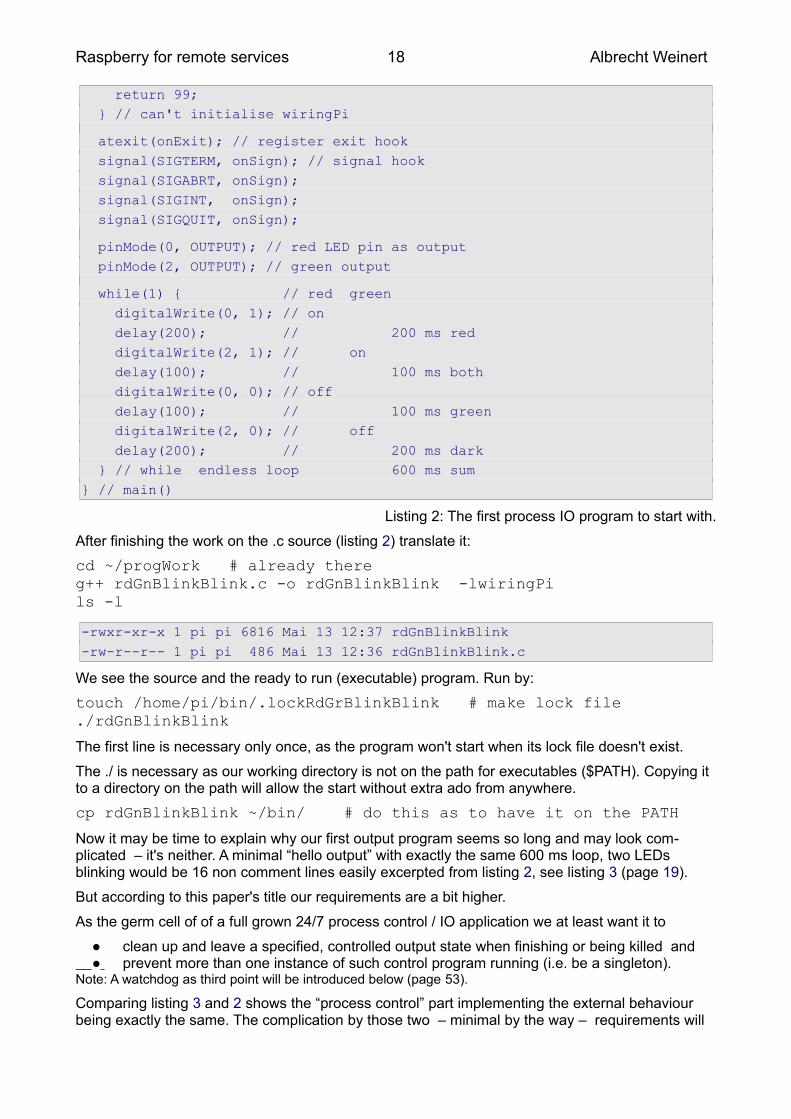
while(1) { // red green digitalWrite(0, 1); // on delay(200); // 200 ms red digitalWrite(2, 1); // on delay(100); // 100 ms both digitalWrite(0, 0); // off delay(100); // 100 ms green digitalWrite(2, 0); // off delay(200); // 200 ms dark } // while endless loop 600 ms sum} // main()
Listing 2: The first process IO program to start with.
After finishing the work on the .c source (listing 2) translate it:
cd ~/progWork # already thereg++ rdGnBlinkBlink.c -o rdGnBlinkBlink -lwiringPils -l
-rwxr-xr-x 1 pi pi 6816 Mai 13 12:37 rdGnBlinkBlink-rw-r--r-- 1 pi pi 486 Mai 13 12:36 rdGnBlinkBlink.c
We see the source and the ready to run (executable) program. Run by:
touch /home/pi/bin/.lockRdGrBlinkBlink # make lock file./rdGnBlinkBlink
The first line is necessary only once, as the program won't start when its lock file doesn't exist.
The ./ is necessary as our working directory is not on the path for executables ($PATH). Copying it to a directory on the path will allow the start without extra ado from anywhere.
cp rdGnBlinkBlink ~/bin/ # do this as to have it on the PATH
Now it may be time to explain why our first output program seems so long and may look com-plicated – it's neither. A minimal “hello output” with exactly the same 600 ms loop, two LEDs blinking would be 16 non comment lines easily excerpted from listing 2, see listing 3 (page 19).
But according to this paper's title our requirements are a bit higher.
As the germ cell of of a full grown 24/7 process control / IO application we at least want it to
● clean up and leave a specified, controlled output state when finishing or being killed and ● prevent more than one instance of such control program running (i.e. be a singleton).Note: A watchdog as third point will be introduced below (page 53).
Comparing listing 3 and 2 shows the “process control” part implementing the external behaviour being exactly the same. The complication by those two – minimal by the way – requirements will

Part II 19 Albrecht Weinert
not grow substantially when getting to a full grown process control program and will partly be put inextra sources and include + source files (or may be even own libraries).
Using this small excerpt (listing 3), it will easily get evident or demonstrated that running two in-stances of the program would spoil the timing behaviour on the process outputs. These multiple starts happen quite easily, often by implementing automatic starts (boot, cron, etc.) forgetting one already has one. Additionally well meaning users tend to start control applications without noticing their state.
Process control applications, in almost all cases, must not run in more than one instance and should enforce this by themselves: No more than one application must access process related IO.
The Unix style solution in listing 2 is to use a fixed lock file that has to exist. Before entering any process control part including its initialisation, it is tried to lock that file. If it can't be locked or if it does not exist the program terminates. As a welcome side effect we can delete the lock file to prevent all future starts – those by hand as well as the automatic ones.
Of course, the lock file must be unlocked when program ends – no matter why or how the program was terminated or killed. Hence, we best implement a clean up and put the unlock there.
This clean up, we need anyway – so it's no extra complication for the unlock. When controlling process outputs it is essential to bring them in a specified state when the program ends, no matter how and why. In listing 2 this is done by catching the relevant signals (interrupts) as well as the program end and putting the clean-up in the registered hooks. In our case we release (and de-energise) our outputs, which most often is the adequate procedure.
// A first simple program for Raspberry's GPIO pins// Rev. 0.0 17.05.2017 Copyright (c) Albrecht Weinert// This is the simple (non process control) version of rdgnBlinkBlink// see the comments there.// compile by: g++ rdGnSimpleBlink.c -o rdGnSimpleBlink -lwiringPi
#include <wiringPi.h> // pinMode, digitalWrite
int main(){ if (wiringPiSetup() == -1) return 99; pinMode(0, OUTPUT); // red LED pin as output pinMode(2, OUTPUT); // green output while(1) { // red green digitalWrite(0, 1); // on delay(200); // 200 ms red digitalWrite(2, 1); // on delay(100); // 100 ms both digitalWrite(0, 0); // off delay(100); // 100 ms green digitalWrite(2, 0); // off delay(200); // 200 ms dark } // while endless 600 ms loop} // main()
Listing 3: The simplified (non process IO) program – not to use just to play with.
Raspberry for remote services 20 Albrecht Weinert
An application as service
When using the Raspberry as server – or device – we usually want applications (process control, web server etc.) start automatically when powering up without a user having to login.
rc.local
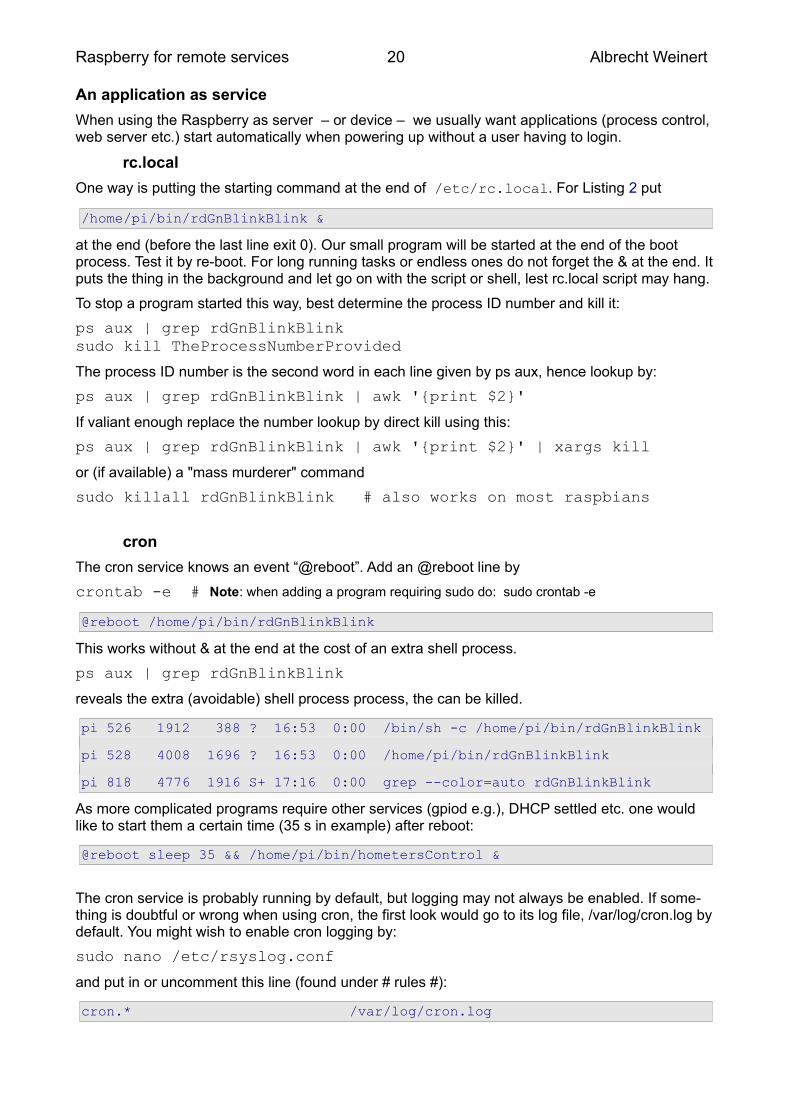
One way is putting the starting command at the end of /etc/rc.local. For Listing 2 put
/home/pi/bin/rdGnBlinkBlink &
at the end (before the last line exit 0). Our small program will be started at the end of the boot process. Test it by re-boot. For long running tasks or endless ones do not forget the & at the end. Itputs the thing in the background and let go on with the script or shell, lest rc.local script may hang.
To stop a program started this way, best determine the process ID number and kill it:
ps aux | grep rdGnBlinkBlinksudo kill TheProcessNumberProvided
The process ID number is the second word in each line given by ps aux, hence lookup by:
ps aux | grep rdGnBlinkBlink | awk '{print $2}'
If valiant enough replace the number lookup by direct kill using this:
ps aux | grep rdGnBlinkBlink | awk '{print $2}' | xargs kill
or (if available) a "mass murderer" command
sudo killall rdGnBlinkBlink # also works on most raspbians
cron
The cron service knows an event “@reboot”. Add an @reboot line by
crontab -e # Note: when adding a program requiring sudo do: sudo crontab -e
@reboot /home/pi/bin/rdGnBlinkBlink
This works without & at the end at the cost of an extra shell process.
ps aux | grep rdGnBlinkBlink
reveals the extra (avoidable) shell process process, the can be killed.
pi 526 1912 388 ? 16:53 0:00 /bin/sh -c /home/pi/bin/rdGnBlinkBlink
pi 528 4008 1696 ? 16:53 0:00 /home/pi/bin/rdGnBlinkBlink
pi 818 4776 1916 S+ 17:16 0:00 grep --color=auto rdGnBlinkBlink
As more complicated programs require other services (gpiod e.g.), DHCP settled etc. one would like to start them a certain time (35 s in example) after reboot:
@reboot sleep 35 && /home/pi/bin/hometersControl &
The cron service is probably running by default, but logging may not always be enabled. If some-thing is doubtful or wrong when using cron, the first look would go to its log file, /var/log/cron.log by default. You might wish to enable cron logging by:
sudo nano /etc/rsyslog.conf
and put in or uncomment this line (found under # rules #):
cron.* /var/log/cron.log
Part II 21 Albrecht Weinert
In our above example cron would log e.g.
May 26 08:53:49 rasp67 CRON[499]: pi CMD (/home/pi/progWork/rdGnBlinkBlink)
It shows our program's start time and command, but only the shell's pId.
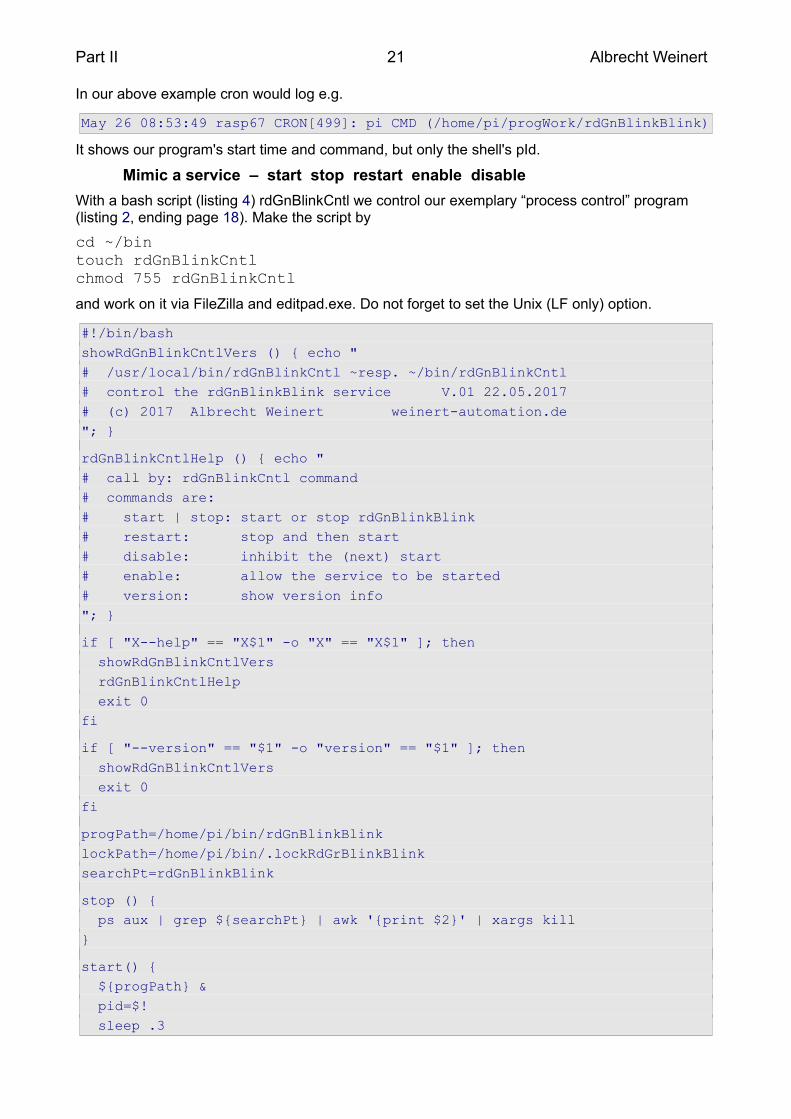
Mimic a service – start stop restart enable disable
With a bash script (listing 4) rdGnBlinkCntl we control our exemplary “process control” program (listing 2, ending page 18). Make the script by
cd ~/bintouch rdGnBlinkCntlchmod 755 rdGnBlinkCntl
and work on it via FileZilla and editpad.exe. Do not forget to set the Unix (LF only) option.
#!/bin/bashshowRdGnBlinkCntlVers () { echo "# /usr/local/bin/rdGnBlinkCntl ~resp. ~/bin/rdGnBlinkCntl# control the rdGnBlinkBlink service V.01 22.05.2017# (c) 2017 Albrecht Weinert weinert-automation.de"; }
rdGnBlinkCntlHelp () { echo "# call by: rdGnBlinkCntl command# commands are:# start | stop: start or stop rdGnBlinkBlink# restart: stop and then start# disable: inhibit the (next) start# enable: allow the service to be started# version: show version info"; }
if [ "X--help" == "X$1" -o "X" == "X$1" ]; then showRdGnBlinkCntlVers rdGnBlinkCntlHelp exit 0fi
if [ "--version" == "$1" -o "version" == "$1" ]; then showRdGnBlinkCntlVers exit 0fi
progPath=/home/pi/bin/rdGnBlinkBlinklockPath=/home/pi/bin/.lockRdGrBlinkBlinksearchPt=rdGnBlinkBlink
stop () { ps aux | grep ${searchPt} | awk '{print $2}' | xargs kill }
start() { ${progPath} & pid=$! sleep .3

Raspberry for remote services 22 Albrecht Weinert
if ps -p $pid > /dev/null; then echo "rdGnBlinkBlink started with PId ${pid}" exit 0 fi exit 99}
if [ "start" == "$1" ]; then start; fi if [ "stop" == "$1" ]; then stop exit 0fi
if [ "restart" == "$1" ]; then stop startfi
if [ "enable" == "$1" ]; then if [ -f $lockPath ]; then echo "rdGnBlinkBlink was enabled, already." exit 0 fi touch $lockPath exit $?fi
if [ "disable" == "$1" ]; then if [ -f $lockPath ]; then rm $lockPath exit $? fi echo "rdGnBlinkBlink was disabled, already." exit 0fi
rdGnBlinkCntlHelp
Listing 4: Script rdGnBlinkCntl to control rdGnBlinkBlink (listing 2) as service.
For testing you may use:
gpio readallrdGnBlinkCntl startgpio readallrdGnBlinkCntl stopgpio readall
| BCM | wPi | Name | ModeStart | Val | ModeStop | V | Physical | .. | 17 | 0 | wPi 0 | OUT | rd | IN | 0 | 11 || 12 | .. | 27 | 2 | wPi 2 | OUT | gn | IN | 0 | 13 || 14 | ..
When rdGnBlinkBlink is running you should see GPIO 17&27 as OUT and when stopped as IN.
Part II 23 Albrecht Weinert
Cross-compile C for Raspberry from a powerful workstation
Now we have our first GPIO C example (rdGnBlinkBlink, listing 2, page 18), do know how to implement it as a service (listing 4) not counting the play variant (rdGnSimpleBlink, listing 3). This is a base to go further to useful and greater projects.
But now its also time to pause and re-think tooling and deployment: ● Very few of us like to develop software on a GUI-less Raspberry with local tools
and stone age editors (nano being the least evil of them). ● Or when adding the GUI, only few would like to handle IDEs, version control, documentation generators and all else on a Raspberry (besides from having killed even modest real time capabilities). ● At least this will be true for those of us using all this and more
in all comfort and speed on their powerful Windows (or Ubuntu) workstations.
The pre-condition to develop C software for Raspberries on Windows is being able to cross-compile and cross-link; all else will in the end build upon this. To get this going we download
23.05.2017 17:06 773.928.611 raspberry-gcc4.9.2-r4.exe
from http://gnutoolchains.com/raspberry/. Run it to ● install at C:\util\WinRaspi ....● usable for all ● make no links for duplicate files
(we're on Windows, links exist and do work there, but no one will expect seeing one) ● add C:\util\WinRaspi\bin\ to the path or let installer do it
(In this case it makes sense, even if no one likes extending the PATH by every install.)
To test this best make an empty directory, ● get our .c source (rdGnBlinkBlink.c, listing 2) there via FileZilla and ● cd there.
Then command
arm-linux-gnueabihf-g++.exe rdGnBlinkBlink.c -o rdGnBlinkBlink -lwiringPi
You'll get the compiled and linked runnable rdGnBlinkBlink in no time. Transfer it to the Raspberry, best to another directory, cd there and
chmod 755 rdGnBlinkBlinkrdGnBlinkBlik &
It works! A program made on a Windows PC does GPIO on a Raspberry.
arm-linux-gnueabihf-g++ is the equivalent to plain g++ we used on the Raspberries.
Note on the prefix arm-linux-gnueabihf-:
These prefixes are used for cross tool-chains: They are unique prefixes for the target processor (architecture) and specific library sets. When setting up a new cross compile project in your GCC enabled Eclipse you will be asked for a tool path and a tool prefix; here it would be: C:\util\WinRaspi\bin and “arm-linux-gnueabihf-”, the latter standing for architecture-noVendor-system-applicationBinaryInterface.
Note on the g++ or gcc choice:
Both gcc and g++ are GNU compilers respectively tool-chain drivers, doing almost the same. g++ treats .c files as C++ source while gcc expects and handles plain C. In the case of our IO example,listing 2, both work and both produce an executable of almost the same length and content.
To round up our (Windows) cross-compile tools chain we should also have a make file under-standing at least make clean and make all. See more in chapter Eclipse – make project (p. 25).
Raspberry for remote services 24 Albrecht Weinert
A note on Windows:
Evidently, we prefer Windows on powerful development workstations – with Java, Eclipse, Open-Office, GNU tools, SVN etc.. We have all liberty of open tools, while enjoying Windows' comfort and professionalism: domain and network file system integration, decent powerful explorer (not changing its name with every upgrade) with tool integration e.g. for SVN (tortoise), decent text editors (Editpad), common clipboard support and so on. And (almost) all just works fine.
With Ubuntu, more than once, dragging files to shells suddenly stopped them working or changed its behaviour. Unclear, pure text or no clipboard support is a good recipe to drive Linux users mad. Experiencing regular total crashes or loosing tools on upgrades of Ubuntu and derivatives, one is constantly shooed back to Windows.
Well this happiness with Windows plus open tools holds up to Windows 7 respectively Windows Server 2008 R2 enterprise. Windows 10 changed this: Its unreliable and the less controllable updates / upgrades do render installed tools inoperable. (We try to keep W<10.)
On the other hand, almost all what we describe for Windows can be (and was here) done on a powerful Ubuntu workstation, too. And yes: Most Windows (even <10) have their "drive nuts" potential, for example, the dangerous faking directory and file names, when accessing the file system graphically, like showing the fake name “Programme” for “Program Files”.
But the comfort, stability and usability balance is positive. Hence use Windows, Ubuntu or what ever you like as your cross-development platform.
Eclipse – step zero
Now (cross-) developing on a powerful workstation, we want, the comfort of a powerful IDE. Our choice is Eclipse, used since years for Java projects, Web, AVR C and much more.
Put your sources, listing 2 & 3 in our examples, in an Eclipse's project folder. Best make the folder and the copies before making the new cross-C project. Set tool path and a tool prefix to:
C:\util\WinRaspi\bin and arm-linux-gnueabihf- and
… enjoy Eclipse's support and comfort.
Well, a little work on make files and project setting will be unavoidable.
A reliable source of trouble are Eclipse's automatically generated make files, which notoriously fail. Before stepping into (great!) configuration trouble to get this make*make working, drop the generated make files and write an own makefile which Eclipse would use with targets all and clean.
Thereby you get
+ immense flexibility considering targets, devices and else which in the end will often be needed,
+ building and cleaning automatically by scripts or by just running make by command line without starting or even needing the IDE
▼ involved with the ill syntax and semantic of the make tool.
So we make the appropriate changes in project → settings C/C++ → build and add a makefile to the project. And while we're at it we put the exemplary project in a SVN repository.
Part II 25 Albrecht Weinert
Eclipse – make project
See at the browser or get (by svn checkout https://...) all makefiles, sources etc. at https://weinert-automation.de/svn/rasProject_01/You'll need to login (guest:guest). In this paper ([31]) there will be no listing for
26.05.2017 15:27 9.521 makefile26.05.2017 15:27 1.163 make_raspberry_01_settings.mk26.05.2017 15:27 1.165 make_raspberry_02_settings.mk26.05.2017 15:27 1.116 make_raspberry_03_settings.mk29.05.2017 18:37 770 progTransWin ..... and some more
The makefile and its includes do work in our Eclipse C make project via project build and clean.
As postulated above you can use the makefile with more functionality and in automated batch files directly (without Eclipse). Be in the project/source directory, say D:\eclipCeWsOx\rasProject_01:
make helpmake help_commmake clean allmake PROGRAM=rdGnSimpleBlink clean all
The last two commands generate our two Raspberry IO programs rdGnBlinkBlink (PROGRAM default setting) and rdGnSimpleBlink (listings 2 and 3). And by
winscp.com /script=progTransWin /parameter pi:raspberry 192.168.89.67 bin rdGnBlinkBlink
winscp.com /script=progTransWin /parameter pi:raspberry 192.168.89.67 bin rdGnSimpleBlink
we transfer them to /home/pi/bin of our Raspberry 192.168.89.67 with the parametrised WinSCP script. This is integrated in the makefile and can (on Windows, only) also be done by:
make PROGRAM=rdGnBlinkBlink clean progappmake PROGRAM=rdGnSimpleBlink clean progapp
Eclipse – troubles and hints
SVN client chaos Where there is light, there is shadow
One trouble with Eclipse is putting in a decent SVN client. SubClipse made the least trouble. And there's the problem of different client versions with in-compatibly different structures of local working copies. You may well have two or more SVN clients on your workstation: command line, TortoiseSVN (explorer plug-in), SubClipse (eclipse plug in) etc. If the SVN client's working copy versions differ, your in trouble as virtually no SVN client offers backward compatibility. Tips:
● Try to keep the number low (<=3). At least, the three SVN clients named share settings. ● Do not try to stay with old working copy versions too long. Have a strategy when and
how to update all your clients and to upgrade all local working copies (with batch files).
Eclipse marking non-existent errors
This problem hits mainly, but not only, cross-compile, cross-build projects:While “make all” directly on the shell or indirectly in Eclipse by “build project” goes with zero errors and warnings – and yields an usable result – Eclipse marks the sources with non-existent errors and warnings and loads of red and yellow marks where none should be. Additionally, “open declaration”, language searches and else are giving incorrect results:
So we have an IDE bugged useless.
Raspberry for remote services 26 Albrecht Weinert
With CDT (C/C++ plug in) Eclipse uses own partly buggy compilers and indexers for judging sources. The “real” make uses the ”real” target compilers etc., the only ones one has to make happy anyway. Web search reveals a lot of in-official remedies concerning configuration and partly source code, some of them useless or harmful and some also sheer voodoo.
One tip is to check Eclipse's include path configuration, even if it was correct yesterday. It has to “include” all local includes (those of -I./include e.g.) and all implicit includes the target tool chain has. So far, so good. But even if this is correct, errors of this category (uint8_t not defined) may remain. It seems CDT/indexer being unable to handle indirect and conditional includes correctly. Sometimes, this include handling problem may be worked around by mucking up respectively spoiling the sources a bit by extra includes, as already seen in this quite old AVR example:
#include "arch/config.h" // for sake of Eclipse (4.2.x)#include "we-aut_sys/ll_system.h"#include "pt/pt.h" // Eclipse 4.2.x; can't handle nested includes#include <avr/io.h> // for sake of Eclipse; 4.7 is even worse with includes#include <stdint.h> // for sake of Eclipse (needed since 4.7)
Problem remains that those extra unconditional includes (done when needed in other include files) may, besides the aesthetic damage, under certain conditions spoil the real build. So, sometimes unexplainable errors remain or can't be voodooed away. This was the case in our Raspberry C projects when growing beyond our introductory examples. Here updating to the newest Eclipse CDT IDE – then Oxygen, 4.7.0, June 2017 – was the rescue. Adding SubClipse 1.10.13 and Web-tools (for some .xml, .css for doxygen e.g.) was no problem and brought the projects back to no errors/warnings/red/yellow.
But before getting too enthusiastic on Oxygen: For the AVR projects in the same workspace updating to Oxygen (with AVR plug-in) led to a not repairable (not voodooable) catastrophic failure with > 1000 false errors.
Note 1: To emphasize the last point, projects used successfully for years got a useless IDE by just upgrading Eclipse. Eclipse versions good for one target may fail on others, and vice versa.Hence, never ever spoil a running IDE by updating. And, at least, save every bit (installations and workspaces, full trees etc.) before daring an update to have a safe way back.
Note 2: An IDE for C or any other language marking false errors and warning is worse than none. When marking errors or warnings, correctness and consistency with the target tool chain has the absolute top priority. Speed – wrong answers fast – is less than secondary.
Note 3 (begin 2019): Switching to “Eclipse IDE for C/C++ Developers; Version: 2018-12 (4.10.0)” and just using on (copy of) workspace and projects went without troubles and most of the indexer / false positive troubles gone. we started to remove above voodoo step by step.To avoid too much enthusiasm Eclipse2018-12 insisted on a HTML syntax check of Doxygen control files – they are NOT html – leading to loads of warnings. Exclude Doxygen files from build is the remedy.
Cross tooling summary
Now we can successfully ● cross-compile/cross-develop with
● GNU-tools, ● using Eclipse (Oxygen) with make, or ● make (alone / on shell or automated batch)
● bringing all under version control, here SVN ● having all on Windows (or almost all on Ubuntu)for our Raspberries and even ● upload the program just build from Windows to the Raspberry automated by make.
So, we can go on to utilise Raspberry Pis in a professional development environment.
Part II 27 Albrecht Weinert
Making a library
Having common utility functions, variables and values in extra .c and .h files, let's see how to makea library from them, when not wanting to link them to every executable in question.
In a key matrix example below we have three sources
● keysPiGpioTest.c main program organizing two cyclic tasks with three threads
● weRasp/sysUtil.c, include/sysUtil.h utilities and cyclic task execution support
● weRasp/weGPIOd.c. include/weGPIOd.h IO support for using the gpio library(daemon, socket), matrix scan support
The usual (and no bad) way is to translate all three .c files to .o files by
arm-linux-gnueabihf-gcc -DMCU=BCM2837 -I./include -c -o weRasp/sysUtil.o weRasp/sysUtil.c
best organised in the makefile and link all three .o files to the executable keysPiGpioTest. With this procedure you may ● change every source before cross-build. The good point is ● get one monolithic (mid-sized) executable you may transfer to and ● run on every Pi where a pigpiod is installed and the daemon is is running.
On the other hand you may be tempted to make one (or more) of the utilities a library – in our exemplary case sysUtil.c. Doing so you may ● separate stable utility and runtime code from the more volatile application sources ● keep the source code away from the application programmers.
Then you translate one source less and link the extra library with the -lsysUtil option. The library libsysUtil has to be present on the cross-build workstation as well as on every Pi where an application linked against it must run. To make the library on the workstation do:
arm-linux-gnueabihf-gcc -Wall -DMCU=BCM2837 -I./include -shared -o weRasp/libSysUtil.so -fPIC weRasp/sysUtil.c
copy weRasp\libSysUtil.so C:\util\WinRaspi\arm-linux-gnueabihf\sysroot\usr\lib\
Transfer the library libSysUtil.so to the Raspberry to a directory remotely (ftp) accessible. There do:
sudo cp libsysUtil.so /usr/local/lib/sudo chmod +x /usr/local/lib/libSysUtil.sosudo ldconfig
The last command creates a link to our newly put / changed dynamic library and caches it for quickuse. Think of it when the application won't run complaining “missing library”.
But before making (sysUtil e.g.) a library be sure that a) it is now stable over a considerable time to come and b) on the target machines is a changing zoo of many programs linking to that library.
Otherwise (and mostly) the little advantages of having a library aren't worth the trouble and the disadvantages.
Raspberry for remote services 28 Albrecht Weinert
Starting with GPIO – a look at wiringPi, bcm2835 and a derivative
We here survey and test some GPIO libraries starting with bcm2835 and wiringPi, as basically used already on page 16, above. See or svn checkout as described on page 25.
Now, install the bcm2835 library on the Raspberry by
wget http://www.airspayce.com/mikem/bcm2835/bcm2835-1.50.tar.gztar xvfz bcm2835-1.50.tar.gzcd bcm2835-1.50/dir./configuremakesudo make installfind / -name "libbcm2835.a"
To test the just installed library locally on the Raspberry translate and run the lib's examples/blink
cd ~/progWorkcp /home/pi/bcm2835-1.50/examples/blink/blink.c ./g++ blink.c -o blink -lbcm2835
./blink^C
This little program blink In will flash the red LED on our test harness (figure 4, page 16).
To use the library for cross-compile and -make it on our (Windows) workstation and projects, too, we copy two of the library's files
02.06.2017 11:47 80.726 bcm2835.h02.06.2017 13:03 63.756 libbcm2835.a
to our workstation. The .h file goes to the tool chain's include directory
C:\util\WinRaspi\arm-linux-gnueabihf\sysroot\usr\include\bcm2835.h
The '.a' file – the compiled library – we will add to our Raspberry cross tool-chain, as
C:\util\WinRaspi\arm-linux-gnueabihf\sysroot\usr\lib\libbcm2835.a
At this stage you should be able to translate a little example by command line:
arm-linux-gnueabihf-g++.exe blink7.c -o blink7 -lbcm2835
The executable blink7, made for Raspberry target would run there, but not on Windows.
The projects example rdGnBlinkBlink (listing 2, page 18, based on wiringPi) has been ported as rdGnBcm2835Blink to libbcm2835 and is fully supported by the makefile – including the program transfer to the Raspberry. See the SVN project for details (cf. page 25).
The bcm2835 library is a bit heavyweight compared to its features and suffers from its initialisation ritual. We tried to improve, and reduce this library to a minimum. While the improvement was promising, we could not reduce respectively get rid of the initialisation part. The GPIO usage initialisation is a bit tricky and described more by tradition as by specification. In the end we gave up this approach as well as using this library at all.
So far we considered the Raspberry IO libraries ● wiringPi ● bcm2835 ● pigpio (see below on page 30).
And we used and tried them in small process IO applications – forcing singleton, being usable as service etc. – like seen and discussed with listing 2 and 4.
Part II 29 Albrecht Weinert
wiringPi – resume
wiringPi is well known and widely used.
It tries to cover the range of Raspberry Pi1, 2 and 3 with its diverse variants as well as some alternate Pi lookalikes. Additionally wiringPi covers a wide selection of extension boards or so called shields considered popular. Well this "serve all" approach is doomed to fail under other than the assumed "all" conditions.
Probably as consequence of this “cover everything including popular shields” approach wiringPi introduces indirection respectively abstraction layers away from from the µP's (BCM2835, BCM2836, BCM2837) GPIO numbers or (virtualised) IO register addresses ([56]).With wiringPi's indirection one can directly refer to the 28 respectively 40 pin header numbering or an own special wiringPi numbering scheme. One example:
Pin header 28 / 40 Pi1 / most else
µP BCM2835 (Pi1) µP BCM2837 / µP BCM2836 Pi3 / most else
wiringPi's own number
HW pin 13 GPIO 21 GPIO 27 2
This scheme seems unique; all other libraries utilised use the GPIO numbers that refer to the µP's “truth”, the pin's properties and available functionality etc. For a shield or extension occupying all 40/28 header pins in a fixed layout the HW pin number describes the extension's interface. wiringPiis eager to support that directly; all others may do the translation directly or better by some macros to get all flexibility for the targets to cover.
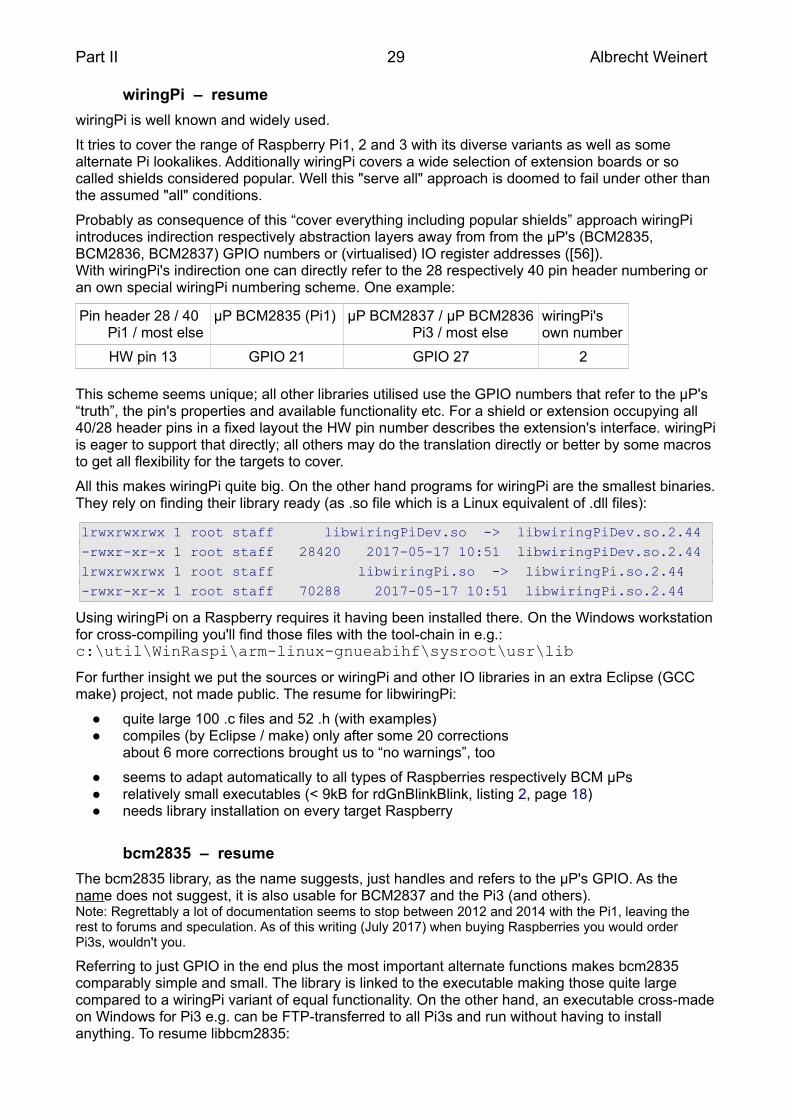
All this makes wiringPi quite big. On the other hand programs for wiringPi are the smallest binaries.They rely on finding their library ready (as .so file which is a Linux equivalent of .dll files):
lrwxrwxrwx 1 root staff libwiringPiDev.so -> libwiringPiDev.so.2.44-rwxr-xr-x 1 root staff 28420 2017-05-17 10:51 libwiringPiDev.so.2.44lrwxrwxrwx 1 root staff libwiringPi.so -> libwiringPi.so.2.44-rwxr-xr-x 1 root staff 70288 2017-05-17 10:51 libwiringPi.so.2.44
Using wiringPi on a Raspberry requires it having been installed there. On the Windows workstationfor cross-compiling you'll find those files with the tool-chain in e.g.:c:\util\WinRaspi\arm-linux-gnueabihf\sysroot\usr\lib
For further insight we put the sources or wiringPi and other IO libraries in an extra Eclipse (GCC make) project, not made public. The resume for libwiringPi:
● quite large 100 .c files and 52 .h (with examples) ● compiles (by Eclipse / make) only after some 20 corrections
about 6 more corrections brought us to “no warnings”, too
● seems to adapt automatically to all types of Raspberries respectively BCM µPs ● relatively small executables (< 9kB for rdGnBlinkBlink, listing 2, page 18) ● needs library installation on every target Raspberry
bcm2835 – resume
The bcm2835 library, as the name suggests, just handles and refers to the µP's GPIO. As the name does not suggest, it is also usable for BCM2837 and the Pi3 (and others). Note: Regrettably a lot of documentation seems to stop between 2012 and 2014 with the Pi1, leaving the rest to forums and speculation. As of this writing (July 2017) when buying Raspberries you would order Pi3s, wouldn't you.
Referring to just GPIO in the end plus the most important alternate functions makes bcm2835 comparably simple and small. The library is linked to the executable making those quite large compared to a wiringPi variant of equal functionality. On the other hand, an executable cross-madeon Windows for Pi3 e.g. can be FTP-transferred to all Pi3s and run without having to install anything. To resume libbcm2835:
Raspberry for remote services 30 Albrecht Weinert
● relatively small 1 .c + 1 h. (w/o examples) ● compiles as downloaded with just two style warnings and no errors on Eclipse / workstation
● the library is written for Raspberry Pi1 / BCM2835, only ● this can be repaired (so far for Raspberry Pi3) by not using
the lib's enums or marcos for GPIO numbers – but own macros or direct literals
● large executables compared to wiringPi (~57kB for rdGnBcm2835Blink)Note: large executables may run faster than small ones using a shared library.
● needs no library installation on a target Raspberry when transferring cross-builds
bcm2835 – improvements due (?) – resume
So bcm2835 seems outdated and to need
● stylistic improvements l ○ like typos comments but first of all ○ making indices out of all relative addresses
to get rid of “y[x/4] respectively y + x/4 in production code
● could be made smaller by ○ separating special and alternate functionality as well as ○ by getting rid of wrapped system functions
well defined by Linux (man page e.g.) and better used directly
As said, we went this way with a reduced and improved library and test examples, fulfilling all said requirements:
● better adapted to Raspberry Pi3, too, ● making the production code clearer and easier to read by ● being less error prone in usage ● reduces the runnable size of the little demo (by 42kB)
One may very well ask if this is worth the trouble – especially ○ when concentrating on pigpio in the future (strongly recommended) and ○ having to admit that the (naive) aspiration to get rid of the complex
initialisation code to catch the GPIO's ever changing virtual addresses failed.
And the answer is "No".
Hence, still profiting from the lessons learned, we deleted this sub-project.In the end we consider bcm2835 (and our offspring deleted) a dead end street and do not recommended to use it.
Let's see – and use – pigpio[d] instead.
The pigpio library
All IO libraries considered so far do burden the production code using them with the trouble to ○ initialise the GPIO (memory) usage, ○ adapt to changing (virtual) addresses as well as ○ the fighting with access rights.No decent OS offering any protection will let user code do IO. Early approaches to do GPIO with Raspberry OSs required sudo. In between the standard GPIO usages (read write) can be made accessible without sudo, but more settings or alternate functions will not.
The pigpio library uses a different approach. It defines a server or daemon which does all initialisa-tions and has control over all GPIO functions. This server has to be started with sudo and may run forever in background. Programs doing (process) IO just communicate with the daemon by ● socket (as in example rdGnPiGpioDBlink and all our control applications) or by ● pipe (never used here).

Part II 31 Albrecht Weinert
Both approaches need no sudo. In the case of socket the control program and the GPIO pins may be on different Raspberries on the same network or one control program can use multiple Raspberries' GPIO. A third way is ● linking the pigpio library to the program (as in example rdGnPiGpioBlink).
This linking pigpio to the program approach is, of course, contradictory to pigpio's philosophy. And, alas, such program has to be started with sudo. But that program being build and running that way is also the said daemon/server. It can be used remotely or locally by other programs using the socket or pipe approach. And, not really surprising after all, pigpio forces its daemon's singleton property. A program using the link approach won't start when the daemon (pigpiod) is running.
Nevertheless, one should make program's usage of pigpiod singleton, too.
To get and install pigpio (see also [61]) do:
wget https://github.com/joan2937/pigpio/archive/master.zipunzip master.zipcd pigpio-mastermakesudo make installsudo ldconfig -v # may be necessary
Then do all the tests provided as recommended in [61] by
sudo ./x_pigpio # check C I/Fsudo pigpiod # start daemon./x_pigpiod_if2 # check C I/F to daemon (all passed)./x_pigpio.py # check Python I/F to daemon (one or four fails)./x_pigs # check pigs I/F to daemon (no or one fail)./x_pipe # check pipe I/F to daemon (same result)
As said in [61] a few tests fail and many many more are passed; this is OK.
Please find and see the working examples rdGnPiGpioBlink and rdGnPiGpioDBlink in the SVN repository mentioned above on page 25.
And when using pigpiod on a Raspberry it's recommendable to start it at boot. Best use:
sudo crontab -e # sudo here(!) when program to add needs sudo
and add one line at the end:
@reboot /usr/local/bin/pigpiod -s 10
Starting pigpiod without parameters uses default settings: 5 µs sample rate, PCM clock, port 8888, both interfaces (socket, pipe) enabled; -s 10 would set 10 µs sampling; -p might change port.
Note again: You must put sudo in front of crontab -e when adding or editing a task requiring sudo. Do not prepend the task command with sudo. The crontab command suggests your editing a single system configuration file directly. That's an illusion. Every user + sudo seems has own cron editor settings and files. Getting this (sudo) business wrong is the source of notorious “My crontab (@boot) setting isn't ..” complaints.
Note also: cron tasks might be started without having your environment and path settings. Hence, use the full path to the “real” executable (like /usr/local/bin/pigpiod e.g.).
A last note: When cross-compiling / cross-building it may happen (after first time using a feature) linker ending with not being able to satisfy externals. In this case the workstation tool chain may have other / outdated libraries.
23.06.2017 15:15 256.624 libpigpio.so23.06.2017 15:15 65.128 libpigpiod_if.so23.06.2017 15:15 75.624 libpigpiod_if2.so

Raspberry for remote services 32 Albrecht Weinert
Copy those files from the Raspberry's /usr/local/lib to your workstation'sC:\util\WinRaspi\arm-linux-gnueabihf\sysroot\usr\lib (by ftp).
Besides solving the GPIO sudo hassle when using the daemon variant, Joan N.N.'s pigpio library has a lot of other rich and useful features, like PWM on every pin.
This library's socket approach with all good points brings one disadvantage: A (binary) singe write to one pin takes 98 µs. Making more than 5 such IO calls in an 1 ms cycle is,hence, a no go. Here, bulk / bank functions may save the day.
Hence, with pigpio, a programming style not endlessly repeating the same IO operation, like turning On a relay already on, is adequate.
The pigpio site (http://abyz.co.uk/rpi/pigpio/pdif2.html) offers no offline .pdf document. The very good on-line documentation allows being .pdf-printed (60 pages, links partly working).
Process IO hardware
In our introductory examples (rdGnBlinkBlink, listing 2, page 18) the process IO is directly con-nected to the IO pins of Raspberry's µP. This might be feasible to a certain extend when all sensors and actuators are nearby in a closed encasement. Figure 5 shows a professional key matrix, LEDs and a piezo beeper as one suitable example for directly attached process IO. The break-out board is just a test harness and helps to connect a logic analyser (it is the black box on the left of Figure 5).
In the production version the Pi is fixed to the back of the key matrix.
In all other cases and when controlling power beyond 48 mW, or distant actuators and sensors interface and protecting circuitry is mandatory. A lot of offers are found, often under the genus “shield”. But beware of useless or outright dangerous devices.
Fig. 5: Direct attached IO

Part II 33 Albrecht Weinert
LEDs and buttons – direct IO
As soon as process IO signals go beyond the borders of a Raspberry, protective circuitry is man-datory. Low power LEDs, piezo speakers and buttons within the same protective encasement are an acceptable exception.
A real use case had three LEDs and a 12 keys matrix EOZ Clavier S.series, 12 touches. Imagine the hardware set-up as figure 5 without the breadboard and logic analyser in a metal box.
The key matrix was directly attached to 7 GPIO, see listing 5 for the concrete set-up. Single or multiple key presses were determined by a common algorithm. Its seven steps according to the seven scan lines defined in the keyMatrix structure were put in the 1ms cycle.
#define ROW123 PIN37
#define ROW456 PIN35
#define ROW789 PIN31
#define ROWa0h PIN33
#define COL147a PIN40
#define COL2580 PIN38
#define COL369h PIN36
#define NoCols 3 // number of columns
#define NoRows 4 // number of rows in key matrix
static keyMatrix thePad = {
.noCols = NoCols, .noRows = NoRows,
.colRow = {COL147a, COL2580, COL369h, // noCols + noRows,
ROW123, ROW456, ROW789, ROWa0h},
.keyVal= { // [ rowInd * noCols + colInd ]
'1', '2', '3',
'4', '5', '6',
'7', '8', '9',
'*', '0', '#' },
}; // thePad
Listing 5: Defines and structure for exemplary12 keys matrix EOZ Clavier S.series
The device's IO was controlled by a next tier system via Modbus over IP (see below). This general approach of using Raspberries as TCP/IP attached remote subsystems calls for a PoE solution.
LEDs directly driven by GPIO pins, of course, need a resistor of about 270 Ω and the pad drive strength can be reduced down to 8 mA.
Speakers and beepers
Piezo speakers should get a series resistor of e.g. 47 Ω, too. The drive strength may be set to 2 mA. Without resistor, one may observe spikes when applying voltage to the speaker, generated by its mechanical (resonance) vibrations. Magnetic speakers must be 200 Ω, with series resistors, when directly attached to one or two (push-pull) output pins.
For generating a tone one may use the gpio library's (see chapter The pigpio library, page 30) ability of “PWM at every pin, by setting the desired frequency and turning the tone on by PW=50 %and off by 0 %:
#define PIEPS PIN12 set_PWM_frequency(thePi, PIEPS, 400); set_PWM_dutycycle(thePi, PIEPS, 128); // PW 50% → tone

Raspberry for remote services 34 Albrecht Weinert
::::: set_PWM_dutycycle(thePi, PIEPS, 0); // PW 0% → silent
On the other hand, when not wanting to play music, but only giving little short signal beeps, one may produce good 500, 400 or (see example) 200 Hz beeps as little extra task in an 1 ms cycle thread, organising the matrix scan over a 10 ms period in 7 steps as main task:
while(commonRun) { waitKey1ms(3); // 3ms end scan gpio_write(thePi, PIEPS, beep); crScanStep(&thePad); // 0 waitKey1ms(1); // 1ms scan crScanStep(&thePad); // 1 waitKey1ms(1); // 1ms scan gpio_write(thePi, PIEPS, 0); crScanStep(&thePad); // 2 waitKey1ms(1); // 1ms scan crScanStep(&thePad); // 3 waitKey1ms(1); // 1ms scan crScanStep(&thePad); // 4 waitKey1ms(1); // 1ms scan gpio_write(thePi, PIEPS, beep); :::::
As you assumed, the (uint8_t) variable beep is set to 1 when a tone is wanted and to 0 for off.
Using speakers directly controlled by GPIO brings two problems ● generating the tone frequency by software either directly or by hardware or library
PWM may eat resources or may bring problems with seldom used and hardly tested library functions,
● depending on the surrounding and the speaker the tones may be just or hardly audible.
The last point may be healed by amplification instead of using a GPIO as power source – in simple cases one n-channel MOSFET alone may do the job.
Piezo buzzers, on the other hand, contain a fixed frequency generator circuitry and a piezo speak-er of fitting resonance. With low electrical power – as deliverable from a GPIO – they can be quiteloud. This solves both problems. On the other hand one has the fixed frequency, usually in the 2..3 kHz range. Nevertheless most type can very well by "on-off-modulated" up to about 600 Hz, allowing some distinguishable sound effects.
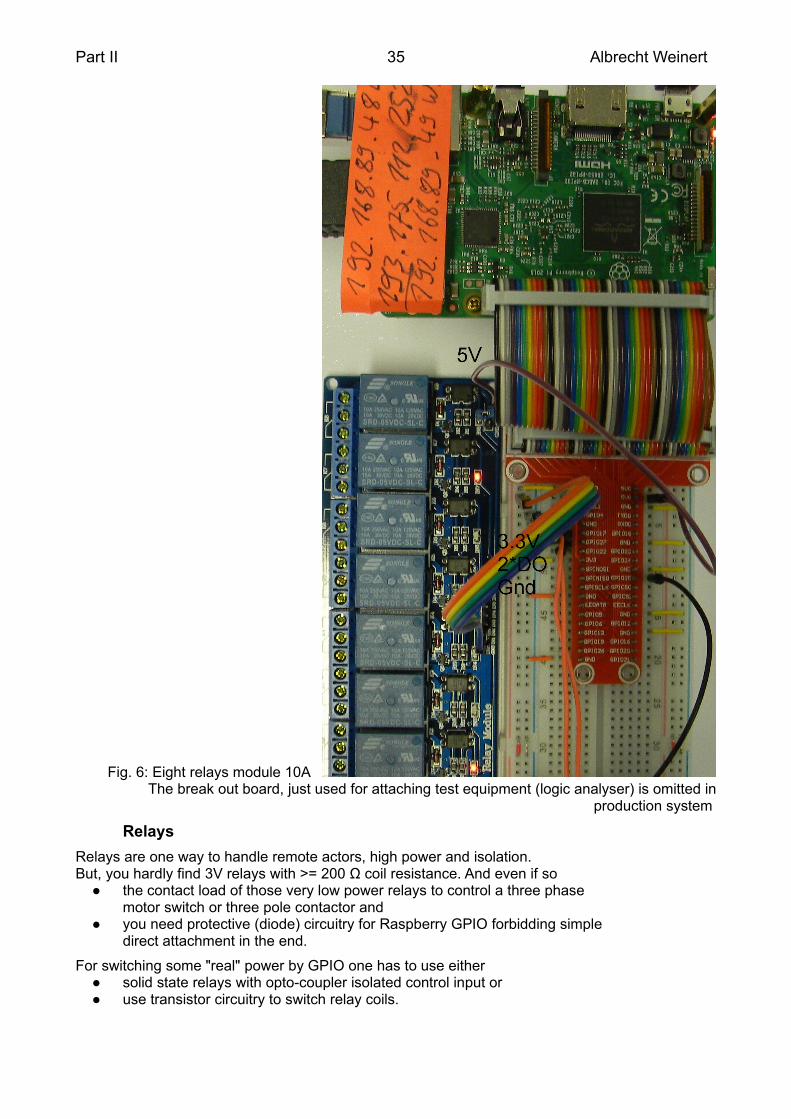
Part II 35 Albrecht Weinert
Fig. 6: Eight relays module 10A The break out board, just used for attaching test equipment (logic analyser) is omitted in
production system
Relays
Relays are one way to handle remote actors, high power and isolation. But, you hardly find 3V relays with >= 200 Ω coil resistance. And even if so ● the contact load of those very low power relays to control a three phase
motor switch or three pole contactor and ● you need protective (diode) circuitry for Raspberry GPIO forbidding simple
direct attachment in the end.
For switching some "real" power by GPIO one has to use either ● solid state relays with opto-coupler isolated control input or ● use transistor circuitry to switch relay coils.

Raspberry for remote services 36 Albrecht Weinert
The latter solution comes quite handy in (semi-) professional modules, like in figure 6, page 35. Figure 6 shows a module with eight 5 V relays, each well controllable by Raspberry's GPIO. The separate 5 V supply for the relays may come from a separate source, or, quite handy, also from Raspberry's 5 V power supply including PoE. So in the end one has 11 short female / female pin topin connections: Gnd, 3.3 V, 5 V and up to eight GPIOs between the Raspberry's 40 pin connector and the relay module (omitting, of course, the experimental break out board used in figure 6).
Figure 6 shows an eight relays module with 10 A changeover contact 250 V or 30 V=. Obviously it has one status LED per relay (which is quite nice) powered by the 3.3 V side (which is OK). These LEDs are red, which is the same sh... mistake as with Raspberry's power LED:
In all professional process control standards red means error/fault.
On the other hand: Replacing Raspberry's red SMD LED "power and else OK" by a green one isn'tdifficult.
Besides this “red light sin” and besides being "no name and no documentation" the module is morethan OK for less then 10 €. As the controller side and the 5 V relay supply have common ground (inmost exemplars), the opto-couplers seem nice overkill (no circuit diagram available). And as a sur-prise in this undocumented case the 8 control inputs are low-active.
Similar higher power relay modules, best with 12 V coil supply, are also available and have been used in production systems.
Power transistors
N-channel power MOS-FETs or npn Darlington transistors or Darlington arrays may be used as (open drain, open collector) N-switches. The transistors would have to be placed near the Raspberry an can be connected directly (gate, array input) or via a fitting resistor (base) with a GPIO pin. (Load M and Raspberry's Gnd have to be the same than.)
Depending on the transistor / array type and a suitable supply and grounding layout, the loads maybe in the range of 400mA ..10A and up to 60V. The loads and or their supplies can be placed quite separated from the Raspberry.
Note: There are (probably Chinese, totally un-documented) single power MOS-FET modules offering a red LED to signal on (nice, except the red) but featuring no current or temperature pro-tection at all. Under certain circumstances, this might be acceptable.
Nevertheless, most power MOS-FETs, as the IRF520, need >= 4 V gate voltage to switch fullyon. That a 3.3 V powered µC cannot deliver. Fig. secret: Chinese module's circuit diagram
Replacing the power MOS-FET by a small signal one (if sufficient) heals the switching problem. And the 100 Ohm gate to source resistor and the LED can / should be omitted or made larger if gate on voltage is critical.
piXtend
In one case we used a piXtend board and stainless case to extend a Raspberry PI. For some 200 € piXtend tries to resemble the standards of industrial process control. It offers graphical Codesys configuration/programming (for 50 € + VAT extra). Considering the advertising and the complete price including case, DIN rail bottom and Codesys license (all in all some 250 €), the properties as industrial PLC, the mechanical quality, the IDE etc. won't fill the customer with enthusiasm. Additionally the piXtend (image) distribution ran into the infamous libc6 dependency disaster at one due update inhibiting all further update/upgrade at the Raspberry affected. In the end this approach promised more than could be fulfilled. For a deep-rooted Codesys fan it might be attractive.

Part II 37 Albrecht Weinert
piXtend pure
The piXtend extension for Raspberries is also usable without Codesys by an extended wiringPi library. You need to install wiringPi, and then you install the piXtend tools and libraries (cf. [54]):
cd ~git clone git://git.code.sf.net/p/pixtend/pxdev pxdevcd pxdev/chmod +x build./build
To install git see page 16.
In our case ./build reported one fatal error, but at least the command line tool pixtendtool was usable. Contrary to its title [54] tells nothing on the library and its use. It seems to be a command line tool plus nothing. So one is left high and dry when writing C programs for piXtend.
Resume: The non-Codesys software accompanying piXtend is not usable for own control pro-grams. On the other hand, besides a lot of flaws, the hardware has some nice features, like CAN, RS485 and 12/24V IO and supply. The hardware interface to the Raspberry is essentially one SPI shared in an unnecessarily complicated way, additionally obfuscated by using an AVR controller asSPI slave for multiple IOs. This single SPI seems a severe bottleneck and one reason for the poor timing performance with Codesys: Here 100ms (yes!) seems the fastest cycle, possible.
Communication hardware – RS485
As the Raspberry Pi3 has 4 USB, Ethernet, WLAN and with some extra software/configuration even Bluetooth, there's seldom need for extra communication modules. One exception may be Modbus (see page 40) over RS485 often found in quite interesting equipment, like heat pumps, gas ovens and "smart" power meters, to name just a few.
Most DIN rail-mounted one or three phase energy meters come with a so called S0 bus. That's justan opto-coupler or switch output giving 300..1000 (as configured) 100 ms closures per kWh. Thesecan be observed by Raspberry's GPIO input with pull-up and counted allowing seldom energy consumption updates and seldom and coarse non-equidistant average power samples.Note: The so-called S0-"bus" is a good example of transferring older technology's solutions without any cogitation to a new one: It's just counting and stopwatching the Ferraris wheel – but without being able to see the energy flow direction / sign of power.
Better electronic meters offer a real bus connection, usually at a slightly higher price. And, usually in this and some other fields, that will be Modbus over RS485. In the exemplary case of power meters this gives precise and actual measurements of voltage, current, frequency, active and reactive power, overall consumption and often much more.
In our context, a process control set-up with those devices would be a RS485 bus with the Rasp-berry as Modbus master / client and one or many of those devices as Modbus slave / server.
RS485 is a serial two wire 5 V (3 V sufficient), push pull serial link, half-duplex, standard UART bytes + start and stop bits. To get the RS485 two wire interface one can ● use an USB to RS485 stick or ● attach a TTL to RS485 converter to Raspberries standard serial link:
UART: TxD = GPIO14 = pin8; RxD = GPIO15 = pin10
The USB stick solution is commonly reported to bring driver problems and, if finally brought to work, causing resource conflicts and system crashes. The reason is Raspberry's USB link already being overused / misused for other build-in USB to XYZ converters.
Hence, one would stick with Raspberry's standard UART (pins 8 and 10). Besides extra RS485 or even Modbus related tasks, using just this UART is more difficult than it should really be. This is partly due to no documentation at all or, worse, misleading documents and examples as not for which Pi variant they are applicable.
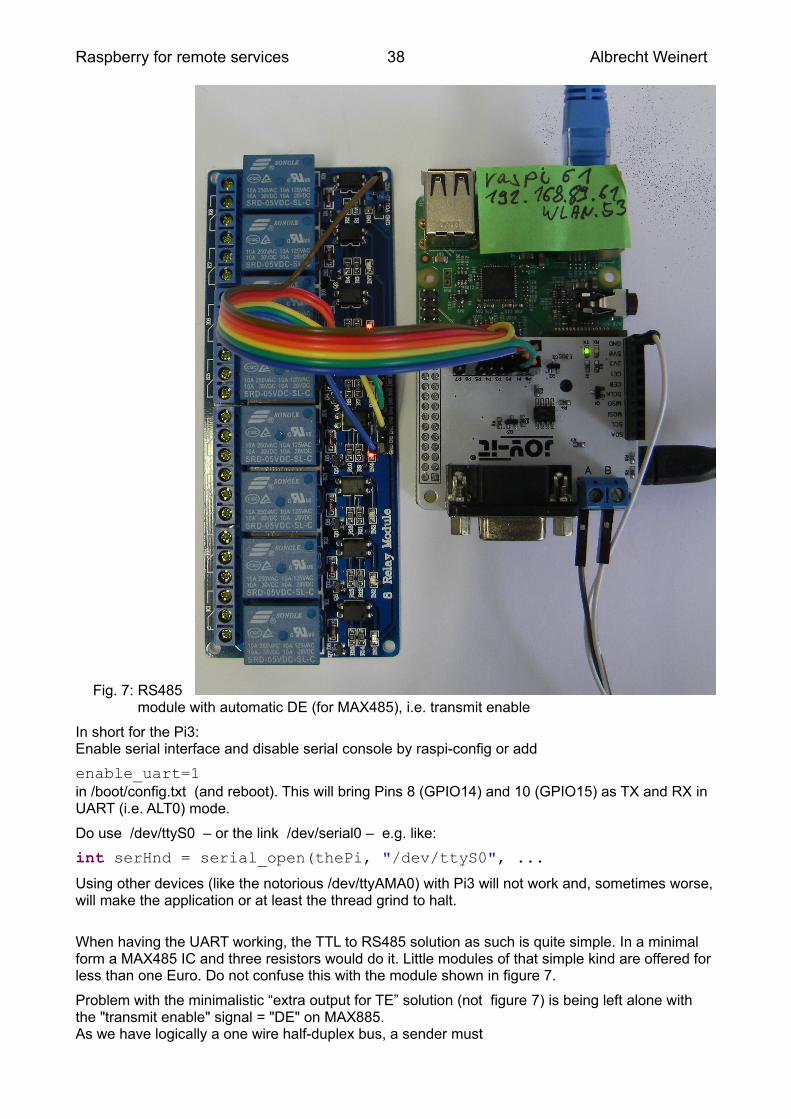
Raspberry for remote services 38 Albrecht Weinert
Fig. 7: RS485 module with automatic DE (for MAX485), i.e. transmit enable
In short for the Pi3: Enable serial interface and disable serial console by raspi-config or add
enable_uart=1in /boot/config.txt (and reboot). This will bring Pins 8 (GPIO14) and 10 (GPIO15) as TX and RX in UART (i.e. ALT0) mode.
Do use /dev/ttyS0 – or the link /dev/serial0 – e.g. like:
int serHnd = serial_open(thePi, "/dev/ttyS0", ...
Using other devices (like the notorious /dev/ttyAMA0) with Pi3 will not work and, sometimes worse,will make the application or at least the thread grind to halt.
When having the UART working, the TTL to RS485 solution as such is quite simple. In a minimal form a MAX485 IC and three resistors would do it. Little modules of that simple kind are offered for less than one Euro. Do not confuse this with the module shown in figure 7.
Problem with the minimalistic “extra output for TE” solution (not figure 7) is being left alone with the "transmit enable" signal = "DE" on MAX885. As we have logically a one wire half-duplex bus, a sender must
Part II 39 Albrecht Weinert
● apply "transmit enable" before the first start bit of its (Modbus) telegram and ● remove "transmit enable" very shortly after the telegram's last stop bit.Note: “Receive enable” might be the inverse of "transmit enable" or always on.
The suggesting idea of using an extra GPIO pin to DE is naive: ● we would have to modify the drivers respectively the Modbus library at every point,
where the sending a telegram would start. ● And while getting the start (even if error prone and killed by library updates) would
be feasible, hitting the telegram's end usually evolves to a not solvable problem.
In the end, pure hardware solutions generating the DE signal from TxD are the most simple ones, and, when well made, totally reliable. There are modules of that kind, just translating RxD/TxD to/from RS485-A&B; see figure 7. Besides doing the TTL to RS845 transmission line (A&B) translation by a MAX485 IC (with auto DE) for about 10 €, it brings all covered GPIO and supply pins to extra connectors. Hence other (process) IO can still easily be attached.Note: This should be taken for granted but is not. There are “shields” with the 40 pin connector using supply and two IO burying all else.
Figure 7, page 38, shows this "GPIO forwarding" for a relays module as example.
The Plus side of this module ("joy-it") is ● the reliable DE automatism and ● forwarding the Raspberry pins unused for RS485 to an own pin header
supplying an eight relay module and serving eight GPIO (outputs) to it The (big) minus is ▼ having only two screw clamps "A" and "B". One always needs "Gnd", too!
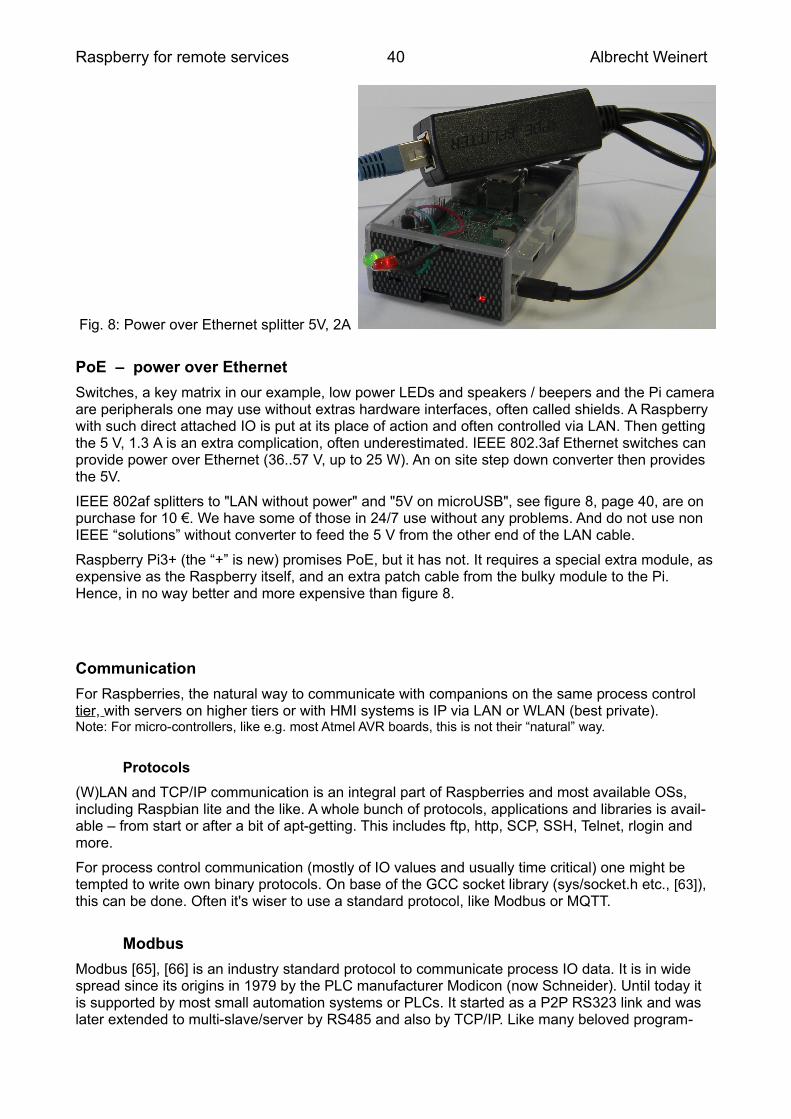
Raspberry for remote services 40 Albrecht Weinert
Fig. 8: Power over Ethernet splitter 5V, 2A
PoE – power over Ethernet
Switches, a key matrix in our example, low power LEDs and speakers / beepers and the Pi cameraare peripherals one may use without extras hardware interfaces, often called shields. A Raspberry with such direct attached IO is put at its place of action and often controlled via LAN. Then getting the 5 V, 1.3 A is an extra complication, often underestimated. IEEE 802.3af Ethernet switches can provide power over Ethernet (36..57 V, up to 25 W). An on site step down converter then provides the 5V.
IEEE 802af splitters to "LAN without power" and "5V on microUSB", see figure 8, page 40, are on purchase for 10 €. We have some of those in 24/7 use without any problems. And do not use non IEEE “solutions” without converter to feed the 5 V from the other end of the LAN cable.
Raspberry Pi3+ (the “+” is new) promises PoE, but it has not. It requires a special extra module, asexpensive as the Raspberry itself, and an extra patch cable from the bulky module to the Pi. Hence, in no way better and more expensive than figure 8.
Communication
For Raspberries, the natural way to communicate with companions on the same process control tier, with servers on higher tiers or with HMI systems is IP via LAN or WLAN (best private). Note: For micro-controllers, like e.g. most Atmel AVR boards, this is not their “natural” way.
Protocols
(W)LAN and TCP/IP communication is an integral part of Raspberries and most available OSs, including Raspbian lite and the like. A whole bunch of protocols, applications and libraries is avail-able – from start or after a bit of apt-getting. This includes ftp, http, SCP, SSH, Telnet, rlogin and more.
For process control communication (mostly of IO values and usually time critical) one might be tempted to write own binary protocols. On base of the GCC socket library (sys/socket.h etc., [63]), this can be done. Often it's wiser to use a standard protocol, like Modbus or MQTT.
Modbus
Modbus [65], [66] is an industry standard protocol to communicate process IO data. It is in wide spread since its origins in 1979 by the PLC manufacturer Modicon (now Schneider). Until today it is supported by most small automation systems or PLCs. It started as a P2P RS323 link and was later extended to multi-slave/server by RS485 and also by TCP/IP. Like many beloved program-
Part II 41 Albrecht Weinert
ming languages and protocols of such age, Modbus has a bundle of architectural flaws the worst of which were mistakes already in 1979:
▼ Modbus has no layer concept and mixes physics, transport and application in an unfortu-nate way. The standard makes inadequate references to concrete devices and their addressing idiosyncrasies. As none of those has any effect to the protocol and its telegrams, these references to “4xxx registers” and the like are a rich source of confusion. A lot of secondary literature just dwells on what belongs to the standard and what was meant by "only for a 984A/B/X machine".
▼ Modbus has no data type concept worth the name.One type is "coil" [sic!] = copper wire for relays. This is a boolean forced to one bit. Modbus insists to transfer thousand of bits (sorry "coils") starting at arbitrary odd bit addresses aligned to bytes – meaning RS232 bytes since 1979 and also TCP bytes a bit later. For a controller with only single bit shift machine instructions the load of shift instructions may be larger then the rest of the task.
The only other Modbus data type is called "register" which is just a16 bit something. (Above trans-port Modbus knows no "byte"). Even when the application "thinks" in bytes, this “register” approachbrings the full computational load and risk of errors by endianess handling – without doing any good for current applications' or devices' 32 or 64 bit data.
For the serial interfaces RS232/485 – still in wide use for small controllers – Modbus won't use UART parity supplemented by a simple checksum. The standard requires a complex CRC tele-gram checksum. This overkill is, again, overcharging some controllers even with a clever double look-up algorithm, requiring low baud-rates just to reduce the telegram and CRC load. Serial Mod-bus has no control flow concept, but a set of pause and time-out requirements forcing modern buf-fered UARTs to low gear and requiring extra programming. Some newer Modbus implementations ignore these requirements by implementing "full speed" – the better ones at least documenting or advertising it. But beware: Other stations might just fail or intentionally reject to communicate with such non-conformer – and, alas, quite rightly so.
One last point: Modbus by itself has no security measures. This can and must be handled by usingprotected networks, only. Serial RS232/485 lines should always fall in that category (by physics). For the preferred TCP/IP use protected private LANs (or tunnels).
Resume: As it is a widespread industry standard we should use Modbus on TCP on our Raspberry servers. With the GCC libraries and the Ethernet port we have all infrastructure at hand.
Serial (RTU) Modbus mostly via RS485 should be avoided as long as all partner are linked via Ethernet. Additionally Raspberries would need extra hardware (like MAX485 modules, cf. figure 7, page 38) to have RS485. On the other hand there are many small process IO devices around with good value for money featuring RS485 Modbus interface, like smart meters. Linking those to a Raspberry opens a rich field of applications with professional process IO. So let's do Modbus – preferably Modbus TCP – but let's be open for RS485 if an interesting application calls for it.
libmodbus
With socket libraries ([63]) implementing a minimal Modbus subset (class 0, TCP IP e.g.) is relat-ively easy. Going to higher classes or other interfaces will get hard work. But even with small sub-sets it is re-inventing the wheel, considering age and wide use of the protocol. But looking for a reliable and conforming Modbus library for Raspberry (Linux) was harder than expected.
In the end we used Stéphane Raimbault's libmodbus. It is + function code complete + including even exotic function codes 17/11, which is ▼ implemented in a useless way reporting fixed constants and always “PLC run” + available and tested on many platforms + in wide spread use. It has + implemented all interfaces, TCP/IP and serial, + using an (▼ inconsistent) abstraction layer concept for the interfaces. So the application
software would be less affected should one switch from TCP to RS485.
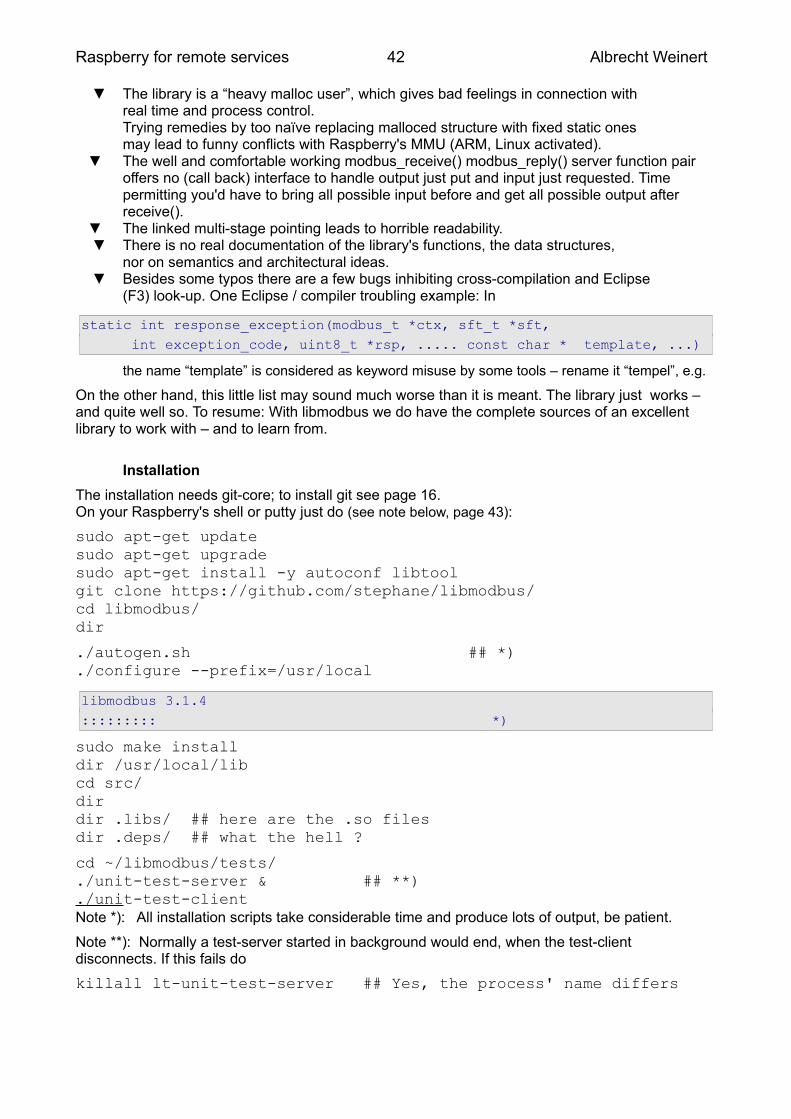
Raspberry for remote services 42 Albrecht Weinert
▼ The library is a “heavy malloc user”, which gives bad feelings in connection withreal time and process control.Trying remedies by too naïve replacing malloced structure with fixed static ones may lead to funny conflicts with Raspberry's MMU (ARM, Linux activated).
▼ The well and comfortable working modbus_receive() modbus_reply() server function pair offers no (call back) interface to handle output just put and input just requested. Timepermitting you'd have to bring all possible input before and get all possible output after receive().
▼ The linked multi-stage pointing leads to horrible readability. ▼ There is no real documentation of the library's functions, the data structures,
nor on semantics and architectural ideas. ▼ Besides some typos there are a few bugs inhibiting cross-compilation and Eclipse
(F3) look-up. One Eclipse / compiler troubling example: In
static int response_exception(modbus_t *ctx, sft_t *sft, int exception_code, uint8_t *rsp, ..... const char * template, ...)
the name “template” is considered as keyword misuse by some tools – rename it “tempel”, e.g.
On the other hand, this little list may sound much worse than it is meant. The library just works – and quite well so. To resume: With libmodbus we do have the complete sources of an excellent library to work with – and to learn from.
Installation
The installation needs git-core; to install git see page 16.On your Raspberry's shell or putty just do (see note below, page 43):
sudo apt-get updatesudo apt-get upgradesudo apt-get install -y autoconf libtoolgit clone https://github.com/stephane/libmodbus/cd libmodbus/dir
./autogen.sh ## *)
./configure --prefix=/usr/local
libmodbus 3.1.4 ::::::::: *)
sudo make installdir /usr/local/libcd src/dirdir .libs/ ## here are the .so filesdir .deps/ ## what the hell ?
cd ~/libmodbus/tests/./unit-test-server & ## **)./unit-test-clientNote *): All installation scripts take considerable time and produce lots of output, be patient.
Note **): Normally a test-server started in background would end, when the test-client disconnects. If this fails do
killall lt-unit-test-server ## Yes, the process' name differs

Part II 43 Albrecht Weinert
Due to a bug in the test-servers they work only with clients on the same machine; change the source accordingly and re-build.
A note on "just do this!" to install libmodbus
Well, due to lacking any respectable background documentation on libmodbus, this "just do!" was our biggest mental hurdle.
To begin with, why should I use libmodbus at all? Because it's good and, when not fitting, adaptable.
What does the above installation – many, many pages of scripts! – do with my system? Gives you some 7 files needed.
What is the – never before used – libtool and why would I need it?To understand get [64] and read it. You would not need it, It's just a help for the project owner to serve many targets. We hoped it would not hurt.
So the short answer to "Should I do this complicated installation?" is: When wanting libmodbus, "Yes, do it". Be courageous or make a backup before. ... And anyway remember ldconfig.
In the end you need the following files – and transferring those from your installation Raspberry toanother one does the installation job:
● the sources of the library and and the tests if you like
● the include files. Put the includes to /usr/local/include/
-rw-r--r-- 1 root staff 11155 2017-08-04 14:34 modbus.h-rw-r--r-- 1 root staff 2124 2017-08-04 14:34 modbus-version.h-rw-r--r-- 1 root staff 1199 2017-08-04 14:34 modbus-rtu.h-rw-r--r-- 1 root staff 1373 2017-08-04 14:34 modbus-tcp.h-rw-r--r-- 1 root staff 3430 2017-08-04 14:34 modbus-private.h-rw-r--r-- 1 root staff 7690 2017-08-08 09:20 config.h-rw-r--r-- 1 root staff 1627 2017-08-04 14:34 modbus-rtu-private.h-rw-r--r-- 1 root staff 1247 2017-08-04 14:34 modbus-tcp-private.h
● the library files. Put them to /usr/local/lib/
lrwxrwxrwx root staff 2017-07-21 libmodbus.so -> libmodbus.so.5.1.0lrwxrwxrwx root staff 2017-07-21 libmodbus.so.5 -> libmodbus.so.5.1.0-rwxr-xr-x root staff 123408 2017-07-21 14:32 libmodbus.so.5.1.0
Do not forget to say sudo ldconfig afterwards. Otherwise you might get incomprehensible errors when running (cross-build) Modbus applications on that machine or when linking there.
Just to run a cross-build Modbus program on another Raspberry an unlinked libmodbus.so ftp-transferred there should suffice. after copying it to /usr/local/lib/:
sudo cp libmodbus.so /usr/local/lib/ ## to where it belongssudo ln -s /usr/local/lib/libmodbus.so /usr/local/lib/libmodbus.so.5sudo ldconfig ## what ever it does, never forget
But it turned out that for what ever reasons programs required libmodbus.so.5 even when made with -lmodbus.
Compile and cross-build
After a successful installation or transfer one can locally compile:
cd ~/ibmodbus/src/tests ## or where ever the .c source isgcc version.c -o version -lmodbus
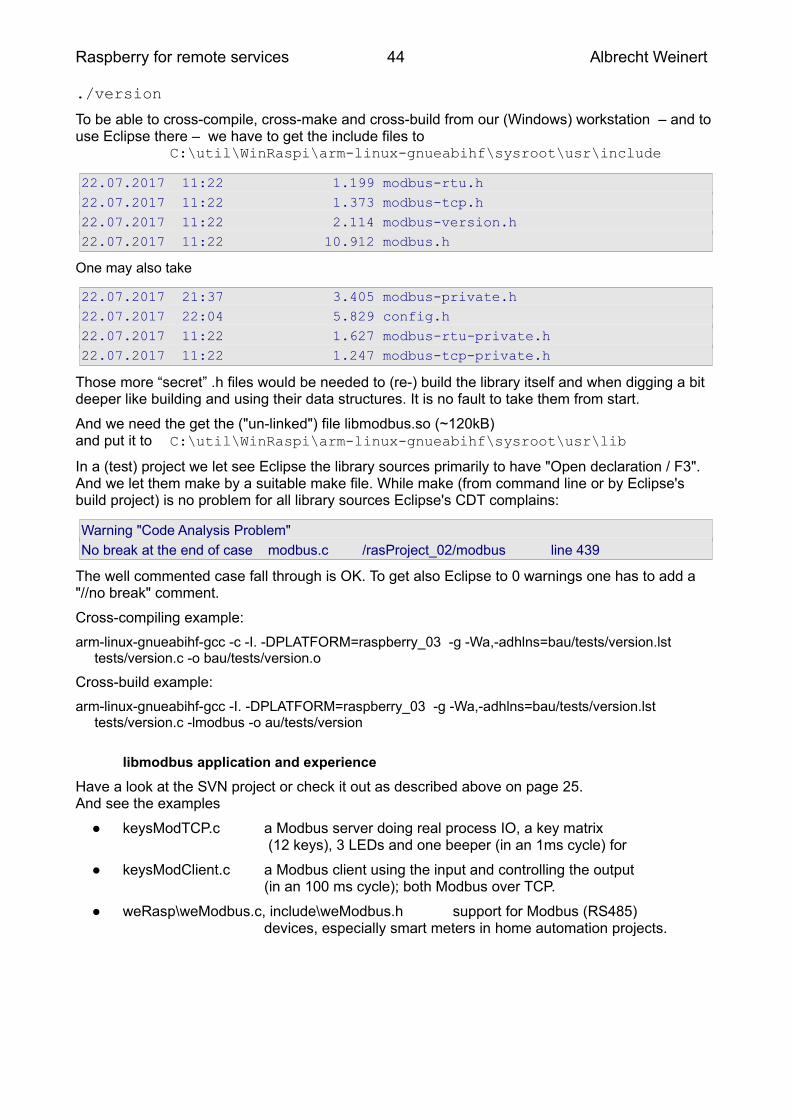
Raspberry for remote services 44 Albrecht Weinert
./version
To be able to cross-compile, cross-make and cross-build from our (Windows) workstation – and to use Eclipse there – we have to get the include files to
C:\util\WinRaspi\arm-linux-gnueabihf\sysroot\usr\include
22.07.2017 11:22 1.199 modbus-rtu.h22.07.2017 11:22 1.373 modbus-tcp.h22.07.2017 11:22 2.114 modbus-version.h22.07.2017 11:22 10.912 modbus.h
One may also take
22.07.2017 21:37 3.405 modbus-private.h22.07.2017 22:04 5.829 config.h22.07.2017 11:22 1.627 modbus-rtu-private.h22.07.2017 11:22 1.247 modbus-tcp-private.h
Those more “secret” .h files would be needed to (re-) build the library itself and when digging a bit deeper like building and using their data structures. It is no fault to take them from start.
And we need the get the ("un-linked") file libmodbus.so (~120kB) and put it to C:\util\WinRaspi\arm-linux-gnueabihf\sysroot\usr\lib
In a (test) project we let see Eclipse the library sources primarily to have "Open declaration / F3". And we let them make by a suitable make file. While make (from command line or by Eclipse's build project) is no problem for all library sources Eclipse's CDT complains:
Warning "Code Analysis Problem"
No break at the end of case modbus.c /rasProject_02/modbus line 439
The well commented case fall through is OK. To get also Eclipse to 0 warnings one has to add a "//no break" comment.
Cross-compiling example:
arm-linux-gnueabihf-gcc -c -I. -DPLATFORM=raspberry_03 -g -Wa,-adhlns=bau/tests/version.lst tests/version.c -o bau/tests/version.o
Cross-build example:
arm-linux-gnueabihf-gcc -I. -DPLATFORM=raspberry_03 -g -Wa,-adhlns=bau/tests/version.lst tests/version.c -lmodbus -o au/tests/version
libmodbus application and experience
Have a look at the SVN project or check it out as described above on page 25. And see the examples
● keysModTCP.c a Modbus server doing real process IO, a key matrix (12 keys), 3 LEDs and one beeper (in an 1ms cycle) for
● keysModClient.c a Modbus client using the input and controlling the output(in an 100 ms cycle); both Modbus over TCP.
● weRasp\weModbus.c, include\weModbus.h support for Modbus (RS485)devices, especially smart meters in home automation projects.

Part II 45 Albrecht Weinert
MQTT
MQTT ([67]) is a TCP based lightweight M2M messaging protocol claiming to be simple, low net-work bandwidth and small code footprint. Notwithstanding those claims, at least the "simplicity" might be slightly doubted.
MQTT is quite successful and widely used in the world of IoT and home automation. Most sources and the protocol are open. The protocol specification is managed by OASIS. To use it, one has to have at least one broker service running on a machine reachable by all clients via TCP/IP. This machine may very well be a Raspberry Pi3 doing other process control work.
A client program producing events might publish those to the broker. The event message must be assigned to a "topic". Topics are to be organised hierarchically in a tree, e.g.
labExp/sweetHome/meters/alarms labExp/sweetHome/hmi/actuators
The publisher might chose several service quality levels from "once or lost", "at least once or duplicated" to "just once" when delivering a message to the broker.
The broker would run by default with no security or encryption. It might be configured with an own user/password base for access to ports and topics, for requiring client certificates and for using TLS. Before jumping to those features in a closed, secured (W)LAN, one should consider these requirements hitting all clients at the site. Think twice before burdening our small Raspberry and ESPxy devices with complicated protocol extensions. But beware: This "have no fear" only holds until we open our private process control LAN to someone else.
A client program wanting to react respectively listen to events has to subscribe to one or more topics. Besides specific topics, like the two examples above, single level (+) and multi-level (#, at the end, only) wildcards can be used:
labExp/sweetHome/+/alarms labExp/sweetHome/hmi/#
In a certain sense, we have the Listener respectively Observer pattern implemented by the MQTT broker to which clients (programs) can publish or subscribe. A client program may very well have both the publisher and the subscriber role.
A client may publish one special "last will" or "testament" (LWT) message. This message will be stored by the broker and pushed to subscribers, only, after this client failed or died. Criteria for death are network and MQTT protocol errors and time outs.
MQTT products
There are a lot of MQTT enabled products with good price performance ratio on the market: ● ESP8266 WiFi modules with MQTT ● single to quadruple power (relay) switches, optionally
● 230V AC or ● 24V ● DIN rail mounted ● wall plug-in
● touch wall switches ● lamps / bulbs and a lot more.
As did Modbus with smart meters, pumps etc., MQTT opens another range of products as sensors and actuators for our process control Raspberries.
MOSQUITTO
A Raspberry Pi 3 doing a 24/7 process control task in >= 20 ms cycles may very well execute some extra services, like an Apache 2.4 server for HMI (see below, page 54) and a MQTT broker, when used judiciously and almost only related to the process control task.

Raspberry for remote services 46 Albrecht Weinert
Mosquitto is an open source implementation of a MQTT broker etc. by Eclipse. It seems to be the most used implementation for small and embedded systems, notwithstanding the lack of findable respectively usable documentation and manuals.
To install Mosquitto do:
sudo apt-get update & sudo apt-get upgradesudo apt-get install mosquittosudo service --status-all | grep mosq
The installation command brings the broker and starts it as service. The broker service can be switched off and on by:
sudo service mosquitto stopsudo service mosquitto start
If we want the broker alone (on an extra Raspberry, e.g.) we would stop here. For having the client (test) program, the library and the include file we do:
sudo apt-get install mosquitto-clientssudo apt-get install libmosquitto-devsudo ldconfig
To test our new broker we utilise the command-line clients, just installed:
mosquitto_sub -d -t labExp/sweetHome/#
-t precedes the topic(s) we subscribe to, and -d brings some extra (debug) messages, helping to get acquainted with the protocol. To see the broker and our (one) running subscriber working we publish a fitting message by command-line, best in another putty console:
mosquitto_pub -d -t labExp/sweetHome/alarm -m "bathtub overflow 3"
If all went well, our subscriber sees the event, immediately. When sending an off topic message
mosquitto_pub -d -t hello/world -m "Hello 11"
nothing should happen.Note: Besides mosquitto_pub and mosquitto_sub, there's a third command-line tool mosquitto_passwd.
libmosquitto
By some searching and grepping (due to lack of documentation) one can see, we have just one library and one include file:
lrwxrwxrwx 1 root root 17 2017-05-29 07:21 libmosquitto.so -> libmosquitto.so.1
-rw-r--r-- 1 root root 46960 2017-05-30 00:32 libmosquitto.so.1-rw-r--r-- 1 root root 54155 2017-05-29 07:21 mosquitto.h
in /usr/lib/ respectively /usr/include/.
Compile and cross-build
To cross-compile and -build on the workstation we put the include file toC:\util\WinRaspi\arm-linux-gnueabihf\sysroot\usr\include
and the library both as libmosquitto.so.1 as well as as "un-linked" (copied) libmosquitto.so to
C:\util\WinRaspi\arm-linux-gnueabihf\sysroot\usr\lib
That's it. As first test we make a simple publisher example (with accompanying make include) in Eclipse and having the make tool build it and ftp it to the target Raspberry, as usual. With this proofof feasibility – and when having understood the API ([69]), we can add MQTT functions (public and/or subscribe) to our C process control software. And we can make own small (ESP8266 based, e.g.) MQTT devices.

Part II 47 Albrecht Weinert
1-wire
1-wire is a bus and protocol specification allowing several IO devices attached to one IO pin. For one 1-wire bus on a Raspberry the default is GPIO04 (Pin7). Another pin may be configured as well as multiple 1-wire buses. But it is good practice to stick to the default, when feasible.
1-wire devices do have a Vcc pin for 3..5V; 5V is allowed even when the bus is limited to 3.3V. By providing a 4K7 pull up resistor to 3.3V one may even omit the Vcc wire to the devices; they can live from the "One" bus wire alone. This feature is called "parasite power" and done by feeding an internal Vcc buffer capacitor by both the external Vcc pin and the I/O bus pin via decoupling diodes. Available 1-wire ICs respectively devices are ● DS1822 thermometer -40°C..+125°C; 1mK resolution, accuracy 2K;
the unique factory 64-Bit registration number starts with 0x28 ● DS18B20 thermometer -40°C..+125°C; 1mK resolution, accuracy 0.5K (0x28) ● DS2430 small EEPROM (0x14) ● DS2408 8 very small power I/O pins (input or open drain; 0x29) ● DS2413 2 very small power I/O pins (input or open drain; 0x3A)
For process I/O with Raspberries the last two, "digital IO via 1-wire", are not attractive. Better use GPIO directly or have a ESP8266 module do it via MQTT. And here would be no use case for an extra EEPROM as we can hibernate data on the SD-card in the OS's file system.
With Raspberry's lack of analogue input, the 1-wire temperature sensors in all their variants may come very useful. One can have the cheap naked IC as well as a device with 1..5 m cable sealed in a stainless steel tube fitting in the standard thermometer inlets of industrial tanks. When heating water with surplus solar power, e.g., one should read the temperature for safety and comfort limits.
1-wire devices are accessed by Linux's device as file approach, the behaviour being implemented in kernel modules (.so files). From the application's point of view this approach is orthogonal to the "use I/O pins directly or driver software approach". To make it happen, i.e. have the files and the kernel modules for 1-wire + thermometer available, we have to (sudo) modify two configuration files. In /boot/config.txt add
dtoverlay=w1-gpio # or dtoverlay=w1-gpio,gpiopin=x
And in /etc/modules add
w1_gpio
w1_therm
After re-boot one 1-wire is ready on the default pin *1). When a sensor is connected find it by
dir /sys/bus/w1/devices
lrwxrwxrwx 2018-07-06 28-0199d507010c -> ../../../devices/w1_bus_master1/28-0199d507010c
lrwxrwxrwx 2018-06-28 w1_bus_master1 -> ../../../devices/w1_bus_master1
Here 28-0199d507010c points points to a thermometer's directory named by the IC's unique serial number. We strongly recommend to resolve the symbolic links*2) down to the thermometer's file w1_slave for a real time application.A read of this "file" reveals an actual measurement as a two line text:
7f 01 86 5d 7f ff 01 10 ea : crc=ea YES
7f 01 86 5d 7f ff 01 10 ea t=23937
If the first line ends with YES the last number in the second line is the temperature in m°C, that is 23.9°C in the example. If the file isn't readable or if YES is not on its (fixed) position consider it an error.Note1 : If a GPIO is thus assigned to a kernel modul, never touch, configure, read nor write it directly. The pigpio(d) library / daemon promises not to to so when not explicitly requested by user code.
Note2 : Do not let time critical code follow symlinks. It's quite a task and probably not optimised away.

Raspberry for remote services 48 Albrecht Weinert
Real time
Every server doing work for others and every system doing process IO does so under timing re-quirements. These requirements should be well defined, best clearly documented with consistent numbers and units. In some fields of application and communities much of it may be considered asimplicitly clear, be it by the industry's standards or by properties of the usual standard products seen as not disputable *).
If someone with PLC background says “someThingX is done in the 1ms cycle” following is implied:
● there is a trigger event by the underlying runtime every 1ms “exactly” … well ± ± accuracy (timing oscillator / source, short time) ± jitter (variability of delays/latency)
● there are 86.400.000 such trigger events per day “exactly” … well ± ± accuracy (long time; can sometimes be made better than short time value) + exactly 0 or exactly 1000 events per leap second (Google, Oracle & others: 0)
● “someThingX” will run at every such trigger event “exactly” … well ± + 0..max delay/latency (meaning max. .. later but never ever too early)
We have “real time” when all those times and intervals are specified to the applications require-ments and “hard real time” when one occurred violation is to be considered as application failure. While the absolute numbers are important the “hard” property has, per se, nothing to do with speed. You may replace 1ms by 1s in our mental example and relax other requirements but con-sider not having (86.400 + number of leap seconds) runs per day as a failure. It may be astonishing how “hard” that can be in some environments.
Keeping in PLC / cycles and with a Raspberry Pi3 / Raspbian lite doing just process IO and relatedcommunication we can well implement 1ms cycles. Going faster might work but would be daring.Note *) on common process IO standards: The same is true for hardware, electrical signals, maximum ratings of IO, EMC etc. Most sold IO extensions, shields etc. are totally inadequate in this respect.
Absolute timing
The approach in our very first LED blink examples (listing 2, ending page 18, e.g.)do somethingdelay (relative from now)do somethingdelay (relative from now)… and so on
never gives an exact timing, how ever exact the delay function used may be. Believe it or use a good logic analyser to verify. The basic recipe to start the “do something” at exact intervals relative to one start point in time is to use absolute time steps as supported by listing 6's functions.
/* Absolute timer delay for the specified number of µs * * @return sleep's return value if of interest (0: uninterrupted) */int timeStep(timTv * timer, unsigned int micros){ timeAddNs(timer, (long)(micros) * 1000); // timer += micros return clock_nanosleep(CLOCK_ABS, TIMER_ABSTIME, timer, NULL);} // delay(unsigned int)
/* Absolute timer initialisation * * This function initialises the time structure provided. * @param timer the time structure to be used (never NULL!) */

Part II 49 Albrecht Weinert
void timeInit(timTv * timer){ clock_gettime(CLOCK_ABS, timer);
} // timeInit(timTv *)
Listing 6: Absolute time steps; excerpt from weRasp/sysUtil.c
This is also the base idea to get PLC like cyclic tasks. Here the execution time of “do something” including all jitter and latencies and considering it's CPU/core usage must be shorter than the (next) timing step.
Latency and accuracy
Of course, it is of no avail to offer 1ms cycles for process control, when the runtime's latency (in thesense of delays on signals) is in the same order of magnitude or worse. One common command line tool to check latency is cyclictest. Get it by:
sudo apt-get install rt-tests
and run it by e.g.
sudo cyclictest -l100000 -m -n -a0 -t1 -p99 -i400 -h400 -q
After some patience on a Raspberry Pi3 with process and some communication load we get a typical result like
# Total: 0001000000# Min Latencies: 00009 # observed 4...12µs# Avg Latencies: 00012 # observed 11...13µs# Max Latencies: 00062 # observed 70..118µs# Histogram Overflows: 00000
The tool and its options as well as the interpretation of the results are non-trivial. Anyway, running the same test again will give comparable results on different run-times and loads. Experimental outcomes are:
● A well configured (specialised, single purpose, single use) Raspian lite on a Pi3is suitable for hard real time process control and 1 ms cycles.
● A graphical (non lite) OS in all our use cases never was and never will be.
The accuracy of the 1ms cycle may very well measured by precise logic analyser observing outputs by the 1ms cycle and derived longer ones (n * 100ms) over a long period. In one case we observed an hour being 144 ms too long (~3.5 s/d). By (excerpt)
absNanos1ms = 1000000 + vcoCorrNs;
while(commonRun) { // timing loop in main thread timeAddNs(&cyc1msEnd, absNanos1ms); // 1 ms time step clock_nanosleep(CLOCK_ABS, TIMER_ABSTIME, &cyc1msEnd, NULL); if (++msTo100Cnt >= 100) {
with the signed byte vcoCorrNs set to -40 we improved the accuracy by 2 orders of magnitude. This correction by a calculated fixed value worked very well over many days of uninterrupted use. So we can conclude this Pi3's quartz stability being excellent while the accuracy could be better.
Of course, this “hand-made” correction value is no practical solution for wide use. vcoCorrNs should be automatically determined by a phase locked loop (PLL) “voltage controlled oscillator” (VCO) algorithm against a precise time source, like NTP (available) or DCF77 (extra hardware).Note: In the (latest) Jessie distribution CLOCK_REALTIME and ABS_MONOTIME's clock will be NTP tuned. Own inventions as with earlier Jessies (or libs) aren't required any longer.
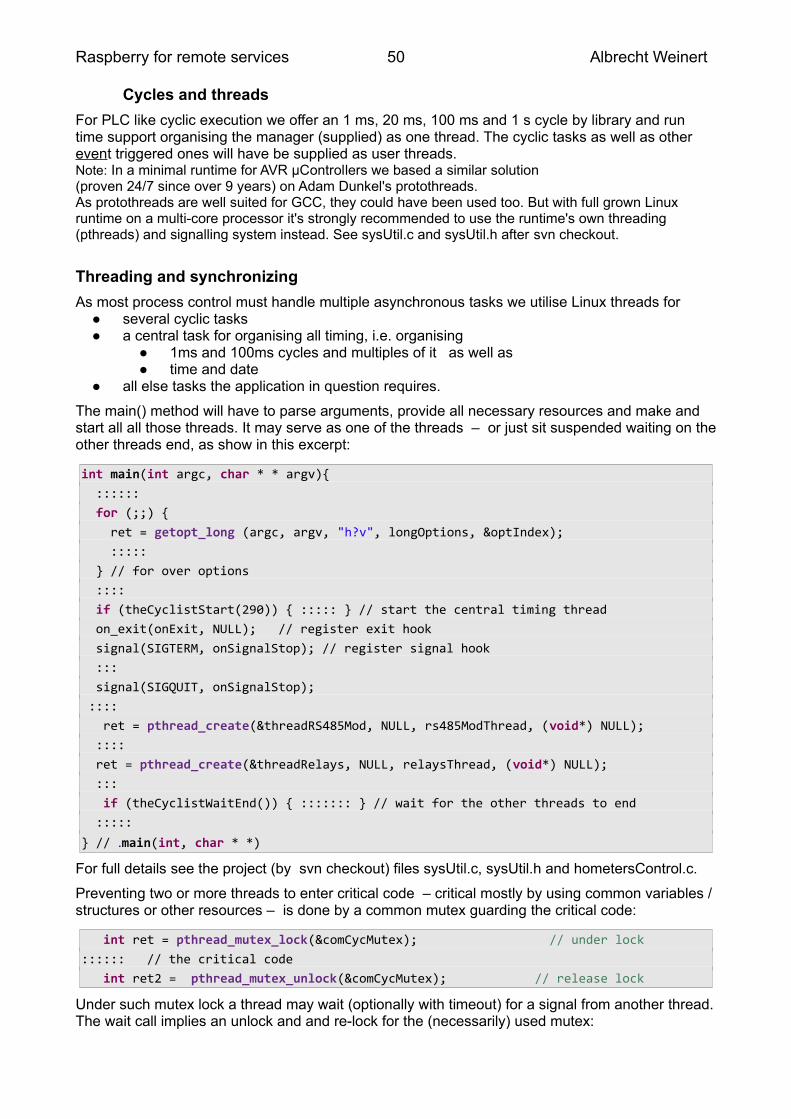
Raspberry for remote services 50 Albrecht Weinert
Cycles and threads
For PLC like cyclic execution we offer an 1 ms, 20 ms, 100 ms and 1 s cycle by library and run time support organising the manager (supplied) as one thread. The cyclic tasks as well as other event triggered ones will have be supplied as user threads.Note: In a minimal runtime for AVR µControllers we based a similar solution (proven 24/7 since over 9 years) on Adam Dunkel's protothreads.As protothreads are well suited for GCC, they could have been used too. But with full grown Linux runtime on a multi-core processor it's strongly recommended to use the runtime's own threading (pthreads) and signalling system instead. See sysUtil.c and sysUtil.h after svn checkout.
Threading and synchronizing
As most process control must handle multiple asynchronous tasks we utilise Linux threads for ● several cyclic tasks ● a central task for organising all timing, i.e. organising
● 1ms and 100ms cycles and multiples of it as well as ● time and date
● all else tasks the application in question requires.
The main() method will have to parse arguments, provide all necessary resources and make and start all all those threads. It may serve as one of the threads – or just sit suspended waiting on theother threads end, as show in this excerpt:
int main(int argc, char * * argv){ :::::: for (;;) { ret = getopt_long (argc, argv, "h?v", longOptions, &optIndex); ::::: } // for over options :::: if (theCyclistStart(290)) { ::::: } // start the central timing thread on_exit(onExit, NULL); // register exit hook signal(SIGTERM, onSignalStop); // register signal hook ::: signal(SIGQUIT, onSignalStop); :::: ret = pthread_create(&threadRS485Mod, NULL, rs485ModThread, (void*) NULL); :::: ret = pthread_create(&threadRelays, NULL, relaysThread, (void*) NULL); ::: if (theCyclistWaitEnd()) { ::::::: } // wait for the other threads to end :::::
} // .main(int, char * *)
For full details see the project (by svn checkout) files sysUtil.c, sysUtil.h and hometersControl.c.
Preventing two or more threads to enter critical code – critical mostly by using common variables / structures or other resources – is done by a common mutex guarding the critical code:
int ret = pthread_mutex_lock(&comCycMutex); // under lock:::::: // the critical code int ret2 = pthread_mutex_unlock(&comCycMutex); // release lock
Under such mutex lock a thread may wait (optionally with timeout) for a signal from another thread.The wait call implies an unlock and and re-lock for the (necessarily) used mutex:

Part II 51 Albrecht Weinert
int ret = pthread_mutex_lock(&comCycMutex); // under lock:::::: // there may be optinal critical code before and after the wait call ret = pthread_cond_wait(&cycTask->cond, &comCycMutex); // unlock / lock int ret2 = pthread_mutex_unlock(&comCycMutex); // release lock
Under the same mutex lock another thread may send the signal to one or all waiting threads:
int ret = pthread_mutex_lock(&comCycMutex); // under lock ret r= pthread_cond_broadcast(&cykTask->cond); // wake threads; unlock / lock int ret2 = pthread_mutex_unlock(&comCycMutex); // release lock
Using this schema detailed in the example, threading and the necessary locking, synchronising and signalling is almost as easy as with Java. Limitations with Raspian are no pthread_yield() and no working thread priorities. The first, if needed, may be substituted by sched_yield() and the priorities by fine granular organising of the process control tasks.
Co-operating applications
Besides the cyclic and organisational tasks (threads) a process control application may have to handle HMI output, output to files (log, error, CSV etc.) and much more. Except for very small and simple applications it seems logical to move some (or all) tasks not belonging to core (real time) process control and process IO to other programs on the same computer.
On the minus or costs side are ● inter process communication and implicitly or explicitly ● inter process synchronisation.
On the plus side we see ● the core process control / IO program getting smaller and ● kept as simple as possible, ● having less or ideally no start parameters (start options) ● being quite suitable to be started as background service (on boot) and hence as depending on less resources (files, HMI and else) ● reliably running 24/7.
Shared memory
To get to this separation of tasks in several co-operating programs we need a be-directional communication from/to the process control program and all its helper programs. Here we could usepipes, sockets or queues, e.g. But here the programs tend to be tightly coupled as consumer and producer and one's failure may severely impede the other. For processes on the same machine shared memory is the easiest way to avoid such hard dependencies and, as well, allow flexible one-to-some relations.
A good approach for our (process control) use case is to organise all ● process input, ● process output, ● command input and ● status output in one well-formed structure (of structures) clearly defined and centrally modifiable in one .h-file common to the application – i.e. all its processes.
This common structure is held and actualised in shared memory. Each co-operating process may work on the shared memory or on a local copy. The latter approach – doing the work on a local copy and copying the parts needed / modified from / to the shared memory – is better in most cases, as almost each access to shared memory will have to done under mutual exclusion by semaphore (not to be confused with above mutex) lock.
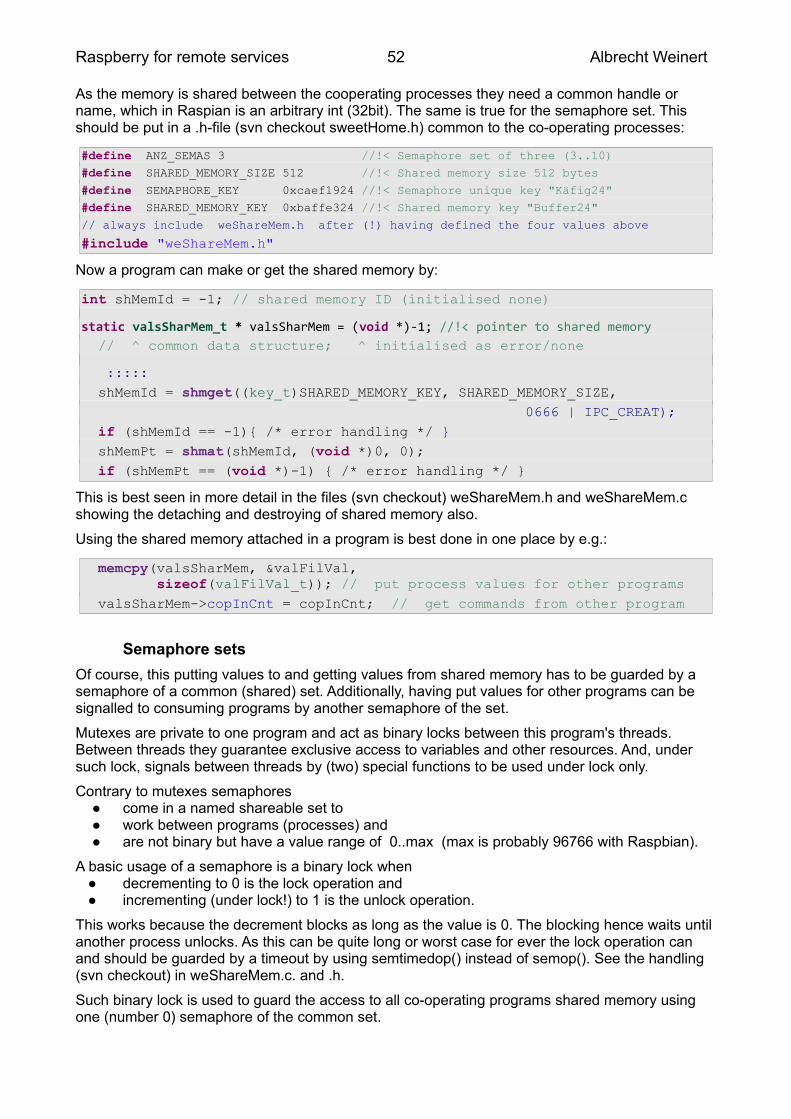
Raspberry for remote services 52 Albrecht Weinert
As the memory is shared between the cooperating processes they need a common handle or name, which in Raspian is an arbitrary int (32bit). The same is true for the semaphore set. This should be put in a .h-file (svn checkout sweetHome.h) common to the co-operating processes:
#define ANZ_SEMAS 3 //!< Semaphore set of three (3..10)
#define SHARED_MEMORY_SIZE 512 //!< Shared memory size 512 bytes
#define SEMAPHORE_KEY 0xcaef1924 //!< Semaphore unique key "Käfig24"
#define SHARED_MEMORY_KEY 0xbaffe324 //!< Shared memory key "Buffer24"
// always include weShareMem.h after (!) having defined the four values above
#include "weShareMem.h"
Now a program can make or get the shared memory by:
int shMemId = -1; // shared memory ID (initialised none)
static valsSharMem_t * valsSharMem = (void *)-1; //!< pointer to shared memory // ^ common data structure; ^ initialised as error/none
::::: shMemId = shmget((key_t)SHARED_MEMORY_KEY, SHARED_MEMORY_SIZE, 0666 | IPC_CREAT); if (shMemId == -1){ /* error handling */ } shMemPt = shmat(shMemId, (void *)0, 0); if (shMemPt == (void *)-1) { /* error handling */ }
This is best seen in more detail in the files (svn checkout) weShareMem.h and weShareMem.c showing the detaching and destroying of shared memory also.
Using the shared memory attached in a program is best done in one place by e.g.:
memcpy(valsSharMem, &valFilVal, sizeof(valFilVal_t)); // put process values for other programs valsSharMem->copInCnt = copInCnt; // get commands from other program
Semaphore sets
Of course, this putting values to and getting values from shared memory has to be guarded by a semaphore of a common (shared) set. Additionally, having put values for other programs can be signalled to consuming programs by another semaphore of the set.
Mutexes are private to one program and act as binary locks between this program's threads. Between threads they guarantee exclusive access to variables and other resources. And, under such lock, signals between threads by (two) special functions to be used under lock only.
Contrary to mutexes semaphores ● come in a named shareable set to ● work between programs (processes) and ● are not binary but have a value range of 0..max (max is probably 96766 with Raspbian).
A basic usage of a semaphore is a binary lock when ● decrementing to 0 is the lock operation and ● incrementing (under lock!) to 1 is the unlock operation.
This works because the decrement blocks as long as the value is 0. The blocking hence waits until another process unlocks. As this can be quite long or worst case for ever the lock operation can and should be guarded by a timeout by using semtimedop() instead of semop(). See the handling (svn checkout) in weShareMem.c. and .h.
Such binary lock is used to guard the access to all co-operating programs shared memory using one (number 0) semaphore of the common set.
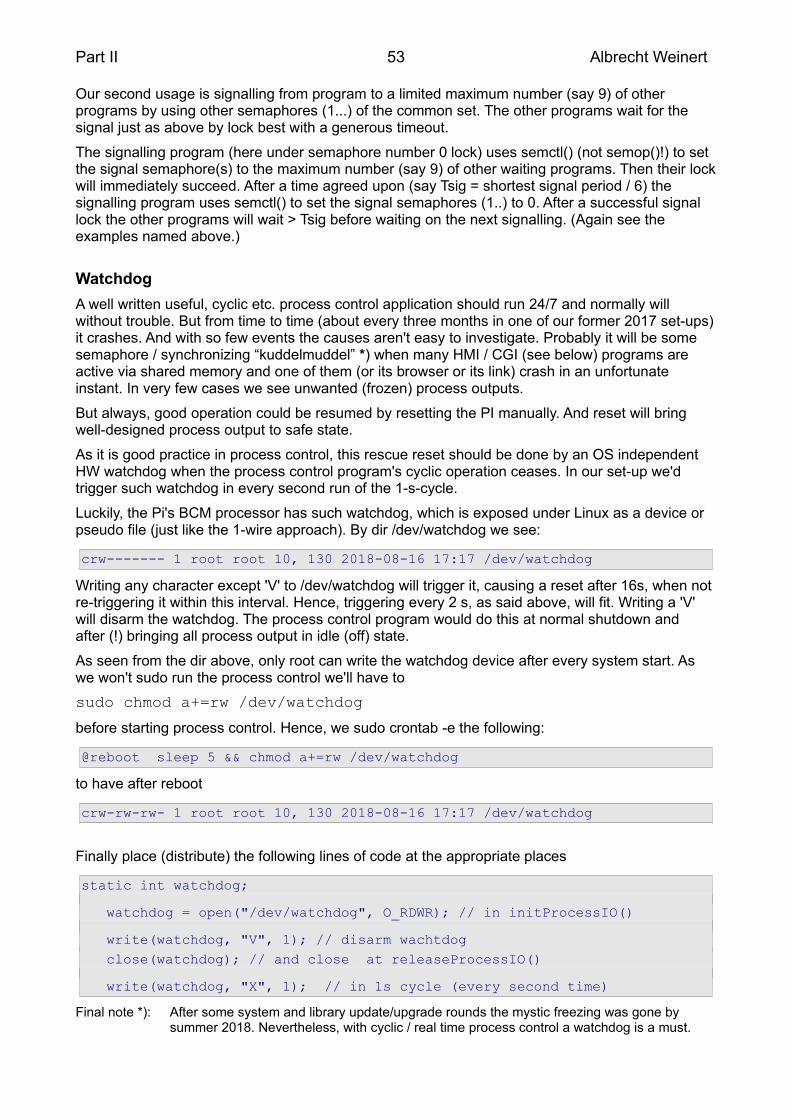
Part II 53 Albrecht Weinert
Our second usage is signalling from program to a limited maximum number (say 9) of other programs by using other semaphores (1...) of the common set. The other programs wait for the signal just as above by lock best with a generous timeout.
The signalling program (here under semaphore number 0 lock) uses semctl() (not semop()!) to set the signal semaphore(s) to the maximum number (say 9) of other waiting programs. Then their lockwill immediately succeed. After a time agreed upon (say Tsig = shortest signal period / 6) the signalling program uses semctl() to set the signal semaphores (1..) to 0. After a successful signal lock the other programs will wait > Tsig before waiting on the next signalling. (Again see the examples named above.)
Watchdog
A well written useful, cyclic etc. process control application should run 24/7 and normally will without trouble. But from time to time (about every three months in one of our former 2017 set-ups)it crashes. And with so few events the causes aren't easy to investigate. Probably it will be some semaphore / synchronizing “kuddelmuddel” *) when many HMI / CGI (see below) programs are active via shared memory and one of them (or its browser or its link) crash in an unfortunate instant. In very few cases we see unwanted (frozen) process outputs.
But always, good operation could be resumed by resetting the PI manually. And reset will bring well-designed process output to safe state.
As it is good practice in process control, this rescue reset should be done by an OS independent HW watchdog when the process control program's cyclic operation ceases. In our set-up we'd trigger such watchdog in every second run of the 1-s-cycle.
Luckily, the Pi's BCM processor has such watchdog, which is exposed under Linux as a device or pseudo file (just like the 1-wire approach). By dir /dev/watchdog we see:
crw------- 1 root root 10, 130 2018-08-16 17:17 /dev/watchdog
Writing any character except 'V' to /dev/watchdog will trigger it, causing a reset after 16s, when not re-triggering it within this interval. Hence, triggering every 2 s, as said above, will fit. Writing a 'V' will disarm the watchdog. The process control program would do this at normal shutdown and after (!) bringing all process output in idle (off) state.
As seen from the dir above, only root can write the watchdog device after every system start. As we won't sudo run the process control we'll have to
sudo chmod a+=rw /dev/watchdog
before starting process control. Hence, we sudo crontab -e the following:
@reboot sleep 5 && chmod a+=rw /dev/watchdog
to have after reboot
crw-rw-rw- 1 root root 10, 130 2018-08-16 17:17 /dev/watchdog
Finally place (distribute) the following lines of code at the appropriate places
static int watchdog;
watchdog = open("/dev/watchdog", O_RDWR); // in initProcessIO()
write(watchdog, "V", 1); // disarm wachtdog close(watchdog); // and close at releaseProcessIO()
write(watchdog, "X", 1); // in 1s cycle (every second time)
Final note *): After some system and library update/upgrade rounds the mystic freezing was gone by summer 2018. Nevertheless, with cyclic / real time process control a watchdog is a must.
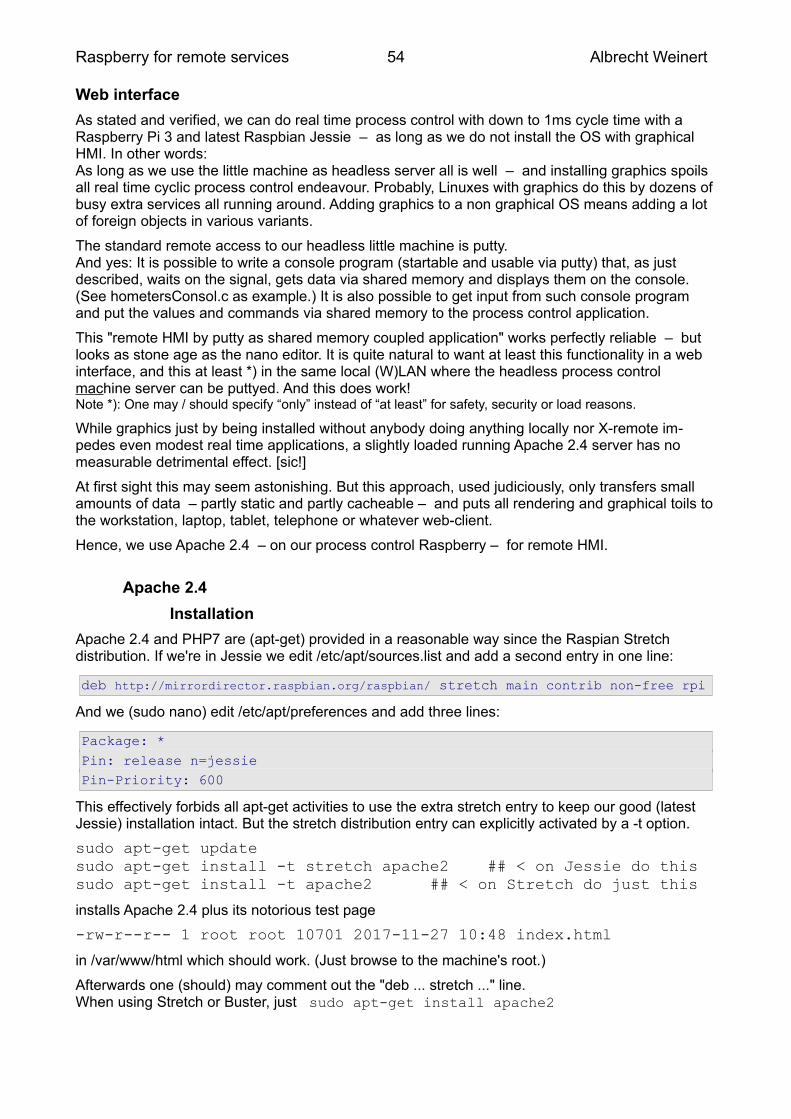
Raspberry for remote services 54 Albrecht Weinert
Web interface
As stated and verified, we can do real time process control with down to 1ms cycle time with a Raspberry Pi 3 and latest Raspbian Jessie – as long as we do not install the OS with graphical HMI. In other words: As long as we use the little machine as headless server all is well – and installing graphics spoils all real time cyclic process control endeavour. Probably, Linuxes with graphics do this by dozens ofbusy extra services all running around. Adding graphics to a non graphical OS means adding a lot of foreign objects in various variants.
The standard remote access to our headless little machine is putty.And yes: It is possible to write a console program (startable and usable via putty) that, as just described, waits on the signal, gets data via shared memory and displays them on the console. (See hometersConsol.c as example.) It is also possible to get input from such console program and put the values and commands via shared memory to the process control application.
This "remote HMI by putty as shared memory coupled application" works perfectly reliable – but looks as stone age as the nano editor. It is quite natural to want at least this functionality in a web interface, and this at least *) in the same local (W)LAN where the headless process control machine server can be puttyed. And this does work!Note *): One may / should specify “only” instead of “at least” for safety, security or load reasons.
While graphics just by being installed without anybody doing anything locally nor X-remote im-pedes even modest real time applications, a slightly loaded running Apache 2.4 server has no measurable detrimental effect. [sic!]
At first sight this may seem astonishing. But this approach, used judiciously, only transfers small amounts of data – partly static and partly cacheable – and puts all rendering and graphical toils tothe workstation, laptop, tablet, telephone or whatever web-client.
Hence, we use Apache 2.4 – on our process control Raspberry – for remote HMI.
Apache 2.4
Installation
Apache 2.4 and PHP7 are (apt-get) provided in a reasonable way since the Raspian Stretch distribution. If we're in Jessie we edit /etc/apt/sources.list and add a second entry in one line:
deb http://mirrordirector.raspbian.org/raspbian/ stretch main contrib non-free rpi
And we (sudo nano) edit /etc/apt/preferences and add three lines:
Package: *Pin: release n=jessiePin-Priority: 600
This effectively forbids all apt-get activities to use the extra stretch entry to keep our good (latest Jessie) installation intact. But the stretch distribution entry can explicitly activated by a -t option.
sudo apt-get updatesudo apt-get install -t stretch apache2 ## < on Jessie do thissudo apt-get install -t apache2 ## < on Stretch do just this
installs Apache 2.4 plus its notorious test page
-rw-r--r-- 1 root root 10701 2017-11-27 10:48 index.html
in /var/www/html which should work. (Just browse to the machine's root.)
Afterwards one (should) may comment out the "deb ... stretch ..." line.When using Stretch or Buster, just sudo apt-get install apache2
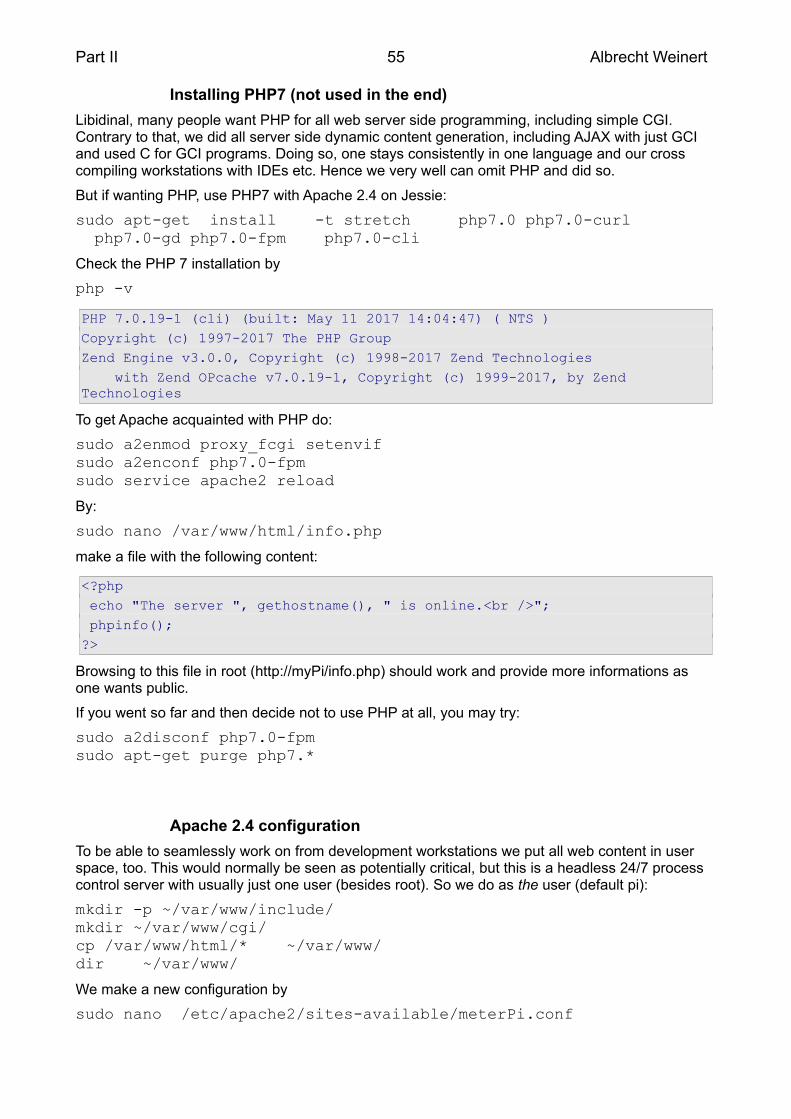
Part II 55 Albrecht Weinert
Installing PHP7 (not used in the end)
Libidinal, many people want PHP for all web server side programming, including simple CGI. Contrary to that, we did all server side dynamic content generation, including AJAX with just GCI and used C for GCI programs. Doing so, one stays consistently in one language and our cross compiling workstations with IDEs etc. Hence we very well can omit PHP and did so.
But if wanting PHP, use PHP7 with Apache 2.4 on Jessie:
sudo apt-get install -t stretch php7.0 php7.0-curl php7.0-gd php7.0-fpm php7.0-cli
Check the PHP 7 installation by
php -v
PHP 7.0.19-1 (cli) (built: May 11 2017 14:04:47) ( NTS )Copyright (c) 1997-2017 The PHP GroupZend Engine v3.0.0, Copyright (c) 1998-2017 Zend Technologies with Zend OPcache v7.0.19-1, Copyright (c) 1999-2017, by Zend Technologies
To get Apache acquainted with PHP do:
sudo a2enmod proxy_fcgi setenvifsudo a2enconf php7.0-fpmsudo service apache2 reload
By:
sudo nano /var/www/html/info.php
make a file with the following content:
<?php echo "The server ", gethostname(), " is online.<br />"; phpinfo();?>
Browsing to this file in root (http://myPi/info.php) should work and provide more informations as one wants public.
If you went so far and then decide not to use PHP at all, you may try:
sudo a2disconf php7.0-fpmsudo apt-get purge php7.*
Apache 2.4 configuration
To be able to seamlessly work on from development workstations we put all web content in user space, too. This would normally be seen as potentially critical, but this is a headless 24/7 process control server with usually just one user (besides root). So we do as the user (default pi):
mkdir -p ~/var/www/include/mkdir ~/var/www/cgi/cp /var/www/html/* ~/var/www/dir ~/var/www/
We make a new configuration by
sudo nano /etc/apache2/sites-available/meterPi.conf
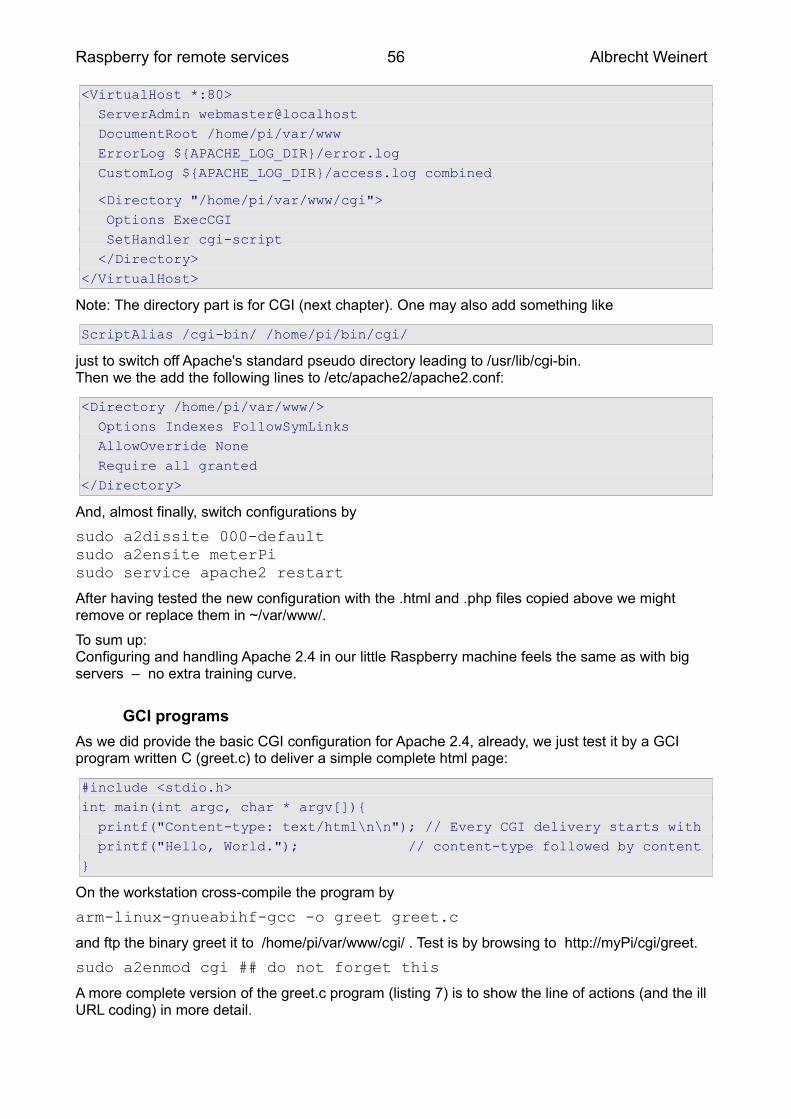
Raspberry for remote services 56 Albrecht Weinert
<VirtualHost *:80> ServerAdmin webmaster@localhost DocumentRoot /home/pi/var/www ErrorLog ${APACHE_LOG_DIR}/error.log CustomLog ${APACHE_LOG_DIR}/access.log combined
<Directory "/home/pi/var/www/cgi"> Options ExecCGI SetHandler cgi-script </Directory></VirtualHost>
Note: The directory part is for CGI (next chapter). One may also add something like
ScriptAlias /cgi-bin/ /home/pi/bin/cgi/
just to switch off Apache's standard pseudo directory leading to /usr/lib/cgi-bin. Then we the add the following lines to /etc/apache2/apache2.conf:
<Directory /home/pi/var/www/> Options Indexes FollowSymLinks AllowOverride None Require all granted</Directory>
And, almost finally, switch configurations by
sudo a2dissite 000-defaultsudo a2ensite meterPisudo service apache2 restart
After having tested the new configuration with the .html and .php files copied above we might remove or replace them in ~/var/www/.
To sum up: Configuring and handling Apache 2.4 in our little Raspberry machine feels the same as with big servers – no extra training curve.
GCI programs
As we did provide the basic CGI configuration for Apache 2.4, already, we just test it by a GCI program written C (greet.c) to deliver a simple complete html page:
#include <stdio.h>int main(int argc, char * argv[]){ printf("Content-type: text/html\n\n"); // Every CGI delivery starts with printf("Hello, World."); // content-type followed by content}
On the workstation cross-compile the program by
arm-linux-gnueabihf-gcc -o greet greet.c
and ftp the binary greet it to /home/pi/var/www/cgi/ . Test is by browsing to http://myPi/cgi/greet.
sudo a2enmod cgi ## do not forget this
A more complete version of the greet.c program (listing 7) is to show the line of actions (and the ill URL coding) in more detail.
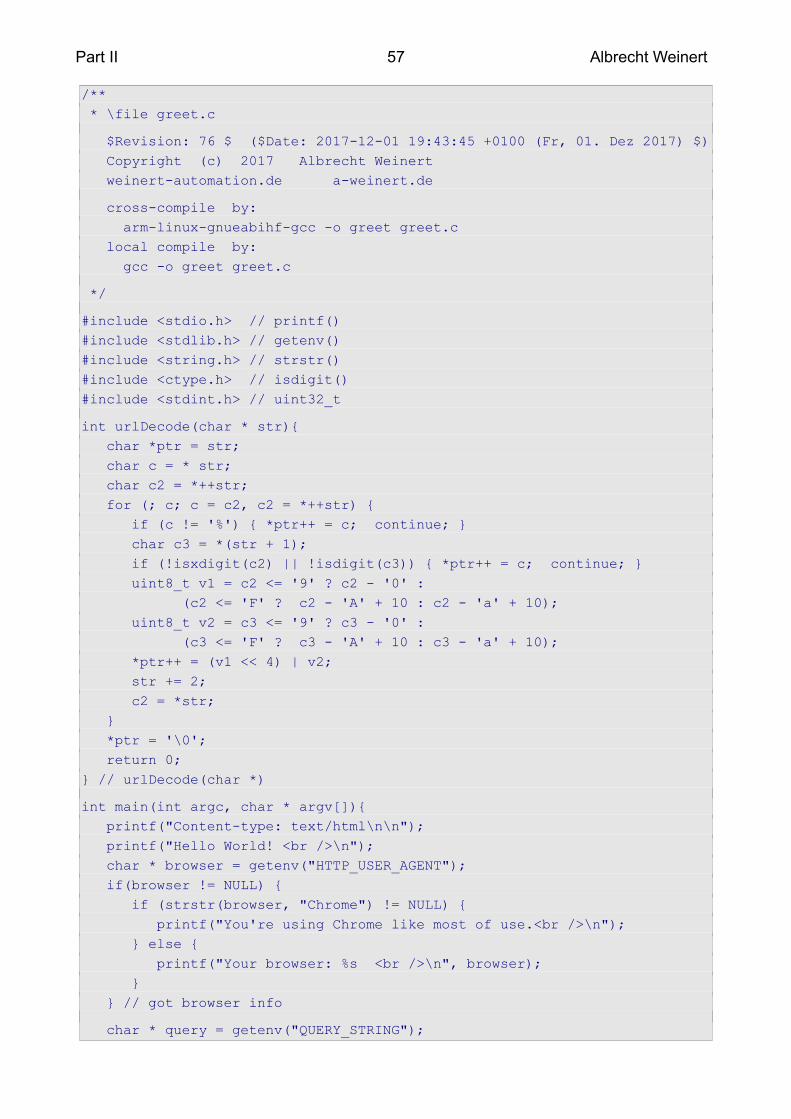
Part II 57 Albrecht Weinert
/** * \file greet.c
$Revision: 76 $ ($Date: 2017-12-01 19:43:45 +0100 (Fr, 01. Dez 2017) $) Copyright (c) 2017 Albrecht Weinert weinert-automation.de a-weinert.de
cross-compile by: arm-linux-gnueabihf-gcc -o greet greet.c local compile by: gcc -o greet greet.c
*/
#include <stdio.h> // printf()#include <stdlib.h> // getenv()#include <string.h> // strstr()#include <ctype.h> // isdigit()#include <stdint.h> // uint32_t
int urlDecode(char * str){ char *ptr = str; char c = * str; char c2 = *++str; for (; c; c = c2, c2 = *++str) { if (c != '%') { *ptr++ = c; continue; } char c3 = *(str + 1); if (!isxdigit(c2) || !isdigit(c3)) { *ptr++ = c; continue; } uint8_t v1 = c2 <= '9' ? c2 - '0' : (c2 <= 'F' ? c2 - 'A' + 10 : c2 - 'a' + 10); uint8_t v2 = c3 <= '9' ? c3 - '0' : (c3 <= 'F' ? c3 - 'A' + 10 : c3 - 'a' + 10); *ptr++ = (v1 << 4) | v2; str += 2; c2 = *str; } *ptr = '\0'; return 0;} // urlDecode(char *)
int main(int argc, char * argv[]){ printf("Content-type: text/html\n\n"); printf("Hello World! <br />\n"); char * browser = getenv("HTTP_USER_AGENT"); if(browser != NULL) { if (strstr(browser, "Chrome") != NULL) { printf("You're using Chrome like most of use.<br />\n"); } else { printf("Your browser: %s <br />\n", browser); } } // got browser info
char * query = getenv("QUERY_STRING");
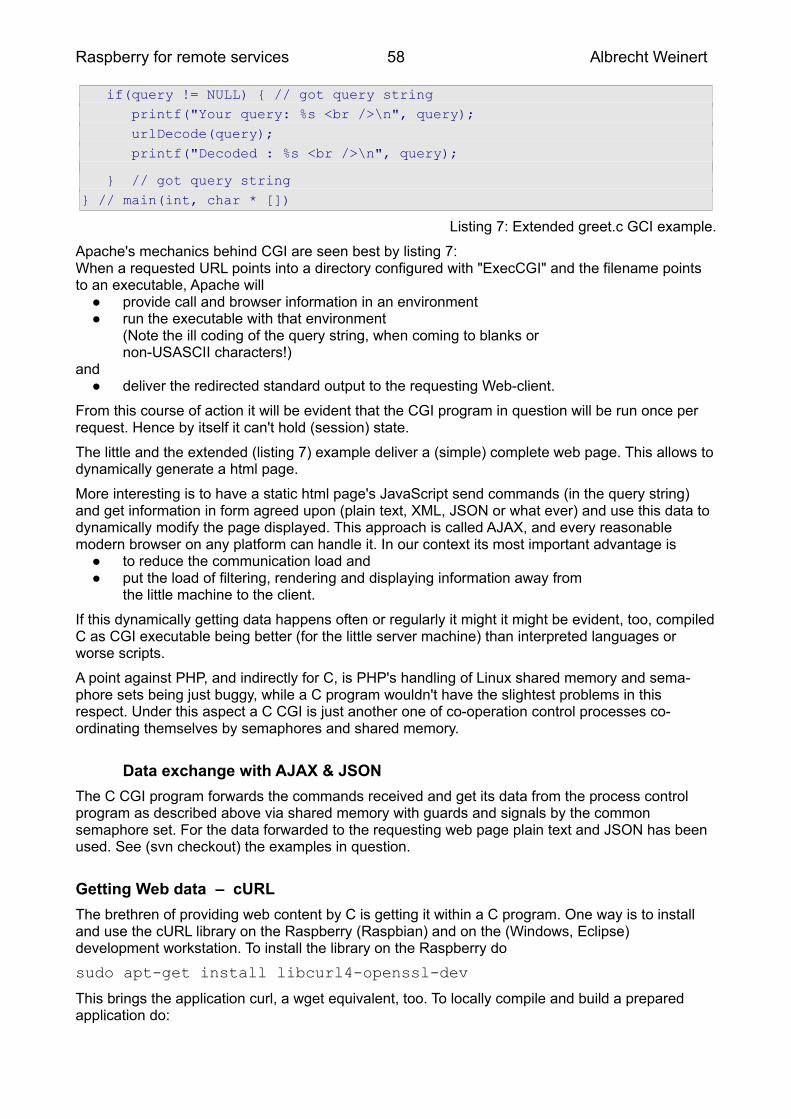
Raspberry for remote services 58 Albrecht Weinert
if(query != NULL) { // got query string printf("Your query: %s <br />\n", query); urlDecode(query); printf("Decoded : %s <br />\n", query);
} // got query string} // main(int, char * [])
Listing 7: Extended greet.c GCI example.
Apache's mechanics behind CGI are seen best by listing 7: When a requested URL points into a directory configured with "ExecCGI" and the filename points to an executable, Apache will ● provide call and browser information in an environment ● run the executable with that environment
(Note the ill coding of the query string, when coming to blanks or non-USASCII characters!)
and ● deliver the redirected standard output to the requesting Web-client.
From this course of action it will be evident that the CGI program in question will be run once per request. Hence by itself it can't hold (session) state.
The little and the extended (listing 7) example deliver a (simple) complete web page. This allows todynamically generate a html page.
More interesting is to have a static html page's JavaScript send commands (in the query string) and get information in form agreed upon (plain text, XML, JSON or what ever) and use this data to dynamically modify the page displayed. This approach is called AJAX, and every reasonable modern browser on any platform can handle it. In our context its most important advantage is ● to reduce the communication load and ● put the load of filtering, rendering and displaying information away from
the little machine to the client.
If this dynamically getting data happens often or regularly it might it might be evident, too, compiledC as CGI executable being better (for the little server machine) than interpreted languages or worse scripts.
A point against PHP, and indirectly for C, is PHP's handling of Linux shared memory and sema-phore sets being just buggy, while a C program wouldn't have the slightest problems in this respect. Under this aspect a C CGI is just another one of co-operation control processes co-ordinating themselves by semaphores and shared memory.
Data exchange with AJAX & JSON
The C CGI program forwards the commands received and get its data from the process control program as described above via shared memory with guards and signals by the common semaphore set. For the data forwarded to the requesting web page plain text and JSON has been used. See (svn checkout) the examples in question.
Getting Web data – cURL
The brethren of providing web content by C is getting it within a C program. One way is to install and use the cURL library on the Raspberry (Raspbian) and on the (Windows, Eclipse) development workstation. To install the library on the Raspberry do
sudo apt-get install libcurl4-openssl-dev
This brings the application curl, a wget equivalent, too. To locally compile and build a prepared application do:

Part II 59 Albrecht Weinert
g++ getLocalWeaterData.c -o getLocalWeaterData -lcurlbd
To cross-work on the (Windows, Eclipse) development workstation ftp libcurl.so.4.3.0 from /usr/lib/arm-linux-gnueabihf to C:\util\WinRaspi\arm-linux-gnueabihf\sysroot\usr\lib\. And in C:\util\WinRaspi\arm-linux-gnueabihf\sysroot\usr\lib\ copy libcurl.so.4.3.0 to libcurl.so.
Also ftp all the complete directory curl from /usr/include/ to C:\util\WinRaspi\arm-linux-gnueabihf\sysroot\usr\include\. Now you can compile and build on the development workstation
arm-linux-gnueabihf-gcc getLocalWeaterData.c -o getLocalWeaterData -lcurl
The executable made can be transferred to and run on a Raspberry with the cURL library installed.
Raspberry for remote services 60 Albrecht Weinert
The result – and where we are
We can handle Raspberry's GPIO pins in C programs.
We can handle a bundle of IO libraries pigpio being the most promising one.
And we know how to cross-compile and cross-build from Windows (or Ubuntu) using make, Eclipseand SVN there. With the make tool and some include file wizardry it is possible to integrate the WinSCP.com file (Windows only) transfer to a target Raspberry in the automated make processing.
C is still the lingua franca in embedded. On the other hand alternatives should be tried and considered – first of all Java.
Some actuators and sensors may directly connect to Raspberry's GPOI but often extra interfacing IO hardware will be needed. We used and tried piXtend which might be disappointing in the light ofprice and promises. Nevertheless it opens the world of Codesys and Web interfaces to slow process control applications.
Low price semi-professional relay and other modules enable the Raspberry to control actuators with some power, including 230/400V equipment.
Modbus (via TCP IP and RS485) and MQTT enable more remote sensing and actuating. As MQTTattached periphery we can use bought and/or self-programmed ESP 8266 (or ESP 32) devices.
For communication process IO and related data to/from small systems the quite old Modbus protocol is still in wide use. On base of the libmodbus library we made our Raspberries Modbus servers/slaves as well as clients/masters. With Modbus via RS485 we attach one to four smart meters to our Raspberry.
With shared memory and semaphore sets we can have multiple (C) programs share data and status with or send commands to a process control program running 24/7 as service.
Such co-operating (C) program can as well be a CCI program run on request by an Apache 2.4 web-server. By this we can put any graphical user interface imaginable by HTML (5) and CSS on ausers browser in the process controlling Raspberry's LAN. Considering graphics on a Raspberry detrimental to even modest real time requirements, process control HMI is to be done by a Web interface via AJAX / GCI with acceptable response times or on another machine.
And staying with C and the pigpio library we digged a little deeper on real-time, PLC like cyclic multi-threaded execution and put such extra features in utility libraries.
A home automation application featuring ● HMI via web interface (Apache 2.4), ● 2 smart three phase meters (RS485), ● five remote measuring and power switching devices (MQTT), ● three temperature sensors (1-wire) and ● a lot of locally attached binary actuators and sensors, i.e. relays, LEDs, buttons, ● fine grained heater power control by phase packet switching (using a solid state relay 100A/400V in the 20 ms cycle) is running 24/7 for 9 months (after having an equivalent laboratory set-up for considerably longer).
The approaches described here allow real time applications like this in one Raspberry Pi3.
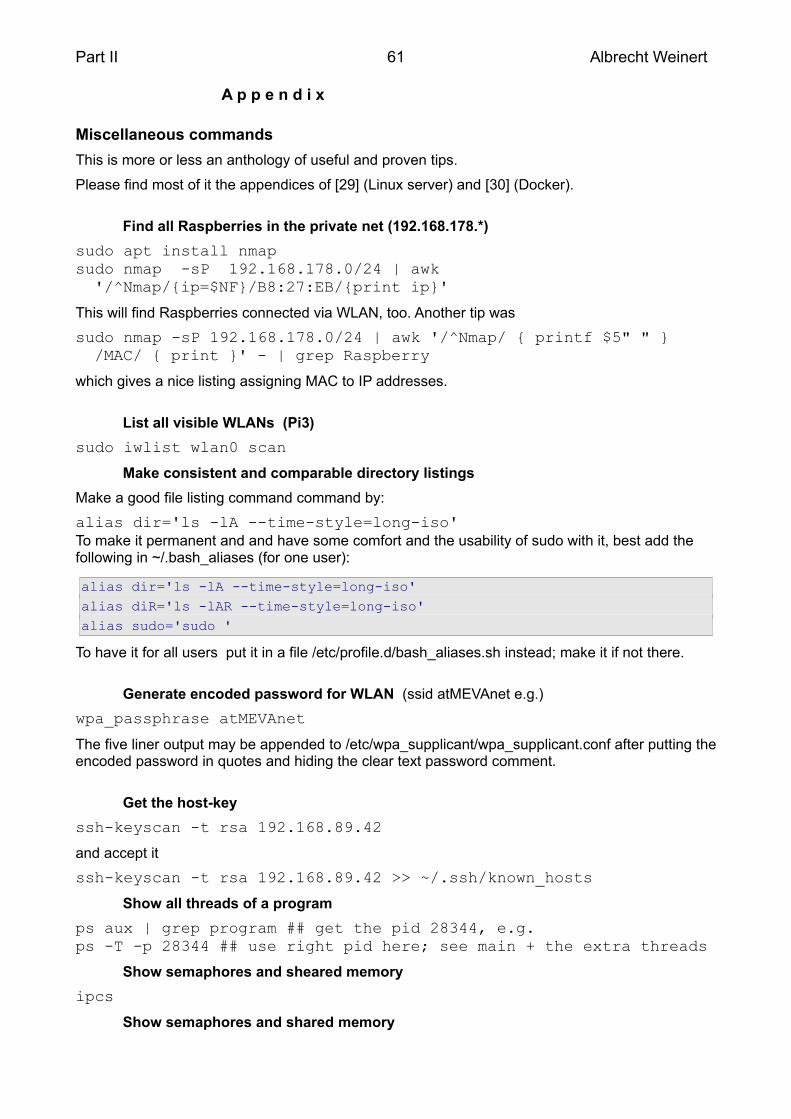
Part II 61 Albrecht Weinert
A p p e n d i x
Miscellaneous commands
This is more or less an anthology of useful and proven tips.
Please find most of it the appendices of [29] (Linux server) and [30] (Docker).
Find all Raspberries in the private net (192.168.178.*)
sudo apt install nmapsudo nmap -sP 192.168.178.0/24 | awk '/^Nmap/{ip=$NF}/B8:27:EB/{print ip}'
This will find Raspberries connected via WLAN, too. Another tip was
sudo nmap -sP 192.168.178.0/24 | awk '/^Nmap/ { printf $5" " } /MAC/ { print }' - | grep Raspberry
which gives a nice listing assigning MAC to IP addresses.
List all visible WLANs (Pi3)
sudo iwlist wlan0 scan
Make consistent and comparable directory listings
Make a good file listing command command by:
alias dir='ls -lA --time-style=long-iso' To make it permanent and and have some comfort and the usability of sudo with it, best add the following in ~/.bash_aliases (for one user):
alias dir='ls -lA --time-style=long-iso' alias diR='ls -lAR --time-style=long-iso' alias sudo='sudo '
To have it for all users put it in a file /etc/profile.d/bash_aliases.sh instead; make it if not there.
Generate encoded password for WLAN (ssid atMEVAnet e.g.)
wpa_passphrase atMEVAnet
The five liner output may be appended to /etc/wpa_supplicant/wpa_supplicant.conf after putting theencoded password in quotes and hiding the clear text password comment.
Get the host-key
ssh-keyscan -t rsa 192.168.89.42
and accept it
ssh-keyscan -t rsa 192.168.89.42 >> ~/.ssh/known_hosts
Show all threads of a program
ps aux | grep program ## get the pid 28344, e.g.ps -T -p 28344 ## use right pid here; see main + the extra threads
Show semaphores and sheared memory
ipcs
Show semaphores and shared memory

Raspberry for remote services 62 Albrecht Weinert
ipcrm -M 0xbaffe024
Stop / start / restart web server
sudo service apache2 stopsudo service apache2 startsudo service apache2 restart
Enable CGI in Apache 2.4
sudo a2enmod cgidsudo service apache2 restart
Watch the MQTT traffic
mosquiSubKill with ^c.
Abbreviations
More abbreviations can be found in [29]'s Appendix.
24/7 24 hours on 7 days a week; uninterrupted service (by hardware or software)
A (as unit) Ampere
ABI Application binary interface; here the C-library interface to OS services
ACL Access control list
AJAX Asynchronous JavaScript and XML (or JSON en lieu de XML)
CGI Common Gateway Interface
CLI Command line interpreter/interface
CoDeSys Controller development system no-free IEC 61131-3 IDE for Windows
CRC Cyclic redundancy check, a polynomial division
CSS Cascading Style Sheets
CSV Coma separated value; a pseudo table format recognised by Excel, Calc and consorts
DHCP Dynamic Host Configuration Protocol
DNS Domain Name System; also used in the sense of domain name server.
FTP File Transfer Protocol; RFC1579
GPIO General purpose IO. The µP's IO pins that have no purpose for the Raspberry nor for its OS, but kindly having been made available for other purposes on pin grids.
GUI Graphical user interface / graphical HMI
HMI Human Machine Interface (without political correctness formerly MMI)
HTML Hypertext Markup Language

Part II 63 Albrecht Weinert
ID Identity; in the sense of a domain's ID management
IDE Integrated development environment (like Eclipse)
IO Input and Output
IP Internet protocol
JSON JavaScript Object Notation
LAN Local Area network; here in the sense of just Ethernet
M2M Machine to machine
MMU Memory management unit
MQTT Message Queuing Telemetry Transport
MS Microsoft
NOOBS New out of the box software
NTFS NT File System; full featured file system with fine grained access rights, links and all else used on all Windows NT inheritors
OASIS Organization for the Advancement of Structured Information Standards
OS Operating System; run time
P2P point to point, exclusive direct link between two communication partners
PoE Power over Ethernet
RAM Random access memory, also implies writeable
RDP Remote Desktop Protocol; from Microsoft
RFC Request for comment; internet standard
ROM Read only memory; storage for fixed values
RS485 or TIA-485, EIA-485 serial communication standard (RS stands for recommended std)
sic! so, exactly so (even if unbelievable) or wrong in the (cited) source already
SD Secure digital memory card; interfaces and protocols by SD Assoc.
SPI Serial Peripheral Interface (shift register attachment protocol)
SSD Solid state disc, a disc drive made of non-volatile RAM
SSH Secure socket shell
SSHFS (remote) File system over SSH
SSL Secure Sockets Layer; former name of TSL
U[S]ART Universal [serial] asynchronous receiver and transmitter
V (as unit) Volt
W (as unit) Watt
WS workstation, often in the sense of PCs and laptops of all sizes
W10 MS Windows 10
XML Extensible Markup Language
xRDP Linux' RDP (particulate) adaptation on the (X) server side
µP Micro-processor
Raspberry for remote services 64 Albrecht Weinert
References
We use identical reference numbers in [29 .. 31] , hence some gaps.
[29] Albrecht Weinert, Ubuntu for remote services, Report, November 2016 – February 2019 , a-weinert.de/pub/ubuntu4remoteServices.pdf
[30] Albrecht Weinert, Ubuntu for docker, Report, April 2017, a-weinert.de/pub/ubuntu4docker.pdf
[31] Albrecht Weinert, Raspberry for remote services, Report, May 2017, This paper (the last actual version): a-weinert.de/pub/raspberry4remoteServices.pdf
[51] Raspberry Org, FTP, Tips on using SSHFS https://www.raspberrypi.org/documentation/remote-access/ssh/sshfs.md
[52] Raspberry Org, SFTP, Tips on using SFTP https://www.raspberrypi.org/documentation/remote-access/ssh/sftp.md
[53] Raspberry Org, SFTP, Tips on enabling WLAN by command line https://www.raspberrypi.org/documentation/configuration/wireless/wireless-cli.md
[54] Qube solutions, Linux Tools & Library for PiXtend – Manual for installation and use of thepxdev-Package with Raspberry Pi and PiXtend (says nothing on library use)V1.05, April 2017 http://www.pixtend.de/files/manuals/AppNote_pxdev_DE.pdf
[55] WinSCP, FTP [command line] client, documentation https://winscp.net/eng/docs/start
[56] Broadcom, BCM2835 ARM Peripherals, data sheet 2012 https://www.raspberrypi.org/app/uploads/2012/02/BCM2835-ARM-Peripherals.pdf
[57] Gert van Loo, QA7ARM Quad A7 core, Technical report on BCM2836, Rev3.4 2014https://www.raspberrypi.org/documentation/hardware/raspberrypi/bcm2836/QA7_rev3.4.pdf
[58] Broadcom, ARM® Cortex®-A53 MPCore Processor, Rev. r0p2Technical Reference ManualDDI0500D_cortex_a53_r0p2_trm.pdf (BCM2837 is Quad-core 64-bit ARM cortex A53 CPU)
http://infocenter.arm.com/help/topic/com.arm.doc.ddi0500d/DDI0500D_cortex_a53_r0p2_trm.pdf
[59] Broadcom, ARM® Cortex®-A Series, Version 1.0, Programmer’s Guide for ARMv8-A http://infocenter.arm.com/help/topic/com.arm.doc.den0024a/DEN0024A_v8_architecture_PG.pdf
[60] Shore, Chris, ARM, Porting to 64-bit ARM, white paper July 2014, https://community.arm.com/cfs-file/ ... /Porting-to-ARM-64_2D00_bit.pdf
[61] N.N., Joan, pigpio library – Download & Install, http://abyz.me.uk/rpi/pigpio/download.html
[62] N.N., Joan, pigpio library – pigpio C interface, http://abyz.me.uk/rpi/pigpio/cif.html
[62] N.N., Joan, pigpio library – pigpiod C interface, http://abyz.me.uk/rpi/pigpio/pdif2.html
[63] Hall, Brian “Beej Jorgensen”, Beej's Guide to Network Programming – Using Internet SocketsVersion 3.0.21, 2016 http://beej.us/guide/bgnet/output/print/bgnet_A4_2.pdf
[64] Gordon Matzigkeit, Alexandre Oliva, Thomas Tanner, Gary V. Vaughan, GNU LibtoolVers. 2.4.6, 2015 https://www.gnu.org/software/libtool/manual/libtool.pdf
[65] Modicon, Modbus Protocol, Reference GuidePI–MBUS–300 Rev. J 1996, http://modbus.org/docs/PI_MBUS_300.pd
[66] Modbus Org, MODBUS Application Protocol Specification V1.1b3, 2012 http://modbus.org/docs/Modbus_Application_Protocol_V1_1b3.pdf
[67] OASIS, MQTT V3.1.1 Protocol Specification, 2014 http://docs.oasis-open.org/mqtt/mqtt/v3.1.1/os/mqtt-v3.1.1-os.pdf
[68] Rahmann, Leila F., Tutorial on Mosquitto and Paho, Eindhoven 2017, http://www.win.tue.nl/~lrahman/iot_2016/tutorial/MQTT_2016.pdf
[69] Mosquitto, The API documentation https://mosquitto.org/api/files/mosquitto-h.html