Primary Integrated Science - Winmat Publishers
92
winmat PUBLISHERS LIMITED Primary Integrated Science Teacher’s Guide 6 Christian Acolatse Eric Anane Jacob Ansong-Ntiri Ernest Aboagye Kumahene Ghana Association of Science Teachers FIRE WATER EARTH AIR Ghana Association of Science Teachers
-
Upload
khangminh22 -
Category
Documents
-
view
1 -
download
0
Transcript of Primary Integrated Science - Winmat Publishers
winmatPUBLISHERS LIMITED
Primary Integrated Science
Teacher’s Guide 6
Christian AcolatseEric Anane
Jacob Ansong-NtiriErnest Aboagye Kumahene
Ghana Association of Science Teachers
FIRE
WATEREARTH
AIR
Ghana Associationof Science Teachers
ii
First published in 2017 by
WINMAT PUBLISHERS LTD P. O. Box 8077 Accra North Ghana
[email protected] www.winmatpublishers.com
Text © Winmat Publishers Limited 2017
Design and illustrations © Winmat Publishers Limited 2017
All rights reserved. No reproduction, copy or transmission of this publication may be made without written permission. Any person who does any unauthorised act in relation to this publication may be liable to criminal prosecution and civil claims for damages.
ISBN 978-9988-0-4630-9
Design and typeset by Francis K. N. Nunoo
Printed in Malaysia
iii
Contents
Primary 6 Course Structure 00
Introduction 00
SECTION 1: Diversity of Matter 00
Unit 1: Fruits and seeds 001 Types of fruits 002 Parts of a fruit 003 Parts of a seed 004 Germination of seeds 005 Dispersal of fruits and seeds 006 Advantages of seed and fruit dispersal 007 Uses of fruits and seeds 00
Unit 2: Air 001 What is air made of? 002 Properties of air 003 Air has mass 004 Air pressure and air resistance 005 Uses of air 00
SECTION 2: Cycles 00
Unit 3: Life cycles of okra and maize plants 001 Growing maize and okro from seeds 002 Life cycle of okro (or okra) 003 Life cycle of maize 00
Unit 4: Water related diseases 001 Water related diseases 002 Malaria 003 Yellow fever 004 Onchocerciasis (river blindness) 005 Guinea worm disease 00

iv
6 Schistosomiasis (bilharzia) 00
Unit 5: Life cycle of the mosquito 001 Mosquitoes 002 The life cycle of the mosquito 003 Controlling mosquitoes 00
SECTION 3: Systems 00
Unit 6: The human digestive system 001 Parts of the digestive system 002 Functions of the organs of the digestive system 003 The products of digestion 00
SECTION 4: Energy 00
Unit 7: Feeding in plants 001 Materials for making plant food 002 Sources of the materials needed by plants to make their food 003 Sunlight and preparation of plant food 00
Unit 8: Feeding in animals 001 Animals found in the community 002 Animals and what they feed on 003 Mode of feeding in animals 00
Unit 9: Respiration 001 Respiration provides energy 002 Breathing 003 Rates of respiration 00
Unit 10: Simple electrical circuits 001 Components of an electrical circuit 002 Electrical conductors and insulators 003 Production of light, heat and sound 004 Making magnets 00
Unit 11: Basic electronics 001 Making an inductor 00
Contents
v
SECTION 5: Interactions of Matter 00
Unit 12: Food processing and preservation 001 Food preservation 002 Methods of food preservation 00
Unit 13: Food poisoning 001 The causes of food poisoning 002 Signs of food poisoning 00
Unit 14: Natural disasters – flooding 001 Floods 002 Effects of flooding 00
GLOSSARY 00
Unit :
vi
Primary 6 Course Structure
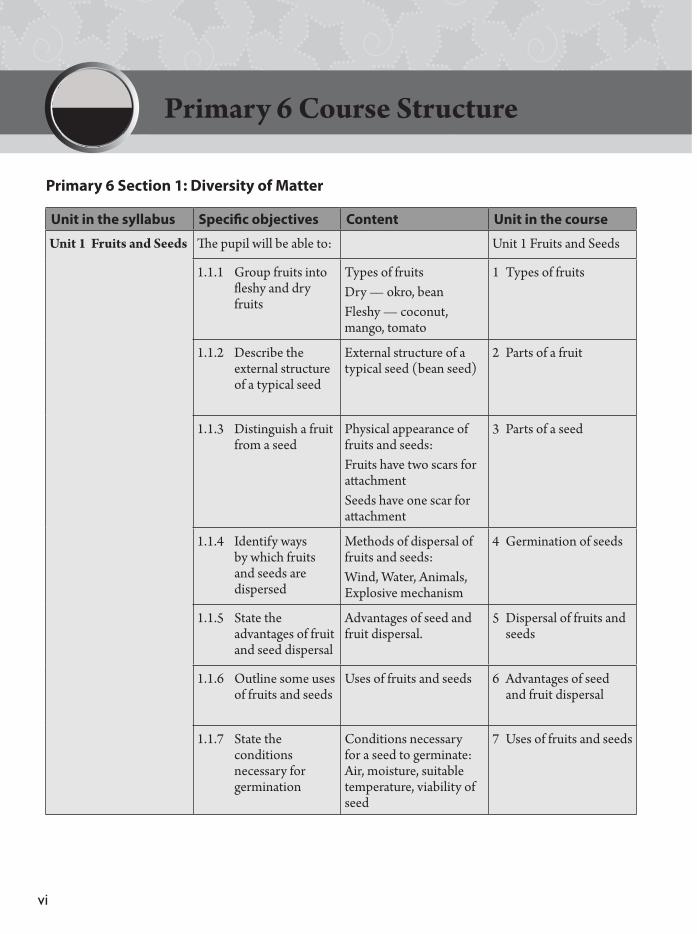
Primary 6 Section 1: Diversity of Matter
Unit in the syllabus Specific objectives Content Unit in the course
Unit 1 Fruits and Seeds The pupil will be able to: Unit 1 Fruits and Seeds
1.1.1 Group fruits into fleshy and dry fruits
Types of fruits Dry — okro, bean Fleshy — coconut, mango, tomato
1 Types of fruits
1.1.2 Describe the external structure of a typical seed
External structure of a typical seed (bean seed)
2 Parts of a fruit
1.1.3 Distinguish a fruit from a seed
Physical appearance of fruits and seeds:Fruits have two scars for attachmentSeeds have one scar for attachment
3 Parts of a seed
1.1.4 Identify ways by which fruits and seeds are dispersed
Methods of dispersal of fruits and seeds: Wind, Water, Animals, Explosive mechanism
4 Germination of seeds
1.1.5 State the advantages of fruit and seed dispersal
Advantages of seed and fruit dispersal.
5 Dispersal of fruits and seeds
1.1.6 Outline some uses of fruits and seeds
Uses of fruits and seeds 6 Advantages of seed and fruit dispersal
1.1.7 State the conditions necessary for germination
Conditions necessary for a seed to germinate: Air, moisture, suitable temperature, viability of seed
7 Uses of fruits and seeds
vii
Primary 6 Course Structure
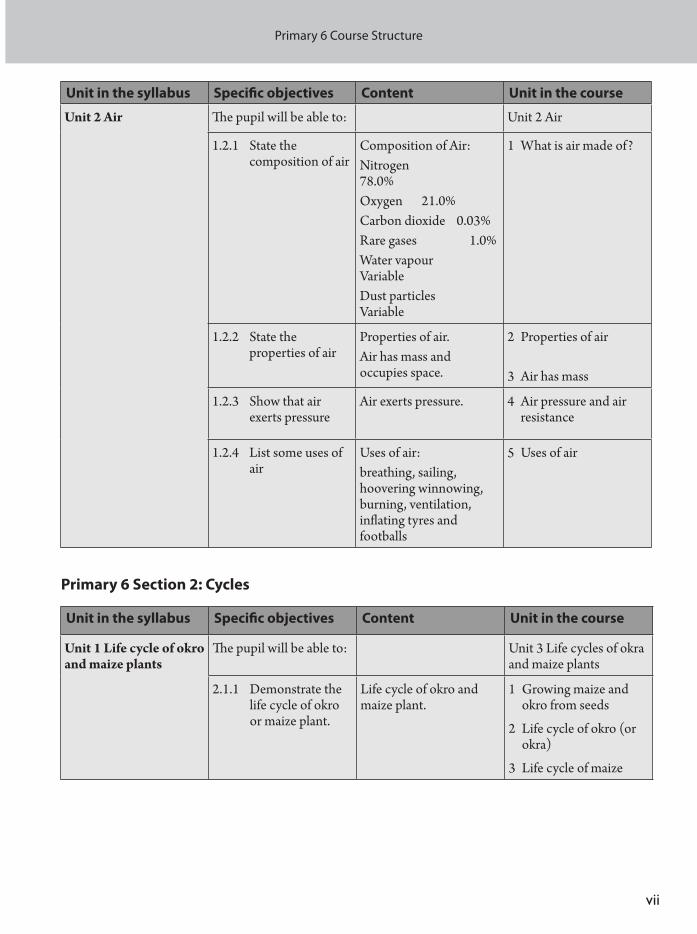
Unit in the syllabus Specific objectives Content Unit in the course
Unit 2 Air The pupil will be able to: Unit 2 Air
1.2.1 State the composition of air
Composition of Air:Nitrogen 78.0%Oxygen 21.0%Carbon dioxide 0.03%Rare gases 1.0%Water vapour VariableDust particles Variable
1 What is air made of?
1.2.2 State the properties of air
Properties of air. Air has mass and occupies space.
2 Properties of air
3 Air has mass
1.2.3 Show that air exerts pressure
Air exerts pressure. 4 Air pressure and air resistance
1.2.4 List some uses of air
Uses of air: breathing, sailing, hoovering winnowing, burning, ventilation, inflating tyres and footballs
5 Uses of air
Primary 6 Section 2: Cycles
Unit in the syllabus Specific objectives Content Unit in the course
Unit 1 Life cycle of okro and maize plants
The pupil will be able to: Unit 3 Life cycles of okra and maize plants
2.1.1 Demonstrate the life cycle of okro or maize plant.
Life cycle of okro and maize plant.
1 Growing maize and okro from seeds
2 Life cycle of okro (or okra)
3 Life cycle of maize

viii
Primary 6 Course Structure
Unit in the syllabus Specific objectives Content Unit in the course
Unit 2 Water related diseases
The pupil will be able to: Unit 4 Water related diseases
2.2.1 List some water related diseases
Water related diseases e.g. Malaria, Yellow fever and River blindness
1 Water related diseases3 Yellow fever 4 Onchocerciasis (river
blindness) 5 Guinea worm disease6 Schistosomiasis
(bilharzia)
2.2.2 List some symptoms of malaria disease
Symptoms of malaria disease
2 Malaria
2.2.3 Describe the prevention of malaria disease
Prevention of malaria
Unit 3 Life cycle of a mosquito
The pupil will be able to: Unit 5 Life cycle of the mosquito
2.3.1 Demonstrate the life cycle of a mosquito
Life cycle of a mosquito 1 Mosquitoes 2 The life cycle of the
mosquito 3 Controlling
mosquitoes
Primary 6 Section 3: Systems
Unit in the syllabus Specific objectives Content Unit in the course
Unit 1 The digestive system of humans
The pupil will be able to: Unit 6 The digestive system of humans
3.1.1 Identify the main organs that form the digestive system
Main organs of the digestive system: Mouth, Stomach, Small intestine, Large intestine
1 Parts of the digestive system
3.1.2 Describe the functions of the organs of the digestive system
Functions of parts of the digestive system.
2 Functions of the organs of the digestive system
3 The products of digestion
ix
Primary 6 Course Structure
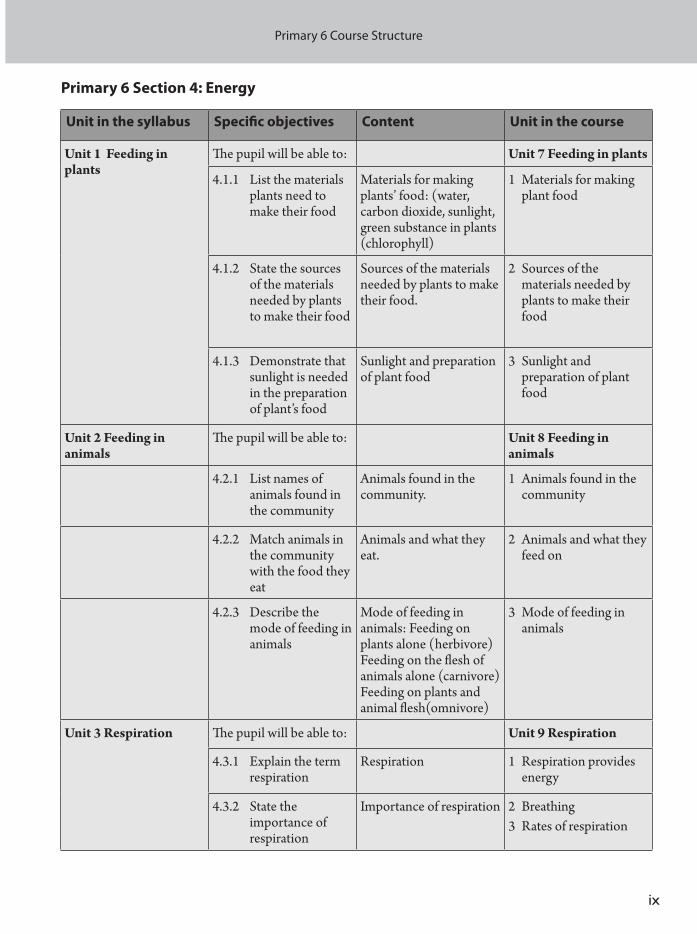
Primary 6 Section 4: Energy
Unit in the syllabus Specific objectives Content Unit in the course
Unit 1 Feeding in plants
The pupil will be able to: Unit 7 Feeding in plants
4.1.1 List the materials plants need to make their food
Materials for making plants’ food: (water, carbon dioxide, sunlight, green substance in plants (chlorophyll)
1 Materials for making plant food
4.1.2 State the sources of the materials needed by plants to make their food
Sources of the materials needed by plants to make their food.
2 Sources of the materials needed by plants to make their food
4.1.3 Demonstrate that sunlight is needed in the preparation of plant’s food
Sunlight and preparation of plant food
3 Sunlight and preparation of plant food
Unit 2 Feeding in animals
The pupil will be able to: Unit 8 Feeding in animals
4.2.1 List names of animals found in the community
Animals found in the community.
1 Animals found in the community
4.2.2 Match animals in the community with the food they eat
Animals and what they eat.
2 Animals and what they feed on
4.2.3 Describe the mode of feeding in animals
Mode of feeding in animals: Feeding on plants alone (herbivore) Feeding on the flesh of animals alone (carnivore) Feeding on plants and animal flesh(omnivore)
3 Mode of feeding in animals
Unit 3 Respiration The pupil will be able to: Unit 9 Respiration
4.3.1 Explain the term respiration
Respiration 1 Respiration provides energy
4.3.2 State the importance of respiration
Importance of respiration 2 Breathing 3 Rates of respiration
x
Primary 6 Course Structure
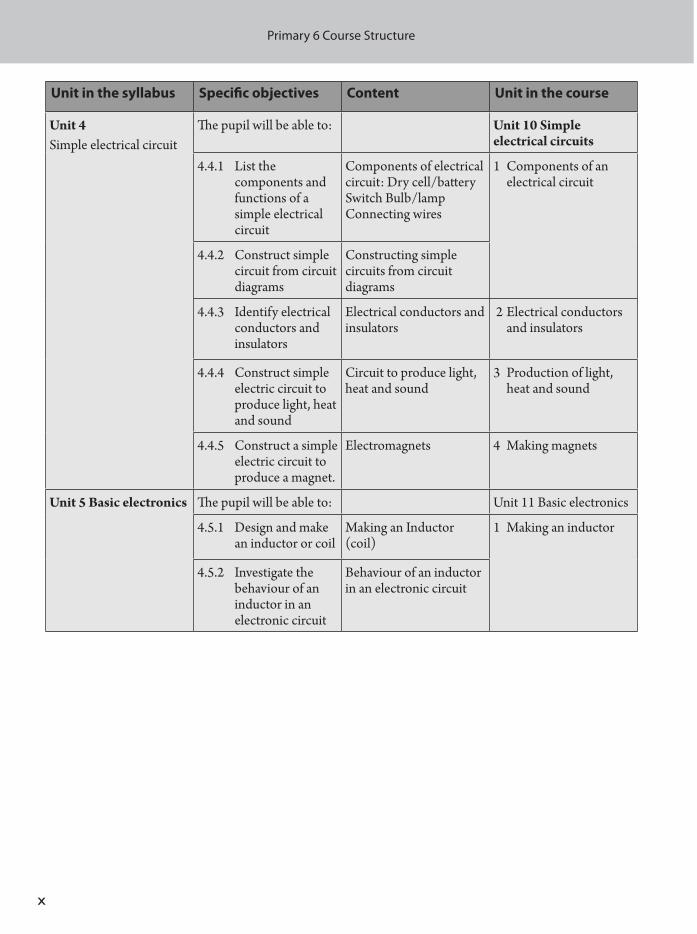
Unit in the syllabus Specific objectives Content Unit in the course
Unit 4 Simple electrical circuit
The pupil will be able to: Unit 10 Simple electrical circuits
4.4.1 List the components and functions of a simple electrical circuit
Components of electrical circuit: Dry cell/battery Switch Bulb/lamp Connecting wires
1 Components of an electrical circuit
4.4.2 Construct simple circuit from circuit diagrams
Constructing simple circuits from circuit diagrams
4.4.3 Identify electrical conductors and insulators
Electrical conductors and insulators
2 Electrical conductors and insulators
4.4.4 Construct simple electric circuit to produce light, heat and sound
Circuit to produce light, heat and sound
3 Production of light, heat and sound
4.4.5 Construct a simple electric circuit to produce a magnet.
Electromagnets 4 Making magnets
Unit 5 Basic electronics The pupil will be able to: Unit 11 Basic electronics
4.5.1 Design and make an inductor or coil
Making an Inductor (coil)
1 Making an inductor
4.5.2 Investigate the behaviour of an inductor in an electronic circuit
Behaviour of an inductor in an electronic circuit
xi
Primary 6 Course Structure
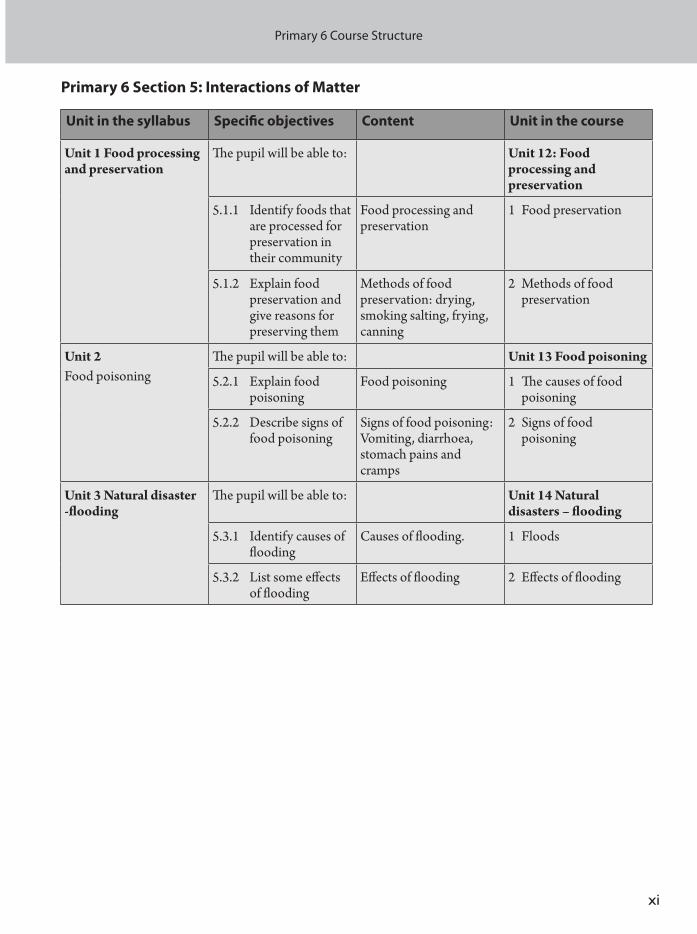
Primary 6 Section 5: Interactions of Matter
Unit in the syllabus Specific objectives Content Unit in the course
Unit 1 Food processing and preservation
The pupil will be able to: Unit 12: Food processing and preservation
5.1.1 Identify foods that are processed for preservation in their community
Food processing and preservation
1 Food preservation
5.1.2 Explain food preservation and give reasons for preserving them
Methods of food preservation: drying, smoking salting, frying, canning
2 Methods of food preservation
Unit 2 Food poisoning
The pupil will be able to: Unit 13 Food poisoning
5.2.1 Explain food poisoning
Food poisoning 1 The causes of food poisoning
5.2.2 Describe signs of food poisoning
Signs of food poisoning: Vomiting, diarrhoea, stomach pains and cramps
2 Signs of food poisoning
Unit 3 Natural disaster -flooding
The pupil will be able to: Unit 14 Natural disasters – flooding
5.3.1 Identify causes of flooding
Causes of flooding. 1 Floods
5.3.2 List some effects of flooding
Effects of flooding 2 Effects of flooding

xii
Contents
xiii
Introduction
This course has been written to deliver the new syllabus in Integrated Science published by the Curriculum Research and Development Division (CRDD) of the Ministry of Education, (MOE) in September 2012. It has been developed by an expert team of Ghanaian teachers and educators and its aim is both to achieve the general aims and the specific objectives of the syllabus, and also to support teachers as they work with the pupils through the year.
The course uses a child-centred approach, and works to develop the abilities of the pupils in line with the profile dimensions specified in the syllabus document. The course is designed to help pupils to develop scientific attitudes and process skills, as well as their knowledge and understanding of science and their ability to apply that knowledge. The course is activity-based and proceeds on the assumption that children learn best when they are actively doing science, not just listening or reading about it. Accordingly, you will see that each unit of the Pupil’s Book contains many activities for pupils to do.
This Teacher’s Guide is designed to support teachers as they create the teaching and learning opportunities and the activities through which the pupils will develop their science skills, their attitudes and their knowledge and understanding of science. For each unit in the Pupil’s Book, this guide provides a list of the key words introduced in the topic, advice on lesson planning and a list of resources required so that these can be collected together before the teaching of the unit begins. Guidelines on how to present the teaching and learning activities are provided, and there is particular emphasis on opportunities for activities for both more able and less able pupils. This will help teachers to individualise their teaching so that they can offer the best learning opportunities to all the pupils in their class.
This course also provides plenty of assessment opportunities. There are questions for discussion throughout the Pupil’s Book, and these can be used for ongoing evaluation of the pupils by the teacher. Each unit in the Pupil’s Book ends with a summary of the topics covered, and a set of questions which may be used for self-evaluation by the pupils, for homework or as an end-of-unit test. Answers to the end-of-unit questions are provided in this guide. In addition, this guide provides a set of Review questions for each unit which are designed to provide information both on the knowledge and understanding which the pupils have acquired, and also the development of their scientific skills and attitudes.
School-based Assessment (SBA) is an important feature introduced by the new MOE syllabus. The Review questions at the end of each unit in this guide are written in the same style as the
1

xiv
SBA items to be provided by the Ministry of Education and we hope that they will assist teachers with their School-based Assessment. These items may be used for assessment, for examination practice or as a way of reviewing the topics covered during the school year.
We hope that you enjoy using this course, and working with your pupils to develop their scientific abilities.
The authors January 2012
Introduction
1
Section 1: Diversity of Matter
Fruits and seeds
Syllabus objectives covered in this unit
By the end of this unit the pupils will be able to:
1. 1. 1 Group fruits into fleshy and dry fruits.
1. 1. 2 Describe the external structure of a typical seed.
1. 1. 3 Distinguish a fruit from a seed.
1. 1. 4 Identify ways by which fruits and seeds are dispersed.
1. 1. 5 State the advantages of fruit and seed dispersal.
1. 1. 6 Outline some uses of fruits and seeds.
1. 1. 7 State the conditions necessary for germination.
Introduction and additional information
Please Note – It is important at the beginning of any exercise to stress that fruits which birds and animals enjoy eating may be poisonous to humans. Nothing must be eaten without the permission of the teacher/ adult in charge.
Flowering plants make up the largest and most important group in the plant kingdom. Most of the plants that we cultivate or collect from the wild are members of this group. The function of the flower is to reproduce the plant by making seeds. The terms fruit and seed are scientific terms, clearly defined, and it is good to ensure that they are used properly. Fruits are the fertilised ovaries of fleshy fruits, and usually they grow and swell to facilitate the dispersal of the seeds, which are the fertilised ovules inside the fruit. Some fruits grow large and fleshy, and often have a sweet pleasant flavour, so that animals can be used to aid the dispersal of their seeds. However, not all fruits are attractive to animals: jacaranda fruits, flamboyant tree fruits and sycamore tree fruits are all dry and hard, and rely on other means for the dispersal of their seeds. Note that many products often called vegetables, such as tomatoes, peppers and okra, are in fact fruits, botanically speaking.
1
2
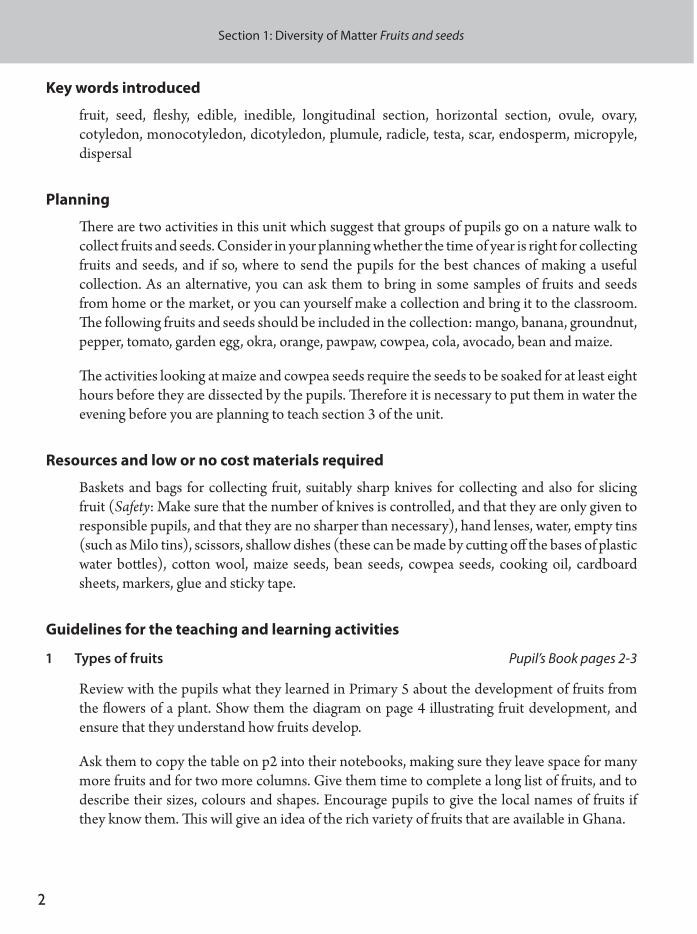
Key words introduced
fruit, seed, fleshy, edible, inedible, longitudinal section, horizontal section, ovule, ovary, cotyledon, monocotyledon, dicotyledon, plumule, radicle, testa, scar, endosperm, micropyle, dispersal
Planning
There are two activities in this unit which suggest that groups of pupils go on a nature walk to collect fruits and seeds. Consider in your planning whether the time of year is right for collecting fruits and seeds, and if so, where to send the pupils for the best chances of making a useful collection. As an alternative, you can ask them to bring in some samples of fruits and seeds from home or the market, or you can yourself make a collection and bring it to the classroom. The following fruits and seeds should be included in the collection: mango, banana, groundnut, pepper, tomato, garden egg, okra, orange, pawpaw, cowpea, cola, avocado, bean and maize.
The activities looking at maize and cowpea seeds require the seeds to be soaked for at least eight hours before they are dissected by the pupils. Therefore it is necessary to put them in water the evening before you are planning to teach section 3 of the unit.
Resources and low or no cost materials required
Baskets and bags for collecting fruit, suitably sharp knives for collecting and also for slicing fruit (Safety: Make sure that the number of knives is controlled, and that they are only given to responsible pupils, and that they are no sharper than necessary), hand lenses, water, empty tins (such as Milo tins), scissors, shallow dishes (these can be made by cutting off the bases of plastic water bottles), cotton wool, maize seeds, bean seeds, cowpea seeds, cooking oil, cardboard sheets, markers, glue and sticky tape.
Guidelines for the teaching and learning activities
1 Types of fruits Pupil’s Book pages 2-3
Review with the pupils what they learned in Primary 5 about the development of fruits from the flowers of a plant. Show them the diagram on page 4 illustrating fruit development, and ensure that they understand how fruits develop.
Ask them to copy the table on p2 into their notebooks, making sure they leave space for many more fruits and for two more columns. Give them time to complete a long list of fruits, and to describe their sizes, colours and shapes. Encourage pupils to give the local names of fruits if they know them. This will give an idea of the rich variety of fruits that are available in Ghana.
Section 1: Diversity of Matter Fruits and seeds
3
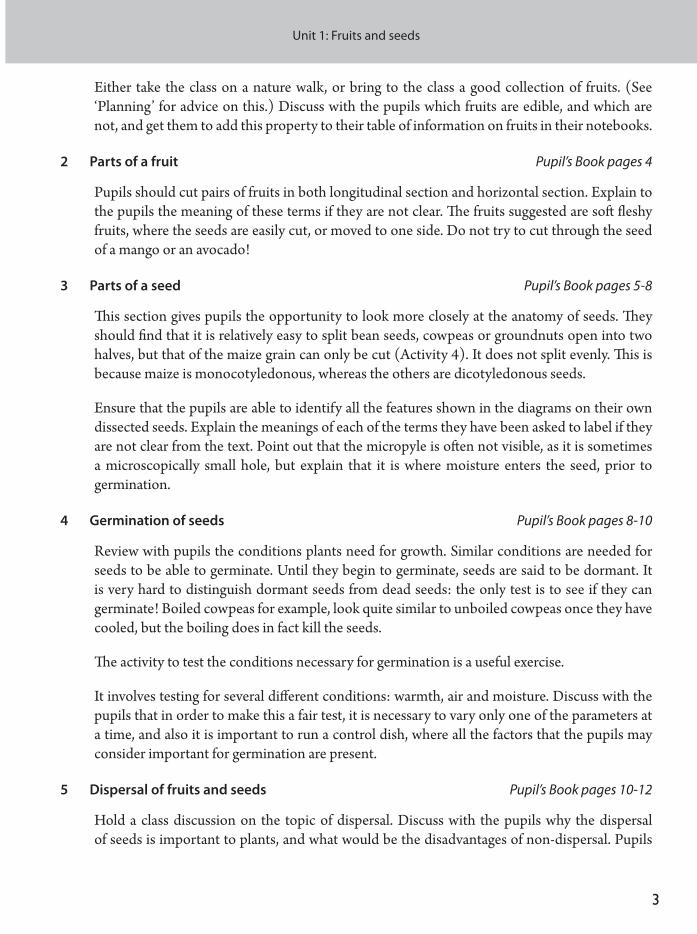
Either take the class on a nature walk, or bring to the class a good collection of fruits. (See ‘Planning’ for advice on this.) Discuss with the pupils which fruits are edible, and which are not, and get them to add this property to their table of information on fruits in their notebooks.
2 Parts of a fruit Pupil’s Book pages 4
Pupils should cut pairs of fruits in both longitudinal section and horizontal section. Explain to the pupils the meaning of these terms if they are not clear. The fruits suggested are soft fleshy fruits, where the seeds are easily cut, or moved to one side. Do not try to cut through the seed of a mango or an avocado!
3 Parts of a seed Pupil’s Book pages 5-8
This section gives pupils the opportunity to look more closely at the anatomy of seeds. They should find that it is relatively easy to split bean seeds, cowpeas or groundnuts open into two halves, but that of the maize grain can only be cut (Activity 4). It does not split evenly. This is because maize is monocotyledonous, whereas the others are dicotyledonous seeds.
Ensure that the pupils are able to identify all the features shown in the diagrams on their own dissected seeds. Explain the meanings of each of the terms they have been asked to label if they are not clear from the text. Point out that the micropyle is often not visible, as it is sometimes a microscopically small hole, but explain that it is where moisture enters the seed, prior to germination.
4 Germination of seeds Pupil’s Book pages 8-10
Review with pupils the conditions plants need for growth. Similar conditions are needed for seeds to be able to germinate. Until they begin to germinate, seeds are said to be dormant. It is very hard to distinguish dormant seeds from dead seeds: the only test is to see if they can germinate! Boiled cowpeas for example, look quite similar to unboiled cowpeas once they have cooled, but the boiling does in fact kill the seeds.
The activity to test the conditions necessary for germination is a useful exercise.
It involves testing for several different conditions: warmth, air and moisture. Discuss with the pupils that in order to make this a fair test, it is necessary to vary only one of the parameters at a time, and also it is important to run a control dish, where all the factors that the pupils may consider important for germination are present.
5 Dispersal of fruits and seeds Pupil’s Book pages 10-12
Hold a class discussion on the topic of dispersal. Discuss with the pupils why the dispersal of seeds is important to plants, and what would be the disadvantages of non-dispersal. Pupils
Unit 1: Fruits and seeds
4
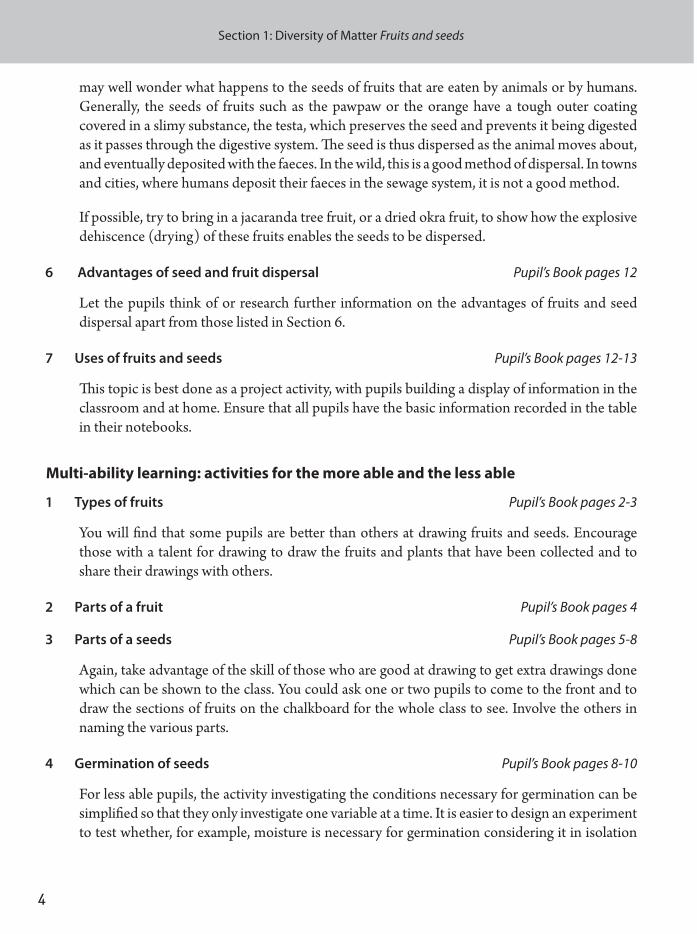
may well wonder what happens to the seeds of fruits that are eaten by animals or by humans. Generally, the seeds of fruits such as the pawpaw or the orange have a tough outer coating covered in a slimy substance, the testa, which preserves the seed and prevents it being digested as it passes through the digestive system. The seed is thus dispersed as the animal moves about, and eventually deposited with the faeces. In the wild, this is a good method of dispersal. In towns and cities, where humans deposit their faeces in the sewage system, it is not a good method.
If possible, try to bring in a jacaranda tree fruit, or a dried okra fruit, to show how the explosive dehiscence (drying) of these fruits enables the seeds to be dispersed.
6 Advantages of seed and fruit dispersal Pupil’s Book pages 12
Let the pupils think of or research further information on the advantages of fruits and seed dispersal apart from those listed in Section 6.
7 Uses of fruits and seeds Pupil’s Book pages 12-13
This topic is best done as a project activity, with pupils building a display of information in the classroom and at home. Ensure that all pupils have the basic information recorded in the table in their notebooks.
Multi-ability learning: activities for the more able and the less able
1 Types of fruits Pupil’s Book pages 2-3
You will find that some pupils are better than others at drawing fruits and seeds. Encourage those with a talent for drawing to draw the fruits and plants that have been collected and to share their drawings with others.
2 Parts of a fruit Pupil’s Book pages 4
3 Parts of a seeds Pupil’s Book pages 5-8
Again, take advantage of the skill of those who are good at drawing to get extra drawings done which can be shown to the class. You could ask one or two pupils to come to the front and to draw the sections of fruits on the chalkboard for the whole class to see. Involve the others in naming the various parts.
4 Germination of seeds Pupil’s Book pages 8-10
For less able pupils, the activity investigating the conditions necessary for germination can be simplified so that they only investigate one variable at a time. It is easier to design an experiment to test whether, for example, moisture is necessary for germination considering it in isolation
Section 1: Diversity of Matter Fruits and seeds
5
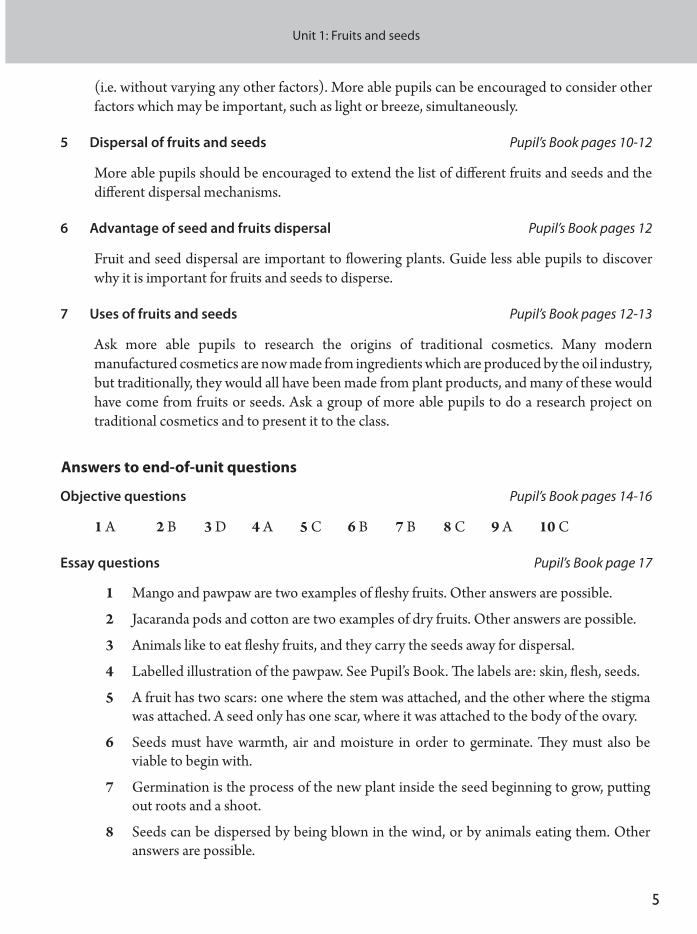
(i.e. without varying any other factors). More able pupils can be encouraged to consider other factors which may be important, such as light or breeze, simultaneously.
5 Dispersal of fruits and seeds Pupil’s Book pages 10-12
More able pupils should be encouraged to extend the list of different fruits and seeds and the different dispersal mechanisms.
6 Advantage of seed and fruits dispersal Pupil’s Book pages 12
Fruit and seed dispersal are important to flowering plants. Guide less able pupils to discover why it is important for fruits and seeds to disperse.
7 Uses of fruits and seeds Pupil’s Book pages 12-13
Ask more able pupils to research the origins of traditional cosmetics. Many modern manufactured cosmetics are now made from ingredients which are produced by the oil industry, but traditionally, they would all have been made from plant products, and many of these would have come from fruits or seeds. Ask a group of more able pupils to do a research project on traditional cosmetics and to present it to the class.
Answers to end-of-unit questions
Objective questions Pupil’s Book pages 14-16
1 A 2 B 3 D 4 A 5 C 6 B 7 B 8 C 9 A 10 C
Essay questions Pupil’s Book page 17
1 Mango and pawpaw are two examples of fleshy fruits. Other answers are possible.
2 Jacaranda pods and cotton are two examples of dry fruits. Other answers are possible.
3 Animals like to eat fleshy fruits, and they carry the seeds away for dispersal.
4 Labelled illustration of the pawpaw. See Pupil’s Book. The labels are: skin, flesh, seeds.
5 A fruit has two scars: one where the stem was attached, and the other where the stigma was attached. A seed only has one scar, where it was attached to the body of the ovary.
6 Seeds must have warmth, air and moisture in order to germinate. They must also be viable to begin with.
7 Germination is the process of the new plant inside the seed beginning to grow, putting out roots and a shoot.
8 Seeds can be dispersed by being blown in the wind, or by animals eating them. Other answers are possible.
Unit 1: Fruits and seeds
6
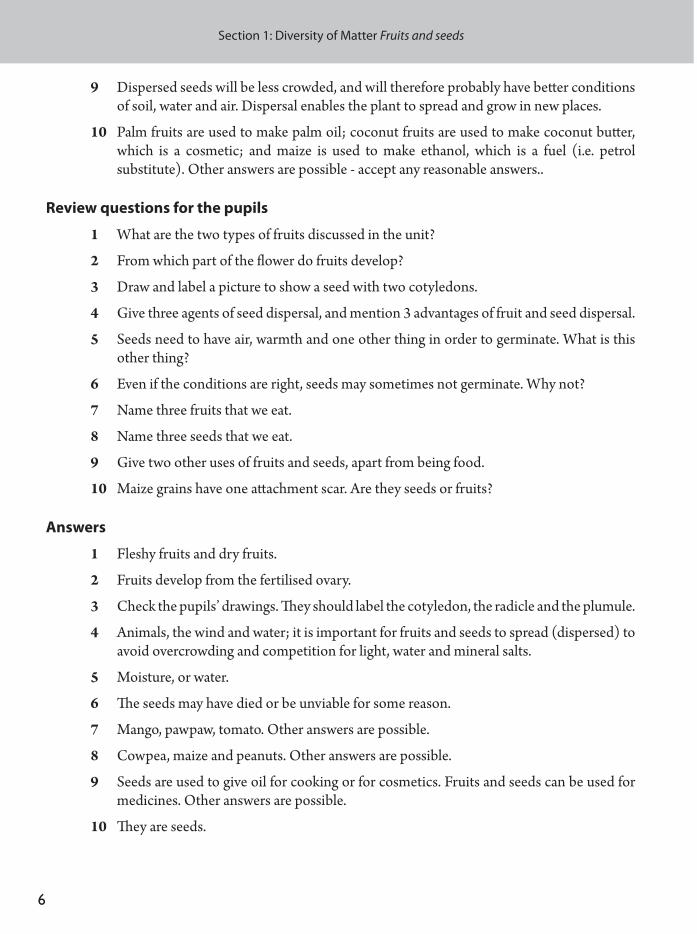
9 Dispersed seeds will be less crowded, and will therefore probably have better conditions of soil, water and air. Dispersal enables the plant to spread and grow in new places.
10 Palm fruits are used to make palm oil; coconut fruits are used to make coconut butter, which is a cosmetic; and maize is used to make ethanol, which is a fuel (i.e. petrol substitute). Other answers are possible - accept any reasonable answers..
Review questions for the pupils
1 What are the two types of fruits discussed in the unit?
2 From which part of the flower do fruits develop?
3 Draw and label a picture to show a seed with two cotyledons.
4 Give three agents of seed dispersal, and mention 3 advantages of fruit and seed dispersal.
5 Seeds need to have air, warmth and one other thing in order to germinate. What is this other thing?
6 Even if the conditions are right, seeds may sometimes not germinate. Why not?
7 Name three fruits that we eat.
8 Name three seeds that we eat.
9 Give two other uses of fruits and seeds, apart from being food.
10 Maize grains have one attachment scar. Are they seeds or fruits?
Answers
1 Fleshy fruits and dry fruits.
2 Fruits develop from the fertilised ovary.
3 Check the pupils’ drawings. They should label the cotyledon, the radicle and the plumule.
4 Animals, the wind and water; it is important for fruits and seeds to spread (dispersed) to avoid overcrowding and competition for light, water and mineral salts.
5 Moisture, or water.
6 The seeds may have died or be unviable for some reason.
7 Mango, pawpaw, tomato. Other answers are possible.
8 Cowpea, maize and peanuts. Other answers are possible.
9 Seeds are used to give oil for cooking or for cosmetics. Fruits and seeds can be used for medicines. Other answers are possible.
10 They are seeds.
Section 1: Diversity of Matter Fruits and seeds
7
Diagnostic assessment
These diagnostic assessment exercises will assist you as the teacher to evaluate the impact of the teaching and learning activities in this unit and to assess the extent to which the unit objectives have been achieved.
1 Look back at the lessons on fruits and seeds and review the teaching and learning activities. Which lessons went well? Which lessons did not go so well? Can you say why this was? Did the pupils find it interesting to investigate different fruits and seeds? Were they focused on it during the lessons?
2 This unit involves pupils collecting fruits and seeds on a nature walk. Were there any difficulties with this? Did the pupils enjoy the nature walk? Were there enough fruits or seeds for them to collect?
3 How successful were the pupils when they did the Review questions above? Was the class:
A All successful (all pupils scored 8 out of 10 or above)
B Mostly successful (most pupils scored 8 out of 10 or above)
C Some were successful (between 2 and the number in B of pupils scored 8 out of 10 or above/between quarter and half the class scored 8 out of 10 or above)
D Not really successful? (fewer than a quarter of the class scored 8 out of 10 or above)
4 Can the pupils carry out these objectives:
• Explain what seed dispersal is?
• List the conditions necessary for a viable seed to germinate?
Rate your results as A (all pupils), B (most pupils), C (some pupils) or D (only a few pupils).
5 List two aspects of the teaching and learning activities that went well for this unit. Decide how you can build on this success for future teaching. List two difficulties that you had in teaching this unit. Decide how you can remedy these issues for future teaching.
Unit 1: Fruits and seeds
8
Air
Syllabus covered in this unit
By the end of this unit the pupils will be able to:
1.2.1 State the composition of air.
1.2.2 State the properties of air.
1.2.3 Show that air exerts pressure.
1.2.4 List some uses of air.
Introduction and additional information
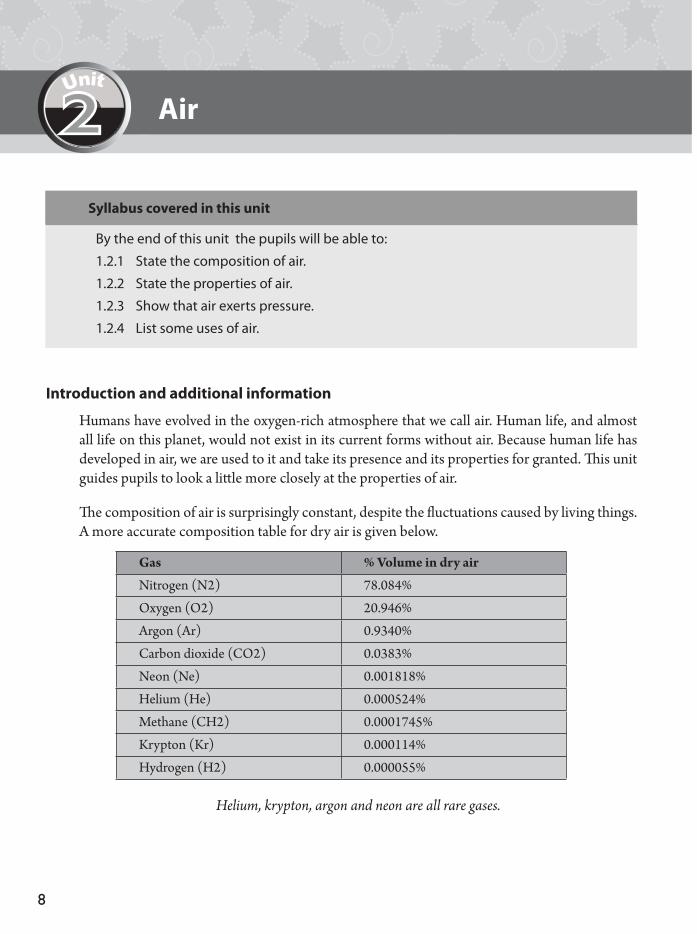
Humans have evolved in the oxygen-rich atmosphere that we call air. Human life, and almost all life on this planet, would not exist in its current forms without air. Because human life has developed in air, we are used to it and take its presence and its properties for granted. This unit guides pupils to look a little more closely at the properties of air.
The composition of air is surprisingly constant, despite the fluctuations caused by living things. A more accurate composition table for dry air is given below.
Gas % Volume in dry air
Nitrogen (N2) 78.084%
Oxygen (O2) 20.946%
Argon (Ar) 0.9340%
Carbon dioxide (CO2) 0.0383%
Neon (Ne) 0.001818%
Helium (He) 0.000524%
Methane (CH2) 0.0001745%
Krypton (Kr) 0.000114%
Hydrogen (H2) 0.000055%
Helium, krypton, argon and neon are all rare gases.
2
9
Air in the tropics is typically humid, containing as much as 3% by volume of water vapour (reducing the other percentages of gases proportionately).
Carbon dioxide levels are now higher than they have been in the past. Previously they were closer to 0.035%, although there is geological evidence that the level of CO2 in the atmosphere has fluctuated throughout geological time. Carbon dioxide is one of the so-called greenhouse gases, which are of concern to environmentalists because they have the effect of trapping solar heat radiation within the Earth’s atmosphere, rather than allowing it to escape. This has the effect of raising ambient temperatures (the temperatures of the surrounding environment), which could damage many ecosystems. Water vapour is also a greenhouse gas in this respect, as are methane and other industrial waste gases. Despite only being present in trace amounts, their effect in trapping heat is significant.
Air does have mass. At sea level, air has a density of about 1.2 kg/m3 so that one litre of air weighs about 1.2 g.
Key words introduced
nitrogen, oxygen, argon, carbon dioxide, air pressure, air resistance, rare gases
Planning
The practical work for this unit is relatively straightforward, and the demonstrations and experiments make for interesting classroom work. Make sure that you have all the equipment that is required, including some balloons for the experiment to show that air has mass.
Resources and low or no cost materials required
Candles, matches, shallow dishes (or plastic water bottles which can be cut to make shallow dishes). Note that the bottom end of a plastic water bottle makes a good shallow dish, and the top end makes a good funnel for pouring water. You will also need large bowls or basins for holding water, a transparent container big enough to go over the candles without getting too hot (e.g. glass), beakers (or cleaned jam jars), a pouring funnel (or the top part of a plastics water bottle), Plasticine® or sticky clay, sticky tape, a conical flask or glass bottle, a metre stick, balloons, string, scissors, a sharp knife, some coins, glass sheet, umbrella, cloths.
Guidelines for the teaching and learning activities
1 What is air made of? Pupil’s Book pages 18-20
Discuss the composition of air pie chart with the pupils. Ask them if they have heard of the gases that are listed. Ask them if they think that there are any others that should be in the list
Unit 2: Air

10
which are not. Any other gases which they might suggest, apart from water vapour, are only present in air in trace quantities, even if local gases such as smoke or traffic exhaust fumes may be at unpleasantly high concentrations.
In the demonstration to show the candle consuming oxygen in the upturned jar, ensure that the air inside is allowed to cool back to room temperature before readings are taken. The burning candle will have heated the air, causing it to expand, so it must be allowed to cool for accurate comparisons. The candle will go out after it has consumed all the oxygen, so wait for a period before looking at the level of the water. Using two or more candles does not increase the amount of air that is consumed, because it is still only the 21% that is oxygen that can be consumed. Using more candles should consume the oxygen more quickly, however.
2 Properties of air Pupil’s Book pages 20-22
It is important that pupils grasp the idea that air does indeed take up space, and Activities 2 and 3 demonstrate this clearly. Remind them that car tyres or bicycle tyres are held in shape by the air inside them taking up space. Guide pupils to come up with other ways which indicate that air exerts pressure. In Activity 2, it is very important to keep the beaker completely flat upside down as it is placed in the water. Tilting it even slightly will allow water in.
3 Air has mass Pupil’s Book pages 22-23
The activity in this section is a neat and convincing demonstration that when the air is released from a balloon, the balloon becomes lighter. Take the pupils through the demonstration step by step. Ensure that they are clear that when the two balloons are inflated and balanced at either end of the stick, their weights are equal. When the air is released from one balloon, this equilibrium is disturbed because there is a change of weight in the deflated balloon. It is important not to burst the balloon roughly, as this can often lead to bits of the balloon itself disappearing, which would invalidate the comparison.
4 Air pressure and air resistance Pupil’s Book pages 24-25
There is difference between air pressure and air resistance. Air pressure is due to the weight of the air above us, and it acts in all directions: we are pushed down as much as up, and from one side as much as the other, with the result that the net effect of the pressure in applying a force is zero. Air resistance, on the other hand, is a frictional force which develops when we try to move through the air. If we move with something broad and bulky such as a large open cloth, or an opened umbrella, that frictional force can become easily felt.
The demonstration of air pressure acting on a plastic water bottle works well (Activity 5). Make sure that the pupils understand that all they are doing is taking the air out of the inside of the
Section 1: Diversity of Matter Air
11
bottle. There is therefore less air to push back against the air pressure from the outside, and so the bottle becomes crushed.
5 Uses of air Pupil’s Book pages 26
Hold a classroom discussion about the uses of air, and invite all of the pupils to contribute. We are so used to the air all around us that we have developed many ways of interacting with it and using it. The pupils should complete the table in their notebooks. Air has many uses. Some of them are as follows; breathing, combusting (burning), growth of plants (plants use nitrogen), moving air (wind) helps windmills which are used to generate electricity, etc.
Multi-ability learning – activities for the more able and the less able
1 What is air made of? Pupil’s Book pages 18-20
Ask a group of more able pupils to say how they think the composition of air will be different in a bedroom with no ventilation after a family has been sleeping in the room for ten hours. What changes to the composition of the air would they expect? Ask them to plan an investigation to check if their predictions are correct.
2 Air pressure and air resistance Pupil’s Book pages 24-25
More able pupils can plan an investigation to demonstrate the effects of air resistance on a toy car running down an inclined plane. They could first time it with no extra air resistance, and then attach a large card sail to the car and time it again, to see if it takes longer to run down the inclined plane. If their experimental design is good, let them carry out the experiment, and demonstrate it to the class.
3 Uses of air Pupil’s Book page 26
As an extension activity, less able pupils could be asked to draw up a list of situations when air is not helpful or useful to us. Windy or stormy weather is one example, or dust and rubbish being blown in the wind from dirty roads. Wind can also cause erosion of dry light soils.
Less able pupils could also build a model of a sailing boat to demonstrating an important use of air. They can show their boat to the class, demonstrating how wind can make it move across a bowl of water.
Plants also need air for respiration, just as animals do. Ask a group of more able pupils to devise an investigation to show that plants also need air to live and to grow. They could do this using some potted plants, and covering one with a plastic bag, sealing it carefully. The plants can then be left for a week or two. Ask the group to report back to the class, showing all the covered and uncovered plants.
Unit 2: Air
12
Answers to end-of-unit questions
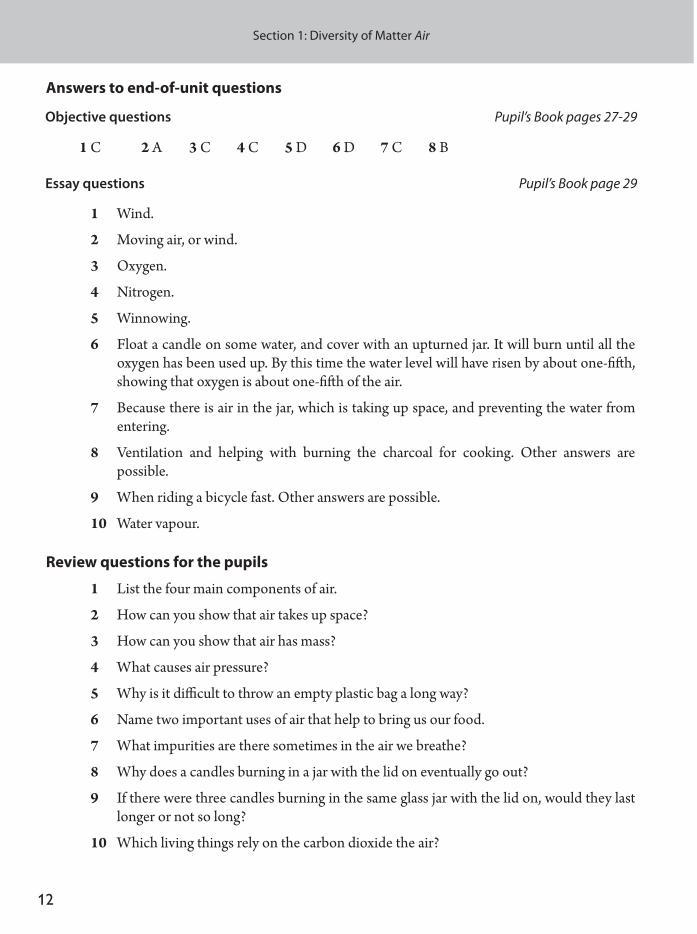
Objective questions Pupil’s Book pages 27-29
1 C 2 A 3 C 4 C 5 D 6 D 7 C 8 B
Essay questions Pupil’s Book page 29
1 Wind.
2 Moving air, or wind.
3 Oxygen.
4 Nitrogen.
5 Winnowing.
6 Float a candle on some water, and cover with an upturned jar. It will burn until all the oxygen has been used up. By this time the water level will have risen by about one-fifth, showing that oxygen is about one-fifth of the air.
7 Because there is air in the jar, which is taking up space, and preventing the water from entering.
8 Ventilation and helping with burning the charcoal for cooking. Other answers are possible.
9 When riding a bicycle fast. Other answers are possible.
10 Water vapour.
Review questions for the pupils
1 List the four main components of air.
2 How can you show that air takes up space?
3 How can you show that air has mass?
4 What causes air pressure?
5 Why is it difficult to throw an empty plastic bag a long way?
6 Name two important uses of air that help to bring us our food.
7 What impurities are there sometimes in the air we breathe?
8 Why does a candles burning in a jar with the lid on eventually go out?
9 If there were three candles burning in the same glass jar with the lid on, would they last longer or not so long?
10 Which living things rely on the carbon dioxide the air?
Section 1: Diversity of Matter Air
13
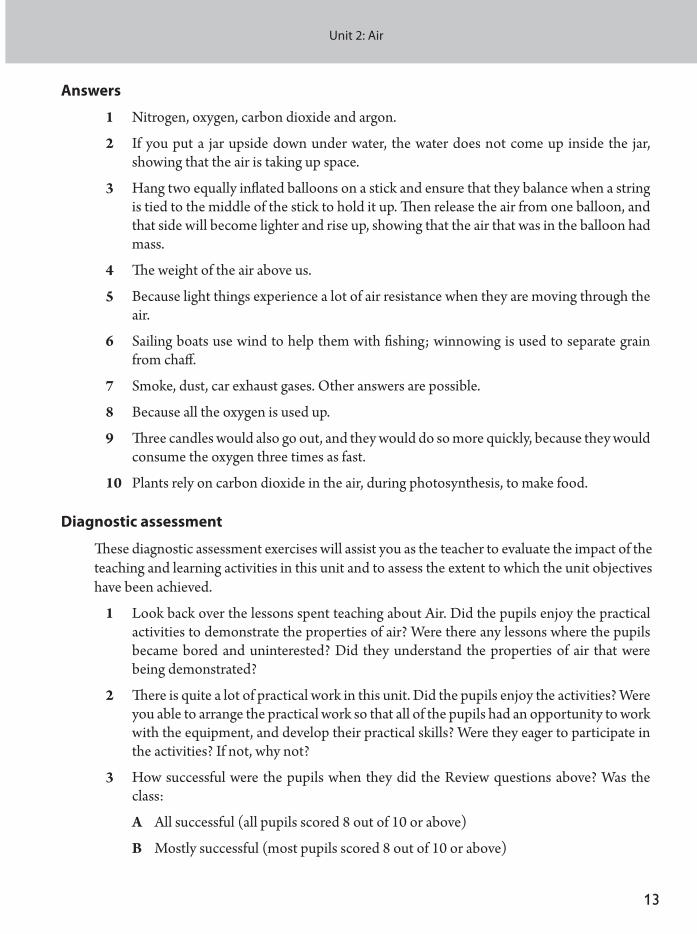
Answers
1 Nitrogen, oxygen, carbon dioxide and argon.
2 If you put a jar upside down under water, the water does not come up inside the jar, showing that the air is taking up space.
3 Hang two equally inflated balloons on a stick and ensure that they balance when a string is tied to the middle of the stick to hold it up. Then release the air from one balloon, and that side will become lighter and rise up, showing that the air that was in the balloon had mass.
4 The weight of the air above us.
5 Because light things experience a lot of air resistance when they are moving through the air.
6 Sailing boats use wind to help them with fishing; winnowing is used to separate grain from chaff.
7 Smoke, dust, car exhaust gases. Other answers are possible.
8 Because all the oxygen is used up.
9 Three candles would also go out, and they would do so more quickly, because they would consume the oxygen three times as fast.
10 Plants rely on carbon dioxide in the air, during photosynthesis, to make food.
Diagnostic assessment
These diagnostic assessment exercises will assist you as the teacher to evaluate the impact of the teaching and learning activities in this unit and to assess the extent to which the unit objectives have been achieved.
1 Look back over the lessons spent teaching about Air. Did the pupils enjoy the practical activities to demonstrate the properties of air? Were there any lessons where the pupils became bored and uninterested? Did they understand the properties of air that were being demonstrated?
2 There is quite a lot of practical work in this unit. Did the pupils enjoy the activities? Were you able to arrange the practical work so that all of the pupils had an opportunity to work with the equipment, and develop their practical skills? Were they eager to participate in the activities? If not, why not?
3 How successful were the pupils when they did the Review questions above? Was the class:
A All successful (all pupils scored 8 out of 10 or above)
B Mostly successful (most pupils scored 8 out of 10 or above)
Unit 2: Air
14
C Some were successful (between 2 and the number in B of pupils scored 8 out of 10 or above/between quarter and half the class scored 8 out of 10 or above)
D Not really successful? (fewer than a quarter of the class scored 8 out of 10 or above)
4 Can the pupils carry out the following objectives? Rate your results as A (all pupils), B (most pupils), C (some pupils) or D (only a few pupils).
• Can the pupils draw a set-up which shows that air contains oxygen?
• Do the pupils know what the composition of air is?
• Can the pupils state that two properties of air are that it takes up space and that it has mass?
• Can the pupils list four uses of air in everyday life?
5 Think about what went well in the teaching of this unit. Was it the practical work? Was it the fact that air is familiar to everyone? What can you learn from this unit, so that you can build on end improve your teaching in the future?
Section 1: Diversity of Matter Air
15
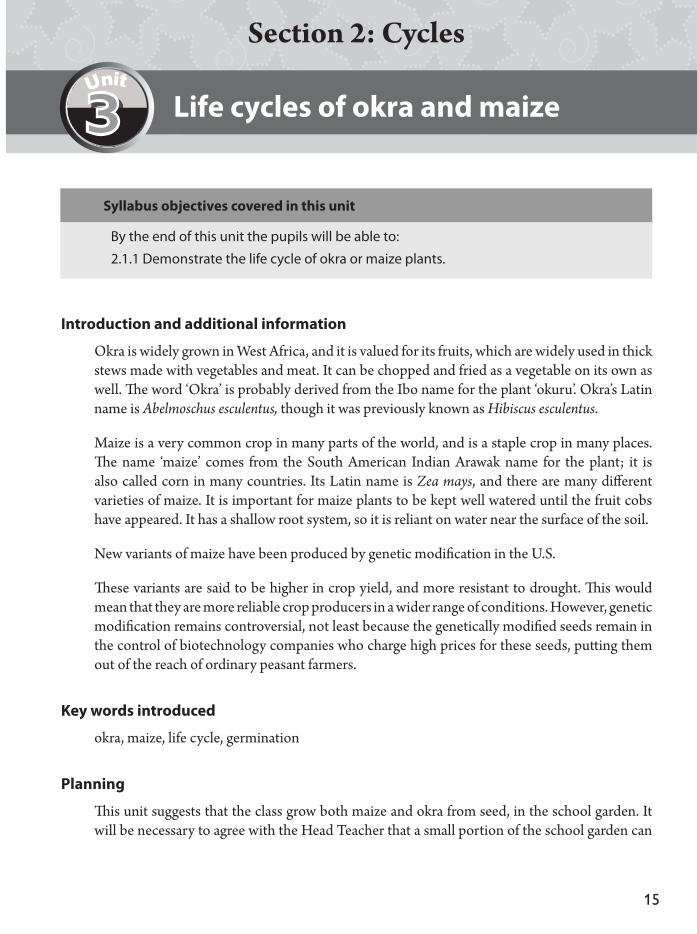
Section 2: Cycles
Life cycles of okra and maize
Syllabus objectives covered in this unit
By the end of this unit the pupils will be able to:
2.1.1 Demonstrate the life cycle of okra or maize plants.
Introduction and additional information
Okra is widely grown in West Africa, and it is valued for its fruits, which are widely used in thick stews made with vegetables and meat. It can be chopped and fried as a vegetable on its own as well. The word ‘Okra’ is probably derived from the Ibo name for the plant ‘okuru’. Okra’s Latin name is Abelmoschus esculentus, though it was previously known as Hibiscus esculentus.
Maize is a very common crop in many parts of the world, and is a staple crop in many places. The name ‘maize’ comes from the South American Indian Arawak name for the plant; it is also called corn in many countries. Its Latin name is Zea mays, and there are many different varieties of maize. It is important for maize plants to be kept well watered until the fruit cobs have appeared. It has a shallow root system, so it is reliant on water near the surface of the soil.
New variants of maize have been produced by genetic modification in the U.S.
These variants are said to be higher in crop yield, and more resistant to drought. This would mean that they are more reliable crop producers in a wider range of conditions. However, genetic modification remains controversial, not least because the genetically modified seeds remain in the control of biotechnology companies who charge high prices for these seeds, putting them out of the reach of ordinary peasant farmers.
Key words introduced
okra, maize, life cycle, germination
Planning
This unit suggests that the class grow both maize and okra from seed, in the school garden. It will be necessary to agree with the Head Teacher that a small portion of the school garden can
3
16
be allocated to your class. Check the area in advance, and work out how many groups of pupils will be able to plant their seeds, where they will grow, and how much space they will require.
Note that it is necessary to soak the okra seeds for two days before they are planted to assist with the germination of these seeds.
It will take at least three months for the plants to reach maturity from the time of planting, and pupils will need time during these coming three months to visit their plots in the school garden to watch the growth and development of their plants. Some pupils may be required to water and take care of the growing plants (a rota system could be organised). You could consider allocating the first period on each Monday (or every other Monday) for a short visit to the school garden, to monitor the growth of the plants.
Resources and low or no cost materials required
You will need to arrange access to part of the school garden for your class. Pupils will need normal gardening tools, such as hoes and spades, and they will need a supply of water and watering cans. Obtain some good quality seeds, to ensure that the maximum proportion will germinate.
Guidelines for the teaching and learning activities
1 Growing maize and okra from seeds Pupil’s Book pages 30-32
Look at the life cycle diagrams for maize and okra at the beginning of this section, and go through them with the pupils, Make sure that they understand why we refer to this process as a cycle. Explain to them why it goes round and round.
Show the pupils some maize and okra seeds. These can be the ones to be used for planting in the school garden. Also bring in some specimens of the fruits - the actual okra fruits and some maize cobs.
Plan the planting activities carefully with the class. Give as many pupils as possible access to their own plots of land in the school garden. It is good to have at least four different groups doing their own planting and cultivation. You can encourage the pupils to water and nurture their crops by starting a friendly competition to see which group will be able to produce the largest yields at the end.
Follow the guidelines for planning distance suggested in the Pupil’s Book, or use local knowledge about these plants.
Section 2: Cycles Life cycles of okra and maize
17
2 Life cycle of okra Pupil’s Book pages 32- 32
Go through the life cycle diagram on page 32 with the pupils. Return to these illustrations during the period that the plants are growing, and ask the pupils to say what stage the plants have reached, and what will be the next stage.
3 Life cycle of maize Pupil’s Book pages 33-34
As with the okra, go through the life cycle diagram on page 33 with the pupils. Return to these illustration while the maize is growing, and ask the pupils to say what stage the plants have reached, and what will be the next stage.
Discuss how maize is used in their localities with the pupils. What are the names of some of the foods that are produced from maize?
Multi-ability learning – activities for the more able and the less able
1 Growing maize and okra from seeds Pupil’s Book pages 30-32
This cultivation activity, which will continue for three months or more, is the type of activity where pupils who are less academically inclined can shine. Many such pupils are very good with their hands, and very good at growing things. Ensure that they have every opportunity to contribute to the cultivation of their groups’ crops.
More able pupils can be offered the opportunity to try growing different varieties of maize or okra. Ask them to see if they can find seeds for different varieties of these crops. They can plant them in their own plots, and note any difference from the crops of the rest of the class.
2 Life cycle of okra Pupil’s Book pages 32-33
Ask some less able pupils to take on an extra assignment, and to bring from home a recipe in which okra is used as a main ingredient. They should interview their families at home, and write down the okra recipes, and then bring them to school to share with the class. If you have the time and facilities, it would be useful for them to be able to demonstrate to the class the recipes that they have gathered.
3 Life cycle of maize Pupil’s Book pages 33-34
More able pupils can do some research into the different varieties of maize. There are special varieties of maize used for cattle food, popcorn and bio-fuels, for example, and the more able pupils can be asked to research these and to make a presentation to the class about their findings.
Unit 3: Life cycles of okra and maize
18
Answers to end-of-unit questions
Objective questions Pupil’s Book pages 35-36
1 C 2 D 3 B 4 C 5 B 6 C 7 A 8 B 9 D 10 A
Essay questions Pupil’s Book page 37
1 Two of: Dobidi, Aburotia, La Posta, Obatanpa.
2 The seeds must be viable, and they must have moisture, air and warmth.
3 8-10 weeks.
4 1-3 cms.
5 7.5 cms.
6 90-120 days.
7 The seeds are the small pieces of maize on the cob.
8 False. It should be 40-90 cms.
9 Weeding and mulching (also watering).
10 Akple and banku. Other answers are possible.
Review questions for the pupils
1 Which parts of the okra plant do we eat?
2 How is okra prepared for eating?
3 What do okra seeds look like?
4 Summarise the life cycle of the okra plant.
5 What conditions are necessary for healthy maize plants?
6 How long does it take maize plants to grow from seed to maturity?
7 Which parts of the maize plant can we eat?
8 Name three types of food made from maize.
9 What else is maize used for apart from food?
10 Summarise the life cycle of the maize plant.
Answers
1 We eat the fruits. We can also eat the leaves.
2 It can be chopped up and used in stews, or it can be fried. Other answers are possible.
Section 2: Cycles Life cycles of okra and maize
19
3 Okra seeds are small, round and white, and covered in mucus in the pod.
4 Okra seeds germinate in wet soil, then grow into young plants. The young plants become mature and produce flowers. The flowers produce okra fruits, which contain the seeds. These seeds can be planted, and so the cycle can be repeated.
5 Maize needs good soil and plenty of water during its growing stages.
6 90-120 days, or 3-4 months.
7 We can only eat the seeds from the cob.
8 Akpale, banku and kenkey. Other answers are possible.
9 Maize can be used for cattle food, for bio-fuels or for making popcorn.
10 Maize seeds germinate and grow into young plants. The young plants mature and produce cobs. These cobs carry seeds, which can be harvested again, and used to start a new life cycle.
Diagnostic assessment
These diagnostic assessment exercises will assist you as the teacher to evaluate the impact of the teaching and learning activities in this unit and to assess the extent to which the unit objectives have been achieved.
1 Look back at the time spent with the pupils working in the school garden to germinate and grow maize and okra seeds. Did the pupils enjoy these gardening activities? Do you think that they learned a lot in growing their own plants, or was this something they were already familiar with?
2 This work requires the pupils to have access to the school garden, and to keep returning to visit it every week to observe the growth of their plants. How did this work out? Were you able to get enough space within the school garden to complete this work? Was it very disruptive to have to give the pupils time to return to the garden each week to monitor the progress of their plants?
3 How successful were the pupils when they did the Review questions above? Was the class:
A All successful (all pupils scored 8 out of 10 or above)
B Mostly successful (most pupils scored 8 out of 10 or above)
C Some were successful (between 2 and the number in B of pupils scored 8 out of 10 or above/between quarter and half the class scored 8 out of 10 or above)
D Not really successful? (fewer than a quarter of the class scored 8 out of 10 or above)
4 Can the pupils carry out this objective? Again, rate your pupils as A (all), B (most), C (some) or D (few)
Unit 3: Life cycles of okra and maize
20
• Can pupils describe the life cycle of either maize or okra plants?
5 Identify two difficulties which you faced in doing this work on growing crops. Decide how you can deal with these problems for your future teaching.
Section 2: Cycles Life cycles of okra and maize
21
Water related diseases
Syllabus objectives covered in this unit
By the end of this unit the pupils will be able to:
1.4.1 state the symptoms of some water related diseases
1.4.2 describe how to prevent some water related diseases
Introduction and additional information
About 70 per cent of the whole surface of the Earth is covered with water. Most of this is sea water which, because it is so salty, does not harbour harmful bacteria and worms. Fresh water, on the other hand, obtained from rainfall, rivers, streams, lakes and wells, can easily become contaminated and can harbour bacteria, worms and other organisms which transmit diseases.
Pupils learnt about water-borne diseases including cholera, typhoid and polio in Primary 5. The term ‘water-borne diseases’ is reserved largely for infections that are predominantly transmitted through contact with infected water or through consumption of infected water. The disease-causing bacteria live directly in the water and it is the water that transmits the disease. With water related diseases, however, there is a further vector that spreads the disease apart from the water. These vectors include mosquitoes, worms, flies and water fleas. These diseases are transmitted by parasites that live in water within their life cycle.
Mosquitoes are both irritating and dangerous as they transmit a range of diseases. We now know that not all mosquitoes carry the malarial germs, only the Anopheles mosquito. The Aedes mosquito transmits yellow fever. Many species transmit elephantiasis, including the Culex mosquito. The Anopheles mosquito can be distinguished from the Culex mosquito by the appearance of its body when it is standing. Pupils will learn more about mosquitoes and their life cycle in the following unit. Note that malaria can also be transmitted when an infected person donates blood to a healthy person.
The symptoms of malaria are similar to those of typhoid. Typhoid symptoms include fever, diarrhoea and abdominal pains.
Guinea worm disease is very common in Ghana and it is spread by the water flea. Human beings are the main host (primary host) of the Guinea worm. Lakes, ponds and rivers become
4
22
contaminated with Guinea worm larvae. A person drinking the water may also drink the water flea without noticing it. The embryos make holes in the walls of the stomach, small and large intestines to reach the skin. Just below the skin, the embryos grow into adult Guinea worms. The Guinea worms make sores or blisters on the skin of the leg and arm. The sores release another dose of embryos when the affected person makes contact with lakes, ponds and rivers. The embryos are eaten by water fleas and when they are drunk in the contaminated water, they again infect another person. This happens in a cycle.
Bilharzia is often described as a ‘man made’ disease, because it is spread by the activities of people in or near lakes, ponds and rivers that create a good environment for the worms. Poor personal hygiene deposits the worms into the water, and then swimming, bathing, washing and drinking allow the worms to be picked up again.
Key words introduced
contamination, germ, malaria, mosquito, cholera, bacteria, Guinea worm, worm, water flea, bilharzia, river blindness
Planning
It is a good idea to invite a health worker to come into the class to talk about water related diseases. This could either be a nurse from the community health centre or a doctor from a local hospital. Setting this up will take some planning and advance work, and you will have to agree a suitable date for the health worker to come into the class. Ensure that the pupils are properly prepared for this visit, and that you have done some preliminary work with them on water related diseases, so that they can ask useful questions of the health worker and get the most value out of the visit.
Try to collect some photographs of the disease-causing agents discussed in this unit and of some patients suffering from these diseases, and let the pupils take a closer look at them.
Resources and low or no cost materials required
Posters, pictures of disease-causing agents, health education posters and any other visual aid material which is useful. Glass jars and nets for trapping mosquito eggs, mosquito larvae and adult mosquitoes if possible.
Section 2: Cycles Water related diseases
23
Guidelines for the teaching and learning activities
1 Water related diseases Pupil’s Book pages 39–40
Take the pupils out of the classroom to visit some ponds or areas where mosquitoes breed. Most schools will have some of these areas unless the compound is kept very clean indeed. Catching mosquito larvae requires care and speed: they rest just under the surface of the water, but as soon as the water is disturbed they sink to the bottom by a series of quick jerky movements – this is why they are often called ‘wrigglers’ – making them much harder to find.
Sections 2 to 6 Pupil’s Book pages 40–45
These sections provide a lot of information for the pupils on the five major water related diseases, malaria, cholera, Guinea worm, bilharzia and river blindness. Discuss each disease in turn and invite the pupils to contribute from their own experiences. Almost all pupils will have had friends or relatives who have experienced one or more of these diseases. Hold a classroom discussion on each of the diseases so that pupils can tell the class what they know.
The tables of information summarise what the pupils should know. Although some prescription drugs are listed in the Pupil’s Book, pupils should not take any of these without consultation with a doctor or health worker.
Bring in the health worker when going through this section of the Pupil’s Book. It is useful if the health worker can focus particularly on methods of preventing the spread of these diseases.
There are useful activities at the end of these sections which give pupils the opportunity to think carefully about what they have learned about the diseases and to suggest what can be done to prevent the spread of diseases within the school and within their communities.
Multi-ability learning: activities for the more able and the less able
1 Water related diseases Pupil’s Book pages 39-40
If the class is successful in collecting some mosquito eggs and some larvae, some pupils may be keen to keep these specimens in the classroom and to watch them hatch into adult mosquitoes. It is acceptable to do this provided that it is done in a closed container, so that none of the adults are allowed to escape. Once the larvae have hatched into adults, they should be destroyed. Ask the pupils to keep a record to show how long the eggs remain, and how long the larvae stay before hatching.
Sections 2 to 6 Pupil’s Book pages 40-45
More able pupils should be asked to pick one of the five diseases discussed, and to research it more thoroughly. They can look in newspapers and magazines for reports.
Unit 4: Water related diseases
24
Answers to end-of-unit questions
Objective questions Pupil’s Book pages 46-48
1 C 2 D 3 C 4 C 5 B 6 C 7 A 8 C 9 C 10 D
Essay questions Pupil’s Book page 48
1 In fresh stagnant water.
2 If the Anopheles mosquito bites and sucks the blood of a person with malaria, some of the malaria parasites are sucked up in the blood. These then multiply in the mosquito, and are injected into the next person that the mosquito bites after a few days.
3 Three things we can do to prevent malaria include sleeping under treated mosquito nets, using mosquito repellents and removing any water standing around which could be a place where the mosquito could breed. (Other answers are possible.)
4 Two symptoms of Guinea worm disease are blisters and sores on the skin of the leg and arm and the patient suffers pain and general weakness.
5 Bilharzia can be prevented by avoiding bathing or standing in water with snails, avoiding urinating in or near water sources, boiling drinking water, killing water snails, controlling weeds by manual clearing, provision of good sources of water and sanitary facilities and health education. (Accept any two of these.)
6 Bilharzia is caused by a small worm which develops in fresh water snails, which then passes into a human body in infected water.
7 Painless lumps on the skin, itching of the skin and eye trouble.
Review questions for the pupils
1 What are the symptoms of malaria?
2 Why does sleeping under a net help to prevent malaria?
3 How can malaria be treated?
4 Malaria can be prevented by breaking the life cycle of the mosquito. What does this mean?
5 Name two ways of preventing the spread of Guinea worm.
6 How is bilharzia spread from one person to another?
7 What causes river blindness?
8 How can river blindness be prevented?
9 Name two things which your school can do to help reduce water related diseases.
Section 2: Cycles Water related diseases
25
10 Name two things which could be done in the community to reduce water related diseases.
Answers
1 Sweating and fever, headaches, vomiting and general weakness.
2 Because it prevents you from being bitten by the mosquitoes which spread malaria.
3 There are prescription drugs which can help to ease malaria. These must only be taken on the advice of a doctor.
4 Breaking the life cycle of the mosquito means preventing any one part of its life cycle from occurring, e.g. clearing stagnant water so it cannot breed, killing adult mosquitoes with insecticides, introducing fish such as tilapia to eat the larvae.
5 Drinking only clean or bottled water and not bathing or swimming in water which may be contaminated.
6 By bathing or swimming in contaminated water.
7 Onchocera worms which live in black flies.
8 Avoiding the bites of black flies and using insecticides to remove black flies from the areas where we live.
9 Answers here will vary. Check what the pupils have written. Suggestions are: ensuring that there is not stagnant water lying around the school compound, ensuring that the school toilets remain clean and hygienic and spraying classrooms with insecticides to reduce mosquitoes and black flies.
10 Answers here will vary. Check what the pupils have written. Suggestions are: ensuring that all stagnant water is removed from community areas, ensuring rubbish and litter is removed to avoid the presence of flies and mosquitoes, and providing a health education programme to improve the personal hygiene of people in the community.
Diagnostic assessment
These diagnostic assessment exercises will assist you as the teacher to evaluate the impact of the teaching and learning activities in this unit and to assess the extent to which the unit objectives have been achieved.
1 Review the learning for this unit. Were there any lessons which the pupils particularly enjoyed? Can you say why? Was the visit of the health worker to the class a success? Did the pupils take full advantage of this visit?
2 This unit has fewer practical activities than previous units and more time spent on classroom discussions. Did the pupils enjoy this methodology or did they miss doing practical activities?
Unit 4: Water related diseases
26
3 How successful were the pupils when they did the Review questions above? Was the class:
A All successful (all pupils scored 8 out of 10 or above)
B Mostly successful (most pupils scored 7 out of 10 or above)
C Some were successful (between 2 and the number in B of pupils scored 8 out of 10 or above/between quarter and half the class scored 8 out of 10 or above)
D Not really successful? (fewer than a quarter of the class scored 8 out of 10 or above)
4 Can the pupils carry out these objectives:
• Name some water related diseases?
• Describe how to control the spread of malaria in their community?
Rate your results as A (all pupils), B (most pupils), C (some pupils) or D (only a few pupils).
5 Teaching about health requires different methodologies from investigating other aspects of science. What methodologies do you think it will be useful to develop for future teaching?
Section 2: Cycles Water related diseases
27
Life cycle of the mosquito
Syllabus objectives covered in this unit
By the end of this unit the pupils will be able to:
1.5.1 Demonstrate the life cycle of a mosquito.
Introduction and additional information
Mosquitoes are extremely dangerous insects because of the diseases that they carry. Although their bites are itchy and irritating, that is insignificant when compared with their ability to pass malaria and other diseases from one person to another. The Anopheles mosquito transmits malaria, while the Aedes mosquito transmits yellow fever and dengue. Most types of mosquito can transmit the filarial worm which leads to elephantiasis. Other diseases such as encephalitis and West Nile fever are also transmitted by mosquitoes. Malaria alone causes more than 5 million deaths around the world every year. The mosquito life cycle is a good example of complete metamorphosis.
Most larvae use siphon tubes going through the water surface for breathing, and hang on or near the water surface. Anopheles larvae do not have a siphon and typically lie parallel to the water surface through the larval feeding stage, followed by a resting transformation stage, before emerging as the adult (imago) stage (which is the reproductive stage). Many other insects such as butterflies show this separation of the larval feeding stages from the adult reproductive stage.
Anopheles and Aedes mosquitoes lay their eggs singly on stagnant water, but Culex and other mosquitoes tend to lay their eggs in rafts. Only female mosquitoes bite animals to get the blood needed to produce eggs. Male mosquitoes do not bite; both the male and female feed on the nectar of flowers for food. In most female mosquitoes, the mouth parts form a long proboscis for piercing the skin of mammals to suck their blood.
Key words introduced
eggs, larva, pupa, adult, insect, thorax, abdomen, jointed legs, antenna, compound eyes, metamorphosis
5

28
Planning
Make arrangements to leave open jars or tins of water at various suitable points around the school compound. It may be necessary to alert other staff that you do not wish these tins of water to be removed, otherwise they may get tidied away! Reassure staff that you will not be allowing adult mosquitoes to emerge.
This unit also requires that pupils set up their mosquito hatcheries during one lesson, and then leave them for daily observation. You will need to incorporate the need for daily observations in to your other teaching during this unit, in order to give the pupils time to observe their jars and to make their notes.
Resources and low or no cost materials required
Tins, jars or dishes for leaving water in, hand lenses, mosquito netting or glass covers.
Guidelines for the teaching and learning activities
1 Mosquitoes Pupil’s Book pages 49-50
Hold a class discussion about mosquitoes, and ask the pupils what they know about them already. Have the pupils study the illustration of the adult Anopheles mosquito in order for them to learn the main parts of the insect’s body.
2 The life cycle of the mosquito Pupil’s Book pages 50-52
Discuss the concept of a life cycle, explaining the concept of metamorphosis to the pupils. They may already know the individual stages of the life cycle, but may not have realised that these are all stages in the life of the same insect. Just as maggots are the larvae of flies, and caterpillars are the larvae of butterflies, so wrigglers are the larvae of mosquitoes.
Help the pupils to collect mosquito eggs in their jars of water, and to set up their hatcheries at the back of the classroom. The pupils may well need to use the hand lenses in order to see the tiny mosquito eggs on the surface of the water. Once they have got some eggs on the water, the jar should be brought into the classroom, and covered, to prevent adult mosquitoes from escaping. Help the pupils to identify the wrigglers, which should hatch out after a couple of days. After the pupal stage, get them to watch for adults emerging from the pupal skin, and resting on the water to allow their wings to dry and harden. Ensure that you destroy the adults at the end of the observations. Have the pupils read and study the text about each of the four stages of the mosquito life cycle.
Section 2: Cycles Life cycle of the mosquito

29
3 Controlling mosquitoes Pupil’s Book pages 52-53
Get pupils to brainstorm ways of controlling mosquitoes. They should know most of the ways, either from their own knowledge or experience, or from what they learnt in the previous unit. Make sure pupils know why it is better to control mosquitoes early in their life cycle.
Multi-ability learning: activities for the more able and the less able
2 The life cycle of the mosquito Pupil’s Book pages 50-52
More able pupils should be asked to see if they can identify the types of mosquito that they have in their hatcheries. Anopheles larvae usually lie parallel to the surface of the water, while the larvae of other mosquitoes hang down, with just one end attached to the surface of the water. More able pupils can use additional references to try to identify the larvae in their hatcheries.
Answers to end-of-unit questions
Objective questions Pupil’s Book pages 54-56
1 D 2 D 3 B 4 A 5 B 6 A 7 C 8 D 9 B 10 D
Essay questions Pupil’s Book page 56
1 Insects.
2 Metamorphosis is the type of life cycle where the animal changes from one form to another as it develops to adulthood.
3 Egg, Larva, Pupa, Adult (or imago).
4 Anopheles, Culex and Aedes mosquitoes.
5 10-14 days.
6 False. They lay eggs in still water.
7 The Anopheles mosquito lays approximately 300 eggs at one time.
8 The pupa is the resting stage.
9 Mosquitoes can be controlled by using insecticides to spray adults, by using netting, and by removing stagnant water. Other answers are possible.
10 Knowledge of the mosquito life cycle tells us that stagnant water is necessary for the egg, larva and pupa stages. Removing all stagnant water will therefore reduce mosquito populations.
Unit 5: Life cycle of the mosquito
30
Review questions for the pupils
1 What are the three main parts of a mosquito’s body?
2 What is the life cycle of the mosquito?
3 At which stage of the mosquito’s life cycle is the mosquito likely to bite animals?
4 Which type of mosquito transmits malaria?
5 How long does it take for the eggs of a mosquito to hatch out after they have been laid in water?
6 What do the eggs of the mosquito hatch into in the life cycle of a mosquito?
7 Where is the most common place you can look for mosquito eggs?
8 How can you prevent mosquitoes from breeding in your area?
Answers
1 The head, the thorax and the abdomen.
2 Egg to larva to pupa to adult, which then lays more eggs.
3 The female adult is the one which bites humans and animals.
4 Anopheles.
5 About two days.
6 The eggs hatch into larvae, or wrigglers.
7 On any still or stagnant water that is exposed to the air.
8 By removing all still and stagnant water lying around your area. Accept answers you think are best in the situation or locality.
Diagnostic assessment
These diagnostic assessment exercises will assist you as the teacher to evaluate the impact of the teaching and learning activities in this unit and to assess the extent to which the unit objectives have been achieved.
1 Review the work done on the life cycle of the mosquito. Were there any lessons where the pupils seemed particularly interested and keen? Were there any lessons where the pupils became bored and uninterested?
2 This unit involves collecting mosquito eggs and breeding the adult mosquitoes in the classroom. Did you manage to collect some suitable mosquito eggs without too much difficulty? Were the pupils able to see them with the aid of a hand lens? Did the pupils manage to follow the stages of the mosquito life cycle through to the adult stage?
Section 2: Cycles Life cycle of the mosquito
31
3 How successful were the pupils when they did the Review questions above? Was the class:
A All successful (all pupils scored 5 out of 8 or above)
B Mostly successful (2/3 of the pupils scored 5 out of 8 or above)
C Some were successful (between 1/3 and 2/3 of the pupils scored 5 out of 8 or above)
D Not really successful
4 Can the pupils carry out the following objective? Again, rate your pupils as A (all), B (most), C (some) or D (few).
• Can the pupils draw a flow chart to show the life cycle of a mosquito?
5 List two aspects of the teaching and learning activities that went well for this unit. Decide how you can build on this success for future teaching.
Unit 5: Life cycle of the mosquito
32
Section 3: Systems
The human digestive system
Syllabus objectives covered in this unit
By the end of this unit the pupils will be able to:
3.1.1 Identify the main organs that form the digestive system.
3.1.2 Describe the functions of the organs of the digestive system.
Introduction and additional information
The human digestive system is really just a long tube, running from the mouth to the anus. The small intestine, which is actually much longer than the large intestine, is all coiled up inside the gut, but if laid out it would be about 6m long. The whole digestive system is about 7m long. The small intestine is called small because the width of the tubes in this portion of the digestive system is smaller than those in the large intestine, which has a greater lumen. During digestion, food is physically broken down by chewing, and by the churning action of the stomach, and chemically broken down by the acids (largely hydrochloric acid) and the enzymes released into the stomach and the small intestine.
A lot of water is added to food during the process of digestion: either we drink water at the same time as food, or water is added with the saliva and the enzymes. It is sensible for the body to re-absorb this water, and this is done in the large intestine. So the function of the small intestine is to absorb nutrients, while the function of the large intestine is to re-absorb the water.
The products of digestion - the sugar molecules, amino acids and fatty acids - are all relatively small organic molecules, and they are able to diffuse through the lining of the small intestine into the blood capillaries which make up much of the walls of the small intestine. Complex carbohydrates such as starch are broken down into glucose, eventually, and other carbohydrates, such as sucrose and other fruit sugars are either digested as glucose, or they are absorbed unchanged, and transported to the liver for processing.
Fats are a good source of energy - they contain much more energy per gram than carbohydrates do. They are therefore useful as energy storage molecules, which is one of their principal uses within the human body. If we eat too much food, it is laid down as fat in various parts of the body,
6

33
as a store against future shortages. In many parts of the West, where food is readily available, excess fat storage - obesity - has become a major health issue.
Key words introduced
oesophagus, stomach, small intestine, large intestine, rectum, anus, starch, carbohydrates, proteins, amino acids, enzymes, digestion, absorption, fats, oils, fatty acids, faeces
Planning
Pupils can have great fun with the activity of building a model of the human digestive system, but you need to ensure that there are plenty of waste materials for them to make use of. Try to collect some used plastic bags, old bicycle inner tubes, rubber tubing from the laboratory, or other plastic piping, and any other items which you feel might be useful.
If possible, try to borrow wall charts of the human digestive system, or better still, a human anatomy model.
Resources and low or no cost materials required
No-cost waste items such as used plastic bags, old bicycle inner tubes, rubber tubing, plastic piping, and wall charts of the human digestive system, a human anatomy model.
Guidelines for the teaching and learning activities
1 Parts of the digestive system Pupil’s Book pages 57-59
Go through the diagram on page 58 with the pupils, and ensure that they are familiar with all the parts of the human digestive system. Ensure that pupils pick up the concept that the digestive system is just a tube running from the mouth to the anus.
Divide the class into groups and ask them to model the structure of the human digestive system. This can either be done using Plasticine® or modelling clay, or it can be done using no-cost waste products. Rubber tubing is good for the oesophagus, a plastic bag can represent the stomach, and the small intestine can be made from old bicycle tyre inner tubes. Using these resources also helps to reinforce the fact that the digestive system is just one long tube.
2 Functions of the organs of the digestive system Pupil’s Book pages 59-61
Go through the text and the illustrations with the pupils to make sure that they understand what is happening at each part of the digestive system. Discuss the functions, and make clear the difference in function between the small intestine and the large intestine. The class notebook
Unit 6: The human digestive system
34
activity means that the pupils will have a useful summary of the functions of the parts of the human digestive system in their notebooks.
3 The products of digestion Pupil’s Book pages 61-62
The chemical processes involved in digestion are a topic the pupils will return to at secondary level. However, it is useful to introduce the names of the end products of digestion here. Hold a class discussion on what different types of food are made up of. Almost all foods are, in fact, a combination of carbohydrates, proteins and fats, but most of them have a preponderance of one form or the other. Rice, for example, is often thought of as a pure starchy food, but in fact has at least 7% protein content, which is why it is such a successful staple food in many countries.
Multi-ability learning: activities for the more able and the less able
1 Parts of the digestive system Pupil’s Book pages 57-59
The model building activity is one which less able pupils can enjoy as much as the more able. Ensure that they contribute well to the group activities. Different groups can be encouraged to make their models more complex, for example they could use a funnel to represent the mouth, with teeth drawn on with marker pens. Where possible, guide pupils to model the digestive system using clay and paint the various parts (mouth, stomach, small and large intestines).
2 Functions of the organs of the digestive system Pupil’s Book pages 59-61
Ask some of the more able pupils to suggest a list of functions of the tongue. This is not discussed in the Pupil’s Book, but it is an organ in the mouth, and it is therefore part of the digestive system. They may suggest either of its two principal functions, which are to move the food around the mouth to ensure that it is properly chewed and broken up into small chunks for swallowing, and also to taste the food, to ensure that it is not rotten or poisonous.
3 The products of digestion Pupil’s Book pages 61-62
More able pupils should be encouraged to extend the list of foods in the table to include foods taken at breakfast time and as snacks. Many packaged snacks such as crisps and biscuits give their food composition in the labels on the packaging. They can add these to their table.
Answers to end-of-unit questions
Objective questions Pupil’s Book pages 63-65
1 C 2 C 3 A 4 A 5 B 6 C 7 A 8 C 9 B 10 D
Section 3: Systems The human digestive system
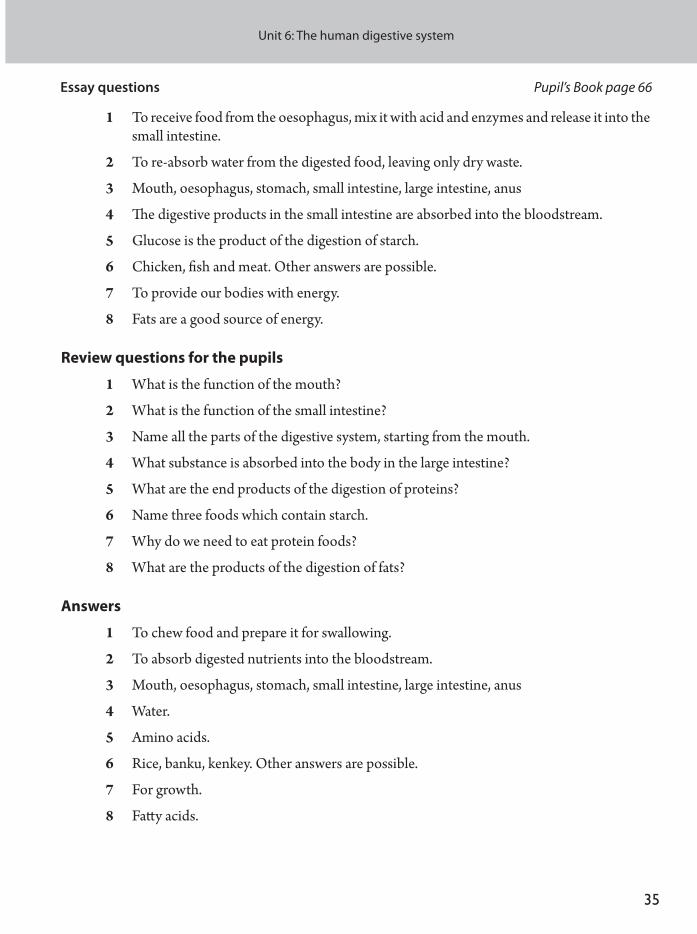
35
Essay questions Pupil’s Book page 66
1 To receive food from the oesophagus, mix it with acid and enzymes and release it into the small intestine.
2 To re-absorb water from the digested food, leaving only dry waste.
3 Mouth, oesophagus, stomach, small intestine, large intestine, anus
4 The digestive products in the small intestine are absorbed into the bloodstream.
5 Glucose is the product of the digestion of starch.
6 Chicken, fish and meat. Other answers are possible.
7 To provide our bodies with energy.
8 Fats are a good source of energy.
Review questions for the pupils
1 What is the function of the mouth?
2 What is the function of the small intestine?
3 Name all the parts of the digestive system, starting from the mouth.
4 What substance is absorbed into the body in the large intestine?
5 What are the end products of the digestion of proteins?
6 Name three foods which contain starch.
7 Why do we need to eat protein foods?
8 What are the products of the digestion of fats?
Answers
1 To chew food and prepare it for swallowing.
2 To absorb digested nutrients into the bloodstream.
3 Mouth, oesophagus, stomach, small intestine, large intestine, anus
4 Water.
5 Amino acids.
6 Rice, banku, kenkey. Other answers are possible.
7 For growth.
8 Fatty acids.
Unit 6: The human digestive system
36
Diagnostic assessment
These diagnostic assessment exercises will assist you as the teacher to evaluate the impact of the teaching and learning activities in this unit and to assess the extent to which the unit objectives have been achieved.
1 Review the lessons spent on the Human digestive system. Were there any lessons where the pupils seemed particularly interested and keen? Can you say why this was?
2 Did the pupils enjoy the model-building activity? Were you able to supply them with enough raw materials for them to make some good, interesting models? Did they manage to get some good models made in the time allowed? It is not always easy to predict how long model-building will take. Was this a problem?
3 How successful were the pupils when they did the Review questions above? Was the class:
A All successful (all pupils scored 5 out of 8 or above)
B Mostly successful (2/3 of the pupils scored 5 out of 8 or above)
C Some were successful (between 1/3 and 2/3 of the pupils scored 5 out of 8 or above)
D Not really successful
4 Can the pupils carry out this objective? Again, rate your pupils as A (all), B (most), C (some) or D (few).
• Can the pupils draw or model and label the main organs of the digestive system?
5 List two aspects of the teaching and learning activities that went well for this unit. Can these features of the teaching be applied in other areas of your science teaching?
Section 3: Systems The human digestive system
37
Section 4: Energy
Feeding in plants
Syllabus objectives covered in this unit
By the end of the unit the pupils will be able to:
4.1.1 List the materials plants need to make their food.
4.1.2 State the sources of the materials needed by plants to make their food.
4.1.3 Demonstrate that sunlight is needed in the preparation of a plant’s food.
Introduction and additional information
This unit introduces pupils to the processes through which plants prepare their food. All food that people eat comes directly or indirectly from plants. Plants prepare their food through a process known as photosynthesis. The green matter (chlorophyll) in leaves and stems traps the Sun’s energy and uses it to turn carbon dioxide, taken from the air through the leaves, and water, taken from the soil through the roots, into glucose and oxygen. The glucose is used by the plant for respiration or converted into starch and stored. The oxygen is released into the air.
Note that there are some plants without green matter (chlorophyll). These plants cannot make their own food. They are usually parasites on other plants. Examples are mushroom, Orobanche uniflora (Cancer Root), Indian Pipe (Monotropa uniflora), Beechdrops.
Key words introduced
chlorophyll, photosynthesis, carbon dioxide, minerals, glucose
Planning
Ensure that you have gathered together all the things for the practical activity in the Pupil’s Book, page 68.
Resource and low or no cost materials required
Empty tins, maize and bean seeds, loamy soil
7
38
Guidelines for teaching and learning activities
1 Materials for making plant food Pupil’s Book pages 67-68
Guide pupils to find out the things plants require in order to prepare their food. It may be convenient to use a chart to aid the exercise.
Provide pupils with the equipment for planting the seeds in Activity 1 and ask them to follow the instructions given in the activity. They need to check the plants every day and report their findings in a project book.
Discuss with pupils why plants need the following materials: chlorophyll, sunlight, air (carbon dioxide), water and nutrients and minerals.
2 Sources of the materials needed by plants to make their food Pupil’s Books page 68-69
Guide pupils to understand that plants make food in the leaves. The chlorophyll in the leaves traps the Sun’s energy and uses it to combine water from the soil with carbon dioxide from the air. Minerals from the water collected by the plants through their roots is also used in the making of plant food.
3 Sunlight and preparation of plant food Pupil’s Book page 69
This section introduces pupils to the reasons why green plants are special. Guide them to understand that the plants need chlorophyll to absorb sunlight to help them prepare their food. Let pupils also understand that the process by which plants make their food is known as photosynthesis. After the process, oxygen is released into the air. Both plants and animals need oxygen in the air to breathe.
Pupils should write the equation for photosynthesis into their notebooks.
Multi-ability learning: activities for the more able and the less able
1 Materials for making plant food Pupil’s Book pages 67-68
Less able pupils may struggle with the idea that plants need to feed. Stress that all living things have to have food to provide energy for growing and all the processes of living. It is easier to show this with water. Pupils will know that if plants do not have water they will die.
Section 4: Energy Feeding in plants
39
2 Sources of the materials needed by plants to make their food Pupil’s Books pages 68-69
3 Sunlight and preparation of plant food Pupil’s Book page 69
More able pupils could do further research on the importance of plants in taking in carbon dioxide and giving out oxygen.
Answers to end-of-unit questions
Objective questions Pupil’s Book pages 70-72
1 A 2 C 3 B 4 C 5 B 6 D 7 A 8 B 9 D 10 B
Essay questions Pupil’s Book page 72
1 Air, water, sunlight.
2 The most important minerals are those containing nitrogen, phosphorus, potassium.
3 The process by which plants prepare their food using chlorophyll, sunlight, carbon dioxide and water. Other answers are possible.
4 Because there is no sunlight to make food and get energy.
5 Some plants do not have green matter (chlorophyll).
6 Producers.
7 Oxygen, which is used for respiration by living things.
Review questions for the pupils
1 Write out the photosynthesis equation.
2 What is the role of chlorophyll in photosynthesis?
3 Why do plants need food?
4 Do all plants contain chlorophyll?
5 From where do plants get the minerals they need to stay healthy?
6 Which part of the plant contains the chlorophyll?
Answers chlorophyll
1 carbon dioxide + water --------------- > glucose + oxygen sunlight
2 Chlorophyll traps the Sun’s energy and uses it in photosynthesis.
Unit 7: Feeding in plants
40
3 Plants need food to give them the energy to grow and remain healthy.
4 No. Plants without chlorophyll are parasites.
5 Plants get minerals from the soil through their roots.
6 The leaves contain the chlorophyll.
Diagnostic assessment
These diagnostic assessment exercises will assist you as the teacher to evaluate the impact of the teaching and learning activities in this unit and to assess the extent to which the unit objectives have been achieved.
1 Review the lessons spent on the Feeding in plants. Were there any lessons where the pupils seemed particularly interested and keen? Can you say why this was?
2 Did the pupils enjoy growing the seeds? Did both plants look as they were supposed to? Did pupils understand what the activity was showing? Was a week long enough for the plants to grow or do you need to take longer for this activity?
3 How successful were the pupils when they did the Review questions above? Was the class:
A All successful (all pupils scored 4 out of 6 or above)
B Mostly successful (2/3 of the pupils scored 4 out of 6 or above)
C Some were successful (between 1/3 and 2/3 of the pupils scored 4 out of 6 or above)
D Not really successful
4 Can the pupils carry out this objective? Again, rate your pupils as A (all), B (most), C (some) or D (few).
• Can the pupils list the materials that plants need to make their food and give the sources for these materials?
5 List two aspects of the teaching and learning activities that went well for this unit. Can these features of the teaching be applied in other areas of your science teaching?
1
41
Feeding in animals
Syllabus objectives covered in this unit
By the end of this unit the pupils will be able to:
4.2.1 List the names of animals found in the community.
4.2.2 Match animals in the community with the food they eat.
4.2.3 Describe the mode of feeding in animals.
Introduction and additional information
Feeding is one of the life processes of all living things including animals. Animals must feed in order to get energy and also to grow strong and healthy. Children, by nature, love to learn more about animals. In this unit, they can explore feeding habits in different animals. Do make sure that the pupils understand that the term ‘animals’ includes birds, fish, insects, snails and humans. It is a common error for children to think that ‘animal’ refers just to mammals - large warm–blooded furry animals - whereas in fact the term covers all organisms in the Animal Kingdom, such as worms, mosquitoes, beetles, and microscopic creatures as well. Having established this fact about what animals are, ensure the pupils understand that all animals must feed, but they do not all feed on the same diet.
Observations of animals should always be made on living specimens, but animals are not as easy to manage as plants. They do not usually stay where they are put and are more difficult to observe in their natural habitats. For this reason, it is good to ensure that some animals have been collected in advance, so that the pupils can observe them making their investigations. Insects such as grasshoppers or snails can be useful to observe. However, any captured animal should be looked after carefully, kept in healthy suitable conditions and released as soon as possible. There is a good opportunity here to work with the pupils to develop respect for the natural environment – an important scientific attitude.
Key words introduced
energy, healthy, consumers, herbivorous, carnivorous, omnivorous, domestic
8
42
Planning
Try to have some live animals available for observation. Some science teachers are able to keep small animals such as lizards or grasshoppers in a suitable glass box in the classroom or laboratory. These provide a very good resource for teaching about animals and how they feed but they need to be kept in appropriate conditions and given the right type of food where they will be seen live feeding on their food. If it is not possible to keep animals in the classroom or laboratory, try to investigate areas in your local environment where you know that animals such as lizards, grasshoppers, termites, fowls and so on can be found. Cows, goats, dogs and cats are easier to find but again, it is a good idea to plan where you will take the pupils to observe them. In some cases there is the need to rent VCDs and DVDs which are videos of animals living and feeding in the wild. Pupils could watch documentaries from TV stations all on the same subject.
Resources and low cost or no cost materials required
• Access to animals, either in the classroom or in the local environment
• Magazines, newspapers or photographs of animals of all kinds feeding on their type of diet
• Documentaries on animals feeding
Guidelines for the teaching and learning activities
1 Animals found in the community Pupil’s Book pages 73-74
This opening section is based on classroom discussion after the pupils have made an earlier observation of animals in their community. The main objective is to afford the pupils the opportunity to begin to develop a sense of critical thinking which is crucial in report writing. Ask what they think animals are, and then to name those found in their community.
The activity is structured to develop observation skills. It may be difficult to find many animals in the school compound. If you have any opportunity to take the pupils to somewhere in the community where they will observe more animals, it would be very useful. If not, concentrate on the discussion that should follow the activity, asking pupils for their own experiences of animals they may have at home or have seen in the community.
2 Animals and what they feed on Pupil’s Book page 74
Pupils will know that animals must feed in order to obtain energy. However, it is one thing knowing the animals must feed and another showing exactly what they feed on. Activity 2 therefore seeks to test the pupils’ familiarity with animals and what they feed on. The pupils have made a list of animals in their community in Activity 1. With the list of different kinds of food items, the pupils need to match the animals they have listed with the food they feed on. It
Section 4: Energy Feeding in animals
43
is important to note that some of the animals may feed on more than one kind of food and this should show in pupils’ answers. Pupils should add the food each animal feeds on to their table.
3 Mode of feeding Pupil’s Book page 75
Lead pupils to realise that animals are not self-feeders because they do not produce their own food, like plants do. They rely on ready–made food in the form of plants or other animals. Depending on what type of food an animal feeds on, the animal can be a herbivore or a carnivore or an omnivore (‘omnivore’ means eats everything).
Widen the discussion to include wild animals. All pupils will have heard of many wild animals and will know what several of them eat. Some pupils may have seen animals in the wild feeding. Ask pupils for their own experiences. Again, make sure the discussion does not just include mammals. Reptiles, fish, bird and insects should also be included. All pupils will have seen some birds feeding. Which birds are meat-eaters? Pupils may not realise that birds that eat insects are classified as meat eaters.
Multi-ability learning: activities for the more able and the less able
1 Animals found in the community Pupil’s Book pages 73-74
All pupils usually enjoy learning about animals and less able pupils should not be at a disadvantage. Some may have more experience to draw on with animals. Make sure you give them the opportunity to contribute and talk about any personal experience they have.
2 Animals and what they feed on Pupil’s Book page 74
Again, less able pupils should not be at a disadvantage with this topic.
3 Mode of feeding Pupil’s Book page 75
All pupils can be asked to expand the list of animals and match it with what they feed on. The list can be broad - pupils should not limit it to mammals. For more able pupils, you could talk about other categories that you can put animals into according to their feeding habits, for example scavengers or predators. What does this tell you about their feeding habits? More able pupils could consider why some animals are omnivores and what this means. (They can live in different kinds of habitats and are more adaptable than carnivores or herbivores. If one food source becomes scarce, they can find others. Rats are an excellent example of omnivores, as are humans.)
Unit 8: Feeding in animals
44
Answers to end-of-unit questions
Objective questions Pupil’s Book pages 76-78
1 A 2 B 3 D 4 C 5 B 6 B 7 D 8 C 9 A 10 C
Essay questions Pupil’s Book page 78
1 Animals must feed in order to get energy and also to grow strong and healthy.
2 herbivore, carnivore, omnivore
3 Carnivorous animals (a carnivore)
4 i. sheep found in pastures
ii grasshopper found in the field or on farmlands
Other answers are possible. Accept any that are correct.
5 False
6 Producers
7 False
8 Omnivore
Review questions for the pupils
1 What are animals?
2 Why do animals not produce their own food?
3 Animals are called consumers. Explain why they are called this.
4 Feeding is a requirement for animals in order to obtain energy. Nevertheless, animals do not feed on the same diet. Explain.
5 Give a brief explanation of a carnivore and give one example.
Answers
1 Animals are organisms in the Animal Kingdom
2 Animals lack chlorophyll for photosynthesis, as plants have. They therefore cannot produce their own food, but feed by eating plants or other animals. All animals ultimately gain their energy from plants; some directly, as herbivores, other indirectly, as carnivores or omnivores.
3 Animals are not self-feeders. They get their food by feeding on plants or other animals - they consume these.
Section 4: Energy Feeding in animals

45
4 Although all animals belong to the animal kingdom, they are different in terms of size, shape and nutritional requirements. They have adapted to eat different things, according to their environment and way of life.
5 A carnivore is an animal that eats animal flesh only. An example is the tiger.
Diagnostic assessment
These diagnostic assessment exercises will assist you as the teacher to evaluate the impact of the teaching and learning activities in this unit and to assess the extent to which the unit objectives have been achieved.
1 Review the work done on teaching about Feeding in animals. Did the pupils enjoy the practical activities to demonstrate the modes of feeding in animals? Did they understand the lesson in general? Were there any lessons where the pupils became bored and uninterested?
2 This unit involves a visit by the class to a nearby community to observe animals in relation to their feeding habits. Were there any difficulties with this visit? Did the pupils enjoy it? What was the general feeling of the pupils? Were they curious and if so was their curiosity satisfied? Would you plan this visit differently in the future? Additionally, pupils are supposed to watch videos of animals and their mode of feeding from VCDs and DVDs. Was it possible to organise this? Was it successful?
3 How successful were the pupils when they did the Review questions above? Was the class:
A All successful (all pupils scored 3 out of 5 or above)
B Mostly successful (2/3 of the pupils scored 3 out of 5 or above)
C Some were successful (between 1/3 and 2/3 of the pupils scored 3 out of 5 or above)
D Not really successful
4 Can the pupils carry out the following objectives:
Can the pupils match animals such as cats, goats, rabbits, chickens, horses, sheep and dogs with the food they feed on?
Do the pupils know the three modes of feeding in animals?
Can the pupils list the three types of animals based on their feeding habit?
Can the pupils define herbivore and carnivore?
Rate your results as A (all pupils), B (most pupils), C (some pupils) or D (only a few pupils).
5 Think about what went well in the teaching of this unit. What can you learn from this unit so that you can build on it and improve your teaching in the future?
Unit 8: Feeding in animals

46
Respiration
Syllabus objectives covered in this unit
By the end of this unit the pupils will be able to:
4.1.1 Explain the term ‘respiration’.
4.1.2 State the importance of respiration.
Introduction and additional information
Respiration has two different, but related meanings in physiology. The first meaning relates to the process of breathing in air to deliver oxygen to the lungs, and breathing out carbon dioxide. The respiratory system is the system which carries out this process for the body, and it is this system which we are exploring in this unit.
The second meaning refers to the biochemical process by which oxygen reacts through a complex series of stages with the food products of digestion to release energy, which is used by the body for all functions, including growth, brain activity and keeping all the other body systems going, as well as providing extra energy to the muscular system for more active pursuits such as running and dancing. Even when we are sleeping, our cellular metabolism continues, and cellular respiration is required to fuel this. Our bodies have a basal metabolic rate of respiration, which can be increased very quickly when we are more active.
The breathing rate, or respiration rate, is a rough measure of energy consumption, but it is not very accurate. Someone who doubles their breathing rate would often more than double their consumption of oxygen, because as well as breathing faster, their breathing also becomes deeper, so that more oxygen is taken in with each breath. Nevertheless, as a starting point, the breathing rate does provide a very rough guide to the rate of oxygen consumption.
Respiration in its second meaning above does not only apply to humans, or even to animals. Plants respire, taking in oxygen, which is used to release energy from glucose, leaving carbon dioxide and water as the waste products.
Key words introduced
windpipe or trachea, bronchus, lung, alveolus, diaphragm, blood, respiration
9
47
Planning
Gather together the low-cost resources which are required for the breathing model demonstration. Empty plastic water bottles are very useful in the science classroom, and you can keep a supply of these available for different uses. Also try to get hold of a good wall chart of the human respiratory system for the pupils to look at.
Resources and low or no cost materials required
Balloons, clean plastic water bottles, rubber bands, a sheet of rubber or plastic/polythene, scissors and a sharp knife.
A stop clock for measuring time is useful, although a wristwatch with a second hand can also be used.
Guidelines for the teaching and learning activities
1 Respiration provides energy Pupil’s Book pages 79-80
Look at the photographs with the pupils. Air, or the oxygen contained in it, is needed for charcoal to release heat energy. Similarly air, with oxygen in it, is required by humans to react with their food to release energy. There are major differences, of course - the main one being that because the energy released in the body is not principally heat energy, the oxidation of food can go on at body temperature, and we do not become as hot as a pot of charcoal. Some of the energy is released as heat, however, and this heat energy is useful to mammals and birds as it helps to keep their bodies at the optimum temperature for the enzymes to work - in humans, about 37°C - no matter what the surrounding temperature is.
Go through the diagram of the respiratory system with the pupils, and make sure that they are familiar with all of the organs of the system. Explain that the two main bronchi divide into progressively smaller bronchioles. There are millions of alveoli in the lungs. These are the tiny air sacs where the gaseous exchange takes place.
2 Breathing Pupil’s Book pages 81-83
These two activities on breathing give pupils an excellent feel for the way breathing is managed by the body. In the breathing model, the rubber or plastic sheet across the base of the bottle actually represents the diaphragm which is at the base of the human chest. This is a curved sheet of muscle which flattens and descends during breathing in (inspiration) and contracts and rises into a bell shape during breathing out (expiration).
Unit 9: Respiration
48
3 Rates of respiration Pupil’s Book pages 83-84
Encourage the pupils to undertake these investigations into breathing rates, but make sure that they do not become over-stressed trying to make themselves breathe too fast. Pupils who are fitter will be able to run and dance with a smaller change to their breathing rates than pupils who are less fit, so the investigation could be extended into a test of fitness.
Multi-ability learning: activities for the more able and the less able
1 Respiration provides energy Pupil’s Book pages 79-80
More able pupils can be asked to consider the differences between burning and cellular respiration, although they both involve oxygen use. They should research the subject and write notes on all the differences that they can think of in their notebooks.
2 Rate of respiration Pupil’s Book pages 83-84
More able pupils can be asked to consider the fact that when we breathe faster, we also breathe deeper. This means that doubling your breathing rate means more than doubling the rate of oxygen consumption. Ask the more able pupils to refine their investigation of breathing rates to take this into account, and to develop a system which measures more accurately the volumes of air breathed in and out in a 30-second period. This could be done by measuring the volume of air taken in during shallow breathing, and the volume of air taken in during heavy breathing, using an air-filled plastic bag.
Answers to end-of-unit questions
Objective questions Pupil’s Book pages 85-87
1 D 2 B 3 A 4 C 5 C 6 B 7 C 8 B 9 B 10 A
Essay questions Pupil’s Book page 87
1 Respiration is the process of breathing air in and out of the body.
2 Air is drawn into the lungs through the mouth and the nose, by the chest expanding to draw in the air through the action of the diaphragm.
3 The nose is meant to provide access for the air to the respiratory system and to clean and filter the air as it passes through.
4 In the alveoli of the lungs.
5 Oxygen is needed to produce energy for the body from food.
Section 4: Energy Respiration

49
6 Measure their breathing rate at rest. Then measure their breathing rate while sprinting, and see if they are breathing three times as fast as when they are at rest.
Review questions for the pupils
1 Name four organs of the respiratory system.
2 What is the purpose of respiration?
3 What is the function of the lungs?
4 If a person who has been at rest starts to run, what will happen to his breathing rate?
5 Which part of the air is important for respiration?
6 How could you show which activity requires more energy, sprinting or dancing?
7 Through what organs does oxygen from the air pass in order to become oxygen in the blood?
Answers
1 Nose, windpipe (or trachea), lungs, bronchi. Other possible answers include mouth, diaphragm, alveoli.
2 The purpose of respiration is to provide the body with oxygen to enable it to release energy.
3 The lungs permit the oxygen from the air to be dissolved into oxygen in the blood and the carbon dioxide to be expelled.
4 Their breathing rate will increase.
5 Oxygen.
6 Ask a person to sprint for 30s and measure their breathing rate.
Compare it with their breathing rate at rest. Then ask them to dance for 30s, and measure their breathing rate again. Compare it with their rest breathing rate.
7 The nose (or mouth), the windpipe, the bronchi, the lungs and the alveoli.
Diagnostic assessment
These diagnostic assessment exercises will assist you as the teacher to evaluate the impact of the teaching and learning activities in this unit and to assess the extent to which the unit objectives have been achieved.
1 Review the lessons on Respiration. Were there any lessons where the pupils seemed particularly interested and keen? Can you say why this was? Did the pupils enjoy the activities to measure breathing rates?
Unit 9: Respiration
50
2 How successful were you and the class in building a working model of the respiratory system, using a water bottle, plastic bag and a balloon? It is not always easy to get this model to work convincingly unless the air seals are very tight. Were you able to borrow a human torso model or wallcharts to show the parts of the respiratory system?
3 How successful were the pupils when they did the Review questions above? Was the class:
A All successful (all pupils scored 5 out of 7 or above)
B Mostly successful (1/3 of the pupils scored 5 out of 7 or above)
C Some were successful (between 1/3 and 2/3 of the pupils scored 5 out of 7 or above)
D Not really successful
4 Can the pupils carry out this objective? Again, rate your pupils as A (all), B (most), C (some) or D (few).
Explain how energy is obtained from the food that we eat?
5 List two aspects of the teaching and learning activities that went well for this unit. Decide how you can build on this success for future teaching.
Section 4: Energy Respiration

51
Simple electrical circuits
Syllabus objectives covered in this unit
By the end of this unit the pupils will be able to:
4.4.1 List the components and functions of a simple electrical circuit.
4.4.2 Construct simple circuits from circuit diagrams.
4.4.3 Identify electrical conductors and insulators.
4.4.4 Construct simple electric circuits to produce light, heat and sound.
4.4.5 Construct a simple electric circuit to produce a magnet.
Introduction and additional information
Pupils have worked with simple electrical circuits before in Primary 4 and 5, for example to show energy transformations. This unit offers them an opportunity to study more carefully how electrical circuits work, and to get used to the symbols used in circuit diagrams.
At this stage, pupils need to be familiar with the symbols for a dry cell, connecting wires, a switch, a lamp, a resistor, a capacitor, a diode and an LED. For your information, the symbols are listed here.
open switch
closed switch cell
batterry
ammeter buzzer
A
voltmeter
V
lamp/bulb lamp/bulb
fuse resistor
variable LED
motor
diode capacitor
resistor
M
inductor
10
52
The correct term for a single ‘battery’ such as those used in flashlights is a dry cell, or cell for short. It consists of one anode, one cathode and a dry chemical gel connecting these. The term ‘battery’ is correct when a series of these cells is connected to form a set or battery of cells. This is also shown in the symbols above.
There are two ways of showing resistors in circuit diagrams: the European standard is the rectangular box shown above, while the US standard is the zigzag line, also shown above. Either is correct.
Key words introduced
cell, conductor, insulator, switch
Planning
Small electrical circuits are easy for pupils to set up, so this is an opportunity to have as many pupils as possible handling the equipment. Make sure that all the cells to be used are in good condition, and check that the bulbs have not blown. Keep them carefully after each lesson in a small box, where they will not become damaged.
There is an interesting project suggested in this unit which gives pupils the chance to make a small electric motor actually drive another mechanical device, such as a small model fan. Clearly, suitable motors are needed for this project, and it will be worthwhile contacting the nearest secondary school or the nearest science resource centre to see if you can borrow some small motors. Ensure that they will operate successfully with the dry cells that you have available.
Resources and low or no cost materials required
Connecting wire cut into suitable lengths, dry cells, dry cell holders (if dry cell holders are not available, you can use crocodile clips to connect the wires to the cells; rubber bands or sticky tape are also good low-cost alternatives), torchlight bulbs in the range 1.5v to 4.5v, light bulb holders, switches (these can be made from small pieces of wood, with two drawing pins separated, and a paper clip attached to one pin).
Guidelines for the teaching and learning activities
1 Components of an electrical circuit Pupil’s Book pages 88-92
Take the pupils through the text and illustrations, and ensure that they understand the functions of each of the components in the simple light bulb circuit illustrated. Draw a large diagram of the light bulbs they are using on the chalkboard, so that the pupils understand how they are
Section 4: Energy Simple electrical circuits
53
made, and that the two terminals of the bulb are (a) the central pin, and (b) the screw casing surrounding the pin.
Simple circuit diagrams
Pupils need to become fully conversant with circuit diagrams, and they should be able to draw them freely and easily. Show them the symbols that they will need to use, and in particular point out that the cell symbol has polarity indicators: the long side is the positive side, and the short side is the negative side.
Ask the pupils to carry out the activities of building circuits with real components from the circuit diagrams given in the book. They should keep a record of the circuits they have constructed, and note down what happened for each of the circuits in their notebooks.
These activities provide a good opportunity for pupils to practise their skills of prediction and experimentation. Pupils should be asked to predict what will happen in each of the circuits which they have designed, and then to test their predictions by experiment. Try to ensure that cells are not short-circuited at any time, as this can cause wires to overheat and the cells to be destroyed.
2 Electrical conductors and insulators Pupil’s Book pages 92-93
Hold a classroom discussion to go through as many examples as the pupils can think of of both conducting and non-conducting materials. Pupils should be familiar with the fact that most metals are good conductors of electricity, and that most non-metals are not. There is a small group of materials such as silicon which are termed semi-conductors, and they have special conduction properties which have made them crucial to electronic components. Unless they come up in the classroom discussion, you should leave these to one side for now, as they are taken up again in the next unit.
3 Production of light, heat and sound Pupil’s Book pages 94-96
Students may ask what the resistor is for in Activity 2. Resistors restrict the flow of current in order to protect other components in the circuit. The resistor is protecting the LED from too much current flowing through it. The switch is needed to turn the flow of electricity on and off. Students may predict that adding more LEDs and fewer cells will make the light dimmer.
In Activity 3, resistance wire is designed to restrict the current going through it. As the current passes through the wire, some of the energy is lost as heat energy, so the wire heats up. The thinner or longer the wire, the more it heats up. Winding it around a piece of wood (an insulator) is an easy method of using a long piece of wire and concentrating the heating effect.
Unit 10: Simple electrical circuits
54
In Activity 4, the variable resistor controls the amount of current that flows in the circuit. The higher the resistance, the lower the circuit that is flowing, so the quieter the bell. (Variable resistors are using for controlling volume in many electric products.)
If you can get hold of some electric motors for pupils to use, challenge groups of pupils to build a circuit with an electric motor in it and to find things the electric motor could power, such as a fan. Pupils could experiment with different designs of fan blades, made out of stiff card, to see which works best.
4 Making magnets Pupil’s Book pages 97-98
Explain to pupils that a solenoid is a coil of wire used to create a magnetic field when a current is passed through it. When a current flows through any piece of wire, it creates a magnetic field around the wire. We can make this much stronger by winding the wire into a coil (a solenoid) and by inserting an iron bar into the coil (i.e. wrapping the wire around the iron bar). The more coils there are, the stronger the magnetic field. The greater the current passing through the wire, the greater the magnetic field. The iron bar works as a magnet once the circuit is switched on. When the current is switched off, the iron bar no longer works as a magnet. i.e. it is only a temporary magnet. The direction of the magnetic field - i.e. which end of the magnet is the north pole - can be reversed by turning the battery round.
Multi-ability learning: activities for the more able and the less able
1 Components of an electrical circuit Pupil’s Book pages 88-92
Ask a group of more able pupils to investigate the structure of other types of light bulbs, such as domestic incandescent bulbs and low energy bulbs. They should try to identify the electrical terminals of the bulbs. They should present their findings to the class as a whole.
More able pupils can be asked to investigate whether the switch can be fitted anywhere in the circuit. Ask them to predict what will happen if the switch is moved to different points in the circuit, and then to test their predictions.
2 Electrical conductors and insulators Pupil’s Book pages 92-93
More able pupils can do further investigation into industrial insulators. Power cables carrying electricity from the dam at Akosombo have large long ceramic insulators to insulate the current carrying cables from the pylons, which are also metal and which would discharge all the power to the earth if they were not insulated from the cables. The characteristic shape of these insulators is adopted in order to permit rain water to run off them in separate drips rather than a continuous stream, as a continuous stream of water would also permit the conduction of the electricity into the earth.
Section 4: Energy Simple electrical circuits

55
3 Production of light, heat and sound Pupil’s Book pages 94-96
Pupils have made electric circuits similar to these before. Put less able pupils in groups with more able pupils to make the circuits.
4 Making magnets Pupil’s Book pages 97-98
More able pupils can research some of the uses of electromagnets in industry.
Answers to end-of-unit questions
Objective questions Pupil’s Book pages 99-101
1 C 2 A 3 D 4 C 5 A 6 D 7 C 8 C 9 C 10 A
Essay questions Pupil’s Book page 101
1 An electric circuit consists of components joined together by wire around which an electric current flows, powered by a battery.
2 Any three of: a lamp, bell, motor, LED, resistor, solenoid. Other answers are possible.
3 The circuit must be complete; the switch must be closed; the cells must be working; the components must be working and connected the right way round. Other answers are possible.
4 No current will flow.
5 A coil of wire which forms an electric field when a current is put through it.
6 Put it in a solenoid.
7 Use more coils of wire or increase the current.
Review questions for the pupils
1 What is the function of the connecting wires in an electrical circuit?
2 What is the function of the switch in an electrical circuit?
3 How is it that the electrical energy remains in a cell which is not connected in a circuit?
4 Give two requirements for a light bulb in a simple circuit to light up.
5 Predict whether the light will light up when the switch is closed in this circuit.
Unit 10: Simple electrical circuits
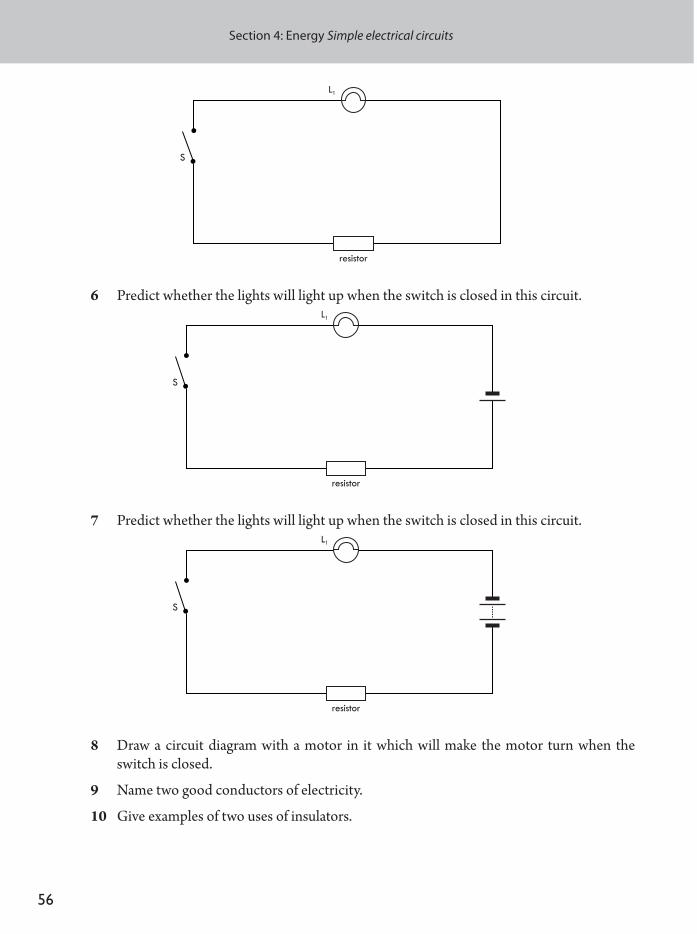
56
resistor
S
L1
6 Predict whether the lights will light up when the switch is closed in this circuit.
resistor
S
L1
7 Predict whether the lights will light up when the switch is closed in this circuit.
resistor
S
L1
8 Draw a circuit diagram with a motor in it which will make the motor turn when the switch is closed.
9 Name two good conductors of electricity.
10 Give examples of two uses of insulators.
Section 4: Energy Simple electrical circuits
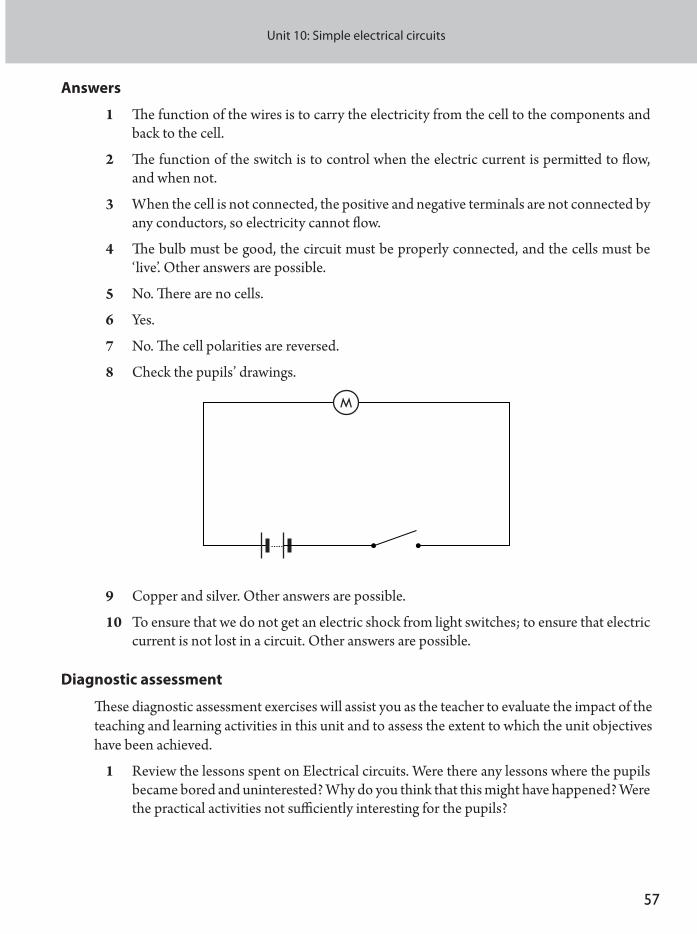
57
Answers
1 The function of the wires is to carry the electricity from the cell to the components and back to the cell.
2 The function of the switch is to control when the electric current is permitted to flow, and when not.
3 When the cell is not connected, the positive and negative terminals are not connected by any conductors, so electricity cannot flow.
4 The bulb must be good, the circuit must be properly connected, and the cells must be ‘live’. Other answers are possible.
5 No. There are no cells.
6 Yes.
7 No. The cell polarities are reversed.
8 Check the pupils’ drawings.
M
9 Copper and silver. Other answers are possible.
10 To ensure that we do not get an electric shock from light switches; to ensure that electric current is not lost in a circuit. Other answers are possible.
Diagnostic assessment
These diagnostic assessment exercises will assist you as the teacher to evaluate the impact of the teaching and learning activities in this unit and to assess the extent to which the unit objectives have been achieved.
1 Review the lessons spent on Electrical circuits. Were there any lessons where the pupils became bored and uninterested? Why do you think that this might have happened? Were the practical activities not sufficiently interesting for the pupils?
Unit 10: Simple electrical circuits
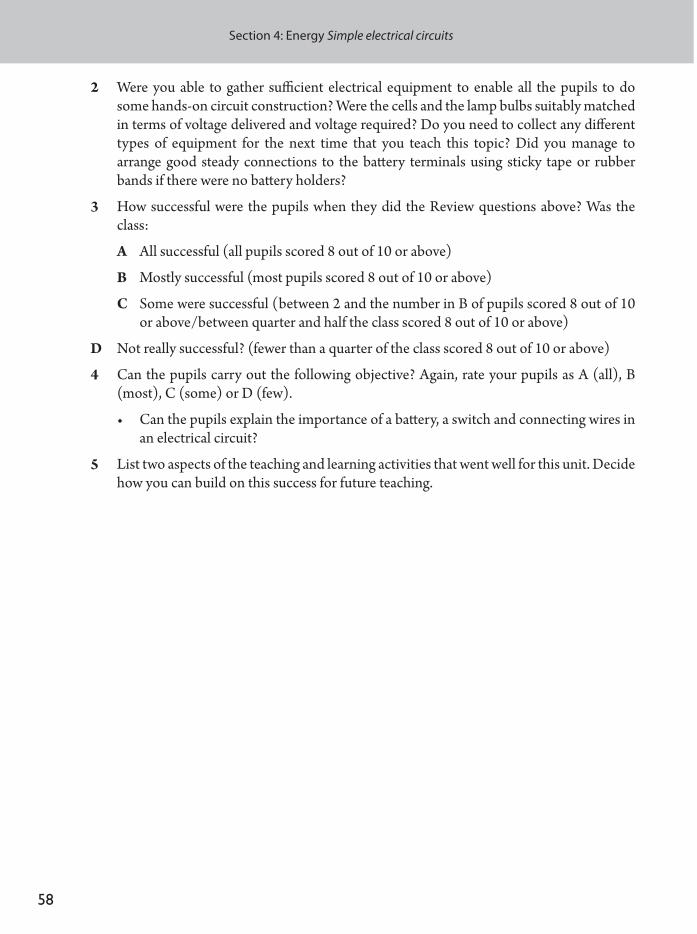
58
2 Were you able to gather sufficient electrical equipment to enable all the pupils to do some hands-on circuit construction? Were the cells and the lamp bulbs suitably matched in terms of voltage delivered and voltage required? Do you need to collect any different types of equipment for the next time that you teach this topic? Did you manage to arrange good steady connections to the battery terminals using sticky tape or rubber bands if there were no battery holders?
3 How successful were the pupils when they did the Review questions above? Was the class:
A All successful (all pupils scored 8 out of 10 or above)
B Mostly successful (most pupils scored 8 out of 10 or above)
C Some were successful (between 2 and the number in B of pupils scored 8 out of 10 or above/between quarter and half the class scored 8 out of 10 or above)
D Not really successful? (fewer than a quarter of the class scored 8 out of 10 or above)
4 Can the pupils carry out the following objective? Again, rate your pupils as A (all), B (most), C (some) or D (few).
• Can the pupils explain the importance of a battery, a switch and connecting wires in an electrical circuit?
5 List two aspects of the teaching and learning activities that went well for this unit. Decide how you can build on this success for future teaching.
Section 4: Energy Simple electrical circuits
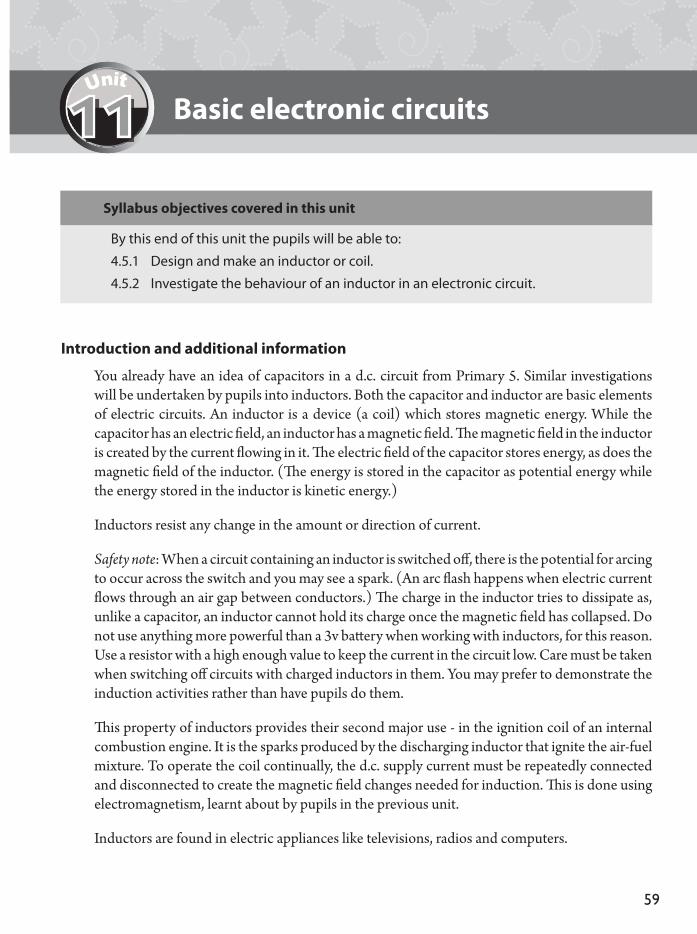
59
Basic electronic circuits
Syllabus objectives covered in this unit
By this end of this unit the pupils will be able to:
4.5.1 Design and make an inductor or coil.
4.5.2 Investigate the behaviour of an inductor in an electronic circuit.
Introduction and additional information
You already have an idea of capacitors in a d.c. circuit from Primary 5. Similar investigations will be undertaken by pupils into inductors. Both the capacitor and inductor are basic elements of electric circuits. An inductor is a device (a coil) which stores magnetic energy. While the capacitor has an electric field, an inductor has a magnetic field. The magnetic field in the inductor is created by the current flowing in it. The electric field of the capacitor stores energy, as does the magnetic field of the inductor. (The energy is stored in the capacitor as potential energy while the energy stored in the inductor is kinetic energy.)
Inductors resist any change in the amount or direction of current.
Safety note: When a circuit containing an inductor is switched off, there is the potential for arcing to occur across the switch and you may see a spark. (An arc flash happens when electric current flows through an air gap between conductors.) The charge in the inductor tries to dissipate as, unlike a capacitor, an inductor cannot hold its charge once the magnetic field has collapsed. Do not use anything more powerful than a 3v battery when working with inductors, for this reason. Use a resistor with a high enough value to keep the current in the circuit low. Care must be taken when switching off circuits with charged inductors in them. You may prefer to demonstrate the induction activities rather than have pupils do them.
This property of inductors provides their second major use - in the ignition coil of an internal combustion engine. It is the sparks produced by the discharging inductor that ignite the air-fuel mixture. To operate the coil continually, the d.c. supply current must be repeatedly connected and disconnected to create the magnetic field changes needed for induction. This is done using electromagnetism, learnt about by pupils in the previous unit.
Inductors are found in electric appliances like televisions, radios and computers.
111
60
Key words introduced
inductor, series, circuits, direct current (d.c.), power source (dry cells connected in series)
Planning
Ensure that you have gathered together all the equipment that is required for the practical activities.
Resources and low or no cost materials required
Inductor (coil), series, circuit, direct current (d.c.), power source (dry cells connected in series)
Guidelines for the teaching and learning activities
1 Making an inductor Pupil’s Book pages 102-104
For Activity 1, provide the pupils with the elements for making their inductor and ask them to follow the instructions given in the activity. It may be more convenient to get the pupils into groups to work in small numbers.
The activity here is to guide the pupils to build an inductor using coils of length 100cm wound on finger-like paper or plastic rods, about 4cm long.
Ensure that all pupils record what they do in their respective investigations clearly in their notebooks. In addition to this, show them manufactured inductors of various sizes.
When it comes to Activity 2, looking at the behaviour of an inductor in a circuit, you may wish to carry out the investigation yourself, with pupils watching. If pupils are doing the activity themselves, warn them to be careful as electricity can always be dangerous.
You may need to repeat the opening and closing of the switch several times to allow all pupils to see the behaviour of the LED. When the switch is closed in diagram (a), you should see the LED come on dimly, then rapidly get brighter. This is because when the current starts to flow, the inductor needs to build up a magnetic field. While it does this, the inductor acts as a resistor and restricts the flow of current, so the LED comes on dimly. Once the field is built, the current flows normally and the LED gets brighter. When the switch is opened, the circuit is broken and the LED goes out.
The point of circuit (b) is as a control for circuit (c). It shows what happens to two LEDs when the inductor is connected in series. The same will happen as in circuit (a), but with both LEDs.
Section 4: Energy Basic electronic circuits

61
In diagram (c), when the switch is closed, LED 1 comes on dimly at first while the inductor builds its magnetic field, then it gets brighter once the field is built. LED 2 does not light up because it is connected the wrong way round for the direction in which the current is flowing. (So the current is flowing from the battery through LED 1, through the inductor and resistor and back to the battery.)
When the switch is opened, LED 1 goes out because its circuit is broken. LED 2 comes on brightly, however, as its circuit is still closed and the inductor has stored energy in its magnetic field. The current therefore flows round the circuit from the inductor and through the resistor to LED 2, then back to the inductor, for as long as its stored energy lasts. LED 2 goes out when the inductor’s stored energy runs out.
Multi-ability learning: activities for the more able and the less able
1 Making an inductor Pupil’s Book pages 102-104
When doing Activity 2, for less able pupils, explain the features of the circuit and ensure that they understand what they are supposed to be doing. Use mixed-ability groups to carry out the activities and ask more able pupils to help the less able ones, explaining what they are doing, if necessary. This will also benefit more able pupils by ensuring that they can explain the concepts involved.
Set more able pupils to research the use of inductors in industry, including in the internal combustion engine. Can they provide a simplified explanation of how this works?
Answers to end-of-unit questions
Objective questions Pupil’s Book pages 105-107
1 B 2 C 3 D 4 C 5 C 6 B 7 A 8 C 9 D 10 B
Essay questions Pupil’s Book page 107
1 The function of the inductor is to store energy in its magnetic field.
2 The LED brightens slowly when the switch is closed because the inductor starts to build its magnetic field as soon as the switch is closed. This causes more resistence, so the current is lower while the field is building, so the LED is dimmer. Once the magnetic field is built, the current flows at its maximum and the LED gets brighter.
3 If there is no inductor in the circuit, the LED comes on brightly and stays at the same level of brightness. The flow of the current comes on at the maximum and stays there.
Unit 11: Basic electronic circuits
62
Review questions for the pupils
1 When two components in an electric circuit are connected together in line, they are said to be ‘in ___________’.
2 When two components in an electric circuit are connected side by side, they are said to be ‘in _____________’.
3 Explain what happens inside the coil of the inductor when the switch is closed.
Answers
1 series
2 parallel
3 When the switch is closed, a magnetic field is created inside the coil and magnetic energy is stored inside the coil.
Diagnostic assessment
These diagnostic assessment exercises will assist you as the teacher to evaluate the impact of the teaching and learning activities in this unit and to assess the extent to which the unit objectives have been achieved.
1 Did the pupils understand what they were trying to do in this unit? Were they able to relate this unit to activities on electrical circuits in other units?
2 Were you able to collect together all the equipment required for these activities? Did any of the equipment become damaged? Have you been able to replace it?
3 How successful were the pupils when they did the Review questions above? Was the class:
A All successful (all pupils scored 2 out of 3 or above)
B Mostly successful (2/3 of the pupils scored 2 out of 3 or above)
C Some were successful (between 1/3 and 2/3 of the pupils scored 2 out of 3 or above)
D Not really successful
4 Can the pupils carry out this objective:
Can the pupils describe what an inductor is?
Rate your results as A (all pupils), B (most pupils), C (some pupils) or D (only a few pupils).
5 If you had difficulties, how will you modify your methods in handling the same topic?
Section 4: Energy Basic electronic circuits
63
Section 5: Interaction of Matter
Food processing and preservation
Syllabus objectives covered in this unit
By the end of this unit the pupils will be able to:
5. 1. 1 Identify foods that are processed for preservation in their community.
5. 1. 2 Explain food preservation and give reasons for preserving it.
Introduction and additional information
The process of food preservation is an art which humans have been practising since the time when we were all hunter-gatherers. Our food supply does not naturally come to us in a steady stream throughout the year, so it is necessary to preserve crops when they are harvested, so that they can last through the year, and to preserve meat when animals are slaughtered, so that it does not need to be eaten all at once.
Some of the well-known traditional methods of preserving foods are discussed in the Pupil’s Book, and pupils should be encouraged to talk about the methods that they have seen being used in their homes and villages.
Key words introduced
preservation, microbes, bacteria, moulds, drying, salting, heating, frying, smoking, freezing, canning, pasteurisation, bottling, irradiation, vacuum packing
Planning
Try to have plenty of preserved and processed foods available in the classroom to demonstrate the different methods of preservation to the pupils.
The second activity in the unit suggests comparing how quickly fresh fish and chicken go off, compared with preserved fish and chicken. Bring in some suitable samples to carry out this investigation, but ensure that in leaving unprocessed foods exposed to the air and to the environment you are not causing a health hazard, or encouraging rats and cockroaches (use a mesh cover, for example). Dispose of the spoiled food quickly and safely after the demonstration.
12
64
Resources and low or no cost materials required
Samples of foods that have been preserved by drying, salting, heating, frying, smoking, freezing, canning, pasteurisation, bottling, irradiation, vacuum-packing.
Charcoal burner, grill and suitable container for smoking fish.
Samples of fresh fish and fresh chicken to compare with smoked fish and frozen chicken, access to a refrigerator and deep freezer.
Guidelines for the teaching and learning activities
1 Food preservation Pupil’s Book pages 108 –110
The pupils will probably already know a lot about food preservation from their home lives, so hold a class discussion to bring out as many ideas as possible about how food can be preserved. Use the illustration in the Pupil’s Book on page 109 to stimulate discussion. Make sure the pupils have a good list of preserved foods in the table in their notebooks.
For the second activity to compare fresh fish with smoked fish, and fresh chicken with frozen chicken, ensure that the plates of fresh meat which are to be left to go off do not cause a health hazard. Fresh food left to see how quickly it decays should be kept in a cupboard, or somewhere it cannot be taken by rats, and it should be inspected daily. Safety: Discard all rotting food as soon as it has started to rot.
2 Methods of food preservation Pupil’s Book pages 110-115
There are very many methods of food preservation, some traditional and some modern. Go through the text and illustrations with the pupils and illustrate each method of preservation with samples of preserved food brought into the classroom. Explain to the pupils that in every case, the method of preservation is designed to remove the microbes, and to prevent them from getting to the food and beginning to metabolise and decompose it. This can be done by dehydrating them (lack of water), by denying them air, or killing them by heating and then denying them access, as in canning.
There is an activity to smoke and dry fish using a charcoal burner, a suitable wood box and a grill for the fish. See what equipment can be brought in from the pupils’ homes, as they may have more suitable apparatus for drying and smoking fish.
Section 5: Interaction of Matter Food processing and preservation
65
Multi-ability learning: activities for the more able and the less able
1 Food preservation Pupil’s Book pages 108- 110
This is another topic where pupils will be able to contribute from their own home knowledge. Pupils who do not normally do well in the academic environment of school may well be able to make a bigger contribution to these discussions, based on their home knowledge. Ensure that the less able pupils contribute as fully as possible to the class discussions.
2 Methods of food preservation Pupil’s Book pages 110-115`
Ask all pupils to look at home and talk to their parents to see what other types of food preservation they can identify. Ask them to bring some samples into school. More able pupils can explain how the microbes are kept from attacking each of the foods.
It would also be possible to prevent microbes from rotting meat by putting anti-bacterial disinfectants on the meat. We know this works, because formalin is used to keep medical and zoological specimens for many years. Ask groups to explain why this is not a suitable method of food preservation.
Answers to end-of-unit questions
Objective questions Pupil’s Book pages 116-118
1 B 2 B 3 A 4 A 5 C 6 A 7 C 8 C 9 A 10 B
Essay questions Pupil’s Book page 118
1 Canning and vacuum packing.
2 It is the process of preventing microbes from spoiling foods.
3 False. Paracetamol is a medicine, which has no nutritional value.
4 Drying, smoking, salting, canning and pasteurisation. (Other answers are possible.) Pasteurisation is the best process for milk.
5 Drying corn and smoking and salting fish. (Other answers are possible.)
6 It should be kept in the freezer, at temperatures of between 0°C and -18°C.
7 A fridge cooler compartment has a temperature of between 0°C and 4°C. This is cold enough to slow down the rate of activity of the microbes, but not cold enough to stop it altogether.
8 Preservatives are chemicals which are added to food to prevent it from spoiling quickly.
9 To prevent the food from spoiling quickly.
Unit 12: Food processing and preservation
66
10 Artificial preservatives used in excess can cause harm to humans.
Review questions for the pupils
1 Explain why food needs to be preserved.
2 Explain why drying fish is an effective way of preserving the fish.
3 Name two methods of food preservation which work with meat.
4 What method of preservation can be used with maize?
5 Name two types of traditionally smoked fish.
6 Give examples of two methods of food preservation used in your village.
7 Give two methods of food preservation that you might see in a town supermarket.
8 How does canning preserve the foods inside?
9 What should be the temperature of the freezer compartment of a fridge?
10 What causes foods to rot?
Answers
1 Food harvested when there is plenty needs to be preserved for times when there is little food. If it is not properly preserved it will rot and spoil.
2 The dried fish contains no water, so the microbes are unable to be active, as they need water in order to be active.
3 Freezing and drying work well with meat.
4 Drying is a suitable way of preserving maize.
5 Momoni and koobi. Other answers are possible.
6 Pupils’ answers will vary. Check what they have written.
7 Canning and vacuum packing. Other answers are possible.
8 Food to be canned is first pasteurised to kill all the microbes present, and is then sealed in cans so that no microbes can access the food.
9 Between 0°C and -18°C.
10 Microbes digesting the food cause it to rot and spoil.
Diagnostic assessment
These diagnostic assessment exercises will assist you as the teacher to evaluate the impact of the teaching and learning activities in this unit and to assess the extent to which the unit objectives have been achieved.
Section 5: Interaction of Matter Food processing and preservation

67
1 Look back over the work on Food preservation. Were there any lessons where the pupils seemed particularly interested and keen? Did they contribute to the discussions on food preservation? Were they able to bring ideas from their own home backgrounds?
2 How did the activities to show that unpreserved fish and unpreserved chicken rot quickly proceed? Were there any difficulties with these activities?
Could you devise better ways of carrying out this investigation in the future?
Were you able to successfully smoke some pieces of fish in the classroom? Did the pupils help with the supply of equipment for this?
3 How successful were the pupils when they did the Review questions above? Was the class:
A All successful (all pupils scored 8 out of 10 or above)
B Mostly successful (most pupils scored 8 out of 10 or above)
C Some were successful (between 2 and the number in B of pupils scored 8 out of 10 or above)
D Not really successful
4 Can the pupils carry out this objective? Again, rate your pupils as A (all), B (most), C (some) or D (few).
• Describe how a named food substance is preserved in their community.
5 List two aspects of the teaching and learning activities that went well for this unit. Decide how you can build on this success for future teaching.
Unit 12: Food processing and preservation
68
Food poisoning
Syllabus objectives covered in this unit
By the end of this unit the pupils will be able to:
5.2.1 - Explain food poisoning.
5.2.2 - Describe signs of food poisoning.
Introduction and additional information
Food poisoning (foodborne disease) is a very common disease, but is entirely preventable. It is useful to distinguish between toxic food poisoning, where the bacteria living and feeding on the food have released toxins which stay in the food and give us diseases when we ingest them, and infectious food poisoning, where the bacteria living and feeding on the food are ingested with the food, and they then infect our bodies themselves. In toxic food poisoning there may not be fever present, because the body itself is not infected by the bacteria. However, toxic food poisoning can still be extremely dangerous. Botulin, the toxin secreted by Clostridium botulinum, is one of the most poisonous substances known. It is so potent that it takes only about 75 nanograms to kill a person, and 500 grams of it would be enough to kill the entire human population (6.6 billion persons). It is reported that it has been developed for use as a biological weapon by some countries.
Infectious food poisoning occurs when sanitation and hygiene conditions are not good. Typically, this occurs after flooding, when sanitation systems overflow, and human excrement may well come into contact with water used for drinking and with food. Acute infectious diarrhoea is a common cause of death in developing countries (particularly among infants), accounting for up to 8 million deaths annually.
In both types of food poisoning, the frequent vomiting and diarrhoea cause rapid dehydration of the body. A significant proportion of body fluids can be lost very quickly, and this can lead to general weakness and eventually to death. It is therefore very important to supply victims with plenty of fluids to replace those lost.
The fluids should consist of clean bottled water, to which has been added salt and sugar. One teaspoon of salt and 8 teaspoons of sugar should be added to each litre of water to make a suitable oral rehydration drink.
13
69
Key words introduced
microbe, Staphylococcus bacteria, Clostridium botulinum, botulism, toxic food poisoning, infectious food poisoning, typhoid, cholera, dysentery, contamination, fever, vomiting, nausea, diarrhoea, toxins
Planning
It is useful to have some input from health workers on this topic. Either try to arrange for the class to visit a local clinic to talk to patients and staff about the signs and symptoms and treatment of people with food poisoning, or invite a health worker to come to the class to talk about food poisoning. Make contact with the health workers well in advance, and discuss with them what would make the best learning experience for the pupils.
Collect together a few samples of badly preserved foods, such as tins of meat that have been cracked or damaged, and opened packs of meat. Safety: These items may well be poisonous, so treat them with care. Use plastic gloves when handling them, and quickly and safely dispose of them after showing them to the pupils. Also collect some products from supermarkets, to show the pupils their sell-by date labels.
Resources and low or no cost materials required
Examples of badly preserved foods, wall charts about food poisoning diseases such as typhoid, cholera and botulism.
Guidelines for the teaching and learning activities
1 The causes of food poisoning Pupil’s Book pages 119-123
Go through the text and illustrations with the pupils. Show them the examples of the badly preserved foods which you have been able to collect: damaged tins of meat are a common source of botulism, as the Clostridium botulinum bacteria thrive in low oxygen conditions. Also show the pupils the sell-by date labels on packaged foods, which they should learn to read and understand every time they purchase foods with this type of packaging and labelling. Draw an enlarged sell-by date label on the chalkboard, to help the pupils to identify the relevant information.
Have the pupils act out their role plays for the whole class. Make sure they focus on issues such as where the poisoned foods may have come from, why we might continue to eat the poisoned foods even though we may have doubts, and what might be the consequences.
Unit 13: Food poisoning
70
Examine the pupils’ posters on the prevention of infectious food poisoning, and arrange for the best posters to be displayed on the classroom walls during the teaching of this topic. Guide pupils to define food poisoning as illness caused by eating contaminated food.
2 Signs of food poisoning Pupil’s Book pages 123 -124
Try to arrange a class visit to the health clinic, or for the visit of the health worker to the class. Discuss the visit with the pupils in advance, and ensure that they know why they are going on the visit and what it is that they might want to ask.
Discuss with pupils the use of oral rehydration techniques for people with food poisoning to compensate for the loss of fluids due to vomiting and diarrhoea.
Multi-ability learning: activities for the more able and the less able
1 The causes of food poisoning Pupil’s Book pages 119-123
More able pupils could be asked to do some research to find out more about botulism and the botulin toxin, which is an extremely active nerve-paralysing toxin.
Ask less able pupils to do some research on sell-by dates and labels. They can look at different types of food in their kitchens at home. What types of food have long sell-by dates and what types have short sell-by dates?
2 Signs of food poisoning Pupil’s Book pages 123-124
There were several outbreaks of cholera in the Accra area in 2007 and 2014. Ask a group of more able pupils to research what was reported on these outbreaks, and to describe the stages of the outbreaks of the disease, and the signs and symptoms of those who suffered.
Answers to end-of-unit questions
Objective questions Pupil’s Book pages 125-127
1 A 2 D 3 C 4 C 5 B 6 B 7 D 8 B 9 C 10 D
Essay questions Pupil’s Book page 128
1 Toxic food poisoning and infectious food poisoning.
2 Toxic food poisoning is caused by poorly preserved foods which have become infected with bacteria such as Staphylococcus and Clostridium.
3 For example, damaged tins of meat, badly frozen meat, badly preserved bakery products and salads, food past its sell-by date. Accept any reasonable answers.
Section 5: Interaction of Matter Food poisoning
71
4 In toxic poisoning, we take in toxins which cause disease. In infectious food poisoning, we take in microbes, which infect us and cause disease.
5 By good personal hygiene, and by clean hygienic preservation and preparation of food.
6 Vomiting, diarrhoea, abdominal pain, fever, general weakness.
7 Anyone suffering should be taken to a health centre as quickly as possible. They should also be given oral rehydration fluids.
8 It is the disease, or type of food poisoning, caused by eating food containing the toxin botulin, produced by the Clostridium botulinum bacteria.
9 False.
10 Flooding leads to the overflow of sanitation systems, so that we are more likely to drink water or eat food which has been contaminated with human faeces.
Review questions for the pupils
1 What is food poisoning?
2 Name one infectious food poisoning disease.
3 What are the three main symptoms of food poisoning?
4 Why is botulin dangerous?
5 Why is a cracked or damaged tin of meat dangerous?
6 List two good personal hygiene habits which can help to reduce the risk of food poisoning.
7 Give two good cooking habits which can help to reduce the risk of food poisoning.
8 What is the use of date labels on food products?
Answers
1 Food poisoning is when we eat food that has been poisoned by microbes, or we eat food with microbes in it that infect us and give us disease.
2 Cholera.
3 Vomiting, diarrhoea, stomach pains, cramps and fever.
4 It is a very toxic nerve agent sometimes found in bad food, which can easily kill.
5 Because it may have been infected with Staphylococcus or Clostridium bacteria or it may have been contaminated with other bacteria.
6 Washing hands after using the toilet, keeping hands free from dirt at all times. Other answers possible.
Unit 13: Food poisoning
72
7 Any two of: ensuring that the areas where food is prepared are always washed and cleaned; ensuring that food is always well cooked, so as to destroy any bacteria on it; ensuring food is kept covered so flies or cockroaches cannot get to it; ensuring food is put in the fridge to prevent it going rotten; ensuring that food to be cooked is within its sell-by date. Other answers possible.
8 They tell us how long the food can be kept before it should be eaten. After that date, the food is not guaranteed to be properly preserved.
Diagnostic assessment
These diagnostic assessment exercises will assist you as the teacher to evaluate the impact of the teaching and learning activities in this unit and to assess the extent to which the unit objectives have been achieved.
1 Review the lessons spent on Food poisoning. Were there any lessons which the pupils particularly enjoyed? Can you say why this was? Did they find this an interesting topic? Can you think of ways in which it could have been made more interesting?
2 This unit involves a visit by the class to the local health clinic, or a visit by a health worker to the class. Did these visits go well? Were you able to find a health worker to assist with this part of the pupils’ learning? We also used role plays in this unit, which may not have been used before. Did this bring out some of the issues to do with food poisoning well? Were the pupils engaged by this activity?
3 How successful were the pupils when they did the Review questions above? Was the class:
A All successful (all pupils scored 6 out of 8 or above)
B Mostly successful (2/3 of the pupils scored 6 out of 8 or above)
C Some were successful (between 1/3 and 2/3 of the pupils scored 6 out of 8 or above)
D Not really successful
4 Can the pupils carry out the following objectives? Again, rate your pupils as A (all), B (most), C (some) or D (few).
• Can the pupils explain how to identify an expired food product?
• Can the pupils list three signs of food poisoning?
5 Consider the two new aspects of teaching and learning activities in this unit, the clinic visit and the role plays. Did they go well? Are they teaching techniques that you would want to build more into your teaching skills’ repertoire?
Section 5: Interaction of Matter Food poisoning
73
Natural disasters – flooding
Syllabus objectives covered in this unit
By the end of this unit the pupils will be able to:
5.0.1 Identify causes of flooding.
5.0.2 List some effects of flooding.
Introduction and additional information
September 2007 saw some of the worst flooding in West Africa for more than a decade. The flooding was inland, and was as a result of continued torrential rain over many days. At least fourteen countries were hit, and some of the worst affected were those such as Niger and Burkina Faso, where rainfall is normally low. In Ghana, it is thought that as many as 20 people were killed, with nearly half a million being made homeless. The north of Ghana was declared a disaster area and it was reported that some villages and communities had been completely wiped off the map.
Flooding has obviously been a periodic event since our climate settled into its present patterns after the last ice age, but anecdotal evidence suggests that it is becoming more frequent in recent years and causing more loss of life. Two explanations have been put forward for this. Flooding causes more damage to human communities and more loss of life when the flooding affects inhabited areas. Because the global population has now grown so large, the planet is becoming much more crowded, and there are areas of land which might previously have been left unoccupied because they are areas which are at great risk of flooding, but these are now inhabited because population pressures mean that people have nowhere else to live. The delta of the Ganges in Bangladesh is one such area.
The second reason put forward is that global warming is affecting established climate patterns and causing them to become more extreme. Thus we might expect to see more periods of extreme cold and extreme heat, and more periods of extreme drought and of extremely high rainfall. It is certainly true that an atmosphere of a higher ambient temperature can carry a greater amount of water vapour than a cooler atmosphere, providing the potential for increased rainfall. Additionally, global warming would melt some of the Arctic and Antarctic ice fields, which could result in a rise in the global mean sea level. This could affect many low-lying countries, such as the Pacific Island States, and parts of South-East Asia.
14
74
We all need to be more aware of the dangers of flooding and we need to try to design communities and buildings which have adequate drainage and which are not built in high flood-risk areas.
Key words introduced
flood, drainage, epidemic, clay, gravel
Planning
Try to collect a good range of magazines, newspaper articles, reports, photographs and other resources about flooding. You can try to focus either on the floods in West Africa, or internationally. Photograph archives are available on the internet, and some of these can be downloaded.
Resources and low or no cost materials required
Magazines, newspapers, photographs of flooding. A heap of clay soil, sand, gravel, water, a watering can and hand trowel.
Guidelines for the teaching and learning activities
1 Floods Pupil’s Book pages 129 - 131
Hold a classroom discussion about flooding. Ask the pupils if they have any personal experience of flooding, or if they know of anyone who has. This discussion will need to be managed sensitively, as there will be many school pupils in Ghana who were personally affected by the flooding in September 2007.
The activity looking at the drainage capacities of different soils is best carried out in the school yard. Clay soil, while it forms a good, strong foundation for houses, is very slow to drain, so care needs to be taken when building on a clay soil. A sandy, gravel soil drains much more easily, but is a less good foundation for buildings. Probably the best compromise is to build houses on clay soils that are well-drained, either naturally, or by creating artificial drainage.
2 Effects of flooding Pupil’s Book pages 131 -132
Discuss the effects of flooding with pupils. Loss of possessions and damage to buildings are often the most obvious effects, but damage to the infrastructure, such as roads and drains, may take longer to repair. Damage to crops and livestock may cause food shortages and famines, even in a time of heavy rain.
Section 5: Interaction of Matter Natural disasters – flooding
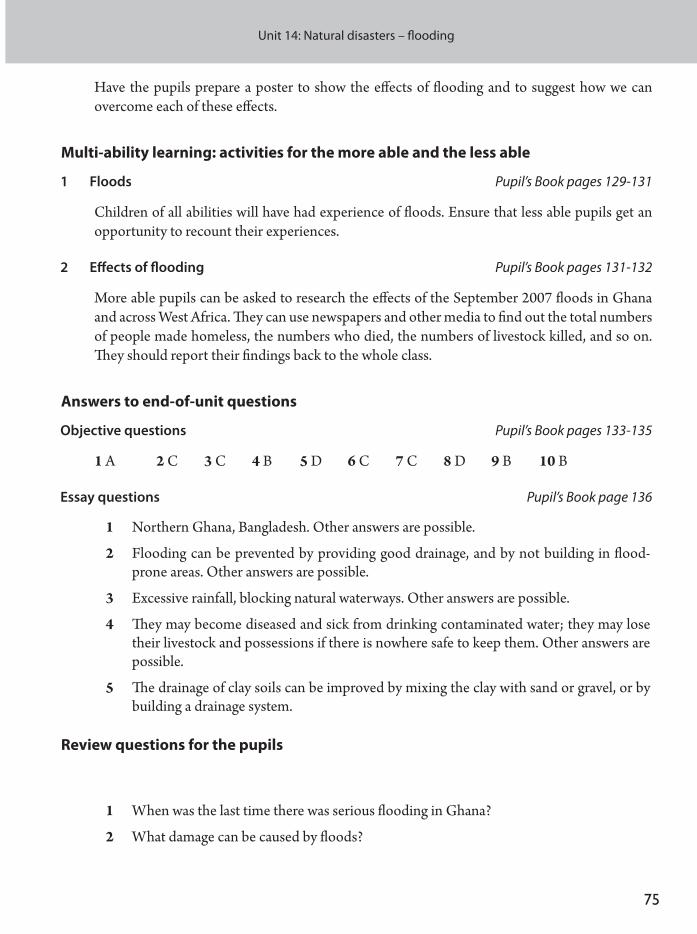
75
Have the pupils prepare a poster to show the effects of flooding and to suggest how we can overcome each of these effects.
Multi-ability learning: activities for the more able and the less able
1 Floods Pupil’s Book pages 129-131
Children of all abilities will have had experience of floods. Ensure that less able pupils get an opportunity to recount their experiences.
2 Effects of flooding Pupil’s Book pages 131-132
More able pupils can be asked to research the effects of the September 2007 floods in Ghana and across West Africa. They can use newspapers and other media to find out the total numbers of people made homeless, the numbers who died, the numbers of livestock killed, and so on. They should report their findings back to the whole class.
Answers to end-of-unit questions
Objective questions Pupil’s Book pages 133-135
1 A 2 C 3 C 4 B 5 D 6 C 7 C 8 D 9 B 10 B
Essay questions Pupil’s Book page 136
1 Northern Ghana, Bangladesh. Other answers are possible.
2 Flooding can be prevented by providing good drainage, and by not building in flood-prone areas. Other answers are possible.
3 Excessive rainfall, blocking natural waterways. Other answers are possible.
4 They may become diseased and sick from drinking contaminated water; they may lose their livestock and possessions if there is nowhere safe to keep them. Other answers are possible.
5 The drainage of clay soils can be improved by mixing the clay with sand or gravel, or by building a drainage system.
Review questions for the pupils
1 When was the last time there was serious flooding in Ghana?
2 What damage can be caused by floods?
Unit 14: Natural disasters – flooding
76
3 Name two things that people can do to prevent their homes being damaged by floods.
4 What is the cause of flooding?
5 Why is it that outbreaks of cholera often follow flooding?
Answers
1 September 2007.
2 Buildings can be demolished, roads broken, livestock killed, crops and possessions washed away, sanitation systems can be damaged, drinking water supplies can be damaged.
3 People should not build homes in areas prone to flooding; people should ensure that their villages are well-drained.
4 Excessive rainfall, storms at sea, tsunamis.
5 Outbreaks of cholera often occur because food and water supplies become contaminated with faeces during flooding, and this spreads the cholera bacteria.
Diagnostic assessment
These diagnostic assessment exercises will assist you as the teacher to evaluate the impact of the teaching and learning activities in this unit and to assess the extent to which the unit objectives have been achieved.
1 Look back over your teaching and learning about Flooding. Were the pupils particularly interested in this topic? Did they have family members with personal experiences of flooding? Did they find it difficult to talk about these experiences, or were they willing to share them with the class?
2 Was the practical activity on the drainage capacities of different types of soil useful? Did the pupils observe the different rates of drainage?
3 How successful were the pupils when they did the Review questions above? Was the class:
A All successful (all pupils scored 3 out of 5 or above)
B Mostly successful (2/3 of the pupils scored 3 out of 5 or above)
C Some were successful (between 1/3 and 2/3 of the pupils scored 3 out of 5 or above)
D Not really successful
4 Can the pupils carry out the following objective? Again, rate your pupils as A (all), B (most), C (some) or D (few).
Section 5: Interaction of Matter Natural disasters – flooding
77
• Can the pupils explain what causes flooding in some parts of Ghana during the rainy season?
5 List two aspects of the teaching and learning activities that went well for this unit. Decide how you can build on this success for future teaching.
Unit 14: Natural disasters – flooding

78
Glossary