
Présentation PowerPoint - Rapidmooc
46
Quick start guide Start-up and user guide for the Rapidmooc Studio.
-
Upload
khangminh22 -
Category
Documents
-
view
0 -
download
0
Transcript of Présentation PowerPoint - Rapidmooc

Quick start guide
Start-up and user guide for the Rapidmooc Studio.

We recommend you read the RAPIDMOOC_BEST_PRACTICES guide which providesadvice on how to prepare your media, write your prompter text, what to wear and other generalinformation for recording.
But first of all!

Full-HD Robotic Camera
40-inch screen for real-time chroma key preview, video prompter, photoboothand studio controls
Support tray for user computer + connection ports (HDMI, USB, audio PC) + remotes controls
Lockable space containing:- Inwicast Box
Video controlsAudio controls
- Wireless microphone receiver + lapelmicrophones
Mobile stand on wheels
+The pack also includes:
• 4x LED lights with tripods;
• Pop-up green screen with tripod;
• Full kit of cables and connectors
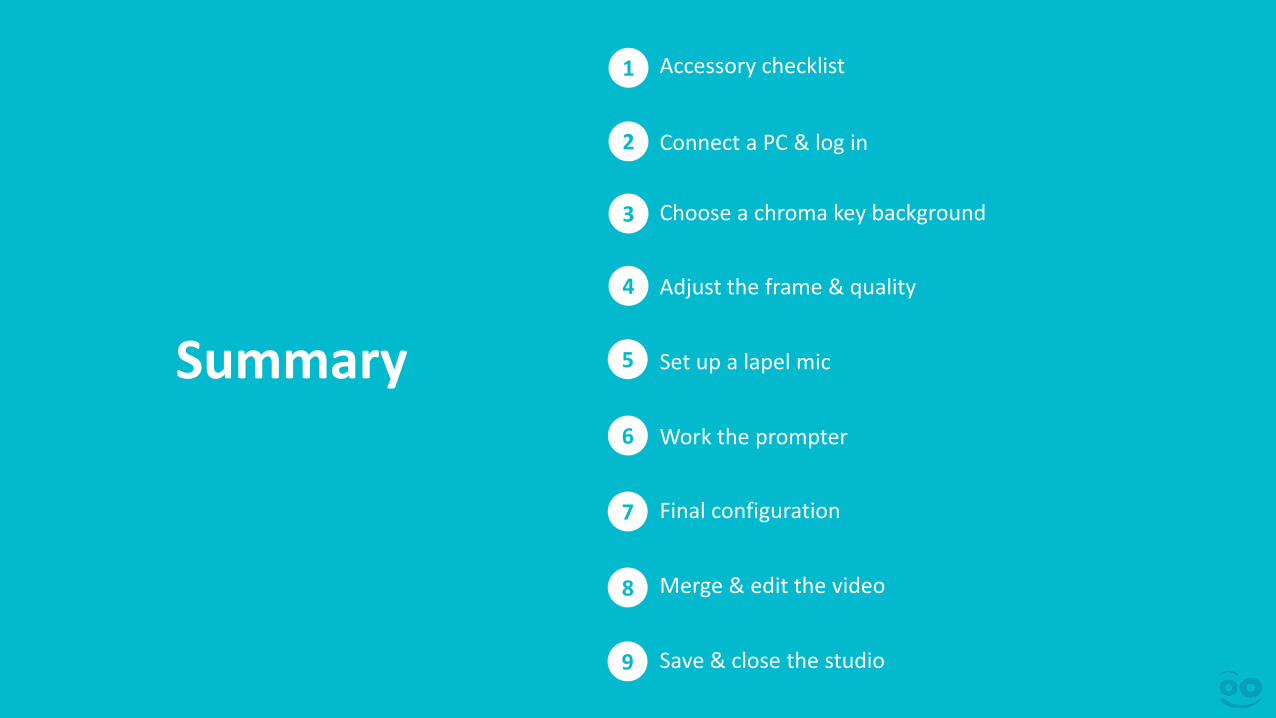
Summary
Connect a PC & log in2
Choose a chroma key background
Adjust the frame & quality
Set up a lapel mic
Work the prompter
Final configuration
Merge & edit the video
Save & close the studio
3
4
5
6
7
8
9
Accessory checklist1

Accessory checklist1
Start by gathering together all the devices for controlling the studio and recording that you mayneed.
TV remotecontrol
Camera remotecontrol
Lapel micsx2
Wireless keyboard and mouse
PC remotecontrol + dongle
Studio remotecontrol

Turn on the lights2
Turn on (a) the lights. The intensity (b)was set when the studio was set up. You may need to adjust it if there is a large variation in lighting in the room.
Avoid having variations of light in the room (use black-out blinds if needed).
a
b
i The green screen must be evenly lit, but not intensely. The green must be ‘solid’ without any hot spots.

Connect the presentation computer2
If you want to overlay with media such slideshows, videos or animations that are stored on yourcomputer, then simply connect your computer as follows:
Connect the studio’s HDMI cable to your computer’sHDMI or Displayport port
(adaptor needed).
If using a Powerpoint presentation, insert the PC remote control’s
dongle into your computer (USB port). This will allow you to change
slides remotely.
Turn on your computer
1 2
i Remember to turn on your PC and disable sleep mode so that itdoesn’t turn off during recording.

Turn on the studio2
i Check that the power cable is plugged into a socket.
Start up the system by flipping the main switch found inside the unit.

Log in2
i If the screen shows “no signal”, turn off the system using the main switch and wait 30 seconds before turning it back on.
When you start up the studio, you willbe asked to log in to your account orcreate a new one. You will be the onlyone to have access to your recordings(except the system administrator).

Choose an overlay background - Home3
You will then arrive at the studio’s home interface, directly layered over your presentation.
The MERGED VIEW is activatedand the PC source image ischosen by default.
i
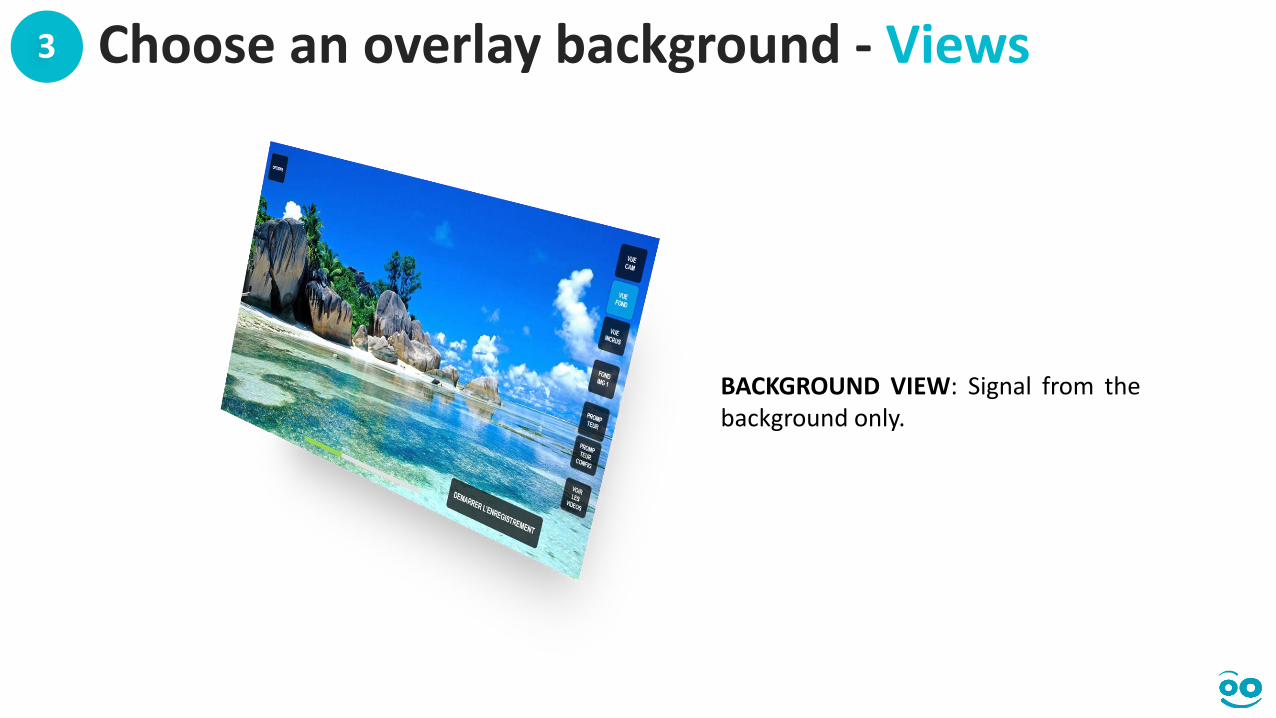
Choose an overlay background - Views3
BACKGROUND VIEW: Signal from thebackground only.
Choose an overlay background - Views3
i
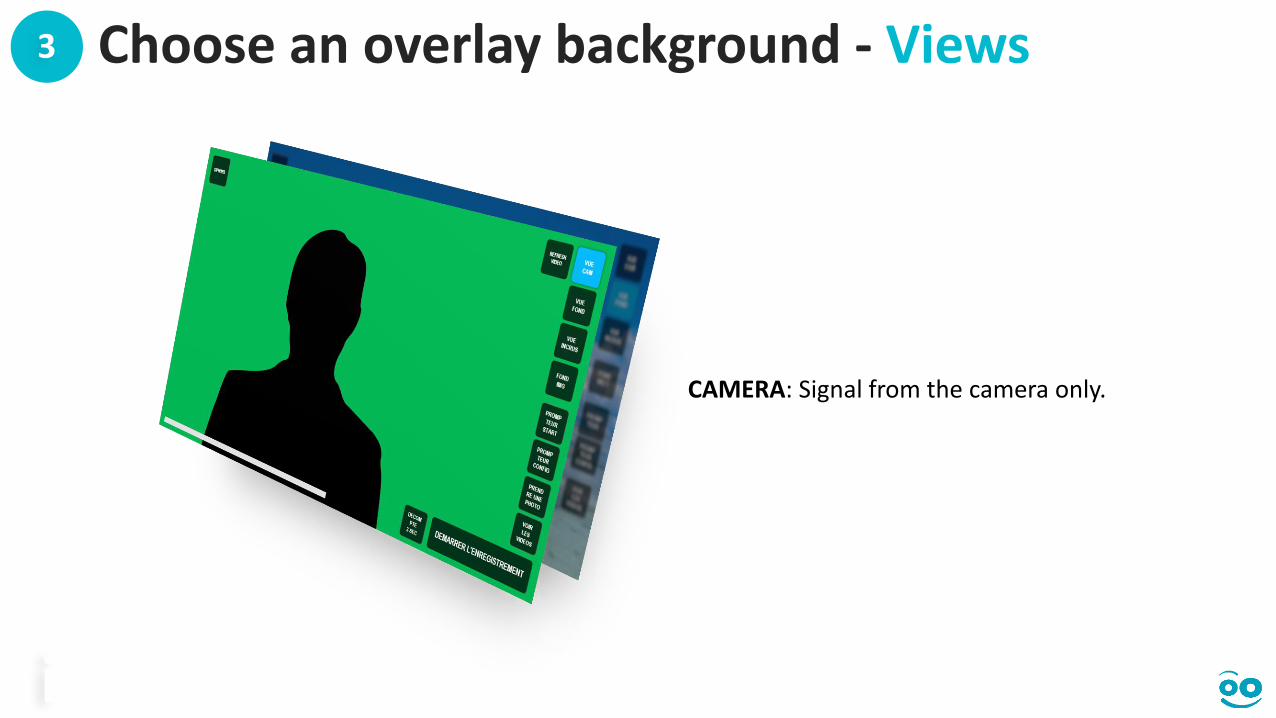
CAMERA: Signal from the camera only.

Choose an overlay background - Views3
MERGED VIEW: Camera + backgroundview.

Choose an overlay background - Backgrounds3
To change the background, simply click on CONTENT SRC and choose a source.
PC: signal from the deviceconnected to the studio viathe HDMI cable
IMG: image from the studio(uploaded previously — seenext slide).

i Import your images from your USB drive. You can also use a USB drive to import your prompter scripts, other videos and download your recordings.
To change the background image:
- Click on CONTENT SRC then select IMG.
- Double click on the background.
- Select your image via the file explorer (Images or USB drive) then confirm.
3
1
2
3
Choose an overlay background - Backgrounds

Choose an overlay background - Pip3
You can also insert your slideshows, images, videos (from a PC source) directly into a background image in a specific area. To do so:
Select your image1
i PIP = Picture in picture

3
Click on CREATE SLIDE MASK found in the CONTENT SRC IMG mode
2
Click and drag the red box.
Make the box bigger or smaller by clickingon the bottom right-hand corner.
Adjust the image to a 16:9 ratio (button) and click Save.
Choose an overlay background - Pip

Choose an overlay background - PIP3
The red box will be automatically replacedby the presentation media from your PC!
Click CONTENT SRC PC to see the result.3

Adjust the frame4
Preset configurations based on various user heights will have been saved when the studio was installed.
Select the right configuration based on your height directly from the menu OPTION > CAMERA CONTROL.
Click on the desired image/preset configuration and the camera will do the rest:
i When the studio is turned on, the system will start with preset #1
3 4
5 6 7 8
1 2

Adjust the frame4
If you want to add or edit a preset:
- Select a new window or the one you want to change- A green outline will show your selection (#2 below)
3 4
5 6 7 8
21
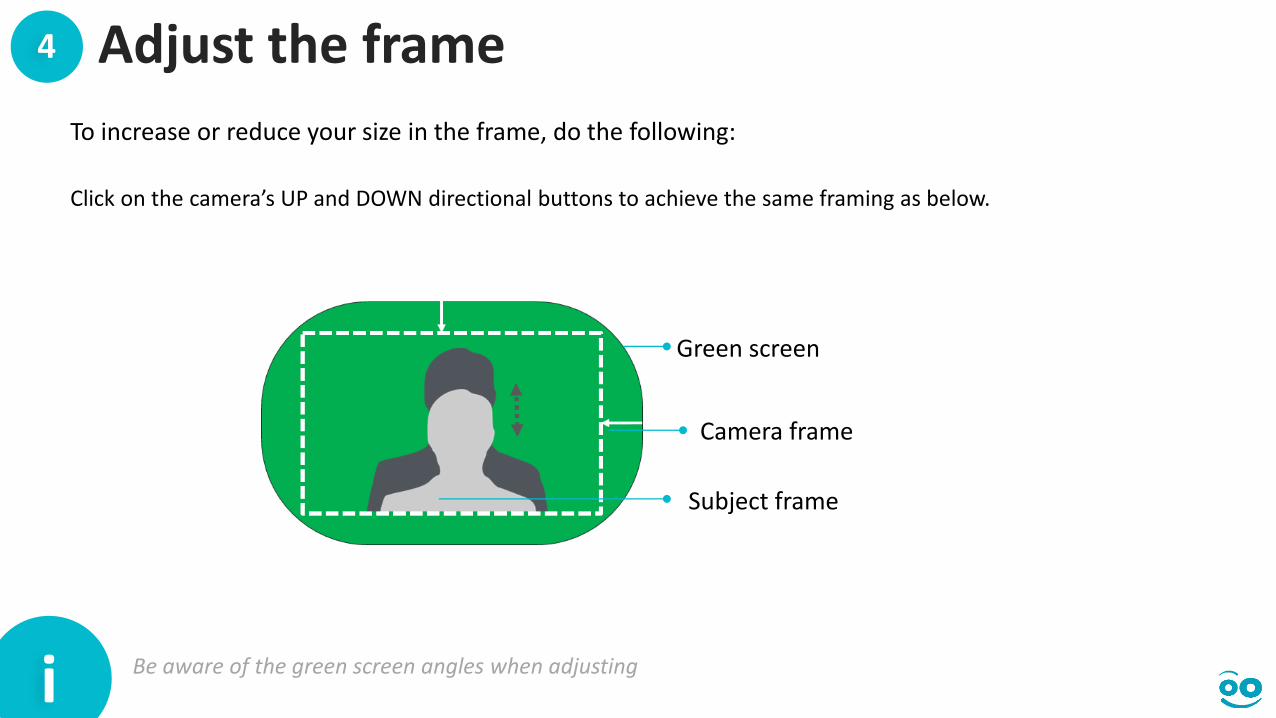
Adjust the frame4
To increase or reduce your size in the frame, do the following:
Click on the camera’s UP and DOWN directional buttons to achieve the same framing as below.
Green screen
Camera frame
Subject frame
i Be aware of the green screen angles when adjusting
Adjust the frame4
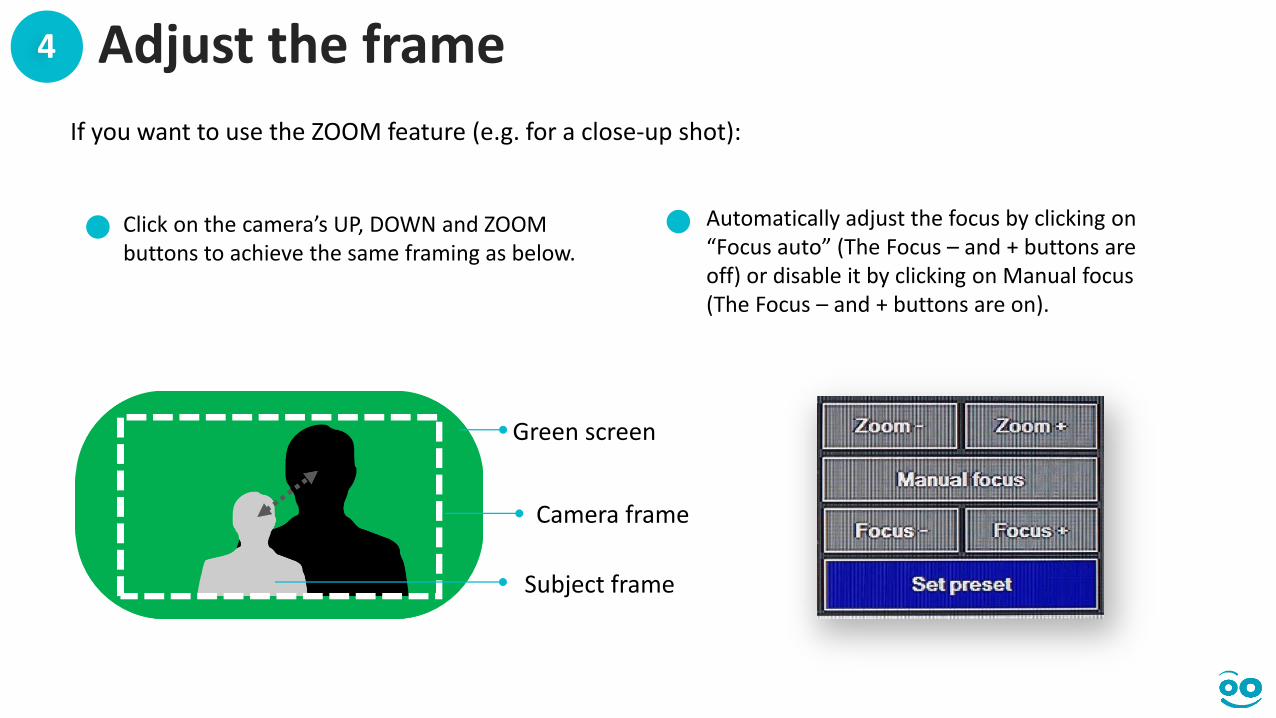
If you want to use the ZOOM feature (e.g. for a close-up shot):
• Click on the camera’s UP, DOWN and ZOOM buttons to achieve the same framing as below.
• Automatically adjust the focus by clicking on “Focus auto” (The Focus – and + buttons are off) or disable it by clicking on Manual focus (The Focus – and + buttons are on).
Green screen
Camera frame
Subject frame

Adjust the frame4
Finish by clicking on Set preset • A new screenshot will replace the previous one to show the new preset has been saved
3 4
5 6 7 8
1 2

Adjust the overlay quality4
Click on OPTIONS (top left) then GREEN SCREEN SETUP to adjust the quality of the overlay.
- Color: This allows you to select the colour that will be replaced (usually green). Slide the cursor untilthe background shows the desired colour;
- Gain: This determines how the different shades of the chosen colour well be keyed. Slide the cursoruntil the outline of the overlay area is how you want it;
- Y Suppress: Slide the cursor until the level of black in the overlay area which was removed is correct.

Adjust the video quality4
The Options button allows you to quickly adjust the quality and resolution of your videos:
- Resolution: HD 720p (default) or FULL HD 1080p.
OPTIONS
- Quality: HQ (High Quality) or SQ (Simple Quality). These encoding settings can be adjusted in the CONFIG menu at the bottom of the list (onlyaccessible in Admin mode).

Set up a lapel mic5
i Check out the RAPIDMOOC_BEST_PRACTICES guide.
Turn on the receiver using the ON/OFF switch next to the antenna. A green light will indicate that it is turned on and the batteries are still charged.
Hide the mic as well as possible. Place it around 10cm from your chin and also point it towards your chin.
Pass the mic wire underneath your clothing. Make sure nothing rubs against the wire nor the mic.
Put the wireless receiver in the inside pocket of your jacket or clip it onto your trousers (preferably on the siderather than behind for a better audio signal).
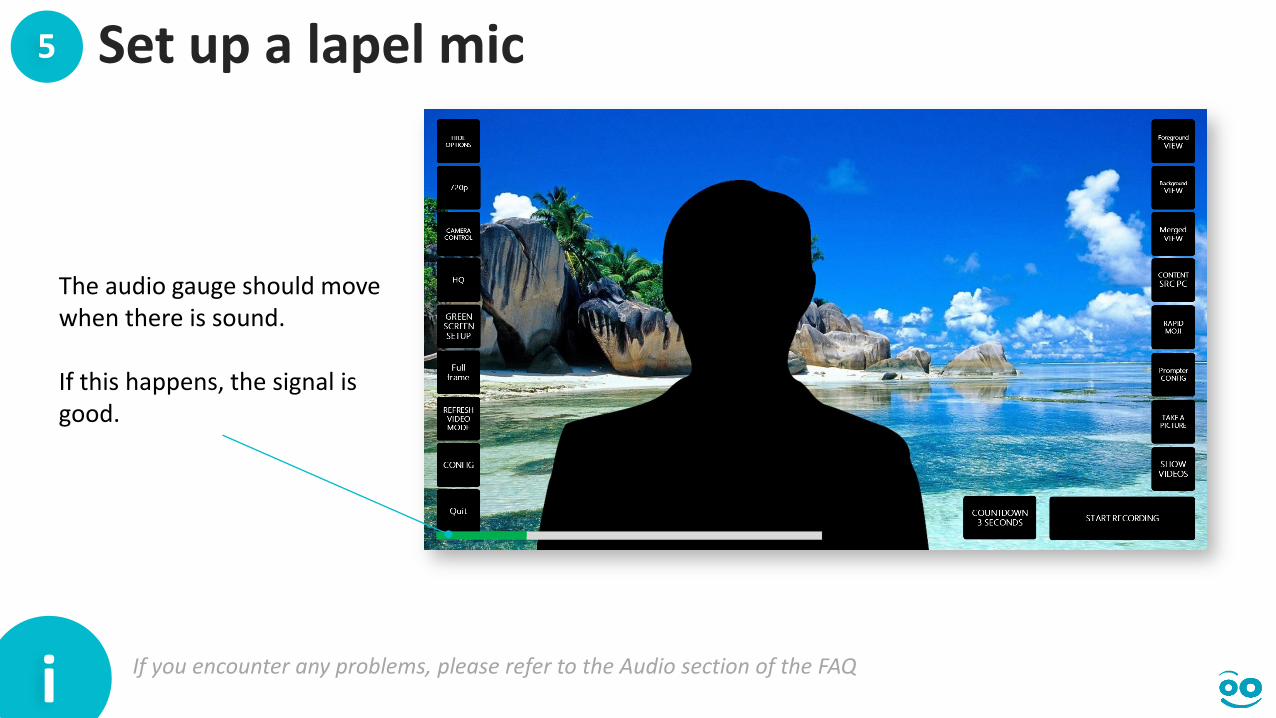
i If you encounter any problems, please refer to the Audio section of the FAQ
The audio gauge should move when there is sound.
If this happens, the signal isgood.
Set up a lapel mic5
Activate the prompter6
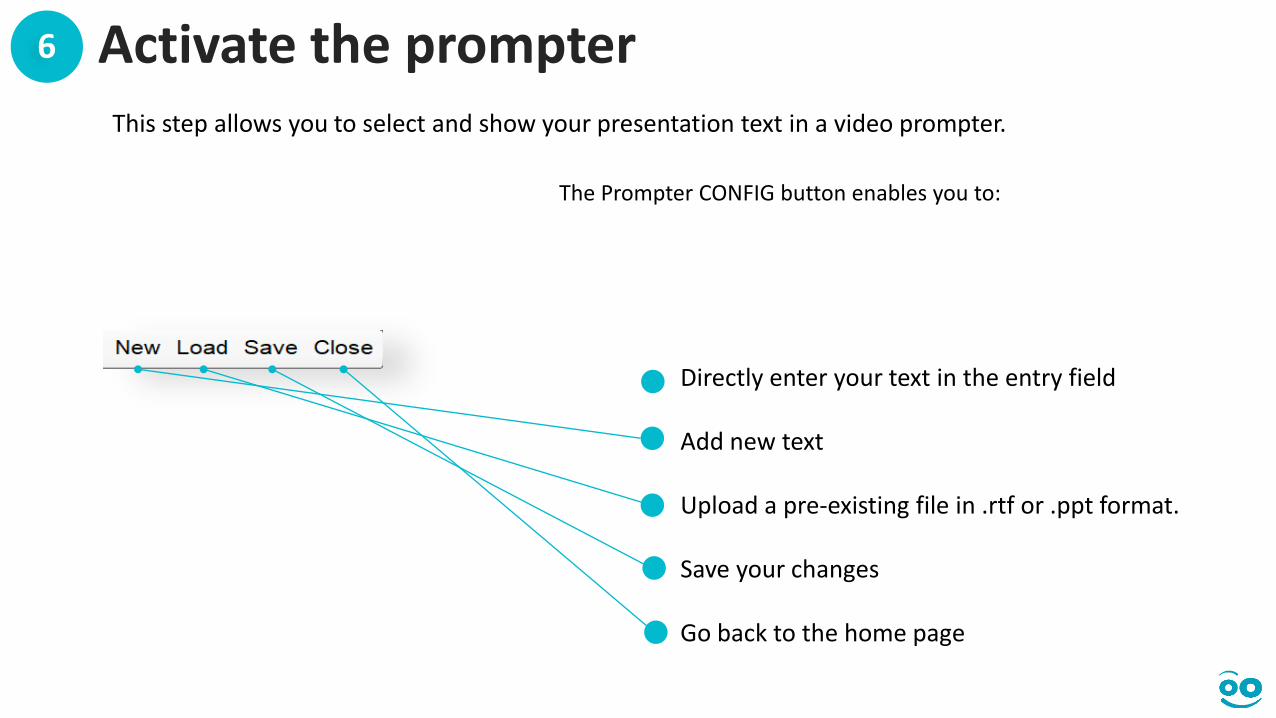
This step allows you to select and show your presentation text in a video prompter.
- Directly enter your text in the entry field
- Add new text
- Upload a pre-existing file in .rtf or .ppt format.
- Save your changes
- Go back to the home page
The Prompter CONFIG button enables you to:

Activate the prompter6
To upload a pre-existing script:
- Save your file on your USB drive being pluging it into the studio.- RTF (You can easily create a .rtf file with word processor like Microsoft
Word, simply click on “Save as”)- PPT (Slide’s comments).
- Click on Open.
- Choose the files from the USB drive using the drop-down menu.
1
2
3

Activate the prompter6
Add markers* to show when to change slides [clic1]…[clic2]…[clic3])Add automatic tags in your script and Rapidmooc will handle your presentation’s animation:
[SHOWME]: show overlay (i.e. MERGED view).
[HIDEME]: hide overlay (i.e. CONTENT view).
[SWITCH]: switch between the CONTENT and MERGED view with a melting effect.
[CAMERA1]… [CAMERA8]: choose pre-set cameras (done via the CAMERA CONTROLbutton).
[STOP]: stop recording
*The parts in brackets will not be added to the subtitles.

Activate the prompter6
You can also choose:
Scroll speed (between 0.4 and 0.6 depending on how quickly you speak).
Text size (+ or – 55 depending on your vision).
Prompter window transparency (30).
Manual or automatic launch of prompter.
Remember to save before closing the prompter.

Final configurations7
i Check out the RAPIDMOOC_BEST_PRACTICES guide before starting to learn how to prepareyour clothing, presentation media and prompter text.
1 Stand in front of the green screen.
2
3 Put your slideshow in presentation mode.
4Take your computer remote control so you can interact with your presentation media.
5If needs be, choose a countdown timer (3, 6 or 9 seconds). And, when you’re ready, click start recording.
Check you have 3 good input signals: media, camera and audio.
Example of recording with a slideshow.
START RECORDING

Stop the recording7
Click on “Stop recording” using the studio’s wireless keyboard or studio remote control.
SHOW
VIDEOS
Your video will be ready in a few seconds and the SHOW VIDEOS button will appear
Stop the recording using the [STOP] tag.Or
VIA THE PROMPTER MANUALLY

Watch your videos8
SHOW VIDEOS
The SHOW VIDEOS button will take you to your video library.
Click on any thumbnail to start watching the recording.

Edit your videos - tools8
Tools available for mp4 export :
- Cut & Paste - Subtitles - Credits and Jingle
The main editing tools can be found in the navigation bar of the video you want to edit. This allows you to have a ready-to-use file right after you finish recording. To go into edit mode and use the post-production tools, simply click on the following icon:

Edit your videos - Cut & Paste8
Did you start your recording a bit early? Stop it too late? Need to hide something? The cut and paste tool is what you need.The Cut tool will immediately create a new video without the need to re-encode.
a
b
c
Click on the scissors(a).
Select the start and end point of the excerpt using the yellowtriangle (b) or the video timecodes (c).
1
2

Edit your videos - Cut & Paste8
Click on the first thumbnail to generate the excerpt (d)
Select a 2nd piece and click on the 2nd
thumbnail (e) and so on to delete parts WITHIN the video
Add the title of the new video (f)And then Create video(g)
5
3
After some short processing, your new video willbe available in your library.
d
f
g
4
e

Edit your videos - Subtitles8
The studio allows you to take the prompter script and add it as subtitles. You can use the editor to edit the script before exporting the video.
i A .vtt file containing the subtitles will be included with your mp4 file when you download your video to your USB drive
Click on the SUBTITLES rectanglular bubble in the editing menu
Edit the text and timecodes if needed
Click on Save
1
2
3
Edit your videos - Subtitles8
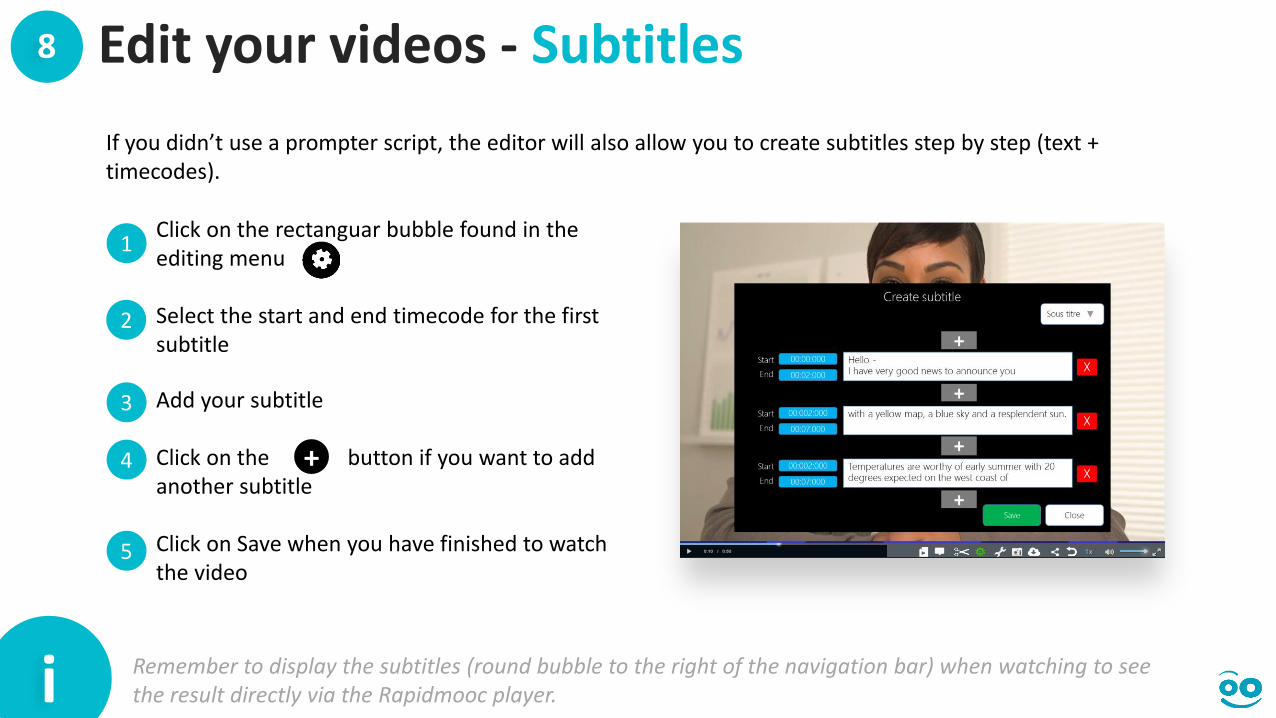
Click on the rectanguar bubble found in the editing menu
Select the start and end timecode for the first subtitle
2
1
If you didn’t use a prompter script, the editor will also allow you to create subtitles step by step (text + timecodes).
Add your subtitle
Click on the button if you want to addanother subtitle
Click on Save when you have finished to watchthe video
4
3
5
+
i Remember to display the subtitles (round bubble to the right of the navigation bar) when watching to seethe result directly via the Rapidmooc player..

Edit your videos – Merging8
Click on the merge video icon. If you used a prompter script, this file will be chosen by default.
Click on MERGE WITH SUBTITLES and follow the link to the new video. The source file won’t be erased.
2
1
Merging subtitles: you can merge the subtitles with the video. The result will be ONE mp4 file with the subtitles embedded.

Edit your videos - Merging8
Click on the merge video icon
Click where (+ thumbnail) you want to insert your new video.
2
1
Merging videos: The video can be merged with another video, e.g. credits, intro or outro:
Select the video/credits.
Choose the transition length, background colourand export format.
Give your new video a title and click Merge the media.
4
3
4
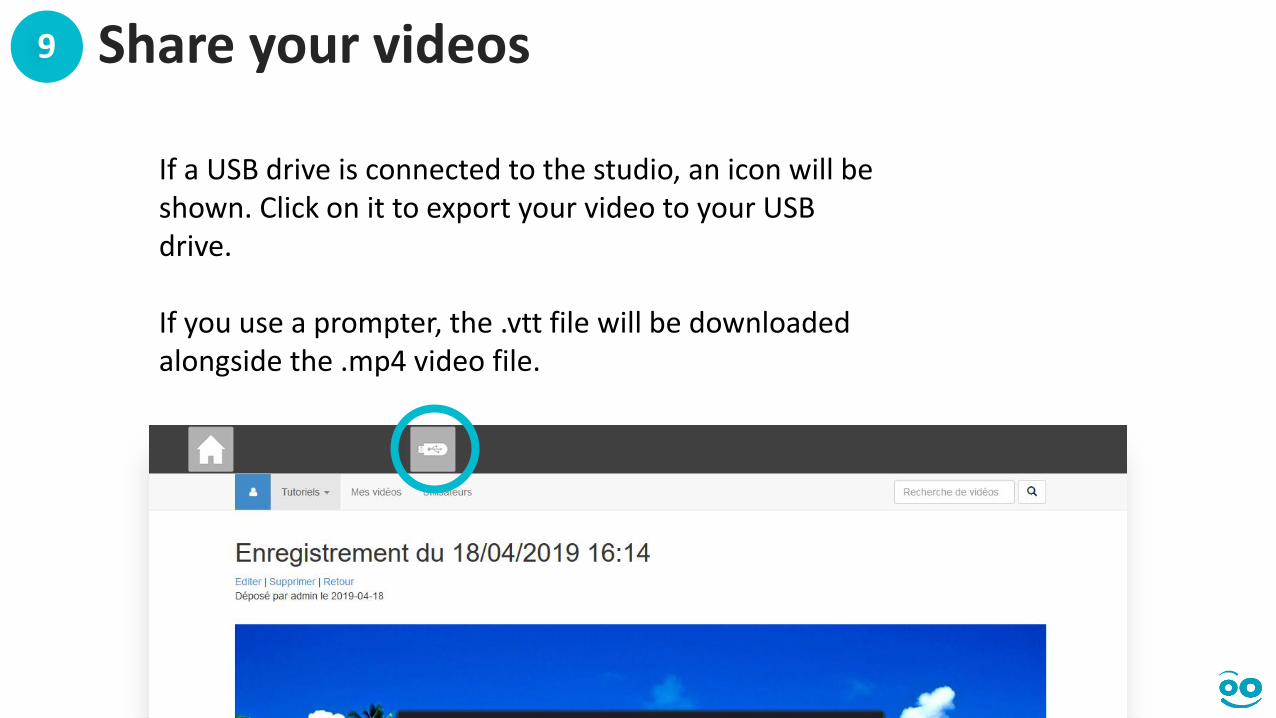
Share your videos9
If a USB drive is connected to the studio, an icon will beshown. Click on it to export your video to your USB drive.
If you use a prompter, the .vtt file will be downloadedalongside the .mp4 video file.

Turn off Rapidmooc9
From the home page, click on Quit RAPIDMOOC found on the left in the Options menu.
Wait for the box to turn off completely. You will know this is done when you see the message: No cables connected.
Turn off the main switch found behind the studio.
1
2
3
To exit the video player and go back to the Rapidmooc home page, click on the Home icon.
iRemember to turn off the peripheral devices: wireless keyboard, microphones and PC remote control before leaving the room.

Congratulations!You now know how to use the Rapidmooc studio.