Prepared by: Connie Bretz Walnut Creek Extension District ...
16
Prepared by: Connie Bretz Walnut Creek Extension District Family and Consumer Science Agent KSU, County Extension Councils, Extension Districts and U.S Department of Agriculture Cooperat- ing. K-State Research and Extension is an equal opportunity provider and employer. K-State Research and Extension is committed to making its services, activities and programs accessible to all participants. If you have special requirements due to a physical, vision or hearing disability, or a dietary restriction please contact Connie Bretz at 1-866-755-1654 or [email protected].
-
Upload
khangminh22 -
Category
Documents
-
view
3 -
download
0
Transcript of Prepared by: Connie Bretz Walnut Creek Extension District ...

Prepared by: Connie Bretz
Walnut Creek Extension District Family and Consumer Science Agent
KSU, County Extension Councils, Extension Districts and U.S Department of Agriculture Cooperat-
ing. K-State Research and Extension is an equal opportunity provider and employer. K-State Research
and Extension is committed to making its services, activities and programs accessible to all participants.
If you have special requirements due to a physical, vision or hearing disability, or a dietary restriction
please contact Connie Bretz at 1-866-755-1654 or [email protected].

PICTURE PERFECT PIES
Select the Right Pan:
Never shiny! Soggy, soaked under crusts result when shiny metal pans are used because they
deflect the heat.
To improve browning, put shiny metal pans on a cookie sheet for baking. Glass or dull-metal
pans absorb heat and make a crisp crust. This is especially important for custard pies.
Check the size of ceramic or pottery plates; they may not be standard size. A standard size plate
holds about 3 3/4 cups liquid. You may need to adjust the amount of filling and the baking time.
Disposable foil pie pans usually are smaller than standard pie plates, although foil deep dish pie
pans are closer to the norm.
Ingredients for Pastry:
Flour, use all purpose or pastry flour.
Fat
-Shortening produces a tender and rich pastry.
-Cold shortening contributes to a more flaky texture than shortening at room
temperature, but at the cost of a lesser tenderness.
-Lard usually makes a more tender pastry than shortening
-Margarine products usually make a less tender product than those made with
shortening. To ensure best results use only butter or shortening. If you use margarine,
your pie crust will be unacceptable tough and not flaky or crisp.
-Oil usually produces more tender pastry than solid fats when mixed by the conventional
method, but the pastry may be crumbly and greasy.
Salt adds flavor. A pastry made without salt is flat and flavorless.
Water
-Too much water the pastry is tough.
-Too little water the pastry is crumbly and
hard to roll.
-Use ice water if your kitchen is warm to
help keep the shortening cooler.
-Milk can be substituted for water but it
will make the pastry browner.
-Using vinegar in place of part of the water
will make a tender pastry.
-Pastry made with hot water is not as flaky
as those made with cold water. It has a cookie like texture - a mealy, rather than flaky texture.
Use the ingredients specified in the recipe; don’t make changes or substitutes.
Measure ingredients carefully
Stir together the flour and salt, then cut in the shortening until the mixture resembles small peas.
If you do not have a pastry blender try using 2 knives in a crisscross motion to cut in shortening.
Add water gradually to the mixture, then gently toss it together just until it’s evenly moistened.
Flour the rolling surface just enough to keep the dough from sticking.
Use ice water unless recipe specifies otherwise.
For best results, use a pastry blender to cut in the shortening, a rolling pin with stockinet cover to
roll out the dough and a pastry cloth to keep the dough from sticking.
Roll the pastry to an even thickness. Try not to stretch it as you’re transferring it to the pie plate.
Loosely wrap the pastry around a rolling pin to transfer it to the pie plate. Carefully lift the rolling
pin, then unroll the pastry in the center of the plate. Or, if desired, fold the pastry in quarters, care-
fully lift and center it in pie plate, and unfold.
If pastry is to be prebaked without filling, lightly press pastry into pan so that there are no air pock-
ets under crust; prick it with a fork to prevent it from puffing up. Prick both bottom and sides. Bake
the pricked pastry in 450 degree oven for 10-12 minutes or until it is golden. Cool.
For a more uniformly shaped pastry shell, after pricking the shell with a fork line it with foil and fill
with dry beans to prevent the crust from puffing. (Or line pastry shell with a double thickness of
heavy-duty foil; press down firmly but carefully). The weight of the beans or foil keeps the pastry
in shape. Bake pastry in 450 degree oven for 5 minutes. Remove beans and foil, continue baking 5-
7 minutes more or until pastry is golden.
For baking, use heat-resistant glass, ceramic, or dull metal pans as these absorb heat so that crusts
brown perfectly. Shiny metal pans reflect heat and will produce a soggy crust.
Use the size pie plate or pan recommended in the recipe so that the filling and crust will fit. If the
size isn’t marked on the bottom of the pie plate you can check by measuring the top inside diame-
ter.
Preheat your oven according to manufacturer’s directions, allowing 10-15 minutes.
For more even baking, bake pies on the center rack of the oven. You can bake more than one pie at
a time - just leave enough space between the pies and the sides of the oven to let air circulate.
If you are making double crust pie, trim the edge of the bottom pastry after you pour in the filling
so it doesn’t pull the pastry down into the pie plate.

Patch any cracks with a pastry scrap before adding the filling. Moisten the underside of the scrap
with a little water so it stays in place.
If the crust begins to brown too soon during baking, cover loosely with foil. (For single-crust pies,
use a narrow strip of foil to cover the rim of the pie). To prevent the pastry edges from over brown-
ing, tear off a 12 inch square of foil. Fold it in quarters and cut a quarter circle off the folded corner
( about 3 inches from the tip). Unfold the foil and place it on the pie, slightly molding the foil over
the edge.
Avoid messy spills in the oven; set the pie plate on a baking sheet on the oven rack. The pan catches
any juice if the pie bubbles over.
After baking, cool your pie on a wire rack. Allowing the air to circulate under the pie prevents the
crust from becoming soggy.
To get a head start on your next pastry project, prepare your pastry as directed, but don’t roll it out.
Instead, flatten the pastry into a patty, place it in a freezer bag, and freeze for up to 2 months. When
you are ready to use your pastry simply thaw overnight in the refrigerator.
You also can roll pastry out and fit it into a pie plate or tart pan. Place the pastry in a freezer bag and
freeze for up to 2 months. Frozen pastry shells can be baked without thawing, but you will need to
use a freezer-to-oven pie plate and may need to add 5-10 minutes to the baking time.
Pie Crust Edges:
The edge that you put on your pie crust serves 2 purposes; to look good and to keep the pie filling
sealed in. Making it look good is as easy as a few pinches, presses, tucks and twists.
Rope-shape Edge:
Trim and fold under the edge of the pastry for a single-crust, double-crust, or lattice-top
pie. Then crimp around the edge of the pastry by pinching it. “When pinching, push forward
on a slant with a bent finger and pull back with your thumb.
Flower Petal Edge:
Trim and fold under the edge of the pastry for a single-crust, double-crust, or lattice-top
pie. Make a large scallop by placing your thumb flat against the inside pastry edge and
pressing the dough around it with your other hand’s thumb and index finger. Then lightly
press the tines of a fork in the center of each scallop.
Cut Out Edge:
Line the plate with pastry, and trim pastry to the edge of the pie plate. Roll pastry
scraps until they are thin. Use a knife or pastry cutter to cut the pastry scraps into desired
shapes. Brush the edge of the pastry shell with water. Arrange the pastry cutouts on the
edge of the pastry shell, and press lightly to secure.
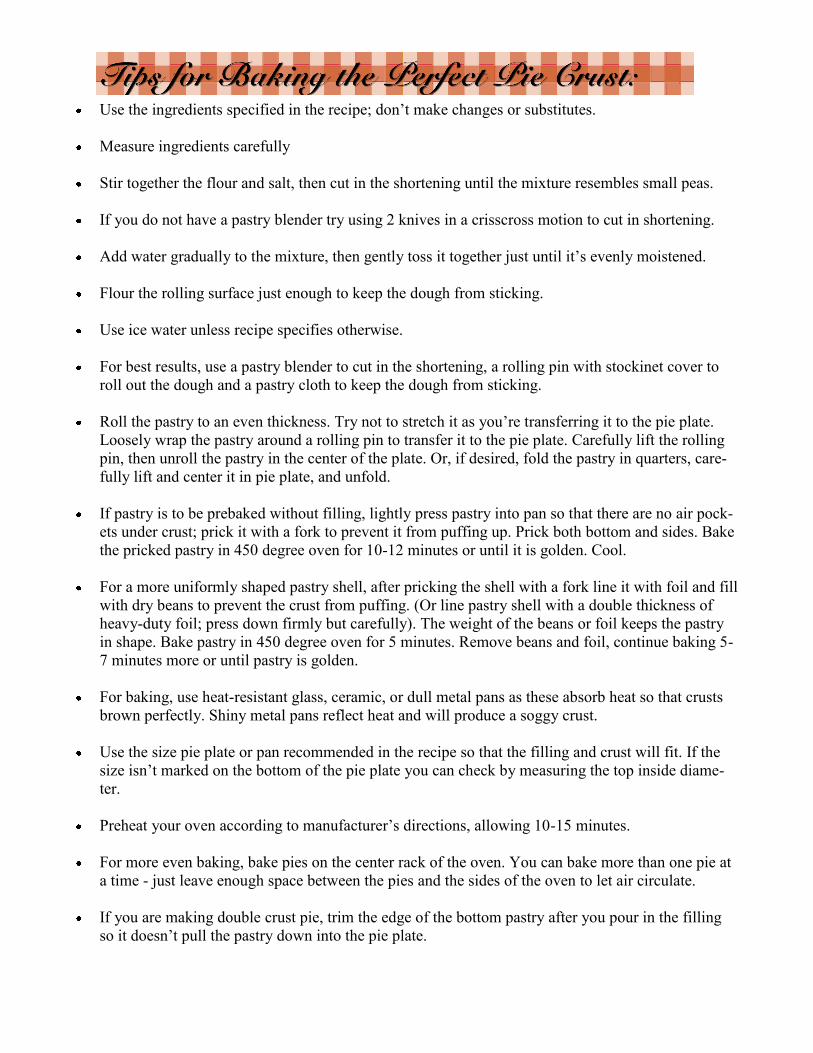
Twisted Edge:
Line the pie plate with pastry, and trim pastry to the edge of the plate. Brush the edge
of the pastry shell with water. Loosely twist tow 1/2 inch wide strips of pastry dough
around the edge of the pastry shell. As a strip runs out, seal another strip to it by pressing
the ends together. Secure the twist by lightly pressing the bottom strip against the edge of
the pastry shell.
Scalloped Edge:
To create a scalloped edge, use a round - bowled measuring tablespoon to press
against thumb and index finger of other hand.
Lattice Pie Top:
Line pie pan with pastry leaving 1” overhang. Cut rolled pastry for top crust in strips 1/2 inch wide.
Add filling to pastry lined pan. Moisten rim of pie with water and lay half of the strips over the pie
about 1 inch apart. Repeat with remaining strips, placing them in opposite direction in a diamond or
square pattern. Trim strips even with pie edge. Turn bottom crust’s overhang up over rim and ends
of strips. Press firmly all around to seal strips to rim. Flute edges as desired.
Fancy Lattice Top:
Twist strips of pastry place over pie to make the lattice; cut strips with rippled pastry wheel to give a
pretty edge.
Woven lattice Top:
Lay half the pastry strips one inch apart over the filled pie. Weave the first across strip through the
center. Add another cross strip, first folding back every other strip to help in weaving crosswise
strips over and under. Continue weaving until lattice is complete. Fold lower crust over pastry strips,
press firmly around the edge to seal strips to the rim. Flute edge as desired. You may find it easier to
weave lattice on waxed paper, lifting it on to pie.
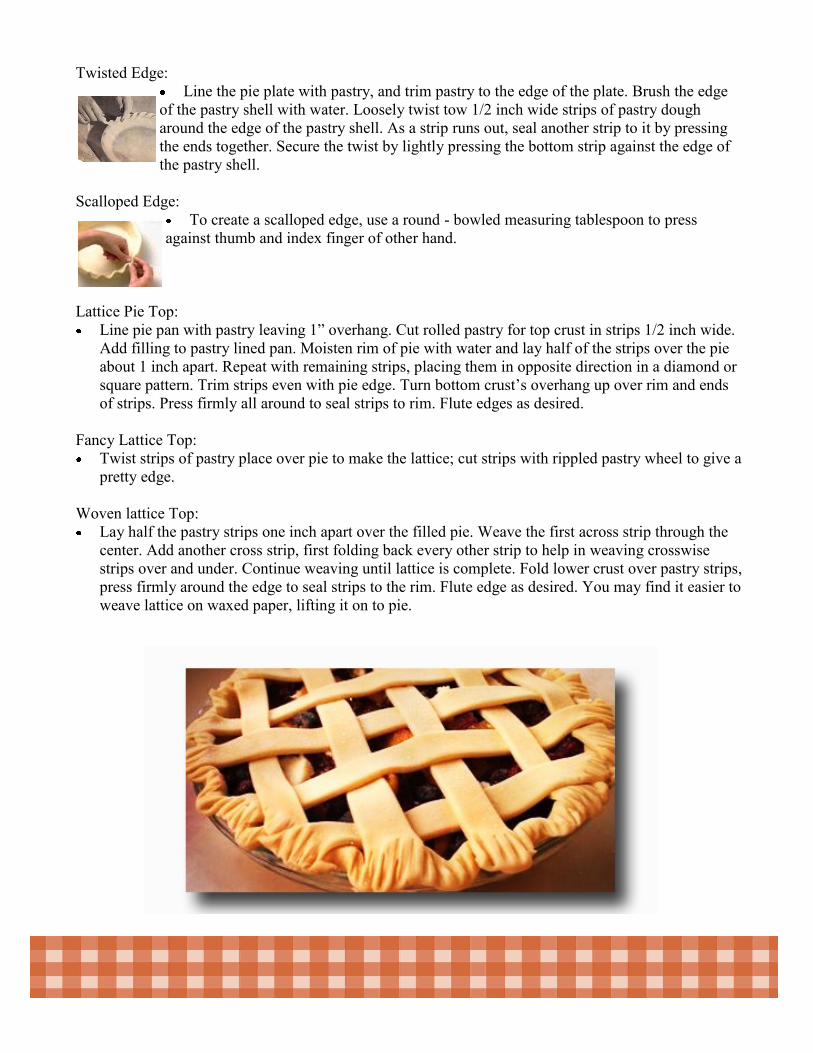
Lattice-Top Pie:
1. Prepare pastry for double-crust pie. Roll out dough for bottom crust and line pie plate. Trim bottom
crust to 1/2 inch beyond edge of pie plate. Roll out second ball of dough. Cut dough into 1/2 to 3/4
inch strips with a pastry wheel or sharp knife. Use a ruler to keep strips straight.
2. Place the desired fruit pie filling in the bottom pastry shell. Carefully lay half of the cut strips atop
the filled pie, spacing strips at 1-inch intervals and all in the same direction, as shown.
3. Carefully fold back alternate strips already in place atop fruit filling. Place another cut pastry strip
in center of pie at right angles to the pastry strips that are already in place, as shown.
4. Slowly unfold the folded pastry strips and fold back the strips that were straight. Add another pastry
strip at right angles to the folded strips and 1 inch away from the last strip, as shown. Repeat this
weaving process till the lattice top is completed.
5. Trim the pastry strips even with the bottom crust. Fold bottom pastry over the lattice strips to build
up the edge. Seal and flute edge.
6. Brush pastry with milk and sprinkle with some granulated sugar before baking, if desired. Adjust
foil. Bake as directed. For an easy lattice, cut pastry into 1/2 inch strips. Lay half the strips 1 inch
apart across pie (twist strips, if desired). Arrange remaining strips in diamond-shaped pattern, as
shown. Press ends of strips into rim of crust. Fold bottom pastry over the lattice strips; seal and
flute.
Fork Trim:
Make a high standing rim. With 4 tined fork, press pastry to rim at 1/2 inch intervals.
Coin:
Trim overhand even with pie pan. Cut circles the size of pennies form pastry scraps with toy cookie
cutter, thimble or bottle cap. Moisten with cold water and place circles on rim, overlapping them
slightly. Press lightly to rim. For one crust pies.

Sparkle tops: Moisten top crust with cold water, using fingers. Then sprinkle evenly with a little
sugar.
Shiny tops: Brush top crust lightly with beaten egg or egg yolk, cream, milk, undiluted evaporated
milk or melted butter, shortening, or salad oil. Sprinkle with sugar if desired.
Decorative Vents: Use tin cookie cutters or cut around homemade patterns with sharp knife to
make steam vents in the shape of the fruit in the pie. Cherries, apples or a cluster of grapes, for in-
stance.
Initial tops: Cut initials with a knife or prick them with a fork of steam vents. A for apple, B for
blueberry, etc.
Crumb crusts are best for freezer pies because they are not as brittle as a standard pastry. A frozen
crumb crust becomes firmer.
Four 2 1/2 inch graham crackers will yield about 1/4 cup crumbs.
Chilling the crust after baking hardens the butter and makes a firmer crust.
For a non-stick crumb crust, wrap a hot, wet towel under the bottom and around the sides of the pie
plate just before serving the pie. Hold the towel against the plate for a few minutes; this loosens the
crust so it will slip out easily.
Preheat oven. Combine all ingredients in a medium bowl. Use a spoon to mix well. Spread mixture
evenly over bottom of a 9 inch pan. Use a smaller pie pan, the back of a large spoon, a custard cup of
your hands to press mixture against bottom and up sides of pan 1/2 inch higher than rim of pan. Bake
and cool. Makes one 9 inch crust.
CRUST CRUMBS
MELTED
BUTTER SUGAR
OTHER
INGREDIENTS
OVEN
TEMP.
BAKING
TIME
Graham-Cracker
1 1/4 cups graham-cracker crumbs 1/3 cup 1/4 cup
375F (190C) 8 minutes
Gingersnap 1 1/4 cups gingersnap crumbs 1/3 cup 1/4 cup
375F (190C) 8 minutes
Vanilla-wafer 1 1/2 cups vanilla-wafer crumbs 1/3 cup 1/4 cup
375F (190C) 8 minutes
Nutty-graham
1 cup graham-cracker crumbs 1/3 cup 1/4 cup
1/3 cup finely chopped walnuts or pecans
375F (190C) 8 minutes
Coconut-graham
1 cup graham-cracker crumbs 1/3 cup 1/4 cup
1/2 cup flaked or shredded coconut
375F (190C) 8 minutes
Coconut-graham
2 cups flaked or shredded coconut 1/4 cup
325F (190C) 8 minutes
Chocolate-cookie 1 1/2 cups chocolate cookie crumbs 1/3 cup 2 Tbsp.
375F (190C) 8 minutes

Tough crust
Crumbly crust
Crust does not brown
Soggy lower crust
Shrinks in pan
Pastry shell blisters
Insufficient fat
Too much water
Over mixing
Too much flour on molding board
Kneading
Too little water
Too much fat
Self rising flour used
Insufficient mixing
Too little fat
Too much water
Too much flour on board
Over mixed
Rolled too thick
Oven temperature too low
Filling too moist
Bottom crust torn or broken
Soaked before baking starts
Using shiny pie pan
Placing pie pan on cookie sheet or
aluminum foil
Oven temperature too low or time to short
Unbalanced recipe
Too much handling
Pastry stretched tightly in pan
Dough stored to long in refrigerator
Dough uneven in thickness
Pastry fitted to tightly in pan
Not pricked enough
Oven temperature to low
POOR CHARACTERISTIC REASON WHY

PERFECT PIE CRUST
3 cups all-purpose flour
1 1/2 tsp. salt
1 1/4 cup shortening
1 whole egg
1/2 cup water
1 tablespoon vinegar
Bake at 400 F for 10-12 minutes. Makes 2 double crusted pie shells.
1. Cut shortening into flour and salt mixture with a pastry blender until particles resemble
coarse crumbs or small peas.
2. Combine water, egg and vinegar. Sprinkle over flour mixture while stirring with a fork,
until particles are just moist enough to cling together and form a ball. You may not need
all the water mixture.
3. Add just the right amount of water. Too little makes a dry dough which is hard to roll
out and cracks around the edge. Too much makes a sticky dough. Either will result in
tough pastry.
4. Flour pastry cloth evenly, working in some flour with your hands. Cloth or stocking
covered rolling pin reduces amount of flour and handling need and makes a tender pas-
try.
5. Form dough into ball. Flatten to 1/2 inch. Roll out on floured pastry cloth to scant 1/8
inch thick circle, at least 2 inches larger than inverted pie plate.
6. To maintain a circular shape and even thickness, roll from the center to edge in all direc-
tions.
7. Transfer rolled out pastry to pie plate by folding in half, then in half again; lift carefully
to plate.
8. Unfold pastry and fit loosely into plate. Pat out air pockets on bottom. Lift sides and let
fall gently into bend of plate. Do not stretch dough or it will shrink.
Instead of folding pastry simply wrap pastry around the rolling pin. Unroll onto the pie
plate. Ease pastry into pie plate, being careful not to stretch it.
9. For single crust pastry, trim pastry to 1/2 inch beyond edge of plate. Fold under extra
pastry and crimp edges and bake as directed in recipes. Before baking prick bottom and
sides of pastry with fork. Bake in a 450 degree oven for 10 - 12 minutes or until golden.
10. For a double crust pie, trim top crust 1/2 inch beyond edge of plate. Fold top crust under
bottom pastry. Seal, crimp edge. Bake as directed in recipe.

A mixture of sugar and
a thickening agent such as
flour, cornstarch, or tapi-
oca is combined with the
fruit.
Cornstarch or tapioca
produces a clearer filling
than flour, but some peo-
ple prefer the flavor of
flour. The amounts of
sugar and thickening de-
pend upon the sweetness
and juiciness of the fruit.
One tablespoon cornstarch
is equal to 2 tablespoons
flour.
A product called Clear
Jel is one of the best pie
filling thickeners. This is a
modified food starch that
produces the correct
thickening. Other starches,
such as corn starch, break
down and result in a runny
filling. To order Clear Jel
call Home Canning Essen-
tials (Alltrista) at 1-800-
392-2575 or Sweet Cele-
brations at 1-800-328-
6722.
Another thickening product is available in the
King Arthur’s Baking Catalog called pie fill-
ing enhancer. This product is a blend of Clear
Jel, fine sugar that keeps the Clear Jel from
clumping and ascorbic acid, to highlight the
flavor the fruit. Use 1/4 to 1/2 cup of enhan-
cer in your favorite apple, blueberry, cherry,
pear, strawberry-rhubarb or other fruit pie.
This thickener is not gluey, not cloudy, just
smooth and not watery. To order a free cata-
log call 1-800-827-6836.
Sometimes for berries 1 cup of sugar is
enough, but if berries are very tart or not fully
ripe you may need as much as 3 cups. 1 1/3
cup sugar is the average amount.
Some like to add spice to berry pies; usually
1/3 tsp. cinnamon or 1/4 tsp. cloves or nut-
meg.
One to two tablespoons lemon juice can be
added to berry pie filling to bring out the best
flavor.
Be sure to use either a double-crust or lattice-
top as the recipe specifies. It won’t work to
substitute one for the other because some fill-
ings require the venting of the lattice; others,
such as apples, benefit from steaming under a
top crust.
You can use either fresh or frozen fruit in
your pie. Be sure to mix frozen fruit with the
sugar-flour mixture; let it thaw for 15 to 30
minutes - until the fruit is partially thawed
but still icy-before transferring it to a pastry
lined plate. Pies made with frozen fruit will
take a little longer to bake. Before the foil is
removed, bake a pie made with frozen fruit in
a 375 degree oven about 50 minutes (rather
than 25). Remove the foil and continue bak-
ing until the pie is done (usually 20 to 30
minutes longer).
Place a pizza pan or baking sheet under a
double crust fruit pie when you put it in the
oven to catch any filling that bubble over.
Fruit pies need to bubble in the center to be
properly cooked - otherwise the thickener
won’t be clear. To see if the pie is done,
make a small hole in the top crust and spoon
out some of the juice. If the juice is clear, the
pie is done. If it’s cloudy, bake the pie a little
longer.
Allow fruit pies to cool 3-4 hours before
serving so the pieces don’t fall apart when
you cut it.
FRUIT PIES

ALL AMERICAN PIE:
Which pie is the number one American favorite? You
guessed it-apple pie. Apple pies date back to 14th
Century England when apple filling was substituted in
traditional meat pies. The Pilgrims brought apples to
America and served apple pie for breakfast. In Colo-
nial America, apple pie was served with, not after, the
main course at lunch or dinner.
CHRISTMAS PIE:
Mincemeat pie has been a traditional Christmas pie
since the 13th century. These early pies were baked in
a rectangular crust that symbolized the manger. The
spices were symbolic of the wise men’s gifts. For
good luck, it was a custom to eat a mincemeat pie each
day for the 12 days between Christmas and the
Twelfth Night.
BASIC FRUIT PIE Prepare favorite pastry for double crust 9” pie. To make filling: mix together dry ingredients.
Toss with fruit and lemon juice (1 -2 Tbsp.), if used. Turn into pastry-lined pie plate. Dot with
margarine. Make several slits in top crust. Cover pie with pastry; seal and flute edge. Bake as
directed or until crust is browned.
RHUBARB
1 1/4 cups sugar
1/4 cup corn starch
2 tsp. orange rind
1/4 tsp. salt
5 cups 1-inch pieces rhubarb
1 Tbsp. margarine
Bake in 425 oven 45 minutes. Note: 2 (1 lb., 4
oz) pkgs. Frozen rhubarb thawed and drained,
may be substituted for fresh.
CHERRY
3/4 cup sugar
3 Tbsp. corn starch
1/2 tsp. salt
2 cans (1 lb. each) pitted sour red
cherries, drained with 1/3 cup juice
reserved
1/4 tsp. almond extract
1 Tbsp. margarine
Mix dry ingredients; too with cherries, juice
and almond extract. Bake in 425 oven 15 min-
utes; reduce to 350 and bake 40 minutes.
PINEAPPLE
3/4 cup sugar
1/4 cup corn starch
1/4 tsp. salt
1/4 tsp. nutmeg
4 cups drained, diced, ripe, fresh
pineapple
1 Tbsp. margarine
Bake in 425 oven 15 minutes; reduce to 350
and bake 40 minutes longer.
PEACH
3/4 cup sugar
2 1/2 Tbsp. corn starch
1/2 tsp. cinnamon
6 cups sliced, peeled, pitted peaches
1 Tbsp. lemon juice
1 Tbsp. margarine
Bake in 425 oven 40 minutes.

APPLE 3/4 cup sugar
1 Tbsp. corn starch
1 tsp. cinnamon
6 cups sliced, pared, cored apples
1 Tbsp. lemon juice
1 Tbsp. margarine
Bake in 425 oven 50 minutes.
BLUEBERRY
1 cup sugar
2 1/2 Tbsp. cornstarch
4 cups blueberries
1 Tbs. margarine
Bake in 425 oven 40 minutes.
PEAR
1/2 cup firmly packed dark brown sugar
3 Tbsp. corn starch
1/2 tsp. ginger
1/8 tsp. salt
4 1/2 cups thinly sliced, pared, cored ripe pears
1 Tbsp. lemon juice
1 Tbsp. margarine
Bake in 425 oven 15 minutes, reduce to 350 and
bake 40 minutes longer.
STRAWBERRY
1 cup sugar
2 1/2 Tbsp. corn starch
4 cups strawberries, hulled and halved
1 Tbsp. margarine
Bake in 425 oven 40 minutes.
MICROWAVE FRENCH APPLE PIE
1 microwaved 9-inch pastry shell, with
high fluted edge.
Filling:
5-6 cups peeled, sliced apples
1 Tbsp. lemon juice
1/2 cup sugar
2 Tbsp. flour
1/2 tsp. cinnamon or 1/4 tsp. nutmeg
Topping:
1/4 cup butter or margarine
1/2 cup flour
1/4 cup brown or granulated sugar
1/2 tsp. nutmeg
Toss filling ingredients together. Pile high in pas-
try shell. Cut butter into other topping ingredients
until crumbly. Sprinkle evenly over filling. Place
wax paper under plate while microwaving. Micro-
wave at high 8 minutes. Rotate 1/2 turn. Micro-
wave 6 to 10 minutes until apples are tender.
CHERRY PIE
1 1/4 - 1 1/2 cups sugar
2 Tbsp. quick-cooking tapioca
5 cups fresh or frozen unsweetened pitted
tart red cherries
1/4 tsp. almond extract
1 recipe Pastry for Double-Crust Pie
In a large mixing bowl stir together sugar and
tapioca. Add cherries and almond extract. Gently
toss to coat. Let mixture stand about 15 minutes or
until a syrup forms, stirring occasionally. (If using
frozen fruit, let mixture stand about 1 hour.)
Meanwhile, prepare and roll out pastry. Line a 9-
inch pie plate with half of the pastry; set aside.
Stir cherry mixture. Transfer cherry mixture to
pastry-lined pie plate. Trim pastry to edge of pie
plate. Cut slits in remaining pastry; place on fill-
ing and seal. Crimp edge as desired.
To prevent overbrowning, cover edge of the pie
with foil. Bake in a 375 oven for 25 minutes for
fresh fruit (50 minutes for frozen fruit). Remove
foil. Bake for 25 to 35 minutes more for fresh fruit
(about 30 minutes more for frozen fruit) or until
top is golden. Cool completely on a wire rack.
Lattice Cherry Pie: Prepare as above, except
substitute 1 recipe pastry for lattice-top pie.

CUSTARD PIES
Custard pies consist of an egg and milk moisture in which the egg cooks and thus thickens the
pie during baking. The best custard pies are smooth and velvety. They may look difficult, but
they are easy to make.
Use a wire whisk to thoroughly mix the filling ingredients.
Avoid messy spills by placing the pie shell on the oven rack, then pouring in the liquid pie
filling.
When baking pumpkin and other custard type pies, start with the higher temperature to help
“set” the crust, preventing it from getting soggy. Switch to the lower temperature, allowing
the pie to bake gradually and help prevent it from burning.
To check for doneness after baking for the recommended time, insert a knife off-center; if it
comes out clean with no custard filling clinging to it, the pie is done. Or, gently shake the
pie. If that area that appears to be liquid is less than the size of a quarter, the pie is done. It
will continue to set after it is removed from the oven.
Overcooking custard mixtures results in an undesirable product. When a baked custard pie
overcooks, tiny bubbles appear around the edge of the pie, and there is a separation of liquid
from solid when custard is cut.
After the custard pie cools to room temperature, always cover and refrigerate it if it’s to be
stored for any length of time before serving. Cover and chill to after serving as well.
To avoid bubbles on the surface of custard pies, beat the filling mixture only until it is
mixed well. Do not beat so hard that the mixture becomes foamy.
The problem with milk-based custard pies is a soggy crust on the bottom of a pie. Here are 2
solutions:
1. Use a heavy freezer to oven glass baking dish. They retain the heat longer than
metal does and gives a brown well-cooked bottom crust.
2. Bake the unfilled crust for about 5 minutes. Do not prick the crust before baking
it and cool it for 15 minutes before adding filling. After the crust has been filled,
bake the pie as directed in the recipe. It may be necessary to cover edge with foil
to prevent over browning.

CREAM PIES
The filling for a cream pie is cooked before it goes into a baked pastry shell.
After cooling pies to room temperature, cover and refrigerate any with fillings containing eggs
or dairy products.
To cover a meringue-topped pie, insert several toothpicks halfway into the surface of the me-
ringue to hold wrap away from pie. Loosely cover with clear plastic wrap and chill to store
(After the meringue is refrigerated, it will be somewhat rubbery).
Tips to Make a Smooth Cream Filling:
For a smooth consistency in cream fillings be sure to:
1. Mix sugar and cornstarch thoroughly before adding liquid. This separates the starch
granules and helps prevent lumping.
2. Stir constantly when cooking filling to prevent scorching. Don’t stir too quickly or the
mixture will break down and won’t thicken.
3. Boil 2 minutes so starch will cook thoroughly and filling won’t taste starchy.
4. Be sure to add at least half of the hot cornstarch mixture to egg yolks to prevent thinning
after filling is cool.
5. Never add egg yolks directly to hot mixture. Particles of cooked egg will result.
6. Use a heavy saucepan.
7. If butter or margarine is added to the filling, stir it very gently, or the mixture will break
down and become thin.

Tips for Meringues:
1. Avoid using plastic bowls and utensils when
possible because plastic attracts fat.
2. Older eggs increase volume in meringue.
3. Use egg whites that are room temperature. To
speed this up, place the bowl containing the egg
whites in another bowl containing about 1 inch of
warm water.
4. Avoid getting any yolk into the bowl of whites.
If even a drop of yolk is in the egg whites, they
will not beat to the desired stiffness.
5. Whip egg whites till frothy, then add cream of
tartar. Beat egg whites until soft peaks form. Then
add sugar (1 tablespoon at a time) beating well
after each addition. Beat until stiff but not rigid.
6. Beat until sugar dissolves to help prevent bead-
ing (those brown sugar drips on top). To test, rub
some meringue between your fingers to see if it is
still grain. The grains are undissolved sugar.
7. Meringues are more tender when beaten at a
high speed throughout beating time.
8. Cream of tartar increases foam stability to heat.
9. For less leakage and slippage, put meringues on
top of hot fillings sealing it well by pushing it
unto the edge of the fluted pastry.
10. Put spoonfuls of meringue on filling so that it
touches the edge of crust all around. This prevents
shrinkage. Also if filling is not covered com-
pletely, the oven heat may cause it to weep.
11. Meringue may be topped with coconut, sliv-
ered almonds or mini chocolate chips before bak-
ing.
12. Bake Meringues for 12-15 minutes at 350 de-
grees or until peaks are brown. Too long for bak-
ing causes weeping.
13. Cool away from drafts in a warm place to
avoid shrinkage.
14. For ease in cutting meringue, dip knife in cold
water.
15.You can substitute 1 tsp. lemon juice for cream
of tartar in meringues. The acid gives the same
result.
Trouble Shooting Guide to Meringues:
If your meringue has one of the following
problems, here’s the solution:
If your Meringue is Low in Volume:
Start adding the sugar to the egg whites as
soon as soft peaks form (tips bend over
slightly).
After adding the sugar, beat till stiff peaks
form and the sugar is completely dissolved.
If your Meringue Shrinks:
Beat meringue till stiff peaks form and sugar
is completely dissolved.
If your Meringue Beads or Weeps:
Be sure the oven temperature is not too low.
If your Meringue Leaks:
Spread the meringue on the filling while fill-
ing is still hot, sealing it well to edges of the
pastry.
Sky High No Weep Meringue
1 Tbsp. cornstarch
3 egg whites
7 Tbsp sugar
1/2 cup cold water
1/4 tsp. cream of tartar
1 tsp. vanilla
1. Dissolve cornstarch in cold water. Cook until
clear, cool.
2. In a medium mixing bowl beat the egg whites
until they are frothy.
3. Add cream of tartar and beat egg whites until
soft peaks form.
4. Beat in cooled cornstarch paste.
5. Add sugar ( 1 Tbsp. at a time) and beat until
stiff and sugar is dissolved.
6. Add vanilla and mix.
7. Immediately spread meringue over pie, care-
fully sealing to edge of pastry to prevent
shrinkage.
8. Bake at 350F for 12-15 minutes or until
golden brown.
Store or Freeze your Pie Safely: Fruit pies may stand at room temperature for 24 hours. Cover and refrigerate for longer storage.
Custard and cream pies should be served as soon as they are cool, or covered lightly with plastic
wrap and refrigerated for up to 2 days. Don’t freeze cream or custard pies.
To freeze unbaked fruit pies, treat any light colored fruit with an ascorbic-acid color keeper.
Assemble the pie in a metal or freeze-to-oven pie plate. Place it in a freezer bag; seal, label and
freeze. Frozen pies should be used within 2-4 months. To bake a frozen pie, unwrap it and cover
with foil. Bake in a 450 F oven for 15 minutes; reduce the temperature to 357 F and bake another
15 minutes. Uncover and continue baking for 55-60 minutes more or until crust is golden and fill-
ing is bubbly.
To freeze baked fruit pies, bake and cool the pie completely. Place it in a freezer bag, seal, label,
Refrigerator Pies - Chiffon Pies Chiffon pies can be tricky, so it’s important to
fully understand the technique. For a smooth pie,
the gelatin needs to be of the proper consistency.
1. Combine the gelatin with other ingredients
and heat as recipe directs until the gelatin dis-
solves and the liquid is clear. The gelatin must
be completely dissolved for the mixture to
thicken evenly.
2. Pour the hot gelatin mixture into a metal bowl
and chill in the refrigerator or in another bowl
of iced water. Metal helps the mixture cool
because it conducts the heat to the outside
more quickly than other materials.
3. Chill the gelatin mixture until it has the con-
sistency of unbeaten egg whites. Then remove
from the refrigerator of bowl of iced water and
let stand at room temperature while you beat
the egg whites; this will prevent the gelatin
from becoming to thick.
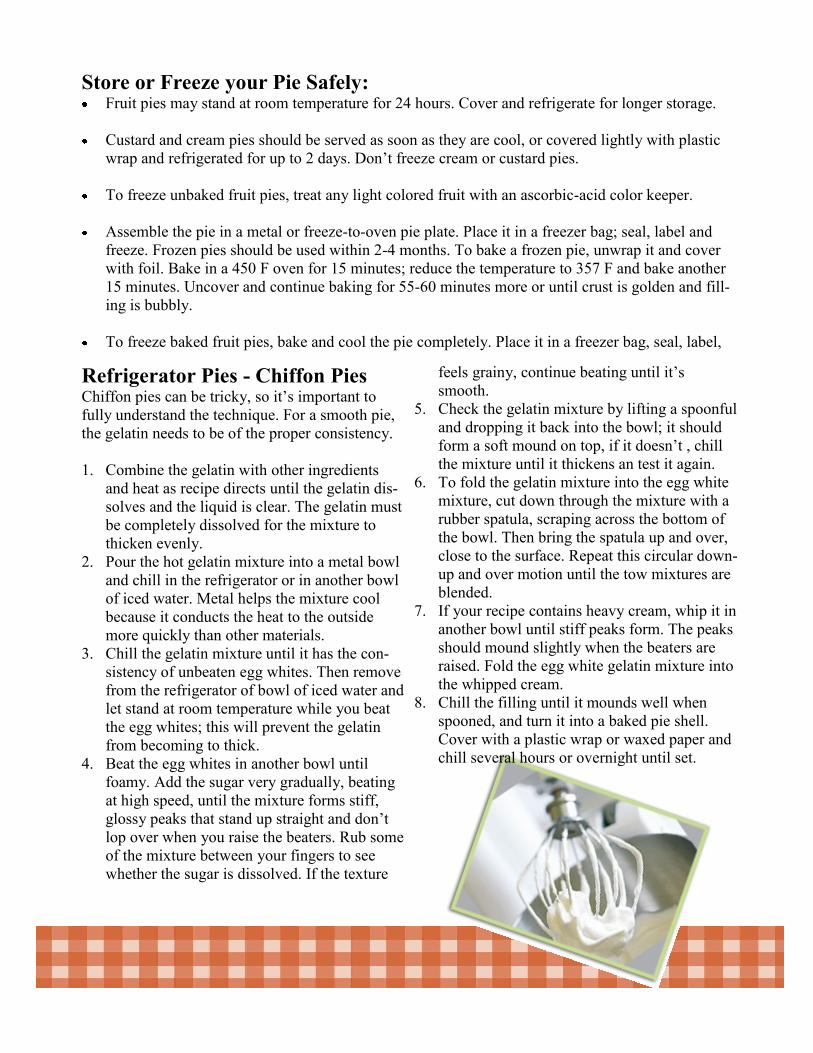
4. Beat the egg whites in another bowl until
foamy. Add the sugar very gradually, beating
at high speed, until the mixture forms stiff,
glossy peaks that stand up straight and don’t
lop over when you raise the beaters. Rub some
of the mixture between your fingers to see
whether the sugar is dissolved. If the texture
feels grainy, continue beating until it’s
smooth.
5. Check the gelatin mixture by lifting a spoonful
and dropping it back into the bowl; it should
form a soft mound on top, if it doesn’t , chill
the mixture until it thickens an test it again.
6. To fold the gelatin mixture into the egg white
mixture, cut down through the mixture with a
rubber spatula, scraping across the bottom of
the bowl. Then bring the spatula up and over,
close to the surface. Repeat this circular down-
up and over motion until the tow mixtures are
blended.
7. If your recipe contains heavy cream, whip it in
another bowl until stiff peaks form. The peaks
should mound slightly when the beaters are
raised. Fold the egg white gelatin mixture into
the whipped cream.
8. Chill the filling until it mounds well when
spooned, and turn it into a baked pie shell.
Cover with a plastic wrap or waxed paper and
chill several hours or overnight until set.