
Oracle Database Installation Guide 11g Release 1 (11.1) for AIX
248
Oracle® Database Installation Guide 11g Release 1 (11.1) for AIX Based Systems B32076-03 August 2008
-
Upload
khangminh22 -
Category
Documents
-
view
0 -
download
0
Transcript of Oracle Database Installation Guide 11g Release 1 (11.1) for AIX

Oracle® DatabaseInstallation Guide
11g Release 1 (11.1) for AIX Based Systems
B32076-03
August 2008

Oracle Database Installation Guide, 11g Release 1 (11.1) for AIX Based Systems
B32076-03
Copyright © 2008, Oracle. All rights reserved.
Primary Author: Namrata Bhakthavatsalam
Contributing Authors: Kevin Flood, Clara Jaeckel, Emily Murphy, Terri Winters
Contributors: David Austin, Subhranshu Banerjee, Mark Bauer, Robert Chang, Jonathan Creighton, Sudip Datta, Thirumaleshwara Hasandka, Joel Kallman, George Kotsovolos, Simon Law, Richard Long, Rolly Lv, Padmanabhan Manavazhi, Sreejith Minnanghat, Krishna Mohan, Rajendra Pingte, Hanlin Qian, Janelle Simmons, Roy Swonger, Lyju Vadassery, Douglas Williams
The Programs (which include both the software and documentation) contain proprietary information; they are provided under a license agreement containing restrictions on use and disclosure and are also protected by copyright, patent, and other intellectual and industrial property laws. Reverse engineering, disassembly, or decompilation of the Programs, except to the extent required to obtain interoperability with other independently created software or as specified by law, is prohibited.
The information contained in this document is subject to change without notice. If you find any problems in the documentation, please report them to us in writing. This document is not warranted to be error-free. Except as may be expressly permitted in your license agreement for these Programs, no part of these Programs may be reproduced or transmitted in any form or by any means, electronic or mechanical, for any purpose.
If the Programs are delivered to the United States Government or anyone licensing or using the Programs on behalf of the United States Government, the following notice is applicable:
U.S. GOVERNMENT RIGHTS Programs, software, databases, and related documentation and technical data delivered to U.S. Government customers are "commercial computer software" or "commercial technical data" pursuant to the applicable Federal Acquisition Regulation and agency-specific supplemental regulations. As such, use, duplication, disclosure, modification, and adaptation of the Programs, including documentation and technical data, shall be subject to the licensing restrictions set forth in the applicable Oracle license agreement, and, to the extent applicable, the additional rights set forth in FAR 52.227-19, Commercial Computer Software--Restricted Rights (June 1987). Oracle USA, Inc., 500 Oracle Parkway, Redwood City, CA 94065.
The Programs are not intended for use in any nuclear, aviation, mass transit, medical, or other inherently dangerous applications. It shall be the licensee's responsibility to take all appropriate fail-safe, backup, redundancy and other measures to ensure the safe use of such applications if the Programs are used for such purposes, and we disclaim liability for any damages caused by such use of the Programs.
Oracle, JD Edwards, PeopleSoft, and Siebel are registered trademarks of Oracle Corporation and/or its affiliates. Other names may be trademarks of their respective owners.
The Programs may provide links to Web sites and access to content, products, and services from third parties. Oracle is not responsible for the availability of, or any content provided on, third-party Web sites. You bear all risks associated with the use of such content. If you choose to purchase any products or services from a third party, the relationship is directly between you and the third party. Oracle is not responsible for: (a) the quality of third-party products or services; or (b) fulfilling any of the terms of the agreement with the third party, including delivery of products or services and warranty obligations related to purchased products or services. Oracle is not responsible for any loss or damage of any sort that you may incur from dealing with any third party.
Contents
Preface ................................................................................................................................................................. xi
Audience....................................................................................................................................................... xiDocumentation Accessibility ..................................................................................................................... xiCommand Syntax ....................................................................................................................................... xiiAccessing Documentation......................................................................................................................... xiiRelated Documentation............................................................................................................................ xiiiTypographic Conventions........................................................................................................................ xiv
What’s New in Oracle Database 11g ............................................................................................... xv
New Components Available for Installation......................................................................................... xvChanges in the Install Options ................................................................................................................ xviDatabase Configuration Assistant ......................................................................................................... xviiDatabase Upgrade Assistant.................................................................................................................. xviiiAutomatic Storage Management Fast Mirror Resync.......................................................................... xixSYSASM Privilege for Automatic Storage Management Administration ........................................ xxAutomatic Maintenance Tasks Management........................................................................................ xxAutomatic Diagnostic Repository........................................................................................................... xxEnhanced Optimal Flexible Architecture............................................................................................... xxiOracle Direct Network File System Client............................................................................................ xxiiDeprecated Components in Oracle Database 11g Release 1 (11.1).................................................... xxii
1 Overview of Oracle Database Installation
Planning the Installation ........................................................................................................................ 1-1New Oracle Products Installed with This Release ............................................................................ 1-2
Oracle Application Express .............................................................................................................. 1-2Oracle Warehouse Builder ................................................................................................................ 1-3Oracle Configuration Manager ........................................................................................................ 1-3Oracle Database Vault ....................................................................................................................... 1-3
Installation Considerations .................................................................................................................... 1-4Hardware and Software Certification............................................................................................. 1-4Multiple Oracle Homes Support...................................................................................................... 1-4
Installing the Software on a System with an Existing Oracle Installation.......................... 1-4Oracle Cluster Synchronization Services........................................................................................ 1-5Using Network Attached Storage or NFS File Systems ............................................................... 1-5Default Audit Policy and Initialization Parameters...................................................................... 1-6
Oracle Database Installation Methods................................................................................................. 1-6Interactive Installation Methods ...................................................................................................... 1-6Automated Installation Methods Using Response Files .............................................................. 1-7
Oracle Database Installation Types ...................................................................................................... 1-7Database Configuration Options .......................................................................................................... 1-8
Preconfigured Database Types ........................................................................................................ 1-8Installation Choices that Affect Database Creation....................................................................... 1-8Creating a Database After Installation............................................................................................ 1-9
Database Storage Options ...................................................................................................................... 1-9File System .......................................................................................................................................... 1-9Automatic Storage Management .................................................................................................. 1-10Raw Devices..................................................................................................................................... 1-12
Database Management Options ......................................................................................................... 1-12Management Options for Preconfigured Databases.................................................................. 1-13Management Options for Custom Databases ............................................................................ 1-14Features Provided by Oracle Enterprise Manager Database Control .................................... 1-14
Database Backup and Recovery Options.......................................................................................... 1-14Enabling Automated Backups....................................................................................................... 1-15Backup Job Default Settings ......................................................................................................... 1-15
E-mail Notification Options................................................................................................................ 1-16
2 Oracle Database Preinstallation Requirements
Logging In to the System as root......................................................................................................... 2-1Checking the Hardware Requirements................................................................................................ 2-2
Memory Requirements...................................................................................................................... 2-3System Architecture........................................................................................................................... 2-3Disk Space Requirements.................................................................................................................. 2-4
Checking the Software Requirements ................................................................................................. 2-5Operating System Requirements ..................................................................................................... 2-5Compiler Requirements .................................................................................................................... 2-6Patch Requirement............................................................................................................................. 2-6Additional Software Requirements ................................................................................................. 2-7
Oracle JDBC/OCI Drivers ......................................................................................................... 2-8ODBC Drivers.............................................................................................................................. 2-8Oracle Messaging Gateway ....................................................................................................... 2-8Browser Requirements ............................................................................................................... 2-8
Preinstallation Requirements for Oracle Configuration Manager................................................. 2-8Checking the Network Setup................................................................................................................. 2-9
Configuring Name Resolution ......................................................................................................... 2-9Installing on DHCP Computers .................................................................................................... 2-10

Installing on Multihomed Computers ......................................................................................... 2-10Installing on Computers with Multiple Aliases ......................................................................... 2-11Installing on Non-Networked Computers .................................................................................. 2-11
Creating Required Operating System Groups and Users ............................................................. 2-11Creating the Oracle Inventory Group .......................................................................................... 2-13Creating the OSDBA Group .......................................................................................................... 2-14Creating an OSOPER Group (Optional) ...................................................................................... 2-15Creating an OSASM Group ........................................................................................................... 2-15Creating the Oracle Software Owner User.................................................................................. 2-15
Determining Whether an Oracle Software Owner User Exists ......................................... 2-16Creating an Oracle Software Owner User............................................................................ 2-16Modifying an Oracle Software Owner User ........................................................................ 2-17
Configure Shell Limits and System Configuration Parameters .................................................. 2-17Configure Shell Limits.................................................................................................................... 2-17Configure System Configuration Parameters ............................................................................. 2-18
Identifying Required Software Directories ..................................................................................... 2-18Oracle Base Directory ..................................................................................................................... 2-19Oracle Inventory Directory............................................................................................................ 2-19Oracle Home Directory .................................................................................................................. 2-20
Identifying or Creating an Oracle Base Directory .......................................................................... 2-20Identifying an Existing Oracle Base Directory............................................................................ 2-21Creating an Oracle Base Directory................................................................................................ 2-21
Choosing a Storage Option for Oracle Database and Recovery Files ......................................... 2-22Creating Directories for Oracle Database or Recovery Files ........................................................ 2-23
Guidelines for Placing Oracle Database Files on a File System................................................ 2-23Creating Required Directories....................................................................................................... 2-24
Preparing Disk Groups for an Automatic Storage Management Installation .......................... 2-25General Steps for Configuring Automatic Storage Management ............................................ 2-25Step 1: Identifying Storage Requirements for Automatic Storage Management................... 2-25Step 2: Using an Existing Automatic Storage Management Disk Group ............................... 2-28Step 3: Creating DAS or SAN Disk Partitions for Automatic Storage Management ............ 2-29Step 4: Configuring Disks for Automatic Storage Management.............................................. 2-30Identifying Required Raw Partitions for Database Files ........................................................... 2-30Configuring Database File Storage for Automatic Storage Management and Raw Devices 2-31
Stopping Existing Oracle Processes ................................................................................................... 2-33Configuring the oracle User’s Environment .................................................................................... 2-34Running the rootpre.sh Script ....................................................................................................... 2-37
3 Installing Oracle Database
Preinstallation Considerations .............................................................................................................. 3-1Performing Multiple Oracle Database Installations in Noninteractive Mode .......................... 3-1
Reviewing Installation Guidelines....................................................................................................... 3-1Selecting the Database Character Set .............................................................................................. 3-2Installing the Sample Schemas ......................................................................................................... 3-3
Accessing the Installation Software ..................................................................................................... 3-4Downloading Oracle Software from the Oracle Technology Network Web Site..................... 3-4
Downloading the Installation Archive Files ........................................................................... 3-4

Extracting the Installation Files................................................................................................. 3-5Copying the Software to the Hard Disk ......................................................................................... 3-5
Mounting Disks........................................................................................................................... 3-5Copying the Oracle Database Software to a Hard Disk ........................................................ 3-6
Database Security Options ..................................................................................................................... 3-6Installing the Oracle Database Software ............................................................................................. 3-7
Running Oracle Universal Installer ................................................................................................. 3-7Installing Automatic Storage Management ..................................................................................... 3-14
Step 1: Reviewing Automatic Storage Management Installation Considerations................. 3-14Step 2: Installing the Automatic Storage Management Instance and configuring Disk Groups.... 3-15Step 3: Installing Oracle Database to Use Automatic Storage Management.......................... 3-17Step 4: Testing the Automatic Storage Management Installation............................................ 3-19
Installing Oracle Database Examples................................................................................................ 3-19
4 Oracle Database Postinstallation Tasks
Required Postinstallation Tasks ............................................................................................................ 4-1Downloading and Installing Patches .............................................................................................. 4-1Configuring Oracle Products............................................................................................................ 4-2
Recommended Postinstallation Tasks.................................................................................................. 4-2Creating a Backup of the root.sh Script...................................................................................... 4-2Configuring New or Upgraded Databases..................................................................................... 4-3Setting Up User Accounts ................................................................................................................. 4-3Setting the NLS_LANG Environment Variable............................................................................. 4-3Generating the Client Static Library................................................................................................ 4-4Direct NFS Client ............................................................................................................................... 4-4
Enabling Direct NFS Client ....................................................................................................... 4-5Disabling Direct NFS Client ...................................................................................................... 4-7Checking NFS Buffer Size Parameters ..................................................................................... 4-7
Enabling Large Page Support........................................................................................................... 4-7Required Product-Specific Postinstallation Tasks............................................................................. 4-8
Configuring Oracle Net Services ..................................................................................................... 4-8Configuring Oracle Label Security .................................................................................................. 4-9Configuring Oracle Database Vault ................................................................................................ 4-9Configuring Oracle Messaging Gateway ....................................................................................... 4-9
Modifying the listener.ora File for External Procedures .................................................... 4-10Modifying the tnsnames.ora File for External Procedures ................................................ 4-10Setting Up the mgw.ora Initialization File .......................................................................... 4-11
Configuring Oracle Precompilers ................................................................................................. 4-11Configuring Pro*C/C++ ......................................................................................................... 4-11Configuring Pro*FORTRAN .................................................................................................. 4-12
Configuring Secure Sockets Layer................................................................................................ 4-12Installing Oracle Text Supplied Knowledge Bases .................................................................... 4-12
Postinstallation Tasks for Oracle Application Express .................................................................. 4-12Restarting Processes........................................................................................................................ 4-13Choosing an HTTP Server ............................................................................................................. 4-13
About the Embedded PL/SQL Gateway.............................................................................. 4-13

About Oracle HTTP Server and mod_plsql ......................................................................... 4-13About Password Security ....................................................................................................... 4-13
Configuring the Embedded PL/SQL Gateway .......................................................................... 4-14Configuring the Embedded PL/SQL Gateway in New Installation or When Upgrading Database 4-14Disabling and Enabling the Oracle XML DB HTTP Server ............................................... 4-14
Copying the Images Directory ...................................................................................................... 4-15Copying the Images Directory After an Upgrade............................................................... 4-16Copying the Images Directory After a New Installation ................................................... 4-16
Configuring Oracle HTTP Server in a New Installation ........................................................... 4-17Configuring Oracle HTTP Server Release 9.0.3 in a New Installation............................. 4-17Configuring Oracle HTTP Server distributed with Oracle Database 11g or Oracle Application Server 10g in a New Installation 4-19
Enabling Network Services in Oracle Database 11g .................................................................. 4-22Running Oracle Application Express in Other Languages....................................................... 4-24
Installing a Translated Version of Oracle Application Express ........................................ 4-25Managing JOB_QUEUE_PROCESSES ......................................................................................... 4-25
Viewing the Number of JOB_QUEUE_PROCESSES .......................................................... 4-25Changing the Number of JOB_QUEUE_PROCESSES........................................................ 4-26
Obfuscating PlsqlDatabasePassword Parameter........................................................................ 4-26Obfuscating Passwords........................................................................................................... 4-26
Logging In to Oracle Application Express .................................................................................. 4-26Oracle Application Express User Roles ................................................................................ 4-27Setting Up Your Local Environment..................................................................................... 4-27
Patching Oracle Application Express 3.0..................................................................................... 4-27Postinstallation Database Configuration for Oracle Configuration Manager.......................... 4-28
Preparing Pre-9.2 Databases .......................................................................................................... 4-28Instrumenting the Database for Configuration Collections...................................................... 4-29Additional Step for E-Business Suites.......................................................................................... 4-29Additional Step for Oracle Enterprise Manager Grid Control ................................................. 4-30
5 Getting Started with Oracle Database
Checking the Installed Oracle Database Contents and Directory Location ................................. 5-1Logging In to Oracle Enterprise Manager Database Control .......................................................... 5-1Managing Automatic Storage Management ....................................................................................... 5-3
Starting and Stopping Automatic Storage Management ............................................................. 5-3Automatic Storage Management Utilities ...................................................................................... 5-3
Accessing Oracle Database with SQL*Plus ........................................................................................ 5-3Accessing Oracle Database with SQL Developer .............................................................................. 5-4Reviewing Accounts and Passwords .................................................................................................... 5-4Unlocking and Resetting User Passwords........................................................................................... 5-7
Using Database Control to Unlock Accounts and Reset Passwords .......................................... 5-7Using SQL*Plus to Unlock Accounts and Reset Passwords ........................................................ 5-8Unlocking and Changing Passwords.............................................................................................. 5-8
Identifying Databases ............................................................................................................................. 5-9Locating the Server Parameter File .................................................................................................... 5-10Reviewing Tablespaces and Data Files, Redo Log Files, and Control Files .............................. 5-10
Identifying Tablespaces and Data Files ....................................................................................... 5-10Locating Redo Log Files ................................................................................................................. 5-11Locating Control Files..................................................................................................................... 5-12
6 Removing Oracle Software
Overview .................................................................................................................................................... 6-1Identifying All Instances ........................................................................................................................ 6-1Removing Oracle Configuration Manager.......................................................................................... 6-2Removing Oracle Application Express from the Database.............................................................. 6-2Removing an Oracle Database............................................................................................................... 6-3Removing an Automatic Storage Management Instance ................................................................. 6-4Reconfiguring Oracle Cluster Synchronization Services ................................................................. 6-5
Identifying Oracle Database 11g Oracle Homes............................................................................ 6-6Reconfiguring the Oracle CSS Daemon .......................................................................................... 6-6Deleting the Oracle CSS Daemon Configuration .......................................................................... 6-7
Removing Oracle Software..................................................................................................................... 6-8
A Installing and Configuring Oracle Database Using Response Files
How Response Files Work? ................................................................................................................... A-1Reasons for Using Silent Mode or Noninteractive Mode............................................................ A-2Creating a Database Using Automatic Storage Management as the Storage Option for Database Files A-3General Procedure for Using Response Files ................................................................................ A-3
Creating the oraInst.loc File .................................................................................................................. A-3Preparing a Response File ..................................................................................................................... A-4
Editing a Response File Template................................................................................................... A-4Recording a Response File ............................................................................................................... A-5
Running Oracle Universal Installer Using a Response File ........................................................... A-7Running Net Configuration Assistant Using a Response File....................................................... A-8Running Database Configuration Assistant Using a Response File............................................. A-9
Using Database Configuration Assistant in Noninteractive Mode ........................................... A-9Using Database Configuration Assistant in Silent Mode............................................................ A-9Running Database Configuration Assistant in Noninteractive or Silent Mode....................... A-9
B Cloning an Oracle Home
C Using NAS Devices
General Configuration Guidelines for NAS Devices ...................................................................... C-1NFS Feature Description........................................................................................................................ C-2Choosing Mount Points ......................................................................................................................... C-2
Choosing Mount Points for Oracle Software Files ....................................................................... C-2Choosing Mount Points for Oracle Database and Recovery Files ............................................. C-4
Creating Files on a NAS Device for Use with Automatic Storage Management........................ C-4NFS Mount Options................................................................................................................................ C-5

D Optimal Flexible Architecture
Overview of the Optimal Flexible Architecture Standard .............................................................. D-1Implementing Optimal Flexible Architecture ................................................................................... D-1
File Systems........................................................................................................................................ D-1Number of File Systems ............................................................................................................ D-2Naming Conventions ................................................................................................................ D-2
Naming Directories........................................................................................................................... D-2Oracle Base Directory Naming Convention........................................................................... D-2Naming Mount Points for Very Large Databases (VLDBs)................................................. D-2Referring to Path Names........................................................................................................... D-3Oracle Home Directory Naming Convention........................................................................ D-3Naming Subdirectories ............................................................................................................. D-3
Naming Database Files..................................................................................................................... D-4Separating Segments with Different Requirements..................................................................... D-5Exploiting the Optimal Flexible Architecture Structure for Oracle Files.................................. D-6Optimal Flexible Architecture File Mapping ................................................................................ D-6
E Managing Oracle Database Port Numbers
About Managing Ports ........................................................................................................................... E-1Viewing Port Numbers and Access URLs .......................................................................................... E-2Port Numbers and Protocols of Oracle Components ....................................................................... E-2Changing the Oracle Enterprise Management Agent Port.............................................................. E-4Changing the Oracle Enterprise Manager Database Console Ports .............................................. E-4Changing the Oracle Ultra Search Ports ............................................................................................. E-5Changing the Oracle XML DB Ports.................................................................................................... E-5
F Configuring Oracle Database Globalization Support
Installing and Using Oracle Components in Different Languages............................................... F-1Configuring Oracle Components to Run in Different Languages ............................................. F-1
Determining the Operating System Locale by Using the LANG Environment Variable F-2Configuring Locale and Character Sets by Using the NLS_LANG Environment Variable .... F-3
Installing Translation Resources..................................................................................................... F-3Running Oracle Universal Installer in Different Languages ......................................................... F-4
G Troubleshooting
Verify Requirements ............................................................................................................................... G-1X Window Display Errors ...................................................................................................................... G-1What to Do If an Installation Error Occurs?....................................................................................... G-2Reviewing the Log of an Installation Session ................................................................................... G-3Troubleshooting Hostname Changes and CSS.................................................................................. G-3Troubleshooting Oracle Configuration Manager ............................................................................. G-4Troubleshooting Configuration Assistants ........................................................................................ G-6
Configuration Assistant Failure...................................................................................................... G-6Irrecoverable Errors .......................................................................................................................... G-6
Silent-Mode Response File Error Handling....................................................................................... G-7

Cleaning Up After a Failed Installation.............................................................................................. G-7After Failed Upgrade Installation ........................................................................................................ G-7
Reverting to Earlier Release............................................................................................................. G-8After a Failed New Installation ....................................................................................................... G-8
Images Displaying Incorrectly in Oracle Application Express ...................................................... G-8Online Help Not Working ..................................................................................................................... G-9
H Frequently Asked Questions About Installation
Installing Oracle Database or Oracle Database................................................................................. H-1Installing Oracle Database Tools ......................................................................................................... H-3Installing Oracle Database with Oracle Applications ..................................................................... H-7Installing Oracle Database Heterogeneous Connectivity Tools (Gateways)............................... H-8
I Country Codes
Valid Country Codes................................................................................................................................. I-1
Glossary
Index
xi
Preface
This guide provides instructions about installing and configuring Oracle Database for AIX. This guide covers Optimal Flexible Architecture, Database Storage Options, and Database Configuration Options. This guide also talks about installing and configuring database using response files, globalization support, ports, and troubleshooting.
The preface contains the following topics:
■ Audience
■ Documentation Accessibility
■ Command Syntax
■ Accessing Documentation
■ Related Documentation
■ Typographic Conventions
AudienceThis guide is intended for anyone responsible for installing Oracle Database 11g Release 1 (11.1) on a single AIX system. Additional installation guides for Oracle Database, Oracle Real Application Clusters, Oracle Clusterware, Oracle Database Examples, and Oracle Enterprise Manager Grid Control are available on the relevant installation media.
Documentation AccessibilityOur goal is to make Oracle products, services, and supporting documentation accessible, with good usability, to the disabled community. To that end, our documentation includes features that make information available to users of assistive technology. This documentation is available in HTML format, and contains markup to facilitate access by the disabled community. Accessibility standards will continue to evolve over time, and Oracle is actively engaged with other market-leading technology vendors to address technical obstacles so that our documentation can be accessible to all of our customers. For more information, visit the Oracle Accessibility Program Web site at http://www.oracle.com/accessibility/.
Accessibility of Code Examples in DocumentationScreen readers may not always correctly read the code examples in this document. The conventions for writing code require that closing braces should appear on an
xii
otherwise empty line; however, some screen readers may not always read a line of text that consists solely of a bracket or brace.
Accessibility of Links to External Web Sites in DocumentationThis documentation may contain links to Web sites of other companies or organizations that Oracle does not own or control. Oracle neither evaluates nor makes any representations regarding the accessibility of these Web sites.
TTY Access to Oracle Support ServicesOracle provides dedicated Text Telephone (TTY) access to Oracle Support Services within the United States of America 24 hours a day, 7 days a week. For TTY support, call 800.446.2398. Outside the United States, call +1.407.458.2479.
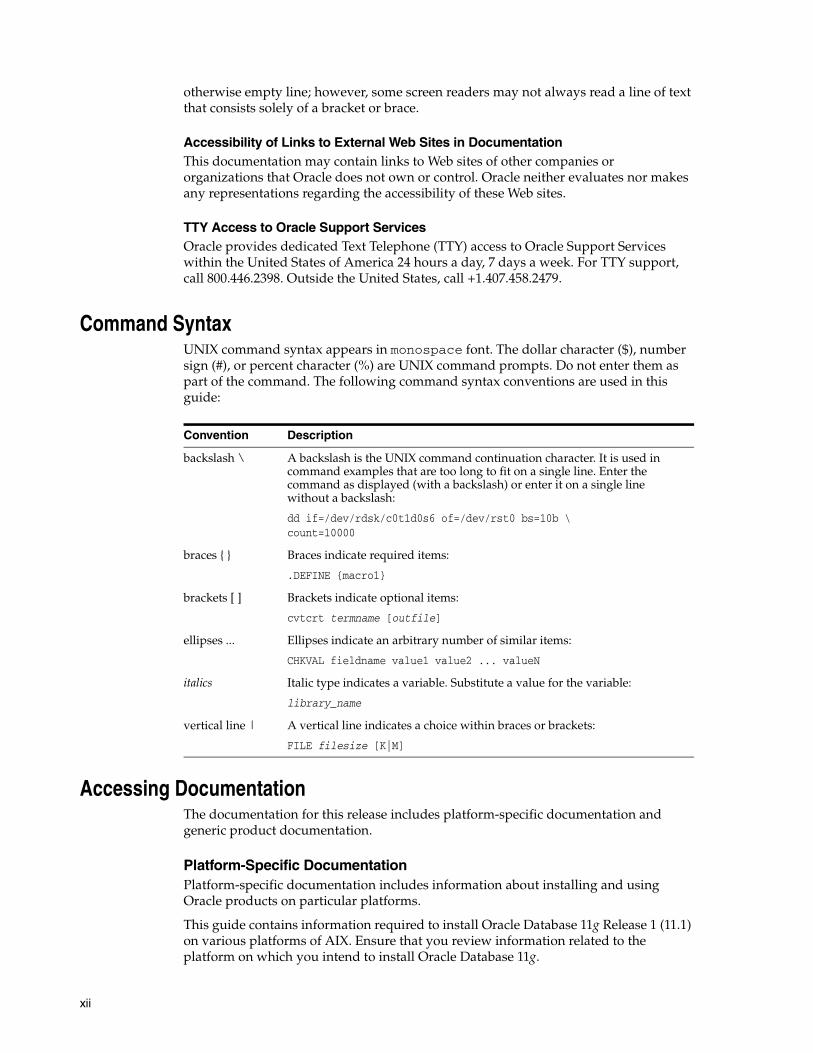
Command SyntaxUNIX command syntax appears in monospace font. The dollar character ($), number sign (#), or percent character (%) are UNIX command prompts. Do not enter them as part of the command. The following command syntax conventions are used in this guide:
Accessing DocumentationThe documentation for this release includes platform-specific documentation and generic product documentation.
Platform-Specific DocumentationPlatform-specific documentation includes information about installing and using Oracle products on particular platforms.
This guide contains information required to install Oracle Database 11g Release 1 (11.1) on various platforms of AIX. Ensure that you review information related to the platform on which you intend to install Oracle Database 11g.
Convention Description
backslash \ A backslash is the UNIX command continuation character. It is used in command examples that are too long to fit on a single line. Enter the command as displayed (with a backslash) or enter it on a single line without a backslash:
dd if=/dev/rdsk/c0t1d0s6 of=/dev/rst0 bs=10b \ count=10000
braces { } Braces indicate required items:
.DEFINE {macro1}
brackets [ ] Brackets indicate optional items:
cvtcrt termname [outfile]
ellipses ... Ellipses indicate an arbitrary number of similar items:
CHKVAL fieldname value1 value2 ... valueN
italics Italic type indicates a variable. Substitute a value for the variable:
library_name
vertical line | A vertical line indicates a choice within braces or brackets:
FILE filesize [K|M]
xiii
The platform-specific documentation for this product is available in both Adobe portable document format (PDF) and HTML format on the product media. To access the platform-specific documentation on media:
1. Use a Web browser to open the welcome.htm file in the top-level directory of the media.
2. For DVD only, select the appropriate product link.
3. Select the Documentation tab.
If you prefer paper documentation, then open and print the PDF files.
Product DocumentationProduct documentation includes information about configuring, using, or administering Oracle products on any platform. The product documentation for Oracle Database 11g products is available in both HTML and PDF formats in the Oracle Database 11g Release 1 (11.1) Online Documentation Library. To check for updates to this document and to view other Oracle documentation, select the Documentation link or the Software & Patches link on the Oracle Database 11g Release 1 Beta Program Web site.
Related DocumentationThe platform-specific documentation for Oracle Database 11g products includes the following manuals:
■ Oracle Database Release Notes for AIX 5L Based Systems (64-Bit)
■ Oracle Database Client Installation Guide for AIX 5L Based Systems (64-Bit)
■ Oracle Database Examples Installation Guide
■ Oracle Real Application Clusters Installation Guide for AIX Based Systems
■ Oracle Database Quick Installation Guide for AIX 5L Based Systems (64-Bit)
■ Oracle Database Client Quick Installation Guide for AIX 5L Based Systems (64-Bit)
■ Oracle Enterprise Manager Grid Control Installation and Basic Configuration
■ Oracle Database Administrator's Reference for Linux and UNIX
■ Oracle Database Storage Administrator's Guide
■ Oracle Clusterware Installation Guide for AIX Based Systems
■ Oracle Database Upgrade Guide
■ Oracle Database 2 Day DBA
For information about Oracle error messages, see Oracle Database Error Messages. Oracle error message documentation is available only in HTML. If you only have access to the Oracle Database 10g Release 2 (10.2) Online Documentation Library, then you can browse the error messages by range. Once you find the specific range, use your browser's "find in page" feature to locate the specific message. When connected to the Internet, you can search for a specific error message using the error message search feature of the Oracle online documentation.
Many books in the documentation set use the sample schemas of the seed database, which is installed by default when you install Oracle. Refer to Oracle Database Sample Schemas for information on how these schemas were created and how you can use them yourself.
xiv
Printed documentation is available for sale in the Oracle Store at:
http://oraclestore.oracle.com/
To download free release notes, installation documentation, white papers, or other collateral, please visit the Oracle Technology Network. You must register online before using OTN; registration is free and can be done at:
http://www.oracle.com/technology/membership/
If you already have a user name and password for Oracle Technology Network, then you can go directly to the documentation section of the Oracle Technology Network Web site at:
http://www.oracle.com/technology/documentation/
Refer to Oracle Database Release Notes for AIX 5L Based Systems (64-Bit) or important information that was not available when this book was released. The release notes for Oracle Database 11g are updated regularly. The most recent version is available on Oracle Technology Network at:
http://www.oracle.com/technology/documentation/index.html
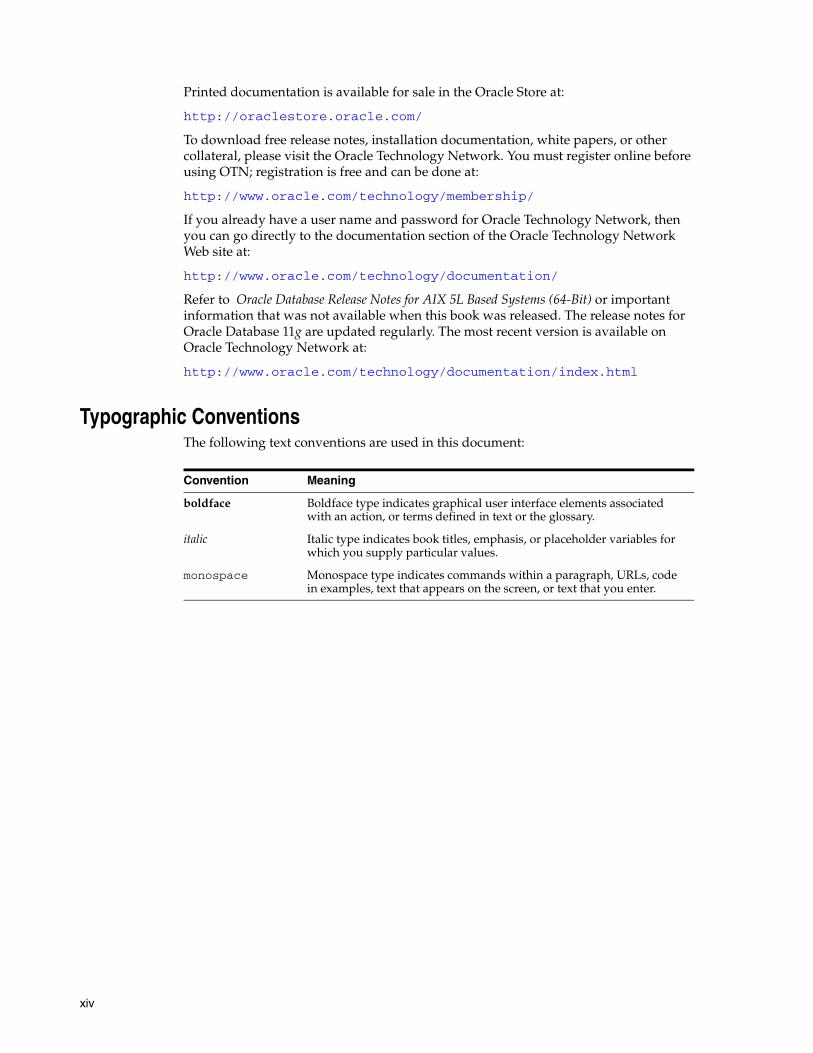
Typographic ConventionsThe following text conventions are used in this document:
Convention Meaning
boldface Boldface type indicates graphical user interface elements associated with an action, or terms defined in text or the glossary.
italic Italic type indicates book titles, emphasis, or placeholder variables for which you supply particular values.
monospace Monospace type indicates commands within a paragraph, URLs, code in examples, text that appears on the screen, or text that you enter.
xv
What’s New in Oracle Database 11g
The following is a list of new features or enhancements provided with Oracle Database 11g:
■ New Components Available for Installation
■ Changes in the Install Options
■ Database Configuration Assistant
■ Database Upgrade Assistant
■ Automatic Storage Management Fast Mirror Resync
■ Automatic Maintenance Tasks Management
■ Automatic Diagnostic Repository
■ Enhanced Optimal Flexible Architecture
■ Oracle Direct Network File System Client
■ Deprecated Components in Oracle Database 11g Release 1 (11.1)
New Components Available for InstallationThe following are the new components available while installing Oracle Database 11g:
■ Oracle Application Express: This feature is installed with Oracle Database 11g. It was previously named HTML DB, and was available as a separate Companion CD component. Oracle Application Express is now installed by default with any Oracle Database 11g installation.
■ Oracle Configuration Manager: This feature is offered during installation. It was previously named Customer Configuration repository (CCR). It is an optional component for database installation and can be installed with any Oracle Database 11g installation. Oracle Configuration Manager gathers and stores details relating to the configuration of the software stored in database Oracle home directories.
■ Oracle Database Vault: This feature is installed with Oracle Database 11g. It is an optional component for database installation.
■ Oracle Real Application Testing: This feature is installed by default with the Enterprise Edition installation type of Oracle Database 11g.
■ Oracle Warehouse Builder: This feature is installed with Oracle Database 11g.

xvi
Changes in the Install OptionsThe following are install option changes for Oracle Database 11g:
■ Oracle Configuration Manager: Oracle Configuration Manager is integrated with Oracle Universal Installer. However, it is an optional component for database installation and can be installed with any Oracle Database 11g installation.
■ Oracle Data Mining: Enterprise Edition installation type selects Oracle Data Mining option by default. In Oracle Database 11g, the Data Mining metadata is created with SYS metadata when you select the Create Database option.
■ Oracle Database Vault: Oracle Database Vault is integrated with Oracle Universal Installer. However, it is an optional component with database installation. To install this product, you must select the Custom Installation.
To install Oracle Database Vault with Enterprise Edition, complete the Enterprise Edition installation and then perform a custom installation. Select Oracle Label Security and Oracle Database Vault, and install these products on the same Enterprise Edition database.
■ Oracle HTTP Server: Starting with Oracle Database 11g, Oracle HTTP Server is available on a separate media shipped with Oracle Database. In the previous releases, this product was available as a Companion CD component.
■ Oracle Ultra Search: Starting Oracle Database 11g, Oracle Ultra Search is integrated with Oracle Database. In the previous releases, this product was available as a Companion CD component.
■ Oracle XML DB: Starting with Oracle Database 11g, Oracle XML DB is no longer an optional feature. Database Configuration Assistant installs and configures it for all database installations.
Note: With Standard Edition and Enterprise Edition of Oracle Database 11g Release 1, Oracle Warehouse Builder with basic features is installed. However, with Enterprise Edition, you can purchase options that extend Oracle Warehouse Builder.
See Also: The following sections and guides for more information:
■ Chapter 2, "Oracle Database Preinstallation Requirements" for information about the preinstallation requirements
■ Oracle Database Application Express User's Guide for more information about Oracle Application Express
■ The "Preinstallation Requirements for Oracle Configuration Manager" on page 2-8 for more information
■ Oracle Database Vault Administrator's Guide for more information about Database Vault
■ Oracle Database Performance Tuning Guide for more information about Oracle Real Application Testing
■ Oracle Warehouse Builder User's Guide for more information about Oracle Warehouse Builder
xvii
Database Configuration AssistantThe following additions and enhancements are made to Database Configuration Assistant:
■ Added Support to Configure New Database Options
■ Automatic Memory Management
■ Oracle Base and Diagnostic Destination Configuration
■ Oracle Data Mining
■ Secure Database Configuration
■ Switching a Database from Database Control to Grid Control Configuration
Added Support to Configure New Database OptionsThe following options in Oracle Database 11g can be configured using Database Configuration Assistant:
■ Oracle Application Express
■ Oracle Database Vault
■ Oracle Warehouse Builder
Automatic Memory Management This is a new initialization parameter in Oracle Database 11g to automate the memory allocation. By default, Database Configuration Assistant now uses MEMORY_TARGET instead of specifying individual values for SGA_TARGET and PGA_AGGREGATE_TARGET. The Memory management page of Database Configuration Assistant has a new option to select automatic memory management.
Oracle Base and Diagnostic Destination ConfigurationThe directory that you specify when you are prompted for ORACLE_BASE by Oracle Universal Installer is stored in the Oracle home inventory. Database Configuration Assistant uses this value to derive the default database locations and the
See Also: The following sections and guides for more information:
■ The "Preinstallation Requirements for Oracle Configuration Manager" on page 2-8 for more information
■ Oracle Data Mining Administrator's Guide for more information about Oracle Data Mining
■ Oracle Database Vault Administrator's Guide for more information about Oracle Database Vault
■ Oracle Fusion Middleware Administrator's Guide for Oracle HTTP Server for more information about Oracle HTTP Server
■ Oracle Ultra Search Administrator's Guide for more information about Ultra Search
■ Oracle XML DB Developer's Guide for more information about Oracle XML DB
See Also: The "Using Automatic Memory Management" section of Oracle Database Administrator's Guide

xviii
DIAGNOSTIC_DEST parameter. The diagnostic destination location contains all Automatic Diagnostic Repository directories (diagnostic files, such as Alert logs and so on). Starting with Oracle Database Release 11g, the initialization parameter settings for background dump, user dump, and core dump destinations are replaced by the Diagnostic Destination.
Oracle Data MiningIn Oracle Database 11g, Data Mining metadata is created with the SYS metadata. It is created by the catproc.sql and other scripts that are run as the SYS user. You no longer configure the Data Mining option through the Database Features screen of Oracle Database Configuration Assistant.
Secure Database ConfigurationOracle Database 11g has new defaults for audit and password profiles. Database Configuration Assistant has a new screen to enable the new security settings during the database creation and existing database configuration.
Switching a Database from Database Control to Grid Control ConfigurationIn previous releases, Database Configuration Assistant contains the functionality to configure a database either with Database Control, or with Grid Control. You can configure a database either while creating it or later. However, reconfiguring a database from Database Control to Grid Control requires significant manual effort. With Oracle Database 11g, Database Configuration Assistant provides the Enterprise Manager Configuration plug-in, which automates the process to switch configuration of a database from Database Control to Grid Control.
Database Upgrade AssistantThe following additions and enhancements are made to Database Configuration Assistant:
■ Command Line Option to Auto Extend System Files
■ Express Edition Upgrade
■ Integration with Oracle Database 11g Pre-upgrade Tool
■ Moving Data Files into ASM, SAN, and Other File Systems
■ Oracle Base and Diagnostic Destination Configuration
Command Line Option to Auto Extend System FilesThe command line option AUTOEXTEND facilitates auto extending of the data files as a part of the upgrade. This option automatically extends the data files during the
See Also: "Optimal Flexible Architecture" for more information about Oracle base and diagnostic destination configuration
See Also: Oracle Data Mining Administrator's Guide for more information about Oracle Data Mining
See Also: The "Database Security Options" on page 3-6 for more information
See Also: Oracle Real Application Clusters Installation Guide for Linux and UNIX for more information about configuring Grid Control
xix
upgrade and turns the autoextend back to its original settings after the upgrade. This option is useful if there is enough space on the disk, and if you do not need to add new data files or manually increase the size of the files.
Express Edition UpgradeFor single-instance databases, Oracle Database Upgrade Assistant configuration utility enables you to upgrade from Oracle Database Express Edition (Oracle Database XE) to Oracle Database 11g. The XE database files reside under the path ORACLE_BASE/oradata/XE. These files must be copied to a new location as the user may remove the XE Home after upgrade.
Integration with Oracle Database 11g Pre-upgrade ToolDatabase Upgrade Assistant uses the new pre-upgrade script for Oracle Database 11g. This script is used to estimate disk space, initialization parameters, statistics gathering, and providing feedback on possible problem areas.
Moving Data Files into ASM, SAN, and Other File SystemsYou can move data files to ASM, OFS, or other storage devices, such as Storage Area Networks (SAN) and Network Area Storage (NAS), as part of the upgrade. If you move the database files during the upgrade, then you can benefit from the typical downtime for this tablespace by rebalancing disks and moving files to a better storage device, such as SAN, NAS, or ASM.
Oracle Base and Diagnostic Destination ConfigurationThe directory that you specify when you are prompted for ORACLE_BASE by Oracle Universal Installer is stored in the Oracle home inventory. Database Upgrade Assistant uses this value to derive the default database locations and the DIAGNOSTIC_DEST parameter. The diagnostic destination location contains all ADR directories (diagnostic files, such as the alert logs, trace files, and so on). This diagnostic destination directory is required while upgrading an earlier Oracle Database release to Oracle Database 11g Release of the database. If the Oracle base directory already exists, then Oracle Database Upgrade Assistant automatically retrieves this information and populates its path. Starting with Oracle Database 11g Release 1, the initialization parameter settings for background dump (BACKGROUND_DUMP_DEST), user dump (USER_DUMP_DEST), and core dump (CORE_DUMP_DEST) destinations are replaced by the Diagnostic Destination (DIAGNOSTIC_DEST).
Automatic Storage Management Fast Mirror ResyncAutomatic Storage Management fast mirror resync quickly resynchronizes Automatic Storage Management disks within a disk group after transient disk path failures, as long as the disk drive media is not corrupted. Any failures that render a failure group
See Also: The "Altering a Bigfile Tablespace" section in Oracle Database Administrator's Guide for more information about the AUTOEXTEND clause
See Also: The Preparing Disk Groups for an Automatic Storage Management Installation on page 2-25 for more information about preparing disk groups for Automatic Storage Management
See Also: Appendix D, "Optimal Flexible Architecture"for more information about Oracle base and diagnostic destination configuration
xx
temporarily unavailable are considered transient failures. Disk path malfunctions, such as cable disconnections, host bus adapter or controller failures, or disk power supply interruptions, can cause transient failures. The duration of a fast mirror resync depends on the duration of the outage. The duration of a resynchronization is typically much shorter than the amount of time required to completely rebuild an entire Automatic Storage Management disk group.
SYSASM Privilege for Automatic Storage Management AdministrationOracle Database 11g introduces an optional system privilege, SYSASM, and an optional operating system group, OSASM, to secure privileges to perform Automatic Storage Management administration tasks. Oracle recommends that you use SYSASM instead of SYSDBA for Automatic Storage Management administration, to separate Automatic Storage Management administration from database administration. In a future release, Oracle may restrict access to Automatic Storage Management only to operating system users that are members of the OSASM operating system group, and require the use of SYSASM to administer Automatic Storage Management.
Automatic Maintenance Tasks ManagementThis feature provides out-of-the-box management of scheduling and resource allocation, such as CPU time, among the various database maintenance tasks, such as Automatic Optimizer Statistics Collection and Automatic Segment Advisor. Maintenance tasks are regulated to the extent that end-user activity gets the necessary resources to finish its work.
Automatic Diagnostic RepositoryThe Automatic Diagnostic Repository is a feature added to Oracle Database 11g. It is a new system managed repository for storing and organizing trace files and other error diagnostic data. The Automatic Diagnostic Repository provides a comprehensive view of the critical errors encountered by the database. This feature also enables you to maintain the relevant data needed for problem diagnostics and their eventual resolution. The Automatic Diagnostic Repository reduces the time to resolve errors and code defects. The repository is stored as a directory structure under the ADR base directory that contains the diag directory. The default location of the ADR base directory is set by DIAGNOSTIC_DEST. If the ORACLE_BASE variable is set, then the default value of DIAGNOSTIC_DEST is equal to the value of the ORACLE_BASE variable. If the value of the ORACLE_BASE variable is not set, then the default value of DIAGNOSTIC_DEST is set to $ORACLE_HOME/log. However, this location can be changed by using the DIAGNOSTIC_DEST parameter of the init.ora file.
See Also: The "Automatic Storage Management Fast Mirror Resync" section in Oracle Database Storage Administrator's Guide for more information about ASM fast mirror resync
Note: You can create an operating system group for Automatic Storage Management administrator, in addition to dba and oper groups.
See Also: Chapter 24, "Managing Automated Database Maintenance Tasks" of Oracle Database Administrator's Guide for more information about Automatic Maintenance task management
xxi
Enhanced Optimal Flexible ArchitectureThe following enhancements are made to the Optimal Flexible Architecture in Oracle Database 11g:
■ Oracle Base and Oracle Home
■ Flash Recovery Area and Data File Location
Oracle Base and Oracle HomeIn Oracle Database 11g, Oracle Universal Installer prompts you to specify the Oracle base. You can share this Oracle base across all of the Oracle homes you create on the system. Oracle recommends that you share an Oracle base for all of the Oracle homes created by the same user.
Oracle Universal Installer has a list box where you can edit or select the Oracle base. The installer derives the default Oracle home from the Oracle base location you provide in the list box. However, you can change the default Oracle home by editing the location.
When installing Oracle Clusterware, the Oracle Clusterware home should not be under Oracle base. This is because the root.sh script in Unix operating systems changes the ownership of the parent directories up to the root file system (/) to the root user. If you specify an Oracle Clusterware home under Oracle base, Oracle Universal Installer displays an error.
The following are the changes made in Oracle Database 11g with respect to Oracle base to make it Optimal Flexible Architecture compliant:
■ ORACLE_BASE is a recommended environment variable. However, this variable will be made mandatory in future releases.
■ Oracle recommends that you create the flash recovery area and data file location under Oracle base.
Flash Recovery Area and Data File LocationIn Oracle Database 10g, the default locations for the flash recovery area and data files are one level above the Oracle home directory. However, in Oracle database 11g, Oracle base is the starting point to set the default locations for flash recovery and data files. However, Oracle recommends that you keep the flash recovery area and data file location on separate disks. To mount the disks you can use the following mount points for flash recovery area and data file location respectively:
$ORACLE_BASE/flash_recovery_area$ORACLE_BASE/oradata
Oracle recommends you use separate disks for oradata, flash recovery, and the Oracle home.
If you install Oracle RAC, then you must share flash recovery area and data file location among all the nodes.
See Also: The "Automatic Diagnostic Repository (ADR)" section in Oracle Database Administrator's Guide for more information about the Automatic Diagnostic Repository
See Also: Appendix D, "Optimal Flexible Architecture" for more information about Optimal Flexible Architecture

xxii
Oracle Direct Network File System ClientThis feature is implemented as a Direct Network File System (NFS) client as a part of Oracle RDBMS Kernel in Oracle Disk Manager library. NAS-based storage systems use NFS to access data. In Oracle Database 10g, NAS storage devices are accessed using the operating system provided kernel NFS driver, which require specific configuration settings to ensure its efficient and correct usage with Oracle. The following are the major problems that arise in correctly specifying configuration parameters:
■ NFS clients are very inconsistent across platforms and vary across operating system releases.
■ The configuration parameters are difficult to tune. There are more than 20 NFS parameters and they have subtle differences across platforms.
■ NFS client stack is designed for general purpose. Therefore, it contains features like file attribute management that are not required for Oracle.
■ Oracle Direct NFS implements NFS version 3 protocol within the Oracle RDBMS kernel.
The following are the main advantages of implementing Oracle Direct NFS client functionality in Oracle RDBMS Kernel:
■ It enables complete control over input-output paths to network file servers, resulting in predictable performance, simplified configuration management, and superior diagnostics.
■ Its operations avoid the kernel NFS layer bottlenecks and resource limitations. However, the kernel is still used for network communication modules.
■ It provides a common NFS interface for Oracle for potential use on all host platforms and supported NFS servers.
■ It enables improved performance through load balancing across multiple connections to NFS servers and deep pipelines of asynchronous input-output operations with improved concurrency.
Deprecated Components in Oracle Database 11g Release 1 (11.1)The following is a list of components that were part of Oracle Database 10g release 2 (10.2), and are not available for installation with Oracle Database 11g:
■ iSQL*Plus
■ Oracle Workflow
■ Oracle Data Mining Scoring Engine
■ Oracle Enterprise Manager Java console
See Also: Oracle Clusterware Installation Guide for AIX Based Systems for more information in Network File System
1
Overview of Oracle Database Installation 1-1
1Overview of Oracle Database Installation
This chapter describes the different installation types of Oracle Database for AIX Based Systems and issues to consider before you install Oracle Database:
■ Planning the Installation
■ New Oracle Products Installed with This Release
■ Installation Considerations
■ Oracle Database Installation Types
■ Database Configuration Options
■ Database Storage Options
■ Database Management Options
■ Database Backup and Recovery Options
■ E-mail Notification Options
Planning the InstallationThe Oracle Database installation process consists of the following phases:
1. Read the release notes: Read Oracle Database Release Notes for AIX 5L Based Systems (64-Bit) before you begin the installation. The release notes are available with the platform-specific documentation. The latest version of the release notes is available on Oracle Technology Network at:
http://www.oracle.com/technology/documentation
2. Review the licensing information: Although the installation media in the media pack contain many Oracle components, you are permitted to use only those components for which you have purchased licenses.
Oracle Support Services does not provide support for components for which licenses have not been purchased.
3. Plan the installation: This chapter describes the Oracle products that you can install and issues that you must consider before starting the installation.
You can also refer to Appendix H, which covers frequently asked questions about installing Oracle Database components, such as how to install Oracle Database if the site uses Oracle applications or if you need multiple Oracle Database connections.
See Also: Oracle Database Licensing Information for more details
New Oracle Products Installed with This Release
1-2 Oracle Database Installation Guide
4. Complete preinstallation tasks: Chapter 2 describes preinstallation tasks that you must complete before installing the product.
5. Install the software: Use the following sections to install Oracle Database:
■ Chapter 3 describes how to use Oracle Universal Installer to install Oracle Database and Automatic Storage Management.
■ Appendix A provides information on performing noninteractive (silent) installations, which you may want to use if you need to perform multiple installations of Oracle Database.
■ Appendix B provides information on cloning Oracle home.
■ Appendix F describes globalization support information.
■ Appendix G provides troubleshooting advice in case you encounter problems with the installation.
■ Chapter 6 describes how to remove Oracle Database.
6. Complete postinstallation tasks: Chapter 4 describes recommended and required postinstallation tasks.
7. Get started using Oracle Database: Use the following sections to get started with Oracle Database:
■ Chapter 5 describes how to check the contents of the installed Oracle Database, how to start various tools, and how to locate various files.
■ Appendix C describes the network attached storage devices, which you can use to store Oracle database files and Oracle software.
■ Appendix D describes the Optimal Flexible Architecture, which is a set of guidelines that ensures reliable Oracle installations that requires little maintenance.
■ Appendix E explains the method to manage Oracle Database port numbers.
New Oracle Products Installed with This ReleaseThe following products are installed by default when installing Oracle Database 11g Release 1:
■ Oracle Application Express
■ Oracle Warehouse Builder
■ Oracle Configuration Manager
■ Oracle Database Vault
Oracle Application ExpressOracle Application Express is a tool for development and deployment of Web applications for an Oracle database. It improves the productivity, security, reliability, and performance of Oracle database. With little programming or scripting and only a
Note: If you perform a Custom installation, then ensure that you install only the components covered by your license. You cannot install Standard Edition using Custom installation.
New Oracle Products Installed with This Release
Overview of Oracle Database Installation 1-3
Web browser, you can build reporting and data entry applications on existing tables, views, or data imported from spreadsheets.
Oracle Warehouse BuilderOracle Warehouse Builder is the only enterprise business intelligence integration design tool that manages the full life-cycle of data and metadata for the Oracle Database. It provides an easy to use graphical environment to rapidly design, deploy, and manage business intelligence systems.
With the Standard and Enterprise Editions of Oracle Database, you can use Oracle Warehouse Builder that enables you to integrate and transform data into high quality information. When you install the Standard Edition or Enterprise Edition of Oracle Database, the installation provides you with components necessary for Oracle Warehouse Builder, including an unpopulated schema, OWB_SYS. Unlock the OWB_SYS schema and install the Oracle Warehouse Builder software on a client computer, as described in Oracle Warehouse Builder Installation and Administration Guide.
Oracle Configuration ManagerOracle Configuration Manager is a utility that can be optionally configured when installing the Oracle Database. Oracle Configuration Manager is used to collect and upload the configuration information to the Oracle configuration repository.
The following are some of the benefits of Oracle Configuration Manager:
■ Reduces time for resolution of support issues
■ Provides pro-active problem avoidance
■ Improves access to best practices and the Oracle knowledge base
■ Improves understanding of customer’s business needs and provides consistent responses and services
Oracle Configuration Manager can now be installed in two modes:
■ Connected Mode: This mode is recommended if your server has direct connection to the Internet or connection through a proxy server. In this mode, configuration data is automatically collected and uploaded to the Oracle system. Updates to Oracle Configuration Manager occur automatically.
■ Disconnected Mode: This mode is recommended if your server does not have a connection to Internet. In this mode, you can collect configuration data manually by using the emCCR collect command. When you run this command, the collected configuration data is stored in the $ORACLE_HOME/ccr/state/upload/ocmconfig.jar file. You can then upload this file to the Oracle server.
Oracle Database VaultOracle Database Vault enables you to secure business data in ways that were not possible before. Database Vault uses a multifactored and multilayered approach to implementing database security. Before you plan the upgrade process, become familiar with the features of Oracle Database Vault. The Oracle Database Vault Administrator's Guide discusses the basic features of Oracle Database Vault.
Installation Considerations
1-4 Oracle Database Installation Guide
Installation ConsiderationsThis section contains information that you should consider before deciding how to install this product. It contains the following sections:
■ Hardware and Software Certification
■ Multiple Oracle Homes Support
■ Oracle Cluster Synchronization Services
■ Using Network Attached Storage or NFS File Systems
■ Default Audit Policy and Initialization Parameters
Hardware and Software CertificationThe platform-specific hardware and software requirements included in this guide were current when this guide was published. However, because new platforms and operating system software versions might be certified after this guide is published, review the certification matrix on the OracleMetaLink Web site for the most up-to-date list of certified hardware platforms and operating system versions. The OracleMetaLink Web site is available at the following URL:
https://metalink.oracle.com
You must register online before using OracleMetaLink. After logging in, click Certify on the top right-hand side of the screen. The Certifications page appears. You can choose the certification either by product or by platform.
Other options include Oracle's Certification Matrices, Desupport Notices, and Product Availability.
Multiple Oracle Homes SupportThis product supports multiple Oracle homes. This means you can install this release or earlier releases of the software more than once on the same system, in different Oracle home directories.
Installing the Software on a System with an Existing Oracle InstallationYou must install this product into a new Oracle home directory. You cannot install products from one release of Oracle Database into an Oracle home directory of a different release. For example, you cannot install Oracle Database 11g Release 1 software into an existing Oracle9i Oracle home directory. If you attempt to install this release into an Oracle home directory that contains software from an earlier Oracle release, then the installation fails.
You can install this release more than once on the same system if each installation is installed in a separate Oracle home directory.
Note: You cannot remove or uninstall the Database Vault. However, you can disable Oracle Database Vault. Refer to the Disable Oracle Database Vault section in the Oracle Database Upgrade Guide guide for more details.
Installation Considerations
Overview of Oracle Database Installation 1-5
Oracle Cluster Synchronization ServicesThe first time you install Oracle Database 11g and choose Automatic Storage Management as the storage option on a system, the installation configures and starts a single-node version of the Oracle Cluster Synchronization Services (CSS) daemon. The CSS daemon is required to enable synchronization between an Automatic Storage Management instance and the database instances that rely on it for database file storage. By default, Oracle Universal Installer does not configure CSS. Oracle Universal Installer configures these services only if you choose Automatic Storage Management as a storage or recovery option. Because the daemon must be running before any Automatic Storage Management instance or database instance starts, it is configured to start automatically when the system boots.
For Oracle RAC installations, the CSS daemon is installed with Oracle Clusterware in a separate Oracle home directory (also called the Clusterware home directory). For single-node installations, the CSS daemon is installed in and runs from the same Oracle Database home that runs Automatic Storage Management.
If you have installed CSS from the same Oracle home as Oracle Database, then use caution when removing Oracle Database software from the system. Before you remove an Oracle home directory that contains Oracle Database 11g, you must either delete the CSS daemon configuration, or if necessary, reconfigure the CSS daemon to run from another Oracle home directory.
Using Network Attached Storage or NFS File SystemsOracle Database 11g must be able to verify that writes to a disk are completed successfully. NFS file systems, including file systems on NAS devices, may not be able to guarantee that writes to a disk are completed successfully, and this may lead to possible data file corruption. Oracle recommends that you do not store files on NFS mounted file systems unless the storage vendor and storage device are listed in the Oracle Storage Compatibility Program list.
If a storage device is supported, then you can use it to store Oracle software files, Oracle database files, or both.
Note: If you plan to have more than one Oracle Database 11g installation on a single system and you want to use Automatic Storage Management for database file storage, then Oracle recommends that you run the CSS daemon and the Automatic Storage Management instance from the same Oracle home directory and use different Oracle home directories for the database instances.
See Also:
■ "Automatic Storage Management" on page 1-10
■ "Reconfiguring Oracle Cluster Synchronization Services" on page 6-5
■ "Removing Oracle Software" on page 6-8
See Also: Appendix C for guidelines about using NFS and NAS devices for Oracle software or database files
Oracle Database Installation Methods
1-6 Oracle Database Installation Guide
Default Audit Policy and Initialization ParametersOracle Database Vault installs a baseline database auditing policy. This policy covers the access control configuration information stored in Database Vault database tables, information stored in Oracle Catalog (rollback segments, tablespaces, and so on), the use of system privileges, and Oracle Label Security configuration. When you install Oracle Database Vault, the security specific database initialization parameters are initialized with default values.
Oracle Database Installation MethodsYou can choose different installation methods to install Oracle Database, as follows:
■ Interactive Installation Methods
■ Automated Installation Methods Using Response Files
Interactive Installation MethodsWhen you use the interactive method to install Oracle Database, Oracle Universal Installer displays a series of screens that enable you to specify all of the required information to install the Oracle Database software and optionally create a database.
With Oracle Database 11g Release 1 (11.1) on AIX, Oracle Universal Installer provides two interactive methods that you can use to install Oracle Database:
■ Basic: Select this installation method if you want to quickly install Oracle Database. This installation method requires minimal user input. It installs the software and optionally creates a general-purpose database using the information that you specify on the screen. It is the default installation method.
■ Advanced: Select this installation method if you want to complete any of the following tasks:
– Upgrade an existing database
– Select a database character set or different product languages
– Create the EXAMPLE tablespace during the installation
– Create a database on a different file system from the software
– Configure Automatic Storage Management for database storage
– Specify different passwords for administrative schemas
– Configure automated backups or Oracle Enterprise Manager notifications
– Configure Oracle Configuration Manager
– Perform a custom software installation, or choose a different database configuration
The Available Product Components installation screen automatically selects the components most customers need in their Oracle Database installation. It also lists several components that are not selected by default, but which you may want to include. To find the listing of available components, select Advanced, and then in the Installation Type screen, select Custom.
See Also: Oracle Database Vault Administrator's Guide for more information on the database audit policy
Oracle Database Installation Types
Overview of Oracle Database Installation 1-7
Automated Installation Methods Using Response FilesBy creating a response file and specifying this file when you start Oracle Universal Installer, you can automate some or all of the Oracle Database installation. These automated installation methods are useful if you need to perform multiple installations on similarly configured systems or if the system where you want to install the software does not have X Window system software installed.
When you use a response file, you can run Oracle Universal Installer in the following modes, depending on whether you specify all of the required information or not:
■ Silent Mode: Oracle Universal Installer runs in silent mode if you use a response file that specifies all required information. None of the Oracle Universal Installer screens are displayed.
■ Suppressed Mode: Oracle Universal Installer runs in suppressed mode if you do not specify all required information in the response file. Oracle Universal Installer displays only the screens that prompt for the information that you did not specify.
For more information about these modes and about how to complete an installation using response files, refer to Appendix A.
Oracle Database Installation TypesYou can choose to install the Oracle Client separately. You cannot install Oracle Database Client during an Oracle Database Installation.
You can choose one of the following installation types when installing Oracle Database 11g:
■ Enterprise Edition: Installs licensable Oracle Database options and database configuration and management tools in addition to all of the products that are installed during a Standard Edition installation. It also installs products most commonly used for data warehousing and transaction processing.
■ Standard Edition: Installs an integrated set of management tools, full distribution, replication, Web features, and facilities for building business-critical applications.
■ Custom: Enables you to select the individual components that you want to install from the list of all available components.
See Also: "Reviewing Installation Guidelines" on page 3-1 for additional information on Oracle database installation
Note: If you perform a Custom installation, then ensure that you install only the components covered by your license. You cannot install Standard Edition using Custom installation.
See Also:
■ Oracle Database Client Installation Guide for AIX 5L Based Systems (64-Bit) for Oracle Database Client installation instructions
■ Oracle Database Licensing Information for more information about the features available with each Oracle Database edition and for information about licensing
Database Configuration Options
1-8 Oracle Database Installation Guide
Database Configuration OptionsDuring the installation, you can choose whether you want to create an Oracle database as part of the installation. If you choose to create an Oracle database, then Oracle Universal Installer uses Oracle Database Configuration Assistant to create it. You can choose to create one of the preconfigured database types, which are designed for a variety of different applications, modify one of the preconfigured database types, or create a customized database to suit the requirements.
This section describes the following database configuration options:
■ Preconfigured Database Types
■ Installation Choices that Affect Database Creation
■ Creating a Database After Installation
Preconfigured Database TypesOracle provides the following preconfigured database types that you can create or customize during the installation:
■ General Purpose/Transaction Processing
■ Data Warehouse
Refer to the online help provided by either Oracle Universal Installer or Oracle Database Configuration Assistant for a description of these preconfigured database types.
Installation Choices that Affect Database CreationOracle Universal Installer runs Oracle Database Configuration Assistant in one of two modes, depending on the choices that you make during the installation:
■ Noninteractive mode
If you choose either the Enterprise Edition or Standard Edition installation type, then choose to create a preconfigured database type. Oracle Universal Installer prompts you for the minimum amount of information required to create a database of the type you choose. It then runs Oracle Database Configuration Assistant in noninteractive mode to create the database after it installs the software.
■ Interactive mode
If you choose the Custom installation type or choose the Advanced database configuration option, then Oracle Universal Installer does not prompt you for database information. Instead, it installs the software and then runs Oracle Database Configuration Assistant in interactive mode. Using the screens in Oracle Database Configuration Assistant, you can either modify one of the preconfigured
Note: The installation process is the same for all the installation types. Ensure that you install the licensed editions.
Note: Oracle recommends that you use this method to create a database if you have not previously created one.
Database Storage Options
Overview of Oracle Database Installation 1-9
database types or create a custom database and specify precisely how you want to configure it.
Creating a Database After InstallationIf you decide not to create a database during the installation, then you can use Oracle Database Configuration Assistant to create one after you have installed the software. For more information about using Oracle Database Configuration Assistant to create a database after installation, refer to the Oracle Database 2 Day DBA manual.
Database Storage OptionsIf you choose to create a database during the installation, you can specify one of the following storage options for database files:
■ File System
■ Automatic Storage Management
■ Raw Devices
File SystemIf you choose the file system option, then Oracle Database Configuration Assistant creates the database files in a directory on a file system mounted on the computer. Oracle recommends that the file system you choose be separate from the file systems used by the operating system or the Oracle software. The file system that you choose can be any of the following:
■ A file system on a disk that is physically attached to the system
If you are creating a database on basic disks that are not logical volumes or RAID devices, then Oracle recommends that you follow the Optimal Flexible Architecture (OFA) recommendations described in Appendix D and distribute the database files over more than one disk.
■ A file system on a logical volume manager (LVM) volume or a RAID device
If you are using multiple disks in an LVM or RAID configuration, then Oracle recommends that you use the stripe and mirror everything (SAME) methodology to increase performance and reliability. Using this methodology, you do not need to specify more than one file system mount point for database storage.
■ A network file system (NFS) mounted from a certified network attached storage (NAS) device
If the NAS device is certified by Oracle, then you can store the database files on them.
Note: If you choose this method to create a database, then click Help on any of the Oracle Database Configuration Assistant screens for a description of the information that you must specify on that screen.
See Also: The "Using Network Attached Storage or NFS File Systems" section on page 1-5 for more information about certified NAS and NFS devices
Database Storage Options
1-10 Oracle Database Installation Guide
If you choose the Custom installation type or the Advanced database creation option, then you can also choose to use the Oracle-managed files feature with the new database. If you use this feature, then you need to specify only the database object name instead of file names when creating or deleting database files.
Automatic Storage ManagementAutomatic Storage Management is a high-performance storage management solution for Oracle Database files. It simplifies the management of a dynamic database environment, such as creating and laying out databases and managing disk space.
Automatic Storage Management can be used with single database installations, multiple database installations, and in Oracle RAC environments. It can be used with databases created in Oracle Database 10g Release 1 (10.1.0.3 or later). However, Oracle Database 11g Release 1 (11.1) databases can use Automatic Storage Management from Oracle Database 10g Release 1 (10.1). If a site has multiple single-instance databases, then you can use Oracle Clusterware to consolidate multiple databases into a single clustered pool of storage managed by Automatic Storage Management. Automatic Storage Management manages the storage of all database files, such as redo logs, control files, and data pump export files. However, it does not manage Oracle Database executable binary files.
At a high level, implementing Automatic Storage Management involves allocating partitioned disks for Oracle Database with preferences for striping and mirroring. Automatic Storage Management manages the disk space for you. This helps avoid the need for traditional disk management tools, such as Logical Volume Managers (LVM), file systems, and the numerous commands necessary to manage both. The synchronization between Automatic Storage Management and the database instance is handled by CSS.
The following are components of an Automatic Storage Management installation:
■ Automatic Storage Management Disk Groups
■ Automatic Storage Management Instance
■ General Steps for Installing Automatic Storage Management
Automatic Storage Management Disk GroupsA disk group is a set of disk devices that Automatic Storage Management manages as a single unit. Each disk device can be an individual physical disk, a multiple disk device, such as a RAID storage array or logical volume, or even a partition on a physical disk. However, in most cases, disk groups consist of one or more individual physical disks. To enable Automatic Storage Management to balance input-output operation and storage efficiently within the disk group, you must ensure that all devices in the disk group have similar, if not identical, storage capacity and performance.
You can set the redundancy and striping attributes of individual file types within a disk group by using Automatic Storage Management disk group templates. When you create a disk group, Automatic Storage Management creates a set of default templates for that disk group. Default template settings depend on the disk group type. For example, the default template for control files for a normal redundancy disk group sets three-way mirroring. All other file templates are two-way mirrored. For a high redundancy disk group, the default mirroring cannot be changed, which implies that all files are always three-way mirrored in a high redundancy disk group. You can
See Also: Oracle Database Administrator's Guide for more information about Oracle-managed files
Database Storage Options
Overview of Oracle Database Installation 1-11
modify the default templates to suit your site’s needs. Refer to Oracle Database Administrator's Guide for more information.
Automatic Storage Management spreads data evenly across all the devices in the disk group to optimize performance and utilization. You can add or remove disk devices from a disk group without shutting down the database. When you add or remove disks, Automatic Storage Management rebalances the files across the disk group. You can create multiple disk groups to handle specific tasks, such as backup and recovery operations, in addition to regular file storage activities.
When you add a device to a disk group, you can specify a failure group for that device. Failure groups identify disk devices that have common failure characteristics, for example, devices that are attached to the same controller. If the controller fails, then all devices attached to it become unavailable. By default, each device also belongs to its own failure group. By using the failure groups you specify, Automatic Storage Management can distribute data among the devices in the disk group to minimize the risk of data loss caused by component failures.
Automatic Storage Management InstanceThe Automatic Storage Management instance manages Automatic Storage Management disk groups. This instance must be running before you can start a database instance that uses Automatic Storage Management. When you choose Automatic Storage Management as a database storage mechanism, this instance is created and started, if necessary. For a single-instance Oracle Database installation, you only need one Automatic Storage Management instance, regardless of the number of database instances on the system. The Automatic Storage Management instance on any node in a single cluster can handle any combination of disk group types.
General Steps for Installing Automatic Storage ManagementTo install Automatic Storage Management, you use Oracle Universal Installer. This installation guide provides the following general steps for installing Automatic Storage Management:
1. Determine the disk requirements of the site and, if necessary, create one or more disk partitions for Automatic Storage Management.
See Also:
■ "Oracle Cluster Synchronization Services" on page 1-5 for information regarding configuration of CSS daemon on a single node.
■ Oracle Database 2 Day DBA for a general overview, from a non-platform perspective, of Automatic Storage Management
■ Oracle Database New Features Guide for information about new features in this release of Automatic Storage Management
■ Oracle Database Administrator's Guide for a more detailed description of Automatic Storage Management
■ The Oracle Technology Network Web site, for additional information on Automatic Storage Management, which you can visit at
http://www.oracle.com/technology/products/database/asm
Database Management Options
1-12 Oracle Database Installation Guide
"Preparing Disk Groups for an Automatic Storage Management Installation" on page 2-25 provides guidelines on how to determine the disk requirements of the site.
2. Run Oracle Universal Installer to install and create an Automatic Storage Management instance and to create Automatic Storage Management disk groups.
"Step 1: Reviewing Automatic Storage Management Installation Considerations" on page 3-14 provides guidelines on where to install Automatic Storage Management and other installation considerations.
"Step 2: Installing the Automatic Storage Management Instance and configuring Disk Groups" on page 3-15 describes how to create an Automatic Storage Management instance and disk groups.
After you create an Automatic Storage Management instance and its associated disk groups, subsequent databases that you create can use Automatic Storage Management for file storage management. If you have databases that were created before you installed Automatic Storage Management, then you can migrate them to Automatic Storage Management by using the Enterprise Manager Migrate Database Wizard. This wizard is available in Oracle Enterprise Manager Grid Control or Oracle Enterprise Manager Database Control. Alternatively, you can use Oracle Database Recovery Manager (RMAN) to perform the migration.
3. To create an Oracle Database with Automatic Storage Management refer "Step 3: Installing Oracle Database to Use Automatic Storage Management" on page 3-17
4. Test the Automatic Storage Management installation.
"Step 3: Installing Oracle Database to Use Automatic Storage Management" on page 3-17 provides a simple test you can try to check that the Automatic Storage Management installation was successful. "Managing Automatic Storage Management" on page 5-3 explains how to start and access Automatic Storage Management and which Oracle Database tools you can use to manage it.
Raw DevicesRaw devices are disk partitions or logical volumes that have not been formatted with a file system. Raw devices are not available as a storage option when creating a database as a part of a new Oracle Database 11g installation. However, upgrading the existing version of raw devices are supported. Raw device is available as a storage option when you run Oracle Database Configuration Assistant from the following location:
$ORACLE_HOME/bin/dbca
When you use raw devices for database file storage, Oracle writes data directly to the partition or volume, bypassing the operating system file system layer. However, since raw devices can be difficult to create and administer, and because the performance gains over modern file systems are minimal, Oracle recommends that you choose Automatic Storage Management or file system storage in preference to raw devices.
Database Management OptionsTo simplify database administration, Oracle provides a Web-based management tool called Oracle Enterprise Manager. There are two ways that you can deploy Oracle Enterprise Manager:
■ Deploy Oracle Enterprise Manager 10g centrally in the environment
Database Management Options
Overview of Oracle Database Installation 1-13
To deploy Oracle Enterprise Manager centrally, you must install at least one Oracle Management Repository and one Oracle Management Service within the environment, then install an Oracle Enterprise Management Agent on every computer that you want to manage. You can then use a single HTML interface to manage and monitor software and hardware targets on all of those systems. Targets can include Oracle databases, application servers, Net listeners, and third-party software. This single interface is called Oracle Enterprise Manager Grid Control (or simply Grid Control).
■ Deploy Oracle Enterprise Manager Database Control locally on the database system
Oracle Enterprise Manager Database Control software is installed by default with every Oracle Database installation except Custom. During a Custom installation, you can choose not to install Oracle Enterprise Manager Database Control. However, Oracle recommends that you do install it. This local installation provides a Web-based interface called Oracle Enterprise Manager Database Control. The Database Control is similar in function to the Grid Control, but it can manage only a single database. If you want to administer more than one database on this system, then you must either configure a separate Database Control for each database, or install Oracle Enterprise Manager 10g Grid Control.
This section contains the following topics:
■ Management Options for Preconfigured Databases
■ Management Options for Custom Databases
■ Features Provided by Oracle Enterprise Manager Database Control
Management Options for Preconfigured DatabasesWhen you choose to create a preconfigured database during the installation, you must select the Oracle Enterprise Manager interface that you want to use to manage the database. The following options are available:
■ Use Grid Control for central database management
This option is available only if an Oracle Management Agent is installed on the system. When Oracle Universal Installer detects an Oracle Management Agent on the system, you can choose this option and specify the Oracle Management Service that you want to use to manage the database.
If an Oracle Management Agent is not installed, then you need to use Database Control to manage the database. However, if Oracle Management Agent is installed after Oracle Database, then you can use Grid Control to manage this database.
■ Use Database Control for local database management
Note: Oracle Enterprise Manager 10g is available separately on the Oracle Enterprise Manager Grid Control installation media.
Note: Refer to the Oracle Enterprise Manager Concepts manual and the Oracle Enterprise Manager Grid Control Installation and Basic Configuration manual for more information Oracle Enterprise Manager 10g.

Database Backup and Recovery Options
1-14 Oracle Database Installation Guide
This option is selected by default if an Oracle Management Agent is not installed on the system. However, even if a Management Agent is installed, you can still choose to configure Database Control to manage the database.
Management Options for Custom Databases If you choose the Advanced database configuration option or choose to create a database during a Custom installation, then Oracle Universal Installer runs Oracle Database Configuration Assistant in interactive mode. Using a screen in Oracle Database Configuration Assistant, you can specify the Oracle Enterprise Manager interface that you want to use to manage the database. Alternatively, you can also choose not to configure the database with Enterprise Manager.
Oracle recommends that you configure the database to use Enterprise Manager during installation. However, if you choose not to configure the database to use Enterprise Manager during the installation, then you can use Oracle Database Configuration Assistant after the installation to configure the database to use it.
Features Provided by Oracle Enterprise Manager Database Control Oracle Enterprise Manager Database Control provides a Web-based user interface that enables you to monitor, administer, and maintain an Oracle database. You can use it to perform all of the database administration tasks. You can also use it to determine information about the database, such as:
■ Instance name, database version, Oracle home location, media recovery options, and other instance data
■ Current instance availability
■ Database alert information
■ Session and SQL-related performance information
■ Space usage matrix
In addition, it provides you with automatic notification of security alerts and it provides the ability to download and apply patches for the software.
Database Backup and Recovery OptionsIf you choose to use Oracle Enterprise Manager Database Control during the installation, then you can optionally enable automated database backups that use the Oracle-suggested default backup strategy. You do not have to enable automated backups during the installation. If you prefer, you can use Oracle Enterprise Manager Database Control or Grid Control to configure automated backups after you install the software and create a database.
This section contains the following topics:
■ Enabling Automated Backups
■ Backup Job Default Settings
Database Backup and Recovery Options
Overview of Oracle Database Installation 1-15
Enabling Automated BackupsIf you enable automated backups, then Oracle Enterprise Manager schedules a daily backup job that uses Oracle Recovery Manager (RMAN) to back up all of the database files to an on disk storage area called the flash recovery area. The first time the backup job runs, it creates a full backup of the database. Subsequent backup jobs perform incremental backups, which enable you to recover the database to its state at any point during the preceding 24 hours.
To enable automated backup jobs during installation, you must specify the following information:
■ The location of the flash recovery area
You can choose to use either a file system directory or an Automatic Storage Management disk group for the flash recovery area. To set the default values for flash recovery area and data file location, use Oracle base as the starting point.
– Default Flash recovery area: $ORACLE_BASE/flash_recovery_area
– Default data file location: $ORACLE_BASE/oradata
The default disk quota configured for the flash recovery area is 2 GB. For Automatic Storage Management disk groups, the required disk space depends on the redundancy level of the disk group that you choose. Chapter 2 describes how to choose the location of the flash recovery area and identifies its disk space requirements.
■ An operating system user name and password for the backup job
Oracle Enterprise Manager uses the operating system credentials that you specify when running the backup job. The user name that you specify must belong to the UNIX group that identifies database administrators (the ORA_DBA group). This user also must have Logon As A Batch Job privilege.
Backup Job Default Settings If you enable automated backups after choosing one of the preconfigured databases during the installation, then automated backup is configured with the following default settings:
■ The backup job is scheduled to run nightly at 2 a.m.
■ The disk quota for the flash recovery area is 2 GB.
If you enable automated backups by using Oracle Database Configuration Assistant, either during or after the installation, then you can specify a different start time for the backup job and a different disk quota for the flash recovery area.
See Also:
■ Oracle Database 2 Day DBA for information about using Oracle Enterprise Manager Database Control to configure or customize automated backups or to recover a backed up database
■ Oracle Database Backup and Recovery User's Guide for more detailed information about defining a backup strategy and backing up and recovering Oracle databases

E-mail Notification Options
1-16 Oracle Database Installation Guide
E-mail Notification OptionsIf you choose to use the Oracle Enterprise Manager Database Control during the installation, then you can configure Enterprise Manager to send e-mail when specific events occur. These events can include occurrences such as disk space reaching a critical limit (a threshold), or a database shutting down unexpectedly.
If you choose to enable e-mail notifications, then you must specify the following information:
■ The host name of a Simple Mail Transfer Protocol (SMTP) server
■ The e-mail address that should receive the alerts
The e-mail address that you specify could belong to an individual or it could be a shared e-mail account or a distribution list.
You can use Enterprise Manager Database Control to set up, change, or customize e-mail notifications after you have created the database.
2
Oracle Database Preinstallation Requirements 2-1
2 Oracle Database PreinstallationRequirements
This chapter describes the tasks that you must complete before you start Oracle Universal Installer. It includes information about the following tasks:
■ Logging In to the System as root
■ Checking the Hardware Requirements
■ Checking the Software Requirements
■ Preinstallation Requirements for Oracle Configuration Manager
■ Checking the Network Setup
■ Creating Required Operating System Groups and Users
■ Configure Shell Limits and System Configuration Parameters
■ Identifying Required Software Directories
■ Identifying or Creating an Oracle Base Directory
■ Choosing a Storage Option for Oracle Database and Recovery Files
■ Creating Directories for Oracle Database or Recovery Files
■ Preparing Disk Groups for an Automatic Storage Management Installation
■ Stopping Existing Oracle Processes
■ Configuring the oracle User’s Environment
■ Running the rootpre.sh Script
Logging In to the System as rootBefore you install the Oracle software, you must complete several tasks as the root user. To log in as the root user, complete one of the following procedures:
Note: Unless you intend to complete a silent-mode installation, you must install the software from an X Window System workstation, an X terminal, or a PC or other system with X server software installed.
For more information about silent-mode installations, refer to Appendix A.

Checking the Hardware Requirements
2-2 Oracle Database Installation Guide
■ If you are installing the software from an X Window System workstation or X terminal, then:
1. Start a local terminal session, for example, an X terminal (xterm).
2. If you are not installing the software on the local system, then enter the following command to enable the remote host to display X applications on the local X server:
$ xhost fully_qualified_remote_host_name
For example:
$ xhost somehost.us.example.com
3. If you are not installing the software on the local system, then use the ssh, rlogin, or telnet command to connect to the system where you want to install the software:
$ telnet fully_qualified_remote_host_name
4. If you are not logged in as the root user, then enter the following command to switch user to root:
$ su -password:#
■ If you are installing the software from a PC or other system with X server software installed, then:
1. Start the X server software.
2. Configure the security settings of the X server software to permit remote hosts to display X applications on the local system.
3. Connect to the remote system where you want to install the software and start a terminal session on that system, for example, an X terminal (xterm).
4. If you are not logged in as the root user on the remote system, then enter the following command to switch user to root:
$ su -password:#
Checking the Hardware RequirementsThe system must meet the following minimum hardware requirements:
■ Memory Requirements
■ System Architecture
■ Disk Space Requirements
Note: If necessary, refer to your X server documentation for more information about completing this procedure. Depending on the X server software that you are using, you may need to complete the tasks in a different order.
Checking the Hardware Requirements
Oracle Database Preinstallation Requirements 2-3
Memory RequirementsThe following are the memory requirements for installing Oracle Database 11g Release 1:
■ At least 1 GB of RAM
To determine the RAM size, enter the following command:
# /usr/sbin/lsattr -E -l sys0 -a realmem
If the size of the RAM is less than the required size, then you must install more memory before continuing.
■ The following table describes the relationship between installed RAM and the configured swap space requirement:
To determine the size of the configured swap space, enter the following command:
# /usr/sbin/lsps -a
If necessary, refer to the operating system documentation for information about how to configure additional swap space.
System ArchitectureTo determine whether the system architecture can run the software, enter the following command:
# /usr/bin/getconf HARDWARE_BITMODE
The expected output of this command is 64. If you do not see the expected output, then you cannot install the software on this system.
Note: On AIX systems with 1 GB or more of memory, Oracle recommends that you set the paging space to an initial setting of half the size of RAM plus 4 GB, with an upper limit of 32 GB. During installation, to optimize paging, monitor the paging space use in a separate window. Use the command lsps -a to increase or decrease the paging space size. The output of lsps -a should indicate paging space use of less than 25 percent on a healthy system. Refer to Oracle Database Administrator's Reference for Linux and UNIX for more information about configuring paging space.
RAM Swap Space
Between 1024 MB and 2048 MB 1.5 times the size of RAM
Between 2049 MB and 8192 MB Equal to the size of RAM
More than 8192 MB 0.75 times the size of RAM
Note: Oracle recommends that you take multiple values for the available RAM and swap space before finalizing a value. This is because the available RAM and swap space keep changing depending on the user interactions with the computer.
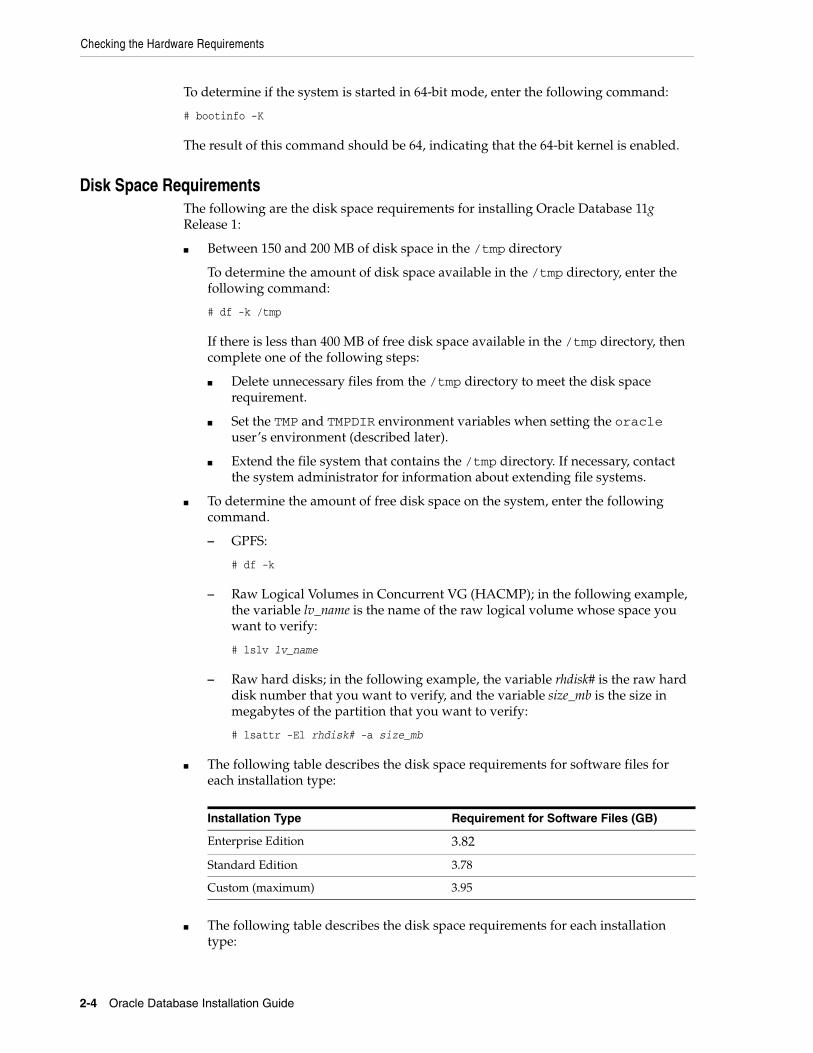
Checking the Hardware Requirements
2-4 Oracle Database Installation Guide
To determine if the system is started in 64-bit mode, enter the following command:
# bootinfo -K
The result of this command should be 64, indicating that the 64-bit kernel is enabled.
Disk Space RequirementsThe following are the disk space requirements for installing Oracle Database 11g Release 1:
■ Between 150 and 200 MB of disk space in the /tmp directory
To determine the amount of disk space available in the /tmp directory, enter the following command:
# df -k /tmp
If there is less than 400 MB of free disk space available in the /tmp directory, then complete one of the following steps:
■ Delete unnecessary files from the /tmp directory to meet the disk space requirement.
■ Set the TMP and TMPDIR environment variables when setting the oracle user’s environment (described later).
■ Extend the file system that contains the /tmp directory. If necessary, contact the system administrator for information about extending file systems.
■ To determine the amount of free disk space on the system, enter the following command.
– GPFS:
# df -k
– Raw Logical Volumes in Concurrent VG (HACMP); in the following example, the variable lv_name is the name of the raw logical volume whose space you want to verify:
# lslv lv_name
– Raw hard disks; in the following example, the variable rhdisk# is the raw hard disk number that you want to verify, and the variable size_mb is the size in megabytes of the partition that you want to verify:
# lsattr -El rhdisk# -a size_mb
■ The following table describes the disk space requirements for software files for each installation type:
■ The following table describes the disk space requirements for each installation type:
Installation Type Requirement for Software Files (GB)
Enterprise Edition 3.82
Standard Edition 3.78
Custom (maximum) 3.95

Checking the Software Requirements
Oracle Database Preinstallation Requirements 2-5
Additional disk space, either on a file system or on an Automatic Storage Management disk group is required for the flash recovery area if you choose to configure automated backups.
Checking the Software RequirementsDepending on the products that you intend to install, verify that the following software are installed on the system.
■ Operating System Requirements
■ Compiler Requirements
■ Patch Requirement
■ Additional Software Requirements
Operating System RequirementsThe following is the operating stem requirements for Oracle Database 11g Release 1:
■ AIX 5L version 5.3, TL 05, Service Pack 06
■ AIX 6L version 6.1, TL 00, Service Pack 04 or later
The following operating system filesets:
■ bos.adt.base
■ bos.adt.lib
■ bos.adt.libm
■ bos.perf.libperfstat
■ bos.perf.perfstat
■ bos.perf.proctools
■ xlC.aix50.rte:8.0.0.7 or later (AIX 5.3)
■ xlC.rte:8.0.0.7 or later (AIX 5.3)
■ xlC.aix61.rte:9.0.0.1 or later (AIX 6.1)
■ xlC.rte:9.0.0.1 or later (AIX 6.1)
Installation Type Disk Space for Data Files (GB)
Enterprise Edition 1.6
Standard Edition 1.6
Custom (maximum) 1.81
Note: Oracle Universal Installer performs checks to verify that the system meets the listed requirements. To ensure that these checks pass, verify the requirements before you start Oracle Universal Installer.

Checking the Software Requirements
2-6 Oracle Database Installation Guide
1. To determine the distribution and version of AIX installed, enter the following command:
# oslevel -s
If the operating system version is lower than AIX 5.3.0.0 Technology Level 5 SP 6, then upgrade your operating system to this level. AIX 5L version 5.3 maintenance packages are available from the following Web site:
http://www-912.ibm.com/eserver/support/fixes/
2. To determine whether the required filesets are installed and committed, enter a command similar to the following:
# lslpp -l bos.adt.base bos.adt.lib bos.adt.libm bos.perf.perfstat \bos.perf.libperfstat bos.perf.proctools
3. To determine the supported kernel mode, enter a command similar to the following:
# getconf KERNEL_BITMODE
Compiler RequirementsThe following are the compiler requirements for Pro*C/C++, Oracle Call Interface, Oracle C++ Call Interface, and Oracle XML Developer’s Kit (XDK), and GNU Compiler Collection (GCC) with Oracle Database 11g Release 1:
■ XL C/C++ Enterprise Edition V8.0 for AIX:
You can download this software from the following link:
http://www-1.ibm.com/support/
■ gcc 3.4.5
Patch RequirementIn addition, you need to verify that the following patches are installed on the system.
Note: On AIX 5L operating system, if you set the value of LOCK_SGA parameter to true, then you must ensure that the CAP_BYPASS_RAC_VMM and CAP_PROPAGATE privileges are enabled for the operating system account that is used to start the respective database instances. Otherwise, setting the value of LOCK_SGA parameter to TRUE alone does not ensure startup of the database instance.
Note: If you do not install the IBM XL C/C++ Enterprise Edition V8.0 compiler, then you need to install this compiler for AIX Runtime Environment Component. The runtime environment file sets can be downloaded with no license requirements from the following link:
http://www-1.ibm.com/support/
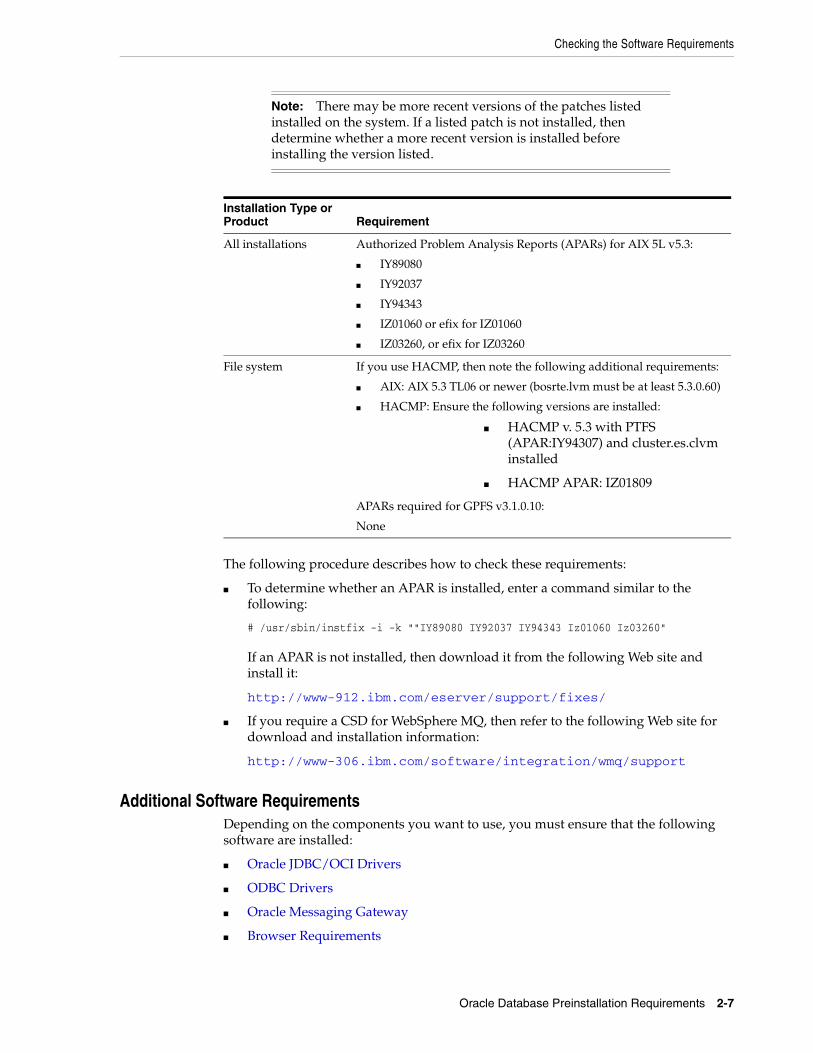
Checking the Software Requirements
Oracle Database Preinstallation Requirements 2-7
The following procedure describes how to check these requirements:
■ To determine whether an APAR is installed, enter a command similar to the following:
# /usr/sbin/instfix -i -k ""IY89080 IY92037 IY94343 Iz01060 Iz03260"
If an APAR is not installed, then download it from the following Web site and install it:
http://www-912.ibm.com/eserver/support/fixes/
■ If you require a CSD for WebSphere MQ, then refer to the following Web site for download and installation information:
http://www-306.ibm.com/software/integration/wmq/support
Additional Software RequirementsDepending on the components you want to use, you must ensure that the following software are installed:
■ Oracle JDBC/OCI Drivers
■ ODBC Drivers
■ Oracle Messaging Gateway
■ Browser Requirements
Note: There may be more recent versions of the patches listed installed on the system. If a listed patch is not installed, then determine whether a more recent version is installed before installing the version listed.
Installation Type or Product Requirement
All installations Authorized Problem Analysis Reports (APARs) for AIX 5L v5.3:
■ IY89080
■ IY92037
■ IY94343
■ IZ01060 or efix for IZ01060
■ IZ03260, or efix for IZ03260
File system If you use HACMP, then note the following additional requirements:
■ AIX: AIX 5.3 TL06 or newer (bosrte.lvm must be at least 5.3.0.60)
■ HACMP: Ensure the following versions are installed:
■ HACMP v. 5.3 with PTFS (APAR:IY94307) and cluster.es.clvm installed
■ HACMP APAR: IZ01809
APARs required for GPFS v3.1.0.10:
None
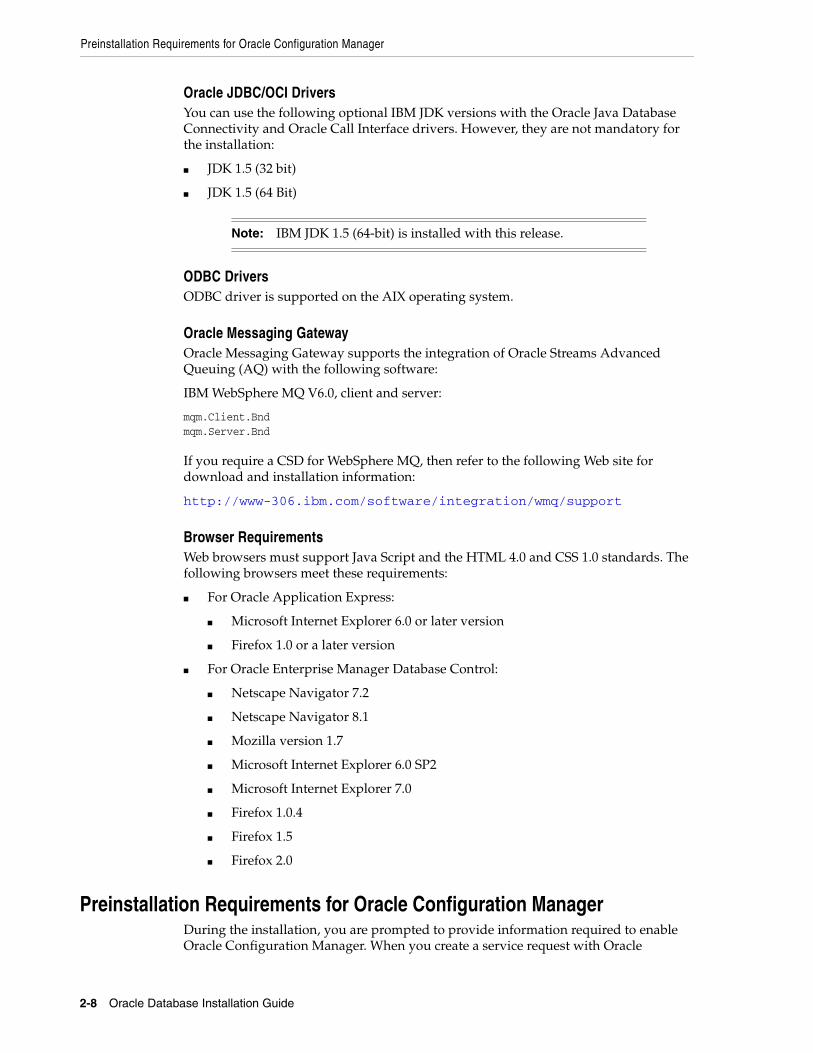
Preinstallation Requirements for Oracle Configuration Manager
2-8 Oracle Database Installation Guide
Oracle JDBC/OCI DriversYou can use the following optional IBM JDK versions with the Oracle Java Database Connectivity and Oracle Call Interface drivers. However, they are not mandatory for the installation:
■ JDK 1.5 (32 bit)
■ JDK 1.5 (64 Bit)
ODBC DriversODBC driver is supported on the AIX operating system.
Oracle Messaging GatewayOracle Messaging Gateway supports the integration of Oracle Streams Advanced Queuing (AQ) with the following software:
IBM WebSphere MQ V6.0, client and server:
mqm.Client.Bndmqm.Server.Bnd
If you require a CSD for WebSphere MQ, then refer to the following Web site for download and installation information:
http://www-306.ibm.com/software/integration/wmq/support
Browser RequirementsWeb browsers must support Java Script and the HTML 4.0 and CSS 1.0 standards. The following browsers meet these requirements:
■ For Oracle Application Express:
■ Microsoft Internet Explorer 6.0 or later version
■ Firefox 1.0 or a later version
■ For Oracle Enterprise Manager Database Control:
■ Netscape Navigator 7.2
■ Netscape Navigator 8.1
■ Mozilla version 1.7
■ Microsoft Internet Explorer 6.0 SP2
■ Microsoft Internet Explorer 7.0
■ Firefox 1.0.4
■ Firefox 1.5
■ Firefox 2.0
Preinstallation Requirements for Oracle Configuration ManagerDuring the installation, you are prompted to provide information required to enable Oracle Configuration Manager. When you create a service request with Oracle
Note: IBM JDK 1.5 (64-bit) is installed with this release.
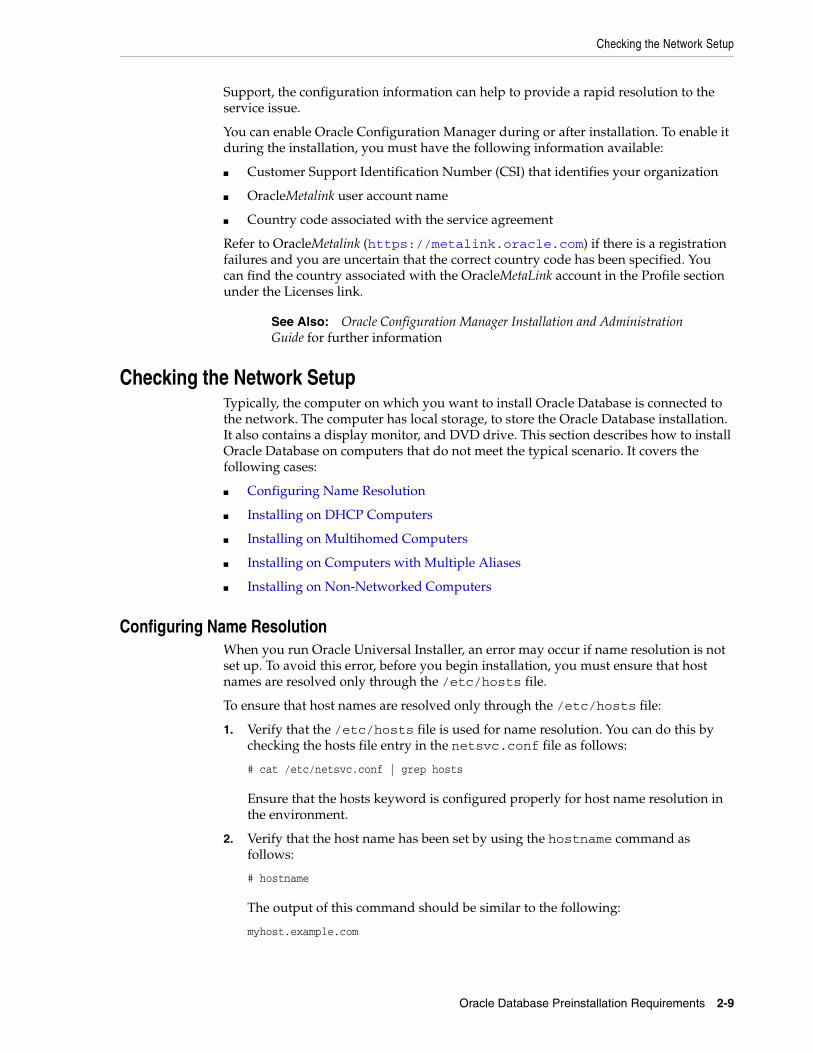
Checking the Network Setup
Oracle Database Preinstallation Requirements 2-9
Support, the configuration information can help to provide a rapid resolution to the service issue.
You can enable Oracle Configuration Manager during or after installation. To enable it during the installation, you must have the following information available:
■ Customer Support Identification Number (CSI) that identifies your organization
■ OracleMetalink user account name
■ Country code associated with the service agreement
Refer to OracleMetalink (https://metalink.oracle.com) if there is a registration failures and you are uncertain that the correct country code has been specified. You can find the country associated with the OracleMetaLink account in the Profile section under the Licenses link.
Checking the Network SetupTypically, the computer on which you want to install Oracle Database is connected to the network. The computer has local storage, to store the Oracle Database installation. It also contains a display monitor, and DVD drive. This section describes how to install Oracle Database on computers that do not meet the typical scenario. It covers the following cases:
■ Configuring Name Resolution
■ Installing on DHCP Computers
■ Installing on Multihomed Computers
■ Installing on Computers with Multiple Aliases
■ Installing on Non-Networked Computers
Configuring Name ResolutionWhen you run Oracle Universal Installer, an error may occur if name resolution is not set up. To avoid this error, before you begin installation, you must ensure that host names are resolved only through the /etc/hosts file.
To ensure that host names are resolved only through the /etc/hosts file:
1. Verify that the /etc/hosts file is used for name resolution. You can do this by checking the hosts file entry in the netsvc.conf file as follows:
# cat /etc/netsvc.conf | grep hosts
Ensure that the hosts keyword is configured properly for host name resolution in the environment.
2. Verify that the host name has been set by using the hostname command as follows:
# hostname
The output of this command should be similar to the following:
myhost.example.com
See Also: Oracle Configuration Manager Installation and Administration Guide for further information
Checking the Network Setup
2-10 Oracle Database Installation Guide
3. Verify that the domain name has not been set dynamically by using the domainname command as follows:
# domainname
This command should not return any results.
4. Verify that the hosts file contains the fully qualified host name by using the following command:
# cat /etc/hosts | grep `eval hostname`
The output of this command should contain an entry for the fully qualified host name and for localhost.
For example:
192.168.100.16 myhost.us.example.com myhost127.0.0.1 localhost localhost.localdomain
If the hosts file does not contain the fully qualified host name, then open the file and make the required changes in it.
Installing on DHCP ComputersDynamic Host Configuration Protocol (DHCP) assigns dynamic IP addresses on a network. Dynamic addressing enables a computer to have a different IP address each time it connects to the network. In some cases, the IP address can change while the computer is still connected. You can have a mixture of static and dynamic IP addressing in a DHCP system.
In a DHCP setup, the software tracks IP addresses, which simplifies network administration. This lets you add a new computer to the network without having to manually assign that computer a unique IP address.
Installing on Multihomed ComputersYou can install Oracle Database on a multihomed computer. A multihomed computer is associated with multiple IP addresses. This is typically achieved by having multiple network cards on the computer. Each IP address is associated with a host name. In addition, you can set up aliases for the host name. By default, Oracle Universal Installer uses the ORACLE_HOSTNAME environment variable setting to find the host name. If ORACLE_HOSTNAME is not set and you are installing on a computer that has multiple network cards, then Oracle Universal Installer determines the host name by using the first entry in the /etc/hosts file.
Clients must be able to access the computer either by using this host name or by using aliases for this host name. To verify this, ping the host name from the client computers using the short name (host name only) and the full name (host name and domain name). Both tests must be successful.
Setting the ORACLE_HOSTNAME Environment VariableUse the following procedure to set the ORACLE_HOSTNAME environment variable. For example, if the fully qualified host name is somehost.us.example.com, then enter one of the following commands:
In Bourne, Bash, or Korn shell:
$ ORACLE_HOSTNAME=somehost.us.example.com$ export ORACLE_HOSTNAME
Creating Required Operating System Groups and Users
Oracle Database Preinstallation Requirements 2-11
In C shell:
% setenv ORACLE_HOSTNAME somehost.us.example.com
Installing on Computers with Multiple AliasesA computer with multiple aliases is registered with the naming service under a single IP but with multiple aliases. The naming service resolves any of those aliases to the same computer. Before installing Oracle Database on such a computer, set the ORACLE_HOSTNAME environment variable to the computer whose host name you want to use.
Installing on Non-Networked ComputersYou can install Oracle Database on a non-networked computer. If the computer, such as a laptop, is configured for DHCP and you plan to connect the computer to the network after the Oracle Database installation, then use the ping command on the computer on which you want to install the database to check if the computer can connect to itself. Perform this step by first using only the host name and then using the fully qualified name, which should be in the /etc/hosts file.
If the ping command fails, then contact your network administrator.
Connecting the Computer to the Network after InstallationIf you connect the computer to a network after installation, then the Oracle Database instance on your computer can work with other instances on the network. The computer can use a static IP or DHCP, depending on the network to which you are connected.
Creating Required Operating System Groups and UsersDepending on whether this is the first time Oracle software is being installed on this system and on the products that you are installing, you may need to create several operating system groups and users.
The following operating system groups and user are required if you are installing Oracle Database:
■ The OSDBA group (dba)
You must create this group the first time you install Oracle Database software on the system. It identifies operating system user accounts that have database administrative privileges (the SYSDBA privilege). The default name for this group is dba.
Oracle Universal Installer prompts you to specify this group name. If software owner is a member of the group dba, then Oracle Universal Installer defaults the OSDBA setting to dba. However, you can also choose a different operating system group if required.
■ The OSOPER group (oper)
Note: When you run the ping command on the computer itself, the ping command should return the IP address of the computer.

Creating Required Operating System Groups and Users
2-12 Oracle Database Installation Guide
This is an optional group. Create this group if you want a separate group of operating system users to have a limited set of database administrative privileges (the SYSOPER privilege). By default, members of the OSDBA group also have the SYSOPER privilege.
In this case, Oracle Universal Installer prompts you to specify the name of this group. The usual name chosen for this group is oper.
■ The OSASM group (asmadmin)
This feature introduces a new SYSASM privilege that is specifically intended for performing Automatic Storage Management administration tasks. Using the SYSASM privilege instead of the SYSDBA privilege provides a clearer division of responsibility between Automatic Storage Management administration and database administration. OSASM is a new operating system group that is used exclusively for Automatic Storage Management. Members of the OSASM group can connect as SYSASM using operating system authentication and have full access to Automatic Storage Management. The usual name chosen for this group is asmadmin.
The following operating system group and user are required for all installations:
■ The Oracle Inventory group (oinstall)
You must have a group whose members are given access to write to the Oracle Central Inventory (oraInventory). The Central Inventory contains the following:
– A registry of the Oracle home directories (Oracle Clusterware, Oracle Database, and Automatic Storage Management) on the system.
– Installation logs and trace files from installations of Oracle software. These files are also copied to the respective Oracle homes for future reference.
Other metadata inventory information regarding Oracle installations are stored in the individual Oracle home inventory directories, and are separate from the Central Inventory.
For new installations, Oracle recommends that you allow OUI to create the Central Inventory directory. By default, if you create an Oracle path in compliance with OFA structure, such as /u01/app, then the Central Inventory is created in the path u01/app/oraInventory, using correct permissions to allow all Oracle installation owners to write to this directory.
■ The Oracle software owner user (typically, oracle)
You must create this user the first time you install Oracle software on the system. This user owns all of the software installed during the installation. This user must have the Oracle Inventory group as its primary group. It must also have the OSDBA and OSOPER groups as secondary groups.
See Also: "Authentication for Accessing Automatic Storage Management Instances" section in Oracle Database Storage Administrator's Guide for more information on SYSASM privilege for Automatic Storage Management
Note: In Oracle documentation, this user is referred to as the oracle user.
Creating Required Operating System Groups and Users
Oracle Database Preinstallation Requirements 2-13
A single Oracle Inventory group is required for all installations of Oracle software on the system. After the first installation of Oracle software, you must use the same Oracle Inventory group for all subsequent Oracle software installations on that system. However, you can choose to create different Oracle software owner users, OSDBA groups, and OSOPER groups (other than oracle, dba, and oper) for separate installations. By using different groups for different installations, members of these different groups have DBA privileges only on the associated databases rather than on all databases on the system.
The following sections describe how to create the required operating system users and groups:
■ Creating the Oracle Inventory Group
■ Creating the OSDBA Group
■ Creating an OSOPER Group (Optional)
■ Creating an OSASM Group
■ Creating the Oracle Software Owner User
Creating the Oracle Inventory GroupLog in as root, and use the following instructions to locate or create the Oracle Inventory group and a software owner:
■ Determining Whether the Oracle Inventory Group Exists
■ Creating the Oracle Inventory Group
Determining Whether the Oracle Inventory Group ExistsWhen you install Oracle software on the system for the first time, Oracle Universal Installer creates the oraInst.loc file. This file identifies the name of the Oracle Inventory group (typically, oinstall), and the path of the Oracle Inventory directory. An oraInst.loc file has contents similar to the following:
To determine whether the Oracle Inventory group exists, enter the following command:
# more /etc/oraInst.loc
inventory_loc=central_inventory_locationinst_group=group
See Also: Oracle Database Administrator's Reference for Linux and UNIX and Oracle Database Administrator's Guide for more information on the OSDBA and OSOPER groups and the SYSDBA and SYSOPER privileges
Note: The following sections describe how to create local users and groups. As an alternative to creating local users and groups, you can create the appropriate users and groups in a directory service, for example, Network Information Services (NIS). For information about using directory services, contact the system administrator or refer to the operating system documentation.
Creating Required Operating System Groups and Users
2-14 Oracle Database Installation Guide
In the preceding example, central_inventory_location is the location of the Oracle Central Inventory, and group is the name of the group that has permissions to write to the central inventory.
If you have an existing Oracle Inventory, then ensure that you use the same Oracle Inventory for all Oracle software installations, and ensure that all Oracle software users you intend to use for installation have permissions to write to this directory.
To determine whether the Oracle Inventory group exists, enter the following command:
# more /etc/oraInst.loc
If the oraInst.loc file exists, then the output from this command is similar to the following:
inventory_loc=/u01/app/oraInventoryinst_group=oinstall
In the previous output example:
■ The inventory_loc group shows the location of the Oracle Inventory
■ The inst_group parameter shows the name of the Oracle Inventory group (in this example, oinstall).
Creating the Oracle Inventory Group If the oraInst.loc file does not exist, then create the Oracle Inventory group by using the following procedure:
1. Enter the following command:
# smit security
2. Choose the appropriate menu items to create the Oracle Inventroy group (oinstall) group.
3. Press F10 to exit.
Creating the OSDBA GroupYou must create an OSDBA group in the following circumstances:
■ An OSDBA group does not exist, for example, if this is the first installation of Oracle Database software on the system
■ An OSDBA group exists, but you want to give a different group of operating system users database administrative privileges in a new Oracle installation
If the OSDBA group does not exist or if you require a new OSDBA group, then create it as follows. In the following procedure, use the group name dba unless a group with that name already exists.
1. Enter the following command:
# smit security
Note: In Oracle documentation, Oracle Inventory group is called oinstall. However, it is not mandatory to use the same name, you can enter a different name for the group.
Creating Required Operating System Groups and Users
Oracle Database Preinstallation Requirements 2-15
2. Choose the appropriate menu items to create the dba group.
3. Press F10 to exit.
Creating an OSOPER Group (Optional)Create an OSOPER group only if you want to identify a group of operating system users with a limited set of database administrative privileges (SYSOPER operator privileges). For most installations, it is sufficient to create only the OSDBA group. If you want to use an OSOPER group, then you must create it in the following circumstances:
■ If an OSOPER group does not exist, for example, if this is the first installation of Oracle Database software on the system
■ If an OSOPER group exists, but you want to give a different group of operating system users database operator privileges in a new Oracle installation
If you require a new OSOPER group, then create it as follows. In the following procedure, use the group name oper unless a group with that name already exists.
1. Enter the following command:
# smit security
2. Choose the appropriate menu items to create the oper group.
3. Press F10 to exit.
Creating an OSASM GroupCreate an OSASM group only if you want SYSASM as a system privilege that enables the separation of the SYSASM database administration privilege from the Automatic Storage Management storage administration privilege. If you want to use an OSASM group, then you must create it in the following circumstances:
■ If an OSASM group does not exist, for example, if this is the first installation of Oracle Database software on the system
■ If an OSASM group exists, but you want to give a different group of operating system users database operator privileges in a new Oracle installation
If you require a new OSOPER group, then create it as follows. In the following procedure, use the group name oper unless a group with that name already exists.
1. Enter the following command:
# smit security
2. Choose the appropriate menu items to create the asmadmin group.
3. Press F10 to exit.
Creating the Oracle Software Owner UserYou must create an Oracle software owner user in the following circumstances:
■ If an Oracle software owner user does not exist, for example, if this is the first installation of Oracle software on the system
Note: The default OSDBA group name is dba.
Creating Required Operating System Groups and Users
2-16 Oracle Database Installation Guide
■ If an Oracle software owner user exists, but you want to use a different operating system user, with different group membership, to give database administrative privileges to those groups in a new Oracle Database installation
Determining Whether an Oracle Software Owner User ExistsTo determine whether an Oracle software owner user named oracle exists, enter the following command:
# id oracle
If the oracle user exists, then the output from this command is similar to the following:
uid=440(oracle) gid=200(oinstall) groups=201(dba),202(oper)
If the user exists, then determine whether you want to use the existing user or create another oracle user. If you want to use the existing user, then ensure that the user’s primary group is the Oracle Inventory group and that it is a member of the appropriate OSDBA and OSOPER groups. Refer to one of the following sections for more information:
■ If you want to use an existing Oracle software owner user, and the user’s primary group is the Oracle Inventory group, then refer to the "Determining Whether an Oracle Software Owner User Exists" section on page 2-16.
■ To modify an existing user, refer to the "Modifying an Oracle Software Owner User" on page 2-17.
■ To create a user, refer to "Creating an Oracle Software Owner User" on page 2-16.
Creating an Oracle Software Owner UserIf the Oracle software owner user does not exist or if you require a new Oracle software owner user, then create it as follows. In the following procedure, use the user name oracle unless a user with that name already exists.
1. Enter the following command:
# smit security
2. Choose the appropriate menu items to create the oracle user, specifying the following information:
■ In the Primary GROUP field, specify the Oracle Inventory group, for example oinstall.
■ In the Group SET field, specify the OSDBA group and if required, the OSOPER group. For example dba or oper.
3. Press F10 to exit.
4. Set the password of the oracle user:
Note: If necessary, contact the system administrator before using or modifying an existing user.
Note: The UID for the oracle user must be less than 65536.
Configure Shell Limits and System Configuration Parameters
Oracle Database Preinstallation Requirements 2-17
# passwd oracle
Modifying an Oracle Software Owner UserIf the oracle user exists, but its primary group is not oinstall or it is not a member of the appropriate OSDBA or OSOPER groups, then you can modify it as follows:
1. Enter the following command:
# smit security
2. Choose the appropriate menu items to modify the oracle user.
3. In the Primary GROUP field, specify the Oracle Inventory group, for example oinstall.
4. In the Group SET field, specify the required secondary groups, for example dba and oper.
5. Press F10 to exit.
Configure Shell Limits and System Configuration Parameters
Oracle recommends that you set shell limits and system configuration parameters as described in this section.
Configure Shell LimitsFor AIX, it is the ulimit settings that determine process memory related resource limits. Verify that the shell limits displayed in the following table are set to the values shown:
To display the current value specified for these shell limits, and to change them if necessary perform the following steps:
1. Enter the following command:
# smit chuser
Note: The parameter and shell limit values shown in this section are recommended values only. For production database systems, Oracle recommends that you tune these values to optimize the performance of the system. See your operating system documentation for more information about tuning kernel parameters.
Shell Limit (As Shown in smit) Recommended Value
Soft FILE size -1 (Unlimited)
Soft CPU time -1 (Unlimited)
Note: This is the default value.
Soft DATA segment -1 (Unlimited)
Soft STACK size -1 (Unlimited)
Soft Real Memory size -1 (Unlimited)
Identifying Required Software Directories
2-18 Oracle Database Installation Guide
2. In the User NAME field, enter the user name of the Oracle software owner, for example oracle.
3. Scroll down the list and verify that the value shown for the soft limits listed in the previous table is -1.
If necessary, edit the existing value. To edit the values, you can use the smit utility. However, to set the value of Soft Real Memory size, you must edit the file /etc/security/limits. If you have permissions to run smit utility, then you automatically have the permissions to edit the limits file.
4. When you have finished making changes, press F10 to exit.
Configure System Configuration ParametersThe following procedure describes how to verify and set the values.
■ To verify that the maximum number of processes allowed per user is set to 2048 or greater, use the following steps:
1. Enter the following command:
# smit chgsys
2. Verify that the value shown for Maximum number of PROCESSES allowed per user is greater than or equal to 2048.
If necessary, edit the existing value.
3. When you have finished making changes, press F10 to exit.
■ To verify that long commands can be executed from shell, use the following steps:
1. Enter the following command:
# smit chgsys
2. Verify that the value shown for ARG/ENV list size in 4K byte blocks is greater than or equal to 128.
If necessary, edit the existing value.
3. When you have finished making changes, press F10 to exit.
Identifying Required Software DirectoriesYou must identify or create the following directories for the Oracle software:
■ Oracle Base Directory
Note: For production systems, this value should be at least 128 plus the sum of the PROCESSES and PARALLEL_MAX_SERVERS initialization parameters for each database running on the system.
Note: Oracle recommends that you set the ncargs system attribute to a value greater than or equal to 128. The ncargs attribute determines the maximum number of values that can be passed as command line arguments.

Identifying Required Software Directories
Oracle Database Preinstallation Requirements 2-19
■ Oracle Inventory Directory
■ Oracle Home Directory
Oracle Base DirectoryThe Oracle base directory is a top-level directory for Oracle software installations. On Unix systems, the Optimal Flexible Architecture (OFA) guidelines recommend that you use a path similar to the following for the Oracle base directory:
/mount_point/app/oracle_sw_owner
In this example:
■ mount_point is the mount point directory for the file system that will contain the Oracle software.
The examples in this guide use /u01 for the mount point directory. However, you can choose another mount point directory, such as /oracle or /opt/oracle.
■ oracle_sw_owner is the operating system user name of the Oracle software owner, for example oracle.
You need to specify the ORACLE_BASE folder that contains all Oracle products.
You can use the same Oracle base directory for more than one installation or you can create separate Oracle base directories for different installations. If different operating system users install Oracle software on the same system, then each user must create a separate Oracle base directory. The following are the examples of Oracle base directories that can exist on the same system:
/u01/app/oracle/u01/app/orauser/opt/oracle/app/oracle
Oracle Inventory DirectoryThe Oracle Inventory directory (oraInventory) stores an inventory of all software installed on the system. It is required and shared by all Oracle software installations on a single system. If you have an existing Oracle Inventory path, then Oracle Universal Installer continues to use that Oracle Inventory.
The first time you install Oracle software on a system, Oracle Universal Installer checks if you have created an OFA-compliant directory structure with the format u[01-09]/app, such as /u01/app, and that the user running the installation has permissions to write to that path. If this is true, then Oracle Universal Installer creates the Oracle Inventory directory similar to /u[01-09]/app/oraInventory. For example:
/u01/app/oraInventory
Note: If you have an existing ORACLE_BASE, then you can select it from the Use existing list. By default, the list contains the existing value for ORACLE_BASE preselected. Refer to "Installing the Oracle Database Software" on page 3-7 for further information.
If you do not have an ORACLE_BASE, then you can create one by editing the text in the list box.
Identifying or Creating an Oracle Base Directory
2-20 Oracle Database Installation Guide
If you have set the environment variable ORACLE_BASE for the oracle user, then Oracle Universal Installer creates the Oracle Inventory directory similar to $ORACLE_BASE/../oraInventory. For example, if ORACLE_BASE is set to /opt/oracle/11, then the Oracle Inventory directory is created similar to /opt/oracle/oraInventory.
If you have neither created an OFA-compliant (Optimal Flexible Architecture) path nor set ORACLE_BASE, then the Oracle Inventory directory is placed in the home directory of the user that is performing the installation. For example:
/home/oracle/oraInventory
Oracle Universal Installer creates the directory that you specify and sets the correct owner, group, and permissions for it. You do not need to create it.
Oracle Home DirectoryThe Oracle home directory is the directory where you choose to install the software for a particular Oracle product. You must install different Oracle products or different releases of the same Oracle product in separate Oracle home directories. When you run Oracle Universal Installer, it prompts you to specify the path to this directory and a name that identifies it. The directory that you specify must be a subdirectory of the Oracle base directory. Oracle recommends that you specify a path similar to the following for the Oracle home directory:
oracle_base/product/11.1.0/db_1
Oracle Universal Installer creates the directory path that you specify under the Oracle base directory. It also sets the correct owner, group, and permissions on it. You do not need to create this directory.
Identifying or Creating an Oracle Base DirectoryBefore starting the installation, you must either identify an existing Oracle base directory or if required, create one. This section contains information about the following:
■ Identifying an Existing Oracle Base Directory
■ Creating an Oracle Base Directory
Note:
■ All Oracle software installations rely on this directory. Ensure that you back it up regularly.
■ Do not delete this directory unless you have completely removed all Oracle software from the system.
Note: During installation, you must not specify an existing directory that has predefined permissions applied to it as the Oracle home directory. If you do, then you may experience installation failure due to file and group ownership permission errors.
Note: You can choose to create an Oracle base directory, even if other Oracle base directories exist on the system.
Identifying or Creating an Oracle Base Directory
Oracle Database Preinstallation Requirements 2-21
Identifying an Existing Oracle Base DirectoryExisting Oracle base directories may not have paths that comply with OFA guidelines. However, if you identify an existing Oracle Inventory directory or existing Oracle home directories, then you can usually identify the Oracle base directories, as follows:
■ Identifying an existing Oracle Inventory directory. Refer to Creating the Oracle Inventory Group on page 2-13 for more information.
■ Identifying existing Oracle home directories
Enter the following command to display the contents of the oratab file:
# more /etc/oratab
If the oratab file exists, then it contains lines similar to the following:
*:/u03/app/oracle/product/11.1.0/db_1:N*:/opt/orauser/infra_904:N*:/oracle/9.2.0:N
The directory paths specified on each line identify Oracle home directories. Directory paths that end with the user name of the Oracle software owner that you want to use are valid choices for an Oracle base directory. If you intend to use the oracle user to install the software, then you can choose one of the following directories listed in the previous example:
/u03/app/oracle/oracle
Before deciding to use an existing Oracle base directory for this installation, ensure that it satisfies the following conditions:
■ It should not be on the same file system as the operating system.
■ The Oracle base directory requires 7.5 GB of free disk space for software files.
To determine the free disk space on the file system where the Oracle base directory is located, enter the following command:
# df -k oracle_base_pathTo continue:
■ If an Oracle base directory exists and you want to use it, then refer to the "Choosing a Storage Option for Oracle Database and Recovery Files" section on page 2-22.
When you configure the oracle user’s environment later in this chapter, set the ORACLE_BASE environment variable to specify the directory you chose.
■ If an Oracle base directory does not exist on the system or if you want to create an Oracle base directory, then refer to the following section.
Creating an Oracle Base DirectoryBefore you create an Oracle base directory, you must identify an appropriate file system with sufficient free disk space.
To identify an appropriate file system:
Note: If possible, choose a directory path similar to the first one (/u03/app/oracle). This path complies with the OFA guidelines.

Choosing a Storage Option for Oracle Database and Recovery Files
2-22 Oracle Database Installation Guide
1. To determine the free disk space on each mounted file system use the following command:
# df -k
2. From the display, identify a file system that has appropriate free space.
The file system that you identify can be a local file system, a cluster file system, or an NFS file system on a certified NAS device.
3. Note the name of the mount point directory for the file system that you identified.
To create the Oracle base directory and specify the correct owner, group, and permissions for it:
1. Enter commands similar to the following to create the recommended subdirectories in the mount point directory that you identified and set the appropriate owner, group, and permissions on them:
# mkdir -p /mount_point/app# chown -R oracle:oinstall /mount_point/app# chmod -R 775 /mount_point/app/
For example:
# mkdir -p /u01/app# chown -R oracle:oinstall /u01/app# chmod -R 775 /u01/app/
2. When you configure the oracle user’s environment later in this chapter, set the ORACLE_BASE environment variable to specify the Oracle base directory that you have created.
Choosing a Storage Option for Oracle Database and Recovery FilesOracle Database files include data files, control files, redo log files, the server parameter file, and the password file. For all installations, you must choose the storage option that you want to use for Oracle Database files. If you want to enable automated backups during the installation, then you must also choose the storage option that you want to use for recovery files (the flash recovery area). You do not have to use the same storage option for each file type.
Use the following guidelines when choosing the storage options that you want to use for each file type:
■ You can choose any combination of the supported storage options for each file type.
■ Oracle recommends that you choose Automatic Storage Management as the storage option for database and recovery files.
■ For more information about these storage options, refer to the "Database Storage Options" section on page 1-9.
For information about how to configure disk storage before you start the installation, refer to one of the following sections depending on your choice:
Note: Database files and Recovery files are supported on file systems and Automatic Storage Management.

Creating Directories for Oracle Database or Recovery Files
Oracle Database Preinstallation Requirements 2-23
■ To use a file system for database or recovery file storage, refer to the "Creating Directories for Oracle Database or Recovery Files" section on page 2-23.
■ To use Automatic Storage Management for database or recovery file storage, refer to the "Preparing Disk Groups for an Automatic Storage Management Installation" section on page 2-25.
Creating Directories for Oracle Database or Recovery FilesThis section contains the following topics:
■ Guidelines for Placing Oracle Database Files on a File System
■ Creating Required Directories
Guidelines for Placing Oracle Database Files on a File SystemIf you choose to place the Oracle Database files on a file system, then use the following guidelines when deciding where to place them:
■ The default path suggested by Oracle Universal Installer for the database file directory is a subdirectory of the Oracle base directory.
■ You can choose either a single file system or more than one file system to store the database files:
– If you want to use a single file system, then choose a file system on a physical device that is dedicated to the database.
For best performance and reliability, choose a RAID device or a logical volume on more than one physical device and implement the stripe-and-mirror-everything (SAME) methodology.
– If you want to use more than one file system, then choose file systems on separate physical devices that are dedicated to the database.
This method enables you to distribute physical input-output operations and create separate control files on different devices for increased reliability. It also enables you to fully implement the OFA guidelines described in Appendix D, "Optimal Flexible Architecture". You must choose either the Advanced database creation option or the Custom installation type during the installation to implement this method.
■ If you intend to create a preconfigured database during the installation, then the file system (or file systems) that you choose must have at least 1.2 GB of free disk space.
For production databases, you must estimate the disk space requirement depending on the use that you want to make of the database.
■ For optimum performance, the file systems that you choose should be on physical devices that are used only by the database.
■ The oracle user must have write permissions to create the files in the path that you specify.
Creating Directories for Oracle Database or Recovery Files
2-24 Oracle Database Installation Guide
Creating Required Directories
To create directories for the Oracle database, or recovery files on separate file systems to the Oracle base directory:
1. Use the df -k command to determine the free disk space on each mounted file system.
2. From the display, identify the file systems that you want to use:
If you are using the same file system for more than one type of file, then add the disk space requirements for each type to determine the total disk space requirement.
3. Note the names of the mount point directories for the file systems that you identified.
4. Enter commands similar to the following to create the recommended subdirectories in each of the mount point directories and set the appropriate owner, group, and permissions on them:
■ Database file directory:
# mkdir /mount_point/oradata# chown oracle:oinstall /mount_point/oradata# chmod 775 /mount_point/oradata
The default location for Database file directory is $ORACLE_BASE/oradata.
■ Recovery file directory (flash recovery area):
# mkdir /mount_point/flash_recovery_area# chown oracle:oinstall /mount_point/flash_recovery_area# chmod 775 /mount_point/flash_recovery_area
The default flash recovery area is $ORACLE_BASE/flash_recovery_area. However, Oracle recomends that you keep the flash recovery area on a separate physical disk than that of the database file directory. This will enable you use the flash recovery area to retrieve data if the disk containing oradata is unusable due to any reasons.
5. If you also want to use Automatic Storage Management for storage, then refer to one of the following sections:
■ Preparing Disk Groups for an Automatic Storage Management Installation section on page 2-25
Note: You must perform this procedure only if you want to place the Oracle Database or recovery files on a separate file system to the Oracle base directory.
File Type File System Requirements
Database files Choose either:
■ A single file system with at least 1.2 GB of free disk space
■ Two or more file systems with at least 1.2 GB of free disk space in total
Recovery files Choose a file system with at least 2.4 GB of free disk space.
Preparing Disk Groups for an Automatic Storage Management Installation
Oracle Database Preinstallation Requirements 2-25
■ Stopping Existing Oracle Processes section on page 2-33.
Preparing Disk Groups for an Automatic Storage Management InstallationThis section describes how to configure disks for use with Automatic Storage Management. Before you configure the disks, you must determine the number of disks and the amount of free disk space that you require. The following sections describe how to identify the requirements and configure the disks on each platform:
■ General Steps for Configuring Automatic Storage Management
■ Step 1: Identifying Storage Requirements for Automatic Storage Management
■ Step 2: Using an Existing Automatic Storage Management Disk Group
■ Step 3: Creating DAS or SAN Disk Partitions for Automatic Storage Management
■ Step 4: Configuring Disks for Automatic Storage Management
■ Identifying Required Raw Partitions for Database Files
■ Configuring Database File Storage for Automatic Storage Management and Raw Devices
General Steps for Configuring Automatic Storage ManagementThe following are the general steps to configure Automatic Storage Management:
1. Identify the storage requirements of the site.
2. Optionally, use an existing Automatic Storage Management disk group.
3. If you are creating an Automatic Storage Management disk group, create partitions for DAS or SAN disks.
4. Use one of the following methods to complete the Automatic Storage Management configuration:
■ If you plan to install Oracle Database using interactive mode, Oracle Universal Installer prompts you for the Automatic Storage Management disk configuration information during the installation.
■ If you plan to install Oracle Database using noninteractive mode, you should manually configure the disks before performing the installation.
Step 1: Identifying Storage Requirements for Automatic Storage ManagementTo identify the storage requirements for using Automatic Storage Management, you must determine the number of devices and the amount of free disk space that you require. To complete this task:
1. Determine whether you want to use Automatic Storage Management for Oracle Database files, recovery files, or both.
Note: You do not have to use the same storage mechanism for data files and recovery files. You can use the file system for one file type and Automatic Storage Management for the other. If you plan to use Automatic Storage Management for both data files and recovery files, then you should create separate Automatic Storage Management disk groups for the data files and the recovery files.

Preparing Disk Groups for an Automatic Storage Management Installation
2-26 Oracle Database Installation Guide
If you plan to enable automated backups during the installation, then you can choose Automatic Storage Management as the storage mechanism for recovery files by specifying an Automatic Storage Management disk group for the flash recovery area. Depending on how you choose to create a database during the installation, you have the following options:
■ If you select an installation method that runs Oracle Database Configuration Assistant in an interactive mode, by choosing the Advanced database configuration option for example, then you can decide whether you want to use the same Automatic Storage Management disk group for database files and recovery files, or you can choose to use different disk groups for each file type. Ideally, you should create separate Automatic Storage Management disk groups for data files and for recovery files.
The same choice is available to you if you use Oracle Database Configuration Assistant after the installation to create a database.
■ If you select an installation type that runs Oracle Database Configuration Assistant in noninteractive mode, then you must use the same Automatic Storage Management disk group for data files and recovery files.
2. Choose the Automatic Storage Management redundancy level that you want to use for each Automatic Storage Management disk group that you create.
The redundancy level that you choose for the Automatic Storage Management disk group determines how Automatic Storage Management mirrors files in the disk group and determines the number of disks and amount of disk space that you require, as follows:
■ External redundancy
An external redundancy disk group requires a minimum of one disk device. The effective disk space in an external redundancy disk group is the sum of the disk space in all of its devices.
If you select this option, Automatic Storage Management does not mirror the contents of the disk group. Choose this redundancy level under any one of the following conditions:
– When the disk group contains devices, such as RAID devices, that provide their own data protection
– The use of the database does not require uninterrupted access to data, for example, in a development environment where you have a suitable backup strategy
■ Normal redundancy
In a normal redundancy disk group, by default Automatic Storage Management uses two-way mirroring for datafiles and three-way mirroring for control files, to increase performance and reliability. Alternatively, you can use two-way mirroring or no mirroring. A normal redundancy disk group requires a minimum of two failure groups (or two disk devices) if you are using two-way mirroring. The effective disk space in a normal redundancy disk group is half the sum of the disk space in all of its devices.
For most installations, Oracle recommends that you use normal redundancy disk groups.
■ High redundancy
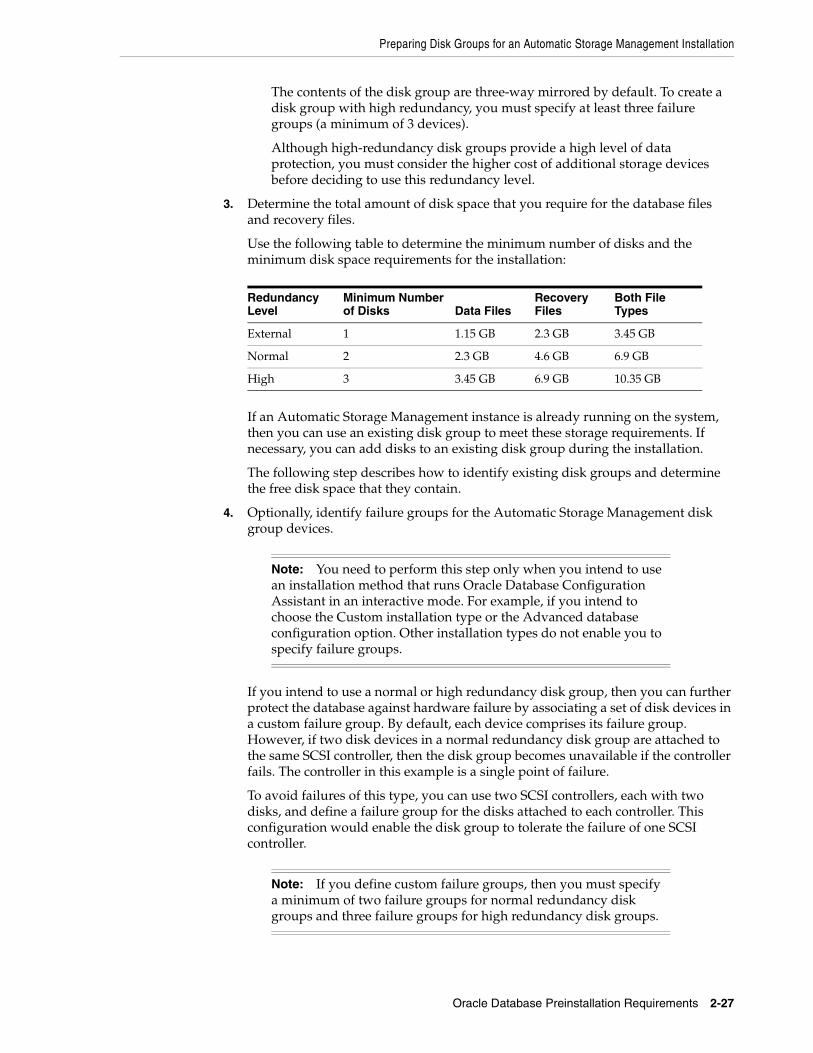
Preparing Disk Groups for an Automatic Storage Management Installation
Oracle Database Preinstallation Requirements 2-27
The contents of the disk group are three-way mirrored by default. To create a disk group with high redundancy, you must specify at least three failure groups (a minimum of 3 devices).
Although high-redundancy disk groups provide a high level of data protection, you must consider the higher cost of additional storage devices before deciding to use this redundancy level.
3. Determine the total amount of disk space that you require for the database files and recovery files.
Use the following table to determine the minimum number of disks and the minimum disk space requirements for the installation:
If an Automatic Storage Management instance is already running on the system, then you can use an existing disk group to meet these storage requirements. If necessary, you can add disks to an existing disk group during the installation.
The following step describes how to identify existing disk groups and determine the free disk space that they contain.
4. Optionally, identify failure groups for the Automatic Storage Management disk group devices.
If you intend to use a normal or high redundancy disk group, then you can further protect the database against hardware failure by associating a set of disk devices in a custom failure group. By default, each device comprises its failure group. However, if two disk devices in a normal redundancy disk group are attached to the same SCSI controller, then the disk group becomes unavailable if the controller fails. The controller in this example is a single point of failure.
To avoid failures of this type, you can use two SCSI controllers, each with two disks, and define a failure group for the disks attached to each controller. This configuration would enable the disk group to tolerate the failure of one SCSI controller.
Redundancy Level
Minimum Number of Disks Data Files
Recovery Files
Both File Types
External 1 1.15 GB 2.3 GB 3.45 GB
Normal 2 2.3 GB 4.6 GB 6.9 GB
High 3 3.45 GB 6.9 GB 10.35 GB
Note: You need to perform this step only when you intend to use an installation method that runs Oracle Database Configuration Assistant in an interactive mode. For example, if you intend to choose the Custom installation type or the Advanced database configuration option. Other installation types do not enable you to specify failure groups.
Note: If you define custom failure groups, then you must specify a minimum of two failure groups for normal redundancy disk groups and three failure groups for high redundancy disk groups.
Preparing Disk Groups for an Automatic Storage Management Installation
2-28 Oracle Database Installation Guide
5. If you are sure that a suitable disk group does not exist on the system, then install or identify appropriate disk devices to add to a new disk group. Apply the following guidelines when identifying appropriate disk devices:
■ All the devices in an Automatic Storage Management disk group should be the same size and have the same performance characteristics.
■ Do not specify more than one partition on a single physical disk as a disk group device. Automatic Storage Management expects each disk group device to be on a separate physical disk.
■ Although you can specify a logical volume as a device in an Automatic Storage Management disk group, Oracle does not recommend its use. Logical volume managers can hide the physical disk architecture. This would prevent Automatic Storage Management from optimizing I/O across the physical devices.
Step 2: Using an Existing Automatic Storage Management Disk Group
If you want to store either database or recovery files in an existing Automatic Storage Management disk group, then you have the following choices, depending on the installation method that you select:
■ If you select an installation method that runs Oracle Database Configuration Assistant in interactive mode (for example, choosing the Advanced database configuration option), then you can decide whether you want to create a disk group or use an existing one.
The same choice is available to you if you use Oracle Database Configuration Assistant after the installation to create a database.
■ If you select an installation method that runs Oracle Database Configuration Assistant in noninteractive mode, then you must choose an existing disk group for the new database; you cannot create a disk group. However, you can add disk devices to an existing disk group if it has insufficient free space for your requirements.
To determine whether an existing Automatic Storage Management disk group exists, or to determine whether there is sufficient disk space in a disk group, you can use Oracle Enterprise Manager Grid Control or Database Control. Alternatively, you can use the following procedure:
1. View the contents of the oratab file to determine whether an Automatic Storage Management instance is configured on the system:
# more /etc/oratab
See Also: "Step 4: Configuring Disks for Automatic Storage Management" on page 2-30 for information about completing this task
Note: This is an optional step.
Note: The Automatic Storage Management instance that manages the existing disk group can be running in a different Oracle home directory.

Preparing Disk Groups for an Automatic Storage Management Installation
Oracle Database Preinstallation Requirements 2-29
If an Automatic Storage Management instance is configured on the system, then the oratab file should contain a line similar to the following:
+ASM:oracle_home_path:N
In this example, +ASM is the system identifier (SID) of the Automatic Storage Management instance and oracle_home_path is the Oracle home directory where it is installed. By convention, the SID for an Automatic Storage Management instance begins with a plus sign.
2. Open a shell prompt and temporarily set the ORACLE_SID and ORACLE_HOME environment variables to specify the appropriate values for the Automatic Storage Management instance that you want to use.
For example, if the Automatic Storage Management SID is named OraDB11g+ASM and is located in the asm subdirectory of the ORACLE_BASE directory, then enter the following commands to create the required settings:
■ Bourne, Bash, or Korn shell:
$ ORACLE_SID=OraDB11g+ASM$ export ORACLE_SID$ ORACLE_HOME=/u01/app/oracle/product/11.1.0/asm$ export ORACLE_HOME
■ C shell:
% setenv ORACLE_SID OraDB11g+ASM% setenv ORACLE_HOME /u01/app/oracle/product/11.1.0/asm
3. By using SQL*Plus, connect to the Automatic Storage Management instance as the SYS user with SYSASM privilege and start the instance if necessary:
# $ORACLE_HOME/bin/sqlplus SQL> CONNECT SYS as SYSASMEnter password: SYS_password SQL> STARTUP
4. Enter the following command to display the existing disk groups, their redundancy level, and the amount of free disk space in each one:
SQL> SELECT NAME,TYPE,TOTAL_MB,FREE_MB FROM V$ASM_DISKGROUP;
5. From the output, identify a disk group with the appropriate redundancy level and note the free space that it contains.
6. If necessary, install or identify the additional disk devices required to meet the storage requirements listed in the previous section.
Step 3: Creating DAS or SAN Disk Partitions for Automatic Storage ManagementTo use a DAS or SAN disk in Automatic Storage Management, the disk must have a partition table. Oracle recommends creating exactly one partition for each disk containing the entire disk.
Note: If you are adding devices to an existing disk group, then Oracle recommends that you use devices that have the same size and performance characteristics as the existing devices in that disk group.
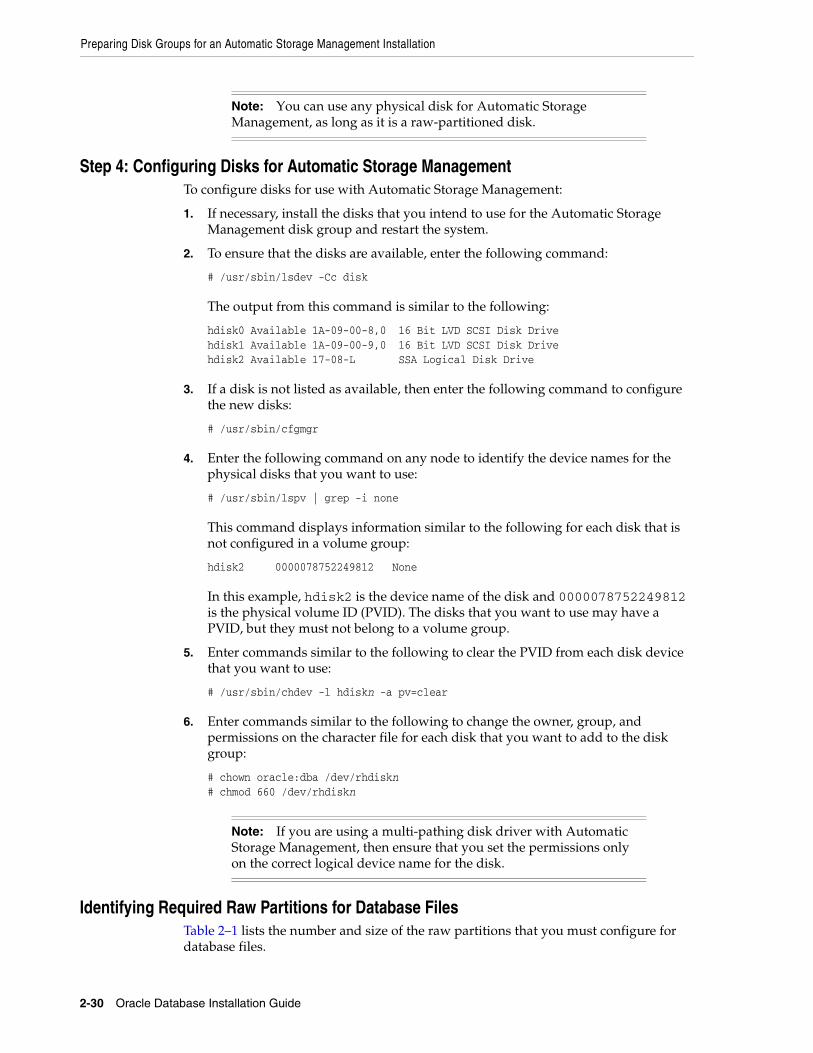
Preparing Disk Groups for an Automatic Storage Management Installation
2-30 Oracle Database Installation Guide
Step 4: Configuring Disks for Automatic Storage ManagementTo configure disks for use with Automatic Storage Management:
1. If necessary, install the disks that you intend to use for the Automatic Storage Management disk group and restart the system.
2. To ensure that the disks are available, enter the following command:
# /usr/sbin/lsdev -Cc disk
The output from this command is similar to the following:
hdisk0 Available 1A-09-00-8,0 16 Bit LVD SCSI Disk Drivehdisk1 Available 1A-09-00-9,0 16 Bit LVD SCSI Disk Drivehdisk2 Available 17-08-L SSA Logical Disk Drive
3. If a disk is not listed as available, then enter the following command to configure the new disks:
# /usr/sbin/cfgmgr
4. Enter the following command on any node to identify the device names for the physical disks that you want to use:
# /usr/sbin/lspv | grep -i none
This command displays information similar to the following for each disk that is not configured in a volume group:
hdisk2 0000078752249812 None
In this example, hdisk2 is the device name of the disk and 0000078752249812 is the physical volume ID (PVID). The disks that you want to use may have a PVID, but they must not belong to a volume group.
5. Enter commands similar to the following to clear the PVID from each disk device that you want to use:
# /usr/sbin/chdev -l hdiskn -a pv=clear
6. Enter commands similar to the following to change the owner, group, and permissions on the character file for each disk that you want to add to the disk group:
# chown oracle:dba /dev/rhdiskn# chmod 660 /dev/rhdiskn
Identifying Required Raw Partitions for Database FilesTable 2–1 lists the number and size of the raw partitions that you must configure for database files.
Note: You can use any physical disk for Automatic Storage Management, as long as it is a raw-partitioned disk.
Note: If you are using a multi-pathing disk driver with Automatic Storage Management, then ensure that you set the permissions only on the correct logical device name for the disk.
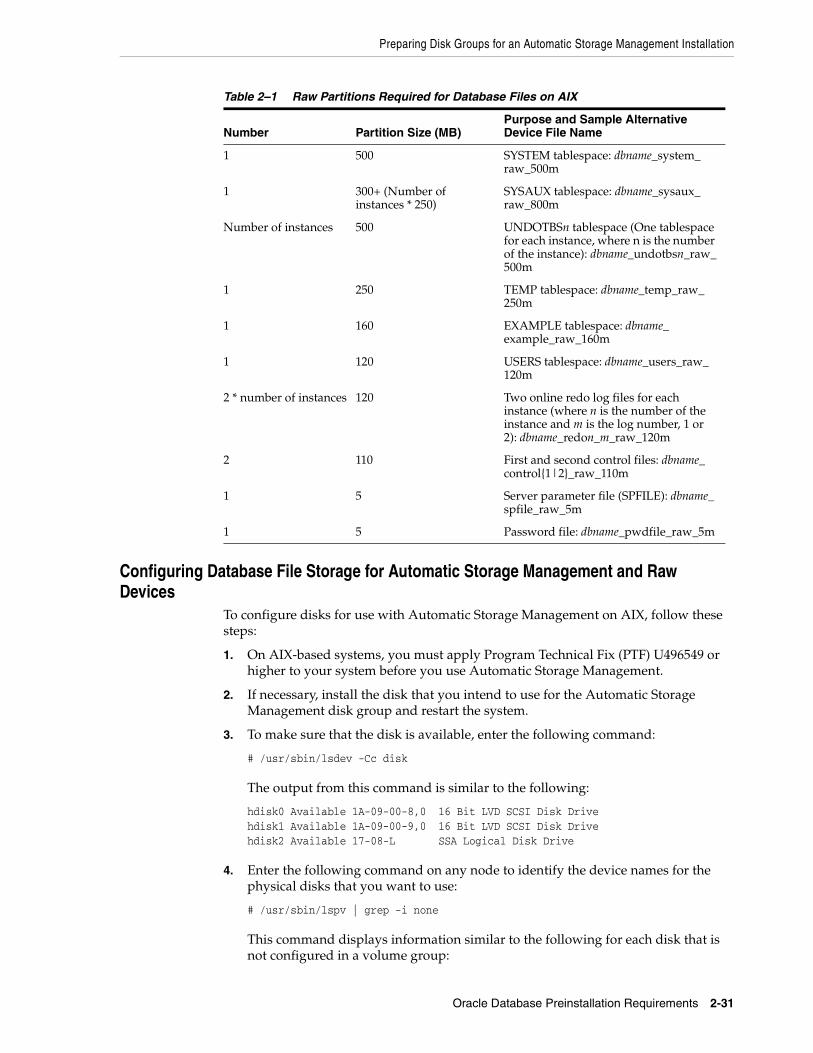
Preparing Disk Groups for an Automatic Storage Management Installation
Oracle Database Preinstallation Requirements 2-31
Configuring Database File Storage for Automatic Storage Management and Raw Devices
To configure disks for use with Automatic Storage Management on AIX, follow these steps:
1. On AIX-based systems, you must apply Program Technical Fix (PTF) U496549 or higher to your system before you use Automatic Storage Management.
2. If necessary, install the disk that you intend to use for the Automatic Storage Management disk group and restart the system.
3. To make sure that the disk is available, enter the following command:
# /usr/sbin/lsdev -Cc disk
The output from this command is similar to the following:
hdisk0 Available 1A-09-00-8,0 16 Bit LVD SCSI Disk Drivehdisk1 Available 1A-09-00-9,0 16 Bit LVD SCSI Disk Drivehdisk2 Available 17-08-L SSA Logical Disk Drive
4. Enter the following command on any node to identify the device names for the physical disks that you want to use:
# /usr/sbin/lspv | grep -i none
This command displays information similar to the following for each disk that is not configured in a volume group:
Table 2–1 Raw Partitions Required for Database Files on AIX
Number Partition Size (MB)Purpose and Sample Alternative Device File Name
1 500 SYSTEM tablespace: dbname_system_raw_500m
1 300+ (Number of instances * 250)
SYSAUX tablespace: dbname_sysaux_raw_800m
Number of instances 500 UNDOTBSn tablespace (One tablespace for each instance, where n is the number of the instance): dbname_undotbsn_raw_500m
1 250 TEMP tablespace: dbname_temp_raw_250m
1 160 EXAMPLE tablespace: dbname_example_raw_160m
1 120 USERS tablespace: dbname_users_raw_120m
2 * number of instances 120 Two online redo log files for each instance (where n is the number of the instance and m is the log number, 1 or 2): dbname_redon_m_raw_120m
2 110 First and second control files: dbname_control{1|2}_raw_110m
1 5 Server parameter file (SPFILE): dbname_spfile_raw_5m
1 5 Password file: dbname_pwdfile_raw_5m

Preparing Disk Groups for an Automatic Storage Management Installation
2-32 Oracle Database Installation Guide
hdisk2 0000078752249812 None
In this example, hdisk2 is the device name of the disk and 0000078752249812 is the physical volume ID (PVID). The disks that you want to use might have a PVID, but they must not belong to a volume group.
5. Enter commands similar to the following to clear the PVID from each disk device that you want to use:
# /usr/sbin/chdev -l hdiskn -a pv=clear
6. Enter a command similar to the following to identify the device name associated with PVID:
# /usr/sbin/lspv | grep -i 0000078752249812
The output from this command should be similar to the following:
hdisk18 0000078752249812 None
Depending on how each node is configured, the device names may differ between nodes. Note that you will clear PVIDs later in this procedure.
7. Enter commands similar to the following to change the owner, group, and permissions on the character raw device files for the disk devices:
■ OCR device:
# chown root:oinstall /dev/rhdiskn# chmod 640 /dev/rhdiskn
■ Other devices:
# chown oracle:dba /dev/rhdiskn# chmod 660 /dev/rhdiskn
For the new device files, choose an alternative device file name that identifies the purpose of the disk device. Table 2–1 suggests alternative device file names for each file. For database files, replace dbname in the alternative device file name with the name that you chose for the database.
8. Enter commands similar to the following on any local node to clear the PVID from each disk device that you want to use:
# /usr/sbin/chdev -l hdiskn -a pv=clear
9. Enter commands similar to the following on local node to change the owner, group, and permissions on the character raw device file for each disk that you want to add to the disk group:
# chown oracle:dba /dev/rhdiskn# chmod 660 /dev/rhdiskn
Note: If the disk device has a PVID, then Automatic Storage Management fails to mount the diskgroup created on the disk device.
Stopping Existing Oracle Processes
Oracle Database Preinstallation Requirements 2-33
Stopping Existing Oracle Processes
If you choose to create a database during the installation, then most installation types configure and start a default Oracle Net listener using TCP/IP port 1521 and the IPC key value EXTPROC. However, if an existing Oracle Net listener process is using the same port or key value, Oracle Universal Installer can only configure the new listener; it cannot start it. To ensure that the new listener process starts during the installation, you must shut down any existing listeners before starting Oracle Universal Installer.
To determine whether an existing listener process is running and to shut it down, if necessary:
1. Switch user to oracle:
# su - oracle
2. Enter the following command to determine whether a listener process is running and to identify its name and the Oracle home directory in which it is installed:
$ ps -ef | grep tnslsnr
This command displays information about the Oracle Net listeners running on the system:
... oracle_home1/bin/tnslsnr LISTENER -inherit
In this example, oracle_home1 is the Oracle home directory where the listener is installed and LISTENER is the listener name.
3. Set the ORACLE_HOME environment variable to specify the appropriate Oracle home directory for the listener:
■ Bourne, Bash, or Korn shell:
$ ORACLE_HOME=oracle_home1$ export ORACLE_HOME
■ C or tcsh shell:
% setenv ORACLE_HOME oracle_home1
Note: If you are using a multi-pathing disk driver with Automatic Storage Management, then ensure that you set the permissions only on the correct logical device name for the disk.
The device name associated with a disk may be different on other nodes. Ensure that you specify the correct device name on each node.
Caution: If you are installing additional Oracle Database 11g products in an existing Oracle home, then stop all processes running in the Oracle home. You must complete this task to enable Oracle Universal Installer to relink certain executables and libraries.
Note: If no Oracle Net listeners run, then refer to the "Configuring the oracle User’s Environment" section on page 2-34 to continue.
Configuring the oracle User’s Environment
2-34 Oracle Database Installation Guide
4. Enter the following command to identify the TCP/IP port number and IPC key value that the listener is using:
$ $ORACLE_HOME/bin/lsnrctl status listenername
5. Enter a command similar to the following to stop the listener process:
$ $ORACLE_HOME/bin/lsnrctl stop listenername
6. Repeat this procedure to stop all listeners running on this system.
Configuring the oracle User’s EnvironmentYou run Oracle Universal Installer from the oracle account. However, before you start Oracle Universal Installer you must configure the environment of the oracle user. To configure the environment, you must:
■ Set the default file mode creation mask (umask) to 022 in the shell startup file.
■ Set the DISPLAY environment variable.
To set the oracle user’s environment:
1. Start a new terminal session, for example, an X terminal (xterm).
2. Enter the following command to ensure that X Window applications can display on this system:
$ xhost fully_qualified_remote_host_name
For example:
$ xhost somehost.us.example.com
3. If you are not already logged in to the system where you want to install the software, then log in to that system as the oracle user.
4. If you are not logged in as the oracle user, then switch user to oracle:
$ su - oracle
5. To determine the default shell for the oracle user, enter the following command:
$ echo $SHELL
6. Open the oracle user’s shell startup file in any text editor:
■ C shell (csh or tcsh):
% vi .login
7. Enter or edit the following line, specifying a value of 022 for the default file mode creation mask:
umask 022
8. If the ORACLE_SID, ORACLE_HOME, or ORACLE_BASE environment variable is set in the file, then remove the appropriate lines from the file.
Note: If the listener uses the default name LISTENER, then you do not have to specify the listener name in this command.

Configuring the oracle User’s Environment
Oracle Database Preinstallation Requirements 2-35
9. Add one of the following lines to the file to set the AIXTHREAD_SCOPE environment variable to S (system-wide thread scope):
■ Bourne shell (sh), Bash shell (bash), or Korn shell (ksh):
AIXTHREAD_SCOPE=S; export AIXTHREAD_SCOPE
■ C shell (csh or tcsh):
setenv AIXTHREAD_SCOPE S
10. Save the file, and exit from the editor.
11. To run the shell startup script, enter one of the following commands:
■ Bash shell:
$ . ./.bash_profile
■ Bourne or Korn shell:
$ . ./.profile
■ C shell:
% source ./.login
12. If you are not installing the software on the local computer, then run the following command on the remote machine to set the DISPLAY variable:
■ Bourne, Bash or Korn shell:
$ export DISPLAY=local_host:0.0
■ C shell:
% setenv DISPLAY local_host:0.0
In this example, local_host is the host name or IP address of the local computer that you want to use to display Oracle Universal Installer.
Run the following command on the remote machine to check if the shell and the DISPLAY environmental variable are set correctly:
echo $SHELLecho $DISPLAY
Now to enable X applications, run the following commands on the local computer:
$ xhost + fully_qualified_remote_host_name
To verify that X applications display is set properly, run a X11 based program that comes with the operating system such as xclock:
$ xclock_path
In this example, xclock_path is the directory path. For example, you can find xclock at /usr/X11R6/bin/xclocks. If the DISPLAY variable is set properly, then you can see xclock on your computer screen.
See Also: Oracle Database Administrator's Reference for Linux and UNIX for more information about this environment variable
Configuring the oracle User’s Environment
2-36 Oracle Database Installation Guide
13. If you determined that the /tmp directory has less than 400 MB of free disk space, then identify a file system with at least 400 MB of free space and set the TMP and TMPDIR environment variables to specify a temporary directory on this file system:
a. Use the df -k command to identify a suitable file system with sufficient free space.
b. If necessary, enter commands similar to the following to create a temporary directory on the file system that you identified, and set the appropriate permissions on the directory:
$ sudo mkdir /mount_point/tmp$ sudo chmod a+wr /mount_point/tmp# exit
c. Enter commands similar to the following to set the TMP and TMPDIR environment variables:
* Bourne, Bash, or Korn shell:
$ TMP=/mount_point/tmp$ TMPDIR=/mount_point/tmp$ export TMP TMPDIR
* C shell:
% setenv TMP /mount_point/tmp% setenv TMPDIR /mount_point/tmp
14. Enter commands similar to the following to set the ORACLE_BASE and ORACLE_SID environment variables:
■ Bourne, Bash, or Korn shell:
$ ORACLE_BASE=/u01/app/oracle$ ORACLE_SID=sales$ export ORACLE_BASE ORACLE_SID
■ C shell:
% setenv ORACLE_BASE /u01/app/oracle% setenv ORACLE_SID sales
In these examples, /u01/app/oracle is the Oracle base directory that you created or identified earlier and sales is the name that you want to call the database (typically no more than five characters).
15. Enter the following commands to ensure that the ORACLE_HOME and TNS_ADMIN environment variables are not set:
■ Bourne, Bash, or Korn shell:
$ unset ORACLE_HOME$ unset TNS_ADMIN
■ C shell:
% unsetenv ORACLE_HOME% unsetenv TNS_ADMIN
See Also: PC-X Server or Operating System vendor documents for further assistance.
Running the rootpre.sh Script
Oracle Database Preinstallation Requirements 2-37
16. To verify that the environment has been set correctly, enter the following commands:
$ umask$ env | more
Verify that the umask command displays a value of 22, 022, or 0022 and the environment variables that you set in this section have the correct values.
Running the rootpre.sh Script
Run the rootpre.sh script:
1. Switch user to root:
$ su -password:#
2. Complete one of the following steps, depending on the location of the installation files:
■ If the installation files are on disc, enter a command similar to the following, where directory_path is the disc mount point directory or the path of the db directory on the DVD:
# /directory_path/rootpre/rootpre.sh
■ If the installation files are on the hard disk, change directory to the Disk1 directory and enter the following command:
# ./rootpre.sh
3. Exit from the root account:
# exit
Note: If the ORACLE_HOME environment variable is set, then Oracle Universal Installer uses the value that it specifies as the default path for the Oracle home directory. However, if you set the ORACLE_BASE environment variable, then Oracle recommends that you unset the ORACLE_HOME environment variable and choose the default path suggested by Oracle Universal Installer.
Note: Do not run the rootpre.sh script if you have a later release of the Oracle Database software already installed on this system.

Running the rootpre.sh Script
2-38 Oracle Database Installation Guide
3
Installing Oracle Database 3-1
3 Installing Oracle Database
The Oracle Database software is available on installation media or you can download it from the Oracle Technology Network Web site. In most cases, you use the graphical user interface (GUI) provided by Oracle Universal Installer to install the software. However, you can also use Oracle Universal Installer to complete silent-mode installations, without using the GUI. This chapter includes the following topics:
■ Preinstallation Considerations
■ Reviewing Installation Guidelines
■ Accessing the Installation Software
■ Database Security Options
■ Installing the Oracle Database Software
■ Installing Automatic Storage Management
■ Installing Oracle Database Examples
Preinstallation ConsiderationsAfter reviewing the information in Chapter 1, "Overview of Oracle Database Installation" and completing the tasks listed in Chapter 2, "Oracle Database Preinstallation Requirements", consider the following case:
Performing Multiple Oracle Database Installations in Noninteractive ModeIf you need to perform multiple installations of Oracle Database, you may want to use noninteractive mode. In noninteractive mode, at each node, you run Oracle Universal Installer from the command line using a response file. The response file is a text file containing the settings you normally enter in the Oracle Universal Installer GUI dialog boxes.
Reviewing Installation GuidelinesReview the following guidelines before starting Oracle Universal Installer:
■ Oracle Universal Installer
See Also: Appendix A for information about silent-mode installations
See Also: Appendix A for information about silent-mode installations
Reviewing Installation Guidelines
3-2 Oracle Database Installation Guide
Do not use Oracle Universal Installer from an earlier Oracle release to install components from this release.
■ Reinstalling Oracle Software
If you reinstall Oracle software into an Oracle home directory where Oracle Database is already installed, you must also reinstall any components, such as Oracle Partitioning, that were installed before you begin the reinstallation.
■ Products requiring a custom installation
To install the following products, you must choose the Custom installation type:
■ Oracle Database Vault
■ Oracle Connection Manager
■ Oracle Label Security
To configure Oracle Label Security to use Oracle Internet Directory, choose the Oracle Internet Directory option when running Database Configuration Assistant. If you are installing Oracle Label Security in an existing Oracle home, then shut down each database in the Oracle home.
■ Installations on a Cluster
If Oracle Clusterware and Oracle RAC are already installed on the system, Oracle Universal Installer displays the Specify Hardware Cluster Installation Mode screen. You must select Local Installation on this screen, unless you want to install Oracle RAC.
Selecting the Database Character SetOracle Database uses the database character set for:
■ Data stored in SQL character datatypes (CHAR, VARCHAR2, CLOB, and LONG).
■ Identifiers such as table names, column names, and PL/SQL variables.
■ Stored SQL and PL/SQL source code, including text literals embedded in this code.
Once a database is created, changing its character set is usually very expensive in terms of time and resources. Such operation may require converting all character data by exporting the whole database and importing it back. Therefore, it is important that you carefully select the database character set already at installation time.
Oracle recommends Unicode AL32UTF8 as the database character set. Unicode is the universal character set that supports most of the currently spoken languages of the world. It also supports many historical scripts (alphabets). Unicode is the native encoding of many technologies, including Java, XML, XHTML, ECMAScript, and LDAP. Unicode is ideally suited for databases supporting the Internet and the global economy.
Note: Before you perform a custom installation, make sure all databases in the Oracle home where you want to install Oracle Label Security are shut down.
See Also: Oracle Real Application Clusters Installation Guide for AIX Based Systems for information on installing Oracle RAC

Reviewing Installation Guidelines
Installing Oracle Database 3-3
As AL32UTF8 is a multibyte character set, database operations on character data may be slightly slower when compared to single-byte database character sets, such as WE8MSWIN1252. Storage space requirements for text in most languages that use characters outside of the ASCII repertoire are higher in AL32UTF8 compared to legacy character sets supporting the language. Note that the increase in storage space concerns only character data and only data that is not in English. The universality and flexibility of Unicode usually outweighs these additional costs.
Legacy character sets should be considered when compatibility, storage requirements, or performance of text processing is critical and the database will ever support only a single group of languages. The database character set to be selected in such case is the character set of most clients connecting to this database.
The default character set suggested or used by Oracle Universal Installer and Database Configuration Assistant in this release is based on the language configuration of the operating system.
For most languages, the default character set is one of the Microsoft Windows character sets, for example WE8MSWIN1252, even though the database is not installed on Windows. This results from the assumption that most clients connecting to the database run under the Microsoft Windows operating system. As the database should be able to store all characters coming from the clients and Microsoft Windows character sets have richer character repertoire than the corresponding ISO 8859 character sets, the Microsoft Windows character sets are usually the better choice. For example, the EE8MSWIN1250 character set supports the Euro currency symbol and various smart quote characters, while the corresponding EE8ISO8859P2 character set does not support them. In any case, Oracle converts the data between the database character set and the client character sets, which are declared by the NLS_LANG settings.
The list of database character sets that is presented to you for selection by Oracle Universal Installer contains only the recommended character sets. Even though Oracle Database supports many more character sets, they are either deprecated or they are binary subsets of another recommended character set. For example, WE8DEC is a deprecated character set and US7ASCII and WE8ISO8859P1 are both binary subsets of WE8MSWIN1252.
If, for compatibility reasons, you need to create a database in one of the non-recommended character sets, choose the Custom installation type or choose the Advanced database configuration option. Database Configuration Assistant in the interactive mode will give you the opportunity to select any of the database character sets supported on AIX.
Installing the Sample SchemasThe Sample Schemas are not available in Basic Installation. There are two instances where the Sample Schemas are available:
■ When a new database instance is created with the Database Configuration Assistant, the Sample Schemas can be installed. However, do not select Custom database. Sample Schemas are not available with a custom installation.
■ When a new database instance is created with the Oracle Universal Installer, select either Enterprise Edition or Standard Edition, then select one of the two templates: General Purpose/Transaction Processing or Data Warehouse. The Sample Schemas can be installed. However, if you select the Advanced option on the Select Database Configuration screen, then the Sample Schemas are not available for installation.
Accessing the Installation Software
3-4 Oracle Database Installation Guide
See Oracle Database Sample Schemas for information about manually installing the Sample Schemas in an existing database.
Accessing the Installation SoftwareThe Oracle Database software is available on installation media or you can download it from the Oracle Technology Network Web site. To install the software from the hard disk, you must either download it from Oracle Technology Network and unpack it, or copy it from the installation media, if you have it.
You can access and install Oracle Database by using one of the following methods:
■ To copy the software to a hard disk, refer to "Copying the Software to the Hard Disk" on page 3-5
■ To download the software from Oracle Technology Network, refer to "Downloading Oracle Software from the Oracle Technology Network Web Site" on page 3-4
Downloading Oracle Software from the Oracle Technology Network Web SiteThis section describes how to download the installation archive files and extract them on to the hard disk. It contains the following topics:
■ Downloading the Installation Archive Files
■ Extracting the Installation Files
Downloading the Installation Archive FilesTo download the installation archive files from Oracle Technology Network:
1. Use any browser to access the software download page from Oracle Technology Network:
http://www.oracle.com/technology/software/
2. Navigate to the download page for the product that you want to install.
3. On the download page, identify the required disk space by adding the file sizes for each required file.
The file sizes are listed next to the file names.
4. Select a file system with enough free space to store and expand the archive files.
In most cases, the available disk space must be at least twice the size of all of the archive files.
5. On the file system that you selected in step 4, create a parent directory for each product, for example OraDB11g, to hold the installation directories.
6. Download all of the installation archive files to the directory that you created in step 5.
7. Verify that the files you downloaded are the same size as the corresponding files on Oracle Technology Network.
8. Extract the files in each directory that you just created.
9. After you have extracted the required installation files, refer to "Installing the Oracle Database Software" on page 3-7.
Accessing the Installation Software
Installing Oracle Database 3-5
Extracting the Installation FilesTo extract the installation archive files, perform the following steps:
1. If necessary, change directory to the directory that contains the downloaded installation archive files.
2. If the downloaded file has the zip extension, use the following command to extract the content:
unzip file_name.zip
If the downloaded file has the cpio.gz extension, use the following command:
$ gunzip filename.cpio.gz
This command creates files with names similar to the following:
filename.cpio
To extract the installation files, enter a command similar to the following:
$ cpio -idcmv < filename.cpio
For each file, this command creates a subdirectory named Diskn, where n is the disk number identified in the file name.
When you have extracted all of the required installation files, refer to "Installing the Oracle Database Software" on page 3-7.
Copying the Software to the Hard DiskBefore installing Oracle Database, you might want to copy the software to the hard disk. Copying the software enables the installation process to run a bit faster. Before copying the installation media content to the hard disk, you must mount the disk. The following sections describe to mount disk and copy its content to the hard disk.
Mounting DisksOn most AIX systems, the disk mounts automatically when you insert it into the installation media. If the disk does not mount automatically, then follow these steps to mount it:
1. Switch user to root:
$ sudo - root
2. If necessary, enter a command similar to the following to unmount the currently mounted disc, then remove it from the drive:
# umount /dvd
In this example, /dvd is the mount point directory for the disc drive.
Note: Refer to the download page for information about the correct options to use with the cpio command.
Some browsers uncompress files while downloading them, but leave the .gz file extension.

Database Security Options
3-6 Oracle Database Installation Guide
3. Insert the appropriate disc into the disc drive, then enter a command similar to the following to mount it:
# /usr/sbin/mount -rv cdrfs /dev/cd0 /dvd
In this example, /dev/cd0 is the device name of the disc drive and /dvd is the mount point directory.
4. If Oracle Universal Installer displays the Disk Location dialog box, enter the disc mount point directory path, for example:
/dvd
To continue, go to one of the following sections:
■ If you want to copy software to a hard disk, refer to "Copying the Oracle Database Software to a Hard Disk" on page 3-6.
■ If you want to install the software from the installation media, refer to "Installing the Oracle Database Software" on page 3-7 .
Copying the Oracle Database Software to a Hard Disk
To copy the contents of the installation media to a hard disk:
1. Create a directory on the hard disk to hold the Oracle software:
$ mkdir OraDb11g
2. Change directory to the directory you created in step 1:
$ cd OraDb11g
3. Mount the disk, if it is not already mounted.
Some platforms automatically mount the disk when you insert it into the drive. If the disk does not mount automatically, refer to "Mounting Disks" section on page 3-5 for platform-specific information about mounting it.
4. Copy the contents of the mounted disk to the corresponding new subdirectory as follows:
$ cp -R /directory_path OraDb11g
In this example, /directory_path is the disk mount point directory.
5. If necessary, mount the next disk and repeat step 4.
Database Security OptionsDuring installation, you are prompted to select a database security configuration. The Secure Configuration option configures the database with database auditing options, and password policy and expiration settings.
For new database installations, the default configuration for Oracle Database 11g Release 1 (11.1) includes the Secure Configuration option. If you want to disable these
Note: If the system does not have a installation media, you can copy the software from the disk to a file system on another system, then either mount that file system using NFS, or use FTP to copy the files to the system where you want to install the software.
Installing the Oracle Database Software
Installing Oracle Database 3-7
enhanced security controls, then you can check the Disable security settings box. Oracle Database is then installed with default options for Oracle Database 10g Release 2. After installation, you can change security settings by starting Database Configuration Assistant and modifying security settings. You can enable or disable auditing or password security settings, or revert to a previous security setting.
For database upgrades, the upgraded database retains your existing database security configuration, to ensure compatibility with existing applications. After installation, you can use Database Configuration Assistant to enable or disable the Secure Configuration option for testing.
Installing the Oracle Database SoftwareIn most cases, you use the graphical user interface (GUI) provided by Oracle Universal Installer to install Oracle Database. The instructions in this section explain how to run the Oracle Universal Installer GUI to perform most database installations.
Running Oracle Universal InstallerThis section describes the Basic Installation as a default setting. For any type of installation process, start Oracle Universal Installer and install the software, as follows:
1. Log on as a member of the Administrators group to the computer on which you want to install Oracle components.
Note:
■ Oracle strongly recommends configuring your database with the Secure Configuration option either during installation, or after installation using Database Configuration Assistant.
■ Database Vault is an enhanced Security feature. If it is installed with the database, then you cannot change the Secure Configuration using Database Configuration Assistant option.
Note: If you run Oracle Universal Installer during the time that daily cron jobs run, then you may encounter unexplained installation problems if your cron job is performing cleanup, and temporary files are deleted before the installation is finished. Oracle recommends that you complete installation before daily cron jobs are run, or disable daily cron jobs that perform cleanup until after the installation is completed.
See Also:
■ "Installing Automatic Storage Management" on page 3-14 if you want to install Oracle Database and use Automatic Storage Management
■ Appendix A if you want to install Oracle Database by using the noninteractive installation method, without the GUI. This method is useful if you need to perform multiple installations of Oracle Database. This appendix covers other advanced installation topics as well.

Installing the Oracle Database Software
3-8 Oracle Database Installation Guide
2. If you are installing the software from installation media, mount the Database DVD if it is not already mounted.
If the disk does not mount automatically, refer to "Mounting Disks" section on page 3-5 for platform-specific information about mounting it.
Some platforms automatically mount the disk when you insert the installation media into the drive.
3. To start Oracle Universal Installer, complete one of the following steps depending on the location of the installation files:
■ If the installation files are on installation media, enter commands similar to the following, where directory_path is the path of the database directory on the installation media:
$ /directory_path/runInstaller
■ If the installation files are on the hard disk, change directory to the database directory and enter the following command:
$ ./runInstaller
If Oracle Universal Installer is not displayed, refer to "X Window Display Errors" on page G-1 for information about troubleshooting.
4. In the Welcome screen, the Basic Installation is selected by default. If you want to perform an advanced installation, then select Advanced Installation, and then answer the prompts as needed.
The subsequent screens that appear, which are listed in the following table, depend on the installation method you have chosen. The order in which the screens appear depends on the options you select.
5. Use the following guidelines to complete the installation:
■ Do not install Oracle Database 11g Release 1 (11.1) software into an existing Oracle home.
■ Follow the instructions displayed on the Oracle Universal Installer screens. If you need additional information, click Help.
■ Do not modify the Java Runtime Environment (JRE) except by using a patch provided by Oracle Support Services. Oracle Universal Installer automatically installs the Oracle-supplied version of the JRE. This version is required to run Oracle Universal Installer and several Oracle assistants.
■ If errors are displayed while installing the software, refer to Appendix G for information about troubleshooting.
Note: Start Oracle Universal Installer from the terminal session where you logged in as the oracle user and set the user’s environment.
See Also: "Oracle Database Installation Methods" on page 1-6 for more information on the Basic and Advanced installation methods
See Also: "Reviewing Accounts and Passwords" on page 5-4 for details on password guidelines
Installing the Oracle Database Software
Installing Oracle Database 3-9
■ If you chose an installation type that runs Oracle Database Configuration Assistant and Oracle Net Configuration Assistant in interactive mode, you must provide detailed information about configuring the database and network.
If you need assistance when using the Oracle Database Configuration Assistant or Oracle Net Configuration Assistant in interactive mode, click Help on any screen.
6. When the configuration assistant tasks are complete click finish, click Exit, then click Yes to exit from Oracle Universal Installer.
7. When Oracle Enterprise Manager Database Control opens in a Web browser, enter the user name and password you created during the installation.
You can log in as SYS, SYSTEM, or SYSMAN. If you log in as SYS, then you must connect as SYSDBA. Enter the password you specified for the account during the installation.
8. When Oracle Universal Installer prompts you to run a script with root privileges, enter a command similar to the following in a terminal where you are logged in as the root user, then click Continue or OK:
# /script_path/script_name
9. See Chapter 4 for information about tasks that you must complete after you have installed Oracle Database.
The following table lists the various screens displayed during database installation:
Note: If you chose a default installation, Oracle Database Configuration Assistant and Oracle Net Configuration Assistant do not run interactively.
Note: If you perform a Custom installation, then ensure that you install only the components covered by your license. You cannot install Standard Edition using Custom installation.
Screen Action
Welcome The Oracle Universal Installer guides you through the installation and configuration of various Oracle products.
You can scan the installed products list and deinstall the products if required. Click Next to proceed with the installaton.
Installing the Oracle Database Software
3-10 Oracle Database Installation Guide
Select Installation Method Select one of the following, then click Next:
■ Basic Installation: This installation method is selected by default. It lets you quickly install Oracle Database using minimal input. It installs the software and optionally creates a general-purpose database using the information that you specify on this screen.
■ Advanced Installation: Lets you perform more complex installations, such as creating individual passwords for different accounts, creating specific types of starter databases (for example, for transaction processing or data warehouse systems), using different language groups, specifying e-mail notifications, and so on.
Specify Inventory Directory and Credentials
This screen is displayed only during the first installation of Oracle products on a system. Specify the full path of the Oracle Inventory directory. Click Next. The next screen contains the operating system group selected by default.
Select Installation Type Select Enterprise Edition, Standard Edition, or Custom.
You can also specify language translations to be installed by clicking on Product Languages.
Click Next.
Note: This screen is available only with Advanced Installation.
Install Location The Oracle base path appears by default. You can change the path based on your requirement.
In the Software Location section, accept the default values or enter the Oracle home name and directory path in which you want to install Oracle components. The directory path should not contain spaces.
Click Next.
Note: This screen is available only with Advanced Installation.
Available Product Components If you selected Custom for the Installation Type, this screen is displayed. Select the components to be installed from the list and click Next. To learn more about each component, place the mouse over the component name.
Note: This screen is available only with Advanced Installation.
Product-specific Prerequisite Checks
This screen checks that the system meets the minimum requirements for the installation. Correct any errors that Oracle Universal Installer may have found, and then click Next.
Upgrade an Existing Database This screen is displayed if you have a previous updatable version of Oracle Database or Automatic Storage Management installed. For in-place database installations where Automatic Storage Management is running, Automatic Storage Management is upgraded automatically.
Click Yes if you want to upgrade or No if not. If you click Yes, the Summary screen is displayed.
For more information about upgrades, refer Oracle Database Upgrade Guide.
Screen Action

Installing the Oracle Database Software
Installing Oracle Database 3-11
Select Configuration Option Select one of the following:
■ Create a database: Select this option if you are creating a database of the following types: General purpose / Transaction processing, and Data warehousing. The Advanced option lets you perform a custom installation.
■ Configure Automatic Storage Management: Select this option to create an Automatic Storage Management instance only. To create an Automatic Storage Management instance, you must provide an Automatic Storage Management SYS Password. After you provide this password, Oracle Universal Installer lets you create an Automatic Storage Management disk group. After you complete this Oracle Universal Installer session, you can run it again to install and configure one or more Oracle databases that use Automatic Storage Management.
■ Install database Software only: Select this option to install the database software only. This option does not create a database or configure Automatic Storage Management.
Select Automatic Storage Management Option
If you selected Configure Automatic Storage Management from the Select Configuration Option screen, and if you have Oracle Enterprise Manager 10g Grid Control installed, then this screen is displayed. Select Yes or No, depending on the requirement to use Grid Control to manage Automatic Storage Management. If you select Yes, then select from the list of Enterprise Management agents to use.
Configure Automatic Storage Management
If you selected Configure Automatic Storage Management from the Select Configuration Option screen, this screen is displayed. Enter the disk group name. The disk group list shows both candidate and member disks; you can click Show Candidates or Show All to filter their display. Then, select the redundancy level and member disks for the disk group.
For Redundancy Level, choose one of the following options. If you do not choose a redundancy level, the disk group defaults to normal redundancy.
■ High: With this option, the contents of the disk group are three-way mirrored by default. To create a disk group with high redundancy, you must specify at least three failure groups (a minimum of three devices).
■ Normal: In a normal redundancy level, by default, the data files of the disk group are two-way mirrored and the control files are three-way mirrored. You can choose to create certain files that are three-way mirrored or not mirrored. To create a disk group with normal redundancy, you must specify at least two failure groups (a minimum of two devices) for two-way mirroring.
■ External: If you select this option, Automatic Storage Management does not mirror the contents of the disk group. Choose this redundancy level when the disk group contains devices, such as RAID devices, that provide their own data protection; or the use of the database does not require uninterrupted access to data, for example, in a development environment where you have a suitable backup strategy.
Screen Action
Installing the Oracle Database Software
3-12 Oracle Database Installation Guide
Select Database Configuration Select the database configuration that best meets the requirements: General Purpose / Transaction Processing, Data Warehouse, or Advanced.
See the online Help provided by either Oracle Universal Installer or Oracle Database Configuration Assistant for a description of these preconfigured database types.
Click Next.
Specify Database Configuration Options
Specify the following information, then click Next:
Database Naming
Specify the Global Database Name using the following syntax:
database_name.domain
where:
■ database_name is the name of the database. It can contain no more than 30 characters (alphanumeric, underscore (_), dollar ($), and pound (#)).
■ domain is the domain used for the database. It can contain no more than 128 characters (alphanumeric, underscore (_), and pound (#)), inclusive of all periods.
For example:
sales.us.example.com
When you enter the Global Database Name, Oracle Universal Installer automatically populates the SID field with the database name, but you can change this SID to another name. The SID can have no more than 64 characters (alphanumeric, dollar ($), and pound (#)).
Specify Database Config Details
Specify the following configuration details, then click Next:
Memory
Specify the amount of memory (RAM) you want to allocate in the Percentage field.
If you install the database software only, then you can click Show Memory Distribution to check the memory usage by the various processes running on the system.
Character Set
Determine how character data is encoded in the database. The default is based on the operating system language. Select Unicode (AL32UTF8) to store multiple languages.
See Also:
■ "Selecting the Database Character Set"
■ Oracle Database Globalization Support Guide for information on choosing a character set.
Security
To disable the default enhanced security controls, you can check the Disable security settings box. Oracle Database is then installed with default options for Oracle Database 10g Release 2.
Sample Schema
You can specify if you want to create Oracle Database with or without sample schemas.
Screen Action
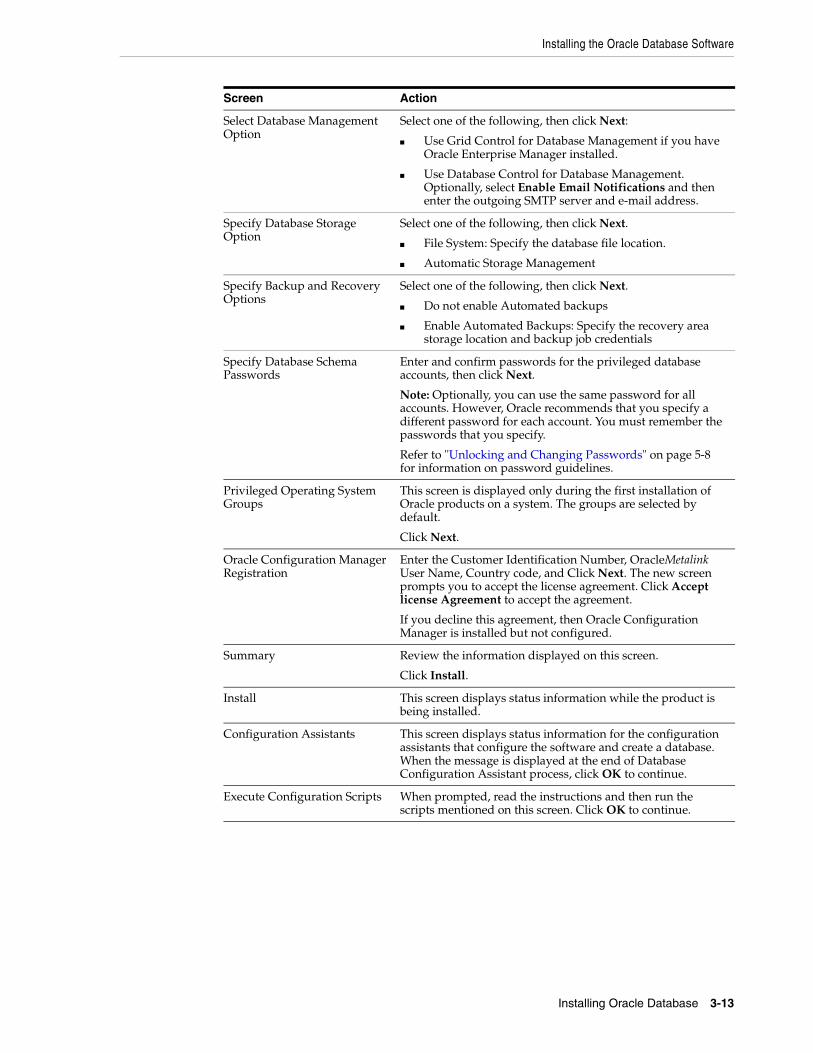
Installing the Oracle Database Software
Installing Oracle Database 3-13
Select Database Management Option
Select one of the following, then click Next:
■ Use Grid Control for Database Management if you have Oracle Enterprise Manager installed.
■ Use Database Control for Database Management. Optionally, select Enable Email Notifications and then enter the outgoing SMTP server and e-mail address.
Specify Database Storage Option
Select one of the following, then click Next.
■ File System: Specify the database file location.
■ Automatic Storage Management
Specify Backup and Recovery Options
Select one of the following, then click Next.
■ Do not enable Automated backups
■ Enable Automated Backups: Specify the recovery area storage location and backup job credentials
Specify Database Schema Passwords
Enter and confirm passwords for the privileged database accounts, then click Next.
Note: Optionally, you can use the same password for all accounts. However, Oracle recommends that you specify a different password for each account. You must remember the passwords that you specify.
Refer to "Unlocking and Changing Passwords" on page 5-8 for information on password guidelines.
Privileged Operating System Groups
This screen is displayed only during the first installation of Oracle products on a system. The groups are selected by default.
Click Next.
Oracle Configuration Manager Registration
Enter the Customer Identification Number, OracleMetalink User Name, Country code, and Click Next. The new screen prompts you to accept the license agreement. Click Accept license Agreement to accept the agreement.
If you decline this agreement, then Oracle Configuration Manager is installed but not configured.
Summary Review the information displayed on this screen.
Click Install.
Install This screen displays status information while the product is being installed.
Configuration Assistants This screen displays status information for the configuration assistants that configure the software and create a database. When the message is displayed at the end of Database Configuration Assistant process, click OK to continue.
Execute Configuration Scripts When prompted, read the instructions and then run the scripts mentioned on this screen. Click OK to continue.
Screen Action
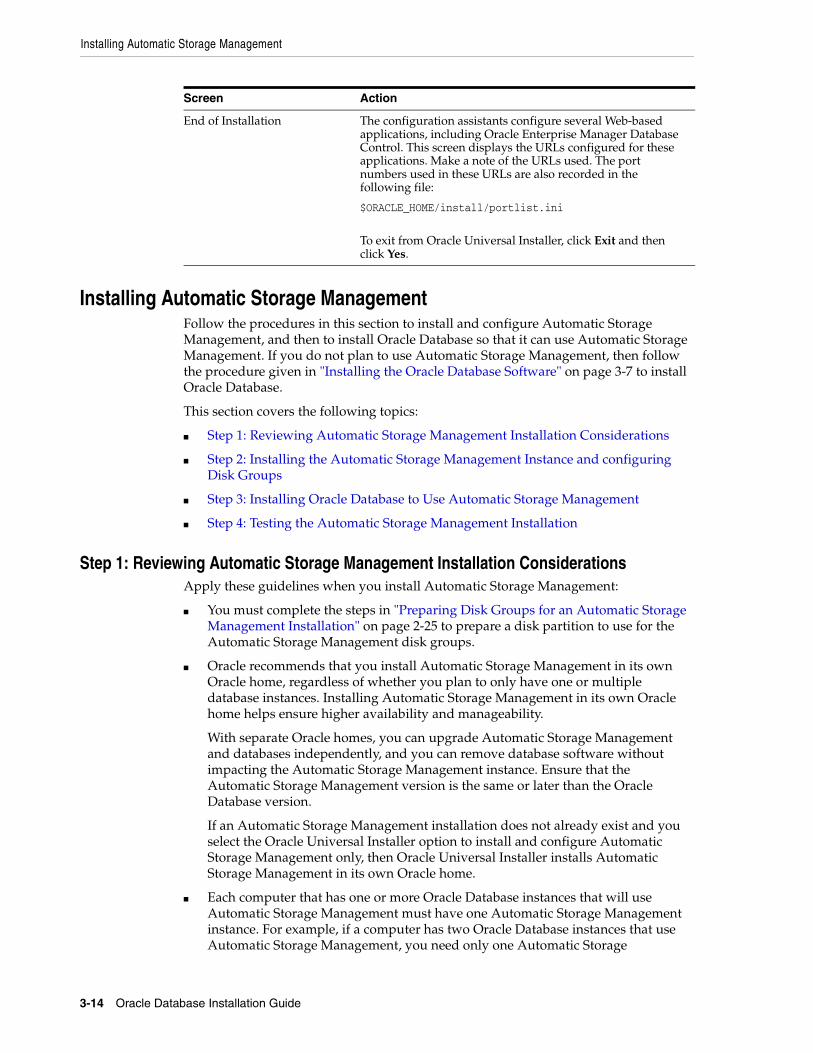
Installing Automatic Storage Management
3-14 Oracle Database Installation Guide
Installing Automatic Storage ManagementFollow the procedures in this section to install and configure Automatic Storage Management, and then to install Oracle Database so that it can use Automatic Storage Management. If you do not plan to use Automatic Storage Management, then follow the procedure given in "Installing the Oracle Database Software" on page 3-7 to install Oracle Database.
This section covers the following topics:
■ Step 1: Reviewing Automatic Storage Management Installation Considerations
■ Step 2: Installing the Automatic Storage Management Instance and configuring Disk Groups
■ Step 3: Installing Oracle Database to Use Automatic Storage Management
■ Step 4: Testing the Automatic Storage Management Installation
Step 1: Reviewing Automatic Storage Management Installation ConsiderationsApply these guidelines when you install Automatic Storage Management:
■ You must complete the steps in "Preparing Disk Groups for an Automatic Storage Management Installation" on page 2-25 to prepare a disk partition to use for the Automatic Storage Management disk groups.
■ Oracle recommends that you install Automatic Storage Management in its own Oracle home, regardless of whether you plan to only have one or multiple database instances. Installing Automatic Storage Management in its own Oracle home helps ensure higher availability and manageability.
With separate Oracle homes, you can upgrade Automatic Storage Management and databases independently, and you can remove database software without impacting the Automatic Storage Management instance. Ensure that the Automatic Storage Management version is the same or later than the Oracle Database version.
If an Automatic Storage Management installation does not already exist and you select the Oracle Universal Installer option to install and configure Automatic Storage Management only, then Oracle Universal Installer installs Automatic Storage Management in its own Oracle home.
■ Each computer that has one or more Oracle Database instances that will use Automatic Storage Management must have one Automatic Storage Management instance. For example, if a computer has two Oracle Database instances that use Automatic Storage Management, you need only one Automatic Storage
End of Installation The configuration assistants configure several Web-based applications, including Oracle Enterprise Manager Database Control. This screen displays the URLs configured for these applications. Make a note of the URLs used. The port numbers used in these URLs are also recorded in the following file:
$ORACLE_HOME/install/portlist.ini
To exit from Oracle Universal Installer, click Exit and then click Yes.
Screen Action
Installing Automatic Storage Management
Installing Oracle Database 3-15
Management instance for that computer, to manage the two database instances that use Automatic Storage Management.
■ When you install Automatic Storage Management, Oracle Database Configuration Assistant creates a separate server parameter file (SPFILE) and password file for the Automatic Storage Management instance.
Step 2: Installing the Automatic Storage Management Instance and configuring Disk Groups
The following steps explain how to create an Automatic Storage Management instance and a disk group for storing Oracle Database files. You can create multiple disk groups for the Automatic Storage Management instance to manage, if you want. If you plan to use Automatic Storage Management for backup and recovery operations, then Oracle recommends that you create a separate disk group for this purpose.
To install an Automatic Storage Management instance and configure its disk groups:
1. If you are installing the software from disk, mount the first installation media if it is not already mounted.
Some platforms automatically mount the disk when you insert the installation media into the drive.
2. To start Oracle Universal Installer, complete one of the following steps depending on the location of the installation files:
■ If the installation files are on installation media, enter commands similar to the following, where directory_path is the path of the database directory on the installation media:
$ cd /tmp$ /directory_path/runInstaller
■ If the installation files are on the hard disk, change directory to the database directory and enter the following command:
$ ./runInstaller
If Oracle Universal Installer does not appear, refer to the "X Window Display Errors" section on page G-1 for information about troubleshooting.
3. The Select a Product to Install screen enables you to install any one of the following products:
■ Oracle Database 11g
■ Oracle Client
■ Oracle Clusterware
4. On the Select Installation Type screen, select either Enterprise Edition, Standard Edition, or Custom, and then click Next.
Note: Start Oracle Universal Installer from the terminal session where you logged in as the oracle user and set the user’s environment (described in Chapter 2).
See Also: "Running Oracle Universal Installer" on page 3-7 for a detailed description of the screens used in this procedure
Installing Automatic Storage Management
3-16 Oracle Database Installation Guide
5. On the Install location screen, the Oracle base path appears by default. You can change the path based on your requirement. In the Software Location section, accept the default values or enter an Automatic Storage Management-specific name and directory location for the Automatic Storage Management instance and Click Next.
For example, you could change name to OraDB11g+ASM and the directory location to the following:
/u01/app/oracle/product/11.1.0/asm
6. On the Product-Specific Prerequisite Checks screen, check that the requirements have been met and then click Next.
7. On the Select Configuration Option screen, select Configure Automatic Storage Management (ASM) and then specify and confirm the Automatic Storage Management SYS password. Then, click Next.
8. On the Configure Automatic Storage Management screen, enter the following settings:
■ Disk Group Name: Enter a name for the disk group.
■ Redundancy: Select one of the following choices to set the redundancy level for the disks within the disk group. If you do not specify a redundancy level, the disk group defaults to normal redundancy.
– High: The contents of the disk group are three-way mirrored by default. To create a disk group with high redundancy, you must specify at least three failure groups (a minimum of three devices).
– Normal: By default, the data files of the disk group are two-way mirrored and the control files are three-way mirrored. You can choose to create certain files that are three-way mirrored or not mirrored. To create a disk group with normal redundancy, you must specify at least two failure groups (a minimum of two devices) for two-way mirroring.
– External: Automatic Storage Management does not mirror the contents of the disk group. Choose this redundancy level when 1) the disk group contains devices, such as RAID devices, that provide their own data protection; or 2) the use of the database does not require uninterrupted access to data, for example, in a development environment where you have a suitable backup strategy.
■ Add Disks: Enter /dev/rdsk on as the disk discovery path. You can also click Disk Discovery Path and enter the required disk discovery path in the dialog box and click OK.
9. Click Next.
10. On the Install screen, check the installed contents, and then click Install.
11. To create another disk group for this instance, run Oracle Database Control Assistant from the $ORACLE_HOME/bin directory manually, and select the Configure Automatic Storage Management option.
Note: This screen lets you create the disk groups to use with the Automatic Storage Management instance. You must have an available partition in order to create disk groups.
Installing Automatic Storage Management
Installing Oracle Database 3-17
At this stage, subsequent databases that you create are able to use Automatic Storage Management. If you have databases that were created before you installed Automatic Storage Management, then you now can migrate them to Automatic Storage Management by using the Enterprise Manager Migrate Database Wizard. This wizard is available in Enterprise Manager Grid Control or Database Control. Alternatively, you can use Oracle Database Recovery Manager (RMAN) to perform the migration.
Step 3: Installing Oracle Database to Use Automatic Storage ManagementAfter you have created the Automatic Storage Management instance and Automatic Storage Management disk groups, you are ready to create a database instance that can use Automatic Storage Management.
To create a database instance to use with Automatic Storage Management:
1. Start Oracle Universal Installer.
2. The Select a Product to Install screen enables you to install any one of the following products:
■ Oracle Database 11g
■ Oracle Client
■ Oracle Clusterware
3. On the Select Installation Type screen, select one of the installation types, and then click Next.
4. On the Install location screen, the Oracle base path appears by default. You can change the path based on your requirement. In the Software Location section, accept the default values or select a different Oracle home from the home used for Automatic Storage Management.
5. If you selected the Custom installation type, then select from the products to install.
6. On the Product-Specific Prerequisite Checks screen, check that the requirements have been met and then click Next.
7. On the Select Configuration Option screen, select Create a Database.
8. On the Select Database Configuration screen, select from the database types displayed and click Next.
9. On the Specify Database Configuration Options screen, enter the following settings and then click Next.
■ Specify the Global Database Name using the following syntax:
database_name.domain
where:
See Also:
■ Enterprise Manager Migrate Database Wizard online Help instructions on how to migrate an existing Oracle Database to Automatic Storage Management
■ Oracle Database Backup and Recovery User's Guide for information about migrating an existing Oracle Database to Automatic Storage Management using Oracle Database Recovery Manager
Installing Automatic Storage Management
3-18 Oracle Database Installation Guide
– database_name with no more than 30 characters (alphanumeric, underscore (_), dollar ($), and pound (#)).
– domain name with no more than 128 characters (alphanumeric, underscore (_), and pound (#)), inclusive of all periods.
■ Specify the SID with less than 64 characters (alphanumeric, dollar ($), and pound (#)).
10. On the Specify Database Config Details screen, enter the following settings, then click Next:
■ Memory
■ Character Sets
■ Security
■ Sample Schema
11. On the Select Database Management Option screen, select either Use Grid Control for Database Management if you have Oracle Enterprise Manager installed, or if you do not have Enterprise Manager, select Use Database Control for Database Management. Optionally, select Enable Email Notifications and then enter the outgoing SMTP server and e-mail address. Then, click Next.
After you complete the installation, you can use either of these utilities to manage the Automatic Storage Management instance.
12. On the Specify Database Storage Option screen, select Automatic Storage Management (ASM) and click Next.
13. On the Specify Backup and Recovery Options screen, perform the following actions:
■ Enable Automated Backups: Select this option, and then select Automatic Storage Management.
■ Backup Job Credentials: Enter the user name and password of the person responsible for managing backups.
14. Click Next.
15. On the Select Automatic Storage Management Disk Group screen, select the Automatic Storage Management disk group that you created in "Step 2: Installing the Automatic Storage Management Instance and configuring Disk Groups" on page 3-15 for recovery and backups.
If the Automatic Storage Management disks that you select do not provide enough space, then the Configure Storage Management screen is displayed so that you can select additional disks as needed. As you select the disks, the adjusted sizes are displayed in the Required Storage Space region. Ideally, the Additional Space Needed value should be a negative number.
16. Click Next.
17. On the Specify Database Schema Passwords screen, enter and confirm passwords for the privileged database accounts, then click Next.
18. On the Oracle Configuration Manager screen, enter the Customer Identification Number, Metalink User Name, Country code, and Click Next. The new screen
See Also: "Running Oracle Universal Installer" on page 7 for further information about these fields.
Installing Oracle Database Examples
Installing Oracle Database 3-19
prompts you to accept the license agreement. Click Accept license Agreement to accept the agreement. However, if you decline this agreement, then Oracle Configuration Manager is installed but not configured.
19. On the Summary screen, check that the contents to be installed are correct, and then click Install.
Step 4: Testing the Automatic Storage Management InstallationTo test the Automatic Storage Management installation, try logging in by using the asmcmd command-line utility, which lets you manage Automatic Storage Management disk group files and directories:
1. Open a shell window, and temporarily set the ORACLE_SID and ORACLE_HOME environment variables to specify the appropriate values for the Automatic Storage Management instance that you want to use.
For example, if the Automatic Storage Management SID, which is named +ASM and is located in the asm subdirectory of the ORACLE_BASE directory, then enter the following commands to create the required settings:
■ Bourne, Bash, or Korn shell:
$ ORACLE_SID=+ASM$ export ORACLE_SID$ ORACLE_HOME=/u01/app/oracle/product/11.1.0/asm$ export ORACLE_HOME
■ C shell:
% setenv ORACLE_SID +ASM% setenv ORACLE_HOME /u01/app/oracle/product/11.1.0/asm
2. By using SQL*Plus, connect to the Automatic Storage Management instance as the SYS user with SYSASM privilege and start the instance if necessary:
# $ORACLE_HOME/bin/sqlplus SQL> CONNECT SYS as SYSASMEnter password: SYS_passwordSQL> STARTUP
3. Enter the following command to view the existing disk groups, their redundancy level, and the amount of free disk space in each one:
SQL> SELECT NAME,TYPE,TOTAL_MB,FREE_MB FROM V$ASM_DISKGROUP;
Installing Oracle Database ExamplesIf you plan to use the following products or features, then download and install the products from the Oracle Database Examples media:
See Also:
■ Oracle Database Utilities for more information about asmcmd
■ "Managing Automatic Storage Management" on page 5-3 for information about other tools that you can use to manage Automatic Storage Management
■ Oracle Database Administrator's Guide for a more detailed description of Automatic Storage Management
Installing Oracle Database Examples
3-20 Oracle Database Installation Guide
■ Oracle JDBC Development Drivers
■ Oracle Database Examples
■ Oracle Text Knowledge Base
■ Various Oracle product demonstrations
You must install the Sample Schemas in order to use Oracle Database Examples.
See Also: ■
■ Oracle Database Examples Installation Guide.for more information on various Oracle product demonstrations.
■ "Installing the Sample Schemas" on page 3-3
4
Oracle Database Postinstallation Tasks 4-1
4Oracle Database Postinstallation Tasks
This chapter describes how to complete postinstallation tasks after you have installed the software. It includes information about the following topics:
■ Required Postinstallation Tasks
■ Recommended Postinstallation Tasks
■ Required Product-Specific Postinstallation Tasks
■ Postinstallation Tasks for Oracle Application Express
■ Postinstallation Database Configuration for Oracle Configuration Manager
You must perform the tasks listed in the "Required Postinstallation Tasks" section. Oracle recommends that you perform the tasks listed in the "Recommended Postinstallation Tasks" section after all installations.
If you install and intend to use any of the products listed in the "Required Product-Specific Postinstallation Tasks" section, then you must perform the tasks listed in the product-specific subsections.
Required Postinstallation TasksYou must perform the tasks described in the following sections after completing an installation:
■ Downloading and Installing Patches
■ Configuring Oracle Products
Downloading and Installing PatchesCheck the OracleMetaLink Web site for required patches for the installation.
To download required patches:
1. Use a Web browser to view the OracleMetaLink Web site:
https://metalink.oracle.com
2. Log in to OracleMetaLink.
Note: This chapter describes basic configuration only. Refer to Oracle Database Administrator's Reference for Linux and UNIX, Oracle Database Administrator's Guide and product-specific administration and tuning guides for more detailed configuration and tuning information.
Recommended Postinstallation Tasks
4-2 Oracle Database Installation Guide
3. On the main OracleMetaLink page, click Patches and Updates.
4. Select Simple Search.
5. Specify the following information, then click Go:
■ In the Search By field, choose Product or Family, then specify RDBMS Server.
■ In the Release field, specify the current release number.
■ In the Patch Type field, specify Patchset/Minipack.
■ In the Platform or Language field, select your platform.
6. Find the latest patch set for Oracle Database using OracleMetaLink.
7. From the list of available patches, select a patch to download.
Patch sets for Oracle databases are identified as x.x.x PATCH SET FOR ORACLE DATABASE SERVER.
8. Review the README file before proceeding with the download.
Each patch has a README file with installation requirements and instructions. Some patches install with Oracle Universal Installer; others require special procedures. Oracle recommends that you always read the README file before proceeding.
9. Download and install the patch.
Configuring Oracle ProductsMany Oracle products and options must be configured before you use them for the first time. Before using individual Oracle products or options, refer to the appropriate manual in the product documentation library.
Recommended Postinstallation TasksOracle recommends that you perform the tasks described in the following section after completing an installation:
■ Creating a Backup of the root.sh Script
■ Configuring New or Upgraded Databases
■ Setting Up User Accounts
■ Setting the NLS_LANG Environment Variable
■ Generating the Client Static Library
■ Direct NFS Client
■ Enabling Large Page Support
Creating a Backup of the root.sh ScriptOracle recommends that you back up the root.sh script after you complete an installation. If you install other products in the same Oracle home directory, then Oracle Universal Installer updates the contents of the existing root.sh script during
Note: If you are not an OracleMetaLink registered user, click Register For MetaLink and follow the registration instructions.

Recommended Postinstallation Tasks
Oracle Database Postinstallation Tasks 4-3
the installation. If you require information contained in the original root.sh script, then you can recover it from the backed up root.sh file.
Configuring New or Upgraded DatabasesOracle recommends that you run the utlrp.sql script after creating or upgrading a database. This script recompiles all PL/SQL modules that might be in an invalid state, including packages, procedures, and types. This is an optional step but Oracle recommends that you do it during installation and not at a later date.
To run the utlrp.sql script, follow these steps:
1. Switch user to oracle.
2. Use the oraenv or coraenv script to set the environment for the database where you want to run the utlrp.sql script:
■ Bourne, Bash, or Korn shell:
$ . /usr/local/bin/oraenv
■ C shell:
% source /usr/local/bin/coraenv
When prompted, specify the SID for the database.
3. Start SQL*Plus, as follows:
$ sqlplus "/ AS SYSDBA"
4. If necessary, start the database:
SQL> STARTUP
5. Run the utlrp.sql script:
SQL> @?/rdbms/admin/utlrp.sql
Setting Up User AccountsFor information about setting up additional user accounts, refer to Oracle Database Administrator's Reference for Linux and UNIX.
Setting the NLS_LANG Environment VariableNLS_LANG is an environment variable that specifies the locale behavior for Oracle software. This variable sets the language and territory used by the client application and the database server. It also declares the character set of the client, which is the character set of data entered or displayed by an Oracle client program, such as SQL*Plus.
See Also: Oracle Database Upgrade Guide for more information about database upgrade.
See Also: Appendix F, "Configuring Oracle Database Globalization Support" for more information about the NLS_LANG environment variable
Recommended Postinstallation Tasks
4-4 Oracle Database Installation Guide
Generating the Client Static LibraryThe client static library (libclntst11.a) is not generated during installation. If you want to link the applications to the client static library, you must first generate it as follows:
1. Switch user to oracle.
2. Set the ORACLE_HOME environment variable to specify the Oracle home directory used by the Oracle Database installation. For example:
■ Bourne, Bash, or Korn shell:
$ ORACLE_HOME=/u01/app/oracle/product/11.1.0/db_1 $ export ORACLE_HOME
■ C shell:
% setenv ORACLE_HOME /u01/app/oracle/product/11.1.0/db_1
3. Enter the following command:
$ $ORACLE_HOME/bin/genclntst
Direct NFS ClientNetwork-attached storage (NAS) systems use NFS to access data. You can store data files on a supported NFS system.
With Oracle Database 11g, instead of using the operating system kernel NFS client, you can configure Oracle Database to access NFS V3 servers directly using an Oracle internal Direct NFS client.
If Oracle Database is unable to open an NFS server using Direct NFS, then Oracle Database uses the platform operating system kernel NFS client. In this case, the kernel NFS mount options must be set up as defined in "Checking NFS Buffer Size Parameters" on page 4-7. Additionally, an informational message will be logged into the Oracle alert and trace files indicating that Direct NFS could not be established.
The Oracle files resident on the NFS server that are served by the Direct NFS Client are also accessible through the operating system kernel NFS client. The usual considerations for maintaining integrity of the Oracle files apply in this situation.
Some NFS file servers require NFS clients to connect using reserved ports. If your filer is running with reserved port checking, then you must disable it for Direct NFS to operate. To disable reserved port checking, consult your NFS file server documentation.
Direct NFS can use up to four network paths defined for an NFS server. The Direct NFS client performs load balancing across all specified paths. If a specified path fails, then Direct NFS reissues I/Os over any remaining paths.
Use the following views for Direct NFS management:
■ v$dnfs_servers: Shows a table of servers accessed using Direct NFS.
■ v$dnfs_files: Shows a table of files currently open using Direct NFS.
■ v$dnfs_channels: Shows a table of open network paths (or channels) to servers for which Direct NFS is providing files.
■ v$dnfs_stats: Shows a table of performance statistics for Direct NFS.
The following sections elaborate on enabling, disabling, checking the buffer size for a Direct NFS Client:
Recommended Postinstallation Tasks
Oracle Database Postinstallation Tasks 4-5
■ Enabling Direct NFS Client
■ Disabling Direct NFS Client
■ Checking NFS Buffer Size Parameters
Enabling Direct NFS ClientBy default Direct NFS will attempt to serve mount entries found in /etc/filesystems. No other configuration is required. You can use oranfstab to specify additional Oracle specific options to Direct NFS. For example, you can use oranfstab to specify additional paths for a mount point.
Additonally, a new Oracle specific file oranfstab can be added to either /etc or to $ORACLE_HOME/dbs. When oranfstab is placed in $ORACLE_HOME/dbs, its entries are specific to a single database. However, when oranfstab is placed in /etc, then it is global to all Oracle databases, and hence can contain mount points for all Oracle databases.
Direct NFS determines mount point settings to NFS storage devices based on the configurations in /etc/mtab. Direct NFS looks for the mount point entries in the following order:
1. $ORACLE_HOME/dbs/oranfstab
2. /etc/oranfstab
3. /etc/mtab
It uses the first matched entry as the mount point.
In all cases, Oracle requires that mount points be mounted by the kernel NFS system even when being served through Direct NFS. Oracle verifies kernel NFS mounts by cross-checking entries in oranfstab with operating system NFS mount points. If a mismatch exists, then Direct NFS logs an informational message, and does not serve the NFS server.
Complete the following procedure to enable Direct NFS:
1. You can optionally create an oranfstab file with the following attributes for each NFS server to be accessed using Direct NFS:
■ Server: The NFS server name.
■ Path: Up to four network paths to the NFS server, specified either by IP address, or by name, as displayed using the ifconfig command on the filer.
■ Local: Up to four local paths on the database host, specified by IP address or by name, as displayed using the ifconfig command run on the database host.
■ Export: The exported path from the NFS server.
■ Mount: The local mount point for the NFS server.
■ Dontroute: Specifies that outgoing messages should not be routed by the operating system, but sent using the IP address they are bound to.
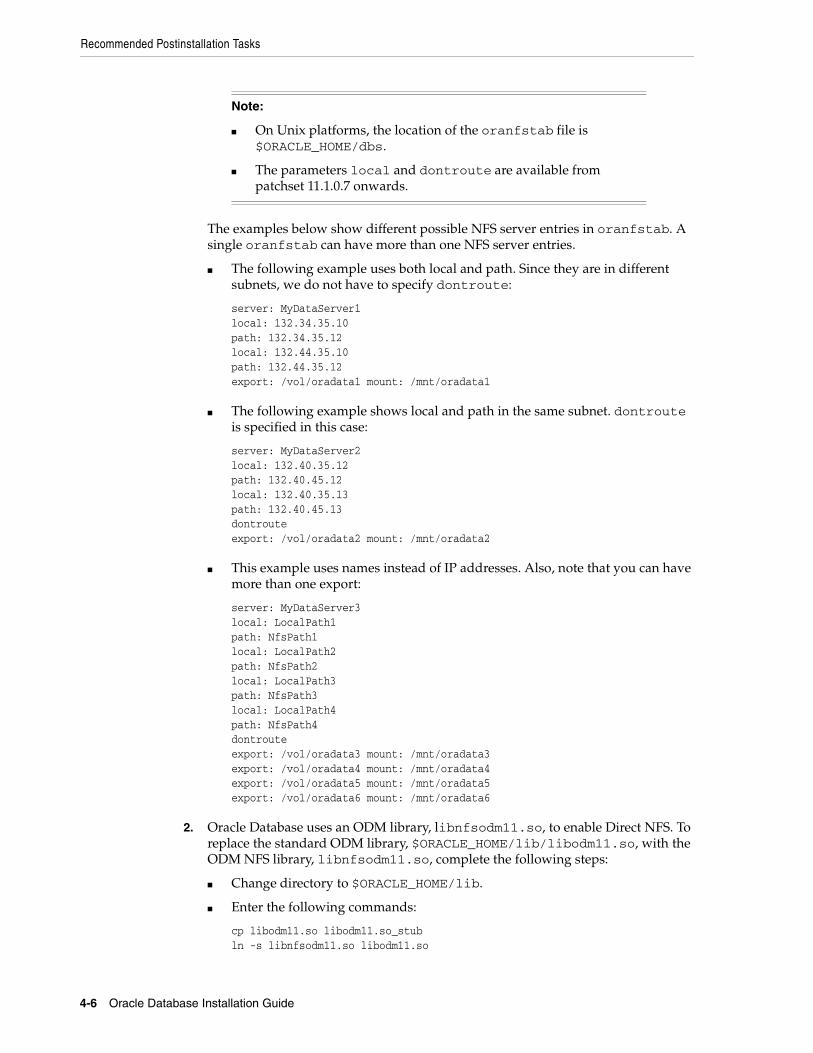
Recommended Postinstallation Tasks
4-6 Oracle Database Installation Guide
The examples below show different possible NFS server entries in oranfstab. A single oranfstab can have more than one NFS server entries.
■ The following example uses both local and path. Since they are in different subnets, we do not have to specify dontroute:
server: MyDataServer1local: 132.34.35.10path: 132.34.35.12local: 132.44.35.10path: 132.44.35.12export: /vol/oradata1 mount: /mnt/oradata1
■ The following example shows local and path in the same subnet. dontroute is specified in this case:
server: MyDataServer2local: 132.40.35.12path: 132.40.45.12local: 132.40.35.13path: 132.40.45.13dontrouteexport: /vol/oradata2 mount: /mnt/oradata2
■ This example uses names instead of IP addresses. Also, note that you can have more than one export:
server: MyDataServer3local: LocalPath1path: NfsPath1local: LocalPath2path: NfsPath2local: LocalPath3path: NfsPath3local: LocalPath4path: NfsPath4dontrouteexport: /vol/oradata3 mount: /mnt/oradata3export: /vol/oradata4 mount: /mnt/oradata4export: /vol/oradata5 mount: /mnt/oradata5export: /vol/oradata6 mount: /mnt/oradata6
2. Oracle Database uses an ODM library, libnfsodm11.so, to enable Direct NFS. To replace the standard ODM library, $ORACLE_HOME/lib/libodm11.so, with the ODM NFS library, libnfsodm11.so, complete the following steps:
■ Change directory to $ORACLE_HOME/lib.
■ Enter the following commands:
cp libodm11.so libodm11.so_stubln -s libnfsodm11.so libodm11.so
Note:
■ On Unix platforms, the location of the oranfstab file is $ORACLE_HOME/dbs.
■ The parameters local and dontroute are available from patchset 11.1.0.7 onwards.
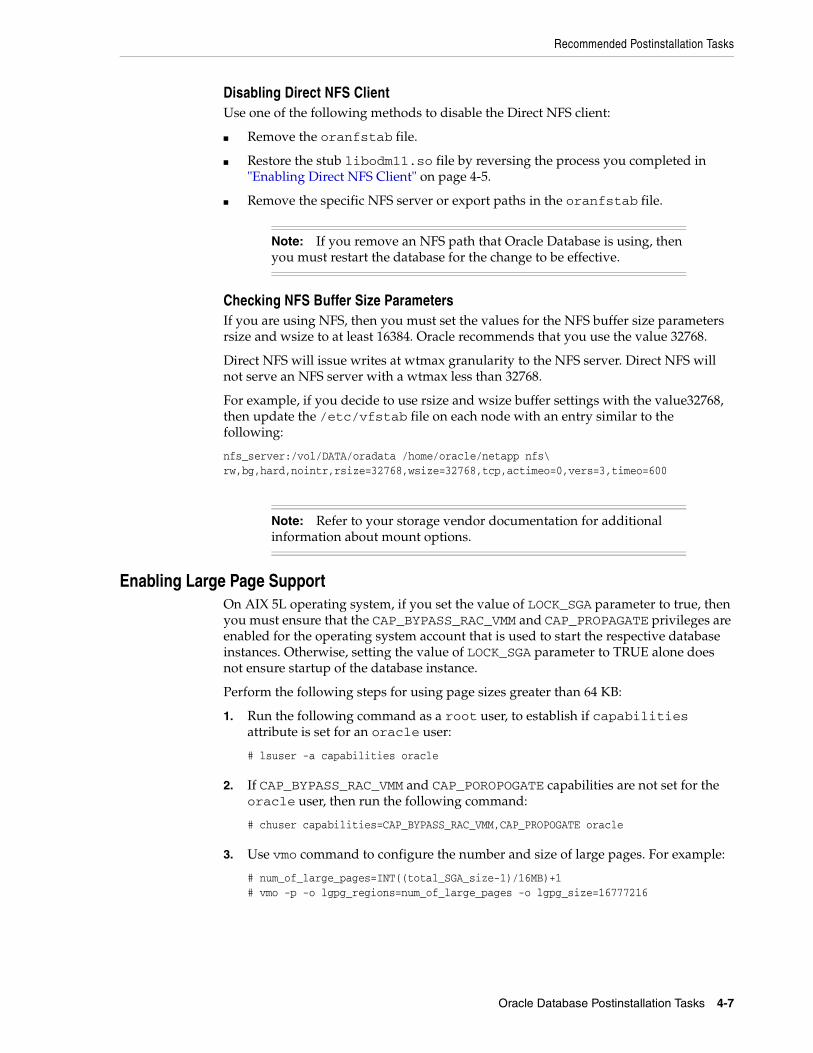
Recommended Postinstallation Tasks
Oracle Database Postinstallation Tasks 4-7
Disabling Direct NFS ClientUse one of the following methods to disable the Direct NFS client:
■ Remove the oranfstab file.
■ Restore the stub libodm11.so file by reversing the process you completed in "Enabling Direct NFS Client" on page 4-5.
■ Remove the specific NFS server or export paths in the oranfstab file.
Checking NFS Buffer Size ParametersIf you are using NFS, then you must set the values for the NFS buffer size parameters rsize and wsize to at least 16384. Oracle recommends that you use the value 32768.
Direct NFS will issue writes at wtmax granularity to the NFS server. Direct NFS will not serve an NFS server with a wtmax less than 32768.
For example, if you decide to use rsize and wsize buffer settings with the value32768, then update the /etc/vfstab file on each node with an entry similar to the following:
nfs_server:/vol/DATA/oradata /home/oracle/netapp nfs\rw,bg,hard,nointr,rsize=32768,wsize=32768,tcp,actimeo=0,vers=3,timeo=600
Enabling Large Page SupportOn AIX 5L operating system, if you set the value of LOCK_SGA parameter to true, then you must ensure that the CAP_BYPASS_RAC_VMM and CAP_PROPAGATE privileges are enabled for the operating system account that is used to start the respective database instances. Otherwise, setting the value of LOCK_SGA parameter to TRUE alone does not ensure startup of the database instance.
Perform the following steps for using page sizes greater than 64 KB:
1. Run the following command as a root user, to establish if capabilities attribute is set for an oracle user:
# lsuser -a capabilities oracle
2. If CAP_BYPASS_RAC_VMM and CAP_POROPOGATE capabilities are not set for the oracle user, then run the following command:
# chuser capabilities=CAP_BYPASS_RAC_VMM,CAP_PROPOGATE oracle
3. Use vmo command to configure the number and size of large pages. For example:
# num_of_large_pages=INT((total_SGA_size-1)/16MB)+1# vmo -p -o lgpg_regions=num_of_large_pages -o lgpg_size=16777216
Note: If you remove an NFS path that Oracle Database is using, then you must restart the database for the change to be effective.
Note: Refer to your storage vendor documentation for additional information about mount options.
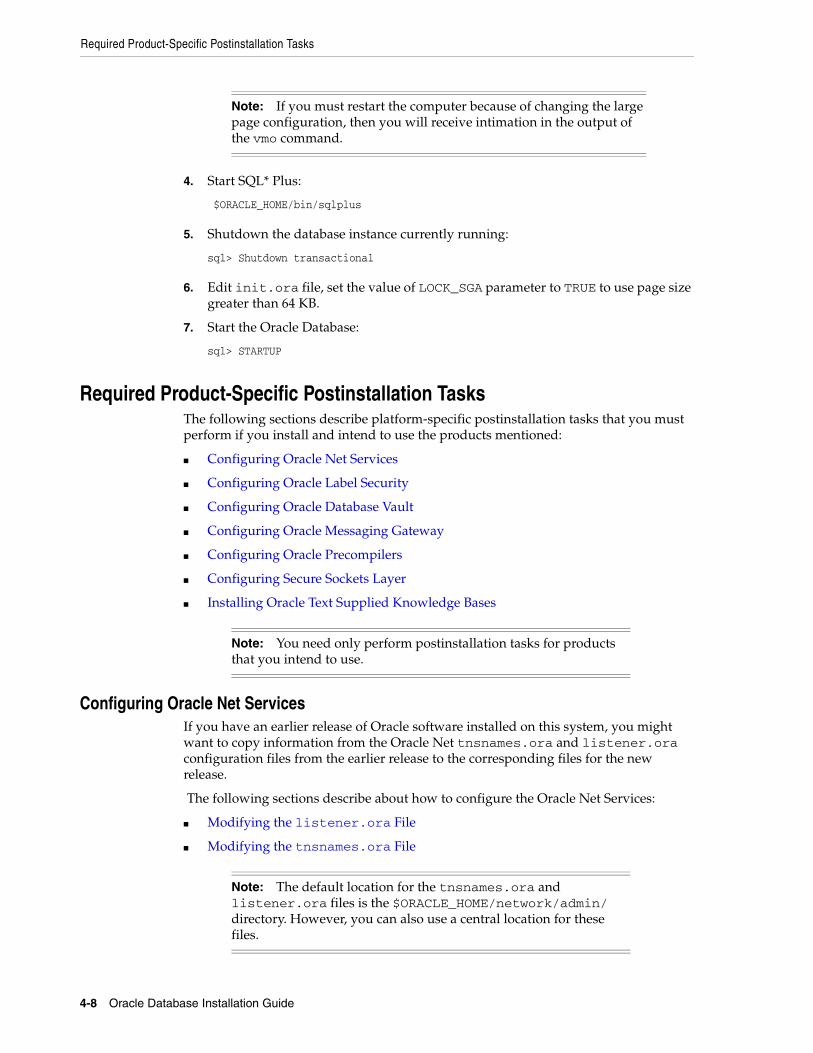
Required Product-Specific Postinstallation Tasks
4-8 Oracle Database Installation Guide
4. Start SQL* Plus:
$ORACLE_HOME/bin/sqlplus
5. Shutdown the database instance currently running:
sql> Shutdown transactional
6. Edit init.ora file, set the value of LOCK_SGA parameter to TRUE to use page size greater than 64 KB.
7. Start the Oracle Database:
sql> STARTUP
Required Product-Specific Postinstallation TasksThe following sections describe platform-specific postinstallation tasks that you must perform if you install and intend to use the products mentioned:
■ Configuring Oracle Net Services
■ Configuring Oracle Label Security
■ Configuring Oracle Database Vault
■ Configuring Oracle Messaging Gateway
■ Configuring Oracle Precompilers
■ Configuring Secure Sockets Layer
■ Installing Oracle Text Supplied Knowledge Bases
Configuring Oracle Net ServicesIf you have an earlier release of Oracle software installed on this system, you might want to copy information from the Oracle Net tnsnames.ora and listener.ora configuration files from the earlier release to the corresponding files for the new release.
The following sections describe about how to configure the Oracle Net Services:
■ Modifying the listener.ora File
■ Modifying the tnsnames.ora File
Note: If you must restart the computer because of changing the large page configuration, then you will receive intimation in the output of the vmo command.
Note: You need only perform postinstallation tasks for products that you intend to use.
Note: The default location for the tnsnames.ora and listener.ora files is the $ORACLE_HOME/network/admin/ directory. However, you can also use a central location for these files.
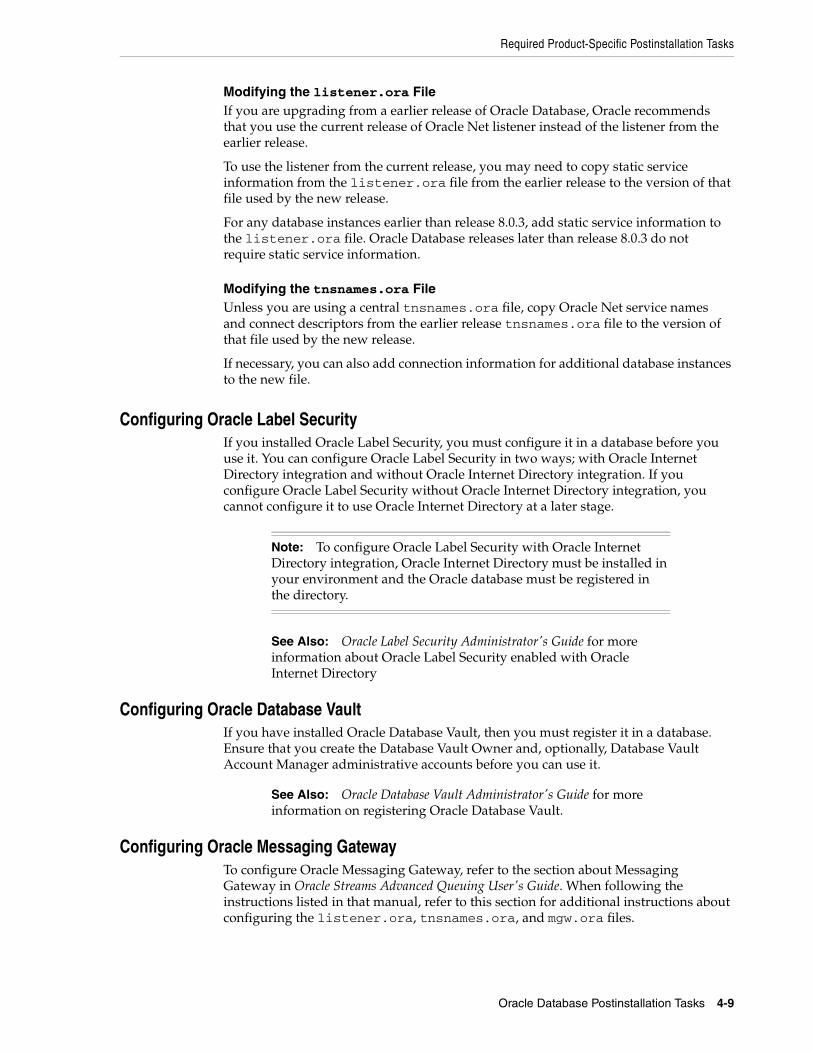
Required Product-Specific Postinstallation Tasks
Oracle Database Postinstallation Tasks 4-9
Modifying the listener.ora FileIf you are upgrading from a earlier release of Oracle Database, Oracle recommends that you use the current release of Oracle Net listener instead of the listener from the earlier release.
To use the listener from the current release, you may need to copy static service information from the listener.ora file from the earlier release to the version of that file used by the new release.
For any database instances earlier than release 8.0.3, add static service information to the listener.ora file. Oracle Database releases later than release 8.0.3 do not require static service information.
Modifying the tnsnames.ora FileUnless you are using a central tnsnames.ora file, copy Oracle Net service names and connect descriptors from the earlier release tnsnames.ora file to the version of that file used by the new release.
If necessary, you can also add connection information for additional database instances to the new file.
Configuring Oracle Label SecurityIf you installed Oracle Label Security, you must configure it in a database before you use it. You can configure Oracle Label Security in two ways; with Oracle Internet Directory integration and without Oracle Internet Directory integration. If you configure Oracle Label Security without Oracle Internet Directory integration, you cannot configure it to use Oracle Internet Directory at a later stage.
Configuring Oracle Database VaultIf you have installed Oracle Database Vault, then you must register it in a database. Ensure that you create the Database Vault Owner and, optionally, Database Vault Account Manager administrative accounts before you can use it.
Configuring Oracle Messaging GatewayTo configure Oracle Messaging Gateway, refer to the section about Messaging Gateway in Oracle Streams Advanced Queuing User's Guide. When following the instructions listed in that manual, refer to this section for additional instructions about configuring the listener.ora, tnsnames.ora, and mgw.ora files.
Note: To configure Oracle Label Security with Oracle Internet Directory integration, Oracle Internet Directory must be installed in your environment and the Oracle database must be registered in the directory.
See Also: Oracle Label Security Administrator's Guide for more information about Oracle Label Security enabled with Oracle Internet Directory
See Also: Oracle Database Vault Administrator's Guide for more information on registering Oracle Database Vault.
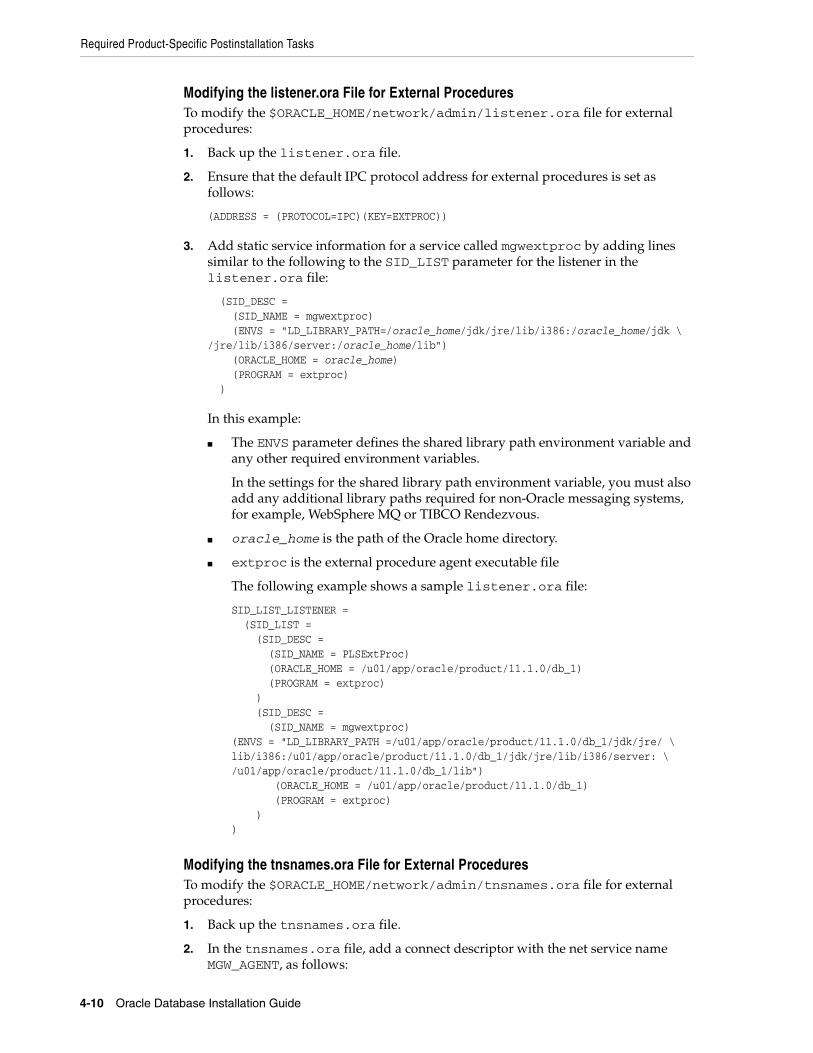
Required Product-Specific Postinstallation Tasks
4-10 Oracle Database Installation Guide
Modifying the listener.ora File for External ProceduresTo modify the $ORACLE_HOME/network/admin/listener.ora file for external procedures:
1. Back up the listener.ora file.
2. Ensure that the default IPC protocol address for external procedures is set as follows:
(ADDRESS = (PROTOCOL=IPC)(KEY=EXTPROC))
3. Add static service information for a service called mgwextproc by adding lines similar to the following to the SID_LIST parameter for the listener in the listener.ora file:
(SID_DESC = (SID_NAME = mgwextproc) (ENVS = "LD_LIBRARY_PATH=/oracle_home/jdk/jre/lib/i386:/oracle_home/jdk \/jre/lib/i386/server:/oracle_home/lib") (ORACLE_HOME = oracle_home) (PROGRAM = extproc) )
In this example:
■ The ENVS parameter defines the shared library path environment variable and any other required environment variables.
In the settings for the shared library path environment variable, you must also add any additional library paths required for non-Oracle messaging systems, for example, WebSphere MQ or TIBCO Rendezvous.
■ oracle_home is the path of the Oracle home directory.
■ extproc is the external procedure agent executable file
The following example shows a sample listener.ora file:
SID_LIST_LISTENER = (SID_LIST = (SID_DESC = (SID_NAME = PLSExtProc) (ORACLE_HOME = /u01/app/oracle/product/11.1.0/db_1) (PROGRAM = extproc) ) (SID_DESC = (SID_NAME = mgwextproc)(ENVS = "LD_LIBRARY_PATH =/u01/app/oracle/product/11.1.0/db_1/jdk/jre/ \lib/i386:/u01/app/oracle/product/11.1.0/db_1/jdk/jre/lib/i386/server: \/u01/app/oracle/product/11.1.0/db_1/lib") (ORACLE_HOME = /u01/app/oracle/product/11.1.0/db_1) (PROGRAM = extproc) ))
Modifying the tnsnames.ora File for External ProceduresTo modify the $ORACLE_HOME/network/admin/tnsnames.ora file for external procedures:
1. Back up the tnsnames.ora file.
2. In the tnsnames.ora file, add a connect descriptor with the net service name MGW_AGENT, as follows:
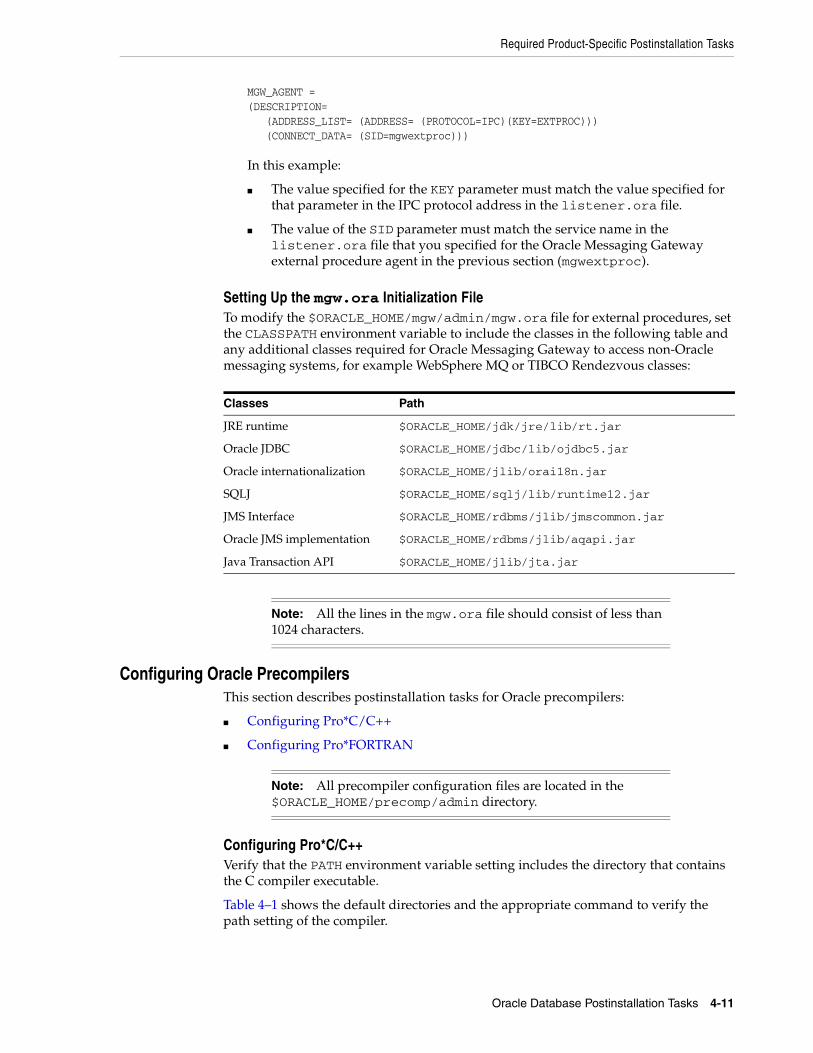
Required Product-Specific Postinstallation Tasks
Oracle Database Postinstallation Tasks 4-11
MGW_AGENT = (DESCRIPTION= (ADDRESS_LIST= (ADDRESS= (PROTOCOL=IPC)(KEY=EXTPROC))) (CONNECT_DATA= (SID=mgwextproc)))
In this example:
■ The value specified for the KEY parameter must match the value specified for that parameter in the IPC protocol address in the listener.ora file.
■ The value of the SID parameter must match the service name in the listener.ora file that you specified for the Oracle Messaging Gateway external procedure agent in the previous section (mgwextproc).
Setting Up the mgw.ora Initialization FileTo modify the $ORACLE_HOME/mgw/admin/mgw.ora file for external procedures, set the CLASSPATH environment variable to include the classes in the following table and any additional classes required for Oracle Messaging Gateway to access non-Oracle messaging systems, for example WebSphere MQ or TIBCO Rendezvous classes:
Configuring Oracle PrecompilersThis section describes postinstallation tasks for Oracle precompilers:
■ Configuring Pro*C/C++
■ Configuring Pro*FORTRAN
Configuring Pro*C/C++Verify that the PATH environment variable setting includes the directory that contains the C compiler executable.
Table 4–1 shows the default directories and the appropriate command to verify the path setting of the compiler.
Classes Path
JRE runtime $ORACLE_HOME/jdk/jre/lib/rt.jar
Oracle JDBC $ORACLE_HOME/jdbc/lib/ojdbc5.jar
Oracle internationalization $ORACLE_HOME/jlib/orai18n.jar
SQLJ $ORACLE_HOME/sqlj/lib/runtime12.jar
JMS Interface $ORACLE_HOME/rdbms/jlib/jmscommon.jar
Oracle JMS implementation $ORACLE_HOME/rdbms/jlib/aqapi.jar
Java Transaction API $ORACLE_HOME/jlib/jta.jar
Note: All the lines in the mgw.ora file should consist of less than 1024 characters.
Note: All precompiler configuration files are located in the $ORACLE_HOME/precomp/admin directory.
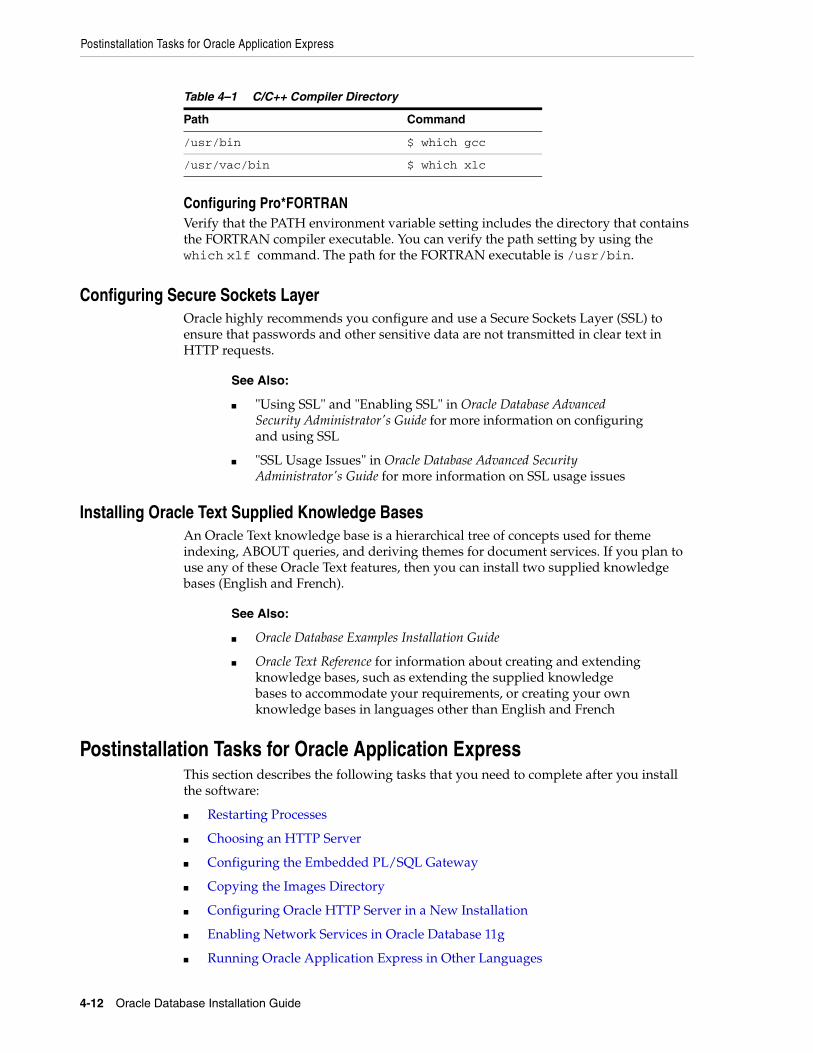
Postinstallation Tasks for Oracle Application Express
4-12 Oracle Database Installation Guide
Configuring Pro*FORTRANVerify that the PATH environment variable setting includes the directory that contains the FORTRAN compiler executable. You can verify the path setting by using the which xlf command. The path for the FORTRAN executable is /usr/bin.
Configuring Secure Sockets LayerOracle highly recommends you configure and use a Secure Sockets Layer (SSL) to ensure that passwords and other sensitive data are not transmitted in clear text in HTTP requests.
Installing Oracle Text Supplied Knowledge BasesAn Oracle Text knowledge base is a hierarchical tree of concepts used for theme indexing, ABOUT queries, and deriving themes for document services. If you plan to use any of these Oracle Text features, then you can install two supplied knowledge bases (English and French).
Postinstallation Tasks for Oracle Application ExpressThis section describes the following tasks that you need to complete after you install the software:
■ Restarting Processes
■ Choosing an HTTP Server
■ Configuring the Embedded PL/SQL Gateway
■ Copying the Images Directory
■ Configuring Oracle HTTP Server in a New Installation
■ Enabling Network Services in Oracle Database 11g
■ Running Oracle Application Express in Other Languages
Table 4–1 C/C++ Compiler Directory
Path Command
/usr/bin $ which gcc
/usr/vac/bin $ which xlc
See Also:
■ "Using SSL" and "Enabling SSL" in Oracle Database Advanced Security Administrator's Guide for more information on configuring and using SSL
■ "SSL Usage Issues" in Oracle Database Advanced Security Administrator's Guide for more information on SSL usage issues
See Also:
■ Oracle Database Examples Installation Guide
■ Oracle Text Reference for information about creating and extending knowledge bases, such as extending the supplied knowledge bases to accommodate your requirements, or creating your own knowledge bases in languages other than English and French
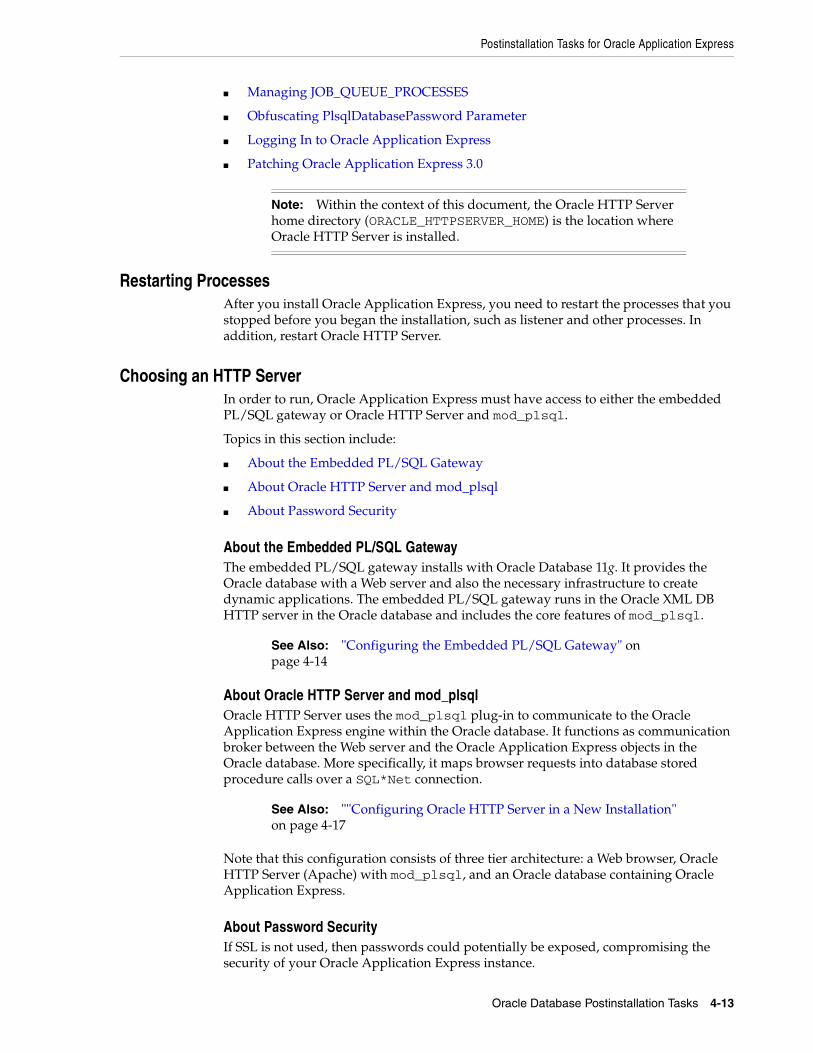
Postinstallation Tasks for Oracle Application Express
Oracle Database Postinstallation Tasks 4-13
■ Managing JOB_QUEUE_PROCESSES
■ Obfuscating PlsqlDatabasePassword Parameter
■ Logging In to Oracle Application Express
■ Patching Oracle Application Express 3.0
Restarting ProcessesAfter you install Oracle Application Express, you need to restart the processes that you stopped before you began the installation, such as listener and other processes. In addition, restart Oracle HTTP Server.
Choosing an HTTP ServerIn order to run, Oracle Application Express must have access to either the embedded PL/SQL gateway or Oracle HTTP Server and mod_plsql.
Topics in this section include:
■ About the Embedded PL/SQL Gateway
■ About Oracle HTTP Server and mod_plsql
■ About Password Security
About the Embedded PL/SQL GatewayThe embedded PL/SQL gateway installs with Oracle Database 11g. It provides the Oracle database with a Web server and also the necessary infrastructure to create dynamic applications. The embedded PL/SQL gateway runs in the Oracle XML DB HTTP server in the Oracle database and includes the core features of mod_plsql.
About Oracle HTTP Server and mod_plsqlOracle HTTP Server uses the mod_plsql plug-in to communicate to the Oracle Application Express engine within the Oracle database. It functions as communication broker between the Web server and the Oracle Application Express objects in the Oracle database. More specifically, it maps browser requests into database stored procedure calls over a SQL*Net connection.
Note that this configuration consists of three tier architecture: a Web browser, Oracle HTTP Server (Apache) with mod_plsql, and an Oracle database containing Oracle Application Express.
About Password SecurityIf SSL is not used, then passwords could potentially be exposed, compromising the security of your Oracle Application Express instance.
Note: Within the context of this document, the Oracle HTTP Server home directory (ORACLE_HTTPSERVER_HOME) is the location where Oracle HTTP Server is installed.
See Also: "Configuring the Embedded PL/SQL Gateway" on page 4-14
See Also: ""Configuring Oracle HTTP Server in a New Installation" on page 4-17

Postinstallation Tasks for Oracle Application Express
4-14 Oracle Database Installation Guide
Refer to "Configuring Secure Sockets Layer" on page 12 for more information.
Configuring the Embedded PL/SQL GatewayAlthough the embedded PL/SQL gateway installs with the Oracle database, you must configure it before you can use it with Oracle Application Express. To accomplish, you run a configuration file and unlock the ANONYMOUS account.
Topics in this section include:
■ Configuring the Embedded PL/SQL Gateway in New Installation or When Upgrading Database
■ Disabling and Enabling the Oracle XML DB HTTP Server
Configuring the Embedded PL/SQL Gateway in New Installation or When Upgrading DatabaseThis section describes how to configure the embedded PL/SQL gateway by running the configuration script apxconf.sql. Running this script enables you to configure the port for Oracle XML DB HTTP server and the specify a password for the Oracle Application Express ADMIN account. Then, you unlock the ANONYMOUS account.
To configure the embedded PL/SQL gateway:
1. Change your working directory to $ORACLE_HOME/apex.
2. Start SQL*Plus and connect to the database where Oracle Application Express is installed as SYS. For example:
$ $ORACLE_HOME/bin/sqlplus SQL> CONNECT SYS as SYSDBAEnter password: SYS_password
3. Run apxconf.sql as shown in the following example:
@apxconf
4. When prompted, enter a password for the Oracle Application Express Admin account.
Be sure to make a note of the password you enter. You will use this password to log in to Oracle Application Express Administration Services.
5. When prompted, enter the port for the Oracle XML DB HTTP server. The default port number is 8080.
6. Enter the following statement to unlock the ANONYMOUS account:
ALTER USER ANONYMOUS ACCOUNT UNLOCK;
Disabling and Enabling the Oracle XML DB HTTP ServerThe embedded PL/SQL gateway runs in the Oracle XML DB HTTP server in the Oracle database. This section describes how to enable or disable the Oracle XML DB HTTP server.
Topics in this section include:
■ Disabling Oracle XML DB HTTP Server
See Also: Choosing an HTTP Server on page 4-13 and About the Embedded PL/SQL Gateway on page 4-13

Postinstallation Tasks for Oracle Application Express
Oracle Database Postinstallation Tasks 4-15
■ Enabling Oracle XML DB HTTP Server
Disabling Oracle XML DB HTTP ServerTo disable Oracle XML DB HTTP server:
1. Start SQL*Plus and connect to the database where Oracle Application Express is installed as SYS. For example:
$ $ORACLE_HOME/bin/sqlplus SQL> CONNECT SYS as SYSDBAEnter password: SYS_password
2. Run the following statement:
EXEC DBMS_XDB.SETHTTPPORT(0);COMMIT;
Enabling Oracle XML DB HTTP ServerTo enable Oracle XML DB HTTP server:
1. Start SQL*Plus and connect to the database where Oracle Application Express is installed as SYS. For example:
$ $ORACLE_HOME/bin/sqlplus SQL> CONNECT SYS as SYSDBAEnter password: SYS_password
2. Run the following statement:
EXEC DBMS_XDB.SETHTTPPORT(port);COMMIT;
For example:
EXEC DBMS_XDB.SETHTTPPORT(8080);COMMIT;
Copying the Images DirectoryWhether you are loading a new installation or upgrading from a previous release, you must copy the images directory from the top level of the $ORACLE_HOME/apex
See Also: Configuring the Embedded PL/SQL Gateway on page 4-14
Note: Port numbers less than 1024 are reserved for use by privileged processes on many operating systems. To enable the XML DB HTTP listener on a port less than 1024, such as 80, review the following documentation:
■ Refer to chapter "Using Protocols to Access the Repository" in Oracle XML DB Developer's Guide for more information on using HTTP(S) and Oracle XML DB Protocol Server.
■ Refer to chapter "Protocol Address Configuration" in Oracle Database Net Services Reference for more information on protocol addressing.

Postinstallation Tasks for Oracle Application Express
4-16 Oracle Database Installation Guide
directory to the location on the file system containing the Oracle home for Oracle HTTP Server.
Topics in this section include:
■ Copying the Images Directory After an Upgrade
■ Copying the Images Directory After a New Installation
Copying the Images Directory After an UpgradeDuring an upgrade, you must overwrite your existing images directory. Before you begin the upgrade, to ensure that you can revert to the previous version, Oracle recommends that you create a copy of your existing images directory for Oracle Application Express, indicating the release number of the images (for example, images_2_0).
To locate the images directory on the file system, review the following files for the text alias /i/:
■ Oracle9i HTTP Server release 2, see the httpd.conf file
■ Oracle HTTP Server distributed with Oracle Database 11g, see the dads.conf file
■ Oracle Application Server 10g, see the marvel.conf file
When you locate the images directory path, Oracle recommends that you copy the existing images directory to a backup location. Doing this enables to revert to the previous release, if that becomes necessary.
After you copy the existing images directory, use the following command syntax to copy the apex/images directory from the 11g Oracle database home to the existing images directory path, overwriting the existing images:
■ Oracle Application Server 10g:
cp -rf $ORACLE_HOME/apex/images ORACLE_HTTPSERVER_HOME/Apache
■ Oracle HTTP Server distributed with Oracle Database 11g:
cp -rf $ORACLE_HOME/apex/images ORACLE_HTTPSERVER_HOME/ohs
In the preceding syntax example:
■ ORACLE_HOME is the Oracle Database 11g Oracle home
■ ORACLE_HTTPSERVER_HOME is the existing Oracle Application Server or Oracle HTTP Server Oracle home, such as /u01/app/oracle/db_2/
Copying the Images Directory After a New InstallationYou can copy the apex/images directory by executing a command similar to the one shown in the following example:
cp -rf $ORACLE_HOME/apex/images ORACLE_HTTPSERVER_HOME/ohs
In the preceding syntax example:
■ $ORACLE_HOME is the Oracle Database 11g Oracle home.
Note: This section is relevant only if you choose Oracle HTTP Server with mod_plsql. However, if you choose Oracle XML DB HTTP Server with the embedded PL/SQL gateway, then these steps can be ignored.
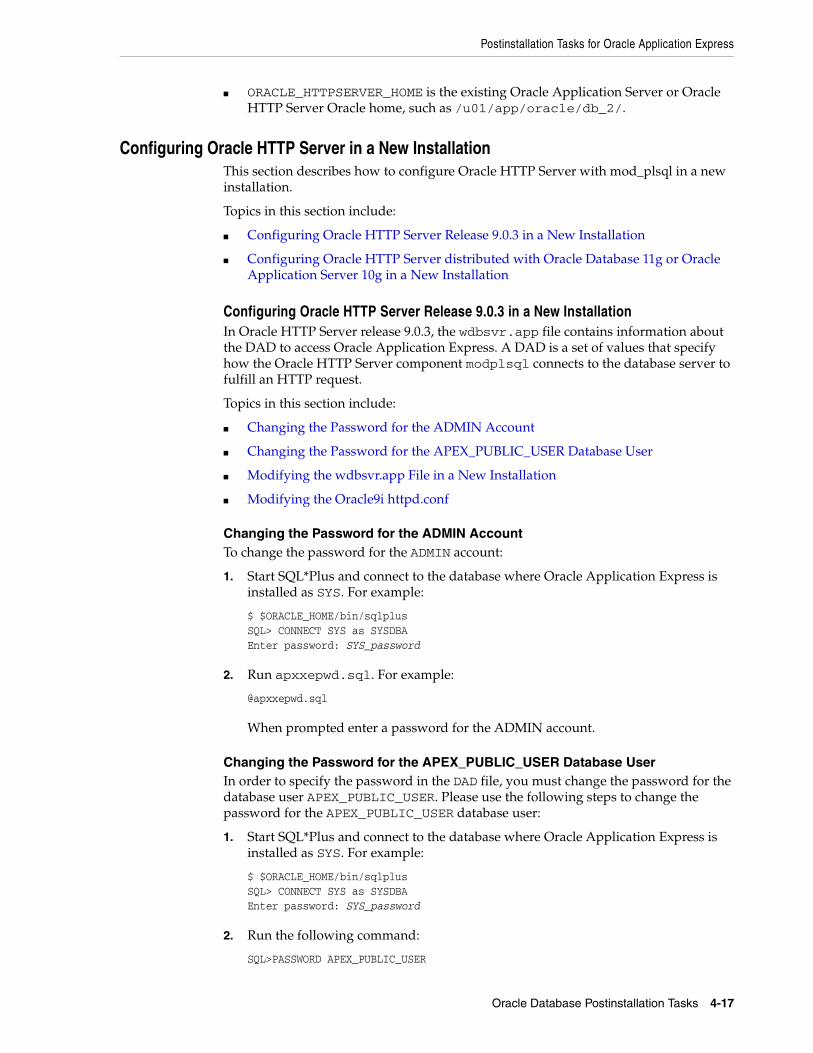
Postinstallation Tasks for Oracle Application Express
Oracle Database Postinstallation Tasks 4-17
■ ORACLE_HTTPSERVER_HOME is the existing Oracle Application Server or Oracle HTTP Server Oracle home, such as /u01/app/oracle/db_2/.
Configuring Oracle HTTP Server in a New InstallationThis section describes how to configure Oracle HTTP Server with mod_plsql in a new installation.
Topics in this section include:
■ Configuring Oracle HTTP Server Release 9.0.3 in a New Installation
■ Configuring Oracle HTTP Server distributed with Oracle Database 11g or Oracle Application Server 10g in a New Installation
Configuring Oracle HTTP Server Release 9.0.3 in a New InstallationIn Oracle HTTP Server release 9.0.3, the wdbsvr.app file contains information about the DAD to access Oracle Application Express. A DAD is a set of values that specify how the Oracle HTTP Server component modplsql connects to the database server to fulfill an HTTP request.
Topics in this section include:
■ Changing the Password for the ADMIN Account
■ Changing the Password for the APEX_PUBLIC_USER Database User
■ Modifying the wdbsvr.app File in a New Installation
■ Modifying the Oracle9i httpd.conf
Changing the Password for the ADMIN AccountTo change the password for the ADMIN account:
1. Start SQL*Plus and connect to the database where Oracle Application Express is installed as SYS. For example:
$ $ORACLE_HOME/bin/sqlplus SQL> CONNECT SYS as SYSDBAEnter password: SYS_password
2. Run apxxepwd.sql. For example:
@apxxepwd.sql
When prompted enter a password for the ADMIN account.
Changing the Password for the APEX_PUBLIC_USER Database UserIn order to specify the password in the DAD file, you must change the password for the database user APEX_PUBLIC_USER. Please use the following steps to change the password for the APEX_PUBLIC_USER database user:
1. Start SQL*Plus and connect to the database where Oracle Application Express is installed as SYS. For example:
$ $ORACLE_HOME/bin/sqlplus SQL> CONNECT SYS as SYSDBAEnter password: SYS_password
2. Run the following command:
SQL>PASSWORD APEX_PUBLIC_USER

Postinstallation Tasks for Oracle Application Express
4-18 Oracle Database Installation Guide
Changing password for APEX_PUBLIC_USERNew password: passwordRetype new password: password
Modifying the wdbsvr.app File in a New InstallationTo create the DAD, you modify the file wdbsvr.app and add an entry for Oracle Application Express.
To modify the wdbsvr.app file, follow these steps:
1. Using a text editor, open the following file:
ORACLE_HTTPSERVER_HOME/Apache/modplsql/cfg/wdbsvr.app
2. Add an entry for Oracle Application Express using the following syntax. Only change the settings indicated in italics.
[DAD_htmldb] connect_string = localhost:1521:orcl password = apex username = apex_public_user default_page = apex document_table = wwv_flow_file_objects$ document_path = docs document_proc = wwv_flow_file_mgr.process_download reuse = Yes enablesso = No stateful = STATELESS_RESET nls_lang = American_America.AL32UTF8
Where:
■ connect_string refers to the host ID, port number, and Oracle9i database where Oracle Application Express was installed. Use the format host:port:sid.
If the Oracle9i version of Oracle HTTP Server you want to use is installed in the same Oracle home as the database you specified for use with Oracle Application Express, leave this parameter blank.
■ password is the Oracle Application Express password for the Oracle Application ADMIN account you specified in Changing the Password for the APEX_PUBLIC_USER Database User on page 4-20.
■ nls_lang determines the language setting of the DAD. The character set portion of the nls_lang value must always be set to AL32UTF8, regardless of whether or not the database character set is AL32UTF8.
If either the territory portion or the language portion of the NLS settings contains a space, you must wrap the value in double quotes as shown in the following example:
nls_lang = "ENGLISH_UNITED KINGDOM.AL32UTF8"
You can find information about the database character set by querying the view NLS_DATABASE_PARAMETERS as shown in the following example:
SELECT value FROM nls_database_parameters WHERE PARAMETER = 'NLS_CHARACTERSET’;
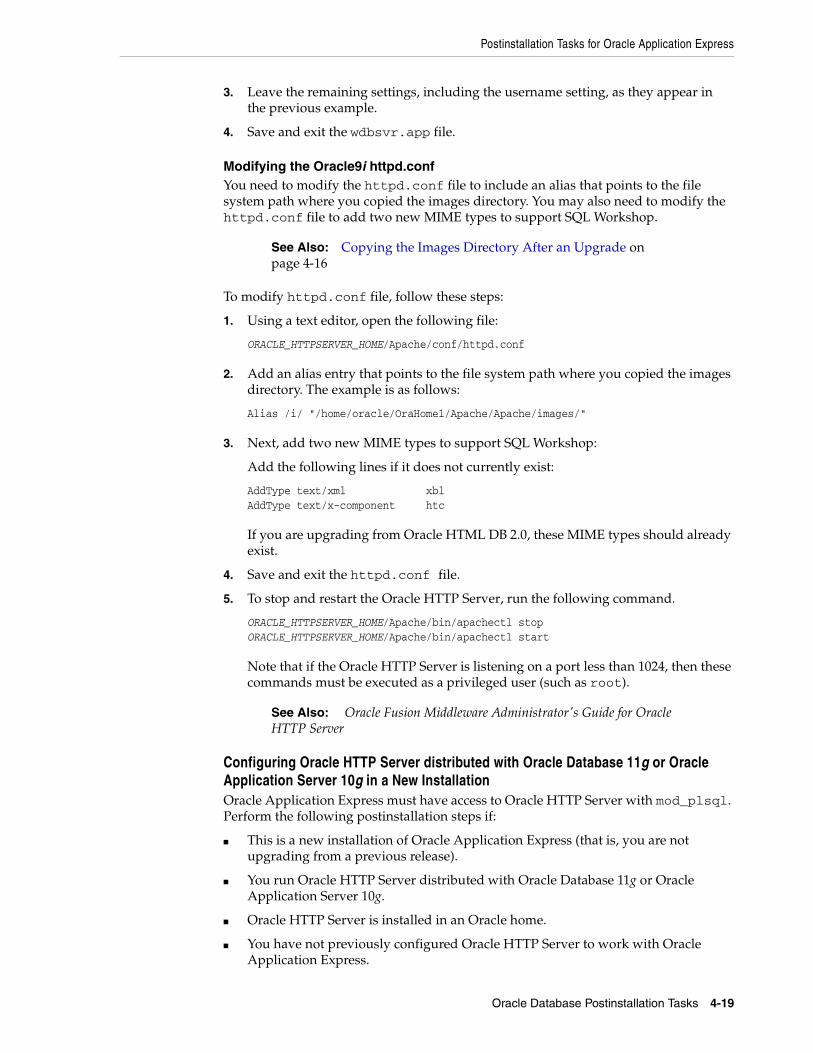
Postinstallation Tasks for Oracle Application Express
Oracle Database Postinstallation Tasks 4-19
3. Leave the remaining settings, including the username setting, as they appear in the previous example.
4. Save and exit the wdbsvr.app file.
Modifying the Oracle9i httpd.confYou need to modify the httpd.conf file to include an alias that points to the file system path where you copied the images directory. You may also need to modify the httpd.conf file to add two new MIME types to support SQL Workshop.
To modify httpd.conf file, follow these steps:
1. Using a text editor, open the following file:
ORACLE_HTTPSERVER_HOME/Apache/conf/httpd.conf
2. Add an alias entry that points to the file system path where you copied the images directory. The example is as follows:
Alias /i/ "/home/oracle/OraHome1/Apache/Apache/images/"
3. Next, add two new MIME types to support SQL Workshop:
Add the following lines if it does not currently exist:
AddType text/xml xblAddType text/x-component htc
If you are upgrading from Oracle HTML DB 2.0, these MIME types should already exist.
4. Save and exit the httpd.conf file.
5. To stop and restart the Oracle HTTP Server, run the following command.
ORACLE_HTTPSERVER_HOME/Apache/bin/apachectl stopORACLE_HTTPSERVER_HOME/Apache/bin/apachectl start
Note that if the Oracle HTTP Server is listening on a port less than 1024, then these commands must be executed as a privileged user (such as root).
Configuring Oracle HTTP Server distributed with Oracle Database 11g or Oracle Application Server 10g in a New InstallationOracle Application Express must have access to Oracle HTTP Server with mod_plsql. Perform the following postinstallation steps if:
■ This is a new installation of Oracle Application Express (that is, you are not upgrading from a previous release).
■ You run Oracle HTTP Server distributed with Oracle Database 11g or Oracle Application Server 10g.
■ Oracle HTTP Server is installed in an Oracle home.
■ You have not previously configured Oracle HTTP Server to work with Oracle Application Express.
See Also: Copying the Images Directory After an Upgrade on page 4-16
See Also: Oracle Fusion Middleware Administrator's Guide for Oracle HTTP Server

Postinstallation Tasks for Oracle Application Express
4-20 Oracle Database Installation Guide
These instructions do not apply if you run Oracle HTTP Server Release 9.0.3. For more information on configuring Oracle HTTP Server Release 9.0.3, see "Configuring Oracle HTTP Server Release 9.0.3 in a New Installation" on page 4-17.
Topics in this section include:
■ Changing the Password for the ADMIN Account
■ Unlocking the APEX_PUBLIC_USER Database User
■ Changing the Password for the APEX_PUBLIC_USER Database User
■ Edit dads.conf File
■ Stop and Restart Oracle HTTP Server
Changing the Password for the ADMIN AccountFirst, change the password for the Oracle Application Express ADMIN account.
To change the password for the ADMIN account:
1. Start SQL*Plus and connect to the database where Oracle Application Express is installed as SYS. For example:
$ $ORACLE_HOME/bin/sqlplus SQL> CONNECT SYS as SYSDBAEnter password: SYS_password
2. Run apxxepwd.sql. For example:
@apxxepwd.sql
When prompted enter a password for the ADMIN account.
Unlocking the APEX_PUBLIC_USER Database UserWhen configuring Oracle HTTP Server for Oracle Application Express in a new installation, the database user APEX_PUBLIC_USER must be an unlocked account. To unlock the account for database user APEX_PUBLIC_USER, execute the following steps:
1. Start SQL*Plus and connect to the database where Oracle Application Express is installed as SYS. For example:
$ $ORACLE_HOME/bin/sqlplus SQL> CONNECT SYS as SYSDBAEnter password: SYS_password
2. Run the following command:
SQL> ALTER USER APEX_PUBLIC_USER ACCOUNT UNLOCK
Changing the Password for the APEX_PUBLIC_USER Database UserIn order to specify the password in the DAD file, you must change the password for the database user APEX_PUBLIC_USER. Please use the following steps to change the password for the APEX_PUBLIC_USER database user:
Note: The Oracle home directory (ORACLE_HTTPSERVER_HOME) is the location where Oracle HTTP Server is installed.
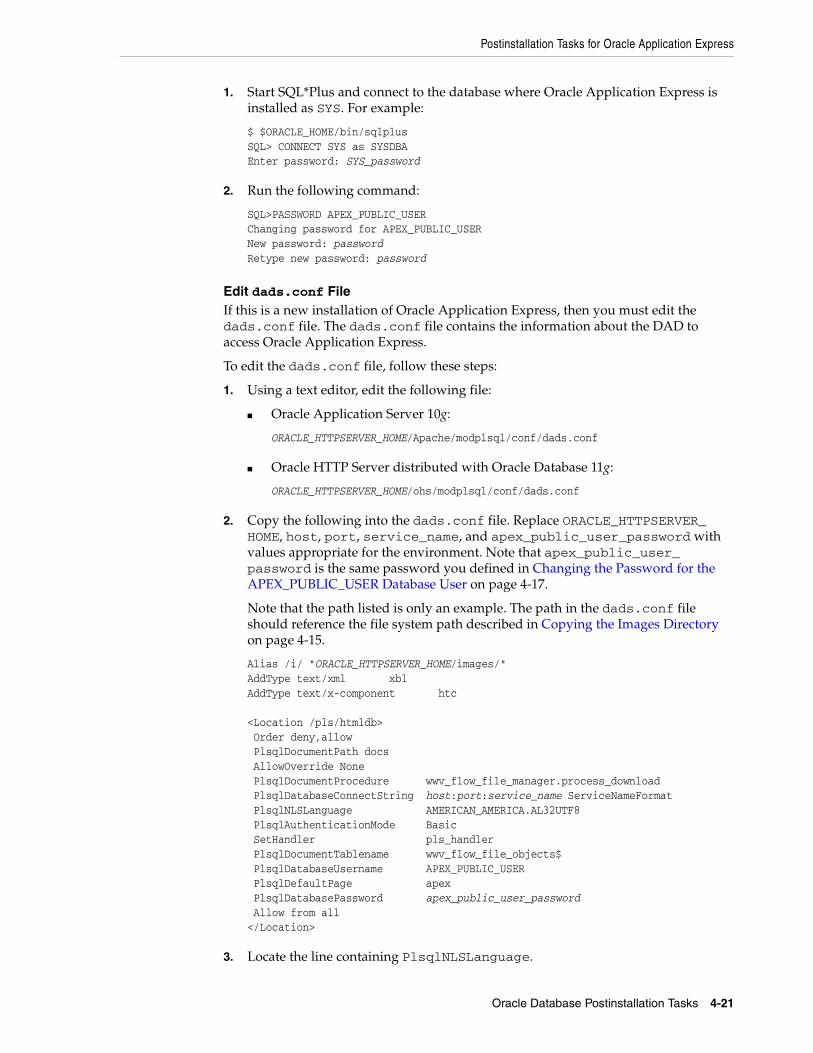
Postinstallation Tasks for Oracle Application Express
Oracle Database Postinstallation Tasks 4-21
1. Start SQL*Plus and connect to the database where Oracle Application Express is installed as SYS. For example:
$ $ORACLE_HOME/bin/sqlplus SQL> CONNECT SYS as SYSDBAEnter password: SYS_password
2. Run the following command:
SQL>PASSWORD APEX_PUBLIC_USERChanging password for APEX_PUBLIC_USERNew password: passwordRetype new password: password
Edit dads.conf File If this is a new installation of Oracle Application Express, then you must edit the dads.conf file. The dads.conf file contains the information about the DAD to access Oracle Application Express.
To edit the dads.conf file, follow these steps:
1. Using a text editor, edit the following file:
■ Oracle Application Server 10g:
ORACLE_HTTPSERVER_HOME/Apache/modplsql/conf/dads.conf
■ Oracle HTTP Server distributed with Oracle Database 11g:
ORACLE_HTTPSERVER_HOME/ohs/modplsql/conf/dads.conf
2. Copy the following into the dads.conf file. Replace ORACLE_HTTPSERVER_HOME, host, port, service_name, and apex_public_user_password with values appropriate for the environment. Note that apex_public_user_password is the same password you defined in Changing the Password for the APEX_PUBLIC_USER Database User on page 4-17.
Note that the path listed is only an example. The path in the dads.conf file should reference the file system path described in Copying the Images Directory on page 4-15.
Alias /i/ "ORACLE_HTTPSERVER_HOME/images/"AddType text/xml xblAddType text/x-component htc
<Location /pls/htmldb> Order deny,allow PlsqlDocumentPath docs AllowOverride None PlsqlDocumentProcedure wwv_flow_file_manager.process_download PlsqlDatabaseConnectString host:port:service_name ServiceNameFormat PlsqlNLSLanguage AMERICAN_AMERICA.AL32UTF8 PlsqlAuthenticationMode Basic SetHandler pls_handler PlsqlDocumentTablename wwv_flow_file_objects$ PlsqlDatabaseUsername APEX_PUBLIC_USER PlsqlDefaultPage apex PlsqlDatabasePassword apex_public_user_password Allow from all</Location>
3. Locate the line containing PlsqlNLSLanguage.

Postinstallation Tasks for Oracle Application Express
4-22 Oracle Database Installation Guide
The PlsqlNLSLanguage setting determines the language setting of the DAD. The character set portion of the PlsqlNLSLanguage value must be set to AL32UTF8, regardless of whether or not the database character set is AL32UTF8. For example:
PlsqlNLSLanguage AMERICAN_AMERICA.AL32UTF8
4. Save and exit the dads.conf file.
Stop and Restart Oracle HTTP ServerTo stop and restart Oracle HTTP Server,run the following commands:
ORACLE_HTTPSERVER_HOME/opmn/bin/opmnctl stopproc ias-component=HTTP_ServerORACLE_HTTPSERVER_HOME/opmn/bin/opmnctl startproc ias-component=HTTP_Server
Enabling Network Services in Oracle Database 11gBy default, the ability to interact with network services is disabled in Oracle Database 11g Release 1 (11.1). Therefore, if you run Oracle Application Express with Oracle Database 11g Release 1 (11.1), you need to use the new DBMS_NETWORK_ACL_ADMIN package to grant connect privilege to any host for the FLOWS_030000 database user. Failing to grant these privileges results in issues with the following:
■ Sending outbound mail in Oracle Application Express.
Users can call methods from the APEX_MAIL package, but issues arise when sending outbound email.
■ Using Web services in Oracle Application Express.
■ PDF/report printing.
■ Searching for content in online Help (that is, using the Find link).
This section contains the following topics:
■ Granting Connect Privileges
■ Troubleshooting an Invalid ACL Error
Granting Connect PrivilegesThe following example demonstrates how to grant connect privileges to any host for the FLOWS_030000 database user.
In order to run the examples, the compatible initialization parameter of the database must be set to at least 11.1.0.0.0. In a 11g database, the parameter is already set by default. However, you will have to set this parameter in case of a database upgrade to 11g from a prior version.
DECLAREACL_PATH VARCHAR2(4000);ACL_ID RAW(16);BEGIN-- Look for the ACL currently assigned to '*' and give FLOWS_030000-- the "connect" privilege if FLOWS_030000 does not have the privilege yet.SELECT ACL INTO ACL_PATH FROM DBA_NETWORK_ACLSWHERE HOST = '*' AND LOWER_PORT IS NULL AND UPPER_PORT IS NULL;
See Also: "Creating and Configuring an Oracle Database" in the Oracle Database Administrator's Guide for information about changing database compatible initialization parameters.
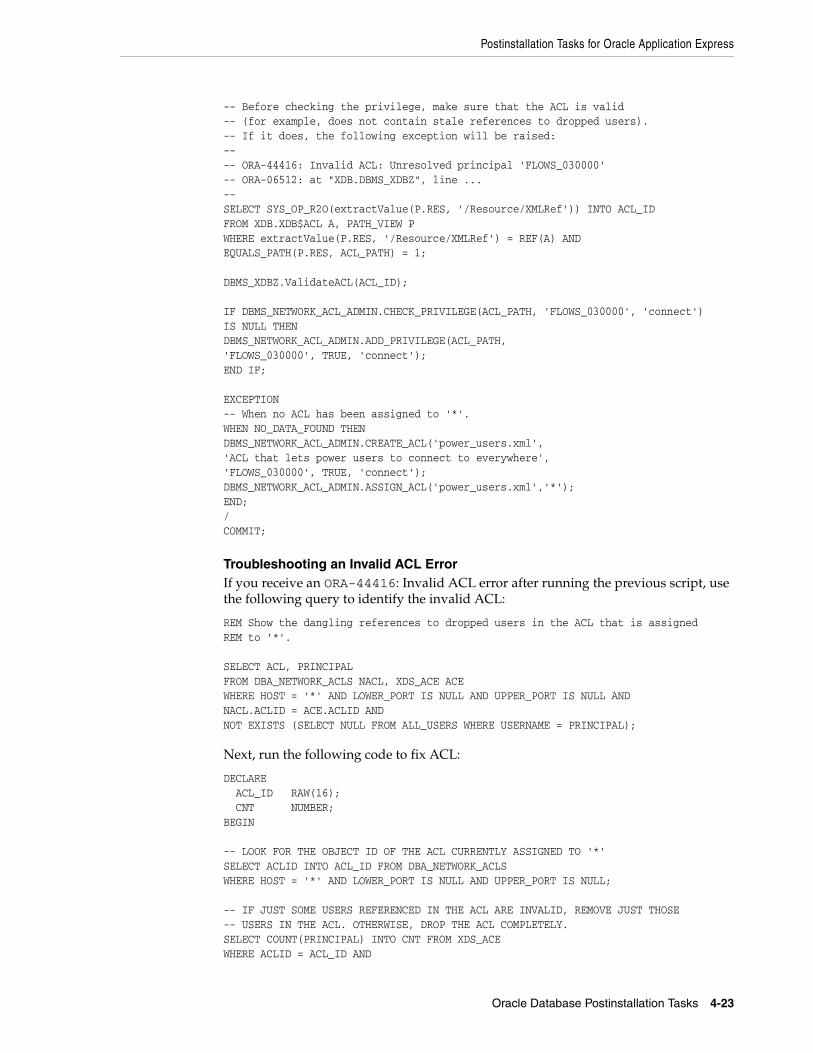
Postinstallation Tasks for Oracle Application Express
Oracle Database Postinstallation Tasks 4-23
-- Before checking the privilege, make sure that the ACL is valid-- (for example, does not contain stale references to dropped users).-- If it does, the following exception will be raised:---- ORA-44416: Invalid ACL: Unresolved principal 'FLOWS_030000'-- ORA-06512: at "XDB.DBMS_XDBZ", line ...--SELECT SYS_OP_R2O(extractValue(P.RES, '/Resource/XMLRef')) INTO ACL_IDFROM XDB.XDB$ACL A, PATH_VIEW PWHERE extractValue(P.RES, '/Resource/XMLRef') = REF(A) ANDEQUALS_PATH(P.RES, ACL_PATH) = 1; DBMS_XDBZ.ValidateACL(ACL_ID); IF DBMS_NETWORK_ACL_ADMIN.CHECK_PRIVILEGE(ACL_PATH, 'FLOWS_030000', 'connect')IS NULL THENDBMS_NETWORK_ACL_ADMIN.ADD_PRIVILEGE(ACL_PATH,'FLOWS_030000', TRUE, 'connect');END IF; EXCEPTION-- When no ACL has been assigned to '*'.WHEN NO_DATA_FOUND THENDBMS_NETWORK_ACL_ADMIN.CREATE_ACL('power_users.xml','ACL that lets power users to connect to everywhere','FLOWS_030000', TRUE, 'connect');DBMS_NETWORK_ACL_ADMIN.ASSIGN_ACL('power_users.xml','*');END;/COMMIT;
Troubleshooting an Invalid ACL ErrorIf you receive an ORA-44416: Invalid ACL error after running the previous script, use the following query to identify the invalid ACL:
REM Show the dangling references to dropped users in the ACL that is assignedREM to '*'.
SELECT ACL, PRINCIPALFROM DBA_NETWORK_ACLS NACL, XDS_ACE ACEWHERE HOST = '*' AND LOWER_PORT IS NULL AND UPPER_PORT IS NULL ANDNACL.ACLID = ACE.ACLID ANDNOT EXISTS (SELECT NULL FROM ALL_USERS WHERE USERNAME = PRINCIPAL); Next, run the following code to fix ACL:
DECLARE ACL_ID RAW(16); CNT NUMBER;BEGIN -- LOOK FOR THE OBJECT ID OF THE ACL CURRENTLY ASSIGNED TO '*'SELECT ACLID INTO ACL_ID FROM DBA_NETWORK_ACLSWHERE HOST = '*' AND LOWER_PORT IS NULL AND UPPER_PORT IS NULL; -- IF JUST SOME USERS REFERENCED IN THE ACL ARE INVALID, REMOVE JUST THOSE-- USERS IN THE ACL. OTHERWISE, DROP THE ACL COMPLETELY.SELECT COUNT(PRINCIPAL) INTO CNT FROM XDS_ACEWHERE ACLID = ACL_ID AND
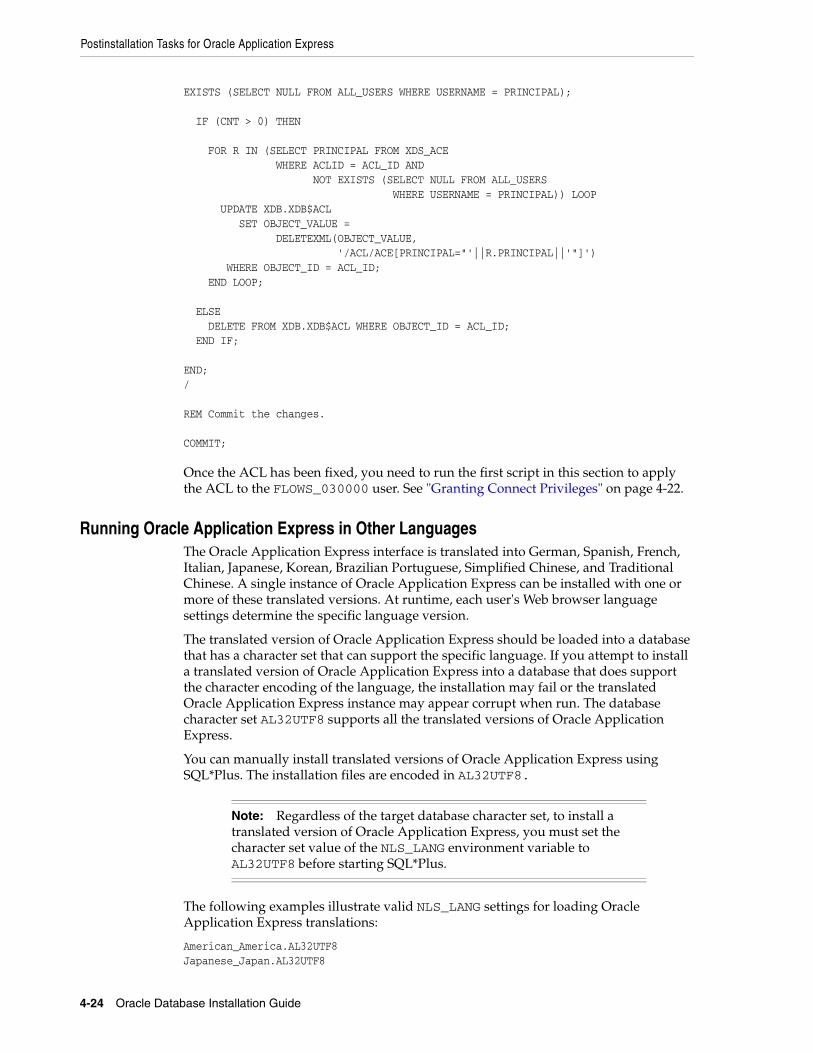
Postinstallation Tasks for Oracle Application Express
4-24 Oracle Database Installation Guide
EXISTS (SELECT NULL FROM ALL_USERS WHERE USERNAME = PRINCIPAL); IF (CNT > 0) THEN
FOR R IN (SELECT PRINCIPAL FROM XDS_ACE WHERE ACLID = ACL_ID AND NOT EXISTS (SELECT NULL FROM ALL_USERS WHERE USERNAME = PRINCIPAL)) LOOP UPDATE XDB.XDB$ACL SET OBJECT_VALUE = DELETEXML(OBJECT_VALUE, '/ACL/ACE[PRINCIPAL="'||R.PRINCIPAL||'"]') WHERE OBJECT_ID = ACL_ID; END LOOP;
ELSE DELETE FROM XDB.XDB$ACL WHERE OBJECT_ID = ACL_ID; END IF;
END;/ REM Commit the changes. COMMIT;
Once the ACL has been fixed, you need to run the first script in this section to apply the ACL to the FLOWS_030000 user. See "Granting Connect Privileges" on page 4-22.
Running Oracle Application Express in Other LanguagesThe Oracle Application Express interface is translated into German, Spanish, French, Italian, Japanese, Korean, Brazilian Portuguese, Simplified Chinese, and Traditional Chinese. A single instance of Oracle Application Express can be installed with one or more of these translated versions. At runtime, each user's Web browser language settings determine the specific language version.
The translated version of Oracle Application Express should be loaded into a database that has a character set that can support the specific language. If you attempt to install a translated version of Oracle Application Express into a database that does support the character encoding of the language, the installation may fail or the translated Oracle Application Express instance may appear corrupt when run. The database character set AL32UTF8 supports all the translated versions of Oracle Application Express.
You can manually install translated versions of Oracle Application Express using SQL*Plus. The installation files are encoded in AL32UTF8.
The following examples illustrate valid NLS_LANG settings for loading Oracle Application Express translations:
American_America.AL32UTF8Japanese_Japan.AL32UTF8
Note: Regardless of the target database character set, to install a translated version of Oracle Application Express, you must set the character set value of the NLS_LANG environment variable to AL32UTF8 before starting SQL*Plus.
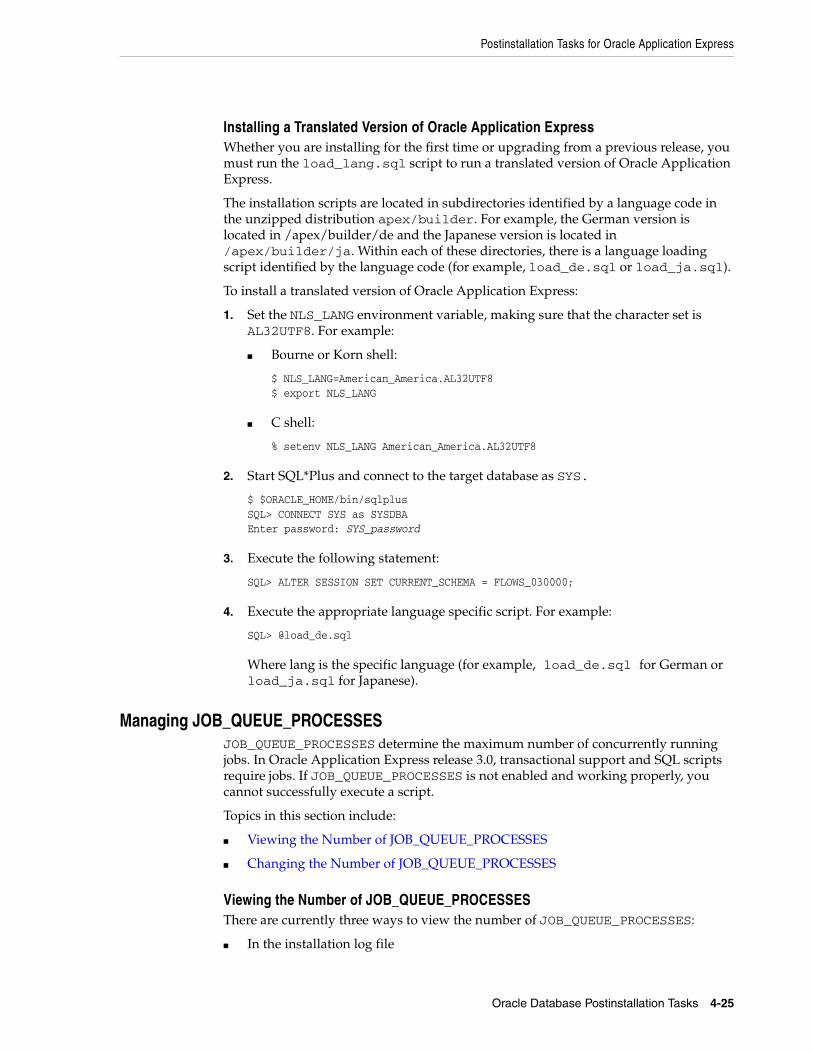
Postinstallation Tasks for Oracle Application Express
Oracle Database Postinstallation Tasks 4-25
Installing a Translated Version of Oracle Application ExpressWhether you are installing for the first time or upgrading from a previous release, you must run the load_lang.sql script to run a translated version of Oracle Application Express.
The installation scripts are located in subdirectories identified by a language code in the unzipped distribution apex/builder. For example, the German version is located in /apex/builder/de and the Japanese version is located in /apex/builder/ja. Within each of these directories, there is a language loading script identified by the language code (for example, load_de.sql or load_ja.sql).
To install a translated version of Oracle Application Express:
1. Set the NLS_LANG environment variable, making sure that the character set is AL32UTF8. For example:
■ Bourne or Korn shell:
$ NLS_LANG=American_America.AL32UTF8$ export NLS_LANG
■ C shell:
% setenv NLS_LANG American_America.AL32UTF8
2. Start SQL*Plus and connect to the target database as SYS.
$ $ORACLE_HOME/bin/sqlplus SQL> CONNECT SYS as SYSDBAEnter password: SYS_password
3. Execute the following statement:
SQL> ALTER SESSION SET CURRENT_SCHEMA = FLOWS_030000;
4. Execute the appropriate language specific script. For example:
SQL> @load_de.sql
Where lang is the specific language (for example, load_de.sql for German or load_ja.sql for Japanese).
Managing JOB_QUEUE_PROCESSESJOB_QUEUE_PROCESSES determine the maximum number of concurrently running jobs. In Oracle Application Express release 3.0, transactional support and SQL scripts require jobs. If JOB_QUEUE_PROCESSES is not enabled and working properly, you cannot successfully execute a script.
Topics in this section include:
■ Viewing the Number of JOB_QUEUE_PROCESSES
■ Changing the Number of JOB_QUEUE_PROCESSES
Viewing the Number of JOB_QUEUE_PROCESSESThere are currently three ways to view the number of JOB_QUEUE_PROCESSES:
■ In the installation log file
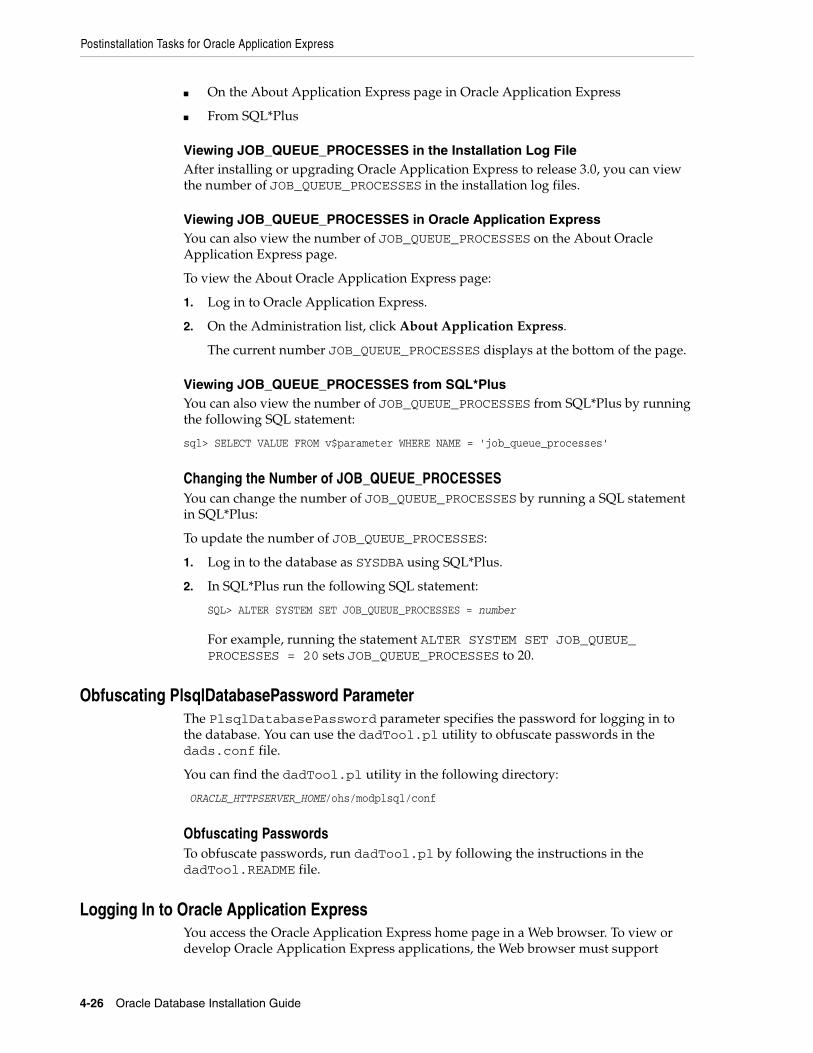
Postinstallation Tasks for Oracle Application Express
4-26 Oracle Database Installation Guide
■ On the About Application Express page in Oracle Application Express
■ From SQL*Plus
Viewing JOB_QUEUE_PROCESSES in the Installation Log FileAfter installing or upgrading Oracle Application Express to release 3.0, you can view the number of JOB_QUEUE_PROCESSES in the installation log files.
Viewing JOB_QUEUE_PROCESSES in Oracle Application ExpressYou can also view the number of JOB_QUEUE_PROCESSES on the About Oracle Application Express page.
To view the About Oracle Application Express page:
1. Log in to Oracle Application Express.
2. On the Administration list, click About Application Express.
The current number JOB_QUEUE_PROCESSES displays at the bottom of the page.
Viewing JOB_QUEUE_PROCESSES from SQL*PlusYou can also view the number of JOB_QUEUE_PROCESSES from SQL*Plus by running the following SQL statement:
sql> SELECT VALUE FROM v$parameter WHERE NAME = 'job_queue_processes'
Changing the Number of JOB_QUEUE_PROCESSESYou can change the number of JOB_QUEUE_PROCESSES by running a SQL statement in SQL*Plus:
To update the number of JOB_QUEUE_PROCESSES:
1. Log in to the database as SYSDBA using SQL*Plus.
2. In SQL*Plus run the following SQL statement:
SQL> ALTER SYSTEM SET JOB_QUEUE_PROCESSES = number
For example, running the statement ALTER SYSTEM SET JOB_QUEUE_PROCESSES = 20 sets JOB_QUEUE_PROCESSES to 20.
Obfuscating PlsqlDatabasePassword ParameterThe PlsqlDatabasePassword parameter specifies the password for logging in to the database. You can use the dadTool.pl utility to obfuscate passwords in the dads.conf file.
You can find the dadTool.pl utility in the following directory:
ORACLE_HTTPSERVER_HOME/ohs/modplsql/conf
Obfuscating PasswordsTo obfuscate passwords, run dadTool.pl by following the instructions in the dadTool.README file.
Logging In to Oracle Application ExpressYou access the Oracle Application Express home page in a Web browser. To view or develop Oracle Application Express applications, the Web browser must support
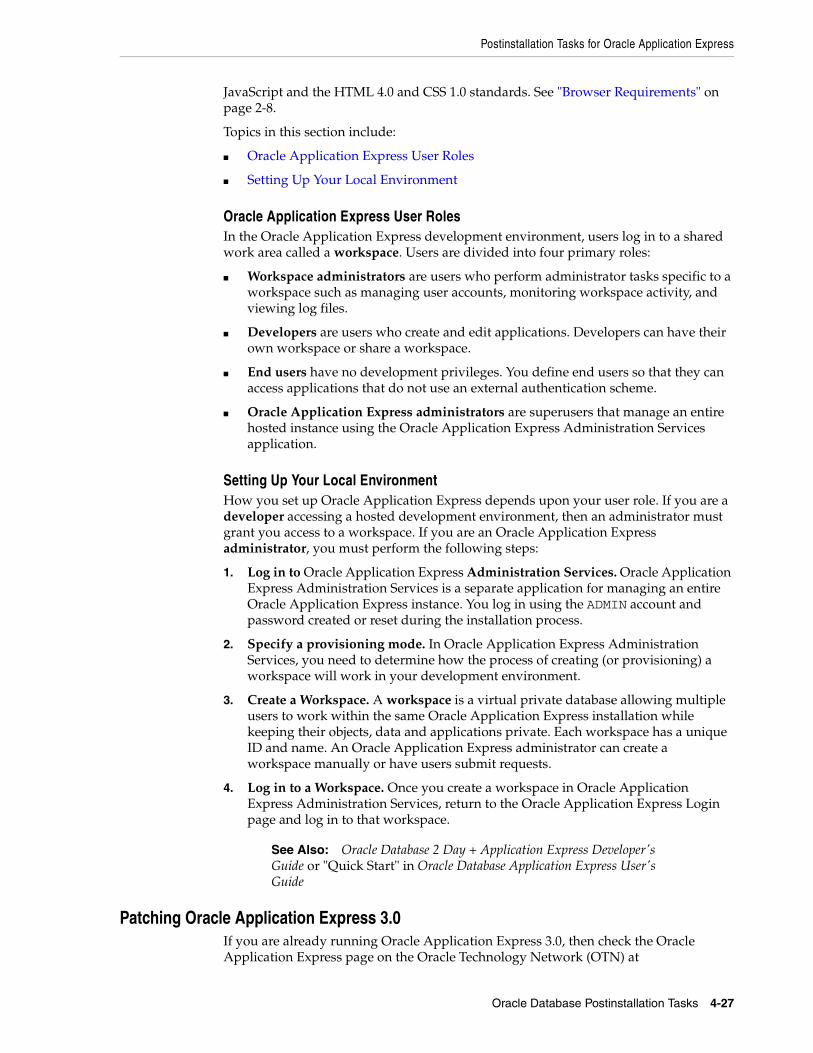
Postinstallation Tasks for Oracle Application Express
Oracle Database Postinstallation Tasks 4-27
JavaScript and the HTML 4.0 and CSS 1.0 standards. See "Browser Requirements" on page 2-8.
Topics in this section include:
■ Oracle Application Express User Roles
■ Setting Up Your Local Environment
Oracle Application Express User RolesIn the Oracle Application Express development environment, users log in to a shared work area called a workspace. Users are divided into four primary roles:
■ Workspace administrators are users who perform administrator tasks specific to a workspace such as managing user accounts, monitoring workspace activity, and viewing log files.
■ Developers are users who create and edit applications. Developers can have their own workspace or share a workspace.
■ End users have no development privileges. You define end users so that they can access applications that do not use an external authentication scheme.
■ Oracle Application Express administrators are superusers that manage an entire hosted instance using the Oracle Application Express Administration Services application.
Setting Up Your Local EnvironmentHow you set up Oracle Application Express depends upon your user role. If you are a developer accessing a hosted development environment, then an administrator must grant you access to a workspace. If you are an Oracle Application Express administrator, you must perform the following steps:
1. Log in to Oracle Application Express Administration Services. Oracle Application Express Administration Services is a separate application for managing an entire Oracle Application Express instance. You log in using the ADMIN account and password created or reset during the installation process.
2. Specify a provisioning mode. In Oracle Application Express Administration Services, you need to determine how the process of creating (or provisioning) a workspace will work in your development environment.
3. Create a Workspace. A workspace is a virtual private database allowing multiple users to work within the same Oracle Application Express installation while keeping their objects, data and applications private. Each workspace has a unique ID and name. An Oracle Application Express administrator can create a workspace manually or have users submit requests.
4. Log in to a Workspace. Once you create a workspace in Oracle Application Express Administration Services, return to the Oracle Application Express Login page and log in to that workspace.
Patching Oracle Application Express 3.0If you are already running Oracle Application Express 3.0, then check the Oracle Application Express page on the Oracle Technology Network (OTN) at
See Also: Oracle Database 2 Day + Application Express Developer's Guide or "Quick Start" in Oracle Database Application Express User's Guide

Postinstallation Database Configuration for Oracle Configuration Manager
4-28 Oracle Database Installation Guide
(http://www.oracle.com/technology/products/database/application_express/index.html) URL for information about patch set releases or later versions of Oracle Application Express:
Upgrading to Oracle Database 11g will not patch an Oracle Application Express 3.0 instance to Oracle Application Express 3.0.1.
Postinstallation Database Configuration for Oracle Configuration ManagerIf you have installed Oracle Configuration Manager in a home that contains a database, you must run a script to create a database account to collect database configuration collections. You must create this account in both Connected and Disconnected modes. Refer to "Oracle Configuration Manager" on page 1-8 for further information on these modes. The database account stores the PL/SQL procedures that collect the configuration information, and the account owns the database management system (DBMS) job that performs the collection. After the account has been set up, as login privileges are no longer required, the account is locked.
This section contains the following topics:
■ Preparing Pre-9.2 Databases
■ Instrumenting the Database for Configuration Collections
■ Additional Step for E-Business Suites
■ Additional Step for Oracle Enterprise Manager Grid Control
Preparing Pre-9.2 DatabasesBefore running the installCCRSQL.sh script to prepare the database for configuration collection, you must perform the following steps for pre 9.2 databases:
1. Edit the initsid.ora file where sid is the database system identifier, and set the UTL_FILE_DIR parameter to include $ORACLE_HOME/ccr/state as one of the directories.
If a server parameter file (spfile) is used, alter the UTL_FILE_DIR parameter using the following SQL*Plus command:
SQL>alter system set utl_file_dir=value scope=spfile
where value is equal to $ORACLE_HOME/ccr/state
2. Restart the database.
Note:
■ Because the collected configuration data is not stored in the database, additional disk space is not required for the database.
■ Because database configuration collections are performed using the database jobs, the job_queue_process initialization parameter must have a value greater than 0 for pre-10g databases only.
Postinstallation Database Configuration for Oracle Configuration Manager
Oracle Database Postinstallation Tasks 4-29
Instrumenting the Database for Configuration CollectionsTo configure the database for configuration collection, run the following script:
■ Run the following command to create the admin directory
$ORACLE_HOME/ccr/bin/setupCCR
■ Run the following script, to configure the database for configuration collection:
$ORACLE_HOME/ccr/admin/scripts/installCCRSQL.sh collectconfig -s SID -r SYSDBA-USER -p SYSDBA-PASSWORD
However, only to configure the database for configuration collection, run the following script:
$ORACLE_HOME/ccr/admin/scripts/installCCRSQL.sh collectconfig -s SID -r SYSDBA-USER -p SYSDBA-PASSWORD
The installCCRSQL.sh script creates an Oracle Configuration Manager user and loads the PL/SQL procedure into the database defined by the ORACLE_SID. You can also specify the database SID by using the -s option in the command line as in the following example where the SID is orcl:
$ORACLE_HOME/ccr/admin/scripts/installCCRSQL.sh collectconfig -s orcl
By default, the connection to the database is through operating system authentication, "/as sysdba." To specify a different SYSDBA user and password, you can use these options:
-r SYSDBA-USER: The login name of the SYSDBA user
-p SYSDBA-PASSWORD: The password for the SYSDBA user
Additional Step for E-Business SuitesIf the database is used as a repository for an Oracle E-Business Suite, you must also run the following script from the ORACLE_HOME in which the E-Business database has been hosted:
$ORACLE_HOME/ccr/admin/scripts/installCCRSQL.sh ebs_collectconfig -u Oracle_Applications_User
The -u parameter is mandatory. If you do not specify this parameter, the application prompts you for the Oracle Applications User. If the -u parameter is specified, you will be prompted for the Oracle Applications Password.
Note:
■ If you specify the SYSDBA user without specifying the password, you will be prompted to enter the password.
■ If you specify only the SYSDBA password without specifying the user name, the user SYS is used by default.
■ If the Oracle Configuration Manager account already exists, when you run the installCCRSQL.sh script, it will be dropped and re-created.
■ If you are upgrading from a 9.x database version to a 10.x version, you must run the installCCRSQL.sh script again to record the upgraded version.
Postinstallation Database Configuration for Oracle Configuration Manager
4-30 Oracle Database Installation Guide
If you want to automate the install, you can run the installCCRSQL.sh script with an additional -w option to specify the Oracle Applications Password. For example:
$ORACLE_HOME/ccr/admin/scripts/installCCRSQL.sh ebs_collectconfig -u Oracle_Applications_User -w Oracle_Applications_Password
You can add the -s SID command to specify the SID of the Oracle Applications Database instance.
If you are not using operating system authentication to connect to the database, you must use the -r and -p parameters to specify the following:
-r SYSDBA-USER: The login name of the SYSDBA user
-p SYSDBA-PASSWORD: The password for the SYSDBA user
If the -r parameter is specified, the -p parameter is optional and will be prompted for.
Additional Step for Oracle Enterprise Manager Grid ControlIf the database is used as a repository for Oracle Enterprise Manager Grid Control, you must also run the following script:
$ORACLE_HOME/ccr/admin/scripts/installCCRSQL.sh collectemrep
When you run this command, then the application prompts you for the SYSMAN password. If you want to automate the install, you can run the installCCRSQL.sh script to specify the SYSMAN password. For example:
$ORACLE_HOME/ccr/admin/scripts/installCCRSQL.sh collectemrep -e SYSMAN PASSWORD
You can add the -s SID command to specify the SID of the Oracle Enterprise Manager Grid Control Database instance. You must run this script from the ORACLE_HOME in which the Oracle Enterprise Manager Grid Control database has been hosted.
If you are not using operating system authentication to connect to the database, you must use the -r and -p parameters to specify the following:
-r SYSDBA-USER: The login name of the SYSDBA user
-p SYSDBA-PASSWORD: The password for the SYSDBA user
If the -r parameter is specified, the -p parameter is optional and will be prompted for.

5
Getting Started with Oracle Database 5-1
5 Getting Started with Oracle Database
This chapter provides information about the default preconfigured database, including information about Oracle database accounts, passwords, and file locations. It includes information about the following topics:
■ Checking the Installed Oracle Database Contents and Directory Location
■ Logging In to Oracle Enterprise Manager Database Control
■ Managing Automatic Storage Management
■ Accessing Oracle Database with SQL*Plus
■ Accessing Oracle Database with SQL Developer
■ Reviewing Accounts and Passwords
■ Unlocking and Resetting User Passwords
■ Identifying Databases
■ Locating the Server Parameter File
■ Reviewing Tablespaces and Data Files, Redo Log Files, and Control Files
Checking the Installed Oracle Database Contents and Directory LocationYou can use Oracle Universal Installer to check the contents and directory location of an Oracle Database installation. To do this, perform the following steps:
1. Start Oracle Universal Installer, follow the instructions in "Running Oracle Universal Installer" on page 3-7.
2. Click Installed Products to display the Inventory dialog box on the Welcome screen.
3. Select the Oracle Database product from the list to check the installed contents.
4. Click Details to find additional information about an installed product.
5. Click Close to close the Inventory dialog box.
6. Click Cancel to close Oracle Universal Installer, and then click Yes to confirm.
Logging In to Oracle Enterprise Manager Database ControlIf you configured Oracle Enterprise Manager Database Control during the installation, you can use it to manage the database. Alternatively, you can use Oracle Enterprise Manager Grid Control to manage the database. To display the Database Control:
Logging In to Oracle Enterprise Manager Database Control
5-2 Oracle Database Installation Guide
1. Use a Web browser to access the Database Control URL:
http://host:port/em
In this example:
■ host is the name of the computer on which you installed Oracle Database
■ port is the port number reserved for the Database Control during installation
If you do not know the correct port number to use, look for the following line in the $ORACLE_HOME/install/portlist.ini file:
Enterprise Manager Console HTTP Port (db_name) = 1158
The installation reserves the first available port from the range 5500 to 5519. For example, if you installed Oracle Database on host mgmt42, and the Database Control uses port 1158, use the following URL:
http://mgmt42:1158/em
Oracle Enterprise Manager displays the Database Control login page.
2. Log in to the database using the user name SYSTEM and connect as SYSDBA. Enterprise Manager displays the Database Home page.
Use the password that you specified for the SYSTEM account during the installation.
Understanding Database Control Login PrivilegesWhen you log in to the Oracle Enterprise Manager Database Control using the SYSMAN user account, you are logging in as the Oracle Enterprise Manager super user. The SYSMAN account is automatically granted the roles and privileges required to access all the management features provided by the Database Control.
You can also use the SYS and SYSTEM accounts to log in to the Database Control. In addition, you can grant login privileges to other database users, as follows:
1. Log in to the Database Control.
2. Click Setup at the top of the Database Control home page.
3. Click Administrators in the left navigation bar.
4. Click Create to create an Enterprise Manager user.
5. In the Name field, enter the user name of an existing database user or click the flashlight icon and select a user from the pop-up window.
6. Enter the password for this user, and then click Review.
7. On the properties page, click Finish.
Enterprise Manager assigns login privileges to the specified user and includes this user in the list of Enterprise Manager users on the Setup Administrators page.
Note: You can also log in to the Database Control using the SYSTEM or SYSMAN accounts or you can grant login privileges to other database users.
See Also: The "Logging In to Oracle Enterprise Manager Database Control" section for information about logging in to the Database Control
Accessing Oracle Database with SQL*Plus
Getting Started with Oracle Database 5-3
Managing Automatic Storage ManagementThis section provides information about managing an Automatic Storage Management installation. It covers the following topics:
■ Starting and Stopping Automatic Storage Management
■ Automatic Storage Management Utilities
Starting and Stopping Automatic Storage ManagementTo start and stop Automatic Storage Management, refer to Oracle Database Administrator's Reference for Linux and UNIX.
Automatic Storage Management UtilitiesTo manage Automatic Storage Management, you can use the following tools:
■ asmcmd: This command-line tool enables you to manage Automatic Storage Management disk group files and directories.
■ Oracle Enterprise Manager Grid Control: If you have Oracle Enterprise Manager installed, you can use Grid Control to manage Automatic Storage Management functions, such as migrating an existing database to Automatic Storage Management, checking the status of the Automatic Storage Management instance, checking the performance of the Automatic Storage Management disk groups, and creating or dropping Automatic Storage Management disk groups.
■ Oracle Enterprise Manager Database Control: This utility enables you to perform functions similar to Grid Control.
■ SQL*Plus: You can run commands that are specific to Automatic Storage Management from either of these tools. To connect to an Automatic Storage Management instance, use the same methods that you use to connect to an Oracle database instance.
Accessing Oracle Database with SQL*PlusTo run the SQL and PL/SQL commands to access the Oracle Database, you can use SQL*Plus. This tool enables you to perform the same database management operations, and to query, insert, update, or delete data directly in the database.
Use the following command to start SQL*Plus and log in as the SYS user, connecting as SYSDBA:
$ $ORACLE_HOME/bin/sqlplus SQL> CONNECT SYS as SYSDBAEnter password: SYS_password
For example, to log on as SYSTEM using the password Systempwd1, you enter:
$ $ORACLE_HOME/bin/sqlplus SQL> CONNECT SYSTEM
See Also:
■ "Logging In to Oracle Enterprise Manager Database Control"
■ Oracle Database Administrator's Guide for more information about managing Automatic Storage Management
■ Oracle Database Utilities for more information about asmcmd
Accessing Oracle Database with SQL Developer
5-4 Oracle Database Installation Guide
Enter password: Systempwd1
If you are logging on as SYS, you would need to connect as SYSDBA:
$ $ORACLE_HOME/bin/sqlplus SQL> CONNECT SYS as SYSDBAEnter password: SYS_password
Accessing Oracle Database with SQL DeveloperTo run the SQL and PL/SQL commands to access Oracle Database, you can use SQL Developer. All SQL and PL/SQL commands are supported as they are passed directly from the SQL Worksheet to the Oracle Database.
Set Up the JDK Path For SQL DeveloperSet the following environmental variables to ensure that the correct jdk is picked up:
■ $ORACLE_HOME
■ $JAVA_HOME=$ORACLE_HOME/jdk
■ $PATH=$JAVA_HOME/bin/:$PATH
To start SQL Developer on which the Sun Java SDK release 1.5 is installed, use the following commands:
■ Change to $ORACLE_HOME/sqldeveloper.
■ Run $ ./sqldeveloper.sh.
■ Right-Click Connections. In the dialog box, enter a Connection name, username, password, and for the host string, the name of the database to which you want to connect and click Connect.
Once connected, you can view, create, modify, and delete the database objects using the Connection Navigator or issue any SQL or PL/SQL command using a SQL Worksheet (From the Tools menu, select SQL Worksheet).
SQL*Plus commands have to be interpreted by the SQL Worksheet before being passed to the database. The SQL Worksheet currently supports a number of SQL*Plus commands. SQL*Plus commands which are not supported by the SQL Worksheet are ignored and are not sent to the Oracle Database.
Reviewing Accounts and PasswordsAll databases created by the Database Configuration Assistant (DBCA) include the SYS, SYSTEM, SYSMAN, and DBSNMP database accounts. In addition, Oracle provides several other administrative accounts. Before using these accounts, you must unlock them and reset their passwords. Table 5–1 describes these accounts and lists their user names and default passwords.
See Also:
■ SQL*Plus User's Guide and Reference
■ SQL*Plus Quick Reference
See Also:
"SQL*Plus Statements Supported and Not Supported in SQL Worksheet" in Oracle Database SQL Developer User's Guide
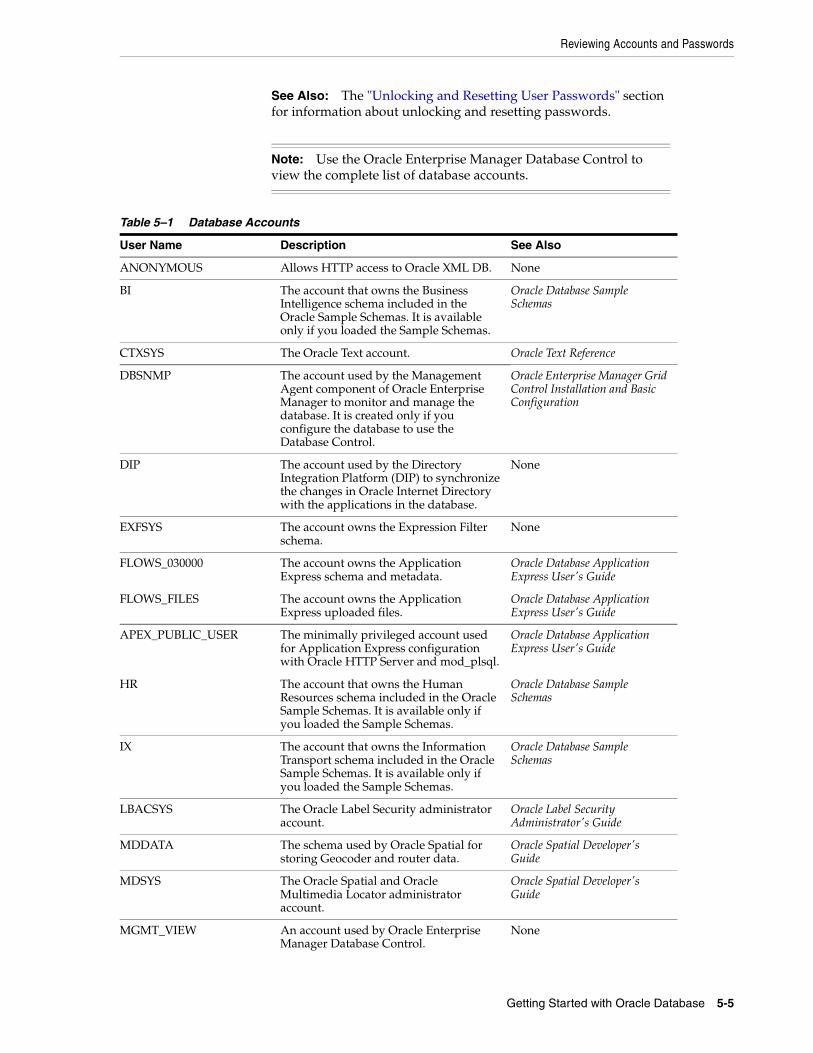
Reviewing Accounts and Passwords
Getting Started with Oracle Database 5-5
See Also: The "Unlocking and Resetting User Passwords" section for information about unlocking and resetting passwords.
Note: Use the Oracle Enterprise Manager Database Control to view the complete list of database accounts.
Table 5–1 Database Accounts
User Name Description See Also
ANONYMOUS Allows HTTP access to Oracle XML DB. None
BI The account that owns the Business Intelligence schema included in the Oracle Sample Schemas. It is available only if you loaded the Sample Schemas.
Oracle Database Sample Schemas
CTXSYS The Oracle Text account. Oracle Text Reference
DBSNMP The account used by the Management Agent component of Oracle Enterprise Manager to monitor and manage the database. It is created only if you configure the database to use the Database Control.
Oracle Enterprise Manager Grid Control Installation and Basic Configuration
DIP The account used by the Directory Integration Platform (DIP) to synchronize the changes in Oracle Internet Directory with the applications in the database.
None
EXFSYS The account owns the Expression Filter schema.
None
FLOWS_030000 The account owns the Application Express schema and metadata.
Oracle Database Application Express User's Guide
FLOWS_FILES The account owns the Application Express uploaded files.
Oracle Database Application Express User's Guide
APEX_PUBLIC_USER The minimally privileged account used for Application Express configuration with Oracle HTTP Server and mod_plsql.
Oracle Database Application Express User's Guide
HR The account that owns the Human Resources schema included in the Oracle Sample Schemas. It is available only if you loaded the Sample Schemas.
Oracle Database Sample Schemas
IX The account that owns the Information Transport schema included in the Oracle Sample Schemas. It is available only if you loaded the Sample Schemas.
Oracle Database Sample Schemas
LBACSYS The Oracle Label Security administrator account.
Oracle Label Security Administrator's Guide
MDDATA The schema used by Oracle Spatial for storing Geocoder and router data.
Oracle Spatial Developer's Guide
MDSYS The Oracle Spatial and Oracle Multimedia Locator administrator account.
Oracle Spatial Developer's Guide
MGMT_VIEW An account used by Oracle Enterprise Manager Database Control.
None
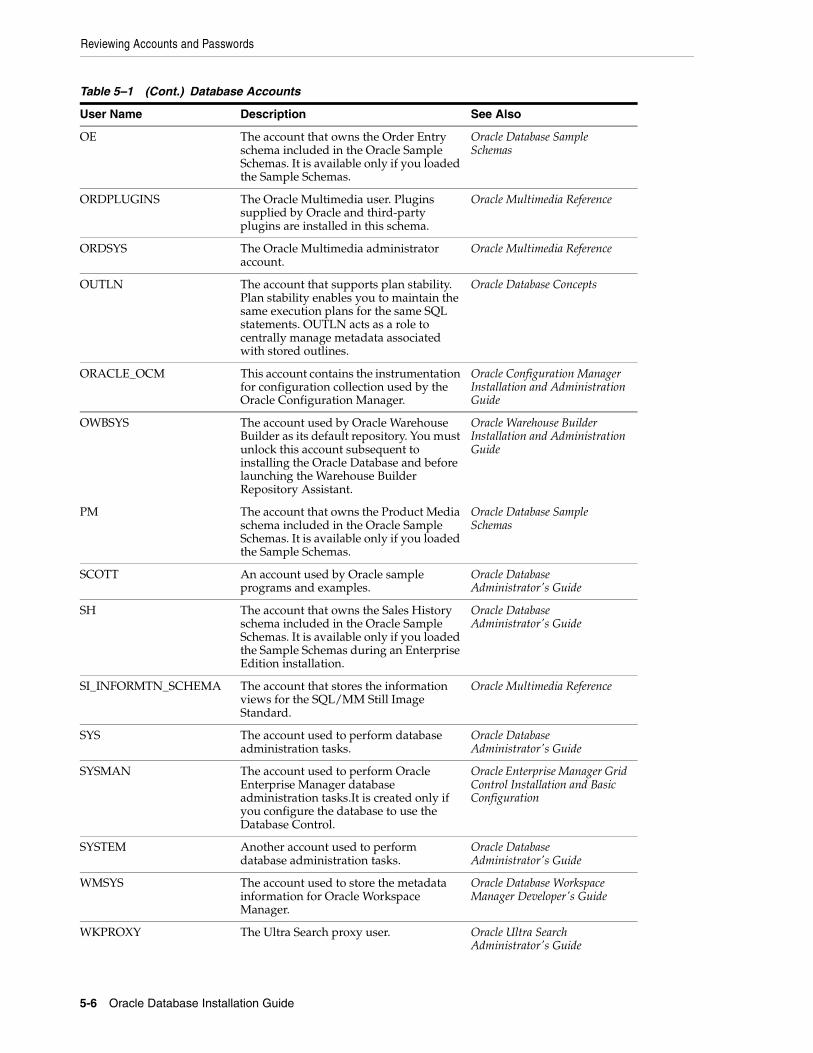
Reviewing Accounts and Passwords
5-6 Oracle Database Installation Guide
OE The account that owns the Order Entry schema included in the Oracle Sample Schemas. It is available only if you loaded the Sample Schemas.
Oracle Database Sample Schemas
ORDPLUGINS The Oracle Multimedia user. Plugins supplied by Oracle and third-party plugins are installed in this schema.
Oracle Multimedia Reference
ORDSYS The Oracle Multimedia administrator account.
Oracle Multimedia Reference
OUTLN The account that supports plan stability. Plan stability enables you to maintain the same execution plans for the same SQL statements. OUTLN acts as a role to centrally manage metadata associated with stored outlines.
Oracle Database Concepts
ORACLE_OCM This account contains the instrumentation for configuration collection used by the Oracle Configuration Manager.
Oracle Configuration Manager Installation and Administration Guide
OWBSYS The account used by Oracle Warehouse Builder as its default repository. You must unlock this account subsequent to installing the Oracle Database and before launching the Warehouse Builder Repository Assistant.
Oracle Warehouse Builder Installation and Administration Guide
PM The account that owns the Product Media schema included in the Oracle Sample Schemas. It is available only if you loaded the Sample Schemas.
Oracle Database Sample Schemas
SCOTT An account used by Oracle sample programs and examples.
Oracle Database Administrator's Guide
SH The account that owns the Sales History schema included in the Oracle Sample Schemas. It is available only if you loaded the Sample Schemas during an Enterprise Edition installation.
Oracle Database Administrator's Guide
SI_INFORMTN_SCHEMA The account that stores the information views for the SQL/MM Still Image Standard.
Oracle Multimedia Reference
SYS The account used to perform database administration tasks.
Oracle Database Administrator's Guide
SYSMAN The account used to perform Oracle Enterprise Manager database administration tasks.It is created only if you configure the database to use the Database Control.
Oracle Enterprise Manager Grid Control Installation and Basic Configuration
SYSTEM Another account used to perform database administration tasks.
Oracle Database Administrator's Guide
WMSYS The account used to store the metadata information for Oracle Workspace Manager.
Oracle Database Workspace Manager Developer's Guide
WKPROXY The Ultra Search proxy user. Oracle Ultra Search Administrator's Guide
Table 5–1 (Cont.) Database Accounts
User Name Description See Also
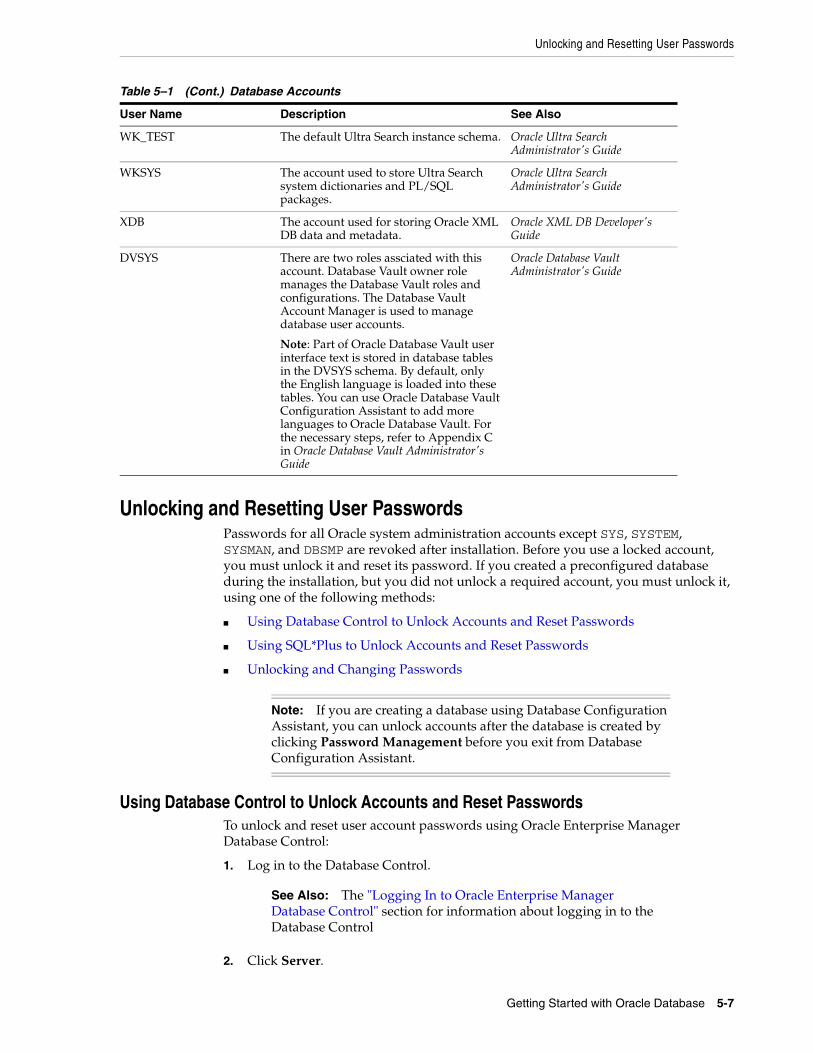
Unlocking and Resetting User Passwords
Getting Started with Oracle Database 5-7
Unlocking and Resetting User PasswordsPasswords for all Oracle system administration accounts except SYS, SYSTEM, SYSMAN, and DBSMP are revoked after installation. Before you use a locked account, you must unlock it and reset its password. If you created a preconfigured database during the installation, but you did not unlock a required account, you must unlock it, using one of the following methods:
■ Using Database Control to Unlock Accounts and Reset Passwords
■ Using SQL*Plus to Unlock Accounts and Reset Passwords
■ Unlocking and Changing Passwords
Using Database Control to Unlock Accounts and Reset PasswordsTo unlock and reset user account passwords using Oracle Enterprise Manager Database Control:
1. Log in to the Database Control.
2. Click Server.
WK_TEST The default Ultra Search instance schema. Oracle Ultra Search Administrator's Guide
WKSYS The account used to store Ultra Search system dictionaries and PL/SQL packages.
Oracle Ultra Search Administrator's Guide
XDB The account used for storing Oracle XML DB data and metadata.
Oracle XML DB Developer's Guide
DVSYS There are two roles assciated with this account. Database Vault owner role manages the Database Vault roles and configurations. The Database Vault Account Manager is used to manage database user accounts.
Note: Part of Oracle Database Vault user interface text is stored in database tables in the DVSYS schema. By default, only the English language is loaded into these tables. You can use Oracle Database Vault Configuration Assistant to add more languages to Oracle Database Vault. For the necessary steps, refer to Appendix C in Oracle Database Vault Administrator's Guide
Oracle Database Vault Administrator's Guide
Note: If you are creating a database using Database Configuration Assistant, you can unlock accounts after the database is created by clicking Password Management before you exit from Database Configuration Assistant.
See Also: The "Logging In to Oracle Enterprise Manager Database Control" section for information about logging in to the Database Control
Table 5–1 (Cont.) Database Accounts
User Name Description See Also
Unlocking and Resetting User Passwords
5-8 Oracle Database Installation Guide
3. In the Security section of the Server page, click Users.
Enterprise Manager displays a table listing all database accounts. The Account Status column indicates whether the account is locked and whether the password is expired.
4. Select the user account that you want to modify, then click Edit.
5. Use the General page of the Users property sheet to unlock the account and, optionally, to change the password.
Using SQL*Plus to Unlock Accounts and Reset PasswordsTo unlock and reset user account passwords using SQL*Plus:
1. Start SQL*Plus and log in as the SYS user, connecting as SYSDBA:
$ $ORACLE_HOME/bin/sqlplus SQL> CONNECT SYS as SYSDBAEnter password: SYS_password
2. Enter a command similar to the following, where account is the user account that you want to unlock and password is the new password:
SQL> PASSWORD account UNLOCK;Changing password for accountNew password: passwordRetype new password: password
Unlocking and Changing PasswordsPasswords for all Oracle system administration accounts except SYS, SYSTEM, SYSMAN, and DBSNMP are revoked after installation. Before you use a locked account, you must unlock it and reset its password. If you created a starter database during the installation, Oracle Database Configuration Assistant displays a screen with your database information and the Password Management button. Use the Password Management button to unlock only the user names you will use.
Apply the following guidelines when specifying passwords:
■ Passwords must be between 8 and 30 characters long.
See Also: Click Help in the Database Control window for more information about using the Database Control.
Note: If you unlock an account but do not reset the password, then the password remains expired. The first time someone connects as that user, they must change the user’s password.
To permit unauthenticated access to the data through HTTP, unlock the ANONYMOUS user account.
See Also: Oracle Database Administrator's Guide for more information about:
■ Unlocking and changing passwords after installation
■ Oracle security procedures
■ Best security practices

Identifying Databases
Getting Started with Oracle Database 5-9
■ Passwords must be from the ASCII character set.
■ Passwords must not start with a numeral.
■ Passwords must not be the same as the user name.
■ Passwords must not be Oracle reserved words.
■ The SYS account password must not be change_on_install.
■ The SYSTEM account password must not be manager.
■ The SYSMAN account password must not be sysman.
■ The DBSNMP account password must not be dbsnmp.
■ If you choose to use the same password for all the accounts, then that password must not be change_on_install, manager, sysman, or dbsnmp.
■ Passwords should have at least one alphabetic, one numeric, and one special character.
■ Passwords should not be simple or obvious words, such as welcome, account, database, and user.
■ Passwords should not have any consecutive repeating characters.
Identifying DatabasesThe Oracle Database 11g software identifies a database by its global database name. A global database name consists of the database name and database domain. Usually, the database domain is the same as the network domain, but it need not be. The global database name uniquely distinguishes a database from any other database in the same network. You specify the global database name when you create a database during the installation, or using the Database Configuration Assistant. For example:
sales.us.oracle.com
In this example:
■ sales is the name of the database. The database name portion is a string of no more than 30 characters that can contain alphanumeric, underscore (_), dollar ($), and pound (#) characters. The DB_NAME initialization parameter specifies the database name.
■ us.oracle.com is the database domain in which the database is located. In this example, the database domain is the same as the network domain. Together, the database name and the database domain make the global database name unique. The domain portion is a string of no more than 128 characters that can contain alphanumeric, underscore (_), and pound (#) characters. The DB_DOMAIN initialization parameter specifies the database domain name.
The DB_NAME parameter and the DB_DOMAIN name parameter combine to create the global database name value assigned to the SERVICE_NAMES parameter in the initialization parameter file.
The System Identifier (SID) identifies a specific database instance. The SID uniquely distinguishes the instance from any other instance on the same computer. Each database instance requires a unique SID and database name. In most cases, the SID is the same as the database name portion of the global database name.
See Also: "Reviewing Accounts and Passwords" for more information about accounts and passwords
Locating the Server Parameter File
5-10 Oracle Database Installation Guide
Locating the Server Parameter FileBy default, the preconfigured database uses a server parameter file named spfilesid.ora, which is stored in the $ORACLE_HOME/dbs directory. However, if you choose Automatic Storage Management for the database, Database Configuration Assistant typically uses the same storage mechanism for the server parameter file.
If the server parameter file is not located in the $ORACLE_HOME/dbs directory, the database uses the SPFILE parameter in an initialization parameter file to locate it. The default initialization parameter file is $ORACLE_HOME/dbs/initsid.ora.
You can use the Oracle Enterprise Manager Database Control to view the location of the server parameter file and list all of the initialization parameters, as follows:
1. Log in to the Database Control.
2. Click Server.
3. In the Database Configuration section of the Server page, click Initialization Parameters.
Enterprise Manager displays a table listing the current value of each initialization parameter.
4. Select SPFile tab.
Enterprise Manager displays a table listing the value of each initialization parameter specified in the server parameter file. The location of the server parameter file is displayed in the earlier table.
Reviewing Tablespaces and Data Files, Redo Log Files, and Control FilesThe following sections contain information about tablespaces and data files, redo log files, and control files:
■ Identifying Tablespaces and Data Files
■ Locating Redo Log Files
■ Locating Control Files
Identifying Tablespaces and Data FilesAn Oracle database is divided into smaller logical areas of space known as tablespaces. Each tablespace corresponds to one or more physical data files. Data files contain the contents of logical database structures such as tables and indexes. You can associate each data file with only one tablespace and database.
Table 5–2 describes the tablespaces provided by the default preconfigured database.
See Also: The "Logging In to Oracle Enterprise Manager Database Control" section for information about logging in to the Database Control
Note: The SYSAUX and SYSTEM tablespaces must be present in all Oracle Database 11g databases.
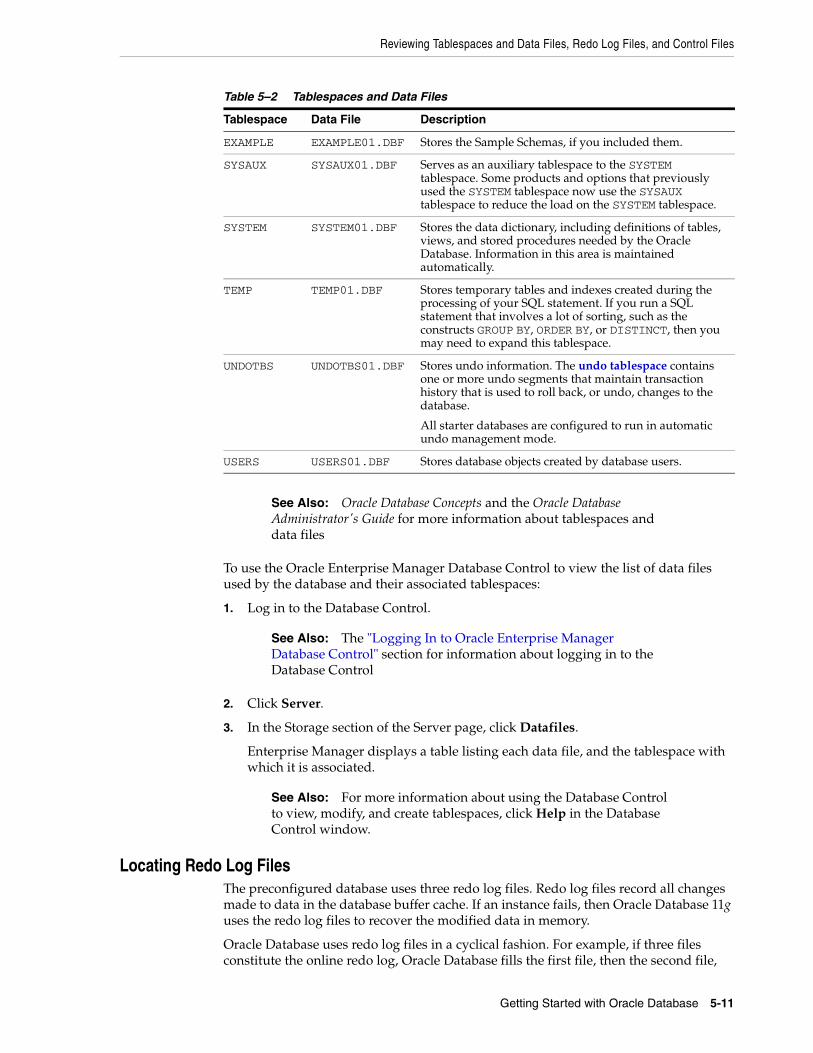
Reviewing Tablespaces and Data Files, Redo Log Files, and Control Files
Getting Started with Oracle Database 5-11
To use the Oracle Enterprise Manager Database Control to view the list of data files used by the database and their associated tablespaces:
1. Log in to the Database Control.
2. Click Server.
3. In the Storage section of the Server page, click Datafiles.
Enterprise Manager displays a table listing each data file, and the tablespace with which it is associated.
Locating Redo Log FilesThe preconfigured database uses three redo log files. Redo log files record all changes made to data in the database buffer cache. If an instance fails, then Oracle Database 11g uses the redo log files to recover the modified data in memory.
Oracle Database uses redo log files in a cyclical fashion. For example, if three files constitute the online redo log, Oracle Database fills the first file, then the second file,
Table 5–2 Tablespaces and Data Files
Tablespace Data File Description
EXAMPLE EXAMPLE01.DBF Stores the Sample Schemas, if you included them.
SYSAUX SYSAUX01.DBF Serves as an auxiliary tablespace to the SYSTEM tablespace. Some products and options that previously used the SYSTEM tablespace now use the SYSAUX tablespace to reduce the load on the SYSTEM tablespace.
SYSTEM SYSTEM01.DBF Stores the data dictionary, including definitions of tables, views, and stored procedures needed by the Oracle Database. Information in this area is maintained automatically.
TEMP TEMP01.DBF Stores temporary tables and indexes created during the processing of your SQL statement. If you run a SQL statement that involves a lot of sorting, such as the constructs GROUP BY, ORDER BY, or DISTINCT, then you may need to expand this tablespace.
UNDOTBS UNDOTBS01.DBF Stores undo information. The undo tablespace contains one or more undo segments that maintain transaction history that is used to roll back, or undo, changes to the database.
All starter databases are configured to run in automatic undo management mode.
USERS USERS01.DBF Stores database objects created by database users.
See Also: Oracle Database Concepts and the Oracle Database Administrator's Guide for more information about tablespaces and data files
See Also: The "Logging In to Oracle Enterprise Manager Database Control" section for information about logging in to the Database Control
See Also: For more information about using the Database Control to view, modify, and create tablespaces, click Help in the Database Control window.
Reviewing Tablespaces and Data Files, Redo Log Files, and Control Files
5-12 Oracle Database Installation Guide
and then the third file. In the next cycle, it reuses and fills the first file, the second file, and so on.
To use the Oracle Enterprise Manager Database Control to view or modify the redo log files for the preconfigured database:
1. Log in to the Database Control.
2. Click Server.
3. In the Storage section of the Server page, click Redo Log Groups.
Enterprise Manager displays a table listing the redo log groups used by the database.
4. To view the name and location of the redo log file associated with a particular group, select that group then click View.
Locating Control FilesThe preconfigured database uses three control files. Oracle recommends that you keep at least three control files for each database and set the CONTROL_FILES initialization parameter to specify the location of each file.
A control file is an administrative file. Oracle Database 11g requires a control file to start and run the database. The control file defines the physical structure of the database. For example, it defines the database name and the names and locations of the database data files and redo log files.
To use the Oracle Enterprise Manager Database Control to view information about the control files for the preconfigured database:
1. Log in to the Database Control.
2. Click Server.
3. In the Storage section of the Server page, click Control Files.
Enterprise Manager displays a table listing the control files used by the database.
See Also: Oracle Database Backup and Recovery User's Guide for more information about redo log files
See Also: The "Logging In to Oracle Enterprise Manager Database Control" section for information about logging in to the Database Control
See Also: For more information about using the Database Control to view, modify, and create redo log files, click Help in the Database Control window
See Also: "Logging In to Oracle Enterprise Manager Database Control" for information about logging in to the Database Control

Reviewing Tablespaces and Data Files, Redo Log Files, and Control Files
Getting Started with Oracle Database 5-13
See Also: For more information about using the Database Control to view information about control files and creating backups of these files to trace them, click Help in the Database Control window
For more information about setting the CONTROL_FILES initialization parameter value, refer to Oracle Database Administrator's Guide

Reviewing Tablespaces and Data Files, Redo Log Files, and Control Files
5-14 Oracle Database Installation Guide
6
Removing Oracle Software 6-1
6 Removing Oracle Software
This chapter describes how to completely remove all Oracle databases, instances, and software from an Oracle home directory. It includes information about the following topics:
■ Overview
■ Identifying All Instances
■ Removing Oracle Configuration Manager
■ Removing Oracle Application Express from the Database
■ Removing an Oracle Database
■ Removing an Automatic Storage Management Instance
■ Reconfiguring Oracle Cluster Synchronization Services
■ Removing Oracle Software
OverviewTo completely remove all Oracle databases, instances, and software from an Oracle home directory, you must:
■ Identify all instances associated with the Oracle home.
■ Remove database and Automatic Storage Management instances.
■ Shut down processes.
■ Reconfigure the Oracle Cluster Synchronization Services Daemon, if necessary.
■ Remove the Oracle software.
Identifying All InstancesTo identify all instances associated with the Oracle home that you want to remove, enter the following command:
$ more /etc/oratab
See Also: If you want to remove an Oracle RAC installation, refer to Oracle Clusterware Installation Guide for AIX Based Systems and Oracle Real Application Clusters Installation Guide for AIX Based Systems for more information
If you want to remove an individual product, refer to the product-specific documentation for requirements and restrictions
Removing Oracle Configuration Manager
6-2 Oracle Database Installation Guide
The output of this command contains entries similar to the following:
+ASM:/u01/app/oracle/product/11.1.0/db_1:NCUST:/u01/app/oracle/product/11.1.0/db_1:N
These entries show that the +ASM Automatic Storage Manager instance and the CUST Oracle database instance are associated with the /u01/app/oracle/product/11.1.0/db_1 Oracle home directory.
Removing Oracle Configuration ManagerTo uninstall Oracle Configuration Manager, follow these steps:
1. If the $ORACLE_HOME directory contains a database, remove the Oracle Configuration Manager user and the associated objects from the database by running the following script:
SQL> $ORACLE_HOME/ccr/admin/scripts/dropocm.sql
2. If the database is a repository for the Oracle E-Business Suite, log in to the database as an SYSDBA user and remove the additional objects from the database by running the following script:
$ORACLE_HOME/ccr/admin/scripts/ebs_dropccr.sql Oracle_Applications_User
3. If the database is a repository for Oracle Grid Control, log in to the database as the SYSMAN user and remove the additional objects from the database by running the following script:
$ORACLE_HOME/ccr/admin/scripts/dropemrep_collect.sql
4. To stop the Scheduler and remove the service or the crontab entry, enter the following command:
$ORACLE_HOME/ccr/bin/deployPackages -d $ORACLE_HOME/ccr/inventory/core.jar
5. Delete the ccr directory by entering the following command:
$ rm -rf $ORACLE_HOME/ccr
Oracle Configuration Manager is successfully uninstalled.
Removing Oracle Application Express from the DatabaseThis section describes how to remove the Oracle Application Express schema, synonyms, and users from the database without deleting the database. If you are going to delete the database, then you do not need to complete these steps.
After using Oracle Universal Installer to remove Oracle Application Express from its Oracle home, you can remove Oracle Application Express components from the database. Perform the following steps:
1. Use SQL*Plus to connect to the database as the privileged user SYS, for example:
Note: You should not follow these steps if you have upgraded your database from a prior release, and still want to use the prior release of Oracle Application Express.
Removing an Oracle Database
Removing Oracle Software 6-3
$ $ORACLE_HOME/bin/sqlplus SQL> CONNECT SYS as SYSDBAEnter password: SYS_password
2. Execute the following commands:
SQL> ALTER SESSION SET CURRENT_SCHEMA = FLOWS_030000;SQL> EXEC wwv_flow_upgrade.drop_public_synonyms;SQL> ALTER SESSION SET CURRENT_SCHEMA = SYS;SQL> DROP USER FLOWS_030000 CASCADE;SQL> DROP USER flows_files CASCADE;SQL> DROP USER apex_public_user CASCADE;
Removing an Oracle DatabaseTo completely remove Oracle Database software, you must remove any installed databases. To remove an Oracle database:
1. Log in as the oracle user:
$ su - oracle
2. Run the oraenv or coraenv script to set the environment for the database that you want to remove, for example:
■ Bourne, Bash, or Korn shell:
$ . /usr/local/bin/oraenv
■ C shell:
% source /usr/local/bin/coraenv
3. At the prompt, specify the SID for the database that you want to remove.
4. Start the Database Configuration Assistant:
$ dbca
The Welcome window appears.
5. Click Next.
The Operations window appears.
6. Select Delete a Database, then click Next.
7. Select the database that you want to delete, then click Finish.
8. In the window that appears, confirm that you want to delete the database.
9. When Database Configuration Assistant removes the database, you are prompted to choose whether you want to perform another operation. Click Yes to return to the Operations screen or click No to exit from Database Configuration Assistant. If you want to remove another database, click Yes and repeat steps 6 through 8.
Note: Removing an Oracle database deletes all of the data in the database. If you want to keep this data, make sure that you back up the database before deleting it.

Removing an Automatic Storage Management Instance
6-4 Oracle Database Installation Guide
Removing an Automatic Storage Management InstanceTo completely remove Oracle database software, you must also remove any Automatic Storage Management instances running in the Oracle home. To remove an Automatic Storage Management instance:
1. If necessary, log in as the oracle user:
$ su - oracle
2. Run the oraenv or coraenv script to set the environment for the Automatic Storage Management instance that you want to remove, for example:
■ Bourne, Bash, or Korn shell:
$ . /usr/local/bin/oraenv
■ C shell:
% source /usr/local/bin/coraenv
3. At the prompt, specify the SID for the Automatic Storage Management instance that you want to remove.
4. Connect to the Automatic Storage Management instance as a SYS user:
$ $ORACLE_HOME/bin/sqlplus SQL> CONNECT SYS as SYSASMEnter password: SYS_password
5. Enter the following command to determine whether any Oracle database instance is using the Automatic Storage Management instance:
SQL> SELECT INSTANCE_NAME FROM V$ASM_CLIENT;
This command lists all of the database instances that are using this Automatic Storage Management instance.
6. If there are no database instances associated with this Automatic Storage Management instance, drop the disk groups associated with this instance as follows:
Note: You cannot perform an Oracle database installation from the same Oracle Universal Installer session in which you perform a deinstallation of Oracle database. In other words, if you deinstall Oracle database with Oracle Universal Installer and want to perform another Oracle database installation. then you must start a new Oracle Universal Installer session.
Note: This command only lists database instances that run. It is possible that other instances are associated with the Automatic Storage Management instance, but they are not currently running.
If you removed a database from this Oracle home but the output from the command shows that this Automatic Storage Management instance is supporting a database instance in another Oracle home, do not remove the Automatic Storage Management instance or the Oracle home.
Reconfiguring Oracle Cluster Synchronization Services
Removing Oracle Software 6-5
a. Identify the disk groups associated with the Automatic Storage Management instance:
SQL> SELECT NAME FROM V$ASM_DISKGROUP;
b. For each disk group that you want to delete, enter a command similar to the following:
SQL> DROP DISKGROUP name INCLUDING CONTENTS;
7. Enter the following command to shut down the Automatic Storage Management instance:
SQL> SHUTDOWN
8. Remove the entry for the Automatic Storage Management instance from the /etc/oratab file.
Reconfiguring Oracle Cluster Synchronization ServicesOracle Cluster Synchronization Services (CSS) is a daemon process that is configured by the root.sh script when you configure an Automatic Storage Management instance. It is configured to start every time the system boots. This daemon process is required to enable synchronization between Oracle Automatic Storage Management and database instances. It must be running if an Oracle database is using Automatic Storage Management for database file storage.
Before you remove an Oracle Database 11g Oracle home, you must determine whether the CSS daemon is running from that Oracle home and whether any other Oracle Database 11g Oracle homes exist on the system:
■ If the Oracle Database 11g Oracle home that you want to remove is the only Oracle Database 11g installation on the system, you can delete the CSS daemon configuration.
■ If the CSS daemon is running from the Oracle Database 11g Oracle home that you want to remove and other Oracle Database 11g installations exist on the system, you must reconfigure the CSS daemon to run from another Oracle Database 11g Oracle home.
The following sections describe how to complete these tasks:
■ Identifying Oracle Database 11g Oracle Homes
■ Reconfiguring the Oracle CSS Daemon
Note: Dropping the Automatic Storage Management disk group makes the disk device available for use with another Automatic Storage Management instance if required. However, all data in the disk group is lost. Make sure that no other database instance requires any data from this disk group before you drop it.
Note: On cluster systems with Oracle RAC installations, the CSS daemon is configured during the Oracle Clusterware installation. If the system is running Oracle Clusterware, refer to Oracle Real Application Clusters Installation Guide for AIX Based Systemsfor information about removing Oracle RAC or Oracle Clusterware.
Reconfiguring Oracle Cluster Synchronization Services
6-6 Oracle Database Installation Guide
■ Deleting the Oracle CSS Daemon Configuration
Identifying Oracle Database 11g Oracle HomesTo identify all of the Oracle Database 11g Oracle home directories, enter the following command:
$ more /etc/oratab
From the output, identify any Oracle home directories where Oracle Database 11g is installed. Oracle homes that contain Oracle Database 11g typically have paths similar to the following. However, they might use different paths.
/mount_point/app/oracle/product/11.1.0/db_n
If there is only one Oracle home directory that contains Oracle Database 11g, refer to the "Deleting the Oracle CSS Daemon Configuration" section on page 6-7 for information about deleting the Oracle CSS daemon configuration.
If you identify more than one Oracle Database 11g Oracle home directory, refer to the following section for information about reconfiguring the Oracle CSS daemon.
Reconfiguring the Oracle CSS DaemonTo reconfigure the Oracle CSS daemon so that it runs from an Oracle home that you are not removing, follow these steps:
1. In all Oracle home directories on the system, stop all Oracle Automatic Storage Management instances and any Oracle Database instances that use Automatic Storage Management for database file storage.
2. Switch user to root.
3. Enter the following command to identify the Oracle home directory being used to run the CSS daemon:
# more /etc/oracle/ocr.loc
The output from this command is similar to the following:
ocrconfig_loc=/u01/app/oracle/product/11.1.0/db_1/cdata/ \localhost/local.ocrlocal_only=TRUE
The ocrconfig_loc parameter specifies the location of the Oracle Cluster Registry (OCR) used by the CSS daemon. The path up to the cdata directory is the Oracle home directory where the CSS daemon is running (/u01/app/oracle/product/11.1.0/db_1 in this example).
If this Oracle home directory is not the Oracle home that you want to remove, go to the "Removing Oracle Software" section on page 6-8.
Note: If the value of the local_only parameter is FALSE, Oracle Clusterware is installed on this system.
See Also: Oracle Real Application Clusters Installation Guide for AIX Based Systems for information about removing Oracle Real Applications Clusters or Oracle Clusterware
Reconfiguring Oracle Cluster Synchronization Services
Removing Oracle Software 6-7
4. Change directory to the Oracle home directory for an Oracle Database 11g installation that you are not removing.
5. Set the ORACLE_HOME environment variable to specify the path to this Oracle home directory:
■ Bourne, Bash, or Korn shell:
# ORACLE_HOME=/u01/app/oracle/product/11.1.0/db_2;# export ORACLE_HOME
■ C shell:
# setenv ORACLE_HOME /u01/app/oracle/product/11.1.0/db_2
6. Enter the following command to reconfigure the CSS daemon to run from this Oracle home:
# $ORACLE_HOME/bin/localconfig reset $ORACLE_HOME
This command stops the Oracle CSS daemon, reconfigures it in the new Oracle home, and then restarts it. When the system boots, the CSS daemon starts automatically from the new Oracle home.
7. To remove the original Oracle home directory, refer to "Removing Oracle Software" section on page 6-8.
Deleting the Oracle CSS Daemon ConfigurationTo delete the Oracle CSS daemon configuration, follow these steps:
1. Remove any databases or Automatic Storage Management instances associated with this Oracle home. Refer to the preceding sections for information about how to complete these tasks.
2. Switch user to root.
3. Change directory to the Oracle home directory that you are removing.
4. Set the ORACLE_HOME environment variable to specify the path to this Oracle home directory:
■ Bourne, Bash, or Korn shell:
# ORACLE_HOME=/u01/app/oracle/product/11.1.0/db_1# export ORACLE_HOME
■ C shell:
# setenv ORACLE_HOME /u01/app/oracle/product/11.1.0/db_1
5. Enter the following command to delete the CSS daemon configuration from this Oracle home:
# $ORACLE_HOME/bin/localconfig delete
The script stops the Oracle CSS daemon, then deletes its configuration. When the system boots, the CSS daemon no longer starts.
Note: Delete the CSS daemon configuration only if you are certain that no other Oracle Database 11g installation requires it.
Removing Oracle Software
6-8 Oracle Database Installation Guide
Removing Oracle SoftwareThe following steps describe how to use Oracle Universal Installer to remove Oracle software from an Oracle home:
1. If necessary, log in as the oracle user:
$ su - oracle
2. Set the ORACLE_HOME environment variable to specify the path of the Oracle home directory that you want to remove:
■ Bourne, Bash, or Korn shell:
$ ORACLE_HOME=/u01/app/oracle/product/11.1.0/db_1 $ export ORACLE_HOME
■ C shell:
% setenv ORACLE_HOME /u01/app/oracle/product/11.1.0/db_1
3. Remove any databases or Automatic Storage Management instances associated with this Oracle home and delete or reconfigure the Oracle CSS daemon.
Refer to the preceding sections for information about how to complete these tasks.
4. Stop any processes running in this Oracle home:
5. Start Oracle Universal Installer as follows:
$ $ORACLE_HOME/oui/bin/runInstaller
6. In the Welcome window, click Deinstall Products.
The Inventory screen appears, listing all of the Oracle homes on the system.
7. In the Inventory screen, select the Oracle home and the products that you want to remove, then click Remove.
Oracle Universal Installer displays a confirmation window asking you to confirm that you want to deinstall the products and their dependent components.
8. Click Yes.
Oracle Universal Installer displays a progress indicator as it removes the software.
Note: Always use Oracle Universal Installer to remove Oracle software. Do not delete any Oracle home directories without first using Oracle Universal Installer to remove the software.
Process Name Command
Database Control $ORACLE_HOME/bin/emctl stop dbconsole
Oracle Net listener $ORACLE_HOME/bin/lsnrctl stop
Note: If you choose to remove Oracle JVM, Oracle Universal Installer removes all installed products that depend on Oracle JVM, including Oracle Database 11g.

Removing Oracle Software
Removing Oracle Software 6-9
9. Click Close on the Inventory screen.
10. When the products have been deleted, click Cancel to exit from Oracle Universal Installer, and then click Yes.

Removing Oracle Software
6-10 Oracle Database Installation Guide

A
Installing and Configuring Oracle Database Using Response Files A-1
A Installing and Configuring Oracle DatabaseUsing Response Files
This appendix describes how to install and configure Oracle products using response files. It includes information about the following topics:
■ How Response Files Work?
■ Creating the oraInst.loc File
■ Preparing a Response File
■ Running Oracle Universal Installer Using a Response File
■ Running Net Configuration Assistant Using a Response File
■ Running Database Configuration Assistant Using a Response File
How Response Files Work?You can automate the installation and configuration of Oracle software, either fully or partially, by specifying a response file when you start Oracle Universal Installer. Oracle Universal Installer uses the values contained in the response file to provide answers to some or all of Oracle Universal Installer prompt. It includes information about the following topics:
■ Reasons for Using Silent Mode or Noninteractive Mode
■ Creating a Database Using Automatic Storage Management as the Storage Option for Database Files
■ General Procedure for Using Response Files
Typically, Oracle Universal Installer runs in interactive mode, which means that it prompts you to provide information in graphical user interface (GUI) screens. When you use response files to provide this information, you run Oracle Universal Installer at a command prompt using either of the following modes:
■ Silent mode
If you include responses for all of the prompts in the response file and specify the -silent option when starting Oracle Universal Installer, then Oracle Universal Installer runs in silent mode. During a silent-mode installation, Oracle Universal Installer does not display any screens. Instead, it displays progress information in the terminal that you used to start it.
■ Noninteractive (or suppressed) mode
How Response Files Work?
A-2 Oracle Database Installation Guide
If you include responses for some or all of the prompts in the response file and omit the -silent option, then Oracle Universal Installer runs in suppressed mode. During a suppressed-mode installation, Oracle Universal Installer displays only the screens for which you did not specify all required information. You can also use variables in the response file or command-line options to suppress other installer screens, such as the Welcome screen or Summary screen, that do not prompt for information.
You define the settings for a silent or noninteractive installation by entering values for the variables listed in the response file. For instance, to specify the Oracle home name, you would supply the appropriate value for the ORACLE_HOME_NAME variable, as in the following example:
ORACLE_HOME_NAME="OraDBHome1"
Another way of specifying the response file’s variable settings is to pass them as command line arguments when you run Oracle Universal Installer. For example:
-silent "ORACLE_HOME_NAME=OraDBHome1" ...
In this command, directory_path is the path of the database directory on the DVD or the path of the Disk1 directory on the hard drive.
This method is particularly useful if you do not want to embed sensitive information, such as passwords, in the response file. For example:
-silent "s_dlgRBOPassword=binks342" ...
Ensure that you enclose the variable and its setting in quotes.
Reasons for Using Silent Mode or Noninteractive ModeThe following table describes several reasons why you might want to run Oracle Universal Installer in silent mode or suppressed mode.
See Also: Oracle Universal Installer and OPatch User's Guide for more information about response file formats.
Mode Uses
Silent Use silent mode if you want to:
■ Complete an unattended installation, which you might schedule using operating system utilities such as at
■ Complete several similar installations on multiple systems without user interaction
■ Install the software on a system that does not have X Window System software installed on it
Oracle Universal Installer displays progress information in the terminal that you used to start it, but it does not display any of Oracle Universal Installer screens.
Suppressed (noninteractive)
Use suppressed mode if you want to complete similar Oracle software installations on more than one system, providing default answers to some, but not all of Oracle Universal Installer prompts.
If you do not specify information required for a particular Installer screen in the response file, then Oracle Universal Installer displays that screen. It suppresses screens for which you have provided all of the required information.
Creating the oraInst.loc File
Installing and Configuring Oracle Database Using Response Files A-3
Creating a Database Using Automatic Storage Management as the Storage Option for Database Files
Before you create a database that uses Automatic Storage Management, you must run the root.sh script. For this reason, you cannot create a database using Automatic Storage Management as the storage option for database files during a silent-mode installation. Instead, you can complete a software-only installation using silent-mode, and then run the Oracle Net Configuration Assistant and Database Configuration Assistant configuration assistants in silent mode after you have completed the software-only installation and you have run the root.sh script.
General Procedure for Using Response FilesThe following are the general steps to install and configure Oracle products using Oracle Universal Installer in silent or suppressed mode:
1. Create the oraInst.loc file.
2. Prepare a response file.
3. Run Oracle Universal Installer in silent or suppressed mode.
4. If you completed a software-only installation, then run Net Configuration Assistant and Database Configuration Assistant in silent or noninteractive mode if required.
These steps are described in the following sections.
Creating the oraInst.loc FileIf you plan to install Oracle products using Oracle Universal Installer in silent or suppressed mode, then you must manually create the oraInst.loc file if it does not already exist. This file specifies the location of the Oracle Inventory directory where Oracle Universal Installer creates the inventory of Oracle products installed on the system.
To create the oraInst.loc file, follow these steps:
1. Switch user to root:
$ su - root
Note: This limitation applies only to databases that use Automatic Storage Management as the storage option for database files. You can create a database that uses the file system option during a silent-mode installation.
Note: You must complete all required preinstallation tasks on a system before running Oracle Universal Installer in silent or suppressed mode.
Note: If Oracle software has been installed previously on the system, the oraInst.loc file might already exist. If the file does exist, you do not need to create a file.

Preparing a Response File
A-4 Oracle Database Installation Guide
2. Create the /etc/ directory if it does not exist:
# mkdir -p /var/opt/oracle# mkdir /etc/
3. Change directory as follows:
# cd /etc/
4. Use a text editor to create the oraInst.loc file, containing the following lines:
inventory_loc=$ORACLE_BASE/oraInventoryinst_group=oinstall
In this example, $ORACLE_BASE is the path of the Oracle base directory, for example, /01/app/oracle.
5. Enter the following commands to set the appropriate owner, group, and permissions on the oraInst.loc file:
# chown oracle:oinstall oraInst.loc# chmod 664 oraInst.loc
Preparing a Response FileThis section describes the following methods to prepare a response file for use during silent-mode or suppressed-mode installations:
■ Editing a Response File Template
■ Recording a Response File
Editing a Response File TemplateThis method is most useful for the Enterprise Edition or Standard Edition installation types.
Oracle provides response file templates for each product and installation type, and for each configuration tool. These files are located at database/response directory on the installation media.
Table A–1 lists the response files provided with Oracle Database.
To copy and modify a response file:
Note: If you copied the software to a hard disk, the response files are located in the database/response directory.
Table A–1 Response Files
Response File Description
enterprise.rsp Enterprise Edition installation of Oracle Database 11g
standard.rsp Standard Edition installation of Oracle Database 11g
custom.rsp Custom installation of Oracle Database 11g
dbca.rsp Database Configuration Assistant
netca.rsp Oracle Net Configuration Assistant
Preparing a Response File
Installing and Configuring Oracle Database Using Response Files A-5
1. Copy the response file from the response file directory to a directory on your system:
$ cp /directory_path/response/response_file.rsp local_directory
In this example, directory_path is the path to the database directory on the installation media. If you have copied the software to a hard drive, then you can edit the file in the response directory if you prefer.
2. Open the response file in a text editor:
$ vi /local_dir/response_file.rsp
In addition to editing settings specific to the Oracle Database installation, check that the FROM_LOCATION path is correct and points to the products.xml file in the stage directory in the installation media. You may want to set this variable to point to an absolute path, for example:
FROM_LOCATION="/directory_path/stage/products.xml"
Remember that you can specify sensitive information, such as passwords, at the command line rather than within the response file. "How Response Files Work?" on page A-1 explains this method.
3. Follow the instructions in the file to edit it.
4. Change the permissions on the file to 700:
$ chmod 700 /local_dir/response_file.rsp
Recording a Response FileYou can use Oracle Universal Installer in interactive mode to record a response file, which you can edit and then use to complete silent-mode or suppressed-mode installations. This method is useful for custom or software-only installations.
When you record the response file, you can either complete the installation, or you can exit from Oracle Universal Installer on the Summary page, before it starts to copy the software to the system.
See Also: Oracle Universal Installer and OPatch User's Guide for detailed information on creating response files
Note: Oracle Universal Installer or configuration assistant fails if you do not correctly configure the response file. Refer to "Silent-Mode Response File Error Handling" section on page G-7 for more information about troubleshooting a failed silent-mode installation.
Note: A fully specified response file for an Oracle Database installation contains the passwords for database administrative accounts and for a user who is a member of the OSDBA group (required for automated backups). Ensure that only the Oracle software owner user can view or modify response files or consider deleting them after the installation succeeds.
Preparing a Response File
A-6 Oracle Database Installation Guide
If you use record mode during a noninteractive mode installation, then Oracle Universal Installer records the variable values that were specified in the original source response file into the new response file.
To record a response file:
1. Complete the preinstallation tasks listed in Chapter 2.
When you run Oracle Universal Installer to record a response file, it checks the system to verify that it meets the requirements to install the software. For this reason, Oracle recommends that you complete all of the required preinstallation tasks and record the response file while completing an installation.
2. If you have not installed Oracle software on this system previously, create the oraInst.loc file, as described in the previous section.
3. Ensure that the Oracle software owner user (typically oracle) has permissions to create or write to the Oracle home path that you will specify when you run Oracle Universal Installer.
4. To record a response file, enter a command similar to the following to start Oracle Universal Installer:
$ /directory_path/runInstaller -record -destinationFile response_filename
In this command:
■ directory_path is the path of the database directory on the DVD or the path of the Disk1 directory on the hard drive
■ The -record parameter specifies that you want to record the responses that you enter in a response file
■ response_filename is the full path and file name of the response file that you want to record
5. On each Oracle Universal Installer screen, specify the required information.
6. When Oracle Universal Installer displays the Summary screen, perform one of the following actions:
■ Click Install to create the response file, then continue with the installation.
■ Click Cancel and then Yes to create the response file but exit from Oracle Universal Installer without installing the software.
The response file is saved in the location that you specified using the -destinationFile option.
7. If you do not complete the installation, then delete the Oracle home directory that Oracle Universal Installer created using the path you specified on the Specify File Locations screen.
Note: You cannot use record mode to create a response file during an installation that uses the Basic installation method.
Note: Do not specify a relative path to the response file. If you specify a relative path, then Oracle Universal Installer fails.
Running Oracle Universal Installer Using a Response File
Installing and Configuring Oracle Database Using Response Files A-7
8. Before using the recorded response file on another system, edit the file and make any required changes.
Use the instructions in the file as a guide when editing it.
Running Oracle Universal Installer Using a Response FileNow, you are ready to run Oracle Universal Installer at the command line, specifying the response file you created, to perform the installation. The Oracle Universal Installer executable, runInstaller, provides several options. For help information on the full set of these options, run the runInstaller command with the -help option, for example:
$ directory_path/runInstaller -help
The help information appears in a window after some time.
To run Oracle Universal Installer using a response file:
1. Complete the preinstallation tasks listed in Chapter 2.
2. Log in as the Oracle software owner user (typically oracle).
3. If you are completing a suppressed-mode installation, set the DISPLAY environment variable.
4. To start Oracle Universal Installer in silent or suppressed mode, enter a command similar to the following:
$ /directory_path/runInstaller [-silent] [-noconfig] \ -responseFile responsefilename
In this example:
■ directory_path is the path of the database directory on the DVD or the path of the Disk1 directory on the hard drive.
■ -silent indicates that you want to run Oracle Universal Installer in silent mode.
■ -noconfig suppresses running the configuration assistants during installation, and a software-only installation is performed instead.
■ responsefilename is the full path and file name of the installation response file that you configured.
Note: You do not have to set the DISPLAY environment variable if you are completing a silent-mode installation.
Note: Do not specify a relative path to the response file. If you specify a relative path, then Oracle Universal Installer fails.
Note: For more information about other options for the runInstaller command, enter the following command:
$ /directory_path/runInstaller -help
Running Net Configuration Assistant Using a Response File
A-8 Oracle Database Installation Guide
5. When the installation completes, log in as the root user and run the root.sh script:
$ sudo shpassword:# /oracle_home_path/root.sh
Running Net Configuration Assistant Using a Response FileYou can run Net Configuration Assistant in silent mode to configure and start an Oracle Net listener on the system, configure naming methods, and configure Oracle Net service names. To run Net Configuration Assistant in silent mode, you must copy and edit a response file template. Oracle provides a response file template named netca.resp in the response directory in the database/response directory on the DVD.
To run Net Configuration Assistant using a response file:
1. Copy the netca.rsp response file template from the response file directory to a directory on your system:
$ cp /directory_path/response/netca.rsp local_directory
In this example, directory_path is the path of the database directory on the DVD. If you have copied the software to a hard drive, you can edit the file in the response directory if you prefer.
2. Open the response file in a text editor:
$ vi /local_dir/netca.rsp
3. Follow the instructions in the file to edit it.
4. Log in as the Oracle software owner user, and set the ORACLE_HOME environment variable to specify the correct Oracle home directory.
5. Enter a command similar to the following to run Net Configuration Assistant in silent mode:
$ $ORACLE_HOME/bin/netca /silent /responsefile /local_dir/netca.rsp
In this command:
■ The /silent option indicates that you want to run Net Configuration Assistant in silent mode.
■ local_dir is the full path of the directory where you copied the netca.rsp response file template.
Note: If you copied the software to a hard disk, then the response file template is located in the database/response directory.
Note: Net Configuration Assistant fails if you do not correctly configure the response file.
Running Database Configuration Assistant Using a Response File
Installing and Configuring Oracle Database Using Response Files A-9
Running Database Configuration Assistant Using a Response FileYou can run Database Configuration Assistant in noninteractive or silent mode to configure and start an Oracle Database on the system. To run Database Configuration Assistant in noninteractive or silent mode, you must copy and edit a response file template. Oracle provides a response file template named dbca.resp in the database/response directory on the DVD.
This section contains the following topics:
■ Using Database Configuration Assistant in Noninteractive Mode
■ Using Database Configuration Assistant in Silent Mode
■ Running Database Configuration Assistant in Noninteractive or Silent Mode
Using Database Configuration Assistant in Noninteractive ModeIn noninteractive mode, Database Configuration Assistant uses values that you specify, in the response file or as command line options, to create a database. As it configures and starts the database, it displays a window that contains status messages and a progress bar. The window that it displays is the same window that is displayed when you choose to create a preconfigured database during an Enterprise Edition or Standard Edition installation.
To run Database Configuration Assistant in noninteractive mode, you must use a graphical display and set the DISPLAY environment variable.
Using Database Configuration Assistant in Silent ModeIn silent mode, Database Configuration Assistant uses values that you specify, in the response file or as command line options, to create a database. Database Configuration Assistant does not display any screens or information while it creates the database.
Running Database Configuration Assistant in Noninteractive or Silent ModeTo run Database Configuration Assistant in noninteractive or silent mode:
1. Copy the dbca.rsp response file template from the response file directory to a directory on your system:
$ cp /directory_path/response/dbca.rsp local_directory
Note: If you copied the software to a hard disk, then the response file template is located in the Disk1/response directory.
Note: As an alternative to editing the response file template, you can also create a database by specifying all required information as command line options when you run Database Configuration Assistant. For information about the list of options supported, enter the following command:
$ $ORACLE_HOME/bin/dbca -help
Running Database Configuration Assistant Using a Response File
A-10 Oracle Database Installation Guide
In this example, directory_path is the path of the database directory on the DVD. If you have copied the software to a hard drive, you can edit the file in the response directory if you prefer.
2. Open the response file in a text editor:
$ vi /local_dir/dbca.rsp
3. Edit the file, following the instructions in the file.
4. Log in as the Oracle software owner user, and set the ORACLE_HOME environment variable to specify the correct Oracle home directory.
5. If you intend running Database Configuration Assistant in noninteractive mode, set the DISPLAY environment variable.
6. Enter a command similar to the following to run Database Configuration Assistant in noninteractive or silent mode with a response file:
$ $ORACLE_HOME/bin/dbca {-progressOnly | -silent} [-cloneTemplate] \ [-datafileDestination /datafilepath] -responseFile /local_dir/dbca.rsp
In this example:
■ The -silent option indicates that you want to run Database Configuration Assistant in silent mode.
■ The -progressOnly option indicates that you want to run Database Configuration Assistant in noninteractive mode.
■ The -cloneTemplate option is required if you want to create one of the following preconfigured databases:
– General Purpose / Transaction Processing
– Data Warehouse
■ -datafileDestination specifies the parent directory where you want to create the database files. If you do not specify this option, the parent directory for database files is the $ORACLE_BASE/oradata directory if the ORACLE_BASE environment variable is set, or the $ORACLE_HOME/oradata directory if ORACLE_BASE is not set.
■ local_dir is the full path of the directory where you copied the dbca.rsp response file template.
Note: Database Configuration Assistant fails if you do not correctly configure the response file.
B
Cloning an Oracle Home B-1
B Cloning an Oracle Home
Cloning an Oracle home involves creating a copy of the Oracle home and then configuring it for a new environment. If you are performing multiple Oracle Database installations, then you may want to use this method to create each Oracle home, because copying files from an existing Oracle Database installation takes less time than creating a new version of them. This method is also useful if the Oracle home that you are cloning has had patches applied to it. When you clone this Oracle home, the new Oracle home will have the patch updates as well.
When cloning Database Oracle homes using 11.1 Database Control, you need to update the exclude file list. This file list specifies files that need not be included when the source Oracle home is archived because these files are not required for the clone operation. The following files should not be included in the archive:
■ sqlnet.ora
■ tnsnames.ora
■ listener.ora
■ oratab
To clone an Oracle home:
1. Verify that the installation of Oracle Database that you want to clone has been successful.
You can do this by reviewing the installActionsdate_time.log file for the installation session, which is normally located in the /orainventory_location/logs directory.
If you have installed patches, then you can check their status by running the following commands:
$ $ORACLE_HOME/OPatch ORACLE_HOME=ORACLE_HOME_using_patch$ $ORACLE_HOME/OPatch opatch lsinventory
2. Stop all processes related to the Oracle home. Refer to "Removing Oracle Software" section on page 6-8 for more information on stopping the processes for an Oracle home.
Note: In addition to cloning an Oracle home, you can clone individual Oracle Database installations by using Enterprise Manager Database Control. Oracle Database Administrator's Guide provides detailed information about cloning Oracle Database installations and Oracle homes.
B-2 Oracle Database Installation Guide
3. Create a ZIP file with the Oracle home (but not Oracle base) directory.
For example, if the source Oracle installation is in the /u01/app/oracle/product/11.1.0/db_1, then you zip the db_1 directory by using the following command:
# zip -r db_1.zip /u01/app/oracle/product/11.1.0/db_1
Leave out the admin, flash_recovery_area, and oradata directories that are in the 11.1.0 directory. These directories will be created in the target installation later, when you create a new database there.
4. Copy the ZIP file to the root directory of the target computer.
5. Extract the ZIP file contents by using the following command:
# unzip -d / db_1.zip
6. Repeat steps 4 and 5 for each computer where you want to clone the Oracle home, unless the Oracle home is on a shared storage device.
7. On the target computer, change directory to the unzipped Oracle home directory, and remove all the .ora (*.ora) files present in the unzipped $ORACLE_HOME/network/admin directory.
8. From the $ORACLE_HOME/oui/bin directory, run Oracle Universal Installer in clone mode for the unzipped Oracle home. Use the following syntax:
$ORACLE_HOME/oui/bin/runInstaller -silent -clone ORACLE_BASE="target_oracle_base" ORACLE_HOME="target_oracle_home" ORACLE_HOME_NAME="unique_name_on node" [-responseFile full_directory_path]
For example:
$ORACLE_HOME/oui/bin/runInstaller -silent -clone ORACLE_BASE= "/u01/app/oracle/" ORACLE_HOME="/u01/app/oracle/product/11.1.0/db_1" ORACLE_HOME_NAME="db_1"
The -responseFile parameter is optional. You can supply clone-time parameters on the command line or by using the response file named on the command line.
Oracle Universal Installer starts, and then records the cloning actions in the cloneActionstimestamp.log file. This log file is normally located in /orainventory_location/logs directory.
9. To configure connection information for the new database, run Net Configuration Assistant.
$ cd $ORACLE_HOME/bin$ ./netca
10. To create a new database for the newly cloned Oracle home, run Database Configuration Assistant as follows:
$ cd $ORACLE_HOME/bin$ ./dbca
Cloning an Oracle Home B-3
Use the following steps to configure Oracle Configuration Manager for a cloned Oracle home:
1. Run the emSnapshotEnv script from bin directory as follows:
$ORACLE_HOME/ccr/bin/emSnapshotEnv
2. Copy the content of the core.jar into pending directory as follows:
cp ccr/inventory/core.jar $ORACLE_HOME/ccr/inventory/pending
3. Use the following command to remove the previous state files:
rm ORACLE_HOME/ccr/state/*.ll
4. If you have removed the state files, then you must relink the core functions with the following command:
$ORACLE_HOME/ccr/bin/deployPackages
5. Use the following command to rerun Oracle Configuration Manager:
$ORACLE_HOME/ccr/bin/configCCR
See Also:
■ Oracle Universal Installer and OPatch User's Guide for detailed information about using Oracle Universal Installer to clone an Oracle Database home
■ Oracle Database Administrator's Guide for information about cloning an Oracle databases, and cloning an Oracle Database home

B-4 Oracle Database Installation Guide
C
Using NAS Devices C-1
C Using NAS Devices
If you have a network attached storage (NAS) device that has been certified through the Oracle Storage Compatibility Program (OSCP), then you can use it to store the Oracle software, the Oracle database files, or both. This appendix provides guidelines for using a NAS storage device for Oracle software and database files. It includes information about the following:
■ General Configuration Guidelines for NAS Devices
■ NFS Feature Description
■ Choosing Mount Points
■ Creating Files on a NAS Device for Use with Automatic Storage Management
■ NFS Mount Options
General Configuration Guidelines for NAS DevicesRefer to the documentation provided with the NAS device for specific information about how to configure it. In addition, use the following guidelines to ensure that the performance of the Oracle software meets the requirements:
■ Before using the NAS device for the installation, verify that it is certified.
■ The performance of Oracle software and databases stored on NAS devices depends on the performance of the network connection between the Oracle server and the NAS device.
For this reason, Oracle recommends that you connect the server to the NAS device using a private dedicated network connection, which should be Gigabit Ethernet or better.
■ For single instance installations, you must create a separate Oracle home directory for each installation. Run the software in this Oracle home directory only from the system that you used to install it.
Note: The OSCP certifies NAS devices only for single-instance databases. For Oracle RAC installations, refer to the Certify page on the OracleMetaLink Web site for information about certified storage solutions, including NAS:
https://metalink.oracle.com
NFS Feature Description
C-2 Oracle Database Installation Guide
NFS Feature DescriptionThe following are the features of NFS:
■ Oracle Kernel handles best possible configuration to perform optimal I/O using available resources, which enables better configuration management.
■ NFS storage is now available across different platforms like Windows.
■ ODM NFS helps standardize all the tunable configuration parameters.
■ ODM NFS has a stable NFS client that does not affect kernel performance. It optimizes the I/O path when making NFS operations.This ensures higher stability.
■ Better diagnostics in case of errors.
Choosing Mount PointsThis section provides guidelines on how to choose the mount points for the file systems that you want to use for the Oracle software and database files. The guidelines contained in the following sections comply with the Optimal Flexible Architecture recommendations:
■ Choosing Mount Points for Oracle Software Files
■ Choosing Mount Points for Oracle Database and Recovery Files
Choosing Mount Points for Oracle Software FilesOracle software files are stored in three different directories:
■ Oracle base directory
■ Oracle Inventory directory
■ Oracle home directory
For the first installation of Oracle software on a system, the Oracle base directory, identified by the ORACLE_BASE environment variable, is normally the parent directory for both the Oracle Inventory and Oracle home directories. For example, for a first installation, the Oracle base, Oracle Inventory, and Oracle home directories might have paths similar to the following:
For subsequent installations, you can choose to use either the same Oracle base directory or a different one, but every subsequent installation uses the original Oracle Inventory directory. For example, if you use the /u02/app/oracle directory as the Oracle base directory for a new installation, then the Oracle Inventory directory continues to be /u01/app/oracle/oraInventory.
To enable you to effectively maintain the Oracle software on a particular system, Oracle recommends that you locate the Oracle Inventory directory only on a local file system, if possible. If you must place the Oracle Inventory directory on a NAS device, create a specific directory for each system, then to prevent more than one system from writing to the same Inventory.
Directory Path
Oracle base ($ORACLE_BASE) /u01/app/oracle
Oracle Inventory $ORACLE_BASE/oraInventory
Oracle home $ORACLE_BASE/product/11.1.0/db_1
Choosing Mount Points
Using NAS Devices C-3
Directory-Specific GuidelinesYou can use any of the following directories as mount points for NFS file systems used to store Oracle software:
■ Oracle base directory or its parents (/u01/app/oracle for example)
If you use the Oracle base directory of one of its parents as a mount point, then the default location for all Oracle software and database files will be on that file system. During the installation, you might consider changing the default location of the following directories:
– The Oracle Inventory directory (oracle_base/oraInventory)
Specify a local file system or a host-specific directory on the NFS file system, for example:
oracle_base/hostname/oraInventory
– The Oracle database file directory (oracle_base/oradata)
You might want to use a different file system for database files, for example, to enable you to specify different mount options or to distribute I/O.
– The Oracle database recovery file directory (oracle_base/flash_recovery_area)
Oracle recommends that you use different file systems for database and recovery files.
If you use this mount point, then all Oracle installations that use this Oracle base directory will use the NFS file system.
■ The product directory (oracle_base/product)
By default, only software files will be located on the NFS file system. You can also use this mount point to install software from different releases, for example:
/u01/app/oracle/product/9.2.0/u01/app/oracle/product/10.2.0/db_1/u01/app/oracle/product/11.1.0/db_1
■ The release directory (oracle_base/product/11.1.0)
By default, only software files will be located on the NFS file system. You can also use this mount point to install different products from the same release, for example:
/u01/app/oracle/product/11.1.0/db_1/u01/app/oracle/product/11.1.0/client_1
■ The Oracle home directory (oracle_base/product/11.1.0/db_1)
By default, only software files will be located on the NFS file system. This is the most restrictive mount point. You can use it only to install a single release of one product:
/u01/app/oracle/product/11.1.0/db_1
Note: In the following examples, the paths shown are the defaults if the ORACLE_BASE environment variable is set before you start Oracle Universal Installer.
Creating Files on a NAS Device for Use with Automatic Storage Management
C-4 Oracle Database Installation Guide
Choosing Mount Points for Oracle Database and Recovery FilesTo store Oracle database or recovery files on a NAS device, you can use different paths depending on whether you want to store files from only one database or from more than one database:
■ Use the NFS file system for files from more than one database
If you want to store the database files or recovery files from more than one database on the same NFS file systems, then use paths or mount points similar to the following:
When Oracle Universal Installer prompts you for the data file and the recovery file directories, specify these paths. The Database Configuration Assistant and Enterprise Manager create subdirectories in these directories using the value you specify for the database name (DB_NAME) as the directory name, for example:
/u02/oradata/db_name1/u03/flash_recovery_area/db_name1
■ Use the NFS file system for files from only one database
If you want to store the database files or recovery files for only one database in the NFS file system, then you can create mount points similar to the following, where orcl is the name that you want to use for the database:
/u02/oradata/orcl/u03/flash_recovery_area/orcl
Specify the directory /u02/oradata when Oracle Universal Installer prompts you for the data file directory and specify the directory /u03/flash_recovery_area when Oracle Universal Installer prompts you for the recovery file location. The orcl directory will be used automatically either by Database Configuration Assistant or by Enterprise Manager.
Creating Files on a NAS Device for Use with Automatic Storage Management
If you have a certified NAS storage device, then you can create zero-padded files in an NFS mounted directory and use those files as disk devices in an Automatic Storage Management disk group. To create these files, follow these steps:
1. If necessary, create an exported directory for the disk group files on the NAS device.
Refer to the NAS device documentation for more information about completing this step.
File Type Path or Mount Point
Database files /u02/oradata
Recovery files /u03/flash_recovery_area
Note: To use files as disk devices in an Automatic Storage Management disk group, the files must be on an NFS mounted file system. You cannot use files on local file systems.

NFS Mount Options
Using NAS Devices C-5
2. Switch user to root:
$ sudo shpassword:
3. Create a mount point directory on the local system:
# mkdir -p /mnt/oracleasm
4. To ensure that the NFS file system is mounted when the system reboots, add an entry for the file system in the /etc/fstab mount file.
For more information about editing the mount file for the operating system, refer to the man pages. For more information about recommended mount options, refer to the "NFS Mount Options" section on page C-5.
5. Enter a command similar to the following to mount the NFS file system on the local system:
# mount /mnt/oracleasm
6. Choose a name for the disk group that you want to create, for example, nfsdg.
7. Create a directory for the files on the NFS file system, using the disk group name as the directory name:
# mkdir /mnt/oracleasm/nfsdg
8. Use commands similar to the following to create the required number of zero-padded files in this directory:
# dd if=/dev/zero of=/mnt/oracleasm/nfsdg/disk1 bs=1024k count=1000
This example creates 1 GB files on the NFS file system. You must create one, two, or three files respectively to create an external, normal, or high redundancy disk group.
9. Enter the following commands to change the owner, group, and permissions on the directory and files that you created:
# chown -R oracle:dba /mnt/oracleasm# chmod -R 660 /mnt/oracleasm
10. When you are creating the database, edit the Automatic Storage Management disk discovery string to specify a regular expression that matches the file names you created. For example, you might specify a disk discovery string similar to the following:
/mnt/oracleasm/nfsdg/*
NFS Mount OptionsYou must mount NFS volumes used for storing database files with special mount options on the host where the database server is running. When mounting an NFS file system, Oracle recommends that you use the same mount point options that the NAS
Note: Creating multiple zero-padded files on the same NAS box does not guard against NAS box failure. Instead, create one file for each NAS box and mirror across them using the Automatic Storage Management technology.
NFS Mount Options
C-6 Oracle Database Installation Guide
vendor used when certifying the device. Refer to the device documentation or contact the vendor for information about recommended mount-point options.
Option Requirement Description
hard Mandatory Generate a hard mount of the NFS file system. If the connection to the server fails or is temporarily lost, then connection attempts are made until the NAS device responds.
bg Optional Try to connect in the background if connection fails.
tcp Optional Use the TCP protocol rather than UDP. TCP is more reliable than UDP.
nfsvers=3 Optional Use NFS version 3. Oracle recommends that you use NFS version 3 where available, unless the performance of version 2 is later.
suid Optional Allow clients to run executables with SUID enabled. This option is required for Oracle software mount points.
rsize Mandatory The number of bytes used when reading from the NAS device. This value should be set to the maximum database block size supported by this platform. A value of 8192 is often recommended for NFS version 2 and 32768 is often recommended for NFS version 3.
wsize Mandatory The number of bytes used when writing to the NAS device. This value should be set to the maximum database block size supported by this platform. A value of 8192 is often recommended for NFS version 2 and 32768 is often recommended for NFS version 3.
nointr (or intr) Optional Do not allow (or allow) keyboard interrupts to stop a process that is hung while waiting for a response on a hard-mounted file system.
Note: Different vendors have different recommendations about this option. Contact the vendor for advice.
actime=0 or noac
Mandatory Disable attribute caching.
Note: You must specify this option for NFS file systems where you want to install the software. If you do not use this option, then Oracle Universal Installer will not install the software in the directory that you specify.
cio Mandatory Disables data caching
rw
forcedirectio
D
Optimal Flexible Architecture D-1
D Optimal Flexible Architecture
This appendix describes the Optimal Flexible Architecture standard. The standard is a set of configuration guidelines created to ensure well organized Oracle installations that are easier to maintain. It includes information about the following topics:
■ Overview of the Optimal Flexible Architecture Standard
■ Implementing Optimal Flexible Architecture
Overview of the Optimal Flexible Architecture StandardAll Oracle components on the installation media are compliant with Optimal Flexible Architecture. This means, Oracle Universal Installer places Oracle Database components in directory locations that follow Optimal Flexible Architecture guidelines.
Although using Optimal Flexible Architecture is not a requirement, Oracle recommends that you use it if the database will grow in size, or if you plan to have multiple databases.
Implementing Optimal Flexible ArchitectureThis section describes the naming strategy recommended by the Optimal Flexible Architecture standard. It contains the following sections:
■ File Systems
■ Naming Directories
■ Naming Database Files
■ Separating Segments with Different Requirements
■ Exploiting the Optimal Flexible Architecture Structure for Oracle Files
■ Optimal Flexible Architecture File Mapping
File SystemsThe following sections describe the conventions for mount points:
■ Number of File Systems
■ Naming Conventions
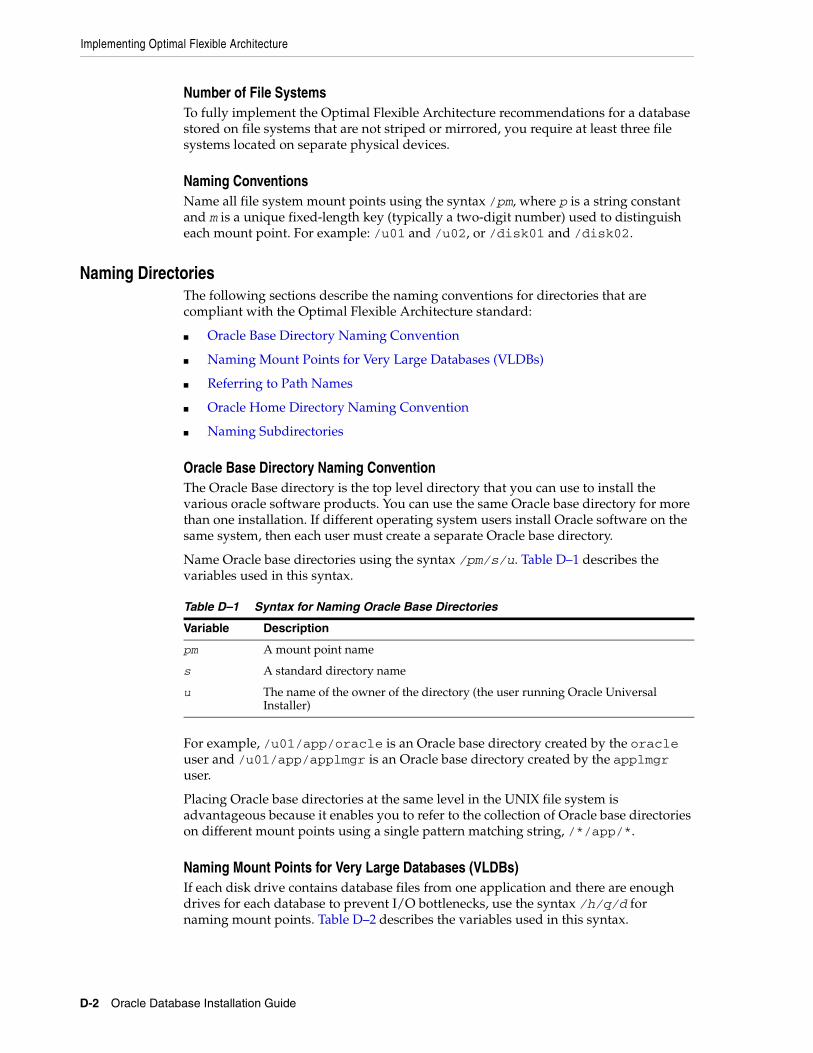
Implementing Optimal Flexible Architecture
D-2 Oracle Database Installation Guide
Number of File SystemsTo fully implement the Optimal Flexible Architecture recommendations for a database stored on file systems that are not striped or mirrored, you require at least three file systems located on separate physical devices.
Naming ConventionsName all file system mount points using the syntax /pm, where p is a string constant and m is a unique fixed-length key (typically a two-digit number) used to distinguish each mount point. For example: /u01 and /u02, or /disk01 and /disk02.
Naming DirectoriesThe following sections describe the naming conventions for directories that are compliant with the Optimal Flexible Architecture standard:
■ Oracle Base Directory Naming Convention
■ Naming Mount Points for Very Large Databases (VLDBs)
■ Referring to Path Names
■ Oracle Home Directory Naming Convention
■ Naming Subdirectories
Oracle Base Directory Naming ConventionThe Oracle Base directory is the top level directory that you can use to install the various oracle software products. You can use the same Oracle base directory for more than one installation. If different operating system users install Oracle software on the same system, then each user must create a separate Oracle base directory.
Name Oracle base directories using the syntax /pm/s/u. Table D–1 describes the variables used in this syntax.
For example, /u01/app/oracle is an Oracle base directory created by the oracle user and /u01/app/applmgr is an Oracle base directory created by the applmgr user.
Placing Oracle base directories at the same level in the UNIX file system is advantageous because it enables you to refer to the collection of Oracle base directories on different mount points using a single pattern matching string, /*/app/*.
Naming Mount Points for Very Large Databases (VLDBs)If each disk drive contains database files from one application and there are enough drives for each database to prevent I/O bottlenecks, use the syntax /h/q/d for naming mount points. Table D–2 describes the variables used in this syntax.
Table D–1 Syntax for Naming Oracle Base Directories
Variable Description
pm A mount point name
s A standard directory name
u The name of the owner of the directory (the user running Oracle Universal Installer)
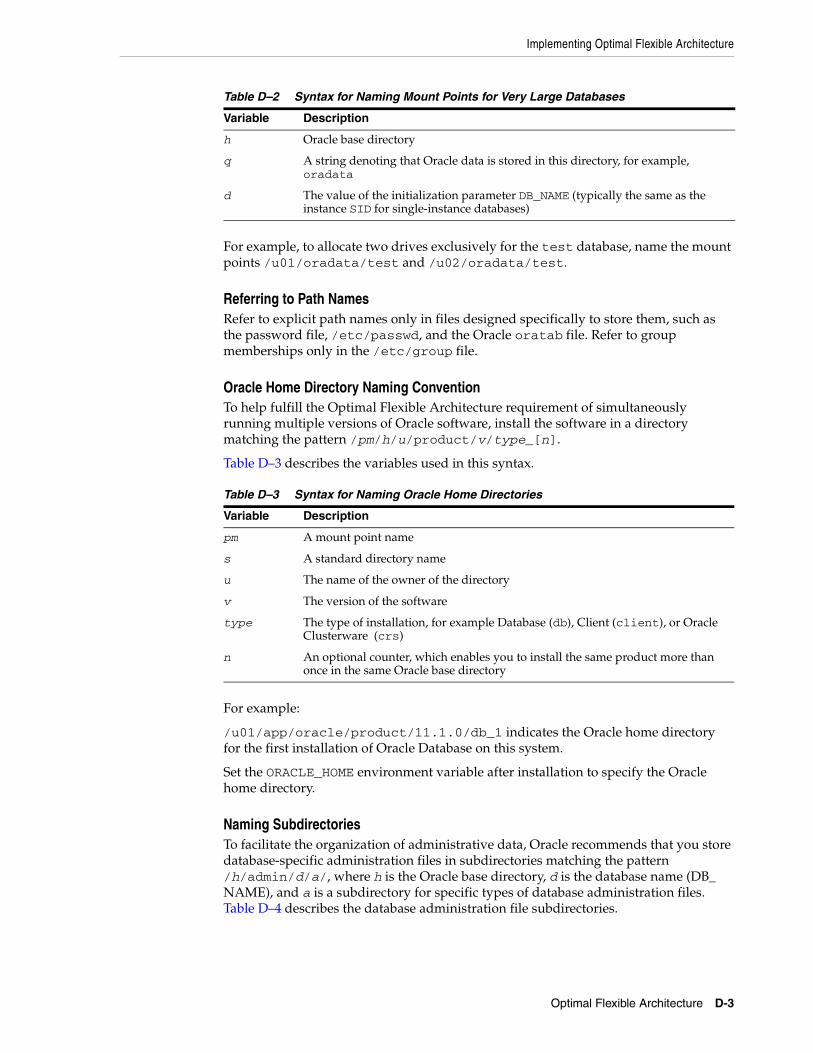
Implementing Optimal Flexible Architecture
Optimal Flexible Architecture D-3
For example, to allocate two drives exclusively for the test database, name the mount points /u01/oradata/test and /u02/oradata/test.
Referring to Path NamesRefer to explicit path names only in files designed specifically to store them, such as the password file, /etc/passwd, and the Oracle oratab file. Refer to group memberships only in the /etc/group file.
Oracle Home Directory Naming ConventionTo help fulfill the Optimal Flexible Architecture requirement of simultaneously running multiple versions of Oracle software, install the software in a directory matching the pattern /pm/h/u/product/v/type_[n].
Table D–3 describes the variables used in this syntax.
For example:
/u01/app/oracle/product/11.1.0/db_1 indicates the Oracle home directory for the first installation of Oracle Database on this system.
Set the ORACLE_HOME environment variable after installation to specify the Oracle home directory.
Naming SubdirectoriesTo facilitate the organization of administrative data, Oracle recommends that you store database-specific administration files in subdirectories matching the pattern /h/admin/d/a/, where h is the Oracle base directory, d is the database name (DB_NAME), and a is a subdirectory for specific types of database administration files. Table D–4 describes the database administration file subdirectories.
Table D–2 Syntax for Naming Mount Points for Very Large Databases
Variable Description
h Oracle base directory
q A string denoting that Oracle data is stored in this directory, for example, oradata
d The value of the initialization parameter DB_NAME (typically the same as the instance SID for single-instance databases)
Table D–3 Syntax for Naming Oracle Home Directories
Variable Description
pm A mount point name
s A standard directory name
u The name of the owner of the directory
v The version of the software
type The type of installation, for example Database (db), Client (client), or Oracle Clusterware (crs)
n An optional counter, which enables you to install the same product more than once in the same Oracle base directory

Implementing Optimal Flexible Architecture
D-4 Oracle Database Installation Guide
For example, /u01/app/oracle/admin/orcl/adhoc/ is the adhoc subdirectory associated with the database named orcl.
In Oracle Database 11g, Automatic Diagnostic Repository (ADR) directories replace the bdump, cdump, and udump directories. The ADR diagnostic data will go into the /h/diag/rdbms/d/i/ directory.
where
h is Oracle Base
d is the database name
i is the instance name.
From there we have the trace, alert, and incident sub-directories.
Naming Database FilesThe following table lists the recommended file naming conventions for database files:
Table D–4 Subdirectories for Database Administration Files
Subdirectory Description
adhoc Ad hoc SQL scripts
arch Archived redo log files
adump Audit files(Set the AUDIT_FILE_DEST initialization parameter to specify the adump directory. Clean out this subdirectory periodically.)
create Scripts used to create the database
exp Database export files
logbook Files recording the status and history of the database
pfile Instance parameter files
Table D–5 Locations for Diagnostic Traces
Diagnostic Data 10g Location 11g Location
Foreground Process traces user_dump_dest {ADR_HOME}/trace/
Background Process traces background_dump_dest {ADR_HOME}/trace/
Alert Log Data background_dump_dest {ADR_HOME}/alert/
Core Dump core_dump_dest {ADR_HOME}/incident/In/
Incident Dumps user_dump_dest or background_dump_dest depending on the process.
{ADR_HOME}/incident/In/
Note: Oracle Managed Files (OMF) and files stored in Automatic Storage Management disk groups use different naming conventions. For more information about these naming conventions, refer to the Oracle Database Administrator's Guide.
File Type File Naming Convention
Control files /h/q/d/control.ctl
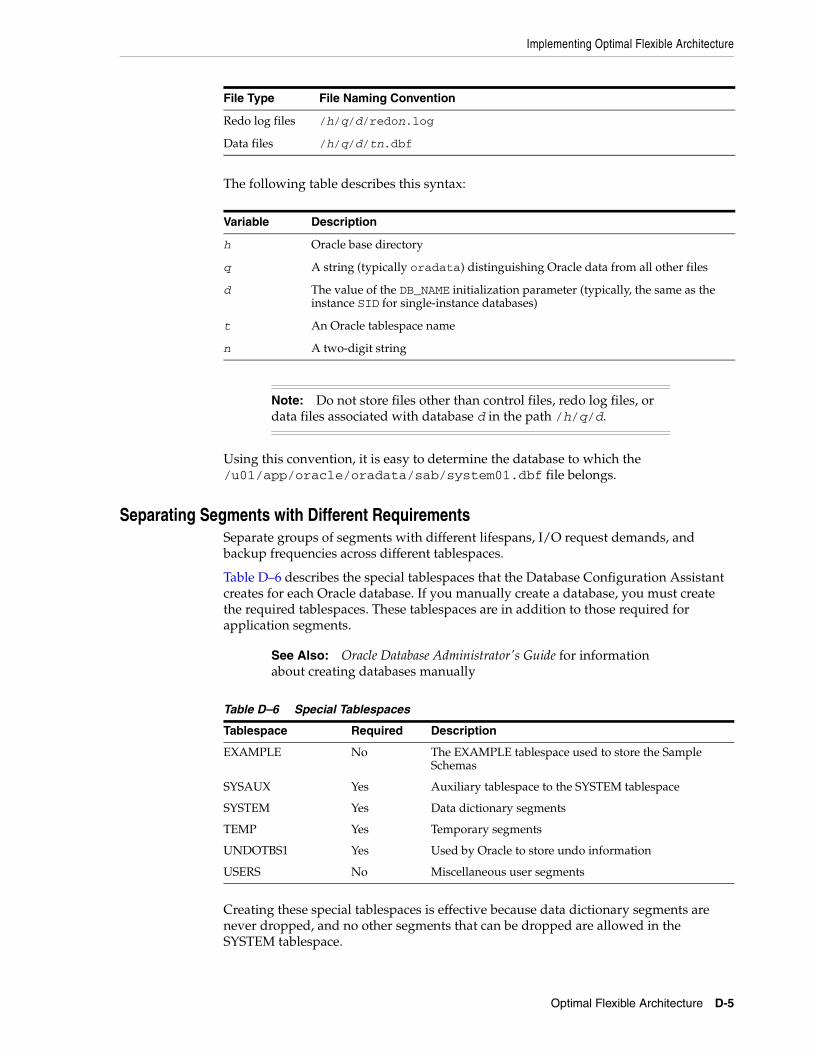
Implementing Optimal Flexible Architecture
Optimal Flexible Architecture D-5
The following table describes this syntax:
Using this convention, it is easy to determine the database to which the /u01/app/oracle/oradata/sab/system01.dbf file belongs.
Separating Segments with Different RequirementsSeparate groups of segments with different lifespans, I/O request demands, and backup frequencies across different tablespaces.
Table D–6 describes the special tablespaces that the Database Configuration Assistant creates for each Oracle database. If you manually create a database, you must create the required tablespaces. These tablespaces are in addition to those required for application segments.
Creating these special tablespaces is effective because data dictionary segments are never dropped, and no other segments that can be dropped are allowed in the SYSTEM tablespace.
Redo log files /h/q/d/redon.log
Data files /h/q/d/tn.dbf
Variable Description
h Oracle base directory
q A string (typically oradata) distinguishing Oracle data from all other files
d The value of the DB_NAME initialization parameter (typically, the same as the instance SID for single-instance databases)
t An Oracle tablespace name
n A two-digit string
Note: Do not store files other than control files, redo log files, or data files associated with database d in the path /h/q/d.
See Also: Oracle Database Administrator's Guide for information about creating databases manually
Table D–6 Special Tablespaces
Tablespace Required Description
EXAMPLE No The EXAMPLE tablespace used to store the Sample Schemas
SYSAUX Yes Auxiliary tablespace to the SYSTEM tablespace
SYSTEM Yes Data dictionary segments
TEMP Yes Temporary segments
UNDOTBS1 Yes Used by Oracle to store undo information
USERS No Miscellaneous user segments
File Type File Naming Convention
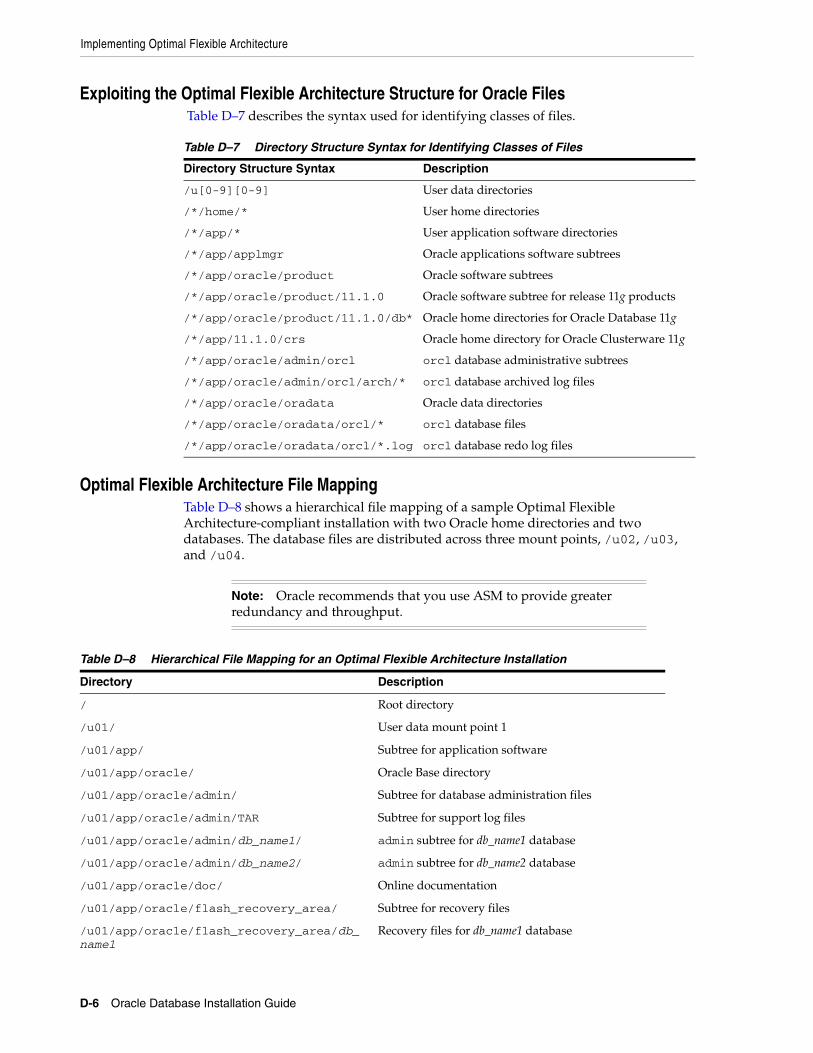
Implementing Optimal Flexible Architecture
D-6 Oracle Database Installation Guide
Exploiting the Optimal Flexible Architecture Structure for Oracle Files Table D–7 describes the syntax used for identifying classes of files.
Optimal Flexible Architecture File MappingTable D–8 shows a hierarchical file mapping of a sample Optimal Flexible Architecture-compliant installation with two Oracle home directories and two databases. The database files are distributed across three mount points, /u02, /u03, and /u04.
Table D–7 Directory Structure Syntax for Identifying Classes of Files
Directory Structure Syntax Description
/u[0-9][0-9] User data directories
/*/home/* User home directories
/*/app/* User application software directories
/*/app/applmgr Oracle applications software subtrees
/*/app/oracle/product Oracle software subtrees
/*/app/oracle/product/11.1.0 Oracle software subtree for release 11g products
/*/app/oracle/product/11.1.0/db* Oracle home directories for Oracle Database 11g
/*/app/11.1.0/crs Oracle home directory for Oracle Clusterware 11g
/*/app/oracle/admin/orcl orcl database administrative subtrees
/*/app/oracle/admin/orcl/arch/* orcl database archived log files
/*/app/oracle/oradata Oracle data directories
/*/app/oracle/oradata/orcl/* orcl database files
/*/app/oracle/oradata/orcl/*.log orcl database redo log files
Note: Oracle recommends that you use ASM to provide greater redundancy and throughput.
Table D–8 Hierarchical File Mapping for an Optimal Flexible Architecture Installation
Directory Description
/ Root directory
/u01/ User data mount point 1
/u01/app/ Subtree for application software
/u01/app/oracle/ Oracle Base directory
/u01/app/oracle/admin/ Subtree for database administration files
/u01/app/oracle/admin/TAR Subtree for support log files
/u01/app/oracle/admin/db_name1/ admin subtree for db_name1 database
/u01/app/oracle/admin/db_name2/ admin subtree for db_name2 database
/u01/app/oracle/doc/ Online documentation
/u01/app/oracle/flash_recovery_area/ Subtree for recovery files
/u01/app/oracle/flash_recovery_area/db_name1
Recovery files for db_name1 database
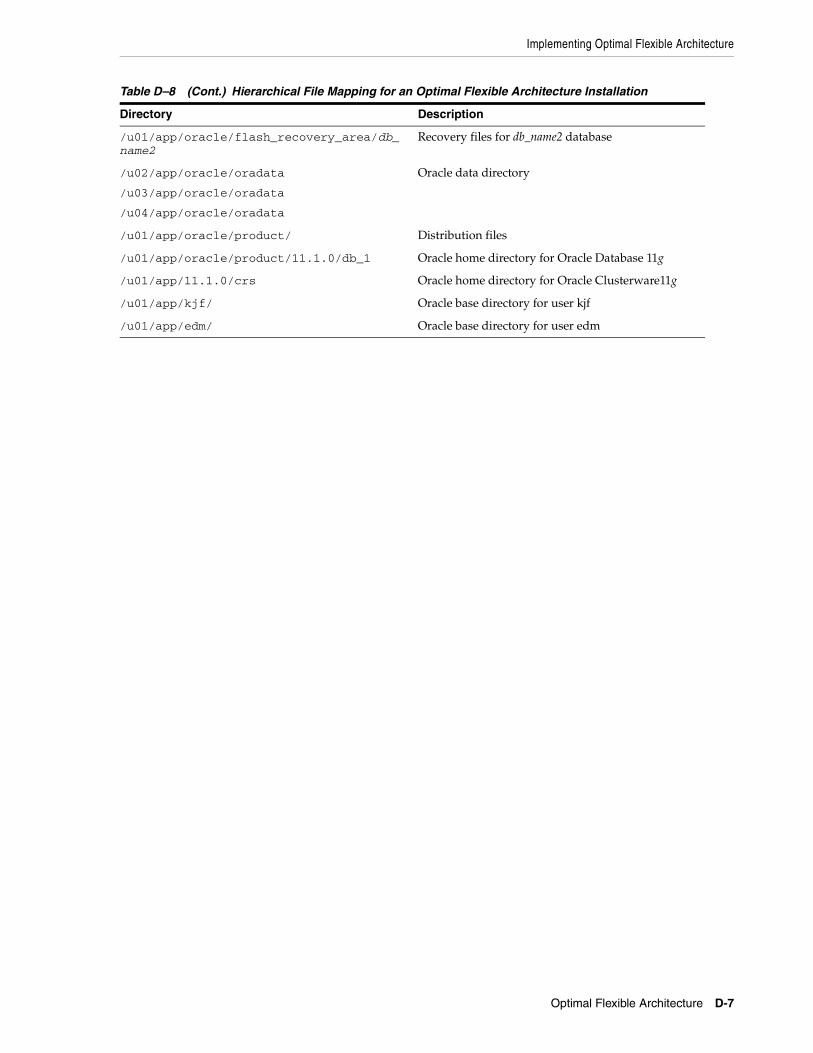
Implementing Optimal Flexible Architecture
Optimal Flexible Architecture D-7
/u01/app/oracle/flash_recovery_area/db_name2
Recovery files for db_name2 database
/u02/app/oracle/oradata
/u03/app/oracle/oradata
/u04/app/oracle/oradata
Oracle data directory
/u01/app/oracle/product/ Distribution files
/u01/app/oracle/product/11.1.0/db_1 Oracle home directory for Oracle Database 11g
/u01/app/11.1.0/crs Oracle home directory for Oracle Clusterware11g
/u01/app/kjf/ Oracle base directory for user kjf
/u01/app/edm/ Oracle base directory for user edm
Table D–8 (Cont.) Hierarchical File Mapping for an Optimal Flexible Architecture Installation
Directory Description

Implementing Optimal Flexible Architecture
D-8 Oracle Database Installation Guide
E
Managing Oracle Database Port Numbers E-1
E Managing Oracle Database Port Numbers
During installation, Oracle Universal Installer assigns port numbers to components from a set of default port numbers. This appendix lists the default port numbers and describes how to change the assigned port after installation. It includes information about the following topics:
■ About Managing Ports
■ Viewing Port Numbers and Access URLs
■ Port Numbers and Protocols of Oracle Components
■ Changing the Oracle Enterprise Management Agent Port
■ Changing the Oracle Enterprise Manager Database Console Ports
■ Changing the Oracle Ultra Search Ports
■ Changing the Oracle XML DB Ports
About Managing PortsDuring installation, Oracle Universal Installer assigns port numbers to components from a set of default port numbers. Many Oracle Database components and services use ports. As an administrator, it is important to know the port numbers used by these services, and to make sure that the same port number is not used by two services on your host.
Most port numbers are assigned during installation. Every component and service has an allotted port range, which is the set of port numbers Oracle Database attempts to use when assigning a port. Oracle Database starts with the lowest number in the range and performs the following checks:
■ Is the port used by another Oracle Database installation on the host?
The installation may be up or down at the time; Oracle Database can still detect if the port is used.
■ Is the port used by a process that is currently running?
This could be any process on the host, even a non-Oracle Database process.
■ Is the port listed in the /etc/services files?
If the answer to any of the preceding questions is yes, Oracle Database moves to the next highest port in the allotted port range and continues checking until it finds a free port.
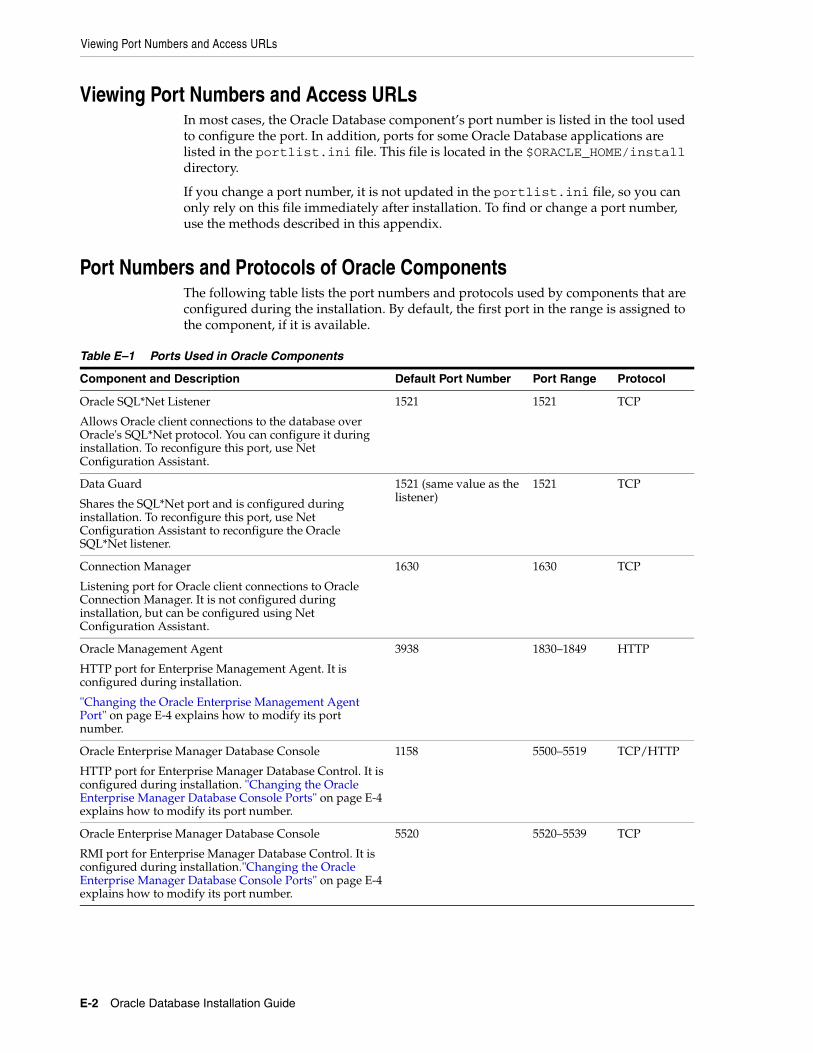
Viewing Port Numbers and Access URLs
E-2 Oracle Database Installation Guide
Viewing Port Numbers and Access URLsIn most cases, the Oracle Database component’s port number is listed in the tool used to configure the port. In addition, ports for some Oracle Database applications are listed in the portlist.ini file. This file is located in the $ORACLE_HOME/install directory.
If you change a port number, it is not updated in the portlist.ini file, so you can only rely on this file immediately after installation. To find or change a port number, use the methods described in this appendix.
Port Numbers and Protocols of Oracle ComponentsThe following table lists the port numbers and protocols used by components that are configured during the installation. By default, the first port in the range is assigned to the component, if it is available.
Table E–1 Ports Used in Oracle Components
Component and Description Default Port Number Port Range Protocol
Oracle SQL*Net Listener
Allows Oracle client connections to the database over Oracle's SQL*Net protocol. You can configure it during installation. To reconfigure this port, use Net Configuration Assistant.
1521 1521 TCP
Data Guard
Shares the SQL*Net port and is configured during installation. To reconfigure this port, use Net Configuration Assistant to reconfigure the Oracle SQL*Net listener.
1521 (same value as the listener)
1521 TCP
Connection Manager
Listening port for Oracle client connections to Oracle Connection Manager. It is not configured during installation, but can be configured using Net Configuration Assistant.
1630 1630 TCP
Oracle Management Agent
HTTP port for Enterprise Management Agent. It is configured during installation.
"Changing the Oracle Enterprise Management Agent Port" on page E-4 explains how to modify its port number.
3938 1830–1849 HTTP
Oracle Enterprise Manager Database Console
HTTP port for Enterprise Manager Database Control. It is configured during installation. "Changing the Oracle Enterprise Manager Database Console Ports" on page E-4 explains how to modify its port number.
1158 5500–5519 TCP/HTTP
Oracle Enterprise Manager Database Console
RMI port for Enterprise Manager Database Control. It is configured during installation."Changing the Oracle Enterprise Manager Database Console Ports" on page E-4 explains how to modify its port number.
5520 5520–5539 TCP
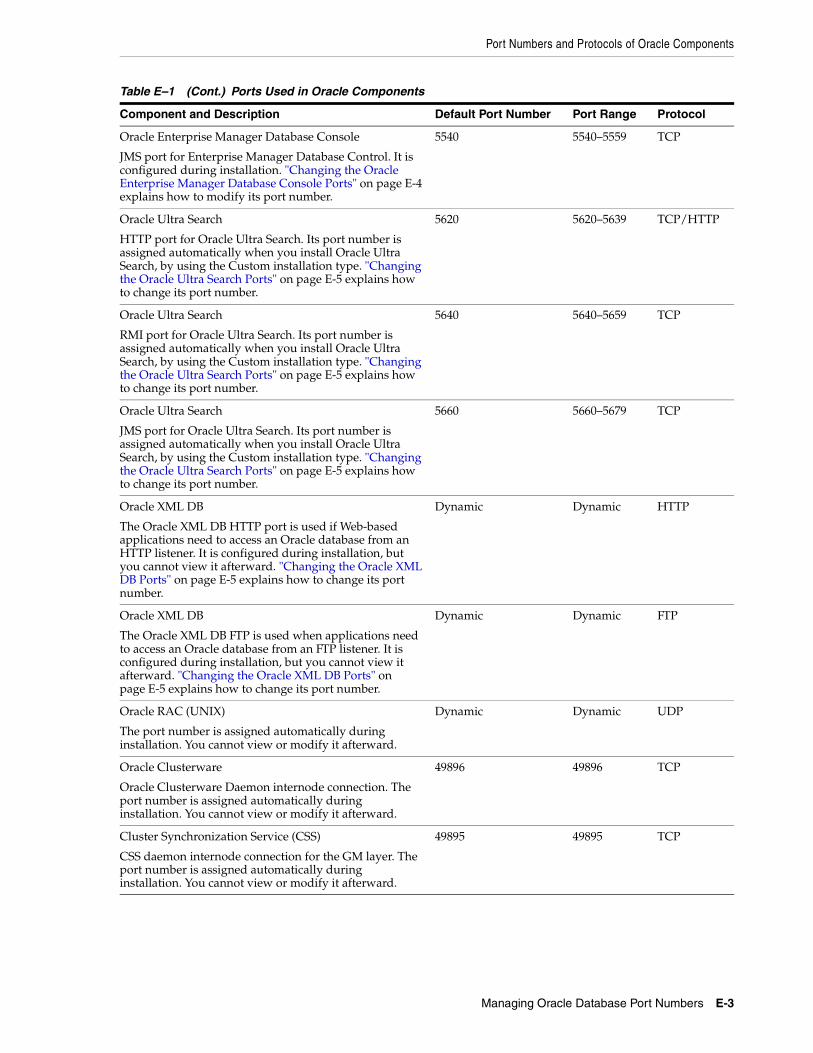
Port Numbers and Protocols of Oracle Components
Managing Oracle Database Port Numbers E-3
Oracle Enterprise Manager Database Console
JMS port for Enterprise Manager Database Control. It is configured during installation. "Changing the Oracle Enterprise Manager Database Console Ports" on page E-4 explains how to modify its port number.
5540 5540–5559 TCP
Oracle Ultra Search
HTTP port for Oracle Ultra Search. Its port number is assigned automatically when you install Oracle Ultra Search, by using the Custom installation type. "Changing the Oracle Ultra Search Ports" on page E-5 explains how to change its port number.
5620 5620–5639 TCP/HTTP
Oracle Ultra Search
RMI port for Oracle Ultra Search. Its port number is assigned automatically when you install Oracle Ultra Search, by using the Custom installation type. "Changing the Oracle Ultra Search Ports" on page E-5 explains how to change its port number.
5640 5640–5659 TCP
Oracle Ultra Search
JMS port for Oracle Ultra Search. Its port number is assigned automatically when you install Oracle Ultra Search, by using the Custom installation type. "Changing the Oracle Ultra Search Ports" on page E-5 explains how to change its port number.
5660 5660–5679 TCP
Oracle XML DB
The Oracle XML DB HTTP port is used if Web-based applications need to access an Oracle database from an HTTP listener. It is configured during installation, but you cannot view it afterward. "Changing the Oracle XML DB Ports" on page E-5 explains how to change its port number.
Dynamic Dynamic HTTP
Oracle XML DB
The Oracle XML DB FTP is used when applications need to access an Oracle database from an FTP listener. It is configured during installation, but you cannot view it afterward. "Changing the Oracle XML DB Ports" on page E-5 explains how to change its port number.
Dynamic Dynamic FTP
Oracle RAC (UNIX)
The port number is assigned automatically during installation. You cannot view or modify it afterward.
Dynamic Dynamic UDP
Oracle Clusterware
Oracle Clusterware Daemon internode connection. The port number is assigned automatically during installation. You cannot view or modify it afterward.
49896 49896 TCP
Cluster Synchronization Service (CSS)
CSS daemon internode connection for the GM layer. The port number is assigned automatically during installation. You cannot view or modify it afterward.
49895 49895 TCP
Table E–1 (Cont.) Ports Used in Oracle Components
Component and Description Default Port Number Port Range Protocol
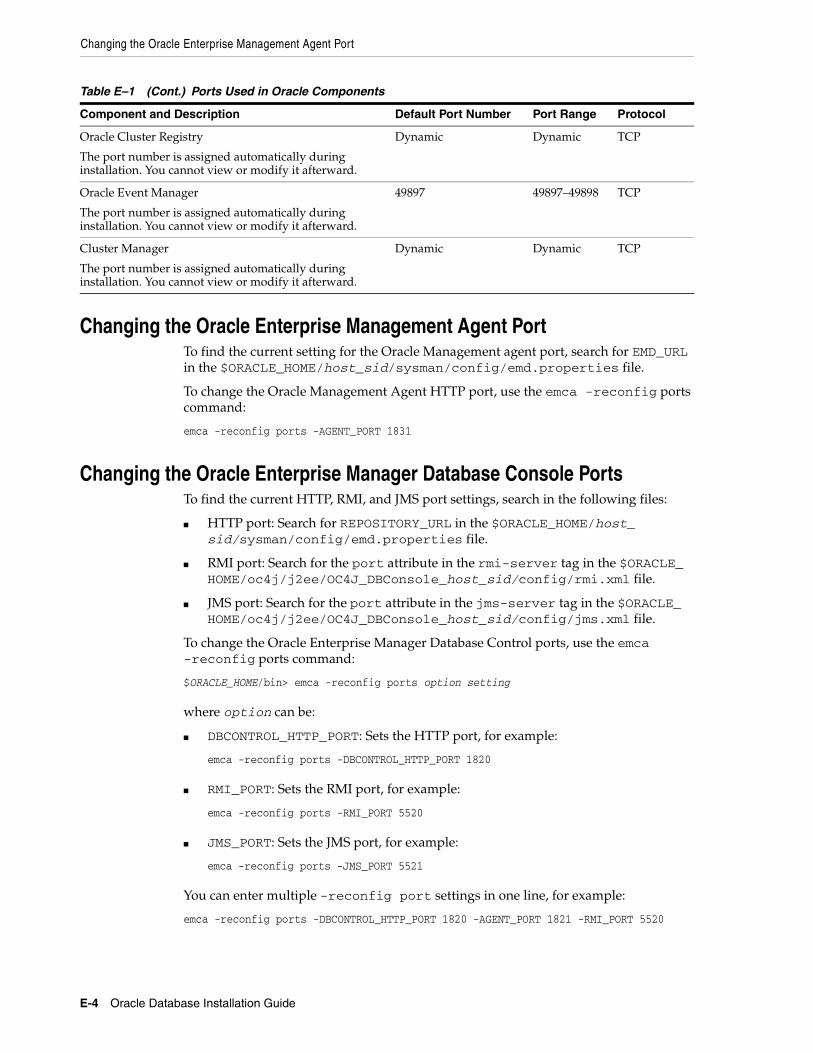
Changing the Oracle Enterprise Management Agent Port
E-4 Oracle Database Installation Guide
Changing the Oracle Enterprise Management Agent PortTo find the current setting for the Oracle Management agent port, search for EMD_URL in the $ORACLE_HOME/host_sid/sysman/config/emd.properties file.
To change the Oracle Management Agent HTTP port, use the emca -reconfig ports command:
emca -reconfig ports -AGENT_PORT 1831
Changing the Oracle Enterprise Manager Database Console PortsTo find the current HTTP, RMI, and JMS port settings, search in the following files:
■ HTTP port: Search for REPOSITORY_URL in the $ORACLE_HOME/host_sid/sysman/config/emd.properties file.
■ RMI port: Search for the port attribute in the rmi-server tag in the $ORACLE_HOME/oc4j/j2ee/OC4J_DBConsole_host_sid/config/rmi.xml file.
■ JMS port: Search for the port attribute in the jms-server tag in the $ORACLE_HOME/oc4j/j2ee/OC4J_DBConsole_host_sid/config/jms.xml file.
To change the Oracle Enterprise Manager Database Control ports, use the emca -reconfig ports command:
$ORACLE_HOME/bin> emca -reconfig ports option setting
where option can be:
■ DBCONTROL_HTTP_PORT: Sets the HTTP port, for example:
emca -reconfig ports -DBCONTROL_HTTP_PORT 1820
■ RMI_PORT: Sets the RMI port, for example:
emca -reconfig ports -RMI_PORT 5520
■ JMS_PORT: Sets the JMS port, for example:
emca -reconfig ports -JMS_PORT 5521
You can enter multiple -reconfig port settings in one line, for example:
emca -reconfig ports -DBCONTROL_HTTP_PORT 1820 -AGENT_PORT 1821 -RMI_PORT 5520
Oracle Cluster Registry
The port number is assigned automatically during installation. You cannot view or modify it afterward.
Dynamic Dynamic TCP
Oracle Event Manager
The port number is assigned automatically during installation. You cannot view or modify it afterward.
49897 49897–49898 TCP
Cluster Manager
The port number is assigned automatically during installation. You cannot view or modify it afterward.
Dynamic Dynamic TCP
Table E–1 (Cont.) Ports Used in Oracle Components
Component and Description Default Port Number Port Range Protocol
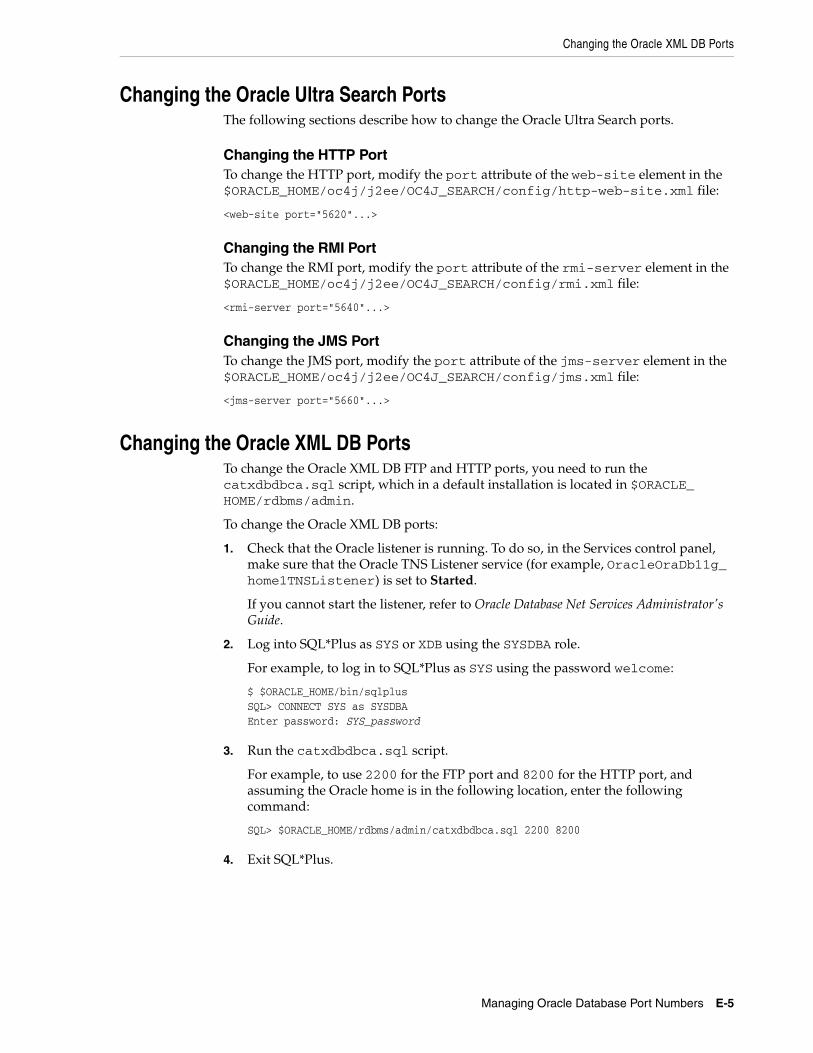
Changing the Oracle XML DB Ports
Managing Oracle Database Port Numbers E-5
Changing the Oracle Ultra Search PortsThe following sections describe how to change the Oracle Ultra Search ports.
Changing the HTTP PortTo change the HTTP port, modify the port attribute of the web-site element in the $ORACLE_HOME/oc4j/j2ee/OC4J_SEARCH/config/http-web-site.xml file:
<web-site port="5620"...>
Changing the RMI PortTo change the RMI port, modify the port attribute of the rmi-server element in the $ORACLE_HOME/oc4j/j2ee/OC4J_SEARCH/config/rmi.xml file:
<rmi-server port="5640"...>
Changing the JMS PortTo change the JMS port, modify the port attribute of the jms-server element in the $ORACLE_HOME/oc4j/j2ee/OC4J_SEARCH/config/jms.xml file:
<jms-server port="5660"...>
Changing the Oracle XML DB PortsTo change the Oracle XML DB FTP and HTTP ports, you need to run the catxdbdbca.sql script, which in a default installation is located in $ORACLE_HOME/rdbms/admin.
To change the Oracle XML DB ports:
1. Check that the Oracle listener is running. To do so, in the Services control panel, make sure that the Oracle TNS Listener service (for example, OracleOraDb11g_home1TNSListener) is set to Started.
If you cannot start the listener, refer to Oracle Database Net Services Administrator's Guide.
2. Log into SQL*Plus as SYS or XDB using the SYSDBA role.
For example, to log in to SQL*Plus as SYS using the password welcome:
$ $ORACLE_HOME/bin/sqlplus SQL> CONNECT SYS as SYSDBAEnter password: SYS_password
3. Run the catxdbdbca.sql script.
For example, to use 2200 for the FTP port and 8200 for the HTTP port, and assuming the Oracle home is in the following location, enter the following command:
SQL> $ORACLE_HOME/rdbms/admin/catxdbdbca.sql 2200 8200
4. Exit SQL*Plus.

Changing the Oracle XML DB Ports
E-6 Oracle Database Installation Guide
F
Configuring Oracle Database Globalization Support F-1
F Configuring Oracle Database GlobalizationSupport
This appendix describes the following Globalization Support topics:
■ Installing and Using Oracle Components in Different Languages
■ Running Oracle Universal Installer in Different Languages
Installing and Using Oracle Components in Different LanguagesThis section describes the following procedures:
■ Configuring Oracle Components to Run in Different Languages
■ Installing Translation Resources
Configuring Oracle Components to Run in Different LanguagesYou can specify the language and the territory, or locale, in which you want to use Oracle components. The locale setting of a component determines the language of the user interface of the component and the globalization behavior, such as date and number formatting. Depending on the Oracle component, the locale of the component is either inherited from the operating system session that started the component, or is defined by the NLS_LANG environment variable.
The operating system locale usually influences Oracle components that are based on Java technology. The NLS_LANG environment variable usually influences Oracle components that use Oracle Client libraries such as OCI.
This section describes the following procedures:
■ Determining the Operating System Locale by Using the LANG Environment Variable
■ Configuring Locale and Character Sets by Using the NLS_LANG Environment Variable
Note: The user interface of an Oracle component will be displayed in a selected language only if the appropriate translation is available and has been installed. Otherwise, the user interface will be displayed in English.
Installing and Using Oracle Components in Different Languages
F-2 Oracle Database Installation Guide
Determining the Operating System Locale by Using the LANG Environment VariableThe locale setting of your operating system session determines the language of the user interface and the globalization behavior for components such as Oracle Universal Installer, Oracle Net Configuration Assistant, and Oracle Database Configuration Assistant. It also determines the globalization behavior of Oracle Database sessions created by a user application through Oracle JDBC driver, unless overridden by the application.
The operating system locale on AIX is determined by the value of the LANG environment variable. Depending on your desktop environment, such as KDE, GNOME, or telnet, you can select a default session locale on a login screen, in a configuration panel, or in a configuration file.
You can modify the LANG variable in the environment of your shell to start an Oracle component in a selected language. For example, to start Oracle Database Configuration Assistant in German, enter one of the following commands:
■ Bourne shell (sh), or Korn shell (ksh), or Bash shell (bash):
$ LANG=de_DE.iso88591 dbca
■ C shell (csh):
% (setenv LANG de_DE.iso88591; dbca)
To modify the operating system locale for all Oracle components started from now on by the given shell, modify the LANG variable using one of the following commands:
■ Bourne shell (sh), or Korn shell (ksh), or Bash shell (bash):
$ LANG=de_DE.iso88591; export LANG$ ...
■ C shell (csh):
% setenv LANG de_DE.iso88591$ ...
The value of the LANG environment variable must be a valid operating system locale. To see the list of valid locales, enter the following command:
$ locale -a
Note: Refer to the operating system documentation on how to select a locale for the operating system session in your desktop environment.
Note: The LC_ALL environment variable overrides the value of the LANG environment variable. For the commands listed in the following section to work, either ensure that the LC_ALL environment variable is not set in the environment, or substitute LC_ALL for LANG.
Note: Refer to the operating system documentation for a mapping between values of the LANG environment variable and the languages and territories that they represent.
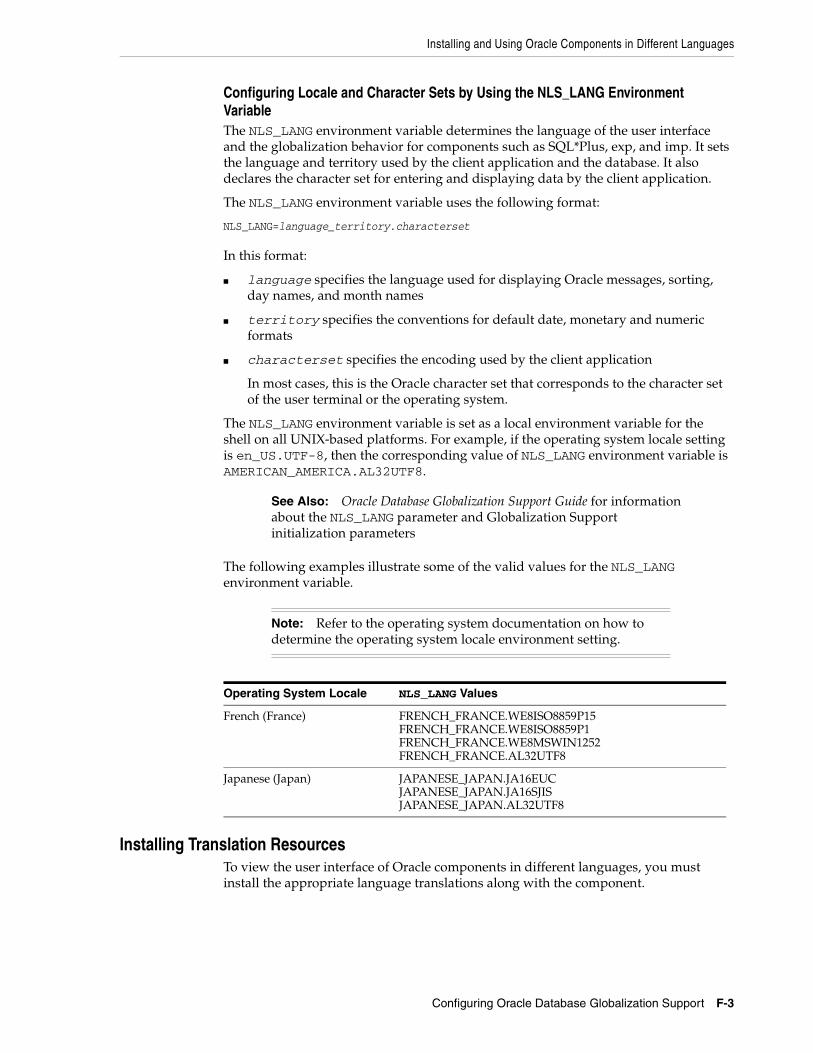
Installing and Using Oracle Components in Different Languages
Configuring Oracle Database Globalization Support F-3
Configuring Locale and Character Sets by Using the NLS_LANG Environment VariableThe NLS_LANG environment variable determines the language of the user interface and the globalization behavior for components such as SQL*Plus, exp, and imp. It sets the language and territory used by the client application and the database. It also declares the character set for entering and displaying data by the client application.
The NLS_LANG environment variable uses the following format:
NLS_LANG=language_territory.characterset
In this format:
■ language specifies the language used for displaying Oracle messages, sorting, day names, and month names
■ territory specifies the conventions for default date, monetary and numeric formats
■ characterset specifies the encoding used by the client application
In most cases, this is the Oracle character set that corresponds to the character set of the user terminal or the operating system.
The NLS_LANG environment variable is set as a local environment variable for the shell on all UNIX-based platforms. For example, if the operating system locale setting is en_US.UTF-8, then the corresponding value of NLS_LANG environment variable is AMERICAN_AMERICA.AL32UTF8.
The following examples illustrate some of the valid values for the NLS_LANG environment variable.
Installing Translation ResourcesTo view the user interface of Oracle components in different languages, you must install the appropriate language translations along with the component.
See Also: Oracle Database Globalization Support Guide for information about the NLS_LANG parameter and Globalization Support initialization parameters
Note: Refer to the operating system documentation on how to determine the operating system locale environment setting.
Operating System Locale NLS_LANG Values
French (France) FRENCH_FRANCE.WE8ISO8859P15FRENCH_FRANCE.WE8ISO8859P1FRENCH_FRANCE.WE8MSWIN1252FRENCH_FRANCE.AL32UTF8
Japanese (Japan) JAPANESE_JAPAN.JA16EUCJAPANESE_JAPAN.JA16SJISJAPANESE_JAPAN.AL32UTF8
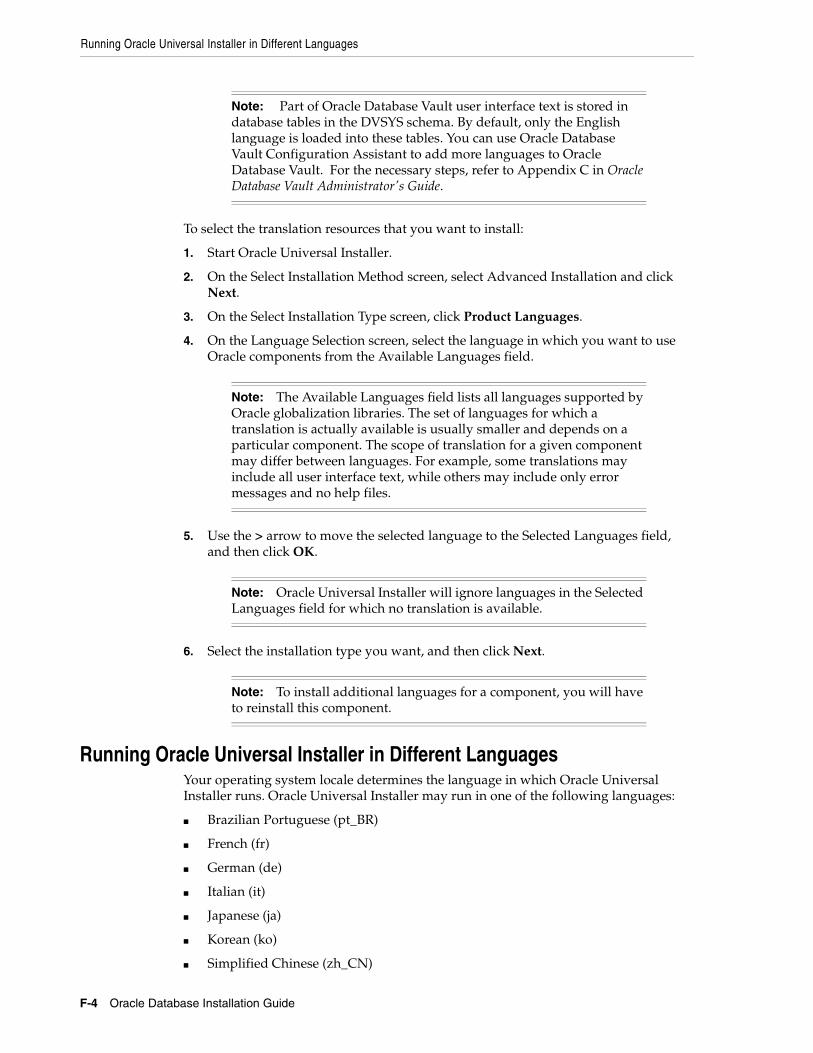
Running Oracle Universal Installer in Different Languages
F-4 Oracle Database Installation Guide
To select the translation resources that you want to install:
1. Start Oracle Universal Installer.
2. On the Select Installation Method screen, select Advanced Installation and click Next.
3. On the Select Installation Type screen, click Product Languages.
4. On the Language Selection screen, select the language in which you want to use Oracle components from the Available Languages field.
5. Use the > arrow to move the selected language to the Selected Languages field, and then click OK.
6. Select the installation type you want, and then click Next.
Running Oracle Universal Installer in Different LanguagesYour operating system locale determines the language in which Oracle Universal Installer runs. Oracle Universal Installer may run in one of the following languages:
■ Brazilian Portuguese (pt_BR)
■ French (fr)
■ German (de)
■ Italian (it)
■ Japanese (ja)
■ Korean (ko)
■ Simplified Chinese (zh_CN)
Note: Part of Oracle Database Vault user interface text is stored in database tables in the DVSYS schema. By default, only the English language is loaded into these tables. You can use Oracle Database Vault Configuration Assistant to add more languages to Oracle Database Vault. For the necessary steps, refer to Appendix C in Oracle Database Vault Administrator's Guide.
Note: The Available Languages field lists all languages supported by Oracle globalization libraries. The set of languages for which a translation is actually available is usually smaller and depends on a particular component. The scope of translation for a given component may differ between languages. For example, some translations may include all user interface text, while others may include only error messages and no help files.
Note: Oracle Universal Installer will ignore languages in the Selected Languages field for which no translation is available.
Note: To install additional languages for a component, you will have to reinstall this component.

Running Oracle Universal Installer in Different Languages
Configuring Oracle Database Globalization Support F-5
■ Spanish (es)
■ Traditional Chinese (zh_TW)
To run Oracle Universal Installer in one of the available languages, change the locale in which your operating system session is running before you start Oracle Universal Installer with the ./runInstaller command. If the selected language is not one of them listed earlier, Oracle Universal Installer runs in English.
You need to ensure that the selected value for the LANG environment variable starts with the appropriate language abbreviation. In the aforementioned list of languages, in which Oracle Universal Installer can run, the required abbreviation appears in parentheses beside the language name. For example, fr_FR and fr_CA are valid values to run the Oracle Universal Installer in French.

Running Oracle Universal Installer in Different Languages
F-6 Oracle Database Installation Guide

G
Troubleshooting G-1
G Troubleshooting
This appendix contains information about troubleshooting. It includes information about the following topics:
■ Verify Requirements
■ X Window Display Errors
■ What to Do If an Installation Error Occurs?
■ Reviewing the Log of an Installation Session
■ Troubleshooting Hostname Changes and CSS
■ Troubleshooting Oracle Configuration Manager
■ Troubleshooting Configuration Assistants
■ Silent-Mode Response File Error Handling
■ Cleaning Up After a Failed Installation
■ After Failed Upgrade Installation
■ Images Displaying Incorrectly in Oracle Application Express
■ Online Help Not Working
Verify RequirementsBefore performing any of the troubleshooting steps in this appendix, ensure that the system meets the requirements and that you have completed all of the preinstallation tasks specified in Chapter 2.
Read the Release NotesRead the release notes for the product before installing it. The release notes are available on the Oracle Database 11g DVD. The latest version of the release notes is also available on the Oracle Technology Network Web site:
http://www.oracle.com/technology/documentation/
X Window Display ErrorsIf you run Oracle Universal Installer on a remote system and you want to display Oracle Universal Installer’s user interface on your local system, you might see error messages similar to the following:
"Failed to connect to server""Connection refused by server"
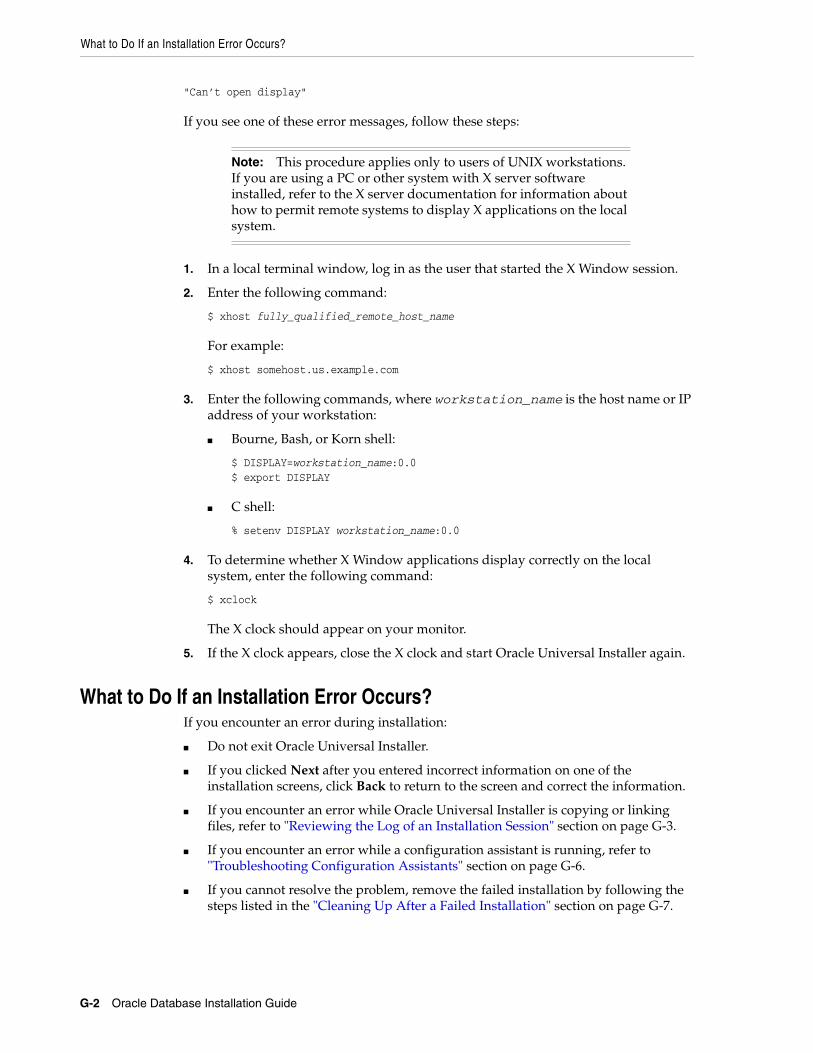
What to Do If an Installation Error Occurs?
G-2 Oracle Database Installation Guide
"Can’t open display"
If you see one of these error messages, follow these steps:
1. In a local terminal window, log in as the user that started the X Window session.
2. Enter the following command:
$ xhost fully_qualified_remote_host_name
For example:
$ xhost somehost.us.example.com
3. Enter the following commands, where workstation_name is the host name or IP address of your workstation:
■ Bourne, Bash, or Korn shell:
$ DISPLAY=workstation_name:0.0$ export DISPLAY
■ C shell:
% setenv DISPLAY workstation_name:0.0
4. To determine whether X Window applications display correctly on the local system, enter the following command:
$ xclock
The X clock should appear on your monitor.
5. If the X clock appears, close the X clock and start Oracle Universal Installer again.
What to Do If an Installation Error Occurs?If you encounter an error during installation:
■ Do not exit Oracle Universal Installer.
■ If you clicked Next after you entered incorrect information on one of the installation screens, click Back to return to the screen and correct the information.
■ If you encounter an error while Oracle Universal Installer is copying or linking files, refer to "Reviewing the Log of an Installation Session" section on page G-3.
■ If you encounter an error while a configuration assistant is running, refer to "Troubleshooting Configuration Assistants" section on page G-6.
■ If you cannot resolve the problem, remove the failed installation by following the steps listed in the "Cleaning Up After a Failed Installation" section on page G-7.
Note: This procedure applies only to users of UNIX workstations. If you are using a PC or other system with X server software installed, refer to the X server documentation for information about how to permit remote systems to display X applications on the local system.

Troubleshooting Hostname Changes and CSS
Troubleshooting G-3
Reviewing the Log of an Installation SessionDuring an installation, Oracle Universal Installer records all of the actions that it performs in a log file. If you encounter problems during the installation, review the log file for information about possible causes of the problem.
If you run Oracle Universal Installer during the time that daily cron jobs run, then you may encounter unexplained installation problems if your cron job is performing cleanup, and temporary files are deleted before the installation is finished. Oracle recommends that you complete installation before daily cron jobs are run, or disable daily cron jobs that perform cleanup until after the installation is completed.
To view the log file, follow these steps:
1. If necessary, enter the following command to determine the location of the oraInventory directory:
$ cat /etc/oraInst.loc
The inventory_loc parameter in this file specifies the location of the oraInventory directory.
2. Enter the following command to change directory to Oracle Universal Installer log file directory, where orainventory_location is the location of the oraInventory directory:
$ cd /orainventory_location/logs
3. Enter the following command to determine the name of the log file:
$ ls -ltr
This command lists the files in the order of creation, with the most recent file shown last. Installer log files have names similar to the following, where date_time indicates the date and time that the installation started:
installActionsdate_time.log
4. To view the most recent entries in the log file, where information about a problem is most likely to appear, enter a command similar to the following:
$ tail -50 installActionsdate_time.log | more
This command displays the last 50 lines in the log file.
5. If the error displayed by Oracle Universal Installer or listed in the log file indicates a relinking problem, refer to the following file for more information:
$ORACLE_HOME/install/make.log
Troubleshooting Hostname Changes and CSSIf you change the hostname for ASM, then the Oracle CSS daemon will not start. In order to counter this problem, please use the following steps:
■ Login as the root user
■ Run localconfig delete to deconfigure CSS. This will remove any configuration related files on the system that referenced the old hostname.
■ Run localconfig add to reconfigure CSS using the new hostname.
For Example:
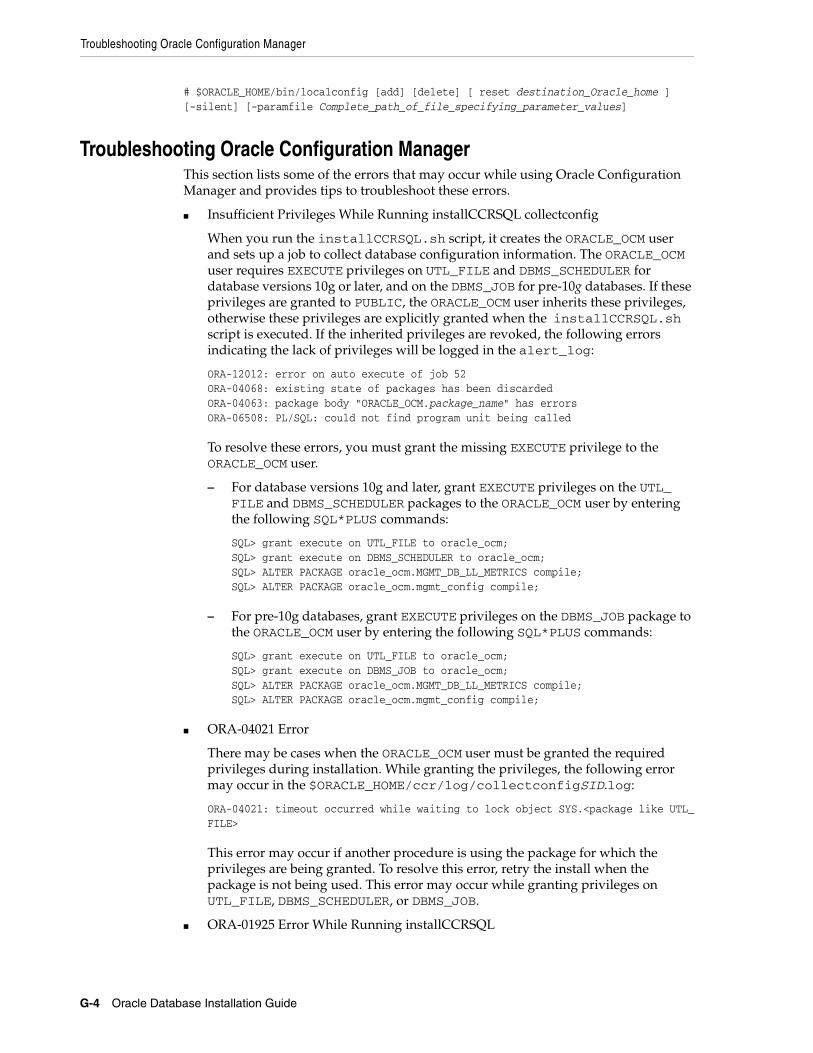
Troubleshooting Oracle Configuration Manager
G-4 Oracle Database Installation Guide
# $ORACLE_HOME/bin/localconfig [add] [delete] [ reset destination_Oracle_home ][-silent] [-paramfile Complete_path_of_file_specifying_parameter_values]
Troubleshooting Oracle Configuration ManagerThis section lists some of the errors that may occur while using Oracle Configuration Manager and provides tips to troubleshoot these errors.
■ Insufficient Privileges While Running installCCRSQL collectconfig
When you run the installCCRSQL.sh script, it creates the ORACLE_OCM user and sets up a job to collect database configuration information. The ORACLE_OCM user requires EXECUTE privileges on UTL_FILE and DBMS_SCHEDULER for database versions 10g or later, and on the DBMS_JOB for pre-10g databases. If these privileges are granted to PUBLIC, the ORACLE_OCM user inherits these privileges, otherwise these privileges are explicitly granted when the installCCRSQL.sh script is executed. If the inherited privileges are revoked, the following errors indicating the lack of privileges will be logged in the alert_log:
ORA-12012: error on auto execute of job 52ORA-04068: existing state of packages has been discardedORA-04063: package body "ORACLE_OCM.package_name" has errorsORA-06508: PL/SQL: could not find program unit being called
To resolve these errors, you must grant the missing EXECUTE privilege to the ORACLE_OCM user.
– For database versions 10g and later, grant EXECUTE privileges on the UTL_FILE and DBMS_SCHEDULER packages to the ORACLE_OCM user by entering the following SQL*PLUS commands:
SQL> grant execute on UTL_FILE to oracle_ocm;SQL> grant execute on DBMS_SCHEDULER to oracle_ocm;SQL> ALTER PACKAGE oracle_ocm.MGMT_DB_LL_METRICS compile;SQL> ALTER PACKAGE oracle_ocm.mgmt_config compile;
– For pre-10g databases, grant EXECUTE privileges on the DBMS_JOB package to the ORACLE_OCM user by entering the following SQL*PLUS commands:
SQL> grant execute on UTL_FILE to oracle_ocm;SQL> grant execute on DBMS_JOB to oracle_ocm;SQL> ALTER PACKAGE oracle_ocm.MGMT_DB_LL_METRICS compile;SQL> ALTER PACKAGE oracle_ocm.mgmt_config compile;
■ ORA-04021 Error
There may be cases when the ORACLE_OCM user must be granted the required privileges during installation. While granting the privileges, the following error may occur in the $ORACLE_HOME/ccr/log/collectconfigSID.log:
ORA-04021: timeout occurred while waiting to lock object SYS.<package like UTL_FILE>
This error may occur if another procedure is using the package for which the privileges are being granted. To resolve this error, retry the install when the package is not being used. This error may occur while granting privileges on UTL_FILE, DBMS_SCHEDULER, or DBMS_JOB.
■ ORA-01925 Error While Running installCCRSQL

Troubleshooting Oracle Configuration Manager
Troubleshooting G-5
This error may occur if the value of the MAX_ENABLED_ROLES initialization parameter has been exceeded. To resolve this error, you must increase the value of the MAX_ENABLED_ROLES parameter and restart the database as follows:
1. Edit the initsid.ora file where sid is the database system identifier and increase the value of MAX_ENABLED_ROLES . If a server parameter (spfile) has been used, alter the MAX_ENABLED_ROLES parameter by using the following SQL*PLus command:
SQL>alter system set MAX_ENABLED_ROLES=value scope=spfile
2. Restart the database.
Once the database has been restarted, re-run the installCCRSQL.sh script.
■ Incorrectly configured hostnames are displayed on OracleMetaLink with only the short names
To ensure that hostnames are displayed with their fully qualified names on OracleMetaLink, the /etc/hosts file must contain an entry that includes both the hostname and the domain in the following format:
IP-Address Full-HostName Short-HostName
For example:
10.10.10.10 myhost.mydomain myhost
If the /etc/hosts file has not been correctly configured, only the short name is displayed on OracleMetaLink.
■ Oracle Configuration Manager Synchronization Messages: Oracle Configuration Manager does not allow you to run multiple commands simultaneously. If you attempt to do so, the following messages may be displayed:
– Message: Another operation is in progress. Please wait...
Description: There are several Oracle Configuration Manager commands that cannot run concurrently. If you try to run one of these commands while another command is in progress, the second command will not be executed until the first command is completed. A message indicating that another command is in progress is displayed. The second command will automatically be run when the first command is completed.
Commands: emCCR collect, emCCR getupdates, emCCR update_components, and emCCR upload
Action: Initially, take no action, the second command will be executed when the first command is completed. But if the command execution takes too long, a timeout will occur. If a timeout occurs, ensure there is no Oracle Configuration Manager activity by executing emCCR stop command. Delete the ccr/state/collector.lock file and restart the Scheduler by running the emCCR start command. If you run the command in Disconnected mode, ensure that no collection or update is taking place and then delete the ccr/state/collector.lock file.
– Message: Operation blocked, waiting..
Description: You cannot run the emCCR update_components command if any other emCCR command is running. If you try to run the command, it will be blocked. You also cannot run any emCCR command while emCCR update_components is running as all other commands will be blocked.
Commands: configCCR and most of the emCCR commands
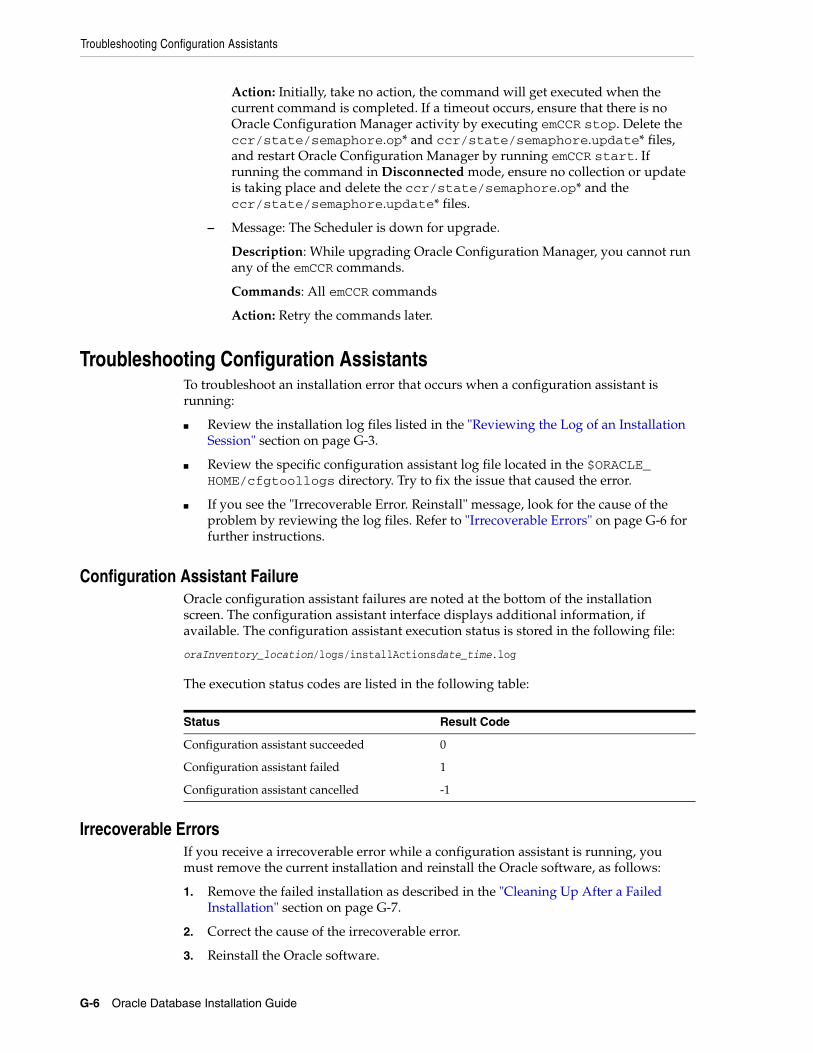
Troubleshooting Configuration Assistants
G-6 Oracle Database Installation Guide
Action: Initially, take no action, the command will get executed when the current command is completed. If a timeout occurs, ensure that there is no Oracle Configuration Manager activity by executing emCCR stop. Delete the ccr/state/semaphore.op* and ccr/state/semaphore.update* files, and restart Oracle Configuration Manager by running emCCR start. If running the command in Disconnected mode, ensure no collection or update is taking place and delete the ccr/state/semaphore.op* and the ccr/state/semaphore.update* files.
– Message: The Scheduler is down for upgrade.
Description: While upgrading Oracle Configuration Manager, you cannot run any of the emCCR commands.
Commands: All emCCR commands
Action: Retry the commands later.
Troubleshooting Configuration AssistantsTo troubleshoot an installation error that occurs when a configuration assistant is running:
■ Review the installation log files listed in the "Reviewing the Log of an Installation Session" section on page G-3.
■ Review the specific configuration assistant log file located in the $ORACLE_HOME/cfgtoollogs directory. Try to fix the issue that caused the error.
■ If you see the "Irrecoverable Error. Reinstall" message, look for the cause of the problem by reviewing the log files. Refer to "Irrecoverable Errors" on page G-6 for further instructions.
Configuration Assistant FailureOracle configuration assistant failures are noted at the bottom of the installation screen. The configuration assistant interface displays additional information, if available. The configuration assistant execution status is stored in the following file:
oraInventory_location/logs/installActionsdate_time.log
The execution status codes are listed in the following table:
Irrecoverable ErrorsIf you receive a irrecoverable error while a configuration assistant is running, you must remove the current installation and reinstall the Oracle software, as follows:
1. Remove the failed installation as described in the "Cleaning Up After a Failed Installation" section on page G-7.
2. Correct the cause of the irrecoverable error.
3. Reinstall the Oracle software.
Status Result Code
Configuration assistant succeeded 0
Configuration assistant failed 1
Configuration assistant cancelled -1
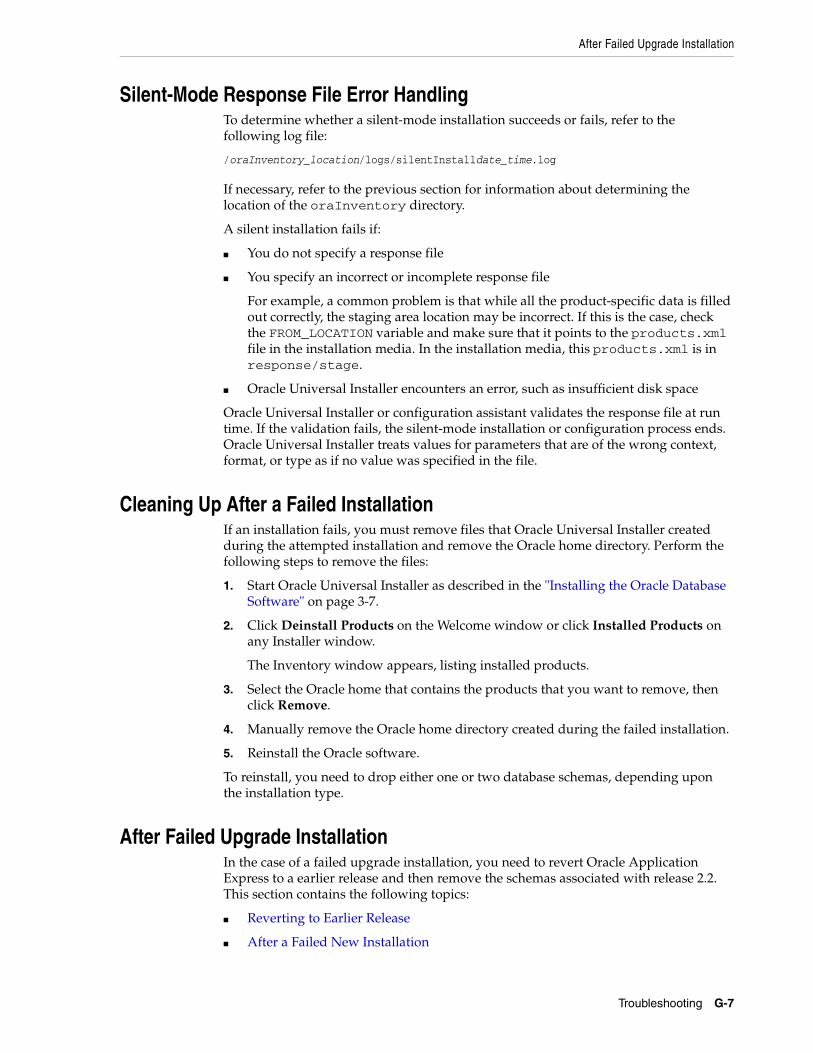
After Failed Upgrade Installation
Troubleshooting G-7
Silent-Mode Response File Error HandlingTo determine whether a silent-mode installation succeeds or fails, refer to the following log file:
/oraInventory_location/logs/silentInstalldate_time.log
If necessary, refer to the previous section for information about determining the location of the oraInventory directory.
A silent installation fails if:
■ You do not specify a response file
■ You specify an incorrect or incomplete response file
For example, a common problem is that while all the product-specific data is filled out correctly, the staging area location may be incorrect. If this is the case, check the FROM_LOCATION variable and make sure that it points to the products.xml file in the installation media. In the installation media, this products.xml is in response/stage.
■ Oracle Universal Installer encounters an error, such as insufficient disk space
Oracle Universal Installer or configuration assistant validates the response file at run time. If the validation fails, the silent-mode installation or configuration process ends. Oracle Universal Installer treats values for parameters that are of the wrong context, format, or type as if no value was specified in the file.
Cleaning Up After a Failed InstallationIf an installation fails, you must remove files that Oracle Universal Installer created during the attempted installation and remove the Oracle home directory. Perform the following steps to remove the files:
1. Start Oracle Universal Installer as described in the "Installing the Oracle Database Software" on page 3-7.
2. Click Deinstall Products on the Welcome window or click Installed Products on any Installer window.
The Inventory window appears, listing installed products.
3. Select the Oracle home that contains the products that you want to remove, then click Remove.
4. Manually remove the Oracle home directory created during the failed installation.
5. Reinstall the Oracle software.
To reinstall, you need to drop either one or two database schemas, depending upon the installation type.
After Failed Upgrade InstallationIn the case of a failed upgrade installation, you need to revert Oracle Application Express to a earlier release and then remove the schemas associated with release 2.2. This section contains the following topics:
■ Reverting to Earlier Release
■ After a Failed New Installation
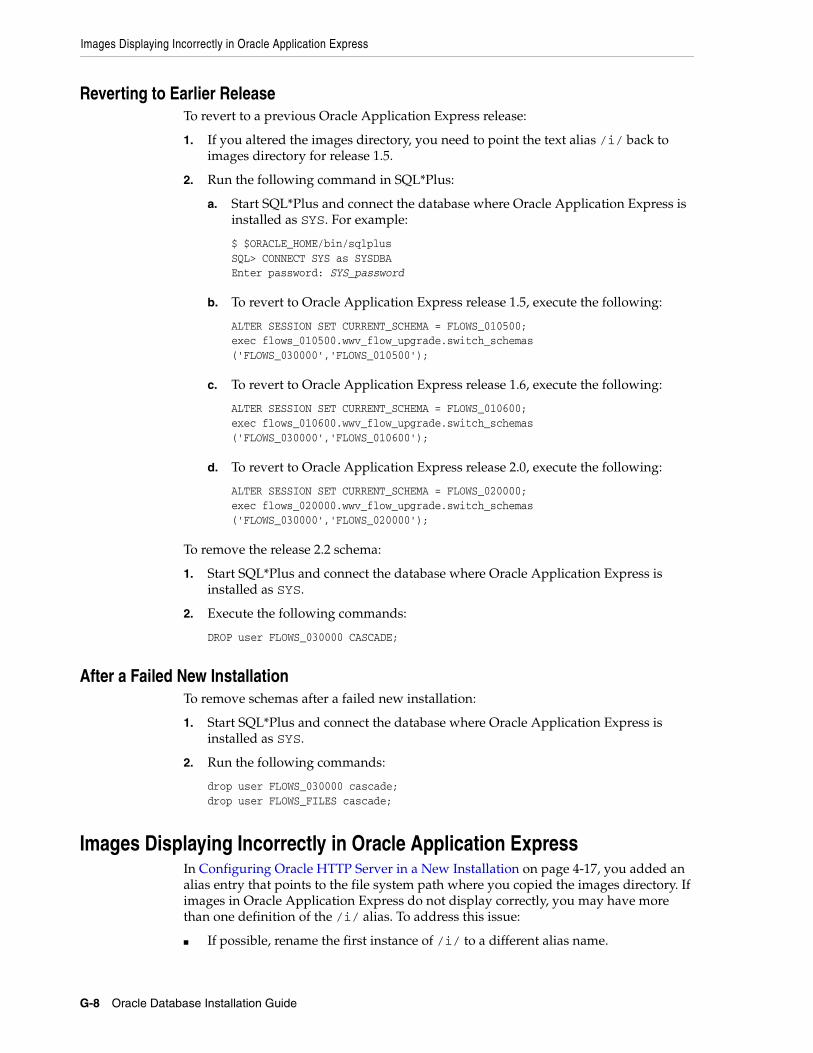
Images Displaying Incorrectly in Oracle Application Express
G-8 Oracle Database Installation Guide
Reverting to Earlier ReleaseTo revert to a previous Oracle Application Express release:
1. If you altered the images directory, you need to point the text alias /i/ back to images directory for release 1.5.
2. Run the following command in SQL*Plus:
a. Start SQL*Plus and connect the database where Oracle Application Express is installed as SYS. For example:
$ $ORACLE_HOME/bin/sqlplus SQL> CONNECT SYS as SYSDBAEnter password: SYS_password
b. To revert to Oracle Application Express release 1.5, execute the following:
ALTER SESSION SET CURRENT_SCHEMA = FLOWS_010500;exec flows_010500.wwv_flow_upgrade.switch_schemas('FLOWS_030000','FLOWS_010500');
c. To revert to Oracle Application Express release 1.6, execute the following:
ALTER SESSION SET CURRENT_SCHEMA = FLOWS_010600;exec flows_010600.wwv_flow_upgrade.switch_schemas('FLOWS_030000','FLOWS_010600');
d. To revert to Oracle Application Express release 2.0, execute the following:
ALTER SESSION SET CURRENT_SCHEMA = FLOWS_020000;exec flows_020000.wwv_flow_upgrade.switch_schemas('FLOWS_030000','FLOWS_020000');
To remove the release 2.2 schema:
1. Start SQL*Plus and connect the database where Oracle Application Express is installed as SYS.
2. Execute the following commands:
DROP user FLOWS_030000 CASCADE;
After a Failed New InstallationTo remove schemas after a failed new installation:
1. Start SQL*Plus and connect the database where Oracle Application Express is installed as SYS.
2. Run the following commands:
drop user FLOWS_030000 cascade;drop user FLOWS_FILES cascade;
Images Displaying Incorrectly in Oracle Application ExpressIn Configuring Oracle HTTP Server in a New Installation on page 4-17, you added an alias entry that points to the file system path where you copied the images directory. If images in Oracle Application Express do not display correctly, you may have more than one definition of the /i/ alias. To address this issue:
■ If possible, rename the first instance of /i/ to a different alias name.
Online Help Not Working
Troubleshooting G-9
■ Alternatively, copy the images from the $ORACLE_HOME/marvel/images directory to the directory defined by the first /i/ alias.
Online Help Not WorkingIf users are accessing Oracle Application Express through a Virtual Host, online Help will not work. Consider the following example:
■ The hostname of the Oracle HTTP Server where the Oracle Application Express DAD resides is internal.server.com and the port is 7777.
■ Users access Oracle Application Express through a Virtual Host. In their Web browsers, users see external.server.com and port 80.
In this example, Oracle Application Express online Help will not work if the users cannot access internal.server.com. To resolve this issue, add the following lines to the Oracle Application Express Database Access Descriptor (DAD) to override the CGI environment variables SERVER_NAME and SERVER_PORT:
PlsqlCGIEnvironmentList SERVER_NAME=external.server.comPlsqlCGIEnvironmentList SERVER_PORT=80
See Also: Oracle HTTP Server mod_plsql User's Guide for information on overriding the CGI environment variables.

Online Help Not Working
G-10 Oracle Database Installation Guide
H
Frequently Asked Questions About Installation H-1
H Frequently Asked Questions AboutInstallation
Use the following guidelines to decide how to install Oracle Database components:
■ Installing Oracle Database or Oracle Database
■ Installing Oracle Database Tools
■ Installing Oracle Database with Oracle Applications
■ Installing Oracle Database Heterogeneous Connectivity Tools (Gateways)
Installing Oracle Database or Oracle DatabaseThe following are frequently asked questions with respect to installing Oracle database:
■ I only need one instance of Oracle Database or I just want to install a test database to get familiar with the product. How do I install Oracle Database for these situations?
■ How can I create an Oracle database that can handle transaction-heavy or data warehousing applications?
■ What’s the best way to install multiple Oracle databases?
■ How do I configure client connections to an Oracle database?
■ What is the best way to install Oracle Client if my client nodes have limited disk space?
■ How do I upgrade Oracle Database?
■ The computers at my site have been configured to run as a cluster. How should I install Oracle Database?
■ How do I migrate my non-Oracle databases to Oracle Database?
Note: Some Oracle Database components may not be available on all platforms. Consult your platform-specific installation guide or release notes.

Installing Oracle Database or Oracle Database
H-2 Oracle Database Installation Guide
I only need one instance of Oracle Database or I just want to install a test database to get familiar with the product. How do I install Oracle Database for these situations?■ If you want a quick installation using the default installation settings, then refer to
the platform-specific Oracle Database Quick Installation Guide.
■ If your site has special requirements, then refer to this guide for more information.
How can I create an Oracle database that can handle transaction-heavy or data warehousing applications?If you want to create a starter database designed for transaction-heavy or data warehousing applications, then refer to this guide for more details. Select the Advanced Installation method, and then select the database type you want on the Select Database Configuration screen.
Alternatively, you can install Oracle OLAP during the Oracle Database installation. Oracle OLAP provides optimal support for database environments that must meet OLAP requirements. To do so, select Advanced Installation, then Custom, and on the Available Product Components screen, select Oracle OLAP.
What’s the best way to install multiple Oracle databases?Use this guide to install Oracle Database using either of the following methods:
■ Installing with response files: This method lets you run Oracle Universal Installer at a command line using a response file that contains settings specific to each computer.
■ Cloning an existing Oracle home: Install Oracle Database in one computer using interactive mode. Afterwards, you can clone its existing Oracle home in each location and then create a new database from there. Refer to Oracle Database Administrator's Guide for more information on cloning databases.
How do I configure client connections to an Oracle database?1. Install Oracle Database on a server by using this guide for more information.
2. Use platform-specific Oracle Database Client Installation Guide to install Oracle Client on each client node, and select the Instant Client installation type.
If you have many client nodes, consider staging the software centrally, mapping the drive, and running Oracle Universal Installer in the noninteractive mode.
If the client nodes only require a default installation into a new Oracle home directory, consider using this guide for more information.
What is the best way to install Oracle Client if my client nodes have limited disk space?1. Install Oracle Database onto a server by using this guide for more details.
See Also: Oracle Database Data Warehousing Guide after installation
See Also:
■ Oracle OLAP User's Guide
■ Oracle OLAP DML Reference
■ Oracle OLAP Java API Reference
Installing Oracle Database Tools
Frequently Asked Questions About Installation H-3
2. Use platform-specific Oracle Database Client Installation Guide to install Oracle Client on each client node, and select the Instant Client installation type.
If you have many client nodes, then consider running Oracle Universal Installer in noninteractive mode.
How do I upgrade Oracle Database?Refer to Oracle Database Upgrade Guide.
The computers at my site have been configured to run as a cluster. How should I install Oracle Database?Use any of the following installation scenarios:
■ If you want to run a single-instance Oracle Database in a clustered environment, then install Oracle Clusterware either before or after you install Oracle Database.
■ If you want a consolidated pool of storage for all databases in a cluster, then install Oracle Clusterware first and use Automatic Storage Management to manage this storage. Afterwards, install Oracle Database (which can be either single instance or Real Application Clusters).
■ If you plan to use Oracle Real Application Clusters, first install Oracle Clusterware, and then install Oracle Real Application Clusters.
Refer to platform-specific Oracle Clusterware Installation Guide and Oracle Real Application Clusters Installation Guide for AIX Based Systems for the platform to install Oracle Clusterware or Oracle Real Application Clusters. Oracle Clusterware is available on the Oracle Clusterware installation media. Refer to this guide which explains how to install Automatic Storage Management and Oracle Database.
Oracle Clusterware is a key component required by Oracle Real Application Clusters installations. Oracle Clusterware is an integrated cluster management solution that can bind multiple servers together to act as a single system. This is referred to as a cluster. It performs workload management and component restart. For example, when an instance supporting a particular service fails, Oracle Clusterware restarts the service on the next available instance that you have configured for that service. Oracle Clusterware can monitor non-Oracle programs, as long as they are defined within the Oracle Clusterware environment using the High Availability API.
How do I migrate my non-Oracle databases to Oracle Database?Use Oracle Migration Workbench to migrate your non-Oracle databases and applications to Oracle. Oracle Migration Workbench software and documentation are available at:
http://www.oracle.com/technology/tech/migration/index.html
Installing Oracle Database ToolsThe following are frequently asked questions with respect to installing Oracle database tools:
■ How do I install Oracle Application Server?
■ How can I administer and monitor my Oracle Database products?
■ How do I manage security for my Oracle Database products?
See Also: Oracle Database Administrator's Guide if you want to use software cloning to upgrade Oracle Database

Installing Oracle Database Tools
H-4 Oracle Database Installation Guide
■ How do I use Oracle Database to manage my XML data?
■ Does Oracle Database provide OLAP tools so that I can analyze data such as trends and time series in my database?
■ Does Oracle Database provide data mining tools that I can use to discover hidden meaning in my data and predict likely outcomes based on my data?
■ How do I perform backup and recovery operations for Oracle Database?
■ Is Oracle Workflow included with Oracle Database 11g?
■ Is there a migration plan for customers that have built solutions using Oracle Workflow?
How do I install Oracle Application Server?Refer to Oracle Application Server Installation Guide. How you install Application Server depends on whether you already have Oracle Database installed:
■ If you do not have Oracle Database installed or you do not want Oracle Application Server to use any of your existing Oracle Databases, then Oracle Universal Installer lets you install a separate Oracle Application Server instance. This database is populated with the metadata that Oracle Application Server must run.
■ If you want Oracle Application Server to use an existing Oracle Database, then do the following:
1. From the Oracle Application Server installation media, run Oracle Application Server Repository Creation Assistant to populate your database with the metadata that Application Server needs.
2. Install the remaining Oracle Application Server components by following the instructions in the Oracle Application Server Installation Guide.
How can I administer and monitor my Oracle Database products?To perform regular administrative functions such as creating, configuring, or deleting databases, or managing database templates, use one of the following methods:
To manage only the single database and listener that you are installing:
1. Use this guide to install Oracle Database.
2. From Oracle Database, use Database Configuration Assistant to manage your databases.
You can also administer and monitor the database with Oracle Enterprise Manager Grid Control, which is installed by default with Oracle Database. Oracle Enterprise Manager Grid Control includes the Oracle Management Agent, Oracle Management Service, and Oracle Management Repository, and Grid Control, a browser-based central console through which administrators can perform all monitoring, administration, and configuration tasks for the enterprise.
To perform advanced administration tasks, such as monitoring Oracle Database and managing multiple hosts, application servers, and databases including the one that you are installing, install Oracle Enterprise Manager as follows:
1. Use this guide to install Oracle Database.
See Also: Oracle Enterprise Manager Grid Control Installation and Basic Configuration available on the Enterprise Manager Grid Control installation media

Installing Oracle Database Tools
Frequently Asked Questions About Installation H-5
If you plan to use Oracle Real Application Clusters, then install Oracle Database by using platform-specific Oracle Clusterware Installation Guide and Oracle Real Application Clusters Installation Guide for AIX Based Systems.
2. Use Oracle Enterprise Manager Grid Control Installation and Basic Configuration to install and configure Oracle Enterprise Manager. For postconfiguration tasks, use Oracle Enterprise Manager Advanced Configuration.
How do I manage security for my Oracle Database products?Oracle provides a wide range of security solutions for your enterprise environment, including centralized administration and security features integrated with Oracle Internet Directory. The set of Oracle security services called Oracle Platform Security integrates the security features built into Oracle Database, Oracle Application Server, and the Oracle Identity Management infrastructure. Combined, these features enable the development and deployment of secure e-business applications.
Oracle Identity Management includes Oracle Internet Directory, a centralized repository that simplifies administration of users and applications in the Oracle environment by means of the following components:
■ Oracle Internet Directory client tools, including LDAP command-line tools, the Oracle Internet Directory SDK, and Oracle Directory Manager.
■ Oracle Internet Directory server components, including the directory server, the directory replication server, the directory integration server, and various tools for starting and stopping them.
Oracle Database includes the Oracle Internet Directory client tools, but not the Oracle Internet Directory server components. To install the Oracle Internet Directory server components, run Oracle Universal Installer from an Oracle 10g Application Server installation.
How do I use Oracle Database to manage my XML data?Use Oracle XML DB, which is installed as part of Oracle Database. Oracle XML DB enables you to efficiently store, generate, retrieve, query, and manage XML data on your site. Oracle XML DB provides all the advantages of a relational database, for example, allowing you to control the referential integrity of XML data with constraints and triggers. It works well with large amounts of XML data by storing it in a parsed, relational form, which improves access performance.
Oracle XML DB supports XML Type, which is a native data type for XML data, for which you can choose various storage options depending on your needs. In addition,
See Also:
■ Oracle Application Server Installation Guide (to install Oracle Identity Management)
■ Oracle Database Security Guide
■ Oracle Database Advanced Security Administrator's Guide
■ Oracle Database Enterprise User Security Administrator's Guide
■ Oracle Label Security Administrator's Guide
■ Oracle Application Server Security Guide
■ Oracle Technology Network topics on database security (http://www.oracle.com/technology/deploy/security/index.html)
Installing Oracle Database Tools
H-6 Oracle Database Installation Guide
Oracle XML DB supports XML Schema processing, structured and unstructured storage, a content repository that you can access by using common protocols (FTP, HTTP(S), and WebDAV), and SQL/XML, which is a standard for SQL with XML. For Oracle Database 11g Release 1 (11.1), Oracle XML DB introduced support for the XQuery language for querying, transforming, and constructing XML; the ability for users to define their own metadata for schema-based XML; a set of new SQL functions for DML operations on XML data; and more.
You can use Oracle XML DB in conjunction with Oracle XML Developer’s Kit (XDK) to build applications that run on either Oracle Database or Oracle Application Server.
Does Oracle Database provide OLAP tools so that I can analyze data such as trends and time series in my database?Yes, install Oracle OLAP, which is provided in the Oracle Database installation. Oracle OLAP provides optimal support for database environments that must meet OLAP requirements.
Use either of the following methods in Oracle Database Installation Guide to install Oracle OLAP:
■ When you run Oracle Universal Installer, select the Custom installation type, and in the Available Product Components screen, select Oracle OLAP.
■ Select the Enterprise Edition installation type, and then on the Select Database Configuration screen, select the Data Warehouse configuration.
Does Oracle Database provide data mining tools that I can use to discover hidden meaning in my data and predict likely outcomes based on my data?Yes. Install Oracle Data Mining, which is provided in the Oracle Database installation. With the Oracle Data Mining option, you can create and execute predictive and descriptive data mining models that use a variety of algorithms.
Use the following method in this guide to install Oracle Data Mining:
1. When you run Oracle Universal Installer, select the Enterprise Edition installation type.
2. In the Select Database Configuration screen, select the General Purpose/Transaction Processing configuration.
See Also:
■ Oracle XML DB Developer's Guide
■ Oracle XML Developer's Kit Programmer's Guide
See Also:
■ Oracle OLAP User's Guide
■ Oracle OLAP DML Reference
■ Oracle OLAP Java API Reference
See Also: Oracle Database Data Warehousing Guide after installation
Installing Oracle Database with Oracle Applications
Frequently Asked Questions About Installation H-7
How do I perform backup and recovery operations for Oracle Database?Use Oracle Database Recovery Manager (RMAN), which is a backup and recovery tool integrated into Oracle Database. This tool satisfies the pressing demands of high-performance, manageable backup, and recovery. Recovery Manager is native to the database server, automatically tracks database structure changes, and optimizes operations accordingly. In addition, Recovery Manager is integrated with leading tape media management products, so that Oracle database backups can be integrated with your existing networked data protection infrastructure.
Is Oracle Workflow included with Oracle Database 11g?Starting with Oracle Database 11g, Oracle Workflow is no longer released with the database. Oracle Workflow will be available with the Oracle E-Business Suite releases.
Is there a migration plan for customers that have built solutions using Oracle Workflow? Starting January 2006, customers are encouraged to re-create and implement workflows using Oracle BPEL Process Manager. Oracle is in the process of creating a technical migration guide that will provide detailed recommendations for migrating Oracle Workflow processes to Oracle BPEL Process Manager.
Installing Oracle Database with Oracle ApplicationsThe following are frequently asked questions with respect to installing Oracle database with Oracle applications:
■ How do I install my Oracle applications with Oracle Database?
■ How can I create Web applications that communicate with Oracle Database?
■ Which Web server can my Oracle applications use?
■ How can I migrate my non-Oracle applications to Oracle?
See Also: The following manuals after you have installed Oracle Data Mining:
■ Oracle Data Mining Concepts
■ Oracle Data Mining Administrator's Guide
■ Oracle Data Mining Application Developer's Guide
■ Oracle Data Mining Java API Reference
■ Oracle Database PL/SQL Packages and Types Reference (search for Data Mining)
See Also:
■ Oracle Database Backup and Recovery User's Guide
■ Oracle Database Backup and Recovery Reference
See Also: Oracle Workflow statement of direction (http://www.oracle.com/technology/products/ias/workflow/workflow_sod.html)
See Also: Oracle Workflow statement of direction (http://www.oracle.com/technology/products/ias/workflow/workflow_sod.html)
Installing Oracle Database Heterogeneous Connectivity Tools (Gateways)
H-8 Oracle Database Installation Guide
How do I install my Oracle applications with Oracle Database?In most cases, install Oracle Database itself, then install the Oracle application. The Oracle Universal Installer for that application prompts you for the connection information. Check the application documentation requirements.
If you need to implement your applications with Oracle Real Applications Clusters databases, refer to Oracle Real Application Clusters Installation Guide for AIX Based Systems and platform-specific Oracle Clusterware Installation Guide.
How can I create Web applications that communicate with Oracle Database?Install Oracle Application Express and a web server:
Use this guide to install Oracle Database. Oracle Application Express is automatically installed, when you install Oracle database.
Which Web server can my Oracle applications use?Install Oracle HTTP Server:
Use this guide to install Oracle Database.
How can I migrate my non-Oracle applications to Oracle? Use Oracle Migration Workbench to migrate your non-Oracle applications to Oracle. Oracle Migration Workbench software and documentation are available at:
http://www.oracle.com/technology/tech/migration/index.html
Installing Oracle Database Heterogeneous Connectivity Tools (Gateways)The following section discusses about Gateway products:
How can my Oracle applications access data in a non-Oracle database system?
How can my Oracle applications access data in a non-Oracle database system?You can use Oracle Database Gateway as the connectivity tool to enable Oracle applications to access data in non-Oracle databases. The following are the functions of Oracle Database Gateway:
■ Integrates a non-Oracle database into your Oracle Database environment.
■ Enables Oracle PL/SQL applications to integrate with APPC-enabled transactions, or access messages in IBM Websphere MQ.
You can install the Gateway product on a computer independent of the Oracle application, Oracle database, and non-Oracle database.
For example, suppose you have the following scenario:
■ Oracle Database is installed on an UNIX computer.
■ The Oracle application is installed on a Microsoft Windows computer and accesses data from the Oracle database on the UNIX computer.
■ The Oracle application must join data in a DB2 database on Solaris Operating System and an Oracle Database on UNIX.
You have the option of installing the Database Gateway for DRDA on the Solaris computer where DB2 is running, on UNIX where Oracle is running, or on a third computer.

Installing Oracle Database Heterogeneous Connectivity Tools (Gateways)
Frequently Asked Questions About Installation H-9
Table H–1 lists the non-Oracle database systems that you can access from Oracle applications, and the Gateways products that are available for those systems.
Table H–1 Oracle Gateway Products
Non-Oracle Database Oracle Gateway Products and Documentation
IBM DB2 Universal Database (UDB)
Oracle Database Gateway for DRDA.
Use Oracle Database Gateway Installation and Configuration Guide for AIX 5L Based Systems (64-Bit), HP-UX PA-RISC (64-Bit), HP-UX Itanium, Solaris Operating System (SPARC 64-Bit), Linux x86, and Linux x86-64 and Oracle Database Gateway for DRDA User's Guide.
IBM DB2 z/OS Oracle Database Gateway for DRDA.
Use Oracle Database Gateway Installation and Configuration Guide for AIX 5L Based Systems (64-Bit), HP-UX PA-RISC (64-Bit), HP-UX Itanium, Solaris Operating System (SPARC 64-Bit), Linux x86, and Linux x86-64 and Oracle Database Gateway for DRDA User's Guide.
IBM DB2/400 Oracle Database Gateway for DRDA.
Use Oracle Database Gateway Installation and Configuration Guide for AIX 5L Based Systems (64-Bit), HP-UX PA-RISC (64-Bit), HP-UX Itanium, Solaris Operating System (SPARC 64-Bit), Linux x86, and Linux x86-64 and Oracle Database Gateway for DRDA User's Guide.
WebSphere MQ Oracle Database Gateway for WebSphere MQ.
Oracle Database Gateway for WebSphere MQ Installation and User's Guide.
CICS/TS
IMSTM Oracle Database Gateway for APPC.
Use Oracle Database Gateway for APPC Installation and Configuration Guide for AIX 5L Based Systems (64-Bit), HP-UX PA-RISC (64-Bit), Solaris Operating System (SPARC 64-Bit), and Linux x86.
SQL Server Oracle Database Gateway for SQL Server.
Use Oracle Database Gateway Installation and Configuration Guide for AIX 5L Based Systems (64-Bit), HP-UX PA-RISC (64-Bit), HP-UX Itanium, Solaris Operating System (SPARC 64-Bit), Linux x86, and Linux x86-64 and Oracle Database Gateway for SQL Server User's Guide.
Sybase Adaptive Server Oracle Database Gateway for Sybase.
Use Oracle Database Gateway Installation and Configuration Guide for AIX 5L Based Systems (64-Bit), HP-UX PA-RISC (64-Bit), HP-UX Itanium, Solaris Operating System (SPARC 64-Bit), Linux x86, and Linux x86-64 and Oracle Database Gateway for Sybase User's Guide.
Teradata Oracle Database Gateway for Teradata.
Use Oracle Database Gateway Installation and Configuration Guide for AIX 5L Based Systems (64-Bit), HP-UX PA-RISC (64-Bit), HP-UX Itanium, Solaris Operating System (SPARC 64-Bit), Linux x86, and Linux x86-64 and Oracle Database Gateway for Teradata User's Guide.
Informix Server Oracle Database Gateway for Informix.
Use Oracle Database Gateway Installation and Configuration Guide for AIX 5L Based Systems (64-Bit), HP-UX PA-RISC (64-Bit), HP-UX Itanium, Solaris Operating System (SPARC 64-Bit), Linux x86, and Linux x86-64 and Oracle Database Gateway for Informix User's Guide.
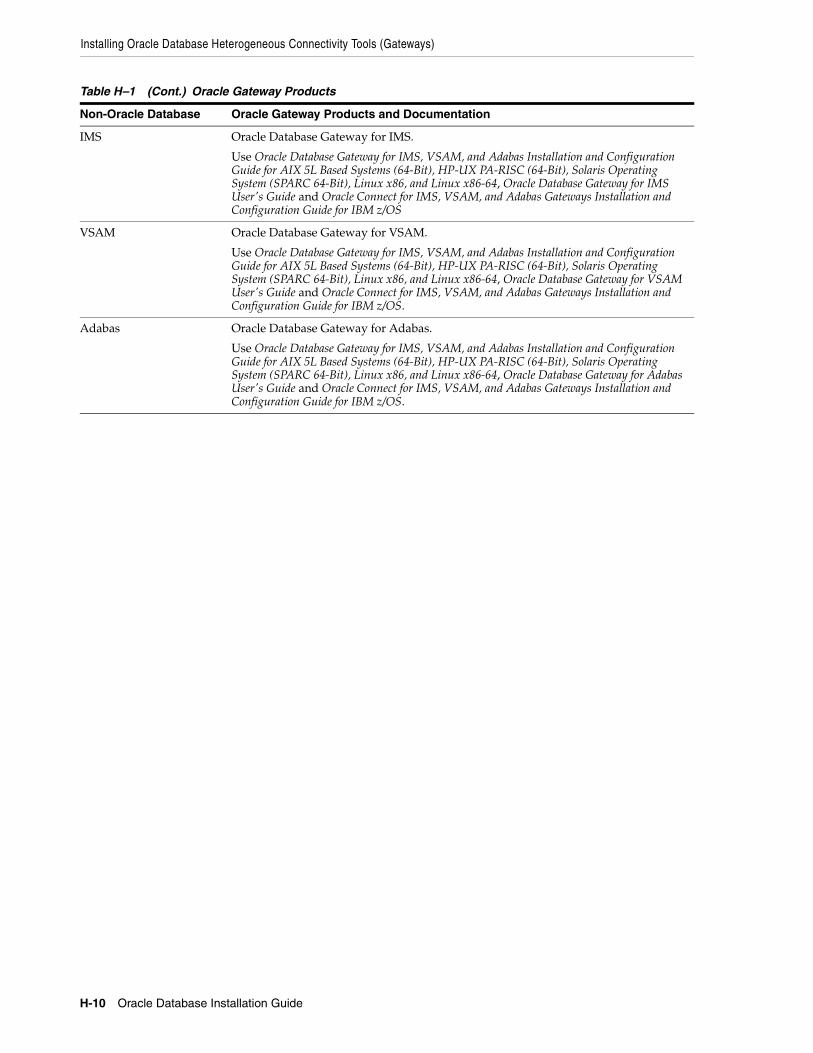
Installing Oracle Database Heterogeneous Connectivity Tools (Gateways)
H-10 Oracle Database Installation Guide
IMS Oracle Database Gateway for IMS.
Use Oracle Database Gateway for IMS, VSAM, and Adabas Installation and Configuration Guide for AIX 5L Based Systems (64-Bit), HP-UX PA-RISC (64-Bit), Solaris Operating System (SPARC 64-Bit), Linux x86, and Linux x86-64, Oracle Database Gateway for IMS User's Guide and Oracle Connect for IMS, VSAM, and Adabas Gateways Installation and Configuration Guide for IBM z/OS
VSAM Oracle Database Gateway for VSAM.
Use Oracle Database Gateway for IMS, VSAM, and Adabas Installation and Configuration Guide for AIX 5L Based Systems (64-Bit), HP-UX PA-RISC (64-Bit), Solaris Operating System (SPARC 64-Bit), Linux x86, and Linux x86-64, Oracle Database Gateway for VSAM User's Guide and Oracle Connect for IMS, VSAM, and Adabas Gateways Installation and Configuration Guide for IBM z/OS.
Adabas Oracle Database Gateway for Adabas.
Use Oracle Database Gateway for IMS, VSAM, and Adabas Installation and Configuration Guide for AIX 5L Based Systems (64-Bit), HP-UX PA-RISC (64-Bit), Solaris Operating System (SPARC 64-Bit), Linux x86, and Linux x86-64, Oracle Database Gateway for Adabas User's Guide and Oracle Connect for IMS, VSAM, and Adabas Gateways Installation and Configuration Guide for IBM z/OS.
Table H–1 (Cont.) Oracle Gateway Products
Non-Oracle Database Oracle Gateway Products and Documentation

I
Country Codes I-1
I Country Codes
This appendix contains a list of valid country codes that can be used while installing Oracle Configuration Manager.
Valid Country CodesTable I–1 contains a list of countries and their short names (codes.)
Table I–1 Country Codes
Country Short Name (Code)
African Other AA
Andorra AD
United Arab Emirates AE
Afghanistan AS
Antigua and Barbuda AM
Anguilla AI
Albania AL
Armenia AM
Netherlands Antilles AN
Angola AO
Antarctica AQ
Argentina AR
American Samoa AS
Austria AT
Australia AU
Aruba AW
Azerbaijan AZ
Bosnia-Herzegovina BA
Barbados BB
Bangladesh BD
Belgium BE
Burkina Faso BF

Valid Country Codes
I-2 Oracle Database Installation Guide
Bulgaria BG
Bahrain BH
Burundi BI
Benin BJ
Bermuda BM
Brunei Darussalam BN
Bolivia BO
Brazil BR
Bahamas BS
Bhutan BT
Bouvet Island BV
Botswana BW
Belarus BY
Belize BZ
Canada CA
Cocos (Keeling) Islands CC
Central African Republic CF
Congo CG
Switzerland CH
Cote D’Ivoire CI
Cook Islands CK
Chile CL
Cameroon CM
China CN
Columbia CO
Costa Rica CR
Cuba CU
Cape Verde CV
Christmas Island CX
Cyprus CY
Czech Republic CZ
Germany DE
Djibouti DJ
Denmark and Iceland DK
Dominica DM
Dominican Republic DO
Algeria DZ
Table I–1 (Cont.) Country Codes
Country Short Name (Code)

Valid Country Codes
Country Codes I-3
Ecuador EC
Estonia EE
Egypt EG
Western Sahara EH
Eritrea ER
Spain ES
Ethiopia ET
Finland FI
Fiji FJ
Falkland Islands (Malvinas) FK
Micronesia (Federated States Of) FM
Faroe Islands FO
France FR
France - Overseas Territories FX
Gabon GA
United Kingdom GB
Grenada GD
Georgia GE
French Guiana GF
Ghana GH
Gibraltar GI
Greenland GL
Gambia GM
Guinea GN
Guadeloupe GP
Equatorial Guinea GQ
Greece GR
South Georgia and South Sandwich Island GS
Guatemala GT
Guam GU
Guinea - Bissau GW
Guyana GY
Hong Kong HK
Heard Island and McDonald Islands HM
Honduras HN
Croatia HR
Haiti HT
Table I–1 (Cont.) Country Codes
Country Short Name (Code)

Valid Country Codes
I-4 Oracle Database Installation Guide
Hungary HU
Indonesia ID
Ireland IE
Israel IL
India IN
British Indian Ocean Territory IO
Iraq IQ
Iran (Islamic Republic of) IR
Iceland IS
Italy IT
Jamaica JM
Jordan JO
Japan JP
Kenya KE
Kyrgyzstan KG
Cambodia KH
Kiribati KI
Comoros KM
Saint Kitts and Nevis KN
Democratic People’s Republic of Korea KP
Republic of Korea KR
Kuwait KW
Cayman Islands KY
Kazakhstan KZ
Lao People’s Democratic Republic LA
Lebanon LB
Saint Lucia LC
Liechtenstein LI
Sri Lanka LK
Liberia LR
Lesotho LS
Lithuania LT
Luxembourg LU
Latvia LV
Libyan Arab Jamahiriya LY
Morocco MA
Monaco MC
Table I–1 (Cont.) Country Codes
Country Short Name (Code)

Valid Country Codes
Country Codes I-5
Republic of Moldova MD
Madagascar MG
Marshall Islands MH
Macedonia MK
Mali ML
Myanmar MM
Mongolia MM
Macau MO
Northern Mariana Islands MP
Martinique MQ
Mauritania MR
Montserrat MS
Malta MT
Mauritius MU
Malawi MW
Mexico MX
Malyasia MY
Mozambique MZ
Namibia NA
New Caledonia NC
Niger NE
Norfolk Island NF
Nigeria NG
Nicaragua NI
Netherlands NL
Norway NO
Nepal NP
Narau NR
Niue NU
New Zealand NZ
Oman OM
Panama PA
Peru PE
French Polynesia PF
Papua New Guinea PG
Philippines PH
Pakistan PK
Table I–1 (Cont.) Country Codes
Country Short Name (Code)

Valid Country Codes
I-6 Oracle Database Installation Guide
Poland PL
Saint Pierre and Miquelon PM
Pitcairn PN
Puerto Rico PR
Portugal PT
Palau PW
Paraguay PY
Qatar QA
Reunion RE
Romania RO
CIS-Comm. of Indep. States RU
Rwanda RW
Saudi Arabia SA
Solomon Islands SB
Seychelles SC
Sudan SD
Sweden SE
Singapore SG
Saint Helena SH
Slovenia SI
Svalbard and Jan Mayen Islands SJ
Slovakia SK
Sierra Leone SL
San Marino SM
Senegal SN
Somalia SO
Suriname SR
Sao Tome and Principe ST
El Salvador SV
South Asia Growth Economies SX
Syrian Arab Republic SY
Swaziland SZ
Turks and Caicos Islands TC
Chad TD
French Southern Territories TF
Togo TG
Thailand TH
Table I–1 (Cont.) Country Codes
Country Short Name (Code)

Valid Country Codes
Country Codes I-7
Tajikistan TJ
Tokelau TK
Turkmenistan TM
Tunisia TN
Tonga TO
East Timor TP
Turkey TR
Trinidad and Tobago TT
Tuvalu TV
Taiwan - Republic of China TW
United Republic of Tanzania TZ
Ukraine UA
Uganda UG
United States Minor Outlying Islands UM
United States US
Uruguay UY
Uzbekistan UZ
Vatican City State (Holy See) VA
Saint Vincent and the Grenadines VC
Venezuala VE
Virgin Islands (British) VI
Vietnam VN
Vanuatu VU
Wallis and Futuna Islands WF
Samoa WS
Yemen YE
Mayotte YT
Serbia and Montenegro YU
South Africa ZA
Zambia ZM
Zaire ZR
Zimbabwe ZW
Table I–1 (Cont.) Country Codes
Country Short Name (Code)

Valid Country Codes
I-8 Oracle Database Installation Guide
Glossary-1
Glossary
Automatic Storage Management disk group
A set of disk devices that Automatic Storage Management manages as a single unit. Each disk device can be an individual physical disk, a multiple disk device such as a RAID storage array or logical volume, or even a partition on a physical disk. You can create the Automatic Storage Management disk group when you create the Automatic Storage Management instance, or with Oracle Database Configuration Assistant.
Automatic Storage Management instance
The Oracle instance that manages Automatic Storage Management disk groups Automatic Storage Management disk groups. It is created automatically when you install and configure Automatic Storage Management. See also Oracle system identifier (SID).
Automatic Storage Management
Enables creation of a single disk group from a collection of individual disk devices. It balances I/O to the disk group across all of the devices in the disk group. It also implements striping and mirroring to improve I/O performance and data reliability.
automatic undo management mode
A mode of Oracle Database in which undo data is stored in a dedicated undo tablespace. Unlike in manual undo management mode, the only undo management that you must perform is the creation of the undo tablespace. All other undo management is performed automatically.
connect descriptor
A specially formatted description of the destination for a network connection. A connect descriptor contains destination service and network route information.
The destination service is indicated by using its service name for the Oracle Database or its Oracle system identifier (SID) for Oracle release 11.1 databases. The network route provides, at a minimum, the location of the listener through use of a network address.
connect identifier
A name, net service name, or service name that resolves to a connect descriptor. Users initiate a connect request by passing a user name and password along with a connect identifier in a connect string for the service to which they want to connect, for example:
SQL> CONNECT user_name@connect_identifierEnter password: password
control files
Glossary-2
control files
Files that record the physical structure of a database and contain the database name, the names and locations of associated databases and online undo tablespace, the time stamp of the database creation, the current log sequence number, and checkpoint information.
default domain
The network domain within which most client requests take place. It can be the domain where the client resides, or a domain from which the client often requests network services. The default domain is also the client configuration parameter that determines what domain to append to unqualified network name requests. A name request is unqualified if it does not have a "." character within it.
directory naming
A naming method that specifies a directory server to resolve a net service name into a connect descriptor. The net service name is stored centrally in a directory server.
directory server
A Lightweight Directory Access Protocol (LDAP)-compliant directory server. A directory can provide centralized storage and retrieval of database network components, user and corporate policies preferences, user authentication, and security information, replacing client-side and server-side localized files.
external procedures
Procedure or function written in the C programming language and stored in a shared library. An Oracle server can call external procedures or functions using PL/SQL routines. For Oracle Database to connect to external procedures, the server must be configured with a net service name and the listener must be configured with protocol address and service information.
global database name
The full database name that uniquely distinguishes it from any other database in your network domain.
For example:
sales.us.example.com
where sales is the name you want to call your database and us.example.com is the network domain in which the database is located.
initialization parameter file
An ASCII text file that contains information needed to initialize a database and instance.
instance
Process associated with a running Oracle Database instance. When a database is started on a database server (regardless of the type of computer), Oracle Database allocates a memory area called the System Global Area and starts one or more Oracle Database processes. This combination of the System Global Area and Oracle Database processes is called an instance. The memory and processes of an instance manage the associated database's data efficiently and serve the users of the database.
net service name
Glossary-3
installation type
A predefined component set that automatically selects which components to install. See "Oracle Database Installation Types" on page 1-7 for a list of installation types available with each top-level component.
Interprocess Communication (IPC)
A protocol that client applications use that resides on the same node as the listener to communicate with the database. IPC can provide a faster local connection than TCP/IP.
listener
A process that resides on the server and whose responsibility is to listen for incoming client connection requests and manage the traffic to the server.
When a client requests a network session with a database server, a listener receives the actual request. If the client information matches the listener information, then the listener grants a connection to the database server.
listener.ora file
A configuration file for the listener that identifies the:
■ Listener name
■ Protocol addresses on which it is accepting connection requests
■ Services for which it is listening
The listener.ora file resides in the $ORACLE_HOME/network/admin directory.
An Oracle Database 11g Release 1 (11.1) does not require identification of the database service because of service registration. However, static service configuration is required for an Oracle Database 11g Release 1 (11.1) if you plan to use Oracle Enterprise Manager.
local naming
A naming method that resolves a net service name into a connect descriptor. This name is configured and stored in the tnsnames.ora file on each individual client.
manual undo management mode
A mode of the database in which undo blocks are stored in user-managed rollback segments.
naming method
A resolution method used by a client application to resolve a connect identifier to a network address when attempting to connect to a database service. Oracle Net Services supports the following naming methods:
■ Local naming
■ Directory naming
■ Host naming
■ External naming
net service name
A simple name for a service that resolves to a connect descriptor. Users initiate a connect request by passing a user name and password along with a net service name in a connect string for the service to which they want to connect:
OPS$
Glossary-4
SQL> CONNECT user_name@net_service_nameEnter password: password
Depending on your needs, net service names can be stored in a variety of places, including:
■ Local configuration file, tnsnames.ora, on each client
■ Directory server
■ External naming service, such as Network Information Service (NIS) or Cell Directory Service (CDS)
OPS$
Acronym for operating system specific. The initialization file parameter OS_AUTHENT_PREFIX enables users to specify a prefix that Oracle uses to authenticate users attempting to connect to the database. Oracle concatenates the value of this parameter to the beginning of the user's operating system account name and password. When a connection request is attempted, Oracle compares the prefixed user name with Oracle user names in the database.
The default value of this parameter is "" (a null string), thereby eliminating the addition of any prefix to operating system account names. In earlier releases, OPS$ was the default setting.
ORACLE_BASE
ORACLE_BASE is the root of the Oracle Database directory tree. The Oracle Base directory is the top level directory that you can use to install the various oracle software products. You can use the same Oracle base directory for more than one installation. For example, /u01/app/oracle is an Oracle base directory created by the oracle user.
ORACLE_HOME
Corresponds to the environment in which Oracle Database products run. If you install an OFA-compliant database, using Oracle Universal Installer defaults, Oracle home (known as $ORACLE_HOME in this guide) is located beneath $ORACLE_BASE. The default Oracle home is db_n where n is the Oracle home number. It contains subdirectories for Oracle Database software executables and network files. See also Oracle home.
Oracle home
The directory path in which to install Oracle components (for example, /u01/app/oracle/product/11.1.0/db_n). You are prompted to enter an Oracle home in the Path field of the Specify File Locations window. See also ORACLE_HOME, Oracle home name.
Oracle home name
The name of the current Oracle home, for example, Db_1. Each Oracle home has a home name that distinguishes it from all other Oracle homes on your computer. During installation, you are prompted to enter an Oracle home name in the Name field on the Specify File Locations window.
Oracle schema
A set of rules that determine what can be stored in an LDAP-compliant directory server. Oracle has its own schema that is applied to many types of Oracle entries,
service registration
Glossary-5
including Oracle Net Services entries. The Oracle schema for Oracle Net Services entries includes the attributes the entries may contain.
Oracle Documentation Library
The media in your kit that includes the Oracle Database documentation. The Oracle Documentation Library is separate from the installation media.
The Oracle Documentation Library does not include this installation guide or Oracle Database Release Notes for Linux. These documents are included on the media labeled Oracle Database 11g Release 1 (11.1) and are available on Oracle Technology Network (OTN).
Oracle Net foundation layer
A networking communication layer that establishes and maintains the connection between the client application and server, and exchanging messages between them.
protocol address
An address that identifies the network address of a network object.
When a connection is made, the client and the receiver of the request, such as the listener, or Oracle Connection Manager, are configured with identical protocol addresses. The client uses this address to send the connection request to a particular network object location, and the recipient "listens" for requests on this address. It is important to install the same protocols for the client and the connection recipient, and to configure the same addresses.
raw partitions
Portions of a physical disk that are accessed at the lowest possible disk (block) level.
redo log files
Files that contain a record of all changes made to data in the database buffer cache. If an instance failure occurs, then an administrator can use the redo log files to recover the modified data that was in memory.
repository
A set of tables located in any Oracle database accessible to the Oracle Management Server. Oracle Management Server uses a repository to store all system data and application data, information about the state of managed nodes distributed throughout the environment, and information about the separately licensable management packs.
service registration
A feature by which the PMON process (an instance background process) automatically registers information with a listener. Because this information is registered with the listener, the listener.ora file does not need to be configured with this static information.
Service registration provides the listener with the following information:
■ Service name(s) for each running instance of the database
■ Instance name(s) of the database
■ Service handlers (dispatchers and dedicated servers) available for each instance
This allows the listener to direct a client's request appropriately.
■ Dispatcher, instance, and node load information
SID
Glossary-6
This allows the listener to determine which dispatcher can best handle a client connection's request. If all dispatchers are blocked, the listener can spawn a dedicated server for the connection.
This information allows the listener to determine how best to service a client connection request.
SID
The Oracle system identifier that distinguishes the database from all other databases on your computer. The SID automatically defaults to the database name portion of the global database name (sales in the example sales.us.example.com) until you reach eight characters or enter a period. You can accept or change the default value.
The SID can also refer to an Automatic Storage Management instance SID, available when you install Automatic Storage Management.
sqlnet.ora file
A configuration file for the client or server that specifies the:
■ Client domain to append to unqualified service names or net service names
■ Order of naming methods for the client to use when resolving a name
■ Logging and tracing features to use
■ Route of connections
■ External naming parameters
■ Oracle Advanced Security parameters
The sqlnet.ora file resides in $ORACLE_HOME/network/admin.
Secure Sockets Layer (SSL)
An industry standard protocol designed by Netscape Communications Corporation for securing network connections. SSL provides authentication, encryption, and data integrity using public key infrastructure (PKI).
SSL
See Secure Sockets Layer (SSL).
System Global Area
A group of shared memory structures that contain data and control information for an Oracle Database instance.
system identifier
See SID.
tablespace
A logical storage unit within a database. Tablespaces are divided into logical units of storage called segments, which are further divided into extents.
tnsnames.ora file
A configuration file that contains net service names mapped to connect descriptors. This file is used for the local naming method. The tnsnames.ora file resides in $ORACLE_BASE/network/admin.

unqualified name
Glossary-7
undo tablespace
An tablespace that contains one or more undo segments. The creation of any other types of segment (for example, tables, indexes) in undo tablespaces is not allowed.
In the automatic mode, each Oracle instance is assigned one and only one undo tablespace. Each undo tablespace is composed of a set of undo files. Undo blocks are grouped in extents. At any point in time, an extent is either allocated to (and used by) a transaction table, or is free.
Blocks in undo tablespaces are grouped into the following categories:
■ File control blocks, bitmap blocks, and so forth used for space management
■ Undo segments containing transaction table blocks, undo blocks, and extent-map blocks used for transaction management
■ Free blocks that are unallocated to file control or undo segments
unqualified name
A net service name that does not contain a network domain.

unqualified name
Glossary-8

Index
Symbols/, G-3
Aaccounts
reviewing, 5-4unauthenticated access to, 5-8
ADMIN accountchanging password for Oracle HTTP Server 9.0.3, 4-17
AIXcharacter raw device names, 2-32checking disk availability for ASM, 2-31configuring disks for ASM, 2-31identifying disks for ASM, 2-31identifying LVM disks, 2-31initializing disks for LVM, 2-32
aliases, multiple on computers, 2-11ANONYMOUS user
unauthenticated account access with, 5-8APPC-enabled databases, H-9Application Express
getting started, 4-26logging in to, 4-26setting up, 4-27user roles, 4-27
Application Express Administration Services, 4-27Application Express administrator, 4-27Application Express user roles
Application Express administrator, 4-27developer, 4-27end user, 4-27workspace administrator, 4-27
applications, migrating non-Oracle applications to Oracle, H-8ASM
changing owner and permissions of diskson AIX, 2-32

character raw device names on AIX, 2-32checking disk availability on AIX, 2-31configuring disks
on AIX, 2-31identifying available disks on AIX, 2-31identifying disks on AIX, 2-31
ASM See Automatic Storage Managementasmcmd utility, 3-19authorized problem analysis report
See APARAutomatic Storage Management
asmcmd utility, 3-19changing owner and permissions of disks, 2-30character raw device names, 2-30characteristics of failure groups, 2-27checking disk availability, 2-30configuring disks, 2-25 to ??, 2-29, 2-30considerations before installing, 3-14DAS disks, 2-29database creation for, 3-17disk devices, 1-10disk groups, 2-26disks, supported, 2-30Enterprise Manager Migrate Database wizard, 3-17failure groups
examples, 2-27identifying, 2-27
identifying available disks, 2-30identifying disks, 2-30installation, testing, 3-19installing, 3-14 to ??managing, 5-3migrating existing databases to, 3-17mirroring, 2-26Optimal Flexible Architecture file naming conventions, D-4Oracle Clusterware, 1-10Oracle home location for new installation, 3-14partition creation, 2-29password file, 3-15recommendations for disk groups, 2-26redundancy levels, 2-26removing, 6-4response files, A-3running multiple databases on a single server, 3-14SAN disks, 2-29space required for preconfigured database, 2-27SPFILE server parameter file, 3-15starting and stopping, 5-3upgrade advantages with separate Oracle homes, 3-14
Automatic Storage Management (ASM)ASM disk group templates, 1-10templates, 1-10upgrading, 3-10
Automatic Storage Management disk groupsabout, 1-10creating, 3-15managing, 5-3
Automatic Storage Management failure groupsabout, 1-11
Automatic Storage Management instance
about, 1-11creating, 3-15
Bbackups of database
Oracle Database Recovery Manager, H-7base directory
See Oracle base directoryBash shell
default user startup file, 2-34.bash_profile file, 2-34Basic installation type
noninteractive installations, A-6Bourne shell
default user startup file, 2-34
CC compiler
requirement, 2-6See also Pro*C/C++
C shelldefault user startup file, 2-34
certification, hardware and software, 1-4cfgmgr command, 2-30character raw device
device name, 2-30device name on AIX, 2-32
character raw device names, 2-30chdev command, 2-32checking disk availability for Automatic Storage Management, 2-30checking distribution of the operating system, 2-6checking version of the operating system, 2-6chmod command, 2-22, 2-24, 2-30, 2-32chown command, 2-22, 2-24, 2-30, 2-32CLASSPATH environment variable, 4-11client static library, generating, 4-4cloning
Oracle home, B-1Cluster Manager
ports, ranges and protocol, E-4Cluster Ready Services (CSS). See Oracle ClusterwareCluster Synchronization Services (CSS)
Automatic Storage Management, 1-10ports, ranges and protocol, E-3
clustersinstallation guidelines, 3-2See also Oracle Clusterware, Oracle Real Application Clusters
Clusterwareinstalled before Oracle Database, 3-2
Clusterware. See Oracle Clusterwarecomputers with multiple aliases, 2-11computers, non-networked, 2-11configuration assistants
failure, G-6troubleshooting, G-6
configuringOracle Application Server 11g (new), 4-19Oracle HTTP Server (new), 4-17Oracle HTTP Server 11g (new), 4-19
configuring disks for Automatic Storage Management, 2-25 to ??, 2-29, 2-30

configuring new disks, 2-30Connection Manager
ports, ranges and protocol, E-2control files
locating, 5-12naming, D-4reviewing, 5-10using Oracle Enterprise Manager Database Control with, 5-12
CONTROL_FILES initialization parameter, 5-12country codes, I-1CSD
download location for WebSphere MQ, 2-8requirements
on AIX, 2-8custom database
failure groups for Automatic Storage Management, 2-27requirements when using Automatic Storage Management, 2-27
custom.rsp file, A-4
DdadTool.pl utility, 4-26DAS (direct attached storage) disks, 2-29data files
creating separate directories for, 2-24defined, 5-10managing with Automatic Storage Management, 1-10minimum disk space for, 2-23naming, D-4options for placing on file system, 2-23recommendations for file system, 2-23reviewing, 5-10setting permissions on data file directories, 2-24setting up, 5-10
Data Guardports, ranges and protocol, E-2
data lossminimizing with Automatic Storage Management, 2-27
data mining toolsOracle Data Mining, H-6
Data Vault, 1-3data warehousing tool
Oracle OLAP, H-6Database Configuration Assistant
running in silent mode, A-9troubleshooting, G-6
database configuration collections, 4-28databases
Automatic Storage Management requirements, 2-27files, 5-10identifying, 5-9initialization parameter file, 5-10naming, 3-12, 3-17non-Oracle
APPC-enabled, H-9non-Oracle, listed, H-9OLAP support (Oracle OLAP), H-6Optimal Flexible Architecture file naming conventions, D-4recovery with Oracle Backup and Recovery, H-7redo log files, 5-11removing, 6-3

removing Oracle HTML DB, 6-2security management, H-5tablespaces, 5-10upgrading, 3-10
DB_DOMAIN initialization parameter, 5-9DB_NAME initialization parameter, 5-9DB2 database, H-9DB2 z/OS database, H-9DB2/400 database, H-9dba group
and ASM disks on AIX, 2-32and Automatic Storage Management disks, 2-30and SYSDBA privilege, 2-11creating, 2-14, 2-15description, 2-11
dbca.rsp file, A-4default data files, 5-11default file mode creation mask
setting, 2-34default tablespaces, 5-11deprecated and desupported components, xxiideveloper, 4-27device names, 2-30
on AIX, 2-32DHCP computers, installing on, 2-10directory
creating separate data file directories, 2-24database file directory, 2-23Oracle base directory, 2-19Oracle home directory, 2-20Oracle Inventory directory, 2-19oraInventory, 2-19permission for data file directories, 2-24
discmounting, 3-5
disk devicesin Automatic Storage Management, 1-10managing with Automatic Storage Management, 1-10
disk spacechecking, 2-4requirements for preconfigured database in Automatic Storage Management, 2-27
diskschanging permissions and owner for ASM
on AIX, 2-32changing permissions and owner for Automatic Storage Management, 2-30checking availability for ASM on AIX, 2-31checking availability for Automatic Storage Management, 2-30configuring for ASM on AIX, 2-31configuring for Automatic Storage Management, 2-25 to ??, 2-29, 2-30configuring new disks, 2-30identifying LVM disks, 2-30identifying LVM disks on AIX, 2-31supported for Automatic Storage Management, 2-30
DISPLAY environment variablesetting, 2-34
DOMAIN_NAME initialization parameter, 5-9Dynamic Host Configuration Protocol. See DHCP
Eembedded PL/SQL gateway

about, 4-13disabling, 4-14enabling, 4-14
end user, 4-27enterprise.rsp file, A-4env command, 2-37environment
checking settings, 2-37configuring for oracle user, 2-34
environment variablesDISPLAY, 2-34NLS_LANG, F-3ORACLE_BASE, 2-22, 2-34ORACLE_HOME, 2-33, 2-34, 2-36ORACLE_HOSTNAME, 2-10ORACLE_SID, 2-34PATH, 2-34removing from shell startup file, 2-34SHELL, 2-34TMP and TMPDIR, 2-4, 2-36TNS_ADMIN, 2-36
errorsconfiguration assistants, G-6installation, G-2, G-3, G-6noninteractive installation, G-7silent mode, G-7X Window, G-1X Window display errors, G-1
EXAMPLE tablespacedescription, 5-11example01.DBF data file, 5-11
example01.DBF data file, 5-11examples
Automatic Storage Management failure groups, 2-27Oracle base directories, 2-19
external redundancyAutomatic Storage Management redundancy level, 2-26
Ffailure group
examples of Automatic Storage Management failure groups, 2-27failure groups
characteristics of Automatic Storage Management failure group, 2-27examples in Automatic Storage Management, 2-27in Automatic Storage Management, 1-11
fatal errors, G-6features
deprecated, xxiifile mode creation mask
setting, 2-34file sets, 2-5file system
appropriate for Oracle base directory, 2-21data file and recovery file placement options, 2-23NFS, 1-5requirements for Oracle base directory, 2-22using for data files, 2-23writing to, 1-5
files, D-4$ORACLE_HOME/dbs/initsid.ora, 5-10

$ORACLE_HOME/install/portlist.ini, 5-2.bash_profile, 2-34contol, D-4control, 5-12custom.rsp, A-4data files, D-4dbca.rsp, A-4editing shell startup file, 2-34enterprise.rsp, A-4/etc/group, D-3/etc/passwd, D-3listener.ora, 4-9.login, 2-34mgw.ora, 4-11oraInst.loc, 2-13, 2-14oraInst.loc file, A-3oratab, 2-21.profile, 2-34redo log, 5-11response files, A-4standard.rsp, A-4tnsnames.ora, 4-8
For, 2-22
GGateways products FAQ, H-8getting started
Application Express, 4-26Global Database Name
about, 3-12, 3-17global database name, 5-9globalization support, F-1Grid Control. See Oracle Enterprise Manager Grid Controlgroup file, D-3groups
checking for existing oinstall group, 2-13creating the dba group, 2-14, 2-15creating the oinstall group, 2-13
Hhardware certification, 1-4hardware requirements, 2-2high redundancy
Automatic Storage Management redundancy level, 2-26home directory
See Oracle home directoryhost name, setting before installation, 2-10HTTP Server
choosing, 4-13httpd.conf
modifications if running Oracle9i, 4-19
IIBM DB2 database, H-9IBM DB2 z/OS database, H-9IBM DB2/400 database, H-9IBM WebSphere MQ
requirement on AIX, 2-8IBM WebSphere MQ Series databases, H-9

identifying disks for Automatic Storage Management, 2-30identifying LVM disks, 2-30Informix Server database, H-9initialization parameter
job_queue_process, 4-28initialization parameter file
description, 5-10in databases, 5-10initsid.ora, 5-10
initialization parametersDB_NAME, 5-9DOMAIN_NAME, 5-9SERVICE_NAMES, 5-9
initsid.ora file, 5-10initsid.ora initialization parameter file, 5-10installation
accessing installation software, 3-4Automatic Storage Management requirements, 2-27available products, 1-7cleaning up after a failed installation, G-7clusters, installation guidelines, 3-2component-specific guidelines, 3-1computer aliases, multiple, 2-11considerations, 1-4errors, G-3, G-6
silent mode, G-7laptops, 2-11log files, G-2noninteractive
error handling, G-7oraInst.loc file, A-3
overview, 1-1 to 1-16reinstalling Oracle software, 3-2response files, A-1, A-4
preparing, A-4, A-5silent mode, G-7templates, A-4
silent mode, A-6, A-7upgrading, H-3
installation errorssteps to resolve, G-2
installation guidelines, 3-8Oracle Label Security, 3-2
installation overview, 1-1installation software
copying to a hard disk, 3-6extracting, 3-5
installation software, accessing, 3-4installCCRSQL.sh, 4-28, G-4installing
other languages, 4-24instance
instance identifier (SID), 2-34IP addresses, multiple, 2-10IPC protocol address
Oracle Messaging Gateway setting, 4-10
JJDK
internationalization class, 4-11
run-time class, 4-11JDK requirements, 2-5
KKorn shell
default user startup file, 2-34
Llanguages
installing Oracle components in different languages, F-4using Oracle components in different languages, F-3
laptops, installing Oracle Database on, 2-11License
Custom installation, 1-2, 3-9listener
identifying Oracle home for, 2-33lsnrctl command, 2-34stopping, 2-33, 2-34stopping existing listener process, 2-33
listener.ora file, 4-9modifying for external procedures, 4-10
local deviceusing for data files, 2-23
log files, G-2troubleshooting, G-3
logical volume managerSee LVM
.login file, 2-34loopback adapters
non-networked computers, 2-11lsdev command, 2-30, 2-31lsnrctl command, 2-34lspv command, 2-30, 2-31LVM
identifying volume group devices, 2-30identifying volume group devices on AIX, 2-31initializing disks on AIX, 2-32recommendations for Automatic Storage Management, 2-26
Mmask
setting default file mode creation mask, 2-34memory requirements, 2-2MGW_AGENT service name, 4-10mgwextproc service
adding static service information, 4-10mgw.ora file
modifying, 4-11Microsoft SQL Server database, H-9migrating applications to Oracle, H-8migrating non-Oracle databases to Oracle, H-3mirroring Automatic Storage Management disk groups, 2-26mkdir command, 2-22, 2-24Mode
Connected, 4-28Disconnected, 4-28
modesetting default file mode creation mask, 2-34
mount point

for Oracle base directory, 2-19mount point directories, 3-6mount point directory
choosing, C-2mount points
Optimal Flexible Architecture conventions for creating, D-1MQSeries
class, 4-11multihomed computers, installing on, 2-10multiple aliases, computers with, 2-11multiple Oracle homes, 1-4
Nnaming subdirectories, D-3NAS devices
creating files on for use with Automatic Storage Management, C-4guidelines for configuration, C-1
Net Configuration Assistanttroubleshooting, G-6
Net Configuration Assistant (NetCA)response files, A-8running at command prompt, A-8
netca.rsp file, A-4network adapters
computers with multiple aliases, 2-11non-networked computers, 2-11primary, on computers with multiple aliases, 2-11See also loopback adapters, primary network adapters
network attached storage devicesSee NAS devices
network cards, multiple, 2-10Network File System See NFSnetwork setup
about, 2-9computers with multiple aliases, 2-11
network topicsDHCP computers, 2-10laptops, 2-11multiple network cards, 2-10non-networked computers, 2-11
new installationadding entry for Application Express, 4-18adding new MIME types, 4-19configuring Oracle Application Server 10g, 4-19configuring Oracle HTTP Server, 4-17configuring Oracle HTTP Server 9.0.3, 4-17modifications to support SQL Workshop, 4-19modifying httpd.conf, 4-19modifying marvel.conf, 4-19modifying wdbsvr.app, 4-18
NFSmount options, C-5using for installation, 1-5
NLS_LANG environment variable, F-3noninteractive installation
oraInst.loc file, A-3response files
preparing, A-4, A-5templates, A-4
silent mode, A-6, A-7
errors, G-7noninteractive mode
about, A-1reasons for using, A-2See also response files, silent mode, A-1
non-networked computers, 2-11non-Oracle databases, listed, H-9normal redundancy, Automatic Storage Management redundancy level, 2-26
Oobfuscate
password, 4-26OEM
See Oracle Enterprise Manageroinstall group
checking for existing, 2-13creating, 2-13description, 2-12
OLAP toolsabout, H-6Oracle OLAP, H-6
OLSSee Oracle Label Security
OMFSee Oracle Managed Files
online helpnot working, G-9
oper groupand SYSOPER privilege, 2-11creating, 2-15description, 2-11
operating systemchecking distribution and version, 2-6
operating system groupscreating the dba group, 2-15creating the oinstall group, 2-13oinstall, 2-12OSDBA, 2-11OSOPER, 2-11osoper, 2-11requirements, 2-11
operating system requirements, 2-5operating system users
creating the oracle user, 2-15oracle, 2-12requirements, 2-11root user, 3-9
Optimal Flexible ArchitectureAutomatic Storage Management, D-4conventions for creating mount points, D-1file identification, D-6file mapping, D-6files systems, D-2naming, D-1
database files, D-4Oracle base directory, D-2subdirectories, D-3very large databases, D-2
Oracle Managed Files, D-4pathnames, D-3

recommendations for Oracle base directory, 2-19recommended path for Oracle base directory, 2-19recommended path for Oracle home directory, 2-20recommended path for Oracle Inventory directory, 2-19special tablespaces, D-5standard, D-1using seperate segments, D-5
Oracle Application Server, H-4Oracle applications
installing with Oracle Database, H-8Oracle base directory
creating, 2-22creating new, 2-21description, 2-19determining disk space on, 2-21equivalent directory on Microsoft Windows, 2-19examples, 2-19identifying appropriate file system, 2-21identifying existing, 2-21mount point for, 2-19naming conventions, D-2recommended path, 2-19relationship with Oracle software owner user, 2-19requirement for, 2-19requirements for existing directory, 2-21requirements on file system, 2-22
Oracle Cluster RegistrySee OCR
Oracle Cluster Registry port, E-4Oracle Clusterware
about, H-3ports, E-3ports, ranges and protocol, E-3used with Automatic Storage Management, 1-10used with Oracle Real Application Clusters, H-3
Oracle componentsusing in different languages, F-3
Oracle CSS Daemonconfiguration, deleting, 6-7
Oracle Data Miningabout, H-6installing, H-6
Oracle Databaseadministering and monitoring, H-4creating data file directories, 2-24Custom installation, 1-7Enterprise Edition installation, 1-7getting started using
accessing, 5-3, 5-4starting and stopping database, 5-3, 5-4
installing with Oracle applications, H-8minimum disk space requirements, 2-23multiple databases on a single server with Automatic Storage Management, 3-14naming, 3-12, 3-17privileged groups, 2-11requirements with Automatic Storage Management, 2-27security management, H-5setting ORACLE_SID environment variable, 2-34Standard Edition installation, 1-7upgrading, H-3

Web servers, H-8Oracle Database Client
configuring connections, H-2Oracle Database components
administering and monitoring, H-4connectivity FAQ, H-8FAQ on installing, H-2 to H-3installing with Oracle applications, H-8installing with Oracle Database tools, H-4
Oracle Database Configuration Assistantresponse file, A-4
Oracle Database Recovery Manager (RMAN)about, H-7Automatic Storage Management, 1-12, 3-17
Oracle Database SIDabout, 3-12naming rules, 3-12
Oracle Database Vaultpostinstallation task, 4-9
Oracle E-Business Suite, 4-29, 6-2Oracle Enterprise Management Agent
HTTP port, changing, E-4ports
ranges and protocol, E-2Oracle Enterprise Manager, 1-12
Database Controllogging into, 5-1port number, 5-1using to modify control files, 5-12using to modify redo log files, 5-12using to view control files, 5-12using to view redo log files, 5-12
database migration to Automatic Storage Management, 3-17login privileges, 5-2Migrate Wizard, 3-17
Oracle Enterprise Manager Database Consoleports, ranges and protocol, E-2
Oracle Enterprise Manager Database Controlports, changing, E-4
Oracle Enterprise Manager Migrate Database wizard, 3-17Oracle Event Manager
ports, ranges and protocol, E-4Oracle home
cloning, B-1Oracle home directory
Automatic Storage Management considerations, 3-14description, 2-20identifying for listener, 2-33multiple homes, network considerations, 2-10recommended path, 2-20requirement for, 2-20requirements, 2-20using to identify Oracle base directory, 2-21
Oracle home name, 2-20Oracle host name, setting before installation, 2-10Oracle HTML DB
removing from the database, 6-2Oracle HTTP Server
about, 4-13Oracle HTTP Server 9.0.3

changing ADMIN password, 4-17configuring (new), 4-17
Oracle internationalization class, 4-11Oracle Internet Directory, H-5Oracle Inventory
description, 2-19pointer file, 2-13, 2-14
Oracle Inventory directorydescription, 2-19recommended path, 2-19
Oracle Inventory groupchecking for existing, 2-13creating, 2-13, 2-14description, 2-12
Oracle JDBC class, 4-11Oracle Label Security
installation guidelines, 3-2post-installation tasks, 4-9
Oracle Managed FilesOptimal Flexible Architecture naming conventions, D-4
Oracle Messaging GatewayCSD requirements
on AIX, 2-8postinstallation tasks, 4-9requirements on AIX, 2-8
Oracle Messaging Gateway class, 4-11Oracle Migration Workbench
migrating non-Oracle applications to Oracle, H-8migrating non-Oracle databases to Oracle, H-3
Oracle Netconfiguration file directory, 4-8identifying Oracle home for listener, 2-33lsnrctl command, 2-34stopping existing listener, 2-33stopping listener, 2-33stopping the listener, 2-34
Oracle Net Configuration Assistantresponse file, A-4
Oracle Net Servicespost-installation tasks, 4-8
Oracle OLAPabout, H-6
Oracle Precompilerspostinstallation tasks, 4-11
Oracle Procedural Gatewaylisted products, H-9
Oracle Real Application Clusters (RAC)installed before Oracle Database, 3-2installing with Oracle Enterprise Manager, H-5Oracle Clusterware
about, H-3Oracle Schemas, xiiiOracle software
removing, 6-8Oracle Software Owner user
and ASM disks, 2-32and Automatic Storage Management disks, 2-30creating, 2-16
Oracle software owner userconfiguring environment for, 2-34

creating, 2-15description, 2-12determining default shell, 2-34relationship with Oracle base directory, 2-19
Oracle SQL Developeraccessing, 5-4
Oracle SQL*Net Listenerports, ranges and protocol, E-2
Oracle Storage Compatibility Program (OSCP)certification of NAS devices, C-1
Oracle Technology Network (OTN)downloading documentation from, xiv
Oracle Text knowledge base, 4-12Oracle Transparent Gateway
listed products, H-9Oracle Ultra Search
ports, changing, E-5ports, ranges and protocol, E-3
Oracle Universal InstallerAutomatic Storage Management behavior, 3-14guidelines for using, 3-1installation guidelines, 3-1response files, A-1
list of, A-4running, 3-7running in different languages, F-4
oracle userand ASM disks, 2-32and Automatic Storage Management disks, 2-30configuring environment for, 2-34creating, 2-15, 2-16description, 2-12determining default shell, 2-34relationship with Oracle base directory, 2-19
Oracle XML DBabout, H-5ports, E-5ports, changing, E-5ports, ranges and protocol, E-3
ORACLE_BASE environment variable, 2-22removing from shell startup file, 2-34setting, 2-34
ORACLE_HOME environment variableremoving from shell startup file, 2-34setting, 2-33unsetting, 2-36
ORACLE_HOSTNAME environment variableabout, 2-10computers with multiple aliases, 2-11multihomed computers, 2-10setting before installation, 2-10
ORACLE_SID environment variableremoving from shell startup file, 2-34setting, 2-34
Oracle9imodifying wdbsvr.app, 4-18
oraInst.loc filelocation, 2-13, 2-14location of, 2-13, 2-14
oraInventory directory

See Oracle Inventory directoryoratab file, 2-21
formats, 2-21location of, 2-21
OSDBA groupand ASM disks on AIX, 2-32and Automatic Storage Management disks, 2-30and SYSDBA privilege, 2-11creating, 2-14, 2-15description, 2-11
OSOPER groupand SYSOPER privilege, 2-11description, 2-11
OTN Web sitedownloading installation software from, 3-4
OUISee Oracle Universal Installer
Ppartition
using with Automatic Storage Management, 2-26partitions
creation for Automatic Storage Management disks, 2-29passwd command, 2-16passwd file, D-3password
obfuscating, 4-26password file for Automatic Storage Management, 3-15passwords
resetting, 5-7with Database Control, 5-7with SQL*Plus, 5-8
reviewing, 5-4specifying for response files, A-2unlocking, 5-7
with Database Control, 5-7with SQL*Plus, 5-8
See alsosecurityPATH environment variable
setting, 2-34pathnames
Optimal Flexible Architecture, D-3permissions
for data file directories, 2-24for Oracle base directory, 2-22
port numbersmanaging, E-1
portlist.ini file, 5-2, E-2ports
access URLs, E-2Cluster Manager, ranges and protocol, E-4Cluster Synchronization Services, ranges and protocol, E-3configured for applications, E-2Connection Manager, ranges and protocol, E-2Data Guard, ranges and protocol, E-2default ranges, E-1Oracle Cluster Registry, E-4Oracle Clusterware, E-3Oracle Clusterware, ranges and protocol, E-3Oracle Enterprise Management Agent HTTP, changing, E-4

Oracle Enterprise Management Agent, ranges and protocol, E-2Oracle Enterprise Manager Database Console, ranges and protocol, E-2Oracle Enterprise Manager Database Control, changing, E-4Oracle Event Manager, ranges and protocol, E-4Oracle SQL*Net Listener, ranges and protocol, E-2Oracle Ultra Search, changing, E-5Oracle Ultra Search, ranges and protocol, E-3Oracle XML DB, E-5Oracle XML DB, changing, E-5Oracle XML DB, ranges and protocol, E-3
post-installationrecommended tasks
user accounts, setting up, 4-3required tasks, 4-1
Oracle Label Security, configuring, 4-9Oracle Net Services, configuring, 4-8patches, installing and downloading, 4-1
postinstallationrecommended tasks
client static library, generating, 4-4root.sh script, backing up, 4-2
required tasksconfiguring Oracle Messaging Gateway, 4-9Oracle Precompilers, 4-11
post-installation tasksconfiguring embedded PL/SQL gateway, 4-14configuring Oracle Application Server 11g, 4-19configuring Oracle HTTP Server (new), 4-17configuring Oracle HTTP Server 9.0.3, 4-17installing other languages, 4-24logging in to Application Express, 4-26obfuscating passwords, 4-26
postinstallation tasksOracle Text knowledge base, 4-12
Precompilersrequirements, 2-6
preconfigured databaseAutomatic Storage Management disk space requirements, 2-27requirements when using Automatic Storage Management, 2-27
privilege, 2-11privileged groups
for Oracle Database, 2-11Pro*C/C++
configuring, 4-11requirements, 2-6See also C compiler
processstopping existing, 2-33stopping existing listener process, 2-33stopping listener process, 2-33
.profile file, 2-34program technical fix
See PTFps command, 2-33PVID
clearing from disk device, 2-32
RRAID
recommended Automatic Storage Management redundancy level, 2-26

using for Oracle data files, 2-23RAM requirements, 2-2raw devices
initializing disks for LVM on AIX, 2-32readme.txt file, E-2reconfiguring CSS, 6-5recovery files
options for placing on file system, 2-23recovery of databases
Oracle Backup and Recovery, H-7redo log, D-4redo log files
in starter database, 5-11locating, 5-11naming, D-4reviewing, 5-10using Oracle Enterprise Manager Database Control with, 5-12
redundancy leveland space requirements for preconfigured database, 2-27for Automatic Storage Management, 2-26
redundant array of independent disksSee RAID
reinstalling Oracle software, 3-2removing
Oracle HTML DB from the database, 6-2requirements
hardware, 2-2response files
about, A-1Automatic Storage Management, A-3creating with template, A-4custom.rsp, A-4dbca.rsp, A-4enterprise.rsp, A-4general procedure, A-3Net Configuration Assistant, A-8netca.rsp, A-4passing values at command line, A-2passwords, A-2security, A-2specifying with Oracle Universal Installer, A-7standard.rsp, A-4See also silent mode, noninteractive mode, A-1
response files installationabout, A-1
root user, 3-8, 3-9logging in as, 2-1
root.sh scriptbacking up, 4-2
SSample Schemas
tablespaces and data files, 5-11SAN (storage area network) disks, 2-29schemas
database schema passwords, 3-13Oracle HTML DB schema removal, 6-2Oracle Schemas, about, xiiiSample Schemas tablespaces and data files, 5-11
security

management tools, H-5See alsopasswords
server parameter file (SPFILE), 3-15SERVICE_NAMES initialization parameter, 5-9shell
determining default shell for oracle user, 2-34SHELL environment variable
checking value of, 2-34shell startup file
editing, 2-34removing environment variables, 2-34
SID, 5-9setting ORACLE_SID environment variable, 2-34
SID. See Oracle Database SIDsilent mode
about, A-1reasons for using, A-2See also noninteractive mode, response files, A-1
silent mode installation, A-6, A-7smit command, 2-14, 2-15, 2-16software certification, 1-4software requirements, 2-5SPFILE server parameter file, 3-15SQL Developer
accessing, 5-4SQL Server database, H-9SQL*Plus
accessing, 5-3SQLJ class, 4-11standard.rsp files, A-4startup file
for shell, 2-34static service information
adding for mgwextproc service, 4-10storage area network disks, 2-29storage management See Automatic Storage Managementsuppressed mode
reasons for using, A-2suppressed mode. See noninteractive modeswap space
checking, 2-3requirements, 2-2
Sybase Adapter Server database, H-9SYS, 4-29SYSDBA, 4-29SYSDBA privilege
associated operating system group, 2-11SYSOPER privilege
associated operating system group, 2-11SYSTEM
tablespace, description, 5-11System Identifier, 5-9
See SIDsystem01.dbf data file, 5-11
Ttablespaces, 5-11
defined, 5-10in databases, 5-10reviewing, 5-10

setting up, 5-10expanding for large sorts, 5-11Optimal Flexible Architecture
special tablespaces, D-5SYSTEM, 5-11TEMP, 5-11UNDOTBS, 5-11USERS, 5-11
TEMPtablespace (temp01.dbf), 5-11
temp01.dbf data file, 5-11temporary disk space
requirements, 2-2Teradata database, H-9TMP environment variable, 2-4
setting, 2-36TMPDIR environment variable, 2-4
setting, 2-36TNS_ADMIN environment variable
unsetting, 2-36tnsnames.ora file, 4-8
adding a connect descriptor, 4-10MGW_AGENT service name, 4-10modifying for external procedures, 4-10
translated versioninstalling, 4-24
troubleshooting, G-1ASM failure to mount disk group, 2-32fatal errors, G-6images, G-8online help not working, G-9
Uumask, 2-37umask command, 2-34, 2-37UNDOTBS
tablespace (undotbs01.dbf), 5-11Uninstall, 6-2, 6-3, 6-4uninstall, 6-2, 6-3, 6-4UNIX commands, 2-37
cfgmgr, 2-30chdev, 2-32chmod, 2-22, 2-24, 2-30, 2-32chown, 2-22, 2-24, 2-30, 2-32env, 2-37lsdev, 2-30, 2-31lspv, 2-30, 2-31mkdir, 2-22, 2-24passwd, 2-16ps, 2-33smit, 2-14, 2-15, 2-16umask, 2-34unset, 2-36unsetenv, 2-36xhost, 2-1xterm, 2-2
UNIX groupschecking for existing oinstall group, 2-13creating the dba group, 2-14
UNIX users

creating the oracle user, 2-16UNIX workstation
installing from, 2-1unset command, 2-36unsetenv command, 2-36upgraded databases
configuring, 4-3upgrading
advantages with separate Oracle homes, 3-14Automatic Storage Management, 3-10databases, 3-10obfuscating password, 4-26
user rolesApplication Express administrator, 4-27developer, 4-27end user, 4-27workspace administrator, 4-27
USERStablespace (users01.dbf), 5-11
userscreating the oracle user, 2-15, 2-16Oracle software owner user, 2-12
UTLRP.SQLrecompiling invalid SQL modules, 4-3
Vvery large databases
Optimal Flexible Architecture naming mount points, D-2
Wwdbsvr.app
modifications if running Oracle9i, 4-18Web servers (Oracle HTTP Server), H-8WebSphere MQ
CSD download location, 2-8CSDs required
on AIX, 2-8requirement on AIX, 2-8
WebSphere MQ class, 4-11WebSphere MQ Series database, H-9Windows
analogy for Oracle base directory, 2-19workspace administrator, 4-27
XX Window
display errors, G-1X Window system
enabling remote hosts, 2-1, 2-2xhost command, 2-1XML data, H-5XML DB HTTP server
disabling, 4-14enabling, 4-14
xterm command, 2-2