PureConnect Integration to Oracle Service Cloud Installation ...
Upload
khangminh22Category
view
1download
0
Oracle® APEXInstallation Guide
Release 21.2F43176-03January 2022

Oracle APEX Installation Guide, Release 21.2
F43176-03
Copyright © 2003, 2022, Oracle and/or its affiliates.
Primary Author: Terri Jennings
Contributors: Christina Cho, David Bliss, Salim Hlayel, Joel Kallman, Christian Neumueller, Marc Sewtz,Jason Straub, Vlad Uvarov, Patrick Wolf
This software and related documentation are provided under a license agreement containing restrictions onuse and disclosure and are protected by intellectual property laws. Except as expressly permitted in yourlicense agreement or allowed by law, you may not use, copy, reproduce, translate, broadcast, modify, license,transmit, distribute, exhibit, perform, publish, or display any part, in any form, or by any means. Reverseengineering, disassembly, or decompilation of this software, unless required by law for interoperability, isprohibited.
The information contained herein is subject to change without notice and is not warranted to be error-free. Ifyou find any errors, please report them to us in writing.
If this is software or related documentation that is delivered to the U.S. Government or anyone licensing it onbehalf of the U.S. Government, then the following notice is applicable:
U.S. GOVERNMENT END USERS: Oracle programs (including any operating system, integrated software,any programs embedded, installed or activated on delivered hardware, and modifications of such programs)and Oracle computer documentation or other Oracle data delivered to or accessed by U.S. Government endusers are "commercial computer software" or "commercial computer software documentation" pursuant to theapplicable Federal Acquisition Regulation and agency-specific supplemental regulations. As such, the use,reproduction, duplication, release, display, disclosure, modification, preparation of derivative works, and/oradaptation of i) Oracle programs (including any operating system, integrated software, any programsembedded, installed or activated on delivered hardware, and modifications of such programs), ii) Oraclecomputer documentation and/or iii) other Oracle data, is subject to the rights and limitations specified in thelicense contained in the applicable contract. The terms governing the U.S. Government’s use of Oracle cloudservices are defined by the applicable contract for such services. No other rights are granted to the U.S.Government.
This software or hardware is developed for general use in a variety of information management applications.It is not developed or intended for use in any inherently dangerous applications, including applications thatmay create a risk of personal injury. If you use this software or hardware in dangerous applications, then youshall be responsible to take all appropriate fail-safe, backup, redundancy, and other measures to ensure itssafe use. Oracle Corporation and its affiliates disclaim any liability for any damages caused by use of thissoftware or hardware in dangerous applications.
Oracle, Java, and MySQL are registered trademarks of Oracle and/or its affiliates. Other names may betrademarks of their respective owners.
Intel and Intel Inside are trademarks or registered trademarks of Intel Corporation. All SPARC trademarks areused under license and are trademarks or registered trademarks of SPARC International, Inc. AMD, Epyc,and the AMD logo are trademarks or registered trademarks of Advanced Micro Devices. UNIX is a registeredtrademark of The Open Group.
This software or hardware and documentation may provide access to or information about content, products,and services from third parties. Oracle Corporation and its affiliates are not responsible for and expresslydisclaim all warranties of any kind with respect to third-party content, products, and services unless otherwiseset forth in an applicable agreement between you and Oracle. Oracle Corporation and its affiliates will not beresponsible for any loss, costs, or damages incurred due to your access to or use of third-party content,products, or services, except as set forth in an applicable agreement between you and Oracle.

Contents
Preface
Audience viii
Documentation Accessibility viii
Diversity and Inclusion viii
Related Documents ix
Conventions ix
Third-Party License Information ix
1 Changes in Release 21.2 for Oracle APEX Installation Guide
2 Oracle APEX Installation Requirements
2.1 Oracle Database Requirements 2-1
2.1.1 Checking the MEMORY_TARGET of the Target Database 2-2
2.1.2 Checking the WORKAREA_SIZE_POLICY of the Target Database 2-3
2.2 Browser Requirements 2-4
2.3 Web Listener Requirements 2-4
2.4 Disk Space Requirement 2-4
2.5 Oracle XML DB Requirement 2-4
3 Oracle APEX Installation Overview
3.1 About Oracle APEX Architecture 3-1
3.2 About Accessing Oracle APEX in Oracle Cloud 3-3
3.3 Understanding the Installation Process 3-3
3.3.1 About Planning Your Installation 3-4
3.3.2 About Patch Sets 3-5
3.3.3 About the Installation Scripts 3-5
3.3.4 About Accessing Oracle APEX 3-5
3.3.5 Requesting a Workspace from the Sign In Dialog 3-7
3.3.6 Resetting Your Password from the Sign In Page 3-8
3.3.7 Recovering Your Workspace Name 3-9
iii
3.4 About the Oracle APEX Runtime Environment 3-9
4 Upgrading from a Previous Oracle APEX Release
4.1 About Release Numbering Conventions 4-2
4.2 Sample Upgrade Scenarios 4-2
4.3 Viewing the Oracle APEX Release Number 4-2
4.4 Viewing the Oracle REST Data Services Release Number 4-3
4.5 About Installing the Oracle APEX Release Included with the Oracle Database 4-3
4.6 About Upgrading Existing Applications 4-3
4.7 About Testing Requirements 4-4
4.8 About Cleaning Up Your Environment 4-4
4.9 About Reverting to a Previous Release 4-4
5 Utilizing the Multitenant Architecture in Oracle Database 12c or Later
5.1 Understanding the Installation Choices 5-1
5.2 Installing Oracle APEX into an Application Container 5-2
5.2.1 About Application Containers 5-2
5.2.2 Creating Application Container 5-3
5.2.3 Installing or Upgrading Oracle APEX in an Application Container 5-3
5.2.4 Verifying the Application Container Installation 5-4
5.2.5 Creating an Application Seed 5-4
5.2.6 Creating an Application PDB from the Application Root Seed 5-5
5.2.7 Configure HTTP Access to the Application PDB 5-6
5.3 Installing Oracle APEX into Different PDBs 5-6
5.3.1 Uninstalling Oracle APEX from a CDB 5-7
5.3.2 Installing Oracle APEX Locally in a PDB 5-7
5.3.3 Installing Oracle APEX into a CDB 5-9
5.4 Plugging in a PDB When 21.2 Oracle APEX Is Installed in the Root Container 5-11
5.4.1 Scenario 1: Plug-in Non-CDB with Oracle APEX 5-12
5.4.2 Scenario 2: Plug-in PDB with a Common APEX from Another CDB 5-12
5.4.3 Scenario 3: Plug-in PDB with a Local Oracle APEX from Another CDB 5-13
5.4.4 Scenario 4: Plug-in Non-CDB or PDB with No Oracle APEX 5-14
5.4.5 Working with Incompatible Oracle APEX Versions 5-14
5.4.5.1 Patching or Upgrading Oracle APEX in a CDB 5-14
5.4.5.2 Patching or Upgrading Oracle APEX in a PDB 5-15
5.5 Plugging in a PDB When Oracle APEX Is Not in the Root Container of the TargetCDB 5-17
5.5.1 Scenario 1: Plug-in a Non-CDB with Oracle APEX 5-17
5.5.2 Scenario 2: Plug-in PDB with Common Oracle APEX from Another CDB 5-18
5.5.3 Scenario 3: Plug-in PDB with a Local Oracle APEX from Another CDB 5-18
iv
5.5.4 Scenario 4: Plug-in a Non-CDB or PDB with No Oracle APEX 5-18
6 Installing and Configuring Oracle APEX and Oracle REST Data Services
6.1 Performing Pre-installation Tasks for Oracle APEX 6-2
6.2 Downloading and Installing Oracle APEX 6-3
6.2.1 Installing Oracle APEX 6-3
6.2.2 Creating or Updating Your Instance Administration Account 6-6
6.2.2.1 What Is an Instance Administrator? 6-6
6.2.2.2 About apxchpwd.sql 6-7
6.2.2.3 Running apxchpwd.sql 6-7
6.2.3 Restarting Processes 6-8
6.2.4 Configuring the APEX_PUBLIC_USER Account 6-8
6.2.4.1 About the APEX_PUBLIC_USER Account 6-8
6.2.4.2 Unlocking the APEX_PUBLIC_USER Account 6-9
6.2.4.3 Changing the Password for the APEX_PUBLIC_USER Account 6-9
6.2.4.4 About Password Expiration in Oracle Database 11g and Later 6-10
6.2.5 Configuring RESTful Services 6-10
6.3 Downloading and Installing Oracle REST Data Services 6-11
6.3.1 Downloading Oracle REST Data Services 6-12
6.3.2 About Configuring Oracle REST Data Services Behind a Reverse Proxy orLoad Balancer 6-12
6.3.3 Web Server HTTP POST Request Limits 6-12
6.4 Configuring Oracle REST Data Services 6-13
6.4.1 Copying the Images Directory 6-13
6.4.2 Validating the Oracle REST Data Services Installation 6-14
6.4.3 Configuring Static File Support 6-14
6.4.4 Securing Oracle REST Data Service 6-14
6.5 Enabling Network Services in Oracle Database 6-15
6.5.1 When and Why Network Services Must be Enabled 6-15
6.5.2 Granting Connect Privileges in Oracle Database 12c or Later 6-16
6.5.3 Troubleshooting an Invalid ACL Error 6-17
6.6 Performing Security Tasks 6-18
6.7 Controlling the Number of Concurrent Jobs 6-18
6.7.1 About Managing the Number of Concurrent Jobs 6-18
6.7.2 Viewing the Number of JOB_QUEUE_PROCESSES 6-18
6.7.2.1 Viewing JOB_QUEUE_PROCESSES in the Installation Log File 6-19
6.7.2.2 Viewing JOB_QUEUE_PROCESSES in Oracle APEX 6-19
6.7.2.3 Viewing JOB_QUEUE_PROCESSES from SQL*Plus 6-19
6.7.3 Changing the Number of JOB_QUEUE_PROCESSES 6-20
6.8 About Running Oracle APEX in Other Languages 6-20
6.9 Installing Translated Versions of Oracle APEX 6-21
v

6.9.1 About Installing Translated Versions of Oracle APEX 6-22
6.9.2 Installing a Translated Version of Oracle APEX 6-22
6.10 Creating a Workspace and Adding Oracle APEX Users 6-23
6.10.1 About Workspaces and Users 6-24
6.10.2 Signing In To Administration Services 6-24
6.10.3 Creating a Workspace Manually 6-25
6.10.4 Creating Oracle APEX Users 6-26
6.10.5 Signing In to Your Workspace 6-28
6.11 Performing Post Installation Tasks for Upgrade Installations 6-29
6.11.1 About Removing Prior Oracle APEX Installations 6-29
6.11.2 Verifying if a Prior Installation Exists 6-29
6.11.3 Removing Schemas and SYS Objects from Prior Installations 6-30
6.11.4 Removing Schemas from Prior Installations in a CDB 6-31
6.11.5 Fixing Invalid ACL 6-31
6.12 About Performance Optimization Tasks 6-31
6.13 Converting Between Runtime and Full Development Environments 6-32
6.13.1 About Runtime and Full Development Environments 6-32
6.13.2 Converting a Runtime Environment to a Full Development Environment 6-33
6.13.3 Converting a Full Development Environment to a Runtime Environment 6-33
A Automating the Oracle APEX Installation Process
A.1 About apxsilentins.sql A-1
A.2 Running apxsilentins.sql A-1
B Maximizing Uptime During an Oracle APEX Upgrade
C Oracle APEX Installation Troubleshooting
C.1 Reviewing a Log of an Installation Session C-1
C.2 Verifying the Validity of anOracle APEX Installation C-1
C.3 Cleaning Up After a Failed Installation C-2
C.3.1 Reverting to a Previous Release After a Failed Upgrade Installation C-2
C.3.1.1 Verifying If You Have a Previous Release of Oracle APEX C-2
C.3.1.2 Reverting the Images Directory C-3
C.3.1.3 Reverting to a Previous Release C-3
C.3.1.4 Removing the Oracle APEX Release Schema C-41
C.3.2 Removing Oracle APEX from the Database C-43
C.4 About Images Displaying Incorrectly in Oracle APEX C-43
vi

C.5 About Page Protection Violation C-44
D Upgrading Oracle APEX within Oracle Database Express Edition
D.1 Upgrading to the Latest Oracle APEX Release D-1
Index
vii

Preface
This guide explains how to install and configure Oracle APEX.
• Audience
• Documentation Accessibility
• Diversity and Inclusion
• Related Documents
• Conventions
• Third-Party License Information
AudienceOracle APEX Installation Guide is intended for anyone responsible for installing OracleAPEX.
To use this manual, you must have administrative privileges on the computer whereyou installed your Oracle database and familiarity with object-relational databasemanagement concepts.
Documentation AccessibilityFor information about Oracle's commitment to accessibility, visit the OracleAccessibility Program website at http://www.oracle.com/pls/topic/lookup?ctx=acc&id=docacc.
Access to Oracle Support
Oracle customers that have purchased support have access to electronic supportthrough My Oracle Support. For information, visit http://www.oracle.com/pls/topic/lookup?ctx=acc&id=info or visit http://www.oracle.com/pls/topic/lookup?ctx=acc&id=trsif you are hearing impaired.
Diversity and InclusionOracle is fully committed to diversity and inclusion. Oracle respects and values havinga diverse workforce that increases thought leadership and innovation. As part of ourinitiative to build a more inclusive culture that positively impacts our employees,customers, and partners, we are working to remove insensitive terms from ourproducts and documentation. We are also mindful of the necessity to maintaincompatibility with our customers' existing technologies and the need to ensurecontinuity of service as Oracle's offerings and industry standards evolve. Because of
Preface
viii

these technical constraints, our effort to remove insensitive terms is ongoing and will taketime and external cooperation.
Related DocumentsFor more information, see these Oracle resources:
• Oracle APEX Release Notes
• Oracle APEX App Builder User’s Guide
• Oracle APEX End User’s Guide
• Oracle APEX Administration Guide
• Oracle APEX SQL Workshop Guide
• Oracle APEX API Reference
• Oracle Database Concepts
• Oracle Database Administrator’s Guide
• Oracle Database SQL Language Reference
• SQL*Plus User's Guide and Reference
ConventionsThe following text conventions are used in this document:
Convention Meaning
boldface Boldface type indicates graphical user interface elements associated with anaction, or terms defined in text or the glossary.
italic Italic type indicates book titles, emphasis, or placeholder variables for whichyou supply particular values.
monospace Monospace type indicates commands within a paragraph, URLs, code inexamples, text that appears on the screen, or text that you enter.
Third-Party License InformationOracle APEX contains third-party code. Please see the Oracle APEX Licensing InformationUser Manual al for notices Oracle is required to provide.
Note, however, that the Oracle program license that accompanied this product determinesyour right to use the Oracle program, including the third-party software, and the termscontained in the following notices do not change those rights.
Preface
ix
1Changes in Release 21.2 for Oracle APEXInstallation Guide
All content in Oracle APEX Installation Guide has been updated to reflect release 21.2functionality.
Deprecated and Desupported Features
See "Deprecated Features" and "Desupported Features" Oracle APEX Release Notes.
1-1

2Oracle APEX Installation Requirements
Before installing Oracle APEX in a on-premises (or local) installation you must verify yourconfiguration meets the minimum installation requirements.
• Oracle Database RequirementsOracle APEX release 21.2 requires an Oracle Database release 12.1.0.2 or later. OracleAPEX runs on all database editions, including Enterprise Edition (EE), Standard Edition(SE) and Express Edition (XE). Oracle APEX can be installed in single-instance databaseand in Oracle Real Application Clusters (Oracle RAC) database.
• Browser RequirementsOracle APEX requires a JavaScript-enabled browser and supports the current and priormajor release of Google Chrome, Mozilla Firefox, Apple Safari, and Microsoft Edge.
• Web Listener RequirementsOracle APEX requires Oracle REST Data Services (ORDS) 19.x or later.
• Disk Space RequirementOracle APEX disk space requirements are described in this section.
• Oracle XML DB RequirementOracle XML DB must be installed in the Oracle database that you want to use if you areinstalling a full development environment. If you are using a preconfigured databasecreated either during an installation or by Database Configuration Assistant (DBCA),Oracle XML DB is already installed and configured.
2.1 Oracle Database RequirementsOracle APEX release 21.2 requires an Oracle Database release 12.1.0.2 or later. OracleAPEX runs on all database editions, including Enterprise Edition (EE), Standard Edition (SE)and Express Edition (XE). Oracle APEX can be installed in single-instance database and inOracle Real Application Clusters (Oracle RAC) database.
If you are upgrading an Oracle Database version 12.1 CDB, you must download from MyOracle Support the one off patch for bug 20618595. Search for 20618595 on the Patches tab.
• Checking the MEMORY_TARGET of the Target DatabaseOracle APEX requires the system global area (SGA) and program global area (PGA) tobe at least 300 MB.
• Checking the WORKAREA_SIZE_POLICY of the Target DatabaseFor the Oracle APEX installation or upgrade process, the WORKAREA_SIZE_POLICY sessionparameter must be set to AUTO.
2-1

2.1.1 Checking the MEMORY_TARGET of the Target DatabaseOracle APEX requires the system global area (SGA) and program global area (PGA)to be at least 300 MB.
Databases typically use automatic memory management, where the memory can becontrolled by the server parameter MEMORY_TARGET. If your database does not useautomatic memory management, consult the Oracle Database Administrator's Guideto find out how to configure manual memory parameters (for example, SGA_TARGET,PGA_AGGREGATE_TARGET, SHARED_POOL_SIZE) instead, for a similar result.
To check the MEMORY_TARGET of the target database:
1. Start SQL*Plus and connect to the database as SYS specifying the SYSDBA role. Forexample:
• On Windows:
SYSTEM_DRIVE:\ sqlplus /nologSQL> CONNECT SYS as SYSDBAEnter password: SYS_password
• On UNIX and Linux:
$ sqlplus /nologSQL> CONNECT SYS as SYSDBAEnter password: SYS_password
2. Start the database:
SQL> STARTUP3. If necessary, enter the following command to determine whether the system uses
an initialization parameter file (initsid.ora) or a server parameter file(spfiledbname.ora):
SQL> SHOW PARAMETER PFILE;
This command displays the name and location of the server parameter file or theinitialization parameter file.
4. Determine the current values of the MEMORY_TARGET parameter:
SQL> SHOW PARAMETER MEMORY_TARGET5. If the value is 0, your database is using manual memory management. Consult the
Oracle Database Administrator’s Guide to learn how to configure an equivalentmemory size using manual memory management, instead of continuing with thesteps that follow.
If the system is using a server parameter file, set the value of the MEMORY_TARGETinitialization parameter to at least 300 MB:
SQL> ALTER SYSTEM SET MEMORY_TARGET='300M' SCOPE=spfile;6. If the system uses an initialization parameter file, change the value of the
MEMORY_TARGET parameter to at least 300 MB in the initialization parameter file(initsid.ora).
7. Shut down the database:
SQL> SHUTDOWN
Chapter 2Oracle Database Requirements
2-2

8. Restart the database:
SQL> STARTUP
See Also:
Using Automatic Memory Management in Oracle Database Administrator’s Guide
2.1.2 Checking the WORKAREA_SIZE_POLICY of the Target DatabaseFor the Oracle APEX installation or upgrade process, the WORKAREA_SIZE_POLICY sessionparameter must be set to AUTO.
To check the WORKAREA_SIZE_POLICY of the target database:
1. Start SQL*Plus and connect to the database as SYS specifying the SYSDBA role. Forexample:
• On Windows:
SYSTEM_DRIVE:\ sqlplus /nologSQL> CONNECT SYS as SYSDBAEnter password: SYS_password
• On UNIX and Linux:
$ sqlplus /nologSQL> CONNECT SYS as SYSDBAEnter password: SYS_password
2. Check the current value of the WORKAREA_SIZE_POLICY parameter:
SQL> SHOW PARAMETER WORKAREA_SIZE_POLICY3. If the value of the parameter is MANUAL, change it to AUTO for the current database
session. For example:
SQL> ALTER SESSION SET WORKAREA_SIZE_POLICY = AUTO;4. Within the same database session, perform the installation or upgrade of Oracle APEX.
Note:
If you are installing Oracle APEX in a CDB, WORKAREA_SIZE_POLICY must be setsystem-wide. For example:
SQL> ALTER SYSTEM SET WORKAREA_SIZE_POLICY=AUTO SCOPE=BOTH;Then, if needed, change it back to MANUAL after Oracle APEX installation orupgrade.
Chapter 2Oracle Database Requirements
2-3

See Also:
WORKAREA_SIZE_POLICY in Oracle Database Reference
2.2 Browser RequirementsOracle APEX requires a JavaScript-enabled browser and supports the current andprior major release of Google Chrome, Mozilla Firefox, Apple Safari, and MicrosoftEdge.
2.3 Web Listener RequirementsOracle APEX requires Oracle REST Data Services (ORDS) 19.x or later.
Oracle REST Data Services (ORDS) is Java-based Web Server. ORDS features theability to emit RESTful web services, offers improved file upload capability, and iscertified with Oracle WebLogic Server and Apache Tomcat.
2.4 Disk Space RequirementOracle APEX disk space requirements are described in this section.
Oracle APEX disk space requirements are as follows:
• Free space for APEX software files on the file system: 310 MB if using Englishonly download (apex_21.2_en.zip) and 705 MB if using full download(apex_21.2.zip).
• Free space in APEX tablespace: 220 MB
• Free space in SYSTEM tablespace: 100 MB
• Free space in APEX tablespace for each additional language (other than English)installed: 60 MB
2.5 Oracle XML DB RequirementOracle XML DB must be installed in the Oracle database that you want to use if youare installing a full development environment. If you are using a preconfigureddatabase created either during an installation or by Database Configuration Assistant(DBCA), Oracle XML DB is already installed and configured.
Tip:
The installer does a prerequisite check for Oracle XML DB and will exit if it isnot installed.
Chapter 2Browser Requirements
2-4

Tip:
The installation of Oracle XML DB creates the user ANONYMOUS. In order forAPEX workspace provisioning to work properly, the ANONYMOUS user must notbe dropped from the database.
Tip:
For more information about manually adding Oracle XML DB to an existingdatabase, see "Administration of Oracle XML DB"in Oracle XML DB Developer’sGuide
Chapter 2Oracle XML DB Requirement
2-5

3Oracle APEX Installation Overview
Oracle APEX Installation Guide describes how to install Oracle APEX in a on-premises (orlocal) installation.
How you sign in and access Oracle APEX depends upon your user role and where OracleAPEX resides. Oracle APEX may reside in a local on-premises Oracle Database or in anOracle Cloud Service.
• About Oracle APEX ArchitectureOracle APEX uses a simple architecture in which pages are dynamically generated usingmetadata stored within the Oracle Database.
• About Accessing Oracle APEX in Oracle CloudLearn about accessing Oracle APEX in Oracle Cloud.
• Understanding the Installation ProcessInstalling Oracle APEX is a multiple step process. You follow the same instructions fornew or upgrade installations.
• About the Oracle APEX Runtime EnvironmentLearn about the Oracle APEX runtime environment.
See Also:
Upgrading from a Previous Oracle APEX Release
3.1 About Oracle APEX ArchitectureOracle APEX uses a simple architecture in which pages are dynamically generated usingmetadata stored within the Oracle Database.
About the Oracle APEX Architecture
The Oracle APEX architecture consists of a web browser, Oracle REST Data Services (theweb listener), and an Oracle Database containing Oracle APEX. The major advantage of thisarchitecture is the separation of the mid-tier and the database tier.
3-1
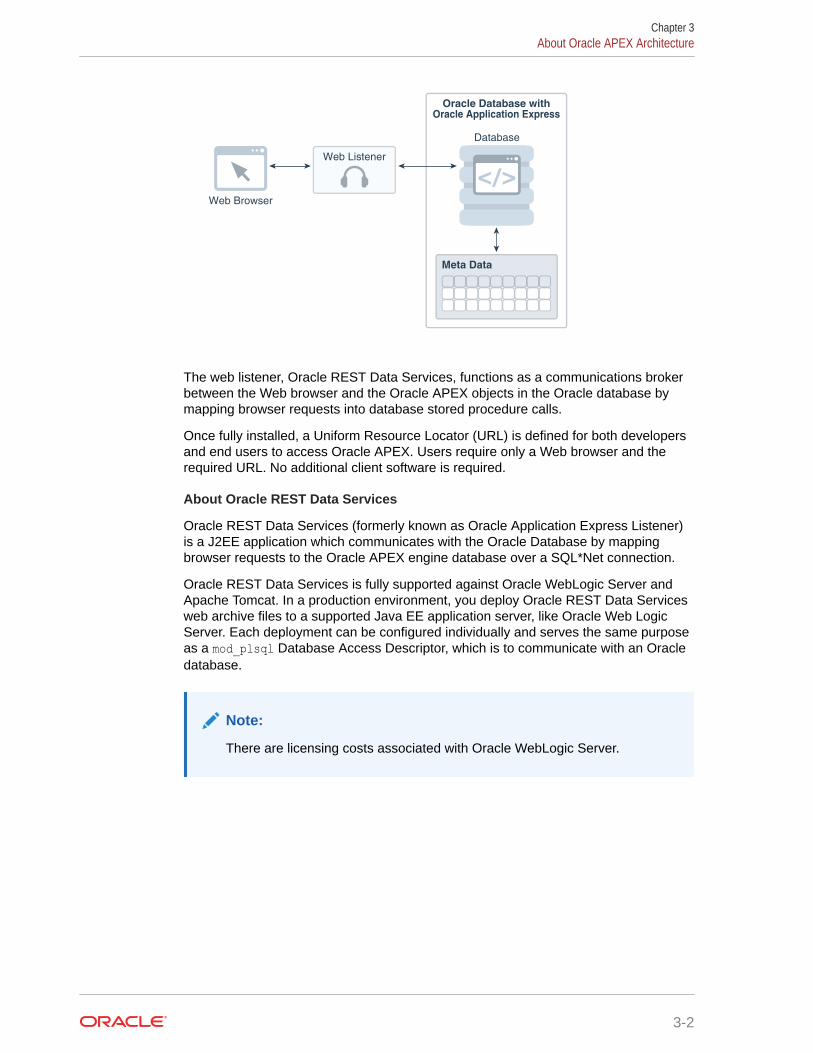
Oracle Database with Oracle Application Express
Meta Data
Database
Web Listener
Web Browser
The web listener, Oracle REST Data Services, functions as a communications brokerbetween the Web browser and the Oracle APEX objects in the Oracle database bymapping browser requests into database stored procedure calls.
Once fully installed, a Uniform Resource Locator (URL) is defined for both developersand end users to access Oracle APEX. Users require only a Web browser and therequired URL. No additional client software is required.
About Oracle REST Data Services
Oracle REST Data Services (formerly known as Oracle Application Express Listener)is a J2EE application which communicates with the Oracle Database by mappingbrowser requests to the Oracle APEX engine database over a SQL*Net connection.
Oracle REST Data Services is fully supported against Oracle WebLogic Server andApache Tomcat. In a production environment, you deploy Oracle REST Data Servicesweb archive files to a supported Java EE application server, like Oracle Web LogicServer. Each deployment can be configured individually and serves the same purposeas a mod_plsql Database Access Descriptor, which is to communicate with an Oracledatabase.
Note:
There are licensing costs associated with Oracle WebLogic Server.
Chapter 3About Oracle APEX Architecture
3-2

See Also:
• "Web Listener Requirements"
• "Installing and Configuring Oracle APEX and Oracle REST Data Services"
• "Installing Oracle REST Data Services" in Oracle REST Data ServicesInstallation, Configuration, and Development Guide
3.2 About Accessing Oracle APEX in Oracle CloudLearn about accessing Oracle APEX in Oracle Cloud.
Oracle APEX may reside in a local on-premises Oracle Database or in a hosted environment,such as a Oracle Cloud service. The sign in process differs depending where Oracle APEXresides.
In Oracle Cloud, Oracle APEX is installed and enabled in:
• Oracle APEX Application Development (APEX Service)
• Autonomous Database for Transaction Processing and Mixed Workloads
• Autonomous Database for Analytics and Data Warehousing
Oracle APEX is available in Exadata Cloud Service and Database Cloud Service in OracleCloud Infrastructure. However, you need to manually customize your databases to install andenable Oracle APEX by following the on-premises installation process or using cloud toolingsuch as Terraform.
See Also:
• Get an Environment
• Welcome to Oracle APEX Application Development Service in Getting Startedwith Oracle APEX Application Development
• Creating Applications with Oracle Application Express on AutonomousDatabase in Using Oracle Autonomous Database on Shared ExadataInfrastructure
3.3 Understanding the Installation ProcessInstalling Oracle APEX is a multiple step process. You follow the same instructions for new orupgrade installations.
• About Planning Your InstallationLearn about the steps needed to install Oracle APEX.
• About Patch SetsPatch sets provide bug fixes only. A point release includes bug fixes and incorporates allcurrent patch sets.
Chapter 3About Accessing Oracle APEX in Oracle Cloud
3-3

• About the Installation ScriptsYou can install Oracle APEX or update from previous release using the sameinstallation procedure and the installation scripts.
• About Accessing Oracle APEXYou access the Oracle APEX development environment, by signing in to a sharedwork area called a workspace.
• Requesting a Workspace from the Sign In DialogRequest a workspace from the Sign In dialog.
• Resetting Your Password from the Sign In PageReset your password by clicking a link on Oracle APEX Sign In page.
• Recovering Your Workspace NameRecover your workspace name from the Oracle APEX Sign In page.
See Also:
"Upgrading from a Previous Oracle APEX Release"
3.3.1 About Planning Your InstallationLearn about the steps needed to install Oracle APEX.
Oracle recommends you take the time to carefully plan your installation.
Installing Oracle APEX involves the following steps:
1. Decide on a Full or Runtime Environment - Determine whether to install a fulldevelopment environment or runtime environment. A full developmentenvironment provides complete access to the App Builder developmentenvironment to develop applications. A runtime environment is the appropriatechoice for production implementations in which you want to run applications thatcannot be modified.
See "About the Oracle APEX Runtime Environment."
2. Verify installation requirements- Before installing, verify your system meets theminimum requirements.
See "Oracle APEX Installation Requirements ."
3. Install the software - Install or upgrade Oracle APEX by downloading a ZIP filefrom the Oracle APEX download page and then downloading and installing OracleREST Data Services (ORDS) as described in "Installing and Configuring OracleAPEX and Oracle REST Data Services."
See Also:
"Upgrading from a Previous Oracle APEX Release"
Chapter 3Understanding the Installation Process
3-4

3.3.2 About Patch SetsPatch sets provide bug fixes only. A point release includes bug fixes and incorporates allcurrent patch sets.
Patch sets are a mechanism for delivering fully tested and integrated product fixes. Patchsets provide bug fixes only. Patch sets typically do not include new functionality and they donot require certification on the target system. Patch sets include all of the libraries that havebeen rebuilt to implement the bug fixes in the set. All of the fixes in the patch set have beentested and are certified to work with each other.
In between major product releases, Oracle may offer a point release. A point release (forexample Oracle APEX release 5.0.3) includes bug fixes and incorporates all current patchsets. Typically, point releases do not introduce new functionality.
See Also:
"Upgrading from a Previous Oracle APEX Release"
3.3.3 About the Installation ScriptsYou can install Oracle APEX or update from previous release using the same installationprocedure and the installation scripts.
The installation script checks for the latest existing Oracle APEX schema and automaticallycopies the instance metadata, workspaces, and applications from the previous schema intothe current schema. The original schema associated with the previous release is leftcompletely unaltered. Following best practices, Oracle recommends that you create newtablespaces for a new release of Oracle APEX and follow the appropriate installationinstructions as outlined in this document.
3.3.4 About Accessing Oracle APEXYou access the Oracle APEX development environment, by signing in to a shared work areacalled a workspace.
How you sign in and access Oracle APEX depends upon your user role.
A workspace enables multiple users to work within the same Oracle APEX installation whilekeeping their objects, data, and applications private. Each workspace has a unique ID andname. An instance administrator can create a workspace manually within Oracle APEXAdministration Services or have users submit requests. Oracle APEX Administration Servicesis a separate application for managing an entire Oracle APEX instance.
Users are divided into four primary roles:
• Instance administrators are superusers that manage an entire hosted instance using aseparate application called Oracle APEX Administration Services. Instanceadministrators manage workspace provisioning, configure features and instance settings,and manage security.
Chapter 3Understanding the Installation Process
3-5

• Workspace administrators can perform administrator tasks specific to aworkspace such as configuring workspace preferences, managing user accounts,monitoring workspace activity, and viewing log files.
• Developers are users who sign in to a workspace and create and editapplications.
• End users can only run existing applications.
If you are a developer, an administrator must grant you access to shared work areacalled a workspace. If you are an Instance administrator, you must sign in to OracleAPEX Administration Services, determine whether to specify a provisioning mode,create a workspace, and then sign in to that workspace.
About Specifying a Provisioning Mode
The Instance administrator determines how the process of provisioning (or creating) aworkspace works for a specific Oracle APEX instance. To determine how provisioningworks, an Instance Administrator selects a Provisioning Methods on the InstanceSettings page:
• Manual - An Instance administrator creates new workspaces and notifies theWorkspace administrator regarding the Sign In credentials.
• Request - Users request a workspace. Once an administrator approves therequest, the user receives an email containing an email verification link. After theuser clicks the email verification link, the workspace is created.
• Automatic - Works similar to Request except requests are automaticallyapproved with no administrator review required
See Also:
"About Specifying How Workspaces Are Created" and "Selecting aWorkspace Provisioning Mode" in Oracle APEX Administration Guide
About Creating Workspaces and Users
Before you can develop or install applications, an administrator must create aworkspace and add Oracle APEX users. To learn more contact your administrator, orsee Creating a Workspace and Adding Oracle APEX Users.
See Also:
• "Creating Workspaces in Administration Services" in Oracle APEXAdministration Guide
• "Making a Service Request" in Oracle APEX Administration Guide
• "Managing Requests" in Oracle APEX Administration Guide
Chapter 3Understanding the Installation Process
3-6

3.3.5 Requesting a Workspace from the Sign In DialogRequest a workspace from the Sign In dialog.
Note:
This topic does not apply to Oracle APEX instances running in Oracle Cloud. Seethe documentation for your Oracle Cloud service.
Your administrator determines how you request a new workspace. If your administrator hasset Provisioning Method to either Request or Automatic and has configured email, you canrequest a workspace on the Sign In dialog.
To request a workspace from the Sign In dialog:
1. Navigate to the Oracle APEX Sign in dialog.
2. Under Sign In, click Request a Workspace.
The Request a Workspace Wizard appears.
3. For Identification:
a. First Name - Enter your first name.
b. Last Name - Enter your last name.
c. Email - Enter the email address. A link to activate your workspace will be sent to thisemail address.
d. Workspace - Enter a workspace name that name uniquely identifies yourdevelopment environment.
e. Click Next.
4. If defined, review and accept the service agreement and click Next.
5. Verify your request and click Submit Request.
Once you complete the Identification form, the following events occur:
a. You will receive an email containing a verification link.
b. When you click the verification link, the workspace is created.
c. You will receive another email containing Sign In credentials (that is, the workspacename, username, and password).
Once you complete the Identification form, the following events occur:
1. You will receive an email containing a verification link.
2. When you click the verification link, the workspace is created.
3. You will then receive another email containing Sign In credentials (that is, the workspacename, username, and password).
Chapter 3Understanding the Installation Process
3-7

See Also:
"About Specifying How Workspaces Are Created" in Oracle APEXAdministration Guide
3.3.6 Resetting Your Password from the Sign In PageReset your password by clicking a link on Oracle APEX Sign In page.
Tip:
To reset your password from the Sign In page, you must provide your emailaddress and the workspace name.
To reset your password from the Sign In Page:
1. In a web browser, navigate to the Oracle APEX Sign In page.
The Sign In page appears.
2. Under Sign In, click Reset Password.
3. In the Reset Password form, enter your email address, workspace name, and clickReset Password.
You will receive an email confirming your workspace name and username andcontaining a Reset Password URL link.
4. In the email, click the Reset Password URL link.
5. In the Change Password form:
a. New Password - Enter your new password.
Tip:
Passwords are case sensitive.
b. Confirm Password - Enter your new password again.
c. Click Apply Changes.
Tip:
You can also reset your password within Oracle APEX. See "Changing YourProfile or Password" in Oracle APEX App Builder User’s Guide
Chapter 3Understanding the Installation Process
3-8

3.3.7 Recovering Your Workspace NameRecover your workspace name from the Oracle APEX Sign In page.
If you cannot remember your workspace name, you can request a list of all workspace namesassociated with your email address.
To find your workspace name:
1. In a web browser, navigate to the Oracle APEX Sign In page.
2. On the Sign In page, click Reset Password.
3. Click Find My Workspace.
4. Enter your email address and click Find Workspace.
You will receive an email listing all workspaces associated with the email address youprovided.
3.4 About the Oracle APEX Runtime EnvironmentLearn about the Oracle APEX runtime environment.
As with any software development life cycle, Oracle strongly recommends that you havedifferent environments for development, testing/QA, and production. For testing andproduction instances, Oracle APEX supports the ability to install just a runtime version ofOracle APEX. This runtime environment minimizes the installed footprint and privileges andimproves application security since in a runtime instance developers cannot inadvertentlyupdate a production application.
An Oracle APEX runtime environment enables you to run production applications, but it doesnot provide a Web interface for administration. A runtime environment only includes thepackages necessary to run your application, making it a more hardened environment. Youadminister the Oracle APEX runtime environment using SQL*Plus or SQL Developer and theAPEX_INSTANCE_ADMIN API.
See Also:
"About the Advantages of the Application Express Runtime Environment" in OracleAPEX App Builder User’s Guide
Scripts are provided to remove or add the developer interface from an existing instance. Tolearn more, see one of the following for the corresponding type of installation:
See also:
"Converting Between Runtime and Full Development Environments"
Chapter 3About the Oracle APEX Runtime Environment
3-9

4Upgrading from a Previous Oracle APEXRelease
Upgrading Oracle APEX creates new database objects in a new schema and migrates theapplication metadata to the new release.
If you have Oracle APEX release 20.x or earlier, following any of the installation scenarios inthis guide upgrades your APEX instance to the current release, creates Oracle APEX 21.2database objects in a new schema, and migrates the application metadata to the newrelease.
• About Release Numbering ConventionsNew releases of Oracle APEX correlate to the calendar year.
• Sample Upgrade ScenariosCommon upgrade scenarios include upgrading from prior release and installing an OracleDatabase release which include Oracle APEX.
• Viewing the Oracle APEX Release NumberView your Oracle APEX release number on the Workspace home page or on the AboutOracle APEX page.
• Viewing the Oracle REST Data Services Release NumberView the Oracle REST Data Services release number on the About Oracle APEX page.
• About Installing the Oracle APEX Release Included with the Oracle DatabaseLearn about the Oracle APEX releases included with Oracle Database releases.
• About Upgrading Existing ApplicationsInstalling a new release of Oracle APEX, updates existing applications to the latestrelease, but does not alter application user interface or application components.
• About Testing RequirementsDetermining the appropriate amount of regression testing when upgrading Oracle APEXdepends upon the complexity, size, and number of applications you are upgrading.
• About Cleaning Up Your EnvironmentFollowing the successful upgrade of all of the environments to the latest release of OracleAPEX, you should clean-up the environments.
• About Reverting to a Previous ReleaseYou can revert to a previous release of Oracle APEX.
See Also:
• Understanding the Installation Process
• Maximizing Uptime During an Oracle APEX Upgrade
4-1

4.1 About Release Numbering ConventionsNew releases of Oracle APEX correlate to the calendar year.
In 2018 and starting with release 18.1 and 18.2, Oracle APEX introduced correlatingthe release number to the calendar year.
In addition, APEX now only offers full releases and no longer provides patch setreleases (such as 5.1.1). Eliminating patch set releases reduces downtime whenupdating existing installations. APEX architecture also enables developers to revertreleases if necessary.
Patch set exceptions (PSEs) may still be delivered for major defects. To learn moreabout PSEs, visit the Oracle APEX 21.2 Known Issues page or the Prior ReleaseArchives for earlier releases.
4.2 Sample Upgrade ScenariosCommon upgrade scenarios include upgrading from prior release and installing anOracle Database release which include Oracle APEX.
Table 4-1 lists common upgrade scenarios.
Table 4-1 Sample Upgrade Scenarios
Upgrade Scenarios Action
Upgrade from a prior Oracle APEX release Download the latest files from theDownloads page.
You install Oracle Database which include OracleAPEX.
Download the latest files from theDownloads page.
4.3 Viewing the Oracle APEX Release NumberView your Oracle APEX release number on the Workspace home page or on theAbout Oracle APEX page.
You can view the Oracle APEX release number on the Workspace home page or onthe About Oracle APEX page:
• Workspace home page:
– Sign in to Oracle APEX.
On the Workspace home page, the current release number displays in thebottom right corner.
• About APEX page:
– Sign in to Oracle APEX.
– Click the Help menu in the upper right and select About.
On the About APEX pag, the release number appears next to Product Build.
Chapter 4About Release Numbering Conventions
4-2

4.4 Viewing the Oracle REST Data Services Release NumberView the Oracle REST Data Services release number on the About Oracle APEX page.
Oracle APEX requires access to the Web listener, Oracle REST Data Services (ORDS) 19.xor later.
To view the Oracle REST Data Services release number:
1. Sign in to Oracle APEX.
2. Click the Help menu in the upper right and select About.
3. Under the CGI Environment section, find APEX_LISTENER_VERSION.
4.5 About Installing the Oracle APEX Release Included with theOracle Database
Learn about the Oracle APEX releases included with Oracle Database releases.
Oracle APEX is included with the following Oracle Database releases:
• Oracle Database 19c - Oracle Application Express Release 18.1.
• Oracle Database 18c - Oracle Application Express Release 5.1.
• Oracle Database 12c Release 2 (12.2)- Oracle Application Express Release 5.0.
• Oracle Database 12c Release 1 (12.1) - Oracle Application Express Release 4.2.
• Oracle Database 11g Release 2 (11.2) - Oracle Application Express Release 3.2.
• Oracle Database 11g Release 1 (11.1) - Oracle Application Express Release 3.0.
The Oracle Database releases less frequently than APEX. Therefore, Oracle recommendsupdating to the latest APEX release available on Oracle Technology Network. To learn more,see the installation instructions for the appropriate Web Listener in your environment.
Note:
If upgrading Oracle APEX from a release that ships with the database, do not alterany APEX files in the Oracle home directory (for example, /u01/app/oracle/product/18.0.0/dbhome_1/apex) .
4.6 About Upgrading Existing ApplicationsInstalling a new release of Oracle APEX, updates existing applications to the latest release,but does not alter application user interface or application components.
Once you upgrade an Oracle APEX instance from a previous release, existing applicationswill work without modification. However, to keep applications maintainable, up-to-date, and toleverage new functionality, developers should perform the steps outlined in UpgradingApplication Express Applications in Oracle APEX App Builder User’s Guide.
Chapter 4Viewing the Oracle REST Data Services Release Number
4-3

4.7 About Testing RequirementsDetermining the appropriate amount of regression testing when upgrading OracleAPEX depends upon the complexity, size, and number of applications you areupgrading.
You should include the majority of complex pages, particularly those that incorporatesignificant JavaScript or extensive PL/SQL computations or processes. Developersshould ensure pages which they manually update based on the Upgrade Applicationor Advisor are also included in regression tests. Not all remaining pages have to beincluded in regression testing. Oracle recommends you include a good representationof different page types includes reports, charts, and forms. An application shouldalways be included in regression testing if its compatibility mode was modified post-upgrade.
While regression testing of upgraded applications is imperative to minimize risk ofdisrupting the end users, it is important that testing is not drawn out for an extendedperiod. As a general rule:
• Step 1: Upgrade your development environment first. Allow developers to reviewthe applications and make initial updates as needed.
• Step 2: Upgrade your QA/Test environment.
• Step 3: Upgrade applications from development are built into this environment.
• Step 4: Upgrade your production environment.
• Step 5: Build upgraded applications into this environment.
4.8 About Cleaning Up Your EnvironmentFollowing the successful upgrade of all of the environments to the latest release ofOracle APEX, you should clean-up the environments.
Once you start developing with the newer release, the Oracle APEX schemaassociated with the prior release can be deleted. If you installed the prior release into aseparate tablespace, you can simply drop the specific tablespace. Oraclerecommends leaving the older Oracle APEX schema(s) for a few weeks and thenremove them from the development, test, and production environments. This cleanupprocess releases disk space and ensures that no one accesses an outdated schemausing tools such as SQL Developer or SQL*Plus.
4.9 About Reverting to a Previous ReleaseYou can revert to a previous release of Oracle APEX.
Because Oracle APEX creates a new schema for each major release, reverting backto a prior release is a relatively simple process. If you revert to a prior release, anymodifications made in the current Oracle APEX instance are lost. The main task is toswitch the public synonyms and grants to point at the previous schema instead of thenew schema.
Chapter 4About Testing Requirements
4-4

See Also:
Reverting to a Previous Release After a Failed Upgrade Installation
Chapter 4About Reverting to a Previous Release
4-5

5Utilizing the Multitenant Architecture in OracleDatabase 12c or Later
Learn about installation choices and different scenarios associated with copying and movingpluggable databases introduced by the Oracle Database 12c or later multitenant architecturewith respect to Oracle APEX.
• Understanding the Installation ChoicesLearn about the installation choices in Oracle APEX.
• Installing Oracle APEX into an Application ContainerLearn about the application container that stores data and metadata for application backends.
• Installing Oracle APEX into Different PDBsYou can install different versions of Oracle APEX into different PDBs.
• Plugging in a PDB When 21.2 Oracle APEX Is Installed in the Root ContainerLearn about scenarios in which the target database has Oracle APEX installed into theroot container, CDB$ROOT - the default installation option.
• Plugging in a PDB When Oracle APEX Is Not in the Root Container of the Target CDBThe scenarios in this section describe when Oracle APEX is not installed in the rootcontainer, CDB$ROOT, by explicitly removing it as described in "Uninstalling Oracle APEXfrom a CDB."
5.1 Understanding the Installation ChoicesLearn about the installation choices in Oracle APEX.
Oracle Database 12c Release 1 (12.1) introduces the multitenant architecture. This databasearchitecture has a multitenant container database (CDB) that includes a root container,CDB$ROOT, a seed database, PDB$SEED, and multiple pluggable databases (PDBs). Eachpluggable database is equivalent to a separate database instance in Oracle Databaserelease 11g. The root container, CDB$ROOT, holds common objects that are accessible toevery PDB utilizing metadata links or object links. The seed database, PDB$SEED, is usedwhen creating a new PDB to seed the new database. The key benefit of the Oracle Database12c or later multitenant architecture is that the database resources, such as CPU andmemory, can be shared across all of the PDBs. This architecture also enables manydatabases to be treated as one for tasks such as upgrades or patches, and backups.
When configuring multitenant architecture, Oracle APEX is installed in the root containerdatabase by default in Oracle Database 12c Release 1 (12.1). In the default installation theroot container, CDB$ROOT, includes the APEX_040200 schema to store the common databaseobjects for the APEX engine such as packages, functions, procedures and views. The seeddatabase, PDB$SEED, also includes the APEX_040200 schema to store the tables that are partof the APEX engine.
You can create a new PDB by copying PDB$SEED, which includes the APEX_210200 schema ifOracle APEX release 21.2 is installed common in the CDB. As such there are multiple copiesof the Oracle APEX engine tables and only single copies of the Oracle APEX engine
5-1

packages, functions, procedures and views. Each PDB will have the APEX_210200schema and have its own copy of the Oracle APEX engine's tables so that it can holdthe metadata for the APEX applications defined within that PDB.
Tip:
Oracle recommends removing Oracle APEX from the root containerdatabase for the majority of use cases, except for hosting companies orinstallations where all pluggable databases (PDBs) utilize Oracle APEX andthey all need to run the exact same release and patch set of Oracle APEX.
See Also:
Installing Oracle APEX into Different PDBs
5.2 Installing Oracle APEX into an Application ContainerLearn about the application container that stores data and metadata for applicationback ends.
• About Application ContainersAn application container is a CDB component that stores data and metadata forapplication backends.
• Creating Application ContainerTo create a PDB within a CDB as an application container, you use the ASAPPLICATION CONTAINER clause of the create PDB command.
• Installing or Upgrading Oracle APEX in an Application Container
• Verifying the Application Container InstallationVerify the application container by inpsecting the log file for ORA- or PLS- errorsand compiling invalid objects.
• Creating an Application SeedAn application seed is used to provision application PDBs with the applicationroot's applications pre-installed.
• Creating an Application PDB from the Application Root SeedAn application PDB is created by issuing the CREATE PLUGGABLE DATABASEstatement from the application root.
• Configure HTTP Access to the Application PDBConfigure a new application PDB for HTTP access.
5.2.1 About Application ContainersAn application container is a CDB component that stores data and metadata forapplication backends.
Oracle APEX can be installed into an application container using the apxappcon.sqlscript. An application container consists of an application root where the application is
Chapter 5Installing Oracle APEX into an Application Container
5-2

defined and one or more PDBs that share data and metadata about the application from theapplication root. You can have multiple application containers within a CDB and eachcontainer can have a different version of Oracle APEX.
Patching or upgrading Oracle APEX in an application container is simplified, because theseactions are done against the application root. When an application PDB wishes to uptake thepatch or upgraded version, it simply syncs with the application root. Oracle APEX continuesto run in the application PDB at the existing version until the application PDB syncs with theapplication root.
5.2.2 Creating Application ContainerTo create a PDB within a CDB as an application container, you use the AS APPLICATIONCONTAINER clause of the create PDB command.
To create Application Container:
1. Use the AS APPLICATION CONTAINER clause of the CREATE PLUGGABLE DATABASEstatement to create an application container.
2. Open the application container.
For Example:
CREATE PLUGGABLE DATABASE apex_approot1 AS APPLICATION CONTAINER admin user admin IDENTIFIED BY <admin_password> FILE_NAME_CONVERT=('pdbseed','apex_approot1');ALTER PLUGGABLE DATABASE apex_approot1 open;
Note:
apex_approot1 and the admin user in the previous example can be any validORACLE identifier.
5.2.3 Installing or Upgrading Oracle APEX in an Application ContainerTo install or upgrade Oracle APEX in an Application Container:
1. Connect to Application Container.
2. Run apxappcon.sql.
apxappcon.sql installs Oracle APEX as an application named APEX into the applicationroot.
The script takes the exact same first four arguments as the apexins.sql script, with theaddition of a fifth parameter which is the password to use for the APEX_PUBLIC_USERpassword. In an upgrade installation, the fifth argument is ignored because theAPEX_PUBLIC_USER database user will already exist.
Chapter 5Installing Oracle APEX into an Application Container
5-3

For example:
ALTER SESSION SET CONTAINER = apex_approot1;
@apxappcon.sql SYSAUX SYSAUX TEMP /i/ P@ssw0rd!
5.2.4 Verifying the Application Container InstallationVerify the application container by inpsecting the log file for ORA- or PLS- errors andcompiling invalid objects.
To verify the Application Container installation:
1. Manually inspect the installation log file for ORA- or PLS- errors.
2. Compile invalid objects by running the following command:
For example:
ALTER SESSION SET CONTAINER=apex_approot1; begin sys.dbms_utility.compile_schema( 'APEX_210200', false ); sys.dbms_utility.compile_schema( 'FLOWS_FILES', false );end;/
3. Query dba_applications and dba_app_errors.
SQL> select app_name, app_version, app_status from dba_applications where app_name = 'APEX'; APP_NAME APP_VERSION APP_STATUS ------------------------------ ------------------------------ ------------ APEX 21.2 NORMAL SQL> select app_name, app_statement, errornum, errormsg from dba_app_errors where app_name = 'APEX'; no rows selected
5.2.5 Creating an Application SeedAn application seed is used to provision application PDBs with the application root'sapplications pre-installed.
To create an Application Seed:
1. Connect to CDB$ROOT as sysdba.
Chapter 5Installing Oracle APEX into an Application Container
5-4

2. Alter session and set container to the application root.
3. Use the AS SEED clause of the CREATE PLUGGABLE DATABASE statement to create anapplication seed.
4. Sync the APEX application with the application seed.
5. Compile invalid objects.
6. Open the application seed in read only mode.
For example:
ALTER SESSION SET CONTAINER=apex_approot1; CREATE PLUGGABLE DATABASE as seed admin user admin identified by <admin_password> file_name_convert=('pdbseed','apex_approot1_seed'); ALTER PLUGGABLE DATABASE apex_approot1$seed open; ALTER SESSION SET CONTAINER=apex_approot1$seed; ALTER PLUGGABLE DATABASE application APEX sync; begin sys.dbms_utility.compile_schema( 'APEX_210200', false ); sys.dbms_utility.compile_schema( 'FLOWS_FILES', false );end;/ ALTER PLUGGABLE DATABASE close immediate; ALTER PLUGGABLE DATABASE open read only;
Note:
apex_approot1 and the admin user in the previous example can be any validORACLE identifier.
5.2.6 Creating an Application PDB from the Application Root SeedAn application PDB is created by issuing the CREATE PLUGGABLE DATABASE statement fromthe application root.
The PLUGGABLE DATABASE is created from the application container seed so the APEXapplication is already installed and ready for configuration.
To create an Application PDB from the Application Root Seed:
1. Connect to CDB$ROOT as sysdba.
2. Alter session and set container to the application root.
3. Use the CREATE PLUGGABLE DATABASE command to create a PDB from the applicationseed.
Chapter 5Installing Oracle APEX into an Application Container
5-5

For example:
ALTER SESSION SET CONTAINER=apex_approot1; CREATE PLUGGABLE DATABASE apex_pdb1 admin user admin identified by <admin password> file_name_convert=('apex_approot1_seed','apex_pdb1'); ALTER PLUGGABLE DATABASE apex_pdb1 open; ALTER SESSION SET CONTAINER=apex_pdb1; SQL> select app_name, app_version, app_status from dba_applications where app_name = 'APEX'; APP_NAME APP_VERSION APP_STATUS ------------------------------ ------------------------------ ------------ APEX 21.1 NORMAL
Note:
apex_approot1 and the admin user in the previous example can be anyvalid ORACLE identifier.
5.2.7 Configure HTTP Access to the Application PDBConfigure a new application PDB for HTTP access.
Configure the new application PDB for HTTP access by following the instructionsstarting with the section Downloading and Installing Oracle REST Data Services.
5.3 Installing Oracle APEX into Different PDBsYou can install different versions of Oracle APEX into different PDBs.
Providing Oracle APEX is not installed in the container database, you can install alocal Oracle APEX within each PDB as required. When APEX is installed locally thereare no APEX metadata linked objects and all packages, views, and tables are createdwithin the APEX_210200 schema, within each PDB where APEX is installed.
• Uninstalling Oracle APEX from a CDBLearn how to uninstall Oracle APEX from a CDB.
• Installing Oracle APEX Locally in a PDBLearn how to install Oracle APEX locally in a PDB.
• Installing Oracle APEX into a CDB
Chapter 5Installing Oracle APEX into Different PDBs
5-6

5.3.1 Uninstalling Oracle APEX from a CDBLearn how to uninstall Oracle APEX from a CDB.
To uninstall Oracle APEX from a CDB:
Note:
Installing or removing Oracle APEX from a CDB requires a local connection to thedatabase.
This section describes removing Oracle APEX from a CDB. If you wish to removeOracle APEX from the CDB that shipped with Oracle Database 12.1, you shoulduse apxremov_con.sqlfrom either $ORACLE_HOME/apex , or from a 4.2.6 APEXdistribution.
1. Change to the apex directory in the location where you unzipped the distribution.
2. Start SQL*Plus and connect to the database where Oracle APEX is installed as SYSspecifying the SYSDBA role. For example:
• On Windows:
SYSTEM_DRIVE:\ sqlplus /nologSQL> CONNECT SYS as SYSDBAEnter password: SYS_password
• On UNIX and Linux:
$ sqlplus /nologSQL> CONNECT SYS as SYSDBAEnter password: SYS_password
3. Run apxremov.sql.
For example:
@apxremov.sql
Note:
If you run apexremov.sql after PDBs have been added to the CDB, then OracleAPEX uninstalls from all of the PDBs, as well as CDB$ROOT and PDB$SEED.Therefore, any applications defined in any of the PDBs will be removed.
5.3.2 Installing Oracle APEX Locally in a PDBLearn how to install Oracle APEX locally in a PDB.
Once you have removed Oracle APEX from the container database by following theinstructions in Uninstalling Oracle APEX from a CDB, you can install APEX locally in a PDB.
To install Oracle APEX locally in a PDB:
Chapter 5Installing Oracle APEX into Different PDBs
5-7

1. Change the apex directory in the location where you unzipped the distribution.
2. Start SQL*Plus and connect to the database where APEX is installed as SYSspecifying the SYSDBA role. For example:
• On Windows:
SYSTEM_DRIVE:\ sqlplus /nologSQL> CONNECT SYS as SYSDBAEnter password: SYS_password
• On UNIX and Linux:
$ sqlplus /nologSQL> CONNECT SYS as SYSDBAEnter password: SYS_password
3. Set the container to the PDB you want to install APEX locally:
ALTER SESSION SET CONTAINER = <PDB_name>;4. Select the appropriate installation option.
Full development environment provides complete access to the App Builderenvironment to develop applications. A Runtime environment enables users torun applications that cannot be modified.
Available installation options include:
• Full development environment - Run apexins.sql passing the following fourarguments in the order shown:
@apexins.sql tablespace_apex tablespace_files tablespace_temp images
Where:
– tablespace_apex is the name of the tablespace for the APEX applicationuser.
– tablespace_files is the name of the tablespace for the APEX files user.
– tablespace_temp is the name of the temporary tablespace or tablespacegroup.
– images is the virtual directory for APEX images. To support future APEXupgrades, define the virtual image directory as /i/.
For example:
@apexins.sql SYSAUX SYSAUX TEMP /i/• Runtime environment - Run apxrtins.sql passing the following four
arguments in the order shown:
@apxrtins.sql tablespace_apex tablespace_files tablespace_temp images
Where:
– tablespace_apex is the name of the tablespace for the APEX applicationuser.
– tablespace_files is the name of the tablespace for the APEX files user.
Chapter 5Installing Oracle APEX into Different PDBs
5-8
– tablespace_temp is the name of the temporary tablespace or tablespace group.
– images is the virtual directory for APEX images. To support future APEXupgrades, define the virtual image directory as /i/.
For example:
@apxrtins.sql SYSAUX SYSAUX TEMP /i/5. Complete the appropriate steps in Installing Oracle APEX and Configuring Oracle REST
Data Services.
Note:
Oracle Database SQL Language Reference for more information about SQL*Plus
When APEX installs, it creates the following database accounts:
• APEX_210200 - This account owns the APEX schema and metadata.
• FLOWS_FILES - This account owns the APEX uploaded files.
• APEX_PUBLIC_USER - This minimally privileged account is used for APEX configurationwith Oracle REST Data Services or Oracle HTTP Server and mod_plsql.
If you configured RESTful Web services, then these additional accounts are created:
• APEX_REST_PUBLIC_USER - The account used when invoking RESTful Services definitionsstored in APEX.
• APEX_LISTENER - The account used to query RESTful Services definitions stored inAPEX.
See Also:
Installing and Configuring Oracle APEX and Oracle REST Data Services
5.3.3 Installing Oracle APEX into a CDBTo install Oracle APEX into a CDB:
Note:
Installing or removing Oracle APEX from a CDB requires a local connection to thedatabase.
1. Change your working directory to the apex directory in the location where you unzippedthe distribution.
2. Start SQL*Plus and connect to CDB$ROOT of the database where APEX is installed as SYSspecifying the SYSDBA role.For example:
Chapter 5Installing Oracle APEX into Different PDBs
5-9

• On Windows:
SYSTEM_DRIVE:\ sqlplus /nologSQL> CONNECT SYS as SYSDBAEnter password: SYS_password
• On UNIX and Linux:
$ sqlplus /nologSQL> CONNECT SYS as SYSDBAEnter password: SYS_password
3. Select the appropriate installation option.
Full development environment provides complete access to the App Builderenvironment to develop applications. A Runtime environment enables users torun applications that cannot be modified.
Available installation options include:
• Full development environment. Run apexins.sql passing the following fourarguments in the order shown:
@apexins.sql tablespace_apex tablespace_files tablespace_temp images
Where:
– tablespace_apex is the name of the tablespace for the APEX applicationuser.
– tablespace_files is the name of the tablespace for the APEX files user.
– tablespace_temp is the name of the temporary tablespace or tablespacegroup.
– images is the virtual directory for APEX images. To support future APEXupgrades, define the virtual image directory as /i/.
Example:
@apexins.sql SYSAUX SYSAUX TEMP /i/
• Runtime environment. Run apxrtins.sql passing the following arguments inthe order shown:
@apxrtins.sql tablespace_apex tablespace_files tablespace_temp images
Where:
– tablespace_apex is the name of the tablespace for the APEX applicationuser.
– tablespace_files is the name of the tablespace for the APEX files user.
– tablespace_temp is the name of the temporary tablespace or tablespacegroup.
Chapter 5Installing Oracle APEX into Different PDBs
5-10
– images is the virtual directory for APEX images. To support future APEXupgrades, define the virtual image directory as /i/.
Example:
@apxrtins.sql SYSAUX SYSAUX TEMP /i/
4. Complete appropriate steps in Installing Oracle APEX and Configuring Oracle RESTData Services.
When APEX installs, it creates the following database accounts:
• APEX_210200 - This account owns the APEX schema and metadata.
• FLOWS_FILES - This account owns the APEX uploaded files.
• APEX_PUBLIC_USER - This minimally privileged account is used for APEX configurationwith Oracle REST Data Services or Oracle HTTP Server and mod_plsql.
If you configured RESTful Web services, then these additional accounts are created:
• APEX_REST_PUBLIC_USER - The account used when invoking RESTful Services definitionsstored in APEX.
• APEX_LISTENER - The account used to query RESTful Services definitions stored inAPEX.
See Also:
• Using SQL*Plus in SQL*Plus User's Guide and Reference
• Patching or Upgrading Oracle APEX in a CDB
• About the Oracle APEX Runtime Environment
• Installing and Configuring Oracle APEX and Oracle REST Data Services
5.4 Plugging in a PDB When 21.2 Oracle APEX Is Installed inthe Root Container
Learn about scenarios in which the target database has Oracle APEX installed into the rootcontainer, CDB$ROOT - the default installation option.
This section describes scenarios in which the target database has Oracle APEX installed intothe root container, CDB$ROOT - the default installation option. Note there are multiple scenariosrelated to where the database being plugged in originated from and how Oracle APEX wasconfigured in the originating database.
• Scenario 1: Plug-in Non-CDB with Oracle APEXPlug-in a Non-CDB with Oracle APEX.
• Scenario 2: Plug-in PDB with a Common APEX from Another CDBPlug-in a PDB with APEX from another CDB.
• Scenario 3: Plug-in PDB with a Local Oracle APEX from Another CDBPlug-in a PDB with a local Oracle APEX from another CDB.
Chapter 5Plugging in a PDB When 21.2 Oracle APEX Is Installed in the Root Container
5-11

• Scenario 4: Plug-in Non-CDB or PDB with No Oracle APEXPlug-in a Non-CDB or PDB if Oracle APEX is not installed.
• Working with Incompatible Oracle APEX VersionsLearn how to work with the incompatible versions of Oracle APEX.
5.4.1 Scenario 1: Plug-in Non-CDB with Oracle APEXPlug-in a Non-CDB with Oracle APEX.
If you are upgrading from a previous Oracle Database release, then you first need toupgrade to a Oracle Database 12c non-CDB (or standalone database) or later andthen plug the database into your CDB. Alternatively, if you have configured a non-CDBOracle Database 12c or later , you may now want to plug this database into a CDB. Inboth cases, the originating database has APEX installed and was not formerly a PDB.
As described in the Oracle Database Installation Guide for your operating system,when plugging in a standalone database you need to run the $ORACLE_HOME/rdbms/admin/noncdb_to_pdb.sql script. This script creates the necessary metadata linkedobjects, instead of local objects and recompiles the database objects for all commondatabase options, including APEX.
After installing Oracle APEX, you need to configure the Web listener for the PDB.
If the version of Oracle APEX installed in the originating database (which is now aPDB) is different from what is installed into the root container of the target, an error willbe raised when trying to open the PDB.
See Also:
• Installing and Configuring Oracle APEX and Oracle REST Data Services
• Working with Incompatible Oracle APEX Versions
5.4.2 Scenario 2: Plug-in PDB with a Common APEX from AnotherCDB
Plug-in a PDB with APEX from another CDB.
If you are copying or moving a PDB from an existing Oracle Database 12c or laterwhere the originating CDB had APEX installed in the root container, you will not needto perform any additional steps, other than configuring the Web listener for the PDB.
This scenario assumes APEX release 21.1 is installed and the APEX_210200 schemawithin the PDB being plugged in already has the metadata linked objects defined andwill compile without error against the metadata linked objects within the target CDB.
If the version of APEX installed in the originating database is different from what isinstalled in the root container of the target an error is raised when trying to open thePDB.
Chapter 5Plugging in a PDB When 21.2 Oracle APEX Is Installed in the Root Container
5-12

See Also:
• Installing and Configuring Oracle APEX and Oracle REST Data Services
• Working with Incompatible Oracle APEX Versions
5.4.3 Scenario 3: Plug-in PDB with a Local Oracle APEX from AnotherCDB
Plug-in a PDB with a local Oracle APEX from another CDB.
If you are copying or moving a PDB from an existing Oracle Database 12c or later whereAPEX was not installed in the root container but is installed locally, then you need to performadditional steps before the PDB can be opened without errors.
This scenario assumes APEX release 21.2 is installed and the APEX_210200 schema withinthe PDB being plugged in contains all of the APEX database objects and has no metadatalinked objects. Therefore, you need to run $ORACLE_HOME/rdbms/admin/apex_to_common.sqlto remove the common objects and create the metadata links for the packages, views and soforth.
To replace local objects with metadata links in the PDB:
1. Change your working directory to $ORACLE_HOME/rdbms/admin.
2. Start SQL*Plus and connect to the database where APEX is installed as SYS specifyingthe SYSDBA role. For example:
• On Windows:
SYSTEM_DRIVE:\ sqlplus /nologSQL> CONNECT SYS as SYSDBAEnter password: SYS_password
• On UNIX and Linux:
$ sqlplus /nologSQL> CONNECT SYS as SYSDBAEnter password: SYS_password
3. Set the container to the PDB to be configured:
ALTER SESSION SET CONTAINER = <PDB_name>;4. Run apex_to_common.sql. For example:
@apex_to_common.sql
If the version of Oracle APEX installed in the originating database is different from what isinstalled in the root container of the target an error is raised when trying to open the PDB.
See Also:
Working with Incompatible Oracle APEX Versions
Chapter 5Plugging in a PDB When 21.2 Oracle APEX Is Installed in the Root Container
5-13

5.4.4 Scenario 4: Plug-in Non-CDB or PDB with No Oracle APEXPlug-in a Non-CDB or PDB if Oracle APEX is not installed.
If you are plugging in a non-CDB, or copying or moving a PDB from another CDB, andOracle APEX is not installed in the originating database or PDB then a warning israised in the alert log when opening the PDB in the target database.
In this scenario, the APEX schema, such as APEX_210200 for Oracle APEX release21.2, will not be present in the originating database or the PDB being plugged in. Inorder to open the PDB without issue and be able to run APEX within the new PDB,you must install APEX into the originating database or PDB before attempting to plugin to the target database. You should install the same version of Oracle APEX into theoriginating database or PDB as the version installed into the target database.
5.4.5 Working with Incompatible Oracle APEX VersionsLearn how to work with the incompatible versions of Oracle APEX.
If the version of Oracle APEX in the root container, CDB$ROOT, is not the same as theOracle APEX version in the PDB then an error is raised every time the PDB is openedpreventing normal database operations within the PDB. The PDB can only be openedin restricted mode by users with RESTRICTED SESSION privilege, until the versionsare compatible.
• Patching or Upgrading Oracle APEX in a CDBLearn how to patch or upgrade Oracle APEX in the root container.
• Patching or Upgrading Oracle APEX in a PDBLearn how to patch or upgrade Oracle APEX in a PDB.
5.4.5.1 Patching or Upgrading Oracle APEX in a CDBLearn how to patch or upgrade Oracle APEX in the root container.
If the version of Oracle APEX in the PDB is a later minor release version than theversion of Oracle APEX in the root container (for example, the PDB contains OracleAPEX release 5.1.4 and the CDB contains Oracle APEX release 5.1.3) then you mustpatch the version of Oracle APEX in the root container to be able to open the PDBwithout error. If the major version of Oracle APEX in the PDB is higher than the versionin the CDB (for example the PDB has Oracle APEX release 19.2 and the CDB hasOracle APEX release 18.1) then you must upgrade the version of Oracle APEX in theCDB to be able to open the PDB without error.
To patch Oracle APEX in the root container:
1. Download the appropriate patch from My Oracle Support.
2. Unzip and extract the installation files.
3. Change your working directory to where the installation files were extracted
4. Start SQL*Plus and connect to the database where Oracle APEX is installed asSYS specifying the SYSDBA role. For example:
• On Windows:
Chapter 5Plugging in a PDB When 21.2 Oracle APEX Is Installed in the Root Container
5-14

SYSTEM_DRIVE:\ sqlplus /nologSQL> CONNECT SYS as SYSDBAEnter password: SYS_password
• On UNIX and Linux:
$ sqlplus /nologSQL> CONNECT SYS as SYSDBAEnter password: SYS_password
5. Run apxpatch_con.sql for example:
@apxpatch_con.sql6. Follow the instructions outlined in the Patch Set Notes for updating the images directory.
See Also:
Installing Oracle APEX into a CDB
5.4.5.2 Patching or Upgrading Oracle APEX in a PDBLearn how to patch or upgrade Oracle APEX in a PDB.
If the minor version of Oracle APEX in the PDB is lower than the version of Oracle APEX inthe root container (for example the PDB has APEX release 4.2.0 and the CDB has APEXrelease 4.2.6) then it will be necessary to patch the version of APEX in the PDB. If the majorversion of Oracle APEX in the PDB is lower than the version in the root container (forexample, the PDB has APEX release 4.2 and the CDB has APEX release 19.2) then theversion of APEX in the PDB will need to be upgraded.
• Patching Oracle APEX in a PDBLearn how to patch Oracle APEX in a PDB.
• Upgrading Oracle APEX in a PDBLearn how to upgrade Oracle APEX in a PDB.
5.4.5.2.1 Patching Oracle APEX in a PDBLearn how to patch Oracle APEX in a PDB.
To patch Oracle APEX in a PDB:
1. Download the appropriate patch from My Oracle Support.
2. Unzip and extract the installation files.
3. Change your working directory to where the installation files were extracted
4. Start SQL*Plus and connect to the database where Oracle APEX is installed as SYSspecifying the SYSDBA role. For example:
• On Windows:
SYSTEM_DRIVE:\ sqlplus /nologSQL> CONNECT SYS as SYSDBAEnter password: SYS_password
• On UNIX and Linux:
Chapter 5Plugging in a PDB When 21.2 Oracle APEX Is Installed in the Root Container
5-15
$ sqlplus /nologSQL> CONNECT SYS as SYSDBAEnter password: SYS_password
5. Run apxpatch.sql using catcon.pl like the following example:
host &OH_HOME/perl/bin/perl -I
&OH_HOME/rdbms/admin &OH_HOME/rdbms/admin/catcon.pl -b apxpatch -c '<PDB_name>' apxpatch.sql
Where:
• &OH_HOME represents the full path to the Oracle home
• <PDB_name> is the name of the PDB you are patching
6. Follow the instructions outlined in the patch set notes for updating the imagesdirectory.
5.4.5.2.2 Upgrading Oracle APEX in a PDBLearn how to upgrade Oracle APEX in a PDB.
To upgrade Oracle APEX in a PDB:
1. Unzip and extract the installation files.
2. Change your working directory to where the installation files were extracted
3. Start SQL*Plus and connect to the database where Oracle APEX is installed asSYS specifying the SYSDBA role. For example:
• On Windows:
SYSTEM_DRIVE:\ sqlplus /nologSQL> CONNECT SYS as SYSDBAEnter password: SYS_password
• On UNIX and Linux:
$ sqlplus /nologSQL> CONNECT SYS as SYSDBAEnter password: SYS_password
4. Run apexins_nocdb.sql or apxrtins_nocdb.sql using catcon.pl like the followingexample:
host &OH_HOME/perl/bin/perl -I
&OH_HOME/rdbms/admin &OH_HOME/rdbms/admin/catcon.pl -b apexins -c '<PDB_name>' apexins_nocdb.sql --pSYSAUX --pSYSAUX --pTEMP --p/i/ --p1,2,3
Where:
• &OH_HOME represents the full path to the Oracle home
• <PDB_name> is the name of the PDB you are patching
5. Follow the instructions outlined in the patch set notes for updating the imagesdirectory.
Chapter 5Plugging in a PDB When 21.2 Oracle APEX Is Installed in the Root Container
5-16

5.5 Plugging in a PDB When Oracle APEX Is Not in the RootContainer of the Target CDB
The scenarios in this section describe when Oracle APEX is not installed in the rootcontainer, CDB$ROOT, by explicitly removing it as described in "Uninstalling Oracle APEX froma CDB."
In such cases, you can optionally install a Oracle APEX into each PDB independently. IfOracle APEX is installed into a PDB it is considered to be installed locally and has nometadata linked objects. There are multiple scenarios related to where the database beingplugged in originated from and how Oracle APEX was configured in the originating database.
• Scenario 1: Plug-in a Non-CDB with Oracle APEXPlug-in a Non-CDB with Oracle APEX.
• Scenario 2: Plug-in PDB with Common Oracle APEX from Another CDBPlug-in a PDB with Oracle APEX from another CDB.
• Scenario 3: Plug-in PDB with a Local Oracle APEX from Another CDBPlug-in a PDB with local Oracle APEX from another CDB.
• Scenario 4: Plug-in a Non-CDB or PDB with No Oracle APEXPlug-in a Non-CDB or PDB if Oracle APEX is not installed.
See Also:
Uninstalling Oracle APEX from a CDB
5.5.1 Scenario 1: Plug-in a Non-CDB with Oracle APEXPlug-in a Non-CDB with Oracle APEX.
If you are upgrading from a previous Oracle Database release then you need to upgrade toOracle Database 12c or later non-CDB (or standalone database) and then plug the databaseinto your CDB. Alternatively you may have configured a non-CDB Oracle Database 12c orlater that you now want to plug into a CDB. In both cases, the originating database hadOracle APEX installed and was not formerly a PDB.
As described in the Oracle Database Installation Guide for your operating system, whenplugging in a standalone database you need to run the $ORACLE_HOME/rdbms/admin/noncdb_to_pdb.sql script. This script creates the necessary metadata linked objects(instead of local objects) and recompiles the database objects for all common databaseoptions. However, because Oracle APEX has been removed from the root container, thescript will not create any metadata links for any of the Oracle APEX objects. The script doesnot change the Oracle APEX installation from the originating database and no additionalsteps are needed other than configuring the Web listener depending on the type of Weblistener you are using.
Chapter 5Plugging in a PDB When Oracle APEX Is Not in the Root Container of the Target CDB
5-17

See Also:
"Installing and Configuring Oracle APEX and Oracle REST Data Services"
5.5.2 Scenario 2: Plug-in PDB with Common Oracle APEX fromAnother CDB
Plug-in a PDB with Oracle APEX from another CDB.
If you are copying or moving a PDB from an existing Oracle Database 12c where theoriginating CDB had Oracle APEX installed in the root container, then an error israised whenever you try to open the PDB. The error is due to the originating PDBincluded metadata links to objects in the originating root container which cannot berecompiled because the target root container does not include Oracle APEX. You willnot be able to open the PDB unless you remove APEX from the PDB or if APEX isalready installed in the target root container. Oracle does not support installing APEXin the root container if it contains PDBs with locally installed Oracle APEX.
5.5.3 Scenario 3: Plug-in PDB with a Local Oracle APEX from AnotherCDB
Plug-in a PDB with local Oracle APEX from another CDB.
If you are copying or moving a PDB from an existing Oracle Database 12c or laterwhere the originating PDB had a local Oracle APEX installed (not in the CDB) thenyou do not need to perform any additional steps, other than configuring the Weblistener in the PDB depending on the type of Web listener you are using.
This scenario assumes Oracle APEX release 21.2 is installed and the APEX_210200schema within the PDB being plugged in, already has all of the Oracle APEX objectsdefined locally and no metadata links.
See Also:
"Installing and Configuring Oracle APEX and Oracle REST Data Services"
5.5.4 Scenario 4: Plug-in a Non-CDB or PDB with No Oracle APEXPlug-in a Non-CDB or PDB if Oracle APEX is not installed.
If you are plugging in a non-CDB, or copying or moving a PDB from another CDB,where Oracle APEX was not installed in the originating database or PDB then you donot need to perform any additional steps. There will be no Oracle APEX engineschema, such as APEX_210200, within the PDB, and the PDB can be started withouterror.
Chapter 5Plugging in a PDB When Oracle APEX Is Not in the Root Container of the Target CDB
5-18

6Installing and Configuring Oracle APEX andOracle REST Data Services
Install or upgrade Oracle APEX by downloading a ZIP file from the Oracle APEX downloadpage and then downloading and installing Oracle REST Data Services (ORDS). Theseinstructions apply to both new and upgrade installations.
• Performing Pre-installation Tasks for Oracle APEXReview and perform pre-installation tasks before installing Oracle APEX.
• Downloading and Installing Oracle APEXLearn about downloading and installing Oracle APEX.
• Downloading and Installing Oracle REST Data ServicesLearn about downloading and installing Oracle REST Data Services.
• Configuring Oracle REST Data ServicesConfiguring Oracle REST Data Services requires that you copy the images directory, runa configuration to configure RESTful Services, configure static files support, and secureOracle REST data service.
• Enabling Network Services in Oracle DatabaseYou must enable network services in Oracle Database to send outbound mail, use Webservices, or use PDF report printing in Oracle APEX.
• Performing Security TasksOracle recommends configuring and using Secure Sockets Layer (SSL) to ensure thatpasswords and other sensitive data are not transmitted in clear text in HTTP requests.
• Controlling the Number of Concurrent JobsLearn about specifying the number of concurrently running jobs.
• About Running Oracle APEX in Other LanguagesYou can install a single instance of Oracle APEX with one or more of translated versions.
• Installing Translated Versions of Oracle APEXLearn about installing translated versions of Oracle APEX.
• Creating a Workspace and Adding Oracle APEX UsersBefore you can develop or install applications, you must create a workspace, add OracleAPEX users, and sign in to your workspace.
• Performing Post Installation Tasks for Upgrade InstallationsOnce you have verified that your upgrade installation was successful and all upgradedapplications function properly, you should remove schemas from prior Oracle APEXinstallations.
• About Performance Optimization TasksLearn about performance optimization.
• Converting Between Runtime and Full Development EnvironmentsLearn about converting between runtime and full development environments.
6-1

See Also:
Web Listener Requirements
6.1 Performing Pre-installation Tasks for Oracle APEXReview and perform pre-installation tasks before installing Oracle APEX.
Before installing Oracle APEX, Oracle recommends that you complete the followingsteps:
1. Review and satisfy all Oracle APEX installation requirements.
2. If you are actively using Oracle APEX and upgrading the current installation, thenshut down with normal or immediate priority the Oracle Database instances whereyou plan to install Oracle APEX. On Oracle Real Application Clusters (OracleRAC) systems, shut down all instances on each node.
An alternative to shutting down the database, you can prevent all users fromaccessing Oracle APEX when upgrading your installation from a previous releaseof Oracle APEX. Oracle only recommends this option in high availability productionenvironments where planned outages are not available. For all other scenarios,the database should be shut down.
To disable access to Oracle APEX when an existing installation is using OracleREST Data Services, shut down the appropriate application server where OracleREST Data Services is deployed.
Once you have prevented access from APEX users, log in to SQL*Plus as SYS,connecting to the database where Oracle APEX is installed, and query V$SESSIONto ensure there are no long running sessions which would interfere with theupgrade process.
3. Back up the Oracle Database installation.
Oracle recommends that you create a backup of the current Oracle Databaseinstallation before you install Oracle APEX. You can use Oracle DatabaseRecovery Manager, which is included in the Oracle Database installation, toperform the backup.
4. Start the Oracle Database instance that contains the target database.
After backing up the system, you must start the Oracle instance that contains thetarget Oracle Database. Do not start other processes such as a Web listener.However, if you are performing a remote installation, make sure the Web listenerfor the remote database has started.
Note:
If you are connecting to a remote database, then start the Web listener.
Chapter 6Performing Pre-installation Tasks for Oracle APEX
6-2

See Also:
• Oracle APEX Installation Requirements
• Oracle Database Backup and Recovery User’s Guide
6.2 Downloading and Installing Oracle APEXLearn about downloading and installing Oracle APEX.
How you install Oracle APEX depends upon by the type of database you into which you areinstalling. This section describes how to download and install Oracle APEX.
• Installing Oracle APEXInstall Oracle APEX by downloading a ZIP file from the Oracle APEX download page.
• Creating or Updating Your Instance Administration AccountLearn how to create or update Instance Administrator account.
• Restarting ProcessesRestart the processes that you stopped before you began the installation.
• Configuring the APEX_PUBLIC_USER AccountIt is important to correctly configure the APEX_PUBLIC_USER account to enable properoperation of Oracle APEX.
• Configuring RESTful ServicesIn a new installation of Oracle APEX, you must run the configuration scriptapex_rest_config.sql to configure RESTful Services.
See Also:
Utilizing the Multitenant Architecture in Oracle Database 12c or Later
6.2.1 Installing Oracle APEXInstall Oracle APEX by downloading a ZIP file from the Oracle APEX download page.
To install Oracle APEX:
1. For installations where the development will be in English only, download the fileapex_21.2_en.zip from the Oracle APEX download page. If the development will includelanguages other than English, download apex_21.2.zip from the Oracle APEX downloadpage. See:
https://www.oracle.com/tools/downloads/apex-downloads.html
Note that the actual file name may differ if a more recent release has shipped since thisdocument was published.
2. Unzip downloaded zip file:
• If English only, unzip apex_21.2_en.zip as follows, preserving directory names:
Chapter 6Downloading and Installing Oracle APEX
6-3

– UNIX and Linux: $ unzip apex_21.2_en.zip– Windows: Double click the file apex_21.2_en.zip in Windows Explorer
• If multiple languages, unzip apex_21.2.zip as follows, preserving directorynames:
– UNIX and Linux: $ unzip apex_21.2.zip– Windows: Double click the file apex_21.2.zip in Windows Explorer
Note:
You should keep the directory tree where you unzip the files short andnot under directories that contain spaces. For example, within Windowsunzip to C:\TEMP.
3. Change your working directory to apex.
4. Start SQL*Plus and connect to the database where Oracle APEX is installed asSYS specifying the SYSDBA role. For example:
• On Windows:
SYSTEM_DRIVE:\ sqlplus /nologSQL> CONNECT SYS as SYSDBAEnter password: SYS_password
• On UNIX and Linux:
$ sqlplus /nologSQL> CONNECT SYS as SYSDBAEnter password: SYS_password
5. Disable any existing password complexity rules for the default profile.
6. Select the appropriate installation option.
Full development environment provides complete access to the App Builderenvironment to develop applications. A Runtime environment enables users torun applications that cannot be modified.
Available installation options include:
• Full development environment. Run apexins.sql passing the following fourarguments in the order shown:
@apexins.sql tablespace_apex tablespace_files tablespace_temp images
Where:
– tablespace_apex is the name of the tablespace for the Oracle APEXapplication user.
– tablespace_files is the name of the tablespace for the Oracle APEX filesuser.
– tablespace_temp is the name of the temporary tablespace or tablespacegroup.
Chapter 6Downloading and Installing Oracle APEX
6-4
– images is the virtual directory for Oracle APEX images. For installations usingEPG, /i/ is the required value for the images argument. To support future OracleAPEX upgrades, define the virtual image directory as /i/.
Example:
@apexins.sql SYSAUX SYSAUX TEMP /i/
Note:
If you receive the following error, exit SQL*Plus and change your workingdirectory to where you unzipped the installation file, for example C:\TEMP inWindows, before starting SQL*Plus:
SP2-0310: unable to open file "apexins.sql"
• Runtime environment. Run apxrtins.sql passing the following arguments in theorder shown:
@apxrtins.sql tablespace_apex tablespace_files tablespace_temp images
Where:
– tablespace_apex is the name of the tablespace for the Oracle APEX applicationuser.
– tablespace_files is the name of the tablespace for the Oracle APEX files user.
– tablespace_temp is the name of the temporary tablespace or tablespace group.
– images is the virtual directory for Oracle APEX images. To support future OracleAPEX upgrades, define the virtual image directory as /i/.
Example:
@apxrtins.sql SYSAUX SYSAUX TEMP /i/When Oracle APEX installs, it creates the following database accounts:
• APEX_210200 - This account owns the Oracle APEX schema and metadata.
• FLOWS_FILES - This account owns the Oracle APEX uploaded files.
• APEX_PUBLIC_USER - This minimally privileged account is used for Oracle APEXconfiguration with Oracle REST Data Services or Oracle HTTP Server and mod_plsql.
If you configured RESTful Web services, then these additional accounts will be created:
• APEX_REST_PUBLIC_USER - The account used when invoking RESTful Services definitionsstored in Oracle APEX.
• APEX_LISTENER - The account used to query RESTful Services definitions stored inOracle APEXs.
If you are upgrading from a previous release, then FLOWS_FILES already exists andAPEX_PUBLIC_USER is created if it does not already exist.
Chapter 6Downloading and Installing Oracle APEX
6-5

See Also:
• About the Oracle APEX Runtime Environment
• Oracle APEX must be installed from a writable directory on the filesystem. See Reviewing a Log of an Installation Session
• Configuring Password Protection in Oracle Database Security Guide
• SQL*Plus User's Guide and Reference for more information aboutSQL*Plus
6.2.2 Creating or Updating Your Instance Administration AccountLearn how to create or update Instance Administrator account.
This section describes how to create or update your Instance Administrator account.
Tip:
Skip this section if you are upgrading from a previous release of OracleAPEX. In an upgrade scenario, the Instance Administrator account andpassword is preserved and carried over from the prior release.
• What Is an Instance Administrator?Instance administrators are superusers that are responsible for managing anentire Oracle APEX instance, including managing workspace provisioning,configuring features and instance settings, and managing security.
• About apxchpwd.sqlRunning the apxchpwd.sql script enables you to create or update your InstanceAdministrator account.
• Running apxchpwd.sqlRun the apxchpwd.sql script to create and update your Instance Administratoraccount.
6.2.2.1 What Is an Instance Administrator?Instance administrators are superusers that are responsible for managing an entireOracle APEX instance, including managing workspace provisioning, configuringfeatures and instance settings, and managing security.
To perform these tasks, an Instance administrator signs in to the Oracle APEXAdministration Services application.
Chapter 6Downloading and Installing Oracle APEX
6-6

See Also:
Oracle Application Express Administration Services in Oracle APEX AdministrationGuide
6.2.2.2 About apxchpwd.sqlRunning the apxchpwd.sql script enables you to create or update your Instance Administratoraccount.
You must run the apxchpwd.sql script in the following scenarios:
• New Oracle APEX installations - Run apxchpwd.sql to create an Instance Administratoraccount and password.
• Converting of a runtime environment to a development environment - Runapxchpwd.sql to change the Instance Administrator account password.
• Changing Your Instance Administrator Password -Run apxchpwd.sql to change thepassword for an existing Instance Administrator account.
• Unlocking Your Instance Administrator Account - Run apxchpwd.sql to unlock anexisting Instance Administrator account.
Tip:
You do not need to run apxchpwd.sql when upgrading from a previous release ofOracle APEX. In an upgrade scenario, the Instance Administrator accountpassword is preserved and carried over from the prior release.
6.2.2.3 Running apxchpwd.sqlRun the apxchpwd.sql script to create and update your Instance Administrator account.
To create or update your Instance Administrator account:
1. Change your working directory to the apex directory where you unzipped the installationsoftware.
2. Start SQL*Plus and connect to the database where Oracle APEX is installed as SYSspecifying the SYSDBA role. For example:
• On Windows:
SYSTEM_DRIVE:\ sqlplus /nologSQL> CONNECT SYS as SYSDBAEnter password: SYS_password
• On UNIX and Linux:
$ sqlplus /nologSQL> CONNECT SYS as SYSDBAEnter password: SYS_password
3. Run apxchpwd.sql. For example:
Chapter 6Downloading and Installing Oracle APEX
6-7

@apxchpwd.sql
Follow the on-screen instructions. You will be prompted provide a username,password, and email address. If the account username does not exist, it will becreated for you.
See Also:
SQL*Plus User's Guide and Reference for more information about SQL*Plus
6.2.3 Restarting ProcessesRestart the processes that you stopped before you began the installation.
After you install Oracle APEX, you must restart the processes that you stopped beforeyou began the installation.
6.2.4 Configuring the APEX_PUBLIC_USER AccountIt is important to correctly configure the APEX_PUBLIC_USER account to enable properoperation of Oracle APEX.
• About the APEX_PUBLIC_USER AccountThe APEX_PUBLIC_USER account is created with a random password in a newinstallation of Oracle APEX.
• Unlocking the APEX_PUBLIC_USER AccountUnlock the APEX_PUBLIC_USER account by running a SQL statement.
• Changing the Password for the APEX_PUBLIC_USER AccountChange the password for the APEX_PUBLIC_USER account by running a SQLstatement.
• About Password Expiration in Oracle Database 11g and LaterYou can set PASSWORD_LIFE_TIME parameter to unlimited by alteringAPEX_PUBLIC_USER to prevent password expiration. To do this create anotherprofile in which the PASSWORD_LIFE_TIME parameter is set to unlimited and alter theAPEX_PUBLIC_USER account and assign it to the new profile.
6.2.4.1 About the APEX_PUBLIC_USER AccountThe APEX_PUBLIC_USER account is created with a random password in a newinstallation of Oracle APEX.
You must change the password for this account before configuring the databaseaccess descriptor (DAD) in a new installation.
Chapter 6Downloading and Installing Oracle APEX
6-8

6.2.4.2 Unlocking the APEX_PUBLIC_USER AccountUnlock the APEX_PUBLIC_USER account by running a SQL statement.
Tip:
If you are upgrading from a prior release of Oracle APEX, this step is unnecessary.
To unlock the APEX_PUBLIC_USER account:
1. Start SQL*Plus and connect to the database where Oracle APEX is installed as SYSspecifying the SYSDBA role. If Oracle APEX is installed in the CDB, ensure you connect toCDB$ROOT. For example:
• On Windows:
SYSTEM_DRIVE:\ sqlplus /nologSQL> CONNECT SYS as SYSDBAEnter password: SYS_password
• On UNIX and Linux:
$ sqlplus /nologSQL> CONNECT SYS as SYSDBAEnter password: SYS_password
2. Run the following statement:
ALTER USER APEX_PUBLIC_USER ACCOUNT UNLOCK
6.2.4.3 Changing the Password for the APEX_PUBLIC_USER AccountChange the password for the APEX_PUBLIC_USER account by running a SQL statement.
Tip:
If you are upgrading from a prior release of Oracle APEX, this step is unnecessary.
To change the password for the APEX_PUBLIC_USER account:
1. Start SQL*Plus and connect to the database where Oracle APEX is installed as SYSspecifying the SYSDBA role. If Oracle APEX is installed in the CDB, ensure you connect toCDB$ROOT. For example:
• On Windows:
SYSTEM_DRIVE:\ sqlplus /nologSQL> CONNECT SYS as SYSDBAEnter password: SYS_password
• On UNIX and Linux:
$ sqlplus /nologSQL> CONNECT SYS as SYSDBAEnter password: SYS_password
Chapter 6Downloading and Installing Oracle APEX
6-9

2. Run the following statement:
ALTER USER APEX_PUBLIC_USER IDENTIFIED BY new_password
Where new_password is the new password you are setting for APEX_PUBLIC_USER.You will use this password when creating the DAD in the sections that follow.
6.2.4.4 About Password Expiration in Oracle Database 11g and LaterYou can set PASSWORD_LIFE_TIME parameter to unlimited by alteringAPEX_PUBLIC_USER to prevent password expiration. To do this create another profile inwhich the PASSWORD_LIFE_TIME parameter is set to unlimited and alter theAPEX_PUBLIC_USER account and assign it to the new profile.
In the default profile in Oracle Database 11g or later, the parameterPASSWORD_LIFE_TIME is set to 180. If you are using Oracle Database 11g or later withOracle APEX, this causes the password for APEX_PUBLIC_USER to expire in 180 days.As a result, your Oracle APEX instance will become unusable until you change thepassword.
See Also:
Oracle Database Security Guide for information on creating profiles andassigning them to database users
6.2.5 Configuring RESTful ServicesIn a new installation of Oracle APEX, you must run the configuration scriptapex_rest_config.sql to configure RESTful Services.
Once configured, the instance administrator can control the availability of the feature. Ifthe instance administrator has disabled RESTful Services for this Oracle APEXinstance, RESTful Services are not available for this instance and the RESTfulServices icon does not display.
To configure RESTful Services in Oracle APEX:
1. Change your working directory to the apex directory where you unzipped theinstallation software.
2. Start SQL*Plus and connect to the database where Oracle APEX is installed asSYS specifying the SYSDBA role. For example:
• On Windows:
SYSTEM_DRIVE:\ sqlplus /nologSQL> CONNECT SYS as SYSDBAEnter password: SYS_password
• On UNIX and Linux:
$ sqlplus /nologSQL> CONNECT SYS as SYSDBAEnter password: SYS_password
3. Run apex_rest_config.sql. For example:
Chapter 6Downloading and Installing Oracle APEX
6-10

@apex_rest_config.sql
When Prompted, enter a password for the APEX_LISTENER and APEX_REST_PUBLIC_USERaccounts.
When configuring RESTful Services in Oracle APEX, it creates two new databaseaccounts.
• APEX_LISTENER - The account used to query RESTful Services definitions stored inOracle APEX.
• APEX_REST_PUBLIC_USER - The account used when calling RESTful Servicesdefinitions stored in Oracle APEX.
See Also:
Enabling RESTful Services for an Instance in Oracle APEX Administration Guide
6.3 Downloading and Installing Oracle REST Data ServicesLearn about downloading and installing Oracle REST Data Services.
• Downloading Oracle REST Data ServicesLearn how to download Oracle REST Data Services.
• About Configuring Oracle REST Data Services Behind a Reverse Proxy or LoadBalancerWhen Oracle APEX is running behind a reverse proxy or load balancer, it is important tocommunicate the original HTTP hostname and protocol as seen by the user's browser tothe Oracle APEX engine.
• Web Server HTTP POST Request LimitsLearn about Web Server HTTP POST request limits.
See Also:
Oracle REST Data Services Installation, Configuration, and Development Guide
Chapter 6Downloading and Installing Oracle REST Data Services
6-11

6.3.1 Downloading Oracle REST Data ServicesLearn how to download Oracle REST Data Services.
Tip:
By default, the context root for accessing Oracle APEX through Oracle RESTData Services is /ords. If you wish to have a context root of /apex foraccessing Oracle APEX, rename the ords.war file to apex.war beforeinstalling Oracle REST Data Services. See "Installing Oracle REST DataServices" in Oracle REST Data Services Installation, Configuration, andDevelopment Guide.
To download Oracle REST Data Services:
1. Download the latest release of Oracle REST Data services.
2. Unzip the downloaded zip file into a directory (or folder) of your choice:
• UNIX and Linux: unzip ords.version.number.zip• Windows: Double-click the file ords.version.number.zip in Windows
Explorer
3. Copy the images directory, apex/images, from the Oracle APEX software ZIP to alocation on the file system where Oracle REST Data Services is installed.
4. See Oracle REST Data Services Installation, Configuration, and DevelopmentGuide and follow and complete all installation and configuration steps.
5. For Oracle Database 12c or later multitenant architecture, ensure that youconfigure the connection using the service name of the specific pluggabledatabase (PDB) you want to access. Do not use the service name of the CDB$ROOTunless you are configuring Oracle REST Data Services to address PDBs throughthe URL. See Oracle REST Data Services Installation, Configuration, andDevelopment Guide for more information.
6.3.2 About Configuring Oracle REST Data Services Behind aReverse Proxy or Load Balancer
When Oracle APEX is running behind a reverse proxy or load balancer, it is importantto communicate the original HTTP hostname and protocol as seen by the user'sbrowser to the Oracle APEX engine.
The Oracle APEX engine uses this information to generate valid URLs in HTMLresponses and HTTP redirects that the user's browser can successfully follow. Theexact configuration steps depend on your Java EE application server. For example, forOracle WebLogic Server, this is accomplished using Oracle WebLogic Server ProxyPlug-Ins. To learn more, see your Java EE application server documentation.
6.3.3 Web Server HTTP POST Request LimitsLearn about Web Server HTTP POST request limits.
Chapter 6Downloading and Installing Oracle REST Data Services
6-12

When running Oracle REST Data Services (ORDS) in standalone mode or within a TomcatJava Container, size limits are being imposed on POST requests which are not file uploads.Oracle APEX users will encounter these limits when uploading data in SQL Workshop usingcopy and paste or when using copy and paste while building an application fromspreadsheet.
• When running Oracle REST Data Services in Standalone Mode, the default limit is 200KB for ORDS 19.4.6 and earlier. It is recommended to increase the limit as follows:
Set the Java System property org.eclipse.jetty.server.Request.maxFormContentSize to a higher value in bytes.You can set this property upon startup of Oracle REST Data Services. For example: java-Dorg.eclipse.jetty.server.Request.maxFormContentSize=3000000 -jar ords.war
• When running on Apache Tomcat, the default limit is 2 megabytes. Adjust ApacheTomcat's maxPostSize parameter to change that limit.
See Also:
http://tomcat.apache.org/ for more information.
6.4 Configuring Oracle REST Data ServicesConfiguring Oracle REST Data Services requires that you copy the images directory, run aconfiguration to configure RESTful Services, configure static files support, and secure OracleREST data service.
How to configure RESTful Services in a new installation is discussed in the following section.
• Copying the Images DirectoryWhether you are loading a new installation or upgrading from a previous release, youmust copy the images directory from the top level of the apex\images directory, forexample C:\TEMP, to the location used by your Oracle REST Data Services installation.
• Validating the Oracle REST Data Services InstallationIn a new installation or upgrade of Oracle APEX and if you are using Oracle REST DataServices 21.2.1 or older, you must validate the Oracle REST Data Services installation.
• Configuring Static File SupportFor configuring static files, you must run apex_rest_config.sql after a new installationof Oracle APEX.
• Securing Oracle REST Data ServiceIn a configuration for Oracle APEX, Oracle recommends setting the parametersecurity.requestValidationFunction to wwv_flow_epg_include_modules.authorize.
6.4.1 Copying the Images DirectoryWhether you are loading a new installation or upgrading from a previous release, you mustcopy the images directory from the top level of the apex\images directory, for exampleC:\TEMP, to the location used by your Oracle REST Data Services installation.
During an upgrade, you overwrite your existing images directory. Before you begin theupgrade, to ensure that you can revert to the previous version, Oracle recommends that you
Chapter 6Configuring Oracle REST Data Services
6-13

create a copy of your existing images directory for Oracle APEX, indicating the releasenumber of the images (for example, images_5_1).
See Also:
Oracle REST Data Services Installation, Configuration, and DevelopmentGuide
6.4.2 Validating the Oracle REST Data Services InstallationIn a new installation or upgrade of Oracle APEX and if you are using Oracle RESTData Services 21.2.1 or older, you must validate the Oracle REST Data Servicesinstallation.
For validating the Oracle REST Data Services installation in a new installation orupgrade of Oracle APEX, run the following :
java -jar ords.war validate [--database <dbname>]
See Also:
Oracle REST Data Services Installation, Configuration, and DevelopmentGuide
6.4.3 Configuring Static File SupportFor configuring static files, you must run apex_rest_config.sql after a newinstallation of Oracle APEX.
Oracle APEX enables application developers to include static files with theirapplications. Static files can be associated with a workspace, an application, a plug-in,or an application theme. When using Oracle REST Data Services as your web listener,static files are served using RESTful service module built into Oracle APEX.Therefore, you must run apex_rest_config.sql after a new installation of OracleAPEX.
See Also:
Configuring Oracle REST Data Services
6.4.4 Securing Oracle REST Data ServiceIn a configuration for Oracle APEX, Oracle recommends setting the parametersecurity.requestValidationFunction towwv_flow_epg_include_modules.authorize.
Chapter 6Configuring Oracle REST Data Services
6-14

Set parameter security.requestValidationFunction towwv_flow_epg_include_modules.authorize activates the white list of callable procedureswhich ships with Oracle APEX and prohibits calls to other procedures.
See Also:
About Configuring Oracle REST Data Services with Oracle Application Express inOracle APEX App Builder User’s Guide
6.5 Enabling Network Services in Oracle DatabaseYou must enable network services in Oracle Database to send outbound mail, use Webservices, or use PDF report printing in Oracle APEX.
• When and Why Network Services Must be EnabledEnabling network services enables support for sending outbound mail in OracleAPEXAPEX, use of Web services in APEX, and PDF report printing with BI Publisher.
• Granting Connect Privileges in Oracle Database 12c or LaterProcedures CREATE_ACL, ASSIGN_ACL, ADD_PRIVILEGE and CHECK_PRIVILEGE inDBMS_NETWORK_ACL_ADMIN are deprecated in Oracle Database 12c. Oracle recommendsto use APPEND_HOST_ACE.
• Troubleshooting an Invalid ACL ErrorLearn how to identify any invalid ACL error by running the query.
6.5.1 When and Why Network Services Must be EnabledEnabling network services enables support for sending outbound mail in Oracle APEXAPEX,use of Web services in APEX, and PDF report printing with BI Publisher.
By default, the ability to interact with network services is disabled in Oracle Database 11gRelease 2 or later. Therefore, if you are running Oracle APEX with Oracle Database 11gRelease 2 or later, you must use the new DBMS_NETWORK_ACL_ADMIN package to grant connectprivileges to any host for the APEX_210200 database user. Failing to grant these privilegesresults in issues with:
• Sending outbound mail in Oracle APEX.
Users can call methods from the APEX_MAIL package, but issues arise when sendingoutbound email.
• Consuming web services from APEX.
• Making outbound LDAP calls from APEX.
• PDF report printing with BI Publisher.
Note:
When upgrading APEX on a database 12c or newer, based on the configuration ofthe old APEX version the upgrade automatically configures Network Services.
Chapter 6Enabling Network Services in Oracle Database
6-15

Tip:
To run the examples described in this section, the compatible initializationparameter of the database must be set to at least 11.1.0.0.0. By default an11g or 12c database will already have the parameter set properly, but adatabase upgraded to 11g or 12c from a prior version may not. Forinformation about changing database initialization parameters, see Specifying the Database Compatibility Level in Oracle MultitenantAdministrator's Guide.
See Also:
About Report Printing in Oracle APEX App Builder User’s Guide.
6.5.2 Granting Connect Privileges in Oracle Database 12c or LaterProcedures CREATE_ACL, ASSIGN_ACL, ADD_PRIVILEGE and CHECK_PRIVILEGE inDBMS_NETWORK_ACL_ADMIN are deprecated in Oracle Database 12c. Oraclerecommends to use APPEND_HOST_ACE.
The following example demonstrates how to grant connect privileges to any host forthe APEX_210200 database user. This example assumes you connected to thedatabase where Oracle APEX is installed as SYS specifying the SYSDBA role.
BEGIN DBMS_NETWORK_ACL_ADMIN.APPEND_HOST_ACE( host => '*', ace => xs$ace_type(privilege_list => xs$name_list('connect'), principal_name => 'APEX_210200', principal_type => xs_acl.ptype_db));END;/
The following example demonstrates how to provide less privileged access to localnetwork resources. This example enables access to servers on the local host only,such as email and report servers.
BEGIN DBMS_NETWORK_ACL_ADMIN.APPEND_HOST_ACE( host => 'localhost', ace => xs$ace_type(privilege_list => xs$name_list('connect'), principal_name => 'APEX_210200', principal_type => xs_acl.ptype_db));END;/
Chapter 6Enabling Network Services in Oracle Database
6-16

6.5.3 Troubleshooting an Invalid ACL ErrorLearn how to identify any invalid ACL error by running the query.
If you receive an ORA-44416: Invalid ACL error after running the previous script, use thefollowing query to identify the invalid ACL:
REM Show the dangling references to dropped users in the ACL that is assignedREM to '*'.
SELECT ACL, PRINCIPAL FROM DBA_NETWORK_ACLS NACL, XDS_ACE ACE WHERE HOST = '*' AND LOWER_PORT IS NULL AND UPPER_PORT IS NULL AND NACL.ACLID = ACE.ACLID AND NOT EXISTS (SELECT NULL FROM ALL_USERS WHERE USERNAME = PRINCIPAL);
Next, run the following code to fix the ACL:
DECLARE ACL_ID RAW(16); CNT NUMBER;BEGIN -- Look for the object ID of the ACL currently assigned to '*' SELECT ACLID INTO ACL_ID FROM DBA_NETWORK_ACLS WHERE HOST = '*' AND LOWER_PORT IS NULL AND UPPER_PORT IS NULL;
-- If just some users referenced in the ACL are invalid, remove just those -- users in the ACL. Otherwise, drop the ACL completely. SELECT COUNT(PRINCIPAL) INTO CNT FROM XDS_ACE WHERE ACLID = ACL_ID AND EXISTS (SELECT NULL FROM ALL_USERS WHERE USERNAME = PRINCIPAL);
IF (CNT > 0) THEN
FOR R IN (SELECT PRINCIPAL FROM XDS_ACE WHERE ACLID = ACL_ID AND NOT EXISTS (SELECT NULL FROM ALL_USERS WHERE USERNAME = PRINCIPAL)) LOOP UPDATE XDB.XDB$ACL SET OBJECT_VALUE = DELETEXML(OBJECT_VALUE, '/ACL/ACE[PRINCIPAL="'||R.PRINCIPAL||'"]') WHERE OBJECT_ID = ACL_ID; END LOOP;
ELSE DELETE FROM XDB.XDB$ACL WHERE OBJECT_ID = ACL_ID; END IF;
END;/
REM commit the changes.
Chapter 6Enabling Network Services in Oracle Database
6-17

COMMIT;
Once the ACL has been fixed, you must run the first script in this section to apply theACL to the APEX_210200 user.
6.6 Performing Security TasksOracle recommends configuring and using Secure Sockets Layer (SSL) to ensure thatpasswords and other sensitive data are not transmitted in clear text in HTTP requests.
Without the use of SSL, passwords could potentially be exposed, compromisingsecurity.
SSL is an industry standard protocol that uses RSA public key cryptography inconjunction with symmetric key cryptography to provide authentication, encryption,and data integrity.
See Also:
"Configuring HTTP Protocol Attributes" in Oracle APEX Administration Guide
6.7 Controlling the Number of Concurrent JobsLearn about specifying the number of concurrently running jobs.
• About Managing the Number of Concurrent JobsLearn about managing maximum number of concurrently running jobs.
• Viewing the Number of JOB_QUEUE_PROCESSESYou can view number of JOB_QUEUE_PROCESSES in three ways.
• Changing the Number of JOB_QUEUE_PROCESSESYou can change the number of JOB_QUEUE_PROCESSES by running a SQL statementin SQL*Plus.
6.7.1 About Managing the Number of Concurrent JobsLearn about managing maximum number of concurrently running jobs.
JOB_QUEUE_PROCESSES determine the maximum number of concurrently running jobs.In Oracle APEX transactional support and SQL scripts require jobs. IfJOB_QUEUE_PROCESSES is not enabled and working properly, you cannot successfullyexecute a script.
6.7.2 Viewing the Number of JOB_QUEUE_PROCESSESYou can view number of JOB_QUEUE_PROCESSES in three ways.
• Viewing JOB_QUEUE_PROCESSES in the Installation Log FileView JOB_QUEUE_PROCESSES in the installation log files.
Chapter 6Performing Security Tasks
6-18

• Viewing JOB_QUEUE_PROCESSES in Oracle APEXView the number of JOB_QUEUE_PROCESSES on the About Oracle APEX page.
• Viewing JOB_QUEUE_PROCESSES from SQL*PlusView the number of JOB_QUEUE_PROCESSES from SQL*Plus.
6.7.2.1 Viewing JOB_QUEUE_PROCESSES in the Installation Log FileView JOB_QUEUE_PROCESSES in the installation log files.
See Also:
"Reviewing a Log of an Installation Session"
6.7.2.2 Viewing JOB_QUEUE_PROCESSES in Oracle APEXView the number of JOB_QUEUE_PROCESSES on the About Oracle APEX page.
To view the About Oracle APEX page:
1. Sign in to Oracle APEX.
2. Locate the Help menu at the top of the page.
3. From the Help menu, select About.
The About Oracle APEX page appears.
4. Scroll down and find JOB_QUEUE_PROCESSES at the bottom of the page.
See Also:
Signing In to Your Workspace
6.7.2.3 Viewing JOB_QUEUE_PROCESSES from SQL*PlusView the number of JOB_QUEUE_PROCESSES from SQL*Plus.
To view the number of JOB_QUEUE_PROCESSES from SQL*Plus:
1. Start SQL*Plus and connect to the database where Oracle APEX is installed as SYSspecifying the SYSDBA role:
• On Windows:
SYSTEM_DRIVE:\ sqlplus /nologSQL> CONNECT SYS as SYSDBAEnter password: SYS_password
Chapter 6Controlling the Number of Concurrent Jobs
6-19

• On UNIX and Linux:
$ sqlplus /nologSQL> CONNECT SYS as SYSDBAEnter password: SYS_password
2. Run the appropriate SQL statement. For example:
SELECT VALUE FROM v$parameter WHERE NAME = 'job_queue_processes'
6.7.3 Changing the Number of JOB_QUEUE_PROCESSESYou can change the number of JOB_QUEUE_PROCESSES by running a SQL statement inSQL*Plus.
To update the number of JOB_QUEUE_PROCESSES:
1. Start SQL*Plus and connect to the database where Oracle APEX is installed asSYS specifying the SYSDBA role:
• On Windows:
SYSTEM_DRIVE:\ sqlplus /nologSQL> CONNECT SYS as SYSDBAEnter password: SYS_password
• On UNIX and Linux:
$ sqlplus /nologSQL> CONNECT SYS as SYSDBAEnter password: SYS_password
2. In SQL*Plus run the following SQL statement:
ALTER SYSTEM SET JOB_QUEUE_PROCESSES = <number>
For example, running the statement ALTER SYSTEM SET JOB_QUEUE_PROCESSES =20 sets JOB_QUEUE_PROCESSES to 20.
6.8 About Running Oracle APEX in Other LanguagesYou can install a single instance of Oracle APEX with one or more of translatedversions.
The Oracle APEX developer and admin interface is translated into the 9 standardlanguages: French, German, Italian, Japanese, Korean, Portuguese (Brazil), SimplifiedChinese, Spanish, and Traditional Chinese. Developers can choose to run the OracleAPEX development environment in any of the installed languages by simply selectingthe language from theApp Builder log in screen or home page.
The Oracle APEX runtime engine which is used by developers to create applications isavailable in the following additional languages: Arabic, Brazilian Portuguese, Croatian,Czech, Danish, Dutch, Finnish, French, French - Canada, German, Greek, Hebrew,Hungarian, Italian, Japanese, Korean, Norwegian, Polish, Portuguese (Portugal) (pt),
Chapter 6About Running Oracle APEX in Other Languages
6-20

Romanian, Russian, Serbian - Cyrillic, Serbian - Latin, Simplified Chinese, Slovak, Slovenian,Spanish, Swedish, Thai, Traditional Chinese, and Turkish.
A single instance of Oracle APEX can be installed with one or more of these translatedversions.
In order to install other languages you must use the apex_21.2.zip file which contains theextra files as described in Installing Translated Versions of Oracle APEX. If you previouslydownloaded apex_21.2_en.zip, then you do not need to re-install Oracle APEX. Simplydownload apex_21.2.zip and unzip the file into the same directory where you unzippedapex_21.2_en.zip.
The translated version of Oracle APEX should be loaded into a database that has a characterset that supports the specific language. If you attempt to install a translated version of OracleAPEX into a database that does not support the character encoding of the language, theinstallation may fail or the translated Oracle APEX instance may appear corrupt when run.The database character set AL32UTF8 supports all the translated versions of Oracle APEX.
You can manually install translated versions of Oracle APEX using SQL*Plus. The installationfiles are encoded in AL32UTF8.
Note:
Regardless of the target database character set, to install a translated version ofOracle APEX, you must set the character set value of the NLS_LANG environmentvariable to AL32UTF8 before starting SQL*Plus.
The following examples illustrate valid NLS_LANG settings for loading Oracle APEXtranslations:
American_America.AL32UTF8Japanese_Japan.AL32UTF8
6.9 Installing Translated Versions of Oracle APEXLearn about installing translated versions of Oracle APEX.
• About Installing Translated Versions of Oracle APEXWhether you are installing for the first time or upgrading from a previous release, youmust run the load_lang.sql script to run a translated version of Oracle APEX.
• Installing a Translated Version of Oracle APEXLearn how to run the appropriate language specific script to install a translated version ofOracle APEX.
See Also:
Managing Application Globalization in Oracle APEX App Builder User’s Guide
Chapter 6Installing Translated Versions of Oracle APEX
6-21

6.9.1 About Installing Translated Versions of Oracle APEXWhether you are installing for the first time or upgrading from a previous release, youmust run the load_lang.sql script to run a translated version of Oracle APEX.
The Oracle APEX developer and admin interface is translated into the 9 standardlanguages: French, German, Italian, Japanese, Korean, Portuguese (Brazil), SimplifiedChinese, Spanish, and Traditional Chinese. Developers can choose to run the OracleAPEX development environment in any of the installed languages by simply selectingthe language from the
The Oracle APEX runtime engine which is used by developers to create applications isavailable in the following languages: Arabic, Brazilian Portuguese, Croatian, Czech,Danish, Dutch, Finnish, French, French - Canada, German, Greek, Hebrew,Hungarian, Italian, Japanese, Korean, Norwegian, Polish, Portuguese (Portugal) (pt),Romanian, Russian, Serbian - Cyrillic, Serbian - Latin, Simplified Chinese, Slovak,Slovenian, Spanish, Swedish, Thai, Traditional Chinese, and Turkish.
To support additional languages not covered in the above list, developers must providetheir own translations. For example, if you develop a Bulgarian application and want toinclude report messages, such as pagination, in Bulgarian, you must translate thestrings used in messages displayed in reports.
See Also:
Translating Messages Used Internally by Oracle Application Express inOracle APEX App Builder User’s Guide
6.9.2 Installing a Translated Version of Oracle APEXLearn how to run the appropriate language specific script to install a translated versionof Oracle APEX.
The installation scripts are located in subdirectories identified by a language code inthe unzipped distribution apex/builder. For example, the German version is located inapex/builder/de and the Japanese version is located in apex/builder/ja. Withineach directory, there is a language loading script identified by the language code (forexample, load_de.sql or load_ja.sql).
Note:
If you have applied a Patch Set and then install translations, you must re-execute the Patch Set to apply all fixes to the translations.
To install a translated version of Oracle APEX:
1. Set the NLS_LANG environment variable, making sure that the character set isAL32UTF8. For example:
Chapter 6Installing Translated Versions of Oracle APEX
6-22

• Bourne or Korn shell:
NLS_LANG=American_America.AL32UTF8export NLS_LANG
• C shell:
setenv NLS_LANG American_America.AL32UTF8
• For Windows based systems:
set NLS_LANG=American_America.AL32UTF8
2. Navigate to the directory under apex/builder based on the language you need to install.For example for German, navigate to apex/builder/de. Start SQL*Plus and connect tothe database where Oracle APEX is installed as SYS specifying the SYSDBA role. Forexample:
• On Windows:
SYSTEM_DRIVE:\ sqlplus /nologSQL> CONNECT SYS as SYSDBAEnter password: SYS_password
• On UNIX and Linux:
$ sqlplus /nologSQL> CONNECT SYS as SYSDBAEnter password: SYS_password
3. Execute the appropriate language specific script. For example:
@load_lang.sql
Where lang is the specific language (for example, load_de.sql for German orload_ja.sql for Japanese).
6.10 Creating a Workspace and Adding Oracle APEX UsersBefore you can develop or install applications, you must create a workspace, add OracleAPEX users, and sign in to your workspace.
• About Workspaces and UsersA workspace enables multiple users to work within the same Oracle APEX installationwhile keeping their objects, data, and applications private.
• Signing In To Administration ServicesSign in to Oracle APEX Administration Services using the Instance administrator accountand password created or reset during the installation process.
• Creating a Workspace ManuallySign in to Oracle APEX Administration Services to create workspace manually.
• Creating Oracle APEX UsersCreate new users in Oracle APEX Administration Services.
Chapter 6Creating a Workspace and Adding Oracle APEX Users
6-23

• Signing In to Your WorkspaceLearn how to sign in to a workspace using the Oracle REST Data Services.
6.10.1 About Workspaces and UsersA workspace enables multiple users to work within the same Oracle APEX installationwhile keeping their objects, data, and applications private.
You access the Oracle APEX home page by logging in to a workspace using aJavaScript enabled Web browser.
Each workspace has a unique ID and name. An instance administrator can create aworkspace manually within Oracle APEX Administration Services or have users submitrequests. Oracle APEX Administration Services is a separate application for managingan entire Oracle APEX instance.
6.10.2 Signing In To Administration ServicesSign in to Oracle APEX Administration Services using the Instance administratoraccount and password created or reset during the installation process.
To manually create a workspace and user accounts, you sign in to a separateapplication for managing an entire Oracle APEX instance called Oracle APEXAdministration Services.
To sign in to Oracle APEX Administration Services:
1. In a Web browser, navigate to the Oracle APEX Administration Servicesapplication.
Tip:
By default, the context root for accessing Oracle APEX through OracleREST Data Services is /ords. If you wish to have a context root of /apexfor accessing Oracle APEX, rename the ords.war file to apex.war beforeinstalling Oracle REST Data Services. See Installing Oracle REST DataServices in Oracle REST Data Services Installation, Configuration, andDevelopment Guide.
By default, Oracle APEX Administration Services installs to the following location:
http://hostname:port/ords/apex_admin
Where:
• hostname is the name of the system where Oracle REST Data Services isinstalled.
• port is the port number assigned when configuring Oracle REST DataServices. In a default installation, this number is 8080. To learn more, see Oracle REST Data Services Installation, Configuration, and DevelopmentGuide.
Chapter 6Creating a Workspace and Adding Oracle APEX Users
6-24

• ords is the service name defined when configuring Oracle REST Data Services.
2. On the Sign In page:
a. Username - Enter the Instance administrator account username specified in Creatingor Updating Your Instance Administration Account.
b. Password - Enter your Instance administrator account password.
c. Click Sign In to Administration.
Oracle APEX Administration Services appears.
Note that, depending on your setup, you might be required to change your passwordwhen you log in for the first time.
See Also:
Oracle Application Express Administration Services in Oracle APEX AdministrationGuide
6.10.3 Creating a Workspace ManuallySign in to Oracle APEX Administration Services to create workspace manually.
To manually create a workspace you sign in, sign in to Oracle APEX Administration Servicesusing the ADMIN account and password created or reset during the installation process.
To create an Oracle APEX workspace manually:
1. Access Oracle APEX Administration Services.
Administration Services appears. Next, create a workspace.
2. Click Manage Workspaces.
3. Under Workspace Actions, click Create Workspace.
The Create Workspace Wizard appears.
4. For Identify Workspace, enter the following:
a. Workspace Name - Enter a unique workspace name.
b. Workspace ID - Leave Workspace ID blank to have the new Workspace IDautomatically generated. A Workspace ID must be a positive integer greater than100000.
c. Workspace Description - Enter a workspace description.
d. Click Next.
5. For Identify Schema, specify whether you are re-using an existing schema or creating anew one.
If you are using an existing schema:
a. For Re-use existing schema, select Yes.
b. Select a schema from the list.
c. Click Next.
Chapter 6Creating a Workspace and Adding Oracle APEX Users
6-25

If you are creating a new schema:
a. For Re-use existing schema, select No.
b. Enter a schema name and password.
c. Specify a space quota.
d. Click Next.
6. For Identify Administrator, enter the Workspace administrator information and clickNext.
7. Confirm your selections and click Create Workspace.
See Also:
• Creating Workspaces in Administration Services in Oracle APEXAdministration Guide
• Managing Existing Workspaces in Oracle APEX Administration Guide
6.10.4 Creating Oracle APEX UsersCreate new users in Oracle APEX Administration Services.
Create new users by signing into the Oracle APEX Administration Services applicationusing your Instance administrator password.
To create an APEX user account:
1. Sign into Oracle APEX Administration Services.
2. Click Manage Workspaces.
3. Under Workspace Actions, click Manage Developers and Users.
The Manage Developers and Users page appears.
4. Click Create User.
5. Under User Attributes, enter the appropriate information. Fields marked with anasterisk are required.
Tip:
Most attributes in Oracle APEX include field-level Help. Attributes withfield-level Help, have light gray icon that resembles a question mark (?).To view field-level Help, click the Help icon.
6. Under Account Privileges:
a. Workspace - Select a workspace from the list.
b. Default Schema - Specify the default schema used for this user
Chapter 6Creating a Workspace and Adding Oracle APEX Users
6-26

When using workspaces that have more than one schema available, this schema isthe default. This setting does not control security, only the user's preference.
c. User is an administrator - Specify if this user should have workspace administratorprivileges.
Administrators are given access to all components. Additionally, they can manageuser accounts, groups, and development services. Components may not be availableif they are switched off by Instance Administrators.
d. User is a developer - Specify if this user should have developer privileges.
Developers must have access to either App Builder, SQL Workshop, or both. Thesecomponents may not be available if they are switched off by the InstanceAdministrator.
e. App Builder Access - Determines whether a developer has access to the AppBuilder.
f. SQL Workshop Access - Determines whether a developer has access to the SQLWorkshop.
g. Team Development Access - Determines whether a developer has access to theTeam Development.
h. Set Account Availability - Select Locked to prevent the account from being used.Select Unlocked to allow the account to be used.
If the user has exceeded the maximum log in failures allowed, specified inWorkspace Preferences, then their account will be locked automatically.
a. Workspace - Select a workspace in which to create the user.
b. Default Schema - Select the default schema for this user.
c. Accessible Schemas (null for all) - Enter a colon-delimited list of schemas forwhich this developer has permissions when using the SQL Workshop.
The list of schemas you enter here restricts the user to a subset of the full set ofschemas provisioned for the workspace and determines what schema names theuser sees in SQL Workshop.
d. User is an administrator - Select Yes or No to specify if this user should haveworkspace administrator privileges.
Administrators are given access to all components. Additionally, they can manageuser accounts, groups, and development services. Components may not be availableif they are switched off by an Instance Administrator.
e. User is a developer - Select Yes or No to specify if this user should have developerprivileges.
Developers must have access to either the App Builder, SQL Workshop, or both.Components may not be available if they are switched off by Instance Administrators.
f. App Builder Access - Determines whether a developer has access to App Builder
g. SQL Workshop Access - Determines whether a developer has access to the SQLWorkshop.
h. Team Development Access - Determines whether a user has access to the TeamDevelopment.
i. Account Availability - Select Locked to prevent the account from being used.Select Unlocked to allow the account to be used.
Chapter 6Creating a Workspace and Adding Oracle APEX Users
6-27

7. Under Password:
• Password - Enter a case sensitive password.
• Confirm Password - Enter the password again.
• Require Change of Password On First Use - Select No to allow the user touse the same password until it expires. Select Yes to require the user tochange the password immediately when logging in the first time.
8. Click Create User or Create and Create Another.
See Also:
"Managing Users Across an Application Express Instance" in Oracle APEXAdministration Guide
6.10.5 Signing In to Your WorkspaceLearn how to sign in to a workspace using the Oracle REST Data Services.
After you creaste a workspace and APEX users, you can sign in to your workspaceusing your credentials (that is, your workspace name, user name and password).
To sign in to your workspace:
1. In a Web browser, navigate to the Oracle APEX Sign In page:
http://hostname:port/apex/
Where:
• hostname is the name of the system where Oracle REST Data Services isinstalled.
• port is the port number assigned when configuring Oracle REST DataServices. In a default installation, this number is 8080. To learn more, see Oracle REST Data Services Installation, Configuration, and DevelopmentGuide.
• apex is the service name defined when configuring Oracle REST DataServices.
The Sign In page appears.
2. On the Sign In page, enter:
• Workspace - Enter the name of your workspace.
• Username - Enter your user name.
• Password - Enter your case-sensitive password.
3. Click Sign In.
Note that, depending on your setup, you might be required to change yourpassword when you log in for the first time.
Chapter 6Creating a Workspace and Adding Oracle APEX Users
6-28

See Also:
• "Creating Workspaces in Administration Services" in Oracle APEXAdministration Guide
• "Managing Requests" in Oracle APEX Administration Guide
6.11 Performing Post Installation Tasks for Upgrade InstallationsOnce you have verified that your upgrade installation was successful and all upgradedapplications function properly, you should remove schemas from prior Oracle APEXinstallations.
• About Removing Prior Oracle APEX InstallationsLearn about removing schemas from a prior installation by verifying if a prior installationexists.
• Verifying if a Prior Installation ExistsRun the SQL query to verify if a prior Oracle APEX installation exists.
• Removing Schemas and SYS Objects from Prior InstallationsStart SQL*Plus and connect to database and execute a statement to remove schemasand SYS objects.
• Removing Schemas from Prior Installations in a CDBUse catcon.pl to remove schemas of prior installations in a CDB.
• Fixing Invalid ACLLearn how to fix an invalid ACL.
See Also:
Upgrading from a Previous Oracle APEX Release
6.11.1 About Removing Prior Oracle APEX InstallationsLearn about removing schemas from a prior installation by verifying if a prior installationexists.
The database users associated with schemas from prior installations are privileged users andshould be removed when they are no longer necessary. Removing schemas from a priorinstallation is a two step process. First you verify if a prior installation exists and then youremove the schemas.
6.11.2 Verifying if a Prior Installation ExistsRun the SQL query to verify if a prior Oracle APEX installation exists.
To verify if a prior installation exists:
Chapter 6Performing Post Installation Tasks for Upgrade Installations
6-29
1. Start SQL*Plus and connect to the database where Oracle APEX is installed asSYS. For example:
• On Windows:
SYSTEM_DRIVE:\ sqlplus /nologSQL> CONNECT SYS as SYSDBAEnter password: SYS_password
• On UNIX and Linux:
$ sqlplus /nologSQL> CONNECT SYS as SYSDBAEnter password: SYS_password
2. Run the following query:
SELECT username FROM dba_users WHERE ( username LIKE 'FLOWS\_______' ESCAPE '\' OR username LIKE 'APEX\_______' ESCAPE '\' ) AND username NOT IN ( SELECT schema FROM dba_registry WHERE comp_id = 'APEX' );
If the results contain entries in the form FLOWS_XXXXXX or APEX_XXXXXX where XXXXXXrepresents six numbers, those entries are candidates for removal.
6.11.3 Removing Schemas and SYS Objects from Prior InstallationsStart SQL*Plus and connect to database and execute a statement to remove schemasand SYS objects.
To remove schemas and SYS objects from prior installations:
1. Start SQL*Plus and connect to the database where Oracle APEX is installed asSYS specifying the SYSDBA role. For example:
• On Windows:
SYSTEM_DRIVE:\ sqlplus /nologSQL> CONNECT SYS as SYSDBAEnter password: SYS_password
• On UNIX and Linux:
$ sqlplus /nologSQL> CONNECT SYS as SYSDBAEnter password: SYS_password
2. Execute statements similar to the following example:
DROP USER APEX_210100 CASCADE;DROP PACKAGE SYS.WWV_DBMS_SQL_APEX_210100;
Chapter 6Performing Post Installation Tasks for Upgrade Installations
6-30

6.11.4 Removing Schemas from Prior Installations in a CDBUse catcon.pl to remove schemas of prior installations in a CDB.
To remove schemas and SYS objects from prior installations, run commands using thefollowing example:
$ORACLE_HOME/perl/bin/perl -I $ORACLE_HOME/rdbms/admin $ORACLE_HOME/rdbms/admin/catcon.pl -b drop_apex210100 -- --x'drop user APEX_210100 cascade'$ORACLE_HOME/perl/bin/perl -I $ORACLE_HOME/rdbms/admin $ORACLE_HOME/rdbms/admin/catcon.pl -b drop_wwv_dbms_sql -- --x'drop package SYS.WWV_DBMS_SQL_APEX_210100'
6.11.5 Fixing Invalid ACLLearn how to fix an invalid ACL.
After following the instructions in"About Removing Prior Oracle APEX Installations," you mayneed to fix an invalid ACL if you are running Oracle Database and you enabled networkservices for the prior Oracle APEX schema.
To fix an invalid ACL:
1. Change your working directory to the apex directory where you unzipped the installationsoftware.
2. Start SQL*Plus and connect to the database where Oracle APEX is installed as SYSspecifying the SYSDBA role. For example:
• On Windows:
SYSTEM_DRIVE:\ sqlplus /nologSQL> CONNECT SYS as SYSDBAEnter password: SYS_password
• On UNIX and Linux:
$ sqlplus /nologSQL> CONNECT SYS as SYSDBAEnter password: SYS_password
3. Execute a statement similar to the following:
EXEC DBMS_NETWORK_ACL_ADMIN.DELETE_PRIVILEGE('power_users.xml', 'APEX_210200');
6.12 About Performance Optimization TasksLearn about performance optimization.
Performance of web applications heavily depends on their size and how often a browser hasto request static content like images, CSS and JavaScript files. To improve performance,most web servers support on-the-fly HTTP response compression and provide settings that
Chapter 6About Performance Optimization Tasks
6-31

enable you to configure on how long browsers can cache a file before requesting itagain. The HTTP response compression is usually implemented using gzip encoding,while browser file caching is enabled by issuing Cache-Control HTTP responseheader.
Please see your web server documentation to learn how to enable responsecompression and browser file caching. For optimal performance of the Oracle APEXdevelopment environment and APEX applications, Oracle recommends enabling gzipcompression of files in the virtual images directory (for example, /i/) and responsesfrom the database access descriptor as well as allowing browsers to cache files fromthe virtual images directory for at least 12 hours.
6.13 Converting Between Runtime and Full DevelopmentEnvironments
Learn about converting between runtime and full development environments.
This section describes how to convert between runtime and full developmentenvironments.
• About Runtime and Full Development EnvironmentsAn Oracle APEX runtime environment enables users to run a productionapplication without supporting the ability to change or edit the application.
• Converting a Runtime Environment to a Full Development EnvironmentStart SQL*Plus and connect to the database where Oracle APEX is installed asSYS specifying the SYSDBA role and run the apxdvins.sql.
• Converting a Full Development Environment to a Runtime EnvironmentStart SQL*Plus and connect to the database where Oracle APEX is installed asSYS specifying the SYSDBA role and run the apxdevrm.sql.
6.13.1 About Runtime and Full Development EnvironmentsAn Oracle APEX runtime environment enables users to run a production applicationwithout supporting the ability to change or edit the application.
A runtime environment includes only the packages necessary to run your applications,making it a more hardened environment. It does not provide a web interface foradministration.
You administer an Oracle APEX runtime environment using SQL*Plus or SQLDeveloper and the APEX_INSTANCE_ADMIN API.
See Also:
• About the Oracle APEX Runtime Environment
• Installing Exported Applications into a Runtime Environment in OracleAPEX Administration Guide
Chapter 6Converting Between Runtime and Full Development Environments
6-32

6.13.2 Converting a Runtime Environment to a Full DevelopmentEnvironment
Start SQL*Plus and connect to the database where Oracle APEX is installed as SYSspecifying the SYSDBA role and run the apxdvins.sql.
To convert an Oracle APEX runtime environment to a full development environment:
1. Change your working directory to the apex directory where you unzipped the installationsoftware.
2. Start SQL*Plus and connect to the database where Oracle APEX is installed as SYSspecifying the SYSDBA role. For example:
• On Windows:
SYSTEM_DRIVE:\ sqlplus /nologSQL> CONNECT SYS as SYSDBAEnter password: SYS_password
• On UNIX and Linux:
$ sqlplus /nologSQL> CONNECT SYS as SYSDBAEnter password: SYS_password
3. Run apxdvins.sql. For example:
@apxdvins.sql
4. Follow the instructions in Creating or Updating Your Instance Administration Account.
See Also:
SQL*Plus User's Guide and Reference for more information about SQL*Plus
6.13.3 Converting a Full Development Environment to a RuntimeEnvironment
Start SQL*Plus and connect to the database where Oracle APEX is installed as SYSspecifying the SYSDBA role and run the apxdevrm.sql.
To convert an Oracle APEX full development environment to a runtime environment:
1. Change your working directory to the apex directory where you unzipped the installationsoftware.
2. Start SQL*Plus and connect to the database where Oracle APEX is installed as SYSspecifying the SYSDBA role. For example:
Chapter 6Converting Between Runtime and Full Development Environments
6-33
• On Windows:
SYSTEM_DRIVE:\ sqlplus /nologSQL> CONNECT SYS as SYSDBAEnter password: SYS_password
• On UNIX and Linux:
$ sqlplus /nologSQL> CONNECT SYS as SYSDBAEnter password: SYS_password
3. Run apxdevrm.sql. For example:
@apxdevrm.sql
See Also:
SQL*Plus User's Guide and Reference for more information about SQL*Plus
Chapter 6Converting Between Runtime and Full Development Environments
6-34

AAutomating the Oracle APEX InstallationProcess
Automate the process of installing and configuring an Oracle APEX instance.
• About apxsilentins.sqlRun the apxsilentins.sql script to automate the installation and configuration of anOracle APEX instance.
• Running apxsilentins.sqlRun the apxsilentins.sql script.
A.1 About apxsilentins.sqlRun the apxsilentins.sql script to automate the installation and configuration of an OracleAPEX instance.
Traditionally you run the run the apexins.sql script to install Oracle APEX and then performa multiple other steps to configure the APEX_PUBLIC_USER account. The apxsilentins.sqlscript simplifies the installation and configuation process. apxsilentins.sql acceptsadditional parameters so that passwords can be passed for following database usersassociated with the Oracle APEX schema: APEX_PUBLIC_USER, APEX_LISTENER,APEX_REST_PUBLIC_USER and the Oracle APEX Instance Administration user, ADMIN. You canalso use these passwords for the configuration of middle tiers and other processes.apxsilentins.sql also completes other installation steps such as creating and setting thepassword for the Instance Administration user, ADMIN, configuring a network ACL, andconfiguring Oracle REST Data Services.
Running the apxsilentins.sql script, removes the need for completing the following topics:
• Installing Oracle APEX
• Creating or Updating Your Instance Administration Account
• Configuring the APEX_PUBLIC_USER Account
• Enabling Network Services in Oracle Database
• Configuring Static File Support (apex_rest_config.sql)
A.2 Running apxsilentins.sqlRun the apxsilentins.sql script.
To run apxsilentins.sql:
1. Change your working directory to apex.
2. Start SQL*Plus and connect as user SYS to the database where Oracle APEX is installed.You will need to specify the SYSDBA role. For example:
• On Windows:
A-1
SYSTEM_DRIVE:\ sqlplus /nologSQL> CONNECT SYS as SYSDBAEnter password: SYS_password
• On UNIX and Linux:
$ sqlplus /nologSQL> CONNECT SYS as SYSDBAEnter password: SYS_password
3. Disable any existing password complexity rules for the default profile.
4. Run apxsilentins.sql passing the following eight arguments in the order shown:
@apxsilentins.sql tablespace_apex tablespace_files tablespace_temp images password_apex_pub_user password_apex_listener password_apex_rest_pub_user password_internal_admin
Where:
• tablespace_apex is the name of the tablespace for the Oracle APEXapplication user.
• tablespace_files is the name of the tablespace for the Oracle APEX filesuser.
• tablespace_temp is the name of the temporary tablespace or tablespacegroup.
• images is the virtual directory for Oracle APEX images. For installations usingEPG, /i/ is the required value for the images argument. To support futureOracle APEX upgrades, define the virtual image directory as /i/.
• password_apex_pub_user is the password for the APEX_PUBLIC_USER databaseaccount.
• password_apex_listener is the password for the APEX_LISTENER databaseaccount.
• password_apex_rest_pub_user is the password for theAPEX_REST_PUBLIC_USER database account.
• password_internal_admin is the password for the Instance AdministrationADMIN Oracle APEX account. This password must meet the followingrequirements:
– Contain at least 6 characters.
– Contain at least one numeric character (0123456789).
– Contain at least one punctuation character (!"#$%&()``*+,-/:;?_).
– Contain at least one uppercase alphabetic character.
For example:
@apxsilentins.sql SYSAUX SYSAUX TEMP /i/ Passw0rd!1 Passw0rd!2 Passw0rd!3 Passw0rd!4
Once apxsilentins.sql completes, you complete the steps in "Downloading andInstalling Oracle REST Services" and "Configuring Oracle REST Data Services"(except for "Configuring Static File Support.")
Appendix ARunning apxsilentins.sql
A-2

Use the passwords you supplied to apxsilentins.sql when completing these steps. Then,move on to Creating a Workspace and Adding Oracle APEX Users.
See Also:
• Downloading and Installing Oracle REST Data Services
• Configuring Oracle REST Data Services
Appendix ARunning apxsilentins.sql
A-3

BMaximizing Uptime During an Oracle APEXUpgrade
Learn how to maximize uptime during an Oracle APEX upgrade.
Previously, Oracle APEX could only be upgraded by completely disabling application usagefor an extended length of time. The following is an overview of the additional steps you cantake to keep your applications usable for end users during most portions of an Oracle APEXupgrade.
This advanced procedure is an alternative to the following the topics in "Downloading andInstalling Oracle APEX."
To upgrade the instance, administrators typically run these phases in one step by executingone of the following:
• For full development environment:
@apexins.sql tablespace_apex tablespace_files tablespace_temp images• For runtime-only environment:
@apxrtins.sql tablespace_apex tablespace_files tablespace_temp imagesWhere:
• tablespace_apex is the name of the tablespace for the Oracle APEX application user.
• tablespace_files is the name of the tablespace for the Oracle APEX files user.
• tablespace_temp is the name of the temporary tablespace or tablespace group.
• images is the virtual directory for Oracle APEX images.
The upgrade of an Oracle APEX instance runs in four phases:
1. Create database schemas and database objects (tables, packages).
2. Migrate application metadata.
3. Migrate data that runtime applications modify and switch to the new version.
4. Migrate additional log and summary data.
Phases 1 and 4 do not disable end users using the instance. Phase 2 only affects developerswho modify applications. Phase 3 affects all access to Oracle APEX.
Oracle now also provides alternative upgrade scripts to run the phases independently.Administrators can use these scripts instead of apexins.sql and apxrtins.sql, to reducethe effective downtime of an Oracle APEX instance from potentially hours to just a fewminutes (depending on hardware performance).
Note:
This feature is not supported when Oracle APEX is installed in CDB$ROOT.
B-1

Administrators must sequentially execute the following scripts to start phases 1, 2 and3, respectively. At the end of phase 3, a scheduler job automatically starts to executephase 4.
To reduce downtime during an Oracle APEX upgrade:
1. Execute phase 1 script: Development and runtime usage is not affected.
• For full development environment:
@apexins1.sql tablespace_apex tablespace_files tablespace_tempimages
• For runtime-only environment:
@apxrtins1.sql tablespace_apex tablespace_files tablespace_tempimages
Example: @apexins1.sql sysaux sysaux temp /i/2. Execute phase 2 script: Development is disabled, but runtime usage is not
affected.
• For full development environment:
@apexins2.sql tablespace_apex tablespace_files tablespace_tempimages
• For runtime-only environment:
@apxrtins2.sql tablespace_apex tablespace_files tablespace_tempimages
Example: @apexins2.sql sysaux sysaux temp /i/3. Disable web access for the web listener, Oracle REST Data Services.
4. Execute phase 3 script: Oracle APEX can not be used.
• For full development environment:
@apexins3.sql tablespace_apex tablespace_files tablespace_tempimages
• For runtime-only environment:
@apxrtins3.sql tablespace_apex tablespace_files tablespace_tempimages
Example: @apexins3.sql sysaux sysaux temp /i/5. Install images of the new Oracle APEX version in your web listener. Administrators
can do this while phase 3 is running or even earlier, if the new version's imagesdirectory is different to the previous Oracle APEX version's ( for example: /i212/ forthe new version vs. /i211/ for the old version).
For details refer to the installation instructions for Oracle REST Data Services.
6. Re-enable web access for the web listener and restart Oracle REST DataServices.
After web access is restarted, developers and users can access the instance again,while phase 4 finishes in the background.
Appendix B
B-2

See Also:
Installing and Configuring Oracle APEX and Oracle REST Data Services
Appendix B
B-3

COracle APEX Installation Troubleshooting
Learn about troubleshooting Oracle APEX Installation.
This section contains information on troubleshooting.
• Reviewing a Log of an Installation SessionThe apexins.sql script creates a log file in the apex directory using the namingconvention installYYYY-MM-DD_HH24-MI-SS.log.
• Verifying the Validity of anOracle APEX InstallationVerify the validity of an Oracle APEX installation by running a query.
• Cleaning Up After a Failed InstallationLearn about best practices for troubleshooting and cleaning up after a failed installation.
• About Images Displaying Incorrectly in Oracle APEXLearn about troubleshooting if images in Oracle APEX do not display correctly.
• About Page Protection ViolationA page protection violation may be caused by manual alteration of protected page items.
See Also:
Upgrading from a Previous Oracle APEX Release
C.1 Reviewing a Log of an Installation SessionThe apexins.sql script creates a log file in the apex directory using the naming conventioninstallYYYY-MM-DD_HH24-MI-SS.log.
In a successful installation, the log file contains the following text:
Thank you for installing Oracle Application Express.Oracle Application Express is installed in the APEX_210200 schema.If the log file contains a few errors, it does not mean that your installation failed. Note thatacceptable errors are noted as such in the log file.
C.2 Verifying the Validity of anOracle APEX InstallationVerify the validity of an Oracle APEX installation by running a query.
You can verify the validity of an Oracle APEX installation by running the following query:
SELECT STATUS FROM DBA_REGISTRYWHERE COMP_ID = 'APEX';
C-1
If the result is VALID, you can assume the installation was successful.
C.3 Cleaning Up After a Failed InstallationLearn about best practices for troubleshooting and cleaning up after a failedinstallation.
In a successful installation the following banner displays near the end of theinstallation:
Thank you for installing Oracle Application Express.Oracle Application Express is installed in the APEX_210200 schema.
To reinstall, you must either drop the Oracle APEX database schemas, or run a scriptto completely remove Oracle APEX from the database, depending upon theinstallation type.
• Reverting to a Previous Release After a Failed Upgrade InstallationLearn about reverting to Oracle APEX to a previous release in the case of a failedupgrade installation.
• Removing Oracle APEX from the DatabaseStart SQL*Plus and connect to the database where Oracle APEX is installed asSYS specifying the SYSDBA role and execute the SQL> @apxremov.sql command.
C.3.1 Reverting to a Previous Release After a Failed UpgradeInstallation
Learn about reverting to Oracle APEX to a previous release in the case of a failedupgrade installation.
In the case of a failed upgrade installation, you may want to revert Oracle APEX to aprevious release and then remove the schemas associated with the current release.
• Verifying If You Have a Previous Release of Oracle APEXRun a query to verify if you have previous release of Oracle APEX.
• Reverting the Images DirectoryIf you altered your images directory, revert it back to the release you want to revertto. You must point the text alias /i/ back to images directory for the release youwant to revert to.
• Reverting to a Previous ReleaseLearn how to revert to a previous release Oracle APEX.
• Removing the Oracle APEX Release SchemaAfter you revert to the prior release, remove the Oracle APEX schema.
C.3.1.1 Verifying If You Have a Previous Release of Oracle APEXRun a query to verify if you have previous release of Oracle APEX.
To verify whether you have a previous release of Oracle APEX:
1. Start SQL*Plus and connect to the database where Oracle APEX is installed asSYS specifying the SYSDBA role. For example:
• On Windows:
Appendix CCleaning Up After a Failed Installation
C-2

SYSTEM_DRIVE:\ sqlplus /nologSQL> CONNECT SYS as SYSDBAEnter password: SYS_password
• On UNIX and Linux:
$ sqlplus /nologSQL> CONNECT SYS as SYSDBAEnter password: SYS_password
2. Execute the following command in SQL*Plus:
select username from dba_users where regexp_like(username,'(FLOWS|APEX)_\d{6}') and username <> (select table_owner from all_synonyms where synonym_name = 'WWV_FLOW' and owner = 'PUBLIC')
If the query above returns any rows, the database contains a previous release of OracleAPEX.
C.3.1.2 Reverting the Images DirectoryIf you altered your images directory, revert it back to the release you want to revert to. Youmust point the text alias /i/ back to images directory for the release you want to revert to.
See Also:
"Copying the Images Directory"
C.3.1.3 Reverting to a Previous ReleaseLearn how to revert to a previous release Oracle APEX.
• Reverting to Release 1.5
• Reverting to Release 1.6
• Reverting to Release 2.0
• Reverting to Release 2.2
• Reverting to Release 3.0
• Reverting to Release 3.1
• Reverting to Release 3.2
• Reverting to Release 4.0
• Reverting to Release 4.1
• Reverting to Release 4.2 in a non-CDB
• Reverting to Release 4.2 in a CDB
• Reverting to Release 5.0 in a non-CDB
• Reverting to Release 5.0 in a CDB
• Reverting to Release 5.1 in a non-CDB
Appendix CCleaning Up After a Failed Installation
C-3

• Reverting to Release 5.1 in a CDB
• Reverting to Release 18.1 in a non-CDB
• Reverting to Release 18.1 in a CDB
• Reverting to Release 18.2 in a non-CDB
• Reverting to Release 18.2 in a CDB
• Reverting to Release 19.1 in a non-CDB
• Reverting to Release 19.1 in a CDB
• Reverting to Release 19.2 in a non-CDB
• Reverting to Release 19.2 in a CDB
• Reverting to Release 20.1 in a non-CDB
• Reverting to Release 20.1 in a CDB
• Reverting to Release 20.2 in a non-CDB
• Reverting to Release 20.2 in a CDB
• Reverting to Release 21.1 in a non-CDB
• Reverting to Release 21.1 in a CDB
• Re-enabling the REST Administration Interface After Downgrading
C.3.1.3.1 Reverting to Release 1.5To revert to Oracle APEX release 1.5:
1. If you altered your images directory, revert it back to the release you want to revertto.
2. Start SQL*Plus and connect to the database where Oracle APEX is installed asSYS specifying the SYSDBA role:
• On Windows:
SYSTEM_DRIVE:\ sqlplus /nologSQL> SQL> CONNECT SYS as SYSDBAEnter password: SYS_password
• On UNIX and Linux:
$ sqlplus /nologSQL> SQL> CONNECT SYS as SYSDBAEnter password: SYS_password
3. Execute the following:
ALTER SESSION SET CURRENT_SCHEMA = FLOWS_010500;exec flows_010500.wwv_flow_upgrade.switch_schemas('APEX_210200','FLOWS_010500');
4. Remove the Oracle APEX release schema. See Removing the Oracle APEXRelease Schema.
Appendix CCleaning Up After a Failed Installation
C-4

See Also:
Reverting the Images Directory
C.3.1.3.2 Reverting to Release 1.6To revert to Oracle APEX release 1.6:
1. If you altered your images directory, revert it back to the release you want to revert to.
2. Start SQL*Plus and connect to the database where Oracle APEX is installed as SYSspecifying the SYSDBA role:
• On Windows:
SYSTEM_DRIVE:\ sqlplus /nologSQL> SQL> CONNECT SYS as SYSDBAEnter password: SYS_password
• On UNIX and Linux:
$ sqlplus /nologSQL> SQL> CONNECT SYS as SYSDBAEnter password: SYS_password
3. Execute the following:
ALTER SESSION SET CURRENT_SCHEMA = FLOWS_010600;exec flows_010600.wwv_flow_upgrade.switch_schemas('APEX_210200','FLOWS_010600');
4. Depending upon the release you are reverting to, execute the appropriate command inSQL*Plus.
5. Remove the Oracle APEX release schema. See Removing the Oracle APEX ReleaseSchema.
See Also:
Reverting the Images Directory
C.3.1.3.3 Reverting to Release 2.0To revert to Oracle APEX release 2.0:
1. If you altered your images directory, revert it back to the release you want to revert to.
2. Start SQL*Plus and connect to the database where Oracle APEX is installed as SYSspecifying the SYSDBA role:
• On Windows:
SYSTEM_DRIVE:\ sqlplus /nologSQL> SQL> CONNECT SYS as SYSDBAEnter password: SYS_password
• On UNIX and Linux:
Appendix CCleaning Up After a Failed Installation
C-5

$ sqlplus /nologSQL> SQL> CONNECT SYS as SYSDBAEnter password: SYS_password
3. Execute the following:
ALTER SESSION SET CURRENT_SCHEMA = FLOWS_020000;exec flows_020000.wwv_flow_upgrade.switch_schemas('APEX_210200','FLOWS_020000');
4. Remove the Oracle APEX release schema. See Removing the Oracle APEXRelease Schema.
See Also:
Reverting the Images Directory
C.3.1.3.4 Reverting to Release 2.2To revert to Oracle APEX release 2.2:
1. If you altered your images directory, revert it back to the release you want to revertto.
2. Start SQL*Plus and connect to the database where Oracle APEX is installed asSYS specifying the SYSDBA role:
• On Windows:
SYSTEM_DRIVE:\ sqlplus /nologSQL> SQL> CONNECT SYS as SYSDBAEnter password: SYS_password
• On UNIX and Linux:
$ sqlplus /nologSQL> SQL> CONNECT SYS as SYSDBAEnter password: SYS_password
3. Execute the following:
ALTER SESSION SET CURRENT_SCHEMA = FLOWS_020200;exec flows_020200.wwv_flow_upgrade.switch_schemas('APEX_210200','FLOWS_020200');
4. Remove the Oracle APEX release schema. See Removing the Oracle APEXRelease Schema.
See Also:
Removing the Oracle APEX Release Schema
C.3.1.3.5 Reverting to Release 3.0To revert to Oracle APEX release 3.0:
Appendix CCleaning Up After a Failed Installation
C-6

1. If you altered your images directory, revert it back to the release you want to revert to.
2. Change your working directory to apex in the 3.0 source.
3. Start SQL*Plus and connect to the database where Oracle APEX is installed as SYSspecifying the SYSDBA role:
On Windows:
SYSTEM_DRIVE:\ sqlplus /nologSQL> SQL> CONNECT SYS as SYSDBAEnter password: SYS_password
On UNIX and Linux:
$ sqlplus /nologSQL> SQL> CONNECT SYS as SYSDBAEnter password: SYS_password
4. Execute the following:
set define '^'
@apexvalidate x x FLOWS_030000ALTER SESSION SET CURRENT_SCHEMA = FLOWS_030000;exec flows_030000.wwv_flow_upgrade.switch_schemas('APEX_210200','FLOWS_030000');ALTER SESSION SET CURRENT_SCHEMA = SYS;declare l_apex_version varchar2(30);begin l_apex_version := flows_030000.wwv_flows_release; dbms_registry.downgrading('APEX','Oracle Application Express','validate_apex','FLOWS_030000'); dbms_registry.downgraded('APEX',l_apex_version); validate_apex;end;/
5. Remove the Oracle APEX release schema. See Removing the Oracle APEX ReleaseSchema.
See Also:
Reverting the Images Directory
C.3.1.3.6 Reverting to Release 3.1To revert to Oracle APEX release 3.1:
1. If you altered your images directory, revert it back to the release you want to revert to.
2. Change your working directory to apex/core in the 3.1 source.
3. Start SQL*Plus and connect to the database where Oracle APEX is installed as SYSspecifying the SYSDBA role:
On Windows:
SYSTEM_DRIVE:\ sqlplus /nologSQL> SQL> CONNECT SYS as SYSDBAEnter password: SYS_password
Appendix CCleaning Up After a Failed Installation
C-7

On UNIX and Linux:
$ sqlplus /nologSQL> SQL> CONNECT SYS as SYSDBAEnter password: SYS_password
4. Execute the following commands:
@wwv_flow_val.plb@wwv_dbms_sql.sql@wwv_dbms_sql.plb
5. Change your working directory to apex in the 3.1 source.
6. Start SQL*Plus and connect to the database where Oracle APEX is installed asSYS specifying the SYSDBA role:
On Windows:
SYSTEM_DRIVE:\ sqlplus /nologSQL> SQL> CONNECT SYS as SYSDBAEnter password: SYS_password
On UNIX and Linux:
$ sqlplus /nologSQL> SQL> CONNECT SYS as SYSDBAEnter password: SYS_password
7. Execute the following:
set define '^' @apexvalidate x x FLOWS_030100ALTER SESSION SET CURRENT_SCHEMA = FLOWS_030100;exec flows_030100.wwv_flow_upgrade.switch_schemas('APEX_210200','FLOWS_030100');ALTER SESSION SET CURRENT_SCHEMA = SYS;declare l_apex_version varchar2(30);begin l_apex_version := flows_030100.wwv_flows_release; dbms_registry.downgrading('APEX','Oracle Application Express','validate_apex','FLOWS_030100'); dbms_registry.downgraded('APEX',l_apex_version); validate_apex;end;/
8. Remove the Oracle APEX release schema. See Removing the Oracle APEXRelease Schema.
See Also:
Reverting the Images Directory
C.3.1.3.7 Reverting to Release 3.2To revert to Oracle APEX release 3.2:
Appendix CCleaning Up After a Failed Installation
C-8

1. If you altered your images directory, revert it back to the release you want to revert to.
2. Change your working directory to apex/core in the 3.2 source.
3. Start SQL*Plus and connect to the database where Oracle APEX is installed as SYSspecifying the SYSDBA role:
On Windows:
SYSTEM_DRIVE:\ sqlplus /nologSQL> SQL> CONNECT SYS as SYSDBAEnter password: SYS_password
On UNIX and Linux:
$ sqlplus /nologSQL> SQL> CONNECT SYS as SYSDBAEnter password: SYS_password
4. Execute the following commands:
@wwv_flow_val.plb@wwv_dbms_sql.sql@wwv_dbms_sql.plb
5. Start SQL*Plus and connect to the database where Oracle APEX is installed as SYSspecifying the SYSDBA role:
On Windows:
SYSTEM_DRIVE:\ sqlplus /nologSQL> SQL> CONNECT SYS as SYSDBAEnter password: SYS_password
On UNIX and Linux:
$ sqlplus /nologSQL> SQL> CONNECT SYS as SYSDBAEnter password: SYS_password
6. Execute the following:
set define '^' @apexvalidate x x APEX_030200ALTER SESSION SET CURRENT_SCHEMA = APEX_030200;exec apex_030200.wwv_flow_upgrade.switch_schemas('APEX_210200','APEX_030200');ALTER SESSION SET CURRENT_SCHEMA = SYS;declare l_apex_version varchar2(30);begin l_apex_version := apex_030200.wwv_flows_release; dbms_registry.downgrading('APEX','Oracle Application Express','validate_apex','APEX_030200') dbms_registry.downgraded('APEX',l_apex_version); validate_apex;end;/
7. Remove the Oracle Application Express release schema. See Removing the OracleAPEX Release Schema.
Appendix CCleaning Up After a Failed Installation
C-9

See Also:
Reverting the Images Directory
C.3.1.3.8 Reverting to Release 4.0To revert to Oracle APEX release 4.0:
1. If you altered your images directory, revert it back to the release you want to revertto.
2. Start SQL*Plus and connect to the database where Oracle APEX is installed asSYS specifying the SYSDBA role:
On Windows:
SYSTEM_DRIVE:\ sqlplus /nologSQL> SQL> CONNECT SYS as SYSDBAEnter password: SYS_password
On UNIX and Linux:
$ sqlplus /nologSQL> SQL> CONNECT SYS as SYSDBAEnter password: SYS_password
3. Execute the following commands:
@wwv_flow_val.sql@wwv_flow_val.plb@wwv_dbms_sql.sql@wwv_dbms_sql.plb
4. Change your working directory to apex in the 4.0 source.
5. Start SQL*Plus and connect to the database where Oracle APEX is installed asSYS specifying the SYSDBA role:
On Windows:
SYSTEM_DRIVE:\ sqlplus /nologSQL> SQL> CONNECT SYS as SYSDBAEnter password: SYS_password
On UNIX and Linux:
$ sqlplus /nologSQL> SQL> CONNECT SYS as SYSDBAEnter password: SYS_password
6. Execute the following:
set define '^'
@apexvalidate x x APEX_040000ALTER SESSION SET CURRENT_SCHEMA = APEX_040000;exec apex_040000.wwv_flow_upgrade.switch_schemas('APEX_210200','APEX_040000');ALTER SESSION SET CURRENT_SCHEMA = SYS;declare l_apex_version varchar2(30);begin
Appendix CCleaning Up After a Failed Installation
C-10

l_apex_version := apex_040000.wwv_flows_release; dbms_registry.downgrading('APEX','Oracle Application Express','validate_apex','APEX_040000'); dbms_registry.downgraded('APEX',l_apex_version); validate_apex;end;/
7. Remove the Oracle APEX release schema. See Removing the Oracle APEX ReleaseSchema.
See Also:
Reverting the Images Directory
C.3.1.3.9 Reverting to Release 4.1To revert to Oracle APEX release 4.1:
1. If you altered your images directory, revert it back to the release you want to revert to.
2. Change your working directory to apex/core in the 4.1 source.
3. Start SQL*Plus and connect to the database where Oracle APEX is installed as SYSspecifying the SYSDBA role:
On Windows:
SYSTEM_DRIVE:\ sqlplus /nologSQL> SQL> CONNECT SYS as SYSDBAEnter password: SYS_password
On UNIX and Linux:
$ sqlplus /nologSQL> SQL> CONNECT SYS as SYSDBAEnter password: SYS_password
4. Execute the following commands:
@wwv_flow_val.sql@wwv_flow_val.plb@wwv_dbms_sql.sql@wwv_dbms_sql.plb
5. Change your working directory to apex in the 4.1 source.
6. Start SQL*Plus and connect to the database where Oracle APEX is installed as SYSspecifying the SYSDBA role:
On Windows:
SYSTEM_DRIVE:\ sqlplus /nologSQL> SQL> CONNECT SYS as SYSDBAEnter password: SYS_password
On UNIX and Linux:
$ sqlplus /nologSQL> SQL> CONNECT SYS as SYSDBAEnter password: SYS_password
Appendix CCleaning Up After a Failed Installation
C-11

7. Execute the following:
set define '^' @apexvalidate x x APEX_040100ALTER SESSION SET CURRENT_SCHEMA = APEX_040100;exec apex_040100.wwv_flow_upgrade.switch_schemas('APEX_210200','APEX_040100');ALTER SESSION SET CURRENT_SCHEMA = SYS;declare l_apex_version varchar2(30);begin l_apex_version := apex_040100.wwv_flows_release; dbms_registry.downgrading('APEX','Oracle Application Express','validate_apex','APEX_040100'); dbms_registry.downgraded('APEX',l_apex_version); validate_apex;end;/
8. Remove the Oracle APEX release schema. See Removing the Oracle APEXRelease Schema.
See Also:
Reverting the Images Directory
C.3.1.3.10 Reverting to Release 4.2 in a non-CDBTo revert to Oracle APEX release 4.2 in a non-CDB:
1. If you altered your images directory, revert it back to the release you want to revertto.
2. Change your working directory to apex/core in the 4.2 source.
3. Start SQL*Plus and connect to the database where Oracle APEX is installed asSYS specifying the SYSDBA role:
On Windows:
SYSTEM_DRIVE:\ sqlplus /nologSQL> SQL> CONNECT SYS as SYSDBAEnter password: SYS_password
On UNIX and Linux:
$ sqlplus /nologSQL> SQL> CONNECT SYS as SYSDBAEnter password: SYS_password
4. Execute the following commands:
alter session set current_schema = SYS; @core_sys_views.sql grant select on sys.wwv_flow_gv$session to APEX_040200; @wwv_flow_val.sql
Appendix CCleaning Up After a Failed Installation
C-12

@wwv_flow_val.plb@wwv_dbms_sql.sqlgrant execute on wwv_dbms_sql to APEX_040200;@wwv_dbms_sql.plb begin dbms_utility.compile_schema('APEX_040200');end;/
5. Change your working directory to apex in the 4.2 source.
6. Start SQL*Plus and connect to the database where Oracle APEX is installed as SYSspecifying the SYSDBA role:
On Windows:
SYSTEM_DRIVE:\ sqlplus /nologSQL> SQL> CONNECT SYS as SYSDBAEnter password: SYS_password
On UNIX and Linux:
$ sqlplus /nologSQL> SQL> CONNECT SYS as SYSDBAEnter password: SYS_password
7. Execute the following:
set define '^' @apexvalidate x x APEX_040200ALTER SESSION SET CURRENT_SCHEMA = APEX_040200;exec apex_040200.wwv_flow_upgrade.switch_schemas('APEX_210200','APEX_040200');ALTER SESSION SET CURRENT_SCHEMA = SYS;declare l_apex_version varchar2(30);begin l_apex_version := apex_040200.wwv_flows_release; dbms_registry.downgrading('APEX','Oracle Application Express','validate_apex','APEX_040200'); dbms_registry.downgraded('APEX',l_apex_version); validate_apex;end;/
8. Remove the Oracle APEX release schema. See Removing the Oracle APEX ReleaseSchema.
See Also:
Reverting the Images Directory
C.3.1.3.11 Reverting to Release 4.2 in a CDBTo revert to Oracle APEX release 4.2 in a CDB:
1. If you altered your images directory, revert it back to the release you want to revert to.
2. Change your working directory to apex/core in the 4.2 source.
Appendix CCleaning Up After a Failed Installation
C-13

3. Create a new text file in that directory named apx42dgrd1.sql consisting of thefollowing:
alter session set current_schema = SYS; @core_sys_views.sql grant select on sys.wwv_flow_gv$session to APEX_040200; @wwv_flow_val.sql@wwv_flow_val.plb@wwv_dbms_sql.sqlgrant execute on wwv_dbms_sql to APEX_040200;@wwv_dbms_sql.plb begin dbms_utility.compile_schema('APEX_040200');end;/
4. Create a second new text file in that directory named apx42dgrd.sql consisting ofthe following:
set define '^' whenever sqlerror exit column :xe_home new_value OH_HOME NOPRINTvariable xe_home varchar2(255) set serverout onbegin-- get oracle_home sys.dbms_system.get_env('ORACLE_HOME',:xe_home); if length(:xe_home) = 0 then sys.dbms_output.put_line(lpad('-',80,'-')); raise_application_error ( -20001, 'Oracle Home environment variable not set' ); end if;end;/whenever sqlerror continue set termout offselect :xe_home from sys.dual;set termout on host ^OH_HOME/perl/bin/perl -I ^OH_HOME/rdbms/admin ^OH_HOME/rdbms/admin/catcon.pl -b apx42dgrd apx42dgrd1.sql
5. Start SQL*Plus and connect to CDB$ROOT of the database where Oracle APEX isinstalled as SYS specifying the SYSDBA role:
On Windows:
SYSTEM_DRIVE:\ sqlplus /nologSQL> SQL> CONNECT SYS as SYSDBAEnter password: SYS_password
On UNIX and Linux:
Appendix CCleaning Up After a Failed Installation
C-14

$ sqlplus /nologSQL> SQL> CONNECT SYS as SYSDBAEnter password: SYS_password
6. Execute the following commands:
@apx42dgrd.sql7. Change your working directory to apex in the 4.2 source.
8. Create a new text file in that directory name apx42dgrd1.sql with the following contents:
set define '^' ALTER SESSION SET CURRENT_SCHEMA = SYS; @apexvalidate x x APEX_040200 ALTER SESSION SET CURRENT_SCHEMA = APEX_040200;exec apex_040200.wwv_flow_upgrade.switch_schemas('APEX_210200','APEX_040200');ALTER SESSION SET CURRENT_SCHEMA = SYS;declare l_apex_version varchar2(30);begin l_apex_version := apex_040200.wwv_flows_release; dbms_registry.downgrading('APEX','Oracle Application Express','validate_apex','APEX_040200'); dbms_registry.downgraded('APEX',l_apex_version); validate_apex;end;/
9. Create a second new text file in that directory named apx42dgrd.sql consisting of thefollowing:
set define '^' whenever sqlerror exit column :xe_home new_value OH_HOME NOPRINTvariable xe_home varchar2(255) set serverout onbegin-- get oracle_home sys.dbms_system.get_env('ORACLE_HOME',:xe_home); if length(:xe_home) = 0 then sys.dbms_output.put_line(lpad('-',80,'-')); raise_application_error ( -20001, 'Oracle Home environment variable not set' ); end if;end;/whenever sqlerror continue set termout offselect :xe_home from sys.dual;set termout on host ^OH_HOME/perl/bin/perl -I ^OH_HOME/rdbms/admin ^OH_HOME/rdbms/admin/catcon.pl -b apx42dgrd apx42dgrd1.sql
Appendix CCleaning Up After a Failed Installation
C-15

10. Start SQL*Plus and connect to CDB$ROOT of the database where Oracle APEX isinstalled as SYS specifying the SYSDBA role:
On Windows:
SYSTEM_DRIVE:\ sqlplus /nologSQL> SQL> CONNECT SYS as SYSDBAEnter password: SYS_password
On UNIX and Linux:
$ sqlplus /nologSQL> SQL> CONNECT SYS as SYSDBAEnter password: SYS_password
11. Execute the following:
@apx42dgrd.sql12. Remove the Oracle APEX release schema. See Removing the Oracle APEX
Release Schema.
See Also:
Reverting the Images Directory
C.3.1.3.12 Reverting to Release 5.0 in a non-CDBTo revert to Oracle APEX release 5.0 in a non-CDB:
1. If you altered your images directory, revert it back to the release you want to revertto.
2. Change your working directory to apex/core in the 5.0 source.
3. Start SQL*Plus and connect to the database where Oracle APEX is installed asSYS specifying the SYSDBA role:
On Windows:
SYSTEM_DRIVE:\ sqlplus /nologSQL> CONNECT SYS as SYSDBAEnter password: SYS_password
On UNIX and Linux:
$ sqlplus /nologSQL> CONNECT SYS as SYSDBAEnter password: SYS_password
4. Execute the following commands:
alter session set current_schema = SYS;
@wwv_flow_val.sql @wwv_flow_val.plb
begin dbms_utility.compile_schema('APEX_050000');end;/
Appendix CCleaning Up After a Failed Installation
C-16
set define '^' @validate_apex x x APEX_050000
begin for i in ( select owner, trigger_name from sys.dba_triggers where owner = 'APEX_050000' and trigger_name like 'WWV_FLOW_UPGRADE_%' order by 1 ) loop sys.dbms_output.put_line('Dropping trigger '||i.owner||'.'||i.trigger_name); execute immediate 'drop trigger '||i.owner||'.'||i.trigger_name; end loop;end;/
ALTER SESSION SET CURRENT_SCHEMA = APEX_050000; exec apex_050000.wwv_flow_upgrade.switch_schemas('APEX_210200','APEX_050000');ALTER SESSION SET CURRENT_SCHEMA = SYS; drop context APEX$SESSION;create context APEX$SESSION using APEX_050000.WWV_FLOW_SESSION_CONTEXT;declare l_apex_version varchar2(30); l_schemas sys.dbms_registry.schema_list_t;begin l_apex_version := apex_050000.wwv_flows_release; dbms_registry.downgrading('APEX','Oracle Application Express','validate_apex','APEX_050000'); dbms_registry.downgraded('APEX',l_apex_version); select username bulk collect into l_schemas from all_users where username in ('FLOWS_FILES','APEX_PUBLIC_USER','APEX_LISTENER','APEX_REST_PUBLIC_USER','APEX_INSTANCE_ADMIN_USER') order by 1; sys.dbms_registry.update_schema_list('APEX', l_schemas); validate_apex;end;/
5. Remove the Oracle APEX release schema. See Removing the Oracle APEX ReleaseSchema.
See Also:
Reverting the Images Directory
C.3.1.3.13 Reverting to Release 5.0 in a CDBTo revert to Oracle APEX release 5.0 in a CDB:
1. If you altered your images directory, revert it back to the release you want to revert to.
2. Change your working directory to apex/core in the 5.0 source.
3. Create a new text file in that directory named apx50dgrd1.sql consisting of the following:
Appendix CCleaning Up After a Failed Installation
C-17

alter session set current_schema = SYS;
@wwv_flow_val.sql @wwv_flow_val.plb
begin dbms_utility.compile_schema('APEX_050000');end;/
set define '^' @validate_apex x x APEX_050000
begin for i in ( select owner, trigger_name from sys.dba_triggers where owner = 'APEX_050000' and trigger_name like 'WWV_FLOW_UPGRADE_%' order by 1 ) loop sys.dbms_output.put_line('Dropping trigger '||i.owner||'.'||i.trigger_name); execute immediate 'drop trigger '||i.owner||'.'||i.trigger_name; end loop;end;/
ALTER SESSION SET CURRENT_SCHEMA = APEX_050000; exec apex_050000.wwv_flow_upgrade.switch_schemas('APEX_210200','APEX_050000');ALTER SESSION SET CURRENT_SCHEMA = SYS; drop context APEX$SESSION;create context APEX$SESSION using APEX_050000.WWV_FLOW_SESSION_CONTEXT;declare l_apex_version varchar2(30); l_schemas sys.dbms_registry.schema_list_t;begin l_apex_version := apex_050000.wwv_flows_release; dbms_registry.downgrading('APEX','Oracle Application Express','validate_apex','APEX_050000'); dbms_registry.downgraded('APEX',l_apex_version); select username bulk collect into l_schemas from all_users where username in ('FLOWS_FILES','APEX_PUBLIC_USER','APEX_LISTENER','APEX_REST_PUBLIC_USER','APEX_INSTANCE_ADMIN_USER') order by 1; sys.dbms_registry.update_schema_list('APEX', l_schemas); validate_apex;end;/
4. Create a second new text file in that directory named apx50dgrd.sql consisting ofthe following:
set define '^' whenever sqlerror exit column :xe_home new_value OH_HOME NOPRINT variable xe_home varchar2(255) set serverout on begin
Appendix CCleaning Up After a Failed Installation
C-18

-- get oracle_home sys.dbms_system.get_env('ORACLE_HOME',:xe_home); if length(:xe_home) = 0 then sys.dbms_output.put_line(lpad('-',80,'-')); raise_application_error (-20001,'Oracle Home environment variable not set' ); end if; end; / whenever sqlerror continue set termout off select :xe_home from sys.dual; set termout on host ^OH_HOME/perl/bin/perl -I ^OH_HOME/rdbms/admin ^OH_HOME/rdbms/admin/catcon.pl -b apx50dgrd apx50dgrd1.sql
5. Start SQL*Plus and connect to CDB$ROOT of the database where Oracle APEX is installedas SYS specifying the SYSDBA role:
On Windows:
SYSTEM_DRIVE:\ sqlplus /nolog SQL> CONNECT SYS as SYSDBA Enter password: SYS_password
On UNIX and Linux:
$ sqlplus /nolog SQL> CONNECT SYS as SYSDBA Enter password: SYS_password
6. Execute the following commands:
@apx50dgrd.sql7. Remove the Oracle APEX release schema. See Removing the Oracle APEX Release
Schema.
See Also:
Reverting the Images Directory
C.3.1.3.14 Reverting to Release 5.1 in a non-CDBTo revert to Oracle APEX release 5.1 in a non-CDB:
1. If you altered your images directory, revert it back to the release you want to revert to.
2. Change your working directory to apex/core in the 5.1 source.
3. Start SQL*Plus and connect to the database where Oracle APEX is installed as SYSspecifying the SYSDBA role:
On Windows:
SYSTEM_DRIVE:\ sqlplus /nologSQL> CONNECT SYS as SYSDBAEnter password: SYS_password
On UNIX and Linux:
Appendix CCleaning Up After a Failed Installation
C-19
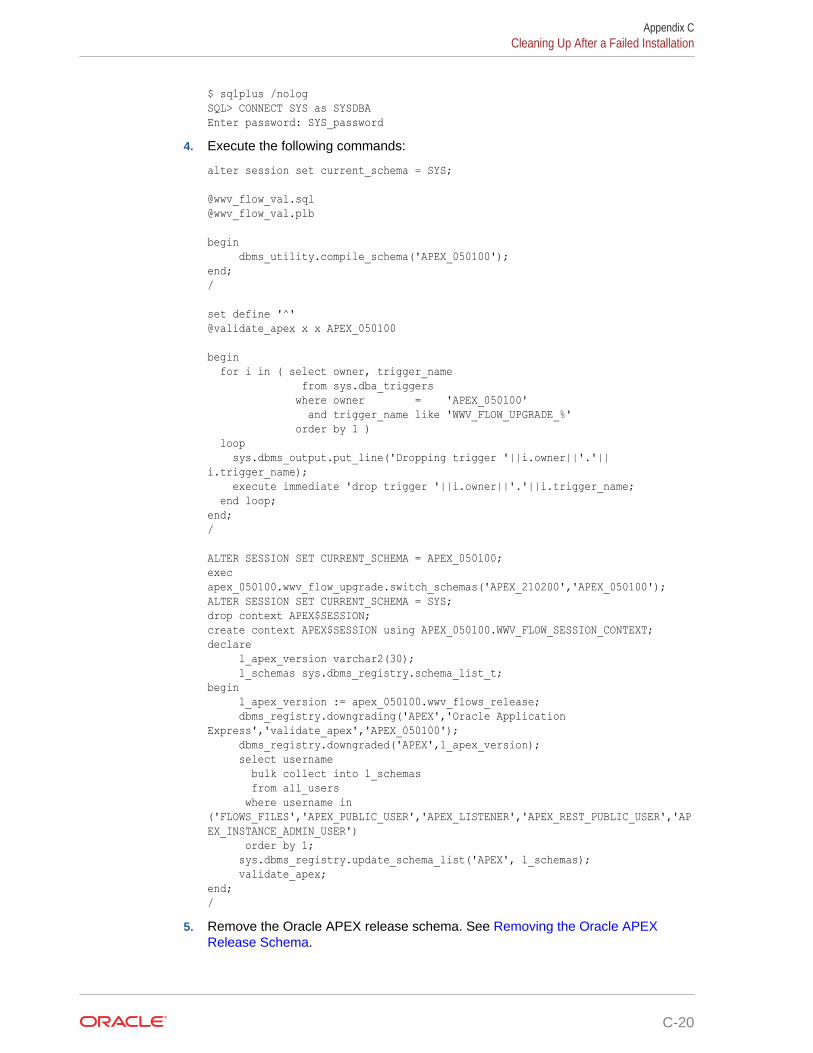
$ sqlplus /nologSQL> CONNECT SYS as SYSDBAEnter password: SYS_password
4. Execute the following commands:
alter session set current_schema = SYS;
@wwv_flow_val.sql @wwv_flow_val.plb
begin dbms_utility.compile_schema('APEX_050100');end;/
set define '^' @validate_apex x x APEX_050100
begin for i in ( select owner, trigger_name from sys.dba_triggers where owner = 'APEX_050100' and trigger_name like 'WWV_FLOW_UPGRADE_%' order by 1 ) loop sys.dbms_output.put_line('Dropping trigger '||i.owner||'.'||i.trigger_name); execute immediate 'drop trigger '||i.owner||'.'||i.trigger_name; end loop;end;/
ALTER SESSION SET CURRENT_SCHEMA = APEX_050100; exec apex_050100.wwv_flow_upgrade.switch_schemas('APEX_210200','APEX_050100');ALTER SESSION SET CURRENT_SCHEMA = SYS; drop context APEX$SESSION;create context APEX$SESSION using APEX_050100.WWV_FLOW_SESSION_CONTEXT;declare l_apex_version varchar2(30); l_schemas sys.dbms_registry.schema_list_t;begin l_apex_version := apex_050100.wwv_flows_release; dbms_registry.downgrading('APEX','Oracle Application Express','validate_apex','APEX_050100'); dbms_registry.downgraded('APEX',l_apex_version); select username bulk collect into l_schemas from all_users where username in ('FLOWS_FILES','APEX_PUBLIC_USER','APEX_LISTENER','APEX_REST_PUBLIC_USER','APEX_INSTANCE_ADMIN_USER') order by 1; sys.dbms_registry.update_schema_list('APEX', l_schemas); validate_apex;end;/
5. Remove the Oracle APEX release schema. See Removing the Oracle APEXRelease Schema.
Appendix CCleaning Up After a Failed Installation
C-20
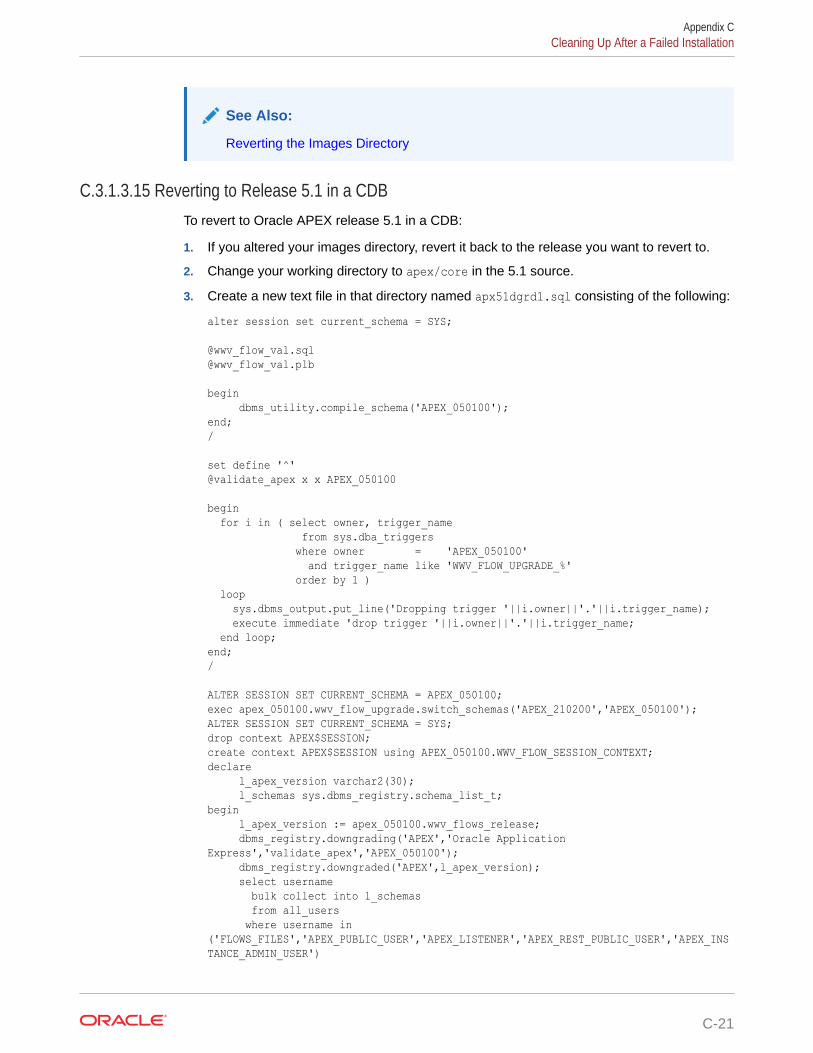
See Also:
Reverting the Images Directory
C.3.1.3.15 Reverting to Release 5.1 in a CDBTo revert to Oracle APEX release 5.1 in a CDB:
1. If you altered your images directory, revert it back to the release you want to revert to.
2. Change your working directory to apex/core in the 5.1 source.
3. Create a new text file in that directory named apx51dgrd1.sql consisting of the following:
alter session set current_schema = SYS;
@wwv_flow_val.sql @wwv_flow_val.plb
begin dbms_utility.compile_schema('APEX_050100');end;/
set define '^' @validate_apex x x APEX_050100
begin for i in ( select owner, trigger_name from sys.dba_triggers where owner = 'APEX_050100' and trigger_name like 'WWV_FLOW_UPGRADE_%' order by 1 ) loop sys.dbms_output.put_line('Dropping trigger '||i.owner||'.'||i.trigger_name); execute immediate 'drop trigger '||i.owner||'.'||i.trigger_name; end loop;end;/
ALTER SESSION SET CURRENT_SCHEMA = APEX_050100; exec apex_050100.wwv_flow_upgrade.switch_schemas('APEX_210200','APEX_050100');ALTER SESSION SET CURRENT_SCHEMA = SYS; drop context APEX$SESSION;create context APEX$SESSION using APEX_050100.WWV_FLOW_SESSION_CONTEXT;declare l_apex_version varchar2(30); l_schemas sys.dbms_registry.schema_list_t;begin l_apex_version := apex_050100.wwv_flows_release; dbms_registry.downgrading('APEX','Oracle Application Express','validate_apex','APEX_050100'); dbms_registry.downgraded('APEX',l_apex_version); select username bulk collect into l_schemas from all_users where username in ('FLOWS_FILES','APEX_PUBLIC_USER','APEX_LISTENER','APEX_REST_PUBLIC_USER','APEX_INSTANCE_ADMIN_USER')
Appendix CCleaning Up After a Failed Installation
C-21

order by 1; sys.dbms_registry.update_schema_list('APEX', l_schemas); validate_apex;end;/
4. Create a second new text file in that directory named apx51dgrd.sql consisting ofthe following:
set define '^' whenever sqlerror exit column :xe_home new_value OH_HOME NOPRINT variable xe_home varchar2(255) set serverout on begin -- get oracle_home sys.dbms_system.get_env('ORACLE_HOME',:xe_home); if length(:xe_home) = 0 then sys.dbms_output.put_line(lpad('-',80,'-')); raise_application_error (-20001,'Oracle Home environment variable not set' ); end if; end; / whenever sqlerror continue set termout off select :xe_home from sys.dual; set termout on host ^OH_HOME/perl/bin/perl -I ^OH_HOME/rdbms/admin ^OH_HOME/rdbms/admin/catcon.pl -b apx51dgrd apx51dgrd1.sql
5. Start SQL*Plus and connect to CDB$ROOT of the database where Oracle APEX isinstalled as SYS specifying the SYSDBA role:
On Windows:
SYSTEM_DRIVE:\ sqlplus /nolog SQL> CONNECT SYS as SYSDBA Enter password: SYS_password
On UNIX and Linux:
$ sqlplus /nolog SQL> CONNECT SYS as SYSDBA Enter password: SYS_password
6. Execute the following commands:
@apx51dgrd.sql7. Remove the Oracle APEX release schema. See Removing the Oracle APEX
Release Schema.
See Also:
Reverting the Images Directory
C.3.1.3.16 Reverting to Release 18.1 in a non-CDBTo revert to Oracle APEX release 18.1 in a non-CDB:
Appendix CCleaning Up After a Failed Installation
C-22

1. If you altered your images directory, revert it back to the release you want to revert to.
2. Change your working directory to apex in the 18.1 source.
3. Create a new text file in that directory named apxdwngrd.sql consisting of the following:
set define '^'set concat onset concat .set verify off set termout offcolumn foo new_val LOGselect 'apxdwngrd_' ||to_char(sysdate, 'YYYY-MM-DD_HH24-MI-SS') || '.log' as foo from sys.dual;set termout onspool ^LOG @@core/scripts/set_appun.sql whenever sqlerror exitset serveroutput on size unlimited declare l_cnt number := 0;begin select count(*) into l_cnt from sys.dba_users where username = '^APPUN'; if l_cnt = 0 then dbms_output.put_line('^APPUN not found in this database.'); raise program_error; end if;end;/whenever sqlerror continue prompt ...Create validate procedure in SYS schema and start registration@@core/validate_apex.sql x x ^APPUN grant inherit any privileges to ^APPUN; prompt Installing SYS views @@core/sys_core_views.sql @@core/wwv_flow_val.sqlgrant execute on sys.wwv_flow_val to ^APPUN.; @@core/wwv_flow_val.plb ALTER SESSION SET CURRENT_SCHEMA = ^APPUN; exec sys.dbms_session.modify_package_state(sys.dbms_session.reinitialize);
Appendix CCleaning Up After a Failed Installation
C-23

begin ^APPUN..wwv_flow_upgrade.remove_jobs(); ^APPUN..wwv_flow_upgrade.create_jobs('^APPUN'); ^APPUN..wwv_flow_upgrade.create_public_synonyms('^APPUN'); ^APPUN..wwv_flow_upgrade.grant_public_synonyms('^APPUN'); ^APPUN..wwv_flow_upgrade.flows_files_objects_remove('^APPUN'); ^APPUN..wwv_flow_upgrade.flows_files_objects_create('^APPUN');end;/ ALTER SESSION SET CURRENT_SCHEMA = SYS; drop context APEX$SESSION;create context APEX$SESSION using ^APPUN..WWV_FLOW_SESSION_CONTEXT; alter package sys.wwv_dbms_sql_^APPUN. compile;alter package sys.wwv_dbms_sql_^APPUN. compile body; exec sys.dbms_session.modify_package_state(sys.dbms_session.reinitialize); set serveroutput on size unlimited declare l_apex_version varchar2(30); l_schemas sys.dbms_registry.schema_list_t;begin execute immediate 'drop package ^APPUN..WWV_FLOW_DB_VERSION'; l_apex_version := ^APPUN..wwv_flows_release; sys.dbms_registry.loading('APEX','Oracle Application Express','validate_apex', '^APPUN'); select username bulk collect into l_schemas from sys.all_users where username in ('FLOWS_FILES','APEX_PUBLIC_USER','APEX_LISTENER','APEX_REST_PUBLIC_USER','APEX_INSTANCE_ADMIN_USER') order by 1; sys.dbms_registry.update_schema_list('APEX', l_schemas); sys.dbms_registry.loaded('APEX',l_apex_version); commit; sys.validate_apex;end;/
4. Start SQL*Plus and connect to the database where Oracle APEX is installed asSYS specifying the SYSDBA role:
On Windows:
SYSTEM_DRIVE:\ sqlplus /nologSQL> CONNECT SYS as SYSDBAEnter password: SYS_password
On UNIX and Linux:
Appendix CCleaning Up After a Failed Installation
C-24

$ sqlplus /nologSQL> CONNECT SYS as SYSDBAEnter password: SYS_password
5. Run the apxdwngrd.sql script:
SQL> @apxdwngrd.sql
6. Remove the Oracle APEX release schema. See Removing the Oracle APEX ReleaseSchema.
See Also:
Reverting the Images Directory
C.3.1.3.17 Reverting to Release 18.1 in a CDBTo revert to Oracle APEX release 18.1 in a CDB:
1. If you altered your images directory, revert it back to the release you want to revert to.
2. Change your working directory to apex in the 18.1 source.
3. Create a new text file in that directory named apxdwngrd.sql consisting of the following:
set define '^'set concat onset concat .set verify off set termout offcolumn foo new_val LOGselect 'apxdwngrd_' ||to_char(sysdate, 'YYYY-MM-DD_HH24-MI-SS') || '.log' as foo from sys.dual;set termout onspool ^LOG @@core/scripts/set_appun.sql whenever sqlerror exitset serveroutput on size unlimited declare l_cnt number := 0;begin select count(*) into l_cnt from sys.dba_users where username = '^APPUN'; if l_cnt = 0 then dbms_output.put_line('^APPUN not found in this database.'); raise program_error; end if;end;/whenever sqlerror continue prompt ...Create validate procedure in SYS schema and start registration@@core/validate_apex.sql x x ^APPUN
Appendix CCleaning Up After a Failed Installation
C-25

grant inherit any privileges to ^APPUN; prompt Installing SYS views @@core/sys_core_views.sql @@core/wwv_flow_val.sqlgrant execute on sys.wwv_flow_val to ^APPUN.; @@core/wwv_flow_val.plb ALTER SESSION SET CURRENT_SCHEMA = ^APPUN; exec sys.dbms_session.modify_package_state(sys.dbms_session.reinitialize); begin ^APPUN..wwv_flow_upgrade.remove_jobs(); ^APPUN..wwv_flow_upgrade.create_jobs('^APPUN'); ^APPUN..wwv_flow_upgrade.create_public_synonyms('^APPUN'); ^APPUN..wwv_flow_upgrade.grant_public_synonyms('^APPUN'); ^APPUN..wwv_flow_upgrade.flows_files_objects_remove('^APPUN'); ^APPUN..wwv_flow_upgrade.flows_files_objects_create('^APPUN');end;/ ALTER SESSION SET CURRENT_SCHEMA = SYS; drop context APEX$SESSION;create context APEX$SESSION using ^APPUN..WWV_FLOW_SESSION_CONTEXT; alter package sys.wwv_dbms_sql_^APPUN. compile;alter package sys.wwv_dbms_sql_^APPUN. compile body; exec sys.dbms_session.modify_package_state(sys.dbms_session.reinitialize); set serveroutput on size unlimited declare l_apex_version varchar2(30); l_schemas sys.dbms_registry.schema_list_t;begin execute immediate 'drop package ^APPUN..WWV_FLOW_DB_VERSION'; l_apex_version := ^APPUN..wwv_flows_release; sys.dbms_registry.loading('APEX','Oracle Application Express','validate_apex', '^APPUN'); select username bulk collect into l_schemas from sys.all_users where username in ('FLOWS_FILES','APEX_PUBLIC_USER','APEX_LISTENER','APEX_REST_PUBLIC_USER','APEX_INSTANCE_ADMIN_USER') order by 1; sys.dbms_registry.update_schema_list('APEX', l_schemas); sys.dbms_registry.loaded('APEX',l_apex_version); commit; sys.validate_apex;end;/
4. Create a second new text file in that directory named apxdwngrd_cdb.sqlconsisting of the following:
Appendix CCleaning Up After a Failed Installation
C-26
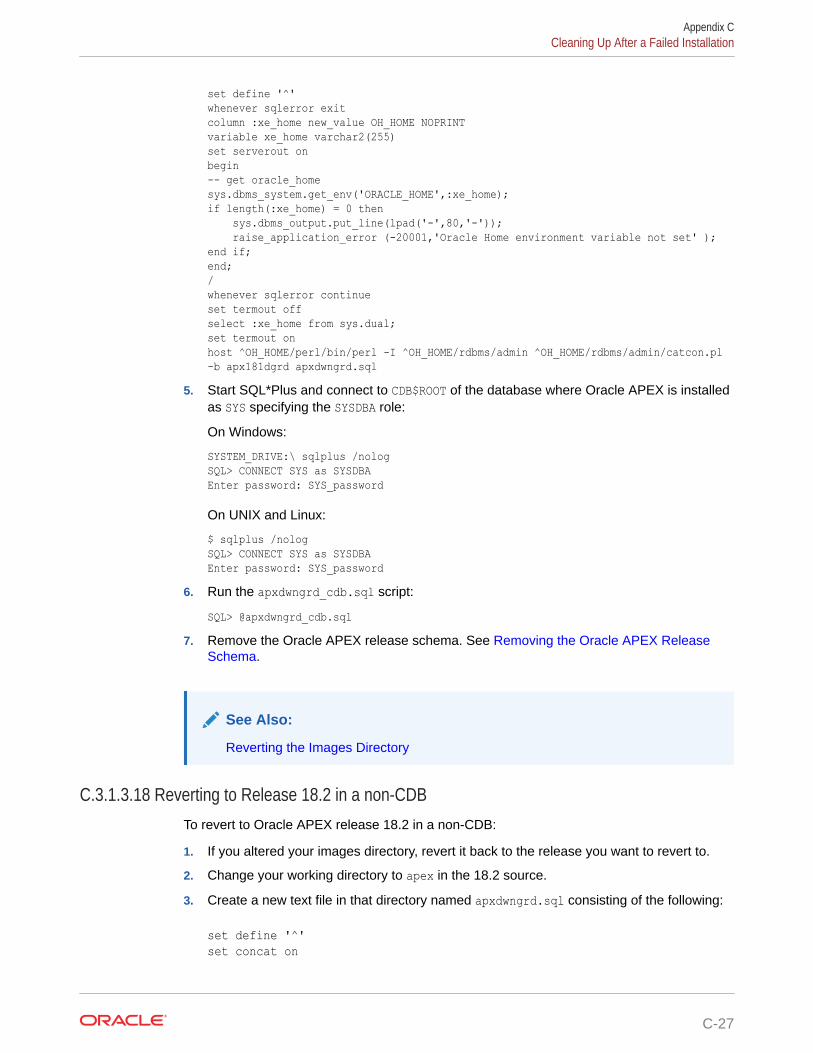
set define '^' whenever sqlerror exit column :xe_home new_value OH_HOME NOPRINTvariable xe_home varchar2(255) set serverout onbegin-- get oracle_home sys.dbms_system.get_env('ORACLE_HOME',:xe_home); if length(:xe_home) = 0 then sys.dbms_output.put_line(lpad('-',80,'-')); raise_application_error (-20001,'Oracle Home environment variable not set' ); end if;end;/whenever sqlerror continue set termout offselect :xe_home from sys.dual;set termout on host ^OH_HOME/perl/bin/perl -I ^OH_HOME/rdbms/admin ^OH_HOME/rdbms/admin/catcon.pl -b apx181dgrd apxdwngrd.sql
5. Start SQL*Plus and connect to CDB$ROOT of the database where Oracle APEX is installedas SYS specifying the SYSDBA role:
On Windows:
SYSTEM_DRIVE:\ sqlplus /nolog SQL> CONNECT SYS as SYSDBA Enter password: SYS_password
On UNIX and Linux:
$ sqlplus /nolog SQL> CONNECT SYS as SYSDBA Enter password: SYS_password
6. Run the apxdwngrd_cdb.sql script:
SQL> @apxdwngrd_cdb.sql7. Remove the Oracle APEX release schema. See Removing the Oracle APEX Release
Schema.
See Also:
Reverting the Images Directory
C.3.1.3.18 Reverting to Release 18.2 in a non-CDBTo revert to Oracle APEX release 18.2 in a non-CDB:
1. If you altered your images directory, revert it back to the release you want to revert to.
2. Change your working directory to apex in the 18.2 source.
3. Create a new text file in that directory named apxdwngrd.sql consisting of the following:
set define '^'set concat on
Appendix CCleaning Up After a Failed Installation
C-27

set concat .set verify off set termout offcolumn foo new_val LOGselect 'apxdwngrd_' ||to_char(sysdate, 'YYYY-MM-DD_HH24-MI-SS') || '.log' as foo from sys.dual;set termout onspool ^LOG @@core/scripts/set_appun.sql whenever sqlerror exitset serveroutput on size unlimited declare l_cnt number := 0;begin select count(*) into l_cnt from sys.dba_users where username = '^APPUN'; if l_cnt = 0 then dbms_output.put_line('^APPUN not found in this database.'); raise program_error; end if;end;/whenever sqlerror continue prompt ...Create validate procedure in SYS schema and start registration@@core/validate_apex.sql x x ^APPUN grant inherit any privileges to ^APPUN; prompt Installing SYS views @@core/sys_core_views.sql @@core/wwv_flow_val.sqlgrant execute on sys.wwv_flow_val to ^APPUN.; @@core/wwv_flow_val.plb ALTER SESSION SET CURRENT_SCHEMA = ^APPUN; exec sys.dbms_session.modify_package_state(sys.dbms_session.reinitialize); begin ^APPUN..wwv_flow_upgrade.remove_jobs(); ^APPUN..wwv_flow_upgrade.create_jobs('^APPUN'); ^APPUN..wwv_flow_upgrade.create_public_synonyms('^APPUN');
Appendix CCleaning Up After a Failed Installation
C-28

^APPUN..wwv_flow_upgrade.grant_public_synonyms('^APPUN'); ^APPUN..wwv_flow_upgrade.flows_files_objects_remove('^APPUN'); ^APPUN..wwv_flow_upgrade.flows_files_objects_create('^APPUN');end;/ ALTER SESSION SET CURRENT_SCHEMA = SYS; drop context APEX$SESSION;create context APEX$SESSION using ^APPUN..WWV_FLOW_SESSION_CONTEXT; alter package sys.wwv_dbms_sql_^APPUN. compile;alter package sys.wwv_dbms_sql_^APPUN. compile body; exec sys.dbms_session.modify_package_state(sys.dbms_session.reinitialize); set serveroutput on size unlimited declare l_apex_version varchar2(30); l_schemas sys.dbms_registry.schema_list_t;begin execute immediate 'drop package ^APPUN..WWV_FLOW_DB_VERSION'; l_apex_version := ^APPUN..wwv_flows_release; sys.dbms_registry.loading('APEX','Oracle Application Express','validate_apex', '^APPUN'); select username bulk collect into l_schemas from sys.all_users where username in ('FLOWS_FILES','APEX_PUBLIC_USER','APEX_LISTENER','APEX_REST_PUBLIC_USER','APEX_INSTANCE_ADMIN_USER') order by 1; sys.dbms_registry.update_schema_list('APEX', l_schemas); sys.dbms_registry.loaded('APEX',l_apex_version); commit; sys.validate_apex;end;/
4. Start SQL*Plus and connect to the database where Oracle APEX is installed as SYSspecifying the SYSDBA role:
On Windows:
SYSTEM_DRIVE:\ sqlplus /nologSQL> CONNECT SYS as SYSDBAEnter password: SYS_password
On UNIX and Linux:
$ sqlplus /nologSQL> CONNECT SYS as SYSDBAEnter password: SYS_password
Appendix CCleaning Up After a Failed Installation
C-29

5. Run the apxdwngrd.sql script:
SQL> @apxdwngrd.sql
6. Remove the Oracle APEX release schema. See Removing the Oracle APEXRelease Schema.
See Also:
Reverting the Images Directory
C.3.1.3.19 Reverting to Release 18.2 in a CDBTo revert to Oracle APEX release 18.2 in a CDB:
1. If you altered your images directory, revert it back to the release you want to revertto.
2. Change your working directory to apex in the 18.2 source.
3. Create a new text file in that directory named apxdwngrd.sql consisting of thefollowing:
set define '^'set concat onset concat .set verify off set termout offcolumn foo new_val LOGselect 'apxdwngrd_' ||to_char(sysdate, 'YYYY-MM-DD_HH24-MI-SS') || '.log' as foo from sys.dual;set termout onspool ^LOG @@core/scripts/set_appun.sql whenever sqlerror exitset serveroutput on size unlimited declare l_cnt number := 0;begin select count(*) into l_cnt from sys.dba_users where username = '^APPUN'; if l_cnt = 0 then dbms_output.put_line('^APPUN not found in this database.'); raise program_error; end if;end;/whenever sqlerror continue prompt ...Create validate procedure in SYS schema and start registration@@core/validate_apex.sql x x ^APPUN
Appendix CCleaning Up After a Failed Installation
C-30

grant inherit any privileges to ^APPUN; prompt Installing SYS views @@core/sys_core_views.sql @@core/wwv_flow_val.sqlgrant execute on sys.wwv_flow_val to ^APPUN.; @@core/wwv_flow_val.plb ALTER SESSION SET CURRENT_SCHEMA = ^APPUN; exec sys.dbms_session.modify_package_state(sys.dbms_session.reinitialize); begin ^APPUN..wwv_flow_upgrade.remove_jobs(); ^APPUN..wwv_flow_upgrade.create_jobs('^APPUN'); ^APPUN..wwv_flow_upgrade.create_public_synonyms('^APPUN'); ^APPUN..wwv_flow_upgrade.grant_public_synonyms('^APPUN'); ^APPUN..wwv_flow_upgrade.flows_files_objects_remove('^APPUN'); ^APPUN..wwv_flow_upgrade.flows_files_objects_create('^APPUN');end;/ ALTER SESSION SET CURRENT_SCHEMA = SYS; drop context APEX$SESSION;create context APEX$SESSION using ^APPUN..WWV_FLOW_SESSION_CONTEXT; alter package sys.wwv_dbms_sql_^APPUN. compile;alter package sys.wwv_dbms_sql_^APPUN. compile body; exec sys.dbms_session.modify_package_state(sys.dbms_session.reinitialize); set serveroutput on size unlimited declare l_apex_version varchar2(30); l_schemas sys.dbms_registry.schema_list_t;begin execute immediate 'drop package ^APPUN..WWV_FLOW_DB_VERSION'; l_apex_version := ^APPUN..wwv_flows_release; sys.dbms_registry.loading('APEX','Oracle Application Express','validate_apex', '^APPUN'); select username bulk collect into l_schemas from sys.all_users where username in ('FLOWS_FILES','APEX_PUBLIC_USER','APEX_LISTENER','APEX_REST_PUBLIC_USER','APEX_INSTANCE_ADMIN_USER') order by 1; sys.dbms_registry.update_schema_list('APEX', l_schemas); sys.dbms_registry.loaded('APEX',l_apex_version); commit; sys.validate_apex;end;/
4. Create a second new text file in that directory named apxdwngrd_cdb.sql consisting ofthe following:
Appendix CCleaning Up After a Failed Installation
C-31

set define '^' whenever sqlerror exit column :xe_home new_value OH_HOME NOPRINTvariable xe_home varchar2(255) set serverout onbegin-- get oracle_home sys.dbms_system.get_env('ORACLE_HOME',:xe_home); if length(:xe_home) = 0 then sys.dbms_output.put_line(lpad('-',80,'-')); raise_application_error (-20001,'Oracle Home environment variable not set' ); end if;end;/whenever sqlerror continue set termout offselect :xe_home from sys.dual;set termout on host ^OH_HOME/perl/bin/perl -I ^OH_HOME/rdbms/admin ^OH_HOME/rdbms/admin/catcon.pl -b apx182dgrd apxdwngrd.sql
5. Start SQL*Plus and connect to CDB$ROOT of the database where Oracle APEX isinstalled as SYS specifying the SYSDBA role:
On Windows:
SYSTEM_DRIVE:\ sqlplus /nolog SQL> CONNECT SYS as SYSDBA Enter password: SYS_password
On UNIX and Linux:
$ sqlplus /nolog SQL> CONNECT SYS as SYSDBA Enter password: SYS_password
6. Run the apxdwngrd_cdb.sql script:
SQL> @apxdwngrd_cdb.sql7. Remove the Oracle APEX release schema. See Removing the Oracle APEX
Release Schema.
See Also:
Reverting the Images Directory
C.3.1.3.20 Reverting to Release 19.1 in a non-CDBTo revert to Oracle APEX release 19.1 in a non-CDB:
1. If you altered your images directory, revert it back to the release you want to revertto.
2. Change your working directory to apex in the 19.1 source.
3. Start SQL*Plus and connect to the database where Oracle APEX is installed asSYS specifying the SYSDBA role:
Appendix CCleaning Up After a Failed Installation
C-32

• On Windows:
SYSTEM_DRIVE:\ sqlplus /nologSQL> CONNECT SYS as SYSDBAEnter password: SYS_password
• On UNIX and Linux:
$ sqlplus /nologSQL> CONNECT SYS as SYSDBAEnter password: SYS_password
4. Run the apxdwngrd.sql script:
SQL> @apxdwngrd.sql
5. Remove the Oracle APEX release schema. See Removing the Oracle APEX ReleaseSchema.
C.3.1.3.21 Reverting to Release 19.1 in a CDBTo revert to Oracle APEX release 19.1 in a CDB:
1. If you altered your images directory, revert it back to the release you want to revert to.
2. Change your working directory to apex in the 19.1 source.
3. Create a script in the apex directory called apxdwngrd_cdb.sql with the followingcontents:
set define '^' whenever sqlerror exit column :xe_home new_value OH_HOME NOPRINTvariable xe_home varchar2(255) set serverout onbegin-- get oracle_home sys.dbms_system.get_env('ORACLE_HOME',:xe_home); if length(:xe_home) = 0 then sys.dbms_output.put_line(lpad('-',80,'-')); raise_application_error (-20001,'Oracle Home environment variable not set' ); end if;end;/whenever sqlerror continue set termout offselect :xe_home from sys.dual;set termout on host ^OH_HOME/perl/bin/perl -I ^OH_HOME/rdbms/admin ^OH_HOME/rdbms/admin/catcon.pl -b apx191dgrd apxdwngrd.sql
4. Start SQL*Plus and connect to the database where Oracle APEX is installed as SYSspecifying the SYSDBA role:
Appendix CCleaning Up After a Failed Installation
C-33

• On Windows:
SYSTEM_DRIVE:\ sqlplus /nologSQL> CONNECT SYS as SYSDBAEnter password: SYS_password
• On UNIX and Linux:
$ sqlplus /nologSQL> CONNECT SYS as SYSDBAEnter password: SYS_password
5. Run the apxdwngrd_cdb.sql script:
SQL> @apxdwngrd_cdb.sql
6. Remove the Oracle APEX release schema. See Removing the Oracle APEXRelease Schema.
C.3.1.3.22 Reverting to Release 19.2 in a non-CDBTo revert to Oracle APEX release 19.2 in a non-CDB:
1. If you altered your images directory, revert it back to the release you want to revertto.
2. Change your working directory to apex in the 19.2 source.
3. Start SQL*Plus and connect to the database where Oracle APEX is installed asSYS specifying the SYSDBA role:
• On Windows:
SYSTEM_DRIVE:\ sqlplus /nologSQL> CONNECT SYS as SYSDBAEnter password: SYS_password
• On UNIX and Linux:
$ sqlplus /nologSQL> CONNECT SYS as SYSDBAEnter password: SYS_password
4. Run the apxdwngrd.sql script:
SQL> @apxdwngrd.sql
5. Remove the Oracle APEX release schema. See Removing the Oracle APEXRelease Schema.
C.3.1.3.23 Reverting to Release 19.2 in a CDBTo revert to Oracle APEX release 19.2 in a CDB:
1. If you altered your images directory, revert it back to the release you want to revertto.
Appendix CCleaning Up After a Failed Installation
C-34

2. Change your working directory to apex in the 19.2 source.
3. Create a script in the apex directory called apxdwngrd_cdb.sql with the followingcontents:
set define '^' whenever sqlerror exit column :xe_home new_value OH_HOME NOPRINTvariable xe_home varchar2(255) set serverout onbegin-- get oracle_home sys.dbms_system.get_env('ORACLE_HOME',:xe_home); if length(:xe_home) = 0 then sys.dbms_output.put_line(lpad('-',80,'-')); raise_application_error (-20001,'Oracle Home environment variable not set' ); end if;end;/whenever sqlerror continue set termout offselect :xe_home from sys.dual;set termout on host ^OH_HOME/perl/bin/perl -I ^OH_HOME/rdbms/admin ^OH_HOME/rdbms/admin/catcon.pl -b apx192dgrd apxdwngrd.sql
4. Start SQL*Plus and connect to the database where Oracle APEX is installed as SYSspecifying the SYSDBA role:
• On Windows:
SYSTEM_DRIVE:\ sqlplus /nologSQL> CONNECT SYS as SYSDBAEnter password: SYS_password
• On UNIX and Linux:
$ sqlplus /nologSQL> CONNECT SYS as SYSDBAEnter password: SYS_password
5. Run the apxdwngrd_cdb.sql script:
SQL> @apxdwngrd_cdb.sql
6. Remove the Oracle APEX release schema. See Removing the Oracle APEX ReleaseSchema.
C.3.1.3.24 Reverting to Release 20.1 in a non-CDBTo revert to Oracle APEX release 20.1 in a non-CDB:
1. If you altered your images directory, revert it back to the release you want to revert to.
2. Change your working directory to apex in the 20.1 source.
Appendix CCleaning Up After a Failed Installation
C-35

3. Start SQL*Plus and connect to the database where Oracle APEX is installed asSYS specifying the SYSDBA role:
• On Windows:
SYSTEM_DRIVE:\ sqlplus /nologSQL> CONNECT SYS as SYSDBAEnter password: SYS_password
• On UNIX and Linux:
$ sqlplus /nologSQL> CONNECT SYS as SYSDBAEnter password: SYS_password
4. Run the apxdwngrd.sql script:
SQL> @apxdwngrd.sql
5. Remove the Oracle APEX release schema. See Removing the Oracle APEXRelease Schema.
C.3.1.3.25 Reverting to Release 20.1 in a CDBTo revert to Oracle APEX release 20.1 in a CDB:
1. If you altered your images directory, revert it back to the release you want to revertto.
2. Change your working directory to apex in the 20.1 source.
3. Create a script in the apex directory called apxdwngrd_cdb.sql with the followingcontents:
set define '^' whenever sqlerror exit column :xe_home new_value OH_HOME NOPRINTvariable xe_home varchar2(255) set serverout onbegin-- get oracle_home sys.dbms_system.get_env('ORACLE_HOME',:xe_home); if length(:xe_home) = 0 then sys.dbms_output.put_line(lpad('-',80,'-')); raise_application_error (-20001,'Oracle Home environment variable not set' ); end if;end;/whenever sqlerror continue set termout offselect :xe_home from sys.dual;set termout on host ^OH_HOME/perl/bin/perl -I ^OH_HOME/rdbms/admin ^OH_HOME/rdbms/admin/catcon.pl -b apx201dgrd apxdwngrd.sql
Appendix CCleaning Up After a Failed Installation
C-36

4. Start SQL*Plus and connect to the database where Oracle APEX is installed as SYSspecifying the SYSDBA role:
• On Windows:
SYSTEM_DRIVE:\ sqlplus /nologSQL> CONNECT SYS as SYSDBAEnter password: SYS_password
• On UNIX and Linux:
$ sqlplus /nologSQL> CONNECT SYS as SYSDBAEnter password: SYS_password
5. Run the apxdwngrd_cdb.sql script:
SQL> @apxdwngrd_cdb.sql
6. Remove the Oracle APEX release schema. See Removing the Oracle APEX ReleaseSchema.
C.3.1.3.26 Reverting to Release 20.2 in a non-CDBTo revert to Oracle APEX release 20.2 in a non-CDB:
1. If you altered your images directory, revert it back to the release you want to revert to.
2. Change your working directory to apex in the 20.2 source.
3. Start SQL*Plus and connect to the database where Oracle APEX is installed as SYSspecifying the SYSDBA role:
• On Windows:
SYSTEM_DRIVE:\ sqlplus /nologSQL> CONNECT SYS as SYSDBAEnter password: SYS_password
• On UNIX and Linux:
$ sqlplus /nologSQL> CONNECT SYS as SYSDBAEnter password: SYS_password
4. Run the apxdwngrd.sql script:
SQL> @apxdwngrd.sql
5. Remove the Oracle APEX release schema. See Removing the Oracle APEX ReleaseSchema.
C.3.1.3.27 Reverting to Release 20.2 in a CDBTo revert to Oracle APEX release 20.2 in a CDB:
Appendix CCleaning Up After a Failed Installation
C-37

1. If you altered your images directory, revert it back to the release you want to revertto.
2. Change your working directory to apex in the 20.2 source.
3. Create a script in the apex directory called apxdwngrd_cdb.sql with the followingcontents:
set define '^' whenever sqlerror exit column :xe_home new_value OH_HOME NOPRINTvariable xe_home varchar2(255) set serverout onbegin-- get oracle_home sys.dbms_system.get_env('ORACLE_HOME',:xe_home); if length(:xe_home) = 0 then sys.dbms_output.put_line(lpad('-',80,'-')); raise_application_error (-20001,'Oracle Home environment variable not set' ); end if;end;/whenever sqlerror continue set termout offselect :xe_home from sys.dual;set termout on host ^OH_HOME/perl/bin/perl -I ^OH_HOME/rdbms/admin ^OH_HOME/rdbms/admin/catcon.pl -b apx202dgrd apxdwngrd.sql
4. Start SQL*Plus and connect to the database where Oracle APEX is installed asSYS specifying the SYSDBA role:
• On Windows:
SYSTEM_DRIVE:\ sqlplus /nologSQL> CONNECT SYS as SYSDBAEnter password: SYS_password
• On UNIX and Linux:
$ sqlplus /nologSQL> CONNECT SYS as SYSDBAEnter password: SYS_password
5. Run the apxdwngrd_cdb.sql script:
SQL> @apxdwngrd_cdb.sql
6. Remove the Oracle APEX release schema. See Removing the Oracle APEXRelease Schema.
C.3.1.3.28 Reverting to Release 21.1 in a non-CDBTo revert to Oracle APEX 21.1 in a non-CDB:
Appendix CCleaning Up After a Failed Installation
C-38

1. If you altered your images directory, revert it back to the release you want to revert to.
2. Change your working directory to apex in the 21.1 source.
3. Start SQL*Plus and connect to the database where Oracle APEX is installed as SYSspecifying the SYSDBA role:
• On Windows:
SYSTEM_DRIVE:\ sqlplus /nologSQL> CONNECT SYS as SYSDBAEnter password: SYS_password
• On UNIX and Linux:
$ sqlplus /nologSQL> CONNECT SYS as SYSDBAEnter password: SYS_password
4. Run the apxdwngrd.sql script:
SQL> @apxdwngrd.sql
5. Remove the Oracle APEX release schema. See Removing the Oracle APEX ReleaseSchema.
C.3.1.3.29 Reverting to Release 21.1 in a CDBTo revert to Oracle APEX release 21.1 in a CDB:
1. If you altered your images directory, revert it back to the release you want to revert to.
2. Change your working directory to apex in the 21.1 source.
3. Create a script in the apex directory called apxdwngrd_cdb.sql with the followingcontents:
set define '^' whenever sqlerror exit column :xe_home new_value OH_HOME NOPRINTvariable xe_home varchar2(255) set serverout onbegin-- get oracle_home sys.dbms_system.get_env('ORACLE_HOME',:xe_home); if length(:xe_home) = 0 then sys.dbms_output.put_line(lpad('-',80,'-')); raise_application_error (-20001,'Oracle Home environment variable not set' ); end if;end;/whenever sqlerror continue set termout offselect :xe_home from sys.dual;set termout on
Appendix CCleaning Up After a Failed Installation
C-39

host ^OH_HOME/perl/bin/perl -I ^OH_HOME/rdbms/admin ^OH_HOME/rdbms/admin/catcon.pl -b apx211dgrd apxdwngrd.sql
4. Start SQL*Plus and connect to the database where Oracle APEX is installed asSYS specifying the SYSDBA role:
• On Windows:
SYSTEM_DRIVE:\ sqlplus /nologSQL> CONNECT SYS as SYSDBAEnter password: SYS_password
• On UNIX and Linux:
$ sqlplus /nologSQL> CONNECT SYS as SYSDBAEnter password: SYS_password
5. Run the apxdwngrd_cdb.sql script:
SQL> @apxdwngrd_cdb.sql
6. Remove the Oracle APEX release schema. See Removing the Oracle APEXRelease Schema.
C.3.1.3.30 Re-enabling the REST Administration Interface After DowngradingIf the REST Administration Interface was used before the upgrade attempt, you mustre-create the APEX_INSTANCE_ADMIN_USER. If the REST Administration Interface wasnot used, skip this step.
To re-create the APEX_INSTANCE_ADMIN_USER:
1. Change your working directory to apex in the, XX.X release source (where XX.X isthe release number you reverted to).
2. Start SQL*Plus and connect to the database where Oracle APEX is installed asSYS specifying the SYSDBA role:
• On Windows:
SYSTEM_DRIVE:\ sqlplus /nologSQL> CONNECT SYS as SYSDBAEnter password: SYS_password
• On UNIX and Linux:
$ sqlplus /nologSQL> CONNECT SYS as SYSDBAEnter password: SYS_password
3. If the no authentication was used, run the following:
create user apex_instance_admin_user no authentication
Appendix CCleaning Up After a Failed Installation
C-40

4. If the authentication was used, run the following:
create user apex_instance_admin_user identified by <random-password> password expire
C.3.1.4 Removing the Oracle APEX Release SchemaAfter you revert to the prior release, remove the Oracle APEX schema.
• Removing the APEX Release 21.2 Schema from a Non-CDBStart SQL*Plus and connect to the database and execute DROP USER APEX_210200CASCADE; command.
• Removing the Oracle APEX Release 21.2 Schema from a CDBCreate text files, start SQL*Plus and connect to the database execute@remove_apx212_usr.sql.
C.3.1.4.1 Removing the APEX Release 21.2 Schema from a Non-CDBStart SQL*Plus and connect to the database and execute DROP USER APEX_210200 CASCADE;command.
To remove the release 21.2 schema from a non-CDB:
1. Start SQL*Plus and connect to the database where APEX is installed as SYS specifyingthe SYSDBA role:
• On Windows:
SYSTEM_DRIVE:\ sqlplus /nologSQL> SQL> CONNECT SYS as SYSDBAEnter password: SYS_password
• On UNIX and Linux:
$ sqlplus /nologSQL> SQL> CONNECT SYS as SYSDBAEnter password: SYS_password
2. Execute the following command:
DROP USER APEX_210200 CASCADE;
Once you have removed the Oracle APEX 21.2 schema, you can now attempt theupgrade again.
C.3.1.4.2 Removing the Oracle APEX Release 21.2 Schema from a CDBCreate text files, start SQL*Plus and connect to the database execute@remove_apx212_usr.sql.
To remove the release 21.2 schema from a CDB:
Appendix CCleaning Up After a Failed Installation
C-41

1. Create a new text file named remove_apx212_usr1.sql with the following contents:
alter session set current_schema = SYS;drop user APEX_210200 cascade;
2. Create a second new text file named remove_apx212_usr.sql with the followingcontents:
set define '^'whenever sqlerror exitcolumn :xe_home new_value OH_HOME NOPRINTvariable xe_home varchar2(255) set serverout onbegin-- get oracle_home sys.dbms_system.get_env('ORACLE_HOME',:xe_home); if length(:xe_home) = 0 then sys.dbms_output.put_line(lpad('-',80,'-')); raise_application_error ( -20001, 'Oracle Home environment variable not set' ); end if;end;/whenever sqlerror continue set termout offselect :xe_home from sys.dual;set termout onhost ^OH_HOME/perl/bin/perl -I ^OH_HOME/rdbms/admin ^OH_HOME/rdbms/admin/catcon.pl -b remove_apx212_usr remove_apx212_usr.sql
3. Start SQL*Plus and connect to the database where APEX is installed as SYSspecifying the SYSDBA role:
• On Windows:
SYSTEM_DRIVE:\ sqlplus /nologSQL> SQL> CONNECT SYS as SYSDBAEnter password: SYS_password
• On UNIX and Linux:
$ sqlplus /nologSQL> SQL> CONNECT SYS as SYSDBAEnter password: SYS_password
4. Execute the following command:
@remove_apx212_usr.sql
Once you have removed the APEX 21.2 schema, you can now attempt theupgrade again.
Appendix CCleaning Up After a Failed Installation
C-42

C.3.2 Removing Oracle APEX from the DatabaseStart SQL*Plus and connect to the database where Oracle APEX is installed as SYSspecifying the SYSDBA role and execute the SQL> @apxremov.sql command.
This section describes how to remove the Oracle APEX schema, synonyms, and users fromthe database without deleting the database.
Note:
Do NOT follow these steps if you have upgraded your database from a priorrelease, and still want to use the prior release of Oracle APEX. For informationabout reverting to a prior release, see Reverting to a Previous Release. If you arenot sure whether you have completed a new installation or an upgrade installation,review Cleaning Up After a Failed Installation to verify if a previous release ofOracle APEX exists in the database.
To remove Oracle APEX from the database:
1. Change your working directory to the apex directory where you unzipped the OracleAPEX software.
2. Start SQL*Plus and connect to the database where Oracle APEX is installed as SYSspecifying the SYSDBA role:
• On Windows:
SYSTEM_DRIVE:\ sqlplus /nologSQL> SQL> CONNECT SYS as SYSDBAEnter password: SYS_password
• On UNIX and Linux:
$ sqlplus /nologSQL> SQL> CONNECT SYS as SYSDBAEnter password: SYS_password
3. Execute the following command:
SQL> @apxremov.sql4. After successfully removing Oracle APEX using apxremov.sql, you must exit your current
SQL*Plus session and reconnect before attempting another install using apexins.sql.
C.4 About Images Displaying Incorrectly in Oracle APEXLearn about troubleshooting if images in Oracle APEX do not display correctly.
If images in Oracle APEX do not display correctly, you may have more than one definition ofthe /i/ alias. To address this issue:
• If possible, rename the first instance of /i/ to a different alias name.
• Alternatively, copy the images from the directory where Oracle APEX was downloaded orthe images copied for Oracle REST Data Services (ORDS) to the directory defined by thefirst /i/ alias.
Appendix CAbout Images Displaying Incorrectly in Oracle APEX
C-43
C.5 About Page Protection ViolationA page protection violation may be caused by manual alteration of protected pageitems.
If this error occurs after installation when trying to log into Oracle APEX, then stop andstart Oracle REST Data Services. If you are unsure of what caused this error, contactthe application administrator for assistance.
Appendix CAbout Page Protection Violation
C-44

DUpgrading Oracle APEX within OracleDatabase Express Edition
Learn how to upgrade Oracle APEX included with Oracle Database Express Edition (XE) .
Tip:
Upgrading Oracle APEX does not change the Oracle Support policy for OracleDatabase XE. Oracle Database XE is only supported on the Oracle OTN forums.Oracle Support will not answer questions about Oracle APEX on Oracle DatabaseXE.
Tip:
To learn more about Oracle Database XE, see https://www.oracle.com/database/technologies/appdev/xe.html
• Upgrading to the Latest Oracle APEX ReleaseLearn how to the latest Oracle APEX release.
D.1 Upgrading to the Latest Oracle APEX ReleaseLearn how to the latest Oracle APEX release.
To upgrade to the latest Oracle APEX release:
1. Download the latest version of Oracle APEX from the download page. See:
http://www.oracle.com/technetwork/developer-tools/apex/downloads/index.html2. Unzip downloaded zip file:
• UNIX and Linux: $ unzip filename.zip• Windows: Double click filename.zip in Windows Explorer
Tip:
Keep the directory tree where you unzip the files short and not underdirectories that contain spaces. For example, within Windows unzip to C:\.
3. Change your working directory to apex.
D-1

4. Start SQL*Plus and connect to the Oracle Database XE where Oracle APEX isinstalled as SYS specifying the SYSDBA role. For example:
• On Windows:
SYSTEM_DRIVE:\ sqlplus /nologSQL> CONNECT SYS as SYSDBAEnter password: SYS_password
• On UNIX and Linux:
$ sqlplus /nologSQL> CONNECT SYS as SYSDBAEnter password: SYS_password
Tip:
Keep the directory tree where you unzip the files short and not underdirectories that contain spaces. For example, within Windows unzipto C:\.
5. Install Oracle APEX:
@apexins.sql tablespace_apex tablespace_files tablespace_temp images
Where:
• tablespace_apex is the name of the tablespace for the Oracle APEXapplication user.
• tablespace_files is the name of the tablespace for the Oracle APEX filesuser.
• tablespace_temp is the name of the temporary tablespace or tablespacegroup.
• images is the virtual directory for Oracle APEX images. To support futureOracle APEX upgrades, define the virtual image directory as /i/.
Example
@apexins.sql SYSAUX SYSAUX TEMP /i/6. Configure ORDS for HTTP(s) access. See Installing and Configuring Oracle APEX
and Oracle REST Data Services.
7. Upgrade the Oracle APEX password by running apxchpwd.sql:
@apxchpwd.sql
When prompted, enter a password for the ADMIN account.
8. Navigate to the Oracle APEX Administration Services application:
a. In a Web browser, navigate to:
http://hostname:port/apex/apex_admin
Where:
hostname is the name of the system where Oracle XML DB Protocol server isinstalled.
Appendix DUpgrading to the Latest Oracle APEX Release
D-2

port is the port number assigned to HTTP on the Oracle XML DB Protocol server. Ina default installation, this number is 8080. If you are using the Oracle Database 12cor later multitenant architecture, then each pluggable database (PDB) will have adistinct port number.
apex is the database access descriptor (DAD) defined in the configuration file.
b. On the Sign In page:
• Username - Enter admin.
• Password - Enter the Oracle APEX administrator account password youspecified in step 4.
• Click Sign In to Administration.
Note that, depending on your setup, you might be required to change your passwordwhen you log in for the first time.
Appendix DUpgrading to the Latest Oracle APEX Release
D-3

Index
AACL
fixing invalid, 6-31Administration Services
signing in, 6-24APEX
accessing in Oracle Cloud, 3-3architecture, 3-1getting started, 6-23XML DB requirement, 2-4
APEX_PUBLIC_USER accountabout, 6-8changing password, 6-9configuring, 6-8expiration in Oracle Database 11g, 6-10unlocking, 6-9
apexins.sqlrunning, 6-3
application containerabout, 5-2
applicationsupgrading, 4-3
apxchpwd.sql, 6-7, D-2changing Instance Administrator account
password, 6-7creating Instance Administrator account, 6-7running, 6-7unlockin Instance Administrator account, 6-7updating Instance Administrator account, 6-7
apxdevrm.sql, 6-34apxdvins.sql, 6-33apxrtins.sql
running, 6-3
Bbrowser
requirement, 2-4
CCDB
application container, 5-3
CDBspatching Oracle APEX, 5-14uninstalling, 5-7
CDBs reinstalling Oracle APEX, 5-9common APEX from another CDB, 5-18configure
HTTP access, 5-6creating
application PDB, application root seed, 5-5application seed, 5-4
Ddatabase requirement
Oracle APEX, 2-1development environment
changing to runtime, 6-33disk space
requirements, 2-4
Eenvironment, configuring, 3-5
Ffull development environment
about, 6-32converting to runtime, 6-33installing in, 6-3
Ggetting started
APEX, 6-23
Iinstallation
downloading Oracle REST Data Services,6-11, 6-12
enabling network services, 6-15installing in other languages, 6-20managing JOB_QUEUE_PROCESSES, 6-18
Index-1

installation (continued)overview, 3-5patch sets, 3-5performing security tasks, 6-18planning, 3-4point releases, 3-5process, 3-5requirements, 2-1, 3-4restart processes, 6-8signing in, 6-23understanding, 3-3verifying validity, C-1
installation optionfull development environment, 6-4runtime environment, 6-4
installingfailures, C-2in application container, 5-3Oracle REST Data Services, 6-11, 6-12other languages, 6-20
Instance administrator accountabout, 6-6creating, 6-6running apxchpwd.sql, 6-7updating, 6-6
Instance Administrator accountchanging password, 6-7creating, 6-7creating password, 6-7unlocking, 6-7
JJOB_QUEUE_PROCESSES, 6-18
changing number of, 6-20viewing from SQL*Plus, 6-19viewing in installation log, 6-19viewing number of, 6-18viewing on About page, 6-19
Llog file, C-1login credentials
recovering workspace name, 3-9
MMEMORY_TARGET
checking, 2-2Multitenant Architecture, 5-1
Nnetwork services
enabling, 6-15granting connect privileges, Oracle Database
12c, 6-16invalid ACL error, 6-17
non-CDBinstalling in, 6-3
OOracle APEX
about users, 6-24about workspaces, 6-24Administration Services, 6-24browser requirement, 2-4configuring your environment, 3-5creating users, 6-26creating workspace manually, 6-25database requirement, 2-1disk space requirements, 2-4download and install in non-CDB, 6-3download and install locally, 6-3incompatible versions, 5-14installing translated versions, 6-21patching in CDBs, 5-14patching in PDBs, 5-15, 5-16pre-installation tasks, 6-2reinstalling in CDBs, 5-9release number, 4-2releases included with Oracle Database, 4-3signing in to workspace, 6-28uninstalling in CDBs, 5-7
Oracle APEX Administration Services, 6-25Oracle APEX Application Development
accessing APEX, 3-3Oracle APEX Clusters (Oracle RAC)
shutting down instances, 6-2Oracle Autonomous Database
accessing Oracle APEX, 3-3Oracle Cloud
accessing APEX, 3-3Oracle Database
Oracle APEX included, 4-3Oracle REST Data Services
configuring, 6-1configuring behind load balancer, 6-12configuring behind reverse proxy, 6-12configuring RESTful Services, 6-10, 6-13Copying the Images Directory, 6-13downloading, 6-11, 6-12installing, 6-1, 6-11, 6-12release number, 4-3
Index
Index-2

Oracle REST Data Services (continued)Validating the Oracle REST Data Services
Installation, 6-14Web Server HTTP POST Request Limits,
6-12ords.version.number.zip, 6-12overview, 3-5
Ppassword
resetting from Sign In page, 3-8patch sets, 3-5PDB
application container, 5-3PDBs
patching APEX, 5-15patching Oracle APEX, 5-15, 5-16
performanceoptimizing, 6-31
performance optimizationabout, 6-31expired header attribute, 6-31gzip compression, 6-31
Plug-in non-CDB, 5-14Plug-in PDB, 5-14plugging in PDBs
APEX from another CDB, 5-12APEX in root, 5-11APEX not contained root, 5-18APEX not in root container of target CDB
non-CDB with Oracle APEX, 5-17APEX not in the root of CDB, 5-17APEX root another CDB, 5-13non-CDB with APEX, 5-12not in the root container of the target CDB
non-CDB or PDB with no APEX, 5-18when not contained in the root container
local APEX from another CDB, 5-18point releases, 3-5post-installation tasks
installing other languages, 6-20pre-installation tasks, 6-2prior installations
removing when upgrading, 6-29
Rrelease number
Oracle REST Data Services, 4-3viewing, 4-2
release numberingconvention, 4-2
removing schemas from prior installation, 6-31
requirements, 2-1browser, 2-4database, 2-1disk space, 2-4MEMORY_TARGET, 2-2Oracle XML DB, 2-4WORKAREA_SIZE_POLICY, 2-3
RESTful Servicesconfiguring, 6-10
reverting to previous release, 4-4running
apexins.sql, 6-3apxchpwd.sql, 6-7, D-2apxdevrm.sql, 6-34apxdvins.sql, 6-33
runtime environmentabout, 3-9, 6-32converting to development environment, 6-33installing in, 6-3
SSecure Sockets Layer (SSL), 6-18Sign In dialog
requesting a workspace, 3-7SSL, 6-18
Ttranslated version
installing, 6-20translated versions
about installing, 6-21troubleshooting, C-1
cleaning up after failed installation, C-2images, C-43reviewing log file, C-1
Uupgrade post installation tasks, 6-29
fixing invalid ACL, 6-31removing prior installation, 6-29removing schemas from prior installation,
6-30verifying prior installation, 6-29
upgradingabout, 4-1environment clean-up, 4-4existing applications, 4-3in application container, 5-3reverting, 4-4sample scenarios, 4-2testing, 4-4
Index
Index-3

user accountscreating, 6-26
Vverifying
application container installation, 5-4
WWeb browser
requirements, 2-4web listener
Oracle REST Data Services, 3-1Web listener
Oracle REST Data Services, 6-1Web Listener
Oracle REST Data Services, 2-4requirements, 2-4
WORKAREA_SIZE_POLICYchecking, 2-3
workspacecreating, 6-25recovering workspace name, 3-9requesting from Sign In dialog, 3-7signing in, 6-28
workspace namerecovering, 3-9
XXML DB
requirement, 2-4
Index
Index-4
Copyright © 2022 FDOKUMEN