Operative Dentistry Preclinical course for third year students First ...
98
Operative Dentistry Preclinical course for third year students First term Edited By Dr. Heba Fathy Mohammed Lecturer of Operative Dentistry 2021-2022
-
Upload
khangminh22 -
Category
Documents
-
view
3 -
download
0
Transcript of Operative Dentistry Preclinical course for third year students First ...

Operative Dentistry
Preclinical course for third year students
First term
Edited By Dr. Heba Fathy Mohammed
Lecturer of Operative Dentistry
2021-2022

2
الرؤية
اقل عع علعع اكل وععت اكإايثععااكليل ععميات عع ك اأتيعع نا ععناناأاإلعع اتتطلعع ااكليل عع
منا كلبحعععلاكليل ععع اب عععما ت موععع ا ععع اوععع كلعععي ل امععع ا عععم اطععع اكل ععع ا كأ
اكل ية.خالق مياكل ه ا يم ااأ
الرسالة
ناعلع اا قعمي و منا ت ع نابمل عيكاةاكل ه ع اأطبمءاأاعيكيإاعل كليل اتق ا
بمال شععط اكلبحث عع اب ععما لبعع اكحت م ععمياا كيبعع اكلتطعع ااكليل عع ا كإوععهم ام عع
كل ت ا و قاكلي اكل حل ا كلي ل .
Vision
The college aspires to be one of the most
distinguished colleges at the regional and
international levels in the field of oral and dental
medicine and scientific research in line with
professional ethics and quality standards.
Mission
The college based on preparing dentists of
professional merit who are able to keep pace with
scientific development and contribute to it in research
activities to meet the needs of society and the local
and international labor market.

3
Content Page
Dental Amalgam Restorations……………….….4
Cavity preparation for composite
Restorations………………….............……….37
Intermediary Restorative materials…. 51 Glassionomer Restorations………………74

4
DENTAL AMALGAM RESTORATIONS
Introduction:
Amalgam was first introduced to the United States in the 1830s as a durable
direct restoration for carious teeth. Because of environmental concerns about
mercury contamination, the use of amalgam as a restorative material in many
countries has already decreased. Even with the concern about the disposal of
mercury, amalgam still is recognized as a satisfactory material for restoring many
defects in teeth. It has straight forward handling procedure and well-tested
material properties which has been documented for over 150 years as a direct
restorative material.
Definitions:
Amalgam: is any alloy in that one of its constituents is mercury.
Dental amalgam alloy: Alloy that contains solid metals of silver tin
compounds.
Dental Amalgam: As used in dentistry, is a powder and liquid. The liquid;
mercury and the powder; silver tin alloy with various combinations.
Advantages of amalgam restorations:
1. Superior adaptation to cavity walls and margins:
This uniquely improves on aging through self–sealing with the corrosive

5
products that occlude the tooth- restoration interface.
Clinical significance: Decreases the microleakage, which may cause
postoperative hypersensitivity and recurrent caries.
Microleakage: A Microscopic space between a dental restoration and the
cavity margin that allows passage of bacteria and fluids.
Pumping of fluids in and out of the defected area (Marginal percolation)
causes formation of macroleakage that allows impaction of food remenants
and accumulation of plaque layers.
Complications of Macroleakage (Figure 1):
1- Pain.
2- Recurrent Caries around the restoration margins.
3- Pulpal Inflammation.
4- Fracture of the tooth and restoration.
5- Restoration Displacement.
2. Low coefficient of thermal expansion:
2.5 times that of the tooth structure which is considered closer than that of the
composite restoration.
Clinical significance: Ensures the marginal integrity of the restoration when
subjected to oral thermal fluctuations.

6
3. High compressive strength (Similar to the tooth structure):
Enables the restoration to sustain occlusal load in the oral cavity without
fracture.
4. Good form stability:
Enables the restoration to maintain occlusal anatomy, inter-proximal contact
and surface polish due to insolubility, high wear resistance and low creep value
of high copper amalgam alloys.
5. Ease of manipulation and satisfactory handling characteristics:
An easy technique for general practitioners to obtain a successful and lasting
restoration (Not a technique sensitive material).
6. Relative low cost: Due to the relatively short time for the construction of
the restorations.
Disadvantages of amalgam restorations:
l. Low tensile and shear strength: It is a brittle restoration which is greatly
vulnerable to fracture under high tensile and shear stresses.
Clinical significance: Low tensile strength indicates the liability of the
restoration to marginal ditching and fracture.
2. Creep: Is time plastic dependent deformation of the set material in the mouth

7
that result in marginal breakdown, flattening of contacts, saucering of occlusal
anatomy and formation of gingival overhang (Figure 2&3). However, creep
values are markedly decreased in the recent high copper alloys.
3. High thermal conductivity: Which may cause pulp irritation unless is
adequately protected by sufficient dentine bridge or by insulating base material.
4. Poor esthetics due to:
Objectionable metallic color: Which may be complicated by tarnish and
corrosion that limits its use to inconspicuous areas of the mouth.
Amalgam blues (Figure 4): It is mainly due to penetration of metallic
ions and corrosive products of amalgam through the dentinal tubules. Thin
or undermined enamel that shows dark blue discoloration of amalgam.
Amalgam tattoo (Figure 5):
– Can occur during amalgam removal if no rubber dam or in case of deep
subgingival proximal amalgam restoration
– Embedded amalgam particles corrode and locally discolor gum with no
evidence of adverse reactions.
5. Lack of adhesion to tooth structure: which dictates the use of macro-
mechanical means of retention like undercuts and grooves in the cavity
preparation.

8
7. Potential health hazards: Due to presence of mercury which has raised
concerns over its safety along many years.
8. Tarnish and Corrosion:
Tarnish: Surface Discoloration/ Formation of dark metal oxide layer over
the amalgam surface (not destructive) (Figure 6).
Corrosion: Material Deterioration/ Break Down due to difference in
electronegativity.
Types:
1- Chemical: Dry corrosion due to direct oxidation of metals.
2- Electrochemical:
a. Galvanic Corrosion:
Presence of two dissimilar metals in contact with each other cause
difference in electronegativity and initiates corrosive reaction (amalgam and
cast gold).
Clinical Manifestations: pain and leave a metallic taste.
b. Local galvanic corrosion: occurs on microscopic level due to
electrochemical differences of different phases of amalgam.
c. Stress corrosion: regions within amalgam that are under stress also display
a greater tendency for corrosion.

9
d. Crevice Corrosion: Difference in O2 tension/ Plaque accumulation on
some areas in amalgam restoration display the corrosive reaction.
e. Concentration cell corrosion: Cracks/ Old and new amalgam restorations
produce a similar reaction as the local galvanic corrosion process.
Indications:
1. Class I & Class II cavities.
2. Class V in posterior area of the mouth
3. Class II cavities where the cervical margin of the box extends subgingivally.
4. Core build-up under full coverage restorations.
5. Where moisture contamination cannot be controlled.
6. Where cost is a major patient concern and esthetics unimportant.
The selection of the cases to be restored with amalgam depends on:
The extent of the lesion: Small and medium sized class I & II cavities.
Esthetics: For esthetic conscious patients, amalgam would be objectionable
and tooth colored restorations would be favored.
Caries incidence: Amalgam is favored with moderately high caries
incidence. While, with rampant caries glass ionomer would be more suitable.
Economics: The cost is mostly in the favor of amalgam, except if repeated
remakes are likely to occur.

10
Contraindications:
1. Extensive lesions especially those including undermined cusps where indirect
restorations serves better.
2. Esthetic areas of the mouth in the anterior and posterior teeth where composite
resin may be favored.
3. Presence of opposing metallic restoration to avoid galvanic activity.
4. Rampant caries where glass ionomer can act as a control restoration (Figure
7).
5. Allergy to any component of amalgam.
Dental amalgam constituents:
Silver (Ag):
1. Increases strength.
2. Increases setting expansion.
3. Decreases the flow and creep.
Tin (Sn):
1. Decreases expansion.
2. Decreases strength.
3. Increases flow.
Copper (Cu):

11
1. Increases strength & hardness.
2. Reduces tarnish & corrosion.
3. Reduces creep.
Zinc (Zn):
1. Decreases oxidation of other elements.
2. Provides better clinical performance; less marginal breakdown.
3. Causes delayed expansion if contaminated with moisture during
condensation.
Mercury (Hg):
1. Responsible for plasticity of the mix of dental amalgam.
2. Binds the particles of the alloy together.
3. Decreases strength.
4. Increases flow.
Other constituents: Palladium (Pd) - Indium (In).

12
Classification and types of dental amalgam alloys:
According to particles shape (Figure 8)
Size
Microfine
Fine
Coarse
lathe cut
Spherical Admixed/ Blended
Low copper
High Copper
Admixed Unicompositional
Zn Containing
(1%)
Zn Free

13
Type Shape Mercury
Content
Strength &
Hardness
Creep, Tarnish and
Corrosion tendency
Lathe cut /
Conventional
Irregular in shape. The Highest
(54% by wt.)
Low The highest
Spherical
(40-50 microns)
Smooth surface
spheres.
Less pressure in
condensation.
The lowest
(40 % by wt.)
higher low
Admixed
(Widely Used)
Blended Low The highest low
According to Copper content
Hg
%
ϒ 2 phase
Strength
&
Hardness
Creep-
Tarnish-
Corrosion
1. Low Copper: < 6% Cu High Present Low High
2. High Copper: >6 % Cu
A. Admixed:
o 70% Silver tin alloy
(conventional) + 30%
spherical Silver copper alloy
to consume ϒ2 phase.
o Cu Content : 9-20%
Low
Eliminated
(the most
brittle, weak,
corrodible
phase)
Present only
with excess Hg
High Low

14
B. Unicompositional:
o Melted Silver copper tin
o Cu Content: 13-30%
According to the zinc content:
1- Zinc containing type (1%):
Zinc tends to form zinc oxide film that covers the surface of the alloy and
prevents oxidation of the other metals during manufacturing (Act as a
scavenger).
Reduces the marginal deterioration.
2- Zinc free type:
It is used in areas where moisture control is difficult as: partially erupted
teeth, sub-gingival and inaccessible cavities.
In areas of moisture contamination upon the use of zinc containing
amalgam, it reacts with water and produce H+
that accumulates and exerts
pressure causing Delayed Amalgam Expansion.
Clinical manifestations: Pain, marginal fracture or ditching of the
amalgam.
Reaction takes place in 24-72 hours after amalgam insertion.
Cavity preparations for amalgam restorations:

15
1. Cavity preparation should have conservative outline. The outline should
exclude centric holding areas, whenever possible.
2. The cavity design should provide adequate bulk to the restoration for more
strength which is given through the depth rather than width.
3. Cavity walls must be parallel or perpendicular to the direction of occlusal
forces.
4. Cavo-surface angle (CSA) should be 90 ° (Butt joint) to provide sufficient
strength at the margin for both the tooth & restoration (Figure 9).
5. Undermined enamel must be removed to avoid fracture under masticatory
load.
6. Elimination of stress concentration by providing smooth walls and floor
and slightly rounded lines angles (Figure 9).
7. Sufficient retentive features including undercuts, grooves etc….
8. Each portion of compound and complex cavities must have its own
independent retention and resistance.
9. The isthmus area should have proportional width to the occlusal and
proximal bucco-lingual width.
10. Sufficient bulk at the isthmus area through rounding of the axio-pulpal line
angles.
11. In compound cavities, the gingival seat should be definite with proper

16
width. The gingival enamel wall should be given proper inclination.
12. If a cusp is undermined and is to be capped with amalgam, it must be
reduced by 1.5- 2 mm for cusp building (Figure 10).
Matricing (If needed):
a. Definition of the matrix system:
Piece of metal or non-metal which is used to support and give form to
the restoration during its packing and hardening.
b. Importance:
1. Temporary wall or resistance during condensation of plastic restorative
material.
2. To maintain the form of the restoration until it hardens (Shape, contour
and contact).
4. Prevent marginal overhangs (Excess of dental filling material above the
cavity margin).
5. Keep the gingiva and rubber dam away from the cavity margins.
c. Ideal Requirements of the matrix band:
1. Easy to adapt to teeth.
2. Rigid
3. Smooth and highly polished

17
4. Provide proper contouring of the restoration.
5. Easy to contour.
6. Easy to introduce and remove.
7. Thin enough not to occupy much space not interfere with the
tightness of the contact.
8. Compatible with the restorative material
d. Types of matrix systems used for amalgam restorations:
1. Ivory matrix holder No. 1:
Indicated when one proximal wall is missing with no cuspal loss
(Compound Class II cavity preparation; OM or OD).
2. Ivory matrix holder No. 8:
Encircles the tooth structure totally- Indicated in Compound and complex
cavities.
3. Tofflimire matrix system (Universal):
Stable- Anatomic adaptation- Ease to introduction and removal.
Indicated in Compound and complex cavities.
Double matrix technique is used with cavities with buccal or lingual
extension.
Characters of properly seated matrix system:
i. The band should be extended 1mm above the height of the marginal

18
ridge.
ii. The matrix band should be burnished to achieve proper contact.
iii. The narrower side of the matrix band should be placed gingivally.
iv. The slotted side of the holder is directed gingivally.
v. The matrix retainer is normally placed in the buccal vestibule parallel
to the buccal aspect of the teeth not disturbed by the check movement.
vi. The loop of the band is could be placed to the right or the left to the
long axis of the retainer depending on the tooth
4. Automatrix:
Readymade band loop can be used in compound and complex
cavities i.e. in extensive preparations.
Bands are supplied in three widths and two thicknesses.
Retainless, convenient, more accessible and saves time.
e. Wedges:
Devices that are used to:
1- Stabilize the matrix band.
2- Prevent the marginal overhangs.
3- Maintain adequate temporary teeth separation to compensate for the
thickness of the matrix.
Properly applied wedge should:

19
1. Properly fit the gingival embrasure (wider embrasure is preferable).
2. Support the matrix band.
3. Color-coded with different sizes.
4. Doesn’t impinge matrix band, contact area or gingival tissue.
Wooden wedges absorb the fluids and increases in size to intimately
fit the width of the embrasure.
Plastic Wedges are of less adaptation than wooden wedges.
Steps of Amalgam Manipulation:
I. Selection of the alloy.
II. Proportioning of alloy/mercury.
III. Trituration of alloy and mercury.
IV. Condensation of the plastic amalgam mix.
V. Carving of the restoration.
VI. Finishing and polishing of the restoration.
I. Selection of the alloy:
A. The shape of the alloy particles:
Spherical Alloy:

20
1. Very soft in consistency that requires only light condensation forces;
therefore; it is indicated in pulp capped teeth or in deep cavities.
2. Requires less Hg.
3. Provides smooth surface.
4. Spherical alloy is not recommended for extensive restorations because it
cannot establish better contour and contact areas. Moreover, it will be more
likely to develop marginal overhang.
Admixed alloy:
Admixed alloy is indicated for extensive restorations especially restoring lost
cusps since it can establish better contour and contact areas due to high strength
and hardness.
B. The copper content :
High copper amalgam has the following advantages:
1. High strength.
2. Greater corrosion resistance.
3. Low creep value therefore, it is indicated in extensive preparations involving
centric holding areas.
4. High copper alloys provide amalgam with superior physical and chemical
properties as well as better handling characteristics and lower mercury content.
C. The zinc content

21
1. Zinc containing amalgam in area of moisture contamination, this will lead to:
delayed amalgam expansion.
2. Reaction takes place in 24-72 hours after amalgam insertion.
3. Therefore, Zinc free amalgam is preferred when moisture contamination is
impossible to control.
4. On the other hand, Zinc free amalgam showed less workability & plasticity
and more susceptibility to oxidation.
D. Form supply of alloy/mercury:
The alloy may be supplied in the form of: Powder, tablets and capsules.
Capsules of preweighed alloy and mercury separated by diaphragm or
septum.
Capsule form is preferred than other forms as:
1. More accurate as the (Alloy: Mercury ratio) is standardized pre- proportioned
by the manufacturer.
2. Less danger of mercury spillage during handling.
3. Eliminates the chance of exposure to mercury vapor during proportioning and
mixing.
4. More convenient to use.
5. Supplied as slow, regular or fast according to the speed of setting and amount

22
of alloy and Hg.
II. Proportioning of alloy and mercury:
A. The amount of alloy / mercury to be used depends on:
The size of the cavity (slight overfill).
The time required for condensation (3-5 minutes average working time).
Weight not volume due to variation in particles size and shape.
B. Importance of alloy / mercury ratio:
To make sure that the Mercury content wet sufficiently every alloy
particle.
Mercury/ alloy ratio must be probably adjusted because of the influence of
mercury on the physical & mechanical properties of the amalgam.
i. Excess Mercury :
In the final restoration causes:
1. Decrease in strength and hardness.
2. Increase in flow and creep due to formation of more 2 phase.
3. Decrease the tarnish and corrosion resistance.
ii. Less Mercury:
1. Some particles remain uncoated & will not bind to the rest of the structure.
2. Non-coherent, friable mix which is difficult to condense will be produced.
3. This mix will also have low plasticity and workability.

23
4. Weak and corrodible restoration will be produced.
Techniques of amalgam proportioning:
i. High Mercury Technique (Increased dryness technique):
Alloy: Mercury is 5:6 by weight.
It was indicated only for lathe cut amalgam (No longer used).
The higher the Alloy/ Mercury ratio, the higher the mercury content of the
final restoration.
Whatever the efforts to get rid of excess mercury by squeezing, residual
mercury would remain in the final restoration.
ii. Low Mercury Technique “Eames Technique”:
Alloy: Mercury is 5:5 by weight.
Indicated in High copper amalgam alloys.
The ratio depends on the type of amalgam alloy, the particle size and shape
and the previous heat treatment of the alloy.
For example, spherical alloys require only 40 wt % of mercury, high
copper alloys needs 50 wt% and lathe-cut conventional alloys require 54
wt%.
Amalgam can be proportioned by amalgamizer or it is better to use
preweighed capsules because the ratio is formerly determined by the

24
manufacturer.
III. Trituration:
Definition: Refers to the process of amalgamation or mixing together
mercury and alloy particles to produce a coherent plastic and homogenous
mass of condensable amalgam.
Objectives:
Removing of surface oxide film off the alloy particle.
Coating of each alloy particle with mercury.
Progressive consumption of mercury.
Decrease the size of particles that can be easily attacked by the mercury.
N.B: The addition of mercury after trituration is contraindicated.
Factors affecting Trituration:
1. Time (minutes).
2. Speed (rpm).
3. Pressure (F/A).
Variables of trituration:
Failure to standardize the factors mentioned above will lead to either: under
trituration or over trituration.
i. Proper trituration:

25
The mix appears homogenous, coherent, shiny, plastic mass.
ii. Under trituration:
The mix appears dull, non-coherent & friable.
Some alloy particles will remain covered with oxide film.
Excess of residual mercury.
The restoration will be weak, corrodible and exhibits excessive flow and
creep.
iii. Over trituration:
It sets fast as a result of rapid mercury consumption and crystallization of
the produced phases.
The mix appears homogenous, but less plastic and sticks to the sides of the
mortar.
Difficult to remove from capsule or manipulate- Presence of cracks or
voids in the final restoration
Weak and corrodible amalgam.
Methods of trituration:
i. Manual trituration:
It involves the use of mortar and pestle to mix the amalgam manually.
ii. Mechanical trituration:
By using Amalgamator for trituration of pre-weighted amalgam capsules.

26
Mulling: It is a continuation of trituration. It is the process of rubbing the
triturated amalgam mix for few seconds (2-5 seconds) between thumb and
index fingers to improve homogeneity, and plasticity.
IV. Condensation:
Definition:
It is the process of forcible application of the fresh amalgam mix into the
cavity preparation.
During this step, the final physical and chemical structure of the
restoration is determined thus it is considered the most important step in
amalgam manipulation.
Objectives:
1. Forceful condensation squeezes unreacted mercury out. This brings
mercury to the top which enables cohesion with the subsequent
increments.
2. It facilitates the blotting of excess mercury which should be removed from
final increment.
3. Increases the adaptation of amalgam to cavity walls and floor.
4. Decreases the porosity thereby increasing the density of the restoration.
5. Increases the strength of final restoration by packing strong phases

27
together.
6. Starts solid state reaction by getting the phases closer together.
Timing of Condensation:
Should start immediately after trituration.
Only fresh mix should be condensed.
Multiple mixes are used to overfill extensive cavities to avoid using
partially set amalgam.
Avoid using a partially set amalgam which will be:
Dry.
Weak.
Non-coherent.
Porous.
Poorly adapted.
Corrodible.
Methods of Condensation: Increments are carried into cavity using
amalgam carrier.
Manually: Using hand condensers (smooth or serrated) which is the
most commonly used method.
Mechanically: Using either vibrator or impact type mechanical

28
device.
– Used with Irregular shaped alloys – Not recommended.
– Eliminated with the spherical alloys and admixed alloy.
– Cause vibration, heat generation and breakage of enamel margins .
Technique of condensation:
1. Proper matricing and wedging for compound and complex cavities.
2. Only fresh mix should be condensed (< 3min.).
3. Selection of suitable size condensers of adaptable forms before the
procedure.
4. Incremental condensation is carried out.
5. The force of the condensation should be towards the cavity details.
6. The initial condenser should be small enough to condense into line and
point angles but large enough not to poke holes in amalgam mass.
7. The size of the condenser must be increased in the succeeding layers.
8. Slight overfilling: 1 mm to ensure that CSA are completely covered.
9. It is started at the deep and retentive areas, against the line angles up to
overfill the cavity.
V. Carving:
Pre-carve burnishing:
Rubbing of the newly condensed by heavy strokes with a metal instrument

29
have a broad surface.
A large ball burnisher is used from the center of the restoration towards to
the margins.
Objectives:
1. Reduce the voids on the surface of amalgam.
2. Remove mercury rich layer.
3. Improve the adaptation.
4. Ease the carving procedure.
5. Increase amalgam density at margins of the cavity.
Carving:
Definition: It is the process of anatomical shaping of amalgam.
Objectives:
1. To produce functional, non-interfering occlusal anatomy.
2. To produce proper occlusal and contour.
3. To produce normal contact area & embrasures.
4. To produce restoration with proper margins with no overhangs or marginal
insufficiency.
Timing of carving:
When amalgam reaches a suitable stage of initial hardening, when it
acquires a definite resistance to the carving instrument. (Amalgam is

30
crying.).
Such carvability stage is reached depending on the setting rate of the alloy
used (Fast, Regular, Slow set).
If amalgam is carved earlier than this stage, overcarving and submargination
will occur.
As the soft material will provide no resistance and will be pushed ahead of
the carving instrument.
Direction of carving:
In any direction except from the restoration to the tooth because it leads
to creation of sub-margins and ditch formation.
A direction parallel to the cavo-surface margins where the sharp carving
instrument will be resting partly on the tooth and partly on the restoration
was always recommended.
Carver:
Must be sharp in order not to cut rather than to burnish.
A dull carver leads to stress induction, crack formation and disturbances in
mercury distribution of the restoration.
Carving procedures:
a. Carving of the occlusal surface:
1. Carving of amalgam should follow the surrounding inclines.

31
2. The occlusal depressions should be carved and represented to restore the
normal anatomy (Proper location and depth).
3. The developmental and supplemental grooves should be continued from
the enamel to the amalgam grooves.
4. Each cusp unit is carved individually to produce:
– The cusp tip: placed in a line joining those cusp tips of the same/
adjacent teeth and should be in proper height.
5. The cusp ridge.
6. The cusp slopes/ inclines that join those of the other cusps in the
developmental grooves.
b. Carving of the proximal aspect:
Carving of the marginal ridge:
The tip of the explorer is placed to contact the matrix band and moved
from the tooth structure to toward the center of the restoration to produce a
proper occlusal embrasure.
The carver is moved from the tooth structure to the restoration with angle
45 ° to eliminate the marginal overhang and produce the marginal ridge
with proper height and contour.
The occluobuccal and occlusolingual contours should be followed from
both sides till they meat forming the contour of the marginal ridge.

32
The height of the marginal ridge should be the same as the adjacent tooth/
the intact side of the same tooth.
The mesial/distal triangular fossae are carved as small triangular depressions.
Post- carve burnishing:
Using a small ball burnisher at very light strokes to allow for smooth
margins of the restoration (satin or velveteen appearance).
Using anatomical burnisher to accentuate and smoothen the occlusal
anatomy.
Checking of occlusion and proximal aspect:
Removal of cervical overhangs using fine explorer.
Checking of inter proximal contact for tightness.
Checking of occlusion using pressure sensitive articulating paper and
removal of premature contact.
A bite-wing x-ray is taken to confirm freedom from proximal overhangs
or marginal ditching.
Instructions: the patient is instructed not to use the operated side for the next
24 hours to avoid cracking or fracture of amalgam.
VI. Finishing and polishing:
Finishing: a procedure of achieving of smooth surface of amalgam and

33
elimination of marginal flashes and minor overhangs.
Polishing: a procedure by which a lustrous homogenous polished surface
amalgam is obtained.
Clinical significance:
1. Increase the corrosion resistance by increasing the surface homogeneity.
2. Decreases plaque retention and hence decreases caries recurrence.
3. Decreases stress concentration and possible ditching or fracture due to
premature contact.
4. Decrease gingival irritation by elimination of discrepancies at the gingival
margin
5. Nice looking amalgam encourages the patient to maintain oral hygiene
measures.
Tools:
Finishing Bur of adaptable size and form to accentuate the occlusal
anatomy and remove the marginal flashes.
Rubber cup and wet pumice with prophylactic paste is used to attain a
polished surface.
Timing:
After 24-48h to avoid disturbing the crystallization.

34
In recent high copper amalgam, finishing can be done the same
appointment and refined later.
Polishing should be accomplished at succeeding appointments.
Dental mercury hygeine precautions:
1. Well ventilated dental office.
2. Any spilled mercury or freshly mixed amalgam should be removed by a
wipe immediately.
3. Avoid touching freshly mixed amalgam. If mercury comes in contact with
skin, should be washed immediately.
4. Eye protection, use of disposable mask and gloves are mandatory.

35
Figure (1): Complications of macroleakage
Figure (2): Occlusal Creep
Figure (3): Proximal Creep
Figure (4): Amalgam Blues
Figure (5): Amalgam Tatto

36
Figure (6) Amalgam Tarnish
Figure (7): Rampant caries
Figure (8): Different Shapes of amalgam alloy particles
Figure (9): Cavity Features for
amalgam restoration
Figure (10):
Undermined cusp reduction

37
CAVITY PREPARATIONS FOR RESIN COMPOSITE RESTORATIONS
The use of resin composite restorative material has revolutionized today’s in
the dental practice. In the hands of a skillful dentist, composite fillings today are
able to replace lost tooth tissue in an invisible way because the preparations often
require removal of less tooth, more natural tooth structure can be maintained.
Also, as a benefit of the bonding process; some weaker areas of the tooth may
also be maintained with a composite restoration. Conservative approach is
advocated over G.V. Black concept for cavity preparation.
Advantages of the conservative cavity design:
1- Preservation of intact healthy tooth structure.
2- Decrease irritation of dentin pulp complex and investing tissues.
3- Decrease the fracture liability of the tooth structure and restorations.
4- Better esthetics as the displayed area of the restoration is minimized.
A comparison concerns the basic tooth preparation principles for amalgam
and composite restorations must be considered.
For Amalgam restoration For Resin composite restoration

38
1-
Ou
tlin
e fo
rm The cavity margins extend in all
the pits and fissure areas.
Caries extension dictates the
outline and cavity extensions.
Susceptible areas to caries is better
to be “sealed” rather than restored.
2-
Res
ista
nce
an
d r
eten
tio
n f
orm
The axial wall and pulpal floor
are located just beyond the DEJ
by 0.5 mm (uniform).
Retention Form:
Macro-mechanical retention by:
1ry retentive feature: occlusal
convergence of the cavity walls
(undercuts)
2ry retentive feature: Pins,
grooves, slots, axial coves etc.
The axial wall and pulpal floor are
located of varying depths (not
uniform).
Retention Form:
Micromechanical bonding of the
composite to the etched and primed
enamel and dentin.
Mechanical undercuts only in extensive
preparations.

39
3- C
on
ven
ien
ce F
orm
Cutting of sound tooth structure is
performed to improve the
accessibility and visibility (e.g.
occlusal or palatal access to
proximal aspect in class II and III
cavity preparations).
The use of recent magnification tools
and micro-sized cutting instruments
for extreme conservation of the tooth
structure
4- R
emova
l o
f ca
rio
us
den
tin
In deep cavities base material
should be applied to prevent the
thermal irritation of amalgam
restoration.
Conservation of the remaining tooth
structure is a primary concern.
Resin composite is an insulating
material (base can be applied in the
deep cavities to avoid chemical
irritation of the pulpal tissues).

40
5- F
inis
hin
g o
f th
e ca
vit
y w
all
s
Highly smooth walls.
Definite line and point angles.
Unsupported/Undermined
enamel must be eliminated.
Bevel is contraindicated to
avoid amalgam fracture
Cavosurface angle: Butt Joint/
90°
Tooth preparation walls being
rougher (to increase the surface area
for bonding).
By the use of diamond abrasives,
Line and point angles are more
rounded.
Unsupported/undermined enamel
could be left behind, this could be
strengthened by composite bonding
Bevel is recommended in cavity
preparation except in gingival seat
and stress bearing areas.
Cavosurface angle: More than 90°
in the beveled area and Butt Joint/
90° in the non-beveled areas.
6-
To
ilet
of
the
cav
ity
No medications should be used in this stage
The cavity should be perfectly clean and dry before the restorative procedure

41
Bevel:
Definition: An incline between the cavity wall and the cavosurface margin in the
prepared cavity.
Importance:
1- To expose the enamel rods ends and increase the surface area for etching,
therefore improve the bond strength.
2- For esthetic reasons; by beveling the restoration blends with the color of the
tooth structure for masking any discrepancy in shades between the restoration
and the tooth.
Contraindications:
1- Areas of heavy occlusal contact of posterior teeth- Palatal aspect of anterior
teeth.
2- Proximal cavities of posterior teeth.
3- Gingival seat in cervical cavities.
4- Root cavities.
Types of bevels for composite resin restorations (Figure 1 &2):
1- Short Bevel:
Extends only a part of thickness of the enamel.
Width of the bevel: 0.5 mm
2- Long Bevel:

42
Extends from the cavo surface angle to the dentino enamel junction (DEJ)
taking the full enamel thickness (1 mm in width).
Short and long bevel are done by the use of diamond 245 bur or abrasive
stone with angulation 45° to the external tooth surface.
3- Scalloped Bevel:
60° angulation and 2-3 mm wide scalloped bevel with variable thickness,
starts inside the DEJ, and feathers and disappears onto the enamel surface.
The type of the selected bevel depends mainly on the amount of tooth
structure missing, the surface area of bonding, the amount of retention
necessary and the enamel layer (Thickness- Degree of calcification- Presence
of white spots or stains).
Basic Preparation Designs for composite restorations:
a. Conventional design.
b. Beveled conventional design.
c. Modified design.
A. Conventional Design:
The design of the cavity preparation resembles that of the amalgam
restoration in some items but more rounded line and point angles.
Outline form is necessary.
Limited dentinal cavity depth.

43
Cavosurface angle is 90°.
Slightly converging walls, flat floors.
Indications:
• Replacing an old class I or II amalgam restorations.
• Large sized cavity where retentive features rather than micromechanical
restorations are needed.
B. Beveled Conventional Design:
Conventional cavity preparation with beveled margins.
Indicated in extensive III, IV and V carious lesions.
C. Modified Cavity Design:
No specific cavity configuration, width or depth.
The outline form is guided mainly by the extension of the carious lesion.
Characterized by conservative removal of the tooth structure.
Indicated in initial small carious lesions surrounded by sound enamel
margins.
Cavity preparation for different classes:
1. Class I Cavity Preparation for composite restorations:
i. Conventional Preparation (Figure 3):
Cavity preparation into dentin of about 0.2 mm.
Marginal ridge and cuspal slopes should be preserved as much as possible.

44
Any remaining caries or old restorative material is removed.
An undermined marginal ridge (enamel) can be left in extensive
preparation and can be strengthened by composite bonding.
ii. Modified Preparation (Figure 4):
Scooped out appearance- Ultraconservative cavity.
When restoring small carious lesions.
Depth of cavity is done till the caries has been removed.
2. Class II cavity preparation:
i. Conventional cavity preparation (Figure 5):
Occlusal step preparation is same as that of the class I.
Proximally: resemble class II of the amalgam restoration in the outline.
Proximal contact could be left intact if the caries is not extensive.
Proximal axial wall depth is only 0.2 mm into dentin.
Proximal box extension gingivally is not as deep as in amalgam
preparation and done just to remove the caries.
ii. Modified cavity preparation:
a. Box Preparation:
Box preparation is indicated in carious lesions involving only the
proximal surface and not the occlusal part.
Axial depth in the proximal box is 0.2 mm into dentin.

45
The buccal and lingual wall are parallel to each other and the axial wall
is perpendicular on them.
All the line and point angles are rounded.
b. Slot Preparation:
Indicated in cases of gingival recession or wide cervical embrasures
with intact marginal ridge.
The proximal surface but can be accessed through the facial or lingual
embrasure.
Depth is 0.2 mm into the dentin.
c. Tunnel Preparation:
Indicated for lesions are at least 2.5 mm apical to marginal ridge.
The proximal surface is accessed through the occlusal surface with
preservation of the marginal ridge area.
Advantages
Retention of marginal ridge.
Maintenance of interproximal contacts.
Disadvantages
Difficulty in ensuring complete removal of caries.
Difficulty in locating proximal caries.
Tunnel restoration is best done under magnification (Intraoral video

46
camera and caries detecting solutions).
Two types of this preparation; complete and incomplete tunnel
preparation according to the type of the restoration.
3. Class III cavity preparation:
Mostly lingual approach to the lesion is preferred.
Advantages of Lingual Approach:
Facial enamel is conserved.
Color matching is not so critical.
Discoloration or deterioration of restoration is not very conspicuous.
Indications for Facial Approach:
Carious lesion is present more facially.
Irregular alignment of teeth making lingual approach difficult.
An existing restoration is present facially.
i. Conventional Class III cavity preparation with bevel:
Indications:
Replacing an existing defective restoration in the crown.
Extensive carious lesion.
Similar to the conventional cavity palatally.
Proximal outline is pear shaped or tear drop.

47
The proximal walls are beveled.
Beveling is not indicated in:
Lingual areas where the cavity margins extend onto the centric tooth
contacts.
Cavity depth is 0.75 mm depth (0.2 mm in the dentin).
The axial wall in convex, following the external contour of the tooth.
Facial Approach: Bevel is again placed on all accessible enamel margins
of the preparation.
ii. Modified cavity preparation:
Indicated for small and moderate lesions.
Designed to be as conservative as possible
Walls extent only of the fault or defect area
No specific shapes or forms- Enamel margins are beveled.
4. Class IV cavity preparation:
i. Beveled Conventional Preparation:
Indications: Restoring large proximal carious lesions or replacing an
existing restoration.
The same as class III but involving the incisal edge.
ii. Modified cavity preparation:

48
No specific cavity design is required.
The enamel margin is beveled.
The width of the bevel is variable according to the amount of tooth
structure loss
All the line and point angles are smooth and rounded.
Indicated in case of fractured incisal edge.
5. Class V cavity preparation:
i. Beveled Conventional Class V cavity preparation:
Indications: Replacement of the defective class V restorations or
large carious lesion.
The same features of the conventional cavity design but with
beveled enamel margins.
The gingival seat is not beveled.
The outline form is capital D or Half-moon shaped cavity.
ii. Modified class V cavity preparation:
Indicated for small and moderate lesions entirely located in the
enamel layer or non-carious lesions.
Variable cavity depth- Axial wall does not have a uniform depth.
The whole lesion is scooped out.

49
Figure (1): Short and long bevel
Figure (2): Scalloped bevel
Figure (3): conventional class I cavity design

50
Figure (4): Modified class I cavity design
Figure (5): Conventional class II for amalgam and resin composite restoration

51
NTERMEDIARY RESTORATIVE MATERIALS
Definition:
They are lining and base materials placed between the dentine (sometimes
pulp) and restorative material to provide pulpal protection or pulpal response.
These intermediate materials are adjuncts to the restorative material and
together they form the restorative system (Figure 1).
Cavity liners:
Materials with usually thin film (less than 0.5 mm) used mainly for sealing
dentinal tubules and may provide pulpal response.
Cavity base materials:
Materials applied in thick section (0.5-2 mm) to provide thermal and
mechanical protection.
Dental pulp:
The main functions of the dental pulp are as follows:
1. Formative: It helps in the formation of the dentin.
2. Nutritive: Through the odontoblasts pulp supplies nutrition to the dentin.
3. Sensory response: The dental pulp provides sensory response to the
external stimuli caused due to temperature changes, pressure and operating
52
procedures.
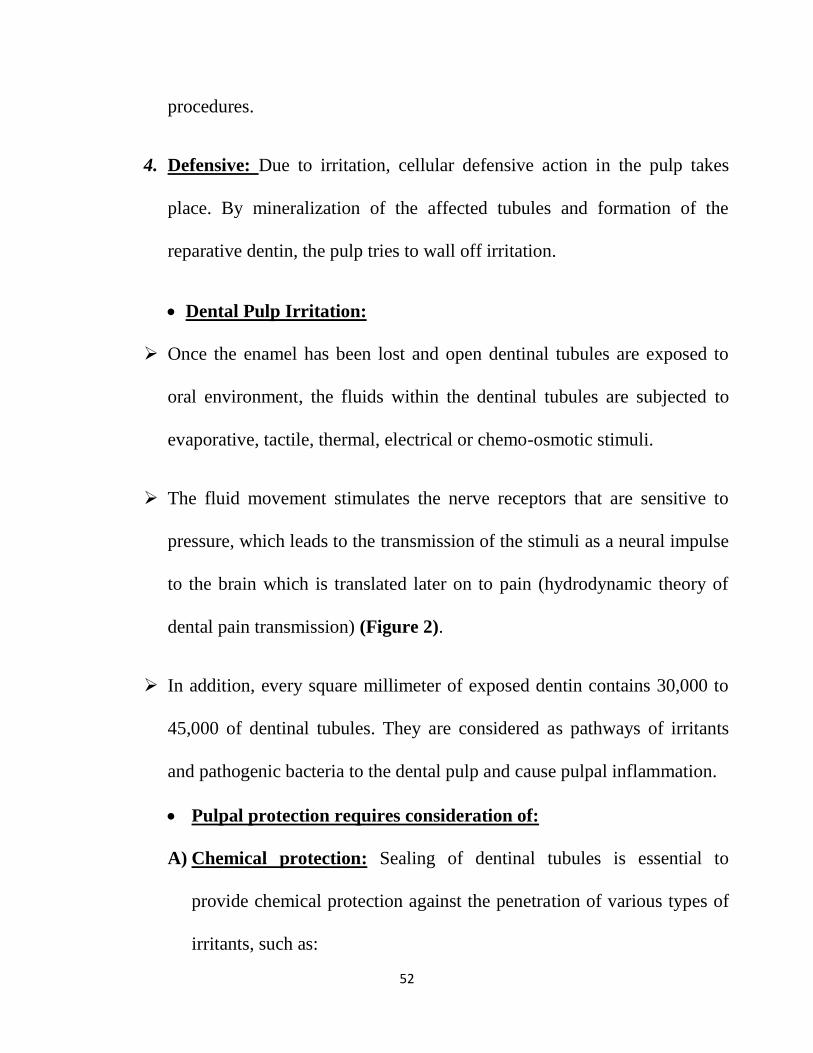
4. Defensive: Due to irritation, cellular defensive action in the pulp takes
place. By mineralization of the affected tubules and formation of the
reparative dentin, the pulp tries to wall off irritation.
Dental Pulp Irritation:
Once the enamel has been lost and open dentinal tubules are exposed to
oral environment, the fluids within the dentinal tubules are subjected to
evaporative, tactile, thermal, electrical or chemo-osmotic stimuli.
The fluid movement stimulates the nerve receptors that are sensitive to
pressure, which leads to the transmission of the stimuli as a neural impulse
to the brain which is translated later on to pain (hydrodynamic theory of
dental pain transmission) (Figure 2).
In addition, every square millimeter of exposed dentin contains 30,000 to
45,000 of dentinal tubules. They are considered as pathways of irritants
and pathogenic bacteria to the dental pulp and cause pulpal inflammation.
Pulpal protection requires consideration of:
A) Chemical protection: Sealing of dentinal tubules is essential to
provide chemical protection against the penetration of various types of
irritants, such as:

53
1- Metallic ions and corrosive products from amalgam restoration.
2- Acid etching during bonding procedure.
3- Residual monomer from composite resin restoration.
4- Bacterial acids, through the microleakage space at tooth/restoration
interface.
B) Thermal protection: Against thermally conductive metallic
restorations such as amalgam and cast gold.
C) Electrical protection: Against galvanism which could result from the
presence of dissimilar metals such as amalgam and cast gold
restorations.
D) Mechanical protection: Especially in deep cavities against
condensation forces during amalgam application.
E) Biological protection (pulpal medication): Through the application of
intermediary restorative material to decrease the pulpal inflammation or
facilitates reparative dentin formation.
Ideal requirements for intermediary materials:
No available material possesses all of these requirements; however, combining
two or more of these materials can accomplish all of the ideal requirements:

54
1. The material should provide a sedative action to the pulp. It should
provide no further irritation, be compatible with pulp-dentin organ and
stimulate reparative dentin formation.
2. It should improve the marginal sealing and the adaptation to the cavity
walls; preferably capable of bonding to tooth structure.
3. The material should possess thermal and electrical insulating capacity
at minimal film thickness.
4. The material should have sufficient strength to resist fracture or
distortion under the forces of condensation of the permanent restoration as
well as under masticatory forces transmitted to it through the permanent
restoration.
5. It should have minimal effective film thickness without compromising
the bulk needed for the future restoration.
6. It should be compatible with overlying restorative material and other
intermediary base materials; it should not interfere with setting or
adaptation of the materials.
7. The material should resist degradation in the oral fluids.

55
8. It should have adequate workability and be easy to apply.
Remaining Dentin Thickness (Figure 3):
There is no perfect replacement for lost enamel or dentin. Sound dentine
is the best barrier between the restorative material and the pulp.
Therefore, the conservation of all possible sound dentin is necessary.
Remaining Dentin Thickness is defined as the dentin bridge between the
pulp and the restoration.
Choice of a suitable intermediate restorative material and clinical judgment
for the need of a specific liner or base material depends mainly on the
remaining dentin thickness (RDT).
If RDT is less than 0.5 mm, indirect pulp capping is required. It is a
procedure in which a material is placed on a thin partition of remaining
dentin where no vital pulp exposure occurs (Figure 4).
If the RDT has been violated in a point due to deep carious lesion or
during cavity preparation, direct pulp capping may be required. Direct pulp-
capping is a treatment for exposed vital pulp involving the placement of a
dental material over the exposed area to facilitate both the formation of

56
protective barrier and the maintenance of vital pulp (Figure 5).
Indications of pulp capping:
a. The tooth must be vital and have no history of spontaneous pain.
b. The result of pulp testing should not linger.
c. A periapical X-ray should show no evidence of pathology.
The success rate of direct pulp capping can be high if:
a. The exposure is small, less than 0.5 mm in diameter.
b. The haemorrhage from the exposure site is easily controlled.
c. The exposure occurred in a clean, uncontaminated field (such as
provided by rubber dam isolation).
d. The tooth is a symptomatic.
Intermediary Materials Classification:

57
A. Liners:
1. Varnish (Figure 6):
Form and Composition:
It is supplied in the form of a liquid composed of 10% synthetic resin
dissolved in 90% organic solvent such as ether, acetone.
Characters:
Mode of action: It seals dentinal tubules; thereby it reduces fluid flow and
decreases hypersensitivity.

58
Can be used only under amalgam restoration: to prevent the migration
of metallic ions into dentinal tubules, thus preventing tooth discoloration
(amalgam blues).
Today, the popularity of amalgam as a direct restorative material has
severely decreased due to the use of direct esthetic restorations
Limitations:
Under resin composite restorations:
The use of varnish under resin composite will prevent the mechanical
interlocking of the resin with tooth structure. In addition, the residual organic
solvent in the varnish may react with or soften the resin.
Under glass ionomer restorations:
The varnish would eliminate the chemical adhesive potential of these
cements, as well as hindering the fluoride uptake from glass ionomer materials.
As result the use of varnish under restorations has been limited.
2. Bonding agent (Adhesive Liners):
These are resinous systems that partially dissolve or penetrate the smear layer
to bond micromechanically to tooth substrate (Self-etch adhesive systems).
They are usually polymerized by visible light curing and are used to bond

59
resin composite to the tooth structure. They also seal the tubules and eliminate
microleakage if properly bonded.
Production of tight hermetic seal with the tooth structure can greatly minimize
the possibility of microleakage, restoration failure and the future pulpal
irritation.
Inflammatory cytotoxic pulpal response may occur if the adhesive system
comes in contact with the pulpal tissue.
3. Calcium hydroxide (Ca(OH2)):
Forms:
• Two pastes (Chemical-cured), e.g.: Dycal.
• One paste (Light-cured/ resin modified Ca (OH2)).
Mode of action:
The old postulations stated that Ca (OH) 2 is a gold standard material applied
for pulpal medication (pulp capping material). It was assumed that it can
stimulate odontoblasts to form reparative dentin and form calcific bridging at the
exposure site. It was assumed also that its alkalinity can neutralize the bacterial
acidity.

60
4. Bioactive Materials:
Definition: Materials that have the effect of eliciting the reparative
response of the dental pulp as the formation of hydroxyapatite crystals.
Mechanism of action:
a. Production of an apatite layer when in contact with phosphate-
containing physiological fluids.
b. Bioactive materials induce cytological and functional changes
Ca (OH) 2 is no longer used as an intermediary materials for this reasons:
1. Does not exclusively stimulate the reparative dentin formation.
2. Can’t produce thermal, chemical or electrical insulator.
3. It is porous and highly soluble.
4. Liable to degradation after acid etching.
5. Fluids from dentinal tubules or the oral environment can cause Ca (OH) 2
dissolution and the formation of voids/defects. This can lead to a failure of
the definitive seal and restoration failure.
6. Presence of tunnels in the formed calcified tissue and possibility of
formation pulp stones.
7. Lack of adhesion to the tooth structure and different restorative materials.
8. Pulpal tissue degeneration after direct pulp capping by Ca (OH) 2 (Figure
9).

61
within pulpal cells, resulting in the formation of reparative dentin at
the surface of exposed dental pulp in vital pulp therapy.
c. They help in proliferation, migration, and differentiation of
odontoblast-like cells that produce a collagen matrix. This
demineralized matrix is then mineralized by osteodentin initially
and then by tertiary dentin formation.
Types:
A. MTA (Mineral Trioxide Aggregate)
B. Tricalcium Phosphate (Theracal)
C. Bioaggregate
D. Biodentine
A. MTA (Mineral Trioxide Aggregate) :
Form and composition:
MTA is a non-resorbable, ash-colored powder made primarily of fine
hydrophilic particles of tricalcium silicate, silicate oxide, and tricalcium oxide
mixed with distilled water.
The mechanism of action:

62
i. When MTA powder is mixed with water at the time of application, calcium
silicates in the powder hydrate to produce a calcium silicate hydrate gel
which solidify within 3-4 hours to produce calcite structure (Crystallization
nuclei).
ii. These nuclei attract fibronectin from blood, which is generally responsible
for cellular adhesion of HMC’s and differentiation to odontoblasts.
iii. It allows the expression of mineralization-related genes on pulp cells.
These genes are responsible for inductive process on hard tissue bridge
formation with MTA cement.
iv. MTA has an initial pH of 10.2, which increases to up to 12.5 during setting
(highly alkaline).
v. Beneficial in direct pulp capping.
Advantages Disadvantages
1. Highly alkaline to neutralize the bacterial
acids.
2. Antibacterial effect.
3. Induces pulpal cell proliferation.
4. Stimulation of mineralized tissue formation.
5. Good biocompatibility.
1. More expensive.
2. Poor handling
characteristics.
3. Long setting time.
4. Grey MTA causes tooth
discoloration.

63
6. Less pulpal inflammation.
7. Antibacterial property.
8. Radiopacity.
9. Induce the release of dentin matrix proteins.
5. Low strength properties
B. TheraCal (Tricalcium Silicate):
A light cured, calcium silicate filled liner with hydrophilic monomer
(Resin modified MTA) designed for use in direct and indirect pulp
capping as a protective base/liner under composites, amalgams,
cements, and other base materials.
TheraCal LC performs as an insulator/barrier and protectant of the
dental pulpal complex.
The Same mode of action of MTA as a capping agent
TheraCal displayed high calcium releasing ability and lower solubility
than either MTA or Dycal.
The capability of TheraCal to be cured avoids the risk of dissolution.
Disadvantages:
Resinous component may induce cytotoxic pulp reaction in direct pulp
capping.

64
C. Bioaggregate:
A modification of MTA (nano-bioceramic particles composed of nano-
calcium silicate, calcium hydroxide, and calcium phosphate.
The same mode of action of MTA.
Can be used as direct and indirect pulp capping.
Advantages over MTA:
Less solubility- Higher antimicrobial action- Excellent biocompatibility, and
significant induction of pulpal and periodontal regeneration.
D. Biodentine:
Form and composition:
A modification of MTA composed of a highly purified paste of tricalcium
silicate, di-calcium silicate, calcium carbonate in the form of capsules.
Advantages over MTA:
1. The setting time is relatively short (around 12 min), which enables the use
of this cement for restorative procedures.
2. The compressive strength resemble the natural dentin.
3. Immersion in phosphate-buffered particles enable the material to produce
maximum concentration of calcium ion release.
4. Sufficiently stable and easy to be handled.

65
5. Enhance the proliferation, migration, and adhesion of human dental pulp
stem cells.
II. Cement bases:
Basically, these are materials with thick consistency applied in thick sections to
substitute lost dentin and provide thermal and mechanical pulpal protection.
1. Resinous Hard-setting Calcium hydroxide Ca(OH)2
2. Reinforced Zinc oxide and eugenol (RZOE)
3. Zinc phosphate cement (ZPC)
4. Zinc polycarboxylate cement (PCC)
5. Glass ionomer cement(GIC)
6. Resin modified glass ionomer cement (RMGI)
2. Reinforced Zinc oxide and eugenol (RZOE):
Form and composition:
It is supplied in the form of a powder of zinc oxide and a liquid of 85% eugenol.
Although Eugenol produces palliative, sedative and obtundant action on the
pulp when used in very low concentrations, Zinc oxide and Eugenol is no
longer used beyond restorations for the following reasons:
1. Cannot be placed in deep cavities or as a direct pulp capping material

66
(Produce pulpal irrirtation).
2. Weak material, can’t withstand the condensation forces during amalgam
application.
3. The eugenol interferes with resinous tooth colored restorations, and can
even depolymerize the already set polymeric materials.
4. Deprives the glass ionomer restorations the bonding capabilities of these
materials.
3. Zinc phosphate cement (ZPC):
Form and composition:
ZPC is supplied in the form of a powder and a liquid. The powder is mainly zinc
oxide and the liquid is the aqueous solution of phosphoric acid.
Properties:
Good thermal insulator, most rigid, durable intermediary base material
under amalgam restoration.
It is the most irritating base material, owing to its acidic pH of phosphoric
acid.

67
Also, it has an exothermic setting reaction and can thus cause thermal
irritation if not properly manipulated.
It is no longer used as a base material.
4. Zinc polycarboxylate cement (PCC):
Form and composition:
PCC is supplied in the form of a powder and a liquid.
The powder is mainly zinc oxide. The liquid is an aqueous solution of 40-
50% polyacrylic acid.
The setting reaction involves the release of zinc ions which blend with
the carboxylic groups forming a cross-linked polyacrylate matrix. The
carboxylic groups that did not enter the reaction will chelate calcium of
the hydroxyapatite of the tooth structure and chemically bond to the
tooth.
Advantages:
It bonds chemically to tooth structure, which leads to proper chemical pro-
tection as well as decreased microleakage.
The pH of the cement liquid is 1.7. In spite of its initial acidic nature, it
produces minimal irritation to pulp-dentin organ.
It is compatible with all permanent restorative materials.
Advantages:

68
Fast setting reaction.
Poor bonding with composite resin restoration.
5. Glass ionomer cements (GIC and RMGI):
Form and composition:
GIC is composed of an acid-soluble fluoro-alumino-silicate glass powder and a
liquid of polyacrylic acid (PAA).
RMGI is the same composition of GIC but in a resinous matrix in capsular form.
Setting Reaction:
The setting is through acid-base reaction.
The setting of RMGI is basically by acid-base reaction, in addition to
immediate command setting light polymerization.
Properties and functions:
It has an excellent sealing ability due to chemical adhesion to tooth
structure through carboxylate ions released from PAA liquid.
It has an anticariogenic property due to fluoride release from the powder
glass component.
It is reasonably biocompatible with P-D organ.
Can be used under metallic restorations
It provides adequate thermal, chemical and mechanical protection as well

69
as proper sealing of dentinal tubules.
Advantages of RMGI over GIC under composite restorations:
1. It has a flexible working time due to command setting by light curing.
2. It also has improved strength and wear properties in addition to ease of
handling. However, GIC has higher fluoride release especially during the
first 24 hours.
3. Less solubility.
4. Especially chosen under resin composite restoration in a technique known
as the sandwich technique to combine the benefit of adhesion and
fluoride release of GI with better esthetic and higher mechanical properties
of resin composite.
5. Reduces the total volume of the cavity preparation, thereby reducing the
total volumetric polymerization shrinkage of resin composite.
6. Chemical bonding with the composite and tooth structure.
7. Does not interfere with the esthetics and optical properties of resin
composite.
Clinical considerations for application of intermediary materials:
Choice of suitable intermediate restorative materials and clinical judgment for the
need of a specific liner or base material depends mainly on:
Remaining dentin thickness (RDT); as the depth of the cavity increases,

70
the RDT decreases and there is more need for intermediary materials
before inserting the permanent restoration.
Adhesive properties of liner or base; to benefit from its adhesive
potential, an intermediary material should be placed directly on tooth
structure except where pulpal medication is essential.
Type of restorative material; whether is a metallic or adhesive esthetic
restoration, a direct or indirect one
After shallow tooth excavation (RDT > 2mm),
There is no need for pulpal protection.
In case of amalgam restoration, only a solution liner (varnish may
be utilized).
In case of resin composite, only its bonding system is needed to
create a tight marginal sealed restoration.
GIC restoration does not need any pulpal protection in this case.
In moderately-deep caries excavation (RDT=1-2mm):
Amalgam restoration would require the use of a cement base
(Glass Ionomer).
With resin composite, dentin bonding agent will provide sufficient
sealing, while a liner/base of RMGI might sometimes be needed to
reduce the volume of the cavity preparation.

71
GIC restoration does not need placement of any intermediary
material.
If extensive dentin is lost (RDT >0.5mm- Indirect pulp capping):
There is strong need for pulpal protection.
In this case, pulpal medication with MTA modified materials are
useful with all restorative materials to induce secondary dentine
formation and relief pulpal inflammation.
Sealing is also essential in addition to a strong base to substitute
dentin loss.
Direct pulp capping:
MTA or MTA modified materials should be applied in exposure
site.
GIC or RMGI as an intermediate restorative material or as a base
beneath the final restoration.

72
Figure (1): Liner and Base materials
Figure (2): Hydrodynamic theory

73
Figure (3): Remaining Dentin Thickness
Figure (4): Pulp capping techniques
Figure (5): Traumatic Pulpal Exposure
Figure (6): Cavity Varnish

74
CHAPTER 4
GLASS IONOMER RESTORATIONS
In the late 1960’s, history had already witnessed a host of restorative
materials including dental amalgam and composites. All had fallen short of that
certain perfection that the dental researchers and clinicians yearned for that of a
material which is tooth-colored esthetic with biocompatible characters. Glass
ionomer cements (GICs) are restorative materials, which clinical use has increased
significantly during the last decade. Glass-ionomer cements belong to the class of
materials known as acid-base cements with anti-cariogenic and adhesive potential
to the tooth structure which are very useful adjunct to restorative dentistry.
Composition of GIC:
Powder of GIC:
• Glass ionomer powder is an acid soluble calcium fluoro-alumino-silicate glass.
• Lanthanum, strontium and barium/ZnO are added to provide radiopacity.
Liquid of GIC:
• Aqueous solutions of polyacrylic acids in concentration of 40-50%,
• The polyacrylic acid was thus modified by copolymerization with maleic and
tricarballylic acids. These acids tend to increase the reactivity and decrease the
viscosity and tendency for gelation of the liquid.
Tartaric acid is also added as an accelerator to
1- Shorten the setting time (but not the working time).
2- Tends to harden and improve the compressive and tensile strengths.
For further decrease the viscosity and improve shelf-life of the material:

75
1- Anhydrous glass ionomer:
The polyacrylic acid copolymers are freeze dried and added to the glass
powder. The liquid in this case is water or water plus tartaric acid.
2- Hydrous glass ionomer:
All the polyacrylic acid copolymers are placed in the liquid component.
Advantages of anhydrous over hydrous GICs:
1- Decreased viscosity which facilitates its use as luting cement.
2- The least long-term solubility
3- Ability to produce higher powder-to-liquid ratios which results in better
physical properties.
4- Improved shelf-life.
However, they suffer two disadvantages:
1- More acidic with greater potential for pulpal irritation.
2- Have a slower initial set.
3- Semi-hydrous:
Material has both hydrous and anhydrous forms of polyacid. This
combination provides intermediate liquid viscosity, speeds up the initial slow set
associated with the anhydrous materials and has an intermediate acidity and
shelf-life.
Setting reaction of GIC:
Glass ionomer undergoes three distinct and overlapping phases during setting.
A. Phase I: Ion leaching phase (Early Stage):
It occurs immediately after mixing.
Acid attacks the ion-leachable Alumino-fluoro-silicate glass powder
and dissolve the outer surface for metal cations (Ca++
and Al+++
) release
(shiny and glossy due to the unreacted matrix).
GIC should be applied in the cavity in this phase because the maximum

76
amount of free carboxylic ions is available for chemical adhesion with
tooth structure.
B. Phase II: Hydrogel phase (initial set)
It begins 5-10 minutes after mixing. During this phase, GIC is rigid and
opaque. This opacity is transient and should disappear during the final
setting phase.
In this stage, the GIC should be protected from moisture and
desiccation.
C. Phase III: Polysalt gel (final set)
Aluminum ions, released more slowly, help the hydrogel to surround
unreacted particles causing final setting and hardening of the cement.
Maturation can continue for several months in conventional types.
In completely set cement, both calcium and aluminum salts are present
in equal amounts.
Fluoride ions are released from the first stage but do not enter the
setting reaction (Released as a by-product).
The final set mass of GIC consists of unreacted glass particles
surrounded by a silica sheath set in a hydrogel matrix.
Role of water in Glassionomer restorations:
Water is the third essential component of the glass-ionomer cement. It
promotes the ion release, it is the medium in which the setting reaction takes
place but the unbound water can be lost from the surface of newly placed glass-
ionomer cement.
This causes an unsightly chalky appearance as microscopic cracks develop in the
drying surface.

77
Advantages of GIC:
1- Adhesion to tooth structure:
GIC undergoes chemical diffusion-based adhesion to tooth structure.
Adhesion is initiated by poly-alkenoic acid when freshly mixed material
contacts the tooth surface.
Phosphate ions are displaced from apatite by carboxyl groups (COO-)
and a chemical bond achieved between Ca++
and carboxyl groups (COO-
).
These ions will combine with the surface layer of cement and develop
an ion-enriched layer or Inter-diffusion zone adhered to tooth structure.
This ion-enriched layer is firmly attached to tooth structure, even if GIC
is de-bonded; it remains sealing the dentinal tubules.
2- Fluoride release and recharge:
The prolonged and substantial release of fluoride ions from all GI
materials is of major clinical significance.
The large release of fluoride ions (Fluoride burst) during the first few
days after placement declines rapidly during the first week but stabilizes
after 2-3 months.
It has been shown that a subsequent professional application of a topical
fluoride will result in a further uptake of fluoride ions by restoration
(recharging). Thus, a GIC can be regarded as a fluoride reservoir.
The Fluoride cycle
a. Leaching phase
Immediately following placement, the fluoride content in GIC is much
higher than that of the tooth. Thus, fluoride ions diffuse from area of high
concentration (GIC) to area of lower concentration (tooth), causing

78
hydroxyapatite of the tooth to transform into fluoroapatite which is resistant to
caries.
b. Equilibrium phase:
In time, the fluoride content of tooth and GIC reaches equilibrium.
c. Depleting phase:
At the surface, GIC begins to release fluoride into the saliva and most of
the fluoride from the GIC surface is lost to the oral fluids.
d. Recharging phase:
Topical application of fluorides through fluoride gel, rinse or toothpaste
can recharge the GIC and the fluoride cycle is thus continued.
3- Biocompatibility of GIC:

79
GIC is a biocompatible material owing to its anti-cariogenic properties and
its compatibility with tooth and soft tissues.
4- Anti-cariogenic potential due to fluoride release:
Bacterial plaque fails to survive on the surface of glass-ionomer as fluoride
decreases the surface energy of the tooth, thus decreasing plaque retention.
Fluoride also has a bacteriostatic effect on Streptococcus Mutans (Major
pathogen found in dental plaque).
Fluoride changes hydroxyapatite of the tooth to flouroapatite which is
more resistant to demineralization.
5- Sealing potential:
The proper sealing potential of GIC, owing to ion-exchange chemical
adhesion, desensitizes dentin, sedates the pulp and eliminates microleakage at
tooth/restoration interface. Combined with its fluoride release, this property
aids in prevention of recurrent decay and allows for remineralization of any
demineralized tooth tissues.
6- Pulpal and soft tissue response to GIC:
Although GIC is an acid-containing restorative material, yet it is
biologically compatible to tooth tissue because polyacrylic acid is weak and
has high molecular weight. This limits its diffusion through dentinal tubules
to the pulp. It also rapidly neutralizes under the buffering action of dentinal
fluid. Soft tissues response to glass-ionomer restorations is favorable.
7- Dimensional stability:
GIC have a low setting contraction of 3% by volume. Also, the thermal
coefficient of expansion and contraction of GIC is close to that of tooth
structure.

80
8- Good thermal insulating capacity:
It is an important characteristic that allows its use as a liner and base
material. This property increases with increase in powder/liquid ratio.
9- Radiopacity:
GIC are radiopaque due to incorporation of radio-Opacifiers such as
Lanthanum in the powder. Silver Cermet GIC has similar radio-opacity to
amalgam restorations.
Disadvantages of GIC:
1- Poor Strength properties
One of the major limitations of glass-ionomer is their susceptibility to brittle
fracture. Glass-ionomer is weak and lack rigidity. It has low fracture toughness.
2- Low Abrasion resistance:
GIC have low wear and abrasion resistance which results in an increase in
surface roughness over time.
3- Solubility and disintegration:
The surface of GIC is subject to dissolution and disintegration especially in
presence of low PH. Care should be taken when using acidic topical fluoride
solutions or bleaching agents.
4- Moisture sensitivity:
Conventional GIC is sensitive to hydration (moisture contamination) and
dehydration (water loss) during setting.
Uptake of water will wash out cement forming metal ions (Ca++
and Al+++
)
since they are highly soluble in water. This will affect the adhesive

81
potentials of the cement and decrease its strength properties.
It will also affect its opacity and esthetic owing to disintegration of the
weakened surface.
During this early stage of setting, the cement is also subject to water loss.
There is still loosely bound water, since not all calcium ions formed.
Ionic cross links with polyacid chains to form the gel matrix.
Dehydration causes poor esthetics as it increases the opacity and causes
surface micro-cracks increasing susceptibility to staining. It also results in
a weakened restoration.
5- Questionable Esthetics:
GIC provide adequate initial color matching, although translucency will take
several days to develop in the auto-cure cement. However, moisture sensitivity
and dissolution alters its esthetic durability.
Indications of GIC:
1. Class III and class V carious cavities, especially if cervical wall is in
dentin or sub-gingival. Also used in cervical non-carious lesions
(abfraction, abrasion and erosion), after proper control of the cause.
2. Restoration of root caries.
3. Pit and fissure sealant material.
4. Luting cement for crowns inlays and veneers.
5. Liner/base (dentin substitute) under any restorative material.
6. Core buildup for crowns and bridges in non-stress bearing areas.
7. Minor repair of restorations and crowns.
8. Caries Control restorations:
Patients with multiple acute carious lesions, have poor oral hygiene and
high caries index. Caries control is an intermediate step in the treatment plan

82
(Holding/stabilization phase) of such conditions, until the reason behind this
acute condition is controlled and subsided.
9. Atraumatic Restorative Treatment (ART restorations).
10. Occlusal lesions on deciduous teeth.
11. Temporary anterior and posterior restorations.
12. Blocking undercuts Luting cements.
Contraindications:
1. GICs are contraindicated in stress-bearing areas, e.g. in Class II and IV
owing to its brittleness and low fracture toughness which causes fracture
under stresses.
2. It has poor optical properties, thus if esthetics is of prime importance, it is
better to laminate GICs with resin composite.
Classification of Glassionomer material:
A. According to composition Modifications:
1- Fast-setting GICs
Manufacturers washed the glass powder with acids to remove calcium
In general, GIC restorations are highly recommended in patients with:
1- High caries index and poor oral hygiene
2- Low salivary flow
3- Non cooperative patient with limited chair time
4- Medically compromised patients
5- In addition, GICs are widely used as long-term intermediary restorations in
geriatrics (old age) and paediatrics (children).

83
ions from the surface, thus delaying initial set and producing excellent
working and setting characteristics.
2- Metal reinforced Glassionomer
The powder has been modified by addition of amalgam alloy powder
(Miracle mix) with expected improved strength properties and decreased
solubility. However, their major disadvantage is that the metal particles are
not bonded to the set material and poor esthetics. This results in increased
wear as the poorly attached metal particles.
3- Ceramic-metal GIC or Cermet
It is produced by sintering the metal and glass powders together to the
glass fillers. The resulting metal-fused-to-glass filler particles can react with
polyacid copolymers to form a GIC with improved abrasion resistance.
However, silver discolors the surrounding tooth structure. Both metal-
reinforced GICs are not used as esthetic restorations but rather used as core
buildup, base and for repair of crowns and amalgam restorations.
4- highly-filled, high-viscosity GIC:
Modifications in filler size and loading were also made to improve physical
and mechanical properties of GICs (GC EQUIA Forte). These glass-ionomers are
particularly useful for Atraumatic restorative treatment technique (ART) in
posterior areas. They have high strength and wear resistance. Even though glass
ionomers are not as strong as composite resins, their overall longevity may be
superior to composite restorations in many instances. High caries rate individuals
will have poor success with composite restorations. Glass ionomer restorations
may last longer than composite restorations with young people consuming large
amounts of sugar, xerostomia patients, older persons with recession, and patients
with poor oral hygiene.

84
5- Low viscosity/Flowable GIC:
It is mainly used as lining pits and fissure sealing, endodontic sealers, sealing
of hypersensitive cervical areas, and it has increased flow.
6- Polyacid-modified resin composite (Compomer):
It is a combination of the word “comp” for composite and “omer” for
ionomer. This material is essentially polymer-based composite that has been
slightly modified to take the advantage of the fluoride releasing behavior of GIC.
Like composite, it is made up of a filler/resin system. The fillers include a
reactive alumino-flouro-silicate glass (Used in GIC).
Though introduced as a type of GIC, it became apparent that in terms of clinical
use and performance, it is best considered as a composite with minimum fluride
release. It is bonded through adhesive resin bonding which prevents fluoride
from entering the tooth. In addition, it was found that physical properties of
compomers severely decrease when water is absorbed.
7- Resin-modified glass ionomer (RMGI):
It is a hybrid material of traditional GIC with a small addition of resin. This
modification could be made in Type I, II.1 and III GICs. The powder portion
consists of the conventional acid-soluble glass particles, while the liquid portion
is aqueous solution of polyacrylic acid copolymers plus a water-soluble monomer
such as HEMA.
Their setting reaction comprises the classic acid/base reaction of GIC plus a
polymerization reaction for the resin which could be; chemically induced, light-
activated or both light and chemical cured.
Advantages of Resin-modified glass ionomer over GIC:
Command fast setting through light-induced polymerization leading to
extending the working time.

85
Immediate stabilization of water balance following polymerization. Thus
they are resistant to water uptake or loss the moment they light-activated.
Improved esthetic qualities.
Improved strength properties and wear resistance.
HEMA is hydrophilic; it increases the wettability leading to stronger
coupling to tooth structure.
The resin component facilitates bonding to composite resin, e.g. in
sandwich technique when placed under resin composite restorations.
Immediate contouring, finishing and polishing can be made safely under
wet conditions.
Disadvantages:
Despite good initial esthetics, they may discolor over time. This might be
due to the water uptake by the hydrophilic HEMA, which cause expansion
and possible stain uptake.
Limitations in depth of cure of light polymerized RMGI.
Less fluoride release than conventional GIC. However, it follows the same
cycle of fluoride release and recharging.
8- Fiber-reinforced GIC:
To improve wear resistance, and increase in flexural strength of GIC, alumina
fibers are mixed with glass powder. This technology is called the polymeric rigid
in organic matrix material, which involves incorporation of a continuous
network/scaffold of alumina and silicon di oxide ceramic fibers.
9- Powder-Modified Nano Glass Ionomers:
It is well-documented that incorporation of nano-sized particles may
improve the mechanical properties of polymeric dental materials. It involves

86
doping conventional GICs with nano-sized glass particles, which can decrease
the setting time and enhance the compression strength and elastic modulus. The
main advantages of decreasing setting times of direct restorative materials are
enhanced ease of handling and manipulation.
10- Nano-filled resin-modified GICs:
Resin-modified GICs also have a polymer resin component, which usually
sets by a self-activated (chemically cured) or light-activated polymerization
reaction. To develop the mechanical properties of a resin composite with the
anticaries potential of GICs, these were developed. However, compared to
composites, resin-modified GICs have reduced mechanical properties, including
brittleness and inferior strength. To overcome these drawbacks, there have been
attempts to incorporate nano-sized fillers (Ketac-N 100).
B. Classification of GIC according to uses:

87
N.B. Type II Restorative:
Esthetic Restorative (Resin modified Glass ionomer) for esthetic
restorations.
Reinforced Restorative (Cermet) where physical properties are required.
C. According to activation mode:
Chemical- Light activation-Dual cured
D. According to mixing technique:
I. Conventional: (Powder + liquid mixing on glass slab)
II. Easily mixable GI:
Capsules
Capsules contain pre –measured glass ionomer powder and liquid, which ensures
correct ratio, consistency of mix and a predictable result. These capsules have
angled nozzle that act as a syringe for accurate placement of the material in to a

88
cavity or a crown for cementation to simplify and allow procedures to be
performed with greater ease and efficiency.
Paste-paste dispensing system:
It provides an optimum ratio, easy mixing and easy placement using a
specially designed cartridge and an easy material dispenser (Nanofilled RMGI).
CLINICAL APPLICATIONS
Cavity preparation
Adhesive quality of the glass ionomer cements dictates that an
ultraconservative approach precludes any necessity for retentive features.
No undercuts or dovetails are necessary.
Cavosurface margins are butt joint and not beveled.
Potent cariostatic influence similarly precludes any extension beyond
elimination of the carious defect.
Tooth Preparation Design
Indications for glass ionomer restoration:
a. Class I / fissure seal
b. Class II occlusal, tunnel approach, proximal approach
c. Class III buccal, lingual approach, posterior restoration.
d. Class III anterior restoration
e. Class V lesions.
f. ART.
g. Sandwich Technique.
a. Class I / Fissure Seal:

89
This concept is especially useful for newly erupted tooth (Deciduous and
first permanent molar in children) by preventing the fissure from being
colonized by plaque and pellicle.
The cavity doesn’t extend more than 1/3 of enamel thickness.
With minimal tooth preparation (Surface roughness and removal of fissure
stain/ initial caries), the fissure is sealed with glass ionomer fissure sealant.
The preparation is done using small tapered stone- small round abrasive
tool.
Do not extend the cavity pulpally.
If glass ionomer can’t withstand occlusal stress in particular situation
(especially in adults), the part of cement can be cut back and laminated
with composite resin.
b. Class II:
In proximal lesion caries usually develops apical to contact are this is
where plaque accumulates.
Incomplete tunnel preparation is recommended.
i. Tunnel Preparation:
Indicated for lesions are at least 2.5 mm apical to marginal ridge.
The proximal surface is accessed through the occlusal surface with
preservation of the marginal ridge area.
The contact area and the marginal ridge will be sound.
Incomplete tunnel preparation is recommended.
Tunnel restoration is best done under magnification (Intraoral video
camera and caries detecting solutions).
No retentive features are given as cement can be retained through it is
adhesive qualities.

90
Cavity preparation is done by using ultrasonic cutting tips to ensure the
access to the apical caries without weakening to the marginal ridge.
Dual cure glass ionomer is suitable to restore such a cavity.
Advantages
1. Retention of marginal ridge.
2. Maintenance of interproximal contacts.
Disadvantages
1. Difficulty in ensuring complete removal of caries.
2. Difficulty in locating proximal caries.
i. Slot Preparation:
Indicated in cases of gingival recession or wide cervical embrasures
with intact marginal ridge.
The proximal surface but can be accessed through the facial or lingual
embrasure.
Depth is 0.2 mm into the dentin.
ii. Class II Proximal Approach
Here only the proximal surface of tooth is involved with occlusal
surface being intact and the proximal can be accessed.
This can occur when:
1. The lesion is detected while preparing the adjacent tooth for
restoration.
2. The lesion is detected when there are no adjacent teeth.
Enter the lesion with small tapered diamond abrasive.
Remove soft caries using small round diamond.
Restore the tooth with auto-cure or dual RMGI.

91
c. Class III and Class V Restorations:
Tooth preparation is same as in resin composite restoration.
Because of low modulus of elasticity of glass ionomer it performs better in
class V restoration than composite resin but esthetically composite resin
restoration is far better than glass ionomer cements.
Best indicated in old aged patients, patients with poor oral hygiene or
small carious/ non-carious lesions (Erosion- Abfraction).
Unlike composite resin restoration there is no need for bevel placement in
tooth preparation.
d. Atraumatic Restorative Technique:
Modern restorative techniques require electrically powered equipments.
In remote area of developing and underdeveloped countries basic
restorative procedures should be carried out without basic infrastructure of
electricity and water. This is where Atraumatic Restorative Technique
(ART) is useful.
In this technique hand excavators are used to remove carious lesion
followed by restoration with highly viscous glass ionomer cement.
Indications:
1. Occlusal caries with adequate tooth structure.
2. Physically or mentally handicapped patients.
3. As a caries control restoration (Holding/ stabilization phase).
4. Successful in providing dental care for populations that would have
minimal or non-existent care or have had several teeth extracted
Clinical Procedures:
1. Teeth are isolated with cotton.
2. Undermined enamel is broken off with hatchets.

92
3. Caries excavated with spoon excavators.
4. Highly viscous glass ionomer is placed in the cavity.
Advantages
1. Maximum preservation of tooth structure.
2. Benefit of tooth adhesion, fluoride release.
3. No need for sophisticated instruments.
4. Low cost treatment.
Disadvantage
In-efficient dental procedure.
Steps of application of GIC:
1. Selection of GIC type.
2. Isolation of the operatory field.
3. Application of liner (if needed).
4. Conditioning of tooth substrate.
5. Matrix application (if needed).
6. Proportioning of powder: liquid (P:L) ratio.
7. Mixing of GIC.
8. Packing of GIC.
9. Maintenance of water balance.
10. Finishing and polishing.
1. Selection of GIC type:
As a restoration, three main properties dictate the selection; which are the
requirements of amount of fluoride release versus esthetics and function.
Conventional GIC is indicated when a high initial burst of fluoride release
is needed.
Highly-filled viscous GIC can be used with increased physical properties

93
is desired but exact color match is not important.
Resin-modified glass ionomer can be used in situations with high esthetic
demands.
Silver cermet can be used as core-buildups in non-stress bearing areas, and
for repair of amalgam restorations.
2. Isolation
A clean dry field is mandatory for both better adhesion of glass ionomer to
tooth structure and also for strength of the restoration (Avoid moisture
contamination of Glassionomer).
3. Application of liner (Pulpal Protection):
When glass ionomer cement is placed directly over the pulp it can result in
pulp necrosis.
In case of pulp capping, MTA or MTA derivatives are required under glass
ionomer restorations.
When a layer of dentin remains, Dentin Bridge can form when glass
ionomer is placed.
Sandwich technique using RMGI:
It is lining deep cavities with RMGI before composite placement.
It is used to combine the benefit of adhesion and fluoride release of GI
with better esthetic and higher mechanical properties of resin composite.
There are three types of glass ionomer sandwich restoration they are:
1. Open sandwich restoration.
2. Closed sandwich restoration.
Advantages over conventional glass ionomer:

94
8. It has a flexible working time due to command setting by light curing.
9. It also has improved strength and wear properties in addition to ease of
handling. However, GIC has higher fluoride release especially during the
first 24 hours.
10. Less solubility.
11. Reduces the total volume of the cavity preparation, thereby reducing the
total volumetric polymerization shrinkage of resin composite.
12. Chemical bonding with the composite and tooth structure.
13. Does not interfere with the esthetics and optical properties of resin
composite.
4. Conditioning the tooth surface:
GI requires conditioning of dentin by polyacrylic acid for 30 seconds.
This will ensure that the dentin surface is clean and will also result in
dentin tubules opening which would have sclerosed in abrasion/erosion.
Class III, Class V and Other Carious Lesions.
It is not necessary to clean the dentin with pumice.
Dentin smear layer that is formed during tooth preparation is removed by
application of polyacrylic acid for 10 seconds. Polyacrylic acid is a mild
acid, it will remove the smear layer found on cut dentin but retains the
smear plugs in the dentinal tubules. This will also increase the surface
energy of the tooth and thus the wettability and adaptation of the material
to the tooth. It also reduces fluid flow and keeps the cavity dry until
restoration is placed. The smear layer is loosely bound to tooth structure. It
has to remove from the surface of cut tooth structure to ensure proper
chemical bonding of GIC. Application of GIC without prior conditioning
results in debonding and gap formation.

95
5. Selection of matrix band (if needed):
For packing of GIC under positive pressure, a matrix band rigid should be
used. Sectional matrix can be applied.
6. Proportioning, Mixing and Placement of GIC:
For the powder/liquid systems, correct powder/liquid ratio should be
maintained.
Mixing could be done either on glass slab or mixing pad using a metal
spatula. No cooling of powder or liquid or glass slab is required.
Powder is mixed into liquid in two increments in folding motions.
Maximum mixing time is 20 seconds.
In pre-proportioned capsules it is mixed in an amalgamator at high speed
at about 4000 rpm for 10 seconds.
Capsules are preferred since they provide consistent and satisfactory
powder: liquid ratio that ensures optimum physical properties.
7. Maintenance of the water balance and Finishing and polishing:
After the required time for setting of cement, the matrix if used is
removed. The restoration surface is protected by waterproof varnish.
Any removal of excess cement with rotary instrument is best delayed after
24 hours.
Final finishing delayed after 24 hours, final finishing is done with fine
diamond, 12-bladed tungsten carbide or flexible finishing disks.
Finishing and polishing of RMGI can be done immediately.
8. Surface Protection (For conventional GI):
After finishing, apply a second thin coat of the resin bond and light

96
activate it to provide a waterproof seal. As the bond is an unfilled resin,
it will wear off the surface quite rapidly and will not interfere unduly with
the subsequent fluoride release.
Varnish application to restoration surface after the cement has set is
essential.
Light activated bonding resin can also be used to protect glass ionomer
surface.
Use of Vaseline to protect the glass ionomer surface is of limited use as
Vaseline is easily removed by action of lips.
RECENT ADVANCES OF GLASSIONOMER:
1- Ionomer- modified resins (Fluoride-containing composites- Giomer):
These are composites that contain glass ionomer fillers but do not contain
polyacrylic acids.
No acid/base reaction in these systems, glass fillers is suspended in the resin
system. Composites that contain fluoride are thus incapable of fluoride recharge
like GIC. They also have less esthetic durability and function than conventional
composites.
2- Glass Carbomer:
This is a novel commercial material of the glass-ionomer type, which has
enhanced bioactivity. The glass used in glass carbomer contains strontium, and
also high amounts of silicon as well as a small amount of calcium. It has also the
advantage of acid-washing process
3- Calcium aluminate GIC (Ceramir):
A hybrid product with a composition between that of calcium aluminate and
GIC, it is designed for luting fixed prosthesis. The calcium aluminate contributes
to a basic pH during curing, reduction in Microleakage and excellent

97
biocompatibility.
4- Bioactive glass (BAG)
Nano-bioceramic particles composed of nano-calcium silicate are
incorporated.
BAG has been used as a restorative material its degradation products
stimulate for the production of growth factors, cell proliferation and activate the
gene expression of osteoblasts.
It also helps in treating dentine hypersensitivity and promoting enamel
remineralization. BAG bonds to both hard and soft tissues.
BAG has antibacterial effect as it raises the pH of aqueous solutions.
5- Zirconomer:
A new class of restorative GIC with increased strength and durability is
developed; it shows strength of amalgam, so it is also called white amalgam.
Zirconia fillers are included in the glass component. It reinforces the structural
integrity of the restorative material and imparts higher mechanical properties for
the restoration
6- Giomer:
Giomers are the latest category of hybrid dental restorative materials. It has
Prereacted glass with poly-acrylic acid and then mixed with the resin. It exhibits
both high fluoride release and recharge of glass ionomer cement. The added
advantages of giomers are its good esthetics, ease of handling and improved
physical properties of the set material.
7- Amalgomer
Amalgomer technology (ceramic reinforced glass ionomer cement) is
introduced into restorative dentistry to match the strength and durability of dental
amalgam. It contains a high level of fluoride with good aesthetics and minimal
cavity preparation required. It bonds to tooth structure and has excellent

98
biocompatibility and shows all the advantages of GIC.