
NGINX Cookbook - Index of
181
Derek DeJonghe Compliments of Complete NGINX Cookbook
-
Upload
khangminh22 -
Category
Documents
-
view
5 -
download
0
Transcript of NGINX Cookbook - Index of

Derek DeJonghe
Compliments of
CompleteNGINXCookbook

FREE TRIAL LEARN MORE
flawless application
deliveryLoad
BalancerContent Cache
Web Server
Security Controls
Monitoring & Management

Derek DeJonghe
Complete NGINX CookbookAdvanced Recipes for Operations
Boston Farnham Sebastopol TokyoBeijing Boston Farnham Sebastopol TokyoBeijing

978-1-491-96895-6
[LSI]
NGINX Cookbookby Derek DeJonghe
Copyright © 2017 O’Reilly Media Inc. All rights reserved.
Printed in the United States of America.
Published by O’Reilly Media, Inc., 1005 Gravenstein Highway North, Sebastopol, CA95472.
O’Reilly books may be purchased for educational, business, or sales promotional use.Online editions are also available for most titles (http://oreilly.com/safari). For moreinformation, contact our corporate/institutional sales department: 800-998-9938 [email protected].
Editor: Virginia WilsonAcquisitions Editor: Brian AndersonProduction Editor: Shiny KalapurakkelCopyeditor: Amanda Kersey
Proofreader: Sonia SarubaInterior Designer: David FutatoCover Designer: Karen MontgomeryIllustrator: Rebecca Demarest
March 2017: First Edition
Revision History for the First Edition2017-05-26: First Release
The O’Reilly logo is a registered trademark of O’Reilly Media, Inc. NGINX Cook‐book, the cover image, and related trade dress are trademarks of O’Reilly Media, Inc.
While the publisher and the author have used good faith efforts to ensure that theinformation and instructions contained in this work are accurate, the publisher andthe author disclaim all responsibility for errors or omissions, including without limi‐tation responsibility for damages resulting from the use of or reliance on this work.Use of the information and instructions contained in this work is at your own risk. Ifany code samples or other technology this work contains or describes is subject toopen source licenses or the intellectual property rights of others, it is your responsi‐bility to ensure that your use thereof complies with such licenses and/or rights.

Table of Contents
Part I. Part I: Load Balancing and HTTP Caching
1. High-Performance Load Balancing. . . . . . . . . . . . . . . . . . . . . . . . . . . . 11.0 Introduction 11.1 HTTP Load Balancing 21.2 TCP Load Balancing 31.3 Load-Balancing Methods 41.4 Connection Limiting 6
2. Intelligent Session Persistence. . . . . . . . . . . . . . . . . . . . . . . . . . . . . . . 92.0 Introduction 92.1 Sticky Cookie 102.2 Sticky Learn 112.3 Sticky Routing 122.4 Connection Draining 13
3. Application-Aware Health Checks. . . . . . . . . . . . . . . . . . . . . . . . . . . . 153.0 Introduction 153.1 What to Check 153.2 Slow Start 163.3 TCP Health Checks 173.4 HTTP Health Checks 18
4. High-Availability Deployment Modes. . . . . . . . . . . . . . . . . . . . . . . . 214.0 Introduction 214.1 NGINX HA Mode 21
v

4.2 Load-Balancing Load Balancers with DNS 224.3 Load Balancing on EC2 23
5. Massively Scalable Content Caching. . . . . . . . . . . . . . . . . . . . . . . . . . 255.0 Introduction 255.1 Caching Zones 255.2 Caching Hash Keys 275.3 Cache Bypass 285.4 Cache Performance 295.5 Purging 30
6. Sophisticated Media Streaming. . . . . . . . . . . . . . . . . . . . . . . . . . . . . 316.0 Introduction 316.1 Serving MP4 and FLV 316.2 Streaming with HLS 326.3 Streaming with HDS 346.4 Bandwidth Limits 34
7. Advanced Activity Monitoring. . . . . . . . . . . . . . . . . . . . . . . . . . . . . . . 377.0 Introduction 377.1 NGINX Traffic Monitoring 377.2 The JSON Feed 39
8. DevOps On-the-Fly Reconfiguration. . . . . . . . . . . . . . . . . . . . . . . . . . 418.0 Introduction 418.1 The NGINX API 418.2 Seamless Reload 438.3 SRV Records 44
9. UDP Load Balancing. . . . . . . . . . . . . . . . . . . . . . . . . . . . . . . . . . . . . . . 479.0 Introduction 479.1 Stream Context 479.2 Load-Balancing Algorithms 499.3 Health Checks 49
10. Cloud-Agnostic Architecture. . . . . . . . . . . . . . . . . . . . . . . . . . . . . . . . 5110.0 Introduction 5110.1 The Anywhere Load Balancer 5110.2 The Importance of Versatility 52
vi | Table of Contents

Part II. Part II: Security and Access
11. Controlling Access. . . . . . . . . . . . . . . . . . . . . . . . . . . . . . . . . . . . . . . . . 5711.0 Introduction 5711.1 Access Based on IP Address 5711.2 Allowing Cross-Origin Resource Sharing 58
12. Limiting Use. . . . . . . . . . . . . . . . . . . . . . . . . . . . . . . . . . . . . . . . . . . . . . 6112.0 Introduction 6112.1 Limiting Connections 6112.2 Limiting Rate 6312.3 Limiting Bandwidth 64
13. Encrypting. . . . . . . . . . . . . . . . . . . . . . . . . . . . . . . . . . . . . . . . . . . . . . . 6713.0 Introduction 6713.1 Client-Side Encryption 6713.2 Upstream Encryption 69
14. HTTP Basic Authentication. . . . . . . . . . . . . . . . . . . . . . . . . . . . . . . . . . 7114.0 Introduction 7114.1 Creating a User File 7114.2 Using Basic Authentication 72
15. HTTP Authentication Subrequests. . . . . . . . . . . . . . . . . . . . . . . . . . . 7515.0 Introduction 7515.1 Authentication Subrequests 75
16. Secure Links. . . . . . . . . . . . . . . . . . . . . . . . . . . . . . . . . . . . . . . . . . . . . . 7716.0 Introduction 7716.1 Securing a Location 7716.2 Generating a Secure Link with a Secret 7816.3 Securing a Location with an Expire Date 8016.4 Generating an Expiring Link 81
17. API Authentication Using JWT. . . . . . . . . . . . . . . . . . . . . . . . . . . . . . . 8317.0 Introduction 8317.1 Validating JWTs 8317.2 Creating JSON Web Keys 84
18. OpenId Connect Single Sign-On. . . . . . . . . . . . . . . . . . . . . . . . . . . . . . 8718.0 Introduction 87
Table of Contents | vii

18.1 Authenticate Users via Existing OpenId ConnectSingle Sign-On (SSO) 87
18.2 Obtaining JSON Web Key from Google 89
19. ModSecurity Web Application Firewall. . . . . . . . . . . . . . . . . . . . . . . 9119.0 Introduction 9119.1 Installing ModSecurity for NGINX Plus 9119.2 Configuring ModSecurity in NGINX Plus 9219.3 Installing ModSecurity from Source for a Web
Application Firewall 93
20. Practical Security Tips. . . . . . . . . . . . . . . . . . . . . . . . . . . . . . . . . . . . . . 9720.0 Introduction 9720.1 HTTPS Redirects 9720.2 Redirecting to HTTPS Where SSL/TLS Is Terminated
Before NGINX 9820.3 HTTP Strict Transport Security 9920.4 Satisfying Any Number of Security Methods 100
Part III. Part III: Deployment and Operations
21. Deploying on AWS. . . . . . . . . . . . . . . . . . . . . . . . . . . . . . . . . . . . . . . . 10321.0 Introduction 10321.1 Auto-Provisioning on AWS 10321.2 Routing to NGINX Nodes Without an ELB 10521.3 The ELB Sandwich 10621.4 Deploying from the Marketplace 108
22. Deploying on Azure. . . . . . . . . . . . . . . . . . . . . . . . . . . . . . . . . . . . . . . 11122.0 Introduction 11122.1 Creating an NGINX Virtual Machine Image 11122.2 Load Balancing Over NGINX Scale Sets 11322.3 Deploying Through the Marketplace 114
23. Deploying on Google Cloud Compute. . . . . . . . . . . . . . . . . . . . . . . . 11723.0 Introduction 11723.1 Deploying to Google Compute Engine 11723.2 Creating a Google Compute Image 11823.3 Creating a Google App Engine Proxy 119
viii | Table of Contents

24. Deploying on Docker. . . . . . . . . . . . . . . . . . . . . . . . . . . . . . . . . . . . . . 12324.0 Introduction 12324.1 Running Quickly with the NGINX Image 12324.2 Creating an NGINX Dockerfile 12424.3 Building an NGINX Plus Image 12624.4 Using Environment Variables in NGINX 128
25. Using Puppet/Chef/Ansible/SaltStack. . . . . . . . . . . . . . . . . . . . . . . 13125.0 Introduction 13125.1 Installing with Puppet 13125.2 Installing with Chef 13325.3 Installing with Ansible 13525.4 Installing with SaltStack 136
26. Automation. . . . . . . . . . . . . . . . . . . . . . . . . . . . . . . . . . . . . . . . . . . . . 13926.0 Introduction 13926.1 Automating with NGINX Plus 13926.2 Automating Configurations with Consul Templating 140
27. A/B Testing with split_clients. . . . . . . . . . . . . . . . . . . . . . . . . . . . . . 14327.0 Introduction 14327.1 A/B Testing 143
28. Locating Users by IP Address Using the GeoIP Module. . . . . . . . . 14528.0 Introduction 14528.1 Using the GeoIP Module and Database 14628.2 Restricting Access Based on Country 14728.3 Finding the Original Client 148
29. Debugging and Troubleshooting with Access Logs, Error Logs, andRequest Tracing. . . . . . . . . . . . . . . . . . . . . . . . . . . . . . . . . . . . . . . . . . 15129.0 Introduction 15129.1 Configuring Access Logs 15129.2 Configuring Error Logs 15329.3 Forwarding to Syslog 15429.4 Request Tracing 155
30. Performance Tuning. . . . . . . . . . . . . . . . . . . . . . . . . . . . . . . . . . . . . . 15730.0 Introduction 15730.1 Automating Tests with Load Drivers 15730.2 Keeping Connections Open to Clients 158
Table of Contents | ix

30.3 Keeping Connections Open Upstream 15930.4 Buffering Responses 16030.5 Buffering Access Logs 16130.6 OS Tuning 162
31. Practical Ops Tips and Conclusion. . . . . . . . . . . . . . . . . . . . . . . . . . . 16531.0 Introduction 16531.1 Using Includes for Clean Configs 16531.2 Debugging Configs 16631.3 Conclusion 168
x | Table of Contents

PART I
Part I: Load Balancing andHTTP Caching
This is Part I of III of NGINX Cookbook. This book is about NGINXthe web server, reverse proxy, load balancer, and HTTP cache. Part Iwill focus mostly on the load-balancing aspect and the advancedfeatures around load balancing, as well as some information aroundHTTP caching. This book will touch on NGINX Plus, the licensedversion of NGINX that provides many advanced features, such as areal-time monitoring dashboard and JSON feed, the ability to addservers to a pool of application servers with an API call, and activehealth checks with an expected response. The following chaptershave been written for an audience that has some understanding ofNGINX, modern web architectures such as n-tier or microservicedesigns, and common web protocols such as TCP, UDP, and HTTP.I wrote this book because I believe in NGINX as the strongest webserver, proxy, and load balancer we have. I also believe in NGINX’svision as a company. When I heard Owen Garrett, head of productsat NGINX, Inc. explain that the core of the NGINX system wouldcontinue to be developed and open source, I knew NGINX, Inc. wasgood for all of us, leading the World Wide Web with one of the mostpowerful software technologies to serve a vast number of use cases.
Throughout this book, there will be references to both the free andopen source NGINX software, as well as the commercial product

from NGINX, Inc., NGINX Plus. Features and directives that areonly available as part of the paid subscription to NGINX Plus will bedenoted as such. Most readers in this audience will be users andadvocates for the free and open source solution; this book’s focus ison just that, free and open source NGINX at its core. However, thisfirst part provides an opportunity to view some of the advanced fea‐tures available in the paid solution, NGINX Plus.

CHAPTER 1
High-Performance Load Balancing
1.0 IntroductionToday’s internet user experience demands performance and uptime.To achieve this, multiple copies of the same system are run, andthe load is distributed over them. As load increases, another copyof the system can be brought online. The architecture technique iscalled horizontal scaling. Software-based infrastructure is increas‐ing in popularity because of its flexibility, opening up a vast worldof possibility. Whether the use case is as small as a set of two forhigh availability or as large as thousands world wide, there’s a needfor a load-balancing solution that is as dynamic as the infrastruc‐ture. NGINX fills this need in a number of ways, such as HTTP,TCP, and UDP load balancing, the last of which is discussed inChapter 9.
This chapter discusses load-balancing configurations for HTTPand TCP in NGINX. In this chapter, you will learn about theNGINX load-balancing algorithms, such as round robin, least con‐nection, least time, IP hash, and generic hash. They will aid you indistributing load in ways more useful to your application. Whenbalancing load, you also want to control the amount of load beingserved to the application server, which is covered in Recipe 1.4.
1

1.1 HTTP Load BalancingProblem
You need to distribute load between two or more HTTP servers.
Solution
Use NGINX’s HTTP module to load balance over HTTP serversusing the upstream block:
upstream backend { server 10.10.12.45:80 weight=1; server app.example.com:80 weight=2;}server { location / { proxy_pass http://backend; }}
This configuration balances load across two HTTP servers on port80. The weight parameter instructs NGINX to pass twice as manyconnections to the second server, and the weight parameter defaultsto 1.
Discussion
The HTTP upstream module controls the load balancing for HTTP.This module defines a pool of destinations, either a list of Unixsockets, IP addresses, and DNS records, or a mix. The upstreammodule also defines how any individual request is assigned to any ofthe upstream servers.
Each upstream destination is defined in the upstream pool by theserver directive. The server directive is provided a Unix socket, IPaddress, or an FQDN, along with a number of optional parameters.The optional parameters give more control over the routing ofrequests. These parameters include the weight of the server in thebalancing algorithm; whether the server is in standby mode, avail‐able, or unavailable; and how to determine if the server is unavail‐able. NGINX Plus provides a number of other convenientparameters like connection limits to the server, advanced DNS reso‐
2 | Chapter 1: High-Performance Load Balancing

lution control, and the ability to slowly ramp up connections to aserver after it starts.
1.2 TCP Load BalancingProblem
You need to distribute load between two or more TCP servers.
Solution
Use NGINX’s stream module to load balance over TCP serversusing the upstream block:
stream { upstream mysql_read { server read1.example.com:3306 weight=5; server read2.example.com:3306; server 10.10.12.34:3306 backup; }
server { listen 3306; proxy_pass mysql_read; }}
The server block in this example instructs NGINX to listen on TCPport 3306 and balance load between two MySQL database read rep‐licas, and lists another as a backup that will be passed traffic if theprimaries are down.
Discussion
TCP load balancing is defined by the NGINX stream module. Thestream module, like the HTTP module, allows you to define upstreampools of servers and configure a listening server. When configuringa server to listen on a given port, you must define the port it’s to lis‐ten on, or optionally, an address and a port. From there a destina‐tion must be configured, whether it be a direct reverse proxy toanother address or an upstream pool of resources.
The upstream for TCP load balancing is much like the upstream forHTTP, in that it defines upstream resources as servers, configuredwith Unix socket, IP, or FQDN; as well as server weight, max num‐
1.2 TCP Load Balancing | 3

ber of connections, DNS resolvers, and connection ramp-up peri‐ods; and if the server is active, down, or in backup mode.
NGINX Plus offers even more features for TCP load balancing.These advanced features offered in NGINX Plus can be foundthroughout Part I of this book. Features available in NGINX Plus,such as connection limiting, can be found later in this chap‐ter. Health checks for all load balancing will be covered in Chapter 2.Dynamic reconfiguration for upstream pools, a feature available inNGINX Plus, is covered in Chapter 8.
1.3 Load-Balancing MethodsProblem
Round-robin load balancing doesn’t fit your use case because youhave heterogeneous workloads or server pools.
Solution
Use one of NGINX’s load-balancing methods, such as least connec‐tions, least time, generic hash, or IP hash:
upstream backend { least_conn; server backend.example.com; server backend1.example.com;}
This sets the load-balancing algorithm for the backend upstreampool to be least connections. All load-balancing algorithms, with theexception of generic hash, will be standalone directives like the pre‐ceding example. Generic hash takes a single parameter, which can bea concatenation of variables, to build the hash from.
Discussion
Not all requests or packets carry an equal weight. Given this, roundrobin, or even the weighted round robin used in examples prior, willnot fit the need of all applications or traffic flow. NGINX provides anumber of load-balancing algorithms that can be used to fit particu‐lar use cases. These load-balancing algorithms or methods can notonly be chosen, but also configured. The following load-balancingmethods are available for upstream HTTP, TCP, and UDP pools:
4 | Chapter 1: High-Performance Load Balancing

Round robinThe default load-balancing method, which distributes requestsin order of the list of servers in the upstream pool. Weight canbe taken into consideration for a weighted round robin, whichcould be used if the capacity of the upstream servers varies. Thehigher the integer value for the weight, the more favored theserver will be in the round robin. The algorithm behind weightis simply statistical probability of a weighted average. Roundrobin is the default load-balancing algorithm and is used if noother algorithm is specified.
Least connectionsAnother load-balancing method provided by NGINX. Thismethod balances load by proxying the current request to theupstream server with the least number of open connectionsproxied through NGINX. Least connections, like round robin,also takes weights into account when deciding to which serverto send the connection. The directive name is least_conn.
Least timeAvailable only in NGINX Plus, is akin to least connections inthat it proxies to the upstream server with the least number ofcurrent connections but favors the servers with the lowest aver‐age response times. This method is one of the most sophistica‐ted load-balancing algorithms out there and fits the need ofhighly performant web applications. This algorithm is a valueadd over least connections because a small number of connec‐tions does not necessarily mean the quickest response. Thedirective name is least_time.
Generic hashThe administrator defines a hash with the given text, variablesof the request or runtime, or both. NGINX distributes the loadamongst the servers by producing a hash for the current requestand placing it against the upstream servers. This method is veryuseful when you need more control over where requests are sentor determining what upstream server most likely will have thedata cached. Note that when a server is added or removed fromthe pool, the hashed requests will be redistributed. This algo‐rithm has an optional parameter, consistent, to minimize theeffect of redistribution. The directive name is hash.
1.3 Load-Balancing Methods | 5

IP hashOnly supported for HTTP, is the last of the bunch. IP hash usesthe client IP address as the hash. Slightly different from usingthe remote variable in a generic hash, this algorithm uses thefirst three octets of an IPv4 address or the entire IPv6 address.This method ensures that clients get proxied to the sameupstream server as long as that server is available, which isextremely helpful when the session state is of concern and nothandled by shared memory of the application. This method alsotakes the weight parameter into consideration when distribut‐ing the hash. The directive name is ip_hash.
1.4 Connection LimitingProblem
You have too much load overwhelming your upstream servers.
Solution
Use NGINX Plus’s max_conns parameter to limit connections toupstream servers:
upstream backend { zone backends 64k; queue 750 timeout=30s;
server webserver1.example.com max_conns=25; server webserver2.example.com max_conns=15;}
The connection-limiting feature is currently only available inNGINX Plus. This NGINX Plus configuration sets an integer oneach upstream server that specifies the max number of connectionsto be handled at any given time. If the max number of connectionshas been reached on each server, the request can be placed into thequeue for further processing, provided the optional queue directiveis specified. The optional queue directive sets the maximum numberof requests that can be simultaneously in the queue. A shared mem‐ory zone is created by use of the zone directive. The shared memoryzone allows NGINX Plus worker processes to share information
6 | Chapter 1: High-Performance Load Balancing

about how many connections are handled by each server and howmany requests are queued.
Discussion
In dealing with distribution of load, one concern is overload. Over‐loading a server will cause it to queue connections in a listen queue.If the load balancer has no regard for the upstream server, it canload the server’s listen queue beyond repair. The ideal approach isfor the load balancer to be aware of the connection limitations of theserver and queue the connections itself so that it can send the con‐nection to the next available server with understanding of load as awhole. Depending on the upstream server to process its own queuewill lead to poor user experience as connections start to timeout.NGINX Plus provides a solution by allowing connections to queueat the load balancer and by making informed decisions on where itsends the next request or session.
The max_conns parameter on the server directive within theupstream block provides NGINX Plus with a limit of how manyconnections each upstream server can handle. This parameter isconfigurable in order to match the capacity of a given server. Whenthe number of current connections to a server meets the value of themax_conns parameter specified, NGINX Plus will stop sending newrequests or sessions to that server until those connections arereleased.
Optionally, in NGINX Plus, if all upstream servers are at theirmax_conns limit, NGINX Plus can start to queue new connectionsuntil resources are freed to handle those connections. Specifying aqueue is optional. When queuing, we must take into consideration areasonable queue length. Much like in everyday life, users and appli‐cations would much rather be asked to come back after a shortperiod of time than wait in a long line and still not be served. Thequeue directive in an upstream block specifies the max length of thequeue. The timeout parameter of the queue directive specifies howlong any given request should wait in queue before giving up, whichdefaults to 60 seconds.
1.4 Connection Limiting | 7


CHAPTER 2
Intelligent Session Persistence
2.0 IntroductionWhile HTTP may be a stateless protocol, if the context it’s to conveywere stateless, the internet would be a much less interesting place.Many modern web architectures employ stateless application tiers,storing state in shared memory or databases. However, this is notthe reality for all. Session state is immensely valuable and vast ininteractive applications. This state may be stored locally for a num‐ber of reasons; for example, in applications where the data beingworked is so large that network overhead is too expensive in perfor‐mance. When state is stored locally to an application server, it isextremely important to the user experience that the subsequentrequests continue to be delivered to the same server. Another por‐tion of the problem is that servers should not be released until thesession has finished. Working with stateful applications at scalerequires an intelligent load balancer. NGINX Plus offers multipleways to solve this problem by tracking cookies or routing.
NGINX Plus’s sticky directive alleviates difficulties of server affin‐ity at the traffic controller, allowing the application to focus on itscore. NGINX tracks session persistence in three ways: by creatingand tracking its own cookie, detecting when applications prescribecookies, or routing based on runtime variables.
9

2.1 Sticky CookieProblem
You need to bind a downstream client to an upstream server.
Solution
Use the sticky cookie directive to instruct NGINX Plus to createand track a cookie:
upstream backend { server backend1.example.com; server backend2.example.com; sticky cookie affinity expires=1h domain=.example.com httponly secure path=/;}
This configuration creates and tracks a cookie that ties a down‐stream client to an upstream server. The cookie in this example isnamed affinity, is set for example.com, persists an hour, cannot beconsumed client-side, can only be sent over HTTPS, and is valid forall paths.
Discussion
Using the cookie parameter on the sticky directive will create acookie on first request containing information about the upstreamserver. NGINX Plus tracks this cookie, enabling it to continuedirecting subsequent requests to the same server. The first positionalparameter to the cookie parameter is the name of the cookie to becreated and tracked. Other parameters offer additional controlinforming the browser of the appropriate usage, like the expire time,domain, path, and whether the cookie can be consumed client-sideor if it can be passed over unsecure protocols.
10 | Chapter 2: Intelligent Session Persistence

2.2 Sticky LearnProblem
You need to bind a downstream client to an upstream server byusing an existing cookie.
Solution
Use the sticky learn directive to discover and track cookies thatare created by the upstream application:
upstream backend { server backend1.example.com:8080; server backend2.example.com:8081;
sticky learn create=$upstream_cookie_cookiename lookup=$cookie_cookiename zone=client_sessions:2m;}
The example instructs NGINX to look for and track sessions bylooking for a cookie named COOKIENAME in response headers, andlooking up existing sessions by looking for the same cookie onrequest headers. This session affinity is stored in a shared memoryzone of 2 megabytes that can track approximately 16,000 sessions.The name of the cookie will always be application specific. Com‐monly used cookie names such as jsessionid or phpsessionid aretypically defaults set within the application or the application serverconfiguration.
Discussion
When applications create their own session state cookies, NGINXPlus can discover them in request responses and track them. Thistype of cookie tracking is performed when the sticky directive isprovided the learn parameter. Shared memory for tracking cookiesis specified with the zone parameter, with a name and size. NGINXPlus is told to look for cookies in the response from the upstreamserver with specification of the create parameter, and searches forprior registered server affinity by the lookup parameter. The valueof these parameters are variables exposed by the HTTP module.
2.2 Sticky Learn | 11
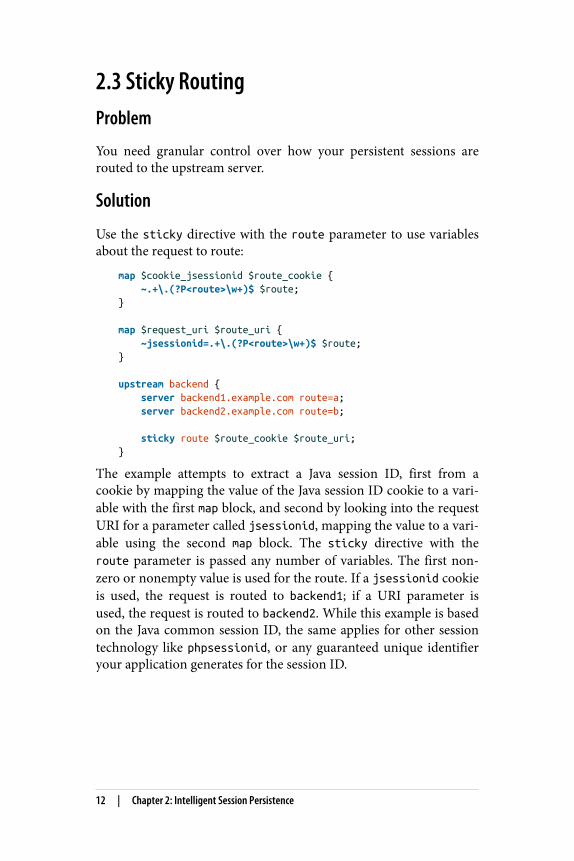
2.3 Sticky RoutingProblem
You need granular control over how your persistent sessions arerouted to the upstream server.
Solution
Use the sticky directive with the route parameter to use variablesabout the request to route:
map $cookie_jsessionid $route_cookie { ~.+\.(?P<route>\w+)$ $route;}
map $request_uri $route_uri { ~jsessionid=.+\.(?P<route>\w+)$ $route;}
upstream backend { server backend1.example.com route=a; server backend2.example.com route=b;
sticky route $route_cookie $route_uri;}
The example attempts to extract a Java session ID, first from acookie by mapping the value of the Java session ID cookie to a vari‐able with the first map block, and second by looking into the requestURI for a parameter called jsessionid, mapping the value to a vari‐able using the second map block. The sticky directive with theroute parameter is passed any number of variables. The first non‐zero or nonempty value is used for the route. If a jsessionid cookieis used, the request is routed to backend1; if a URI parameter isused, the request is routed to backend2. While this example is basedon the Java common session ID, the same applies for other sessiontechnology like phpsessionid, or any guaranteed unique identifieryour application generates for the session ID.
12 | Chapter 2: Intelligent Session Persistence

Discussion
Sometimes you may want to direct traffic to a particular server witha bit more granular control. The route parameter to the stickydirective is built to achieve this goal. Sticky route gives you bettercontrol, actual tracking, and stickiness, as opposed to the generichash load-balancing algorithm. The client is first routed to anupstream server based on the route specified, and then subsequentrequests will carry the routing information in a cookie or the URI.Sticky route takes a number of positional parameters that are evalu‐ated. The first nonempty variable is used to route to a server. Mapblocks can be used to selectively parse variables and save them asanother variable to be used in the routing. Essentially, the stickyroute directive creates a session within the NGINX Plus sharedmemory zone for tracking any client session identifier you specify tothe upstream server, consistently delivering requests with this ses‐sion identifier to the same upstream server as its original request.
2.4 Connection DrainingProblem
You need to gracefully remove servers for maintenance or other rea‐sons while still serving sessions.
Solution
Use the drain parameter through the NGINX Plus API, described inmore detail in Chapter 8, to instruct NGINX to stop sending newconnections that are not already tracked:
$ curl 'http://localhost/upstream_conf\?upstream=backend&id=1&drain=1'
Discussion
When session state is stored locally to a server, connections and per‐sistent sessions must be drained before it’s removed from the pool.Draining connections is the process of letting sessions to that serverexpire natively before removing the server from the upstream pool.Draining can be configured for a particular server by adding the
2.4 Connection Draining | 13

drain parameter to the server directive. When the drain parameteris set, NGINX Plus will stop sending new sessions to this server butwill allow current sessions to continue being served for the length oftheir session.
14 | Chapter 2: Intelligent Session Persistence

CHAPTER 3
Application-Aware Health Checks
3.0 IntroductionFor a number of reasons, applications fail. It could be because ofnetwork connectivity, server failure, or application failure, to name afew. Proxies and load balancers must be smart enough to detect fail‐ure of upstream servers and stop passing traffic to them; otherwise,the client will be waiting, only to be delivered a timeout. A way tomitigate service degradation when a server fails is to have the proxycheck the health of the upstream servers. NGINX offers two differ‐ent types of health checks: passive, available in the open source ver‐sion; as well as active, available only in NGINX Plus. Active healthchecks on a regular interval will make a connection or request to theupstream server and have the ability to verify that the response iscorrect. Passive health checks monitor the connection or responsesof the upstream server as clients make the request or connection.You may want to use passive health checks to reduce the load ofyour upstream servers, and you may want to use active healthchecks to determine failure of an upstream server before a client isserved a failure.
3.1 What to CheckProblem
You need to check your application for health but don’t know whatto check.
15

Solution
Use a simple but direct indication of the application health. Forexample, a handler that simply returns an HTTP 200 response tellsthe load balancer that the application process is running.
Discussion
It’s important to check the core of the service you’re load balancingfor. A single comprehensive health check that ensures all of the sys‐tems are available can be problematic. Health checks should checkthat the application directly behind the load balancer is availableover the network and that the application itself is running. Withapplication-aware health checks, you want to pick an endpoint thatsimply ensures that the processes on that machine are running. Itmay be tempting to make sure that the database connection stringsare correct or that the application can contact its resources. How‐ever, this can cause a cascading effect if any particular service fails.
3.2 Slow StartProblem
Your application needs to ramp up before taking on full productionload.
Solution
Use the slow_start parameter on the server directive to graduallyincrease the number of connections over a specified time as a serveris reintroduced to the upstream load-balancing pool:
upstream { zone backend 64k;
server server1.example.com slow_start=20s; server server2.example.com slow_start=15s;}
The server directive configurations will slowly ramp up traffic tothe upstream servers after they’re reintroduced to the pool. server1will slowly ramp up its number of connections over 20 seconds, andserver2 over 15 seconds.
16 | Chapter 3: Application-Aware Health Checks

Discussion
Slow start is the concept of slowly ramping up the number ofrequests proxied to a server over a period of time. Slow start allowsthe application to warm up by populating caches, initiating databaseconnections without being overwhelmed by connections as soon asit starts. This feature takes effect when a server that has failed healthchecks begins to pass again and re-enters the load-balancing pool.
3.3 TCP Health ChecksProblem
You need to check your upstream TCP server for health and removeunhealthy servers from the pool.
Solution
Use the health_check directive in the server block for an activehealth check:
stream { server { listen 3306; proxy_pass read_backend; health_check interval=10 passes=2 fails=3; }}
The example monitors the upstream servers actively. The upstreamserver will be considered unhealthy if it fails to respond to three ormore TCP connections initiated by NGINX. NGINX performs thecheck every 10 seconds. The server will only be considered healthyafter passing two health checks.
Discussion
TCP health can be verified by NGINX Plus either passively oractively. Passive health monitoring is done by noting the communi‐cation between the client and the upstream server. If the upstreamserver is timing out or rejecting connections, a passive health checkwill deem that server unhealthy. Active health checks will initiatetheir own configurable checks to determine health. Active health
3.3 TCP Health Checks | 17

checks not only test a connection to the upstream server, but canexpect a given response.
3.4 HTTP Health ChecksProblem
You need to actively check your upstream HTTP servers for health.
Solution
Use the health_check directive in a location block:
http { server { ... location / { proxy_pass http://backend; health_check interval=2s fails=2 passes=5 uri=/ match=welcome; } } # status is 200, content type is "text/html", # and body contains "Welcome to nginx!" match welcome { status 200; header Content-Type = text/html; body ~ "Welcome to nginx!"; }}
This health check configuration for HTTP servers checks the healthof the upstream servers by making an HTTP request to the URI '/'every two seconds. The upstream servers must pass five consecutivehealth checks to be considered healthy and will be consideredunhealthy if they fail two consecutive checks. The response from theupstream server must match the defined match block, which definesthe status code as 200, the header Content-Type value as 'text/html', and the string "Welcome to nginx!" in the response body.
18 | Chapter 3: Application-Aware Health Checks

Discussion
HTTP health checks in NGINX Plus can measure more than justthe response code. In NGINX Plus, active HTTP health checksmonitor based on a number of acceptance criteria of the responsefrom the upstream server. Active health check monitoring can beconfigured for how often upstream servers are checked, the URI tocheck, how many times it must pass this check to be consideredhealthy, how many times it can fail before being deemed unhealthy,and what the expected result should be. The match parameter pointsto a match block that defines the acceptance criteria for theresponse. The match block has three directives: status, header, andbody. All three of these directives have comparison flags as well.
3.4 HTTP Health Checks | 19


CHAPTER 4
High-Availability DeploymentModes
4.0 IntroductionFault-tolerant architecture separates systems into identical, inde‐pendent stacks. Load balancers like NGINX are employed to distrib‐ute load, ensuring that what’s provisioned is utilized. The coreconcepts of high availability are load balancing over multiple activenodes or an active-passive failover. Highly available applicationshave no single points of failure; every component must use one ofthese concepts, including the load balancers themselves. For us, thatmeans NGINX. NGINX is designed to work in either configuration:multiple active or active-passive failover. This chapter will detailtechniques on how to run multiple NGINX servers to ensure highavailability in your load-balancing tier.
4.1 NGINX HA ModeProblem
You need a highly available load-balancing solution.
21

Solution
Use NGINX Plus’s HA mode with keepalived by installing thenginx-ha-keepalived package from the NGINX Plus repository.
Discussion
The NGINX Plus repository includes a package called nginx-ha-keepalived. This package, based on keepalived, manages a virtual IPaddress exposed to the client. Another process is run on the NGINXserver that ensures that NGINX Plus and the keepalived process arerunning. Keepalived is a process that utilizes the Virtual RouterRedundancy Protocol (VRRP), sending small messages oftenreferred to as heartbeats to the backup server. If the backup serverdoes not receive the heartbeat for three consecutive periods, thebackup server initiates the failover, moving the virtual IP address toitself and becoming the master. The failover capabilities of nginx-ha-keepalived can be configured to identify custom failure situa‐tions.
4.2 Load-Balancing Load Balancers with DNSProblem
You need to distribute load between two or more NGINX servers.
Solution
Use DNS to round robin across NGINX servers by adding multipleIP addresses to a DNS A record.
Discussion
When running multiple load balancers, you can distribute load viaDNS. The A record allows for multiple IP addresses to be listedunder a single, fully qualified domain name. DNS will automaticallyround robin across all the IPs listed. DNS also offers weighted roundrobin with weighted records, which works in the same way asweighted round robin in NGINX described in Chapter 1. Thesetechniques work great. However, a pitfall can be removing the
22 | Chapter 4: High-Availability Deployment Modes
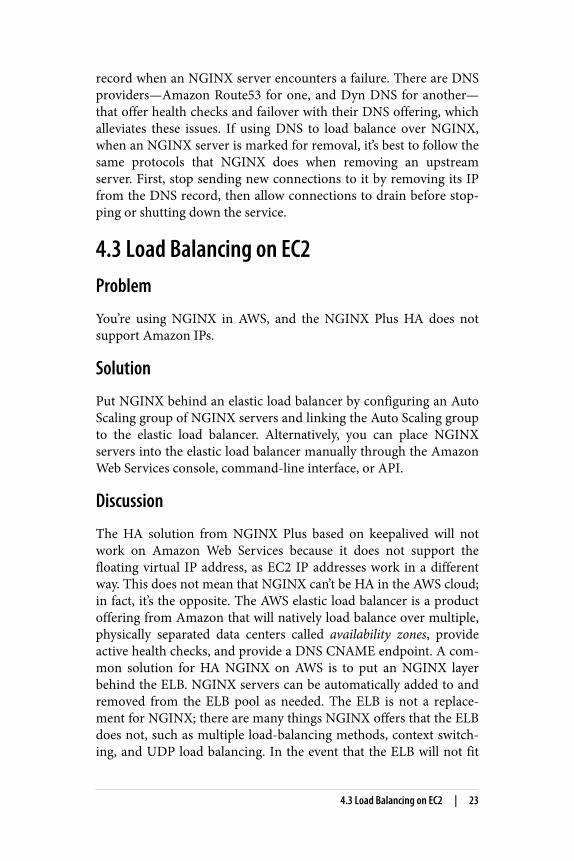
record when an NGINX server encounters a failure. There are DNSproviders—Amazon Route53 for one, and Dyn DNS for another—that offer health checks and failover with their DNS offering, whichalleviates these issues. If using DNS to load balance over NGINX,when an NGINX server is marked for removal, it’s best to follow thesame protocols that NGINX does when removing an upstreamserver. First, stop sending new connections to it by removing its IPfrom the DNS record, then allow connections to drain before stop‐ping or shutting down the service.
4.3 Load Balancing on EC2Problem
You’re using NGINX in AWS, and the NGINX Plus HA does notsupport Amazon IPs.
Solution
Put NGINX behind an elastic load balancer by configuring an AutoScaling group of NGINX servers and linking the Auto Scaling groupto the elastic load balancer. Alternatively, you can place NGINXservers into the elastic load balancer manually through the AmazonWeb Services console, command-line interface, or API.
Discussion
The HA solution from NGINX Plus based on keepalived will notwork on Amazon Web Services because it does not support thefloating virtual IP address, as EC2 IP addresses work in a differentway. This does not mean that NGINX can’t be HA in the AWS cloud;in fact, it’s the opposite. The AWS elastic load balancer is a productoffering from Amazon that will natively load balance over multiple,physically separated data centers called availability zones, provideactive health checks, and provide a DNS CNAME endpoint. A com‐mon solution for HA NGINX on AWS is to put an NGINX layerbehind the ELB. NGINX servers can be automatically added to andremoved from the ELB pool as needed. The ELB is not a replace‐ment for NGINX; there are many things NGINX offers that the ELBdoes not, such as multiple load-balancing methods, context switch‐ing, and UDP load balancing. In the event that the ELB will not fit
4.3 Load Balancing on EC2 | 23

1 Amazon also has a white paper about NGINX Plus failover on AWS: http://bit.ly/2aWAqW8.
your need, there are many other options. One option is the DNS sol‐ution, Route53. The DNS product from AWS offers health checksand DNS failover. Amazon also has a white paper about high-availability NGINX Plus, with use of Corosync and Pacemaker, thatwill cluster the NGINX servers and use an elastic IP to float betweenboxes for automatic failover.1
24 | Chapter 4: High-Availability Deployment Modes

CHAPTER 5
Massively ScalableContent Caching
5.0 IntroductionCaching accelerates content serving by storing request responses tobe served again in the future. Content caching reduces load toupstream servers, caching the full response rather than runningcomputations and queries again for the same request. Cachingincreases performance and reduces load, meaning you can servefaster with fewer resources. Scaling and distributing caching serversin strategic locations can have a dramatic effect on user experience.It’s optimal to host content close to the consumer for the best perfor‐mance. You can also cache your content close to your users. This isthe pattern of content delivery networks, or CDNs. With NGINXyou’re able to cache your content wherever you can place an NGINXserver, effectively enabling you to create your own CDN. WithNGINX caching, you’re also able to passively cache and serve cachedresponses in the event of an upstream failure.
5.1 Caching ZonesProblem
You need to cache content and need to define where the cache isstored.
25

Solution
Use the proxy_cache_path directive to define shared memory cachezones and a location for the content:
proxy_cache_path /var/nginx/cache keys_zone=CACHE:60m levels=1:2 inactive=3h max_size=20g;proxy_cache CACHE;
The cache definition example creates a directory for cached respon‐ses on the filesystem at /var/nginx/cache and creates a shared mem‐ory space named CACHE with 60 megabytes of memory. Thisexample sets the directory structure levels, defines the release ofcached responses after they have not been requested in 3 hours, anddefines a maximum size of the cache of 20 gigabytes. Theproxy_cache directive informs a particular context to use the cachezone. The proxy_cache_path is valid in the HTTP context, and theproxy_cache directive is valid in the HTTP, server, and locationcontexts.
Discussion
To configure caching in NGINX, it’s necessary to declare a path andzone to be used. A cache zone in NGINX is created with the direc‐tive proxy_cache_path. The proxy_cache_path designates a loca‐tion to store the cached information and a shared memory space tostore active keys and response metadata. Optional parameters to thisdirective provide more control over how the cache is maintainedand accessed. The levels parameter defines how the file structure iscreated. The value is a colon-separated value that declares the lengthof subdirectory names, with a maximum of three levels. NGINXcaches based on the cache key, which is a hashed value. NGINX thenstores the result in the file structure provided, using the cache key asa file path and breaking up directories based on the levels value.The inactive parameter allows for control over the length of time acache item will be hosted after its last use. The size of the cache isalso configurable with use of the max_size parameter. Other param‐eters are in relation to the cache loading process, which loads thecache keys into the shared memory zone from the files cached ondisk.
26 | Chapter 5: Massively Scalable Content Caching

1 Any combination of text or variables exposed to NGINX can be used to form a cachekey. A list of variables is available in NGINX: http://nginx.org/en/docs/varindex.html.
5.2 Caching Hash KeysProblem
You need to control how your content is cached and looked up.
Solution
Use the proxy_cache_key directive, along with variables to definewhat constitutes a cache hit or miss:
proxy_cache_key "$host$request_uri $cookie_user";
This cache hash key will instruct NGINX to cache pages based onthe host and URI being requested, as well as a cookie that definesthe user. With this you can cache dynamic pages without servingcontent that was generated for a different user.
Discussion
The default proxy_cache_key is "$scheme$proxy_host
$request_uri". This default will fit most use cases. The variablesused include the scheme, HTTP or HTTPS, the proxy_host, wherethe request is being sent, and the request URI. All together, thisreflects the URL that NGINX is proxying the request to. You mayfind that there are many other factors that define a unique requestper application, such as request arguments, headers, session identifi‐ers, and so on, to which you’ll want to create your own hash key.1
Selecting a good hash key is very important and should be thoughtthrough with understanding of the application. Selecting a cache keyfor static content is typically pretty straightforward; using the host‐name and URI will suffice. Selecting a cache key for fairly dynamiccontent like pages for a dashboard application requires more knowl‐edge around how users interact with the application and the degreeof variance between user experiences. For security concerns youmay not want to present cached data from one user to anotherwithout fully understanding the context. The proxy_cache_keydirective configures the string to be hashed for the cache key. The
5.2 Caching Hash Keys | 27
proxy_cache_key can be set in the context of HTTP, server, andlocation blocks, providing flexible control on how requests arecached.
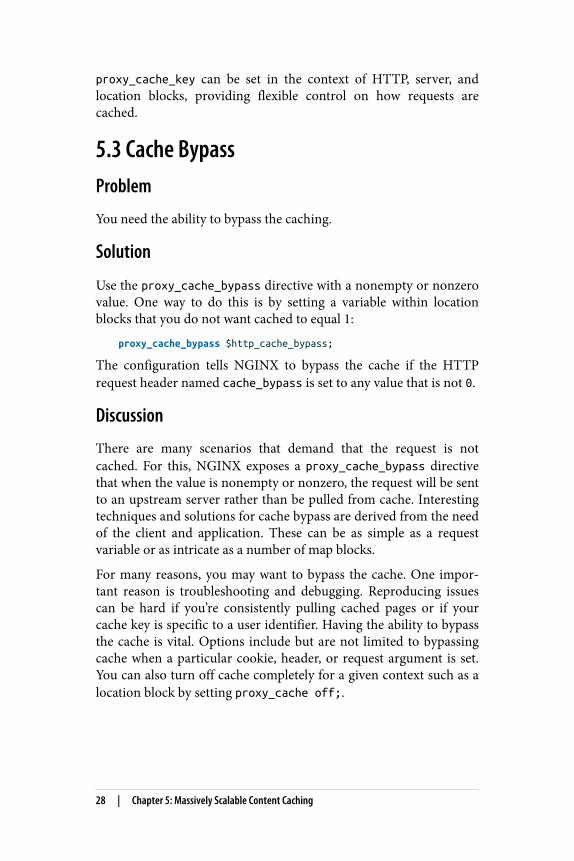
5.3 Cache BypassProblem
You need the ability to bypass the caching.
Solution
Use the proxy_cache_bypass directive with a nonempty or nonzerovalue. One way to do this is by setting a variable within locationblocks that you do not want cached to equal 1:
proxy_cache_bypass $http_cache_bypass;
The configuration tells NGINX to bypass the cache if the HTTPrequest header named cache_bypass is set to any value that is not 0.
Discussion
There are many scenarios that demand that the request is notcached. For this, NGINX exposes a proxy_cache_bypass directivethat when the value is nonempty or nonzero, the request will be sentto an upstream server rather than be pulled from cache. Interestingtechniques and solutions for cache bypass are derived from the needof the client and application. These can be as simple as a requestvariable or as intricate as a number of map blocks.
For many reasons, you may want to bypass the cache. One impor‐tant reason is troubleshooting and debugging. Reproducing issuescan be hard if you’re consistently pulling cached pages or if yourcache key is specific to a user identifier. Having the ability to bypassthe cache is vital. Options include but are not limited to bypassingcache when a particular cookie, header, or request argument is set.You can also turn off cache completely for a given context such as alocation block by setting proxy_cache off;.
28 | Chapter 5: Massively Scalable Content Caching

5.4 Cache PerformanceProblem
You need to increase performance by caching on the client side.
Solution
Use client-side cache control headers:
location ~* \.(css|js)$ { expires 1y; add_header Cache-Control "public";}
This location block specifies that the client can cache the content ofCSS and JavaScript files. The expires directive instructs the clientthat their cached resource will no longer be valid after one year. Theadd_header directive adds the HTTP response header Cache-Control to the response, with a value of public, which allows anycaching server along the way to cache the resource. If we specify pri‐vate, only the client is allowed to cache the value.
Discussion
Cache performance has to do with many variables, disk speed beinghigh on the list. There are many things within the NGINX configu‐ration you can do to assist with cache performance. One option is toset headers of the response in such a way that the client actuallycaches the response and does not make the request to NGINX at all,but simply serves it from its own cache.
5.4 Cache Performance | 29

5.5 PurgingProblem
You need to invalidate an object from the cache.
Solution
Use NGINX Plus’s purge feature, the proxy_cache_purge directive,and a nonempty or zero value variable:
map $request_method $purge_method { PURGE 1; default 0;}server { ... location / { ... proxy_cache_purge $purge_method; }}
Discussion
A common concept for static files is to put a hash of the file in thefilename. This ensures that as you roll out new code and content,your CDN recognizes this as a new file because the URI haschanged. However, this does not exactly work for dynamic contentto which you’ve set cache keys that don’t fit this model. In everycaching scenario, you must have a way to purge the cache. NGINXPlus has provided a simple method of purging cached responses.The proxy_cache_purge directive, when passed a nonzero or non‐empty value, will purge the cached items matching the request. Asimple way to set up purging is by mapping the request method forPURGE. However, you may want to use this in conjunction with thegeo_ip module or a simple authentication to ensure that not anyonecan purge your precious cache items. NGINX has also allowed forthe use of *, which will purge cache items that match a commonURI prefix. To use wildcards you will need to configure yourproxy_cache_path directive with the purger=on argument.
30 | Chapter 5: Massively Scalable Content Caching

CHAPTER 6
Sophisticated Media Streaming
6.0 IntroductionThis chapter covers streaming media with NGINX in MPEG-4 orFlash Video formats. NGINX is widely used to distribute and streamcontent to the masses. NGINX supports industry-standard formatsand streaming technologies, which will be covered in this chapter.NGINX Plus enables the ability to fragment content on the fly withthe HTTP Live Stream module, as well as the ability to deliverHTTP Dynamic Streaming of already fragmented media. NGINXnatively allows for bandwidth limits, and NGINX Plus’s advancedfeature offers bitrate limiting, enabling your content to be deliveredin the most efficient manner while reserving the servers’ resourcesto reach the most users.
6.1 Serving MP4 and FLVProblem
You need to stream digital media, originating in MPEG-4 (MP4) orFlash Video (FLV).
Solution
Designate an HTTP location block as .mp4 or .flv. NGINX willstream the media using progressive downloads or HTTP pseudos‐treaming and support seeking:
31

http { server { ... location /videos/ { mp4; } location ~ \.flv$ { flv; } }}
The example location block tells NGINX that files in the videosdirectory are of MP4 format type and can be streamed with progres‐sive download support. The second location block instructs NGINXthat any files ending in .flv are of Flash Video format and can bestreamed with HTTP pseudostreaming support.
Discussion
Streaming video or audio files in NGINX is as simple as a singledirective. Progressive download enables the client to initiate play‐back of the media before the file has finished downloading. NGINXsupports seeking to an undownloaded portion of the media in bothformats.
6.2 Streaming with HLSProblem
You need to support HTTP live streaming (HLS) for H.264/AAC-encoded content packaged in MP4 files.
Solution
Utilize NGINX Plus’s HLS module with real-time segmentation,packetization, and multiplexing, with control over fragmentationbuffering and more, like forwarding HLS arguments:
32 | Chapter 6: Sophisticated Media Streaming

location /hls/ { hls; # Use the HLS handler to manage requests
# Serve content from the following location alias /var/www/video;
# HLS parameters hls_fragment 4s; hls_buffers 10 10m; hls_mp4_buffer_size 1m; hls_mp4_max_buffer_size 5m;}
The location block demonstrated directs NGINX to stream HLSmedia out of the /var/www/video directory, fragmenting the mediainto four-second segments. The number of HLS buffers is set to 10with a size of 10 megabytes. The initial MP4 buffer size is set to onemegabyte with a maximum of five megabytes.
Discussion
The HLS module available in NGINX Plus provides the ability totransmultiplex MP4 media files on the fly. There are many directivesthat give you control over how your media is fragmented and buf‐fered. The location block must be configured to serve the media asan HLS stream with the HLS handler. The HLS fragmentation is setin number of seconds, instructing NGINX to fragment the media bytime length. The amount of buffered data is set with thehls_buffers directive specifying the number of buffers and thesize. The client is allowed to start playback of the media after a cer‐tain amount of buffering has accrued specified by thehls_mp4_buffer_size. However, a larger buffer may be necessary asmetadata about the video may exceed the initial buffer size. Thisamount is capped by the hls_mp4_max_buffer_size. These buffer‐ing variables allow NGINX to optimize the end-user experience;choosing the right values for these directives requires knowing thetarget audience and your media. For instance, if the bulk of yourmedia is large video files, and your target audience has high band‐width, you may opt for a larger max buffer size and longer lengthfragmentation. This will allow for the metadata about the content tobe downloaded initially without error and your users to receivelarger fragments.
6.2 Streaming with HLS | 33

6.3 Streaming with HDSProblem
You need to support Adobe’s HTTP Dynamic Streaming (HDS) thathas already been fragmented and separated from the metadata.
Solution
Use NGINX Plus’s support for fragmented FLV files (F4F) module tooffer Adobe Adaptive Streaming to your users:
location /video/ { alias /var/www/transformed_video; f4f; f4f_buffer_size 512k;}
The example instructs NGINX Plus to serve previously fragmentedmedia from a location on disk to the client using the NGINX PlusF4F module. The buffer size for the index file (.f4x) is set to 512 kilo‐bytes.
Discussion
The NGINX Plus F4F module enables NGINX to serve previouslyfragmented media to end users. The configuration of such is as sim‐ple as using the f4f handler inside of an HTTP location block. Thef4f_buffer_size directive configures the buffer size for the indexfile of this type of media.
6.4 Bandwidth LimitsProblem
You need to limit bandwidth to downstream media streaming cli‐ents without impacting the viewing experience.
Solution
Utilize NGINX Plus’s bitrate limiting support for MP4 media files:
34 | Chapter 6: Sophisticated Media Streaming

location /video/ { mp4; mp4_limit_rate_after 15s; mp4_limit_rate 1.2;}
This configuration allows the downstream client to download for 15seconds before applying a bitrate limit. After 15 seconds, the client isallowed to download media at a rate of 120% of the bitrate, whichenables the client to always download faster than they play.
Discussion
NGINX Plus’s bitrate limiting allows your streaming server to limitbandwidth dynamically based on the media being served, allowingclients to download just as much as they need to ensure a seamlessuser experience. The MP4 handler described in a previous sectiondesignates this location block to stream MP4 media formats. Therate-limiting directives, such as mp4_limit_rate_after, tell NGINXto only rate-limit traffic after a specified amount of time, in seconds.The other directive involved in MP4 rate limiting ismp4_limit_rate, which specifies the bitrate at which clients areallowed to download in relation to the bitrate of the media. A valueof 1 provided to the mp4_limit_rate directive specifies that NGINXis to limit bandwidth, 1 to 1 to the bitrate of the media. Providing avalue of more than one to the mp4_limit_rate directive will allowusers to download faster than they watch so they can buffer themedia and watch seamlessly while they download.
6.4 Bandwidth Limits | 35


CHAPTER 7
Advanced Activity Monitoring
7.0 IntroductionTo ensure your application is running at optimal performance andprecision, you need insight into the monitoring metrics about itsactivity. NGINX Plus offers an advanced monitoring dashboard anda JSON feed to provide in-depth monitoring about all requests thatcome through the heart of your application. The NGINX Plus activ‐ity monitoring provides insight into requests, upstream server pools,caching, health, and more. This chapter will detail the power andpossibilities of the NGINX Plus dashboard and JSON feed.
7.1 NGINX Traffic MonitoringProblem
You require in-depth metrics about the traffic flowing through yoursystem.
Solution
Utilize NGINX Plus’s real-time activity monitoring dashboard:
37

server { listen 8080; root /usr/share/nginx/html;
# Redirect requests for / to /status.html location = / { return 301 /status.html; }
location = /status.html { }
# Everything beginning with /status # (except for /status.html) is # processed by the status handler location /status { status; }}
The NGINX Plus configuration serves the NGINX Plus status moni‐toring dashboard. This configuration sets up an HTTP server to lis‐ten on port 8080, serve content out of the /usr/share/nginx/htmldirectory, and redirect / requests to /status.html. All other /statusrequests will be served by the /status location that serves theNGINX Plus status API.
Discussion
NGINX Plus provides an advanced status monitoring dashboard.This status dashboard provides a detailed status of the NGINX sys‐tem, such as number of active connections, uptime, upstream serverpool information, and more. For a glimpse of the console, seeFigure 7-1.
The landing page of the status dashboard provides an overview ofthe entire system. Clicking into the Server zones tab lists detailsabout all HTTP servers configured in the NGINX configuration,detailing the number of responses from 1XX to 5XX and an overalltotal, as well as requests per second and the current traffic through‐put. The Upstream tab details upstream server status, as in if it’s in afailed state, how many requests it has served, and a total of howmany responses have been served by status code, as well as otherstats such as how many health checks it has passed or failed. TheTCP/UDP Zones tab details the amount of traffic flowing throughthe TCP or UDP streams and the number of connections. TheTCP/UDP Upstream tab shows information about how much each
38 | Chapter 7: Advanced Activity Monitoring

of the upstream servers in the TCP/UDP upstream pools is serving,as well as health check pass and fail details and response times. TheCaches tab displays information about the amount of space utilizedfor cache; the amount of traffic served, written, and bypassed; aswell as the hit ratio. The NGINX status dashboard is invaluable inmonitoring the heart of your applications and traffic flow.
Figure 7-1. The NGINX Plus status dashboard
Also See
NGINX Plus Status Dashboard Demo
7.2 The JSON FeedProblem
You need API access to the detail metrics provided by the NGINXPlus status dashboard.
Solution
Utilize the JSON feed provided by NGINX Plus’s status API:
$ curl "demo.nginx.com/status/upstreams\ /demo-backend/peers/0/responses"{ "1xx":0, "2xx":199237, "3xx":7404, "4xx":104415, "5xx":19574,
7.2 The JSON Feed | 39

"total":330630}
The curl call requests a JSON feed from the NGINX Plus status APIfor information about an upstream HTTP server pool, and in par‐ticular about the first server in the pool’s responses.
Discussion
The NGINX Plus status API is vast, and requesting just the statuswill return a JSON object with all the information that can be foundon the status dashboard in whole. The JSON feed API allows you todrill down to particular information you may want to monitor oruse in custom logic to make application or infrastructure decisions.The API is intuitive and RESTful, and you’re able to make requestsfor objects within the overall status JSON feed to limit the datareturned. This JSON feed enables you to feed the monitoring datainto any other number of systems you may be utilizing for monitor‐ing, such as Graphite, Datadog, and Splunk.
40 | Chapter 7: Advanced Activity Monitoring

CHAPTER 8
DevOps On-the-FlyReconfiguration
8.0 IntroductionThe term DevOps has been tossed and spun around more than yourfavorite pizza crust. To the people actually doing the work, the termhas nearly lost meaning; the origin of this term comes from a cul‐ture of developers and operations folk working together in an Agileworkflow to enhance quality and productivity and share responsibil‐ity. If you ask a recruiter, it’s a job title; ask someone in marketing,it’s a hit-generating Swiss army knife. In this context, we meanDevOps to be developing software and tools to solve operationaltasks in the ever-evolving dynamic technology landscape. In thischapter, we’ll discuss the NGINX Plus API that allows you todynamically reconfigure the NGINX Plus load balancer, as well asother tools and patterns to allow your load balancer to evolve withthe rest of your environment, such as the seamless reload andNGINX Plus’s ability to utilize DNS SRV records.
8.1 The NGINX APIProblem
You have a dynamic environment and need to reconfigure NGINXon the fly.
41

Solution
Configure the NGINX Plus API to enable adding and removingservers through API calls:
location /upstream_conf { upstream_conf; allow 10.0.0.0/8; # permit access from private network deny all; # deny access from everywhere else}
...upstream backend { zone backend 64k; state /var/lib/nginx/state/backend.state; ...}
The NGINX Plus configuration enables the upstream configurationAPI and only allows access from a private network. The configura‐tion of the upstream block defines a shared memory zone namedbackend of 64 kilobytes. The state directive tells NGINX to persistthese changes through a restart by saving them to the filesystem.
Utilize the API to add servers when they come online:
$ curl 'http://nginx.local/upstream_conf?\ add=&upstream=backend&server=10.0.0.42:8080'
The curl call demonstrated makes a request to NGINX Plus andrequests a new server be added to the backend upstream configura‐tion.
Utilize the NGINX Plus API to list the servers in the upstream pool:
$ curl 'http://nginx.local/upstream_conf?upstream=backend'server 10.0.0.42:8080; # id=0
The curl call demonstrated makes a request to NGINX Plus to listall of the servers in the upstream pool named backend. Currently weonly have the one server that we added in the previous curl call tothe API. The list request will show the IP address, port, and ID ofeach server in the pool.
Use the NGINX Plus API to drain connections from an upstreamserver, preparing it for a graceful removal from the upstream pool.Details about connection draining can be found in Chapter 2,Recipe 2.4:
42 | Chapter 8: DevOps On-the-Fly Reconfiguration

$ curl 'http://nginx.local/upstream_conf?\ upstream=backend&id=0&drain=1'server 10.0.0.42:8080; # id=0 draining
In this curl, we specify arguments for the upstream pool, backend,the ID of the server we wish to drain, 0, and set the drain argumentto equal 1. We found the ID of the server by listing the servers in theupstream pool in the previous curl command.
NGINX Plus will begin to drain the connections. This process cantake as long as the length of the sessions of the application. To checkin on how many active connections are being served by the serveryou’ve begun to drain, you can use the NGINX Plus JSON feed thatwas detailed in Chapter 7, Recipe 7.2.
After all connections have drained, utilize the NGINX Plus API toremove the server from the upstream pool entirely:
$ curl 'http://nginx.local/upstream_conf?\ upstream=backend&id=0&remove=1'
The curl command passes arguments to the NGINX Plus API toremove server 0 from the upstream pool named backend. This APIcall will return all of the servers and their IDs that are still left in thepool. As we started with an empty pool, added only one serverthrough the API, drained it, and then removed it, we now have anempty pool again.
Discussion
This upstream API enables dynamic application servers to add andremove themselves to the NGINX configuration on the fly. Asservers come online, they can register themselves to the pool, andNGINX will begin to start sending it load. When a server needs tobe removed, the server can request NGINX Plus to drain its connec‐tions, then remove itself from the upstream pool before it’s shutdown. This enables the infrastructure to, through some automation,scale in and out without human intervention.
8.2 Seamless ReloadProblem
You need to reload you configuration without dropping packets.
8.2 Seamless Reload | 43

Solution
Use the reload method of NGINX to achieve a seamless reload ofthe configuration without stopping the server:
service nginx reload
The command-line example reloads the NGINX system using theNGINX init script generally located in the /etc/init.d/ directory.
Discussion
Reloading the NGINX configuration without stopping the serverprovides the ability to change configuration on the fly without drop‐ping any packets. In a high-uptime, dynamic environment, you willneed to change your load-balancing configuration at some point.NGINX allows you to do this while keeping the load balanceronline. This feature enables countless possibilities, such as rerun‐ning configuration management in a live environment, or buildingan application- and cluster-aware module to dynamically configureand reload NGINX to the needs of the environment.
8.3 SRV RecordsProblem
You’d like to use your existing DNS SRV record implementation asthe source for upstream servers.
Solution
Specify the service directive with a value of http on an upstreamserver to instruct NGINX to utilize the SRV record as a load-balancing pool:
http { resolver 10.0.0.2;
upstream backend { zone backends 64k; server api.example.internal service=http resolve; }}
44 | Chapter 8: DevOps On-the-Fly Reconfiguration

The configuration instructs NGINX to resolve DNS from a DNSserver at 10.0.0.2 and set up an upstream server pool with a singleserver directive. This server directive specified with the resolveparameter is instructed to periodically re-resolve the domain name.The service=http parameter and value tells NGINX that this is anSRV record containing a list of IPs and ports and to load balanceover them as if they were configured with the server directive.
Discussion
Dynamic infrastructure is becoming ever more popular with thedemand and adoption of cloud-based infrastructure. Autoscalingenvironments scale horizontally, increasing and decreasing thenumber of servers in the pool to match the demand of the load.Scaling horizontally demands a load balancer that can add andremove resources from the pool. With an SRV record, you offloadthe responsibility of keeping the list of servers to DNS. This type ofconfiguration is extremely enticing for containerized environmentsbecause you may have containers running applications on variableport numbers, possibly at the same IP address.
8.3 SRV Records | 45


CHAPTER 9
UDP Load Balancing
9.0 IntroductionUser Datagram Protocol (UDP) is used in many contexts, such asDNS, NTP, and Voice over IP. NGINX can load balance overupstream servers with all the load-balancing algorithms provided tothe other protocols. In this chapter, we’ll cover the UDP load balanc‐ing in NGINX.
9.1 Stream ContextProblem
You need to distribute load between two or more UDP servers.
47

Solution
Use NGINX’s stream module to load balance over UDP serversusing the upstream block defined as udp:
stream { upstream ntp { server ntp1.example.com:123 weight=2; server ntp2.example.com:123; }
server { listen 123 udp; proxy_pass ntp; }}
This section of configuration balances load between two upstreamNTP servers using the UDP protocol. Specifying UDP load balanc‐ing is as simple as using the udp parameter on the listen directive.
Discussion
One might ask, “Why do you need a load balancer when you canhave multiple hosts in a DNS A or SRV record?” The answer is thatnot only are there alternative balancing algorithms we can balancewith, but we can load balance over the DNS servers themselves.UDP services make up a lot of the services that we depend on innetworked systems such as DNS, NTP, and Voice over IP. UDP loadbalancing may be less common to some but just as useful in theworld of scale.
UDP load balancing will be found in the stream module, just likeTCP, and configured mostly in the same way. The main difference isthat the listen directive specifies that the open socket is for work‐ing with datagrams. When working with datagrams, there are someother directives that may apply where they would not in TCP, suchas the proxy_response directive that tells NGINX how manyexpected responses may be sent from the upstream server, by defaultbeing unlimited until the proxy_timeout limit is reached.
48 | Chapter 9: UDP Load Balancing

9.2 Load-Balancing AlgorithmsProblem
You need to distribute load of a UDP service with control over thedestination or for best performance.
Solution
Utilize the different load-balancing algorithms, like IP hash or leastconn, described in Chapter 1:
upstream dns { least_conn; server ns1.example.com:53; server ns2.example.com:53;}
The configuration load balances over two DNS name servers anddirects the request to the name server with the least number of cur‐rent connections.
Discussion
All of the load-balancing algorithms that were described in Recipe9.2 are available in UDP load balancing as well. These algo‐rithms, such as least connections, least time, generic hash, or IPhash, are useful tools to provide the best experience to the consumerof the service or application.
9.3 Health ChecksProblem
You need to check the health of upstream UDP servers.
Solution
Use NGINX health checks with UDP load balancing to ensure onlyhealthy upstream servers are sent datagrams:
9.2 Load-Balancing Algorithms | 49
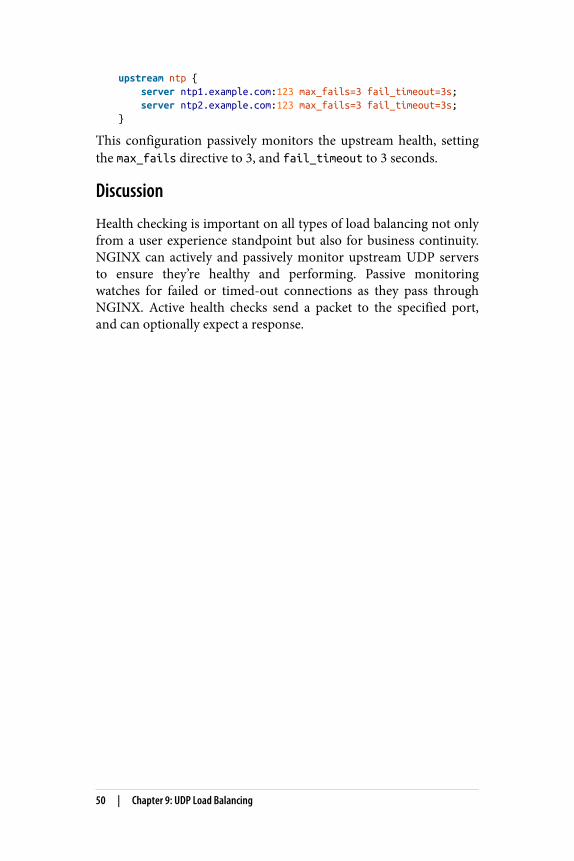
upstream ntp { server ntp1.example.com:123 max_fails=3 fail_timeout=3s; server ntp2.example.com:123 max_fails=3 fail_timeout=3s;}
This configuration passively monitors the upstream health, settingthe max_fails directive to 3, and fail_timeout to 3 seconds.
Discussion
Health checking is important on all types of load balancing not onlyfrom a user experience standpoint but also for business continuity.NGINX can actively and passively monitor upstream UDP serversto ensure they’re healthy and performing. Passive monitoringwatches for failed or timed-out connections as they pass throughNGINX. Active health checks send a packet to the specified port,and can optionally expect a response.
50 | Chapter 9: UDP Load Balancing

CHAPTER 10
Cloud-Agnostic Architecture
10.0 IntroductionOne thing many companies request when moving to the cloud is tobe cloud agnostic. Being cloud agnostic in their architectures ena‐bles them to pick up and move to another cloud or instantiate theapplication in a location that one cloud provider may have thatanother does not. Cloud-agnostic architecture also reduces risk ofvendor lock-in and enables an insurance fallback for your applica‐tion. It’s very common for disaster-recovery plans to use an entirelyseparate cloud, as failure can sometimes be systematic and affect acloud as a whole. For cloud-agnostic architecture, all of your tech‐nology choices must be able to be run in all of those environments.In this chapter, we’ll talk about why NGINX is the right technologychoice when architecting a solution that will fit in any cloud.
10.1 The Anywhere Load BalancerProblem
You need a load-balancer solution that can be deployed in any datacenter, cloud environment, or even local hosts.
51
1 NGINX provides a page to download its software: http://nginx.org/en/download.html.2 Linux packages and repositories can be found at http://nginx.org/en/linux_pack‐
ages.html.
Solution
Load balance with NGINX. NGINX is software that can be deployedanywhere. NGINX runs on Unix; and on multiple flavors of Linuxsuch as Cent OS and Debian, BSD variants, Solaris, macOS, Win‐dows, and others. NGINX can be built from source on Unix andLinux derivatives as well as installed through package managerssuch as yum, aptitude, and zypper. On Windows, it can be installedby downloading a ZIP archive and running the .exe file.
Discussion
The fact that NGINX is a software load balancer rather than strictlyhardware allows it to be deployed on almost any infrastructure.1
Cross-cloud environments and hybrid cloud architectures are on therise, applications are distributed between different clouds for highavailability, and vendor-agnostic architecture limits risk of produc‐tion outages and reduces network latency between the end user andthe application. In these scenarios, the application being hosted typi‐cally doesn’t change and neither should your load-balancing solu‐tion. NGINX can be run in all of these environments with all of thepower of its configuration.2
10.2 The Importance of VersatilityProblem
You need versatility in your architecture and the ability to build inan iterative manner.
Solution
Use NGINX as your load balancer or traffic router. NGINX providesversatility on the platform it runs on or its configuration. If you’rearchitecting a solution, and you’re not sure where it’s going to live or
52 | Chapter 10: Cloud-Agnostic Architecture

need the flexibility to be able to move it to another provider,NGINX will fit this need. If you’re working in an iterative workflow,and new services or configurations are continually changing duringthe development cycle, NGINX is a prime resource, as its configura‐tion can change; and with a reload of the service, the new configura‐tion is online without concern of stopping the service. An examplemight be planning to build out a data center, and then for cost andflexibility, switching gears into a cloud environment. Another exam‐ple might be refactoring an existing monolithic application andslowly decoupling the application into microservices, deploying ser‐vice by service as the smaller applications become ready for produc‐tion.
Discussion
Agile workflows have changed how development work is done. Theidea of an Agile workflow is an iterative approach where it’s OK ifrequirements or scope change. Infrastructure architecture can alsofollow an Agile workflow: you may start out aiming to go into a par‐ticular cloud provider and then have to switch to another partwaythrough the project, or want to deploy to multiple cloud providers.NGINX being able to run anywhere makes it an extremely versatiletool. The importance of versatility is that with the inevitable onset ofcloud, things are always changing. In the ever-evolving landscape ofsoftware, NGINX is able to efficiently serve your application needsas it grows with your features and user base.
10.2 The Importance of Versatility | 53


PART II
Part II: Security and Access
This is Part II of III of NGINX Cookbook. This part will focus onsecurity aspects and features of NGINX and NGINX Plus, thelicensed version of the NGINX server. Throughout this part, youwill learn the basics about controlling access and limiting abuse andmisuse of your web assets and applications. Security concepts suchas encryption of your web traffic as well as basic HTTP authentica‐tion will be explained as applicable to the NGINX server. Moreadvanced topics are covered as well, such as setting up NGINX toverify authentication via third-party systems as well as throughJSON Web Token Signature validation and integrating with Singlesign-on providers. This part covers some amazing features ofNGINX and NGINX Plus such as securing links for time-limitedaccess and security as well as enabling Web Application Firewallcapabilities of NGINX Plus with the ModSecurity module. Some ofthe plug-and-play modules in this part are only available throughthe paid NGINX Plus subscription, however this does not mean thatthe core open source NGINX server is not capable of these securi‐ties.


CHAPTER 11
Controlling Access
11.0 IntroductionControlling access to your web applications or subsets of your webapplications is important business. Access control takes many formsin NGINX, such as denying it at the network level, allowing it basedon authentication mechanisms, or HTTP responses instructingbrowsers how to act. In this chapter we will discuss access controlbased on network attributes, authentication, and how to specifyCross-Origin Resource Sharing (CORS) rules.
11.1 Access Based on IP AddressProblemYou need to control access based on the IP address of the client.
SolutionUse the HTTP access module to control access to protected resour‐ces:
location /admin/ { deny 10.0.0.1; allow 10.0.0.0/20; allow 2001:0db8::/32; deny all;}
57

The given location block allows access from any IPv4 address in10.0.0.0/20 except 10.0.0.1, allows access from IPv6 addresses in the2001:0db8::/32 subnet, and returns a 403 for requests originatingfrom any other address. The allow and deny directives are validwithin the HTTP, server, and location contexts. Rules are checked insequence until a match is found for the remote address.
DiscussionProtecting valuable resources and services on the internet must bedone in layers. NGINX provides the ability to be one of those layers.The deny directive blocks access to a given context, while the allowdirective can be used to allow subsets of the blocked access. You canuse IP addresses, IPv4 or IPv6, CIDR block ranges, the keyword all,and a Unix socket. Typically when protecting a resource, one mightallow a block of internal IP addresses and deny access from all.
11.2 Allowing Cross-Origin Resource SharingProblemYou’re serving resources from another domain and need to allowCORS to enable browsers to utilize these resources.
SolutionAlter headers based on the request method to enable CORS:
map $request_method $cors_method { OPTIONS 11; GET 1; POST 1; default 0;}server { ... location / { if ($cors_method ~ '1') { add_header 'Access-Control-Allow-Methods' 'GET,POST,OPTIONS'; add_header 'Access-Control-Allow-Origin' '*.example.com'; add_header 'Access-Control-Allow-Headers' 'DNT, Keep-Alive, User-Agent,
58 | Chapter 11: Controlling Access

X-Requested-With, If-Modified-Since, Cache-Control, Content-Type'; } if ($cors_method = '11') { add_header 'Access-Control-Max-Age' 1728000; add_header 'Content-Type' 'text/plain; charset=UTF-8'; add_header 'Content-Length' 0; return 204; } }}
There’s a lot going on in this example, which has been condensed byusing a map to group the GET and POST methods together. TheOPTIONS request method returns information called a preflightrequest to the client about this server’s CORS rules. OPTIONS, GET,and POST methods are allowed under CORS. Setting the Access-Control-Allow-Origin header allows for content being served fromthis server to also be used on pages of origins that match this header.The preflight request can be cached on the client for 1,728,000 sec‐onds, or 20 days.
DiscussionResources such as JavaScript make cross-origin resource requestswhen the resource they’re requesting is of a domain other than itsown origin. When a request is considered cross origin, the browseris required to obey CORS rules. The browser will not use theresource if it does not have headers that specifically allow its use. Toallow our resources to be used by other subdomains, we have to setthe CORS headers, which can be done with the add_header direc‐tive. If the request is a GET, HEAD, or POST with standard contenttype, and the request does not have special headers, the browser willmake the request and only check for origin. Other request methodswill cause the browser to make the preflight request to check theterms of the server to which it will obey for that resource. If you donot set these headers appropriately, the browser will give an errorwhen trying to utilize that resource.
11.2 Allowing Cross-Origin Resource Sharing | 59


CHAPTER 12
Limiting Use
12.0 IntroductionLimiting use or abuse of your system can be important for throttlingheavy users or stopping attacks. NGINX has multiple modules builtin to help control the use of your applications. This chapter focuseson limiting use and abuse, the number of connections, the rate atwhich requests are served, and the amount of bandwidth used. It’simportant to differentiate between connections and requests: con‐nections (TCP connections) are the transport layer on whichrequests are made and therefore are not the same thing. A browsermay open multiple connections to a server to make multiplerequests. However, in HTTP/1 and HTTP/1.1, requests can only bemade one at a time on a single connection; whereas in HTTP/2,multiple requests can be made in parallel over a single TCP connec‐tion. This chapter will help you restrict usage of your service andmitigate abuse.
12.1 Limiting ConnectionsProblemYou need to limit the number of connections based on a predefinedkey, such as the client’s IP address.
61

SolutionConstruct a shared memory zone to hold connection metrics, anduse the limit_conn directive to limit open connections:
http { limit_conn_zone $binary_remote_addr zone=limitbyaddr:10m; limit_conn_status 429; ... server { ... limit_conn limitbyaddr 40; ... }}
This configuration creates a shared memory zone named limitbyaddr. The predefined key used is the client’s IP address in binaryform. The size of the shared memory zone is set to 10 mega‐bytes. The limit_conn directive takes two parameters: alimit_conn_zone name, and the number of connections allowed.The limit_conn_status sets the response when the connections arelimited to a status of 429, indicating too manyrequests. The limit_conn and limit_conn_status directives arevalid in the HTTP, server, and location context.
DiscussionLimiting the number of connections based on a key can be used todefend against abuse and share your resources fairly across all yourclients. It is important to be cautious of your predefined key. Usingan IP address, as we are in the previous example, could be danger‐ous if many users are on the same network that originates from thesame IP, such as when behind a Network Address Translation (NAT).The entire group of clients will be limited. The limit_conn_zonedirective is only valid in the HTTP context. You can utilize anynumber of variables available to NGINX within the HTTP contextin order to build a string on which to limit by. Utilizing a variablethat can identify the user at the application level, such as a sessioncookie, may be a cleaner solution depending on the use case. Thelimit_conn_status defaults to 503, service unavailable. You mayfind it preferable to use a 429, as the service is available, and 500-level responses indicate server error whereas 400-level responsesindicate client error.
62 | Chapter 12: Limiting Use

12.2 Limiting RateProblemYou need to limit the rate of requests by predefined key, such as theclient’s IP address.
SolutionUtilize the rate-limiting module to limit the rate of requests:
http { limit_req_zone $binary_remote_addr zone=limitbyaddr:10m rate=1r/s; limit_req_status 429; ... server { ... limit_req zone=limitbyaddr burst=10 nodelay; ... }}
This example configuration creates a shared memory zone namedlimitbyaddr. The predefined key used is the client’s IP address inbinary form. The size of the shared memory zone is set to 10 mega‐bytes. The zone sets the rate with a keyword argument. Thelimit_req directive takes two optional keyword arguments: zoneand burst. zone is required to instruct the directive on which sharedmemory request limit zone to use. When the request rate for a givenzone is exceeded, requests are delayed until their maximum burstsize is reached, denoted by the burst keyword argument. The burstkeyword argument defaults to zero. limit_req also takes a thirdoptional parameter, nodelay. This parameter enables the client touse its burst without delay before being limited. limit_req_statussets the status returned to the client to a particular HTTP statuscode; the default is 503. limit_req_status and limit_req are validin the context of HTTP, server, and location. limit_req_zone isonly valid in the HTTP context.
DiscussionThe rate-limiting module is very powerful in protecting against abu‐sive rapid requests while still providing a quality service to every‐one. There are many reasons to limit rate of request, one being
12.2 Limiting Rate | 63

security. You can deny a brute force attack by putting a very strictlimit on your login page. You can disable the plans of malicioususers that might try to deny service to your application or to wasteresources by setting a sane limit on all requests. The configurationof the rate-limit module is much like the preceding connection-limiting module described in Recipe 12.1, and much of the sameconcerns apply. The rate at which requests are limited can be donein requests per second or requests per minute. When the rate limit ishit, the incident is logged. There’s a directive not in the example:limit_req_log_level, which defaults to error, but can be set toinfo, notice, or warn.
12.3 Limiting BandwidthProblemYou need to limit download bandwidths per client for your assets.
SolutionUtilize NGINX’s limit_rate and limit_rate_after directives tolimit the rate of response to a client:
location /download/ { limit_rate_after 10m; limit_rate 1m;}
The configuration of this location block specifies that for URIs withthe prefix download, the rate at which the response will be served tothe client will be limited after 10 megabytes to a rate of 1 megabyteper second. The bandwidth limit is per connection, so you may wantto institute a connection limit as well as a bandwidth limit whereapplicable.
DiscussionLimiting the bandwidth for particular connections enables NGINXto share its upload bandwidth across all of the clients in a manneryou specify. These two directives do it all: limit_rate_after andlimit_rate. The limit_rate_after directive can be set in almostany context: http, server, location, and if when the if is within alocation. The limit_rate directive is applicable in the same con‐
64 | Chapter 12: Limiting Use

texts as limit_rate_after; however, it can alternatively be set bysetting a variable named $limit_rate. The limit_rate_afterdirective specifies that the connection should not be rate limiteduntil after a specified amount of data has been transferred. Thelimit_rate directive specifies the rate limit for a given context inbytes per second by default. However, you can specify m for mega‐bytes or g for gigabytes. Both directives default to a value of 0. Thevalue 0 means not to limit download rates at all. This module allowsyou to programmatically change the rate limit of clients.
12.3 Limiting Bandwidth | 65


CHAPTER 13
Encrypting
13.0 IntroductionThe internet can be a scary place, but it doesn’t have to be. Encryp‐tion for information in transit has become easier and more attaina‐ble in that signed certificates have become less costly with the adventof Let’s Encrypt and Amazon Web Services. Both offer free certifi‐cates with limited usage. With free signed certificates, there’s littlestanding in the way of protecting sensitive information. While notall certificates are created equal, any protection is better than none.In this chapter, we discuss how to secure information betweenNGINX and the client, as well as NGINX and upstream services.
13.1 Client-Side EncryptionProblemYou need to encrypt traffic between your NGINX server and the cli‐ent.
SolutionUtilize one of the SSL modules, such as the ngx_http_ssl_moduleor ngx_stream_ssl_module to encrypt traffic:
67

http { # All directives used below are also valid in stream server { listen 8433 ssl; ssl_protocols TLSv1.2; ssl_ciphers HIGH:!aNULL:!MD5; ssl_certificate /usr/local/nginx/conf/cert.pem; ssl_certificate_key /usr/local/nginx/conf/cert.key; ssl_session_cache shared:SSL:10m; ssl_session_timeout 10m; }}
This configuration sets up a server to listen on a port encrypted withSSL, 8443. The server accepts the SSL protocol version TLSv1.2. TheSSL certificate and key locations are disclosed to the server for use.The server is instructed to use the highest strength offered by theclient while restricting a few that are insecure. The SSL session cacheand timeout allow for workers to cache and store session parametersfor a given amount of time. There are many other session cacheoptions that can help with performance or security of all types of usecases. Session cache options can be used in conjunction. However,specifying one without the default will turn off that default, built-insession cache.
DiscussionSecure transport layers are the most common way of encryptinginformation in transit. At the time of writing, the Transport LayerSecurity protocol (TLS) is the default over the Secure Socket Layer(SSL) protocol. That’s because versions 1 through 3 of SSL are nowconsidered insecure. While the protocol name may be different, TLSstill establishes a secure socket layer. NGINX enables your service toprotect information between you and your clients, which in turnprotects the client and your business. When using a signed certifi‐cate, you need to concatenate the certificate with the certificateauthority chain. When you concatenate your certificate and thechain, your certificate should be above the chain in the file. If yourcertificate authority has provided many files in the chain, it is alsoable to provide the order in which they are layered. The SSL sessioncache enhances performance by not having to negotiate for SSL/TLSversions and ciphers.
68 | Chapter 13: Encrypting

Also SeeMozilla Server Side TLS Page
Mozilla SSL Configuration Generator
Test your SSL Configuration with SSL Labs SSL Test
13.2 Upstream EncryptionProblemYou need to encrypt traffic between NGINX and the upstream ser‐vice and set specific negotiation rules for compliance regulations orif the upstream is outside of your secured network.
SolutionUse the SSL directives of the HTTP proxy module to specify SSLrules:
location / { proxy_pass https://upstream.example.com; proxy_ssl_verify on; proxy_ssl_verify_depth 2; proxy_ssl_protocols TLSv1.2;}
These proxy directives set specific SSL rules for NGINX to obey. Theconfigured directives ensure that NGINX verifies that the certificateand chain on the upstream service is valid up to two certificatesdeep. The proxy_ssl_protocols directive specifies that NGINX willonly use TLS version 1.2. By default NGINX does not verifyupstream certificates and accepts all TLS versions.
DiscussionThe configuration directives for the HTTP proxy module are vast,and if you need to encrypt upstream traffic, you should at least turnon verification. You can proxy over HTTPS simply by changing theprotocol on the value passed to the proxy_pass directive. However,this does not validate the upstream certificate. Other directivesavailable, such as proxy_ssl_certificate and proxy_ssl_certificate_key, allow you to lock down upstream encryption for
13.2 Upstream Encryption | 69

enhanced security. You can also specify proxy_ssl_crl or a certifi‐cate revocation list, which lists certificates that are no longer consid‐ered valid. These SSL proxy directives help harden your system’scommunication channels within your own network or across thepublic internet.
70 | Chapter 13: Encrypting

CHAPTER 14
HTTP Basic Authentication
14.0 IntroductionBasic authentication is a simple way to protect private content. Thismethod of authentication can be used to easily hide developmentsites or keep privileged content hidden. Basic authentication ispretty unsophisticated, not extremely secure, and, therefore, shouldbe used with other layers to prevent abuse. It’s recommended to setup a rate limit on locations or servers that require basic authentica‐tion to hinder the rate of brute force attacks. It’s also recommendedto utilize HTTPS, as described in Chapter 13, whenever possible, asthe username and password are passed as a base64-encoded stringto the server in a header on every authenticated request. The impli‐cations of basic authentication over an unsecured protocol such asHTTP means that the username and password can be captured byany machine the request passes through.
14.1 Creating a User FileProblemYou need an HTTP basic authentication user file to store usernamesand passwords.
SolutionGenerate a file in the following format, where the password isencrypted or hashed with one of the allowed formats:
71
# commentname1:password1name2:password2:commentname3:password3
The username is the first field, the password the second field, andthe delimiter is a colon. An optional third field can be used for com‐ment on each user. NGINX can understand a few different formatsfor passwords, one of which is if the password is encrypted with theC function crypt(). This function is exposed to the command lineby the openssl passwd command. With openssl installed, you cancreate encrypted password strings with the following command:
$ openssl passwd MyPassword1234
The output will be a string NGINX can use in your password file.
DiscussionBasic authentication passwords can be generated a few ways and in afew different formats to varying degrees of security. The htpasswdcommand from Apache can also generate passwords. Both theopenssl and htpasswd commands can generate passwords with theapr1 algorithm, which NGINX can also understand. The passwordcan also be in the salted sha-1 format that LDAP and Dovecot use.NGINX supports more formats and hashing algorithms, however,many of them are considered insecure because they can be easilybrute-forced.
14.2 Using Basic AuthenticationProblemYou need basic authentication to protect an NGINX location orserver.
SolutionUse the auth_basic and auth_basic_user_file directives to enablebasic authentication:
location / { auth_basic "Private site"; auth_basic_user_file conf.d/passwd;}
72 | Chapter 14: HTTP Basic Authentication

The auth_basic directives can be used in the HTTP, server, or loca‐tion contexts. The auth_basic directive takes a string parameter,which is displayed on the basic authentication pop-up window whenan unauthenticated user arrives. The auth_basic_user_file speci‐fies a path to the user file, which was just described in Recipe 14.1.
DiscussionBasic authentication can be used to protect the context of the entireNGINX host, specific virtual servers, or even just specific locationblocks. Basic authentication won’t replace user authentication forweb applications, but it can help keep private information secure.Under the hood, basic authentication is done by the server returninga 401 unauthorized HTTP code with a response header WWW-Authenticate. This header will have a value of Basic realm="yourstring". This response will cause the browser to prompt for a user‐name and password. The username and password are concatenatedand delimited with a colon, then base64 encoded, and sent in arequest header named Authorization. The Authorization requestheader will specify a Basic and user:password encoded string. Theserver decodes the header and verifies against theauth_basic_user_file provided. Because the username passwordstring is merely base64 encoded, it’s recommended to use HTTPSwith basic authentication.
14.2 Using Basic Authentication | 73


CHAPTER 15
HTTP Authentication Subrequests
15.0 IntroductionWith many different approaches to authentication, NGINX makes iteasy to validate against a wide range of authentication systems byenabling a subrequest mid-flight to validate identity. The HTTPauthentication request module is meant to enable authenticationsystems like LDAP or custom authentication microservices. Theauthentication mechanism proxies the request to the authenticationservice before the request is fulfilled. During this proxy you have thepower of NGINX to manipulate the request as the authenticationservice requires. Therefore, it is extremely flexible.
15.1 Authentication SubrequestsProblemYou have a third-party authentication system to which you wouldlike requests authenticated.
SolutionUse the http_auth_request_module to make a request to theauthentication service to verify identity before serving the request:
75

location /private/ { auth_request /auth; auth_request_set $auth_status $upstream_status;}
location = /auth { internal; proxy_pass http://auth-server; proxy_pass_request_body off; proxy_set_header Content-Length ""; proxy_set_header X-Original-URI $request_uri;}
The auth_request directive takes a URI parameter that must be alocal internal location. The auth_request_set directive allows youto set variables from the authentication subrequest.
DiscussionThe http_auth_request_module enables authentication on everyrequest handled by the NGINX server. The module makes a subre‐quest before serving the original to determine if the request hasaccess to the resource it’s requesting. The entire original request isproxied to this subrequest location. The authentication location actsas a typical proxy to the subrequest and sends the original request,including the original request body and headers. The HTTP statuscode of the subrequest is what determines whether or not access isgranted. If the subrequest returns with an HTTP 200 status code,the authentication is successful and the request is fulfilled. If thesubrequest returns HTTP 401 or 403, the same will be returned forthe original request.
If your authentication service does not request the request body, youcan drop the request body with the proxy_pass_request_bodydirective, as demonstrated. This practice will reduce the request sizeand time. Because the response body is discarded, the Content-Length header must be set to an empty string. If your authenticationservice needs to know the URI being accessed by the request, you’llwant to put that value in a custom header that your authenticationservice checks and verifies. If there are things you do want to keepfrom the subrequest to the authentication service, like responseheaders or other information, you can use the auth_request_setdirective to make new variables out of response data.
76 | Chapter 15: HTTP Authentication Subrequests

CHAPTER 16
Secure Links
16.0 IntroductionSecure links are a way to keep static assets protected with the md5hashing algorithm. With this module, you can also put a limit on thelength of time for which the link is accepted. Using secure links ena‐bles your NGINX application server to serve static content securelywhile taking this responsibility off of the application server. Thismodule is included in the free and open source NGINX. However, itis not built into the standard NGINX package but instead thenginx-extras package. Alternatively, it can be enabled with the --with-http_secure_link_module configuration parameter whenbuilding NGINX from source.
16.1 Securing a LocationProblemYou need to secure a location block using a secret.
SolutionUse the secure link module and the secure_link_secret directiveto restrict access to resources to users who have a secure link:
77

location /resources { secure_link_secret mySecret; if ($secure_link = "") { return 403; }
rewrite ^ /secured/$secure_link; }
location /secured/ { internal; root /var/www; }
This configuration creates an internal and public-facing locationblock. The public-facing location block /resources will return a 403Forbidden unless the request URI includes an md5 hash string thatcan be verified with the secret provided to the secure_link_secretdirective. The $secure_link variable is an empty string unless thehash in the URI is verified.
DiscussionSecuring resources with a secret is a great way to ensure your filesare protected. The secret is used in conjunction with the URI. Thisstring is then md5 hashed, and the hex digest of that md5 hash is usedin the URI. The hash is placed into the link and evaluated byNGINX. NGINX knows the path to the file being requested as it’s inthe URI after the hash. NGINX also knows your secret as it’s pro‐vided via the secure_link_secret directive. NGINX is able toquickly validate the md5 hash and store the URI in the $secure_linkvariable. If the hash cannot be validated, the variable is set to anempty string. It’s important to note that the argument passed to thesecure_link_secret must be a static string; it cannot be a variable.
16.2 Generating a Secure Link with a SecretProblemYou need to generate a secure link from your application using asecret.
78 | Chapter 16: Secure Links
SolutionThe secure link module in NGINX accepts the hex digest of an md5hashed string, where the string is a concatenation of the URI pathand the secret. Building on the last section, Recipe 16.1, we will cre‐ate the secured link that will work with the previous configurationexample given there’s a file present at /var/www/secured/index.html.To generate the hex digest of the md5 hash, we can use the Unixopenssl command:
$ echo -n 'index.htmlmySecret' | openssl md5 -hex(stdin)= a53bee08a4bf0bbea978ddf736363a12
Here we show the URI that we’re protecting, index.html, concaten‐ated with our secret, mySecret. This string is passed to the opensslcommand to output an md5 hex digest.
The following is an example of the same hash digest being construc‐ted in Python using the hashlib library that is included in thePython Standard Library:
import hashlibhashlib.md5.(b'index.htmlmySecret').hexdigest()'a53bee08a4bf0bbea978ddf736363a12'
Now that we have this hash digest, we can use it in a URL. Ourexample will be for www.example.com making a request for thefile /var/www/secured/index.html through our /resources location.Our full URL will be the following:
www.example.com/resources/a53bee08a4bf0bbea978ddf736363a12/\index.html
DiscussionGenerating the digest can be done in many ways, in many languages.Things to remember: the URI path goes before the secret, there areno carriage returns in the string, and use the hex digest of the md5hash.
16.2 Generating a Secure Link with a Secret | 79

16.3 Securing a Location with an Expire DateProblemYou need to secure a location with a link that expires at some futuretime and is specific to a client.
SolutionUtilize the other directives included in the secure link module to setan expire time and use variables in your secure link:
location /resources { root /var/www; secure_link $arg_md5,$arg_expires; secure_link_md5 "$secure_link_expires$uri$remote_addr mySecret"; if ($secure_link = "") { return 403; } if ($secure_link = "0") { return 410; }}
The secure_link directive takes two parameters separated with acomma. The first parameter is the variable that holds the md5 hash.This example uses an HTTP argument of md5. The second parame‐ter is a variable that holds the time in which the link expires in Unixepoch time format. The secure_link_md5 directive takes a singleparameter that declares the format of the string that is used to con‐struct the md5 hash. Like the other configuration, if the hash doesnot validate, the $secure_link variable is set to an empty string.However, with this usage, if the hash matches but the time hasexpired, the $secure_link variable will be set to 0.
DiscussionThis usage of securing a link is more flexible and looks cleaner thanthe secure_link_secret shown in Recipe 16.1. With these direc‐tives, you can use any number of variables that are available toNGINX in the hashed string. Using user-specific variables in thehash string will strengthen your security as users won’t be able totrade links to secured resources. It’s recommended to use a variablelike $remote_addr or $http_x_forwarded_for, or a session cookieheader generated by the application. The arguments to secure_linkcan come from any variable you prefer, and they can be named
80 | Chapter 16: Secure Links

whatever best fits. The conditions around what the $secure_linkvariable is set to returns known HTTP codes for Forbidden andGone. The HTTP 410, Gone, works great for expired links as thecondition is to be considered permanent.
16.4 Generating an Expiring LinkProblemYou need to generate a link that expires.
SolutionGenerate a timestamp for the expire time in the Unix epoch format.On a Unix system, you can test by using the date as demonstrated inthe following:
$ date -d "2020-12-31 00:00" +%s --utc1609372800
Next you’ll need to concatenate your hash string to match the stringconfigured with the secure_link_md5 directive. In this case, ourstring to be used will be 1293771600/resources/
index.html127.0.0.1 mySecret. The md5 hash is a bit differentthan just a hex digest. It’s an md5 hash in binary format, base64 enco‐ded, with plus signs (+) translated to hyphens (-), slashes (/) trans‐lated to underscores (_), and equal (=) signs removed. The followingis an example on a Unix system:
$ echo -n '1609372800/resources/index.html127.0.0.1 mySecret' \ | openssl md5 -binary \ | openssl base64 \ | tr +/ -_ \ | tr -d =TG6ck3OpAttQ1d7jW3JOcw
Now that we have our hash, we can use it as an argument along withthe expire date:
/resources/index.html?md5=TG6ck3OpAttQ1d7jW3JOcw&expires=1609372 800'
The following is a more practical example in Python utilizing a rela‐tive time for the expiration, setting the link to expire one hour fromgeneration. At the time of writing this example works with Python2.7 and 3.x utilizing the Python Standard Library:
16.4 Generating an Expiring Link | 81

from datetime import datetime, timedeltafrom base64 import b64encodeimport hashlib
# Set environment varsresource = b'/resources/index.html'remote_addr = b'127.0.0.1'host = b'www.example.com'mysecret = b'mySecret'
# Generate expire timestampnow = datetime.utcnow()expire_dt = now + timedelta(hours=1)expire_epoch = str.encode(expire_dt.strftime('%s'))
# md5 hash the stringuncoded = expire_epoch + resource + remote_addr + mysecretmd5hashed = hashlib.md5(uncoded).digest()
# Base64 encode and transform the stringb64 = b64encode(md5hashed)unpadded_b64url = b64.replace(b'+', b'-')\ .replace(b'/', b'_')\ .replace(b'=', b'')
# Format and generate the linklinkformat = "{}{}?md5={}?expires={}"securelink = linkformat.format( host.decode(), resource.decode(), unpadded_b64url.decode(), expire_epoch.decode())print(securelink)
DiscussionWith this pattern we’re able to generate a secure link in a special for‐mat that can be used in URLs. The secret provides security of a vari‐able that is never sent to the client. You’re able to use as many othervariables as you need to in order to secure the location. md5 hashingand base64 encoding are common, lightweight, and available innearly every language.
82 | Chapter 16: Secure Links

CHAPTER 17
API Authentication Using JWT
17.0 IntroductionJSON Web Tokens (JWTs) are quickly becoming a widely used andpreferred authentication method. These authentication tokens havethe ability to store some information about the user as well as infor‐mation about the user’s authorization into the token itself. Thesetokens can also be validated asymmetrically, which means load bal‐ancers and proxies are able to validate the token with a public keyand do not need the private key that the token was signed with, thusenhancing security and flexibility. An advantage of offloadingauthentication verification to your NGINX Plus layer is that you’resaving cycles on your authentication service, as well as speeding upyour transactions. The JWT authentication module described in thischapter is available only with an NGINX Plus subscription.
17.1 Validating JWTsProblemYou need to validate a JWT before the request is handled.
SolutionUse NGINX Plus’s HTTP JWT authentication module to validate thetoken signature and embed JWT Claims and headers as NGINXvariables:
83

location /api/ { auth_jwt "api"; auth_jwt_key_file conf/keys.json;}
This configuration enables validation of JWTs for this location. Theauth_jwt directive is passed a string, which is used as the authenti‐cation realm. The auth_jwt takes an optional token parameter of avariable that holds the JWT. By default, the Authentication headeris used per the JWT standard. The auth_jwt directive can also beused to cancel effects of required JWT authentication from inheritedconfigurations. To turn off authentication, pass the keyword to theauth_jwt directive with nothing else. To cancel inherited authenti‐cation requirements, pass the off keyword to the auth_jwt directivewith nothing else. The auth_jwt_key_file takes a single parameter.This parameter is the path to the key file in standard JSON Web Keyformat.
DiscussionNGINX Plus is able to validate the JSON web signature types oftokens as opposed to the JSON web encryption type, where theentire token is encrypted. NGINX Plus is able to validate signaturesthat are signed with the HS256, RS256, and ES256 algorithms. Hav‐ing NGINX Plus validate the token can save the time and resourcesof making a subrequest to an authentication service. NGINX Plusdeciphers the JWT header and payload, and captures the standardheaders and claims into embedded variables for your use.
Also SeeRFC standard documentation of JSON Web SignatureRFC standard documentation of JSON Web AlgorithmsRFC standard documentation of JSON Web TokenNGINX embedded variablesDetailed NGINX blog
17.2 Creating JSON Web KeysProblemYou need a JSON Web Key for NGINX Plus to use.
84 | Chapter 17: API Authentication Using JWT

SolutionNGINX Plus utilizes the JSON Web Key (JWK) format as specifiedin the RFC standard. The standard allows for an array of key objectswithin the JWK file.
The following is an example of what the key file may look like:
{"keys": [ { "kty":"oct", "kid":"0001", "k":"OctetSequenceKeyValue" }, { "kty":"EC", "kid":"0002" "crv":"P-256", "x": "XCoordinateValue", "y": "YCoordinateValue", "d": "PrivateExponent", "use": "sig" }, { "kty":"RSA", "kid":"0003" "n": "Modulus", "e": "Exponent", "d": "PrivateExponent" } ]}
The JWK file shown demonstrates the three initial types of keysnoted in the RFC standard. The format of these keys is also part ofthe RFC standard. The kty attribute is the key type. This file showsthree key types: the Octet Sequence (oct), the EllipticCurve (EC),and the RSA type. The kid attribute is the key ID. Other attributes tothese keys are specified to the standard for that type of key. Look tothe RFC documentation of these standards for more information.
DiscussionThere are numerous libraries available in many different languagesto generate the JSON Web Key. It’s recommended to create a key ser‐vice that is the central JWK authority to create and rotate yourJWKs at a regular interval. For enhanced security, it’s recommended
17.2 Creating JSON Web Keys | 85

to make your JWKs as secure as your SSL/TLS certifications. Secureyour key file with proper user and group permissions. Keeping themin memory on your host is best practice. You can do so by creatingan in-memory filesystem like ramfs. Rotating keys on a regularinterval is also important; you may opt to create a key service thatcreates public and private keys and offers them to the applicationand NGINX via an API.
Also SeeRFC standardization documentation of JSON Web Key
86 | Chapter 17: API Authentication Using JWT

CHAPTER 18
OpenId Connect Single Sign-On
18.0 IntroductionSingle sign-on (SSO) authentication providers are a great way toreduce authentication requests to your application and provide yourusers with seamless integration into an application they already login to on a regular basis. As more authentication providers bringthemselves to market, your application can be ready to integrate byusing NGINX Plus to validate the signature of their JSON WebTokens. In this chapter we’ll explore using the NGINX Plus JWTauthentication module for HTTP in conjunction with an existingOpenId Connect OAuth 2.0 provider from Google. As in Chap‐ter 17, this chapter describes the JWT authentication module, whichis only available with an NGINX Plus subscription.
18.1 Authenticate Users via Existing OpenIdConnect Single Sign-On (SSO)ProblemYou want to offload OpenId Connect authentication validation toNGINX Plus.
87

SolutionUse NGINX Plus’s JWT module to secure a location or server andtell the auth_jwt directive to use $cookie_auth_token as the tokento be validated:
location /private/ { auth_jwt "Google Oauth" token=$cookie_auth_token; auth_jwt_key_file /etc/nginx/google_certs.jwk; }
This configuration tells NGINX Plus to secure the /private/ URIpath with JWT validation. Google OAuth 2.0 OpenId Connect usesthe cookie auth_token rather than the default Bearer Token. Thus,we must tell NGINX to look for the token in this cookie rather thanthe NGINX Plus Default location. The auth_jwt_key_file locationis set to an arbitrary path, a step that we will cover in Recipe 18.2.
DiscussionThis configuration demonstrates how you can validate a GoogleOAuth 2.0 OpenId Connect JSON Web Token with NGINX Plus.The NGINX Plus JWT authentication module for HTTP is able tovalidate any JSON Web Token that adheres to the RFC for JSONWeb Signature specification, instantly enabling any single sign-onauthority that utilizes JSON Web Tokens to be validated at theNGINX Plus layer. The OpenId 1.0 protocol is a layer on top of theOAuth 2.0 authentication protocol that adds identity, enabling theuse of JSON Web Tokens to prove the identity of the user sendingthe request. With the signature of the token, NGINX Plus can vali‐date that the token has not been modified since it was signed. In thisway, Google is using an asynchronous signing method and makes itpossible to distribute public JWKs while keeping its private JWKsecret.
Also SeeDetailed NGINX Blog on OpenId ConnectOpenId Connect
88 | Chapter 18: OpenId Connect Single Sign-On

18.2 Obtaining JSON Web Key from GoogleProblemYou need to obtain the JSON Web Key from Google to use whenvalidating OpenId Connect tokens with NGINX Plus.
SolutionUtilize Cron to request a fresh set of keys every hour to ensure yourkeys are always up-to-date:
0 * * * * root wget https://www.googleapis.com/oauth2/v3/ \ certs-O /etc/nginx/google_certs.jwk
This code snippet is a line from a crontab file. Unix-like systemshave many options for where crontab files can live. Every user willhave a user-specific crontab, and there’s also a number of files anddirectories in the /etc/ directory.
DiscussionCron is a common way to run a scheduled task on a Unix-like sys‐tem. JSON Web Keys should be rotated on a regular interval toensure the security of the key, and in turn, the security of your sys‐tem. To ensure that you always have the most up-to-date key fromGoogle, you’ll want to check for new JWKs at a regular interval. Thiscron solution is one way of doing so.
Also SeeCron
18.2 Obtaining JSON Web Key from Google | 89

CHAPTER 19
ModSecurity Web ApplicationFirewall
19.0 IntroductionModSecurity is an open source web application firewall (WAF) thatwas first built for Apache web servers. It was made available toNGINX as a module in 2012 and added as an optional feature toNGINX Plus in 2016. This chapter will detail installing ModSecurity3.0 with NGINX Plus through dynamic modules. It will also covercompiling and installing the ModSecurity 2.9 module and NGINXfrom source. ModSecurity 3.0 with NGINX Plus is far superior toModSecurity 2.x in terms of security and performance. When run‐ning ModSecurity 2.9 configured from open source, it’s still wrappedin Apache and, therefore, requires much more overhead than 3.0,which was designed for NGINX natively. The plug-and-play ModSe‐curity 3.0 module for NGINX is only available with an NGINX Plussubscription.
19.1 Installing ModSecurity for NGINX PlusProblemYou need to install the ModSecurity module for NGINX Plus.
91

SolutionInstall the module from the NGINX Plus repository. The packagename is nginx-plus-module-modsecurity. On an Ubuntu-basedsystem, you can install NGINX Plus and the ModSecurity modulethrough the advanced packaging tool, also known as apt-get:
$ apt-get update$ apt-get install nginx-plus$ apt-get install nginx-plus-module-modsecurity
DiscussionInstalling NGINX Plus and the ModSecurity module is as easy aspulling it from the NGINX Plus repository. Your package manage‐ment tool, such as apt-get or yum, will install NGINX Plus as well asthe module and place the module in the modules directory withinthe default NGINX Plus configuration directory /etc/nginx/.
19.2 Configuring ModSecurity in NGINX PlusProblemYou need to configure NGINX Plus to use the ModSecurity module.
SolutionEnable the dynamic module in your NGINX Plus configuration, anduse the modsecurity_rules_file directive to point to a ModSecur‐ity rule file:
load_module modules/ngx_http_modsecurity.so;
The load_module directive is applicable in the main context, whichmeans that this directive is to be used before opening the HTTP orStream blocks.
Turn on ModSecurity and use a particular rule set:
modsecurity on; location / { proxy_pass http://backend; modsecurity_rules_file rule-set-file; }
The modsecurity directive turns on the module for the given con‐text when passed the on parameter. The modsecurity_rules_file
92 | Chapter 19: ModSecurity Web Application Firewall

directive instructs NGINX Plus to use a particular ModSecurity ruleset.
DiscussionThe rules for ModSecurity can prevent common exploits of webservers and applications. ModSecurity is known to be able to pre‐vent application-layer attacks such as HTTP violations, SQL injec‐tion, cross-site scripting, distributed-denial-of-service, and remoteand local file-inclusion attacks. With ModSecurity, you’re able tosubscribe to real-time blacklists of malicious user IPs to help blockissues before your services are affected. The ModSecurity modulealso enables detailed logging to help identify new patterns andanomalies.
Also SeeOWASP ModSecurity Core Rule SetTrustWave ModSecurity Paid Rule Set
19.3 Installing ModSecurity from Source for aWeb Application FirewallProblemYou need to run a web application firewall with NGINX using Mod‐Security and a set of ModSecurity rules on a CentOS or RHEL-basedsystem.
SolutionCompile ModSecurity and NGINX from source and configureNGINX to use the ModSecurity module.
First update security and install prerequisites:
$ yum --security update -y && \ yum -y install automake \ autoconf \ curl \ curl-devel \ gcc \ gcc-c++ \ httpd-devel \ libxml2 \
19.3 Installing ModSecurity from Source for a Web Application Firewall | 93

libxml2-devel \ make \ openssl \ openssl-devel \ perl \ wget
Next, download and install PERL 5 regular expression patternmatching:
$ cd /opt && \ wget http://ftp.exim.org/pub/pcre/pcre-8.39.tar.gz && \ tar -zxf pcre-8.39.tar.gz && \ cd pcre-8.39 && \ ./configure && \ make && \ make install
Download and install zlib from source:
$ cd /opt && \ wget http://zlib.net/zlib-1.2.8.tar.gz && \ tar -zxf zlib-1.2.8.tar.gz && \ cd zlib-1.2.8 && \ ./configure && \ make && \ make install
Download and install ModSecurity from source:
$ cd /opt && \ wget \ https://www.modsecurity.org/tarball/2.9.1/modsecurity-2.9.1.\ tar.gz&& \ tar -zxf modsecurity-2.9.1.tar.gz && \ cd modsecurity-2.9.1 && \ ./configure --enable-standalone-module && \ make
Download and install NGINX from source and include any modulesyou may need with the configure script. Our focus here is the Mod‐Security module:
$ cd /opt && \ wget http://nginx.org/download/nginx-1.11.4.tar.gz && \ tar zxf nginx-1.11.4.tar.gz && \ cd nginx-1.11.4 && \ ./configure \ --sbin-path=/usr/local/nginx/nginx \ --conf-path=/etc/nginx/nginx.conf \ --pid-path=/usr/local/nginx/nginx.pid \ --with-pcre=../pcre-8.39 \ --with-zlib=../zlib-1.2.8 \
94 | Chapter 19: ModSecurity Web Application Firewall
--with-http_ssl_module \ --with-stream \ --with-http_ssl_module \ --with-http_secure_link_module \ --add-module=../modsecurity-2.9.1/nginx/modsecurity \ && \ make && \ make install && \ ln -s /usr/local/nginx/nginx /usr/sbin/nginx
This will yield NGINX compiled from source with the ModSecurityversion 2.9.1 module installed. From here we are able to use the ModSecurityEnabled and ModSecurityConfig directives in our config‐urations:
server { listen 80 default_server; listen [::]:80 default_server; server_name _; location / { ModSecurityEnabled on; ModSecurityConfig modsecurity.conf; }}
This configuration for an NGINX server turns on ModSecurity forthe location / and uses a ModSecurity configuration file located atthe base of the NGINX configuration.
DiscussionThis section compiles NGINX from source with the ModSecurityfor NGINX. It’s advised when compiling NGINX from source toalways check that you’re using the latest stable packages available.With the preceding example, you can use the open source version ofNGINX along with ModSecurity to build your own open source webapplication firewall.
Also SeeModSecurity SourceUpdated and maintained ModSecurity Rules from SpiderLabs
19.3 Installing ModSecurity from Source for a Web Application Firewall | 95


CHAPTER 20
Practical Security Tips
20.0 IntroductionSecurity is done in layers, and much like an onion, there must bemultiple layers to your security model for it to be truly hardened. InPart II of this book, we’ve gone through many different ways tosecure your web applications with NGINX and NGINX Plus. Manyof these security methods can be used in conjunction to help hardensecurity. The following are a few more practical security tips toensure your users are using HTTPS and to tell NGINX to satisfy oneor more security methods.
20.1 HTTPS RedirectsProblemYou need to redirect unencrypted requests to HTTPS.
SolutionUse a rewrite to send all HTTP traffic to HTTPS:
server { listen 80 default_server; listen [::]:80 default_server; server_name _; return 301 https://$host$request_uri;}
97

This configuration listens on port 80 as the default server for bothIPv4 and IPv6 and for any hostname. The return statement returnsa 301 permanent redirect to the HTTPS server at the same host andrequest URI.
DiscussionIt’s important to always redirect to HTTPS where appropriate. Youmay find that you do not need to redirect all requests but only thosewith sensitive information being passed between client and server.In that case, you may want to put the return statement in particularlocations only, such as /login.
20.2 Redirecting to HTTPS Where SSL/TLS IsTerminated Before NGINXProblemYou need to redirect to HTTPS, however, you’ve terminatedSSL/TLS at a layer before NGINX.
SolutionUse the standard X-Forwarded-Proto header to determine if youneed to redirect:
server { listen 80 default_server; listen [::]:80 default_server; server_name _; if ($http_x_forwarded_proto = 'http') { return 301 https://$host$request_uri; }}
This configuration is very much like HTTPS redirects. However, inthis configuration we’re only redirecting if the header X-Forwarded-Proto is equal to HTTP.
DiscussionIt’s a common use case that you may terminate SSL/TLS in a layer infront of NGINX. One reason you may do something like this is tosave on compute costs. However, you need to make sure that every
98 | Chapter 20: Practical Security Tips

request is HTTPS, but the layer terminating SSL/TLS does not havethe ability to redirect. It can, however, set proxy headers. This con‐figuration works with layers such as the Amazon Web Services Elas‐tic Load Balancer, which will offload SSL/TLS at no additionalcost. This is a handy trick to make sure that your HTTP traffic issecured.
20.3 HTTP Strict Transport SecurityProblemYou need to instruct browsers to never send requests over HTTP.
SolutionUse the HTTP Strict Transport Security (HSTS) enhancement bysetting the Strict-Transport-Security header:
add_header Strict-Transport-Security max-age=31536000;
This configuration sets the Strict-Transport-Security header to amax age of a year. This will instruct the browser to always do aninternal redirect when HTTP requests are attempted to this domain,so that all requests will be made over HTTPS.
DiscussionFor some applications a single HTTP request trapped by a man inthe middle attack could be the end of the company. If a form postcontaining sensitive information is sent over HTTP, the HTTPSredirect from NGINX won’t save you; the damage is done. This opt-in security enhancement informs the browser to never make anHTTP request, therefore the request is never sent unencrypted.
Also SeeRFC-6797 HTTP Strict Transport Security
OWASP HSTS Cheat Sheet
20.3 HTTP Strict Transport Security | 99

20.4 Satisfying Any Number of SecurityMethodsProblemYou need to provide multiple ways to pass security to a closed site.
SolutionUse the satisfy directive to instruct NGINX that you want to sat‐isfy any or all of the security methods used:
location / { satisfy any;
allow 192.168.1.0/24; deny all;
auth_basic "closed site"; auth_basic_user_file conf/htpasswd;}
This configuration tells NGINX that the user requesting the location / needs to satisfy one of the security methods: either therequest needs to originate from the 192.168.1.0/24 CIDR block or beable to supply a username and password that can be found in theconf/htpasswd file. The satisfy directive takes one of two options:any or all.
DiscussionThe satisfy directive is a great way to offer multiple ways toauthenticate to your web application. By specifying any to the satisfy directive, the user must meet one of the security challenges. Byspecifying all to the satisfy directive, the user must meet all of thesecurity challenges. This directive can be used in conjunction withthe http_access_module detailed in Chapter 11, thehttp_auth_basic_module detailed in Chapter 14, thehttp_auth_request_module detailed in Chapter 15, and thehttp_auth_jwt_module detailed in Chapter 17. Security is only trulysecure if it’s done in multiple layers. The satisfy directive will helpyou achieve this for locations and servers that require deep securityrules.
100 | Chapter 20: Practical Security Tips

PART III
Part III: Deployment andOperations
This is the third and final part of the NGINX Cookbook. This partwill focus on deployment and operations of NGINX and NGINXPlus, the licensed version of the server. Throughout this part, youwill learn about deploying NGINX to Amazon Web Services, Micro‐soft Azure, and Google Cloud Compute, as well as working withNGINX in Docker containers. This part will dig into using configu‐ration management to provision NGINX servers with tools such asPuppet, Chef, Ansible, and SaltStack. It will also get into automatingwith NGINX Plus through the NGINX Plus API for on-the-flyreconfiguration and using Consul for service discovery and configu‐ration templating. We’ll use an NGINX module to conduct A/B test‐ing and acceptance during deployments. Other topics covered areusing NGINX’s GeoIP module to discover the geographical origin ofour clients, including it in our logs, and using it in our logic. You’lllearn how to format access logs and set log levels of error logging fordebugging. Through a deep look at performance, this part will pro‐vide you with practical tips for optimizing your NGINX configura‐tion to serve more requests faster. It will help you install, monitor,and maintain the NGINX application delivery platform.


CHAPTER 21
Deploying on AWS
21.0 IntroductionAmazon Web Services (AWS), in many opinions, has led the cloudinfrastructure landscape since the arrival of S3 and EC2 in 2006.AWS provides a plethora of infrastructure-as-a-service (IaaS) andplatform-as-a-service (PaaS) solutions. Infrastructure as a service,such as Amazon EC2 or Elastic Cloud Compute, is a service provid‐ing virtual machines in as little as a click or API call. This chapterwill cover deploying NGINX into an Amazon Web Service environ‐ment, as well as some common patterns.
21.1 Auto-Provisioning on AWSProblemYou need to automate the configuration of NGINX servers on Ama‐zon Web Services for machines to be able to automatically provisionthemselves.
SolutionUtilize EC2 UserData as well as a pre-baked Amazon MachineImage. Create an Amazon Machine Image with NGINX and anysupporting software packages installed. Utilize Amazon EC2 UserData to configure any environment-specific configurations at run‐time.
103

DiscussionThere are three patterns of thought when provisioning on AmazonWeb Services:
Provision at bootStart from a common Linux image, then run configurationmanagement or shell scripts at boot time to configure theserver. This pattern is slow to start and can be prone to errors.
Fully baked Amazon Machine Images (AMIs)Fully configure the server, then burn an AMI to use. This pat‐tern boots very fast and accurately. However, it’s less flexible tothe environment around it, and maintaining many images canbe complex.
Partially baked AMIsIt’s a mix of both worlds. Partially baked is where softwarerequirements are installed and burned into an AMI, and envi‐ronment configuration is done at boot time. This pattern is flex‐ible compared to a fully baked pattern, and fast compared to aprovision-at-boot solution.
Whether you choose to partially or fully bake your AMIs, you’llwant to automate that process. To construct an AMI build pipeline,it’s suggested to use a couple of tools:
Configuration managementConfiguration management tools define the state of the serverin code, such as what version of NGINX is to be run and whatuser it’s to run as, what DNS resolver to use, and who to proxyupstream to. This configuration management code can besource controlled and versioned like a software project. Somepopular configuration management tools are Ansible, Chef,Puppet, and SaltStack, which will be described in Chapter 25.
Packer from HashiCorpPacker is used to automate running your configuration manage‐ment on virtually any virtualization or cloud platform and toburn a machine image if the run is successful. Packer basicallybuilds a virtual machine on the platform of your choosing,SSH’s into the virtual machine, runs any provisioning you spec‐ify, and burns an image. You can utilize Packer to run the con‐
104 | Chapter 21: Deploying on AWS

figuration management tool and reliably burn a machine imageto your specification.
To provision environmental configurations at boot time, you canutilize the Amazon EC2 UserData to run commands the first timethe instance is booted. If you’re using the partially baked method,you can utilize this to configure environment-based items at boottime. Examples of environment-based configurations might be whatserver names to listen for, resolver to use, domain name to proxy to,or upstream server pool to start with. UserData is a Base64-encodedstring that is downloaded at the first boot and run. The UserDatacan be as simple as an environment file accessed by other bootstrap‐ping processes in your AMI, or it can be a script written in any lan‐guage that exists on the AMI. It’s common for UserData to be a bashscript that specifies variables or downloads variables to pass to con‐figuration management. Configuration management ensures thesystem is configured correctly, templates configuration files basedon environment variables, and reloads services. After UserDataruns, your NGINX machine should be completely configured, in avery reliable way.
21.2 Routing to NGINX Nodes Without an ELBProblemYou need to route traffic to multiple active NGINX nodes or createan active-passive failover set to achieve high availability without aload balancer in front of NGINX.
SolutionUse the Amazon Route53 DNS service to route to multiple activeNGINX nodes or configure health checks and failover between anactive-passive set of NGINX nodes.
DiscussionDNS has balanced load between servers for a long time; moving tothe cloud doesn’t change that. The Route53 service from Amazonprovides a DNS service with many advanced features, all availablethrough an API. All the typical DNS tricks are available, such asmultiple IP addresses on a single A record and weighted A records.
21.2 Routing to NGINX Nodes Without an ELB | 105

When running multiple active NGINX nodes, you’ll want to use oneof these A record features to spread load across all nodes. Theround-robin algorithm is used when multiple IP addresses are listedfor a single A record. A weighted distribution can be used to distrib‐ute load unevenly by defining weights for each server IP address inan A record.
One of the more interesting features of Route53 is its ability tohealth check. You can configure Route53 to monitor the health of anendpoint by establishing a TCP connection or by making a requestwith HTTP or HTTPS. The health check is highly configurable withoptions for the IP, hostname, port, URI path, interval rates, moni‐toring, and geography. With these health checks, Route53 can takean IP out of rotation if it begins to fail. You could also configureRoute53 to failover to a secondary record in case of a failure, whichwould achieve an active-passive, highly available setup.
Route53 has a geological-based routing feature that will enable youto route your clients to the closest NGINX node to them, for theleast latency. When routing by geography, your client is directed tothe closest healthy physical location. When running multiple sets ofinfrastructure in an active-active configuration, you can automati‐cally failover to another geological location through the use ofhealth checks.
When using Route53 DNS to route your traffic to NGINX nodes inan Auto Scaling group, you’ll want to automate the creation andremoval of DNS records. To automate adding and removing NGINXmachines to Route53 as your NGINX nodes scale, you can use Ama‐zon’s Auto Scaling Lifecycle Hooks to trigger scripts within theNGINX box itself or scripts running independently on AmazonLambda. These scripts would use the Amazon CLI or SDK to inter‐face with the Amazon Route53 API to add or remove the NGINXmachine IP and configured health check as it boots or before it isterminated.
21.3 The ELB SandwichProblemYou need to autoscale your NGINX layer and distribute load evenlyand easily between application servers.
106 | Chapter 21: Deploying on AWS

SolutionCreate an elastic load balancer (ELB) or two. Create an Auto Scalinggroup with a launch configuration that provisions an EC2 instancewith NGINX installed. The Auto Scaling group has a configurationto link to the elastic load balancer, which will automatically registerany instance in the Auto Scaling group to the load balancers config‐ured on first boot. Place your upstream applications behind anotherelastic load balancer and configure NGINX to proxy to that ELB.
DiscussionThis common pattern is called the ELB sandwich (see Figure 21-1),putting NGINX in an Auto Scaling group behind an ELB and theapplication Auto Scaling group behind another ELB. The reason forhaving ELBs between every layer is because the ELB works so wellwith Auto Scaling groups; they automatically register new nodes andremove ones being terminated, as well as run health checks and onlypass traffic to healthy nodes. The reason behind building a secondELB for NGINX is because it allows services within your applicationto call out to other services through the NGINX Auto Scaling groupwithout leaving the network and reentering through the publicELB. This puts NGINX in the middle of all network traffic withinyour application, making it the heart of your application’s trafficrouting.
21.3 The ELB Sandwich | 107

Figure 21-1. This image depicts NGINX in an ELB sandwich patternwith an internal ELB for internal applications to utilize. A user makesa request to App-1, and App-1 makes a request to App-2 throughNGINX to fulfill the user’s request.
21.4 Deploying from the MarketplaceProblemYou need to run NGINX Plus in AWS with ease with a pay-as-you-go license.
108 | Chapter 21: Deploying on AWS
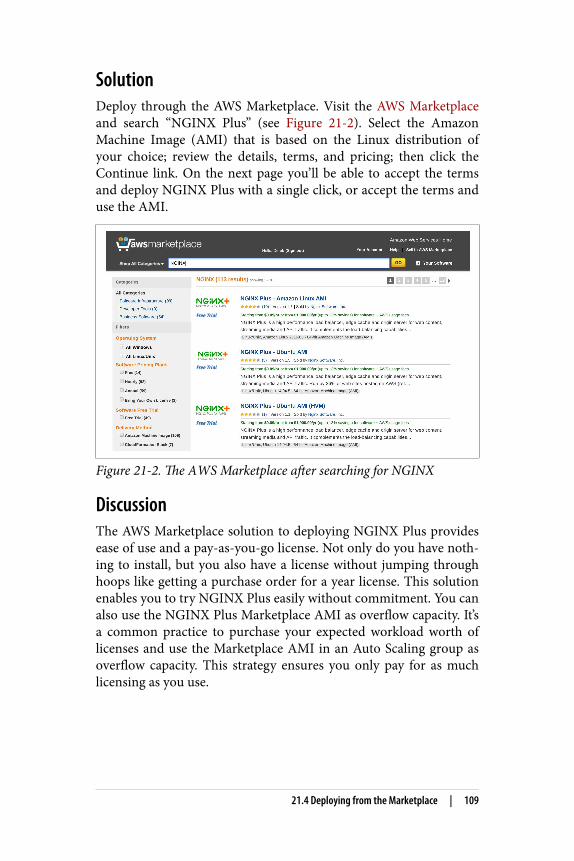
SolutionDeploy through the AWS Marketplace. Visit the AWS Marketplaceand search “NGINX Plus” (see Figure 21-2). Select the AmazonMachine Image (AMI) that is based on the Linux distribution ofyour choice; review the details, terms, and pricing; then click theContinue link. On the next page you’ll be able to accept the termsand deploy NGINX Plus with a single click, or accept the terms anduse the AMI.
Figure 21-2. The AWS Marketplace after searching for NGINX
DiscussionThe AWS Marketplace solution to deploying NGINX Plus providesease of use and a pay-as-you-go license. Not only do you have noth‐ing to install, but you also have a license without jumping throughhoops like getting a purchase order for a year license. This solutionenables you to try NGINX Plus easily without commitment. You canalso use the NGINX Plus Marketplace AMI as overflow capacity. It’sa common practice to purchase your expected workload worth oflicenses and use the Marketplace AMI in an Auto Scaling group asoverflow capacity. This strategy ensures you only pay for as muchlicensing as you use.
21.4 Deploying from the Marketplace | 109


CHAPTER 22
Deploying on Azure
22.0 IntroductionAzure is a powerful cloud platform offering from Microsoft. Azureenables cross-platform virtual machine hosting inside of virtualcloud networks. NGINX is an amazing application delivery platformfor any OS or application type and works seamlessly in MicrosoftAzure. NGINX has provided a pay-per-usage NGINX Plus Market‐place offering, which this chapter will explain how to use, making iteasy to get up and running quickly with on-demand licensing inMicrosoft Azure.
22.1 Creating an NGINX Virtual Machine ImageProblemYou need to create a virtual machine image of your own NGINXserver configured as you see fit to quickly create more servers or usein scale sets.
SolutionCreate a virtual machine from a base operating system of yourchoice. Once the VM is booted, log in and install NGINX orNGINX Plus in your preferred way, either from source or throughthe package management tool for the distribution you’re running.Configure NGINX as desired and create a new virtual machineimage. To create a virtual machine image, you must first generalize
111

the VM. To generalize your virtual machine, you need to removethe user that Azure provisioned, connect to it over SSH, and runthe following command:
$ sudo waagent -deprovision+user -force
This command deprovisions the user that Azure provisioned whencreating the virtual machine. The -force option simply skips a con‐firmation step. After you’ve installed NGINX or NGINX Plus andremoved the provisioned user, you can exit your session.
Connect your Azure CLI to your Azure account using the Azurelogin command, then ensure you’re using the Azure Resource Man‐ager mode. Now deallocate your virtual machine:
$ azure vm deallocate -g <ResourceGroupName> \ -n <VirtualMachineName>
Once the virtual machine is deallocated, you will be able to general‐ize the virtual machine with the azure vm generalize command:
$ azure vm generalize -g <ResourceGroupName> \ -n <VirtualMachineName>
After your virtual machine is generalized, you can create an image.The following command will create an image and also generate anAzure Resources Manager (ARM) template for you to use to bootthis image:
$ azure vm capture <ResourceGroupName> <VirtualMachineName> \ <ImageNamePrefix> -t <TemplateName>.json
The command line will produce output saying that your image hasbeen created, that it’s saving an ARM template to the location youspecified, and that the request is complete. You can use this ARMtemplate to create another virtual machine from the newly createdimage. However, to use this template Azure has created, you mustfirst create a new network interface:
$ azure network nic create <ResourceGroupName> \ <NetworkInterfaceName> \ <Region> \ --subnet-name <SubnetName> \ --subnet-vnet-name <VirtualNetworkName>
This command output will detail information about the newly cre‐ated network interface. The first line of the output data will be thenetwork interface ID, which you will need to utilize the ARM tem‐
112 | Chapter 22: Deploying on Azure

plate created by Azure. Once you have the ID, you can create adeployment with the ARM template:
$ azure group deployment create <ResourceGroupName> \ <DeploymentName> \ -f <TemplateName>.json
You will be prompted for multiple input variables such as vmName,adminUserName, adminPassword, and networkInterfaceId. Enter aname of your choosing for the virtual machine name, admin user‐name, and password. Use the network interface ID harvested fromthe last command as the input for the networkInterfaceId prompt.These variables will be passed as parameters to the ARM templateand used to create a new virtual machine from the custom NGINXor NGINX Plus image you’ve created. After entering the necessaryparameters, Azure will begin to create a new virtual machine fromyour custom image.
DiscussionCreating a custom image in Azure enables you to create copies ofyour preconfigured NGINX or NGINX Plus server at will. Azurecreating an ARM template enables you to quickly and reliablydeploy this same server time and time again as needed. With the vir‐tual machine image path that can be found in the template, you canuse this image to create different sets of infrastructure such as vir‐tual machine scaling sets or other VMs with different configura‐tions.
Also SeeInstalling Azure cross-platform CLIAzure cross-platform CLI loginCapturing Linux virtual machine images
22.2 Load Balancing Over NGINX Scale SetsProblemYou need to scale NGINX nodes behind an Azure load balancer toachieve high availability and dynamic resource usage.
22.2 Load Balancing Over NGINX Scale Sets | 113

SolutionCreate an Azure load balancer that is either public facing or inter‐nal. Deploy the NGINX virtual machine image created in the priorsection or the NGINX Plus image from the Marketplace describedin Recipe 22.3 into an Azure virtual machine scale set (VMSS). Onceyour load balancer and VMSS are deployed, configure a backendpool on the load balancer to the VMSS. Set up load-balancing rulesfor the ports and protocols you’d like to accept traffic on, and directthem to the backend pool.
DiscussionIt’s common to scale NGINX to achieve high availability or to han‐dle peak loads without overprovisioning resources. In Azure youachieve this with virtual machine scaling sets. Using the Azure loadbalancer provides ease of management for adding and removingNGINX nodes to the pool of resources when scaling. With Azureload balancers, you’re able to check the health of your backend poolsand only pass traffic to healthy nodes. You can run internal Azureload balancers in front of NGINX where you want to enable accessonly over an internal network. You may use NGINX to proxy to aninternal load balancer fronting an application inside of a VMSS,using the load balancer for the ease of registering and deregisteringfrom the pool.
22.3 Deploying Through the MarketplaceProblemYou need to run NGINX Plus in Azure with ease and a pay-as-you-go license.
SolutionDeploy an NGINX Plus virtual machine image through the AzureMarketplace:
1. From the Azure dashboard, select the New icon, and use thesearch bar to search for “NGINX.” Search results will appear.
2. From the list, select the NGINX Plus Virtual Machine Imagepublished by NGINX, Inc.
114 | Chapter 22: Deploying on Azure

3. When prompted to choose your deployment model, select theResource Manager option, and click the Create button.
4. You will then be prompted to fill out a form to specify the nameof your virtual machine, the disk type, the default username andpassword or SSH key pair public key, which subscription to billunder, the resource group you’d like to use, and the location.
5. Once this form is filled out, you can click OK. Your form will bevalidated.
6. When prompted, select a virtual machine size, and click theSelect button.
7. On the next panel, you have the option to select optional con‐figurations, which will be the default based on your resourcegroup choice made previously. After altering these options andaccepting them, click OK.
8. On the next screen, review the summary. You have the option ofdownloading this configuration as an ARM template so that youcan create these resources again more quickly via a JSON tem‐plate.
9. Once you’ve reviewed and downloaded your template, you canclick OK to move to the purchasing screen. This screen willnotify you of the costs you’re about to incur from this virtualmachine usage. Click Purchase and your NGINX Plus box willbegin to boot.
DiscussionAzure and NGINX have made it easy to create an NGINX Plus vir‐tual machine in Azure through just a few configuration forms. TheAzure Marketplace is a great way to get NGINX Plus on demandwith a pay-as-you-go license. With this model, you can try out thefeatures of NGINX Plus or use it for on-demand overflow capacityof your already licensed NGINX Plus servers.
22.3 Deploying Through the Marketplace | 115

CHAPTER 23
Deploying on GoogleCloud Compute
23.0 IntroductionGoogle Cloud Compute is an advanced cloud platform that enablesits customers to build diverse, high-performing web applications atwill on hardware they provide and manage. Google Cloud Computeoffers virtual networking and machines, a tried-and-true platform-as-a-service (PaaS) offering, as well as many other managed serviceofferings such as Bigtable, BigQuery, and SQL. In this chapter, wewill discuss how to deploy NGINX servers to Google Cloud Com‐pute, how to create virtual machine images, and how and why youmight want to use NGINX to serve your Google App Engine appli‐cations.
23.1 Deploying to Google Compute EngineProblemYou need to create an NGINX server in Google Compute Engine toload balance or proxy for the rest of your resources in Google Com‐pute or App Engine.
SolutionStart a new virtual machine in Google Compute Engine. Select aname for your virtual machine, zone, machine type, and boot disk.
117
Configure identity and access management, firewall, and anyadvanced configuration you’d like. Create the virtual machine.
Once the virtual machine has been created, log in via SSH orthrough the Google Cloud Shell. Install NGINX or NGINX Plusthrough the package manager for the given OS type. ConfigureNGINX as you see fit and reload.
Alternatively, you can install and configure NGINX through theGoogle Compute Engine startup script, which is an advanced con‐figuration option when creating a virtual machine.
DiscussionGoogle Compute Engine offers highly configurable virtual machinesat a moment’s notice. Starting a virtual machine takes little effortand enables a world of possibilities. Google Compute Engine offersnetworking and compute in a virtualized cloud environment. With aGoogle Compute instance, you have the full capabilities of anNGINX server wherever and whenever you need it.
23.2 Creating a Google Compute ImageProblemYou need to create a Google Compute Image to quickly instantiate avirtual machine or create an instance template for an instancegroup.
SolutionCreate a virtual machine as described in the previous section. Afterinstalling and configuring NGINX on your virtual machineinstance, set the auto-delete state of the boot disk to false. To setthe auto-delete state of the disk, edit the virtual machine. On theedit page under the disk configuration is a checkbox labeled “Deleteboot disk when instance is deleted.” Deselect this checkbox and savethe virtual machine configuration. Once the auto-delete state of theinstance is set to false, delete the instance. When prompted, do notselect the checkbox that offers to delete the boot disk. By performingthese tasks, you will be left with an unattached boot disk withNGINX installed.
118 | Chapter 23: Deploying on Google Cloud Compute

After your instance is deleted and you have an unattached boot disk,you can create a Google Compute Image. From the Image section ofthe Google Compute Engine console, select Create Image. You willbe prompted for an image name, family, description, encryptiontype, and the source. The source type you need to use is disk; andfor the source disk, select the unattached NGINX boot disk. SelectCreate and Google Compute Cloud will create an image from yourdisk.
DiscussionYou can utilize Google Cloud Images to create virtual machines witha boot disk identical to the server you’ve just created. The value increating images is being able to ensure that every instance of thisimage is identical. When installing packages at boot time in adynamic environment, unless using version locking with privaterepositories, you run the risk of package version and updates notbeing validated before being run in a production environment. Withmachine images, you can validate that every package running onthis machine is exactly as you tested, strengthening the reliability ofyour service offering.
Also SeeCreate, delete, and depreciate private images
23.3 Creating a Google App Engine ProxyProblemYou need to create a proxy for Google App Engine to context switchbetween applications or serve HTTPS under a custom domain.
SolutionUtilize NGINX in Google Compute Cloud. Create a virtualmachine in Google Compute Engine, or create a virtual machineimage with NGINX installed and create an instance template withthis image as your boot disk. If you’ve created an instance tem‐plate, follow up by creating an instance group that utilizes thattemplate.
23.3 Creating a Google App Engine Proxy | 119

Configure NGINX to proxy to your Google App Engine endpoint.Make sure to proxy to HTTPS because Google App Engine is public,and you’ll want to ensure you do not terminate HTTPS at yourNGINX instance and allow information to travel between NGINXand Google App Engine unsecured. Because App Engine providesjust a single DNS endpoint, you’ll be using the proxy_pass directiverather than upstream blocks in the open source version of NGINX.When proxying to Google App Engine, make sure to set the end‐point as a variable in NGINX, then use that variable in theproxy_pass directive to ensure NGINX does DNS resolution onevery request. For NGINX to do any DNS resolution, you’ll need toalso utilize the resolver directive and point to your favorite DNSresolver. Google makes the IP address 8.8.8.8 available for publicuse. If you’re using NGINX Plus, you’ll be able to use the resolveflag on the server directive within the upstream block, keepaliveconnections, and other benefits of the upstream module whenproxying to Google App Engine.
You may choose to store your NGINX configuration files in GoogleStorage, then use the startup script for your instance to pull downthe configuration at boot time. This will allow you to change yourconfiguration without having to burn a new image. However, it willadd to the startup time of your NGINX server.
DiscussionYou would want to run NGINX in front of Google App Engine ifyou’re using your own domain and want to make your applicationavailable via HTTPS. At this time, Google App Engine does notallow you to upload your own SSL certificates. Therefore, if you’dlike to serve your app under a domain other than appspot.com withencryption, you’ll need to create a proxy with NGINX to listen atyour custom domain. NGINX will encrypt communication betweenitself and your clients, as well as between itself and Google AppEngine.
Another reason you may want to run NGINX in front of GoogleApp Engine is to host many App Engine apps under the samedomain and use NGINX to do URI-based context switching. Micro‐services are a common architecture, and it’s common for a proxylike NGINX to conduct the traffic routing. Google App Engine
120 | Chapter 23: Deploying on Google Cloud Compute

makes it easy to deploy applications, and in conjunction withNGINX, you have a full-fledged application delivery platform.
23.3 Creating a Google App Engine Proxy | 121


CHAPTER 24
Deploying on Docker
24.0 IntroductionDocker is an open source project that automates the deployment ofLinux applications inside software containers. Docker provides anadditional layer of abstraction and automation of operating-system-level virtualization on Linux. Containerized environments havemade a huge break into the production world, and I’m excited aboutit. Docker and other container platforms enable fast, reliable, cross-platform application deployments. In this chapter we’ll discuss theofficial NGINX Docker image, creating your own Dockerfile to runNGINX, and using environment variables within NGINX, a com‐mon Docker practice.
24.1 Running Quickly with the NGINX ImageProblemYou need to get up and running quickly with the NGINX imagefrom Docker Hub.
SolutionUse the NGINX image from Docker Hub. This image contains adefault configuration, so you’ll need to either mount a local configu‐ration directory or create a Dockerfile and ADD in your configurationto the image build. We’ll mount a volume and get NGINX runningin a Docker container locally in two commands:
123

$ docker pull nginx:latest$ docker run -it -p 80:80 -v $PWD/nginx-conf:/etc/nginx \ nginx:latest
The first docker command pulls the nginx:latest image fromDocker Hub. The second docker command runs this NGINX imageas a Docker container in the foreground, mapping localhost:80 toport 80 of the NGINX container. It also mounts the local directorynginx-conf as a container volume at /etc/nginx. nginx-conf is a localdirectory that contains the necessary files for NGINX configuration.When specifying mapping from your local machine to a container,the local machine port or directory comes first, and the containerport or directory comes second.
DiscussionNGINX has made an official Docker image available via DockerHub. This official Docker image makes it easy to get up and goingvery quickly in Docker with your favorite application delivery plat‐form, NGINX. In this section we were able to get NGINX up andrunning in a container with only two commands! The officialNGINX Docker image mainline that we used in this example is builtoff of the Debian Jessie Docker image. However, you can chooseofficial images built off of Alpine Linux. The Dockerfile and sourcefor these official images are available on GitHub.
Also SeeOfficial NGINX Docker image, NGINXDocker repo on GitHub
24.2 Creating an NGINX DockerfileProblemYou need to create an NGINX Dockerfile in order to create a Dockerimage.
SolutionStart FROM your favorite distribution’s Docker image. Use the RUNcommand to install NGINX. Use the ADD command to add yourNGINX configuration files. Use the EXPOSE command to instruct
124 | Chapter 24: Deploying on Docker

Docker to expose given ports or do this manually when you run theimage as a container. Use CMD to start NGINX when the image isinstantiated as a container. You’ll need to run NGINX in the fore‐ground. To do this, you’ll need to start NGINX with -g "daemonoff;" or add daemon off; to your configuration. This example willuse the latter with daemon off; in the configuration file within themain context. You will also want to alter your NGINX configurationto log to /dev/stdout for access logs and /dev/stderr for error logs;doing so will put your logs into the hands of the Docker daemon,which will make them available to you more easily based on the logdriver you’ve chosen to use with Docker:
Dockerfile:
FROM centos:7
# Install epel repo to get nginx and install nginxRUN yum -y install epel-release && \ yum -y install nginx
# add local configuration files into the image ADD /nginx-conf /etc/nginx
EXPOSE 80 443
CMD ["nginx"]
The directory structure looks as follows:
.├── Dockerfile└── nginx-conf ├── conf.d │ └── default.conf ├── fastcgi.conf ├── fastcgi_params ├── koi-utf ├── koi-win ├── mime.types ├── nginx.conf ├── scgi_params ├── uwsgi_params └── win-utf
I choose to host the entire NGINX configuration within this Dockerdirectory for ease of access to all of the configurations with only oneline in the Dockerfile to add all my NGINX configurations.
24.2 Creating an NGINX Dockerfile | 125
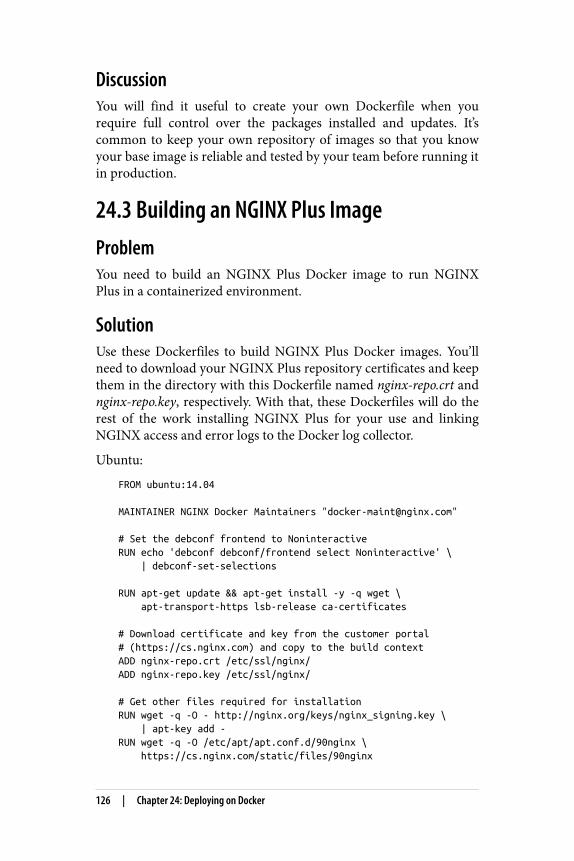
DiscussionYou will find it useful to create your own Dockerfile when yourequire full control over the packages installed and updates. It’scommon to keep your own repository of images so that you knowyour base image is reliable and tested by your team before running itin production.
24.3 Building an NGINX Plus ImageProblemYou need to build an NGINX Plus Docker image to run NGINXPlus in a containerized environment.
SolutionUse these Dockerfiles to build NGINX Plus Docker images. You’llneed to download your NGINX Plus repository certificates and keepthem in the directory with this Dockerfile named nginx-repo.crt andnginx-repo.key, respectively. With that, these Dockerfiles will do therest of the work installing NGINX Plus for your use and linkingNGINX access and error logs to the Docker log collector.
Ubuntu:
FROM ubuntu:14.04
MAINTAINER NGINX Docker Maintainers "[email protected]"
# Set the debconf frontend to NoninteractiveRUN echo 'debconf debconf/frontend select Noninteractive' \ | debconf-set-selections
RUN apt-get update && apt-get install -y -q wget \ apt-transport-https lsb-release ca-certificates
# Download certificate and key from the customer portal # (https://cs.nginx.com) and copy to the build contextADD nginx-repo.crt /etc/ssl/nginx/ADD nginx-repo.key /etc/ssl/nginx/
# Get other files required for installationRUN wget -q -O - http://nginx.org/keys/nginx_signing.key \ | apt-key add -RUN wget -q -O /etc/apt/apt.conf.d/90nginx \ https://cs.nginx.com/static/files/90nginx
126 | Chapter 24: Deploying on Docker

RUN printf "deb https://plus-pkgs.nginx.com/ubuntu \ `lsb_release -cs` nginx-plus\n" \ >/etc/apt/sources.list.d/nginx-plus.list
# Install NGINX PlusRUN apt-get update && apt-get install -y nginx-plus
# forward request logs to Docker log collectorRUN ln -sf /dev/stdout /var/log/nginx/access.logRUN ln -sf /dev/stderr /var/log/nginx/error.log
EXPOSE 80 443
CMD ["nginx", "-g", "daemon off;"]
CentOS 7:
FROM centos:centos7
MAINTAINER NGINX Docker Maintainers "[email protected]"
RUN yum install -y ca-certificates
# Download certificate and key from the customer portal # (https://cs.nginx.com) and copy to the build contextADD nginx-repo.crt /etc/ssl/nginx/ADD nginx-repo.key /etc/ssl/nginx/
# Get other files required for installationRUN wget -q -O /etc/yum.repos.d/nginx-plus-7.repo \ https://cs.nginx.com/static/files/nginx-plus-7.repo
# Install NGINX PlusRUN yum install -y nginx-plus
# forward request logs to Docker log collectorRUN ln -sf /dev/stdout /var/log/nginx/access.logRUN ln -sf /dev/stderr /var/log/nginx/error.log
EXPOSE 80 443
CMD ["nginx", "-g", "daemon off;"]
To build these Dockerfiles into Docker images, run the following inthe directory that contains the Dockerfile and your NGINX Plusrepository certificate and key:
$ docker build --no-cache -t nginxplus .
This docker build command uses the flag --no-cache to ensurethat whenever you build this, the NGINX Plus packages are pulled
24.3 Building an NGINX Plus Image | 127

fresh from the NGINX Plus repository for updates. If it’s acceptableto use the same version on NGINX Plus as the prior build, you canomit the --no-cache flag. In this example, the new Docker image istagged nginxplus.
DiscussionBy creating your own Docker image for NGINX Plus, you can con‐figure your NGINX Plus container however you see fit and drop itinto any Docker environment. This opens up all of the power andadvanced features of NGINX Plus to your containerized environ‐ment. These Dockerfiles do not use the Dockerfile property ADD toadd in configuration; you will need to add in your configurationmanually.
Also SeeNGINX blog on Docker images
24.4 Using Environment Variables in NGINXProblemYou need to use environment variables inside your NGINX configu‐ration in order to use the same container image for different envi‐ronments.
SolutionUse the ngx_http_perl_module to set variables in NGINX fromyour environment:
daemon off;env APP_DNS;include /usr/share/nginx/modules/*.conf;...http { perl_set $upstream_app 'sub { return $ENV{"APP_DNS"}; }'; server { ... location / { proxy_pass https://$upstream_app; } }}
128 | Chapter 24: Deploying on Docker

To use perl_set you must have the ngx_http_perl_module
installed; you can do so by loading the module dynamically or stati‐cally if building from source. NGINX by default wipes environmentvariables from its environment; you need to declare any variablesyou do not want removed with the env directive. The perl_setdirective takes two parameters: the variable name you’d like to setand a perl string that renders the result.
The following is a Dockerfile that loads the ngx_http_perl_moduledynamically, installing this module from the package managementutility. When installing modules from the package utility for Cen‐tOS, they’re placed in the /usr/lib64/nginx/modules/ directory, andconfiguration files that dynamically load these modules are placed inthe /usr/share/nginx/modules/ directory. This is why in the precedingconfiguration snippet we include all configuration files at that path:
FROM centos:7
# Install epel repo to get nginx and install nginxRUN yum -y install epel-release && \ yum -y install nginx nginx-mod-http-perl
# add local configuration files into the imageADD /nginx-conf /etc/nginx
EXPOSE 80 443
CMD ["nginx"]
DiscussionA typical practice when using Docker is to utilize environment vari‐ables to change the way the container operates. You can use environ‐ment variables in your NGINX configuration so that your NGINXDockerfile can be used in multiple, diverse environments.
24.4 Using Environment Variables in NGINX | 129


CHAPTER 25
Using Puppet/Chef/Ansible/SaltStack
25.0 IntroductionConfiguration management tools have been an invaluable utility inthe age of the cloud. Engineers of large-scale web applications are nolonger configuring servers by hand but rather by code, using one ofthe many configuration management tools available. Configurationmanagement tools enable engineers to write configurations andcode one time to produce many servers with the same configurationin a repeatable, testable, and modular fashion. In this chapter we’lldiscuss a few of the most popular configuration management toolsavailable and how to use them to install NGINX and template a baseconfiguration. These examples are extremely basic but demonstratehow to get an NGINX server started with each platform.
25.1 Installing with PuppetProblemYou need to install and configure NGINX with Puppet to manageNGINX configurations as code and conform with the rest of yourPuppet configurations.
131

SolutionCreate a module that installs NGINX, manages the files you need,and ensures that NGINX is running:
class nginx { package {"nginx": ensure => 'installed',} service {"nginx": ensure => 'true', hasrestart => 'true', restart => '/etc/init.d/nginx reload', } file { "nginx.conf": path => '/etc/nginx/nginx.conf', require => Package['nginx'], notify => Service['nginx'], content => template('nginx/templates/nginx.conf.erb'), user=>'root', group=>'root', mode='0644'; }}
This module uses the package management utility to ensure theNGINX package is installed. It also ensures NGINX is running andenabled at boot time. The configuration informs Puppet that theservice does have a restart command with the hasrestart directive,and we override the restart command with an NGINX reload. Itwill manage and template the nginx.conf file with the EmbeddedRuby (ERB) templating language. The templating of the file willhappen after the NGINX package is installed due to the requiredirective. However, it will notify the NGINX service to reloadbecause of the notify directive. The templated configuration file isnot included. However, it can be simple to install a default NGINXconfiguration file, or very complex if using Embedded Ruby (ERB)or Embedded Puppet (EPP) templating language loops and variablesubstitution.
DiscussionPuppet is a configuration management tool based in the Ruby pro‐gramming language. Modules are built in a domain-specific lan‐guage and called via a manifest file that defines the configuration fora given server. Puppet can be run in a master-slave or masterlessconfiguration. With Puppet, the manifest is run on the master andthen sent to the slave. This is important because it ensures that the
132 | Chapter 25: Using Puppet/Chef/Ansible/SaltStack

slave is only delivered the configuration meant for it and no extraconfigurations meant for other servers. There are a lot of extremelyadvanced public modules available for Puppet. Starting from thesemodules will help you get a jump-start on your configuration. Apublic NGINX module from voxpupuli on GitHub will template outNGINX configurations for you.
Also SeePuppet documentationPuppet package documentationPuppet service documentationPuppet file documentationPuppet templating documentationVoxpupuli NGINX module
25.2 Installing with ChefProblemYou need to install and configure NGINX with Chef to manageNGINX configurations as code and conform with the rest of yourChef configurations.
SolutionCreate a cookbook with a recipe to install NGINX and configureconfiguration files through templating, and ensure NGINX reloadedafter the configuration is put in place. The following is an examplerecipe:
package 'nginx' do action :installend
service 'nginx' do supports :status => true, :restart => true, :reload => true action [ :start, :enable ]end
template 'nginx.conf' do path "/etc/nginx.conf" source "nginx.conf.erb" owner 'root' group 'root'
25.2 Installing with Chef | 133
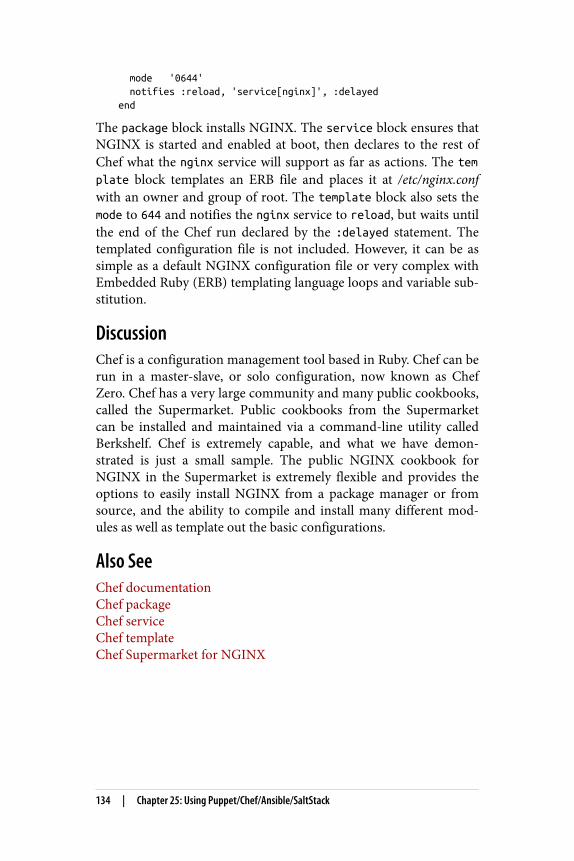
mode '0644' notifies :reload, 'service[nginx]', :delayedend
The package block installs NGINX. The service block ensures thatNGINX is started and enabled at boot, then declares to the rest ofChef what the nginx service will support as far as actions. The template block templates an ERB file and places it at /etc/nginx.confwith an owner and group of root. The template block also sets themode to 644 and notifies the nginx service to reload, but waits untilthe end of the Chef run declared by the :delayed statement. Thetemplated configuration file is not included. However, it can be assimple as a default NGINX configuration file or very complex withEmbedded Ruby (ERB) templating language loops and variable sub‐stitution.
DiscussionChef is a configuration management tool based in Ruby. Chef can berun in a master-slave, or solo configuration, now known as ChefZero. Chef has a very large community and many public cookbooks,called the Supermarket. Public cookbooks from the Supermarketcan be installed and maintained via a command-line utility calledBerkshelf. Chef is extremely capable, and what we have demon‐strated is just a small sample. The public NGINX cookbook forNGINX in the Supermarket is extremely flexible and provides theoptions to easily install NGINX from a package manager or fromsource, and the ability to compile and install many different mod‐ules as well as template out the basic configurations.
Also SeeChef documentationChef packageChef serviceChef templateChef Supermarket for NGINX
134 | Chapter 25: Using Puppet/Chef/Ansible/SaltStack

25.3 Installing with AnsibleProblemYou need to install and configure NGINX with Ansible to manageNGINX configurations as code and conform with the rest of yourAnsible configurations.
SolutionCreate an Ansible playbook to install NGINX and manage thenginx.conf file. The following is an example task file for the playbookto install NGINX. Ensure it’s running and template the configura‐tion file:
- name: NGINX | Installing NGINX package: name=nginx state=present - name: NGINX | Starting NGINX service: name: nginx state: started enabled: yes
- name: Copy nginx configuration in place. template: src: nginx.conf.j2 dest: "/etc/nginx/nginx.conf" owner: root group: root mode: 0644 notify: - reload nginx
The package block installs NGINX. The service block ensures thatNGINX is started and enabled at boot. The template block tem‐plates a Jinja2 file and places the result at /etc/nginx.conf with anowner and group of root. The template block also setsthe mode to 644 and notifies the nginx service to reload. The tem‐plated configuration file is not included. However, it can be as sim‐ple as a default NGINX configuration file or very complex withJinja2 templating language loops and variable substitution.
25.3 Installing with Ansible | 135

DiscussionAnsible is a widely used and powerful configuration managementtool based in Python. The configuration of tasks is in YAML, andyou use the Jinja2 templating language for file templating. Ansibleoffers a master named Ansible Tower on a subscription model.However, it’s commonly used from local machines or build serversdirectly to the client or in a masterless model. Ansible bulk SSH’sinto its servers and runs the configurations. Much like other config‐uration management tools, there’s a large community of public roles.Ansible calls this the Ansible Galaxy. You can find very sophisticatedroles to utilize in your playbooks.
Also SeeAnsible documentationAnsible packagesAnsible serviceAnsible templateAnsible Galaxy
25.4 Installing with SaltStackProblemYou need to install and configure NGINX with SaltStack to manageNGINX configurations as code and conform with the rest of yourSaltStack configurations.
SolutionInstall NGINX through the package management module and man‐age the configuration files you desire. The following is an examplestate file (sls) that will install the nginx package and ensure the ser‐vice is running, enabled at boot, and reloads if a change is made tothe configuration file:
nginx: pkg: - installed service: - name: nginx - running - enable: True
136 | Chapter 25: Using Puppet/Chef/Ansible/SaltStack

- reload: True - watch: - file: /etc/nginx/nginx.conf
/etc/nginx/nginx.conf: file: - managed - source: salt://path/to/nginx.conf - user: root - group: root - template: jinja - mode: 644 - require: - pkg: nginx
This is a basic example of installing NGINX via a package manage‐ment utility and managing the nginx.conf file. The NGINX packageis installed and the service is running and enabled at boot. WithSaltStack you can declare a file managed by Salt as seen in the exam‐ple and templated by many different templating languages. The tem‐plated configuration file is not included. However, it can be assimple as a default NGINX configuration file or very complex withthe Jinja2 templating language loops and variable substitution. Thisconfiguration also specifies that NGINX must be installed prior tomanaging the file because of the require statement. After the file isin place, NGINX is reloaded because of the watch directive on theservice and reloads as opposed to restarts because the reload direc‐tive is set to True.
DiscussionSaltStack is a powerful configuration management tool that definesserver states in YAML. Modules for SaltStack can be written inPython. Salt exposes the Jinja2 templating language for states as wellas for files. However, for files there are many other options, such asMako, Python itself, and others. Salt works in a master-slave config‐uration as well as a masterless configuration. Slaves are called min‐ions. The master-slave transport communication, however, differsfrom others and sets SaltStack apart. With Salt you’re able to chooseZeroMQ, TCP, or Reliable Asynchronous Event Transport (RAET)for transmissions to the Salt agent; or you can not use an agent, andthe master can SSH instead. Because the transport layer is by defaultasynchronous, SaltStack is built to be able to deliver its message to alarge number of minions with low load to the master server.
25.4 Installing with SaltStack | 137

Also SeeSaltStackInstalled packagesManaged filesTemplating with Jinja
138 | Chapter 25: Using Puppet/Chef/Ansible/SaltStack

CHAPTER 26
Automation
26.0 IntroductionThere are many ways to automate NGINX and NGINX Plus config‐uration files, such as rerunning your configuration managementtools or cron jobs that retemplate configuration files. As dynamicenvironments increase in popularity and necessity, the need for con‐figuration automation becomes more relevant. In Chapter 25, wemade sure that NGINX was reloaded after the configuration file wastemplated. In this chapter, we’ll discuss further on-the-fly reconfigu‐ration of NGINX configuration files with the NGINX Plus API andConsul Template.
26.1 Automating with NGINX PlusProblemYou need to reconfigure NGINX Plus on the fly to load balance for adynamic environment.
SolutionUse the NGINX Plus API to reconfigure NGINX Plus upstreampools:
$ curl 'http://nginx.local/upstream_conf?\ add=&upstream=backend&server=10.0.0.42:8080'
139

The curl call demonstrated makes a request to NGINX Plus andrequests a new server be added to the backend upstream configura‐tion.
DiscussionCovered in great detail in Chapter 8 of Part I, NGINX Plus offers anAPI to reconfigure NGINX Plus on the fly. The NGINX Plus APIenables adding and removing servers from upstream pools as well asdraining connections. You can use this API to automate yourNGINX Plus configuration as application servers spawn and releasein the environment.
26.2 Automating Configurations with ConsulTemplatingProblemYou need to automate your NGINX configuration to respond tochanges in your environment through use of Consul.
SolutionUse the consul-template daemon and a template file to templateout the NGINX configuration file of your choice:
upstream backend { {{range service "app.backend"}} server {{.Address}};{{end}}}
This example is of a Consul Template file that templates anupstream configuration block. This template will loop throughnodes in Consul identifying as app.backend. For every node inConsul, the template will produce a server directive with that node’sIP address.
The consul-template daemon is run via the command line and canbe used to reload NGINX every time the configuration file is tem‐plated with a change:
# consul-template -consul consul.example.internal -template \ template:/etc/nginx/conf.d/upstream.conf:"nginx -s reload"
The command demonstrated instructs the consul-template dae‐mon to connect to a Consul cluster at consul.example.internal
140 | Chapter 26: Automation

and to use a file named template in the current working directory totemplate the file and output the generated contents to /etc/nginx/conf.d/upstream.conf, then to reload NGINX every time the templa‐ted file changes. The -template flag takes a string of the templatefile, the output location, and the command to run after the templat‐ing process takes place; these three variables are separated by acolon. If the command being run has spaces, make sure to wrap it indouble quotes. The -consul flag instructs the daemon to what Con‐sul cluster to connect to.
DiscussionConsul is a powerful service discovery tool and configuration store.Consul stores information about nodes as well as key-value pairs ina directory-like structure and allows for restful API interaction.Consul also provides a DNS interface on each client, allowing fordomain name lookups of nodes connected to the cluster. A separateproject that utilizes Consul clusters is the consul-template dae‐mon; this tool templates files in response to changes in Consulnodes, services, or key-value pairs. This makes Consul a very power‐ful choice for automating NGINX. With consul-template you canalso instruct the daemon to run a command after a change to thetemplate takes place. With this, we can reload the NGINX configu‐ration and allow your NGINX configuration to come alive alongwith your environment. With Consul you’re able to set up healthchecks on each client to check the health of the intended service.With this failure detection, you’re able to template your NGINXconfiguration accordingly to only send traffic to healthy hosts.
Also SeeConsul home pageIntroduction to Consul TemplateConsul template GitHub
26.2 Automating Configurations with Consul Templating | 141


CHAPTER 27
A/B Testing with split_clients
27.0 IntroductionNGINX has a module named split_clients that allows you to pro‐grammatically divide up your users based on a variable key. NGINXsplits users by using a lightweight hashing algorithm to hash a givenstring. Then it mathematically divides them by percentages, map‐ping predefined values to a variable you can use to change theresponse of your server. This chapter covers the split_clientsmodule.
27.1 A/B TestingProblemYou need to split clients between two or more versions of a file orapplication to test acceptance.
SolutionUse the split_clients module to direct a percentage of your clientsto a different upstream pool:
split_clients "${remote_addr}AAA" $variant { 20.0% "backendv2"; * "backendv1";}
143

The split_clients directive hashes the string provided by you asthe first parameter and divides that hash by the percentages pro‐vided to map the value of a variable provided as the second parame‐ter. The third parameter is an object containing key-value pairswhere the key is the percentage weight and the value is the value tobe assigned. The key can be either a percentage or an asterisk. Theasterisk denotes the rest of the whole after all percentages are taken.The value of the $variant variable will be backendv2 for 20% of cli‐ent IP addresses and backendv1 for the remaining 80%.
In this example, backendv1 and backendv2 represent upstreamserver pools and can be used with the proxy_pass directive as such:
location / { proxy_pass http://$variant}
Using the variable $variant, our traffic will split between two differ‐ent application server pools.
DiscussionThis type of A/B testing is useful when testing different types ofmarketing and frontend features for conversion rates on ecommercesites. It’s common for applications to use a type of deployment calledcanary release. In this type of deployment, traffic is slowly switchedover to the new version. Splitting your clients between different ver‐sions of your application can be useful when rolling out new ver‐sions of code, to limit the blast radius in case of an error. Whateverthe reason for splitting clients between two different applicationsets, NGINX makes this simple through use of this split_clientsmodule.
Also Seesplit_client documentation
144 | Chapter 27: A/B Testing with split_clients
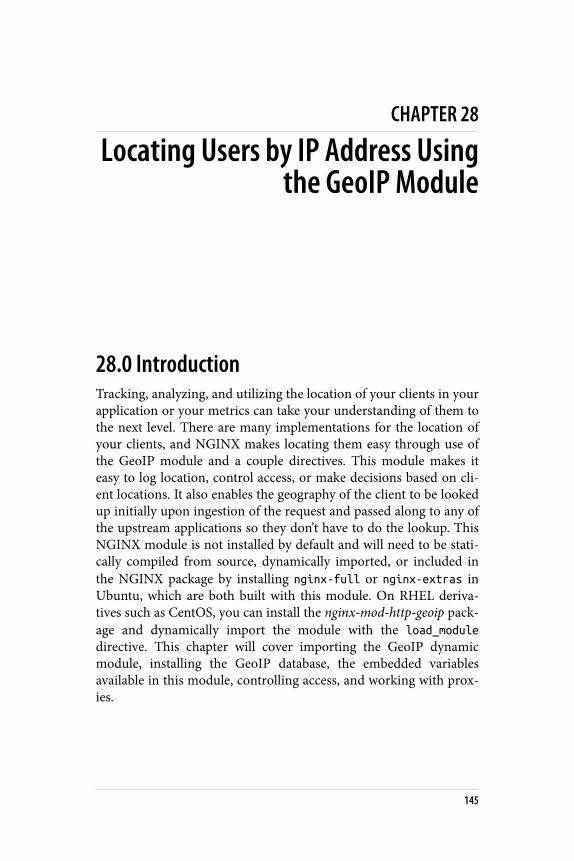
CHAPTER 28
Locating Users by IP Address Usingthe GeoIP Module
28.0 IntroductionTracking, analyzing, and utilizing the location of your clients in yourapplication or your metrics can take your understanding of them tothe next level. There are many implementations for the location ofyour clients, and NGINX makes locating them easy through use ofthe GeoIP module and a couple directives. This module makes iteasy to log location, control access, or make decisions based on cli‐ent locations. It also enables the geography of the client to be lookedup initially upon ingestion of the request and passed along to any ofthe upstream applications so they don’t have to do the lookup. ThisNGINX module is not installed by default and will need to be stati‐cally compiled from source, dynamically imported, or included inthe NGINX package by installing nginx-full or nginx-extras inUbuntu, which are both built with this module. On RHEL deriva‐tives such as CentOS, you can install the nginx-mod-http-geoip pack‐age and dynamically import the module with the load_moduledirective. This chapter will cover importing the GeoIP dynamicmodule, installing the GeoIP database, the embedded variablesavailable in this module, controlling access, and working with prox‐ies.
145

28.1 Using the GeoIP Module and DatabaseProblemYou need to install the GeoIP database and enable its embeddedvariables within NGINX to log and tell your application the locationof your clients.
SolutionDownload the GeoIP country and city databases and unzip them:
# mkdir /etc/nginx/geoip# cd /etc/nginx/geoip# wget "http://geolite.maxmind.com/\download/geoip/database/GeoLiteCountry/GeoIP.dat.gz"# gunzip GeoIP.dat.gz# wget "http://geolite.maxmind.com/\download/geoip/database/GeoLiteCity.dat.gz"# gunzip GeoLiteCity.dat.gz
This set of commands creates a geoip directory in the /etc/nginxdirectory, moves to this new directory, and downloads and unzipsthe packages.
With the GeoIP database for countries and cities on the local disk,we can now instruct the NGINX GeoIP module to use them toexpose embedded variables based on the client IP address:
load_module "/usr/lib64/nginx/modules/ngx_http_geoip_module.so";
http { geoip_country /etc/nginx/geoip/GeoIP.dat; geoip_city /etc/nginx/geoip/GeoLiteCity.dat;...}
The load_module directive dynamically loads the module from itspath on the filesystem. The load_module directive is only valid inthe main context. The geoip_country directive takes a path to theGeoIP.dat file containing the database mapping IP addresses tocountry codes and is valid only in the HTTP context.
DiscussionThe geoip_country and geoip_city directives expose a number ofembedded variables available in this module. The geoip_country
146 | Chapter 28: Locating Users by IP Address Using the GeoIP Module

directive enables variables that allow you to distinguish the countryof origin of your client. These variables include $geoip_country_code, $geoip_country_code3, and $geoip_country_name. Thecountry code variable returns the two-letter country code, and thevariable with a 3 at the end returns the three-letter country code.The country name variable returns the full name of the country.
The geoip_city directive enables quite a few variables. Thegeoip_city directive enables all the same variables as thegeoip_country directive, just with different names, such as$geoip_city_country_code, $geoip_city_country_code3, and$geoip_city_country_name. Other variables include $geoip_city,$geoip_city_continent_code, $geoip_latitude, $geoip_longi
tude, and $geoip_postal_code, all of which are descriptive of thevalue they return. $geoip_region and $geoip_region_name
describe the region, territory, state, province, federal land, and thelike. Region is the two-letter code, where region name is the fullname. $geoip_area_code, only valid in the US, returns the three-digit telephone area code.
With these variables, you’re able to log information about your cli‐ent. You could optionally pass this information to your applicationas a header or variable, or use NGINX to route your traffic in partic‐ular ways.
Also SeeGeoIP update
28.2 Restricting Access Based on CountryProblemYou need to restrict access from particular countries for contractualor application requirements.
SolutionMap the country codes you want to block or allow to a variable:
28.2 Restricting Access Based on Country | 147

load_module "/usr/lib64/nginx/modules/ngx_http_geoip_module.so";
http { map $geoip_country_code $country_access { "US" 0; "RU" 0; default 1; } ...}
This mapping will set a new variable $country_access to a 1 or a 0.If the client IP address originates from the US or Russia, the variablewill be set to a 0. For any other country, the variable will be set to a1.
Now, within our server block, we’ll use an if statement to denyaccess to anyone not originating from the US or Russia:
server { if ($country_access = '1') { return 403; } ...}
This if statement will evaluate True if the $country_access variableis set to 1. When True, the server will return a 403 unauthorized.Otherwise the server operates as normal. So this if block is onlythere to deny people who are not from US or Russia.
DiscussionThis is a short but simple example of how to only allow access froma couple countries. This example can be expounded upon to fit yourneeds. You can utilize this same practice to allow or block based onany of the embedded variables made available from the GeoIP mod‐ule.
28.3 Finding the Original ClientProblemYou need to find the original client IP address because there areproxies in front of the NGINX server.
148 | Chapter 28: Locating Users by IP Address Using the GeoIP Module
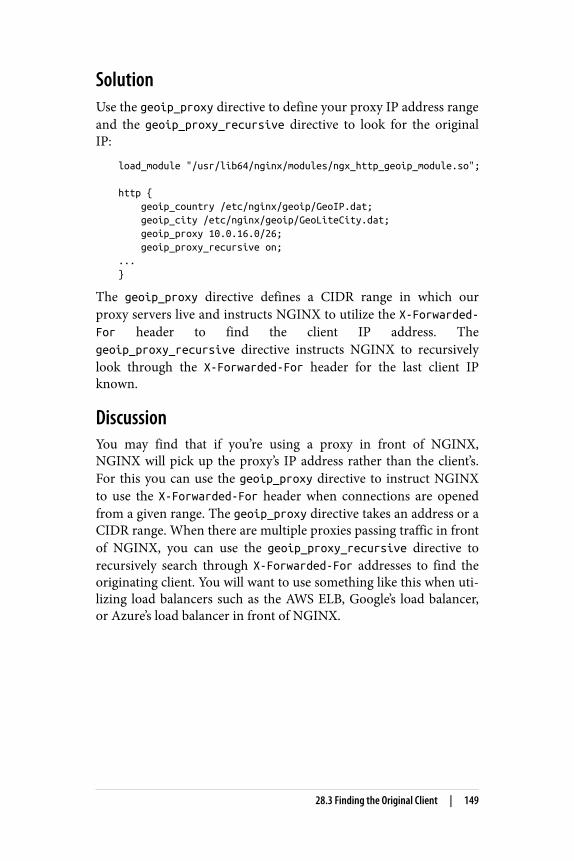
SolutionUse the geoip_proxy directive to define your proxy IP address rangeand the geoip_proxy_recursive directive to look for the originalIP:
load_module "/usr/lib64/nginx/modules/ngx_http_geoip_module.so";
http { geoip_country /etc/nginx/geoip/GeoIP.dat; geoip_city /etc/nginx/geoip/GeoLiteCity.dat; geoip_proxy 10.0.16.0/26; geoip_proxy_recursive on;...}
The geoip_proxy directive defines a CIDR range in which ourproxy servers live and instructs NGINX to utilize the X-Forwarded-For header to find the client IP address. Thegeoip_proxy_recursive directive instructs NGINX to recursivelylook through the X-Forwarded-For header for the last client IPknown.
DiscussionYou may find that if you’re using a proxy in front of NGINX,NGINX will pick up the proxy’s IP address rather than the client’s.For this you can use the geoip_proxy directive to instruct NGINXto use the X-Forwarded-For header when connections are openedfrom a given range. The geoip_proxy directive takes an address or aCIDR range. When there are multiple proxies passing traffic in frontof NGINX, you can use the geoip_proxy_recursive directive torecursively search through X-Forwarded-For addresses to find theoriginating client. You will want to use something like this when uti‐lizing load balancers such as the AWS ELB, Google’s load balancer,or Azure’s load balancer in front of NGINX.
28.3 Finding the Original Client | 149


CHAPTER 29
Debugging and Troubleshootingwith Access Logs, Error Logs, and
Request Tracing
29.0 IntroductionLogging is the basis of understanding your application. WithNGINX you have great control over logging information meaning‐ful to you and your application. NGINX allows you to divide accesslogs into different files and formats for different contexts and tochange the log level of error logging to get a deeper understandingof what’s happening. The capability of streaming logs to a central‐ized server comes innately to NGINX through its Syslog loggingcapabilities. In this chapter, we’ll discuss access and error logs,streaming over the Syslog protocol, and tracing requests end to endwith request identifiers generated by NGINX.
29.1 Configuring Access LogsProblemYou need to configure access log formats to add embedded variablesto your request logs.
SolutionConfigure an access log format:
151

http { log_format geoproxy '[$time_local] $remote_addr ' '$realip_remote_addr $remote_user ' '$request_method $server_protocol ' '$scheme $server_name $uri $status ' '$request_time $body_bytes_sent ' '$geoip_city_country_code3 $geoip_region ' '"$geoip_city" $http_x_forwarded_for ' '$upstream_status $upstream_response_time ' '"$http_referer" "$http_user_agent"'; ...}
This log format configuration is named geoproxy and uses a num‐ber of embedded variables to demonstrate the power of NGINX log‐ging. This configuration shows the local time on the server when therequest was made, the IP address that opened the connection, andthe IP of the client as NGINX understands it per geoip_proxy orrealip_header instructions. $remote_user shows the username ofthe user authenticated by basic authentication, followed by therequest method and protocol, as well as the scheme, such as HTTPor HTTPS. The server name match is logged as well as the requestURI and the return status code. Statistics logged include the pro‐cessing time in milliseconds and the size of the body sent to the cli‐ent. Information about the country, region, and city are logged. TheHTTP header X-Forwarded-For is included to show if the request isbeing forwarded by another proxy. The upstream module enablessome embedded variables that we’ve used that show the statusreturned from the upstream server and how long the upstreamrequest takes to return. Lastly we’ve logged some information aboutwhere the client was referred from and what browser the client isusing. The log_format directive is only valid within the HTTP con‐text.
This log configuration renders a log entry that looks like the follow‐ing:
[25/Nov/2016:16:20:42 +0000] 10.0.1.16 192.168.0.122 Derek GET HTTP/1.1 http www.example.com / 200 0.001 370 USA MI"Ann Arbor" - 200 0.001 "-" "curl/7.47.0"
To use this log format, use the access_log directive, providing alogfile path and the format name geoproxy as parameters:
152 | Chapter 29: Debugging and Troubleshooting with Access Logs, Error Logs, and RequestTracing

server { access_log /var/log/nginx/access.log geoproxy; ...}
The access_log directive takes a logfile path and the format nameas parameters. This directive is valid in many contexts and in eachcontext can have a different log path and or log format.
DiscussionThe log module in NGINX allows you to configure log formats formany different scenarios to log to numerous logfiles as you see fit.You may find it useful to configure a different log format for eachcontext, where you use different modules and employ those mod‐ules’ embedded variables, or a single, catchall format that providesall necessary information you could ever want. It’s also possible tostructure format to log in JSON or XML. These logs will aid you inunderstanding your traffic patterns, client usage, who your clientsare, and where they’re coming from. Access logs can also aid you infinding lag in responses and issues with upstream servers or particu‐lar URIs. Access logs can be used to parse and play back traffic pat‐terns in test environments to mimic real user interaction. There’slimitless possibility to logs when troubleshooting, debugging, oranalyzing your application or market.
29.2 Configuring Error LogsProblemYou need to configure error logging to better understand issues withyour NGINX server.
SolutionUse the error_log directive to define the log path and the log level:
error_log /var/log/nginx/error.log warn;
The error_log directive requires a path; however, the log level isoptional. This directive is valid in every context except for if state‐ments. The log levels available are debug, info, notice, warn, error,crit, alert, or emerg. The order in which these log levels wereintroduced is also the order of severity from least to most. The
29.2 Configuring Error Logs | 153

debug log level is only available if NGINX is configured with the --with-debug flag.
DiscussionThe error log is the first place to look when configuration files arenot working correctly. The log is also a great place to find errorsproduced by application servers like FastCGI. You can use the errorlog to debug connections down to the worker, memory allocation,client IP, and server. The error log cannot be formatted. However, itfollows a specific format of date, followed by the level, then the mes‐sage.
29.3 Forwarding to SyslogProblemYou need to forward your logs to a Syslog listener to aggregate logsto a centralized service.
SolutionUse the access_log and error_log directives to send your logs to aSyslog listener:
error_log syslog:server=10.0.1.42 debug;
access_log syslog:server=10.0.1.42,tag=nginx,severity=info geoproxy;
The syslog parameter for the error_log and access_log directivesis followed by a colon and a number of options. These optionsinclude the required server flag that denotes the IP, DNS name, orUnix socket to connect to, as well as optional flags suchas facility, severity, tag, and nohostname. The server optiontakes a port number, along with IP addresses or DNS names. How‐ever, it defaults to UDP 514. The facility option refers to thefacility of the log message defined as one of the 23 defined in theRFC standard for Syslog; the default value is local7. The tag optiontags the message with a value. This value defaults to nginx.severity defaults to info and denotes the severity of the messagebeing sent. The nohostname flag disables adding the hostname fieldinto the Syslog message header and does not take a value.
154 | Chapter 29: Debugging and Troubleshooting with Access Logs, Error Logs, and RequestTracing
DiscussionSyslog is a standard protocol for sending log messages and collect‐ing those logs on a single server or collection of servers. Sendinglogs to a centralized location helps in debugging when you’ve gotmultiple instances of the same service running on multiple hosts.This is called aggregating logs. Aggregating logs allows you to viewlogs together in one place without having to jump from server toserver and mentally stitch together logfiles by timestamp. A com‐mon log aggregation stack is ElasticSearch, Logstash, and Kibana,also known as the ELK Stack. NGINX makes streaming these logs toyour Syslog listener easy with the access_log and error_log direc‐tives.
29.4 Request TracingProblemYou need to correlate NGINX logs with application logs to have anend-to-end understanding of a request.
SolutionUse the request identifying variable and pass it to your applicationto log as well:
log_format trace '$remote_addr - $remote_user [$time_local] ' '"$request" $status $body_bytes_sent ' '"$http_referer" "$http_user_agent" ' '"$http_x_forwarded_for" $request_id';upstream backend { server 10.0.0.42;}server { listen 80; add_header X-Request-ID $request_id; # Return to client location / { proxy_pass http://backend; proxy_set_header X-Request-ID $request_id; #Pass to app access_log /var/log/nginx/access_trace.log trace; }}
In this example configuration, a log_format named trace is set up,and the variable $request_id is used in the log. This $request_idvariable is also passed to the upstream application by use of the
29.4 Request Tracing | 155

proxy_set_header directive to add the request ID to a header whenmaking the upstream request. The request ID is also passed back tothe client through use of the add_header directive setting therequest ID in a response header.
DiscussionMade available in NGINX Plus R10 and NGINX version 1.11.0, the$request_id provides a randomly generated string of 32 hexadeci‐mal characters that can be used to uniquely identify requests. Bypassing this identifier to the client as well as to the application, youcan correlate your logs with the requests you make. From the front‐end client, you will receive this unique string as a response headerand can use it to search your logs for the entries that correspond.You will need to instruct your application to capture and log thisheader in its application logs to create a true end-to-end relationshipbetween the logs. With this advancement, NGINX makes it possibleto trace requests through your application stack.
156 | Chapter 29: Debugging and Troubleshooting with Access Logs, Error Logs, and RequestTracing

CHAPTER 30
Performance Tuning
30.0 IntroductionTuning NGINX will make an artist of you. Performance tuning ofany type of server or application is always dependent on a numberof variable items, such as, but not limited to, the environment, usecase, requirements, and physical components involved. It’s commonto practice bottleneck-driven tuning, meaning to test until you’ve hita bottleneck, determine the bottleneck, tune for limitation, andrepeat until you’ve reached your desired performance requirements.In this chapter we’ll suggest taking measurements when perfor‐mance tuning by testing with automated tools and measuringresults. This chapter will also cover connection tuning for keepingconnections open to clients as well as upstream servers, and servingmore connections by tuning the operating system.
30.1 Automating Tests with Load DriversProblemYou need to automate your tests with a load driver to gain consis‐tency and repeatability in your testing.
SolutionUse an HTTP load testing tool such as Apache JMeter, Locust,Gatling, or whatever your team has standardized on. Create a con‐figuration for your load-testing tool that runs a comprehensive test
157

on your web application. Run your test against your service. Reviewthe metrics collected from the run to establish a baseline. Slowlyramp up the emulated user concurrency to mimic typical produc‐tion usage and identify points of improvement. Tune NGINX andrepeat this process until you achieve your desired results.
DiscussionUsing an automated testing tool to define your test gives you a con‐sistent test to build metrics off of when tuning NGINX. You must beable to repeat your test and measure performance gains or losses toconduct science. Running a test before making any tweaks to theNGINX configuration to establish a baseline gives you a basis towork from so that you can measure if your configuration change hasimproved performance or not. Measuring for each change made willhelp you identify where your performance enhancements comefrom.
30.2 Keeping Connections Open to ClientsProblemYou need to increase the number of requests allowed to be madeover a single connection from clients and the amount of time idleconnections are allowed to persist.
SolutionUse the keepalive_requests and keepalive_timeout directives toalter the number of requests that can be made over a single connec‐tion and the time idle connections can stay open:
http { keepalive_requests 320; keepalive_timeout 300s; ...}
The keepalive_requests directive defaults to 100, and thekeepalive_timeout directive defaults to 75 seconds.
158 | Chapter 30: Performance Tuning
DiscussionTypically the default number of requests over a single connectionwill fulfill client needs because browsers these days are allowed toopen multiple connections to a single server per fully qualifieddomain name. The number of parallel open connections to adomain is still limited typically to a number less than 10, so in thisregard, many requests over a single connection will happen. A trickcommonly employed by content delivery networks is to create mul‐tiple domain names pointed to the content server and alternatewhich domain name is used within the code to enable the browserto open more connections. You might find these connection opti‐mizations helpful if your frontend application continually polls yourbackend application for updates, as an open connection that allows alarger number of requests and stays open longer will limit the num‐ber of connections that need to be made.
30.3 Keeping Connections Open UpstreamProblemYou need to keep connections open to upstream servers for reuse toenhance your performance.
SolutionUse the keepalive directive in the upstream context to keep con‐nections open to upstream servers for reuse:
proxy_http_version 1.1;proxy_set_header Connection "";
upstream backend { server 10.0.0.42; server 10.0.2.56; keepalive 32;}
The keepalive directive in the upstream context activates a cache ofconnections that stay open for each NGINX worker. The directivedenotes the maximum number of idle connections to keep open perworker. The proxy modules directives used above the upstreamblock are necessary for the keepalive directive to function properly
30.3 Keeping Connections Open Upstream | 159
for upstream server connections. The proxy_http_version direc‐tive instructs the proxy module to use HTTP version 1.1, whichallows for multiple requests to be made over a single connectionwhile it’s open. The proxy_set_header directive instructs the proxymodule to strip the default header of close, allowing the connectionto stay open.
DiscussionYou would want to keep connections open to upstream servers tosave the amount of time it takes to initiate the connection, and theworker process can instead move directly to making a request overan idle connection. It’s important to note that the number of openconnections can exceed the number of connections specified in thekeepalive directive as open connections and idle connections arenot the same. The number of keepalive connections should be keptsmall enough to allow for other incoming connections to yourupstream server. This small NGINX tuning trick can save somecycles and enhance your performance.
30.4 Buffering ResponsesProblemYou need to buffer responses between upstream servers and clientsin memory to avoid writing responses to temporary files.
SolutionTune proxy buffer settings to allow NGINX the memory to bufferresponse bodies:
server { proxy_buffering on; proxy_buffer_size 8k; proxy_buffers 8 32k; proxy_busy_buffer_size 64k; ...}
The proxy_buffering directive is either on or off; by default it’s on.The proxy_buffer_size denotes the size of a buffer used for read‐ing the first part of the response from the proxied server anddefaults to either 4k or 8k, depending on the platform. The
160 | Chapter 30: Performance Tuning

proxy_buffers directive takes two parameters: the number of buf‐fers and the size of the buffers. By default the proxy_buffers direc‐tive is set to a number of 8 buffers of size either 4k or 8k, dependingon the platform. The proxy_busy_buffer_size directive limits thesize of buffers that can be busy, sending a response to the clientwhile the response is not fully read. The busy buffer size defaults todouble the size of a proxy buffer or the buffer size.
DiscussionProxy buffers can greatly enhance your proxy performance, depend‐ing on the typical size of your response bodies. Tuning these settingscan have adverse effects and should be done by observing the aver‐age body size returned, and thoroughly and repeatedly testing.Extremely large buffers set when they’re not necessary can eat up thememory of your NGINX box. You can set these settings for specificlocations that are known to return large response bodies for optimalperformance.
30.5 Buffering Access LogsProblemYou need to buffer logs to reduce the opportunity of blocks to theNGINX worker process when the system is under load.
SolutionSet the buffer size and flush time of your access logs:
http { access_log /var/log/nginx/access.log main buffer=32k flush=1m;}
The buffer parameter of the access_log directive denotes the sizeof a memory buffer that can be filled with log data before beingwritten to disk. The flush parameter of the access_log directivesets the longest amount of time a log can remain in a buffer beforebeing written to disk.
30.5 Buffering Access Logs | 161
DiscussionBuffering log data into memory may be a small step toward optimi‐zation. However, for heavily requested sites and applications, thiscan make a meaningful adjustment to the usage of the disk andCPU. When using the buffer parameter to the access_log direc‐tive, logs will be written out to disk if the next log entry does not fitinto the buffer. If using the flush parameter in conjunction with thebuffer parameter, logs will be written to disk when the data in thebuffer is older than the time specified. When buffering logs in thisway, when tailing the log, you may see delays up to the amount oftime specified by the flush parameter.
30.6 OS TuningProblemYou need to tune your operating system to accept more connectionsto handle spike loads or highly trafficked sites.
SolutionCheck the kernel setting for net.core.somaxconn, which is the maxi‐mum number of connections that can be queued by the kernel forNGINX to process. If you set this number over 512, you’ll need toset the backlog parameter of the listen directive in your NGINXconfiguration to match. A sign that you should look into this kernelsetting is if your kernel log explicitly says to do so. NGINX handlesconnections very quickly, and for most use cases, you will not needto alter this setting.
Raising the number of open file descriptors is a more commonneed. In Linux, a file handle is opened for every connection; andtherefore NGINX may open two if you’re using it as a proxy or loadbalancer because of the open connection upstream. To serve a largenumber of connections, you may need to increase the file descriptorlimit system-wide with the kernel option sys.fs.file_max, or forthe system user NGINX is running as in the /etc/security/limits.conffile. When doing so you’ll also want to bump the number ofworker_connections and worker_rlimit_nofile. Both of theseconfigurations are directives in the NGINX configuration.
162 | Chapter 30: Performance Tuning

Enable more ephemeral ports. When NGINX acts as a reverse proxyor load balancer, every connection upstream opens a temporaryport for return traffic. Depending on your system configuration, theserver may not have the maximum number of ephemeral portsopen. To check, review the setting for the kernel set‐ting net.ipv4.ip_local_port_range. The setting is a lower- andupper- bound range of ports. It’s typically OK to set this kernel set‐ting from 1024 to 65535. 1024 is where the registered TCP portsstop, and 65535 is where dynamic or ephemeral ports stop. Keep inmind that your lower bound should be higher than the highest openlistening service port.
DiscussionTuning the operating systems is one of the first places you lookwhen you start tuning for a high number of connections. There aremany optimizations you can make to your kernel for your particularuse case. However, kernel tuning should not be done on a whim,and changes should be measured for their performance to ensurethe changes are helping. As stated before, you’ll know when it’s timeto start tuning your kernel from messages logged in the kernel log orwhen NGINX explicitly logs a message in its error log.
30.6 OS Tuning | 163


CHAPTER 31
Practical Ops Tips and Conclusion
31.0 IntroductionThis last chapter will cover practical operations tips and is the con‐clusion to this book. Throughout these three parts, we’ve discussedmany ideas and concepts pertinent to operations engineers. How‐ever, I thought a few more might be helpful to round things out. Inthis chapter I’ll cover making sure your configuration files are cleanand concise, as well as debugging configuration files.
31.1 Using Includes for Clean ConfigsProblemYou need to clean up bulky configuration files to keep your configu‐rations logically grouped into modular configuration sets.
SolutionUse the include directive to reference configuration files, directo‐ries, or masks:
http { include config.d/compression.conf; include sites-enabled/*.conf}
165

The include directive takes a single parameter of either a path to afile or a mask that matches many files. This directive is valid in anycontext.
DiscussionBy using include statements you can keep your NGINX configura‐tion clean and concise. You’ll be able to logically group your config‐urations to avoid configuration files that go on for hundreds of lines.You can create modular configuration files that can be included inmultiple places throughout your configuration to avoid duplicationof configurations. Take the example fastcgi_param configuration fileprovided in most package management installs of NGINX. If youmanage multiple FastCGI virtual servers on a single NGINX box,you can include this configuration file for any location or contextwhere you require these parameters for FastCGI without having toduplicate this configuration. Another example is SSL configurations.If you’re running multiple servers that require similar SSL configu‐rations, you can simply write this configuration once and include itwherever needed. By logically grouping your configurationstogether, you can rest assured that your configurations are neat andorganized. Changing a set of configuration files can be done by edit‐ing a single file rather than changing multiple sets of configurationblocks in multiple locations within a massive configuration file.Grouping your configurations into files and using include state‐ments is good practice for your sanity and the sanity of your collea‐gues.
31.2 Debugging ConfigsProblemYou’re getting unexpected results from your NGINX server.
SolutionDebug your configuration, and remember these tips:
• NGINX processes requests looking for the most specificmatched rule. This makes stepping through configurations byhand a bit harder, but it’s the most efficient way for NGINX to
166 | Chapter 31: Practical Ops Tips and Conclusion
work. There’s more about how NGINX processes requests in thedocumentation link in the section “Also See” on page 168.
• You can turn on debug logging. For debug logging you’ll needto ensure that your NGINX package is configured with the --with-debug flag. Most of the common packages have it; but ifyou’ve built your own or are running a minimal package, youmay want to at least double-check. Once you’ve ensured youhave debug, you can set the error_log directive’s log level todebug: error_log /var/log/nginx/error.log debug.
• You can enable debugging for particular connections.The debug_connection directive is valid inside the events con‐text and takes an IP or CIDR range as a parameter. The direc‐tive can be declared more than once to add multiple IPaddresses or CIDR ranges to be debugged. This may be helpfulto debug an issue in production without degrading performanceby debugging all connections.
• You can debug for only particular virtual servers. Because theerror_log directive is valid in the main, HTTP, mail, stream,server, and location contexts, you can set the debug log level inonly the contexts you need it.
• You can enable core dumps and obtain backtraces from them.Core dumps can be enabled through the operating system orthrough the NGINX configuration file. You can read moreabout this from the admin guide in the section “Also See” onpage 168.
• You’re able to log what’s happening in rewrite statements withthe rewrite_log directive on: rewrite_log on.
DiscussionThe NGINX platform is vast, and the configuration enables you todo many amazing things. However, with the power to do amazingthings, there’s also the power to shoot your own foot. When debug‐ging, make sure you know how to trace your request through yourconfiguration; and if you have problems, add the debug log level tohelp. The debug log is quite verbose but very helpful in finding outwhat NGINX is doing with your request and where in your configu‐ration you’ve gone wrong.
31.2 Debugging Configs | 167

Also SeeHow NGINX processes requestsDebugging admin guideRewrite log
31.3 ConclusionThis book’s three parts have focused on high-performance load bal‐ancing, security, and deploying and maintaining NGINX andNGINX Plus servers. This book has demonstrated some of the mostpowerful features of the NGINX application delivery platform.NGINX continues to develop amazing features and stay ahead of thecurve.
This book has demonstrated many short recipes that enable you tobetter understand some of the directives and modules that makeNGINX the heart of the modern web. The NGINX sever is not just aweb server, nor just a reverse proxy, but an entire application deliv‐ery platform, fully capable of authentication and coming alive withthe environments that it’s employed in. May you now know that.
168 | Chapter 31: Practical Ops Tips and Conclusion

About the AuthorDerek DeJonghe has had a lifelong passion for technology. Hisbackground and experience in web development, system adminis‐tration, and networking give him a well-rounded understanding ofmodern web architecture. Derek leads a team of site reliability engi‐neers and produces self-healing, auto-scaling infrastructure fornumerous applications. He specializes in Linux cloud environments.While designing, building, and maintaining highly available applica‐tions for clients, he consults for larger organizations as they embarkon their journey to the cloud. Derek and his team are on the fore‐front of a technology tidal wave and are engineering cloud bestpractices every day. With a proven track record for resilient cloudarchitecture, Derek helps RightBrain Networks be one of the stron‐gest cloud consulting agencies and managed service providers inpartnership with AWS today.