NetBackup IT Analytics Licensing Guide - Veritas
43
NetBackup IT Analytics Licensing Guide Release 11.0
-
Upload
khangminh22 -
Category
Documents
-
view
19 -
download
0
Transcript of NetBackup IT Analytics Licensing Guide - Veritas

NetBackup IT AnalyticsLicensing Guide
Release 11.0

NetBackup IT Analytics Licensing GuideLast updated: 2022-09-01
Legal NoticeCopyright © 2022 Veritas Technologies LLC. All rights reserved.
Veritas and the Veritas Logo are trademarks or registered trademarks of Veritas TechnologiesLLC or its affiliates in the U.S. and other countries. Other names may be trademarks of theirrespective owners.
This product may contain third-party software for which Veritas is required to provide attributionto the third party (“Third-party Programs”). Some of the Third-party Programs are availableunder open source or free software licenses. The License Agreement accompanying theSoftware does not alter any rights or obligations you may have under those open source orfree software licenses. Refer to the Third-party Legal Notices document accompanying thisVeritas product or available at:
https://www.veritas.com/about/legal/license-agreements
The product described in this document is distributed under licenses restricting its use, copying,distribution, and decompilation/reverse engineering. No part of this document may bereproduced in any form by anymeans without prior written authorization of Veritas TechnologiesLLC and its licensors, if any.
THE DOCUMENTATION IS PROVIDED "AS IS" AND ALL EXPRESS OR IMPLIEDCONDITIONS, REPRESENTATIONS AND WARRANTIES, INCLUDING ANY IMPLIEDWARRANTY OF MERCHANTABILITY, FITNESS FOR A PARTICULAR PURPOSE ORNON-INFRINGEMENT, ARE DISCLAIMED, EXCEPT TO THE EXTENT THAT SUCHDISCLAIMERS ARE HELD TO BE LEGALLY INVALID. VERITAS TECHNOLOGIES LLCSHALL NOT BE LIABLE FOR INCIDENTAL OR CONSEQUENTIAL DAMAGES INCONNECTION WITH THE FURNISHING, PERFORMANCE, OR USE OF THISDOCUMENTATION. THE INFORMATION CONTAINED IN THIS DOCUMENTATION ISSUBJECT TO CHANGE WITHOUT NOTICE.
The Licensed Software and Documentation are deemed to be commercial computer softwareas defined in FAR 12.212 and subject to restricted rights as defined in FAR Section 52.227-19"Commercial Computer Software - Restricted Rights" and DFARS 227.7202, et seq."Commercial Computer Software and Commercial Computer Software Documentation," asapplicable, and any successor regulations, whether delivered by Veritas as on premises orhosted services. Any use, modification, reproduction release, performance, display or disclosureof the Licensed Software and Documentation by the U.S. Government shall be solely inaccordance with the terms of this Agreement.
Veritas Technologies LLC2625 Augustine Drive.Santa Clara, CA 95054
http://www.veritas.com

Technical SupportTechnical Support maintains support centers globally. All support services will be deliveredin accordance with your support agreement and the then-current enterprise technical supportpolicies. For information about our support offerings and how to contact Technical Support,visit our website:
https://www.veritas.com/support
You can manage your Veritas account information at the following URL:
https://my.veritas.com
If you have questions regarding an existing support agreement, please email the supportagreement administration team for your region as follows:
[email protected] (except Japan)
DocumentationMake sure that you have the current version of the documentation. Each document displaysthe date of the last update on page 2. The latest documentation is available on the Veritaswebsite.
Veritas Services and Operations Readiness Tools (SORT)Veritas Services andOperations Readiness Tools (SORT) is a website that provides informationand tools to automate and simplify certain time-consuming administrative tasks. Dependingon the product, SORT helps you prepare for installations and upgrades, identify risks in yourdatacenters, and improve operational efficiency. To see what services and tools SORT providesfor your product, see the data sheet:
https://sort.veritas.com/data/support/SORT_Data_Sheet.pdf

Chapter 1 License installation and guidelines ................................ 6
License overview ........................................................................... 7License Editions ...................................................................... 7License feature matrix ............................................................. 10
Understanding licensing restrictions ................................................. 12Get the license key file .................................................................. 14Install a license ............................................................................ 15Verify the current license configuration .............................................. 16
Run the License Summary report ............................................... 17Help About ............................................................................ 17View License Details ............................................................... 18
Consumption criteria of license suites ............................................... 18Storage suite ............................................................................... 18
Capacity Manager .................................................................. 19Fabric Manager ...................................................................... 20
Protection suite ............................................................................ 20Backup Manager .................................................................... 20Virtualization Manager ............................................................. 23
Complete suite ............................................................................. 23File Analytics ......................................................................... 24
Foundation ................................................................................. 24Managing licenses ........................................................................ 24
Managing objects collected from centralized systems .................... 24Managing directly probed enterprise objects ................................ 25What happens to historical data? ............................................... 25Processes to manage license counts .......................................... 26Identify counted and excluded objects ........................................ 26Stack multiple licenses ............................................................ 26Add license with higher entitlement ............................................ 27Change the license edition ....................................................... 27Portal behavior with stacked license suites .................................. 28
View the current license ................................................................. 29Delete clients ............................................................................... 29Expand your license configuration ................................................... 29Exclude objects from future data collections ....................................... 29Configure the Data Collector policy to exclude the object ...................... 30
Contents

Example of configuring a Data Collector policy to exclude arrays..................................................................................... 30
Add objects to the Object Exclusion Database table ...................... 32Removing objects from the license count ........................................... 33Deleting objects using the Inventory List view ..................................... 35
Chapter 2 License management from command line ................. 36
Overview .................................................................................... 36Install a license on Microsoft Windows Portal platform .......................... 36Install a license on Linux Portal platform ............................................ 37Verify the current license configuration .............................................. 38
Run report configuration utility ................................................... 38Run license verification utility .................................................... 39
Removing a Portal license .............................................................. 40
Chapter 3 Troubleshooting ................................................................. 42
License install fails with 'License is already issued for another host'error .................................................................................... 42
5Contents

License installation andguidelines
This chapter includes the following topics:
■ License overview
■ Understanding licensing restrictions
■ Get the license key file
■ Install a license
■ Verify the current license configuration
■ Consumption criteria of license suites
■ Storage suite
■ Protection suite
■ Complete suite
■ Foundation
■ Managing licenses
■ View the current license
■ Delete clients
■ Expand your license configuration
■ Exclude objects from future data collections
■ Configure the Data Collector policy to exclude the object
1Chapter

■ Removing objects from the license count
■ Deleting objects using the Inventory List view
License overviewA valid license is required to run the NetBackup IT Analytics application.
If you have not received your license file, see Get the license key file
The availableNetBackup IT Analytics license suites and their respective inclusionsas follows.
Table 1-1 NetBackup IT Analytics License suites
InclusionsLicense suites
■ Capacity Manager■ Fabric Manager■ Virtualization Manager
Storage suite
■ Backup Manager■ Virtualization Manager
Protection suite
■ Capacity Manager■ Fabric Manager■ Virtualization Manager■ Backup Manager■ File Analytics
Complete suite
Note: Complete suite contains the licenseof File Analytics in addition to those includedin both Storage and Protection suites.
Only following three policies under BackupManager:
■ Veritas NetBackup■ Veritas Backup Exec■ Veritas NetBackup Appliance
Foundation
If you find that you have exceeded your license configuration, refer to:
■ Understanding licensing restrictions
■ Verify the current license configuration
License EditionsThe editions of each license type are defined below:
7License installation and guidelinesLicense overview

■ Standard: Allows licensing for NetBackup IT Analytics Portal only if OracleStandard edition is used and only a single Instance of the Portal is used in theenterprise.
■ Shared Services: Allows licensing in Oracle shared services environment. Youneed to provide your own Oracle license (BYOO - Bring Your Own Oracle).
■ Partitioning: Allows the underlying database to split large tables into partitions,thus improving the database performance and scalability. NetBackup IT Analyticsleverages the Oracle enterprise Edition Database with the Oracle Partitioningoption.
The supported License edition based on the License type of each license suite isas follows:
Table 1-2 Supported editions for each license suite
Supported EditionLicense TypeLicense Suite
Standard
Standard DR
Shared Services
Shared Services DR
Partitioning
Partitioning DR
Perpetual
Storage SuiteStandard
Standard DR
Shared Services
Shared Services DR
Partitioning
Partitioning DR
Subscription
8License installation and guidelinesLicense overview

Table 1-2 Supported editions for each license suite (continued)
Supported EditionLicense TypeLicense Suite
Standard
Standard DR
Shared Services
Shared Services DR
Partitioning
Partitioning DR
Perpetual
Protection SuiteStandard
Standard DR
Shared Services
Shared Services DR
Partitioning
Partitioning DR
Subscription
StandardEvaluation
Complete suite
Standard
Standard DR
Shared Services
Shared Services DR
Partitioning
Partitioning DR
Perpetual
Standard
Standard DR
Shared Services
Shared Services DR
Partitioning
Partitioning DR
Subscription
Shared ServicesSubscriptionFoundation
9License installation and guidelinesLicense overview

Note: A Disaster Recovery (DR) License is required if you deploy two or morecopies of any product from the suite of softwares on a second or subsequent Portalserver for the purpose of disaster recovery, availability, or fail-over from production.A DR License is required for each individual product that you license.
License feature matrixThe following table presents a view of features available under each license suite.
Table 1-3 Feature matrix
Completesuite
Storagesuite
Protectionsuite
FoundationFeature
Collection Policy
Host Discoveryand Collection
VeritasNetBackup,VeritasNetBackupAppliance, andVeritas BackupExec
Data ProtectionPolicies,StorageTargets (DD)
Storage andReplicationPolicies(exceptStoragetargets)
Network andFabricsPolicies
VirtualizationPolicies
Cloud Policies
10License installation and guidelinesLicense overview

Table 1-3 Feature matrix (continued)
Completesuite
Storagesuite
Protectionsuite
FoundationFeature
File Analytics
Inventory
BackupServers
Hosts
Arrays
Azure Objects
AWS Objects(EC2/S3)
VM Objectsand Datastores
Switches
File Sharesand Volumes
Chargeback
Backup
Capacity
SAN Fabric
Solutions
StorageOptimization
Risk Mitigation
11License installation and guidelinesLicense overview

Table 1-3 Feature matrix (continued)
Completesuite
Storagesuite
Protectionsuite
FoundationFeature
Alert Categories
SystemAdministration
Data Collection
DataProtection,exceptServiceNow
Data ProtectionincludingServiceNow
Performance
Storage andStorageForecast
VirtualizationandVirtualizationForecast
Understanding licensing restrictionsAt login, the Portal may prompt with a message window similar to the followingexamples:
12License installation and guidelinesUnderstanding licensing restrictions

The above message is related to storage array capacity licensing. For specificdefinitions of these types of licenses refer to the following section.
See “Consumption criteria of license suites” on page 18.
This message indicates that the total number of Backup Units in your database hasexceeded the number for which you are licensed. A Backup Unit is defined as anyclient, server, media server, master server--that is, any host in your backupinfrastructure for which reporting data is collected.
A number of factors are considered when determining client licensing compliance,as described in the following section.
See “Consumption criteria of license suites” on page 18.
13License installation and guidelinesUnderstanding licensing restrictions

When you reach the object license limit, any additional objects will not be added tothe reporting database. They, however, will be noted in an exception table. Referto the following section for tools to identify excluded objects.
See “Managing licenses” on page 24.
Get the license key fileA valid license file is required to run the Portal application. If you already have alicense file, proceed to the Installation section.
To generate a license key:
1 Open the Veritas support portal.(https://www.veritas.com/content/support/en_US/)
2 Click Licensing and login to the Veritas Entitlement Management Systemusing your Administrator credentials.
3 Open the Entitlements tab and use the filters at the top to filter and locate theentitlements granted to your account.
4 Click the key icon located against the entitlement ID for which you wish togenerate a license key. The Generate License Key page is displayed. Verifyyour account details for which you plan to generate the license key.
5 Select the product version for which you want to generate the key. By default,the latest product version is selected.
6 Specify the license quantity that you wish to deploy using the key. By default,the entire available quantity is displayed in the field. You can utilize a partialsubset of your entitled licenses with this key and generate a separate key forthe remainder.
Note: If you create a key for less than the entitled quantity and if you wish toincrease the quantity of the systems later using the entitlement associated withthe key, you must create a new key for the additional systems. On the contrary,to reduce the number of systems associated with a key, you need to assign anew key to the reduced systems and edit the older key.
7 Provide the host lock string of the system where will be installed using this key.
To get the correct host lock string, run one of these commands on the portalserver:
■ Linux: /opt/aptare/utils/VxLicGetHostLock.sh
14License installation and guidelinesGet the license key file

On Linux, VxLicGetHostLock.sh uses hostname --fqdn commands toget the hostname of the system and uses it to create the host string. Hence,ensure hostname --fqdn returns a fully qualified host name, instead of ashort name. For example, the command output must have at least one dot(.) character.
■ Windows:C:\opt\aptare\utils\VxLicGetHostLock.ps1
If you have not installed the Portal, you can download theVxLicGetHostLock.sh or VxLicGetHostLock.ps1 from the Veritas downloadcenter and run the appropriate script depending on the OS of the Portal server.
8 After running VxLicGetHostLock.sh or VxLicGetHostLock.ps1 file, you getthe following output:
Veritas Get Host Lock utility v1.0.0.0
Copyright (c) 2022 Veritas Technologies LLC. All rights reserved.
FQDN: xyz.abc.com
Host Lock String: [sha512]4aba838e350d3c9471aa5334db5de8ad4a0ff
45e34a6cfaea064f4ca77812acd4c8abc7be6b2d756574b7d6e06ceb9581357
b824f4f70f84b39d938e85ee62b5
While generating the license key on VEMS use the same host lock stringincluding [sha512].
For example:
[sha512]4aba838e350d3c9471aa5334db5de8ad4a0ff
45e34a6cfaea064f4ca77812acd4c8abc7be6b2d756574b7d6e06ceb9581357
b824f4f70f84b39d938e85ee62b5
9 Add comments about to the license key if required for the future reference.
10 Click Generate. The Generated Key page is displayed with the new key in theLicense Key column. You can click the key link and save it locally.
Install a licenseUse the procedures listed in this section to install the Portal license. Your logincredentials must be assigned the Super User role.
As a best practice, install your license directly through the Portal. Instructions forthe command-line installation practices are available.
See “Install a license on Linux Portal platform” on page 37.
15License installation and guidelinesInstall a license

To install a license:
1 Receive the new license file and save the new license file on your Portal serverand complete the subsequent steps.
2 Upload the New License
■ Navigate to Admin > Advanced > License Administration. The Portaldisplays your current license details.
■ Click Add New License.
■ Browse to locate the license file on your Portal server and click OK.
3 Verify the License Installation.
See “Verify the current license configuration” on page 38.
If you have issues with license installation, try uploading the license file againto overwrite the previous one.
Verify the current license configurationAs a Super User, there are a number of ways that you can validate your currentlicense configuration:
■ Run the License Summary report in the Portal.See “Run the License Summary report” on page 17.
■ Click Help About in the Portal.See “Help About” on page 17.
■ View the License Details.See “View License Details” on page 18.
16License installation and guidelinesVerify the current license configuration

Run the License Summary report1 Log into the Portal as a Super User.
2 Search for License Summary.
3 Generate the License Summary report.
Using this report, you can drill down to additional details about counted objects.
Help AboutLog in to the Portal as a Super User and in the Portal toolbar, select:
Help > About
The license details are displayed.
Note: Users without Super User privileges cannot view the license configurationdetails. Only the end user license agreement is displayed.
17License installation and guidelinesVerify the current license configuration

View License DetailsView license details--that is, the specific capabilities that are associated with thelicense that was purchased for your environment by navigating toAdmin>Advanced>License Administration. Your current license details aredisplayed.
Consumption criteria of license suitesThe license consumption for each suite is explained in their respective section. Thecomponent description explains how each client is counted.
License suites:
■ Storage suite
■ Protection suite
■ Complete suite
■ Foundation
Storage suiteStorage suite comprises of licenses specific to the following components:
■ Capacity Manager
■ Fabric Manager
■ Virtualization Manager. This component is common across all the three licensesuites and its license consumption criteria is explained under the protectionsuite.
The Storage suite uses RAW Terabyte as the meter to consume a license. Thelicense consumption criteria for products specific to each component is explainedin the sections below.
18License installation and guidelinesConsumption criteria of license suites

Capacity ManagerWhen licensing Capacity Manager, the license is based on the raw amount of SANstorage in your environment. NetBackup IT Analytics only includes arrays that havebeen polled within the last 30 days.
Storage Array Capacity license criteria
Note: The following description applies to most storage arrays, with the exceptionslisted in the following section.
See “Vendor-specific capacity license criteria” on page 19.
Licensing is based on the raw capacity of storage arrays, for arrays that have beenpolled within the last 30 days. This capacity is the total capacity of all the physicaldisks in the storage array. If arrays are provisioning storage to other arrays and weare capturing data from the source arrays, to avoid double-counting of capacity,only the capacity of the source arrays (not the recipient arrays) is counted towardlicensing.
Vendor-specific capacity license criteriaThe following vendor-specific descriptions list how raw capacity is calculated forcertain specific vendors.
EMC Symmetrix ArraysSum of the capacity of all physical disks from all array groups--no spares. Note:When viewing raw capacity in EMC Control Center, disk group 0 (hot spares) is notincluded in the total capacity calculation--accounting for the difference between theEMC and Capacity Manager reported capacity values.
EMC CLARiiON ArraysSum of the capacity of all physical disks from all array groups--including spares(drives that are not allocated to an array group).
HDS ArraysSum of capacity of all PDEVs from all array groups. Capacity Manager assumesthat all PDEVs are part of an array group, so PDEVs that are marked as--Notincluded in an array group--are included in the capacity calculation. That is, no disksare treated as spares.
19License installation and guidelinesStorage suite

NetApp ArraysSum of the capacity of all physical disks in the filer/array. For NetApp vFilers andV-Series, this represents only internal raw capacity and does not include vFilercapacity or gateway external capacity.
Fabric ManagerCounts licensed switch ports. For example, licensing checks if the switch has beenlicensed from the vendor, such as Brocade.
Protection suiteThis license suite comprises of:
■ Backup Manager
■ Virtualization Manager
The Protection Suite uses Front End Terabyte (FETB) as the meter for licenseconsumption and the below conversion factor is used to convert number of clientsto FETB:
1 FETB = 2.5 clients
The consumption criteria for each product of these components is explained in thesections below.
You can also configure Storage backup target policies along with policies underData protection. Reports related to such Storage backup target are also availablefor Protection Suite license.
Backup ManagerA Backup Manager Unit License is required for each physical or virtual host thatcontains supported third-party backup software agent/server software. This includes,but is not limited to, master servers, media servers, and clients. A Backup ManagerUnit License is required for each of the logical instances, not just one license forthe physical machine. In this discussion, client is synonymous with backup unit.
Cohesity DataProtect■ Counts unique objects such as datastores, resource pools, virtual machines,
etc. that have had a backup job in the last 7 days.
■ Counts unique clients for objects such as NAS, Directory and files that havehad a backup job in the last 7 days.
20License installation and guidelinesProtection suite

Commvault SimpanaClient is counted if any of the following bullets apply:
■ The client has one or more iDataAgents configured.
■ The client was backed up (or had a backup attempt) within the last 7 days. Thisincludes decommissioned clients.
■ The client is a media server or a master server.
■ The client is a VM guest that has been backed up within the last 7 days. Thisincludes decommissioned clients.
Dell EMC NetWorker Backup & Replication■ Counts unique objects such as datastores, resource pools, virtual machines,
etc. that have had a backup job in the last 7 days.
■ Counts unique clients for objects such as NAS, Directory and files that havehad a backup job in the last 7 days.
Note: EMC NetWorker is documented based on vendor version number. Legacyversions of EMCNetWorker (pre version 9.2.1.x) are referred to as EMCNetWorker.For EMC NetWorker versions post 9.2.1.x, they are referred to as Dell EMCNetWorker Backup & Recovery. This is also reflected in the data collector policynames.
EMC AvamarClient is counted if any of the following bullets apply:
■ Avamar provided client data in the last 7 days. This includes decommissionedclients.
■ It is an Avamar server
■ The client is not in the Avamar MC_RETIRED domain
EMC NetWorkerClient is counted if any of the following bullets apply:
■ The client resource is active
■ The client was backed up (or had a backup attempt) within the last 7 days. Thisincludes decommissioned clients.
■ The client is a media server or a master server.
21License installation and guidelinesProtection suite

■ The client is a VM guest that has been backed up within the last 7 days. Thisincludes decommissioned clients.
Generic backupsClient is counted if any of the following bullets apply:
■ The client was backed up (or had a backup attempt) within the last 7 days. Thisincludes decommissioned clients.
■ For generic backups, only the jobs are captured.
HP Data ProtectorClient is counted if any of the following bullets apply:
■ The backup specification is active
■ The client was backed up (or had a backup attempt) within the last 7 days. Thisincludes decommissioned clients.
■ The client is a media server or a master server.
IBM Spectrum Protect (TSM)Node’s client is counted if any of the following bullets apply:
■ The client is a media server or a master server.
■ The client was backed up (or had a backup attempt) within the last 7 days. Thisincludes decommissioned clients.
■ Counts all unique TSM clients for which any of the corresponding nodes onthose clients have communicated with their TSM server/instance within the past45 days (In TSM, this is NODES.LASTACC_TIME)
NAKIVO Backup & Replication■ Counts unique objects such as datastores, resource pools, virtual machines,
etc. that have had a backup job in the last 7 days.
■ Counts unique clients for objects such as NAS, Directory and files that havehad a backup job in the last 7 days.
Oracle Recovery Manager (RMAN)Counts unique databases listed in the Oracle RMAN recovery catalogs for whichthe database has had an Oracle RMAN backup job attempt within the last 90 days.
22License installation and guidelinesProtection suite

Rubrik Cloud Data Management■ Counts unique objects such as datastores, resource pools, virtual machines,
etc. and files that have had a backup job in the last 7 days.
■ Counts unique clients for objects such as NAS, Directory and files that havehad a backup job in the last 7 days.
Veeam Backup & Replication■ Counts unique objects such as datastores, resource pools, virtual machines,
etc. and files that have had a backup job in the last 7 days.
■ Counts unique clients for objects such as NAS, Directory and files that havehad a backup job in the last 7 days.
Veritas Backup ExecClient is counted if any of the following bullets apply:
■ Data was collected within the last 7 days.
■ The client was backed up (or had a backup attempt) within the last 7 days. Thisincludes decommissioned clients.
■ The client is a media server or a master server.
Veritas NetBackupClient is counted if any of the following bullets apply:
■ The client is part of an active backup policy and the policy exists in the NetBackupcatalog (if deleted in NetBackup, the Portal does not count them).
■ The client was backed up (or had a backup attempt) in the last 7 days. Thisincludes decommissioned clients.
■ The client is a media server or a master server.
Virtualization ManagerCounts the number of VM servers.
Complete suiteThis license suite comprises of products under Storage and Protection Suites, withan additional component of File Analytics. See Storage suite and Protection suitesections for respective license inclusions.
23License installation and guidelinesComplete suite

The criteria of license consumption of products under Storage and Protection Suitesis explained above. The Complete Suite uses RAW Terabyte as a meter for licenseconsumption. The consumption criteria of products included in File Analytics isexplained in the subsequent sections.
File AnalyticsCounts the total utilized capacity of all the shares and volumes. For NetBackup FileAnalytics, the count includes shares and volumes backed up by NetBackup.
Note: Once File Analytics data is collected, it cannot be removed from the licensecount.
FoundationThe Foundation license enables only a limited set of features supporting only VeritasNetBackup and Veritas Backup Exec. This license being a Shared Services edition,it requires you to have your own Oracle license. The Foundation license uses FrontEnd Terabyte (FETB) as the meter to consume a license. This license supportslimited reports and alerts that are relevant to the Veritas NetBackup and VeritasBackup Exec policies.
Managing licensesData is collected either directly from individual enterprise objects, such as backupservers or storage arrays; or from a centralized system, such as Hitachi DeviceManager or vCenter. There may be times when you no longer want to collect datafrom an object. You cannot simply delete that object, because the next time datacollection retrieves data, the object will once again appear in your database. Inmost cases, objects must be excluded and then deleted; however, there are someexceptions. Use the guidance provided in the following sections to determine howto remove objects from license counts.
Managing objects collected from centralized systemsWhen collecting from a centralized system, such as Hitachi Device Manager orvCenter, NetBackup IT Analytics relies on the system to supply the information onthe devices and resources that are available. For objects collected via a centralizedsystem, there are two methods for removing collected objects:
■ Preferred Method: Go to the Data Collector policy in the Portal and use the“Exclude” field to exclude objects from collection. For example, for Hitachi Data
24License installation and guidelinesFoundation

Systems, you would exclude arrays in the Data Collector policy. Similarly, forVMware, you would exclude ESX servers in the Data Collector policy. Whenyou exclude objects through a Data Collector policy, NetBackup IT Analyticswill automatically delete these objects from the reporting database.
■ Alternatively, you can go to the centralized system and decommission the object.In this case, you must also delete the object from the NetBackup IT Analyticsdatabase.See “Removing objects from the license count” on page 33.See “Deleting objects using the Inventory List view” on page 35.
Managing directly probed enterprise objectsMany enterprise objects are probed directly to collect metadata. For objects thatare probed directly, follow these steps to remove them from license counts:
■ Exclude fromCollection: If the object was captured during data collection, youwill need to exclude it from collection so that future collections do not recapturethe object.See “Exclude objects from future data collections” on page 29.For Backup Manager, you can go directly to the backup software and removethe client from the backup policy, according to the vendor’s instructions. In thiscase, you do not have to delete the object from the database.
■ Remove from License Count: To remove a directly probed object from licensingconsideration, you must delete the object via the Object Maintenance tool in thePortal.See “Removing objects from the license count” on page 33.See “Deleting objects using the Inventory List view” on page 35.
What happens to historical data?Backup Manager operates differently from other products. Refer to the followingsection to determine the conditions under which backup clients are counted againstyour license. Typically, a client must be part of a backup policy or it must have beenbacked up recently, usually in the last 7 days.
See “Consumption criteria of license suites” on page 18.
Since Backup Manager involves transaction-based data rather than just objectmetadata, when an object is excluded from data collection, these time-sensitivetransactions are retained for historical reporting.
All Other Licensed Modules, such as Capacity Manager and Virtualization Manager,do not keep historical data when objects are permanently deleted from the reportingdatabase.
25License installation and guidelinesManaging licenses

See “Removing objects from the license count” on page 33.
See “What happens to historical data?” on page 25.
Processes to manage license countsUse the following strategies to determine how your licenses are being utilized andto work with the current license configuration.
■ See “Identify counted and excluded objects” on page 26.
■ See “View the current license” on page 29.
■ See “Delete clients” on page 29.
■ See “Expand your license configuration” on page 29.
■ See “Exclude objects from future data collections” on page 29.
■ See “Removing objects from the license count” on page 33.
Identify counted and excluded objects■ To list the objects that are being counted for licensing purposes, run the following
utility:Windows:
\opt\oracle\database\tools\debug\get_license_info.sql
Linux:
/opt/aptare/database/tools/debug/get_license_info.sql
■ To list the clients that are not being included in reportingbecause the licenselimit has been exceeded, run the following SQL query:
select * from apt_rejected_object where is_obsolete !=’Y’;
■ To exclude objects that are not being included in reportingbecause the licenselimit has been exceeded, refer to the following section.See “Exclude objects from future data collections” on page 29.
Stack multiple licensesYou can stack multiple licenses either from the Portal UI or through the commandline.
26License installation and guidelinesManaging licenses

To add a license from the Portal UI, follow the steps described in Installing a Licensesection of this document.See “Install a license” on page 15.
To add a license from the command line, install using these OS-specific commandsas applicable:
■ On Linux:
/opt/aptare/utils/installlicenseUI.sh <path of the license file>
■ On Windows:
C:\opt\aptare\utils\installlicenseUI.bat <path of the license file>
Note:When a permanent license is installed, any evaluation license that is installedwill be removed.
Add license with higher entitlementYou can add licenses with higher entitlement either from the Portal UI or throughthe command line.
To add a license from the Portal UI, follow the steps described in Installing a Licensesection of this document.See “Install a license” on page 15.
To add a license from the command line, install using these OS-specific commandsas applicable:
■ On Linux:
/opt/aptare/utils/installlicenseUI.sh <path of the license file>
■ On Windows:
C:\opt\aptare\utils\installlicenseUI.bat <path of the license file>
Note:When a permanent license is installed, any evaluation license that is installedwill be removed.
Change the license editionNetBackup IT Analytics 11.0 does not allow adding a new license of a differentedition than what is currently installed. To install a license of a different edition, you
27License installation and guidelinesManaging licenses

must remove the existing NetBackup IT Analytics 11.0 license and then install thenew license.
To remove the current licenses, run these commands based on the OS:
■ On Linux, execute this script as a root user./opt/aptare/utils/removeLicenseFiles.sh
■ On Windows, execute this script as an administrator:C:\ opt\aptare\utils\removeLicenseFiles.bat
Portal behavior with stacked license suitesProtection or Complete suite over Foundation licenseWhen Protection or Complete suite license is installed on top of a valid Foundationlicense, the Foundation license is deleted. Additional policies/capabilities will becomeavailable for configuration. Data collection from policies configured with theFoundation license remain unchanged, as they become a subset of either theProtection or Complete suite of license.
Foundation over Protection suite licenseWhen the Foundation license is installed on top of an existing valid Protection suitelicense, the Protection suite license is deleted. Data collection from policies thatare not available in Foundation license continues but reporting is suppressed. Youmust delete or disable the policies that are not supported by the Foundation licensebefore switching the license. Also, you must restart the Tomcat portal and Tomcatagent user services to make the license change effective.
Foundation over Complete suite licenseWhen a Foundation license is installed on top of an existing valid Complete suitelicense, the Complete Suite license is deleted. Data collection from Protection typeof policies that are not available in the Foundation license continue until the licensecoverage but reporting is suppressed. Data collection from Storage type of policesis stopped as RAWTB is exhausted. You must delete or disable the policies thatare not supported in the Foundation license before switching the license type. Youmust also restart the Tomcat portal and Tomcat agent services to make the licensetype effective.
Start Tomcat portal and Tomcat agentOn Linux:
■ /opt/aptare/bin/tomcat-agent restart
■ /opt/aptare/bin/tomcat-portal restart
28License installation and guidelinesManaging licenses

On Windows, restart the Tomcat agent and Tomcat portal from the WindowsServices console.
View the current licenseSee “Verify the current license configuration” on page 38.
Delete clientsFor Backup Manager, if you purge clients, the table that tracks rejected clientsautomatically frees up the license slots so that other clients can be added. Use thehost group management features to delete old clients.
Front End Terabyte (FETB) is used as a meter to calculate the licenses freed whenthe clients are purged. The below conversion factor is used to convert the numberof clients to FETB:
1 FETB = 2.5 clients
Note: Clients decommissioned in the native backup product, via removal from allactive backup policies, consume an NetBackup IT Analytics license until after 48hours from the last backup.
Expand your license configurationPurchase additional licenses to enable reporting for all objects to be collected.Contact Veritas Sales.
Exclude objects from future data collectionsTwo methods can be used to exclude objects from data collection, depending onthe type of object to be excluded.
■ See “Configure the Data Collector policy to exclude the object” on page 30.
■ See “Add objects to the Object Exclusion Database table” on page 32.
29License installation and guidelinesView the current license

Configure the Data Collector policy to exclude theobject
Certain Data Collector Policies can be configured to exclude an object from datacollection. This method should be used if it’s available for the object you want toexclude.
■ Exclude Arrays: EMC Symmetrix and Hitachi Data Systems
■ Exclude ESX Servers: VMware
■ Exclude Switches: Brocade
Example of configuring a Data Collector policy to exclude arrays1. In the Portal, Admin>Data Collection>Collector Administration
2. Select a Collector and a relevant policy. For this example, Hitachi Block Storageis shown.
30License installation and guidelinesConfigure the Data Collector policy to exclude the object

3. If the object is already in the database, the object also will need to be deletedfrom the database in order to exclude it from the license count.
31License installation and guidelinesConfigure the Data Collector policy to exclude the object

See “Removing objects from the license count” on page 33.
Add objects to the Object Exclusion Database tableTo exclude objects (such as clients, ESX hosts, and arrays) from data collection,the object must be inserted into the apt_exclude_object table. If the object is alreadyin the database, the object also will need to be deleted from the database in orderto exclude it from the license count.
See “Removing objects from the license count” on page 33.
See “Deleting objects using the Inventory List view” on page 35.
1. Open a terminal to the Portal server (Linux) or a command prompt on the Portalserver (Windows)
For Linux, su - aptare
2. Execute: sqlplus <ID>/<password>
3. Use the following SQL statement to view the exclude object table:
SQL> desc apt_exclude_object;
Name Null? Type
--------------------------------------------
DOMAIN_IDNOT NULLNUMBER(6)
OBJECT_NAMENOT NULLVARCHAR2(64)
CREATION_DATENOT NULLDATE
APTARE_PRODUCT_TYPENOT NULLNUMBER(2)
Note: For APTARE_PRODUCT_TYPE you will substitute one of the followingnumeric values in the command line execution of the procedure, listed later inthese steps.
■ Backup Manager = 1
■ Capacity Manager = 2 (used for Array objects)
■ Virtualization Manager = 4
■ Replication Manager = 8
■ Fabric Manager = 16
■ File Analytics = 32
4. Execute: select domain_name, domain_id from apt_domain;
This is to capture the domain ID, needed for subsequent script executions.
32License installation and guidelinesConfigure the Data Collector policy to exclude the object

Typically, the domain ID will be 100000, however, in a multi-tenancy, ManagedServices environment, the domain ID will be specific to the client’s domain.
SQL> select domain_name, domain_id from apt_domain;
DOMAIN_NAME DOMAIN_ID
------------------------
CORP07 100000
5. Execute the following, substituting your specific values:
SQL> insert into apt_exclude_object (domain_id, object_name,
aptare_product_type, creation_date) values (100000, ‘Array 123’,2,
sysdate);
This step adds (inserts) this object into the object exclusion database table.Forobject_name substitution, use the name, such as the host or array name.
6. Repeat step 5 for all objects that need to be excluded from data collection.
7. After completing all the inserts, execute: commit;
8. If the clients are already in the database, you will need to delete them from thedatabase so they will not be counted against your license.
See “Removing objects from the license count” on page 33.
Removing objects from the license countTo remove the object from the license count, you must completely remove the objectand its data from the system.
Objects are maintained in the Inventory and Object Maintenance.
Use the following table to determine which area to use to delete the objects.
Table 1-4
Product Area forManagement
Object Type
InventoryArrays
InventoryBackup Servers
InventoryDedupe Appliances
InventoryFile Shares and Volumes
Object MaintenanceDrives
33License installation and guidelinesRemoving objects from the license count

Table 1-4 (continued)
Product Area forManagement
Object Type
InventoryHosts
Object MaintenanceLibraries
InventorySwitches
InventoryVM Servers
To delete objects using Object Maintenance
1 Navigate to Admin>Advanced>Object Maintenance.
2 Locate the object to delete.
3 Select the object and click Permanently Remove.
As the button suggests, you are not just removing the object from the licensecount; you are completely removing it and any data collected from the system.
34License installation and guidelinesRemoving objects from the license count

Deleting objects using the Inventory List viewIf you choose to delete an object (if you have privileges) you are irretrievablydeleting the object from the reporting database. All related historical data will alsobe permanently deleted from the database and unavailable in all reports. A pop-upwindow warns you of this action to prevent inadvertent deletions.
When you delete a host, it removes everything related to the host except the VMServer. To remove the related VM Server, you just explicitly delete it using theInventory window. This prevents servers from being orphaned in the database.
In most cases, you should remove a host from a group, thereby un-linking it fromits relationship with other machines in that group.
To delete objects using the Inventory
Note: VM Guests, individual LUNs, S3 Buckets, EC2 Instances, Azure StorageAccounts, Azure Virtual Machines and datastores cannot be deleted.
1 Select Inventory.
2 Select the object type category and expand to view.
3 Toggle to the Inventory List view.
4 Select an individual object or you can multi-select.
5 Click Delete. Remember all related historical data will also be permanentlydeleted from the database and unavailable in all reports. A confirmation dialogis displayed.
35License installation and guidelinesDeleting objects using the Inventory List view

Licensemanagement fromcommand line
This chapter includes the following topics:
■ Overview
■ Install a license on Microsoft Windows Portal platform
■ Install a license on Linux Portal platform
■ Verify the current license configuration
■ Removing a Portal license
OverviewAs a best practice, install your license directly through the Portal. Alternatively, acommand-line installation is available.
See “Install a license on Microsoft Windows Portal platform” on page 36.
See “Install a license on Linux Portal platform” on page 37.
Install a license on Microsoft Windows Portalplatform
Receive and save the license file on your portal server and then complete all of thefollowing steps.
1. Ensure that the Oracle Processes are Running.
C:\opt\aptare\utils\startoracle.bat
2Chapter

2. Open a DOS command prompt window using Start > Run > cmd
3. Run the license installer utility: C:\opt\aptare\utils\installLicense.bat
4. Enter the complete path to the license key file you saved on your server whenprompted for the name of the license file. A sample dialog is shown below:
Enter the name of the license file you wish to install [*.slf] :
C:\Users\Administrator\Documents\Slic\
A3351334429_QTY200_APTARE_ITA_10_6_COMPLETE_STANDARD_DR_LIC_NNL_4756411672.slf
Verifying license...
License installed
Verify that the services are running by viewing the Services panel:
5. Verify the License Installation.
See “Run license verification utility” on page 39.
Install a license on Linux Portal platformReceive and save the license file on your portal server and then complete all of thefollowing steps.
1. Ensure that the Oracle Processes are Running: Log in as root on yourNetBackup IT Analytics Database server (the Database and Portal servers areusually the same physical server).
/opt/aptare/bin/oracle start
2. Run the Installation Script: Log in as root on your NetBackup IT AnalyticsPortal server.
/opt/aptare/utils/installlicenseUI.sh
37License management from command lineInstall a license on Linux Portal platform

3. When prompted for the name of the license file, enter the complete path to thelicense key file you saved on your server.
For example:
Enter the name of the license file
you wish to install [*.slf]: /opt/aptare/license.slf
Verifying license...
License installed.
4. Verify the license installation.
See “Run license verification utility” on page 39.
Verify the current license configurationThere are a number of ways that you can validate your current license configuration.
■ In the Portal, either run the License Summary report or see the Help About.See “Run the License Summary report” on page 17.See “Help About” on page 17.
■ See “Run report configuration utility” on page 38.
■ See “Run license verification utility” on page 39.
Run report configuration utilityTypically, you’ll run this report when requesting a license key file so that you caninclude actual hostname or Host Lock String in your license request.. If you alreadyhave installed the Portal software, run the following command and include the outputin the email.
■ Windows:
C:\opt\aptare\utils\reportconfig.bat
■ Linux:
/opt/aptare/utils/reportConfig.sh
Sample Output:Veritas Get Host Lock utility v1.0.0.0
Copyright (c) 2021 Veritas Technologies LLC.
All rights reserved.
38License management from command lineVerify the current license configuration

FQDN: sclcplnx18vm17.rsv.ven.veritas.com
Host Lock String: [sha512]8593c605127b368a9cde7158a704
adcce15db165539adbdc7f8dafcf76bdf75cc3af0d3069c925a571
d498d2d7b9cd2908441835891885ac3266768ca6d28efc
Veritas Get Host Lock utility v1.0.0.0
Copyright (c) 2021 Veritas Technologies LLC.
All rights reserved.
FQDN: myhost.mycompany.com
Host Lock String:
[sha512]8593xxxxxxxxxxxxxxxxxxxxxxxxxxxxxc3266768ca6d28efc
Run license verification utilityTypically, you will run this utility after you install the license key.
This utility connects to the database and then compares the counts and names ofthe licensed components with the values contained within the installed license key.For an evaluation license, the report will show the date/time that the license keywill expire--that is, when the software will no longer function.
Log in as a user with super-user privileges and use the following utility to check thelicensed components that are currently enabled in your environment.
Windows:
C:\opt\aptare\utils\verifyLicense.bat
Linux:
/opt/aptare/utils/verifyLicense.sh
Themost important part of this report is the last section titled: VERIFYING LICENSEAGAINSTCONFIGURATION. If this section is blank, there are no license violationsand you have correctly installed the license and, in addition, the number of licensedcomponents within the product matches the installed license key.
The LICENSE DETAILS portion of this report shows the specific capabilities thatare associated with the license that was purchased for your environment.
Sample output:================= LICENSE DETAILS ==================
Main Portal License:
39License management from command lineVerify the current license configuration

Path to license: c:\opt\aptare\portalconf\licenses
License Issued on Jan 12, 2021 12:00:00AM IST
Product Edition: STANDARD
Licensed Modules:
Backup Manager is licensed
Capacity Manager is licensed
Features:
Max SAN capacity (TB): 300
Backup Manager Capacity: 300
Max SAN Ports: Unlimited
Max File Analytics Utilization (TB): Unlimited
Number of allowed vm servers: Unlimited
Activation State: The license is active.
=================== REPORT COMPLETE ====================
Removing a Portal licenseTo remove a portal license or to address issues while license installation, use thefollowing steps to first remove the license and then reinstall.
Windows1. On the Portal, shut down the data receiver by running:
C:\opt\aptare\utils\stopagent.bat
2. Shut down the Portal by running:
C:\opt\aptare\utils\stopportal.bat
3. Run the script to remove license files:
C:\opt\aptare\utils\removelicensefiles.bat
Linux1. On the Portal, shut down the data receiver.
/opt/aptare/bin/tomcat-agent stop
2. Shut down the Portal.
40License management from command lineRemoving a Portal license

/opt/aptare/bin/tomcat-portal stop
3. Run the script to remove license files:
/opt/aptare/utils/removeLicenseFiles.sh
41License management from command lineRemoving a Portal license
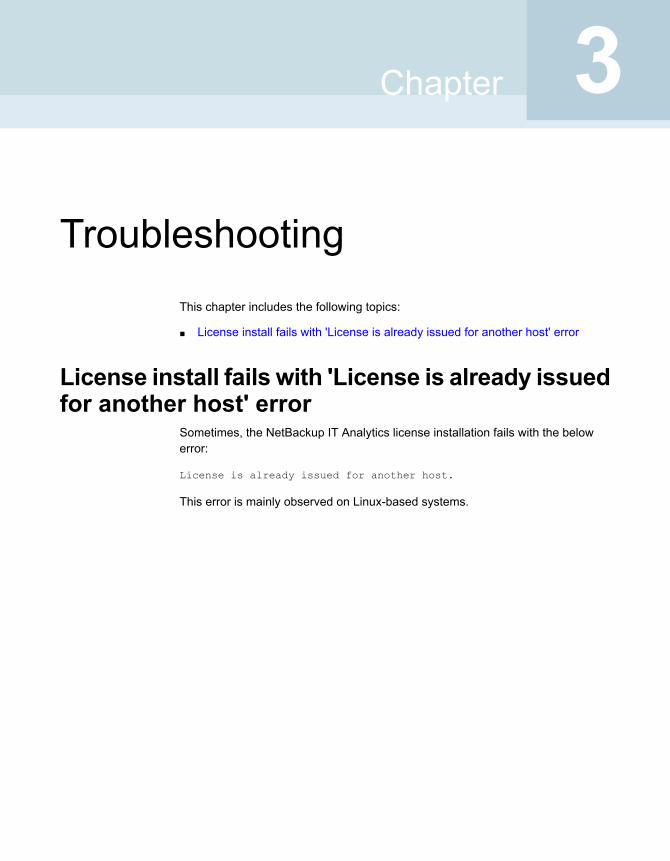
TroubleshootingThis chapter includes the following topics:
■ License install fails with 'License is already issued for another host' error
License install fails with 'License is already issuedfor another host' error
Sometimes, the NetBackup IT Analytics license installation fails with the belowerror:
License is already issued for another host.
This error is mainly observed on Linux-based systems.
3Chapter

To fix this error:
1 Ensure you enter the correct host string on the VEMS portal as displayed bythe utilities, such as:
/opt/aptare/utils/reportConfig.sh
or
/opt/aptare/utils/VxLicGetHostLock.sh
The host string entered on VEMS must also include [sha512].
2 reportConfig.sh and VxLicGetHostLock.sh use hostname --fqdn commandto get the hostname of the system and to create the host string.
Ensure hostname --fqdn returns a fully qualified host name. For example,the command output must have at least one dot (.) character.
3 If the host is not configured with DNS, ensure that /etc/hosts file on thesystem has the host resolution of the IP of the system with the fully qualifiedhost name as the first entry (<IP of the system> <FQHN of the system>).
For example, a host with abc as host name and xyz.com as domain name:
1.2.3.4 abc.xyz.com
43TroubleshootingLicense install fails with 'License is already issued for another host' error