Merchant Administration User Guide
71
Merchant Administration User Guide For Mastercard Payment Gateway Version 18.5.1 02 November 2018
-
Upload
khangminh22 -
Category
Documents
-
view
2 -
download
0
Transcript of Merchant Administration User Guide

Merchant Administration
User Guide
For Mastercard Payment Gateway
Version 18.5.1
02 November 2018

©2018 Mastercard. Proprietary. All rights reserved.
Merchant Administration User Guide 02 November 2018 2
Notices
Following are policies pertaining to proprietary rights and trademarks.
Proprietary Rights
The information contained in this document is proprietary and confidential to Mastercard International
Incorporated, one or more of its affiliated entities (collectively “Mastercard”), or both.
This material may not be duplicated, published, or disclosed, in whole or in part, without the prior
written permission of Mastercard.
Trademarks
Trademark notices and symbols used in this document reflect the registration status of Mastercard
trademarks in the United States. Please consult with the Customer Operations Services team or the
Mastercard Law Department for the registration status of particular product, program, or service
names outside the United States.
All third-party product and service names are trademarks or registered trademarks of their respective
owners.
Disclaimer
Mastercard makes no representations or warranties of any kind, express or implied, with respect to
the contents of this document. Without limitation, Mastercard specifically disclaims all representations
and warranties with respect to this document and any intellectual property rights subsisting therein or
any part thereof, including but not limited to any and all implied warranties of title, non-infringement, or
suitability for any purpose (whether or not Mastercard has been advised, has reason to know, or is
otherwise in fact aware of any information) or achievement of any particular result. Without limitation,
Mastercard specifically disclaims all representations and warranties that any practice or
implementation of this document will not infringe any third party patents, copyrights, trade secrets or
other rights.

©2018 Mastercard. Proprietary. All rights reserved.
Merchant Administration User Guide 02 November 2018 3
Summary of Changes, 28 September 2018
This document reflects changes associated with release 18.5.1
Description of Changes
Added surcharge rules configuration information, added PayPal configuration, Authorization expiry and order certainty information
Summary of Changes, 20 July 2018
This document reflects changes associated with release 18.4
Description of Changes
Added funding and fee information to order/transaction search, updated Transaction Filtering documentation for browser payments
Summary of Changes, 25 May 2018
This document reflects changes associated with release 18.3.
Description of Changes
Updated for password expiry and disabling of operator accounts after 90 days, ability to change passwords anytime
Summary of Changes, 19 Jan 2018
This document reflects changes associated with release 18.1.
Description of Changes
Added device payments configuration
Summary of Changes, 21 Aug 2017
This document reflects changes associated with release 6.11.
Description of Changes
Updated documentation for sensitive data masking
Summary of Changes, 03 May 2017
This document reflects changes associated with release 6.9.
Description of Changes
Fixed formatting issues across the document, updated Gateway Reports
Summary of Changes, 14 October 2016
This document reflects changes associated with release 6.6.

©2018 Mastercard. Proprietary. All rights reserved.
Merchant Administration User Guide 02 November 2018 4
Description of Changes
Updated Search, Home Page, and Risk Details
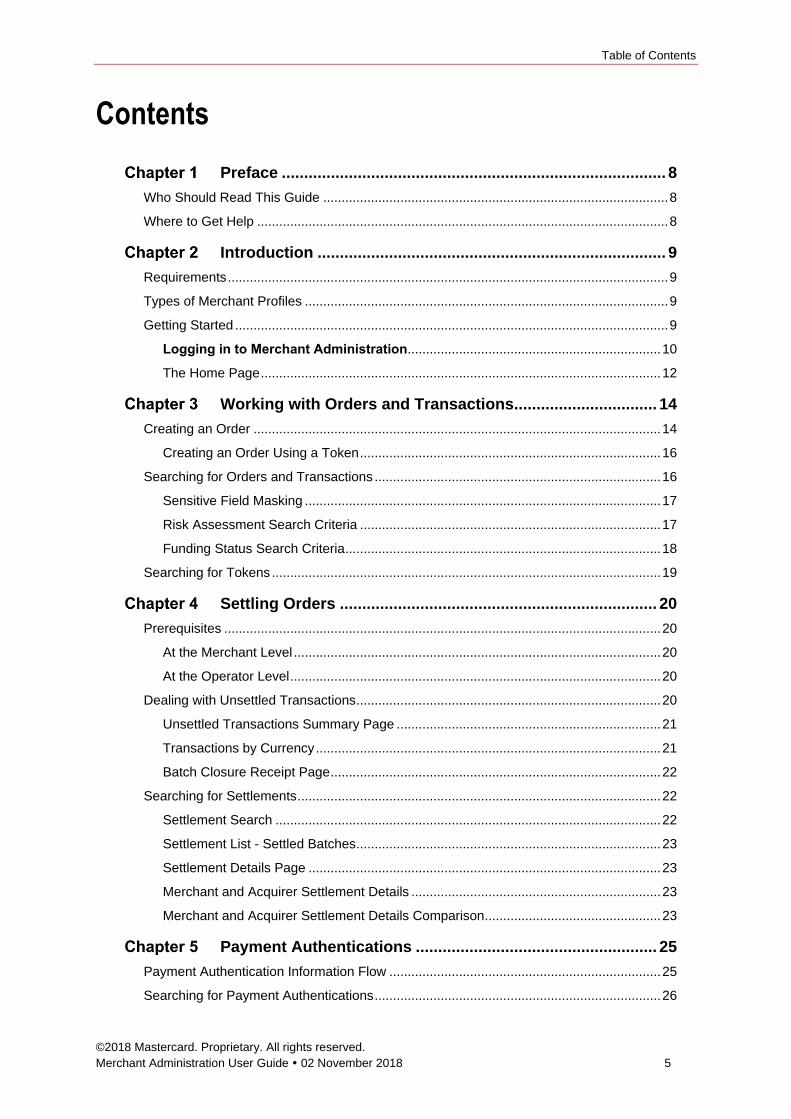
Table of Contents
©2018 Mastercard. Proprietary. All rights reserved.
Merchant Administration User Guide 02 November 2018 5
Contents
Preface ...................................................................................... 8
Who Should Read This Guide .............................................................................................. 8
Where to Get Help ................................................................................................................ 8
Introduction .............................................................................. 9
Requirements ........................................................................................................................ 9
Types of Merchant Profiles ................................................................................................... 9
Getting Started ...................................................................................................................... 9
Logging in to Merchant Administration ..................................................................... 10
The Home Page ............................................................................................................. 12
Working with Orders and Transactions ................................ 14
Creating an Order ............................................................................................................... 14
Creating an Order Using a Token .................................................................................. 16
Searching for Orders and Transactions .............................................................................. 16
Sensitive Field Masking ................................................................................................. 17
Risk Assessment Search Criteria .................................................................................. 17
Funding Status Search Criteria ...................................................................................... 18
Searching for Tokens .......................................................................................................... 19
Settling Orders ....................................................................... 20
Prerequisites ....................................................................................................................... 20
At the Merchant Level .................................................................................................... 20
At the Operator Level ..................................................................................................... 20
Dealing with Unsettled Transactions ................................................................................... 20
Unsettled Transactions Summary Page ........................................................................ 21
Transactions by Currency .............................................................................................. 21
Batch Closure Receipt Page .......................................................................................... 22
Searching for Settlements ................................................................................................... 22
Settlement Search ......................................................................................................... 22
Settlement List - Settled Batches ................................................................................... 23
Settlement Details Page ................................................................................................ 23
Merchant and Acquirer Settlement Details .................................................................... 23
Merchant and Acquirer Settlement Details Comparison ................................................ 23
Payment Authentications ...................................................... 25
Payment Authentication Information Flow .......................................................................... 25
Searching for Payment Authentications .............................................................................. 26

Table of Contents
©2018 Mastercard. Proprietary. All rights reserved.
Merchant Administration User Guide 02 November 2018 6
Payment Authentications Search ................................................................................... 26
Viewing the Payment Authentications List .......................................................................... 27
Viewing an Individual Payment Authentication .............................................................. 28
Downloading Payment Authentication Data ....................................................................... 29
Managing Batches .................................................................. 31
Reports .................................................................................... 33
Gateway Report Search ................................................................................................ 33
Viewing a Gateway Report ............................................................................................ 34
Admin ...................................................................................... 35
Configuration Details ........................................................................................................... 35
Configuration Details ...................................................................................................... 35
Managing Merchant Administration Operators ................................................................... 36
Types of Operators ........................................................................................................ 36
Creating a New Merchant Administration Operator ....................................................... 36
Editing Operators ........................................................................................................... 40
Unlocking an Operator Account ..................................................................................... 41
Unlocking a Merchant Administrator Account ................................................................ 41
Managing Passwords .......................................................................................................... 41
Changing an Operators Password ................................................................................. 42
Changing Your Own Operator Password ...................................................................... 42
Manage Banamex Payment Plans ...................................................................................... 42
How to manage Payment Plans .................................................................................... 42
Adding a Payment Plan ................................................................................................. 43
Using Payment Plans ..................................................................................................... 44
Edit a Payment Plan ...................................................................................................... 46
Acquirer Link Selection .................................................................................................. 46
Downloading Software and Documentation ........................................................................ 46
Configuring Integration Settings .......................................................................................... 46
Integration Authentication .............................................................................................. 47
Excessive Refunds ........................................................................................................ 47
Generating Password for the Reporting API ....................................................................... 48
Configuring Wallets ............................................................................................................. 48
Notifications ......................................................................................................................... 48
Sensitive Fields ................................................................................................................... 49
Device Payments ................................................................................................................ 49
Configure Surcharge Rules ................................................................................................. 49
Configure PayPal ................................................................................................................ 50

Table of Contents
©2018 Mastercard. Proprietary. All rights reserved.
Merchant Administration User Guide 02 November 2018 7
Transaction Filtering .............................................................. 51
Accessing Transaction Filtering .......................................................................................... 51
Supported Transaction Types ............................................................................................. 51
Transaction Filtering Flow ................................................................................................... 52
Transaction Filtering Terms ................................................................................................ 53
Transaction Filtering Rules ................................................................................................. 54
Trusted Cards ................................................................................................................ 54
Suspect Cards ............................................................................................................... 55
IP Address Range Rules ............................................................................................... 56
IP Country Rules ............................................................................................................ 58
Card BIN Rules .............................................................................................................. 59
3D-Secure Authentication Rules .................................................................................... 59
AVS (Address Verification Service) Rules ..................................................................... 60
CSC (Card Security Code) Rules .................................................................................. 61
Risk Assessments for Review ............................................................................................. 61
Managing Risk ........................................................................ 63
Accessing Risk Management .............................................................................................. 63
Using Internal Risk .............................................................................................................. 64
3-D Secure Rules ........................................................................................................... 64
Using an External Risk Provider ......................................................................................... 65
Defining Merchant Operator Privileges for Use with the External Risk Provider ........... 66
Using Both Transaction Filtering and External Risk Provider ............................................. 67
Risk Assessments for Review ............................................................................................. 69
Searching for Orders Based on the Assessment Result .................................................... 69
Index 70

Preface
Who Should Read This Guide
©2018 Mastercard. Proprietary. All rights reserved.
Merchant Administration User Guide 02 November 2018 8
Preface
Who Should Read This Guide
This guide is specifically aimed at merchants and operations personnel using Merchant
Administration, and assumes knowledge of the following:
Web applications.
Commercial practices.
The card processors merchant operational procedures.
Transaction systems operations.
Where to Get Help
If you need assistance with Merchant Administration, please contact Mastercard.

Introduction
Requirements
©2018 Mastercard. Proprietary. All rights reserved.
Merchant Administration User Guide 02 November 2018 9
Introduction
Merchant Administration allows you to monitor and manage your electronic orders through a
series of easy- to-use screens.
Requirements
To use Merchant Administration, you need:
Your Merchant ID.
Your Operator ID and the corresponding password.
Access to the Internet.
An up-to-date web browser such as Firefox, Internet Explorer, or Chrome in the
current major version or previous major version. Other browsers might also work, but
they are not supported.
JavaScript and cookies enabled in your browser.
For browser transactions, payers can use most browsers. However, the gateway might reject
payments from very old, insecure, or rarely used browsers. As a rule, browsers that generate
more than 1% of payment attempts are supported.
Types of Merchant Profiles
Two types of merchant profiles are created for you by the Mastercard Payment Gateway
registration process:
Test merchant profile. Use this to perform test transactions against an emulator of
the transaction processing system. The test merchant profile always has TEST
prefixed to the production Merchant ID. Using the test profile is an ideal way to
become familiar with Merchant Administration as it allows you to create orders, test
transactions and use other areas of the system without affecting your production
system.
Production merchant profile. Use this to perform transactions directly against the
live transaction processing system when you are satisfied with your test transactions.
Be aware that funds will be transferred from payer accounts.
Getting Started
Merchant Administration allows you, as an authorized Operator, to monitor and manage your
electronic orders. Authorized Operators can log in from the Login screen and use the various
features of Merchant Administration.
Authorized merchant personnel must be set up as Operators before they can log in. For
more information see Managing Operators.

Introduction
Getting Started
©2018 Mastercard. Proprietary. All rights reserved.
Merchant Administration User Guide 02 November 2018 10
Logging in to Merchant Administration
To log in from the Merchant Administration Login:
Enter your Merchant ID.
Enter your Operator ID.
Enter your Password. If you have forgotten your password, click the Forgot Password link. For more information, see page 11.
If it’s more than 90 days since your last password change, you will prompted to change your
password.
Warning: You must change your password within 90 days, and if you suspect that your password has been
compromised, please change it immediately.
Click LOG IN. The Merchant Administration home page is displayed.
Note: To log in to Merchant Administration for the first time after your merchant profile has been created
and approved, you must use the default account username "Administrator".
The Merchant Administration Main menu allows you to choose various options relating to
transactions, and Merchant Administration Operator records. These options are described in
detail in the sections that follow.
Note: The options that are displayed on the Merchant Administration Main menu depend on your user
privileges. For more information on user privileges, see Merchant Administration Operator Details on
page 36.
Your merchant profile is set up to allow you to first process transactions in Test mode. When
you are satisfied that testing is complete, you can enable Production mode so that you can
process transactions in real time.
Login Field Definitions
The Merchant Administration Login screen requires the following information.
Field Description
Merchant ID The merchant’s unique alphanumeric identifier provided with each merchant
account/profile.
Operator ID The operator ID.
Password Must be at least eight characters long, contain at least one alphabetical
character and numeric character and is case-sensitive.
Note: Your password should have been provided to you by your Merchant Services Organization (MSO).
If you forget your password, you can have it reset using the Forgot Password Link on the Login screen.
See Resetting a Forgotten Password on page 11.
Changing Your Password at Login
During the log in process you may be prompted to change your password. This could be
because you are logging in for the first time as the "Administrator" or your password has
expired (passwords expire if left unchanged for more than 90 days).
Note: You cannot use the Administrator Operator ID to process transactions. If you wish to process
transactions, you must log in with an Operator ID. See Creating a New Operator.

Introduction
Getting Started
©2018 Mastercard. Proprietary. All rights reserved.
Merchant Administration User Guide 02 November 2018 11
Resetting a Forgotten Password
Note: The Forgot Password link is displayed only if Password Reset functionality is supported by your
MSO.
The Forgot Password link takes you to a page where you can request a temporary password
for logging in to Merchant Administration.
If you have made five or more unsuccessful log-in attempts using an incorrect password,
your password must be reset. You have two options to reset your password:
Use the Forgot Password link.
Contact the Administrator for a password reset, if one more of the following is true:
You do not have an email address recorded against your operator profile.
You have the "Enable Advanced Merchant Administration Features" privilege
enabled.
You have the "Perform Operator Administration" privilege enabled.
You are the primary operator (Administrator) for the merchant profile.
Your account is locked because the "Lock Operator Account" privilege is
enabled on your profile by an operator with administration privileges. In a case
where you have successfully authenticated using the correct password but the
account is locked, then you will notified to contact the Administrator to unlock
your account.
Note: For information on how an Administrator can change an Operators password, see Changing an
Operators Password on page 42.
How to request a temporary password
From the Login page, click Forgot Password.
Enter your Merchant ID and Operator ID and click Request Password.
The Password Reset Requested page appears notifying you that an email with a temporary password has been sent. Click Continue to accept the notification and return to the Login page.
You will receive an email containing the temporary password on your registered email
address. When you log in using the temporary password you will be prompted to change the
password. Once you change the password, you will be logged out of Merchant
Administration and must log in again using the new password.
Selecting Merchant Administration Menu Options
The following menu options are available in Merchant Administration.
Field Description
Home Access dashboard, shortcuts for order creation, order and transaction
search, risk actions (if enabled for risk management)
Search Access orders, financial transactions, payment authentications, and
token details
Orders Create an initial order manually, or perform address verification.
Reports Select and view reports.

Introduction
Getting Started
©2018 Mastercard. Proprietary. All rights reserved.
Merchant Administration User Guide 02 November 2018 12
Field Description
Risk Management Access gateway’s Risk Management solution (if enabled for internal
risk)
Admin Create new Operators, change and delete existing Operator records
and privileges, change passwords and edit merchant configuration
details.
Logout Log out and return to the login page.
The administration options available to you depend on the features provided by the payment
gateway that you requested. The options available to you will also depend on your Operator
privileges. For more information, please refer to Privileges on page 36.
Note: You may not see all of the options described.
Select a menu option to display the submenu for that menu option.
Select an option from the submenu. The selected page is displayed.
Logging Out
You can log out of Merchant Administration at any stage. If you do not log out, you will be
logged out automatically after 15 minutes of inactivity.
Click the Logout link in the top right corner of the screen.
The login screen is displayed when you have successfully logged out.
The Home Page
The home page of Merchant Administration displays the following:
Your Dashboard
The dashboard provides a summary view of your transaction activity to enable you to
see key performance data at a glance.
Terms and Conditions (if any)
If Terms and Conditions have been set by your MSO, the home page first displays
the online user acceptance agreement. Read the agreement and click Accept to
accept the agreement else click Reject. If you reject the online user acceptance
agreement, you will be logged out of the system.
News items for the day (if any)
If merchant news items have been set by your MSO, the home page displays the
News (n items) section as an expandable hyperlink. “n” represents the number of
news items. To view the full news article click the news headline. The content of the
news item displays below the headline.
Shortcuts
The shortcuts bar provides quick access to common tasks that you might need to
perform on a day-to-day basis. Clicking a shortcut takes you the relevant page from
where you can decide to either proceed or cancel the task. The currently available
links are:
Create a New Order

Introduction
Getting Started
©2018 Mastercard. Proprietary. All rights reserved.
Merchant Administration User Guide 02 November 2018 13
o Takes you to the Order Entry page.
View Orders Created Today
o Takes you to the Order and Transaction Search page where all orders
with start and end date both set to ‘Today’ are displayed in the search
results.
View Transactions Processed Today
o Takes you to the Order and Transaction Search page where all
transactions with start and end date both set to ‘Today’ are displayed
in the search results.
Risk Assessments for Review (n)
o This link is only displayed if the merchant operator has “May Perform
Risk Assessment Review” privilege.
o “n” represents the number of orders that are pending review and have
been created within the last 60 days.
o Clicking this link takes you to the Order and Transaction Search page
where all orders with a pending risk review, created within the last 60
days are displayed in the search results.

Working with Orders and Transactions
Creating an Order
©2018 Mastercard. Proprietary. All rights reserved.
Merchant Administration User Guide 02 November 2018 14
Working with Orders and Transactions
Merchant Administration allows you to create, process, save, and view orders and
transactions.
In its most simple form of an order, the payer provides their card details to you, via mail
order or telephone (including Interactive Voice Response (IVR) systems) to make immediate
or later payment for goods or services. An order can also include a range of other actions
(for example payment plans), depending on your privileges, and the acquirer that you are
authorized to use.
Transactions represent the flow of information between the payer, you, and the acquirer
when purchasing goods and services. They include transactions for purchasing goods
immediately, authorizing and billing goods on order, and performing refunds when
necessary. An order can contain one or more transactions.
A successfully created order becomes available for further processing, for example, a refund
or a void. You can retrieve an existing order using order or transaction search.
Creating an Order
Click Orders on the top menu to view the types of orders you have the permission to create.
Note: To create orders you must have the MOTO privilege. See Merchant Administration Operator Details
on page 36.
The following types of orders are available to choose from when creating an order:
Auth/Capture or Purchase
Capture Only
Refund Only
Verify Only
Auth and Capture
Requires two transactions to debit the funds from a payer’s account. First, an authorization
(Auth) transaction is used to reserve the funds on the payer’s card, followed separately by a
capture transaction to actually debit the funds from the payer’s card when the goods or
services have been shipped.
The full amount of the goods or service is used to verify that the funds are available in the
payer’s card account. The funds are reserved until captured by you and transferred to your
account.
The Auth transaction reserves the funds for a predetermined period of time as determined by
the acquirer. If the payer performs another transaction, the current authorization transaction
is taken into account and reduces the payer’s available funds as though the transaction had
taken place.
Order Certainty
You can indicate a certainty level on the authorization amount that will be using the Order
Certainty field. This value overrides the default order certainty value configured on your
merchant profile.

Working with Orders and Transactions
Creating an Order
©2018 Mastercard. Proprietary. All rights reserved.
Merchant Administration User Guide 02 November 2018 15
Note: You must have the "Change Order Certainty" privilege enabled on your merchant profile to
override the default order certainty configured on your merchant profile.
You can set the field to either of the following values:
FINAL: The full authorized amount is expected to be captured with one or more
captures within the mandated time (typically 7 days). The order will only be cancelled
in exceptional circumstances (for example, the payer cancelled their purchase).
Providing this value on your order may qualify the transaction for lower processing
fees.
ESTIMATED: The amount authorized is an estimate of the amount that will be
captured within the mandated time (typically 30-31 days). It is possible that the
amount captured will be less or not be captured at all, or the authorization may be
cancelled. Providing this value on your order may cost you higher processing rates.
The order is rejected where you do not have the privilege to change the order certainty and
the value you provide in this field does not match the default order certainty value configured
on your merchant profile.
Authorization Expiry
Authorizations have a validity period after which they expire. The authorization validity period
(in milliseconds) can be configured in the gateway for an acquirer, card type, and order
certainty combination. Where configured, expired authorizations are automatically reversed
by the gateway.
Note: You must have the "Enable Automatic Authorization Reversals" privilege enabled on your
merchant profile to allow automatic authorization reversals.
When you submit an order, the gateway determines the authorization expiry date and time
based on the configured authorization validity period (using card type, acquirer, and order
certainty combination).
The authorization expiry is returned in the in the transaction response. This field contains the
date and time that the authorization will expire.
Once the authorization validity period expires, the gateway will:
reject any Capture requests against the order
automatically attempt to void the authorization and release funds back to the payer
If the order has already been partially captured, and if your acquirer supports voiding
authorizations for partial captures, the gateway will attempt to void/reverse the outstanding
authorization amount. Where it's not supported, the gateway will not attempt to void/reverse
the authorization.
Note: The gateway does not determine the authorization expiry date and time where no validity period is
configured that applies to the transaction — authorization reversals will not apply for such transactions.
This also means that you may have some authorizations that have expired (but not all).

Working with Orders and Transactions
Searching for Orders and Transactions
©2018 Mastercard. Proprietary. All rights reserved.
Merchant Administration User Guide 02 November 2018 16
Purchase
The Purchase transaction effectively combines an Authorize and a Capture into one
message. A single transaction authorizes the payment and transfers funds from the payer’s
account into your account.
Capture Only
Capture Only captures funds for an order that was authorized either manually, or through an
external system. You must provide the manually/externally produced Authorization ID to
perform the capture.
Refund Only
Refund Only allows you to refund funds from your account back to the payer, without a
previous purchase. A refund only may be performed when you wish to credit the payer’s
account without associating the credit to a previous transaction/receipt.
Verify Only
Verify Only allows you to verify the status of a credit card before performing the transaction.
Depending on the acquirer, address details or the payer name may be matched to ensure
the card details are valid.
Creating an Order Using a Token
You can use a token in place of card details to create an order. For more information on
tokens, see the API online integration documentation.
Notes:
Order creation for ACH is not supported.
Order creation for Gift Cards is not supported.
Searching for Orders and Transactions
The search feature of Merchant Administration allows you to:
Search for orders and transactions.
o Click More tips to find query tips to simplify your search.
o Note that the entered/selected dates and times in the order and transaction
search are based on the time zone as determined by your browser.
Download the search results as a CSV file using the Export results to CSV button.
o You can choose the time zone, CSV character encoding format, and the fields
to export.
o You can add custom fields to export. Click + Add Custom Field link.
o You can save the selected fields for future use. Click Save Selection link.
The saved selections will appear in the Load Saved Selection drop-down list.
Note: To download orders and transactions in CSV format, you must be enabled for the operator
privileges “Download Order Search Results” and “Download Transaction and Payment
Authentication Search Results” respectively.

Working with Orders and Transactions
Searching for Orders and Transactions
©2018 Mastercard. Proprietary. All rights reserved.
Merchant Administration User Guide 02 November 2018 17
Perform bulk captures using the Capture Selected button.
View order and transaction details for an order.
Perform actions on orders by selecting actions from the Actions menu.
o Click Learn about this page if you need assistance with performing actions
including actions associated with risk assessment of orders.
Sensitive Field Masking
Depending on your MSOs configuration, some order and transaction fields may be fully
masked in the search results and the order and transaction details page. These are fields
that have been deemed sensitive by your MSO.
Sensitive fields may be data that can identify a payer (for example, payer name) or provide
information about the payer (for example, contact details or purchase details). For example,
if your MSO has configured “Payer Name” as a sensitive field then the order and transaction
details page will display “Payer Name” as “xxxxxxxx”.
On the Search page, a field label search on fields deemed sensitive will not return any
search results. If you simply search by entering the sensitive field value in the search box,
where records match exclusively on sensitive fields, the order details for these records in the
search results will be masked except the order date. The View link will be disabled so you
will be unable to view the order and transaction details. These records will be omitted from
CSV downloads.
For example, if you searched for “Smith” and if this term matches the value of a sensitive
field “Account Holder” then all the order details (except order date) for the matching records
will be fully masked in the search results and these records will be omitted from CSV
downloads.
If your search matches one or more non-sensitive fields, the sensitive fields in these records
will be fully masked in the search results and the CSV downloads. For example, if you
search for an Order ID and if “Account Holder” is configured as a sensitive field then the
value for “Account Holder” in the matching records will appear fully masked in the search
results and CSV download.
Note: An operator with May View Unmasked Sensitive Data privilege can view sensitive data in unmasked
form.
For information on how to view the sensitive fields configured by your MSO, see Sensitive
Fields on page 49.
Risk Assessment Search Criteria
In the order search, risk assessment fields are displayed as search criteria if you are
configured for risk management services.
You can search for an order based on the:
Risk Assessment Result: This is the overall result of the risk assessment for the
order. Valid values are:
Review required: The order was assessed for risk and requires a review.
Accepted: The order was assessed for risk and accepted.
Rejected: The order was assessed for risk and rejected.

Working with Orders and Transactions
Searching for Orders and Transactions
©2018 Mastercard. Proprietary. All rights reserved.
Merchant Administration User Guide 02 November 2018 18
Not Assessed: The order was not assessed for risk except for risk assessment
by system risk rules and these rules did not reject the order.
Review Decision Status: This is the status of the risk review for the order after your
review. Valid values are:
Pending: The order requires a risk review and is pending a risk review decision.
Accepted: The order was reviewed for risk and was accepted.
Rejected: The order was reviewed for risk and was rejected.
Not Required: The order did not require a risk review.
Overriden: The order has been rejected by the external risk provider and you
chose to override this decision by accepting the order.
Funding Status Search Criteria
In the order and transaction search, the Funding Status field is available as a search criteria.
Funding statuses relate to information provided by your Service Provider and relate to
movement of funds into your bank account.
You can search for an order or transaction based on the following funding statuses:
Funding Not Supported: All transactions on the order were settled to a payment
provider from which the gateway does not receive funding information.
Non Funded: There are no transactions on the order that could result in transfer of
money to / from your account.
Funding in Progress: There are transactions on the order that could result in the
transfer of money to / from your account, but some have not yet have done so. This
is usually a transient state.
Funding Assured: All transactions that could transfer money to / from your account,
are guaranteed to settle, but have not yet done so. The exact amount of the funds to
be transferred might not be known in this state.
Funded: All transactions that could transfer money to / from your account are
clearing and will settle.
Funding Failed: There are transactions on the order that could result in the transfer
of money to or from your account, however the service provider is unable to complete
the transfer of funds, because of some problem with your account. This might be a
transient state.
Funding On Hold: There are transactions on the order that could result in the
transfer of money to / from your account, however the service provider has not yet
received funds from the payer. In case of an order with a refund, the service provider
was not able to return funds to the payer. You might need to contact the payer to
unblock this condition.
By default, all funding statuses are included in a search.
The funding status, amount, and currency for orders and transactions is listed on the order
and transaction details page.

Working with Orders and Transactions
Searching for Tokens
©2018 Mastercard. Proprietary. All rights reserved.
Merchant Administration User Guide 02 November 2018 19
Searching for Tokens
Token search allows you to retrieve details of a token by entering a token ID in the Token
Search box. You can retrieve details for tokens associated with cards, gift cards, or ACH
payment. Alternatively, you can search for tokens using:
card number
expiry date
gift card number
ACH payment details
This finds all tokens that match the search criteria. You can update or delete tokens if you
have May Maintain Tokens operator privilege enabled.
Note: Searching for tokens created using external repositories is currently not supported.

Settling Orders
Prerequisites
©2018 Mastercard. Proprietary. All rights reserved.
Merchant Administration User Guide 02 November 2018 20
Settling Orders
Merchant Administration allows you to settle your customer’s orders automatically or
manually with your acquirer. Settlement allows you to view the set of orders that have been
billed to the customer but still have to be settled with the acquirer.
Note: ACH settlements are not covered by this functionality.
Settlements are balance operations between a merchant’s accounts and an acquirer’s
records. Depending on how your merchant profile is set up, settlement can be done
automatically (the time is set when creating your merchant profile) or manually (you can
settle your orders yourself).
Settlement is divided into two sections:
Settlement. Display orders in the current settlement that are to be settled.
Settlement History Selections. Allows you to search for and view orders that have
already been settled.
Prerequisites
To perform manual settlements you require the following privileges at the merchant and
operator levels.
At the Merchant Level
Perform Reconciliations.
View Settlement Pages.
Manual Batch Closure.
See the Merchant Manager User Guide for more information.
At the Operator Level
View Settlement Pages.
Initiate Manual Batch Closure.
Perform Settlements.
See Merchant Administration Operator Details page.
Dealing with Unsettled Transactions
To view the current orders awaiting settlement:
Select Settlement > Pre-settlement Summary. If you have multiple acquirer links, the Settlement Acquirer Link Selection page is displayed. Note that the card types and

Settling Orders
Dealing with Unsettled Transactions
©2018 Mastercard. Proprietary. All rights reserved.
Merchant Administration User Guide 02 November 2018 21
currencies configured for the acquirer link are also displayed. Select the Acquirer ID and click Submit. The Unsettled Transactions Summary page is displayed.
The Settlement page shows the current orders awaiting settlement. It details a settlement by Currency. Each row for a currency provides details for transactions processed by a specific card type.
If you have the Initiate Manual Batch Closure privilege, a Settle Now button is shown. Click this to settle the batch. The Batch Closure Receipt page is displayed.
Unsettled Transactions Summary Page
The Unsettled Transactions Summary page displays lists of transactions by currency. The
Settle Now button allows you to settle all pending orders.
The fields are as follows:
Field Description
Number of Batch Currently Open The number of the batch that is currently open.
Merchant ID The merchant’s unique alphanumeric identifier. There is a
unique Merchant ID for each merchant account/profile.
Acquirer ID The unique identifier of the card-processor to which the
order was directed for processing.
Transactions by Currency
The transactions are grouped into sections by the transaction currency.
Field Description
Card Types The card types in this summary, for example:
JCB
Visa
Mastercard
American Express
Diners
Bankcard
JCB
Discover
Debits Count The number of debits in the settlement batch.
Total Debits
or Debits Amount
The total debit amount in the settlement batch.
Number Credits The number of credits in the settlement batch.
Total Credits The total credit amount in the settlement batch.

Settling Orders
Searching for Settlements
©2018 Mastercard. Proprietary. All rights reserved.
Merchant Administration User Guide 02 November 2018 22
Batch Closure Receipt Page
The Batch Closure receipt page contains the following details about the batch that was
settled using the Settle Now button on the Unsettled Transactions Summary page.
Field Description
No. of Batch being Closed The number of the batches that is being closed in this
transaction.
Merchant ID The merchant’s unique alphanumeric identifier. There is a unique
Merchant ID for each merchant account/profile.
Acquirer ID The unique identifier of the card-processor to which the order
was directed for processing.
Note: If an acquirer link is configured to have multiple acquirer
relationships, then the acquirer link is suffixed with the Bank Merchant ID
following a hyphen. For example, ANZ via FDRA — 12345 where "ANZ via
FDRA" is the acquirer link and "12345" is the Bank Merchant ID.
Status The batch status.
Searching for Settlements
To view current or completed settlements:
Click Settlement > Settlement Search. The Settlement Search page is displayed.
Enter the search criteria for the type of settlements to locate.
Click Submit. The Settlement List is displayed.
To view a particular batch, select the batch number. The Settlement Details page displays the details of the settlement.
Settlement Search
Specify your search by using the fields to enter the search parameters. Click Submit to start
the search.
The available search parameters are:
Field Description
From/To Search for orders within a date range. If you clear the From field, all
transactions up to the current date are displayed. The From and To
Dates are based on the operator’s time zone as configured in Merchant
Administration.
Batch Number Select settlements belonging to a particular batch.
Settlement Result Select settlements according to result:
All Settlement responses
Successful Settlements
Pending Settlements
Failed Settlements

Settling Orders
Searching for Settlements
©2018 Mastercard. Proprietary. All rights reserved.
Merchant Administration User Guide 02 November 2018 23
Field Description
Acquirer ID Search for orders processed by a particular acquirer.
Settlement List - Settled Batches
This page lists the details of the settled batches.
Field Description
Acquirer ID The unique identifier of the card-processor to which the order was
directed for processing.
Settlement Batch
Number
The identifier for the batch to which the transactions belong.
Settlement Date and
time
The date and time on which the batch was settled.
Debits Count The number of debits in the settled batch.
Credits Count The number of credits in the settled batch.
Settlement Details Page
The Settlement Details page consists of two sections: Merchant and Acquirer Settlement
Details and Merchant and Acquirer Settlement Details Comparison. The transactions in the
Merchant and Acquirer Settlement Details Comparison section are grouped by currencies.
Merchant and Acquirer Settlement Details
Field Description
Merchant ID The merchant’s unique alphanumeric identifier. There is a unique
Merchant ID for each merchant account/profile.
Acquirer ID The unique identifier of the card-processor to which the order was
directed for processing.
Note: If an acquirer link is configured to have multiple acquirer
relationships, then the acquirer link is suffixed with the Bank Merchant ID
following a hyphen. For example, ANZ via FDRA — 12345 where "ANZ via
FDRA" is the acquirer link and "12345" is the Bank Merchant ID.
Settlement Batch
Number
The identifier for the batch to which the transactions belong.
Submission Date The date on which the settlement occurred.
Settlement Response The response received back from the acquirer.
Payment Method The method of funds transfer used for the transaction. For
example, Credit.
Merchant and Acquirer Settlement Details Comparison
Field Description
Currency The currency used for the transaction.
Debits Count The number of debits in the settlement batch.

Settling Orders
Searching for Settlements
©2018 Mastercard. Proprietary. All rights reserved.
Merchant Administration User Guide 02 November 2018 24
Field Description
Total Debits
or Debits Amount
The total debit amount in the settlement batch.
Number Credits The number of credits in the settlement batch.
Total Credits The total credit amount in the settlement batch.

Payment Authentications
Payment Authentication Information Flow
©2018 Mastercard. Proprietary. All rights reserved.
Merchant Administration User Guide 02 November 2018 25
Payment Authentications
Payment Authentications is designed to stop credit card fraud by authenticating payers when
performing e-commerce transactions.
The gateway supports 3DS payment authentication using Mastercard SecureCode™,
Verified by Visa™, J-Secure™, American Express SafeKey™, and Diners Club
ProtectBuy™. 3DS authentication works by redirecting the payer to their card issuer where
they enter a previously registered password.
Merchant Administration allows you to search and view results of payment authentications.
You can view records of every attempt at authentication by your payers.
Payment Authentication Information Flow
A payment authentication is performed immediately before a merchant performs an
authorization or purchase. Authenticating ensures that the card is being used by its
legitimate owner. During a transaction, authentication allows a merchant to confirm the
identity of the payer by redirecting them to their card-issuer where they enter a password
that they had previously registered with their card issuer.
The payer must have registered their card and password with the issuing bank before they
can use the authentication scheme.
The payer’s browser acts as a path to transport messages between the web application, the
payment gateway and the card-issuing banks Access Control Server (ACS).
The following is the flow of information between all the parties in a payment authentication.
If the merchant collects the payer’s details, the payer enters their card details into the merchant application payment page and submits the order, and their browser is redirected to the payment gateway. If the payment gateway collects the payer’s card details, the payer will now enter their card details on the payments page provided by the payment gateway.
The payment gateway determines if the card is enrolled in a Payment Authentication scheme by checking the card scheme database.
If the payer’s card is registered in the scheme, the payment gateway redirects the payer’s browser
to the ACS site for authentication.
If the card is not enrolled, steps 3, 4 and 5 (below) are skipped, and the payment gateway
continues processing the transaction.
The ACS displays the payer’s secret message and the payer enters their response (password), which is checked with the Card Issuer database.
The payer is redirected back to the payment gateway and the card issuer sends an authentication message indicating whether or not the payer’s password matched the message in the database.
The payment gateway continues processing the transaction.
Note: If payment authentication fails, the gateway will not continue to process the transaction, and
the details of the transaction will not be saved. The payment may be blocked if the 3DS transaction
filtering rules configured by you reject the transaction (see Transaction Filtering)
The payer is redirected to the merchant, where the receipt is passed back to the payer.

Payment Authentications
Searching for Payment Authentications
©2018 Mastercard. Proprietary. All rights reserved.
Merchant Administration User Guide 02 November 2018 26
Searching for Payment Authentications
The Payment authentication search page provides ways to select a single or set of payment
authentications to view the results of the authentication.
To search for a payment authentication:
Select Search > Authentications from the submenu. The Payment Authentication Search page is displayed.
Enter your search parameters. If you enter multiple search parameters, the records returned will match all the search criteria.
After you have entered your search criteria you can view the results of your search on the next page.
Payment Authentications Search
Use the fields on the Payment Authentication Search page to find the required payment
authentications.
The search parameters are as follows:
Field Description
From/To Search for orders within a date range. If you clear the From field, all
transactions up to the current date are displayed. The From and To
dates are based on the operator’s time zone as configured in Merchant
Administration.
Authentication ID Search for an order with a particular authentication ID.
Order Reference Search for orders created with specific Order Reference text.
Currency Search for orders processed by a particular currency or all currencies.
Authentication Type Search for a particular type of 3DS authentication. Select an
authentication type from the drop-down list, or leave the default entry to
display all authentication types. The options may include:
All Authenticated Transactions
Mastercard SecureCode
Verified By Visa
JCB J/Secure
American Express SafeKey
Diners Club ProtectBuy

Payment Authentications
Viewing the Payment Authentications List
©2018 Mastercard. Proprietary. All rights reserved.
Merchant Administration User Guide 02 November 2018 27
Field Description
Authentication
Result
Search for transactions with a particular authentication status. Select an
authentication status from the list, or leave the default entry to display
all of them. The available types of authentication status are:
All Authenticated Transactions
Authenticated Transactions – Successful
Authenticated Transactions – Failed
Authenticated Transactions – Undetermined
Authenticated Transactions – Not Enrolled
Number of Results
to Display on Each
Result Page
Enter the number of rows of search results that you wish to see on a
single page.
Leave this field blank for the default number of search results to be
displayed.
Click Submit to start the search and to view the Payment Authentication List page.
Viewing the Payment Authentications List
To view the results of your search, click Search on the Payment Authentication page. The
results display on the Payment Authentication List page.
The Payment Authentication List page details the following information for each
authentication:
Field Description
Authentication ID A unique identifier for the authentication attempt. Click on the ID to view
the authentication details.
Authentication Type The type of 3DS authentication. The available types are:
Verified by Visa
Mastercard SecureCode
JCB J/Secure
American Express SafeKey
Diners ProtectBuy
Order Reference A merchant-supplied identifier for the order. This will typically be used
by the customer to identify their order (for example, a booking reference
number).
Amount The total amount of the order in the transaction currency. For example,
AUD $100.00.
Date The user-locale date and time at which the order was created.

Payment Authentications
Viewing the Payment Authentications List
©2018 Mastercard. Proprietary. All rights reserved.
Merchant Administration User Guide 02 November 2018 28
Viewing an Individual Payment Authentication
To view the details of an individual payment authentication, click the Authentication ID
displayed after a search on the Payment Authentication List page. The Payment
Authentication Details page is displayed. It displays the following information for a specific
payment authentication.
Note: You may not see all the fields listed here. Depending on your configuration, some fields may be
enabled or disabled.
Field Description
Authentication ID A unique identifier for the authentication attempt.
Date The user-locale date and time at which the order was created.
Order Reference A merchant-supplied identifier for the order. This will typically be used
by the customer to identify their order (for example, a booking reference
number).
Card Number The card number used in the order displayed in the card format
configured on your profile.
Amount The total amount of the order in the transaction currency. For example,
AUD $100.00.
Authentication Type The type of payment authentication, for example:
Verified by Visa (Visa 3-D Secure)
Mastercard SecureCode 3-D Secure
JCB J-Secure
American Express SafeKey
Diners ProtectBuy
Verification Token A token generated at the card issuer to indicate that the payer
authentication occurred and the 3DS data provided is valid. Depending
on the card scheme, this may be:
Visa CAVV (Customer Authentication Verification Value)
Mastercard UCAF (Universal Payer Authentication Verification
Value)
American Express AEVV (American Express Verification Value)
Verification Security
Level
The 3-D Secure Electronic Commerce Indicator (ECI) value that is
submitted to the acquirer.
3-D Secure
VERes.enrolled
Indicates if the cardholder was enrolled for 3DS at the time of the
transaction. The available values are:
Y - Yes
N - No
U - Undetermined. For example, the directory server was unavailable
when verifying enrollment.
3-D Secure XID A unique transaction identifier generated by the gateway on behalf of
the merchant to identify the 3DS transaction.

Payment Authentications
Downloading Payment Authentication Data
©2018 Mastercard. Proprietary. All rights reserved.
Merchant Administration User Guide 02 November 2018 29
Field Description
3-D Secure ECI The 3-D Secure Electronic Commerce Indicator (ECI), as returned from
the issuer in response to an authentication request.
3-D Secure
PARes.status
Indicates the result of the payer authentication. Refer to the card
scheme documentation to interpret the authentication result based on
this field. The available values are:
Y – Yes
N – No
A – Attempted authentication but failed. For example, the payer
failed to enter the correct password in three attempts.
U – Undetermined. The payment authentication system was
unavailable at the time of the authentication.
Time taken
(milliseconds)
A payment authentication specific field which indicates the time taken
(in milliseconds) for the payment authentication.
Financial
Transaction
Number
An automatically generated number uniquely identifying the transaction.
This identifier is unique within the merchant.
Note: The following extended response fields are displayed only if an error message is returned from the
Directory Server (DS) or Access Control Server (ACS).
Field Description
Source The source of the following fields. For example, ACS, DS.
Message Type IREQ (Invalid Request Response) or Error
Error Message
Version
The version of the message as returned by the ACS/DS
Error Code The error code as returned by the ACS/DS
Error Detail Detail message as returned by the ACS/DS
Vendor Code Vendor code for the ACS/DS.
Error Description Description of the error, as returned by the ACS/DS.
Downloading Payment Authentication Data
Click the Download button on the Payment Authentication Search page or click the
Download Search Results link on the Payment Authentications List page to download
payment authentication data as a CSV file. Select the CSV character encoding format from
the drop-down list.
Note: You need “Download Transaction and Payment Authentication Search Results” privilege to be able
to down payment authentication data.
The CSV file contains orders with the associated payment authentication data that matches
the search criteria.

Payment Authentications
Downloading Payment Authentication Data
©2018 Mastercard. Proprietary. All rights reserved.
Merchant Administration User Guide 02 November 2018 30
Note: Ensure that you take necessary security measures to protect the data downloaded on to your
computer.

Managing Batches
Downloading Payment Authentication Data
©2018 Mastercard. Proprietary. All rights reserved.
Merchant Administration User Guide 02 November 2018 31
Managing Batches
You can access the Batches tab on the main menu only if your merchant profile has the
Batch privilege enabled.
The Batches page allows you to upload batches of transactions for processing to the
payment gateway. You can also view the status of the batch upload and download the batch
response file, which contains the result of each of the uploaded operations.
Note: To be able to upload batch files and download batch response files, you must have the "May
Upload Batch Files" and "May Download Batch Response Files" operator privileges respectively.
Batch Upload
The Batch Upload section displays only if you have "May Upload Batch Files" operator
privilege. This section allows you to upload a batch file containing the transactions you wish
to process.
Field Description
Version The version of API that matches the field names in the batch file. For
example, if version X is entered then the operations accepted are
those supported in version X of the API.
Entering an invalid value will return an error during batch file validation.
Entering an unsupported value will return errors on all operations in
the batch response file.
Batch File Encoding The character encoding of the batch file. The supported encoding
types are displayed in the drop-down list. For example, UTF-8 and
Latin1 (ISO-8859-1).
Batch File Name The batch file that you wish to upload for processing.
Click Browse to select the batch file. The batch file name is used as
the batch name. This file must comply with the Native Format (CSV).
For information on the Native Format, see the Batch online integration
documentation.
After supplying the above details, click Upload to upload the transactions. This button will
only be activated after values for all the fields are supplied.
Batches
This section displays all the batch files that were uploaded for processing to the payment
gateway. The order of display is based on the upload completed date with the most current
date displayed first. Only 50 entries are displayed with details as follows.
Note: Batches that are not successfully uploaded will not appear.
Field Description
Batch Name The name of the batch file containing operations.
Total Records The total number of operations in the batch.
Upload Completed The time and date uploading of all records was completed.
Batch Status The current batch processing status. Valid values are:

Managing Batches
Downloading Payment Authentication Data
©2018 Mastercard. Proprietary. All rights reserved.
Merchant Administration User Guide 02 November 2018 32
Field Description
Uploading — the batch is in the process of being uploaded.
Uploaded — the batch is successfully uploaded.
Validated — the batch is successfully validated.
Ready — the batch is ready for processing.
Processing — the batch processing has commenced.
Complete — the batch processing is complete.
Processed The total count of records processed.
Errors The total count of records which have timed out or could not be
processed due to system errors.
Last Action Time and date of the last action on the batch.
Processing Completed The time and date when the batch processing completed and all
records were in their final state.
Response File The batch response file containing values for all the fields
specified in the uploaded batch file. Click Download to open or
save the file on your local machine. The download link becomes
visible only once the batch status is "Complete".
The Response File column is displayed only if you have "May
Download Batch Response Files" operator privilege.
Note: The information provided in the batch response file is based on the
fields specified in the batch upload file. You may find it useful to include
API fields such as response.gatewayCode and error.cause to be able to
identify problems in processing operations. See the Batch Online
Integration Documentation for details on what fields can be included in the
response.

Reports
Downloading Payment Authentication Data
©2018 Mastercard. Proprietary. All rights reserved.
Merchant Administration User Guide 02 November 2018 33
Reports
Gateway reports display the details of all your transactions that have been processed by the
payment gateway. It allows you to search for and list the transaction details by date,
transaction mode (test or production), time interval (daily, weekly, monthly) and currency.
To search for a Gateway report:
From the Main menu, select Reports > Gateway Reports. The Gateway Reports display.
Enter your search parameters. If you enter more than one parameter the records returned match all your search criteria.
Click Submit to display the Gateway Report Details page.
Gateway Report Search
Use the fields on the Gateway Report page to enter the search parameters for your order
search.
The search parameters are as follows:
Field Description
From/To Date Search for orders within a date range. If you clear the From field, all
transactions up to the To date (inclusive) are displayed.
Date Type You can search by transaction date or settlement date.
Transaction Date: The date and time the gateway considers
the processing of the transaction to have occurred. This date is
based on the operator’s time zone.
Note: Gateway reports searched by transaction date do not include
transactions flagged for risk review.
Settlement Date: This is the expected date of funds transfer
between an issuer and an acquirer. This date is based on the
acquirer’s time zone.
Time Interval The time granularity used to aggregate transactions:
Daily
Weekly
Monthly
Yearly
Start Time for
Time Interval
Reports are generated for 24 hour periods from the start time of the
time interval as defined in this field.
This field is not applicable if you search by settlement date.
Acquirer The acquirer whose transactions will be included in the report.
Card Scheme The card scheme used for the transaction. For example, Mastercard or
Visa.
Currency The currency used for the transaction.

Reports
Downloading Payment Authentication Data
©2018 Mastercard. Proprietary. All rights reserved.
Merchant Administration User Guide 02 November 2018 34
Viewing a Gateway Report
A Gateway Report is grouped into sections by transaction currency and the payment
method. Each row of the list provides aggregated details for transactions processed by a
specific acquirer, using a specific currency, and occurring in a specific period. The size of the
period is determined by the Time Interval selected on the Gateway Report Search page.
Note: A merchant may have multiple merchant acquirer relationships with the same acquirer.
Each row of the list specifies the details described in the following table.
Field Description
Transaction Date The start date of the period for which transactions are aggregated.
Acquirer The name of the acquirer who processed the transactions.
Merchant The merchant’s unique alphanumeric identifier. There is a unique
Merchant ID for each merchant account/profile.
No. Transactions The number of transactions processed by the acquirer, in a given
currency, during the reporting period.
Total Authorizations The total amount (specified using the currency and the currency
symbol) of authorizations, less any voids or refunds in, the reported
transactions.
Total Captures The total amount (specified using the currency and the currency
symbol) of captures, less any voids or refunds, in the reported
transactions.
Total Purchases The total amount (specified using the currency and the currency
symbol) of purchases, less any voids or refunds, in the reported
transactions.
Total Refunds The total amount (specified using the currency and the currency
symbol) of refunds in the reported transactions

Admin
Configuration Details
©2018 Mastercard. Proprietary. All rights reserved.
Merchant Administration User Guide 02 November 2018 35
Admin
The Admin option allows you to:
Modify your configuration settings.
Create, modify, and delete Operator details.
Change your password.
Download software.
Configuration Details
How to configure your merchant settings
Select Admin from the Main menu.
Select Configuration Details from the submenu.
Configuration Details
The Configuration Details page allows you to view some details of your configuration.
Configuration Details Definitions
Field Description
Merchant Name The merchants registered business, trading or
organization name.
Merchant ID The merchant’s unique alphanumeric identifier. There is a
unique Merchant ID for each merchant account/profile.
Note: You cannot change the Merchant Name and Merchant ID. Should you require any changes to these
fields, please contact your MSO.
International Definitions
The Internationalization section on the Configuration Details screen contains the following
information:
Field Description
Locale The default locale for Merchant Administration unless
overridden by the operator locale.
Time Zone The default time zone for Merchant Administration unless
overridden by the operator time zone.
Note: You cannot change these fields. Should you require any changes to these fields, please contact
your MSO.

Admin
Managing Merchant Administration Operators
©2018 Mastercard. Proprietary. All rights reserved.
Merchant Administration User Guide 02 November 2018 36
Managing Merchant Administration Operators
Merchant Administration allows you to create, modify, enable, and delete an Operators
details. Before you can perform these functions you must have the user privilege Perform
Operator Administration. This is done in the Operator Details page from the Admin menu.
You can create and edit Merchant Administration Operators.
To manage Operators:
From the Main menu, select Admin> Operators. The Admin Operator List page is displayed.
You can choose to create an Operator, edit an Operator, change an existing Operator’s password, or delete an Operator.
Note: This page displays a list of all existing Merchant Administration Operators.
Types of Operators
There are two types of Operator:
Web-based Operators are Operators who perform Administration functions using
the Merchant Administration web interface as described in this guide.
A Primary Operator (Administrator) is created when your merchant profile is
created. This Operator is allocated privileges to create, modify and delete other
Operators. This Operator can also be modified and viewed, but not deleted.
Creating a New Merchant Administration Operator
From the Main menu, select Admin > Operators. The Admin – Operator List page is displayed.
Select Create a new Merchant Administrator Operator. The Merchant Administration Operator Details page (page 36) is displayed. It contains sections for recording details, security and transaction privileges for new Operators.
Enter the details as required.
Click Submit.
The Admin – Operator List re-displays and includes the new Operator.
Merchant Administration Operator Details
To create a new Merchant Administration operator, fill in the following fields.
Mandatory fields on the screen are indicated by a red asterisk.
Operator Details
Field Description
Merchant The merchant’s unique alphanumeric identifier. There is a unique
Merchant ID for each merchant account/profile.
Operator ID The unique identifier of the merchant Operator.
Operator Name The name of the Operator.

Admin
Managing Merchant Administration Operators
©2018 Mastercard. Proprietary. All rights reserved.
Merchant Administration User Guide 02 November 2018 37
Field Description
Description Extra description of the user (for example, job title, department or
level of privileges allocated).
Password The password must be at least eight characters long and contain at
least one alphabetical character and numeric character. The
password is case sensitive.
Confirm Password Enter the password again in this field for confirmation when adding a
new password or changing an existing one.
Email Address The Operator’s email address.
If Password Reset functionality is supported by your MSO, then a
temporary password is sent to this email address when the Operator
uses the Forgot Password link on the Login screen to request a
password reset.
Locale The default language displayed in Merchant Administration unless
overridden by the Operator.
Time Zone The operator’s time zone.
Security
Field Description
Lock Operator
Account
Allows an Operator with administration privileges to lock out an
Operator. The locked out operator will be unable to log on to Merchant
Administration until an Operator with administration privileges clears
the check box to re-enable the Operator.
An operator account with more than 90 days of inactivity is
automatically locked out.
Note: If Password Reset functionality is supported by your MSO, then selecting
this check box will prevent the Operator from using the Forgot Password link on
the Login screen to request a password reset.
Must Change
Password at Next
Login
If selected, the next time an Operator logs in they are required to
change their password.
Password Reset
Required
Indicates if password reset is required. This field is set to "Yes" after
five failed login attempts; else set to "No".
You may request a password reset using the Forgot Password link
on the Merchant Administration log-in screen or contact the
Administrator for a password reset. For information on how to reset
an Operators password, see Changing an Operators Password on
page 42.
View Unmasked
Account Identifiers
Allows the Operator to view unmasked account identifiers such as
card number, gift card number when viewing order and transaction
details.

Admin
Managing Merchant Administration Operators
©2018 Mastercard. Proprietary. All rights reserved.
Merchant Administration User Guide 02 November 2018 38
Field Description
View Unmasked
Sensitive Data
Allows the Operator to view order and transaction details, deemed
sensitive by your MSO, in unmasked form. See Configuring
Sensitive Fields on page 49.
Note: To enable this privilege, you must have View Unmasked Sensitive Data
merchant privilege configured on your merchant profile by your MSO.
Transactions
Field Description
Perform MOTO
Transactions
Allows the operator to create orders in Merchant Administration and
allows user to mark orders as complete.
Perform Verification
Only
Allows the operator to perform a Verify Only transaction.
Perform Voids Allows the operator to void transactions.
A void is the cancellation of a previous transaction. Voids can only
be performed if the transaction is in an unreconciled batch.
Note: A void is only possible if voids are supported by the acquirer.
Perform
Captures/Purchases
Depending on the transaction mode (Auth Then Capture or
Purchase), this privilege allows the operator to perform captures or
purchases.
Perform Stand Alone
Captures
Allows the operator to perform captures for orders authorized
manually, or in an external system.
Perform Bulk
Captures
Allows the operator to perform a capture against a set of selected
orders.
Perform Refunds Allows the operator to give refunds. A refund is the transfer of funds
from a merchant to a card holder.
Perform Standalone
Refunds
Allows a refund to be performed without first creating a capture or
purchase.
Perform Excessive
Refunds
Allows you to perform refunds for amounts greater than the
authorized amount.
Excessive Refund
Limit
The maximum limit allowed for an excessive refund, in excess of the
authorized amount.
You must set a refund limit for each currency configured for the
merchant.
Batch
Note: Only merchants with the Batch privilege can enable Batch operator privileges.

Admin
Managing Merchant Administration Operators
©2018 Mastercard. Proprietary. All rights reserved.
Merchant Administration User Guide 02 November 2018 39
Field Description
May Upload Batch
Files
Allows the operator to upload batch files to the payment gateway via
Merchant Administration.
The upload option is available through the Batches tab on the main
menu.
May Download Batch
Response Files
Allows the operator to download the batch response file from the
payment gateway.
The download option is available through the Batches tab on the main
menu.
Merchant Maintenance
Field Description
Modify the merchant
configuration
Allows the operator to edit the merchant’s configuration details.
Perform Operator
administration
Allows the operator to create, edit and delete other Operators details.
If Password Reset functionality is supported by your MSO, then
enabling this privilege will prevent the Operator from using the Forgot
Password link on the Login screen to request a password reset.
General Privileges
Field Description
Perform Settlements Operator may perform settlements.
View Report Pages Operator can view Gateway Reports.
Download Order
Search Results
Allows the Operator to download order search results in CSV format.
Download Transaction
and Payment
Authentication Search
Results
Allows the Operator to download transaction and payment
authentication search results in CSV format.
Allow Software
Download
Allows the merchant to download software and documentation from
the payment gateway. For example, the merchant may need to
download the Merchant Administration documentation.
Note: This privilege is a prerequisite to the Documentation Download
privileges.
Allow Merchant
Administration
Documentation
Download
Allows the operator to download documentation from Merchant
Administration portal.
View Settlement
Pages
Allows the merchant to view batch settlement details.
Initiate Manual Batch
Closure
Allows the merchant to trigger settlement for a batch.

Admin
Managing Merchant Administration Operators
©2018 Mastercard. Proprietary. All rights reserved.
Merchant Administration User Guide 02 November 2018 40
Field Description
May Configure Risk
Rules
Allows the Operator to configure external risk using the Risk
Management module.
May Configure
Transaction Filtering
Allows the Operator to configure transaction filtering rules for a
merchant.
May Perform Risk
Assessment Review
Allows the Operator to make a decision on whether to accept or
reject an order based on the assessment results from external risk
and/or transaction filtering.
May Bypass Risk
Management
Allows the Operator to process orders without performing risk
assessment on orders. If both transaction filters and external risk is
configured, this privilege bypasses both at the merchant level.
May Configure
Integration Settings
Allows the Operator to configure integration settings for a merchant.
The integration methods include API or Hosted Batch, which allow
the merchant application to directly connect to the payment gateway.
May Configure
Reporting API
Integration Settings
Allows the Operator to generate passwords used to integrate with the
reporting API and download Transaction reports.
May Configure Email
and Webhook
Notifications
Allows the Operator to configure merchant and customer notifications
for payment events such as successful payments, successful
refunds, etc.
May Maintain Tokens Allows the Operator to delete tokens associated with the merchant’s
token repository.
May View Dashboard Allows the Operator to view the dashboard on the home page. The
dashboard provides a graphical indication of the merchant’s
Authorization, Capture, Pay and Refund transactions for the selected
period.
Configure Surcharge
Rules
Allows you to configure surcharge rules if you want the gateway to
calculate surcharge for transactions.
Go to Admin > Configure Surcharge Rules and click the Learn
More… link for information on how to configure surcharge rules.
Editing Operators
To edit an Operator:
From the Main menu, select Admin > Operators. The Operator List on page 36 page is displayed.
The Edit an Operator section lists all existing Operators. You can do any of the following:
To edit a particular Operator, click Edit. The Operator Details page is displayed.
To delete a particular Operator, click Delete. A message prompts you to confirm
deletion. Click OK or Cancel as appropriate.
To change an Operators password, click the Change Password link. The
Change Password page appears.
Note: The Change Password link does not display for the logged in user. Use Admin > Change Password
on page 42 to change the password of the currently logged in Operator.

Admin
Managing Passwords
©2018 Mastercard. Proprietary. All rights reserved.
Merchant Administration User Guide 02 November 2018 41
Unlocking an Operator Account
If a Merchant Administration Operator with administration privileges enables "Lock Operator
Account" privilege for the Operator profile then the Operator gets locked out of Merchant
Administration.
The account may also get locked due to five unsuccessful login attempts, or if your account
has been inactive for more than 90 days.
Note: To reinstate a locked out Merchant Administration Operator, you must have the May Perform
Operator Administration user privilege.
To reactivate a locked out Merchant Administration Operator, log in as an activated Operator
with the appropriate privileges:
From the Main menu, select Admin > Operators. The Admin – Operator List page is displayed.
Identify the Operator to edit and select Edit. The Operator Details display, with the existing values and settings in the fields.
Deselect the Lock Operator Account check box.
Click Submit to commit the changes. The Operators account has now been unlocked.
Unlocking a Merchant Administrator Account
If the administrator Operator for Merchant Administration is inactive for more than 90 days, the administrator will be locked out and will be unable to log in to Merchant Administration. To reinstate a locked out administrator Operator, please contact your MSO.
Managing Passwords
You may need to change an Operators password, unlock an Operators login, or change your
own password from time to time. Before you attempt to do this, you must be aware of the
prerequisites and requirements.
Prerequisites
To change an Operators password you must have May Perform Operator Administration
operator privilege. See Operator Details.
Password Requirements
The password:
Must be at least 8 characters, and include at least one alphabetic character and
numeric character, for example, password_1
Must not be the same as one of the previous 5 passwords.
Must not be the same as the operator name.
Password Options
When creating or modifying an Operator record, you can select whether the Operator
password expires on next login. The Operator is then prompted to change their password at
the next login attempt.

Admin
Manage Banamex Payment Plans
©2018 Mastercard. Proprietary. All rights reserved.
Merchant Administration User Guide 02 November 2018 42
Operators can change their password at any time, but they cannot re-use that password for
the next five password changes. They can also reset their own password if the existing
password has been forgotten. See Resetting a Password.
Changing an Operators Password
Note: To change an Operators password, you must have “May Perform Operator Administration” user
privilege.
To change an Operators password:
From the Main menu, select Admin > Operators. The Admin – Operator List page is displayed.
Identify the Operator in the Edit Operator section, and click Change Password link. The Change Operator Password page is displayed.
Enter the New Password, and re-enter the new password in the Confirm New Password field.
Click Submit.
Changing Your Own Operator Password
To change your password:
From the Main menu, select Admin > Change Password. The Change Password page is displayed.
Enter the Old Password, the New Password, and re-enter the new password in the Confirm Password field.
Click Submit.
The password is changed, and you will have to use the new password the next time you log
in.
Manage Banamex Payment Plans
How to manage Payment Plans
Select Admin from the Main menu.
Select Manage Payment Plans from the submenu. The Manage Payment Plans page is displayed.
Note: If you have multiple acquirer links, the Acquirer Link Selection on page 46 page is displayed.
Add payment plans as required in the Add Payment Plan on page 43.
Manage your payment plans as required in the Payment Plans on page 44.
Note: Only merchant operators with administrator privileges can view and manage payment plans.

Admin
Manage Banamex Payment Plans
©2018 Mastercard. Proprietary. All rights reserved.
Merchant Administration User Guide 02 November 2018 43
Adding a Payment Plan
Field Description
Plan Name An identifier for the payment plan as chosen by you. The plan name
must be unique per payment plan type for the merchant.
Note: The plan name cannot exceed 20 characters.
Plan Type The payment plan types enabled on your merchant profile by the
MSO operator. Only enabled payment plans are displayed for
configuration in the drop-down list.
The payment plan options include:
Pay in installments, interest-free — Pay in installments for a specified number of months without any interest payments to the payer.
Pay in installments, with interest — Pay in installments for a specified number of months with interest payments to the payer.
Pay in installments after a deferral period, interest-free — Pay in installments for a specified number of months without any interest payments to the payer after a deferral period specified in months.
Pay in installments after a deferral period, with interest — Pay in installments for a specified number of months with interest payments to the payer after a deferral period specified in months.
Pay in full after a deferral period — Pay the full amount of the purchase after a number of deferral months. The customer will take delivery of the goods at time of purchase and before any payments are made.
Start Date The start date for the payment plan. It must be less than or equal to
the current date for the payment plan to be valid.
End Date The end date for the payment plan. It must be greater than or equal
to the current date for the payment plan to be valid.
Minimum Order
Amount
The minimum order amount for the payment plan in the supported
currency. When you create an order, the configured payment plans
will be offered only if the total order amount is greater than or equal
to this minimum order amount. If you do not enter a value for this
field, the amount defaults to zero.
You can enter minimum order amounts only for currencies supported
on the selected plan type.
Plan Terms (Payer
Options)
The number of monthly installments and/or deferrals for the payment
plan. The number of applicable installments and deferrals vary from
plan to plan.
How to Configure Payment Plan Terms
Payment Plan terms include:
(Optional) Installments — the number of monthly installments payable by the payer
for the order, if applicable to the payment plan.

Admin
Manage Banamex Payment Plans
©2018 Mastercard. Proprietary. All rights reserved.
Merchant Administration User Guide 02 November 2018 44
(Optional) Deferrals — the number of months for which payment can be deferred, if
applicable to the payment plan.
To configure installments:
Review and select an installment term from the pre-defined set of default installment terms listed under No of Installments, paid monthly.
If you wish to add a new installment term, type the number of installments (less than 99 months) for the term in the installments text box and click Add Installment.
The new installment term displays in the No of Installments, paid monthly list box.
If you wish to delete any installment terms, click Remove. You can use the <Ctrl> key to select multiple installment terms.
To configure deferrals:
Review and select a deferral term from the pre-defined set of default deferral terms listed under Deferral Months.
If you wish to add a new deferral term, type the number of deferral months (less than 99 months) in the deferral months text box and click Add Deferral.
The new deferral term displays in the Deferral Months list box.
If you wish to delete any deferral terms, click Remove. You can use the <Ctrl> key to select multiple deferral terms.
After configuring the payment plan terms, click Add to add the payment plan to the Payment
Plans list on page 43. Click Cancel to reset the Add Payment Plan section.
Using Payment Plans
Field Description
Plan ID The system-generated unique identifier for the payment plan. The
Plan ID is unique across all payment plan types configured for the
merchant.
Payment Plan A concatenation of Payment Plan Name and Payment Plan Type
(<Plan Name> - <Plan Type> as entered in the Add Payment Plan
section. For example, Banamex - Pay without Interest.
# Of Installments A list of installment terms for the payment plan, specifying the number
of monthly installments payable by the payer. If installments are not
applicable to the plan type, is displayed.
# Of Deferrals A list of deferral terms for the payment plan, specifying the number of
months for which the payment can be deferred. If deferrals are not
applicable to the plan type, is displayed.
Start Date The start date for the payment plan, which must be less than or equal
to the current date for the payment plan to be valid. If a value is not
specified, the start date is valid now.
End Date The end date for the payment plan, which must be greater than or
equal to the current date for the payment plan to be valid. If a value is
not specified, the end date is valid now and always.

Admin
Manage Banamex Payment Plans
©2018 Mastercard. Proprietary. All rights reserved.
Merchant Administration User Guide 02 November 2018 45
Field Description
Minimum Amounts The minimum order amount for the payment plan in the supported
currencies. If a value is not specified, the amount defaults to zero and
hence the validation will be bypassed.
Note: Banamex Payment Plans are applicable only to transactions using
Mexican Peso currency.
Status The status of the payment plan. Valid values are:
Enabled — indicates that the payment plan is enabled. If the plan is
valid, enabled payment plans will be available for selection when
creating an order. For more information, see How to Enable/Disable
Payment Plans on page 45.
Disabled — indicates that the payment plan is disabled. Disabled
payment plans will not be available for selection when creating an
order.
Action Provides two actions:
Enable/Disable allows you to either enable or disable the payment
plan. Disabled payment plans are grayed out in the Payment Plans
list.
Edit allows you to edit the payment plan and apply changes, if any.
Click Save to save the changes or Cancelto exit the edit mode. For
more information, see How to Edit a Payment Plan on page 46.
Note: You cannot edit the Plan ID field.
Enable/Disable a Payment Plan
When creating an order, only payment plans that are enabled and valid are offered for
selection. A payment plan is enabled using the following options, listed in the order of
precedence:
The plan type is enabled by the MSO.
The payment plan is enabled using Enable.
The precedence implies that a payment plan may be enabled using Enable only if the plan
type for the payment plan is enabled by your MSO in Merchant Manager.
If a payment plan is currently enabled, then the Start and End dates are validated for the
following conditions:
The start date must be less than or equal to the current date.
The end date must be greater than or equal to the current date.
For example, if payment plan type "Pay in installments, interest free" is not enabled by your
MSO then it will not be visible for configuration under Add Payment Plan > Plan Type drop-
down list. On the other hand, if it is available for configuration and its instance is disabled
using Disable, then the Start and End dates even if valid will be ignored. However, if a
payment plan is enabled by your MSO and through Enable, and if the Start and/or End
dates are invalid then the payment plan will not be offered for selection when creating an
order.
Admin
Downloading Software and Documentation
©2018 Mastercard. Proprietary. All rights reserved.
Merchant Administration User Guide 02 November 2018 46
Note: Invalid payment plans will be listed in the Payment Plans list but will be grayed out.
Valid payment plans for an order may be filtered if one or more of the following conditions
apply:
The total order amount is less than the minimum order amount defined for the plan in
the corresponding currency.
The currency for the order is not supported by your MSO.
Note: Currently, only Mexican Peso currency is supported on Banamex Payment Plans.
The card type for the order is not supported by your MSO.
Edit a Payment Plan
The Edit for a payment plan is activated only for enabled payment plans, which means:
The payment plan type must be enabled by the MSO in Merchant Manager, and
The payment plan must be enabled using Enable.
An invalid payment plan (invalid start and/or end date) will be available for editing
unlike a payment plan disabled using Disable. For a payment plan type that is
disabled by the MSO, both Editand Enables will be inactive.
Acquirer Link Selection
If you have configured multiple acquirer links for the same acquirer, the Acquirer Selection
page is displayed.
The card types and currencies configured for the acquirer link are also displayed. Click
Show next to the acquirer link against which you wish to configure payment plans.
The name of the acquirer link displays in the Add Payment Plan section label to indicate the
acquirer link thats currently selected for configuration. Follow the steps outlined in Adding a
Payment Plan on page 43 and Using Payment Plans on page 44 to configure and manage
payment plans.
Downloading Software and Documentation
To download software and documentation you must have the Allow Merchant Administration
Documentation Download privilege.
How to download software and documentation
Select Admin from the Main menu.
Select Software Download from the submenu.
Click the appropriate link and follow the prompts to download the required file.
Configuring Integration Settings
API or Batch integration enables your merchant application to directly connect to the
payment gateway. This page allows you to configure the settings for the API or the Batch
integration.

Admin
Configuring Integration Settings
©2018 Mastercard. Proprietary. All rights reserved.
Merchant Administration User Guide 02 November 2018 47
Note: The Integration Settings submenu option appears only if API and/or Batch are enabled for your
merchant profile. To modify integration settings, the operator must have "May Configure Integration
Settings" privilege.
Integration Authentication
To establish a secure channel between your integration and the payment gateway, you can
enable passwords or set up SSL certificates to authenticate yourself on the payment
gateway.
How to Enable Integration Authentication
Select Admin from the Main menu.
Select Integration Settings from the submenu. The Integration Settings page appears displaying the set up for the authentication modes that were enabled for your merchant profile.
If Password Authentication is enabled for your merchant profile, the Integration Authentication section displays "Password 1" and "Password 2" labels with the value "Not Enabled".
Note: The password cannot be shared between test and production merchant profiles.
a) Click Edit to open the Integration Authentication Passwords page.
b) Click Generate New to generate a new password. The system-generated password
is a 16 byte, randomly generated value that is encoded as a hex string. Though it is of
sufficient length and quality to resist brute force guessing, it should be secured in the
same manner as user passwords and other sensitive data.
You can generate and enable a second password if you wish to roll to a new
password.
c) After generation, click Enable Integration access via password to use the
generated password to secure your transactions. You must always have at least one
password generated and enabled but you may have up to two passwords set up.
Note: At a given time, you may use only one password for configuration in your merchant
application. The second password is for rolling purposes; it is used when the first one expires.
d) Click Submitto save the settings.
Excessive Refunds
If you have the Excessive Refunds privilege enabled on your merchant profile, you can
configure a maximum excess amount for a currency to perform excessive refunds for an
order in that currency.
Excessive refunds allow the total refunded amount for an order to exceed the total captured
amount for the order by a maximum excess amount as configured by you. For example, if
the total captured amount is $100 USD for an order and you have set the maximum excess
amount as $20 USD then you can refund up to $120 USD.
If you do not set a maximum excess amount for a currency, excessive refunds for orders in
this currency are rejected.

Admin
Generating Password for the Reporting API
©2018 Mastercard. Proprietary. All rights reserved.
Merchant Administration User Guide 02 November 2018 48
Generating Password for the Reporting API
For information on how to generate the password and use the Reporting API, see the API
online integration documentation.
Configuring Wallets
Depending on your privileges, you can configure your wallet account on the wallet provider
using the wallet configuration screens. Currently, the following wallet providers are
supported:
Visa Checkout
Amex Express Checkout
MasterPass
Hover the mouse over a field or section to view the tool-tip help and section help respectively.
Notifications
This feature allows you to configure merchant as well as customer email notifications for
events such as successful payments, successful refunds, etc. You can also set up merchant
API notifications addressed to your system, which are sent when a transaction is created or
updated in the gateway.
Note: To configure notifications, you must have May Configure Notifications privilege selected in your
operator profile.
The supported payment events are:
Successful payments: A payment transaction has been processed successfully. A
notification is sent for transactions where there is a commitment to make a payment:
o Authorization
o Purchase
o Standalone Capture
In case of transactions subject to risk, the payment notification is only sent after the
gateway has completed the risk assessment and transaction has been released for
processing.
This notification is best suited if you are a low-volume merchant wishing to receive an
email when you have made a sale.
Successful refunds: A refund transaction has been processed successfully. A
notification is sent for both Refund and Standalone Refund transactions.
Payments requiring risk review: The risk service has identified a payment as
potentially fraudulent. A notification is sent advising you to review the payment and
decide whether to proceed with processing the payment or not.
Note: Not applicable to customer emails.

Admin
Sensitive Fields
©2018 Mastercard. Proprietary. All rights reserved.
Merchant Administration User Guide 02 November 2018 49
Sensitive Fields
The Sensitive Fields page allows you to view order and transaction data deemed sensitive
by your MSO. The sensitive fields configured by your MSO appear as Selected Fields on
this page.
Sensitive data may be data that can identify a payer (for example, payer name) or provide
information about the payer (for example, contact details or purchase details).
The sensitive fields will be fully masked on the order and transaction details page. For
example, if your MSO has configured “Payer Name” as a sensitive field then the order and
transaction details page will display “Payer Name” as “xxxxxxxx”.
On the Search page, a field label search on fields deemed sensitive will not return any
search results. If you simply search by entering the sensitive field value in the search box,
where records match exclusively on sensitive fields, the order details for these records in the
search results will be masked except the order date. The View link will be disabled so you
will be unable to view the order and transaction details. These records will be omitted from
CSV downloads.
For example, if you searched for “Smith” and if this term matches the value of a sensitive
field “Account Holder” then all the order details (except order date) for the matching records
will be fully masked in the search results and these records will be omitted from CSV
downloads.
If your search matches one or more non-sensitive fields, the sensitive fields in these records
will be fully masked in the search results and the CSV downloads. For example, if you
search for an Order ID and if “Account Holder” is configured as a sensitive field then the
value for “Account Holder” in the matching records will appear fully masked in the search
results and CSV download.
Note: An operator with May View Unmasked Sensitive Data privilege can view sensitive data in unmasked
form.
Device Payments
The Device Payments page allows you to configure the gateway for use with Apple Pay.
Click Add New Certificate and follow the steps to procure a signed certificate from Apple
and to upload it to the gateway.
Successfully uploaded certificates are listed at the bottom of the page with the certificate
identifier, submitted date and expiration date. You can delete an uploaded certificate
anytime.
Configure Surcharge Rules
The gateway can calculate surcharge for a transaction based on the surcharge rules you
configure. Please click the Learn More… link for information on configuring surcharge rules.
Admin
Configure PayPal
©2018 Mastercard. Proprietary. All rights reserved.
Merchant Administration User Guide 02 November 2018 50
Configure PayPal
To allow the gateway to grant permissions to use the PayPal REST API, go to Admin >
PayPal Configuration.
Click Grant Permissions in PayPal link to be redirected to the PayPal site to grant the
required permission.

Transaction Filtering
Accessing Transaction Filtering
©2018 Mastercard. Proprietary. All rights reserved.
Merchant Administration User Guide 02 November 2018 51
Transaction Filtering
Transaction Filtering allows you to configure rules to enable the gateway to identify
transactions that should be rejected or marked for review.
Rules may be configured by both MSOs and merchants. They are evaluated based on the
principle of gates or hurdles. Even if a single rule fails, the gateway will reject the transaction
and the order will not be allowed to proceed.
The assessment result is displayed on the order response and order details screens. You
can also search for orders based on the assessment results, from transaction filtering and/or
external risk provider.
Note: Only Authorization, Pay, Verification Only, and Standalone Capture transactions are assessed
against the transaction filtering rules. Assessment on other transactions such as Standalone Refunds or
Voids is not performed.
The gateway offers advanced fraud management of transactions via the Risk Management
feature. See Managing Risk.
Accessing Transaction Filtering
To access Transaction Filtering on the main menu and configure transaction filtering rules,
you must have May Configure Transaction Filtering operator privilege.
The following associated privileges may be enabled in relation to transaction filtering:
May Perform Risk Assessment Review — enables the merchant operator to review
orders marked for review. See Risk Assessments for Review.
May Bypass Risk Management — enables the merchant operator to process the
transaction by bypassing transaction filtering rules configured by the merchant.
For more information on these privileges, see Merchant Operator General Privileges on
page 36.
Supported Transaction Types
Transaction filtering is performed on the following initial transactions submitted to the
gateway:
Verification Only,
if May Use Verification Only for AVS/CSC Risk Assessment privilege is enabled,
or if the requested transaction is a Verify transaction.
Authorization,
if the merchant profile is enabled for Auth Then Capture transaction mode and
May Use Verification Only for AVS/CSC Risk Assessment privilege is not
enabled, or if the authorization follows a Verify transaction and risk was
bypassed on the Verify.
Purchase,
if the merchant profile is enabled for Purchase transaction mode and Verification
Only for AVS/CSC Risk Assessment privilege is not enabled.

Transaction Filtering
Transaction Filtering Flow
©2018 Mastercard. Proprietary. All rights reserved.
Merchant Administration User Guide 02 November 2018 52
Standalone Capture,
if the merchant profile has the privilege for a Standalone Capture and
Verification Only for AVS/CSC Risk Assessment privilege is not enabled.
Transaction Filtering Flow
The processing steps for an order when transaction filtering is configured is as follows:
Note: If at any step, the transaction filtering rules evaluate to reject the transaction, the order is blocked
and further checks will not be performed. The order will be reversed where appropriate.
Note 2: When transaction filtering rules evaluate to accept or review, the transaction will progress to the
next step of assessment until all checks have been performed and a final assessment result of accept or
review can be returned.
Step Description
3DS check If a 3DS authentication scheme is enabled and configured,
3DS authentication is performed. If payer authentication
fails, the gateway automatically rejects the transaction.
MSO pre-transaction checks
Transaction filtering rules configured by the MSO are run
before performing the transaction
Merchant pre-transaction checks
Transaction filtering rules configured by the merchant are
run before performing the transaction.
Pre-transaction checks refer to assessment before performing the transaction. No transaction
response data from the acquirer (AVS and CSC results) will be available for assessment. If the
assessment result is Reject, voids or reversals are not applicable as the transaction has not yet been
performed.
Process transaction The gateway processes the transaction.
MSO post-transaction checks
Transaction filtering rules configured by the MSO are run
after performing the transaction
Merchant post-transaction checks
Transaction filtering rules configured by the merchant are
run after performing the transaction.
Post-transaction checks refer to assessment after performing the transaction. The transaction
response data from the acquirer (AVS and CSC results) will be available to be assessed. If the
recommendation is Reject, and if the transaction that was assessed is Verification Only, then no voids
or reversals are required as the financial transaction has never been submitted. However, when an
Authorization, Purchase, or Standalone Capture transaction has been rejected after being assessed,
the system will automatically void or reverse the transaction.

Transaction Filtering
Transaction Filtering Terms
©2018 Mastercard. Proprietary. All rights reserved.
Merchant Administration User Guide 02 November 2018 53
Assessment Result The assessment result after evaluating transaction filtering
rules is returned in the transaction response. This may be:
Review required: The order was assessed and
requires a review.
Accepted: The order was assessed and accepted.
Rejected: The order was assessed and rejected.
Not Assessed: The order was not assessed
except for assessment by MSO-configured rules
and these rules did not reject the order.
Note 1: If the merchant has not configured any rules or if the merchant rules are bypassed, the rules
configured by the MSO are always applied to the transaction.
Note 2: Assessment after the financial transaction (post-transaction assessment) is not applicable to
Referred transactions (Authorization or Purchase transactions that received a "Refer to Issuer" acquirer
response).
Transaction Filtering Terms
Transaction Filtering Rules
Configuration to enable the gateway to identify high or low risk transactions. The rules may
be based on assessing the results returned by industry standard card verification processes
(for example, CSC, AVS, 3DS) or on black/white lists (for example, Card BIN, IP Country, IP
range).
MSO Rules
A set of rules configured by the MSO for filtering transactions. An MSO can configure rules
that apply to all merchants, or configure rules per merchant.
Merchant Rules
A set of rules configured by the merchant for filtering transactions.
Risk Assessment Result
The overall result after evaluating rules configured by the MSO and merchant.
External Risk Provider
An external risk provider service that integrates with the gateway to perform risk assessment
of transactions processed through the gateway. Transactions are pre-screened using
transaction filters before being sent to the external risk provider for risk scoring.
Trusted Cards
A white list of trusted credit card numbers owned by those cardholders whom the merchant
considers trustworthy to transact with.
Suspect Cards
A black list of credit card numbers owned by those cardholders whom the merchant
considers untrustworthy to transact with.

Transaction Filtering
Transaction Filtering Rules
©2018 Mastercard. Proprietary. All rights reserved.
Merchant Administration User Guide 02 November 2018 54
System Reject
An MSO action to reject the transaction because the rules configured by the MSO evaluated
to “Reject”.
No Action
An action available when defining rules that instructs the gateway to process the transaction.
Accept
An action available when defining rules that instructs the gateway to accept the transaction.
Reject
An action available when defining rules that instructs the gateway to reject the transaction.
Review
An action available when defining rules that instructs the gateway to mark the transaction for
review so it can be manually reviewed by the merchant to be either accepted or rejected.
Not Assessed
The order was not assessed for risk except for risk assessment by MSO-configured risk
rules and these rules did not reject the order.
Transaction Filtering Rules
The rules you can configure to filter transactions are based on:
assessing the results returned by industry standard card verification processes
3D-Secure authentication rules
CSC (Card Security Code) rules
white lists and black lists
IP Address Range rules
IP Country rules
Card BIN rules
Note: Only transaction filtering rules configured for IP Address Range and IP Country will be applied to
browser payments.
Click Transaction Filtering on the main menu and select the rule you wish to configure. As
a merchant, you can set the action to No Action (this means Accept), Reject, or Review.
Note: To configure rules, you must have “May Configure Transaction Filtering” operator privilege.
Trusted Cards
Trusted cards list is a set of credit card numbers owned by those cardholders whom you
consider trustworthy to transact with. Typically, a cardholder with a good record of
transaction history has a high potential of being added to the trusted card list. Configuring
trusted card rules ensures that transactions from trusted cards are always accepted.

Transaction Filtering
Transaction Filtering Rules
©2018 Mastercard. Proprietary. All rights reserved.
Merchant Administration User Guide 02 November 2018 55
Add a Trusted Card
Select Transaction Filtering > Trusted Cards from the submenu. The Trusted Cards configuration page is displayed.
In the Add New Card Number pane, enter the following details:
Card Number: The credit card number of the cardholder
Cardholder Name: (optional) The name of the cardholder; cannot exceed 40
characters.
Reason: (optional) The reason to add this card as a trusted card; cannot exceed 40
characters.
Click Add. The Trusted Cards page re-displays with the new entry appearing in the Current Trusted Cards list. The card number is displayed in 6.4 card masking format (irrespective of the masking format configured on your merchant profile.)
Edit a Trusted Card
In the Current Trusted Card Numbers pane, filter the list based on a card number:
Enter the card number in the Filter by Card Number text box. Click Clear if you
want to clear the filter string. Clearing the filter repopulates the entire list of card
numbers and turns off the filter mode.
Filter Mode: Off indicates that the filter option is not enabled on the Trusted Cards list.
Filter Mode: On indicates that the filter option is enabled on the Trusted Cards list.
Click Go. Only card numbers that match the filter criteria are displayed in the Current
Trusted Card Numbers list. The card numbers are sorted in ascending order.
If the list of trusted cards exceeds 20 entries, pagination triggers which allows you to navigate
between multiple pages.
Click Edit next to the card number record. Make changes to the required fields. When you modify the card number, ensure that you enter the complete card number for validation purposes. Editing Card Holder name and Reason do not require you to enter the card number.
Click Update to process the changes.
Click Cancel if you want to cancel the changes.
Delete a Trusted Card
In the Current Trusted Card Numbers pane, filter the trusted cards list based on a card number. See Step 1 in Edit a Trusted Card section.
Select one or more card numbers you want to delete using the checkboxes in the Select column. You may use Select All/None to select/clear all card numbers.
Click Remove Trusted Card Numbers to delete the selected card numbers.
Suspect Cards
Suspect cards list is a set of credit card numbers owned by those cardholders whom you
consider untrustworthy to transact with. Typically, a cardholder with a fraudulent transaction
history has a high potential of being added to the suspect card list. Configuring suspect card
rules ensures that transactions from suspect cards are always rejected.

Transaction Filtering
Transaction Filtering Rules
©2018 Mastercard. Proprietary. All rights reserved.
Merchant Administration User Guide 02 November 2018 56
Add a Suspect Card
Select Transaction Filtering > Suspect Cards from the submenu. The Suspect Cards configuration page is displayed.
In the Add New Card Number pane, enter the following details:
Card Number: The credit card number of the cardholder
Cardholder Name: (optional) The name of the cardholder; cannot exceed 40
characters.
Reason: (optional) The reason to add this card as a suspect card; cannot exceed 40
characters.
Click Add. The Suspect Cards page re-displays with the new entry appearing in the Current Suspect Cards list. The card number is displayed in 6.4 card masking format (irrespective of the masking format configured on your merchant profile.)
Edit a Suspect Card
In the Current Suspect Card Numbers pane, filter the list based on a card number:
Enter the card number in the Filter by Card Number text box. Click Clear if you
want to clear the filter string. Clearing the filter repopulates the entire list of card
numbers and turns off the filter mode.
Filter Mode: Off indicates that the filter option is not enabled on the Suspect Cards list.
Filter Mode: On indicates that the filter option is enabled on the Suspect Cards list.
Click Go. Only card numbers that match the filter criteria are displayed in the Current
Suspect Card Numbers list. The card numbers are sorted in ascending order.
If the list of suspect cards exceeds 20 entries, pagination triggers which allows you to navigate
between multiple pages.
Click Edit next to the card number record. Make changes to the required fields. When you modify the card number, ensure that you enter the complete card number for validation purposes. Editing Card Holder name and Reason do not require you to enter the card number.
Click Update to process the changes.
Click Cancel if you want to cancel the changes.
Delete a Suspect Card
In the Current Suspect Card Numbers pane, filter the suspect cards list based on a card number. See Step 1 in Edit a Suspect Card section.
Select one or more card numbers you want to delete using the checkboxes in the Select column. You may use Select All/None to select/clear all card numbers.
Click Remove Suspect Card Numbers to delete the selected card numbers.
IP Address Range Rules
IP addresses can help in identifying the origin of the transaction thereby enabling you to
track the location of the cardholder. Configuring IP Address Range rules enable you to block
or review transactions from a specific IP address or IP addresses within a range.

Transaction Filtering
Transaction Filtering Rules
©2018 Mastercard. Proprietary. All rights reserved.
Merchant Administration User Guide 02 November 2018 57
Note: A browser payment will be rejected if originating from an IP address of a range which has an
action of Review.
Add an IP Address Range Rule
Select Transaction Filtering > IP Address Range Rules from the submenu. The IP Address Range Rules configuration page is displayed.
In the Add IP Address Range to be Blocked pane, enter the following details. The IP address, specified in IPv4 format must be between the range 0.0.0.0 and 255.255.255.255.
IP Address Range start: The first IP address in the range to be blocked/reviewed.
IP address range end: (Optional) The last IP address in the range to be
blocked/reviewed.
You can block/review a single IP address or an IP address range. For example, if you want to
block IP Address 192.0.2.255, simply type 192.0.2.255 as the IP Address Range Start entry. To
block an IP address range, say 192.0.2.222 to 192.0.2.255, type 192.0.2.222 and 192.0.2.255 as
the start and end IP address ranges respectively.
If the specified IP addresses form a large range, the system displays a warning "The rule you
want to configure will apply to a very large number of IP addresses. Are you sure you want to add
this rule?". Click OK if you want to continue else click Cancel.
Click Add. The IP Address Range Rules page re-displays with the added entry appearing in the Currently Blocked IP Address Ranges list. You can filter this list based on an IP address:
1. Enter the IP address in the Filter Ranges by IP address text box. Click Clear if you want to
clear the filter string. Clearing the filter repopulates the entire list of IP address ranges and
turns off the filter mode.
Filter Mode: Off indicates that the filter option is not enabled on the IP Address Ranges list.
Filter Mode: On indicates that the filter option is enabled on the IP Address Ranges list.
You can also use the filter option to check if an IP range is blocked currently.
2. Click Go. Only IP ranges that match the filter criteria are displayed in the Currently Blocked
IP Address Ranges list. The IP ranges are sorted in ascending order.
If the list of IP address range rules exceeds 20 entries, pagination triggers which allows you to
navigate between multiple pages.
Deleting a Blocked IP Address Range
In the Currently Blocked IP Address Ranges pane,
Filter the IP address range rules list based on an IP address. See Step 3 in Add an IP Address Range Rule section.
Select one or more IP address range rules you want to delete using the checkboxes in the Select column. You may use Select All/None to select/clear all IP address ranges.
Click Delete to delete the selected IP address range rules. A warning message displays, which alerts you about deleting IP ranges that may occur in multiple IP ranges if overlapping IP ranges have been defined.
Click Yes if you want to proceed with the deletion of the selected IP ranges. Click No to cancel the deletion.

Transaction Filtering
Transaction Filtering Rules
©2018 Mastercard. Proprietary. All rights reserved.
Merchant Administration User Guide 02 November 2018 58
IP Country Rules
Configuring IP Country rules enable you to block or review transactions originating from a
pre-defined list of countries. You can also configure additional rules to block countries
identified as using IPs from unknown countries or IPs of anonymous proxies that mask the
true origin of the request.
Note: A browser payment will be rejected if originating from an IP address of a country which is listed in
Review.
Add an IP Country Rule
Select Transaction Filtering > IP Country Rules from the submenu. The IP Country Rules configuration page is displayed.
In the Add an IP Country Rule pane, select the action you want to perform on unknown countries and anonymous proxies.
Unknown country is a country that's not listed on this page or an IP address that does not
resolve to a valid country.
Anonymous Proxy refers to IP address of a known anonymous proxy server. These are
addresses that have been identified to mask the true origin of the request.
No Action: This is the default. An unknown country/anonymous proxy with this status
is accepted.
Review: an unknown country/anonymous proxy with this status is manually reviewed
and either accepted or rejected.
Reject: an unknown country/anonymous proxy with this status is rejected
automatically.
Assign a country or list of countries to one of the following actions:
No action: lists countries you want to accept transactions from.
Review: lists countries you want to mark for review before proceeding with the order.
Marking countries for review provides merchants with the flexibility to make a
decision on whether to process or reject a transaction from the specified country.
Reject: lists countries you want to reject transactions from.
Note: If a country has been added to the Reject list, the action for these two options for
unknown country and anonymous proxy will be automatically set by the gateway to Reject. If
countries are only listed for Review, the action for these two options will be automatically set to
Review, however you may choose to set it to Reject.
To mark a country for review:
Select the country from either the No Action or the Reject list box.
Click Review to move the country to the Review list box. If you want to undo your
action, select the country in the Review list box and click either No Action or Reject.
To reject a country:
Select the country from either the No Action or the Review list box.
Click Reject to move the country to the Reject list box. If you want to undo your
action, select the country in the Reject list box and click either No Action or Review.

Transaction Filtering
Transaction Filtering Rules
©2018 Mastercard. Proprietary. All rights reserved.
Merchant Administration User Guide 02 November 2018 59
Click Save to save the IP country rule.
Click Cancel if you want to exit the IP country rules configuration page without saving any changes.
Edit an IP Country Rule
You can change the configured actions against the countries anytime and save the changes.
Delete an IP Country Rule
To delete an IP country rule, move countries from the Review and Reject list boxes to the No Action
list box and save the changes.
Card BIN Rules
The card Bank Identification Number (BIN) can help in identifying the location of the card
issuer. Configuring card BIN rules enable you to block or review transactions from a specific
BIN or all BINs within a range.
Add a Card BIN Rule
Select Transaction Filtering > Card BIN Rules from the submenu. The Card BIN Rules configuration page is displayed.
In the Add BIN Range to be Blocked pane, enter the following details. The BIN must be six numeric characters in length and cannot start with zero.
BIN Range Start: The first BIN in the range to be blocked.
BIN Range End: (Optional) The last BIN in the range to be blocked.
You can block/review a single BIN or a BIN range. For example, if you want to block BIN 123456,
simply type 123456 as the BIN range start entry. To block a BIN range, say 111111 to 222222,
type 111111 and 222222 as the start and end BIN ranges respectively.
Click Add. The card BIN range is added to the card BIN rules.
The Currently Blocked BIN Ranges pane displays a list of all currently configured card BIN
rules in ascending order. If the list of current card BIN rules exceeds 20 entries, pagination
triggers which allows you to navigate between multiple pages.
Deleting a Card BIN Rule
In the Currently Blocked BIN Ranges pane,
Select one or more BIN rules you want to delete using the checkboxes in the Select column. You may use Select All/None to select/clear all BIN rules.
Click Delete. A warning message displays, which alerts you about deleting BIN ranges that may occur in multiple BIN ranges if overlapping BIN ranges have been defined. Click Yes if you want to proceed with the deletion of the selected BIN ranges. Click No to cancel the deletion.
3D-Secure Authentication Rules
3-Domain Secure™ (3-D Secure or 3DS) authentication is designed to protect online
purchases against credit card fraud by allowing you to authenticate the payer before
submitting the transaction. It uses the card scheme’s Directory Server to determine whether
the payer is enrolled for 3DS, then redirects the payer to the issuer’s Access Control Server
(ACS) where they enter a previously registered password for authentication.

Transaction Filtering
Transaction Filtering Rules
©2018 Mastercard. Proprietary. All rights reserved.
Merchant Administration User Guide 02 November 2018 60
You can block/review transactions based on the 3DS authentication results. Note that the
gateway by default rejects transactions where payer authentication failed.
The gateway supports 3DS authentication using MasterCard SecureCode™, Verified by
Visa™, J/Secure™, American Express SafeKey™, and Diners Club ProtectBuy™.
Add a 3-D Secure Rule
Select Transaction Filtering > 3-D Secure Rules from the submenu. The 3-D Secure
Rules configuration page is displayed.
Click Learn More to learn about 3-D Secure Rules and how to configure them.
AVS (Address Verification Service) Rules
The Address Verification Service (AVS) is a security feature used for e-commerce
transactions. It compares the card billing AVS data that the cardholder supplies with the
records held in the card issuer’s database. Once the transaction is successfully processed
and authorised, the card issuer returns a result code (AVS result code) in its authorisation
response message. The result code verifies the AVS level of accuracy used to match the
AVS data.
Note: If the merchant privilege "May Use Verification Only for AVS/CSC Risk Assessment" is enabled,
then a Verification Only transaction is performed to obtain the AVS result code. Verification Only allows
the system to verify cardholder information without performing a financial transaction. So, enabling this
permission allows the gateway to process the AVS rules before performing a financial transaction. If this
permission is disabled then the AVS rules are processed after the financial transaction. If the order is
rejected the system automatically reverses the transaction.
Add an AVS Rule
Select Transaction Filtering > AVS Rules from the submenu. The AVS Rules configuration page is displayed.
In the Configure AVS Response Codes pane, select an action for each AVS response code.
No Action: (default) accept transactions returning the selected AVS response code.
Review: mark transactions returning the selected AVS response code for review.
Reject: reject transactions returning the selected AVS response code.
Click Save to save the AVS Rule.
Click Cancel if you want to exit the AVS Rules page without saving any changes.
Edit an AVS Rule
You can change the configured actions against the AVS response codes anytime and save
the changes.
Delete an AVS Rule
To delete an AVS rule, select No Action against the AVS response code and save the
changes.

Transaction Filtering
Risk Assessments for Review
©2018 Mastercard. Proprietary. All rights reserved.
Merchant Administration User Guide 02 November 2018 61
CSC (Card Security Code) Rules
The Card Security Code (CSC), also known as CVV (Visa), CVC2 (MasterCard), CID/4DBC
(Amex), or CVV2, is a security feature that compares the CSC entered by the payer with the
records held by the card issuer.
A CSC response code is returned in the transaction response message indicating the extent
to which the CSC matched (or failed to match). You can configure CSC rules to accept,
review, or reject a transaction on the basis of this CSC response code.
Note: If the merchant privilege "May Use Verification Only for AVS/CSC Risk Assessment" is enabled,
then a Verification Only transaction is performed to obtain the CSC result code. Verification Only allows
the system to verify cardholder information without performing a financial transaction. So, enabling this
permission allows the gateway to process the CSC rules before performing a financial transaction. If this
permission is disabled then the CSC rules are processed after the financial transaction. If the order is
rejected the system automatically reverses the transaction.
Add a CSC Rule
Select Transaction Filtering > CSC Rules from the submenu. The CSC Rules configuration page is displayed.
In the Configure CSC Response Codes pane, select an action for each CSC response code.
No Action: (default) accept transactions returning the selected CSC response code.
Review: mark transactions returning the selected CSC response code for review.
Reject: reject transactions returning the selected CSC response code. Note that
response code "(M) CSC Match" has "Reject" action disabled.
Click Save to save the CSC Rule.
Click Cancel if you want to exit the CSC Rules page without saving any changes.
Edit a CSC Rule
You can change the configured actions against the CSC response codes anytime and save
the changes.
Delete a CSC Rule
To delete a CSC rule, select No Action against the CSC response code and save the
changes.
Risk Assessments for Review
The Transaction Filtering pages (Summary and the rule configuration pages) display Risk
Assessments for Review (n) link at the top of the page if the operator privilege May
Perform Risk Assessment Review is enabled.
“n” represents the number of orders that are pending review and have been created within
the last 60 days. Clicking this link takes you to the Order and Transaction Search page

Transaction Filtering
Risk Assessments for Review
©2018 Mastercard. Proprietary. All rights reserved.
Merchant Administration User Guide 02 November 2018 62
where all orders with a pending risk review, created within the last 60 days are displayed in
the search results.

Managing Risk
Accessing Risk Management
©2018 Mastercard. Proprietary. All rights reserved.
Merchant Administration User Guide 02 November 2018 63
Managing Risk
Risk Management is a security feature used for e-commerce transactions, which enables
MSOs and merchants to mitigate fraud effectively using a set of risk rules. The risk rules are
the building blocks of risk management. They are configured to identify transactions of
high/low risk where the gateway accepts, rejects, or mark transactions for review based on
risk assessment.
The gateway currently supports risk assessment of transactions via external risk providers.
External risk refers to any external risk provider that integrates with the gateway to perform
risk assessment of transactions processed through the gateway. The transactions are pre-
screened using transaction filtering before being sent to the external risk provider for risk
scoring. See Transaction Filtering (see page 51).
Note: To configure external risk, the operator must have “May Configure Risk Rules” privilege enabled.
Accessing Risk Management
To use Risk Management, your MSO must have the Risk Management privilege enabled for
you, and must have enabled and configured an external risk provider.
The following privileges are available for a merchant operator:
May Configure Risk Rules — enables the merchant operator to configure external
risk.
May Perform Risk Assessment Review — enables the merchant operator to review
orders marked for review. See Risk Assessments for Review.
May Bypass Risk Management — enables the merchant operator to process the
transaction by bypassing external risk rules configured by the merchant.
For more information on these privileges, see Merchant Operator General Privileges on
page 36.

Managing Risk
Using Internal Risk
©2018 Mastercard. Proprietary. All rights reserved.
Merchant Administration User Guide 02 November 2018 64
Using Internal Risk
The internal risk functionality offered by the gateway has been superseded by Transaction
Filtering. All existing internal risk rules are available for configuration under Transaction
Filtering with updates to 3-D Secure rules. The Risk Management 3-D Secure rules will
continue to be available for configuration until you activate the updated 3-D Secure rules.
3-D Secure Rules
3-Domain Secure™ (3-D Secure or 3DS) authentication is designed to protect online
purchases against credit card fraud by allowing you to authenticate the payer before
submitting the transaction. It uses the card scheme’s Directory Server to determine whether
the payer is enrolled for 3DS, then redirects the payer to the issuer’s Access Control Server
(ACS) where they enter a previously registered password for authentication.
You can block/review transactions based on the 3DS authentication states. Note that the
gateway by default rejects transactions where payer authentication failed.
The gateway supports 3DS authentication using MasterCard SecureCode™, Verified by
Visa™, J/Secure™, American Express SafeKey™, and Diners Club ProtectBuy™.
Add 3DS Rules
Select Risk Management > 3-D Secure Rules from the submenu. The 3-D Secure Rules configuration page is displayed.
In the Configure Clash Action pane, select the action you want to perform when risk rules evaluate to both "Always Accept" and "Always Reject". By default, the action is set to "Always Reject".
Internal Risk evaluates rules based on the action associated with that rule. A risk status is
determined after evaluating all the rules associated with a transaction inclusive of the rules set by
your payment service provider. Occasionally, these rules can clash when they evaluate to both
"Always Accept" and "Always Reject" and fail to determine the final action on the order. For
example, if a card number is listed as a Suspect Card (Always Reject) and if the 3DS rule results
in "Always Accept" for an authentication state, then the system encounters a rule deadlock
requiring operator intervention to break the deadlock. In such a case, the action set for the Clash
Rule comes into effect to determine the final action on the order.
Always Accept: accepts the transaction by overriding all other actions except
"Always Reject".
Always Reject: rejects the transaction by overriding all other actions except "Always
Accept".
Select the action for each 3DS authentication state:
No action: (default) accept transactions returning the selected 3DS authentication
state.
Review: mark transactions returning the selected 3DS authentication state for
review.
Reject: reject transactions returning the selected 3DS authentication state.
Click Save to save the 3DS Rule including the clash rule configuration.
Click Cancel if you want to exit the 3DS Rules configuration page without saving any changes.

Managing Risk
Using an External Risk Provider
©2018 Mastercard. Proprietary. All rights reserved.
Merchant Administration User Guide 02 November 2018 65
Edit 3DS Rules
You can change the configured actions against the 3DS authentication states anytime and
save the changes. Note that "Always Accept" can be enabled for the authentication state "Y-
Card Holder Verified" only.
Deleting 3DS Rules
To delete a 3DS rule, select No Action against the 3DS authentication state and save the
changes. To delete a 3DS rule, select No Action against the 3DS authentication state and save the changes.
Using an External Risk Provider
When you choose to configure only the external risk provider, transactions are sent to the
external risk provider for risk scoring before or after the transaction, based on the external
risk provider configuration. Transaction filtering rules will be dormant and will not contribute
to the risk assessment result.
Risk assessment is performed before or after the first transaction submitted to the external
risk provider. See Supported Transaction Types.
The processing steps for an order when an external risk provider is configured is as follows:
Step Description
3DS check If a 3DS authentication scheme is enabled and configured,
3DS authentication is performed. If payer authentication
fails, the gateway automatically rejects the transaction.
Pre-transaction checks If the external risk provider is configured to run before
transaction processing, the transaction will be sent directly
to the external risk provider for risk scoring before the
transaction is performed.
Pre-transaction checks refer to risk assessment before performing the transaction. No transaction
response data from the acquirer (AVS and CSC results) will be available for risk assessment. If the
risk assessment result is Reject, voids or reversals are not applicable as the transaction has not yet
been performed.
Post-transaction checks If the external risk provider is configured to run after
transaction processing, the transaction will be performed
first and then sent to the external risk provider for risk
scoring.
Post-transaction checks refer to risk assessment after performing the transaction. The transaction
response data from the acquirer (AVS and CSC results) will be available to be assessed for risk. If the
risk recommendation is Reject, and if the transaction that was assessed for risk is Verification Only,
then no voids or reversals are required as the financial transaction has never been submitted.
However, when an Authorization, Purchase, or Standalone Capture transaction has been rejected after
being assessed for risk, the system will automatically void or reverse the transaction.

Managing Risk
Using an External Risk Provider
©2018 Mastercard. Proprietary. All rights reserved.
Merchant Administration User Guide 02 November 2018 66
Risk Assessment Result The risk assessment result is returned in the transaction
response. This may be:
Review required: The order was assessed for risk
and requires a review.
Accepted: The order was assessed for risk and
accepted.
Rejected: The order was assessed for risk and
rejected.
Not Assessed: The order was not assessed for
risk except for risk assessment by MSO-configured
rules and these rules did not reject the order.
Completing the Risk Management Questionnaire
If your MSO has configured you for risk assessment by the external risk provider, you must
answer a risk scoring questionnaire if:
You are a bronze or silver level merchant, and you are the lead merchant for an
external risk provider tenant.
You have been assigned the May Configure Risk Rules privilege.
The next time you log in to Merchant Administration, you will be prompted to answer the
questionnaire by the external risk provider configuration Alert message.
Click Tenant Configuration to view the external risk provider Tenant Configuration page, or
OK to answer the questionnaire later.
If changes have been made to the tenant details at the Merchant Manager level (such as
changing the merchant currency), you may be prompted to re-answer the questionnaire.
The External Risk Provider Tenant Configuration Page
Select the appropriate external risk provider’s Tenant Configuration page.
The fields in Tenant Information are defined by the MSO administrator when defining the
external risk provider Tenant in Merchant Manager. They cannot be changed in Merchant
Administration.
If you are directed here after an MSO administrator assigns you as a lead merchant to a
profile, you must complete the fields in the Risk Rule Configuration section. The Risk Rules
provided by the external risk provider differ for each Tenant and depend on the Service
Level, Business Type, and Currency. The screen capture above is an example only.
Defining Merchant Operator Privileges for Use with the External Risk Provider
When a merchant has the external risk provider enabled, the operators must be assigned
certain privileges to ensure that they are given the correct access rights when they use a link
to sign on to the external risk provider.
Note: This mapping applies only to merchants with a Silver or Gold service levels.
The following table shows how roles in the external risk provider are mapped to the
merchant operator privileges in Merchant Administration.

Managing Risk
Using Both Transaction Filtering and External Risk Provider
©2018 Mastercard. Proprietary. All rights reserved.
Merchant Administration User Guide 02 November 2018 67
Note: A tick () indicates that the privilege is enabled.
Operator Privileges in Merchant Manager
External Risk Provider Role
Link to the External Risk Provider
Key Capabilities in the External Risk Provider
May Configure Risk Rules
Merchant
Fraud Support
View in the External Risk Provider link
displayed in the order and transaction
details screen.
Note: All MSO operators will have access to the
external risk provider in order to provide level
one support.
View
transaction
details.
MSO Fraud
Administrator
View in External Risk Provider link
displayed in the order and transaction
details screen.
Administer
the risk
management
process
Using Both Transaction Filtering and External Risk Provider
When you choose to configure both transaction filters and an external risk provider, the
transactions are pre-screened using transaction filters before being sent to the external risk
provider for risk scoring. This allows you to filter out any obvious cases of rejection before
incurring the cost of sending the transaction to the external risk provider.
Both transaction filtering and the external risk provider assessment will be performed on the
first transaction that is submitted to the gateway. See Supported Transaction Types.
The processing steps for an order when both transaction filtering and an external risk
provider are configured is as follows:
Note 1: If at any step, either transaction filtering rules or external risk rules evaluate to reject the
transaction, the order is blocked and further checks will not be performed. The order will be reversed
where appropriate.
Note 2: When transaction filtering rules or the external risk provider evaluate to accept or review, the
transaction will progress to the next step of assessment until all checks have been performed and a final
assessment result of accept or review can be returned.

Managing Risk
Using Both Transaction Filtering and External Risk Provider
©2018 Mastercard. Proprietary. All rights reserved.
Merchant Administration User Guide 02 November 2018 68
Step Description
3DS check If a 3DS authentication scheme is enabled and configured,
3DS authentication is performed. If payer authentication
fails, the gateway automatically rejects the transaction.
MSO pre-transaction checks
Transaction filtering rules configured by the MSO are run
before performing the transaction
Merchant pre-transaction checks
Transaction filtering rules configured by the merchant are
run before performing the transaction.
External risk pre-transaction checks
If the external risk provider is configured to run before
transaction processing, the transaction will be sent directly
to the external risk provider for risk scoring before the
transaction is performed.
Pre-transaction checks refer to assessment before performing the transaction. No transaction
response data from the acquirer (AVS and CSC results) will be available for assessment. If the
assessment result is Reject, voids or reversals are not applicable as the transaction has not yet been
performed.
Process transaction The gateway processes the transaction.
MSO post-transaction checks
Transaction filtering rules configured by the MSO are run
after performing the transaction
Merchant post-transaction checks
Transaction filtering rules configured by the merchant are
run after performing the transaction.
Post-transaction checks If the external risk provider is configured to run after
transaction processing, the transaction will be performed
first and then sent to the external risk provider for risk
scoring.
Post-transaction checks refer to assessment after performing the transaction. The transaction
response data from the acquirer (AVS and CSC results) will be available to be assessed. If the
recommendation is Reject, and if the transaction that was assessed is Verification Only, then no voids
or reversals are required as the financial transaction has never been submitted. However, when an
Authorization, Purchase, or Standalone Capture transaction has been rejected after being assessed,
the system will automatically void or reverse the transaction.

Managing Risk
Risk Assessments for Review
©2018 Mastercard. Proprietary. All rights reserved.
Merchant Administration User Guide 02 November 2018 69
Assessment Result The assessment result from transaction filtering and
external risk is returned in the transaction response. This
may be:
Review required: The order was assessed and
requires a review.
Accepted: The order was assessed and accepted.
Rejected: The order was assessed and rejected.
Not Assessed: The order was not assessed
except for assessment by MSO-configured rules
and these rules did not reject the order.
Note 1: If the merchant has not configured any rules or if the merchant rules are bypassed, the rules
configured by the MSO are always applied to the transaction.
Note 2: Assessment after the financial transaction (post-transaction assessment) is not applicable to
Referred transactions (Authorization or Purchase transactions that received a "Refer to Issuer" acquirer
response).
Risk Assessments for Review
Risk Management pages (Summary and the rule configuration pages) display Risk
Assessments for Review (n) link at the top of the page if the operator privilege May
Perform Risk Assessment Review is enabled.
“n” represents the number of orders that are pending review and have been created within
the last 60 days. Clicking this link takes you to the Order and Transaction Search page
where all orders with a pending risk review, created within the last 60 days are displayed in
the search results.
Searching for Orders Based on the Assessment Result
You can search for orders based on the assessment result from transaction filtering and/or
external risk. See Searching for Orders and Transactions on page 16. To view risk
assessment details for an order, click the Risk Details section in the order and transaction
details page.

Index
©2018 Mastercard. Proprietary. All rights reserved.
Merchant Administration User Guide 02 November 2018 70
Index
A
Accessing Risk Management • 50, 62
Acquirer Link Selection • 41, 45
Adding a 3-D Secure Rule • 63
Adding a Payment Plan • 41, 42, 45
Admin • 34
Auth and Capture • 13
B
Batch Closure Receipt Page • 21
C
Changing an Operator's Password • 10, 36, 41
Changing Your Own Operator Password • 39,
41
Changing Your Password at Login • 9
Configuration Details • 34
Configuration Details Definitions • 34
Configuring 3-D Secure Rules • 63
Configuring Integration Settings • 45
Configuring Your Settings • 34
Creating a New Merchant Administration
Operator • 11, 35
D
Dealing with Unsettled Transactions • 19
Deleting a 3-D Secure Rule • 64
Deleting a Blocked IP Address Range • 56, 58
Downloading Payment Authentication
Information • 28
Downloading Software and Documentation •
45
E
Edit a Payment Plan • 44, 45
Editing Operators • 39
Enable/Disable a Payment Plan • 44

Index
©2018 Mastercard. Proprietary. All rights reserved.
Merchant Administration User Guide 02 November 2018 71
G
Gateway Report Search Page • 32
General Privileges • 38, 50, 62
Getting Started • 8
I
International Definitions • 34
Introduction • 8
L
Logging in to Merchant Administration • 9
Logging Out • 11
Login Field Definitions • 9
M
Manage Banamex Payment Plans • 41
Managing Batches • 30
Managing Merchant Administration Operators
• 35, 39
Managing Passwords • 40
Managing Risk • 62
Merchant Administration Operator Details
page • 13, 35
P
Payment Authentication Information Flow • 24
Payment Authentications • 24
Payment Authentications Search Page • 25
Preface • 7
Prerequisite Settlement Privileges • 19
R
Reports • 32, 50
Requirements • 8
Resetting a Forgotten Password • 9, 10
Reviewing Currently Rejected 3-D Secure
Authentication States • 64
Risk Management Architecture • 50, 64, 66
S
Searching for Orders • 15, 18
Searching for Orders Based on Risk
Recommendation • 68
Searching for Payment Authentications • 25,
27
Searching for Settlements • 21
Selecting Merchant Administration Menu
Options • 10
Settlement Details Page • 21, 22
Settlement List - Settled Batches • 21, 22
Settlement Search Page • 21
Settling Orders • 19
T
The Home Page • 11
Types of Merchant Profiles • 8
Types of Operators • 35
U
Unlocking an Operator Account • 40
Unsettled Transactions Summary Page • 20,
21
Using Both Internal Risk and External Risk •
66
Using External Risk Only • 64
Using Payment Plans • 41, 43, 45
V
Verification Only • 15
Viewing a Gateway Report • 33
Viewing an Individual Payment Authentication
• 27
Viewing the Payment Authentications List • 26,
28
W
Where to Get Help • 7
Who Should Read This Guide • 7
Working with Orders • 13