Manual Car Amplifier DLS X program X D20 - 130.com.ua
17
In store "130" you can find and buy almost all necessary goods for your auto in Kyiv and other cities, delivery by ground and postal services. Our experienced consultants will provide you with exhaustive information and help you to chose the very particular thing. We are waiting for you at the address http://130.com.ua PHONES (044) 360-7-130 (050) 336-0-130 (063) 788-0-130 (067) 233-0-130 (068) 282-0-130 Internet store of autogoods CAR RECEIVERS — Receivers • Media receivers and stations • Native receivers • CD/DVD changers • FM-modulators/USB adapters • Flash memory • Facia plates and adapters • Antennas • Accessories | CAR AUDIO — Car audio speakers • Amplifiers • Subwoofers • Processors • Crossovers • Headphones • Accessories | TRIP COMPUTERS — Universal computers • Model computers • Accessories | GPS NAVIGATORS — Portable GPS • Built-in GPS • GPS modules • GPS trackers • Antennas for GPS navigators • Accessories | VIDEO — DVR • TV sets and monitors • Car TV tuners • Cameras • Videomodules • Transcoders • Car TV antennas • Accessories | SECURITY SYSTEMS — Car alarms • Bike alarms • Mechanical blockers • Immobilizers • Sensors • Accessories | OPTIC AND LIGHT — Xenon • Bixenon • Lamps • LED • Stroboscopes • Optic and Headlights • Washers • Light, rain sensors • Accessories | PARKTRONICS AND MIRRORS — Rear parktronics • Front parktronics • Combined parktronics • Rear-view mirrors • Accessories | HEATING AND COOLING — Seat heaters • Mirrors heaters • Screen-wipers heaters • Engine heaters • Auto-refrigerators • Air conditioning units • Accessories | TUNING — Vibro-isolation • Noise-isolation • Tint films • Accessories | ACCESSORIES — Radar-detectors • Handsfree, Bluetooth • Windowlifters • Compressors • Beeps, loudspeakers • Measuring instruments • Cleaners • Carsits • Miscellaneous | MOUNTING — Installation kits • Upholstery • Grilles • Tubes • Cable and wire • Tools • Miscellaneous | POWER — Batteries • Converters • Start-charging equipment • Capacitors • Accessories | MARINE AUDIO AND ELECTRONICS — Marine receivers • Marine audio speakers • Marine subwoofers • Marine amplifiers • Accessories | CAR CARE PRODUCTS — Additives • Washer fluid • Care accessories • Car polish • Flavors • Adhesives and sealants | LIQUID AND OIL — Motor oil • Transmission oil • Brake fluid • Antifreeze • Technical lubricant ICQ 294-0-130 597-0-130 SKYPE km-130
-
Upload
khangminh22 -
Category
Documents
-
view
2 -
download
0
Transcript of Manual Car Amplifier DLS X program X D20 - 130.com.ua

In store "130" you can find and buy almost all necessary goods for your auto in Kyiv and other cities, delivery by ground and postal services. Our experienced
consultants will provide you with exhaustive information and help you to chose the very particular thing. We are waiting for you at the address
http://130.com.ua
PHONES (044) 360-7-130 (050) 336-0-130 (063) 788-0-130 (067) 233-0-130 (068) 282-0-130
Internet store of autogoods
CAR RECEIVERS — Receivers • Media receivers and stations • Native receivers • CD/DVD changers • FM-modulators/USB adapters • Flash memory • Facia plates and adapters • Antennas • Accessories | CAR AUDIO — Car audio speakers • Amplifiers • Subwoofers • Processors • Crossovers • Headphones • Accessories | TRIP COMPUTERS — Universal computers • Model computers • Accessories | GPS NAVIGATORS — Portable GPS • Built-in GPS • GPS modules • GPS trackers • Antennas for GPS navigators • Accessories | VIDEO — DVR • TV sets and monitors • Car TV tuners • Cameras • Videomodules • Transcoders • Car TV antennas • Accessories | SECURITY SYSTEMS — Car alarms • Bike alarms • Mechanical blockers • Immobilizers • Sensors • Accessories | OPTIC AND LIGHT — Xenon • Bixenon • Lamps • LED • Stroboscopes • Optic and Headlights • Washers • Light, rain sensors • Accessories | PARKTRONICS AND MIRRORS — Rear parktronics • Front parktronics • Combined parktronics • Rear-view mirrors • Accessories | HEATING AND COOLING — Seat heaters • Mirrors heaters • Screen-wipers heaters • Engine heaters • Auto-refrigerators • Air conditioning units • Accessories | TUNING — Vibro-isolation • Noise-isolation • Tint films • Accessories | ACCESSORIES — Radar-detectors • Handsfree, Bluetooth • Windowlifters • Compressors • Beeps, loudspeakers • Measuring instruments • Cleaners • Carsits • Miscellaneous | MOUNTING — Installation kits • Upholstery • Grilles • Tubes • Cable and wire • Tools • Miscellaneous | POWER — Batteries • Converters • Start-charging equipment • Capacitors • Accessories | MARINE AUDIO AND ELECTRONICS — Marine receivers • Marine audio speakers • Marine subwoofers • Marine amplifiers • Accessories | CAR CARE PRODUCTS — Additives • Washer fluid • Care accessories • Car polish • Flavors • Adhesives and sealants | LIQUID AND OIL — Motor oil • Transmission oil • Brake fluid • Antifreeze • Technical lubricant
ICQ 294-0-130 597-0-130
SKYPE km-130

How to install and operate theX-program amplifiers
Welcome!This owners manual is written in easy english anduses a lot of drawings to simply the installation anduse of the above amplifiers.
Your X-program amplifiers must be installedcorrectly in order to work well. This manual will showyou how to install the amplifier like a pro. Pleaseread the entire manual before beginning theinstallation.Install the amplifier yourself if you feelconfident with our instructions and if you have theproper tools. However if you feel unsure, turn overthe installation job to someone better suited to it.
Warranty ServiceThis amplifier is covered by warranty, dependingon the conditions in the country where it is sold. Ifthe amplifier is returned for service, please includethe original dated receipt with the product.
Contents
Features…………………………….. 2Installation…………………….……. 2Tools and materials needed………. 3Amplifier installation kit………….... 3Routing Wires…………………….... 3
WiringPower and Outputs……………..…. 4Inputs and controls………………... 5High and low level inputs............... 5Input level control........................... 6Bass boost,Crossovers, etc............ 6Crossovers / features on each model 7
X-D10 speaker wiring:Subwoofer…………………………... 8
X-D20 / D25 speaker wiring:Front speakers…...……………….... 9Subwoofer…………………………... 9
X-D30 speaker wiring:Two speakers and subwoofer.......... 10
X-D40 speaker wiring:Four speakers…………………….... 11Two speakers and bridged subwoofer 11Connection of subwoofers............... 12
Testing……………………………….. 13Troubleshooting……………………... 13Professional tips…………………….. 14Specifications………………………... 15
Technical AssistanceFor technical assistance ask the shop where theproduct was sold or the distributor in your very coun-try. Information can also be found on our WEB-sitewww.xprogram.comWe follow a policy of continuous advancement indevelopment. For this reason all or part ofspecifications & designs may be changed withoutprior notice.
DLS Svenska ABP.O. Box 13029 - SE-40251 Göteborg - Sweden
Tel: +46 31 840060 - Fax: +46 31 844021E-mail: [email protected]
X-program products are produced in Taiwan
X-program is designed, engineered and distributed by:
This product must be returned to theseparate collection system for electronicproducts. Do not dispose this producttogether with general household waste.
DECLARATION OF CONFORMITYX-program amplifiers for vehicles are manufacturedin accordance with the EU directive EEC 95/54 (72/245/EEC) and are marked with the approval number.They are also marked in accordance with the WEEE-directive 2002/96/EC.The products are also produced in accordance withthe EU RoHS directive 2002/95/EC.
X-D10X-D20 X-D25X-D30X-D40
130.c
om.ua
Autogood products «130»

The models include
- Digital class D technique- High efficiency- Low profile design- RCA line inputs- RCA line outputs (not X-D30 / X-D40)- High level input with Auto start- Bass boost 0 - +18 dB- Phase shift control ( not X-D40)- Powerful cable terminals- Built-in active crossovers
InstallationBefore you begin installation
Before you begin you need to read the manual, to havesome tools, cables and other material available. Thereis one such list of material on the following page.
Amplifier location
Important Allow air circulation around the amplifier.
2
Disconnect Battery
Before starting the instal-lation, always disconnectthe negative terminal ofthe battery.
The X-program series of amplifiers have a compactdesign that allows great flexibility in mounting. Youcan mount it under a seat or in the trunk.When you select a location, do remember that theamplifier generates a lot of heat.
Choose a location where air can circulate freelyaround the amplifier. Do not cover the amplifier withcarpets or hide behind trim panels.Do not mount the amplifier in an inverted or upsidedown position.
Check all locations and placements carefully beforemaking any cuts, drilling any holes or making anyconnections.
X-logo on amplifier cooling flange
The X-logo on the amplifier top is attached withtwo 1 mm hex. screws. The logo can be removedand twisted 90 or 180 degrees, and then screwedback in wanted position. The logo can be mountedin four different ways to match your installation.
Mounting
Fasten the amplifier to the surface using the fourseparate brackets coming with the amplifier. Thebrackets are attached to the amplifier with screwsand can be directed in two ways, see figure:
Mount the flanges this way, or this way.
Bottom plate of amplifier
130.c
om.ua
Autogood products «130»

Tools and material needed
Tools:Flat and Phillips screwdriversWire cutterWire stripperElectric drill with drillsCrimping toolDigital multimeter or test lampWire brush, scraper or a pieceof an abrasive sheet to removepaint for a good ground connectionGrease to protect the groundconnection from oxidation
Material:Speaker wire: minimum12 AWG = 4 mm2 for subwoofers13 – 16 AWG = 1,5-2,5 mm2 for otherspeakersSheet metal screws for mounting theamplifier to the amplifier board and theamplifier board to the car + some extrafor fuse holder, amplifier ground etc.Electrical insulation tape½ inch thick plywood or particle board forthe amplifier to be mounted upon.
Amplifier installation kit:If available,buy an amplifier installation kit. Itcontains normally all you need. This is what youhave to buy if you buy the items separately
20- 25 feet = 6- 7.5 meter power cable,minimum AWG 5 = 16 mm2 or heavier1 pc of fuseholder to install close to thecar battery + fuse 50 Ampere.20 feet of AWG 15 = 1,5 mm2 wire forremote turn on / off cable from radio.RCA-cable for input from radio.- 20 feet or 5 meter for trunk installations-12 feet or 2 – 3 meter for under seatinstallations.Four to eight splicers to connect speakercables to high level input cable, if high levelinput is used.Wire tiesInsulating grommet or insulating tube
Stereohead unit
3
Professional Tip:
If amplifier installation kits are available withdifferent size of power cable, chose the mostheavy power cable to improve sound quality andto allow more amplifiers to be installed now orlater.The amplifier power terminals accept AWG 4cables directly, so If possible buy AWG 4 = 21mm2 cable for best performance.Both the positive wire and the ground wire musthave the same size. To avoid cable fire, be surenot to oversize the main fuse value for the powerwires.
THE DC-FEEDMaximum main fuse values for different cablesizes. 6 mm2 (9 AWG) :25 A 10 mm2 (7AWG) :40 A 16 mm2 (5AWG) :60 A 21 mm2 (4AWG) :100 A 33 mm2 (2AWG) :150 A 42 mm2 (1AWG) :200 A
Routing wires
130.c
om.ua
Autogood products «130»

WiringPower and Outputs
Ground Terminal ( GND )
Remote terminal ( REM )
Use only 25 ampere ATCblade type fuses whenreplacing a blown fuse.
4
Power terminal ( +12V)Connect the fuse holder as close to the vehiclebattery + as possible, using AWG 4 = 21 mm2
power cable. Use a ring crimp terminal cable toconnect to battery +. Apply silicon grease to thefuse to prevent corrosion. The AWG4 cable canuse an 80 Amp fuse, if the cable is smaller, thefuse value must be lower (see table on previouspage).
Connect to a good chassis ground. The groundconnection should be clean, unpainted metal to prov-ide a good electrical connection. Use a wire brush,a scraper or a piece of an abrasive sheet to cleanthe metal. Use a lock washer or two to securecontact. Protect with silicon grease or by paintapplied afterwards.
Power(Green)
Protect(Red)
Power Light / Protect light
The power light (green ) comes on whenthe amplifier is turned on.
The protect light ( red ) comes onwhen the amplifier shuts down fromoverheating, or a short circuit ( spea-ker failure)
Fuses
For RCA cable signal input:Connect the radio power antenna lead = remoteturn on/off from the car stereo to the amplifier remoteconnection. This turns on the amplifier wheneverthe car stereo is turned on.You can either use the built in remote cable in theRCA cable itself or use a separate cable.
Sometimes a small disturbance may enter theamplifier coming from the remote voltage , throughthe built in remote wire and into the RCA cable.Thus we recommend to use a separate remote wireand run the RCA lead separate from remote wire,power cables and speaker cables.You can insert the cable directly into the amplifierterminal. If there is no remote voltage available fromthe stereo, you must connect to the ignition keythrough the radio or any accessories fuse.
For High Level input:We recommend you to connect the remote wire asdescribed above. The amplifier will produce soft on/ soft off operation this way.In the case that there is no remote voltage availablefrom the car stereo or you want to simplify the in-stallation, the amplifier can be turned on/ turned offby the high level input voltage. This is doneautomatically when the head unit is turned on. Thereis a small disadvantage that this function gives softturn on operation but some pop sound whenswitching off.
GND REM +12V Fuse
A cable up to AWG 4 fits directly in the amplifier +12 V terminal, tighten with the hex screw.
Be sure to use a rubber grommet or a plasticinsulating tube where the cable passes the firewallor other places where it can be easily jammed.Use wire ties to secure to existing cables in theengine compartment.
DLSDLS FH1fuse holder
Battery+ pole
GND REM +12V Fuse
GND REM +12V Fuse
To head unit PowerAntenna lead
130.c
om.ua
Autogood products «130»

ImportantUse either the low level or high level input, do notuse both at same time.
Low level inputUse a pair of shielded stereo audio cables with RCAtype jack. Most trunk-mountamplifiers need a 20 feetRCA cable ( appr 5 – 6 me-ters). Most under the seatinstallations require 12 feet( 2 – 3 meters) RCA cables.Avoid placing the RCA cableclose to speaker cables,power cables and remotecontrol cable. Connect to input socket R/L.
X-D40 has dual inputs Front R/L & Rear R/L.Depending on your chosen configuration you canuse either two separate RCA cable, or a single RCAcable together with an Y-split to connect both inputs.
X-D30 has dual inputs, one for the stereo channels(Input R/L), and one for the mono channel (Sub In-put R/L), both inputs must be connected on themono channel input socket.
Input and controls
Low level Input WiringInputs may be low level from the RCA output of the carstereo or high level from the car stereo speaker out-put. Low level = RCA is to prefer for the best soundquality.
Connect left and right speaker wires coming fromthe car stereo to the high level input as shown. Youmust connect both plus and minus as the inputs arebalanced, connecting plus only gives lower level andbad sound quality. By changing the polarity of plusand minus, you can change the phase.
X-D10/20/25/30On these models you connect as in this example:
X-D30On X-D30 the high level signal is fed internally tochannel SUB when using high level input.
X-D40The four channel amplifier is connected likewise,however we have four channels.You can feed two channels from RCA and twochannels using high level input from rear speakercables.
5
RCA Output on X-D10, X-D20, X-D25
Use RCA Outputs toconnect additionalamplifiers (not available onX-D30 / X-D40).
Input Output
R R
L L
High Input(L/R Ch) White: L ch.+
White/Black: L ch.-Grey/Black: R ch.-Grey: R ch.+
Hi level input plug on amp for CH L/R.
High Input(Rear) Violet: L ch.+
Violet/Black: L ch.-Green/Black: R ch.-Green: R ch.+
Hi level input plug on amp for CH L/R.
High Input(Front) White: L ch.+
White/Black: L ch.-Grey/Black: R ch.-Grey: R ch.+
High level input socket
Automatic turn on when using high level input.The amplifier turns on automatically when using highlevel input, you dont need to connect a separateremote wire from your head unit.
For a soft turn ON /OFF operation we recommendyou to use a remote wire, if this is available.
High Level Input wiring
Parallel input on X-D30
If you don’t have dual line cables tofront and sub Input you can use asingle line cable. Connect to the ste-reo input sockets and set the Parallelinput swich to position P-sub and thesignal is fed to the Sub input socketautomatically.
Parallelinput
Off P Sub
130.c
om.ua
Autogood products «130»

Input Level control
The input level control, 6V – 0,3 V,matches the output of your radio tothe input of the amplifier. After instal-lation is complete, make sure the in-put of the amplifier is turned down allthe way ( counter-clockwise at 6V ).
The high pass filterblocks very lowfrequencies from reachingthe speakers. It is mostlyused at say 60 Hz toprotect small speakers (like 6 inch and smaller )from deep bass.
High Pass filter X-D30, X-D40
Low Pass filter X-D40
The low pass filter ismostly used forsubwoofers. It will allowlow frequencies only andblocks higher frequencies.A typical setting is 50 –70 Hz.
6
Play a CD, make sure all bass or treble settings orequalizer are flat, and turn the volume of the radioup until you just start to hear distortion. Turn thevolume control down just a bit. On the amplifierincrease the input level control ( clockwise or to theright ) until you just start to hear distortion, then backthe level control just a bit. Now your radio andamplifier levels are matched.
Bass boost XD10, XD20, XD25, XD40
Bass boost is used to increase thebass volume at a low frequency.frequencies. You can select theamplification between 0 dB ( noamplification ) and +18 dB ( fullamplification ).
This function is used to compensate forthe bass box function and to adjust foryour own taste of bass. Set level controlat 0 dB if you want it to be inoperative.
The phase control can be setcontinuously from 0 - 180 degrees.This function is used together withsubwoofers. This is very useful whenyou want to adjust the bass sound forbest front stage image. Start at 0 andturn the control slowly clockwise untilyou experience that the bass sound iscoming from the front. If you don’t getthe result you want, also try to phasereverse the subwoofer connections andmake a new adjustment.
On models X-D20, X-D25 the phasecontrol and LP-filter can be switchedon-off.
Phase control X-D10, D20, D25, D-30
Subsonic filter X-D20, X-D25
The Subsonic filterblocks the very deepestfrequencies from reachingthe subwoofers. It can beset from 15 to 150 Hz andcan be switched on / off.A typical setting forsubwoofer use is 25-30Hz
Level
6V 0,3V
Phase
0 180o
Bass boost
0 +18 dB
Subsonic
45 Hz
15 Hz 150 Hz Off On
80 Hz
CrossoverFlat
50 Hz 500 Hz HP LP
Set the swich in position HP to activate the filter.The filter can also be used as subsonic filter to removethe very deepest frequencies from a bass box. Thetypical setting is then around 25 – 50 Hz.The slope of the High Pass filter is 12 dB / octave.The filter can be switched off (position Flat) if youwant to run the amplifier in full range mode.
CrossoverFlat
50 Hz 500 Hz HP LP
Set the switch in position LP to activate the filter.Set the filter switch in FLAT position if you want torun the amplifier in full range mode.
Subsonic filter X-D30
The Subsonic filter blocks the verydeepest frequencies from reaching thesubwoofers. It can be switched on / off.The cutoff frequency is 25 Hz.
Subsonic
Off On
Features / crossovers
Low Pass filter X-D10, D20, D25, D30
The low pass filter ismostly used forsubwoofers. It will allowlow frequencies only andblocks higher frequencies.A typical setting is 50 –70 Hz.On X-D30 the frequency is variable from 30 Hz to150 Hz.
Crossover
50 Hz 500 Hz
150 Hz 250 Hz130.c
om.ua
Autogood products «130»

The X-D10 is a mono channel amplifier mainlyintended for use with one or more subwoofers.
The amplifier has the following filters / features:
Lowpass filter adjustable between 50 and 500 Hz. Subsonic / highpass filter fixed to 25 Hz. Phase control adjustable 0 to 180 degrees. Bass boost adjustable 0 - +18 dB
The XD20 & XD25 are 2-channel amplifiers.They have the same filter configuration, only diffe-rent output power.
The amplifiers have the following filters / features:
Lowpass filter adjustable from 50 to 500 Hz. Subsonic / highpass filter adjustable between 15 Hz to 150 Hz. Both filters can be switched on-off. Phase control adjustable from 0 to 180 degrees. Bass boost adjustable 0 - +18 dB
7
The X-D40 is a 4-channel amplifier where the fil-ter configuration is the same for both front and rearchannel pairs.The amplifier has the following filters / features:
Lowpass filter adjustable from 50 to 500 Hz. Highpass filter adjustable between 50 to 500 Hz. The filters can be turned off for running the amplifier flat. Built in subsonic 25 Hz / 18 dB for all channels Bass boost adjustable 0 - +18 dB
The X-D30 is a 3-channel amplifier for use with afront system and a subwoofer.The amplifier has the following filters / features:
Stereo section: High pass filter adjustable from 50 to 500 Hz, thefilter can be switched on - off.
Mono section: Lowpass filter adjustable between 30 and 150 Hz. Subsonic / highpass filter fixed to 25 Hz. Can beswitched on - off. Built in subsonic 25 Hz / 18 dB for front channels Phase control adjustable from 0 to 180 degrees.
Crossovers/filters and other features on each model
/X-D25
150
60 100
130.c
om.ua
Autogood products «130»

One 4 ohm subwoofer
Phase control setting:The phase control can be setcontinuously from 0 - 180 degrees.This function is used together withsubwoofers. This is very useful whenyou want to adjust the bass sound forbest front stage image.
Bass boost setting:Bass boost is used to increase thebass volume at a low frequency.frequencies. You can select theamplification between 0 dB ( noamplification ) and +18 dB ( fullamplification ).
Two 4 ohm subwoofers
NOTE!Minimum amplifier load is 1 ohm, lowerimpedances may damage the amplifier. Thisconnection gives a 2 ohm load with 4 ohmsubwoofers.
Filter settings
8
Speaker wiring X-D10
X-D10
- - + +
NOTE!Minimum amplifier load is 1 ohm, this connectiongives a 4 ohm load with a 4 ohm subwoofer.
On page 12 you can find more examples of how toconnect subwoofers to amplifiers.
Crossover
50 Hz 500 Hz
150 Hz 250 Hz
Phase
0 180o
Bass boost
0 +18 dB
This function is used to compensate for the bassbox function and to adjust for your own taste of bass.Set level control at 0 dB if you want it to beinoperative.NOTE! Use the bass boost very carefully. Thesound can be destroyed if you turn it up to high.
Start at 0 and turn the control slowly clockwise untilyou experience that the bass sound is coming fromthe front. If you don’t get the result you want, also tryto phase reverse the subwoofer connections andmake a new adjustment.
For power wiring, see page 4For High or low level input wiring, see page 5
LP-filter:The low pass filter is mostlyused for subwoofers. It will allowlow frequencies only and blockshigher frequencies.A typical setting is 50 – 70 Hz.
- - + +NOTE!The speaker termi-nal has dual + and- for easierconnection if youhave more thanone subwoofer.They are internallyconnected inparallel and cannot be bridged.
130.c
om.ua
Autogood products «130»

X-D20, X-D25
Speaker wiring X-D20 / D25
Two fullrangespeakers tochannel L/R
One 4 ohmsubwooferbridged
9
For power wiring, see page 4For High or low level input wiring, see page 5
+ L - + R -
NOTE!Minimum amplifier load is 2 ohm in stereo mode,lower impedances may damage the amplifier.
NOTE!Minimum speaker impedance in bridged connectionis 4 ohm, this connection gives a 2 ohm load with a4 ohm subwoofer. The load is halved whenconnected in bridge mode.On page 12 you can find more examples of how toconnect subwoofers to amplifiers.
Phase control setting:The phase control can be setcontinuously from 0 - 180 degrees.This function is used together withsubwoofers. This is very useful whenyou want to adjust the bass sound forbest front stage image.
Bass boost setting:Bass boost is used to increase thebass volume at a low frequency.frequencies. You can select theamplification between 0 dB ( noamplification ) and +18 dB ( fullamplification ).
Phase
0 180o
Bass boost
0 +18 dB
This function is used to compensate for the bassbox function and to adjust for your own taste of bass.Set level control at 0 dB if you want it to beinoperative.
NOTE! Use the bass boost very carefully. Thesound can be destroyed if you turn it up to high.
Start at 0 and turn the control slowly clockwise untilyou experience that the bass sound is coming fromthe front. If you don’t get the result you want, also tryto phase reverse the subwoofer connections andmake a new adjustment.
Crossover
50 Hz 500 Hz
150 Hz 250 Hz
Filter settings
LP-filter setting:The low pass filter is mostlyused for subwoofers. It will allowlow frequencies only and blockshigher frequencies.A typical setting is 50 – 70 Hz.
Subsonic filter setting:This filter blocks the verydeepest frequencies fromreaching the subwoofers.It can be set from 15 to150 Hz and can beswitched on / off.A typical setting forsubwoofer use is 25-30Hz.
Subsonic
45 Hz
15 Hz 150 Hz Off On
80 Hz
It can also be used for a front system to limit thefrequency range. The filter can stop the lowestfrquencies from reaching the system when youcombine with a subwoofer. A typical setting can be60-80 Hz.
+ L - + R -
130.c
om.ua
Autogood products «130»

X-D30
For power wiring, see page 4For High or low level input wiring, see page 5
10
With the HPF-filter in OFFposition the amplifierallows the speakers to playfullrange. If you for somereason want to limit the lowbass reproduction switchon the HPF-filter. Thetypical setting is then aro-und 60 – 80 Hz.
Filter settings Sub channel
Speaker wiring X-D301. Two fullrange speakers to the front channels
- - + + + L - + R -
Filter settings Front channels
HPF
150 Hz
50 Hz 500 Hz On Off
250 HzThe Subsonic filter blocks the verydeepest frequencies from reaching thesubwoofers. It can be switched on / off.The cutoff frequency is 25 Hz. Normalposition is ON.
Subsonic
Off On
The low pass filter is used forsubwoofers. It will allow lowfrequencies only and blockshigher frequencies.A typical setting is 50 – 70 Hz.
LPF
30 Hz 150 Hz
60 Hz 100 Hz
The phase control can be setcontinuously from 0 - 180 degrees.This function is used together withsubwoofers. This is very useful whenyou want to adjust the bass sound forbest front stage image. Start at 0 andturn the control slowly clockwise untilyou experience that the bass sound iscoming from the front. If you don’t getthe result you want, also try to phasereverse the subwoofer connections andmake a new adjustment.
Phase
0 180o
One or two subwoofers to sub channels,Each speaker min 4 ohm.
130.c
om.ua
Autogood products «130»

11
2. Two fullrange speakers and one subwoofer bridged to X-D40.
Rear subwoofer Rear or front speakers
Filter settings Front channels
Speaker wiring X-D40
1. Four fullrange speakers to X-D40. One pair in front and one pair in rear.
Rear speakers Front speakers
Filter settings Front channelsFilter settings Rear channels
With the filter switch inFlat position the amplifierallows the speakers toplay fullrange. If you forsome reason want to limitthe low bass reproductionto the front or rearspeakers, set the switchto HP. The typical settingis then around 60 – 80 Hz.
D C
X-D40
+ L - + R - + L - + R - + L - + R - + L - + R -
Filter settings Rear channels
CrossoverFlat
50 Hz 500 Hz HP LP
CrossoverFlat
50 Hz 500 Hz HP LP
Bass boost is used to increase thebass volume at a low frequency.frequencies. You can select theamplification between 0 dB ( noamplification ) and +18 dB ( fullamplification ).
This function is used to adjust for yourown taste of bass. Set level control at 0dB if you want it to be inoperative.
NOTE! Use the bass boost verycarefully. The sound can bedestroyed if you turn it up to high.
Bass boost
0 +18 dB
With the filter switch inFlat position the amplifierallows the speakers toplay fullrange. When youhave a subwoofer in yoursystem it is adviceable tolimit the low bassreproduction to the frontspeakers, set the switchto HP. The typical settingis then around 60 – 80 Hz.
CrossoverFlat
50 Hz 500 Hz HP LP
Set the switch in positionLP to activate the filter.It will allow lowfrequencies only andblocks higher frequencies.A typical setting is 50 – 70Hz.
Bass boost
0 +18 dB
Bass boost is used to increase thebass volume at a low frequency.frequencies. You can select theamplification between 0 dB ( noamplification ) and +18 dB ( fullamplification ).
This function is used to compensate forthe bass box function and to adjust foryour own taste of bass. Set level controlat 0 dB if you want it to be inoperative.For power wiring, see page 4
For High or low level input wiring, see page 5
130.c
om.ua
Autogood products «130»

CONNECTION OF SUBWOOFERSTO DLS MONO AMPS
Connection of a subwooferwith 4 ohm single voice coilImpedance = 4 ohm
Amplifier speaker terminal - - + +
Amplifier speaker terminal - - + +
Amplifier speaker terminal L+ L- R+ R-
Amplifier speaker terminal L+ L- R+ R-
Connection of a subwooferwith 4 ohm dual voice coilsImpedance = 2 ohm
Amplifier speaker terminal - - + +
Connection of two subwooferswith 4 ohm single voice coilImpedance = 2 ohm
+
+
4Ω
4Ω-
-
Amplifier speaker terminal - - + +
Connection of four subwooferswith 4 ohm single voice coilImpedance = 1 ohm
4Ω
4Ω
4Ω
4Ω
+-
+-
+-
+-
+
+
-
-4Ω
4Ω
+
+
-
-4Ω
4Ω
+
+
-
-4Ω
4Ω
Amplifier speaker terminal - - + +
Connection of two subwooferswith 4 ohm dual voice coilsImpedance = 1 ohm
+-4Ω
Amplifier speaker terminal - - + +
Connection of two subwooferswith 4 ohm dual voice coils inparallel and then in series to theamplifier with a resultingimpedance of 4 ohms.
If you connect two subwoofers with2 ohm voice coils in this way theresulting impedance is 2 ohms.
CONNECTION OF SUBWOOFERS INBRIDGE MODE TO DLS STEREO AMPS
On
DLS
mon
o am
plifi
ers,
with
dua
l spe
aker
con
nect
ors,
both
the
+ a
nd -
term
inal
s ar
e in
tern
ally
con
nect
ed in
par
ralle
l.
4Ω+ -
+ -
Single voice coil subwooferconnected in bridge mode.Impedance = 4 ohmAmplifier load = 2 ohm
Amplifier speaker terminal L+ L- R+ R-
+ -4Ω
Single voice coil subwooferconnected in bridge mode.Impedance = 2 ohmAmplifier load = 1 ohm (only forDLS A-series amplifiers)
+
+
-
-4Ω
4Ω
Amplifier speaker terminal L+ L- R+ R-
Dual voice coil subwooferconnected in parallel in bridgemode.Impedance = 2 ohmAmplifier load = 1 ohm
+
+
-
-4Ω
4Ω
+
+
-
-4Ω
4Ω
-
-
+
+4Ω
4Ω
-
-
+
+4Ω
4Ω
Connection of two subwooferswith 4 ohm dual voice coils inparallel and then in series to theamplifier gives a resultingimpedance of 4 ohm.Amplifier load = 2 ohm
Amplifier speaker terminal L+ L- R+ R-
-
-
+
+4Ω
4Ω
Amplifier speaker terminal L+ L- R+ R-+ -
+ -
Connection of two subwooferswith 4 ohm voice coils in seriesImpedance = 8 ohmAmplifier load= 4 ohm
4Ω
4Ω
Connection of a 4 ohm dualvoice coil subwoofer with thevoice coils in series.Impedance = 8 ohmAmplifier load= 4 ohm
4Ω
12
130.c
om.ua
Autogood products «130»

13
TestingBefore you finish the installation, you should do thefollowing tests to make sure the wiring is correct andeverything is operating properly.
Reconnect Battery
When wiring is complete,reconnect the batterynegative terminal.
If problems occour during the installation, or later,this guide might help you to find out whats´s wrong.
THE AMPLIFIER IS DEAD:1. Check power lead, ground and remote connections at the amplifier using a multi meter.2. Check the battery terminal connections.3. Check the power lead fuse or circuit breaker. If fuse damage continues, inspect the power lead for short circuits.4. Check the amplifier protection fuses. Are these broken change to new ones with the same value. If short circuiting continues, contact your local DLS dealer. A fault may exist in the amplifier.5. To start the amplifier requires a remote voltage of 9-15 volt. Check the voltage with a multi meter.
AMPLIFIER PROTECTION FUSE BLOWS AT LOWVOLUME :1. One or more speaker cables are shorted. Make aninsulation test with a multi meter. The cables must nothave a connection to earth.
THE AMPLIFIER TURNS OFF AFTER 10 - 30 MINU-TES.The amplifier is overheating due to inadequate venti-lation. Check mounting position is free from obstruction.
Do this:1. Move the amplifier to a place with better ventil-
ation.2. Install one or two fans to cool down the heat-
sink.3. Overheating can also be caused by an
impedance load below the level permitted.
NO OUTPUT FROM ONE OR MORE SPEAKERS:
Check the following:1. Balance control position.2. Fader control position.3. Speaker cable connections to both amplifier and
drivers.4. Signal lead plugs and cables.5. Change left and right signal lead plugs in the
amplifier to see if the problem moves to a diffe-rent speaker, the lead has a fault.If the problem remains, the speaker or amplifierare at fault.
Troubleshooting
Test speaker connectionsMake sure the speakers are connected right. Usethe balance control on the head unit to make sureright channel is on right speaker etc. If speakersdon´t play at all, one or both speaker wires maybe disconnected.
Test power wiring
1. Turn on the head unit but do not turn up thevolume. The amplifier power light shouldcome on. If not, check the remote and +12volt wires. Also check the groundconnection.
2. Turn up the head units volume slightly. Allspeakers should operate. if not, check wiringconnections at amplifier and speakers.
130.c
om.ua
Autogood products «130»
NOISE PROBLEMS
WHINING NOISE VARYING WITH ENGINEREVOLUTIONS:
Do this:1. Rewire the power supply (12 V) to source
unit direct from battery.2. Rewire ground wire from source unit to
clean position on chassis.3. Check all power connections to ensure that
they are clean and tight.4. Check quality of system ground connection.5. Install a Power Cap capacitor. This can be
helpful against most noise problems.
CONSTANT WHINING NOISE:
Do this:1. Ensure that all equipment has a common
ground point.2. Check quality of earth strap connection from
battery negative terminal to chassis.3. Disconnect signal cables from amplifier to
see if noise disappears. If so the leads arepicking up noise. Test this by laying a newcable over the seats and reconnecting to theamplifier. If the noise does not return, re-route original cable away from source ofinterference.If noise remains regardless of cable position,try to use so called Quasi-balanced signalcables. DLS PRO-cables areQuasibalanced.
SPEAKER POLARITY CHECK.
All speakers in a car audio system should beconnected in phase (the same polarity). All spea-ker cones must move in the same direction. Out ofphase speakers will cause a lack of bass, and apoor stereo soundstage.
Checking polarity:Hold the - connection of the speaker wire to the -terminal of a 1,5 Volt flashlight battery. Tap the +wire on to the + terminal of the battery, and observethe movement of the cone. The cone should moveoutwards when the wire touches the battery, andinwards when the battery is removed. If it is theother way around, the speaker has been connectedbackwards and it must be removed and connectedcorrectly.If your system also has a subwoofer connectedthrough a passive 6 or 12 dB crossover, try toconnect this with various polarity and judge whatsounds best. The phase shift in passive crossoverssometimes makes it necessary to change polarity.
+
-
+
-
Battery1,5 Volt
NOTE! Tweeters can not be tested this way, doublecheck the connections instead.
Professional Tip:Professional Tip:
Professional Tip: Professional Tip:
Installing in trunkWhen installing the amplifier in the trunk, run thepower wires along the same path as the othervehicle wiring. Many cars have insulated channelsfor wiring. you will have to remove the door sill trimand the carpet.
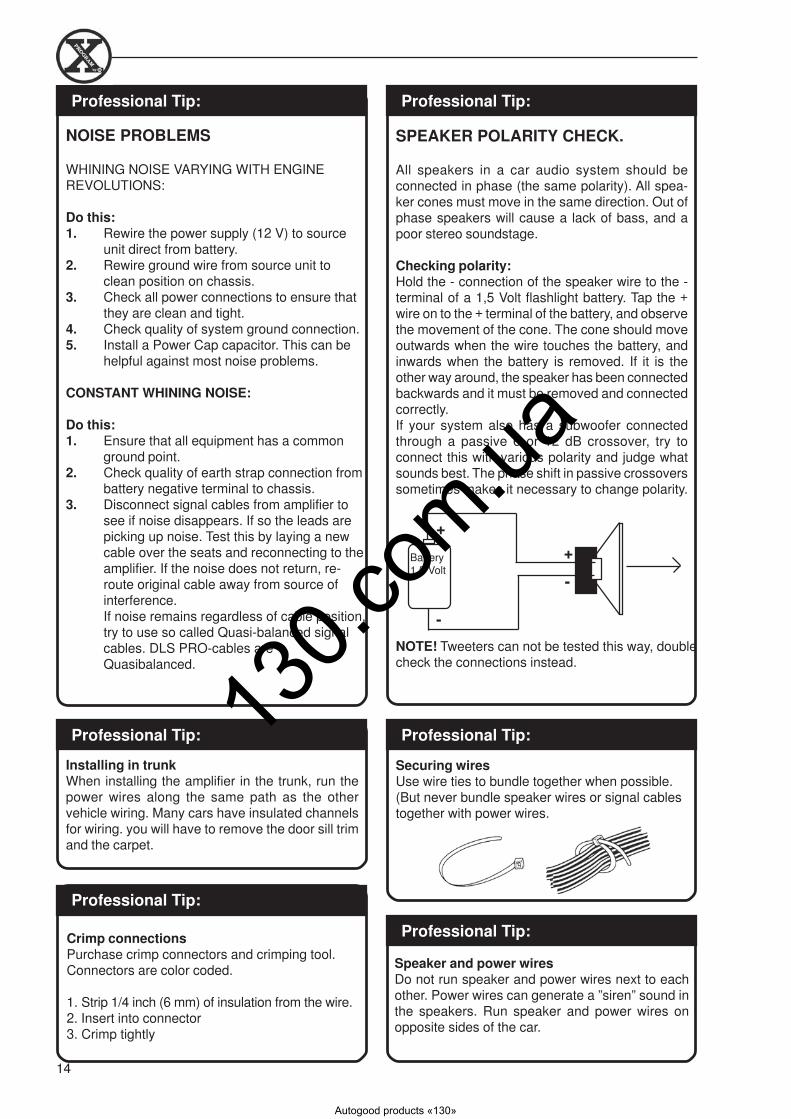
Securing wiresUse wire ties to bundle together when possible.(But never bundle speaker wires or signal cablestogether with power wires.
Professional Tip:
Professional Tip:
Speaker and power wiresDo not run speaker and power wires next to eachother. Power wires can generate a ”siren” sound inthe speakers. Run speaker and power wires onopposite sides of the car.
Crimp connectionsPurchase crimp connectors and crimping tool.Connectors are color coded.
1. Strip 1/4 inch (6 mm) of insulation from the wire.2. Insert into connector3. Crimp tightly
14
130.c
om.ua
Autogood products «130»

Specifications
We follow a policy of continuous advancement indevelopment.For this reason all or part of specifications & designsmay be changed without prior notice.
15
X-program X-D10 X-D20 X-D25
Number of channels 1 2 2Power output, 4 ohm (0,1% THD) 180 W 2 x 120 W 2 x 180 WPower output, 2 ohm (0,2% THD) 330 W 2 x 200 W 2 x 280 WPower output 1 ohm 590 WPower output, 4 ohm bridged N/A 1 x 400 W 1 x 550 WSignal to noise ratio, A-weighted >95 dB >100 dB >100 dBDamping factor >100 >100 >100Frequency response 15 Hz - 350 Hz 10 Hz - 35 kHz 10 Hz - 35 kHzInput impedance, low level 33 kohm 33 kohm 33 kohmInput impedance, high level 1 kohm 1 kohm 1 kohmHigh level input with auto start Yes Yes YesLine output (RCA) Yes Yes YesInput sensitivity 0,3 - 6V 0,3 - 6V 0,3 - 6VBass boost adjustable gain 0 - 18 dB 0 - 18 dB 0 - 18 dBFilter high pass /subsonic built-in 15-150 Hz* 15-150 Hz*Filter low pass 50-500 Hz 50-500 Hz* 50-500 Hz** can be switched in/outPhase control 0-180o cont. Yes Yes YesPower consumption, idle 1,2 A 0,9 A 1,6 AFuse 2 x 25 A 1 x 25 A 2 x 25 ADimensions HxWxD(mm) 50x298x250 50x258x250 50x298x250Dimensions (inch) 2x11,8x10 2x10,1x10 2x11,8x10Weight 3,2 kg 2,8 kg 3,5 kg
X-program X-D30 X-D40
Number of channels 3 4Power output, 4 ohm (0,1% THD) 2 x 120 W 4 x 110 WPower output, 2 ohm (0,2% THD) 2 x 200 W 4 x 180 WPower output, 4 ohm bridged 1 x 310 W 2 x 380 WPower out mono sub ch. 4 ohm 1 x 220 W N/APower out mono sub ch. 2 ohm 1 x 330 W N/ASignal to noise ratio, A-weighted >100 dB >100 dBDamping factor >100 >100Frequency response 10 Hz - 35 kHz 10 Hz - 35 kHzInput impedance, low level 33 kohm 33 kohmInput impedance, high level 1 kohm 1 kohmHigh level input with auto start Yes YesLine output (RCA) No NoInput sensitivity 0,3 - 6V 0,3 - 6VVariable phase shift control 0-180 degrees -Filter high pass all channels - 50 - 500 Hz*Filter low pass, all channels - 50 - 500 Hz*Filter high pass front channels 50 - 500 Hz -Filter low pass, sub channel 30 - 150 Hz -Subsonic filter stereo channels Fixed 25 Hz / 18 dB Fixed 25 Hz / 18 dBSubsonic filter mono channel Fixed 25 Hz* -* can be switched in/outBass boost adjustable gain - 0 - 18 dBPower consumption, idle 1,8 A 1,6 AFuse 2 x 25 A 2 x 25 ADimensions HxWxD(mm) 50x338x250 50x318x250Dimensions (inch) 2x13,3x10 2x12,5x10Weight 4,1 kg 3,8 kg
All above output powerratings at 14,4 VDC
130.c
om.ua
Autogood products «130»

DLS Svenska ABP.O. Box 13029
SE-40251 Göteborg, SwedenTel: +46 31 840060Fax: +46 31 844021E-mail: [email protected]
www.dls.se
130.c
om.ua
Autogood products «130»